HOLIDAY DONATION DRIVE - SUPPORT MSW - DO YOUR PART TO KEEP THIS GREAT FORUM GOING! (Only 51 donations so far out of 49,000 members - C'mon guys!)
×


rwiederrich
-
Posts
5,518 -
Joined
-
Last visited
Content Type
Profiles
Forums
Gallery
Events
Everything posted by rwiederrich
-
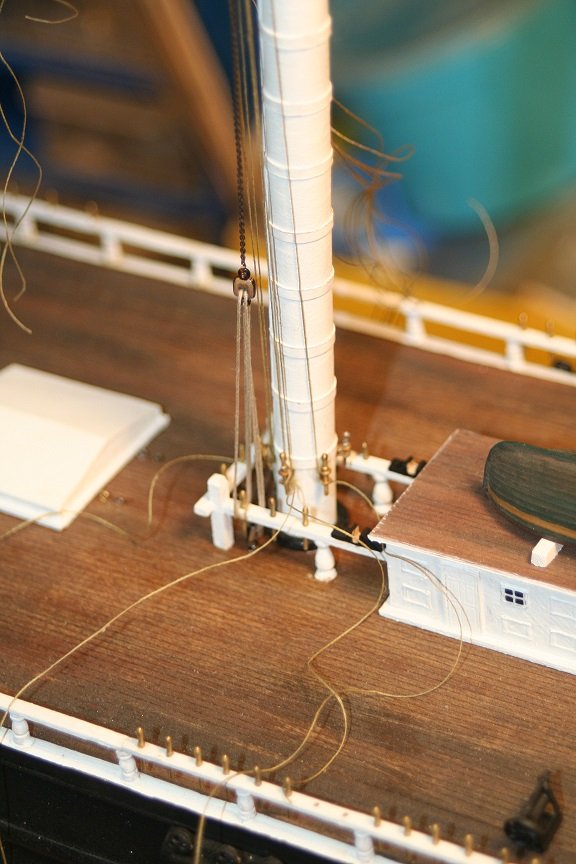
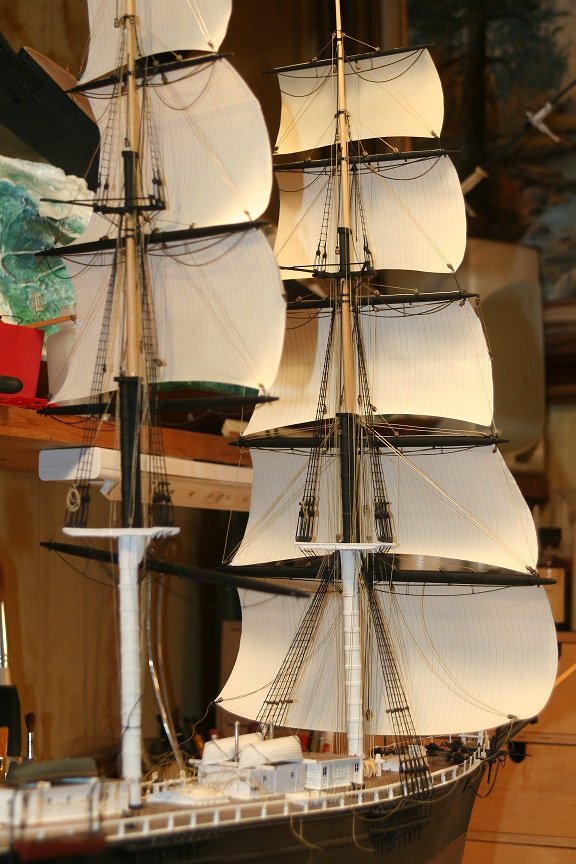
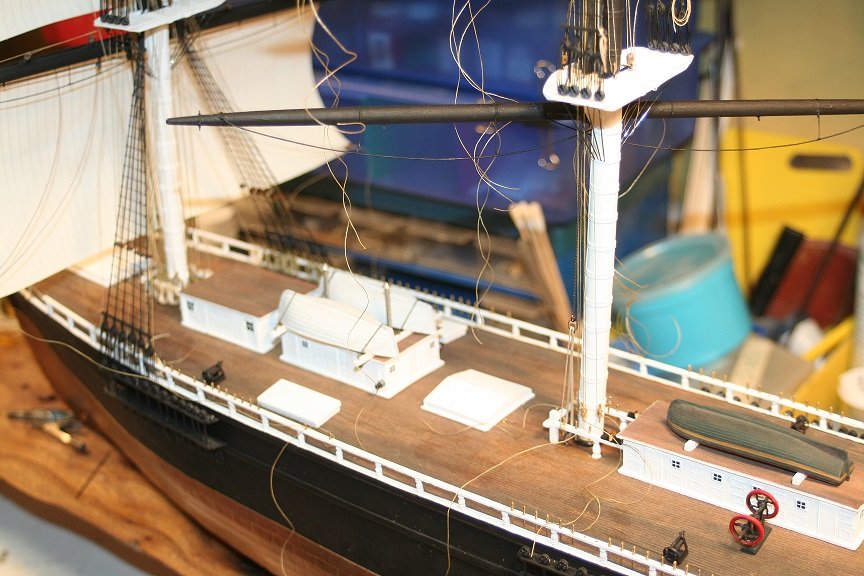
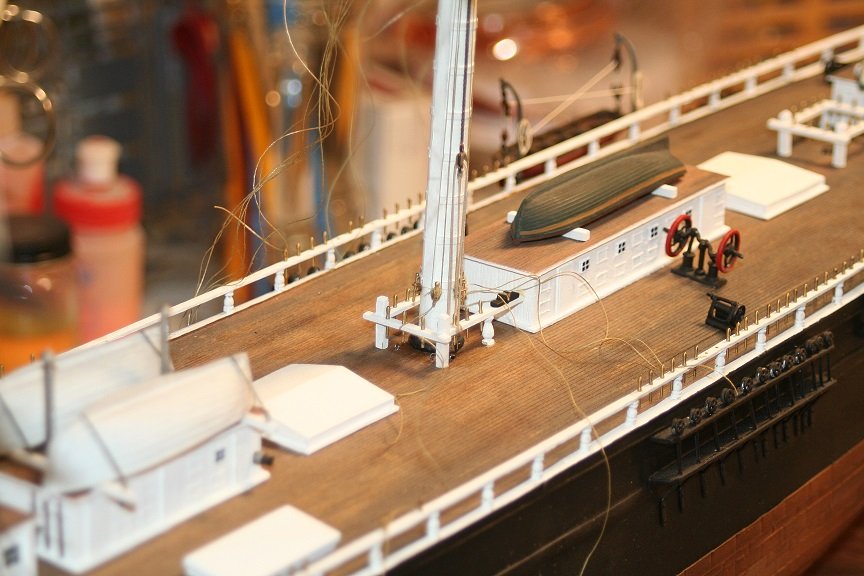
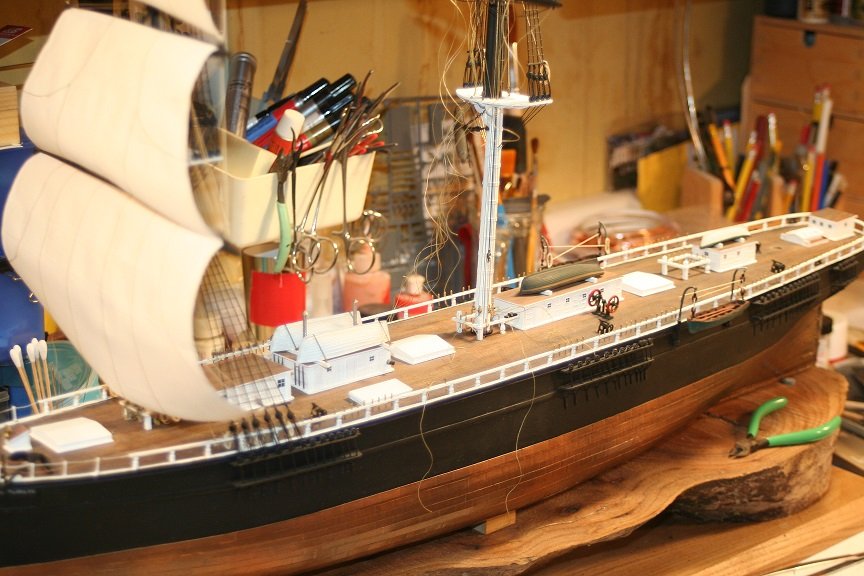
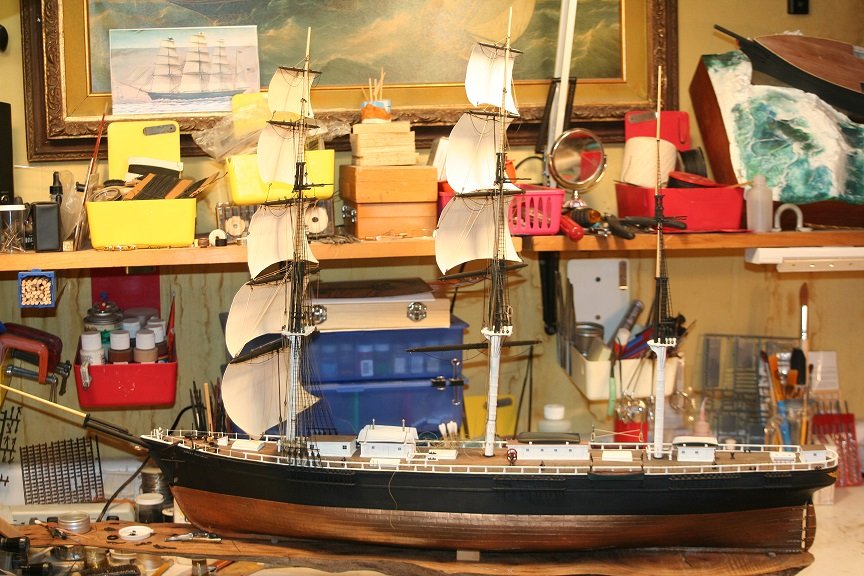
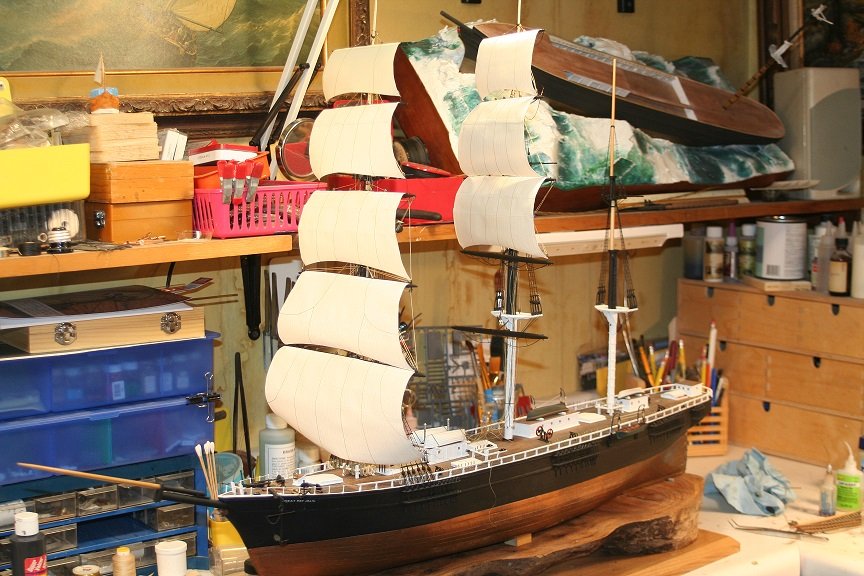
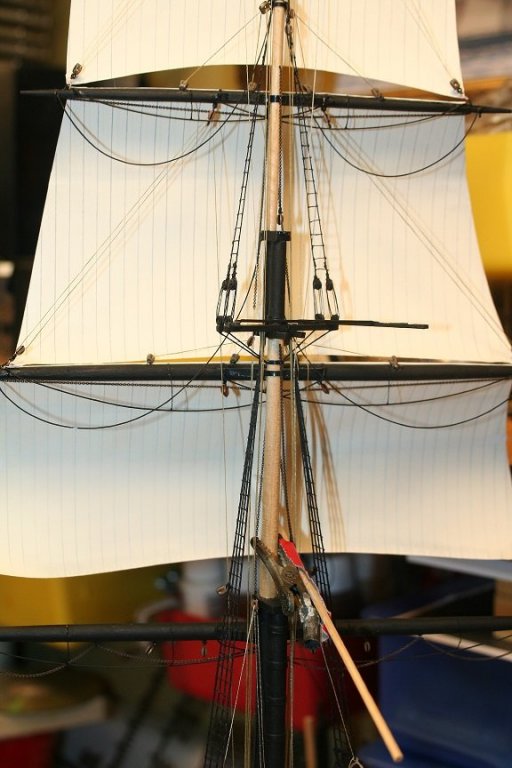
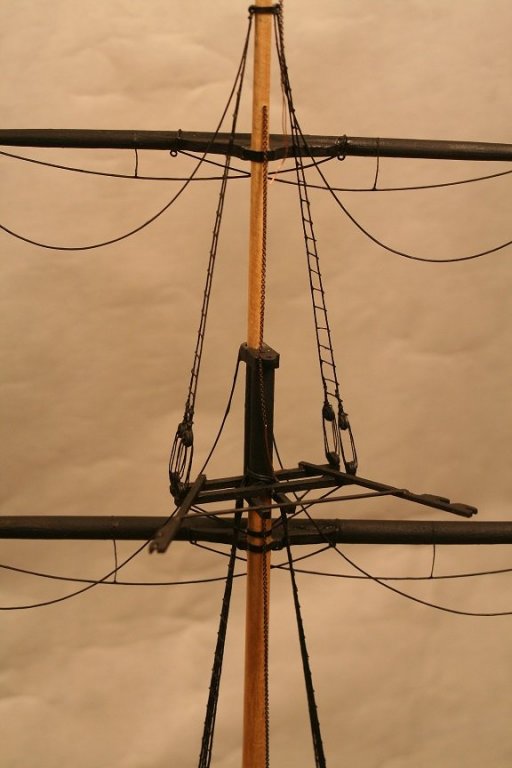
Working through detangling and assigning the royal and topgallant sail control lines...I will give them special attention running them down through the top fairleads at a later date... Now the fife and spider rails are in and collecting their specific lines. Slow going...but after I spent a week working on my wife's hair dressing station...I'm going to focus back on the build. I'm finishing up the Port side...then, I'll flip the model round and have at the starboard side. So much to do. Rob

- 1,208 replies
-
- 11
-

-
- great republic
- clipper
- (and 1 more)
-
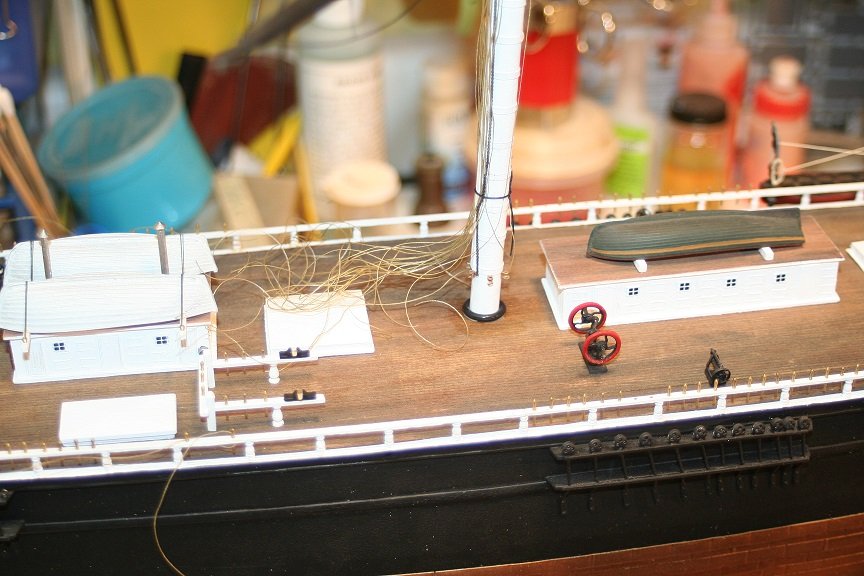
Getting a slow start back at figuring out the rigging for the main mast...and the belay points for dozens of lines.

- 1,208 replies
-
- 6
-
-
- great republic
- clipper
- (and 1 more)
-
Just fantastic... Rob
-
Doris....your LED only images almost look like early morning(sunrise) or sunset shadows, as the sun light peers through windows. Welcome to a beautiful new day or evening on the Royal Katherine.....please.....make yourself at home.. Rob
- 1,035 replies
-
- 6
-
-
- royal katherine
- ship of the line
- (and 1 more)
-
Fantastic...wonderful...marvelous.. I wonder..what would the cabin look like if the light were not coming from the open ceiling(Your over head lights), but from the LED's you installed? Can you temporarily cover the roof and let us see what the effect will really look like? It might be a bit darker and full of shadows.... Rob
- 1,035 replies
-
- 6
-
-
- royal katherine
- ship of the line
- (and 1 more)
-
You are an artisan extraordinaire, Doris. Rob
- 1,035 replies
-
- 6
-
-
- royal katherine
- ship of the line
- (and 1 more)
-
Sailing off the bench....... I'll need to focus on building my wife a hair washing station for her in house salon....so I'll be at that for a bit. Happy new year everyone...... Rob

- 1,208 replies
-
- 11
-
-
- great republic
- clipper
- (and 1 more)
-
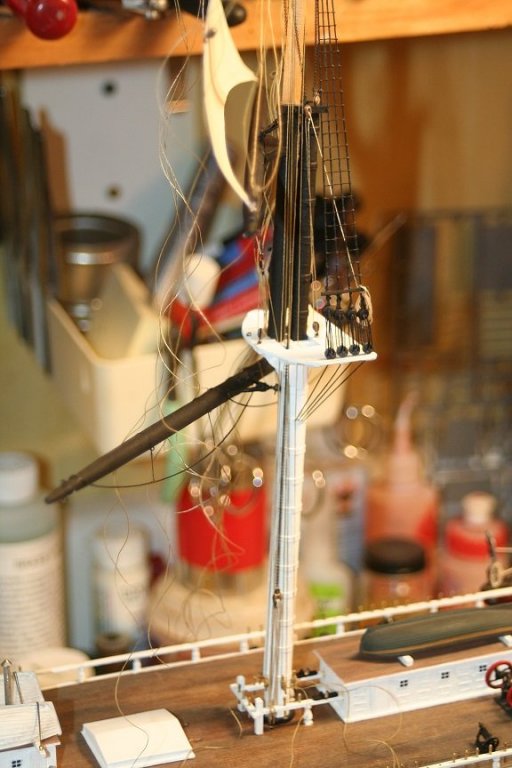
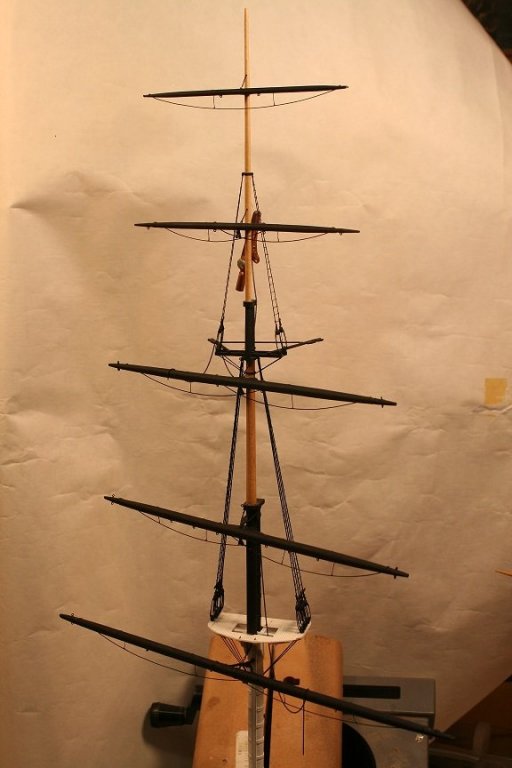
Here are some pix of the stepped mast from several angles. Got to let it dry for a couple of hours before I begin to focus on deciphering the many lines and getting the correct ones belayed on the spider band. I'm enjoying the speed of the build at this point...I truly think this technique of nearly finishing each mast before stepping....makes the completion look as if it's not years off....... Rob


- 1,208 replies
-
- 11
-
-
- great republic
- clipper
- (and 1 more)
-
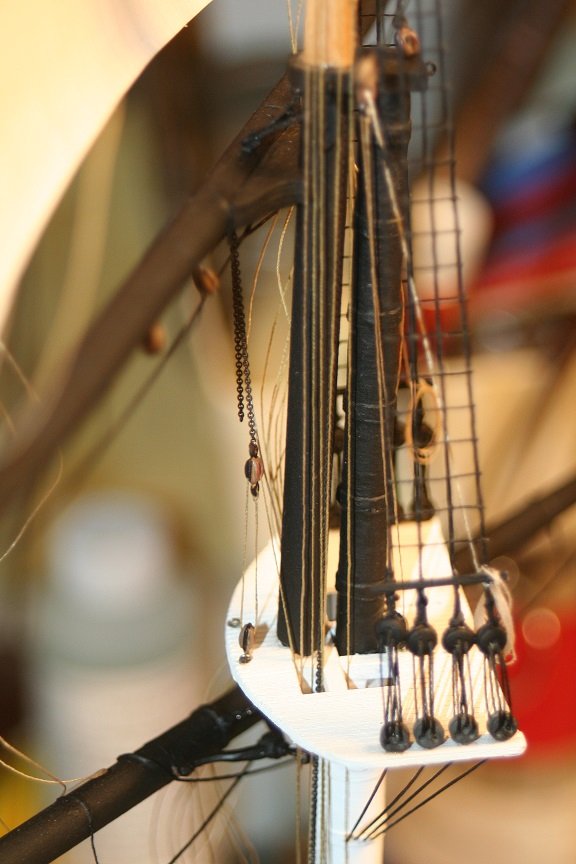
First, I appreciate all the fine comments and likes...Thanks. After some final touch-ups and some changes to the main fiferail.....I stepped the mast.
- 1,208 replies
-
- 8
-
-
- great republic
- clipper
- (and 1 more)
-
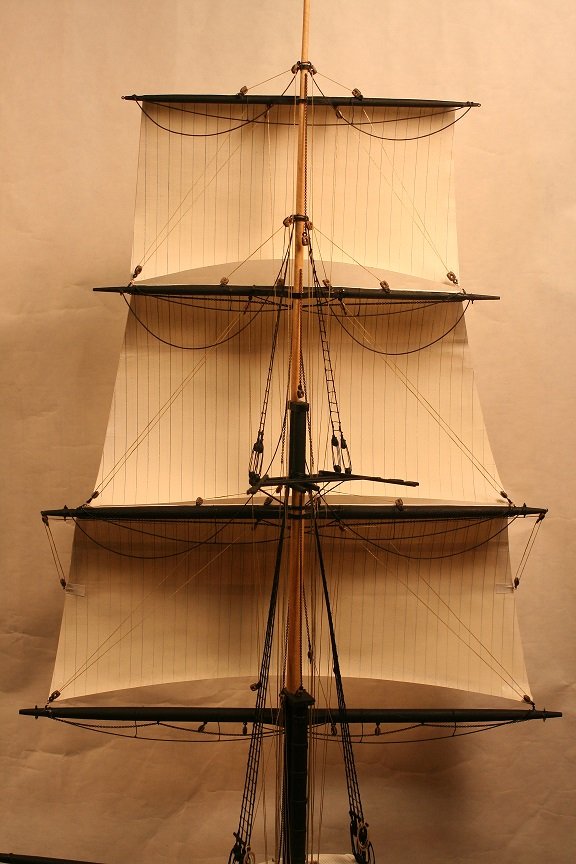
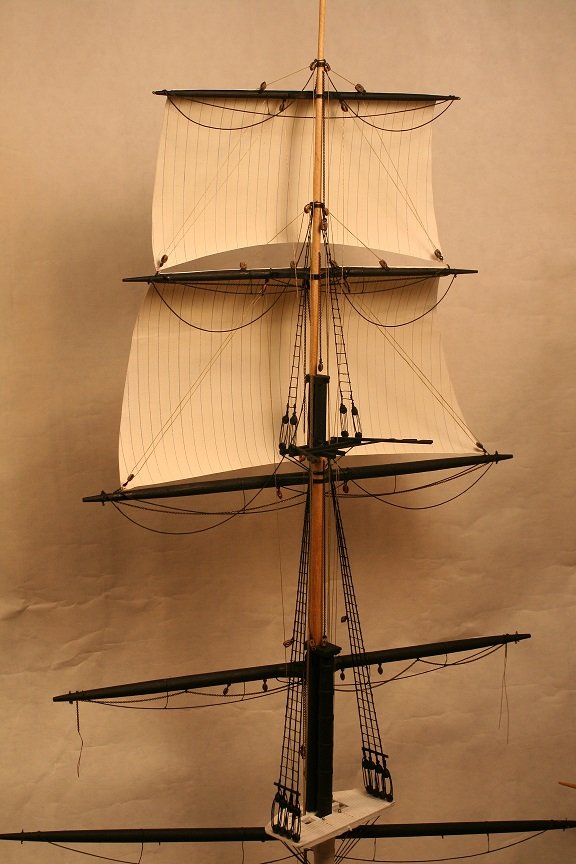
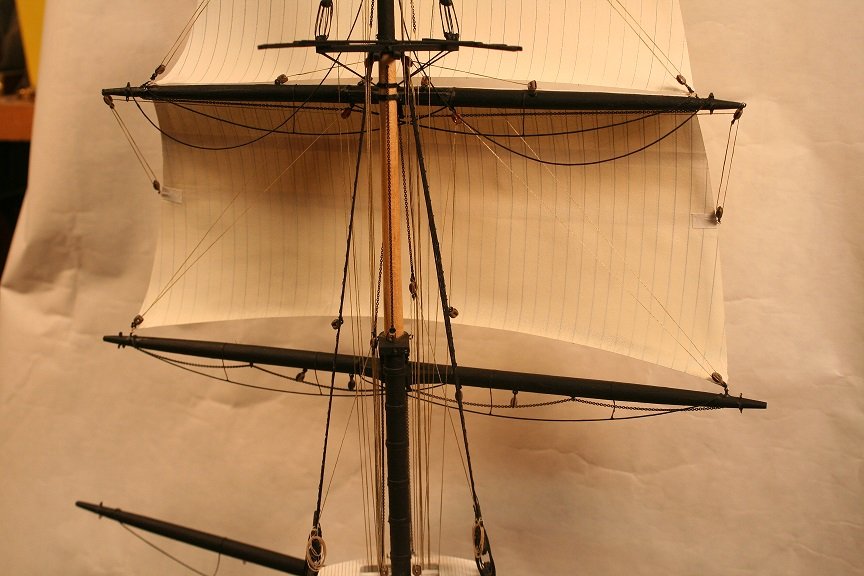
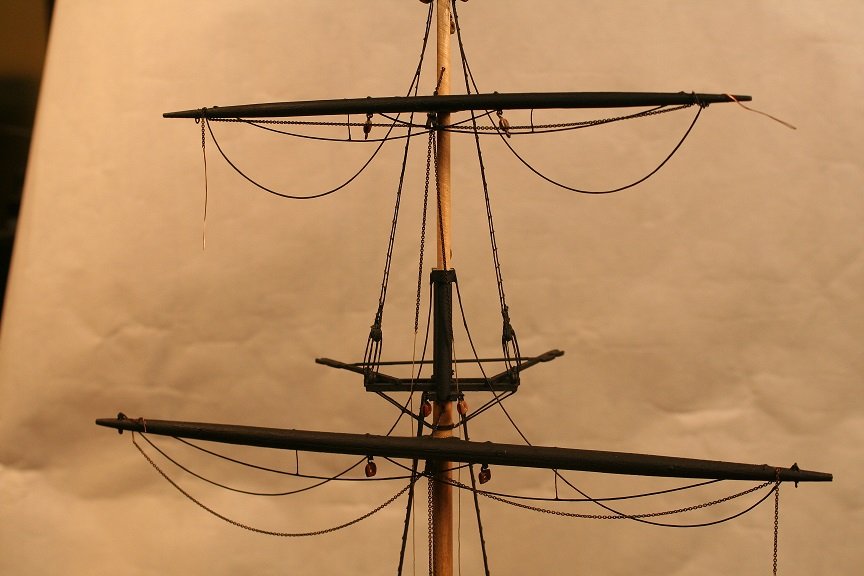
Added the rest of the upper topsail rigging. Just a few touch-ups and some detailing left. I'll step the mast..then begin the main shrouds. I have to swing the main mast port/starboard to make this the simplest it can be and that means I cannot fix the lower topsail until that work is complete. Have a fine evening. Rob
- 1,208 replies
-
- 13
-
-
- great republic
- clipper
- (and 1 more)
-
After the sail was dry, I shackled up the sheets and reefed in the clews. Still have to add the reef points, the leach lines, clew lines and the downhauls. But I'm getting there...and then the mast will get stepped into the hull. Rob
- 1,208 replies
-
- 13
-
-
- great republic
- clipper
- (and 1 more)
-
Spent a bit more time today working on the upper topsail. Used my gator extender for the sail position...worked magnificently.
- 1,208 replies
-
- 8
-
-
- great republic
- clipper
- (and 1 more)
-
Doris....your work with modeling clay is just amazing..... Rob
- 1,035 replies
-
- 5
-
-
- royal katherine
- ship of the line
- (and 1 more)
-
Michael...I would think that a natural sail is not set tight like a drum head..but is rather over sized...and as you suggested...they slightly stretch. My experience with paper is that if you only cut the sail exactly the right size...the surface used to create the billow will indeed rob from the length....making the sail short. So experimentation has proven this to be true. Rob
- 1,208 replies
-
- 3
-
-
- great republic
- clipper
- (and 1 more)
-
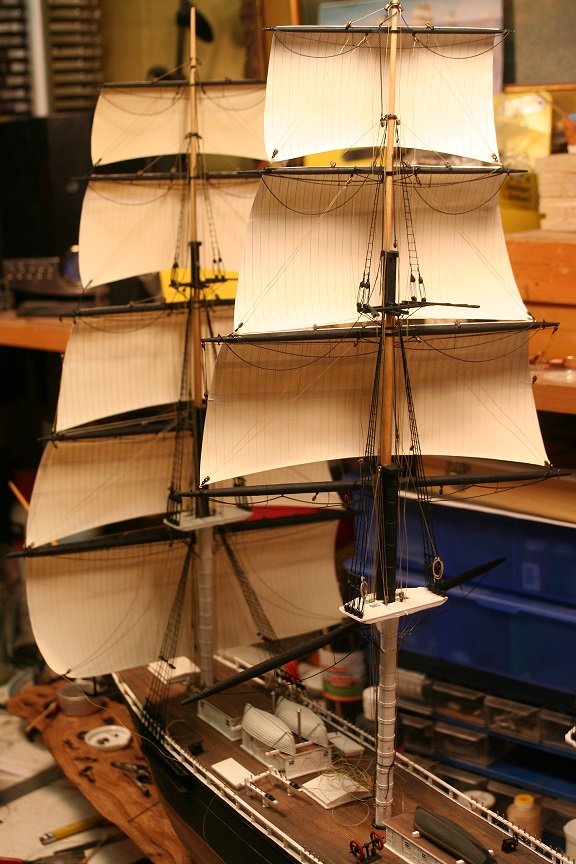
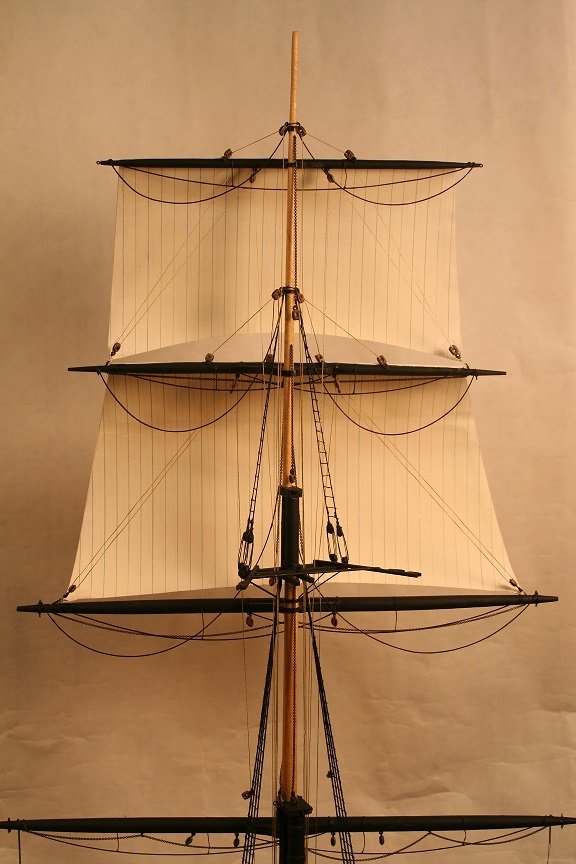
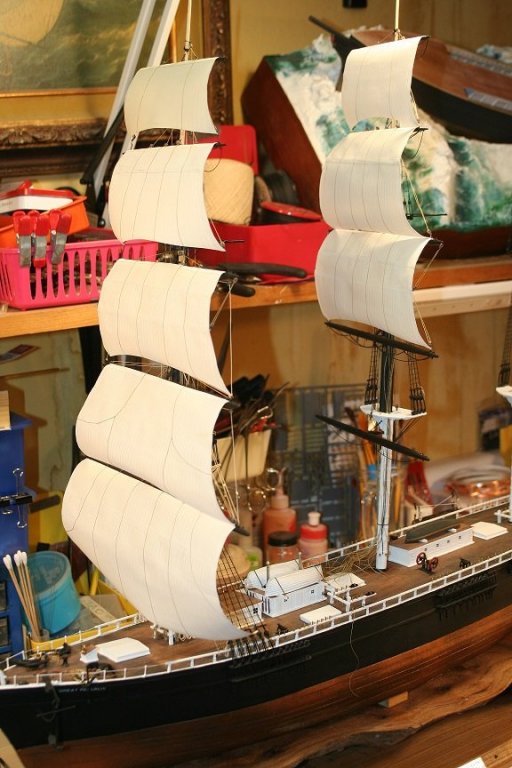
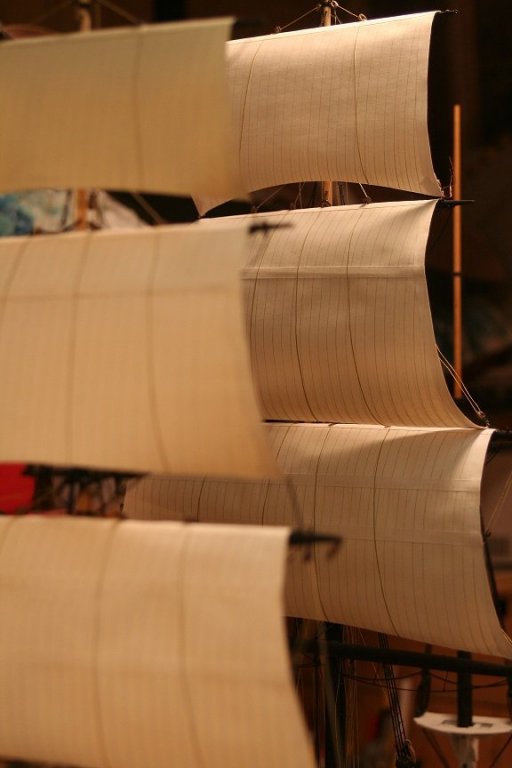
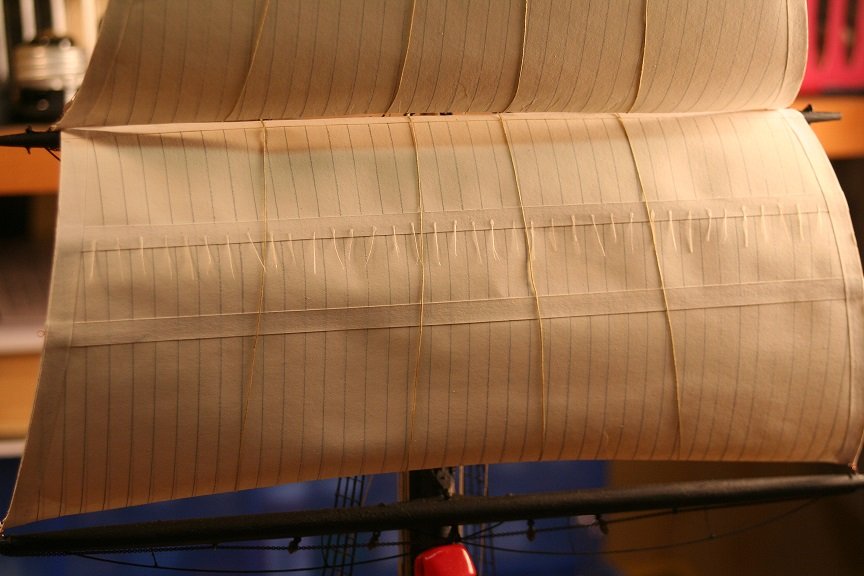
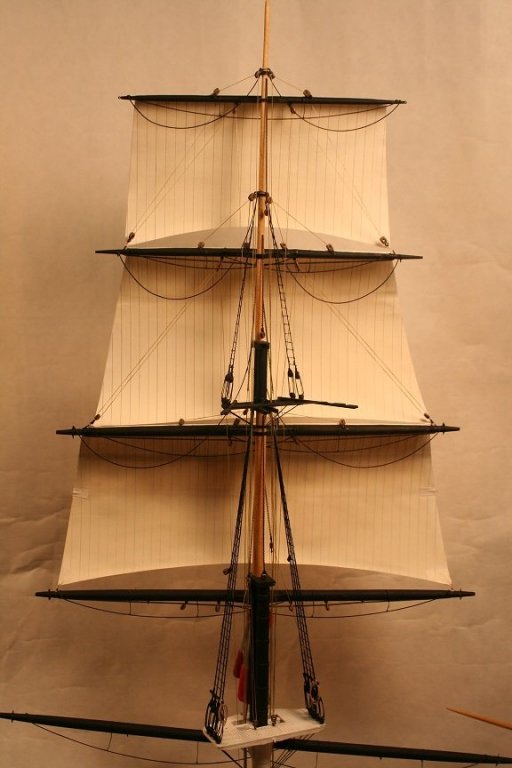
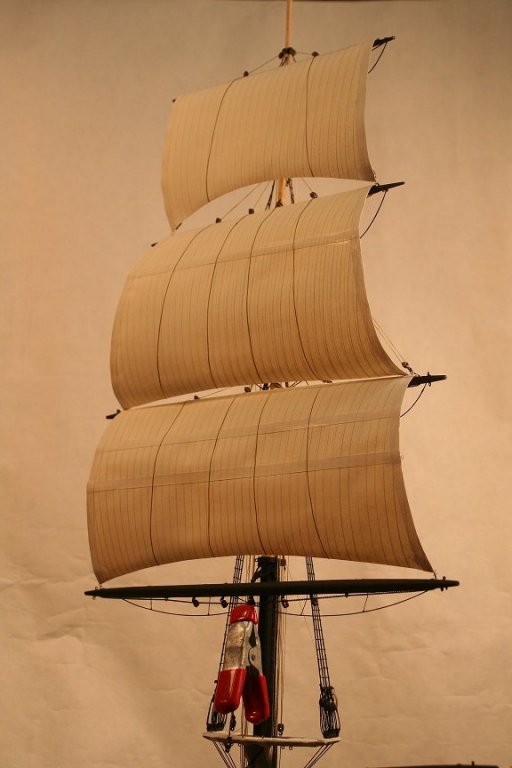
One note: The sails are made slightly longer and when rolled and suspended...when dry..they are easily roped in with the sheets and secured giving the proper billow. If you make the sails the exact size required..when you billow them, they will be to short. Here are some images where I left off. Rob

- 1,208 replies
-
- 9
-
-
- great republic
- clipper
- (and 1 more)
-
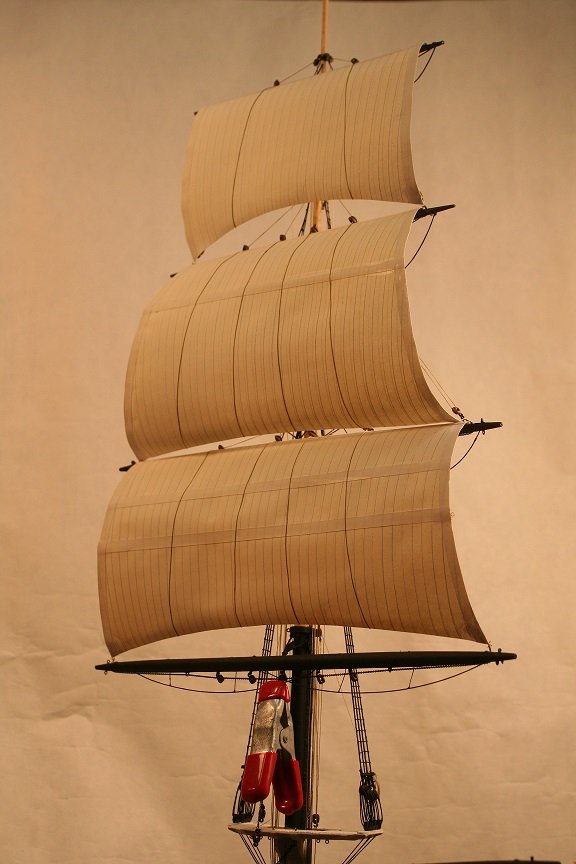
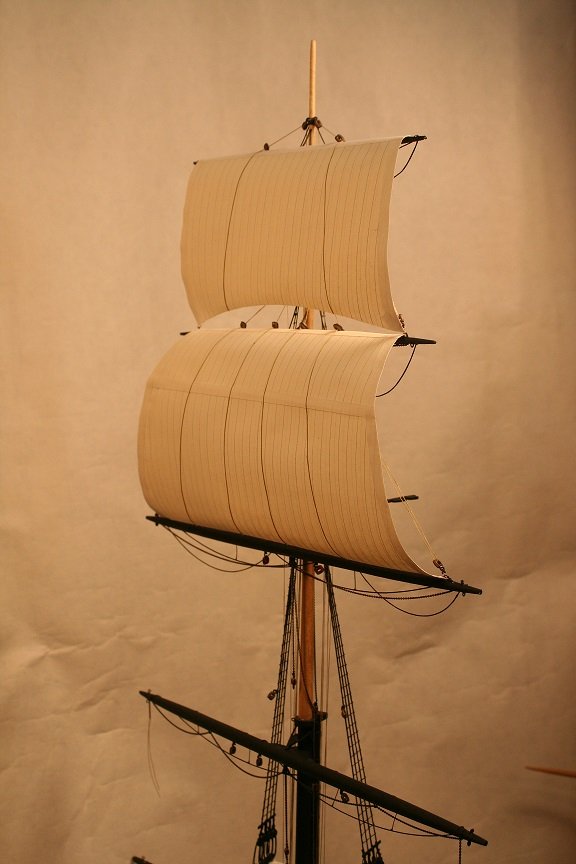
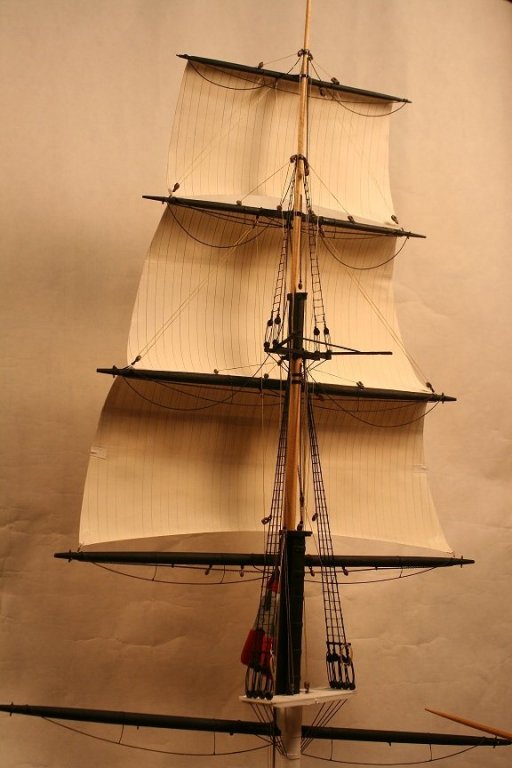
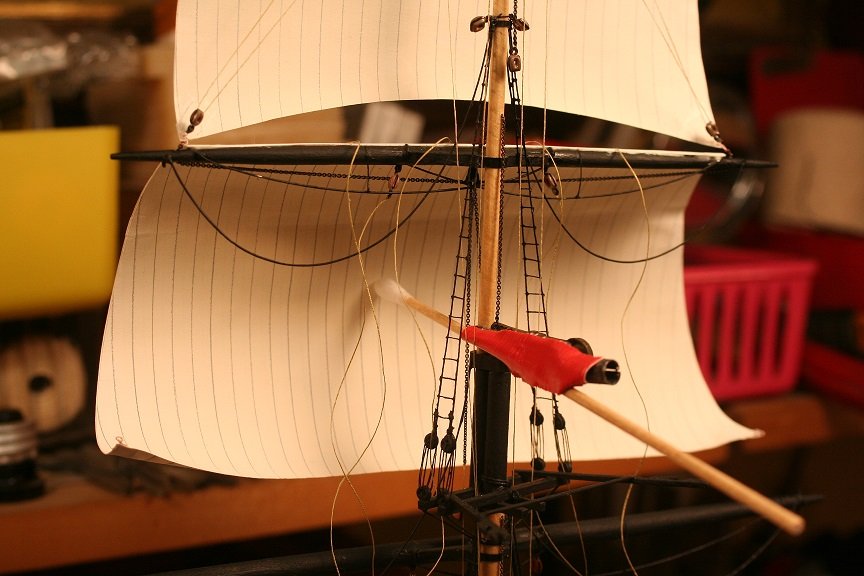
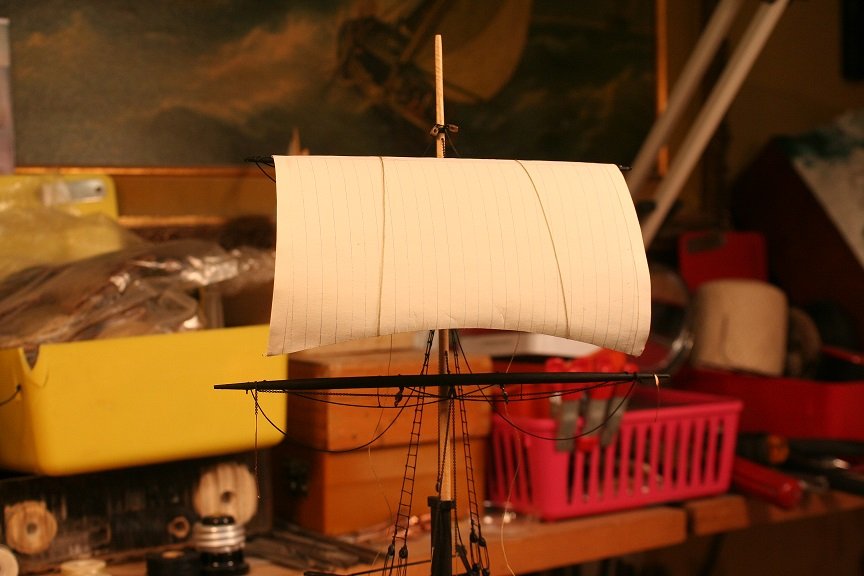
Instead of using a wad of paper to help extend the sail into a more natural billow and distance from the mast...I used a cotton applicator taped to a alligator clip. This idea worked out fantastic....I could set the distance easily. Just wait for the glue to dry....(Gonna use this every time)
- 1,208 replies
-
- 9
-
-
- great republic
- clipper
- (and 1 more)
-
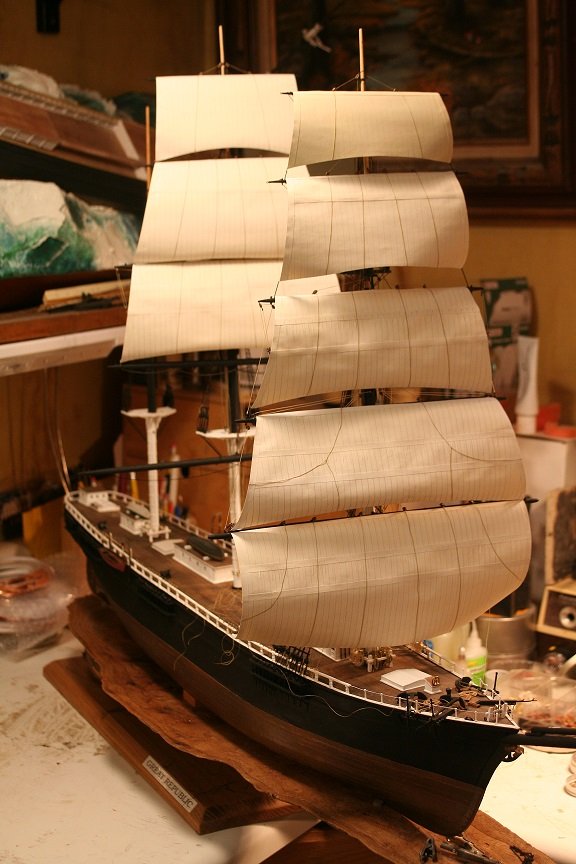
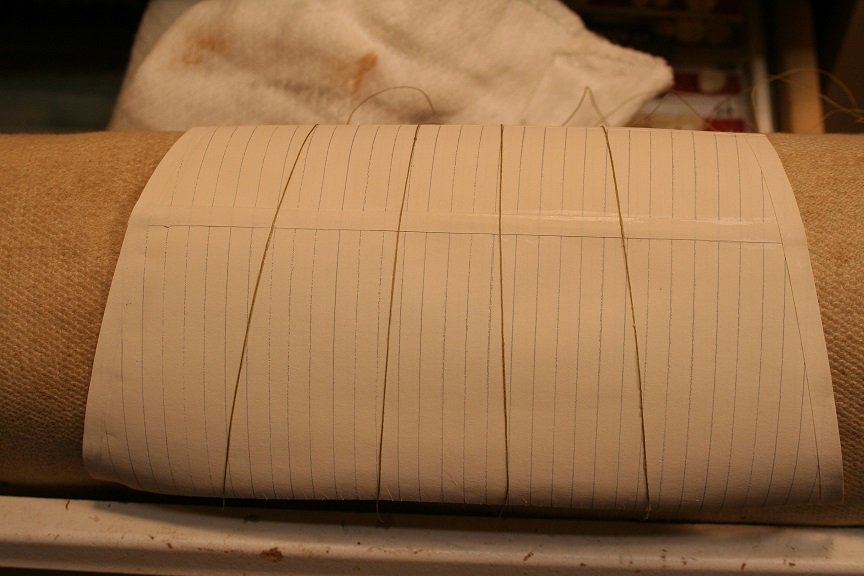
Spent some time working on sails..... Here are some pix. Started with the topgallant construction...
- 1,208 replies
-
- 5
-
-
- great republic
- clipper
- (and 1 more)
-
Thanks Popeye....I'm trying the best I can to achieve the most accuracy in this scale. Rob
- 1,208 replies
-
- 3
-
-
- great republic
- clipper
- (and 1 more)
-
Wire. Then painted black. No one is going to play with them to see if they are hemp or not...and in many cases, anyway, they were wire cable. Once tucked amid the numerous other running and standing rigging....they present themselves with great accuracy. Which is the actual goal anyway. Thanks for the fine comments and interest. Rob
- 1,208 replies
-
- 4
-
-
- great republic
- clipper
- (and 1 more)
-
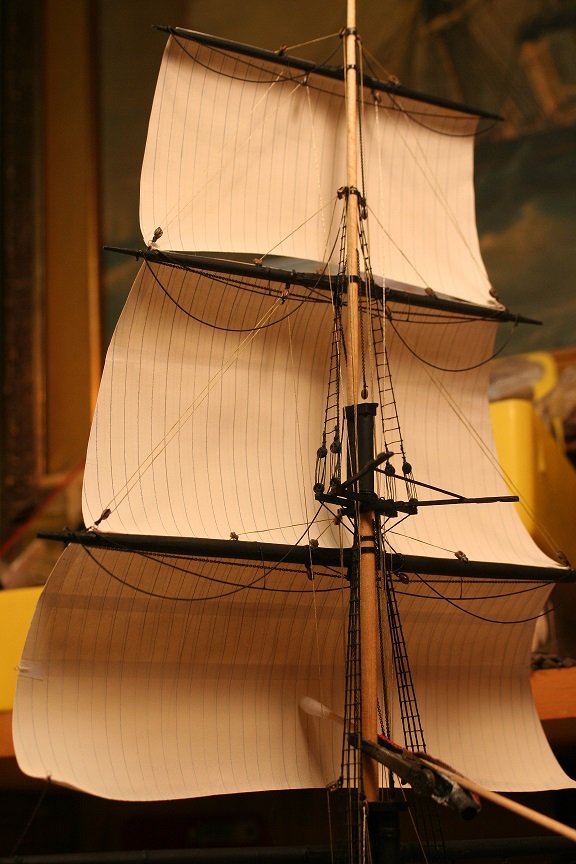
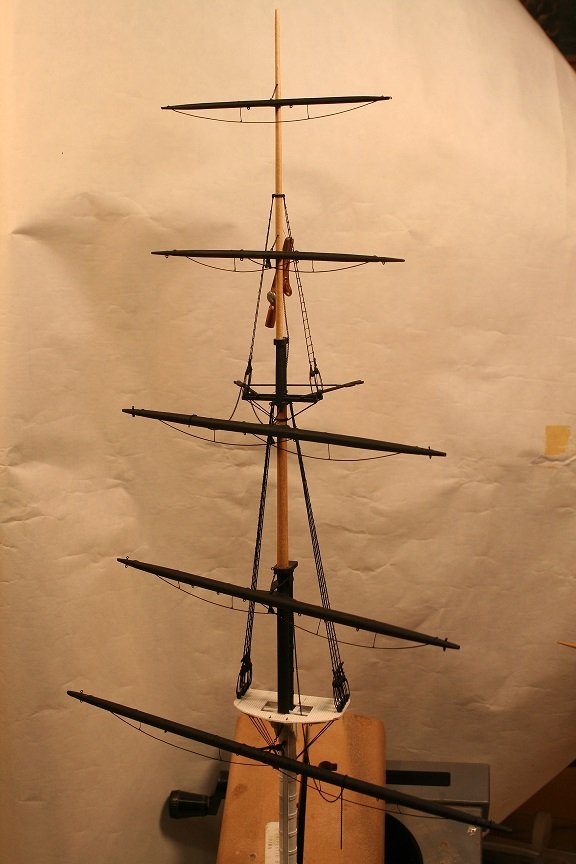
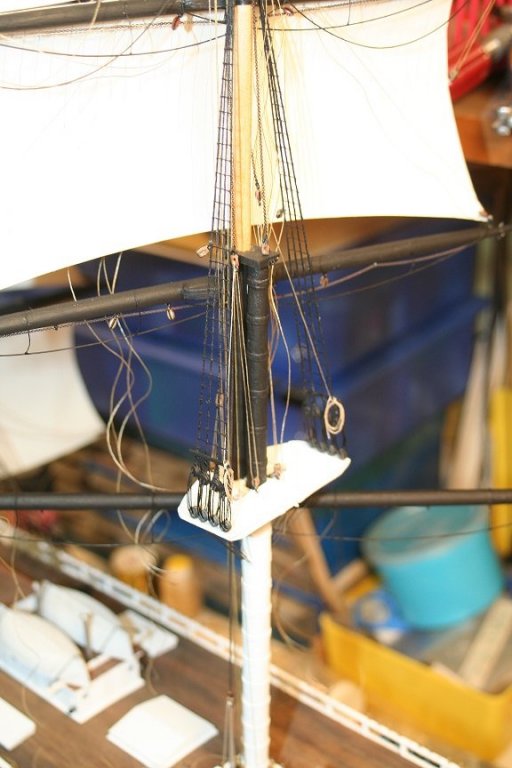
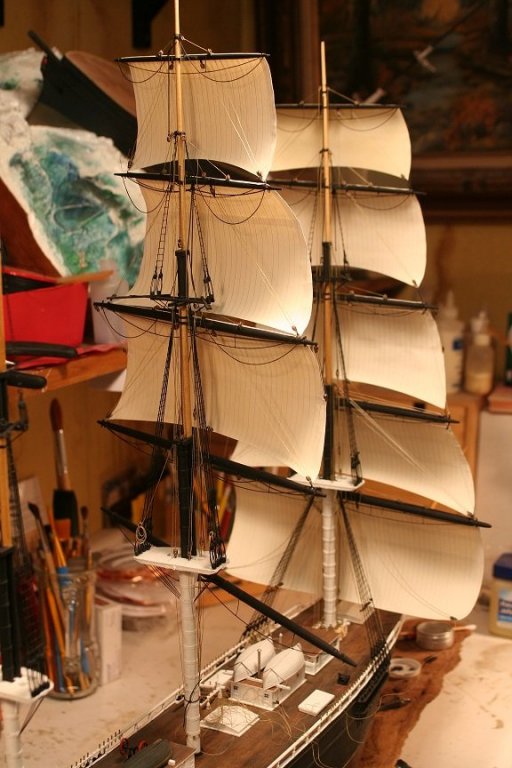
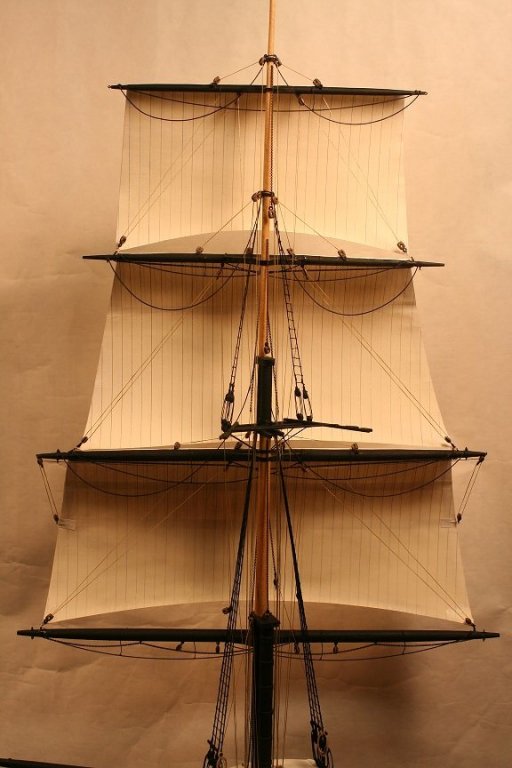
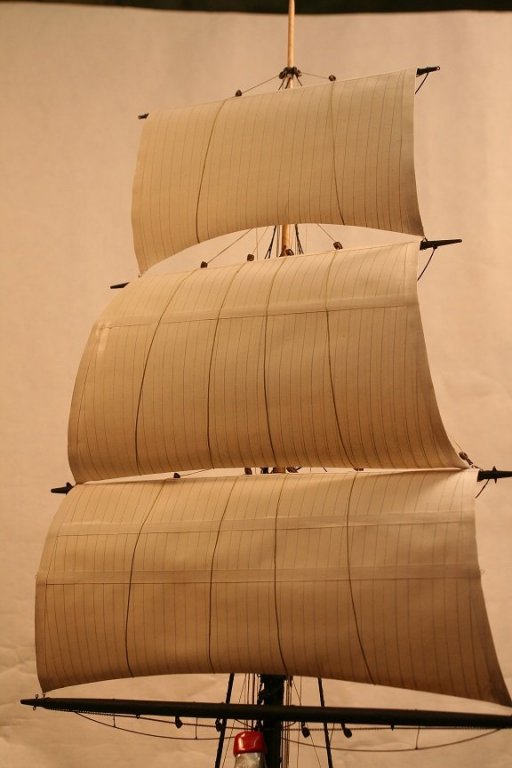
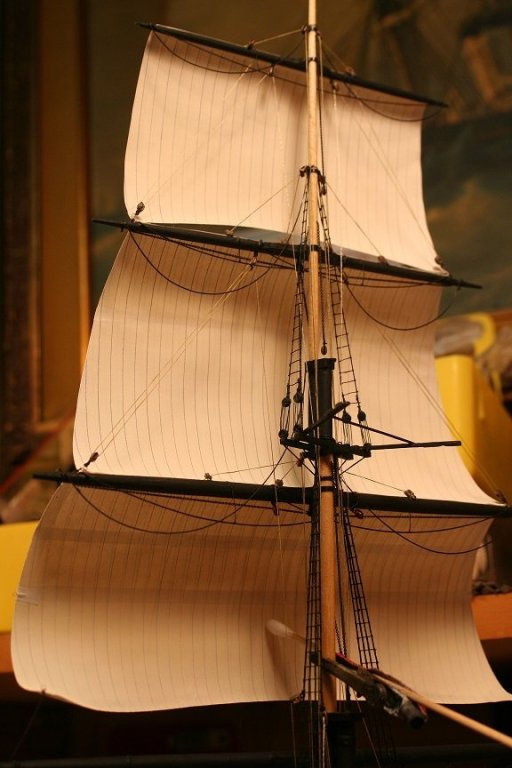
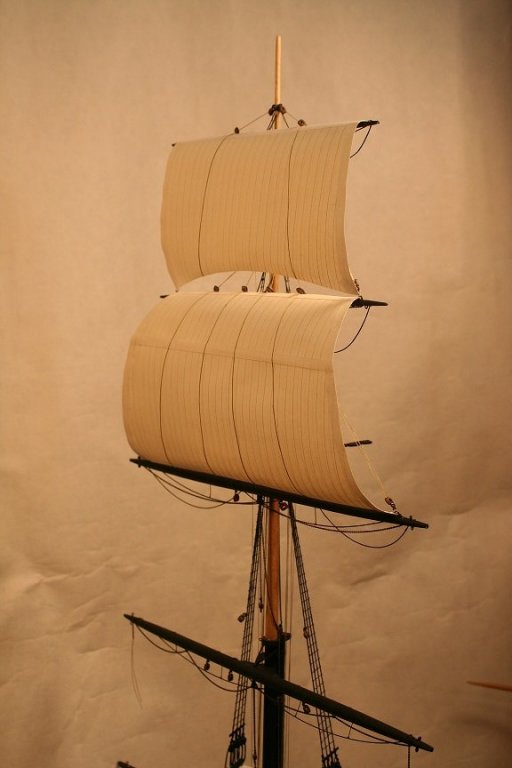
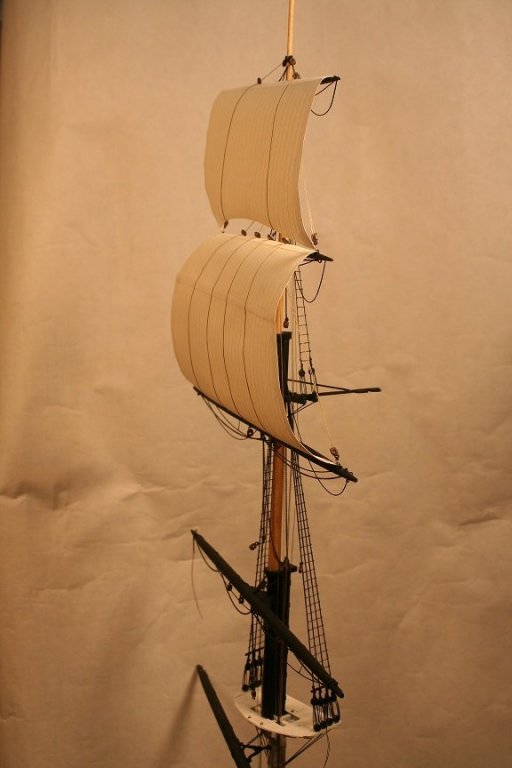
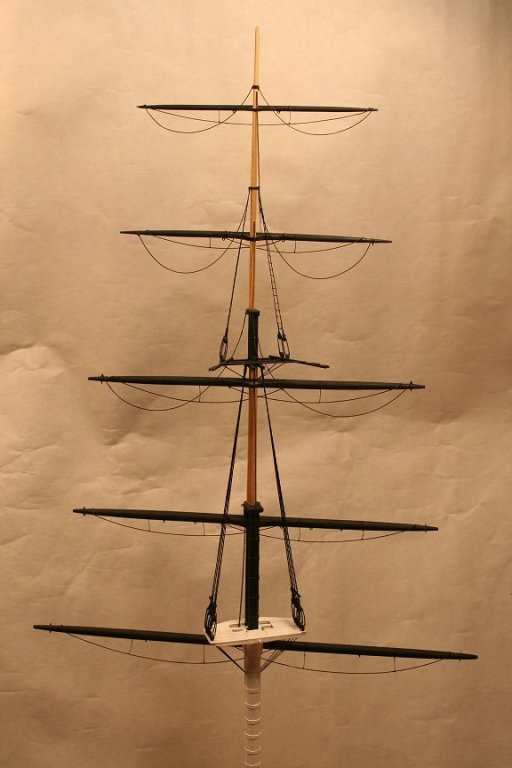
Once that was all done I moved into making and installing the first of the sails...the royal. It is setting suspended at the right billow..and allowed to dry....then I will add the clew blocks to the clew cringles and finish rigging the bubntlines by adding the bunt blocks on the yard and running the lines down along the mast to the spider rail. After this is all finished I will begin fabricating the topgallant sail and her rig.... Rob
- 1,208 replies
-
- 8
-
-
- great republic
- clipper
- (and 1 more)
-
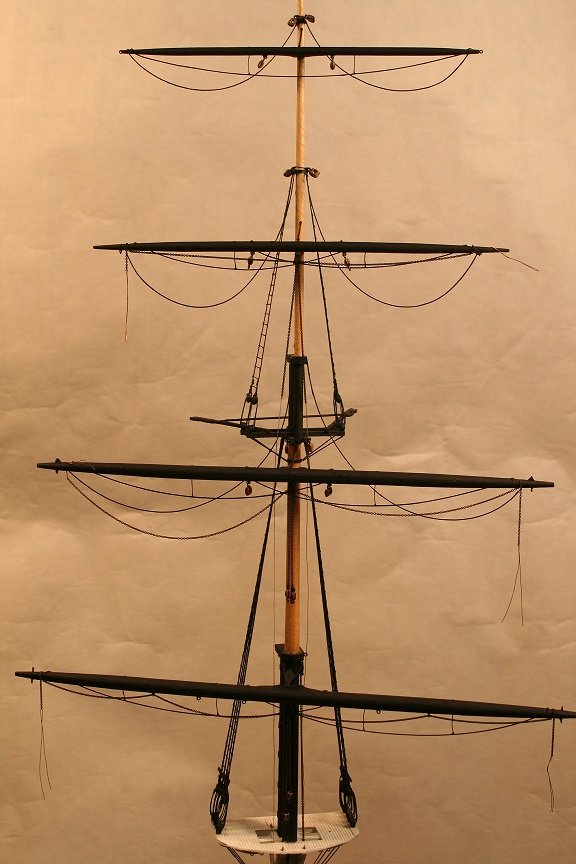
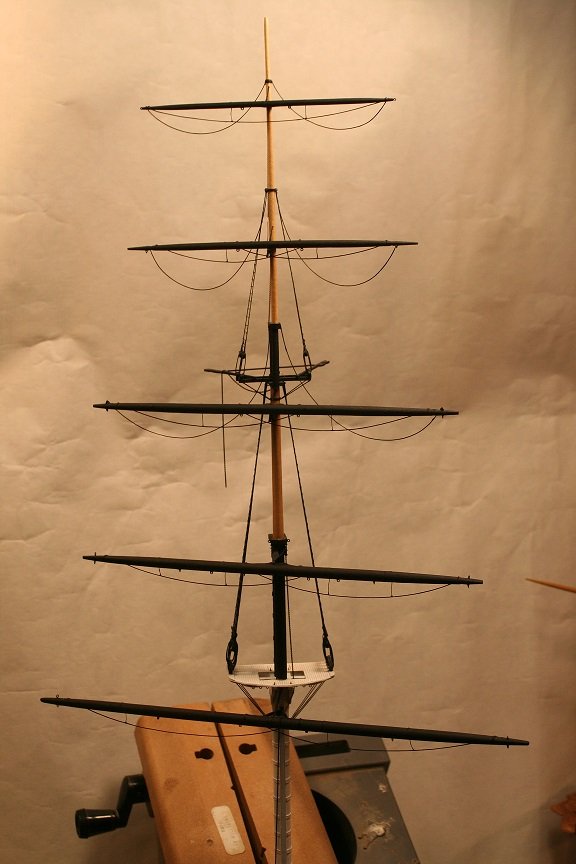
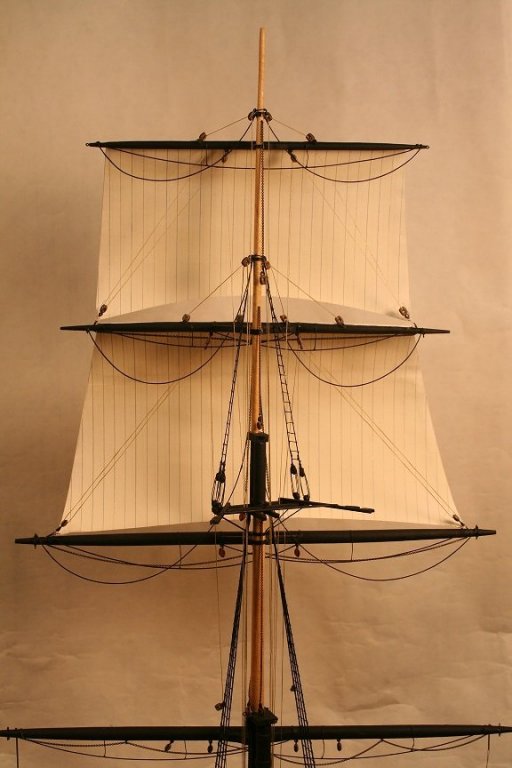
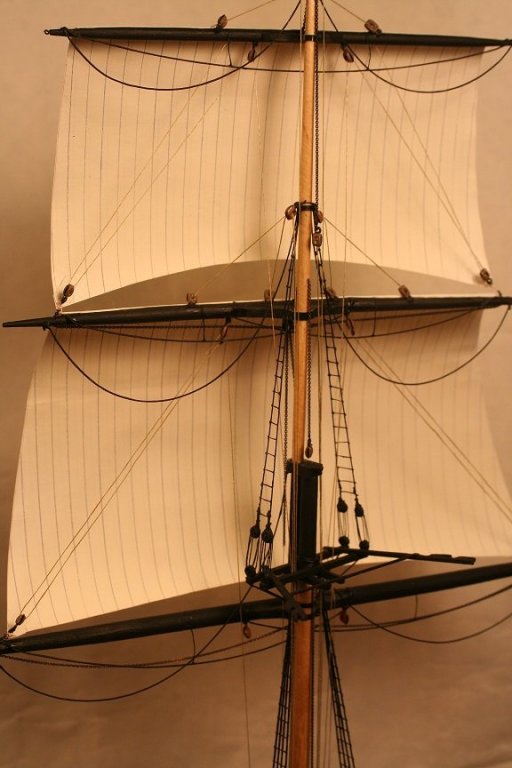
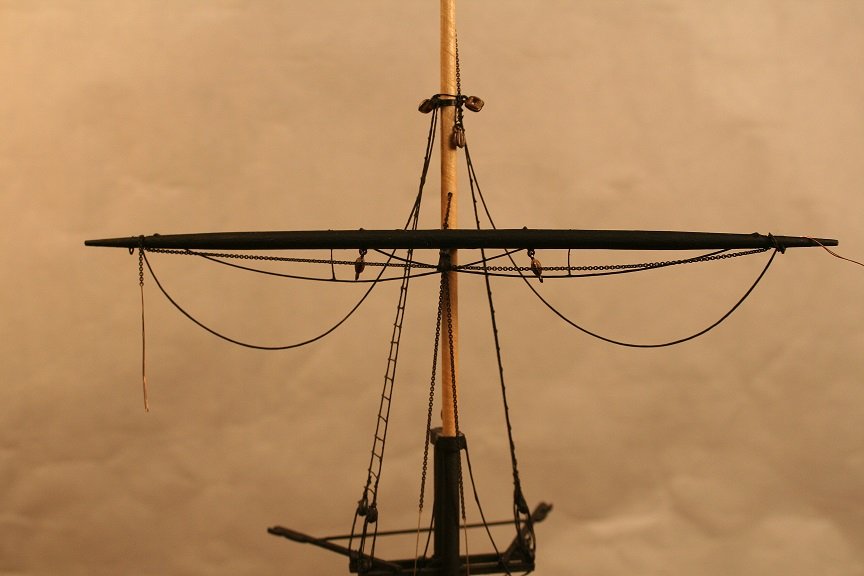
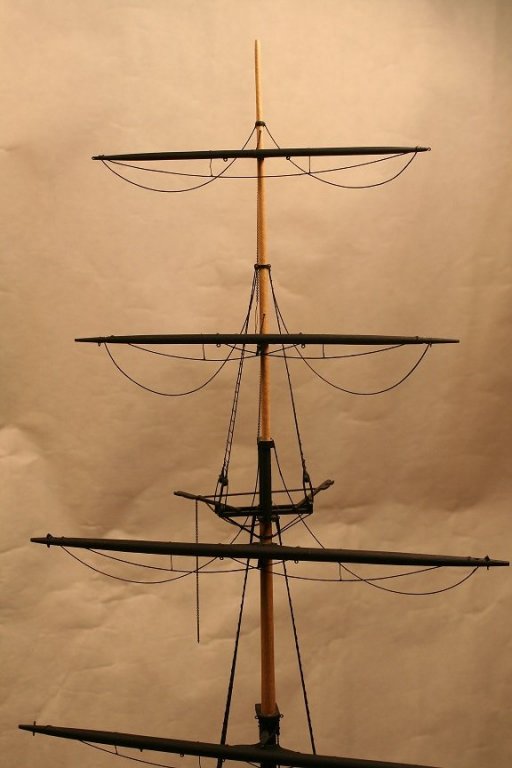
Worked a bit today on the yard blocks and the sheets..here's some pix.

- 1,208 replies
-
- 8
-
-
- great republic
- clipper
- (and 1 more)
-
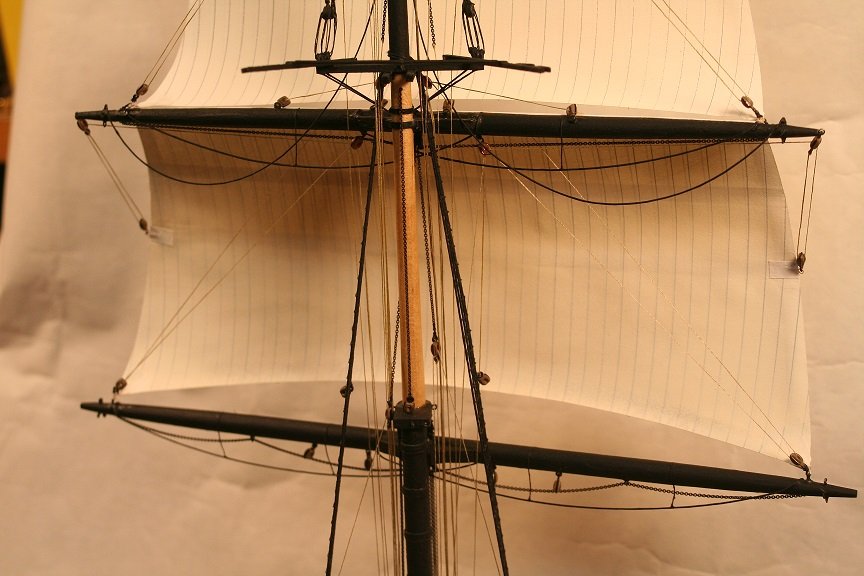
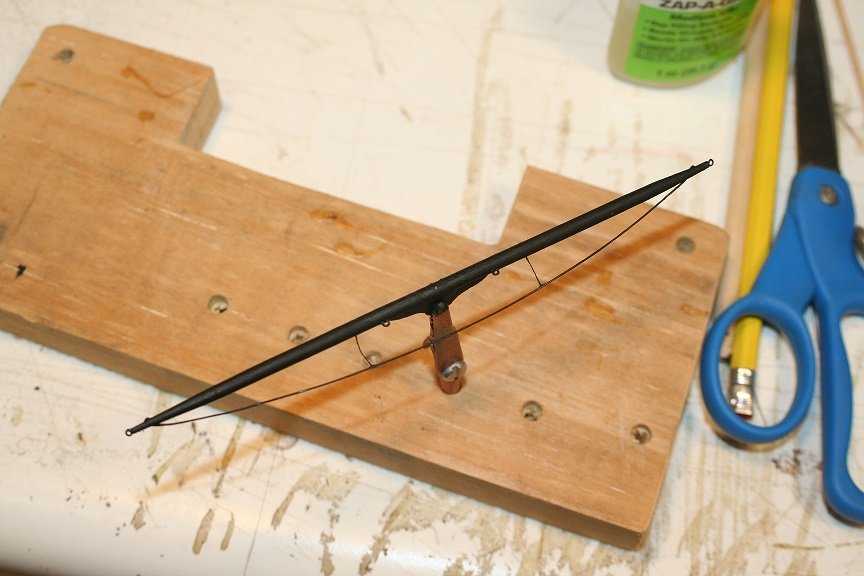
I realized that I could also add items side by side as well as from top to bottom. Installing all the sagging lifts one side at a time made the process move out faster. Next is making and adding all the blocks needed for the sail rigging and for the yards. Unlike last time, I'll probably just make all the blocks, then hang them and then run the rigging. It is more productive for me to create small projects......making the BIG project come along that much faster......It's all mental.... I'll be back at it tomorrow for an hour or so then CHRISTMAS! Merry Christmas everyone....... Rob
- 1,208 replies
-
- 4
-
-
- great republic
- clipper
- (and 1 more)
-
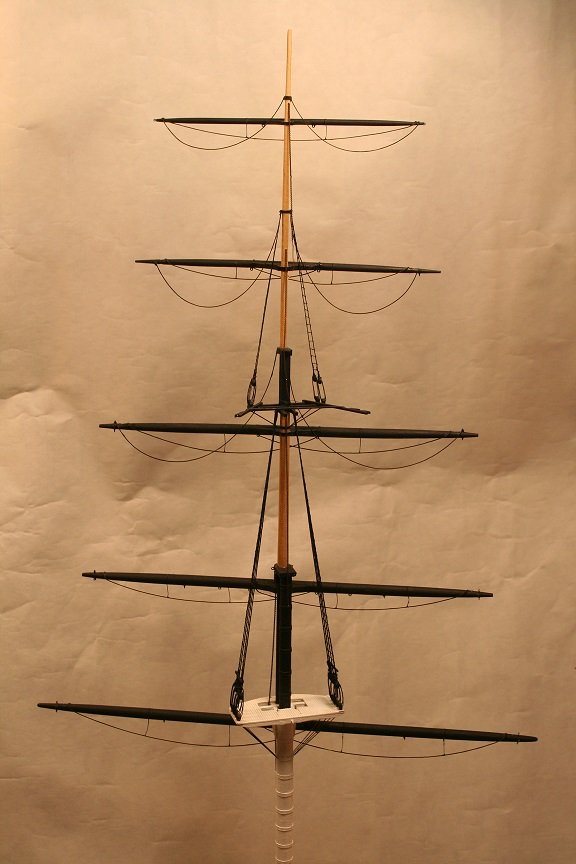
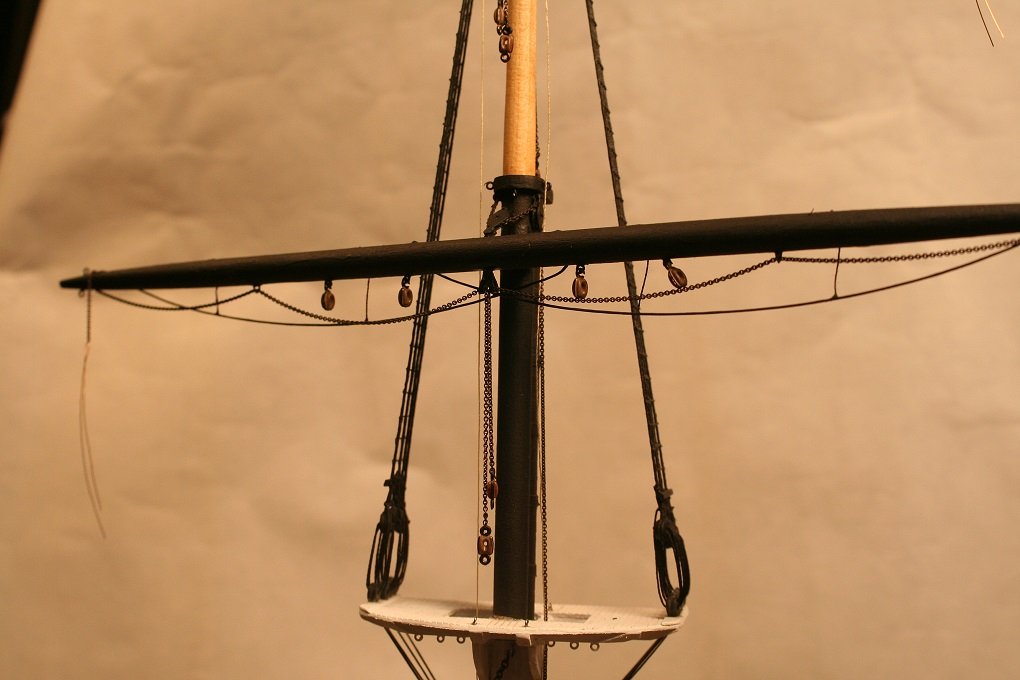
Once installed I then added the relaxed lifts....

- 1,208 replies
-
- 7
-
-
- great republic
- clipper
- (and 1 more)
-
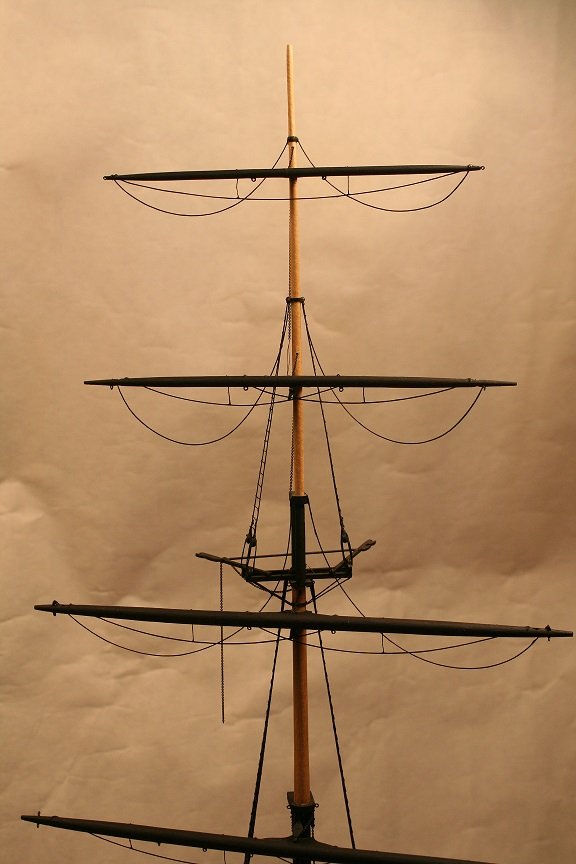
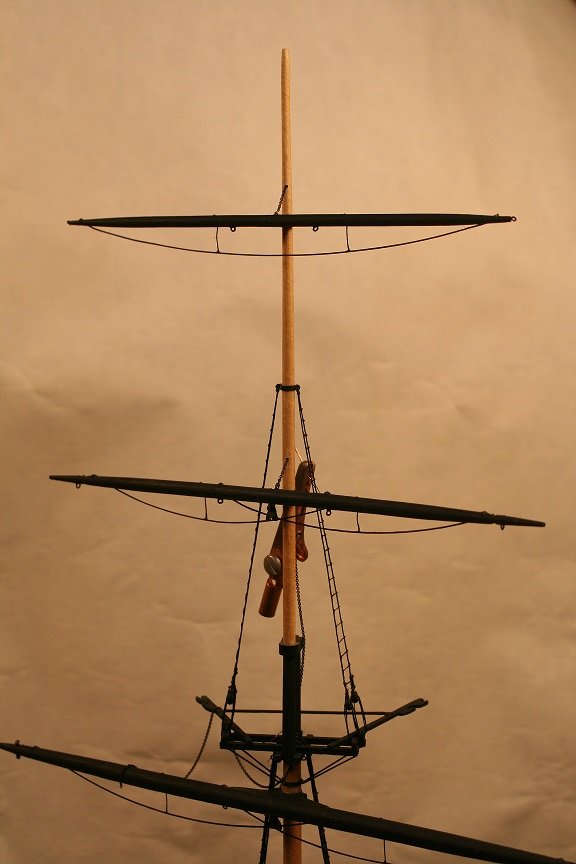
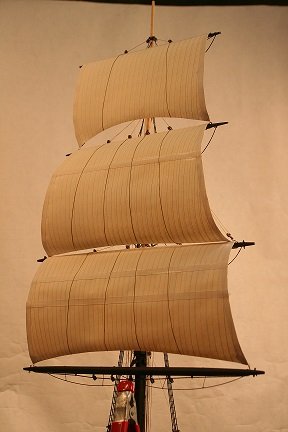
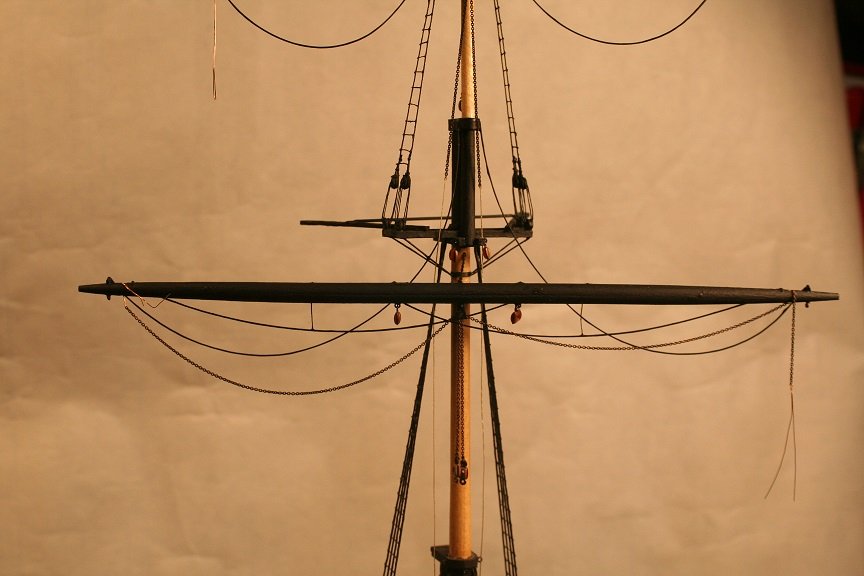
Spent a little time roday working on the topgallant and royal yards.

- 1,208 replies
-
- 6
-
-
- great republic
- clipper
- (and 1 more)