rwiederrich
-
Posts
5,520 -
Joined
-
Last visited
Content Type
Profiles
Forums
Gallery
Events
Everything posted by rwiederrich
-
Once installed I then added the relaxed lifts....

- 1,208 replies
-
- 7
-

-
- great republic
- clipper
- (and 1 more)
-
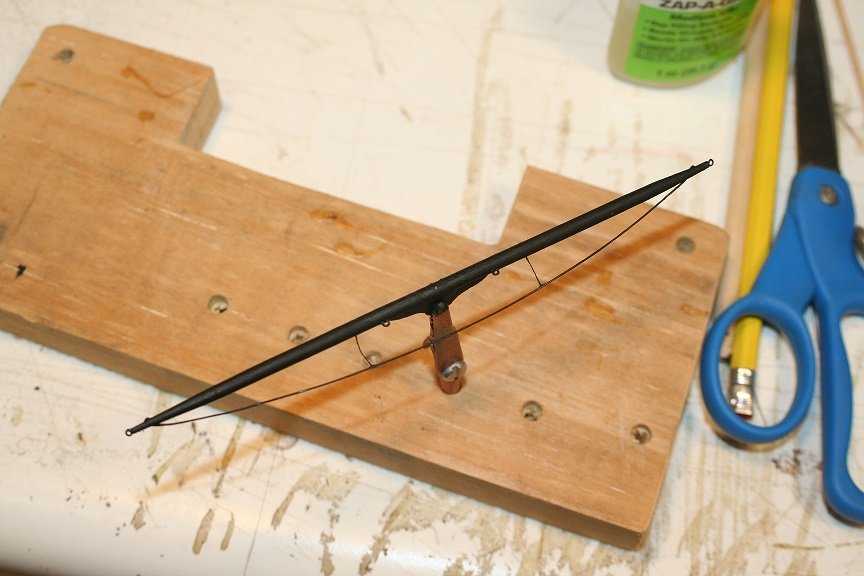
Spent a little time roday working on the topgallant and royal yards.

- 1,208 replies
-
- 6
-
-
- great republic
- clipper
- (and 1 more)
-
Those resistors are great for toning down the brightness of those LED's. I appreciate your response about the sails. Fine chalk powders are great for weathering, if that is what you are using. Cloth sails have always been problematic....because of the scale issue....I'm interested in your technique. Another question; What is the gold paint you are using for all your gold work? Is that the automotive paint? It sure is bright and has a tendency to flow smoothly into voids and makes the carvings softer and less rigid looking. Rob
- 1,035 replies
-
- 5
-
-
- royal katherine
- ship of the line
- (and 1 more)
-
Fantastic Doris.... I can see from that one image of you holding the cabin bulkhead, that your scale is much larger than what I generally work in. 1/55 is slightly larger than 1/128. Your work is just wonderful.... On another note; you will have to give a quick tutorial on how you fashioned your sails...what they are made of and your treatments for them. Your sails are very realistic. Rob
- 1,035 replies
-
- 6
-
-
- royal katherine
- ship of the line
- (and 1 more)
-
Once all the yards are mounted, then I will add all the relaxed lifts in sequence. I began the topgallant yard by adding all the eye bolts and the sheet block...now I'm getting ready to rig the foot ropes and stirrups. The sheet holes have been drilled and chamfered. Rob

- 1,208 replies
-
- 7
-
-
- great republic
- clipper
- (and 1 more)
-
Spent a bit of time today and finished up the top sail yard...still need to add the halyard.
- 1,208 replies
-
- 7
-
-
- great republic
- clipper
- (and 1 more)
-
These are my vary own thoughts. I am no purist and for as long as I have been building ship models(nearly 50 years), I have used anything and everything to build my models. You can find material from wood, plastic, metal, paper, card, wax, vinyl, rubber, poly-, bondo, plaster, and a plethora of other materials on all my models. The key philosophy is that *Paint covers a multitude of sin*, and the REAL ship I'm modeling was painted. It's not what you use to build your model...it's HOW you used it and does it replicate what you are modeling accurately. Rob
- 1,035 replies
-
- 7
-
-
- royal katherine
- ship of the line
- (and 1 more)
-
Layering of multiple colors is the key to form detailed cabinetry. Wonderfully done. I suspect the light has come on for many modelers after you have exposed your techniques and they will begin to incorporate these techniques and materials into their own builds...so very nice. The purist of modeler can still find respect for your technique...even though they themselves would try to achieve their results in wood. I am a firm believer in using whatever material you can to achieve the results you are seeking. It is the end result that matters.. NOT what you made your model from. You have done that is great measure. Rob
- 1,035 replies
-
- 7
-
-
- royal katherine
- ship of the line
- (and 1 more)
-
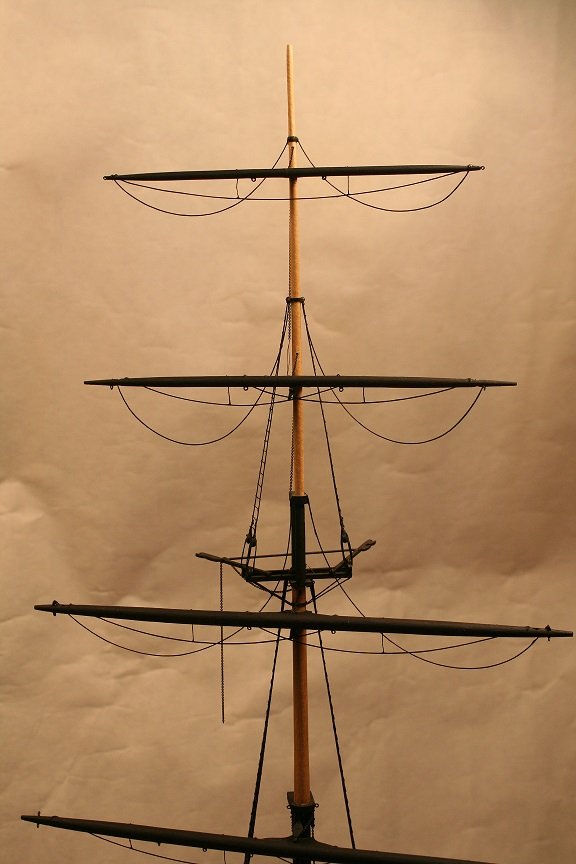
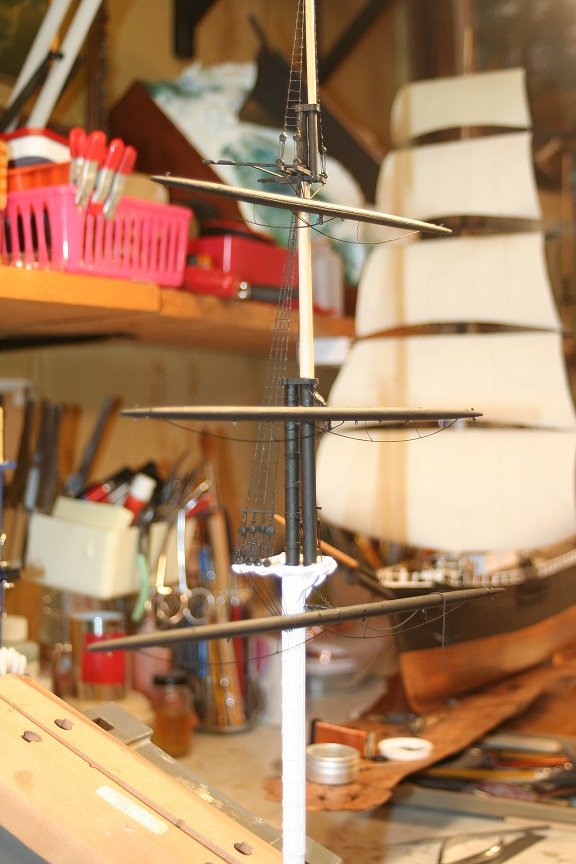
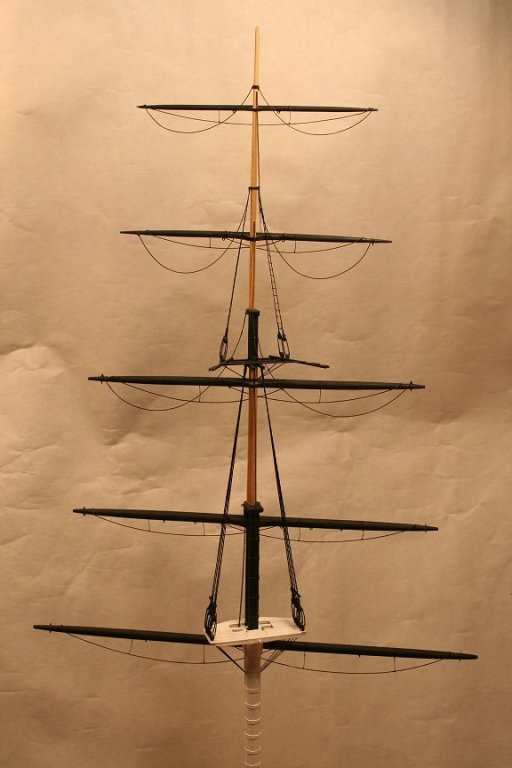
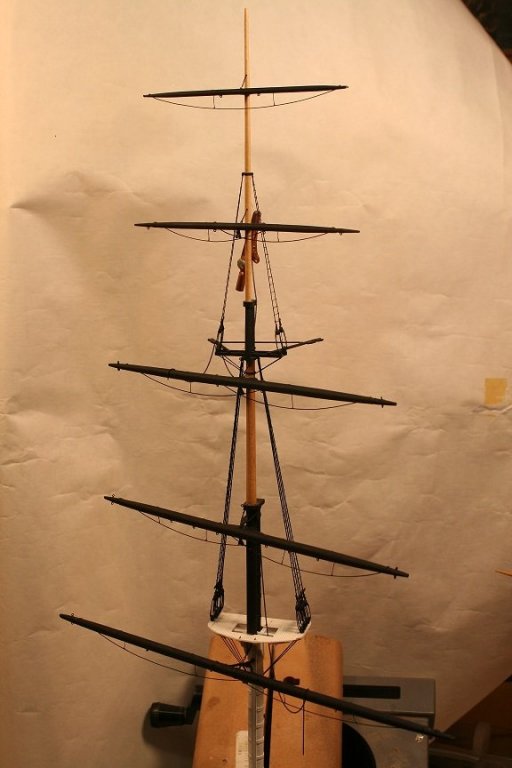
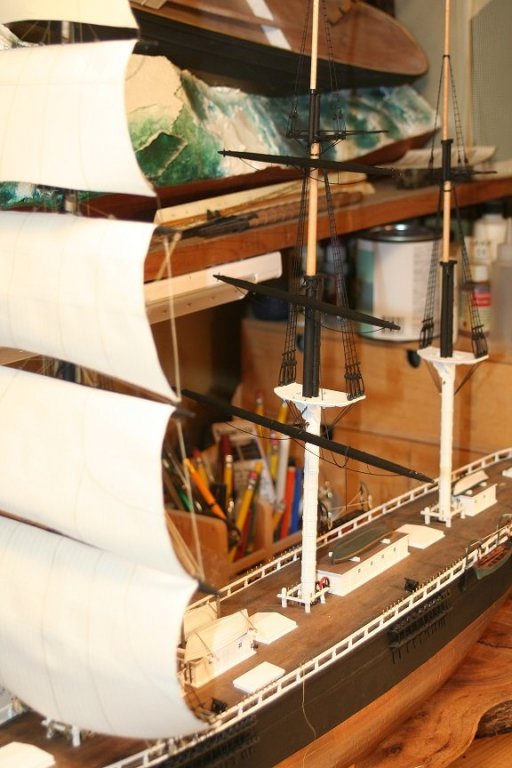
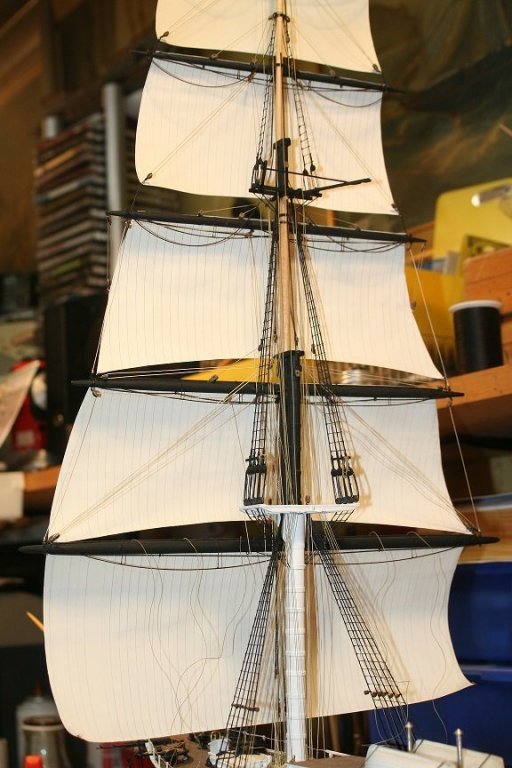
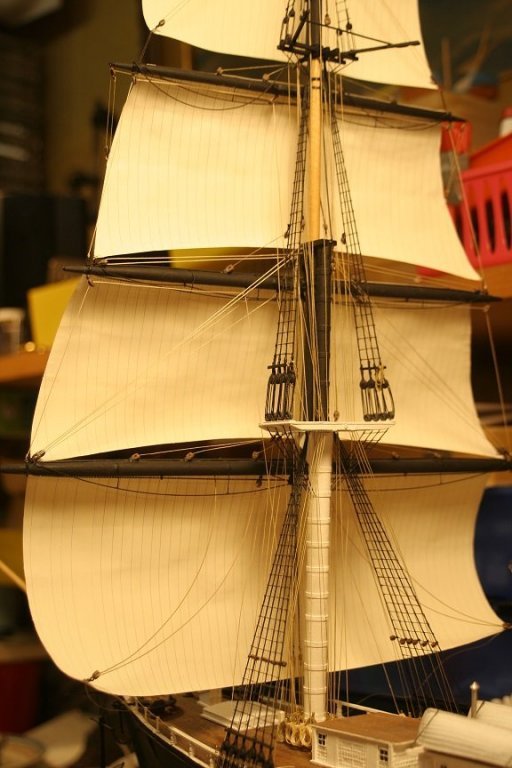
In this sail-less image, the lines missing are the buntlines and the stun sail yard rigging. Still lots going on with out them. Rob
-
Indeed, I am confident you are very correct. However, my point is that the smaller the scale, the more difficult the application....just by the size and my inability to handle the material...due to shaky old hands. I see a million applications for this material...and I for one will avail myself of it for future builds. Thanks so vary much for your tutorials. Rob
- 1,035 replies
-
- 9
-
-
- royal katherine
- ship of the line
- (and 1 more)
-
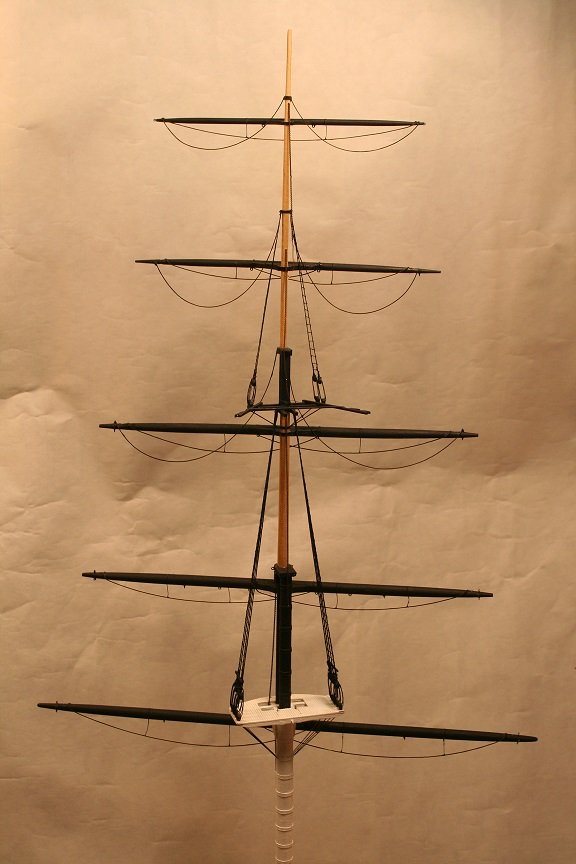
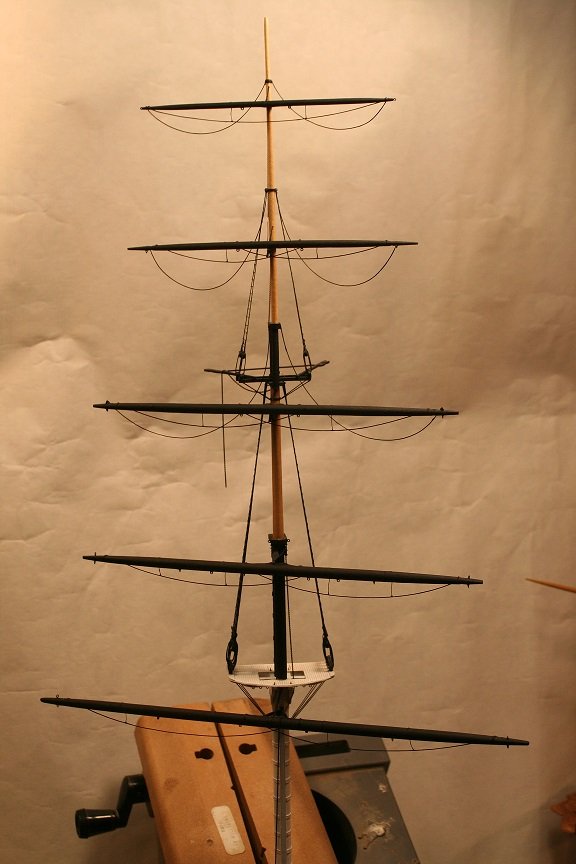
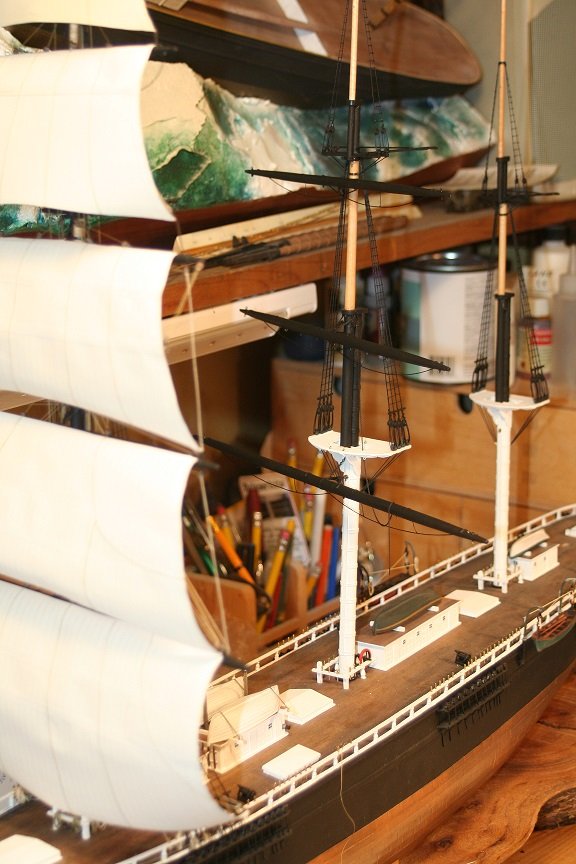
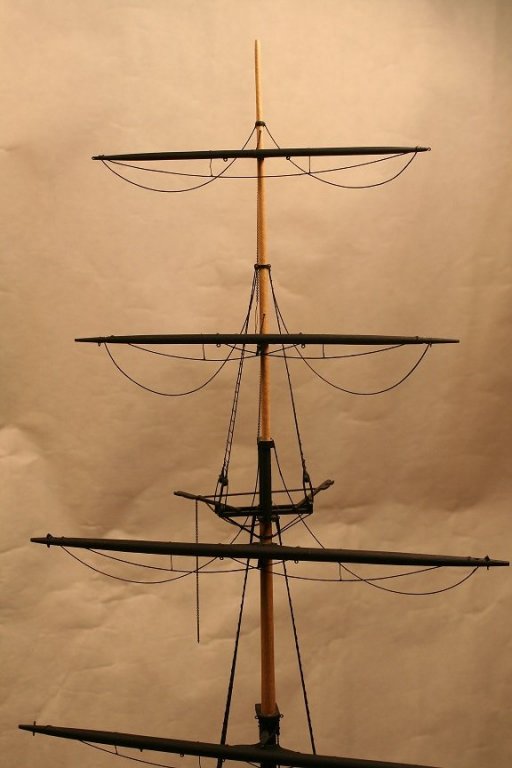
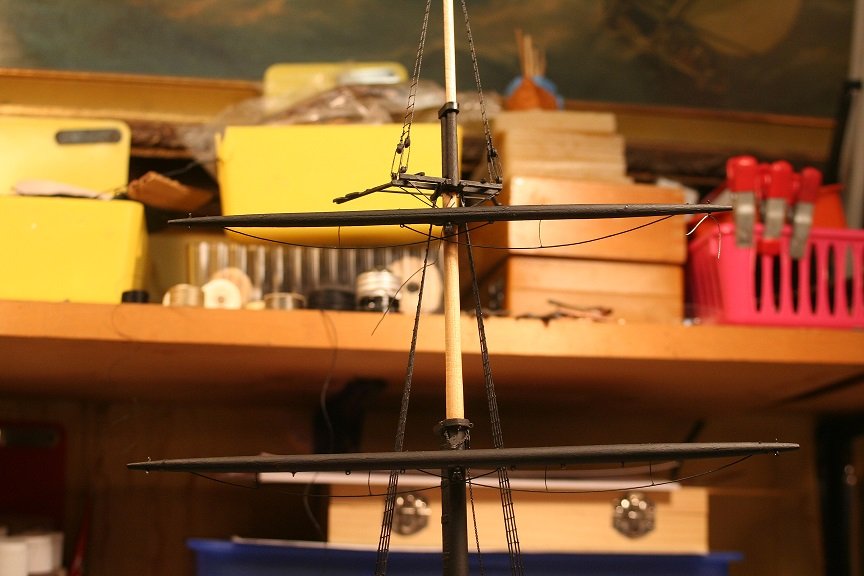
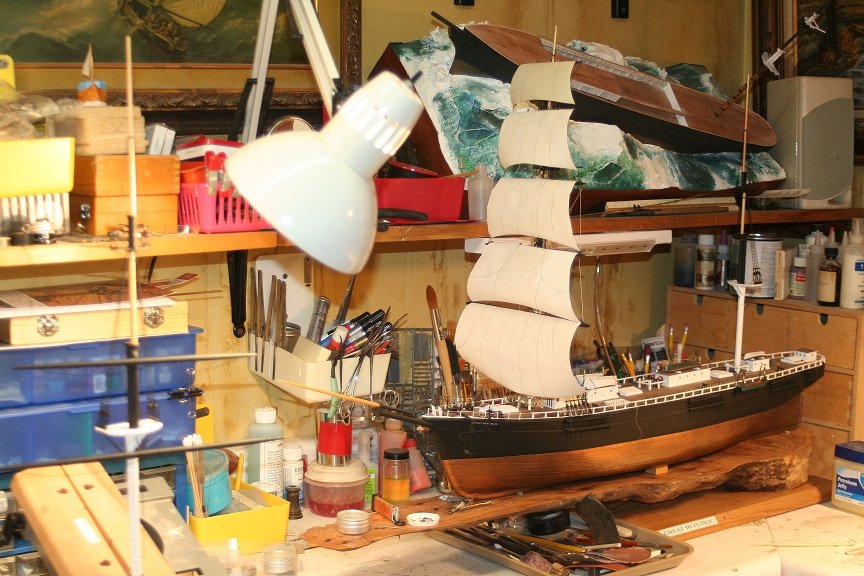
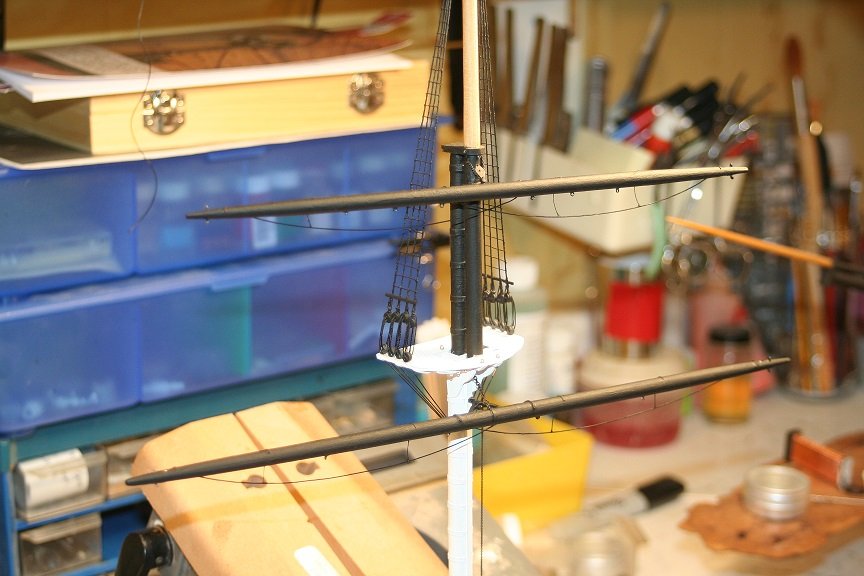
I took one of the over all build sight...and one from on face so you can see the the 20+deg pitch to the yards. This weekend and most of next week I'll be building like mad(I pray). Rob
- 1,208 replies
-
- 8
-
-
- great republic
- clipper
- (and 1 more)
-
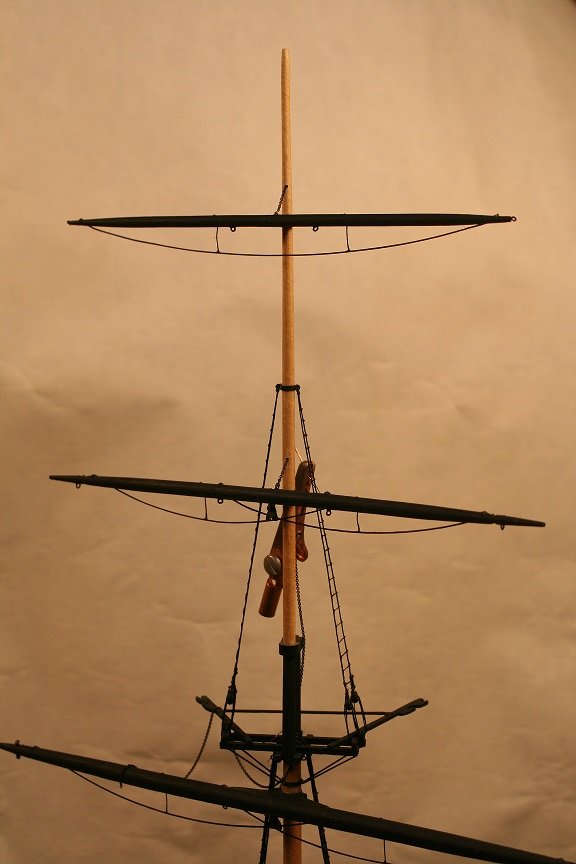
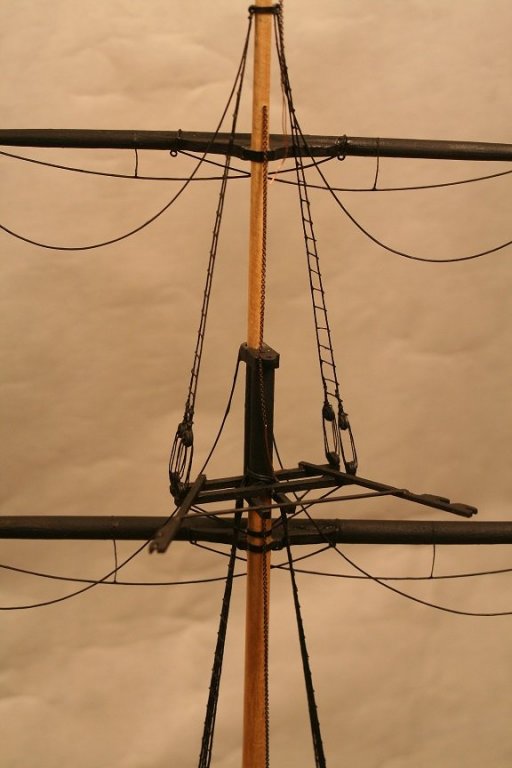
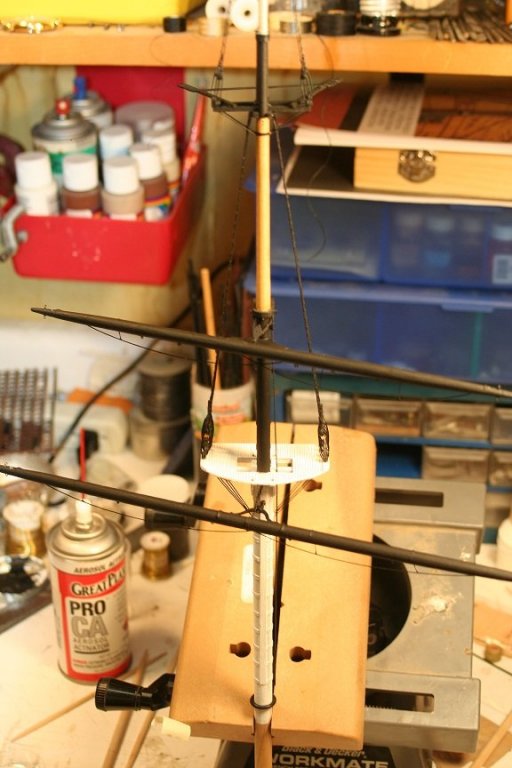
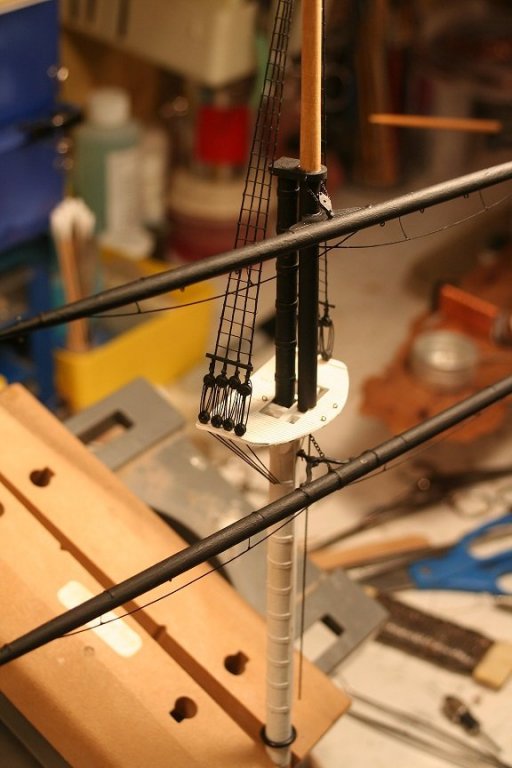
Spent a bit of time this evening making the lower top mast. Because this design is based on Forbes and not Howes...the lower topsail has a large gin block used for hauling up the spar. I remembered that I will be adding the yards going up in sequence and THEN coming back down adding the sails in sequence. Here is a couple pix of my slow progress tonight.
- 1,208 replies
-
- 7
-
-
- great republic
- clipper
- (and 1 more)
-
I find this technique very reminiscent of a technique I also used on some models....however, I I didn't grasp the realization of using this technique extensively as Doris has. Not to answer for her, but I believe real wood is used for the proper relief needed and being real wood in a desirous shade it blends in after being sealed with the dull coat. Wonderful execution. My Great Republic deck houses are smaller than her interior panels alone.....so the strips would have to be extremely thin if I were ever to adapt this technique in my scale. Still it is intriguing. Rob
- 1,035 replies
-
- 5
-
-
- royal katherine
- ship of the line
- (and 1 more)
-
micro drill adapter for mill
rwiederrich replied to michael mott's topic in Modeling tools and Workshop Equipment
Michael...wonderful adaptation. Looks like something I would do...oh wait......I have. I also have some high speed air dental hand pieces, I Use as well that work very good. Great ingenuity. Rob -
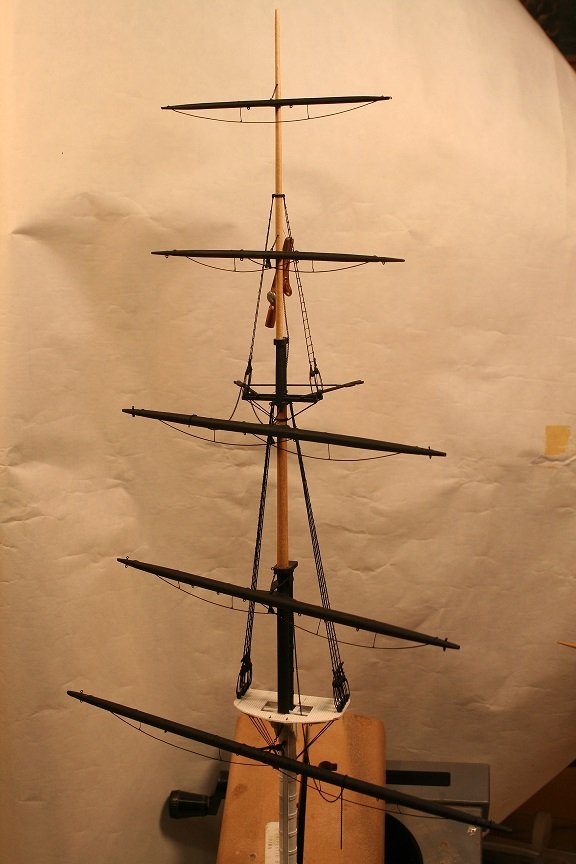
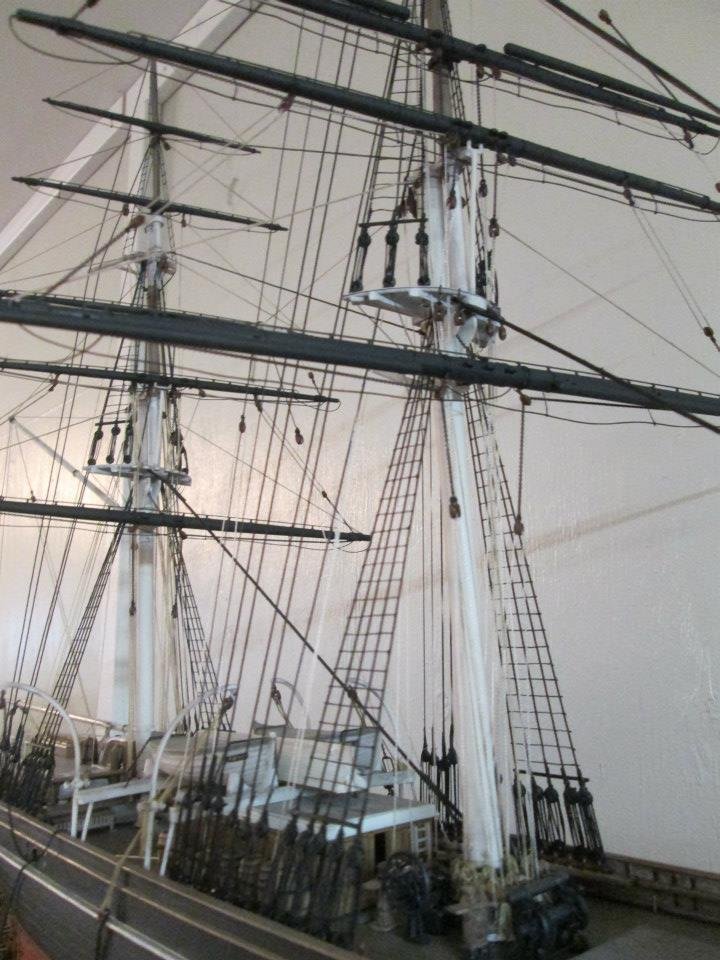
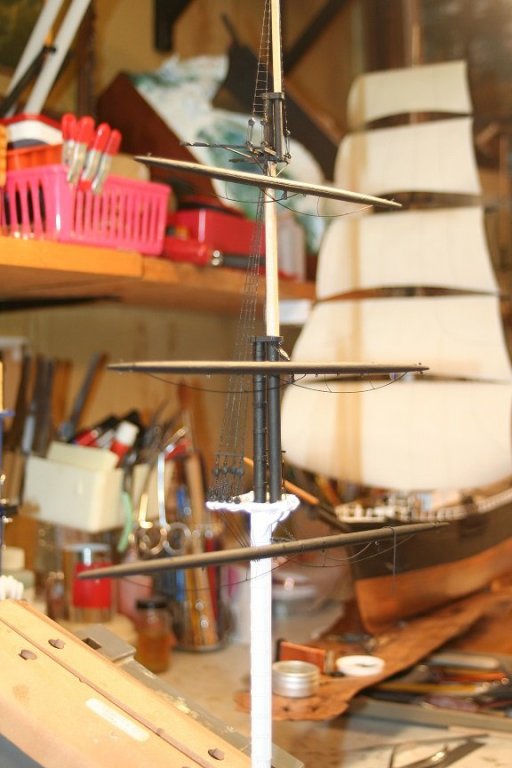
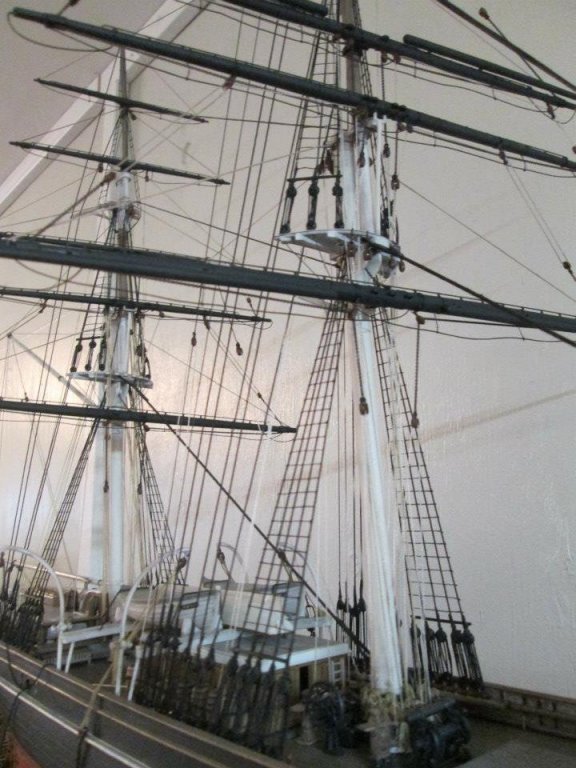
Well.... having nice sail control rigging doesn't always mean it has to be completely blocked by the sails. When sails are removed you lose some additional rigging namely the buntlines and clews. You only get to see the rigging from the aft aspect...if it is done correctly, you can still enjoy it with sails set. Rob
-
Thank you Doris for the fine examples of the direction you are going. I suspect my own lack of the exact time frame for the shift from offset bowsprits to the more traditional forward and on axis designs drove me to this line of questioning. I'm looking at the counter action created by the gammon lashing, which do their work by pulling the bowsprite in toward the midline and down toward the stem. Your picture examples show that lateral forces are applied to the starboard side of the Stem not on top of the stem(which I referred to as the *Foot*)....which in later designs became more prevalent. If the bowsprit does not find support from contact with the *Foot* or Stem...then all the Gammon lashing energy is being countered by the fore stays. Regardless....my questions have been answered, and your attention is most appreciated. Love your work. Rob
- 1,035 replies
-
- 8
-
-
- royal katherine
- ship of the line
- (and 1 more)
-
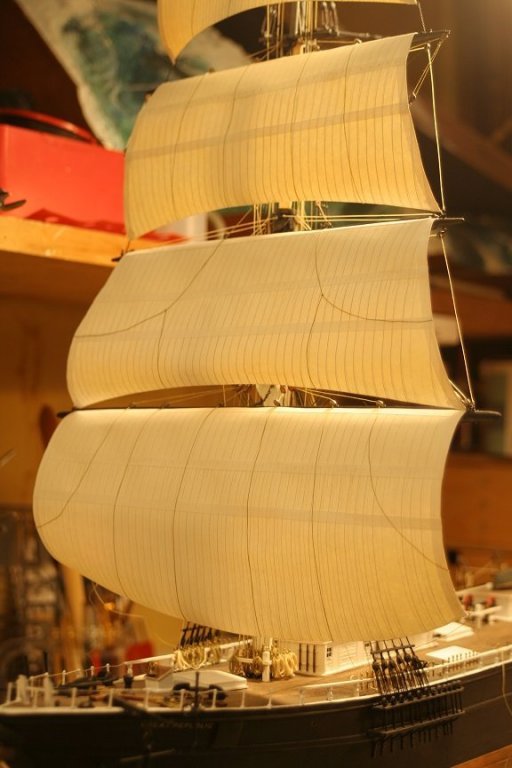
I appreciate that very much Popeye....effective looking sails can be some of the hardest things to replicate...and keeping the web of rigging that controls them is just as critical. Now I'm back at the beginning stages again of yard fabrication and rigging for the mainmast. Much of what I learned along the way of fabricating the foremast will truly expedite this next masts construction. Foot ropes, stirrups, and eye bolts will all be added prior to install. I'll be off work for 11 days during the holidays so I hope to get loads of work done. Thanks again for your fine comments and compliments. Rob
- 1,208 replies
-
- 4
-
-
- great republic
- clipper
- (and 1 more)
-
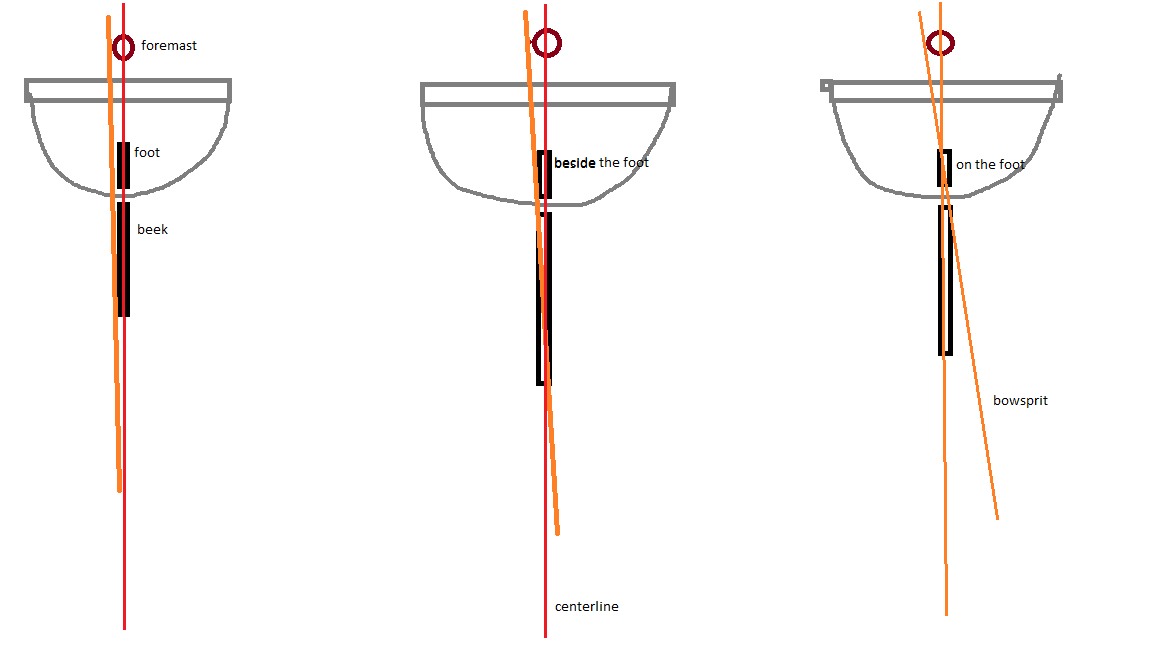
Doris I drew up quickly, an example of the 3 possibilities the bowsprit might find itself. Key elements are noted on the drawing. My question is, from your model, the exit hole for the bowsprit would place the bowsprit off axis if you were to seat it on the foot as noted by the example on the right. if you were to keep your bowsprits termination on axis, you would follow the drawing example on the left. the middle drawing is a representation of an average. Key notes: The bowsprit is abutted to the foremast(for reasons previously noted). The real question is, will you be actually resting the bowsprit on the foot(where it usually is found) or will you be placing it along side it and allowing for it to be centered and then fixing it there? That was my entire line of questioning. Rob

- 1,035 replies
-
- 9
-
-
- royal katherine
- ship of the line
- (and 1 more)
-
In most instances the offset for the bowsprit was established because of the internal proximity of the foremast and the bowsprit. Because the forecastle was short and tall, the bowsprit and foremast found no room to be on axis with one another...so they did indeed offset the bowsprit by fashioning it beside the foremast. I know this,....however, in one of the images Doris took of her additional seats of relief addition...the angle of the exit for the bowsprit and the bowsprit foot is too acute...resulting in the bowsprit being exaggerated to port by almost 20degrees....from what I can tell. My original question was centered around that angle....NOT that, was that angle(Or offset) correct. I can only assume the bowsprit will be fashioned NEXT to the seat and not ON the seat... Question: Doris...will you be rigging this model with masts, yards(sails) and rigging? Rob(inquisitive minds want to know)
- 1,035 replies
-
- 6
-
-
- royal katherine
- ship of the line
- (and 1 more)
-
I suspected that...but I thought I'd ask. The angle appears to be significant in relations to the distance of the hole(Bowsprit exit) from the foot. Rob
- 1,035 replies
-
- 5
-
-
- royal katherine
- ship of the line
- (and 1 more)
-
The doors are magnificent...I assume they are made from the vinyl as well? One question: I noticed the offset of the bowsprit exit hole and the bowsprit foot are not aligned...is there some reason for this? Sometimes the bowsprit is laid port or starboard of the foremast because of proximity....but I would still think the exit and foot would be parallel to one another. Just noticing. Your work is so wonderful its hardly fathomable that it is made from card stock and some self adhesive vinyl laminate and modeling compound. The folks who build exclusively with wood, would have a rough time keeping up with your standard...... Just wonderful work Doris. Rob
- 1,035 replies
-
- 7
-
-
- royal katherine
- ship of the line
- (and 1 more)
-
Unfortunately the broken spar was almost inevitable....as the meat of the spar becomes less but the iron work remains the same. In their weakened state, with holes drilled through for jackstay eyebolts and in frequency....these slender spars have little in the way of rigidity when forcefully applying copper banding. I know this feeling myself...regrettable. If I took a picture every time I broke something or lost something in the hole that is the floor of my shop.....I would have no band width left for actual construction images. Ed your masterfully crafted YA is nearing her completion and the thrill of watching her come together leaves a giddy feeling. Wonderful. Rob
- 3,618 replies
-
- 4
-
-
- young america
- clipper
- (and 1 more)
-
2 seats of ease for a hundred... requiring release from the stresses of their day....seams a bit short sighted. On the designers part.... Your model is looking superb... Rob
- 1,035 replies
-
- 9
-
-
- royal katherine
- ship of the line
- (and 1 more)
-
Wonderful metallurgy.........Michael. It just keeps getting better, every time I look in....love it. Rob