Check out our new MSW Sponsor Innocraftsman
×


rwiederrich
-
Posts
5,504 -
Joined
-
Last visited
Content Type
Profiles
Forums
Gallery
Events
Everything posted by rwiederrich
-
I appreciate that Omega and Tarbrush. I'm always looking for ways to save time and effort and in the end the result is quite convincing. Wood doesn't always have to be the final choice of building material. And since these panels are 1/8" in size...I found the compromise to tediousness. Rob
- 1,208 replies
-
- 5
-

-
- great republic
- clipper
- (and 1 more)
-
Well...My way is always the easiest route...not the best.....sometimes. Thanks for the fine comments. Rob
- 1,208 replies
-
- 3
-
-
- great republic
- clipper
- (and 1 more)
-
I pretty much throw things together..so the kindness shown with all the likes is very much appreciated. Smaller scale models lend to mimicked detail.....or applied detail. I can get away with many flaws. Rob
- 1,208 replies
-
- 5
-
-
- great republic
- clipper
- (and 1 more)
-
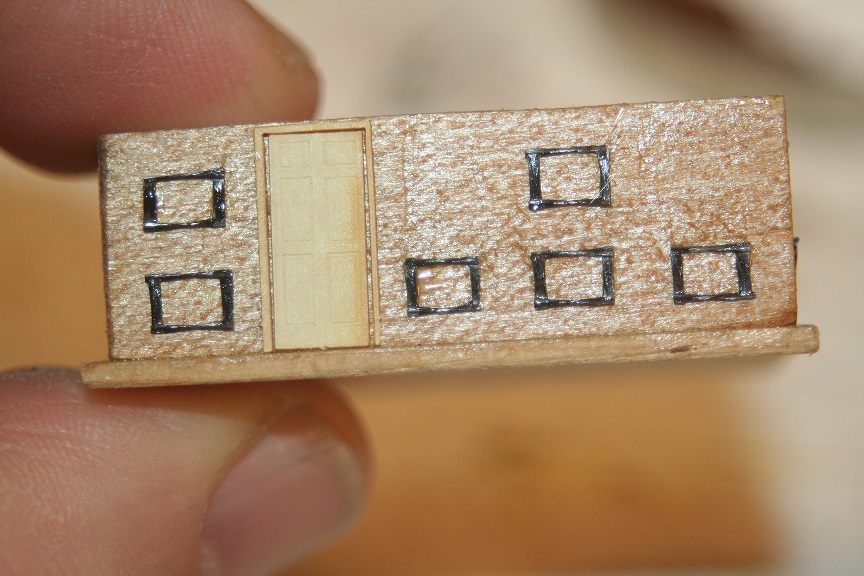
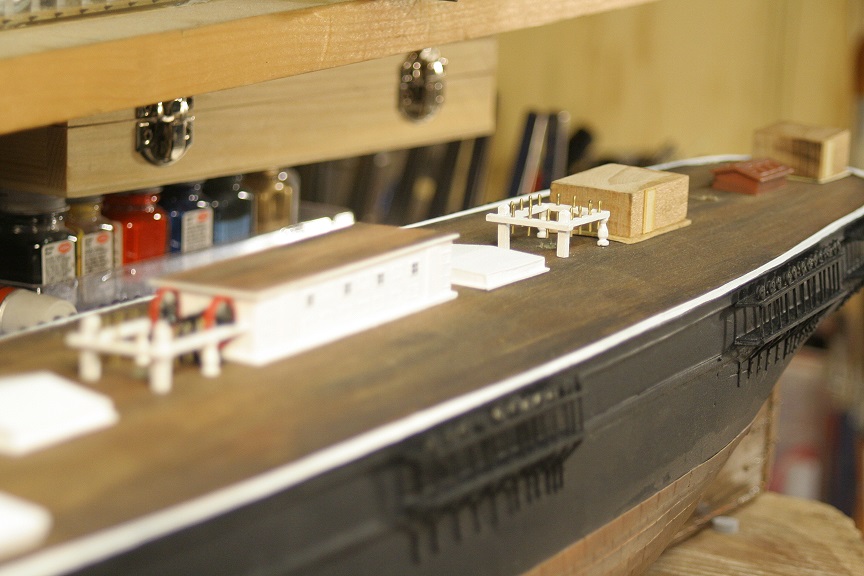
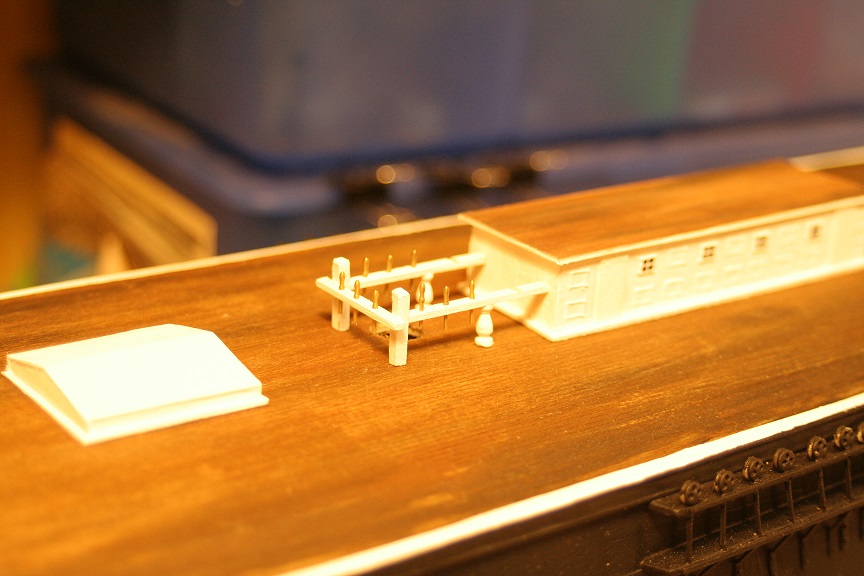
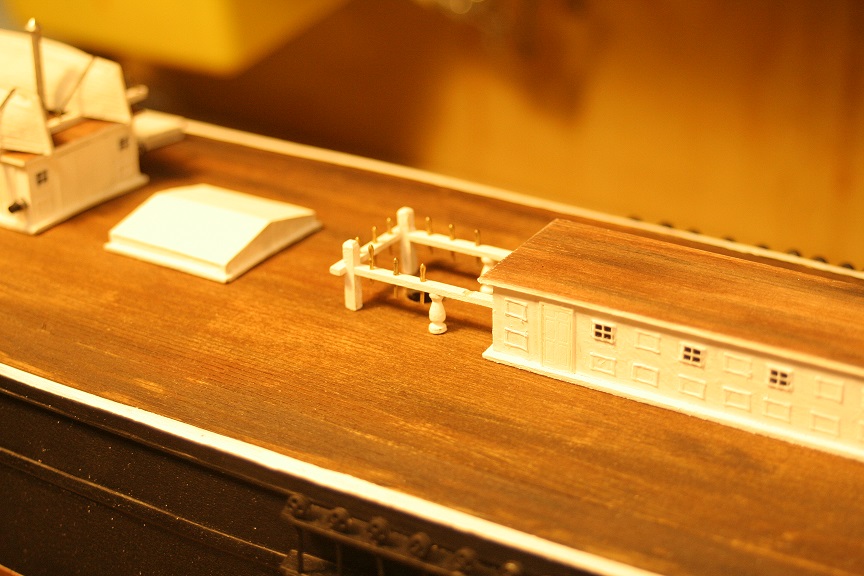
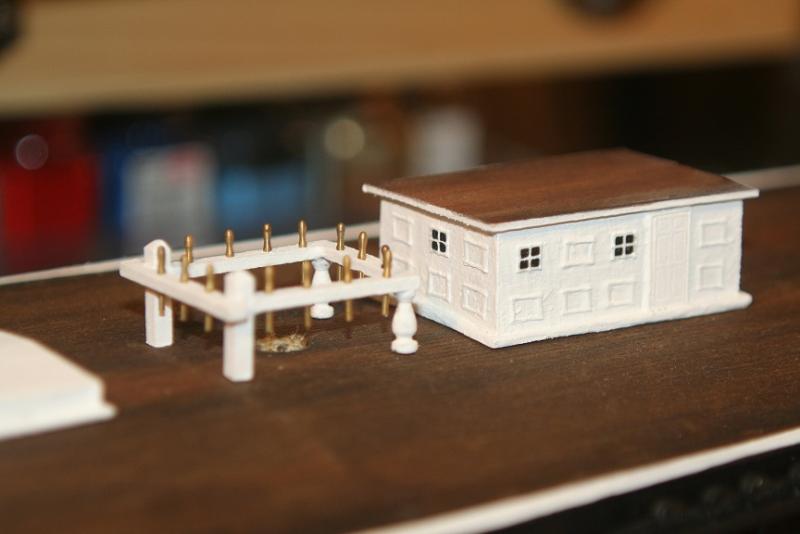
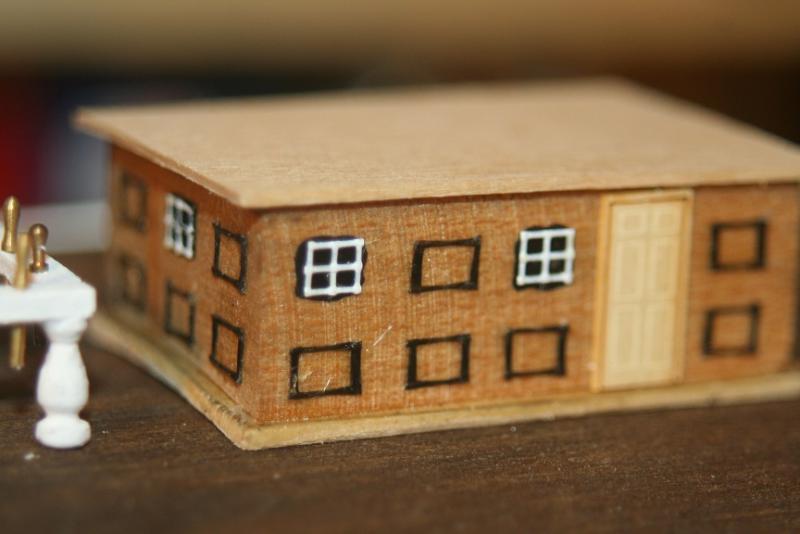
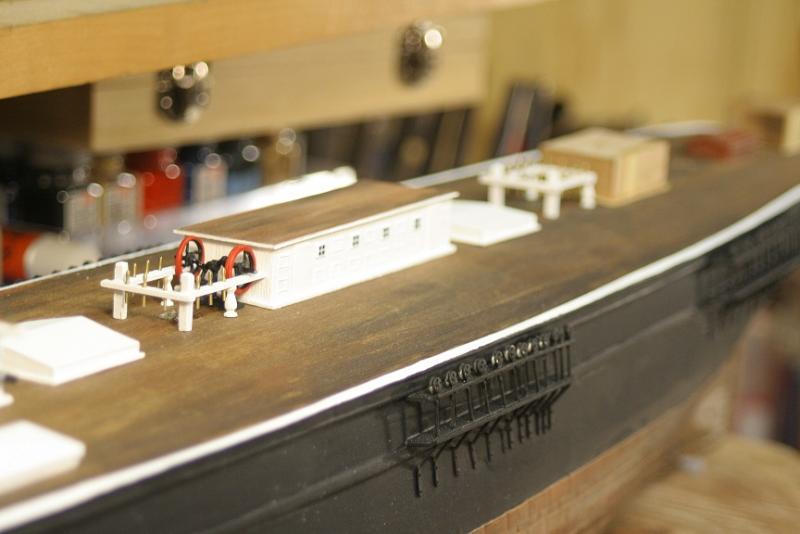
After this I fill and paint around the windows and all the panels in white paint. I added the capstan polls to the rear of the aft cabin and the capstan. Lastly will be the sky light and the 6 crab winches. The scale is pretty small and most work requires magnifying goggles. (I'm getting old) I hope this little look into the unorthodox building techniques of these cabins helps demonstrate how much of a hack builder I really am. Rob


- 1,208 replies
-
- 10
-
-
- great republic
- clipper
- (and 1 more)
-
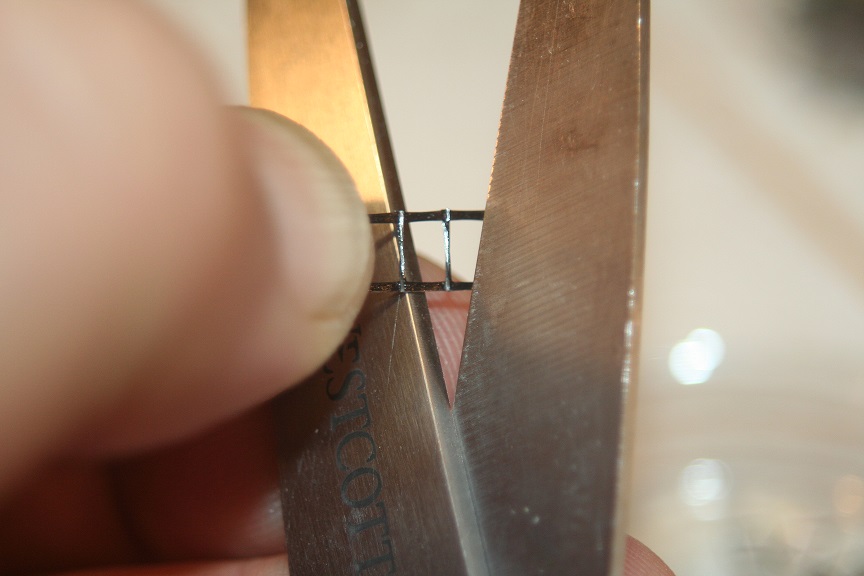
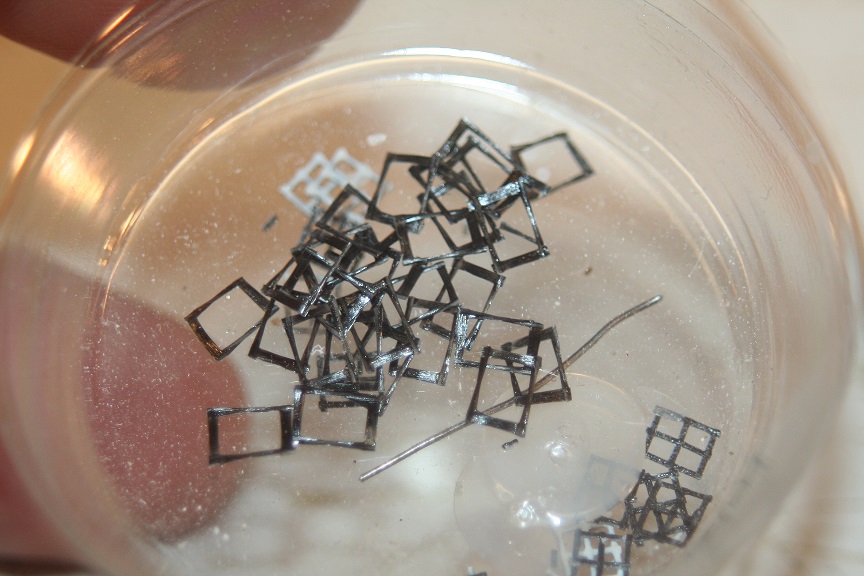
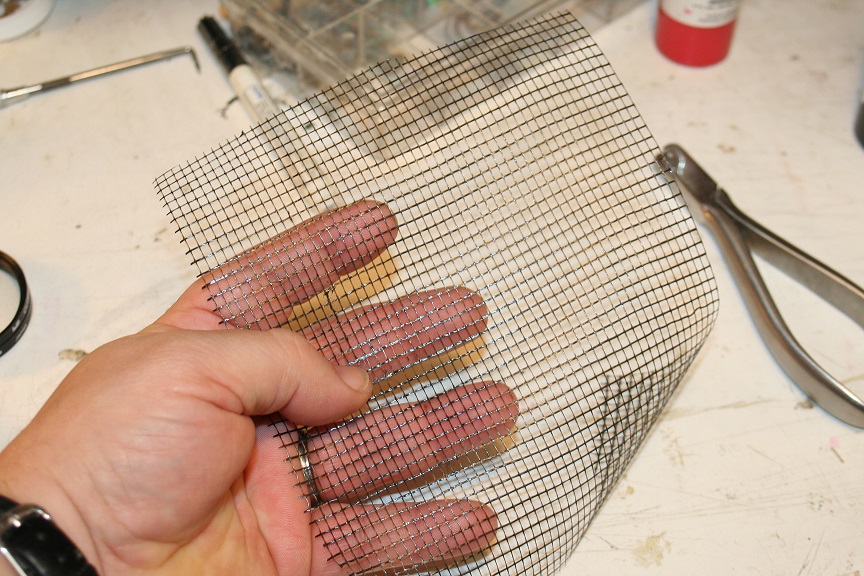
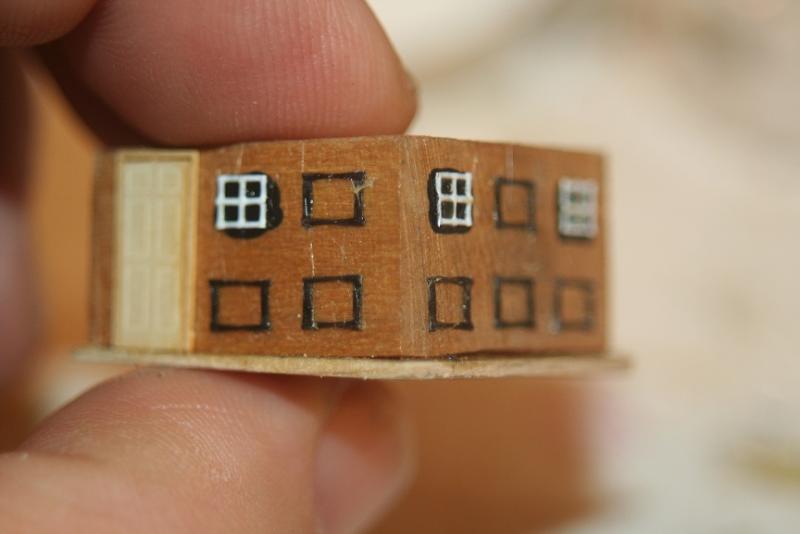
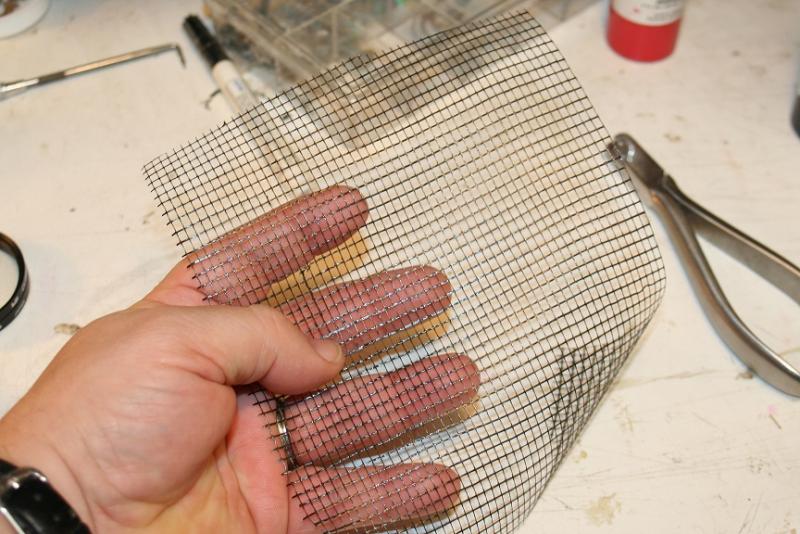
After this I select screen mesh and paint then cut out the window panes and add them.
- 1,208 replies
-
- 9
-
-
- great republic
- clipper
- (and 1 more)
-
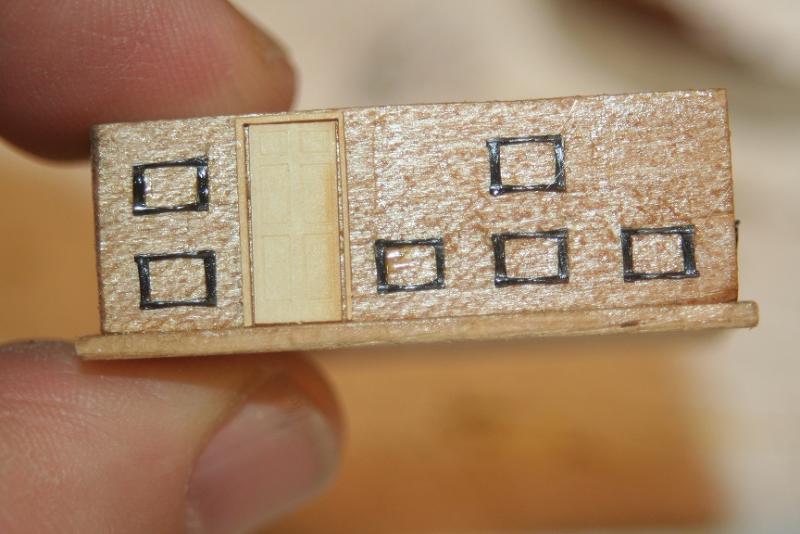
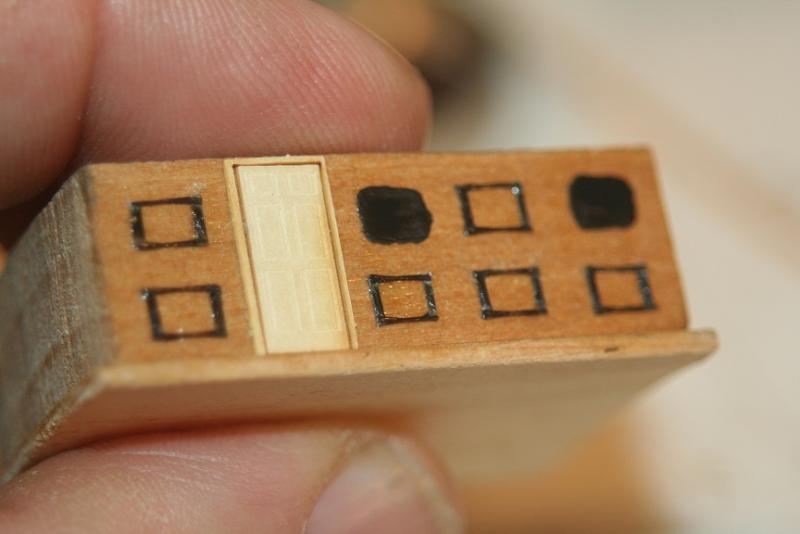
After that I apply contact cement to the building sides and to each panel piece and locate them on the building. I also apply *N* scale door panels as well and then paint the spot where the windows will be located.
- 1,208 replies
-
- 7
-
-
- great republic
- clipper
- (and 1 more)
-
Well let me see... I first select a good swath of nylon mesh for the panel simulation
- 1,208 replies
-
- 5
-
-
- great republic
- clipper
- (and 1 more)
-
Ed I appreciate your attentiveness toward the details that are missed by even the most discriminating viewer. Plus, I believe the scale you selected lends itself to such details I could only hope that if I were able to mimic simply half the detail you have addressed with your YA build...I feel I would have built a quality scale model myself. Visiting the Maritime museum in Virginia..it was evident the best detail was captured in enormous models over 6~10ft long. You have been an inspiration. Merry Christmas. Rob
- 3,618 replies
-
- 8
-
-
- young america
- clipper
- (and 1 more)
-
Thanks Popeye..a lot. I have only the two aft houses and the sky light and capstan....then the 6 crab winches and then I can tackle the main turned post rail. Marry Christmas. Rob
- 1,208 replies
-
- 3
-
-
- great republic
- clipper
- (and 1 more)
-
Tarbrush.suppose I can take some images of the paneling step to document the process. It might help some to see my multi media approach to construction. The holidays are getting in the way of some serious building, but I hope the week after Christmas I can devote some real time to the project. Rob
- 1,208 replies
-
- 4
-
-
- great republic
- clipper
- (and 1 more)
-
I, unlike yourself Ed, will have a fantastic example to follow......thanks. Rob(Beautiful as usual)
- 3,618 replies
-
- 6
-
-
- young america
- clipper
- (and 1 more)
-
Yes Crothers book does and that is one of my major sources indeed. I will check again on McKay's bio information presented by Crothers. Thanks. Rob
- 3,618 replies
-
- 2
-
-
- young america
- clipper
- (and 1 more)
-
Ed..wonderful remark. I appreciate the clarity and specificity. I was wondering how you came about Webb's original spar plan for the YA? I wasn't sure that Webb designed and installed his own spars as well. Many builders simply contracted that aspect out based upon their requirements for their ships performance design. I've had a bear recovering such information for some of my McKay builds. It's as if all that information is now lost to time. Apart from the generic. Like you, I rely heavily upon Crothers research and deductive conclusions. Again...thanks for all your time in responding. Rob
- 3,618 replies
-
- 3
-
-
- young america
- clipper
- (and 1 more)
-
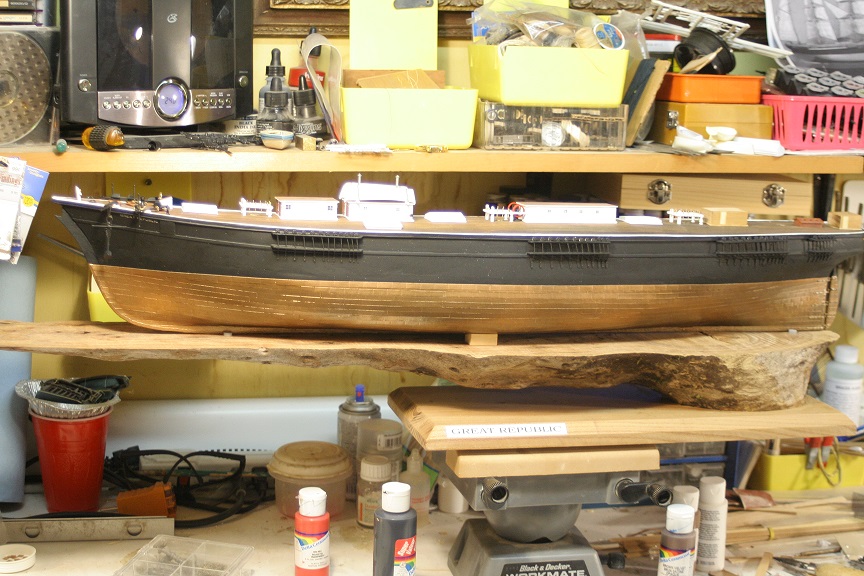
Thanks Albert. I could be more pro-typical in my construction techniques...and neater too. I didn't realize the shop was so messy. Unlike some builders on these pages..I have *Zones* of messes and tools and such. If I put everything away during my build...the tidiness of the shop would take more time to maintain then the build itself. A couple of pieces of equipment..some may have wondered about, are my light curing unit, used for curing light cured plastic for custom made parts, and my vacuum former and a sanding disk /table saw lathe I built.(It's off to the far left), imaged sometimes. Currently I am paneling the aft cabin and wheel house. Experimenting with the design of the half dome skylight as well(wood, wire and glass)...Oh boy. Rob
- 1,208 replies
-
- 3
-
-
- great republic
- clipper
- (and 1 more)
-
Wonderfully constructed Ed. I too had noticed some minor discrepancies with the final product and the drawings...but assumed what you had described. so much more goes into construction beyond what version of the drawing you are working to. My drawings have several inaccuracies...I have to work over. Besides......some these drawings are nearly only suggestive of what was typical...not what was actual. Leaving much builders artistic license, for sure. Crothers in his masting book mentions that mast builders of the time left limited documents for us to study over and the specific mast design used on our favorite clipper may not even be available. Love the work....you're doing magnificent. Rob
- 3,618 replies
-
- 2
-
-
- young america
- clipper
- (and 1 more)
-
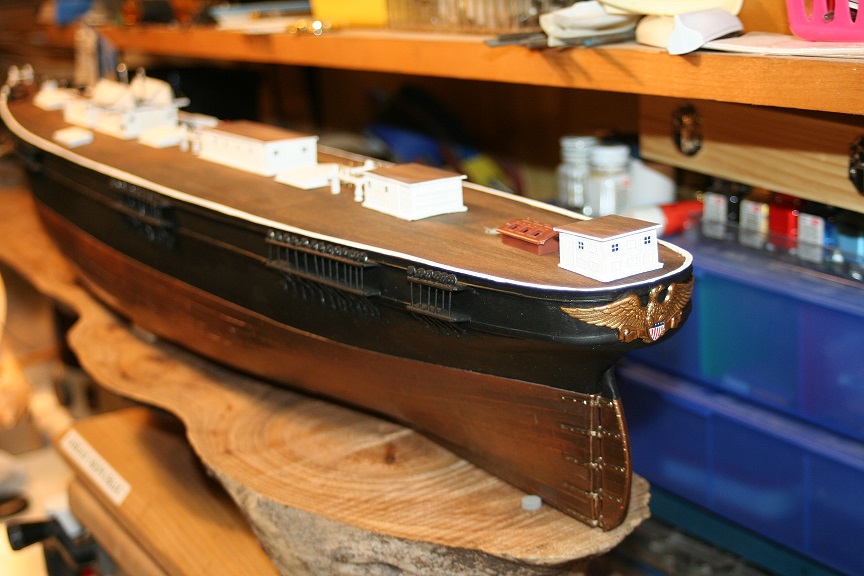
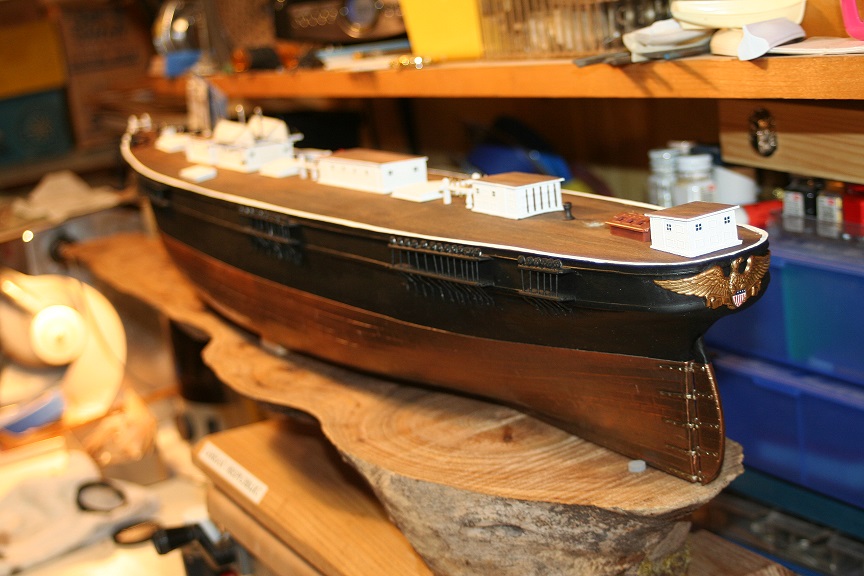
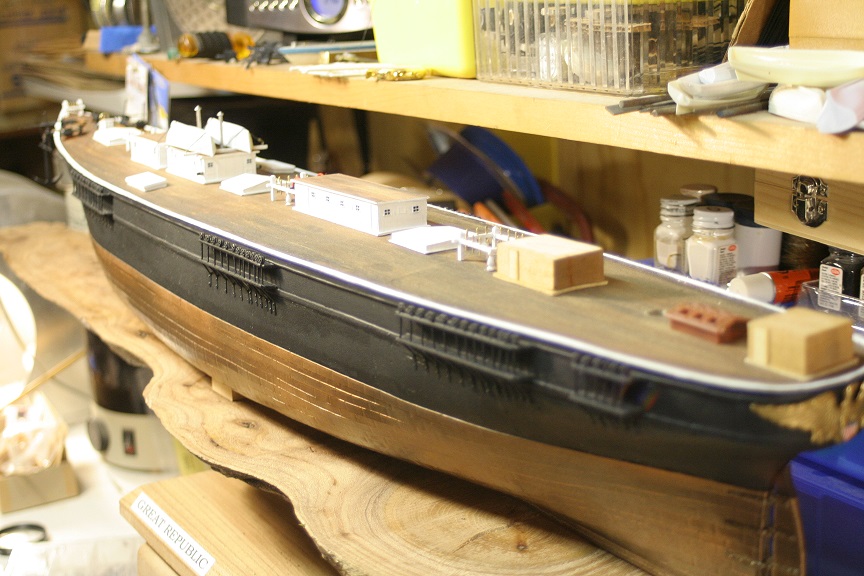
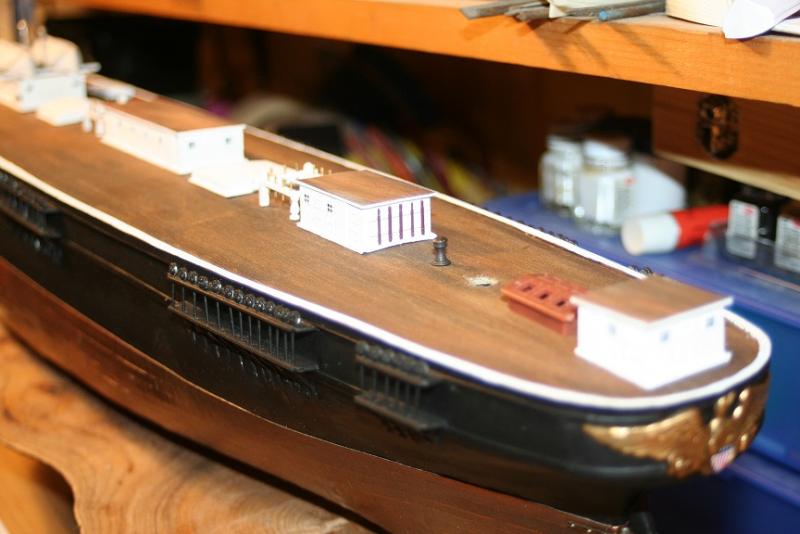
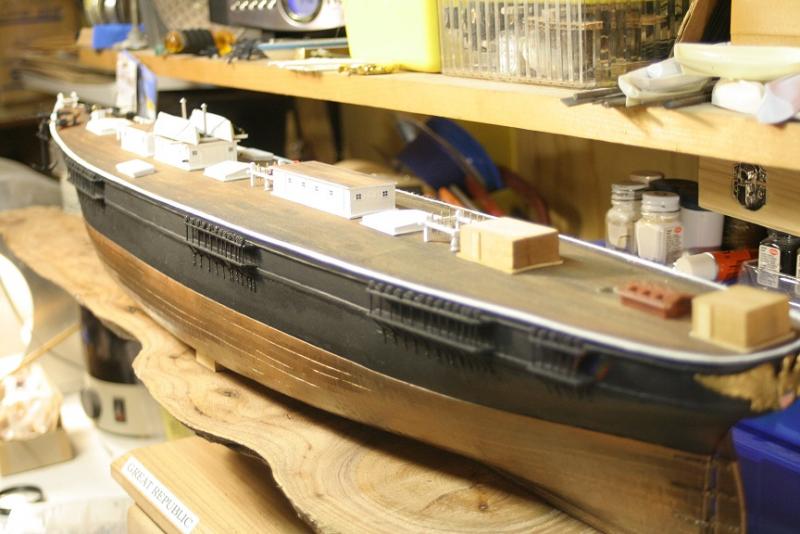
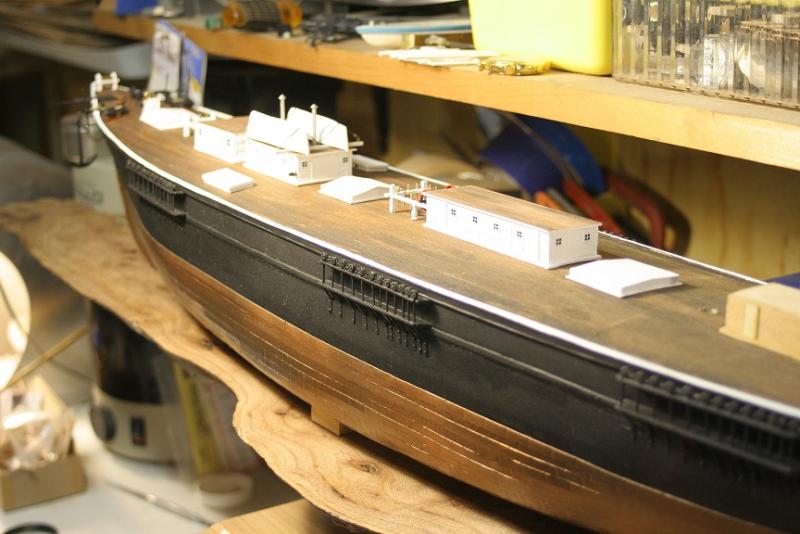
Lastly the mizzen fife rail and some over all images of the current state of the vessel.


- 1,208 replies
-
- 14
-
-
- great republic
- clipper
- (and 1 more)
-
Next I finished up the main mast fife rail with the pump installed.

- 1,208 replies
-
- 14
-
-
- great republic
- clipper
- (and 1 more)
-
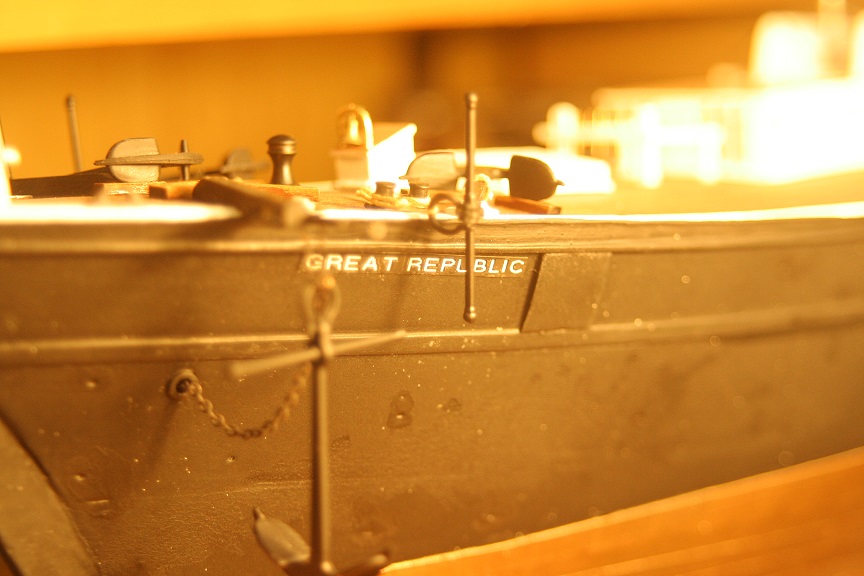
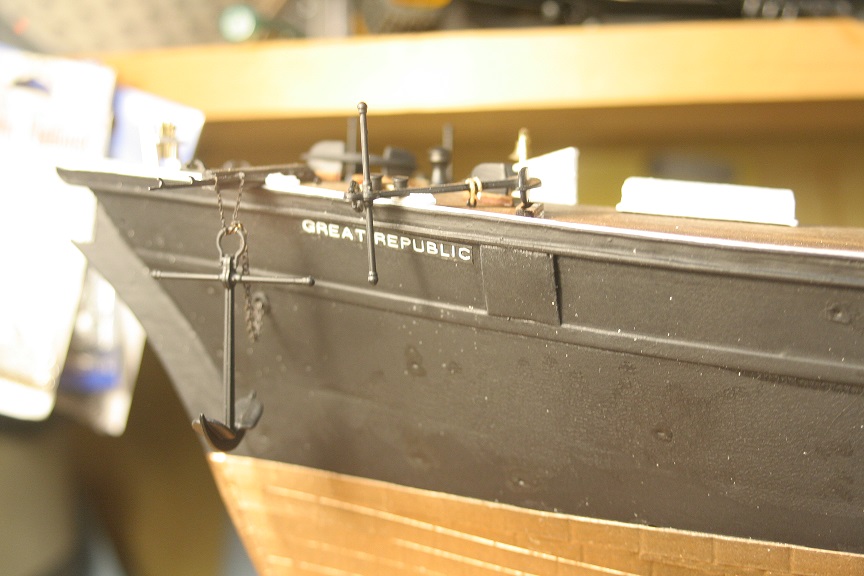
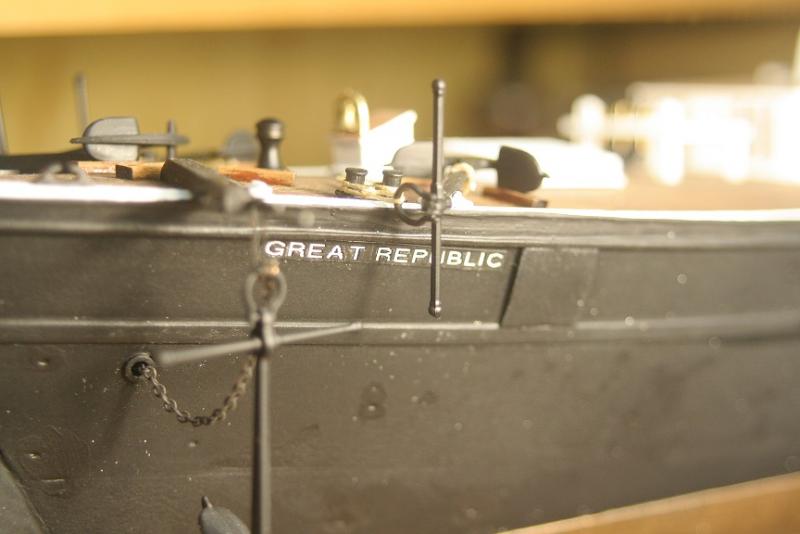
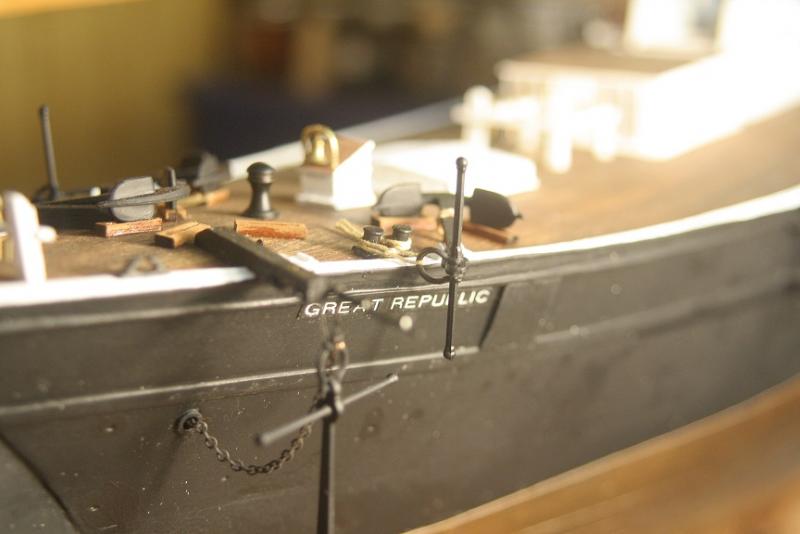
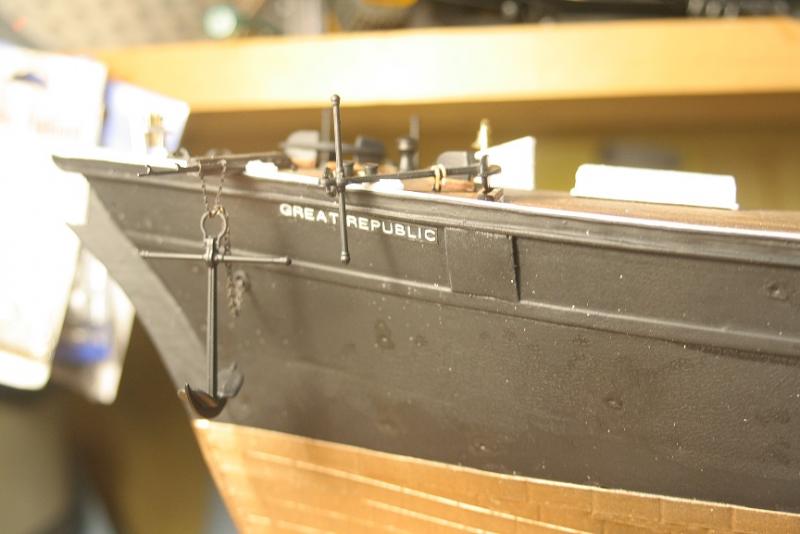
Well..I worked a bit on the GR today. First..my image quality was hurting so I figured out I had my camera's white light setting all wrong for the lighting of the room....I adjusted it now things are brighter. The first image is still set on the wrong white light setting. It is of the new Great Republic name board. All other images are correct.

- 1,208 replies
-
- 11
-
-
- great republic
- clipper
- (and 1 more)
-
Popeye...I'm so glad you are doing a clipper...I'll be visiting this thread often for sure. Gee I wish my admiral ordered me to build on my ships...what a burden you have to bare..... Second..I always wondered why the keels and cutwater on some of these models are so heavy. This model looks like nearly 1/4" thick or at least 3/16" Fun stuff anyway. Good to see you at work. Rob
- 453 replies
-
- 5
-
-
- thermopylae
- sergal
- (and 1 more)
-
I feel at this juncture, that I'm simply parting my ship together...small piece by piece. As what looks obvious..the aft cabin is next...I almost started it last night..but I was required else ware. My goal is to finish both the aft house and the helm next. Currently I'm finishing the pump that goes with the main fife rail...between the main mast and house. It wasn't in the photo because it was being painted. Rob
- 1,208 replies
-
- 4
-
-
- great republic
- clipper
- (and 1 more)
-
Popeye..The paint mach is tricky...cuz they are done at quite different times...but must look like they were done at the same time. Especially when the deck house roof needs to match the deck as closely as possible...to make it congruent. Darker on the edgers then the high middle...cuz that is typically where the walkers walk. Thanks for the fine comments and encouragement. The main fife rail is next to be fashioned. Rob
- 1,208 replies
-
- 5
-
-
- great republic
- clipper
- (and 1 more)