Check out our new MSW Sponsor Innocraftsman
×


rwiederrich
-
Posts
5,504 -
Joined
-
Last visited
Content Type
Profiles
Forums
Gallery
Events
Everything posted by rwiederrich
-
Man....! Love it. Rob
-
How Realistic Can One Make Sails?
rwiederrich replied to Julie Mo's topic in Masting, rigging and sails
Cat......I did another experiment for the Great Republic sails. This is simply an experiment and there will be far more detail added...but the general idea of billow and reef edge stressing in the fabric is achieved. I'll add reef point and bunt/leach lines when the sails are rigged. My example is not weathered....I decided to keep the sails as clean and sharp since the ship is clean and sharp. Rob


- 100 replies
-
- 12
-

-
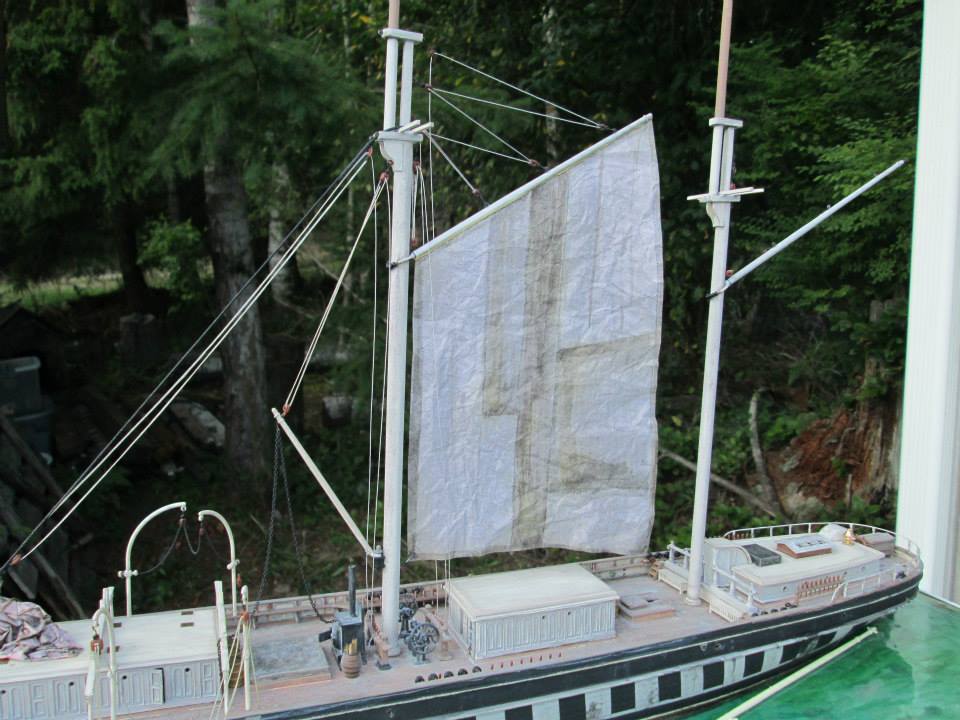
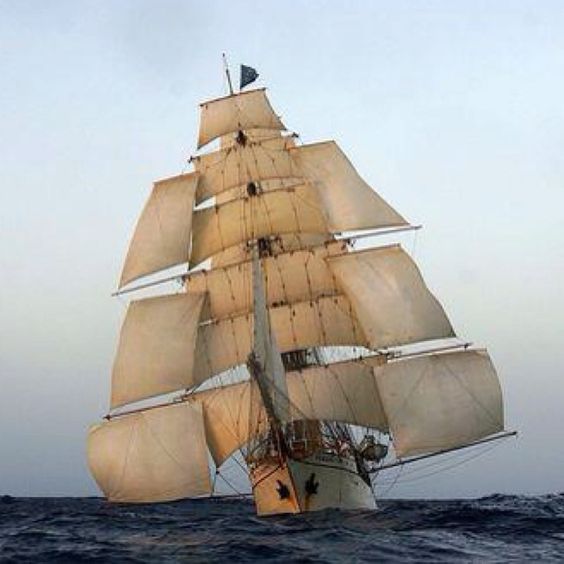
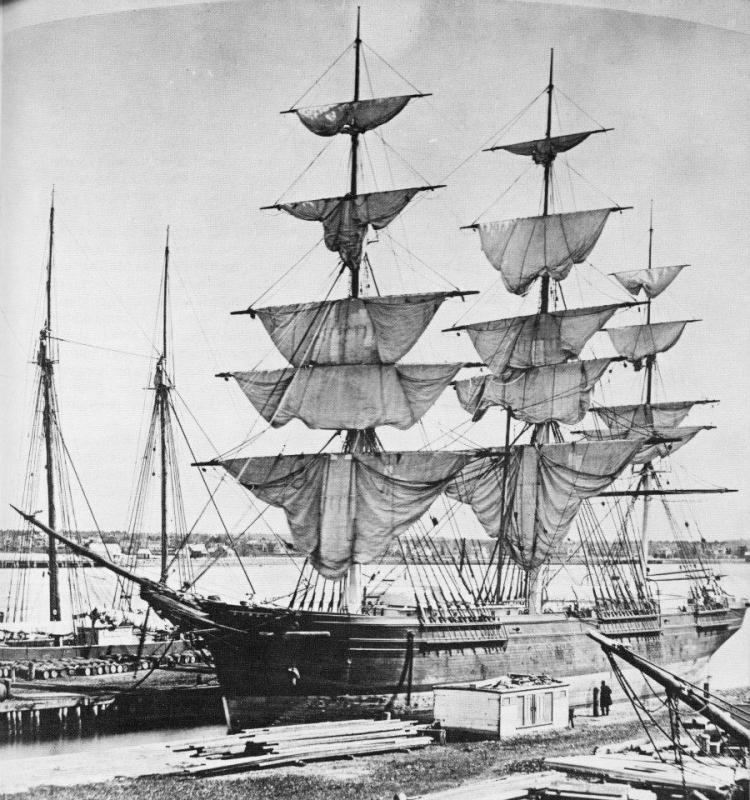
I'm looking for a soft full sail...full, but not over powered..or limp. Kinda like this image(I won't be using stuns.) Rob
- 1,208 replies
-
- 9
-
-
- great republic
- clipper
- (and 1 more)
-
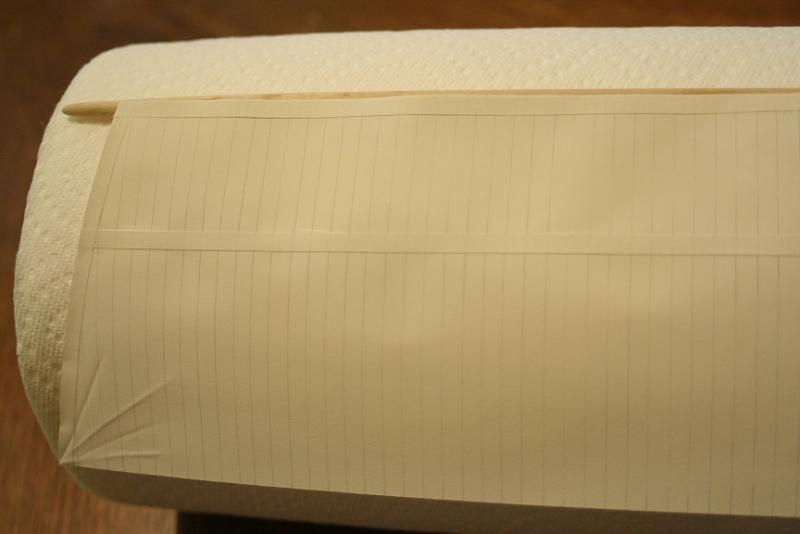
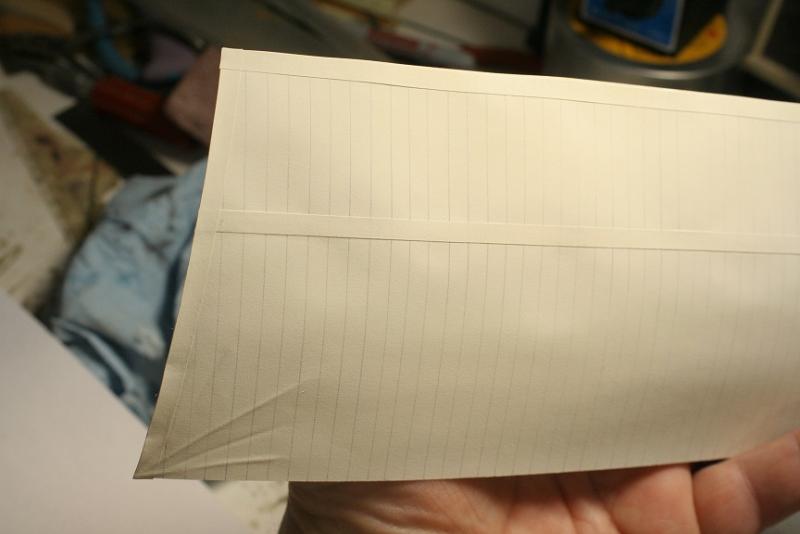
Working on the sail curve.......the edge is important to roll right. This is a lower topsail...Not a main course.

- 1,208 replies
-
- 11
-
-
- great republic
- clipper
- (and 1 more)
-
This is simply an experiment....and the actual sails will have lower edge banding as well as reef points. Plus I will work more diligently in achieving the curved lower edge. I think they will look clean and crisp...the look I'm looking for. Rob
- 1,208 replies
-
- 5
-
-
- great republic
- clipper
- (and 1 more)
-
Magnificent work and attention to detail Ed... Rob
- 3,618 replies
-
- 3
-
-
- young america
- clipper
- (and 1 more)
-
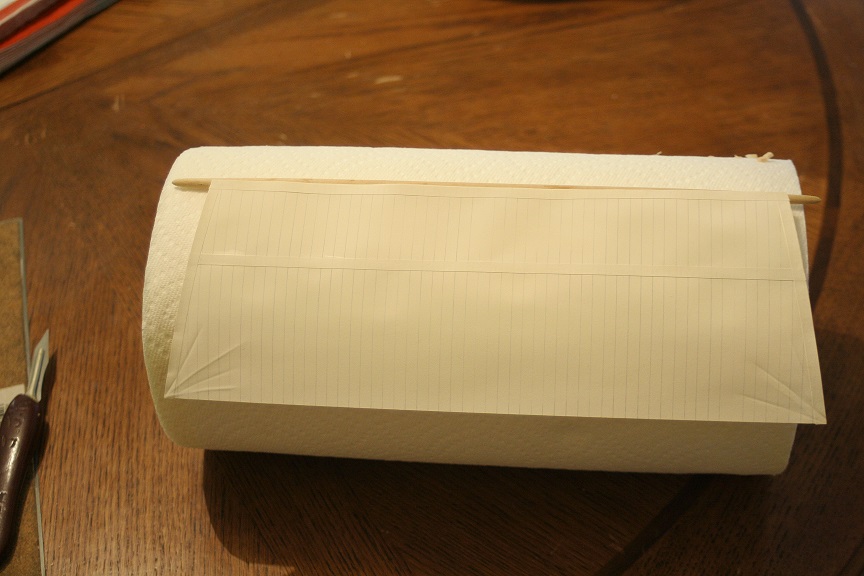
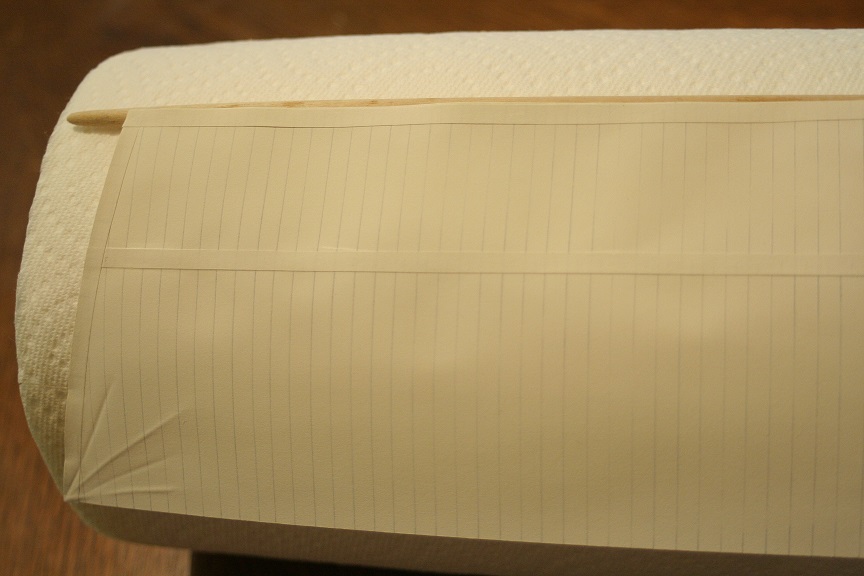
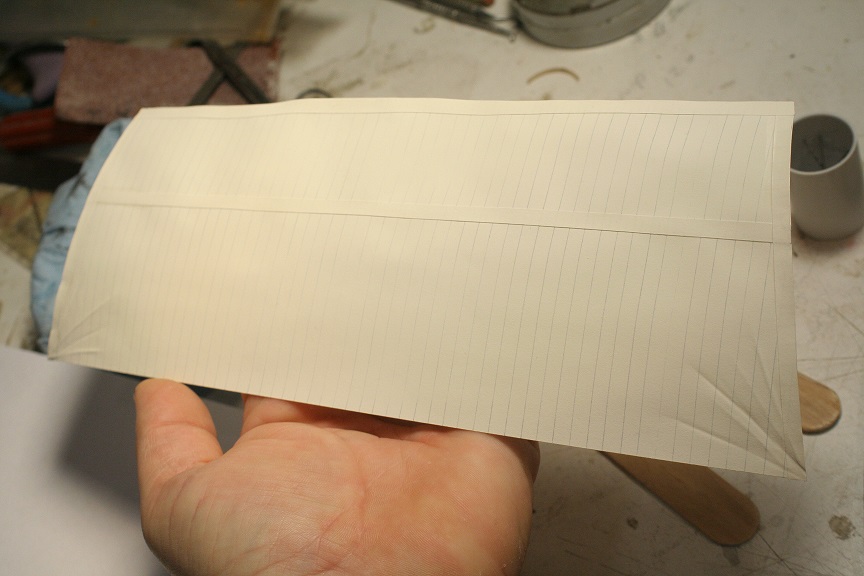
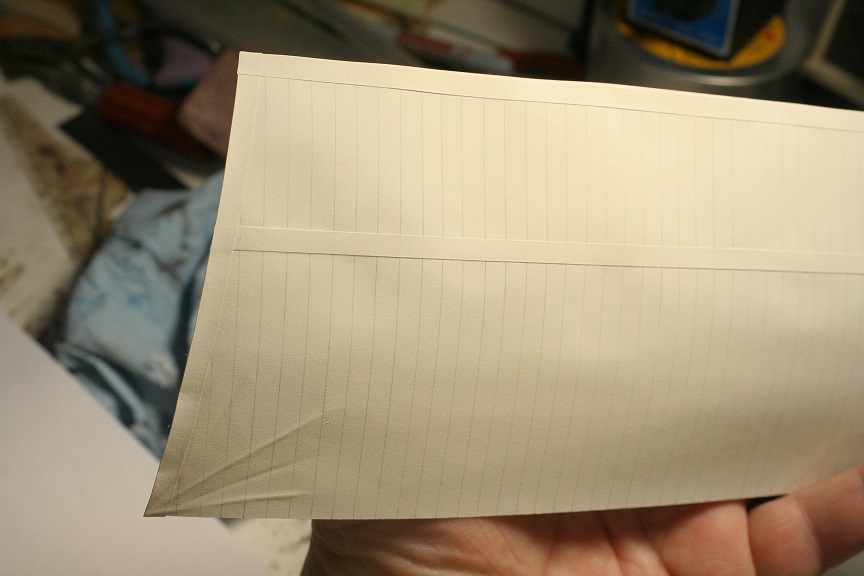
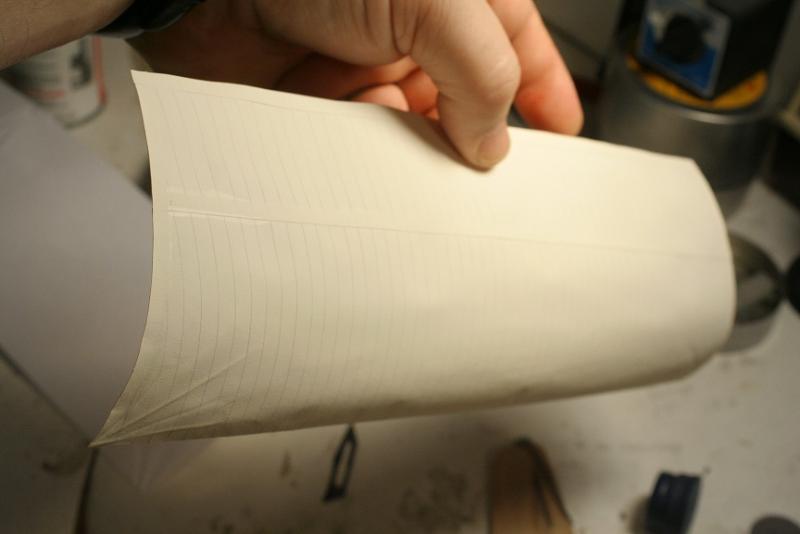
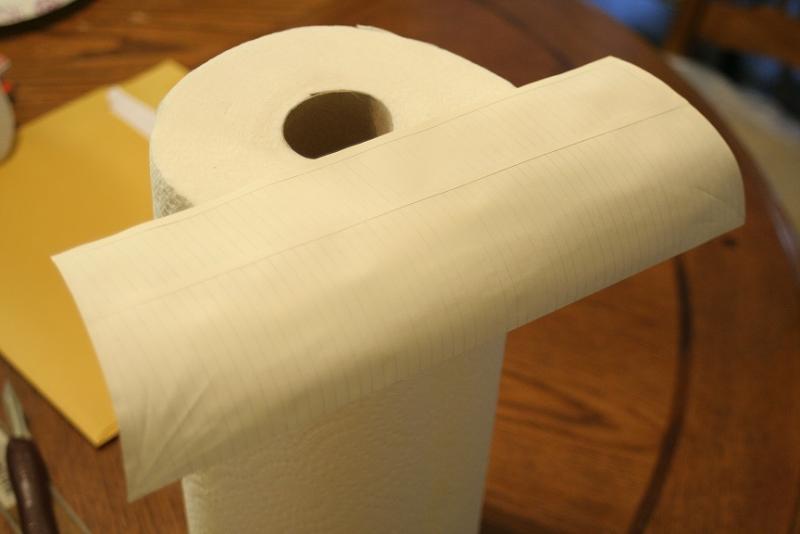
Well I experimented after a great deal of study....... After creating the strips of canvas and fixing the edge and top banding and the clew band. I then lightly dusted with the appropriate light tan paint to soften the joint lines...I created the edge pleats by pressing heavy gauge wire alternately into the sail.....here is my experiment. Rob(the band seams are present on both sides.)


- 1,208 replies
-
- 10
-
-
- great republic
- clipper
- (and 1 more)
-
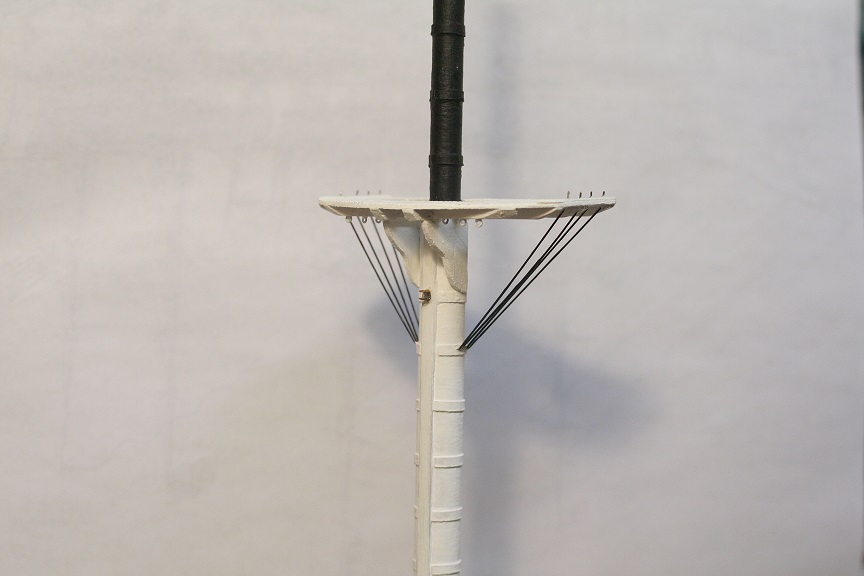
Yes..Jeff I lived in the Olympic natl. forest watershed at Gold Mtn. I'm currently drawing up a seam template that I will duplicate that can be used for each sail. It will represent in scale...3/32=1ft. Or 3/16" =2ft canvas bands that represent each band on each sail. I will make many copies of the template one for each sail and cut the sail to scale, band it and each sail will be in scale to the other(I hope). I'm currently trying to figure out a good way to represent the upper spider bands and their pins for each mast. I failed to mention earlier concerning the futtock shrouds that they were probably cable...since from all I gather from my extensive study.....McKay was a forward thinker and utilized many ideas on the Great Republic that found their way on ships many years later....like self ventilating cabins, use of cable in the rigging and the use of a 15 horse power steam engine or loading/unloading cargo, pumping out the ship and operating the yards. Here's kinda what I was simulating. Rob
- 1,208 replies
-
- 8
-
-
- great republic
- clipper
- (and 1 more)
-
I might have missed it(sure I did). Where are you going to display this beauty....on a dark wood mantle over your brick fire place..? Rob
- 2,625 replies
-
- 4
-
-
- kaiser wilhelm der grosse
- passenger steamer
- (and 1 more)
-
Well Jeff something or the other is up my sleeve...that's for sure... I've worked extensively with plain white paper. I've used simple yellow food coloring mixed in isopropyl alcohol 90%...and I've used brown India ink also diluted in alcohol. Once sprayed(Misted) on the sail it colors the sail as well as ages it. I don't have very many images of the process..except one image I found of a sail I did representing an extremely weathered patched old sail..hanging to dry. I was replicating the Portuguese Ferriera(aka..Cutty Sark) when she was laid up in some old backwater for years...rotting away. Her sails were very bad off. I tried to mimic the extremely wrinkled weathered drying sail...much like these sails drying on this clipper. But much worse off. Rob

- 1,208 replies
-
- 11
-
-
- great republic
- clipper
- (and 1 more)
-
I've decided to make my sails in like fashion..except using paper.. Rob
- 1,208 replies
-
- 6
-
-
- great republic
- clipper
- (and 1 more)
-
Well, unlike your masterpiece, I'm barely touching on detail. I really do appreciate your fine comments. Nothing could be less ornate then a greyhound of the see...stripped of all finary and things of comfort...speed is bread into them and any encumbrances to that goal are left at the dock side. Again...your comments are very appreciated..especially coming from one so masterful and accomplished as yourself. Rob
- 1,208 replies
-
- 3
-
-
- great republic
- clipper
- (and 1 more)
-
Thanks Patrick...I work relatively fast when I have the time to do so. I plan out my work in stages and finish each stage before moving onto the next. I feel I get more accomplished when I tackle small jobs....they eventually all add up. Once I can measure the finished dimensions of the ship....I'll probably frame out(from knotty maple) a display case. Unlike most of my models that are out of reach by most..this one will be at table top level and needs protection from marauding grandkids fingers and creeping feline-ical critters. Rob
- 1,208 replies
-
- 2
-
-
- great republic
- clipper
- (and 1 more)
-
Are those ventilators directional? Man..what a jumble(Forest) of ventilators on that old steam liner. You/re doing such a wonderful job Nils...love it...just love it. Rob
- 2,625 replies
-
- 6
-
-
- kaiser wilhelm der grosse
- passenger steamer
- (and 1 more)
-
B)You are an astute observer,,,,my names sake. Well...my avatar anyway...... . ?...what do you use for water in your builds....some kinda clay....? Rob
-
How Realistic Can One Make Sails?
rwiederrich replied to Julie Mo's topic in Masting, rigging and sails
Cat..fantastic job. I will be making paper sails for my Great Republic Clipper. That will be roughly 25 sails for a model 1/128 scale. I've made paper sails before..in various stages of decay...from new to heavily warn/stained and patched. Have you ever died your paper sails after you made them? I mist mine with a brown India ink Alcohol solution...they look used and weathered...pretty niffy trick. Anyway...loved your post. Rob -
When is the best time to attach sails?
rwiederrich replied to Bishophobbies's topic in Masting, rigging and sails
Your vessel is a bit different then my ship...Great Republic(clipper). However, in the past(I have yet to get to the sail portion yet), I always attached the sail to the yard of ship....so that I could make all the rigging additions such as leach and bunt lines an most importantly the blocks at the jackstays that they run through. Once finalized it was only a matter of running these lines through their appropriate blocks underneath the cross trees. Plus you can hang the mast via parrels or truss and sling. I built a jig to hold the yard from tip to tip and dressed it with sail and rigging..then fixed it to the yard. No rustling or wrestling fore and back stays. Good luck....OH..were those sails premade that you got aftermarket..ready to hang? Rob -
Are your sails starched? Rob
-
OH. boy...I'll be following this for sure...8 ft..good night nurse! In your preemptive list you didn't mention the benifactor......unless you have a castle you plan on displaying it in. I'm ready....... Rob
-
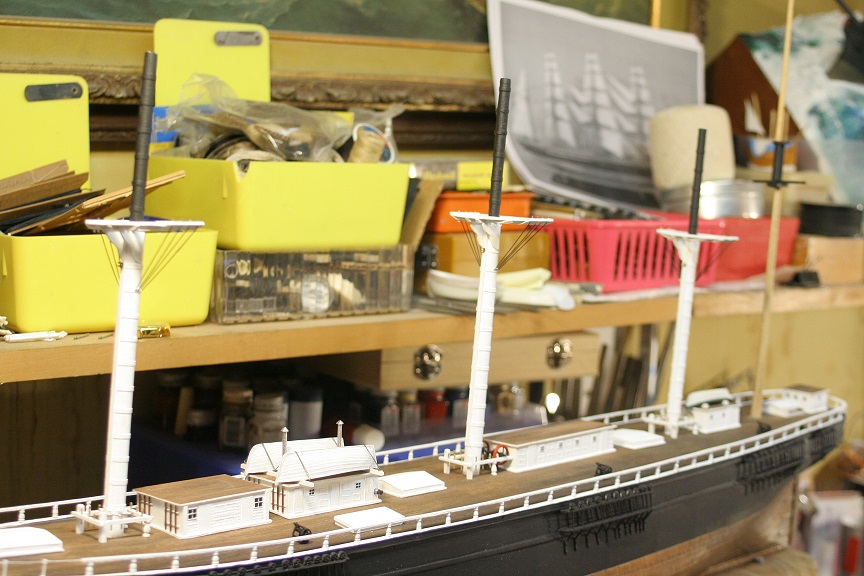
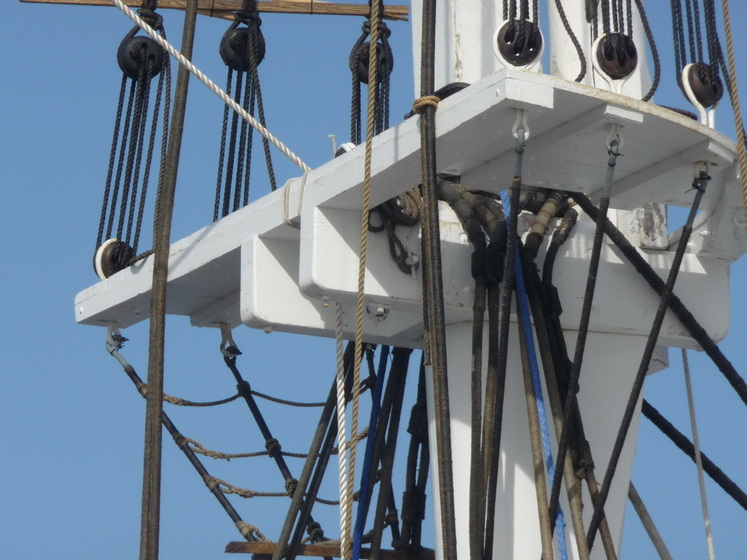
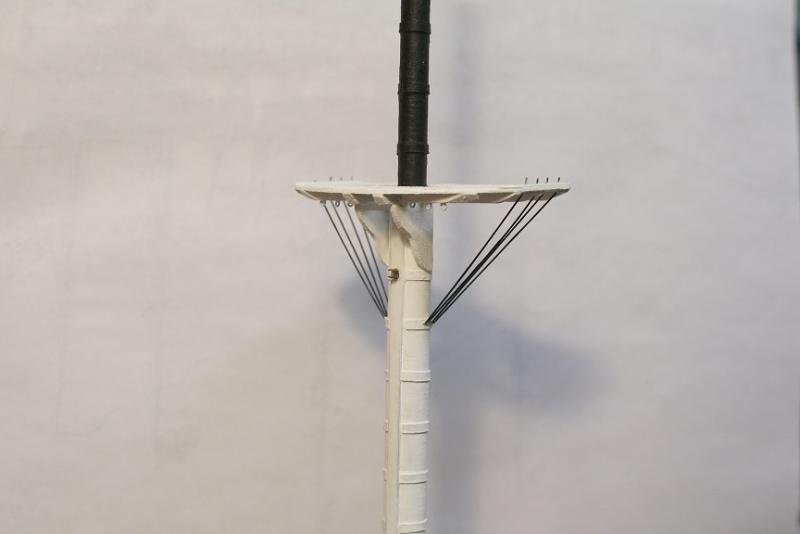
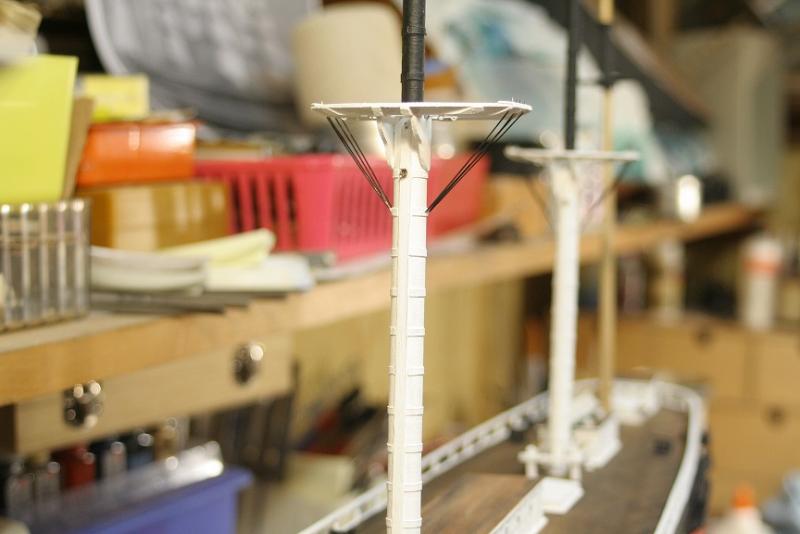
I spent a bit of time adding the futtock shrouds.....More work to tidy them up.and get them ready for the deadeyes.

- 1,208 replies
-
- 14
-
-
- great republic
- clipper
- (and 1 more)
-
Thanks Popeye...I appreciate that very much. And thank you everyone for your likes. Rob
- 1,208 replies
-
- 2
-
-
- great republic
- clipper
- (and 1 more)
-
I thought of you Jeff...when I saw her in the shop....Just had to have it for the bath decore. I'm all about nautical(Good authentic nautical) Rob
-
Looks almost like a flat bottomed keel boat....... Great work. Rob
-
I always use tung oil.....Fine product in my view. Rob
- 3,618 replies
-
- 4
-
-
- young america
- clipper
- (and 1 more)