-
Posts
5,516 -
Joined
-
Last visited
Content Type
Profiles
Forums
Gallery
Events
Everything posted by rwiederrich
-
- 1,208 replies
-
- great republic
- clipper
-
(and 1 more)
Tagged with:
-
Fantastic work Nils.....I like the woodwork mingled within the iron work. Rob
- 2,625 replies
-
- kaiser wilhelm der grosse
- passenger steamer
-
(and 1 more)
Tagged with:
-
Thanks Popeye...and thanks everyone for the likes. Yes those are extra 1/96 CS spare parts. In my building technique I sometimes utilize spare parts that are in scale as models for me to use to make my own parts from metal or some other media. I have many kits I bash from to aid in my builds. Remember...if I can use someone else's machined parts I will. I'm after the end product...the means and process getting there is irrelevant. Oh..by the way..it was brought to my attention on another forum that my calculations for scale on the GB is off. So for all who are following, let me clear the scale thing up for you..so I don't create further confusion. This particular model is built 3/32"=1ft. 10.75 scale feet= 1 inch. The GR was a total of 400ft long(335ft from stem to stern of hull only) So dividing 335 or 400 by 10.75 you get roughly 31" or 38". Then divide 31" or 38 by 12=2.5 or 3.1 Finally take the hull length 335 or 400 and divide that by 2.5 or 3.1= 130ish. So from all that mind bending contortioning....my model has a hull of 31", 38" as a completed model and is in the scale of 1/130. NOT the erroneous scale I posted earlier of 1/280. I think that's right. Rob(I hope it's right)
- 1,208 replies
-
- great republic
- clipper
-
(and 1 more)
Tagged with:
-
Good deductive application of the build masts for this vessel Ed. 36" D places your banding at scale 36" spacing. After building the Glory of the Seas masts I realized that that is quite a bit of banding. Love the updates and fine workmanship. Rob
- 3,618 replies
-
- young america
- clipper
-
(and 1 more)
Tagged with:
-
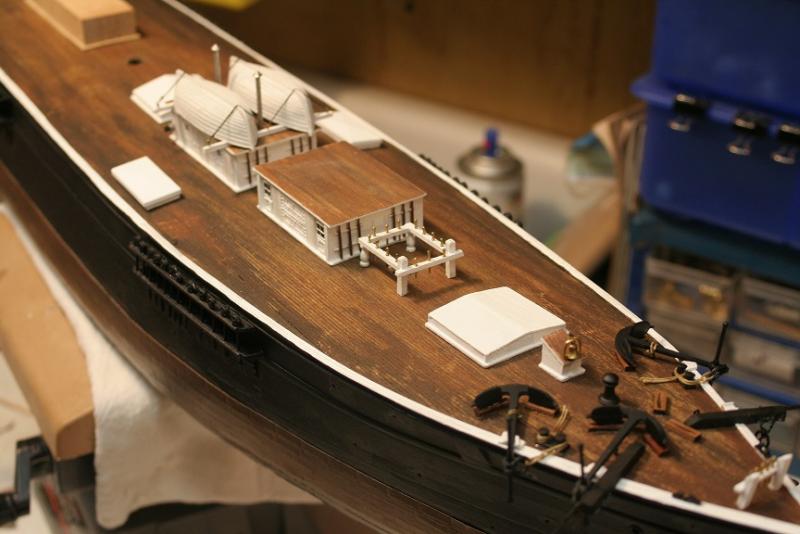
Working forward aft..I still need to add the ships bell mounted on the forward campanionway, just forward of the hatchway. Slowly moving along. Rob
- 1,208 replies
-
- great republic
- clipper
-
(and 1 more)
Tagged with:
-
- 1,208 replies
-
- great republic
- clipper
-
(and 1 more)
Tagged with:
-
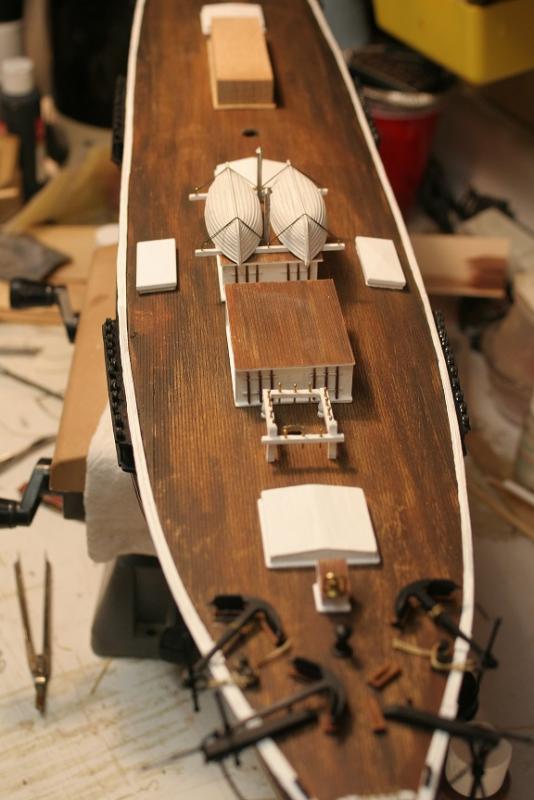
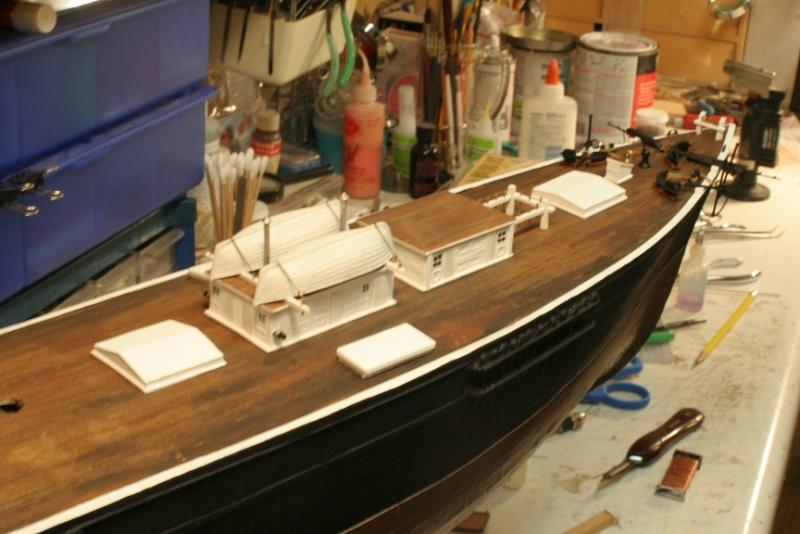
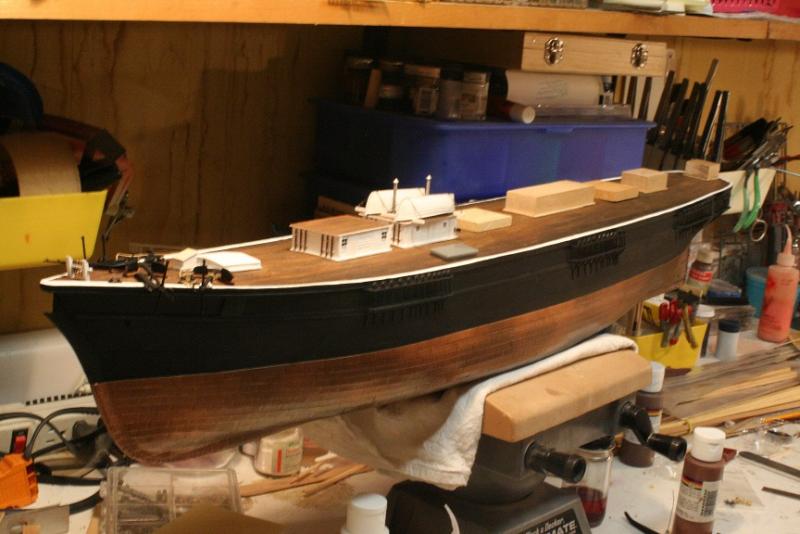
Modeling habits of old would have me work the entire model at once....ie..placing deck parts along the length of the model. I've decided to forgo that approach and begin from the bow and work aft. Instead of making/installing all the bits or cleats then installing them..I make them all then only install the ones in the area I am working. Same goes with the deck furniture and houses. For some reason it makes the build go by faster for me to see small accomplishments being made then to drudge through an entire vessel that isn't really finished...just piece mealed. I've been working overtime so I have had few hours to dedicate to the GR.....I am planning to working on the for fife rail this weekend and possibly the main hatch. Sweeewww...I'm used to working at a faster clip(Pun). Rob
- 1,208 replies
-
- great republic
- clipper
-
(and 1 more)
Tagged with:
-
Wonderful work Nils......on par with many of the professional models I viewed at the Mariners Museum in Virginia. Just beautiful. Rob
- 2,625 replies
-
- kaiser wilhelm der grosse
- passenger steamer
-
(and 1 more)
Tagged with:
-
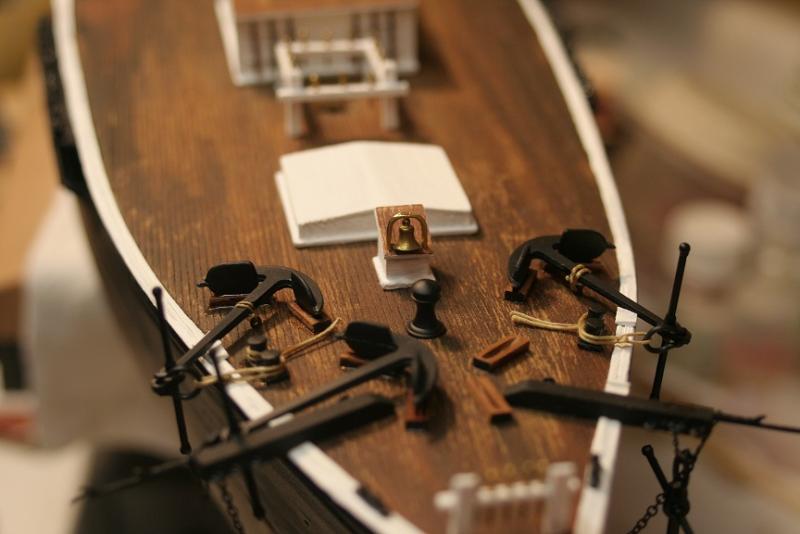
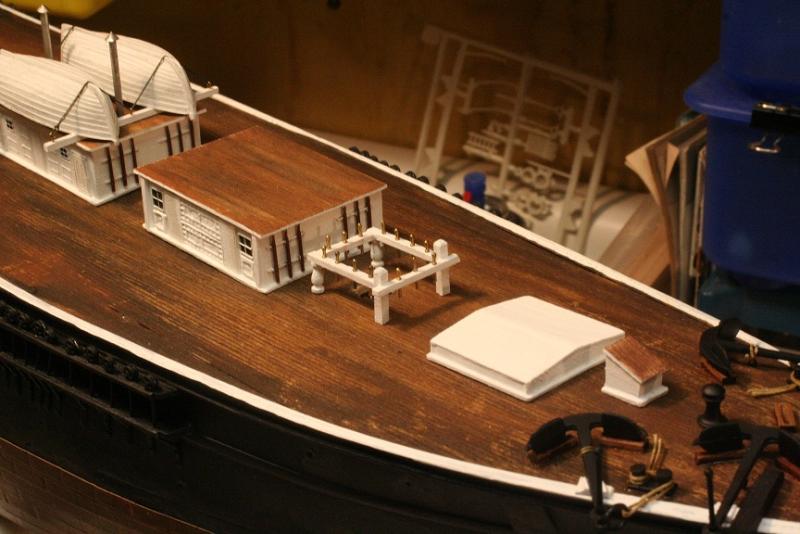
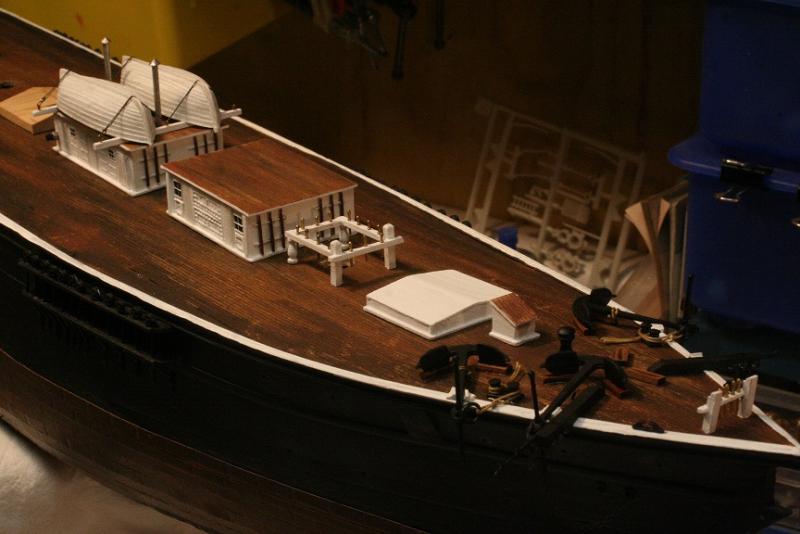
I'll be adding rope coils about the fordeck to finish it up before I begin to add the forward rail.
- 1,208 replies
-
- great republic
- clipper
-
(and 1 more)
Tagged with:
-
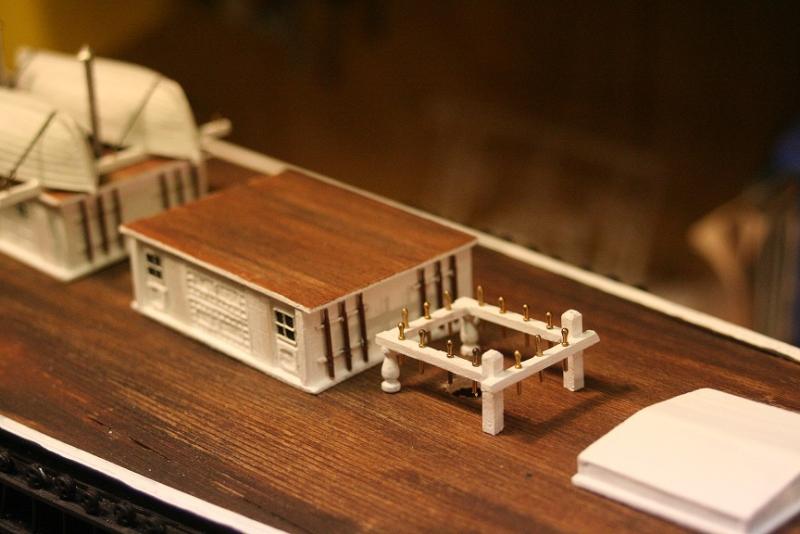
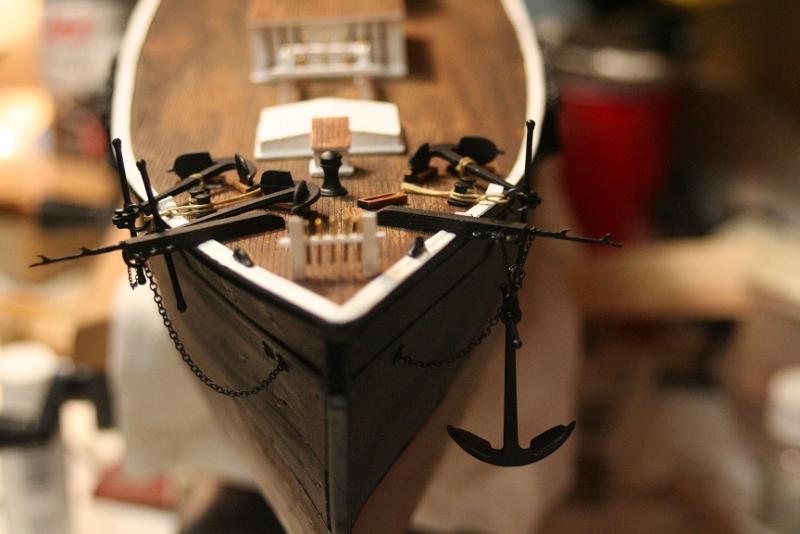
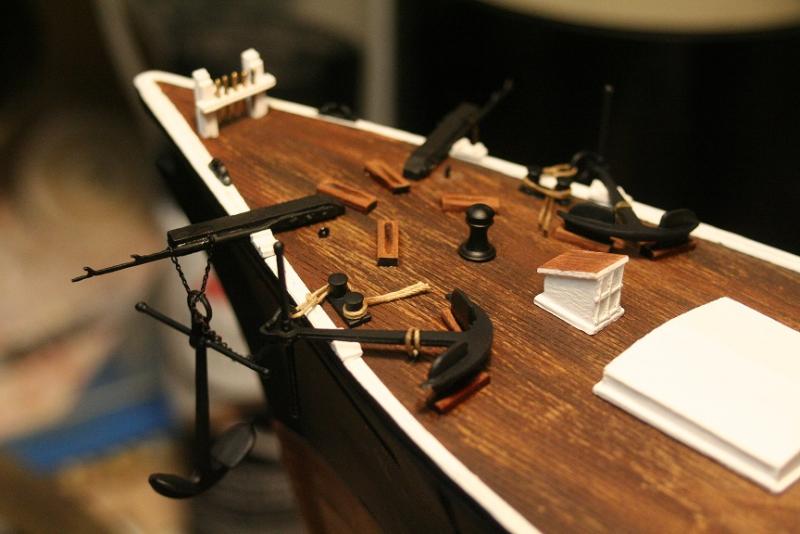
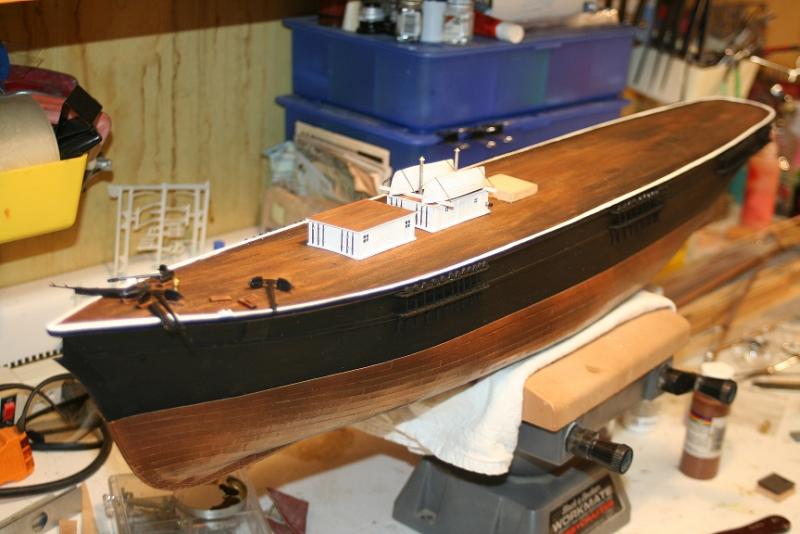
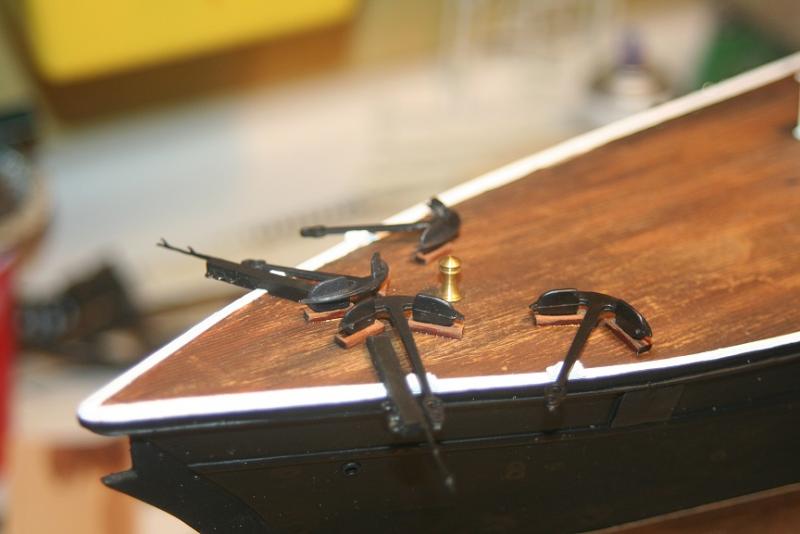
Well I worked on the GR a bit today..finished laying up a port anchor underneath the cathead. I added the forward passageway and the forward hold cover. Even at this scale the parts are pretty small. Rob
- 1,208 replies
-
- great republic
- clipper
-
(and 1 more)
Tagged with:
-
Fantastic wood working Ed. I do appreciate the time you spend in describing the processes...it's as if we're learning at the hand of a master shipwright in 1853. The main mast of the GR are end tapered and I will be rigging a gig for the process on my wood lather for this. Watching you use your equipment is quite refreshing and encouraging as well...not to mention all the hand working you apply to this project. Rob
- 3,618 replies
-
- young america
- clipper
-
(and 1 more)
Tagged with:
-
Coming along nicely....fun to watch you solve these RC issues. Rob
- 553 replies
-
- sloop of war
- constellation
-
(and 3 more)
Tagged with:
-
Fantastic work..clean and neat. Great detail. Rob
- 1,051 replies
-
- cheerful
- Syren Ship Model Company
-
(and 1 more)
Tagged with:
-
Excellent work Ed. I too will be fashioning similar fixtures for the GR myself. Great execution. Rob
- 3,618 replies
-
- young america
- clipper
-
(and 1 more)
Tagged with:
-
I'm sicker then a skunk today so I will be brief. I tinkered on the GR and finished up the knightshead. Going to bed...see everyone later. Rob
- 1,208 replies
-
- great republic
- clipper
-
(and 1 more)
Tagged with:
-
Nights heads and the forward fife will be added soon. Thanks for your comments and likes everyone. Rob
- 1,208 replies
-
- great republic
- clipper
-
(and 1 more)
Tagged with:
-
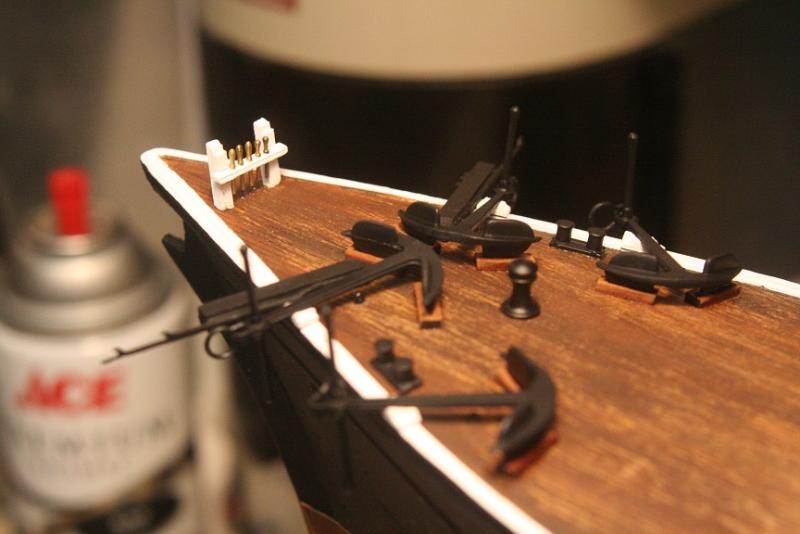
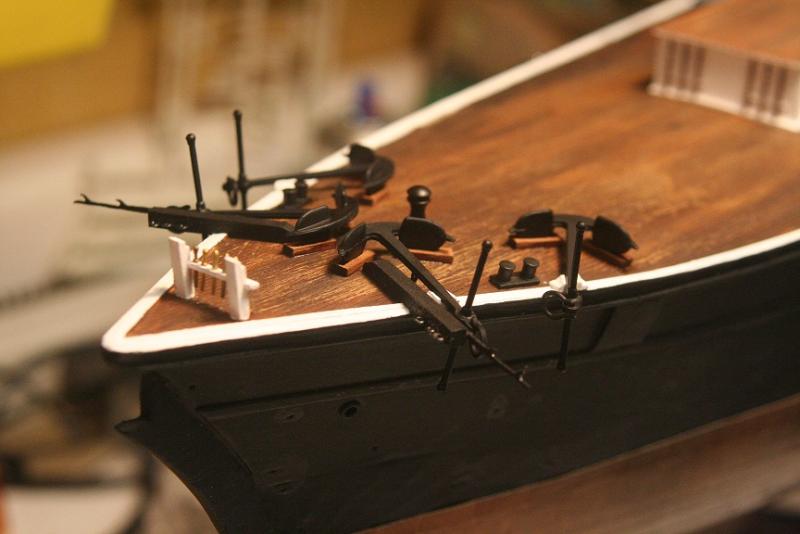
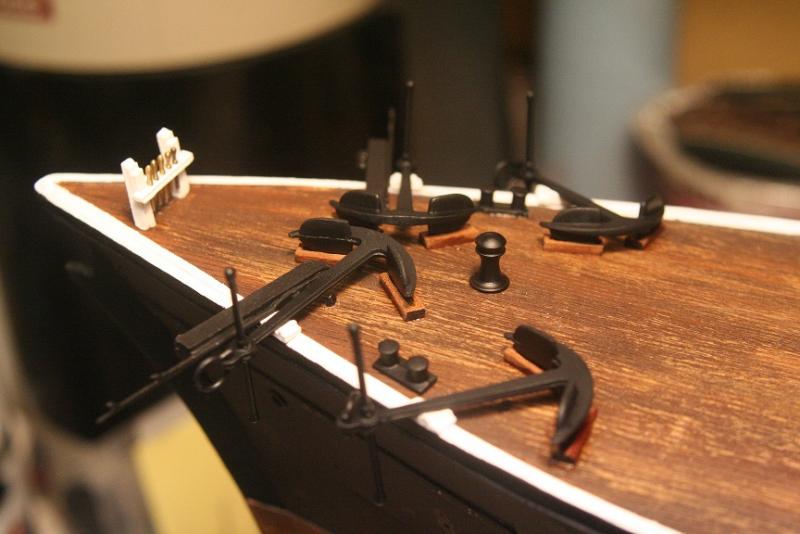
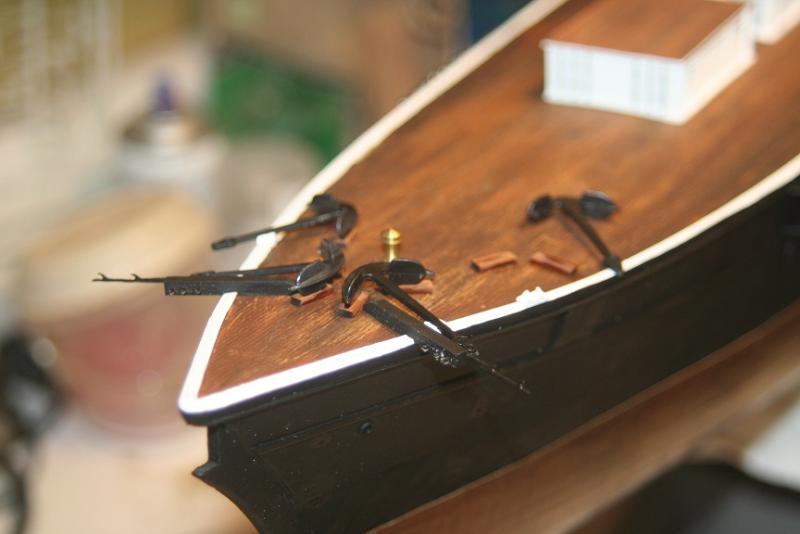
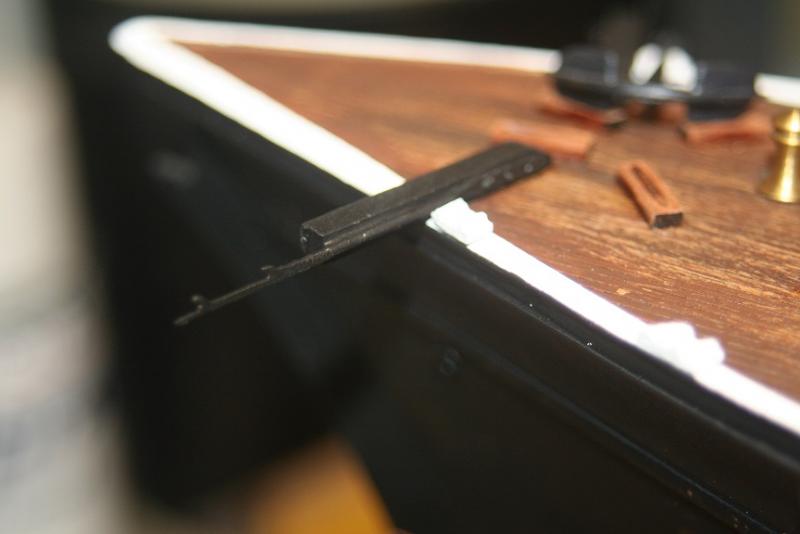
The cast anchors still need refining and the stocks still need to be added. I haven't attached the tie downs as of yet either. Making all the flute rests and the seats along the rail edge took the majority of time last night. The whiskers are metal, riveted to the catheads. I suspect I will suspend one of the anchors from one of the catheads and depict all the rigging required for such. Probably sneak in the bowsprit in there as well. Thanks for your fine comments. I'm laboring in the shadows of giants...so your comments are much appreciated. Rob
- 1,208 replies
-
- great republic
- clipper
-
(and 1 more)
Tagged with:
-
- 1,208 replies
-
- great republic
- clipper
-
(and 1 more)
Tagged with:
-
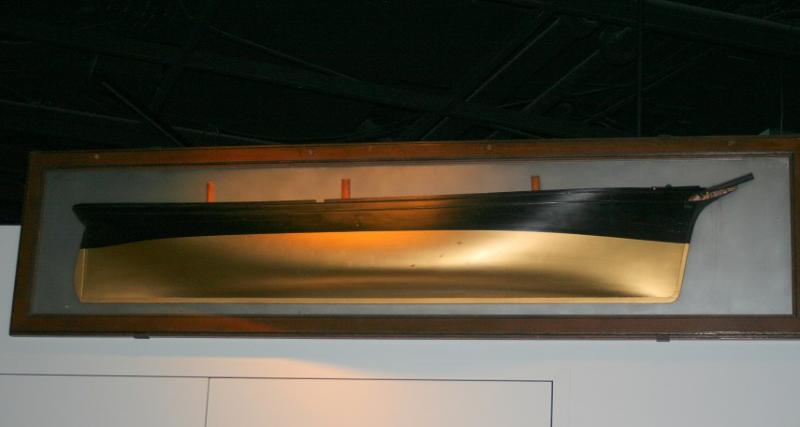
I currently have half models of the clippers Lightning, Cutty Sark and I will be making one for the Sovereign of the Seas. Rob
- 3,618 replies
-
- young america
- clipper
-
(and 1 more)
Tagged with:
-
Yes..I have seen this image many times before. It sure was a big half model. Assuming this is not the model used to scale up the design...would not that model need to be segmented for such a task? This appears more a depictive model..rather then a working scale model. Regardless...it was amazing and so was the *Challenge*. Rob
- 3,618 replies
-
- young america
- clipper
-
(and 1 more)
Tagged with:
-
Care to share those other pictures Ed? I for one would love to see them. If you have not already posted them. Rob
- 3,618 replies
-
- young america
- clipper
-
(and 1 more)
Tagged with:
-
The model of the Webb clipper, Challenge just beneath the half model was exquisite. Rob
- 3,618 replies
-
- young america
- clipper
-
(and 1 more)
Tagged with:
-
Ed..I wasn't sure that it was the builders model..but it was very large and ...did you zoom in on the cheek plates to see the ornamental designs? Beautiful. Unfortunately Donald McKay,s half model of the Glory of the Seas was not available for viewing. I hope you enjoy the image. Rob
- 3,618 replies
-
- young america
- clipper
-
(and 1 more)
Tagged with:
-
Thanks everyone...I have been on holiday in Washington DC and virginia and have recently returned...so I hope to return to the GR build soon.
- 1,208 replies
-
- great republic
- clipper
-
(and 1 more)
Tagged with:
-
- 3,618 replies
-
- young america
- clipper
-
(and 1 more)
Tagged with:
About us
Modelshipworld - Advancing Ship Modeling through Research
SSL Secured
Your security is important for us so this Website is SSL-Secured
NRG Mailing Address
Nautical Research Guild
237 South Lincoln Street
Westmont IL, 60559-1917
Model Ship World ® and the MSW logo are Registered Trademarks, and belong to the Nautical Research Guild (United States Patent and Trademark Office: No. 6,929,264 & No. 6,929,274, registered Dec. 20, 2022)
Helpful Links
About the NRG
If you enjoy building ship models that are historically accurate as well as beautiful, then The Nautical Research Guild (NRG) is just right for you.
The Guild is a non-profit educational organization whose mission is to “Advance Ship Modeling Through Research”. We provide support to our members in their efforts to raise the quality of their model ships.
The Nautical Research Guild has published our world-renowned quarterly magazine, The Nautical Research Journal, since 1955. The pages of the Journal are full of articles by accomplished ship modelers who show you how they create those exquisite details on their models, and by maritime historians who show you the correct details to build. The Journal is available in both print and digital editions. Go to the NRG web site (www.thenrg.org) to download a complimentary digital copy of the Journal. The NRG also publishes plan sets, books and compilations of back issues of the Journal and the former Ships in Scale and Model Ship Builder magazines.


