rwiederrich
-
Posts
5,520 -
Joined
-
Last visited
Content Type
Profiles
Forums
Gallery
Events
Everything posted by rwiederrich
-
Two hours because I was reading it on my phone …………with a magnifying headset….🙄🤪👍
-
Rich I just took about Two hours to finish reading your article. Wow! So much information and discovery. Great read. Thanks for the many kudos and also referencing Vlad’s wonderful build as well. A third article would do his build justice…… Good idea. It would be something if through this article a museum would materialize. 😏 Thanks again my friend. Great job. Rob
-
Yeah …..tell me about it. Mine are 1/8”. 🤪 Rob
-
Oh boy. Thanks Vlad. I’m so glad you are over the Covid. I’ve been on holiday(Anniversary) for the last 10 days …… Plus , I’ve been keeping busy with lots of mundane tasks. It will be exciting to begin on the hull soon. Again…. Thank you so much. Any book yet? Rob
-
Did you include images of the finished model on display? I didn’t see any. Cept with Mike and me. Rob
-
How fun. I can’t wait to see it in print in the NRJ. Very impressive work indeed Rob
-
I took all those images bro. From hikes we took. Thanks for the fine comments Rich. We had a blast. Rob
-
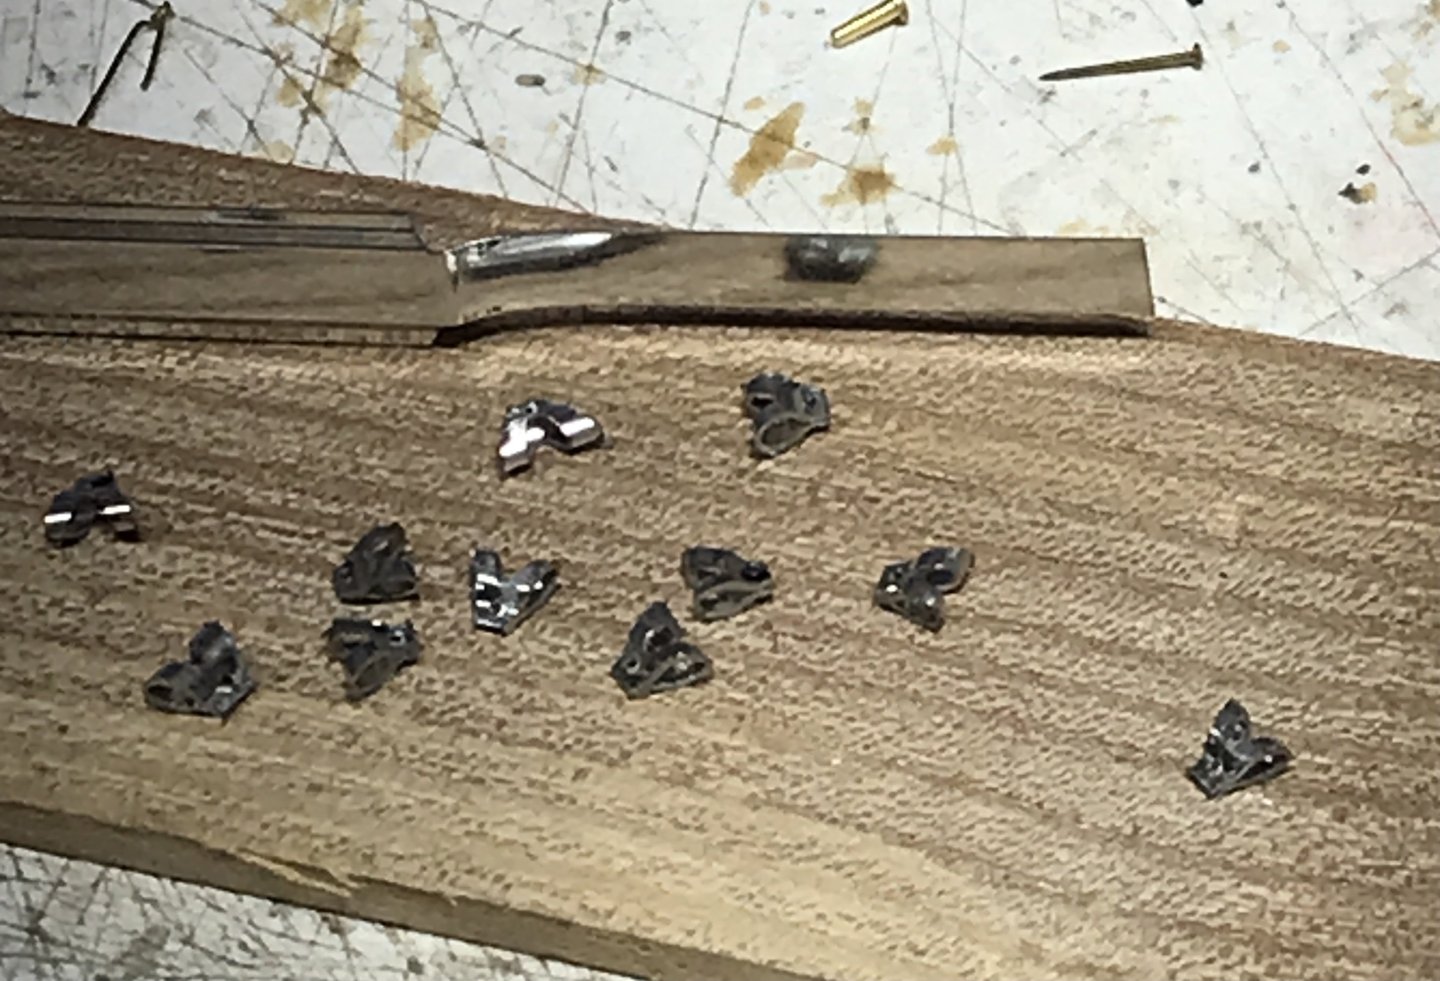
Started working on the metal sheet blocks. I’m following the same method I used for Glory of the Seas. I used metal record tabs. Bent them in half to form the block body. Marked and cut them. But first I drilled all the mounting holes on the mill. Here are some pics of the process. Short but sweet. Next, I’ll mount them on the yards when I get to that point and paint the entire thing then. Each block is 1/8” wide. Rob


-
I’m back from the best getaway ever in Sedona Arizona.


-
I built a 1956 version of the Cutty Sark. No problems with the blocks. If you expose any model to direct sun light it will deteriorate as well.
-
Good eye Johnny. Each block is cleaned of flashing...drilled out and then painted an appropriate block color...then the eye and stropping is painted as well....using paint pens. I used many other kinds of wood blocks in the past...but found, for regularity, and consistency....not to mention expeditious, these premade blocks can be made to look very convincing. Plus, like all things...they are fast and easy to prepare. I'm generally a lazy modeler to begin with anyway. But if it works...it works. I have hundreds upon hundreds of those blocks...single and doubles.😉 Rob
-
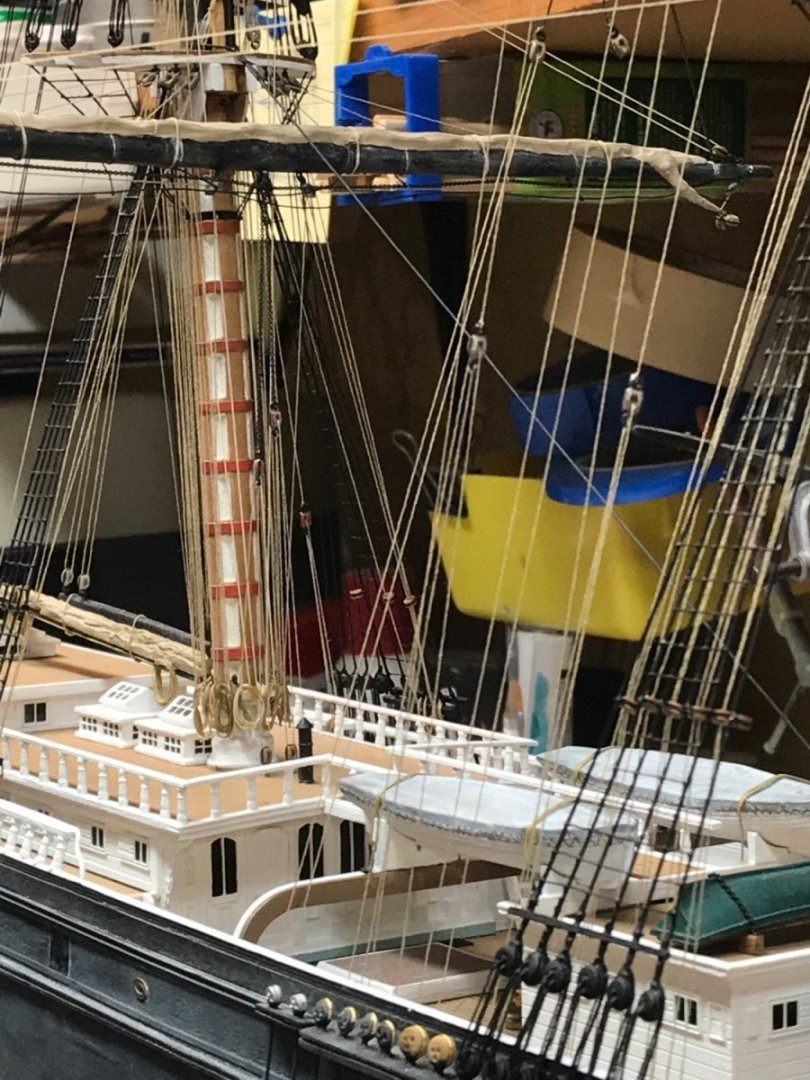
What I've Learned over the course of time is that, it is far easier to rig your yards on the mast...with the mast off hull. You are free 360deg around the mast to work. Secondly, if you start with the upper most yard...sky or royal...you can then easily run the rigging down through the mast structures far easier and with less opportunity to damage something. I perfected this method and building in this manner when I built the Great Republic. Then when you have all the yards mounted....except the main course...you leave that to add after the mast is glued in, you can go through your lines and belay them to the correct spot/pin. Now, in your case, if the masts are already glued in, you can still start from the top and work down. Again...because it is far easier to run the sheet and bunt lines this way. Then you move to the next yard and so forth. I always add the stays after each mast/yard section is done....so you have room to work around the mast, without bumping into the stay. I can't explain my entire method here in this short posting, but I assure you, you must look at your rigging 3 dimensionally.. Top to bottom and from the inside out. What rigging requires a block/s and where is that block/s located. As you go, if you have any questions, feel free to ask. Rob
- 431 replies
-
- 1
-

-
- Flying Fish
- Model Shipways
- (and 2 more)
-
This is one reason why I rig from the top down and I rig the yards on the mast OFF hull. Once I install the mast...I can easily trace out the lines and were they go. Sure it's a lot of them, but when you work down you can secure those lines first down through the mast rigging and when you arrive at the main course yard...you have just its lifts and bunt, sheet lines to belay at the fife and rail.

- 431 replies
-
- 1
-

-
- Flying Fish
- Model Shipways
- (and 2 more)
-
Twisting of the block tackle is a real pain...that can be illiminated if you thread each block with the line straight. Cotton lines works best for staying off twisting. Especially when you're dealing with hundreds of lines.
-
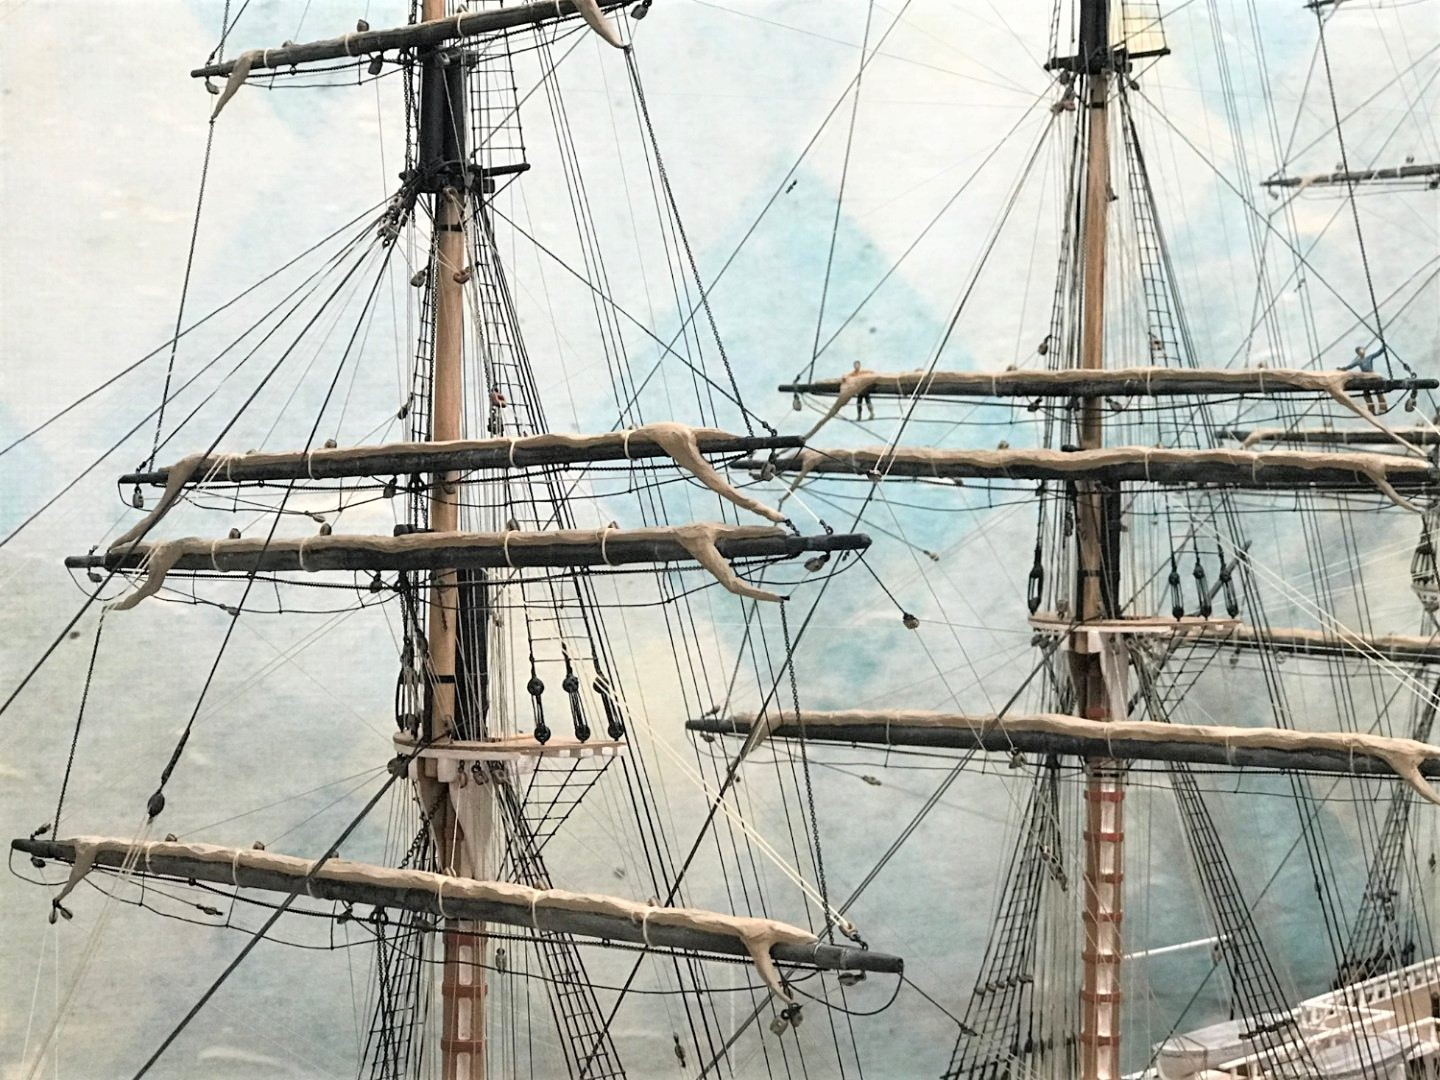
Jerad. There is one thing I can see that will give you more grief if not addressed first. You need to pay special attention to the installation of all your running rigging blocks....especially the ones at the foot of the mast. They should have been installed before you fixed the fife rail in place. They are way easier to get to once in place then if you have to add them after the fact. Running Rigging, unlike standing rigging requires a lot of preplanning. Your main course blocks should all be placed before hand. Before you get too far along..... Review your rigging charts and see your block layout. Place all the blocks needed for the rigging for the foremast on the mast and tops before you begin the rigging of lines. You still need to place the bunt line blocks under the tops. This would have been far easier with the masts still off the model. No real problem.....keep this as a learning experience. Rigging takes a lot of pre-thought.....so take your time. And undersized line is easier to use then over sized line. Plus is scales better. Keep up the good work. I posted an image of Glory of the Seas. Note: the larger lift lines and all the smaller bunt, leach and braces. Also notice the number of lines coming down the main mast to the fife rail. These lines have to be about an 1" diameter at scale to work with so many other lines. Now, mind you, I fully rigged Glory. Every line short the stunsail lifts and sheets.....cuz I didn't place stunsails or booms on Glory....she spent most of her time on the West coast, not in tropical seas where the light winds blow. Rob
- 431 replies
-
- 1
-
-
- Flying Fish
- Model Shipways
- (and 2 more)
-
I typically use a fly fishing line for the standing rigging. It mimics hemp cable real well. I also use several sizes of cotton embroidery thread. Pretty much anything I can find in the right size and shade. I like to alternate shades to represent aged and younger lines. I don't use nylon for running rigging ....it has a memory and is tough to get to hang naturally. I do use small black nylon for the deadeye lanyards. It is more resilient to fraying. Rob
- 431 replies
-
- 1
-
-
- Flying Fish
- Model Shipways
- (and 2 more)
-
I used line that represented about 3/4"~1" in diameter at scale. The smaller the better. Running rigging used for purchases and double blocks typically was smaller in diameter...especially if you were using the line for sheets and buntlines. It is easy to use over scaled lines...then they become over bearing on one another at the belay point. I use larger running rigging line for lifts...but the lines for purchases and blocks is smaller. If you ever look at real pics of sailing ships....you can hardly make out any of the lines....because they are so small in diameter. Personally, I would caution against using over sized rigging line. Rob
- 431 replies
-
- 2
-
-
- Flying Fish
- Model Shipways
- (and 2 more)
-
Tool conversations are always circlic. Who doesn't like talking about tools...no matter how braud the conversation goes. The original question was, *Are there better tools for drilling tiny holes?* If you want all your holes parallel...a drill press is the best solution. If you're requirement is tiny holes in tight, places...finger drills or pin vices work well.😀 Rob
-
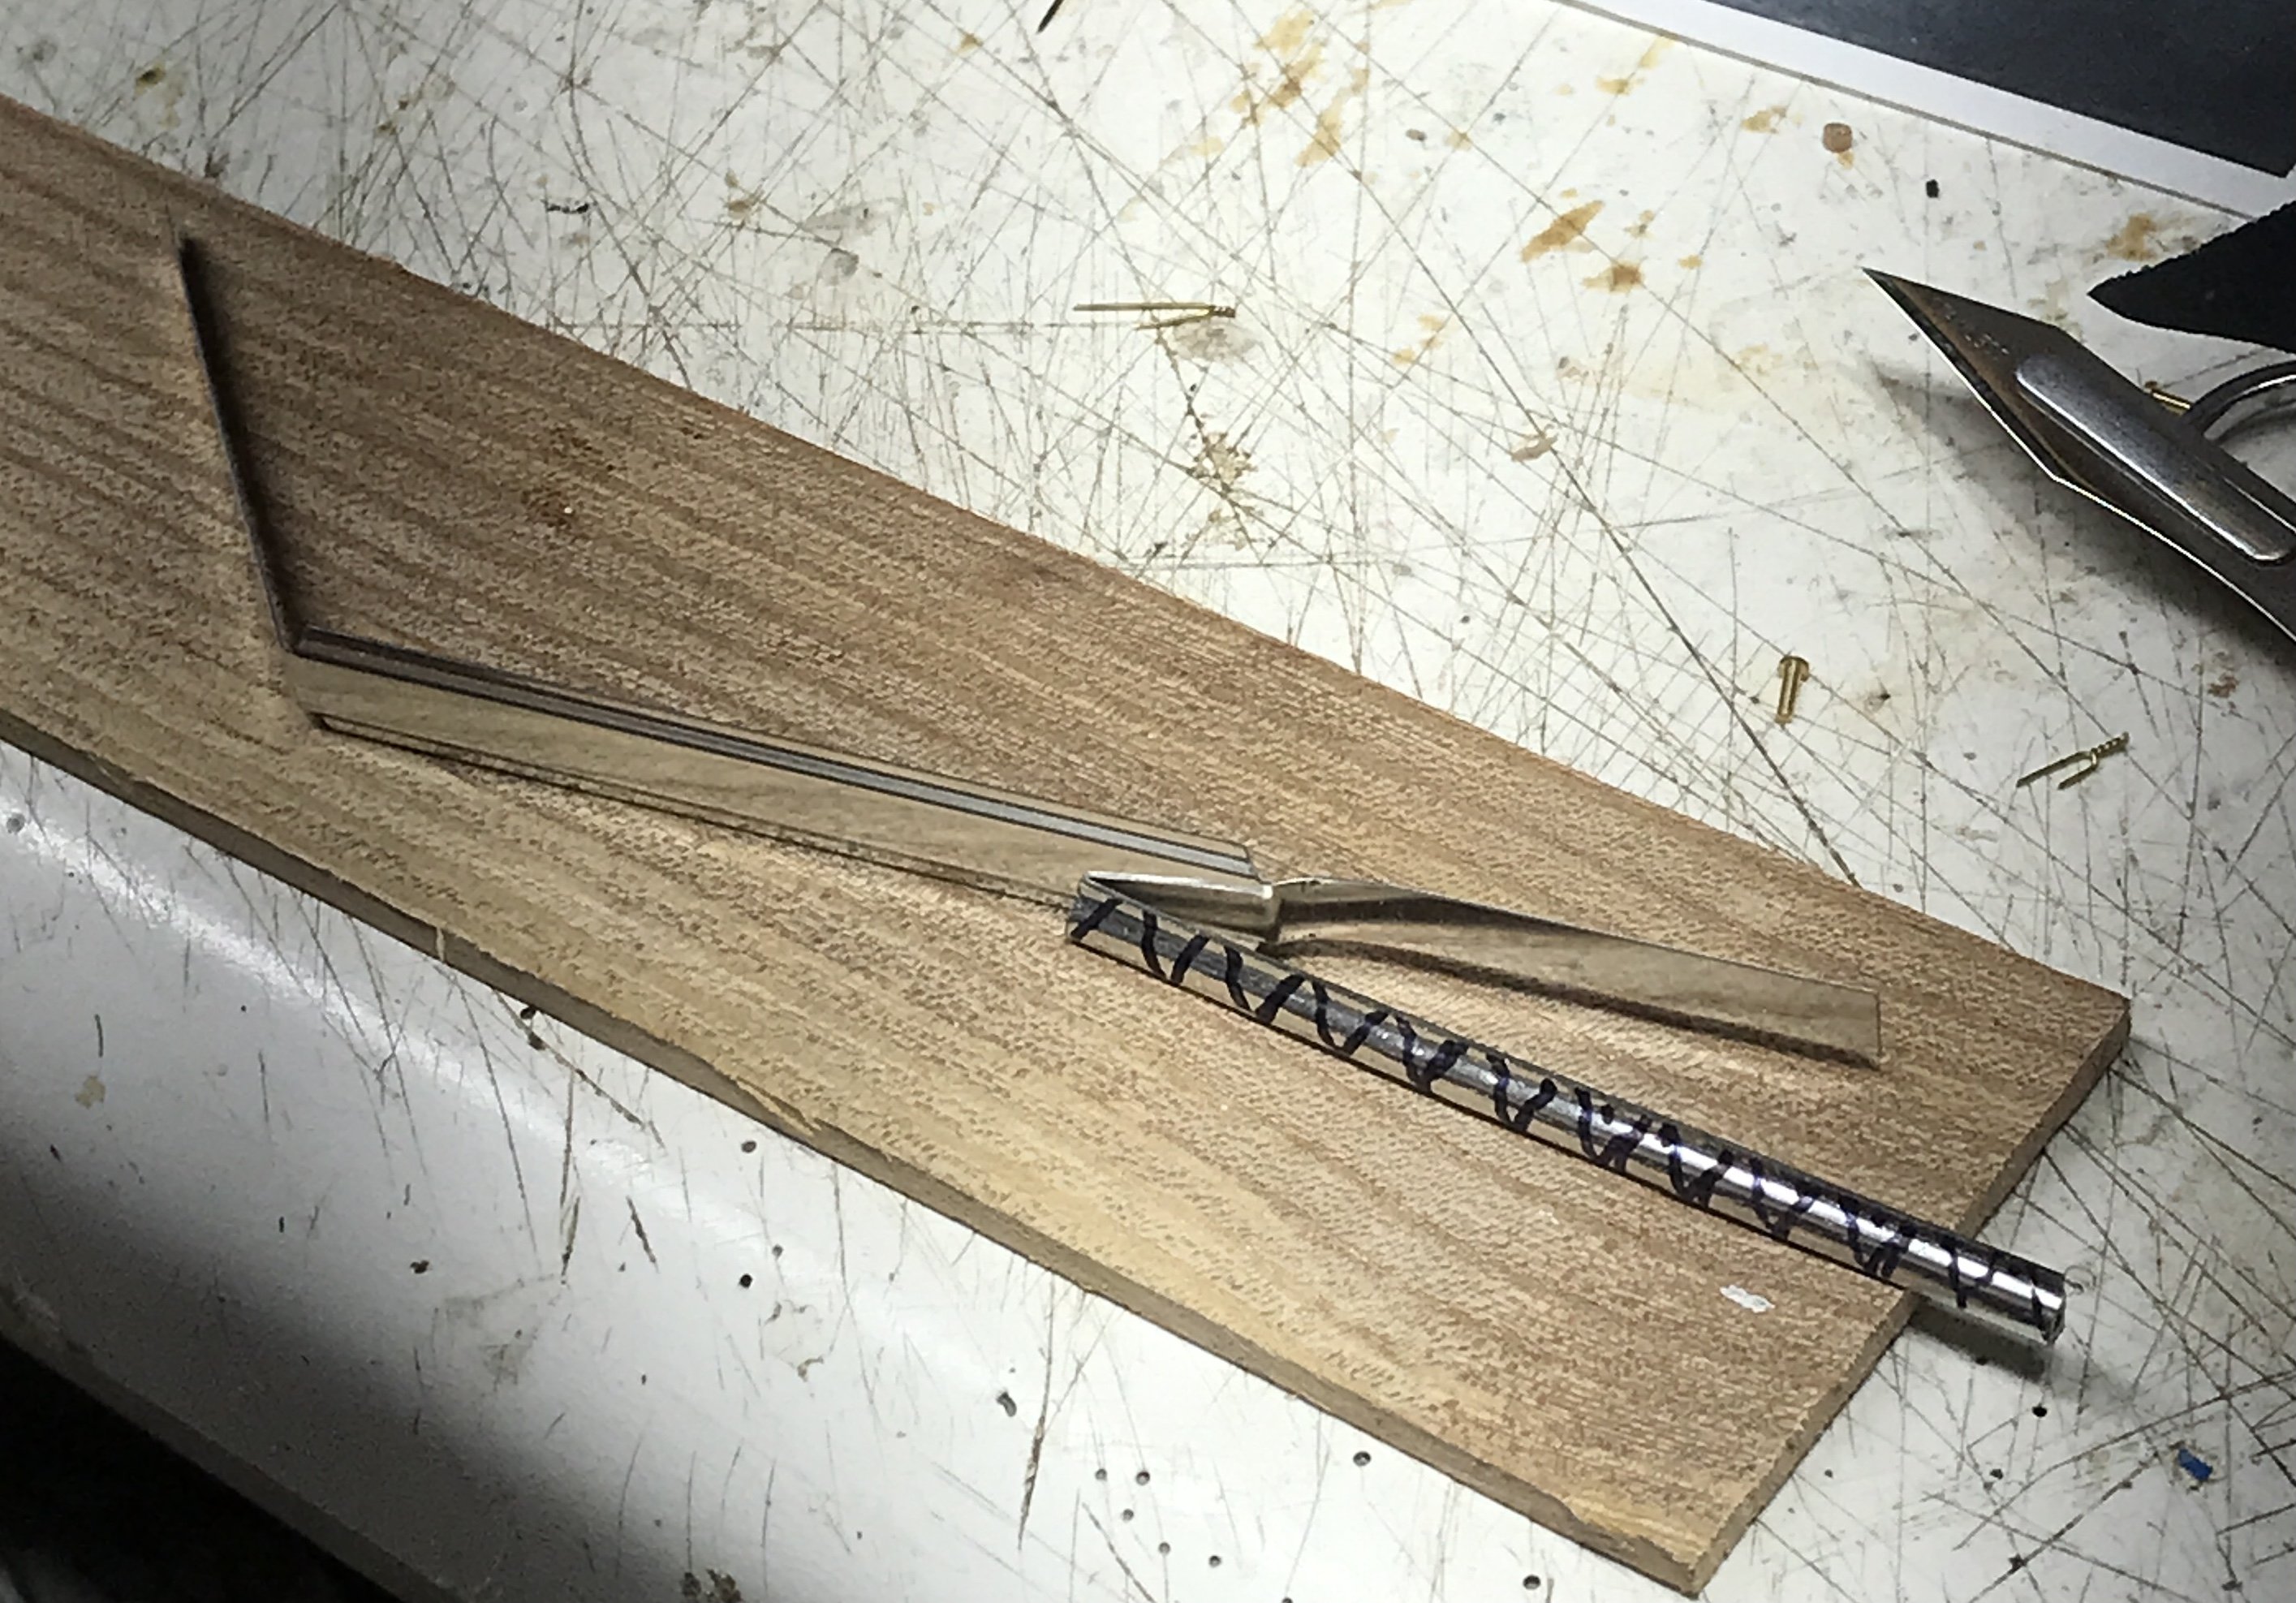
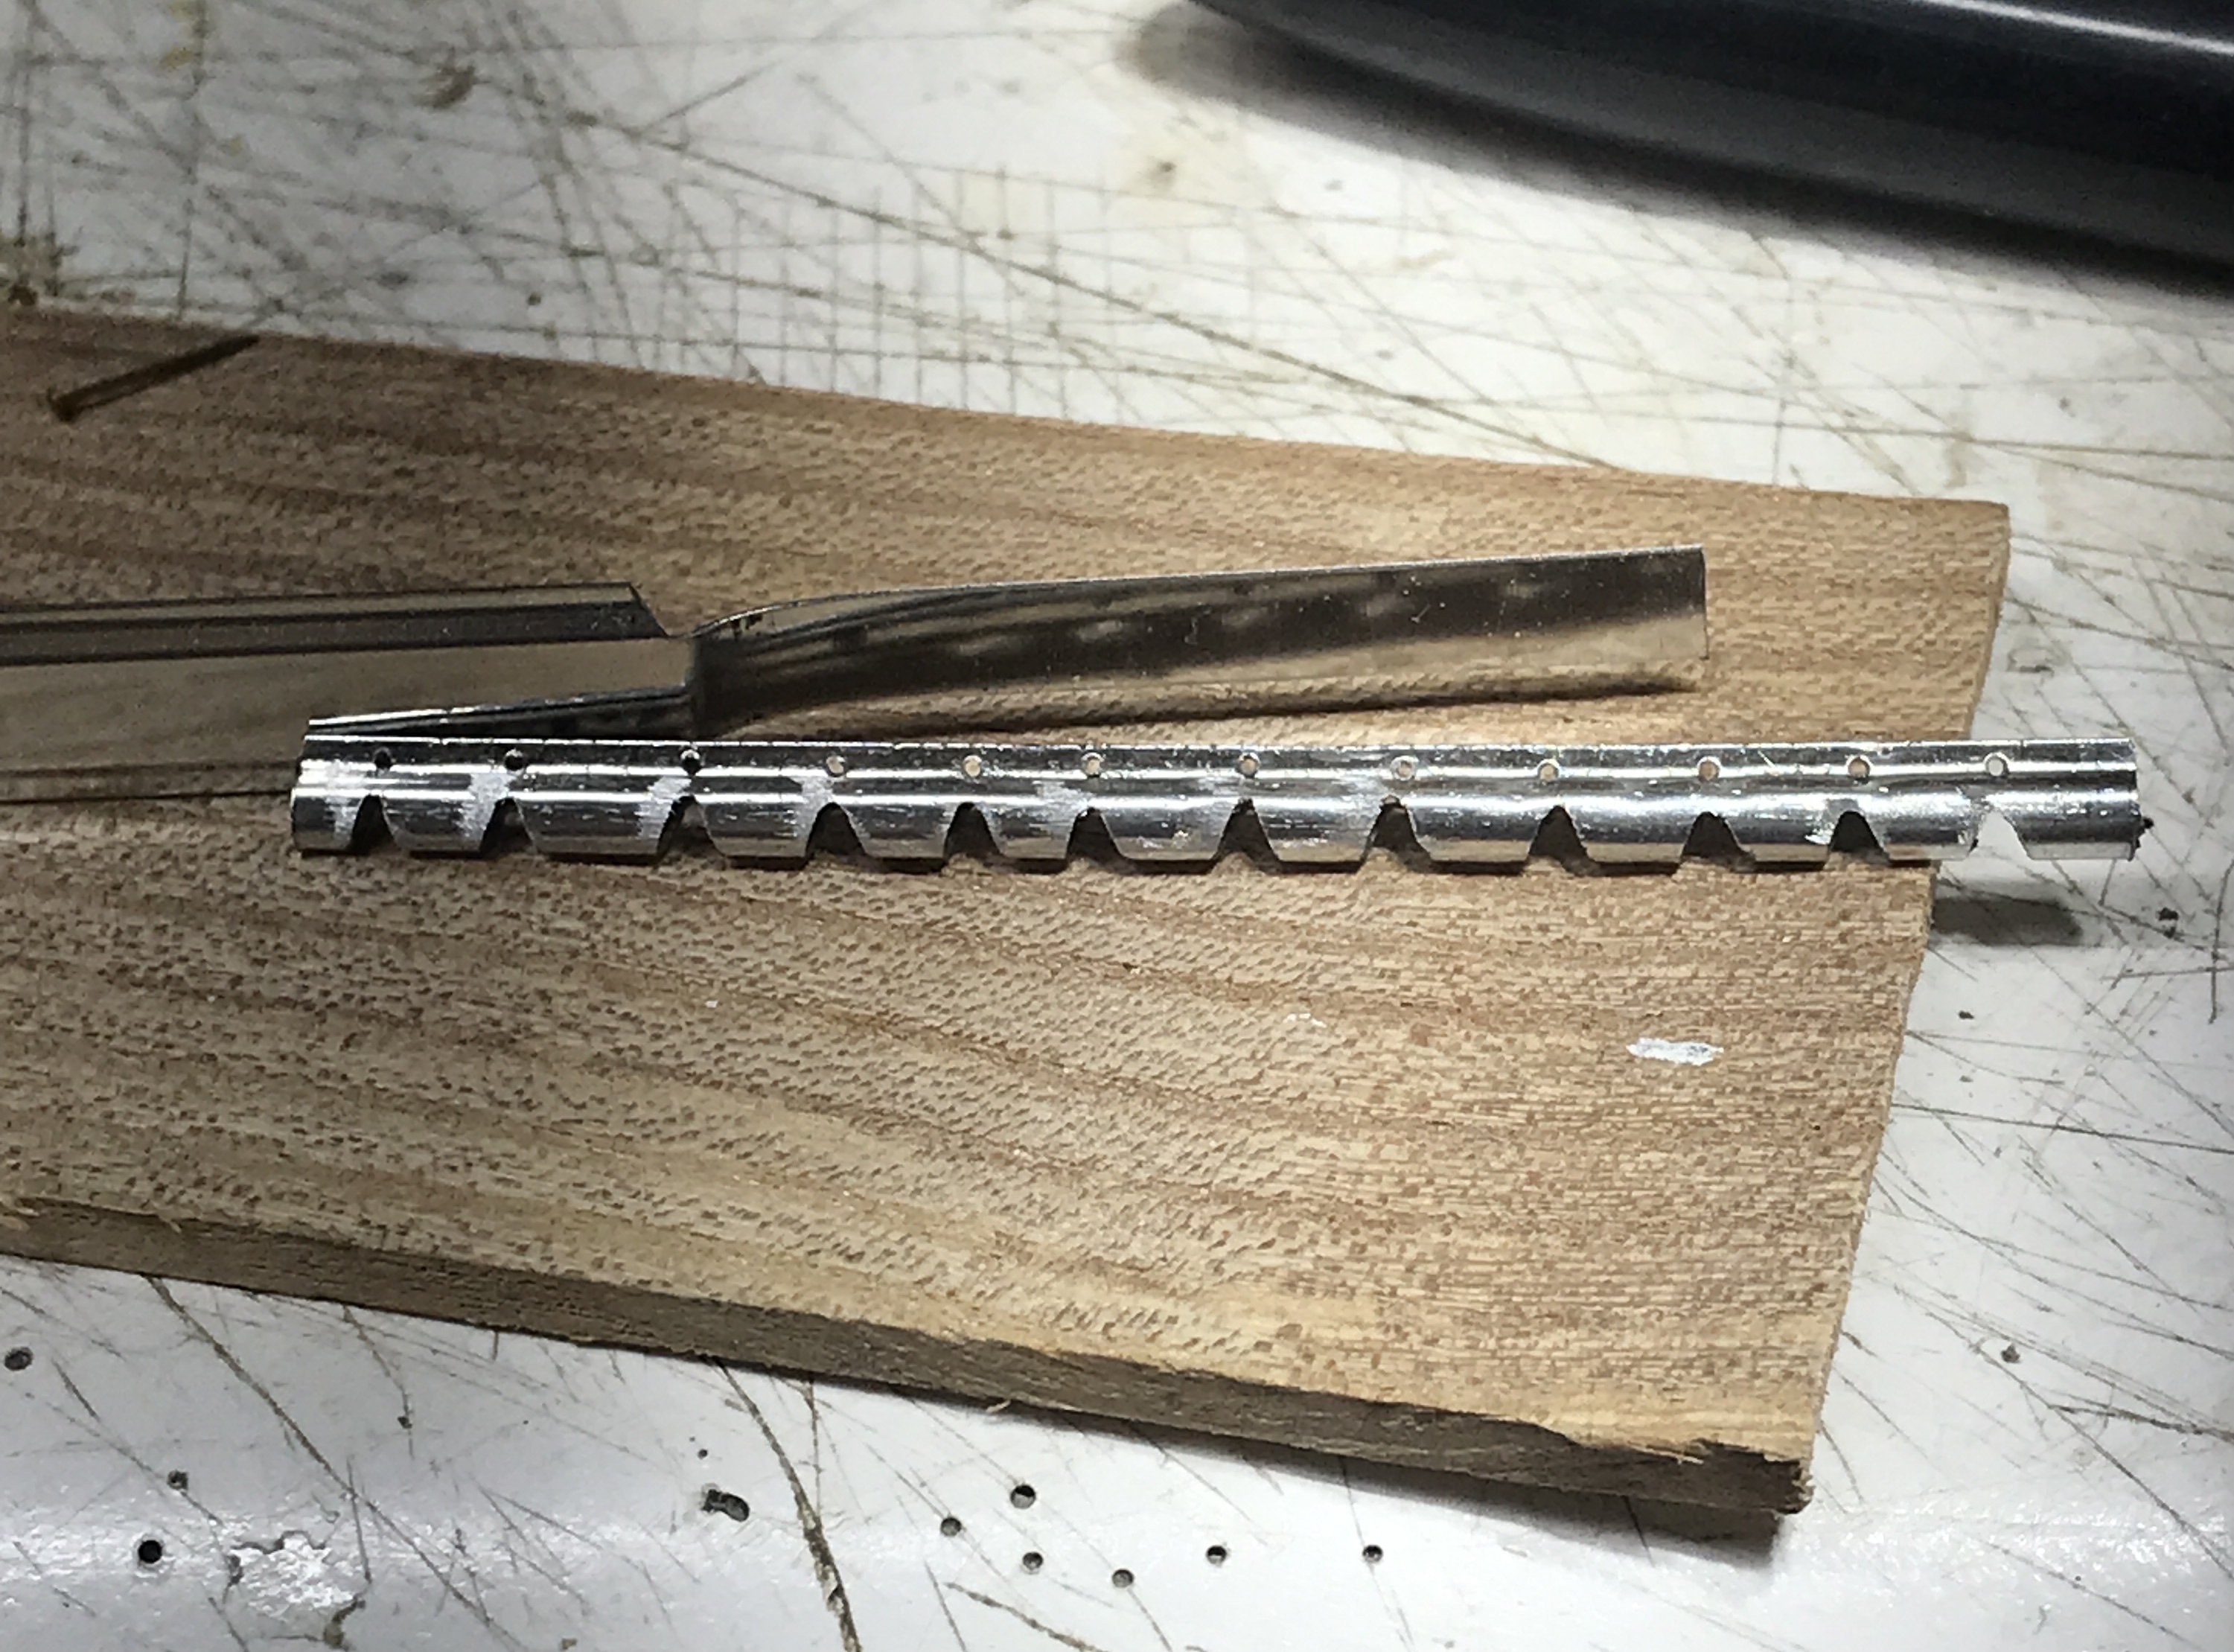
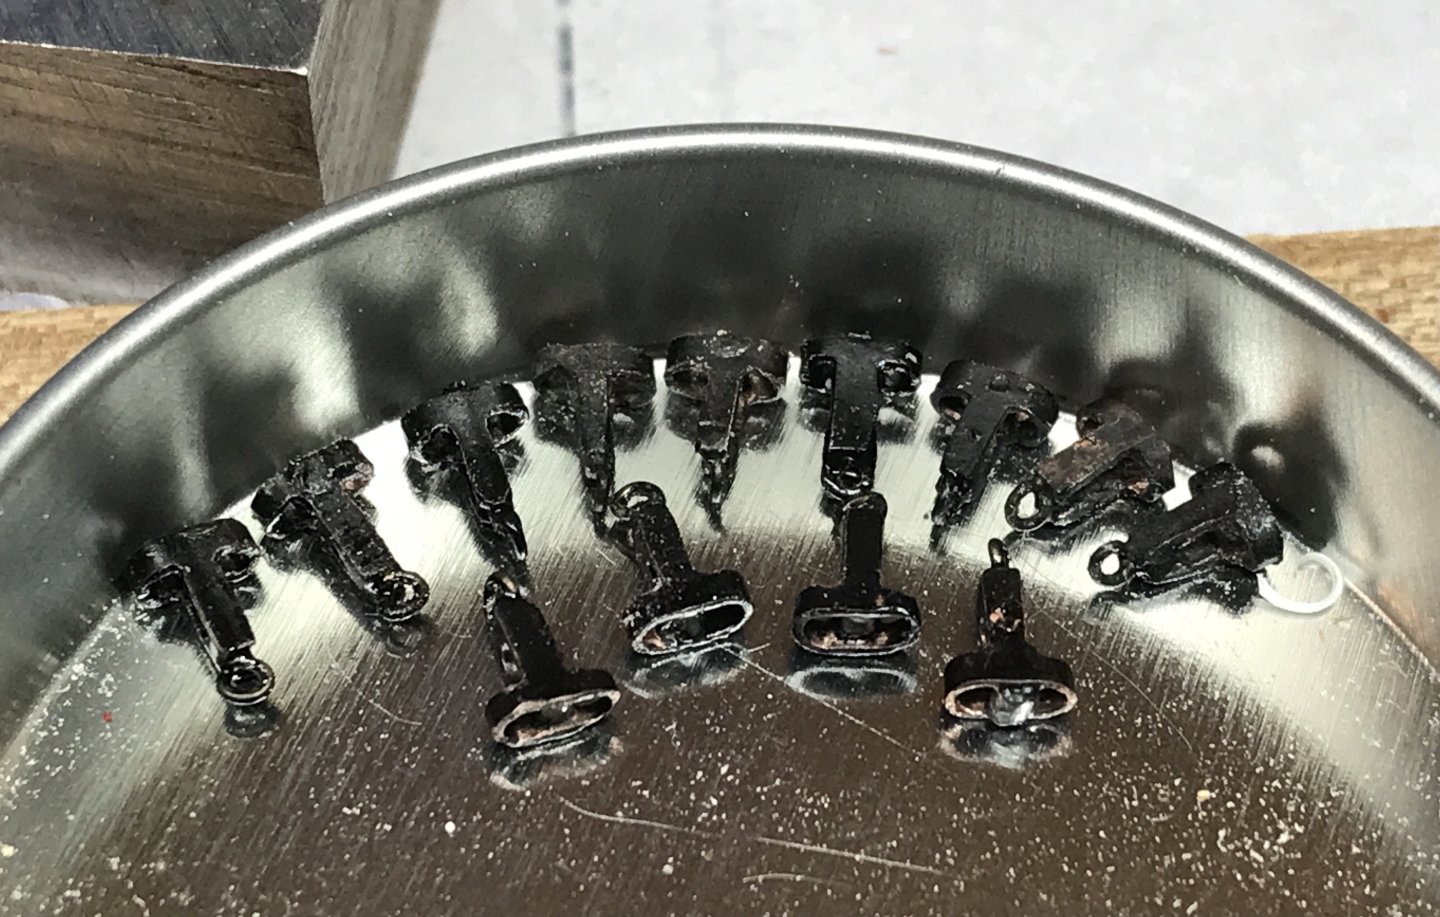
Thanks Rich. I was going to make these also from composite plastic...but after seeing so many dive in and do some soldering themselves....I wanted to do the same.....however, I designed mine to only need one solder joint and that included soldering the eye bolt at the same time as closing up the vertical sides. Some other examples I have seen look a bit larger...possibly as large as 1/4". but I had to fight the scale monster and even at the smallest I could make...1/8". It still means the blocks are a foot in scale size. I've seen real gin blocks and they are quite large....at around 10~12". I'll be using 3 per topsail yard for the fore and main masts, 2 for the mizzen topsail yard ...and....one for the topgallant and royal downhaul purchases. 14 in total. Rob
-
Yeah...what's up with that? A couple other paintings show black boats as well However....I think I'm gonna go with white. It was typical of the period and as mentioned...was far easier to see on the open ocean then black...for sure. UNLESS...it can be proven that McKay had these vessels pain these boat black....or dark green. I've got time to make this decision anyway. It's still information gathering. Rob
-
When I built my 1/96 Cutty Sark. I did indeed add the ships name on the bow of her life boats. Every painting of Staghound depicts her boats as black. Not sure why that is. I think that detail might be just a little too small to replicate. Thanks for the fine compliments. Rob
-
The extra detail is nice. Good suggestion. Rob
-
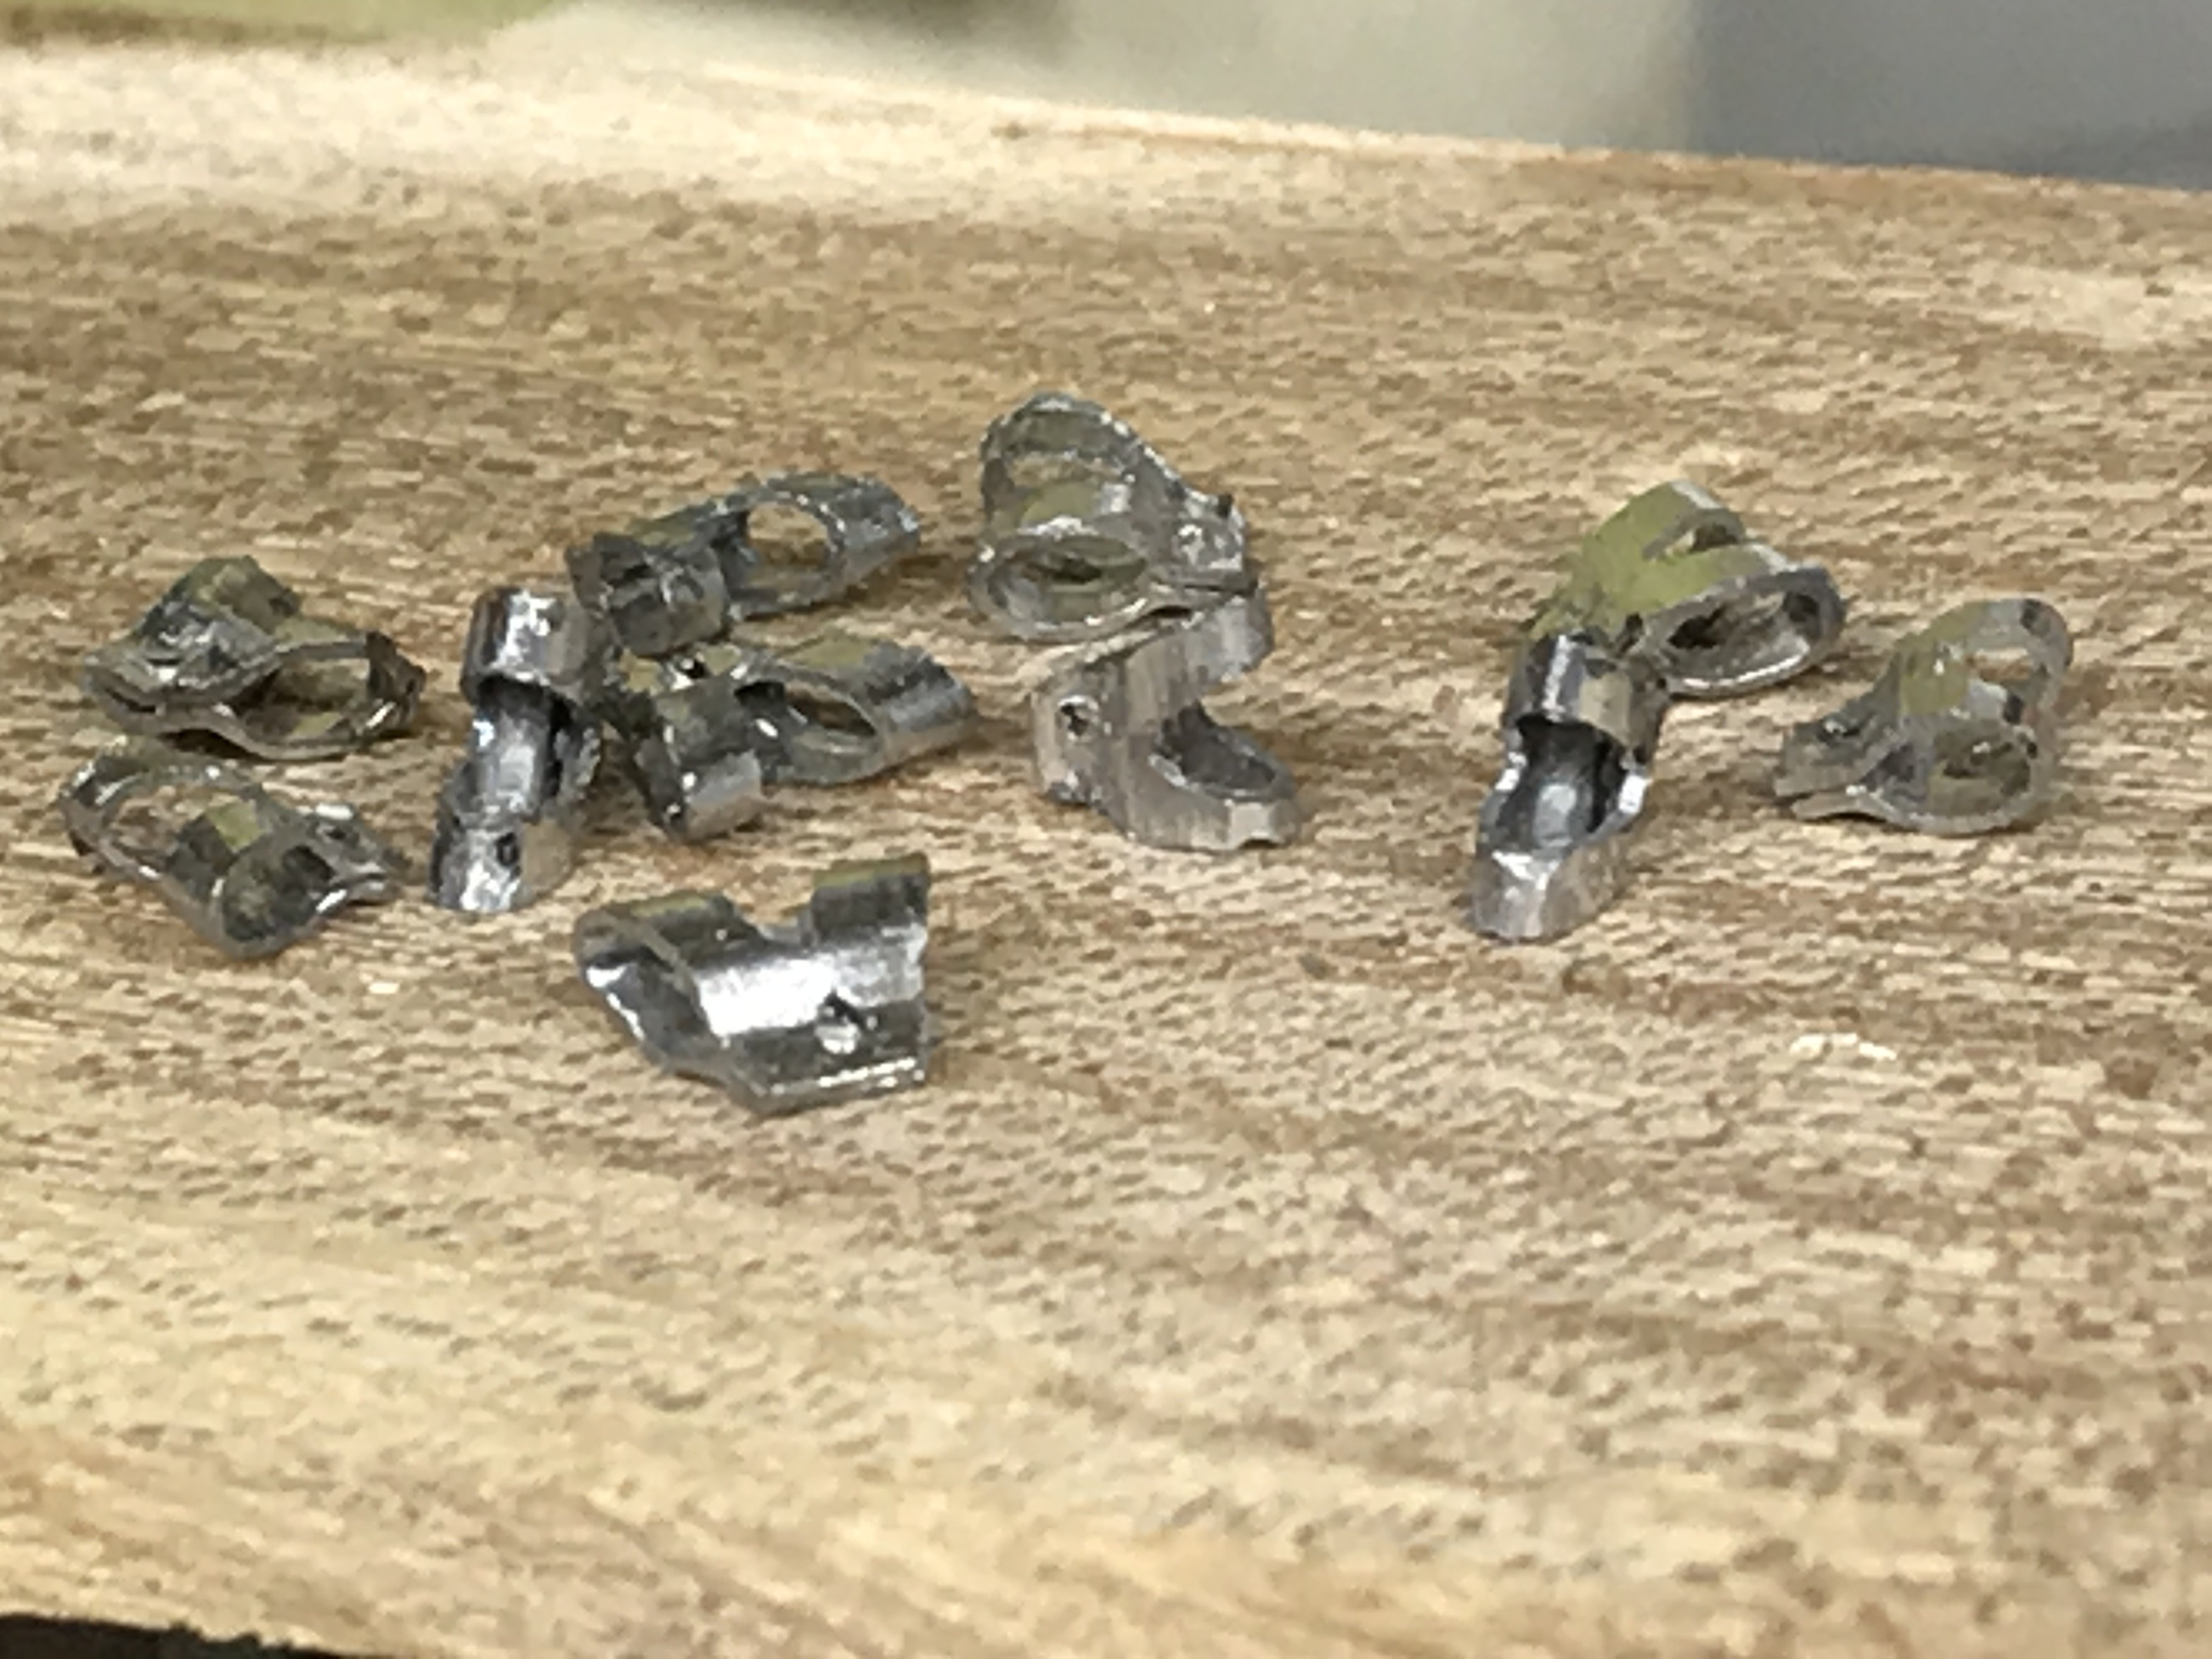
I finished up 15 gin blocks. One getting painted……the original and these boys and girls. Man what tiny metal work. Rob
-
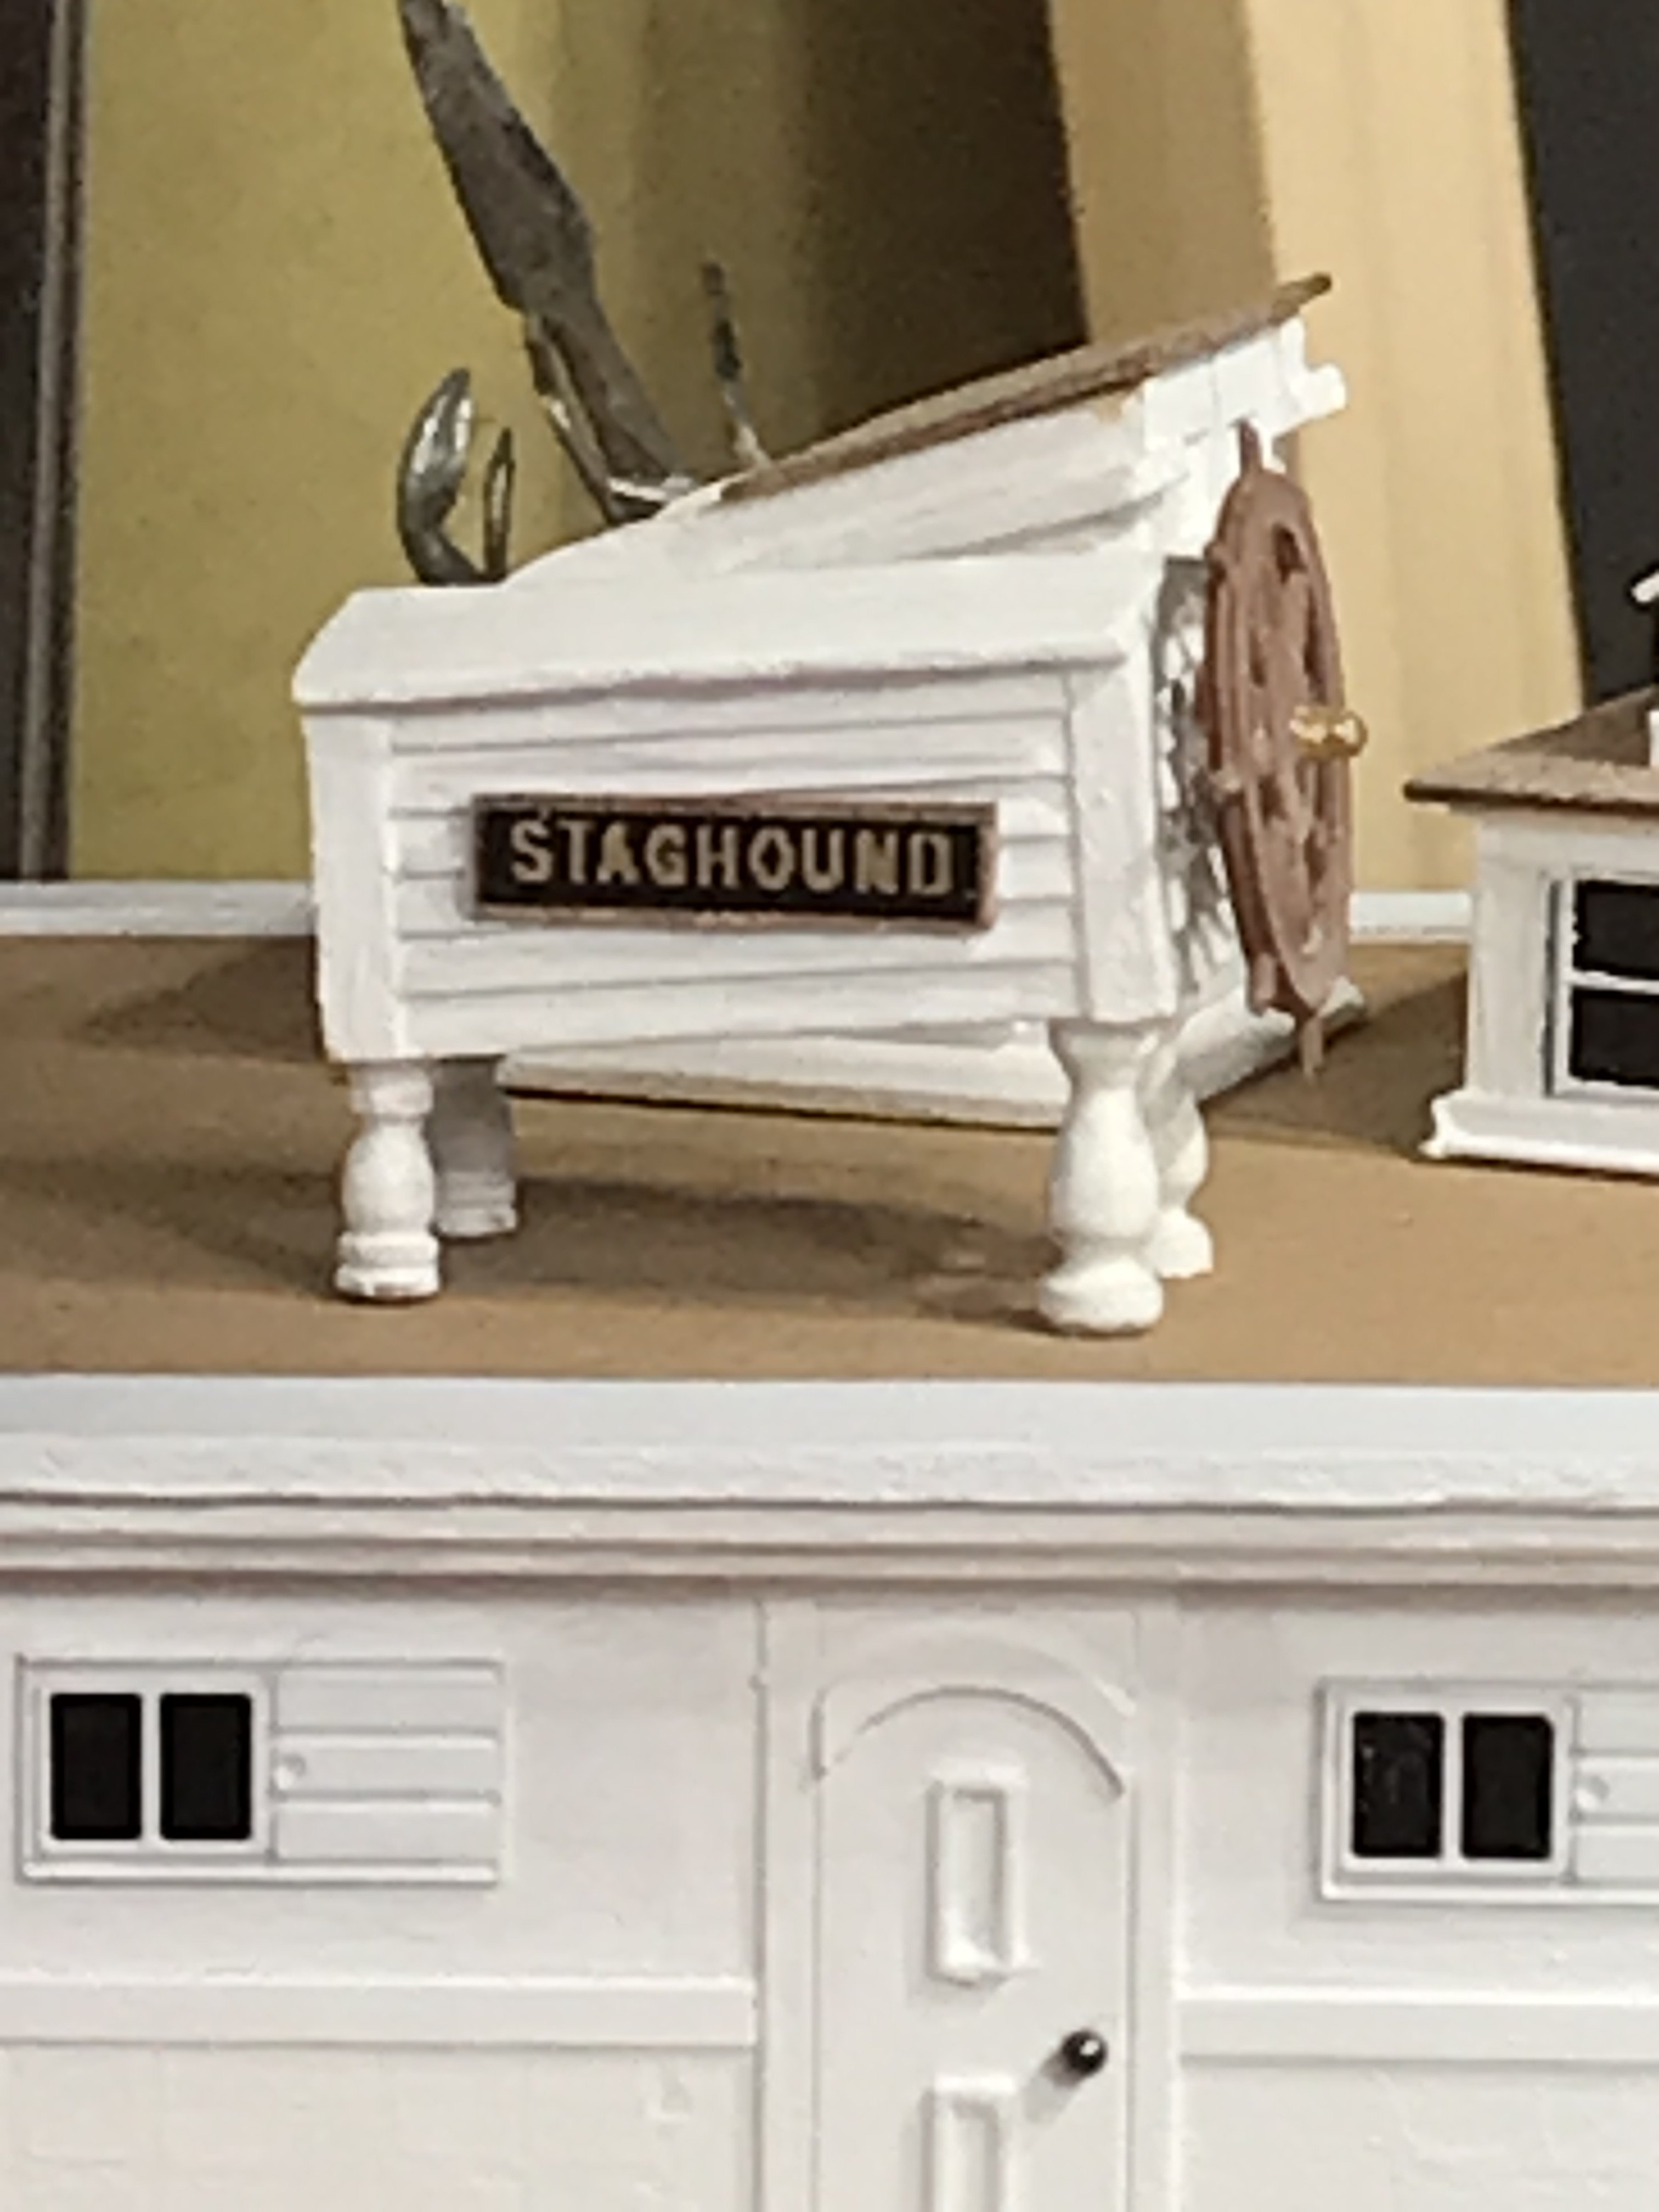
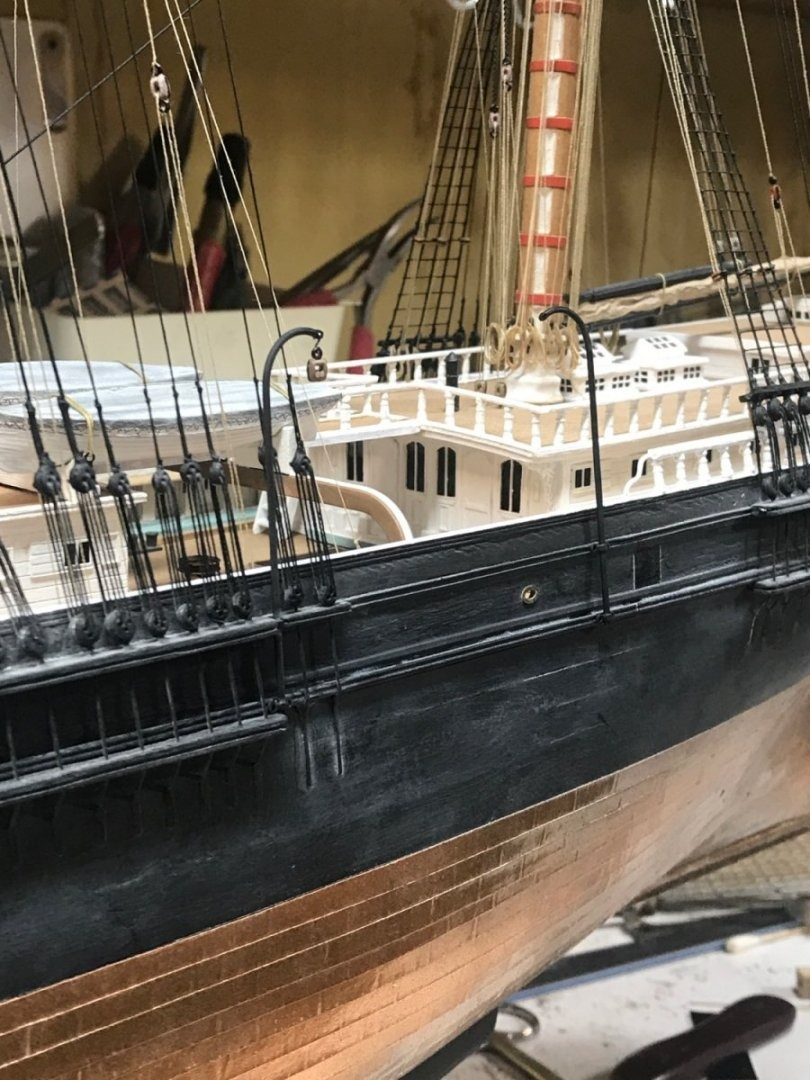
Per Rich’s suggestion, I added name boards to the wheel box. Just for fun. They’re about 3.5 8ths long. Rob