rwiederrich
-
Posts
5,520 -
Joined
-
Last visited
Content Type
Profiles
Forums
Gallery
Events
Everything posted by rwiederrich
-
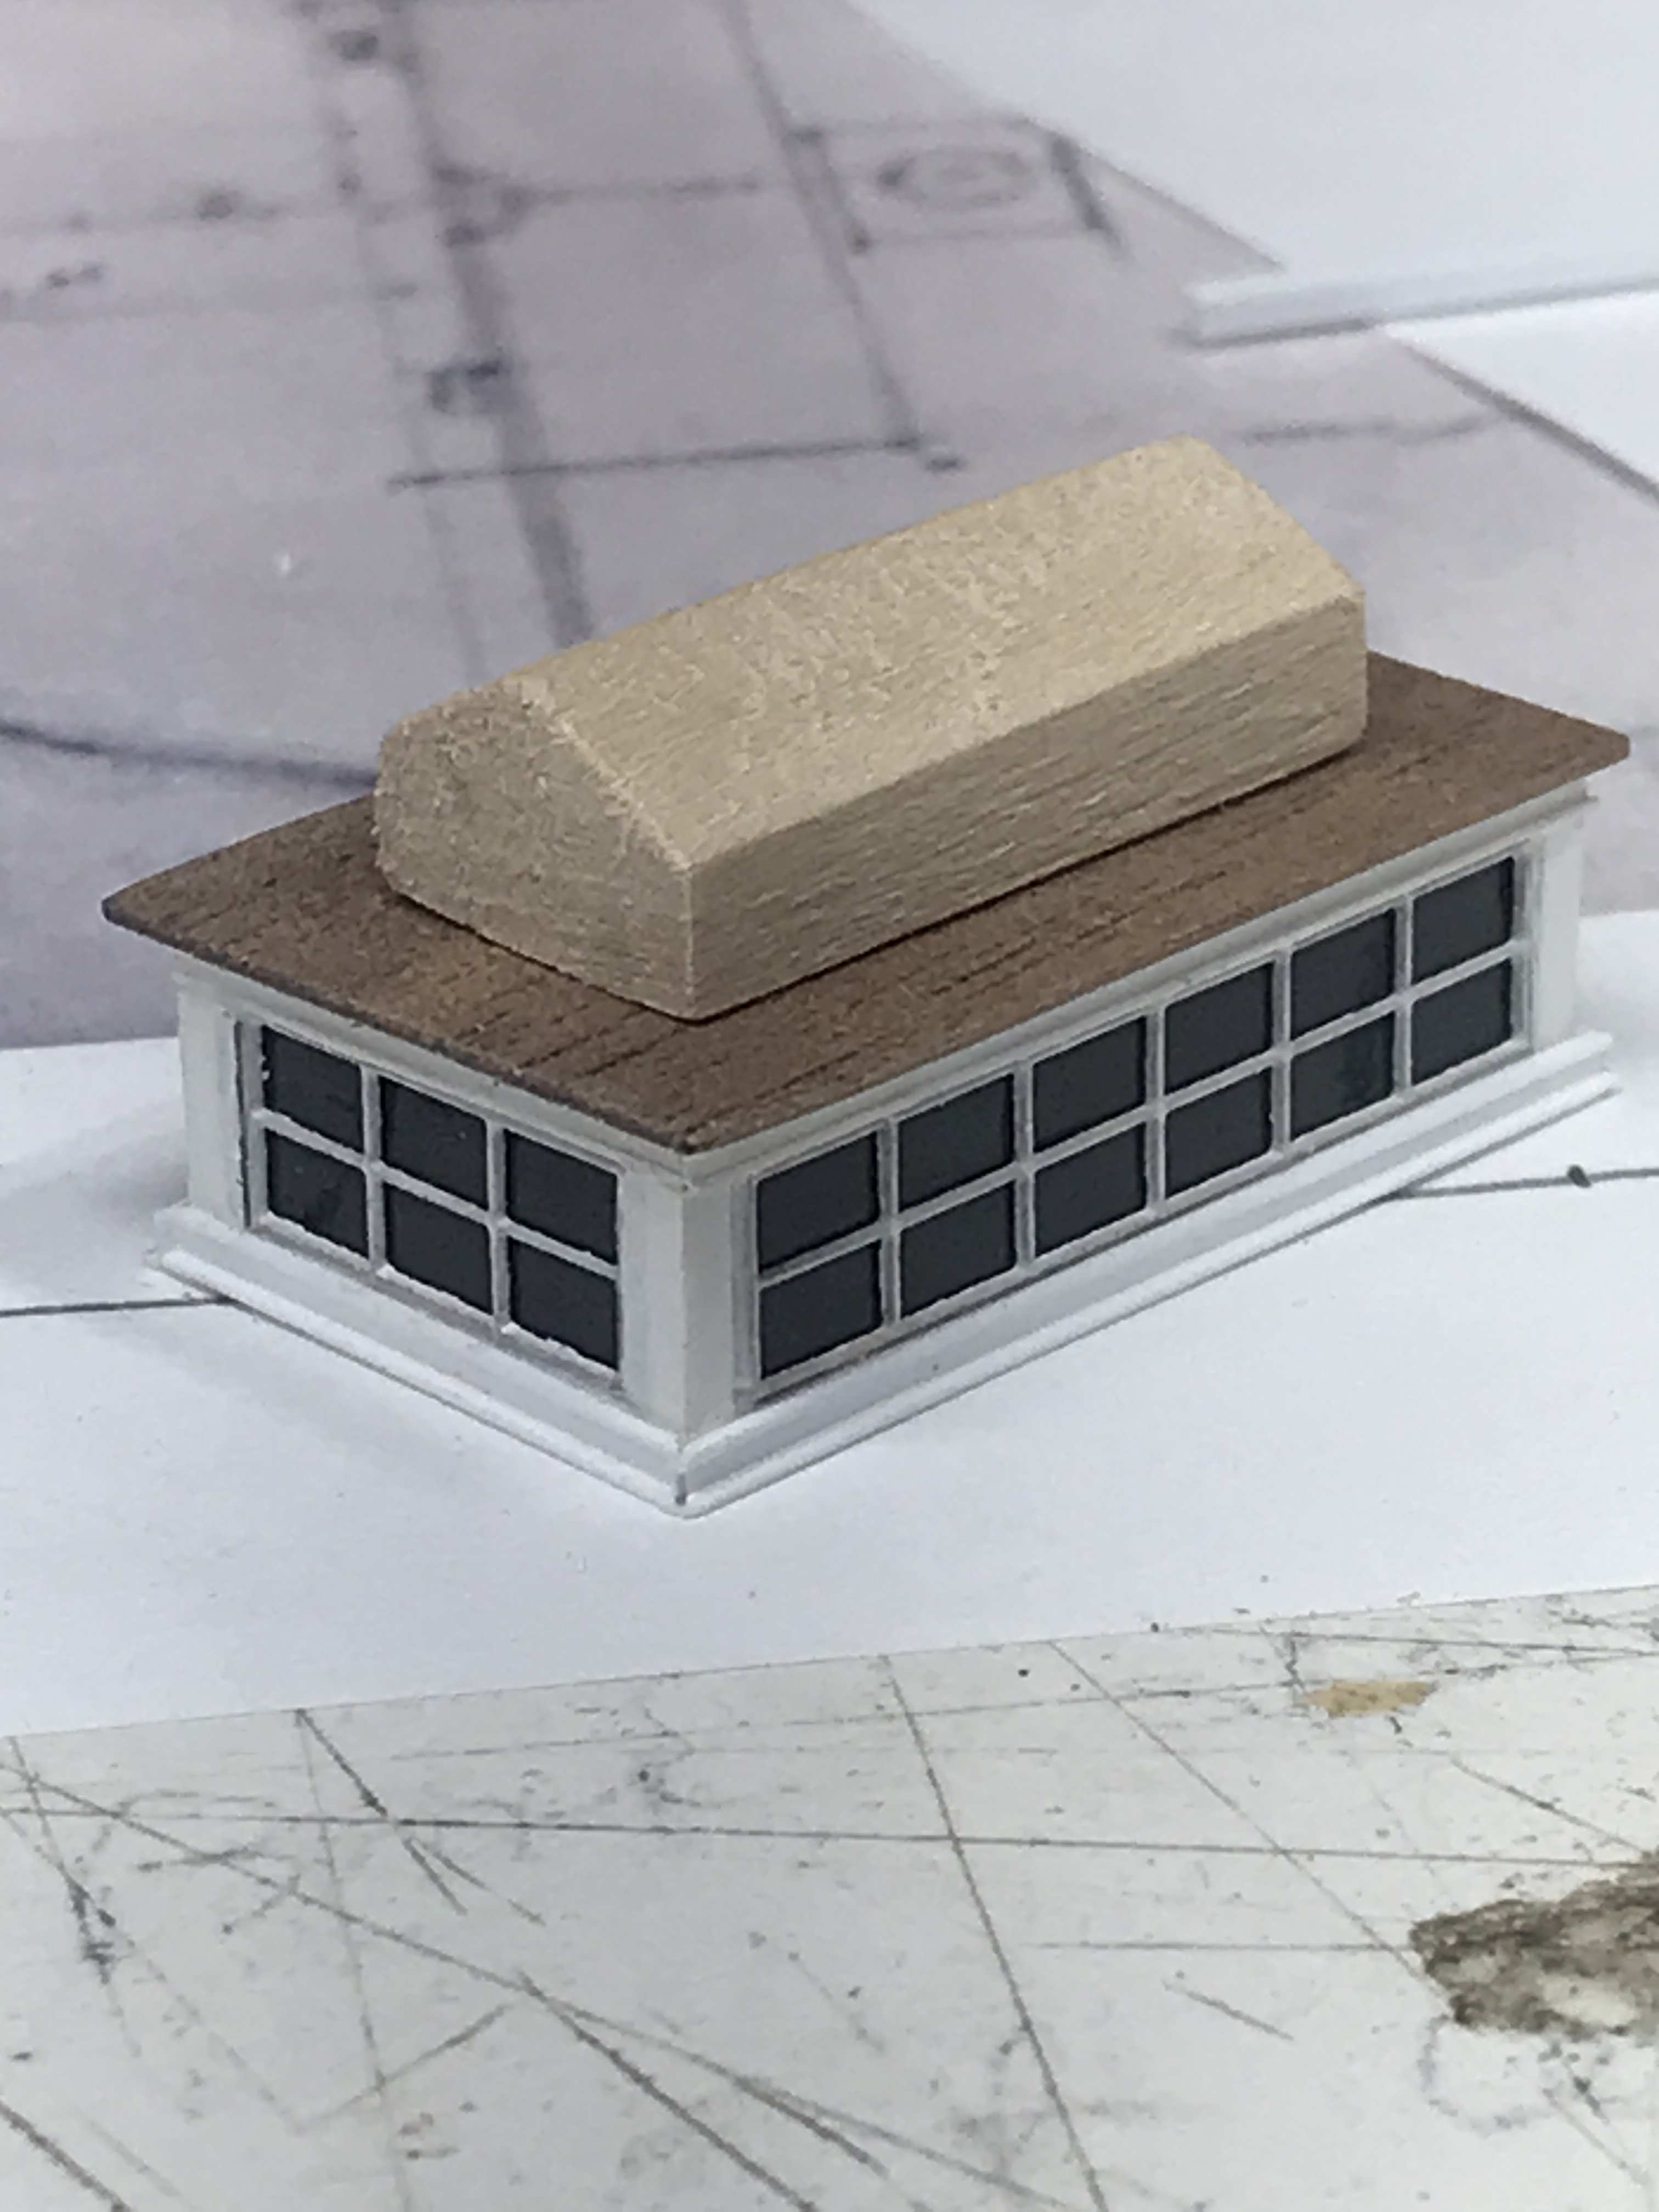
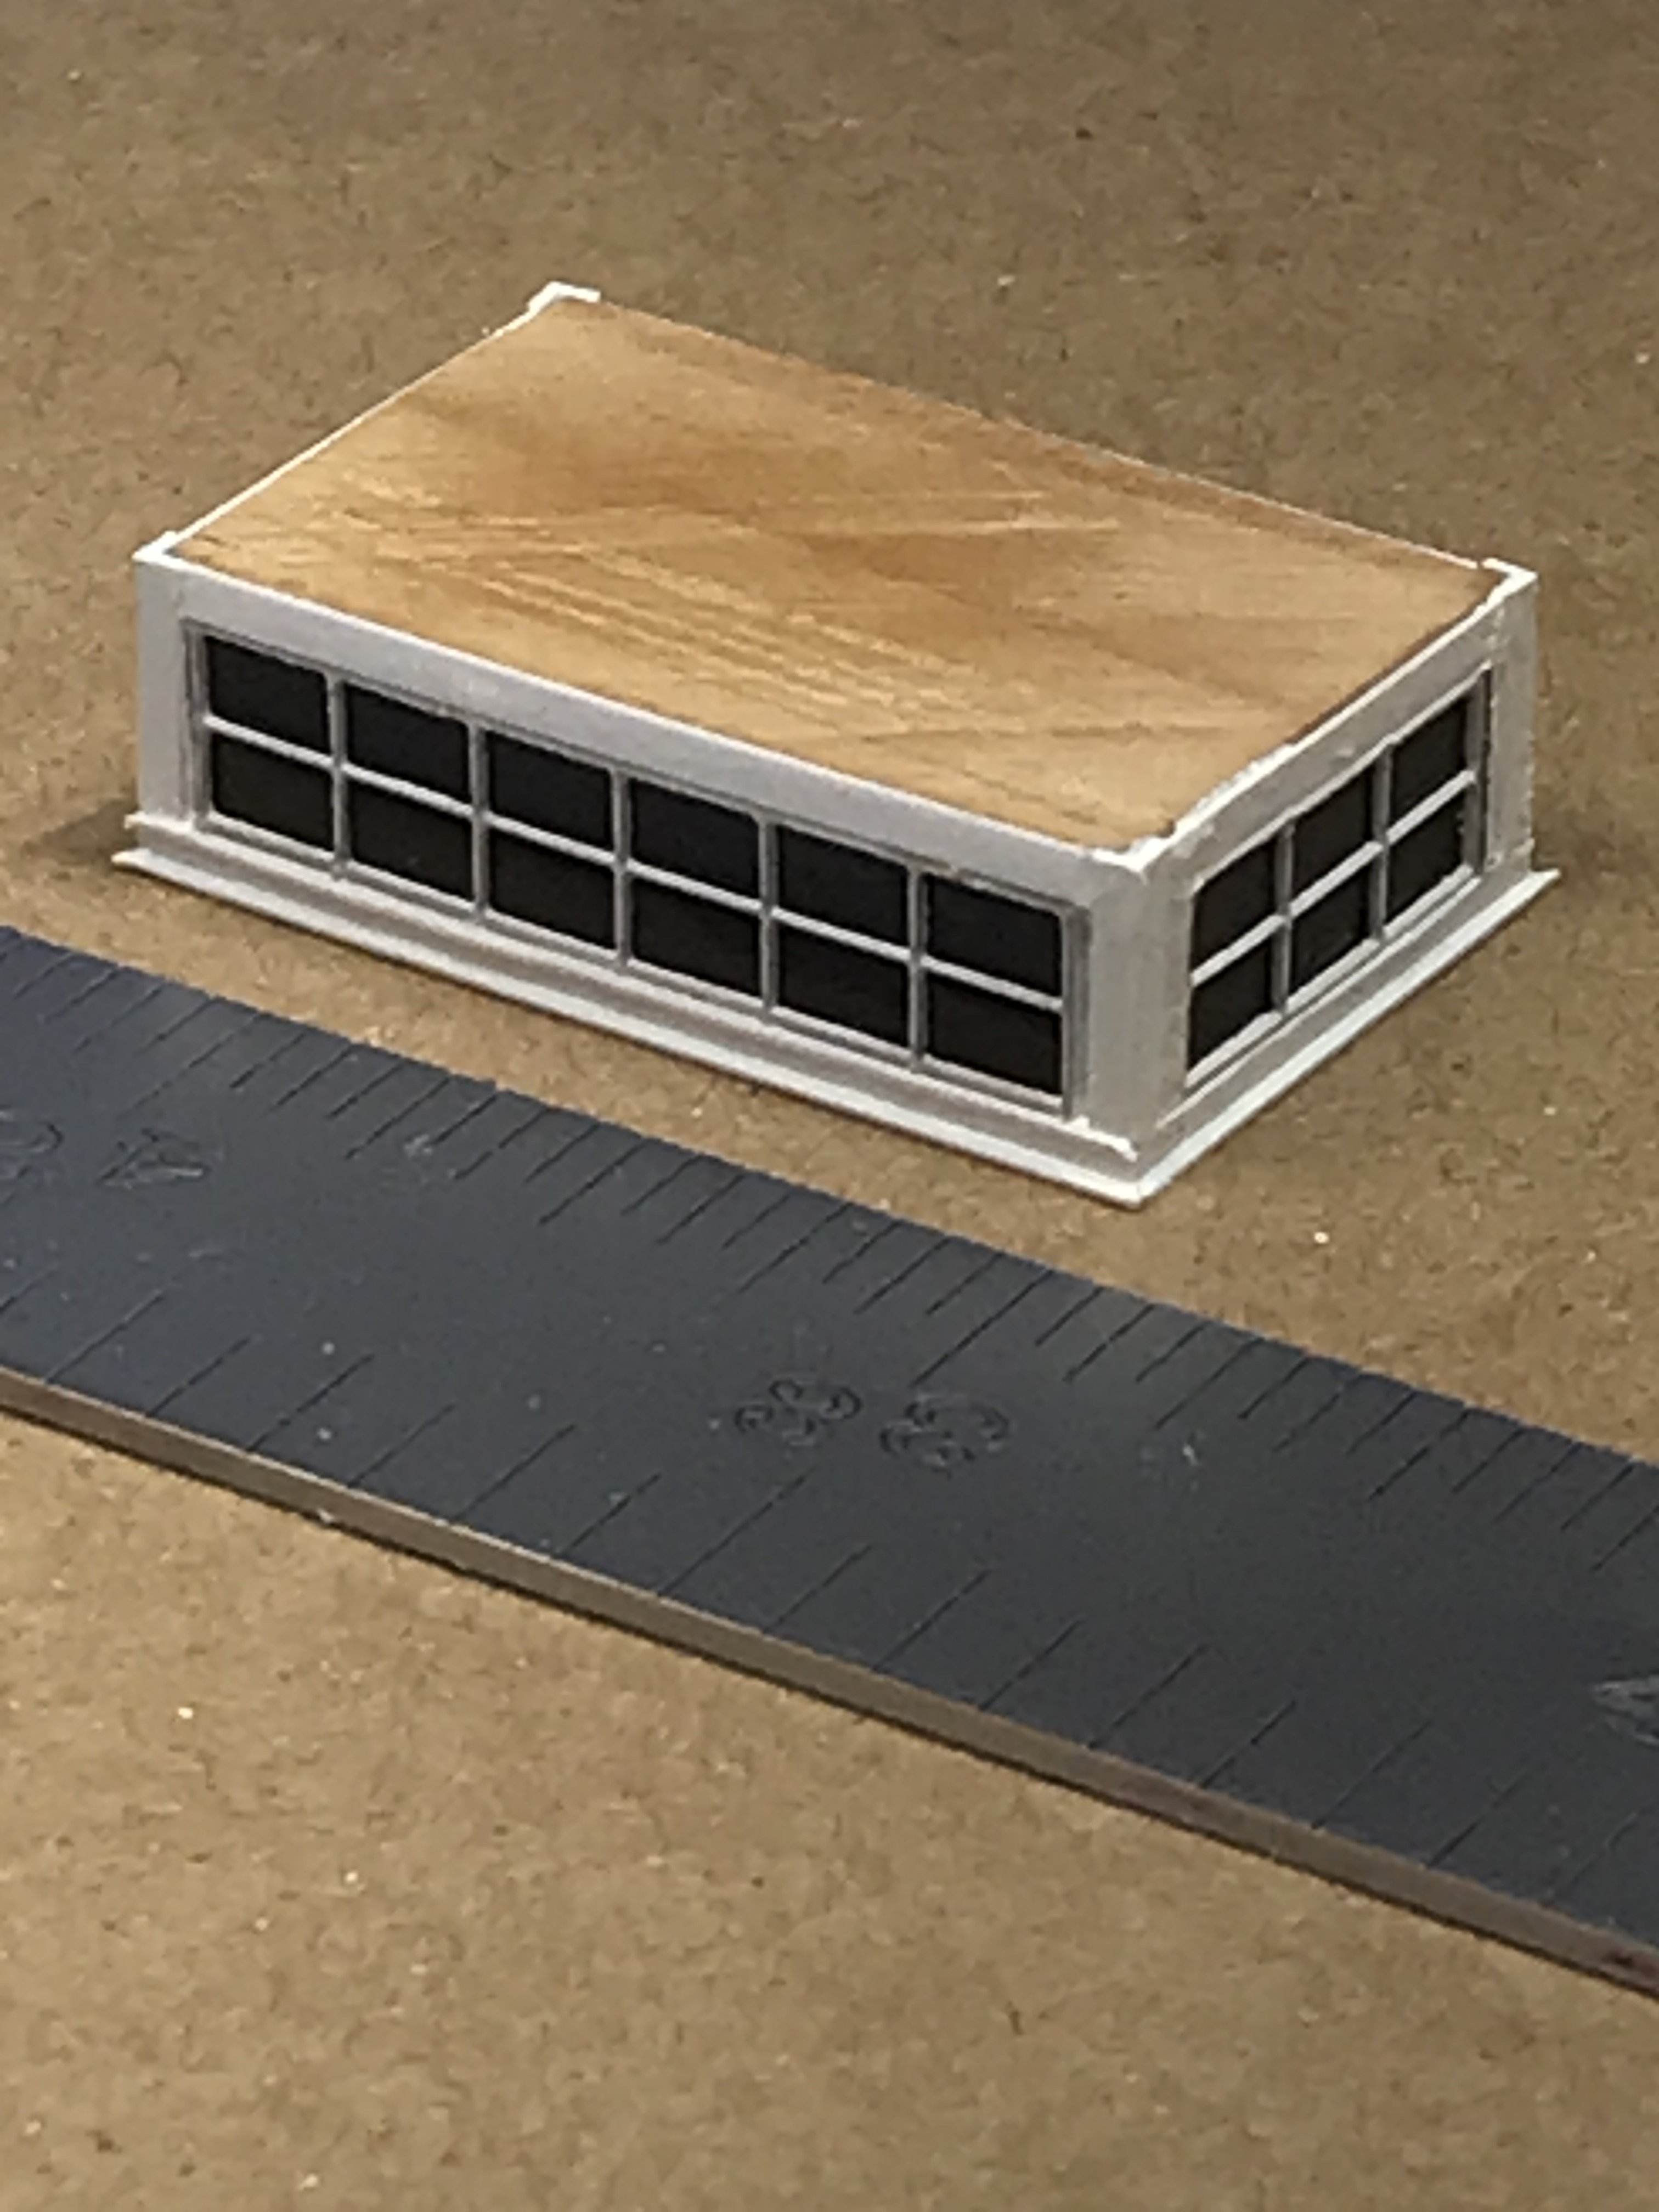
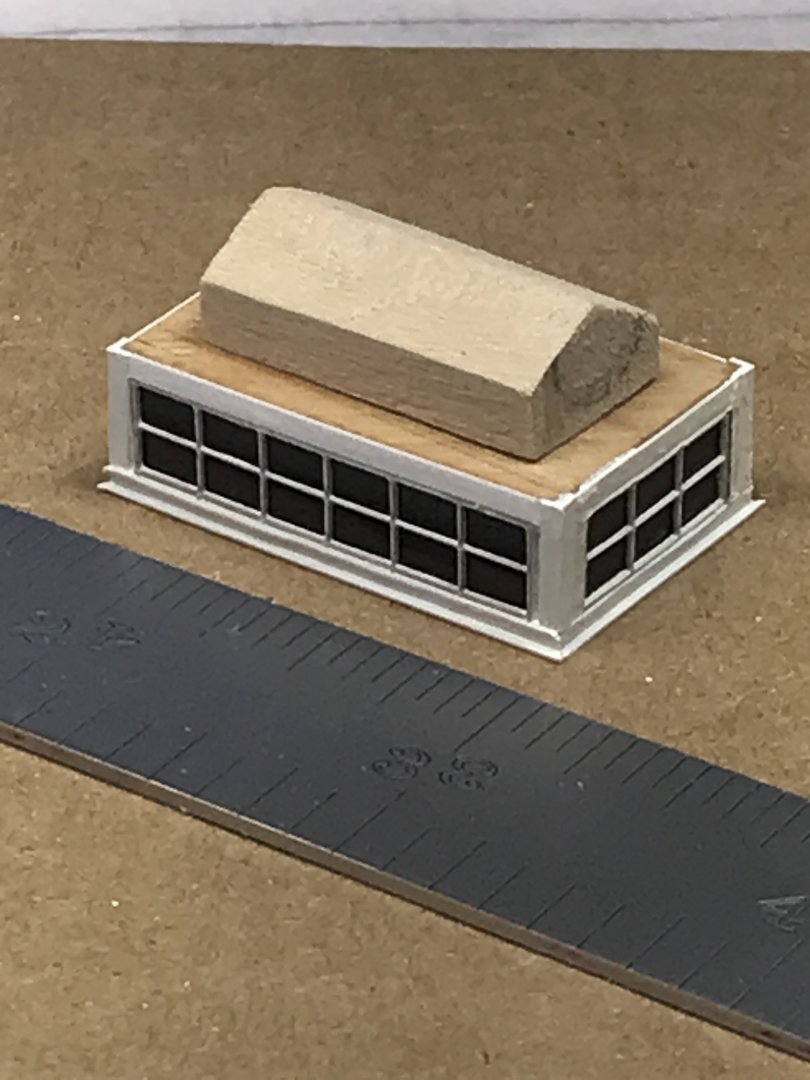
I added the mahogany top Rob

-
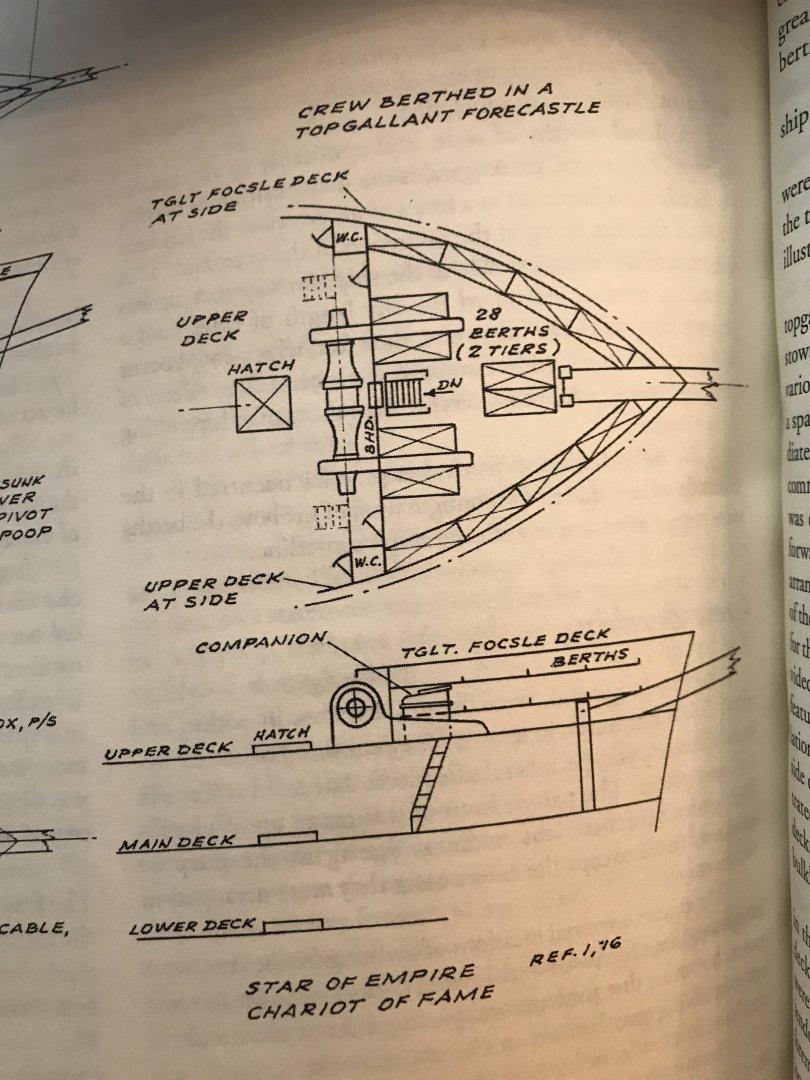
Do you think these examples of Star of Empire , Chariot of Fame will be close to Staghound ? Rob
-
Water closets were routinely placed outside the forecastle and on port and starboard sides. Note Crothers notes on these two clippers.
-
This excerpt from Crothers book, American built packets and freighters of the 1850s. Crothers says……
-
I suspect her deck was flush with the monkey rail.....NOT the main rail. Remember...no expense was too much. McKay had an open checkbook from the owners. This revelation changes a lot of things forward on her design. She also had private heads/houses port and starboard as depicted. This particular drawing was a depiction for iron hulls...but to reconcile the patent windless, one needs to make adjustments. Rob
-
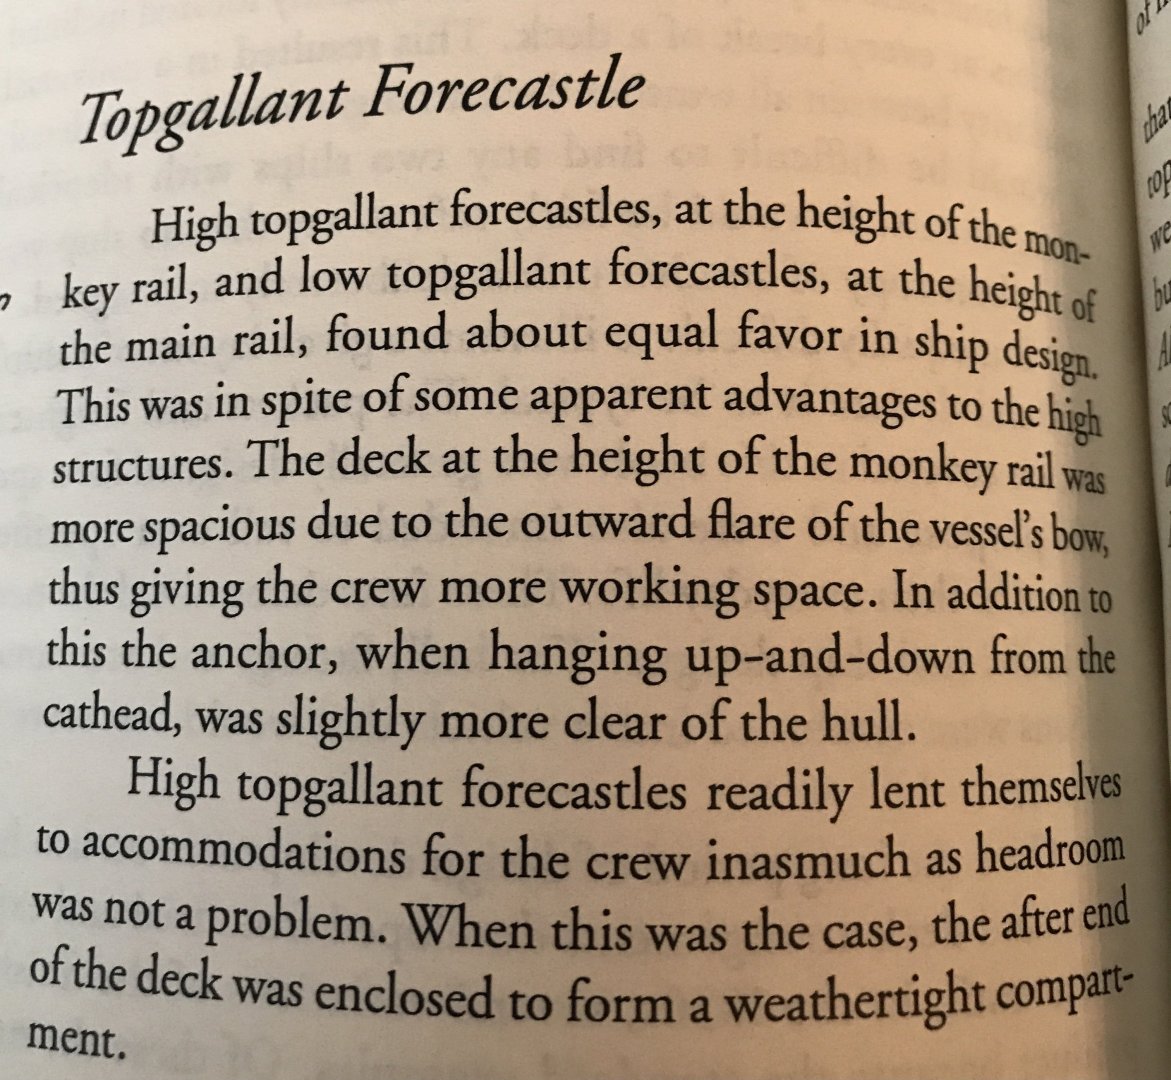
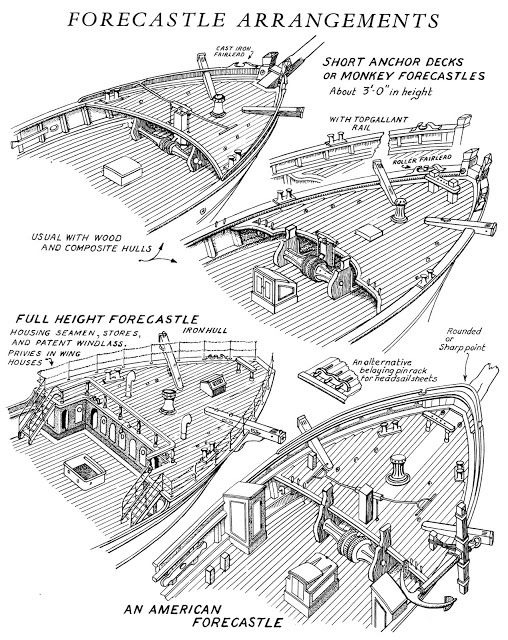
Just as a reminder....Staghound HAD a patent windless. I suspect she actually had a full height forecastle. Note what Campbell says about the full height forecastle....they were used when a patent windless was used....😲
-
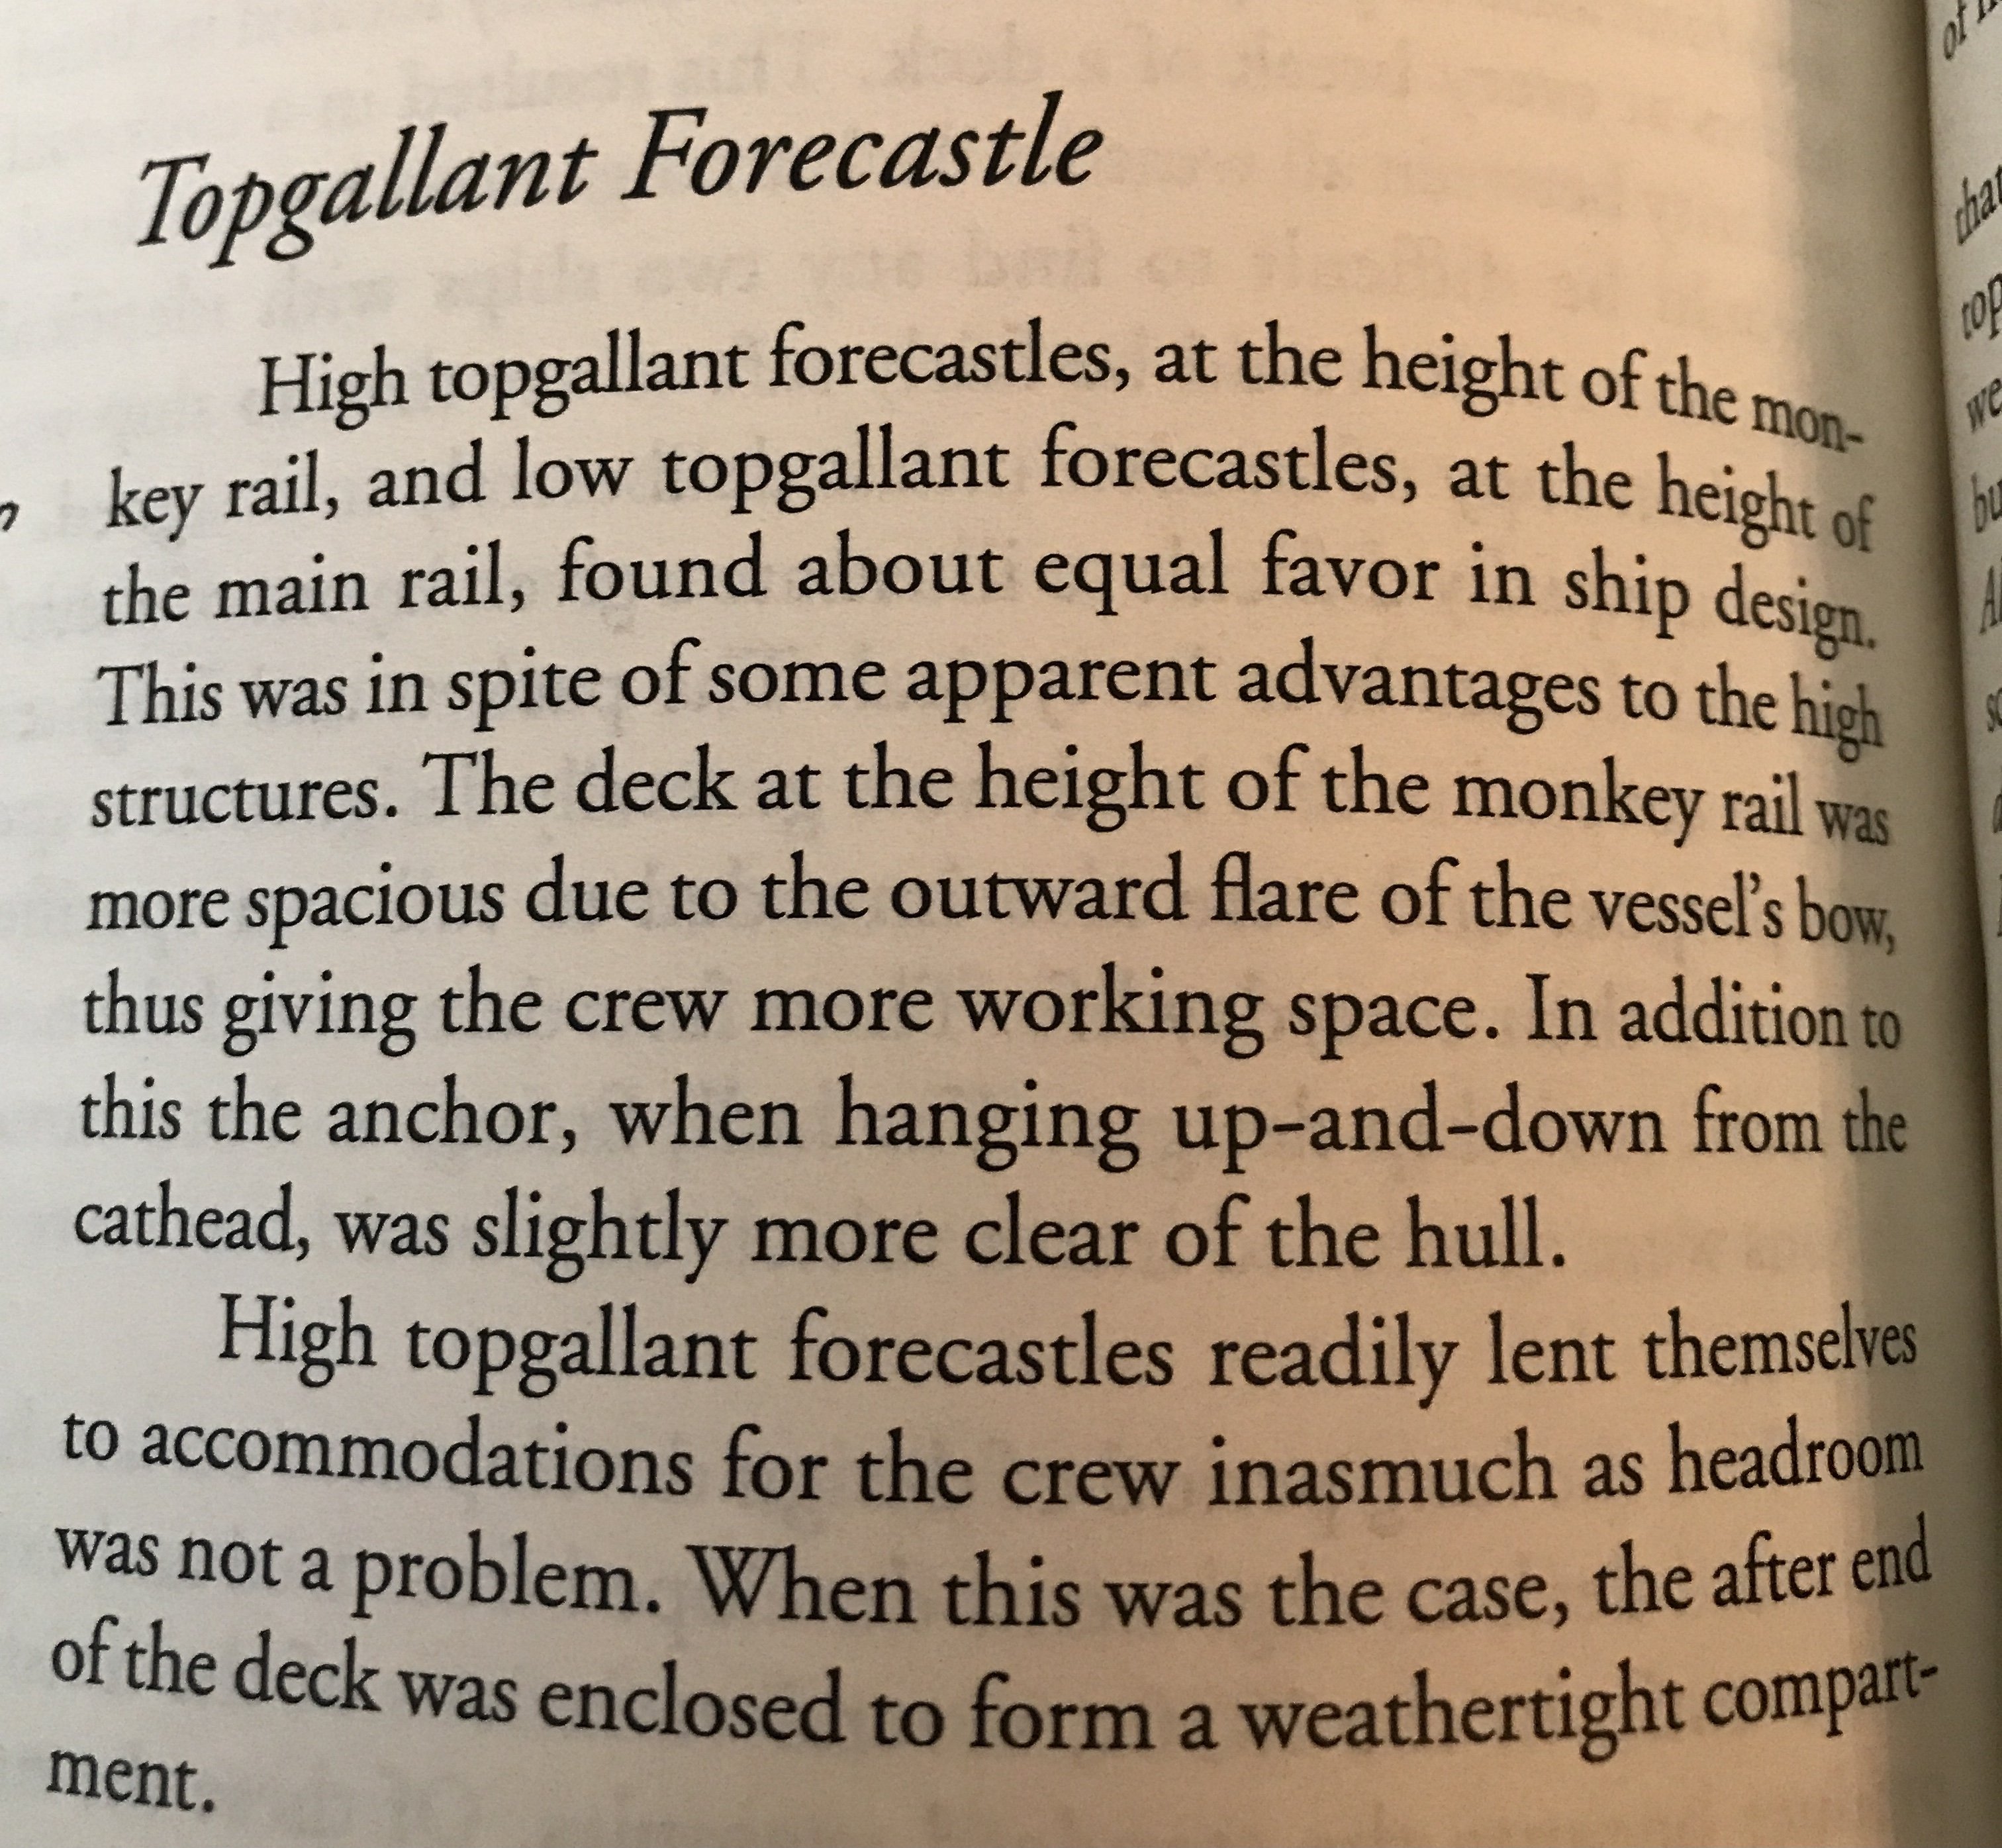
There must be some significance in Staghound having a *Topgallant Forecastle*...described by Duncan. I need to research and ponder this a bit more. Knowing what we now know about her patent windless. Rob
-
I thought about that....but redundancy wasn't a thing at the time...and the patent windless had built in hand driven ability...when the hubs were disconnected. Seams like a lot of expense to have the state of the art and a wooden standard aboard together. Duncan may have noted that if he hadn't been openly clear she had the state of the art patent windless. Emphasizing its superiority and modernness. Further thoughts? Rob
-
Rich....time to put on your thinking cap....(again). If Staghound had a patent windless beneath her forecastle capstan....... then we need to reconfigure her forecastle front. She will not have an open front FC like so many of her sisters. No need for a windless hand crank mechanism on her forecastle either. Her chain would enter through the howes holes...go aft to her new patent windless and then from there directly down into her chain holding spaces. No need for the chain to run across the deck and enter through chain ports just forward of her main cabin. Her forecastle can be weather tight in a word, and be decorated such as the portico in style and grace.. What input do you have on this idea...based on the facts of her windless issue? Rob
-
Thanks, If we could find any images of any of the packet ships McKay built earlier…..we might find he used varnished woods on his exteriors of such fixtures. I think it adds depth and contrast. Rob
-
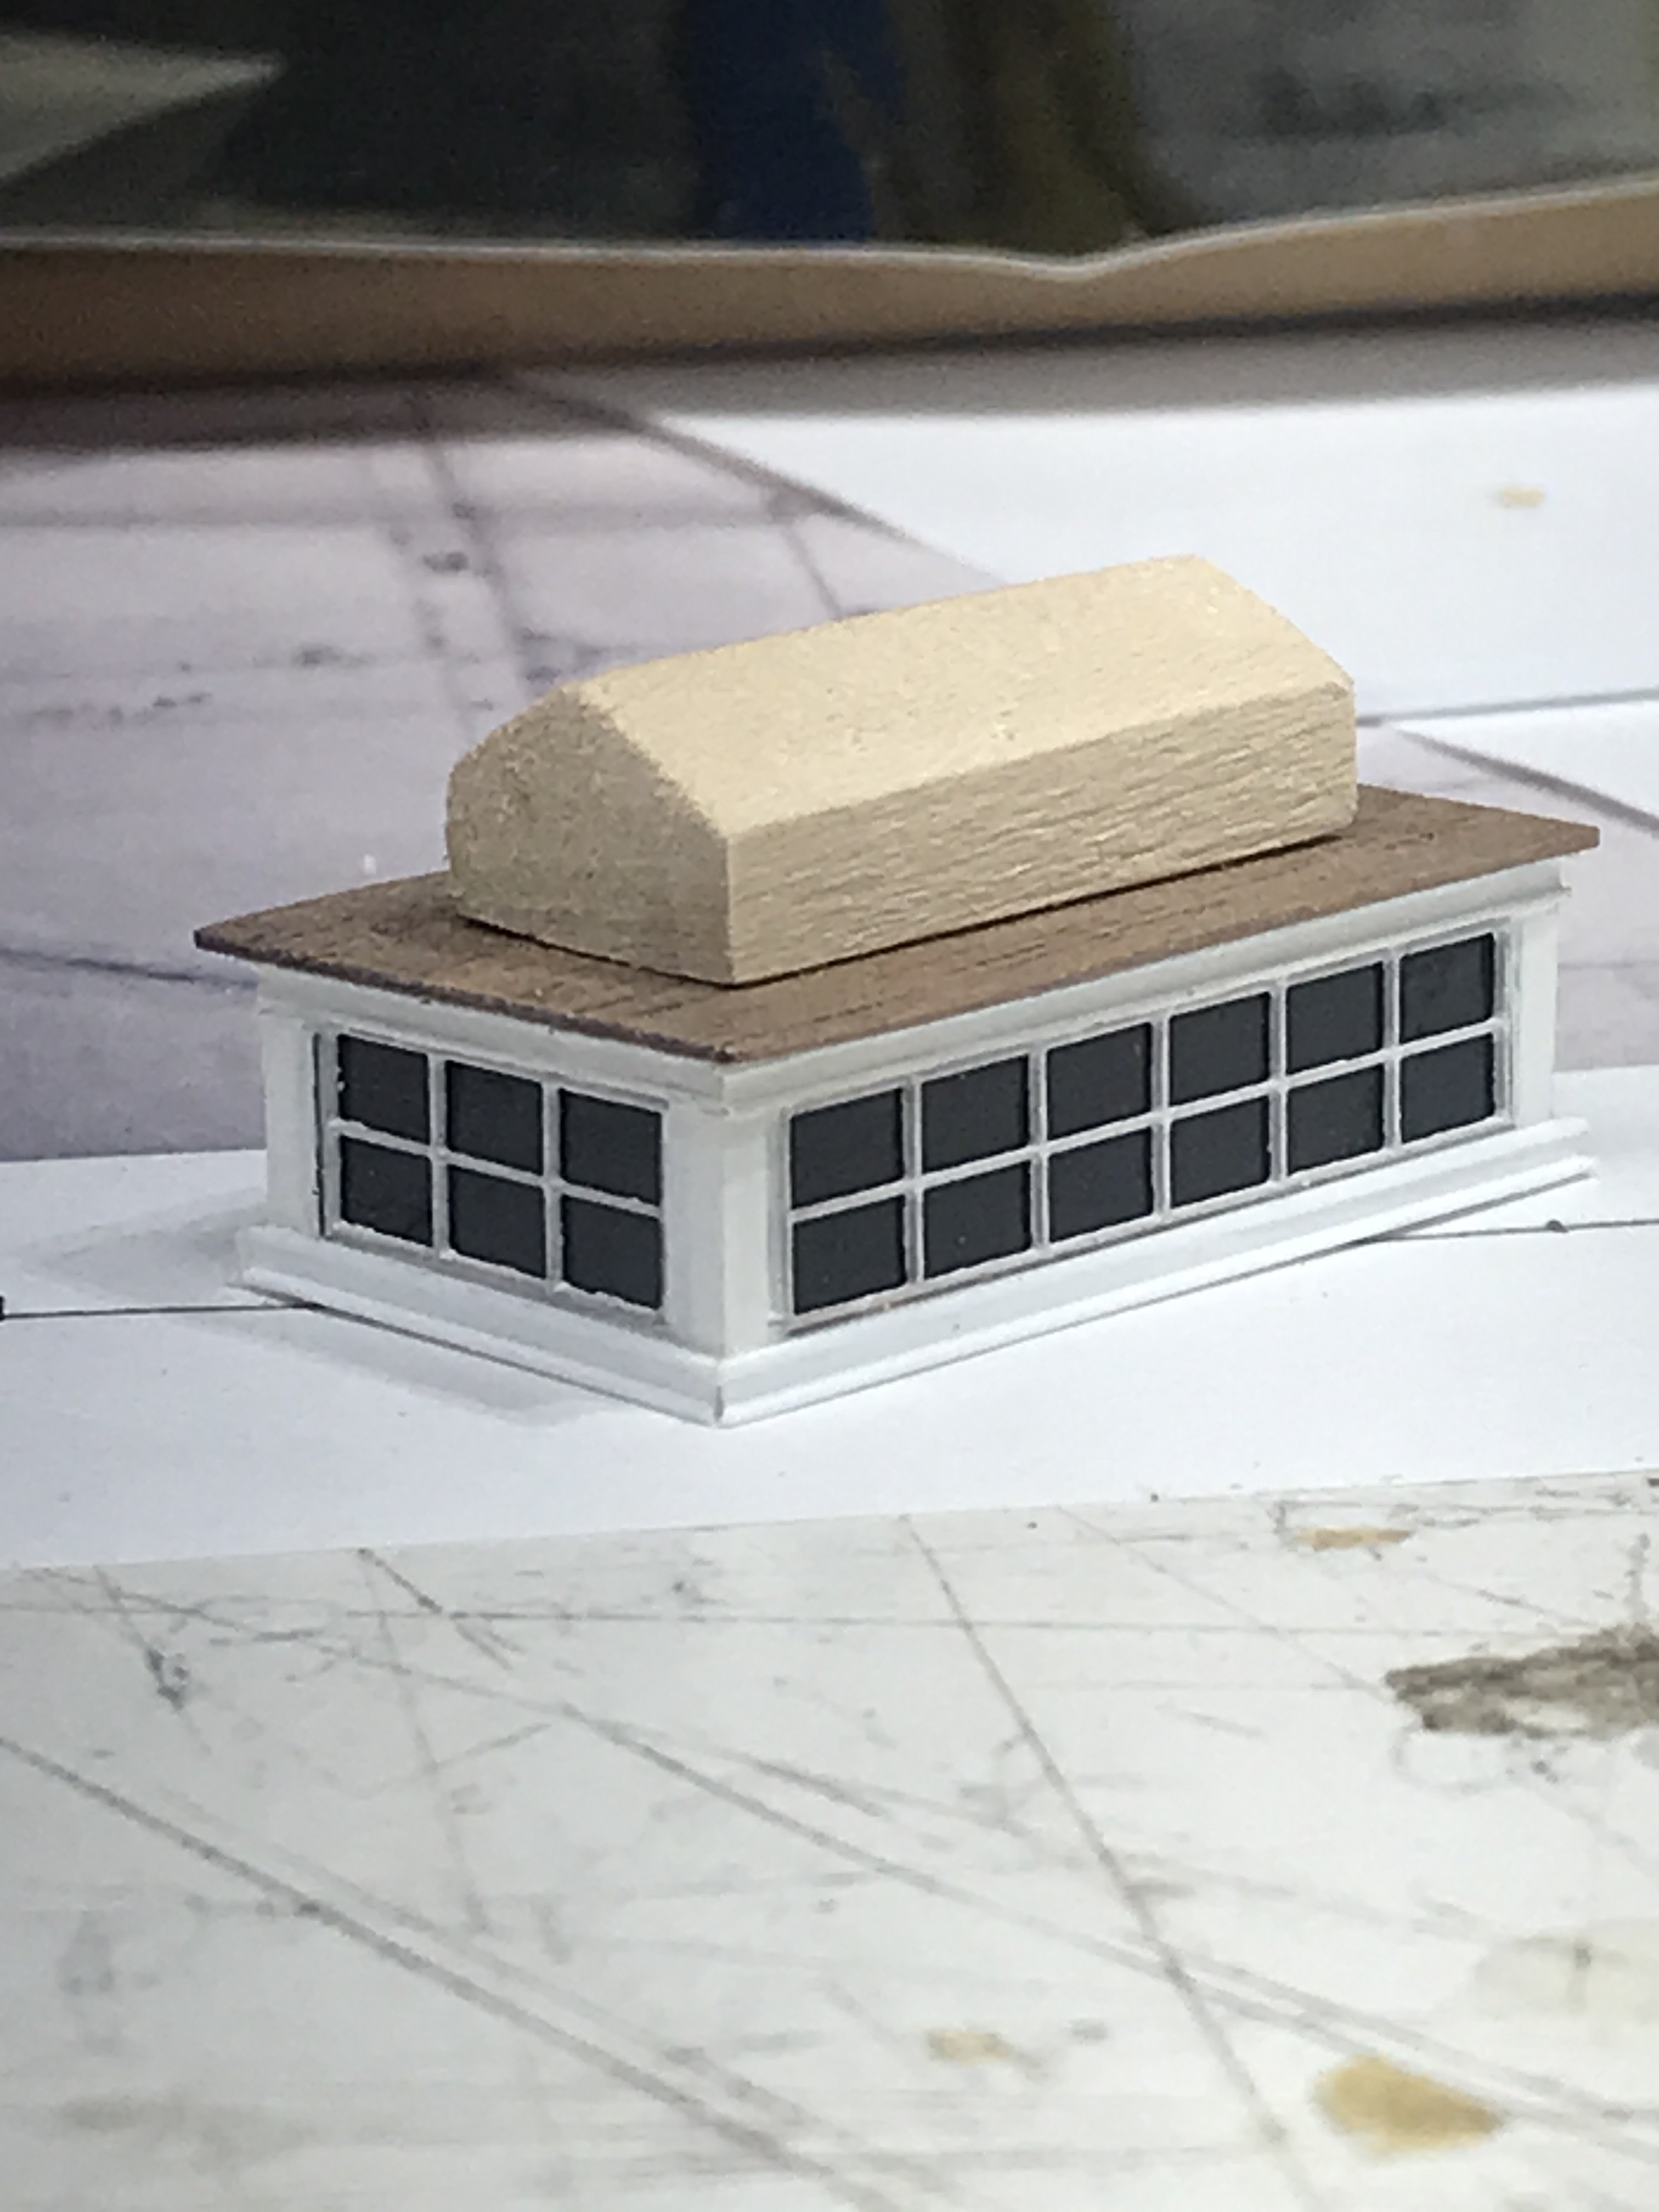
That will be included in the thin mahogany veneer that will be put on top. (Not yet shown). Not finished with it yet. I’ve decided to use a varnished mahogany top for sitting, instead of painting it white. I had, honey do, things to take care of today…..so work was put on hold. Rob
-
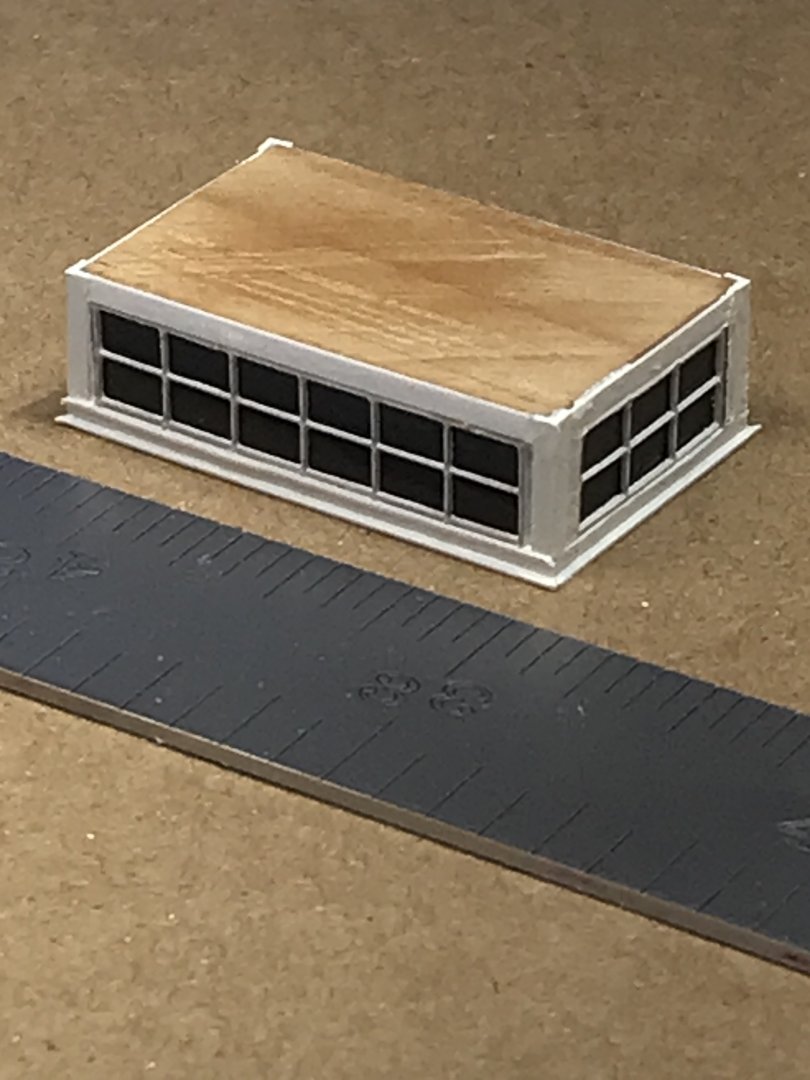
I thought strongly about just doubling up the 6ft design……but the skylight had too be bigger, that is why I chose the 10ft design. In choosing that, I permitted myself some artistic license, to use the same design, but gave the sitting ledge all the way around….on all four sides. And more openness to the lower house body. The main difference between this vessel and Glory of the Seas, is that, Glory was recorded on film. So we had a standard we HAD to meet. We couldn’t do any less. As long as we keep to the eyewitness account of Duncan McLean…… we’re golden. Just look at the fun we had playing with the portico. Is it right, is it wrong……? It’s an 8x8 portico with doors on either side, with a 4ft recess. Done deal. What we do and did next was a result of logic and typical practice. As we understand it. Rob
-
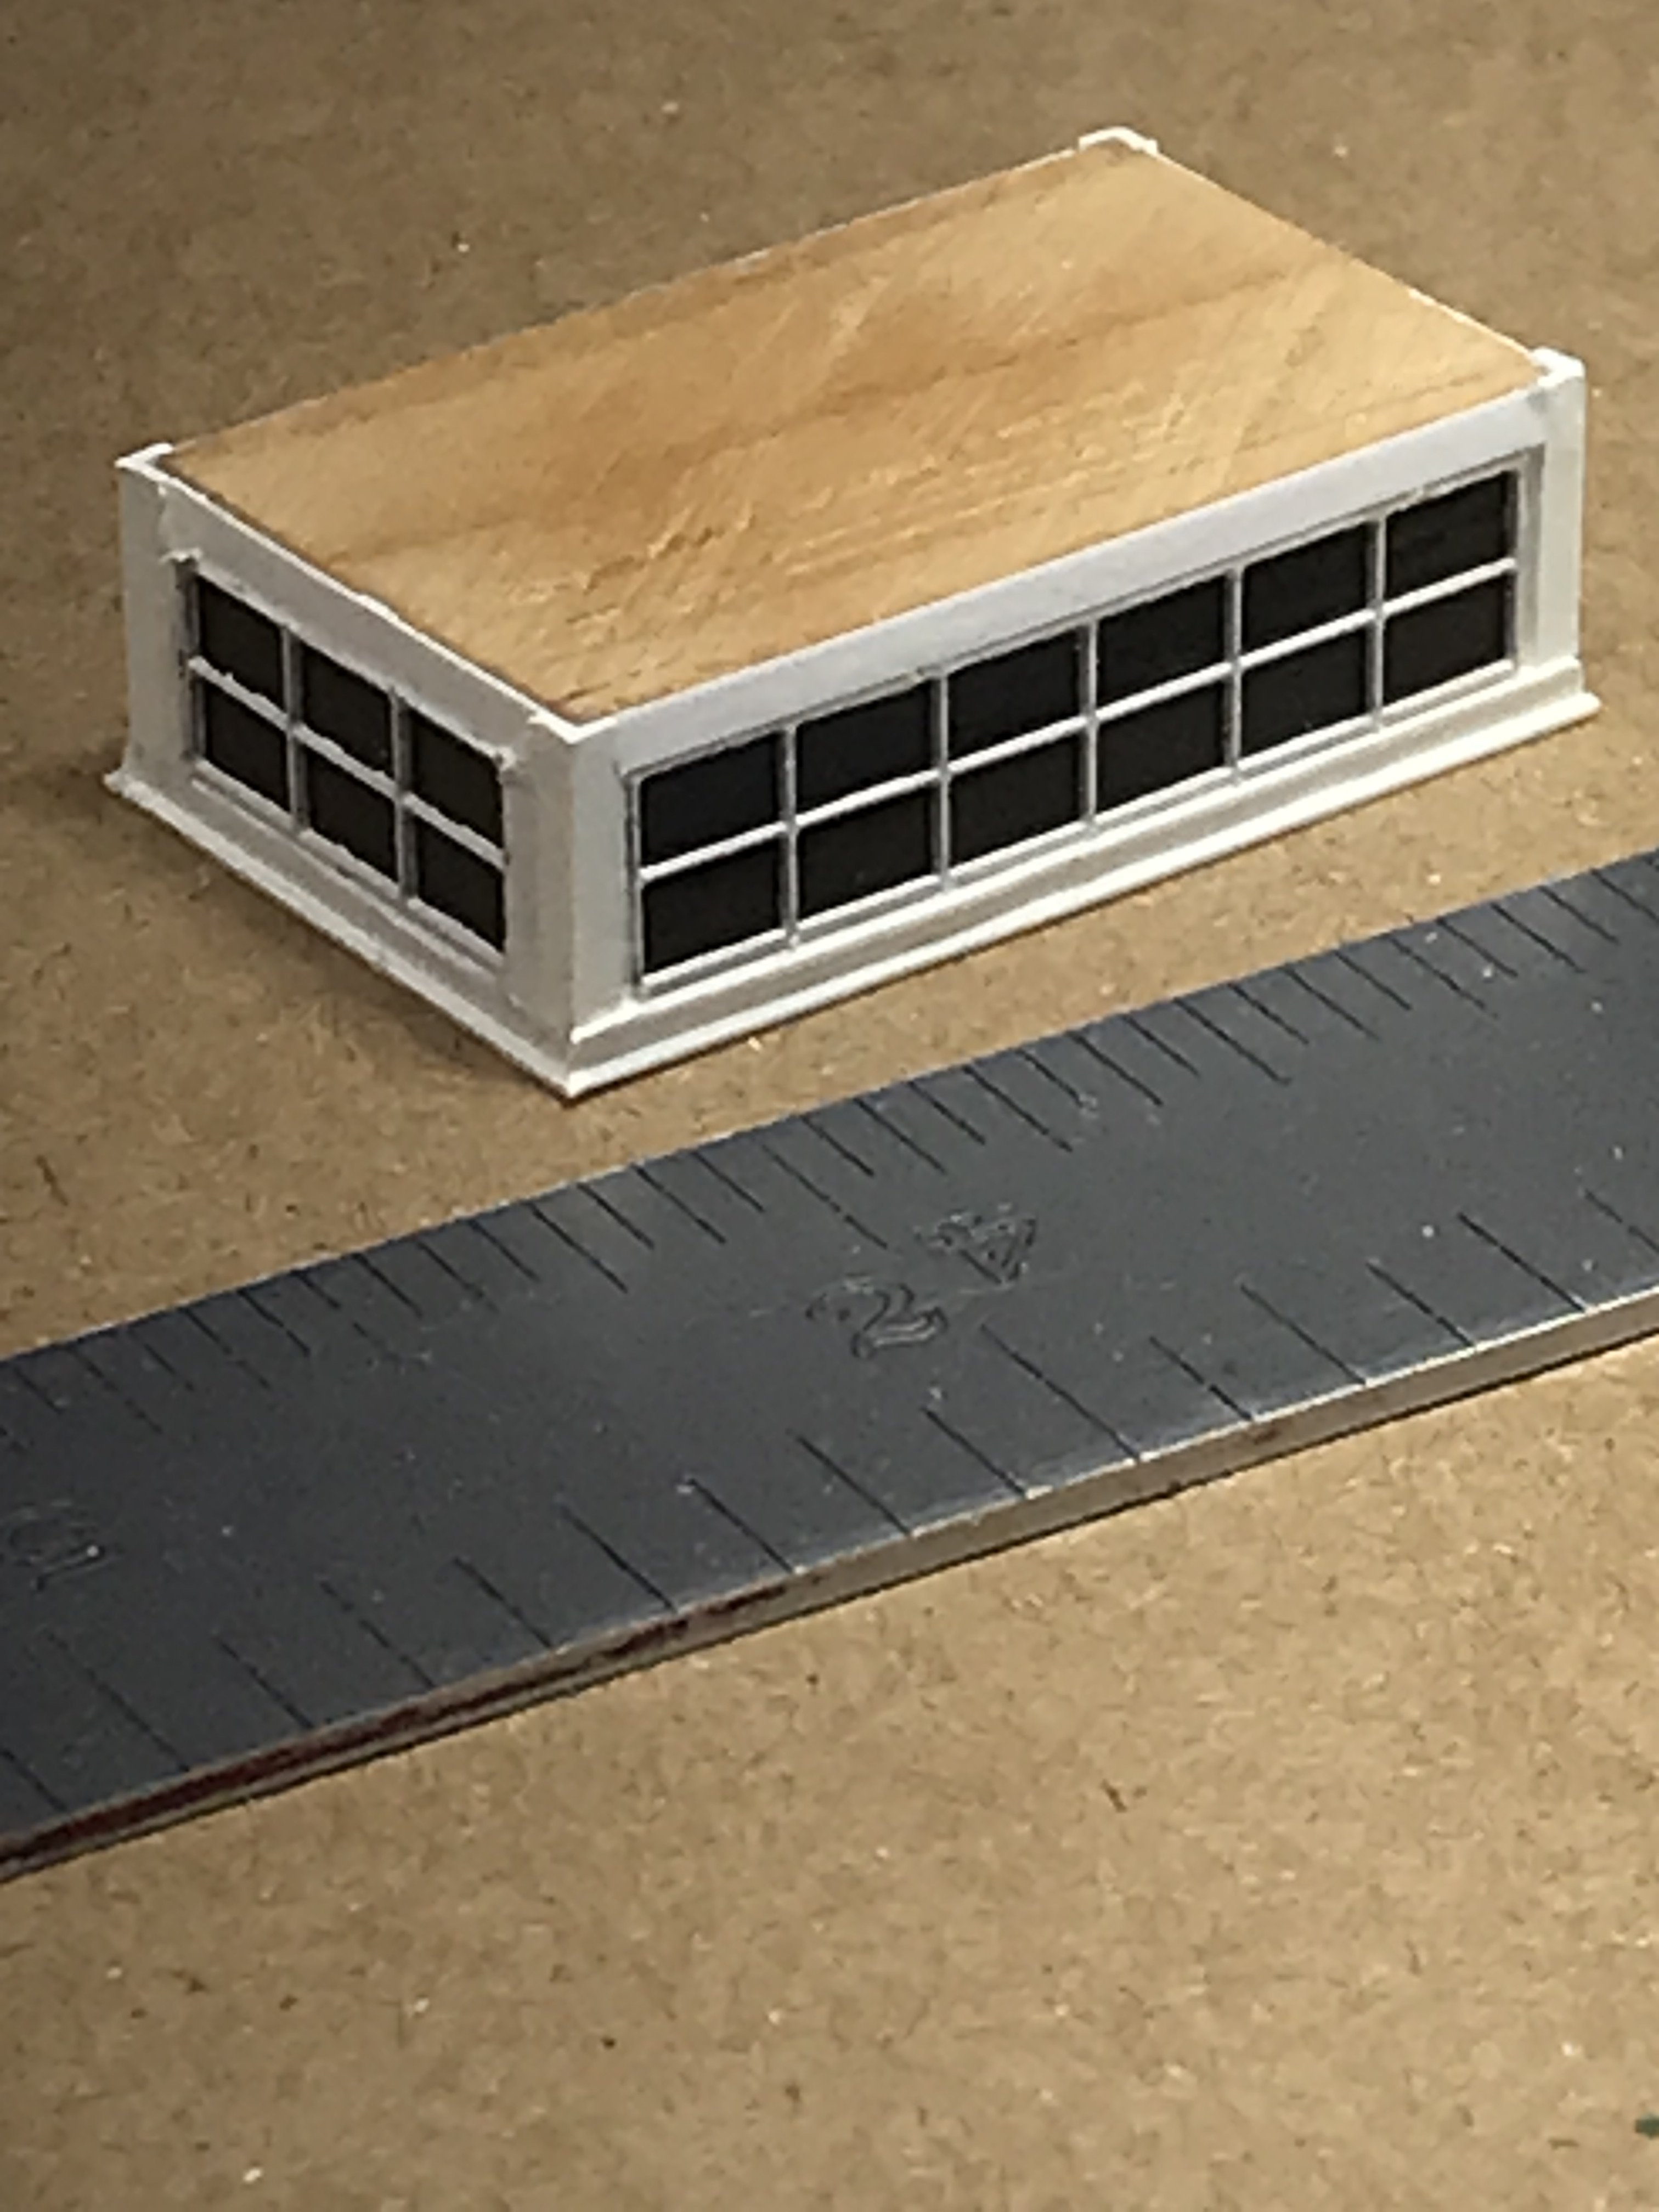
Milling the corner pieces was very tricky. I tooled up the stock and ran a section through the routing bit. Those sections are less than 3/32”. On both sides of the molding. I haven’t decided if I’ll add the brass glass guards yet. Might be too crowded and clumsy in this scale. Rob
-
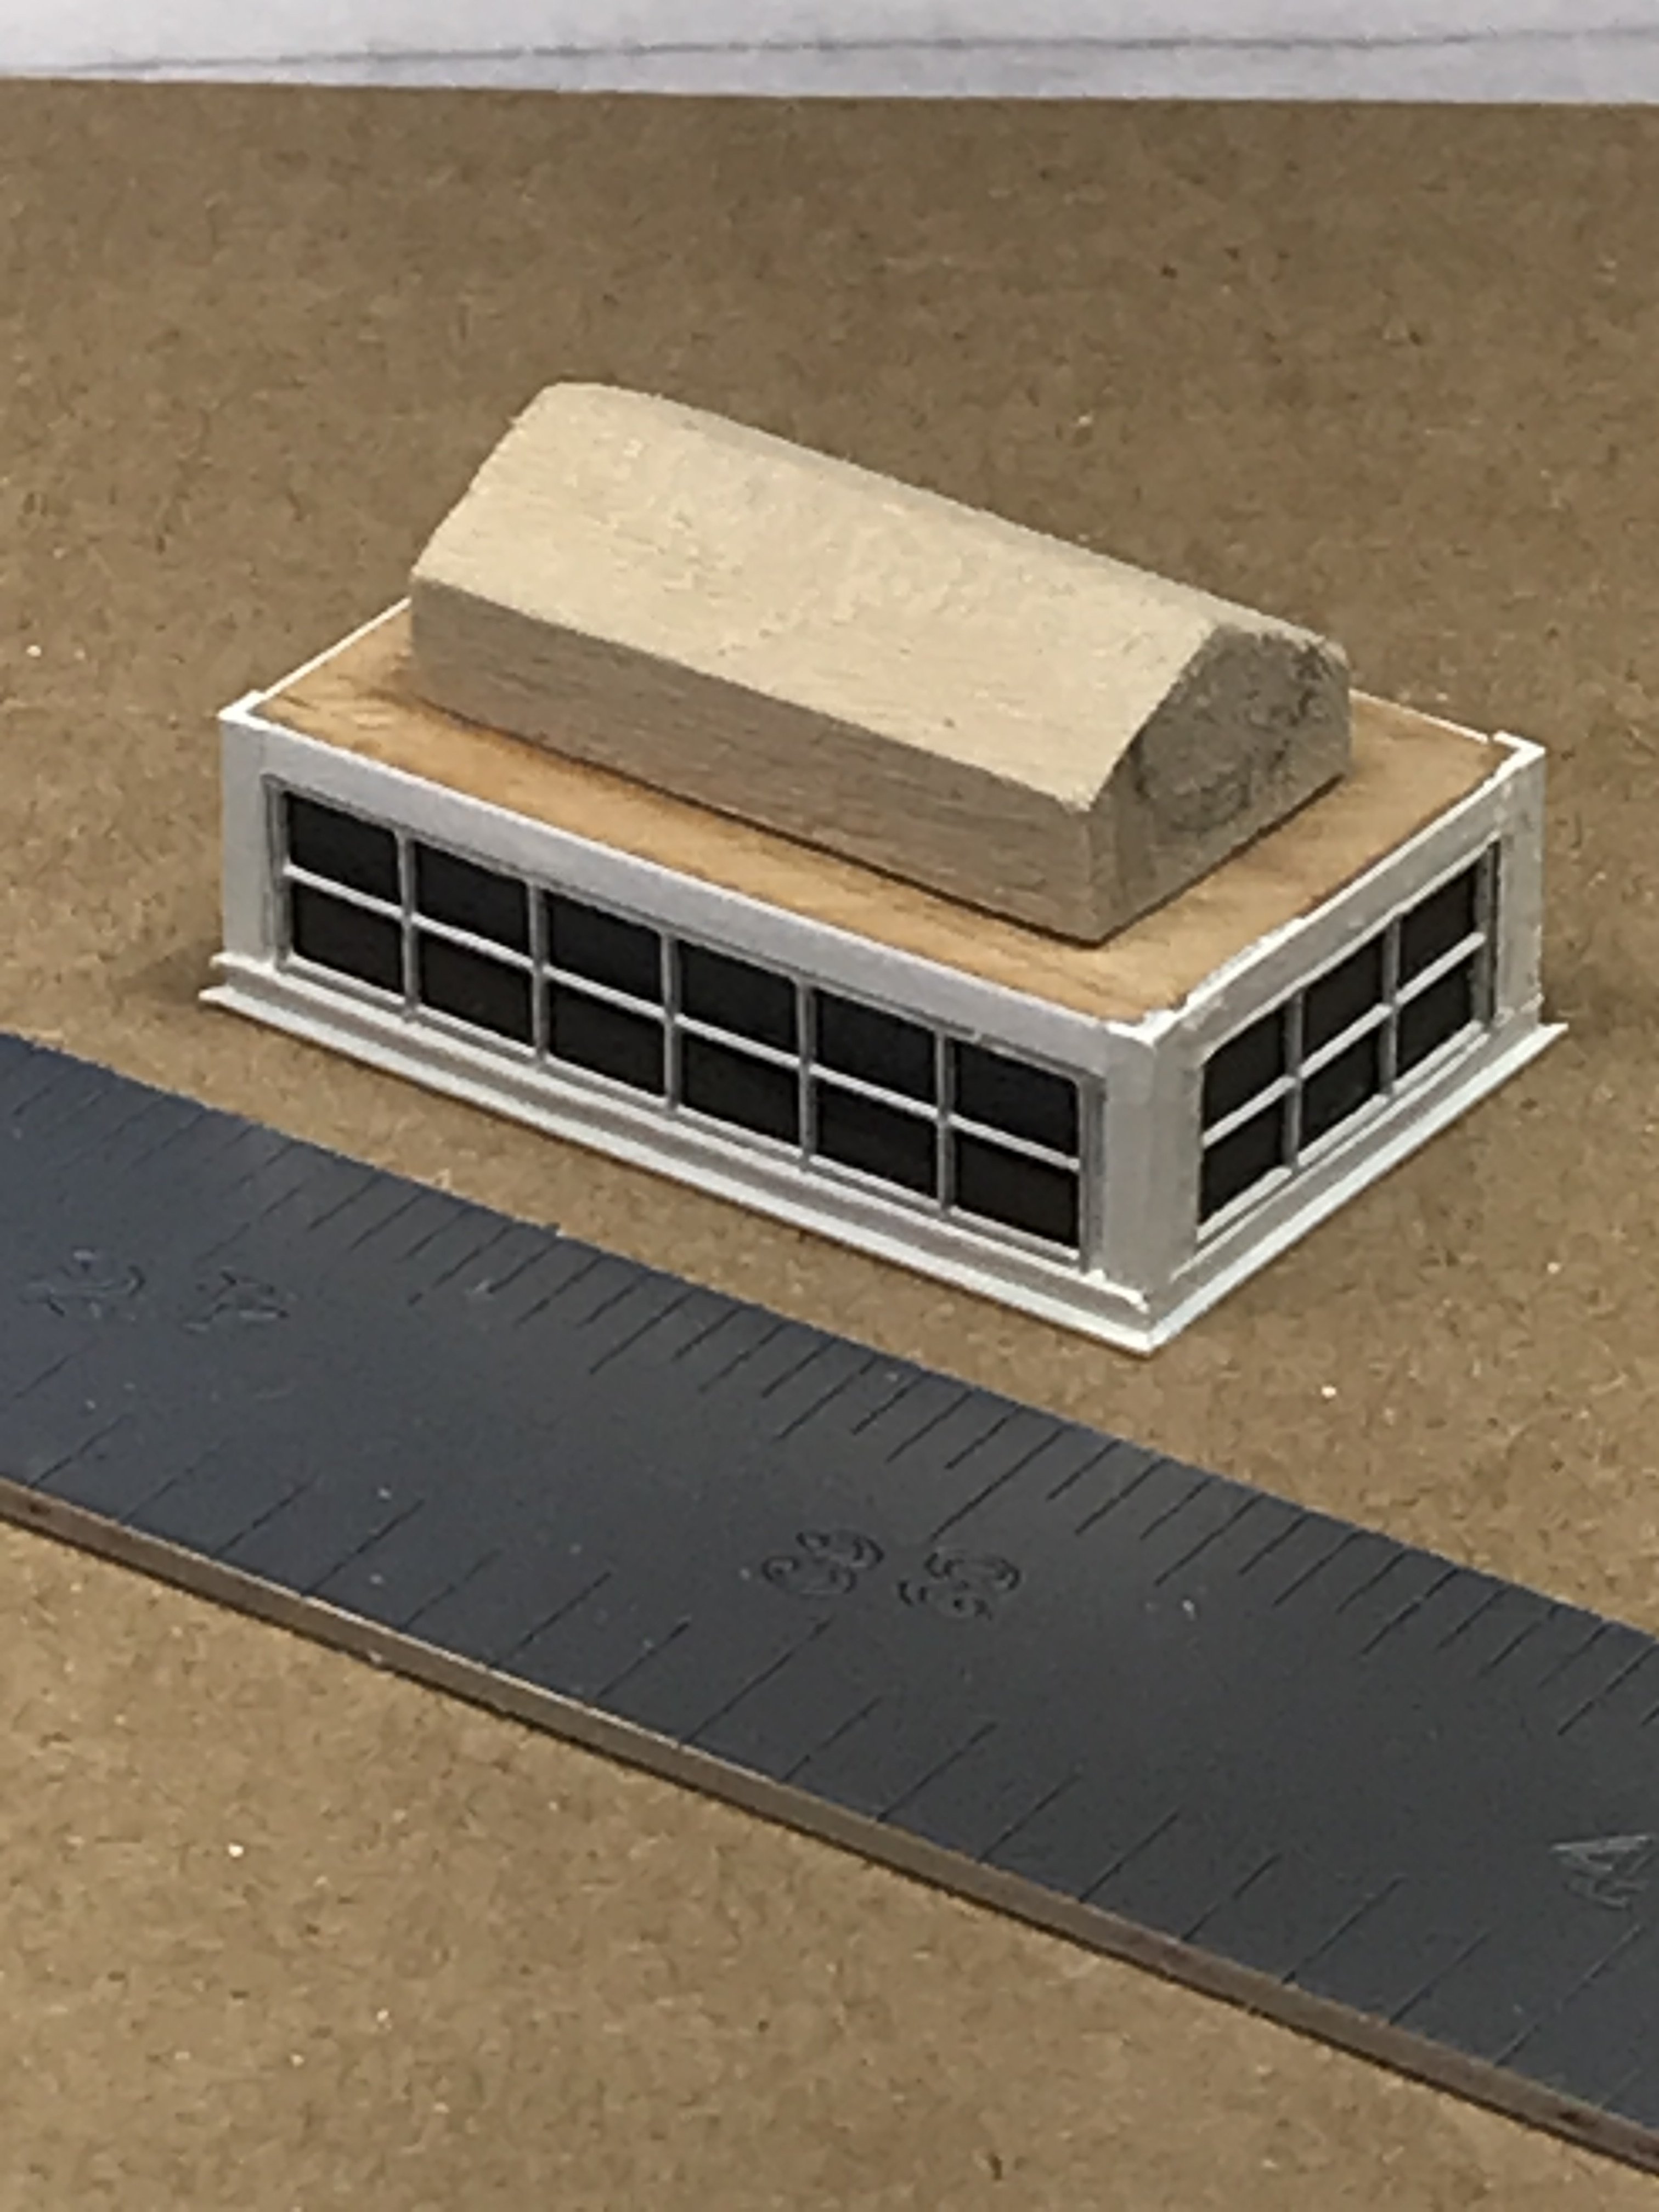
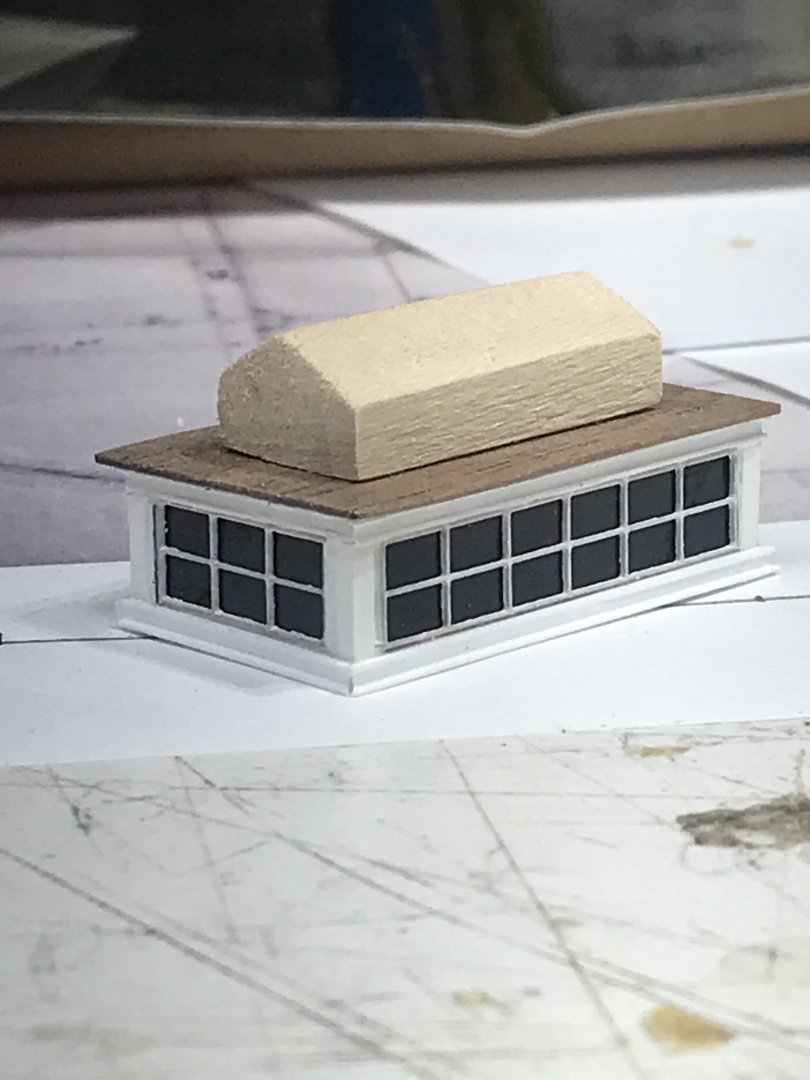
This morning I began the 10ft main skylight. Just finished up the base of the light. Onto the skycap. It may come to your attention that the light is a bit different than the drawing you made Rich. That was for a 6ft light. I have artistic license to produce a light that fits the bill. It will still retain the same design. Rob

-
One very good reason McKay probably purchased the Patent windless...instead of making his own. McLean did say that every expense was utilized to use the most advanced technology available in the forecastle mechanics. Ro
-
So lets follow that for a minute. What does *paring* 2 look like, if Duncan McLean said, *A* large skylight.....? Rob
-
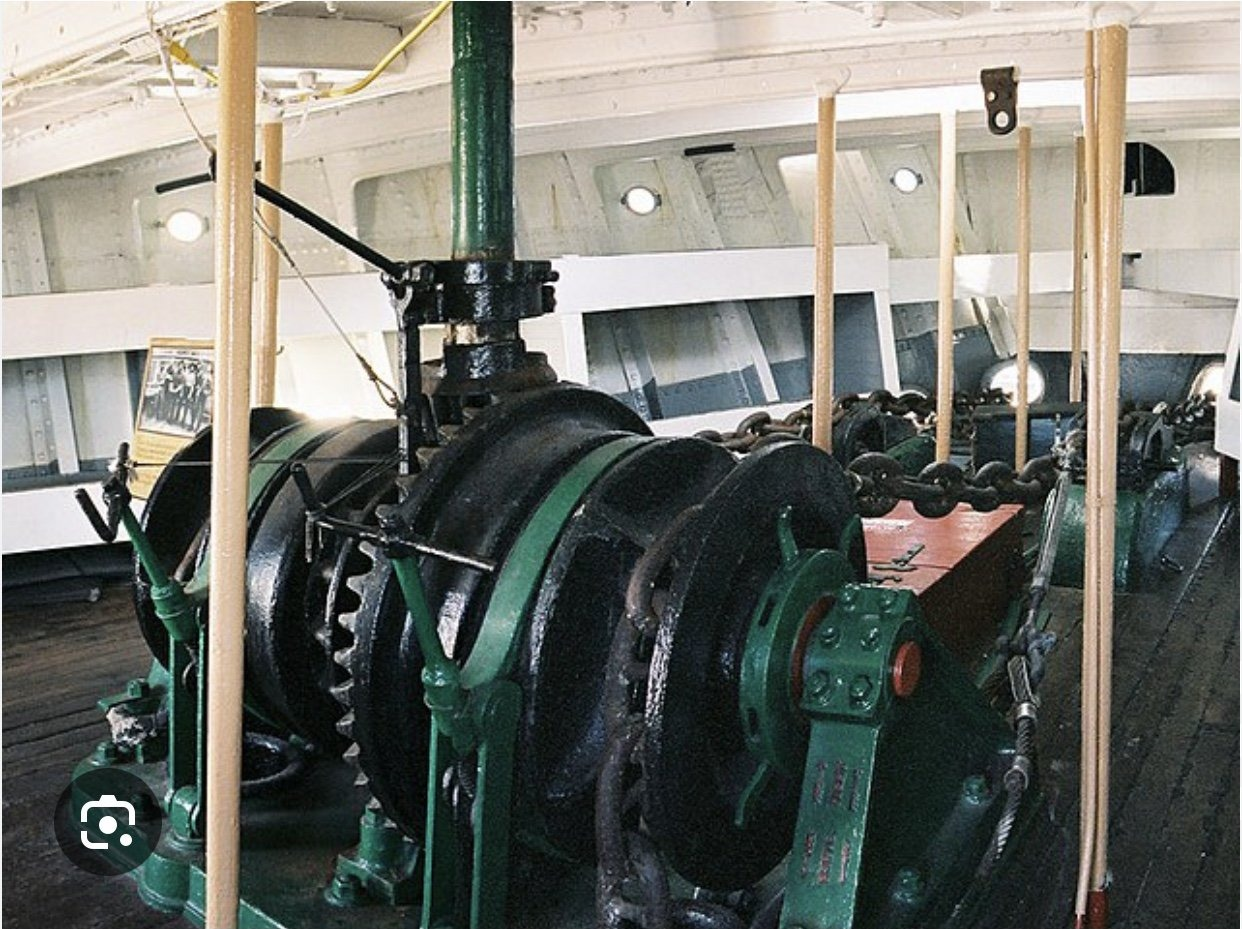
Here is a patent windless shipboard. Rob
-
Maybe, but Duncan's description is, *A large skylight*. An average 6 1/2' skylight wouldn't yield the same description. IMV. However, doubling up two *singles*, might be an answer. But if McKay had the freedom to buy or build whatever he needed for this ship, why skimp? Why not just build the skylight you envisioned? Fill the space over the dining room with light. Rob
-
Good thing, this monster is located under the forecastle. Since the owners of Staghound gave McKay an open checkbook...no wonder he installed this. this kind of windless wasn't used in Flying Cloud, or Flying fish, or Glory of the Seas for that matter. It must have been expensive for the time. So that means Staghound had no hand lever windless....typical, just under the edge of the forecastle deck.... Rob
-
Thanks Pat.....I want to get as much deck furniture accomplished before hand...during the lull...prior to getting the bulkheads. Again, thanks for looking in my friend. Rob
-
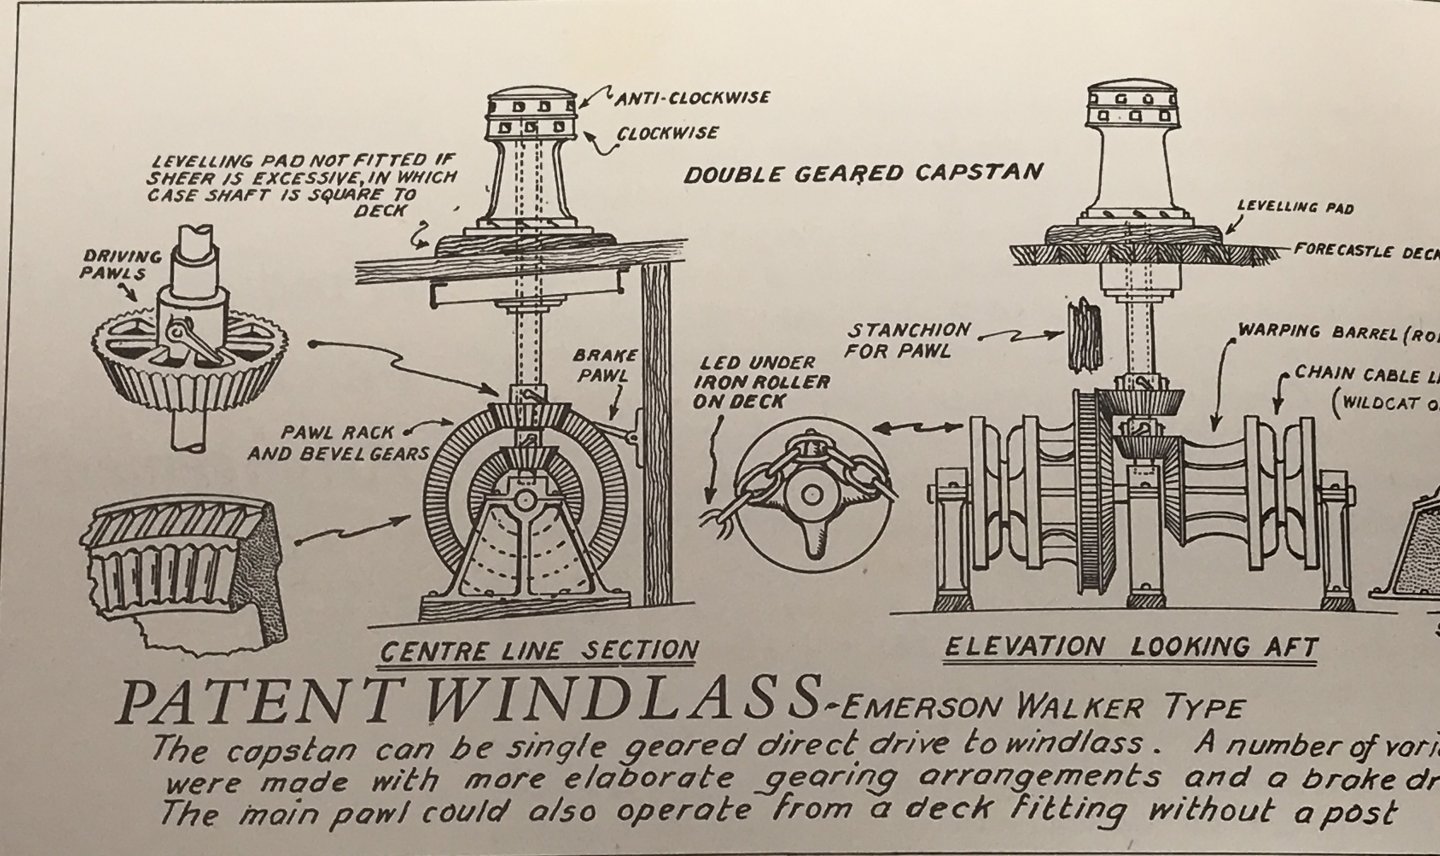
One other thing to confuse you. Duncan McLean says she had a Patent windless. Not a hand lever windless. Here is. Patent Windless found in Campbell’s book. Every drawing we have seen shows her with a hand lever windless. Riddle me this……
-
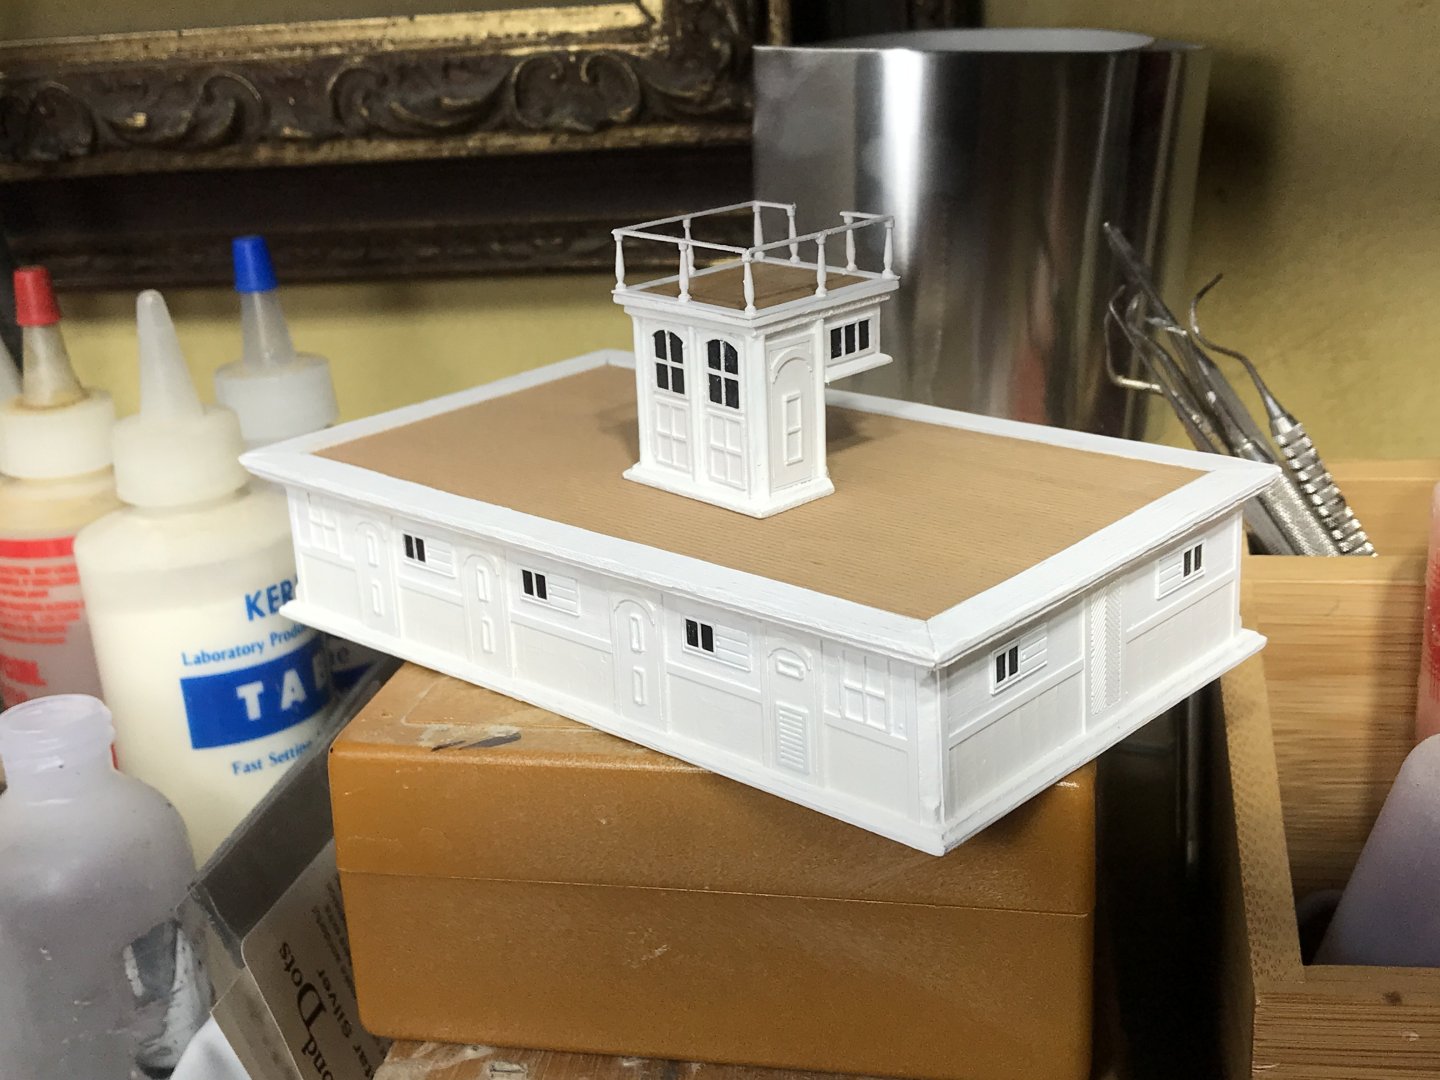
That is a great looking window. Good idea. Hey……about the skylight. I know Glory had 6x6 with a 4ft light in the middle and 1ft seats on both sides. But I though Staghound had. Much larger single skylight. That was 10ft long? I’ll have to recheck too. Here are the two houses waiting to be installed. Rob
-
You're building one of those other guys it appears. different animals. these look to be 68ft tall and riding on rectangular barges. Fun project for sure.. Rob
-
Wow....your pile driver is nearly twice as tall as the ones depicted in that image you provided , the one I reproduced. Those towers are 39ft tall. I devised that by calculating the height of the man by the donkey....for academic purposes...he's 6ft tall and he fits 6.5 times the height of the drivers pier. that measurement was taken for both drivers with men on their barges. So apparently, you are NOT mimicking these drivers, but are building one twice as tall with a smaller, less efficient boiler. Well, then I owe you an apology. Rob(good job) Rob
-
That might be true according to the drawing...but it surely isn't indicative to the drivers in the image...or the one Keith is building. The images depict the pier is slightly taller than 3 boilers....but Keiths pier is four and a half times taller than his boiler. either he's building a much taller pier....or his boiler is too small. Keith deviates from the picture in that his barge is square. Sure to boot, I bet the design was very flexible...and there were no hard standards...cept the functionality. Rob