rwiederrich
-
Posts
5,520 -
Joined
-
Last visited
Content Type
Profiles
Forums
Gallery
Events
Everything posted by rwiederrich
-
If you are simply furling the sail.....but these fellows are not furling just yet. They need to get the large topsails unproductive. And that means, pulling up the reef tackle and the sail, half way and, dropping the yard to impede its ability. (This is done simultaneously). This causes the top half of the sail to fall over the bottom half. Reducing its size. This action is done quickly, so strong gusts don't rip down the masting that is overloaded. Once the sails size is reduced(hence) its force...then the entire sail was pulled up and furled to the yard. It was a dangerous and arduous adventure, and it took a lot of men. This problem is exactly why they invented the *double* topsails. Rob
-
I hope everyone is understanding the process of furling and reefing the topsail ? The reef tackle is located on the side of the sail..bout midway. These lines are pulled in and the sail is then partially furled up to the yard. The head of the sail fall forward and is blocked by the mid reefing of the lower part of the sail. As seen on the foremast, mainmast, mizzen topsails This process was the precursor of the process of cutting the sail....the process that the Forbes and Howes double topsail designs accomplished. So prior to these advances....the single topsail was clewed up by the reef tackle to the yard, the sail is bent to.....permitting the top half of the sail to fall forward and reduce its effectiveness. Then the crew furled the rest of the sail to the yard. Rob
-
Sorry my friend, but there are only 4 yards per mast in this painting. Only 2 sails on the fore mast...one on the main and one on the mizzen. Some tricky re-rigging of her topsail to reduce its overall exposure, by clewing up her reef tackle. This trick exposes the sail to extreme stress on the reef points on the edge of the sails and doesn't provide proper support along the length of the head of the sail at the yards jackstays. Looks like 2 sails but is only one. Rob
-
Something else is wrong. She is flying a lower topsails. Meaning she is rigged with double topsails. she didn't have this Howes arrangement. ???????? Or... some tricky re-rigging of her topsail to reduce its overall exposure, by clewing up her reef tackle. This trick exposes the sail to extreme stress on the reef points on the edge of the sails and doesn't provide proper support along the length of the head of the sail at the yards jackstays. Interesting depiction. No wonder Forbes and subsequently Howes developed the double topsail. 4 yards per mast....interesting. This would be a great way to depict my Staghound......with the sails just like this...... Rob
-
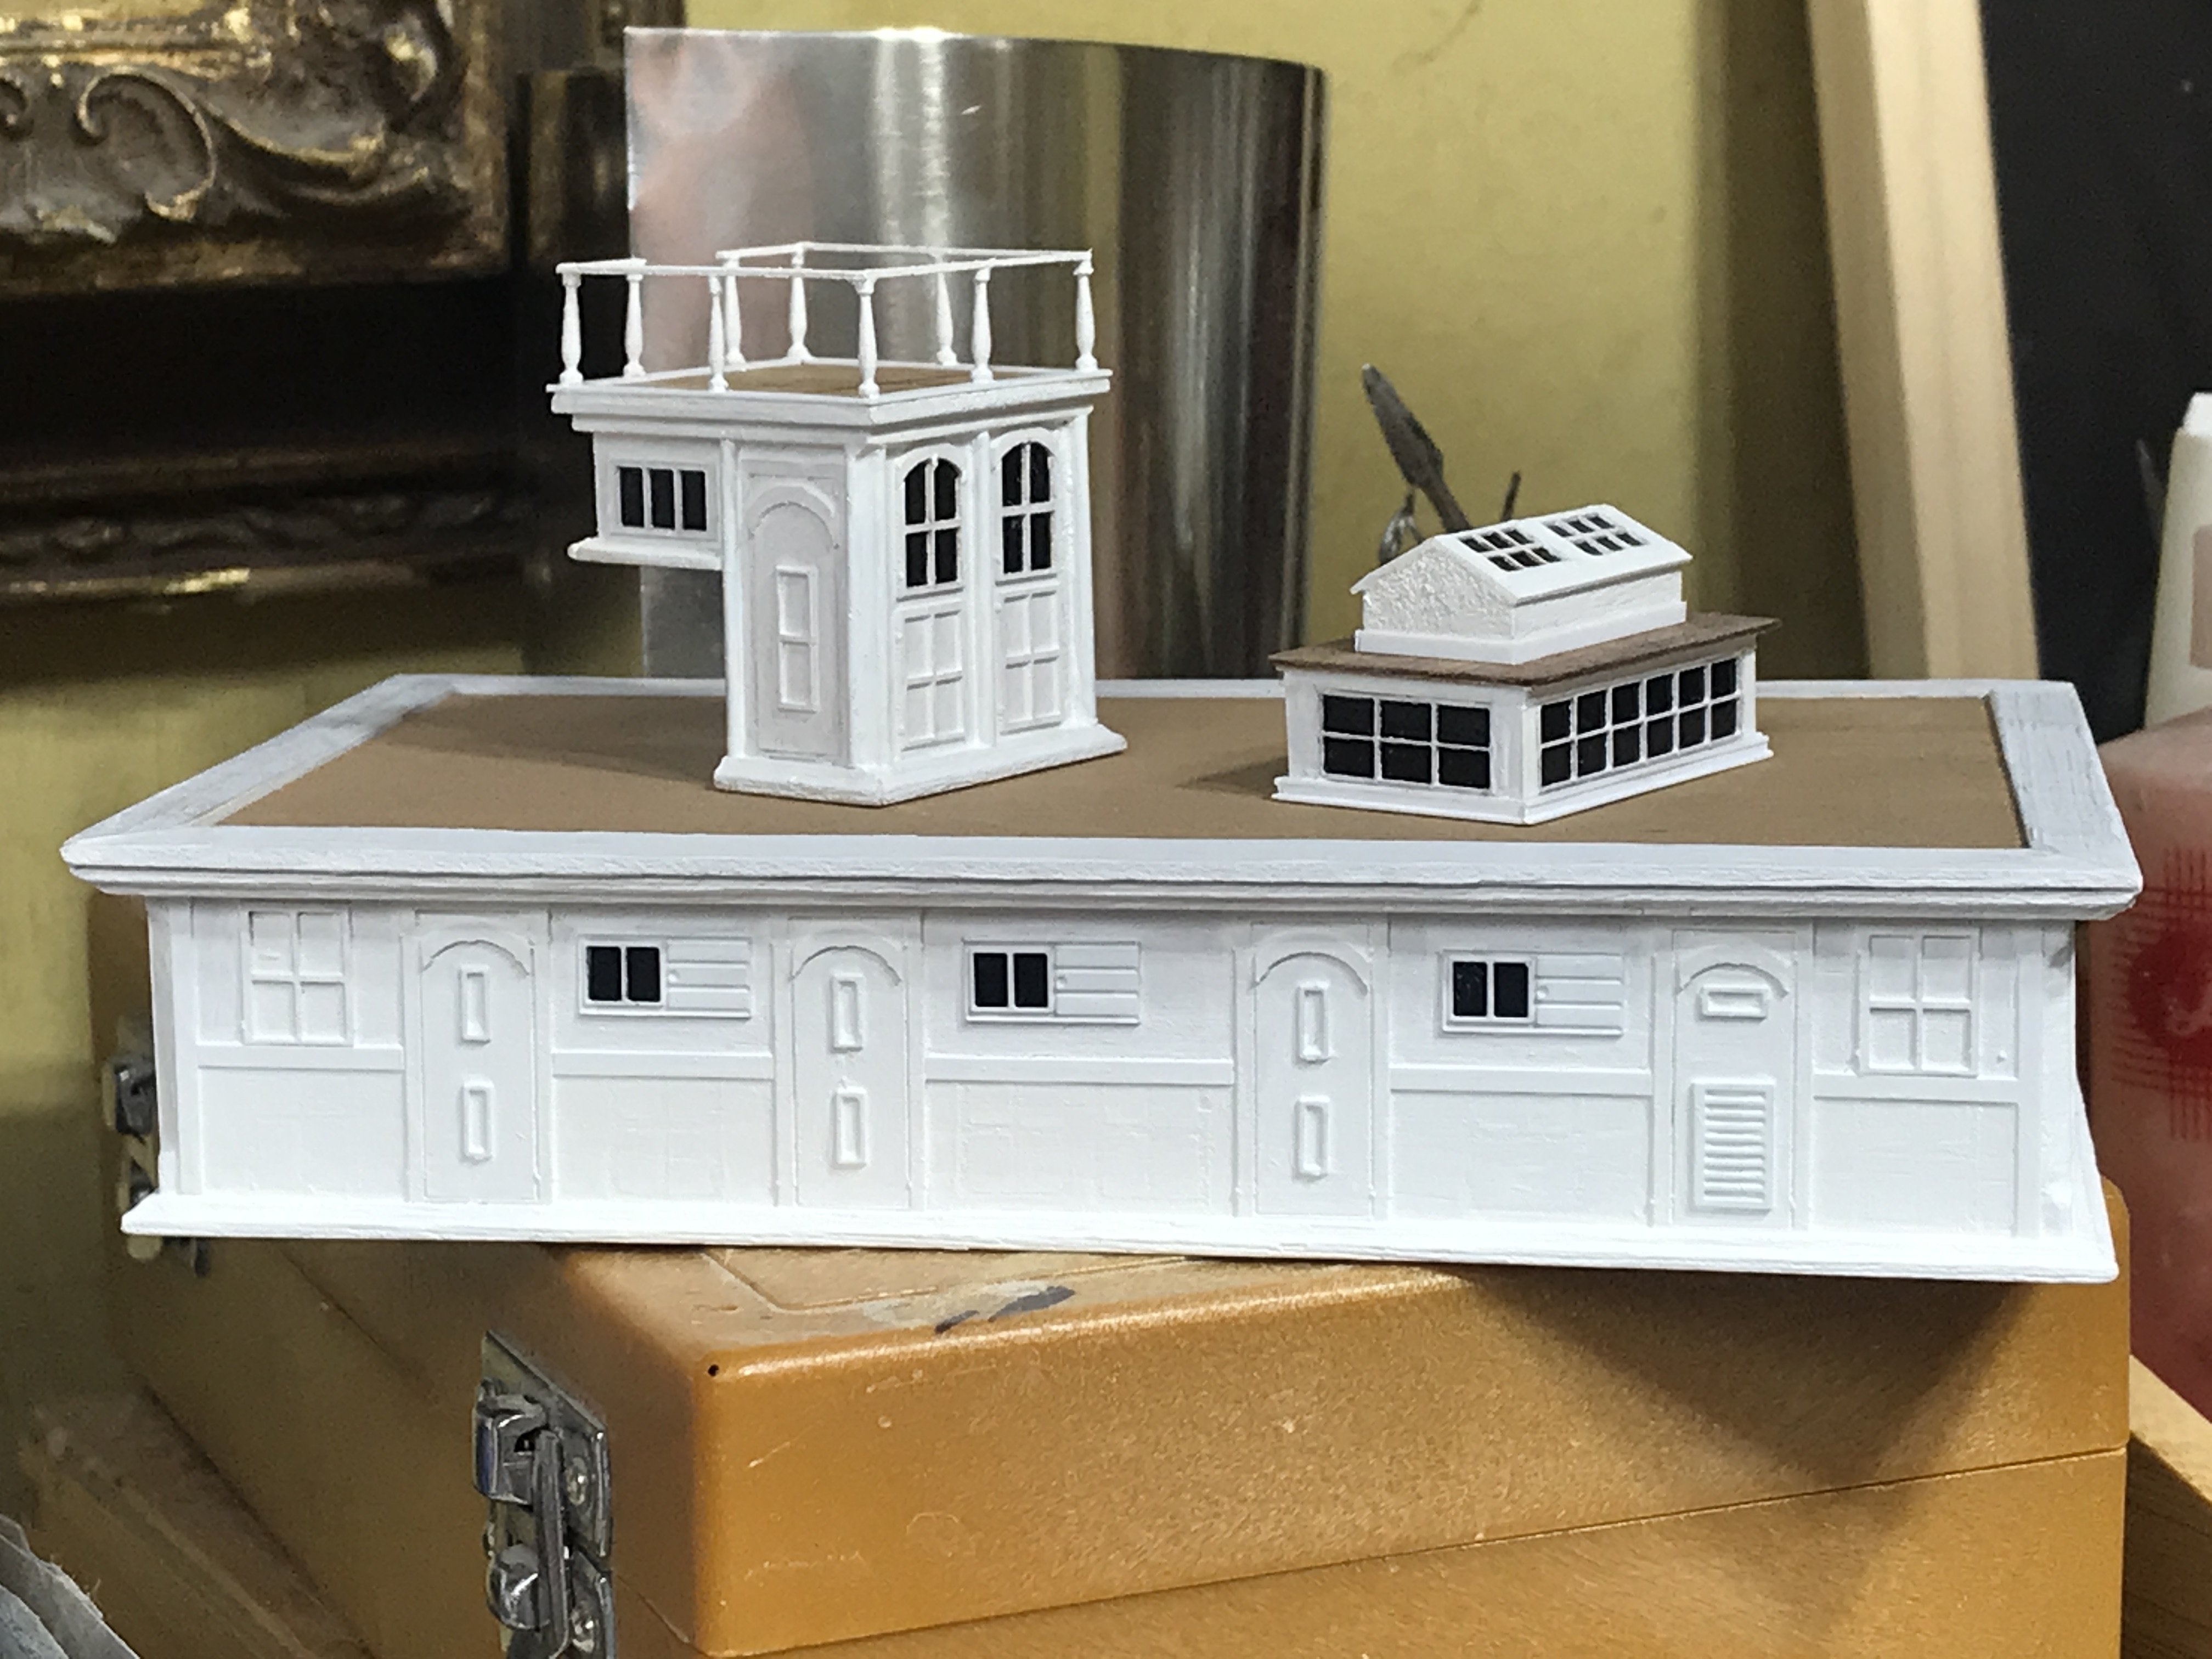
I like your representation. Can’t wait to see the front Decor and windows Rob
-
I like the idea. Rob
-
The Forward cabin in the poop. Captain on one side first second officers on the other. Captains always were in the poop cabin…..never with the crew in the main cabin or forecastle. Read the accounts of the captain of the “Wild Boat of the Pacific”, the Dreadnaught…. In , “From Forecastle To Cabin”. Captains rarely left the poop to go forward. Mates did that.
-
Remember…. The captains cabin overlook’s the deck, so windows on the forecast are not a no option. They’re on the poop bulkhead. Rob
-
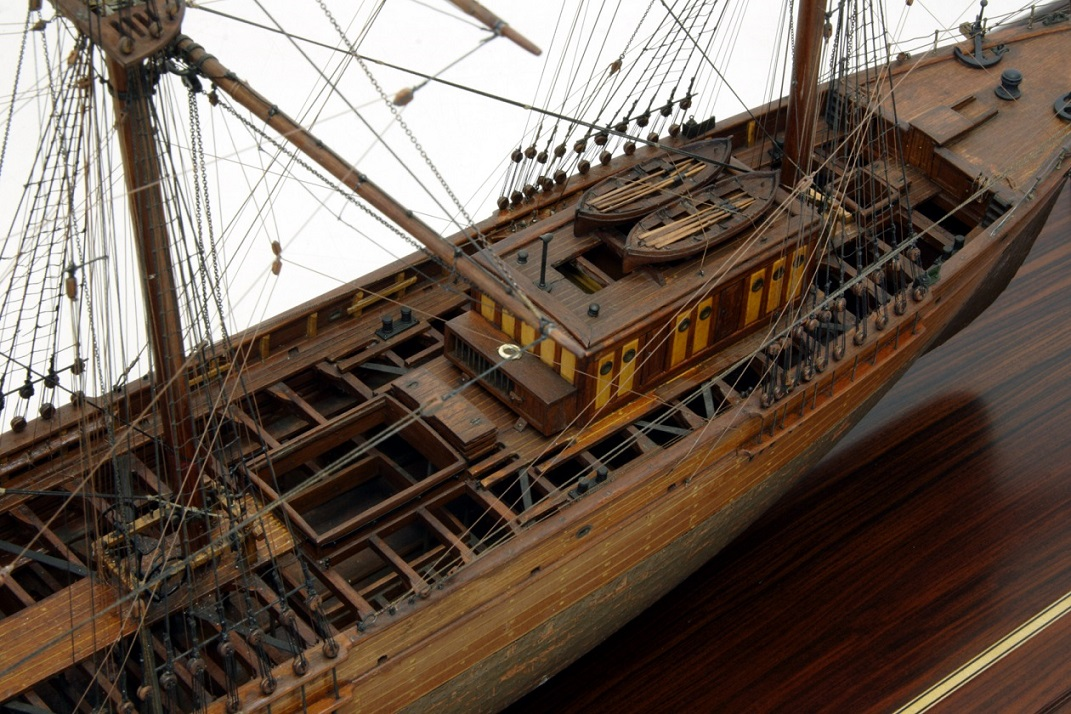
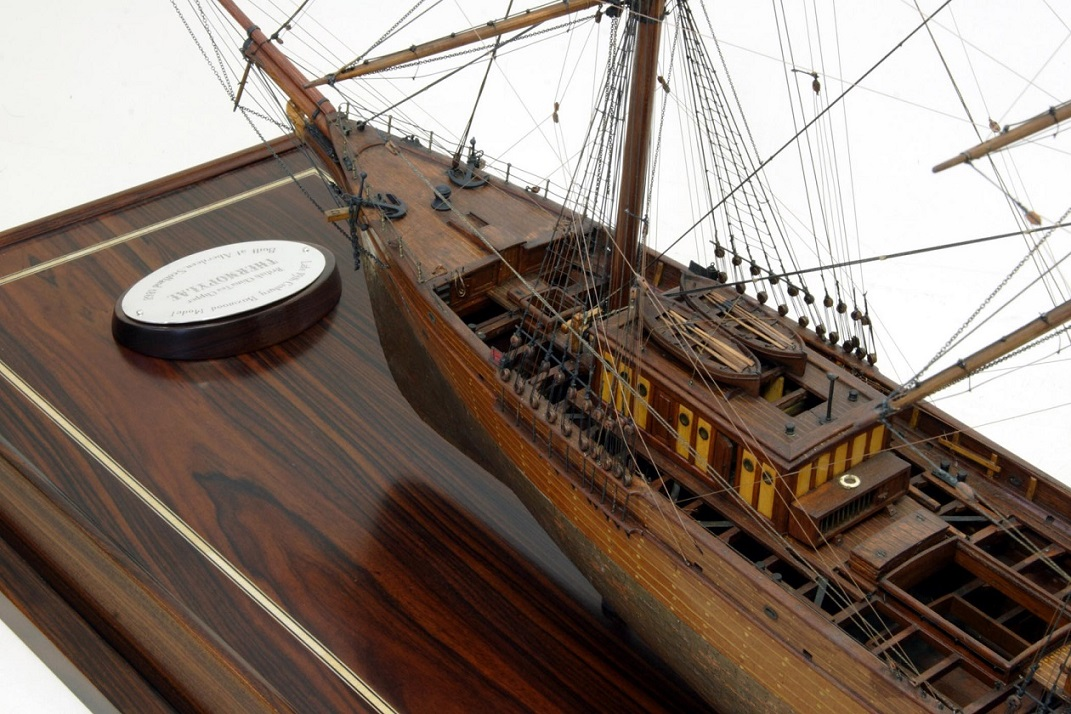
My thought are………. The forecastle bulkhead has ladders on either side….. there is two egress companion ways and possibly several windows. This is all balanced between themselves and cabinet work. I suggested the Aberdeen Thermopylae as an example for the head of the companion ways on the deck of the forecastle. The doors have to be short…..so the slide roofs. The WC’s are within the depressed forecastle below. On both sides to accommodate waste disposal. The example I gave shows a flat bulkhead from port to starboard. THAT is what I was pointing out. Rob
-
Have you considered my forecastle suggestions. Rob
-
The phrase, “Before them” , means what? First we have to realize, the access ladders must be either direct center. Because the closets are on either side to allow waste to exit. Next to the WC’s are the companion ways, maybe a window, then the center ladder. Could be a window under the ladder too. Rob
-
Sorry bro…..I missed it apparently. High forecastle ladders on the outside edges, with several companion way entrances just inside of them and a couple windows might do the trick. Rob
-
What I’m talking about is the companion way entry. From 5 ft to 3 ft below
-
Rich, I have not seen you concept . Where is it?
-
Rich, I think we need to mimic the companion ways like that are found on this Thermopylae model Rob
-
Buttersworth got her bow all wrong. How is that even possible? Rob
-
Actually, Rich, these images are perfect. I can see clearly her curves and the true sharpness of her stern post It clearly shows me her sterns roundness and it’s angle of insertion into the curve’s leading too her shallow dead rise. I can make these work for me. Remember, I’m highly visual, and I learned my comparative interpretation skills making telescope mirrors for years. Staghound was surly a vary sharp design, not full and robust, like Glory of the Seas. Her belly is shallow and thin, though she has depth to her hull. Like McLean said, her exit is as sharp as her entry. Thanks for asking for these images. Rob
-
Rick....she's looking amazing....love your mast work. Everything so clean and sharp. So nice. Rob
-
I know we agreed that McLean made a mistake when he said the forecastle was the height of the main rail...but what if he was correct? What if the topgallant deck was at the main rail and the entry to the forecastle deck was, (As it is with the aft cabin), set 3 ft below. And the crew accessed it via a companionway as Crothers depicted in his book I quoted earlier? The patent windless still would fit. The reason I am readdressing it is...if McLean was wrong on this matter...and on several other issues...HOW then can we conclude he wasn't wrong on many other issues? And if we are to conclude his first hand knowledge was derived from actually getting his info from McKay's yard...then we must also conclude his observation of the forecastle must also be correct...and that we are missing something. That something, I feel, can be found in Crothers depictions of what I am describing. The low topgallant forecastle deck was at the main rail....there was a companionway entry midship that led down to the forecastle deck...where the patent windless was. I'll find the picture from Crothers and post it later. Wresting with this issue, I concluded that we need to look at this more objectively. We can't assume because we know how it was done on Glory of the Seas, that McKay did the same for his first clipper. I truly doubt it. Crothers says, the low topgallant forecastle was just as prevalent as the high. And to disregard McLean's observation on this...means every other observation he made is suspect. Personally, I don't want to go there, I trust his highly informed observations. If we are to conclude they were *Highly* informed. Staghound had either a high topgallant...which its deck level was at the monkey rail(our current stance), or she had a low topgallant forecastle, which its deck level was at the main rail. Lowering her ceiling height....but if the forecastle deck was recessed 3ft below...as is the main cabin aft...then there is ample room for the patent windless and working space for the crew. Rob
-
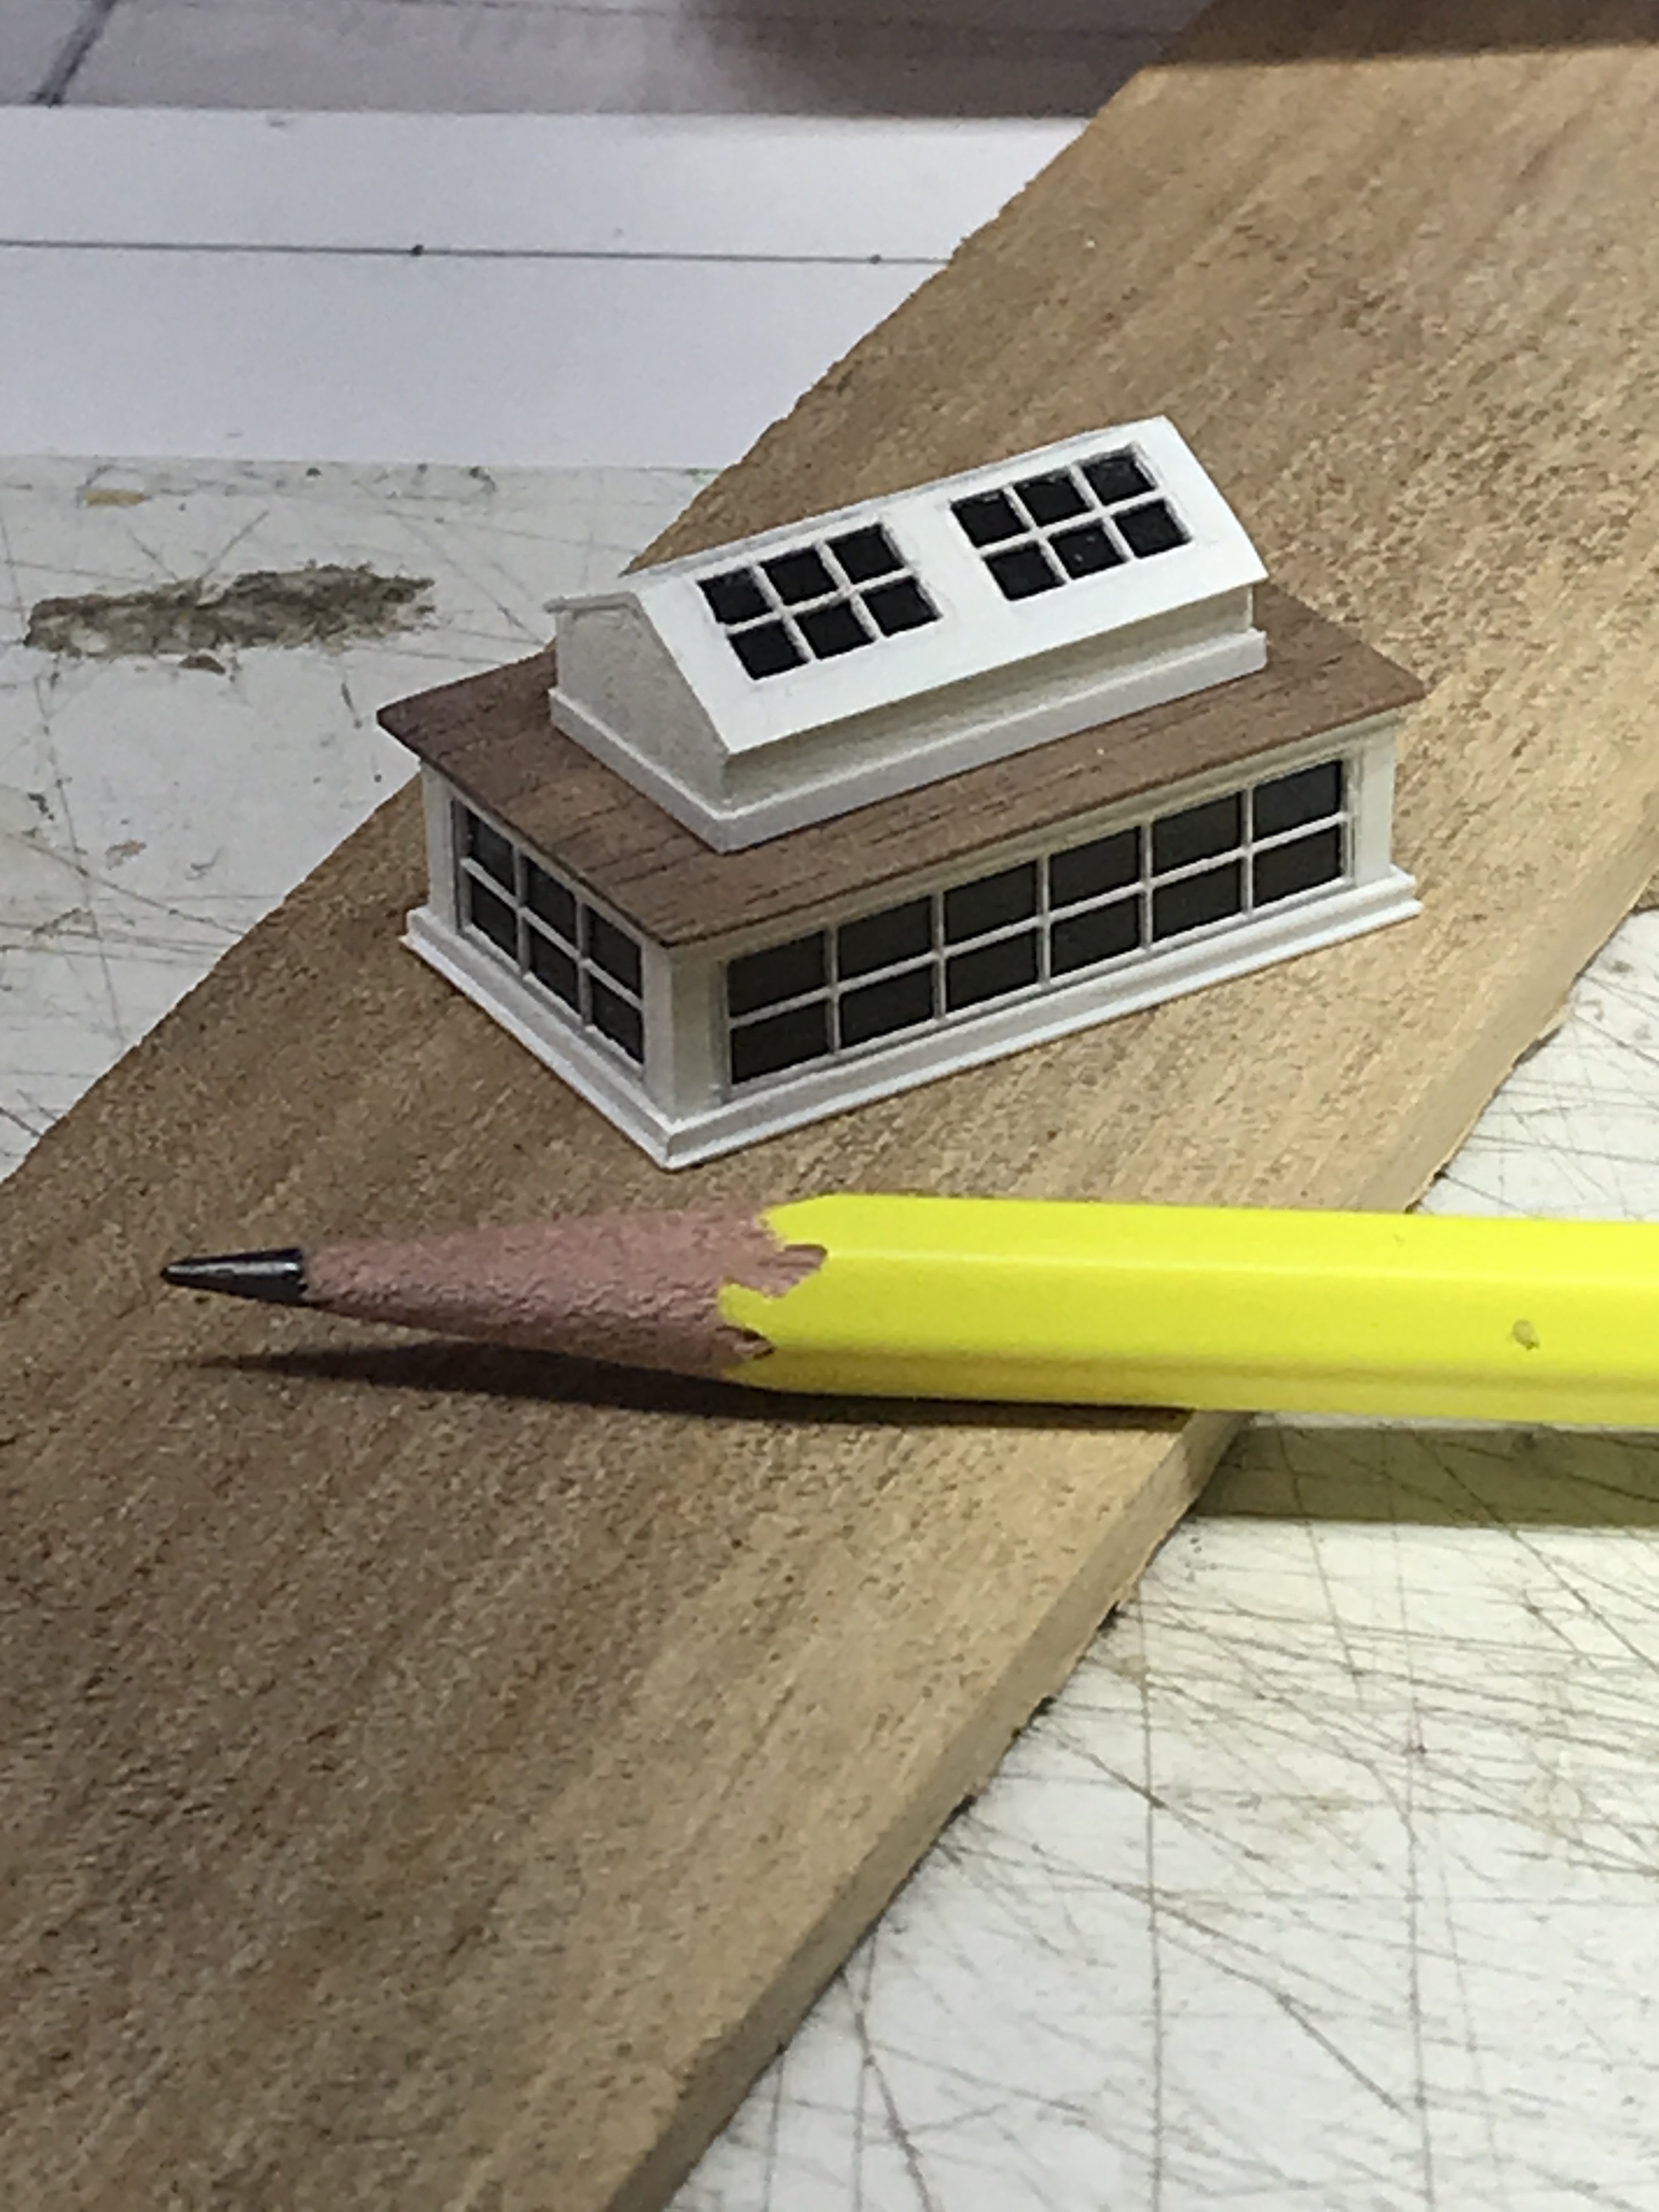
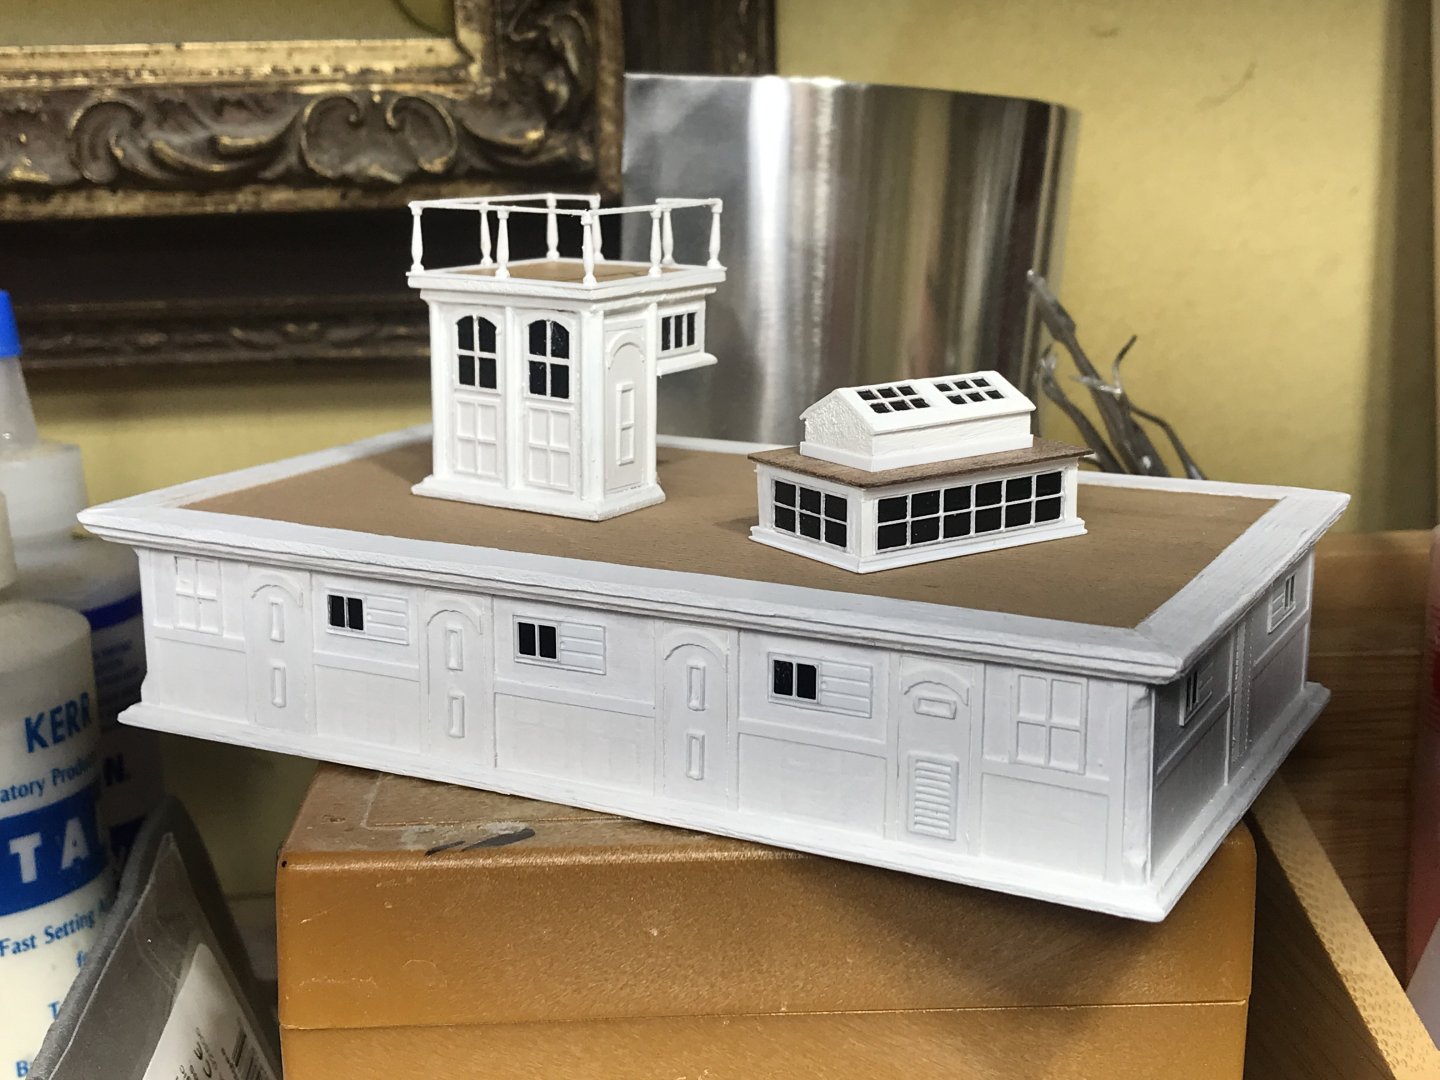
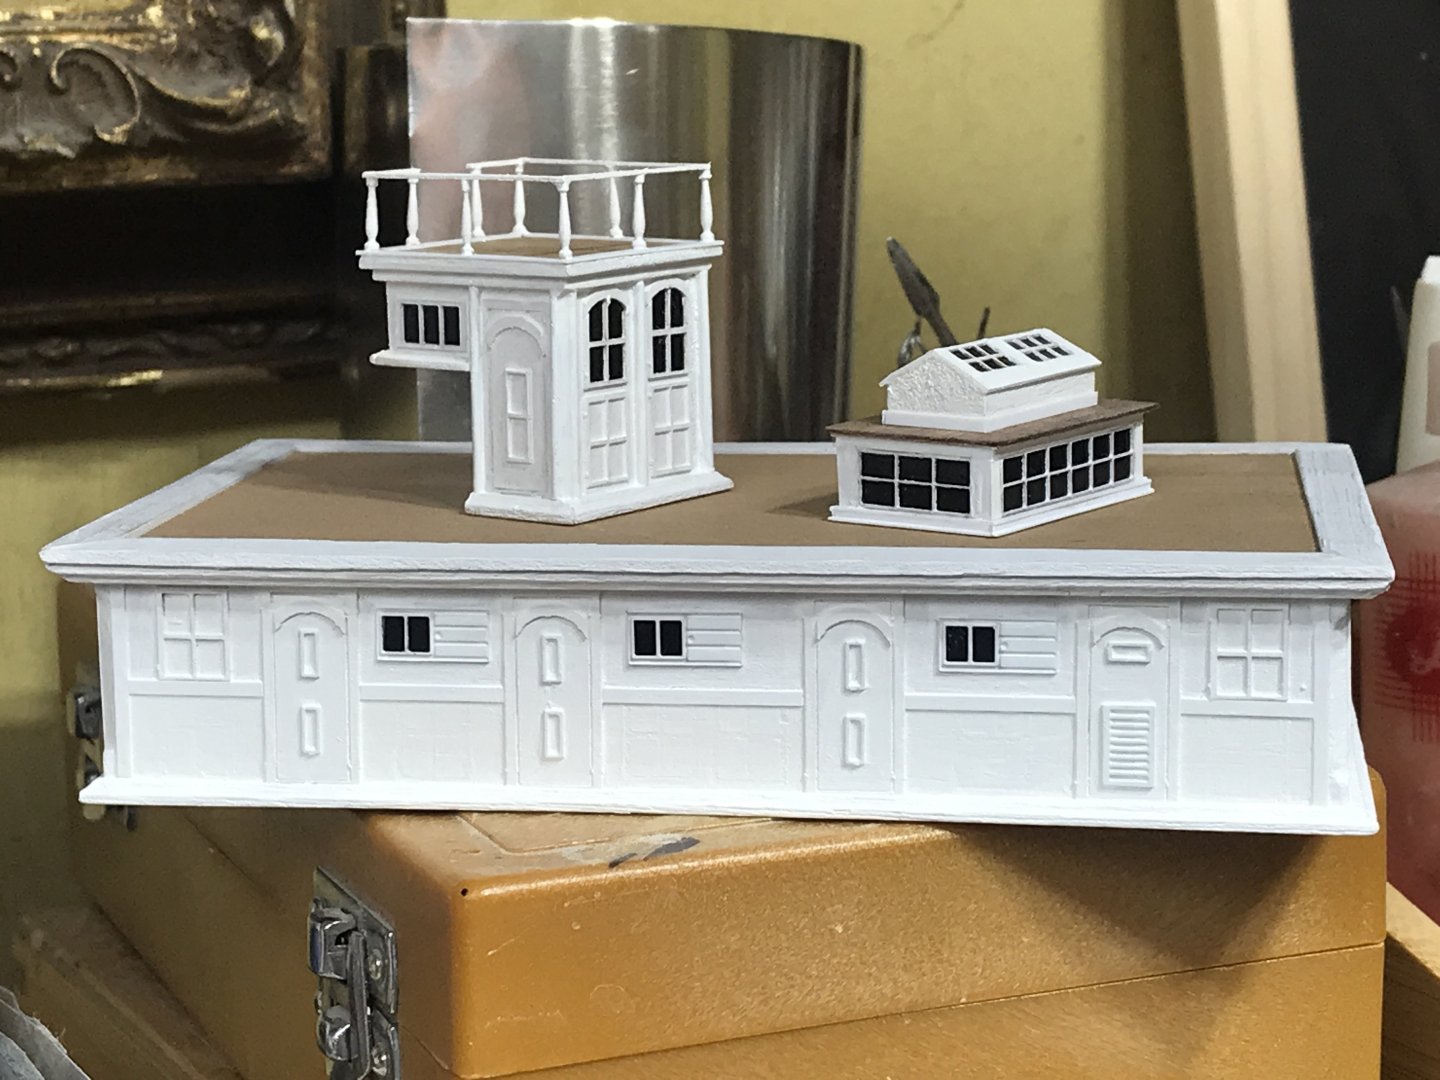
Perfect Rich….looks spot on fantastic. I needed the aft companion way measurements, cus it’s the next thing I’m building. It will have a slanted roof and windows on the sides. Kinda like that of Flying Clouds. Again, super job. Rob
-
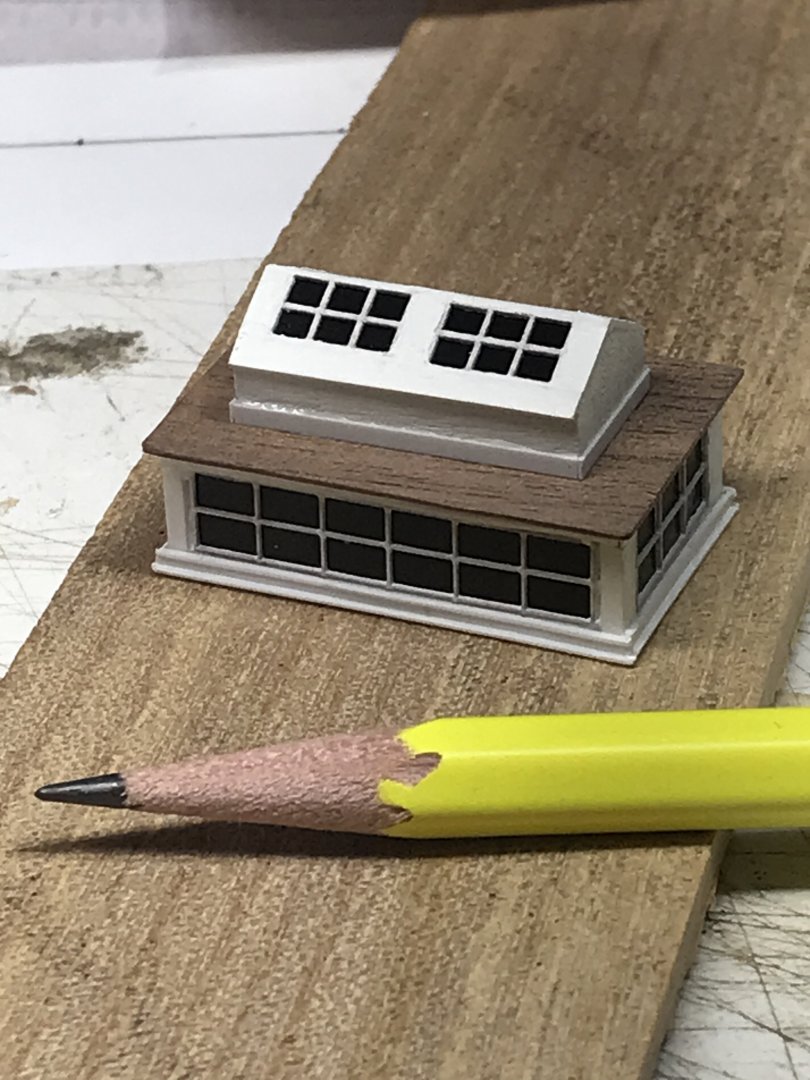
Finished the skylight. Rob

-
Thanks Rich...I thought so. It will look bold once I finish off the top section in white.
-
I was going to suggest that. Not sure the exact size of the standard WC.....so some experimenting will need to happen. Just like every aspect of this vessel...we need to evaluate the realities to the speculative. We know the forecastles true height...and we know she had a patent windless...requiring working room.....and we know she had a forward hatch and its requirements. Now to fit it all in and make it look nice....(said...while pointing at you)....😃 Rob
-
Inside the forecastle....there might have been troughs for the chain to ride in and to keep the area dry for crewmen's work and off duty doings. But that is within the forecastle.....I think the exterior would be similar to the drawing above....with a straight deck edge, with WC's on either side just under the edge and further back is the bulkhead/wall. Doors on either side with possibly a larger service door in the middle for access to the patent windless. The external would look similar to Glory of the Seas....but without a windless exposed in the middle. The spacing would have to be adjusted to compensate. Chapelle's drawing shows the WC's outside the deck on either side...extending past the forward hatch. If the WC's are pushed back on either side to accommodate the forward hatch...it seriously shortens the forecastle space. duncan McLean says her topgallant forecastle is at the level of the main rail....but Chapelle shows it at the monkey rail. Crothers says...both high and low topgallant forecastles were equally used....BUT this ship has a patent Windless...which means she had to be as high as the monkey rail...despite what McLean says. Thoughts? Rob