HOLIDAY DONATION DRIVE - SUPPORT MSW - DO YOUR PART TO KEEP THIS GREAT FORUM GOING! (Only 72 donations so far out of 49,000 members - Can we at least get 100? C'mon guys!)
×


rwiederrich
-
Posts
5,518 -
Joined
-
Last visited
Content Type
Profiles
Forums
Gallery
Events
Everything posted by rwiederrich
-
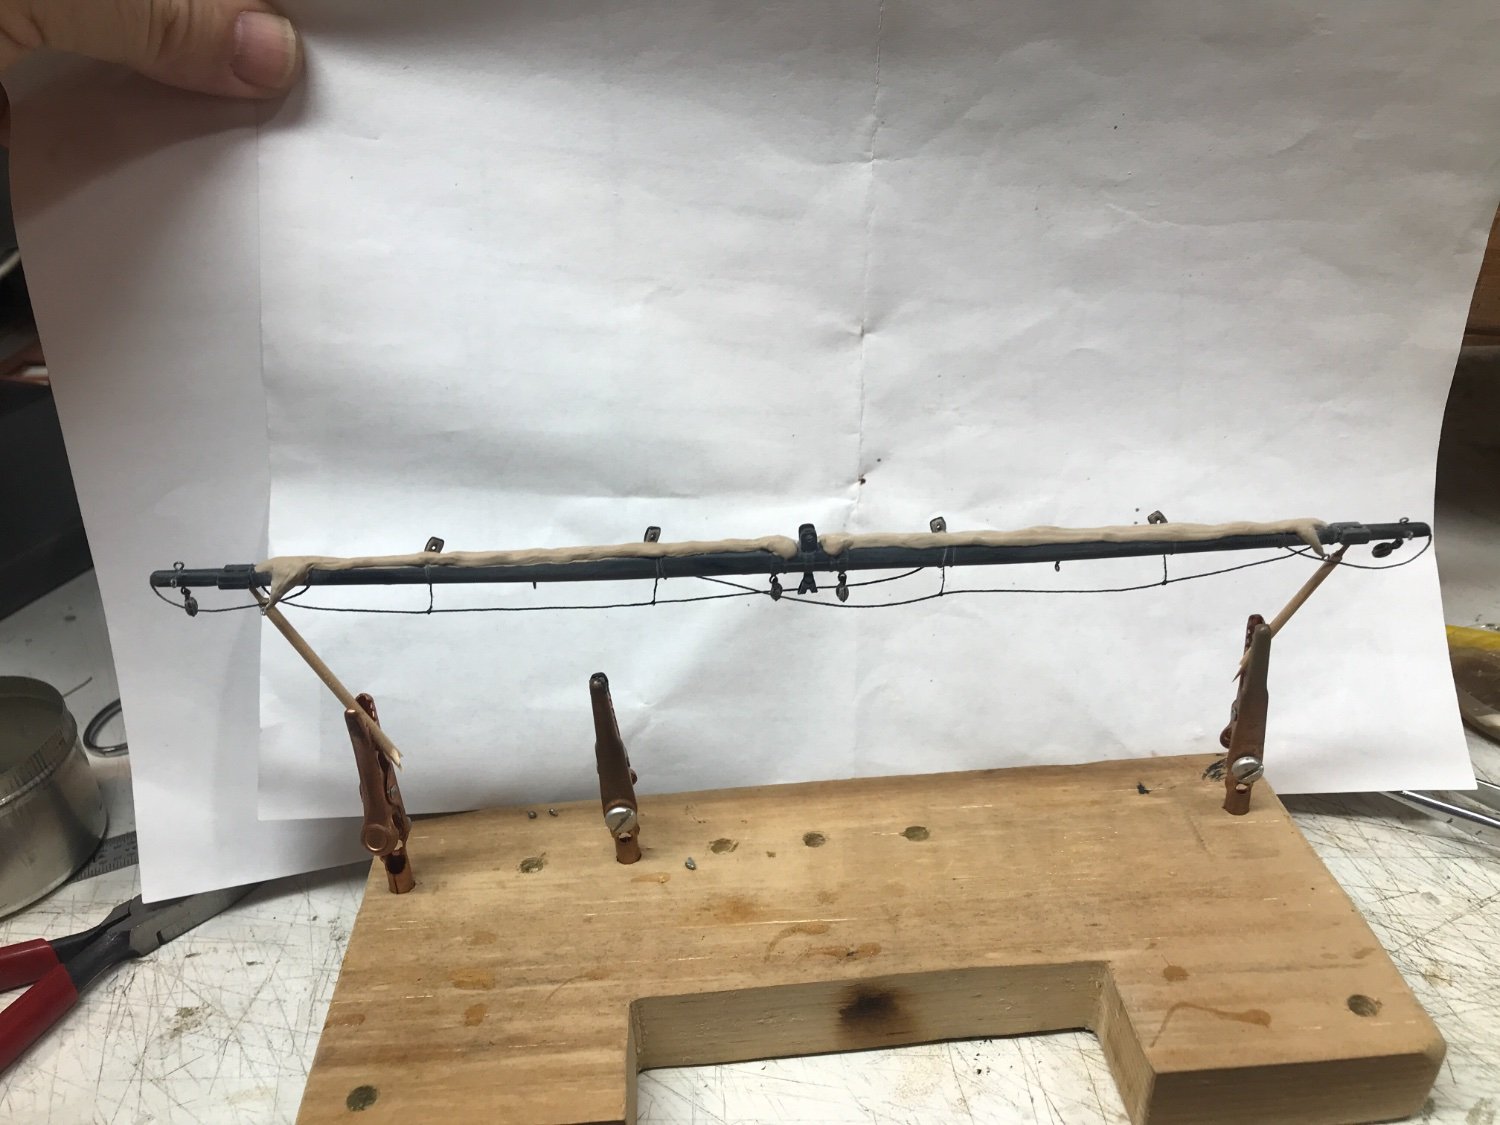
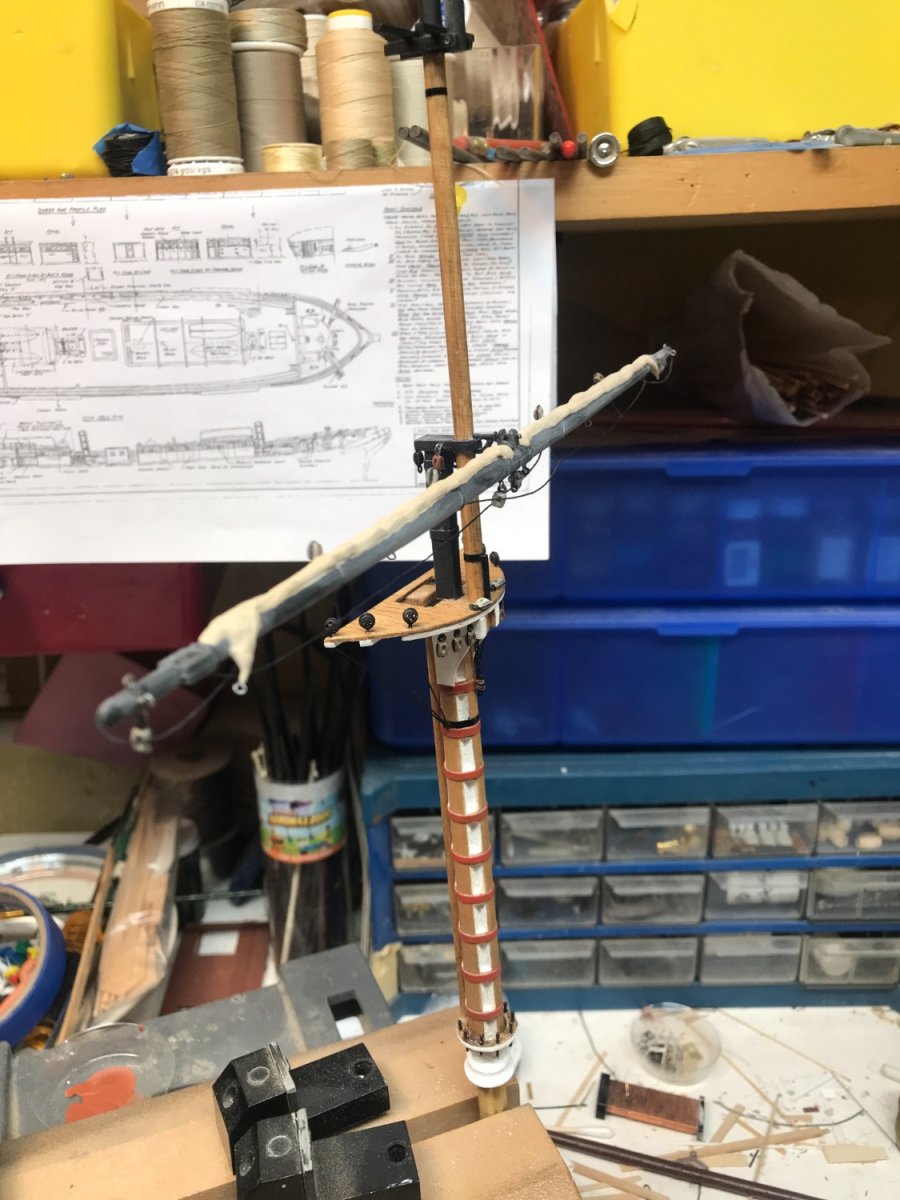
Thanks Pat... It can be a struggle to create convincing enough tightly furled sails. You have to capture the uneven rolled/tufted effect without the sail appearing overly exaggerated or comical. I added some slight detailing to the surface of the sail to break up any uniformity and lend greater detail as to what might be expected in tightly rolled canvas that is furled over jackstays and banding. Still needing to add becket banding/straps and run the chain sheets for the topsail. I might even add some whiter highlights to emphasize reflections. Its knowing when to stop and to know when less is more. Thanks for the fine comments. Rob
- 3,560 replies
-
- 2
-

-
- clipper
- hull model
- (and 2 more)
-
I still have much detailing to add to the sail. Beckets(straps) still need to be installed. I’ll probably add the chain sheets for the top topsail. Rob
- 3,560 replies
-
- 2
-
-
- clipper
- hull model
- (and 2 more)
-
You're on your way to rigging mastery. Just remember that book includes rigging for several types of ships....avoid the iron carriers and stick with the wooden descriptions(Those would generally be the clippers). And some descriptions are referenced for both types...because the function was identical. Those descriptions can also be used. Have fun. Rob
- 3,560 replies
-
- 2
-
-
- clipper
- hull model
- (and 2 more)
-
"Masting and Rigging the Clipper Ship and Ocean Carrier" A used one of Ebay for $28~ $60 Rob
- 3,560 replies
-
- 2
-
-
- clipper
- hull model
- (and 2 more)
-
Wonderful work Vlad....you're moving along nicely. What mast are you adding the jackstay too? Rob
-
It adds that extra added detail. I used it quite extensively on my model railroading too. Simple but easy and effective. My coat of arms. Rob
-
Yes they might. Have you heard of window glaze, or liquid window? It is sold by MicroMart. It is a white glue material that you simply rub inside the port hole causing it to all come together in a white window(use a tooth pic), and it dries clear. Causing/creating the windows. I use it all the time. Pretty nifty. It might be easier then the other process. Rob
-
Its nice to get after market stanchions that are nearly perfect for your build. Makes things so much easier. I had to hand turn over 100 4.5mm stanchions for Glory of the Seas. Saving time were ever you can is one of my moto's. You're doing a smart clean job on her....I'm impressed. Are your port holes going to have glass in them? Rob
-
Nic........I can only assume that you've endured many of my postings and quite sure you have heard me say....*I am generally a lazy modeler*. If I can find or concoct a simpler, easier way of getting out of having to actually make a part from thin air....I'll take plan B. Shoot, I'll take plan Z if it achieves my goal and it requires the least amount of energy expenditure. Both mental and physical. Rob (You hit the nail on the head).
-
To be honest...As you put it, is sounds more self promoting, then I had intended. I actually was quoting a phrase my father always liked to use. He always said....*If someone else can do it....so can you*. He was instilling in us that we had....*LIfe, Liberty and the Pursuit of Happiness. Life..thank the Lord mom and dad had me here, LIberty...I have protection from you and the Govt, and the Pursuit of Happiness....If you suck at being happy because you have no imagination or ingenuity or skill, then that is entirely your own fault*. Tom...I surely do not have it all. Rob(I do have the most important things...God and my family)
-
Short of processing the sheet block like EdT did by making separate sides and bolting them together(Pretty tough job at 1/96. I searched for a material I could manipulate to simulate the same structure. These metal tabs used for medical folders...had embossed portions that when bent over on themselves provided the exact replication of the body of the sheet block I needed to fabricate. Simply cutting the shape of the block into the stock material was done with a small cut off disk in my dental handpiece. Sure I had to forego the rollers in the actual block, but again, in this scale, it is a detail easily left out without degradation of the intended structure. And the effect is still quite convincing. Thanks for noticing. Rob
-
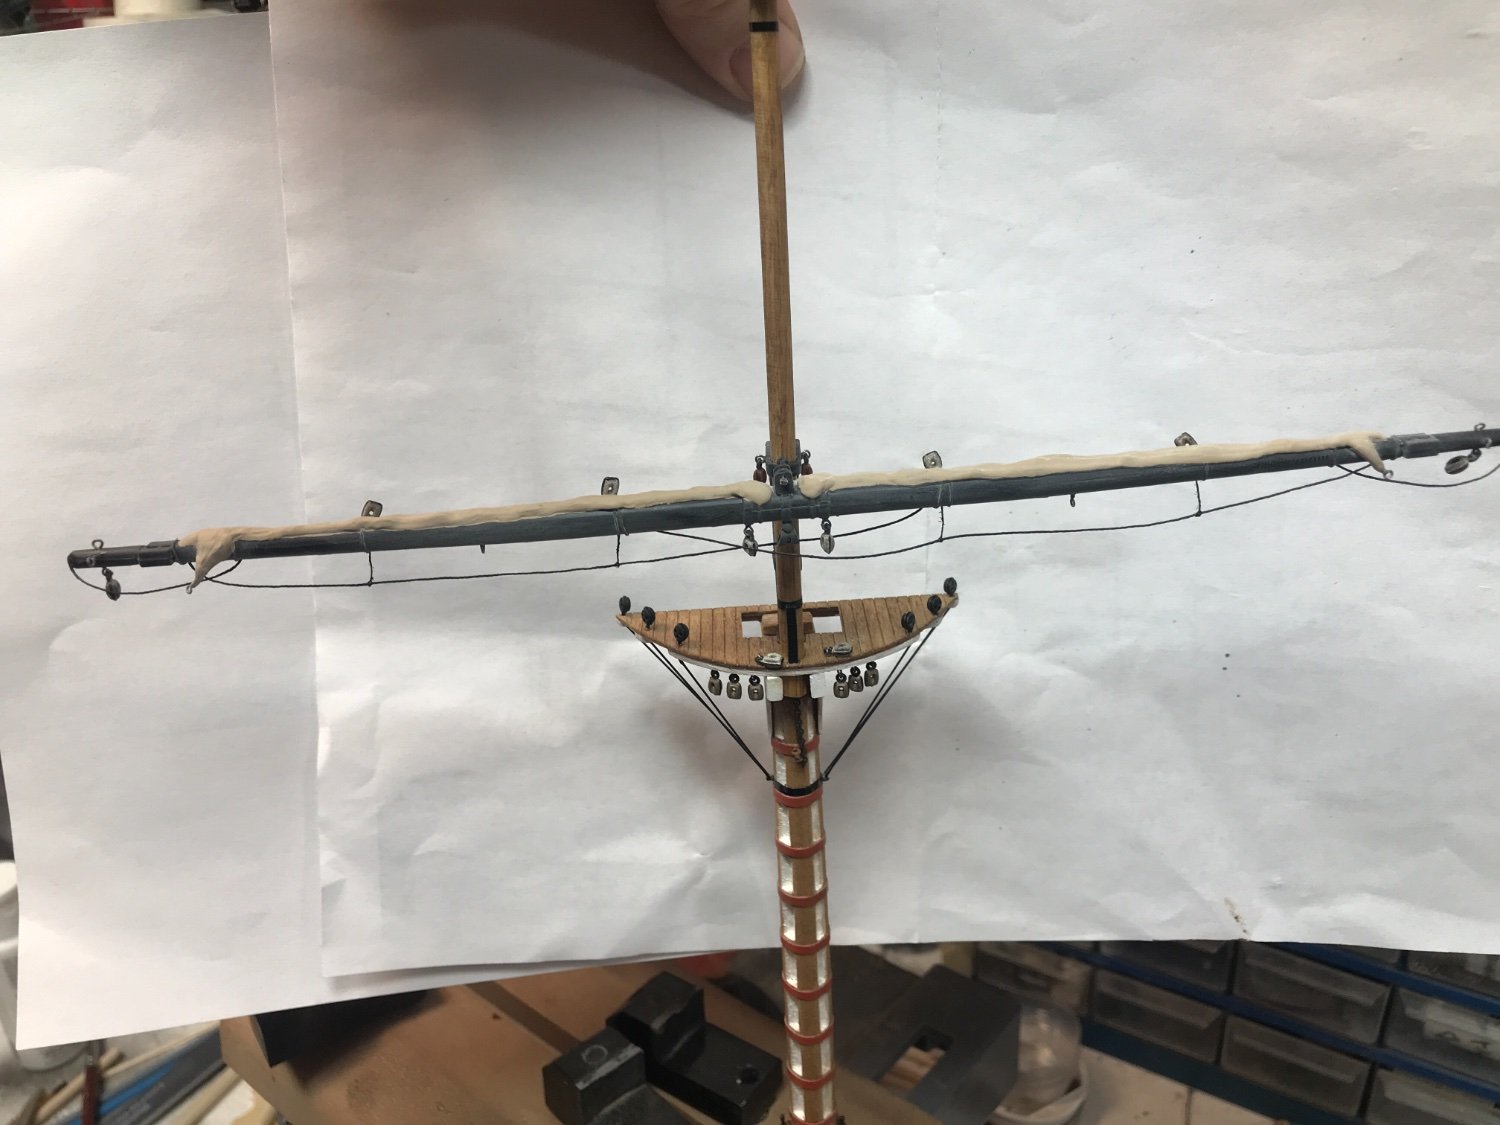
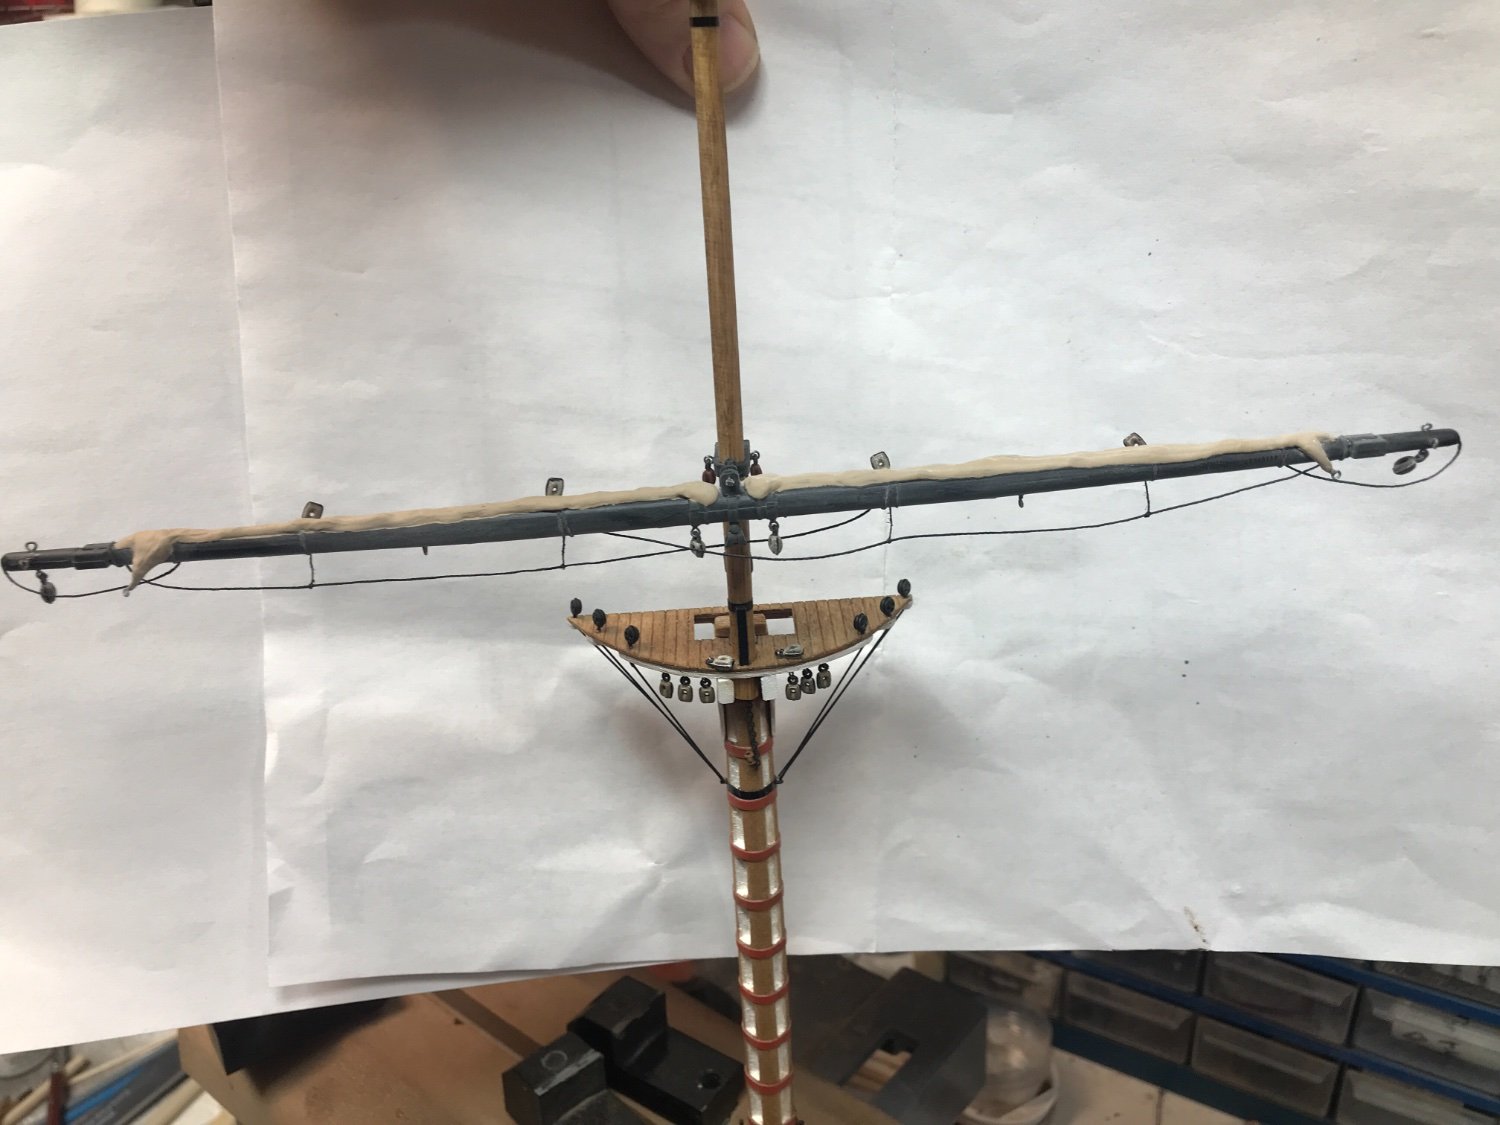
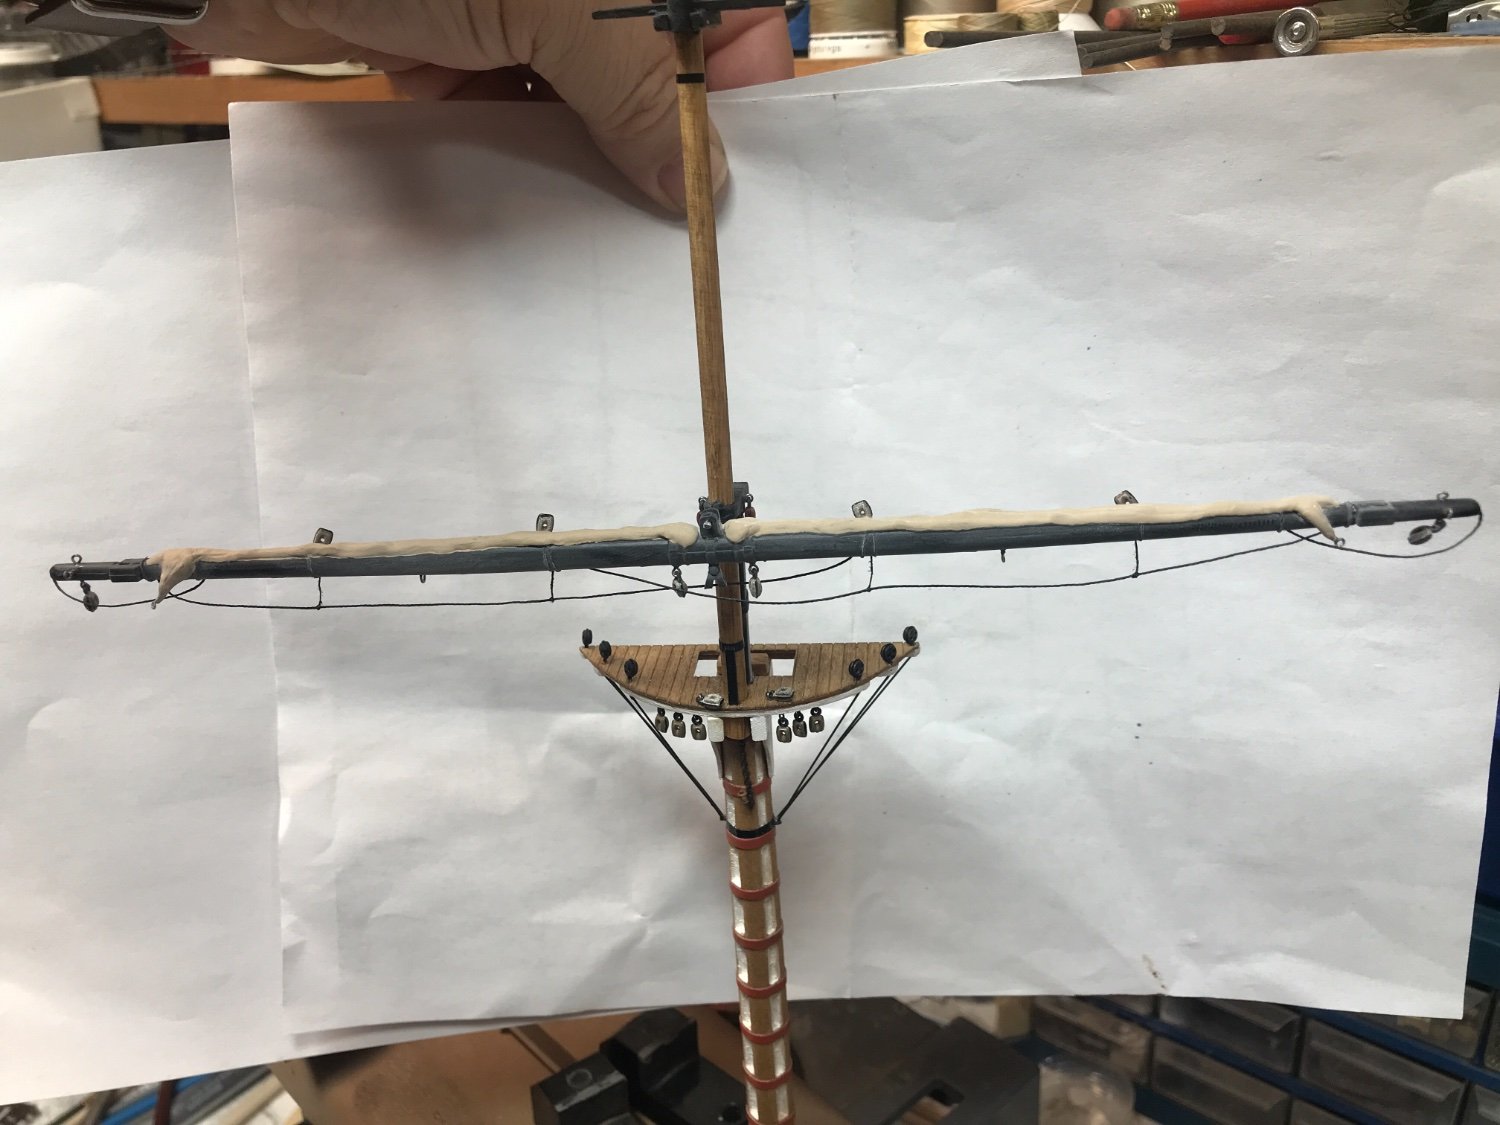
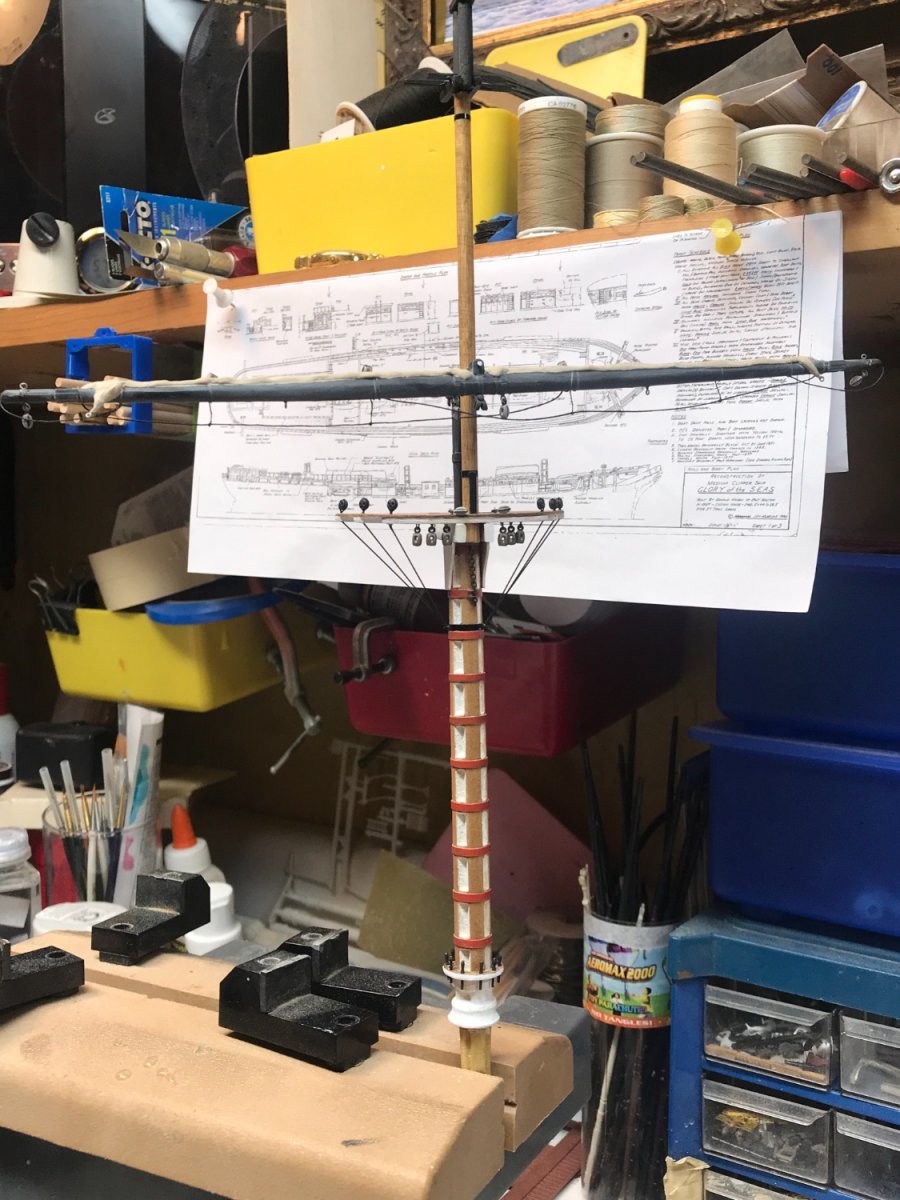
This is why this image is so helpful. You have just the main yard to use for measurements. Remember when I told you some time ago that clipper builders used other components of their ships to be measuring stick for yet other portions of their ships? Well in this case the main mast is 91ft long...so is the main yard...91ft long. That is why I said that by a simple rudimentary observation, you can see that the main yard is twice as long as the main mast is from deck to tops. Its a magical symmetry built into the design of the vessel. Rob
-
Vlad...wonderful job...just wonderful. Hey..can you take a pic of the plan you are using that shows the cathead details. I'm curious. Rob
-
I am a firm believer in paint. It covers a multitude of sins and is actually typically accurate. No real vessel ever goes to sea unpainted and unweather protected. If one attempts in their model to be artistic or mechanically structural....a varnished bare wood model can be impressive...showing off structures and building techniques and skillful wood joinery. I prefer to build accurate finished and weathered models...and the freedom of using any material to accomplish that is one of my greatest modeling pleasures. I use any appropriate material and you would not know it on the finished model. Wood, Veneer, plastic, metal, card stock, wax, compounds,....you name it...if it can be painted it will get used. I just wanted to mention that I was impressed with your use of plastic card stock and 1/4 round stock and tube stock to accomplish the goal of creating your houses and some of their furnishings. Knowing that paint is going to grace the material...you have freedom to use anything other then wood. And in many cases it is far easier to work. Again...great job. Thanks for your fine compliments as well. Rob
-
Just think of the metal tabs that are found in Medical type records...that you press open and closed after you slide a new hole punched paper onto it. These metal tabs have a raised ribbed body...that I cut and fold over onto itself...forming the internal portion of the sheet block. It's just using the preformed metal and forming it into what I need. Cutting (forming the shape of the block) and drilling is the artsy part. Tiny, but artsy. I could have come up with several other ways to make these sheet blocks...but I had to do it easily and repetitively. Cheaply...that comes to mind as well. Rob
- 3,560 replies
-
- 1
-
-
- clipper
- hull model
- (and 2 more)
-
I appreciate your fine comments Bill. I try to put my best foot forward. I also hope to have some more updates soon. I'm not as fast as I used to be....only due to the fact my time is generally required elsewhere. Rob
- 3,560 replies
-
- 2
-
-
- clipper
- hull model
- (and 2 more)
-
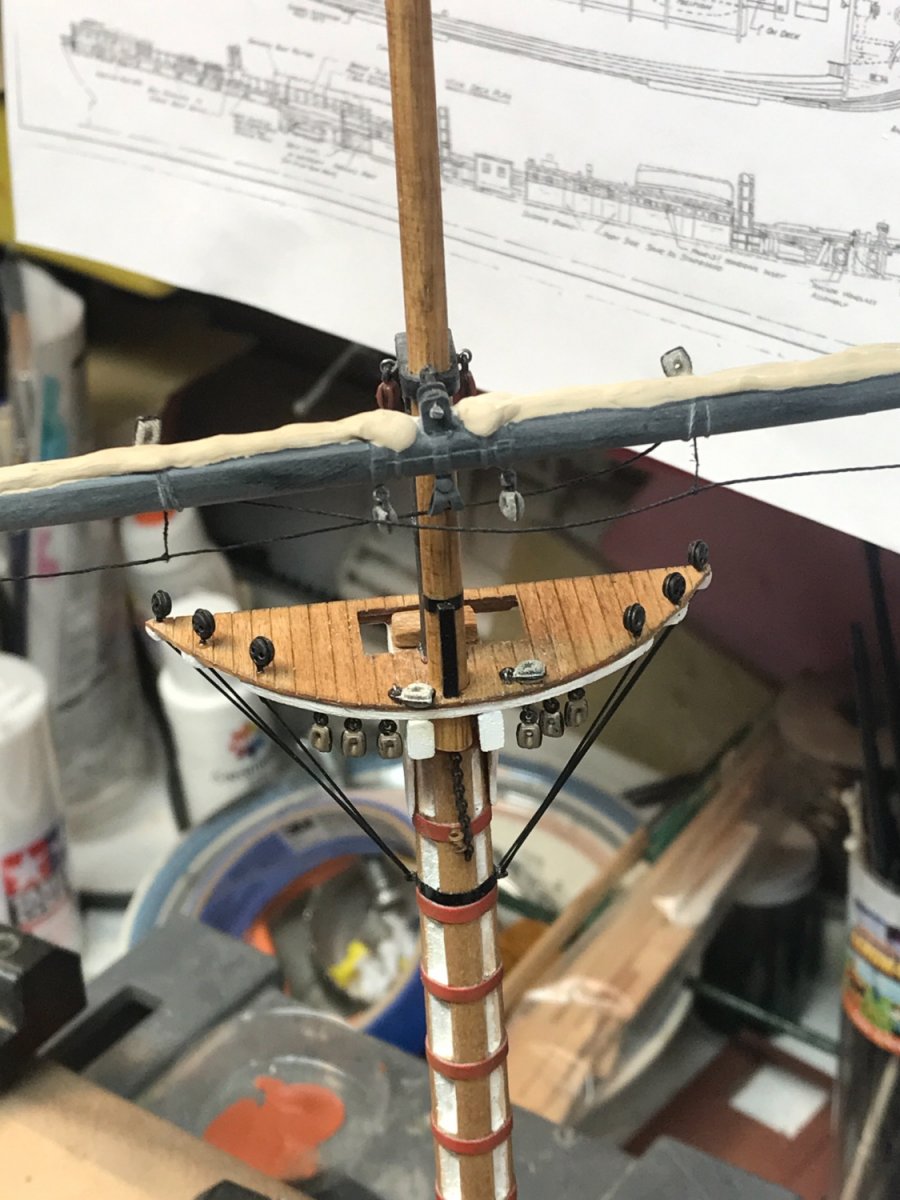
Like my process when I built the Great Republic(The previous images), I will first add the shrouds..then add each yard and then rig it to the mast. Each yard will be rigged with its furled sail, foot ropes, flemish horses....prior to being added to the mast. Once each mast is complete with its finished yards...the entire mast/yard assembly, will then be glued into the hull. Then I will finish up rigging the sheets, buntlines and lifts at the fife/pinrails. Its a process that is made up of several other minor processes. Rob
- 3,560 replies
-
- 1
-
-
- clipper
- hull model
- (and 2 more)
-
Thanks Vlad...Things are slow now...because I'm making lots of eyebolts and blocks with eyebolts mounted to them. I have so many combinations of single, double and triple blocks that need eyebolts mounted to them. Each mast will be fully blocked prior to rigging the shrouds. I spent quite a bit of time calculating the lengths of each yard for each mast and then gathering the materials to create them. Lot of study and behind the curtain work. Rob
- 3,560 replies
-
- 1
-
-
- clipper
- hull model
- (and 2 more)
-
Wonderful work and attention to detail. She is a beautiful vessel and your replication of her is superior. Great job. I've enjoyed your log....and how you are utilizing mixed media without restraint. Rob
-
I was doing some general measurement checking and Glory’s fore and main lower yards were 91ft long. That is roughly half the the distance the main yards are from the deck. In other words, the yards are twice as long as is the yards are from the deck to their location on the mast. 91 ft is enormous and is quite long. It almost seams too long, until I measured the main mast lower yard from an image of Glory floating as a canary in Alaska. Sure enough the mast measures up. Her yards were enormous. Im just gathering the information currently. Rob

- 3,560 replies
-
- 3
-
-
- clipper
- hull model
- (and 2 more)
-
Upon further reflection and review of portions of my dialogue.....I wish to apologies if I gave any rash judgments concerning the previous posts. I'm very passionate about clippers...and since their *Era* was very short and very specific, I tend to be overly corrective, when vessels of similar appearance are mistakenly assessed as clippers. Not that that is what happened, but I felt it necessary to make sure the distinction was made for the viewing public. All is well and I express my deepest regrets for implying a correction when one was not needed. Getting back to the original posters dilemma.....I would suggest Restoration of redeemable portions of this model be undertaken and preservation to include the natural patina which also preserves the historical integrity. If too much of the original material....ie....shrouds, or paint are replaced and painted over...the model can be robbed of the evidence of its creators skill or original expression. Restoration is a fine balancing line between preservation and protection. Rob
-
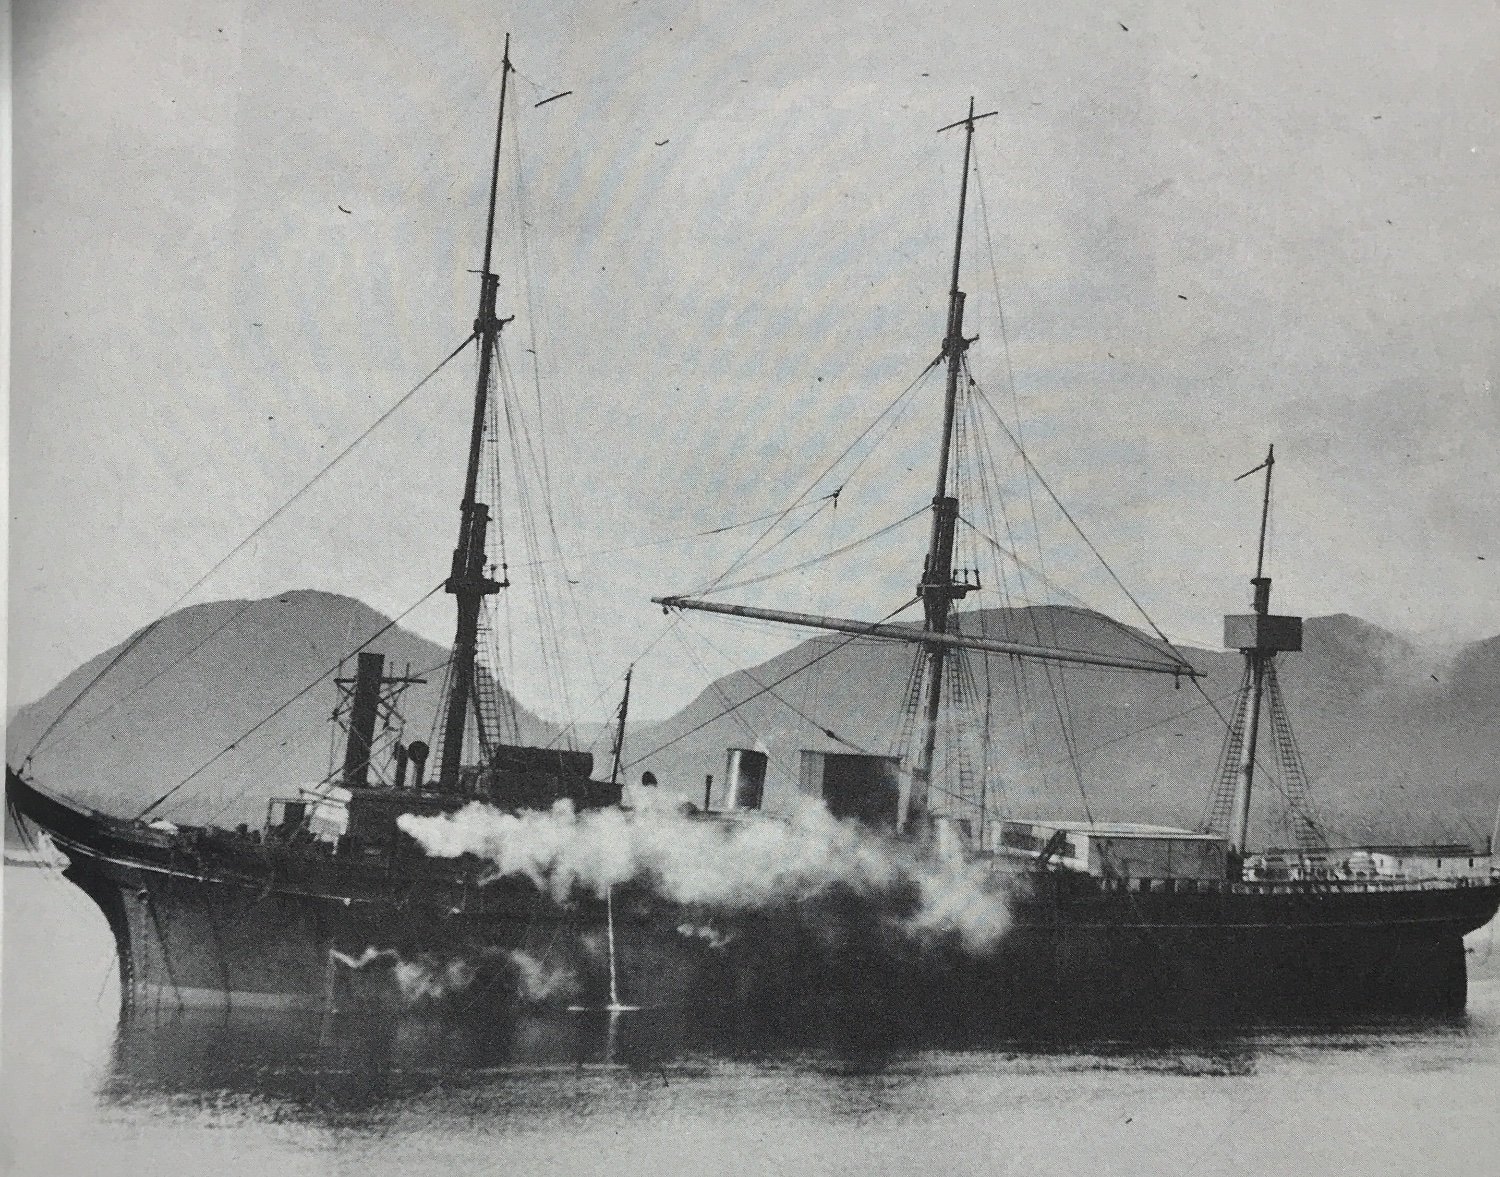
I read your statement correctly Keith. Indeed, you never did say the Mount Stewart was a clipper…(directly)…I wasn’t inferring that you did. You did say you didn’t find a clipper with 7 yards on all three masts, and that you did find one of the Mount Stewart with 7 yards on only her main mast That statement alone gives the impression that the Stewart was still a clipper……just not with 7 yards on all 3 masts. I was simply informing the viewing audience that despite the Stewart’s sail configuration……she is in no way a clipper design. Sorry if I appeared to put words in your mouth. When the conversation is reviewed closely, you can see that I actually did not. Your search for such a vessel, and finding an image for us to review is commendable. Rob
-
Not to be nitpicky, but for everyone's edification, this vessel is not a clipper. She is an iron hulled carrier....designed more on the DownEaster model. Probably Scottish. Definitely European. I'll do more research. Rob