HOLIDAY DONATION DRIVE - SUPPORT MSW - DO YOUR PART TO KEEP THIS GREAT FORUM GOING! (Only 13 donations so far - C'mon guys!)
×


rwiederrich
-
Posts
5,516 -
Joined
-
Last visited
Content Type
Profiles
Forums
Gallery
Events
Everything posted by rwiederrich
-
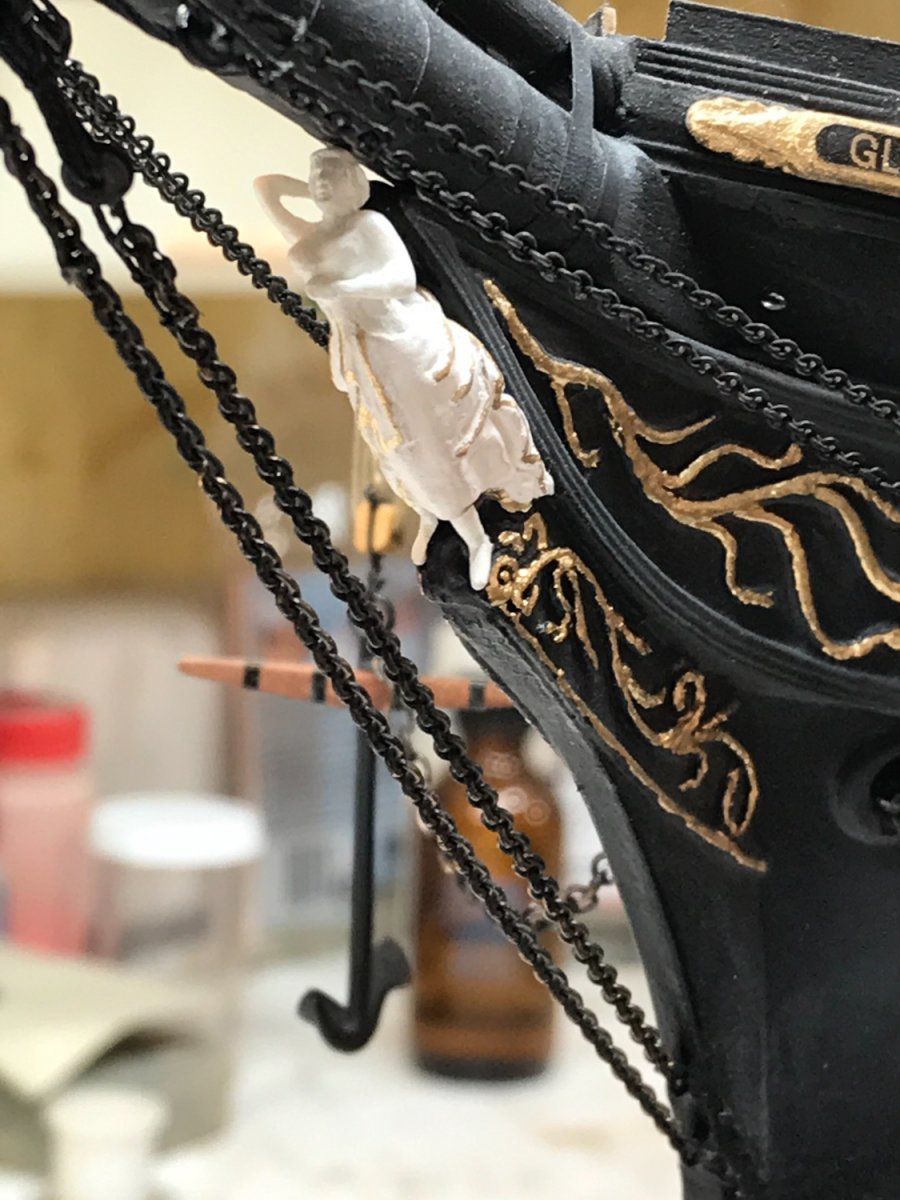
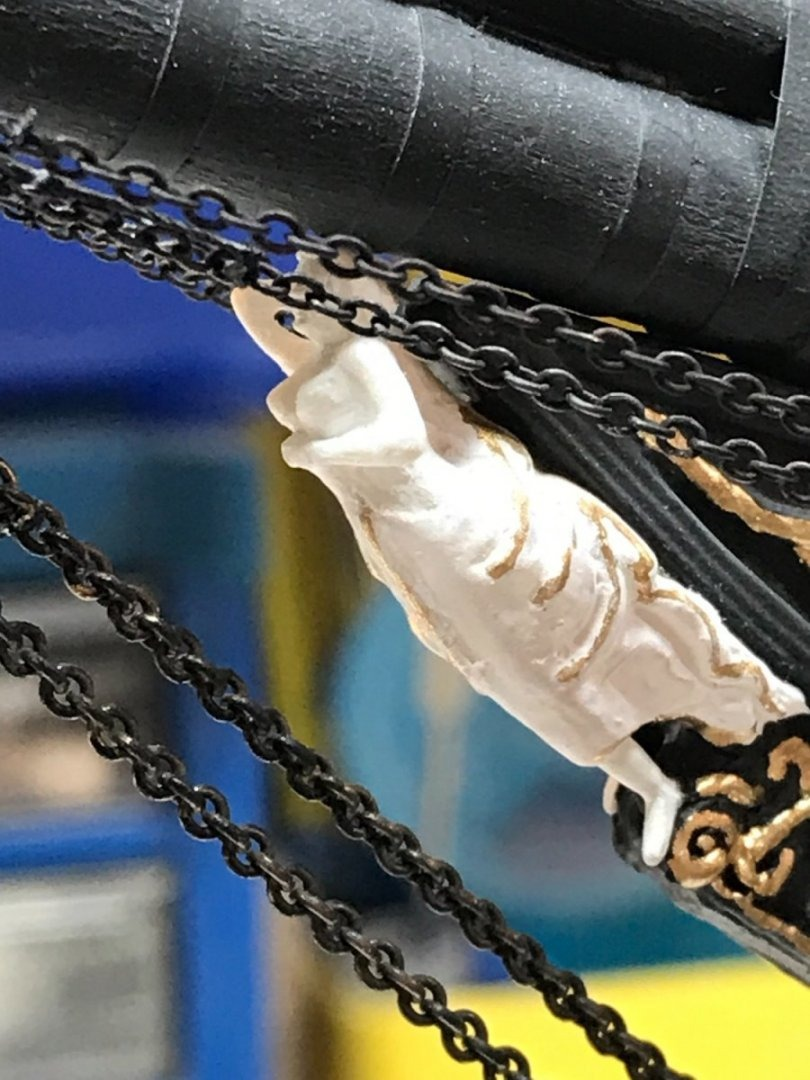
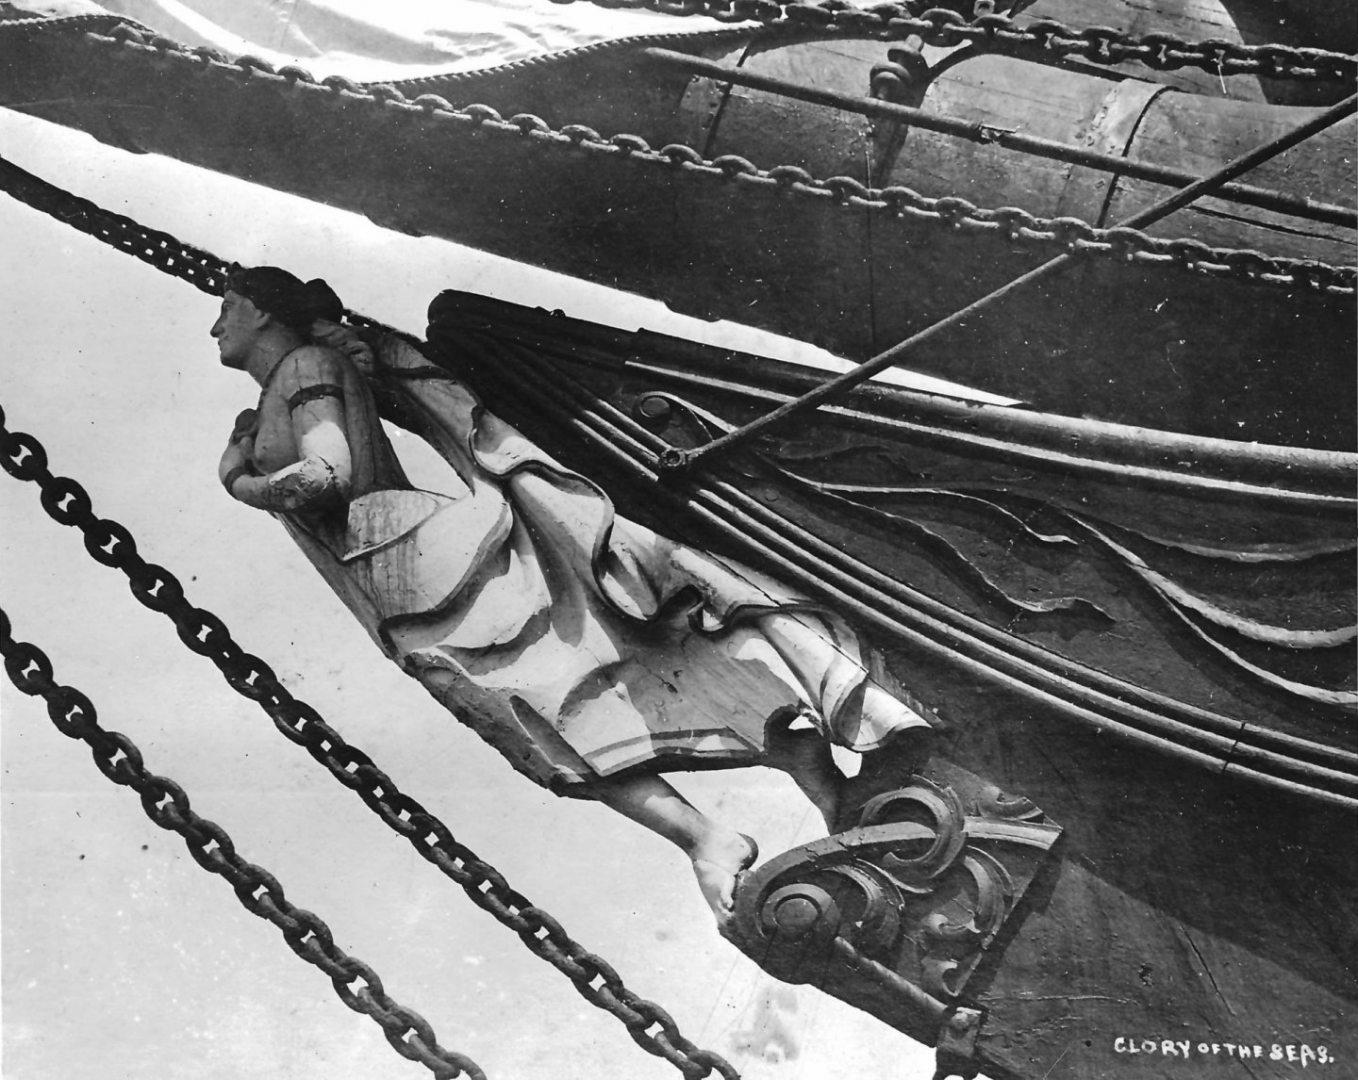
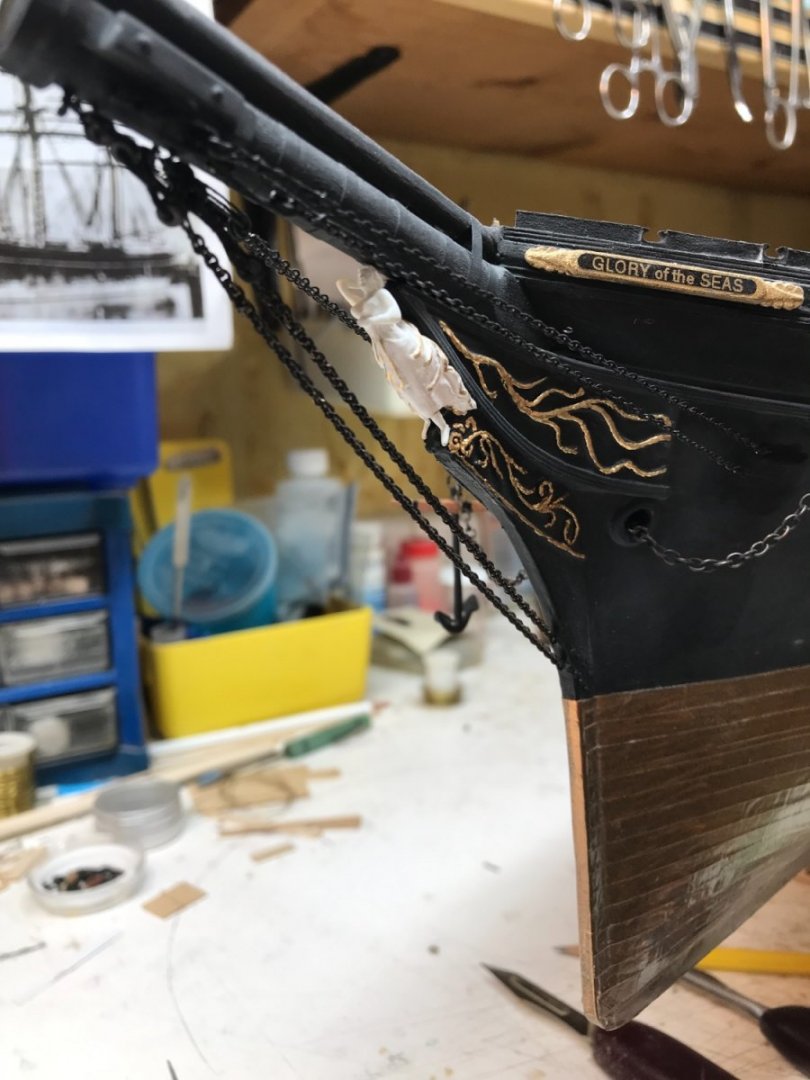
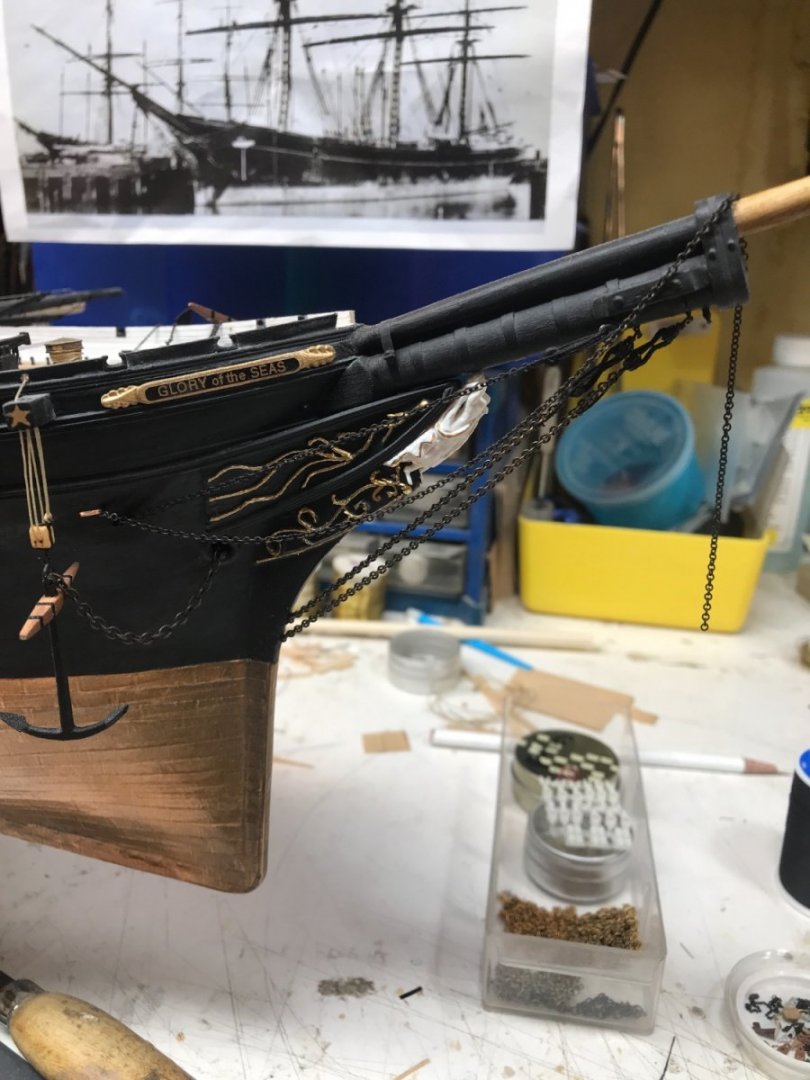
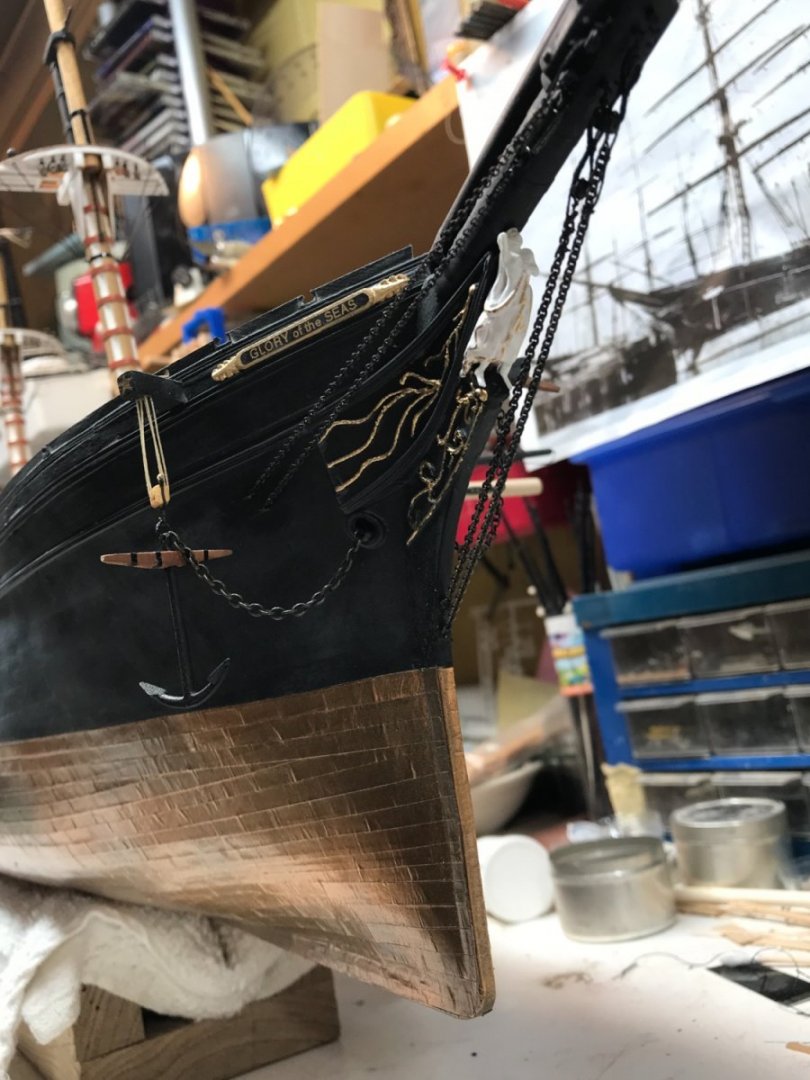
Just a reminder...the figurehead is only 7/8" long. Here is a comparison to the prototype.
- 3,560 replies
-
- 3
-

-
- clipper
- hull model
- (and 2 more)
-
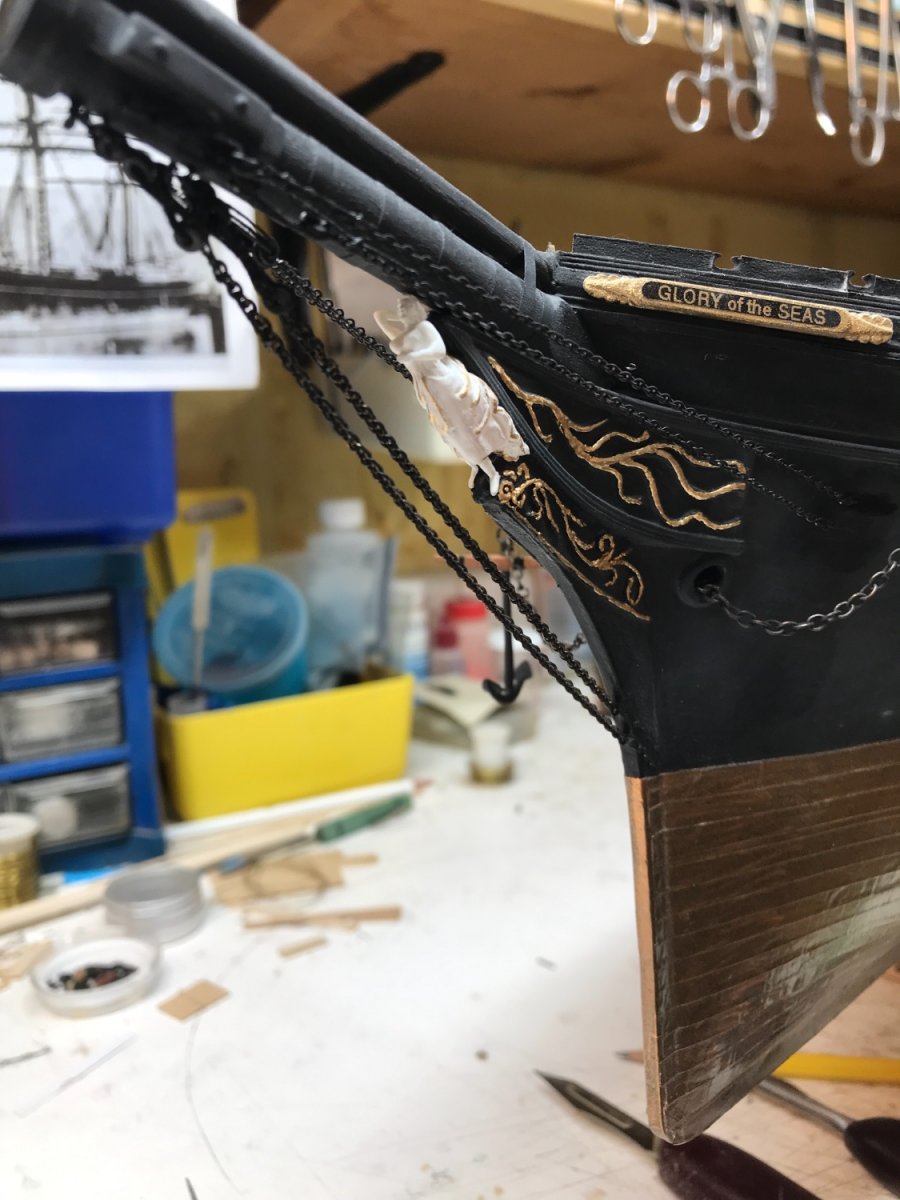
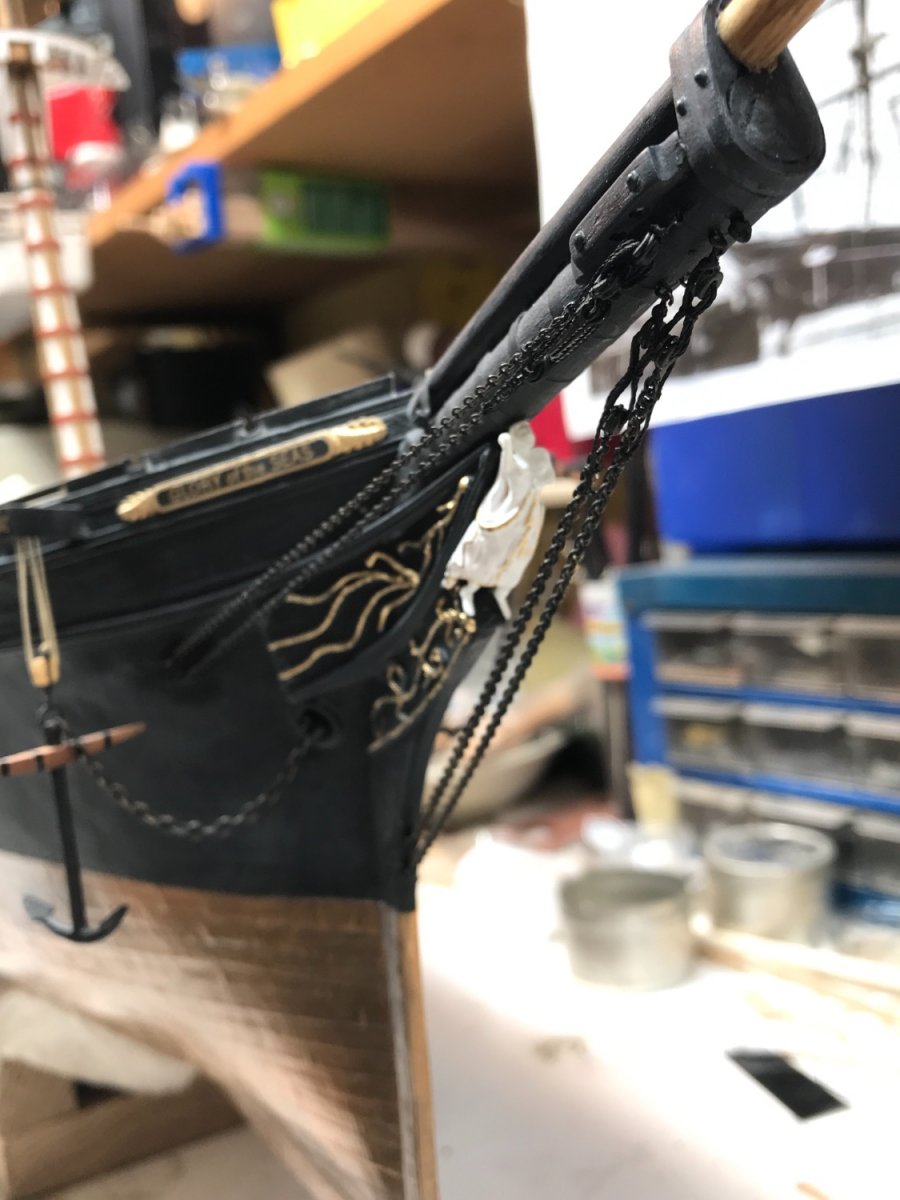
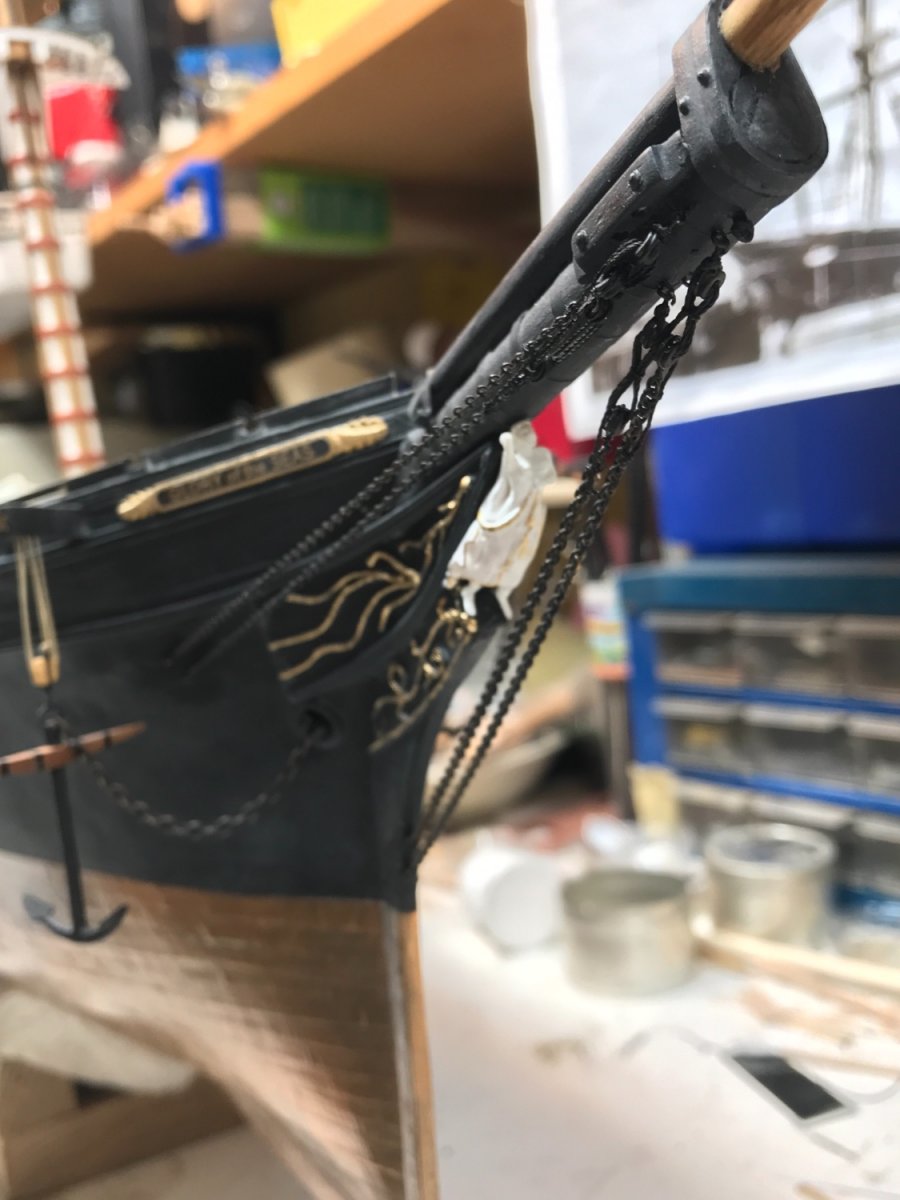
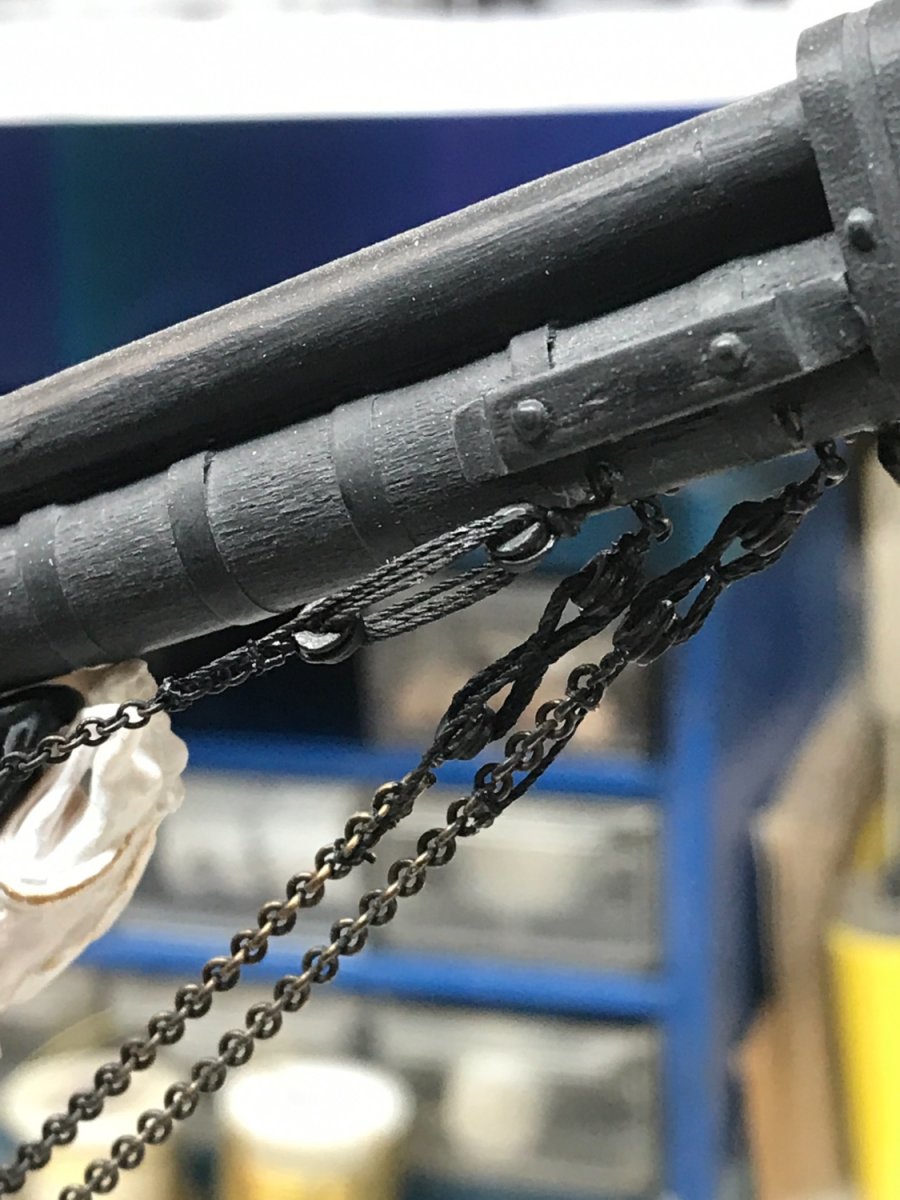
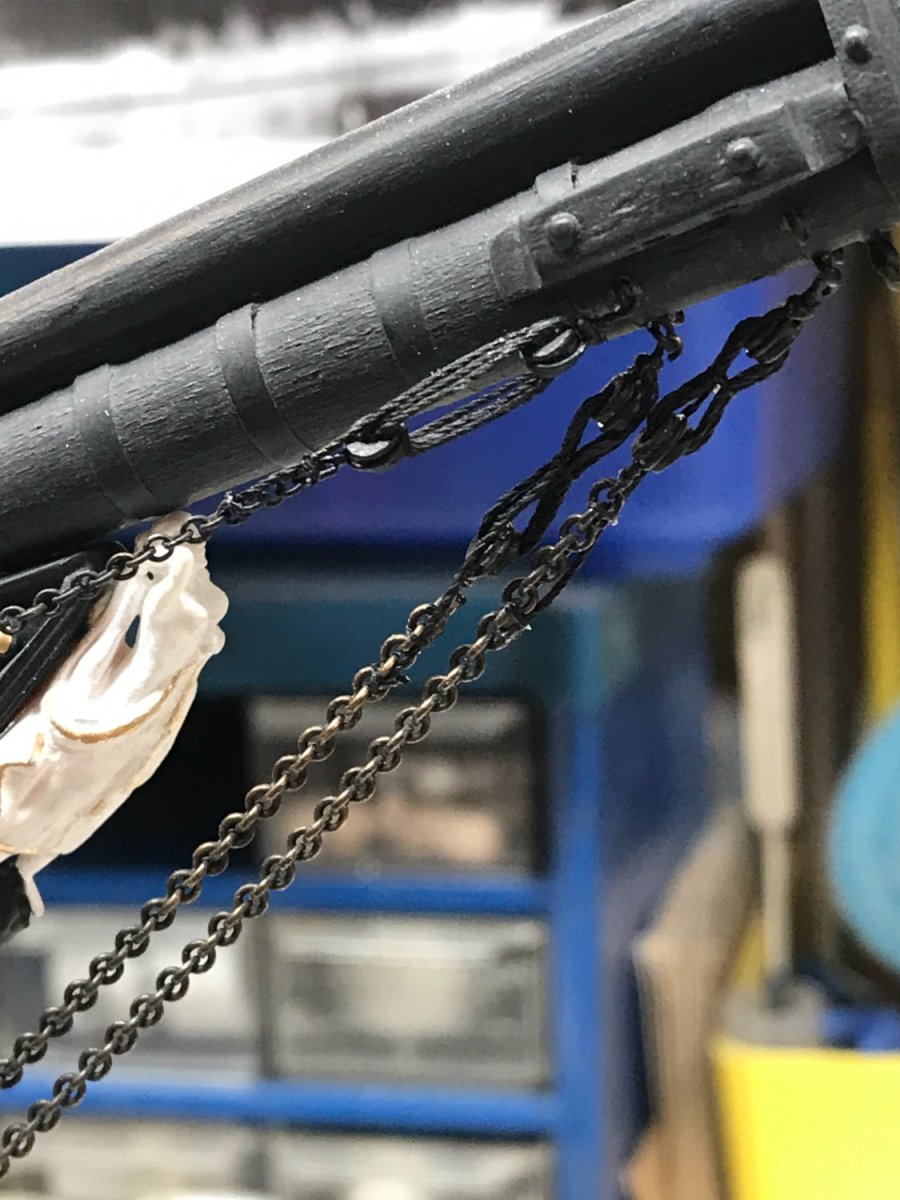
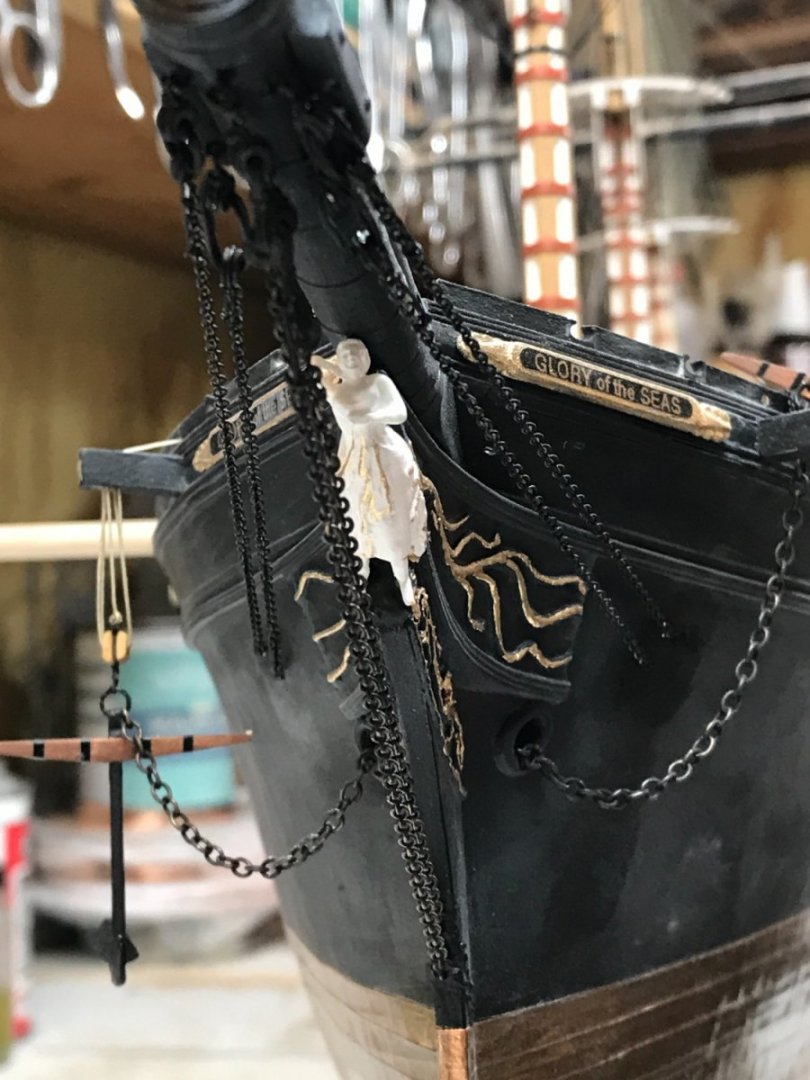
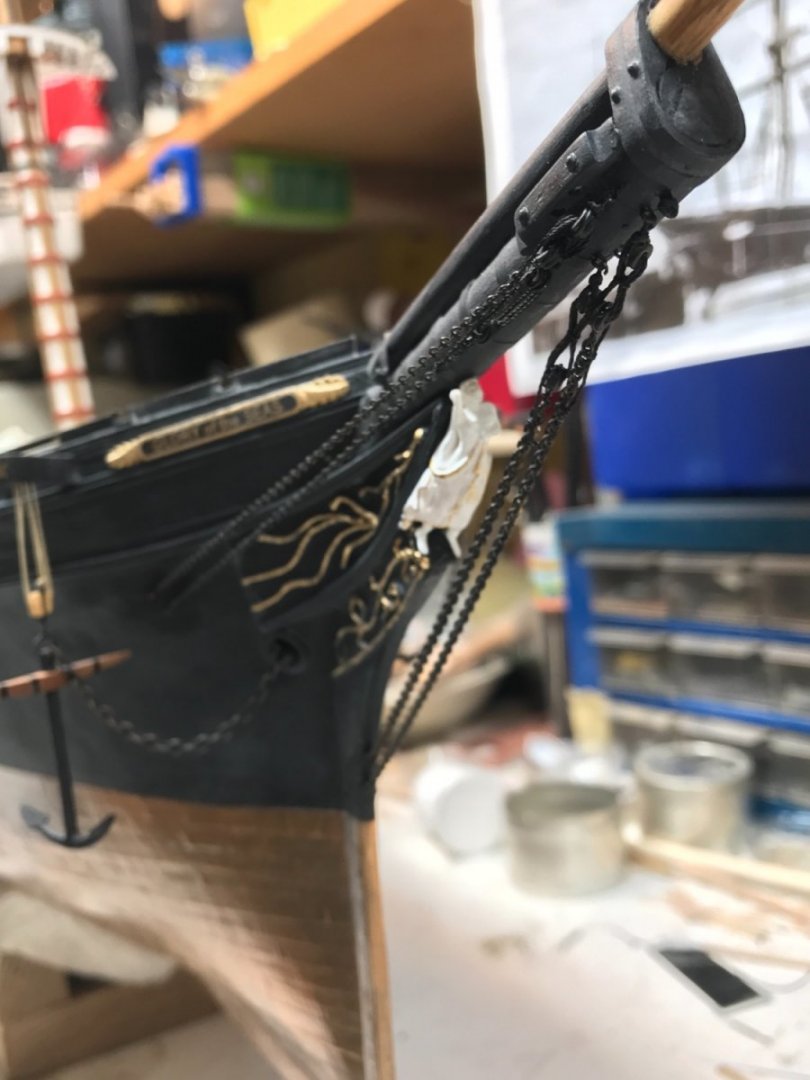
Finished up the chain head gear. Now onto the martingale and stays. Rob


- 3,560 replies
-
- 6
-

-
-
- clipper
- hull model
- (and 2 more)
-
A bit more work on the starboard side…..now to the port. Rob

- 3,560 replies
-
- 4
-
-
- clipper
- hull model
- (and 2 more)
-
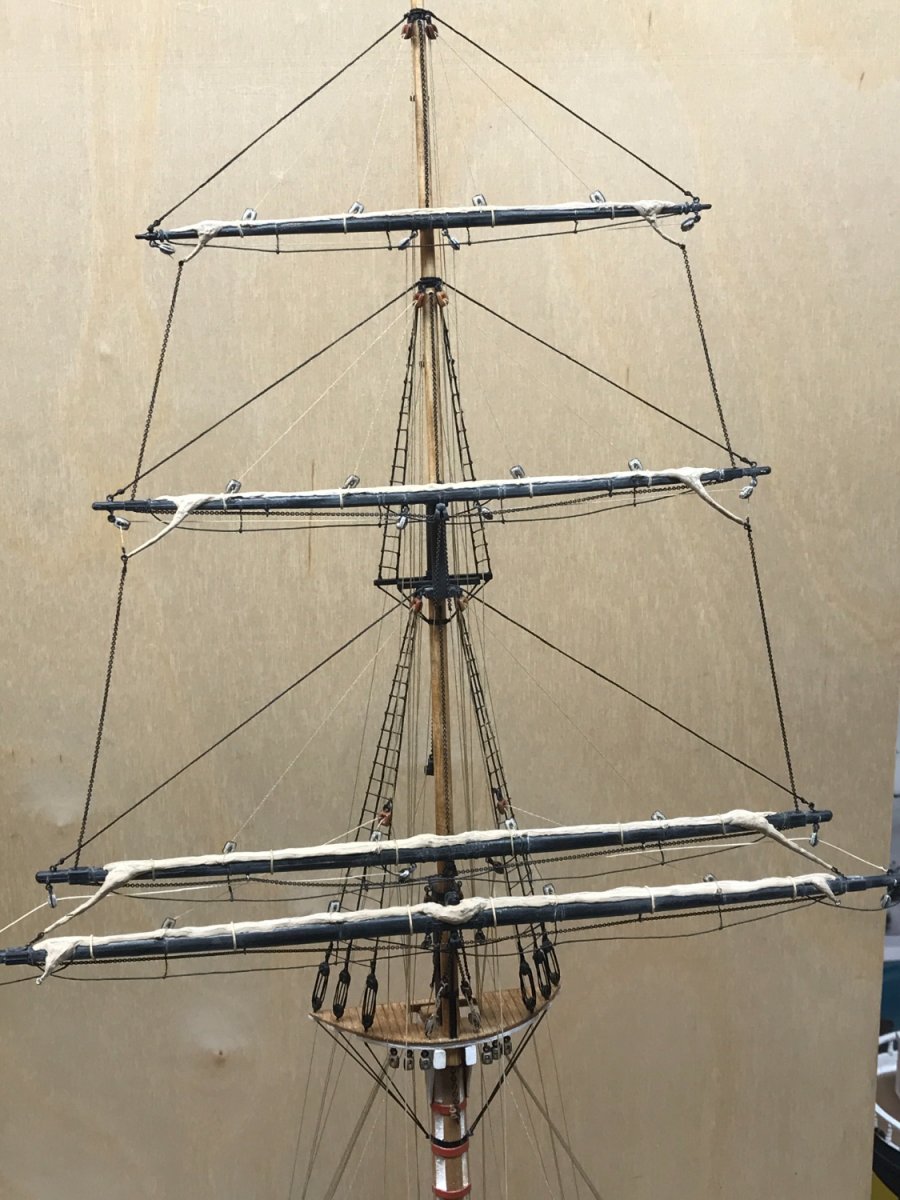
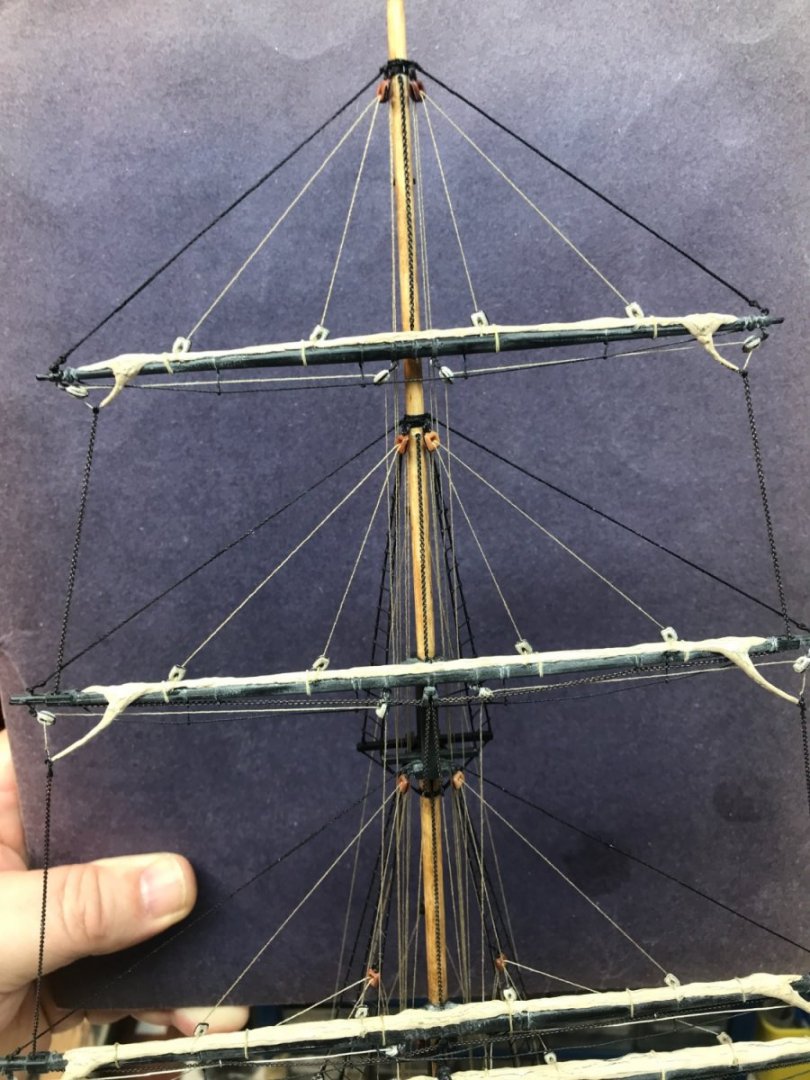
The lifts are standing rigging...accept on the main yard lifts. When the yards are raised via their haulyards...the lifts are slung and go slack. Look at the black line on my mizzen mast and you'll see the difference. Rob
- 3,560 replies
-
- 1
-
-
- clipper
- hull model
- (and 2 more)
-
Yes Vlad...I've been studying clipper rigging for over 45 years...don't beat yourself up....it is a growing learning thing.....and once you see how standard rigging works...you will feel more comfortable with it. Rob
- 3,560 replies
-
- 2
-
-
- clipper
- hull model
- (and 2 more)
-
I concur. Shroud pin rails are very typical in such limited situations. I'll go that route...thanks for the validation. Rob
-
And most ships carried several thicknesses of sail. Those set for heavy weather and those for lighter fare. What an ordeal to have to change out sail for the weather you are anticipating. And of course Stunsails were of the lightest cotton duct. Rob
- 3,560 replies
-
- 1
-
-
- clipper
- hull model
- (and 2 more)
-
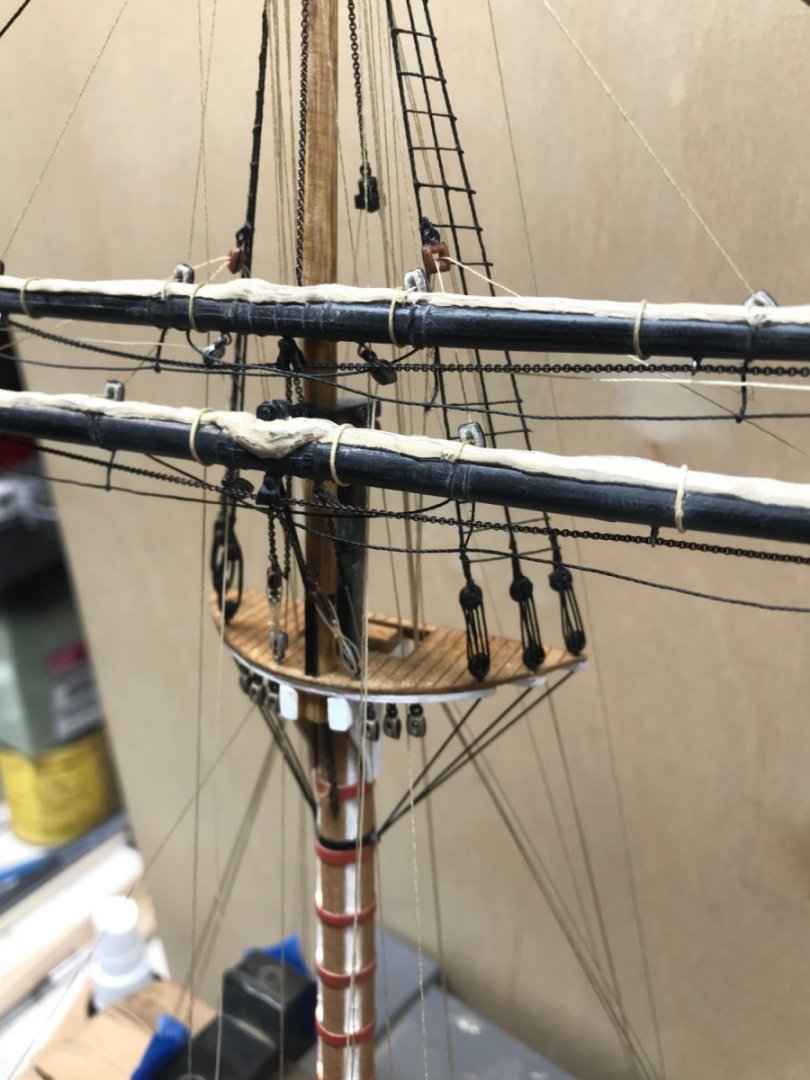
One thing I'm internalizing over is the lack of proper belaying points for the mizzen sail running rigging. No image I have shows clearly the belay points for the sheets and bunt lines and since the mizzen lacks a proper fife rail(short of the spider band)....I can only imagine that the rail was used as a pin rail...though no photographic evidence shows this. I was thinking of using a practice used on many vessels with similar issues....by using shroud suspended pin rails. Pin rails were bent to the inside of the lanyards at the deadeye point.....providing a belay point for the lines coming down from the fairleads that are fixed up on the inside shroud points. I do not want to drill holes in the fragile rail if at all possible. Rob(thinking out loud)
- 3,560 replies
-
- 1
-
-
- clipper
- hull model
- (and 2 more)
-
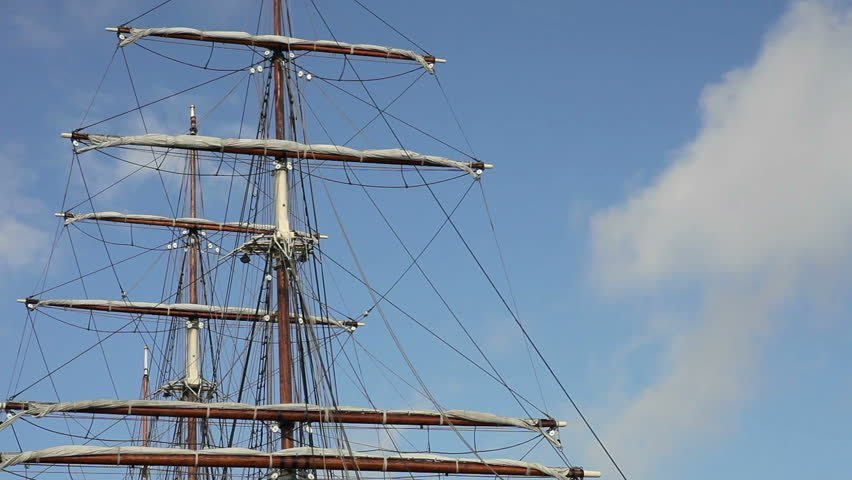
This image is what I'm trying to replicate on Glory...though I wanted tighter furling...like in her San Fran dock image. This furled arrangement is bent to the yard, unlike the other arrangement called quartered. where the sails clue is brought to the center of the yard. Rob
- 3,560 replies
-
- 3
-
-
- clipper
- hull model
- (and 2 more)
-
Metal bashing
rwiederrich replied to michael mott's topic in Metal Work, Soldering and Metal Fittings
Michael...what does the actual radiator look like...so your replication can be accurate.....I have no reference to make any judgements. All of your attempts look fine if indeed that is what the prototype looks like. Being a modelers perfectionist....I know you have accuracy pointing the way...but what does that actually look like? Rob(Magnificent work as usual) -
Far too many things will distract from them when they are layered over the shrouds. If it works…..do it. Nothing is set in stone. Rob
-
Nic....I think you are being a bit conservative in your estimation, though I do agree..... I concede that the rigging takes as long or(In my case) Waaay longer. It is fully dependent on the extent of your rigging detail. If one were to limit their detail to lifts and braces and foot ropes...indeed. But when one calculates the time needed to make gin blocks, rig properly the downhauls/ their purchases, bunt and sheets....not to mention sails and all their intricacies......you could be there twice as long. But, yes...rigging can take at least as long as the hull and all its details. Rob
- 3,560 replies
-
- 2
-
-

-
- clipper
- hull model
- (and 2 more)
-
Interesting....enough. I never figured the method to be technique sensitive. I simply apply a small drop of glue to each shroud...then press a precut length of ratline thread against all the shrouds and give the entire ratline a simple roll/twist through the glue......completely incorporating the glue through out the shrouds and the ratlines....then let dry. I applied the ratlines to all the shrouds on Glory's mizzen mast by simply rotating between them....allowing a bit of drying for each then moving onto the next. By the time I returned to the starting shroud...the glue was dry and and I laid another ratline. I finished up all the ratlines on the mizzen in about 40~ 45 minutes...this time included trimming off the excess. Rob
-
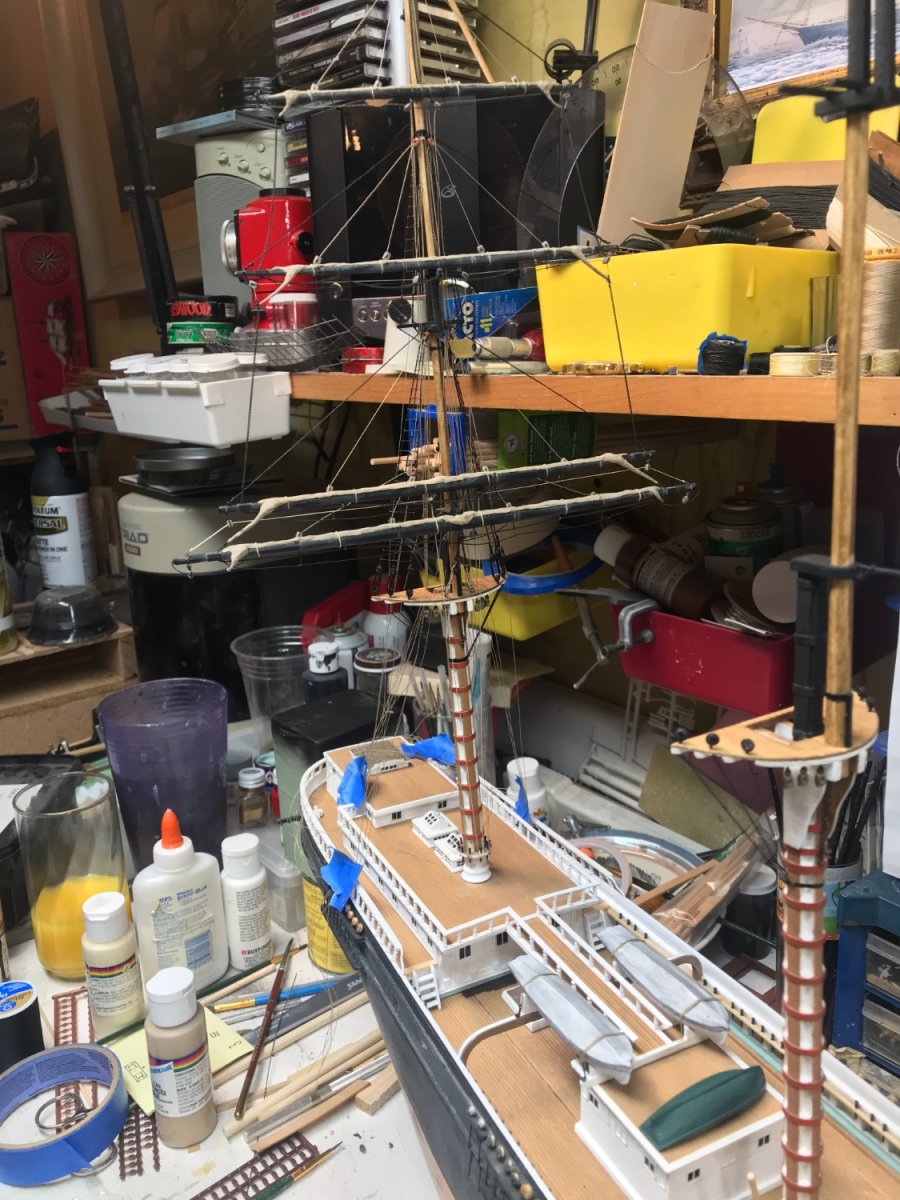
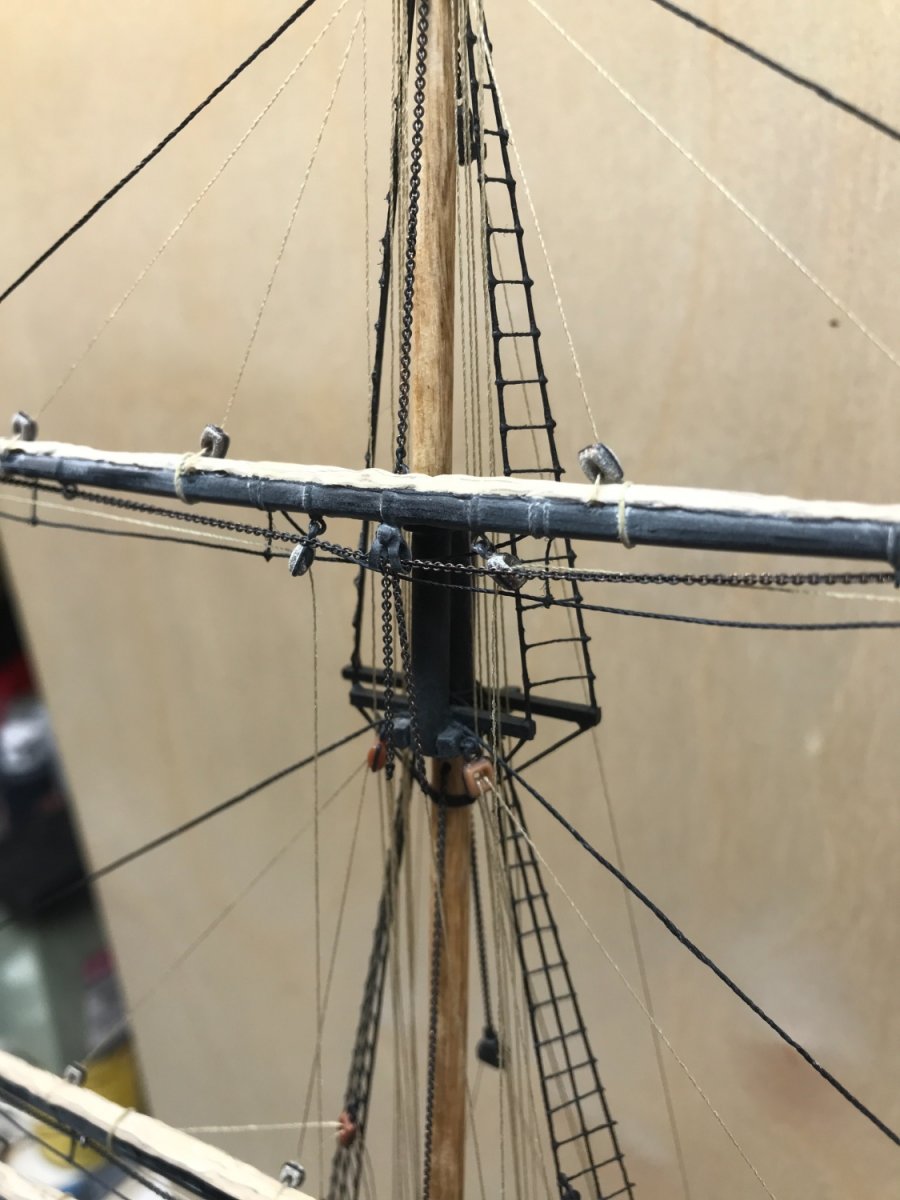
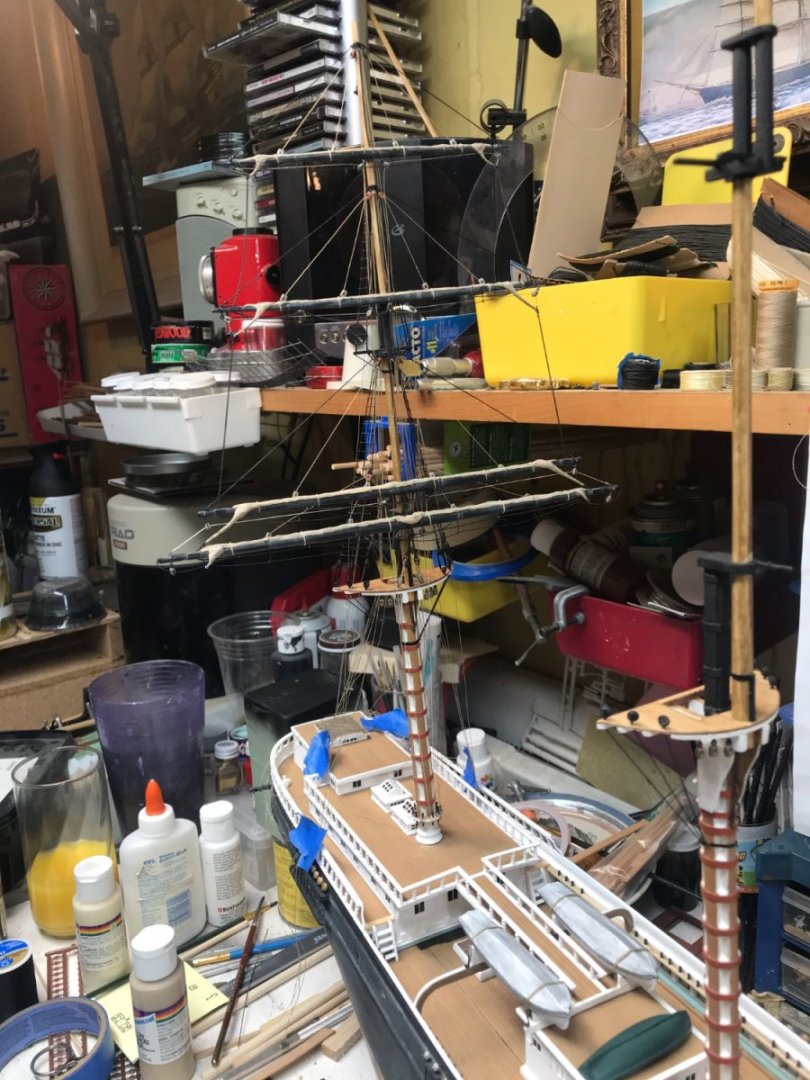
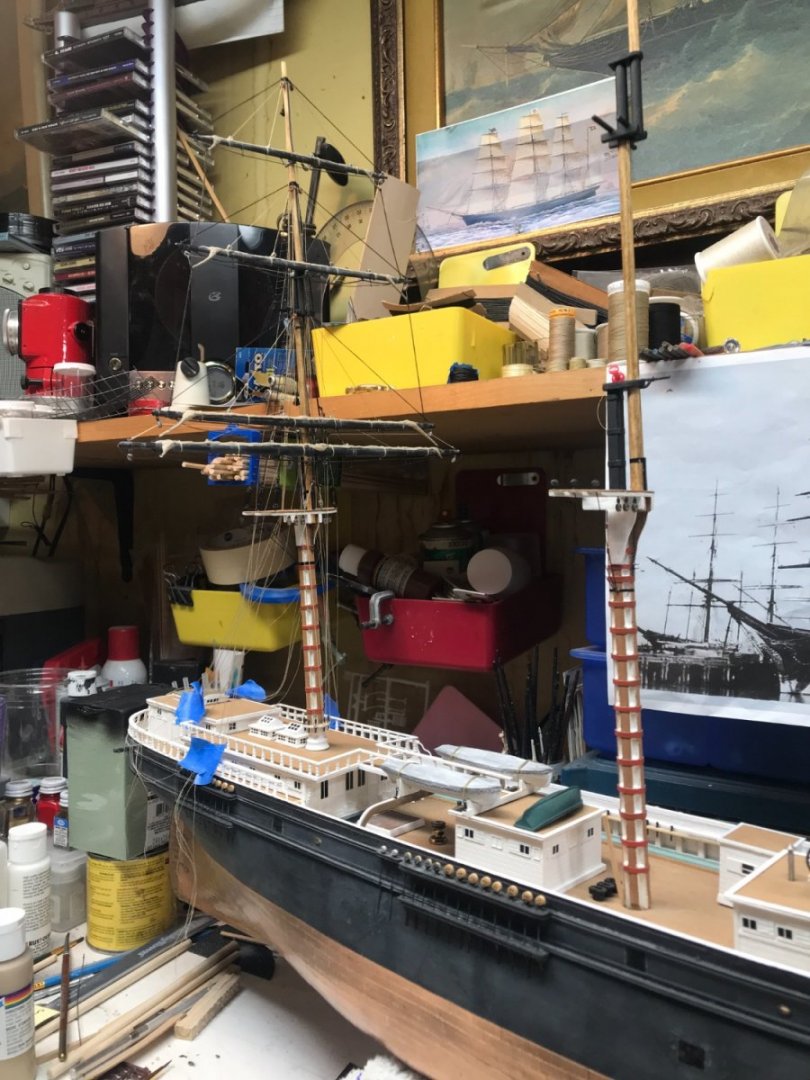
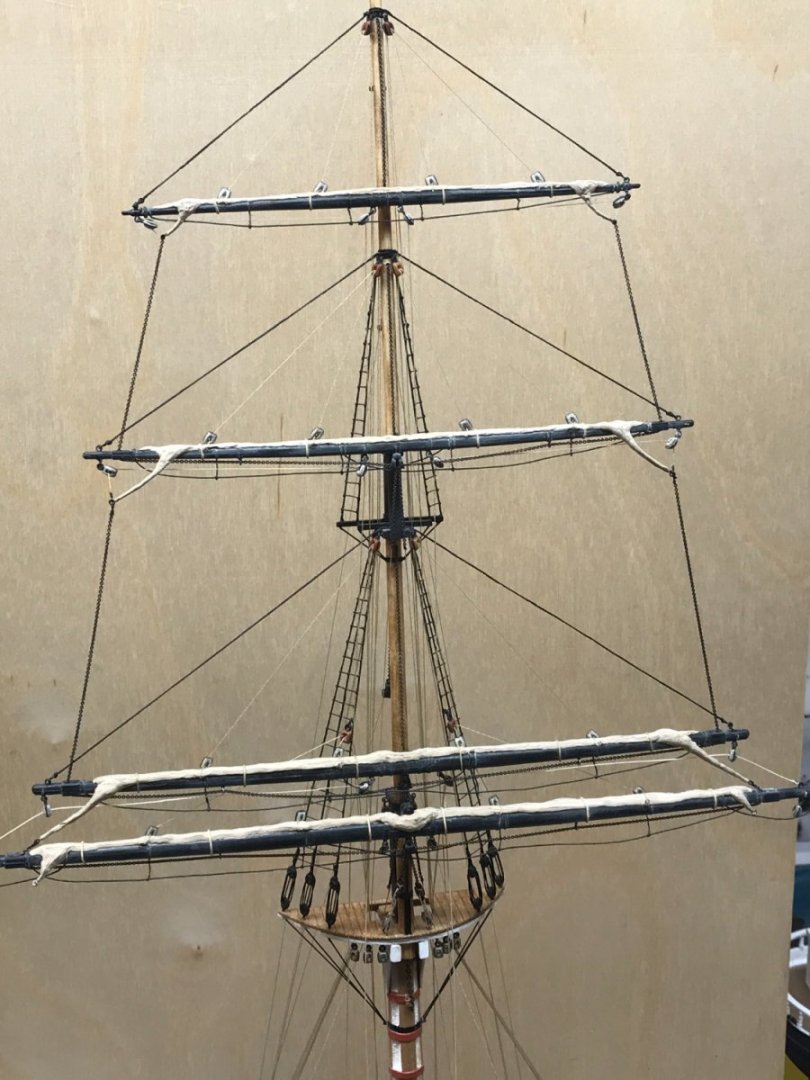
Now I’ll step the mast and add the shrouds and begin belaying lines and adding the back stays. So much to still do. Rob
- 3,560 replies
-
- 1
-
-
- clipper
- hull model
- (and 2 more)
-
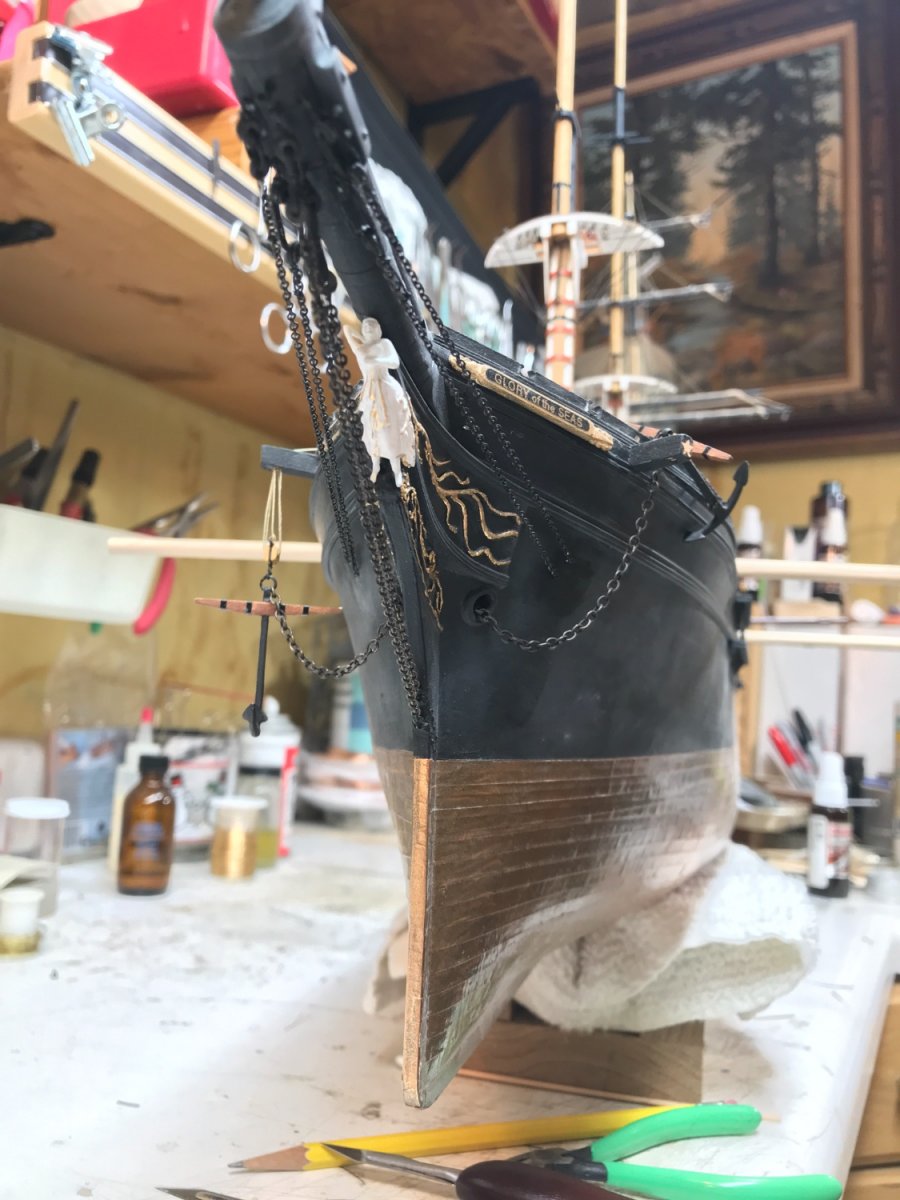
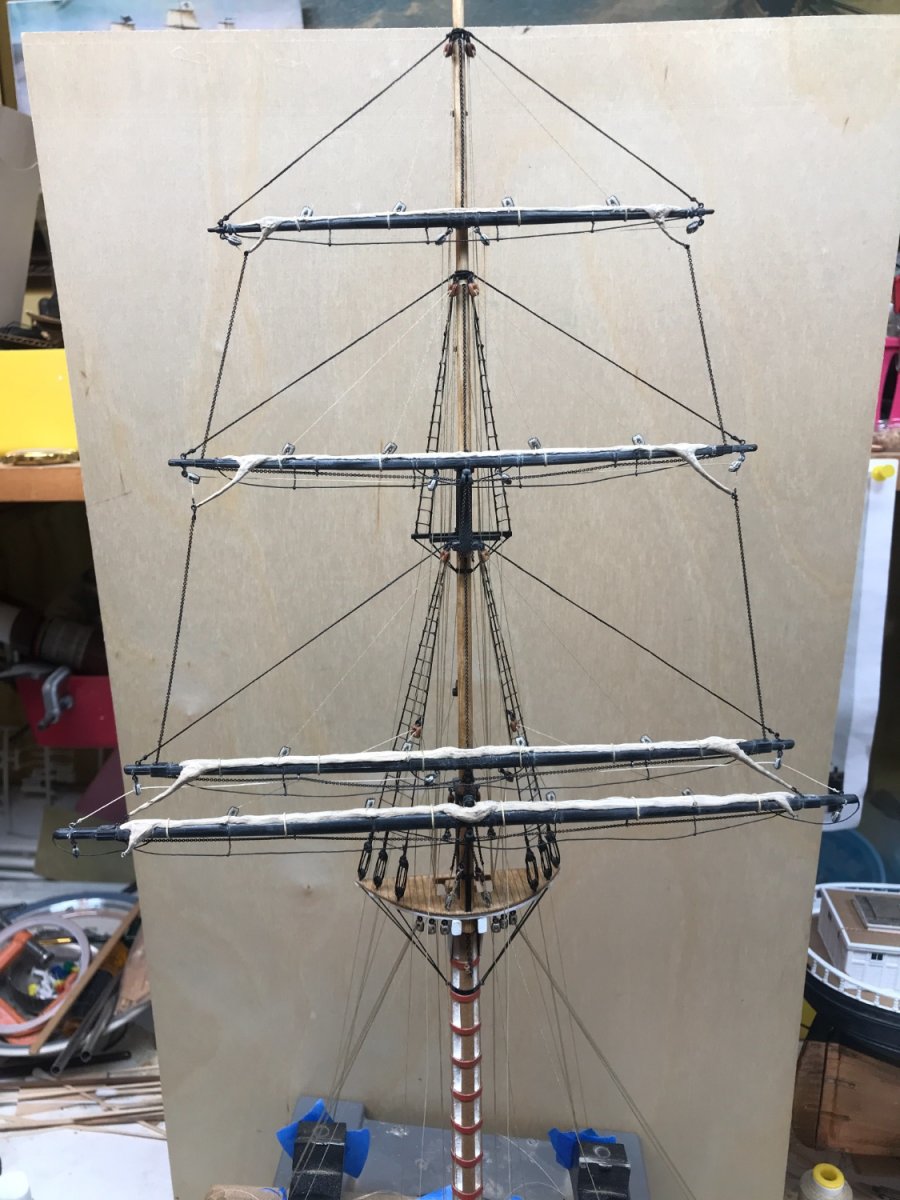
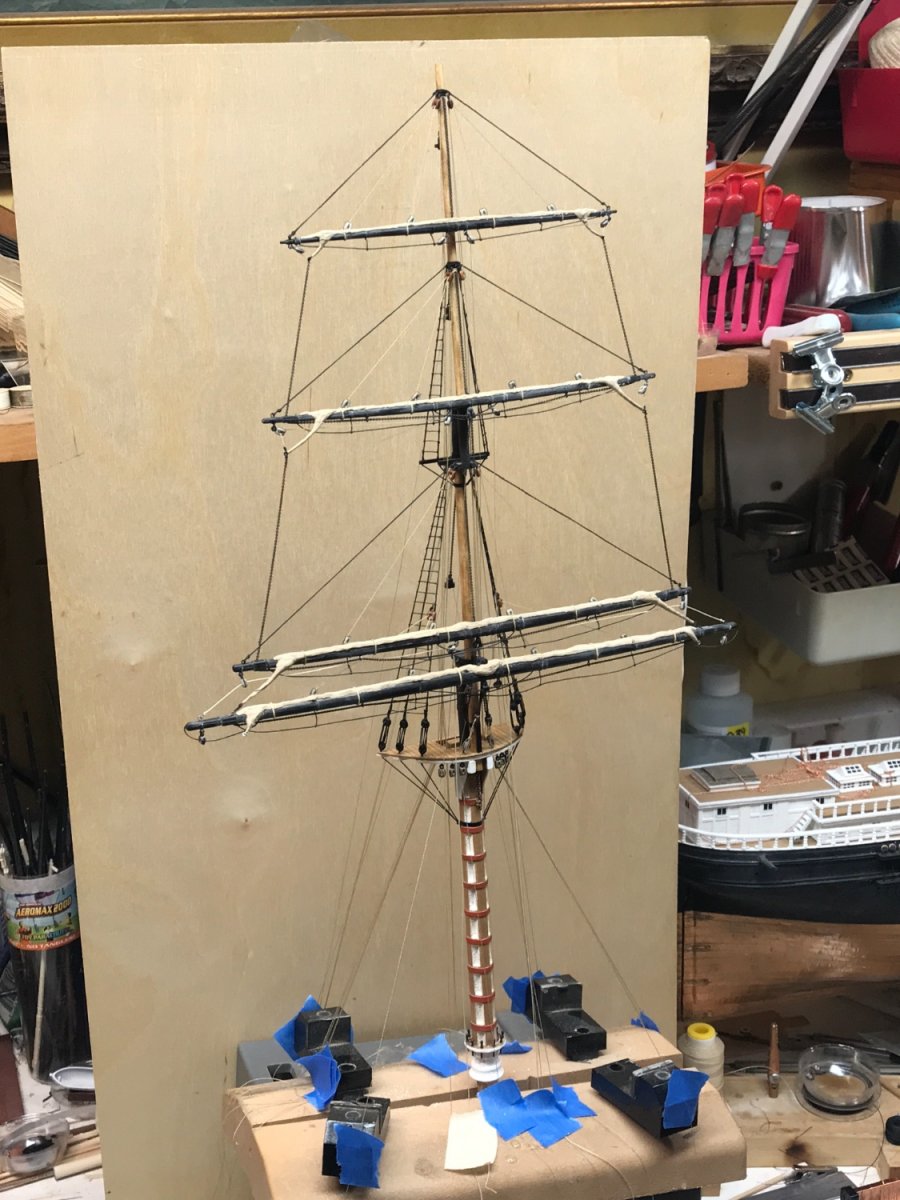
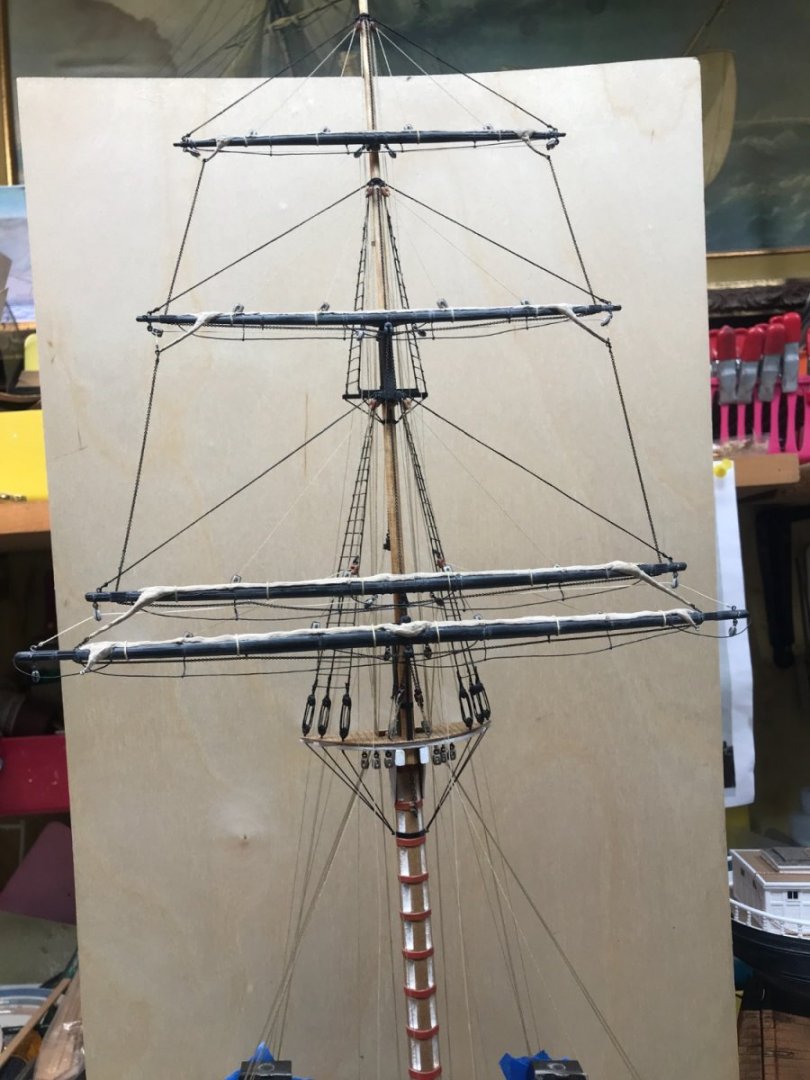
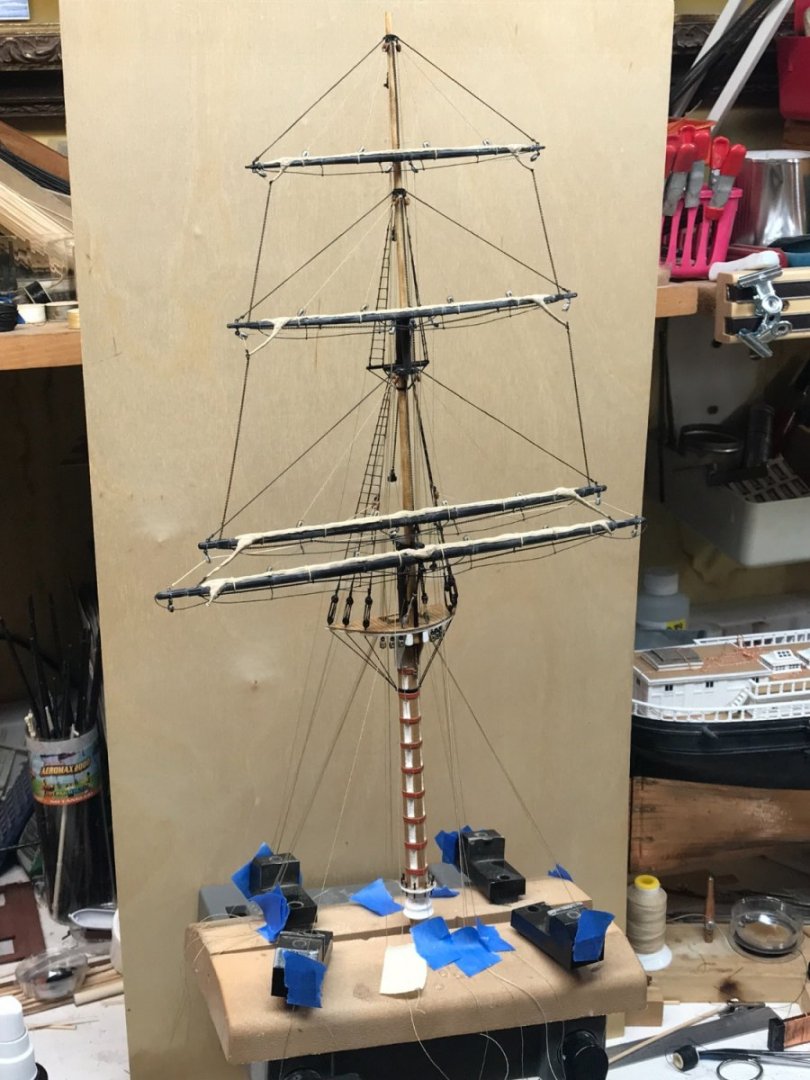
Temp stepped mast on model. Now to focus on the head gear and make some corrections. Rob

- 3,560 replies
-
- 8
-
-
- clipper
- hull model
- (and 2 more)
-
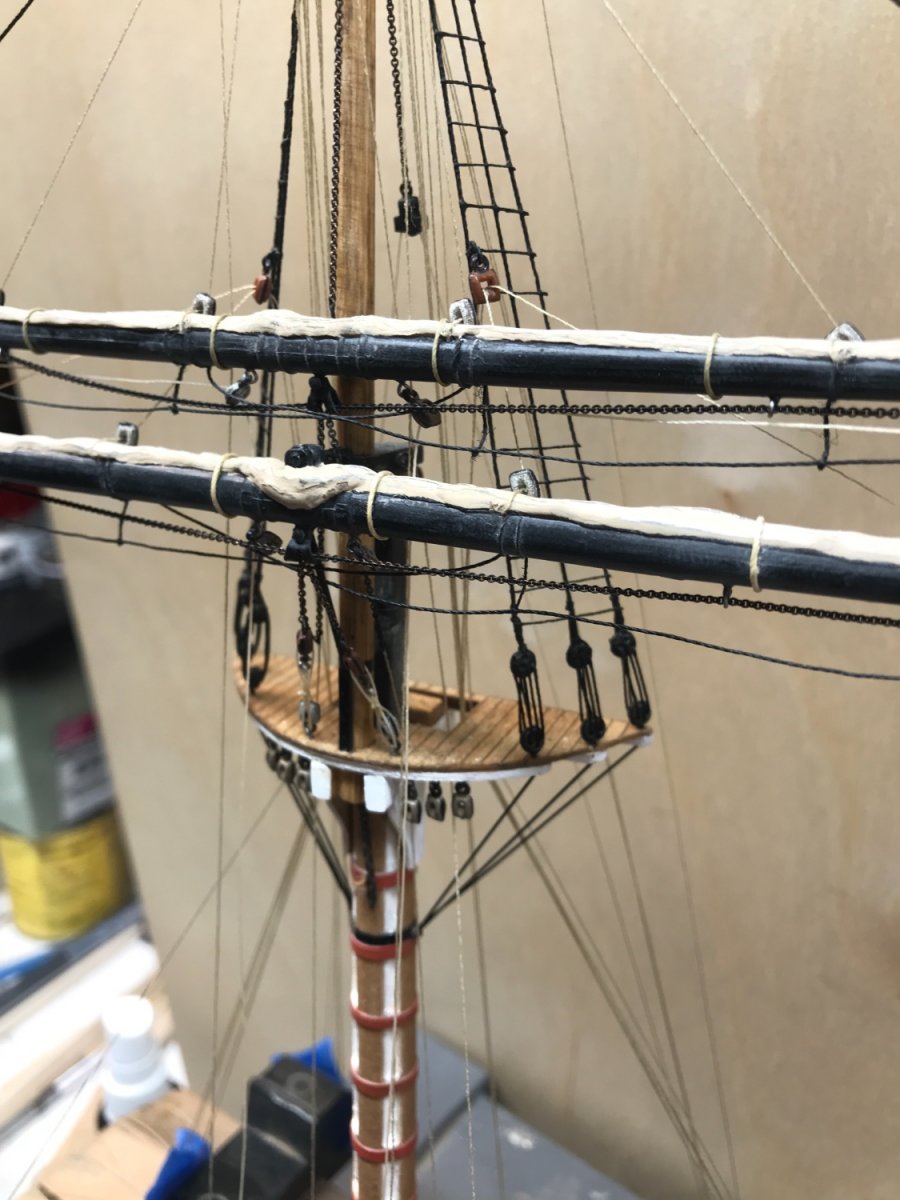
The main yard won’t get rigger or mounted till the main shrouds and rat lines are added. Then there will be room to rig it and to belay all the other lines that run through their prospective fairleads mounted on the shrouds. Rob
- 3,560 replies
-
- 1
-
-
- clipper
- hull model
- (and 2 more)
-
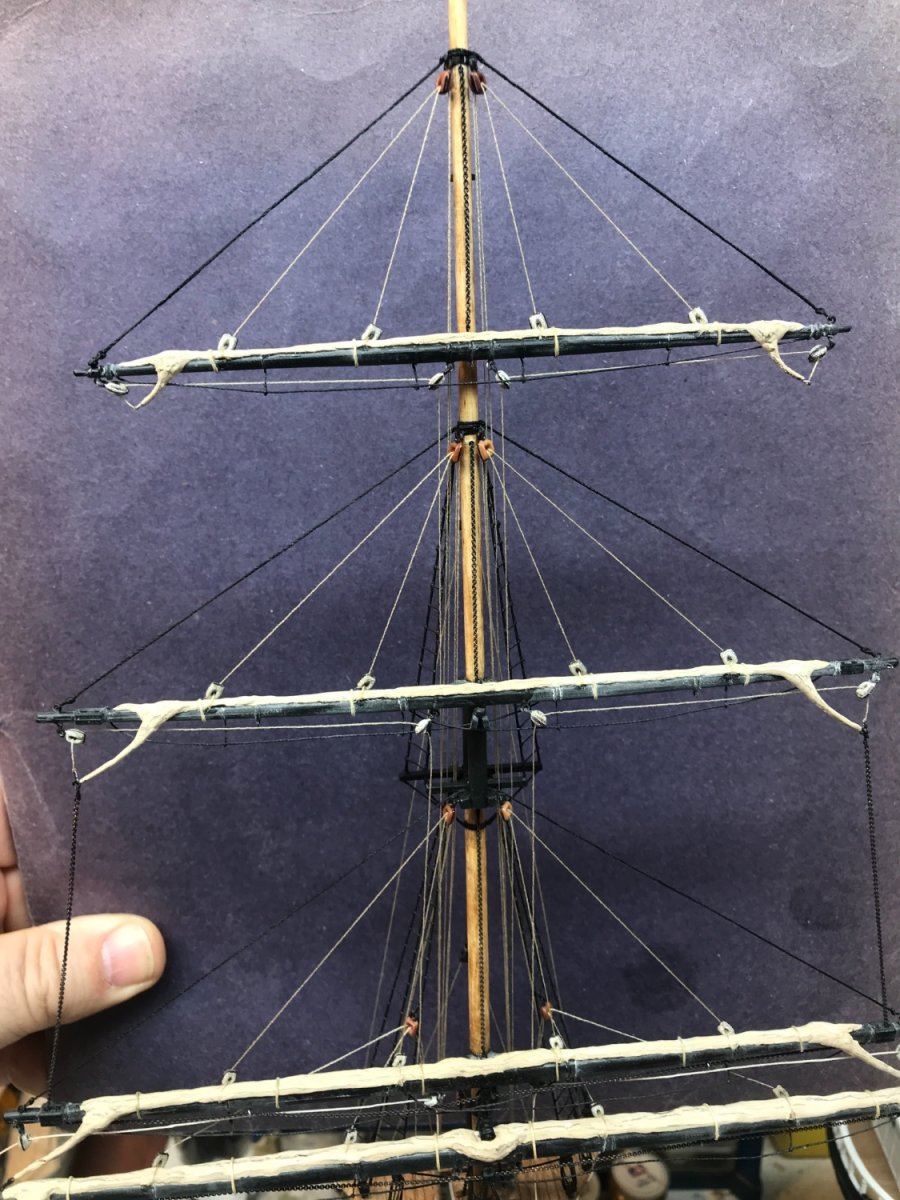
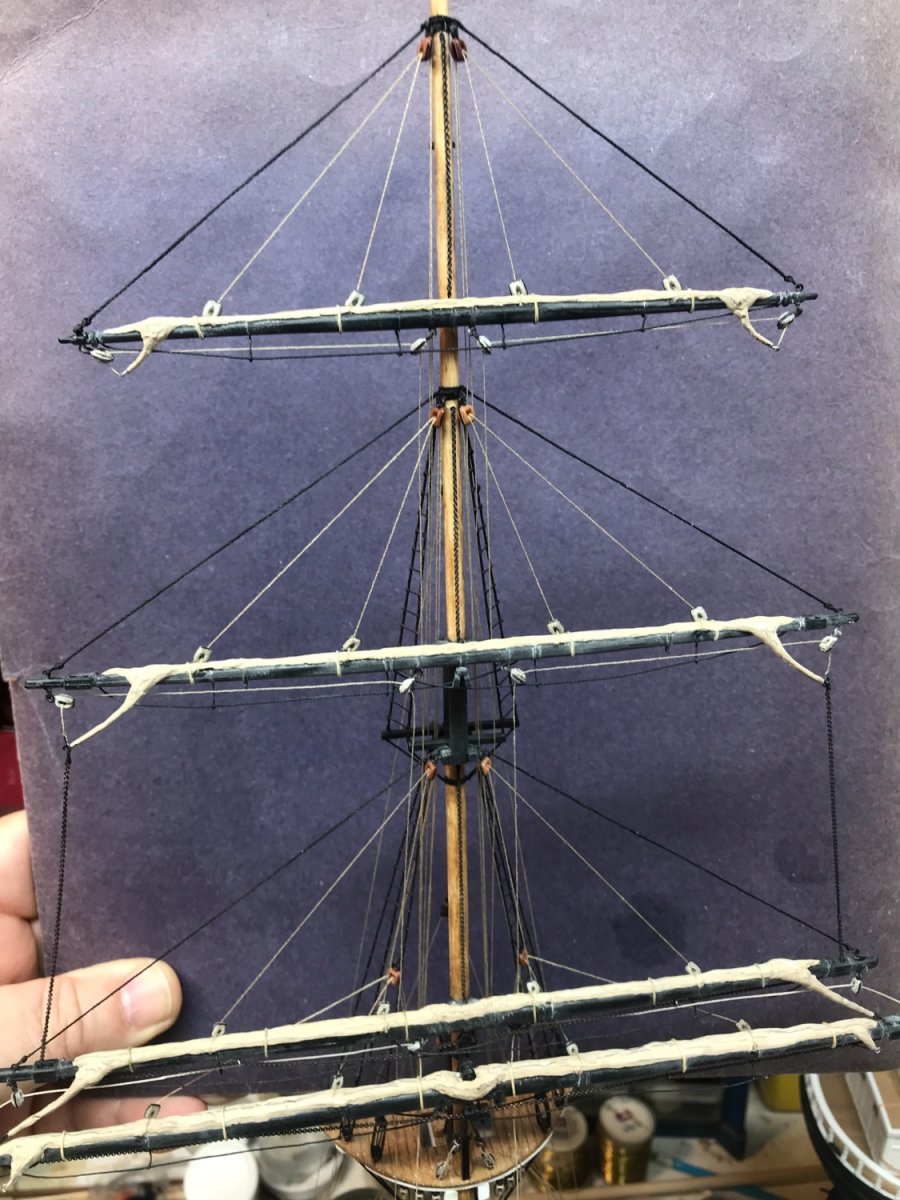
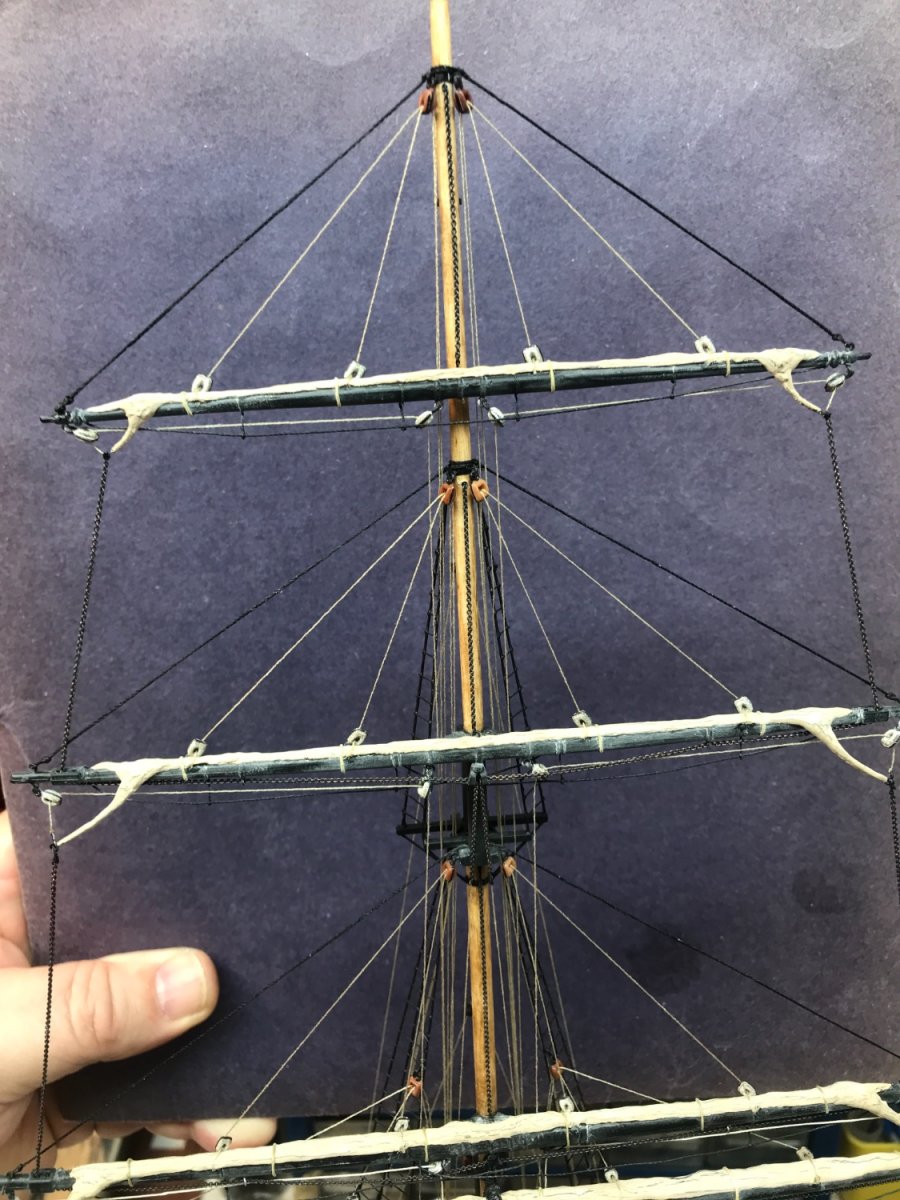
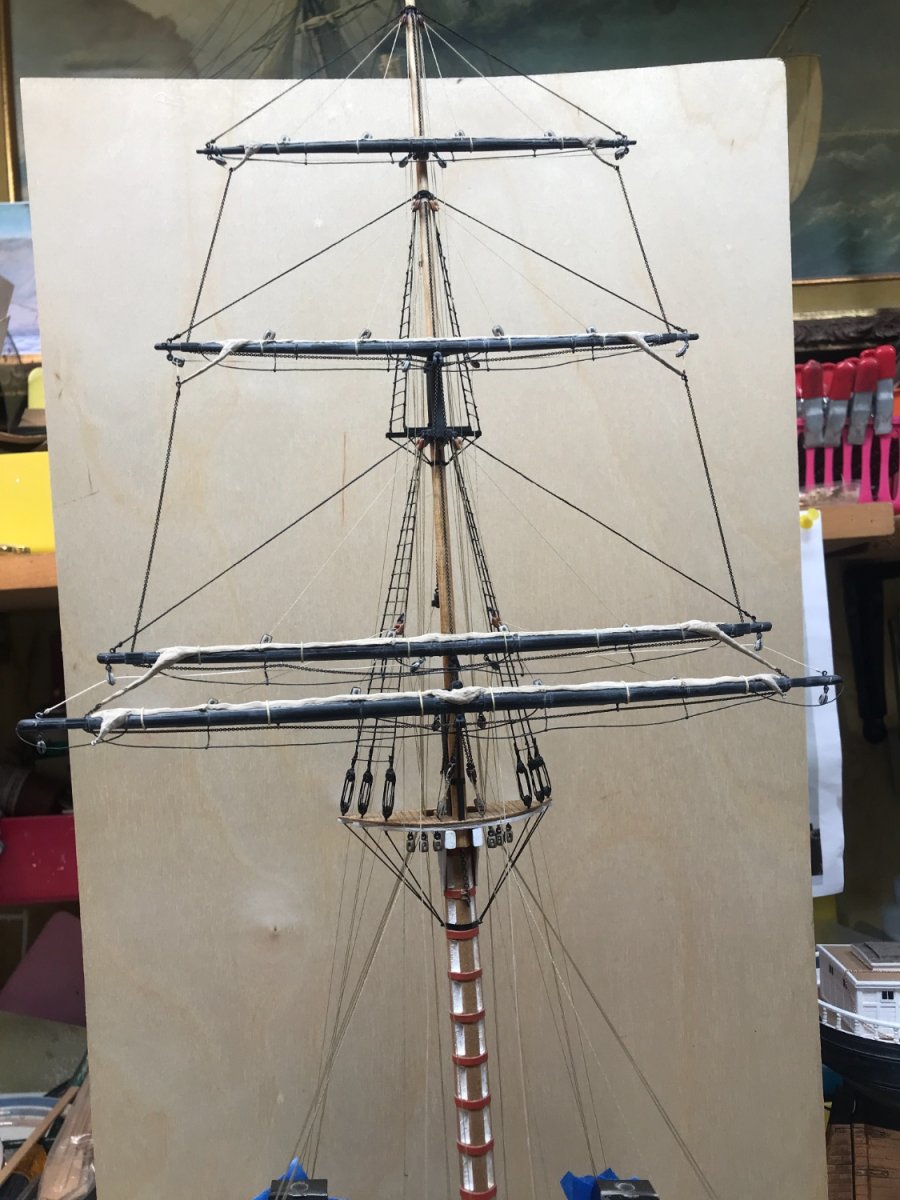
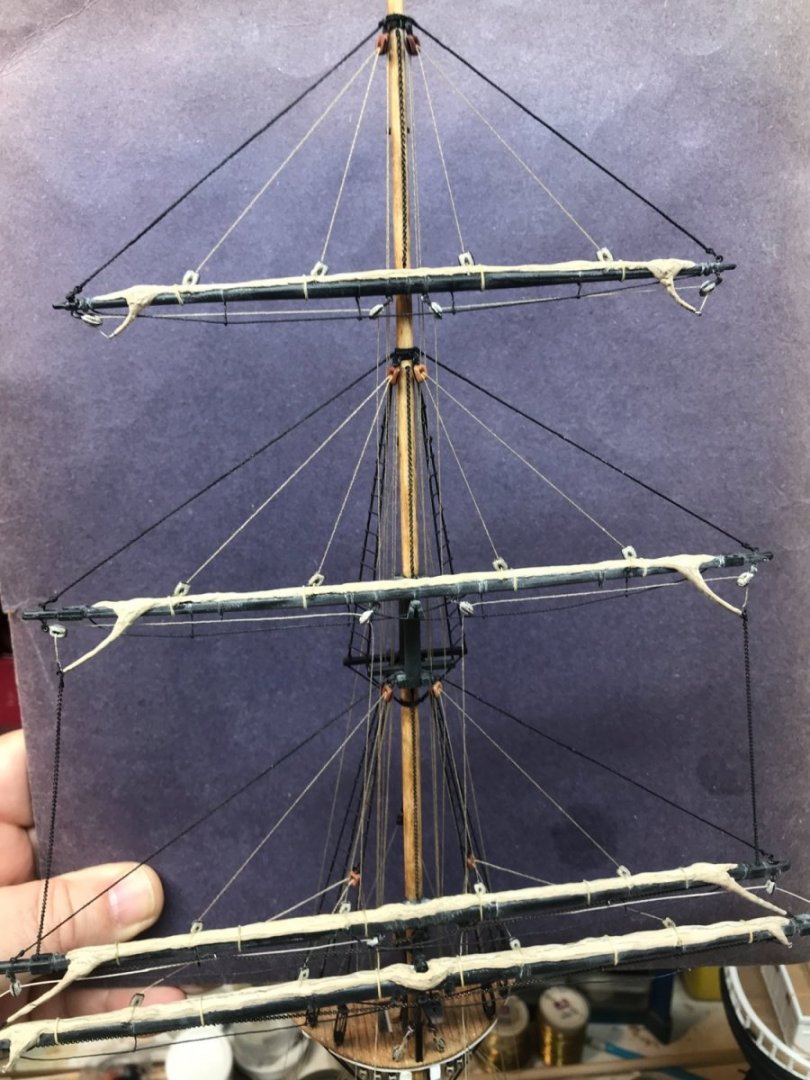
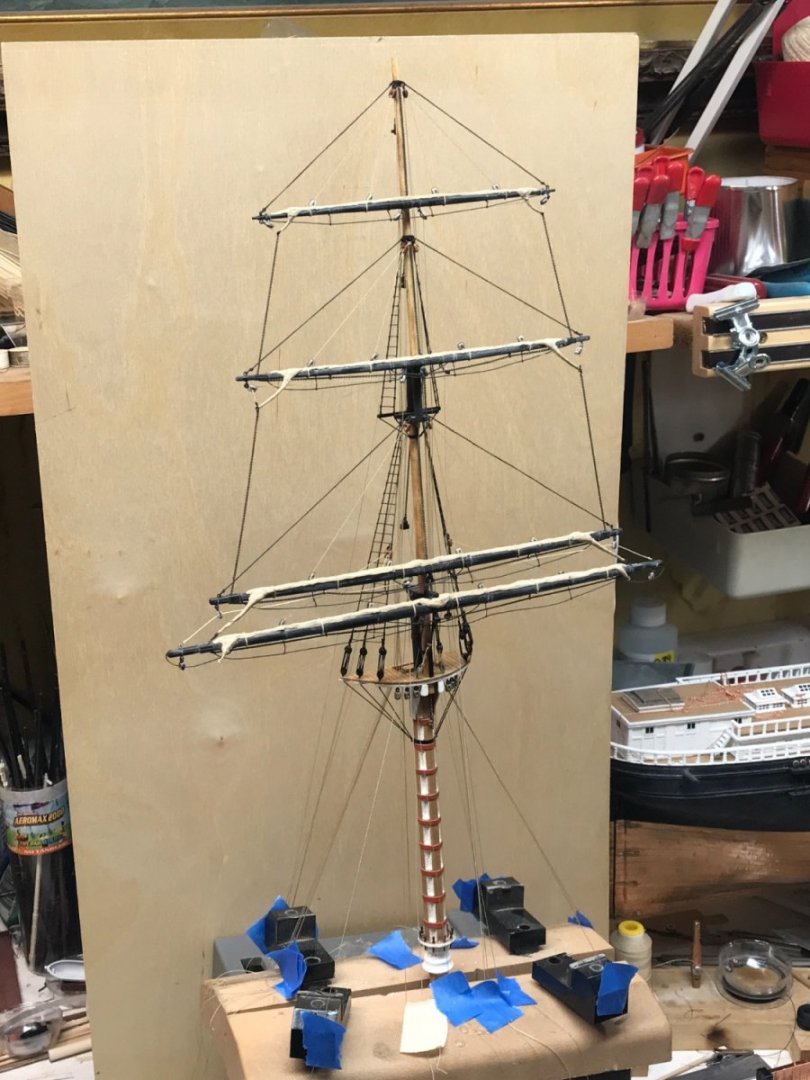
I’m nearing the final rigging of the mizzenmast. I will now belay the lower topsail down haul and the appropriate leach lines to the fife rail before stepping on the model. Here are some updated pics.


- 3,560 replies
-
- 9
-
-
- clipper
- hull model
- (and 2 more)
-
I’ve owned my workmate for over 30 years and have built my ships masts this way since I owned mine. So much detail can be done this way…..easily and safely. Rob
-
Thanks Druxey, that means a lot.. Authenticity was the greatest challenge and the scale made that even harder. I think I may have reached my goal. Actually, I don't see too often, models rigged with tight furled sails, but as photographs clearly show us...while in port the sails were made weather tight on the yards....meaning...a clean pressed tight sail was a sign of sharp seamanship and the sail almost acted as a covering for itself....no loose untuffed sections that could attract quantities of standing water and critters. We wanted to look good while we were in port....all those peering eyes and such. And if you were expecting a long stay in port...you unbent the sails and stowed them in their locker. Rob
- 3,560 replies
-
- 2
-
-
- clipper
- hull model
- (and 2 more)
-
Thanks Bill, that means a lot. I hope I’m staying true to my subject matter. Rob
-
Thanks a lot Michael. At this scale I surely didn’t want bulky. Tightly furled sails are not easy to pull off convincingly. Thanks…..your approval is worth millions. Rob