Schrader
-
Posts
304 -
Joined
-
Last visited
Content Type
Profiles
Forums
Gallery
Events
Everything posted by Schrader
-
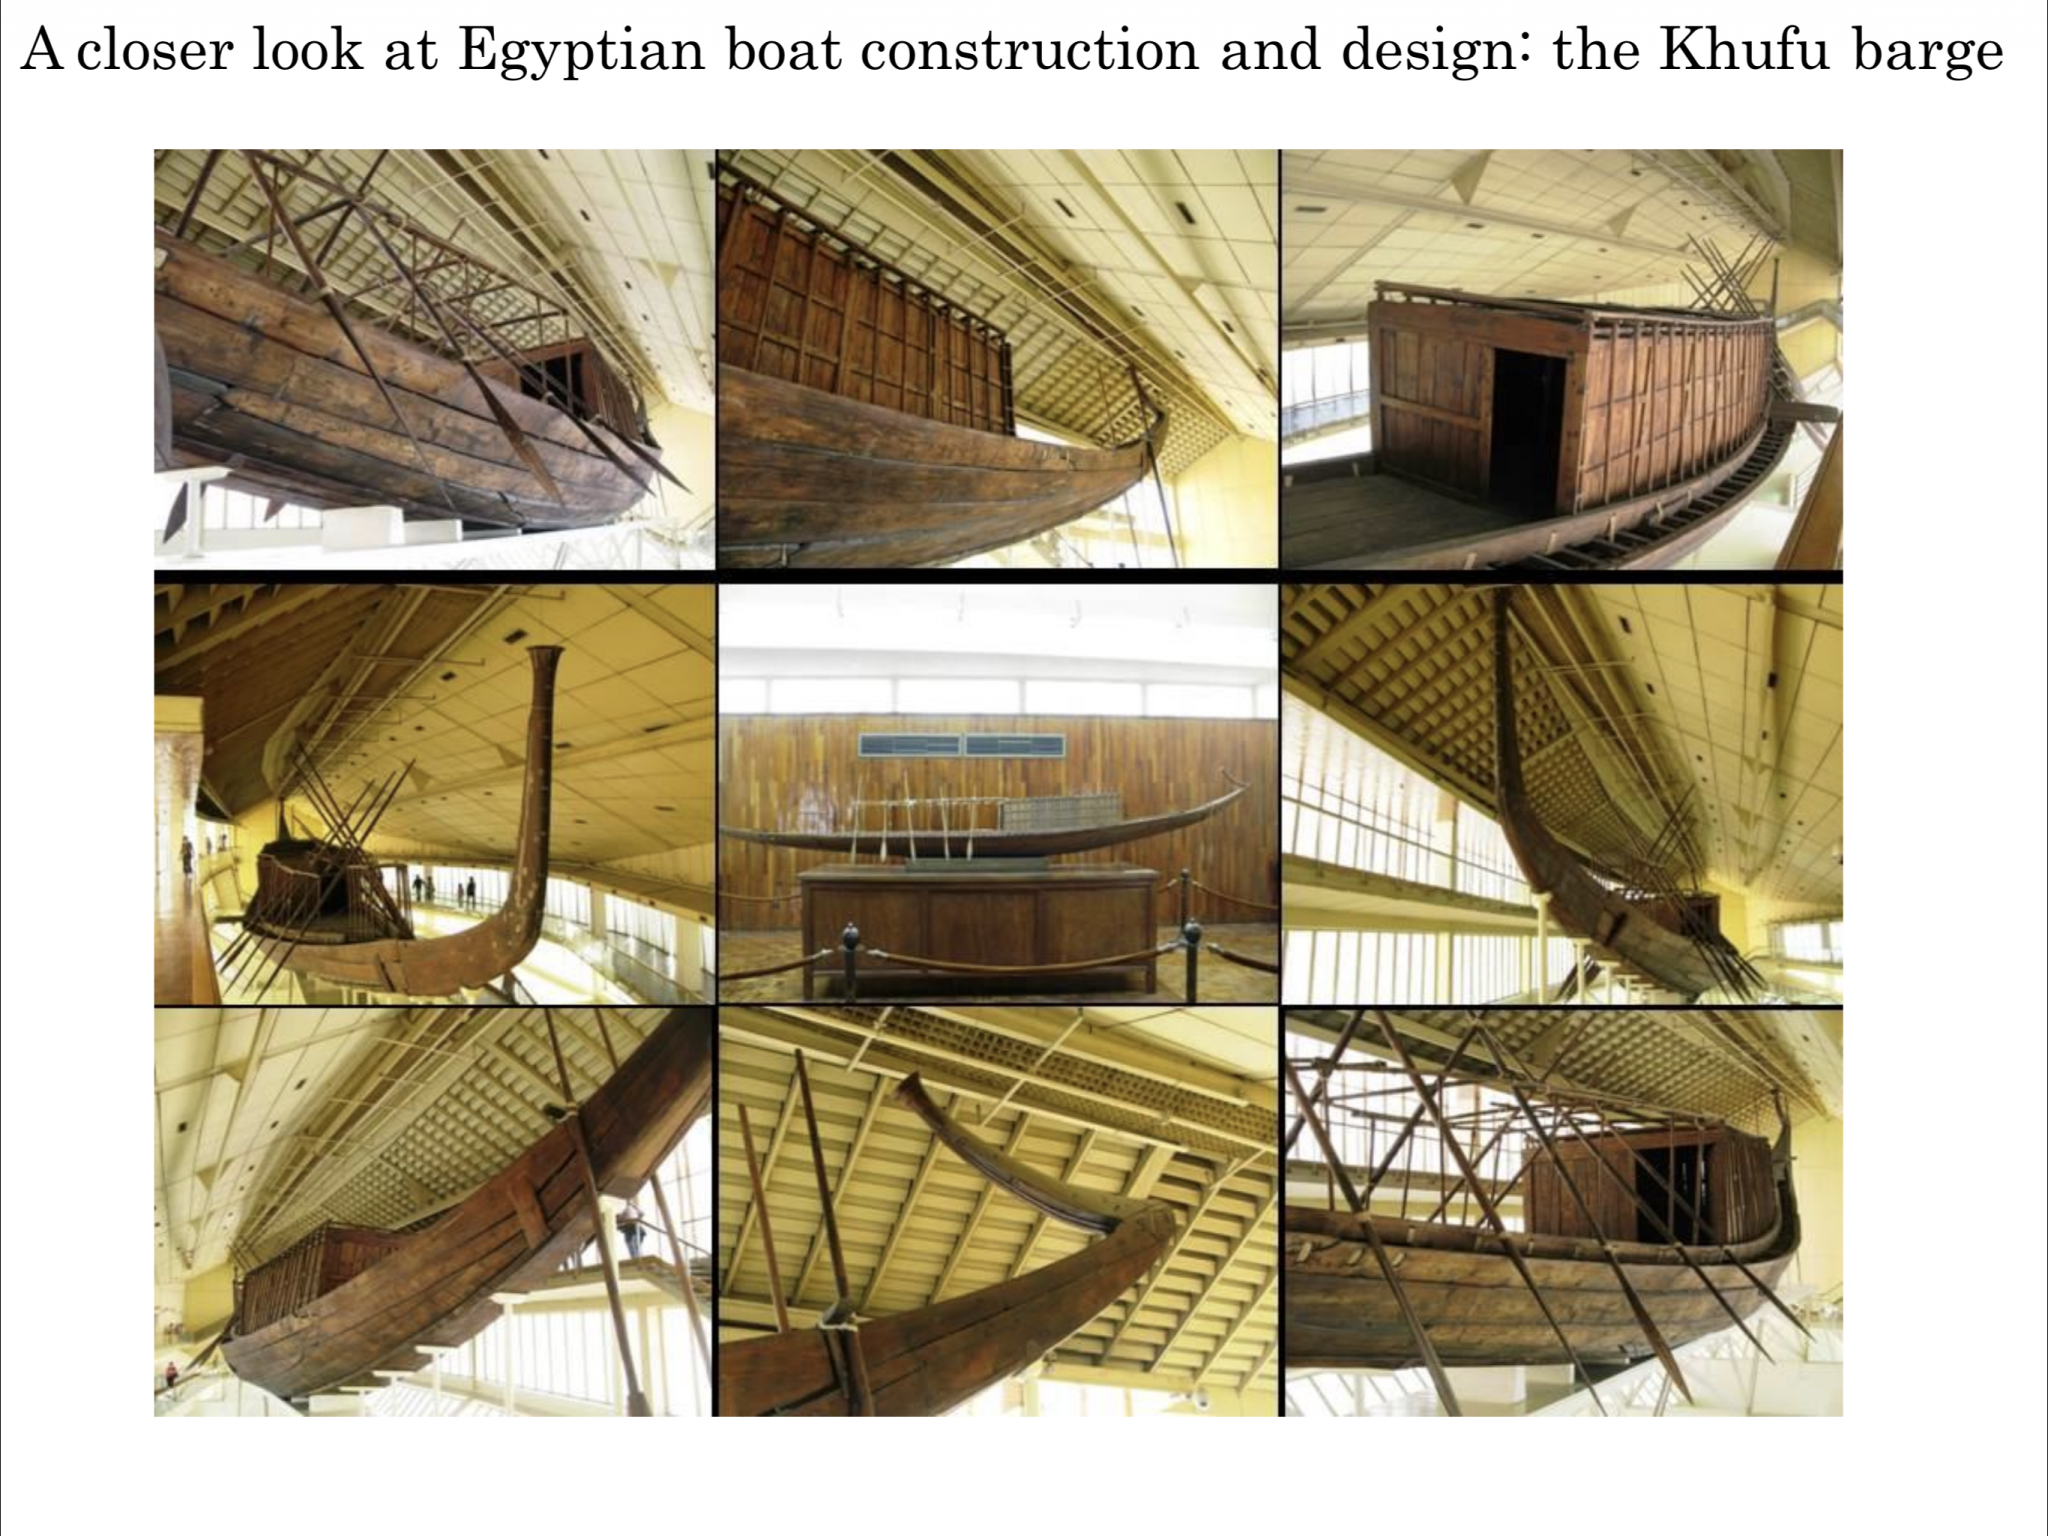
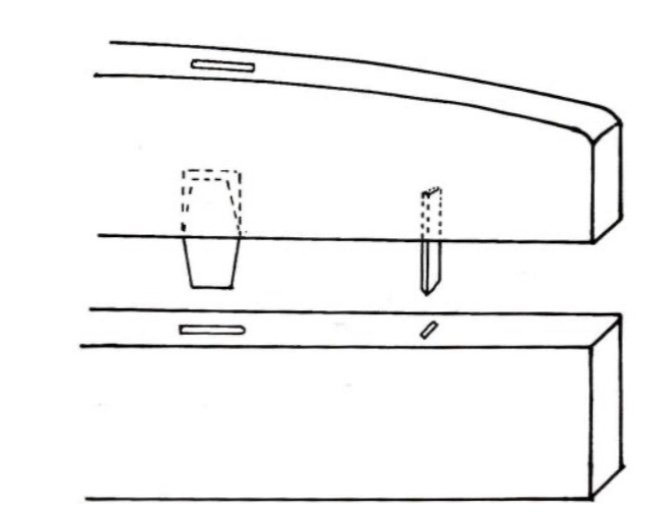
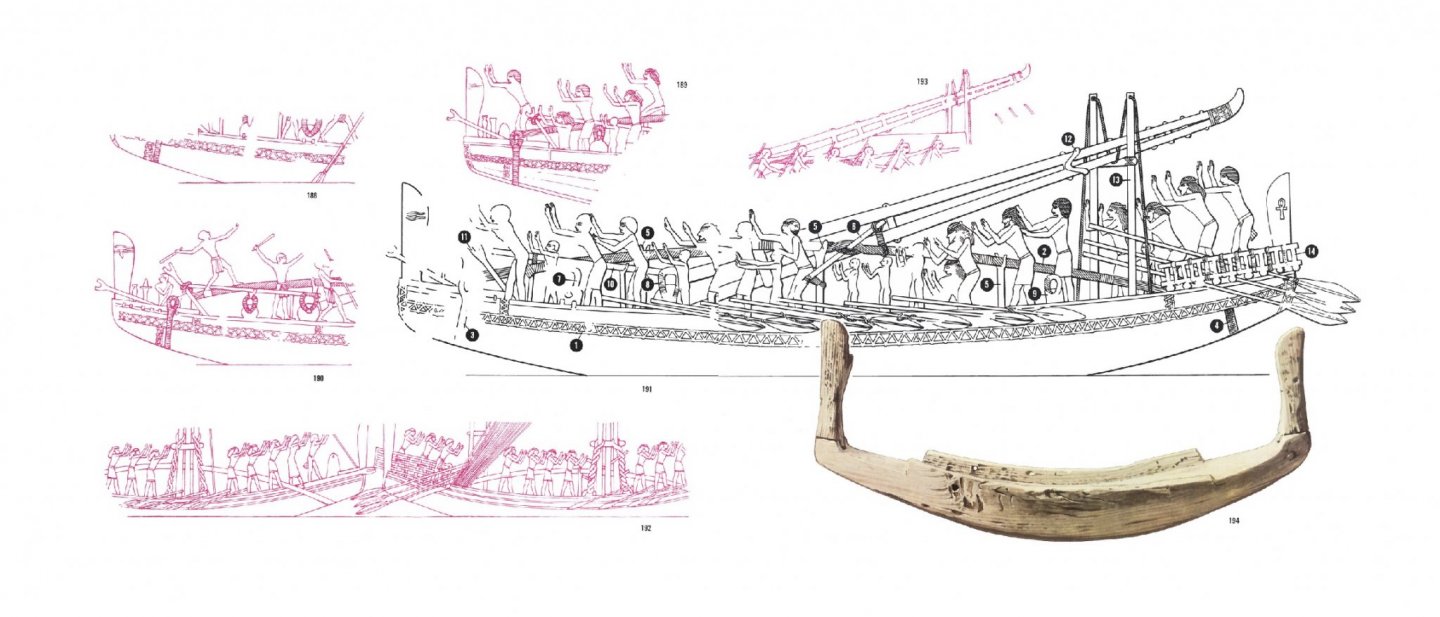
 PLANKS Something we as a modeler have been custom to see, are planks that go from stem to stern....... but here that is not the case. Even though some symmetrical “appearance” is between both sides, look like the forms are completely out of any logic...... In the picture above we can see how the planks are looking like in the Khufu ship. Let’s remember that we are talking about the same era (Fifth Dynasty) so for our model, we will be taking the same idea. Planks were very thick piece of wood. In this case, the bottom had 8 planks, up to 7 m long and 14-16 cm thick. The sides also 14-16 cm thick but up to 23 m long. By this time, the ships belonged to the “SHELF-FIRST” tradition. Which meant that the lateral and longitudinal strength resided in the hull. Take a look about the scarfs.....the intention behind was to increase the length of the “joint” between planks increasing the strength of the hull. Mortice and tennos were used to align the planks
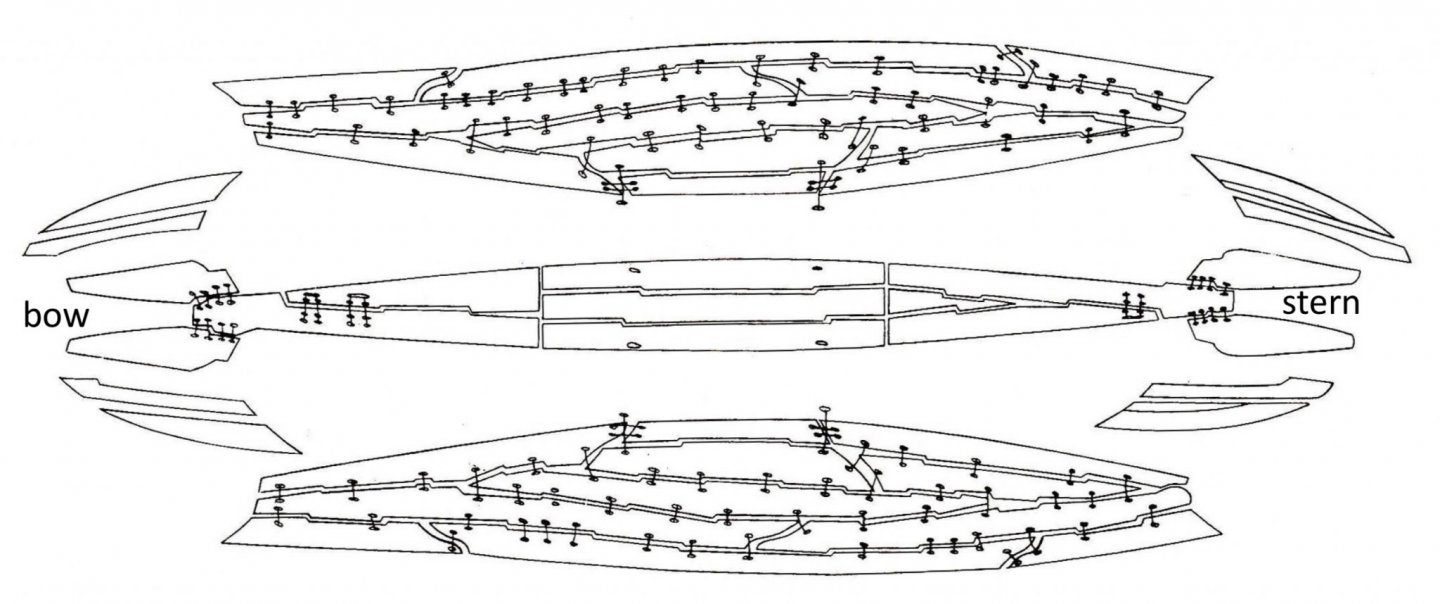
- 158 replies
-
- 4
-

-
- byblos ship
- Egyptian
- (and 1 more)
-
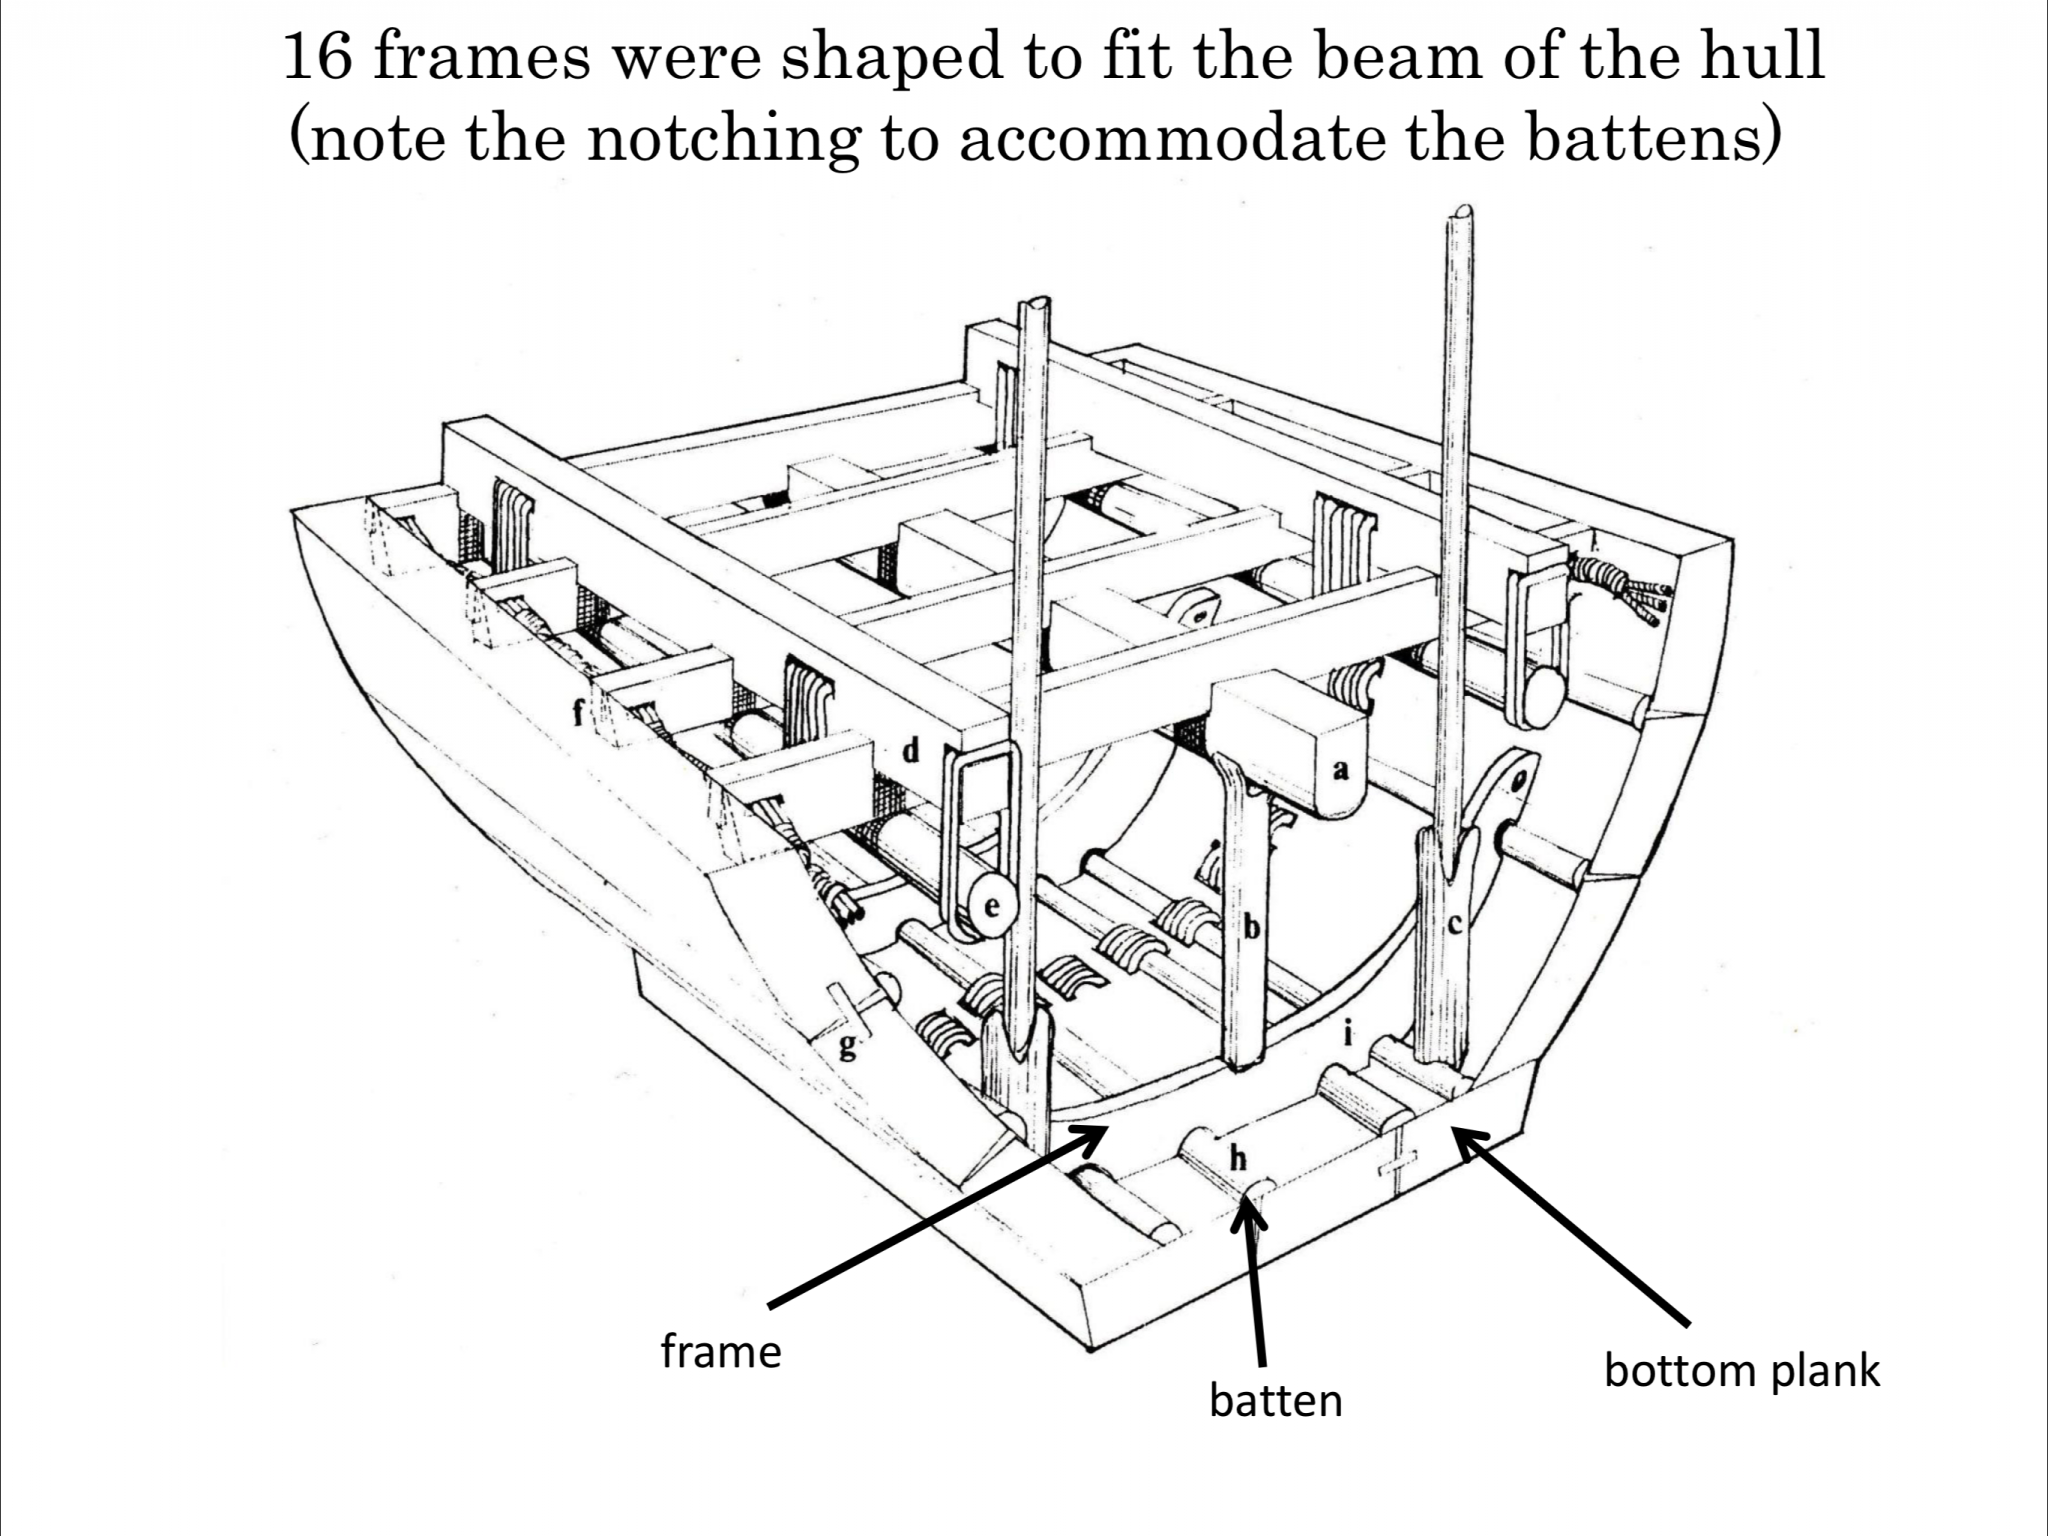
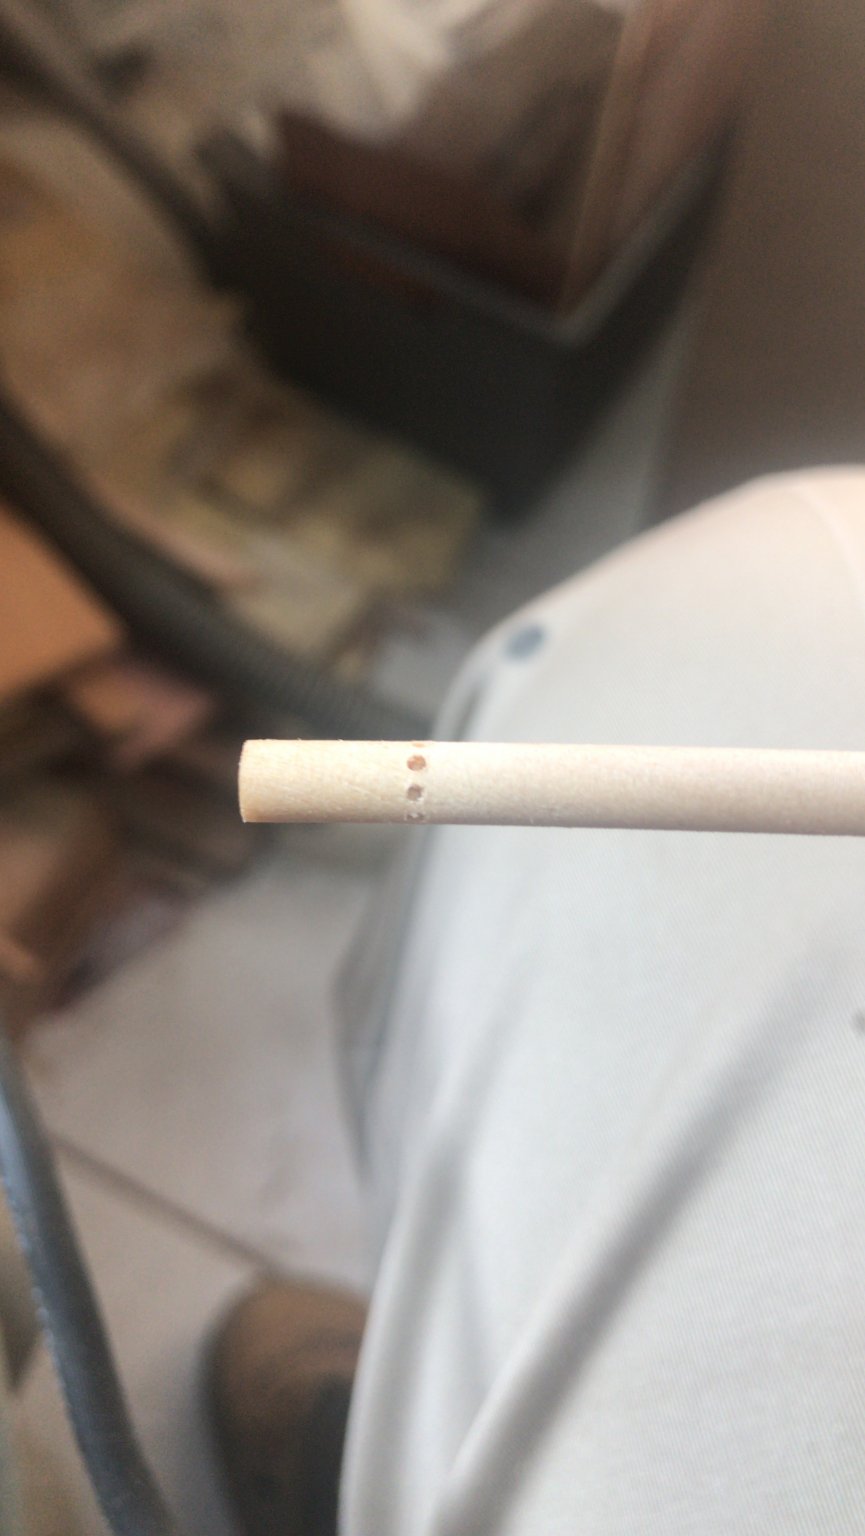
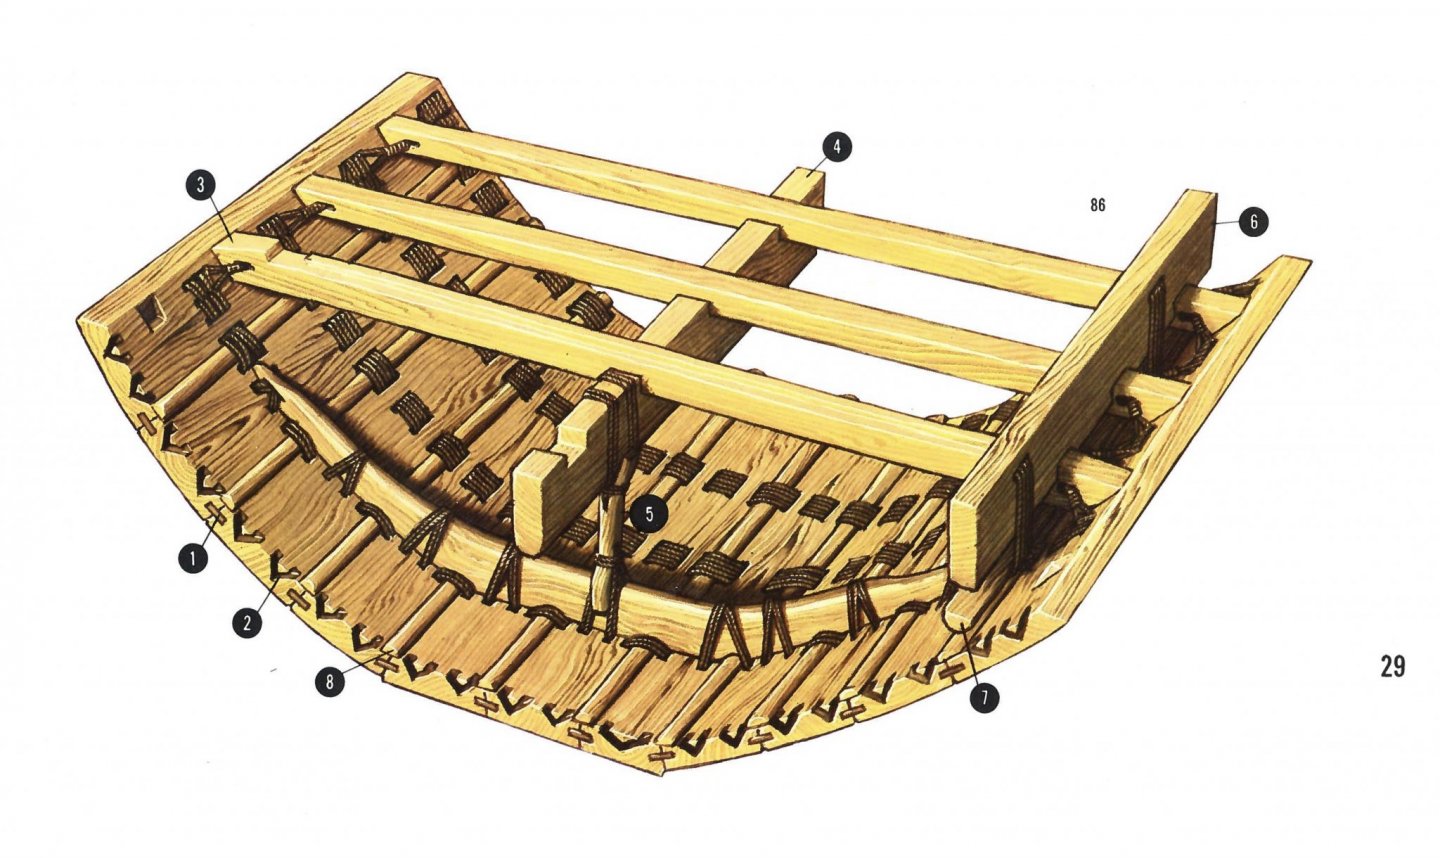
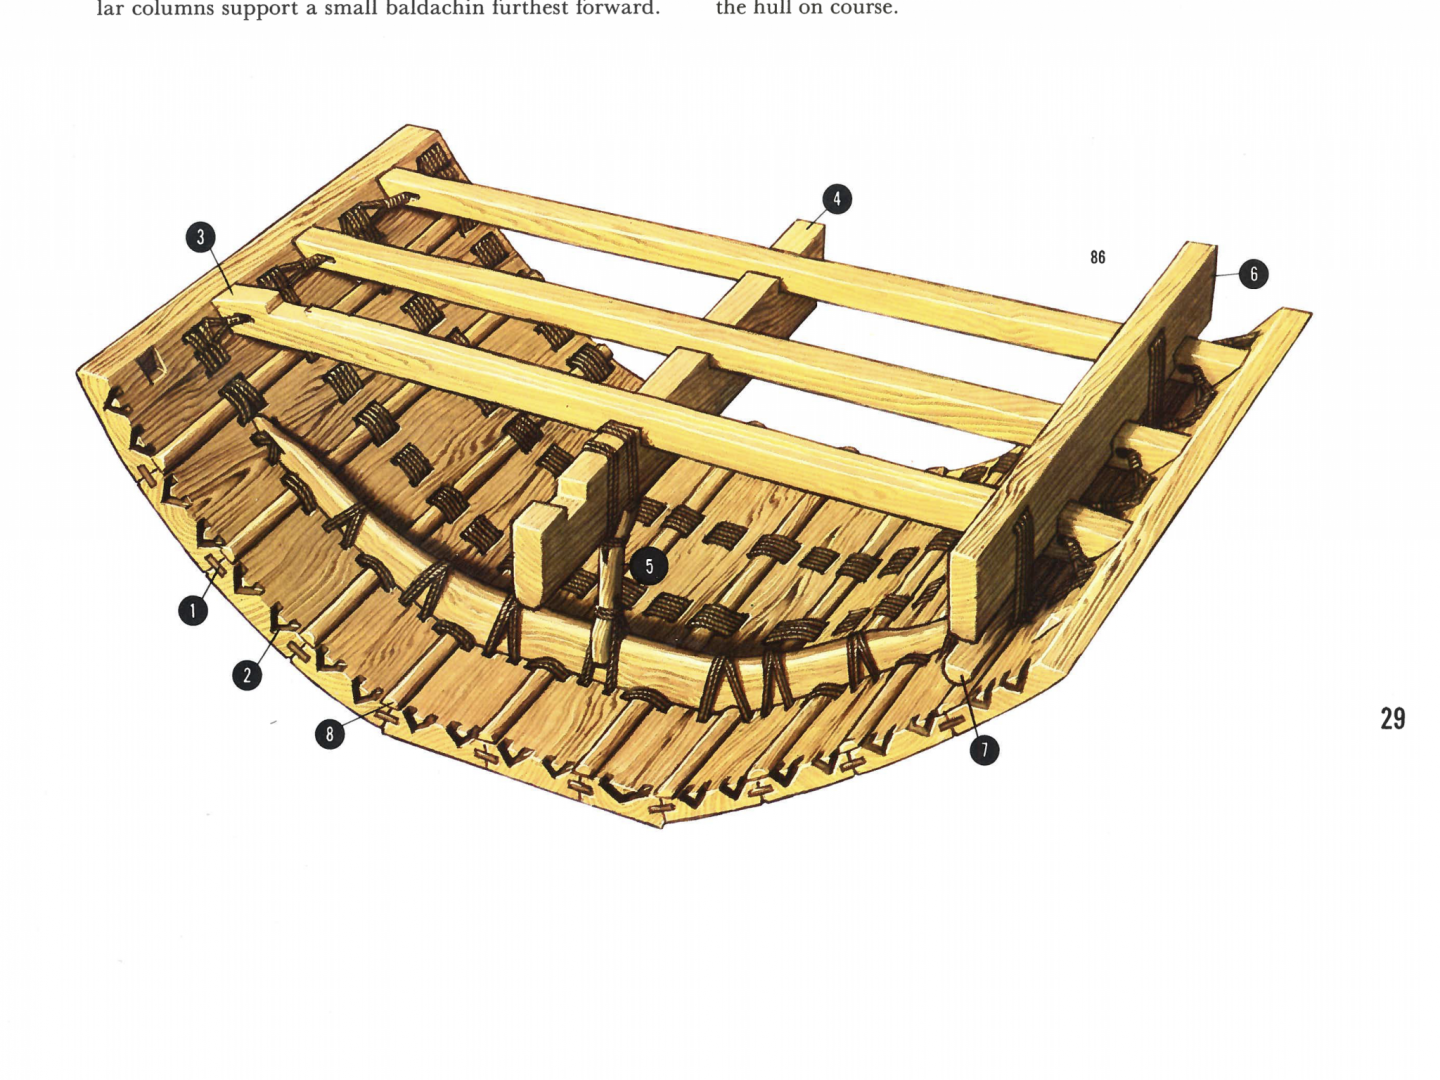
¨Nightmare number one........How the stanchions are fixed to the frames? Here the answer......book Ships of the Pharaoh same picture is coming with details about my “second” nightmare......How the frames are fixed to the planks..... ”Nightmare” number three......how the planks are sewed one each other?...... Well....... We can se some “V” channels (Number 2) in the picture above....those were used to pass through the rope...so.... HOW TO MAKE THEM? If in the scale I am working on the plank width are only 4.2 mm? (In scale 1:1 are 14 - 17 cm)....... well..... we will see.
- 158 replies
-
- 6
-
-
- byblos ship
- Egyptian
- (and 1 more)
-
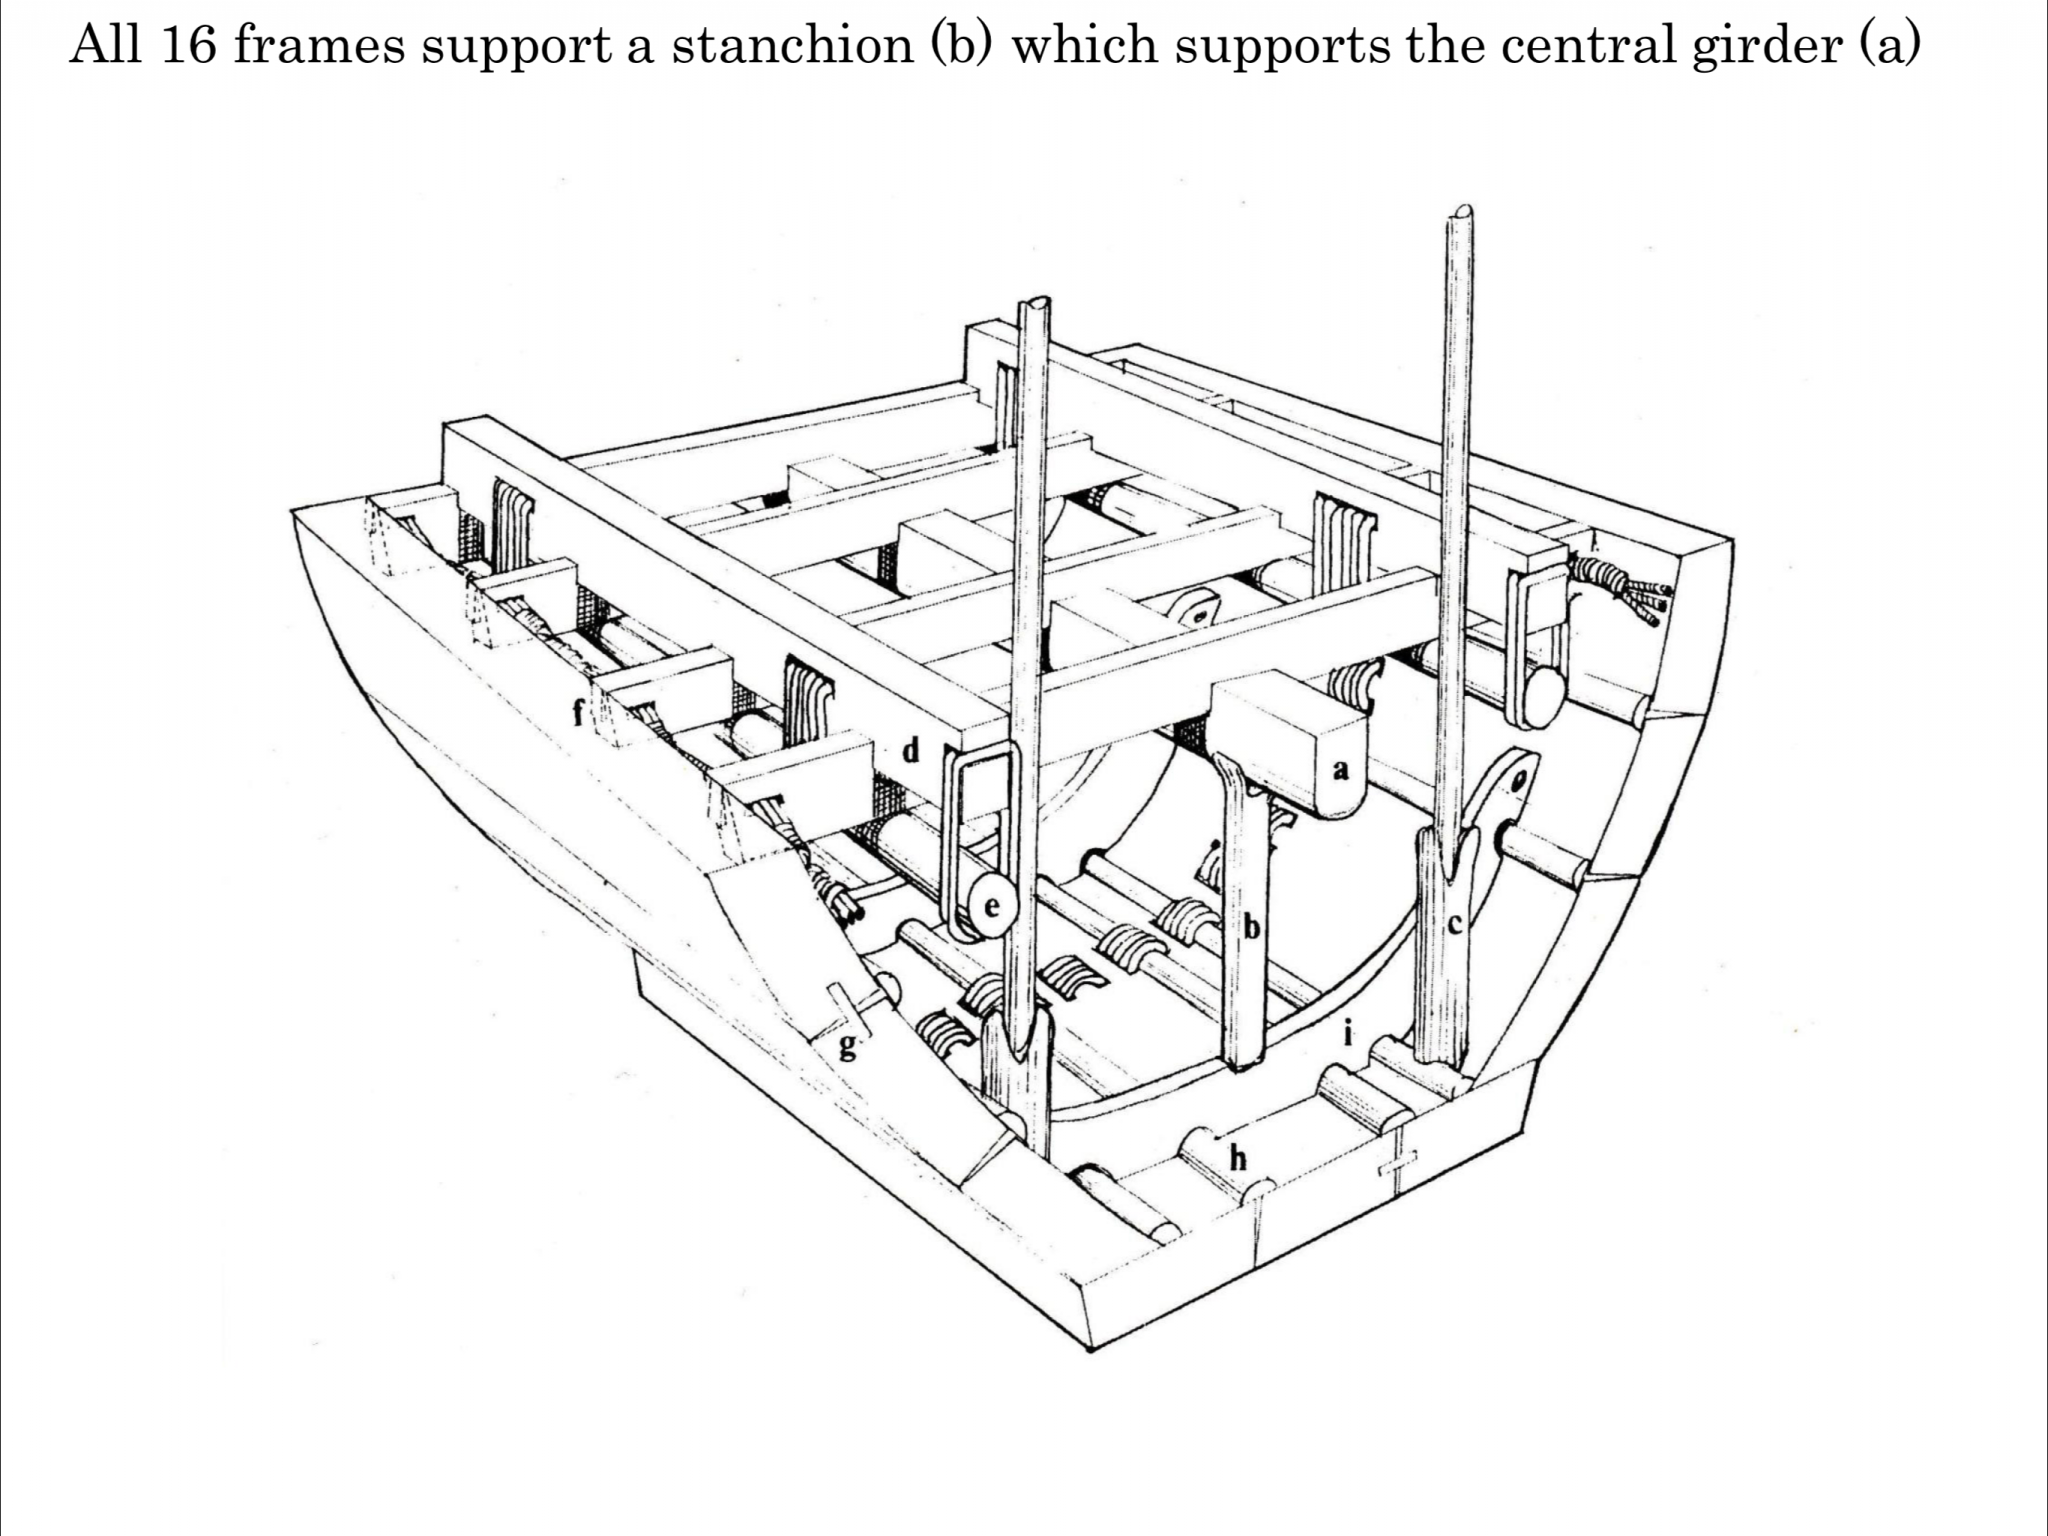
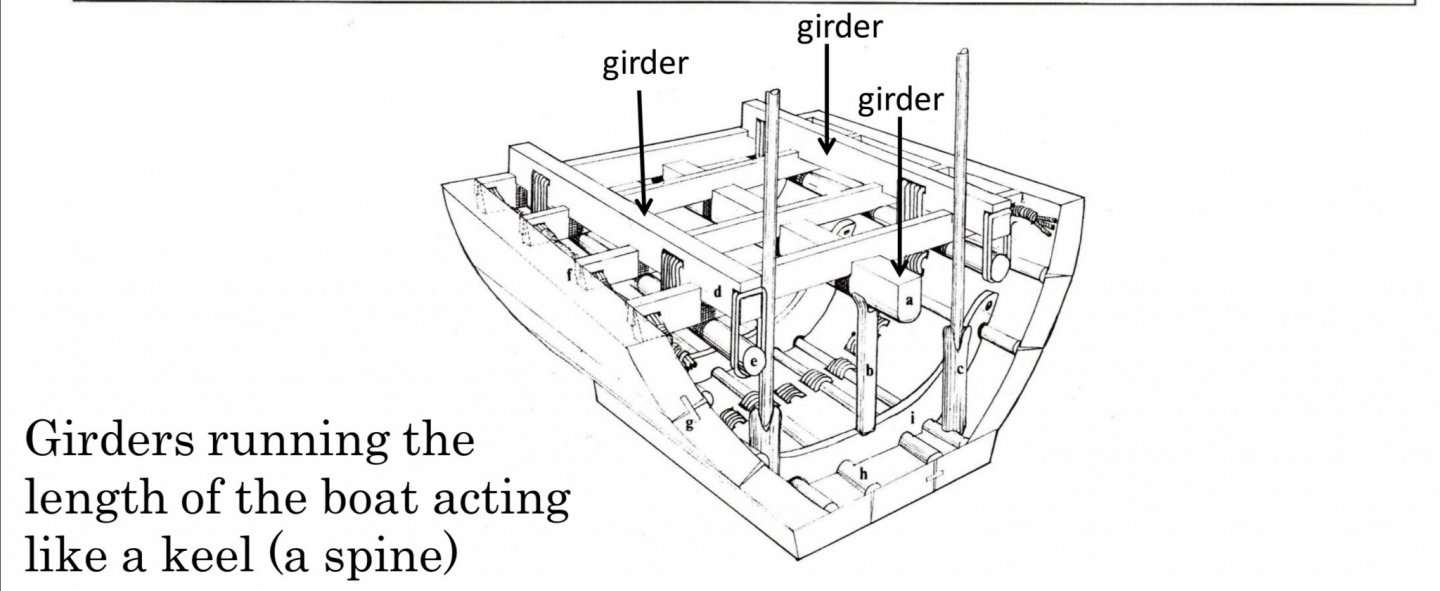
Let’s see some other hull elements.....not without mentioning that these information has come from As I mentioned because the era, the hull construction is the same. Above the frames, a stanchion that support the central girder........ Here is where we come with the ¨keel¨!!!!!..... according with the documentation the ¨first¨kell in these kind of ships were these three girders..... My nightmare is ¨configuring¨ my mind in order to achieve as much detail as I can !!!!


- 158 replies
-
- 5
-
-
- byblos ship
- Egyptian
- (and 1 more)
-
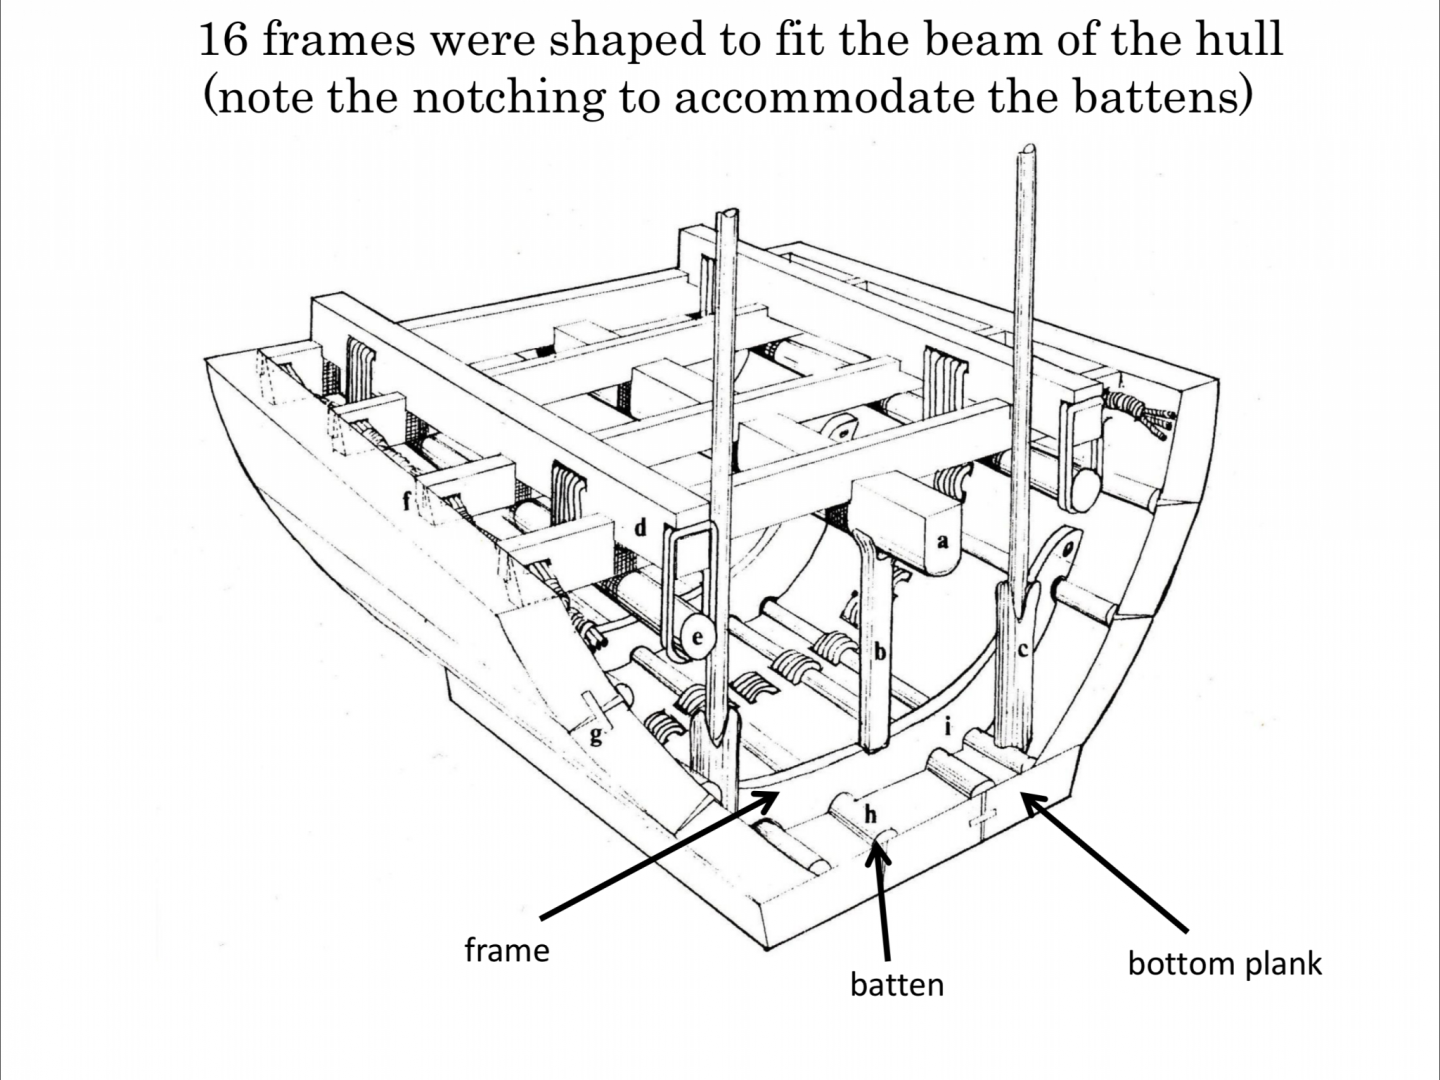
We can not start to build this model without talking a little bit about history. WOOD The wood came pretty much from Byblos ( Coast city from Lebanon). The wood found in those tombs is Cedar from Lebanon, which is a kind of coniferous, and today there are a lot of questions about the transportation method. Ships, Barges or even towed in the water. Having in consideration the drying process they have, that was slow, in open space and with natural change of temperature (avoiding damages), did not make sense that the wood came to Egypt floating on the water. HULL By these times, the hull structure was very heavy. Planks were sewed with ropes no nails were founded the idea behind it was.....It looks like the ships were built near the Nile river, deassembled - transported to the read/see and assemble again. The structure was pretty much based in the planks. So thick and heavy. The frames were installed after the hull was completed and they had to be accommodate to the battens ( they were used to help the hull tightness) The discussion about keel or not keel is another story. But for this era looks like that the keel was not existed yet. Note we will going in more detail to the hull once we start to build it
- 158 replies
-
- 3
-
-
- byblos ship
- Egyptian
- (and 1 more)
-
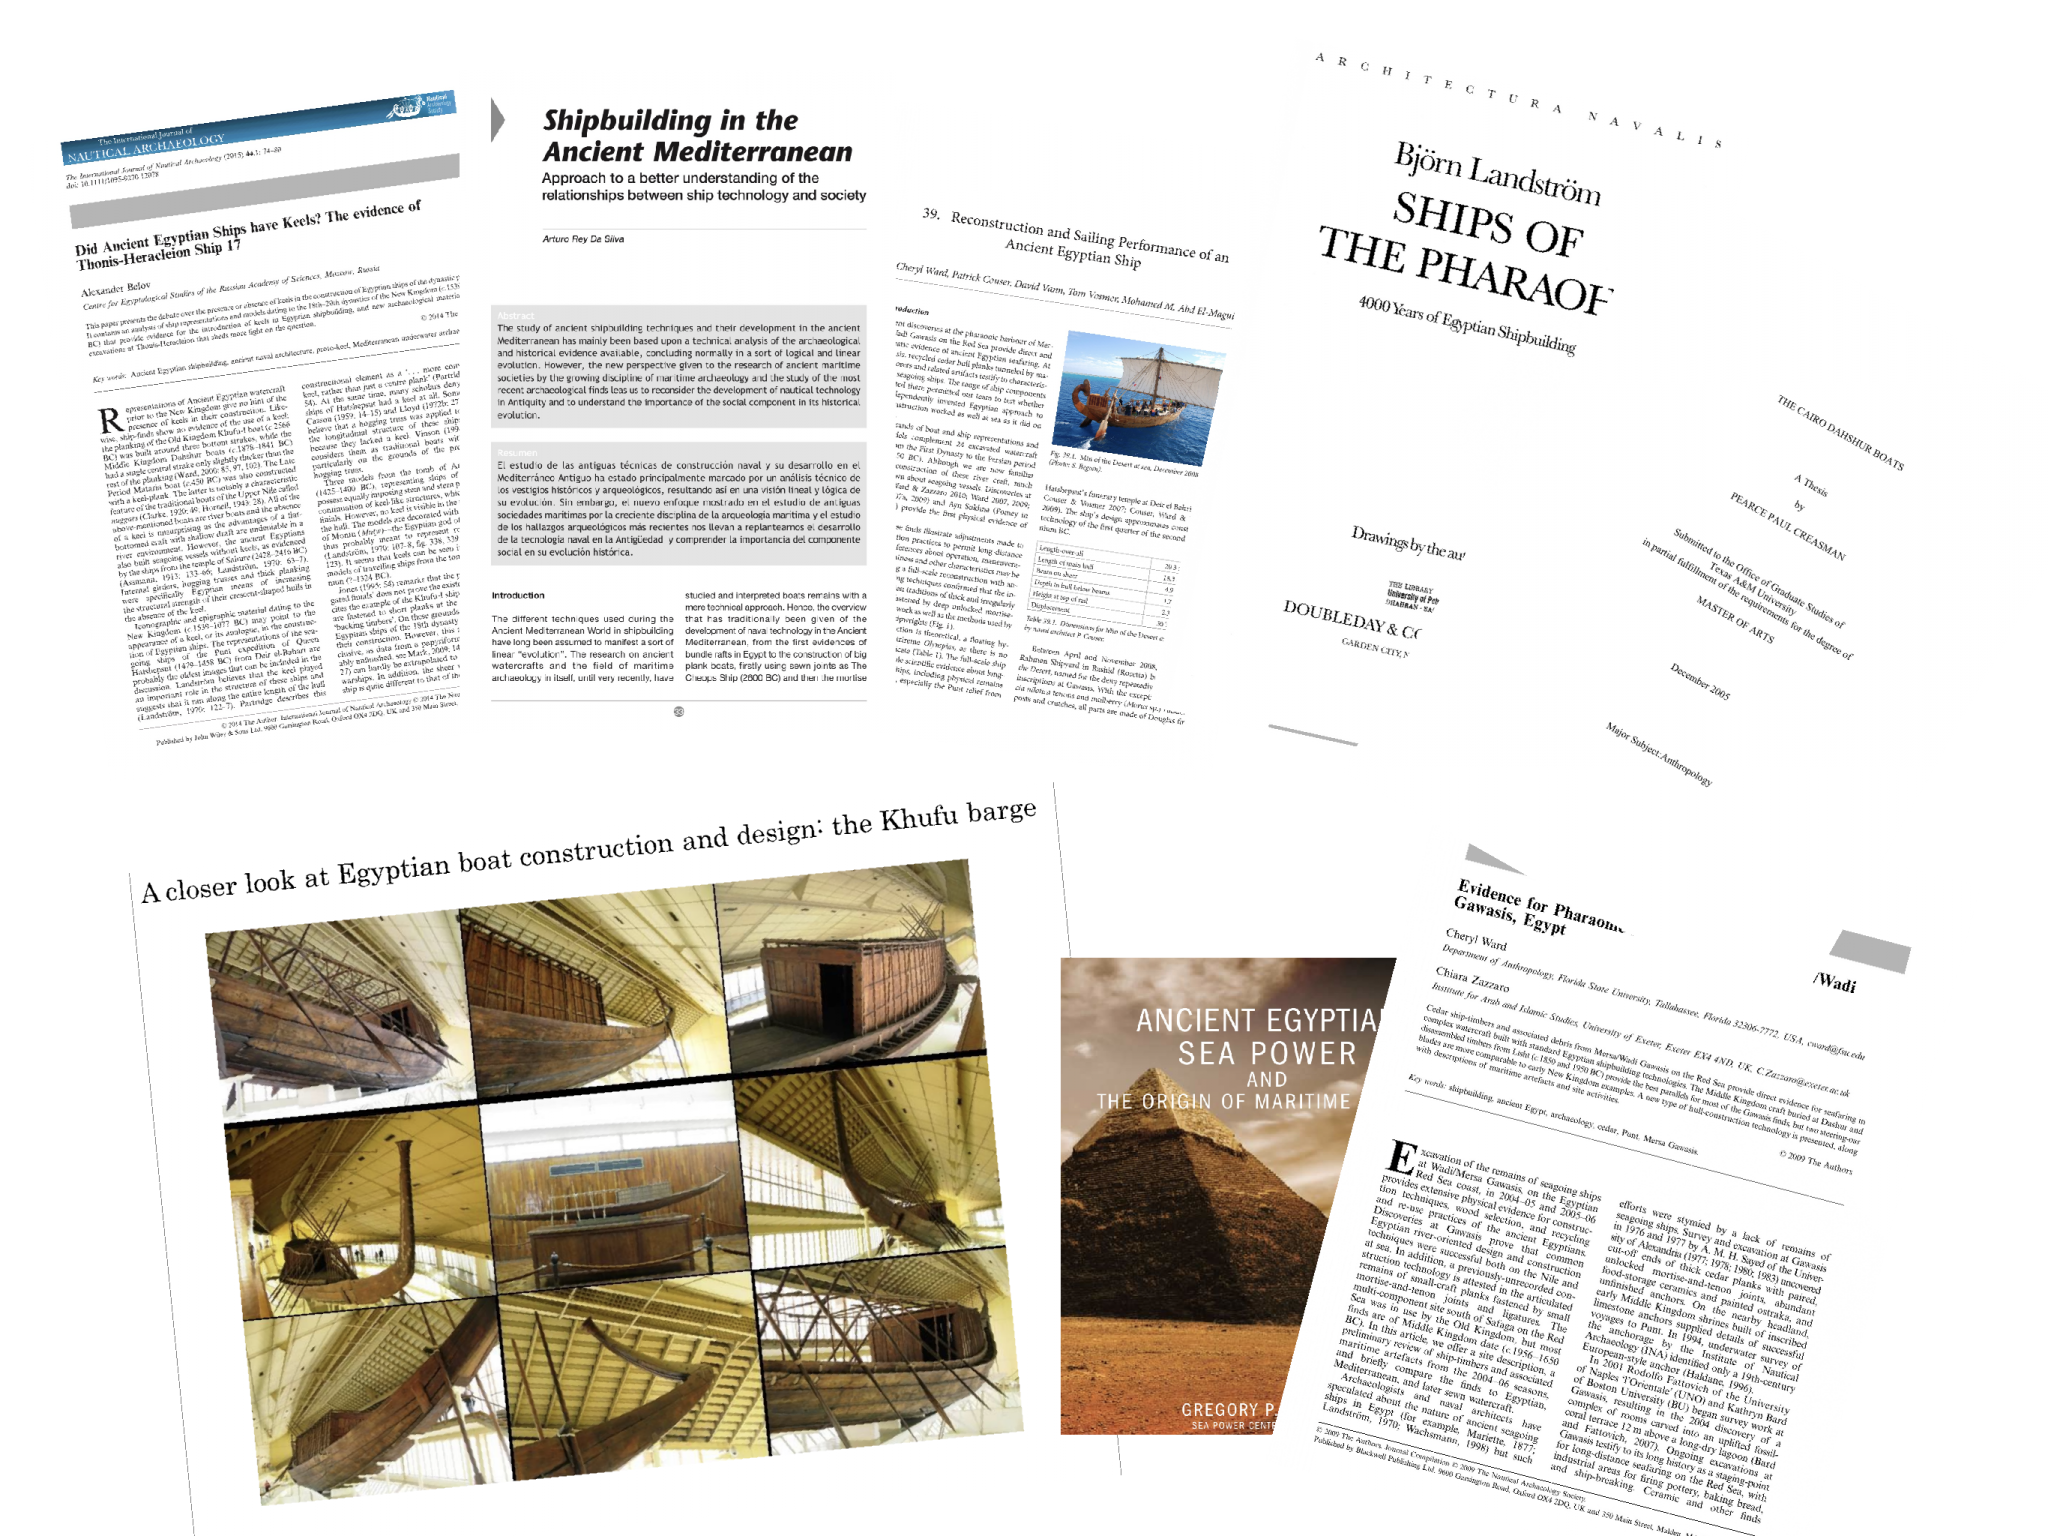
In the book Ships of the Pharaoh, there is chapter dedicated to this kind of ships, where based in some draws found in Sahure king tomb, where we can see a lot of details, and will help us (as they helped George) to build it as much accurately possible In the log, we will be finding and building as much elements as we can
- 158 replies
-
- 4
-
-
- byblos ship
- Egyptian
- (and 1 more)
-
First we have to know, that there is a lot of literature about the Egyptian ancient ships. I tried to gather an read as much I could. Having in consideration all those that George sent to me, plus others that really brought my attention Must of all are regarding/related to “river” boats or even to funerary boats. But taking in consideration the era - Fifth Dynasty - and some information collected in all these articles, I came to the conclusion that all construction methods are pretty much the same for all those boats, with some differences that make the Seagoing Egyptians ships more resistentes.

- 158 replies
-
- 4
-
-
- byblos ship
- Egyptian
- (and 1 more)
-
I want to start with a new log. George just finished his project related with an ancient Egyptian Seagoing Ship, dated 2500 years BC. It brought to me a lot of curiosity.... so I decided to start my own.....so many steps, documents to read, CAD to build my own plans an so. Amati has the same model, but it comes with a lot of simplifications, as George already mentioned and from my point of view, with some mistakes.... LET’S START !!!!!!!!
- 158 replies
-
- 4
-
-
- byblos ship
- Egyptian
- (and 1 more)
-
Thanks to you all for those kind words. I’ve learned a lot from all of you. this model is a really fun one to work with. thanks again
-
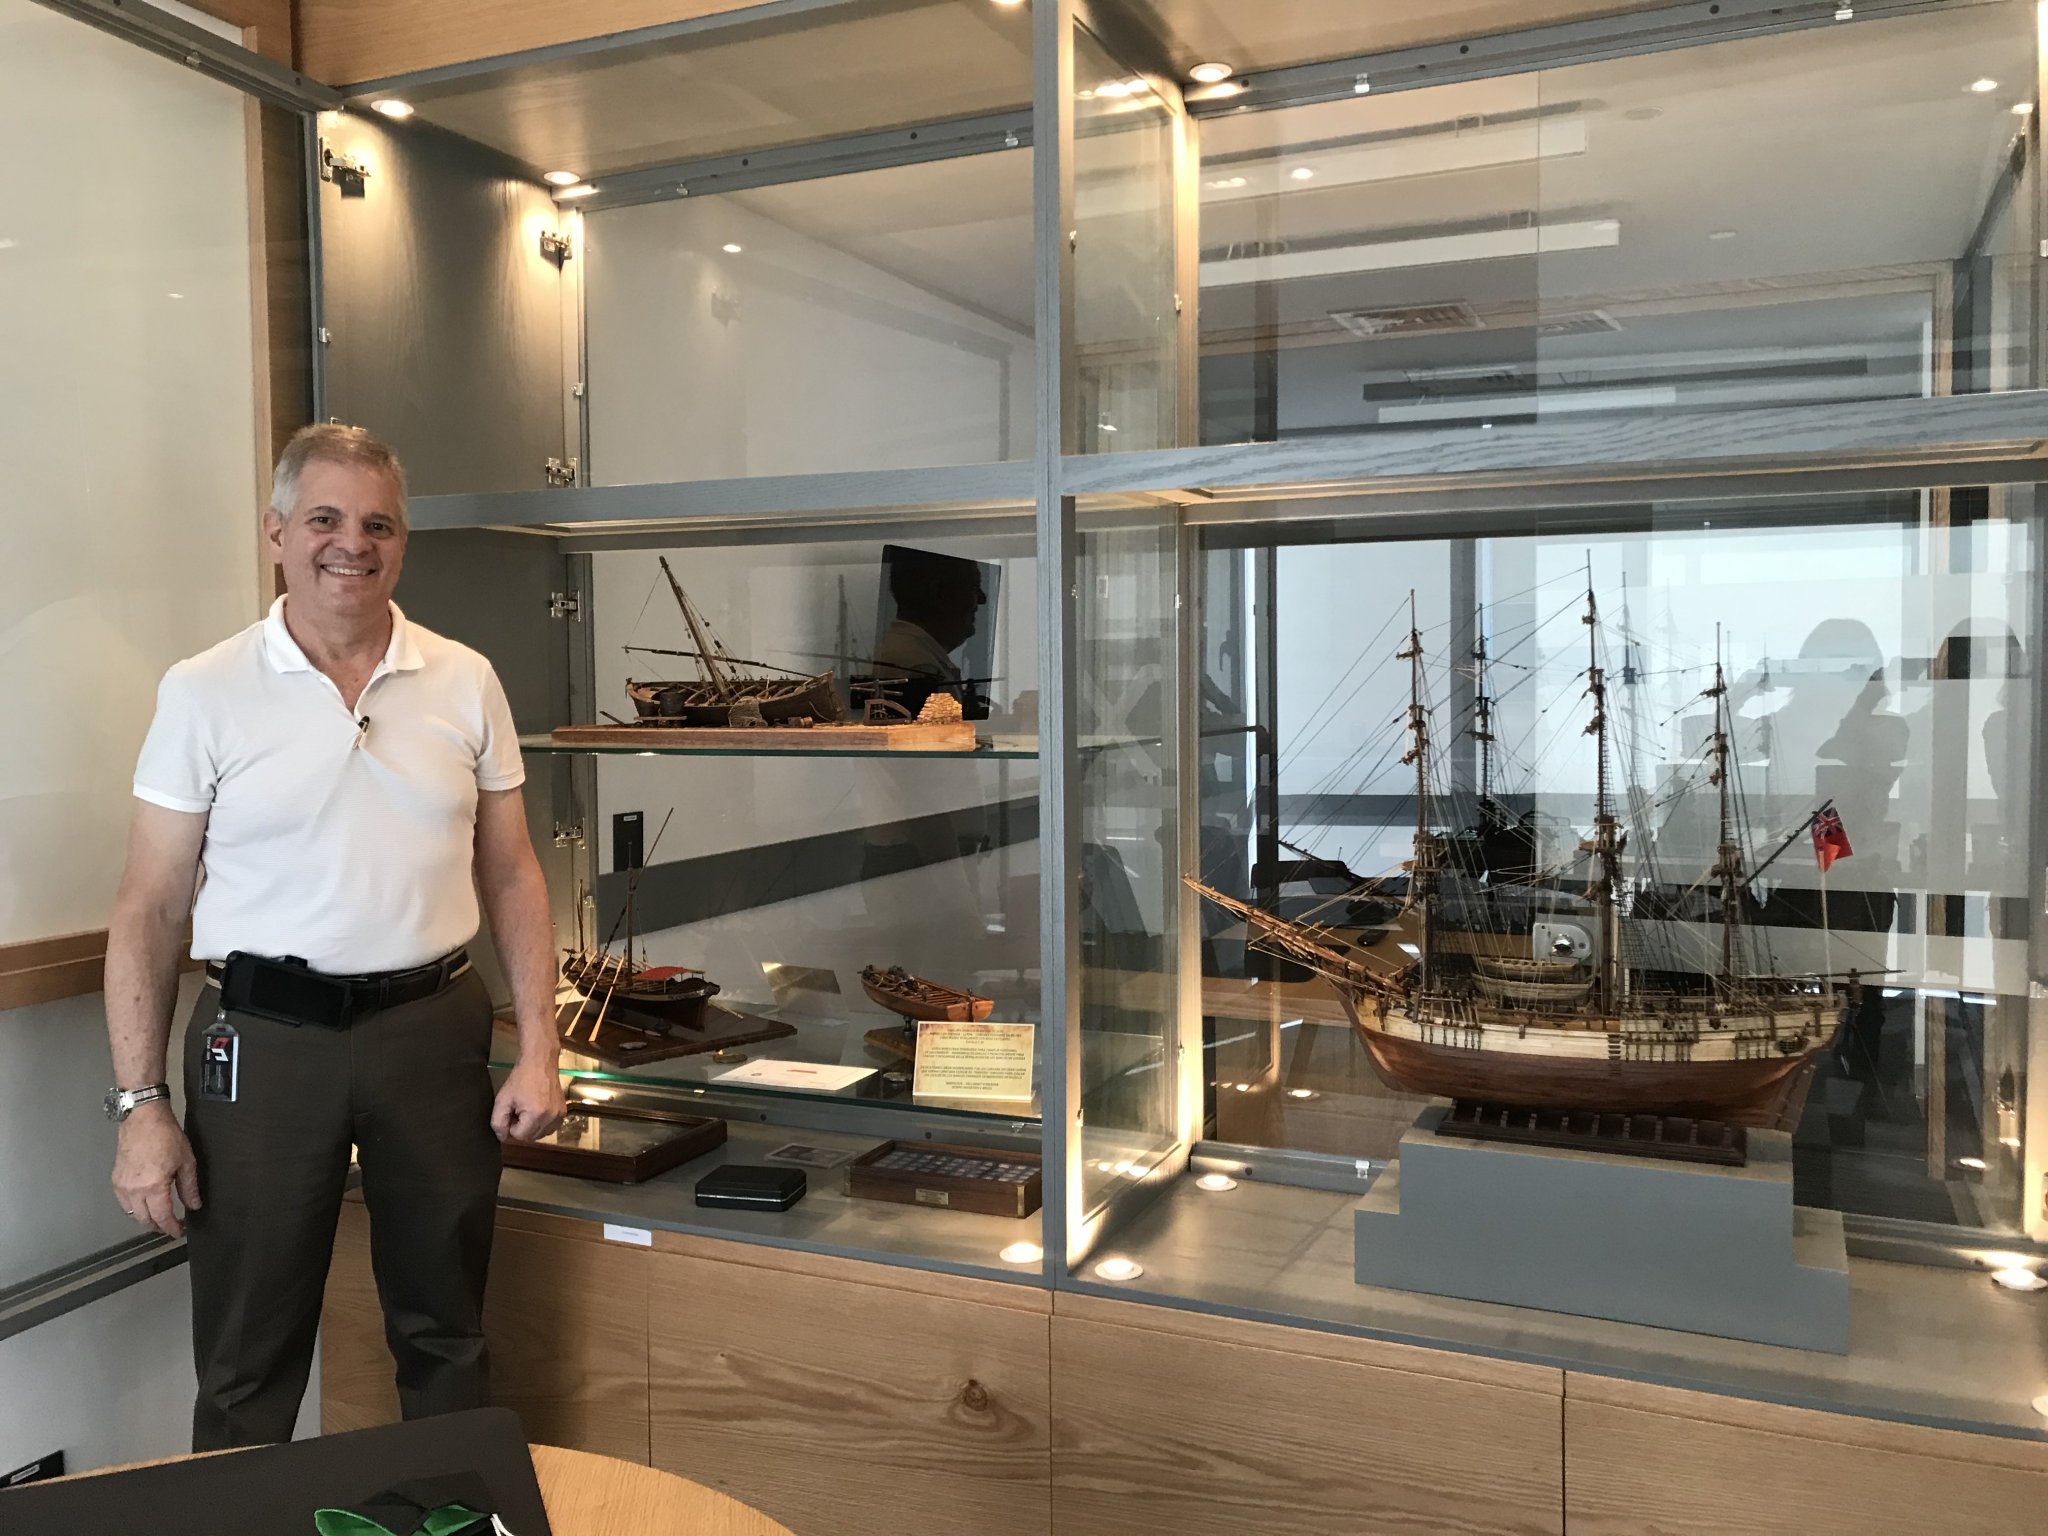
The showcase.....

-
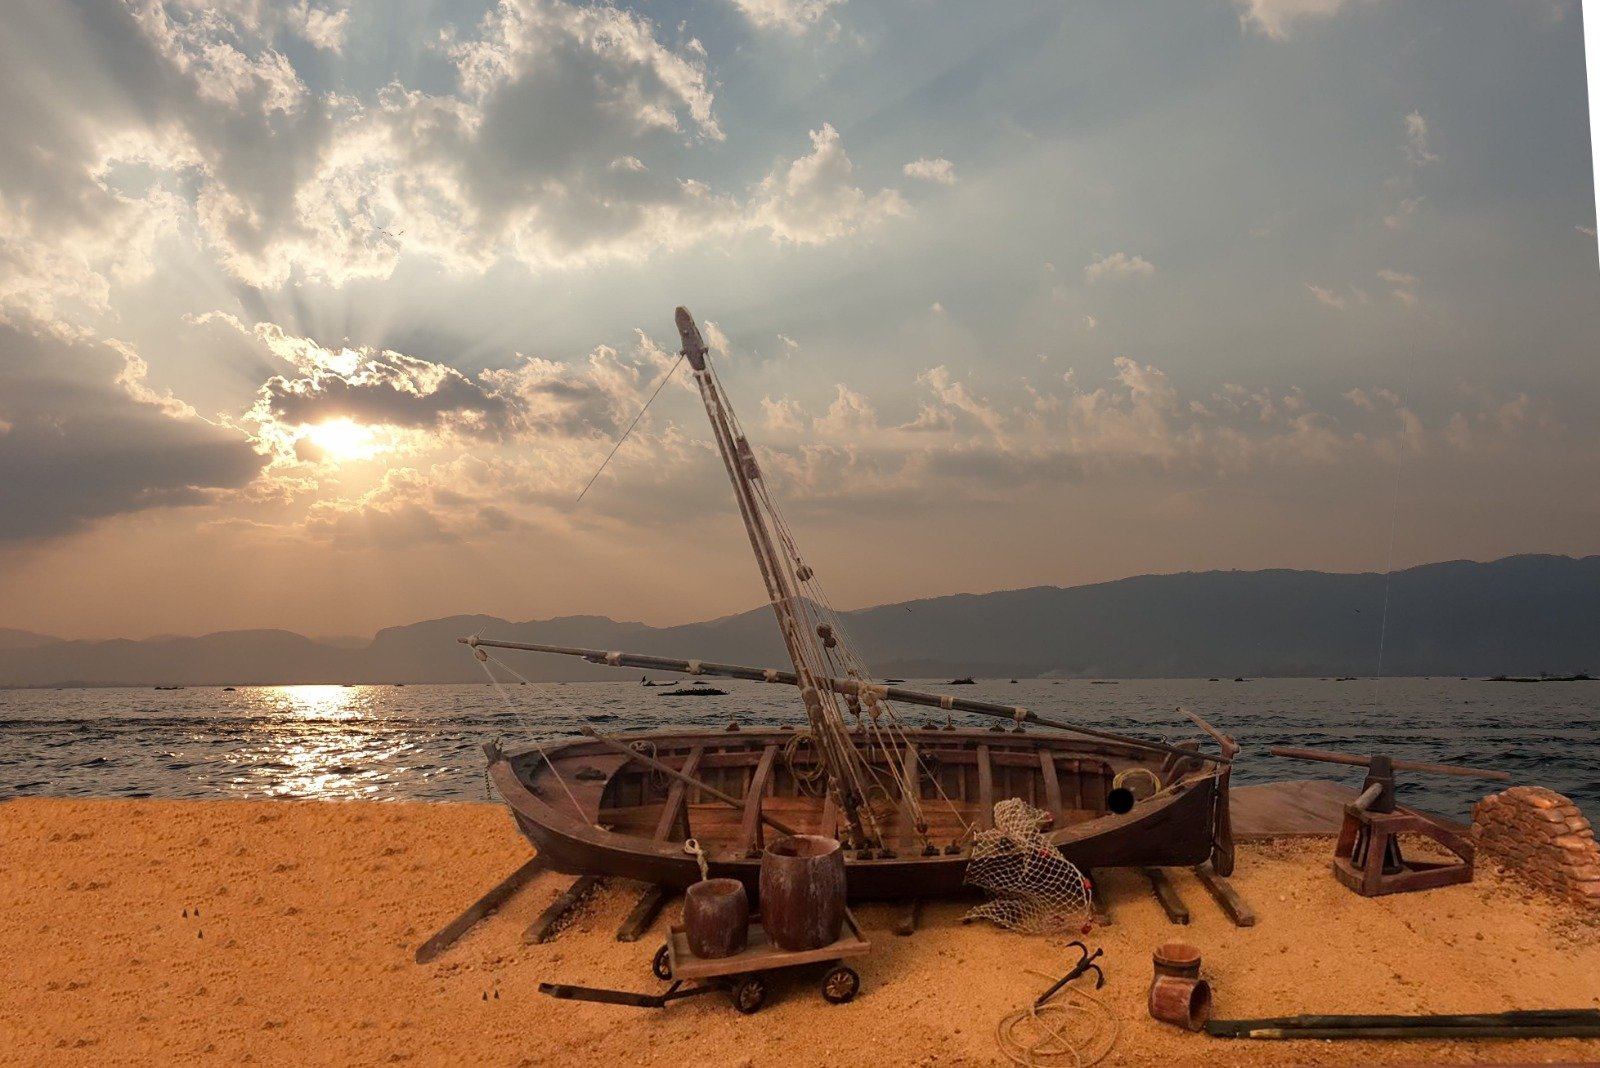
This picture is about a simulation a friend of mine from Spain did..... it really looks “espectacular “. Thanks Jose

-
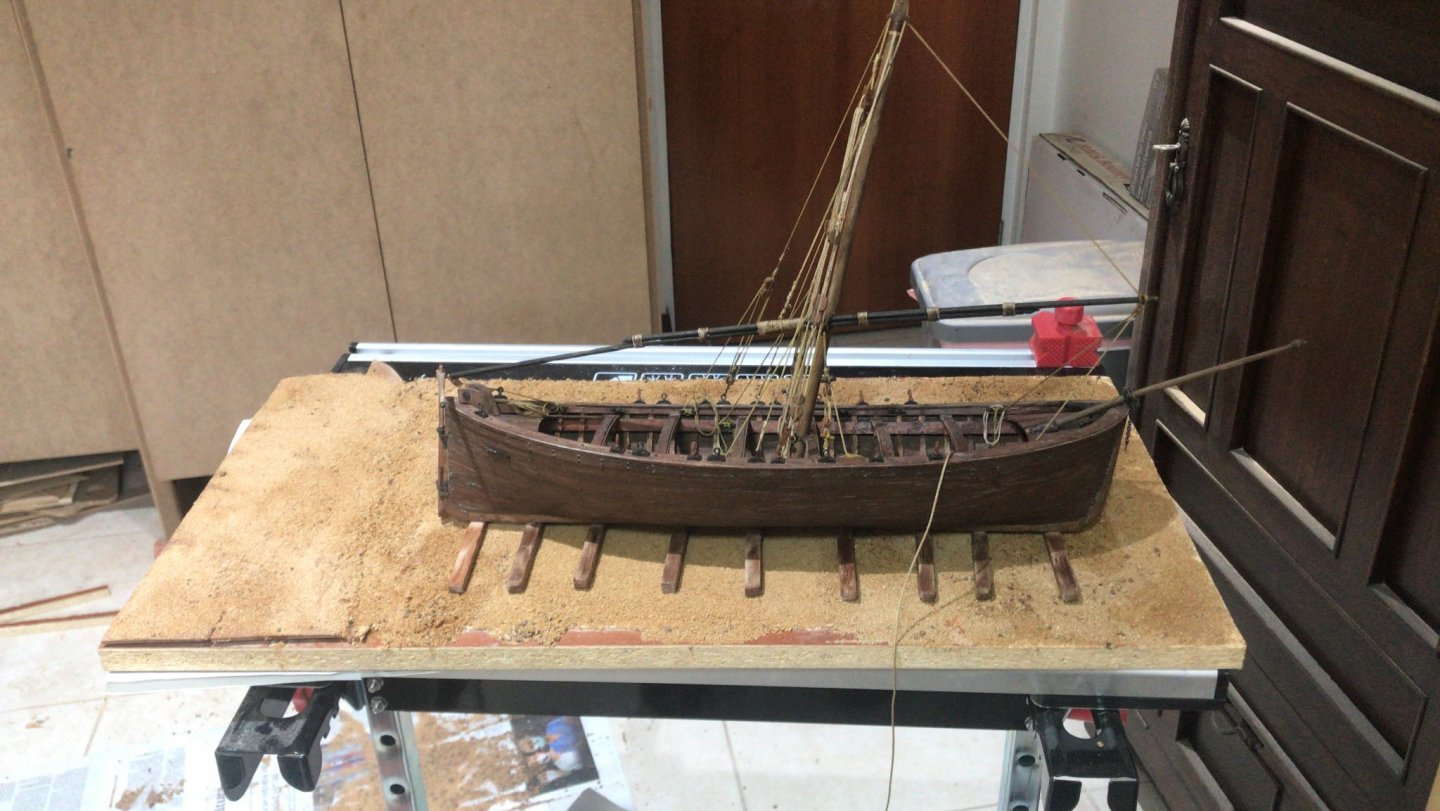
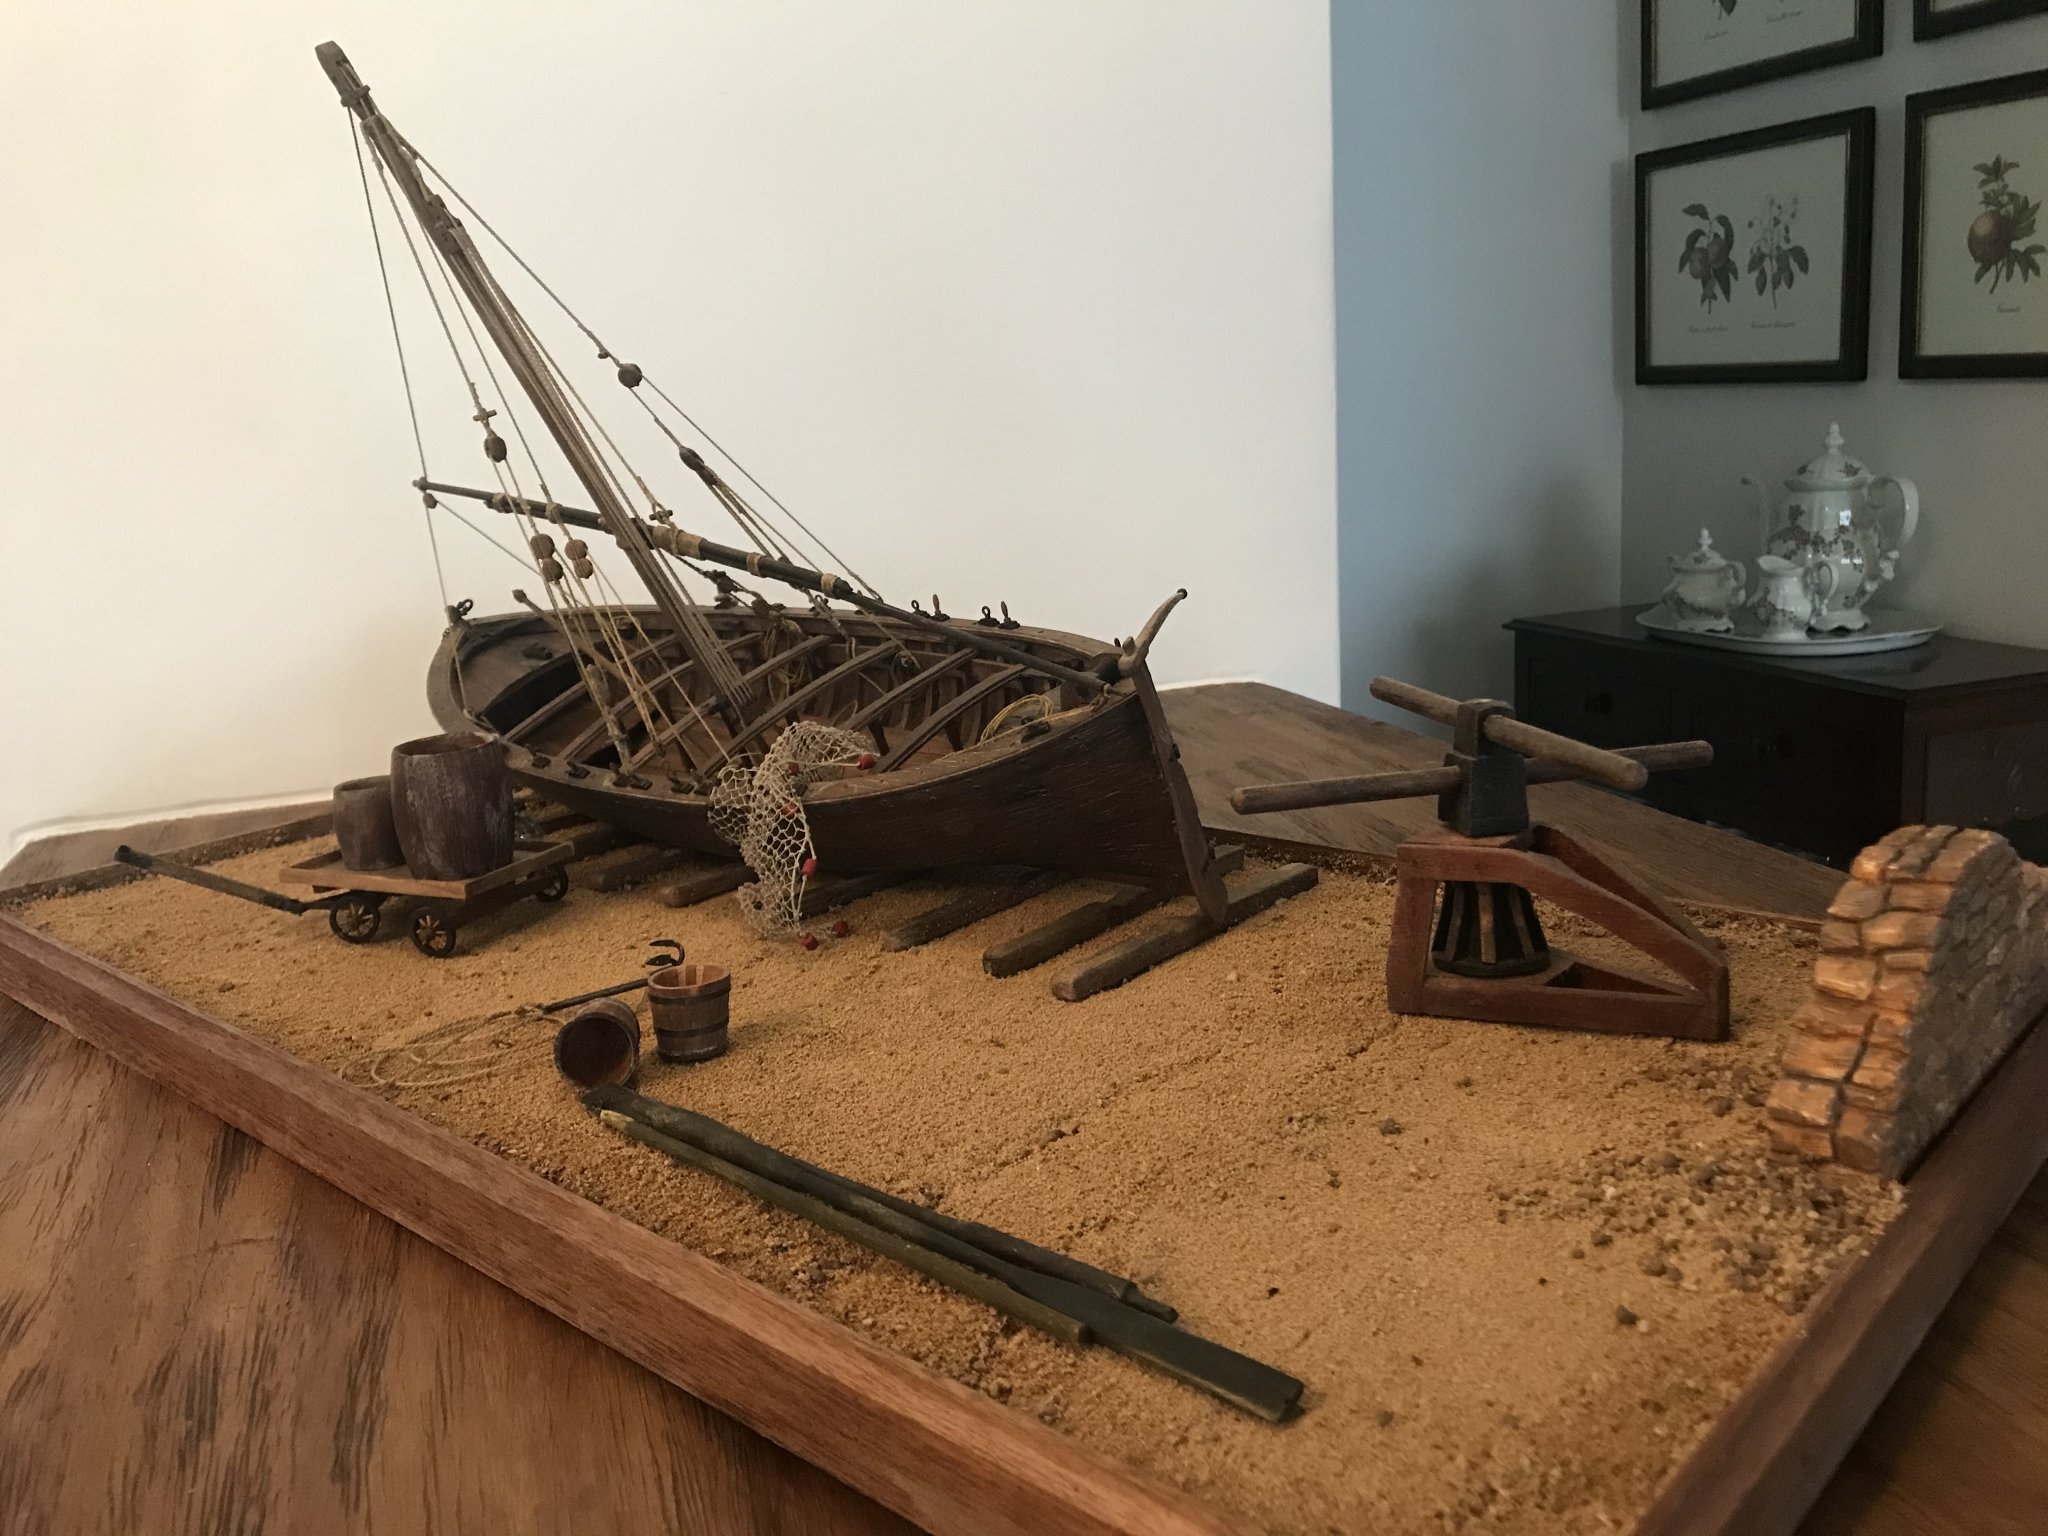
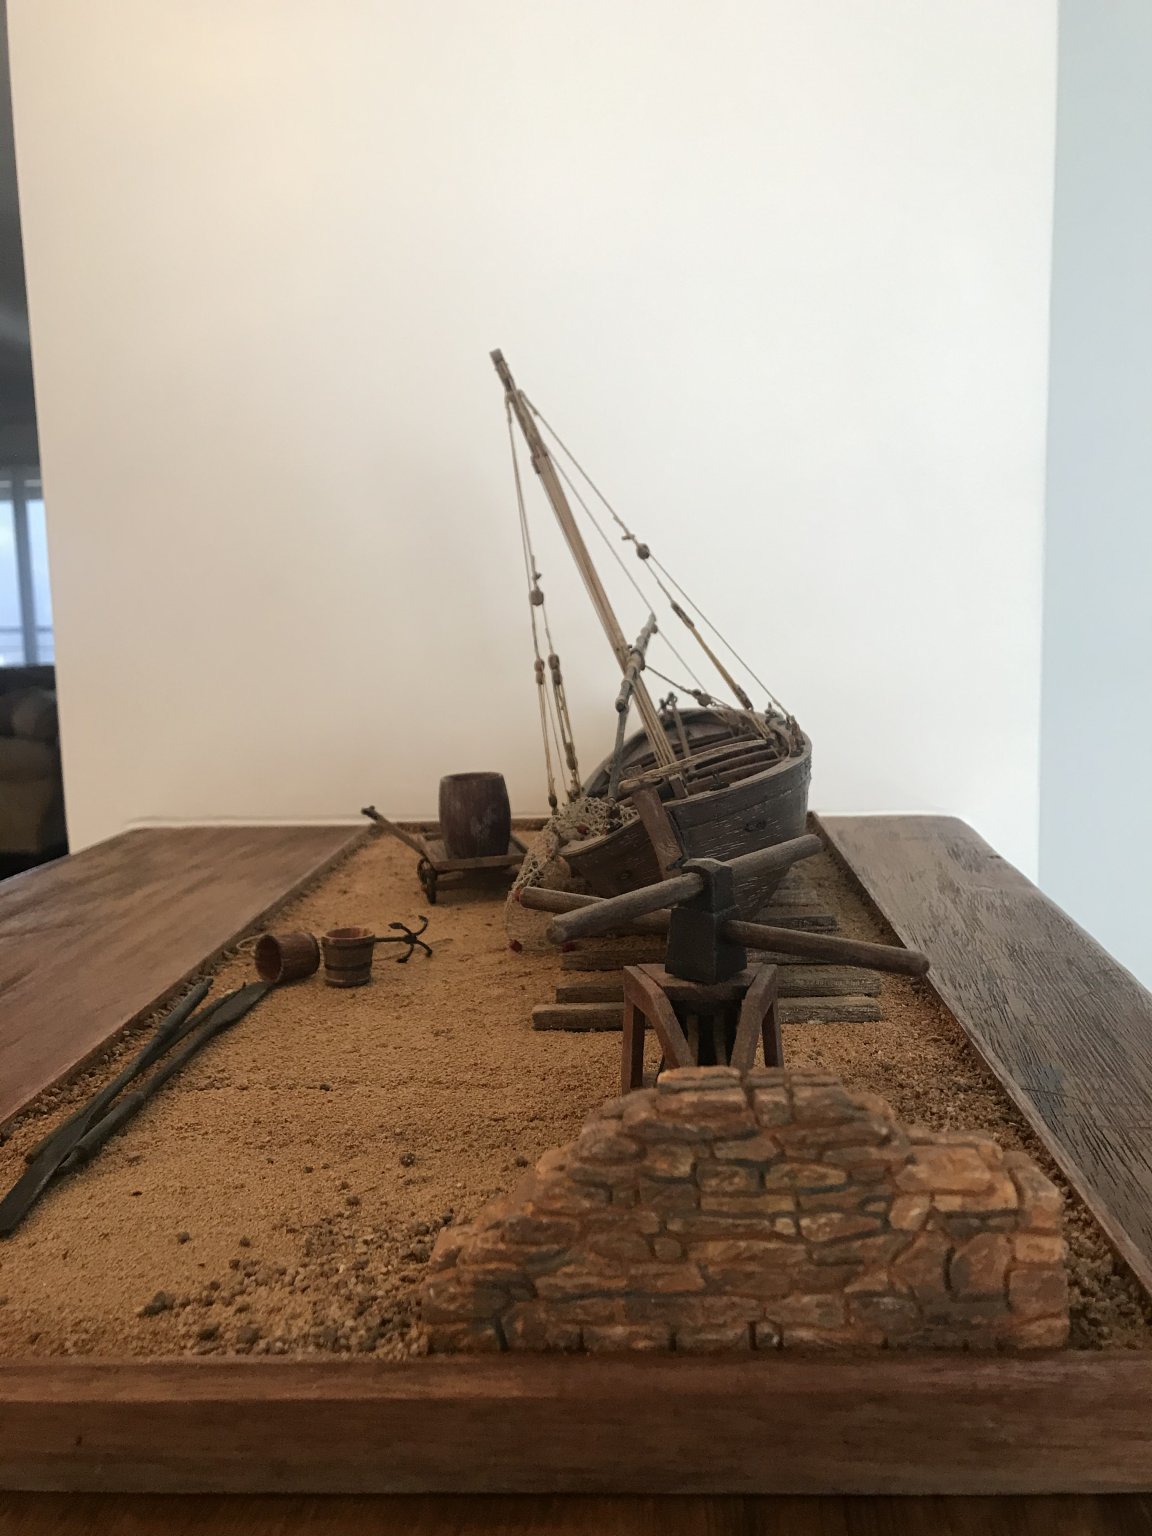
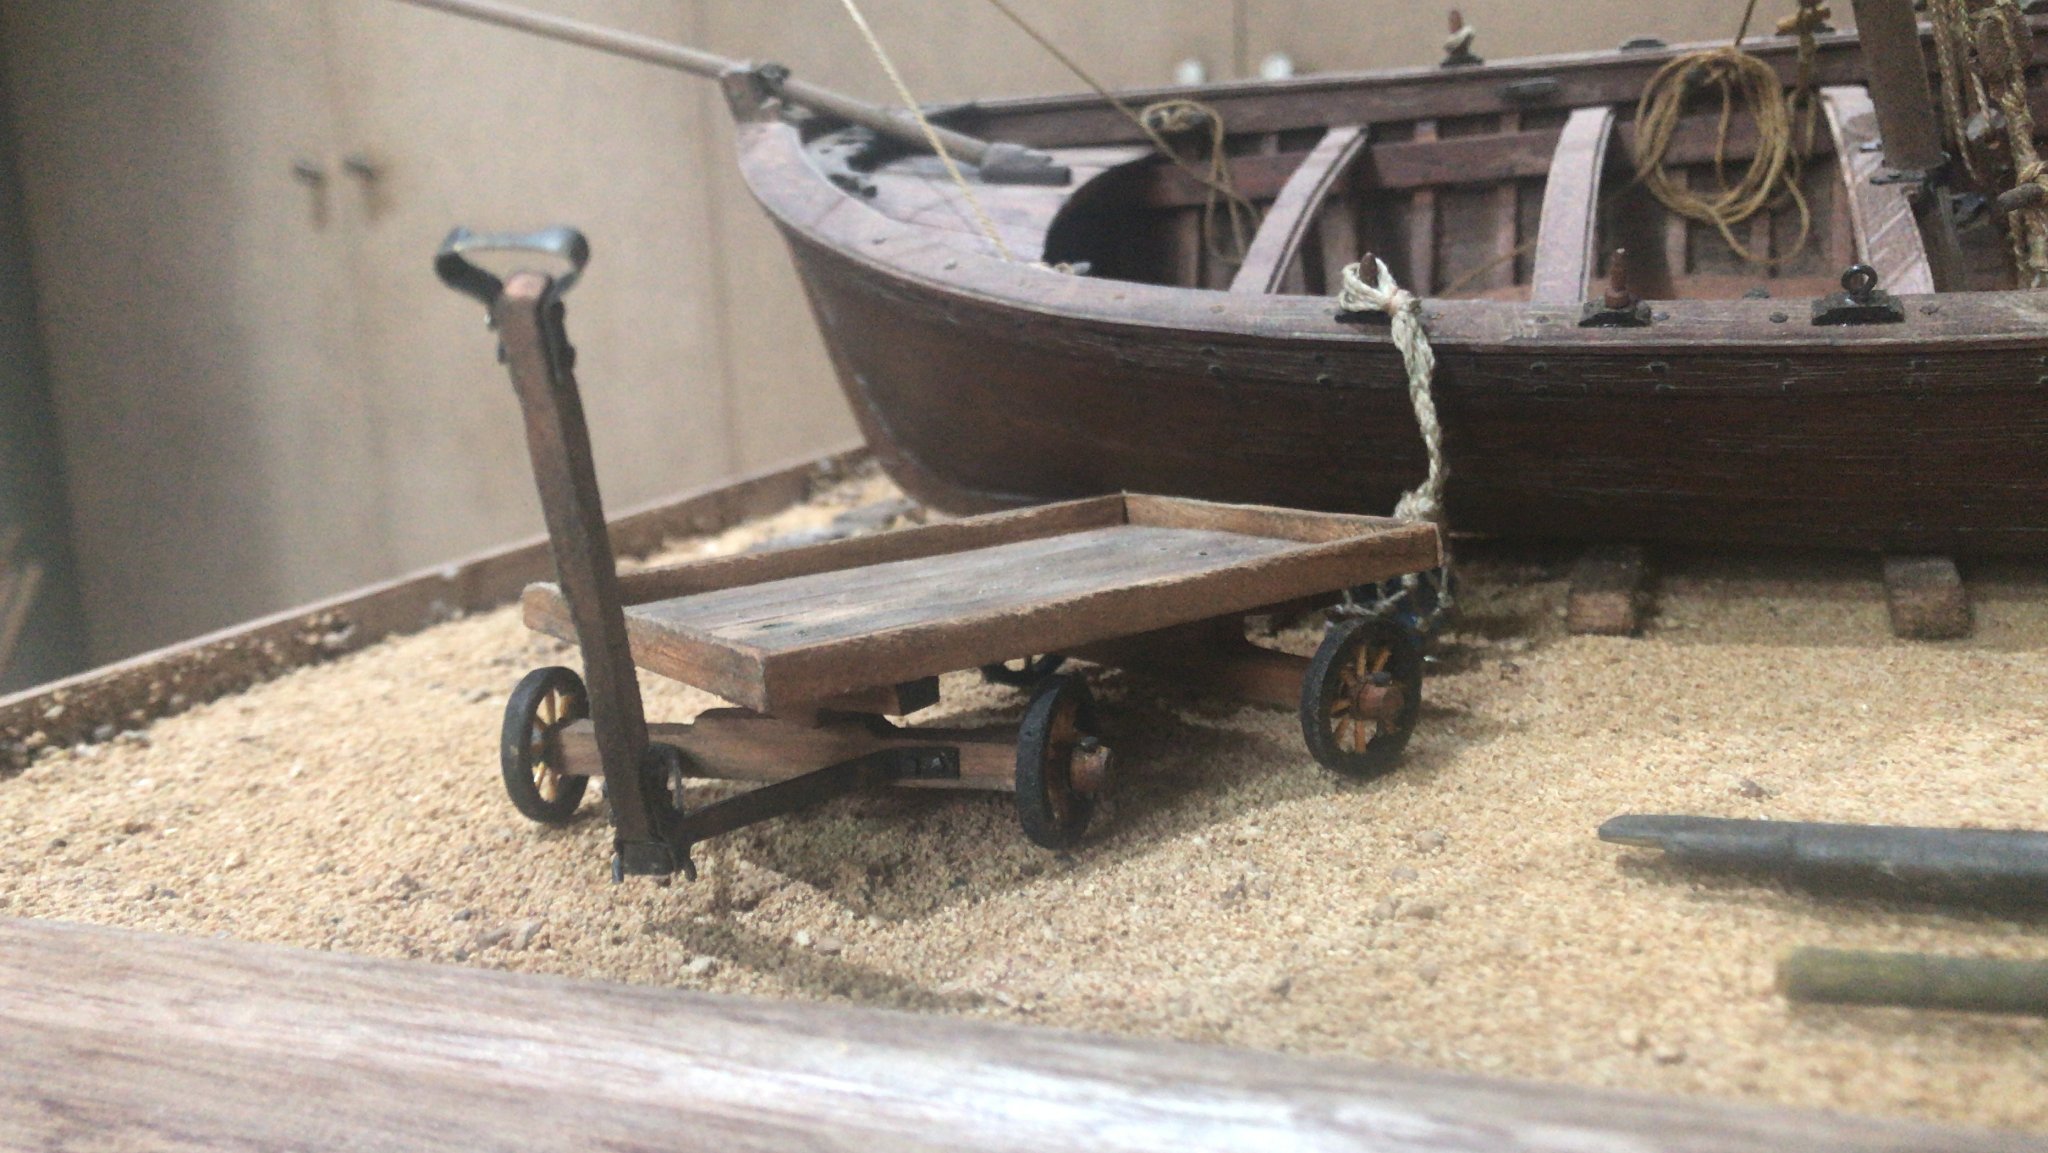
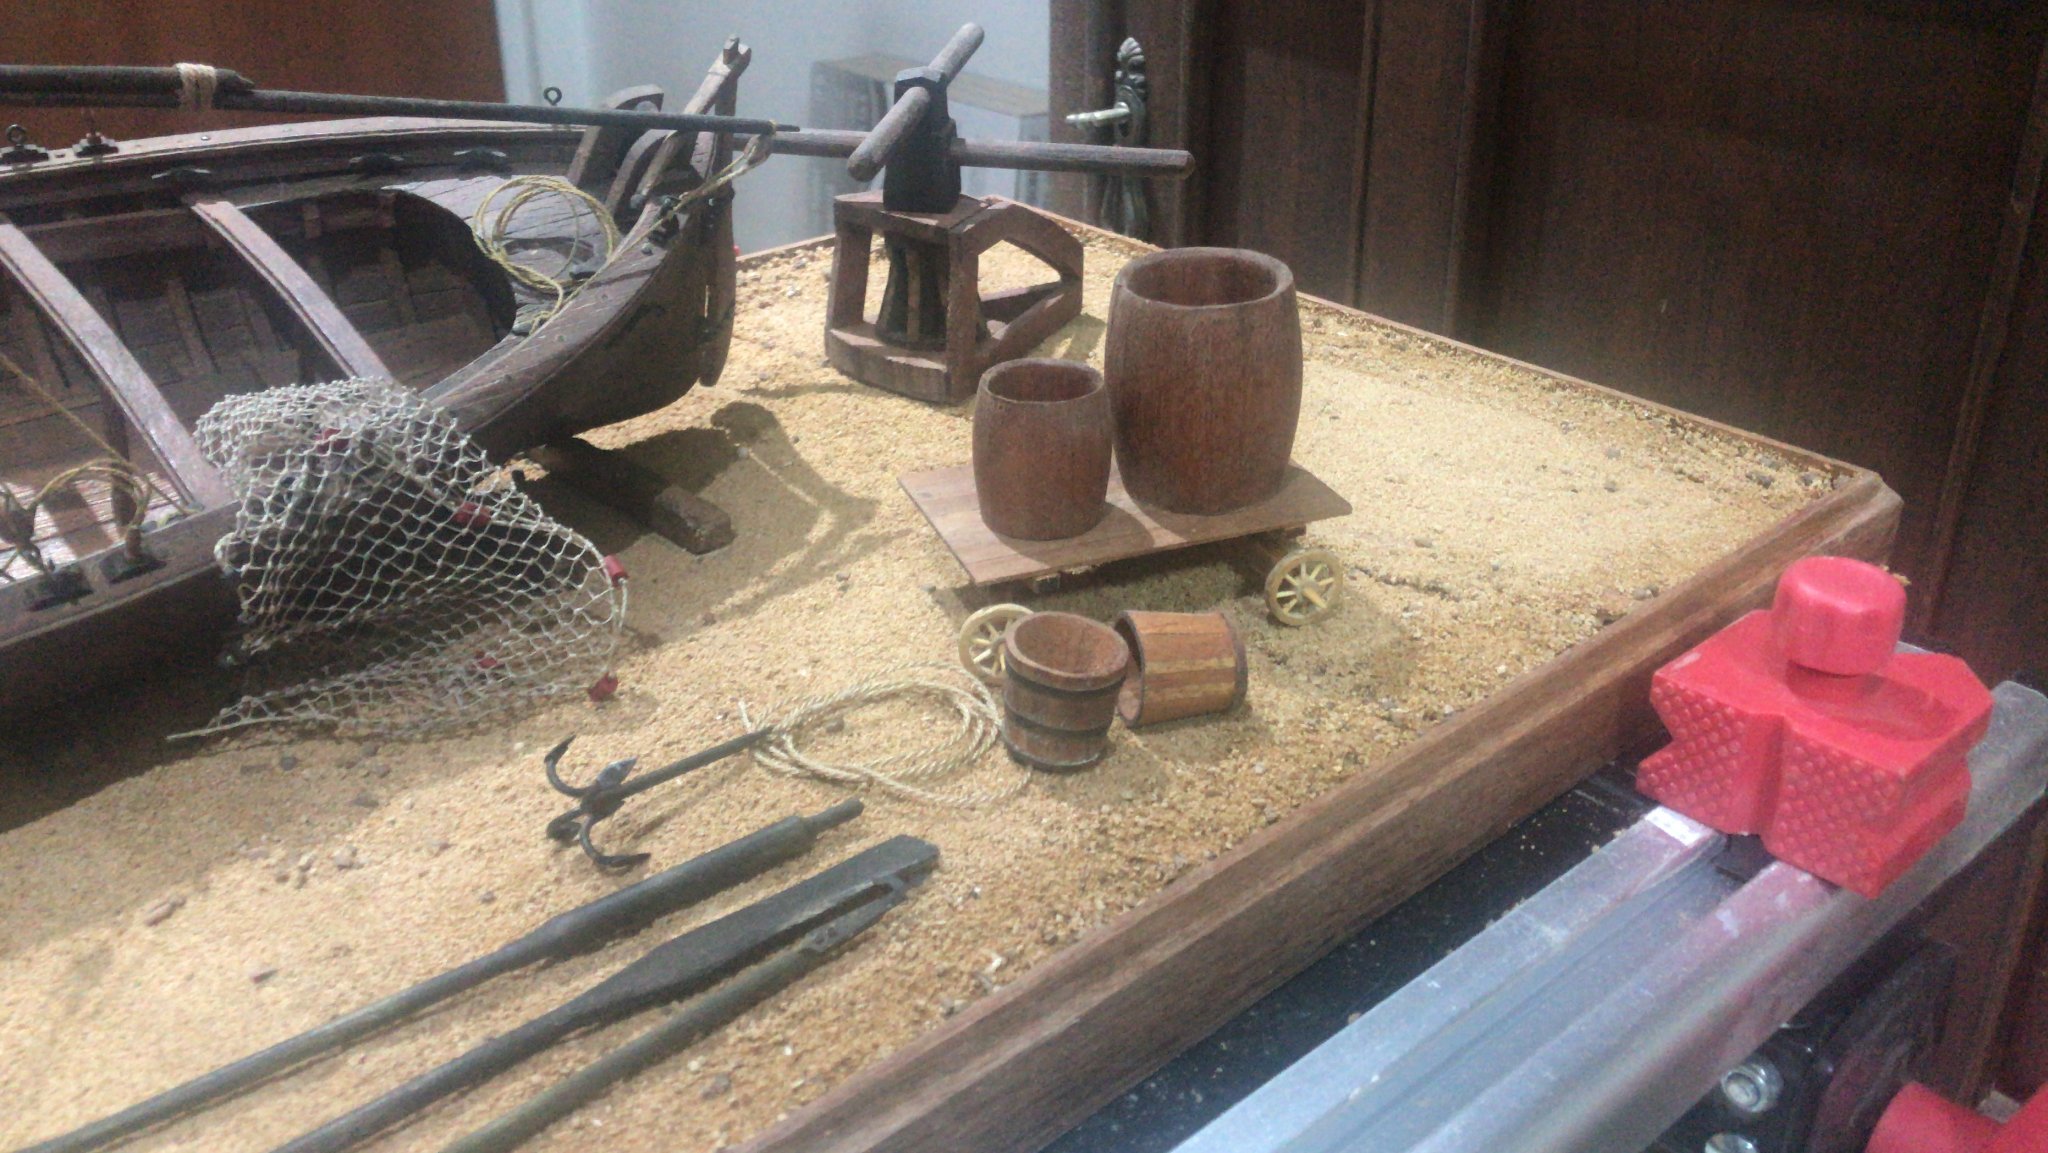
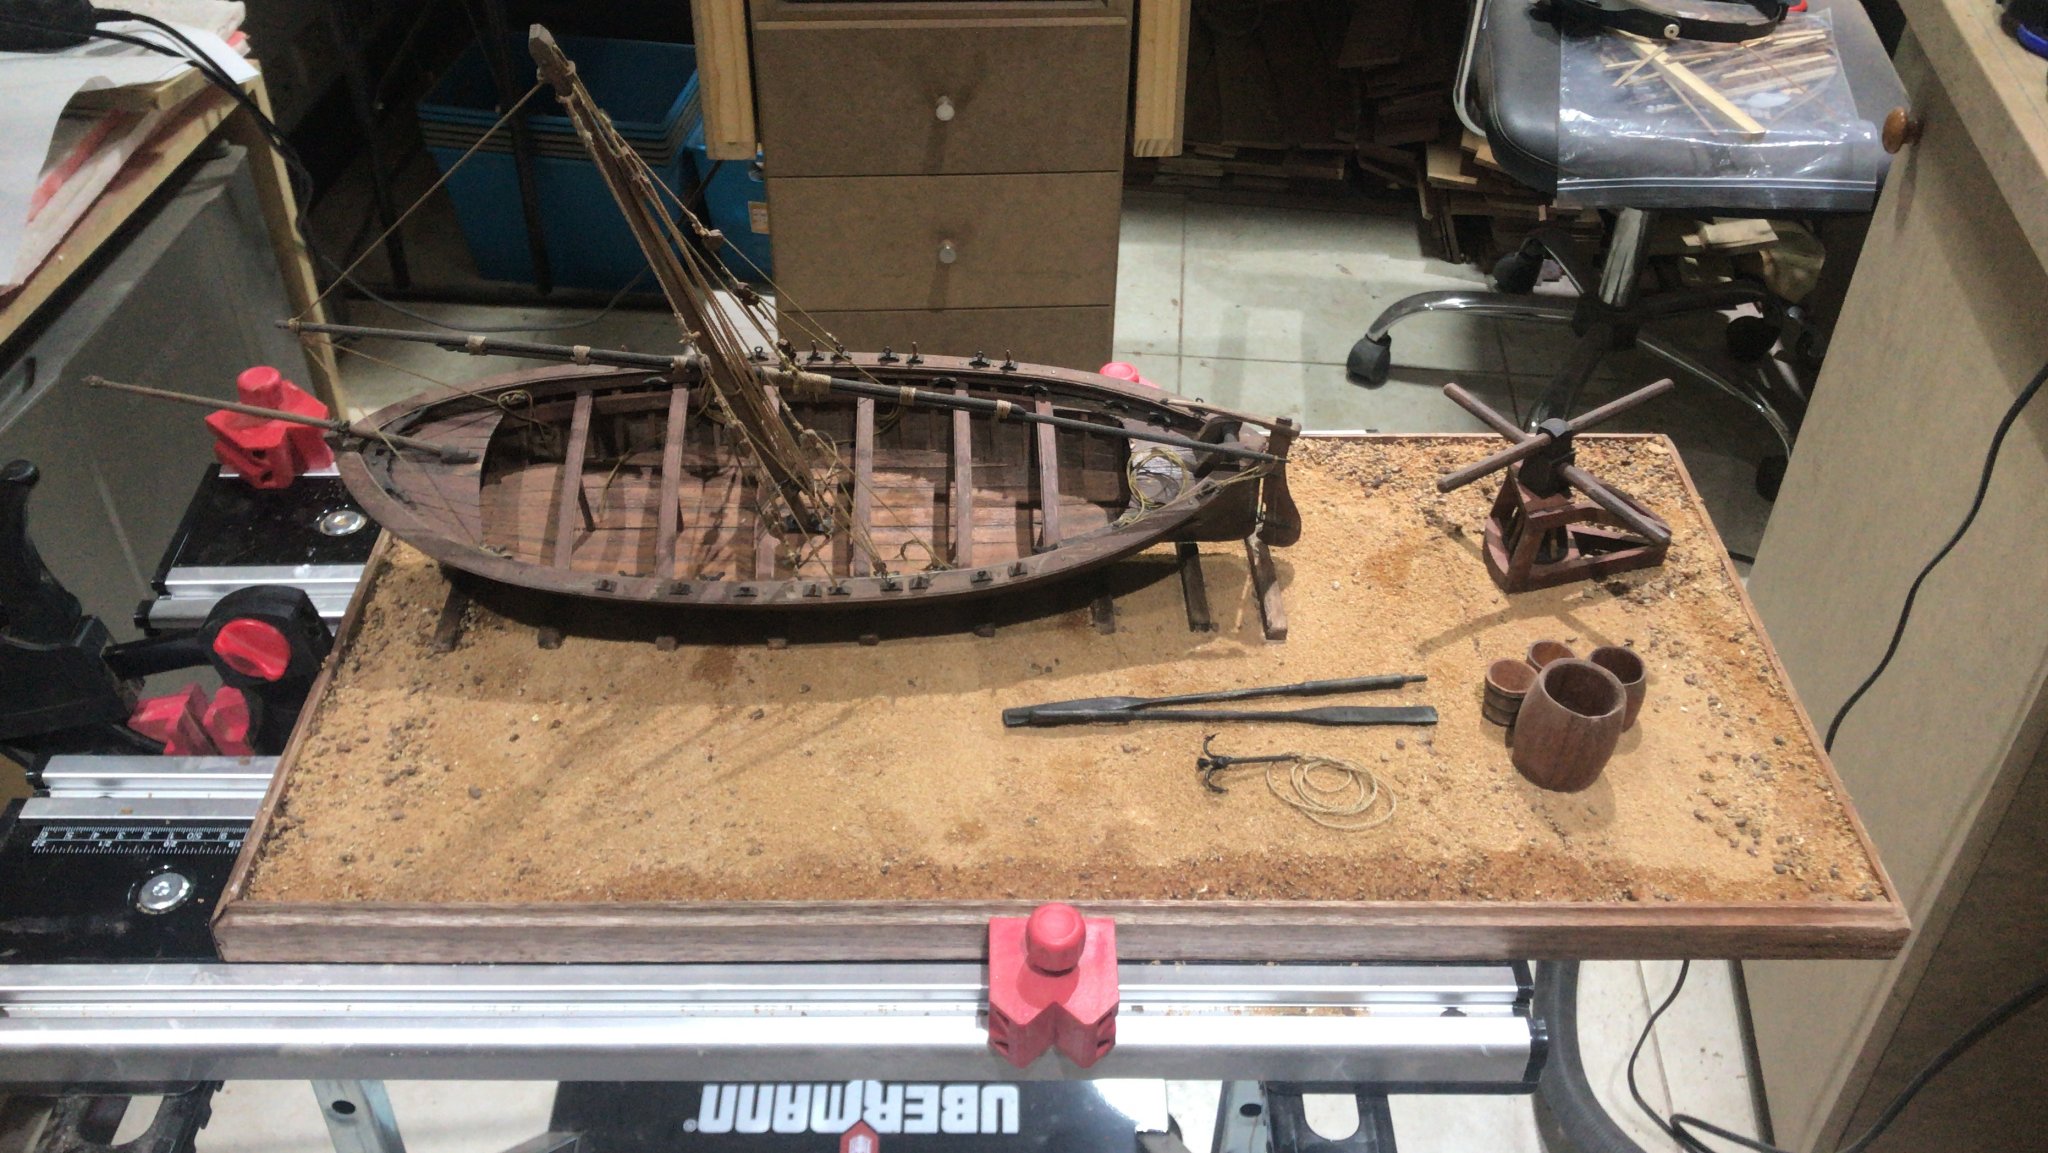
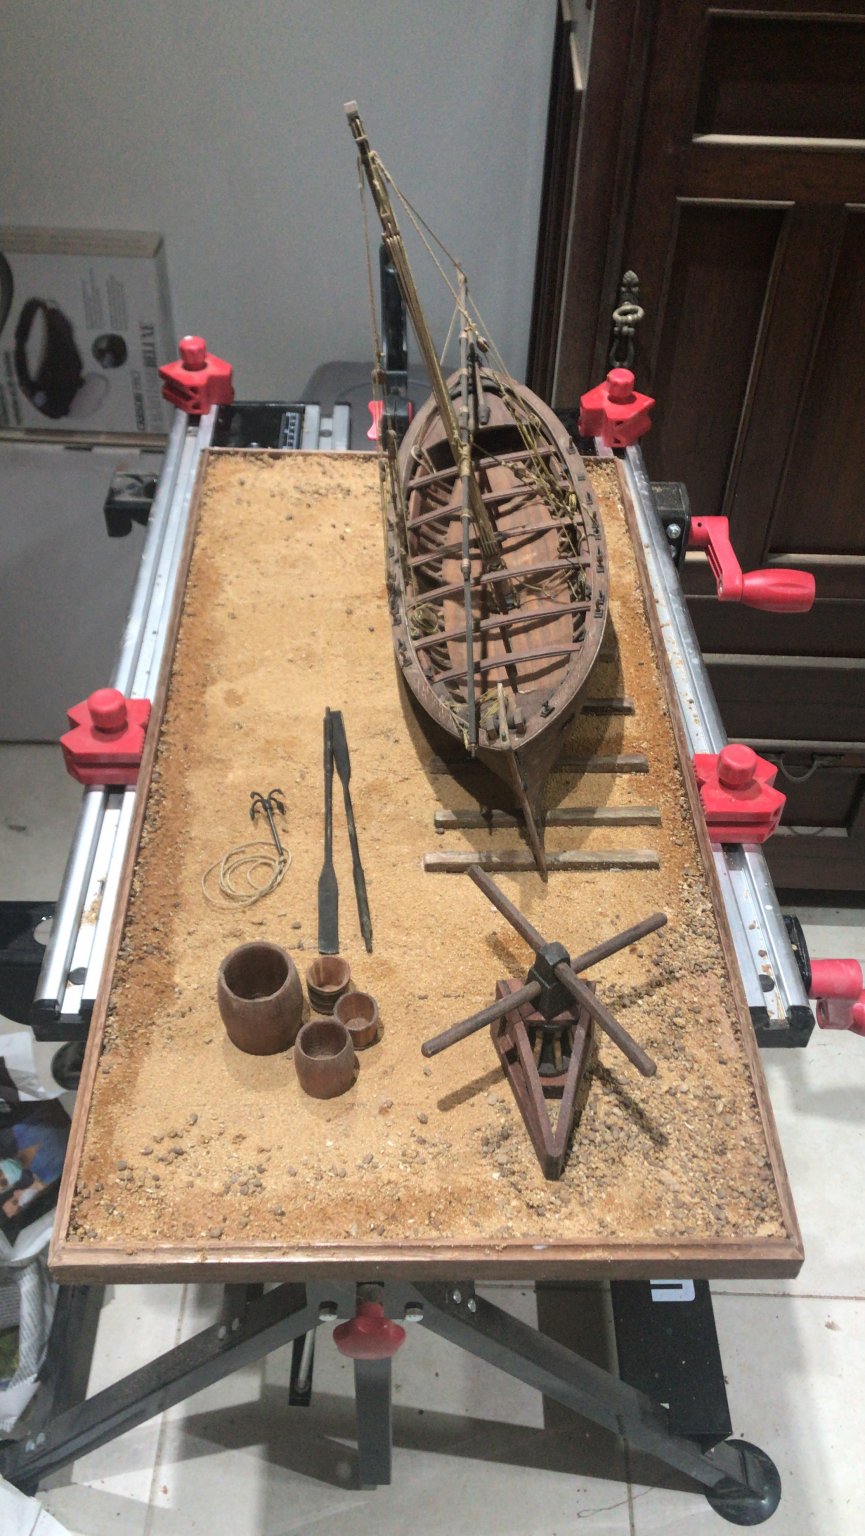
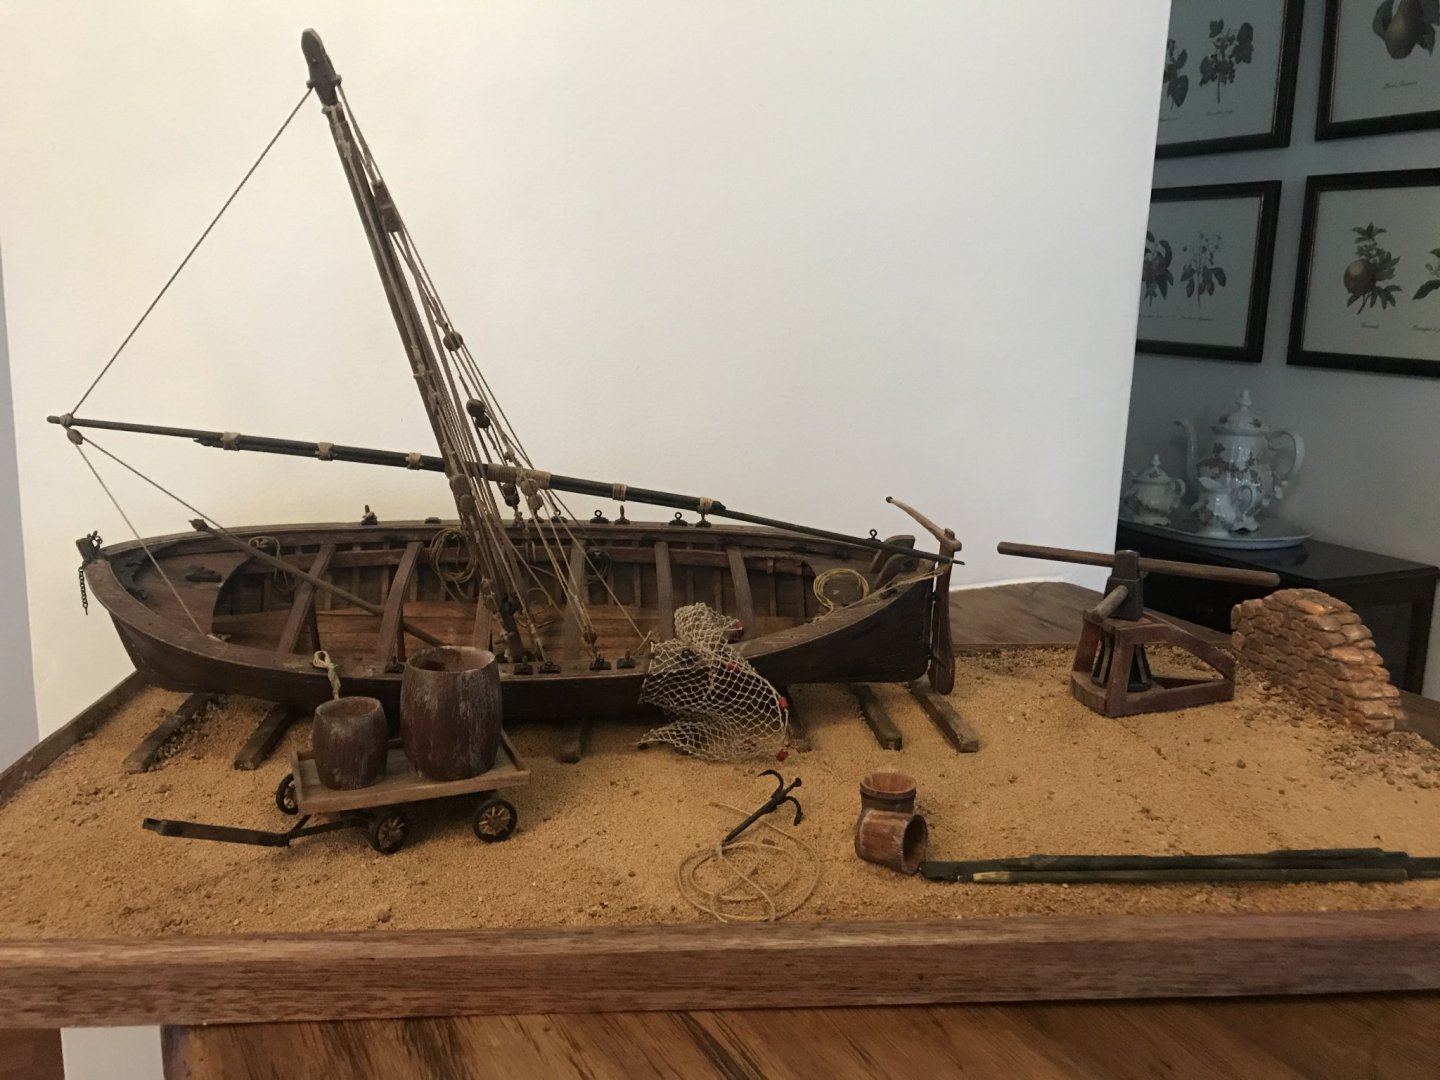
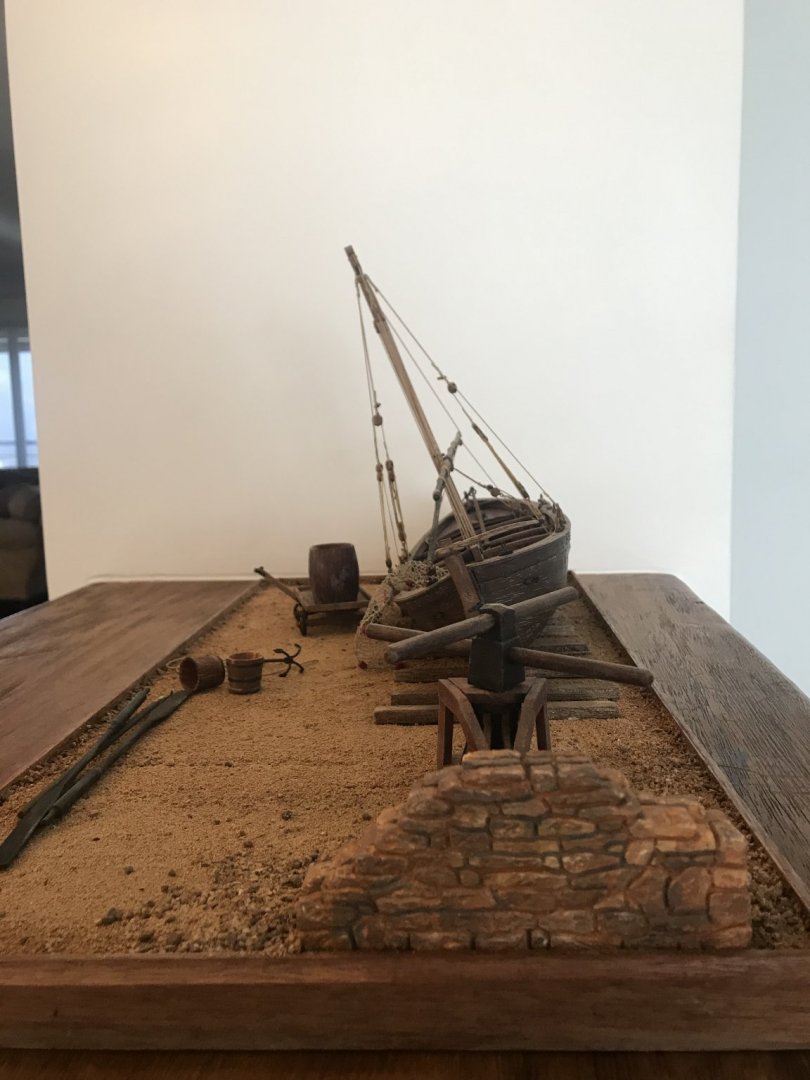
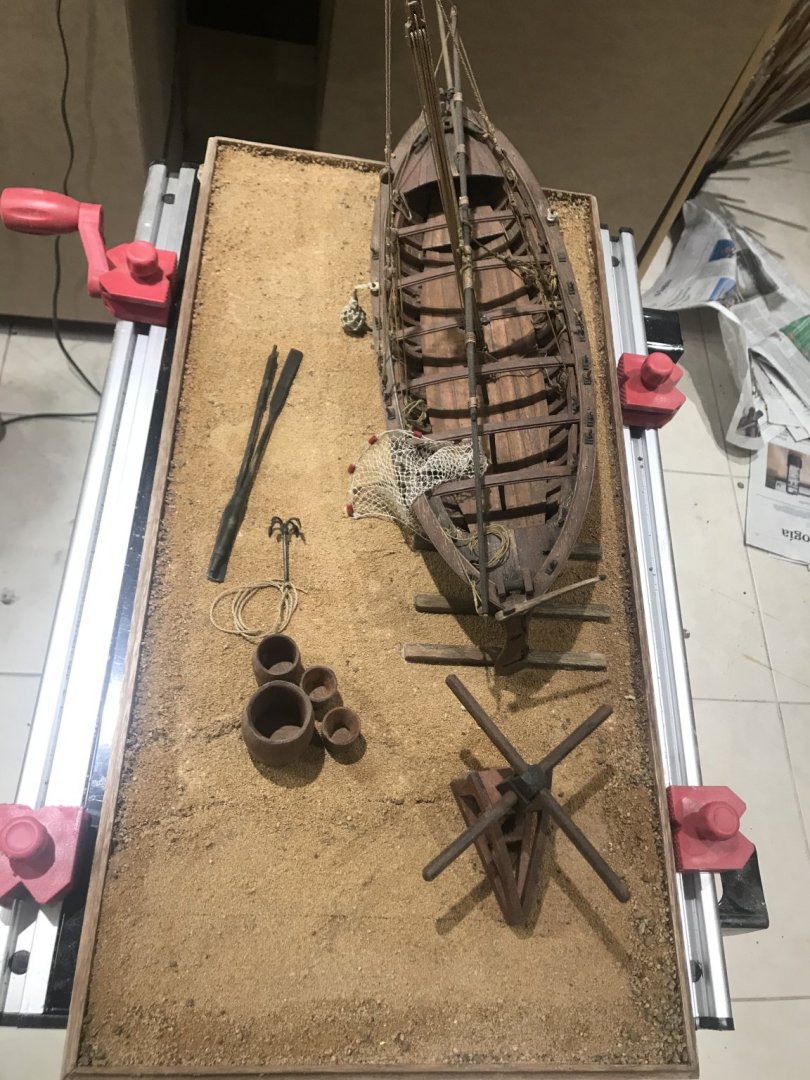
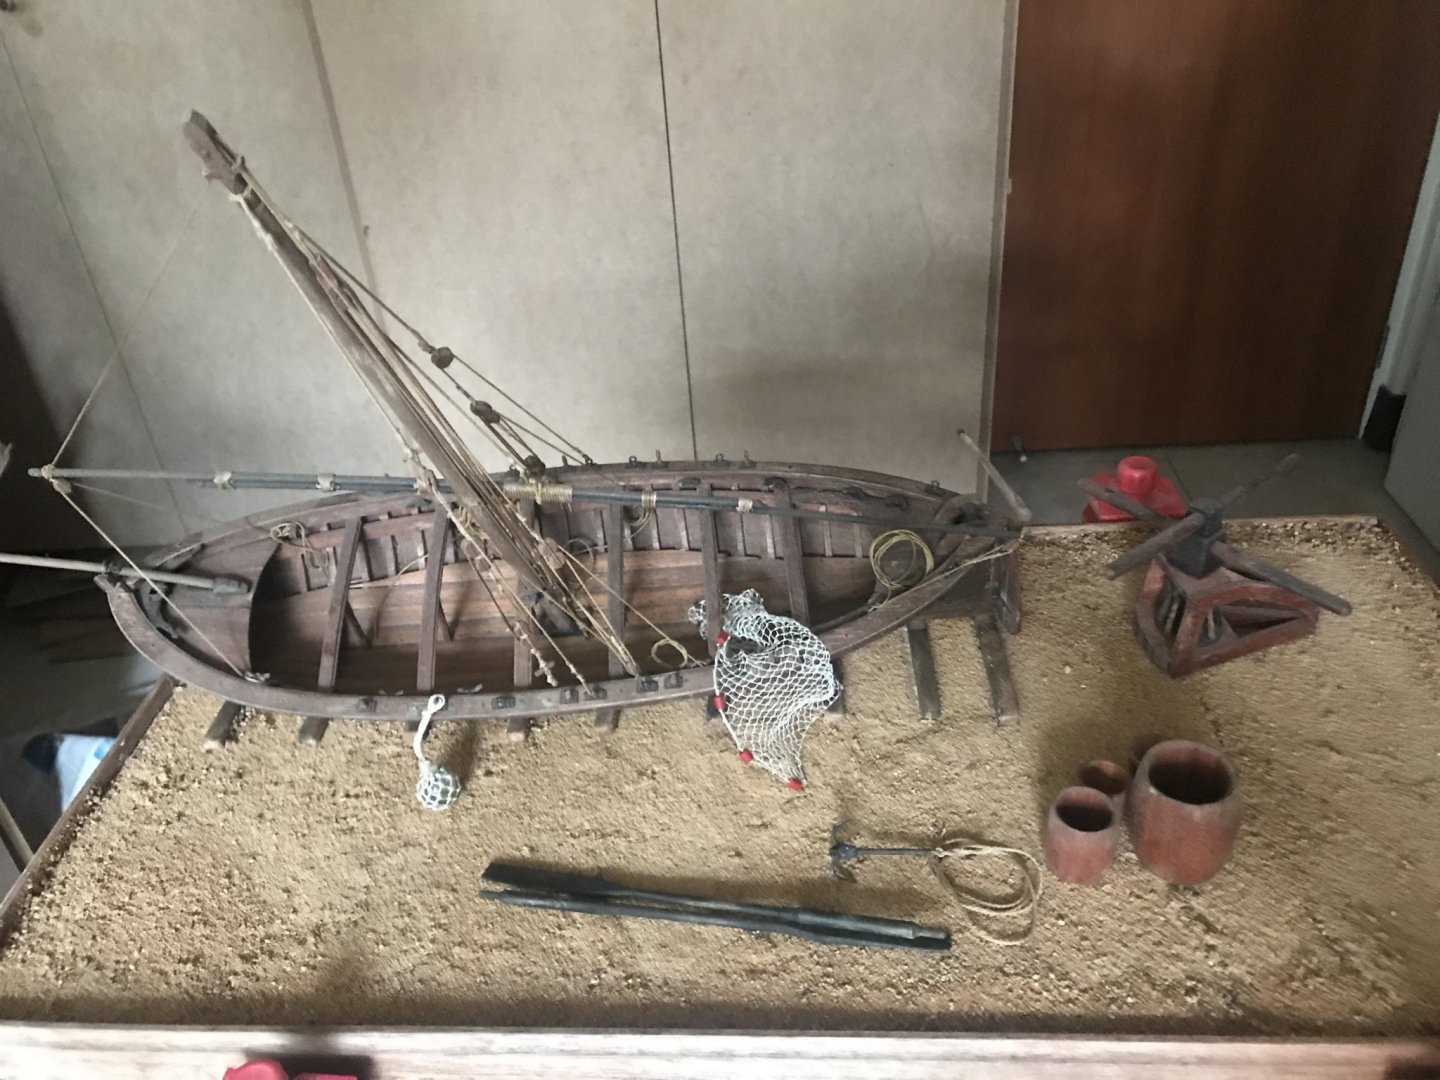
Previous to finished it some pictures about how the diorama will looks like.....


-
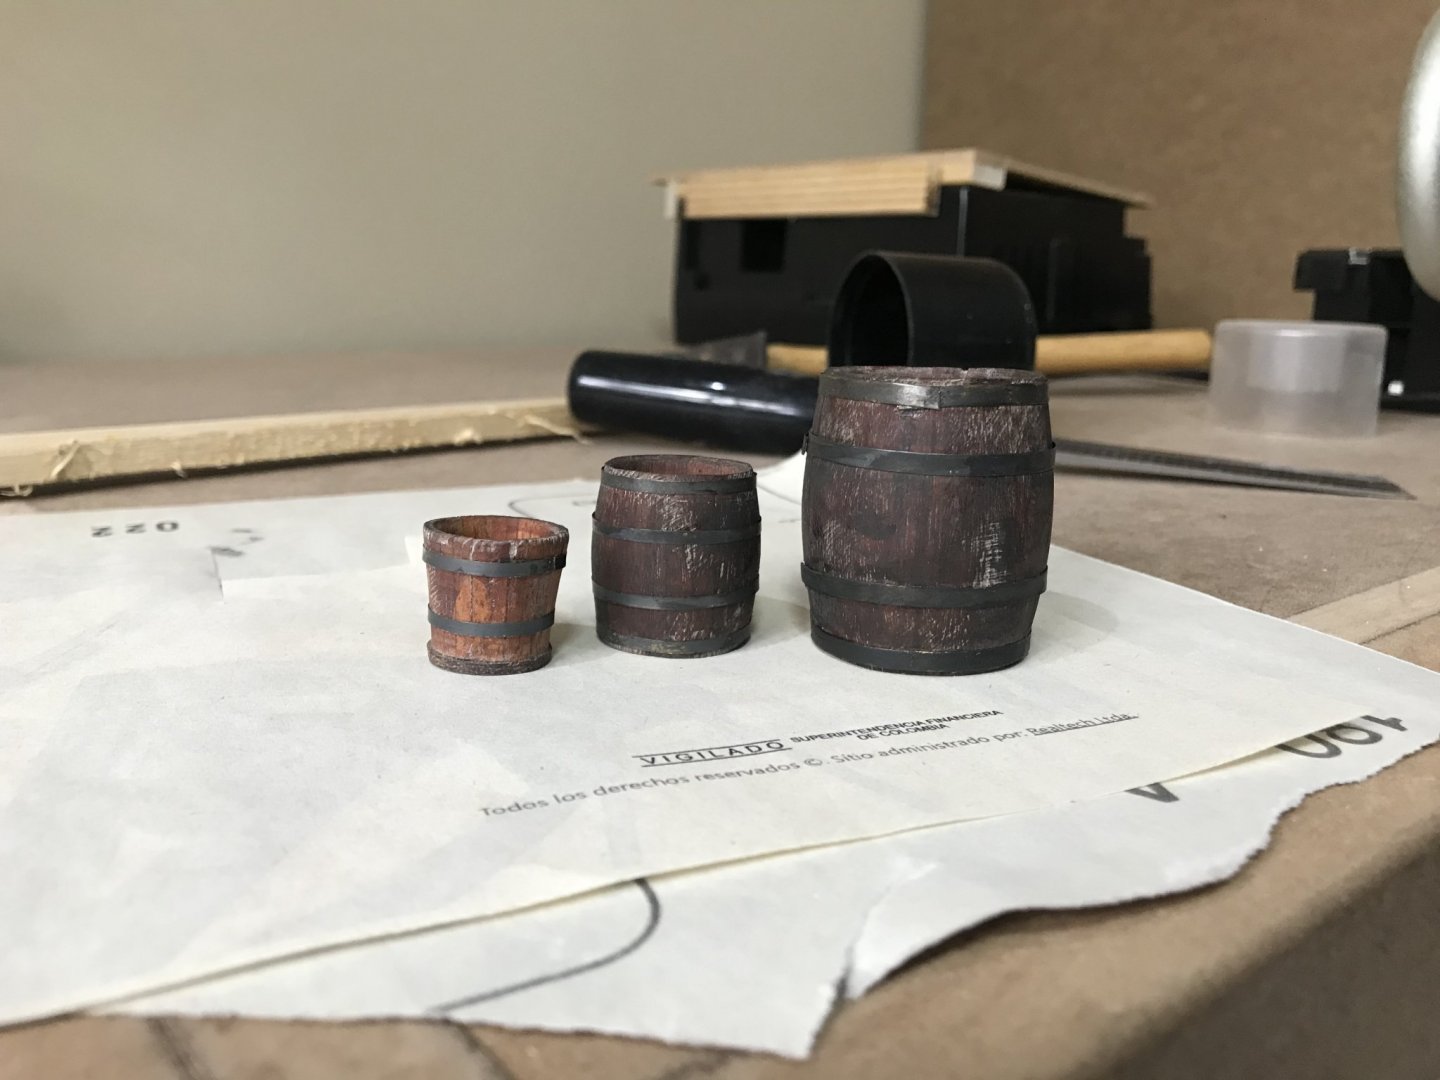
Barrels and buckets finishes.........
-
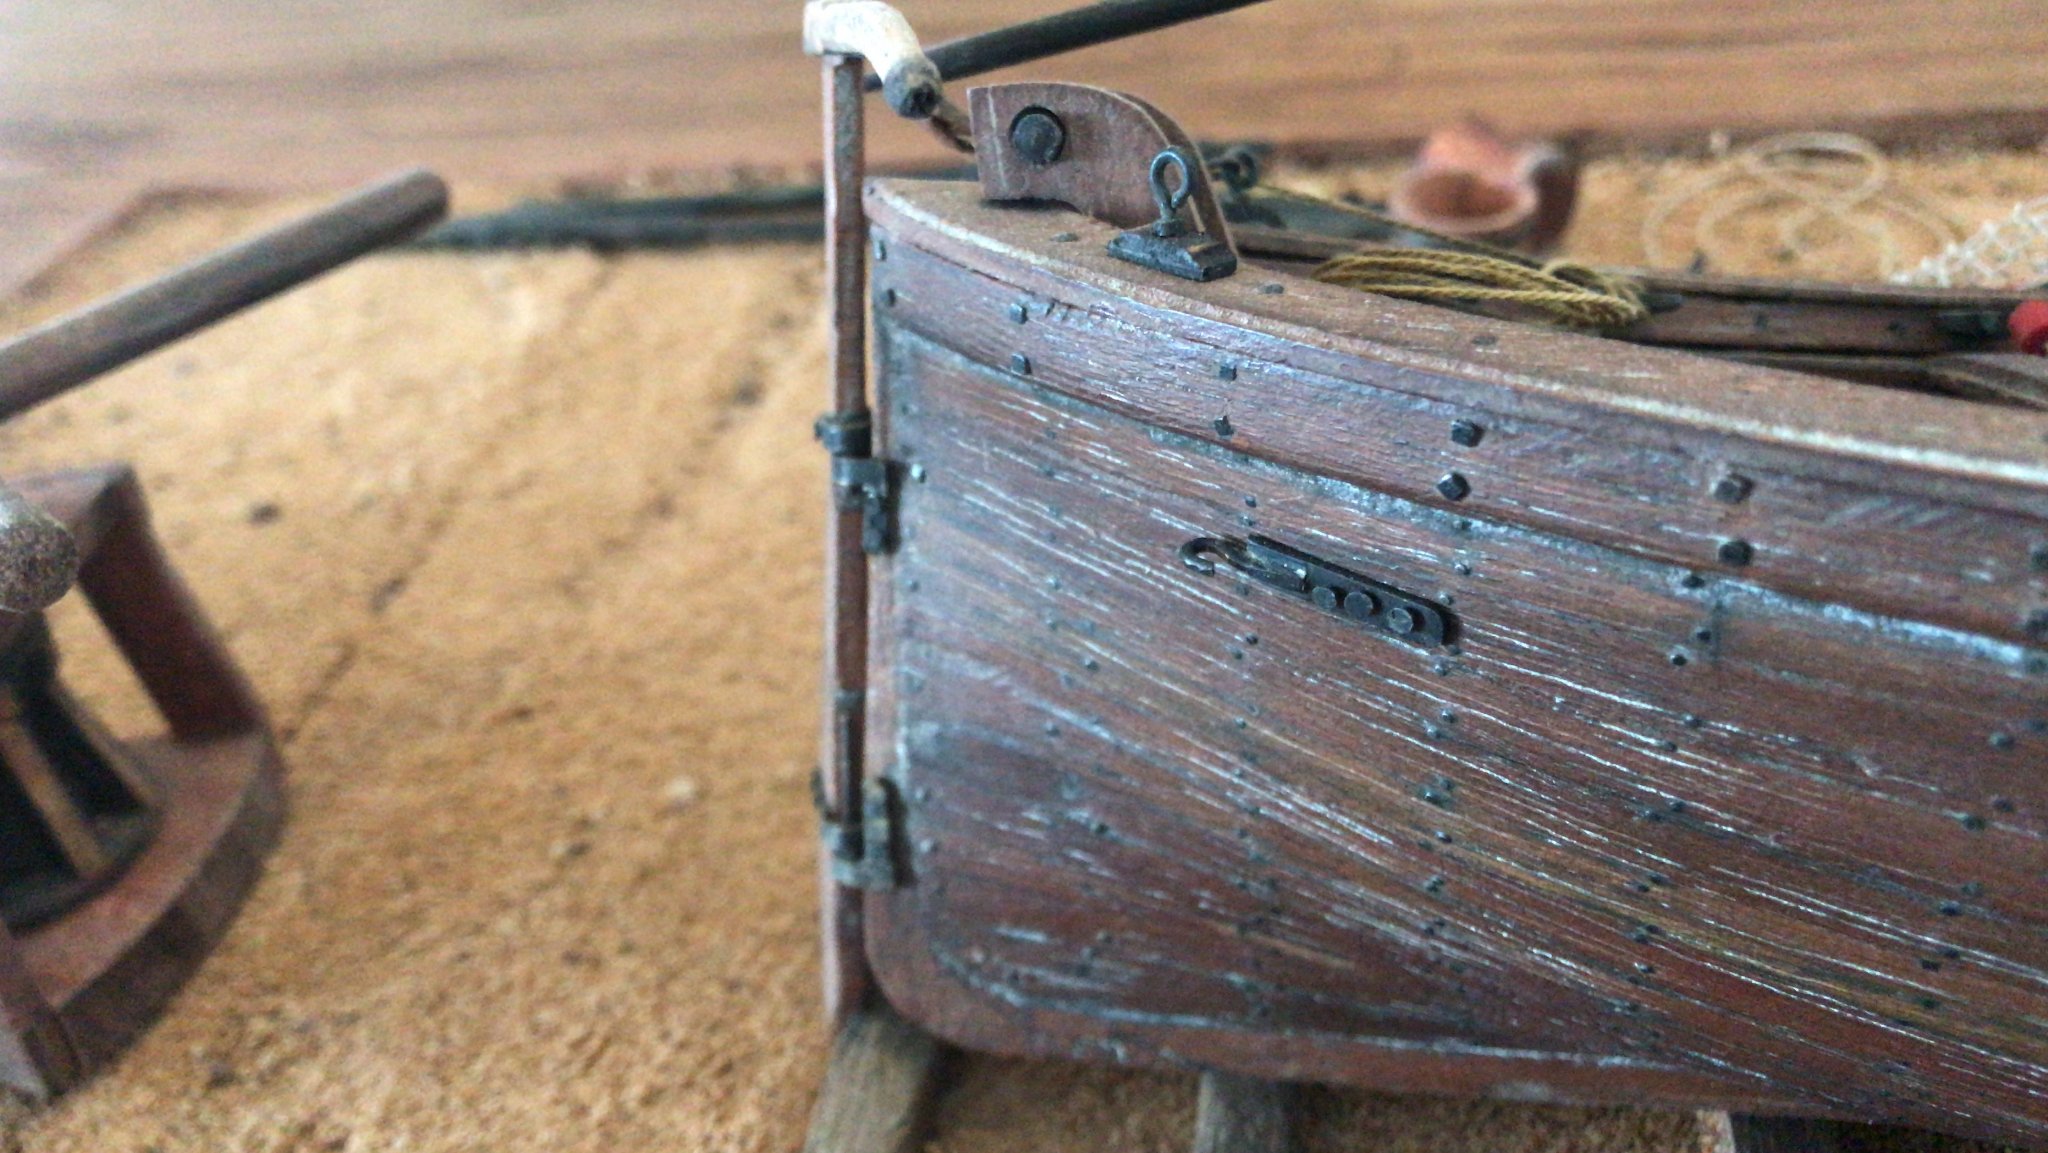
To the boat..........

-
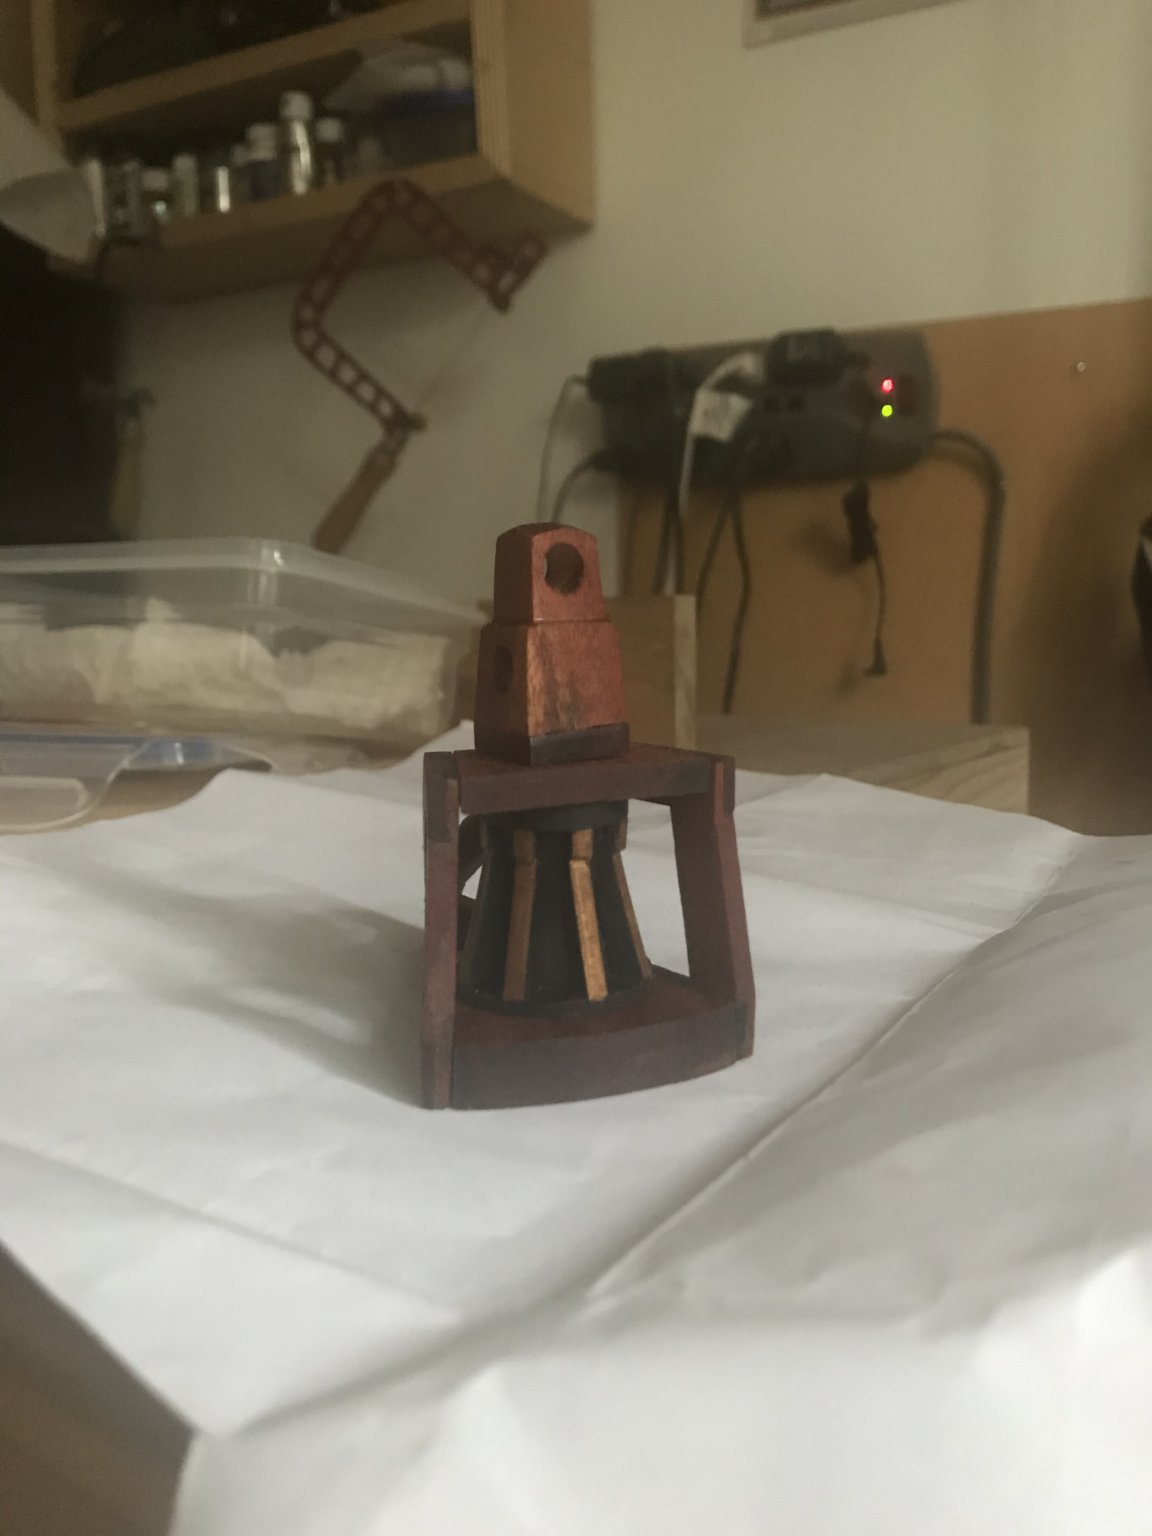
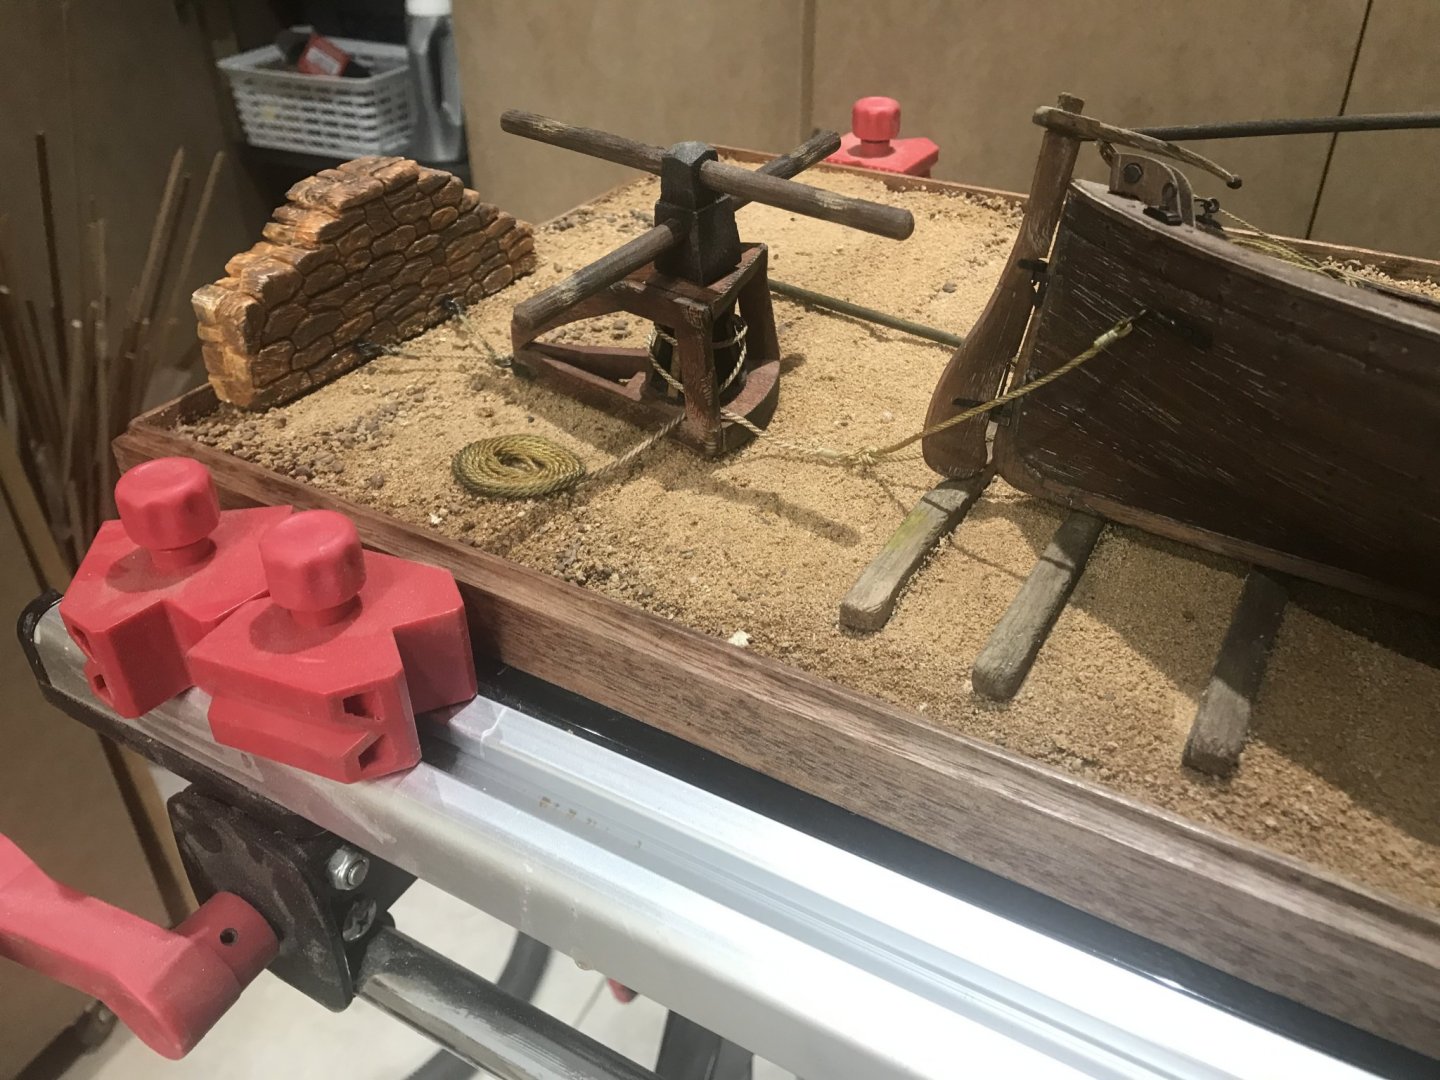
Capstan anchored......

-
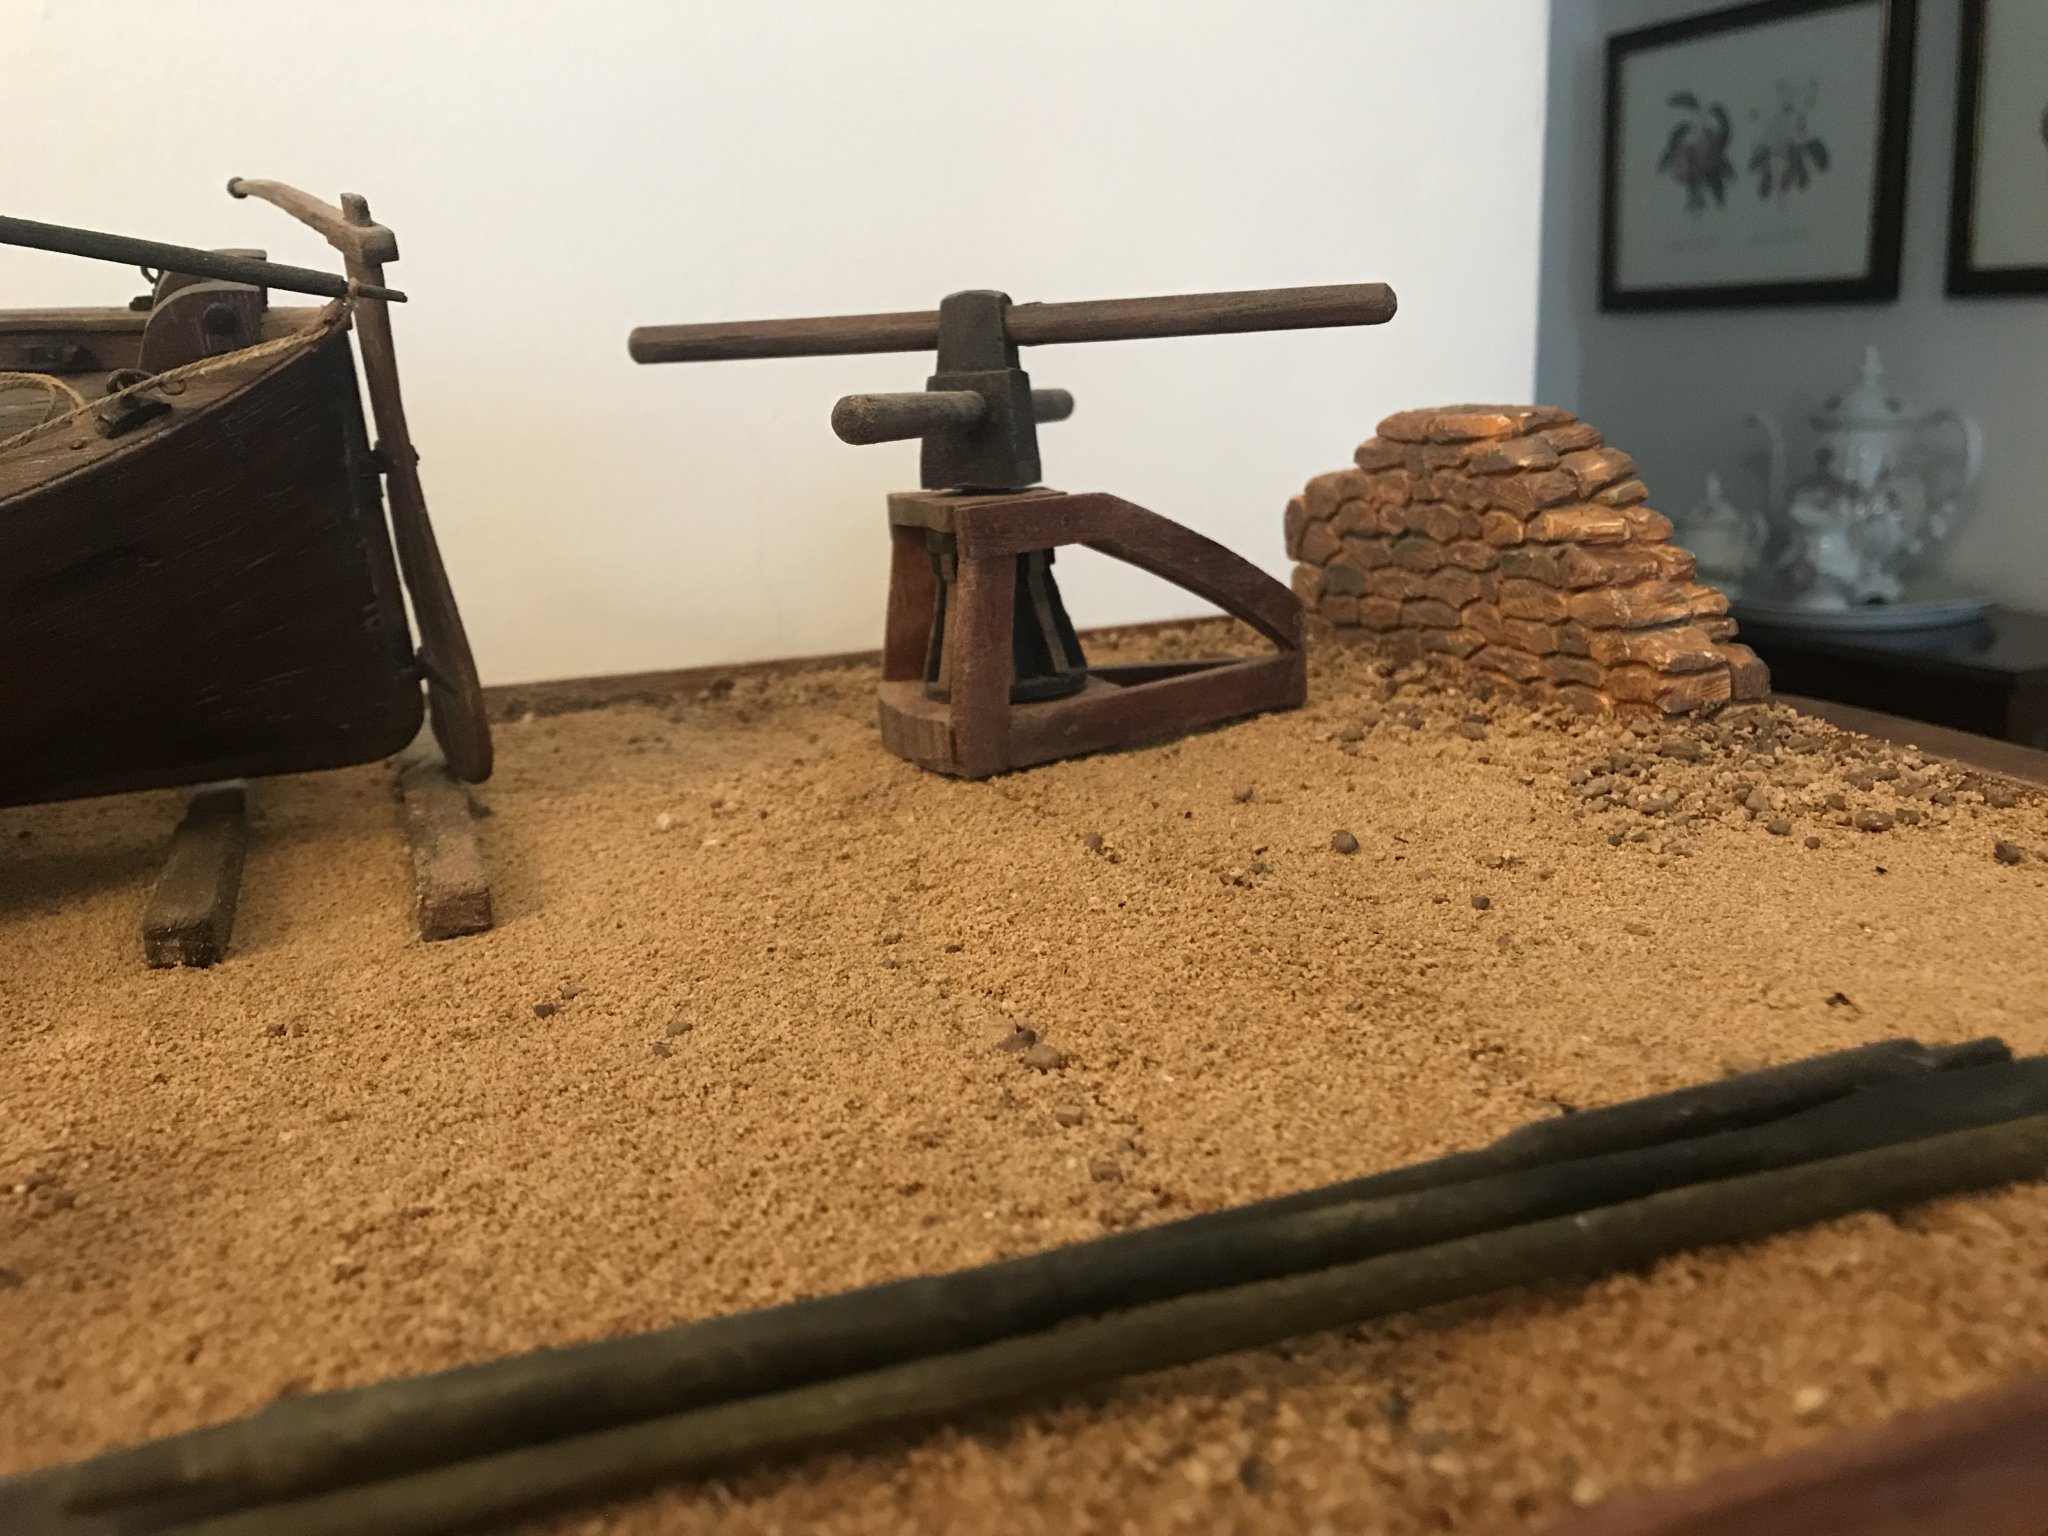
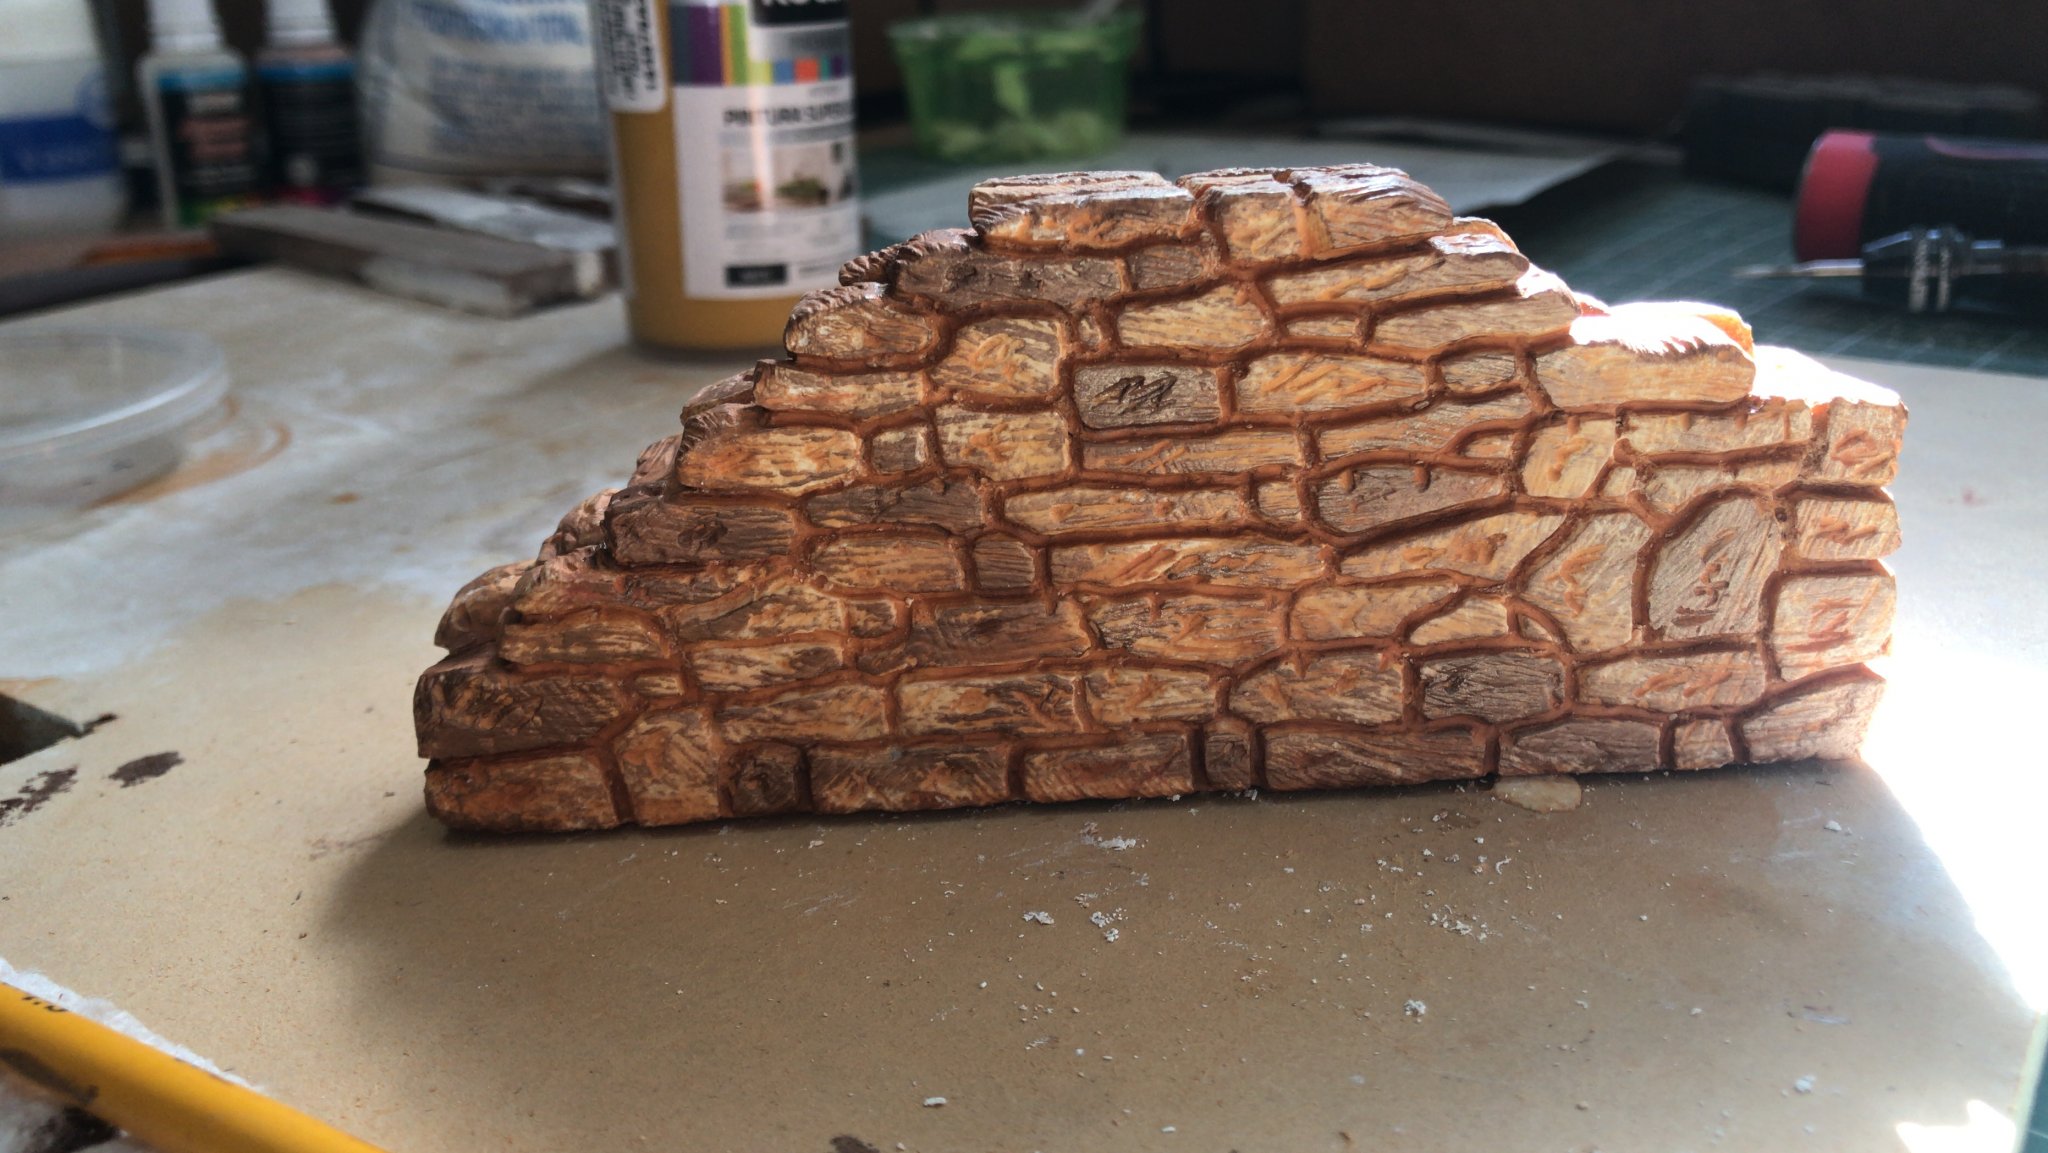
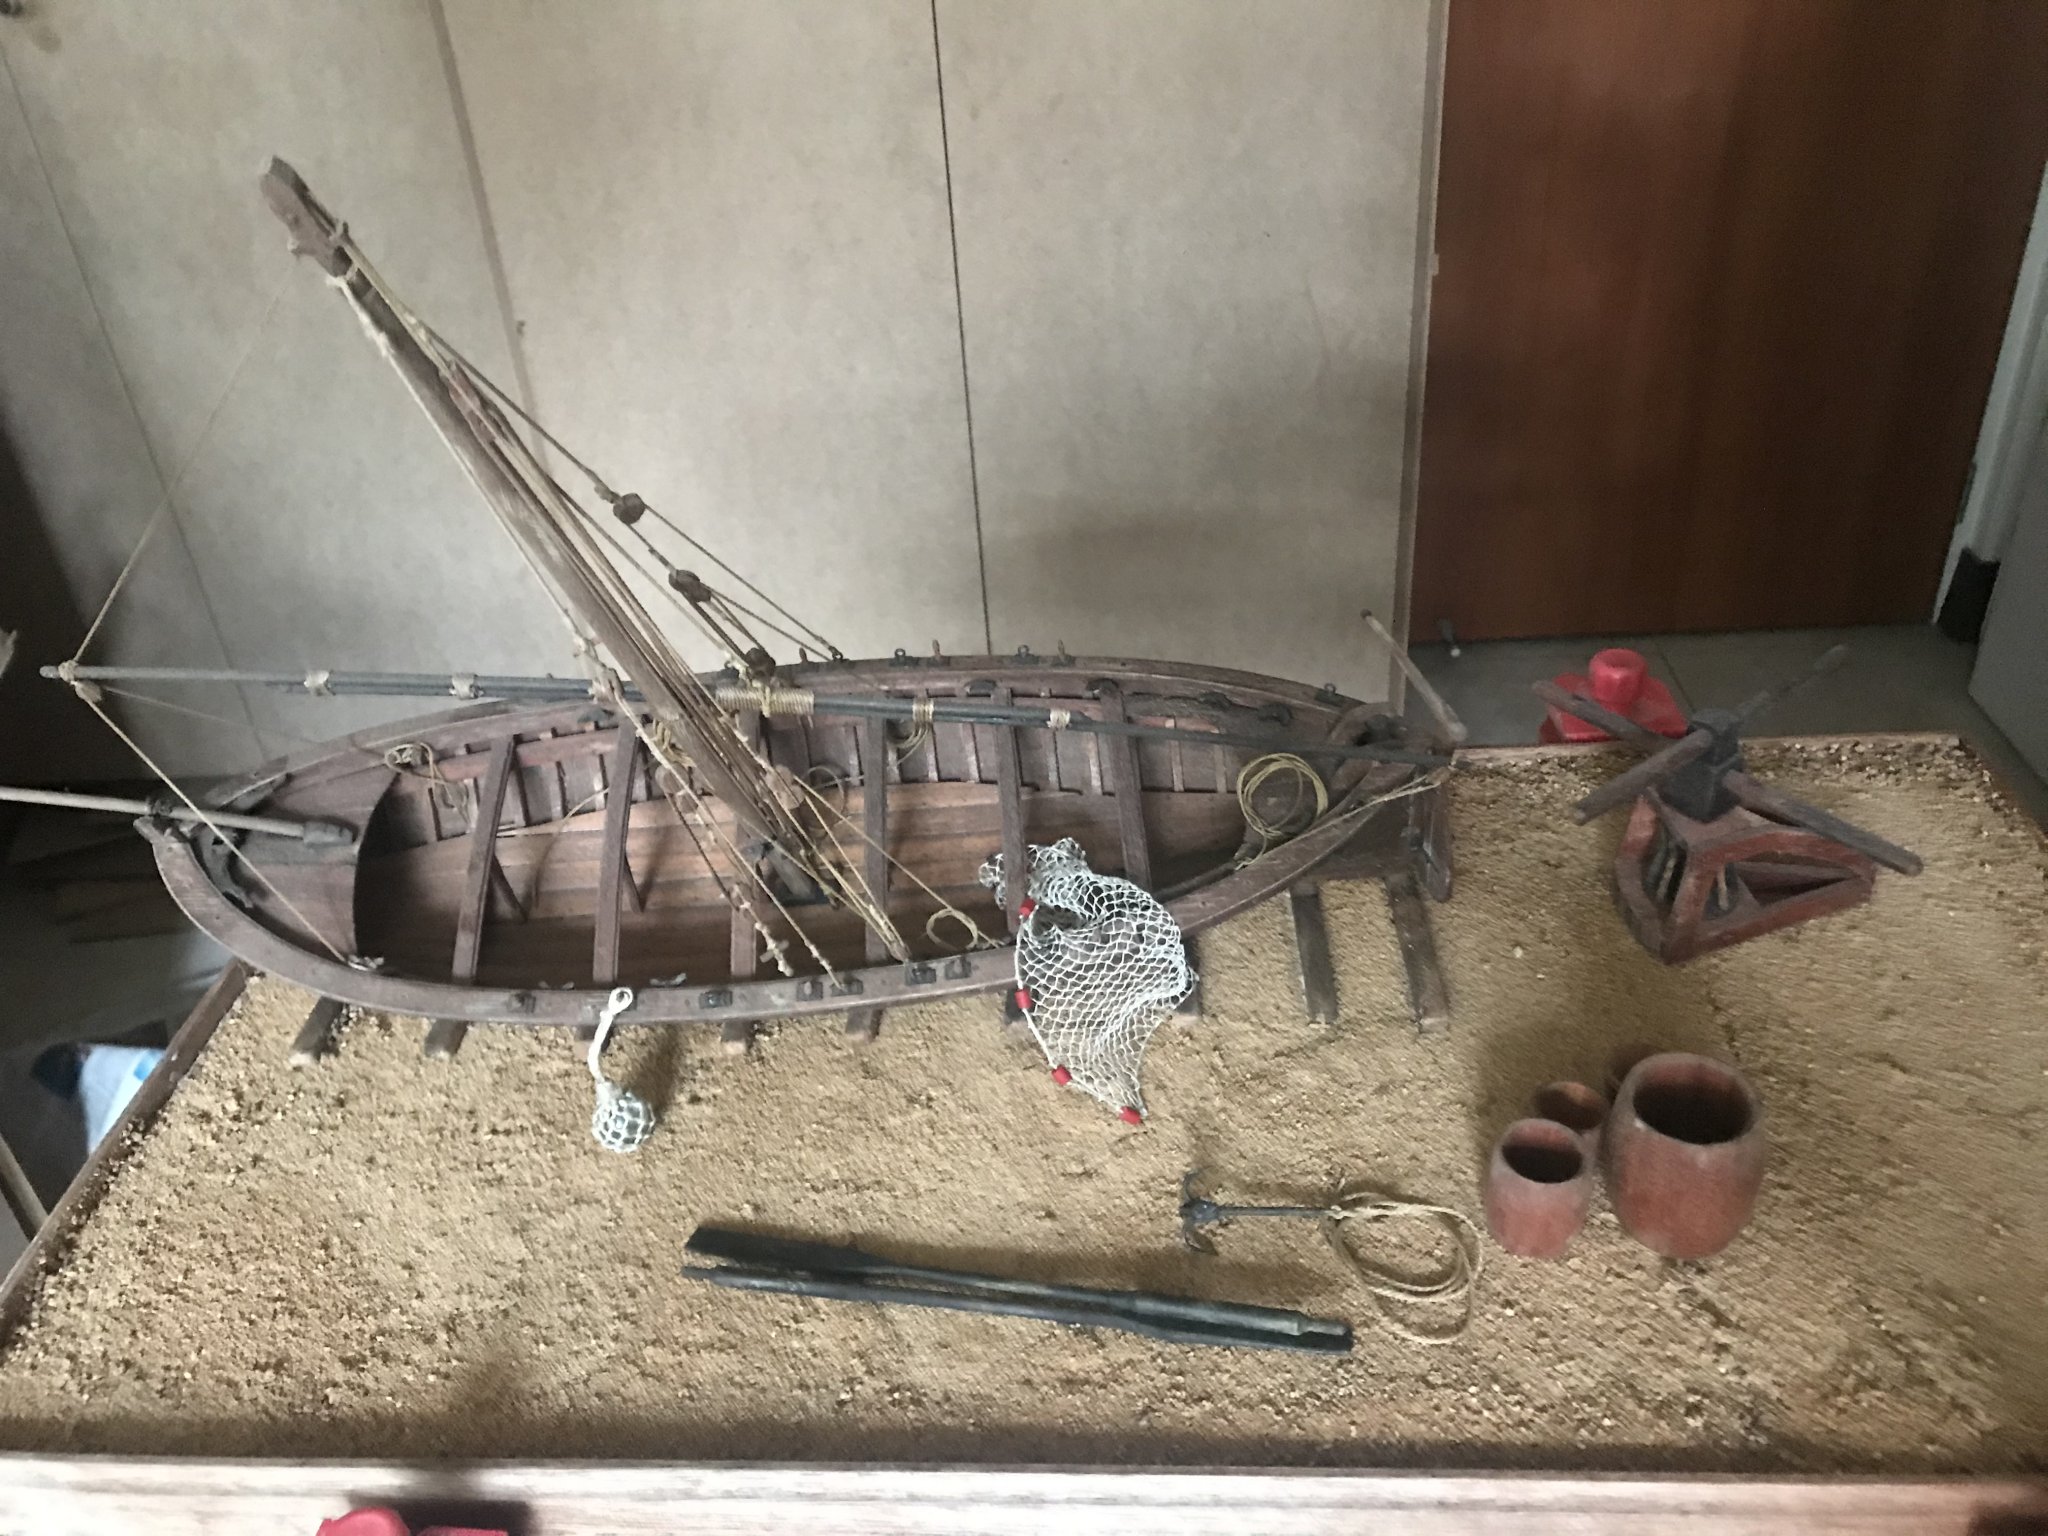
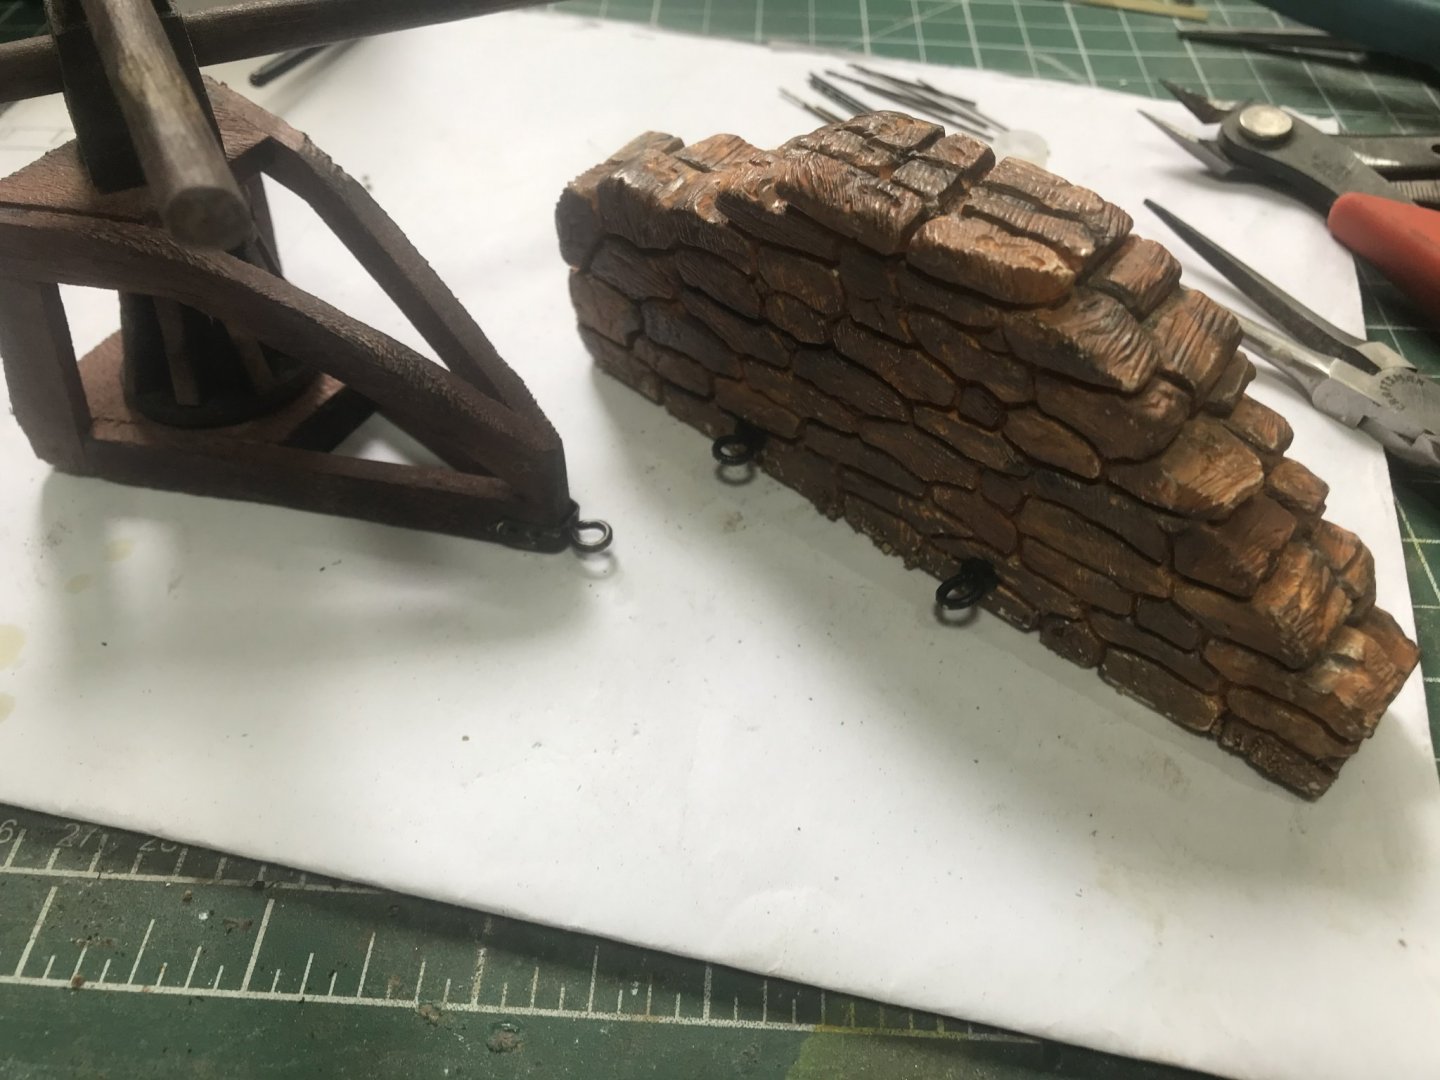
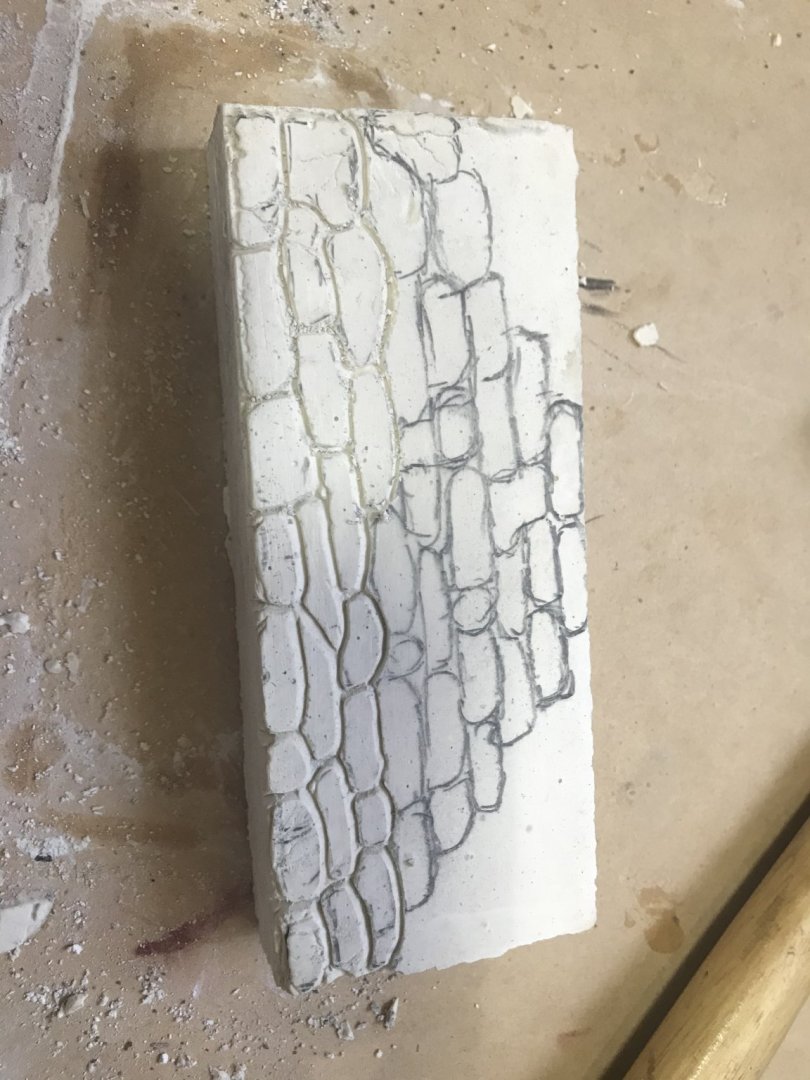
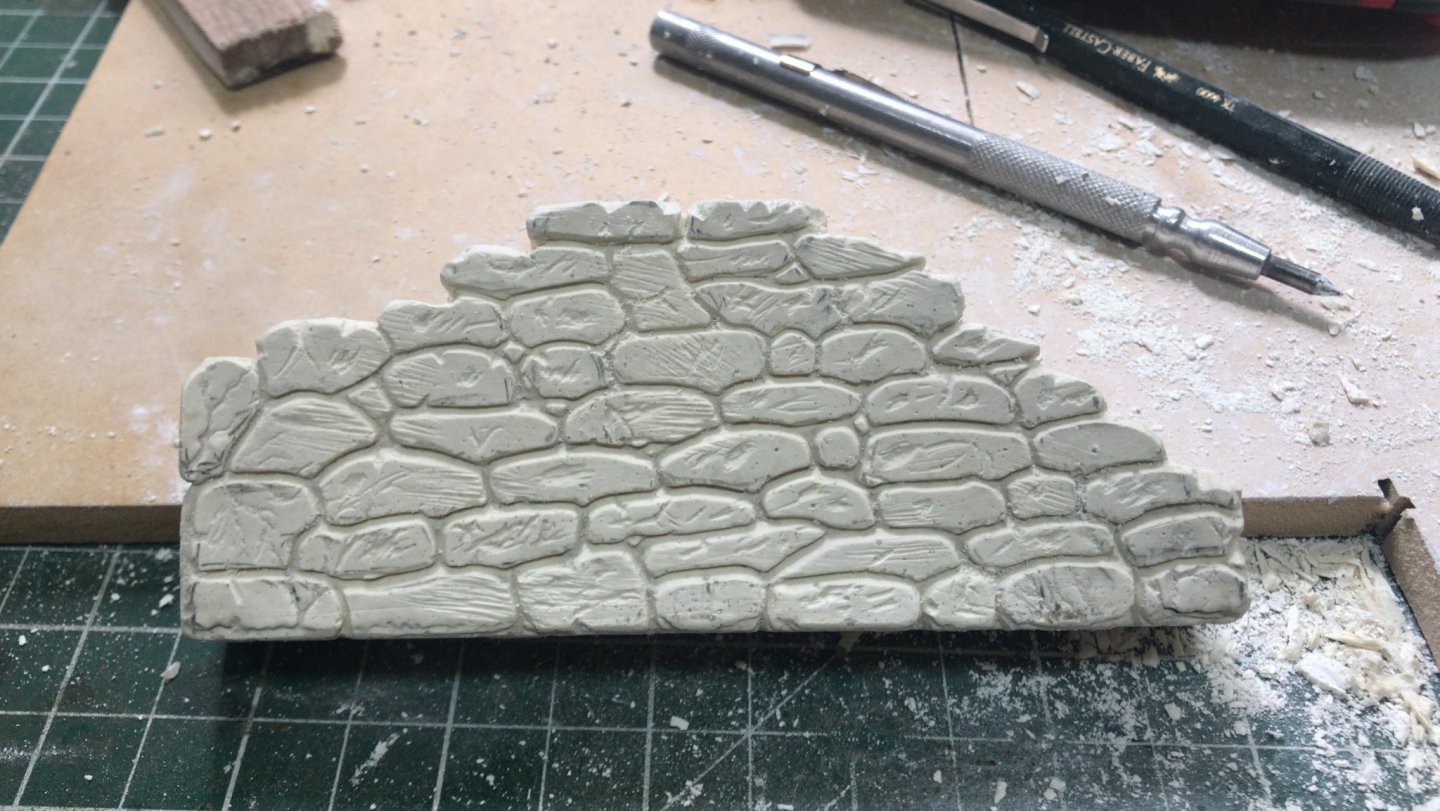
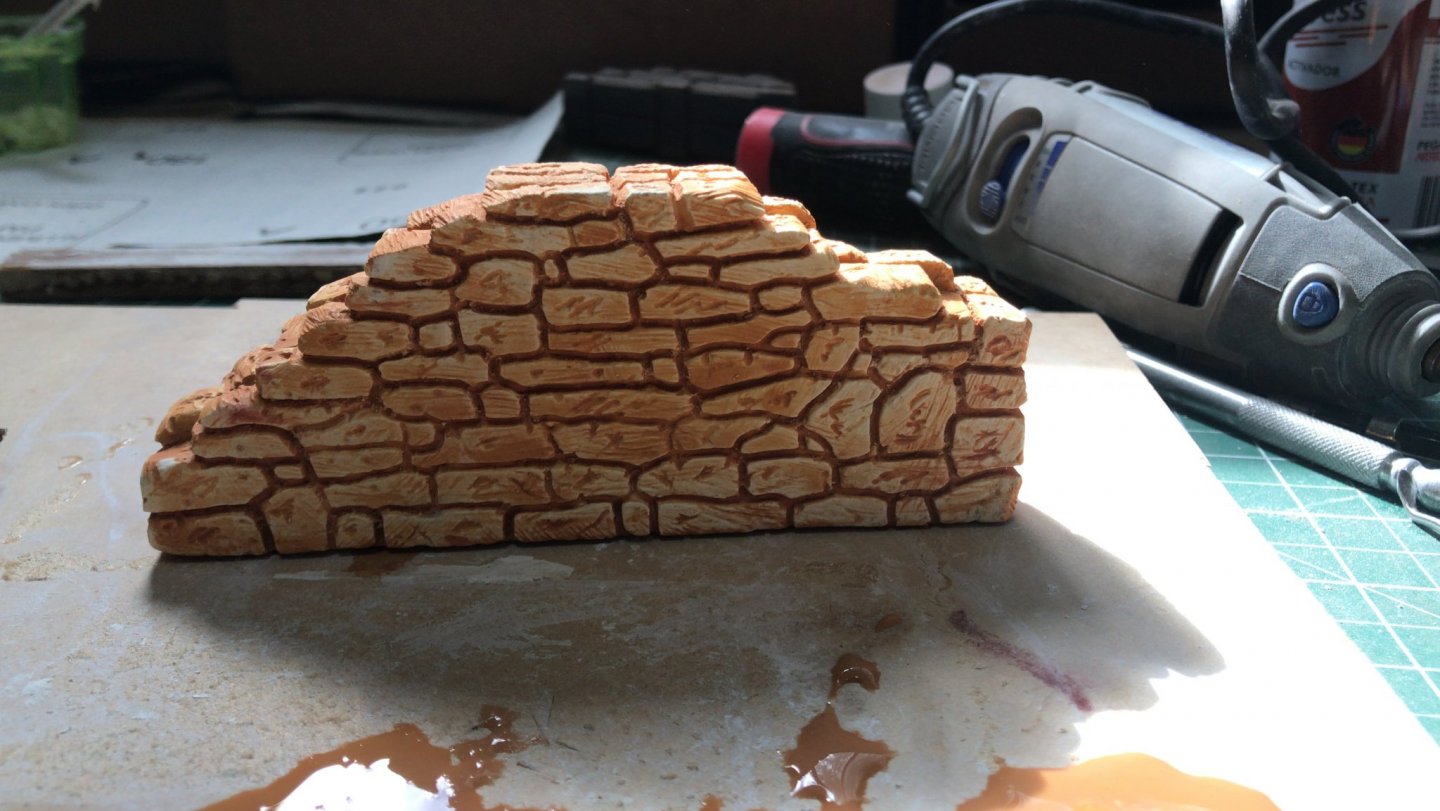
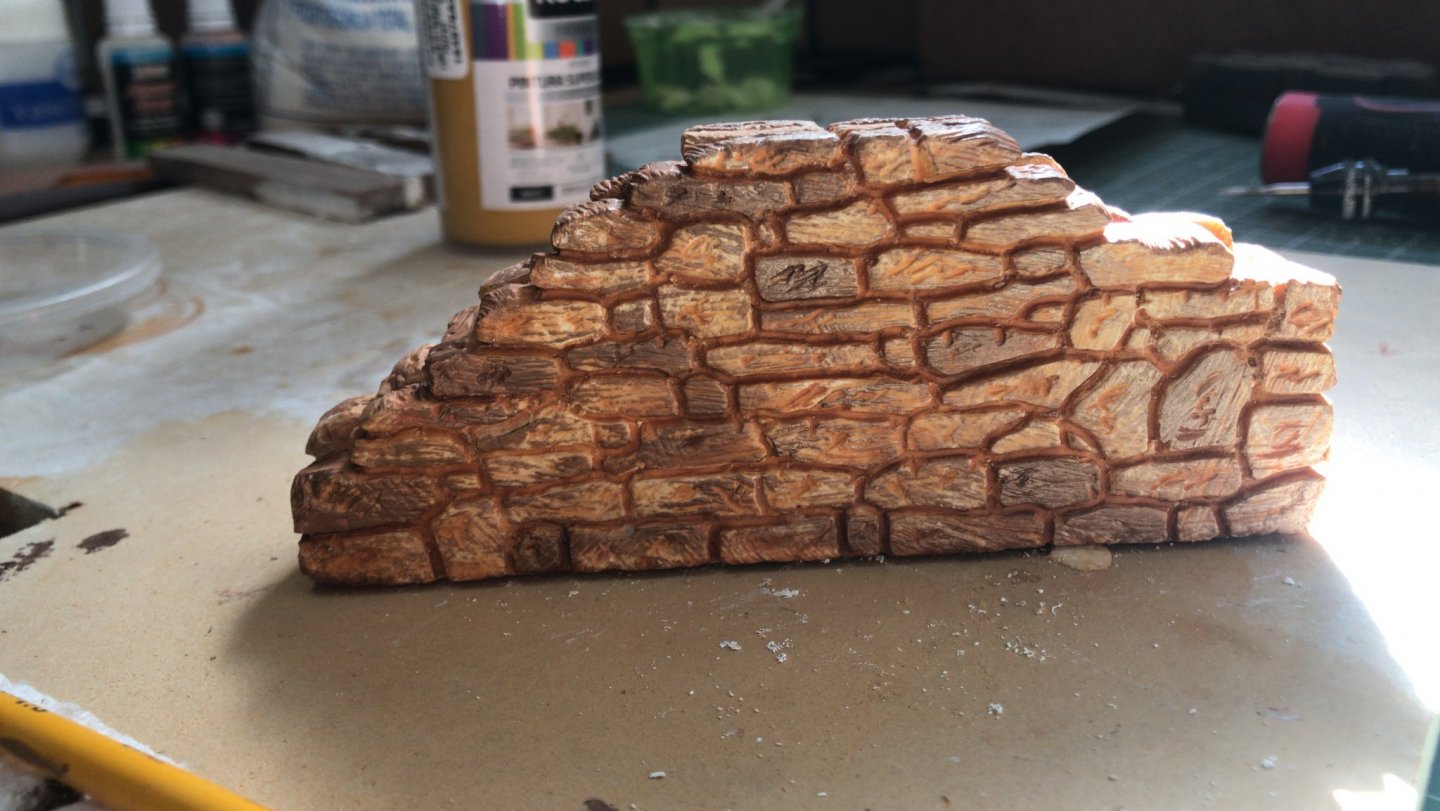
This is going to be my previous last post.......😒. The model is “already finished”......You never finish a diorama.... you have to abandon it!!!! The beach capstan usually were anchored to a stone wall. This was necessary to provide resistance at the time they pull the boat to the beach....... I used “nativity” technique to create it......


-
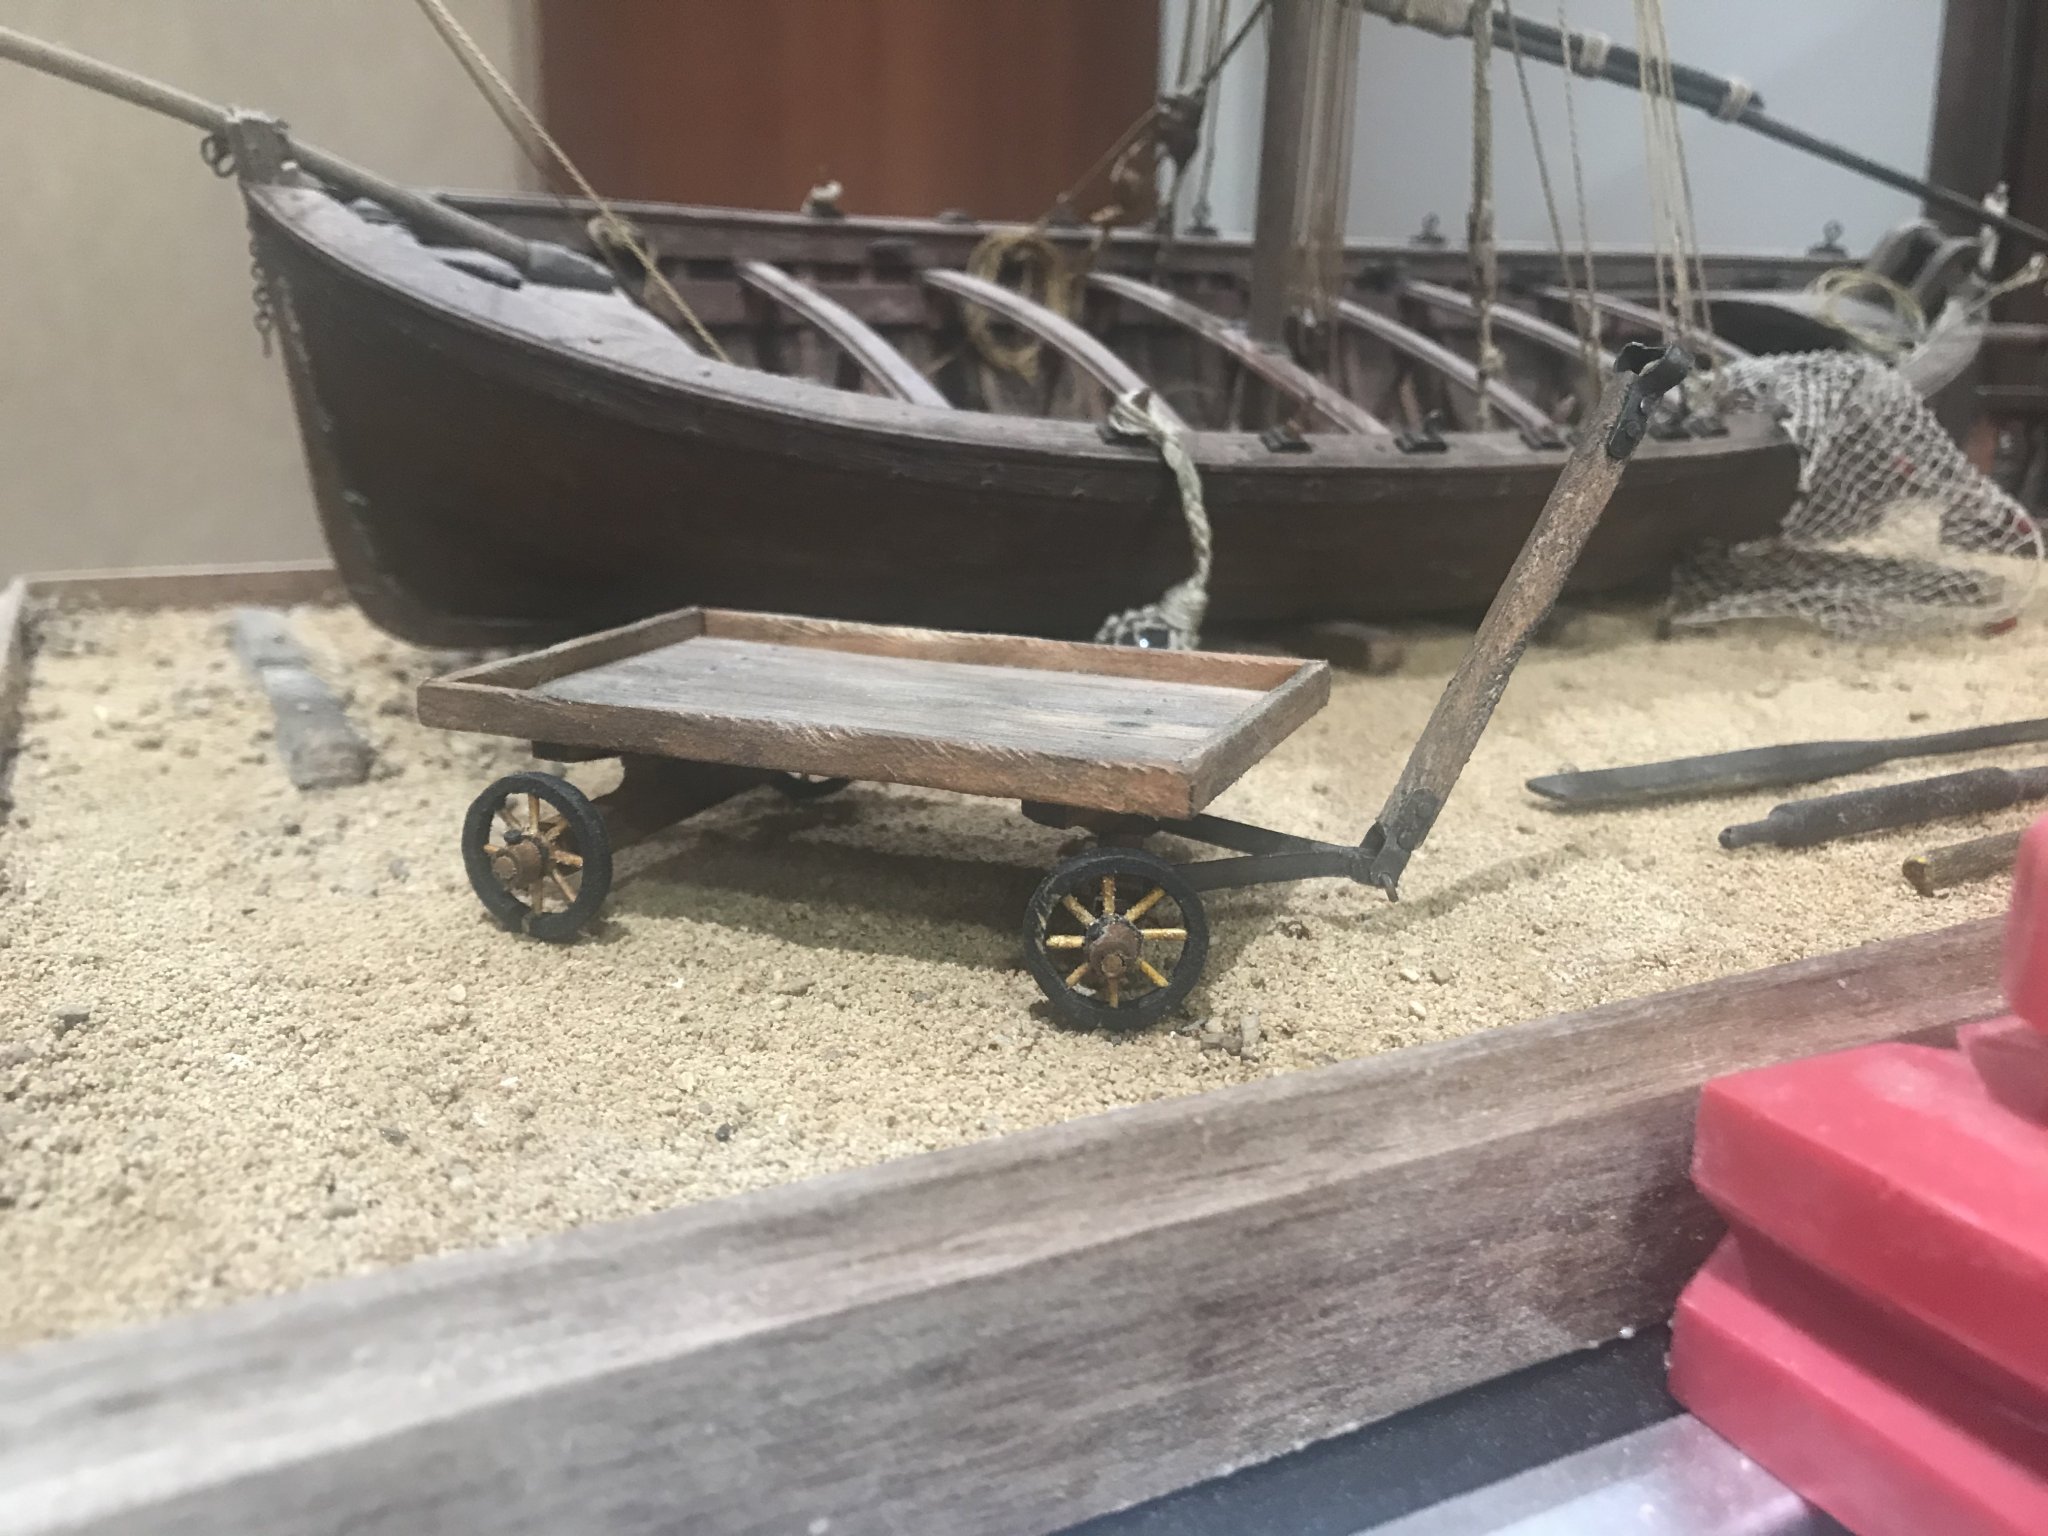
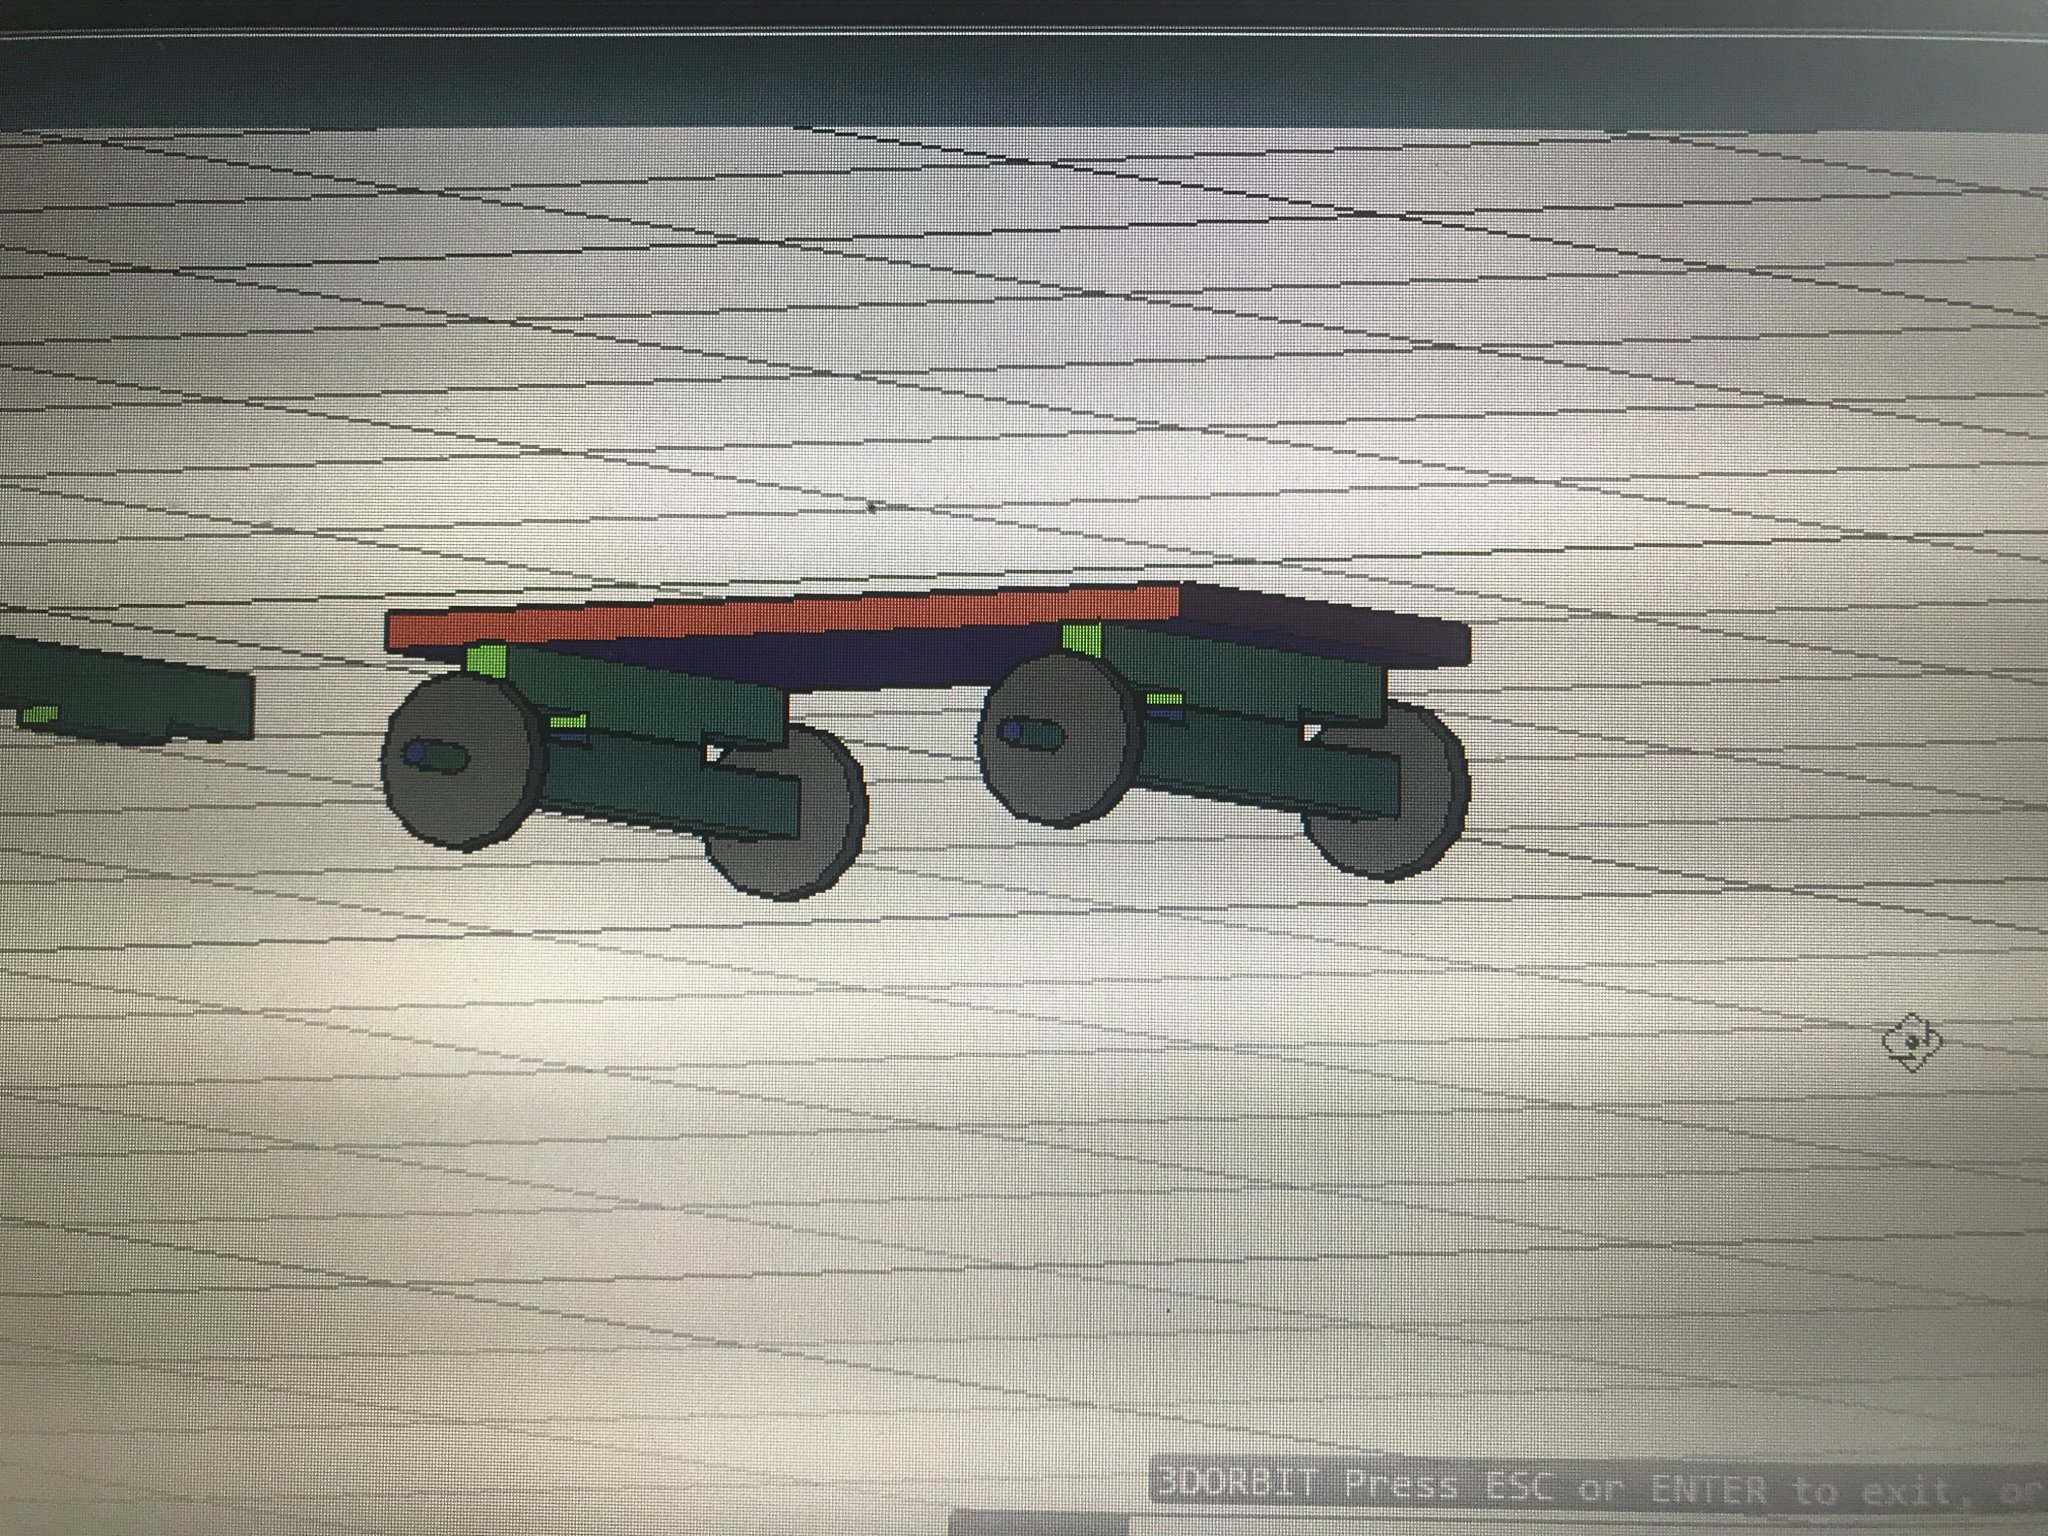
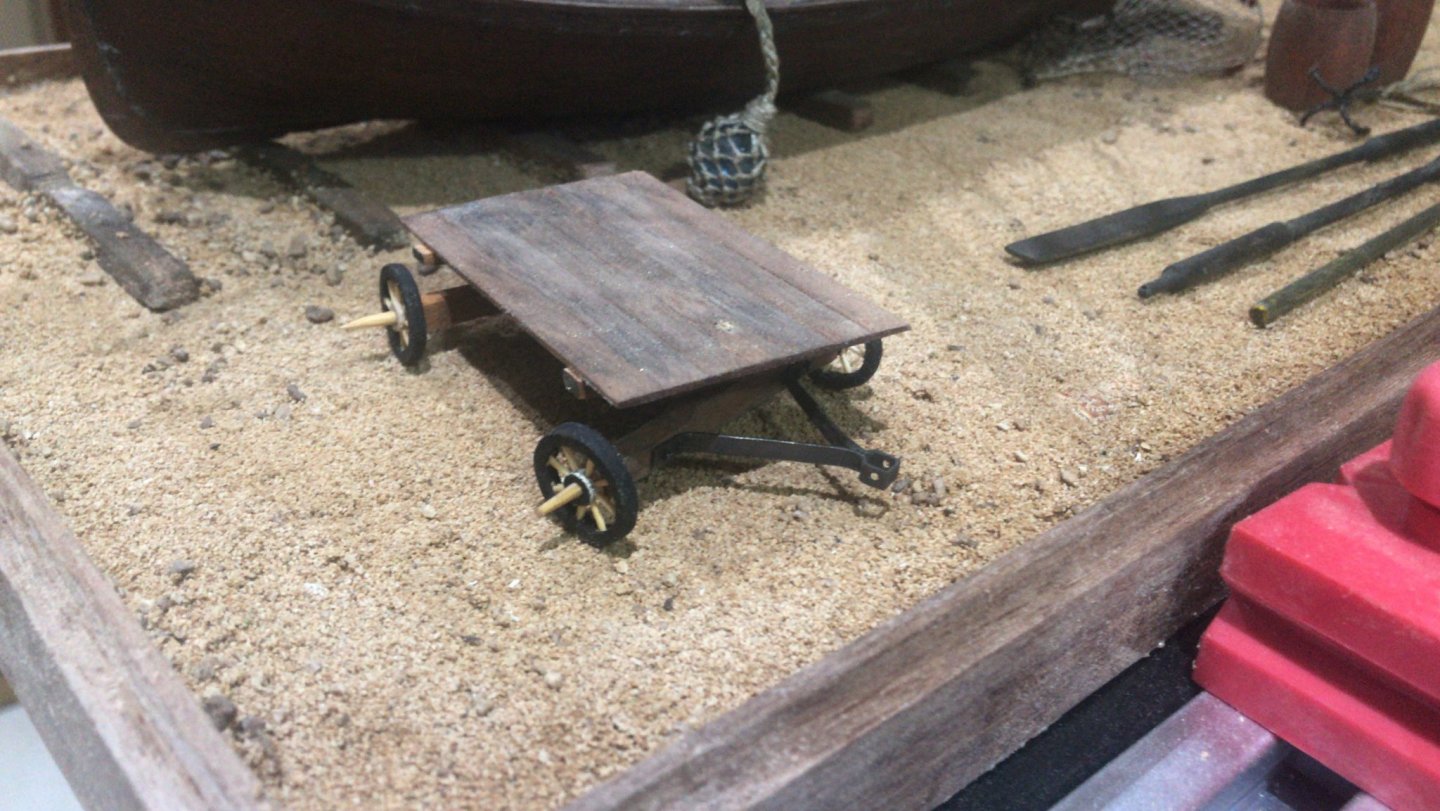
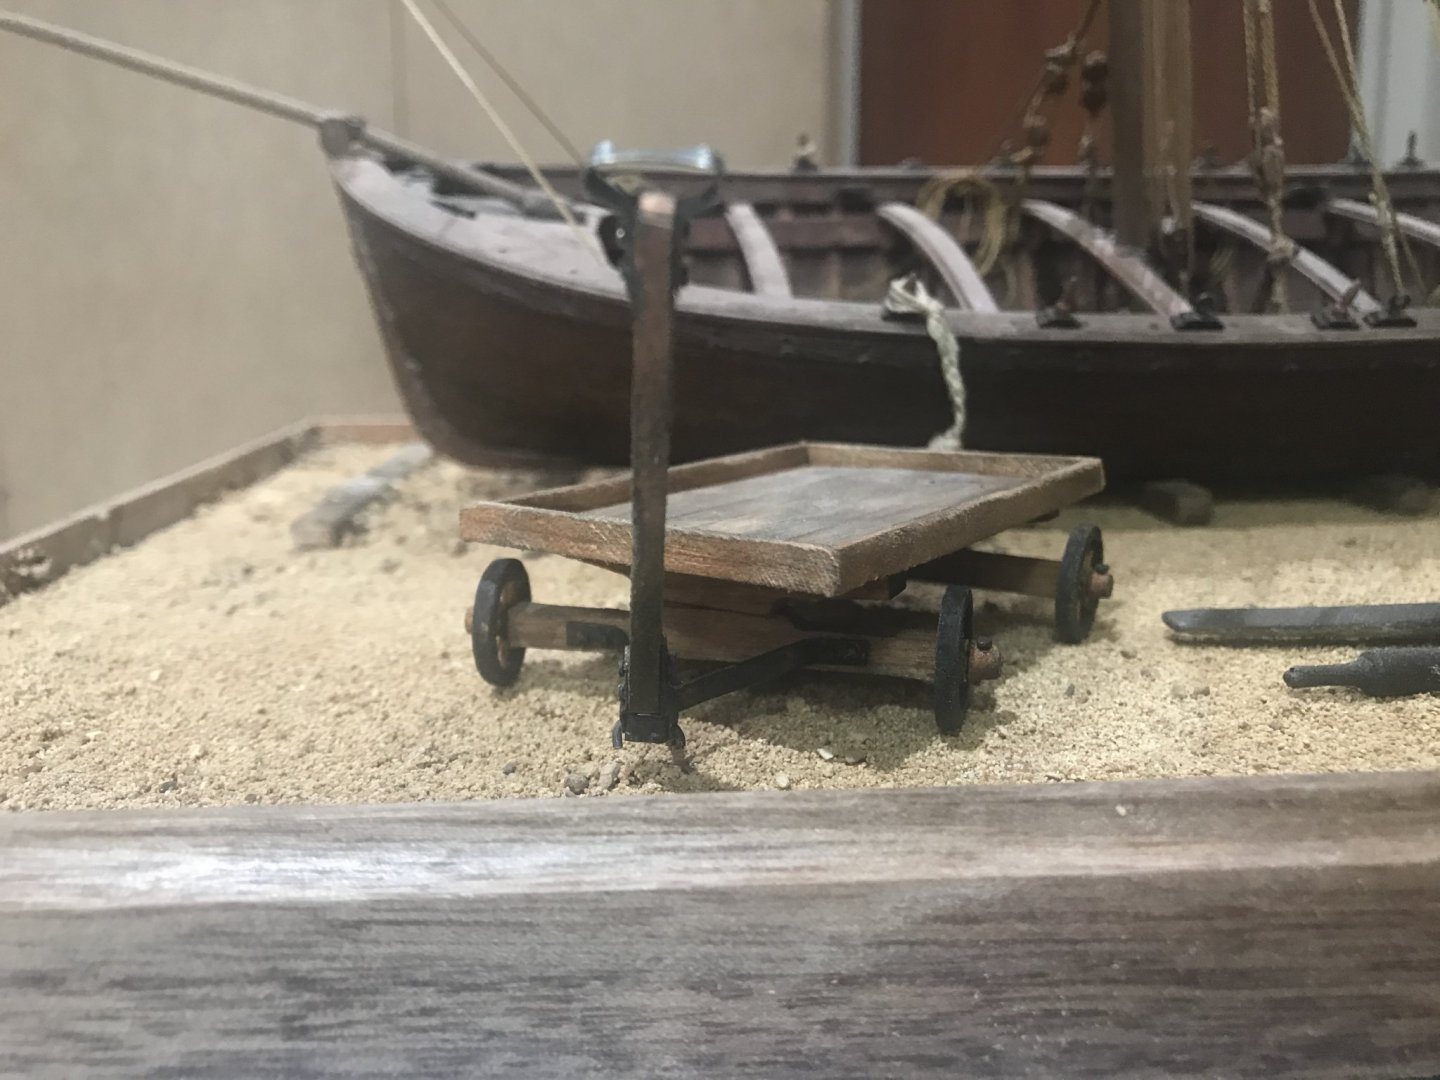
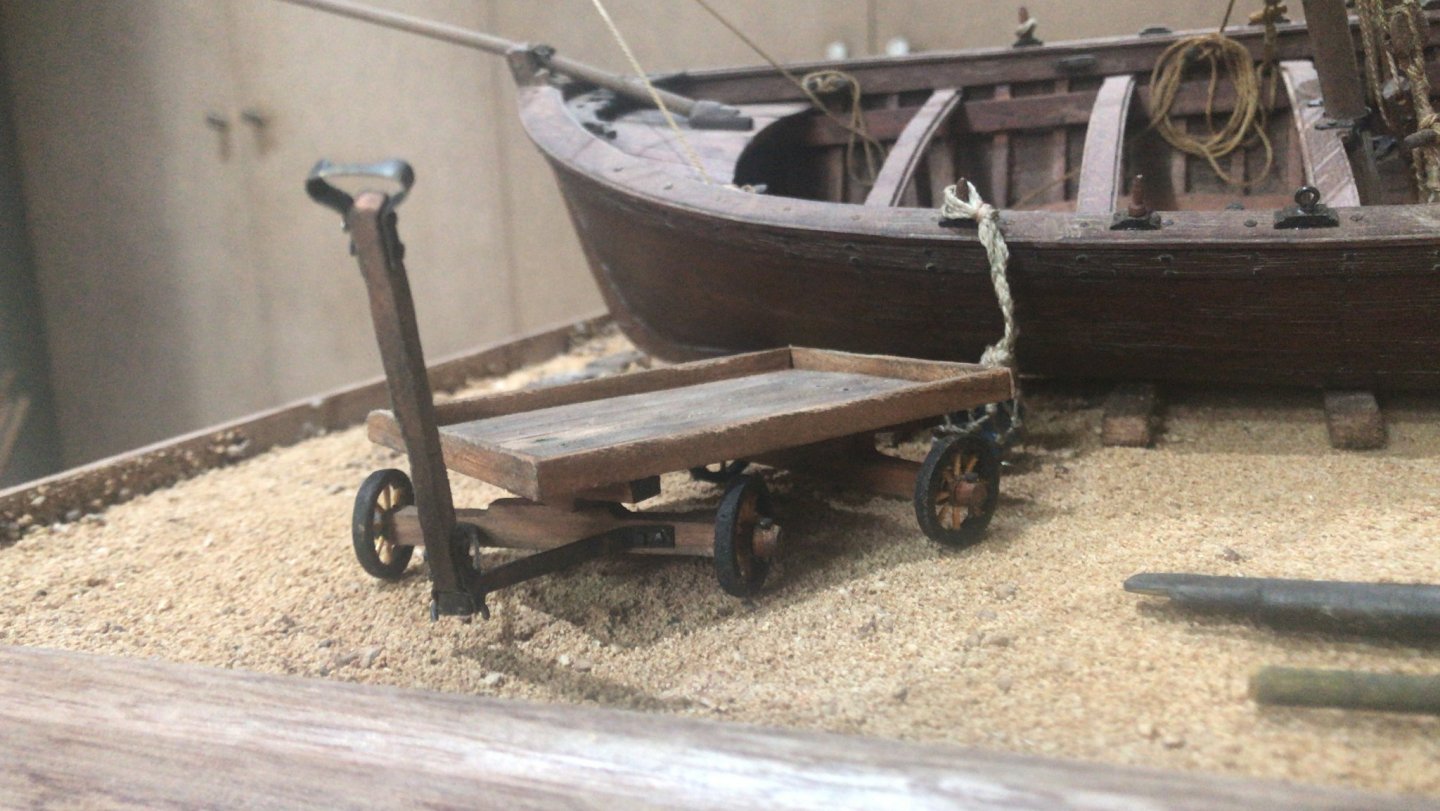
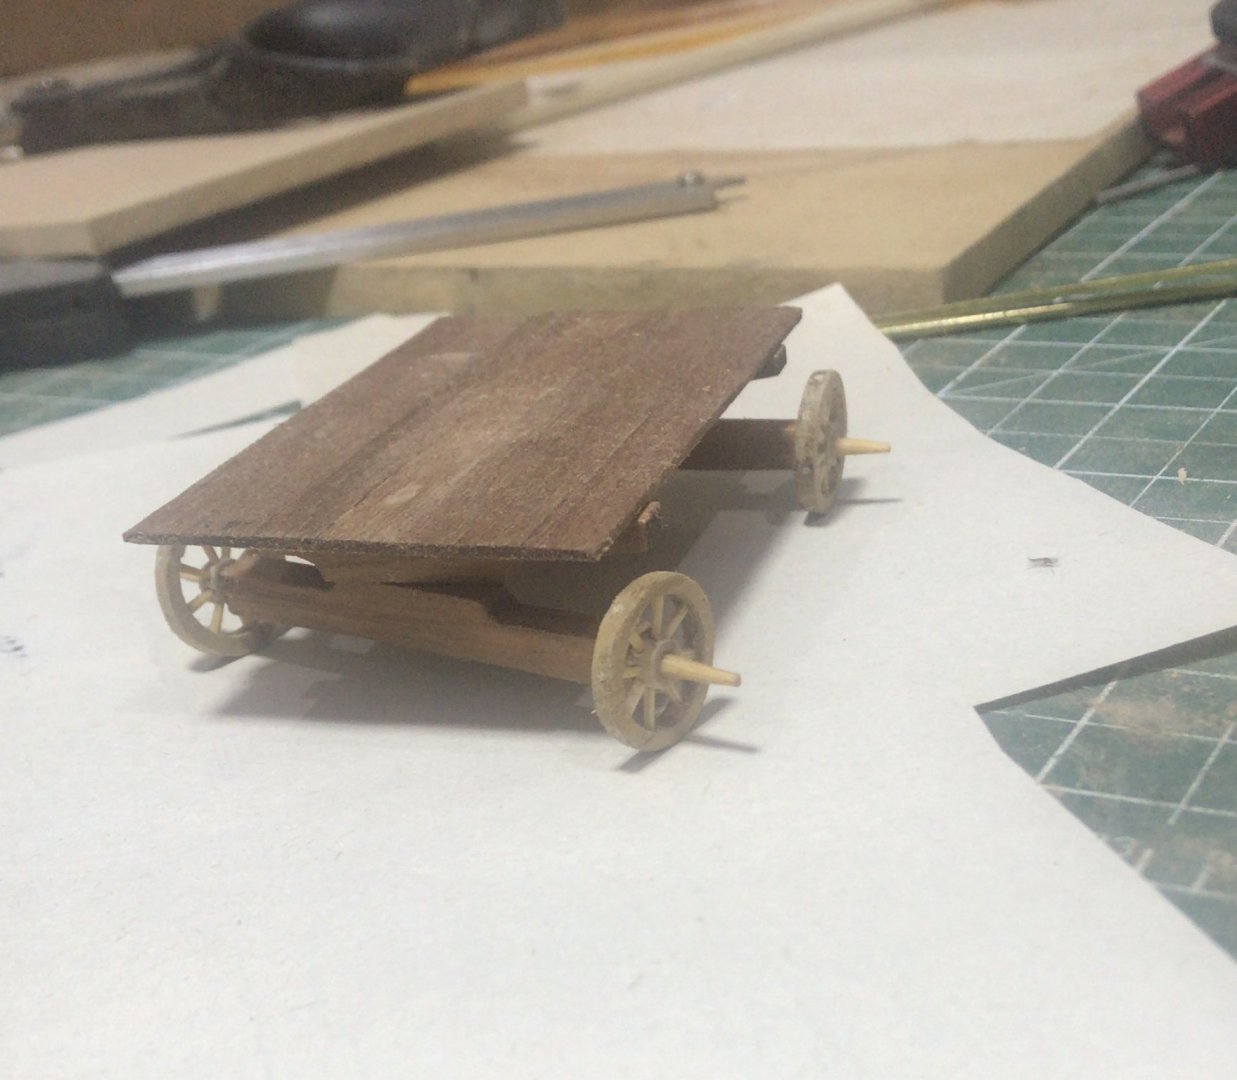
Let’s continue with the wheelbarrow.... yet another task done.....


-
It was judge mistake when I was registered 😳😳😳😳
-
My name and last name are from Germany. But my mother language is spanish. My great grandparents migrated From Germany rigth before the second world war.
-
But you are completely right. I have been thinking about it some days I think to take it out and put it aside...some others I think to take it out and leave it inside the boat....and some others I think to leve it as it is........😄😄
-
In the diorama is going to look like this..... Is not finished yet!!!! But we will need to wait because this log catch up my work already 😀 Regards

-
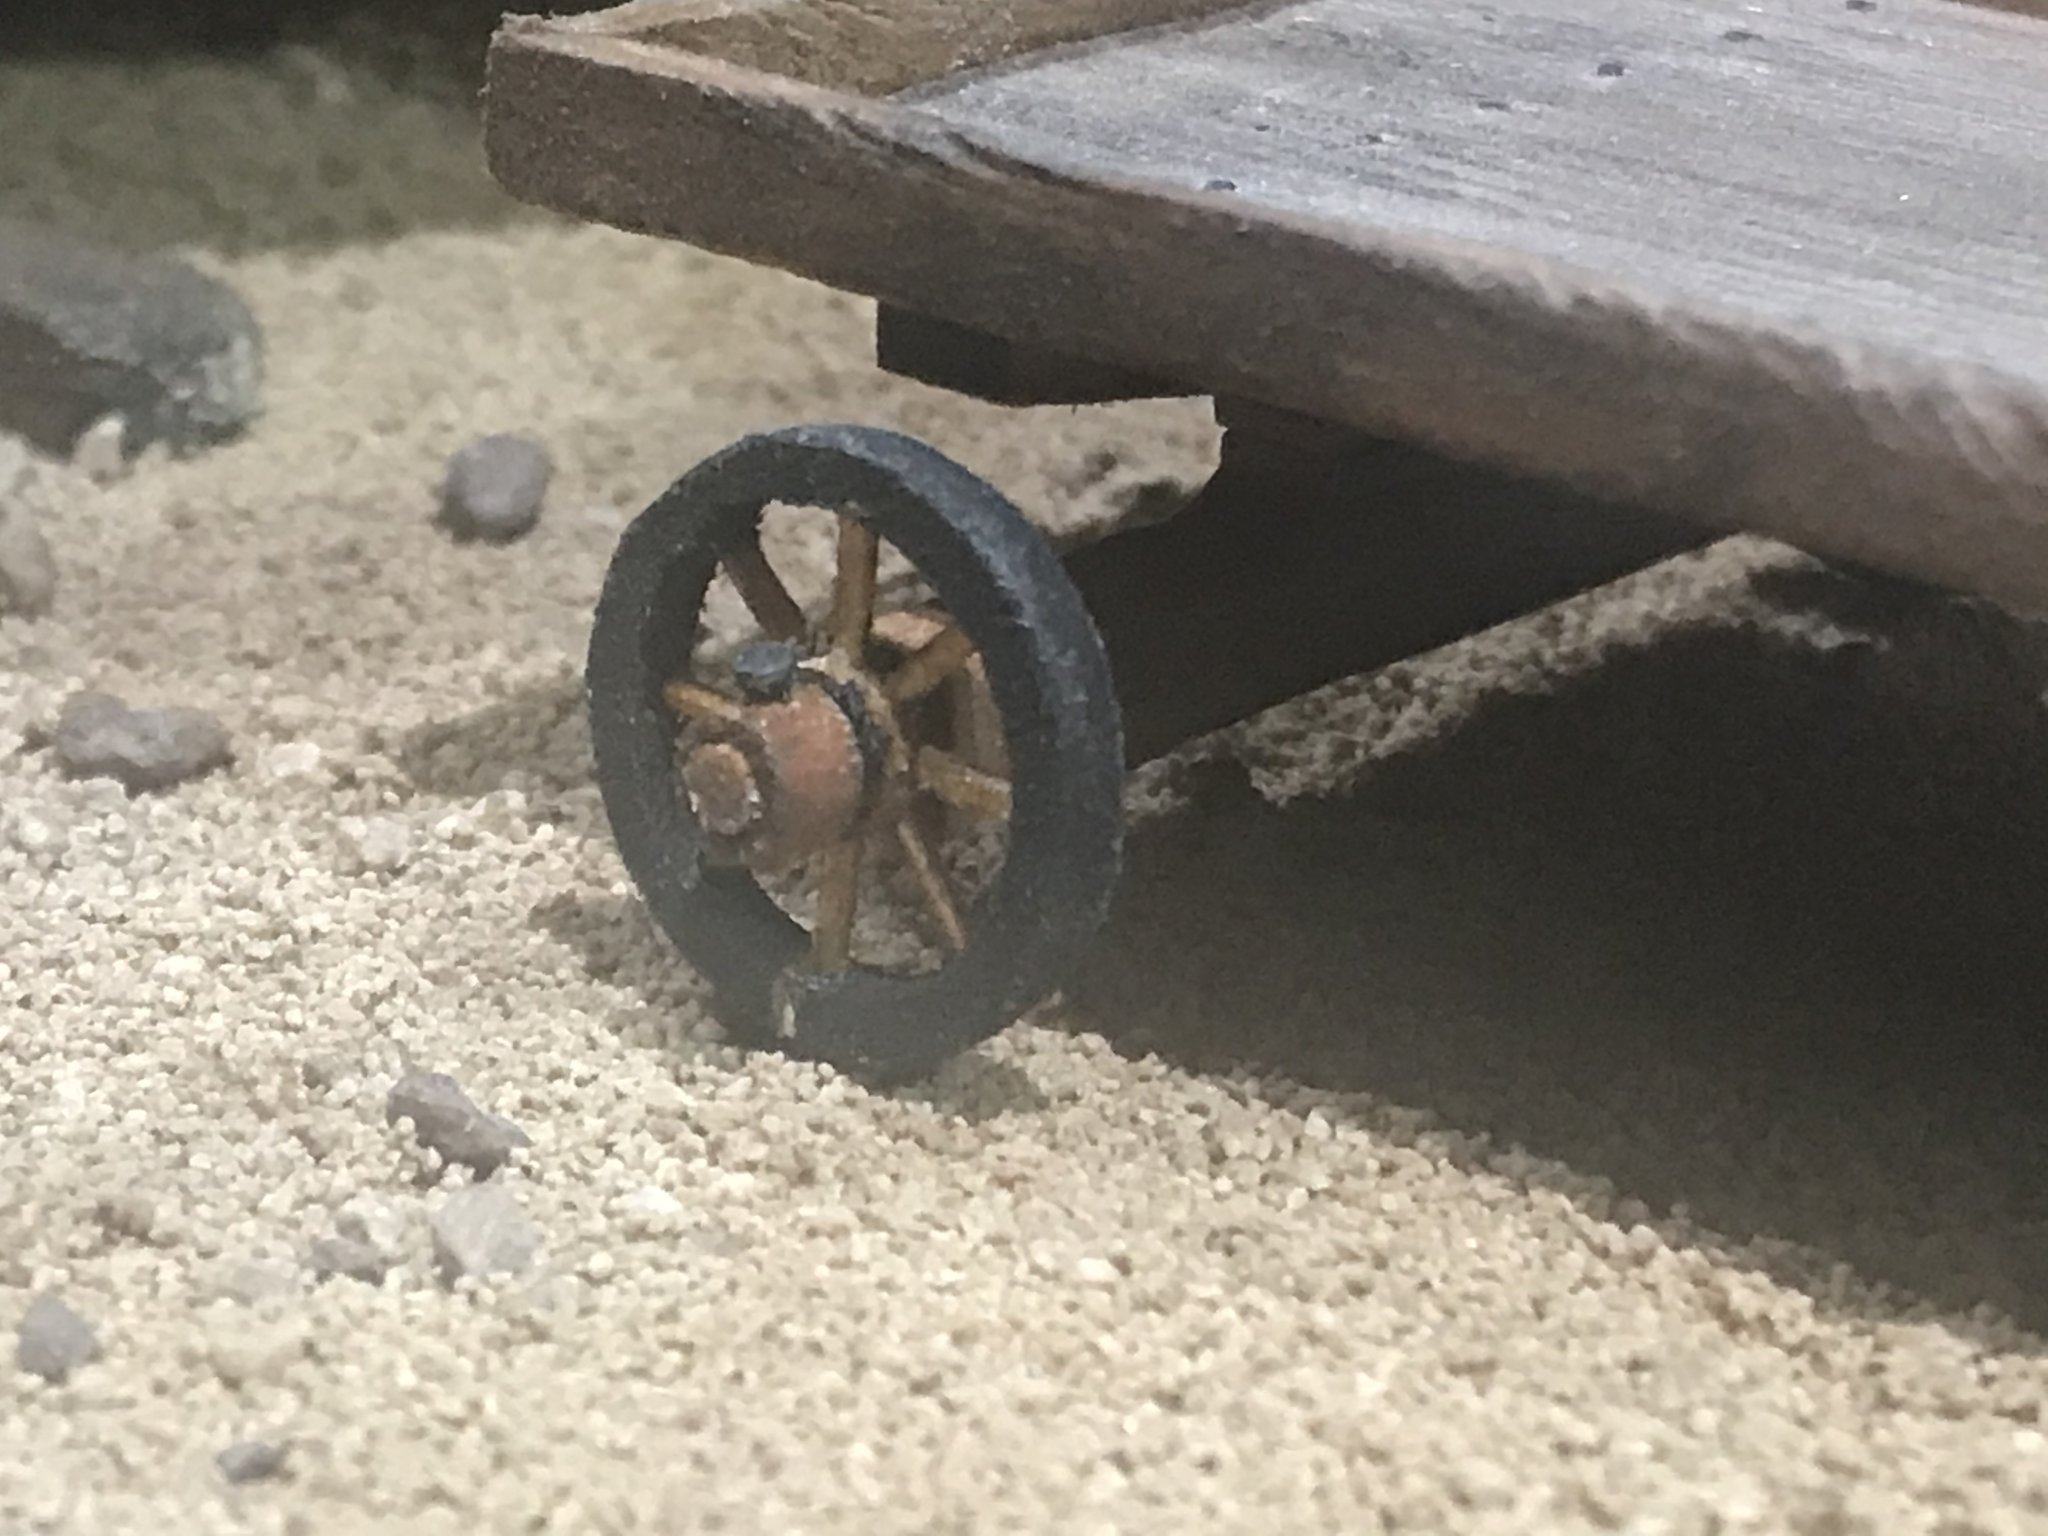
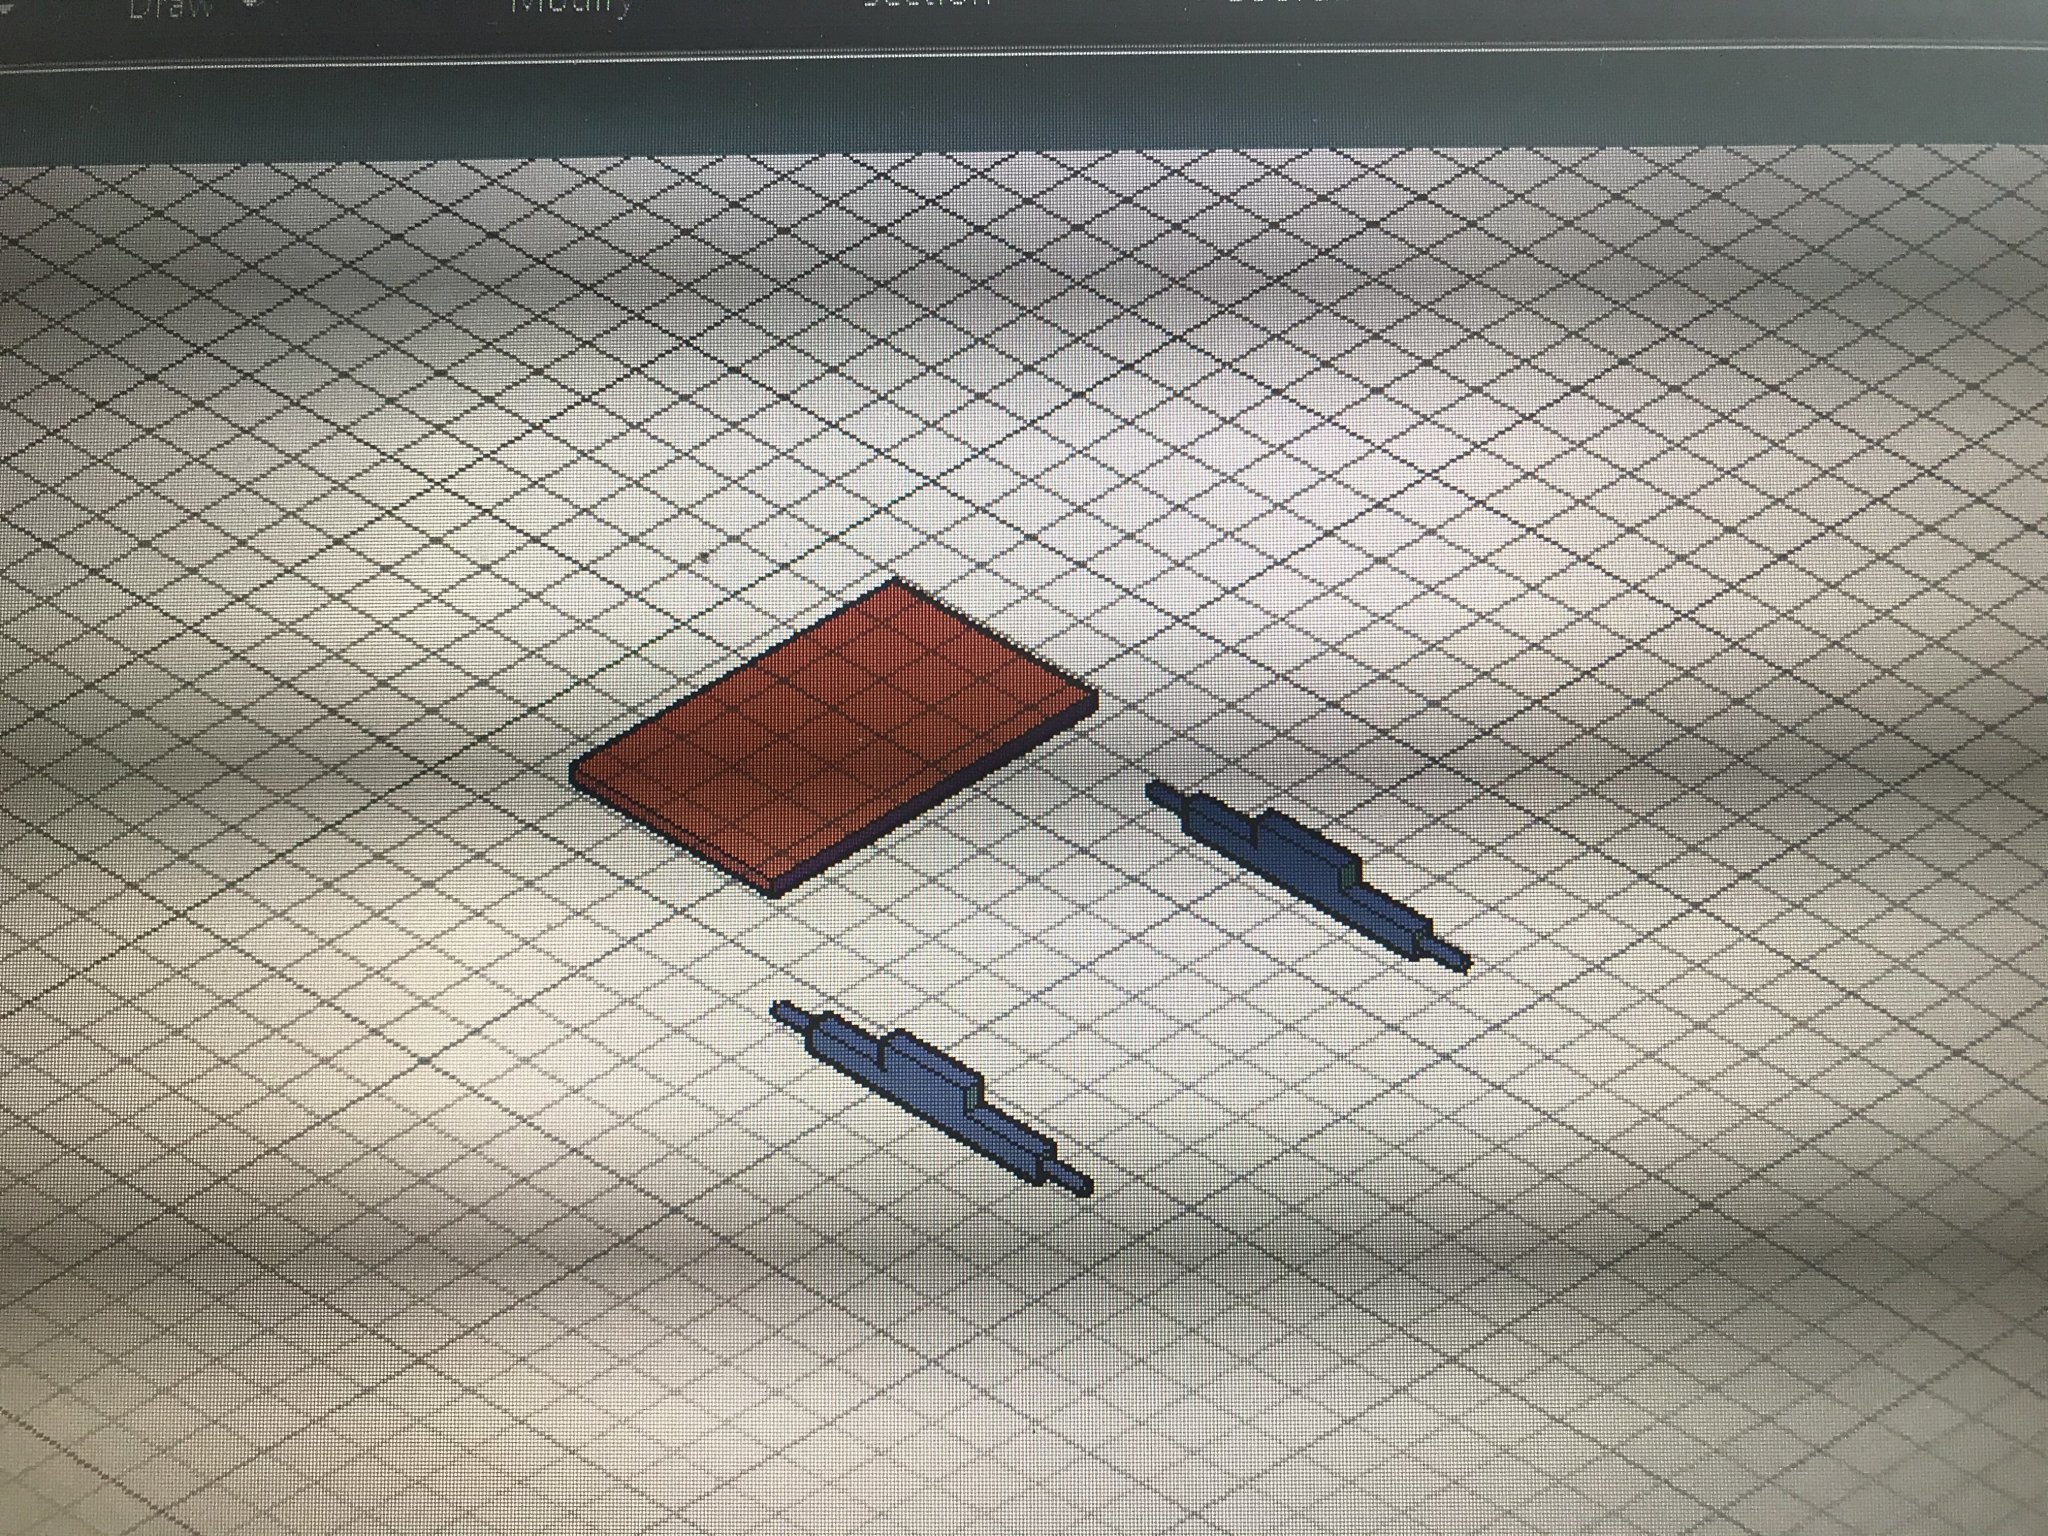
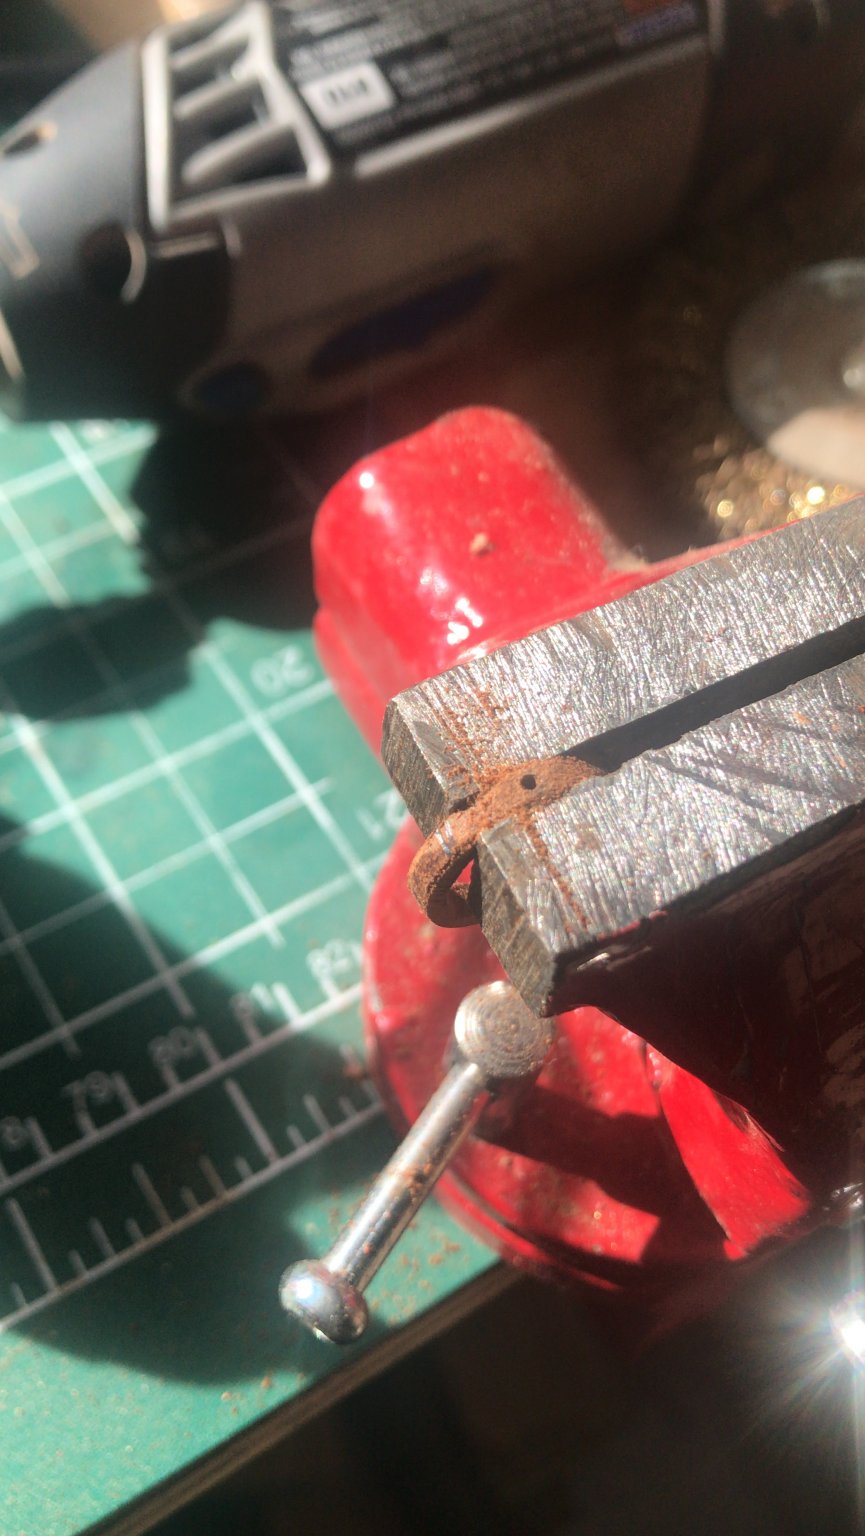
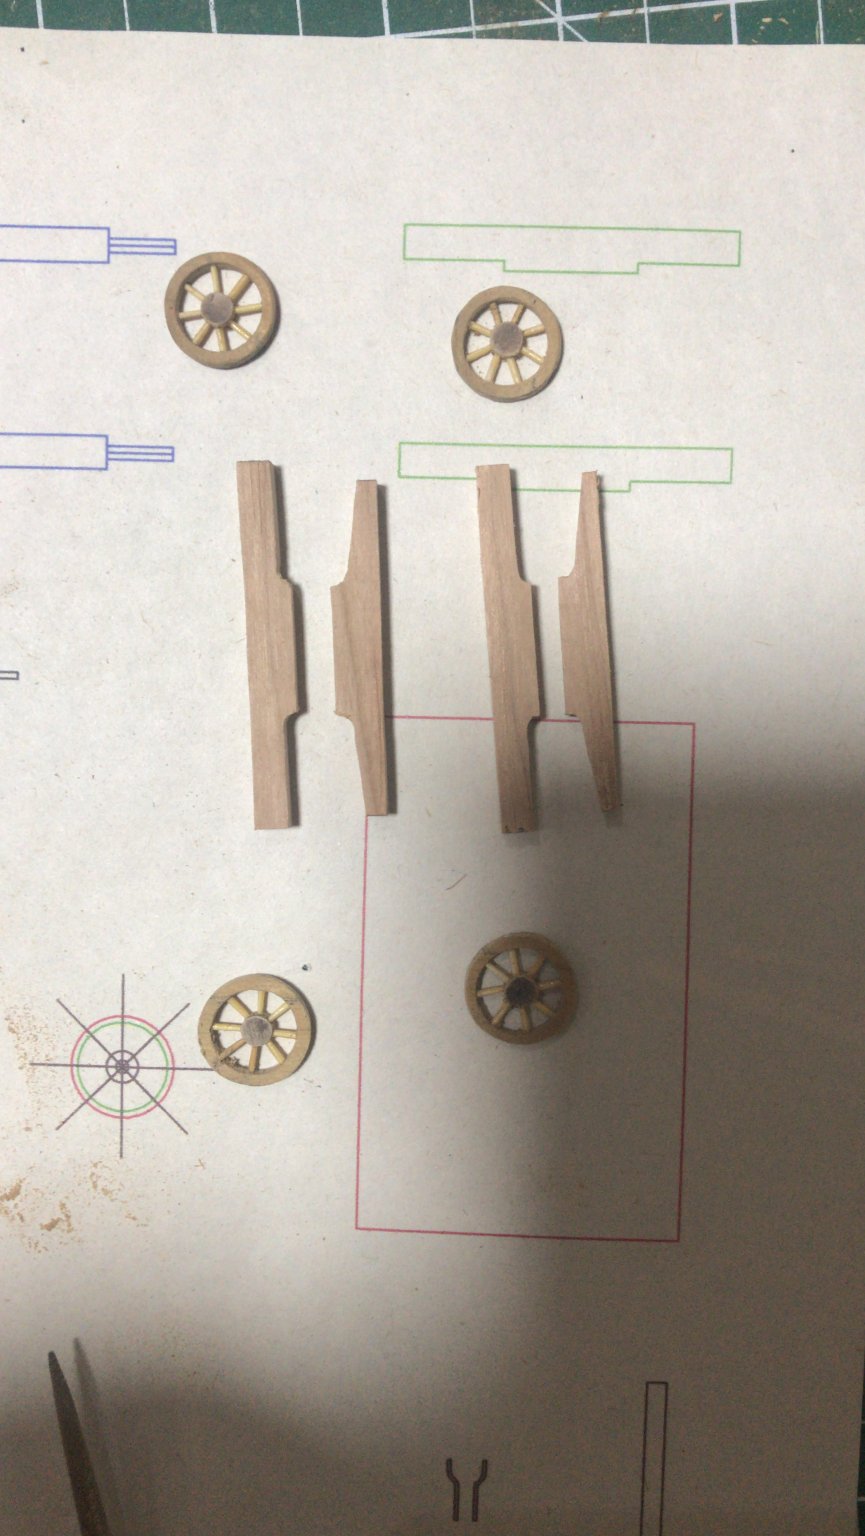
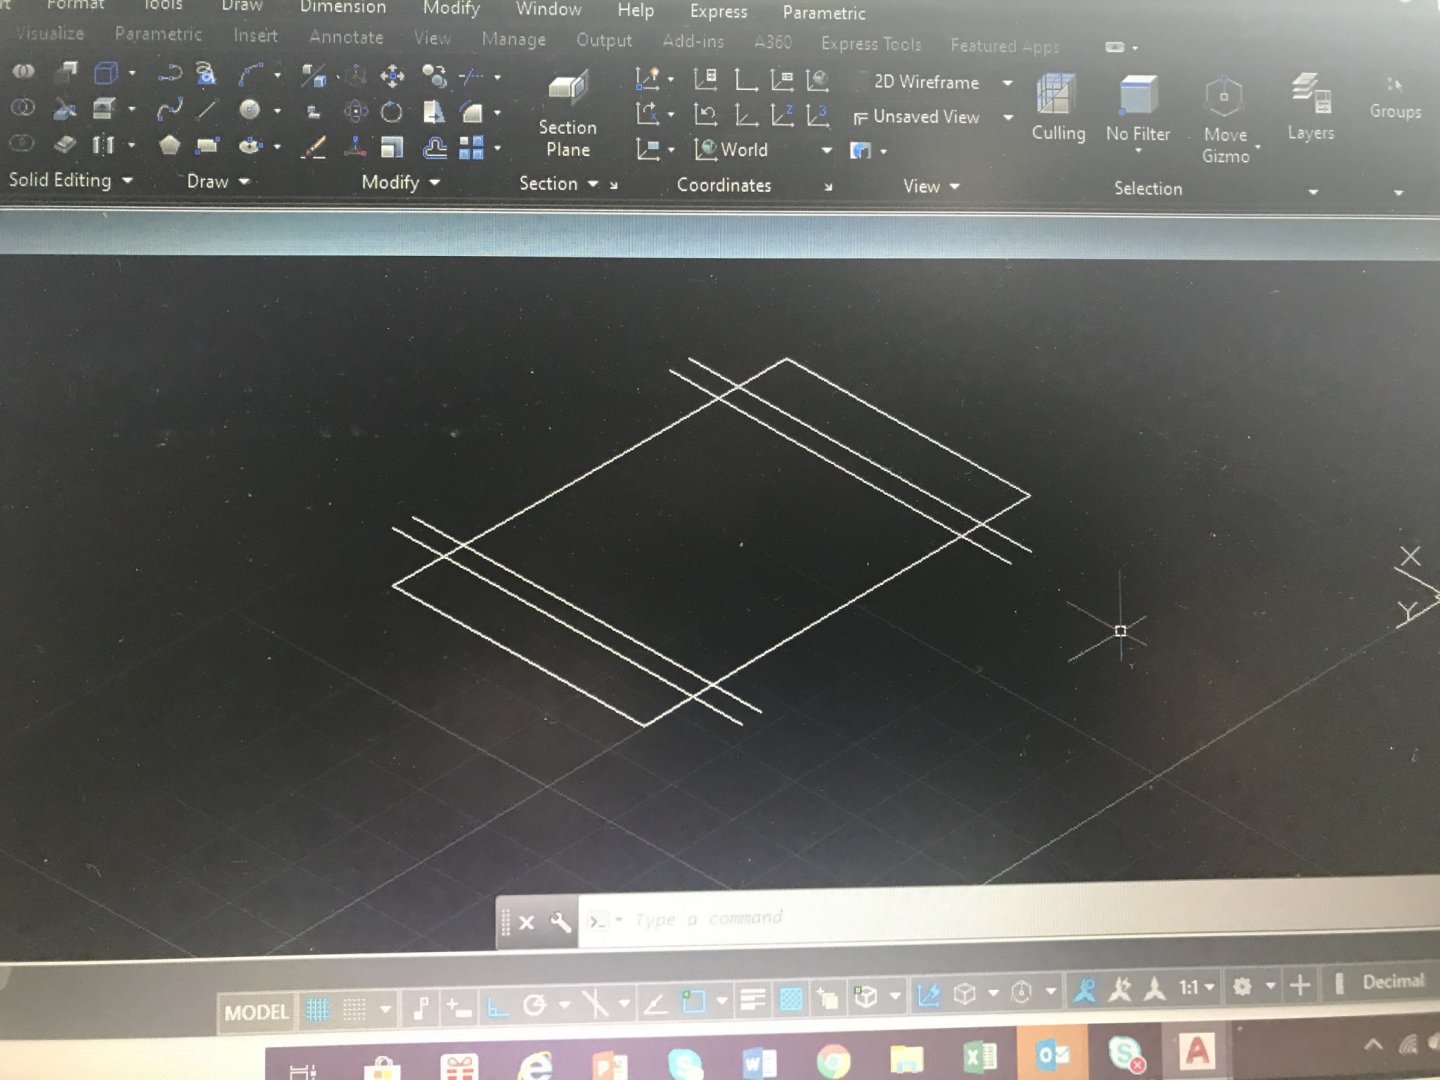
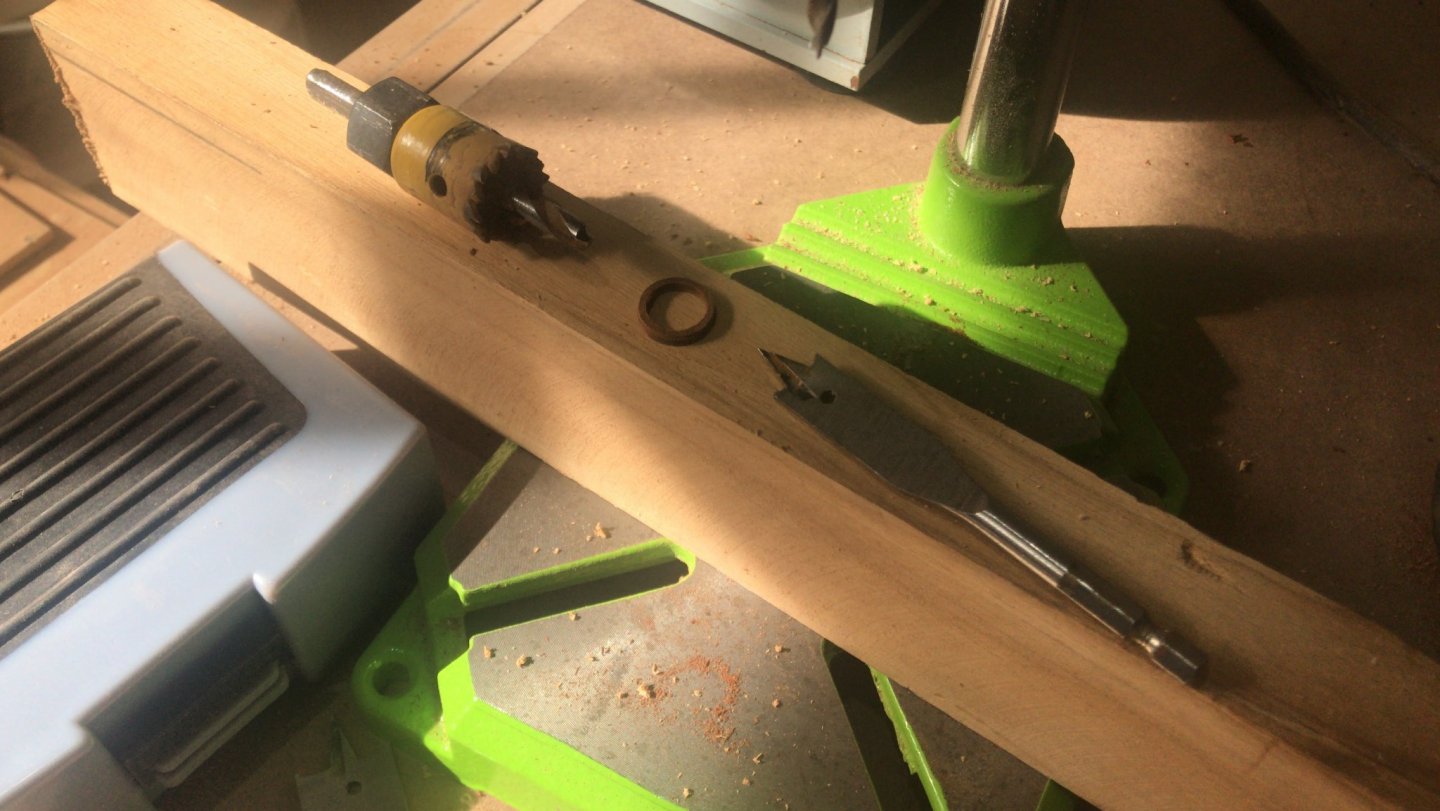
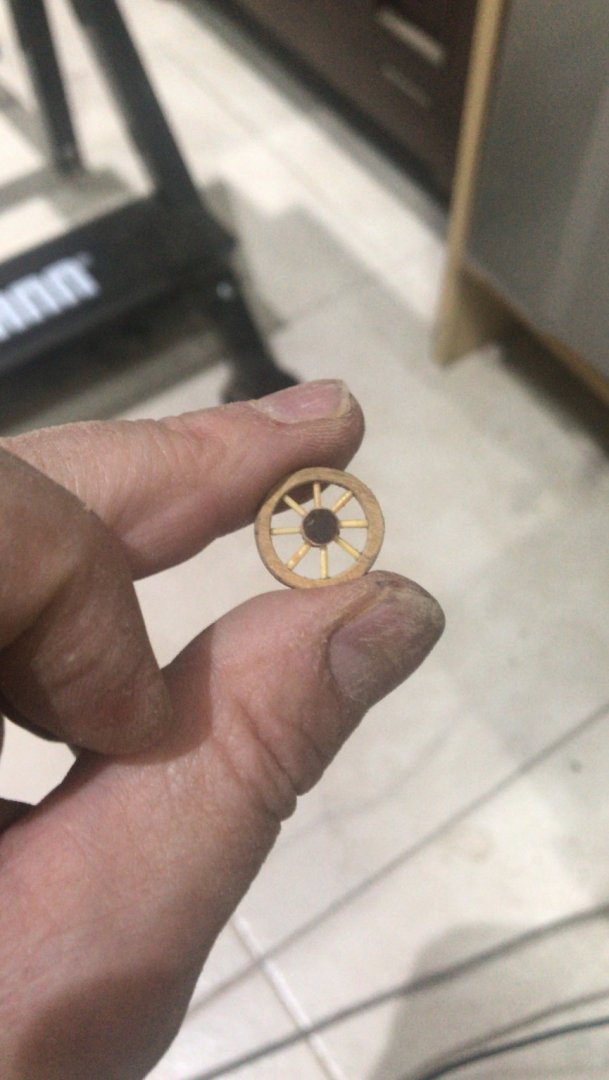
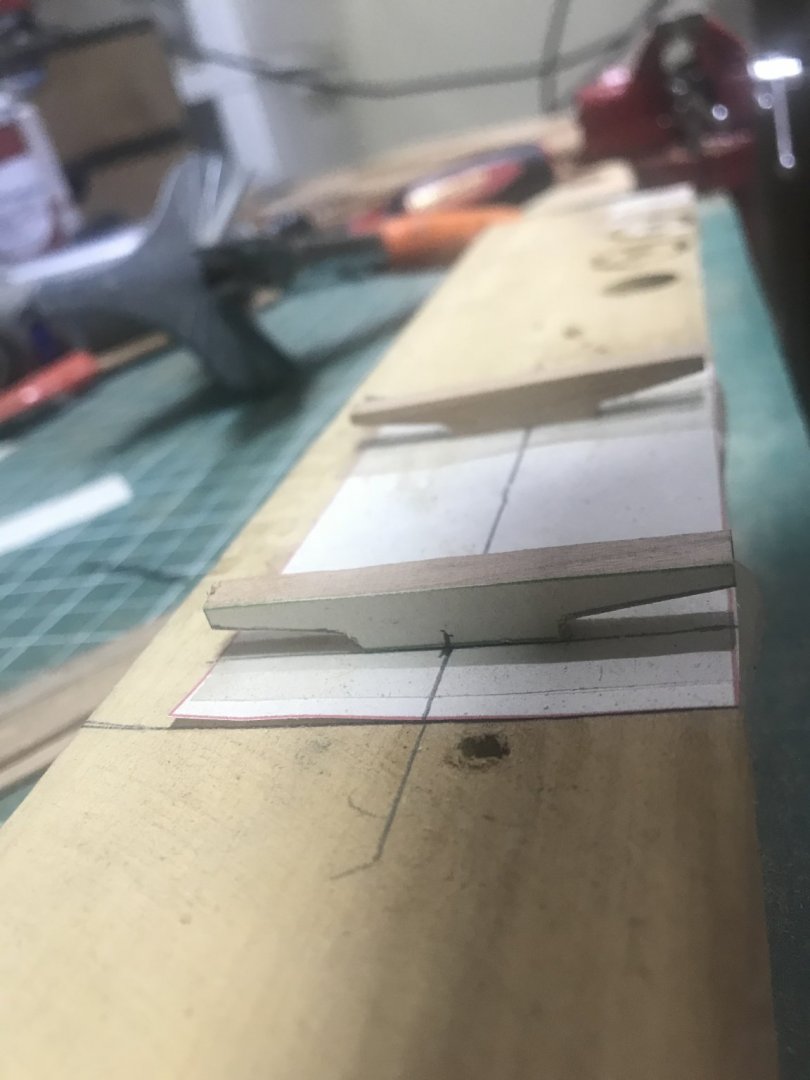
Working in my diorama.... I decided to work in a wooden “old” 4 wheelbarrow...... Design in autocad Let’s start with the wheels..... The axels, board and assembly...


-
Sorry ..... I don’t get it. Please explain me a little more
-
Now...le’t see.....


-
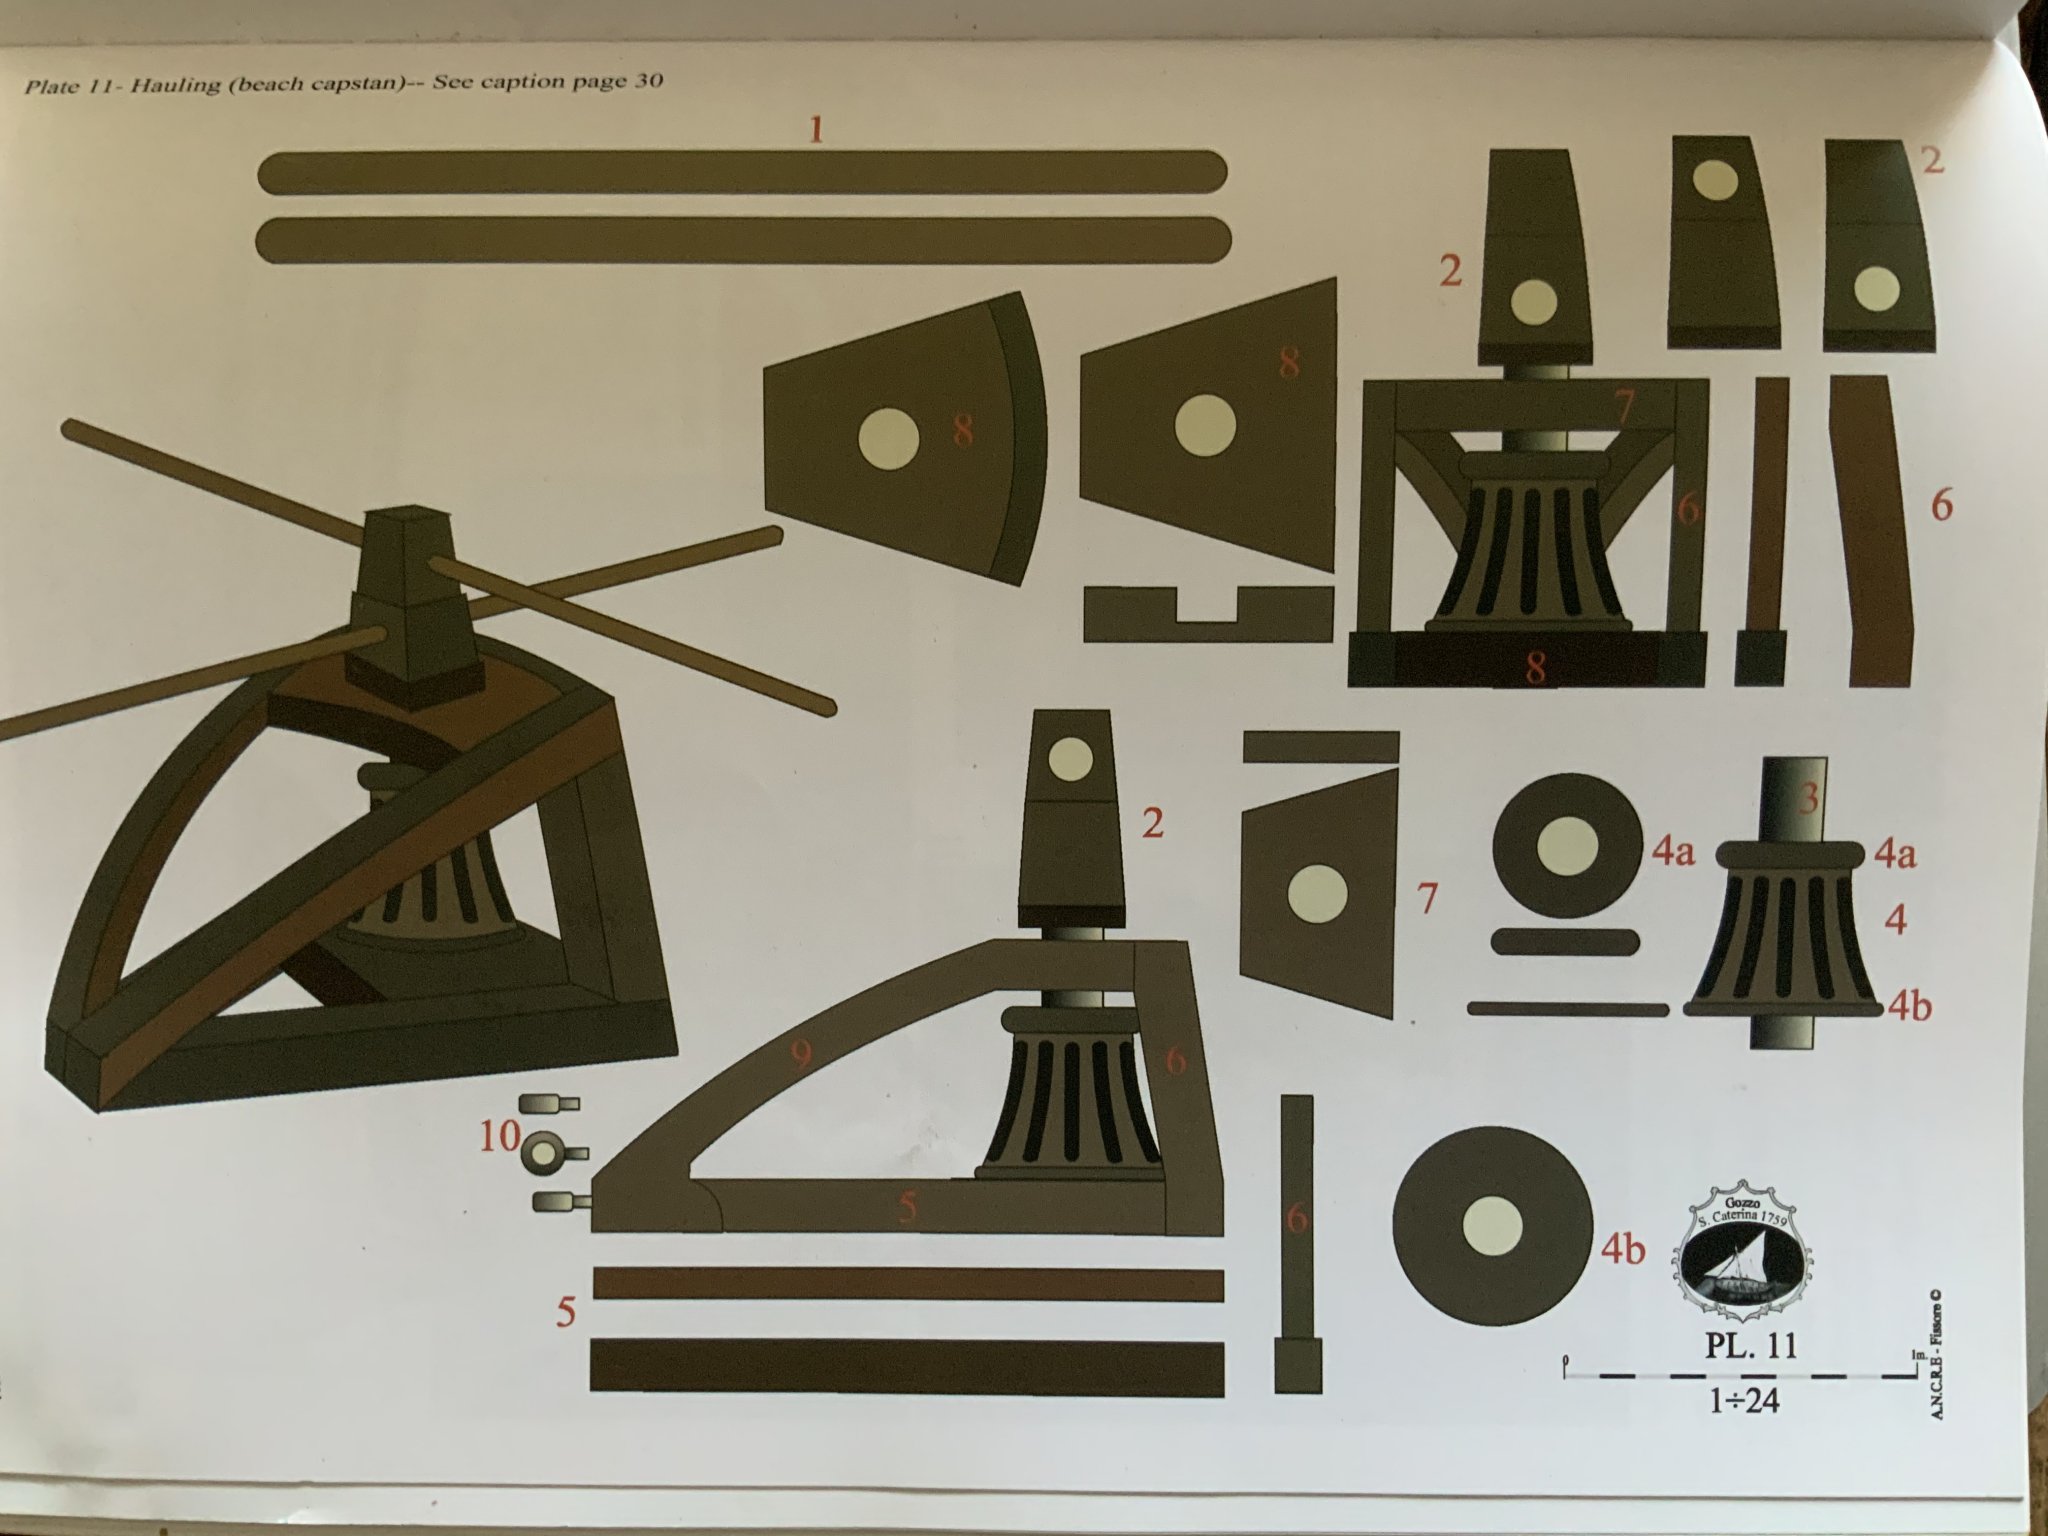
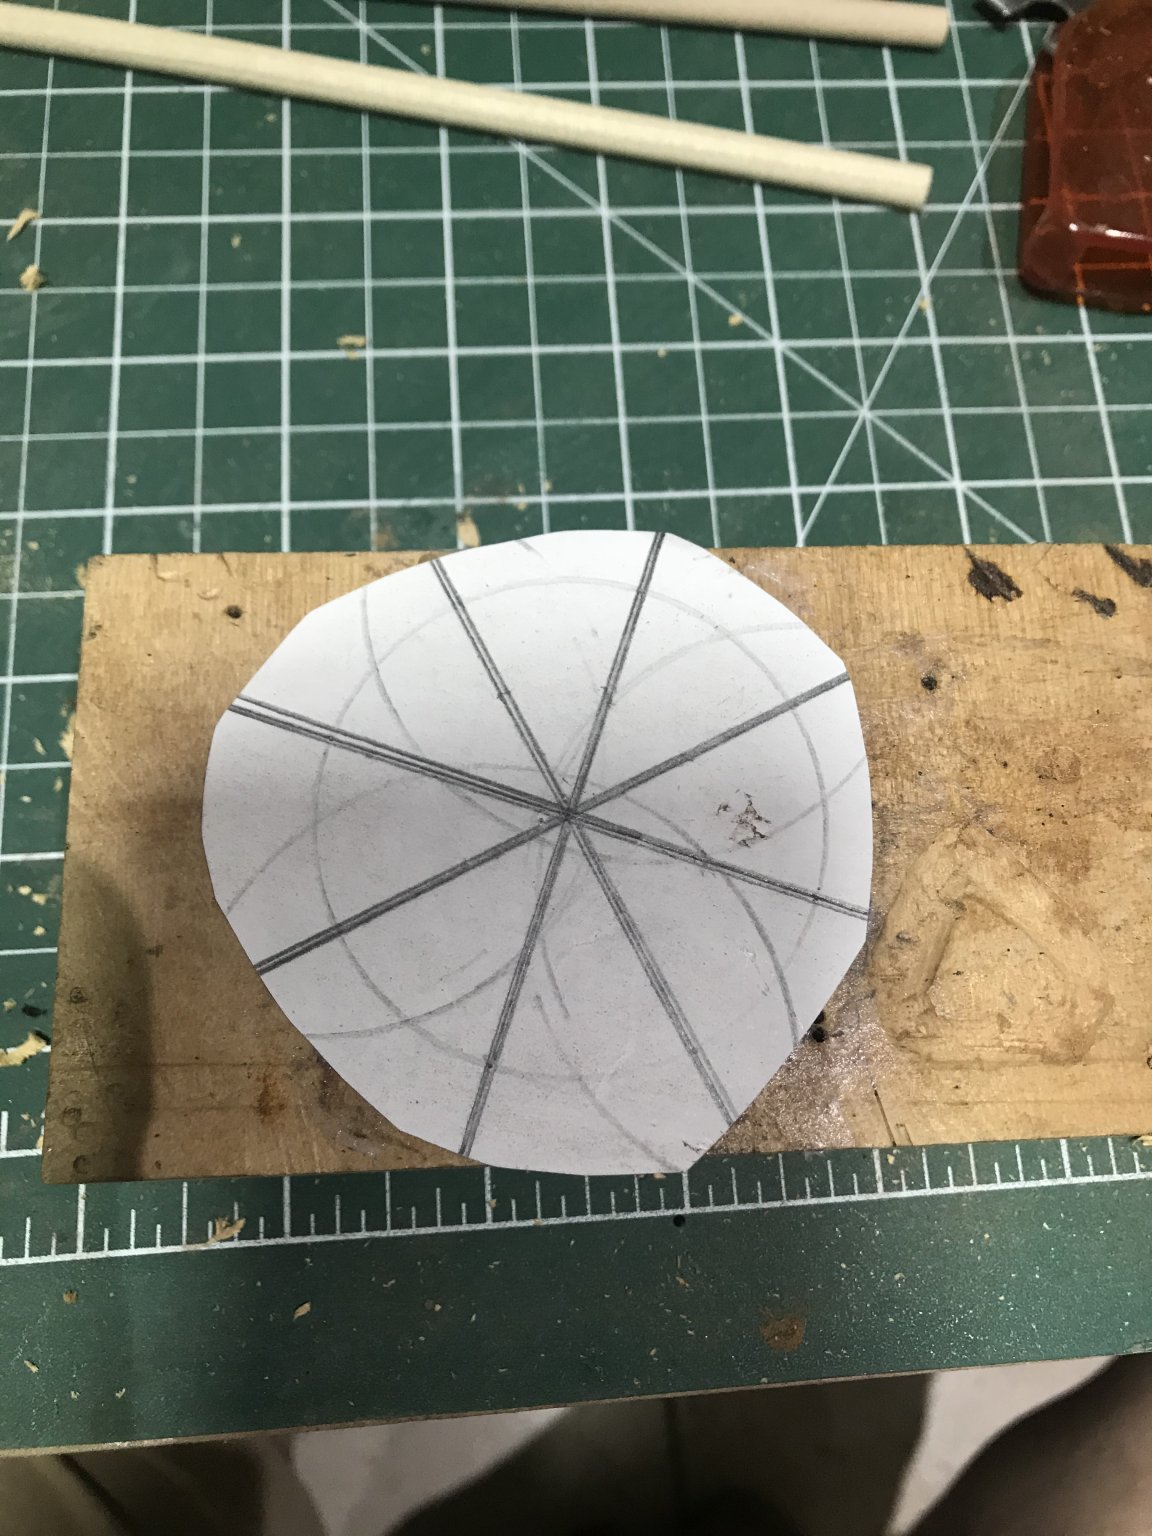
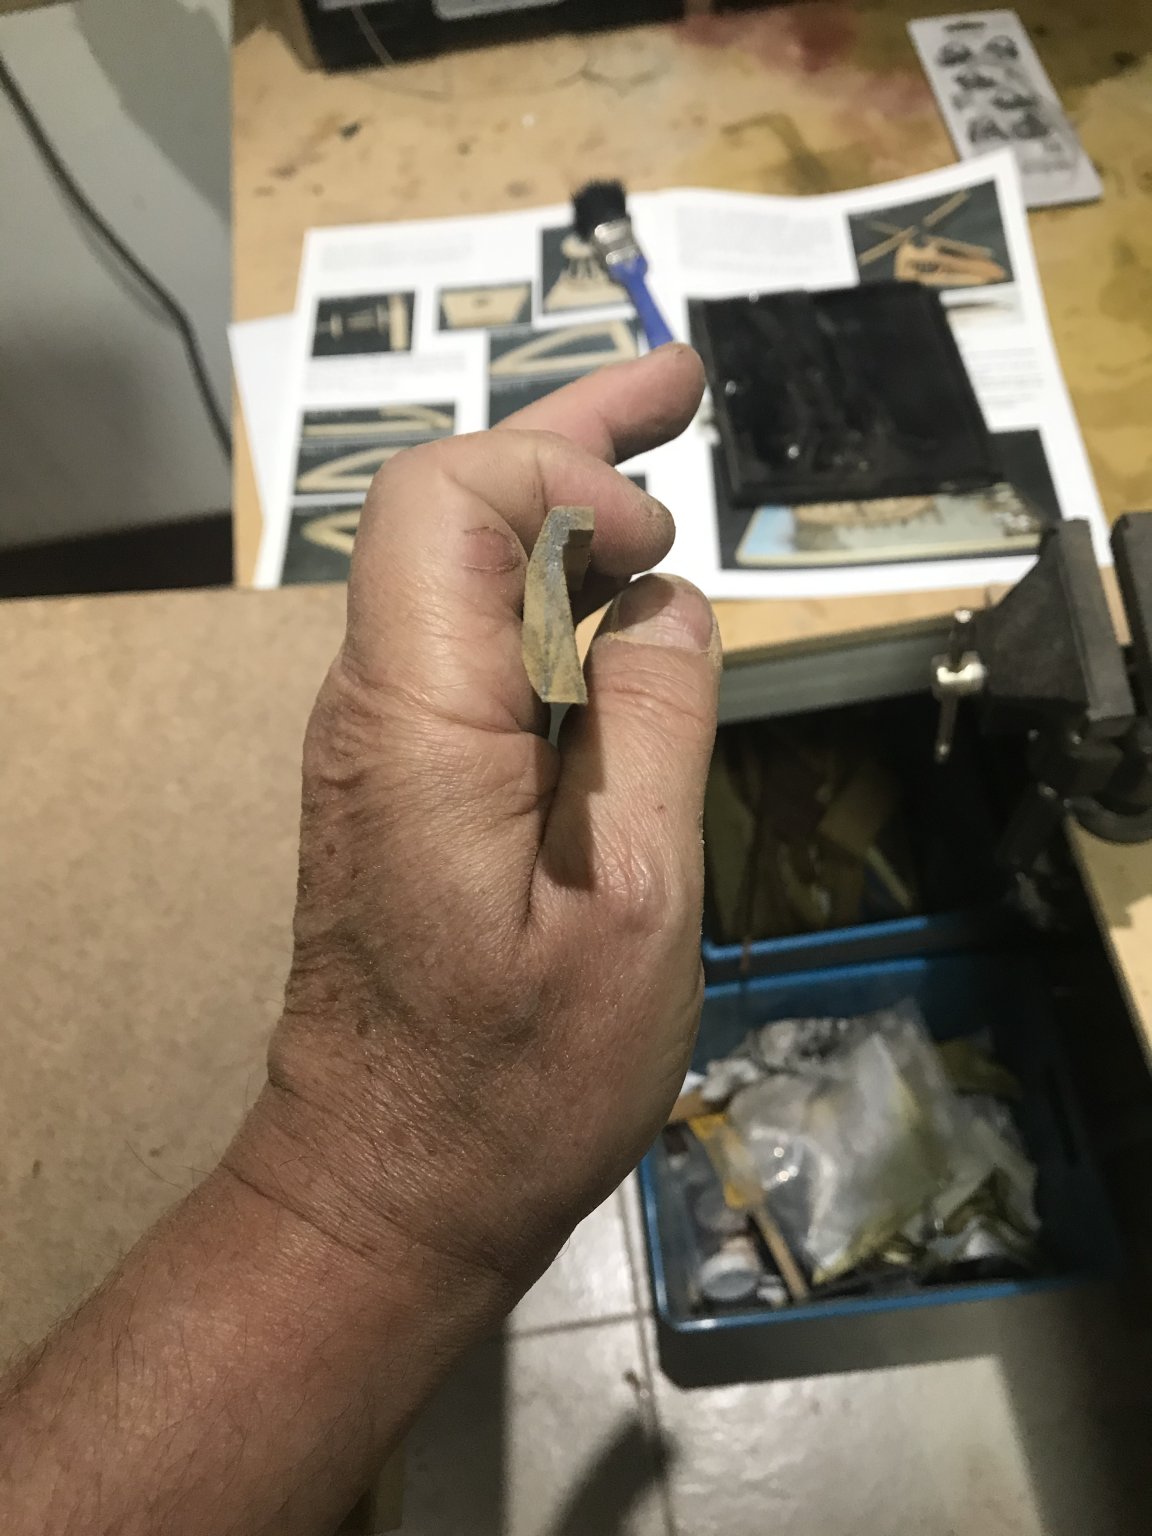
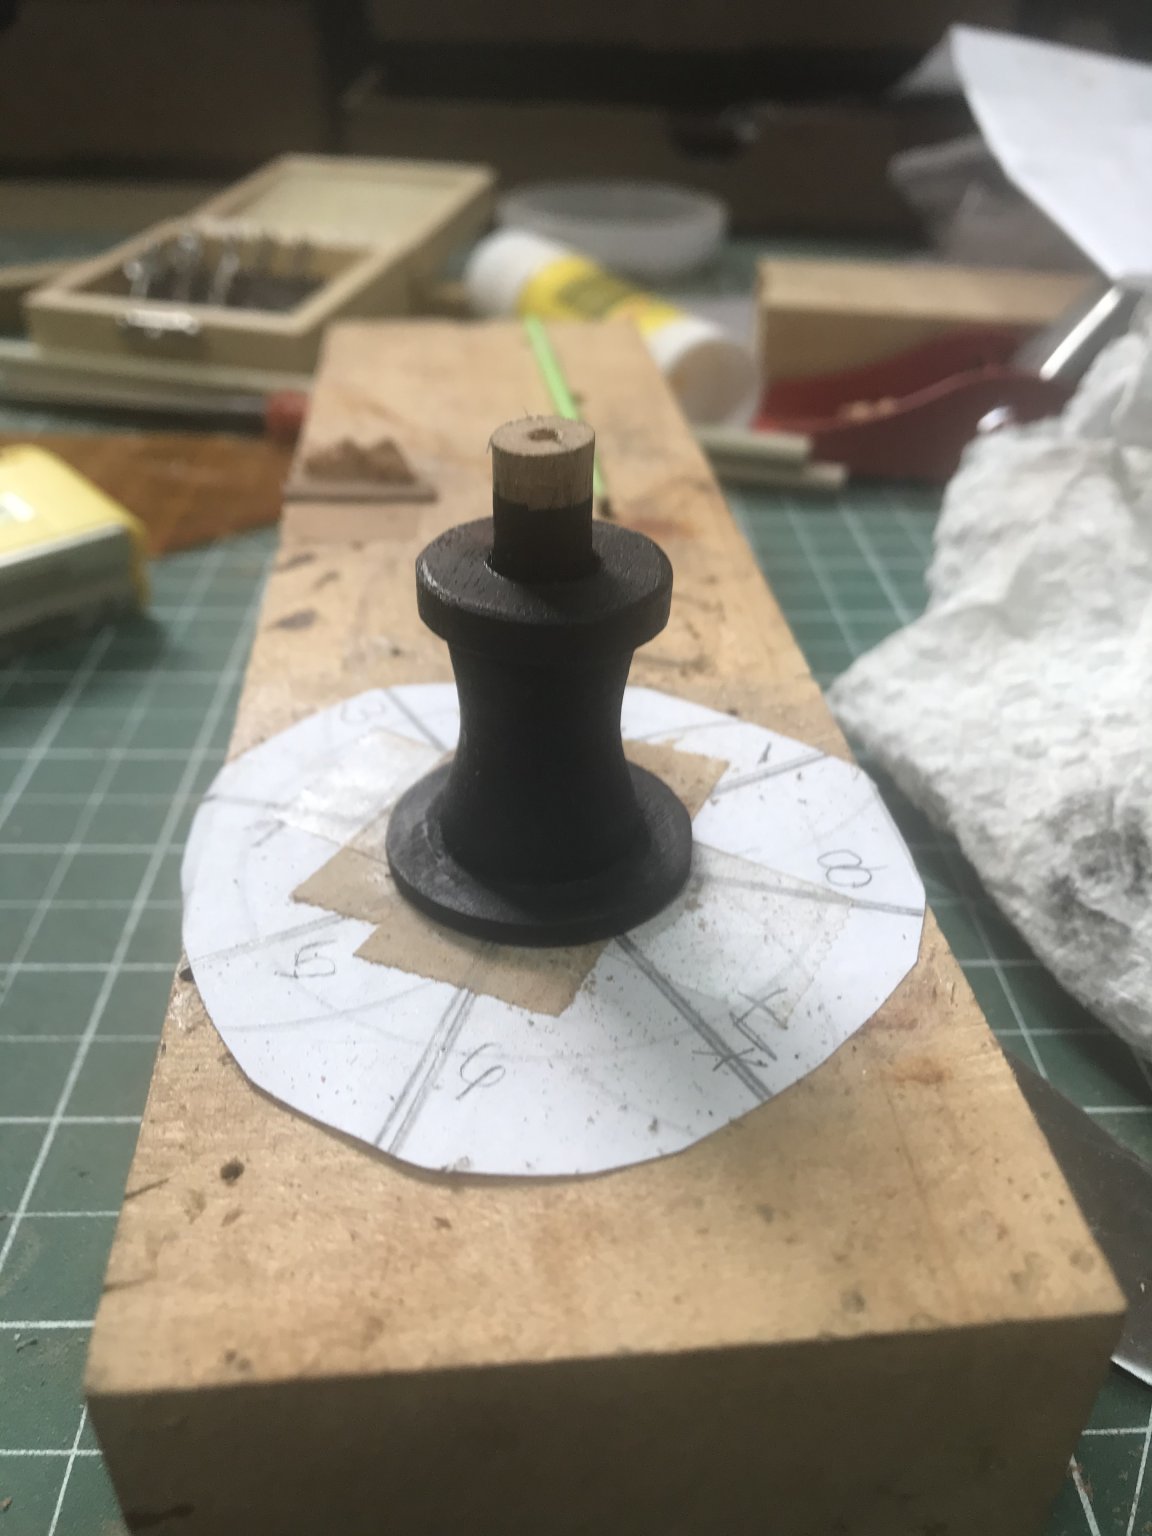
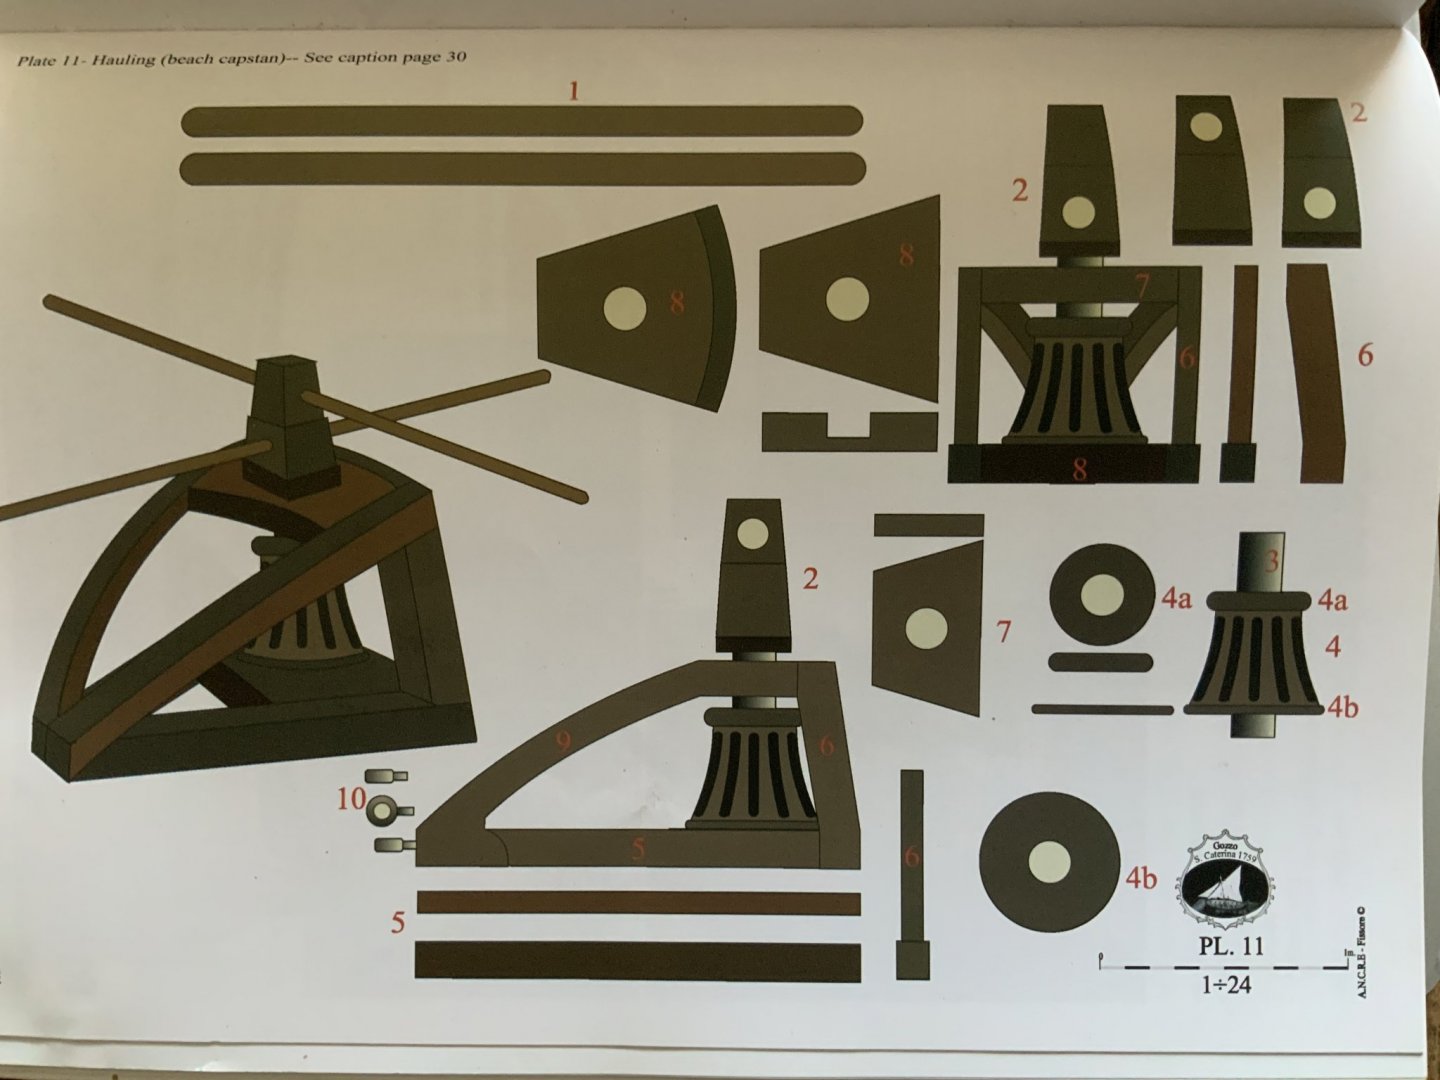
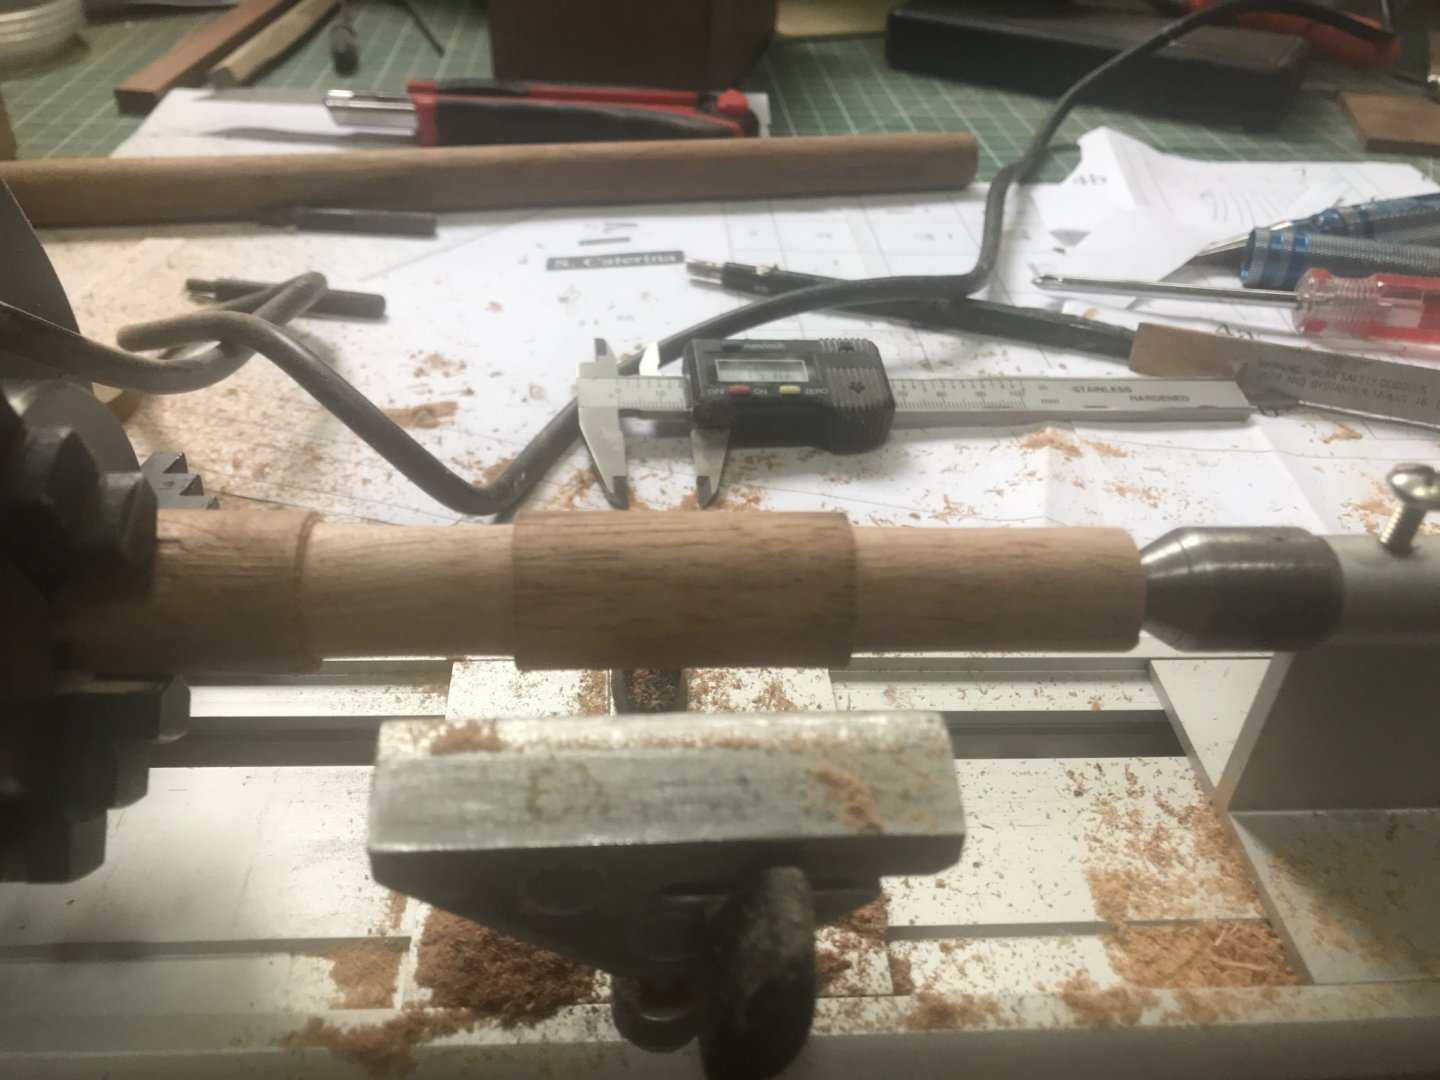
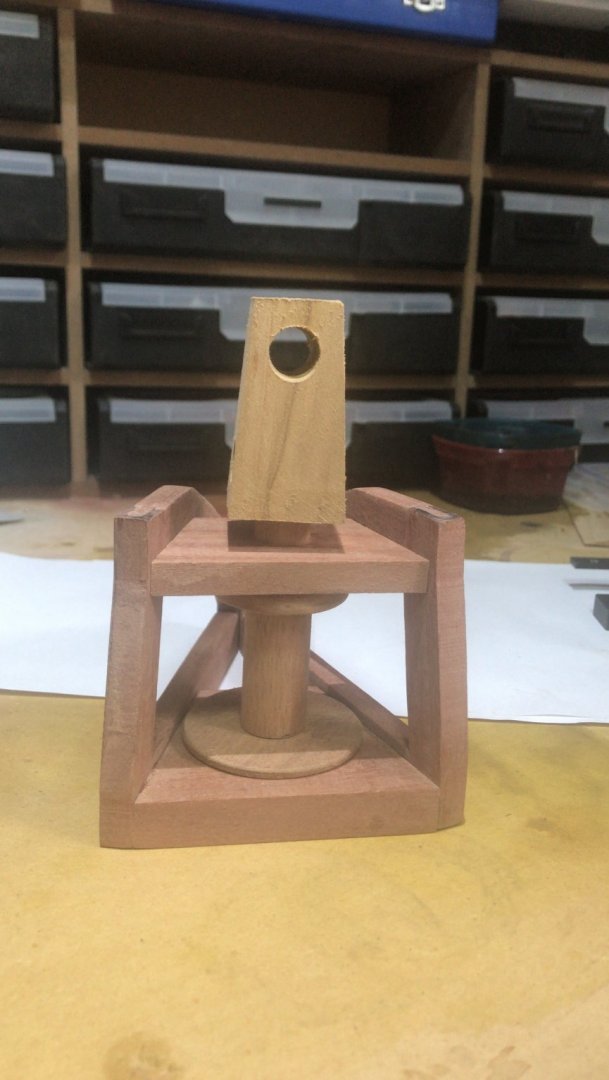
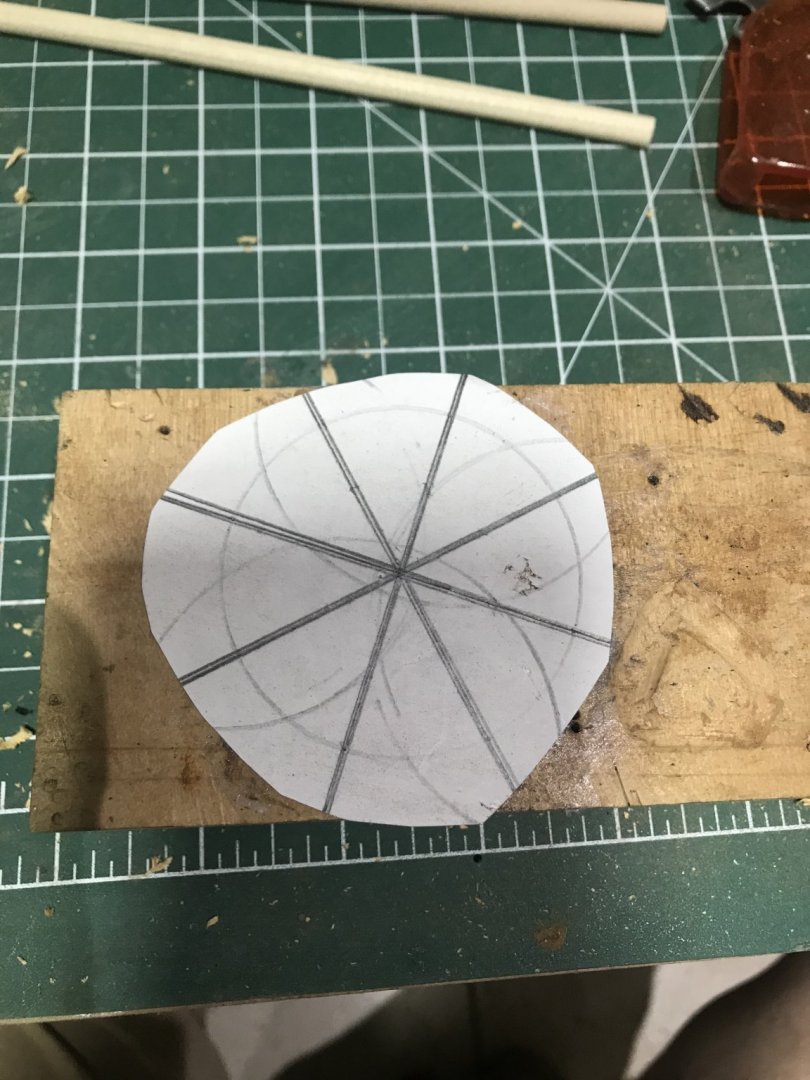
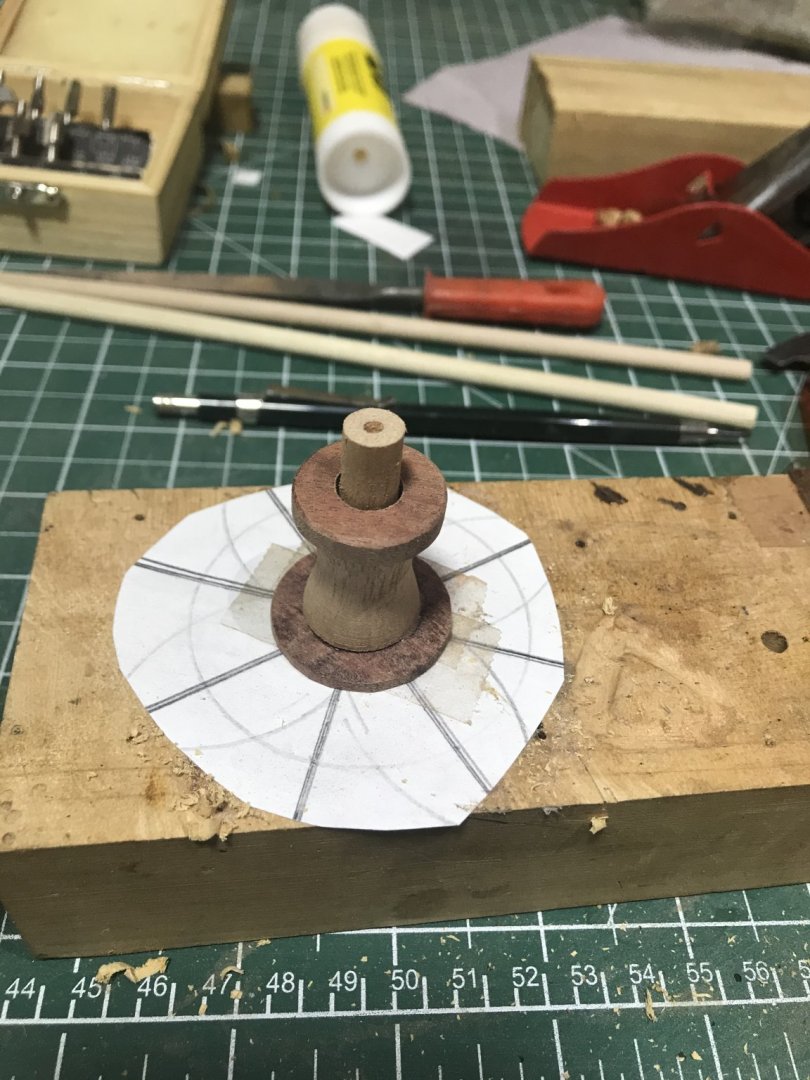
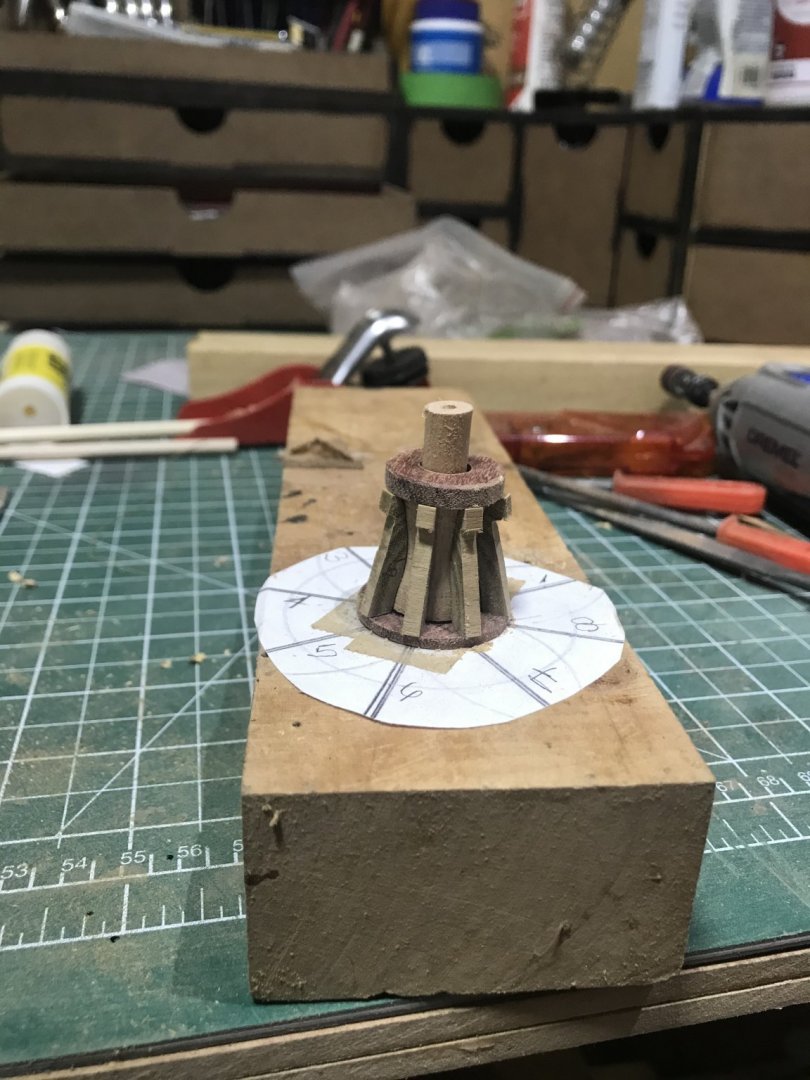
now.... let’s start to see how is going to look forward.... but before we need to work in the beach capstan .... Beach capstan.... from the monograph I took the plans. I realize the scale is not right. So for this 1:12 I decided to take the internal plan which is 1:24 ....


-
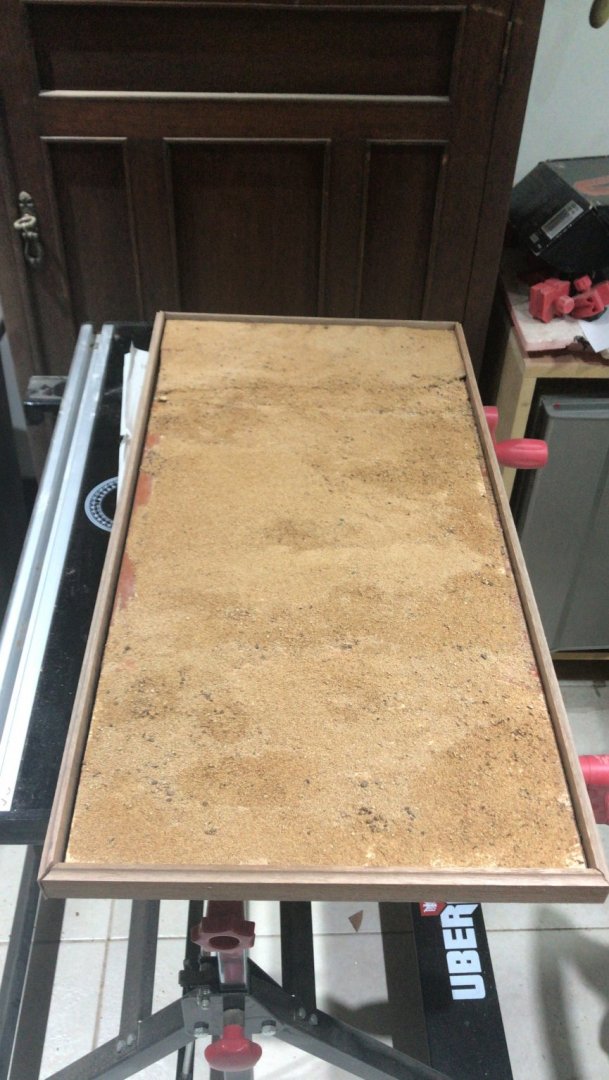
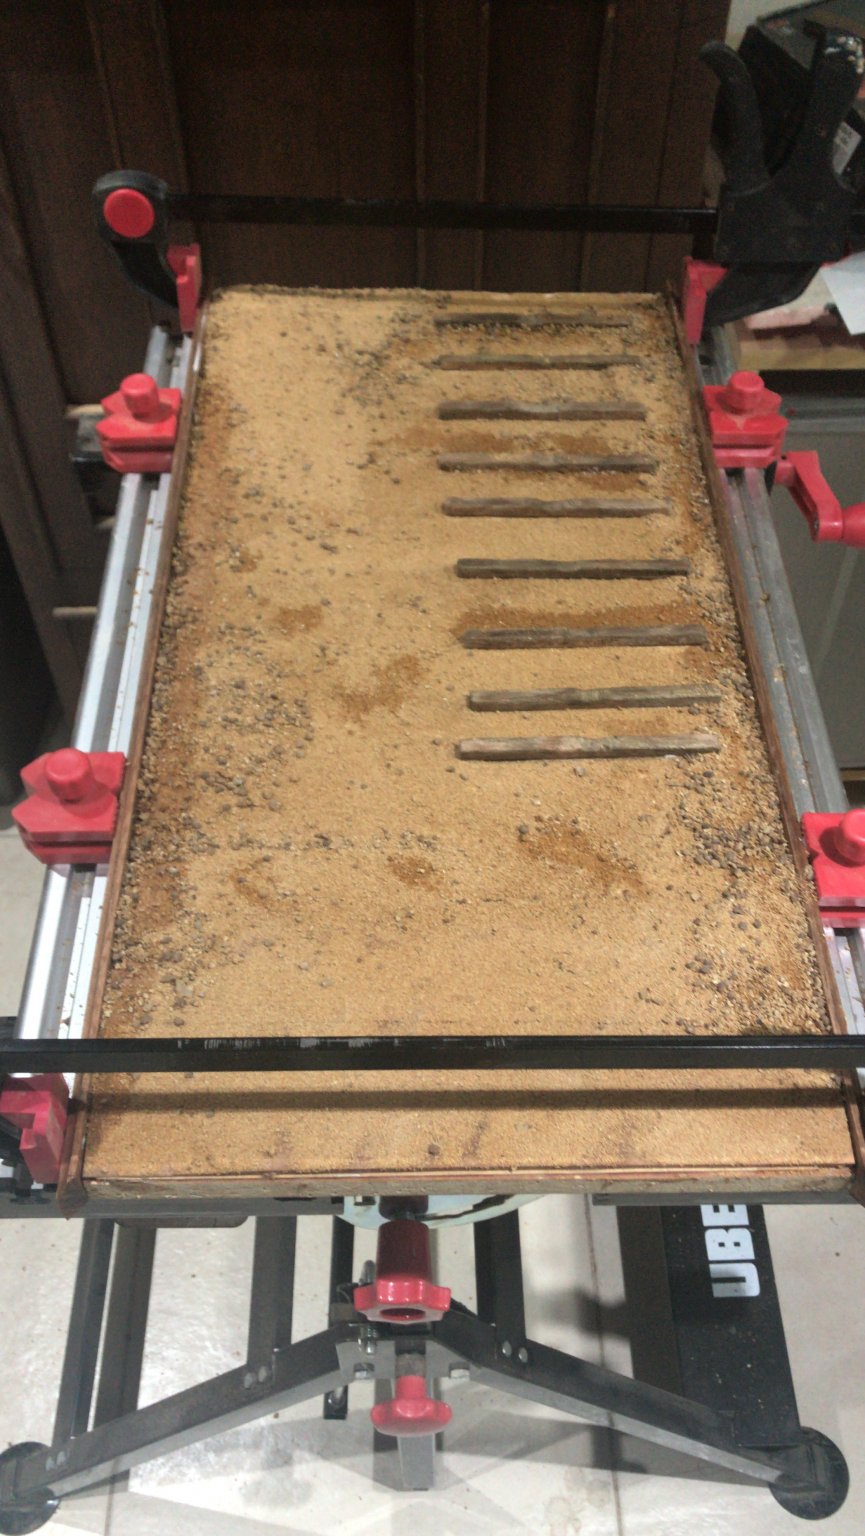
Base..... I decided at this time, it will be my first diorama. So I went to the internet and the monograph and I saw a couple a good ideas. I went to prepare de basa as a beach with sand, taking care of the leveling, not uniform surfaces and so.... I put some logs...aged. They are going to “receive“ the boat.... Let’s see how is looking so far..... I t need to be completed with some “fences” and fixing some spots without sand...