Schrader
-
Posts
304 -
Joined
-
Last visited
Content Type
Profiles
Forums
Gallery
Events
Everything posted by Schrader
-
 George..... I'm here to watch......Coming from you this is going to be interesting. Your discipline and intellectual curiosity take me to next level.
 -
It is unbelievably. But for the scale we have to work, that would be “impossible”. But take a look about the frames they are not precise...... they just are made to keep the form and give the hull the strength it needs. this is really valuable information for my project. I hope you don’t mind if I use it. As you can see in my Egyptian, I’m trying to replicate the way those ships were built. Thanks a lot
-
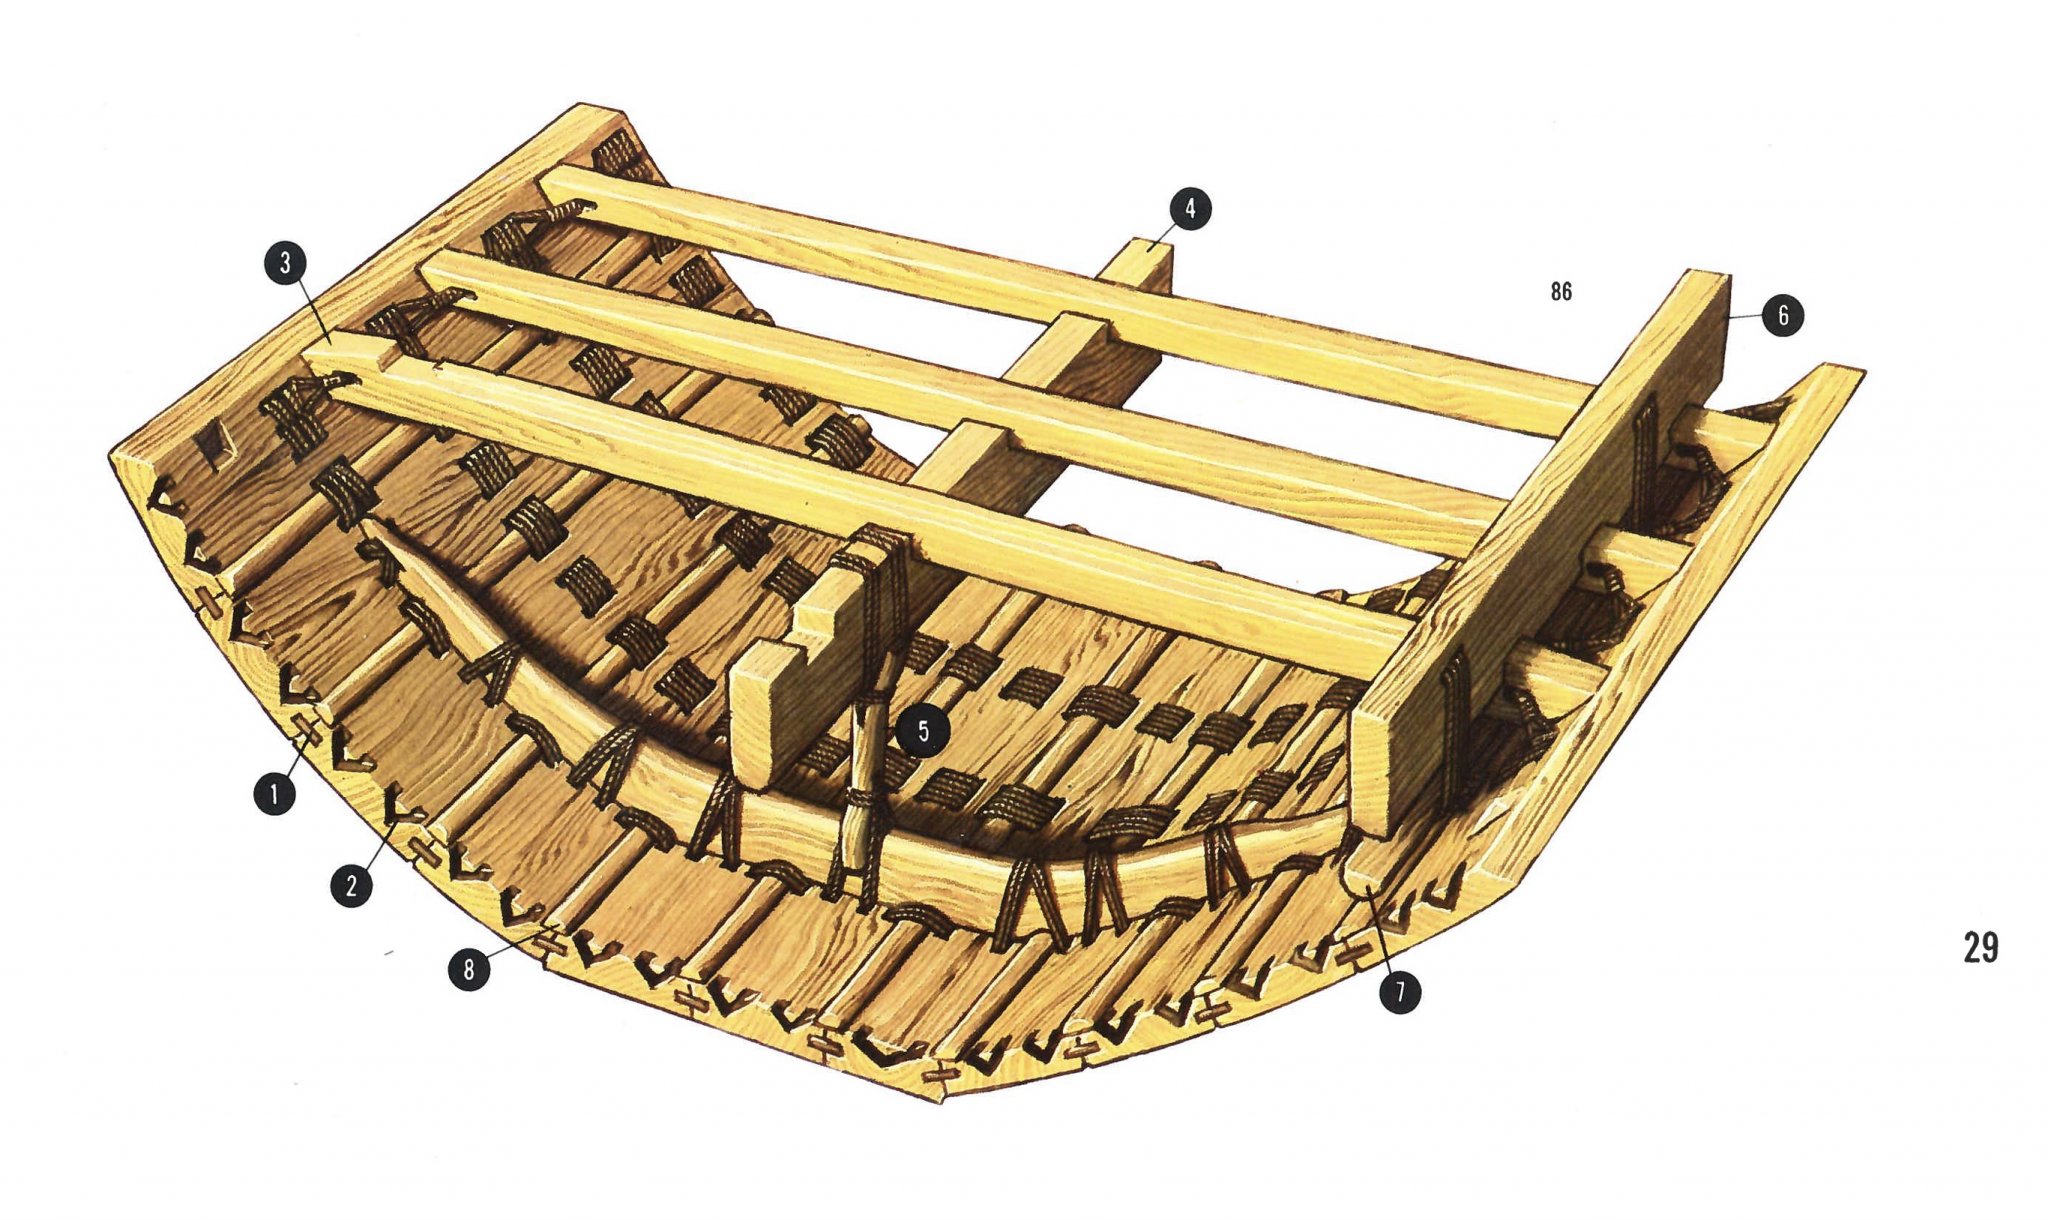
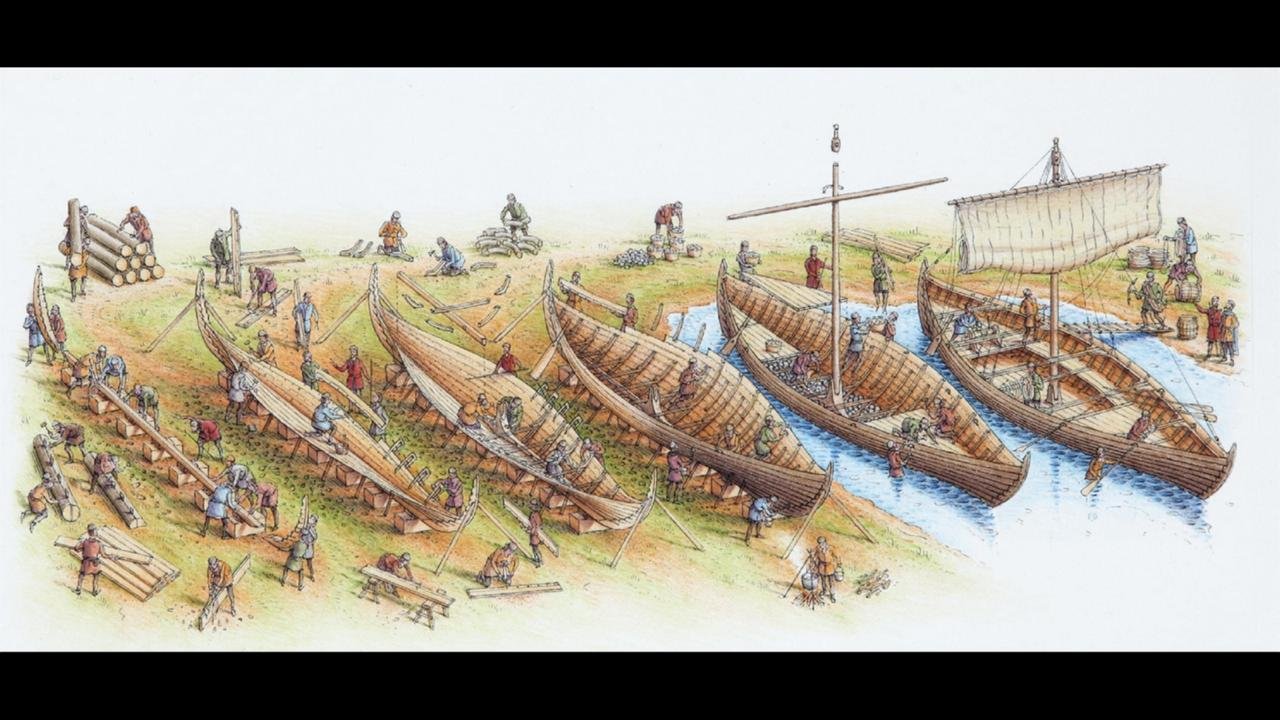
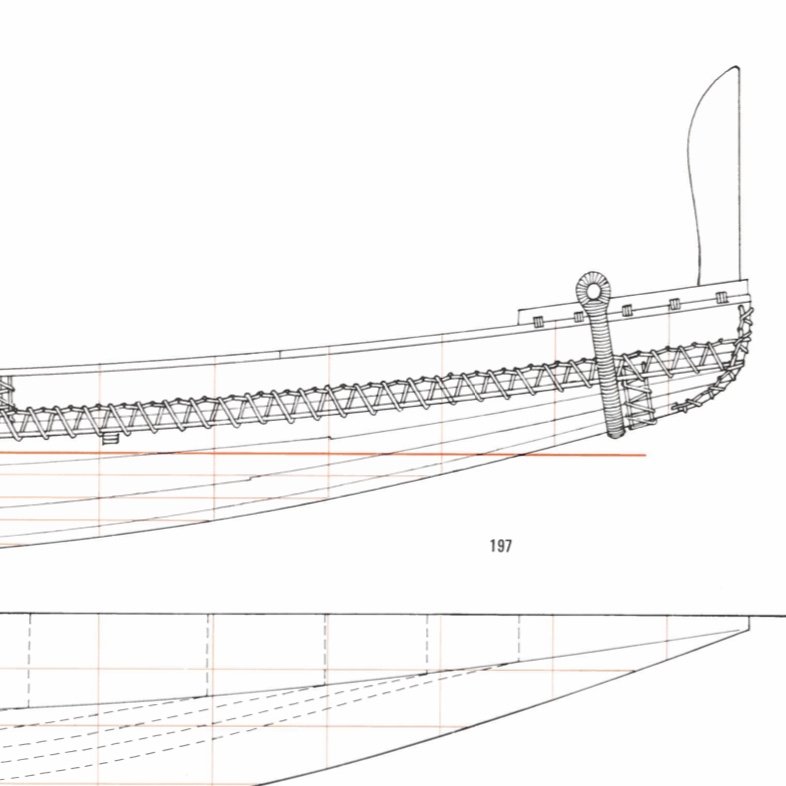
Hello..... Having in my mind to have one Viking after having one Egyptian..... Take a look of this picture..... is a recreation of the Viking shipyard.... You will see how they just put the frames once the ship is started.....The frames are made after all to adjust to the real shape of the clinker hull
-
Dioramas are really the "next" step for us. Go ahead!!!! but just keep in mind...... Dioramas never end we have to abandon them 😀😀😀
-
Thanks Lou I agree completely. A couple of fitting elements and I think I am ready To start with the external hull. This is going to give a total different external look let’s see
- 158 replies
-
- 2
-

-
- byblos ship
- Egyptian
- (and 1 more)
-
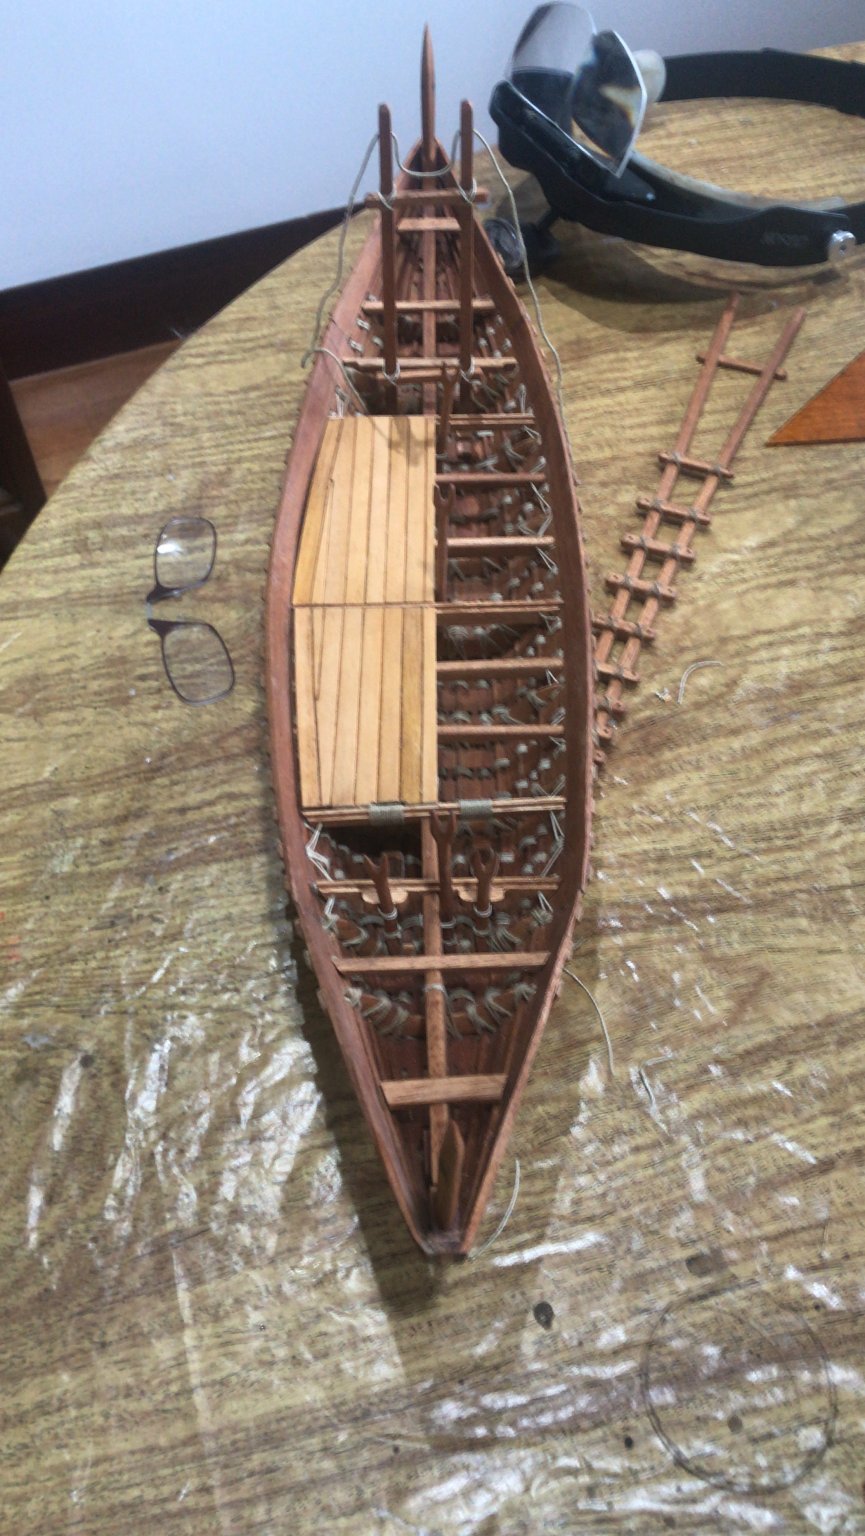
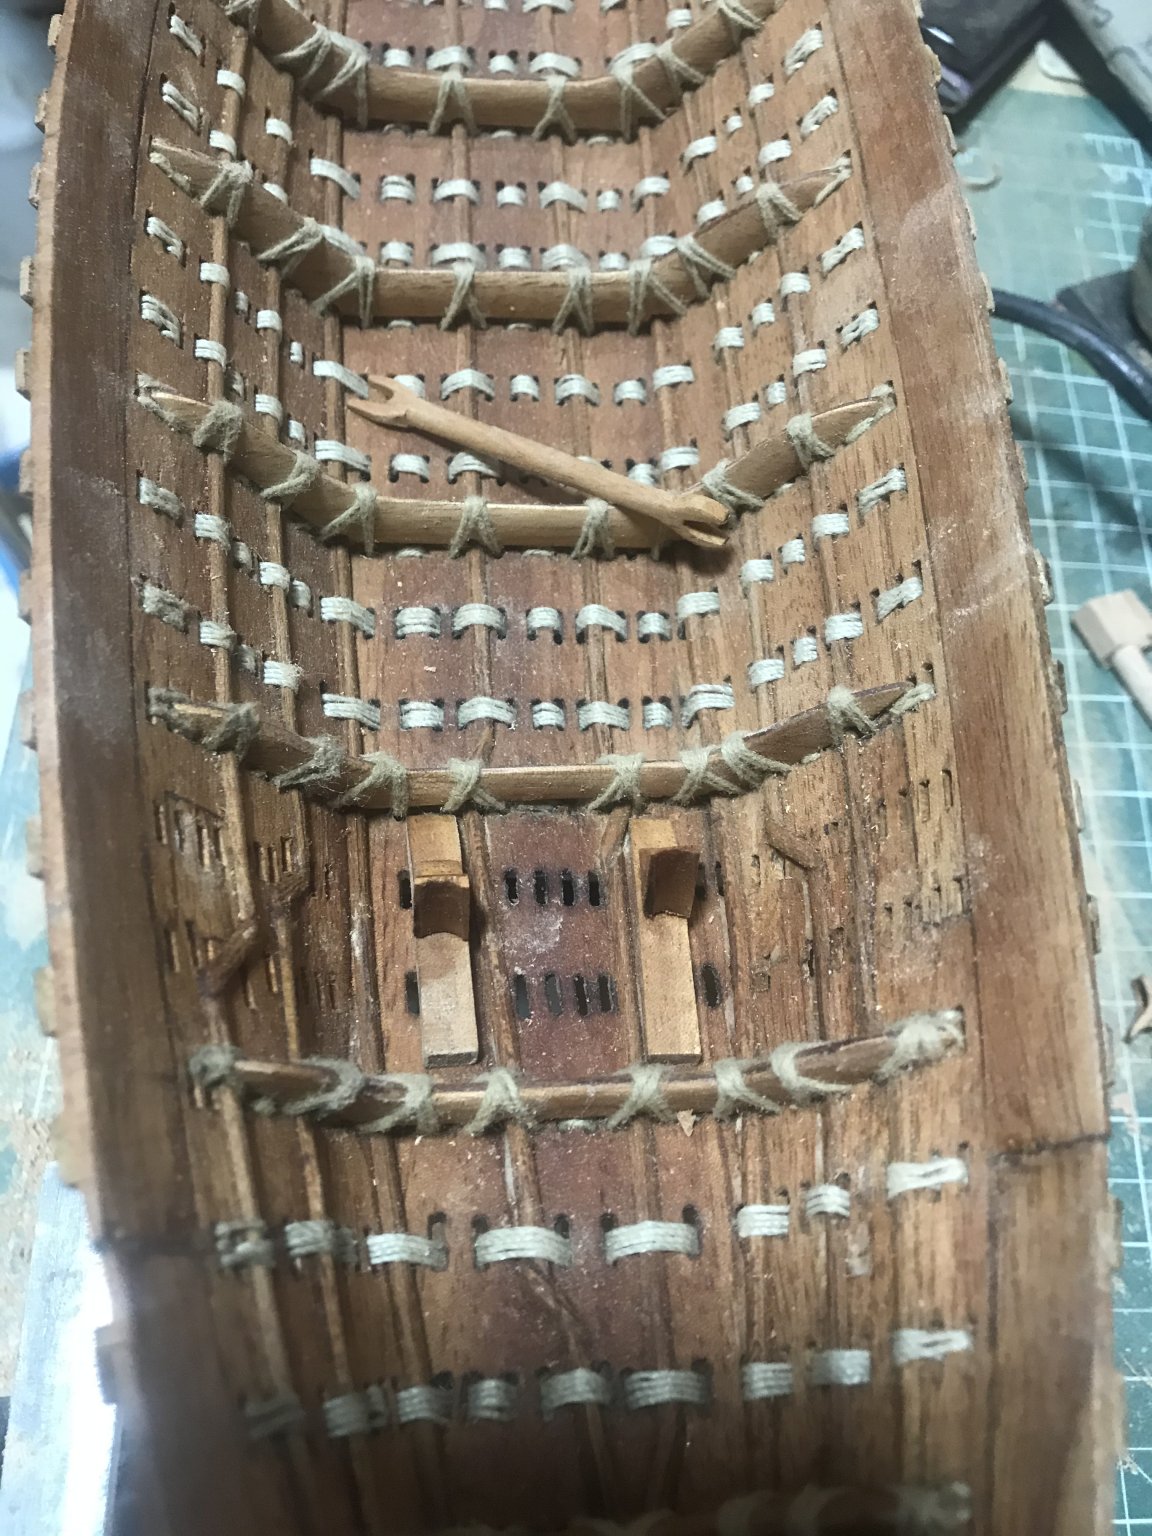
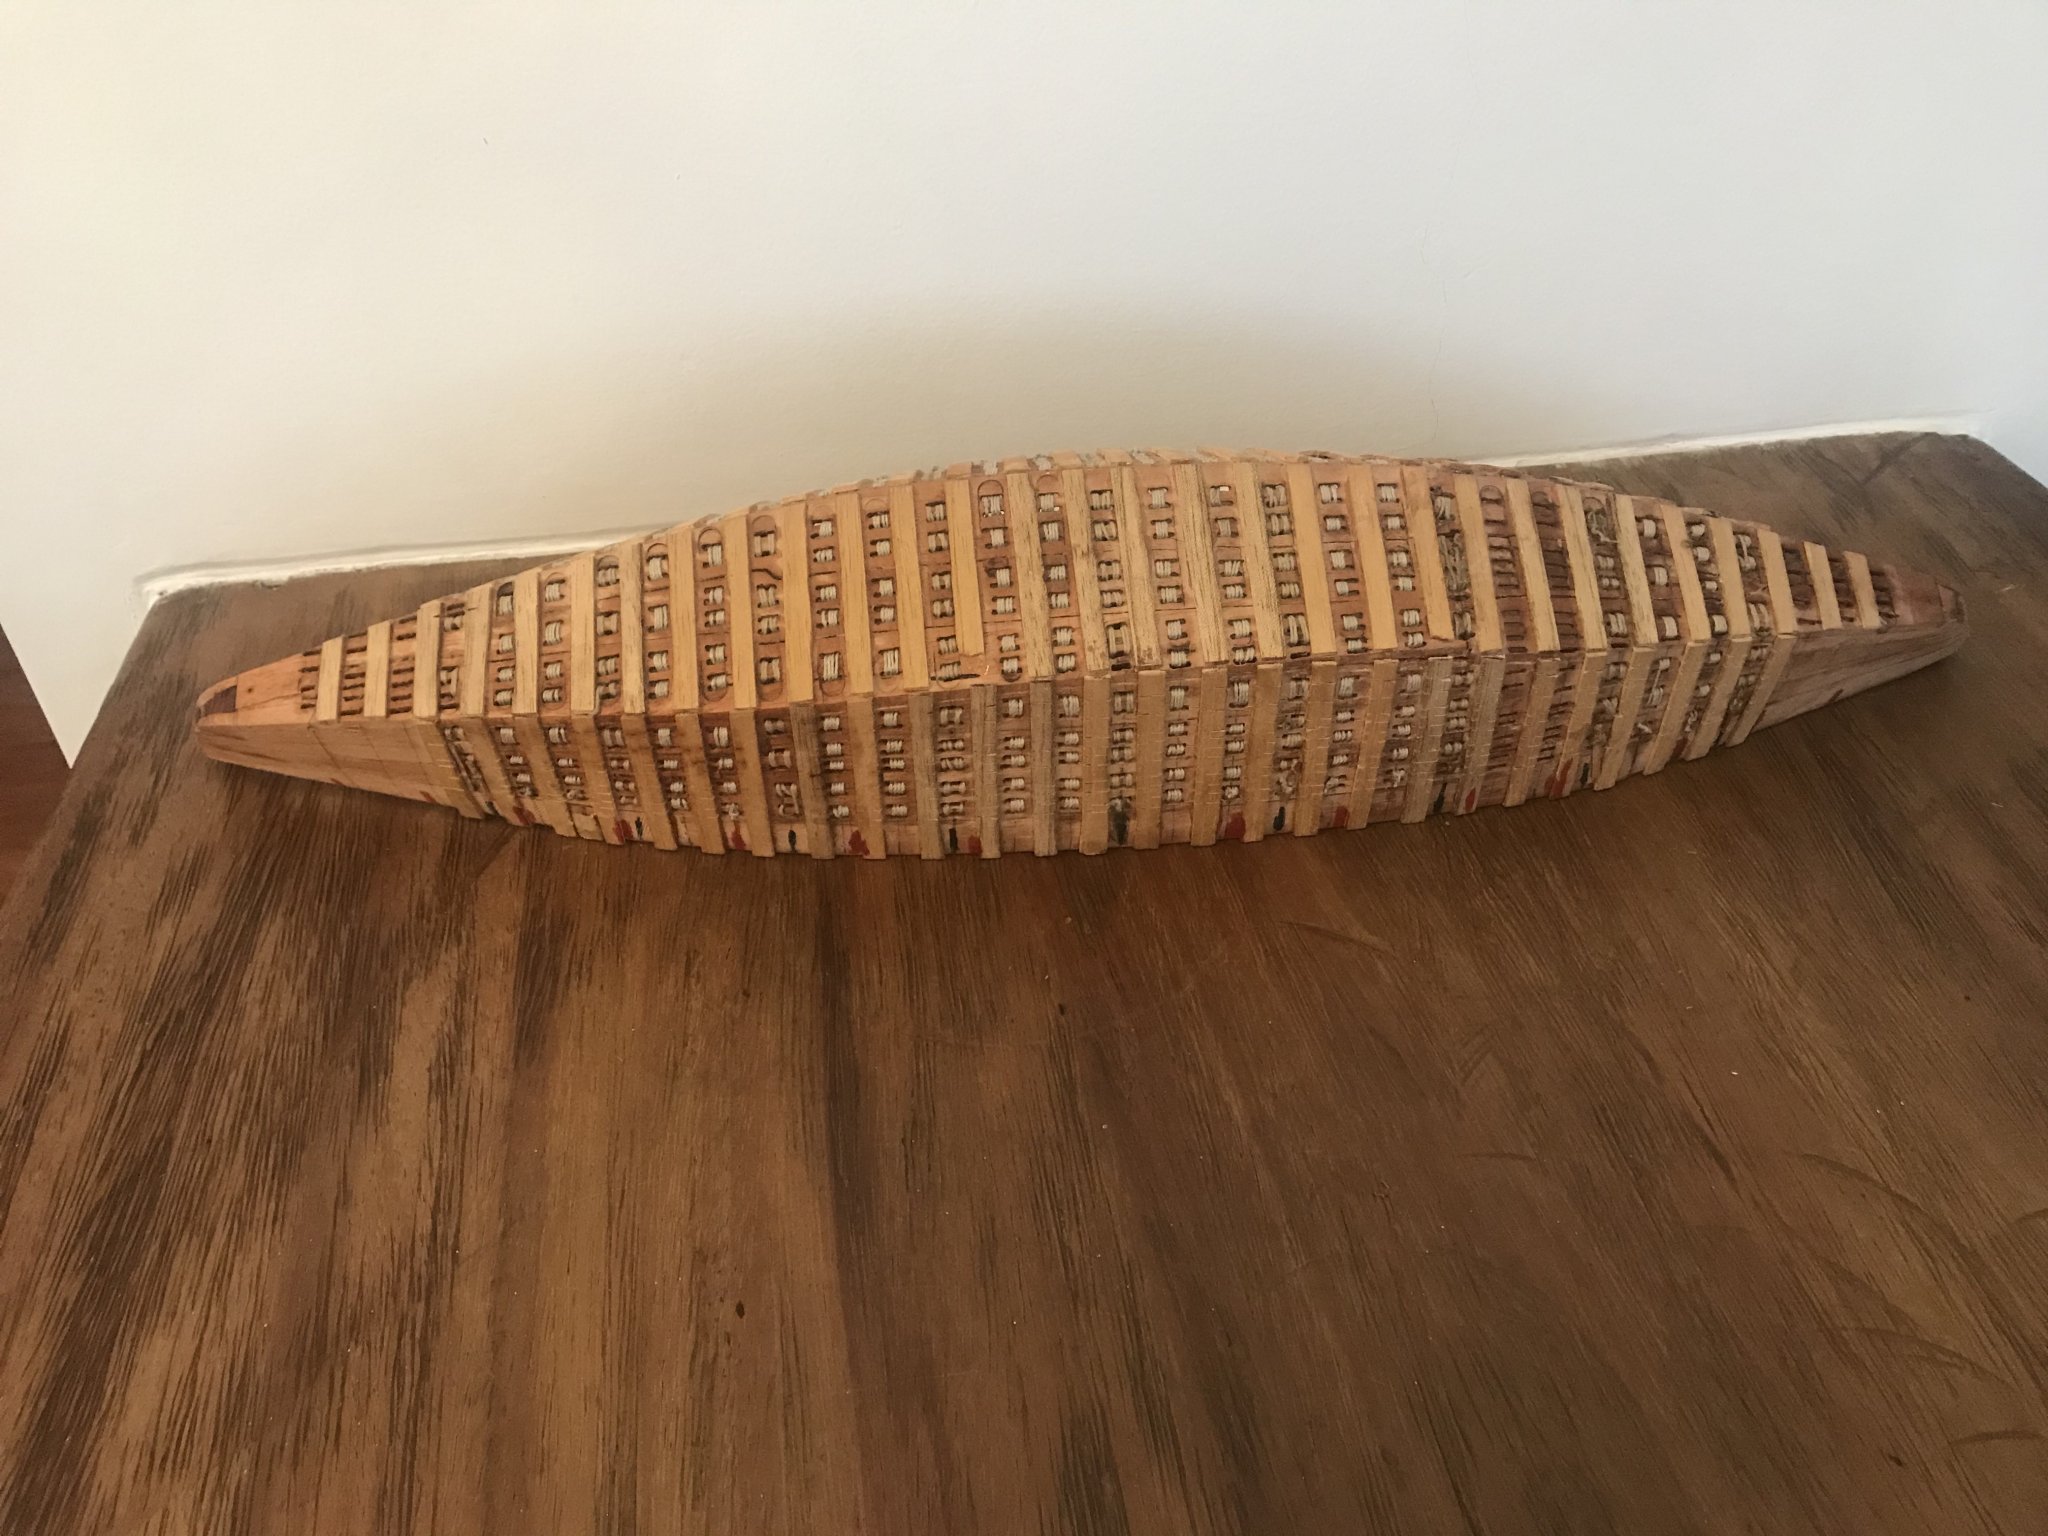
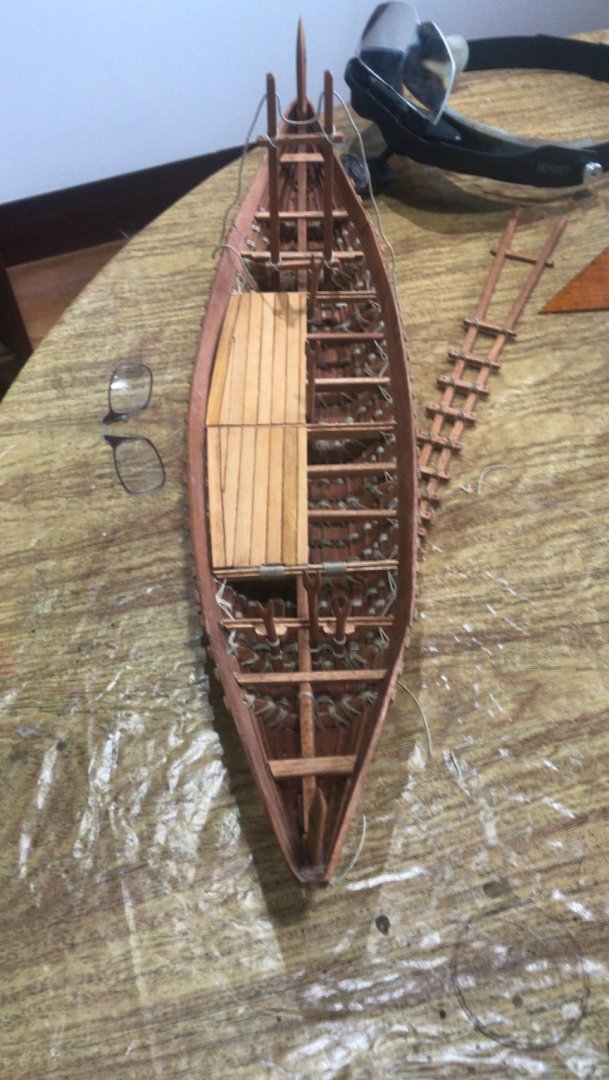
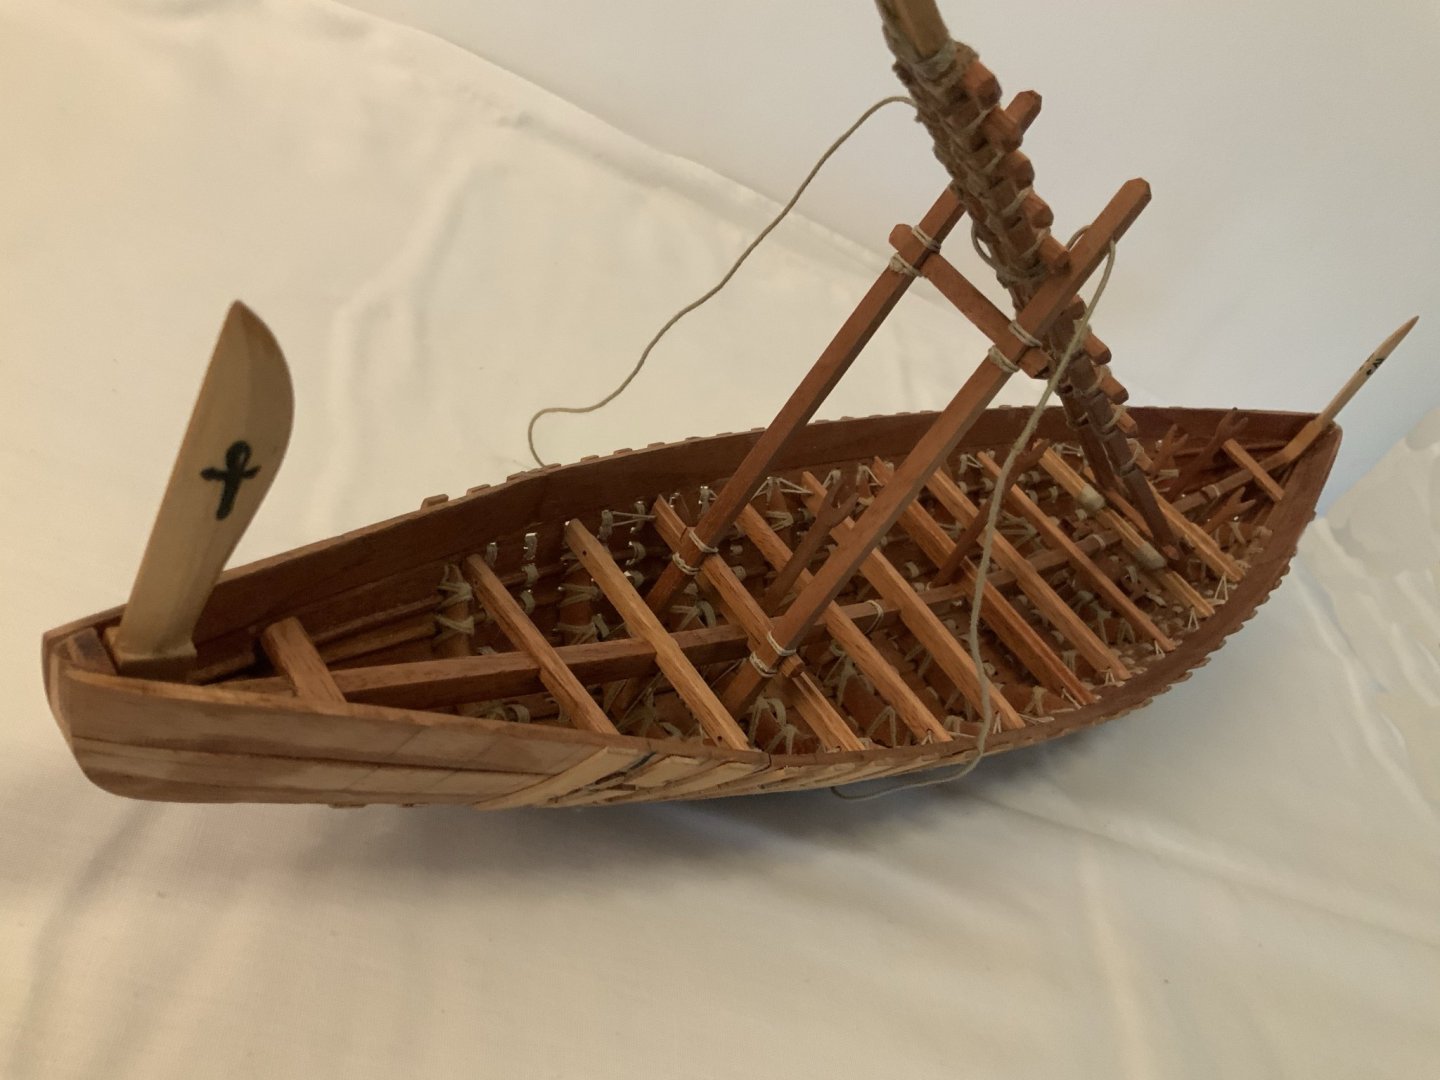
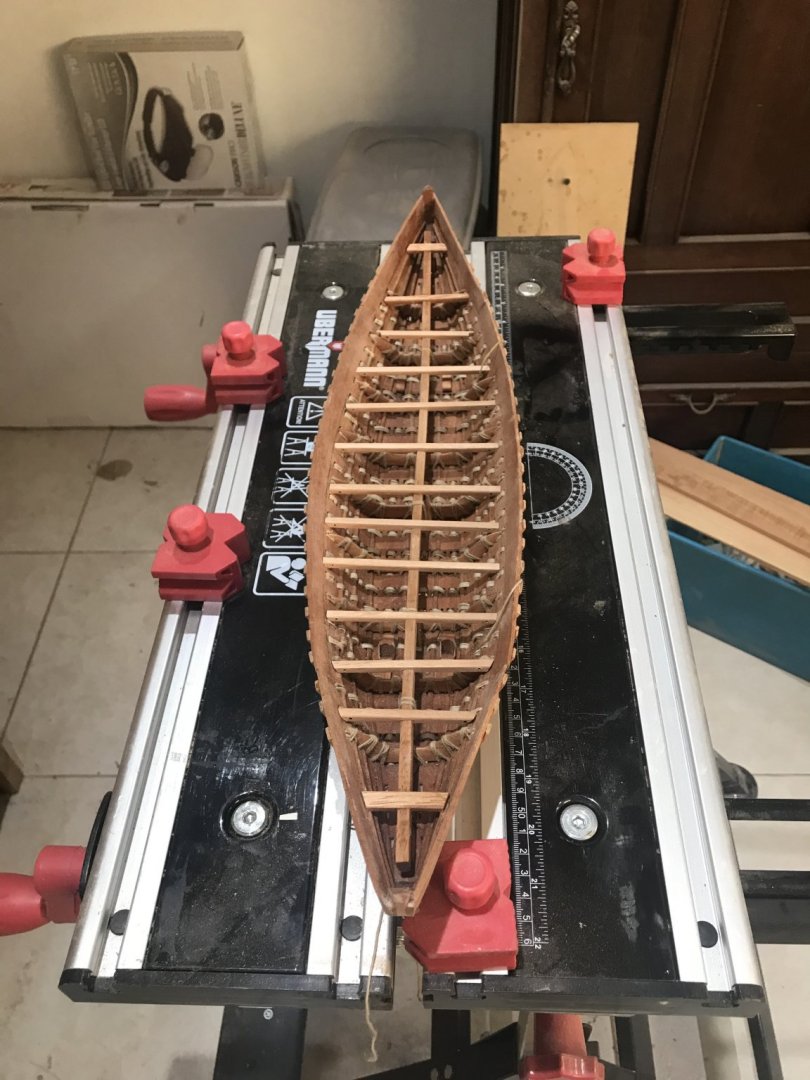
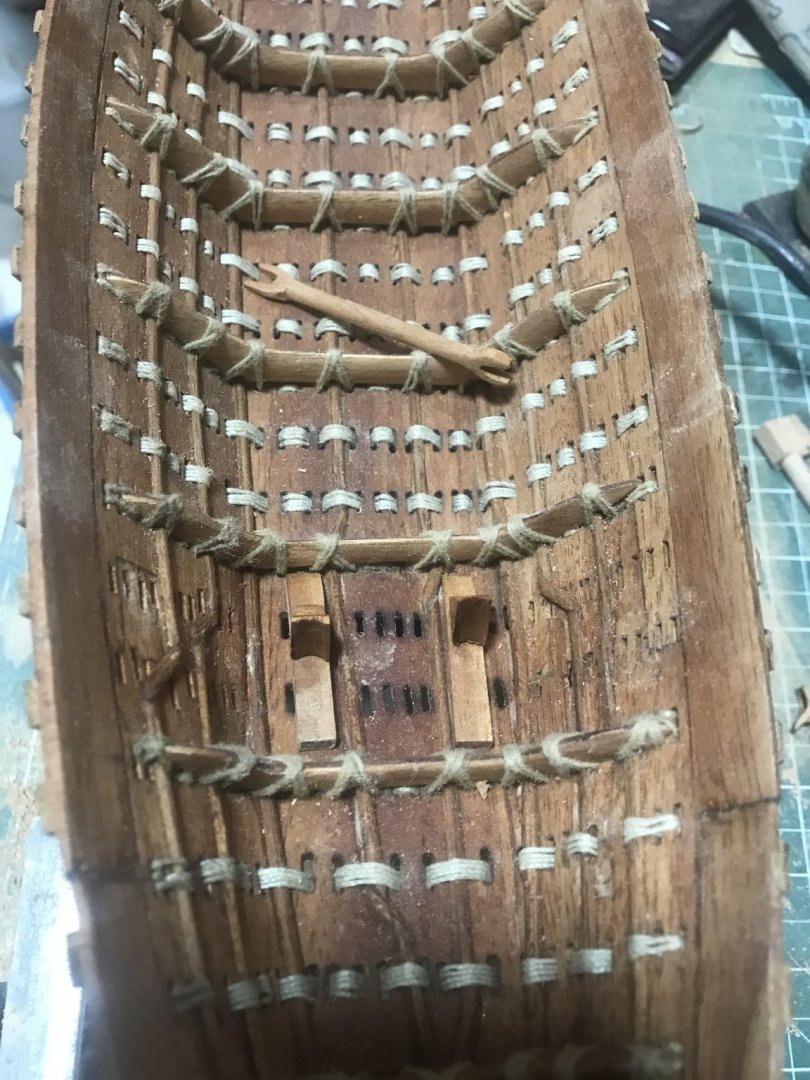
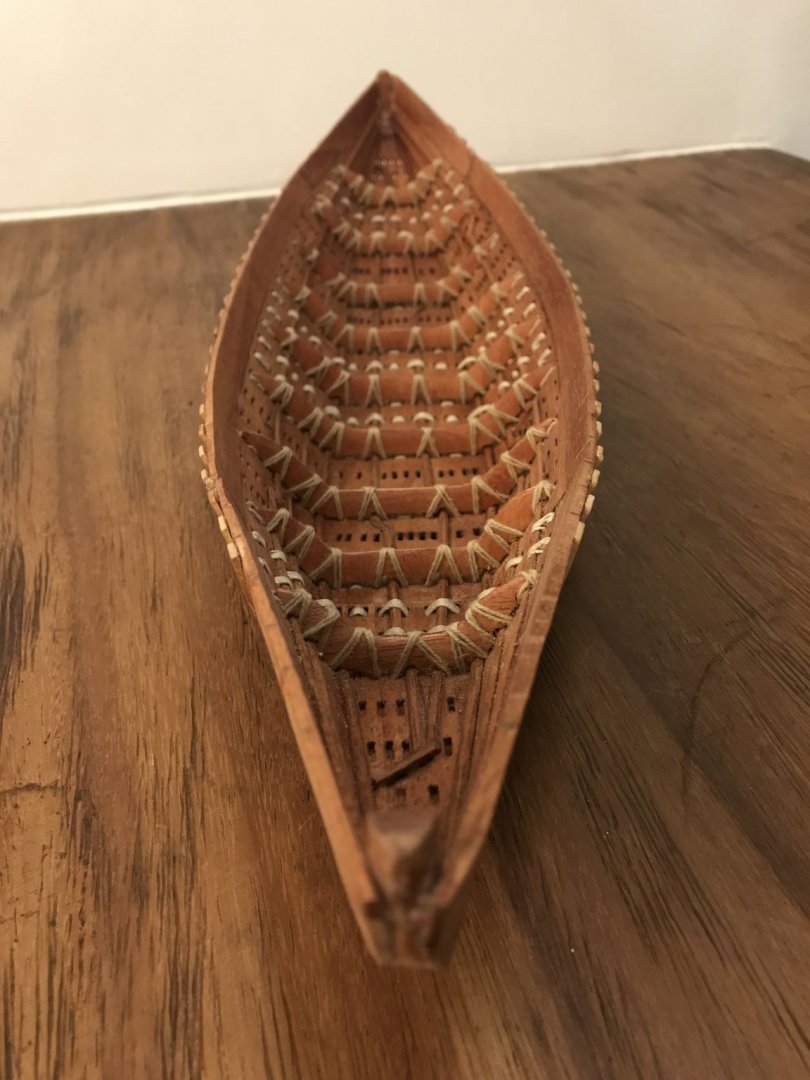
Let’s keep going with the advances..... I’ve been working in the deck. The central zone will be full removable and I have done just half of it. It will allow all the hull sewed been sewing....... It is sewed also.... at the same time I’ve working in the bow and stern deck but these are just “presented” since I need to work in the external hull, finish the hull sewing... And then they will be fixed/sewed. Take look how it is looking so far.....


- 158 replies
-
- 12
-
-
- byblos ship
- Egyptian
- (and 1 more)
-
Now we are talking!!!!! Really good decision. We all have been to the same “process”. Good job
-
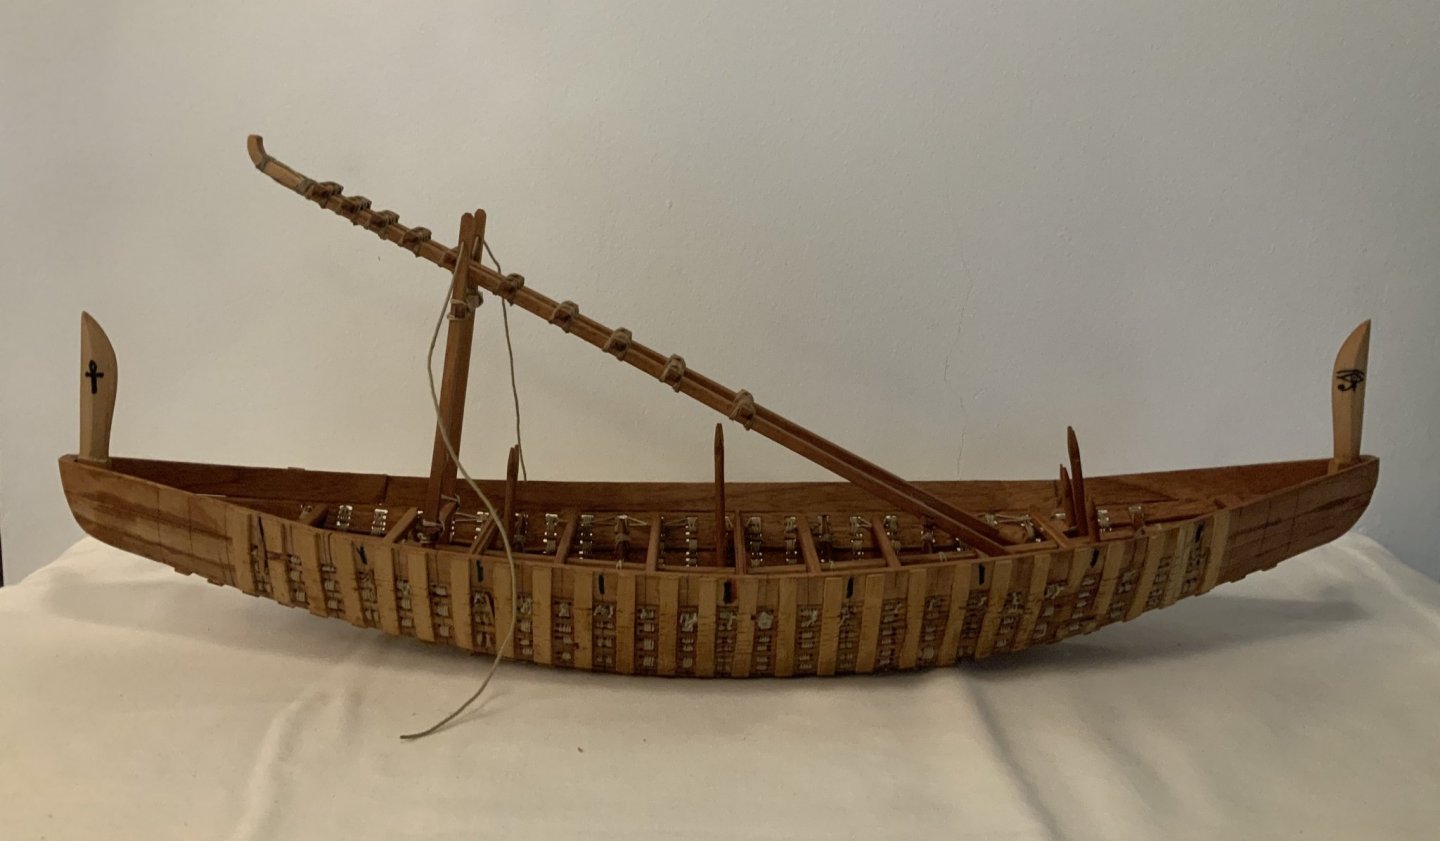
Some pictures with advances..... It has the must of the beams and the mast “support”, when it is not with sail..... SO FAR!!!!! JUST GLUE IN THE HULL!!!! ALL THE ELEMENTS HAVBE BEEN TIED UP. ....😀

- 158 replies
-
- 9
-
-
- byblos ship
- Egyptian
- (and 1 more)
-
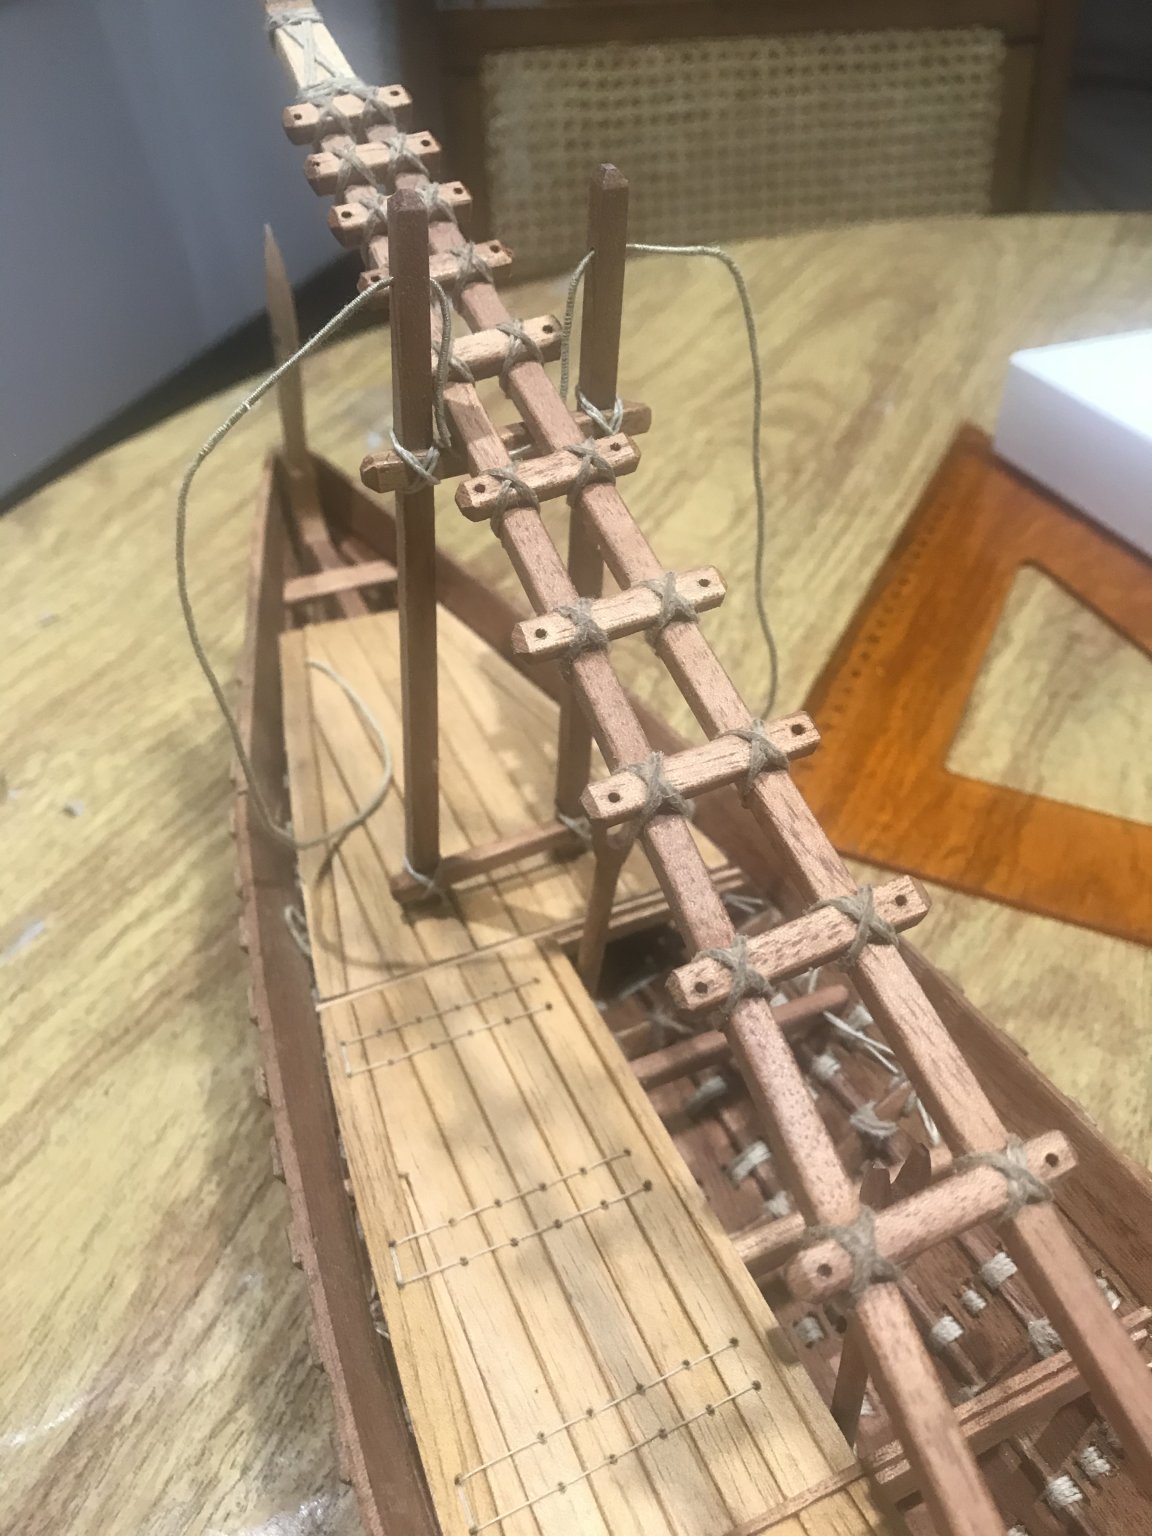
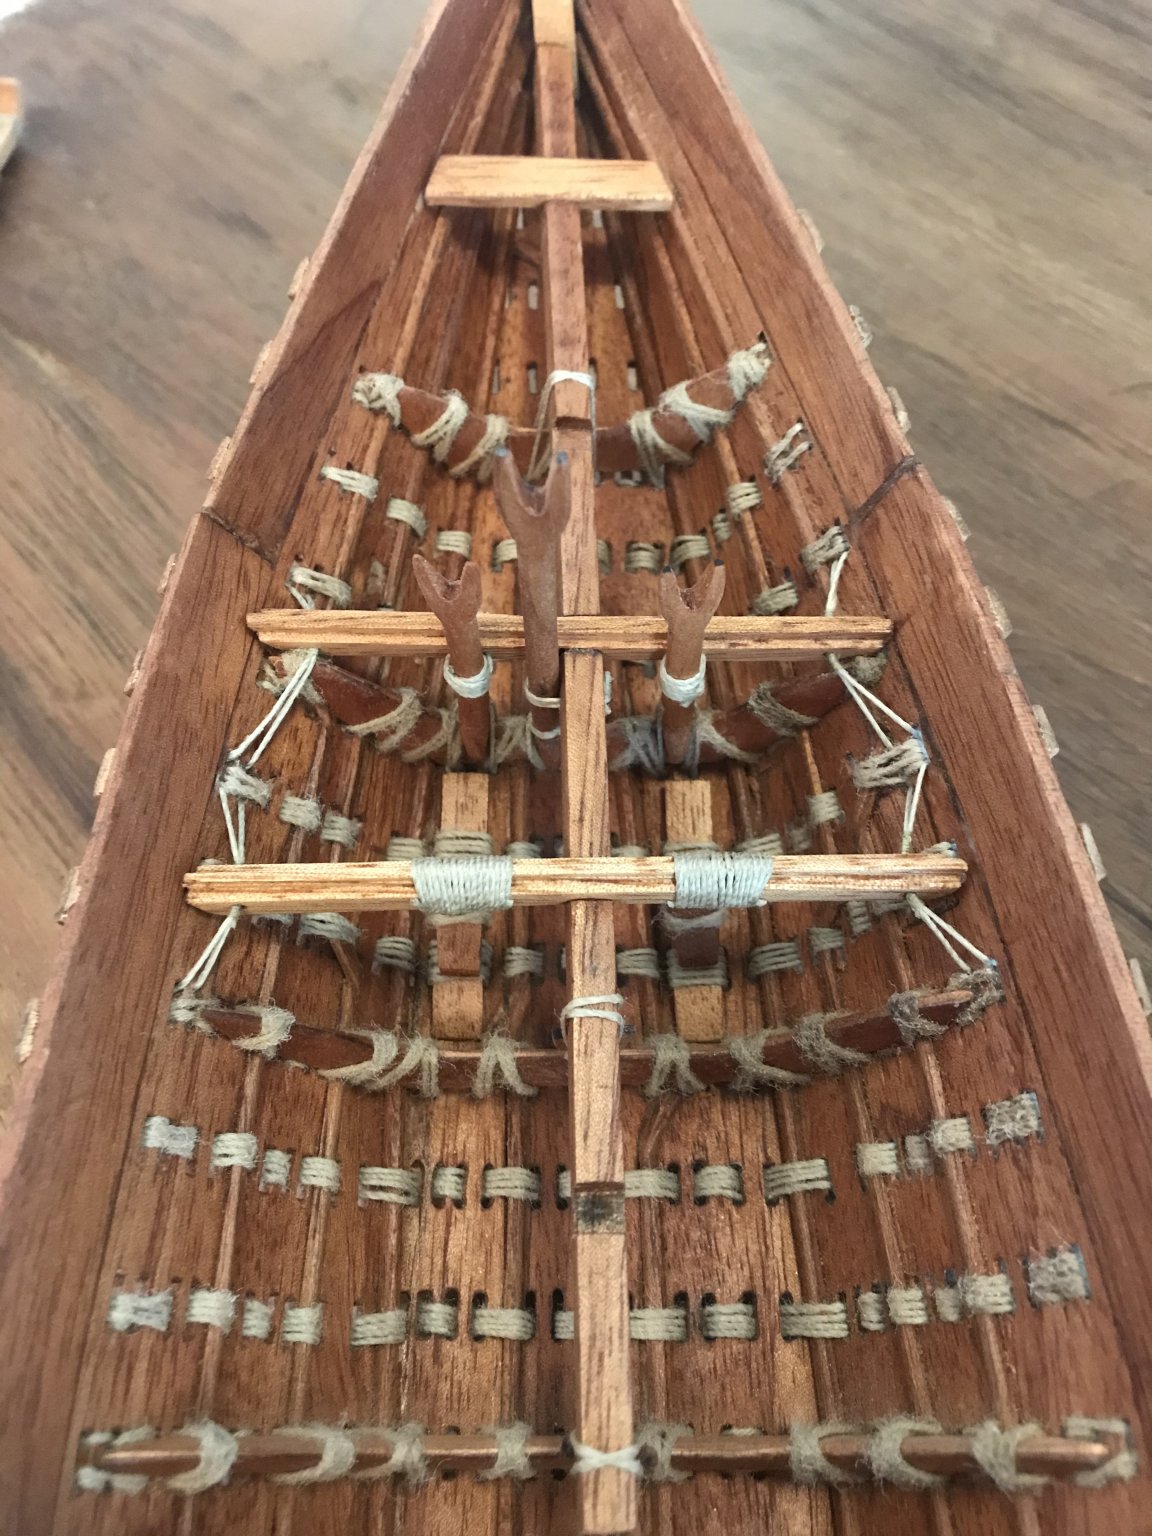
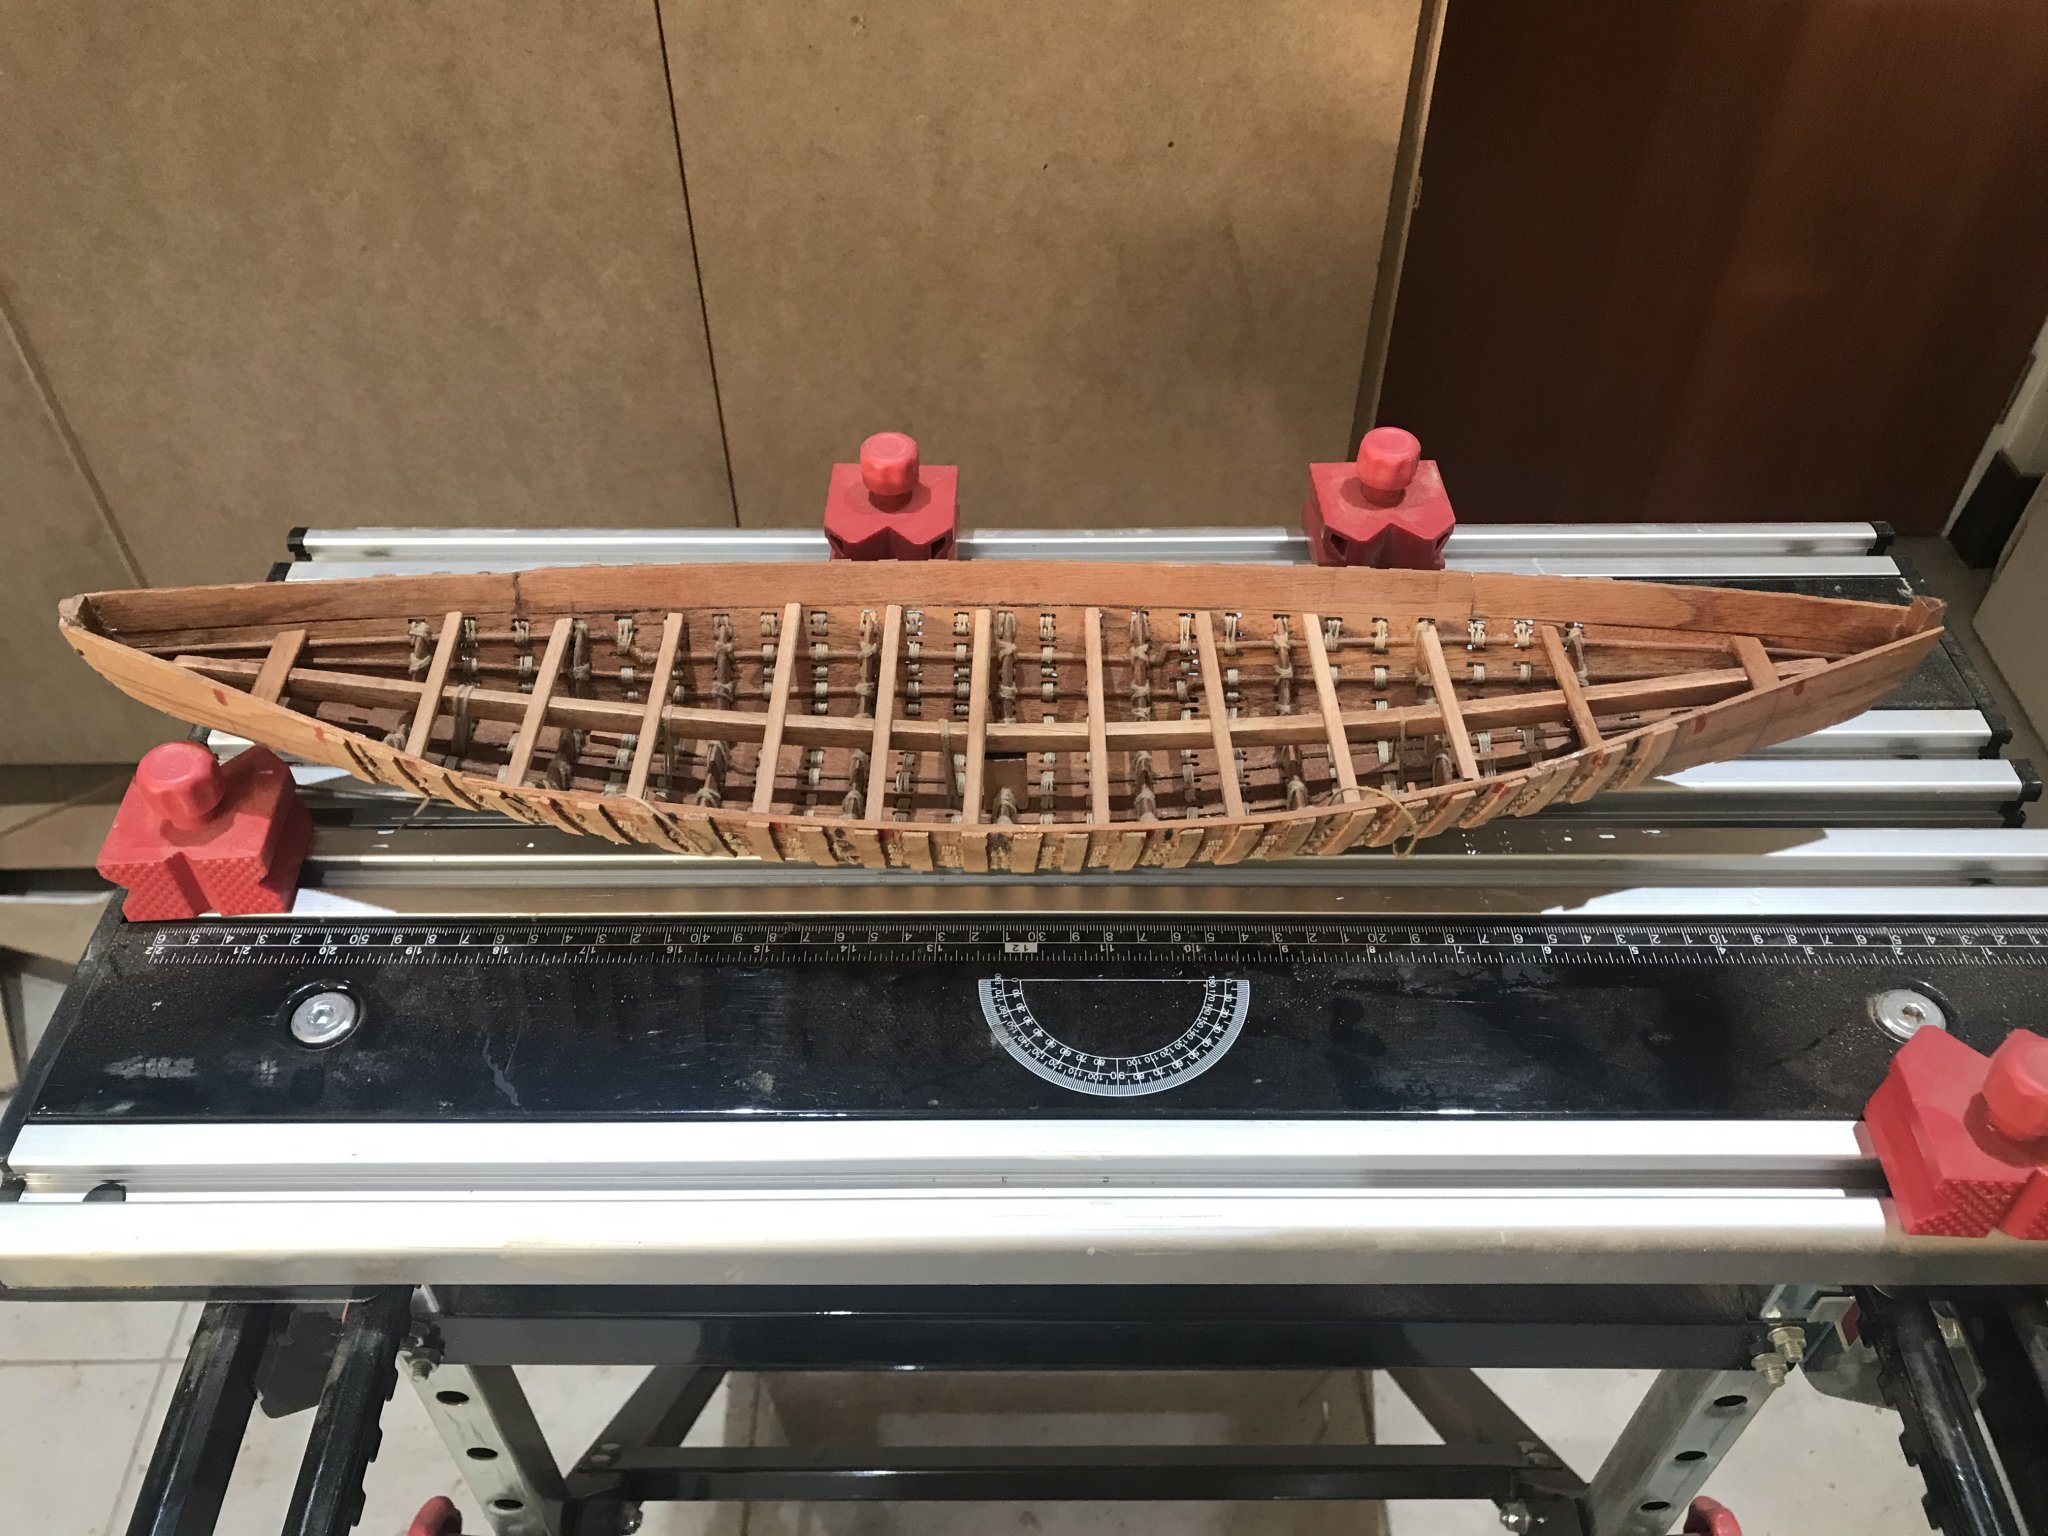
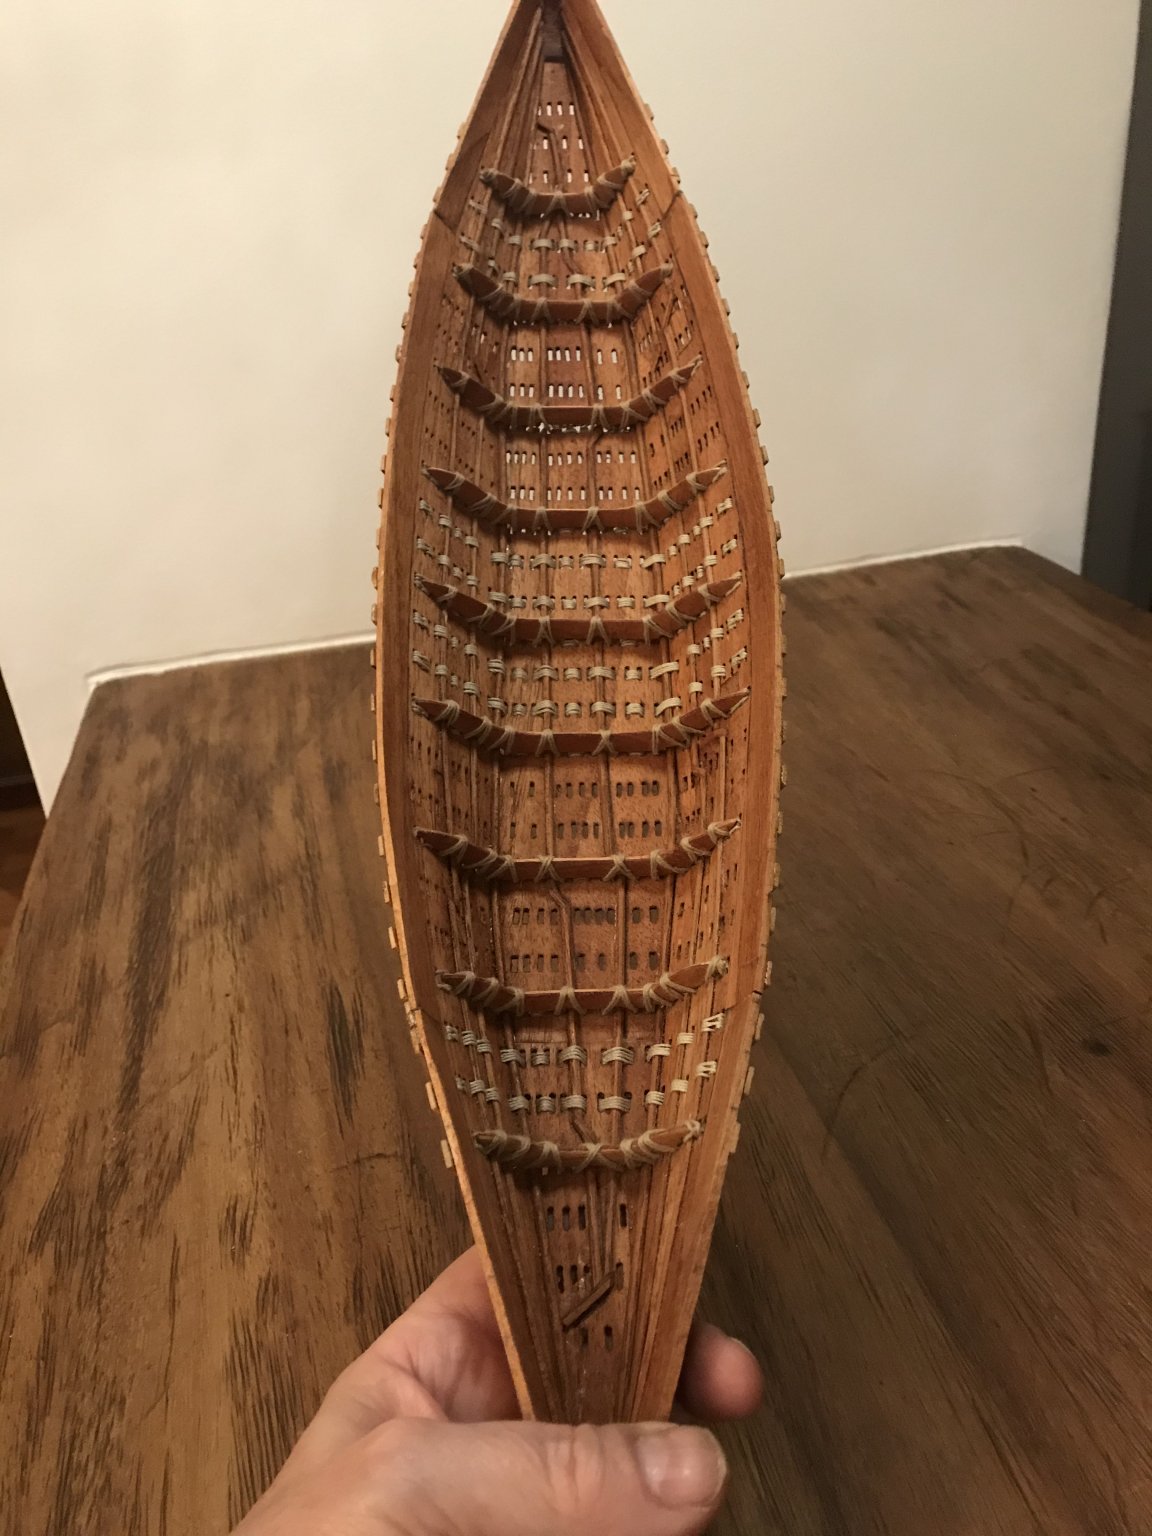
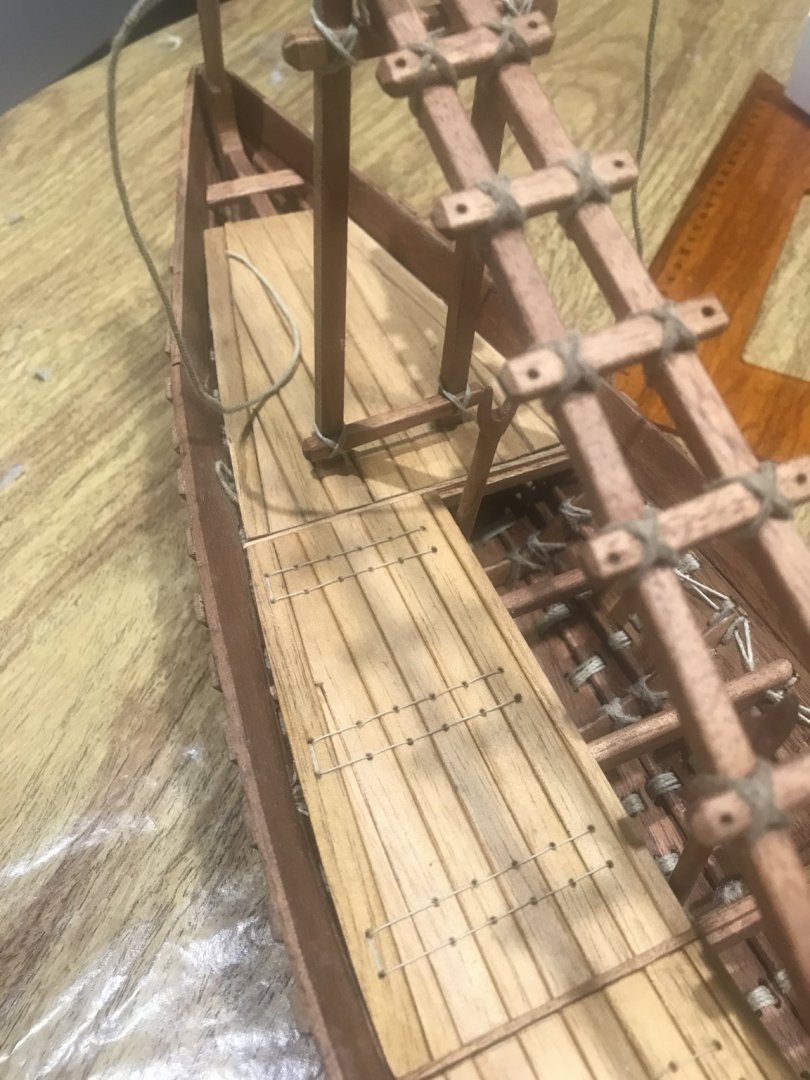
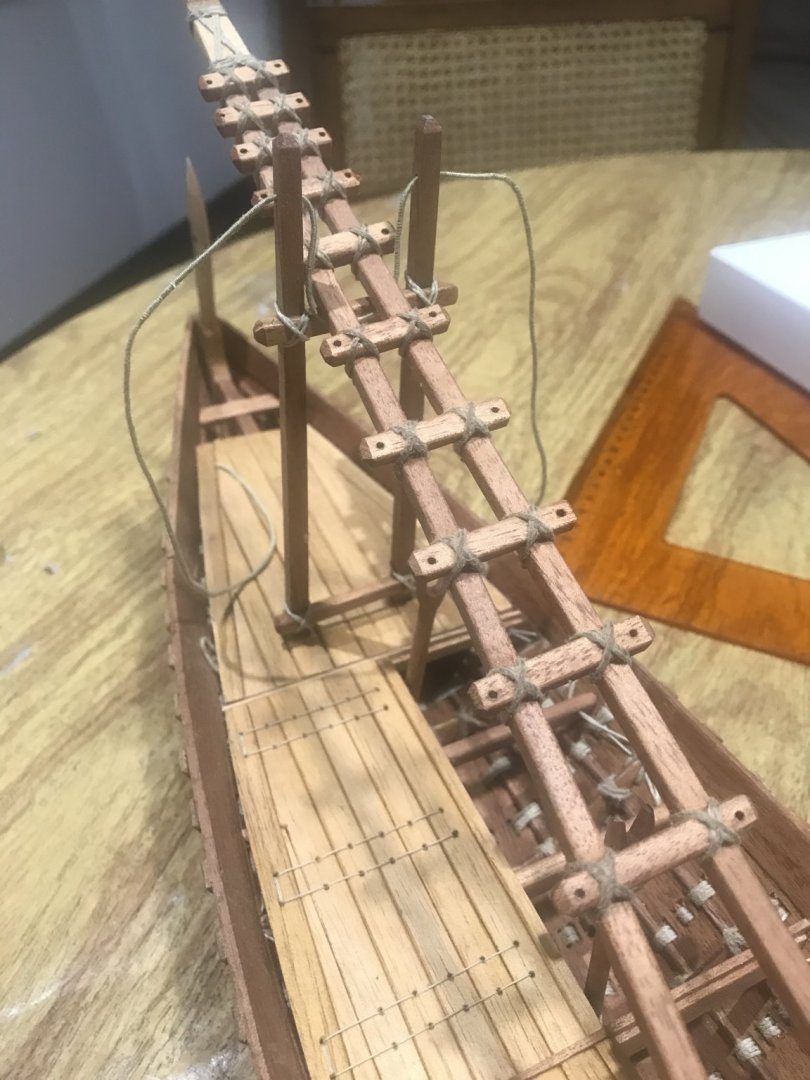
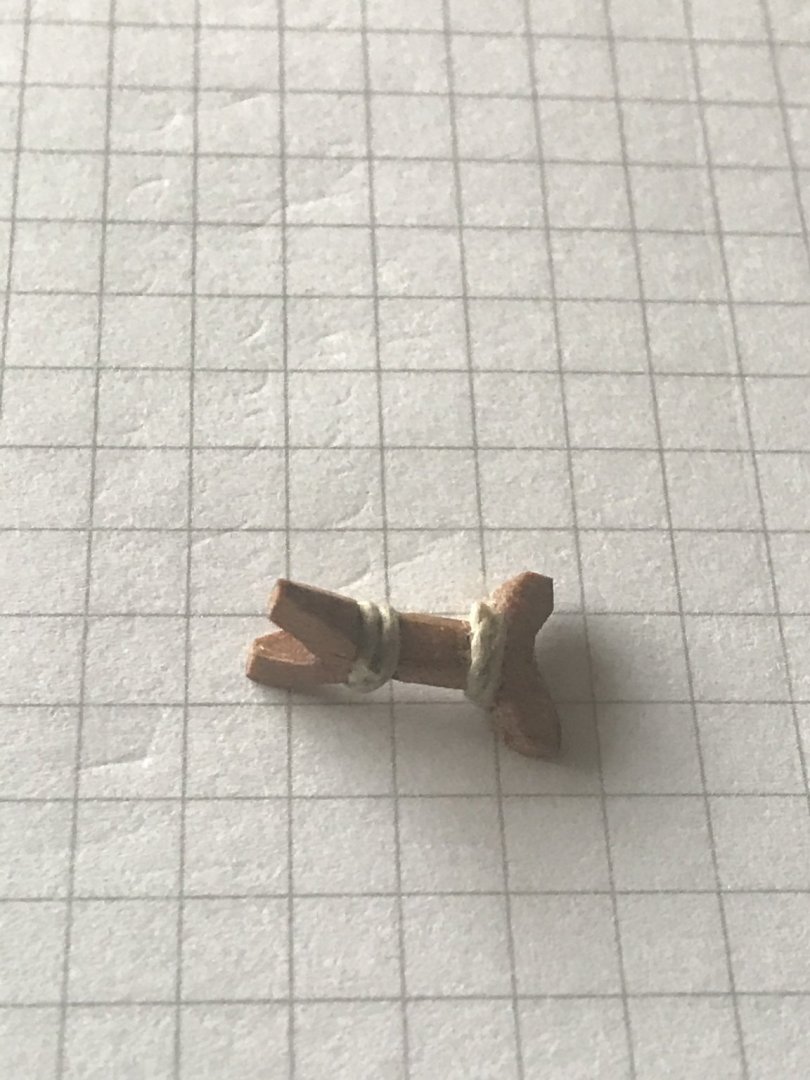
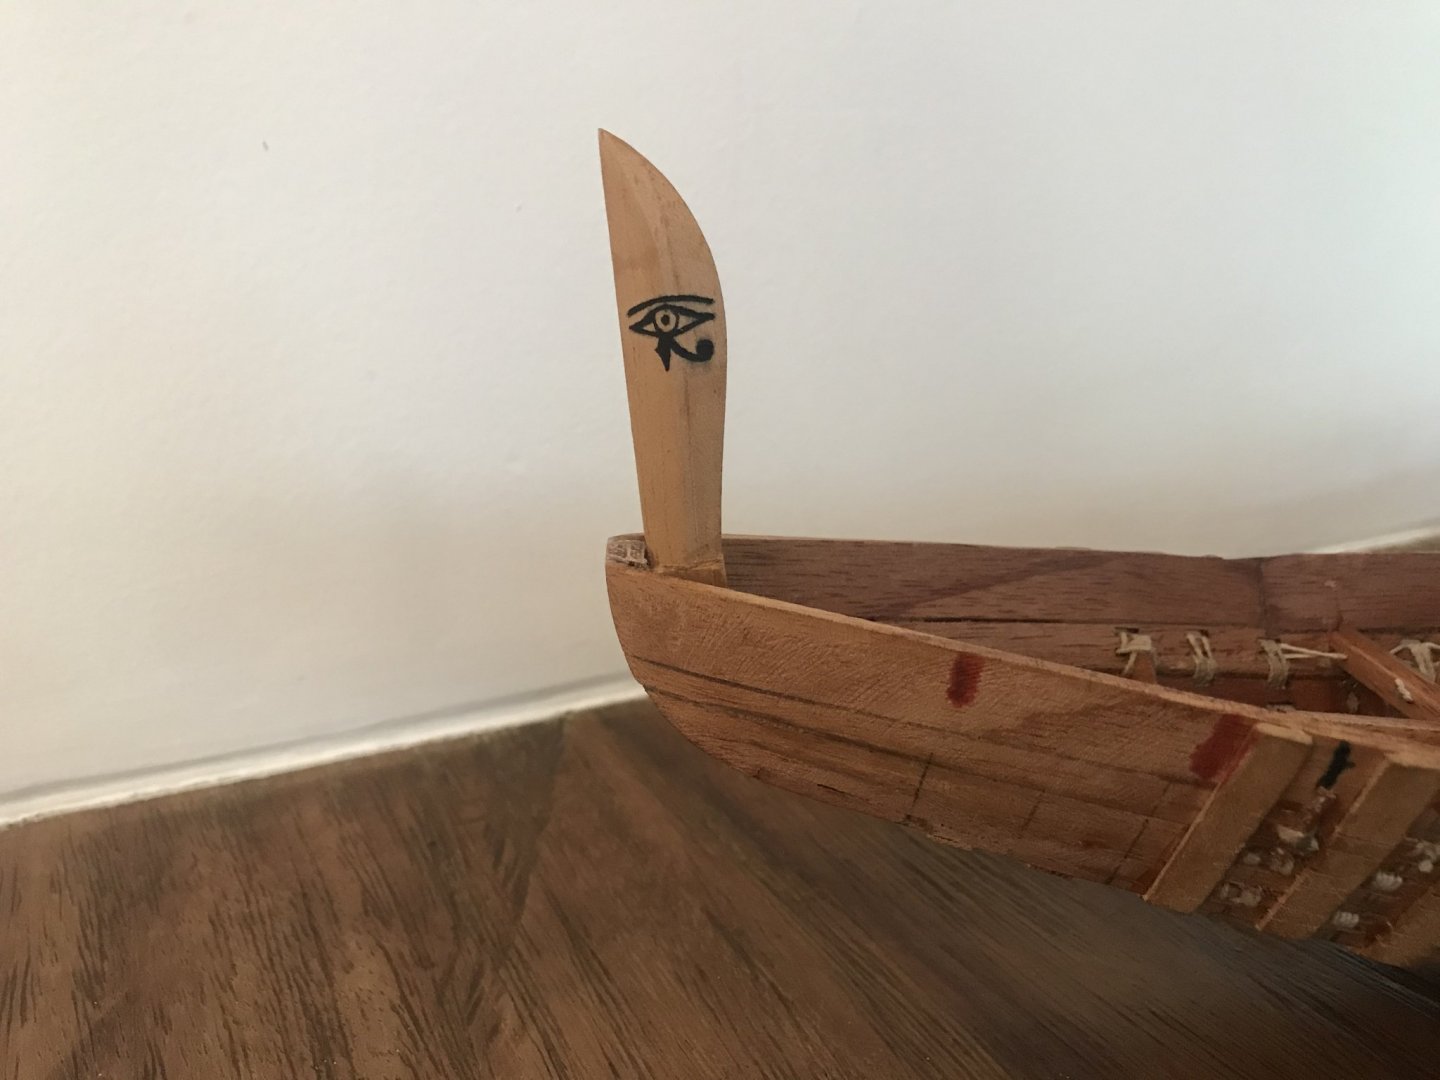
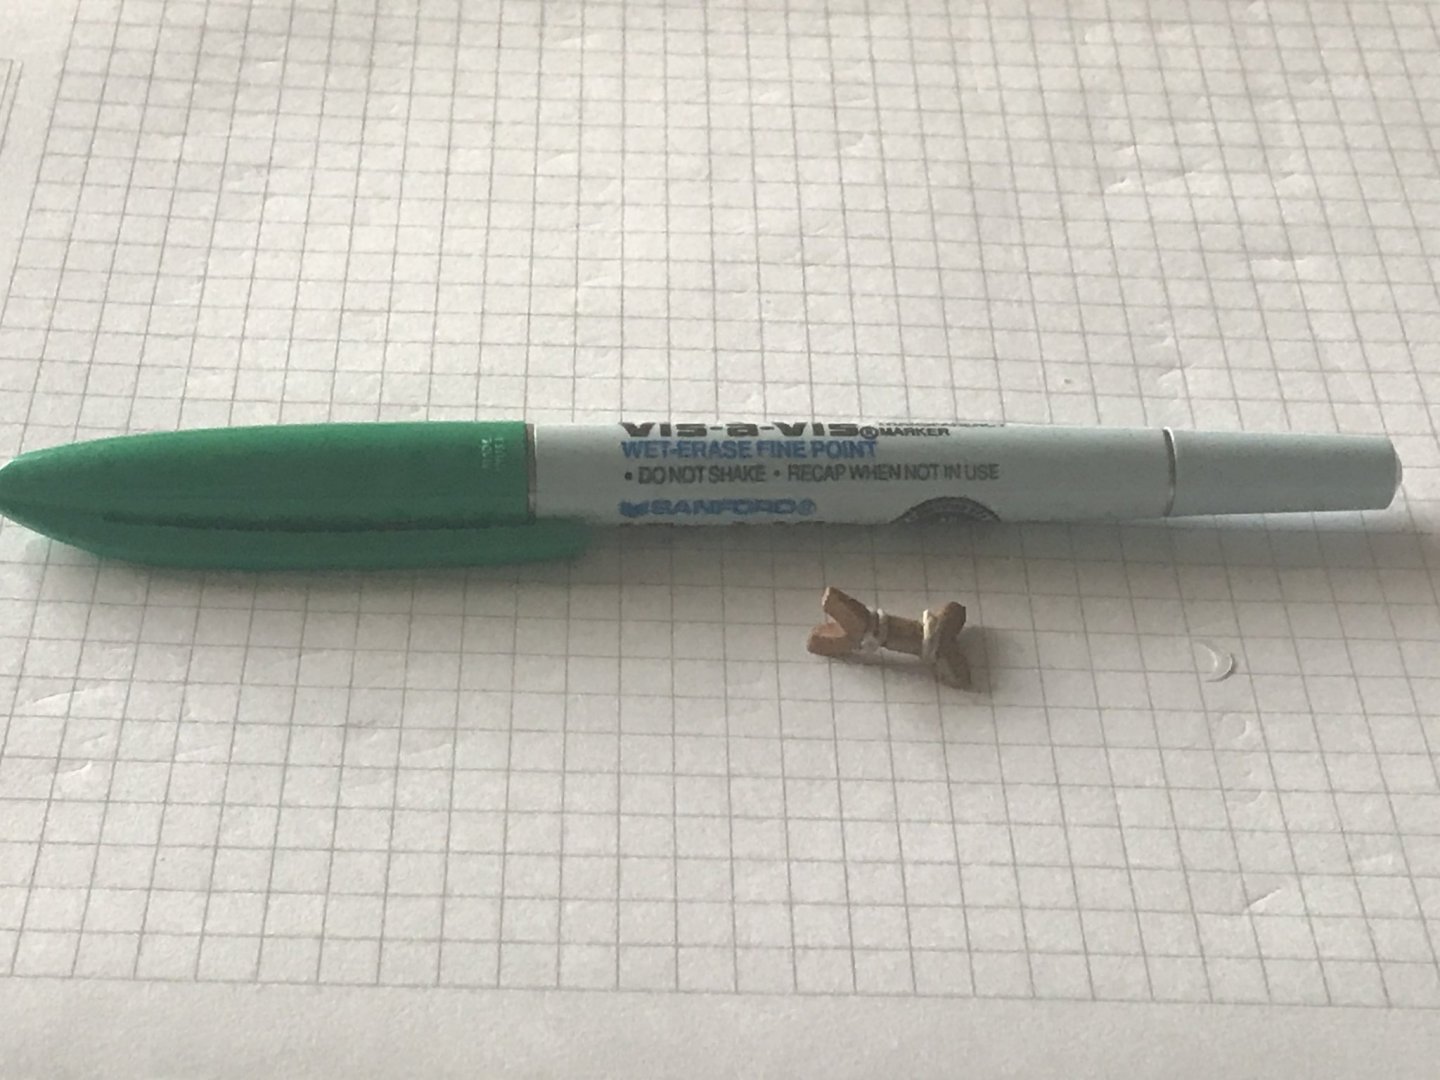
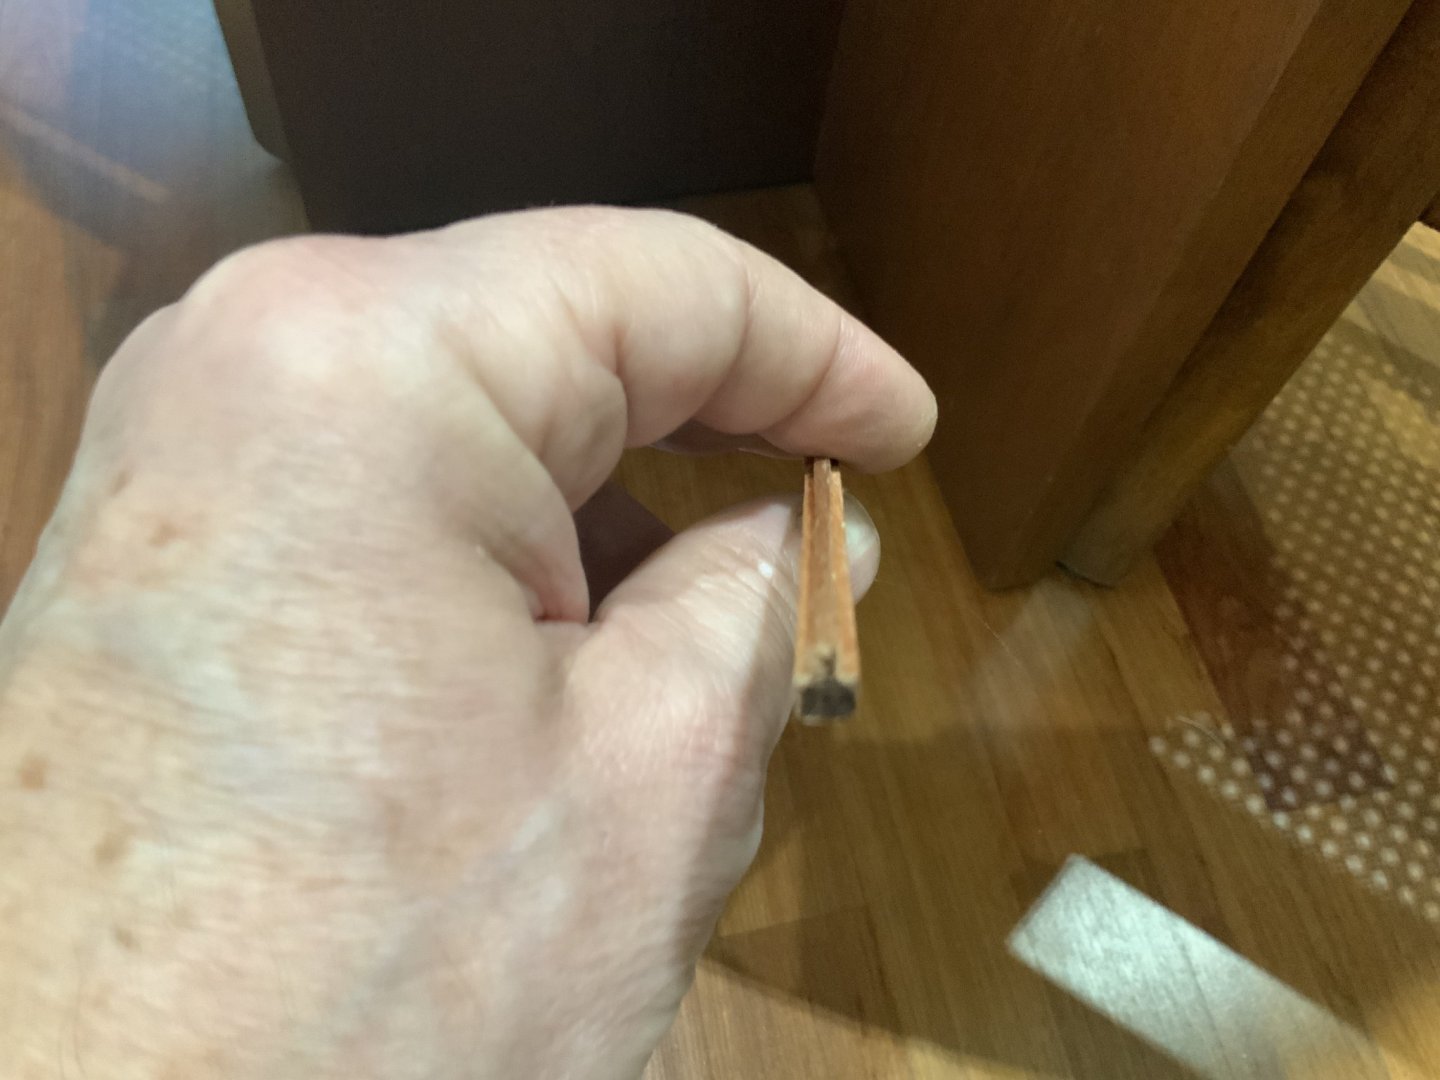
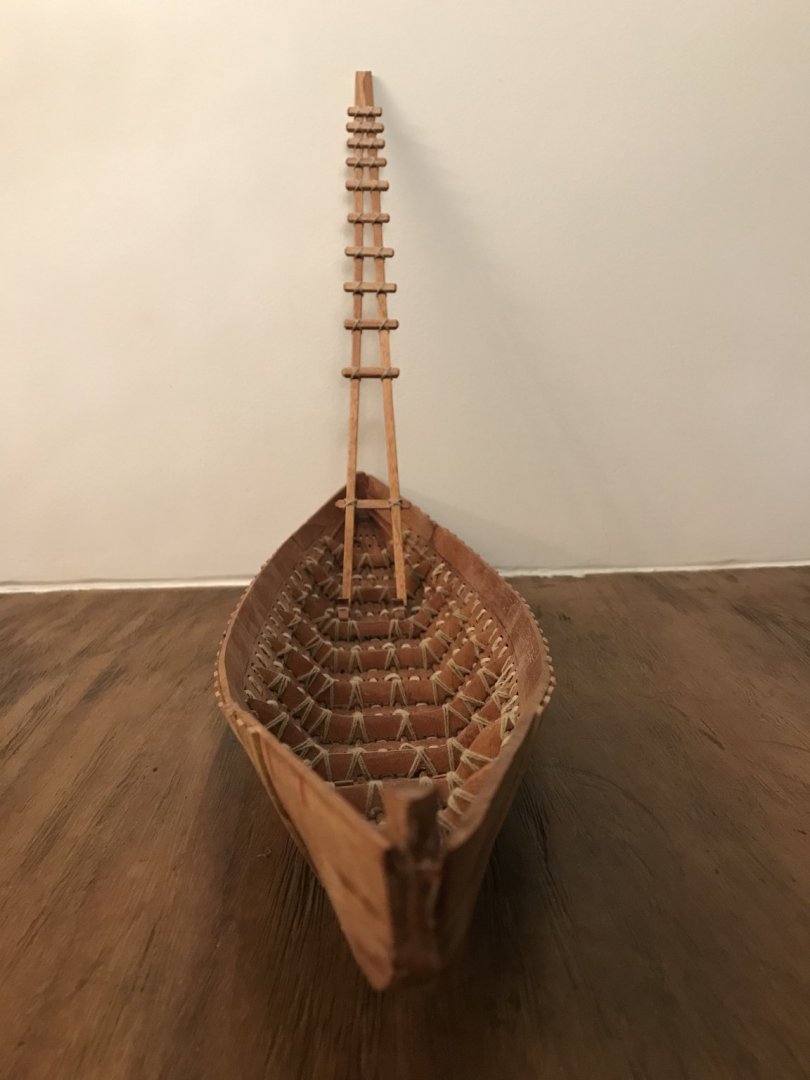
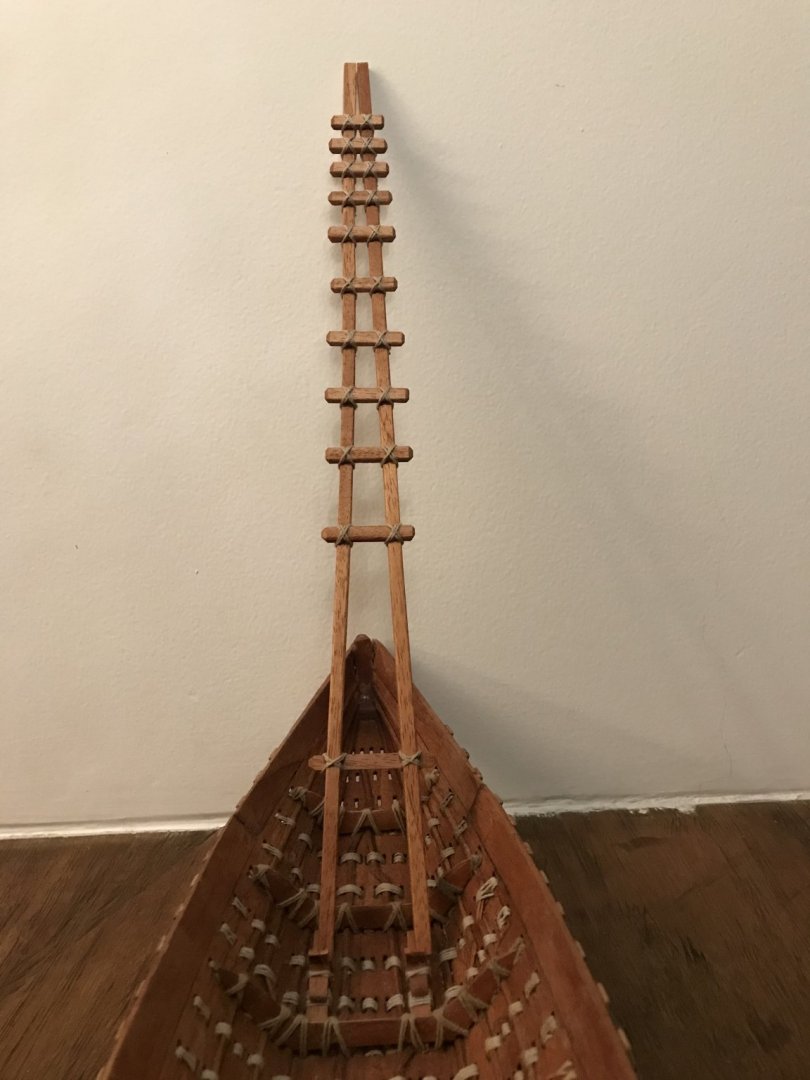
Let’s keep going.... The little “columns” that fix the girder to the hull through the frames are in place..... The poles for the hugging-truss and mast raising system are in place... I started to fix the beams to the hull...... they are supported by the girder and tied to the hull.... We are going to install first these beams.....they are the “end” of each deck section.... Same thing with the bow pole with the “eye of Horus” ........

- 158 replies
-
- 12
-
-
- byblos ship
- Egyptian
- (and 1 more)
-
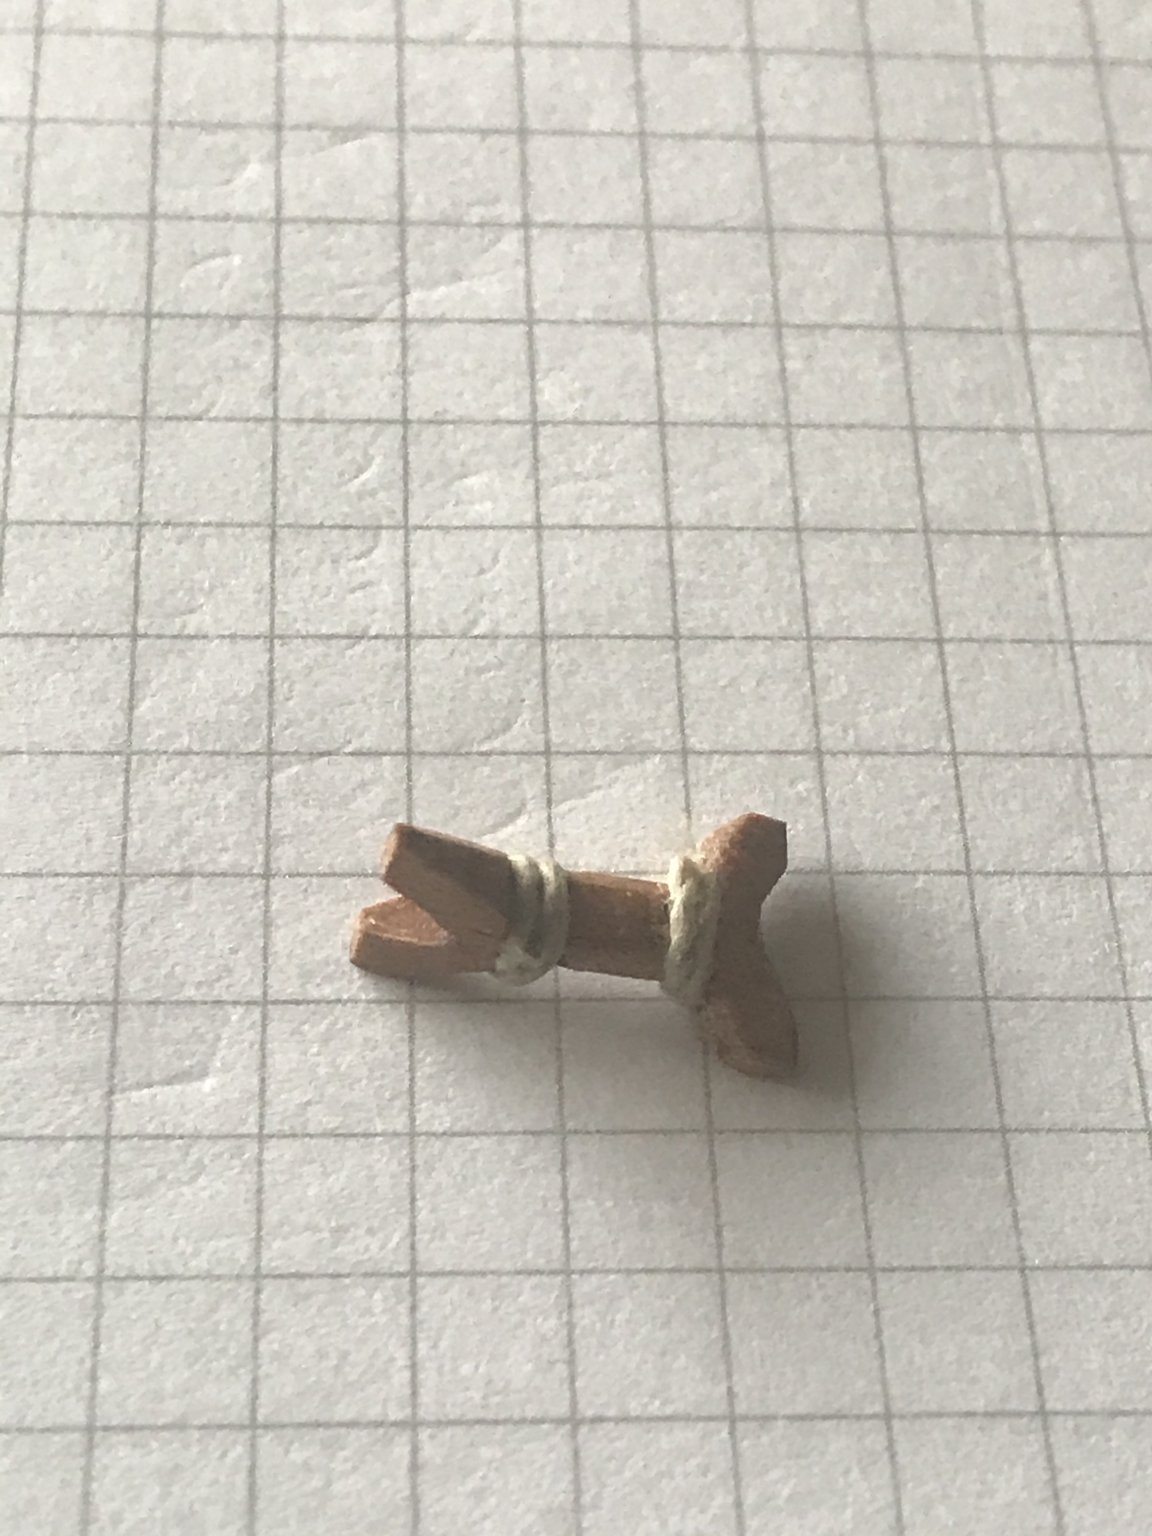
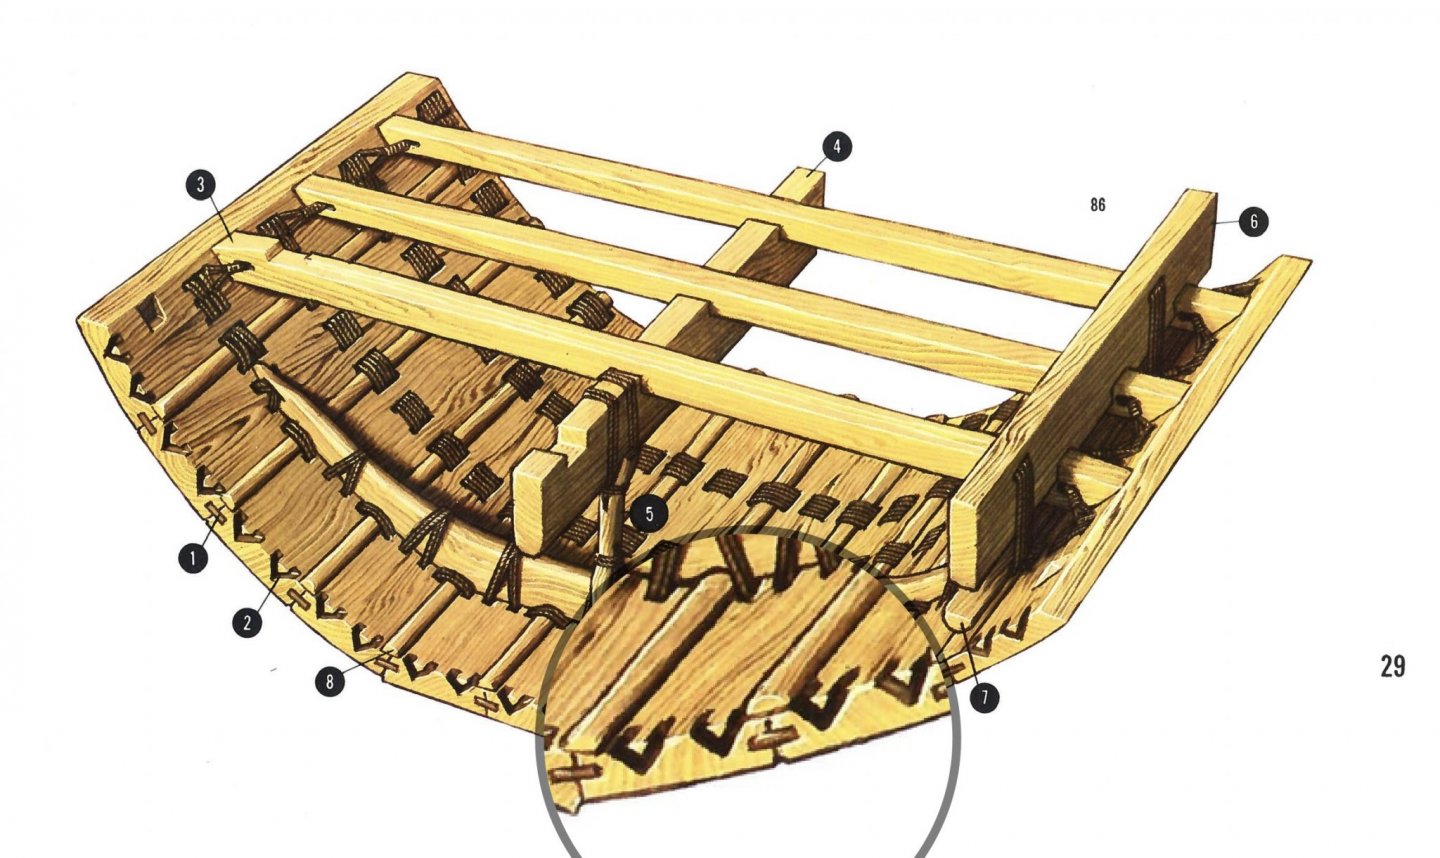
In the real life the planks had some “V” channels internally. They were so thick ...... there were no doble planking. This is only for “model construction “ purposes, since the scale is not allowing to make those “v” channels..... in other books they mention that they put papyrus and animal grease in the joints

- 158 replies
-
- 4
-
-
- byblos ship
- Egyptian
- (and 1 more)
-
Thank a lot Pat people following this log is forcing me to do a job that keep their attention on it i’ll do my best
- 158 replies
-
- 2
-
-
- byblos ship
- Egyptian
- (and 1 more)
-
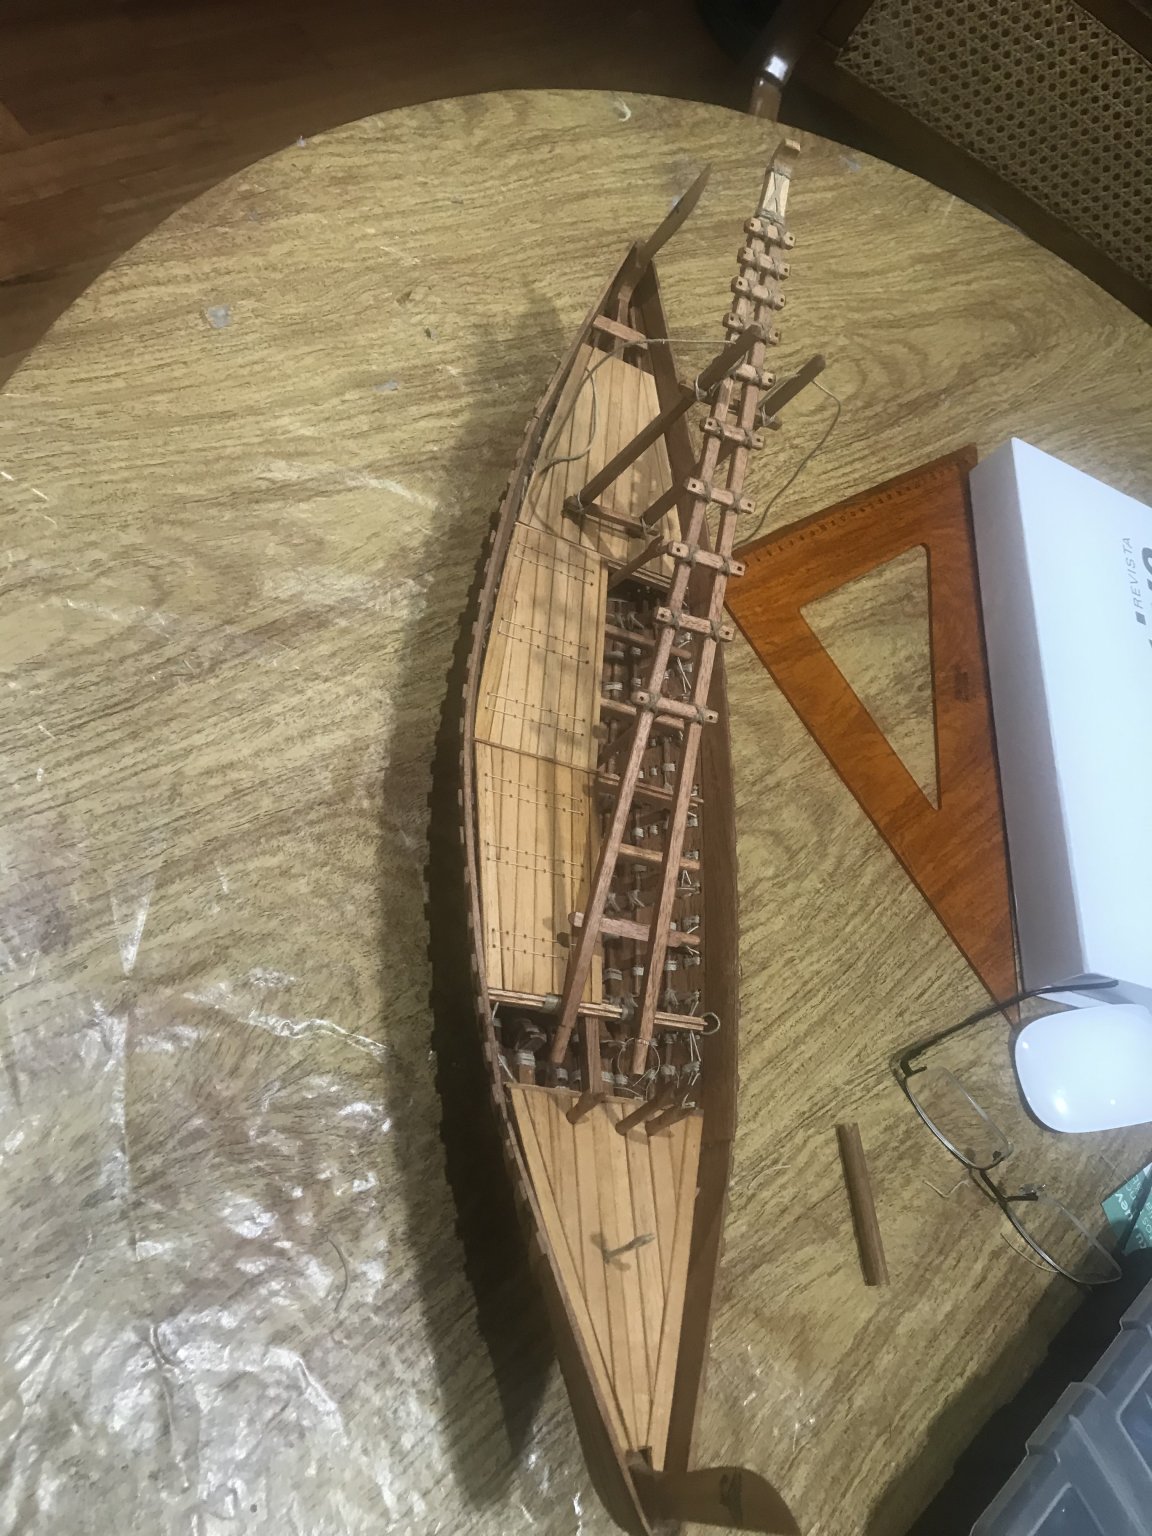
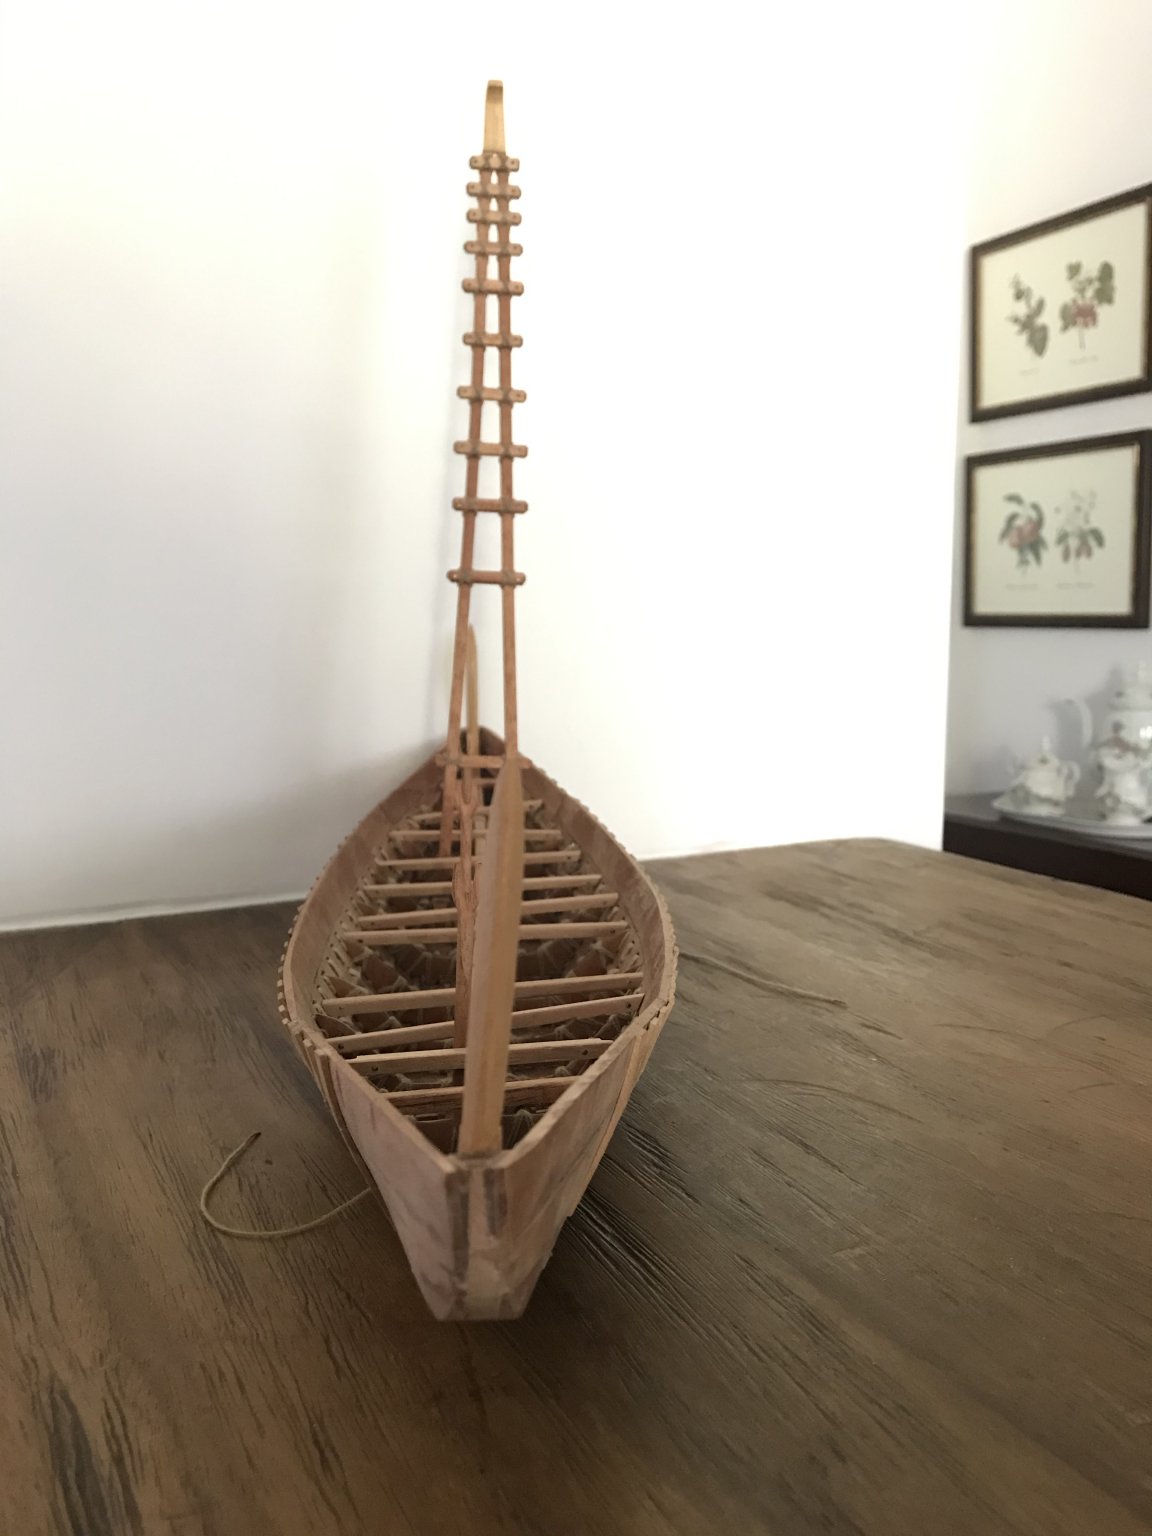
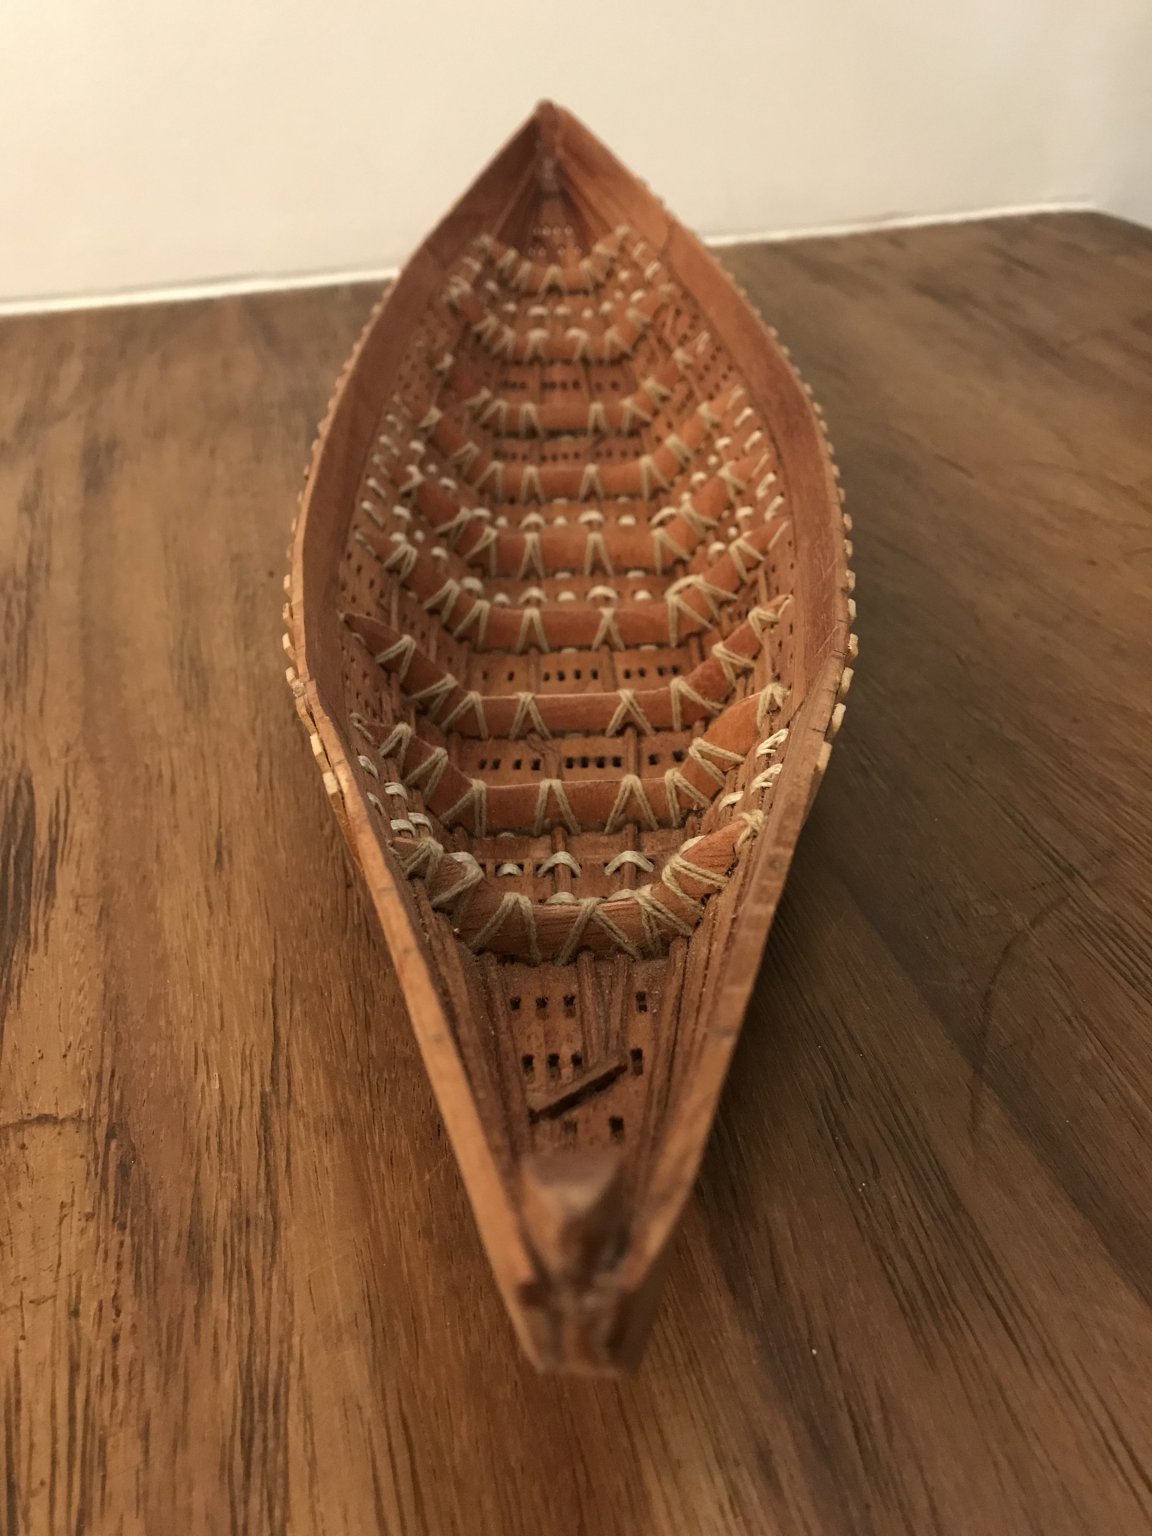
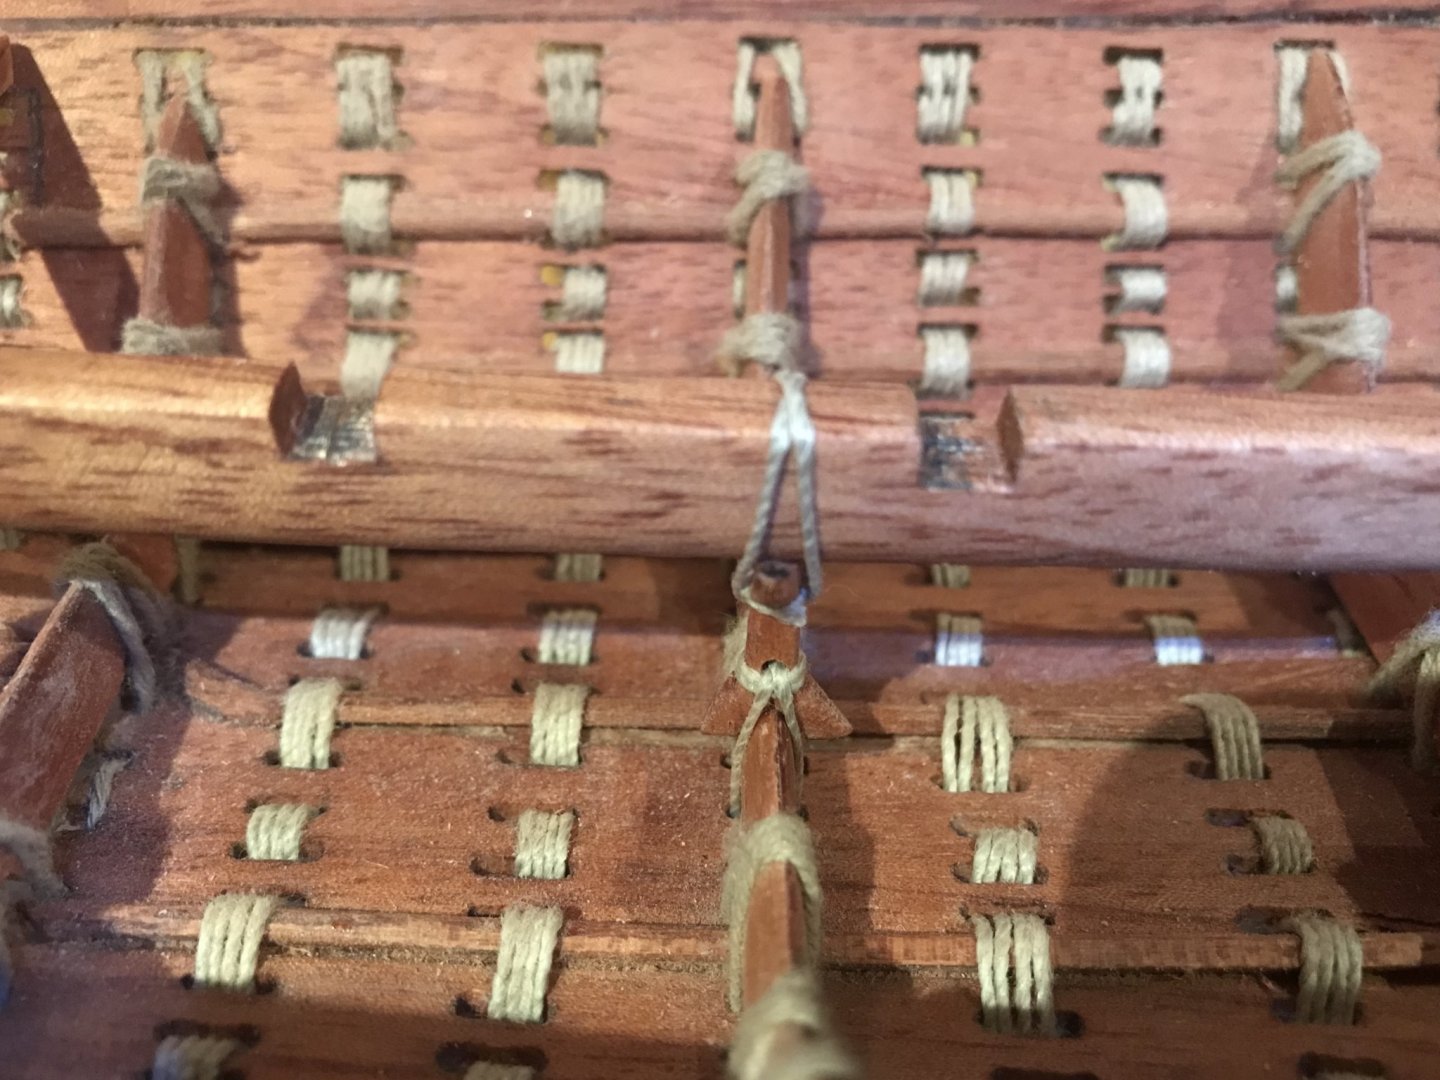
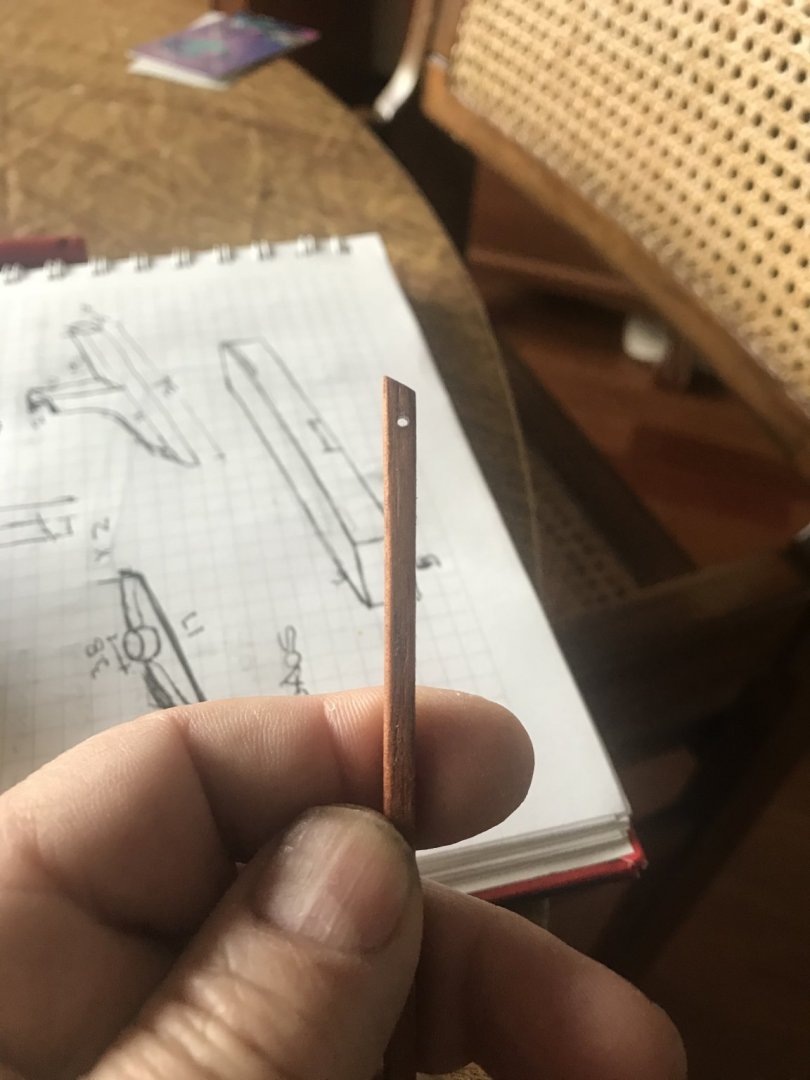
I want to give an update...... Let’s keep in mind this “famous” picture.... It is time to start with the central beam or girder .... according with the investigation this is the equivalent to the keel. It is its predecessor..... it was among the Hugging-Truss, the elements that kept the hull with this form and gave to it the strength..... In this case, the beam was convex and in order to give it the right form I needed to tie it up to the hull. Thanks to God I had a lot of holes to do it.... 😀 I did it before the deck beams. It gave me the “exact” position for them..... They have a little holes in both ends, that is the way they wil be tied to the hull..... Also the Bow-Stern “poles are made..... I choose different wood in order to “kill” a little bit the monotony.....


- 158 replies
-
- 10
-
-
- byblos ship
- Egyptian
- (and 1 more)
-
Is a process with a lot of try and error...... I use to repeat all those pieces that at the end I don’t feel “good” with. That’s why some times I take a long time to make posts. But thanks a lot for being in the bench. Let’s see how this adventure is going to “THE END” 😀
- 158 replies
-
- 1
-
-
- byblos ship
- Egyptian
- (and 1 more)
-
What a quality job!!!! I am really impressed. This is other that is in my Santa Claus wish list.
-
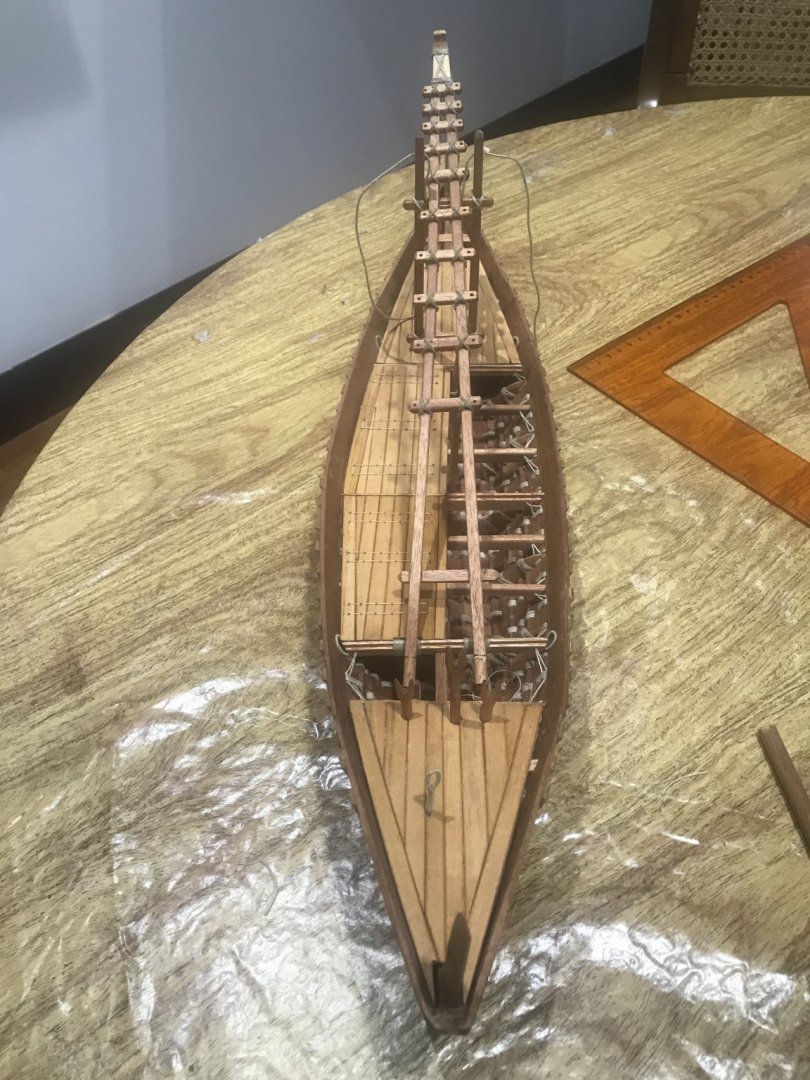
Let’s continue with our project..... To finish the sewed process in the hull, we need to fix the “skates” that will receive the mast...... And.... the mast....
- 158 replies
-
- 13
-
-
- byblos ship
- Egyptian
- (and 1 more)
-
Your ideas and investigation have helped me a lot. thanks George.
- 81 replies
-
- 2
-
-
- egyptian
- byblos ship
- (and 1 more)
-
Good Job and really well illustrated. I’ll follow from now for iron nails you can use sewing pins and blued Let me show you a picture

-
Thanks!!!!
-
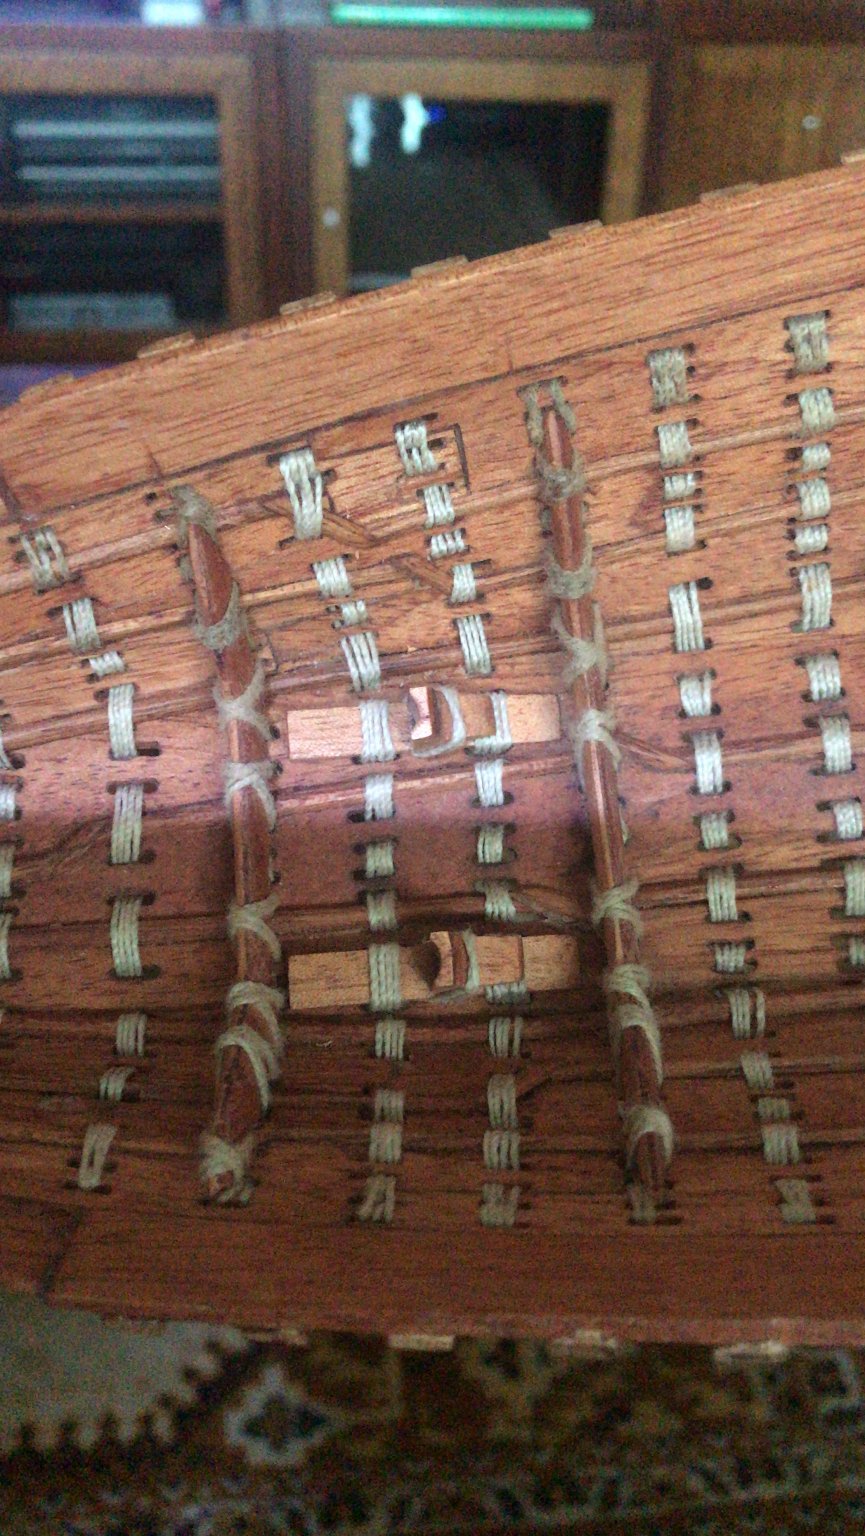
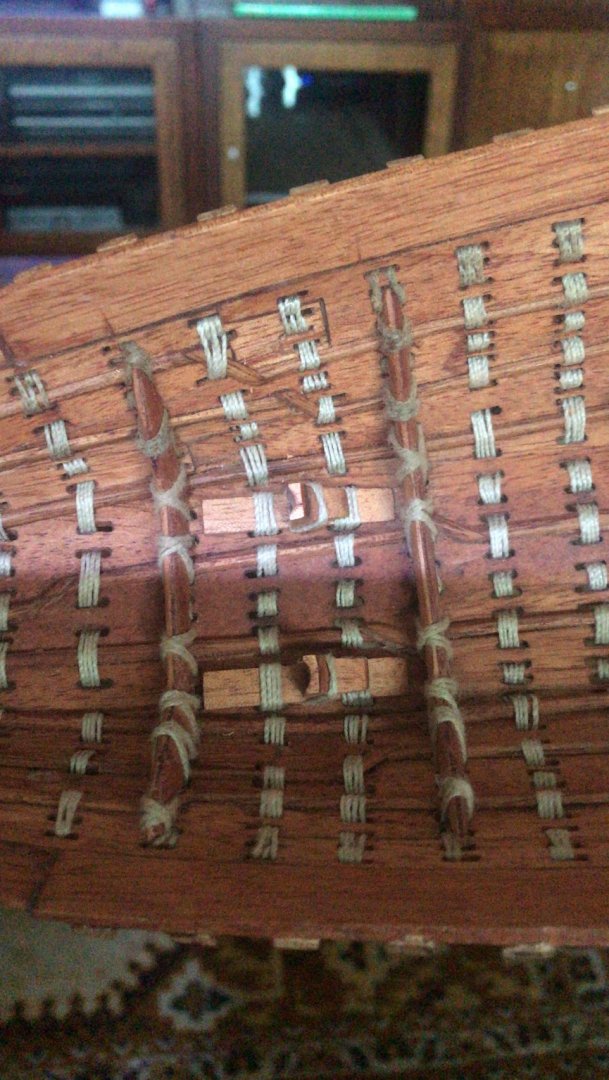
Let’s see the backside of the hull..... there we can see the idea I was trying to explain

- 158 replies
-
- 9
-
-
- byblos ship
- Egyptian
- (and 1 more)
-
Really It was not just my idea. Vladimir Herrero made de Cheops barge some years ago. He had the same idea. I just took it and improved a little ..... build first the inner hull finally no channels. I put some reinforcements that made two functions.... reinforce and “channel” thanks a lot for your kind words
- 158 replies
-
- 2
-
-
- byblos ship
- Egyptian
- (and 1 more)
-
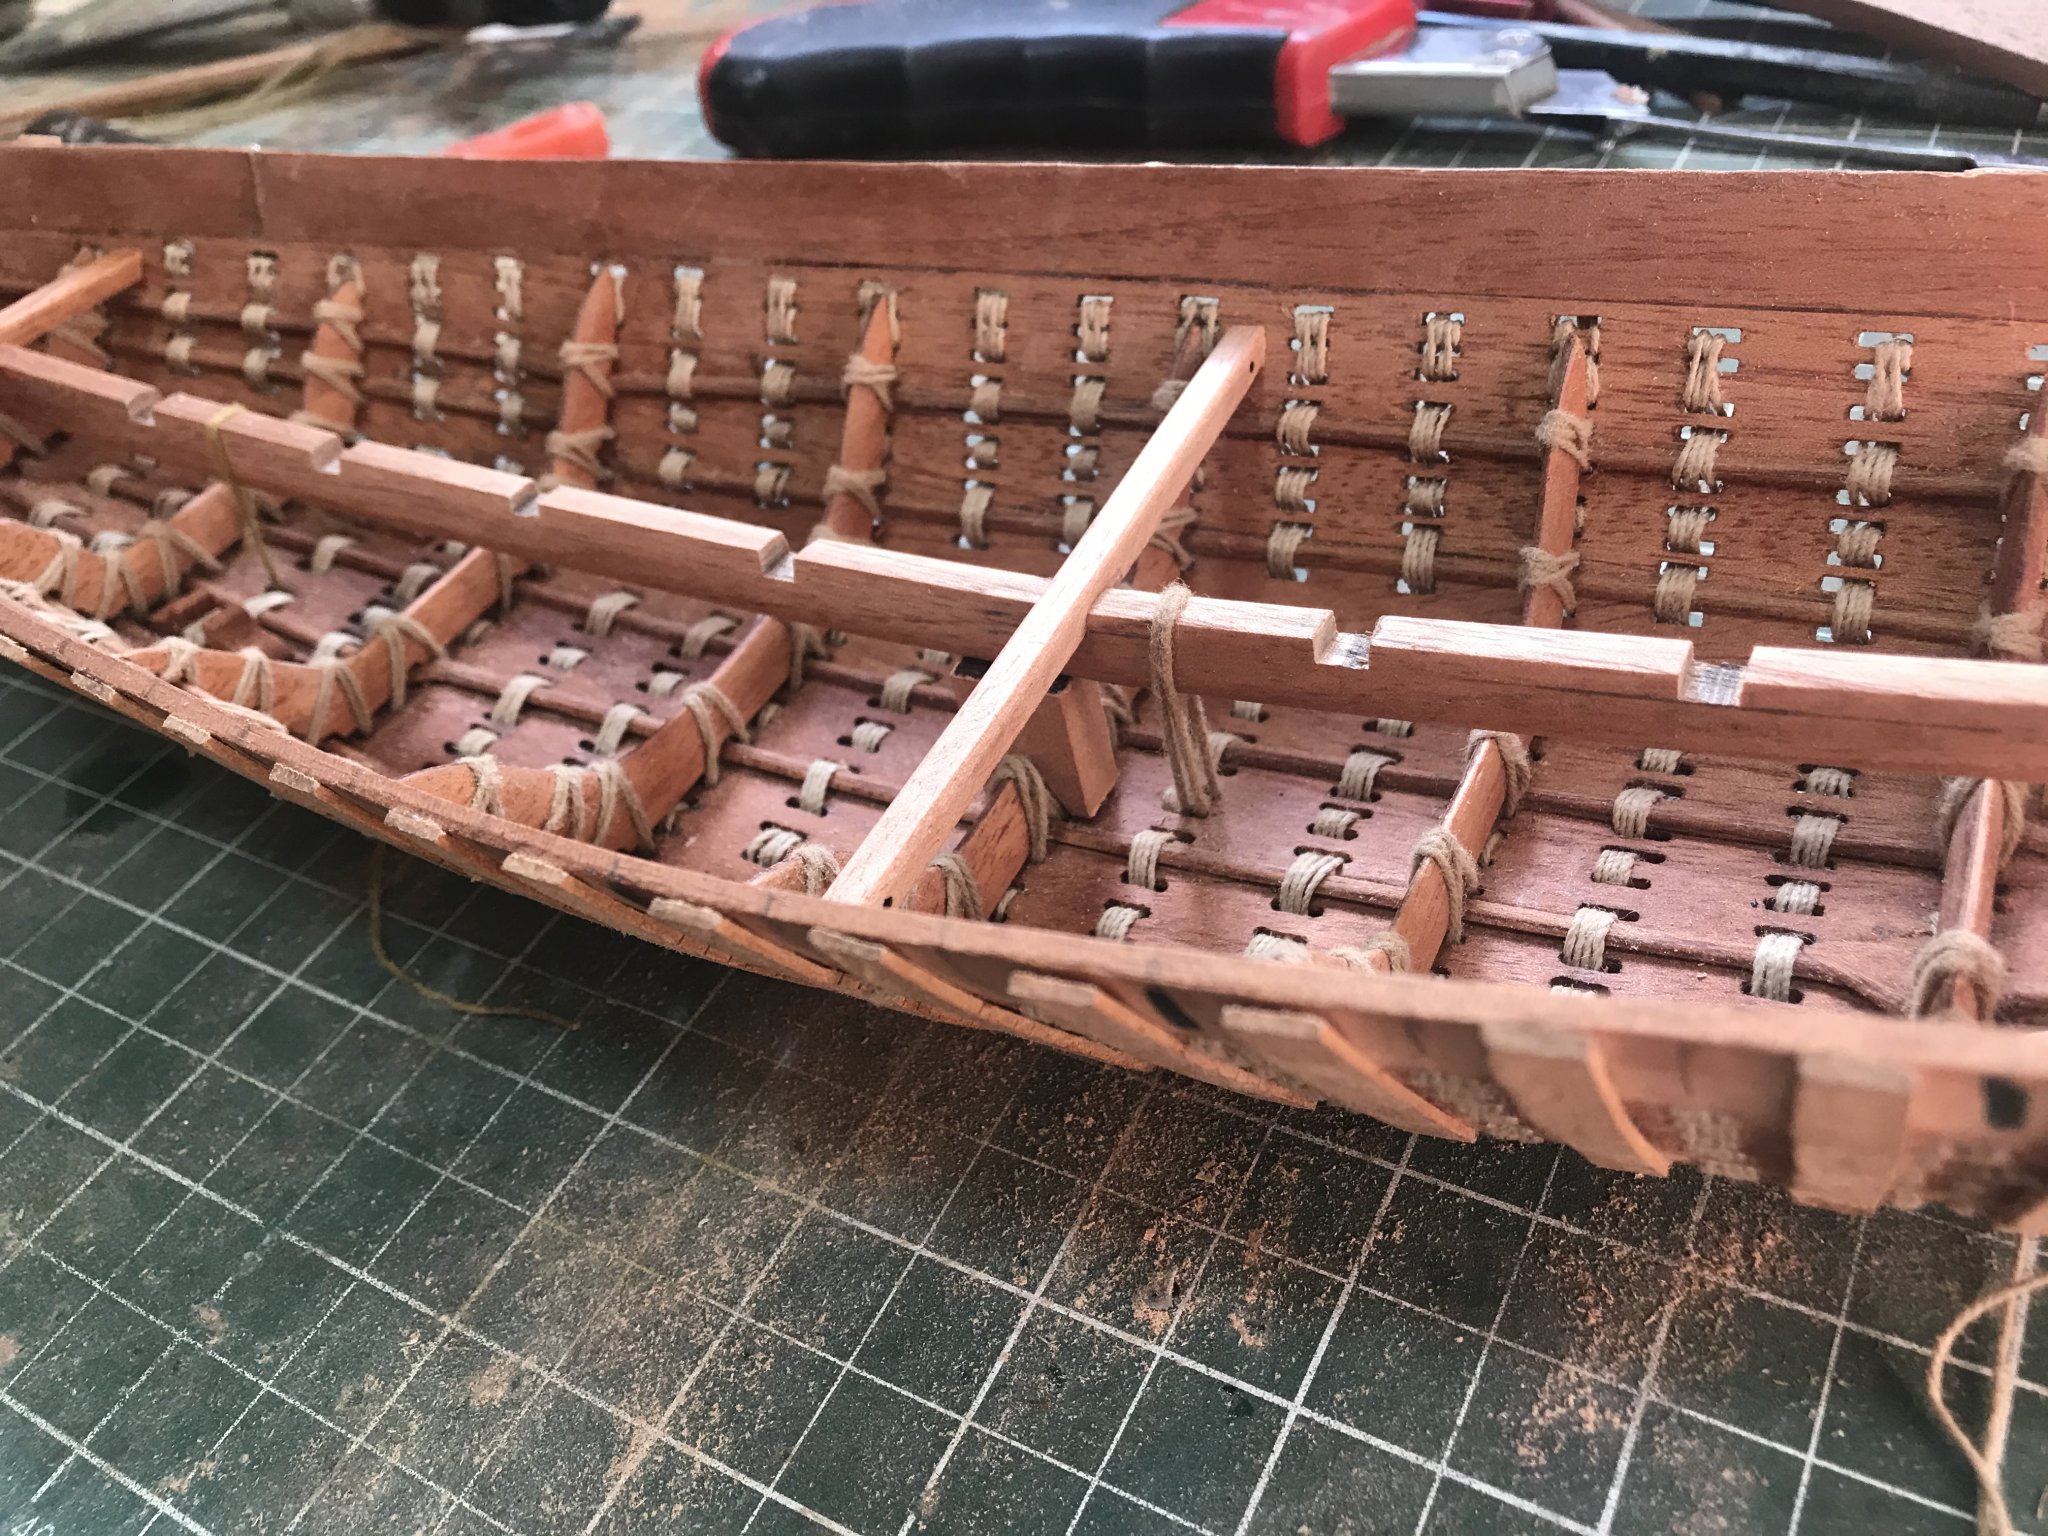
Now.... all the frames in their places........ planks being sewed...

- 158 replies
-
- 16
-
-
- byblos ship
- Egyptian
- (and 1 more)