Schrader
-
Posts
304 -
Joined
-
Last visited
Content Type
Profiles
Forums
Gallery
Events
Everything posted by Schrader
-
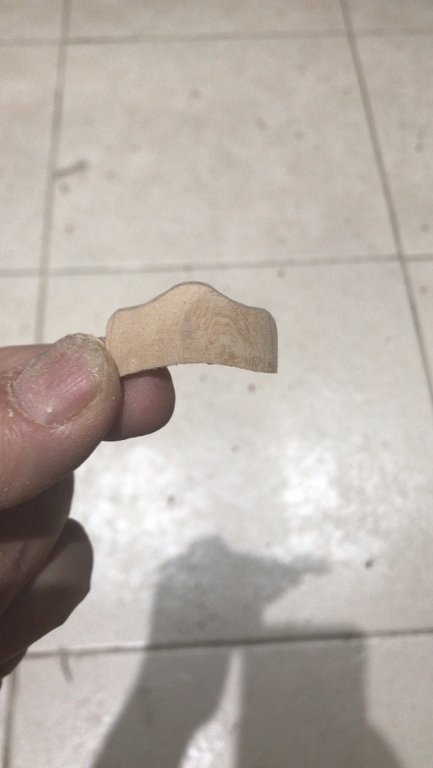
 This "Falua" has a little shield in the back side of the rudder (?? is this the right word?). Its form is curved. So to fix it, I went attaching to pieces of basswood and made the cuts. With the cylinder sanding tool I gave it the curve form Attached to its place
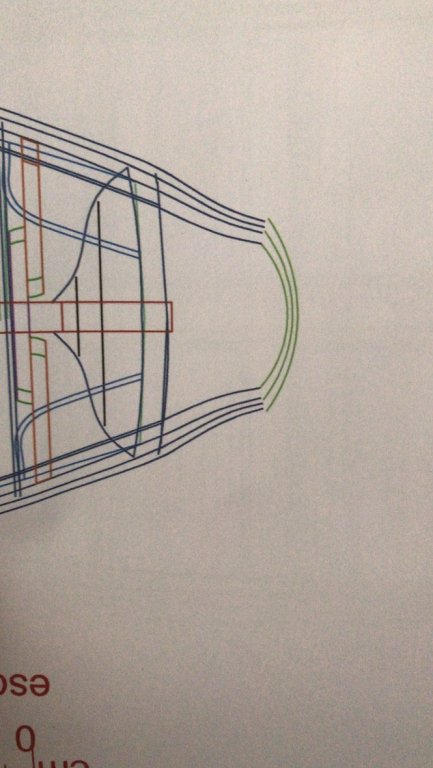

-
This is the final result including the little top with hinges that eventually work!!!!!

-
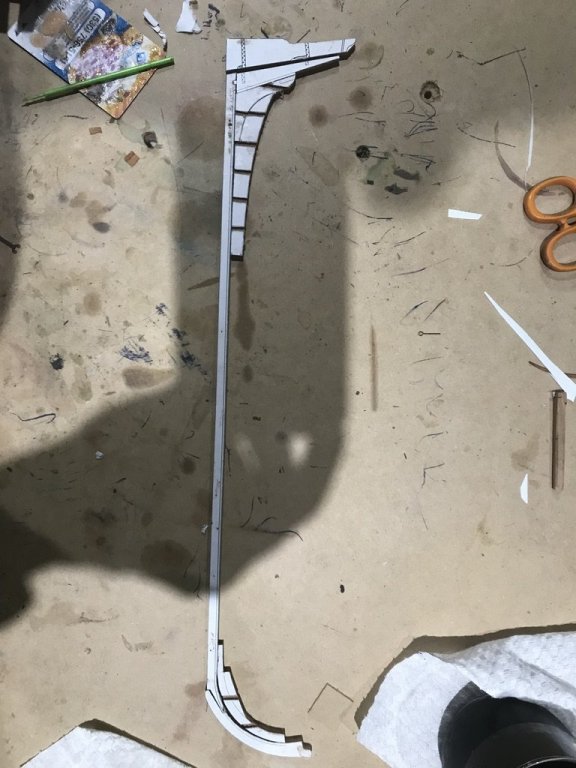
Let's start with the stern benches. These have an special form. So I decided to build like a "mold" I duplicated them, creating a back support for the little placks. Using the same template, I built the top of them


-
But...... Not everything is going smooth....... I found this big mistake This need to be corrected. With Heat, water and a little vises ...... this was the result
-
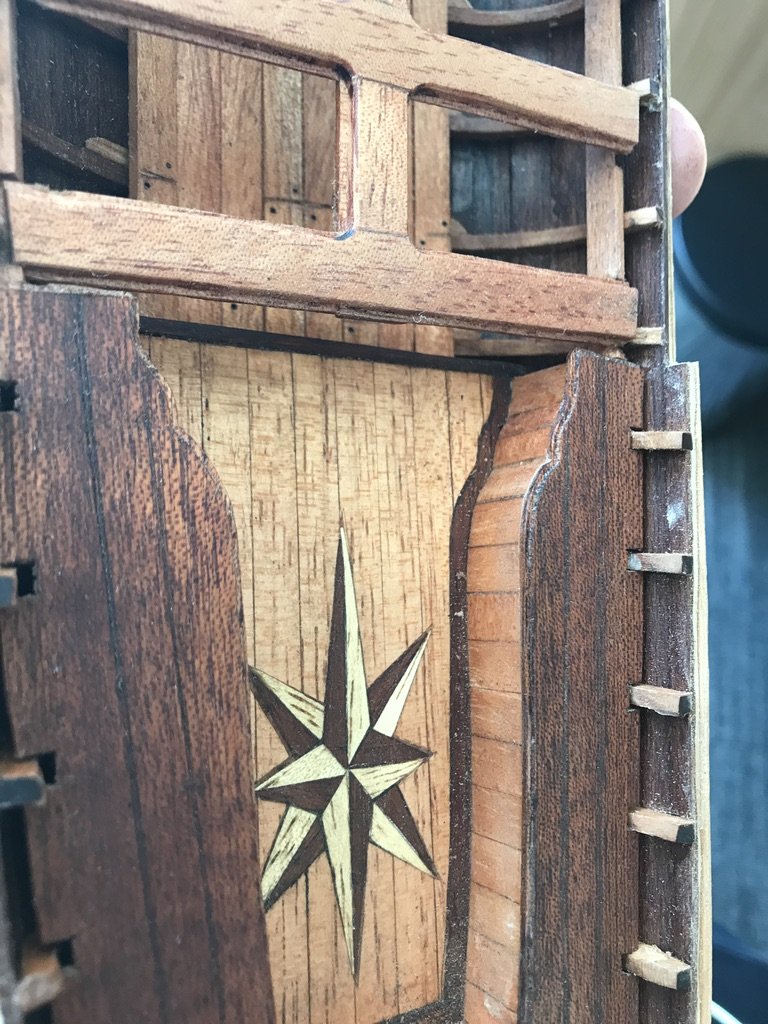
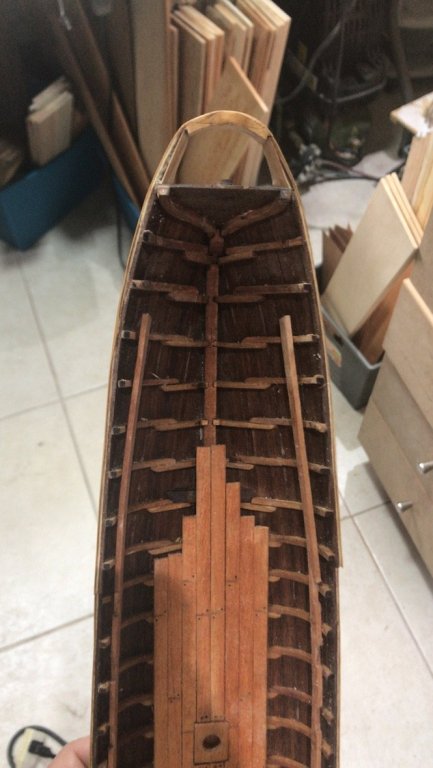
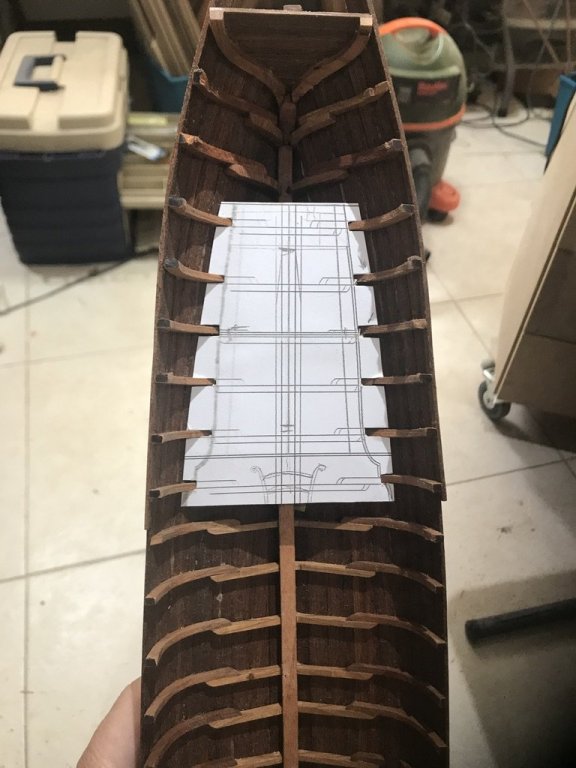
Yesterday I started to work in the different floors. The stern floor Two important messages The boat reality is different to the plans The decoration according with this reality is out of scale. THEN...... this job need to be repeated.
-
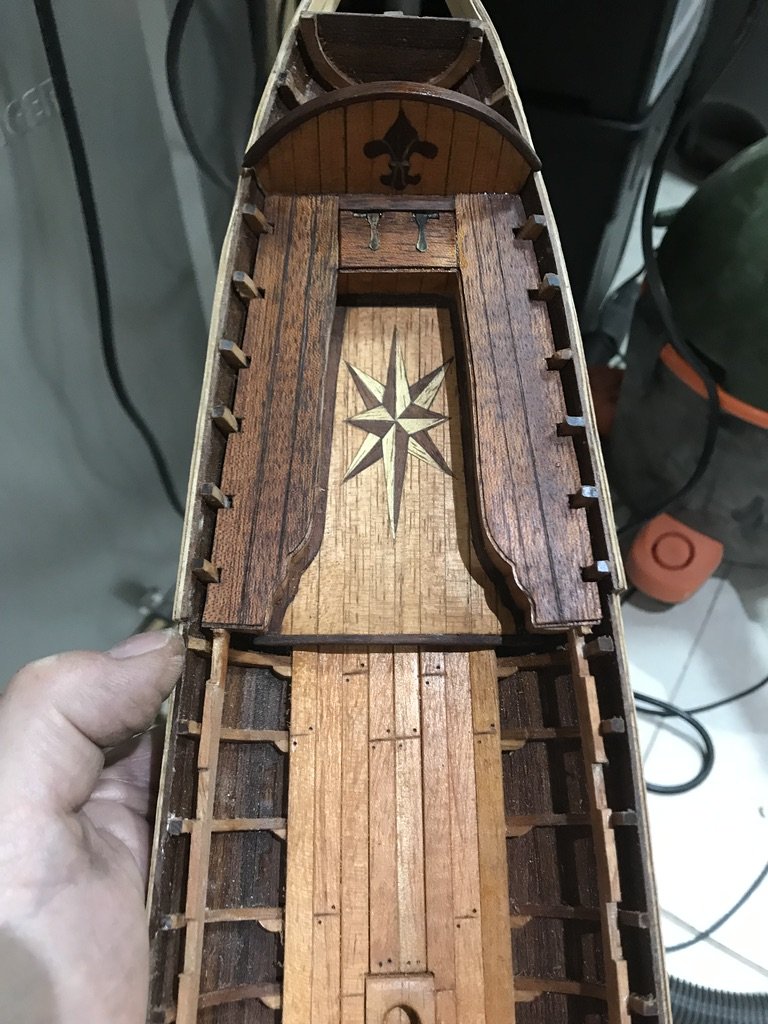
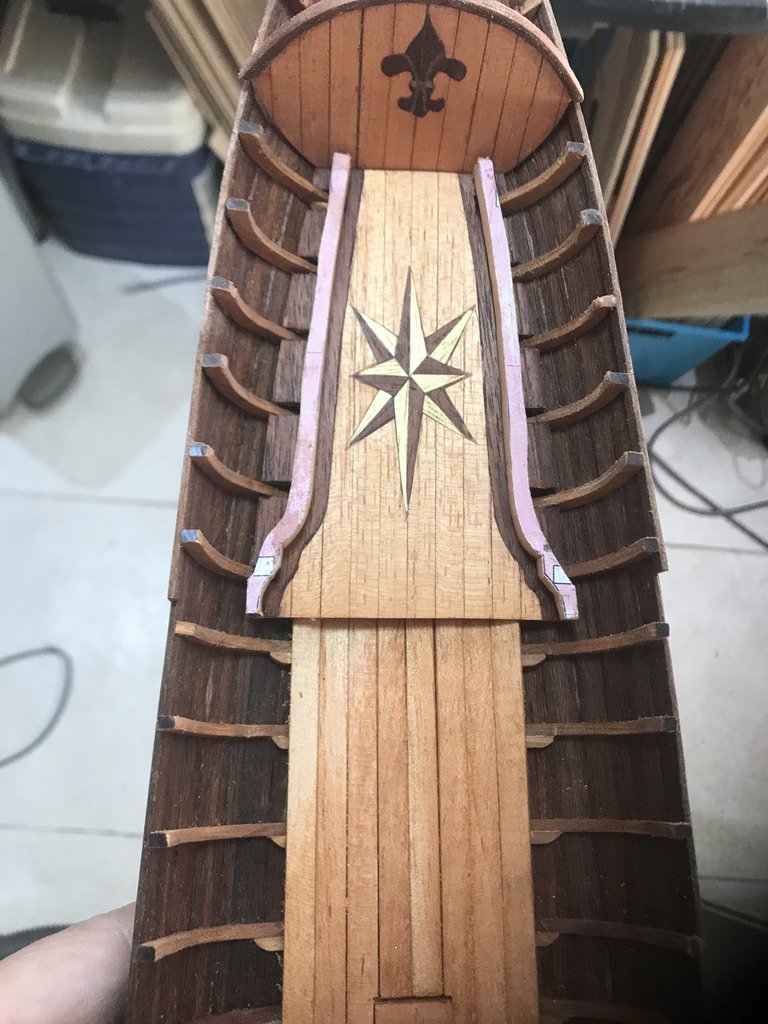
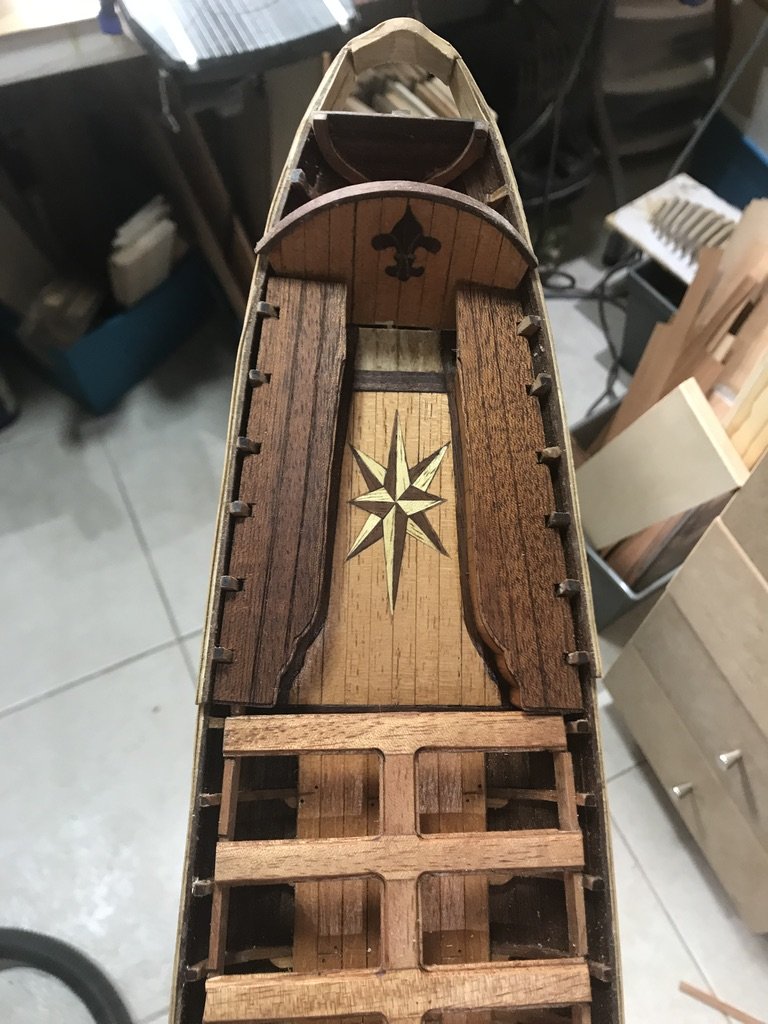
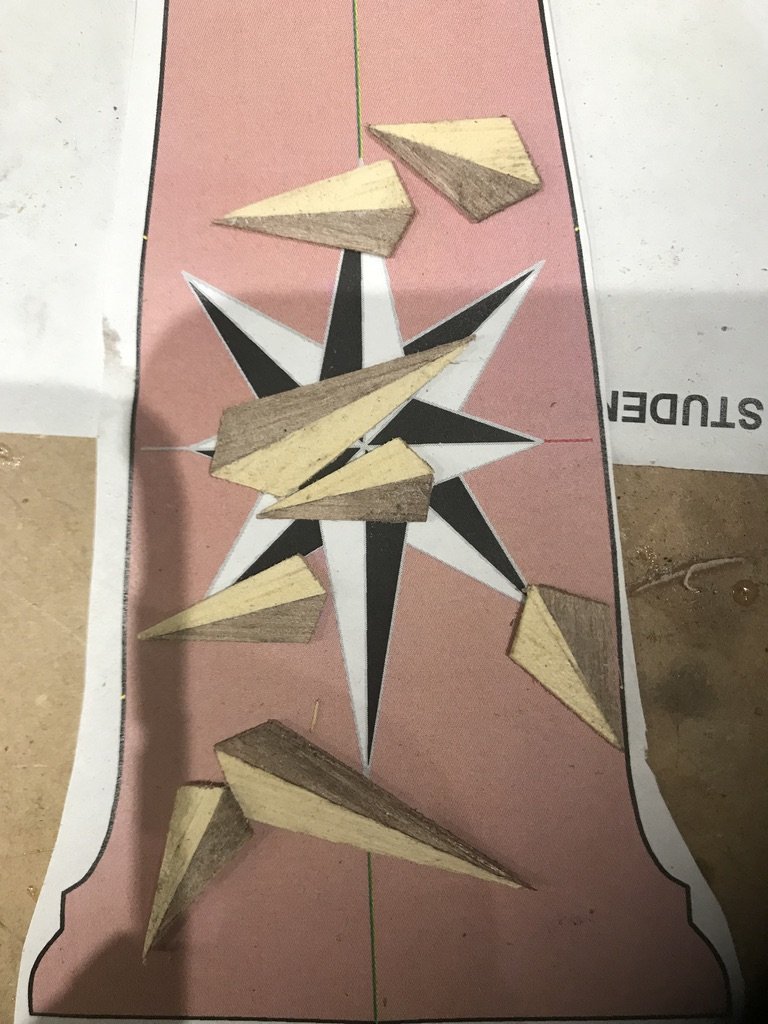
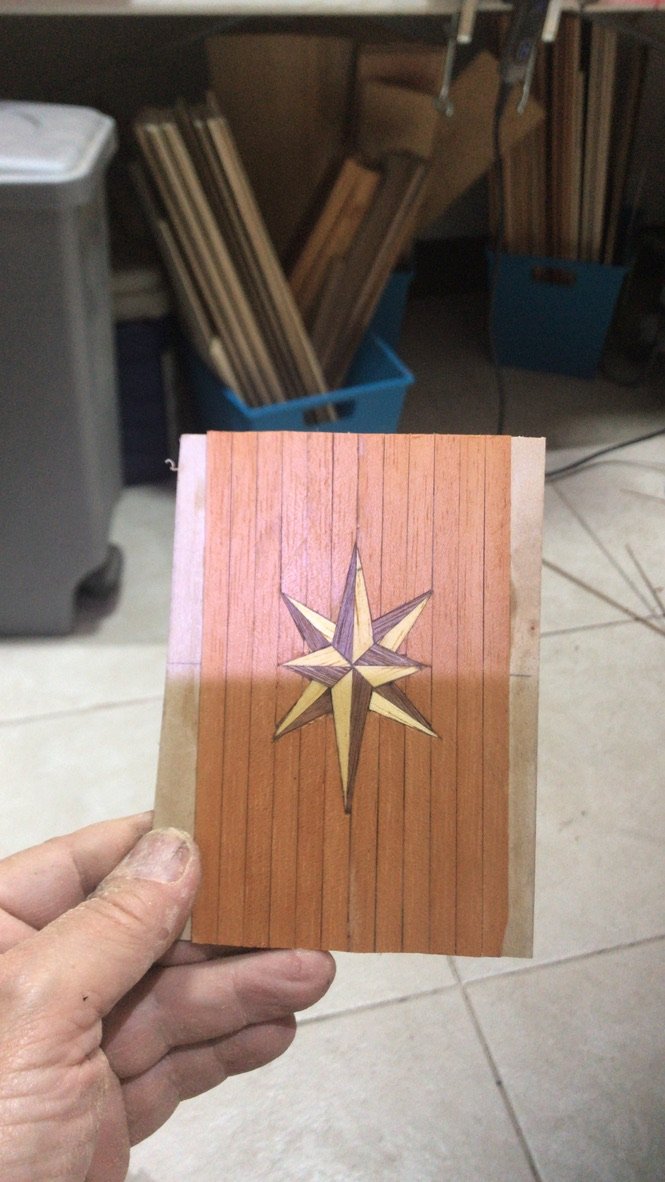
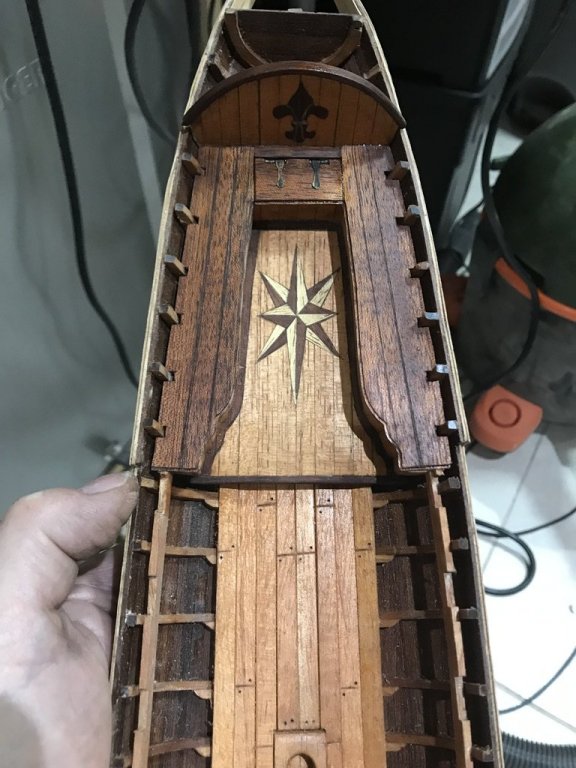
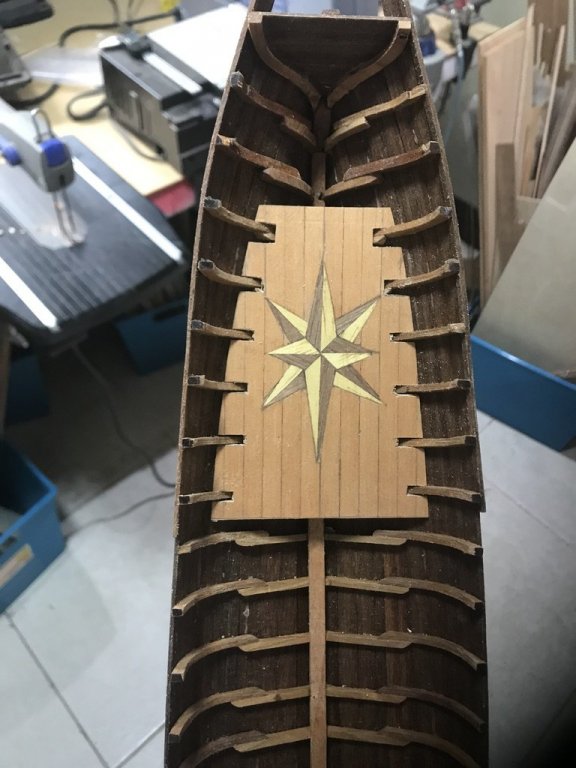
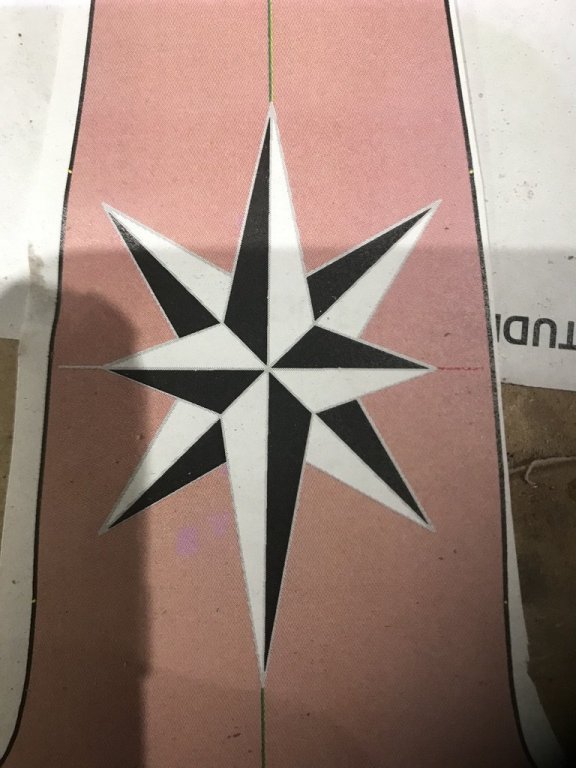
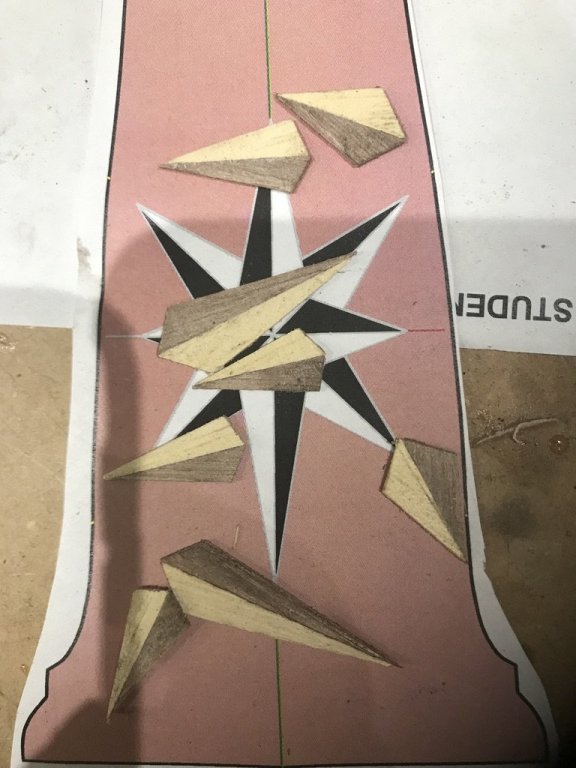
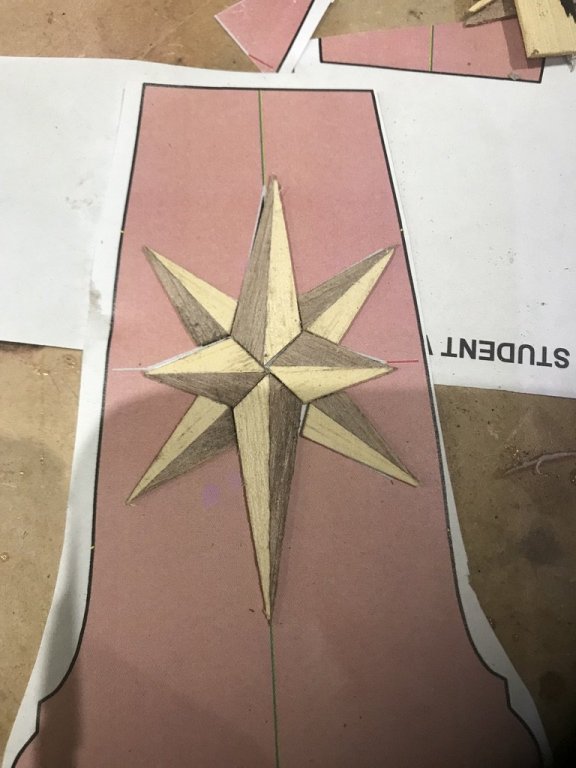
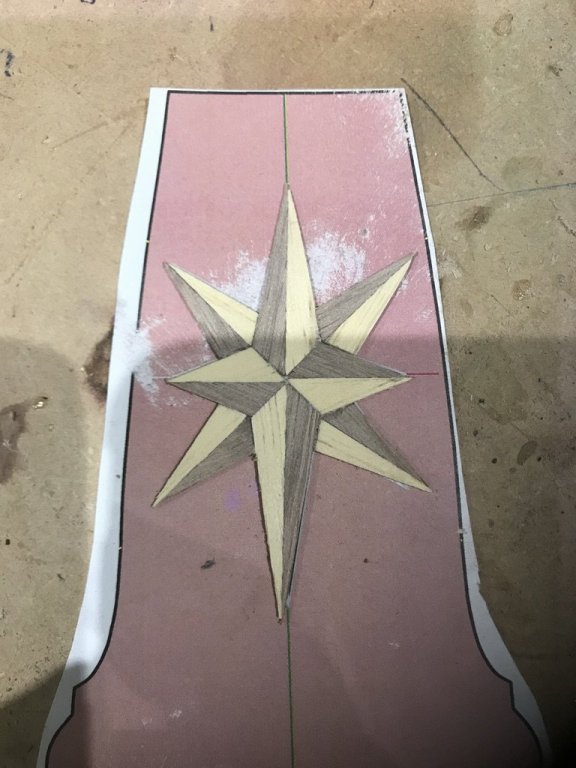
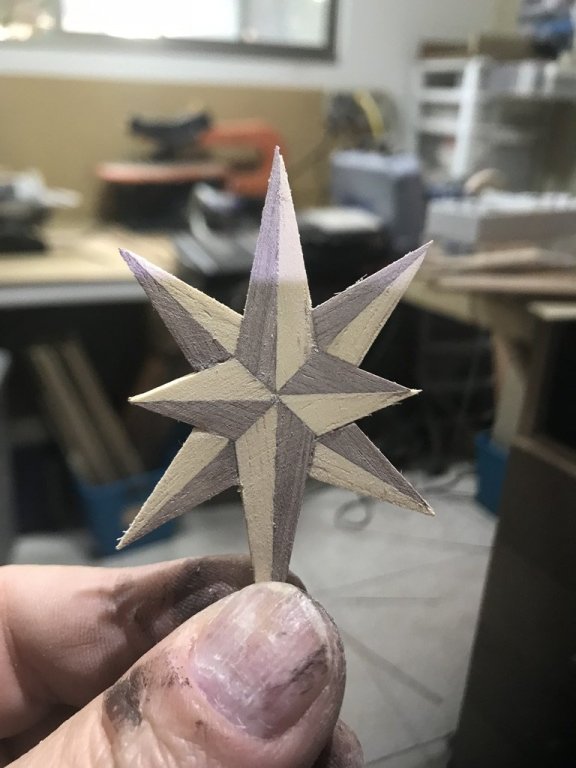
Finally, copying the Jose Collado idea, I decided to work in the stern/officials floor. Introducing a Compass Rose. For this effect, I decided to go after a "parquet" method. 1. I took basswood and abarco. (tropical wood), and cut the triangles according with the mold 2. I arrange those triangles according to the mold 3. I glued them all 4. After, on a 1mm triplex I completed the floor with red cedar.... and this is the result

- 41 replies
-
- 12
-

-
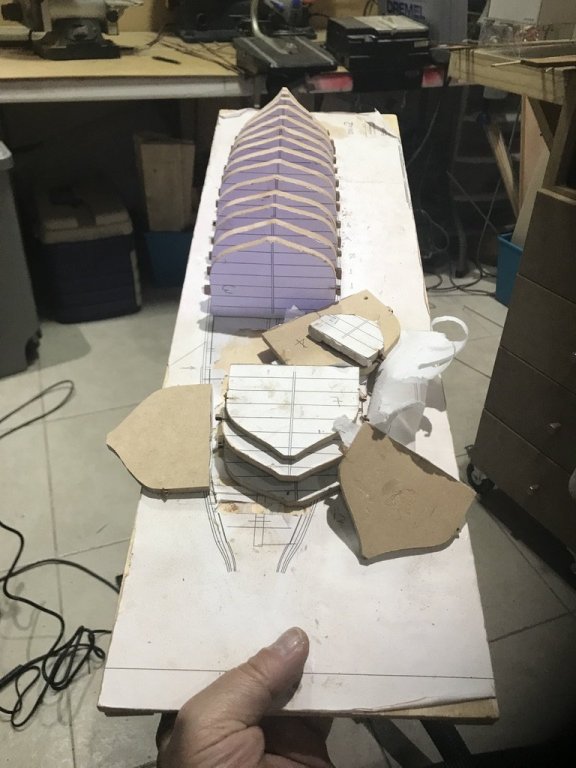
The unmolding process was a little hard, but at the end, just one frame suffered a little bit The false frames mold..... ended its life time
-
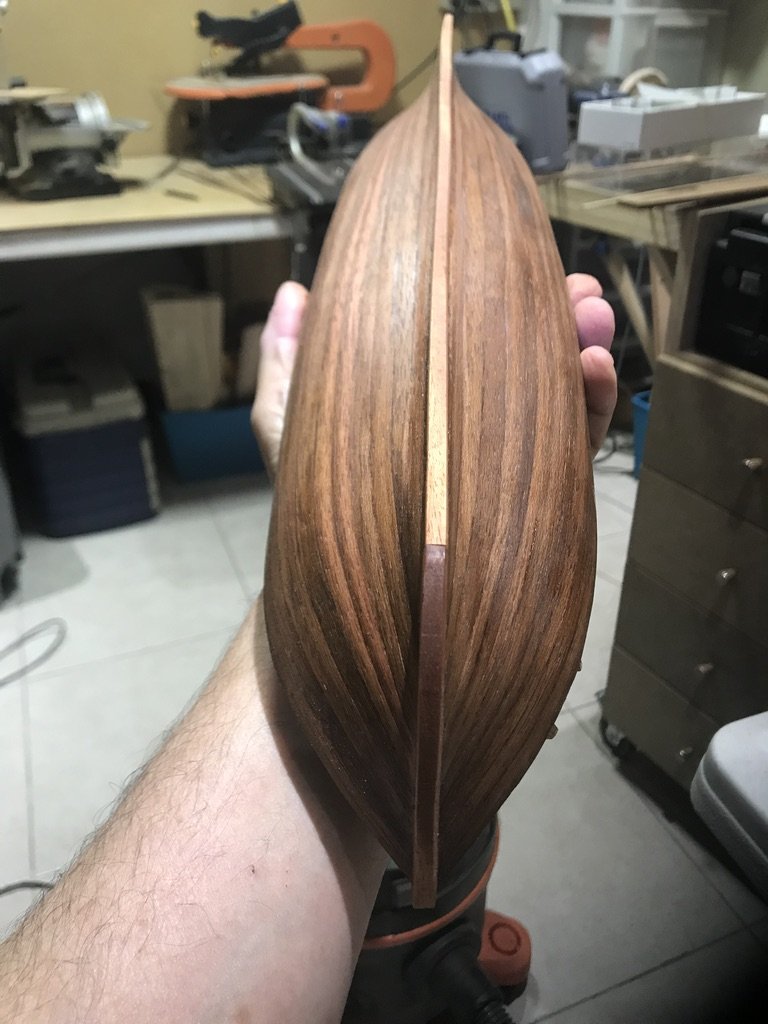
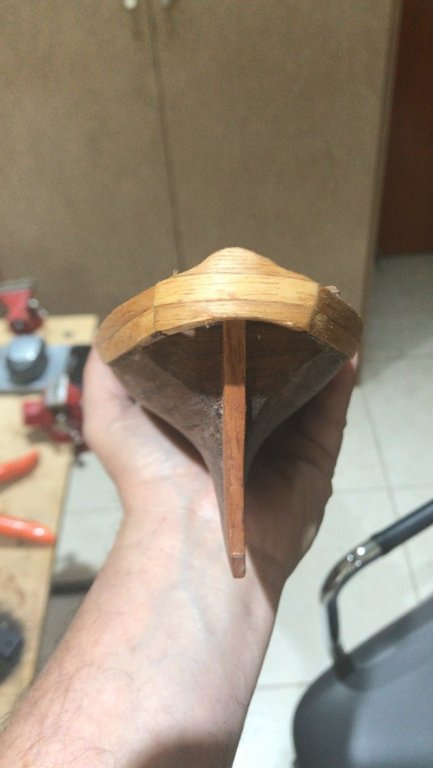
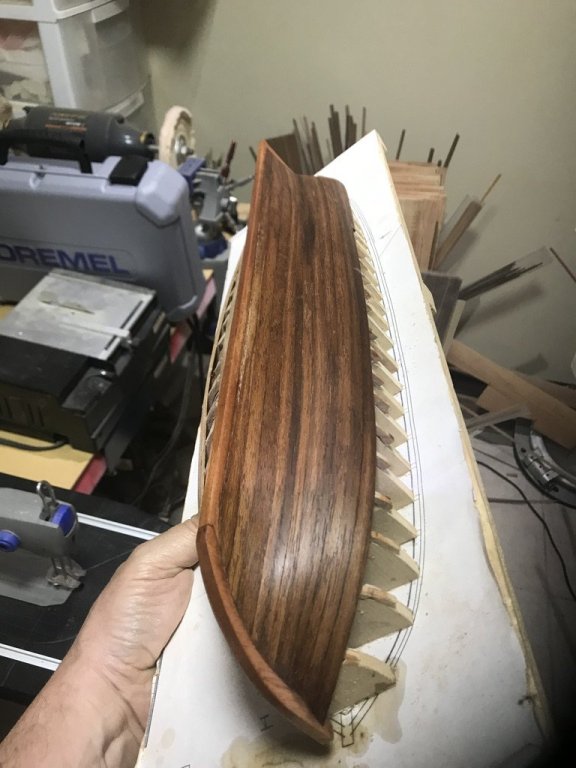
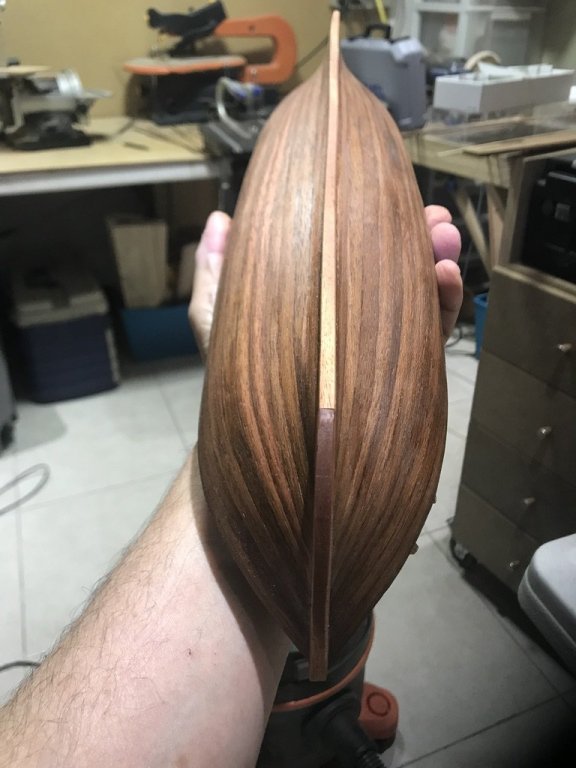
Here we are ...... During the week, I finally saw the light.. liked the wood color contrast. Since those are tropical woods, I had no idea how they would look like, after the danish oil. I really liked it. NOTE: The keel is in tropical mahogany which is more light and the hull is in tolua Last edited: 23 minutes ago
-
It looks wonderful!!!! I would like to have it
- 124 replies
-
- 2
-
-
- longboat
- Chaloupe Armee En Guerre
- (and 1 more)
-
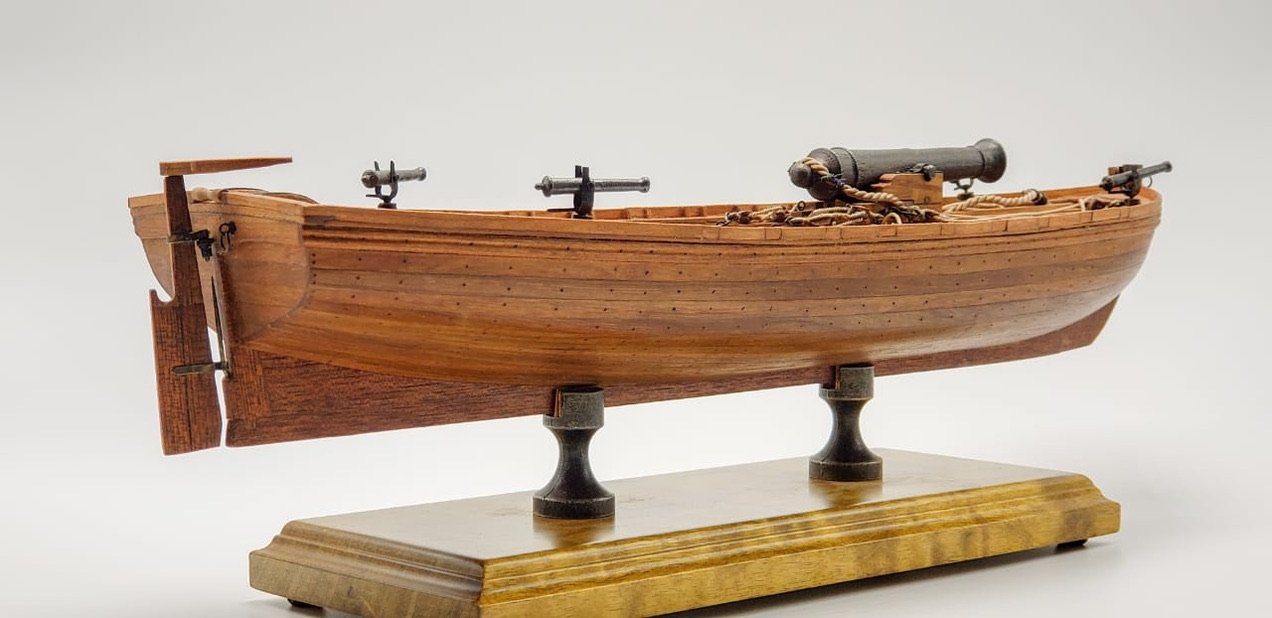
Tony I just want to share with you my final product. Feel free to ask me for whatever you need or want

- 124 replies
-
- 16
-
-
- longboat
- Chaloupe Armee En Guerre
- (and 1 more)
-
This was the 21st of March. One month learning what not to do the second time. So the second time I did my best to correct the mistakes .......... and I was able to catch up my work in very short period of time......the 27th of march I was like
-
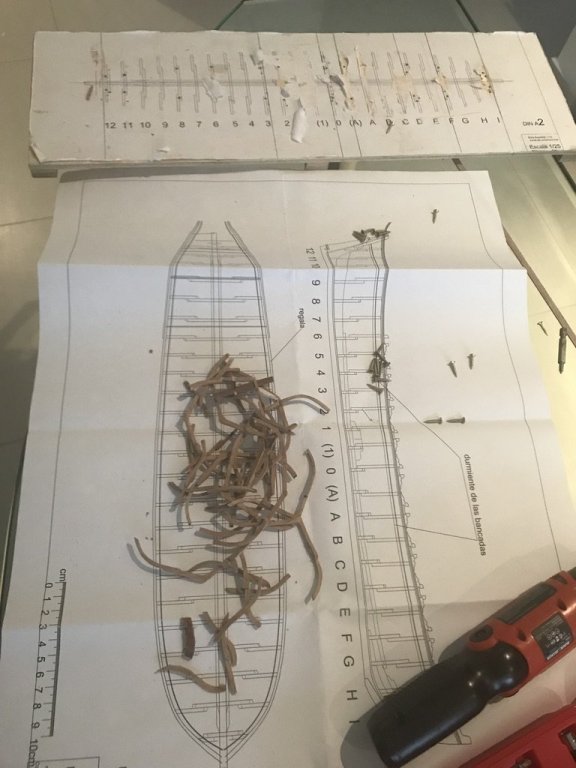
Then............CRASH...........I realized every thing was not right Wrong template Wrong alignment Wrong cut interpretation (plans) So....................I made a difficult decision ............ START OVER
-
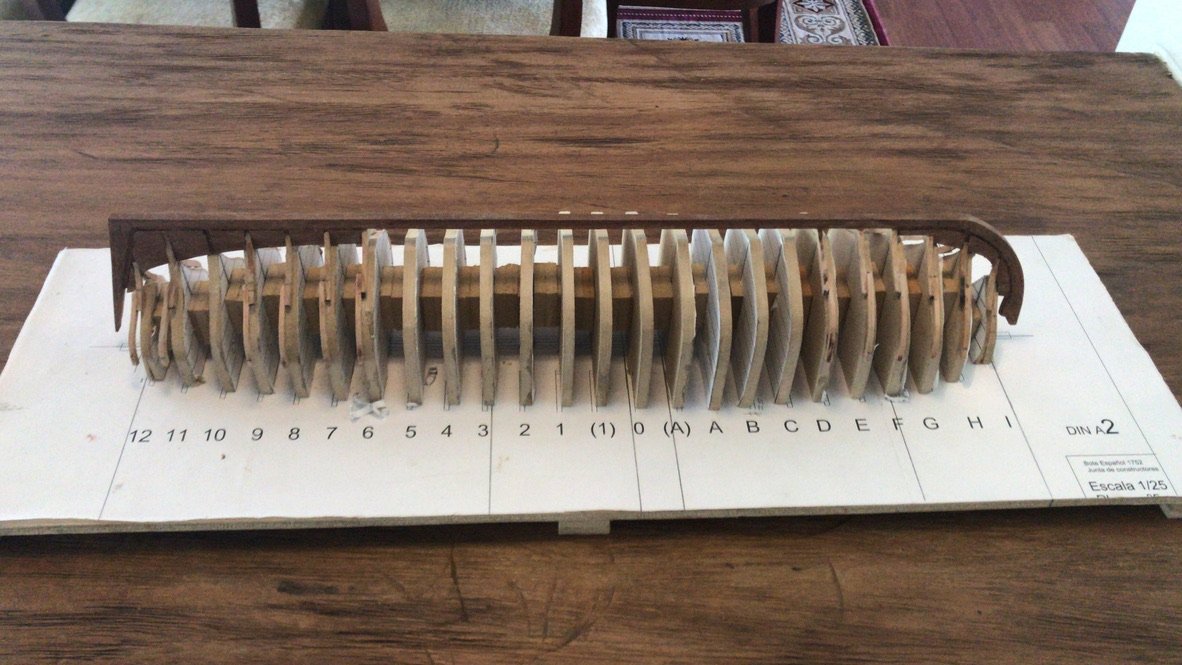
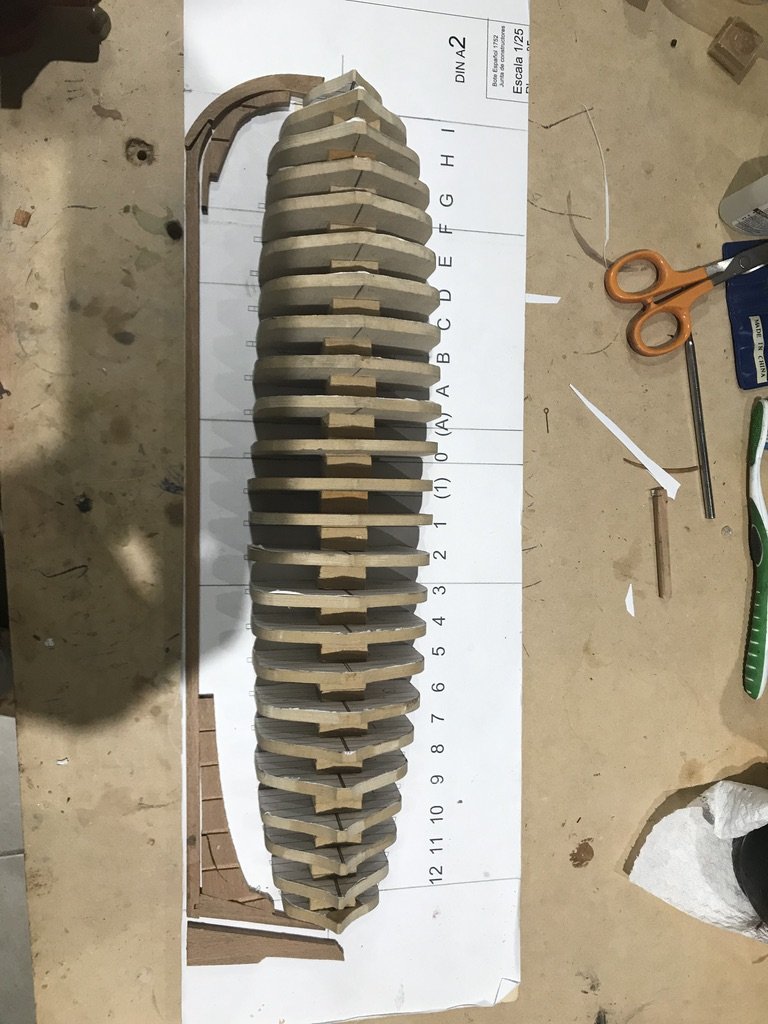
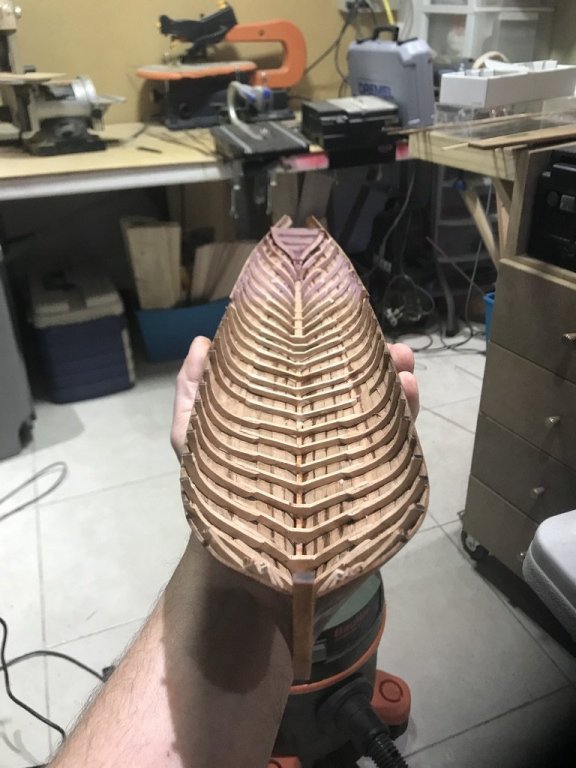
After, assembling the false frames, with the frames on top of them.......but working in the keel before......

-
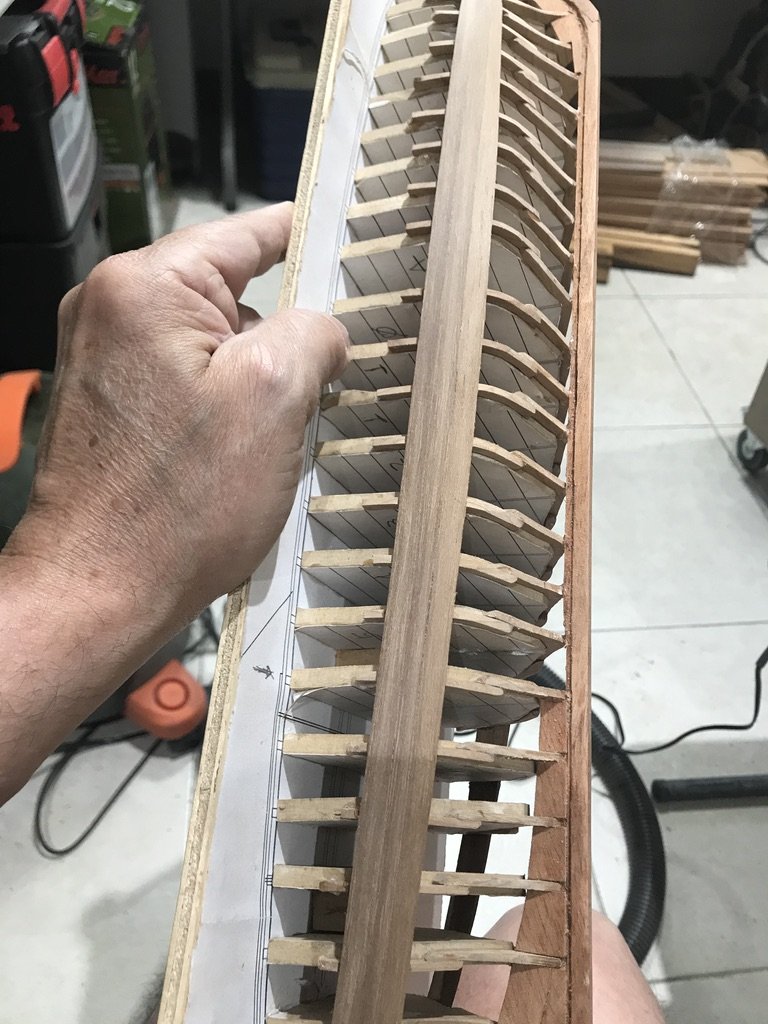
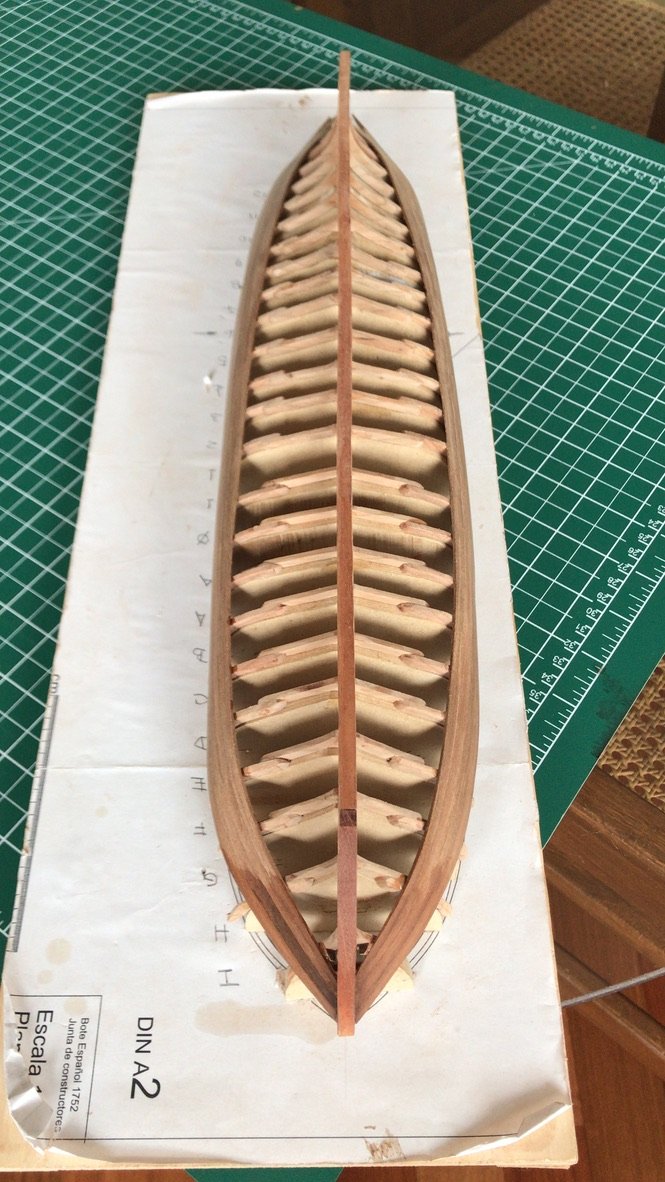
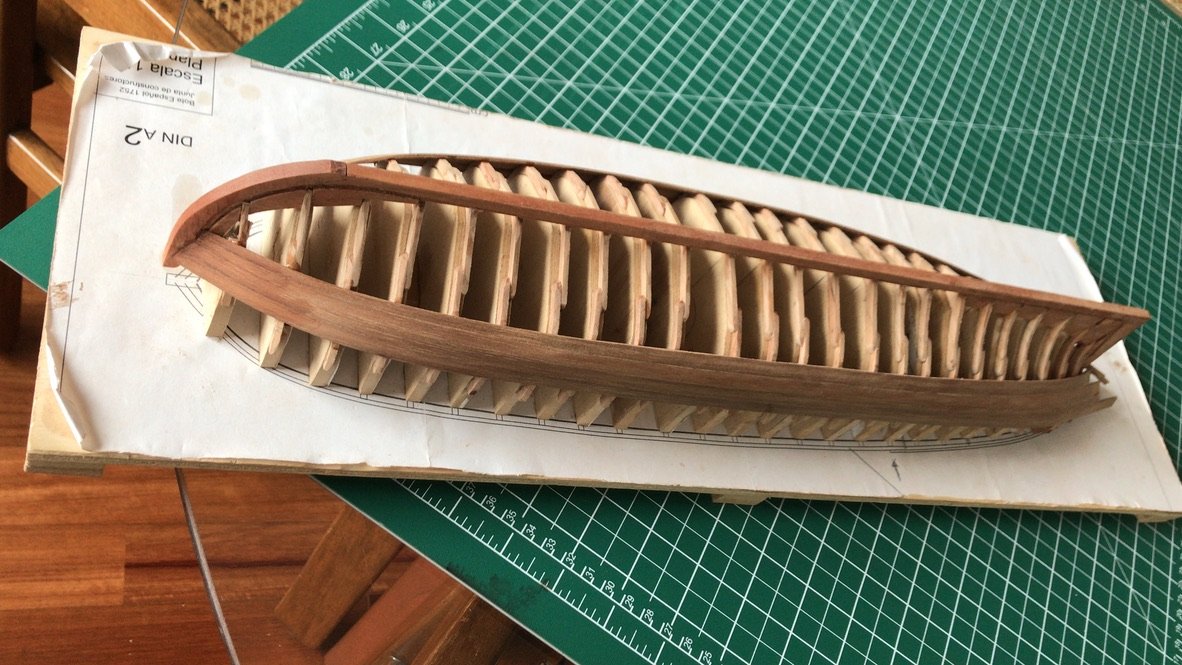
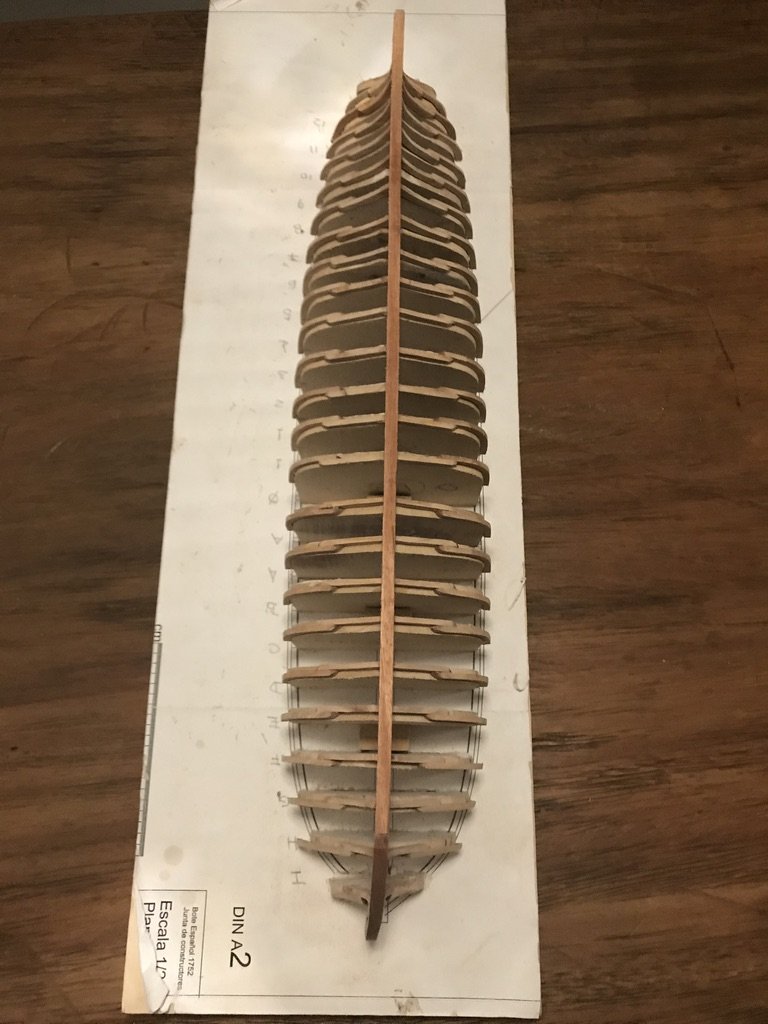
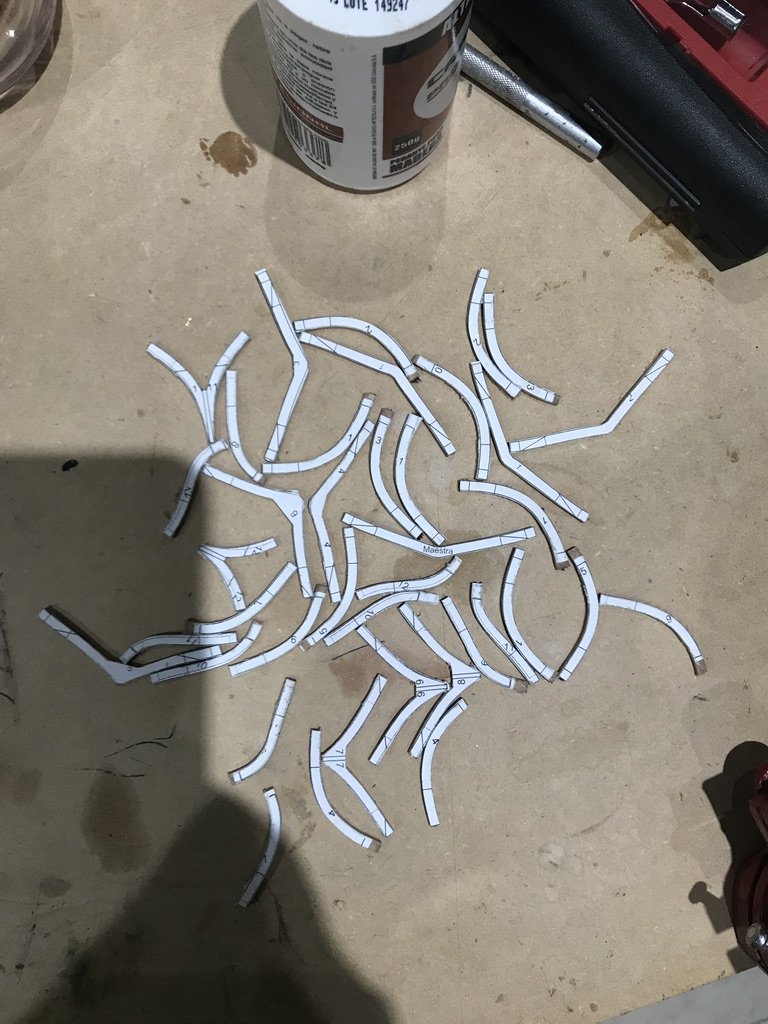
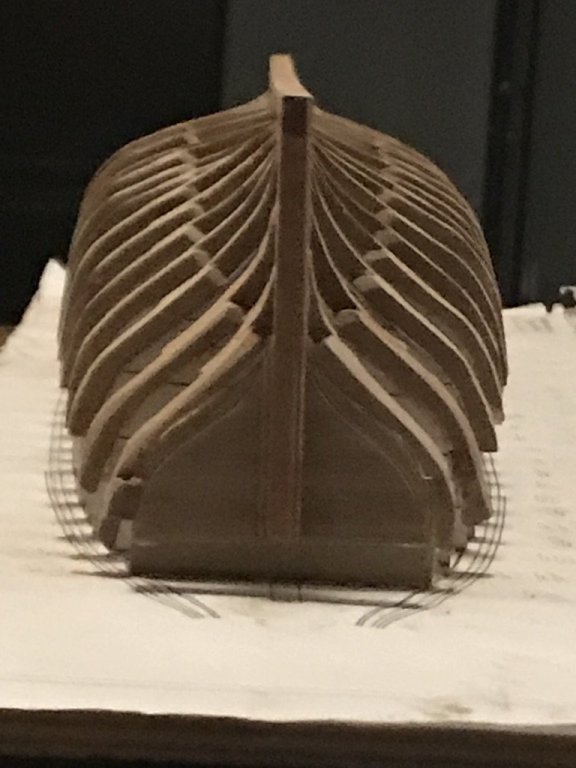
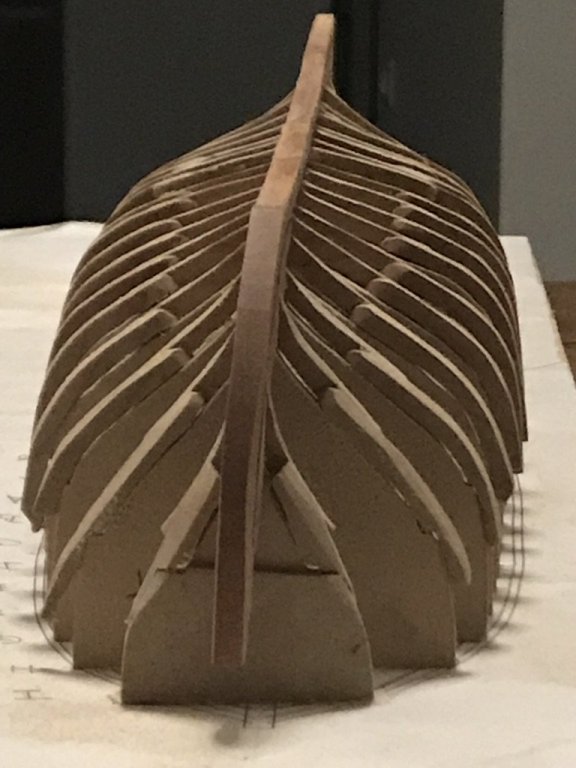
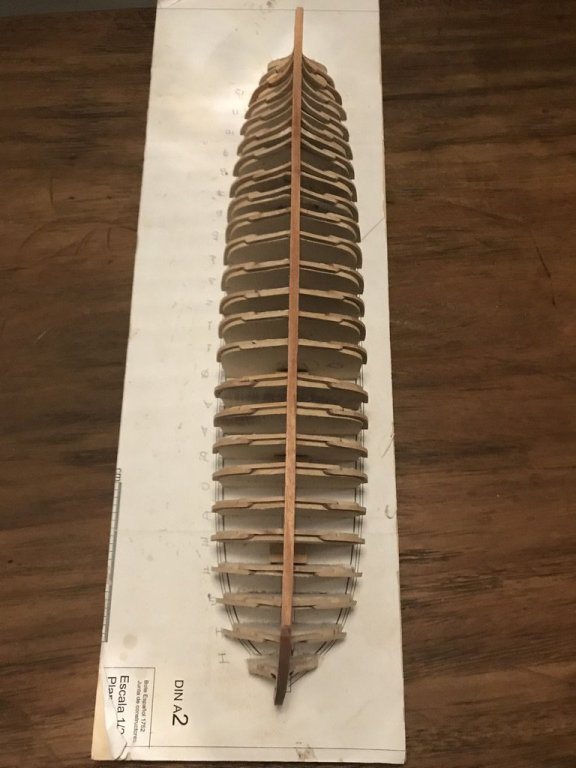
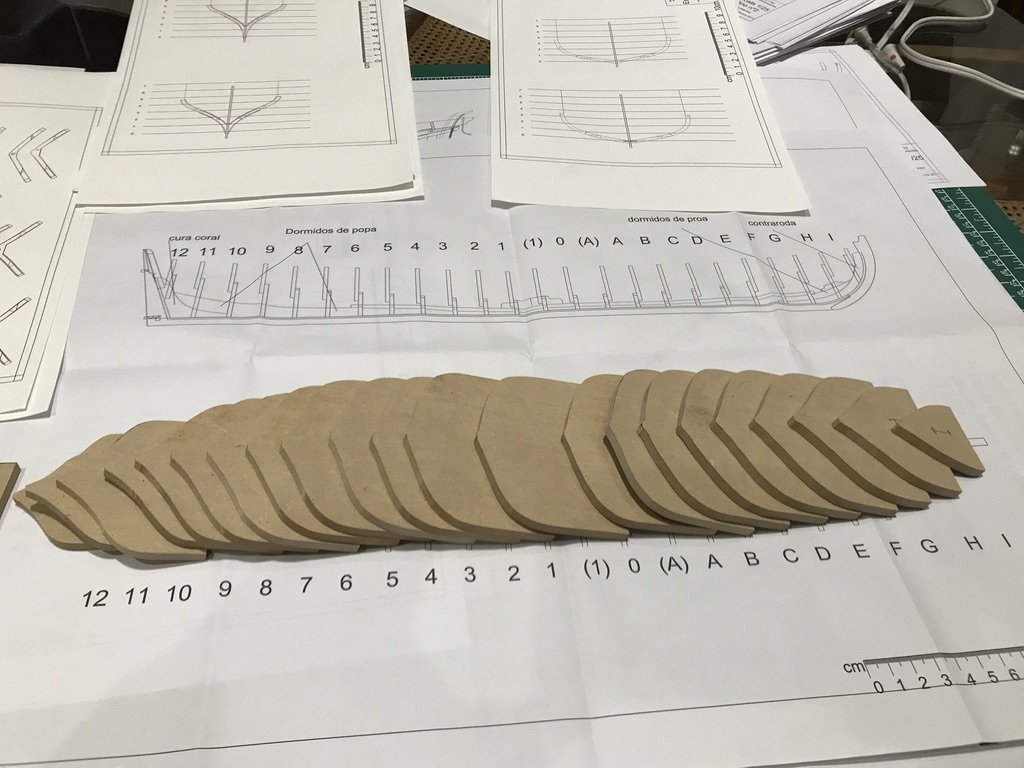
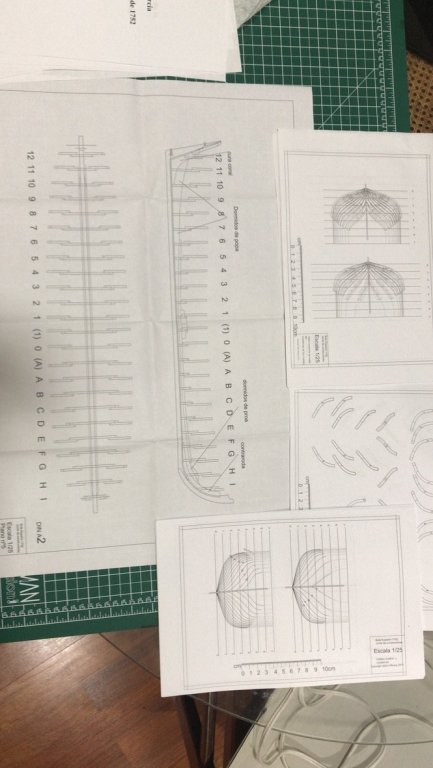
This kind of Ship, could be developed with three different methods: False Frames Solid hull mold Construction Jig Since I decided to work with Solid Hull mold in my previous project, I decided to start a new adventure in this one, with False Frames....so the first step is.......
-
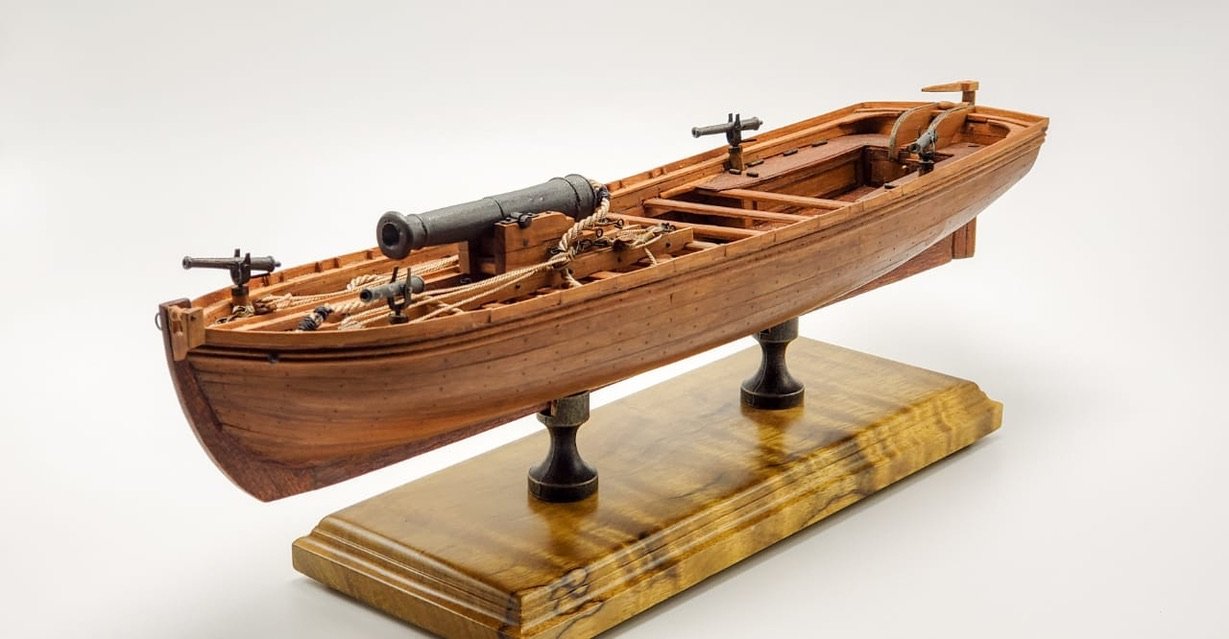
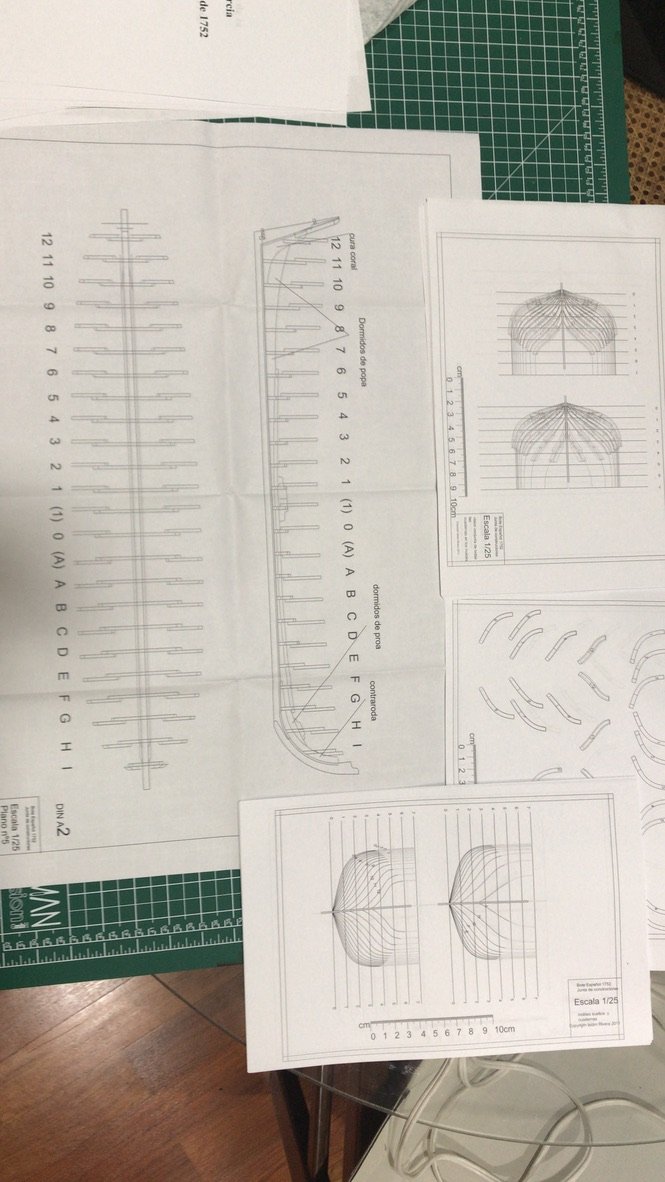
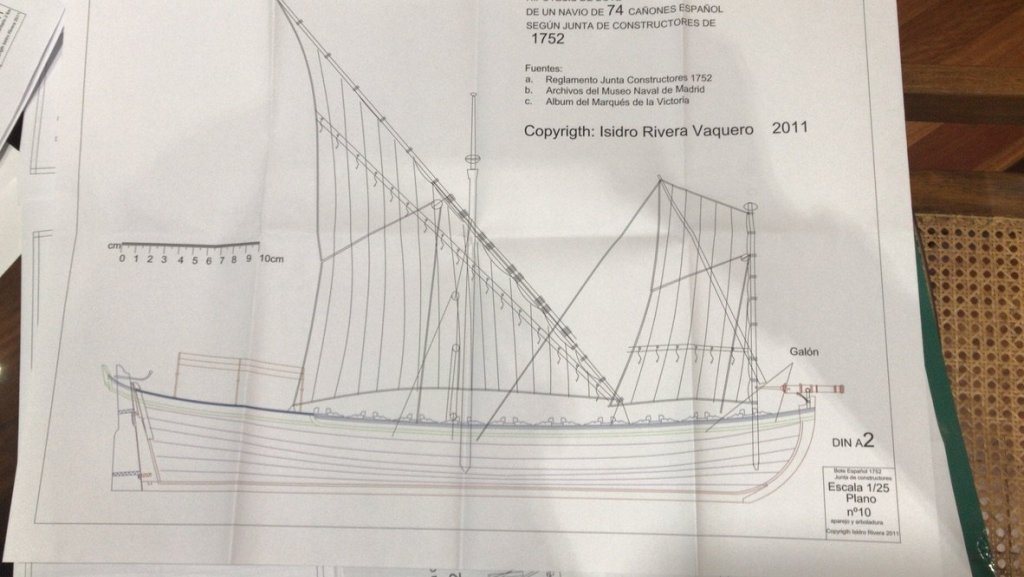
Hello all I want to share this construction log, about the Spanish Longboat, that could be converted to Falúa (Luxury Longboat for Officers). The plans have been developed by Isidro Rivera, well known spanish naval researcher, who has many papers, books and plans already published. I have the fortune to be in contact permanently with him, Jose Collado who is his partner in construction, and a bunch of really good guys, who are always, willing to help when I need it. I started the 17th of February and.......
-
Tony what a good solution!!!! Something to think about. Really the model gains a lot Hellmuht
- 124 replies
-
- 1
-
-
- longboat
- Chaloupe Armee En Guerre
- (and 1 more)
-
Tony I don't have any log outside, because this is my first scratch model. So I did not know what the result would be 😊. But the result is not that bad. But nevertheless, I do have the photos with the process that I can share with you in any matter you could be interested in. Regards Hellmuht
- 124 replies
-
- 2
-
-
- longboat
- Chaloupe Armee En Guerre
- (and 1 more)
-
Your method is impressive. At the end I wish my results will be as good as yours Hellmuht
- 124 replies
-
- 2
-
-
- longboat
- Chaloupe Armee En Guerre
- (and 1 more)
-
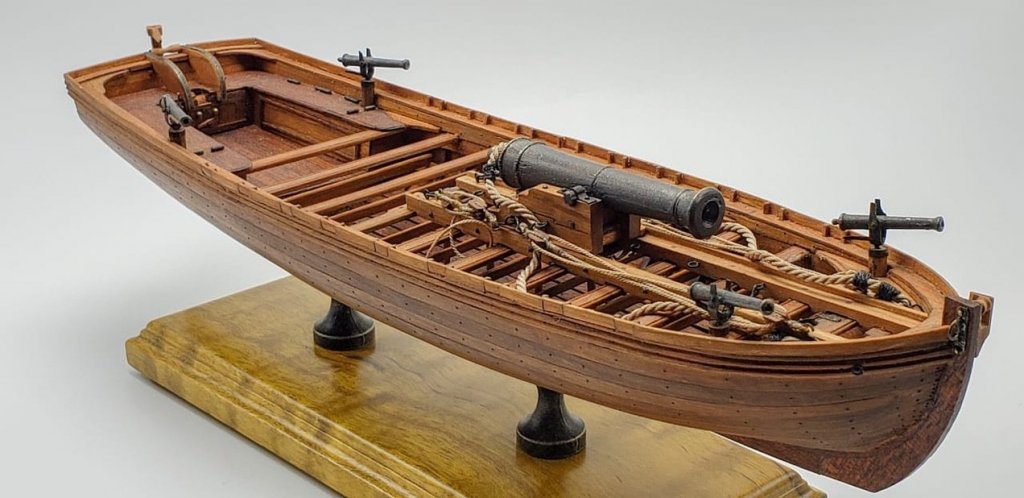
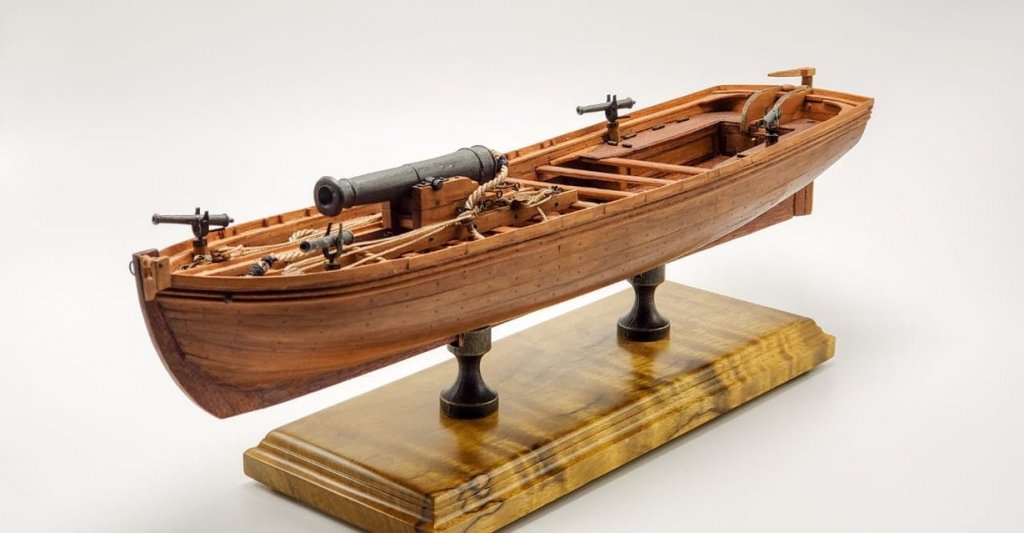
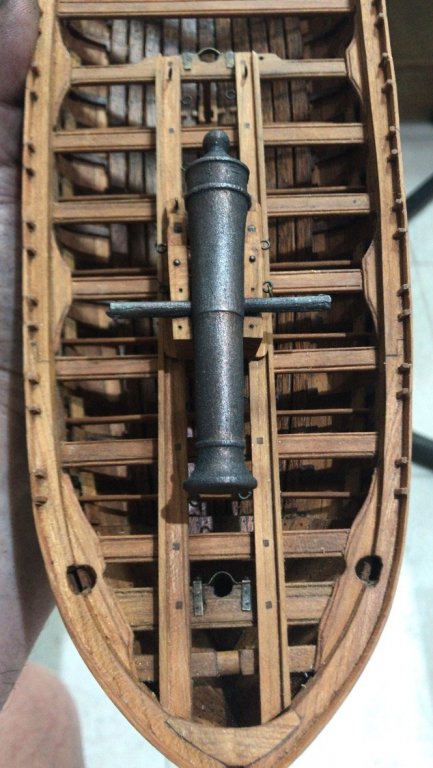
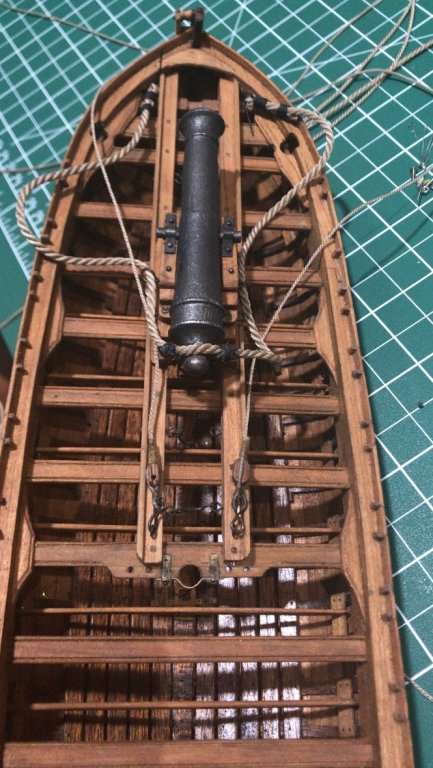
Tony I'm glad you are working on the same project I am. I'm in the process to install the canon. Take a look I decided to move forward with cast and I think it was worth it Hellmuht

- 124 replies
-
- 7
-
-
- longboat
- Chaloupe Armee En Guerre
- (and 1 more)
-
Thanks. Sam It’s my second model. The approach of “old” is working well so far. A lot to improve. Fell free to make comments and suggestions whatever you need fell free to ask regards Hellmuth Schrader
-
of course not. I don't mind. Just be careful. the ochre paint shoul be just a wash. use some graphite powder on the wood deck expand the graphite with a cloth Use a rubber to take as much you can the graphite Take a look about the joints. They should show off with the graphite. Also the clear basswood should bring its curves/veins aswell put some Vallejo Ochre diluted in water (very diluted) with a cloth on the wood. Wait for drying. You can simulate the nails with a pyrograph. You need to try it before please. Regards