Peter Bloemendaal
-
Posts
236 -
Joined
-
Last visited
Content Type
Profiles
Forums
Gallery
Events
Everything posted by Peter Bloemendaal
-
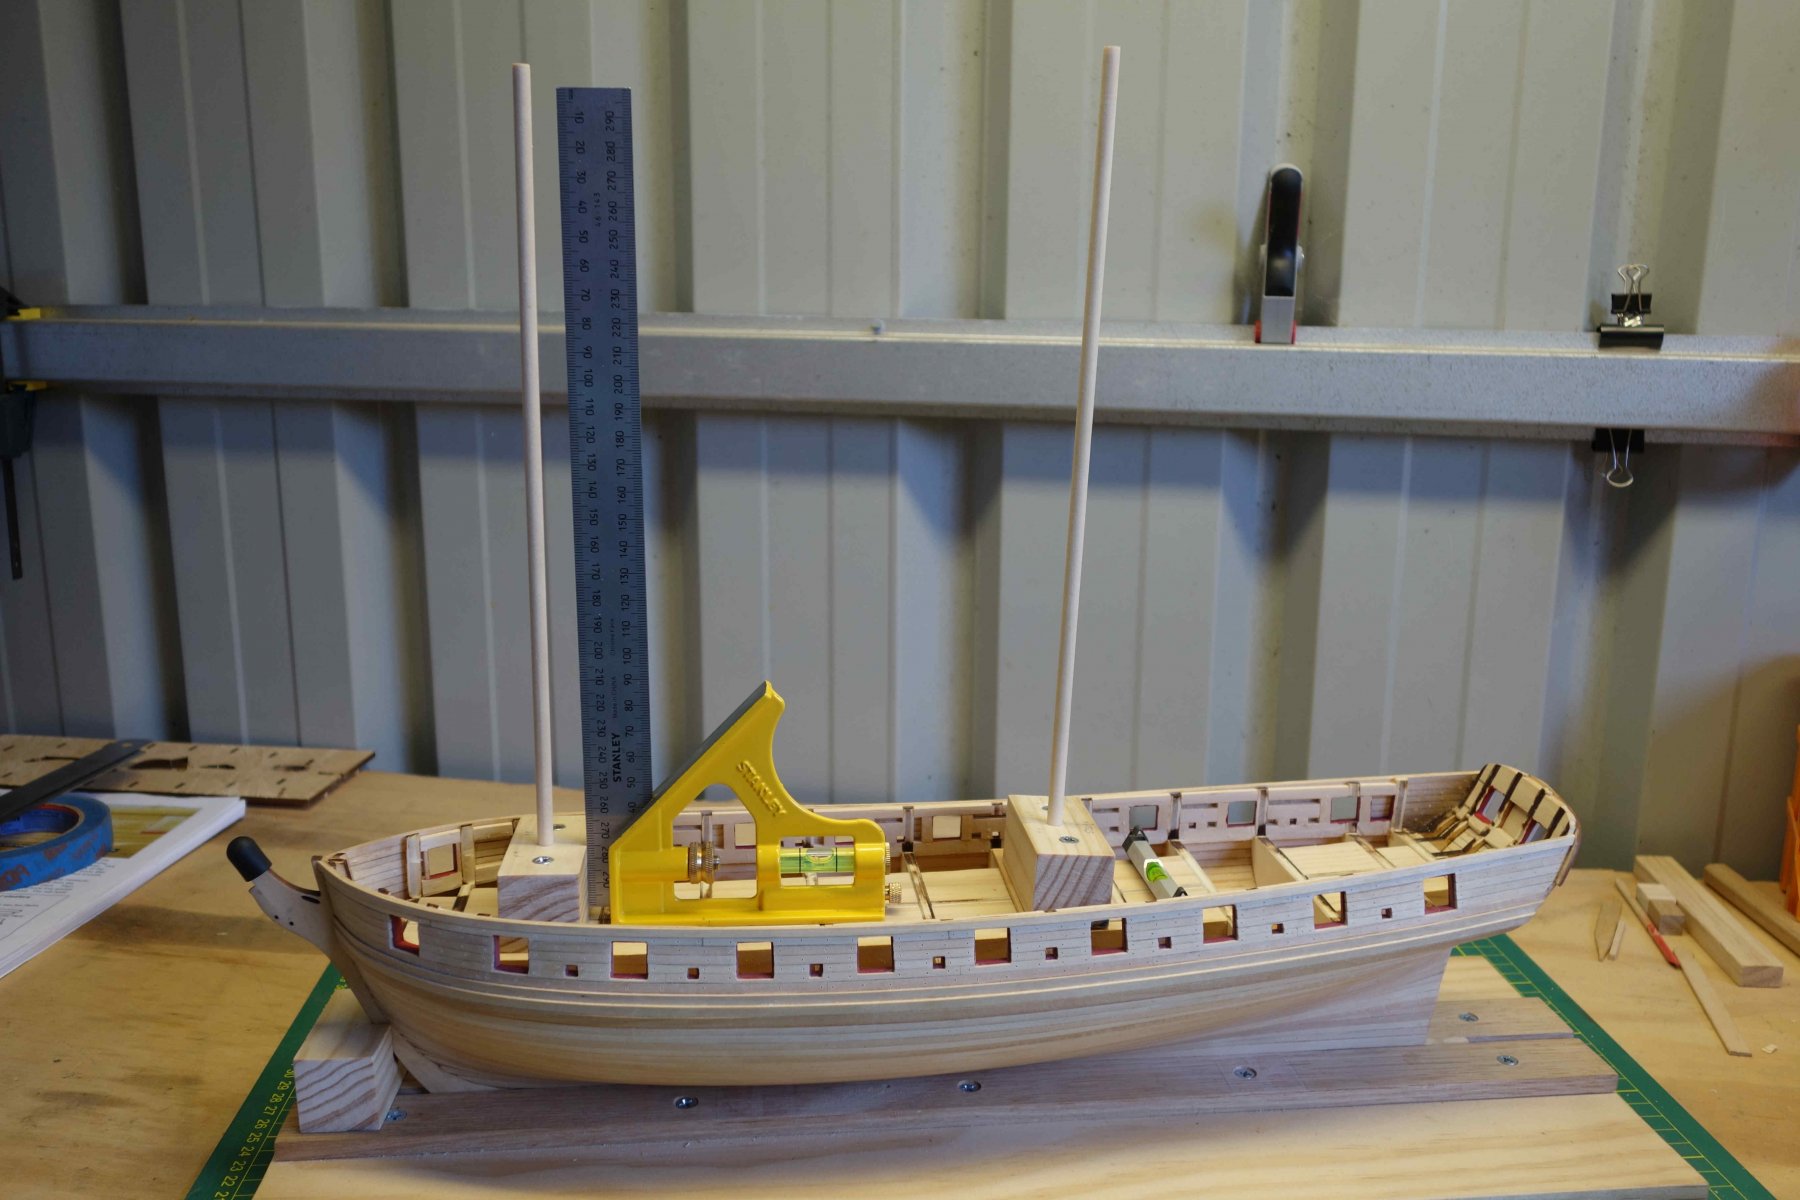
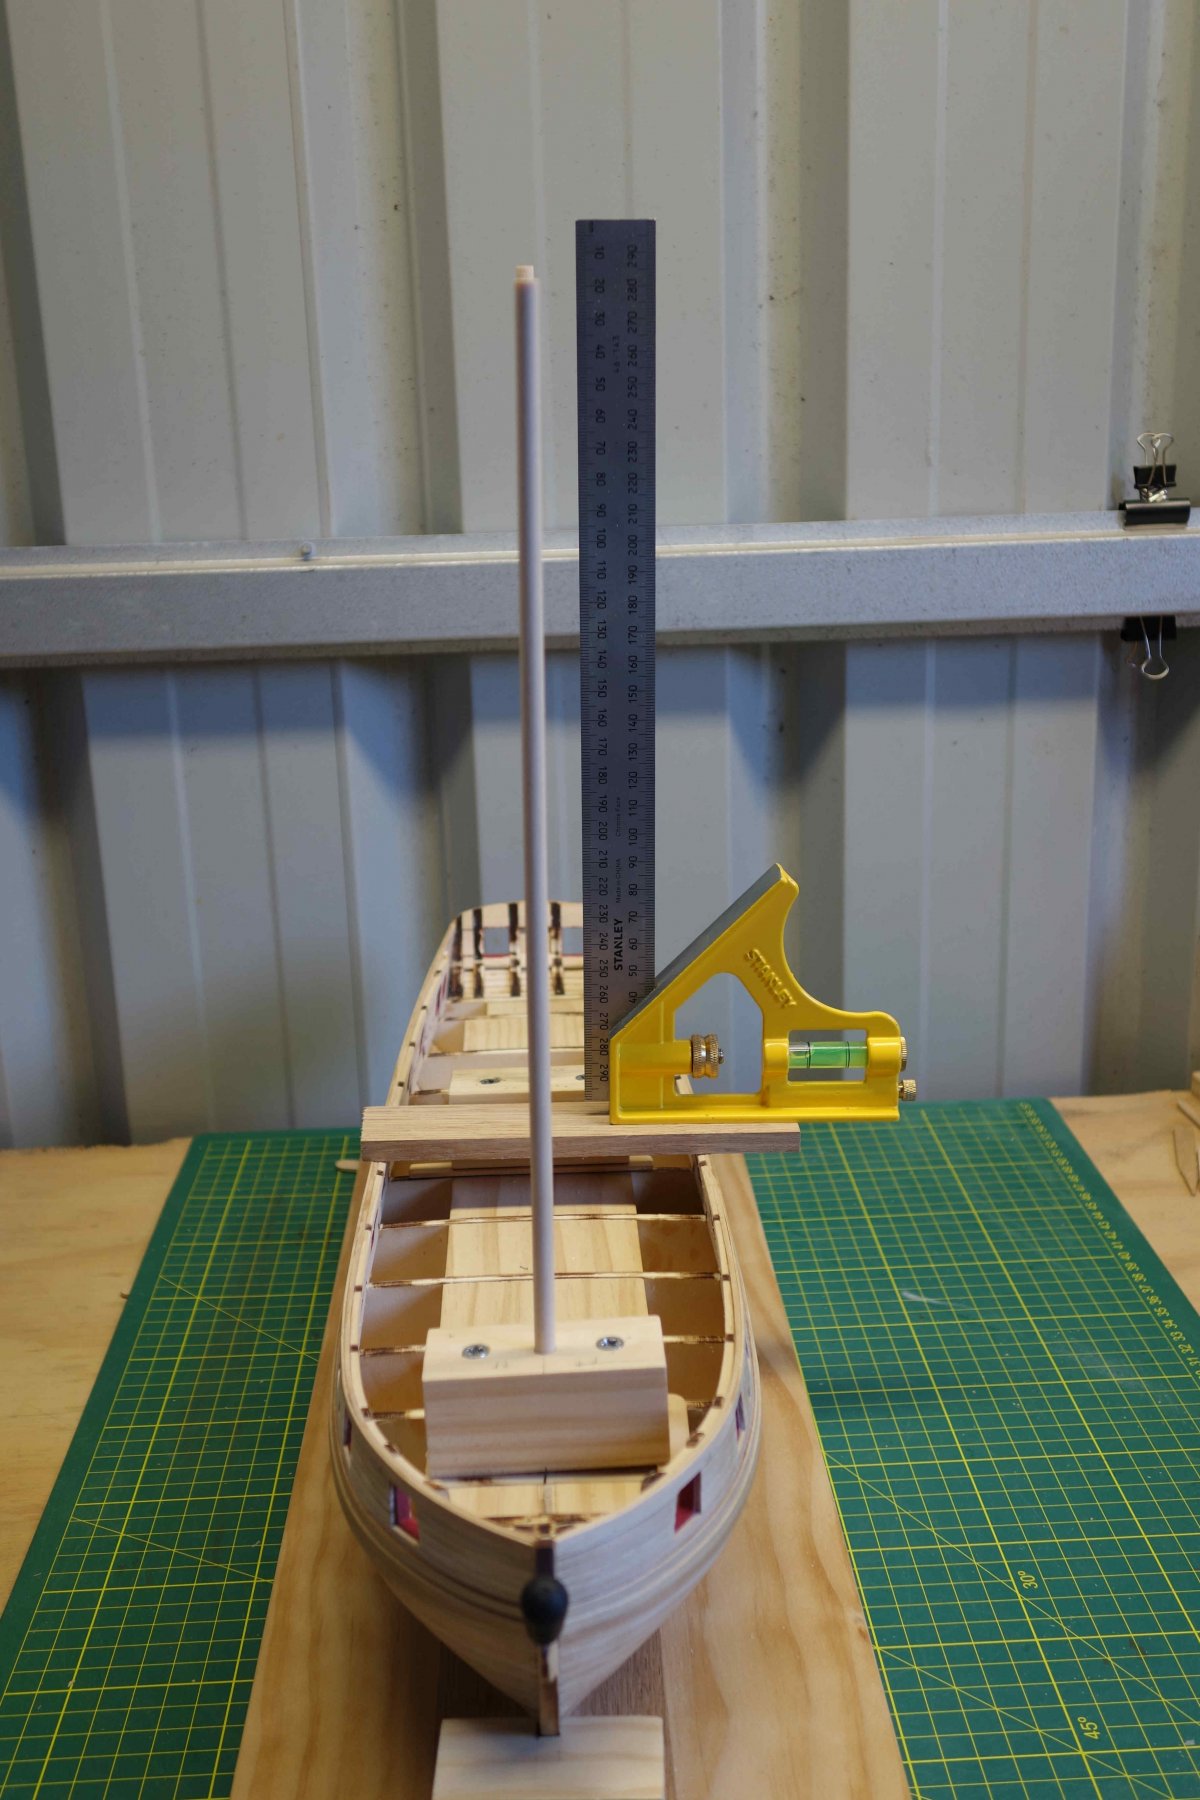
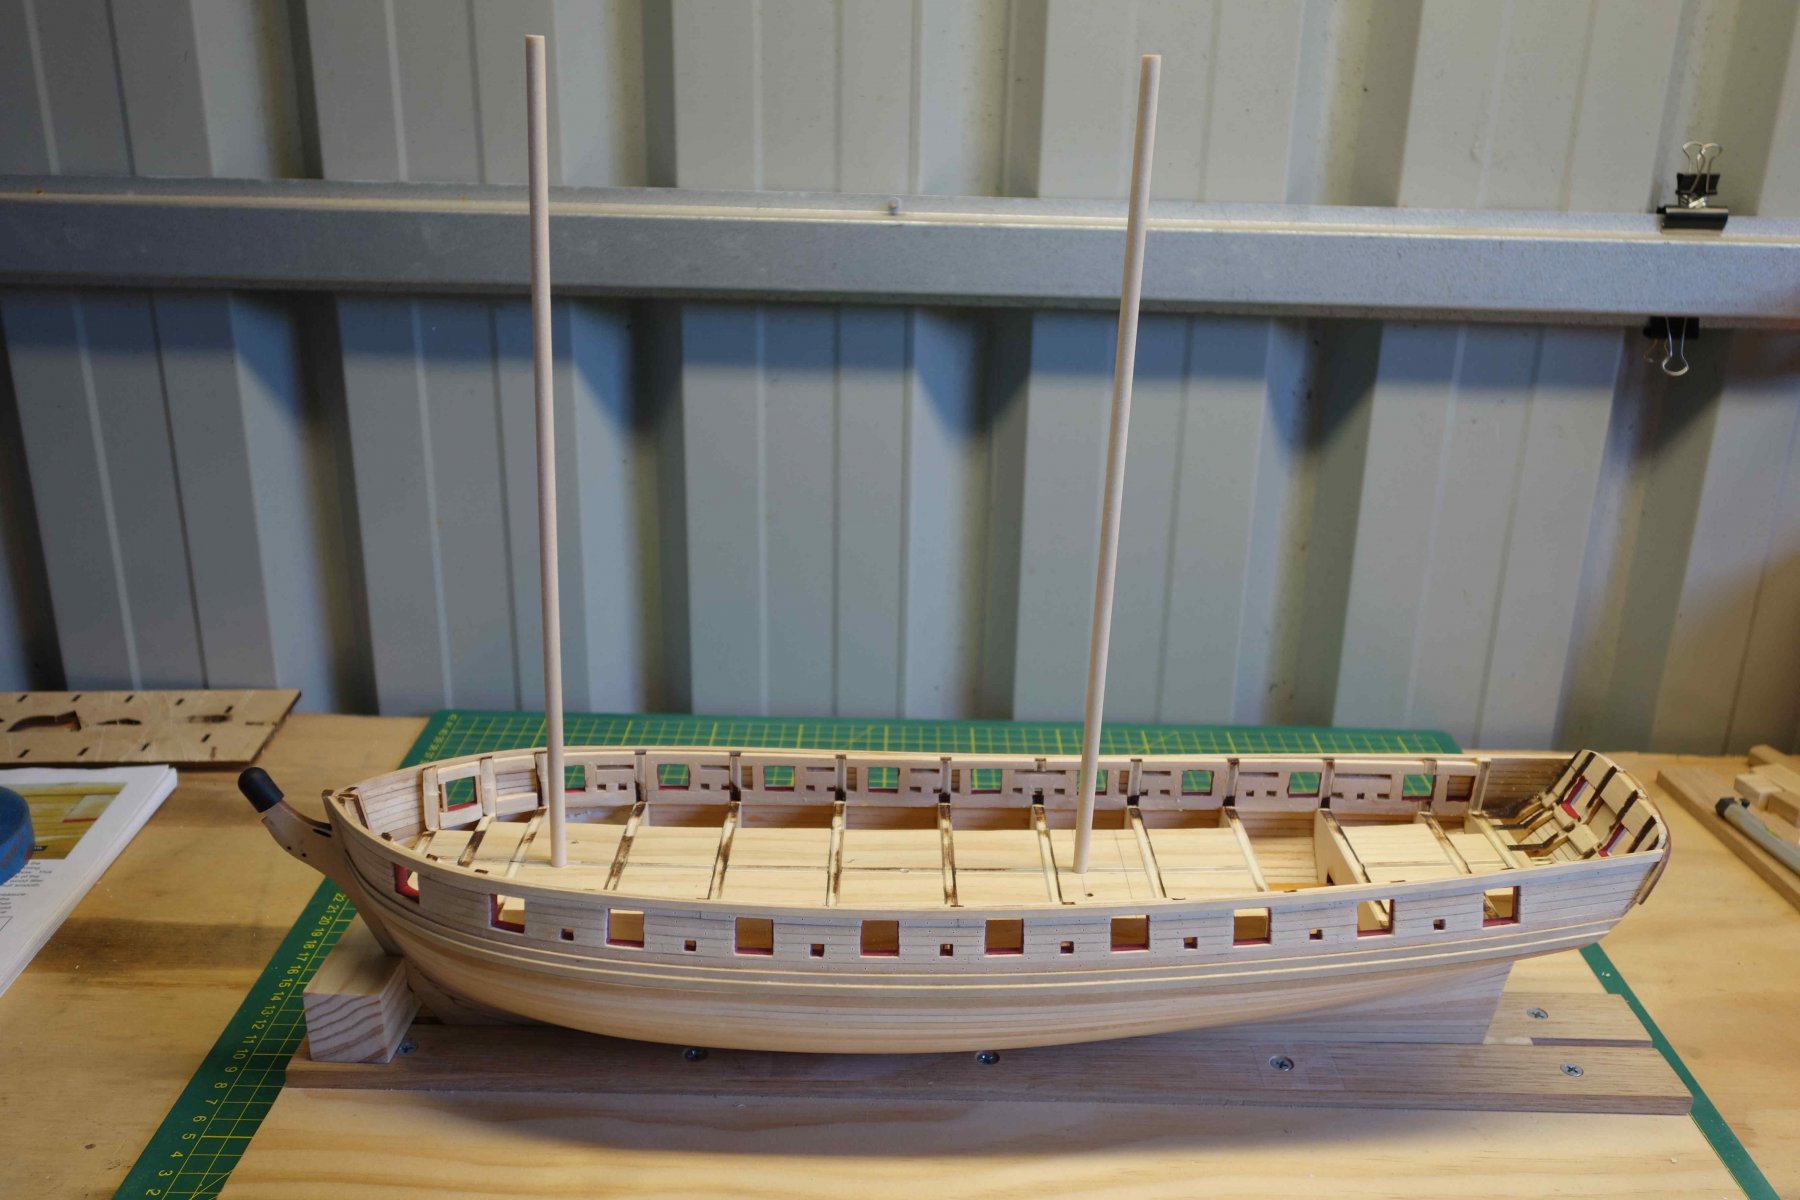
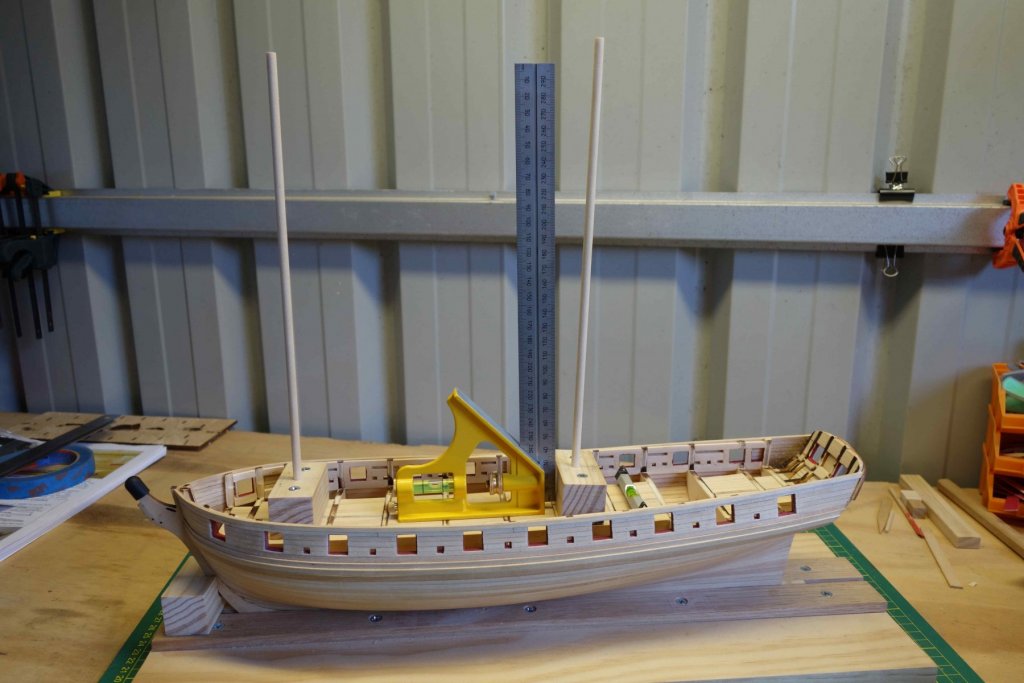
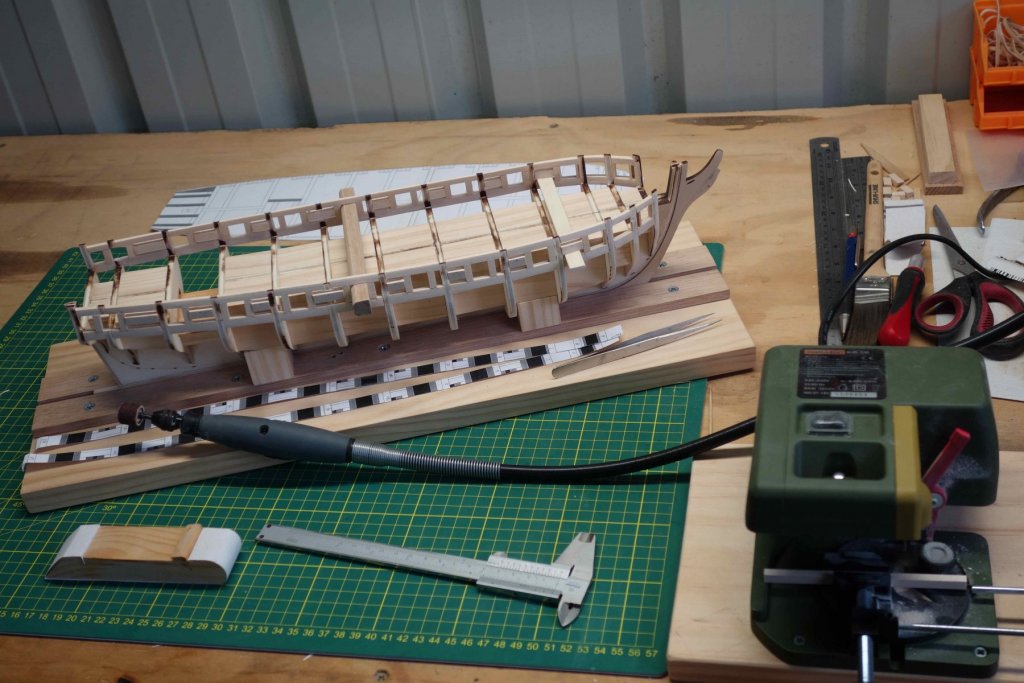
 I felt like putting the holes for the mast in before adding the deck. It was a bit of a struggle because I only have the dremel drill stand (max drill size for the chuck is 3mm, the rest hand drill) and I used pine blocks. So the mast hole in the blocks were expectedly way out of alignment (no surprises here). I then lined the hole in the bottom of the block up with the location of the mast on the deck and screwed the block down. Next I added a dowel, loosened the block a bit and started adding packers under the block until I was happy with the alignment. I'm not sure if I would recommend doing it this way, because I am not 100% happy with the end result but I thought I'd share it anyway. When (if?) I get to the point of adding the masts, I don't think it will be too hard to fix the angles. At least they are in the right location and they line up across the length of the ship. So I got two out of three...


- 242 replies
-
- 9
-

-
- syren
- model shipways
- (and 1 more)
-
Thanks Svein, It's a great option but it must be a European thing because I haven't seen anything like it in our hardware store. And with our store less than 5 minutes away from work, I spent many lunch time breaks lurking around looking for ideas. I was just thinking, with the money spent on wax sticks, drill bits, wood fillers, sandpaper, tools, etc., I wonder how much those tree nails are worth based on the amount that end up in the ship. On a per gram basis surely way more than gold. Maybe an idea for a new thread. What are the most valuable components of a ship, time not included. The tree nails must be up there...
- 242 replies
-
- 3
-
-
- syren
- model shipways
- (and 1 more)
-
Thanks Richard, Thanks for the offer Floyd. I had a look at your photo. It looks like just a wood filler. Although Minwax is not available here it shouldn't be too hard to find something similar. I'll get some and practice a bit more. I just finished drilling 250 odd holes on one side of the model and they are patiently waiting to be filled. They may have to wait a little bit longer...
- 242 replies
-
- 2
-
-
- syren
- model shipways
- (and 1 more)
-
Had a bit of fun last night making up a little cross section of the hull and trying out processes like Tree nails, paint, masking tape, colour mix etc. I felt a bit like a chemist diluting the stain to get it right. It all went well until I knocked over one of the container on the work bench and in the process of getting a rag knocked my toe a beauty.... Probably a reminder why chemistry wasn't my thing. The drying times might have suffered a bit as well, I was not that patient. I'm glad I made the effort though because I learned a lot. I have one question though. Does anyone warm up the wax stick a bit to make it softer. I'm a bit nervous of denting the wood when I press the wax into the holes. The wax seems quite hard. Or is there another trick to it. Peter

- 242 replies
-
- 4
-
-
- syren
- model shipways
- (and 1 more)
-
Hi Dough, it is looking good. Just my 2 cents worth, I would do 2 things differently after I finished planking my hull. I tried to cover the full hull length with each plank. That made it a lot harder finishing the stern edge. When looking at Chucks photo's he split them up in two halves and they met up at different bulkhead positions. (you might already been doing this but I couldn't see it in your photo's). So you have extra length at the stern to get the connection right. At the stern I wet the planks and pre-bend them, but not enough. As you press them onto the bulkhead they compress a bit and they get a sharper bend at the bulkhead location. On my model you can see the location of the bulkheads on the outside of the hull which means it is not a smooth radius. With the last few planks I tried to get a tighter radius than needed and work with dried planks only. It's harder to wrap a plank around a radius and clamp the ends than to push it onto a radius and only hold the middle (theoretically...). Sorry if it turned out to be a bit long winded.
-
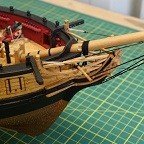
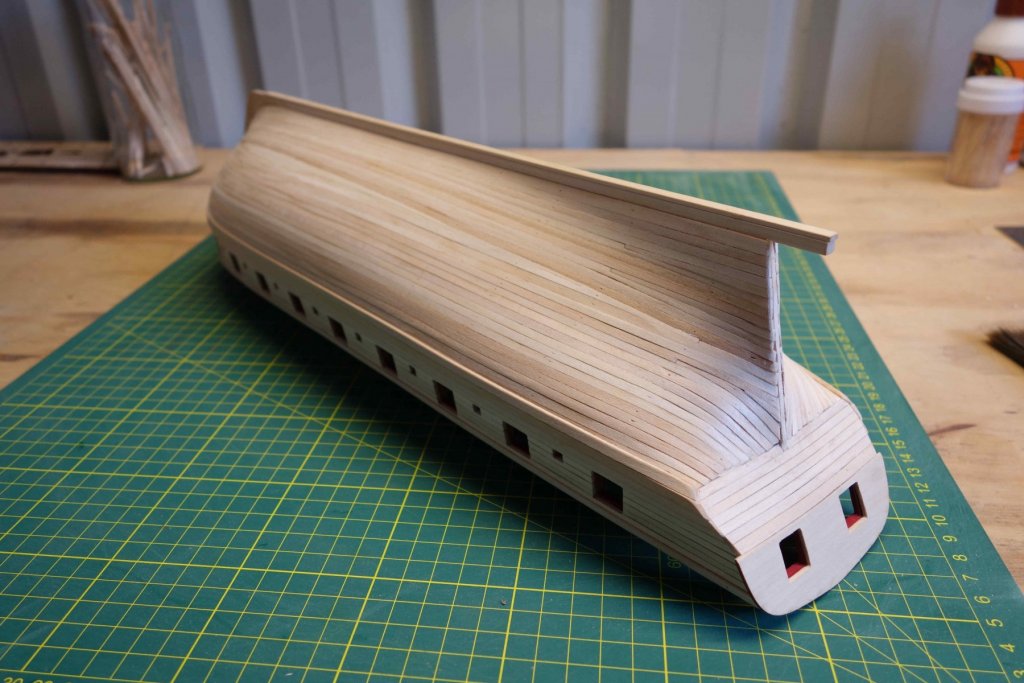
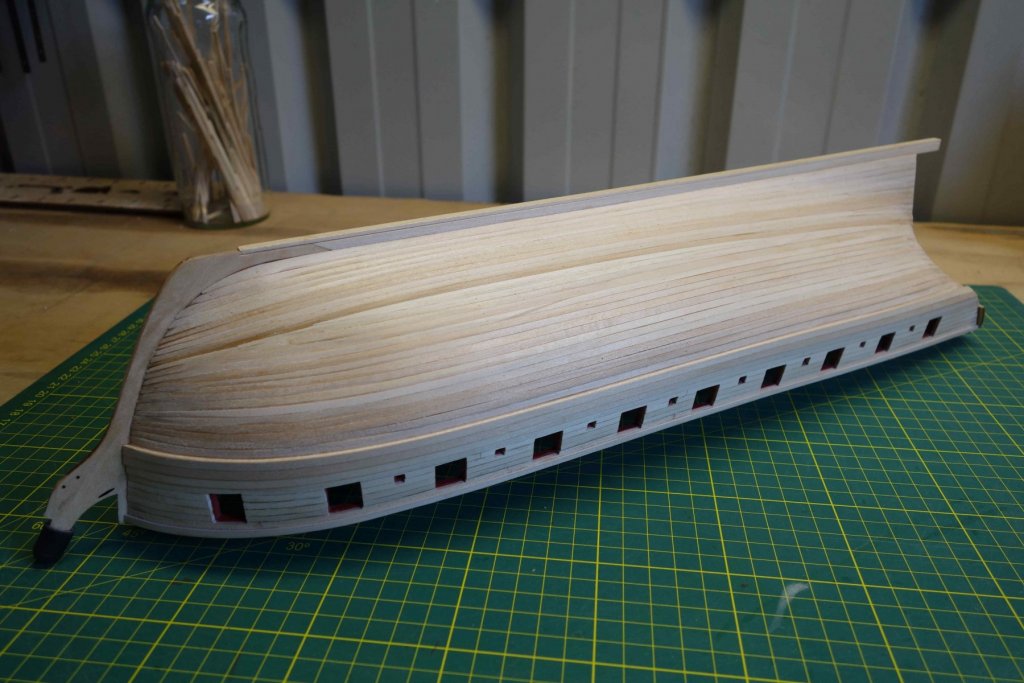
Well, I finished the planking today so here are some photo's. A nice milestone. I am really enjoying the journey so far. Next, I will be spending some time working out the colours scheme and the treenails. I will make up a panel with some of the scrap planks and practice a bit before I go any further on the model. Peter.

- 242 replies
-
- 13
-
-
- syren
- model shipways
- (and 1 more)
-
Just my 2 cents worth. 1. Buy a ship you really like the look of. 2. Buy a beginners Mamoli kit so you get used the Mamoli way of doing things (not sure about this one...) 3. Make sure it has a lot of the tasks that are repeated in the Victory, so include basic planking (no solid hull), it has a few gun assemblies, only one mast with full rigging, etc. 4. Create a log so you can get a lot of help and it keeps you motivated (at least it does for me). 5. Keep plugging away...and plugging away....and... Mind you, reading your post again you seem to have been modelling for many years including wood, so you might not be that far off giving the Victory a go.
-
Hi Doug, Here are the clamp photo's. The trick is to use flexible materials that don't slide off when clamped on an angle. However, I lost count on how many time I had to get on the floor looking for the eraser, cork block or clamp. So far I manage to hold on to the Syren.
- 242 replies
-
- 10
-
-
- syren
- model shipways
- (and 1 more)
-
That is not fair, you have an extra siren to practice on....
-
Hi Doug, There is nothing wrong with cradling the Syren, trust me, I know....... I cut up a cork sanding block to fit snug in the deck area and use a rubber eraser on the stern plank, When clamping these together nothing touches or dents the wood around it and the angles are still good enough for the clamp to stay in place...just. I'll make a photo of it tonight. It doesn't look pretty but it's effective.
- 242 replies
-
- 1
-
-
- syren
- model shipways
- (and 1 more)
-
Thanks all, Hi Doug, I'm not sure whether I should slow down to learn from your next planks or keep going with the risk of you copying my mistakes.... Nah, I'll keep going. It will naturally slow down to 2 planks per evening as the gap gets smaller and there is more measuring and sanding to do. It already feels like each plank is it's own little project. And I'm always a hand short trying to clamp the buggers. Peter.
- 242 replies
-
- 1
-
-
- syren
- model shipways
- (and 1 more)
-
Well, the 0.5mm drill bits are on order. I decided not to use the golden oak. I can't get the Minwax Golden Oak here in Perth and I'm not happy with the British Paint Golden oak. I am favouring a Baltic Pine stain with a clear matt varnish at the moment but I'm still experimenting. Choosing colours is turning out to be a real pain. Even the red I end up mixing myself from 3 different reds (I have got about 8 tubes of red and a coupe of valleja paints). I hope I don't run out because there is no way I can get the same colour by mixing it a second time...lol. Enough ranting. Here are some more pics. I am slowly working my way towards the corner with the tightest bend.
- 242 replies
-
- 10
-
-
- syren
- model shipways
- (and 1 more)
-
Thanks Floyd, I just googled and downloaded a drill size to Decimal equiv. chart. Which means a number 74 = 0.0225"=0.57mm. So I'll practice with a 0.5 and 0.6mm bit. The smallest size I have in the shed is 0.7mm at the moment so there is more shopping to be done... The plan is to finish the area with a sanding sealer, sand it a bit, drill and apply wood filler, another sand and finish with 2 coats of golden oak stain & varnish (all water based). I'll practice that on some leftovers glued together. I aim to color it as subtle as possible.
- 242 replies
-
- 1
-
-
- syren
- model shipways
- (and 1 more)
-
Thanks Floyd, Steve, Yep, the next stage is going to be the fun part. I intend to make a bit of a plan, measure and draw it up and see if I can split it up into main sections as suggested in the manual. I will stay away from the glue for a little while until I (think) I know what I am doing. (famous last words??). It's also time to start practicing with the tree nails, so it's off to the hardware store and get me some different colored wood fillers. What hole size is recommended for this. Chuck mentions drill size 0.55 but I'm not sure if that is an imperial size or 0.55mm. Cheers, Peter
- 242 replies
-
- 2
-
-
- syren
- model shipways
- (and 1 more)
-
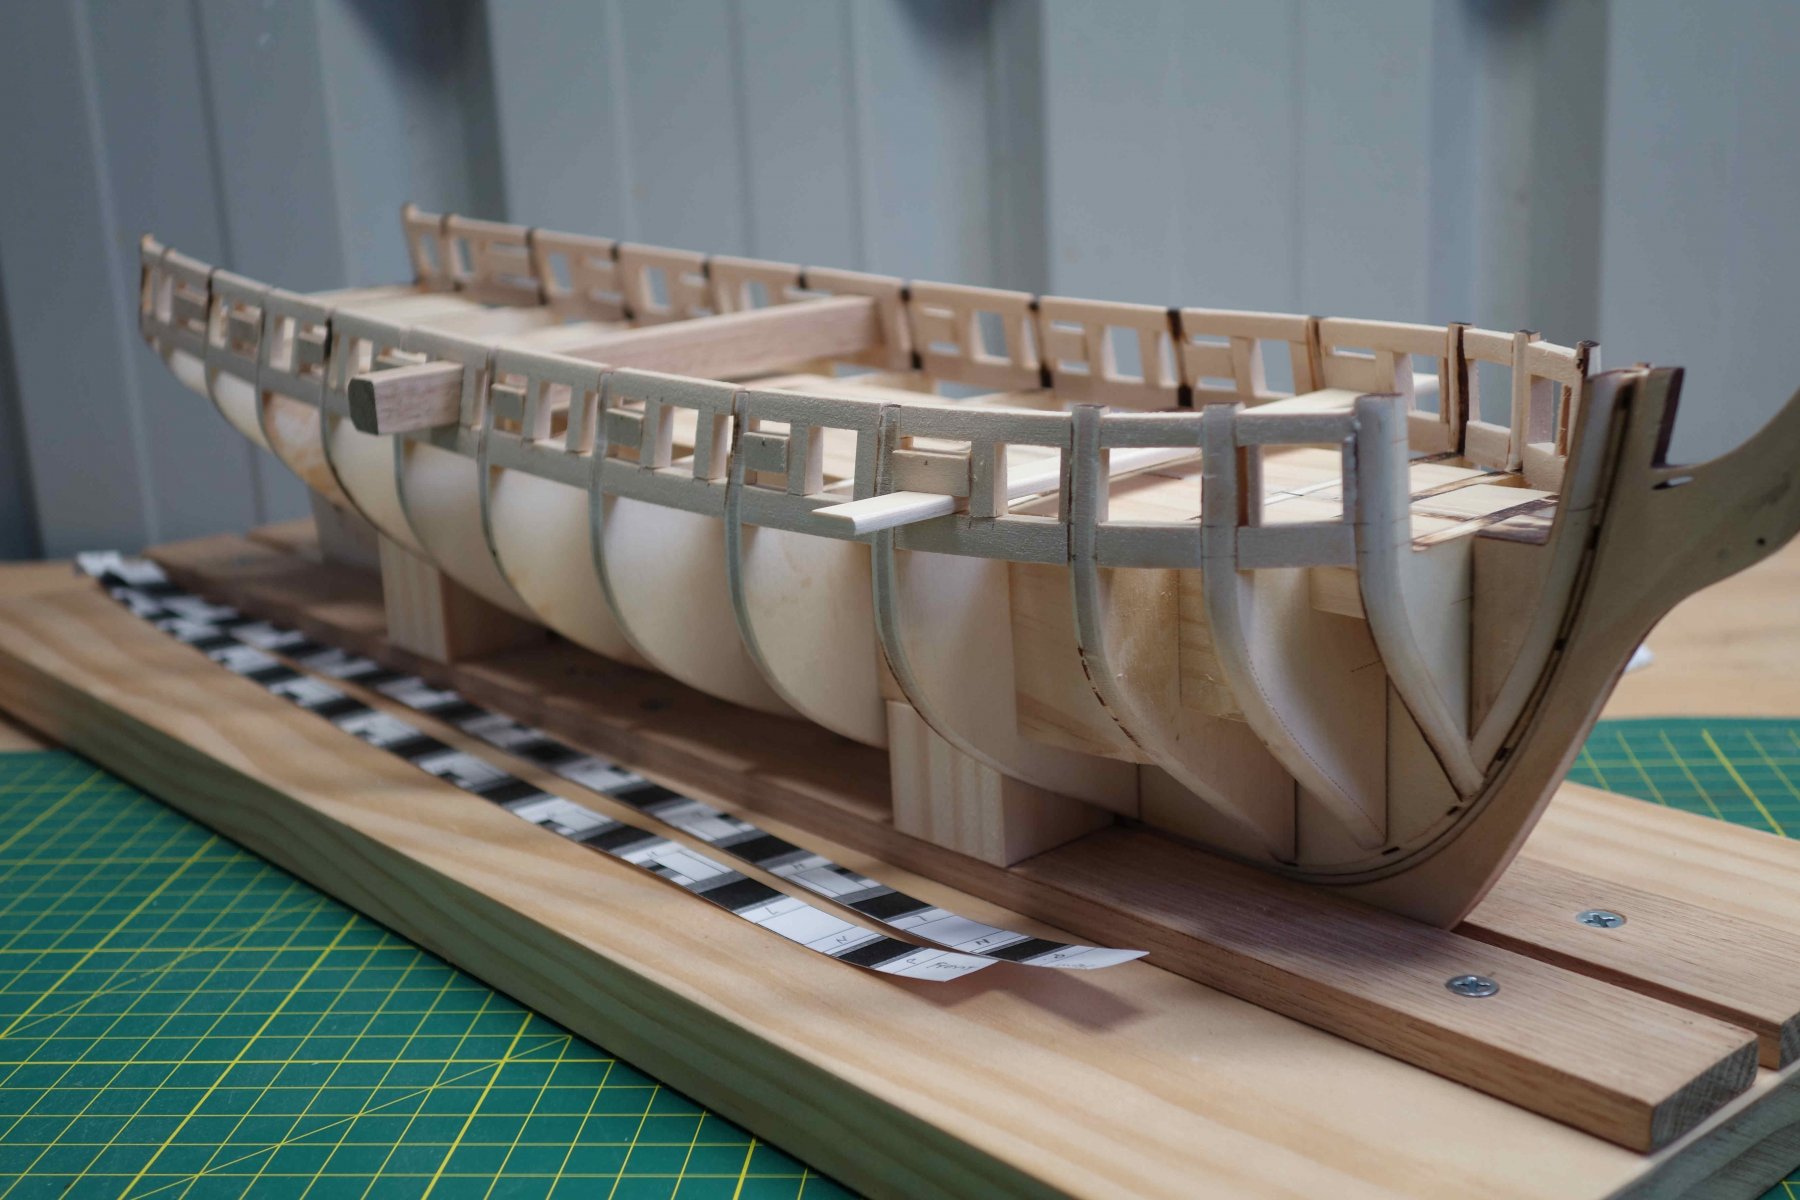
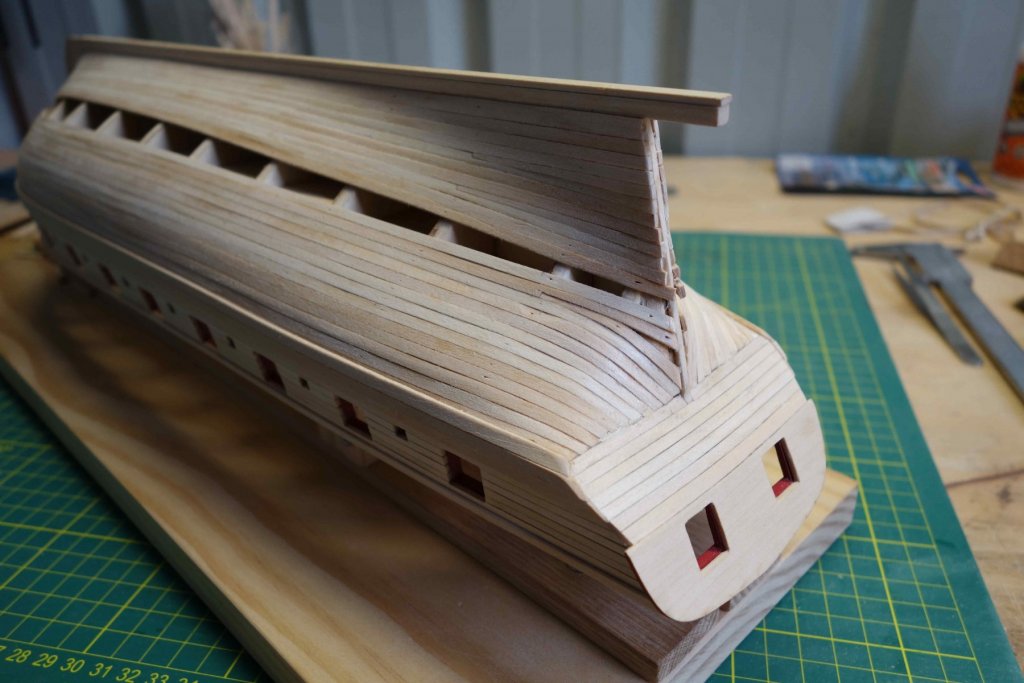
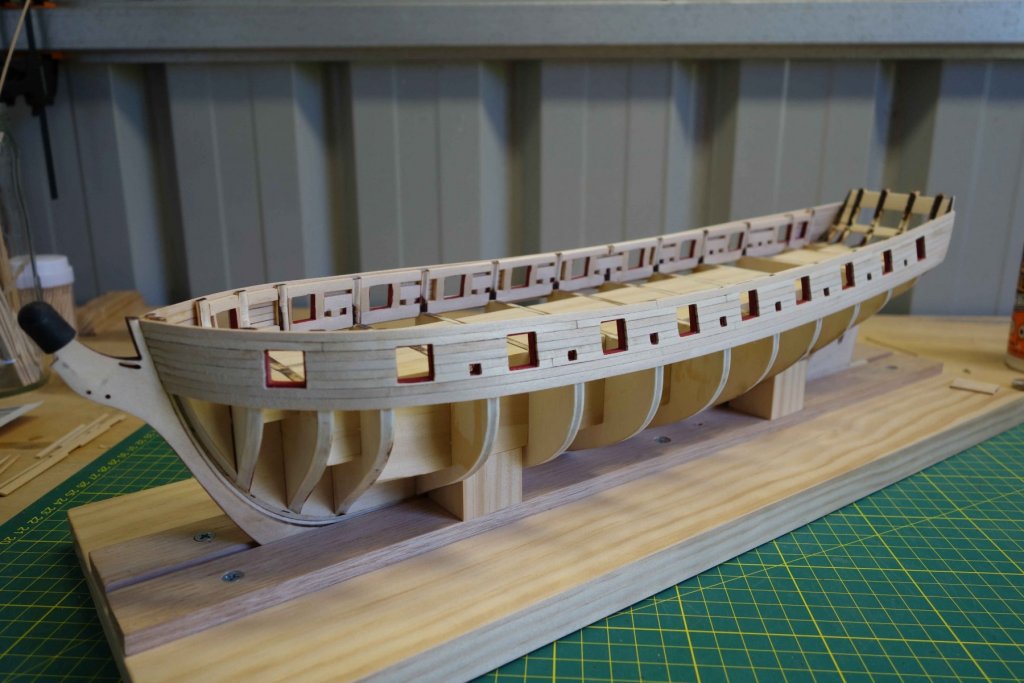
Some more progress. No real dramas to that are worth mentioning, just following the instruction to the letter. I'm getting closer to the business end of the planking. I'll let the photo's do the talking.


- 242 replies
-
- 13
-
-
- syren
- model shipways
- (and 1 more)
-
Hi Shawn, Just an observation if you don't mind. In your last photo, the upper whale plank seems to run parallel with the gun ports. The gap seems consistent. I had a bugger of a time lining it up with the photo's in the manual, (Because I sanded the reference lines off the bulkheads...) because they shouldn't run parallel. In Chucks words: "You will notice that the run of the planking DOES NOT follow the run of the gun ports across the hull. This is not an error. The planking will not follow the run of the gun ports". So I think your positioning is slightly off (I hope so anyway, otherwise mine is off, and mine are already glued....) Cheers, Peter
-
Hi Scott, I did FIFO to Port Hedland as well and lived there for over 6 years. My first attempt to wood modelling was during the first FIFO period where I thought I'd fix the boring evenings by doing some woodwork. There were no boring evenings and needless to say the modelling didn't end well... Very nice model by the way... Cheers, Peter
-
Hi Floyd, This may be a silly idea, but based on how the AL scrapers work, can you maybe cut/file your own profile based on the timber size. Cheers, Peter
-
Hi Robin, I'll be following along as well. Reminds me of my visit in 2005 on board the replica here in Perth. I found a few photo's. Cheers, Peter


- 91 replies
-
- 8
-
-
- kolderstok
- duyfken
- (and 1 more)
-
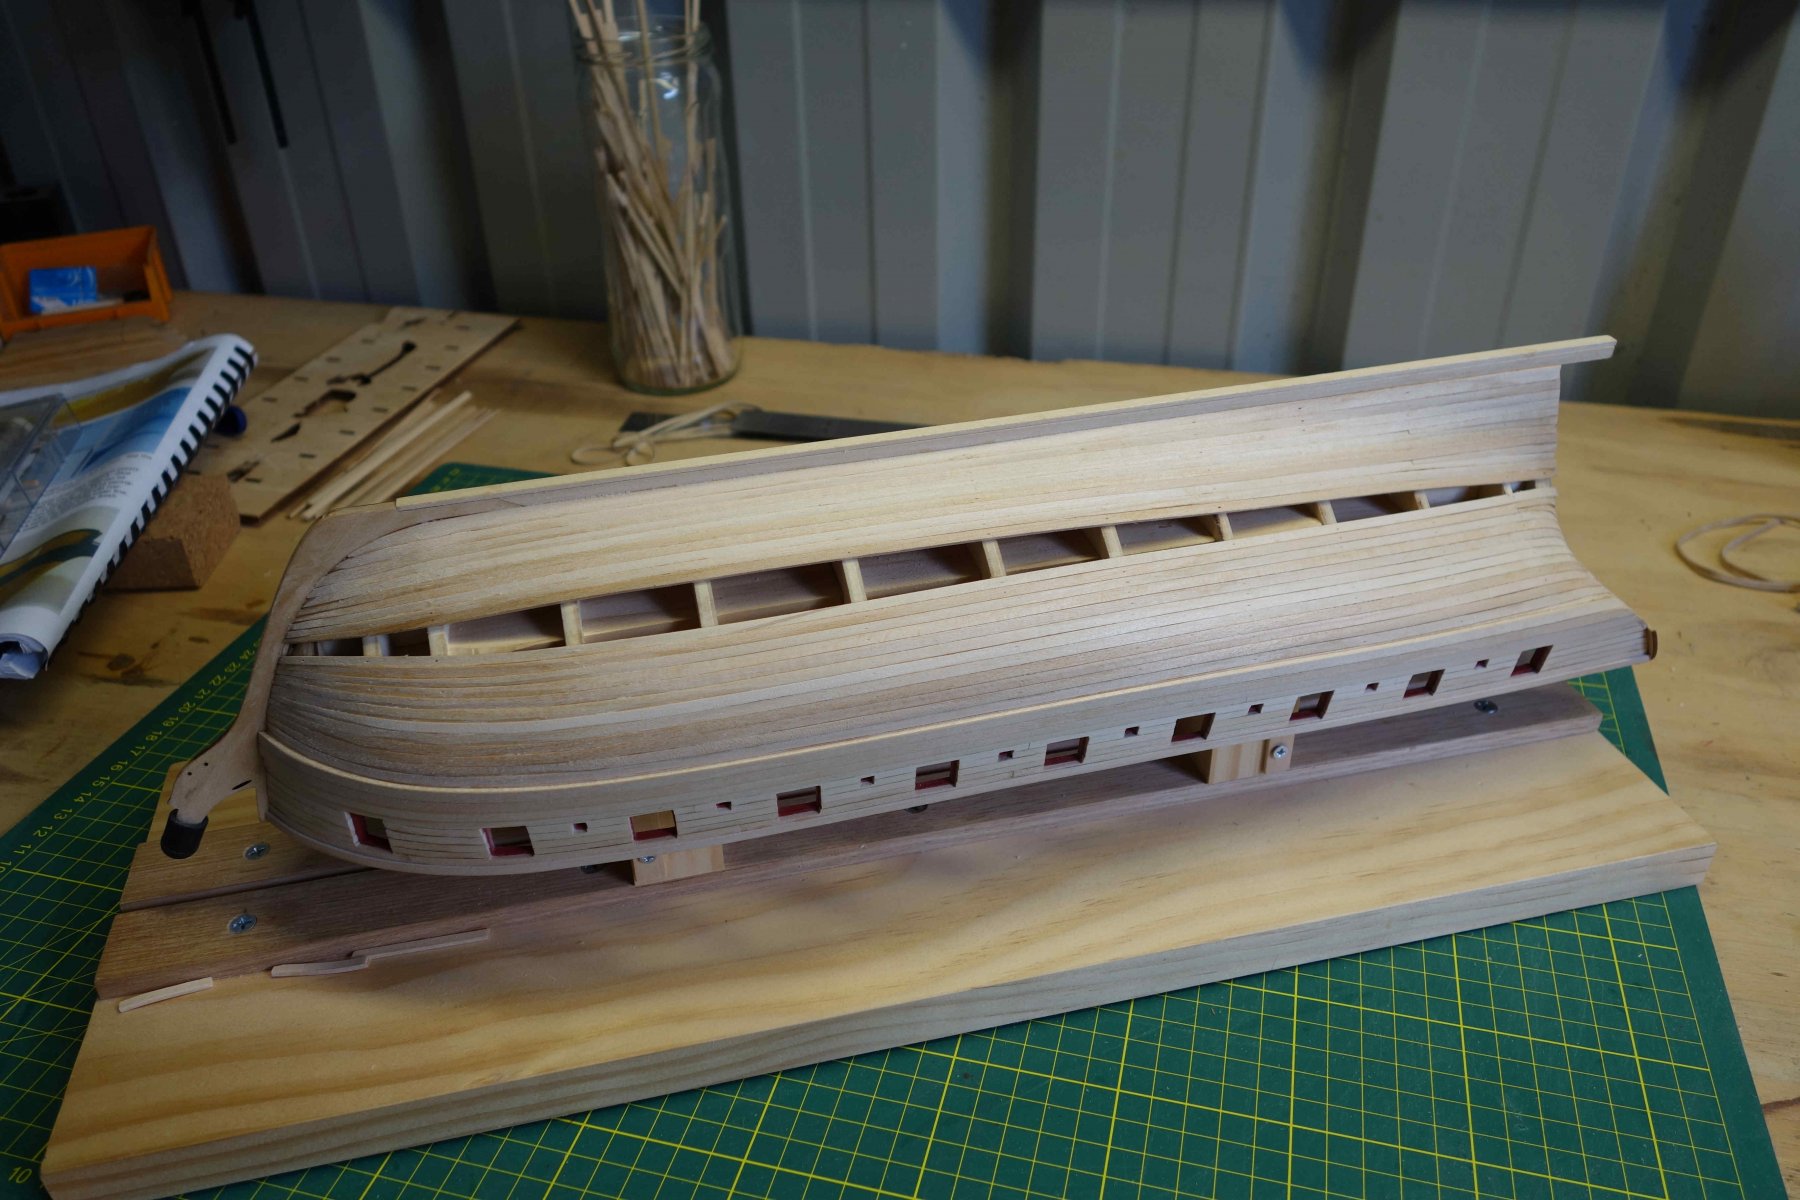
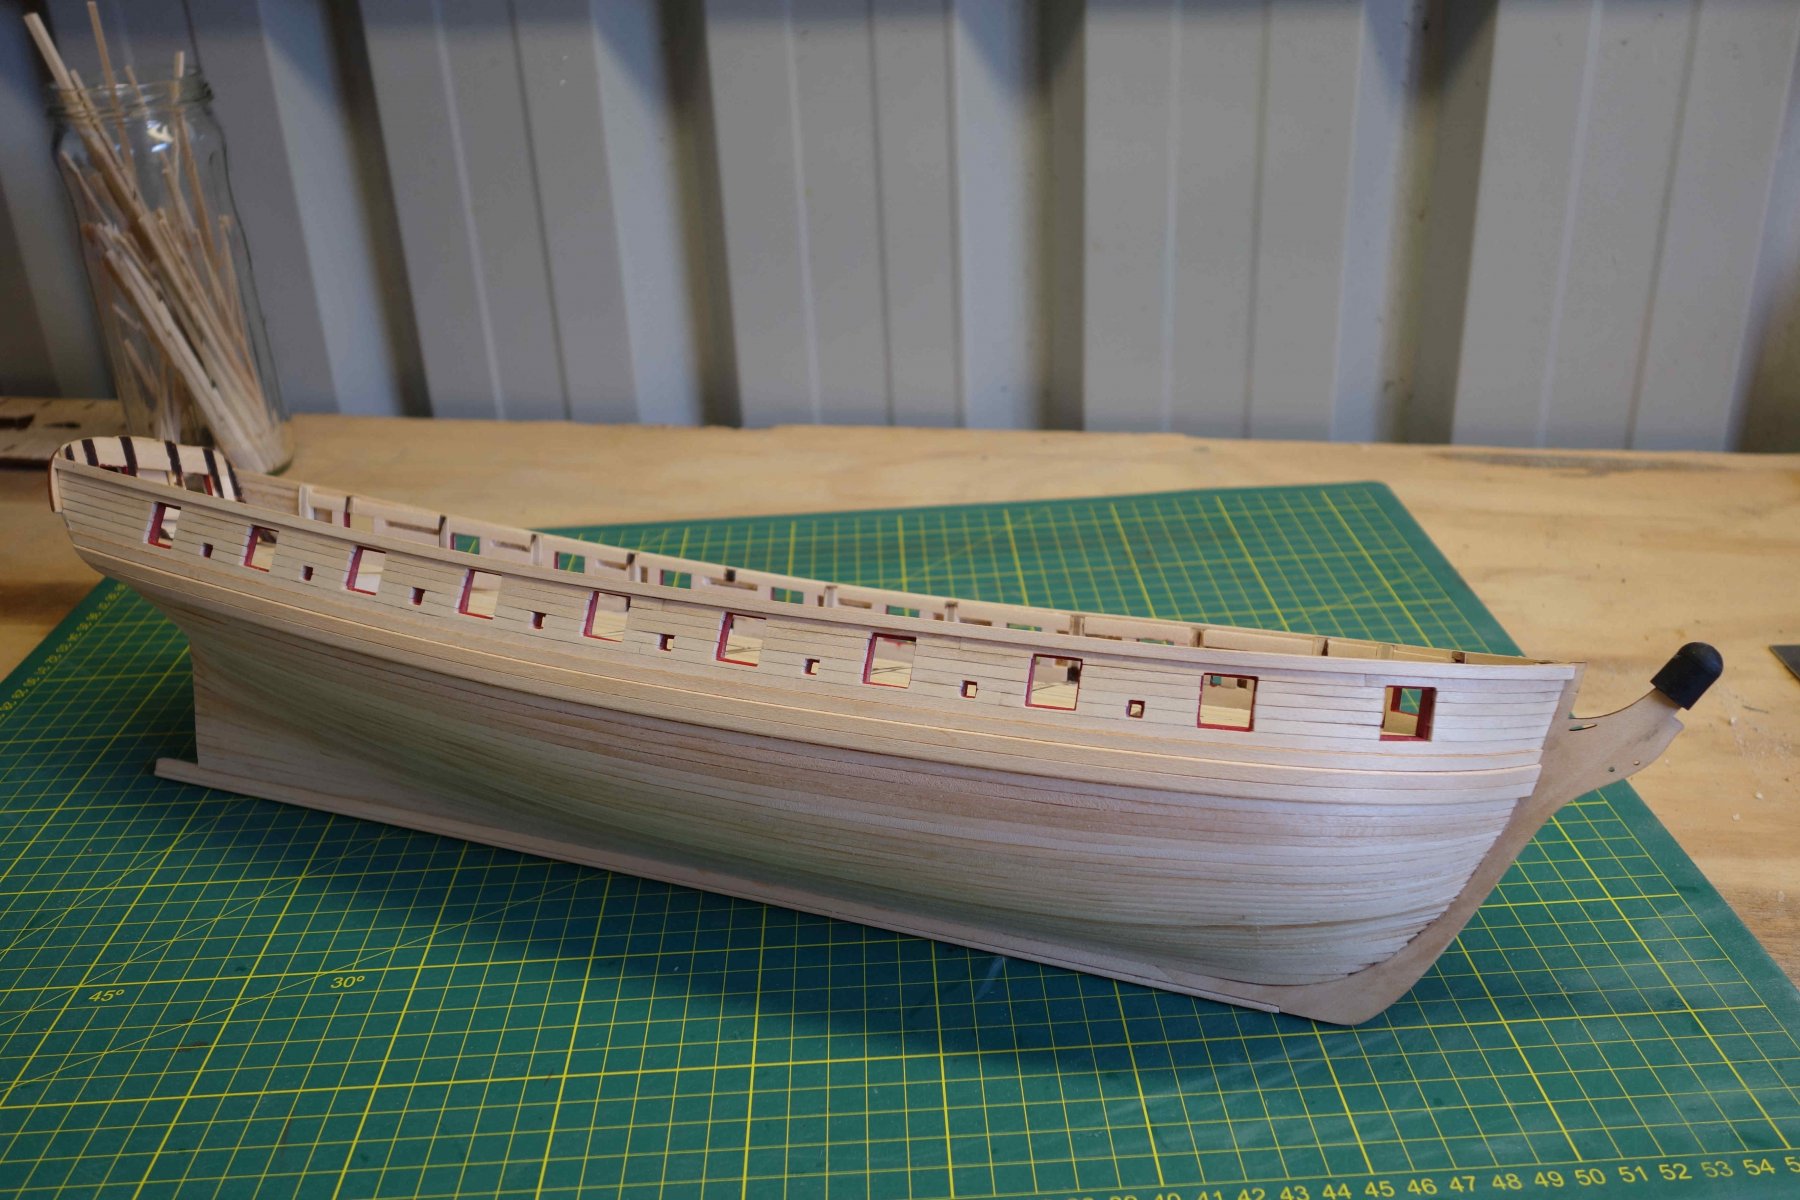
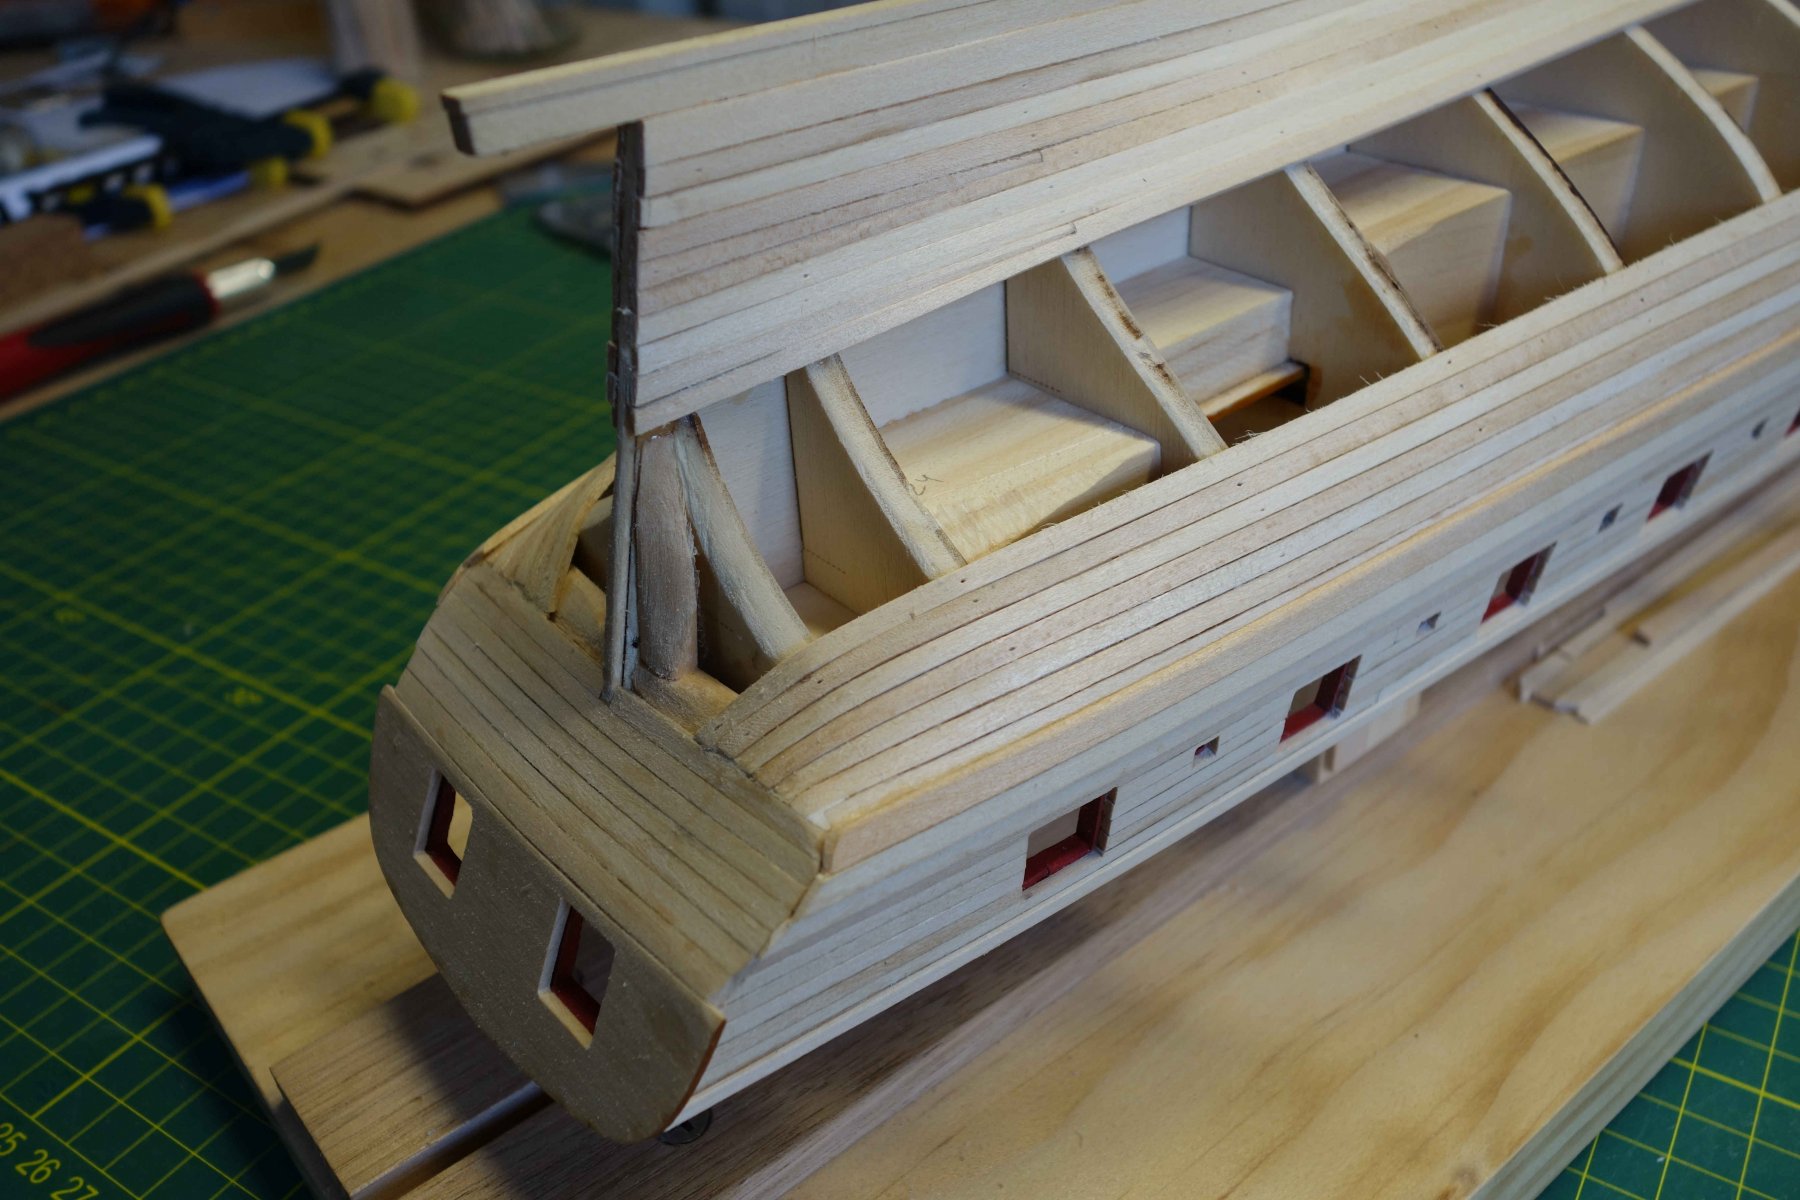
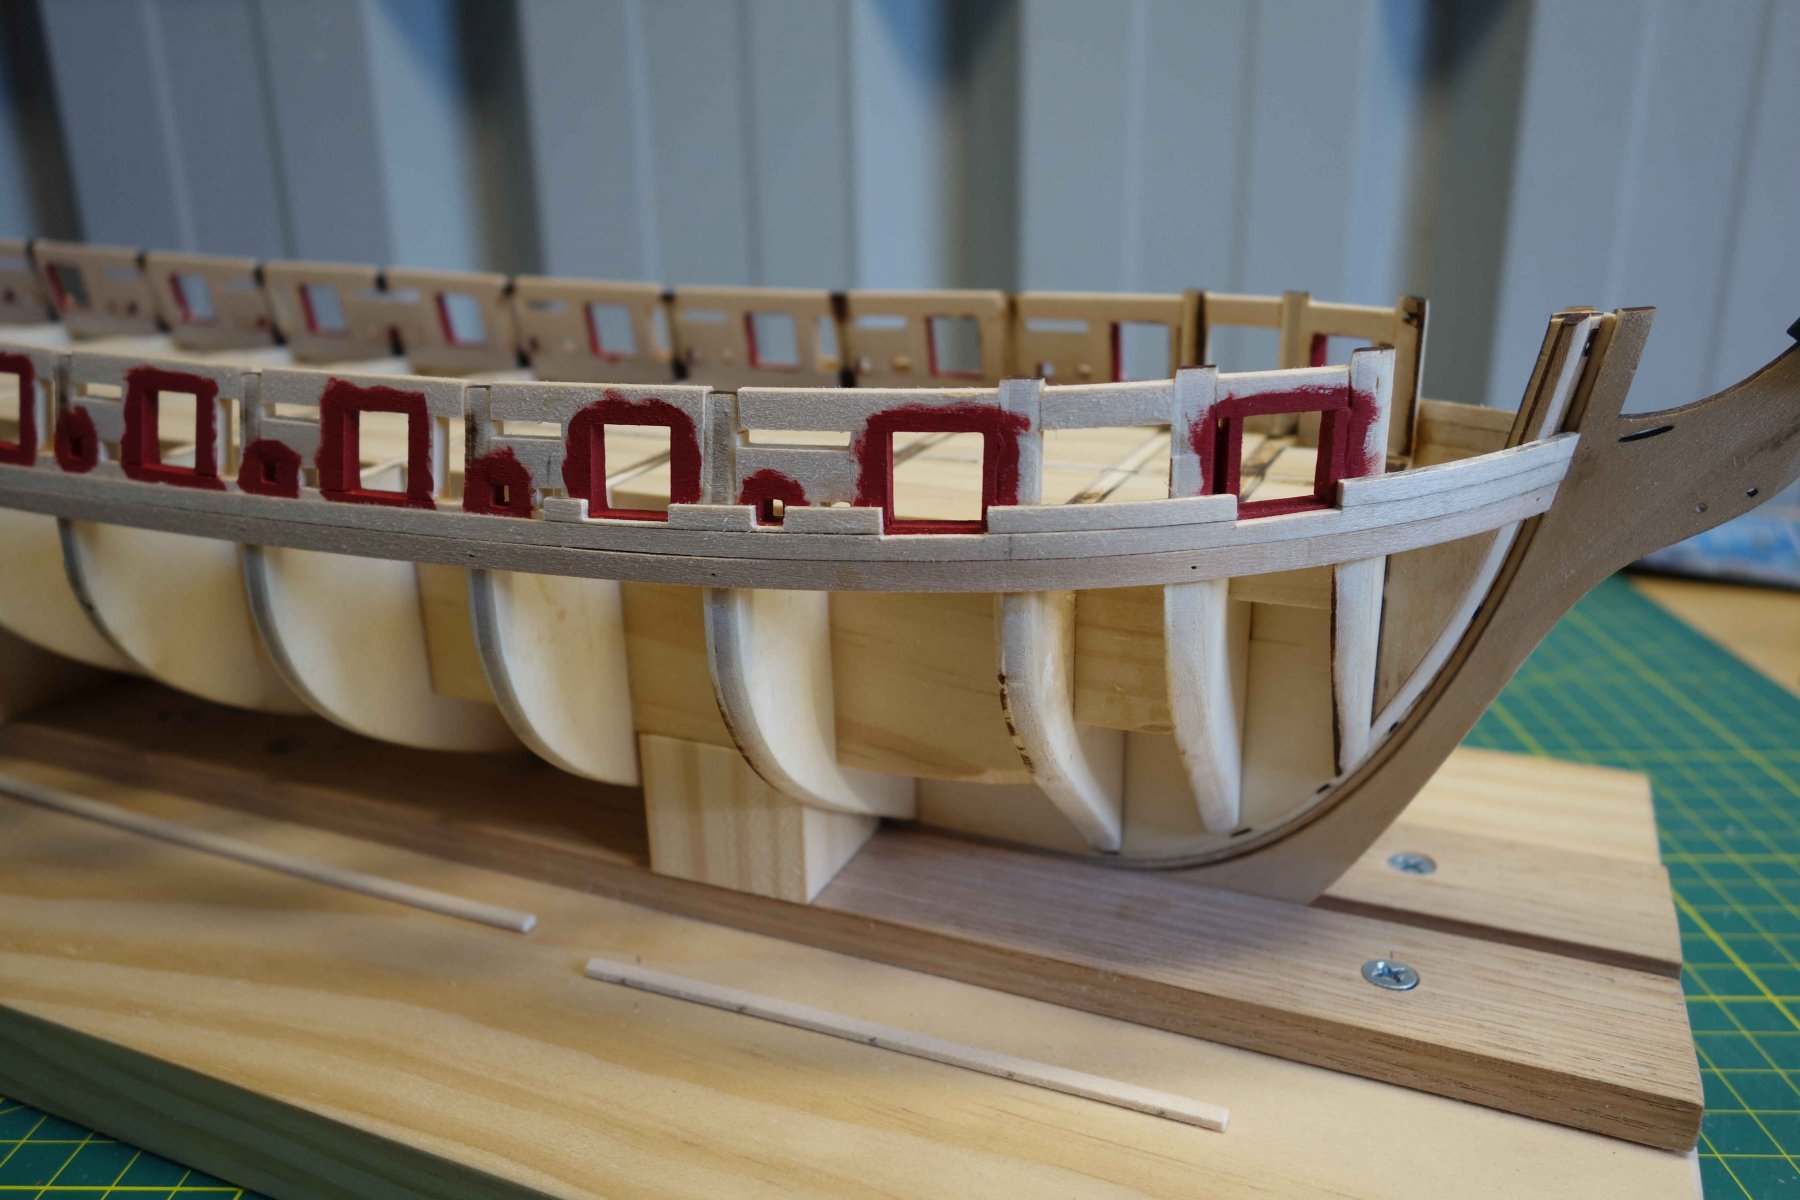
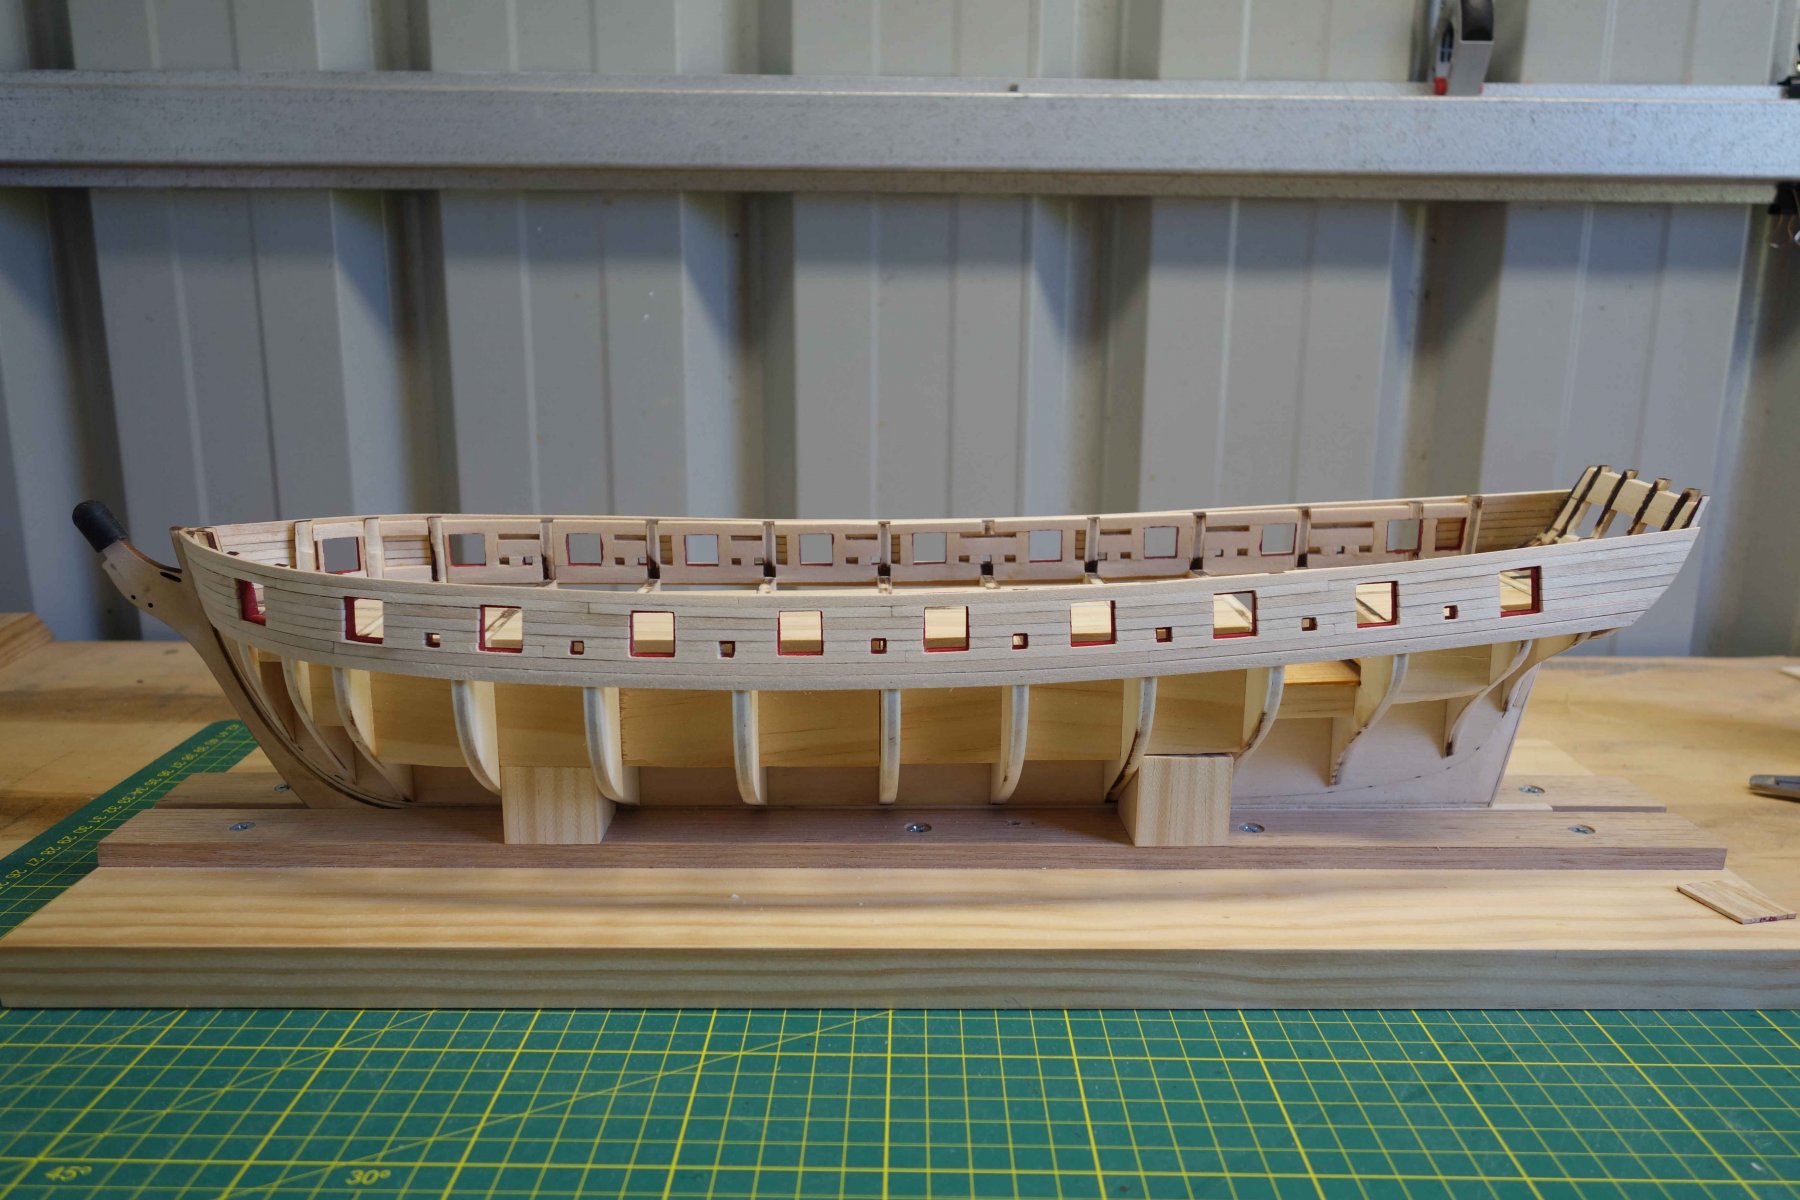
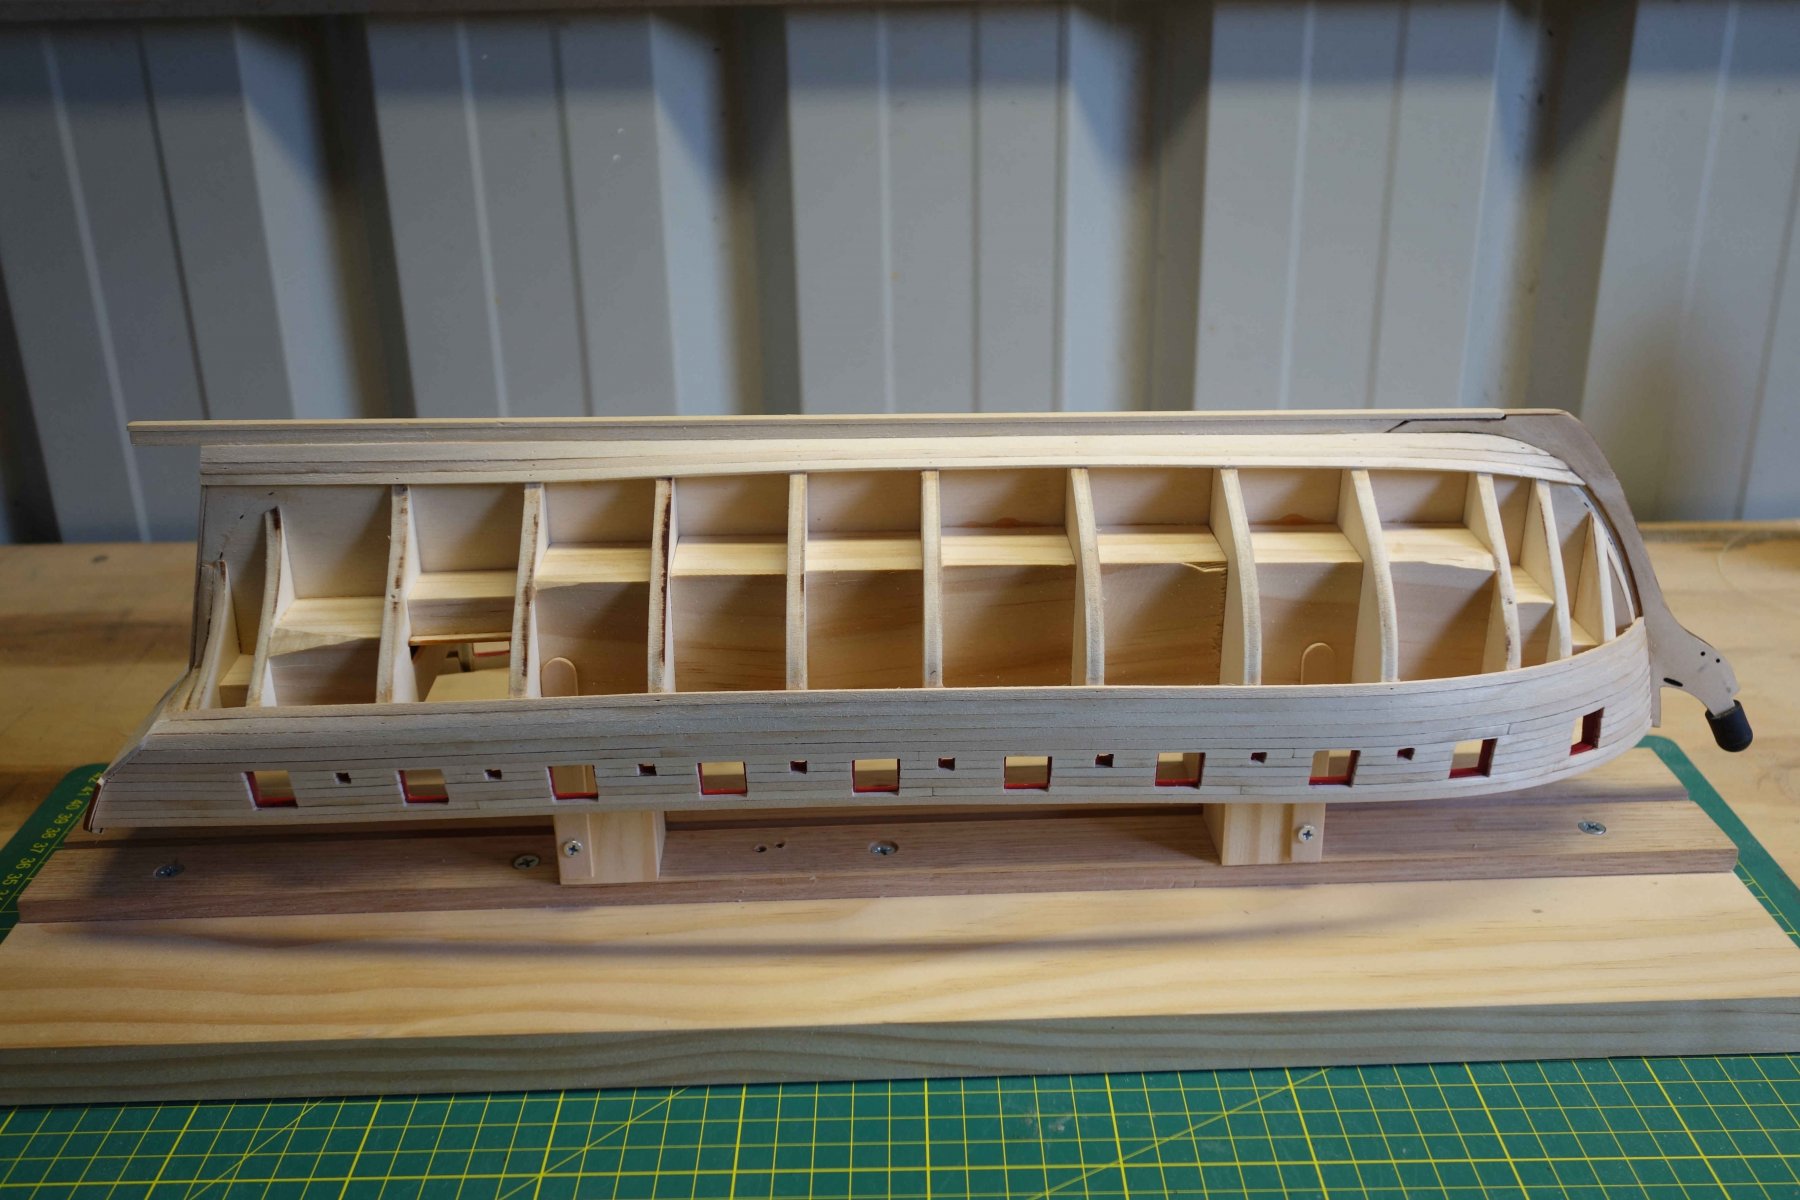
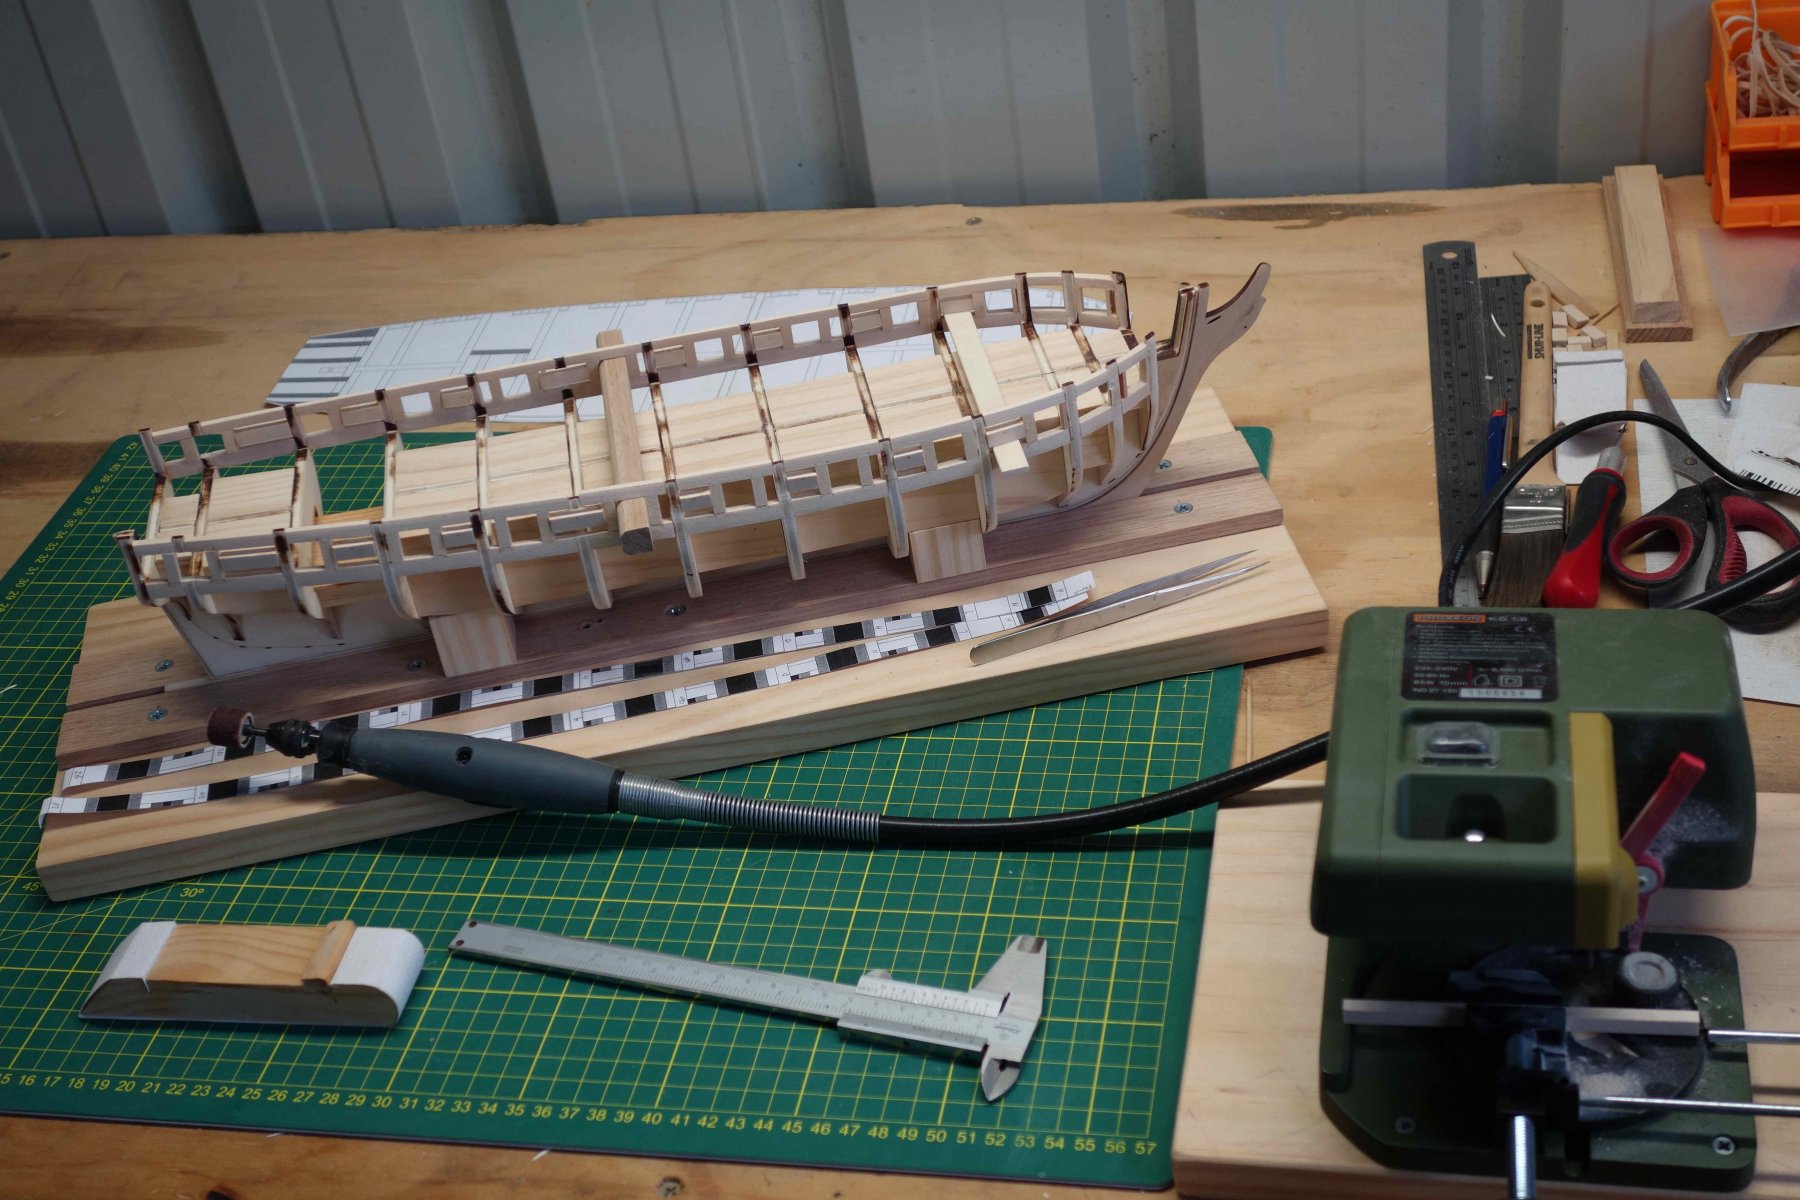
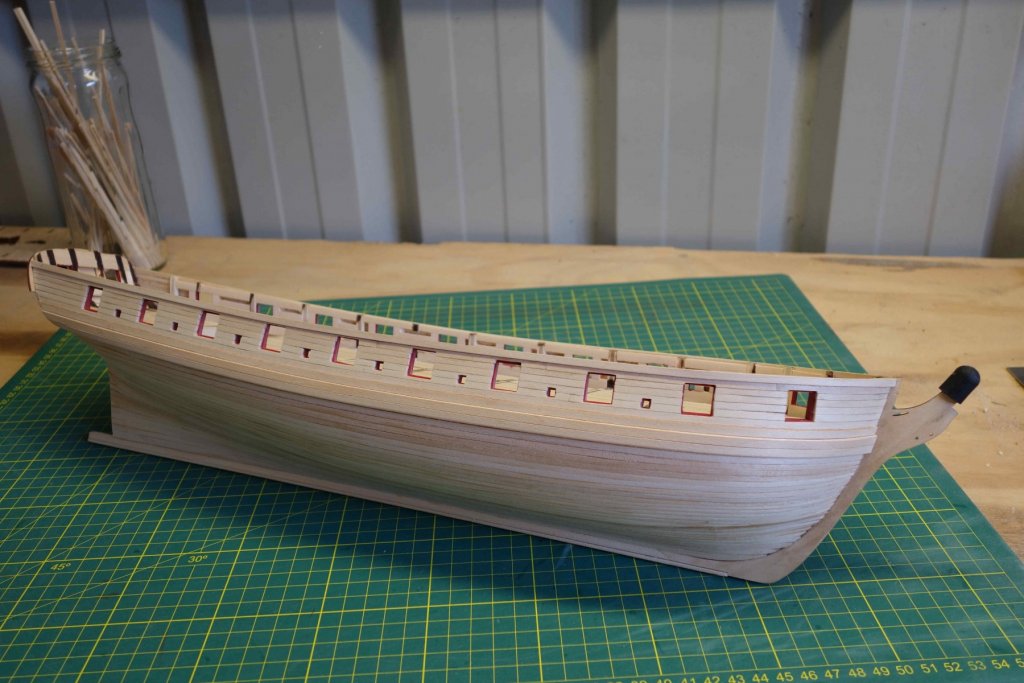
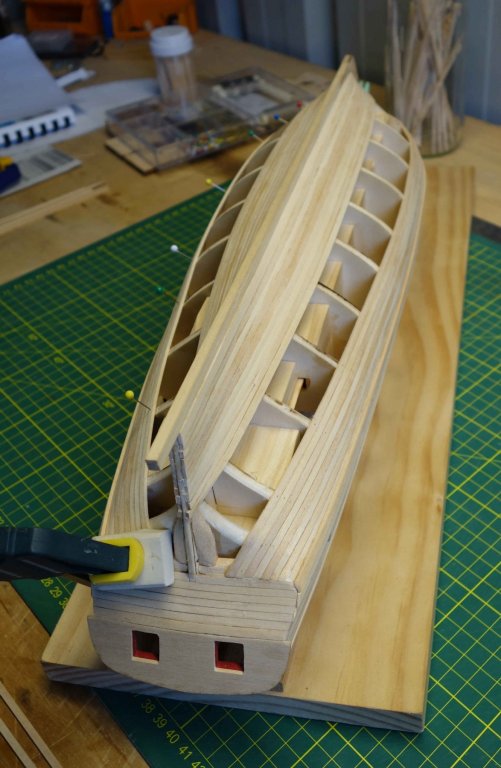
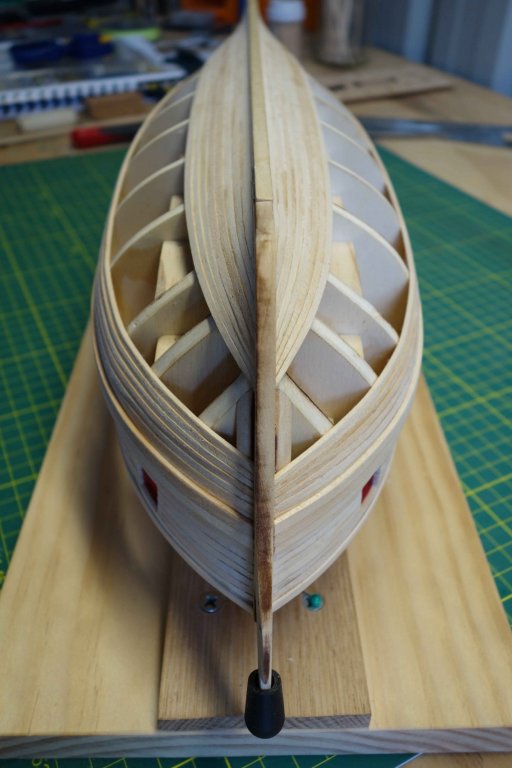
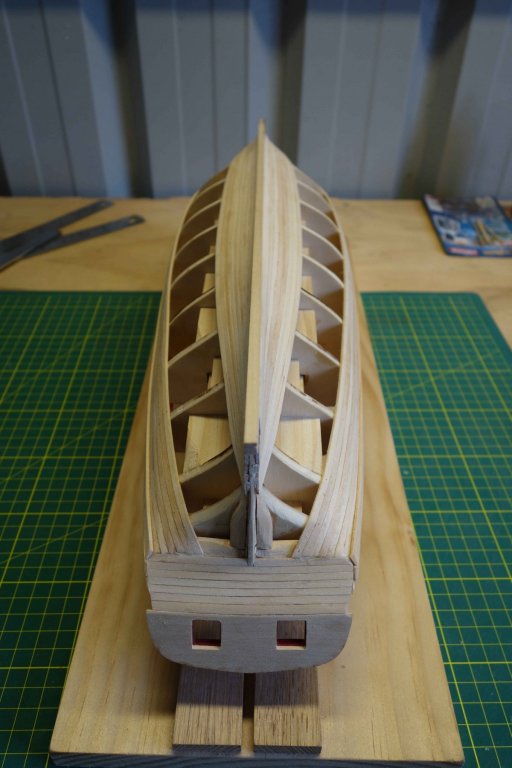
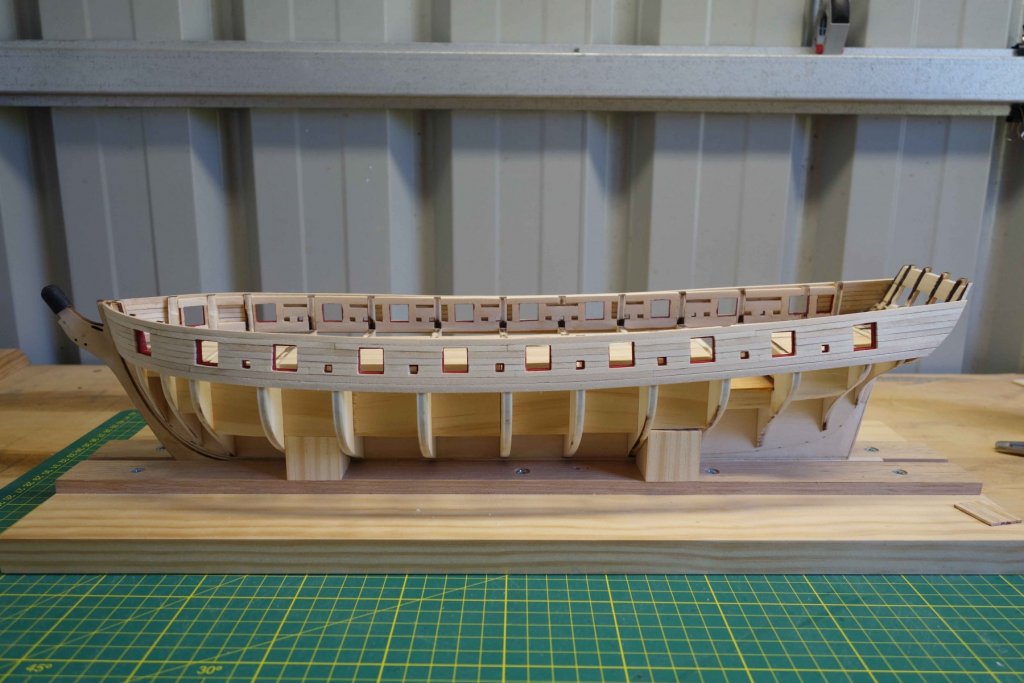
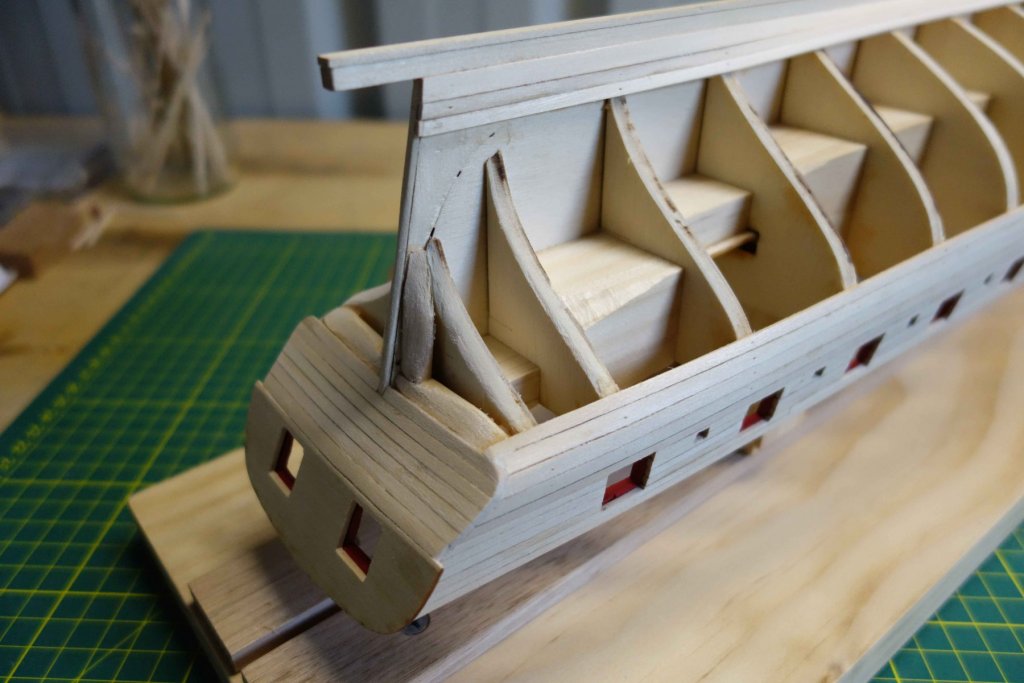
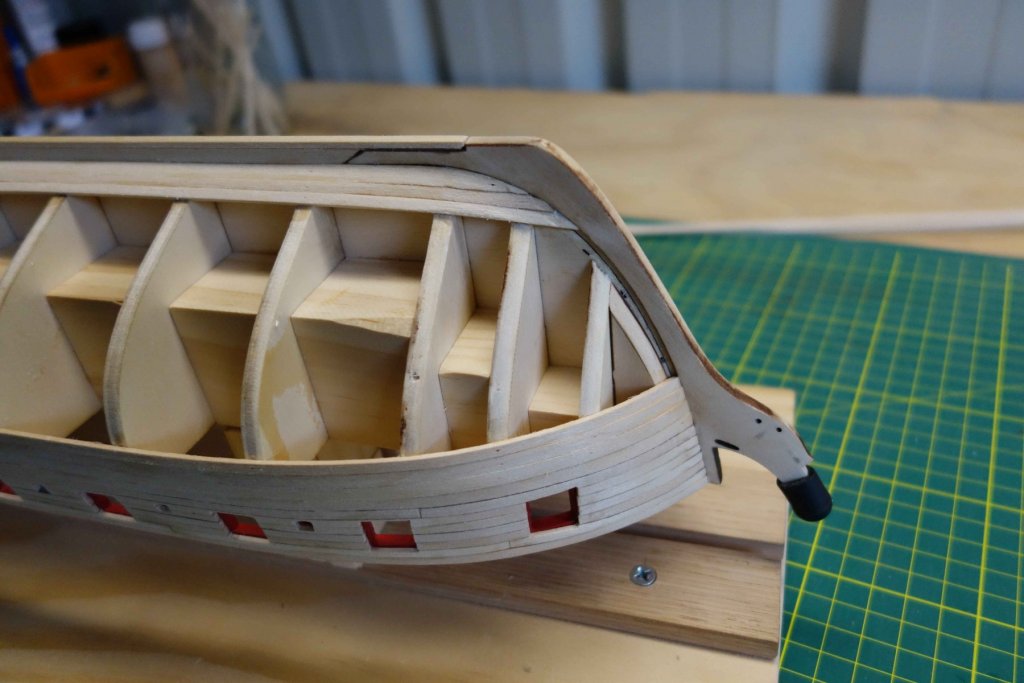
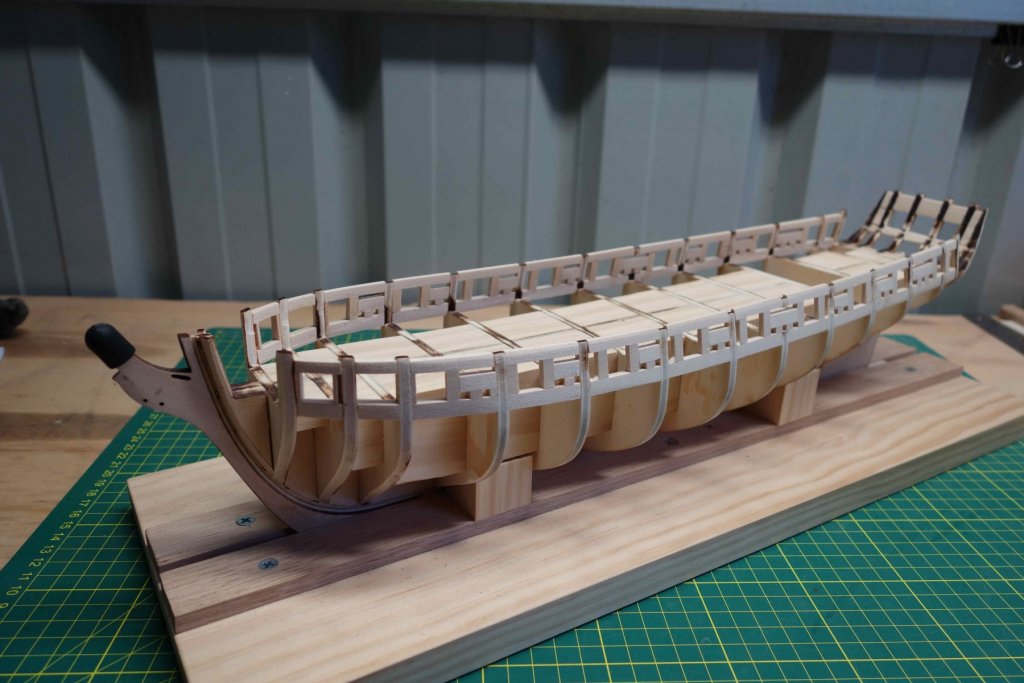
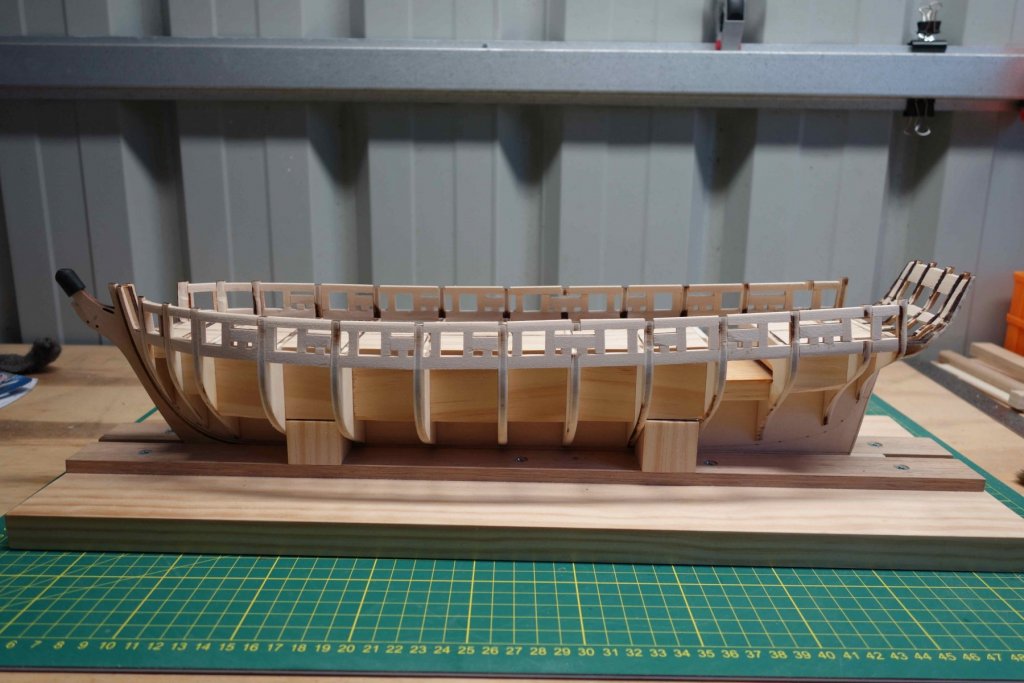
I Finished Chapter 4, the Stern Framing, without too much drama, spend quite a bit of time sanding (as usual) and shaping. Onwards to Chapter 5, the dreaded planking....


- 242 replies
-
- 7
-
-
- syren
- model shipways
- (and 1 more)
-
Hi Floyd, I haven't read the manual yet, but if you go to entry 358 of Chucks prototype build log, he discusses how he did the cap rails. http://modelshipworldforum.com/resources/Chuck Passaro - MS Brig Syren Prototype Build Log.pdf Cheers, Peter
-
Hi Floyd, I know a little bit where you are coming from. My first two attempts (years ago, without the benefit of a website like this) ended up in the bin as well. My only planking success is the beginners kit 'Bon Retour' from AL, which had cut out pre shaped planks in addition to the strips. And with the cross section I conveniently avoided planking. At least we keep plugging away, so we should get there eventually...
- 242 replies
-
- 2
-
-
- syren
- model shipways
- (and 1 more)
-
Hi Floyd, the Chop saw is great. I use it all the time, especially on this part of the job. The only thing I get caught with is the end stop. I tend to push it up against the end of the part to be cut giving it a bit of load. After the cut, the stop springs back, making the supposedly same length second cut almost always shorter. Also sometimes when you go too quick, the blade seems to snap off the final bit which sometimes also moves the stop a bit. So its 1 cut, check, next cut, check, etc. The nose I just saw rolling on the floor. I must have brushed past something and I couldn't figure out where it came from. So I parked it on the nose to not forget about it. I probably add a smiley face and make it a permanent fixture. The gun port jig was definitely your idea. It seemed logical to me to extend it to the sweep ports as well. BTW I admire your efforts on the planking recovery. I didn't put any "likes" on your posts not wanting to send the wrong message that I was liking what I was seeing...lol. I'm not sure what I would do under the same circumstances. Maybe I'll find out soon enough.
- 242 replies
-
- 1
-
-
- syren
- model shipways
- (and 1 more)
-
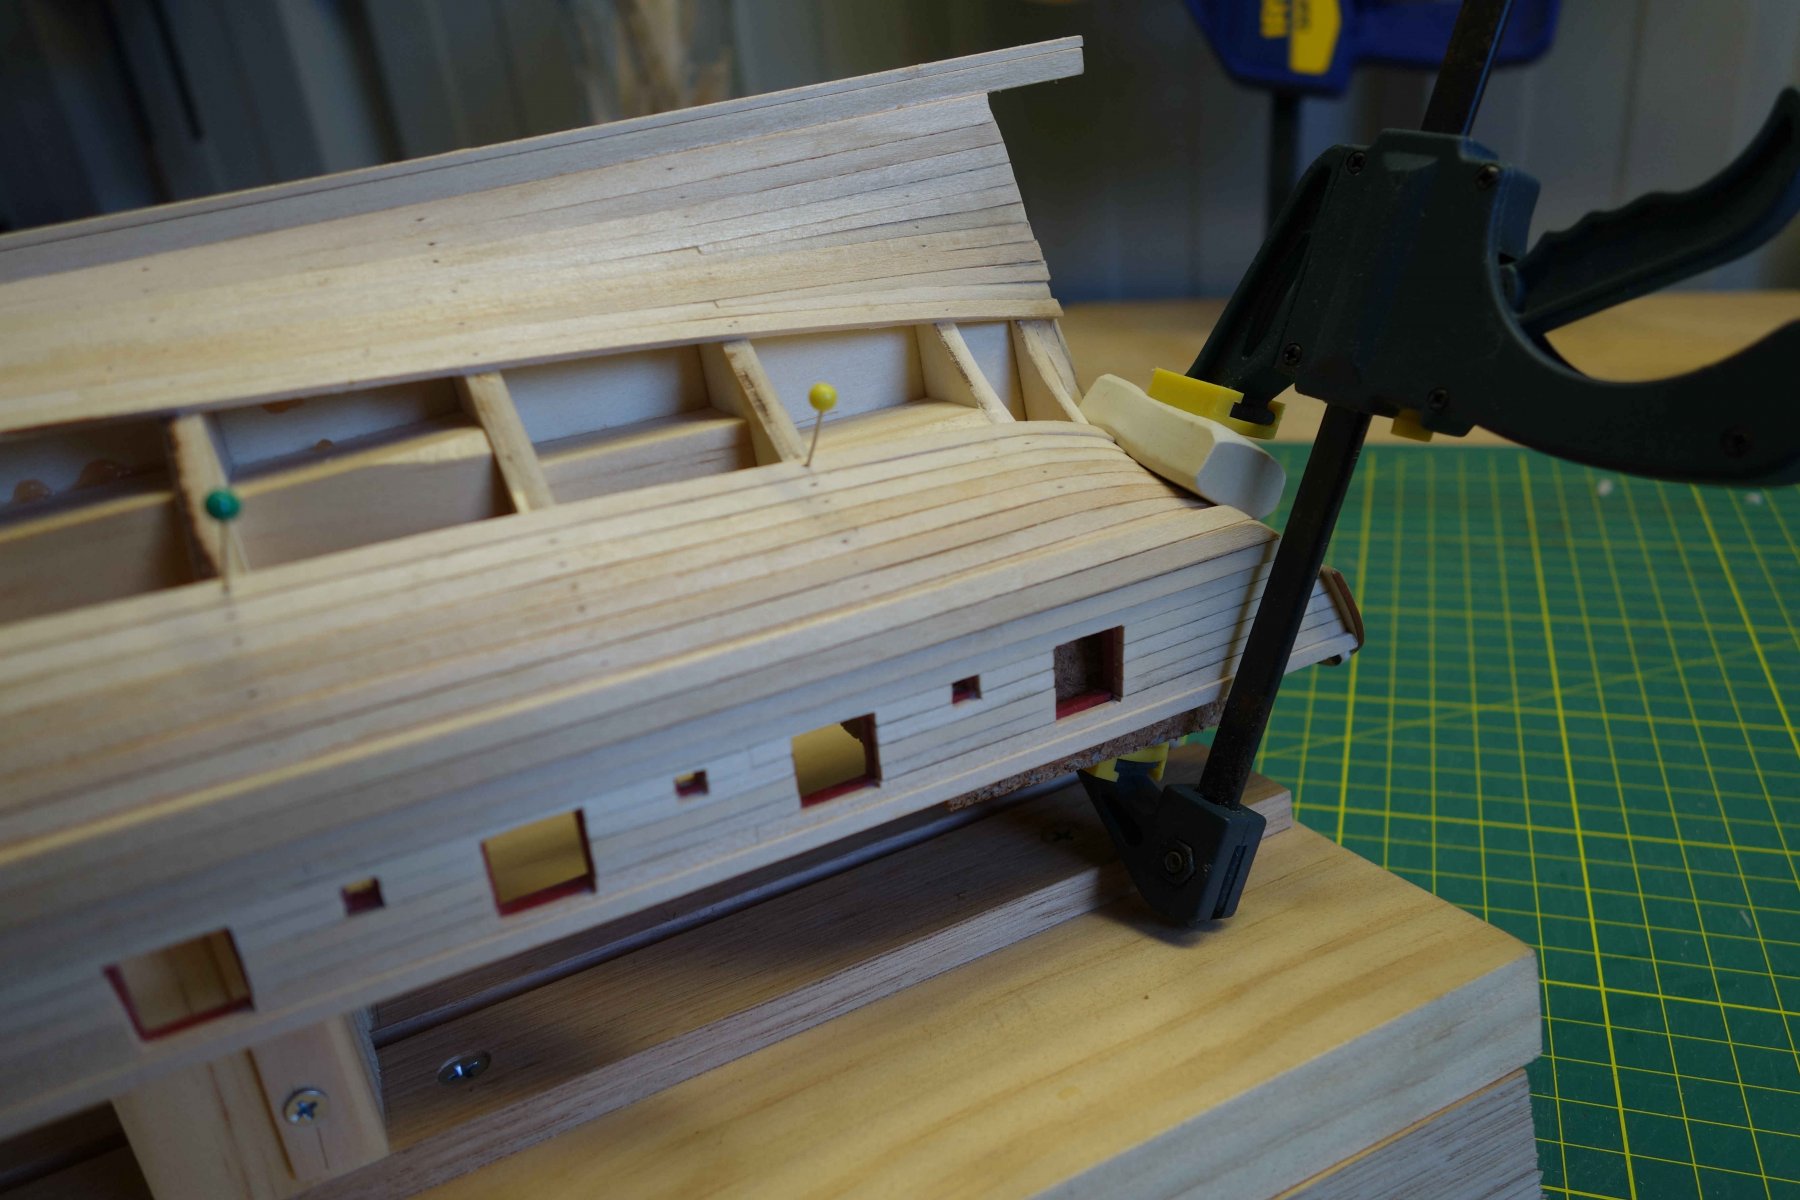
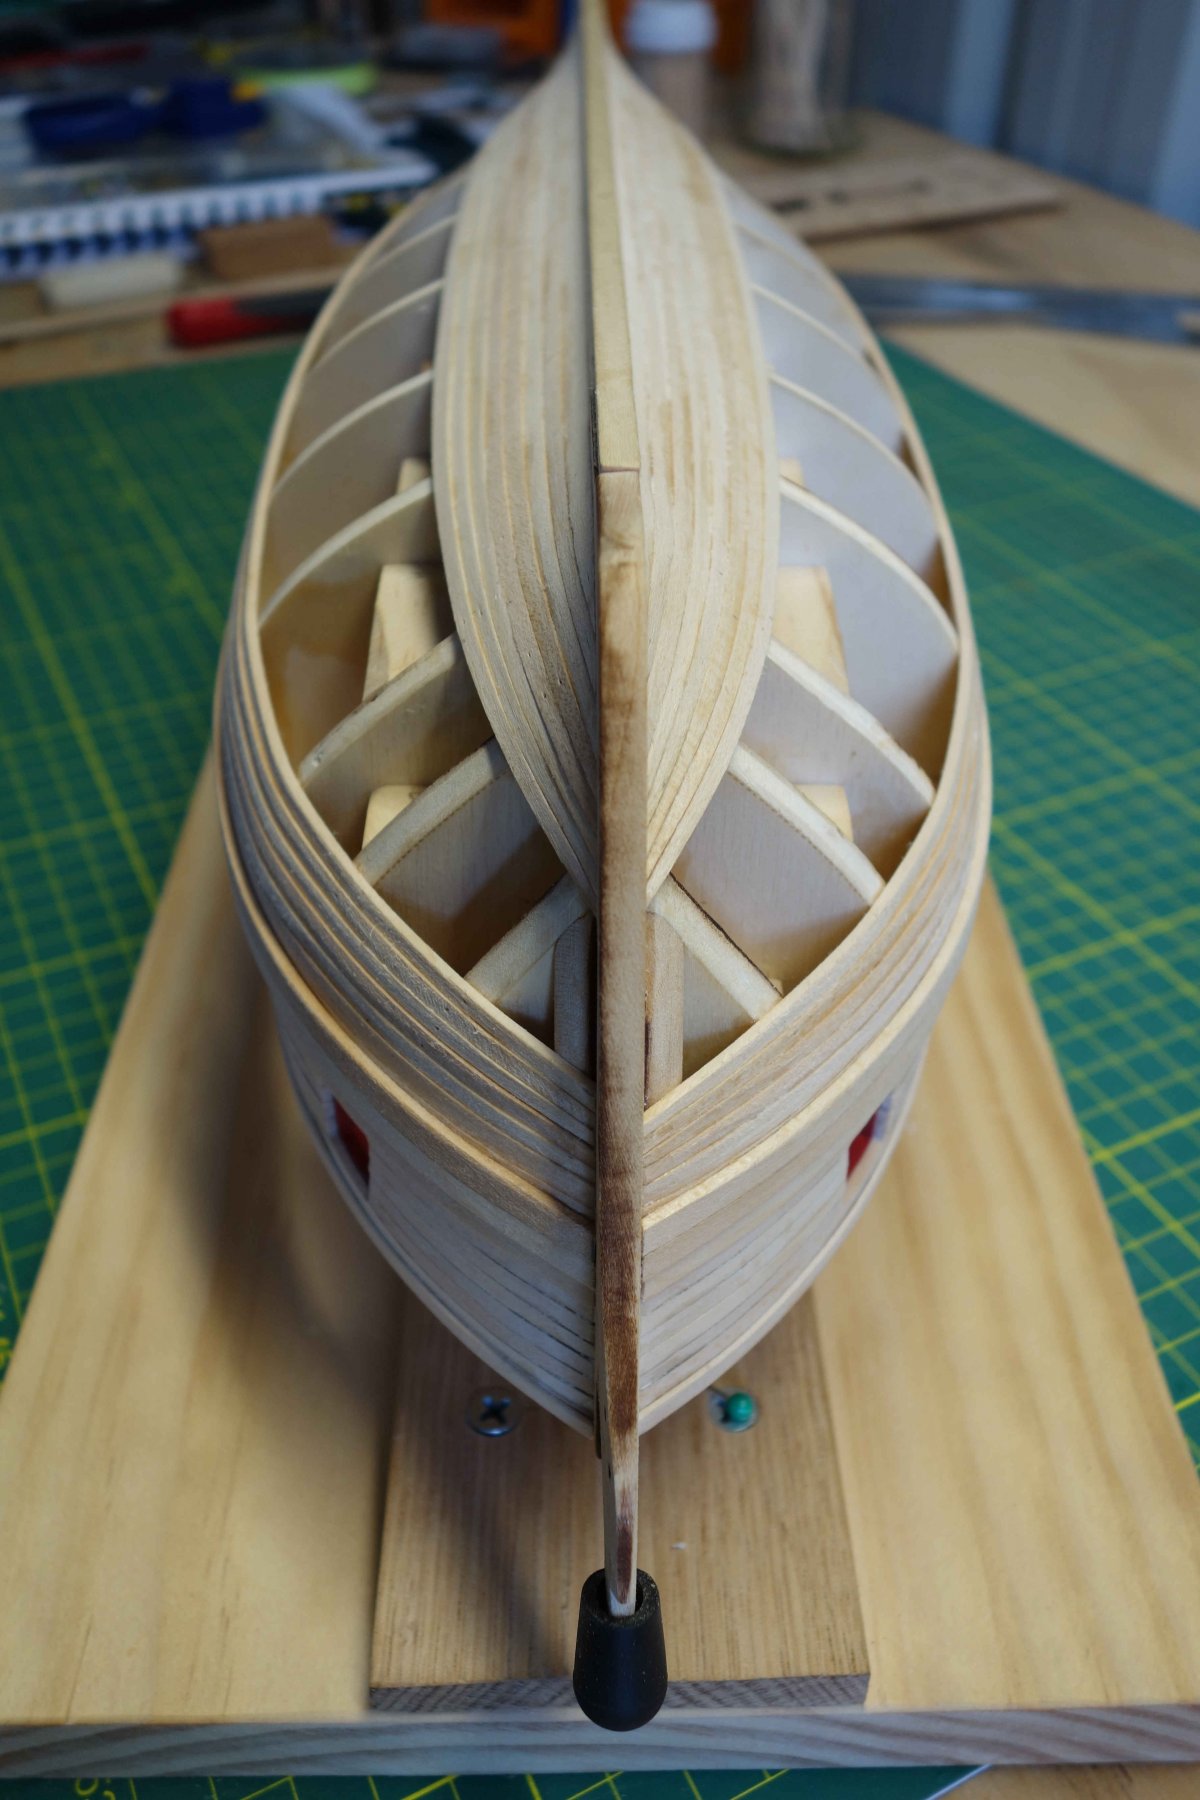
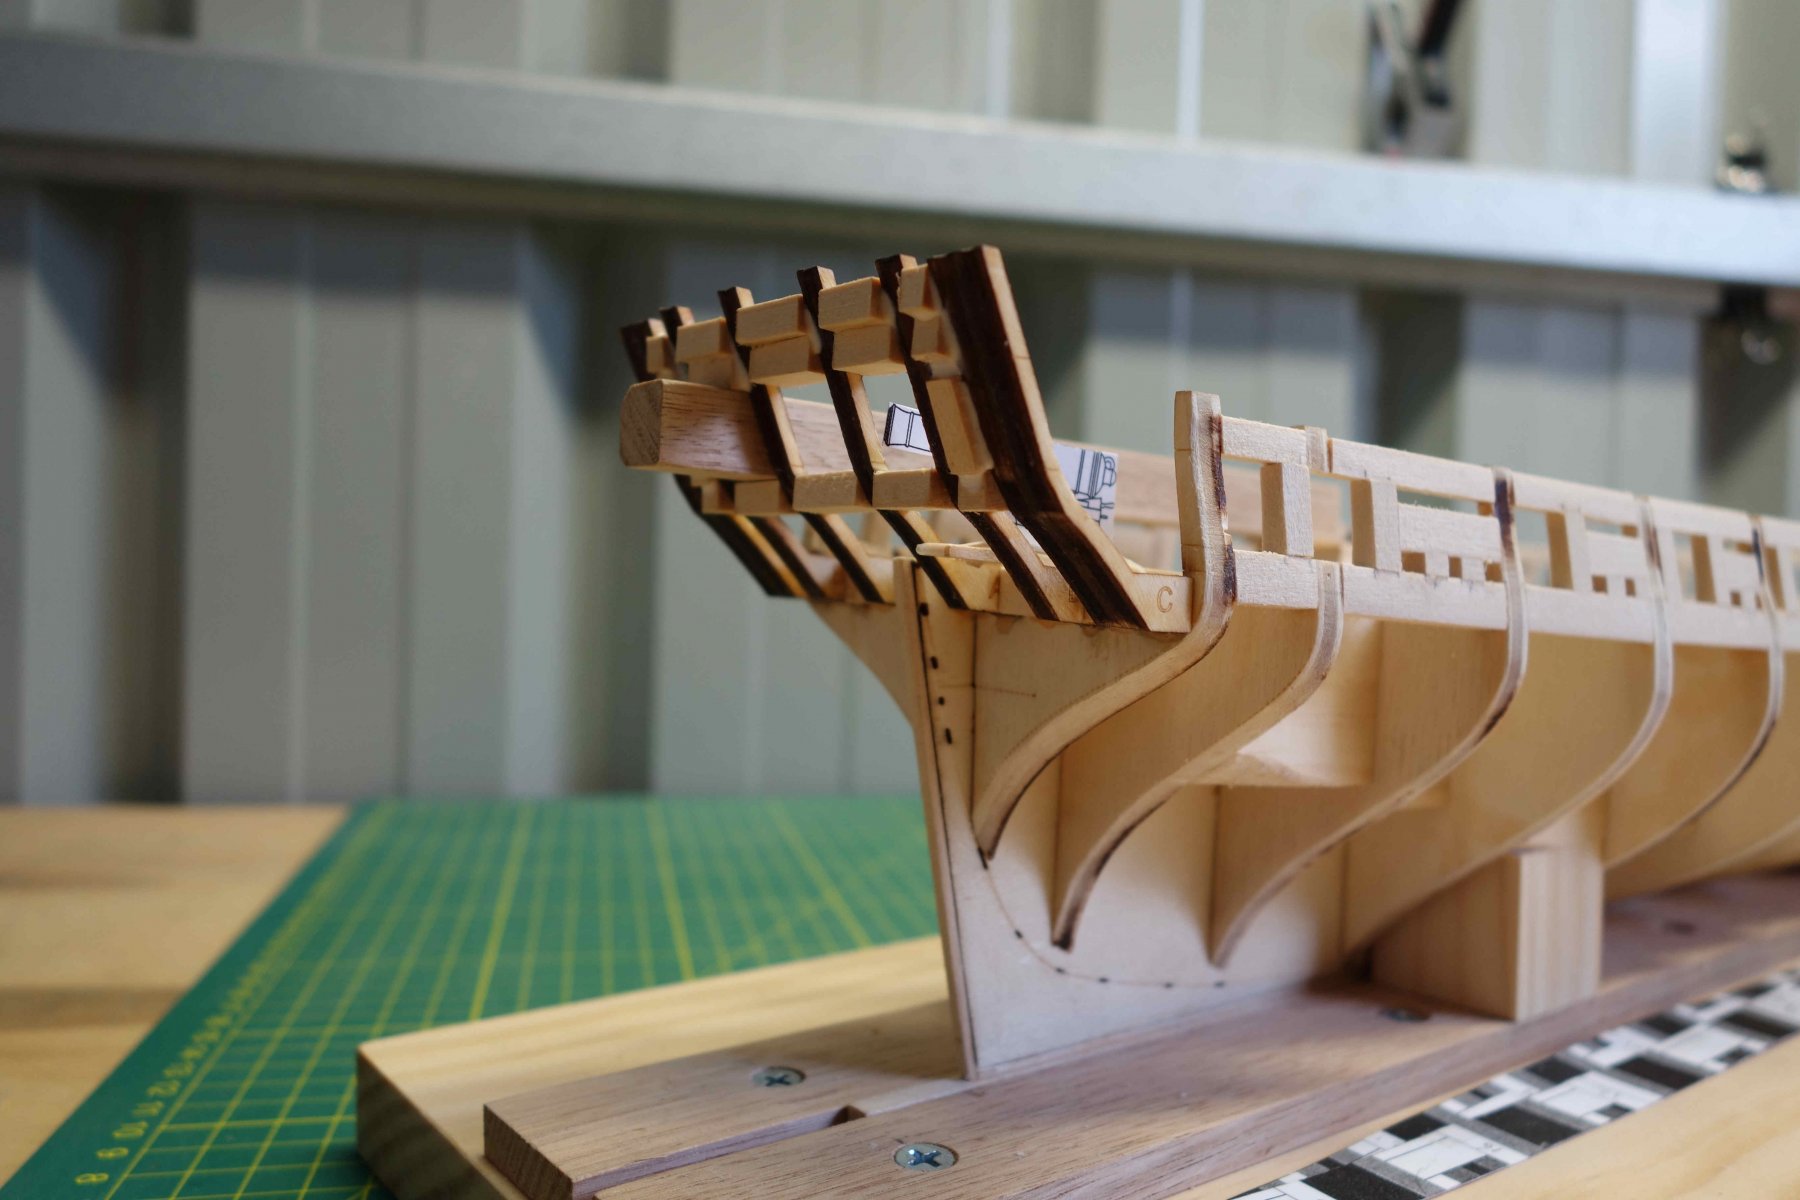
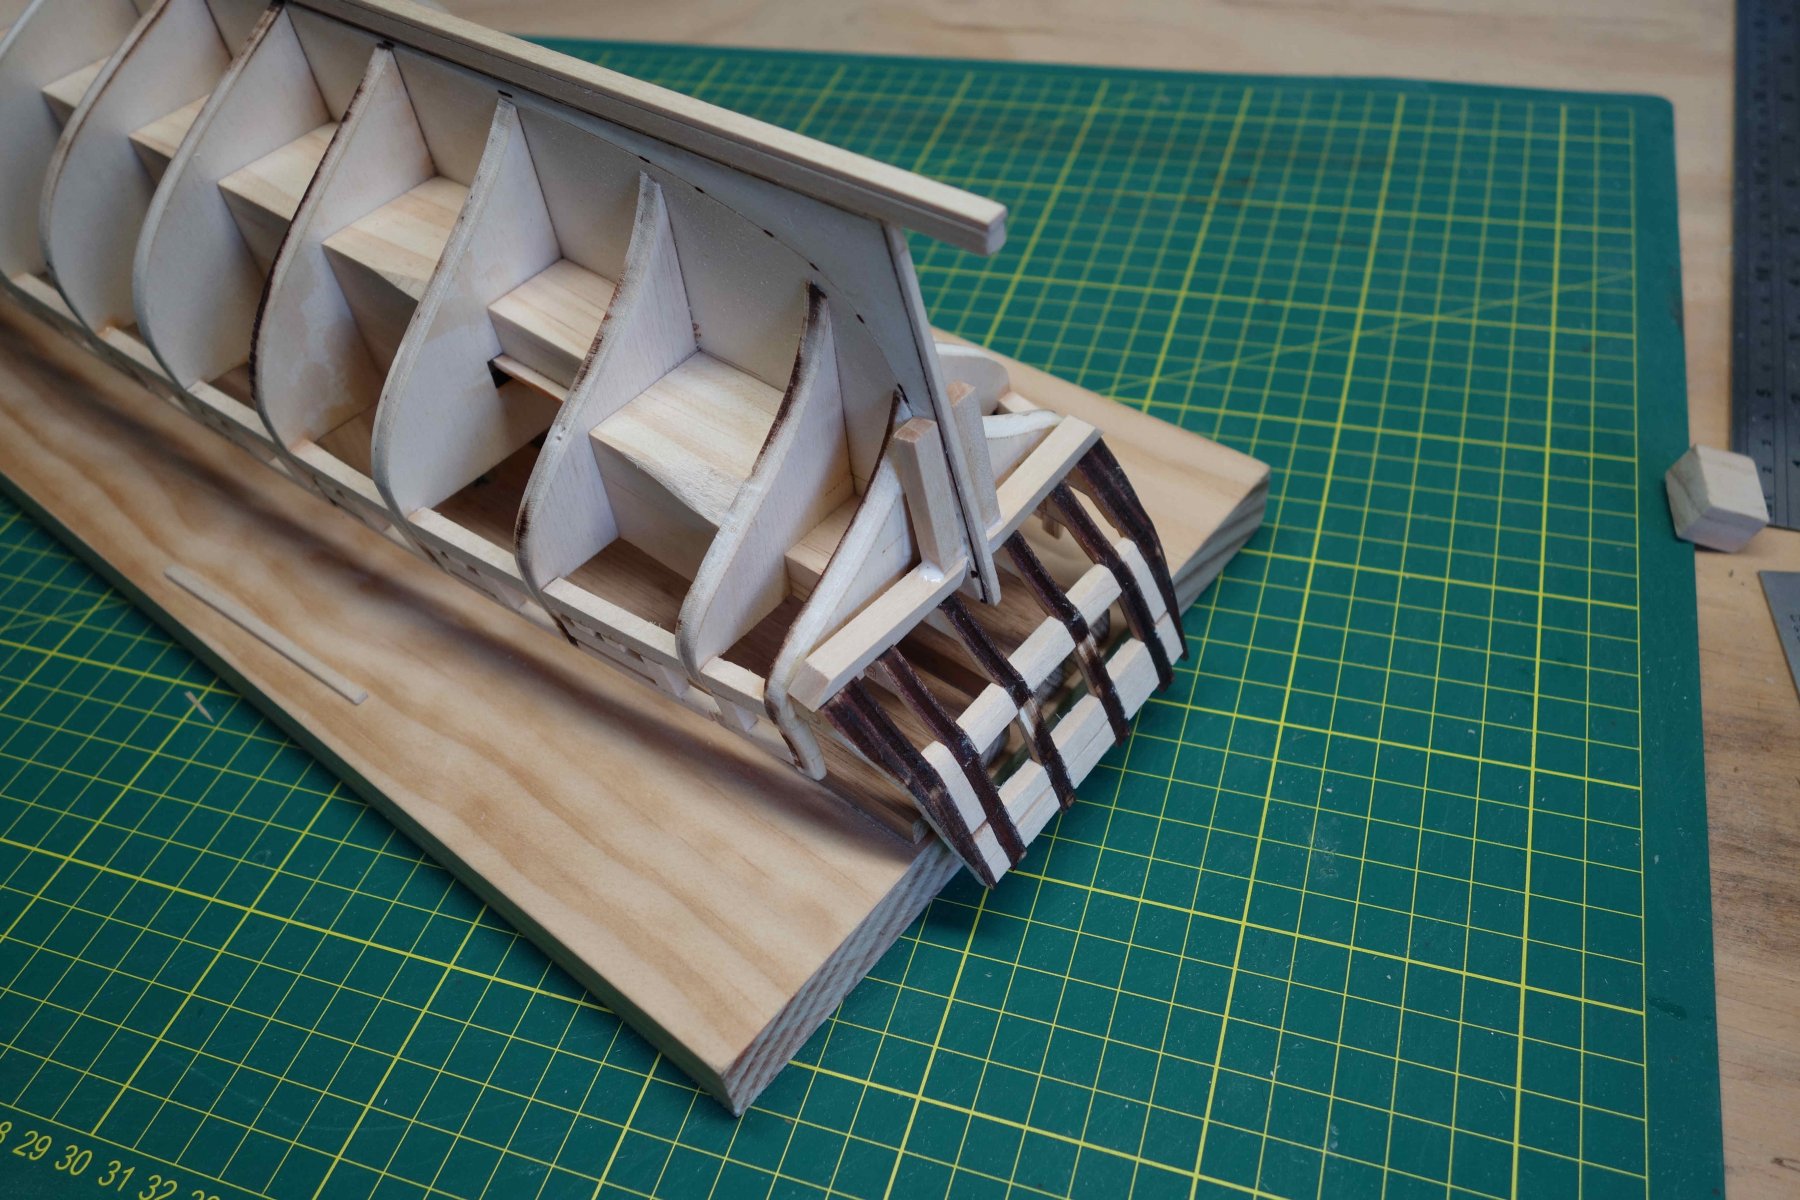
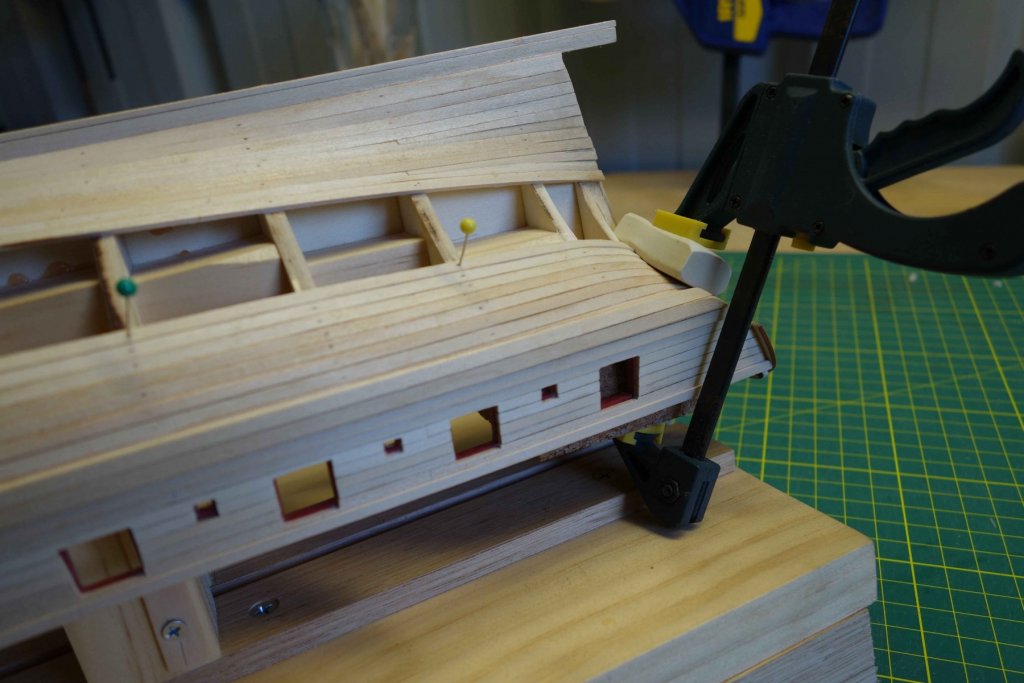
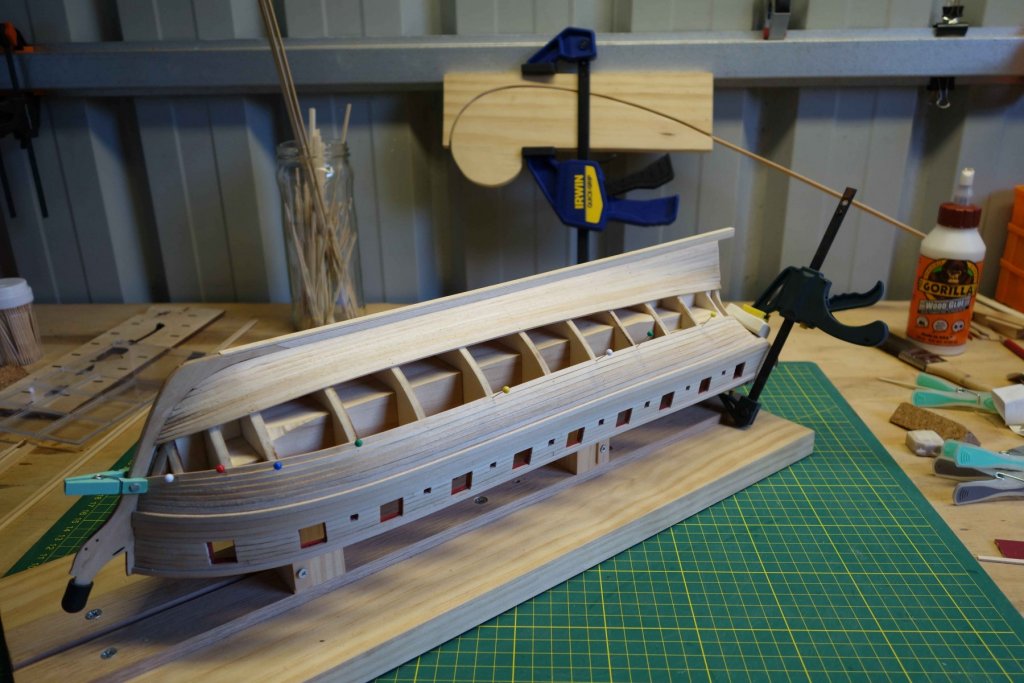
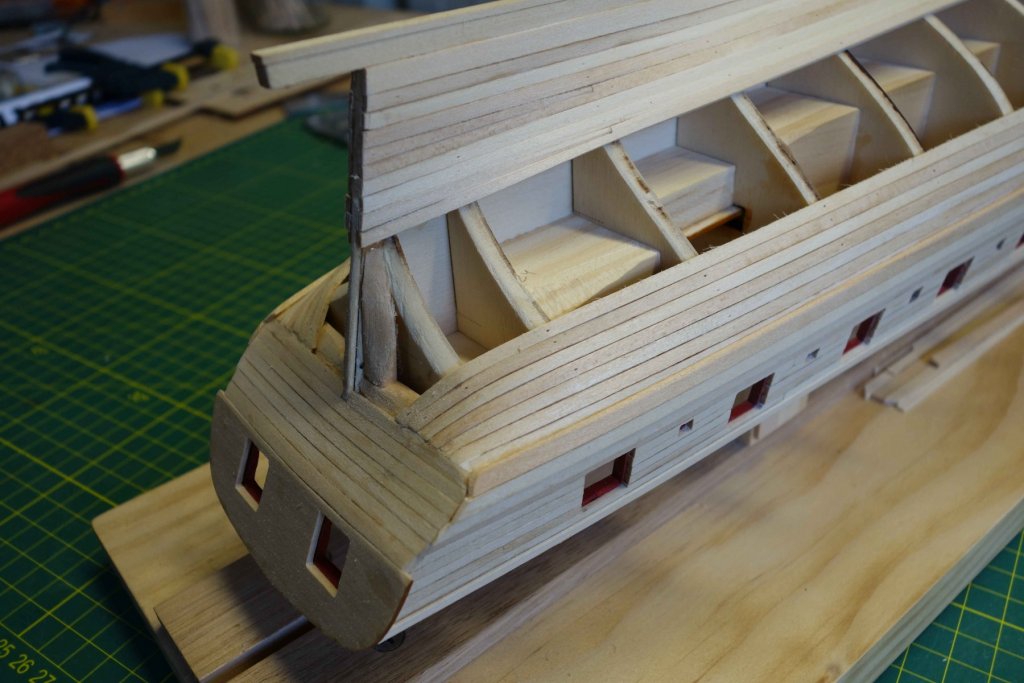
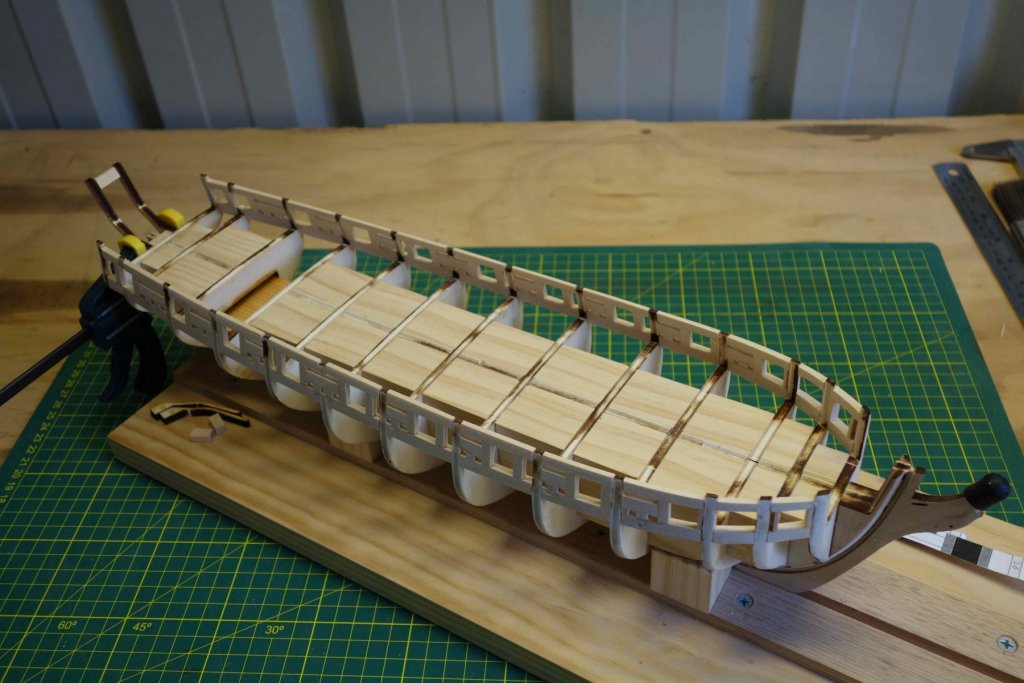
Next Update. I finished chapter 3 without much drama and started the stern Framing. I now appreciate the comments on how fragile this part is. I definitely intend to take it slow here and allow the glue to dry at each step....


- 242 replies
-
- 9
-
-
- syren
- model shipways
- (and 1 more)
-
Thanks Al, I just hope you can still say the same things when I'm halfway into the planking......