Peter Bloemendaal
-
Posts
236 -
Joined
-
Last visited
Content Type
Profiles
Forums
Gallery
Events
Everything posted by Peter Bloemendaal
-
 Looking great Svein, There is one thing I want to mention. The copper hull looks great but the ageing process ssems to be going pretty quick. Don't forget it will keep going. I treated one sample pretty aggressively and the copper is peeling by now. So at the stage when you are happy the way it looks you may want to seal the hull to stabelise the way it looks. I hope that makes sense. Cheers, Peter
 -
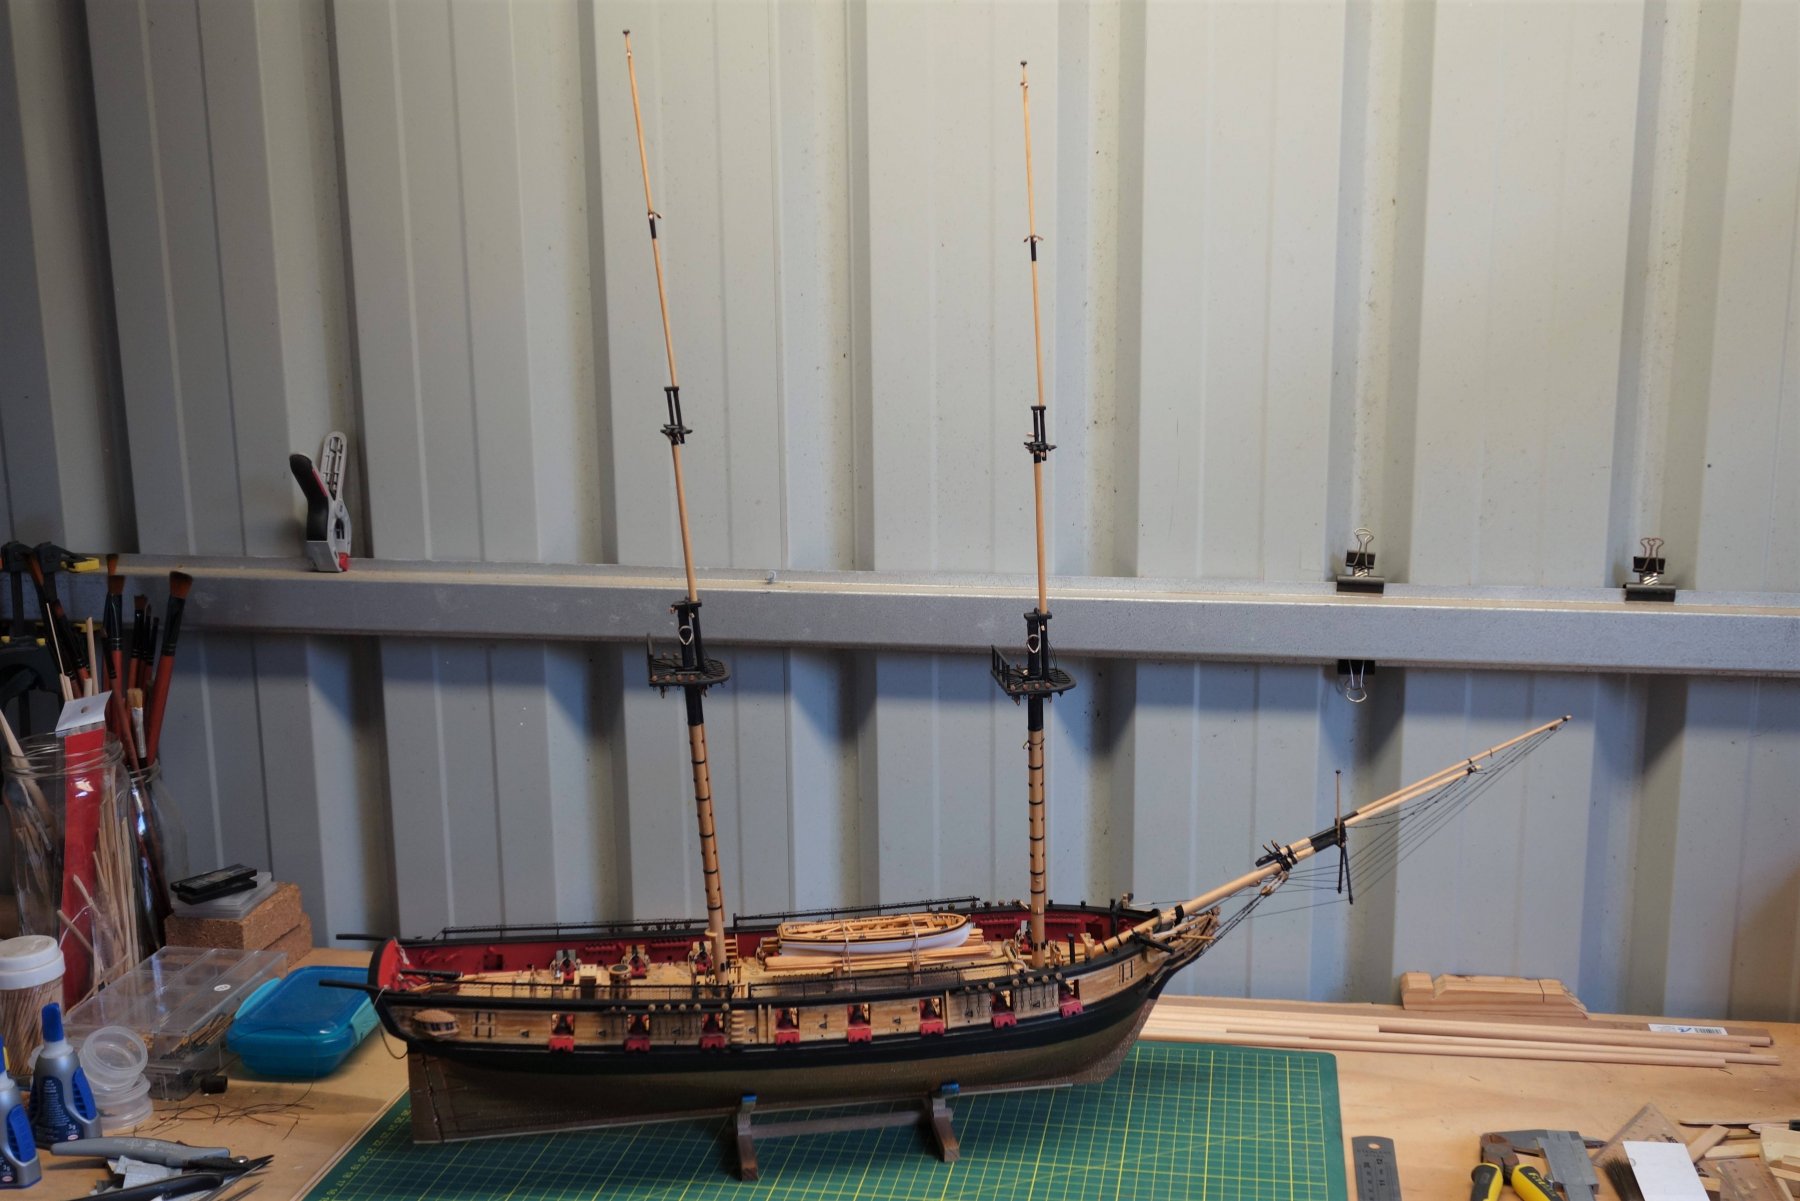
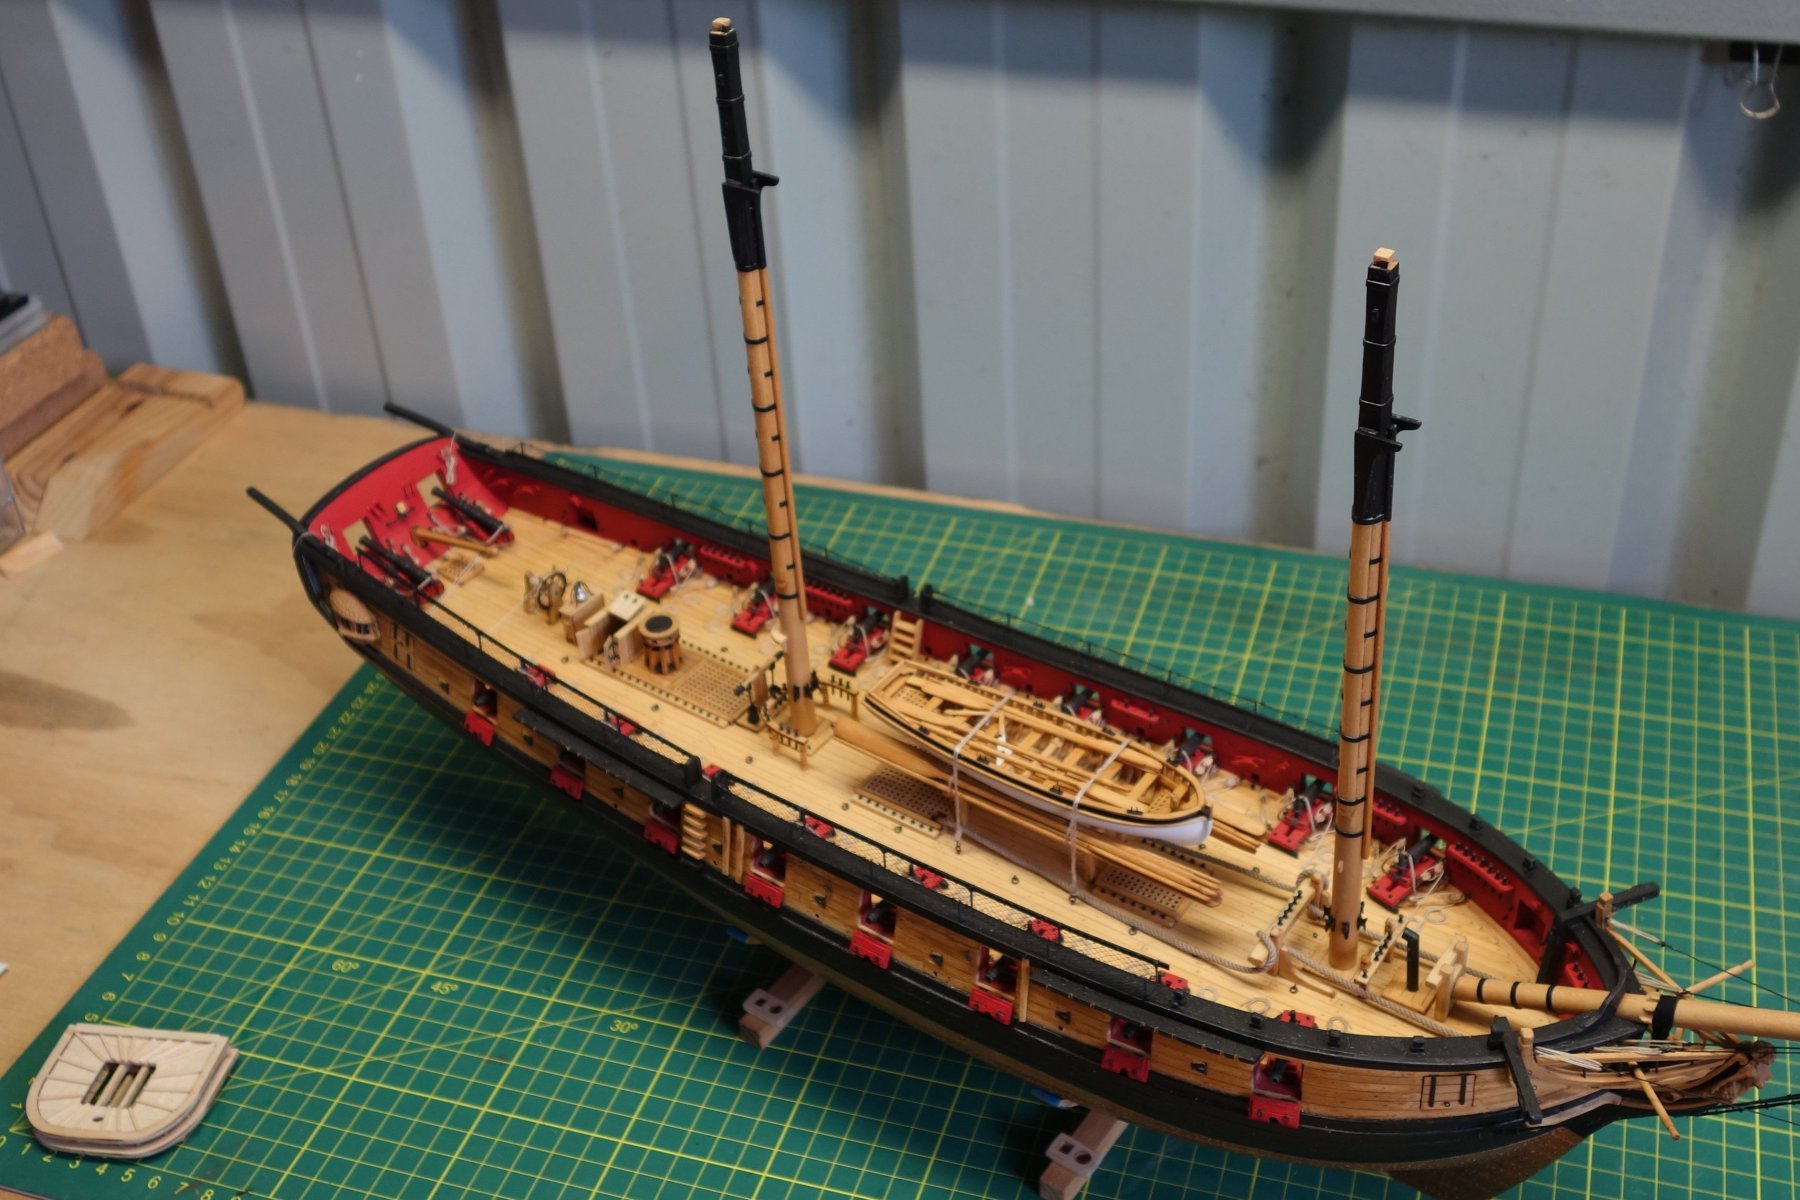
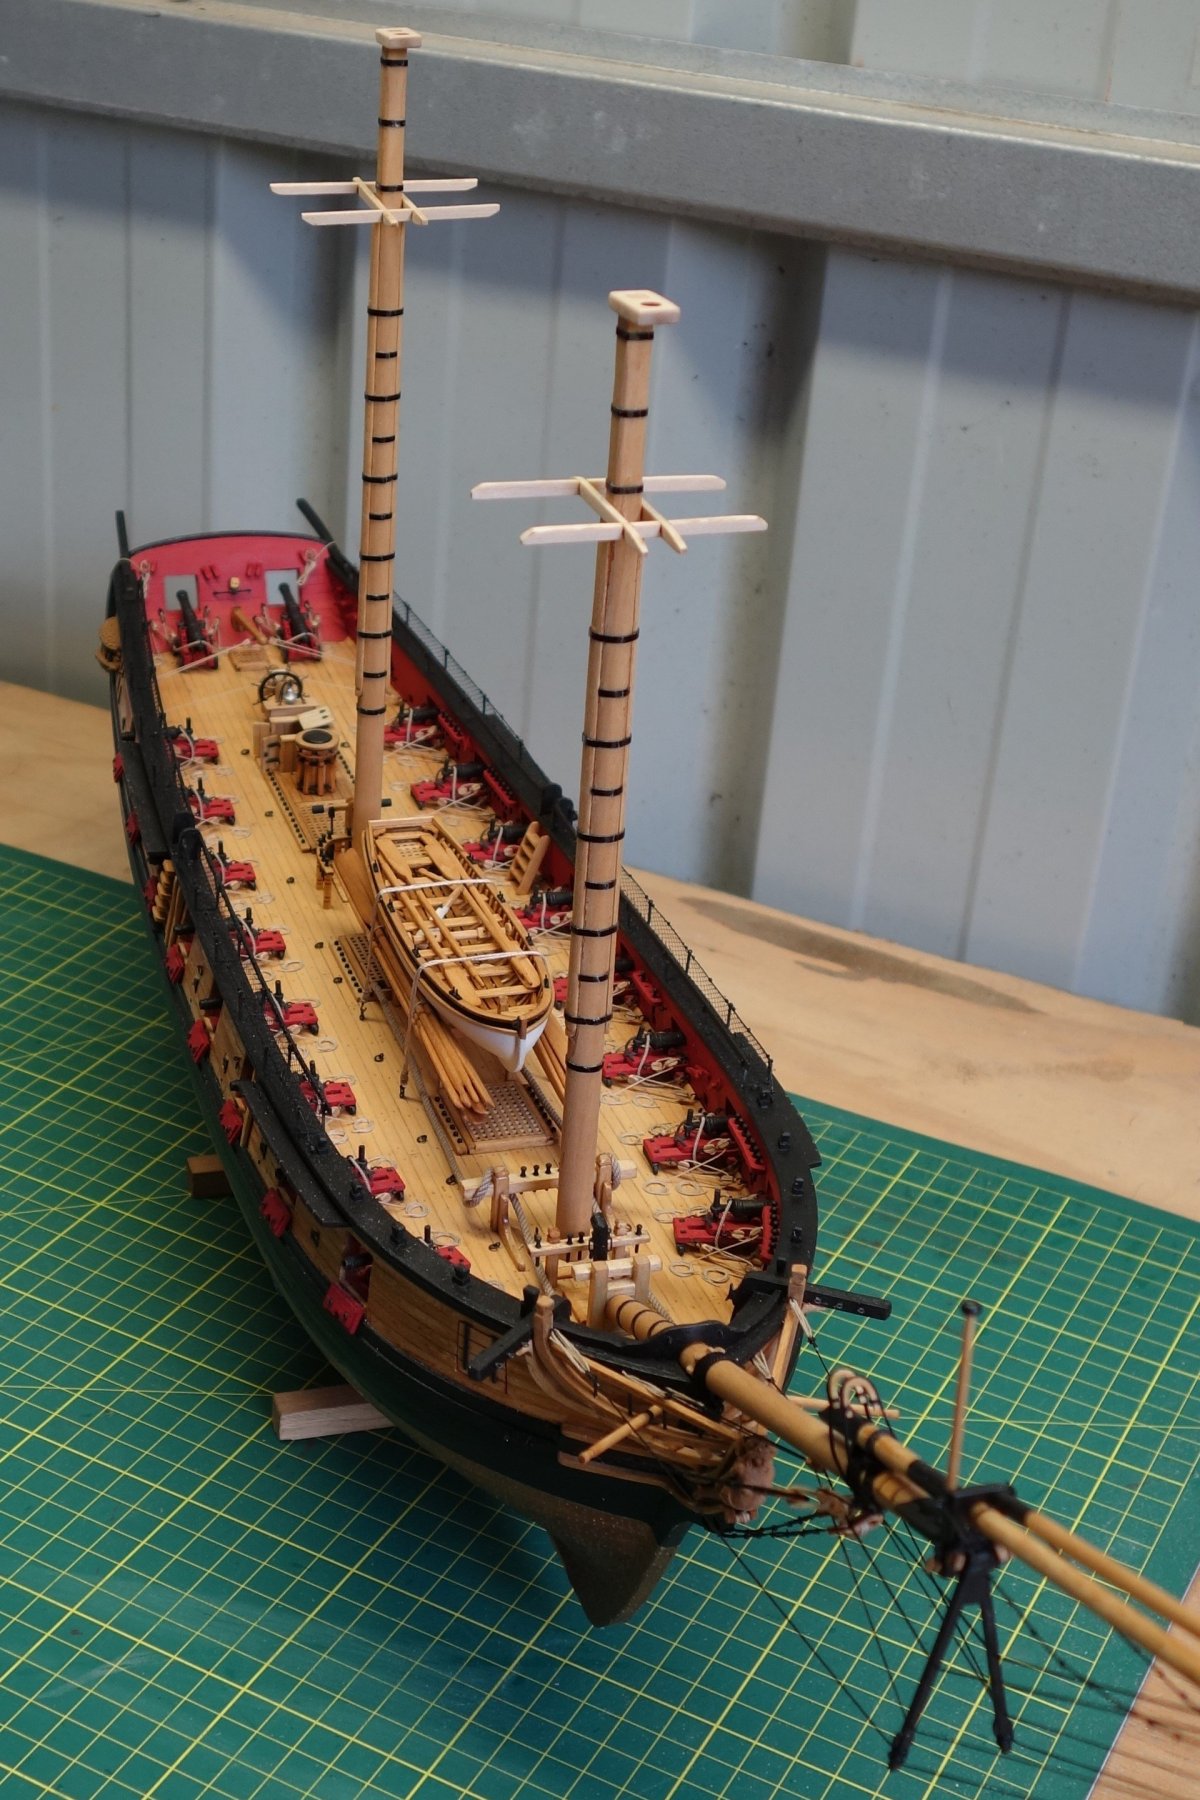
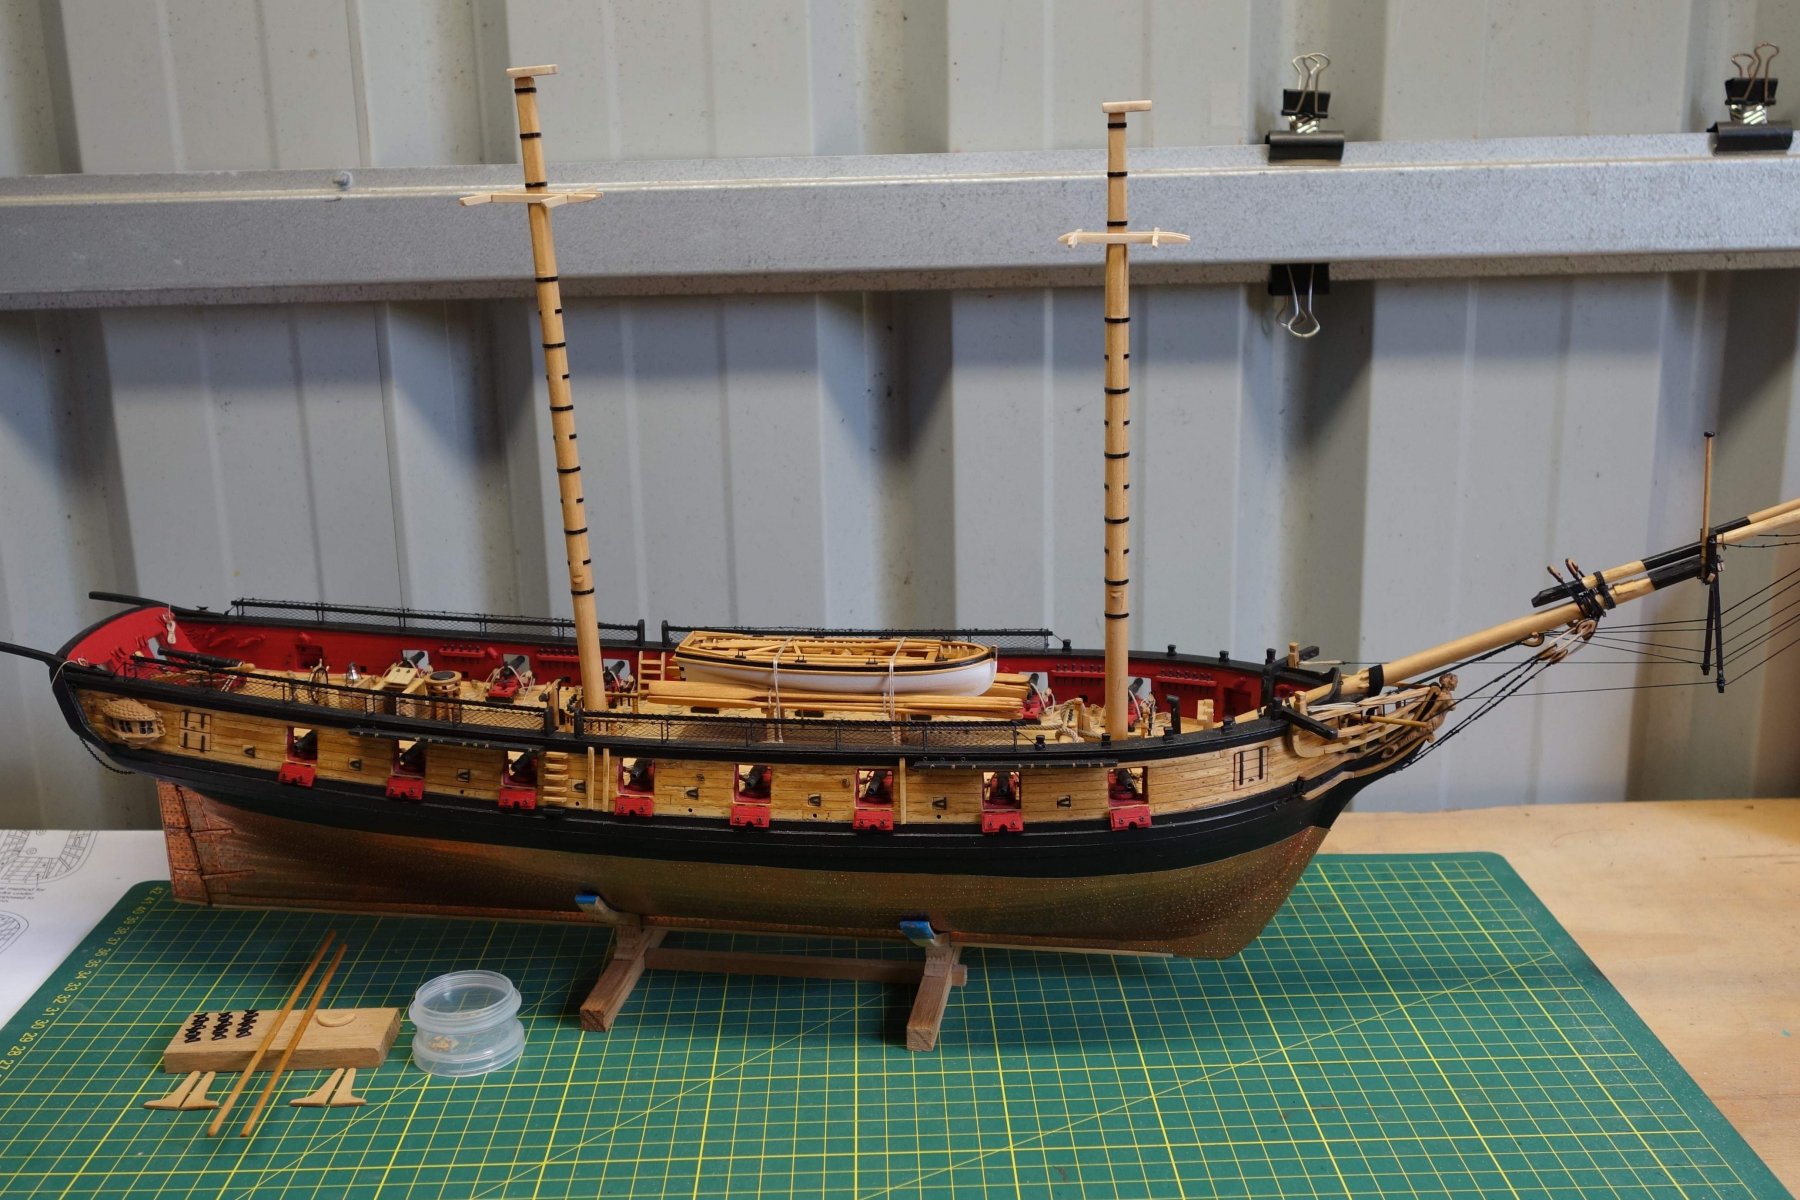
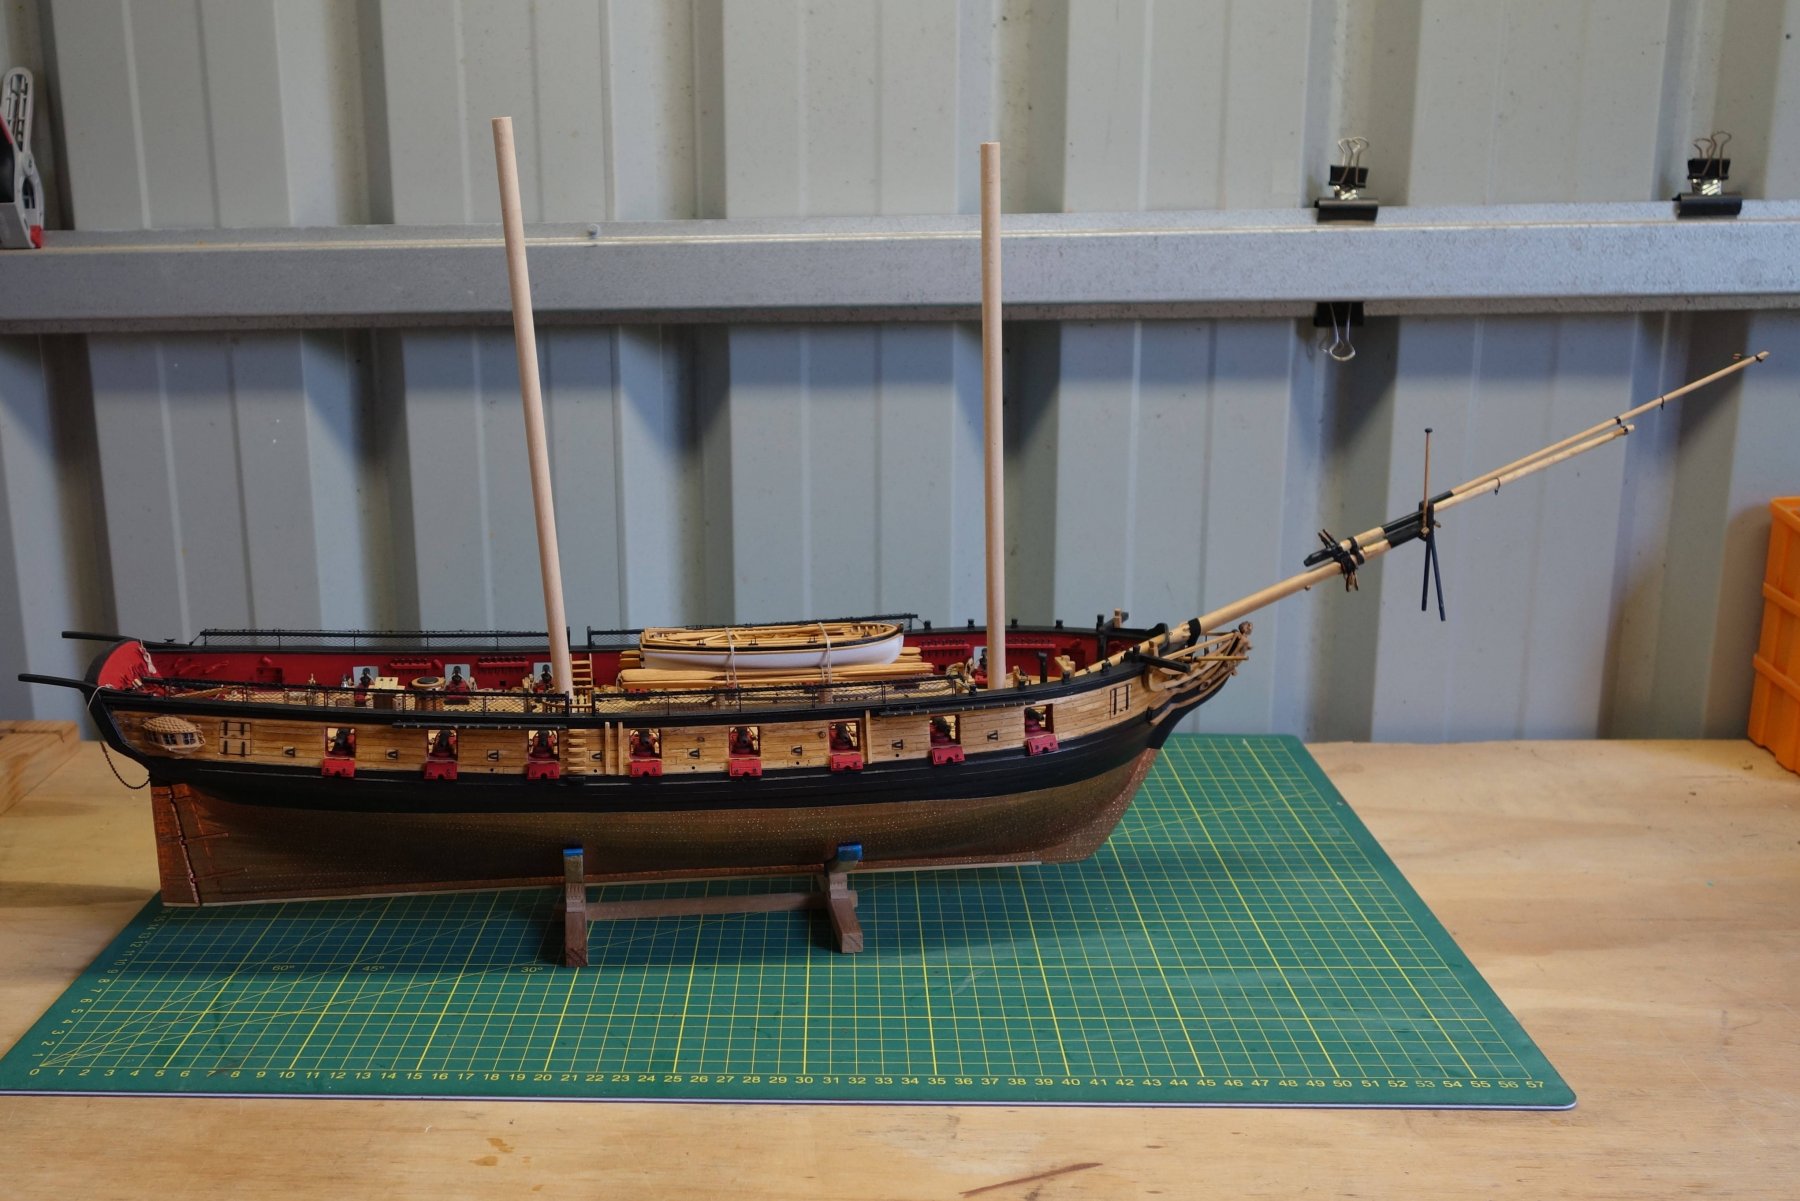
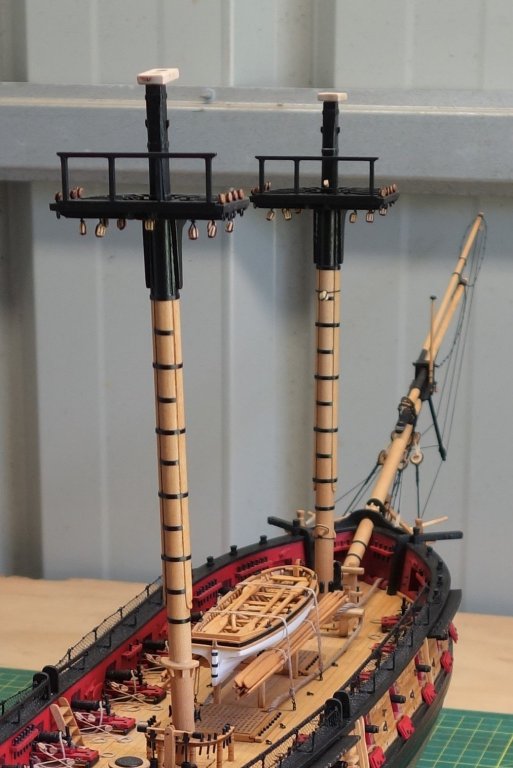
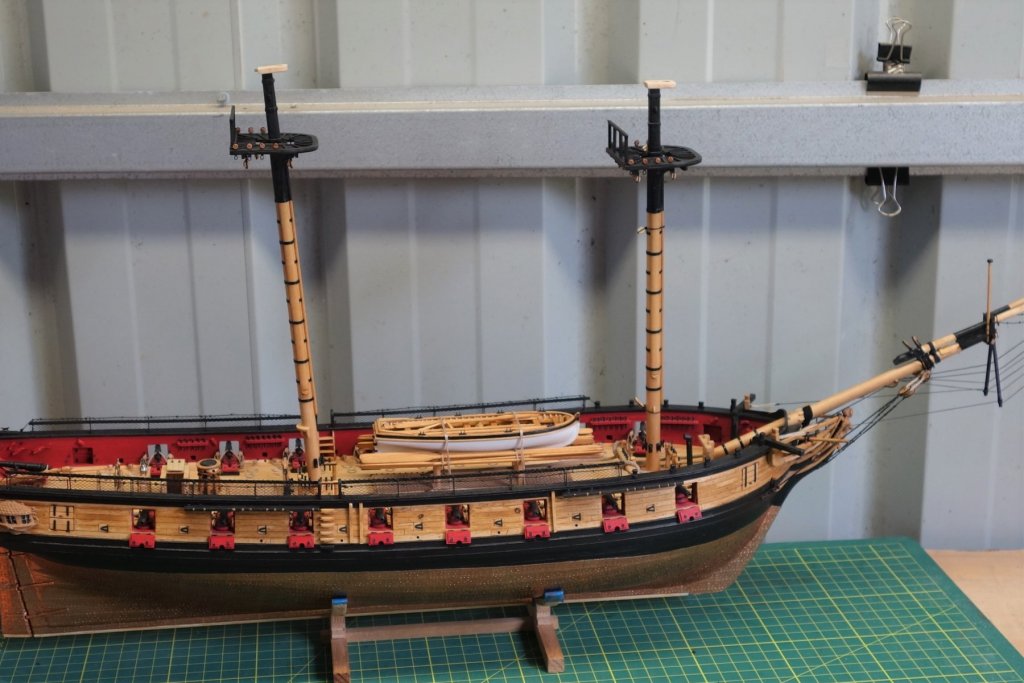
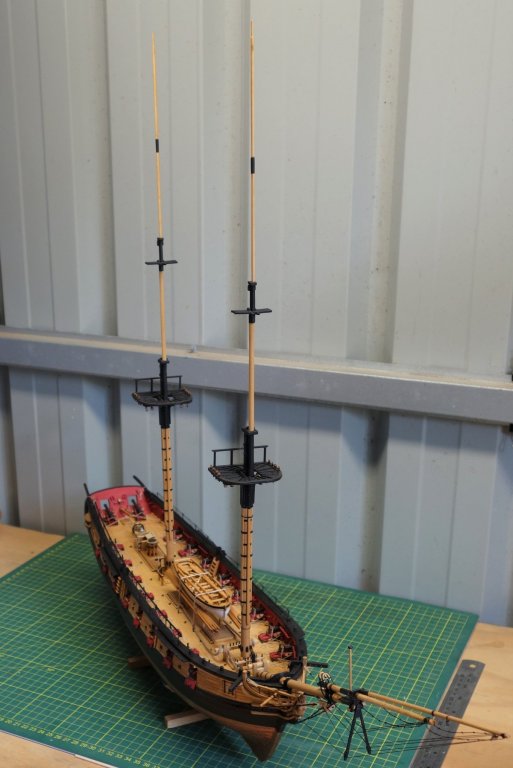
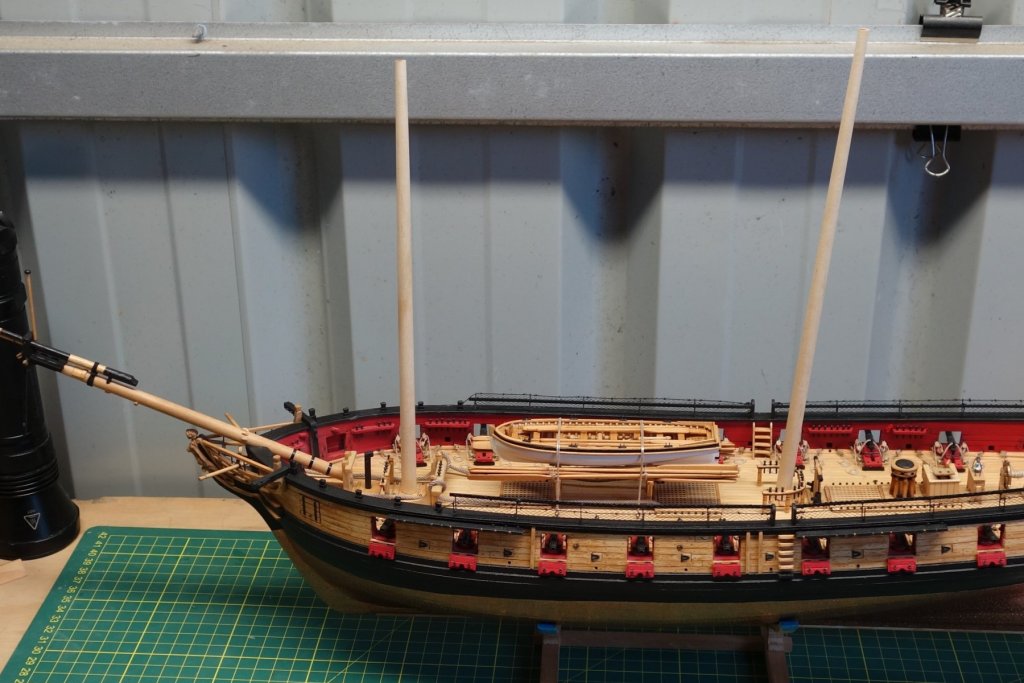
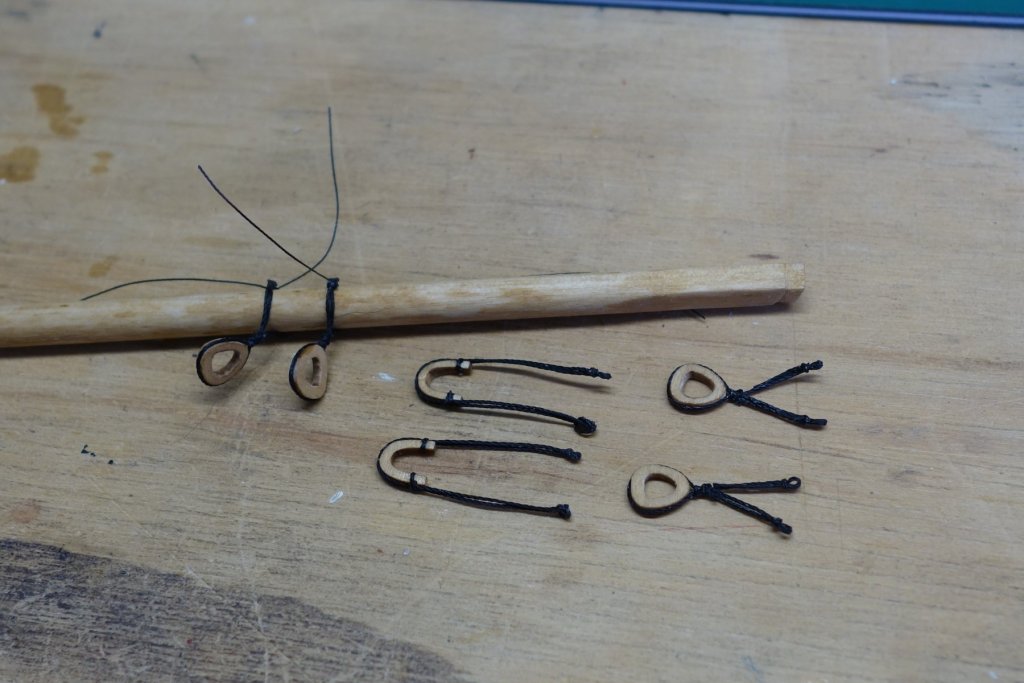
Thanks for all the likes again everyone. Well the jeer blocks, slings and lower lift blocks are attached to the masts, the masts are glued into the hull and the chain plates are attached to the hull as well. Just a few photo's of the very simple setup I used to line up the masts and of the components mentioned above. I did notice on the close-up photo's that my netting has turned out very sloppy. Not too happy with that in hindsight but I am not keen pulling that apart and starting again. I'll learn from it for the next one (hopefully...). Looks like rigging is next... Cheers, Peter


- 242 replies
-
- 14
-

-
- syren
- model shipways
- (and 1 more)
-
Hi Christos, The kit comes with some extras in the laser cut sheets. Especially with delicate or high volume small parts. Peter.
-
Hi Messis, The quality of the instructions was one of the reasons I chose the Syren (amongst others of course...). I do recommend model shipways kits (not sure if I qualify with a sample size of 1...lol). I also don't seem to have a lot of trouble with the wood quality as some others mention in their logs a bit. Not sure why, but most of my spares still sit in the laser cut sheets. As for the blackening, I used the instructions on this website: http://www.modelboatyard.com/blackening.html and bought the following solution from an aussie website: http://www.watsonbrass.com.au/index.php?main_page=product_info&cPath=30&products_id=223&zenid=b7caed66653398c47a36f74d11d3797b I haven't had trouble bending the wire at all (and sometimes I bend them a lot!!). They can get a bit shiny but I don't mind it as long it keeps it's metal look. Hope this helps. Cheers, Peter
- 242 replies
-
- 2
-
-
- syren
- model shipways
- (and 1 more)
-
Great to see you back Jesse. Model looks great as usual. When I use my phone I always attach them to an email and email them to myself and open them on my pc. You don't have to connect the 2 devices. Maybe that can work for you as well. Peter.
- 1,306 replies
-
- 5
-
-
- syren
- model shipways
- (and 1 more)
-
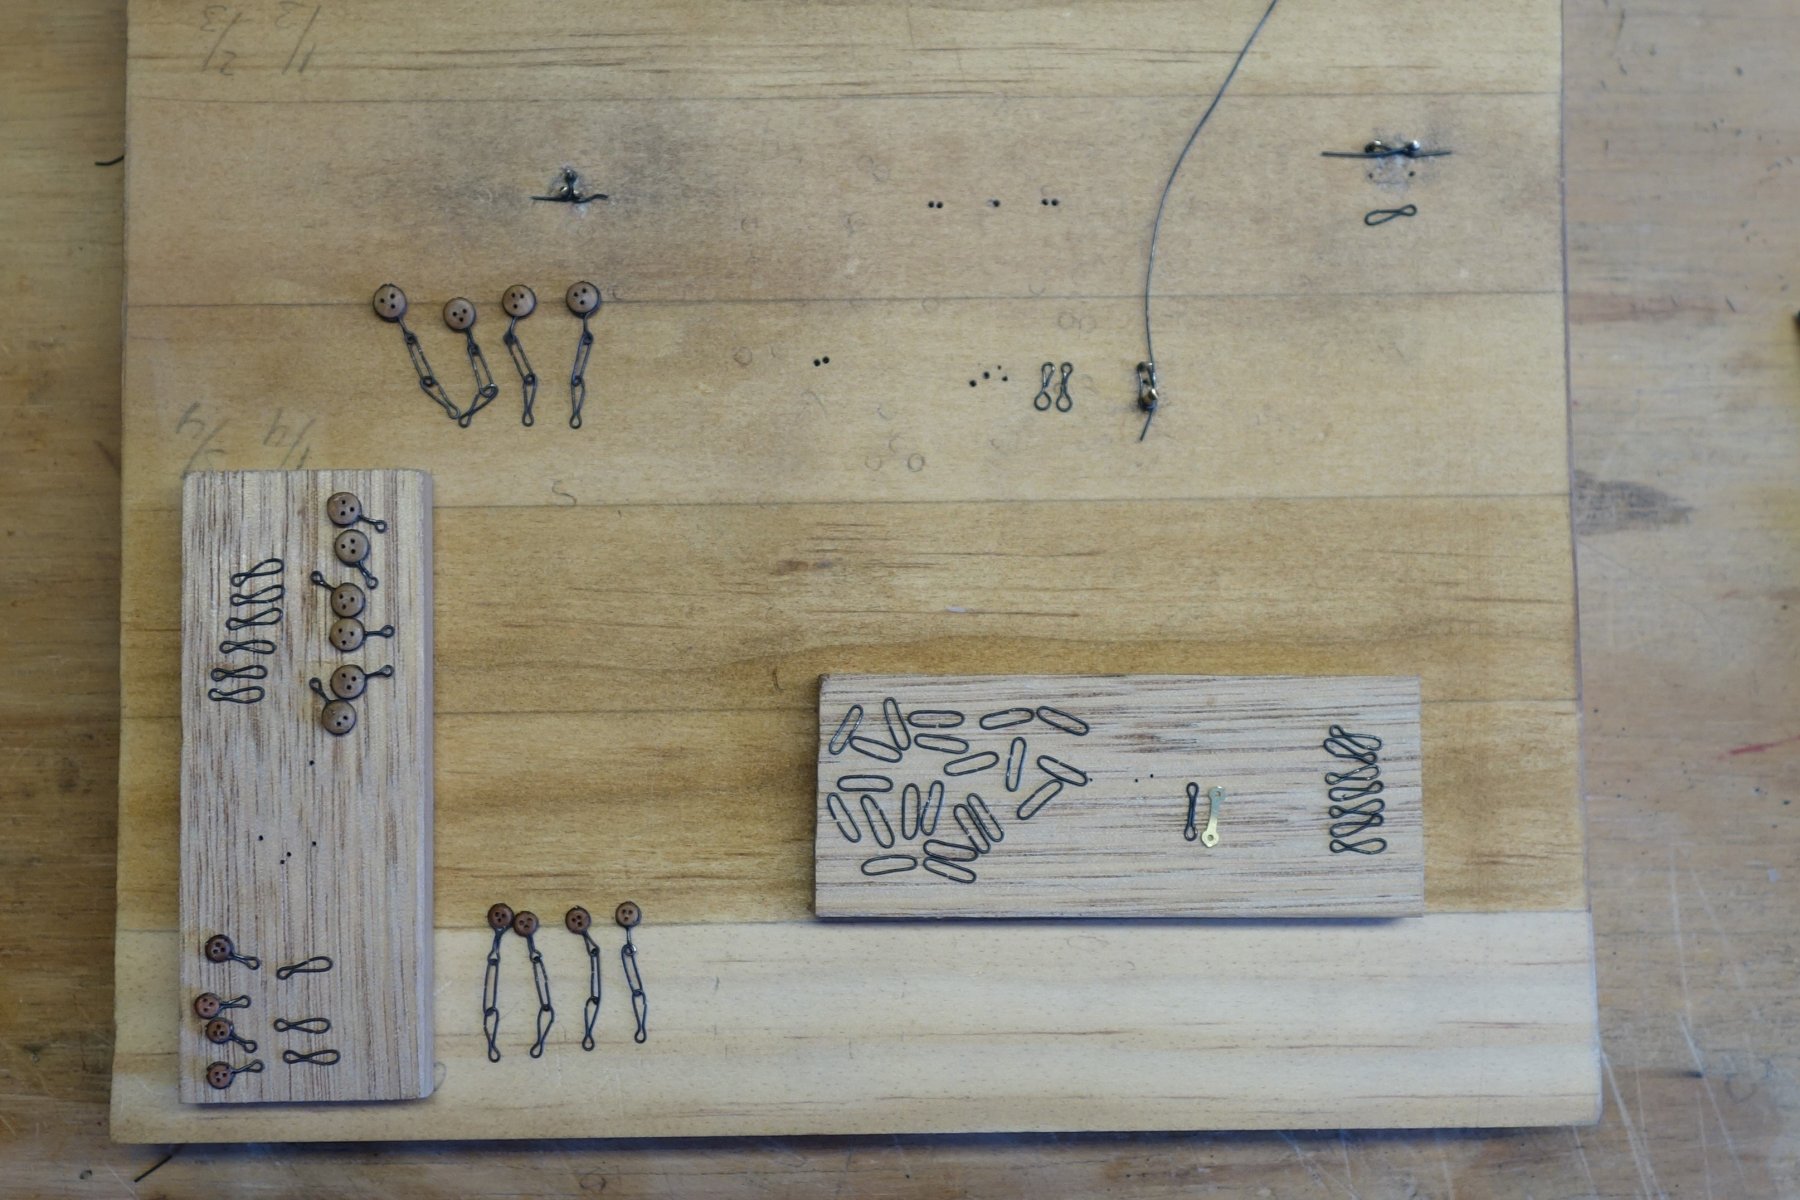
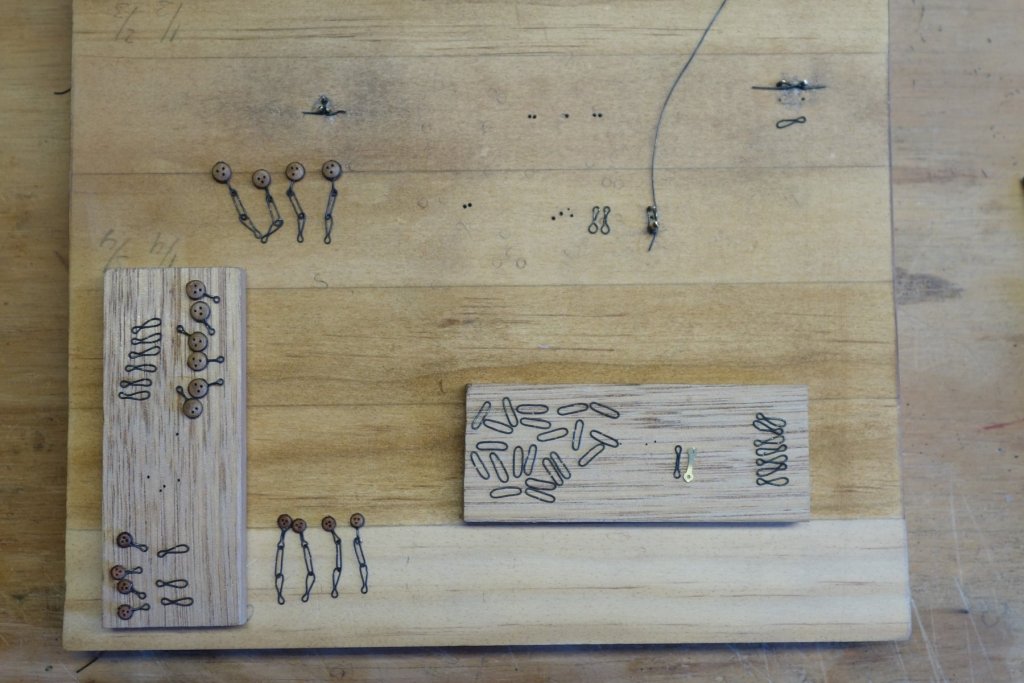
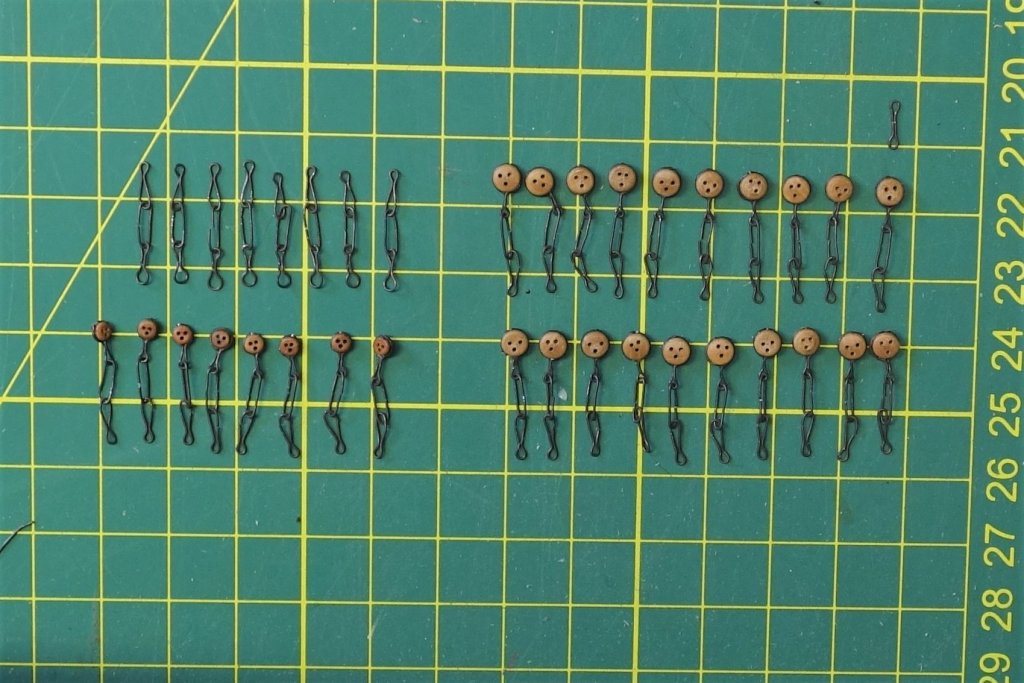
Thanks Thomas, Hi Messis, I made the chain plates with the 28 gauge wire supplied in the kit. I blackened sections of it first and made a jig (just different sized nails at the correct distances). It's all very well explained in the instructions. The second last photo is trying to show the jig and some of the nail locations. Peter
-
Thanks for all the likes everyone. Time for another update. I have been progressing nicely without any dramas (touch wood...lol). I have been building up the masts up to the point where I have to add all the blocks. Next will be gluing them into the hull. That will be a milestone and definitely a task I will take my time with. I plan not to use a jig but I will likely cover a fair distance running around the model to make sure they line up while the glue sets. I also made a start on the chain plate assemblies (so I can multitask after all, didn't think I had it in me....lol). I haven't put them on the channels yet. There are a few photo's to get through so better get on with it.... Cheers, Peter


- 242 replies
-
- 16
-
-
- syren
- model shipways
- (and 1 more)
-
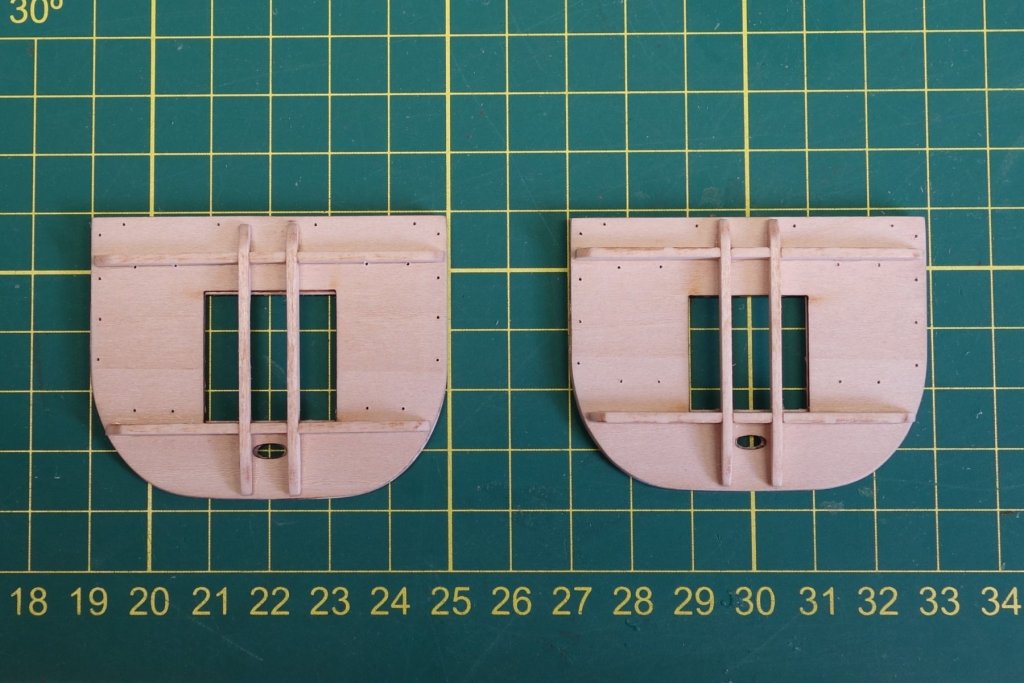
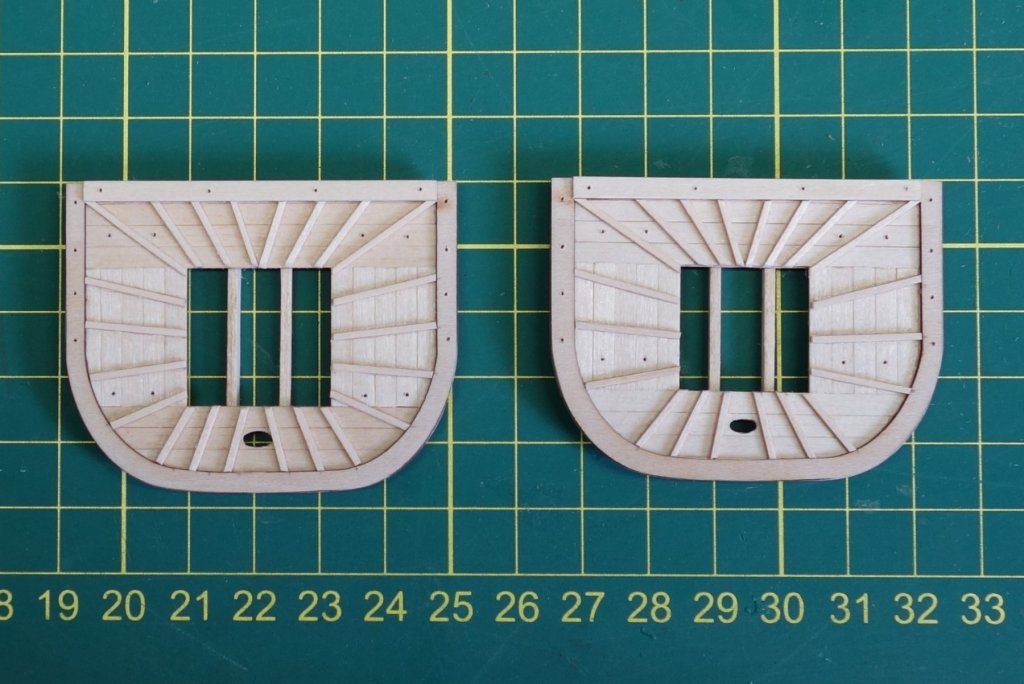
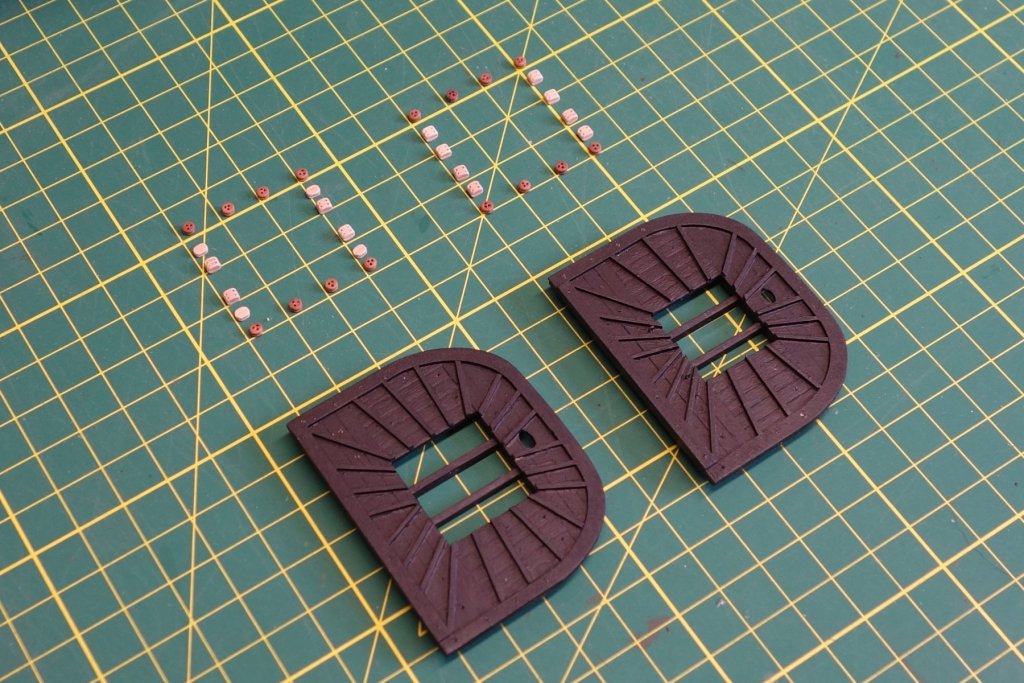
Hi Art, It's looking good. Just a few words of caution. Because the frames are only connected at the base, they have a tendency not to be parallel the higher up you go. When you start planking the outer hull without the deck in place, just make sure the frames are in the correct position. Also when you plank the deck before assembling it into the model, it may get a bit more difficult to get the curves right when fitting it onto the frames. And finally I didn't need clamping for the 2nd planking of the hull. There is no bending involved so just holding them for a few seconds was enough to lock them into place. Cheers, Peter
- 139 replies
-
- 3
-
-
- san francisco
- artesania latina
- (and 1 more)
-
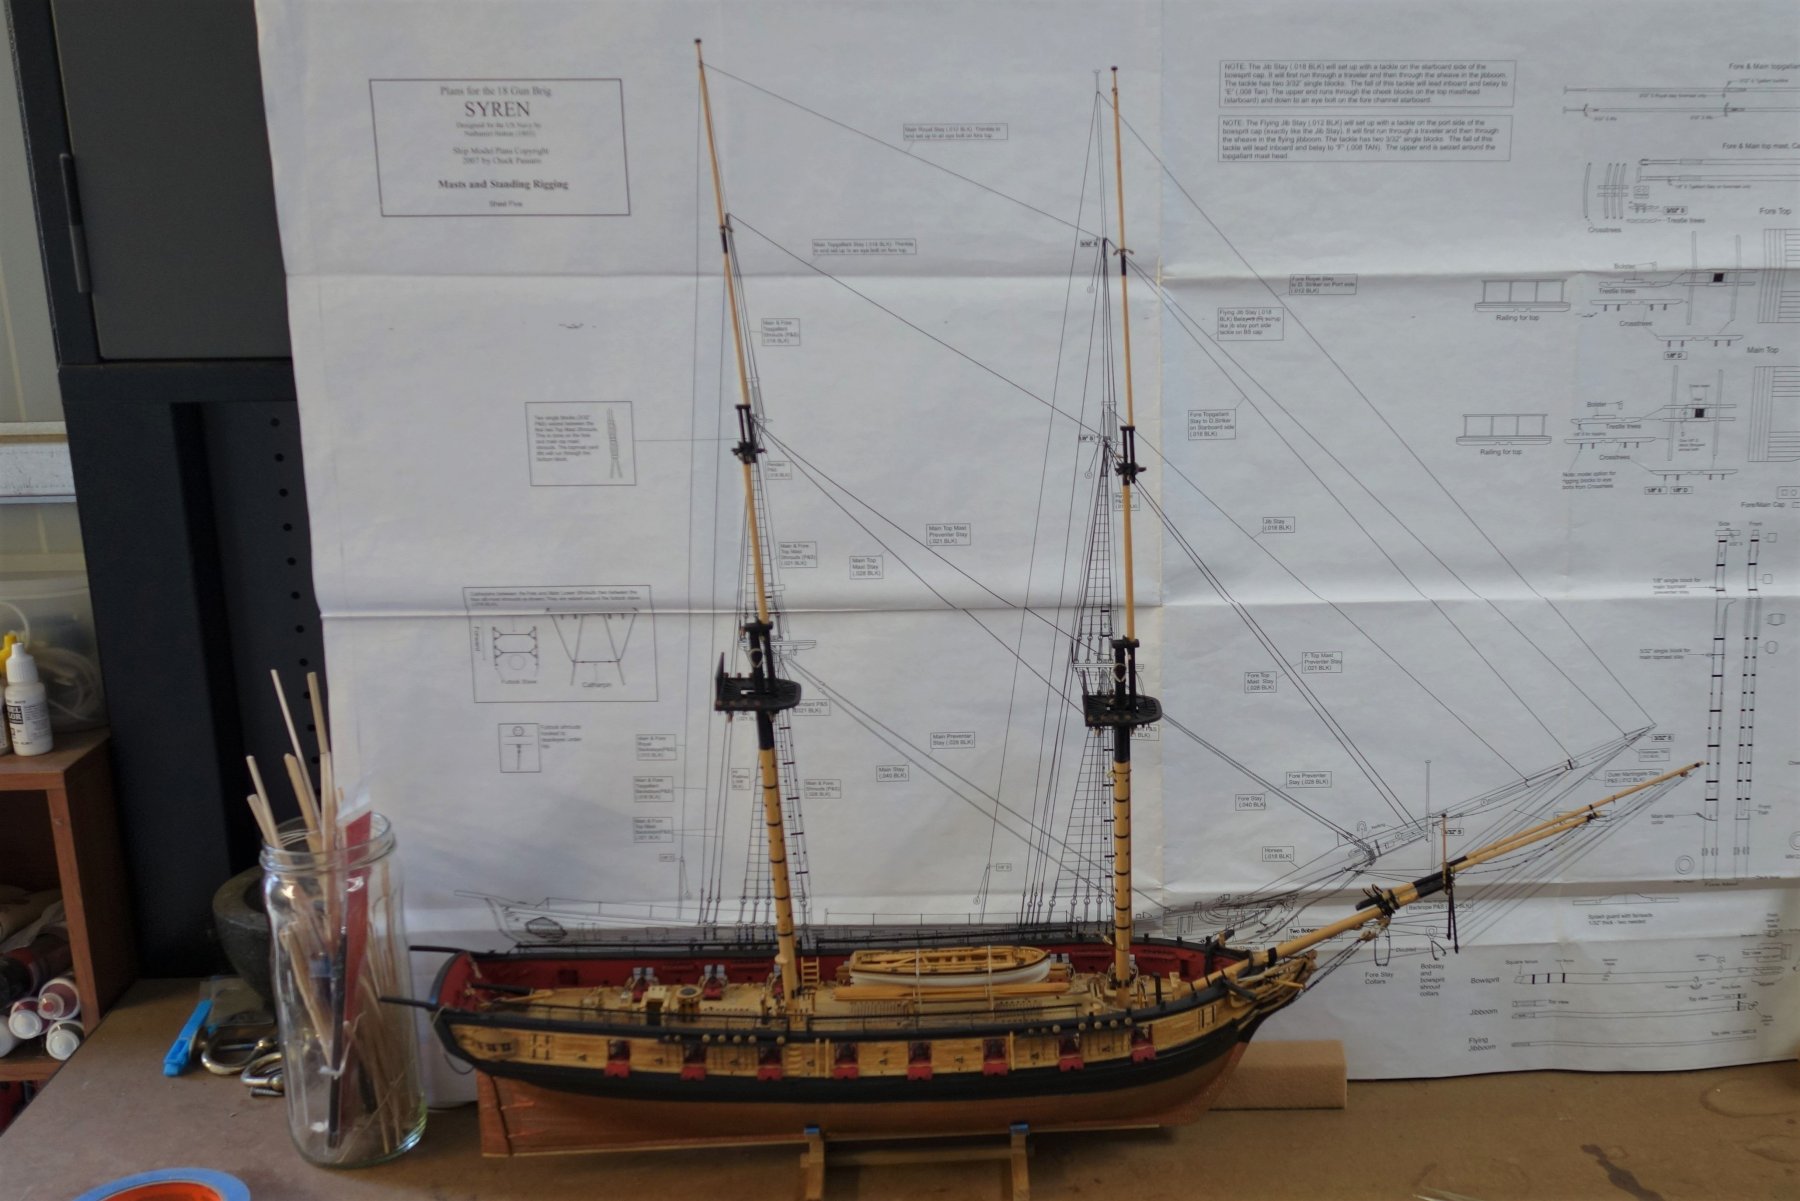
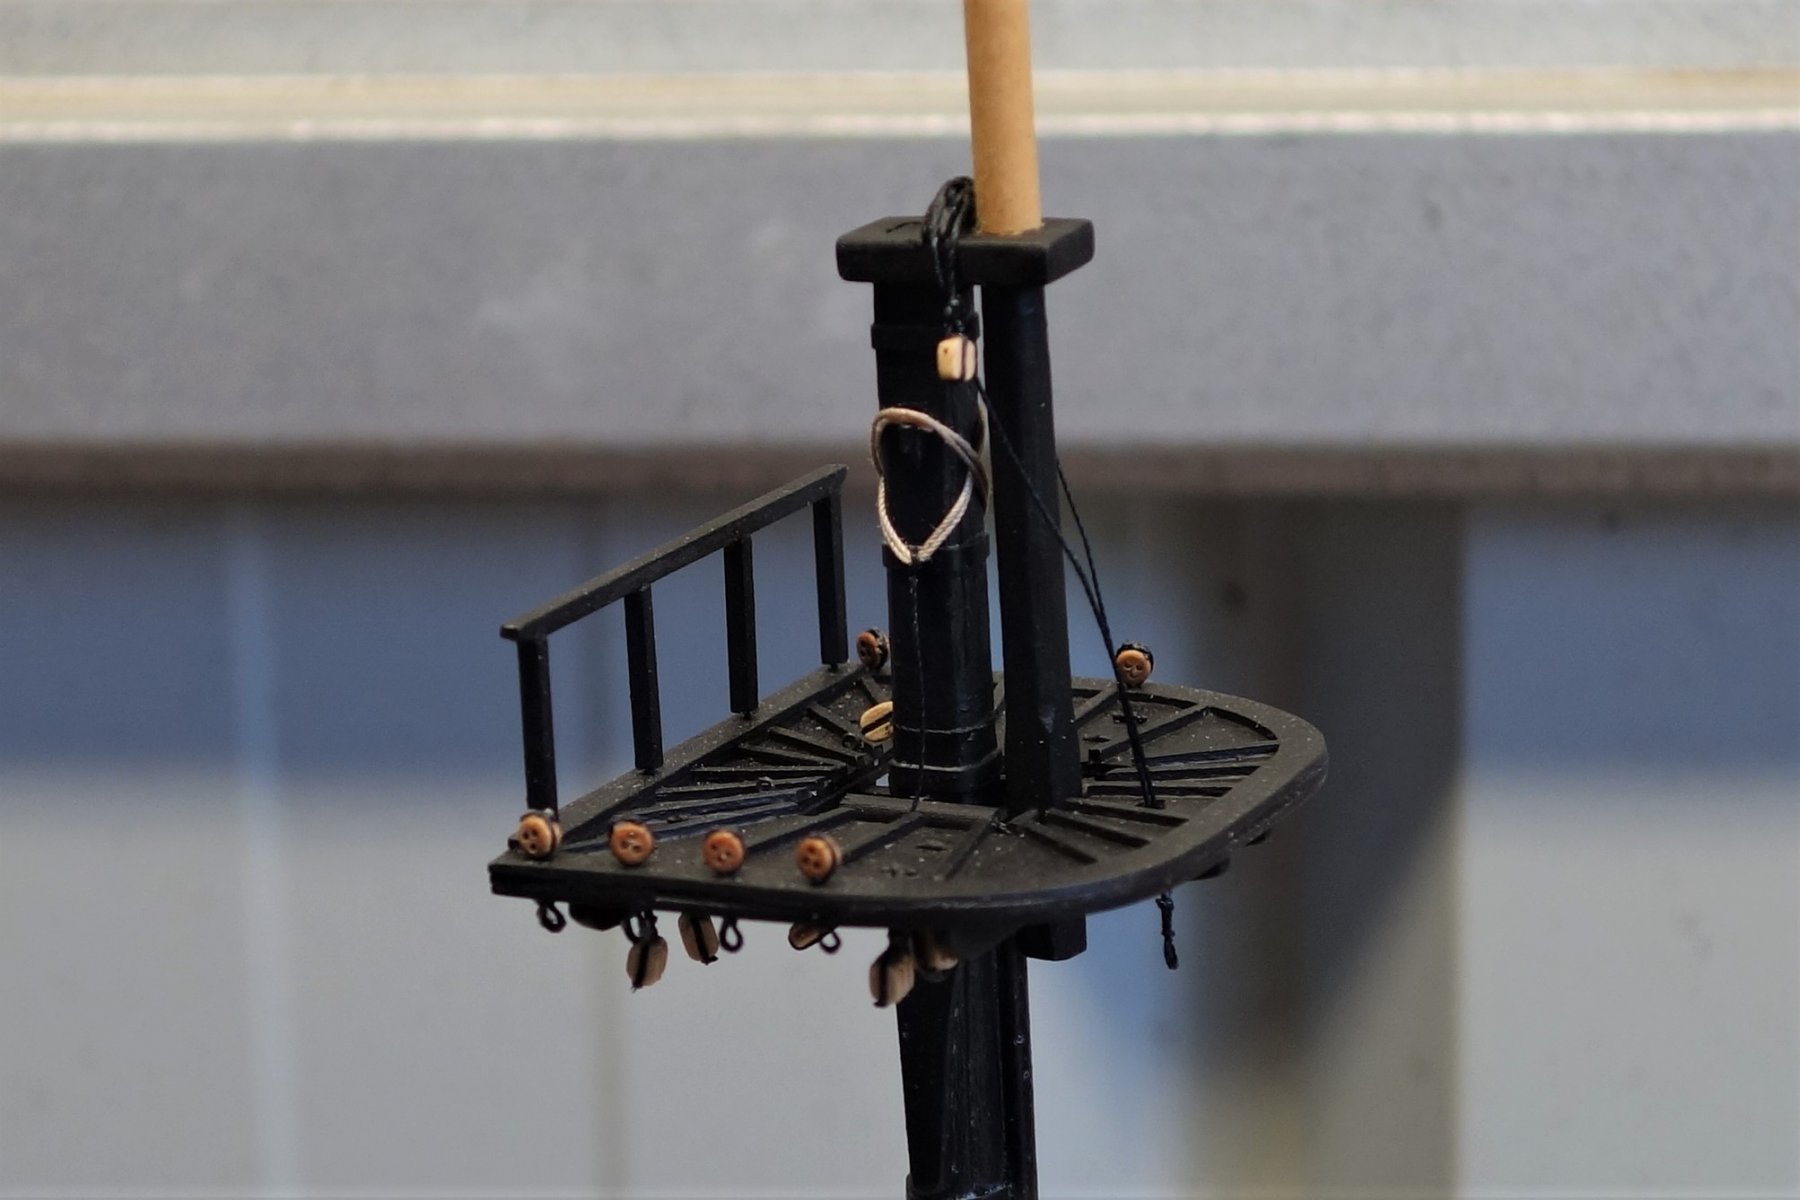
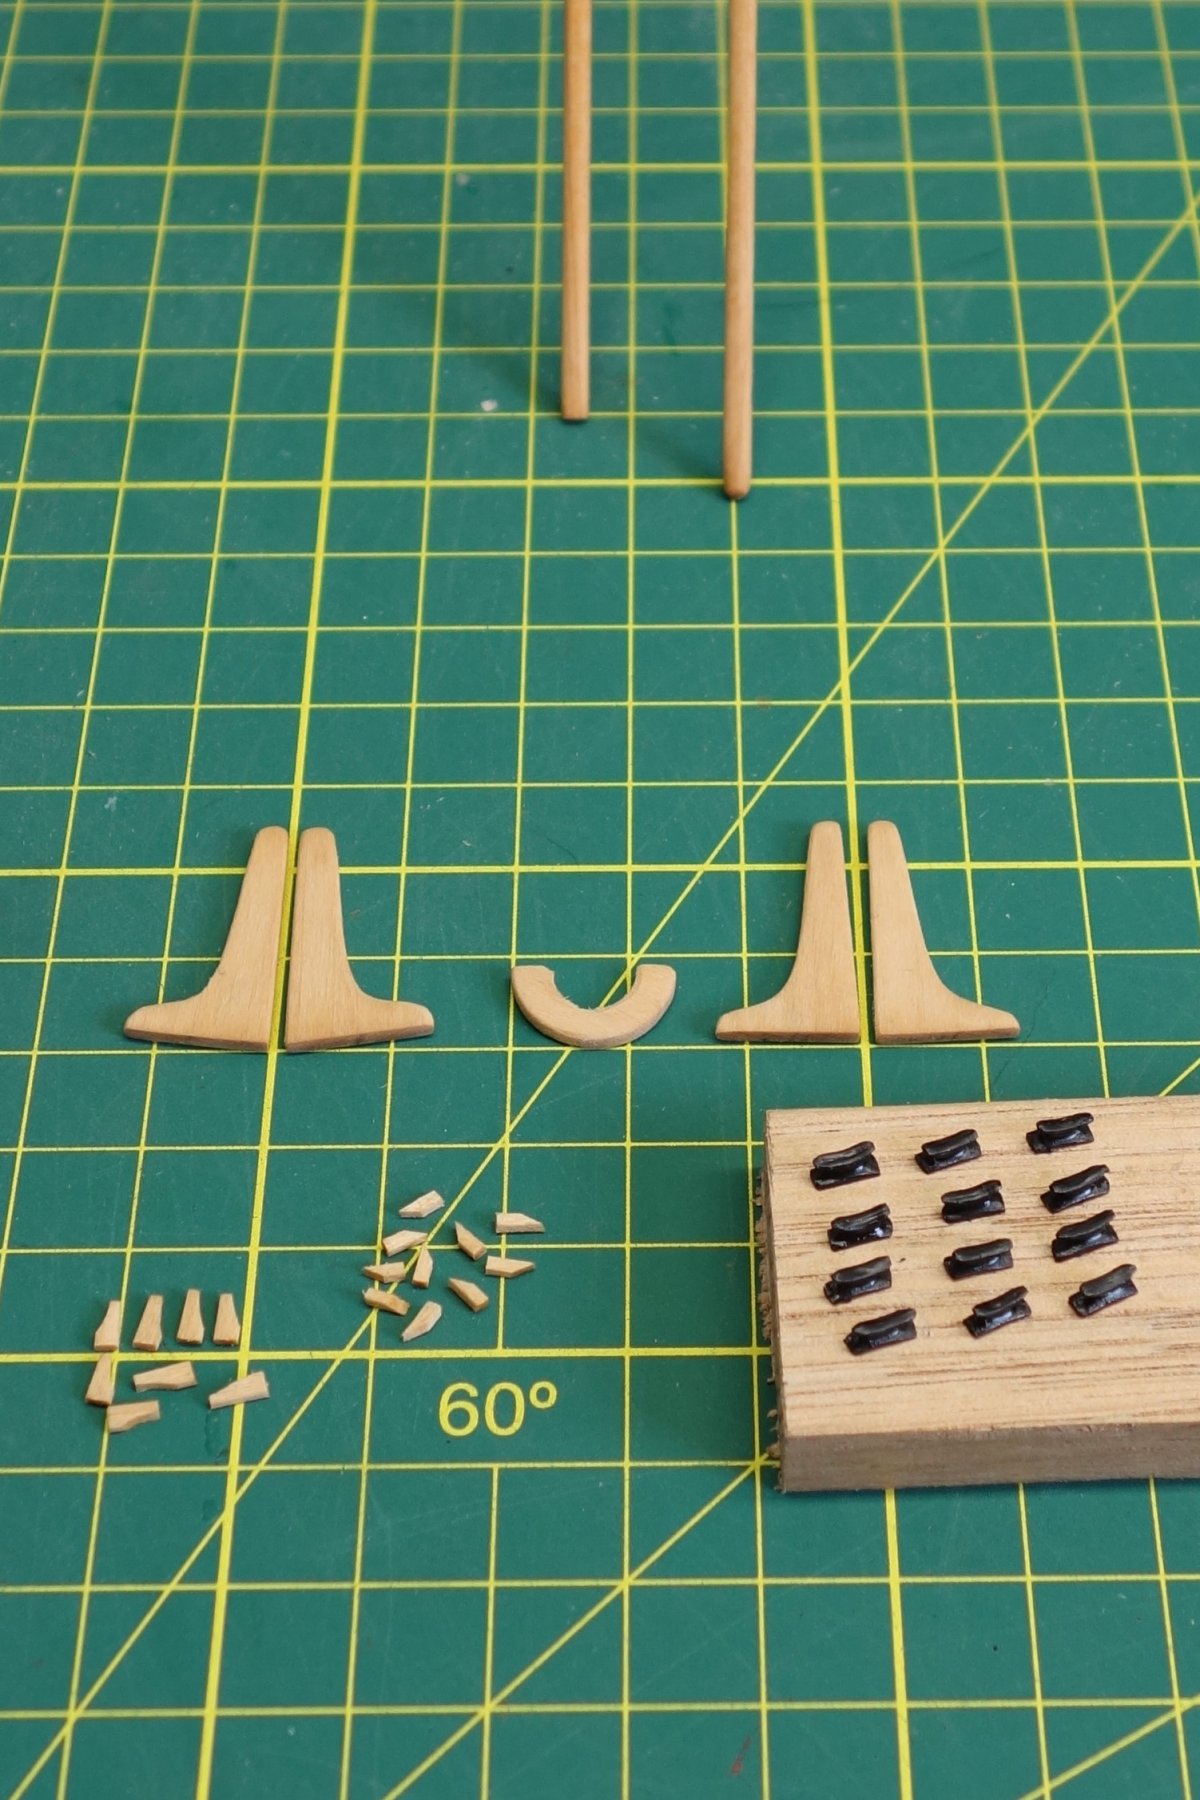
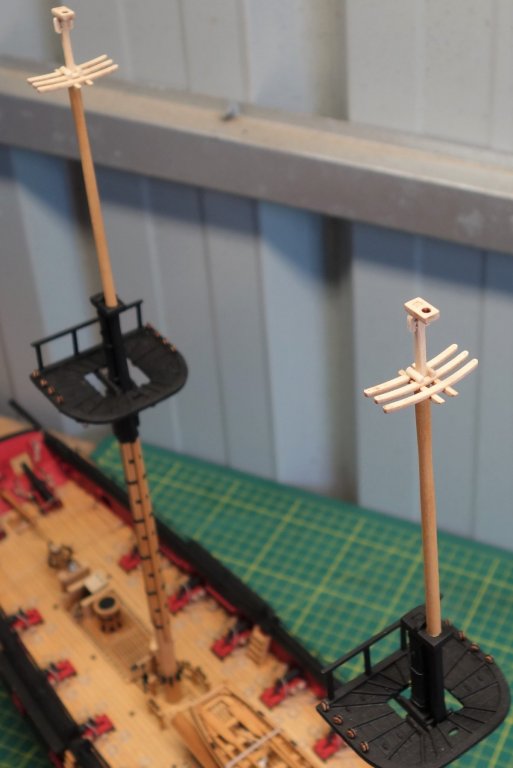
A little bit more progress. The two masts are painted and I made some inroads with the mast tops. I let the photo's do the talking. Cheers, Peter

- 242 replies
-
- 12
-
-
- syren
- model shipways
- (and 1 more)
-
Hi Art, I don't think you need to add shims anywhere (I didn't). I don't believe the decks are supposed to run parallel. Again from memory they were slightly curved in both directions & they were glued on all 4 frames. It did make clamping the deck's down to maintain the shape interesting... Cheers, Peter
-
Hi Art, Not sure what you mean about fairing. From memory I don't think I faired anything, just cleaned the burn marks off as the parts came out of the laser cut panels. I did enjoy this build, just be careful with the sharp ends at the top. I managed to break one off and had a bugger of a time reconnecting it properly. It's looking good. Cheers, Peter
-
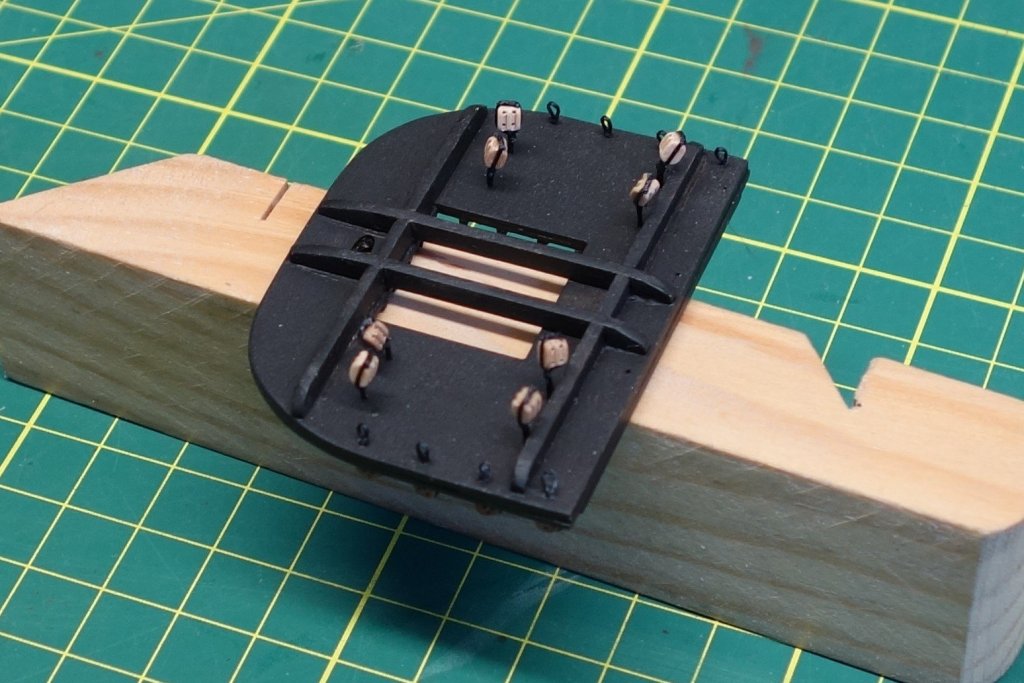
Hi Art, Below the upper deck the inside hull doesn't need planking. If you go to page 20/2 of the manual, (where they show where the accessories are added) you can see some pictures of what the inside looks like. Also, If you decide to add it, you may run into trouble with the cannons on the lower deck, Cheers, Peter
-
Thanks Jim, I certainly am enjoying this build. Cheers, Peter.
-
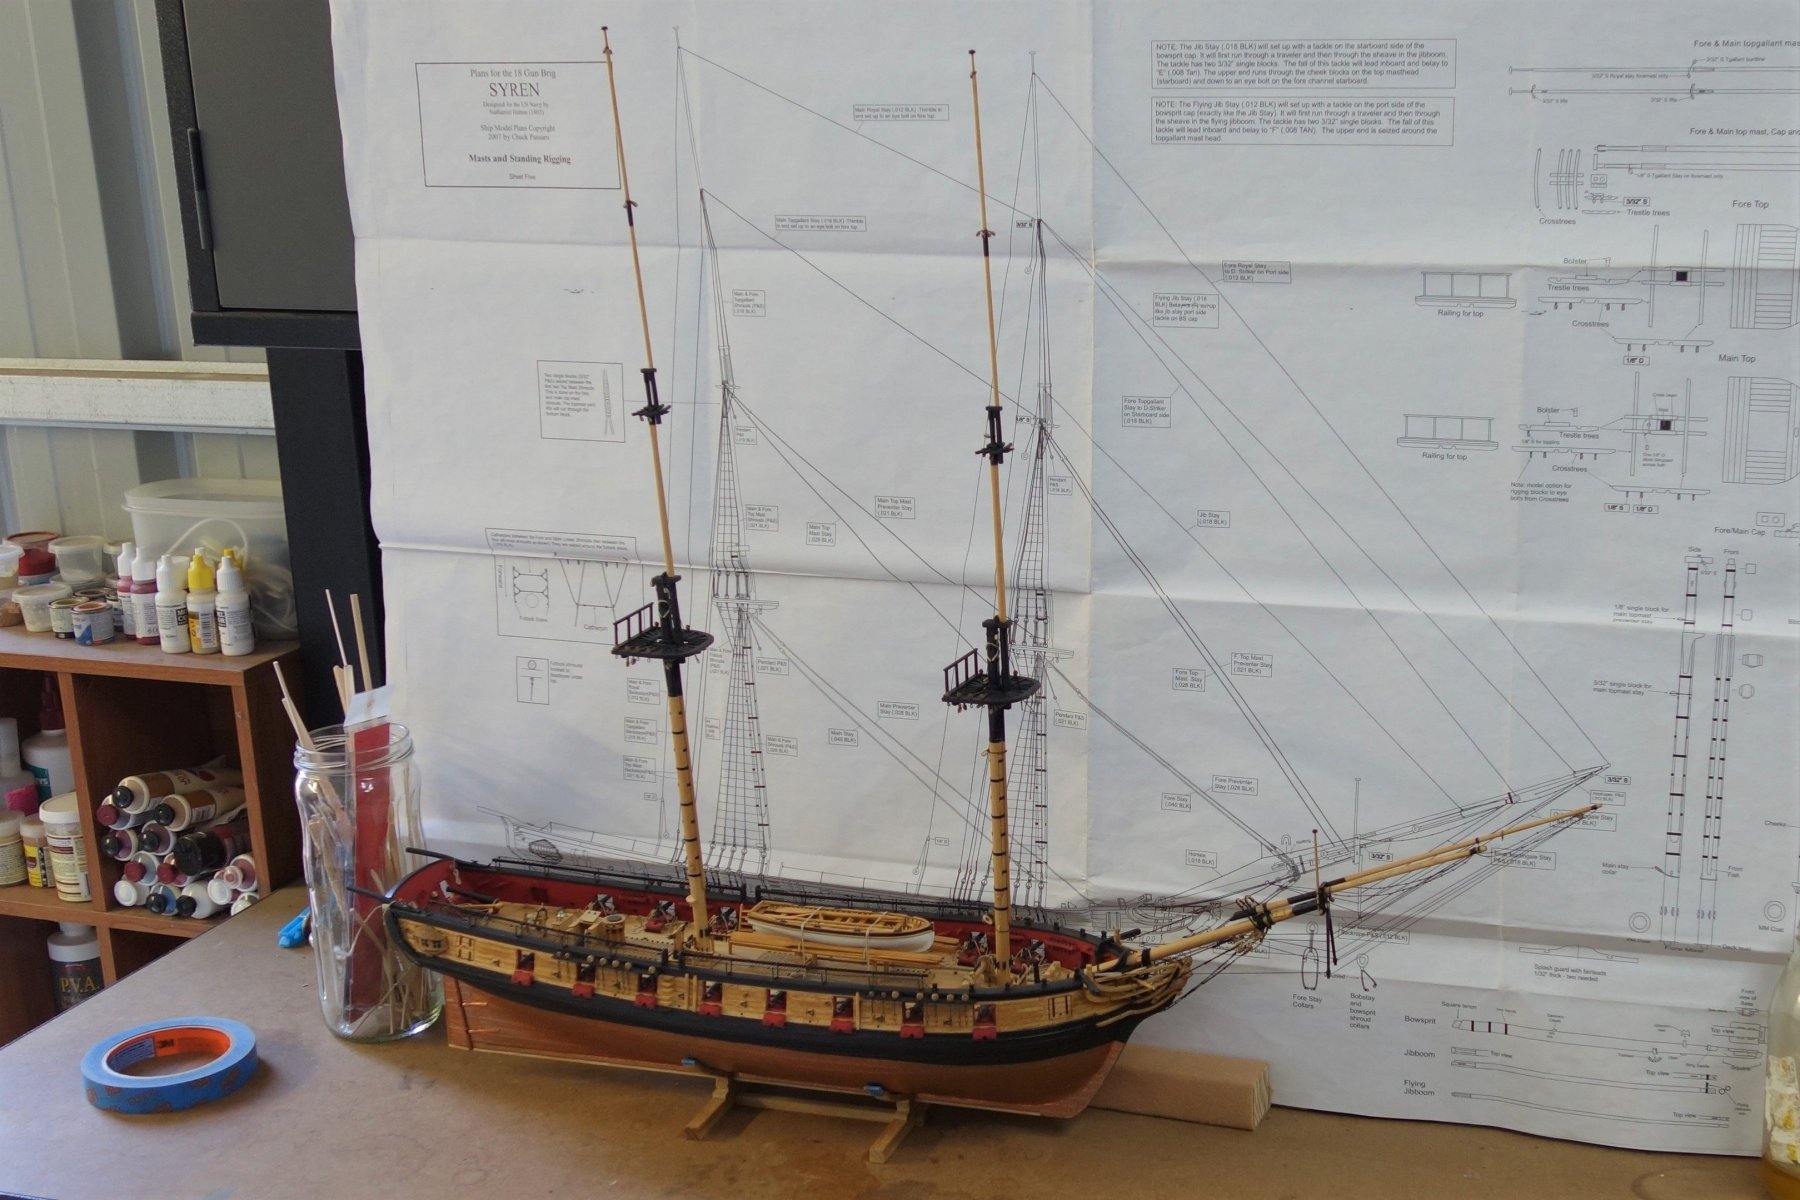
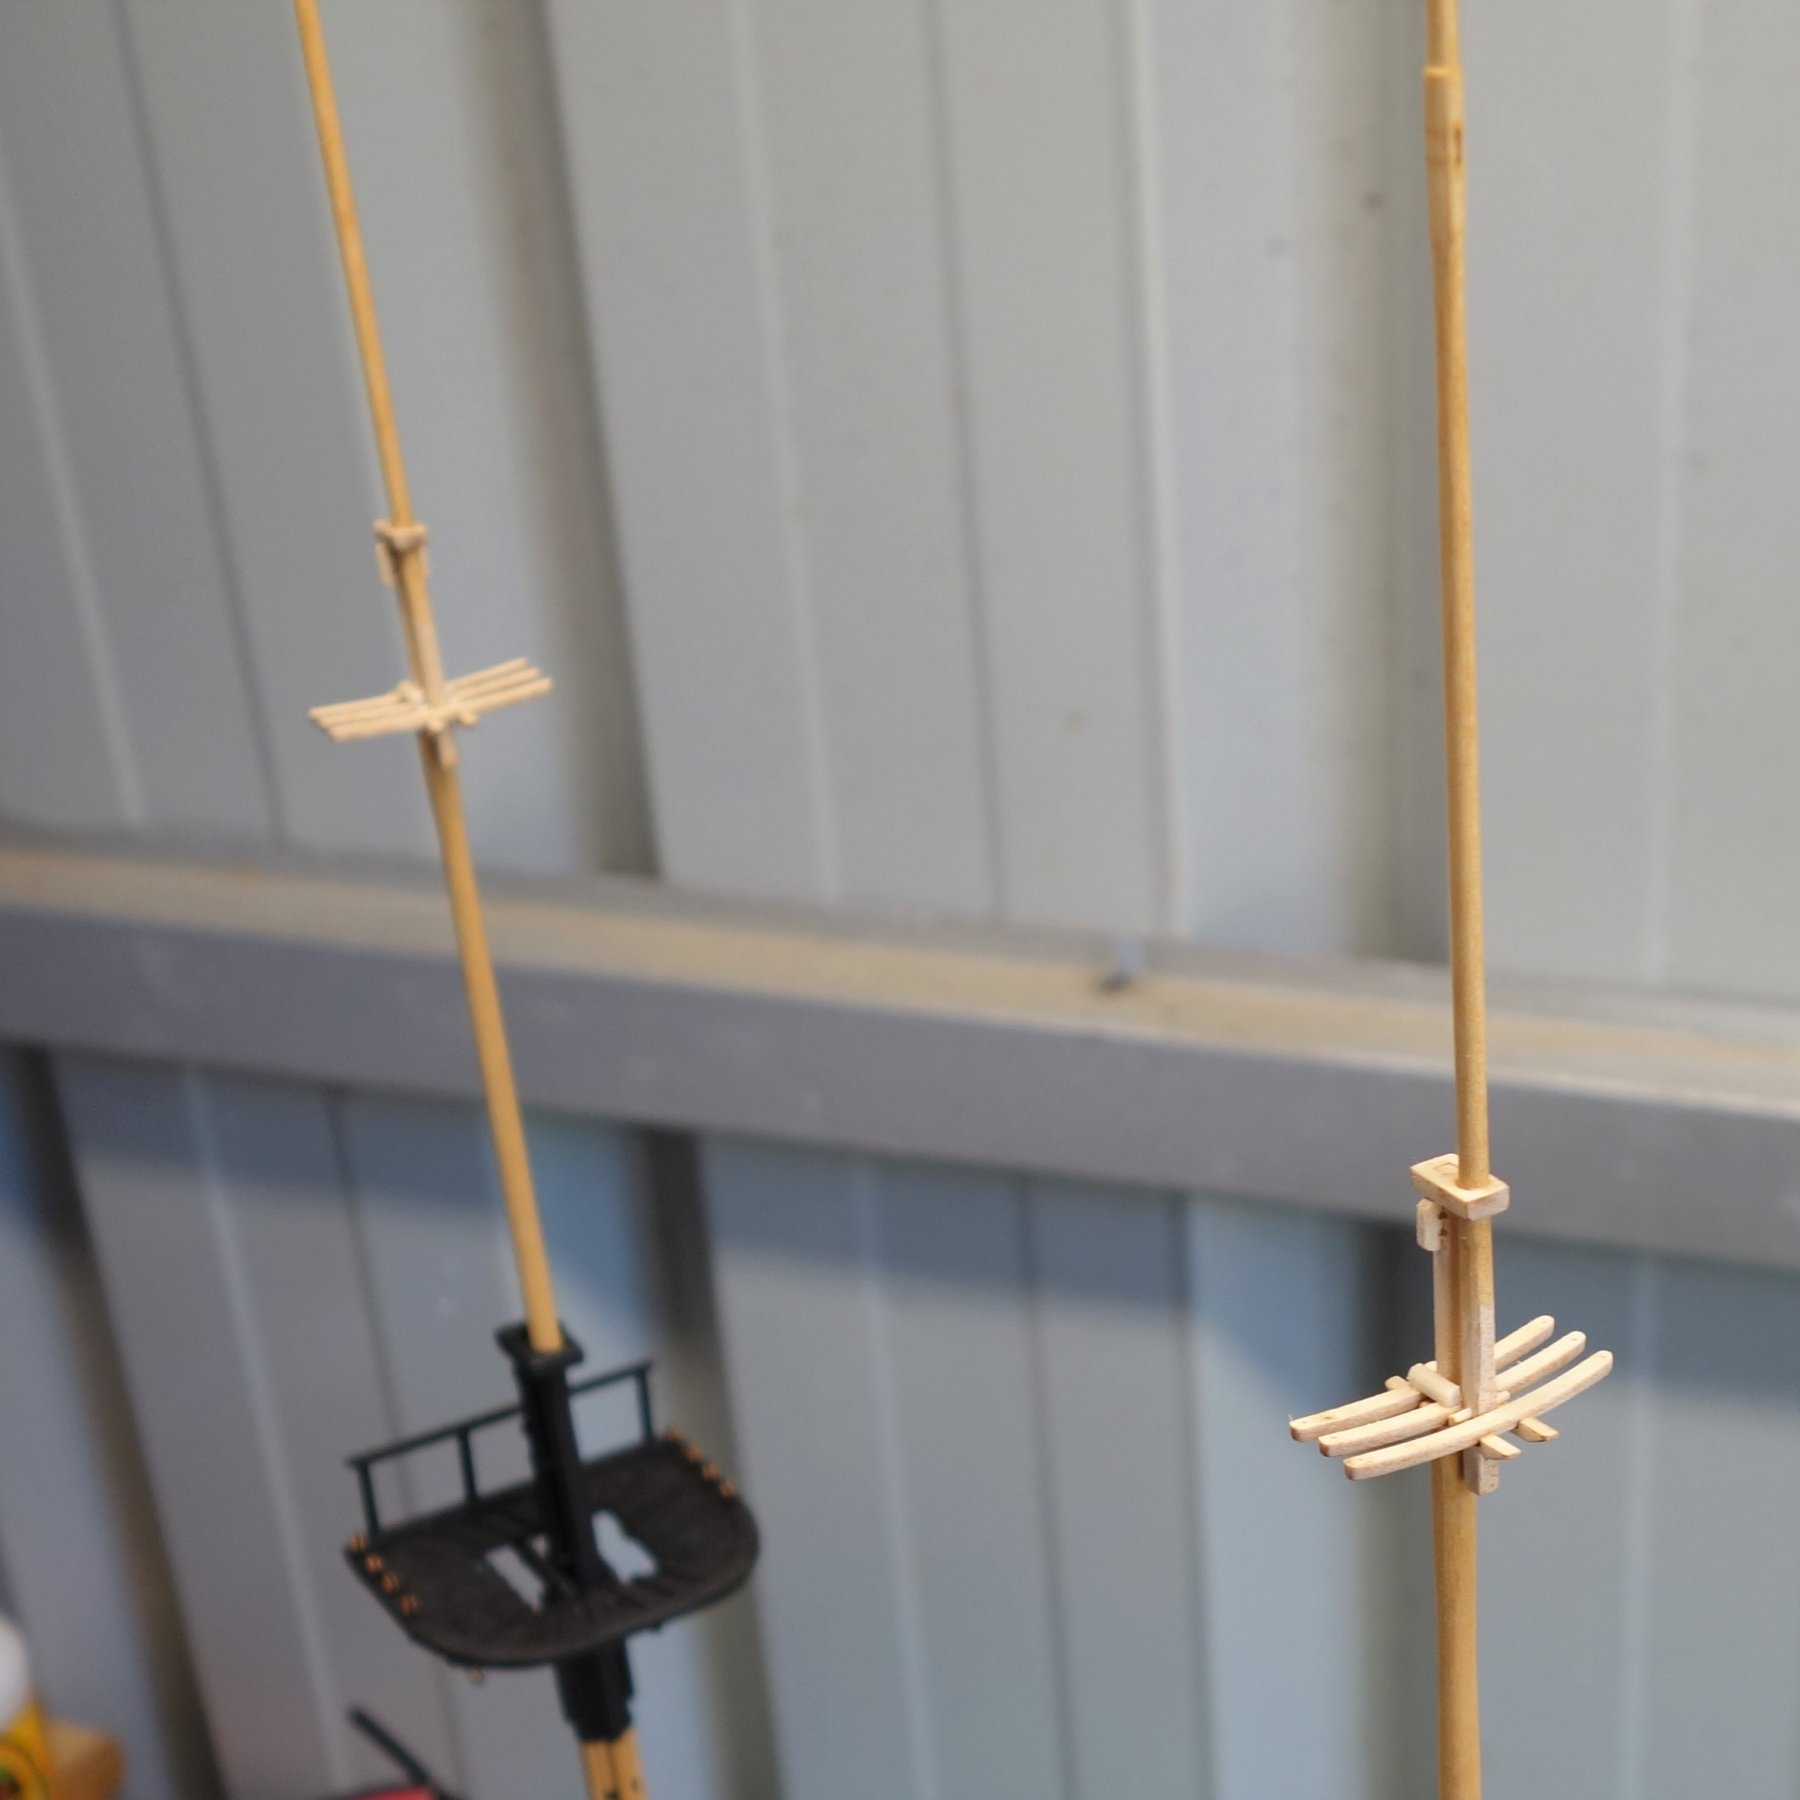
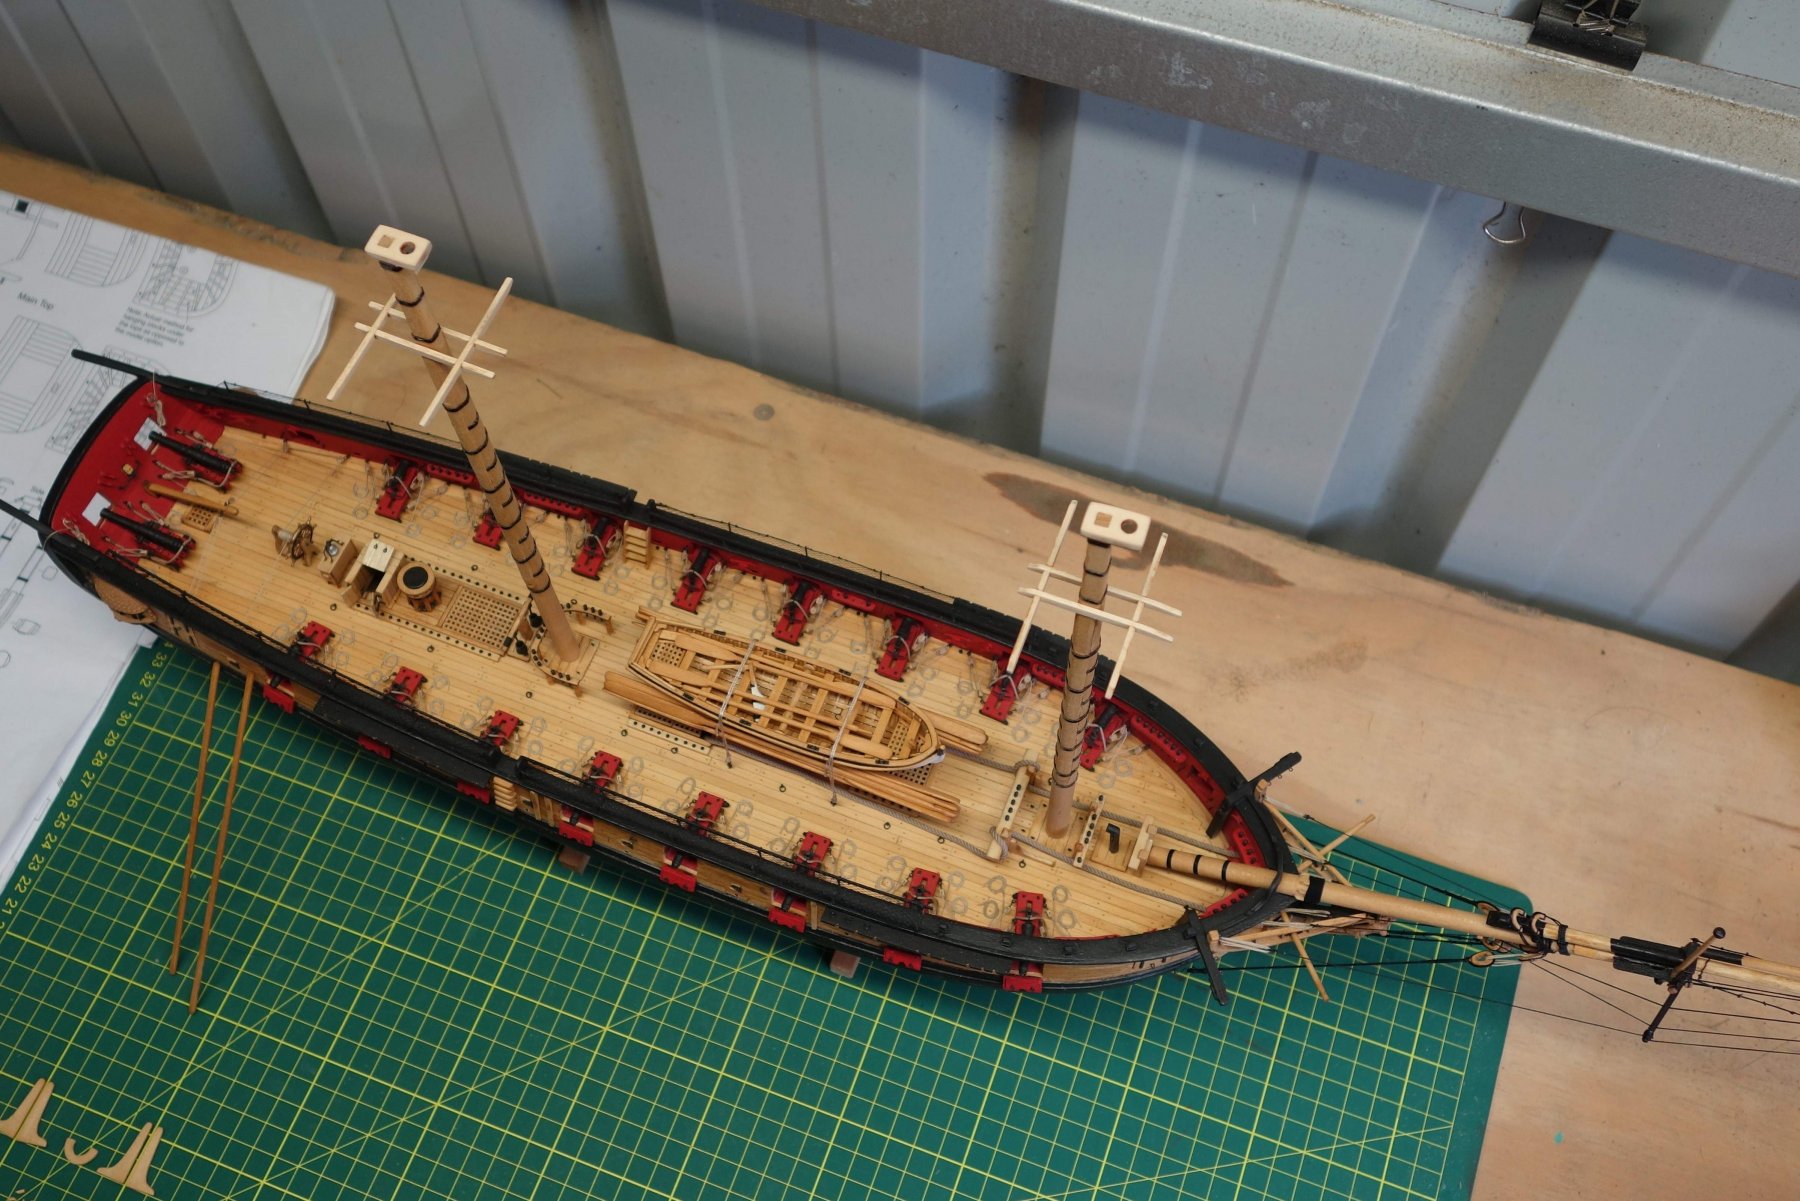
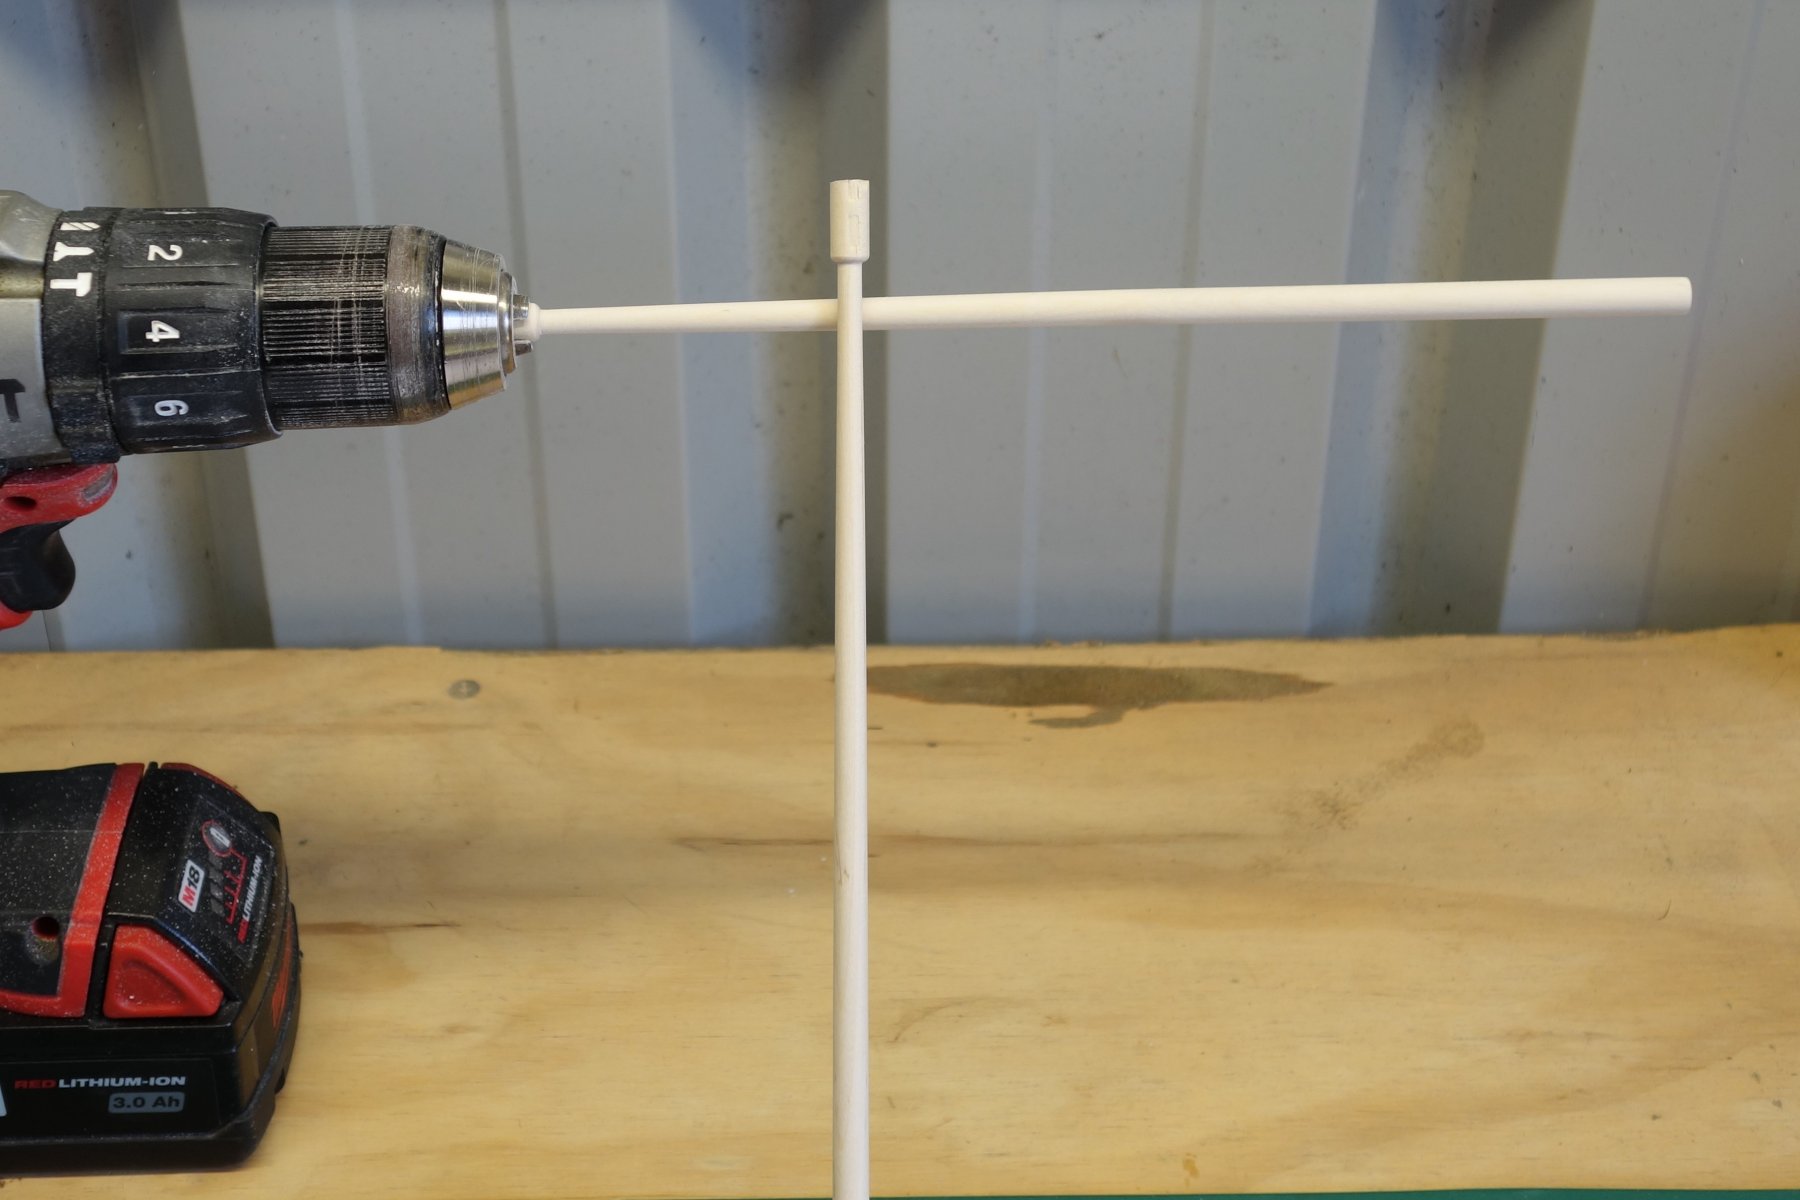
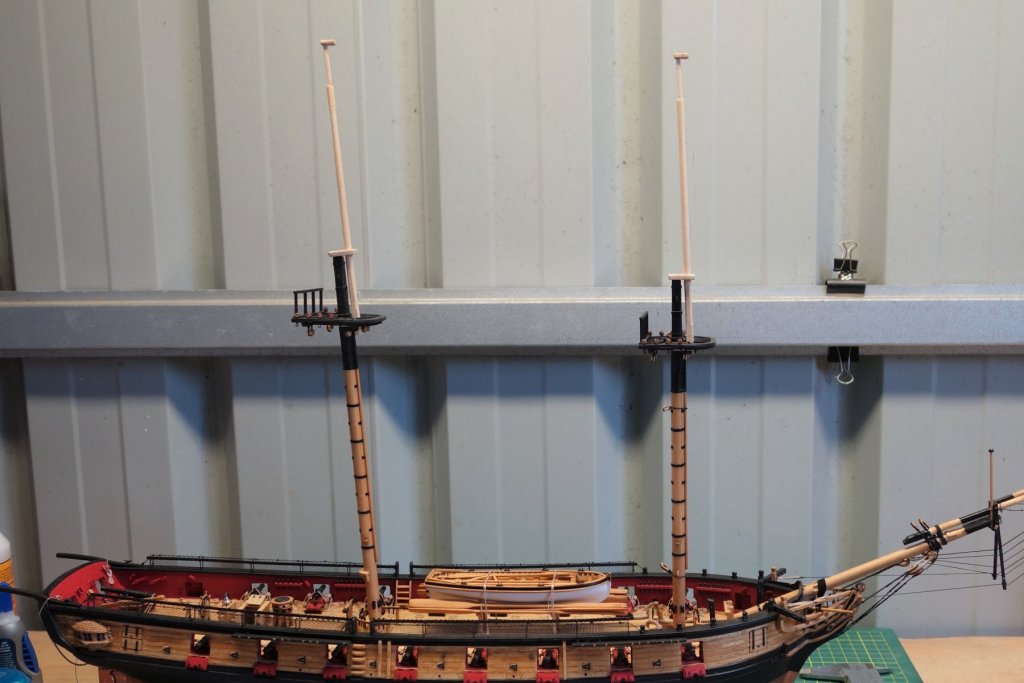
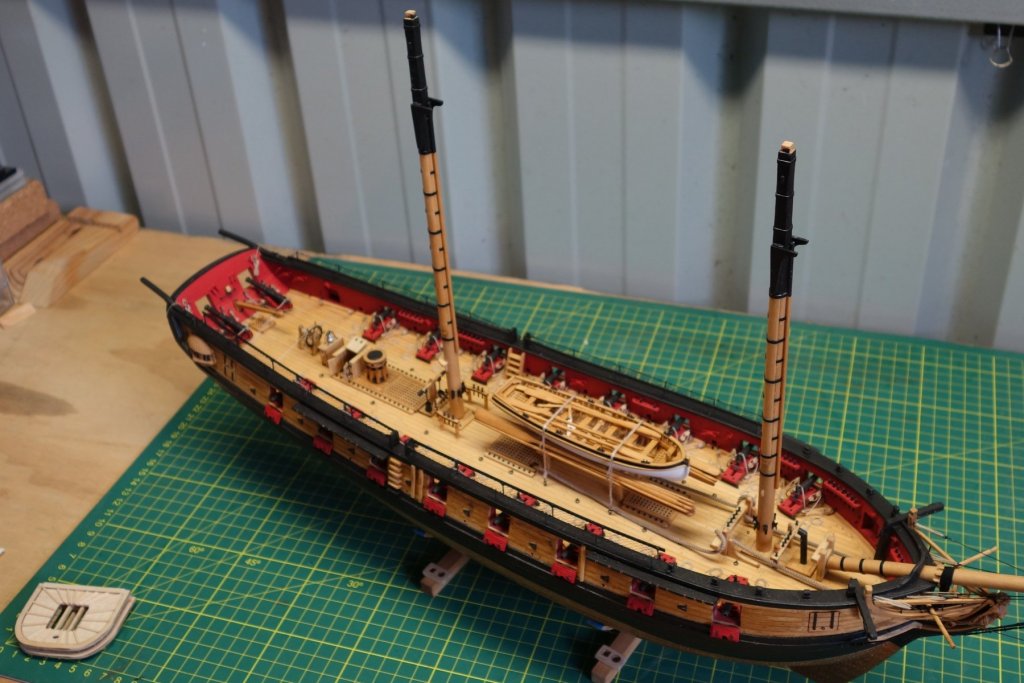
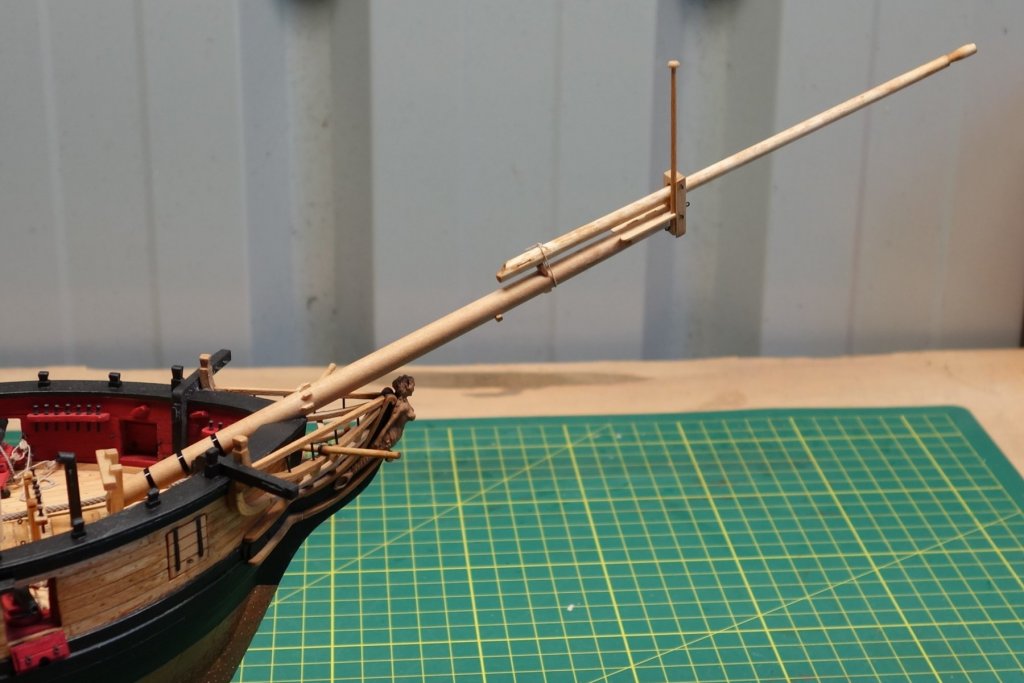
Thanks for the 'likes' again everyone. Made a start on the lower masts. They make a great change on the overall look of the ship. Still have to add a few bits and pieces to complete them but I thought it is worth sharing a few photo's. I thinks I am in luck with how they fit in the holes on the deck. I made the tenons a bit longer and gave them a snug fit. Then I rotated the masts to a position where the tilt angle was just about right. I marked the positions and started building up the mast assemblies. So when Gluing time comes in the distant future it doesn't look like I will need a big setup for the positioning of the masts (fingers crossed). Here a some photo's. Cheers, Peter.


- 242 replies
-
- 15
-
-
- syren
- model shipways
- (and 1 more)
-
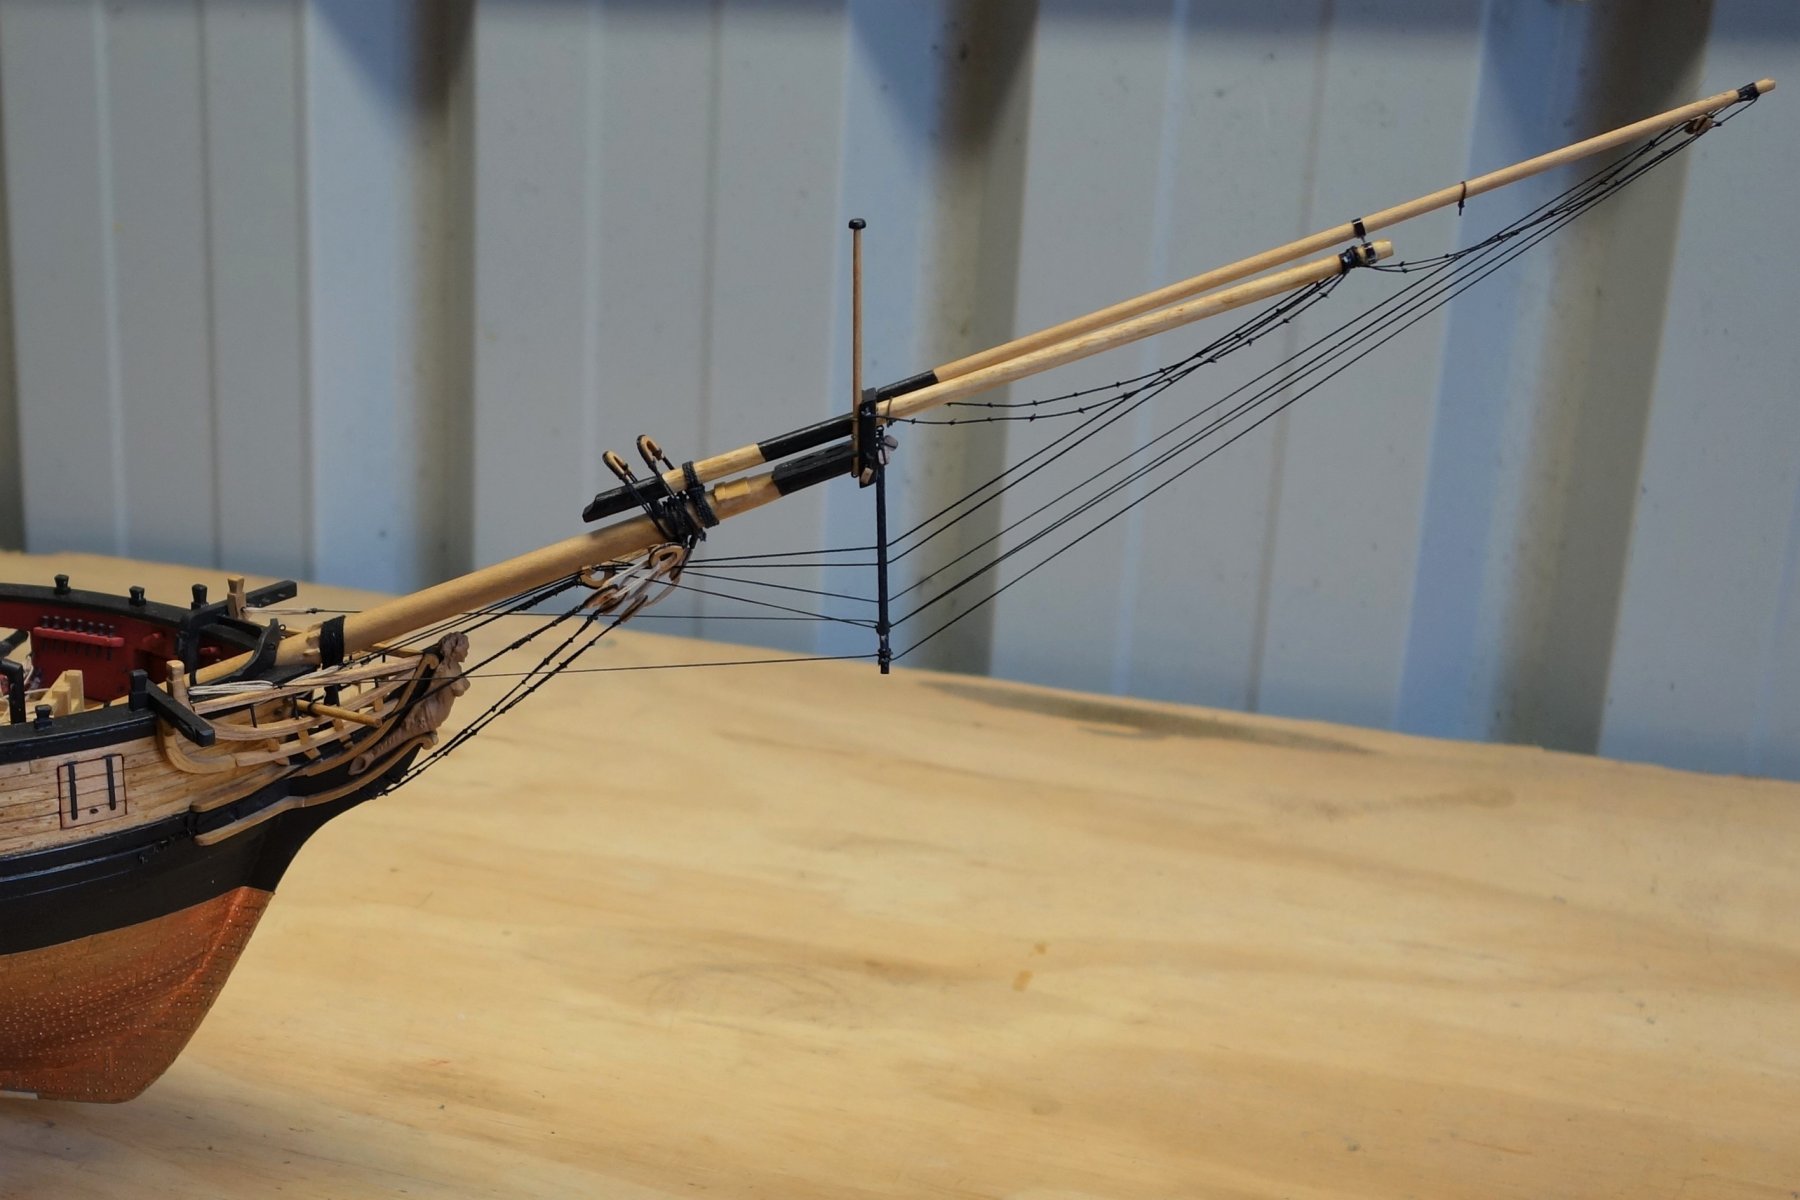
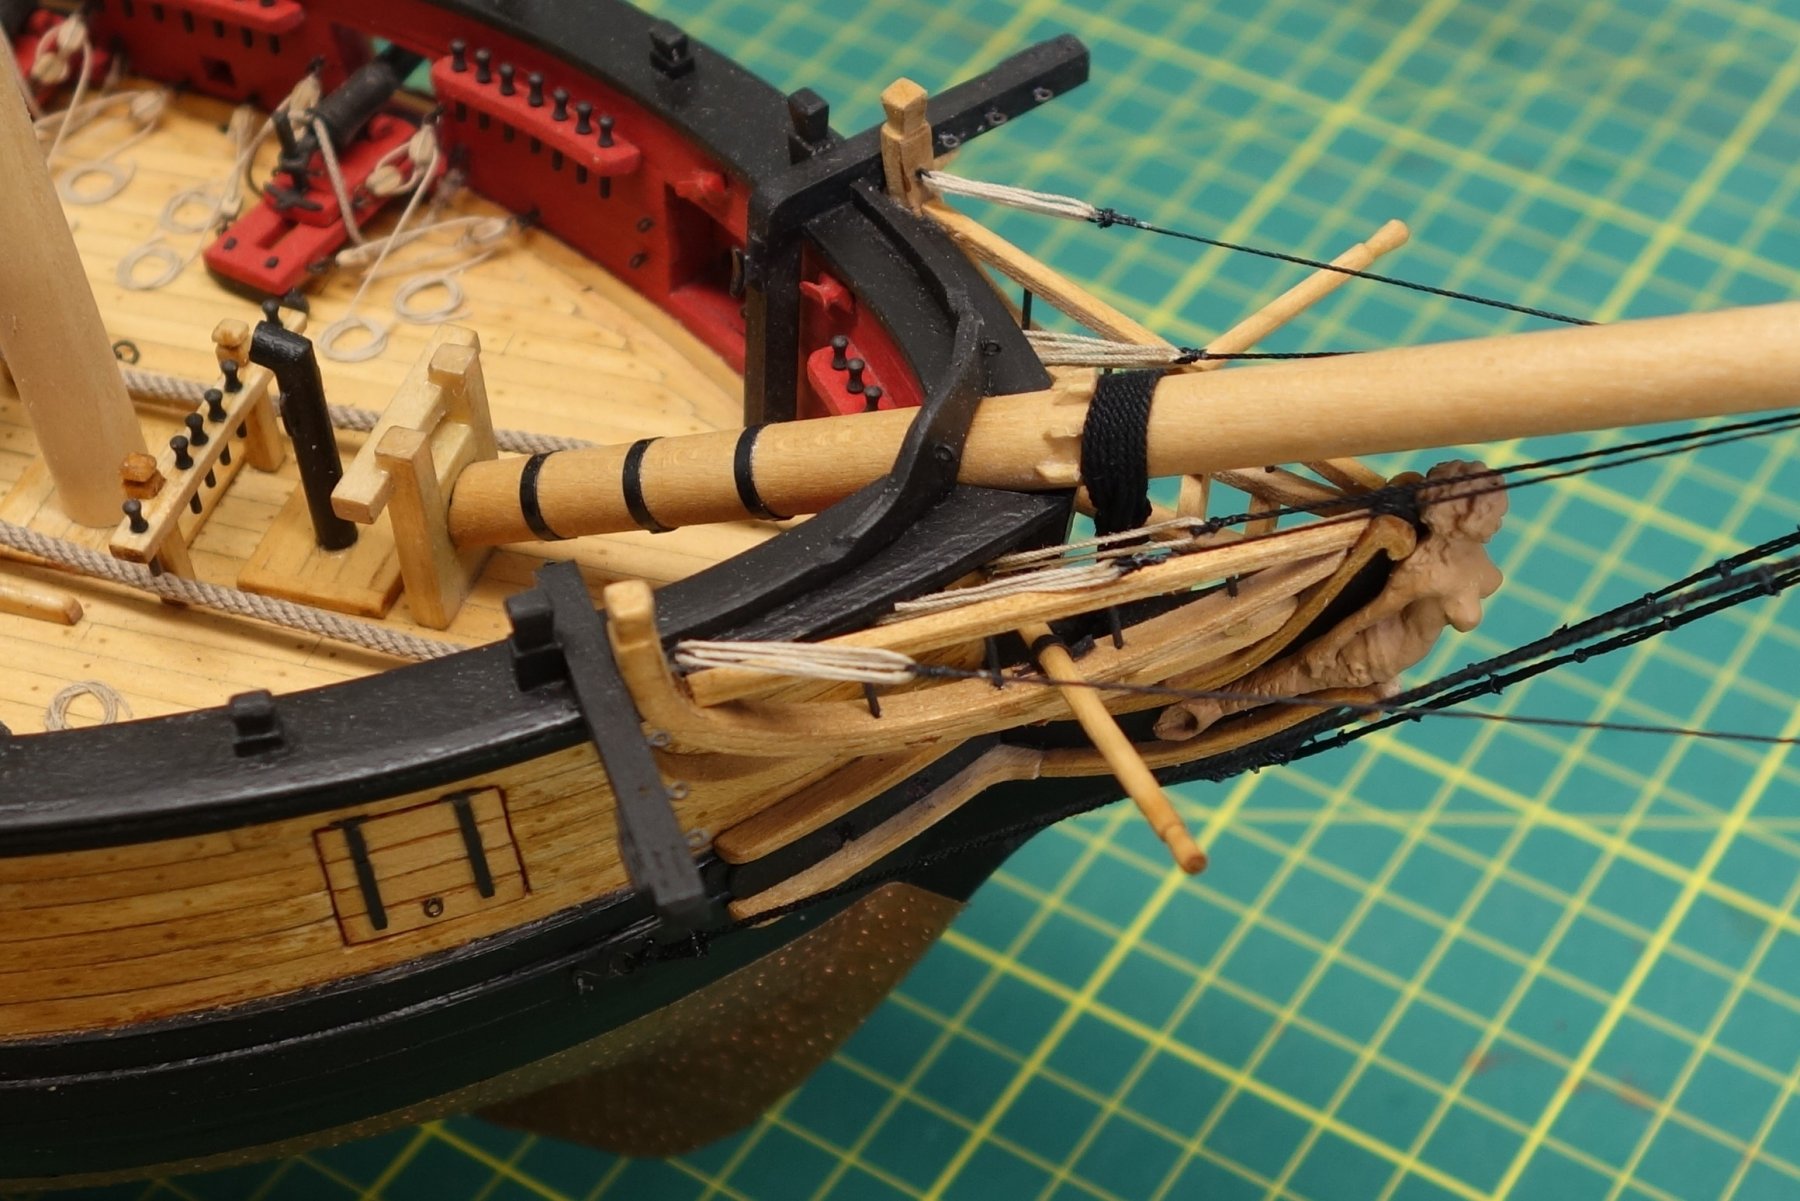
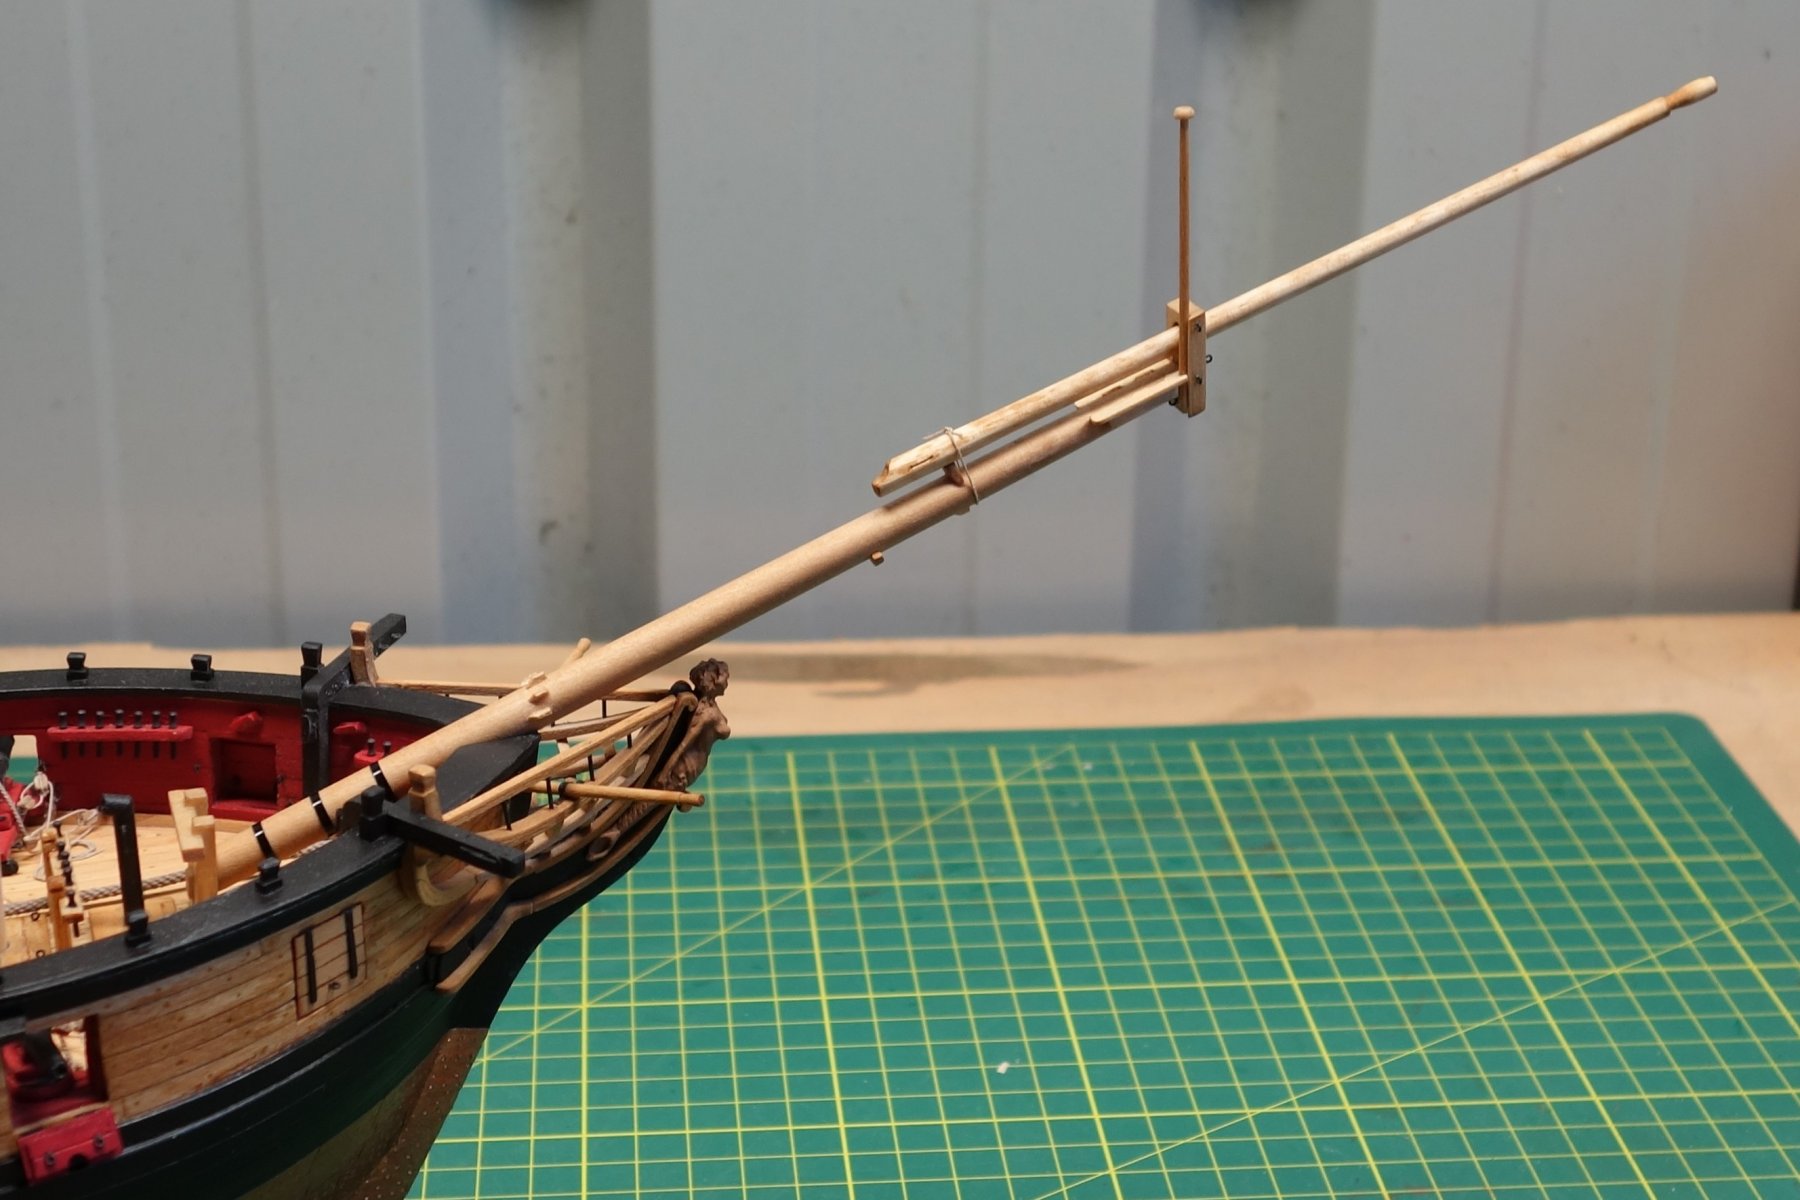
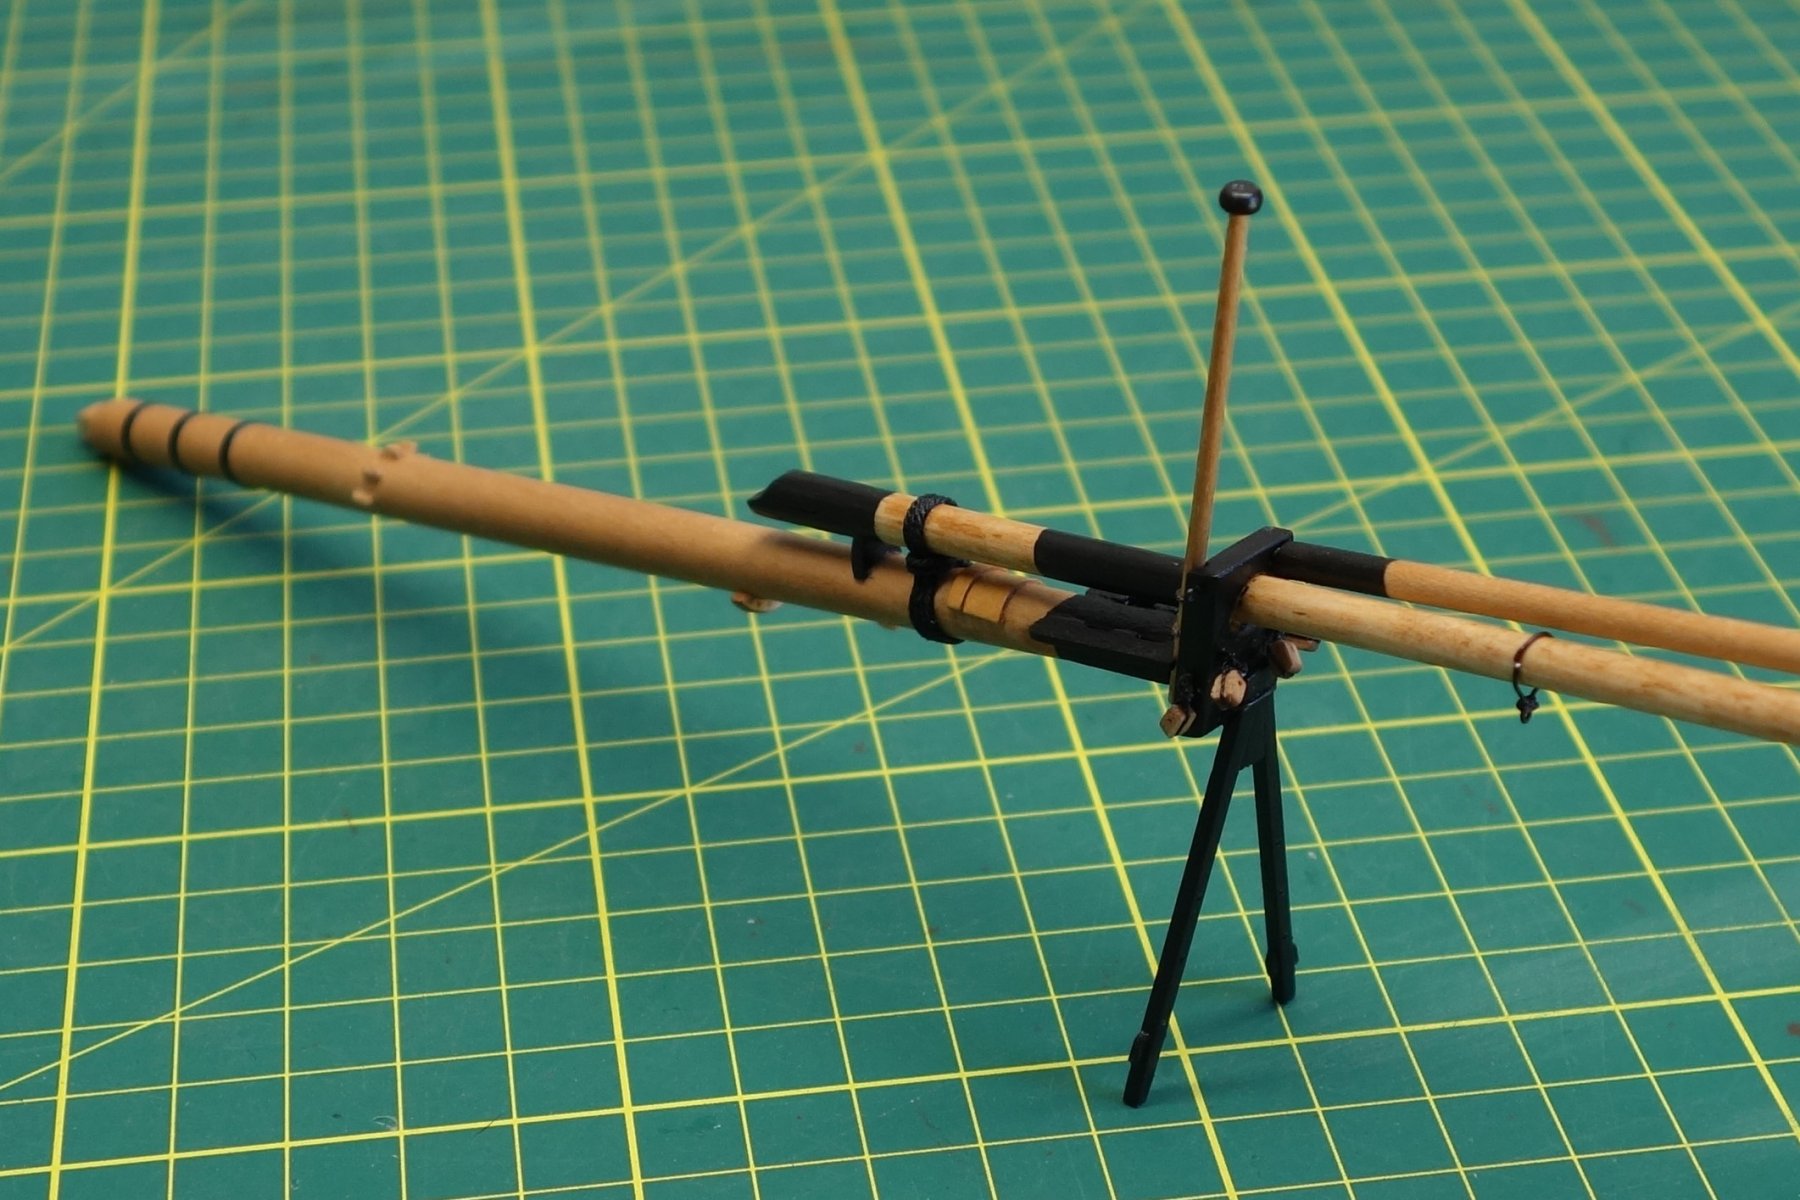
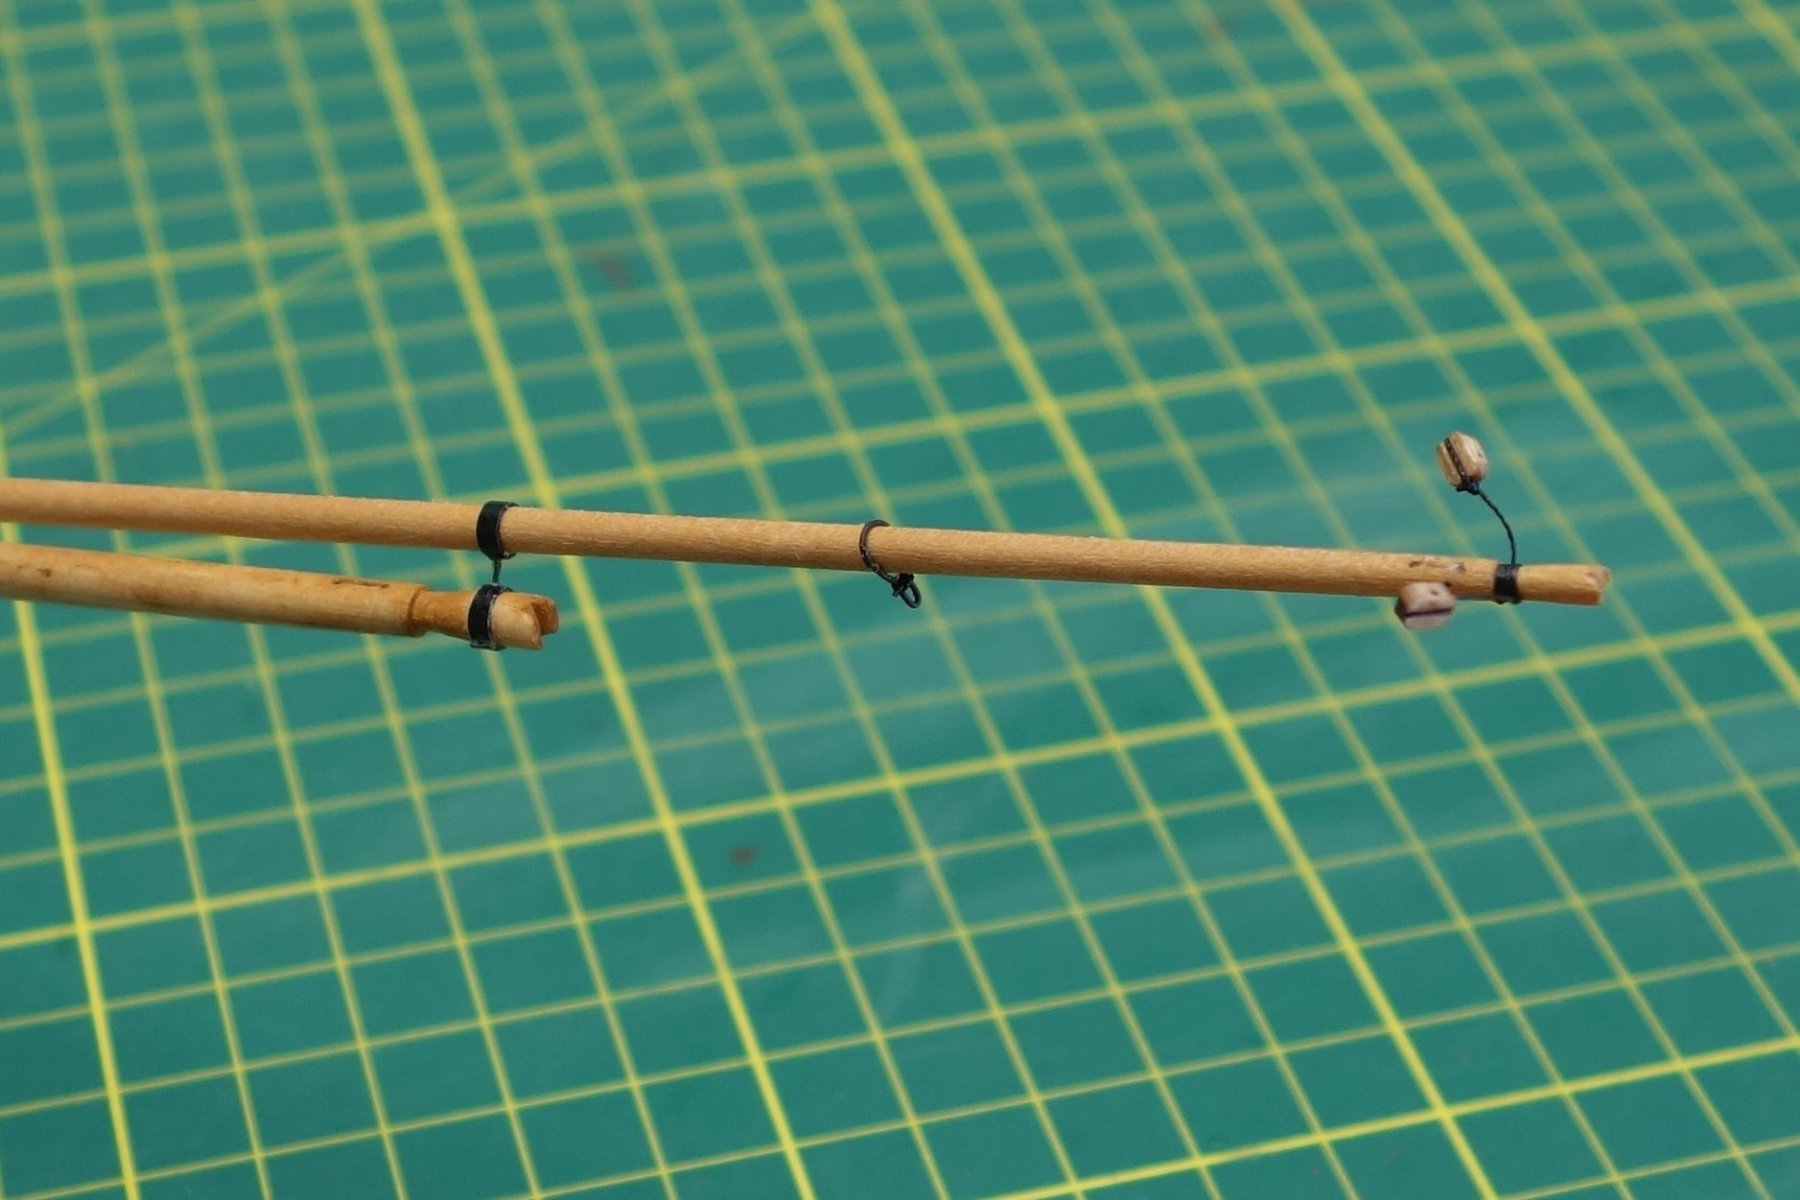
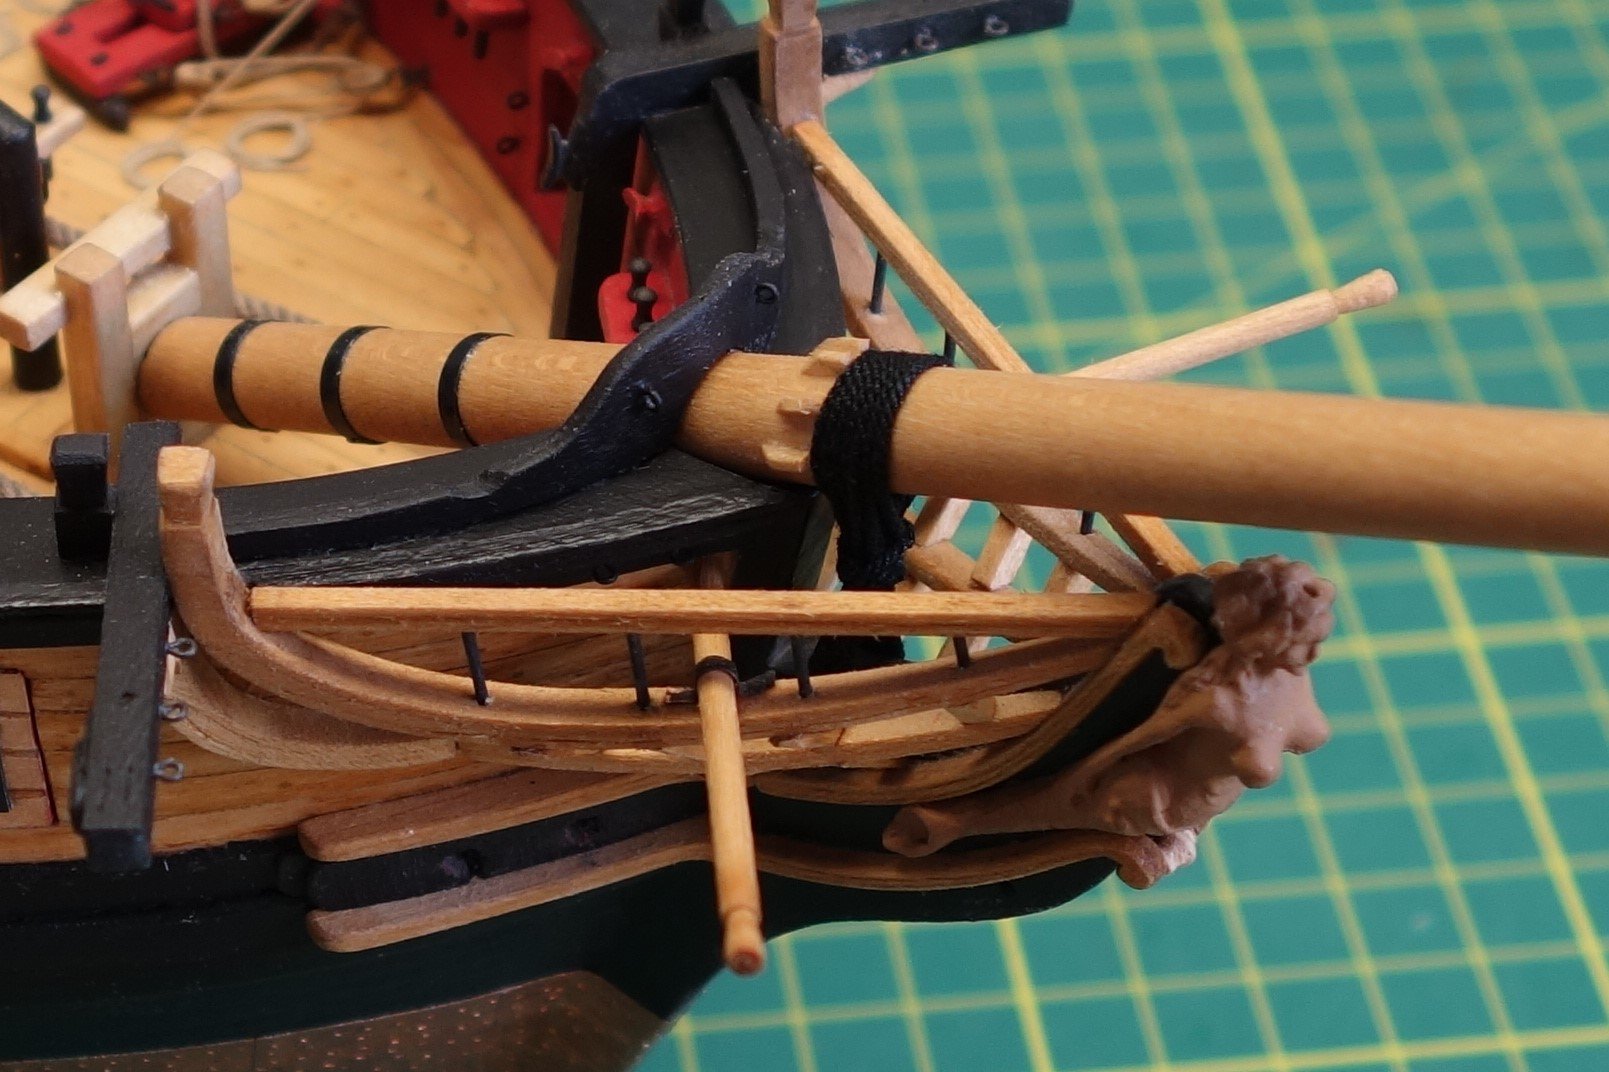
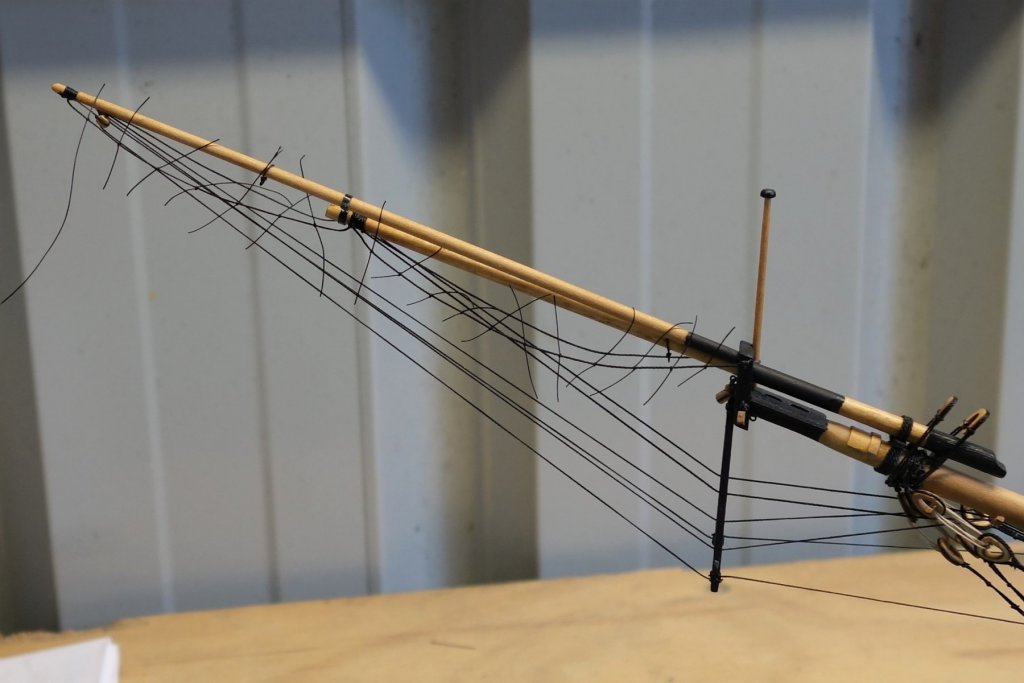
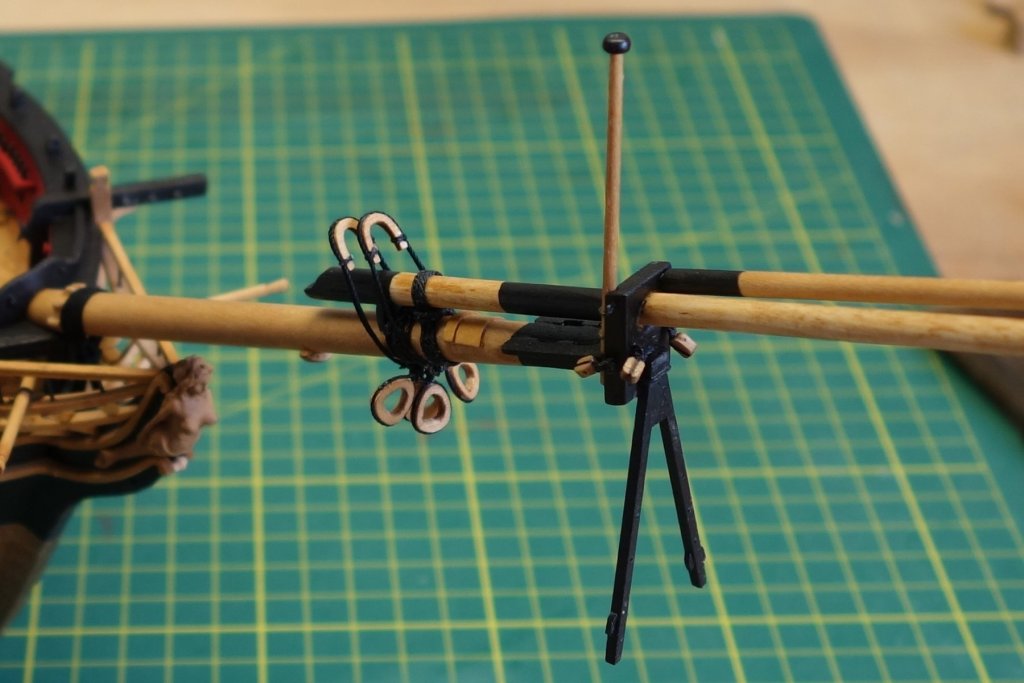
Thanks for the previous likes everyone. I have finished the bowsprit assembly including the rigging so I would like to share that milestone with just a few photo's. Next I will make a start on the masts. Cheers, Peter


- 242 replies
-
- 11
-
-
- syren
- model shipways
- (and 1 more)
-
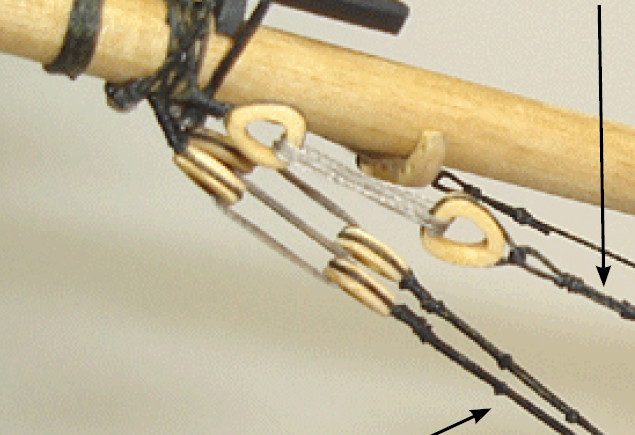
Thanks Jim, That explains your comment perfectly now. It also explain why I didn't get it. My question was more related to the 0.008" tan line that lashed the two hearts together. I couldn't figure out where/how chuck had hidden the start and end of that line. I did the two bobstays last night and I think I figured it out. Or at least I have a result that I am reasonably happy with. Cheers, Peter
-
Hi All, Just would like to share a bit of a brain fart I had over the weekend. As I was doing work on the bowsprit I felt like mixing it up a bit and make a start on the main masts. Well, first step is a no brainer - taper the mast. So got the plan out, measured the bottom, 8mm (tick), the top 5mm (tick) added a bit of length for the bit in the drill chuck and tenon and cut two lengths, one for the main and one for the fore mast. Next few hours I was creating dust sanding away, and after the sanding spent a fair bit of time carefully cutting the tenons to fit them on the ship. I also made some photo's for the forum. I was pretty chuffed with myself. Finally, after dinner I decided to go back in the shed for a bit and read the manual to familiarize myself with the next steps. After reading step 1, went back inside for the day. The top 5mm of the masts are the squared sizes. the masts barely need to be tapered at all... After the dust settled (pun intended) I considered it as a very valuable afternoon of modelling, I learned a big lesson (not to get too cocky) without breaking anything or using a part of the kit that is difficult to replace. Cheers, Peter

- 242 replies
-
- 6
-
-
- syren
- model shipways
- (and 1 more)
-
Thanks Al. Hi Jim, The Bowsprit assembly is already glued on so it's too late for your tip. I did dry test the fairlead holes by putting the correct size lines through to ensure they are large enough. Can you show me a photo how you did the hearts, I can't quite picture it. I'm still curious how Chuck made the rigging of his hearts look so tidy. BTW, I like your music choice, I have been playing that song "a salty dog" from Procol Harum into double digits now and it started me looking for more on YouTube.....lol Cheers, Peter
-
I have a question. In the manual, one of the instructions explains to 'lash the corresponding hearts with 0.008" tan rigging line'. These lashings are everywhere in the model. I have studied these photo's but I can't figure out where to start and end these lines and how they are tied together. I can't see any half knots or glued ends. I feel a bit stupid, but can anyone explain how these are done so neatly. Cheers, Peter
- 242 replies
-
- 1
-
-
- syren
- model shipways
- (and 1 more)
-
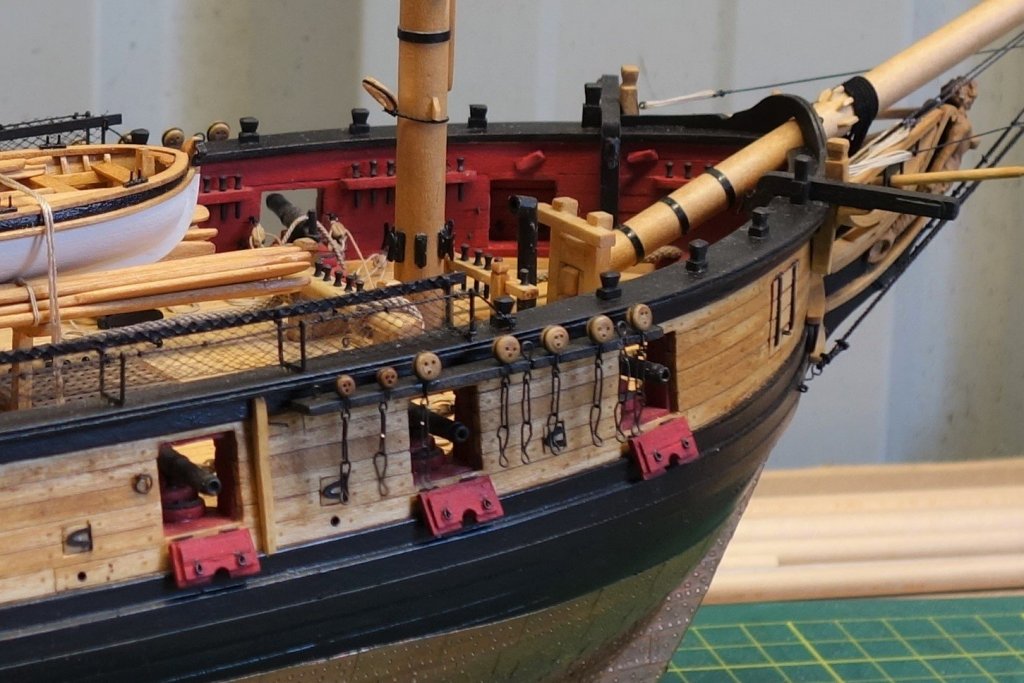
Well, its been a while so I better post another update on the build. I finished the Bowsprit assembly up until the rigging. It hasn't been without its challenges. I made the bowsprit twice because I wasn't happy with the 1/4" dowel size, I thought it a bit too small compared to the size on the plan. The saddle looked to be the simplest part (and probably is ) but took me 4 attempts. And the Dolphin Striker broke off as I was working on the Gammoning. Luckily it broke on a glued connection so after cleaning I could glue it straight back on and didn't have to re-do it. The bowsprit collars were seriously fiddly and I am starting to struggle to understand how and/or where some of the rigging lines start and end, resulting in some results that don't match the instructions. So far I have managed to hide them but I need to do some research in this area. Anyway, enough dribble, here are some photo's.


- 242 replies
-
- 10
-
-
- syren
- model shipways
- (and 1 more)
-
She is beautiful Messis. Very well done. The natural look of the sails is very impressive. That British ship has no chance of catching up.... Peter
-
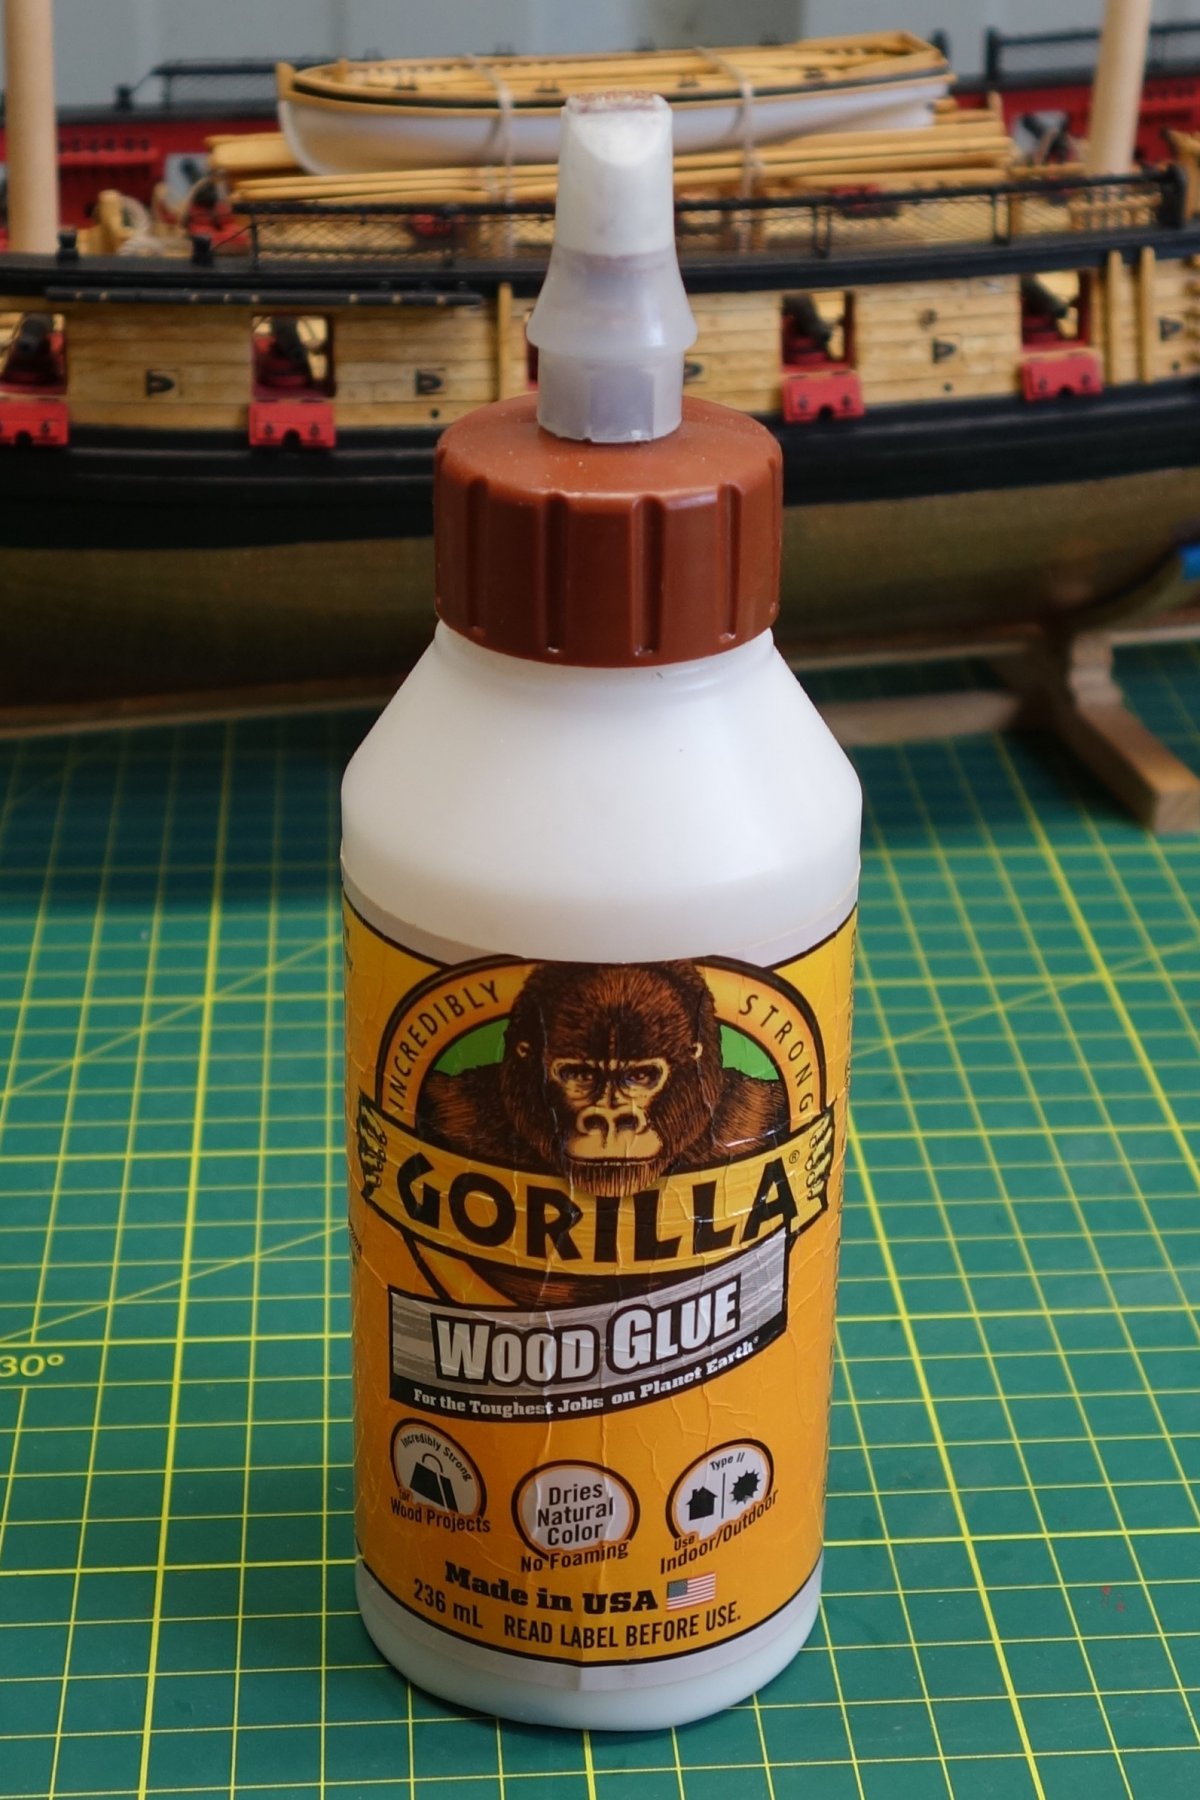
Hi Josh, It's the Gorilla Wood Glue. I have included a photo. Thinking back on the steps I used to create them I may have been slightly wrong on step 5. I started using weights but I think they came out too flat the next day. I did put them under a steel ruler overnight so they kept their shape but can't remember if and by how much I weighted them down. Just a bit of trail and error I suppose, just like all the other steps....lol. Here is the photo.

- 242 replies
-
- 2
-
-
- syren
- model shipways
- (and 1 more)
-
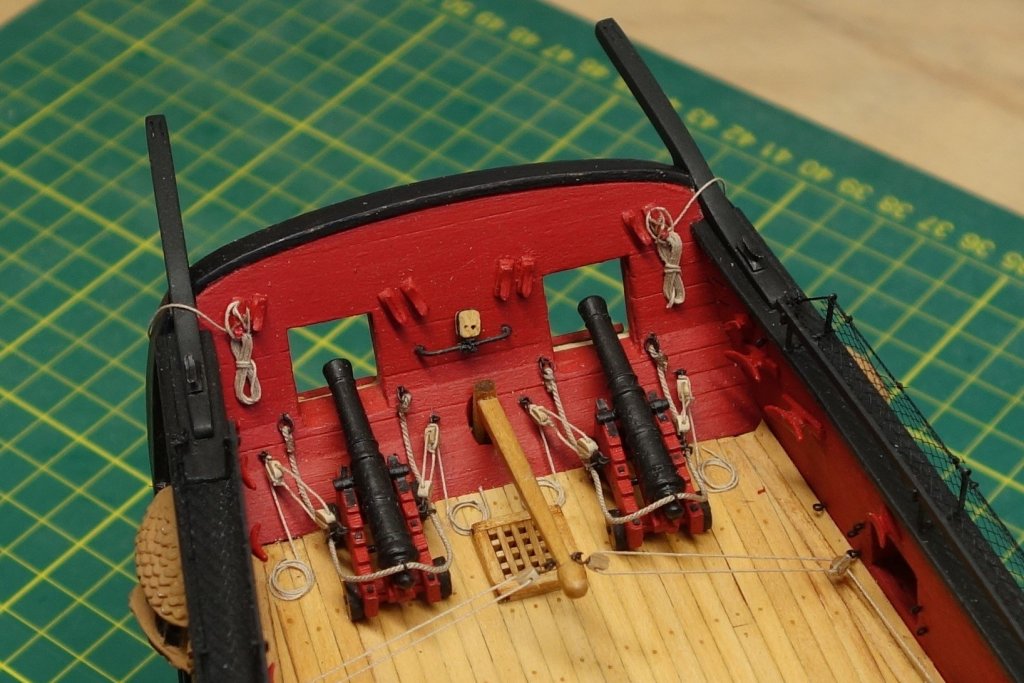
Hi Josh, I'm not sure if my technique is a good one but it worked for me in the end. For a start I didn't use the rope out of the kit. I replaced most of my rope with rope from the Syren Ship Model Company (Chuck) which is a lot easier to work with. This is the way I did it: 1. I put around 3-4 turns around a pencil ensuring I went over the start of the rope so that that bit ends up on the inside of the coil. 2. After cutting the end and holding the rope around the pencil I soaked it with diluted GORILLA PVA glue. (around 50-50 from memory) 3. After wiping off the excess and holding it for around 30-60 seconds, enough to hold it's shape, not too long to get stuck on the pencil, I carefully wedged it off the pencil edge. 4. I left the coil to dry for about an hour, next I flattened it with my finger. This is where most of my rejects came from as you want to look for a naturally coiled looking rope. Some of them bend down with sharp corners and just don't look natural. The more you do the less you reject as you start to get a feel for it. 5. Next I put a batch under a flat surface like a steel ruler, put some weight on it and left it overnight. 6. The next day I pulled the inside end off a bit and cut the end so it is nicely tucked under the coil. The outside end was cut so it looked as natural as possible. Finally I glued it on top of the cut end of the gun rigging. I hope this helps. Cheers, Peter
- 242 replies
-
- 1
-
-
- syren
- model shipways
- (and 1 more)
-
Harley & Jim, thanks for the advice. Thinking about it that makes perfect sense. I can see the issue trying to put the long boat back in position after the rigging. So she is currently solidly glued in position and won't go anywhere....👍
-
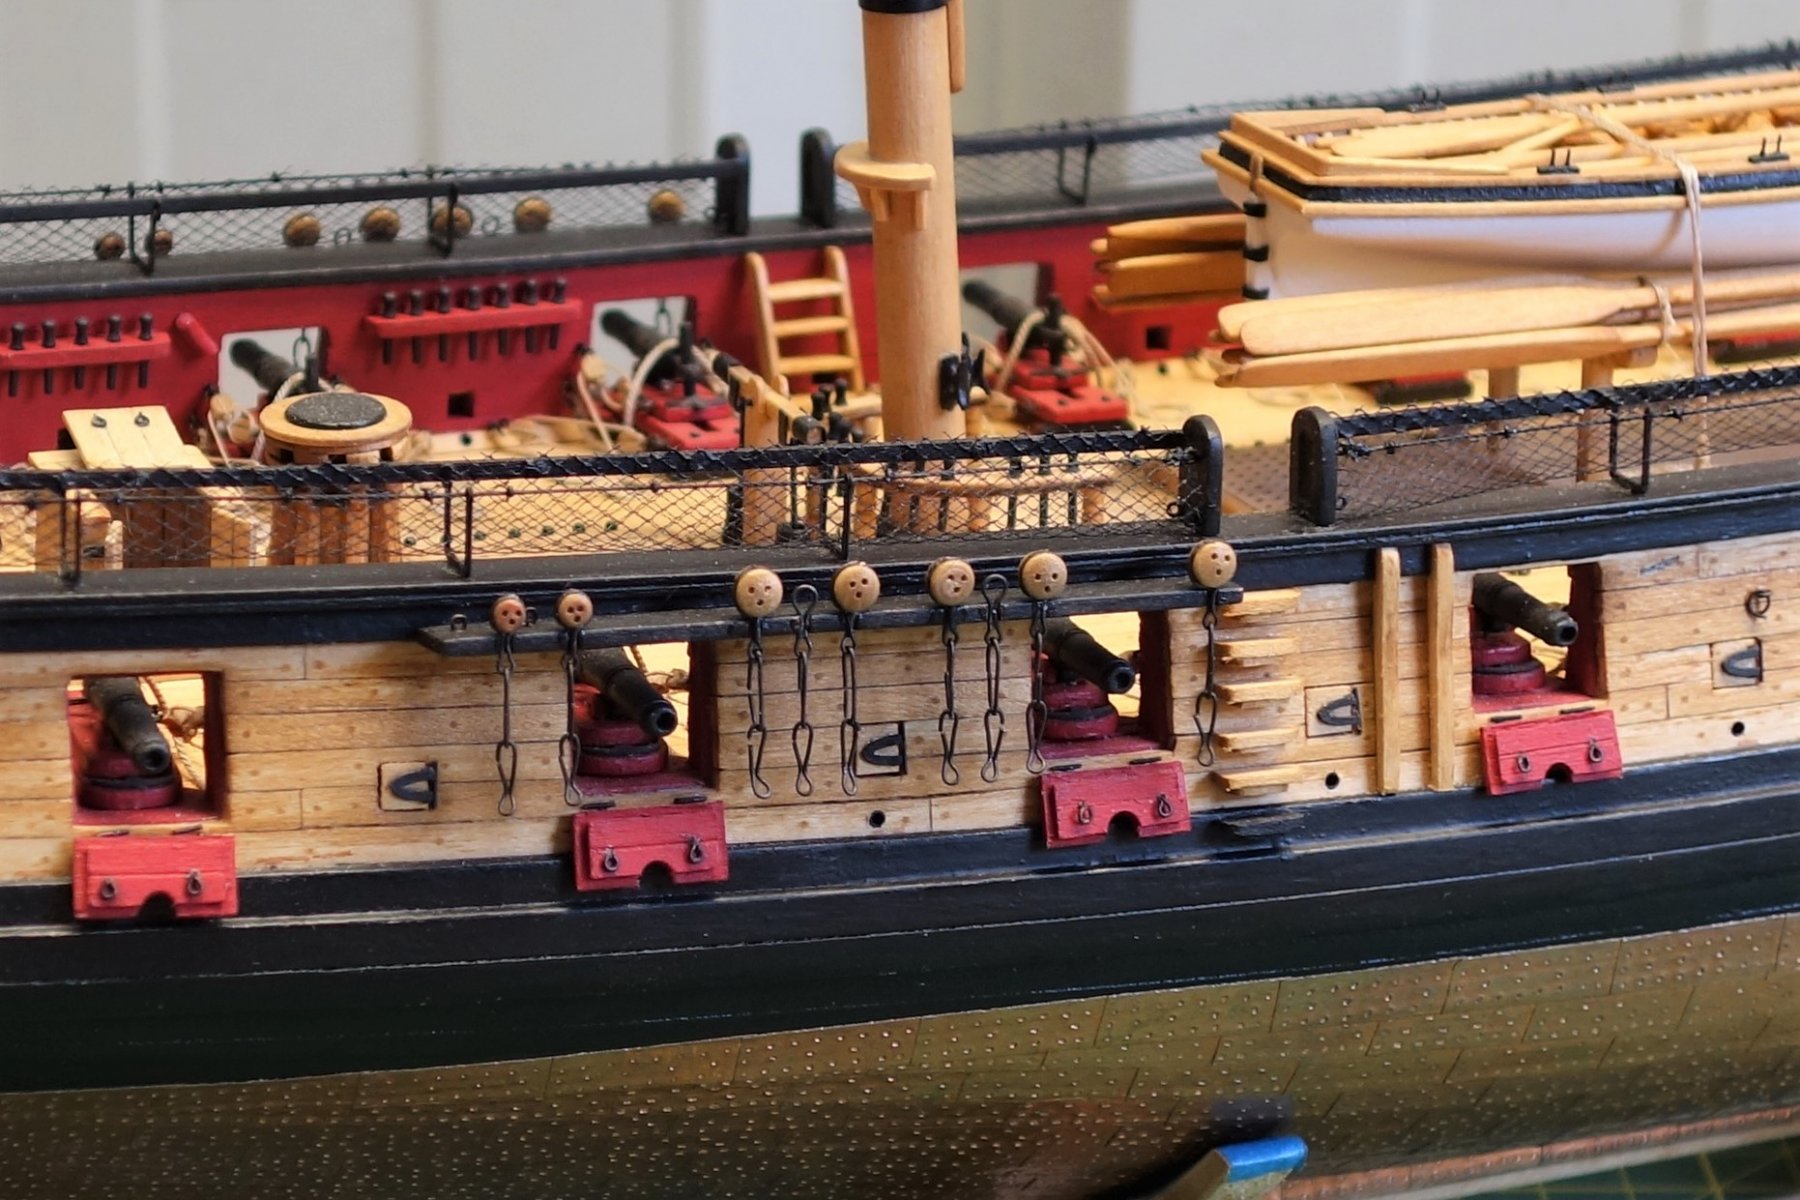
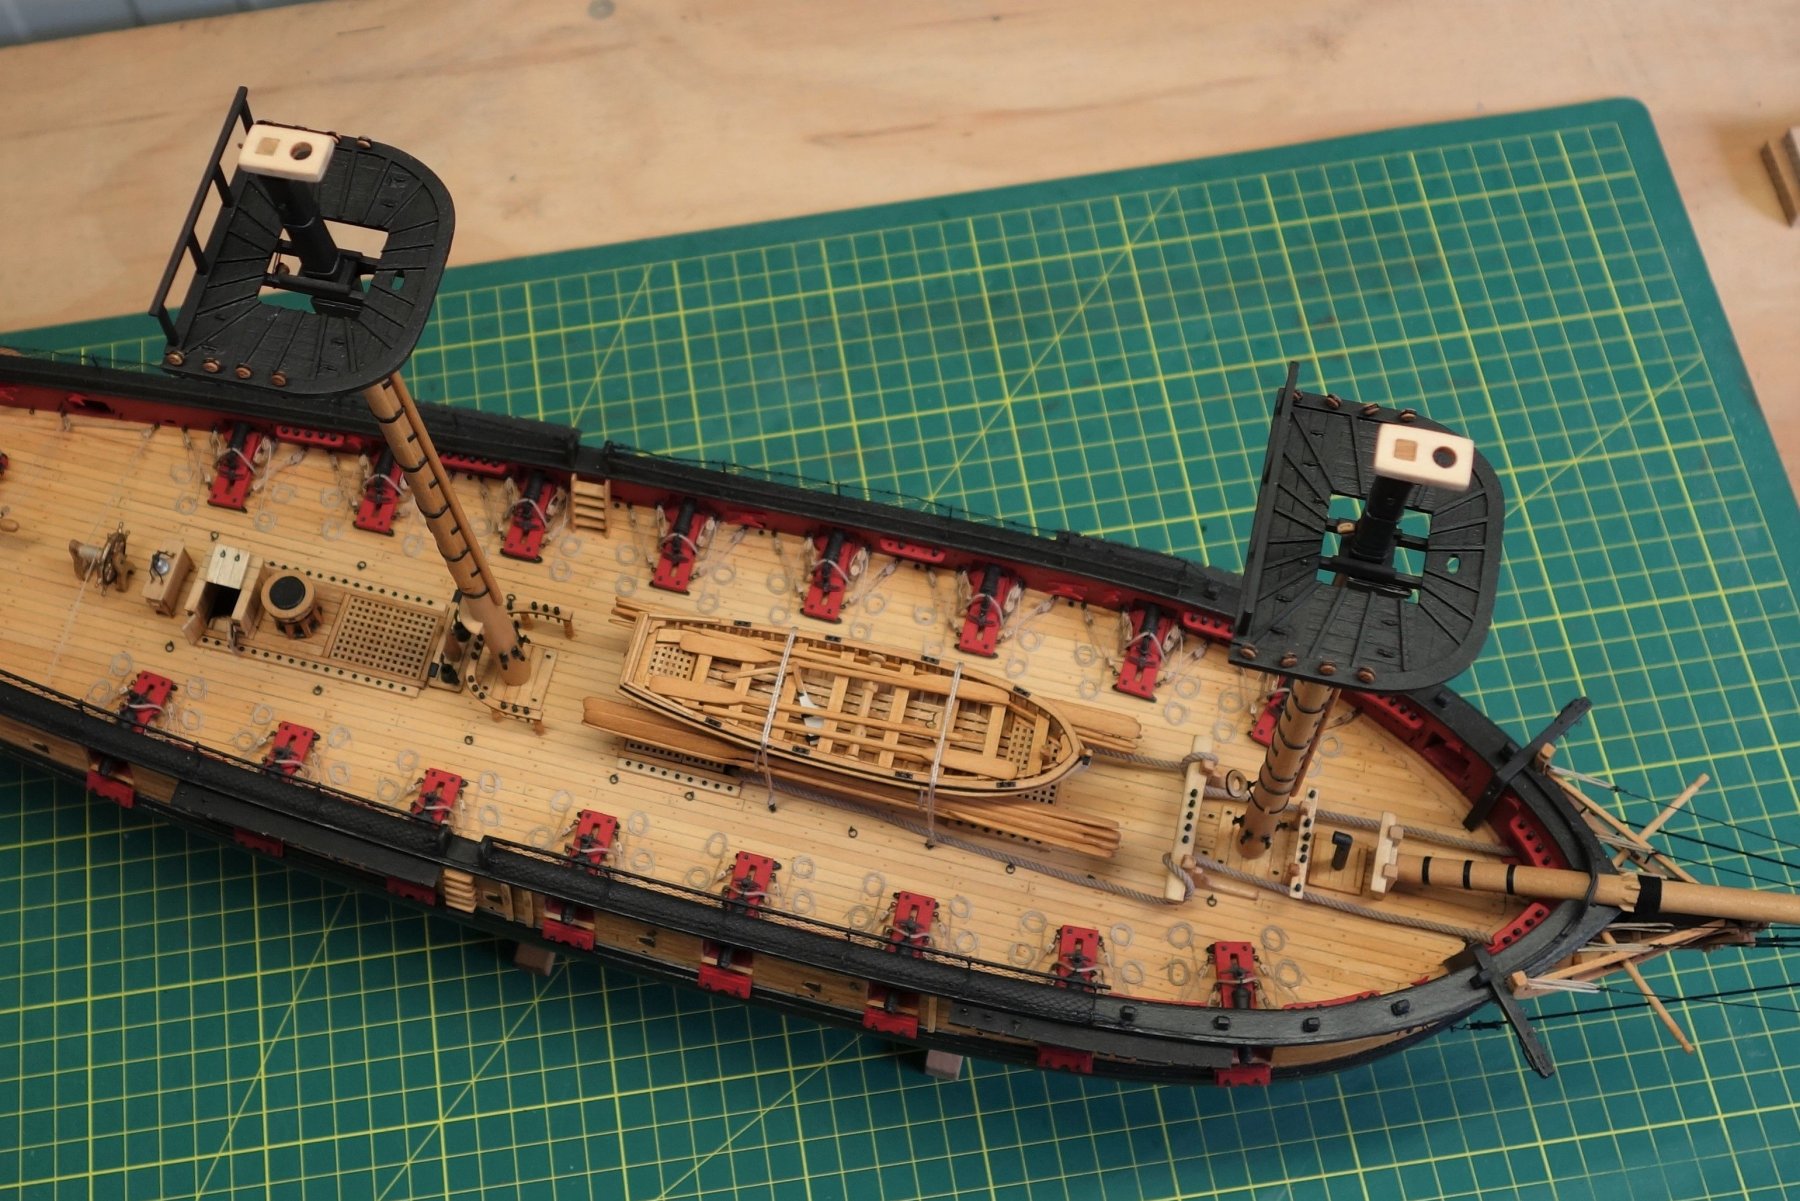
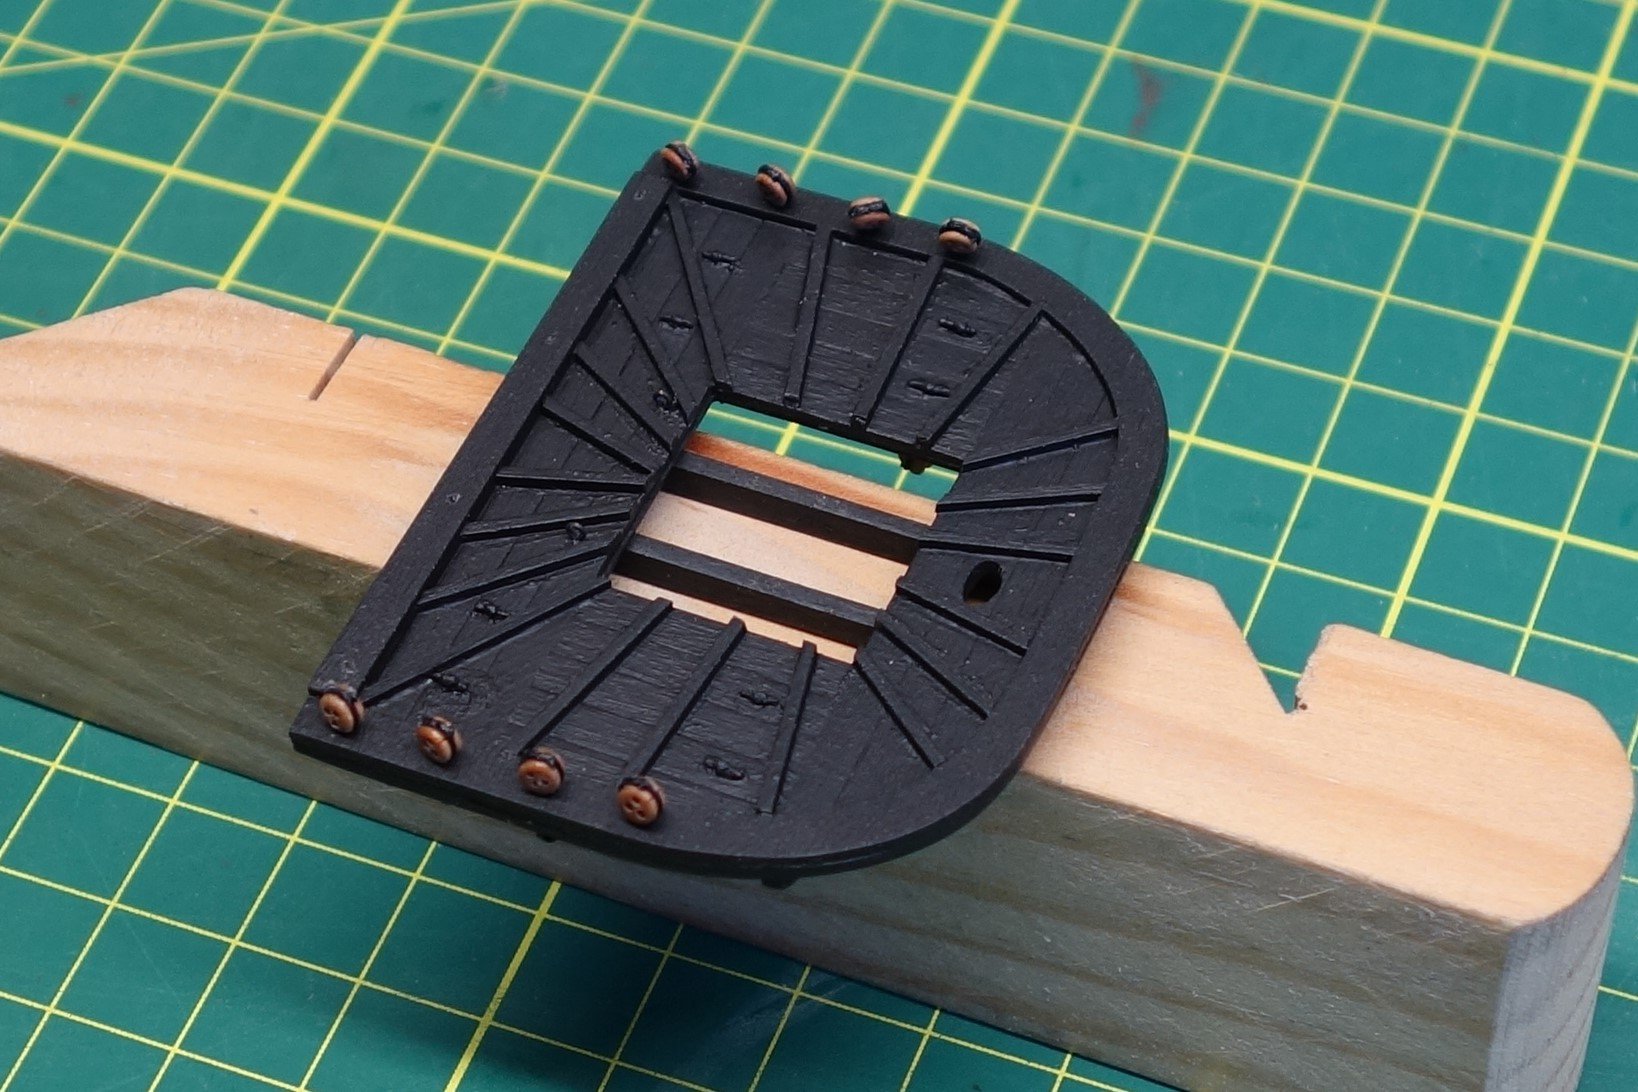
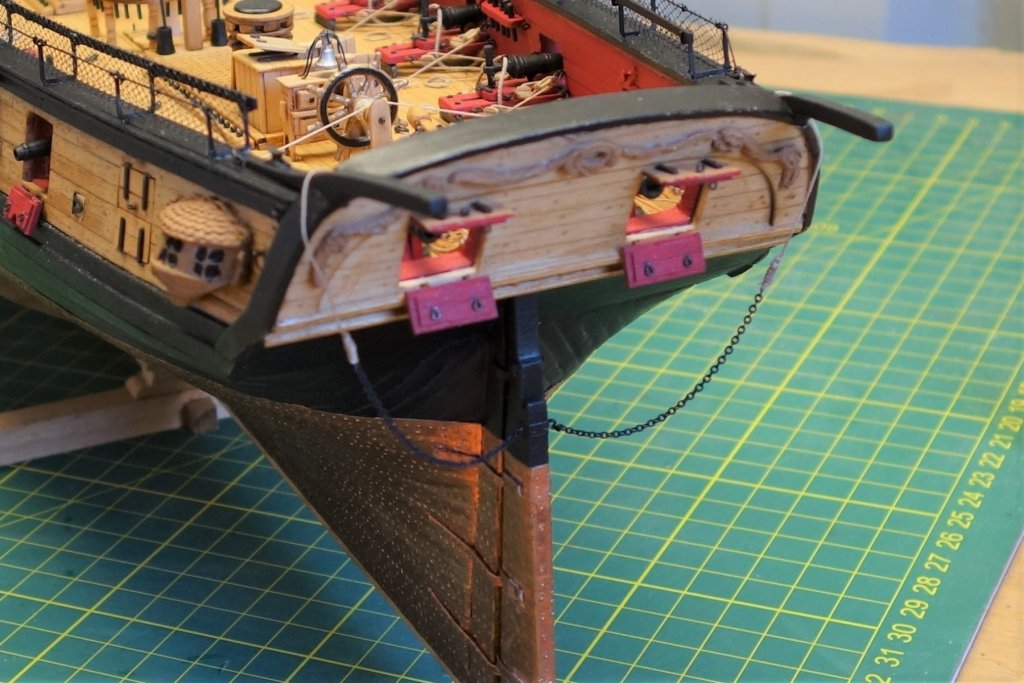
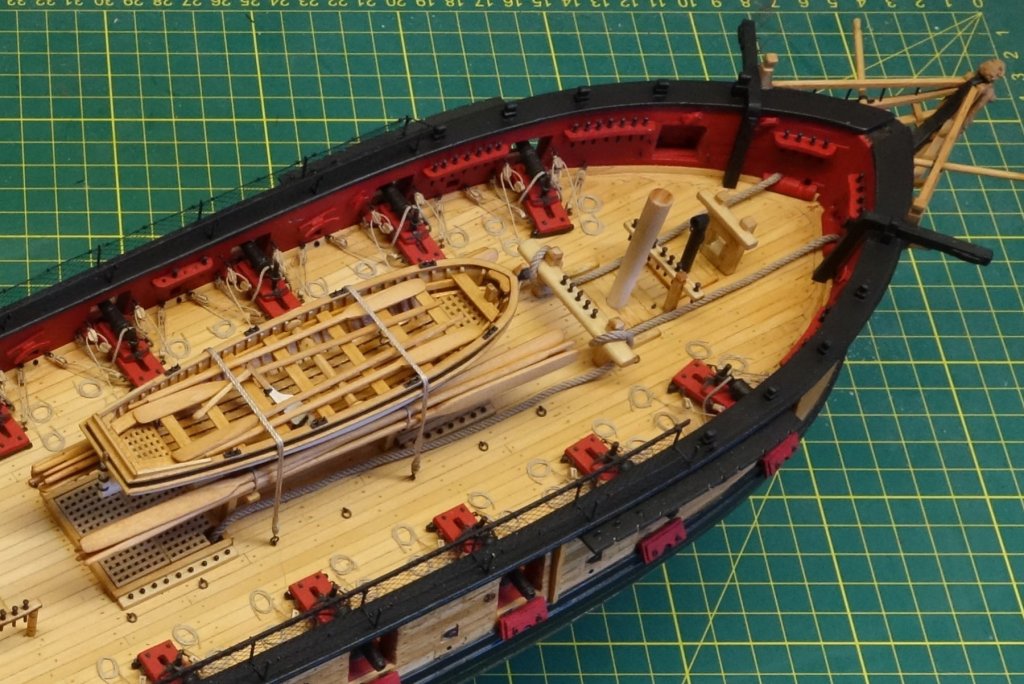
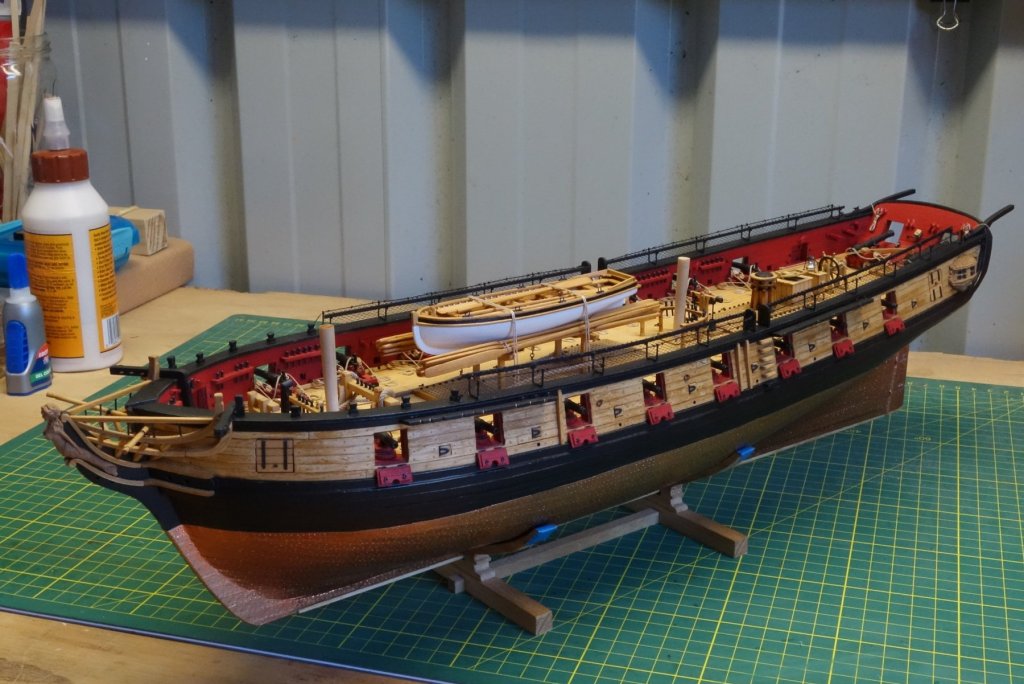
Thanks Messis, and also thanks for the likes. A small update this time. I lashed the long boat and the sweeps down on the gallow bits. I haven't glued them yet. I have a feeling that during the rigging stage it may be handy to temporarily take the long boat off the ship to create some needed space for my hands. I also added the rudder pendants and added a few rope coils. And the netting is done. The netting was tricky as at one stage I pulled a eye bolt out of the boarding panel (with half the netting in place) and with another section I had to re glue the boarding panel all together. In the end it didn't end up being perfect but I'm happy with the result. I also had a bit of a play placing the anchor ropes. This completes the hull so it looks like I will make a start on the bowsprit next. Just a few photo's this time.
- 242 replies
-
- 16
-
-
- syren
- model shipways
- (and 1 more)