HOLIDAY DONATION DRIVE - SUPPORT MSW - DO YOUR PART TO KEEP THIS GREAT FORUM GOING!
×


JpR62
-
Posts
699 -
Joined
-
Last visited
Content Type
Profiles
Forums
Gallery
Events
Everything posted by JpR62
-
 Thanks DocBlake and all the likes. This model is really great to build. But I much say that the help of the many logs on this forum help me a lot.
- 164 replies
-
- 3
-

-
- first build
- model shipways
- (and 2 more)
-
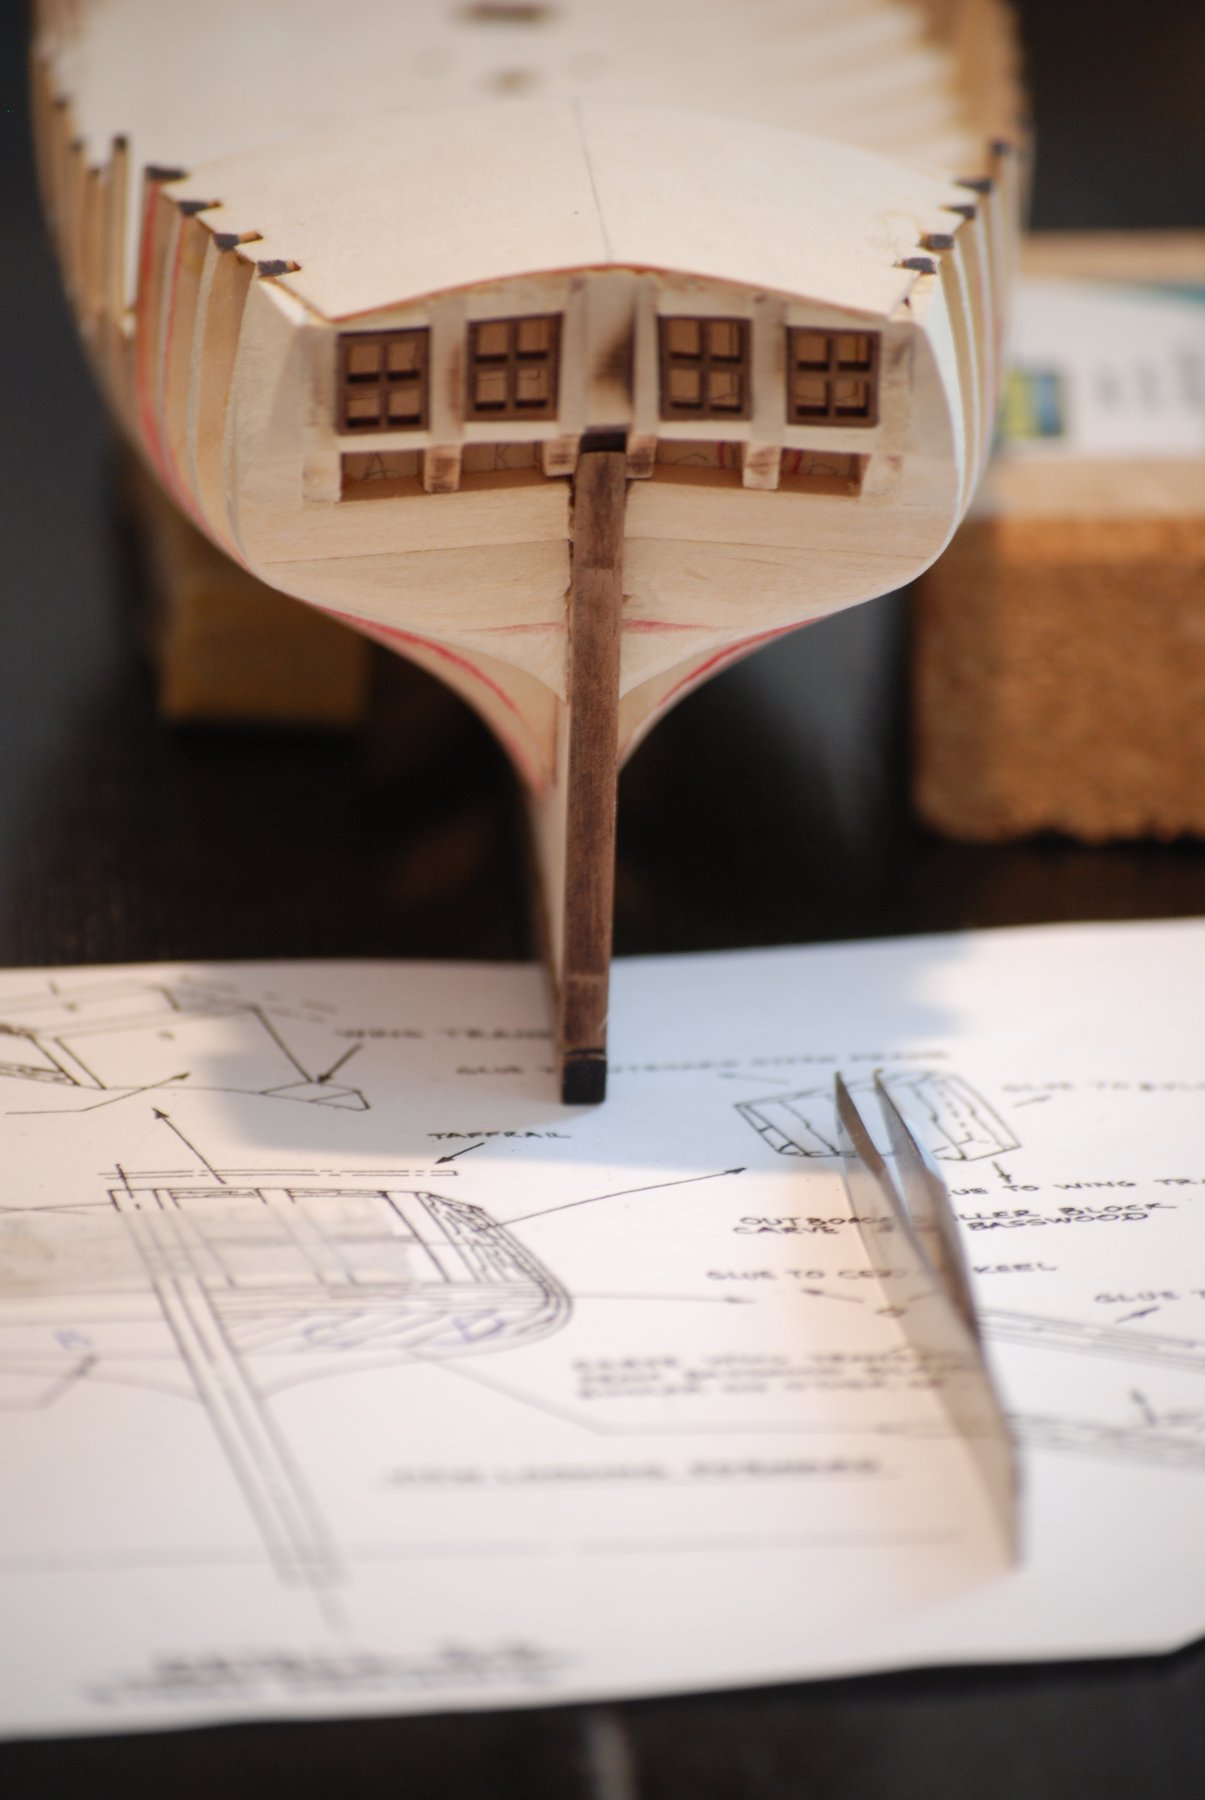
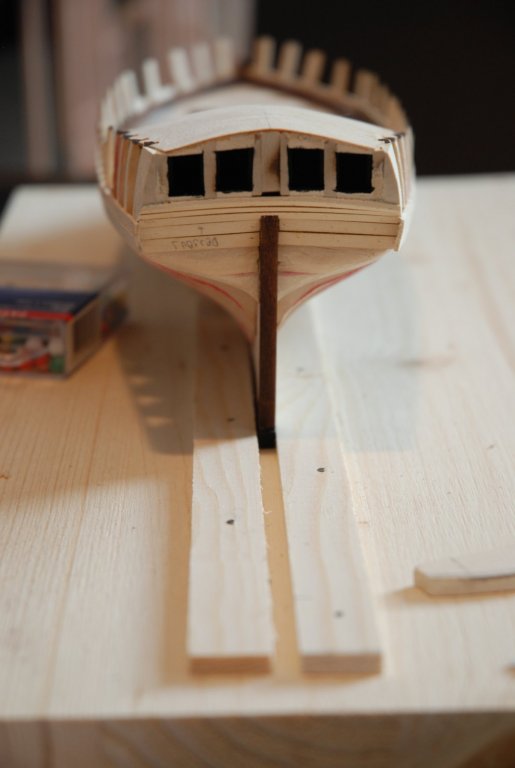
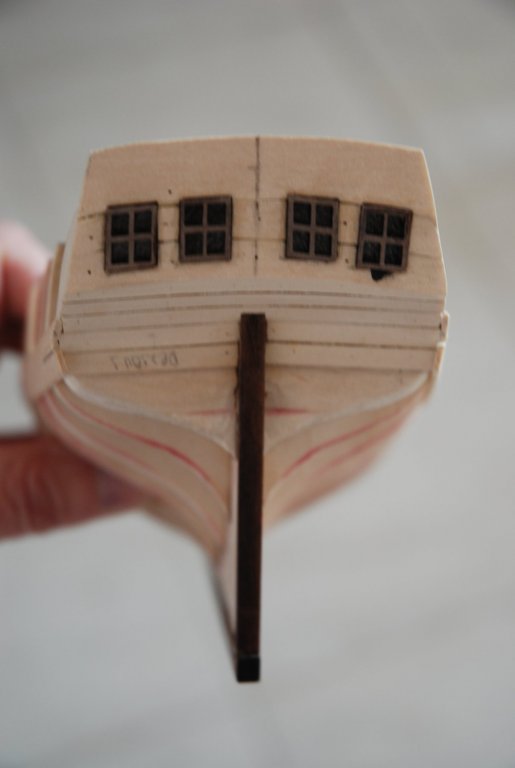
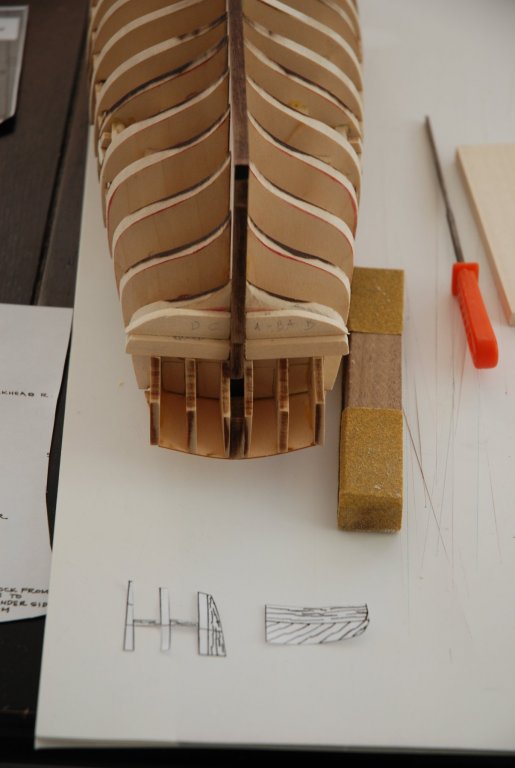
I have worked on the first planking of the transom & counter. I started with the counter. Then I applied some black acrylic color inside the interior of the windows cavities. Inspiring of the method described in the addendum that has been written by John H. Earl, I made a jig to cut three planks for the planking of the transom. So I could keep a consistent curve for all the planks using this template. I copied the profile from Detail 2-J on Plan Sheet 2 and cut this template from a scrap piece of wood. I used this piece as a guide to cut out each plank from a large sheet of basswood of the proper thickness. The line drawn in the center of the planking material enabled me to glue each time the piece in the good position so the curve would be the same on each plank. The plank at the top is intentionally larger. It will be cut at the right size when the second planking will be performed. Finally, I cut the four holes for the windows and glued them in position. The windows should just protrude a little from the first layer of wood in prevision of the final layer of walnut. They should be at level when the second layer of planking will be done... I need some sanding before begin this next step...

- 164 replies
-
- 15
-
-
- first build
- model shipways
- (and 2 more)
-
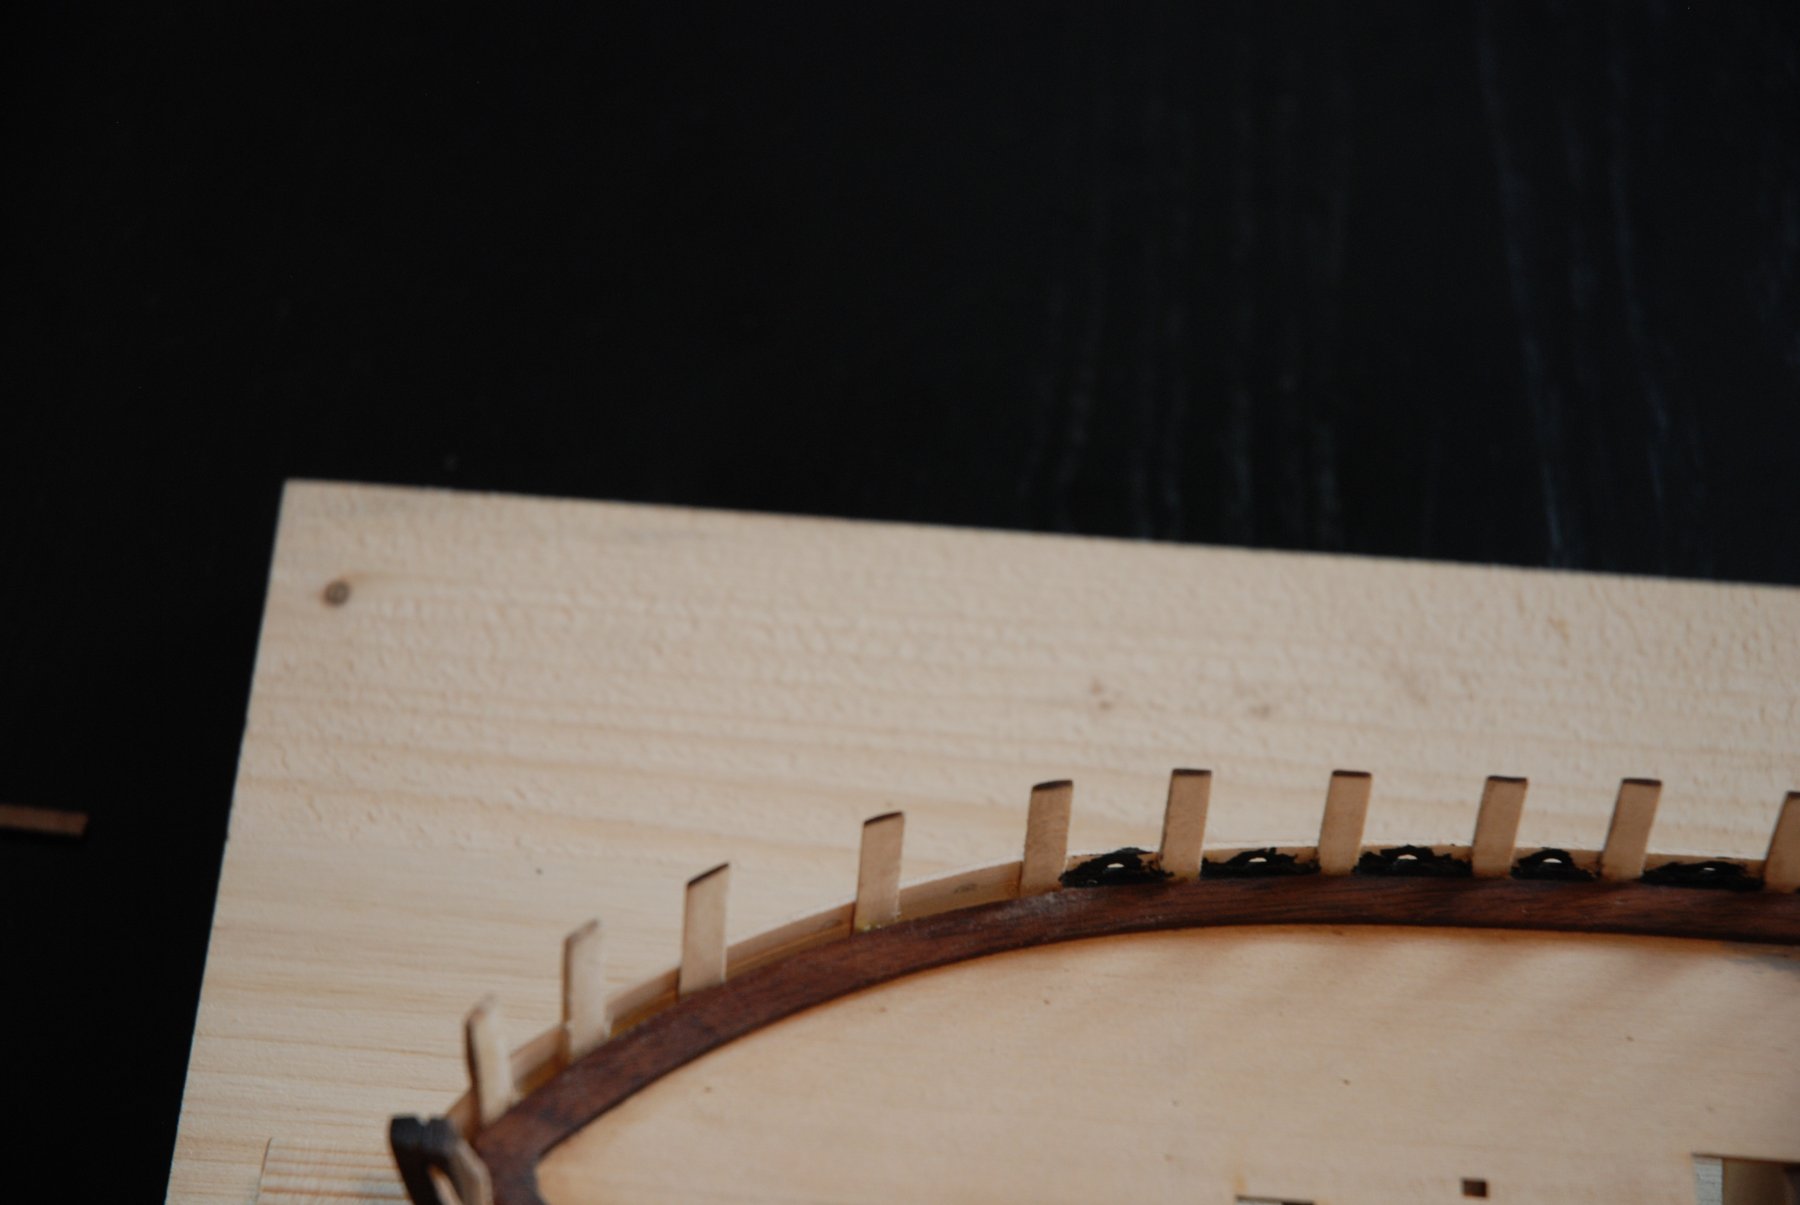
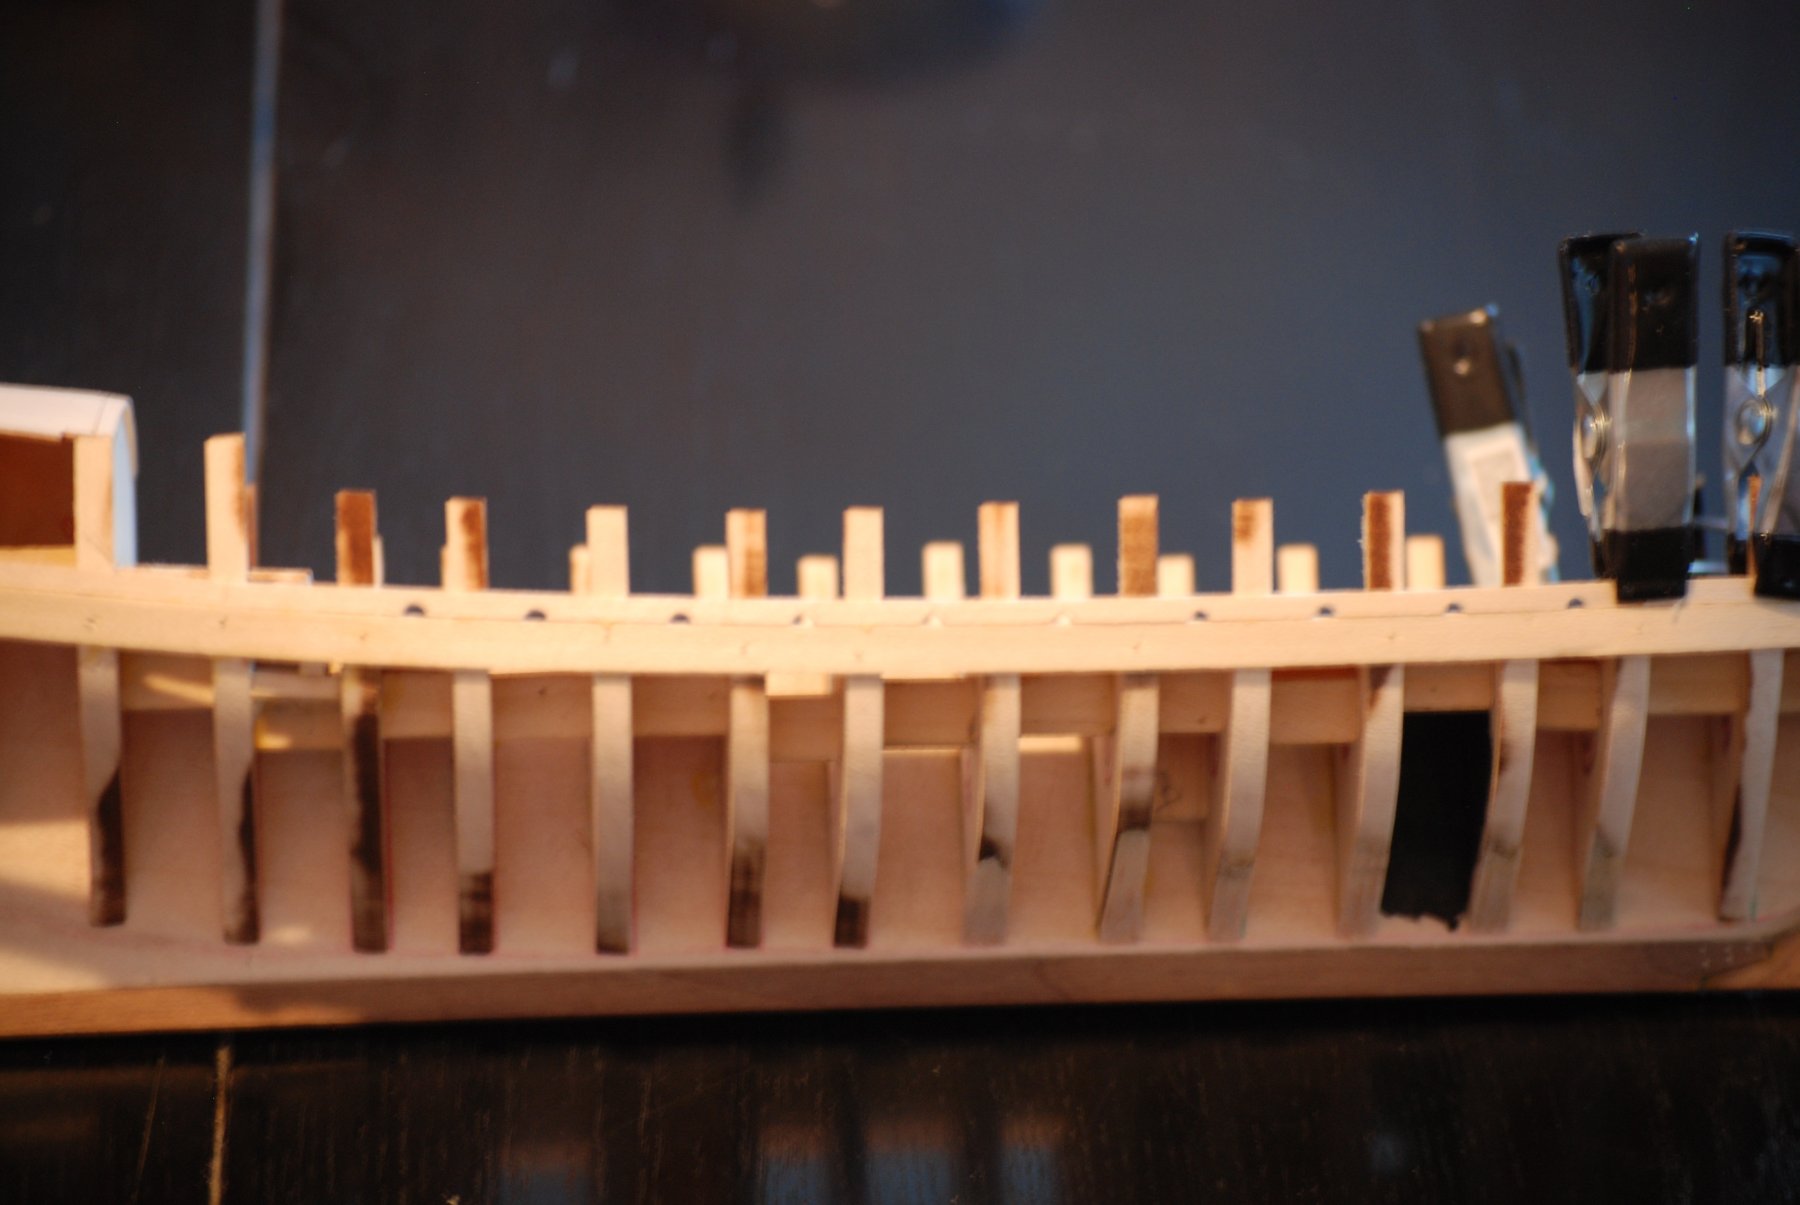
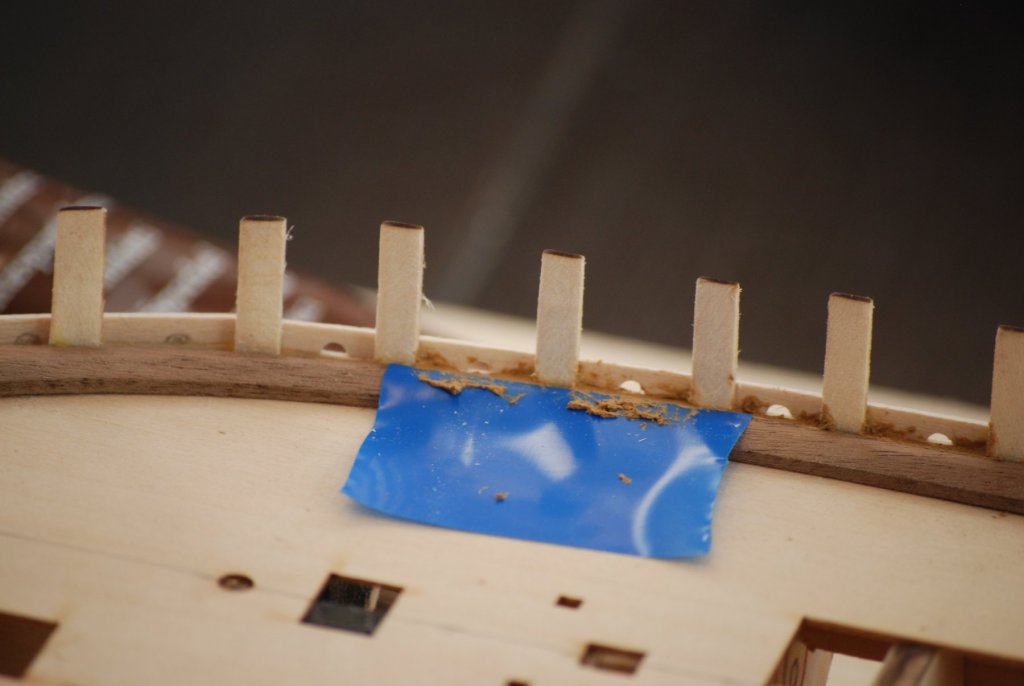
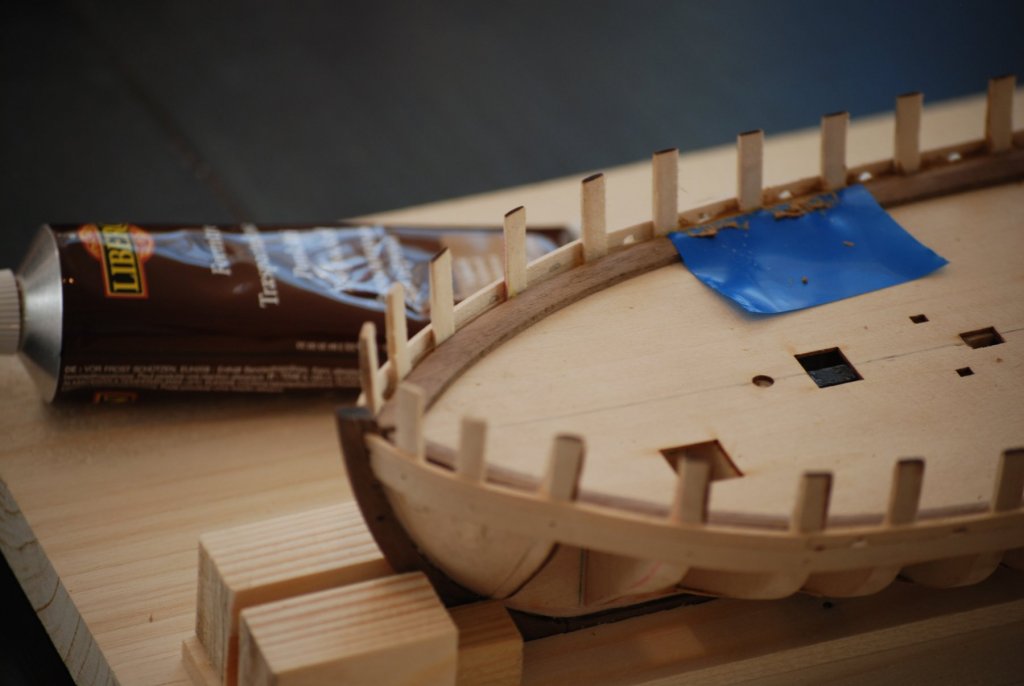
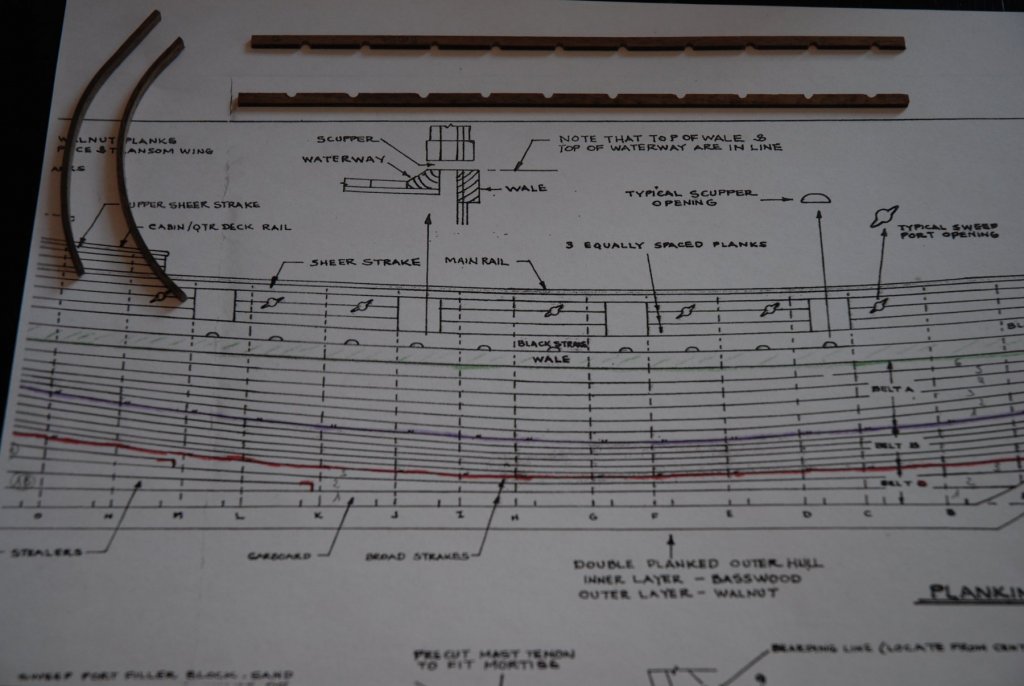
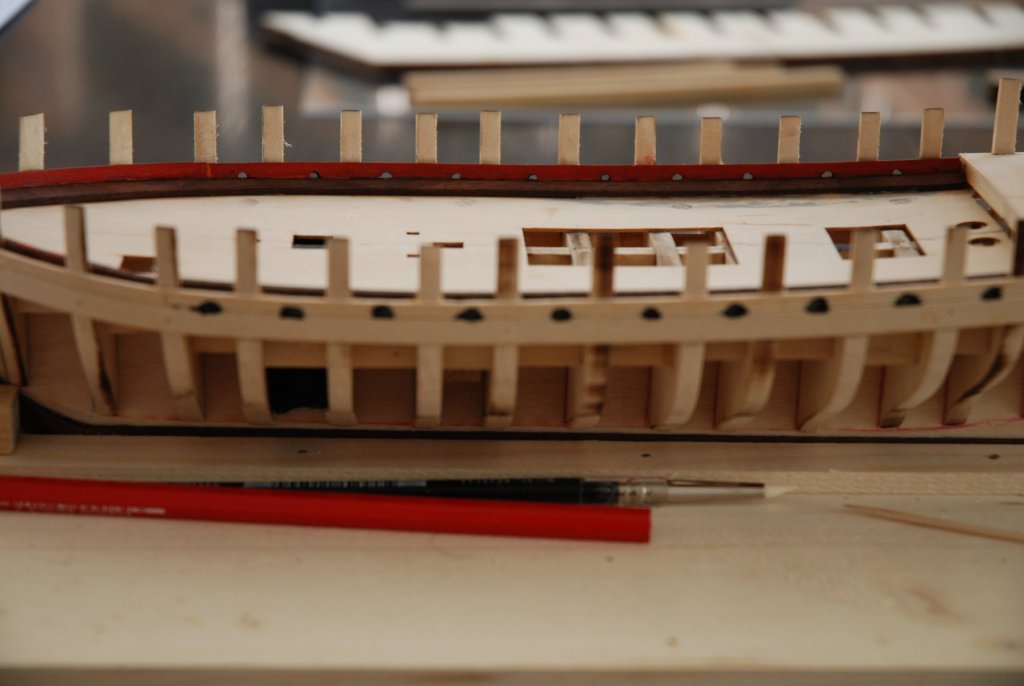
The extension of the bulkheads have been slowly reduced at the width of 3/64". I used my proxxon to achieve this job. The waterway was glued on the false deck using epoxy glue. When the glue has dried, I noticed that in two places, a small gap remain between the false deck and the waterway... I put some filler to be at level... You can look this on the last picture. I decided to fill the space between the outer black strake and the waterway. I don't want that we can see a hole through the scupper. I protect the waterway with a piece of Tesa blue tape and carefully fill the gap with some wood filler ('Pate à bois' from Libéron, walnut color). When it was dry, I painted the space with black acrylic color. Now come some more interesting job. I prepare the 1/16" spirketing plank. I decided to use two pieces. One at the bow and the second with the scuppers. The first piece was put in hot water and then bend. For the second, I made a photocopy of the plan and using a small rounded file, I carefully cut the scuppers using the plan as guide. The two pieces were glued in place and I just paint an undercoat of red acrylic color to have some idea of the final result. I will now work on the transom & counter...
- 164 replies
-
- 12
-
-
- first build
- model shipways
- (and 2 more)
-
I'm also on board. It will be a great model. I have a lot to learn.
- 359 replies
-
- 7
-
-
- prince de neufchatel
- model shipways
- (and 1 more)
-
Thanks so much ragove, DocBlake, captgino and all the likes. DocBlake I will have probably a lot of questions when it will be time for masting and riggings. Because it will be a new world for me. But the road is still long... Captgino, I have beginning the building on last mid December, so I have a small advance. When I received the ship model, I was a little afraid... So much woods... I wanted to see if I would get to do something with it before to start a log... Jean-Paul
- 164 replies
-
- 4
-
-
- first build
- model shipways
- (and 2 more)
-
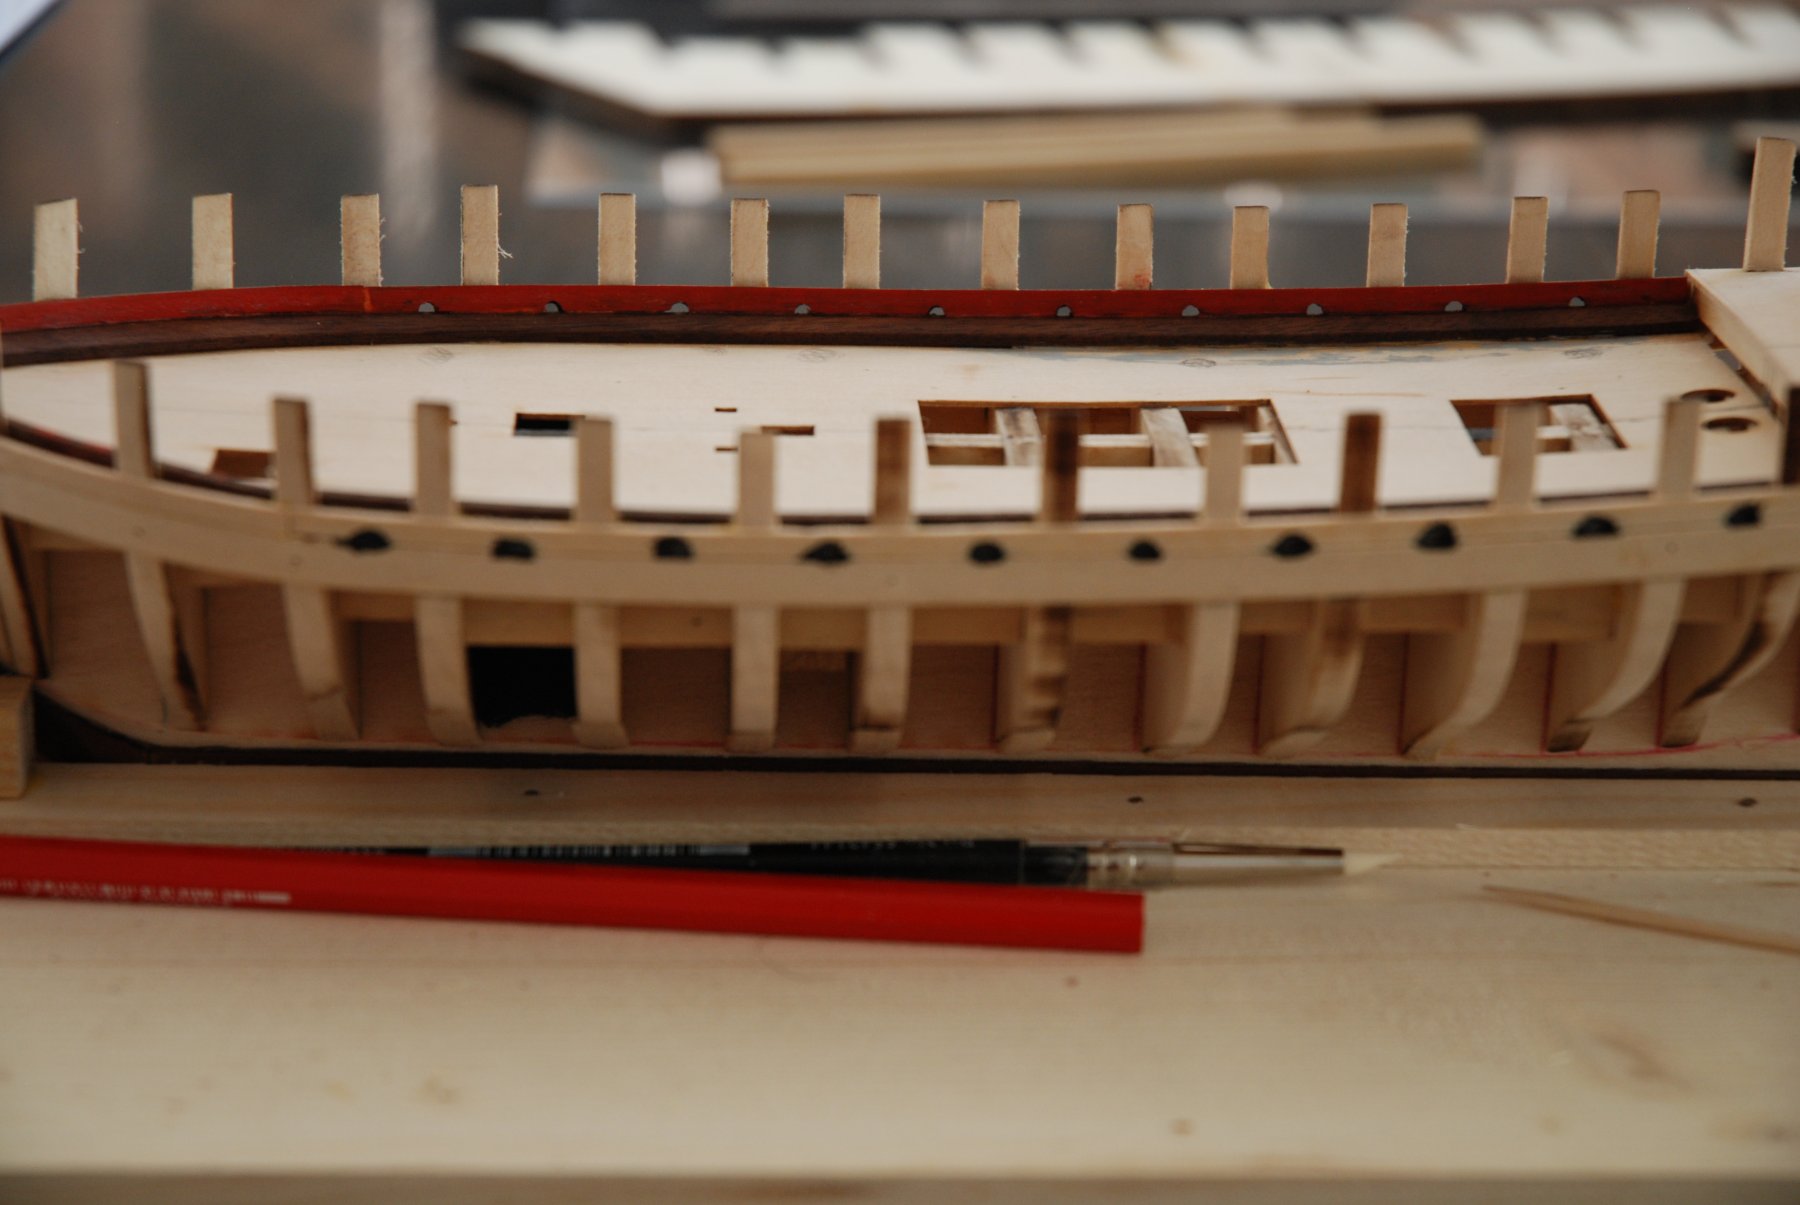
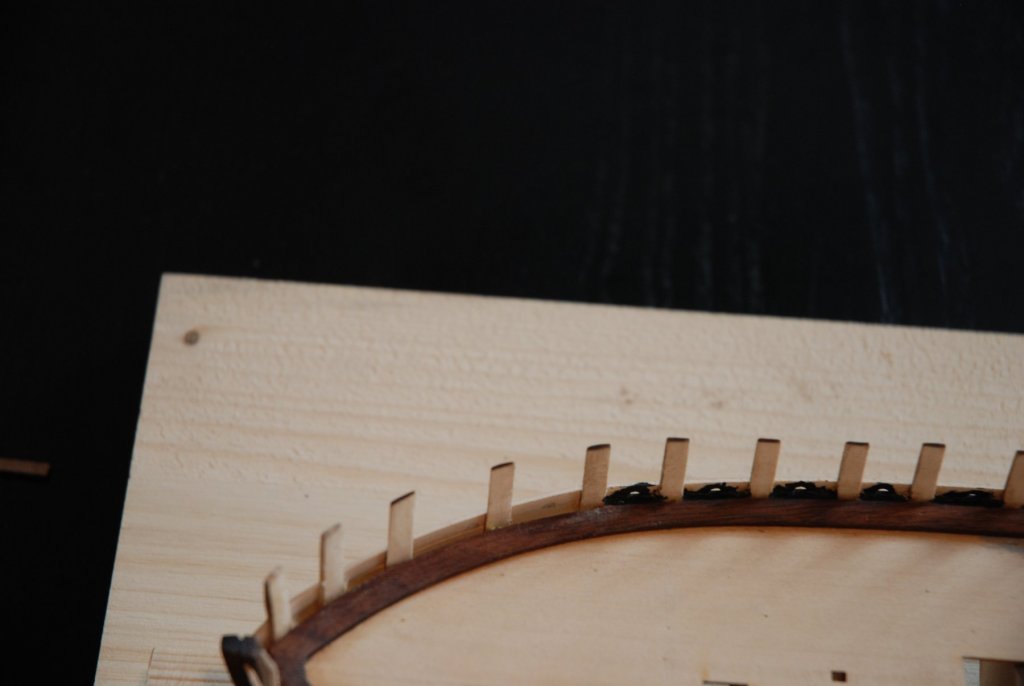
Little update on my AVS build log. I have added the first plank of the wales and the black strakes. I try to already open the scuppers. It will be a little challenging to align them with the spirketing plank but I like the fact that we can see light through to them. I used a copy of the plan to find the right location and drill them with a little rounded file. The black strake is made in 3 parts. Next steps the waterway at deck...

- 164 replies
-
- 9
-
-
- first build
- model shipways
- (and 2 more)
-
What a wonderful model. I dream to arrive one day to build a model like this one. I will follow your next log with great interest. Thanks to share your work. Jean-Paul
- 682 replies
-
- 5
-
-
- halifax
- lumberyard
- (and 1 more)
-
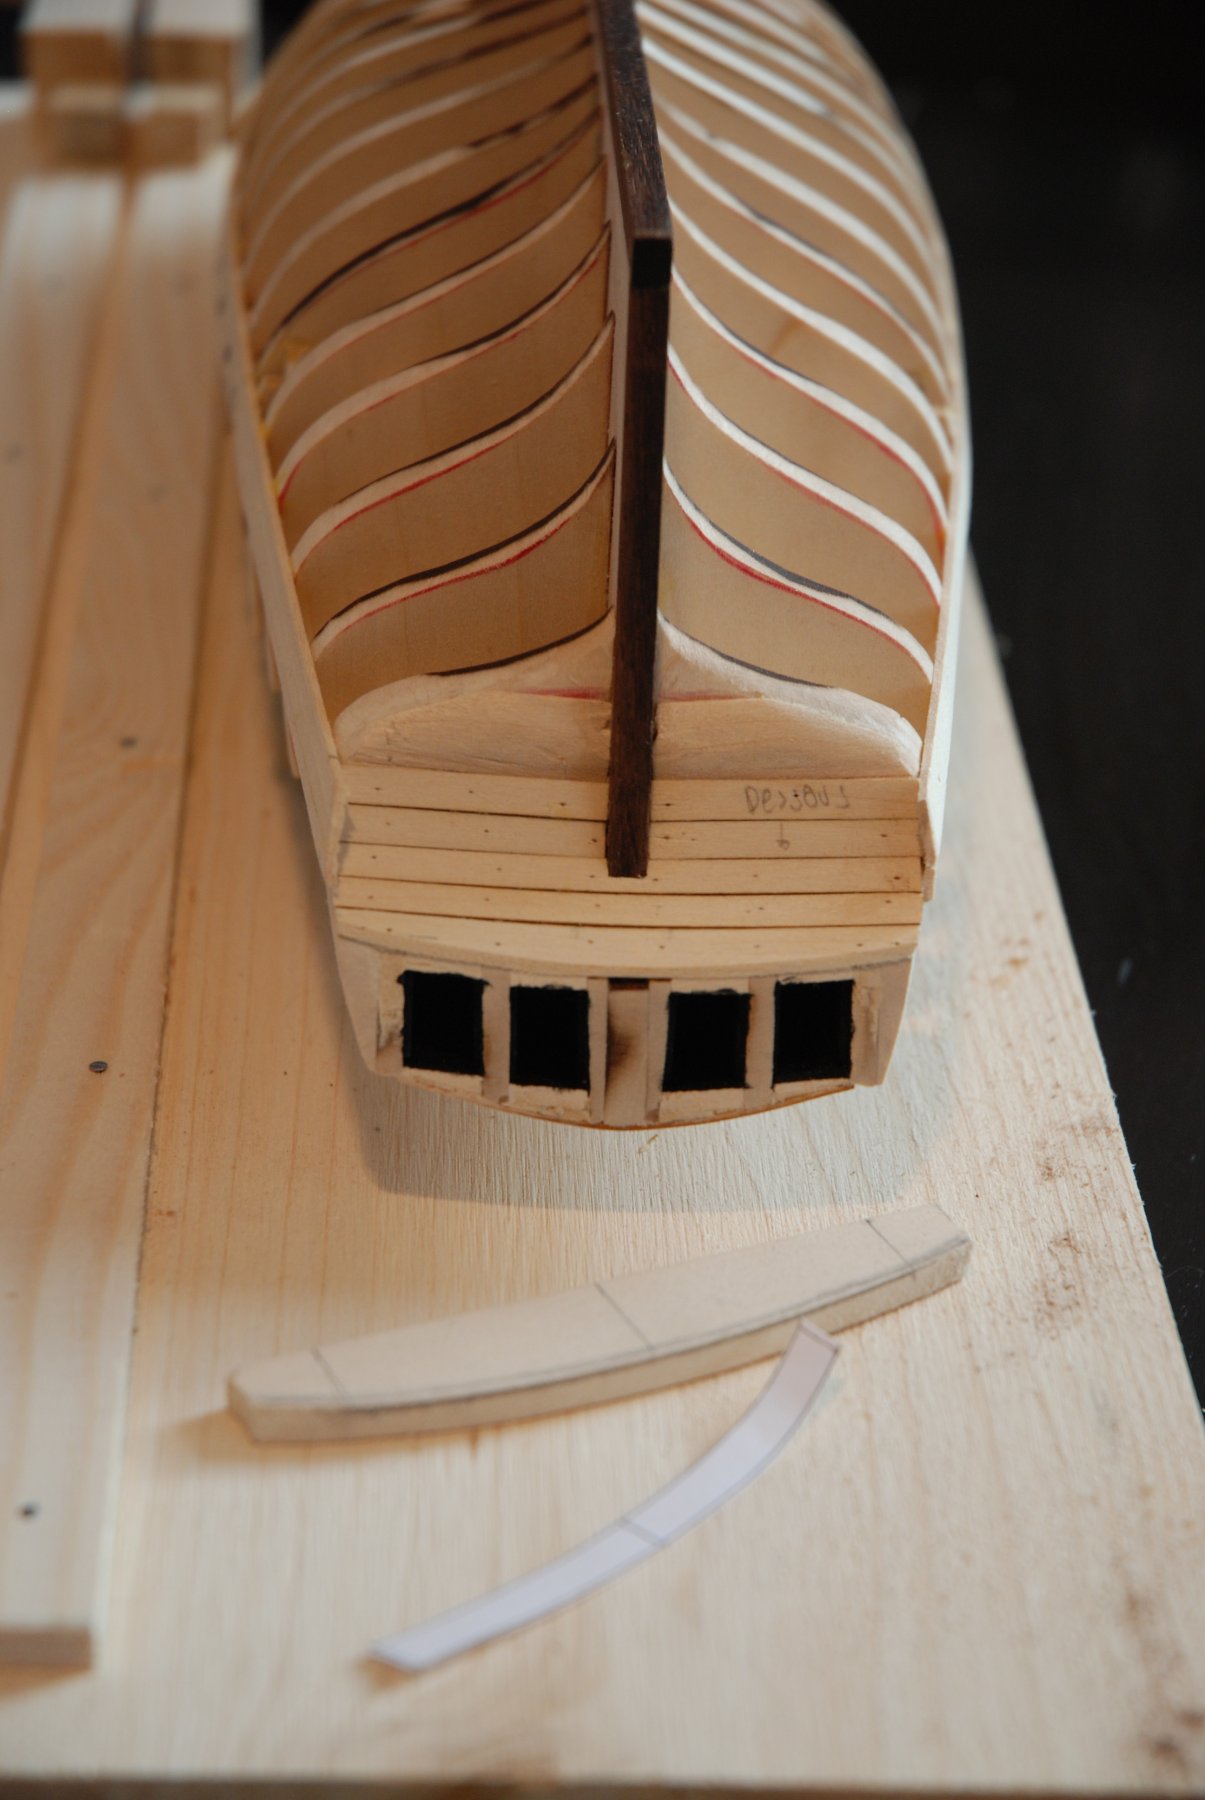
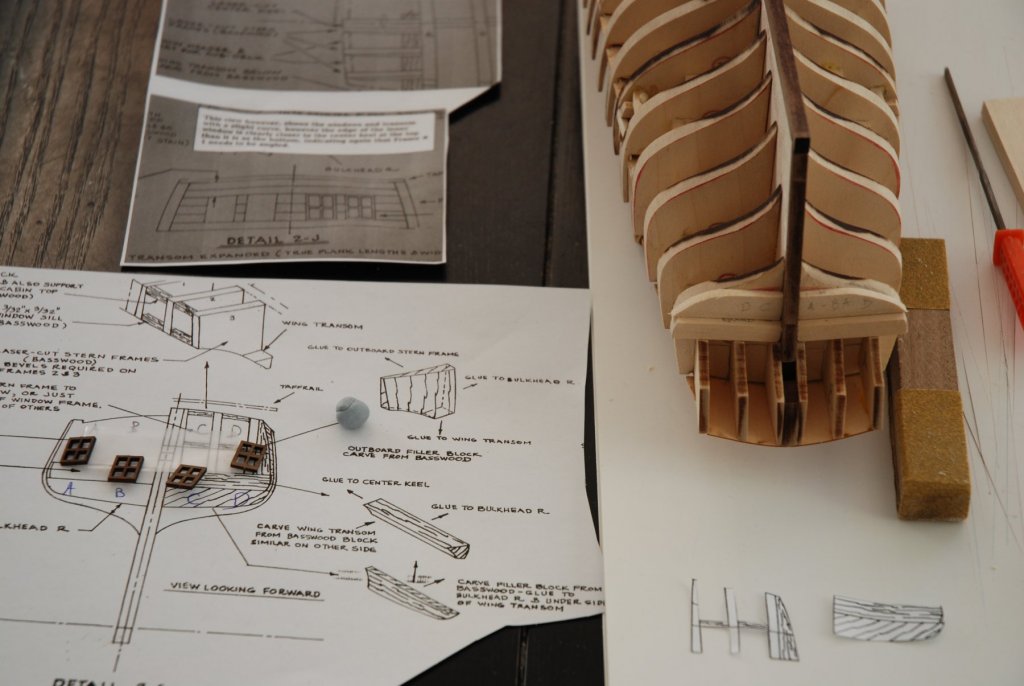
The word is still going. I have worked on the stern transom. Following the plan, I have glued the 6 laser-cut basswood parts. To be sure that the frames are in correct position, I have used the windows to set the space between these parts. I made a photocopy of the plan and labeled the windows so I can memorize their location. You will note that the two parts glued on the center keel have been shaped in form following the plan. Thanks to the build log of GuntherMT to get my attention on this detail. The wing transom and filler pieces are added beneath the stern frames and then sanded. On the third photo I put temporarily the windows in place to see how they will be fit. Always great pleasure with this model ship.

- 164 replies
-
- 13
-
-
- first build
- model shipways
- (and 2 more)
-
Innovation, precision, perfection. These are a few words who describe Your works. Can't wait to see the next steps.
-
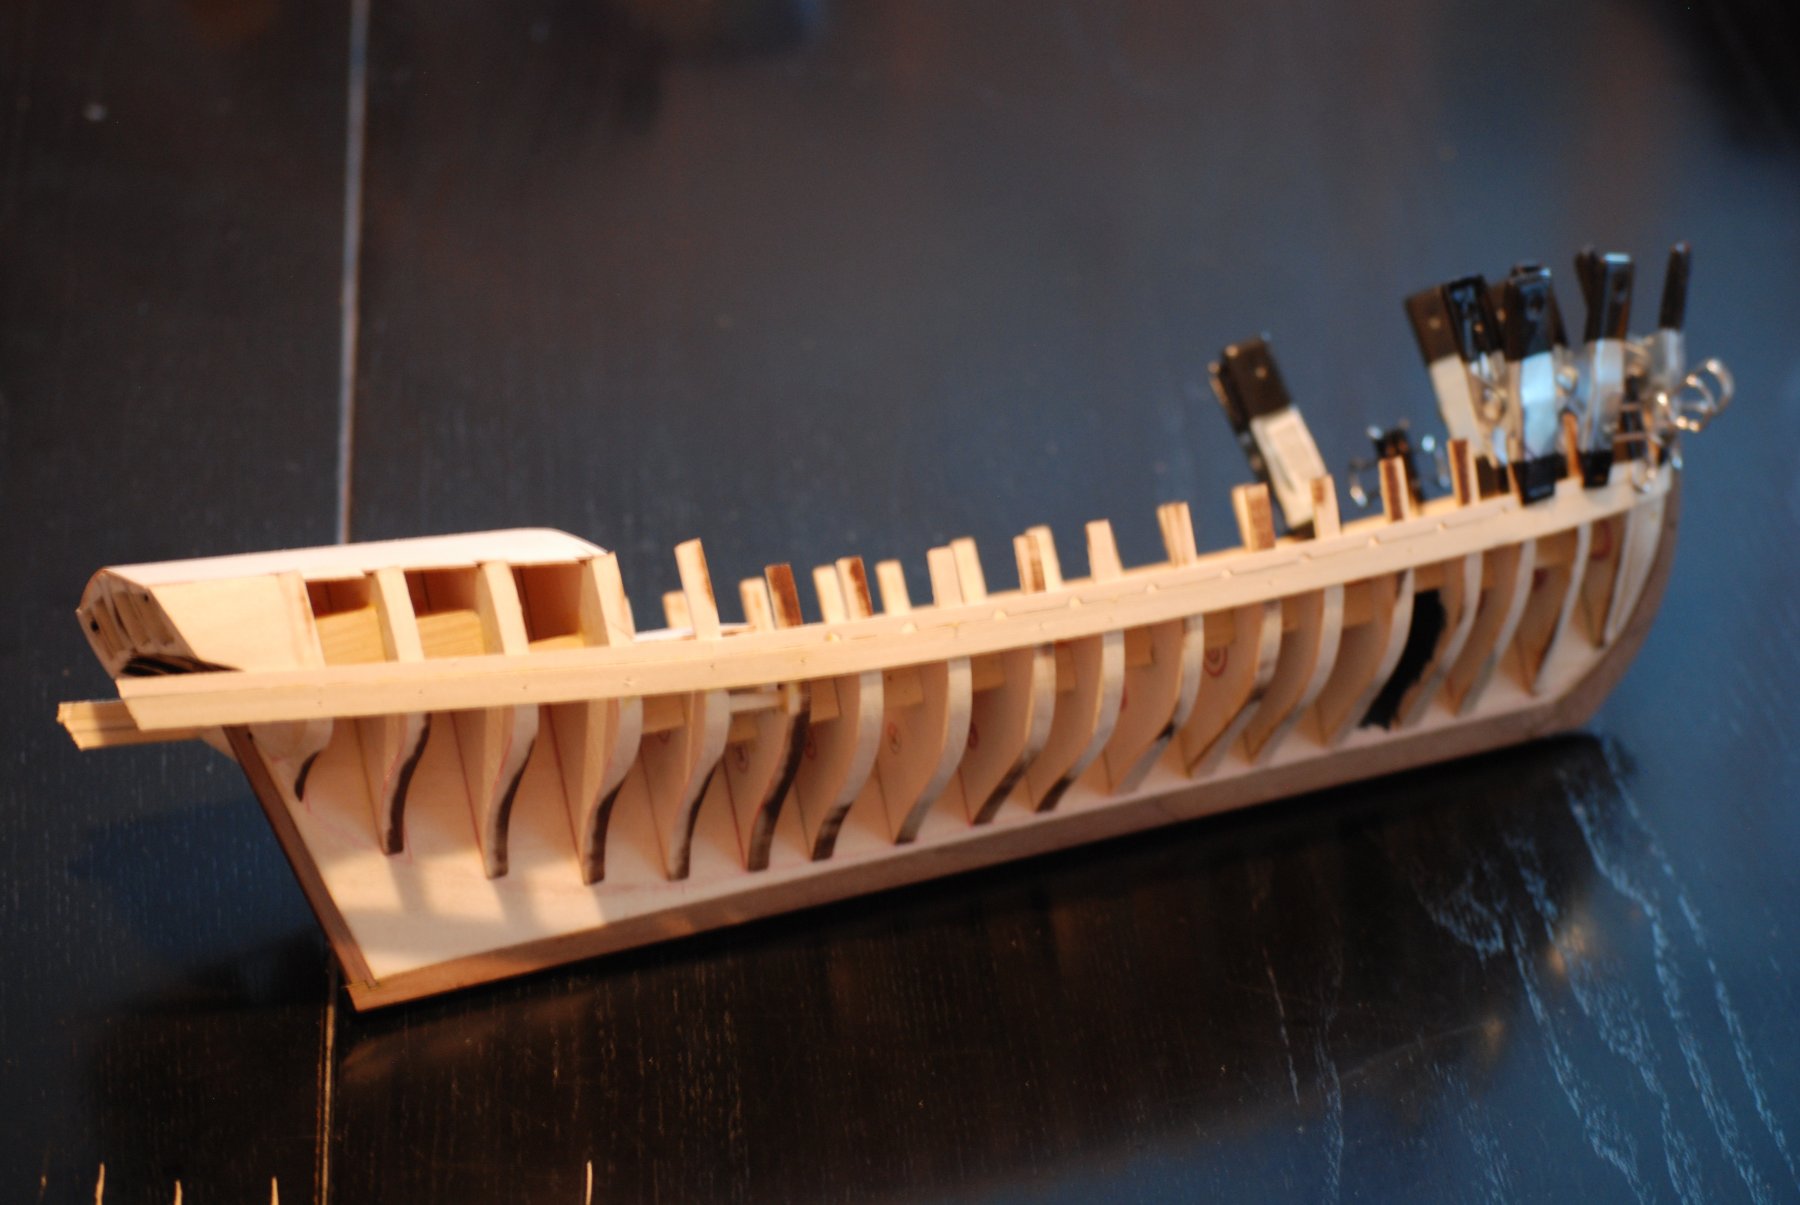
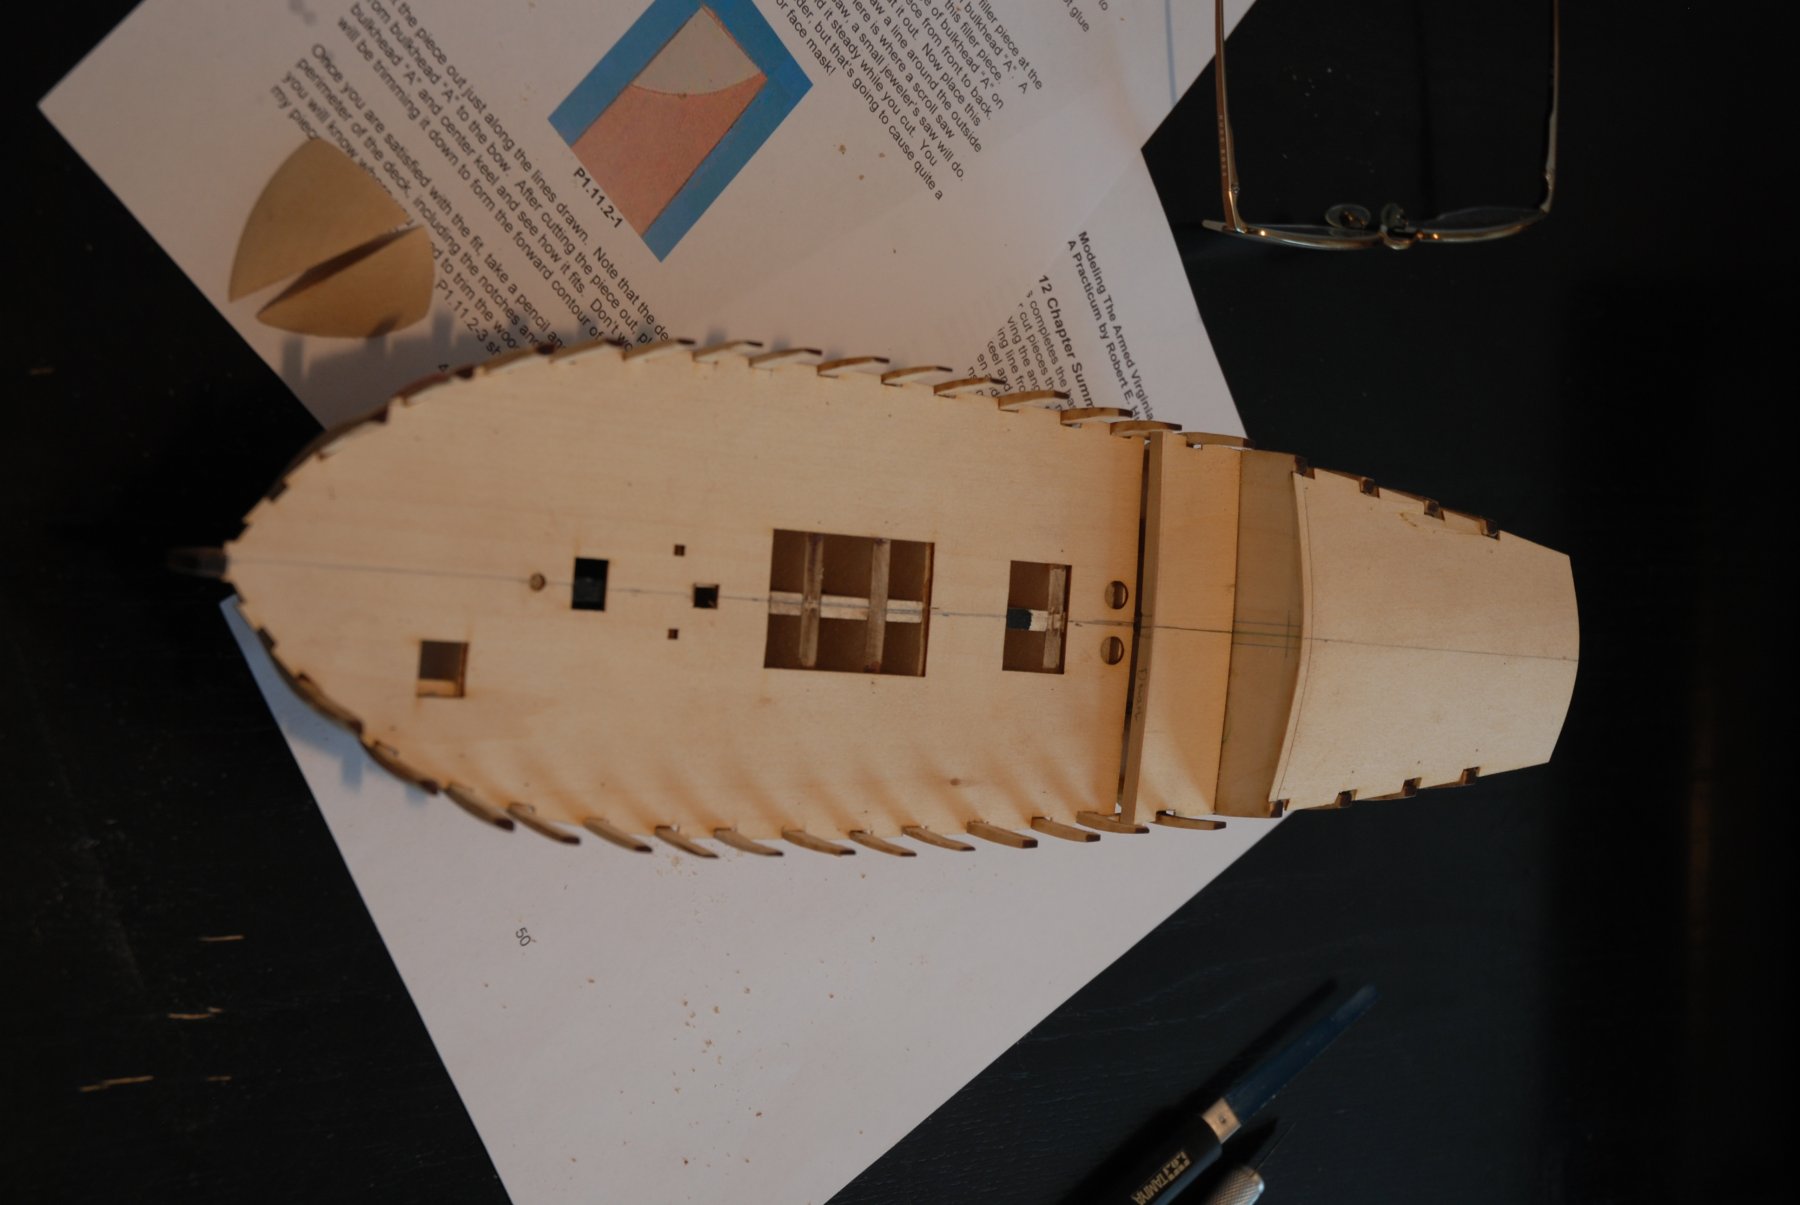
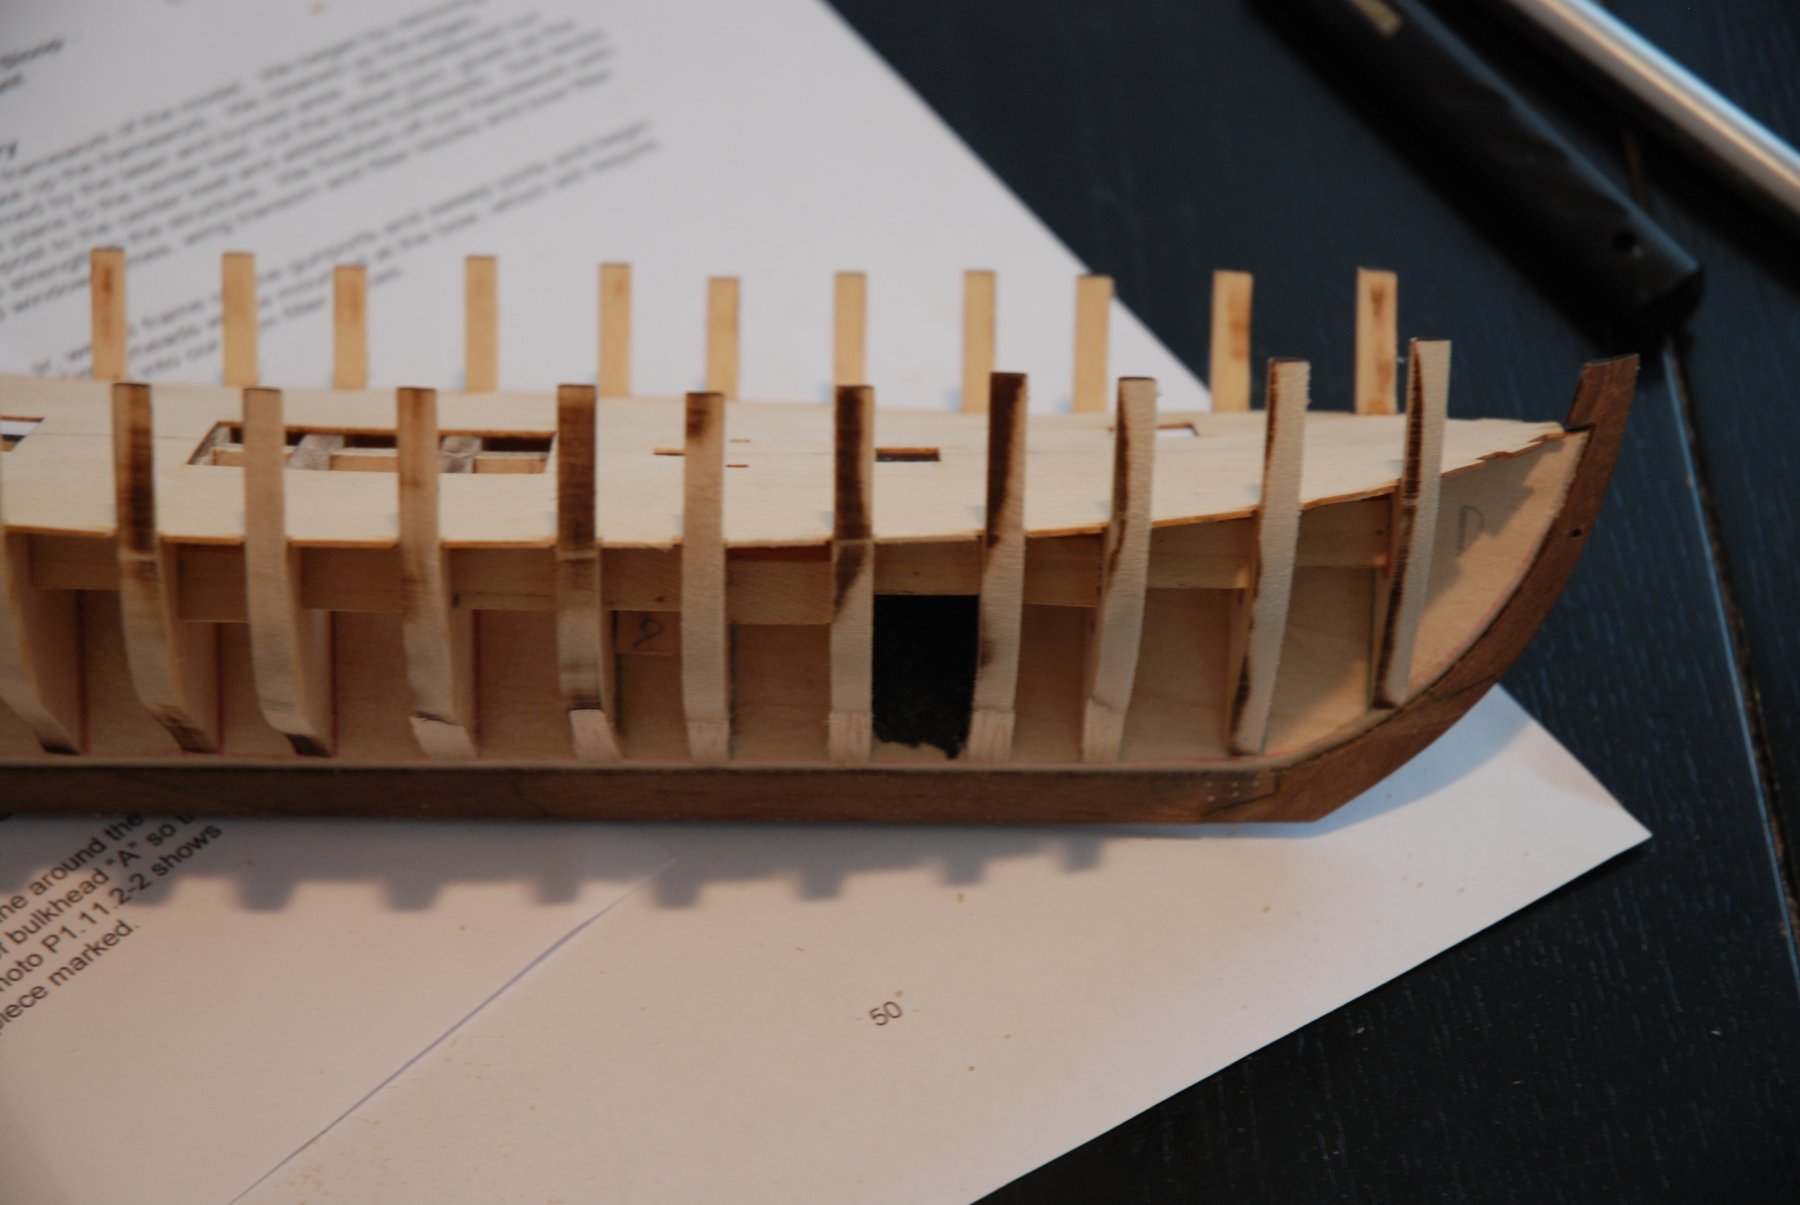
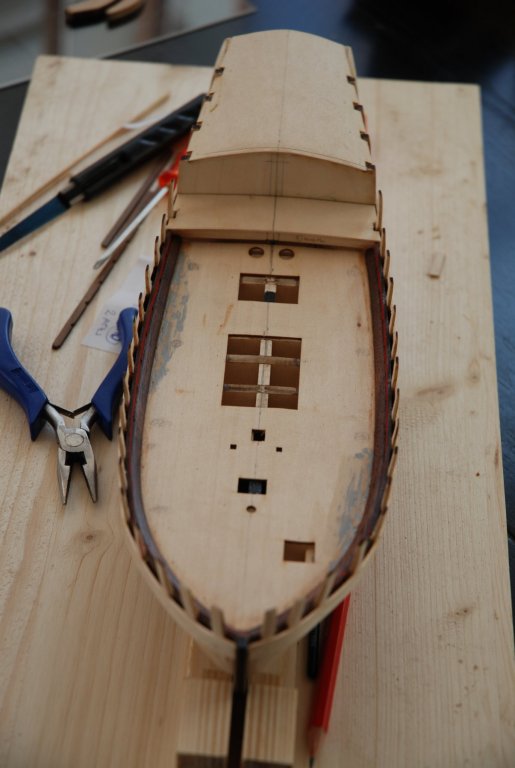
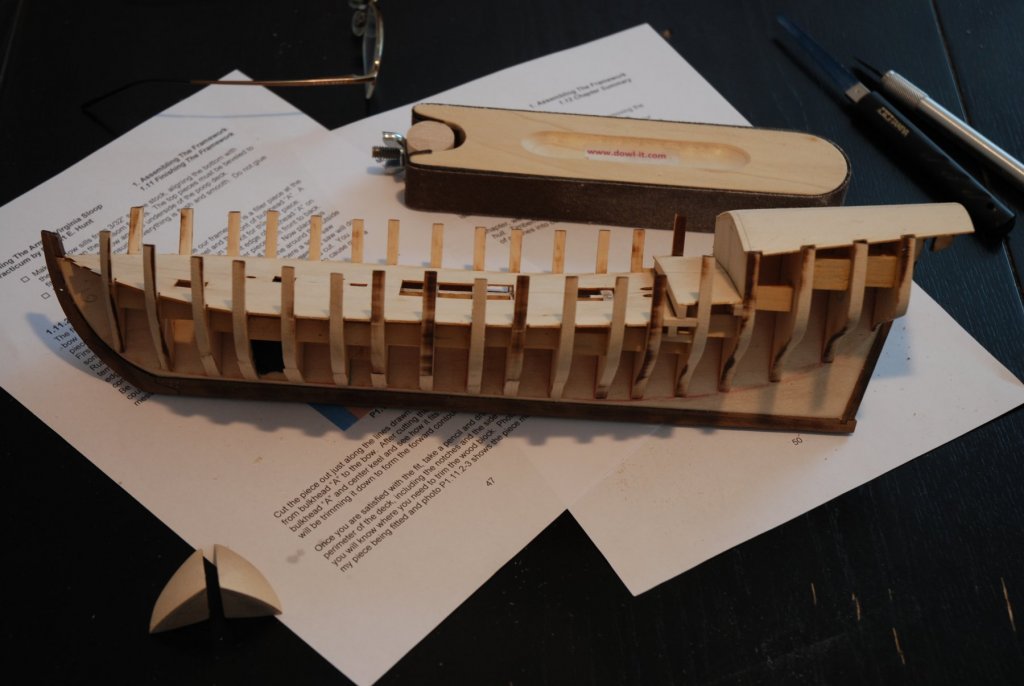
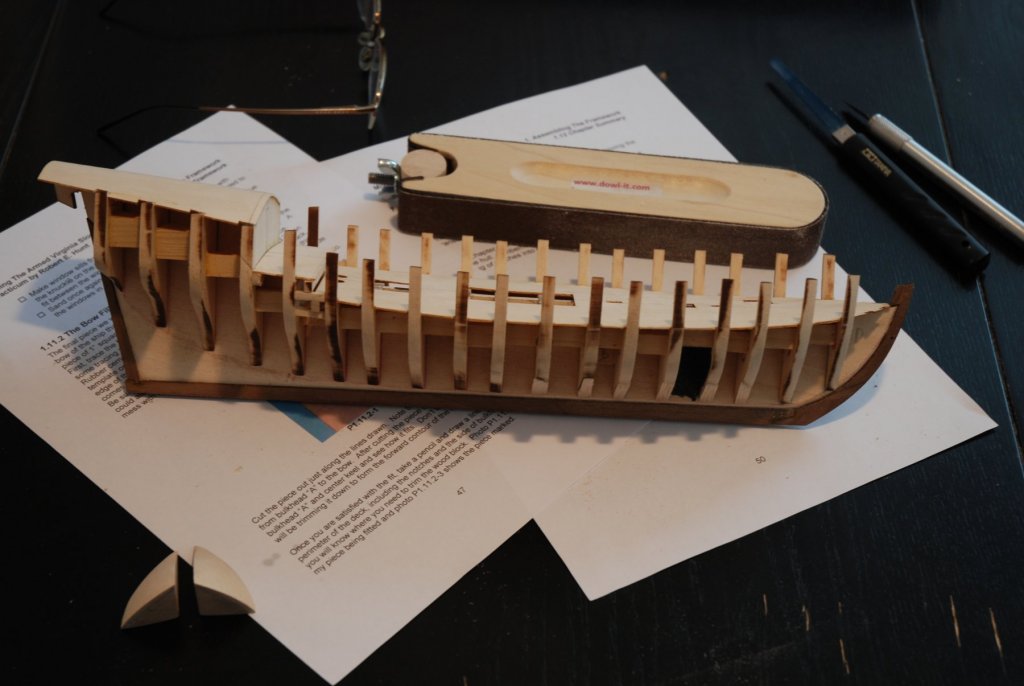
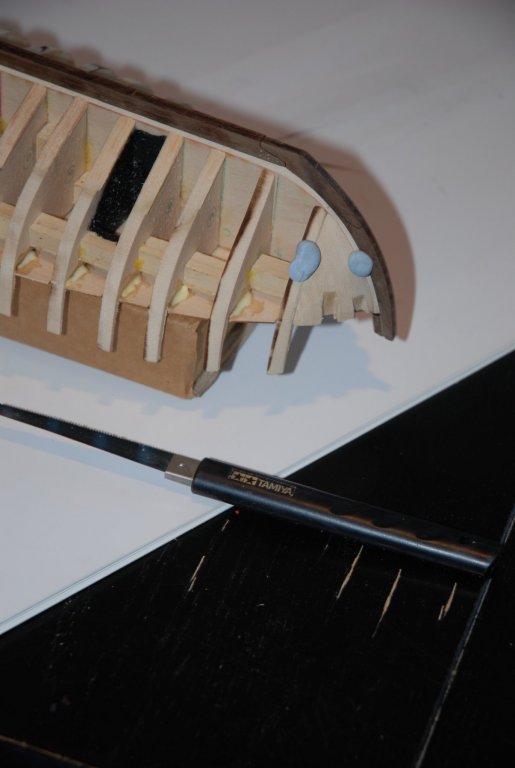
Following steps of the AVS build It takes a lot of time to prepare the bulkheads to just arrive to easily insert them into the false keel. When I have finished to glue them, some of them didn't reach the bearding line. They are too short. I had to add shims to the bottom. Then I add scrap blocks between each bulkheads to make the structure more rigid so I can faire the hull. The three false decks were glued in place and I have my first problem... I use strips of wood and elastics to keep up the false deck. But one of the strip brokes suddenly and a little part of the false deck was broken... Nothing irreparable. Some glue and a little piece of sandpaper. You can see this on the third pictures on the starboard of the quarter false deck. But as it will be cover by the planking, I hope we will finally see nothing... As I have an exemplar of the excellent book 'Modeling an armed Virginia Sloop by Clayton A. Feldman, I see a little modification that I can ad to the keel. The stem was divided in two parts. I can only recommend to read this book which is a source of great advices and contains a lot of details. As my next build ship will be the Cheerful from Syren Ship Model Company, I try to add some treenails on the keel. I use the Chuck process to add these treenails. I made 5 small holes using a drill (0.5 mm) and fill the holes with wood filler. The bow filler was cut and carefully sanded. Finally I glue it in position and put two balls of blu tack to keep them in place during the drying times of the glue. The building it really great. Each step brings many questions... But with the Hunt practicum and the build logs of this forum, I always found an answer. Thanks to all to share Your works !


- 164 replies
-
- 11
-
-
- first build
- model shipways
- (and 2 more)
-
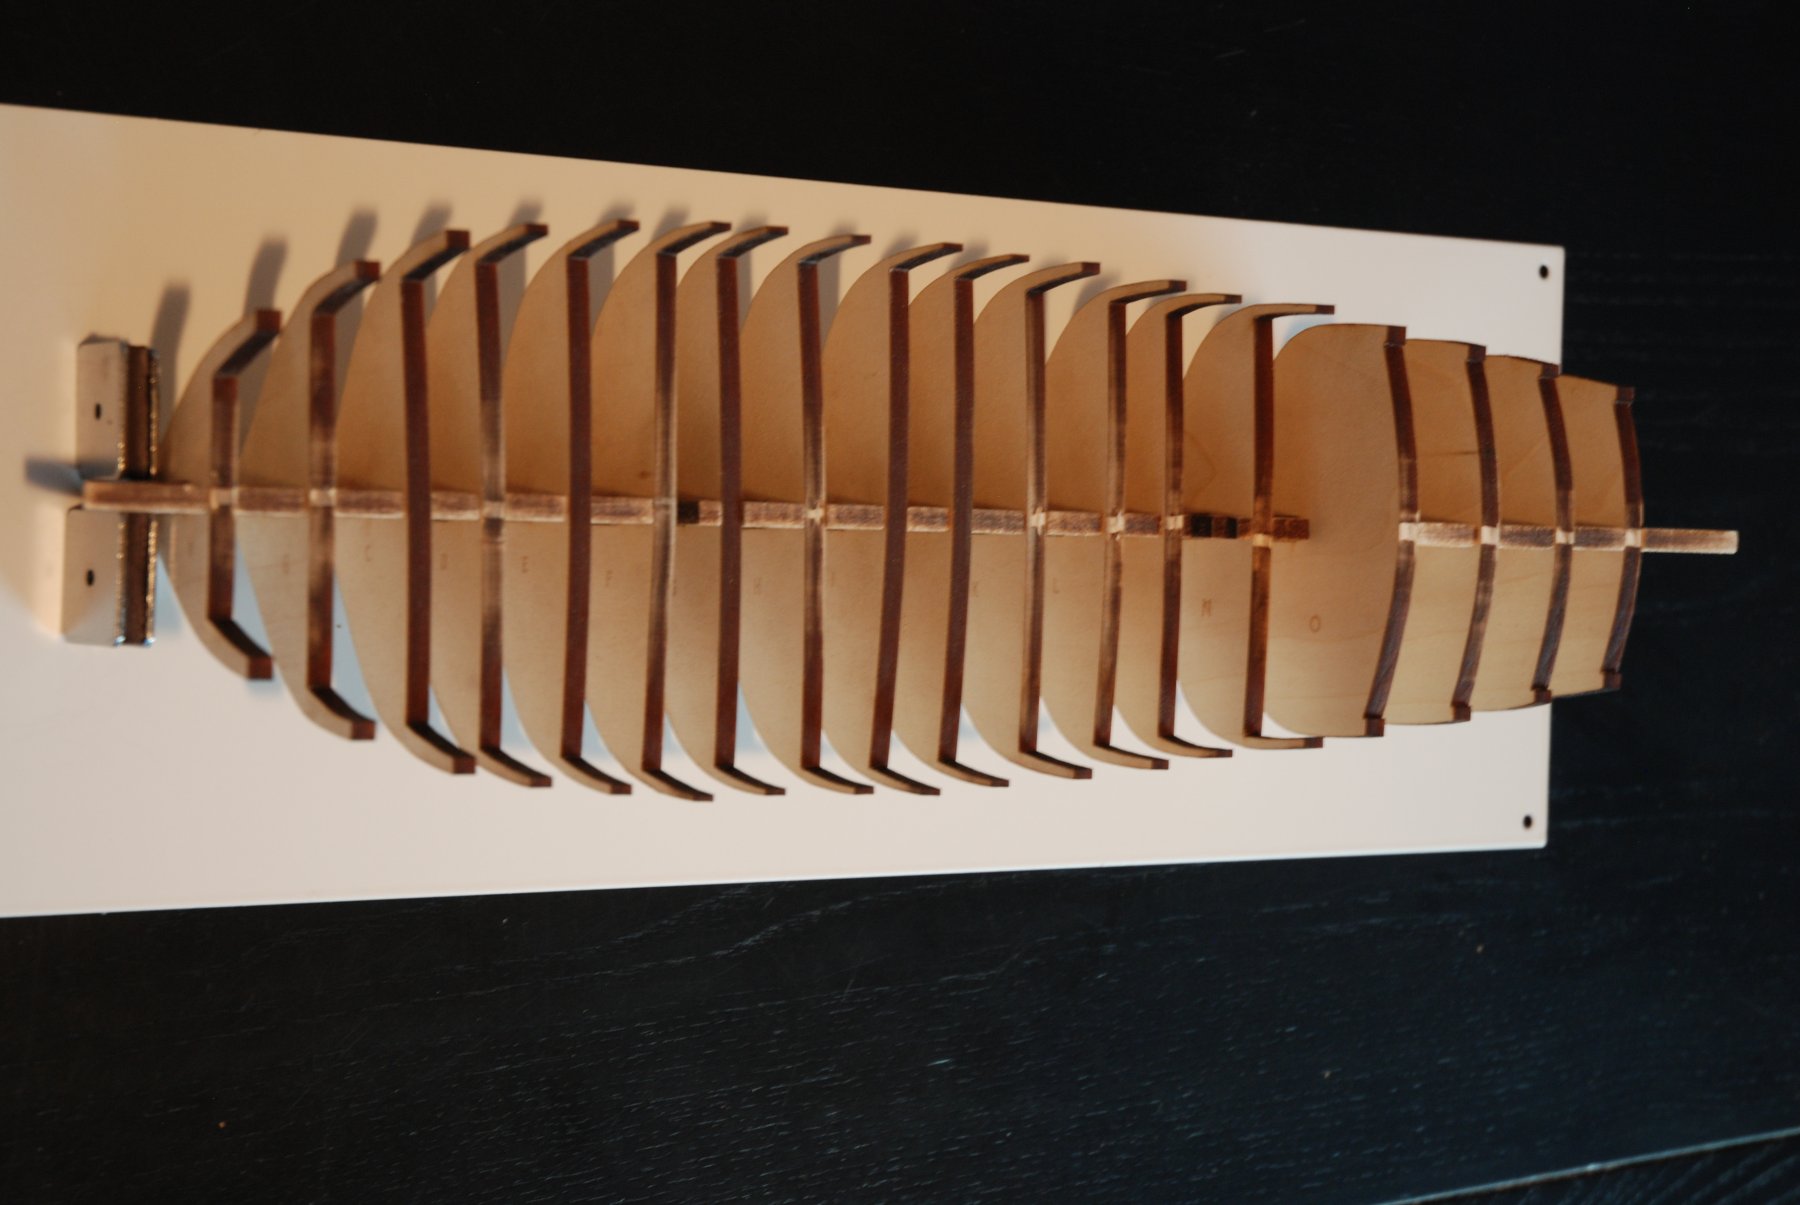
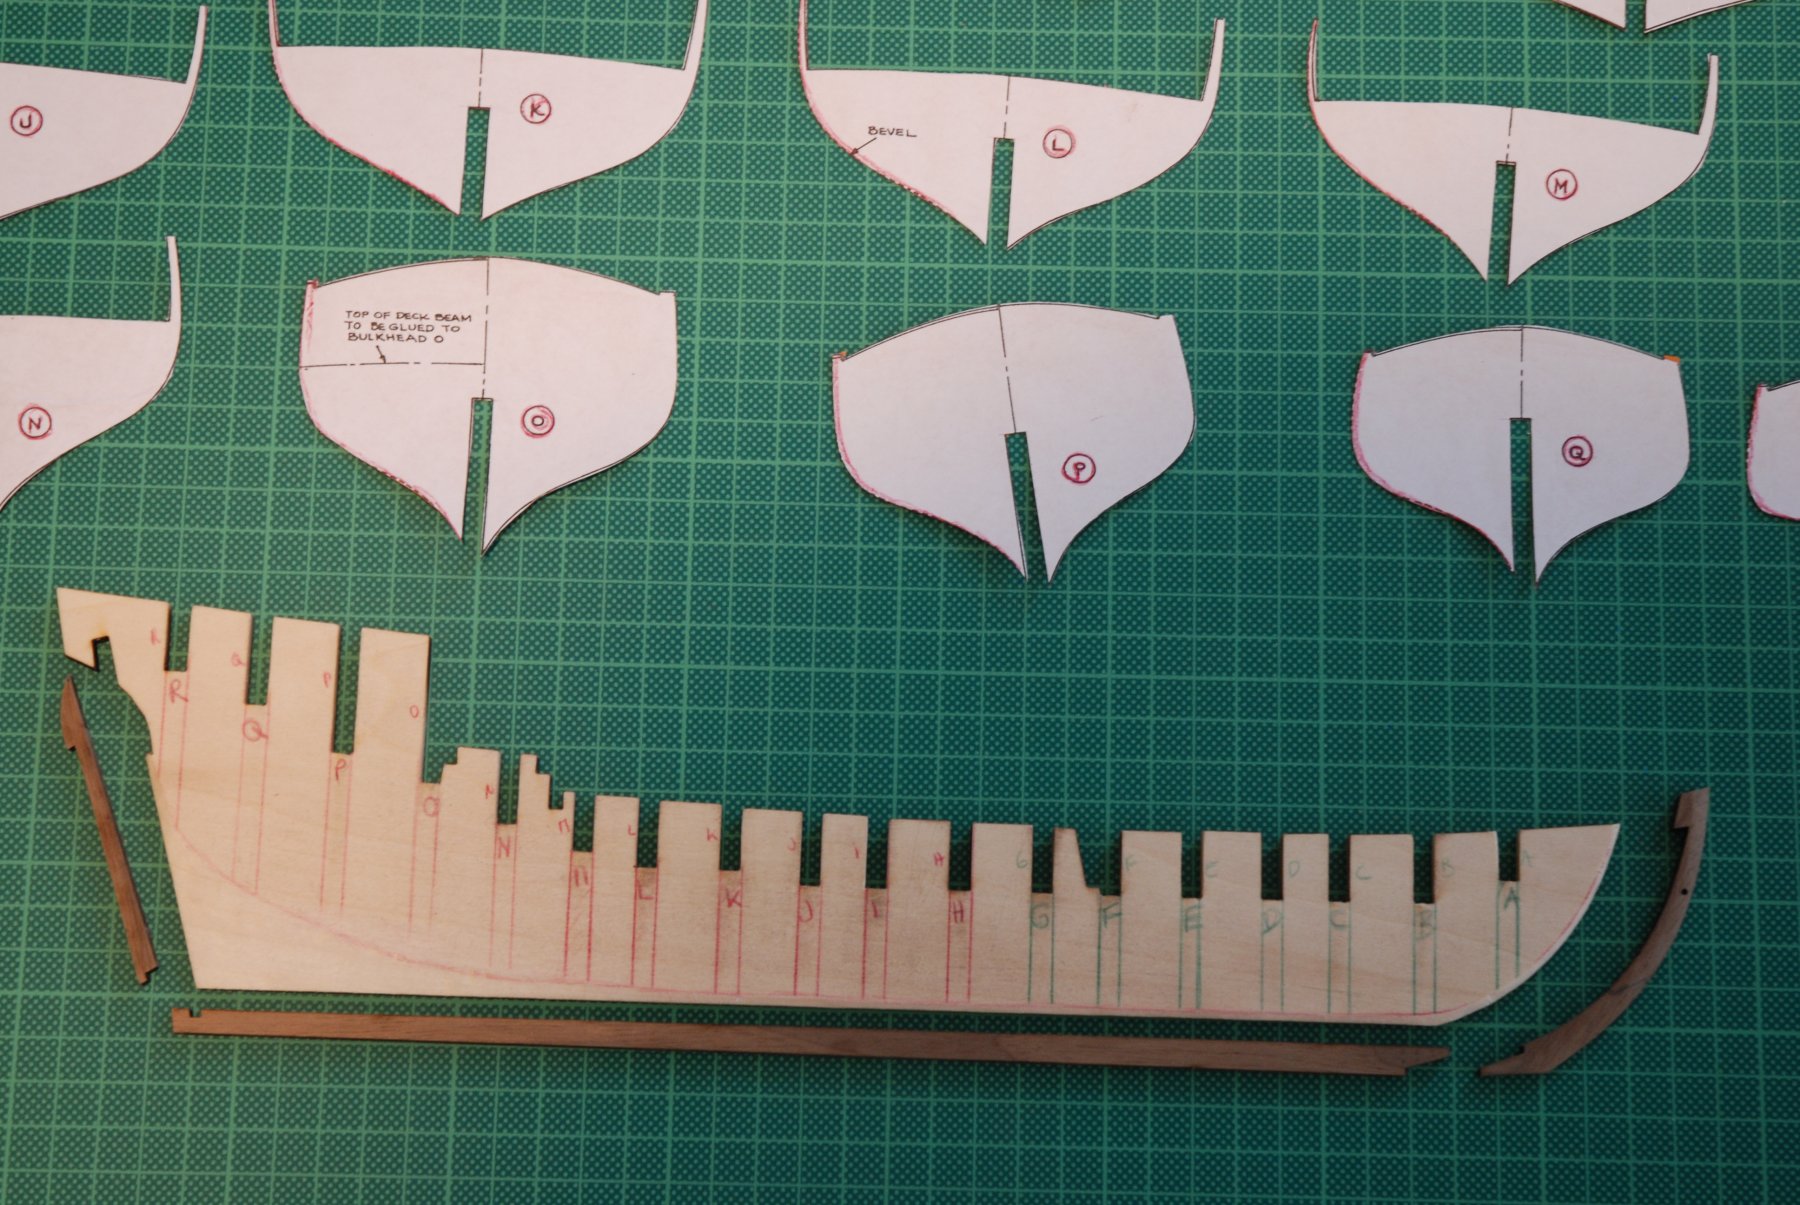
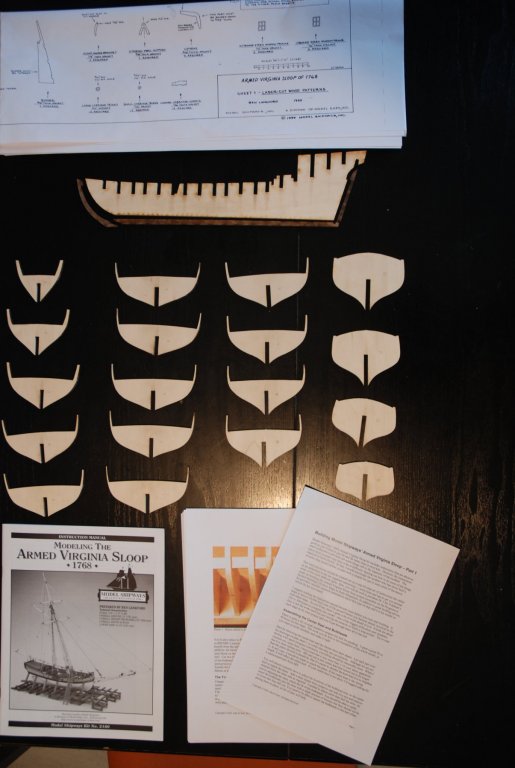
Hello, this is my first build log. After reading many build logs and hesitate between some models (HMC Sherbourne, HM Cutter Mermaid), I finally choose the Armed Virginia Sloop from Model Shipways in 1:48 scale. I choose this model because I can found many advices on the excellent build logs of this forum: aliluke, DocBlake, GuntherMT, Ryland Craze,... All this logs have wonderful pictures on the building process. I have also found two excellent documents on the web : an addendum from John H. Earl and the practicum of Robert E. Hunt. It's also a model not to much complicate with only one mast. On mid November, I ordered the kit through the modelexpo website and, one week later, I received it. It was a big surprise: what a quantity of woods... Just after the beginning of my work, I realized that without the practicum of M Hunt it will be very hard to complete this model. So, on beginning of last December, I ordered the complete version of this practicum. Two weeks after, I received the CD and was a little more reassured. I first slowly cut out all the bulkheads and I adjust the slots. I made a first try with all the bulkheads but without glue... Before gluing I extend the lines of the slot and mark all the letters to be sure to not invert some bulkheads... I also made a copy of the plan with my printer and cut all the paper bulkheads and glue them on a piece of cardboard. It will be so more easy to report the bevels on the real bulkheads.


- 164 replies
-
- 12
-
-
- first build
- model shipways
- (and 2 more)
-
Hello, I'm new on the world of the model ship building. As many of You, I have built some plastic ship models when I was a youth (Santa Maria, Soleil Royal, USS Constitution, Titanic,...) When I was a member of a modelling club, I discovered the world of the military figures and turn my interest into these part of the world modeling. I'm always painting figure miniatures. I recently found this forum and his wonderful build logs. As I never lost my interest for the model ships, I decide to try to build my first boat. I'm actually working on the Armed Virginia Sloop from Model Shipways. Sorry if my English is not perfect but I live in the french part of Switzerland. We have mountains but also the larger lake of Europe (the Leman) on which sail very nice barges. I hope to share soon my work through a build log. Have a nice day. Jean-Paul