HOLIDAY DONATION DRIVE - SUPPORT MSW - DO YOUR PART TO KEEP THIS GREAT FORUM GOING! (Only 75 donations so far out of 49,000 members - C'mon guys!)
×


Warnerade
-
Posts
184 -
Joined
-
Last visited
Content Type
Profiles
Forums
Gallery
Events
Everything posted by Warnerade
-
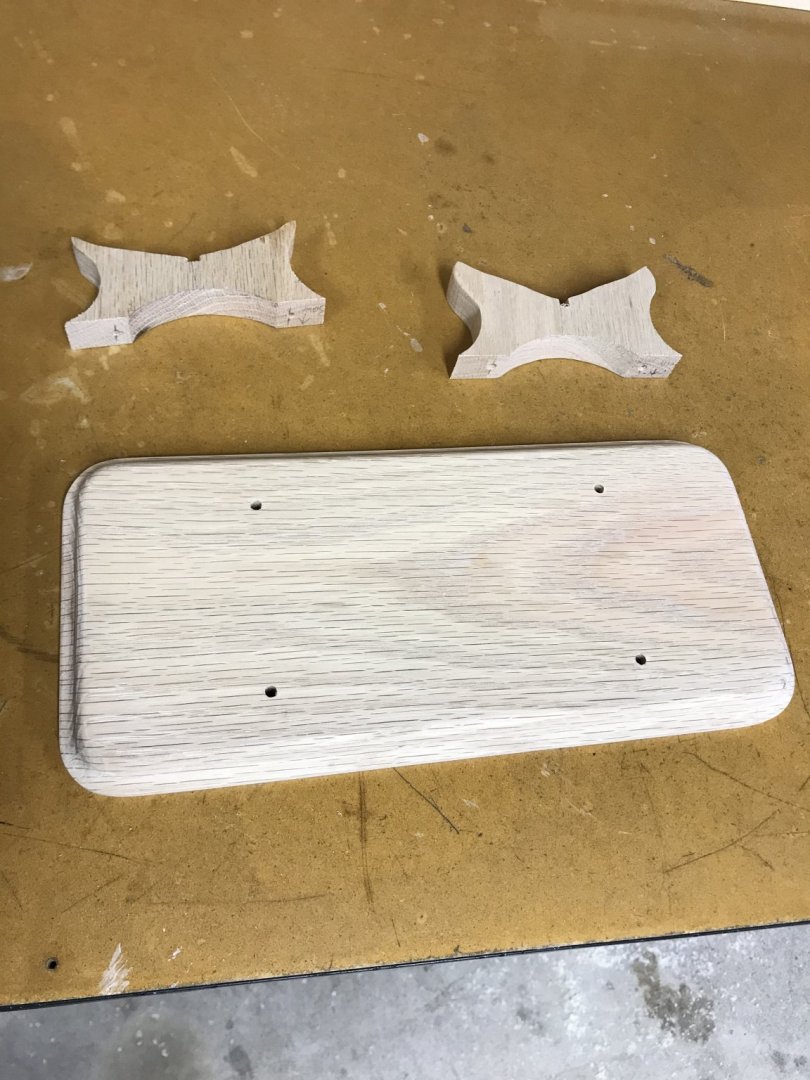
The kit itself came with 2 small pieces of laser cut plywood for the “filler” blocks to allow for more surface area when glueing the sides of the hull. I personally am a fan of bigger fill blocks to allow for more surface area, as Id hate to wake up one day to see the hull coming apart. I have some balsa wood from a whittling kit that I use, it’s really soft. The glue I use for planking expands when it dries so in my head I tell myself that it will have a better fixation. I still have to sand them down to shape, which I will he doing with a Dremel with a sanding flap wheel, file, and then a sanding block for the finishing touches What are other options for good filler blocks?

-
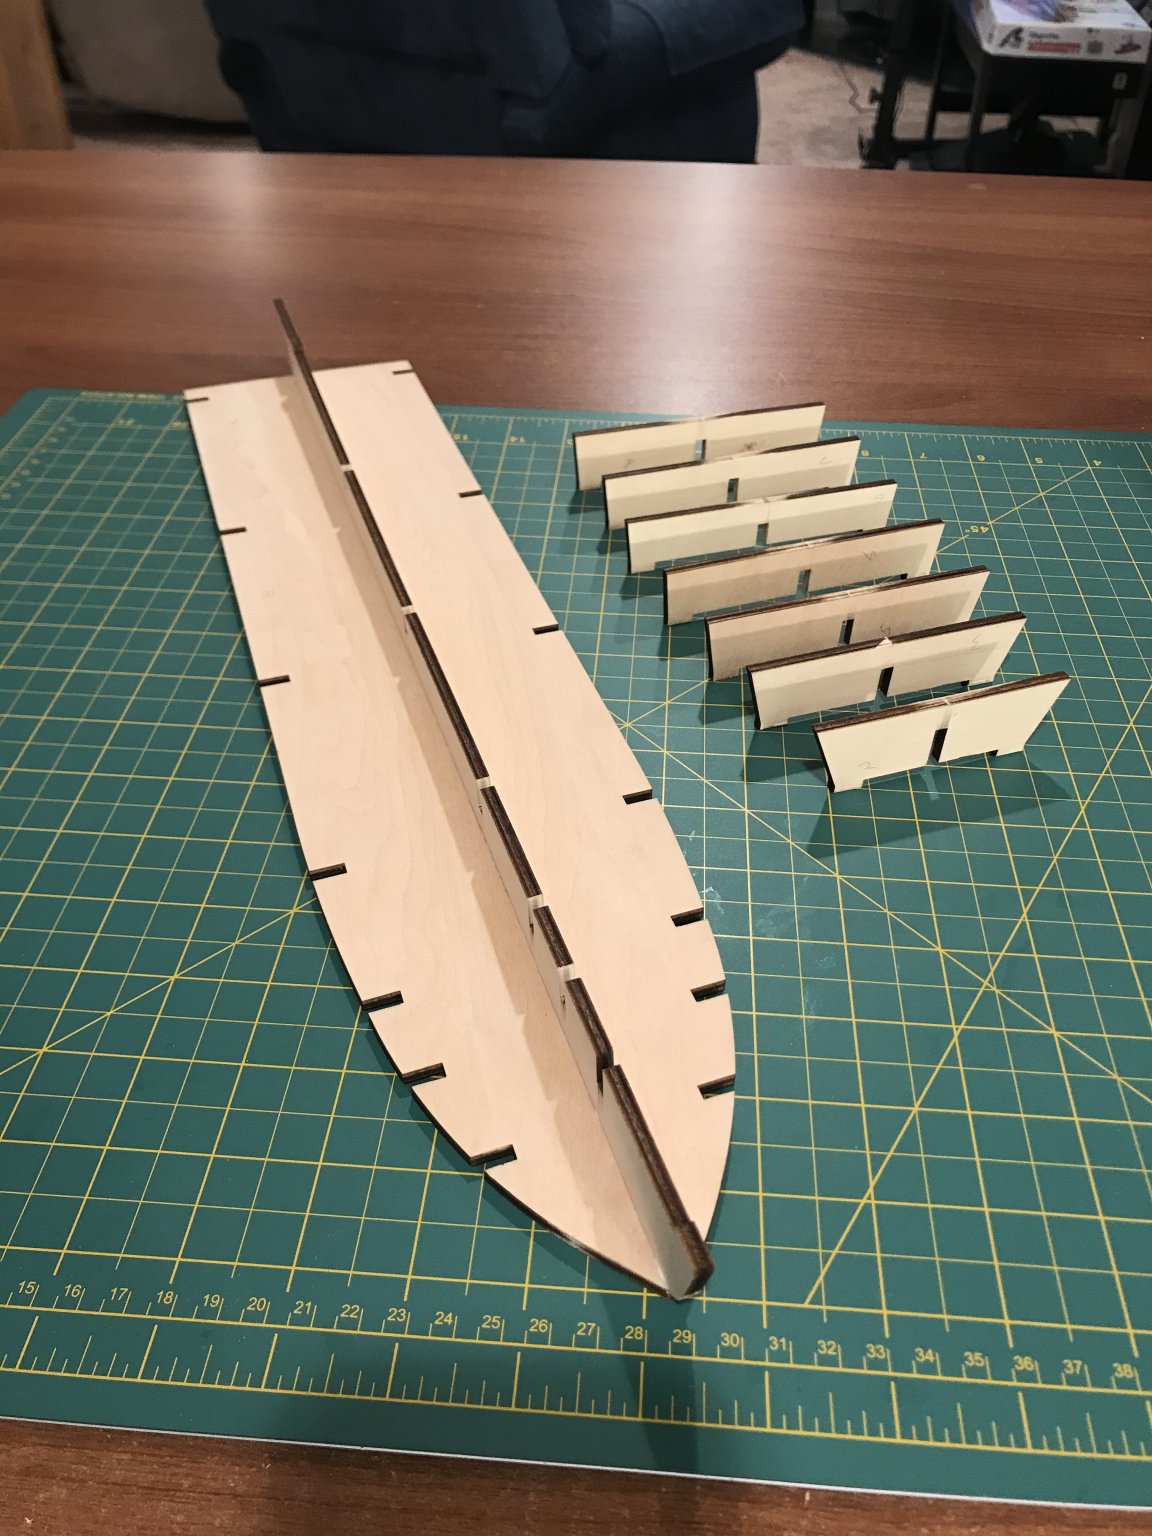
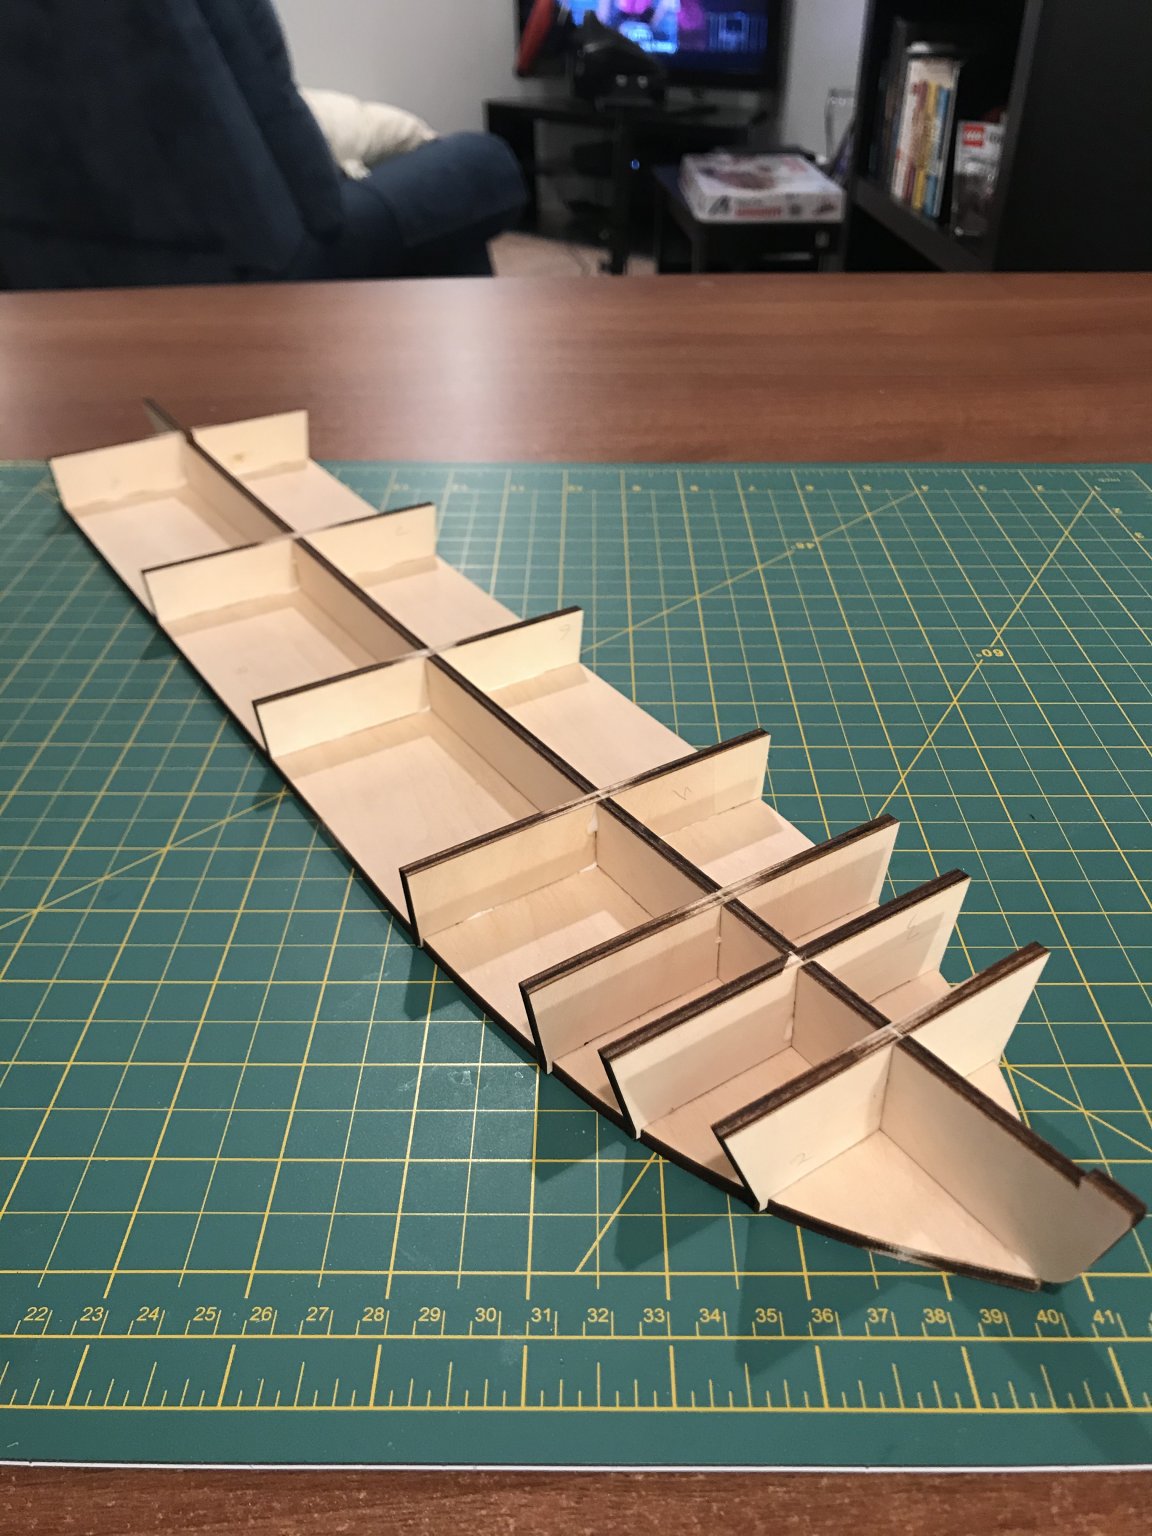
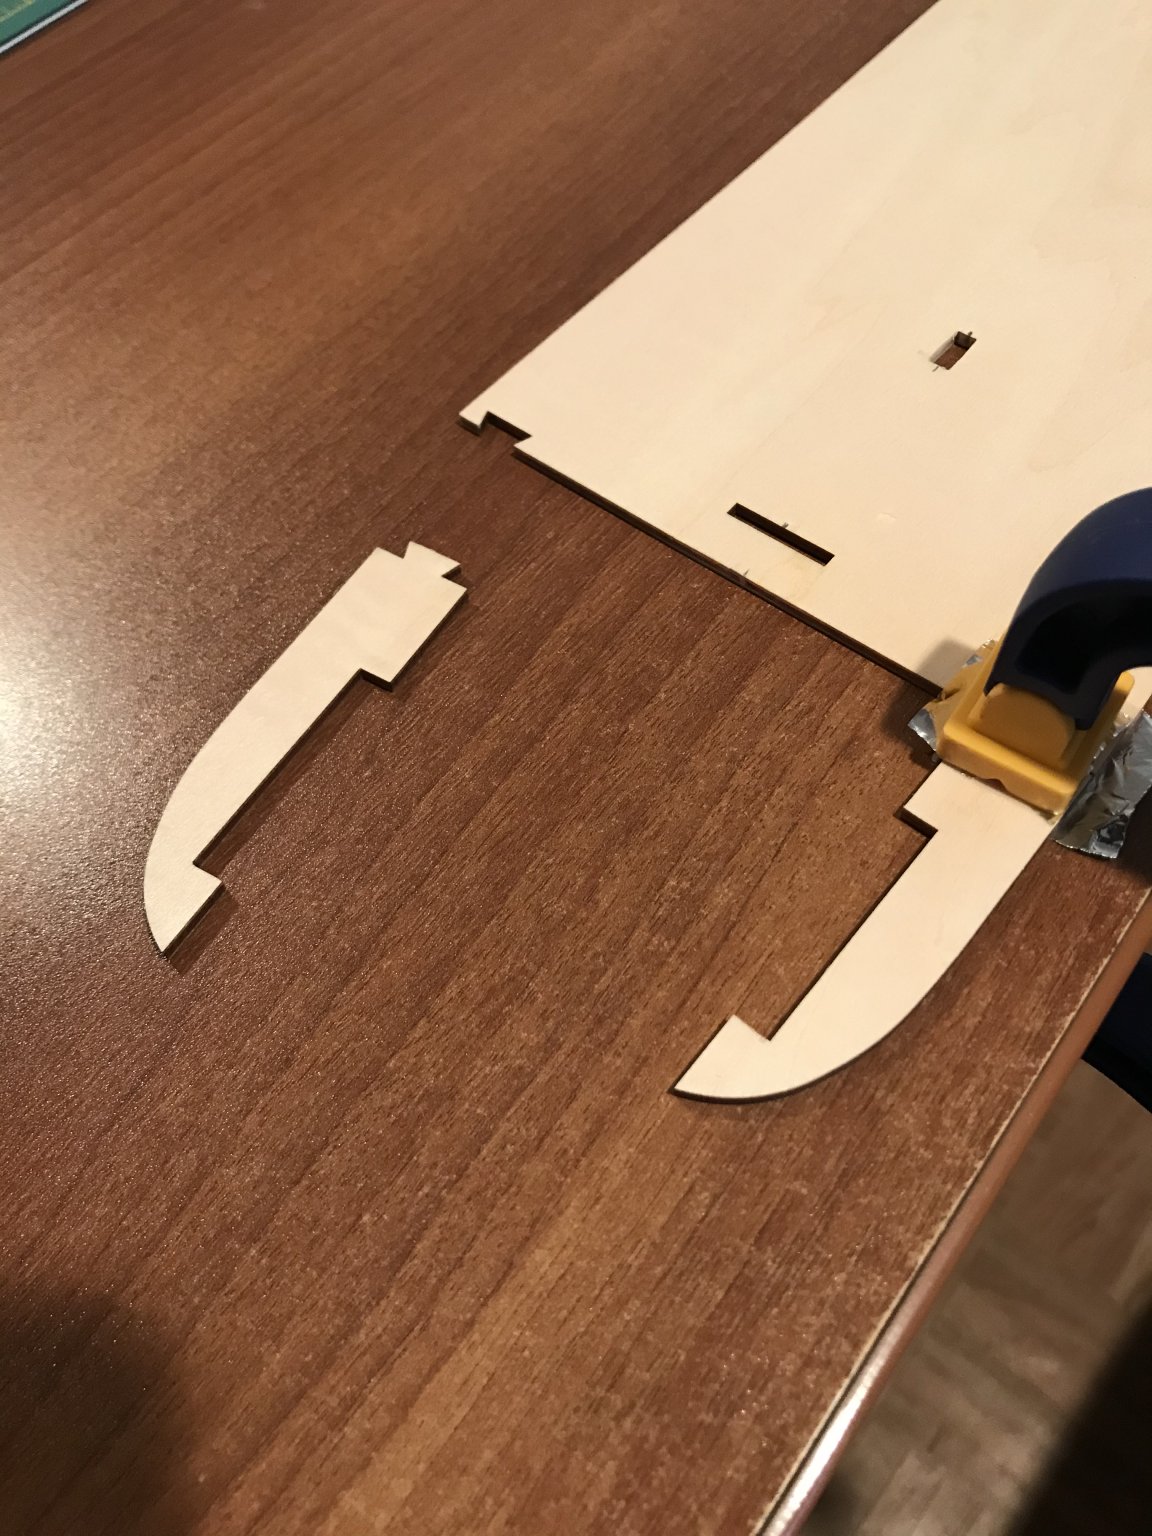
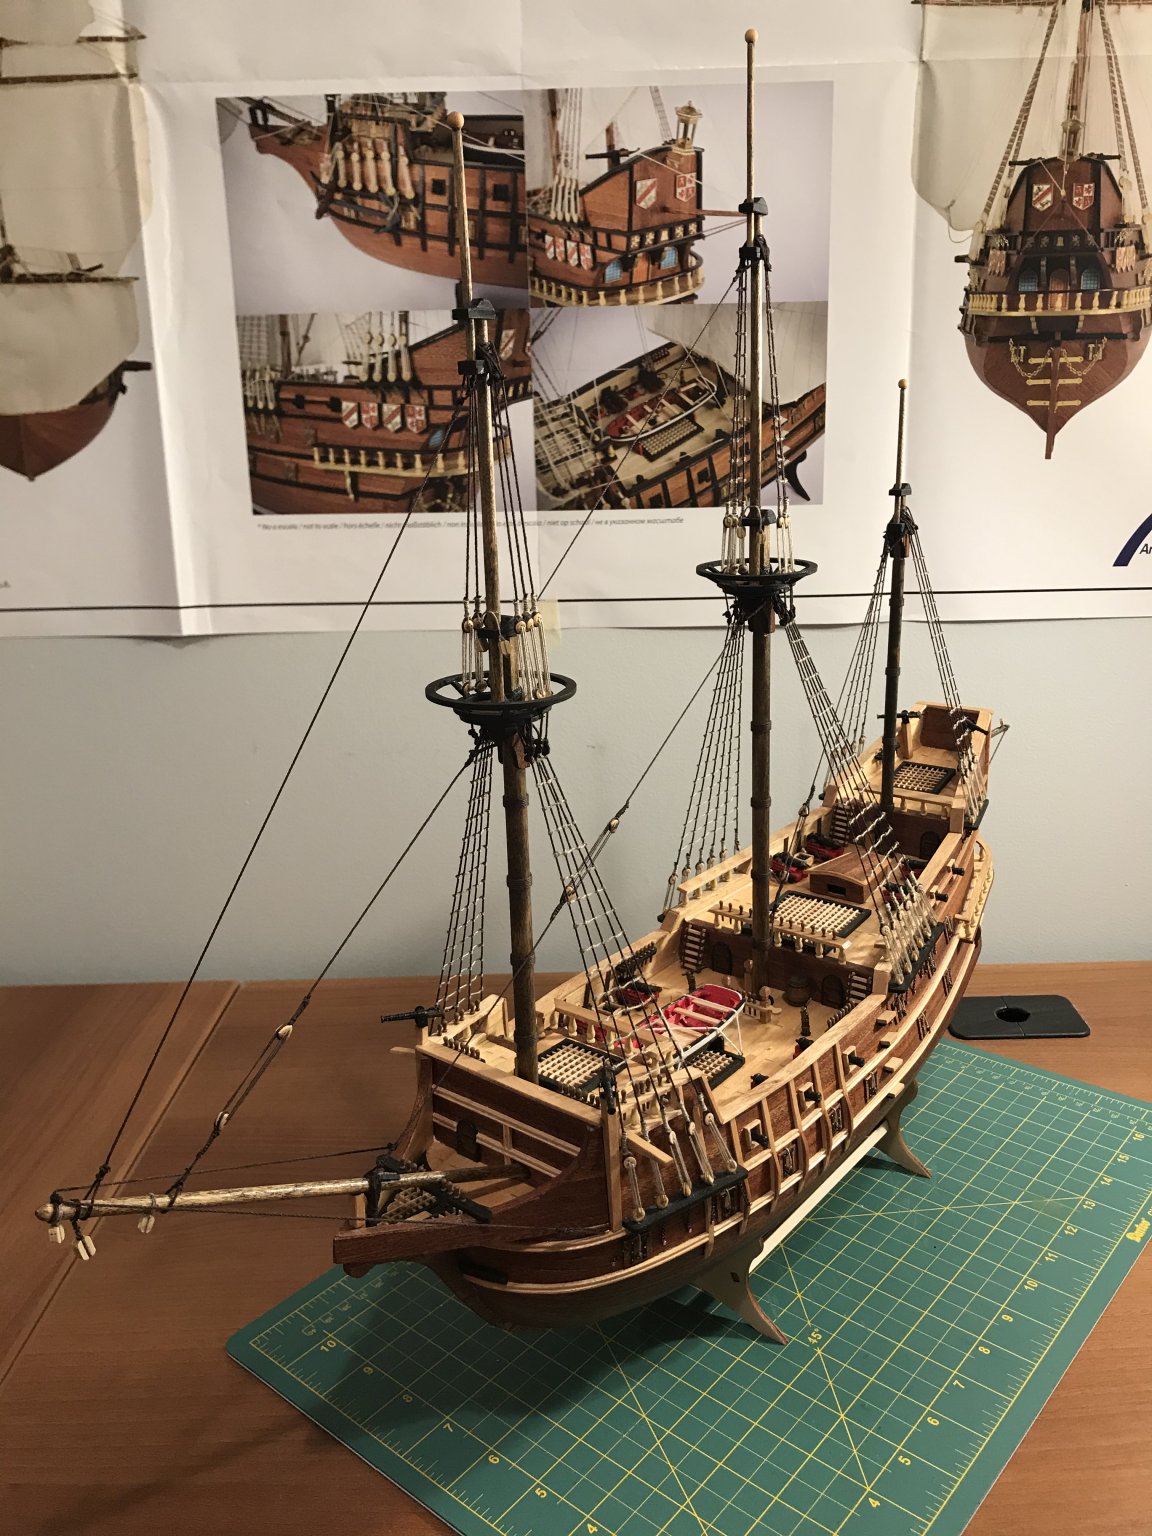
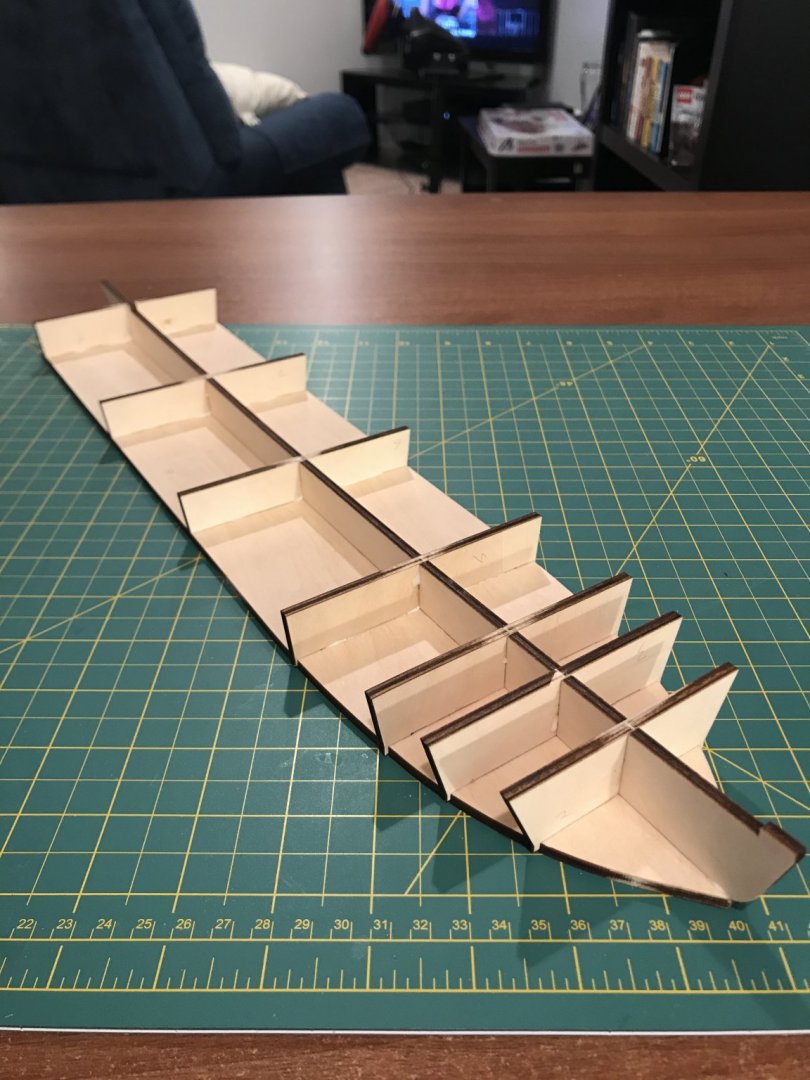
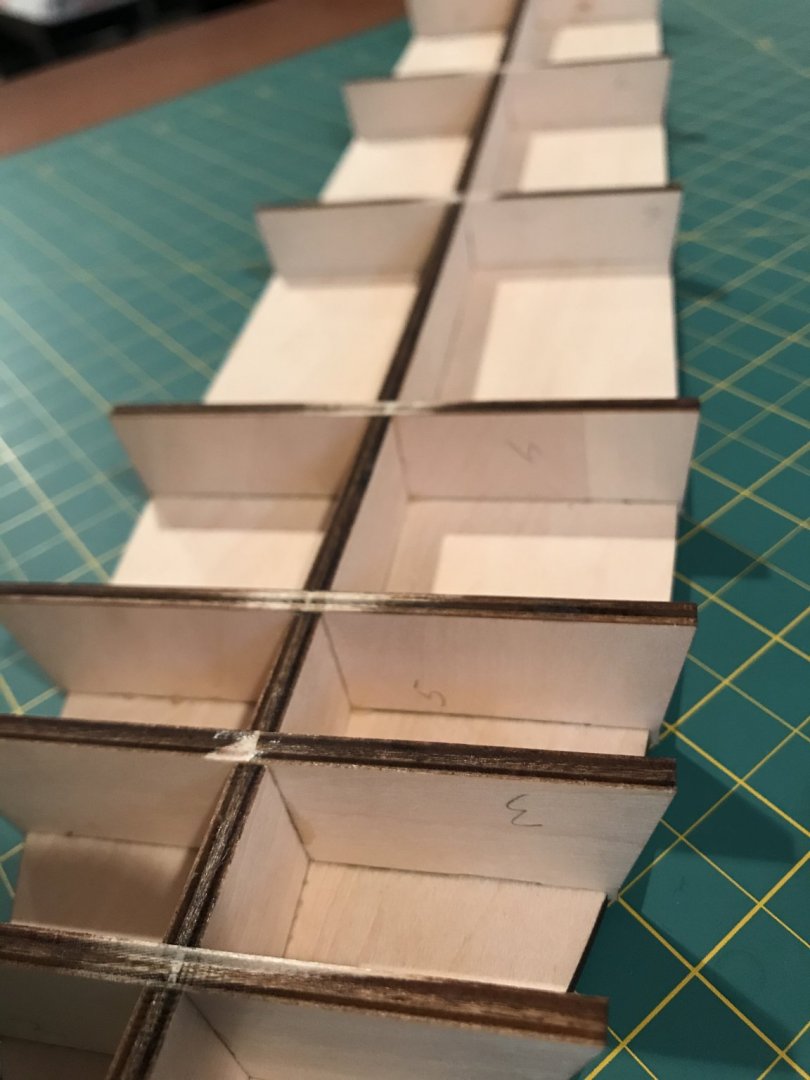
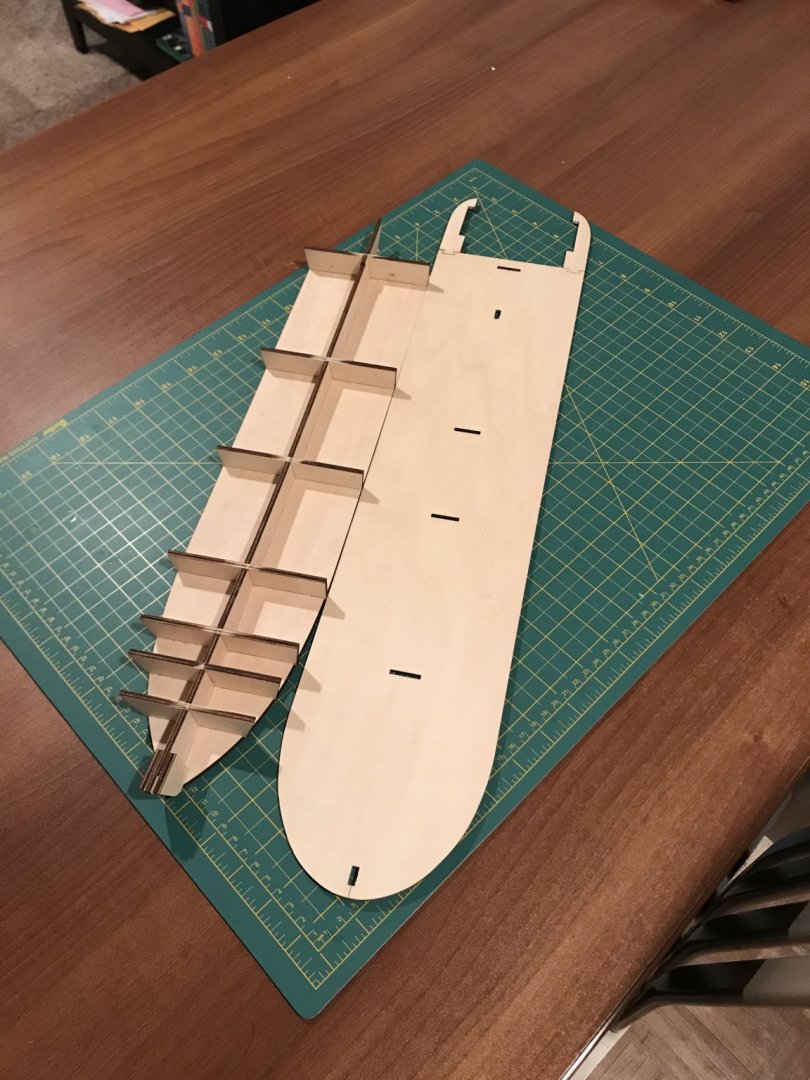
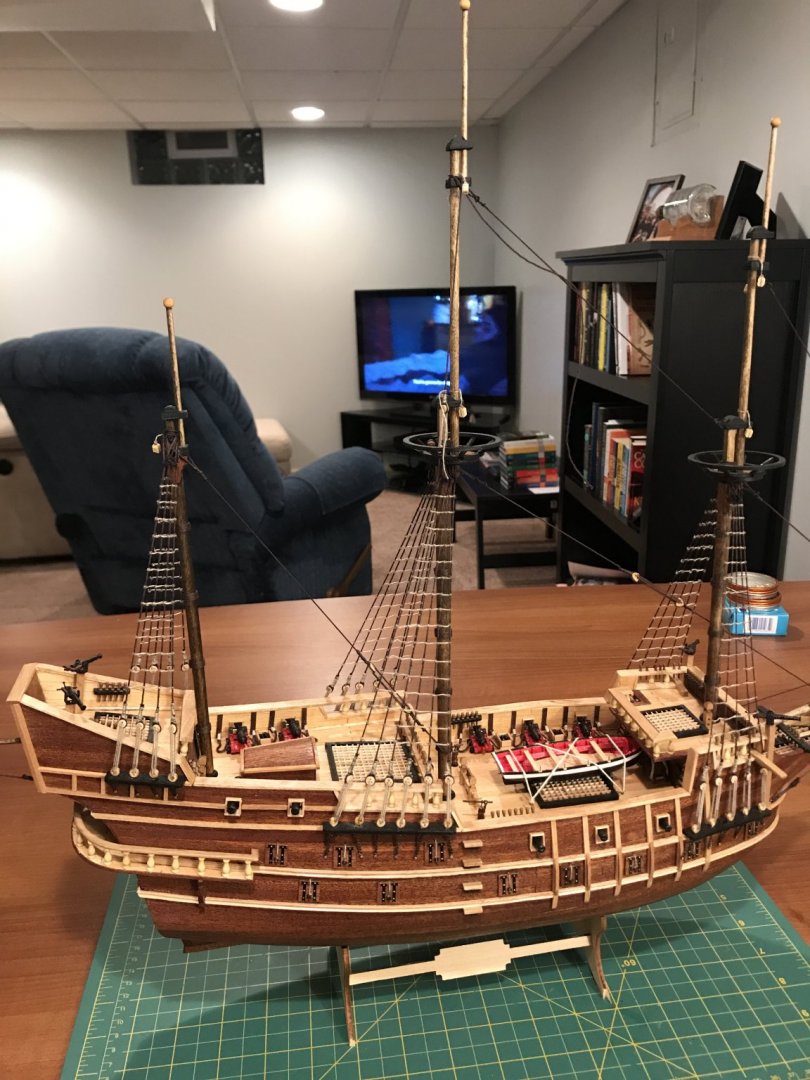
I started assembling the keel first, as per the instructions. I’m not sure how other kits are but mine extremely tight, to the point where I couldn’t not even dry fit them without feeling like I needed a mallet to get them into place so I filed down all of the connecting joints just a tad. After that they all slid right together. howevet, I did find a mistake in the plywood labeling. The bulkhead pieces 4 and 5 were labeled backward. Other than that, so far so good.


-
I just started this as well, I am still working so most likely you will stay ahead of me which will be a fantastic reference for me to use when the directions are less than satisfactory. Also, yes, you can post from a mobile device. That is almost entirely how I post my images as I don't upload them to my computer. At the bottom of the "post" page, click the link next to the paper clip that says "click to choose files" and just upload directly from your device. The only issue I have found is that it often uploads them in a random order, not necessarily in the order you have selected them.
-
After finishing my last build (link is in my profile) I started a ship in a bottle. I am still working with that, but I can only spend so much time working at such a tiny level, I prefer the larger models. So I will be tinkering with the ship in a bottle intermittently. I was pretty bummed when I found out Artesania Latina closed their doors, and one day I was speaking with my fiancé about it. The local hobby store in her hometown just happened to have one more AL model on the shelf and she picked it up for my anniversary gift. I was originally planning on starting a victory, but I am beyond excited to start a different style of ship. One thing that recently caught my interest while browsing other builds is the idea of opening up the doors and windows and finishing the interior as well. I am still in the planning stages for that, but as of now I am planning on adding a small casino room, a kitchen (if I can find the parts) and a couple of bedrooms.

-
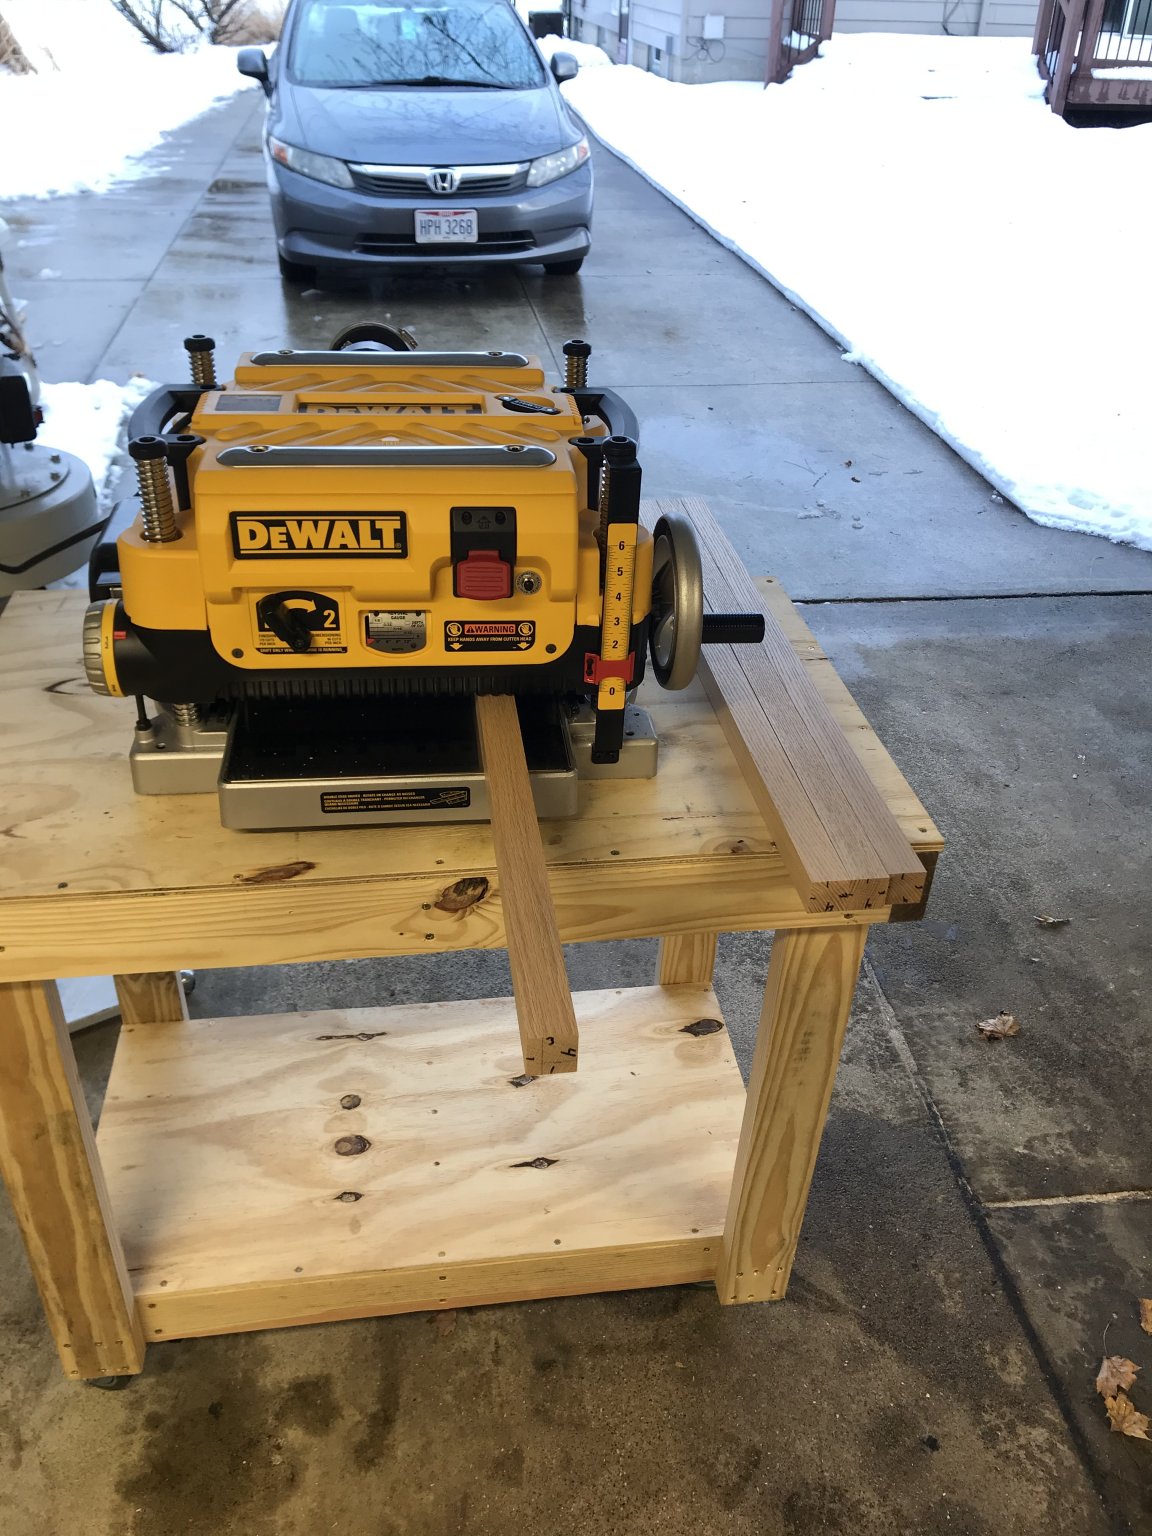
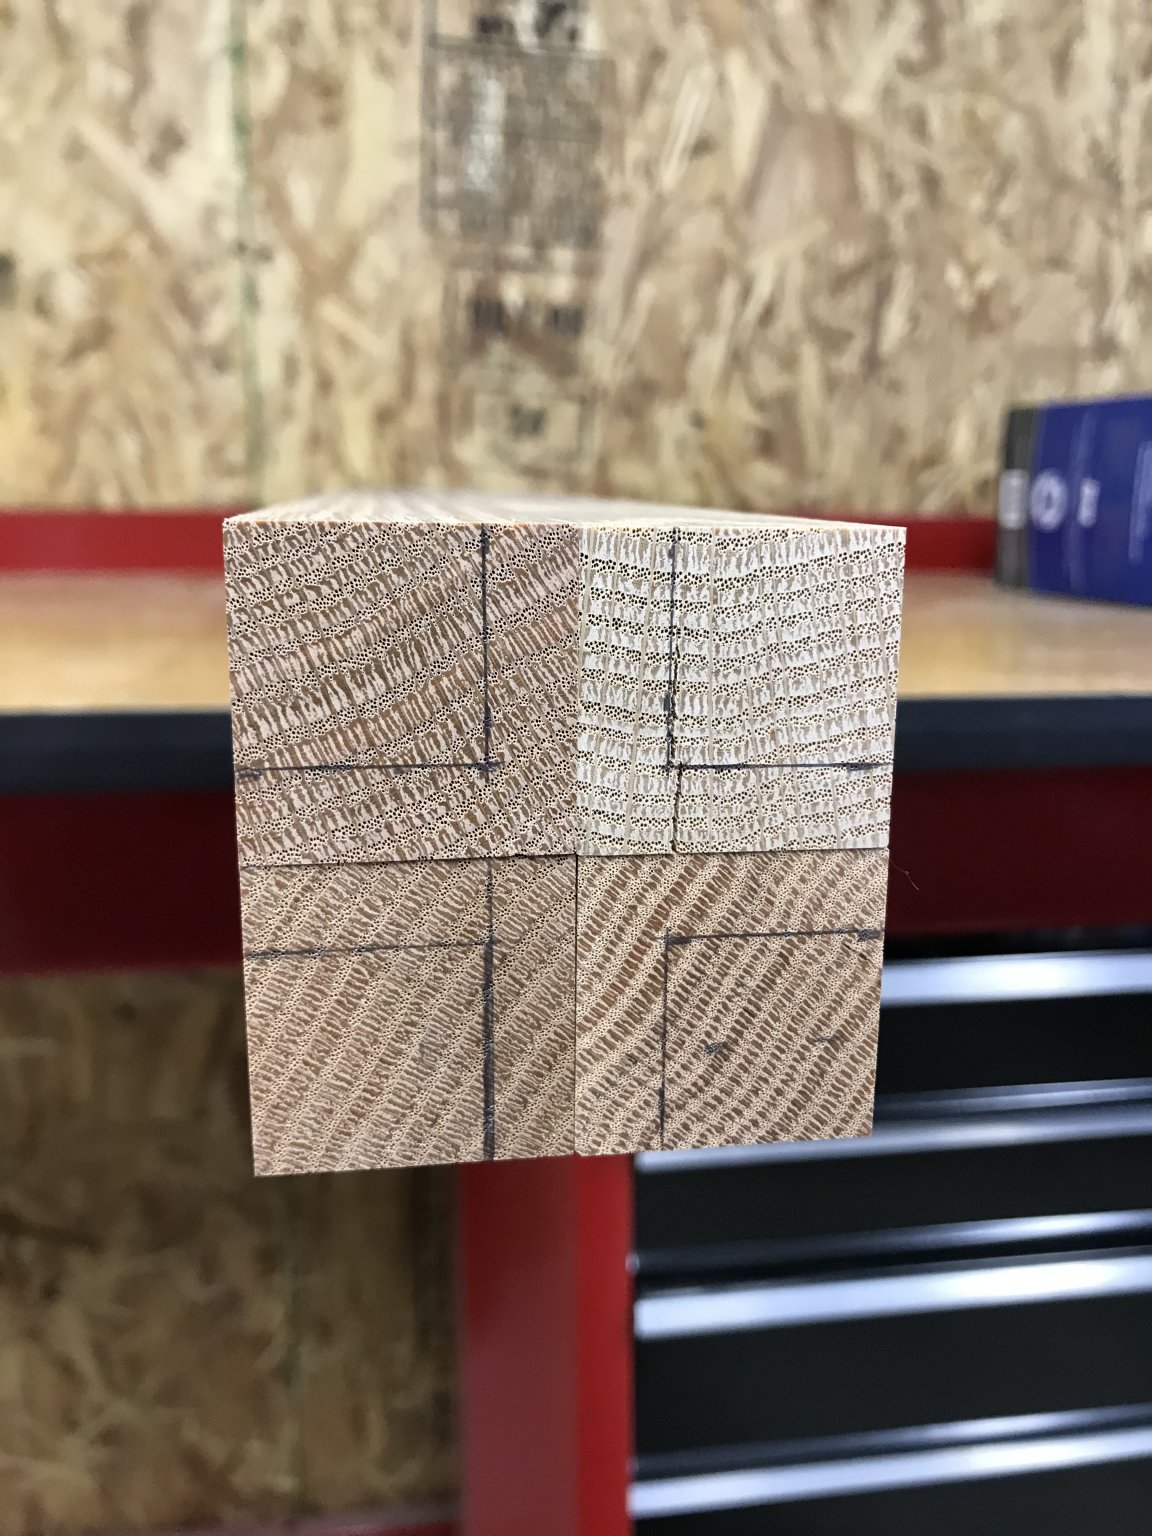
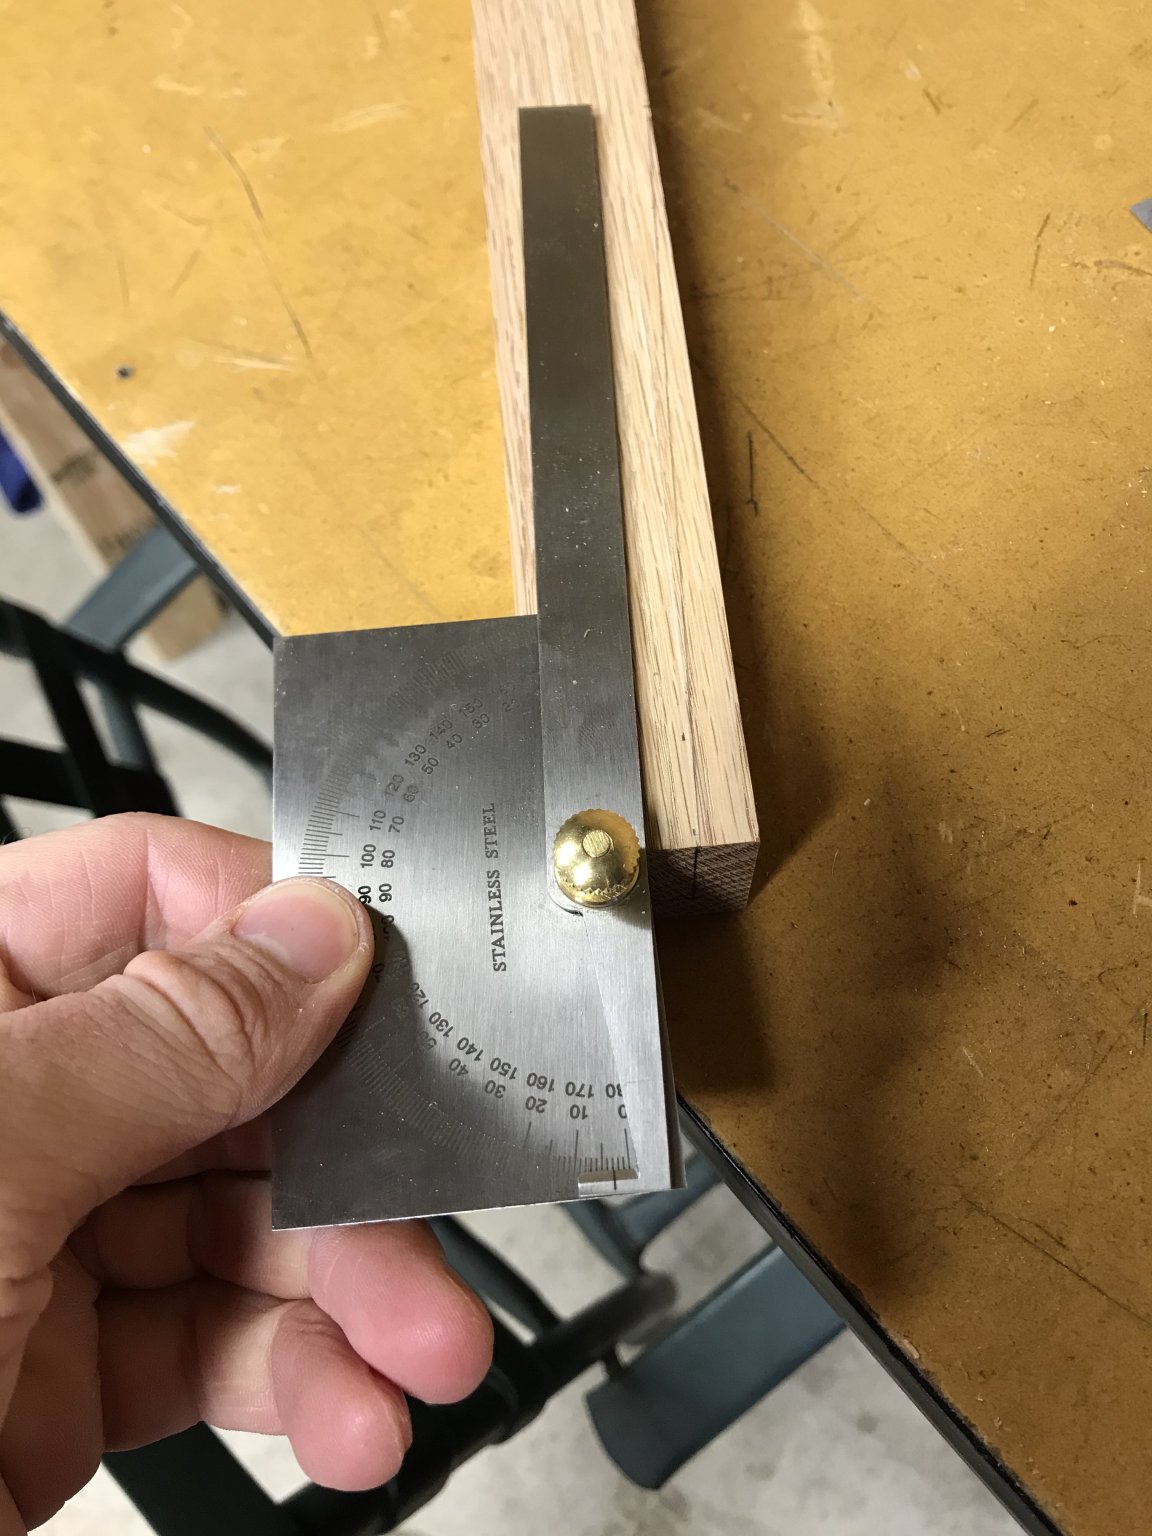
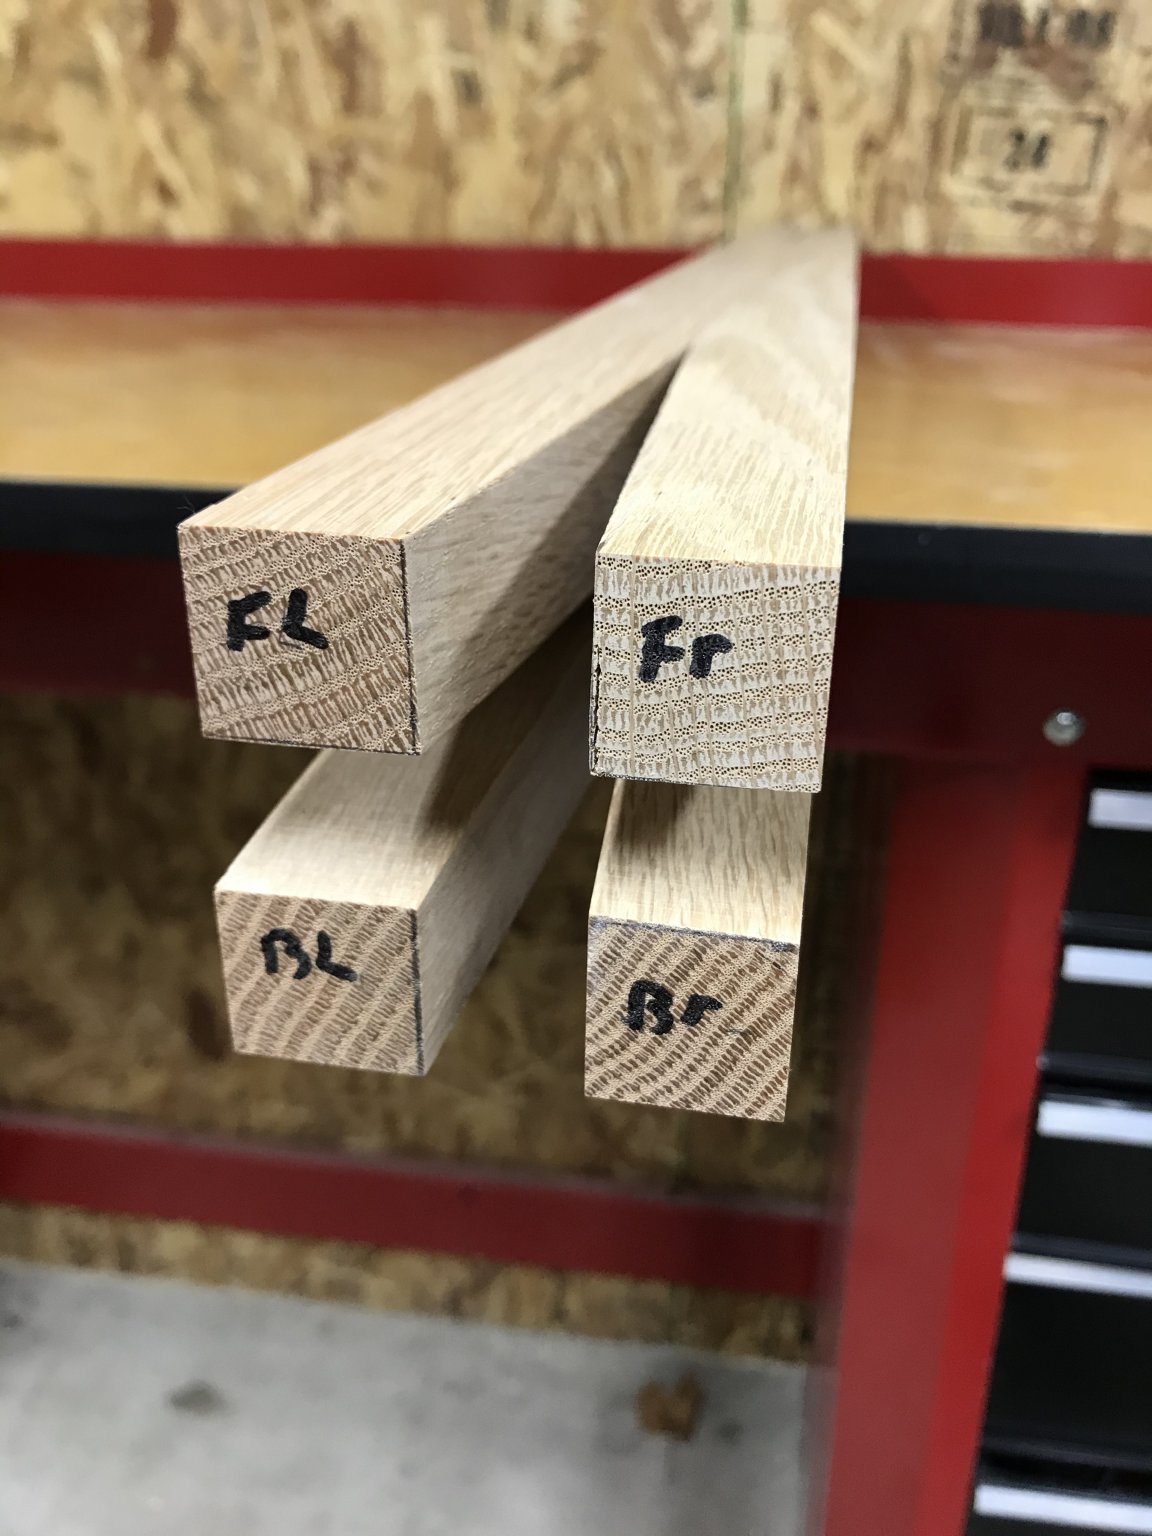
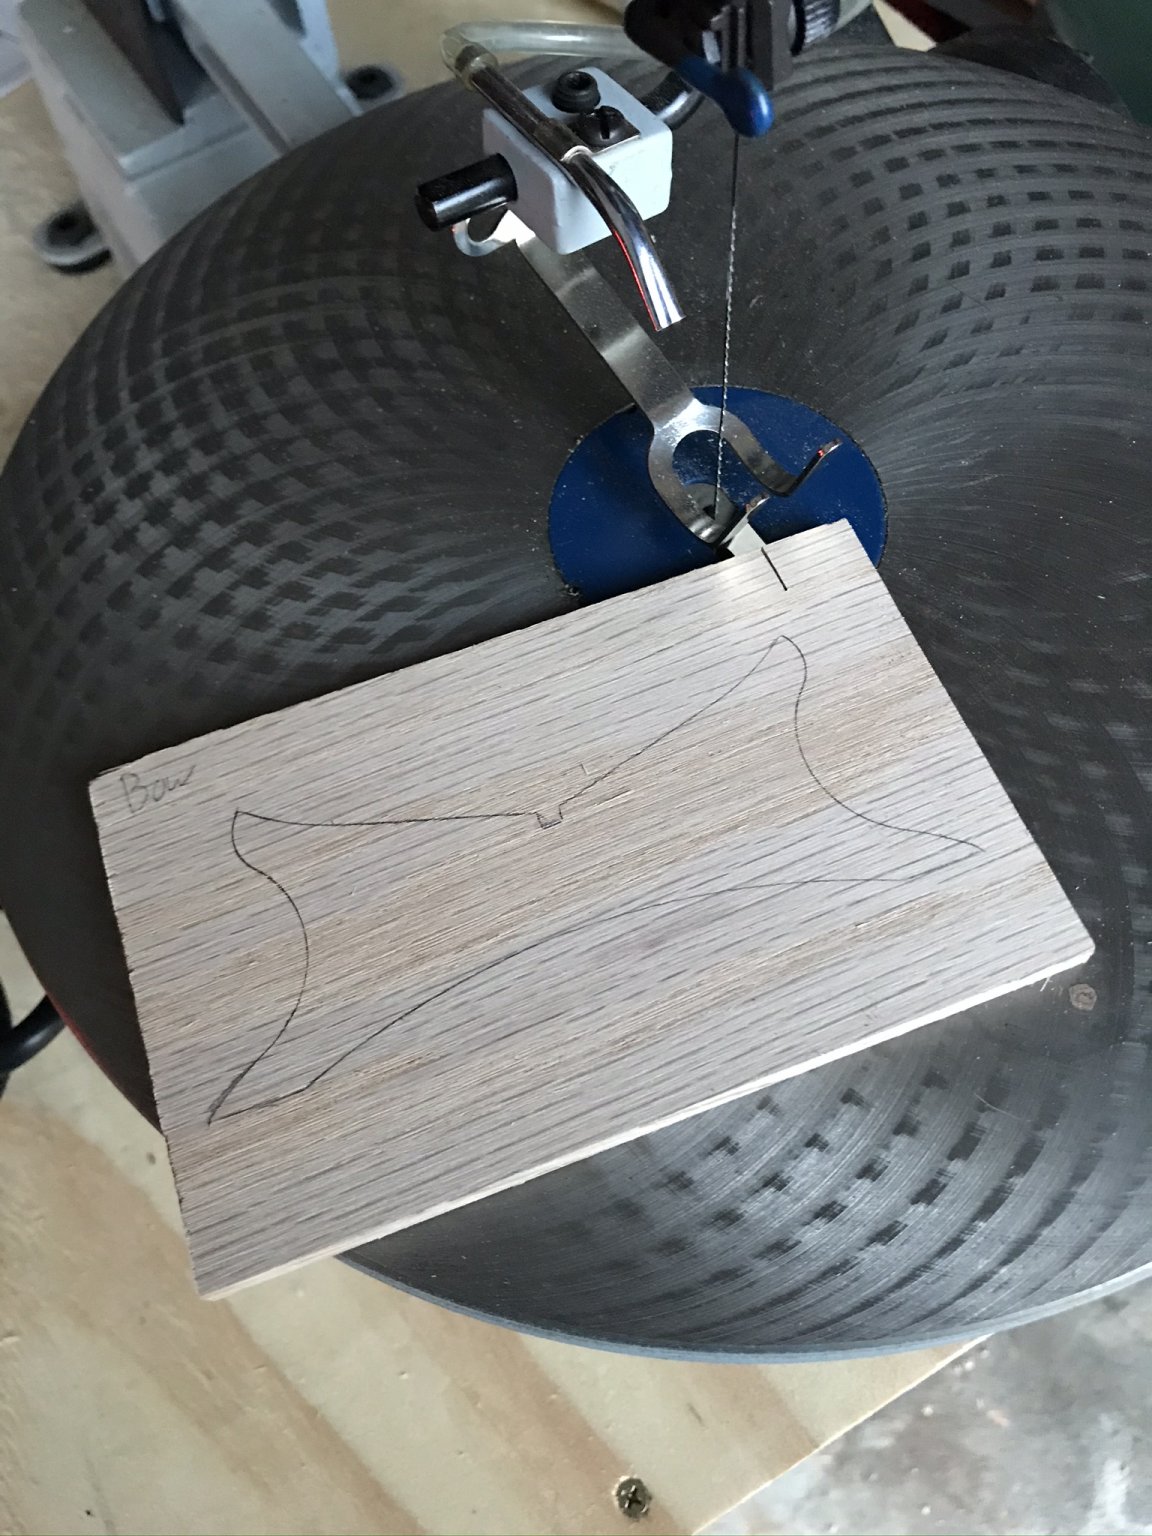
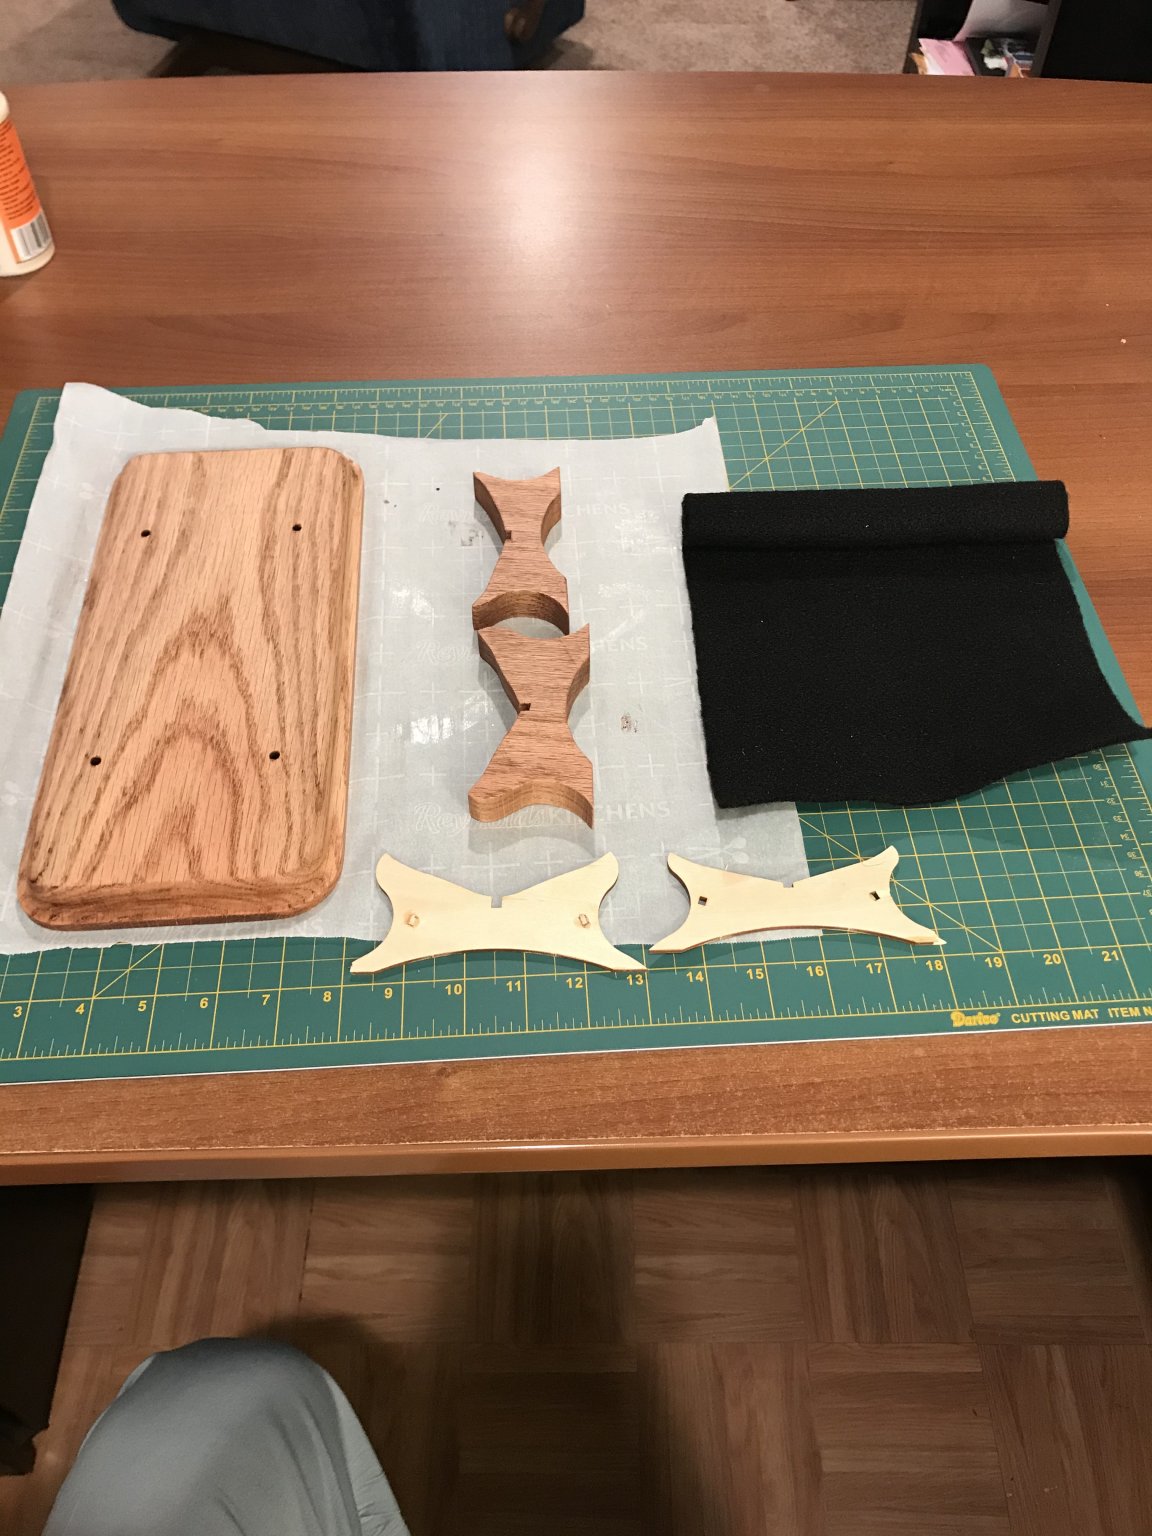
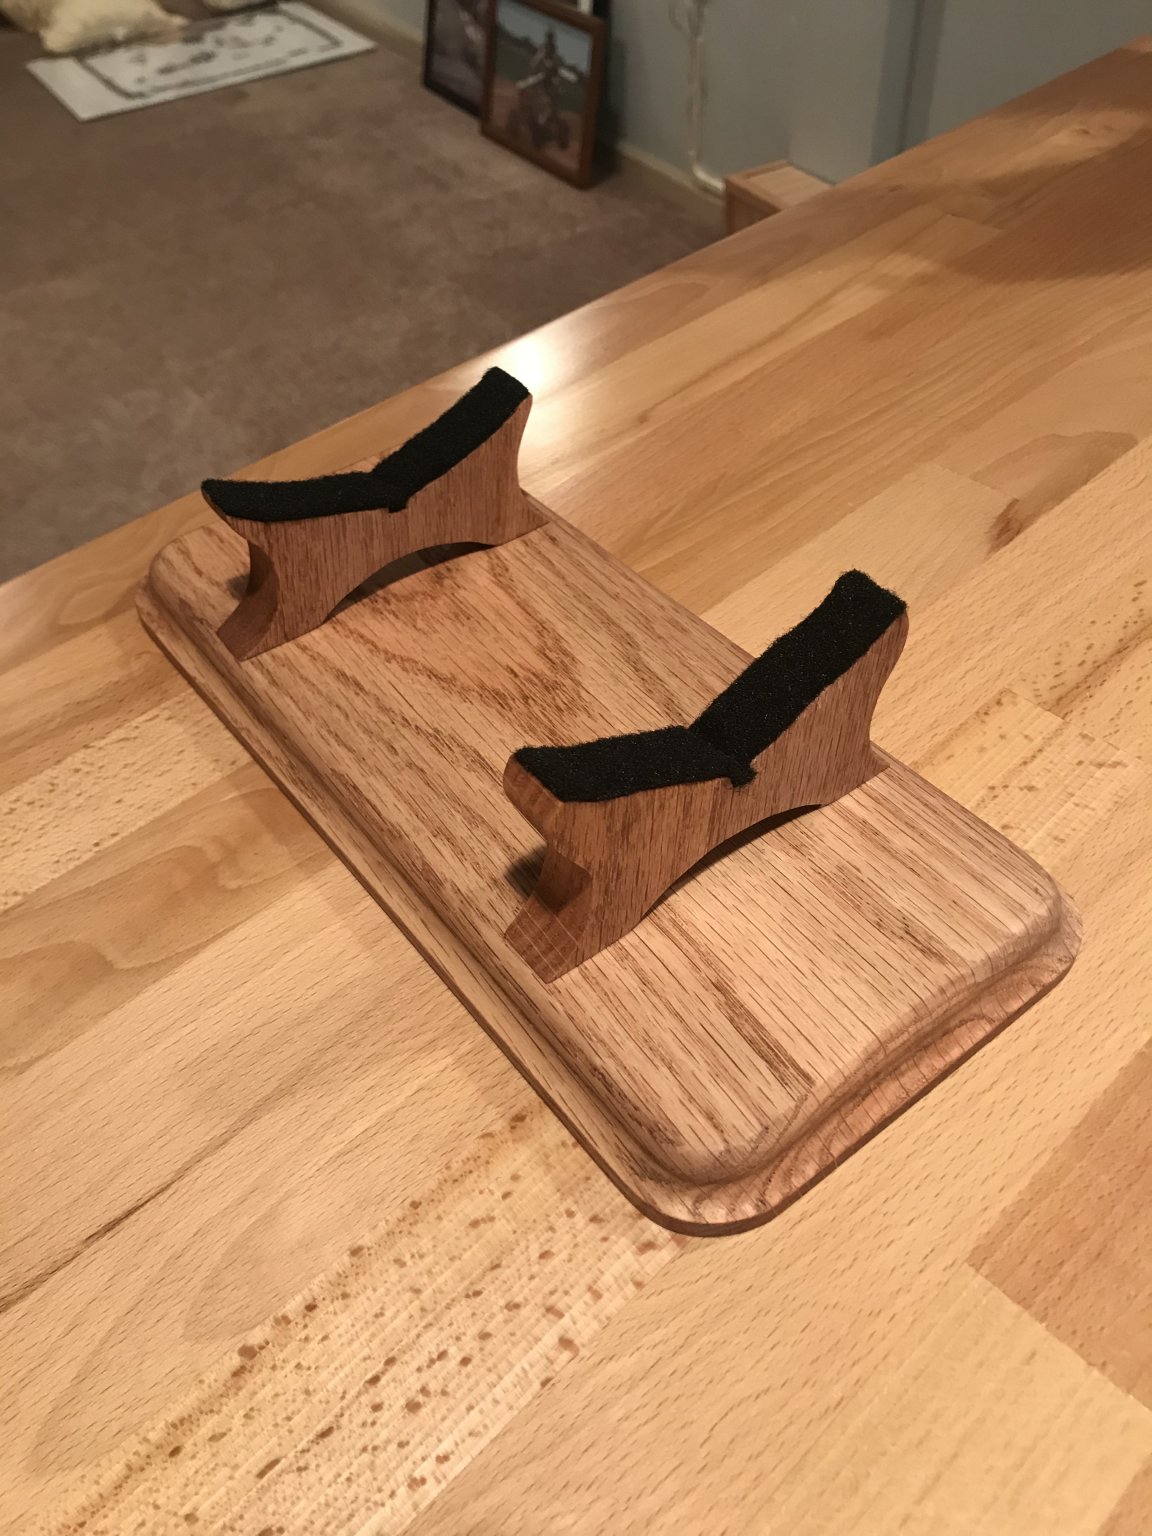
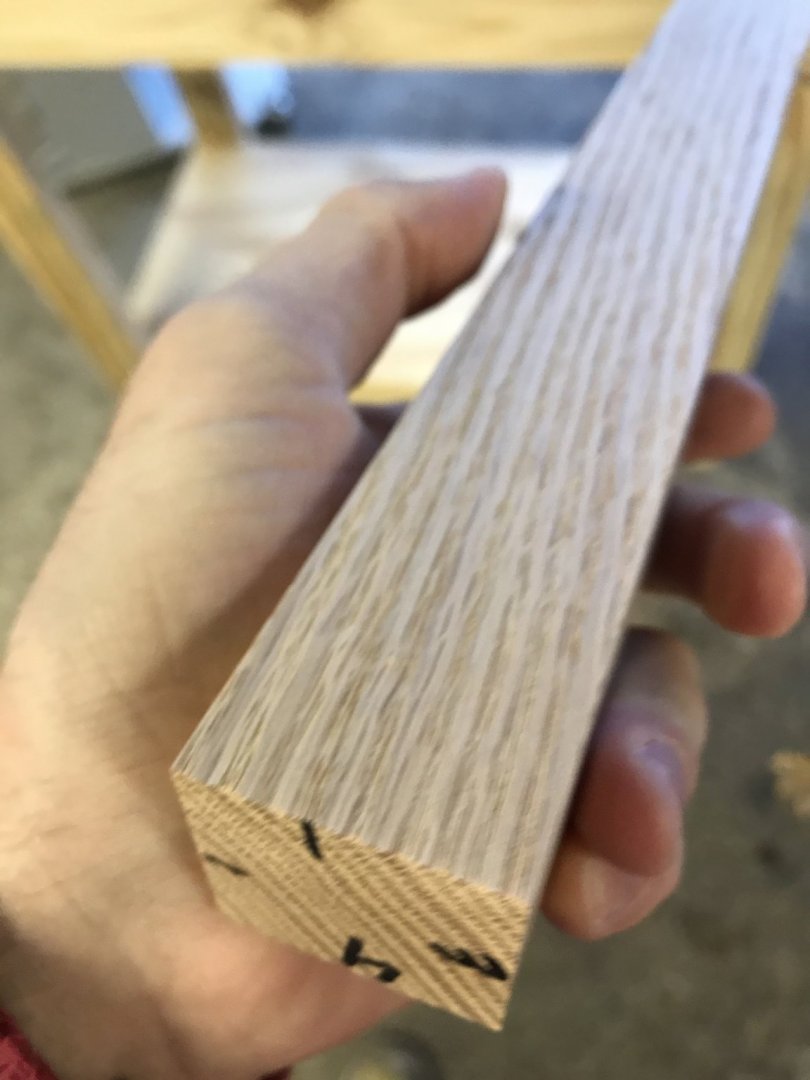
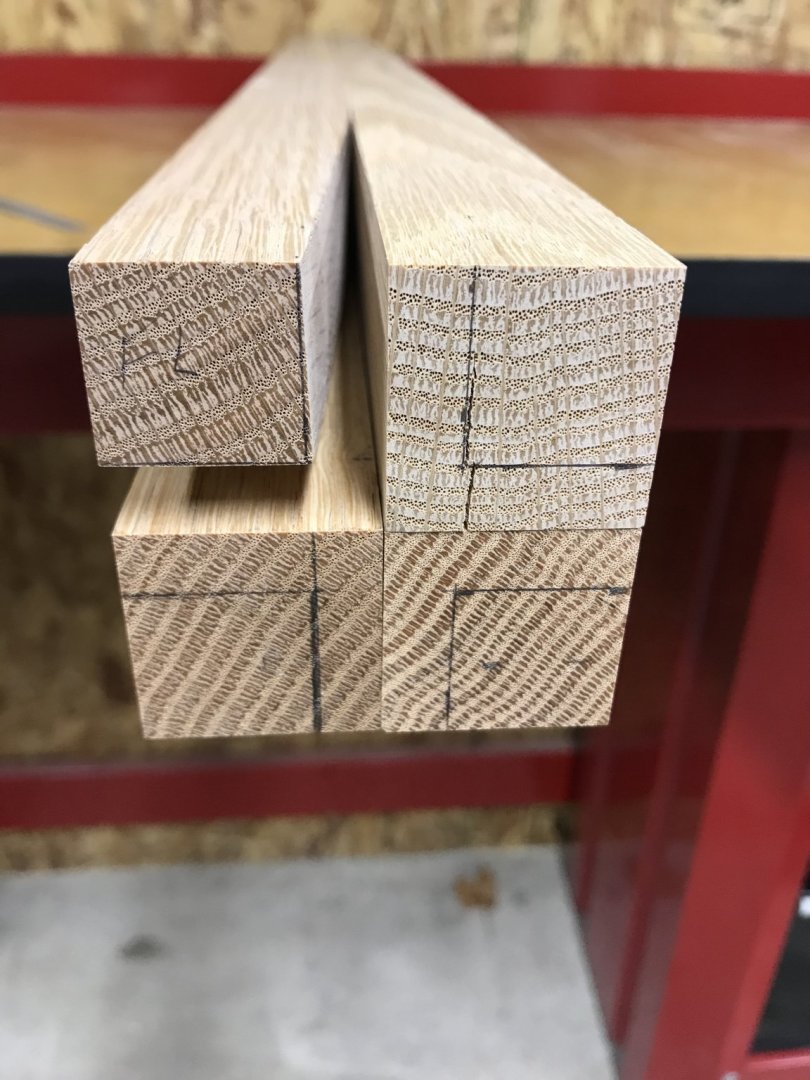
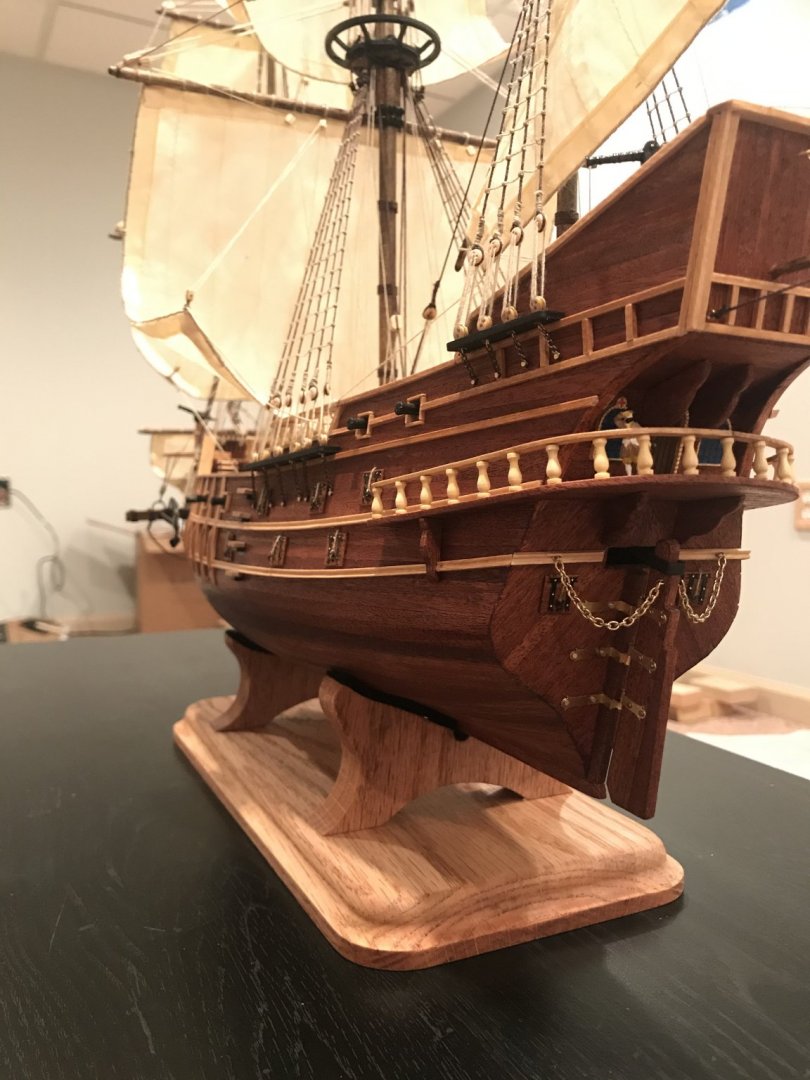
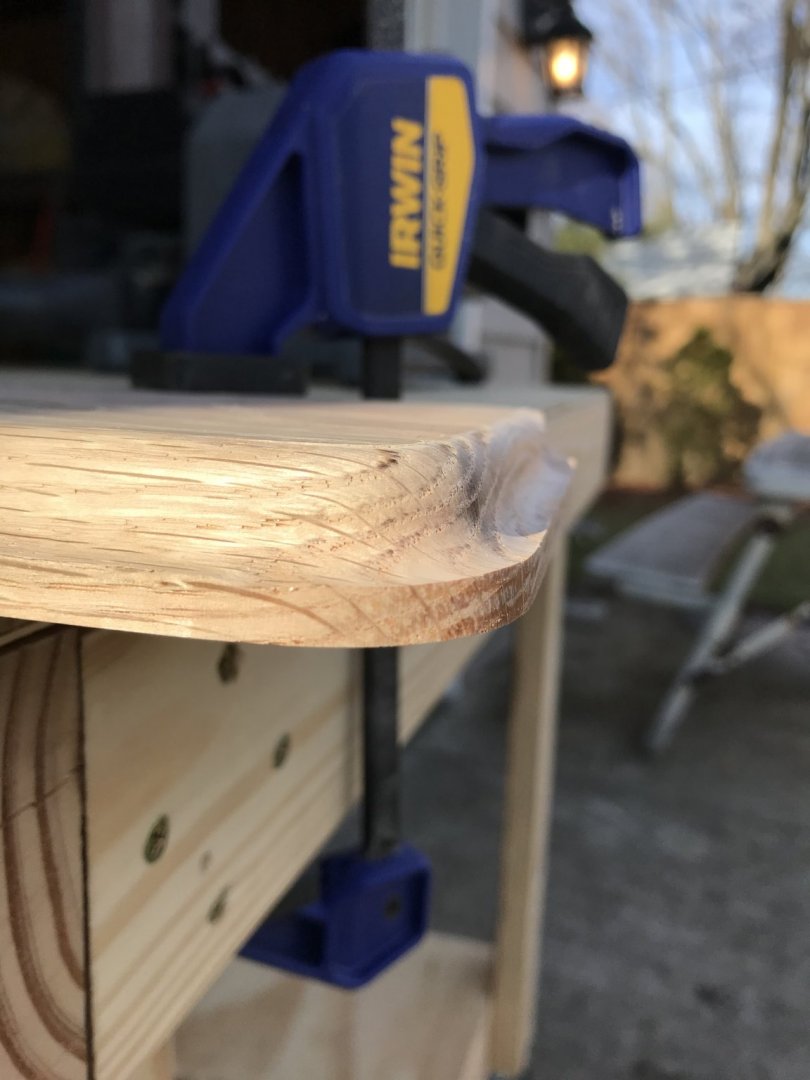
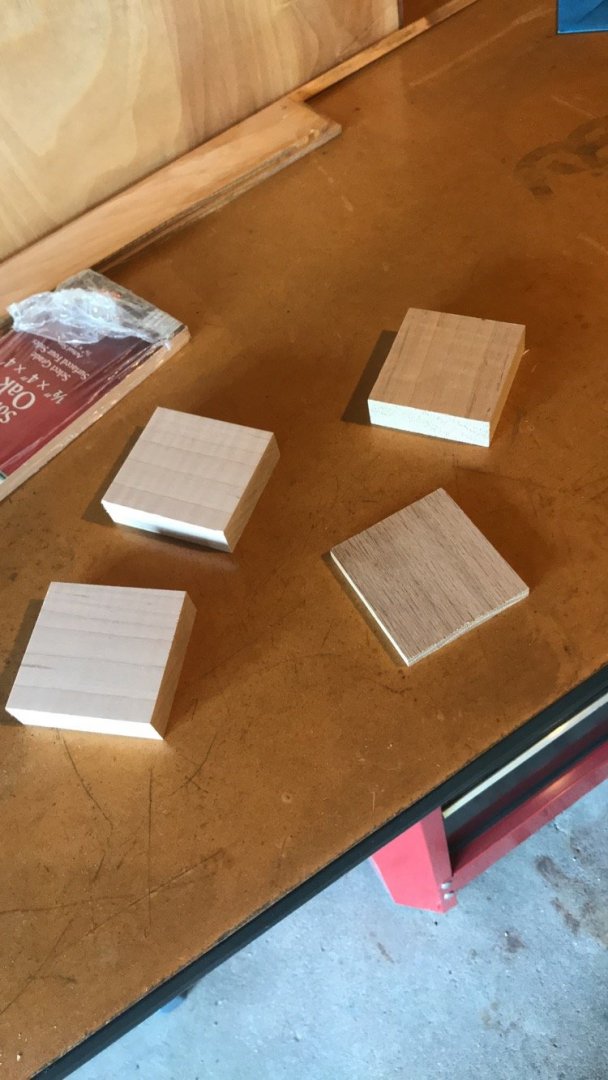
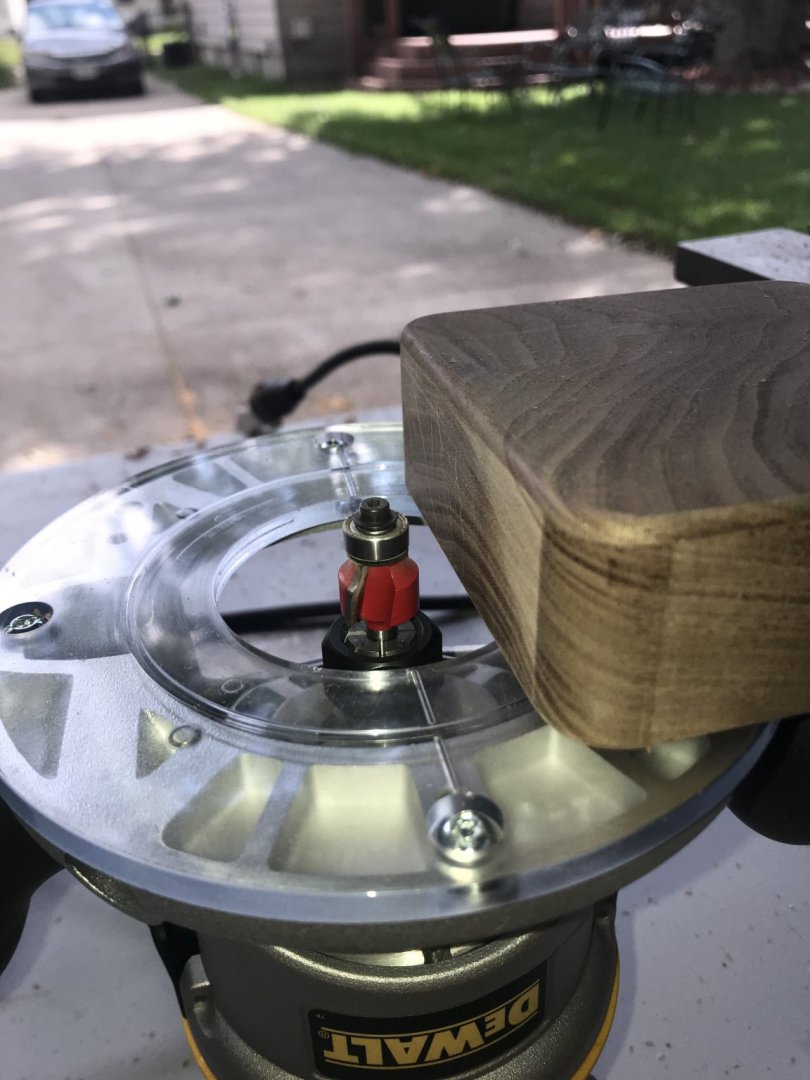
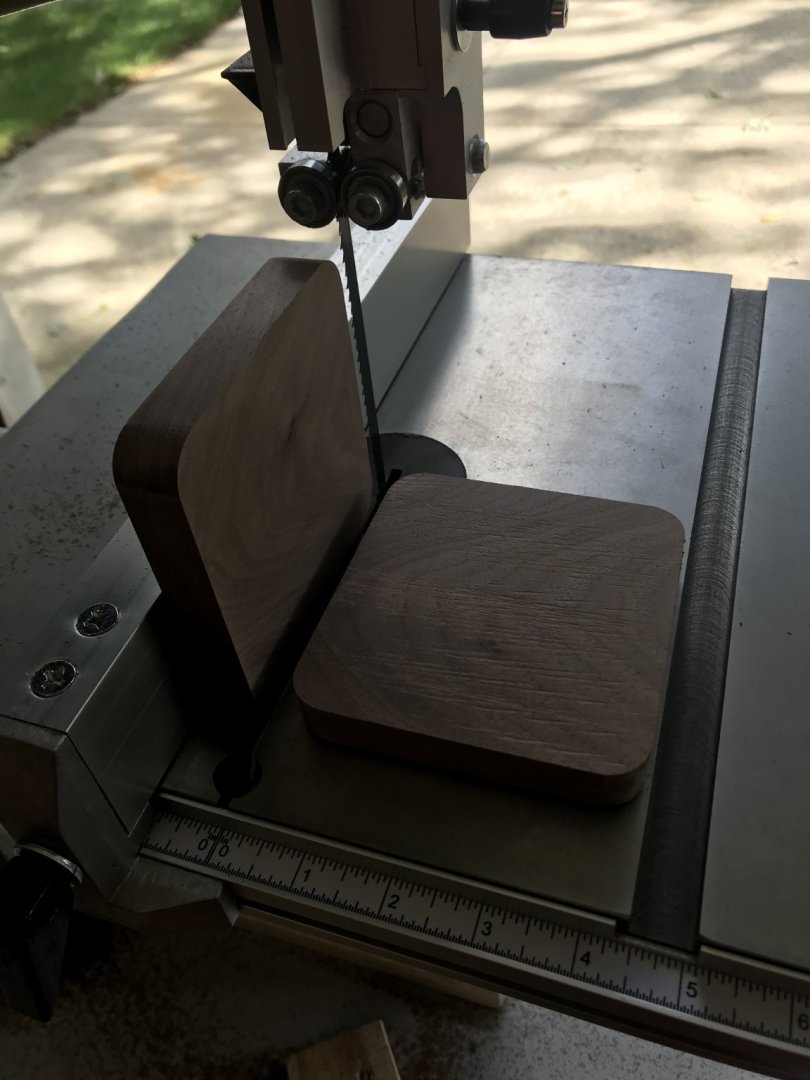
Well I decided I wasn’t done yet. Initially I placed the ship on top of my book shelf but I realized I wasn’t happy with it there so I am making a display case for it that will have a plexiglass cover made for over top of it to keep the dust off of it. so far I think the hardest part of building the case will be finding pieces of oak that all match in shade and grain...the selection was pretty thin. i got started by getting some pieces of 2x2x4 red oak and then planed them for a smooth/flat surface. They were a bit rough coming off the saw mill. Then I measured 1” boxes on the bottom in the 4 corners to add a slight taper to the wood at the bases. I used a 3 degree taper.


- 88 replies
-
- 3
-

-
- finished
- artesania latina
- (and 1 more)
-
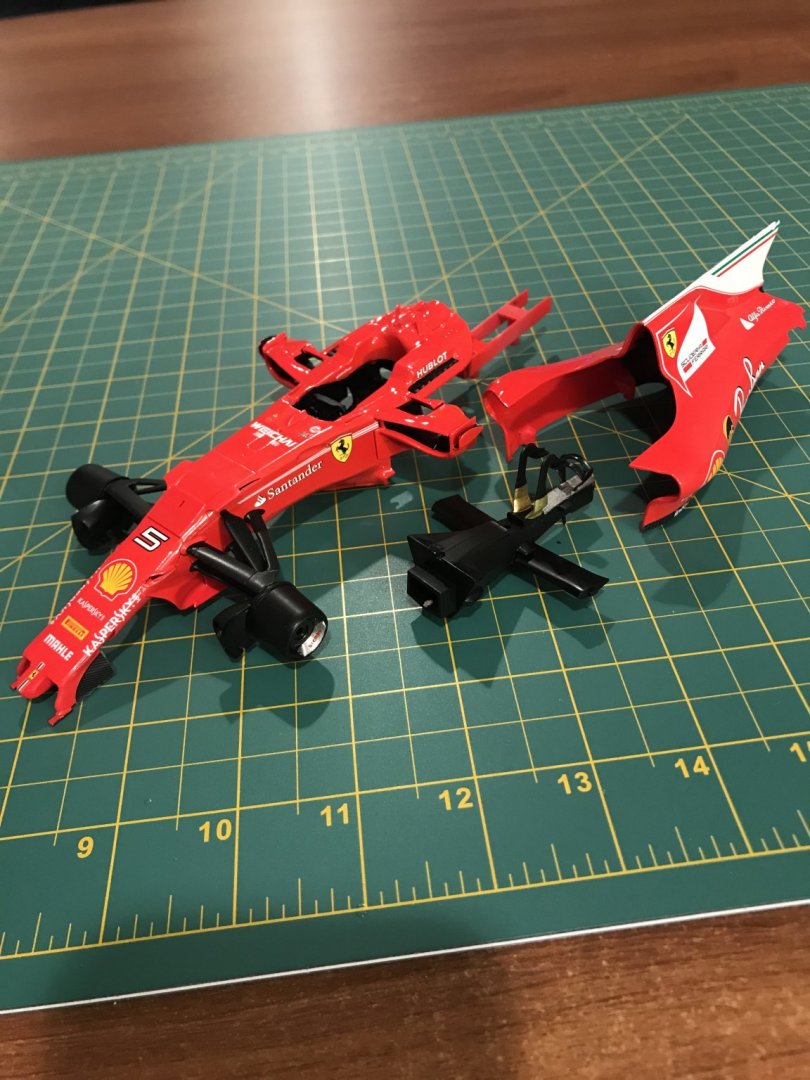
Thank you everyone osmosis, currently I am working on 2 much smaller project. A ship in a bottle (build log is already started on here) and a ferrari formula 1 car. I believe you have the same Mississippi kit. Let me know when your get started, I’m sure we can share some info back and fourth. however, as soon as those 2 are done my fiancé did already purchase my next big ship for christmas. It’s another kit from Artesania Latina, the Mississippi River Queen. I cannot wait to get it started


- 88 replies
-
- 1
-
-
- finished
- artesania latina
- (and 1 more)
-
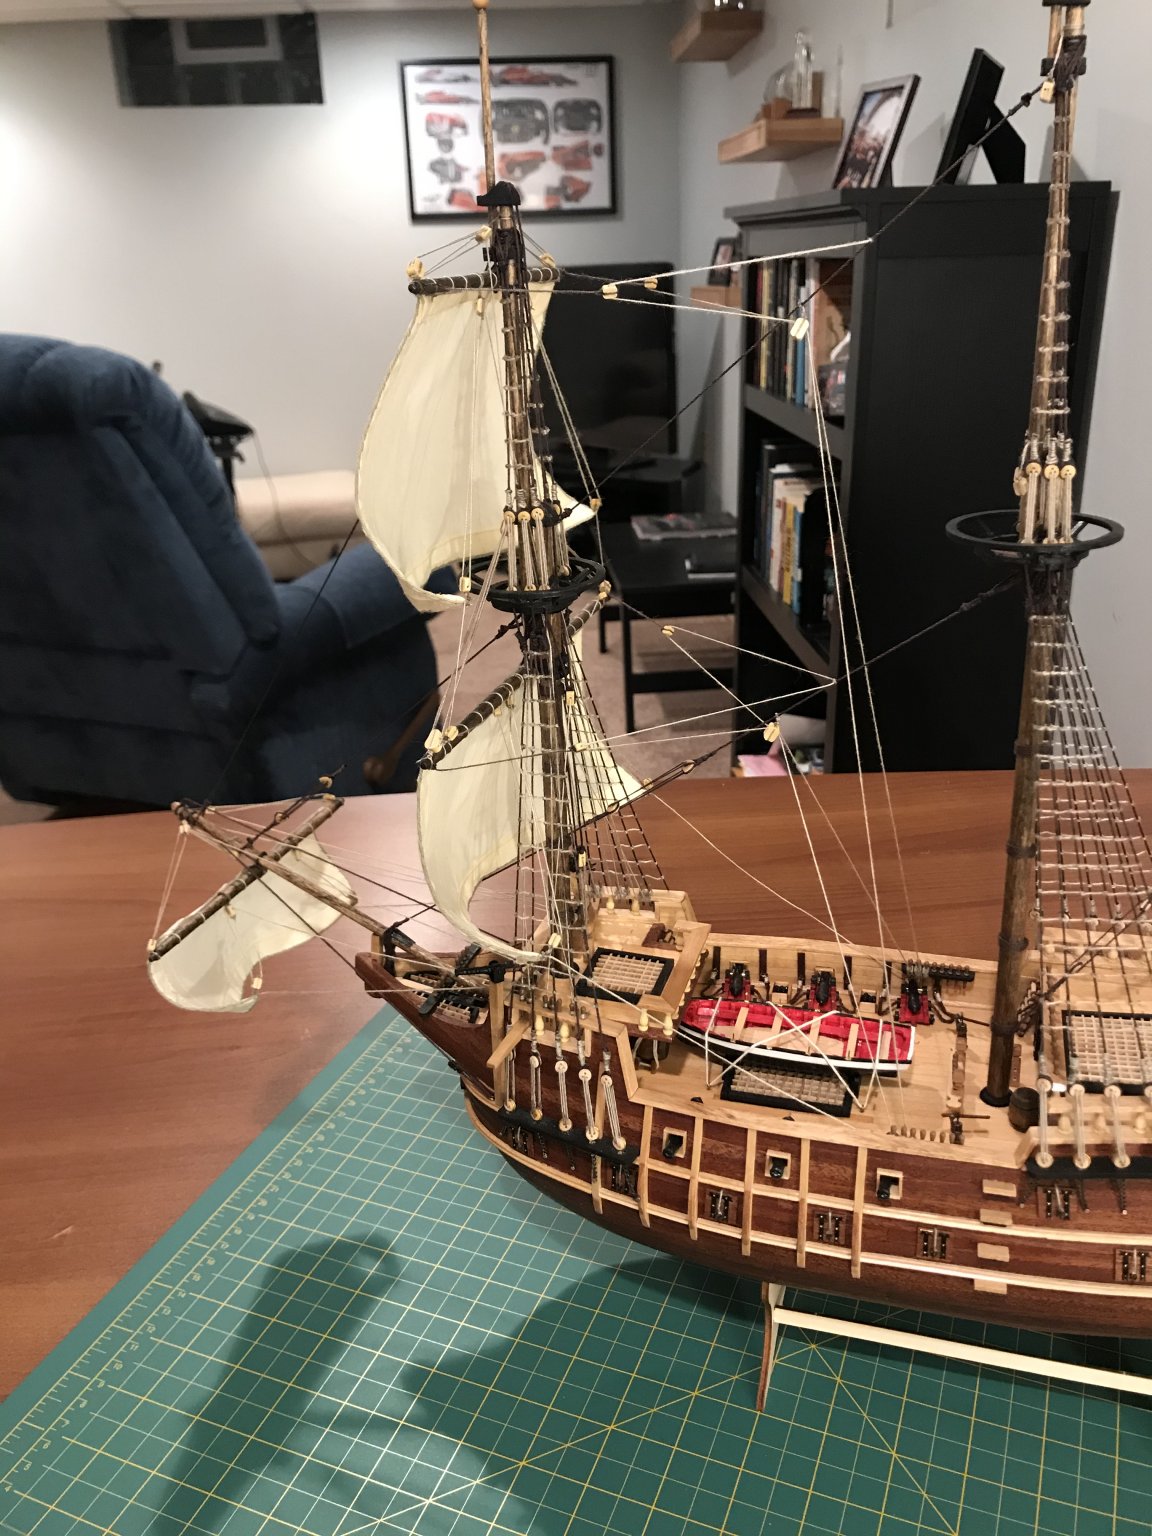
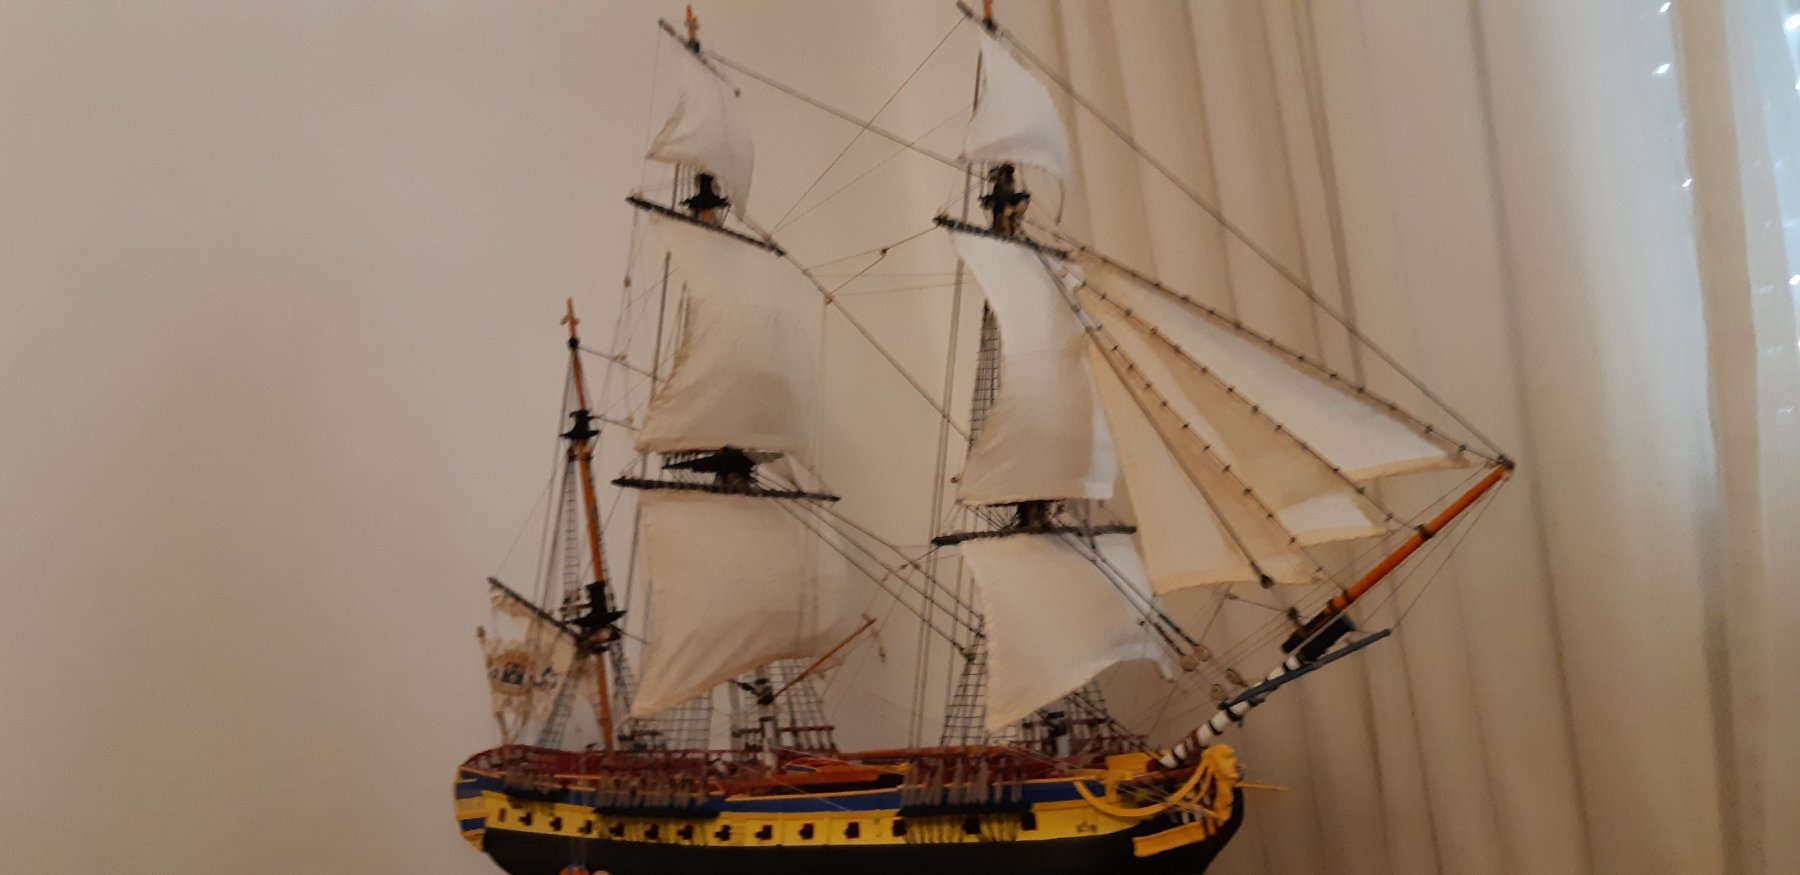
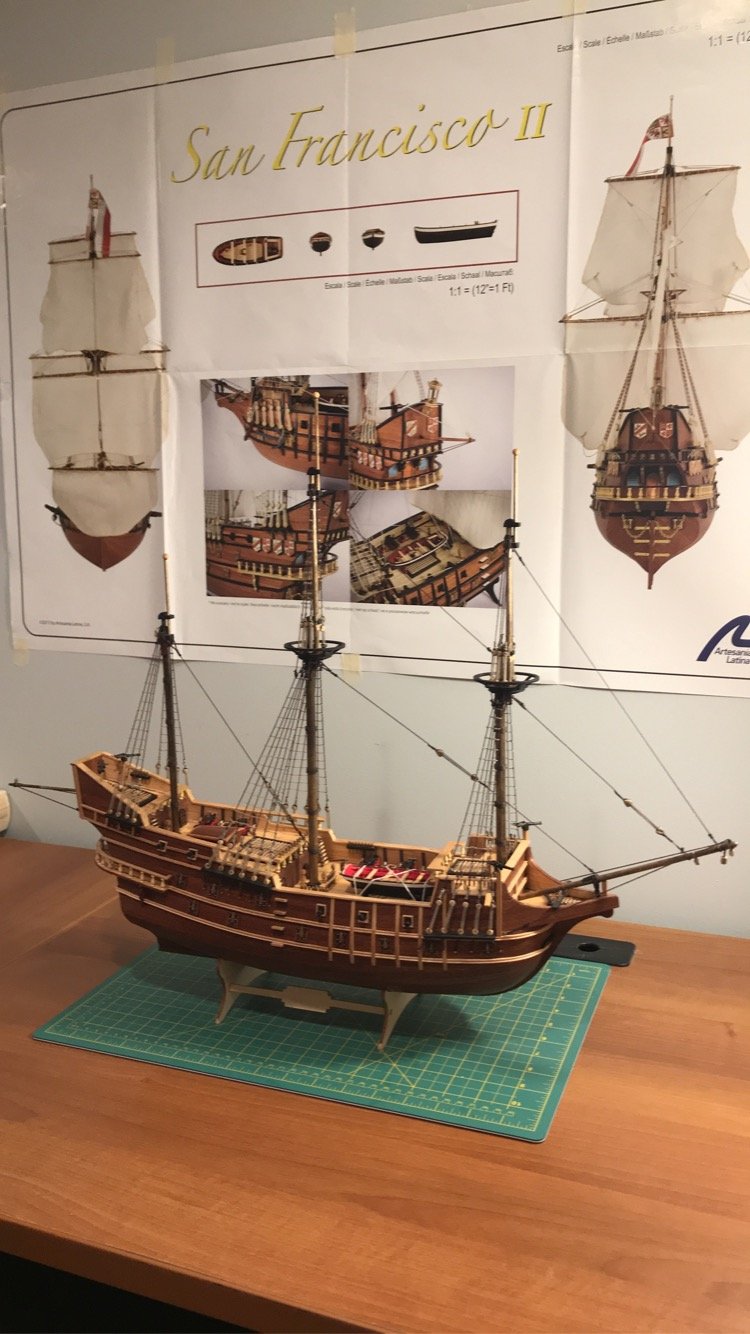
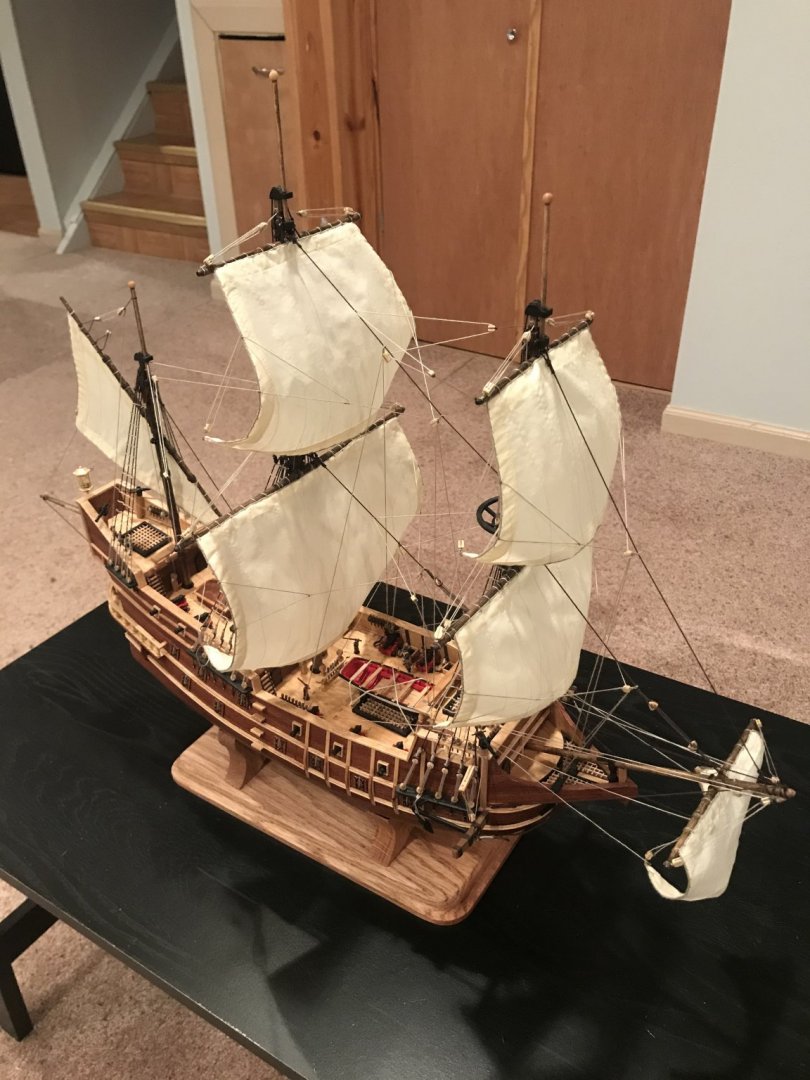
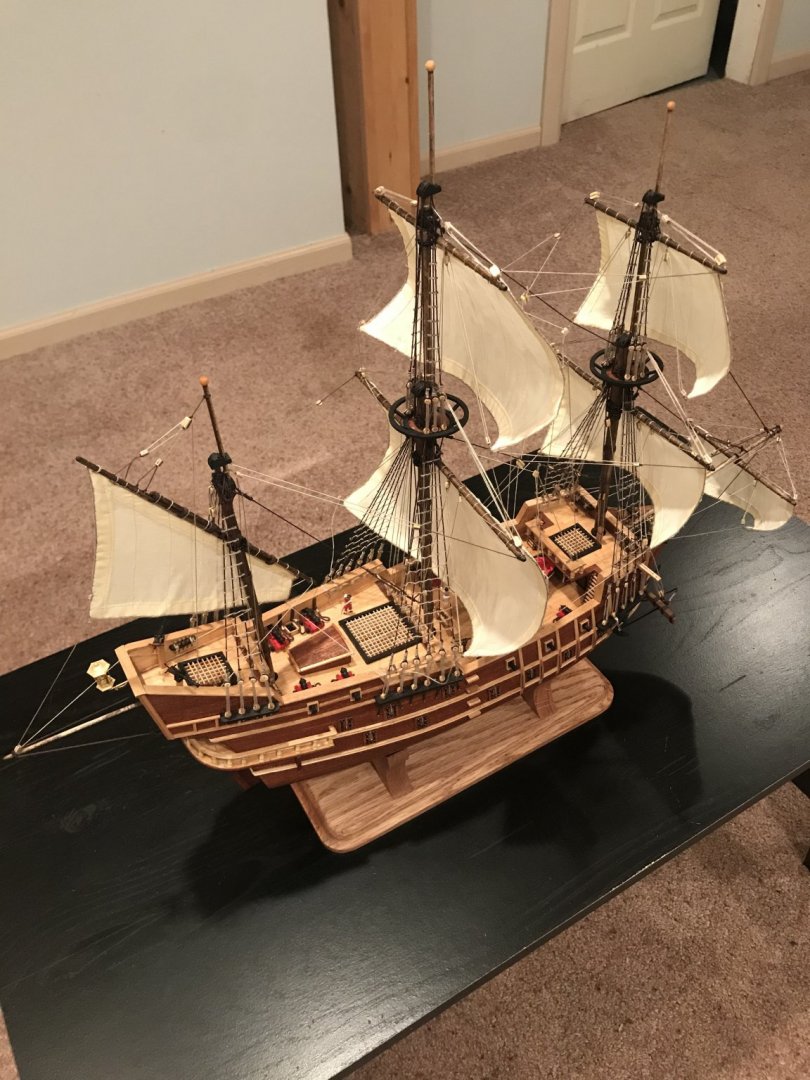
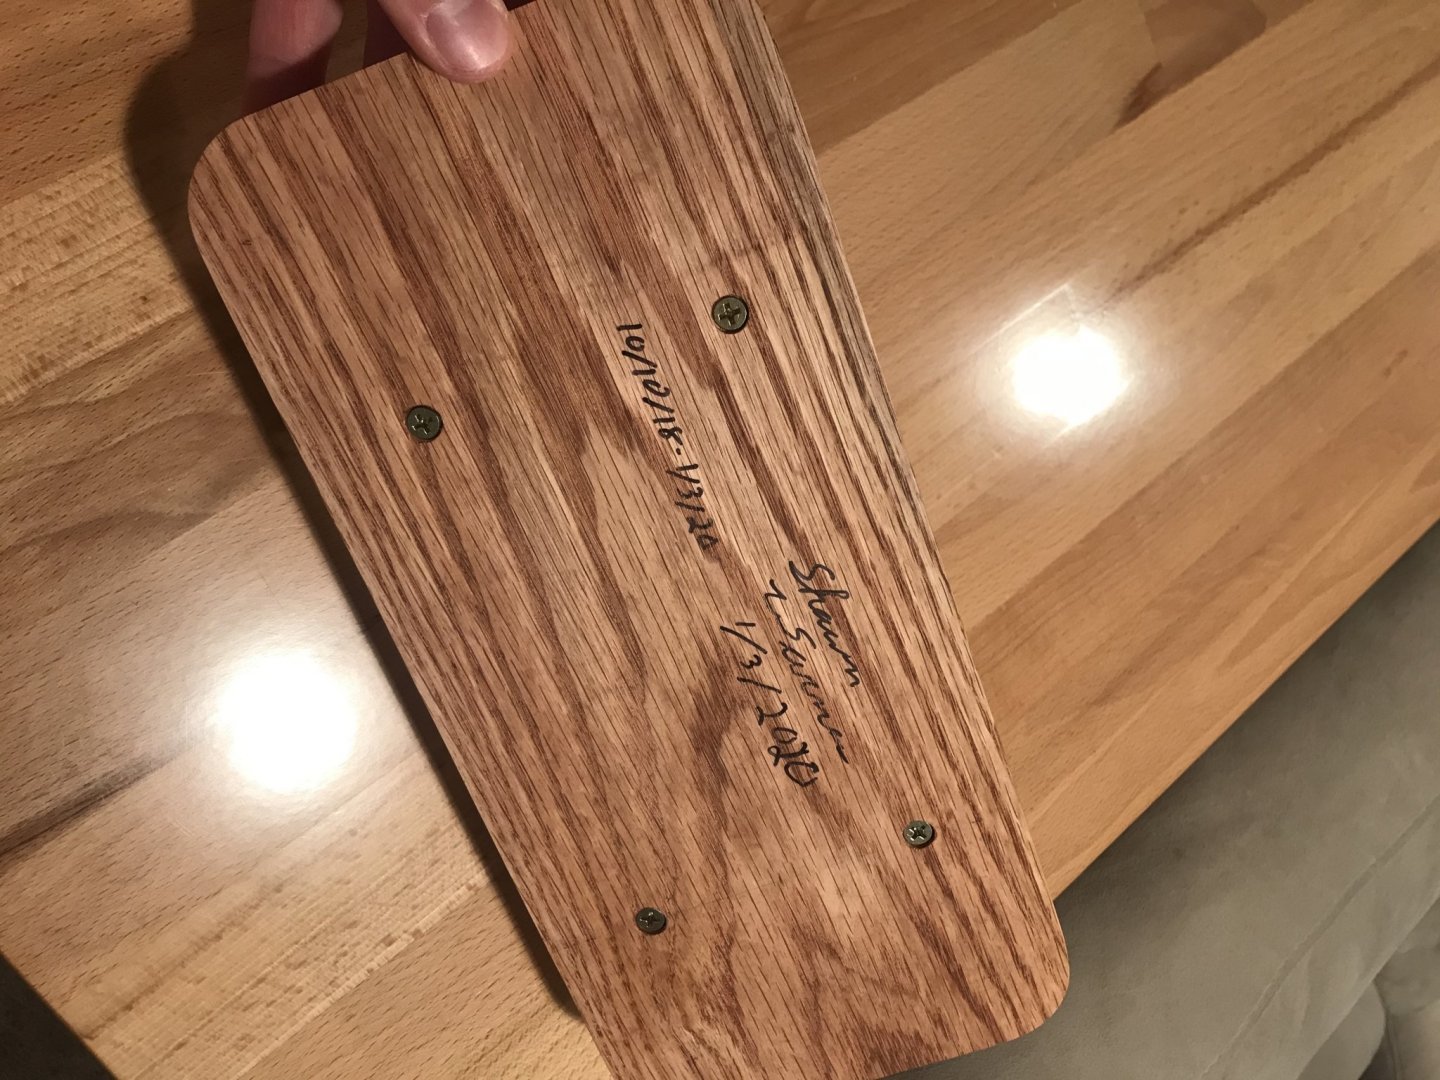
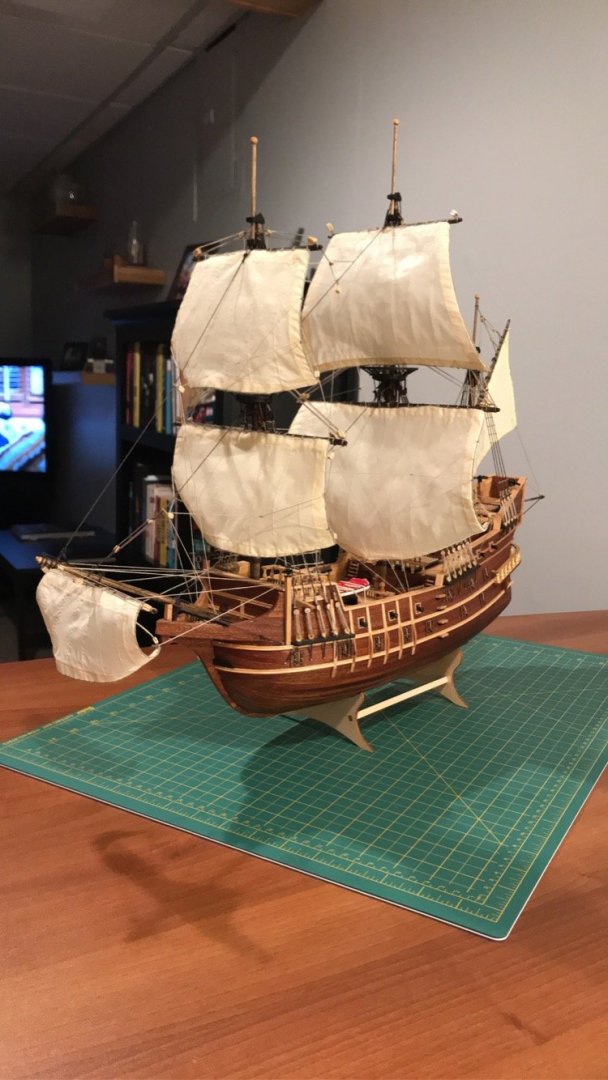
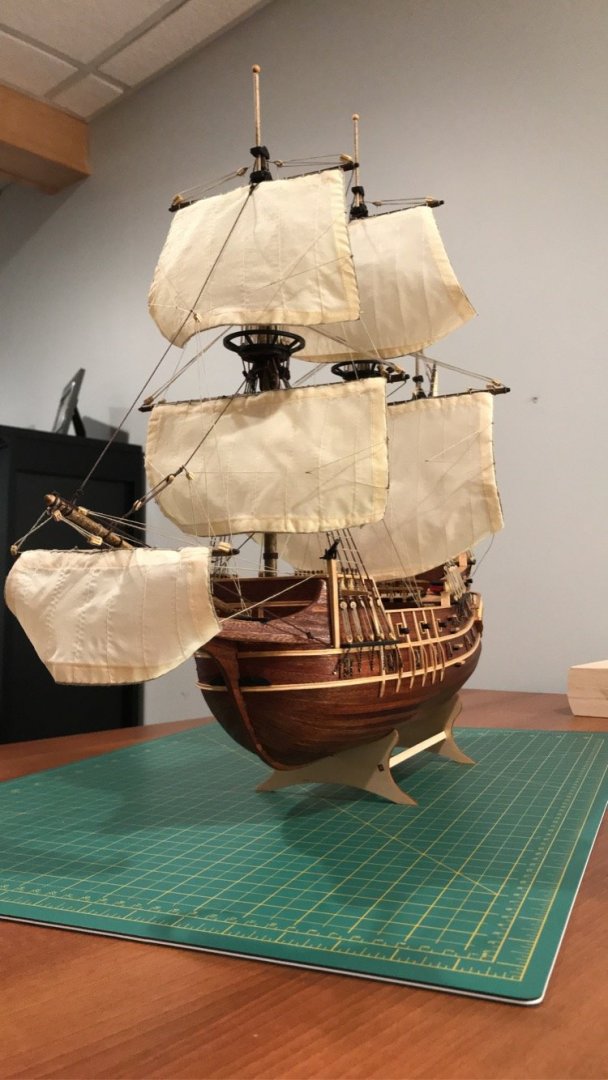
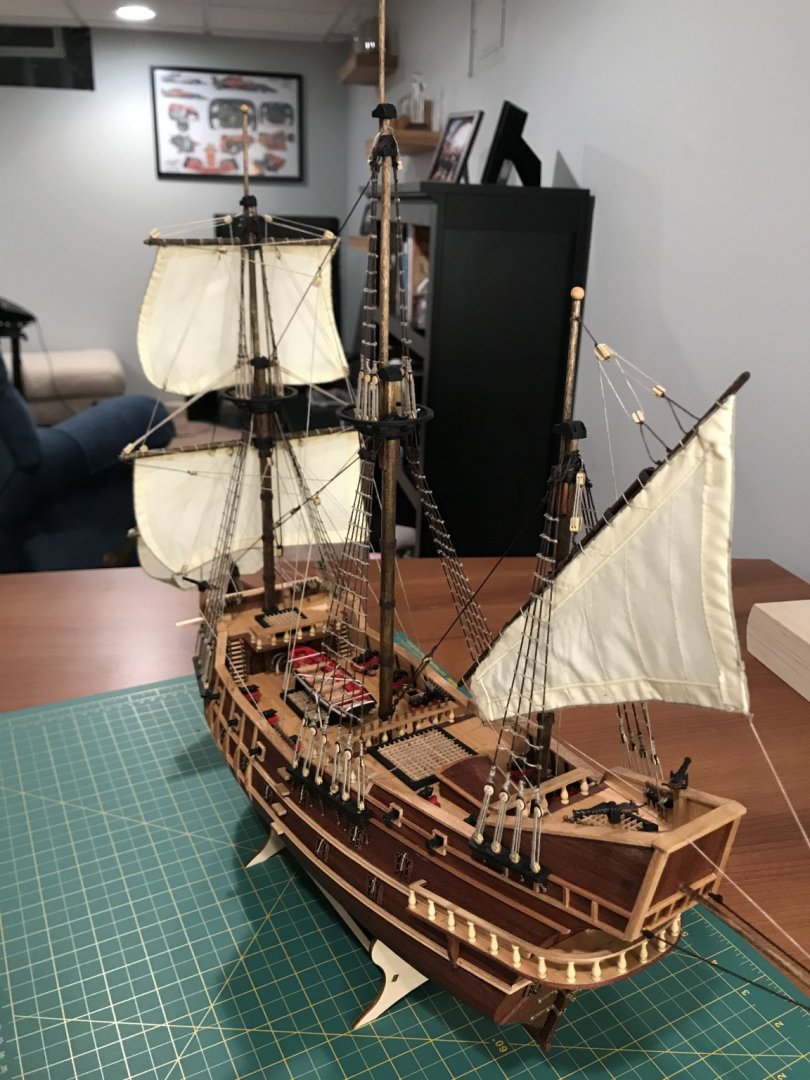
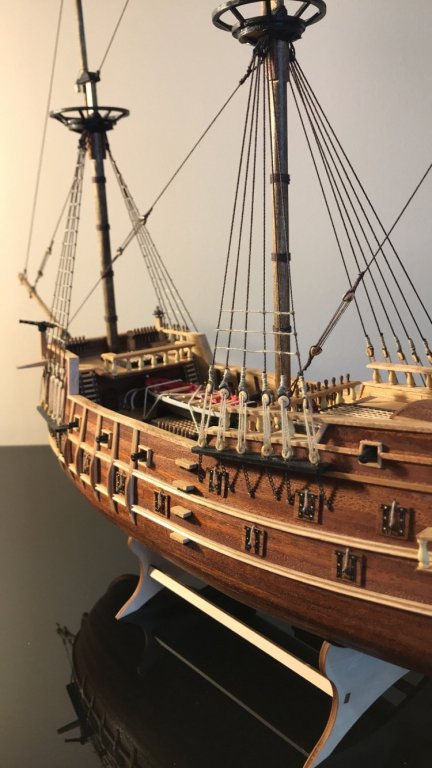
I still have to build the display case, which I will probably wait to start until it gets a little warmer outside. But the ship itself is done! 10/11/2018 - 1/3/2020 approximately 500 hours. it sort of bummed me out that Artesania Latina closed its doors. I am fairly new to the model ship world but I really enjoyed building this model and numerous people have asked where to buy this specific one.


- 88 replies
-
- 5
-
-
- finished
- artesania latina
- (and 1 more)
-
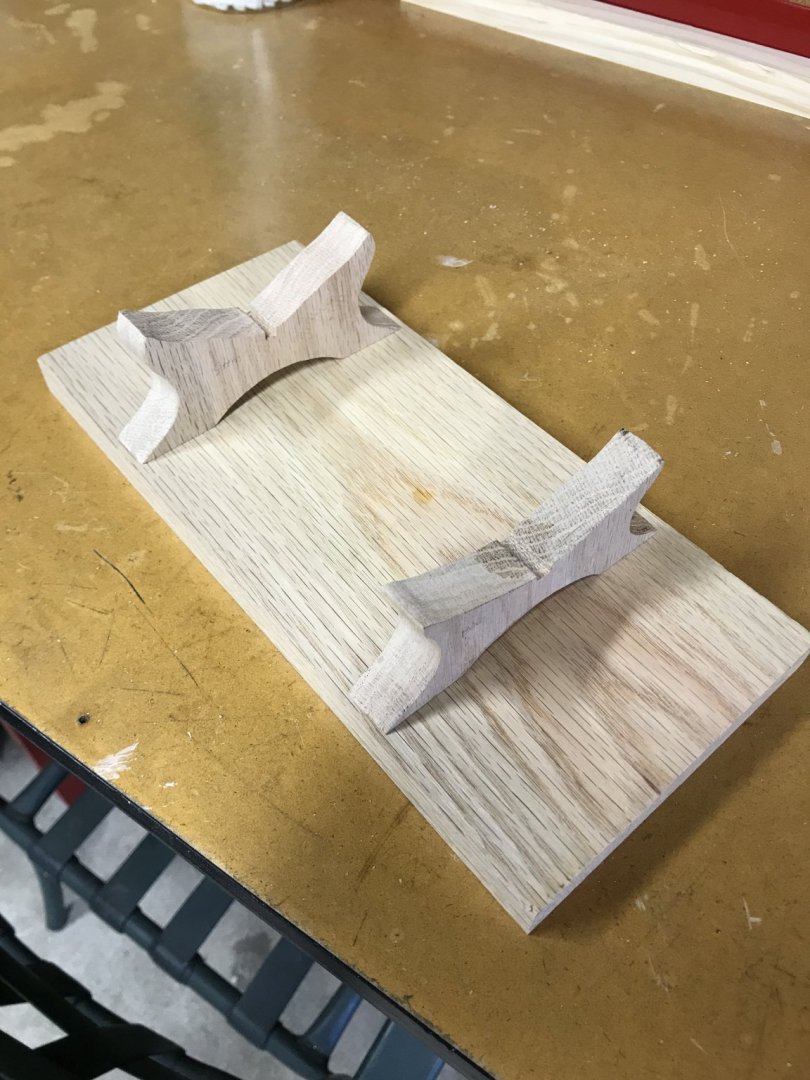
I decided to trash the stand that the model came with and make my own out of oak. I started with an oak board from Home Depot and finished with something that turned out much better than I expected


- 88 replies
-
- 1
-
-
- finished
- artesania latina
- (and 1 more)
-
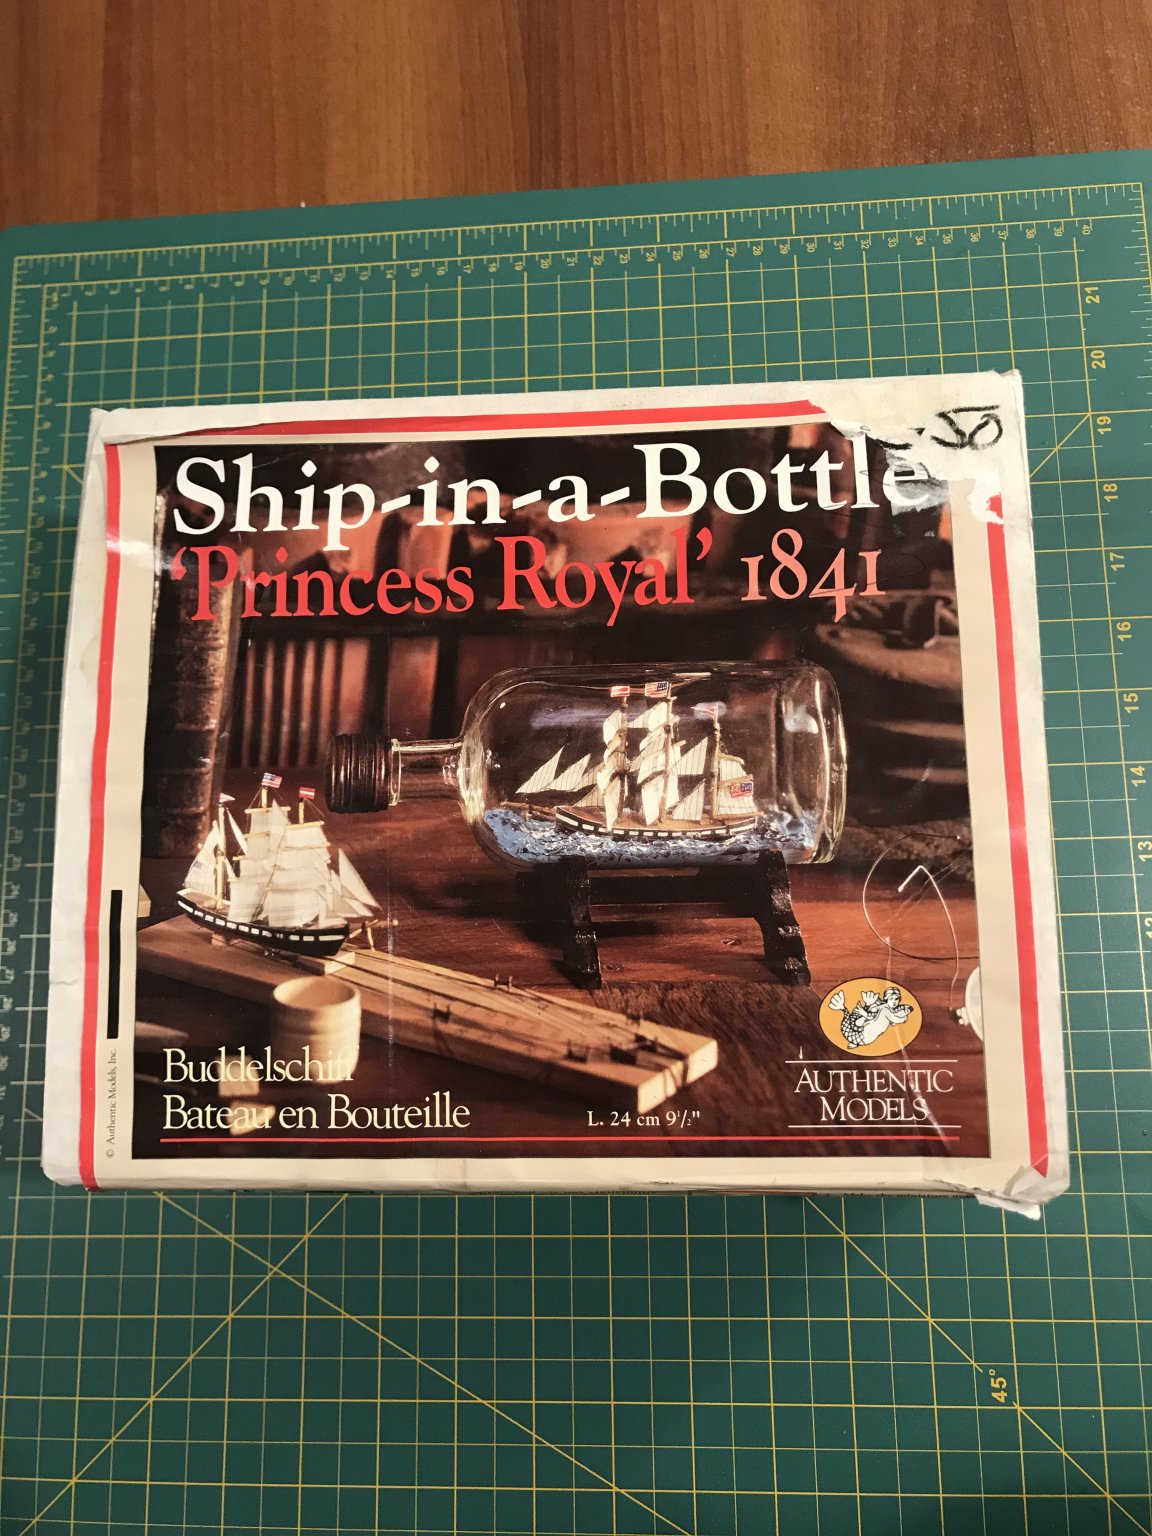
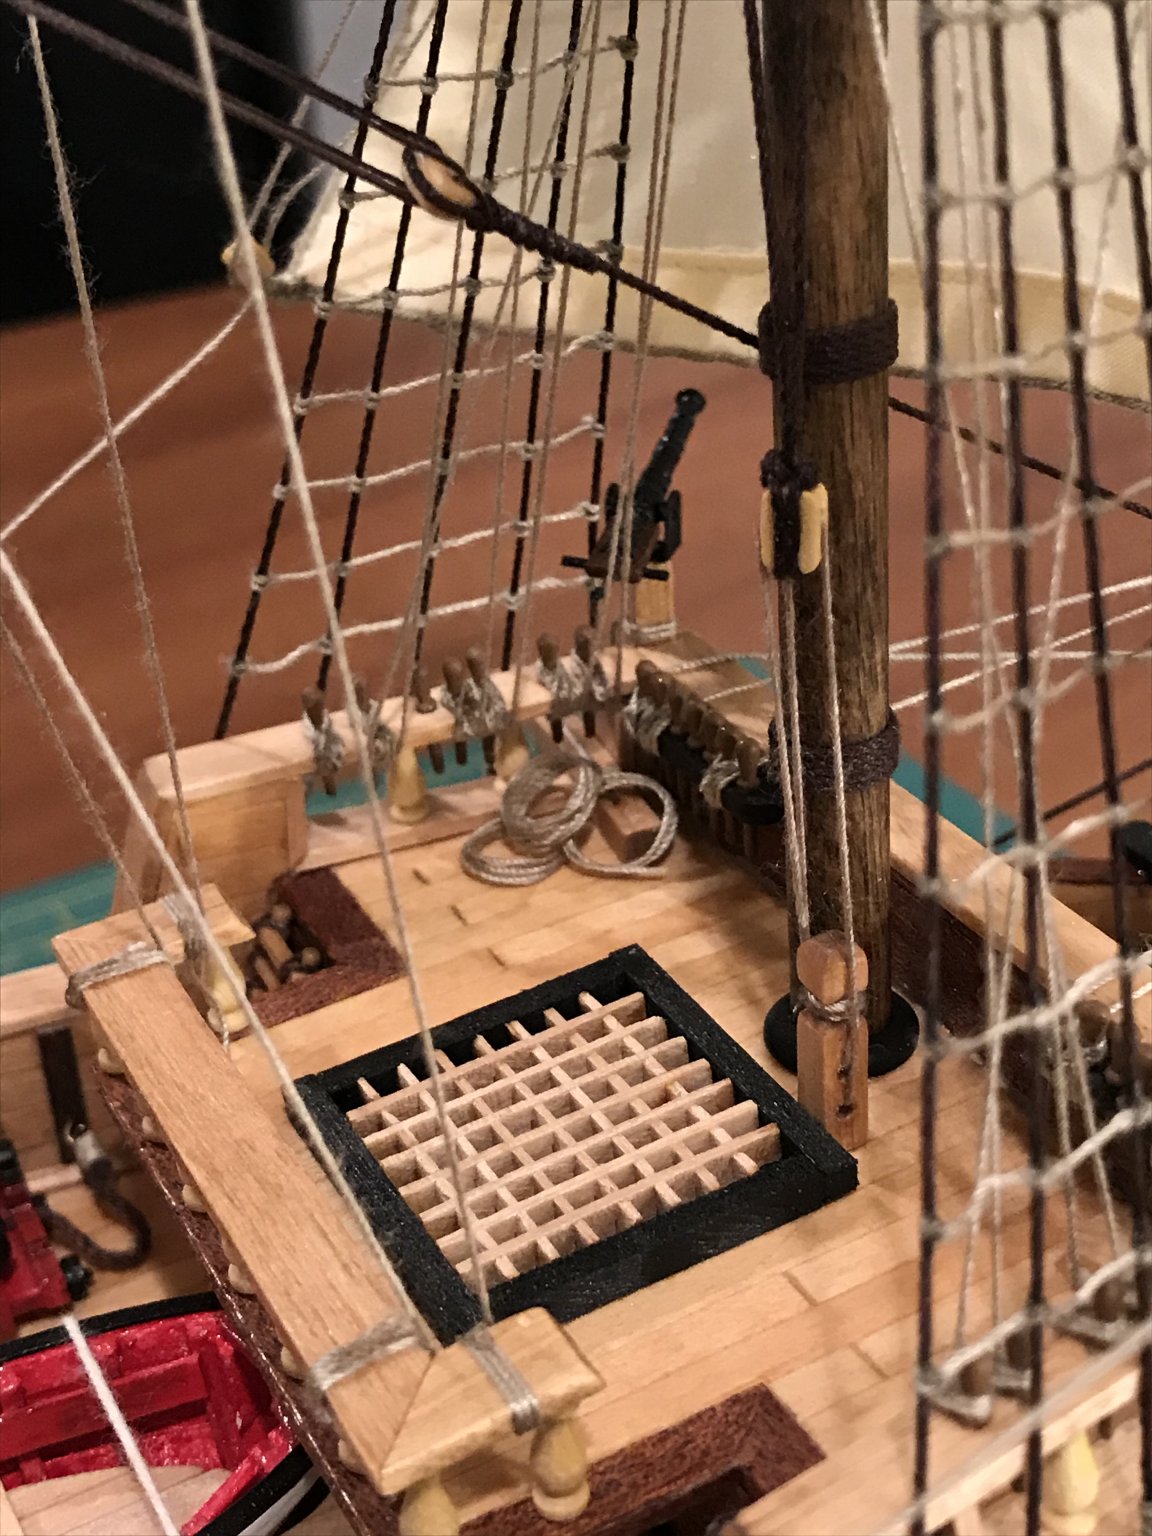
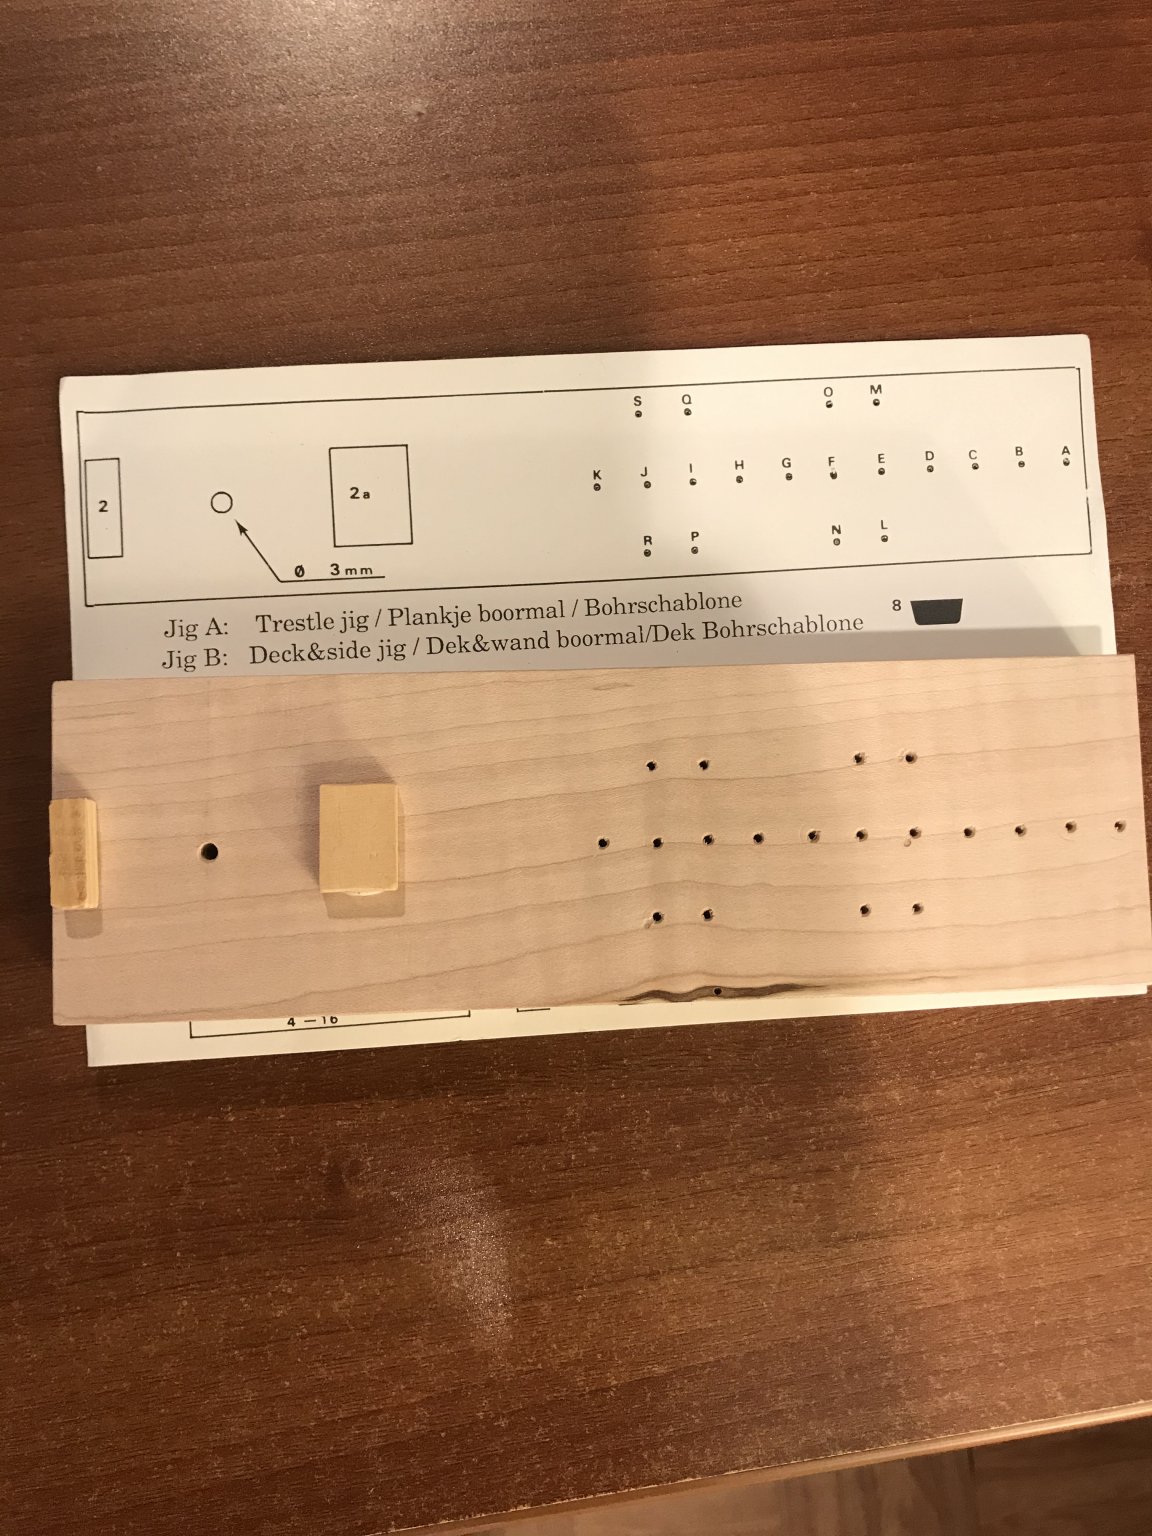
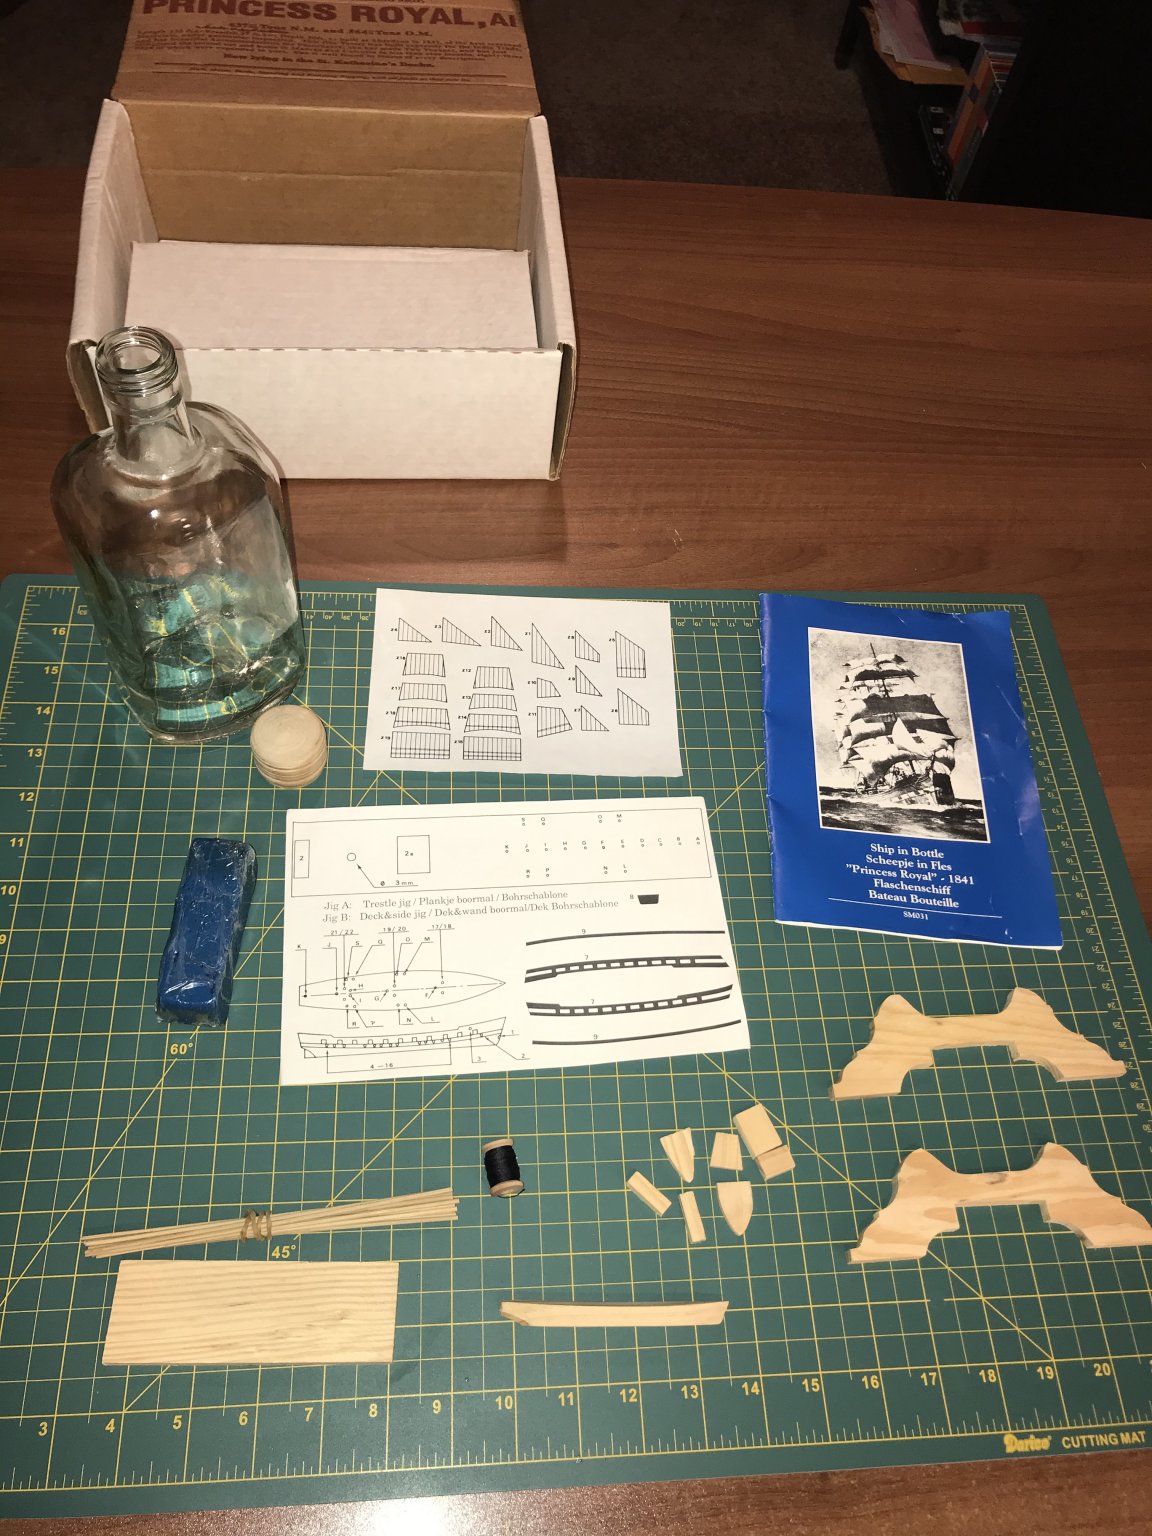
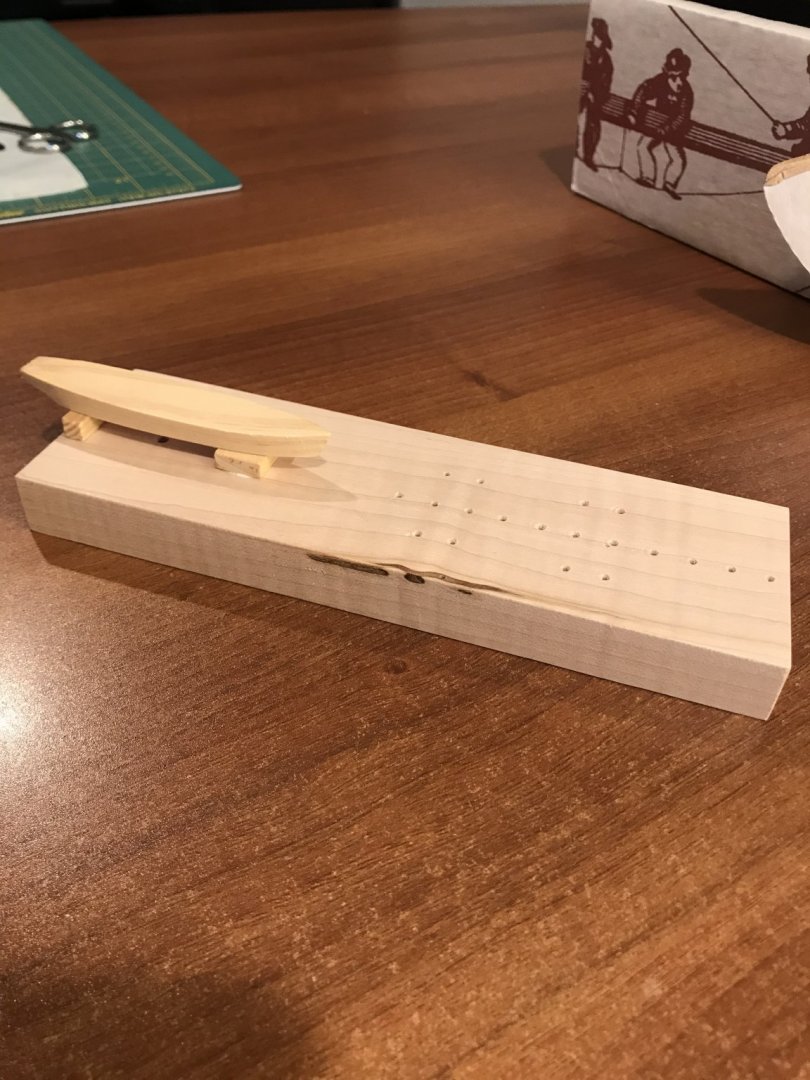
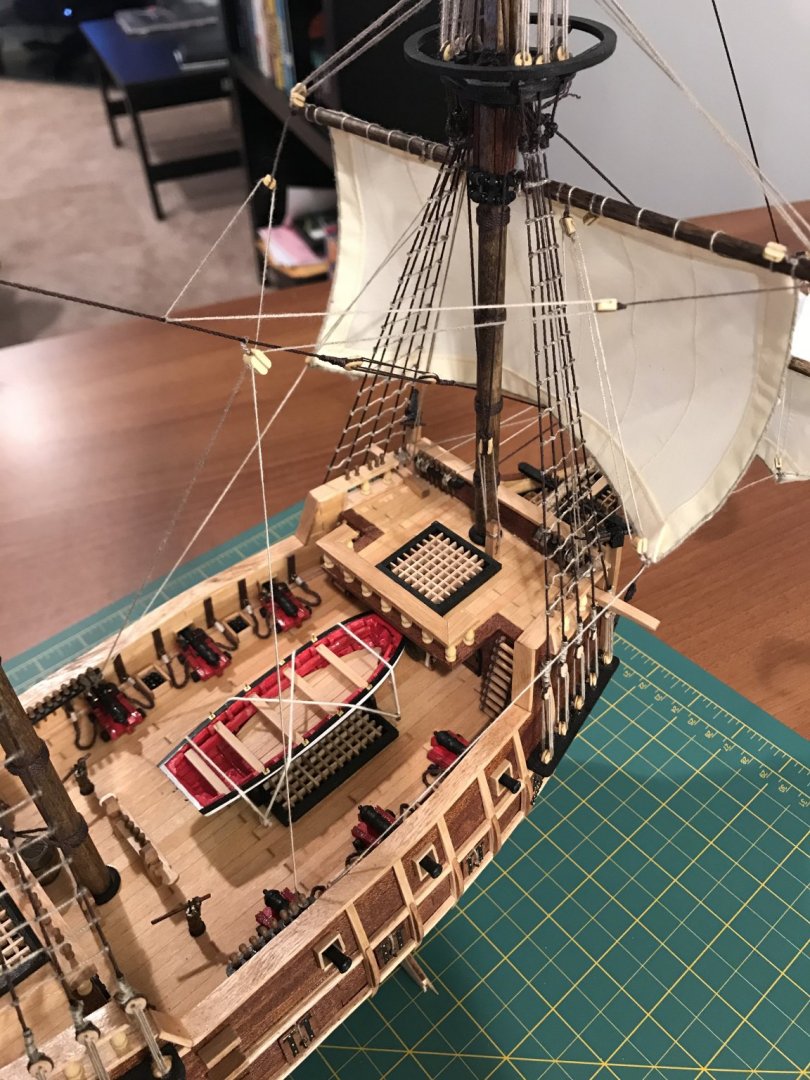
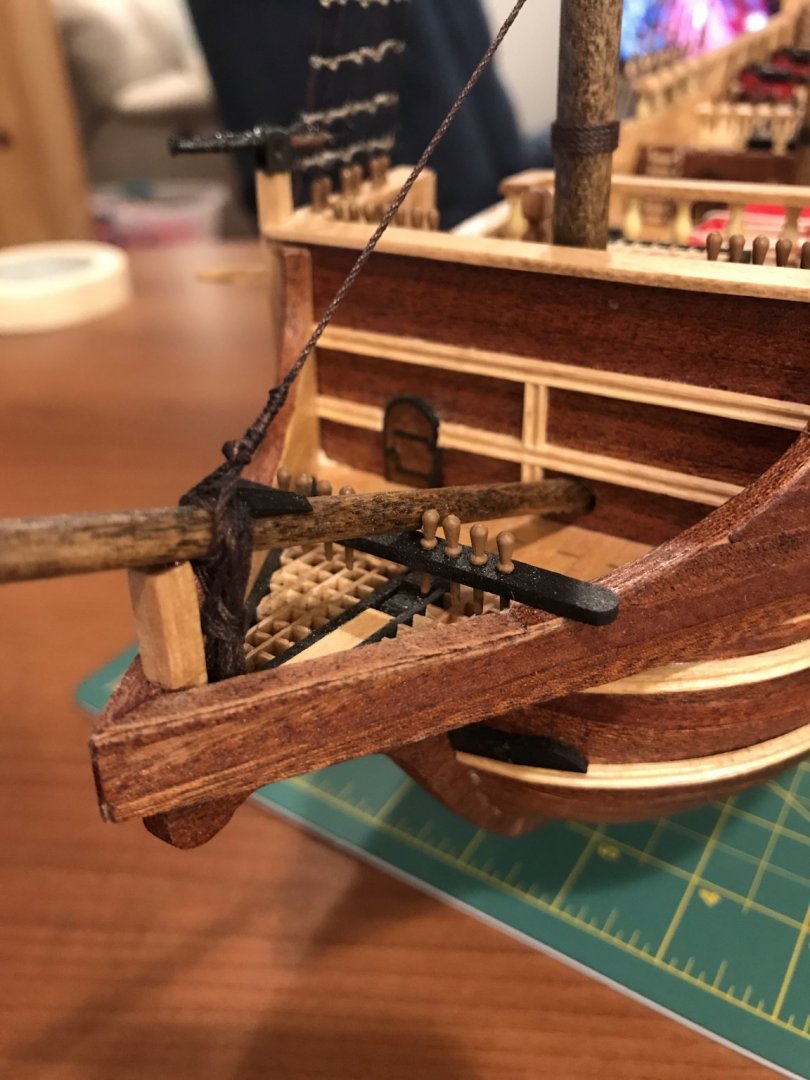
Today was my first day off of work for Christmas vacation so I got a little progress done on the jig that holds the ship while building it. While building the Amati it didn’t require anything like this, I’m intrigued to see how all of these holes will be utilized. next the fore and aft cabins will be fitted and glued. The kit comes with very crudely shaped wood so it will require a little filler and quite a bit of sanding


- 4 replies
-
- 2
-
-
- princess royal
- authentic models
- (and 1 more)
-
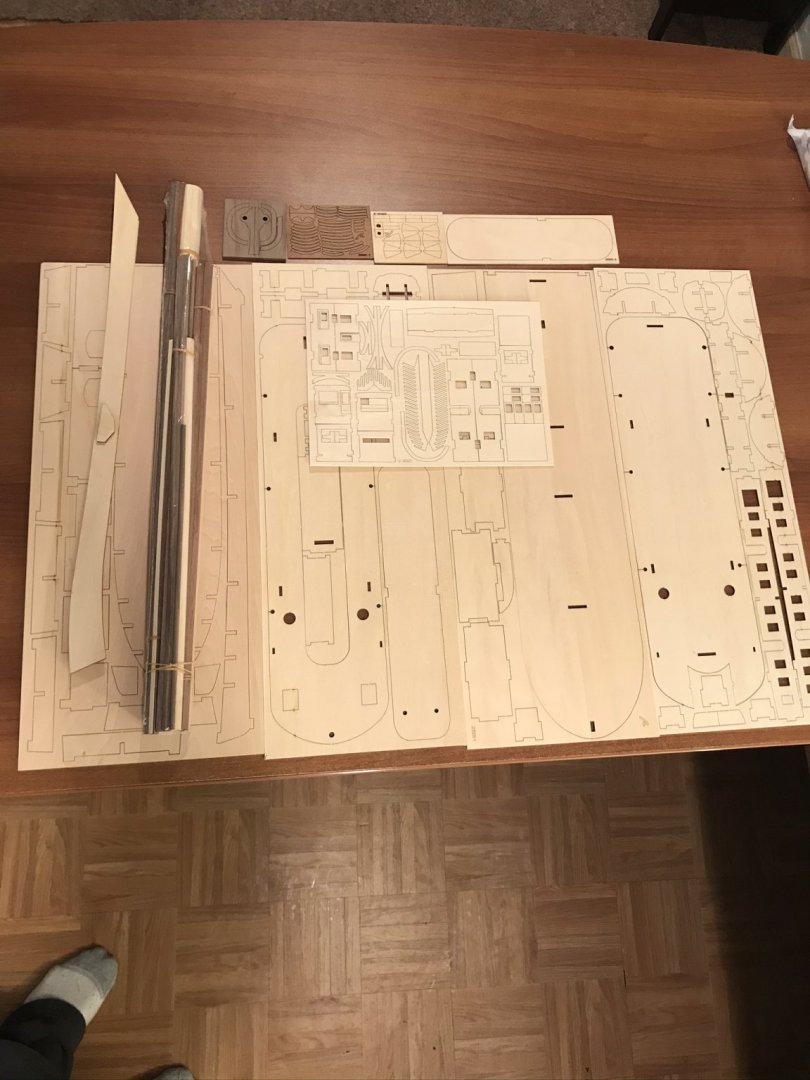
Well my San Francisco by Artesania Latina build is coming to an end, just working on the stand and display case now I decided to start planning for my next build. My first ship was the Golden Yacht bottle kit by Amati, I will say I enjoy the larger models more but about a year ago I came across this kit on eBay and purchased it. From what I can tell the kit itself was produced and sold in 1988 and stopped selling shortly after that. I have tried to research the kit and there is not much on out there on it. I was a bit skeptical purchasing something so old on eBay as the box was damaged in the picture, but from what I could tell it had never been opened. And when it arrived, it was clear that it wasn’t. All of the parts inside the box were still packed away and appeared to be in pristine condition. I have not started it yet, but I will soon.


- 4 replies
-
- 3
-
-
- princess royal
- authentic models
- (and 1 more)
-
thank you, and thank you to everyone else. Osmosis, did you see that Artesania has closed their doors for good? Website is down and everything
-
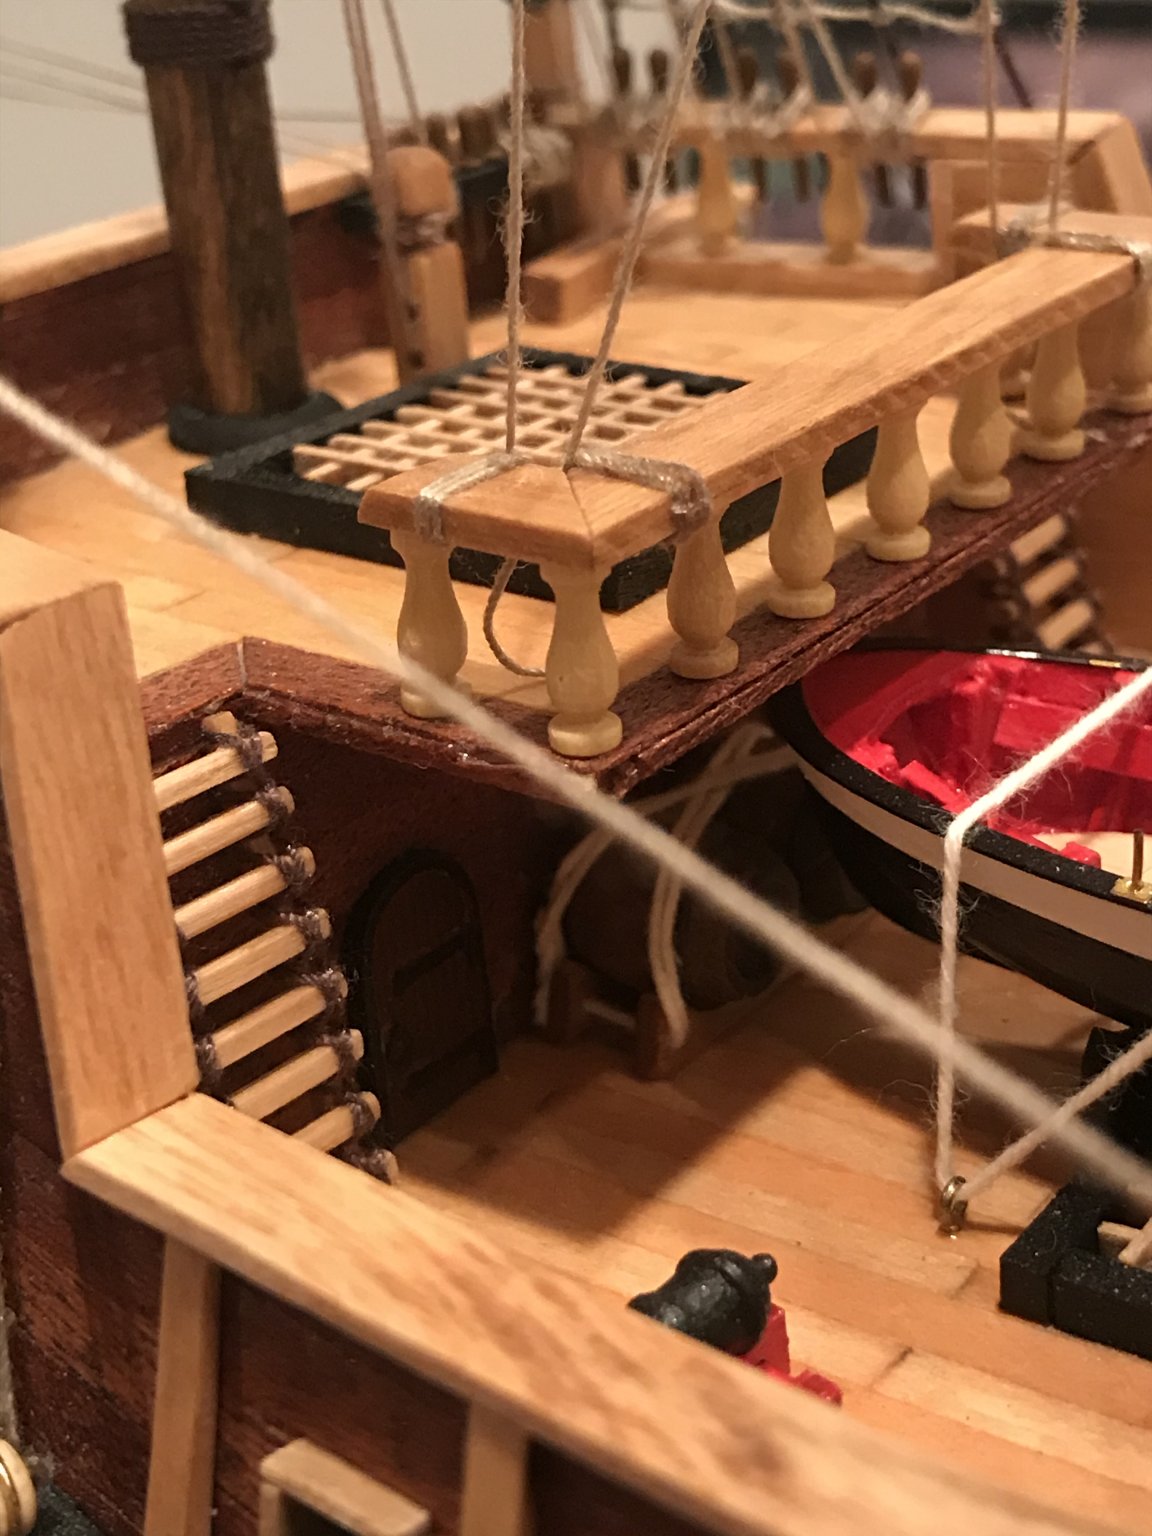
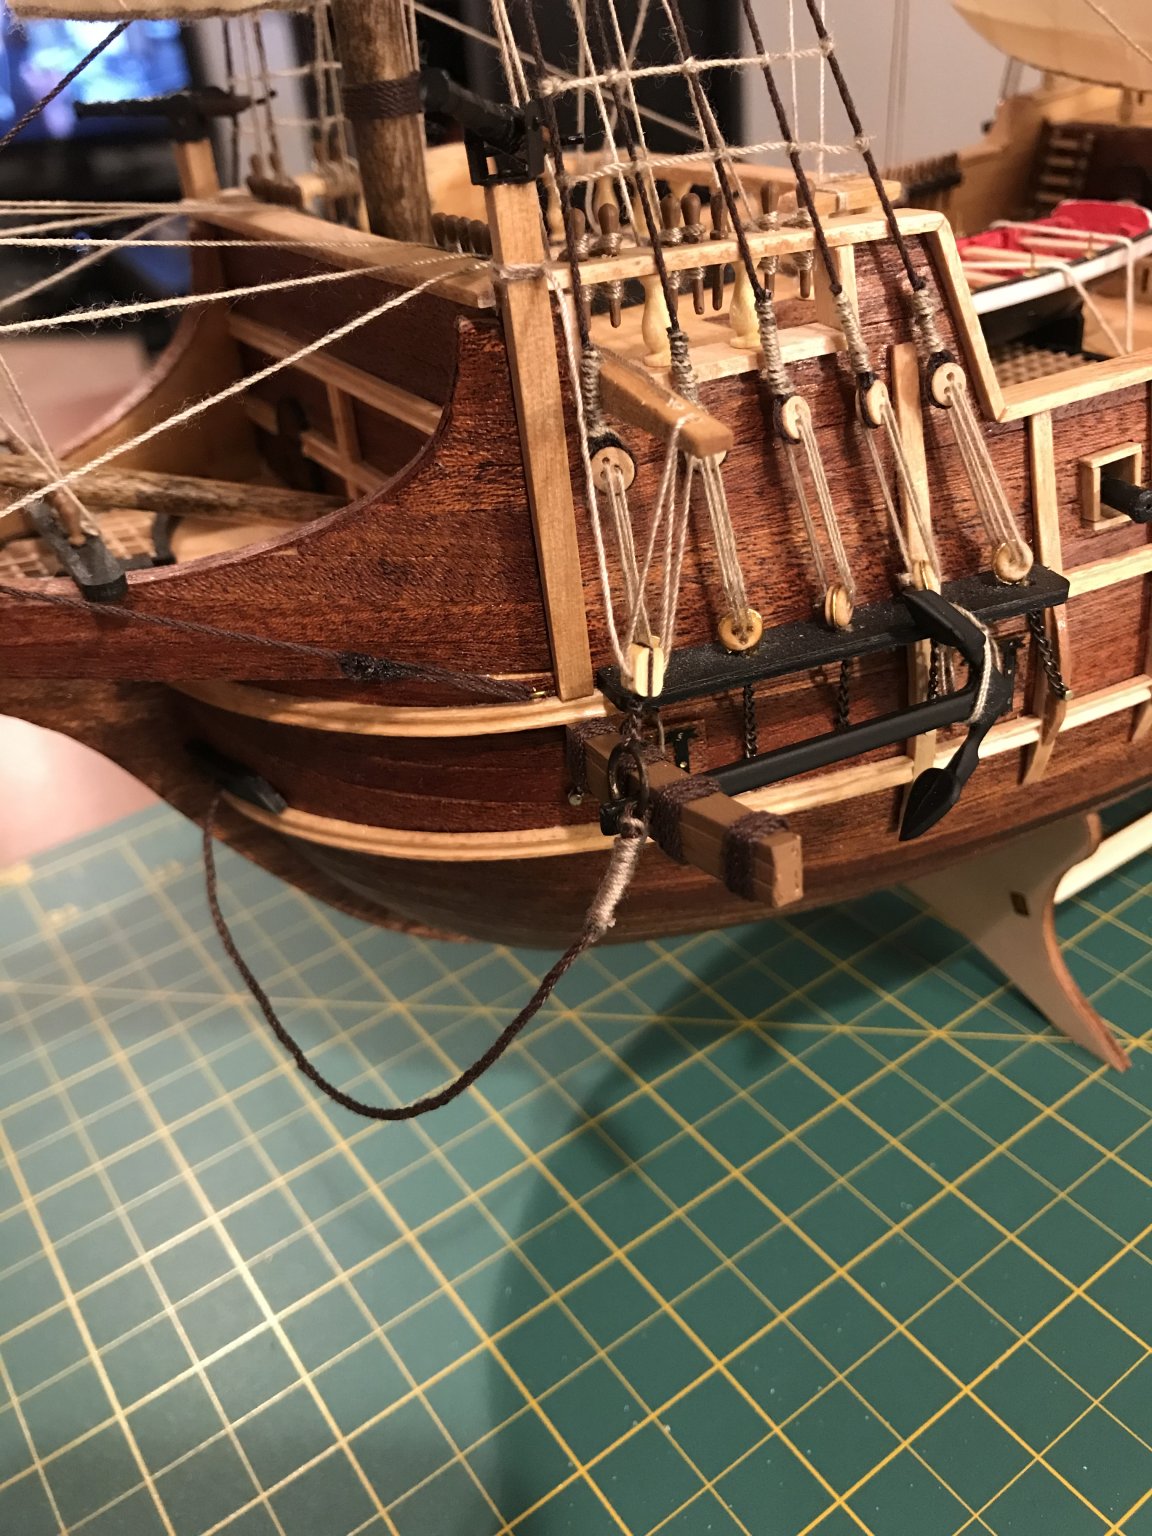
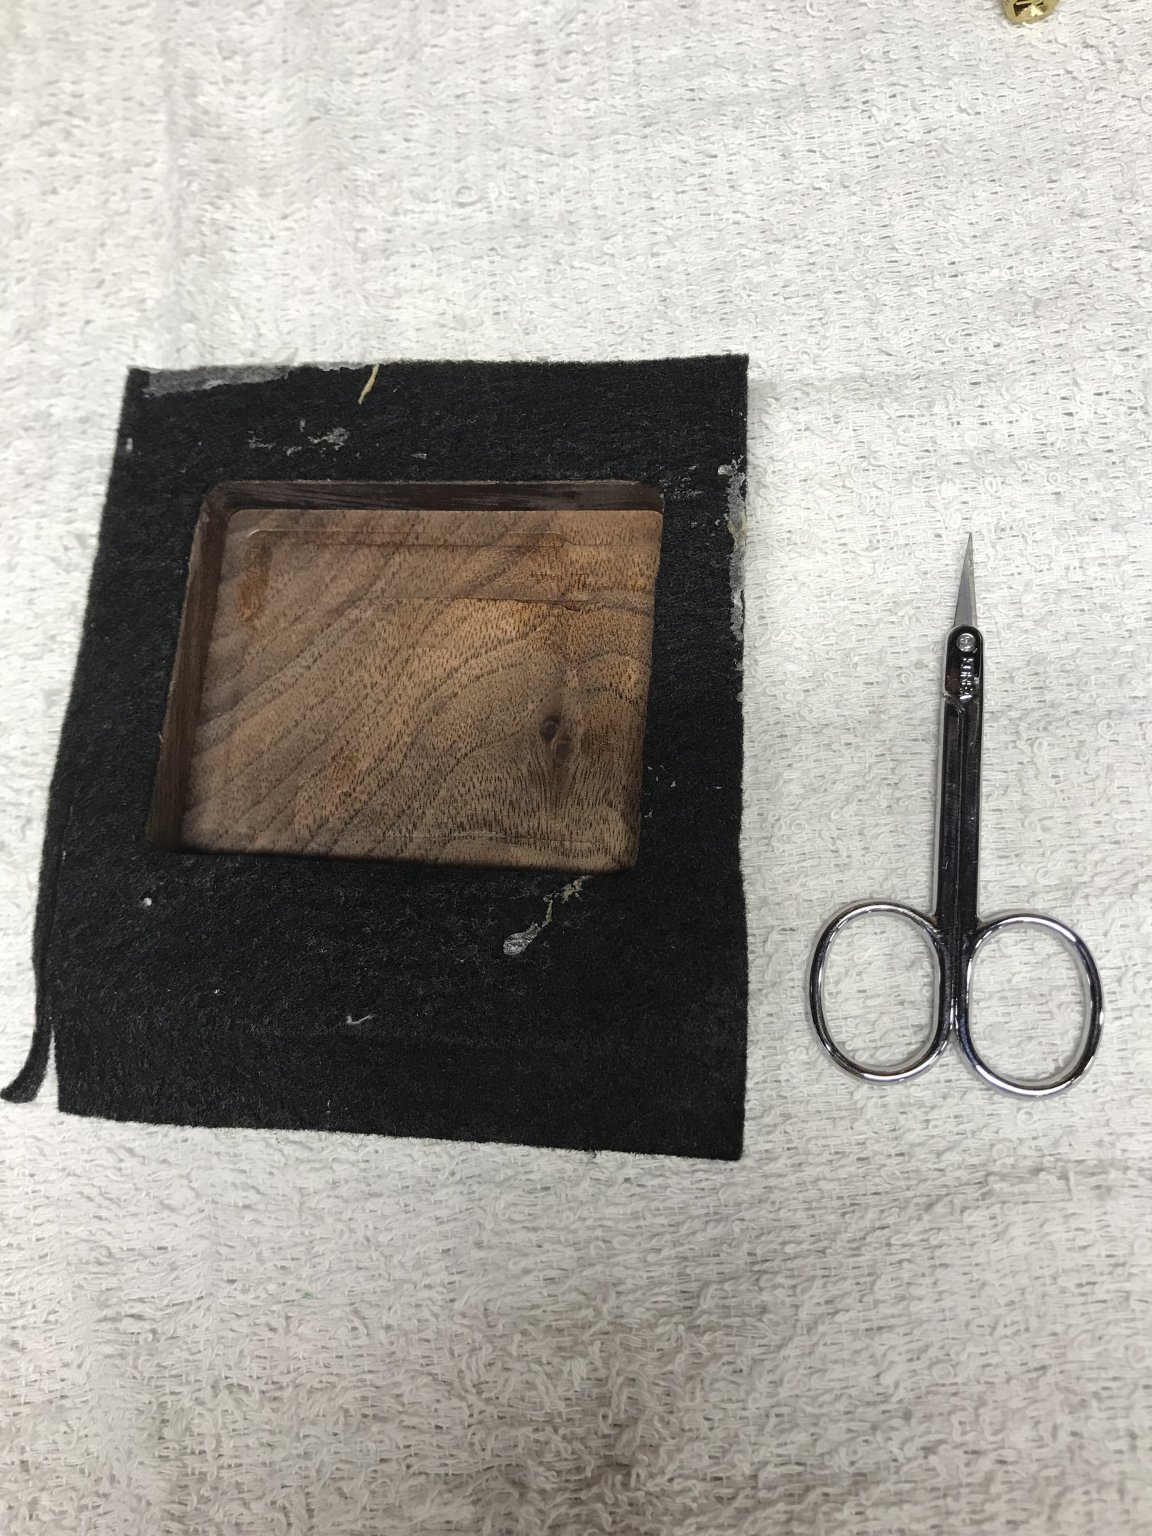
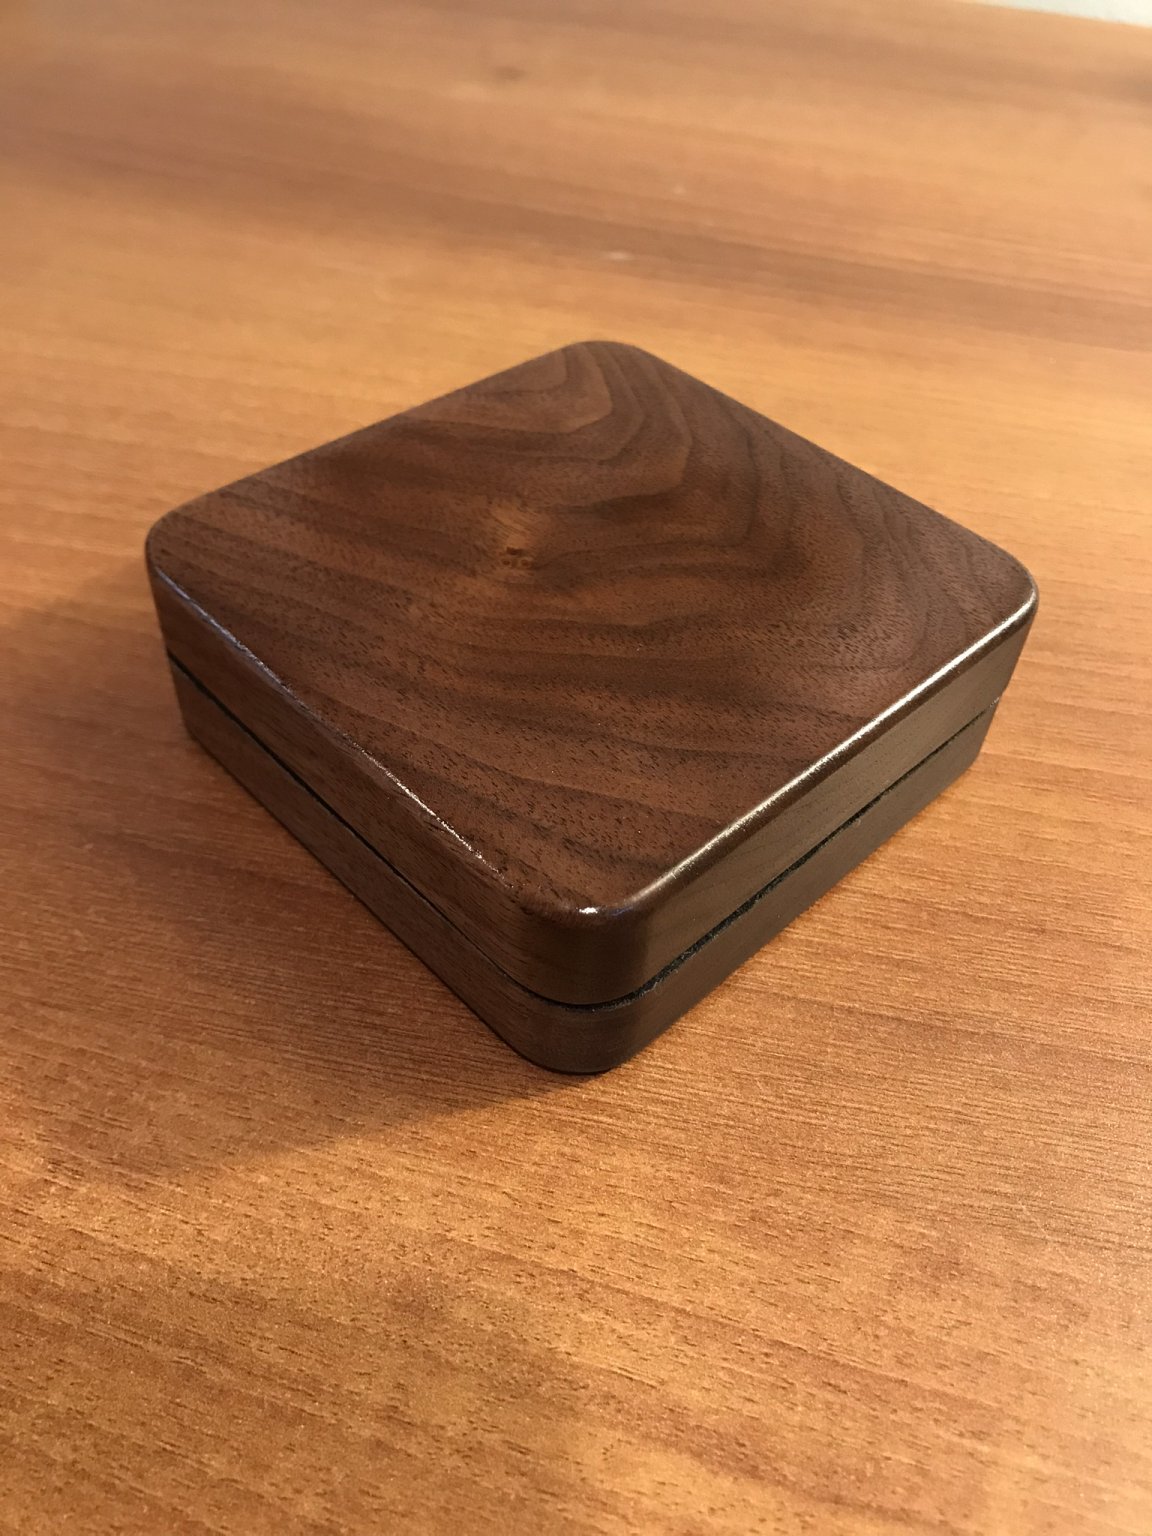
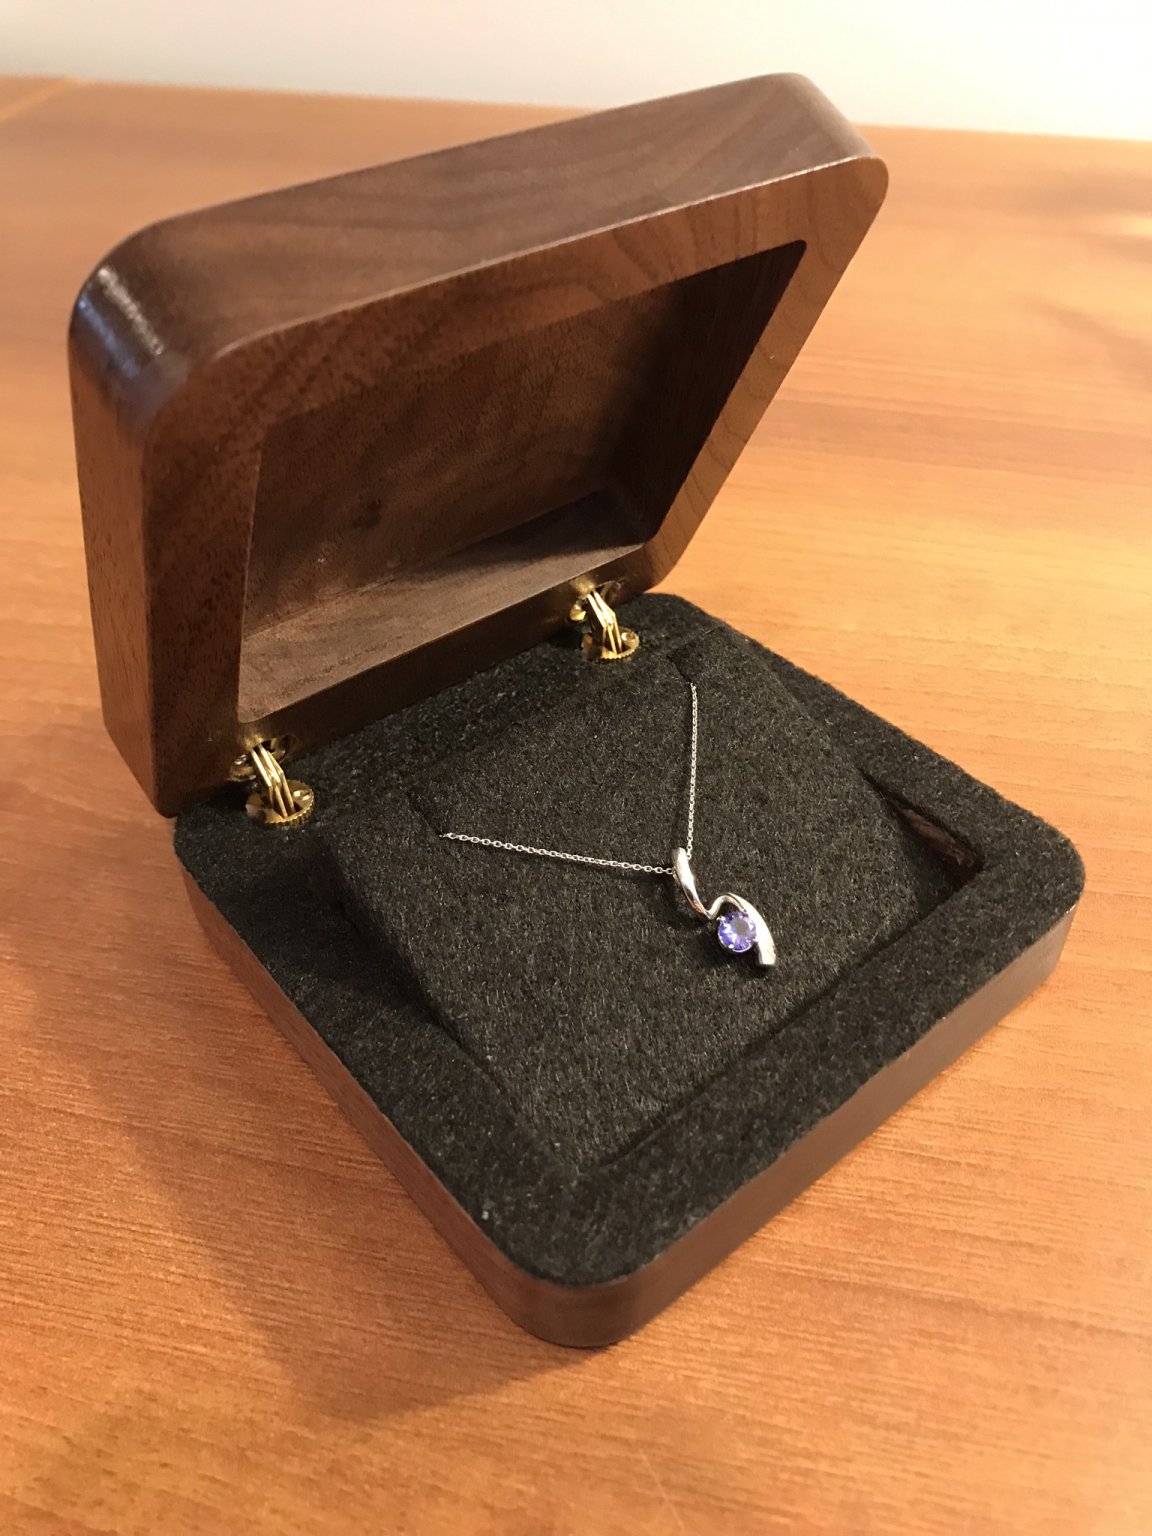
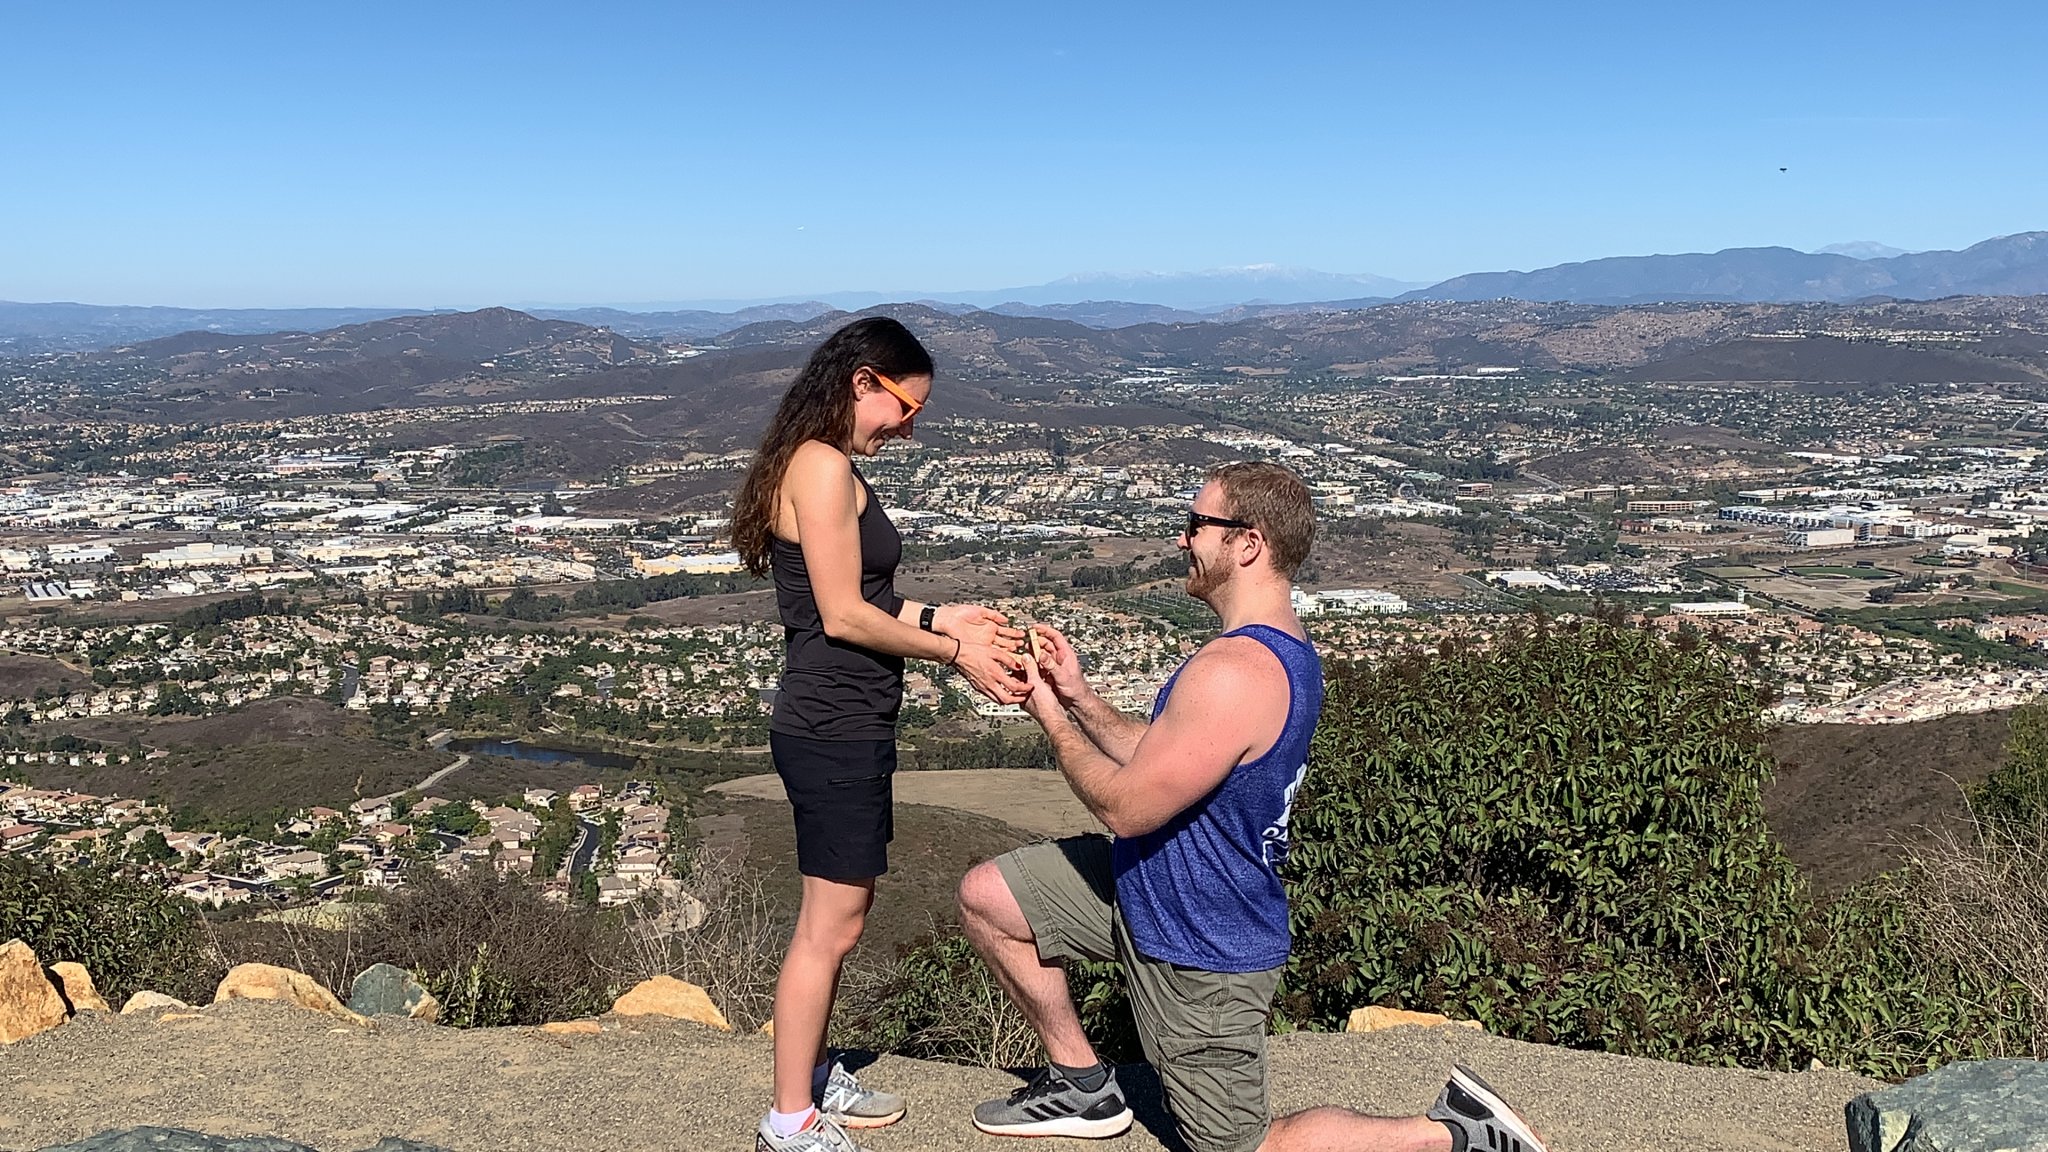
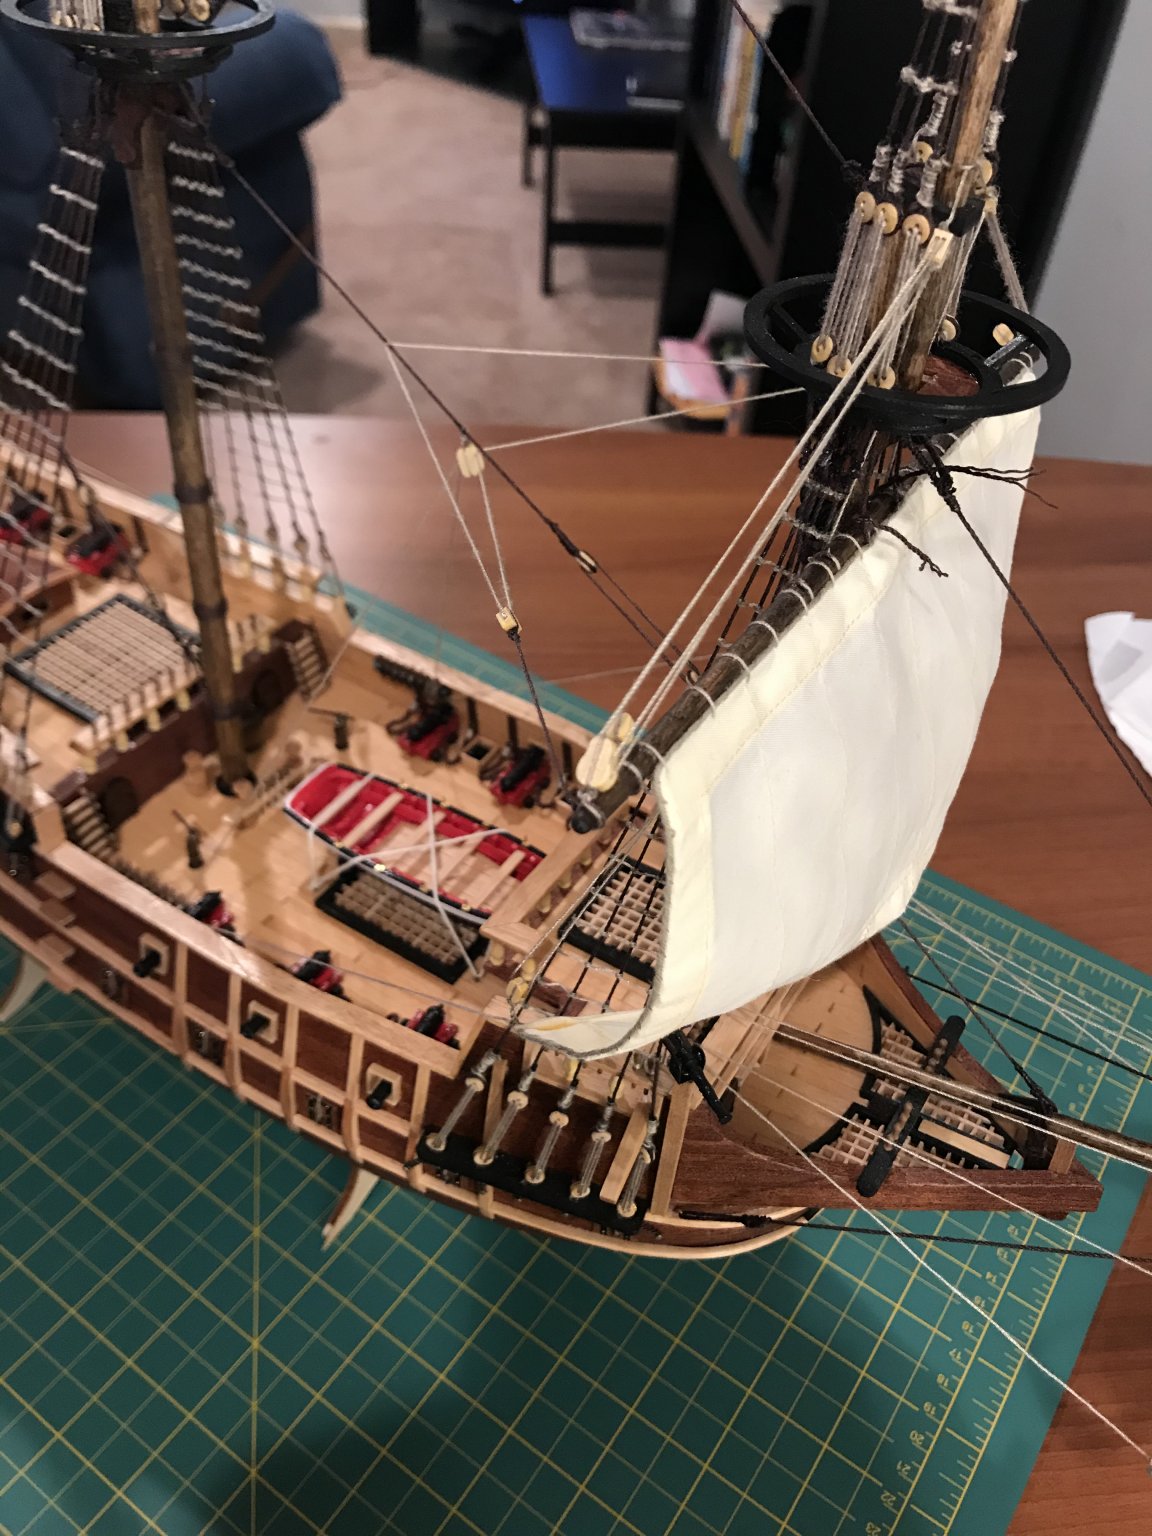
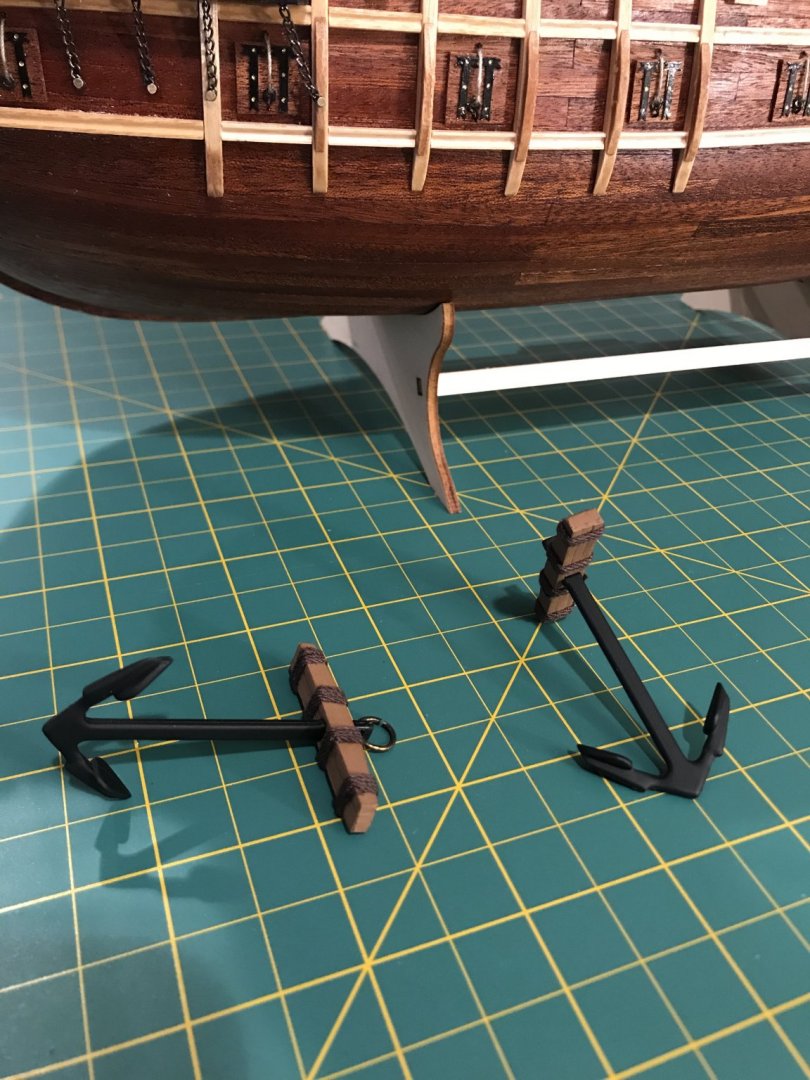
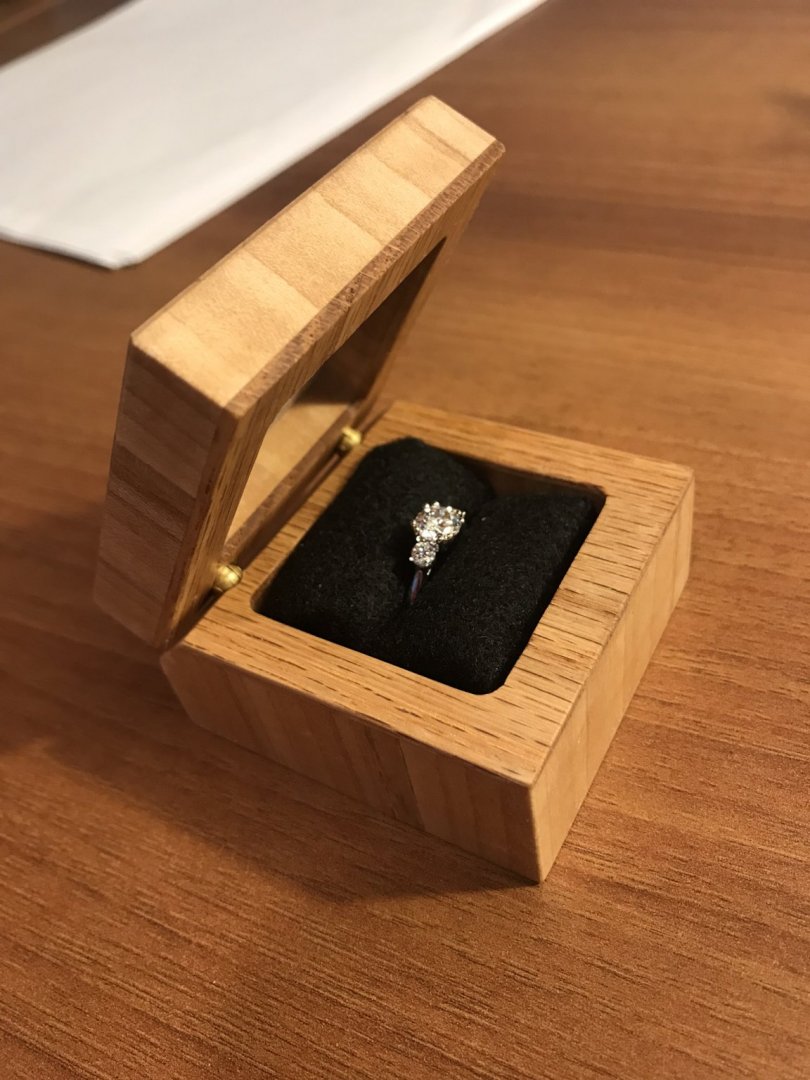
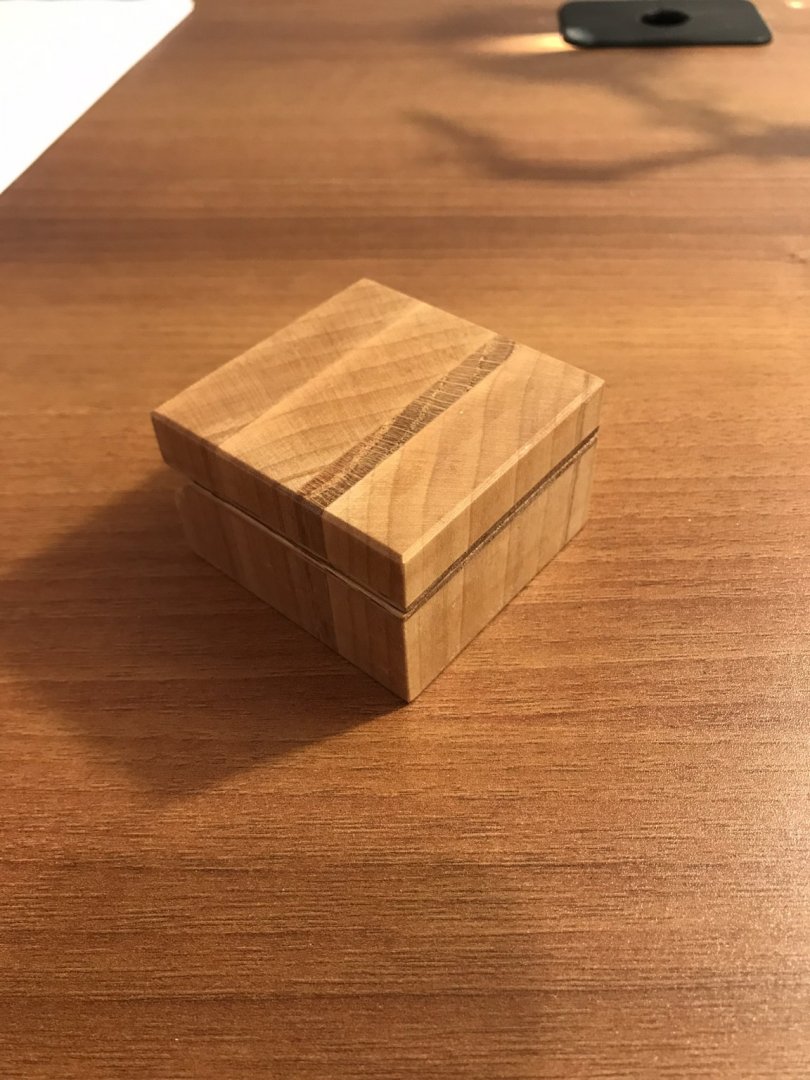
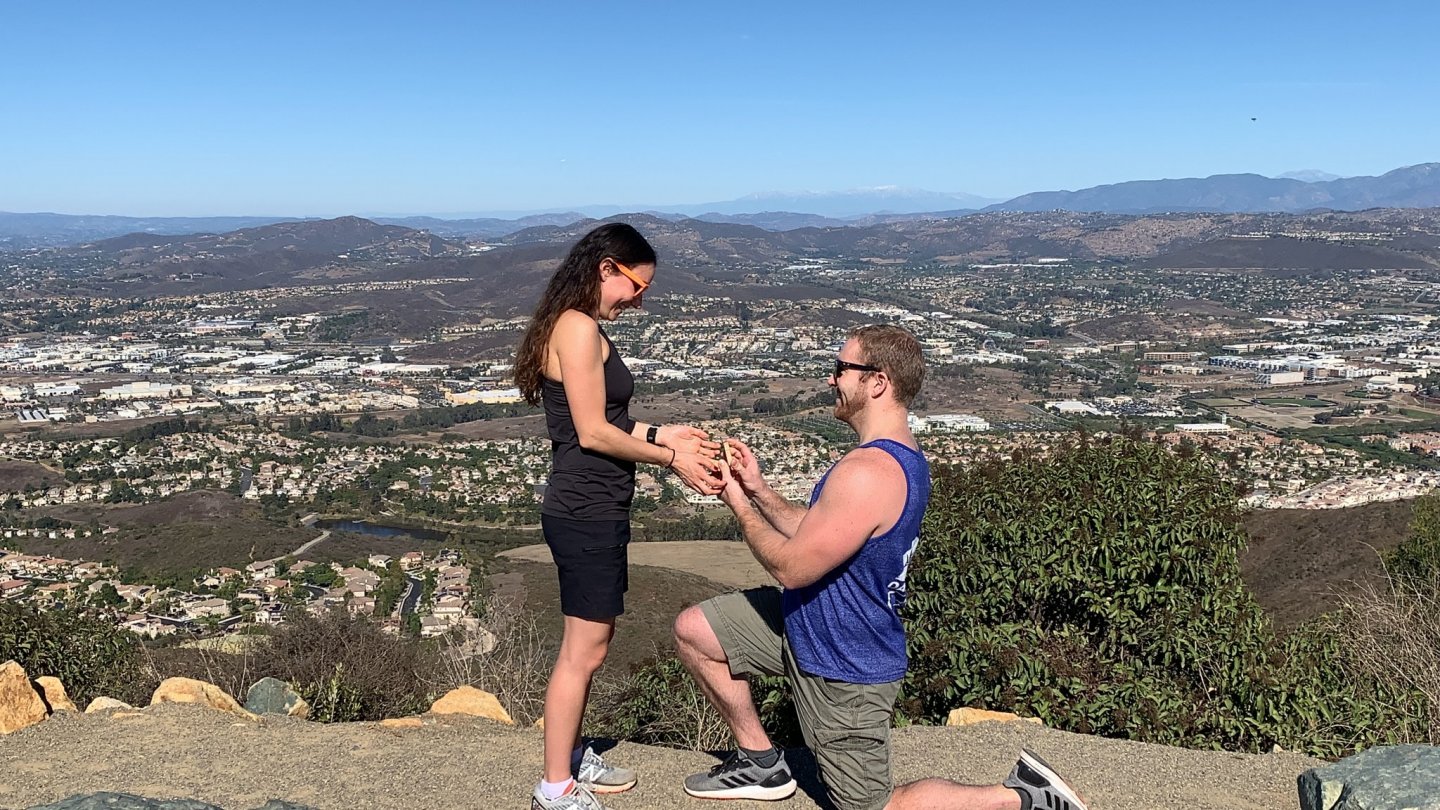
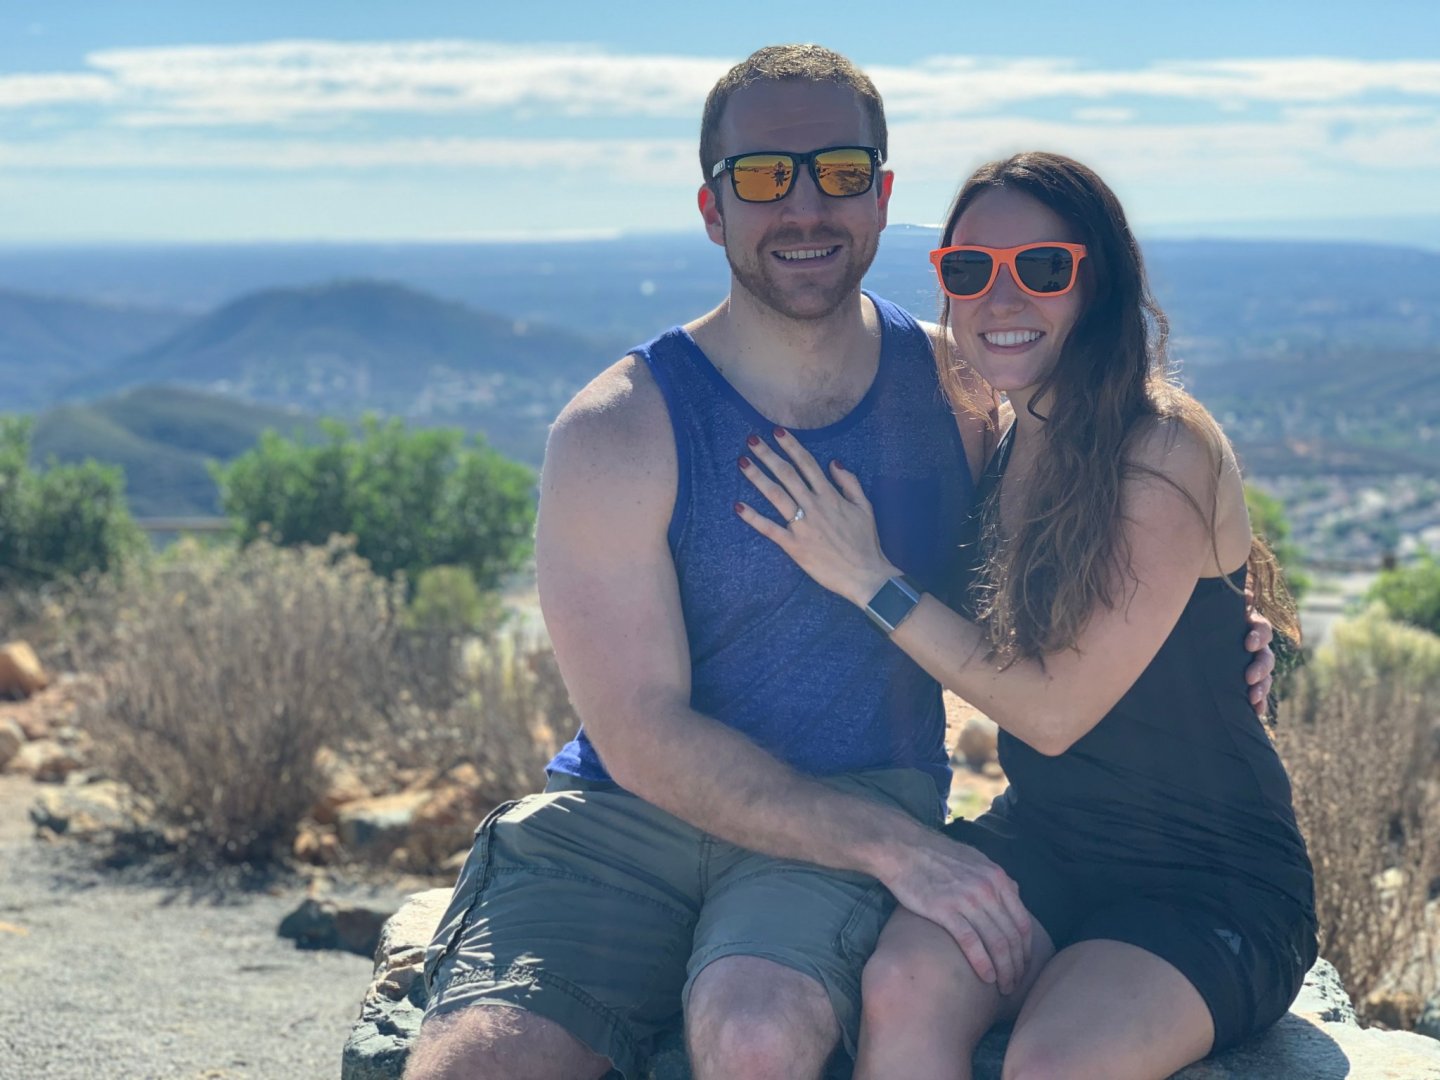
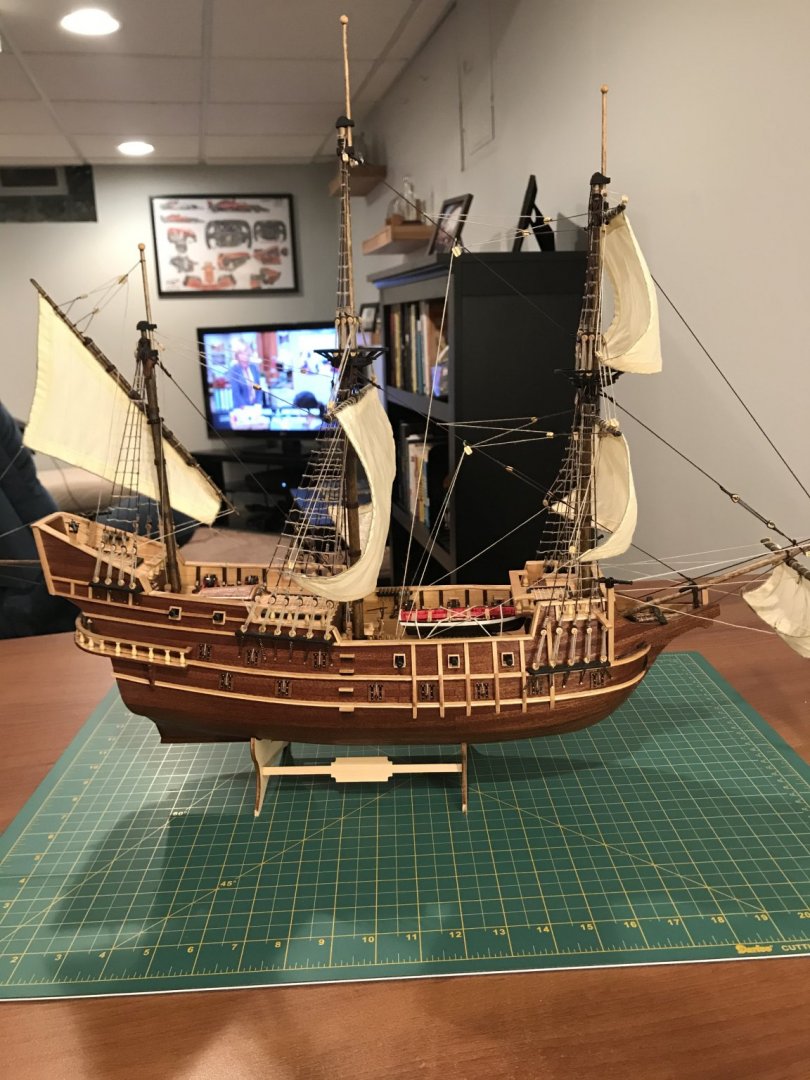
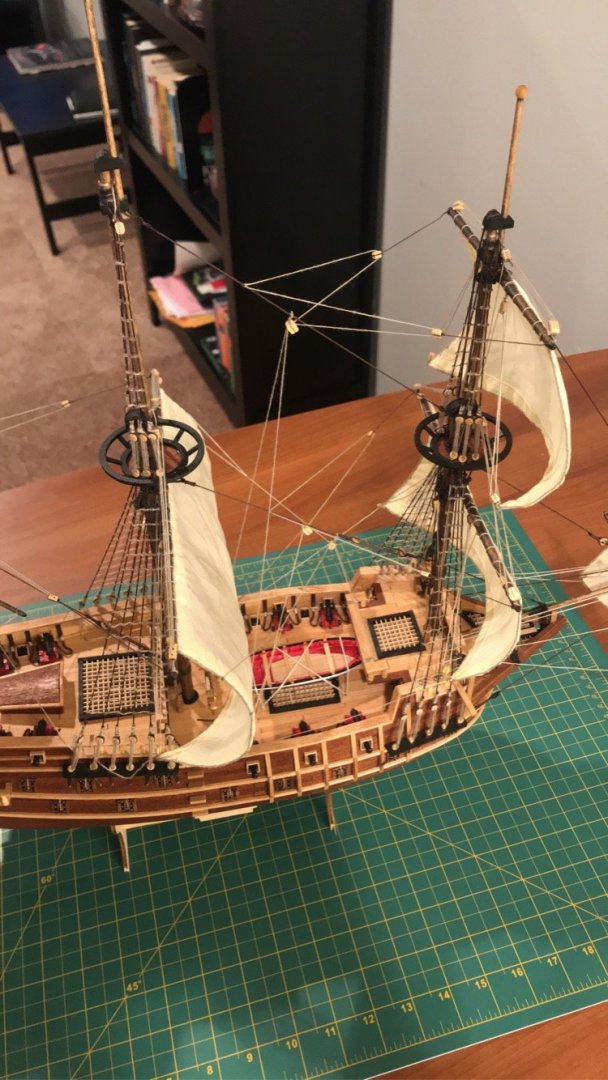
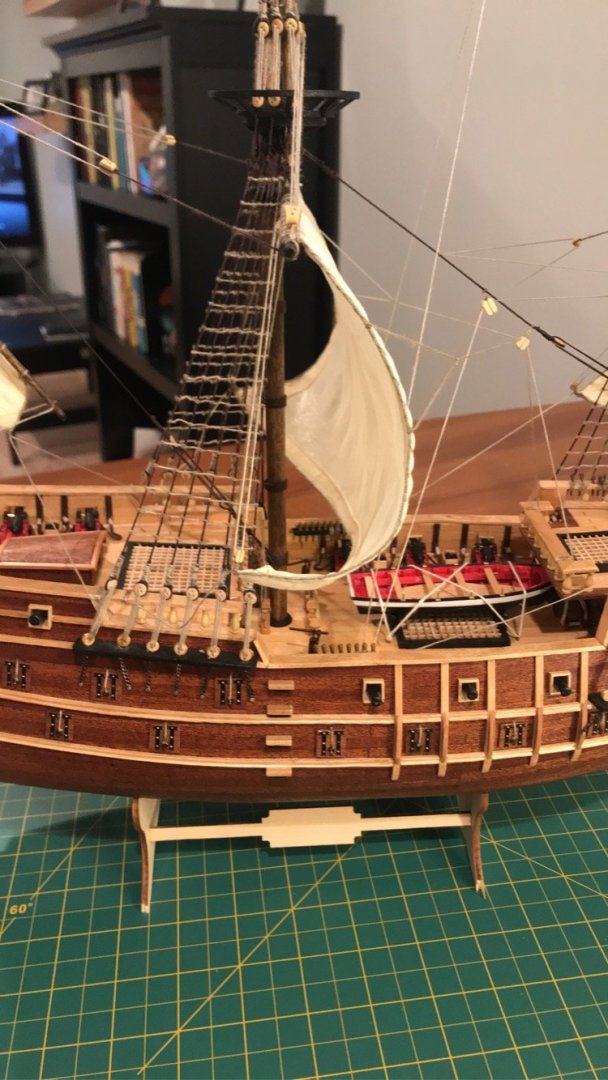
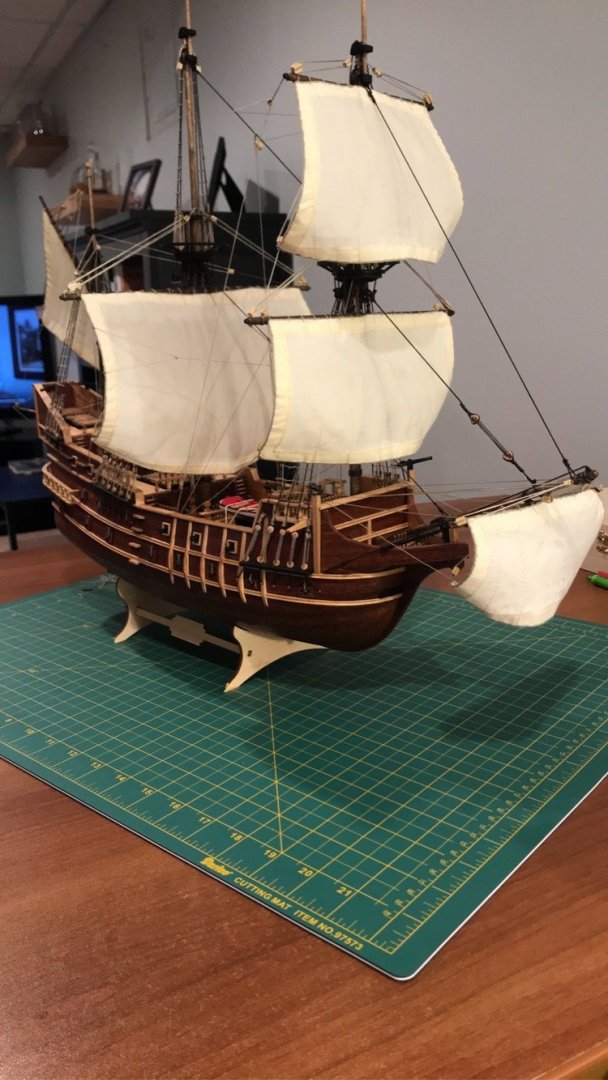
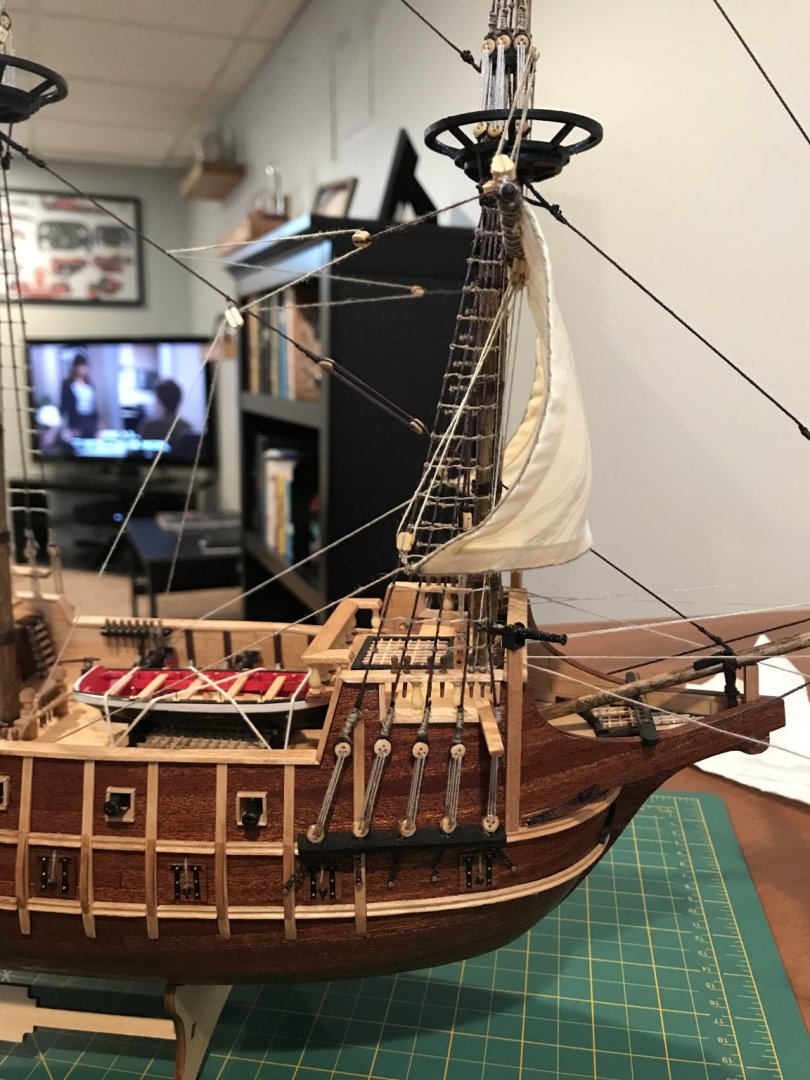
Got the final sail on, the anchors are attached, and now I just have to attach the people and finish a few other small details. I really like the idea of having extra rigging coiled up and placed throughout the ship. Also, just because I’m still excited about it...I recently got engaged while on a trip in California. I made her a custom ring box and a necklace box so of course there will be pictures attached, (and of course they are out of order that I tried to post in) happy thanksgiving everyone!


- 88 replies
-
- 7
-
-
- finished
- artesania latina
- (and 1 more)
-
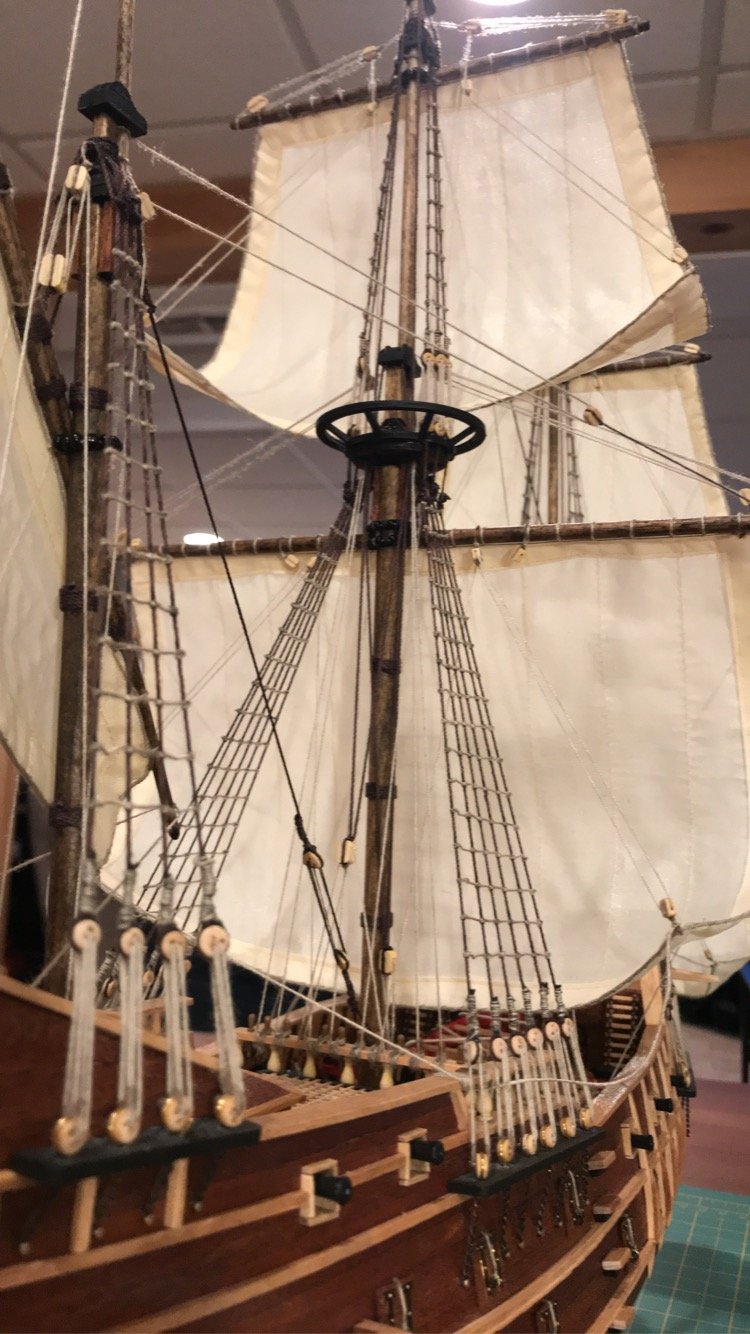
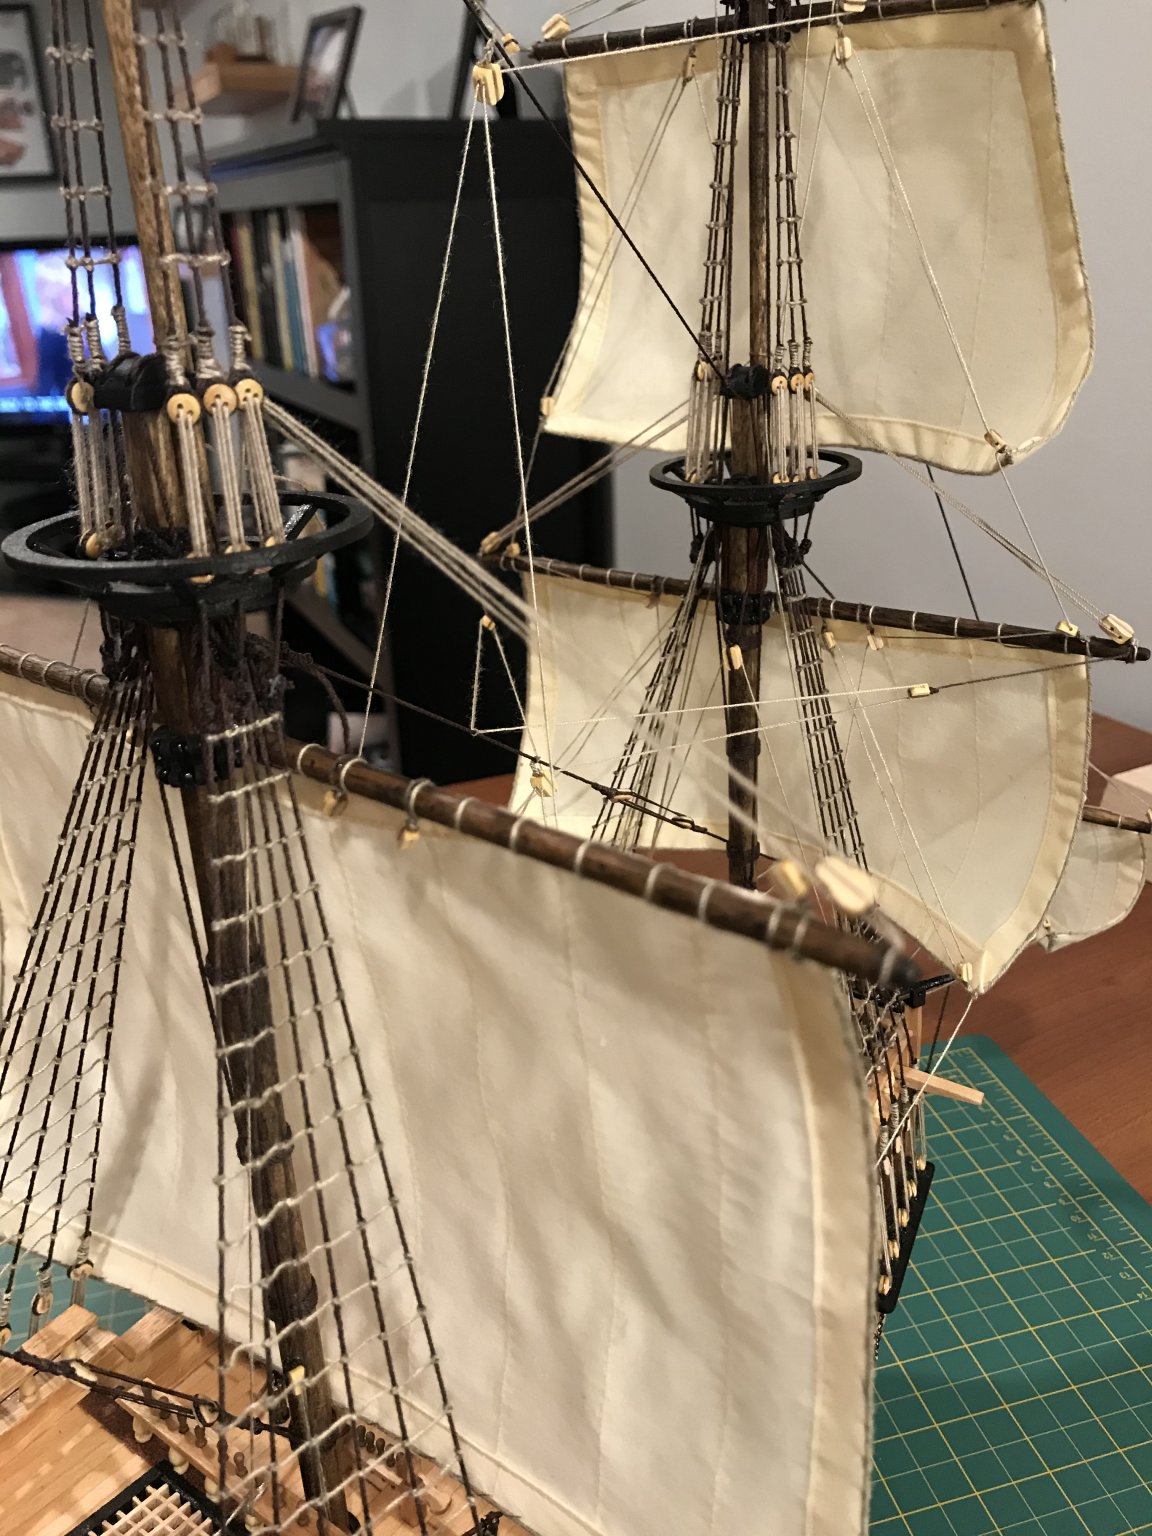
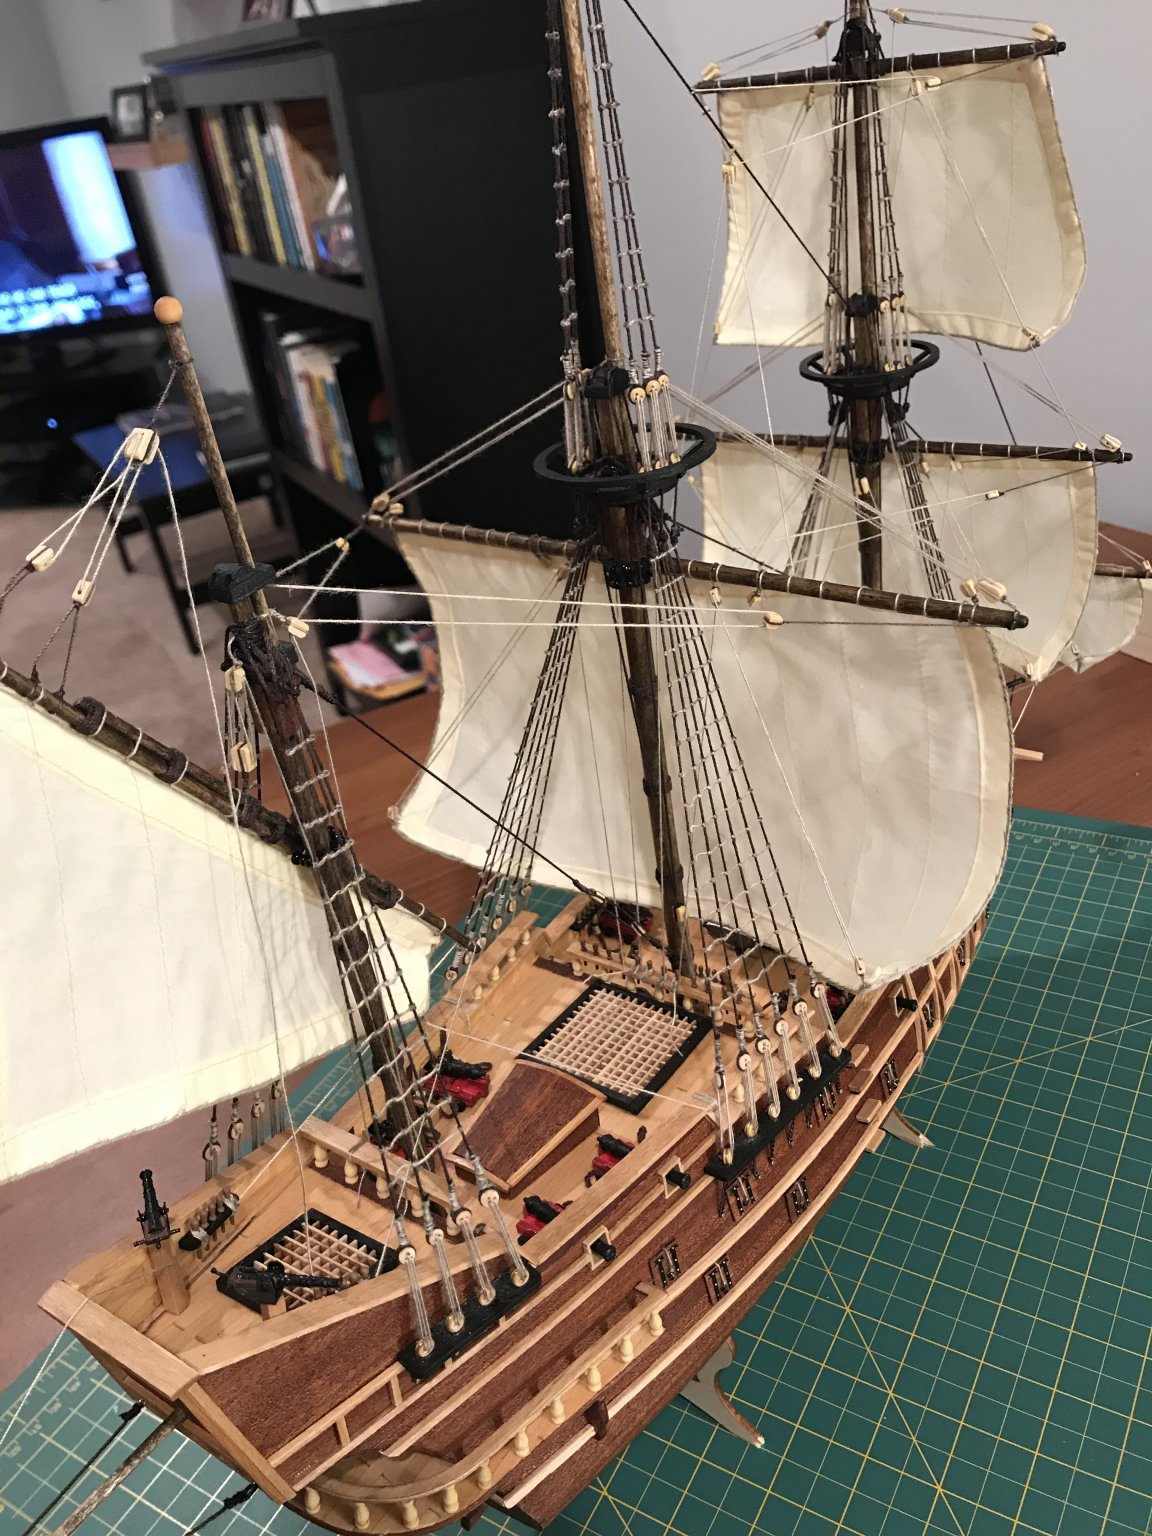
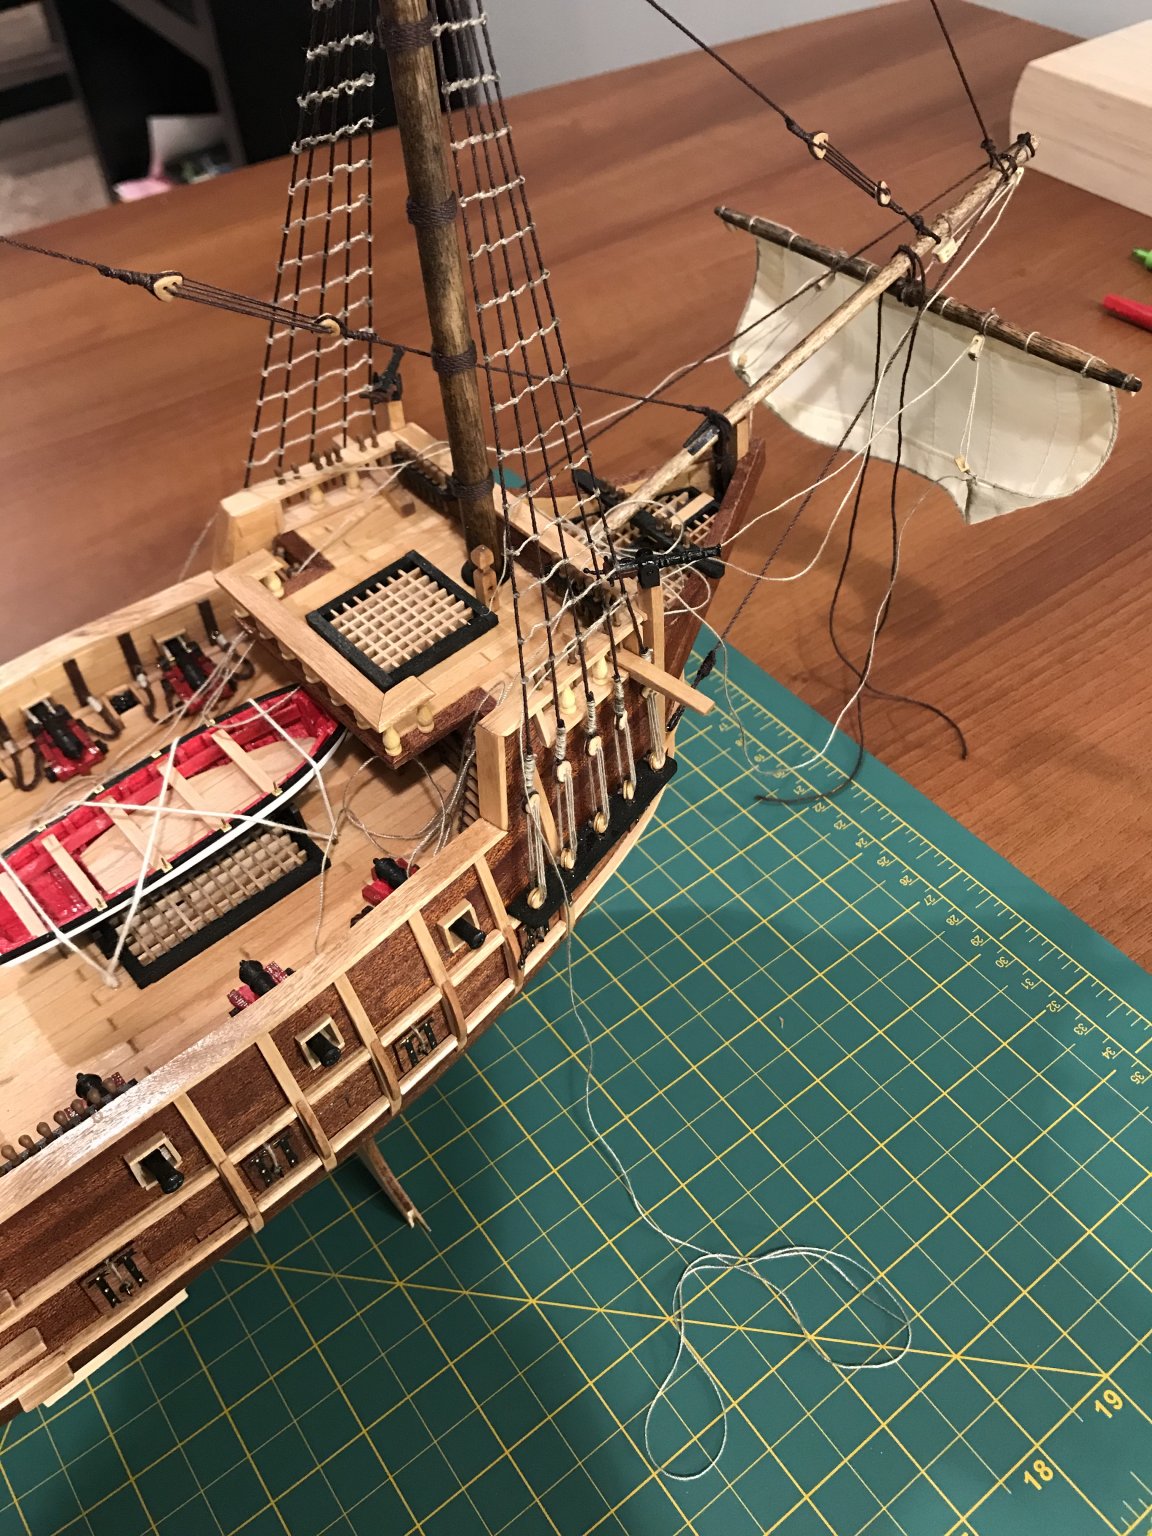
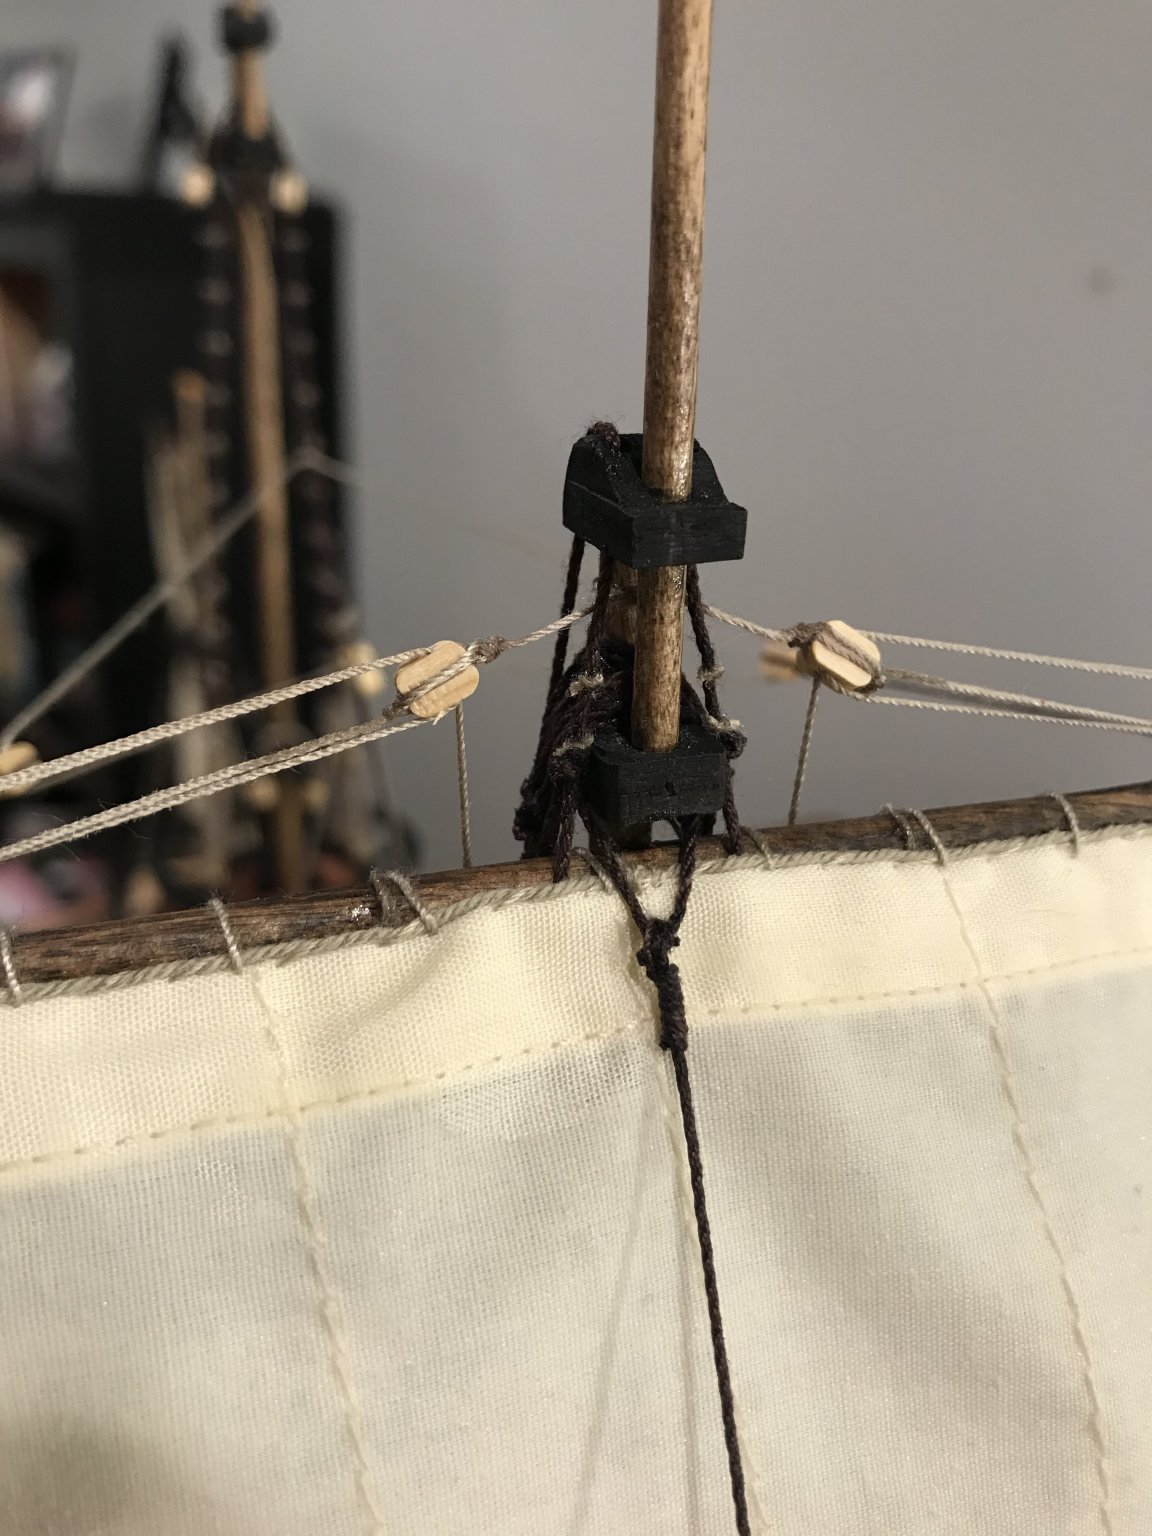
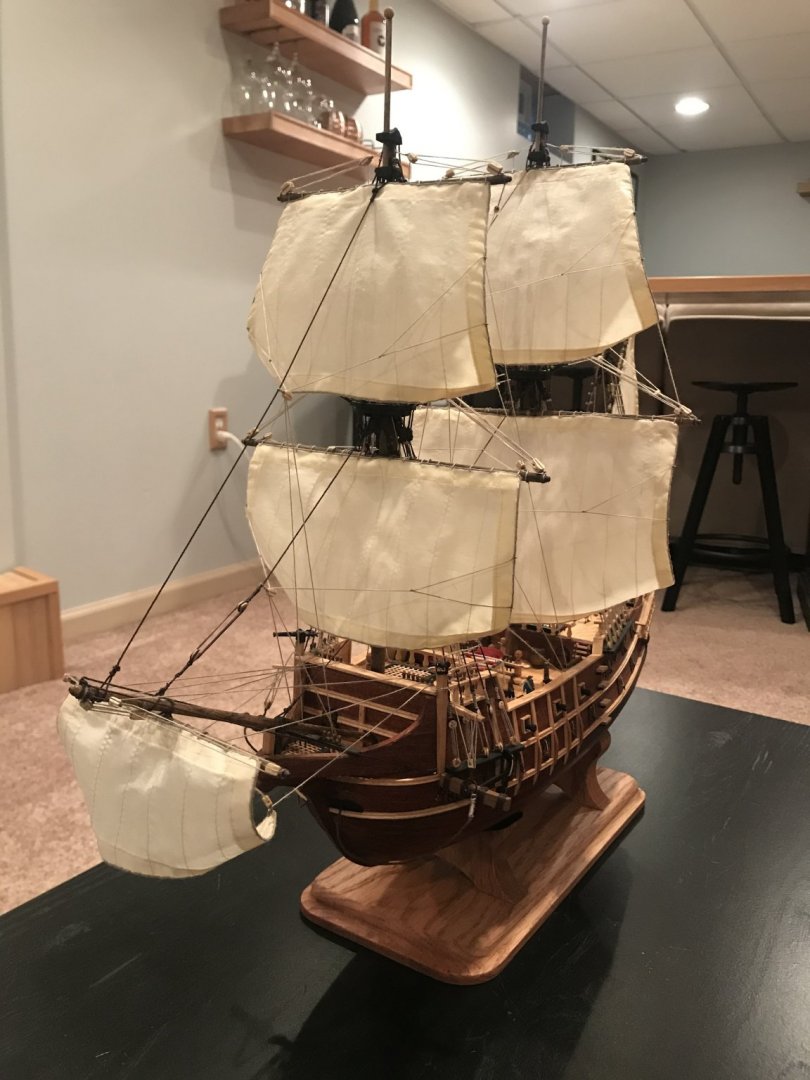
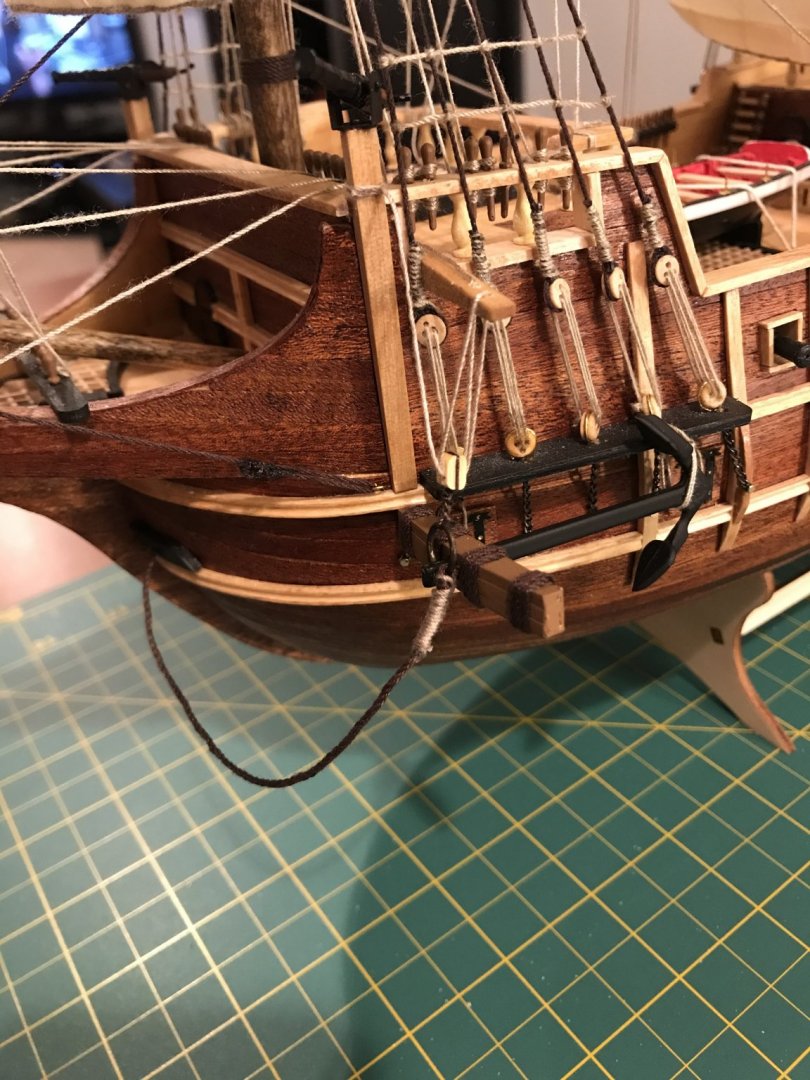
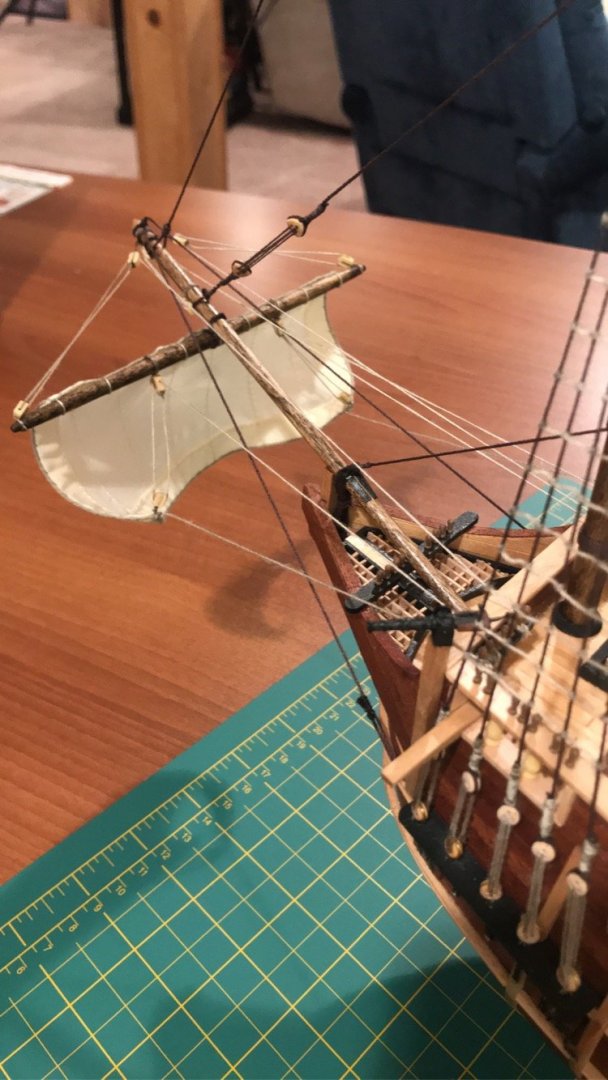
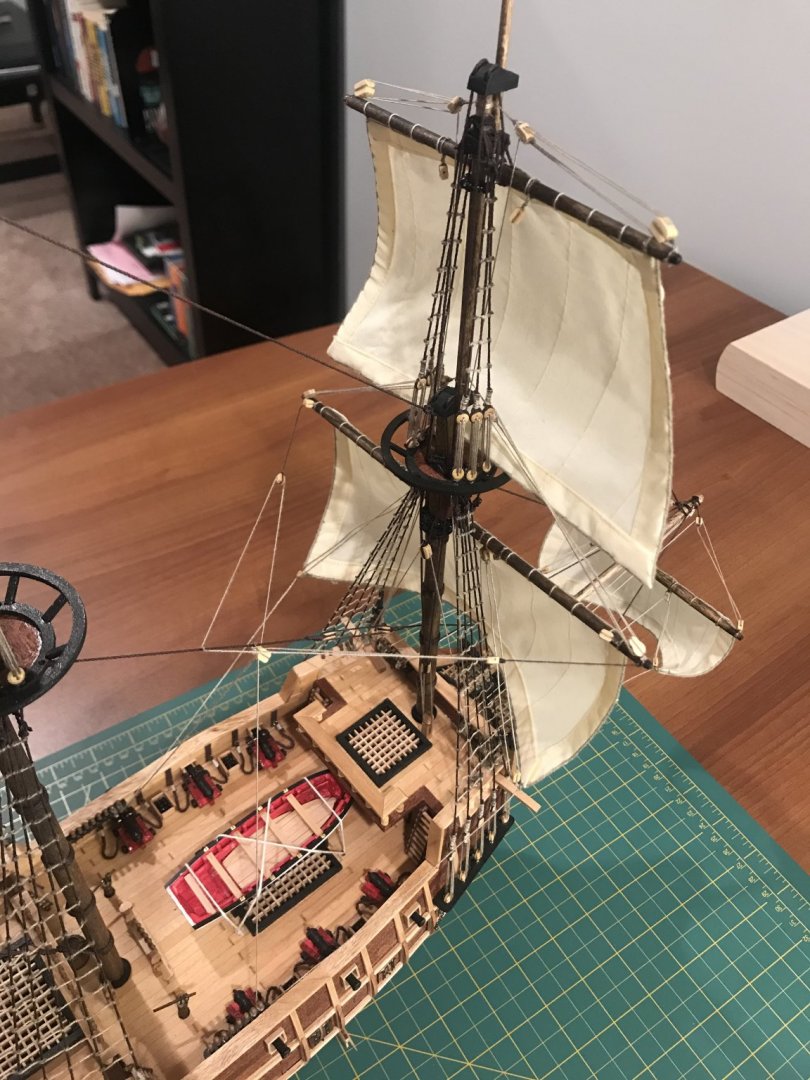
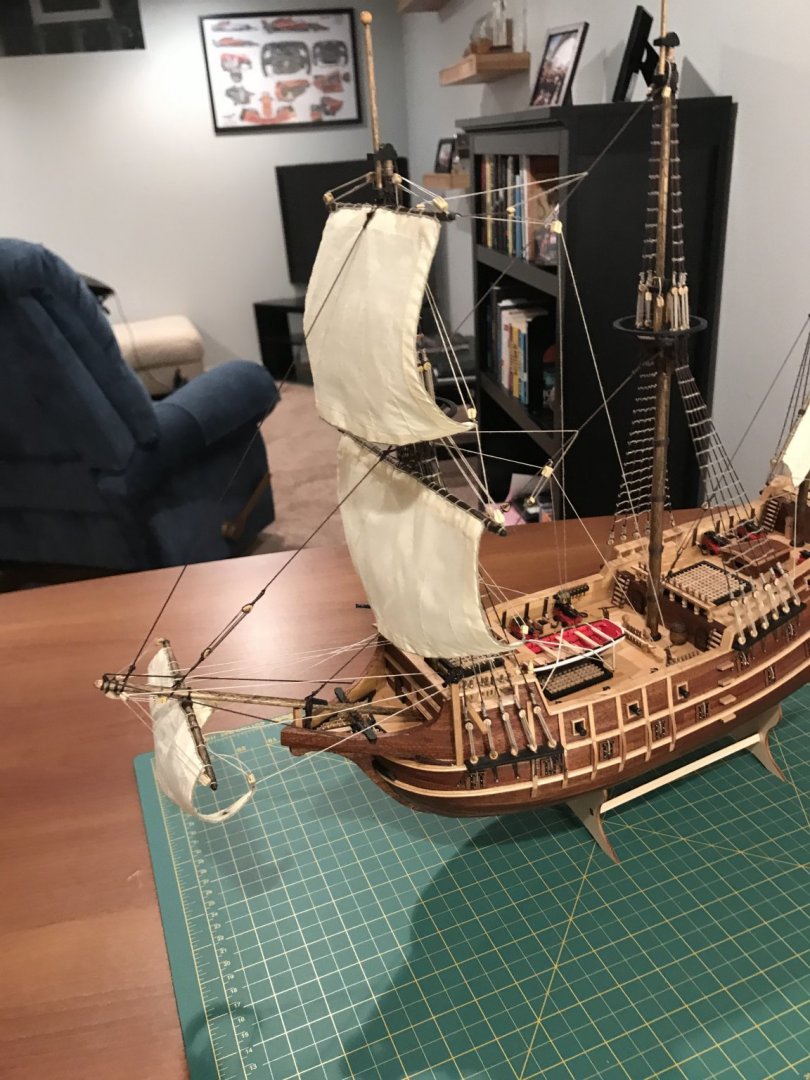
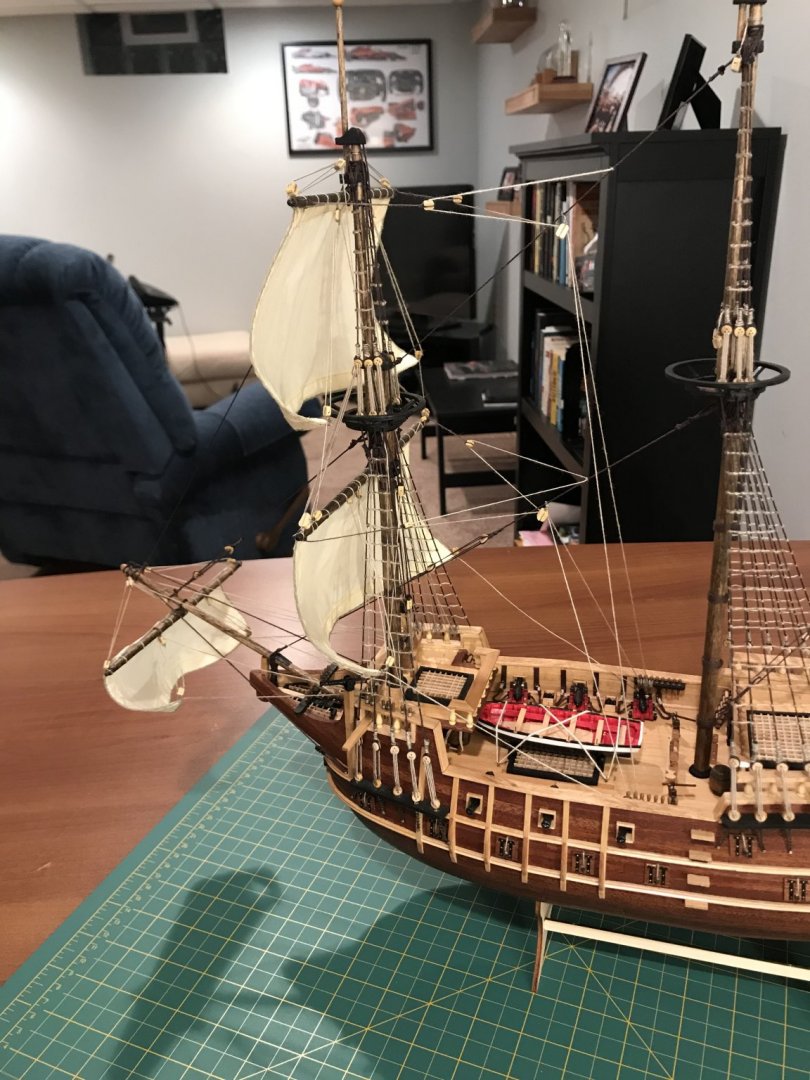
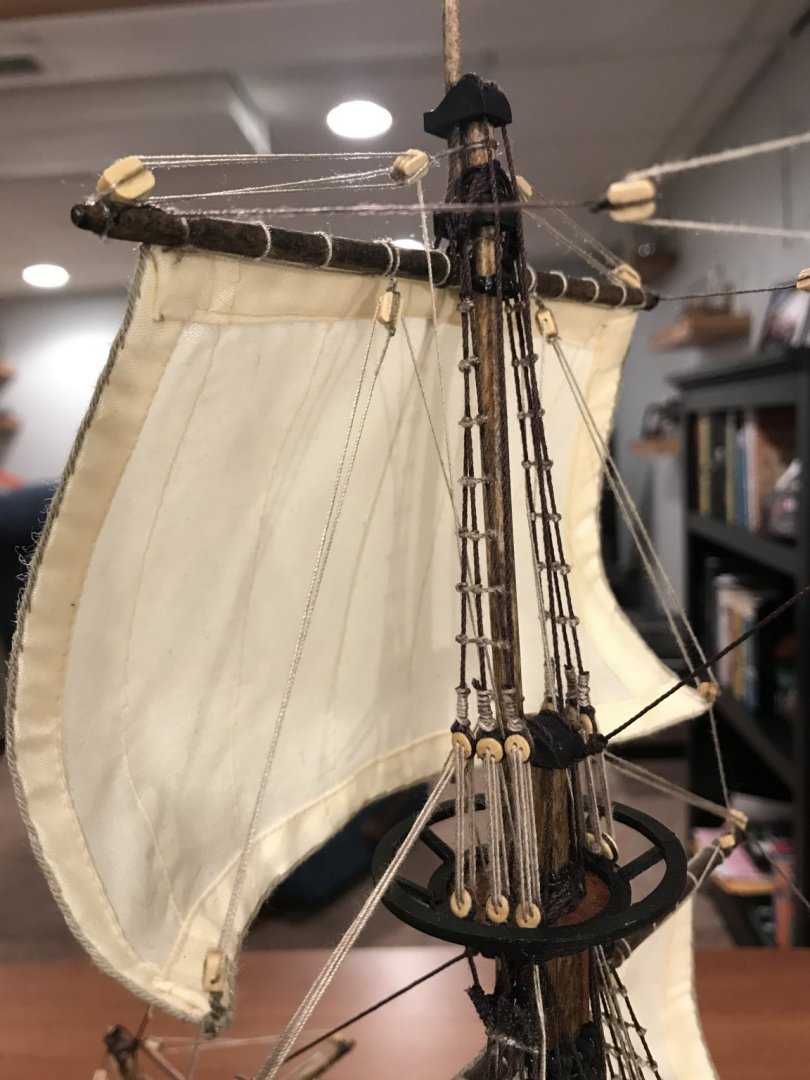
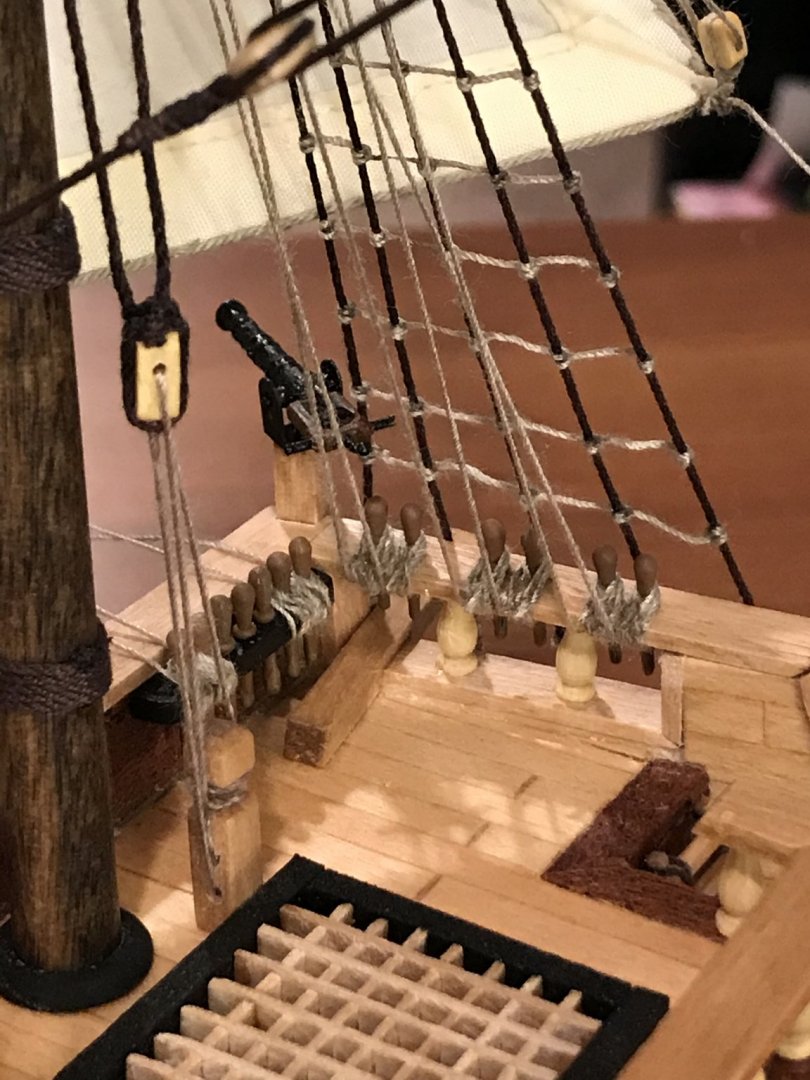
Just a few more lines to rig and some misc stuff (like putting the rudder on...totally forgot) but it’s looking like I’ll have her complete before Christmas, which is sort of surprising to me. for my next build I am going to utilize the bees wax for the frays On the rigging. I was using a lighter initially on the cotton thread but the nylon is too fragile. I actually burned one completely up so I stopped with that nonsense. im also going to get a serving machine and serve more of the knots for the rigging. I was too inpatient with a few things but she still turned out gorgeous. anyone have any good plans to make a display case with a drawer in the base?


- 88 replies
-
- 4
-
-
- finished
- artesania latina
- (and 1 more)
-
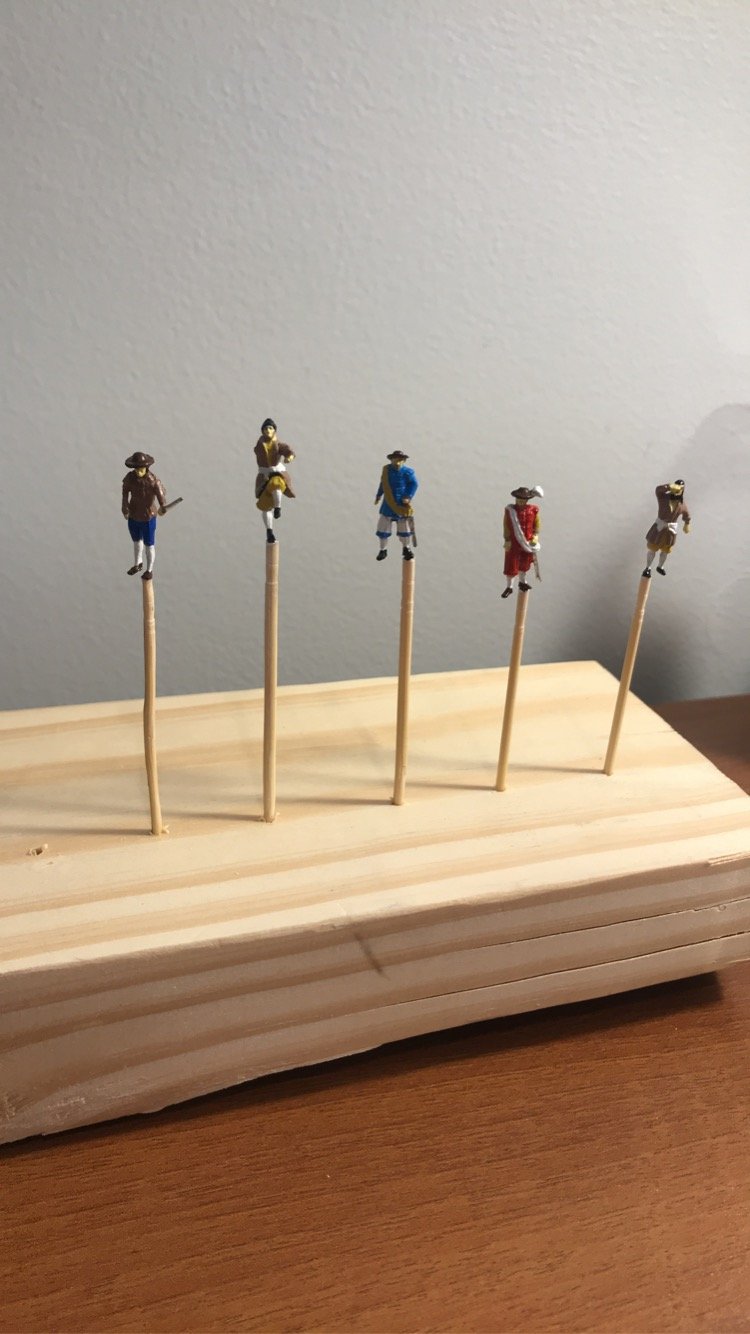
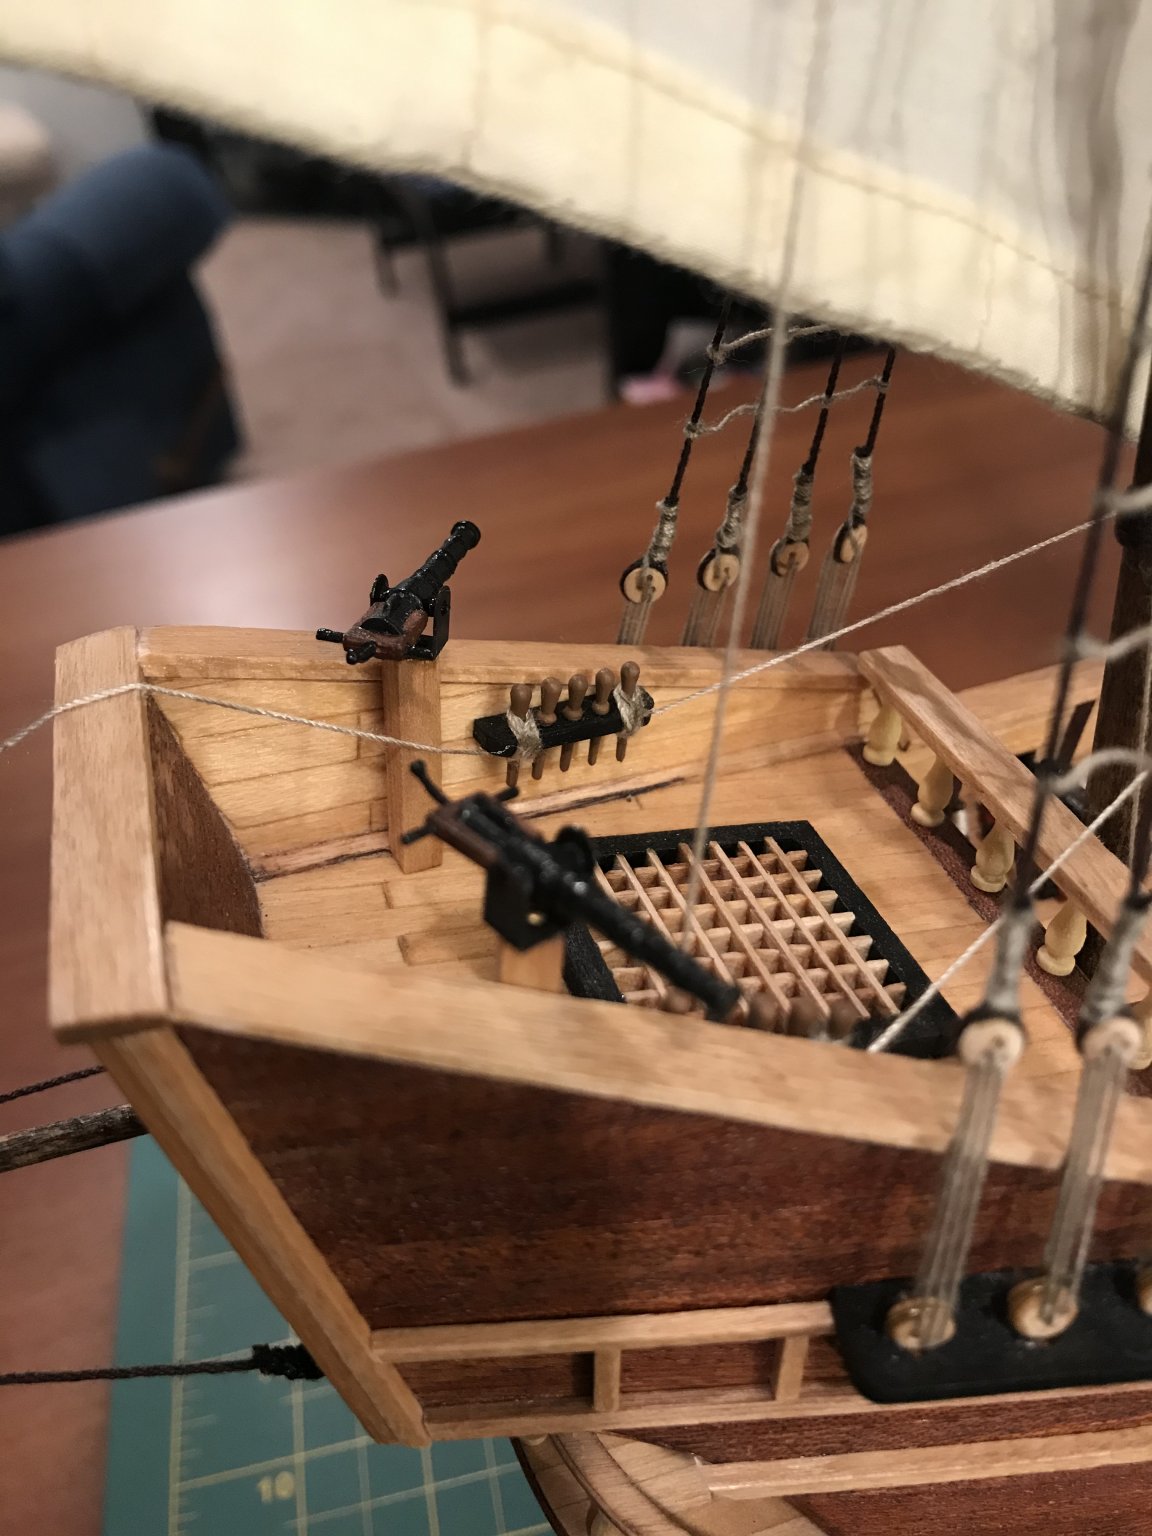
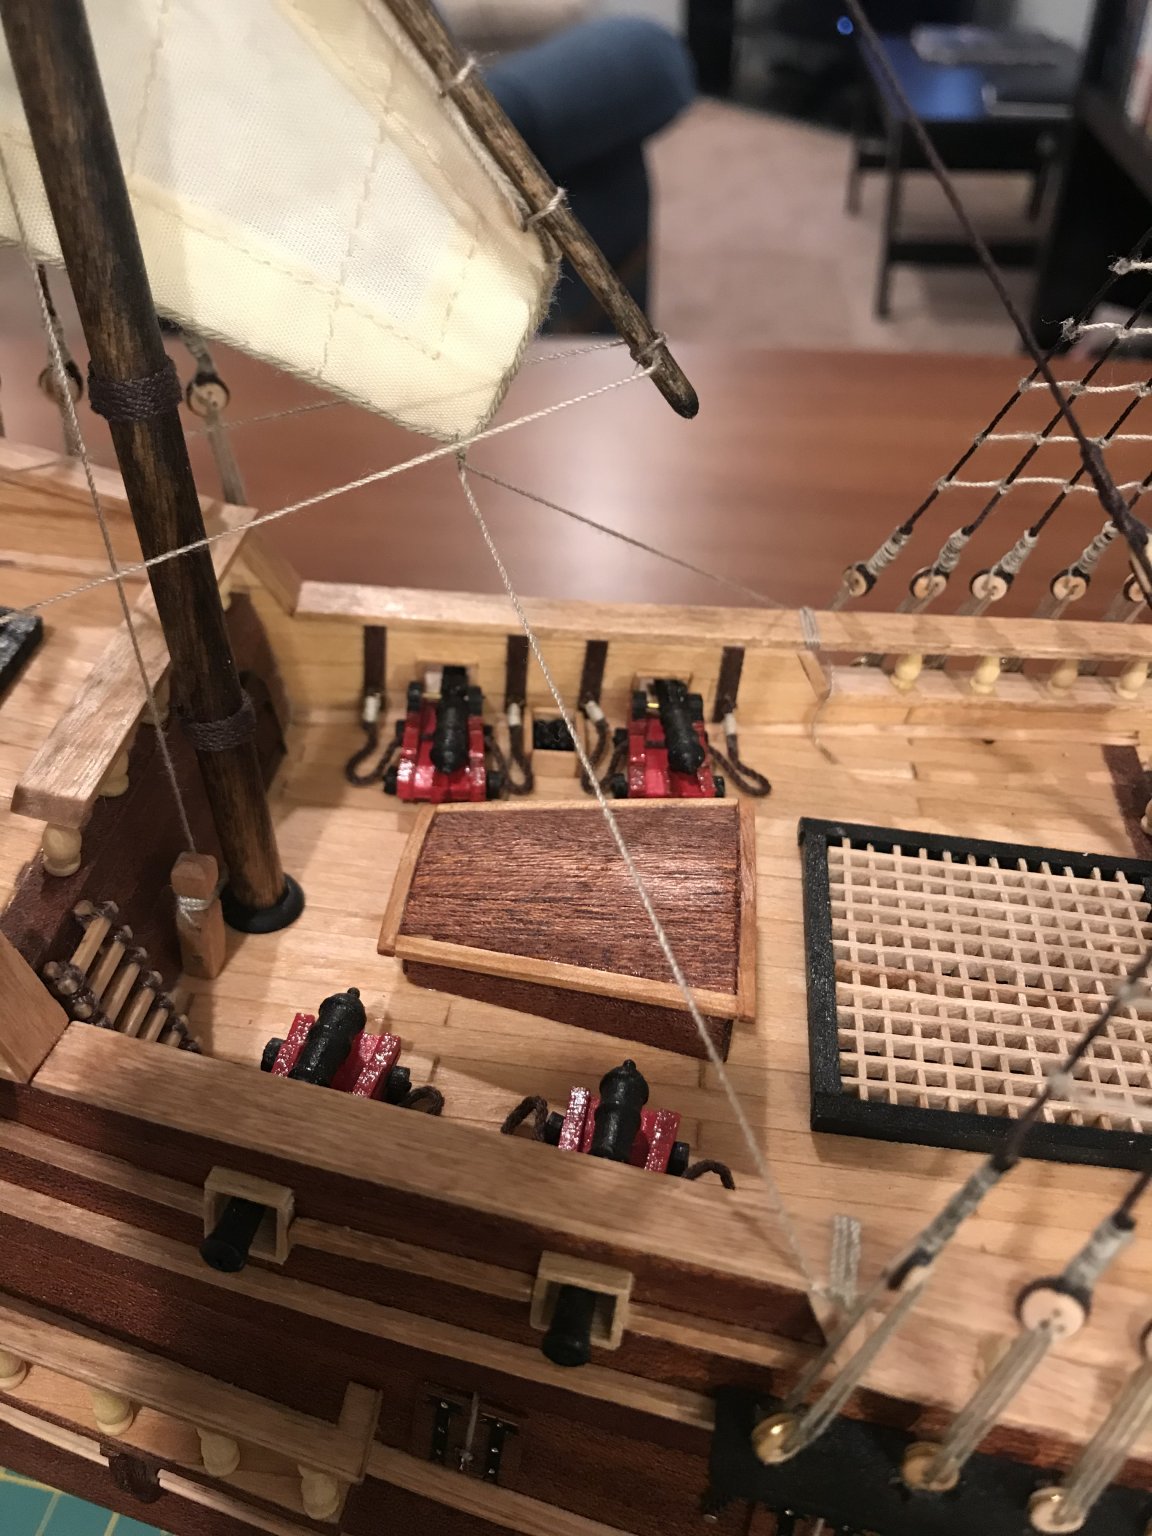
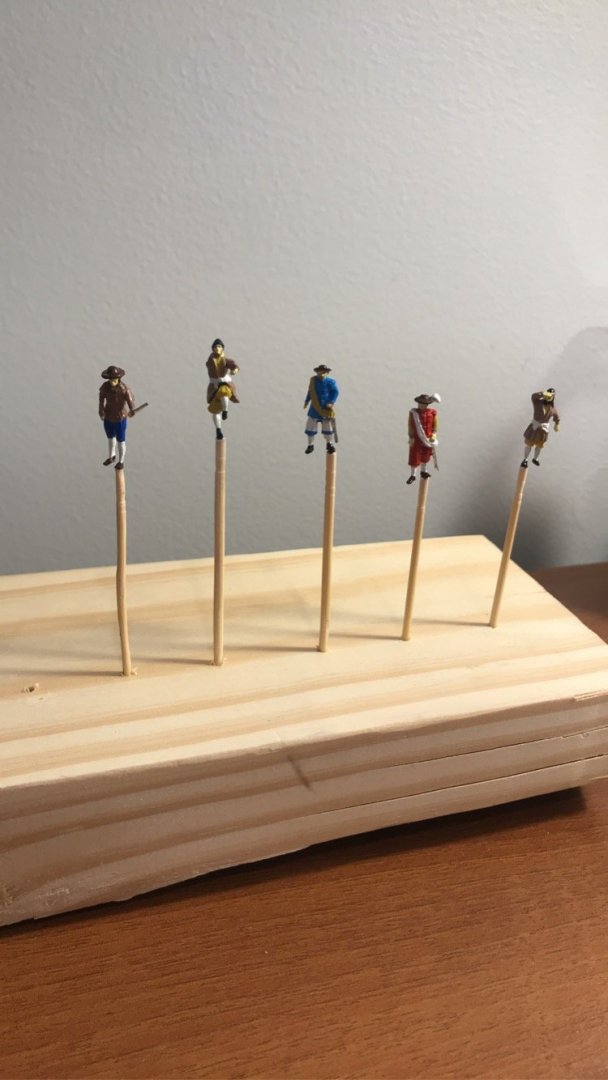
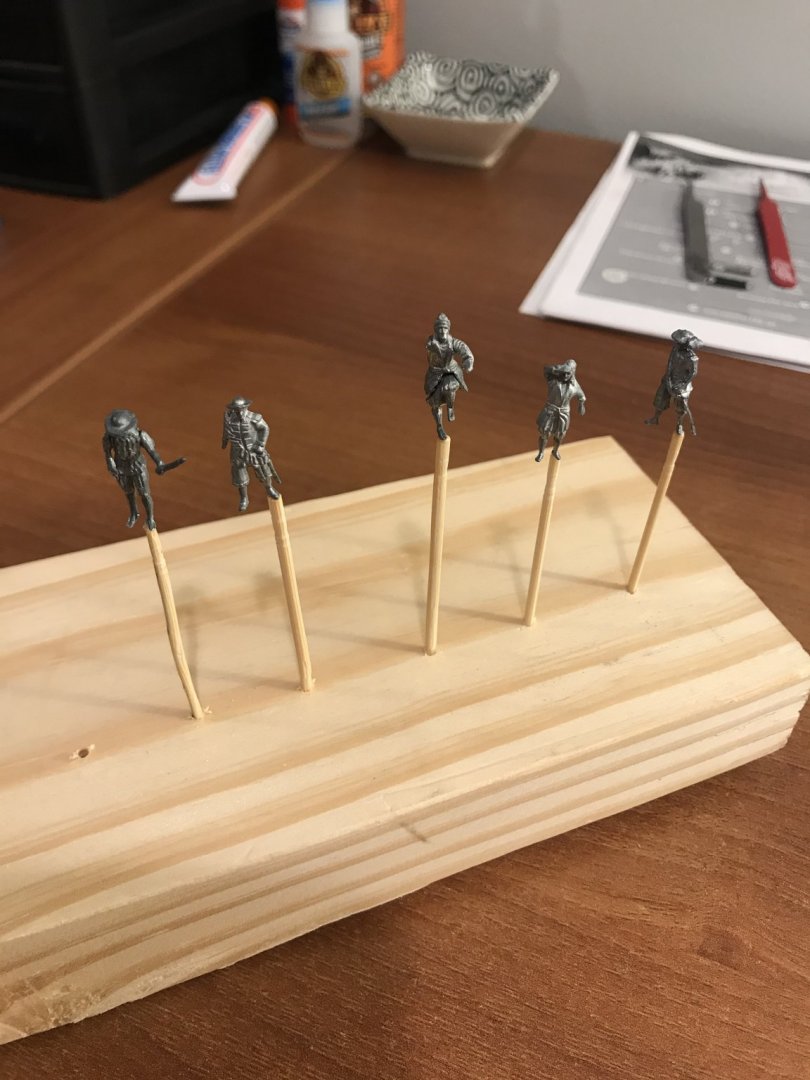
Only have 1 more sail left and then it’s on to the small details and the display case. The kit comes with little die cast people I was on the fence about using but I decided to use them. It’s really starting to come together and I could be more excited. the figurines needed a little filing to get rid of the casting lines, and the kit itself was missing one of the srms so I have to email Artesania requesting another one. They may take a while to get respond but they will replace parts at no cost.


- 88 replies
-
- 6
-
-
- finished
- artesania latina
- (and 1 more)
-
Yup! The hardest part is cutting the holes in cardboard and pinning the sail to try and get the best shape but its working pretty well. I appreciate your help with the matter
-
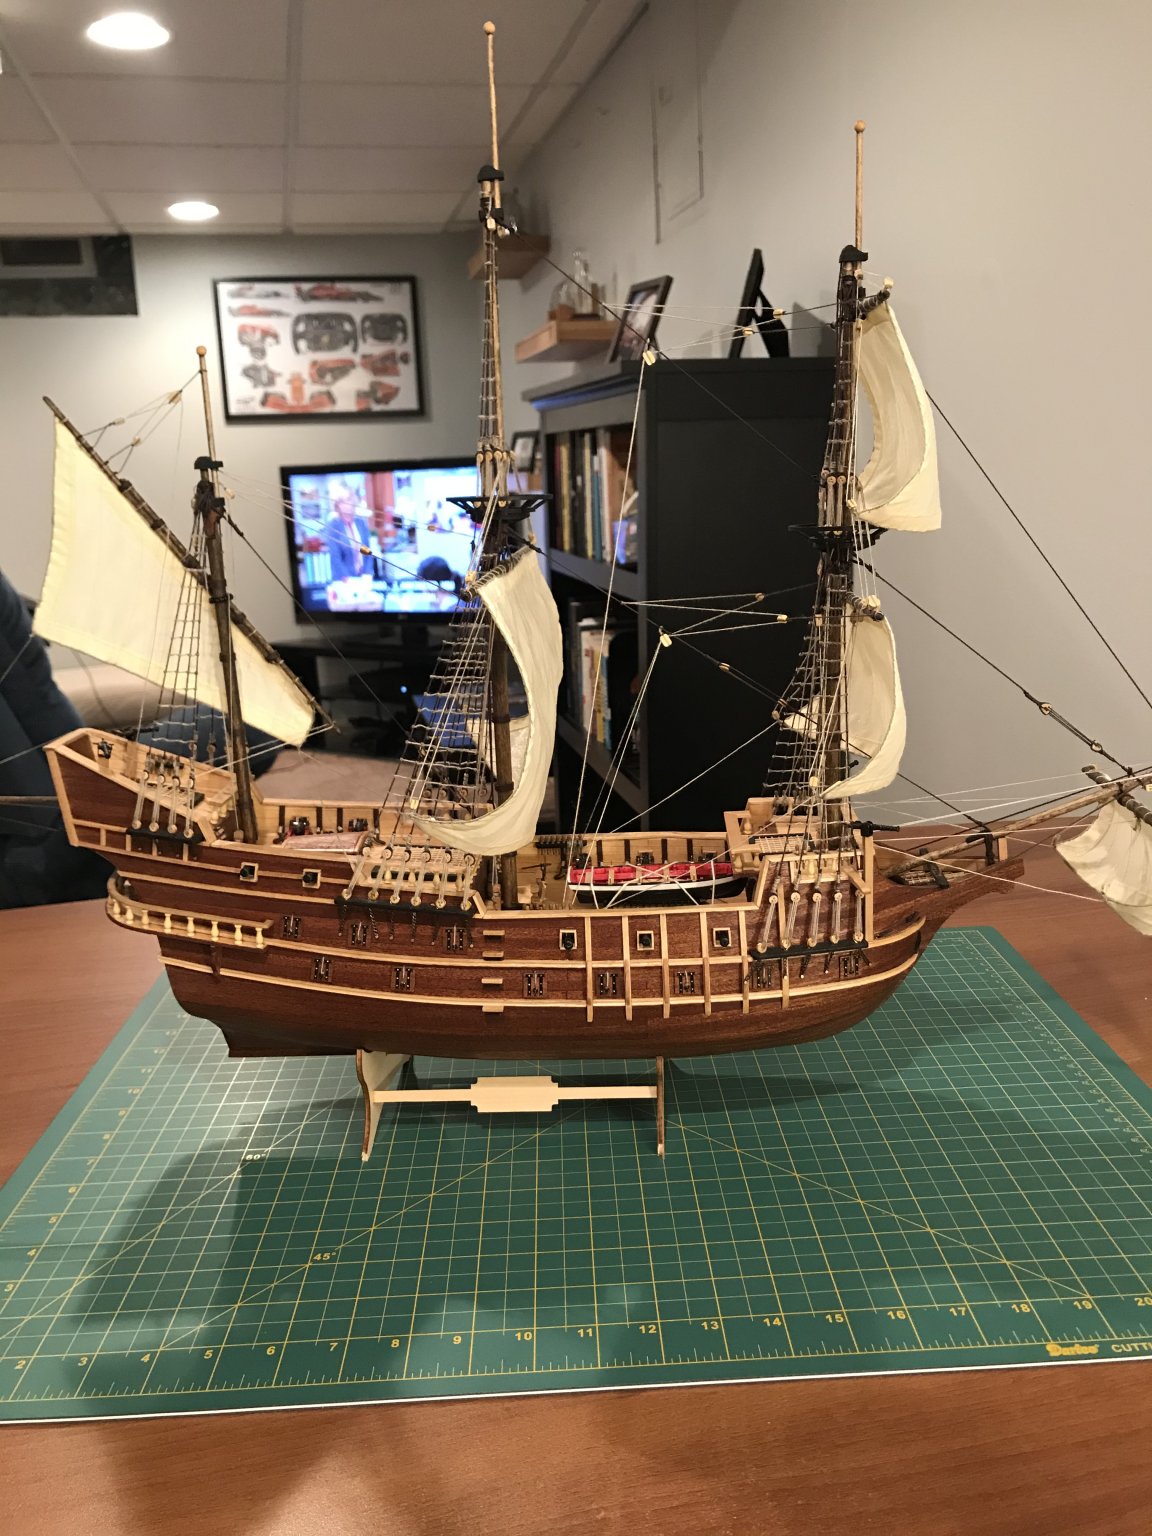
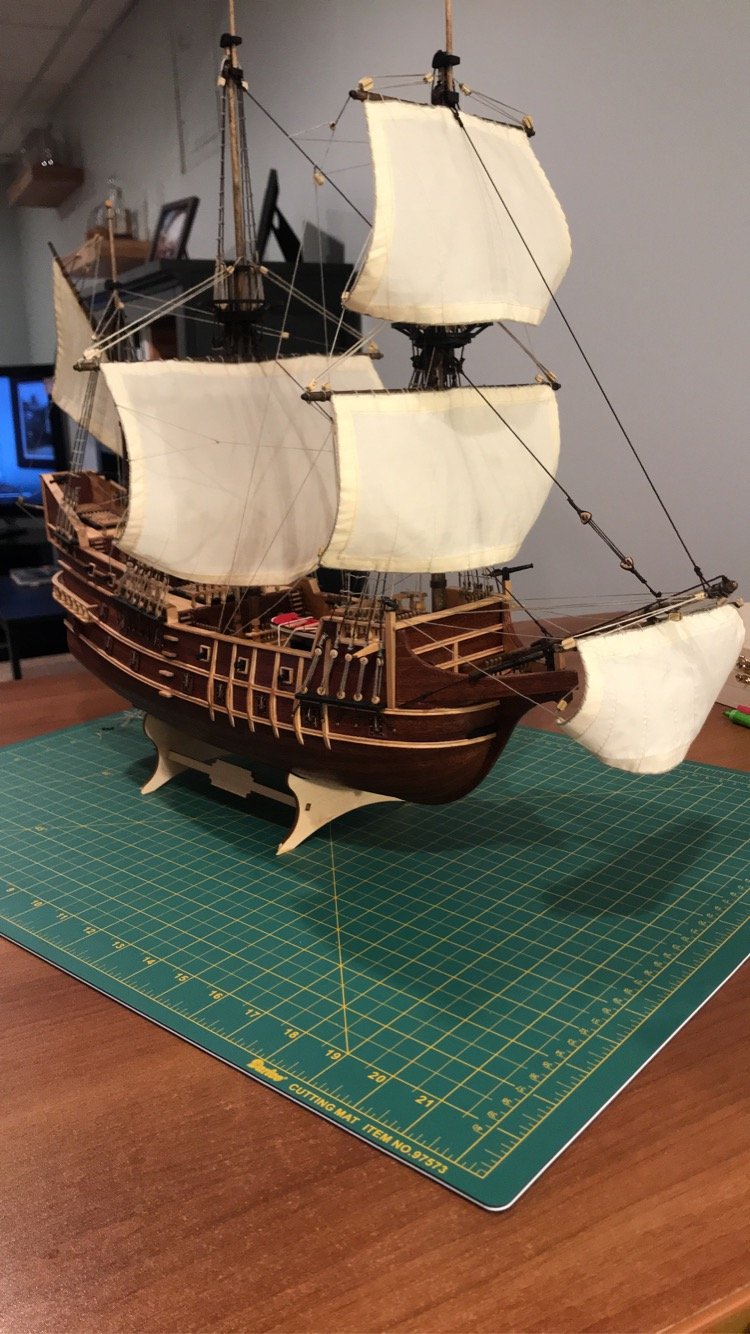
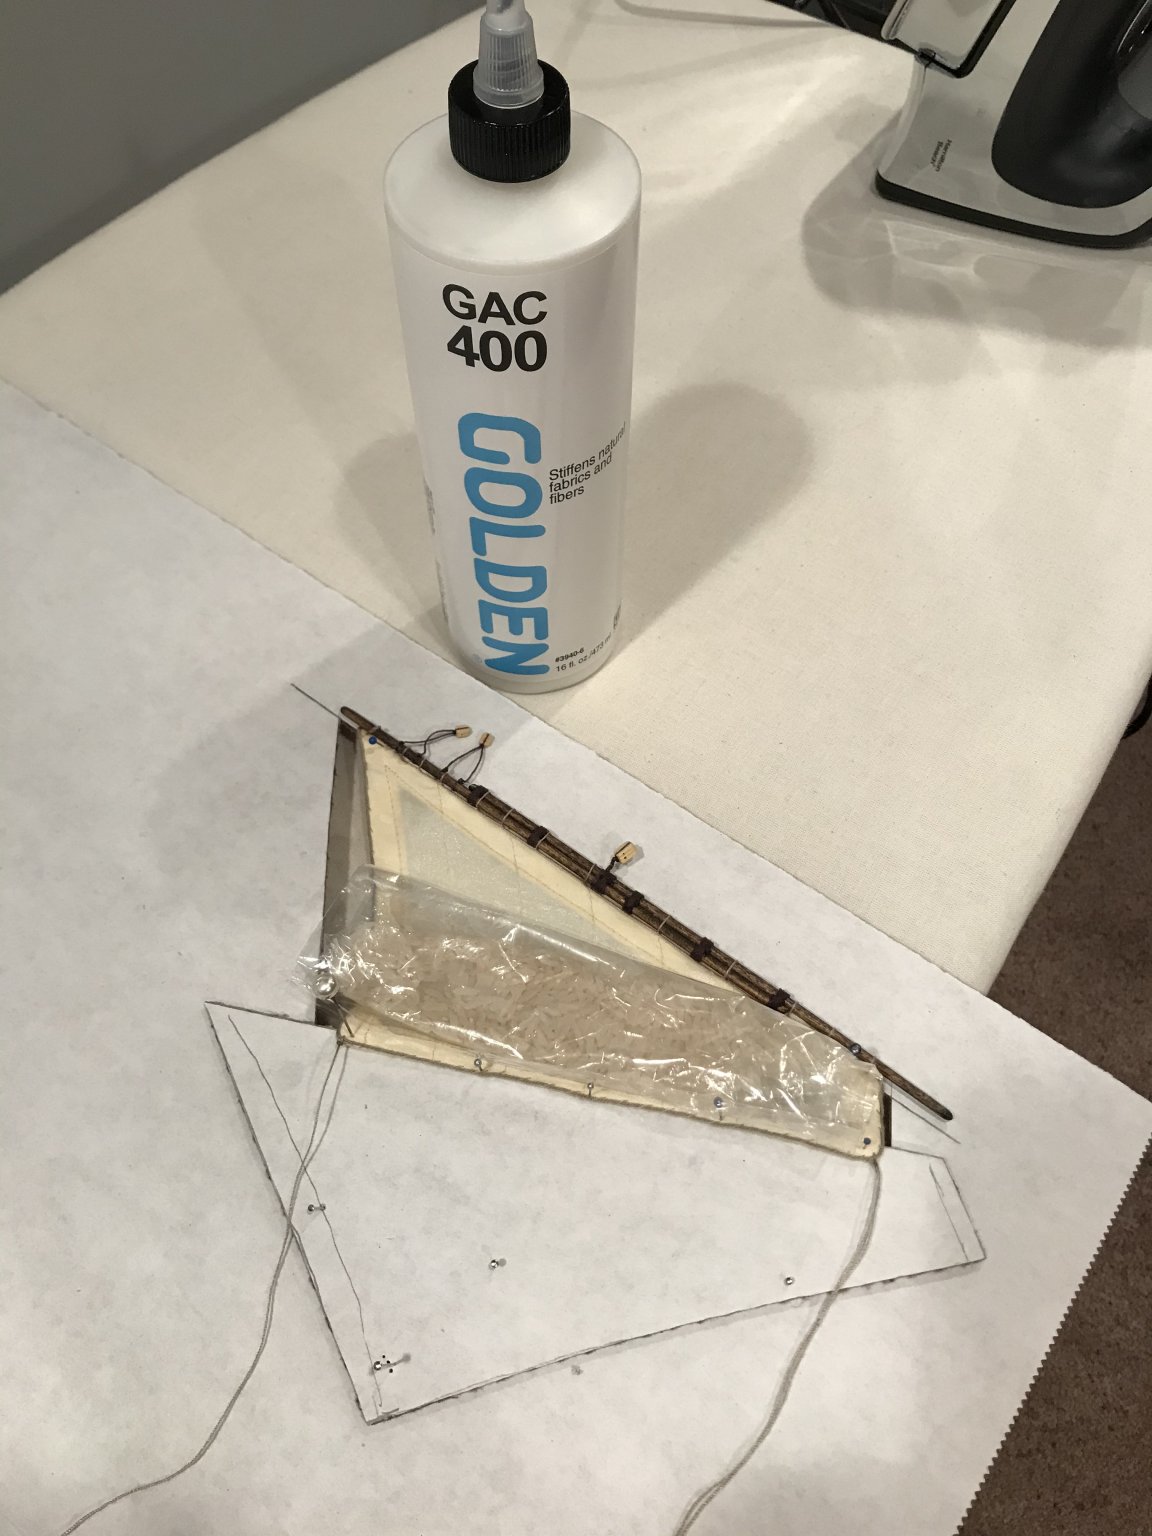
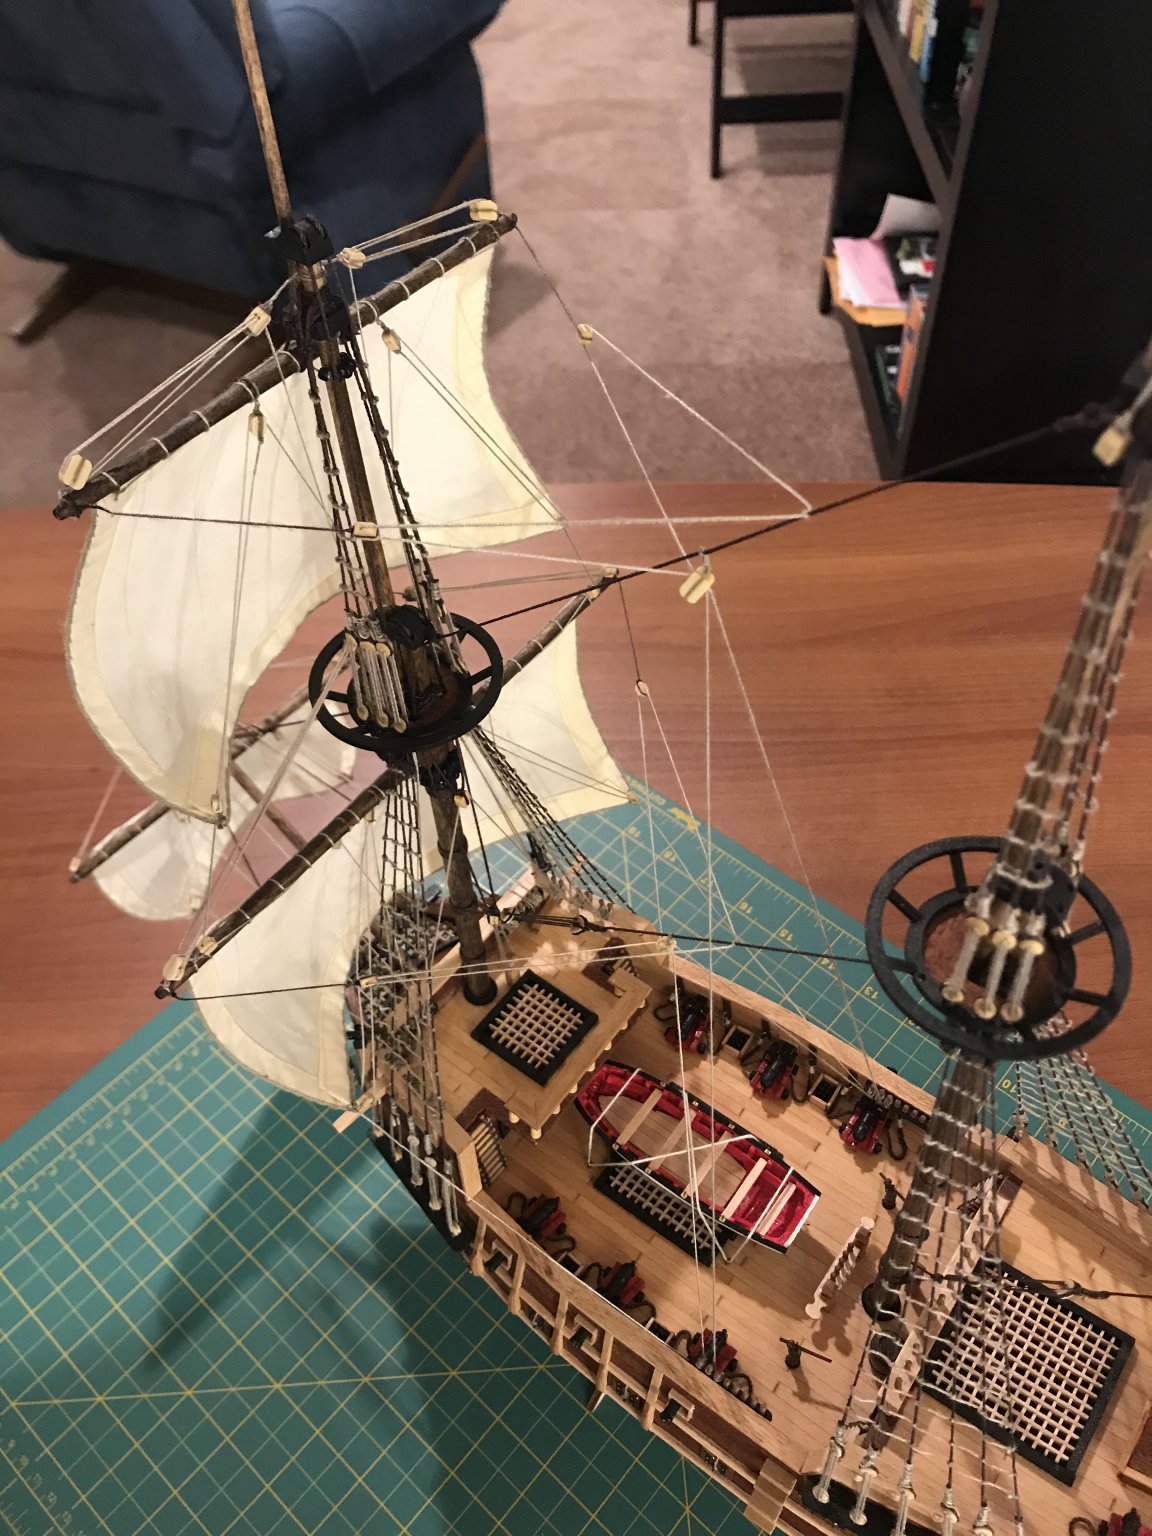
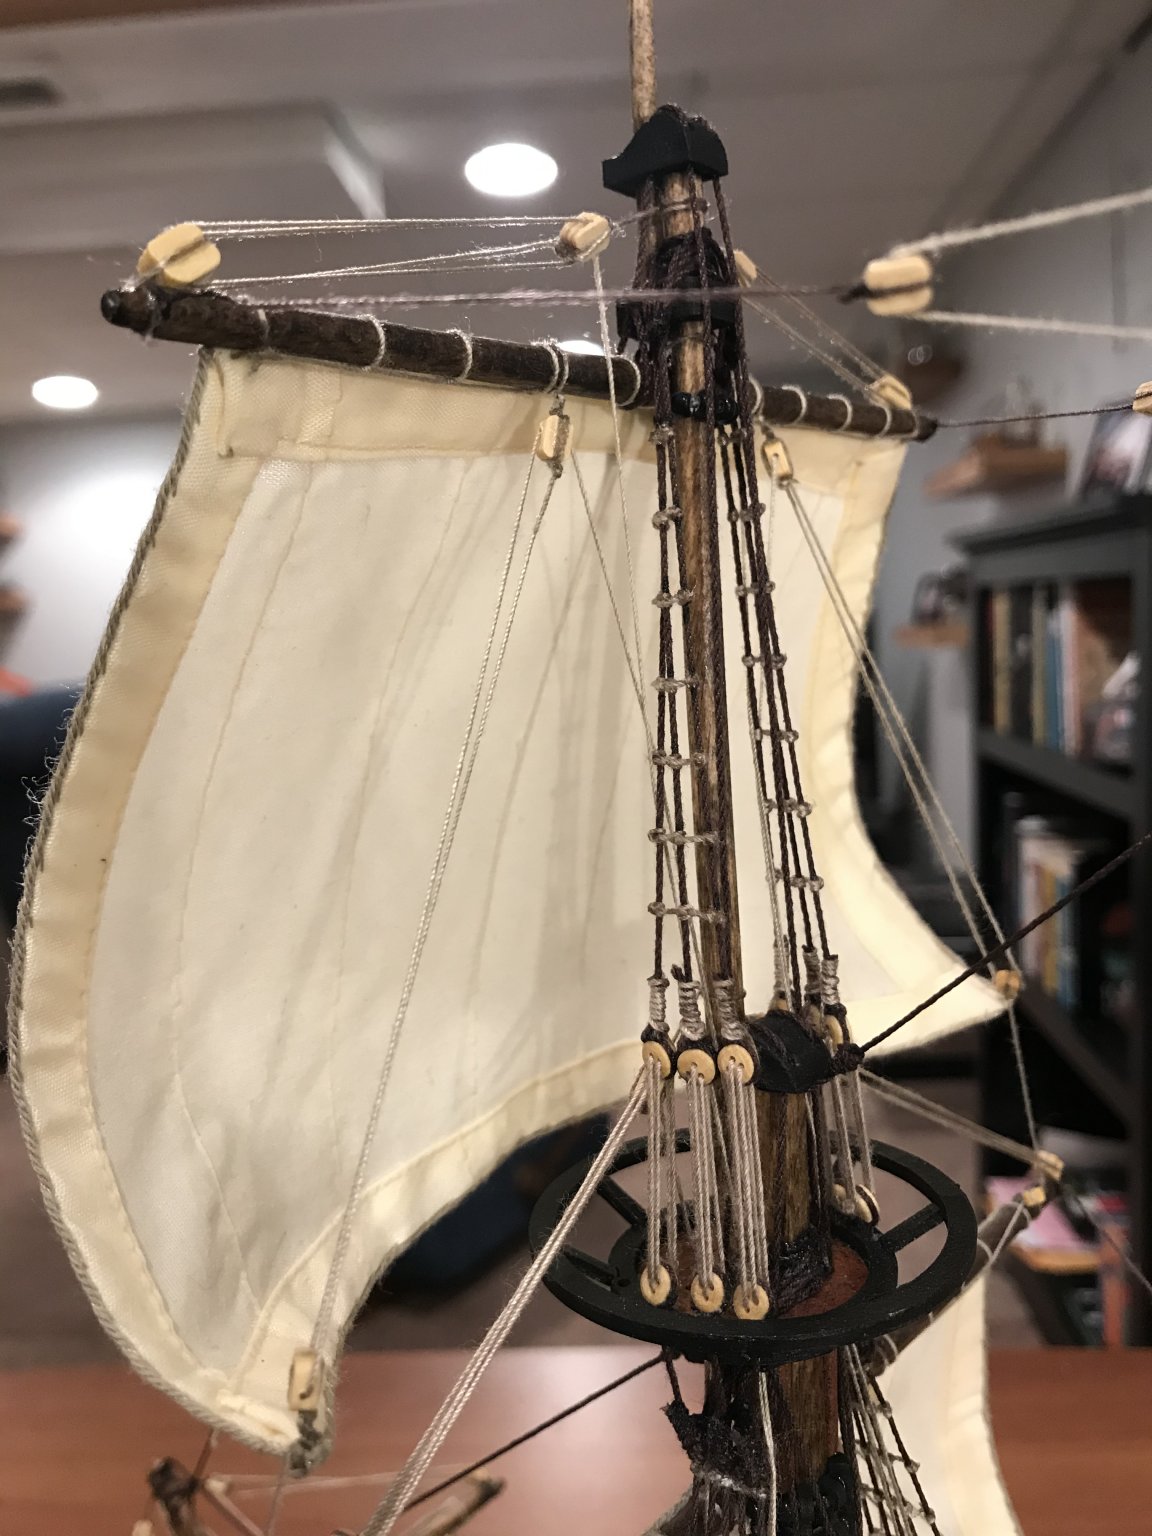
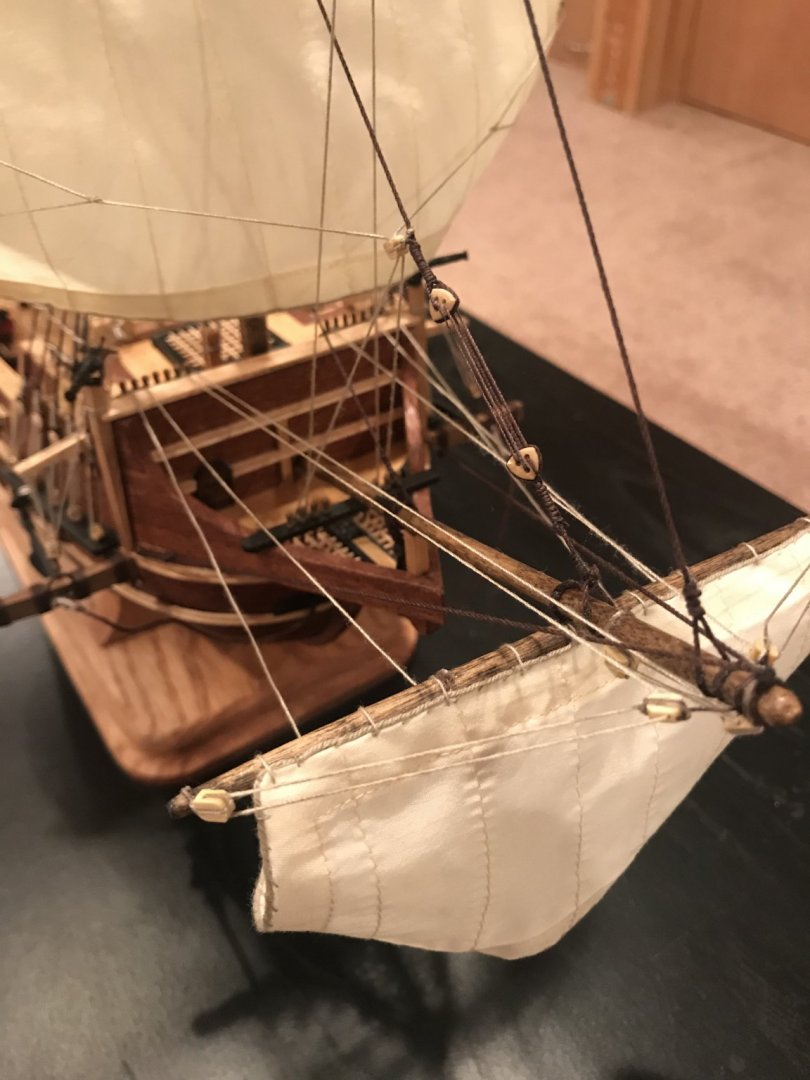
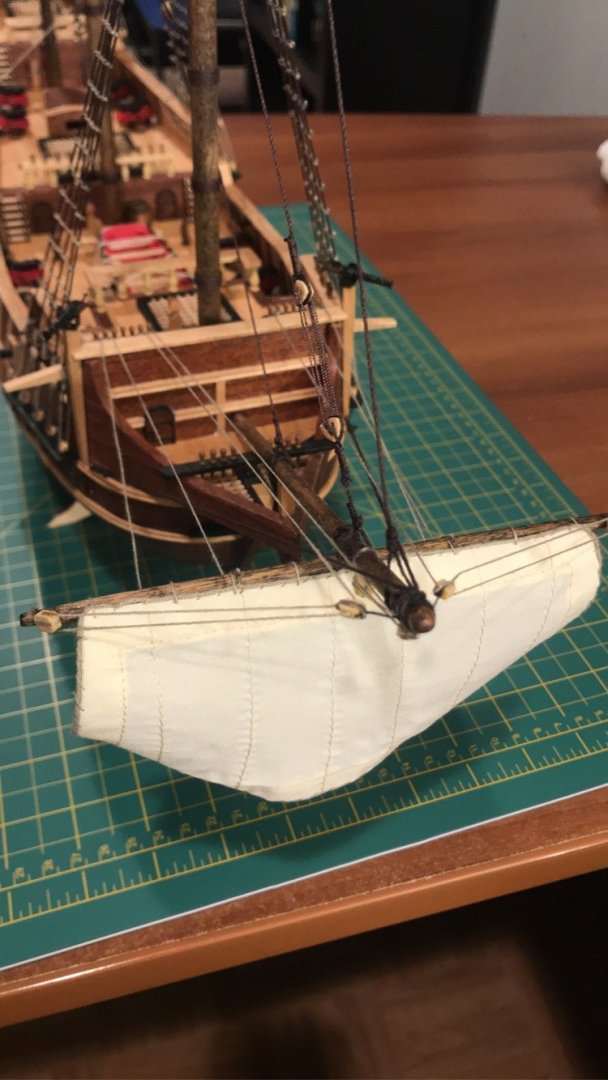
Getting the sails done as we speak. Now that I have more space for things for my next build I decided to start serving the rigging. Originally I decided against it due to time, space, and not knowing how. But last night I was taking a close up picture and realized that square knots just don’t do it justice. the GAC 400 for the sails has been working like a charm. I just cut a hole roughly the size of the sail, pin it, and apply 3 coats of it on both sides and place a small bag of rice on it (allow it to dry in between each coat) and it’s ready to go.


- 88 replies
-
- 7
-
-
- finished
- artesania latina
- (and 1 more)
-
Thanks for your post! I do like the way the furled sails look. Another look I really like is adding a polymer to the sails called GAC400 (available are Michaels crafts) and making them look like the wind is blowing into them rather than just sagging with gravity. I remember seeing this thread a while back and it stuck with me. (Attached below is a picture of the ship from the thread) https://modelshipworld.com/topic/15657-hermione-by-messis-finished-artesania-latina-189/page/10/ I am not quite sure what approach I am taking yet...I feel like either way I cannot go wrong, which makes the decision even harder haha

- 88 replies
-
- 1
-
-
- finished
- artesania latina
- (and 1 more)
-
I have actually been tossing the idea around about how to do the sails. Would you mind posting a few pictures? I really do like the idea of furled sails as it allows you to see more of the intricate rigging
-
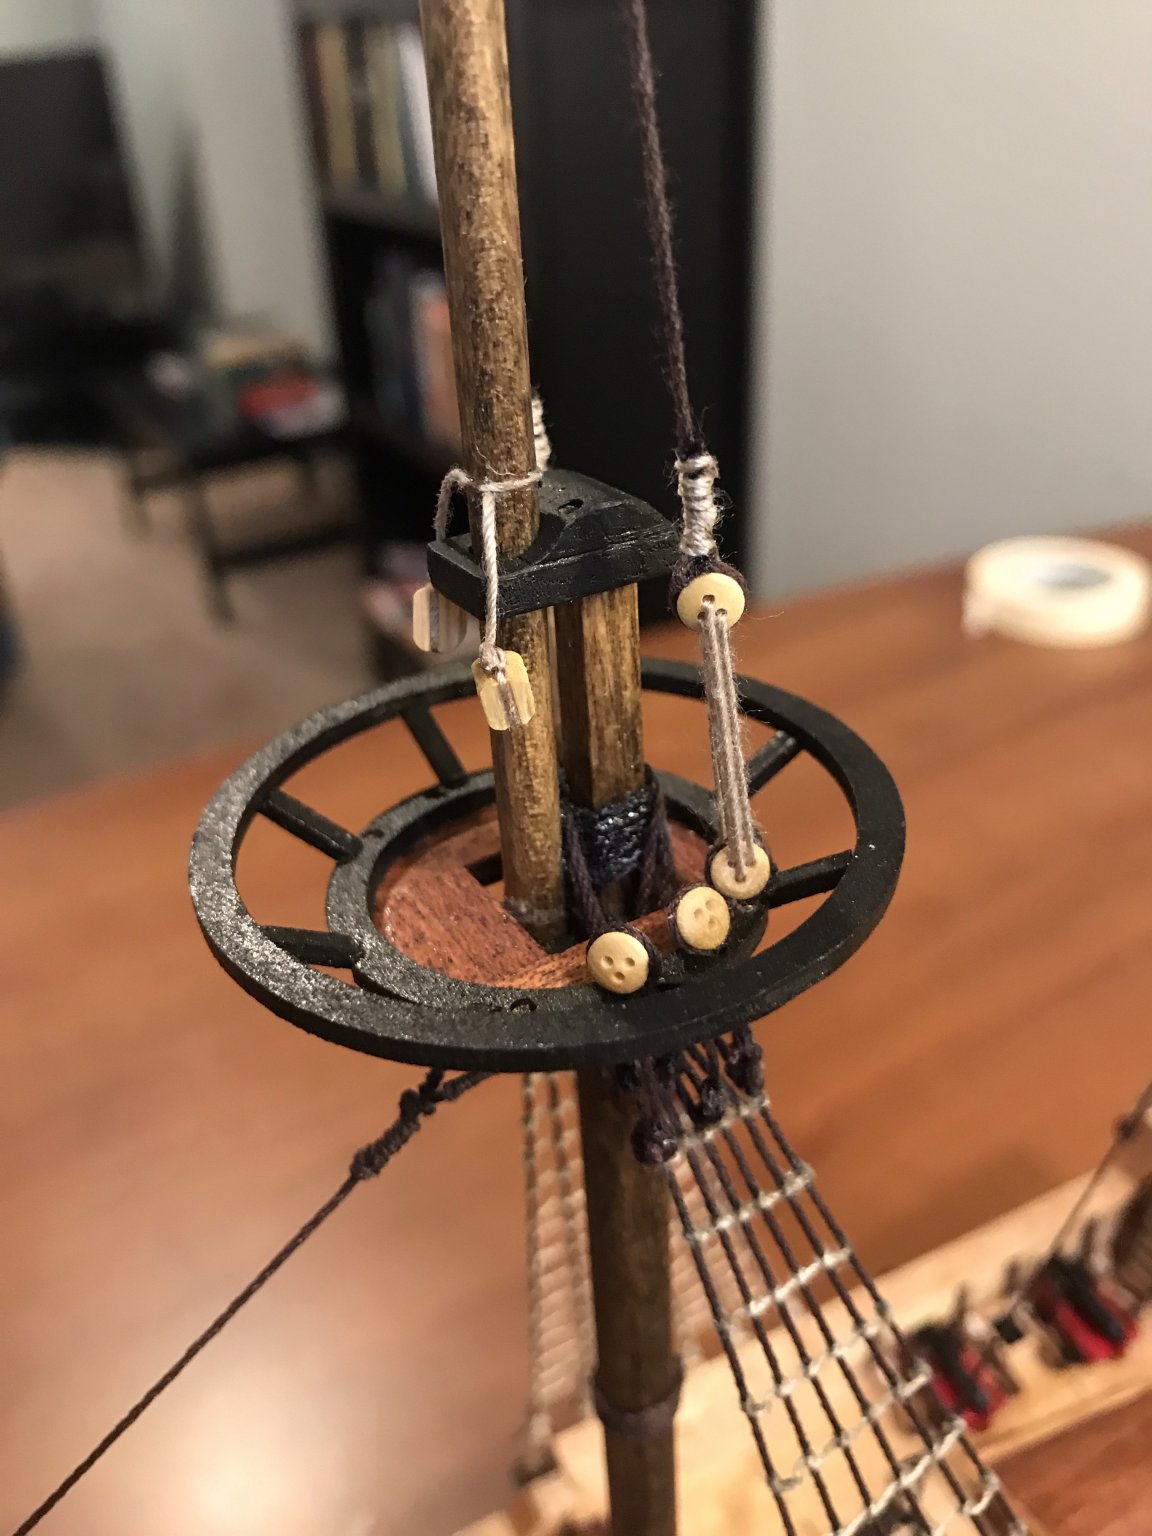
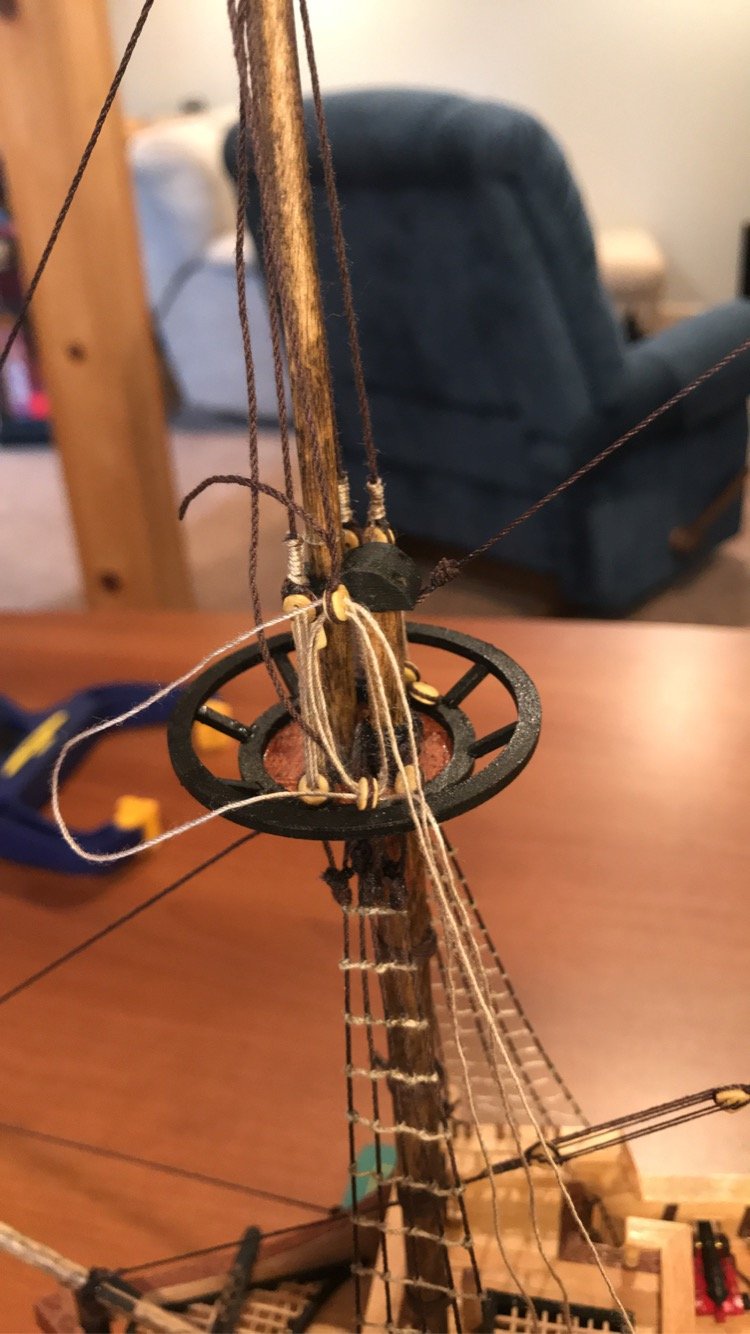
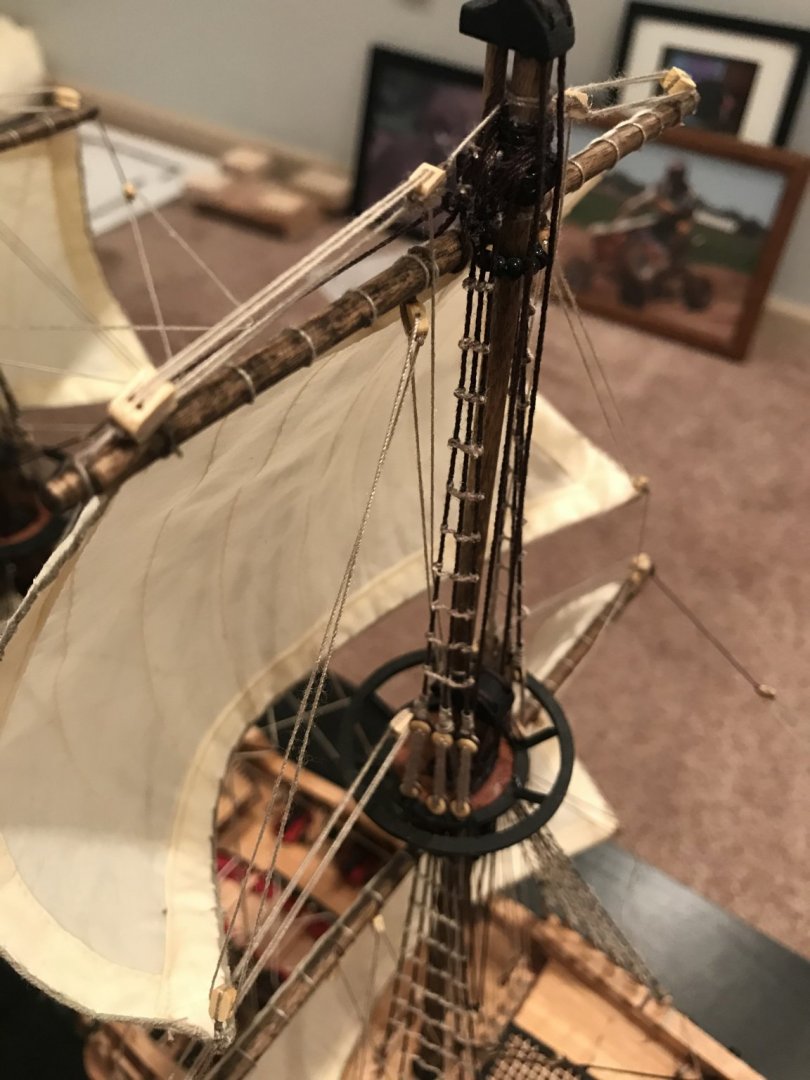
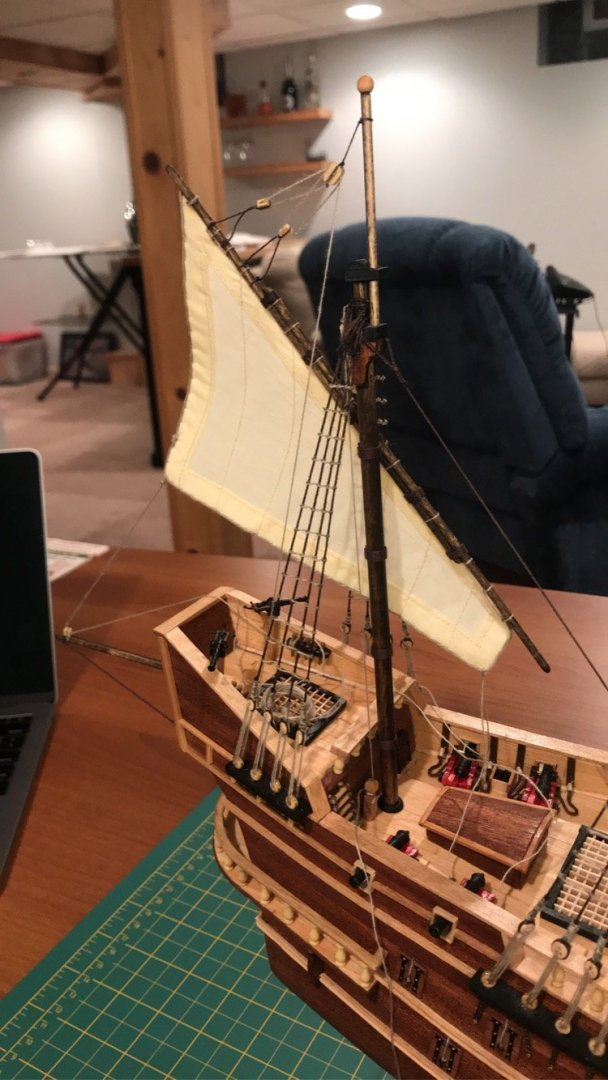
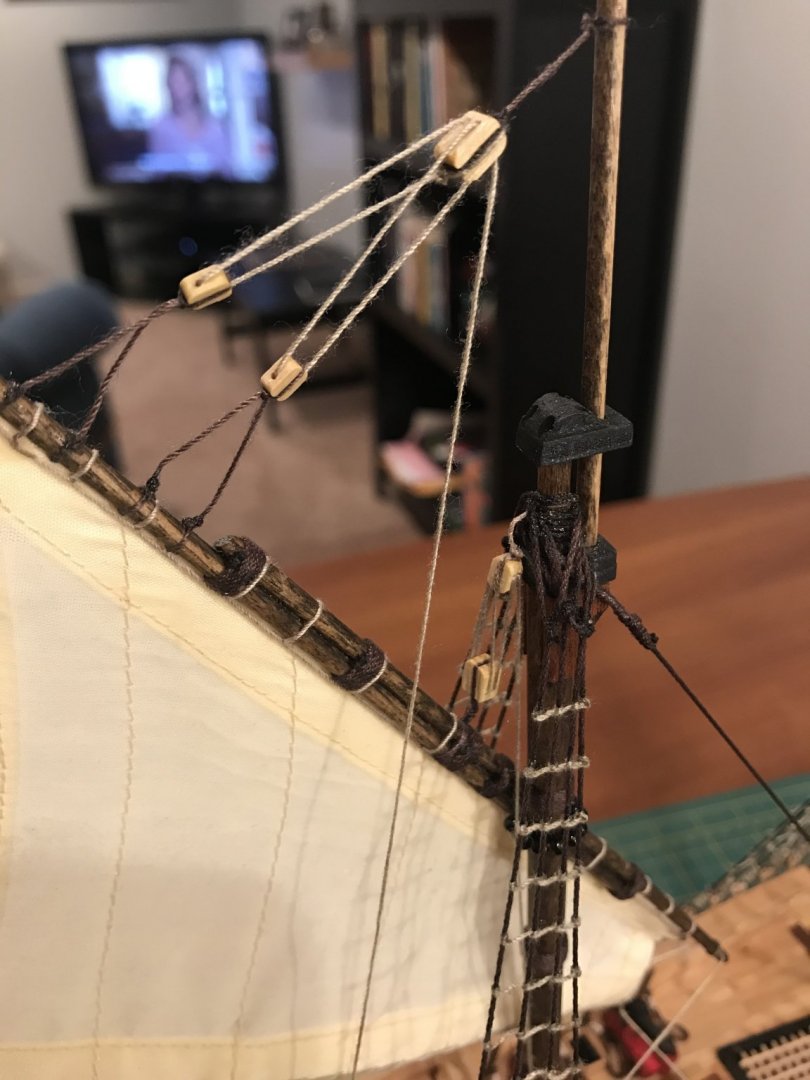
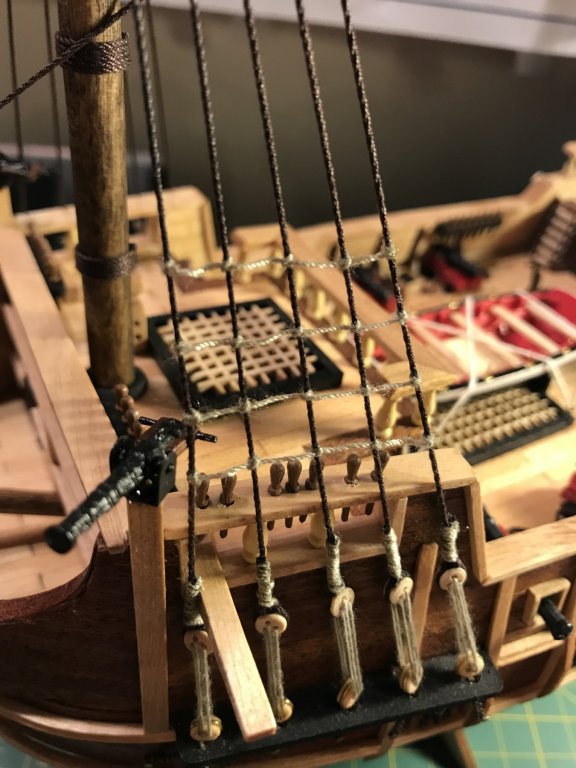
The 11th marked the year anniversary of this project, to celebrate I decided to sit down and finish the remainder of the shrouds and rat lines


- 88 replies
-
- 3
-
-
- finished
- artesania latina
- (and 1 more)
-
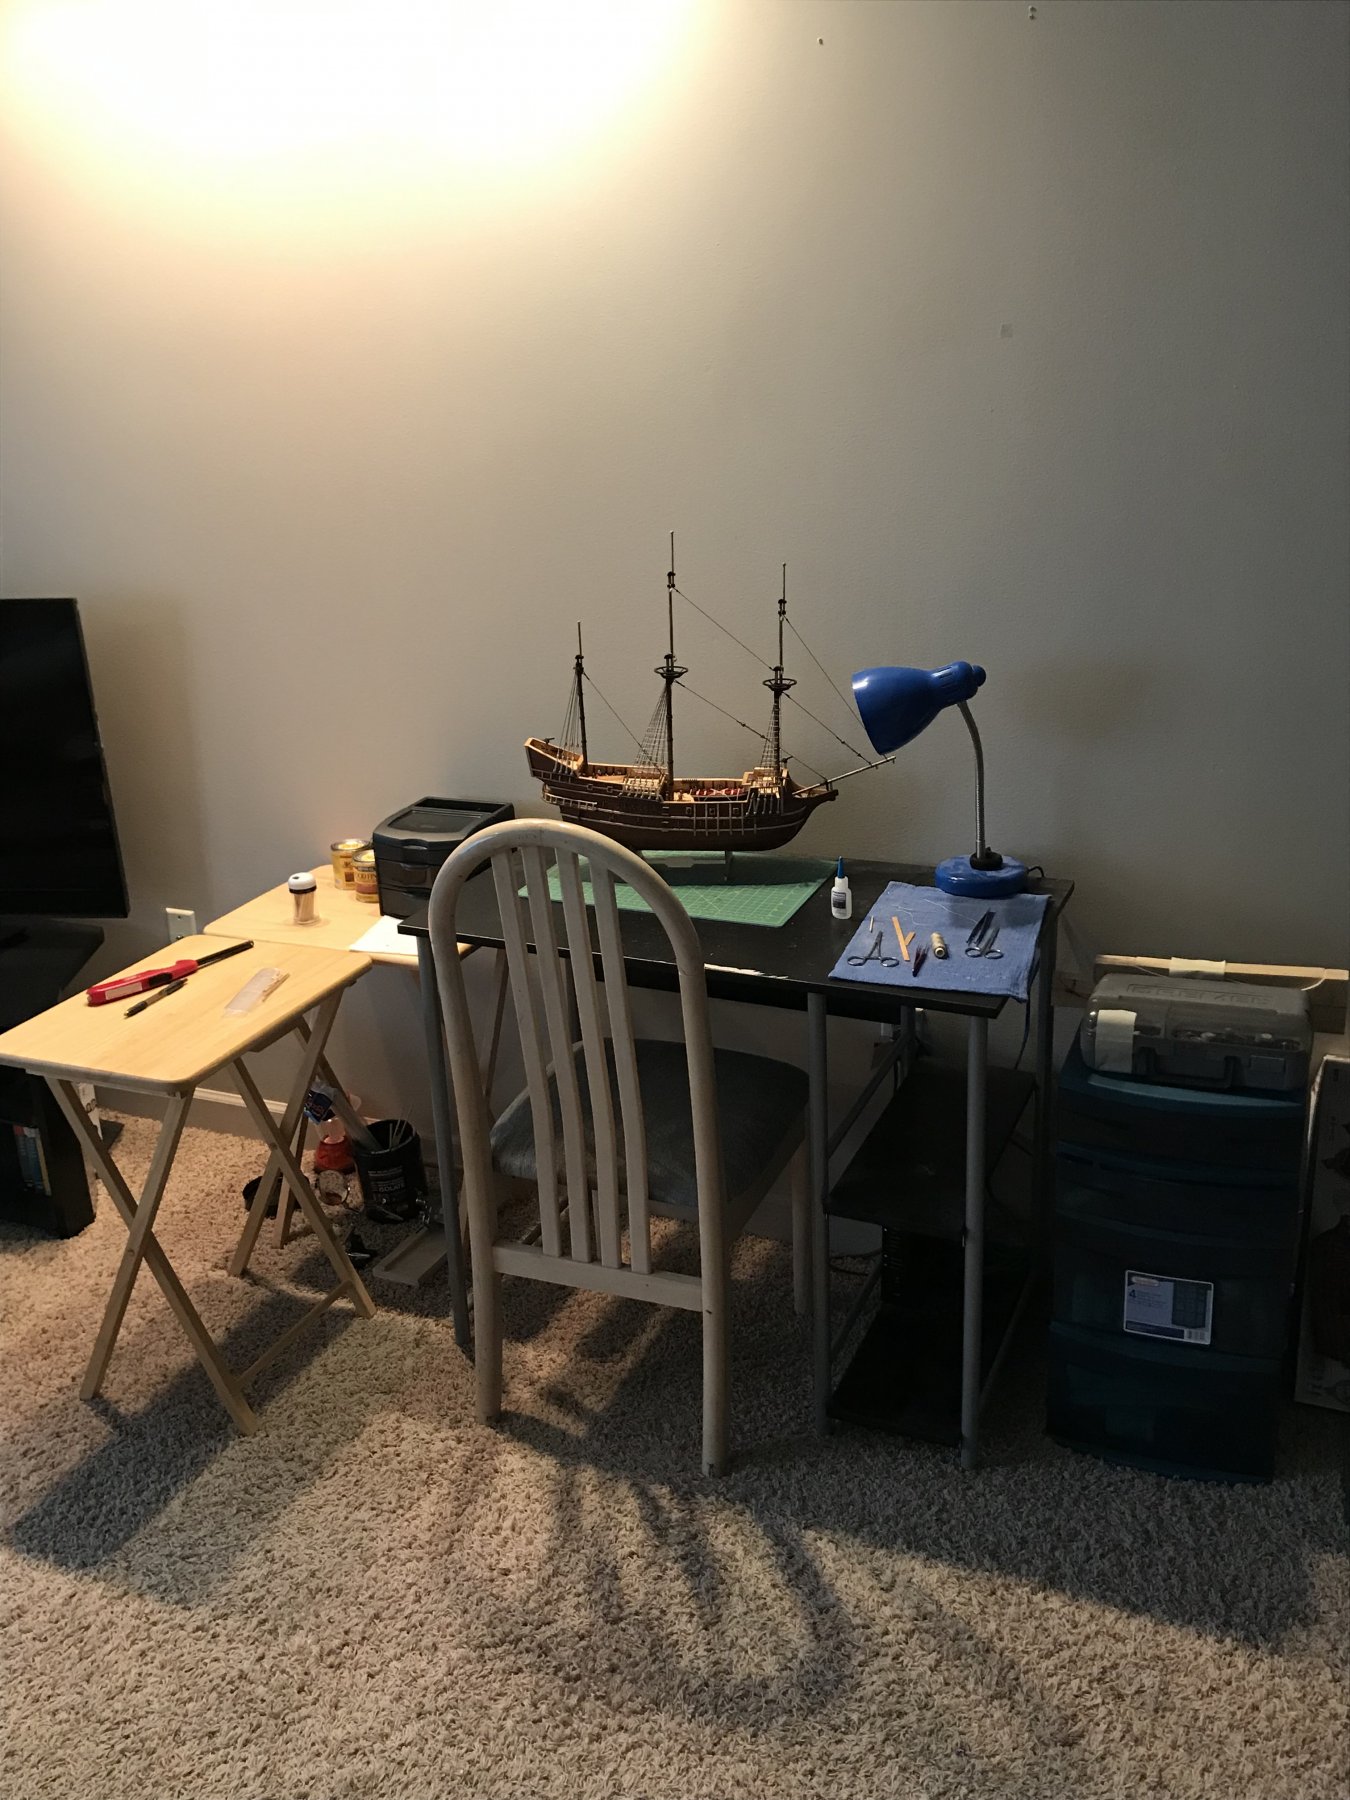
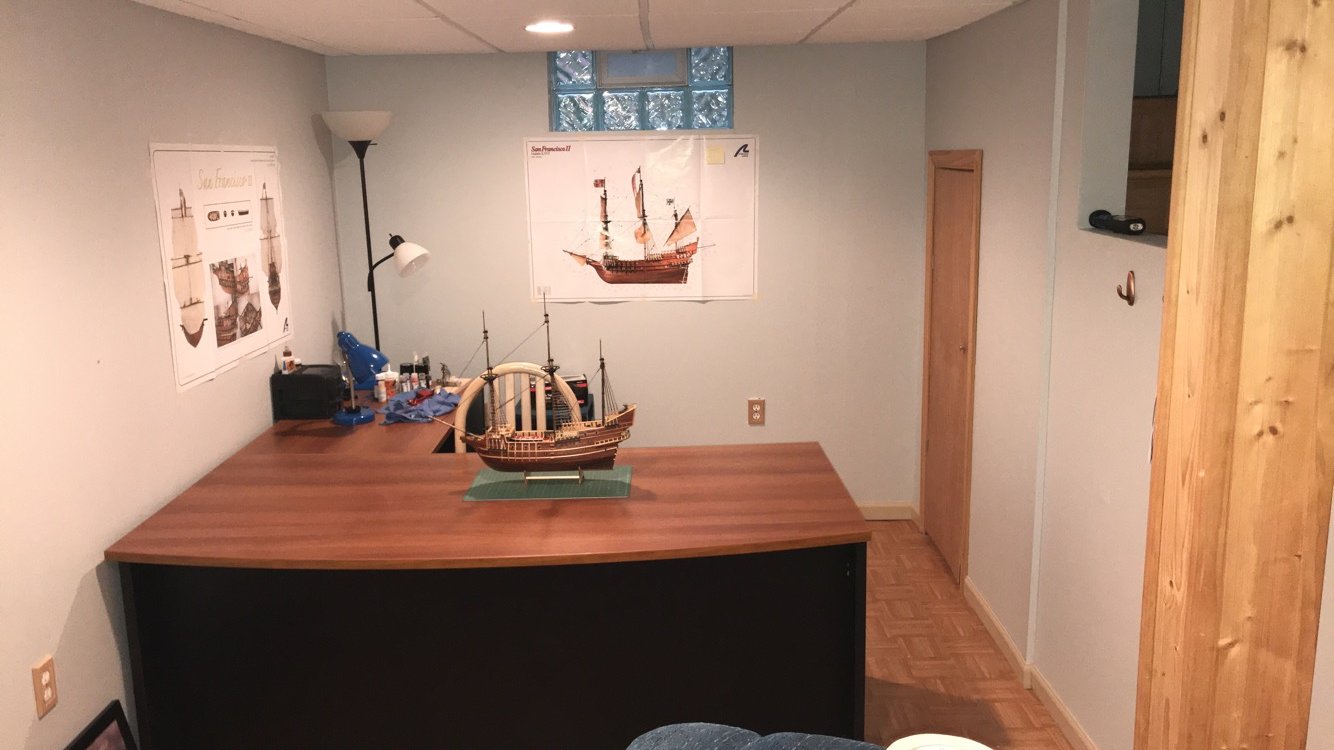
Not much to update on the ship itself, I am however all settled into my new house! Spent the evening (finally) setting up the shipyard. It’s not quite done yet, but it’s quite the upgrade from my apartment setup. I have a few more house items to take care of but I will be getting back to work soon. Cheers Old New


- 88 replies
-
- 1
-
-
- finished
- artesania latina
- (and 1 more)
-
Your sails (along with the rest of the ship) look phenomenal. I’ll admit, I bought a sewing machine just for the sails and learned to sew as the sails progressed. Not my best work. I’ll definitely look into the information on the Dutch sites if I ever decide to make another one. Thank you
-
Are you asking if I sold it or if I am willing to sell when it is done? No I did not sell it, I moved to a new state for work and needed to transport it in the moving process. And I doubt I would be interested in selling when it is complete. This is my first big shop project, I would however be willing to sell future projects. Or if you were asking where I got the lot from, a local hobby store had it in stock. If you search for “artesania latina” you will be able to purchase from their website.
-
Growing up I raced motocross and there were times when I’d have numerous bikes and four wheelers on one trailer, strapping it all down was a different project each time it seemed like so I just applied those same principles. It came to me out of the blue one day. Thankfully I only got as far as the shrouds, if I had gotten the yards on the method probably would not have worked as well
-
I was unable to figure out who to contact for more rigging line, I am glad they were okay with sending more though. I always like hearing about companies that stand behind their product. I’m glad you were able to finish your kit. Feel free to post some pictures here if you want. After working on a much more involved model, looking back I enjoy the simplicity of the solid hull/smaller kit and will probably do another one similar to this one day. Cheers. Also, now that I have seen other kits, I am starting to think the instructions and diagram wasn’t as bad as I originally thought haha
-
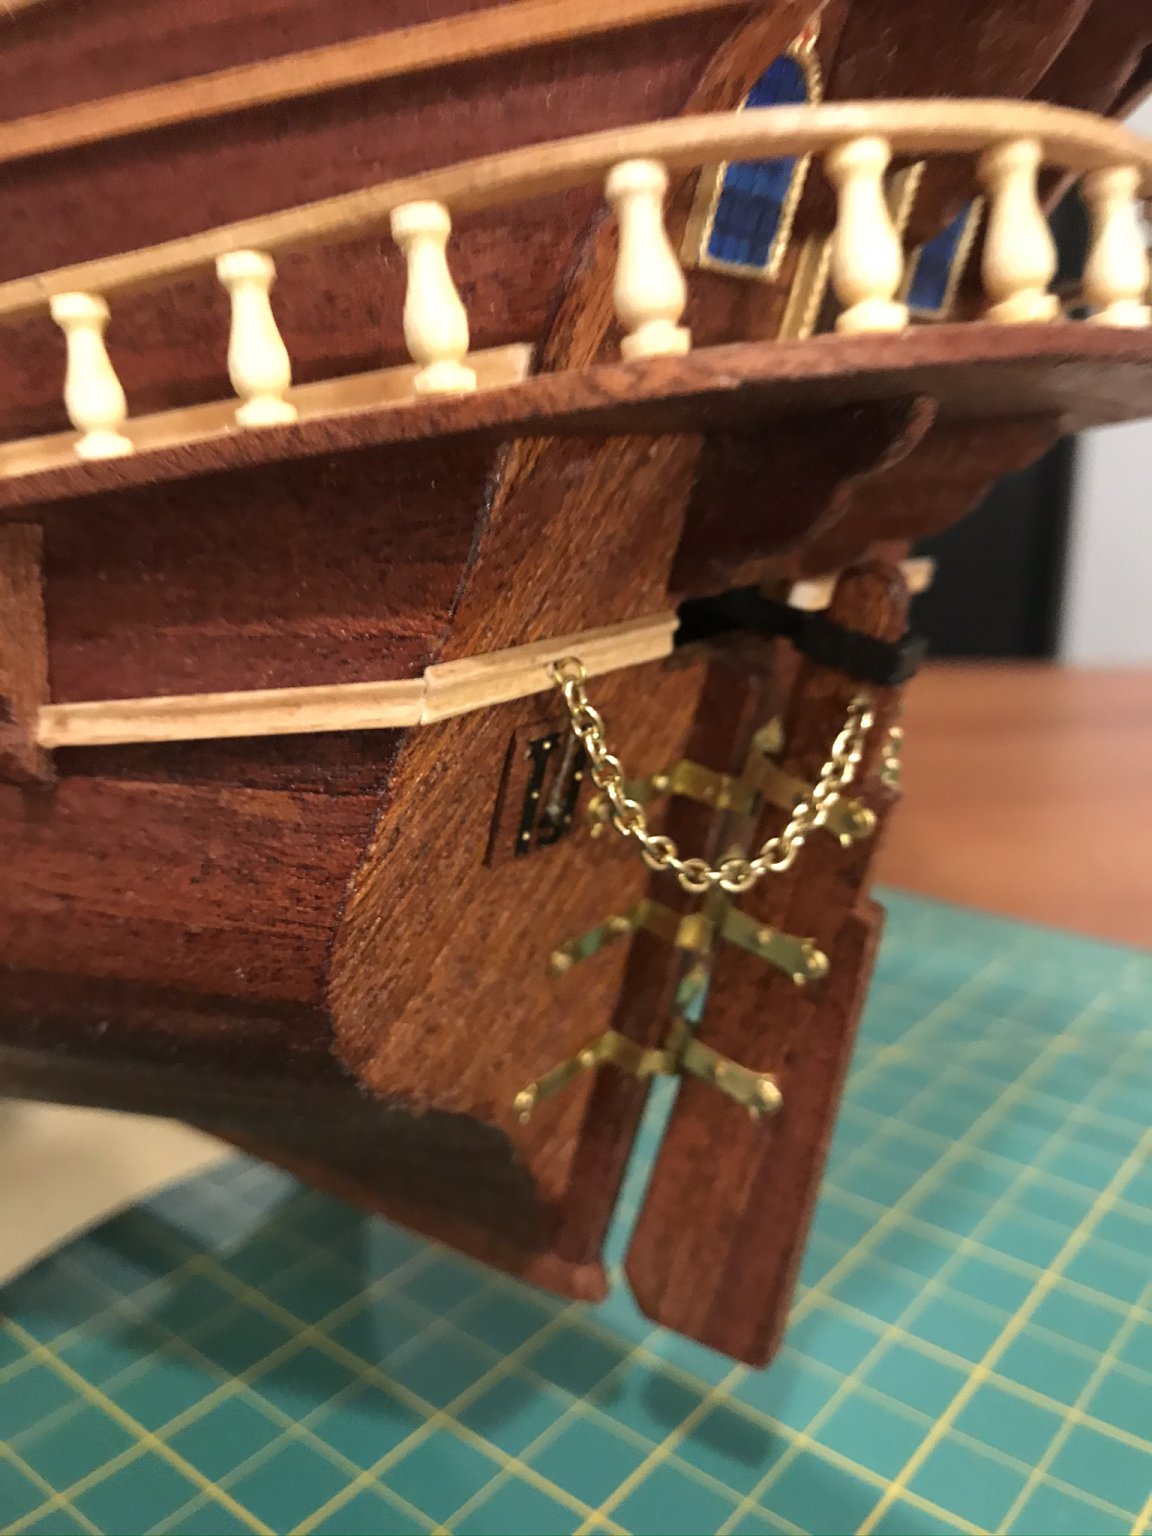
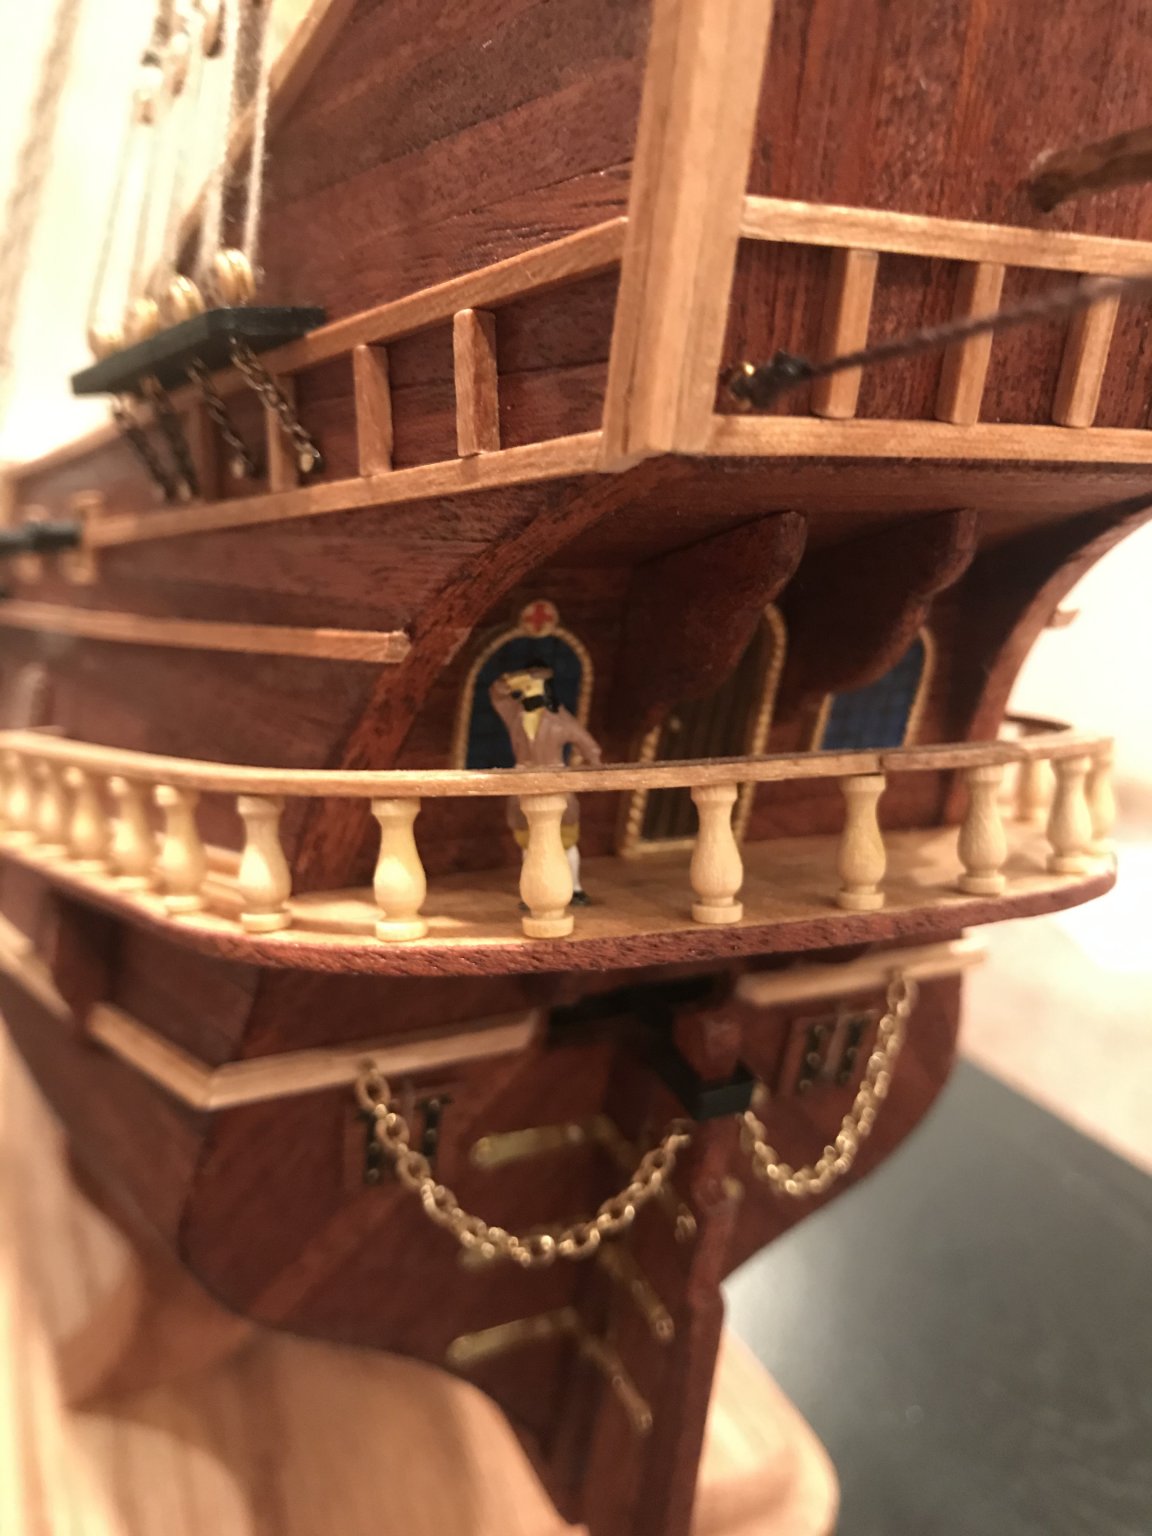
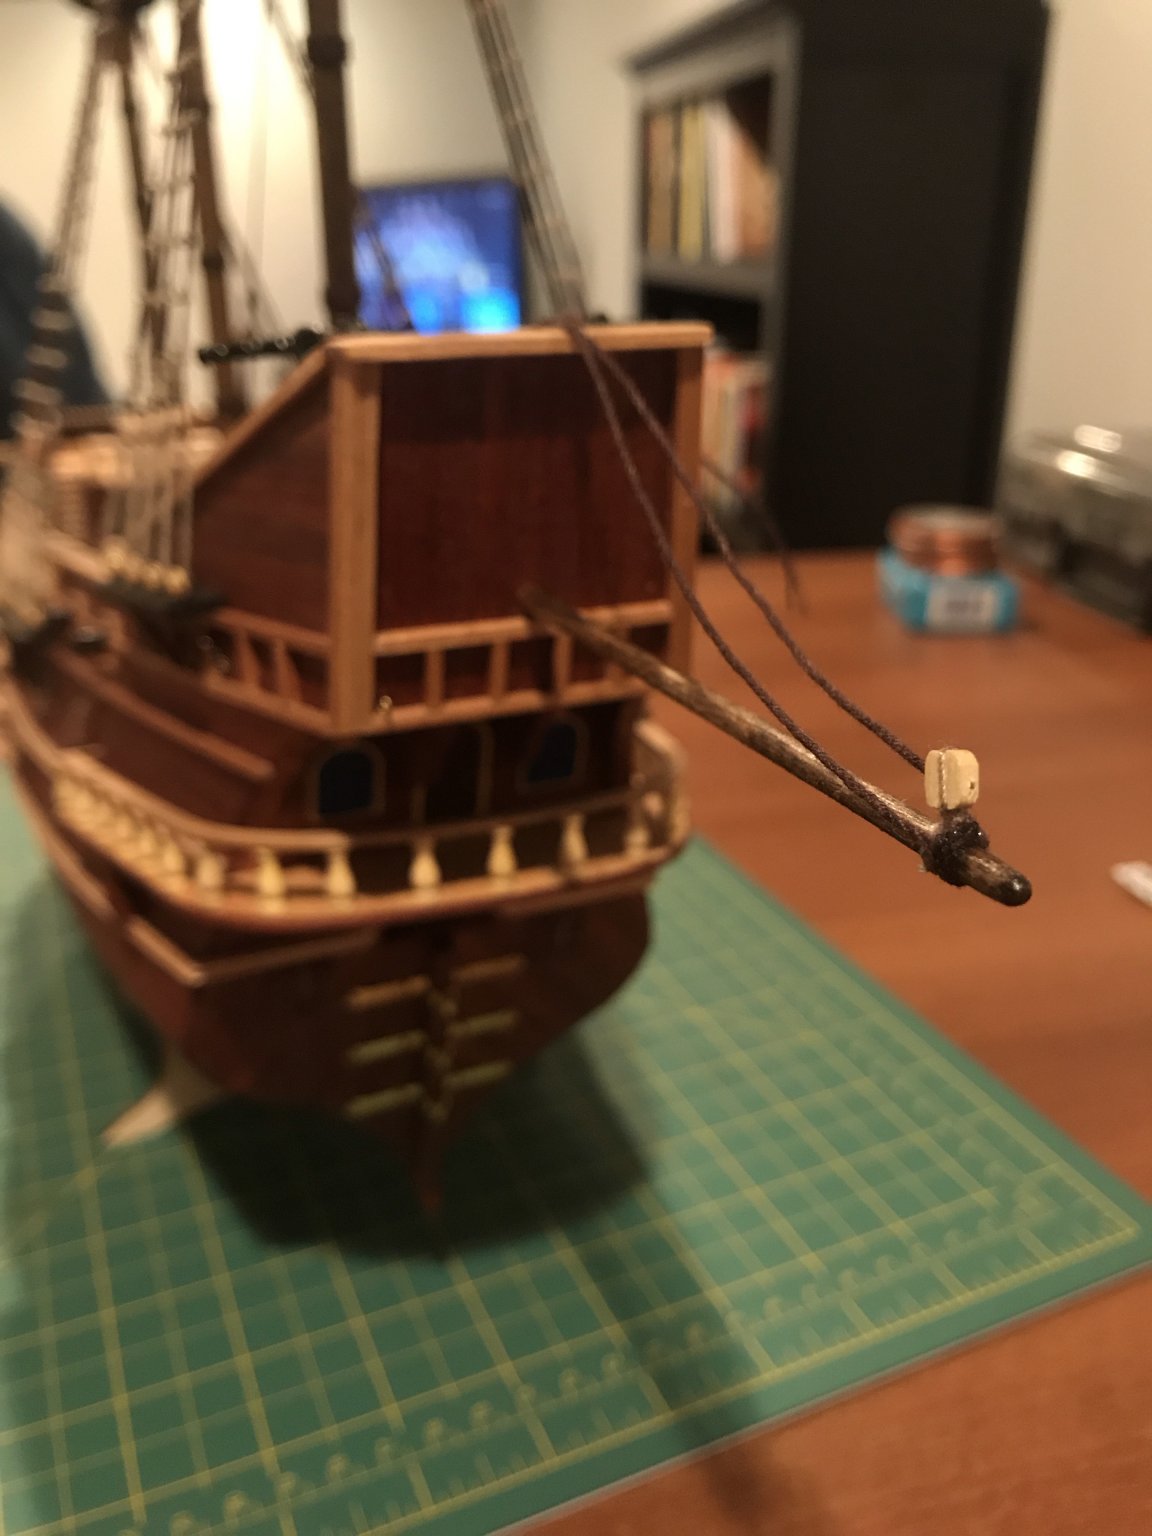
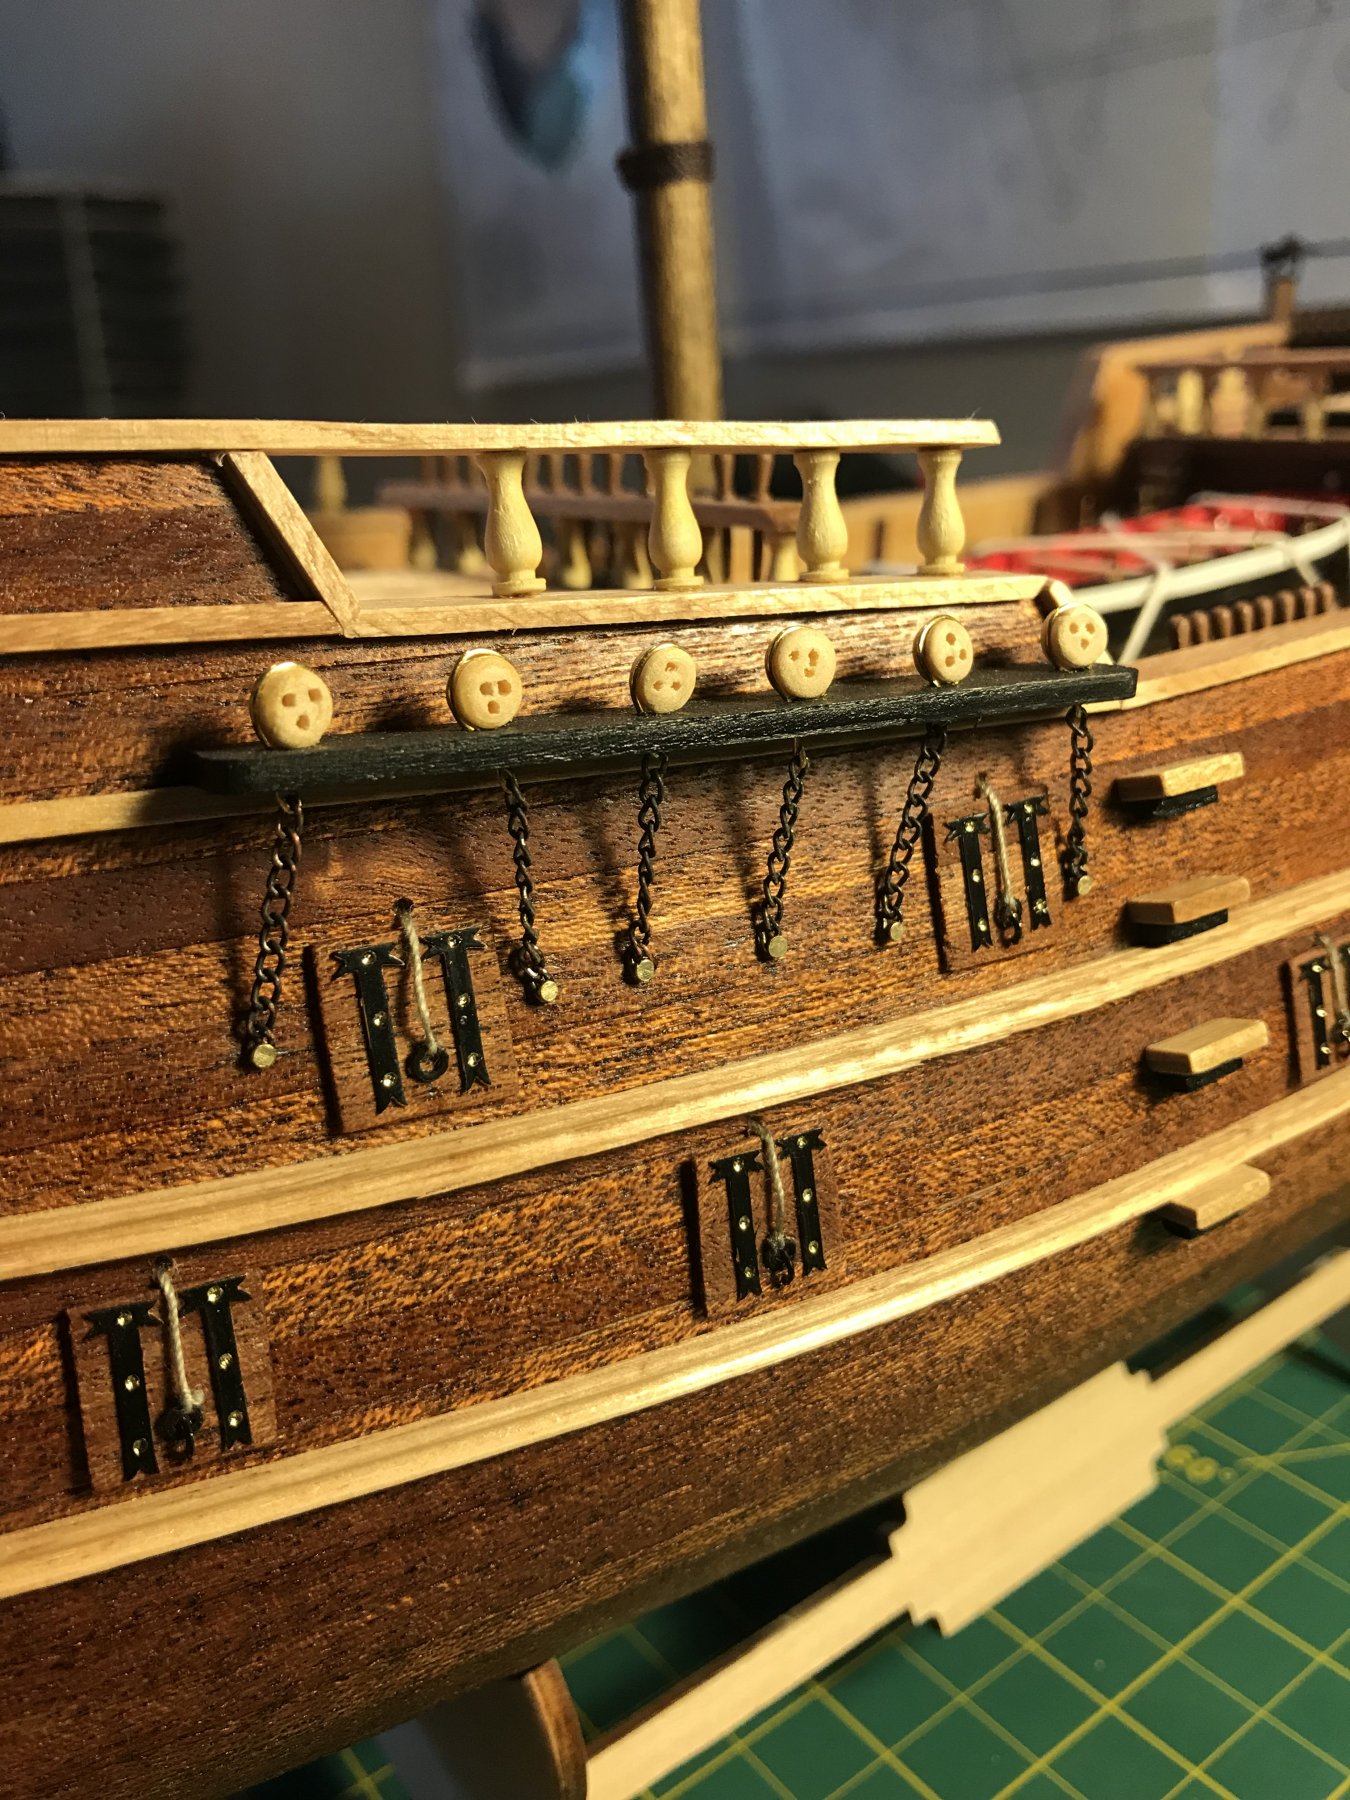
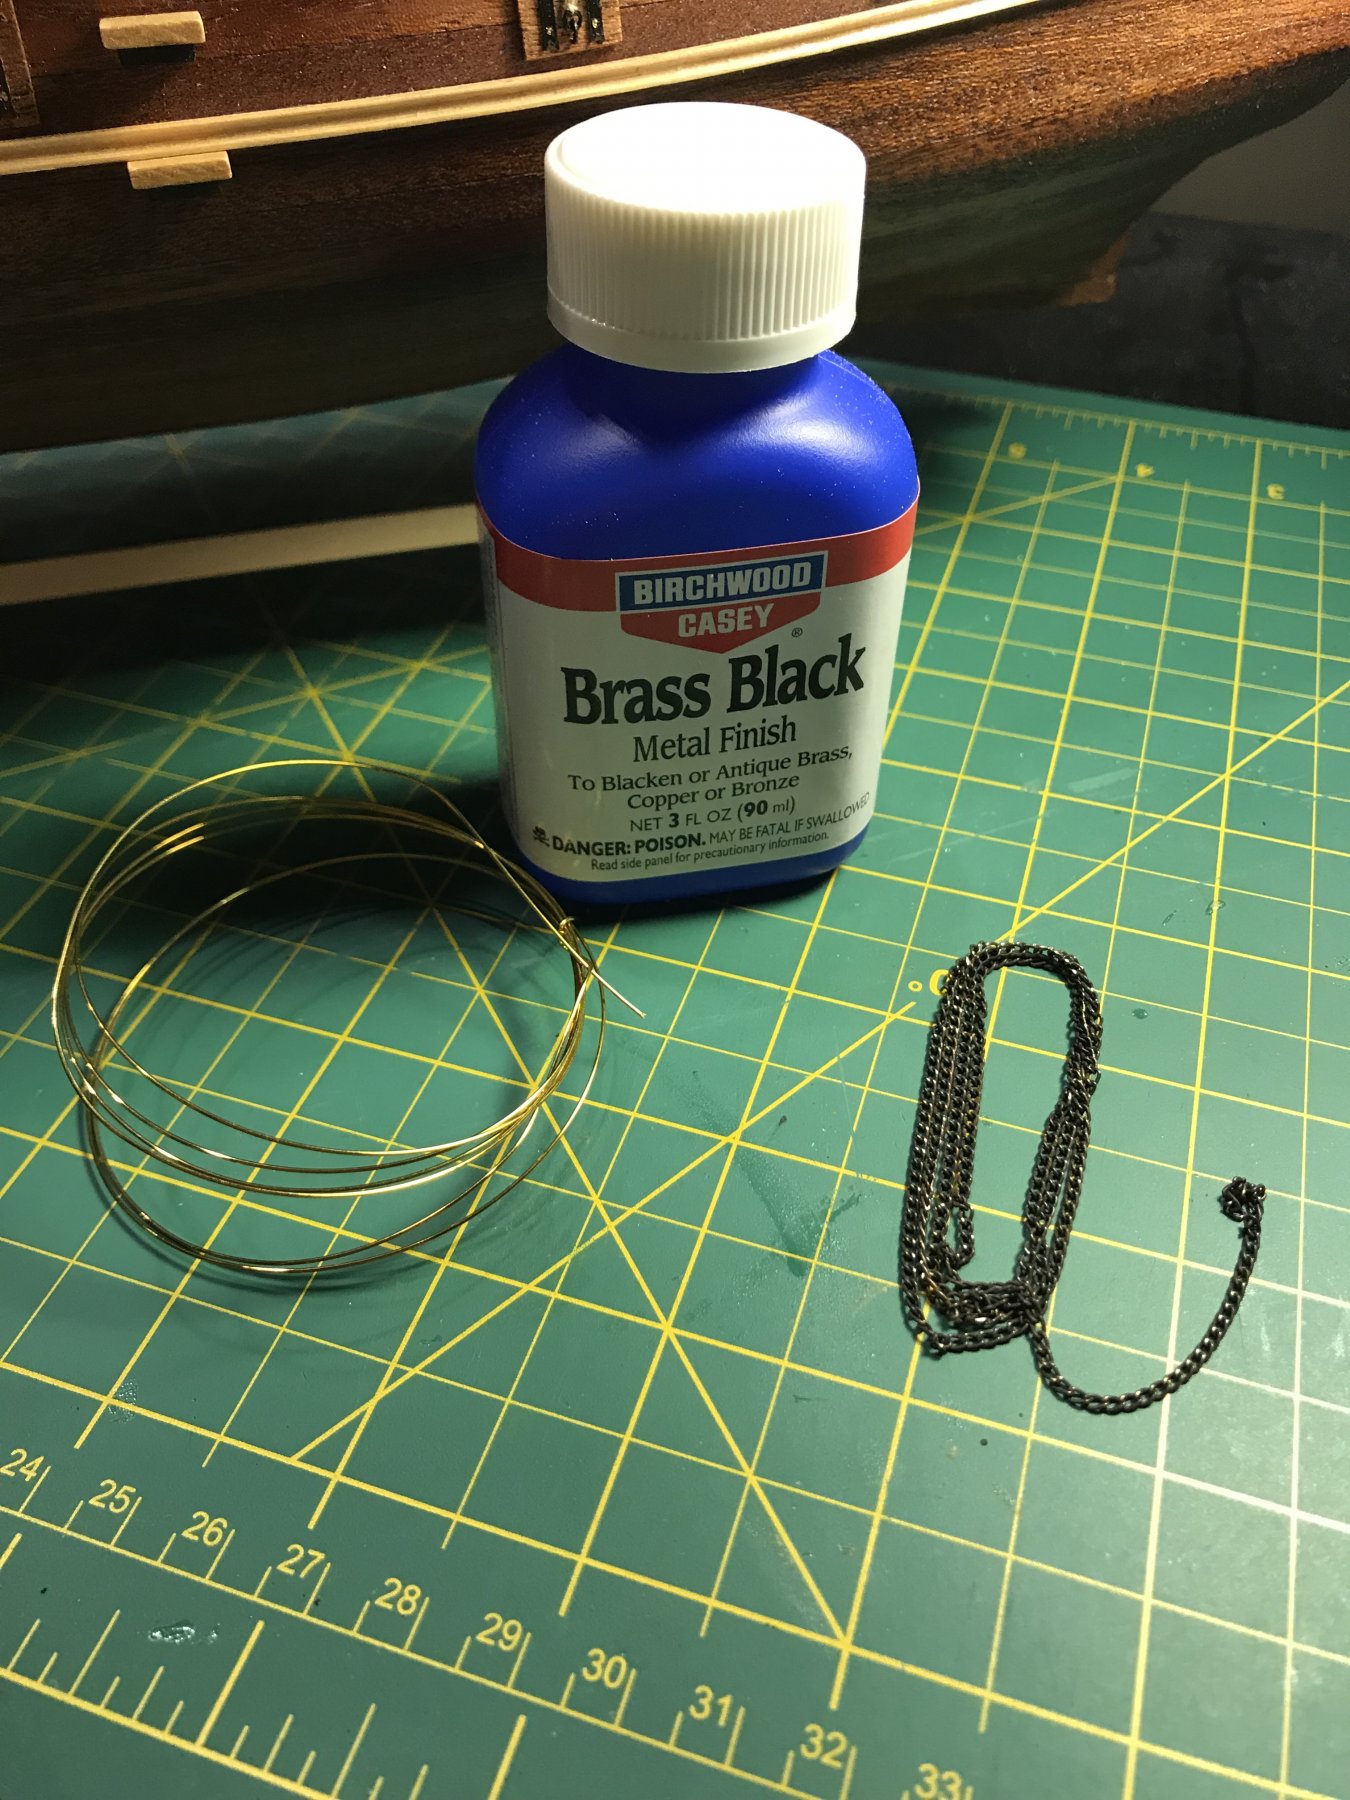
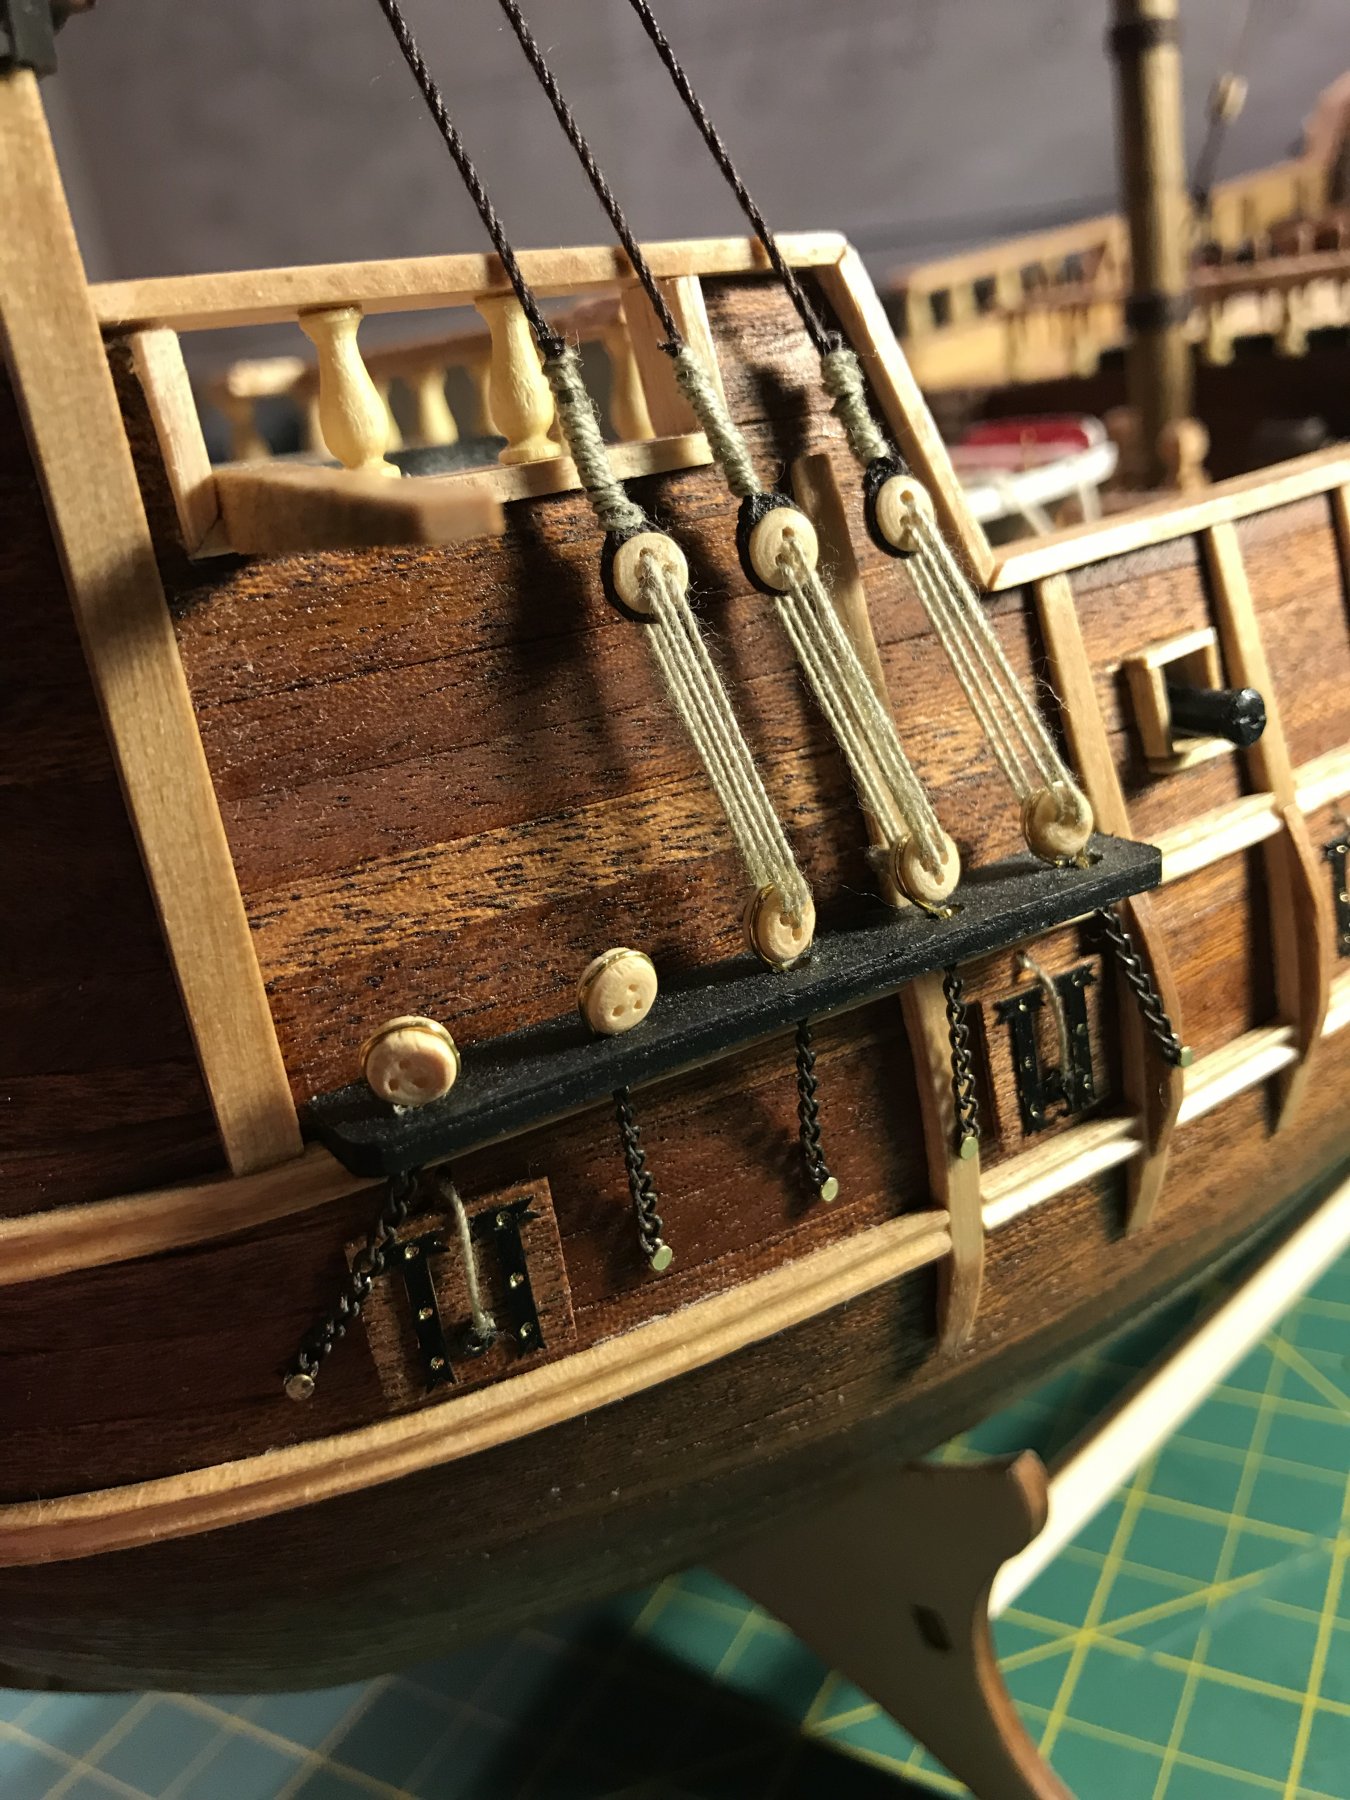
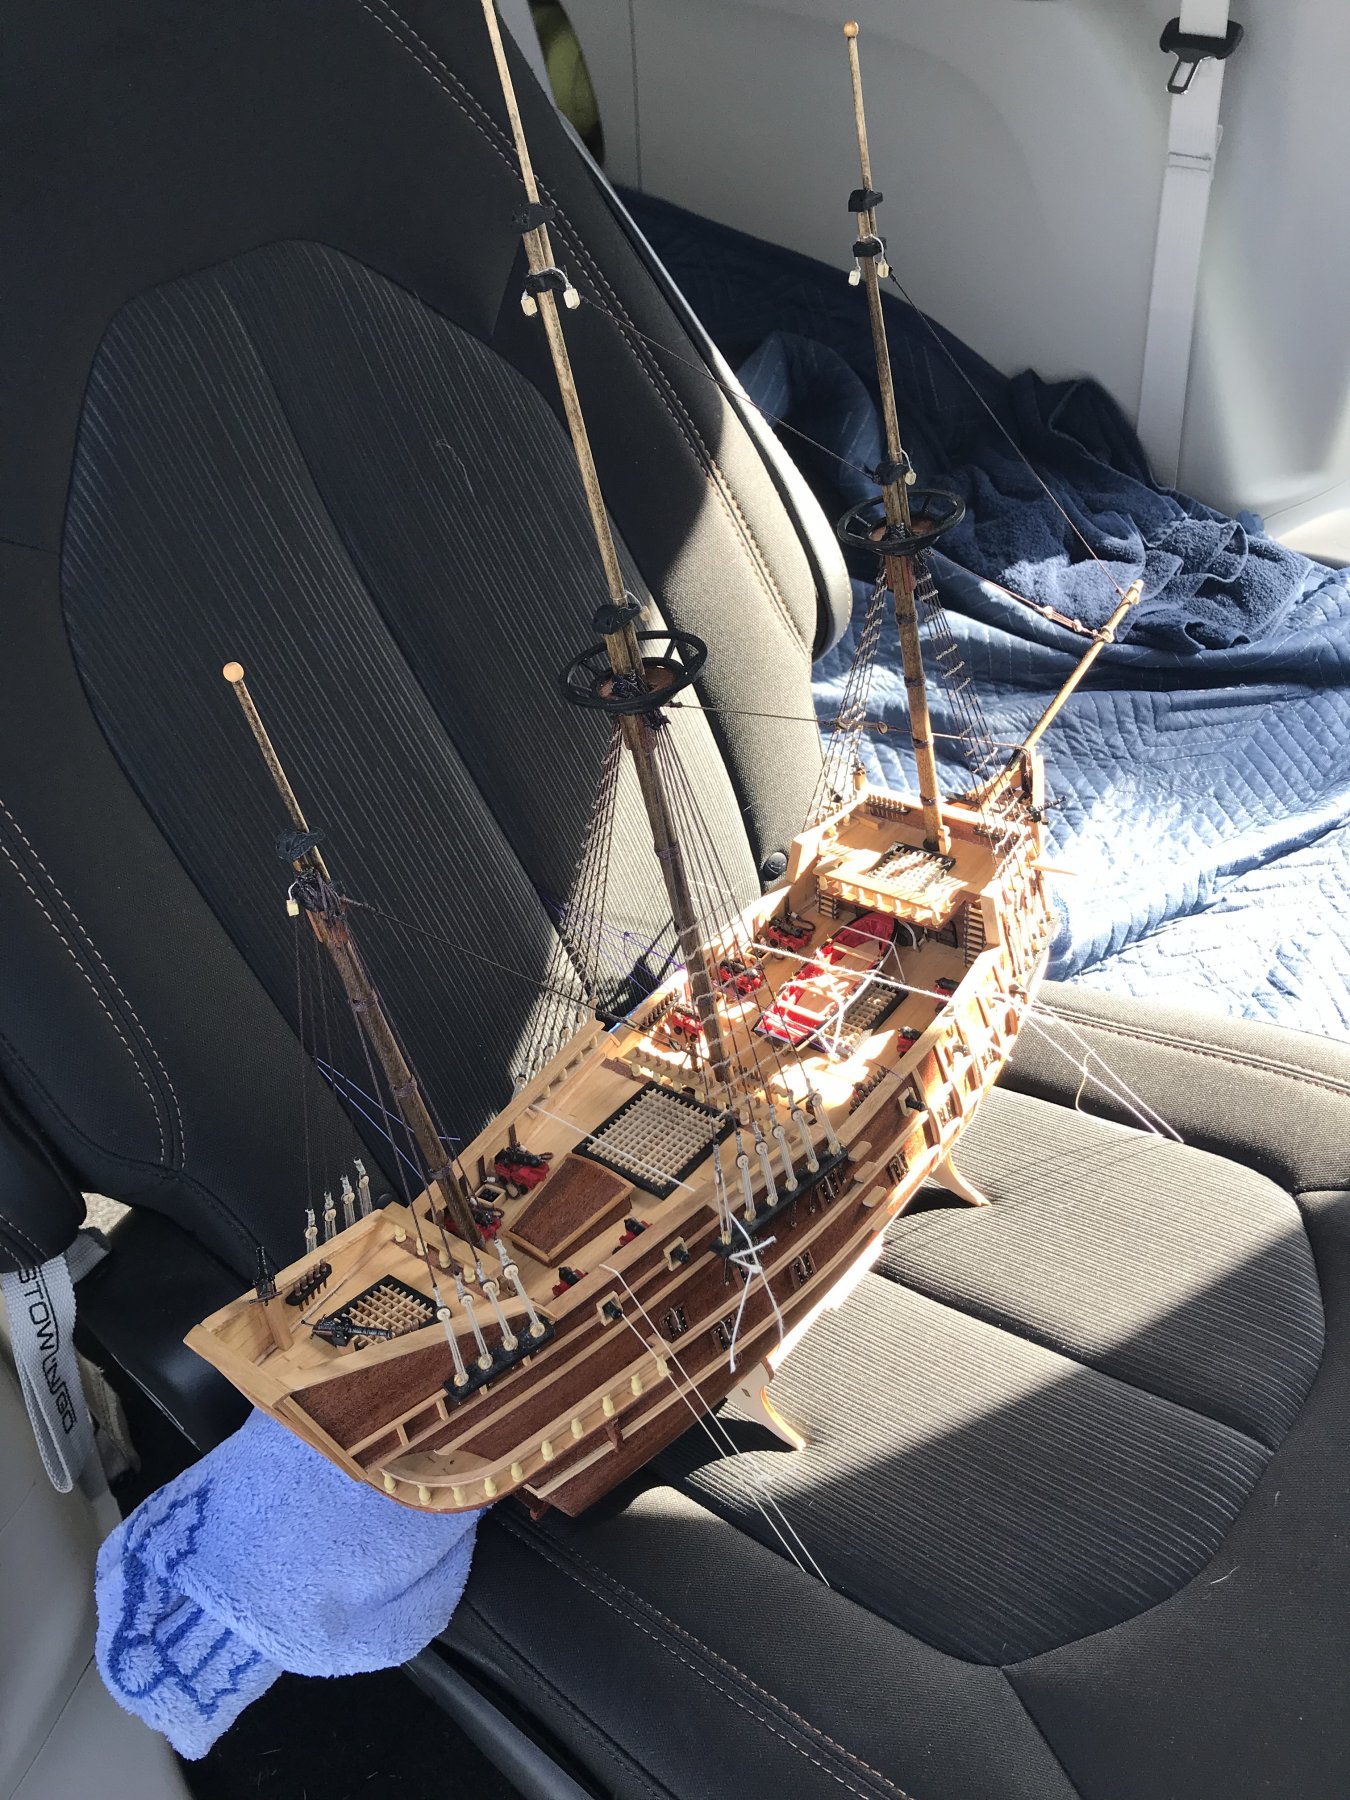
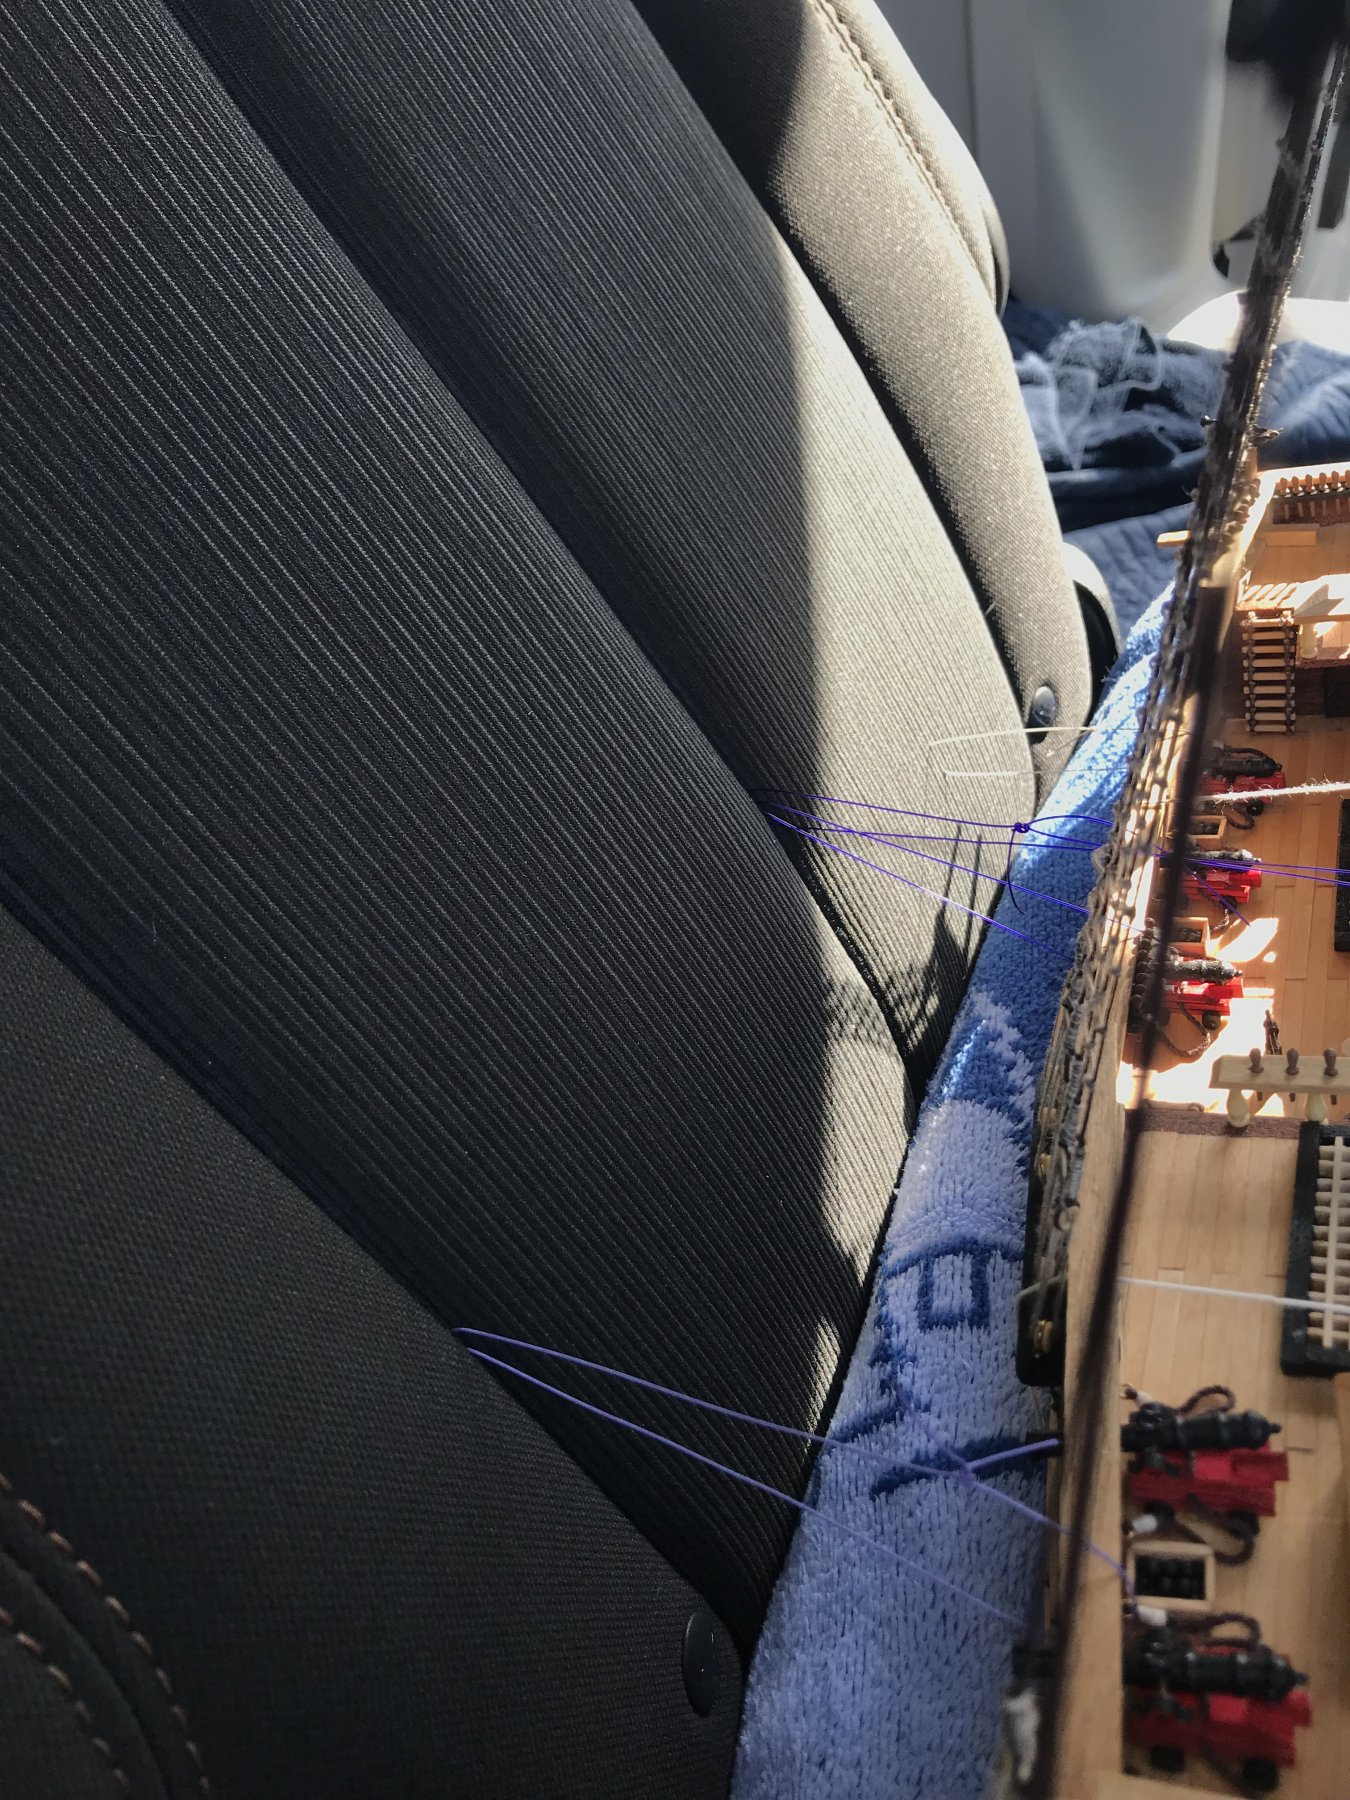
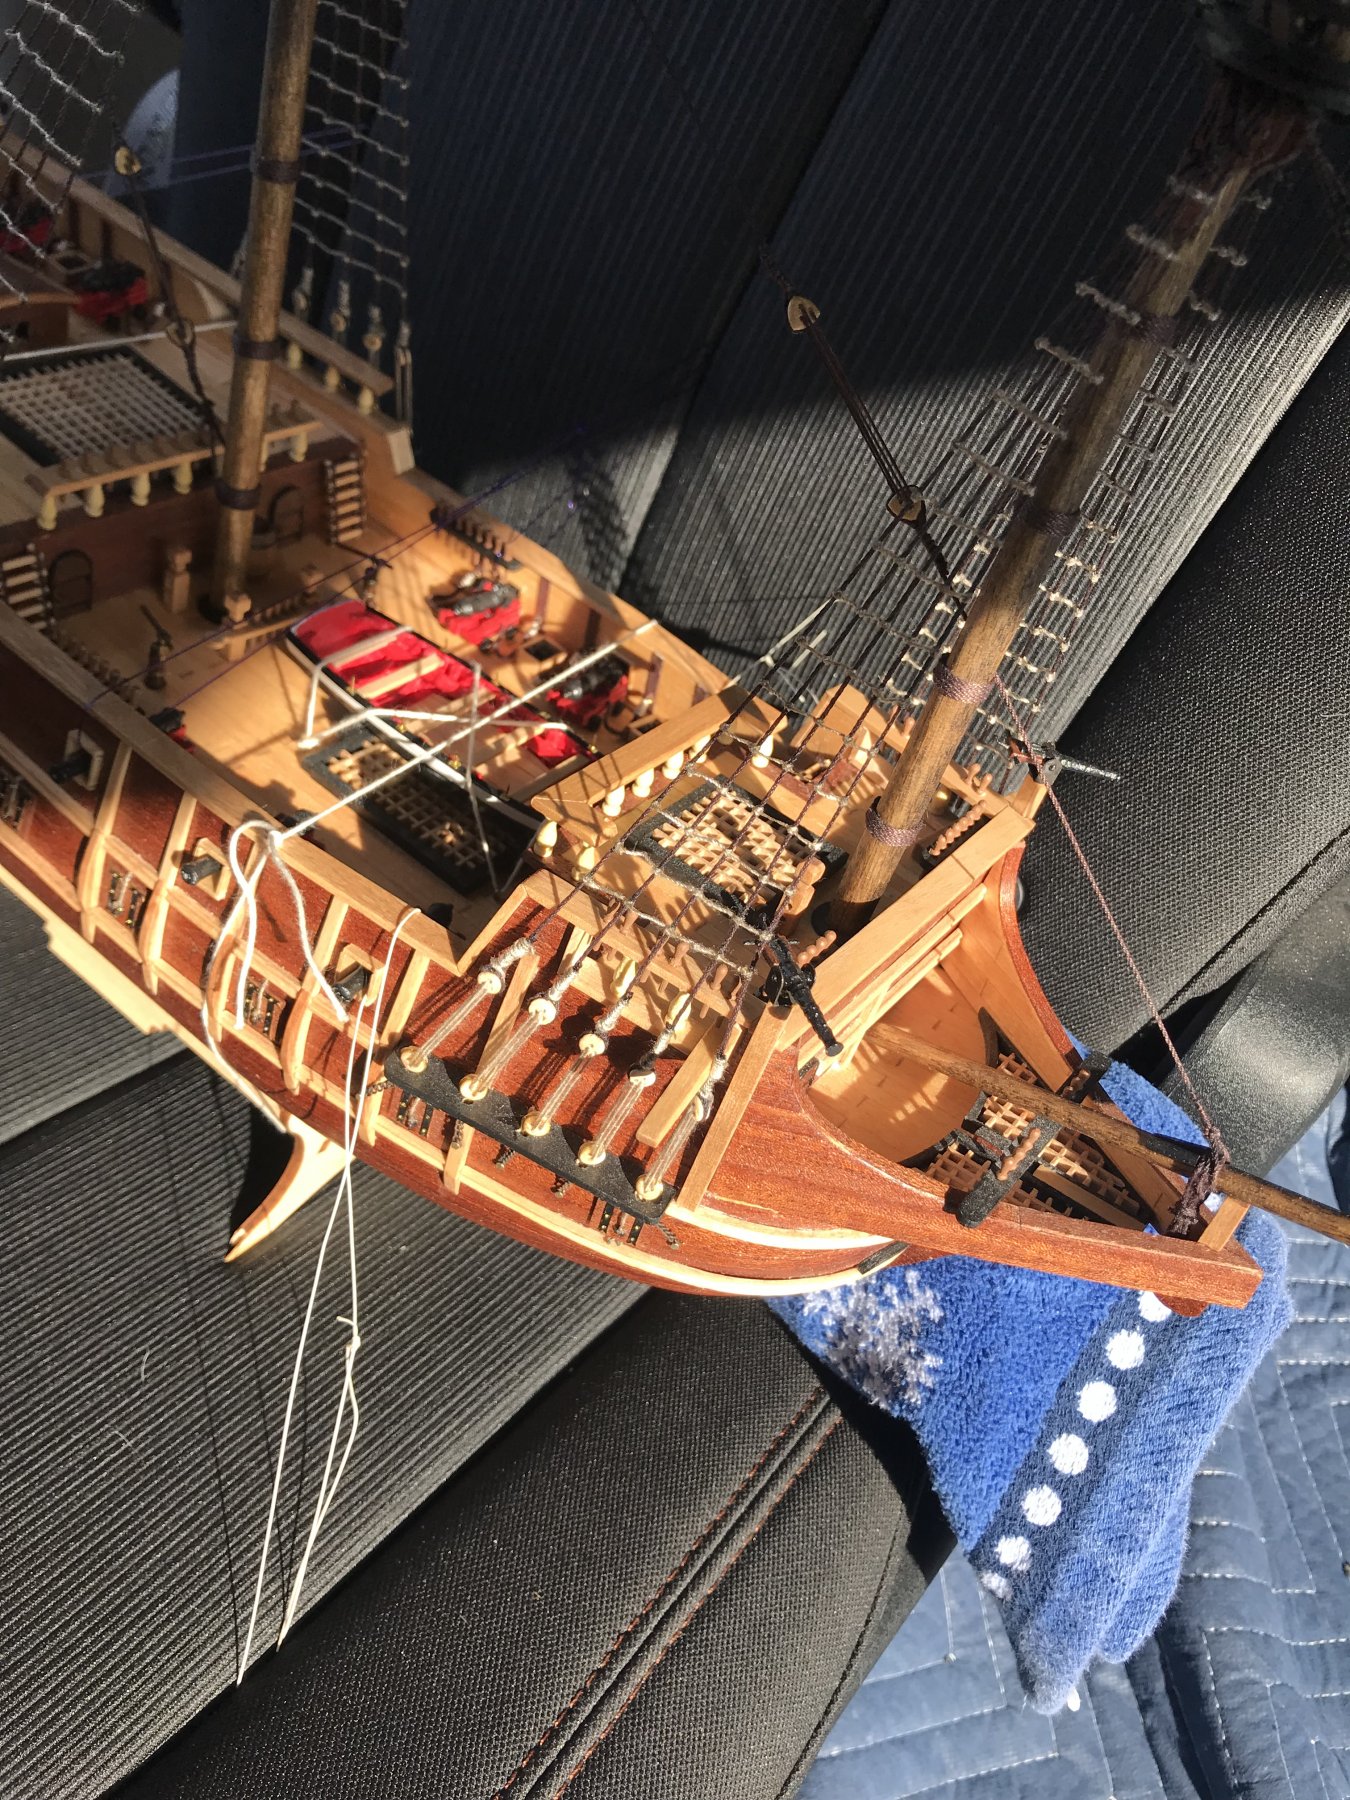
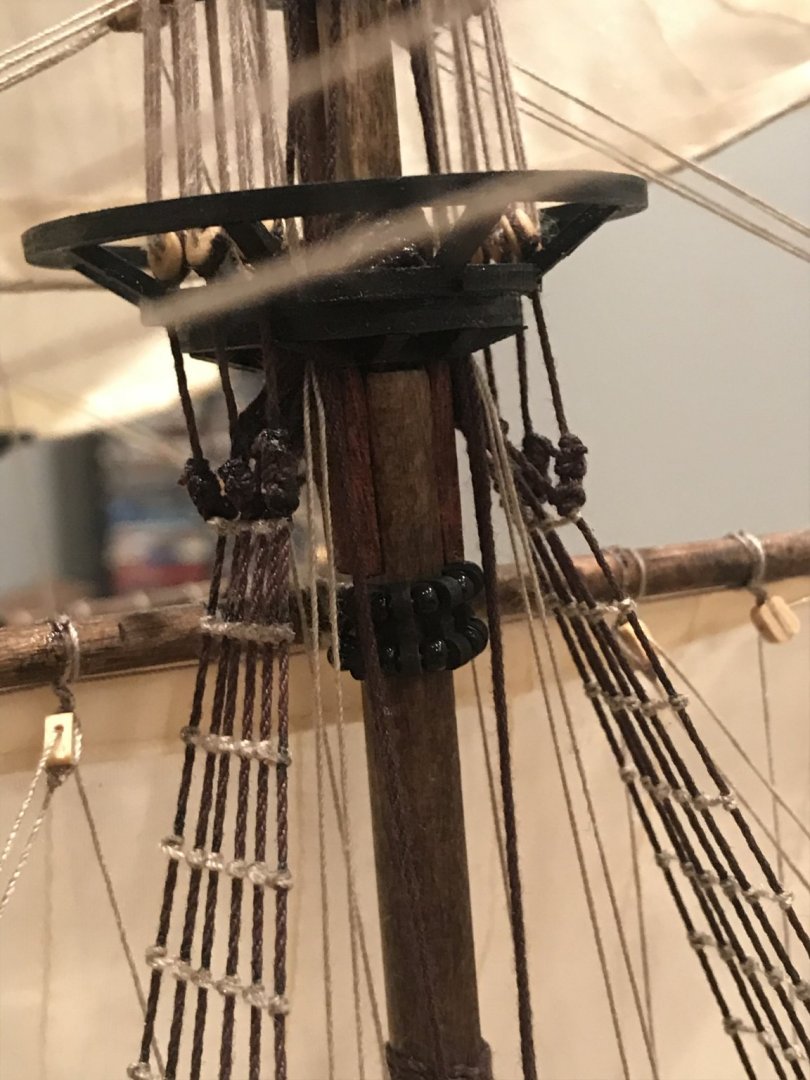
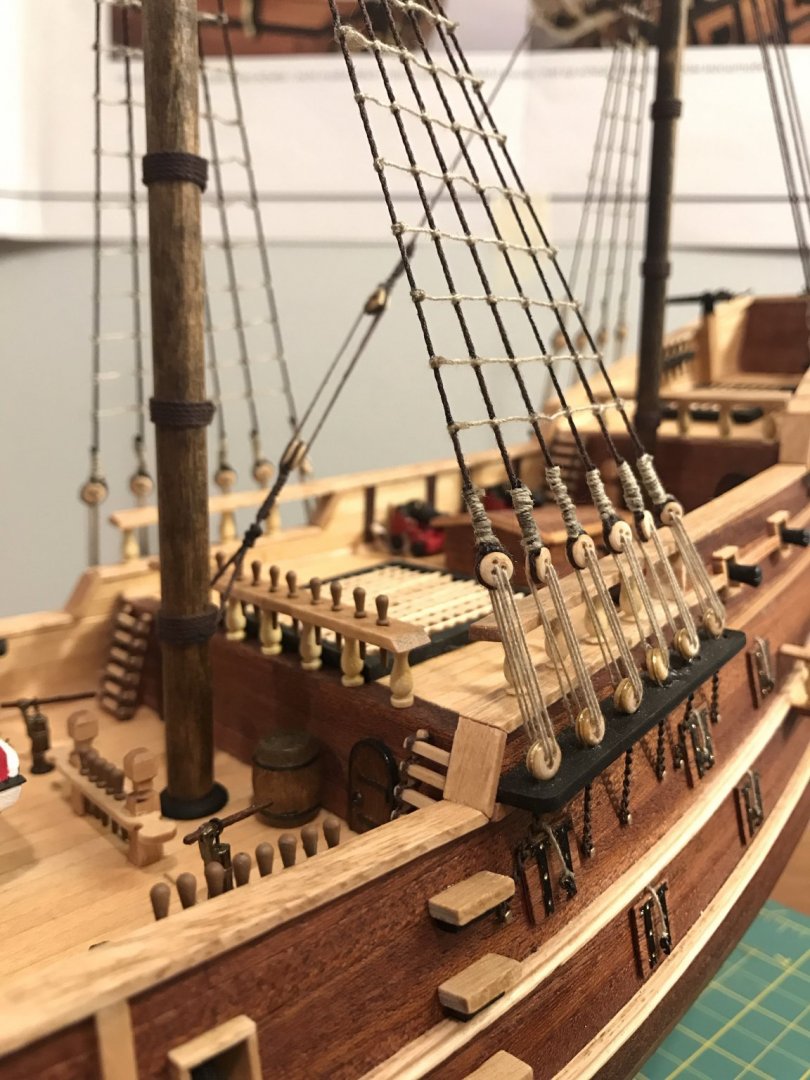
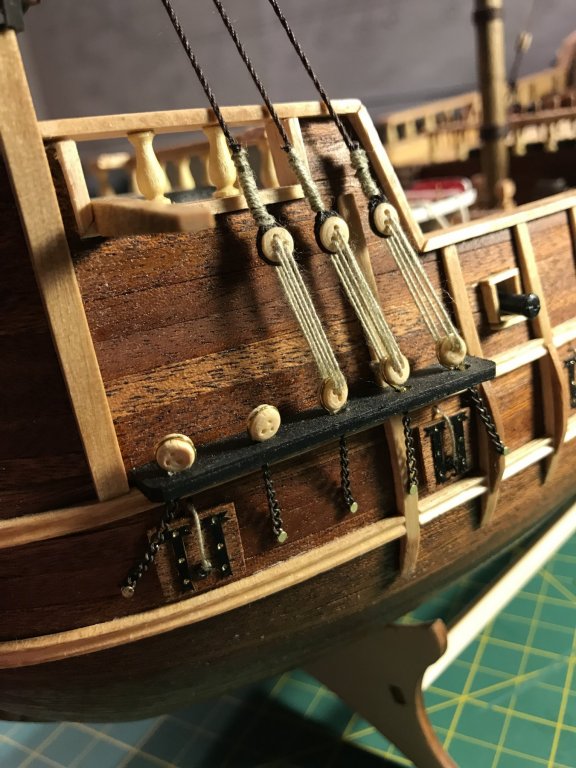
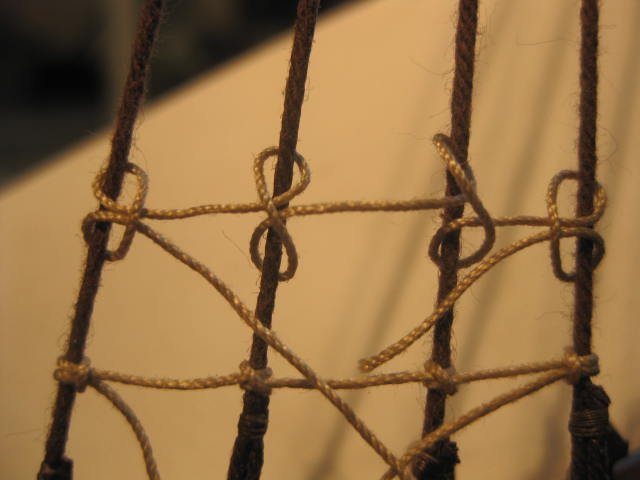
Progress has been slow lately, and is currently on hold. I am currently in the process of moving to Michigan. I was hoping to have all of the shrouds and ratlines completed before the move but i didn’t quite make it. A lot of the dead eyes that came in the kit are very poor quality, I used what good ones I could find and am currently waiting for a shipment of more before I get back to work. I used this brass black due to change the colors of the deadeye chains from brass to black, I think it looks 10x better. It’s simple. Just clean the surface and let soak until desired color. Rinse. Dry. Many ways to tie ratlines, here’s the method that I used A picture of my old work area, my new space is going to be much better. While browsing the forums I’ve seen many people who have built shopping crates for their projects....I’ve also seen a few of those projects get unpacked with varying levels of damage. I also don’t gave easy access to a workshop at the moment so I took a different approach. I tied the ship to the stand by wrapping string around it in a few places. I then placed the ship/stand on the backseat of my vehicle i then used nylon suture (medical fall talk for needle and thread, same stuff they use to see you up in the ER) and sewed the setup to the seat in various spots. The drive gave me anxiety but It was very secure, no risk of airbag damage (back seat) and I could see it at all times so I could pull off if something happened. It worked flawlessly and it’s safely siting at my new house. Once I get settled I will post pictures of the new workspace.


- 88 replies
-
- 3
-
-
- finished
- artesania latina
- (and 1 more)