HOLIDAY DONATION DRIVE - SUPPORT MSW - DO YOUR PART TO KEEP THIS GREAT FORUM GOING! (Only 13 donations so far - C'mon guys!)
×


Dwight
-
Posts
84 -
Joined
-
Last visited
Content Type
Profiles
Forums
Gallery
Events
Everything posted by Dwight
-
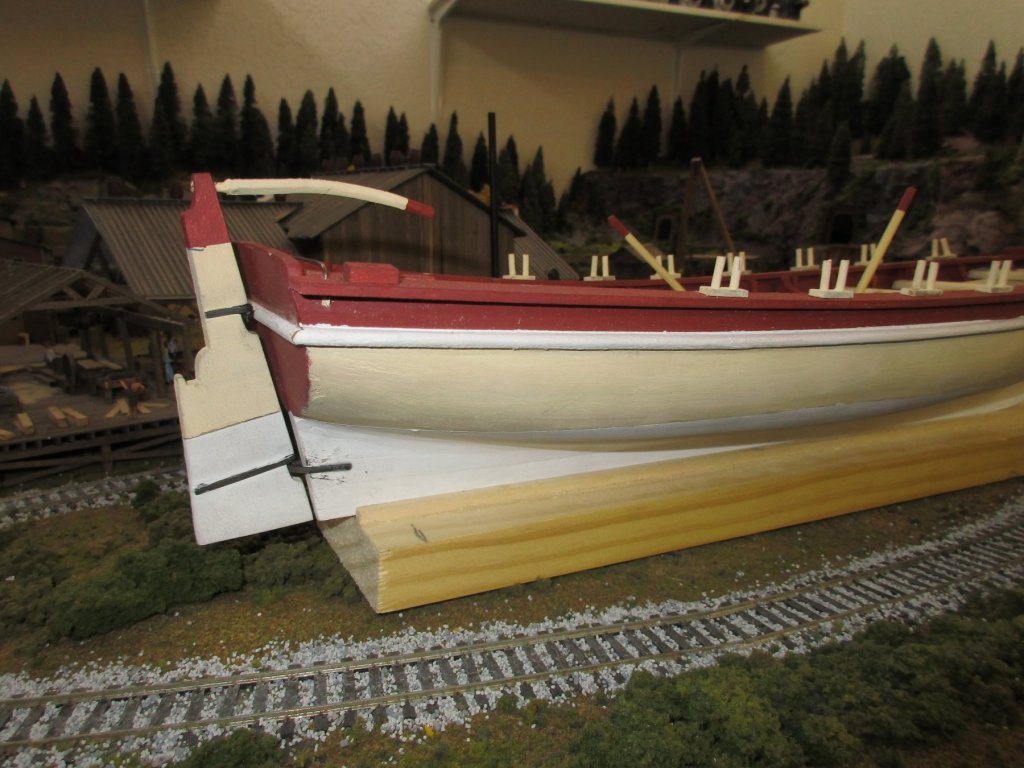
BTW the " background " in the first shot is my model railroad. Space is becoming rare in the workshop.
-
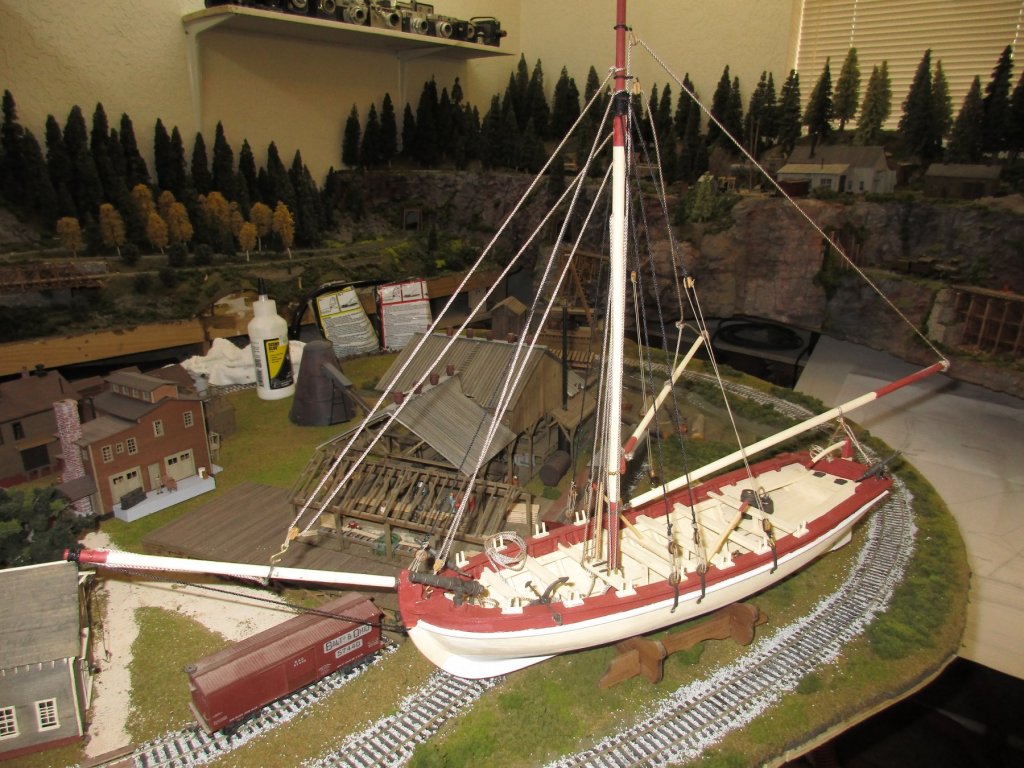
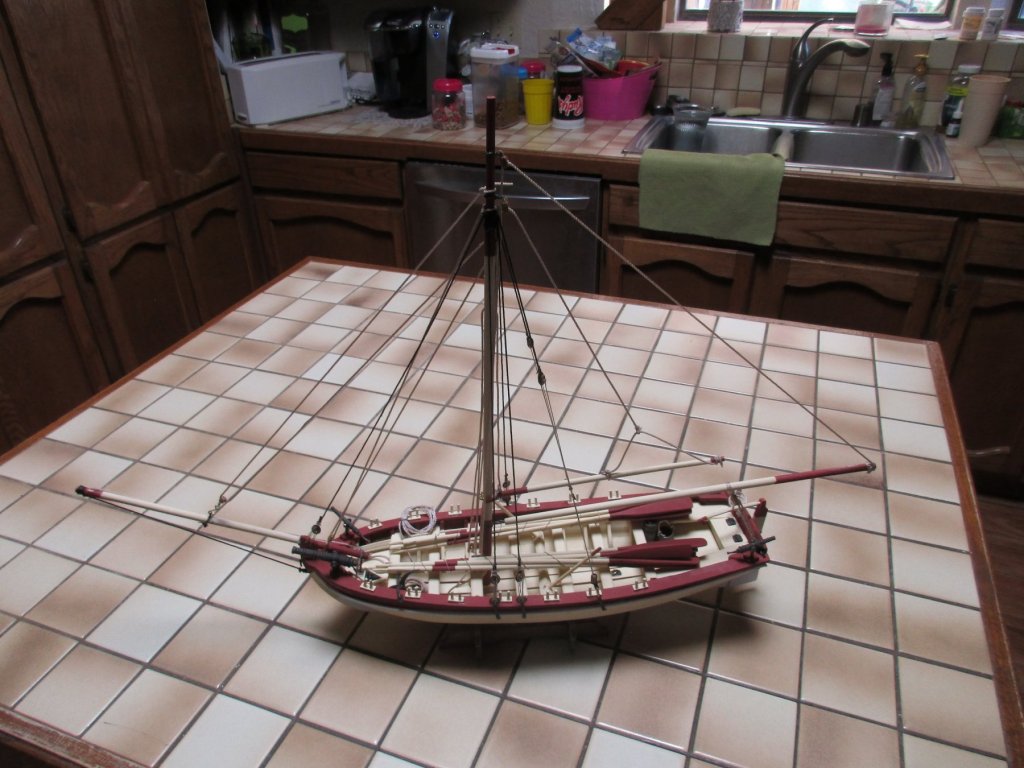
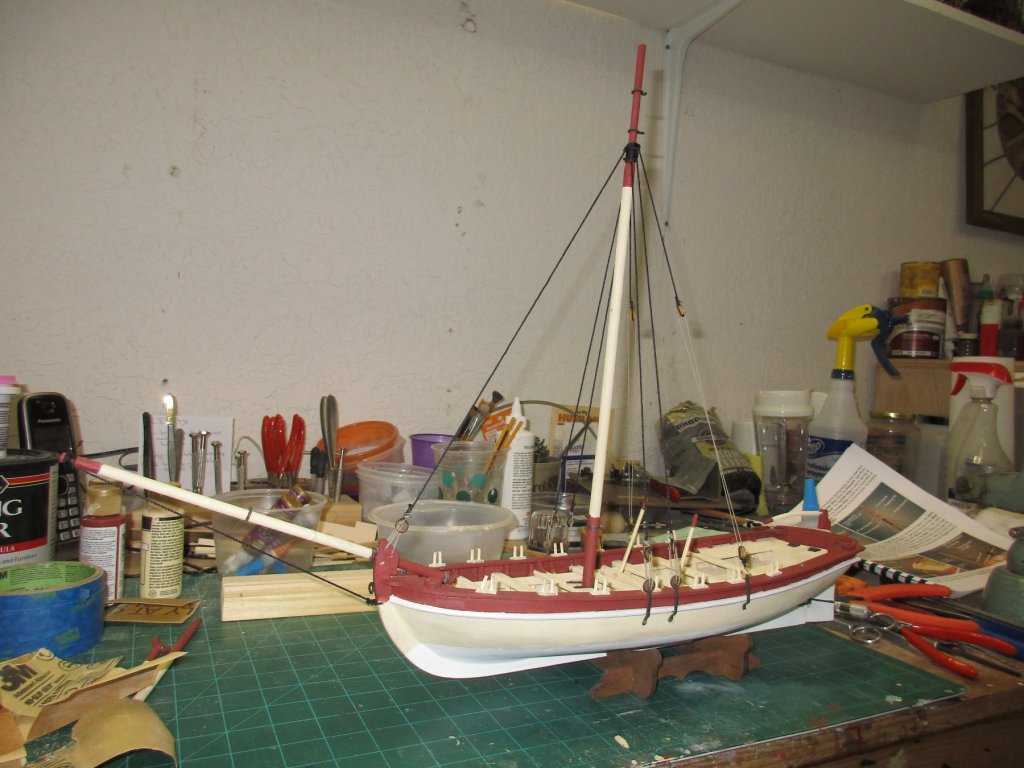
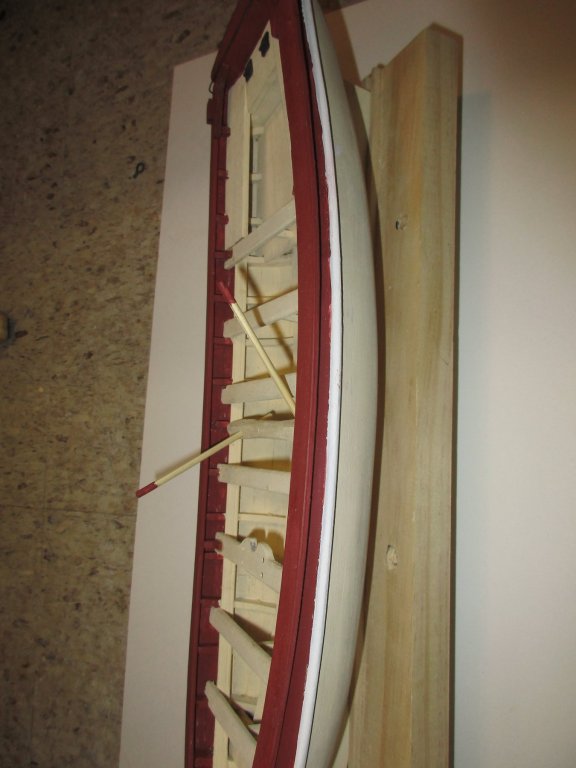
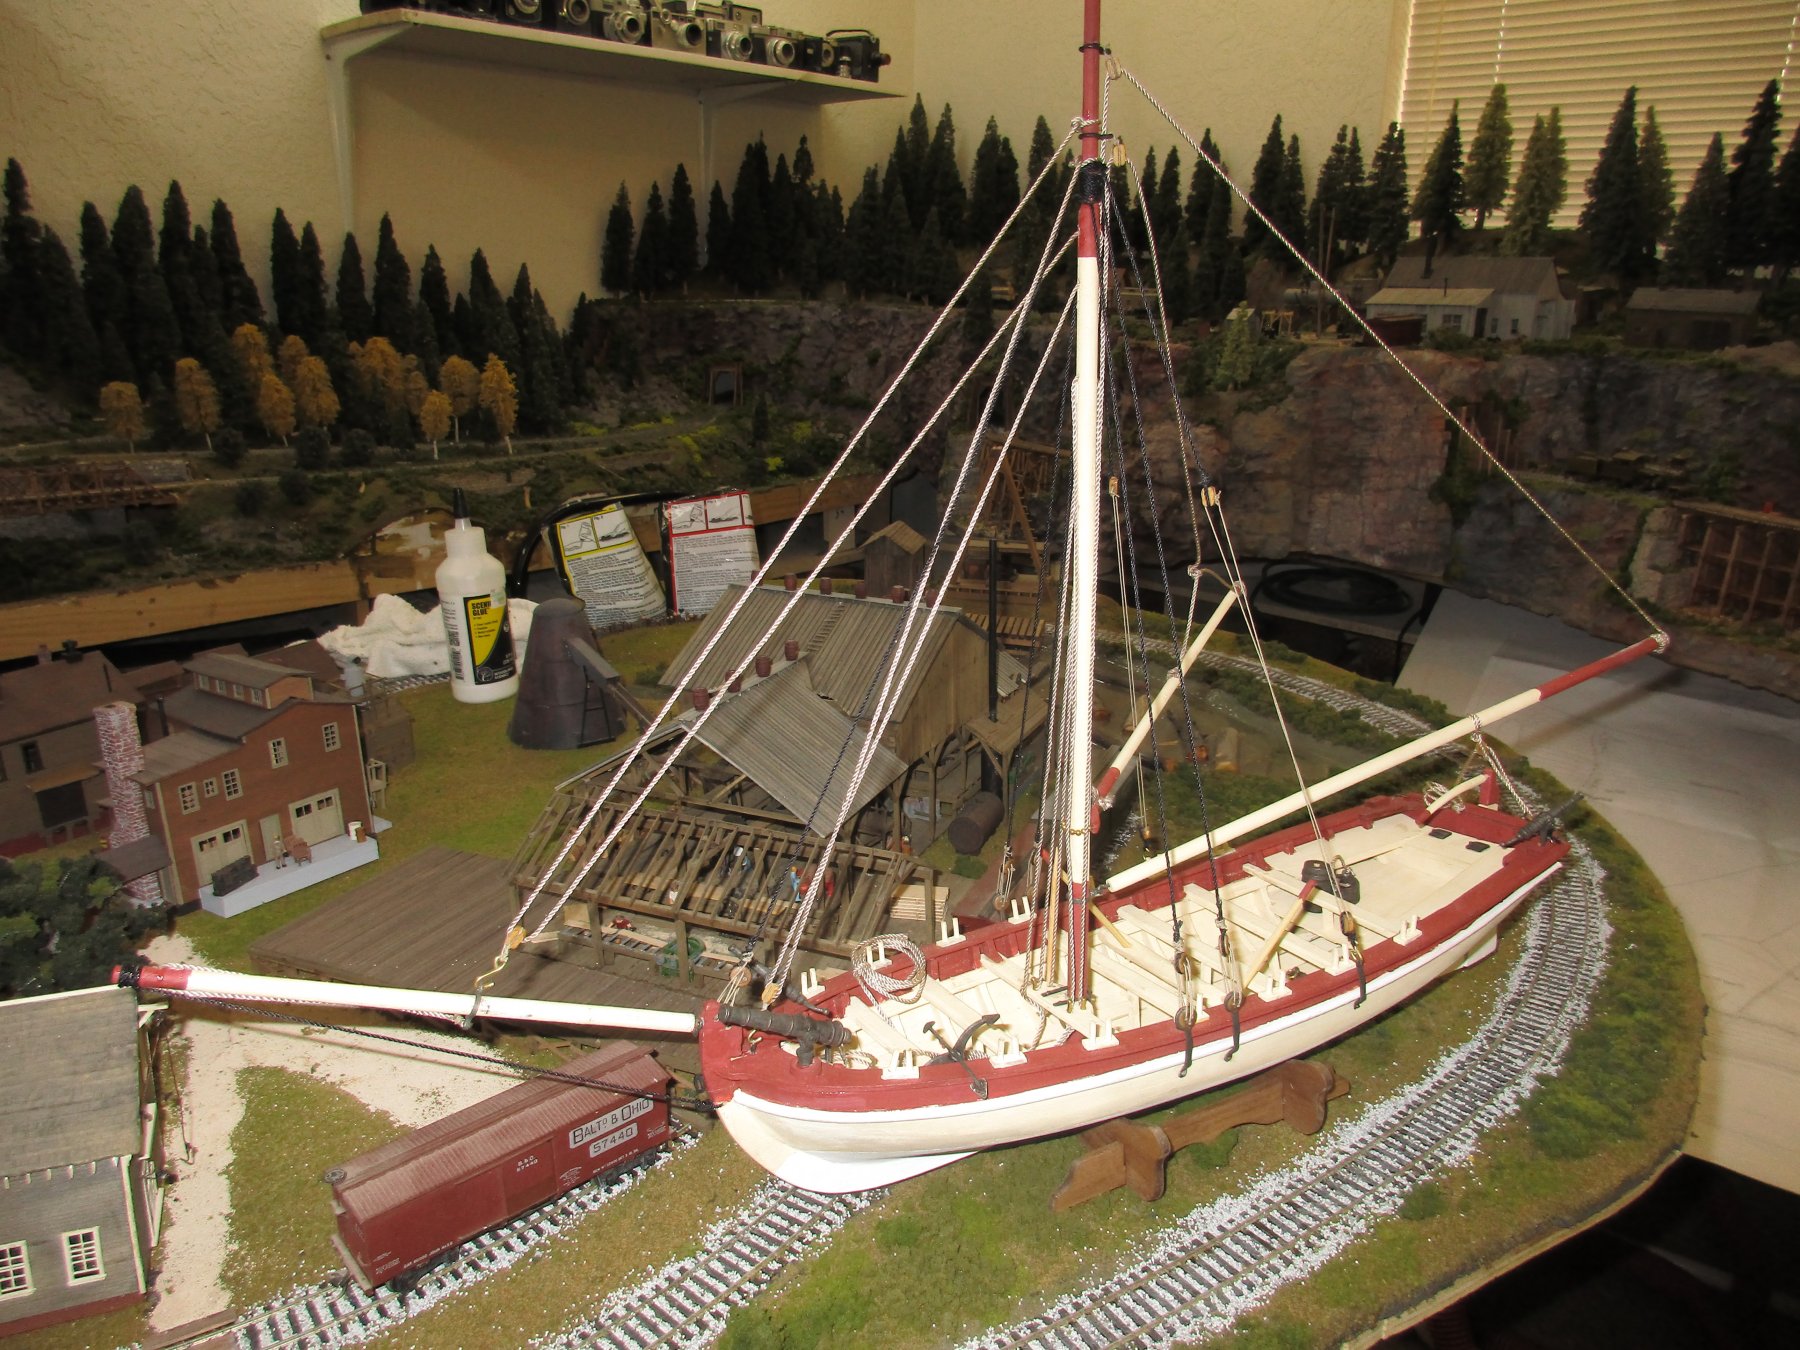
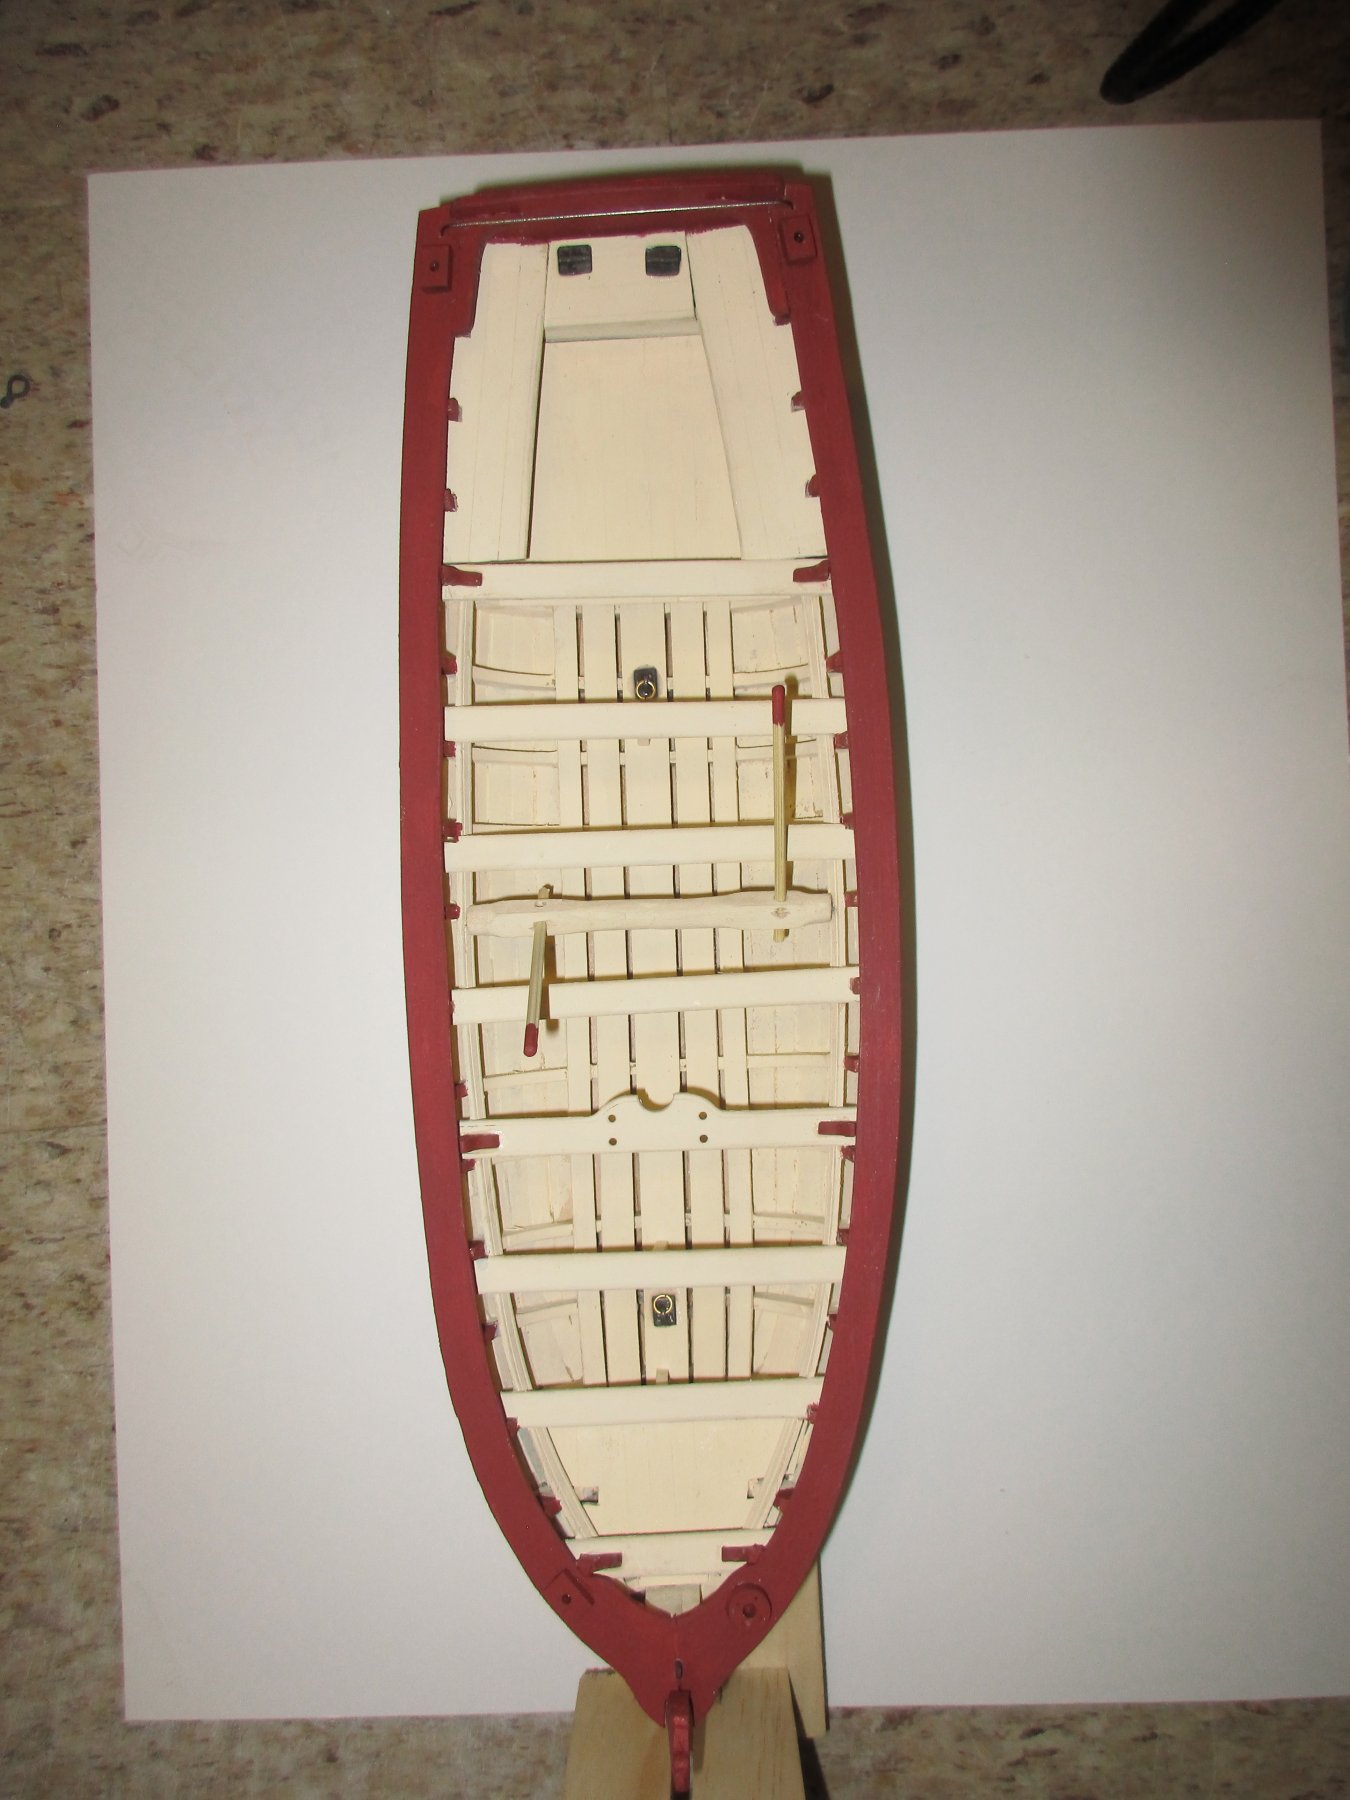
Rigging all finished and cannons , anchor and accessories installed. I've decided not to install the gold decorations. They just look too British and I'm imagining this could be an American longboat. Finished. Time to clean up the shipyard and get read for the Armed Virginia Sloop.
- 28 replies
-
- 5
-

-
- 18th Century Armed Longboat
- Model Shipways
- (and 1 more)
-
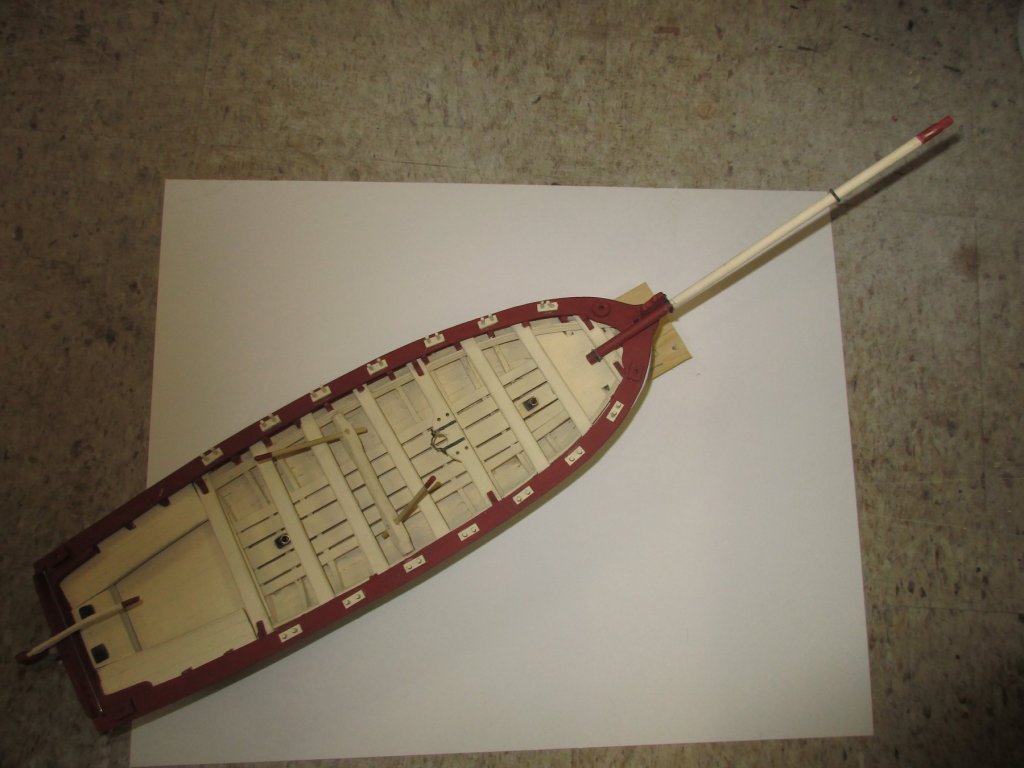
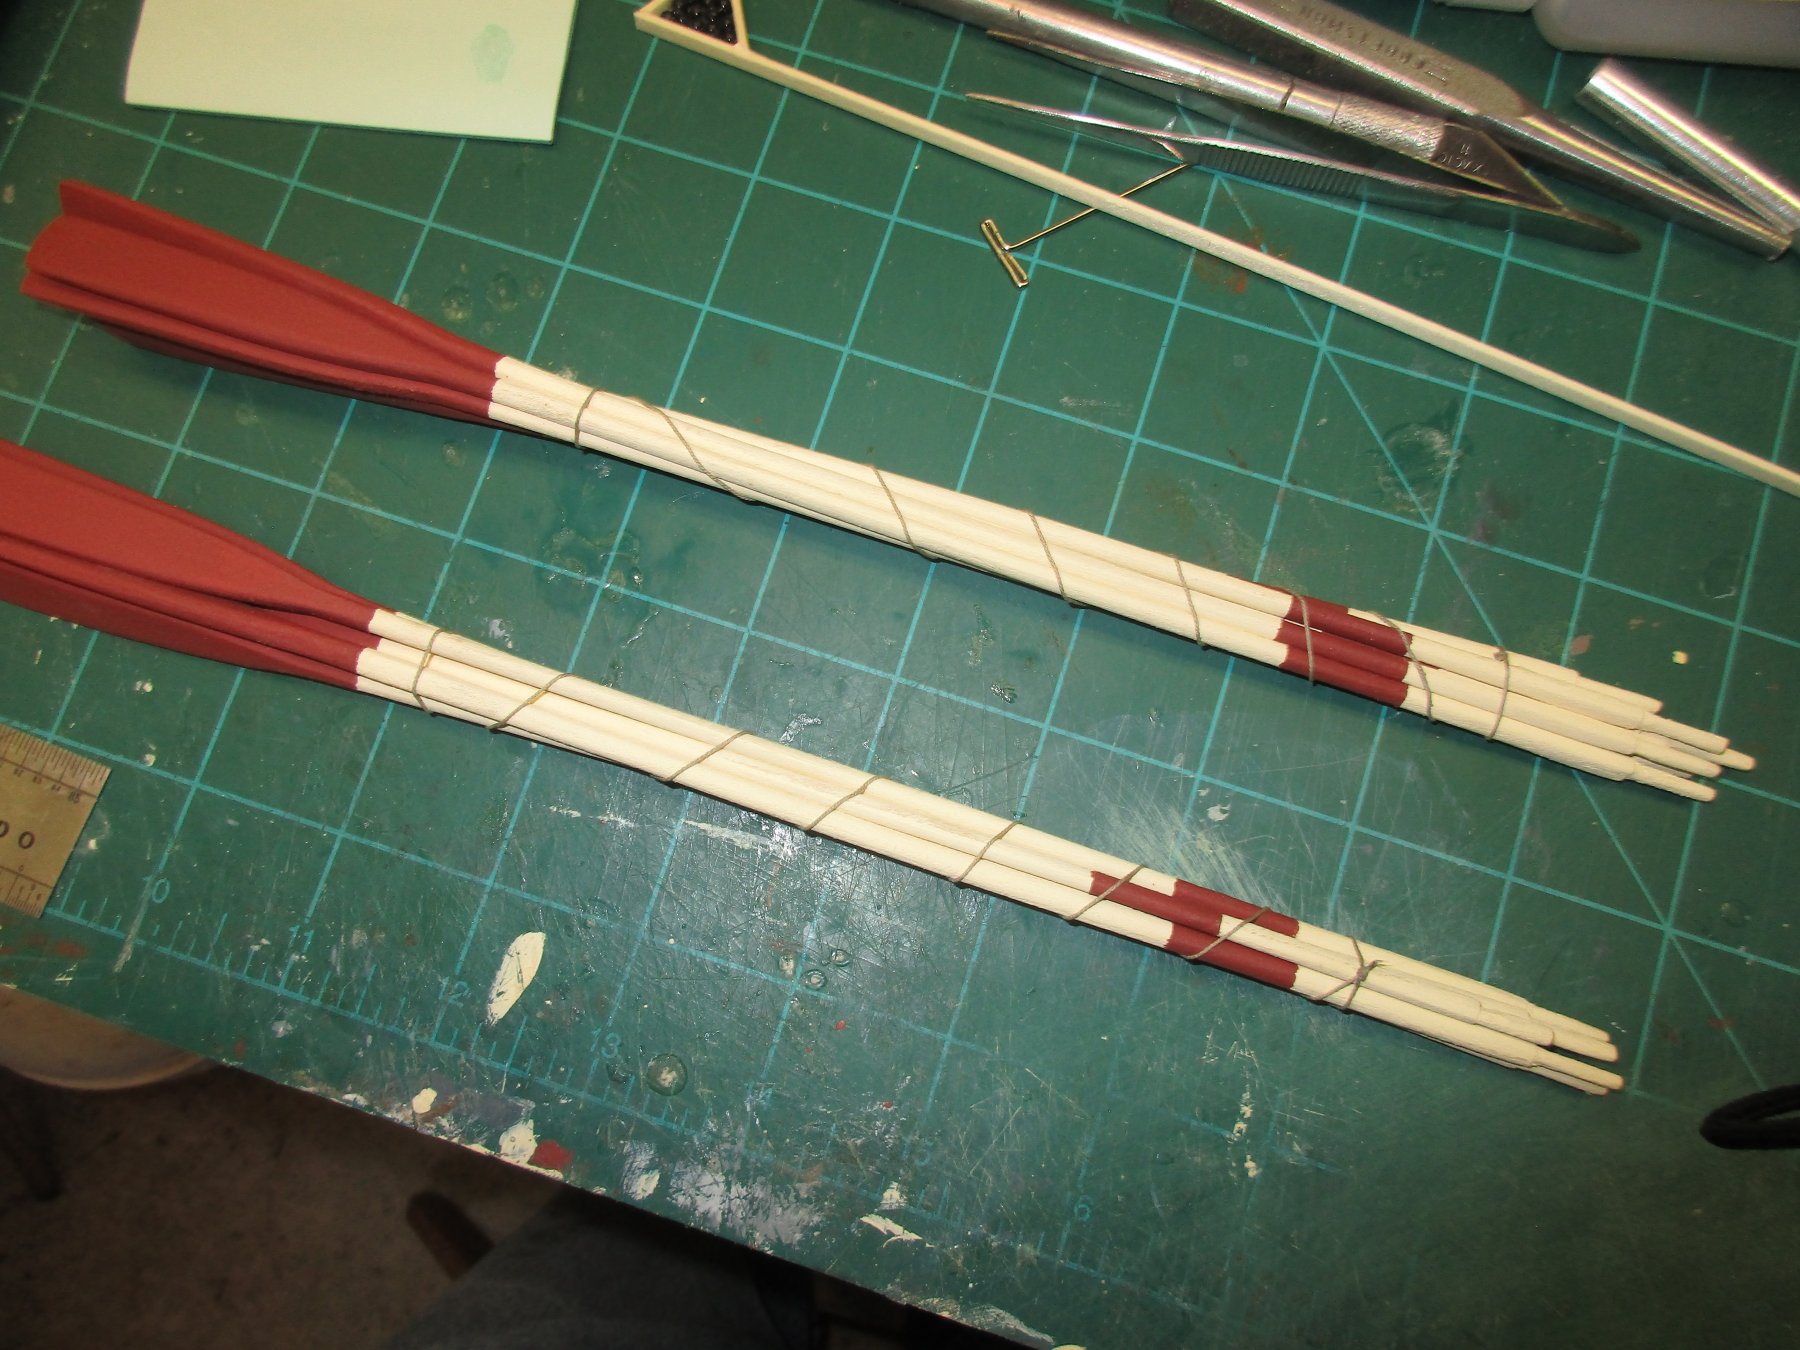
Ores done.

-
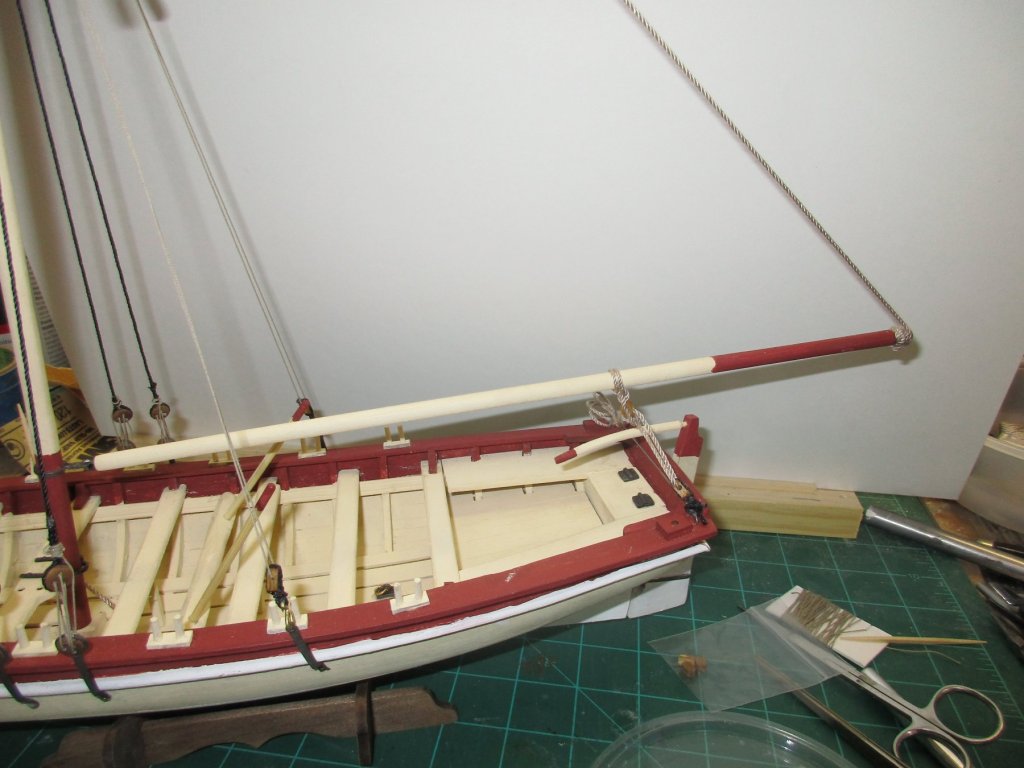
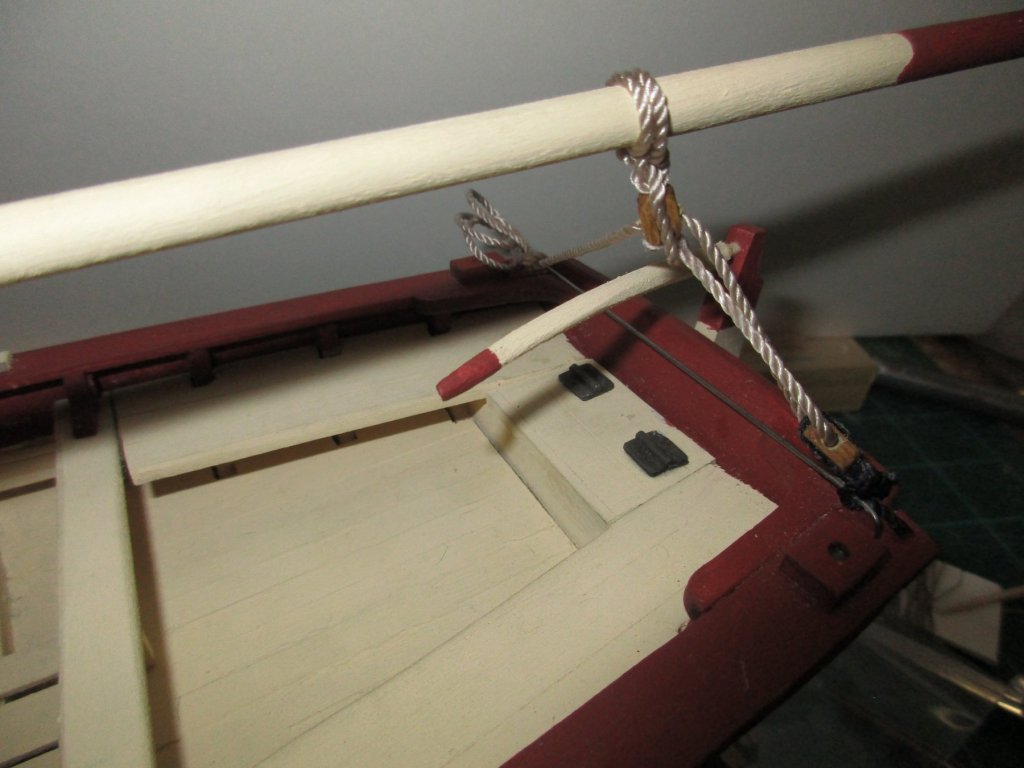
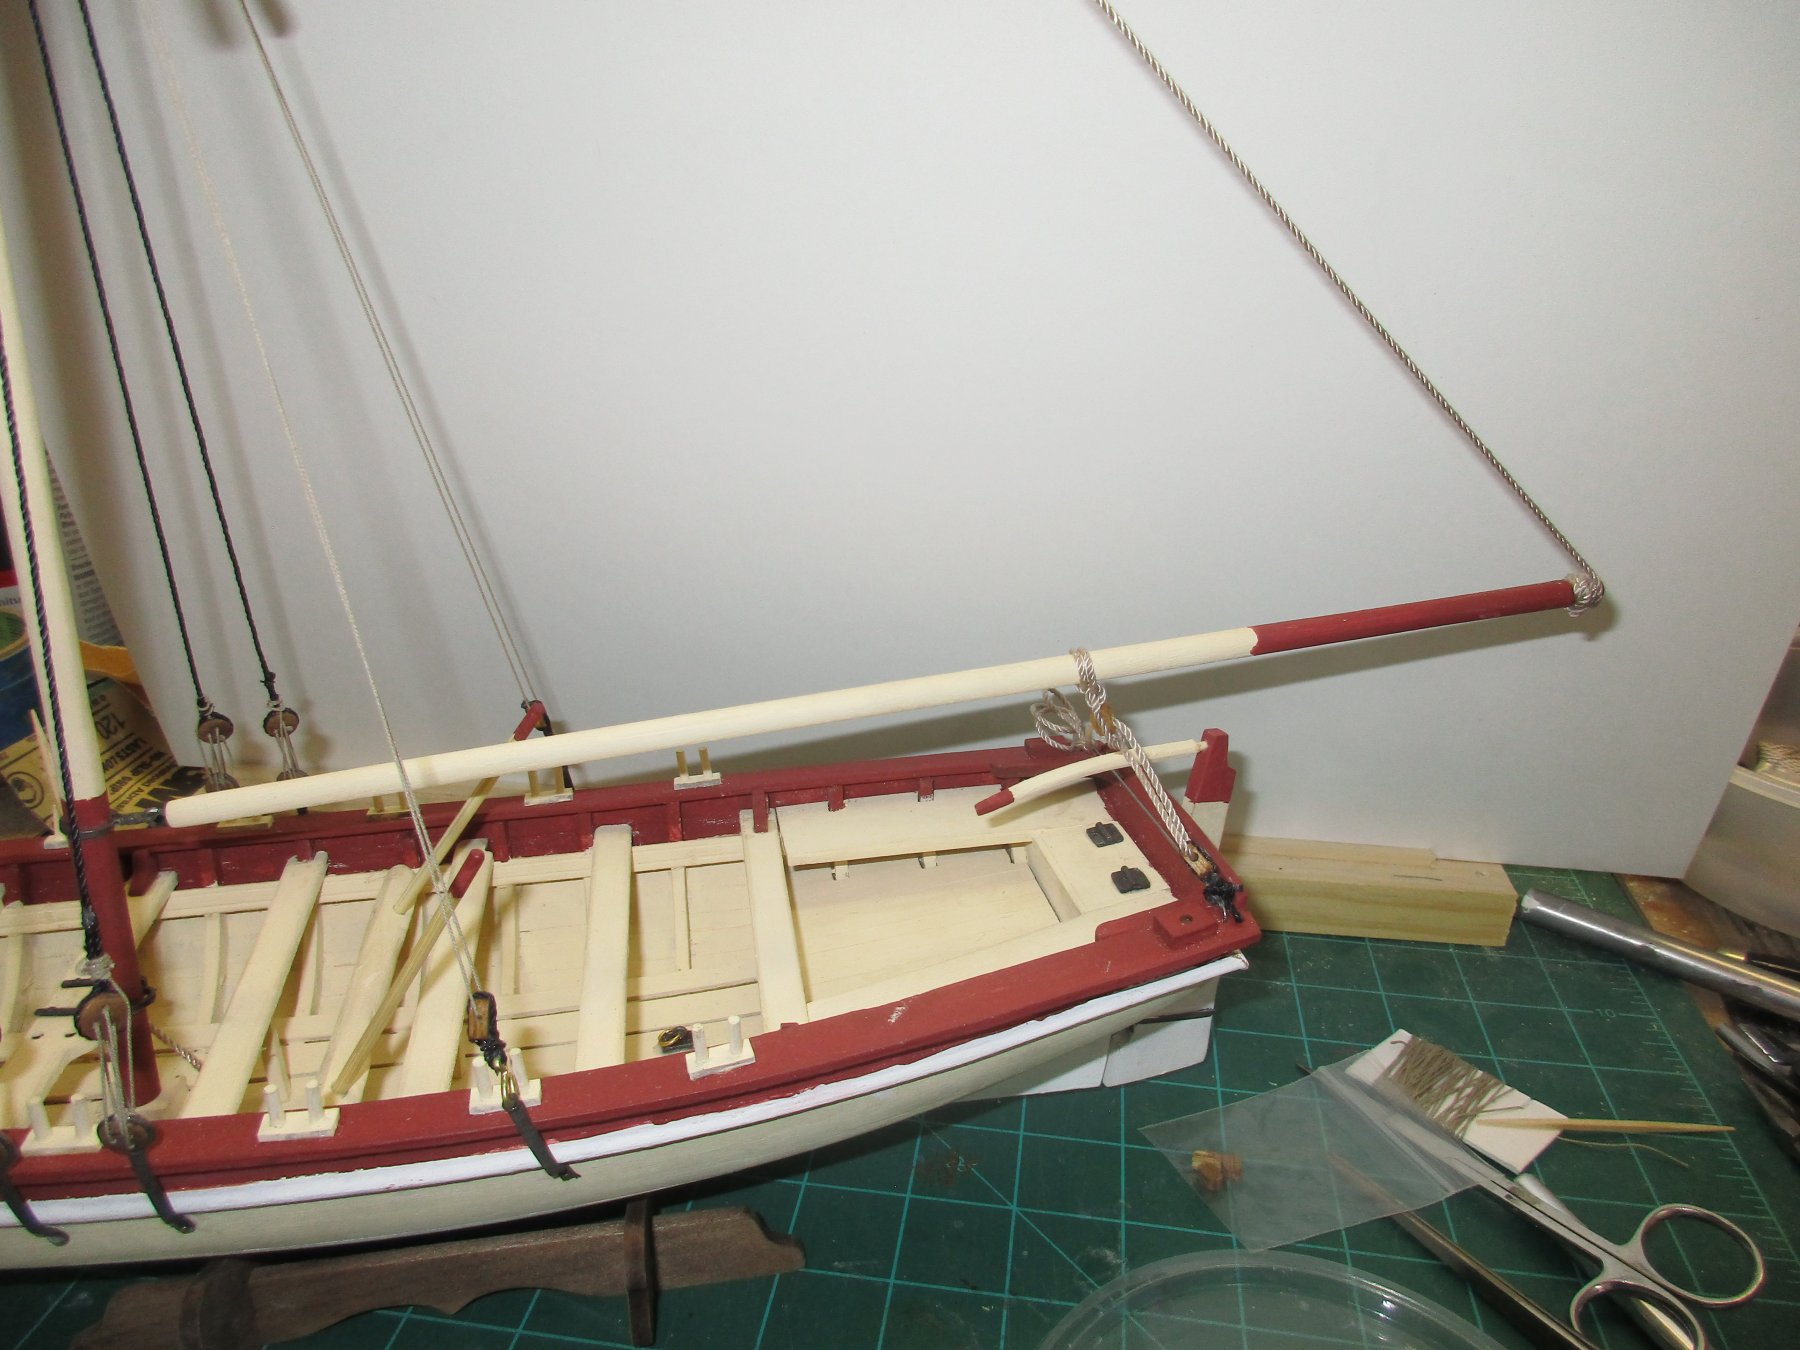
Got the boom installed and attached to the horse. Really don't like this rope.
- 28 replies
-
- 1
-
-
- 18th Century Armed Longboat
- Model Shipways
- (and 1 more)
-
And BTW where did you get that handy little thing. I've got a Unimat but too short to do much.
-
Rigging : something I've never done and something I might never be able to do. I'm not sure it's the instructions or me but this is HARD. Finished the standing rigging. Had to order some line from Chuck at Syren. Some of the stuff in the kit wasn't usable but I got it done.I still can't tie a clove hitch but CA makes up for some of my weekneses

- 28 replies
-
- 1
-
-
- 18th Century Armed Longboat
- Model Shipways
- (and 1 more)
-
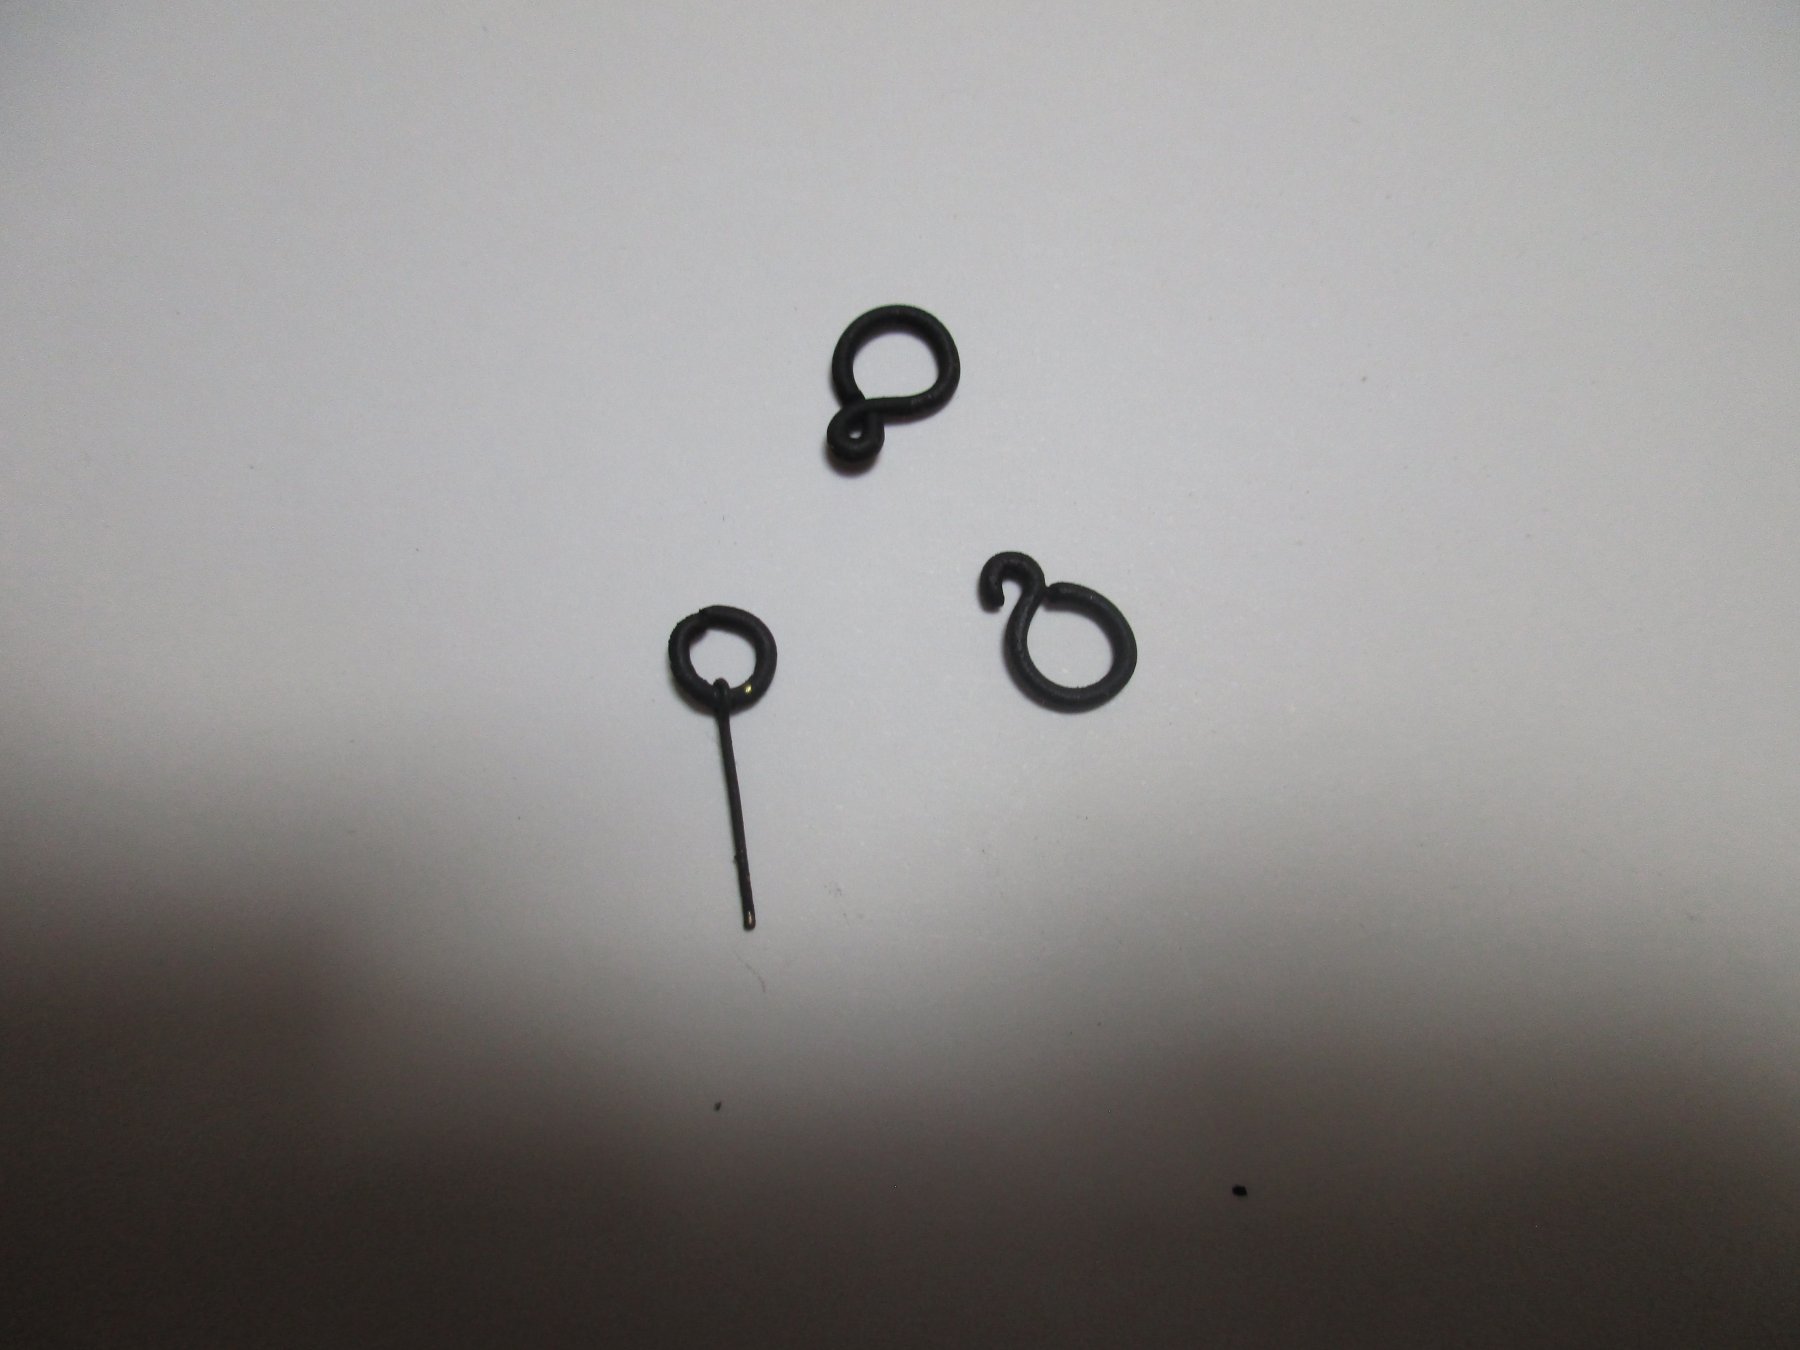
I'm also missing some rings. I'll try to make them outa' wire but I'm not real confident.
-
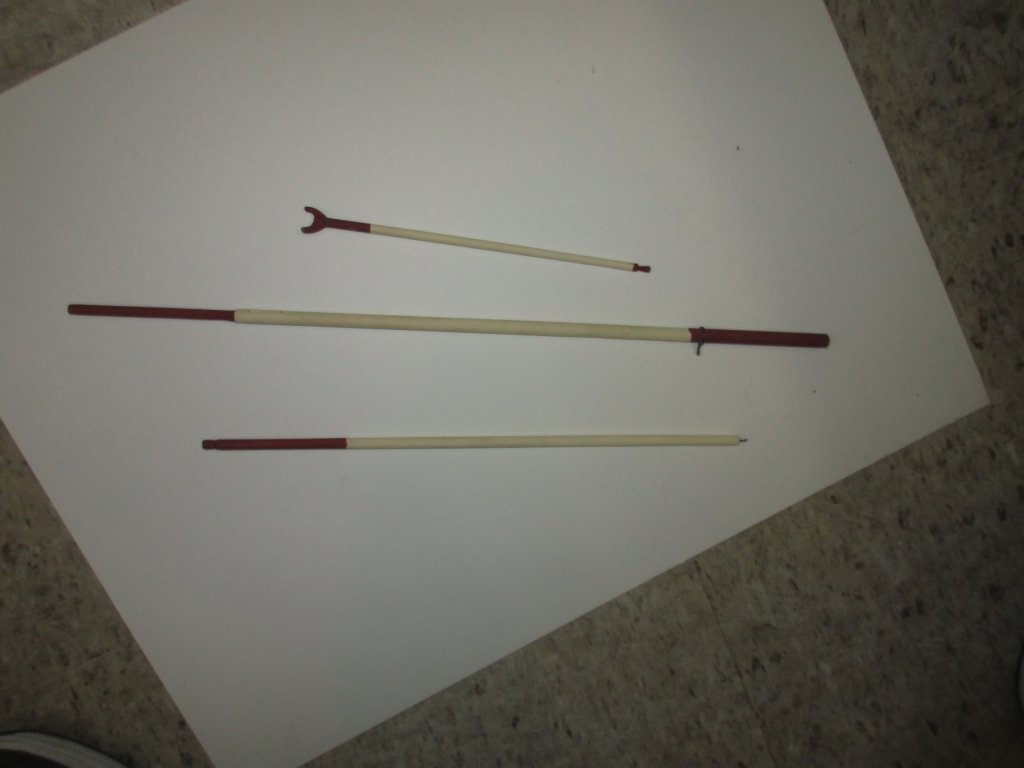
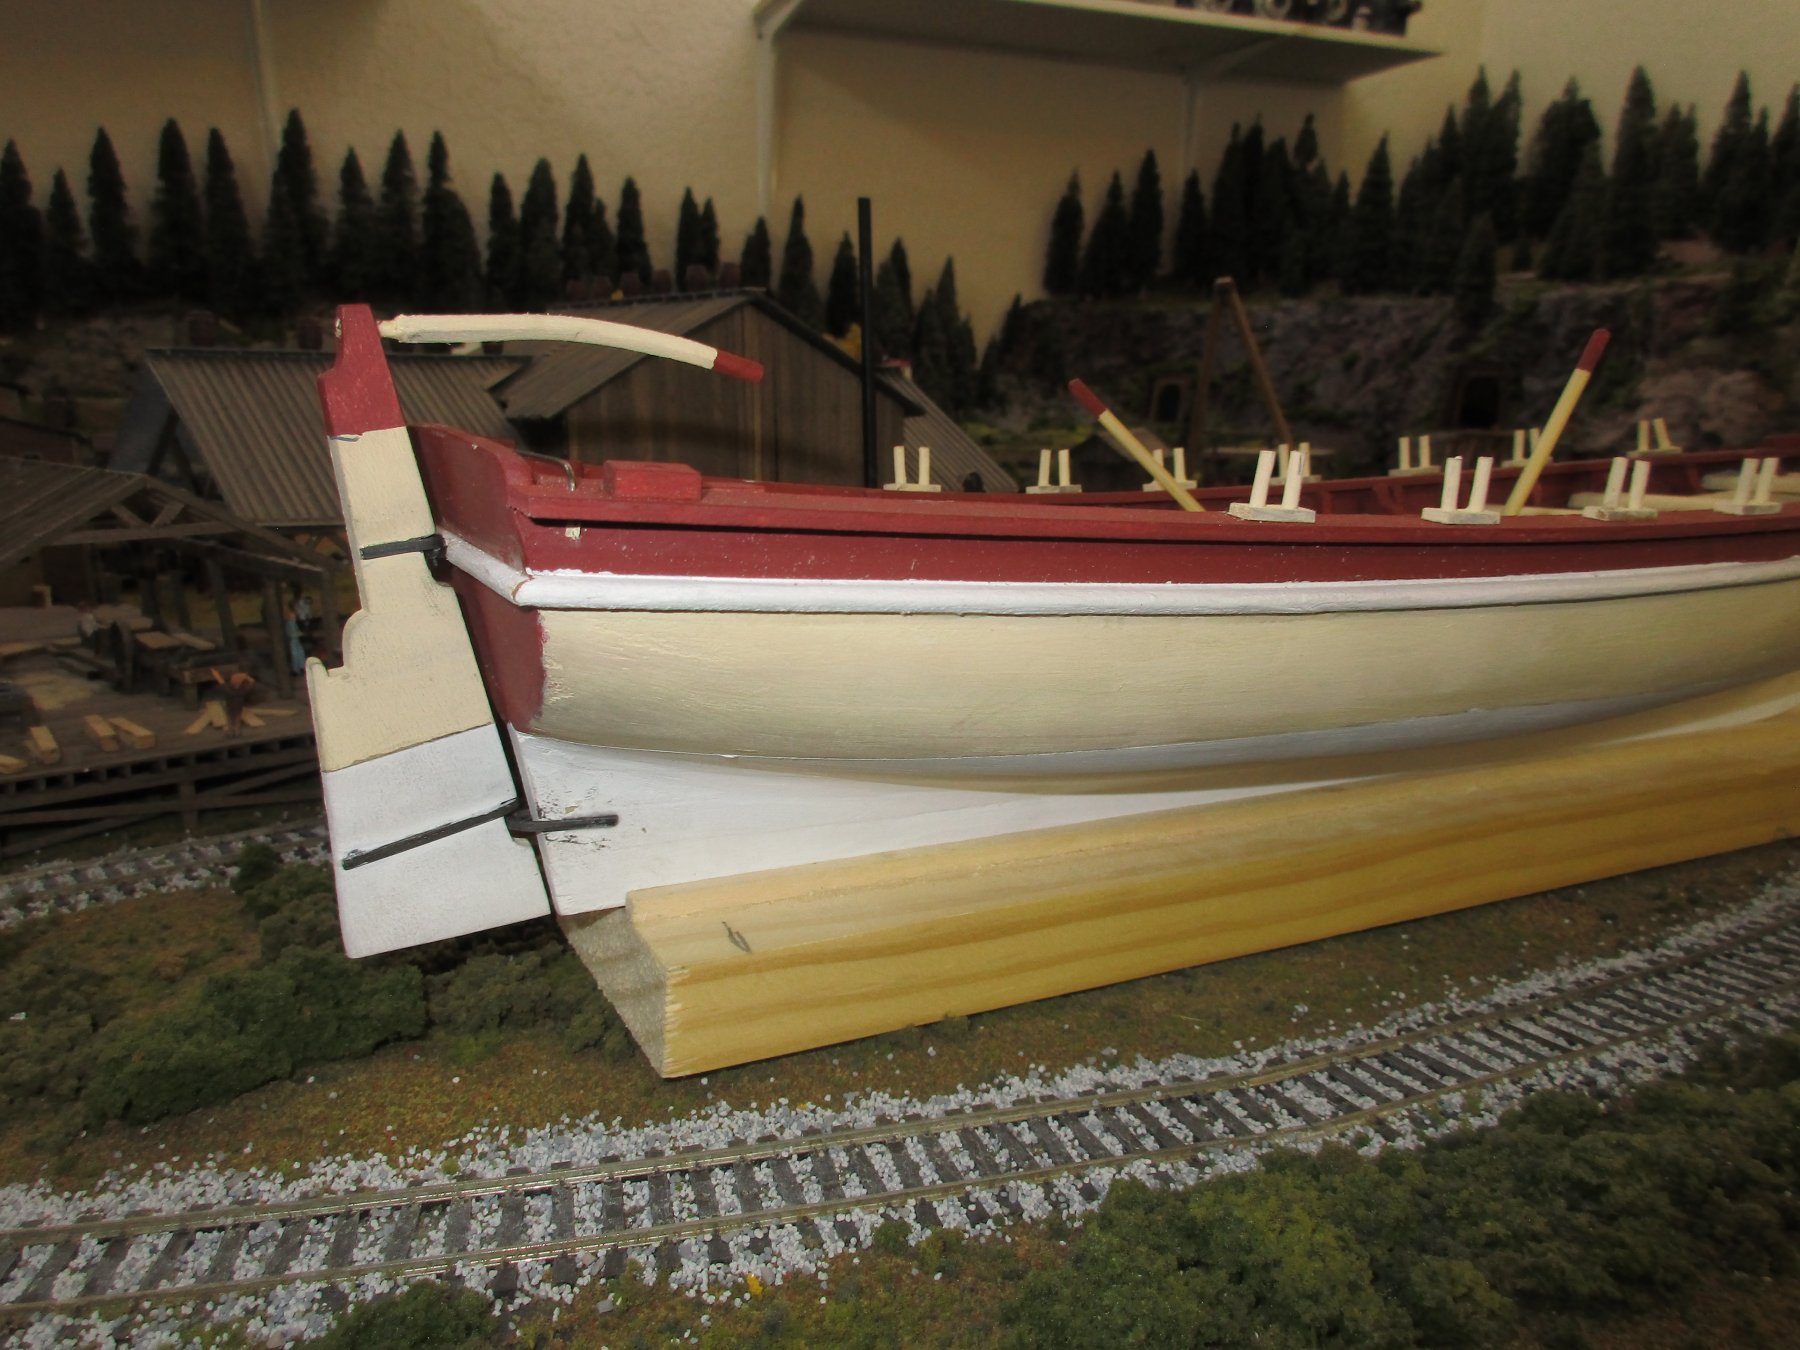
Some more progress. Ore locks installed , main mast , boom and gaff done but probably not tapered enough , bow sprint completed and installed. I also fought with the rudder till it was perfect , installed and glued it and VOILA , it's not parallel with the keel. Right now I'm too frustrated to mess with it further , maybe later.
- 28 replies
-
- 1
-
-
- 18th Century Armed Longboat
- Model Shipways
- (and 1 more)
-
Griphos , at mine you can , balsa wood as well. Jim , havn't the slightest idea
-
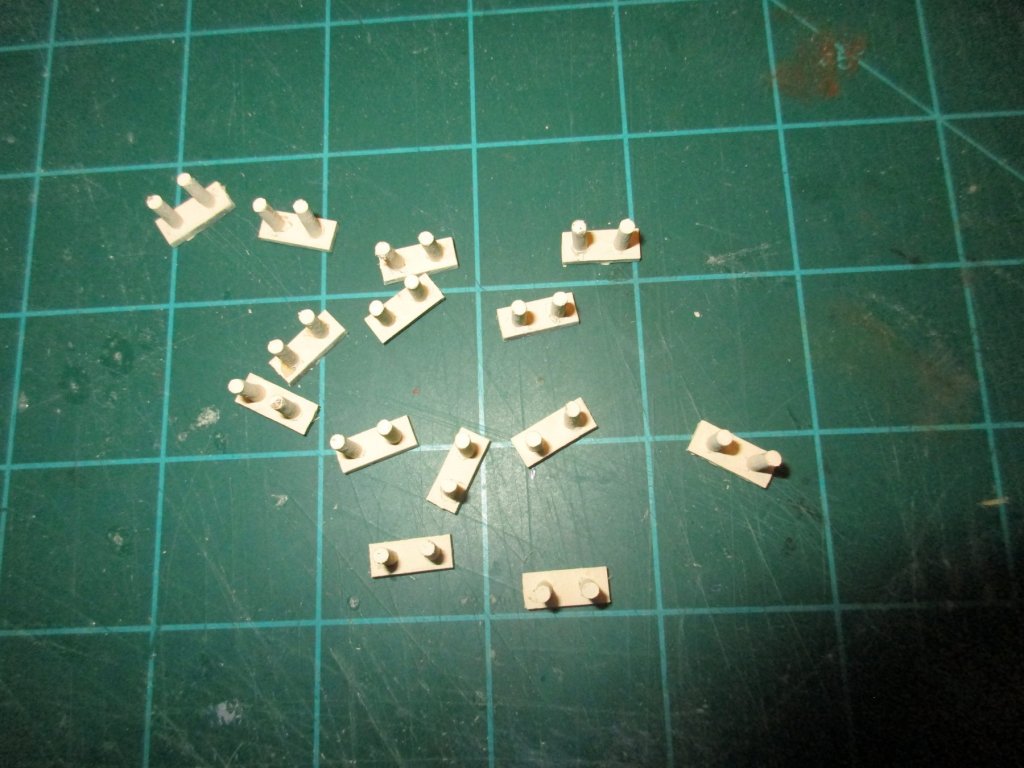
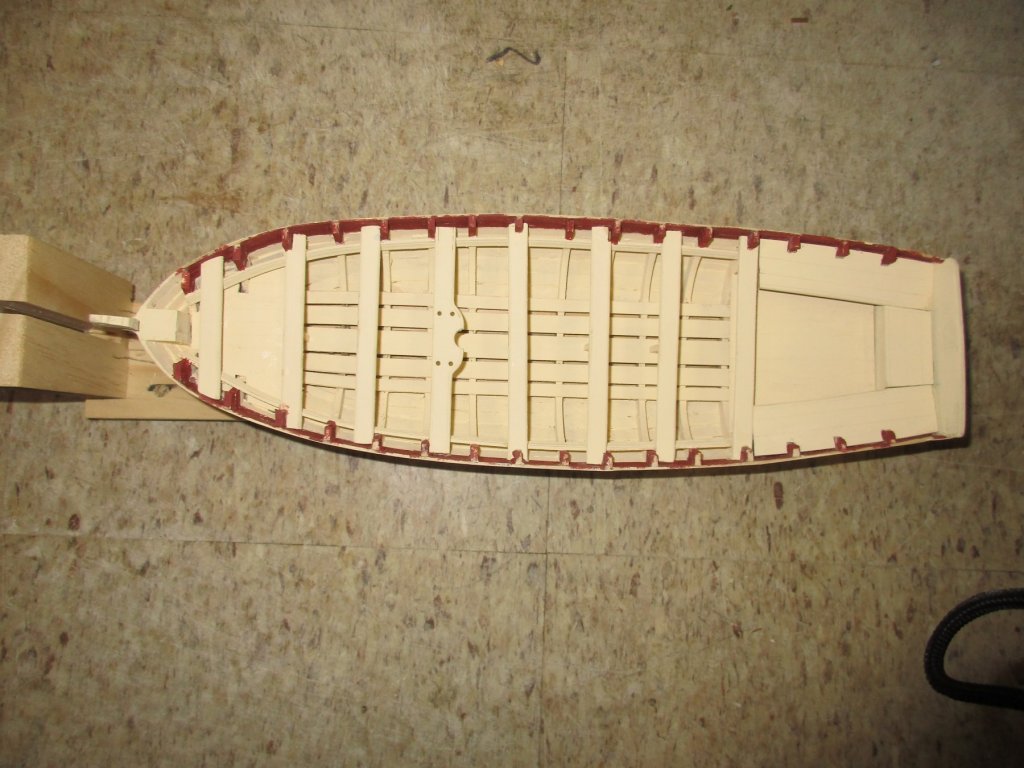
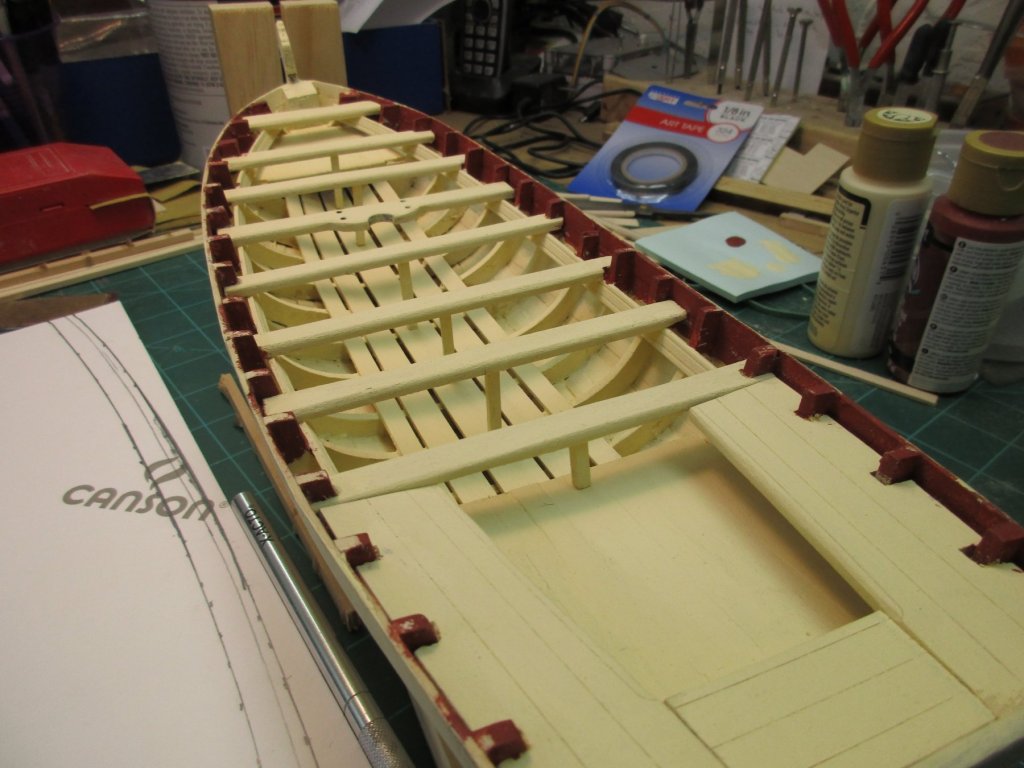
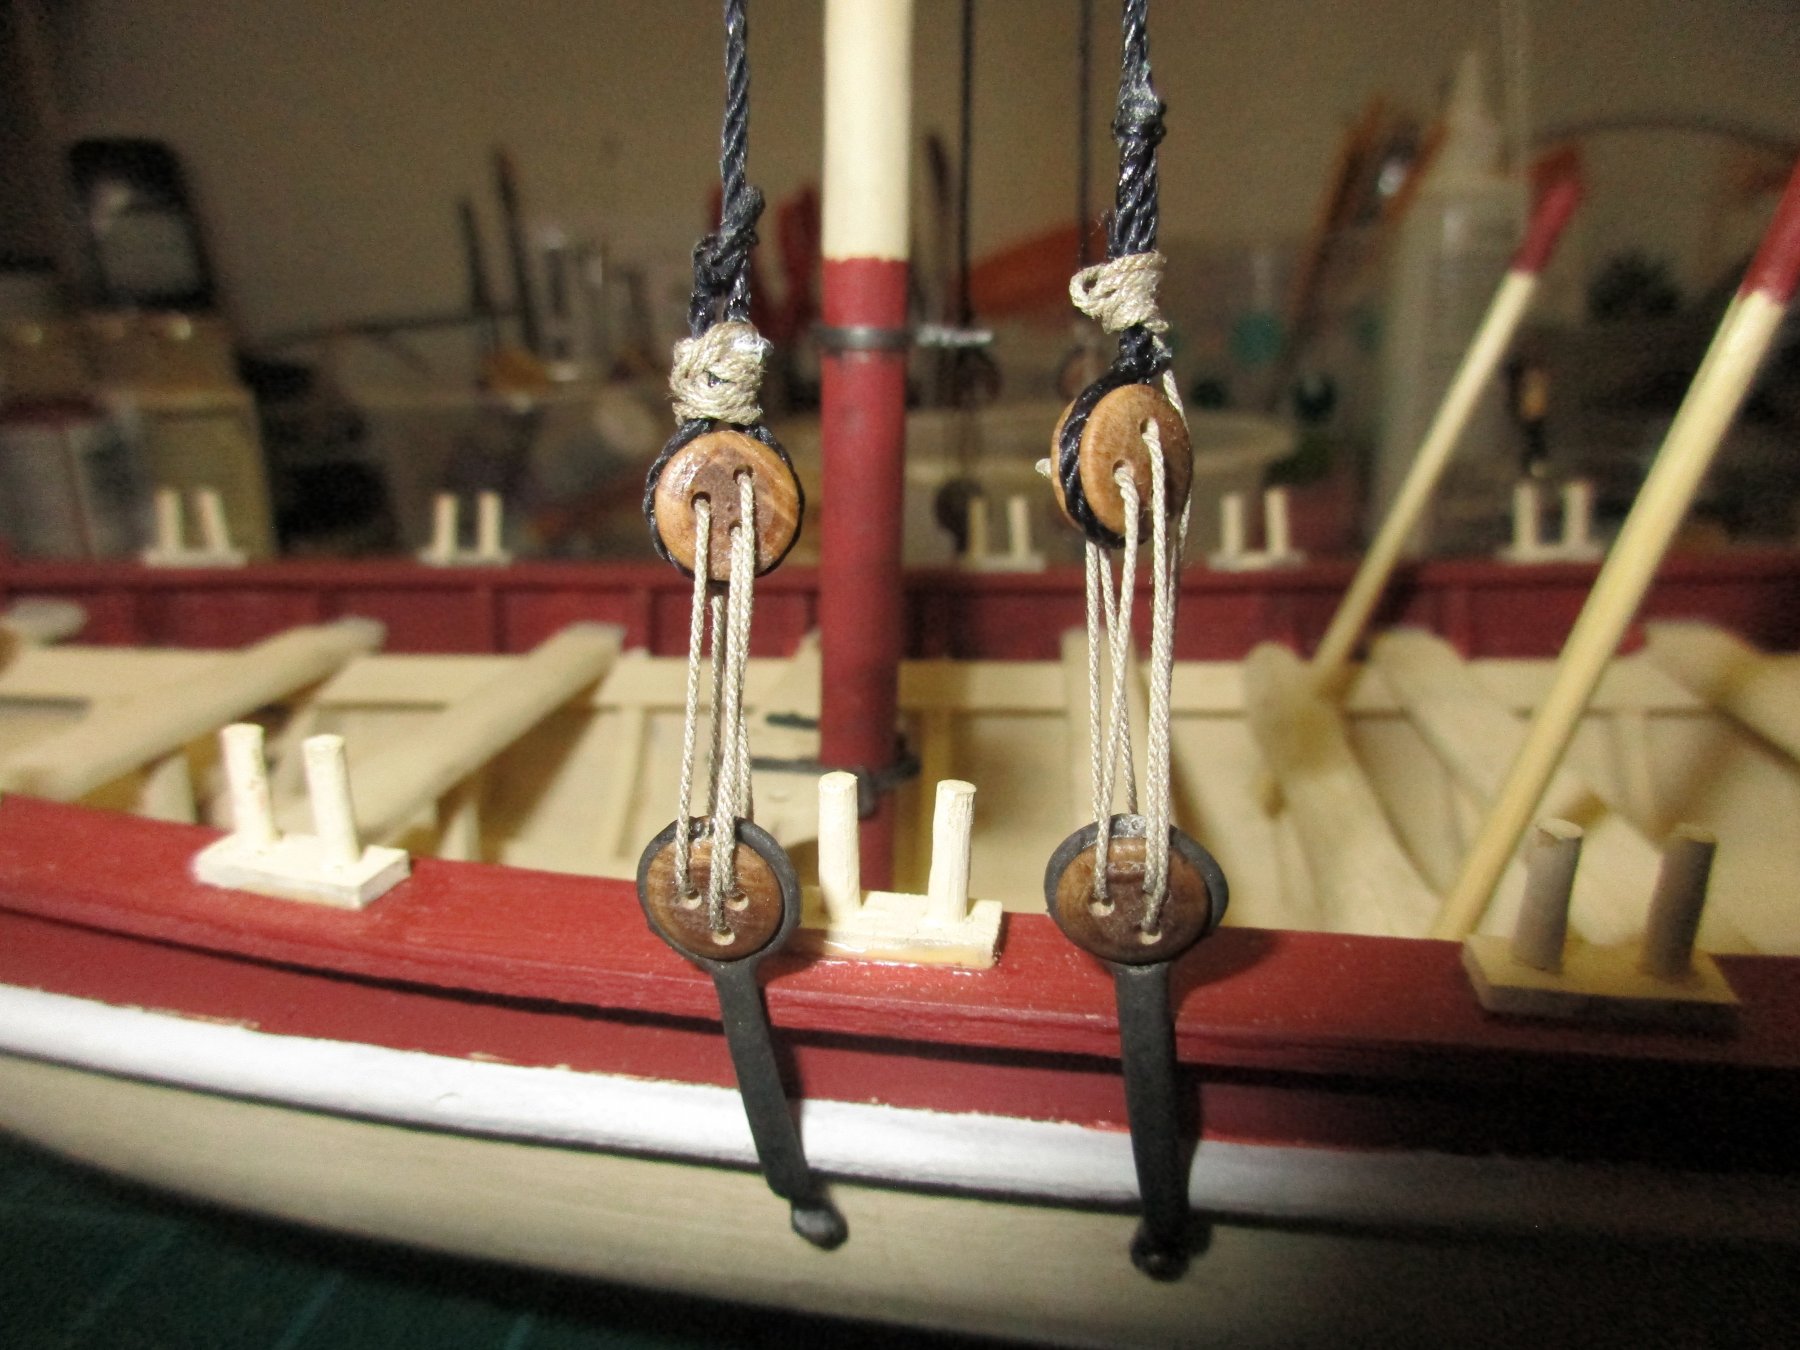
More progress. Didn't like the instructions for the cap rails so I went to Hobby Lobby and bought a sheet of boxwood and made them as one piece including the brest hook. Also installed the thwart knees, transom knees , windlass , lifting rings , locker hinges , horse and all four cannon mounts. Got the orelocks but they arn't installed yet. Installed the rubrails also.

-
Installed the thwarts. Had to fudge a little due to misaligned frames , my fault.I also installed the thwart supports. I tried carving them like the directions show but after wasting about a foot of square stock , gave up and just left them square.
- 28 replies
-
- 3
-
-
- 18th Century Armed Longboat
- Model Shipways
- (and 1 more)
-
Arthur , I just noticed you used bracing between the bulkhead centers. Great idea as one of mine( #2 I think ) moved during planking and I didn't notice till I was installingthe thwarts. Had to fiddle those around to make them " look " parallel.
-
Arthur , it's craft paint from Hobby Lobby and you're right , the floor was much harder than expected. Jim , I was thinking the same thing but I've been reading plankingg instructions by Chuck P. and he uses a hair drier without water ! Gonna try this next.
-
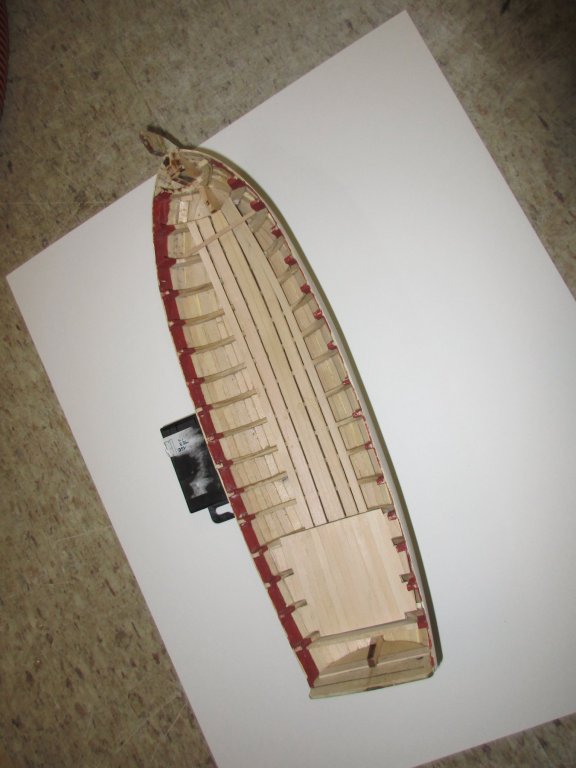
As the hull sems to be an ongoing project I decided to move on. I began work on the inside of the hull. Painted the top two planks ( this was really hard for me...I'm dyslexic ) but I got it " done ". Installed the flood boards. This was easier than expected . Stern locker and the plaatform supports were next. I probably will paint the inside of the hull while I can get to most of it. More later.
- 28 replies
-
- 1
-
-
- 18th Century Armed Longboat
- Model Shipways
- (and 1 more)
-
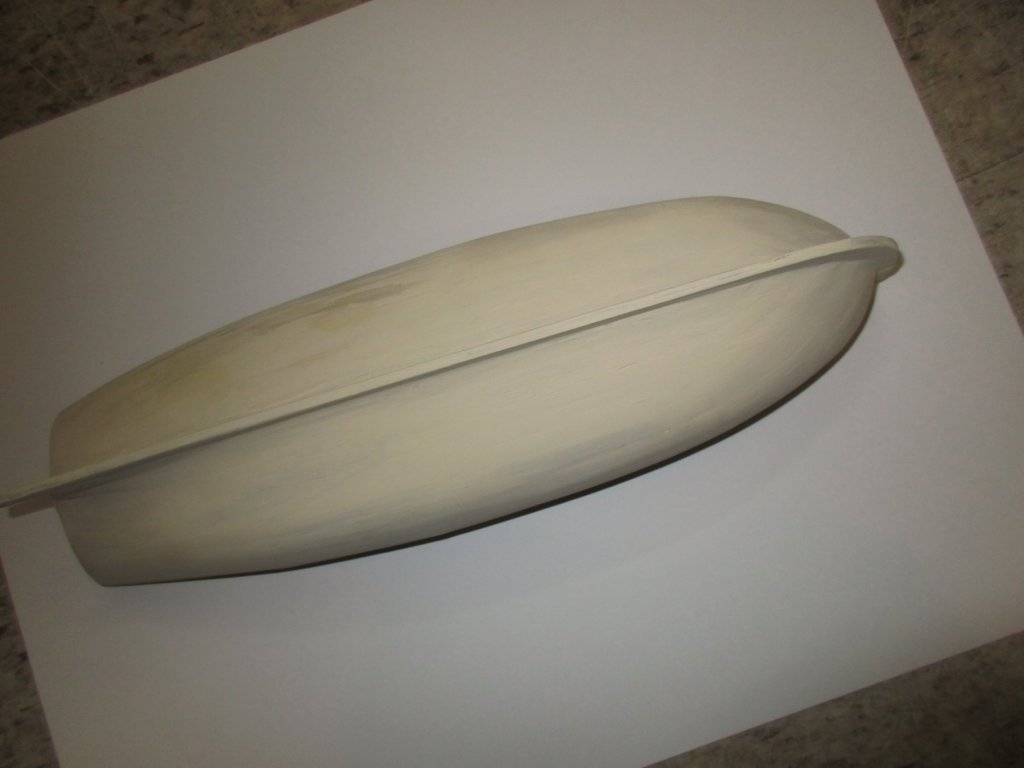
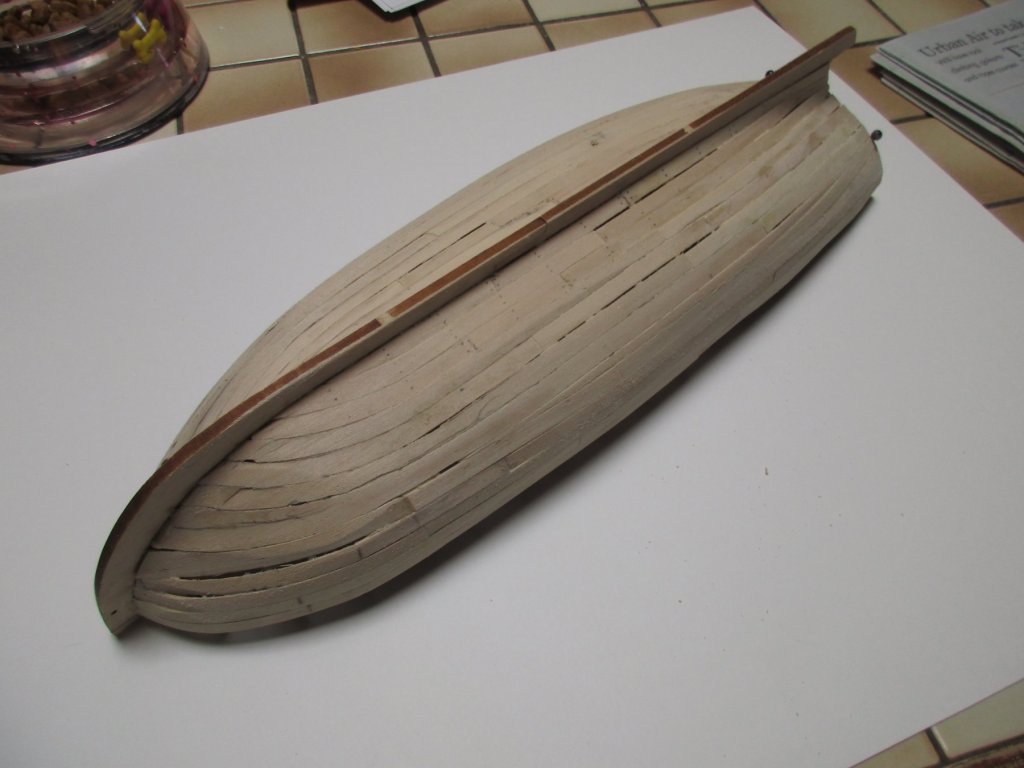
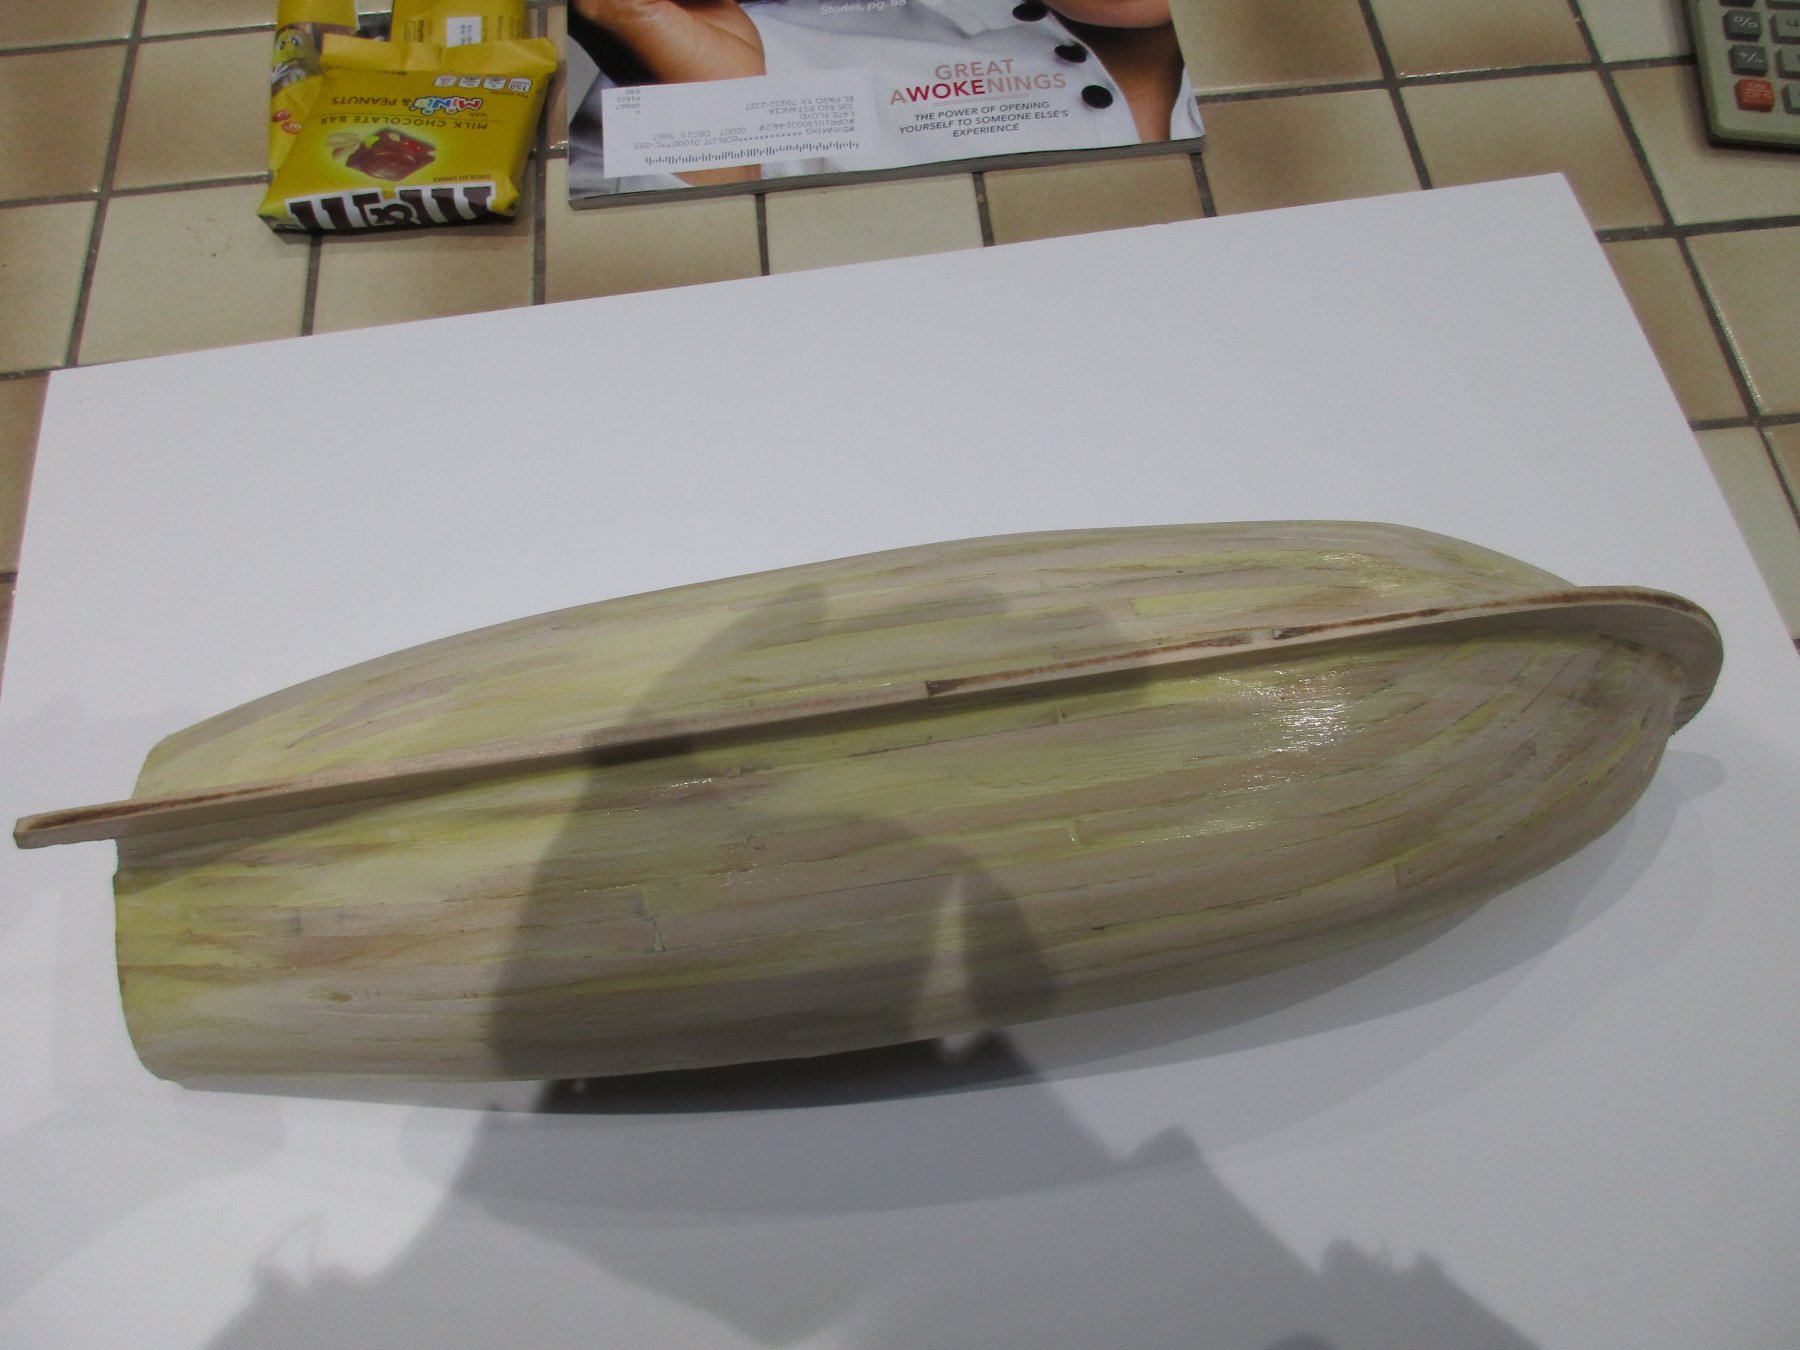
I found some paint that looks like fresh box wood and painted the hull. Looks much better and will help me see where I still need to fill and sand. There is more than one way to hide a lousey planking job. I've also spent a lot of time reading and now feel I understand the planking concepts much better. Of course I should have done this before I messed it up but I honestly don't think it would have made as much sense before. I must be a tactile learner. Here's how she looks now. Still not satisfied but on I go.
- 28 replies
-
- 1
-
-
- 18th Century Armed Longboat
- Model Shipways
- (and 1 more)
-
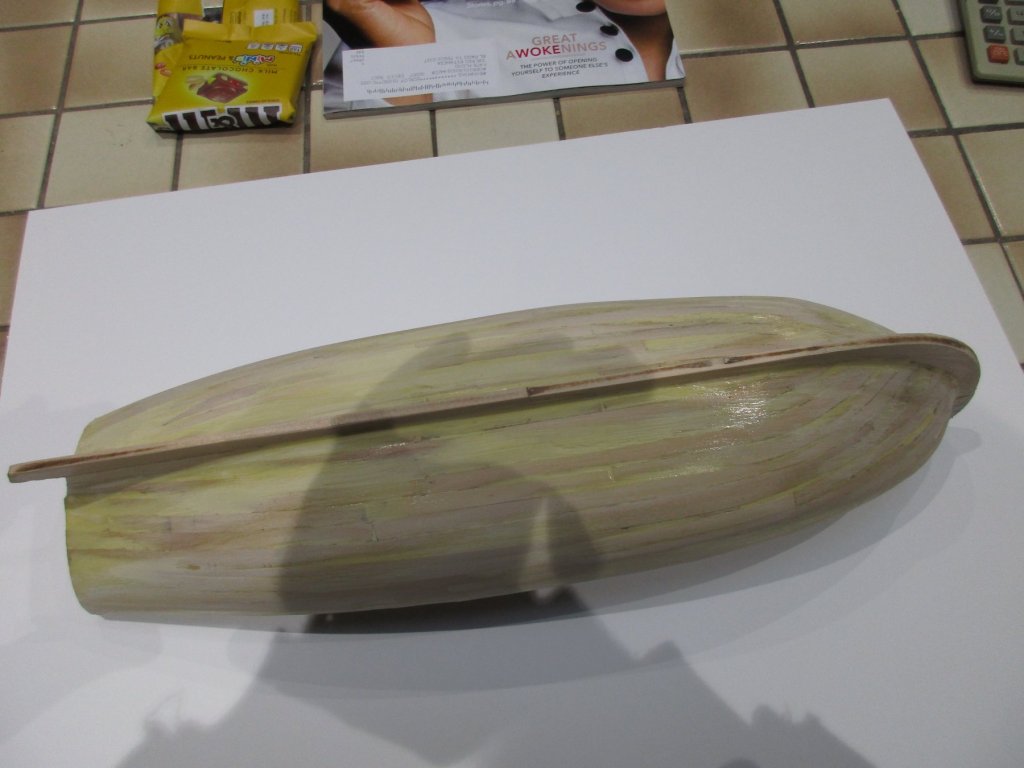
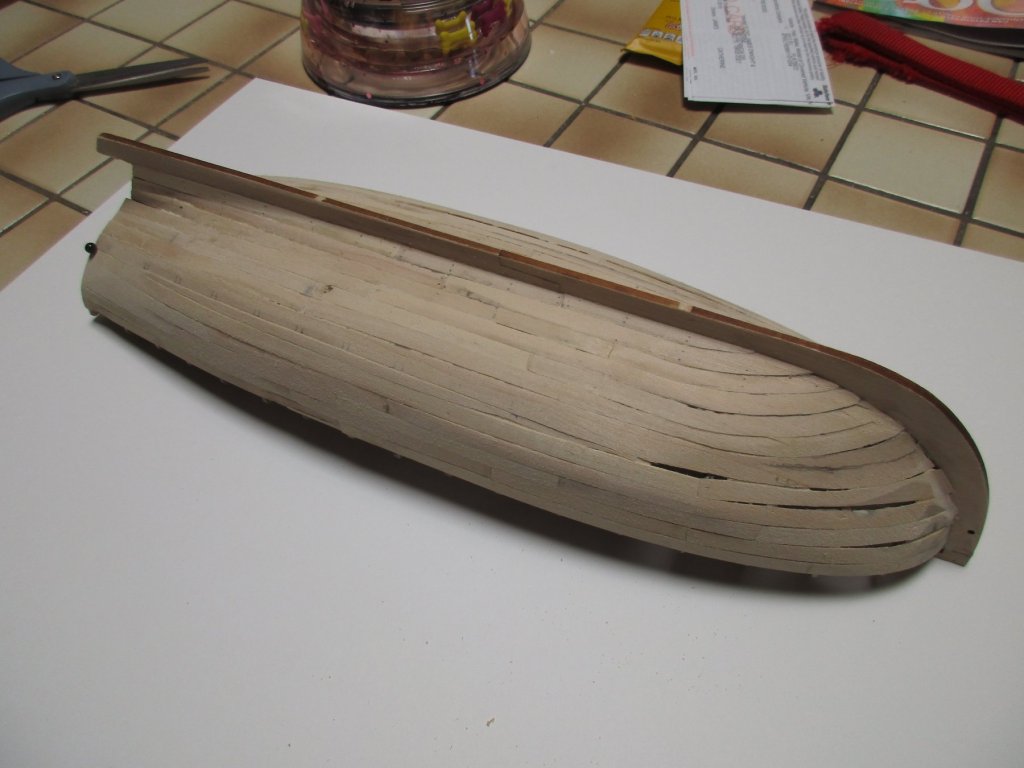
Did a bunch of wood filling and a bunch more sanding. Also a lot more reading to find out what went wrong so I have learned a bunch. Anyway heres what she looks like now. No doubt she's gonna be painted.
- 28 replies
-
- 2
-
-
- 18th Century Armed Longboat
- Model Shipways
- (and 1 more)
-
OK now you've done it ! I'm gonna throw mine in the river and go back to Model Railroading !
- 95 replies
-
- 2
-
-
- Model Shipways
- 18th Century Armed Longboat
- (and 1 more)
-
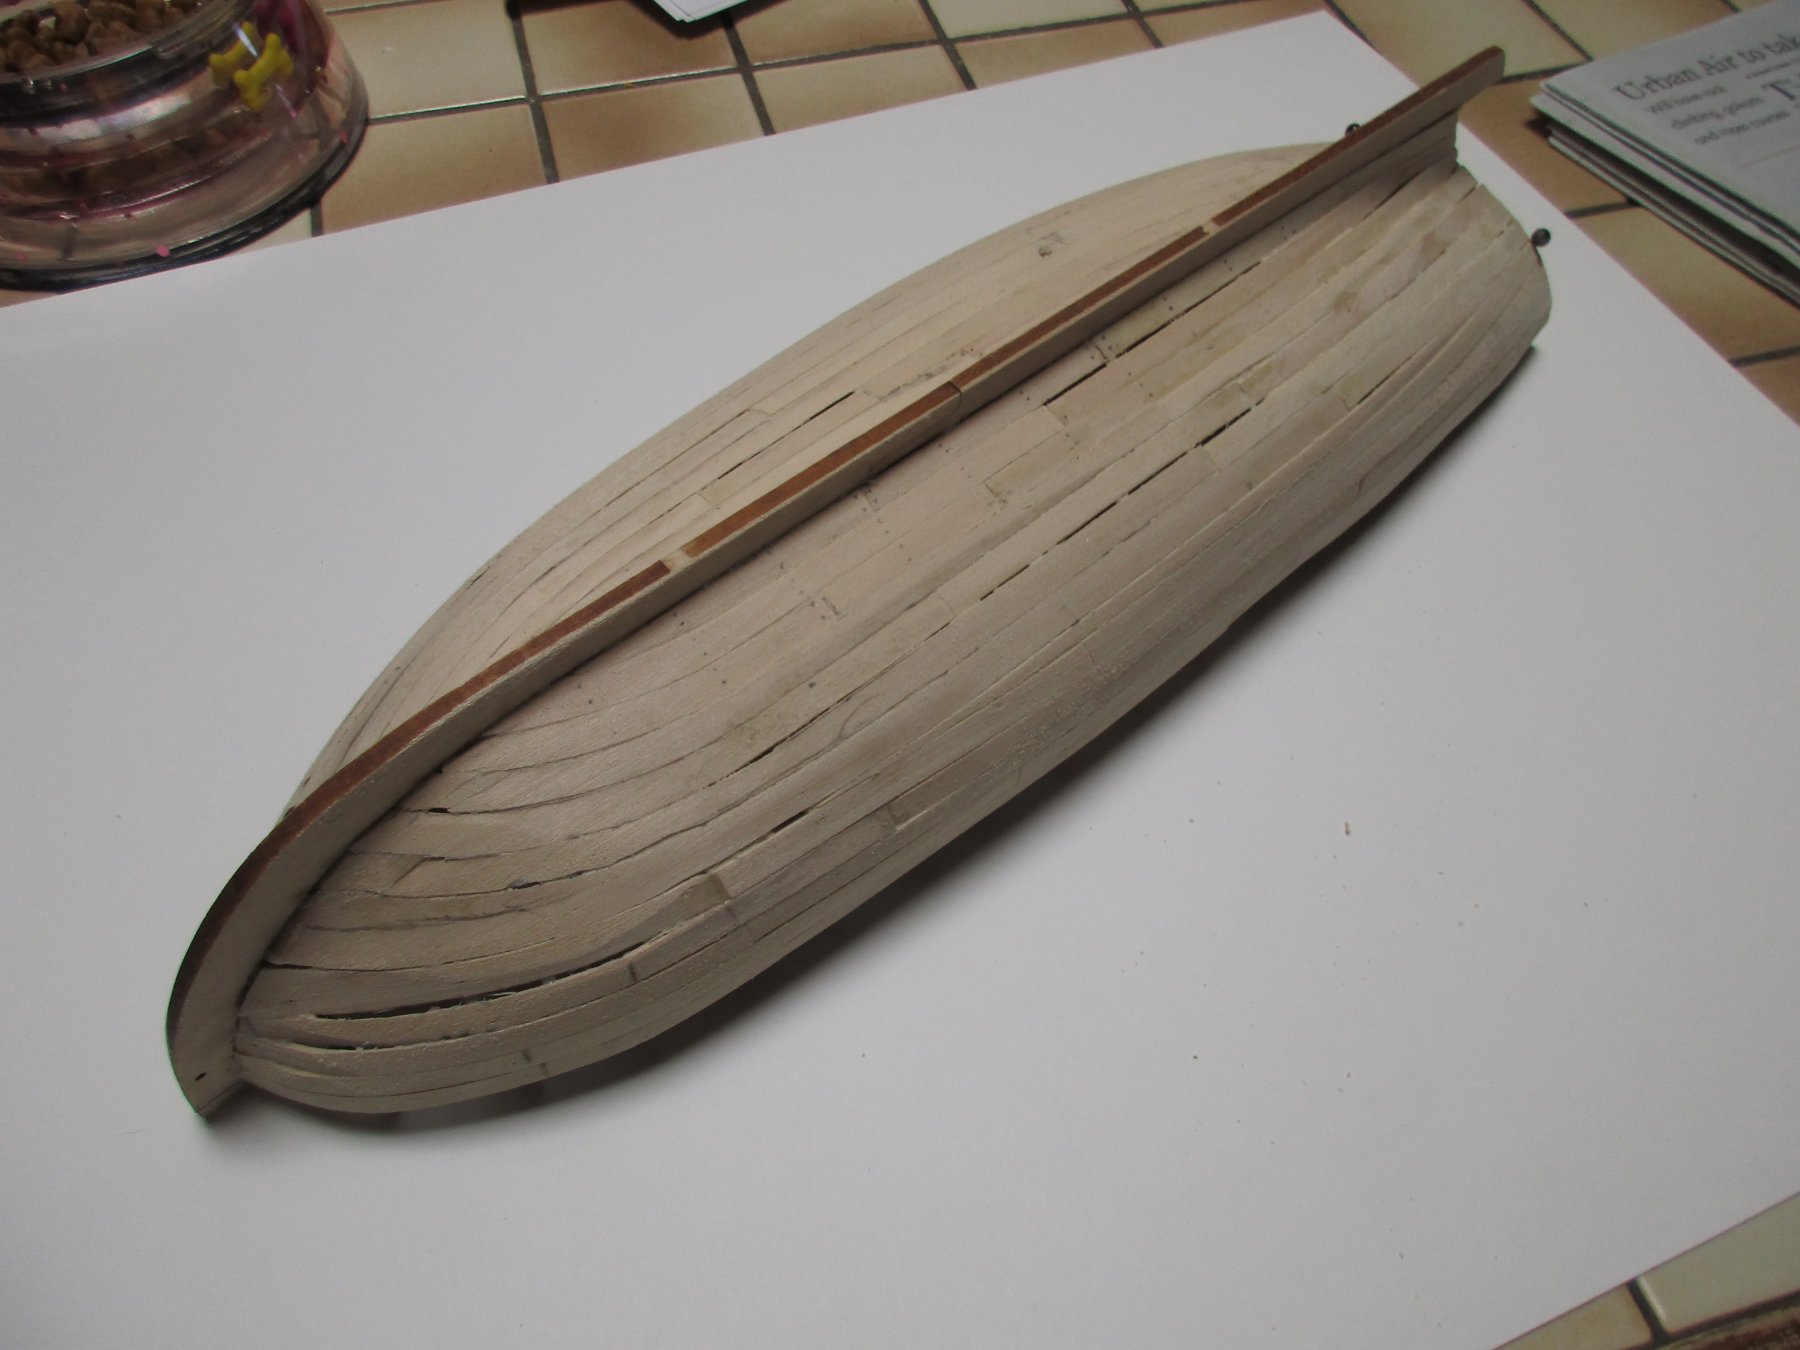
Probably works much better than soaking , Jim. Unfortunately the only source of steam I have is in the kitchen and thats high politics country. I did get the thing " planked " if you ignore the gaps and dips and ..... This thing will definitely not float ! Hoopefully lots of wood filler will allow me to get it to the point where it can be painted.
- 28 replies
-
- 1
-
-
- 18th Century Armed Longboat
- Model Shipways
- (and 1 more)
-
Good for you !
-
Oh I havn't had any trouble bending with hot water. It's the side bending I can't get. I've let the wood soak in hot water for as long as two hours and it still fights me. What I'm doing now works for site or edge bending while the traditional method works for everything else. I done't even have any trouble side bending small amounts with the wood wet and using my fingers.
-
My names Dwight ( no I wasn't named after a President or a CW singer ) and I'm a retired chemistry teacher. I've been building models as long as I can remember but just decided to add shipwright to my resume'. I've kinda started a build log and may actually continue it if the results of the build aren't awful. I'll try and enclose a pic of one of my last RR build so to prove I'm not completely daft trying this ship thing.
.thumb.JPG.aea2aec1b2cc0549be06a8852168c1a6.JPG)
-
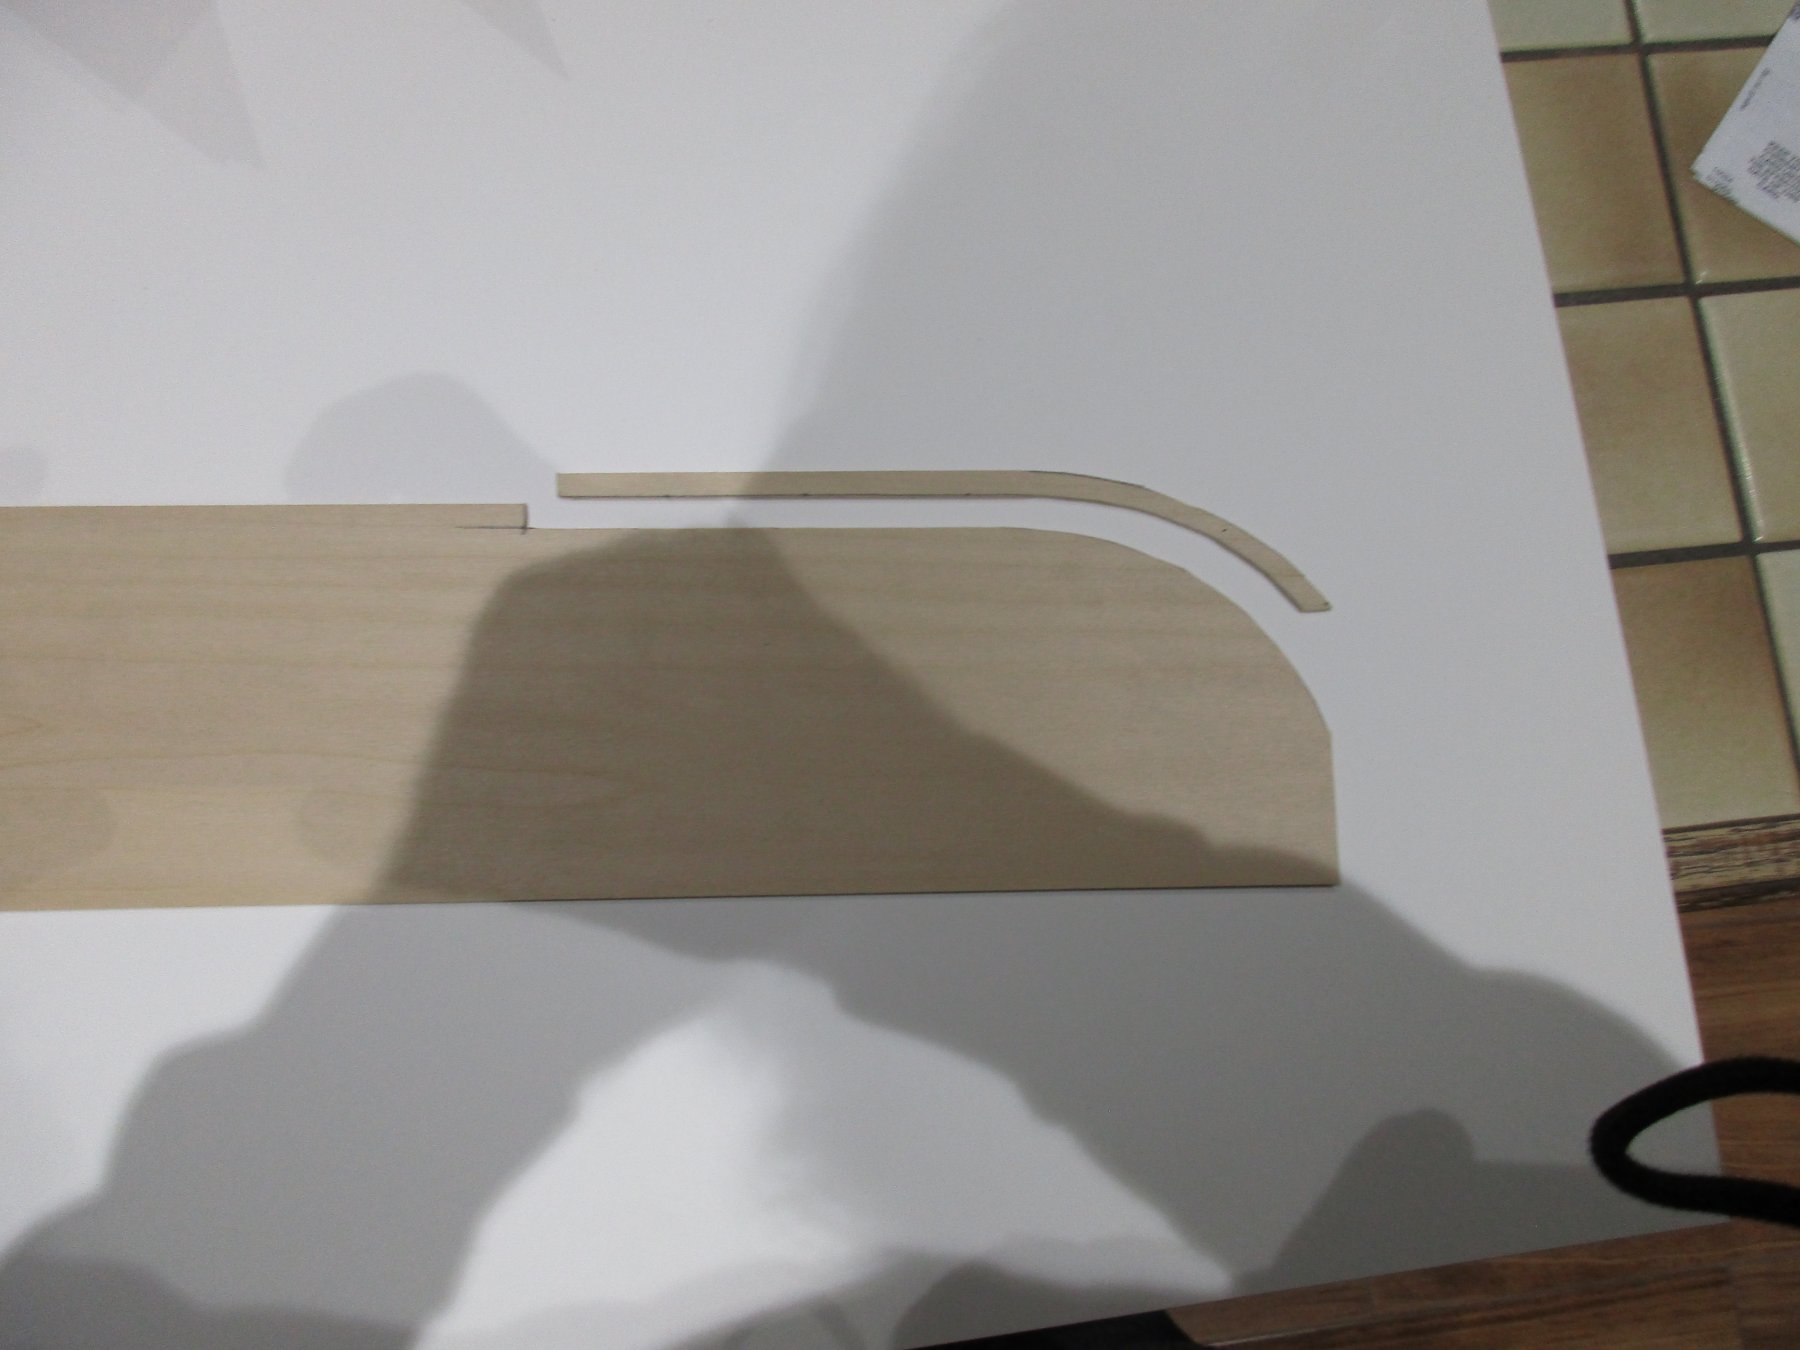
Well I was determined not to do this , too embarrassing. Anyway here I am. I've got to the point of planking this little guy and thats a new experience !!! Those of you who have built this boat know that some master builder decided to start off the planking with an impossible task , namely edge bending. I ruined half my plank material trying to master this mysterious procedure to no avail soooo..... having been an avid model railroader for most of my life I decided to just make the darn planks with the edge bend built in. Off to Hobby Lobby searching through the selection of boxwood for one that didn't have grain running in snake patterns and using some french curves and voila one edge bent plank. I've done about 10 of these and 6 or 7 actually worked. Don't know if anyone has run into this problem or my solution but for what it's worth , here it is. Sorry for the bad photo , I'm a much better model builder than a photographer When I finish planking and using up two or three pounds of wood filler and sq. yards of sand paper I'll post some more pics. if its still in one piece.

-
US Brig Syren by Gahm - Model Shipways
Dwight replied to Gahm's topic in - Kit build logs for subjects built from 1801 - 1850
I think I'm gonna' throw my Syren kit in the river , box and all ! -
That pic makes me shivver. I don't like anything below 50 but I live in west Texas
- 367 replies
-
- 2
-
-
- model shipways
- niagara
- (and 1 more)


.JPG.5d966a303f148137e9ebe19c1953cda3.JPG)