


grsjax
-
Posts
1,012 -
Joined
-
Last visited
Content Type
Profiles
Forums
Gallery
Events
Posts posted by grsjax
-
-
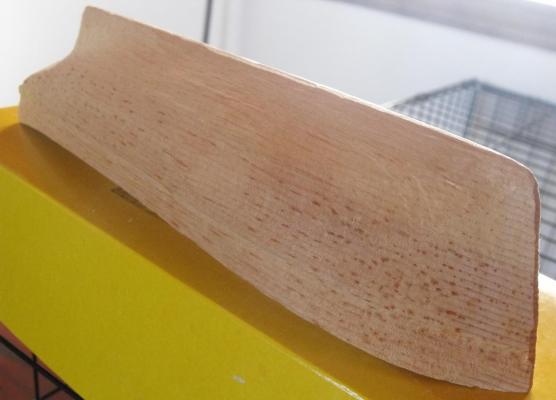
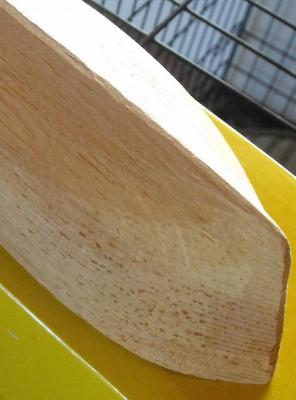
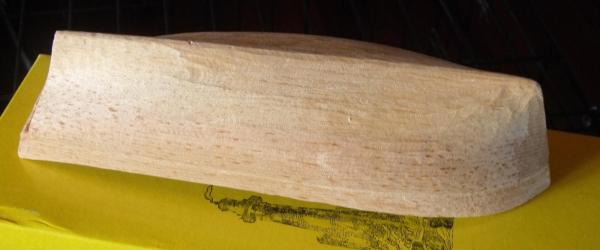
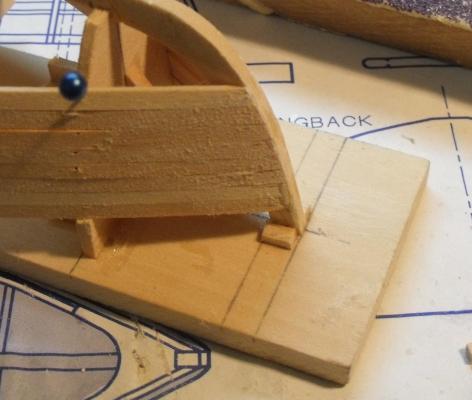
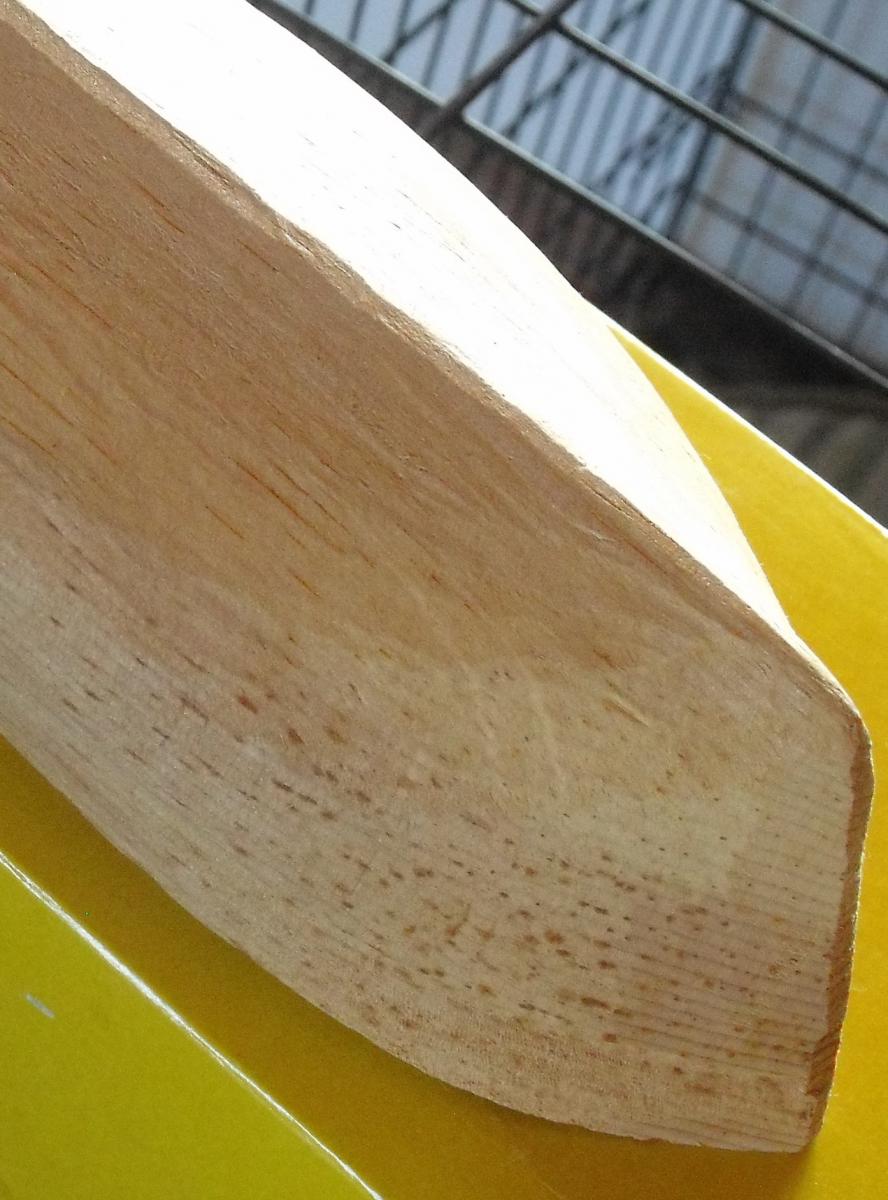
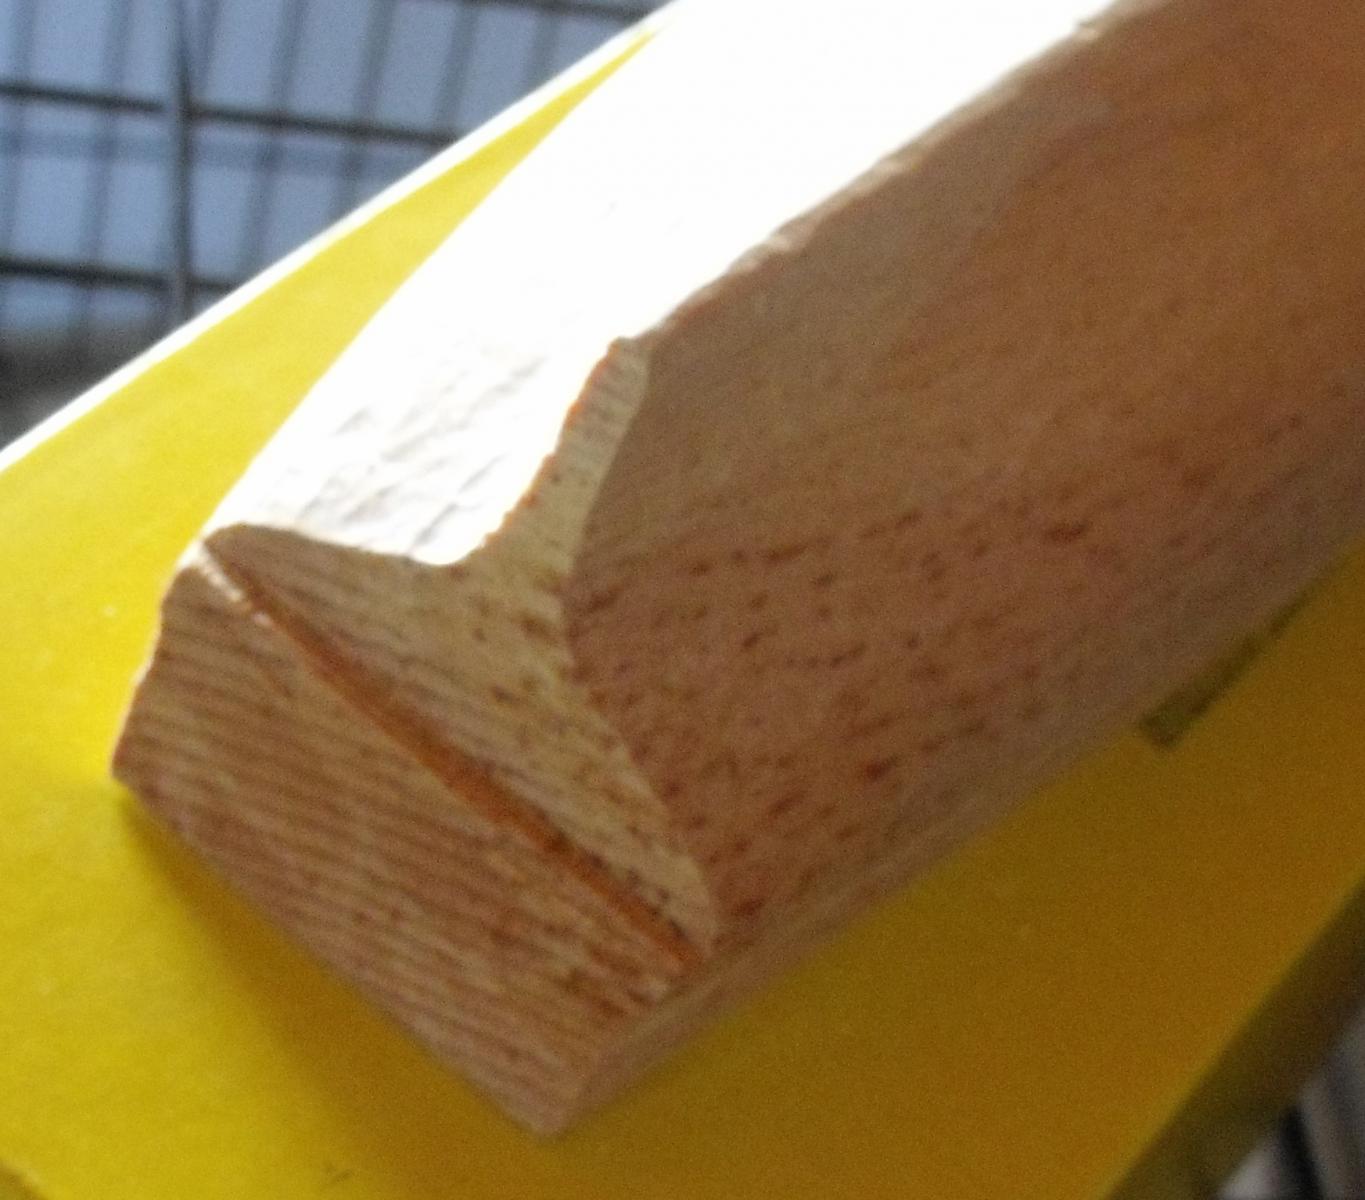
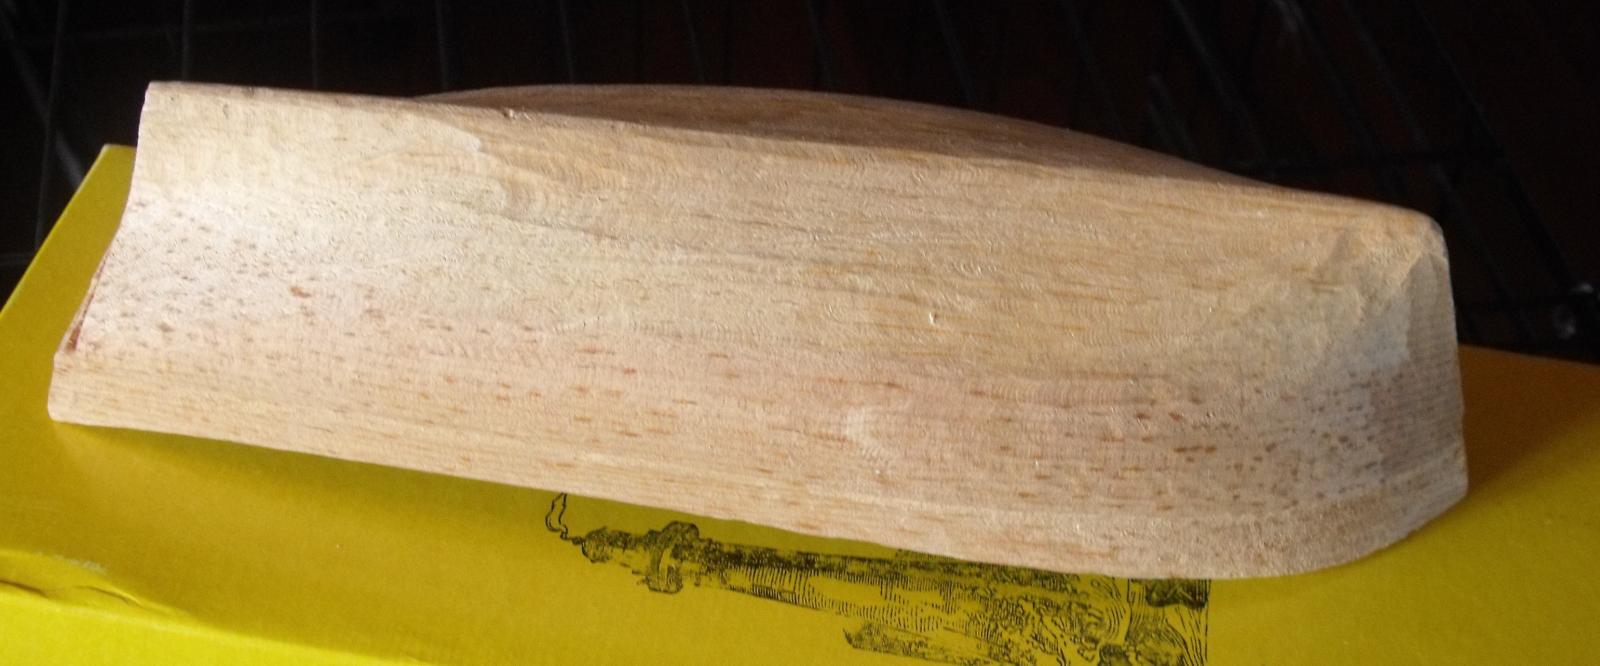
Good point. I have added 4 pics to the original post that show the flecks. I thought they might be stains but a close look indicates they are part of the grain structure.
-
Picked up an old Model Shipways Gjoa kit. The hull is not the usual basswood or mahogany I have seen in other MSW kits. It is a fairly hard light brown with dark brown flecks in it. Straight, coarse grain. I thought it might be pine but haven't seen any with the brown flecks before. Any ideas?

-
One thing to remember is that not everything called walnut actually comes from a walnut tree. Some of the woods that come in kits are from fast growing tropical trees that do not produce the strength and other qualities of true walnut. That said good quality black walnut isn't that expensive and is widely available. I agree that replacing the poor quality "walnut" in a kit is the way to go.
-
I believe the Barbary pirates used galleys as late as the middle of the 19th century.
-
Read this somewhere many years ago. Take rosin core solder of the correct size, split down one side and remove the rosin, bend into the thimble shape and you'r done. Never tried this myself so have no first hand knowledge but it sounds like a workable idea.
-
Hi.
Use annealed copper tube of the correct size.
Fill with casting sand(very fine sand). And block the ends.
Bend around a bar of the required diameter. Can use heat if required.
Bend as many turns as required.
Remove the sand.
Cut to make rings.
Then grind outer part away.
Regards Antony.
Edit -: Turn it on a lathe.
You can also use low temperature melting metals to fill the copper tube and when finished forming heat the copper to remove the core metal.
-
There is a DIY design for a jointer in a back issue of NRJ (Nautical Research Journal) http://www.thenrg.org/the-journal.php . It was in the late '70s I think. NRJ will provide reprints of old articles and I believe there is a complete index online. Just can't find the URL at the moment. Anyway it uses a dremel tool for power and looks like it would be more than adequate for any work you might need on a model.
-
Good website for info on mini-mills and lathes is http://www.mini-lathe.com/Mini_mill/Main/mini-mill.htm
-
The Pinky is a nice looking kit. No experiance with it but the double backbone construction looks interesting and the boat itself is a great subject. It is a model of H.I. Chappelle's boat that he designed for his own use and I always liked the looks of it. For more info on the history of the Pinky and how it was built you might want to take a look at Chappelle's books "American Sailing Craft" and "The American Fishing Schooners".
-
If the humidity is high it may take awhile for the oil to get hard enough to buff. When I lived in Florida I did some walnut gunstocks with tung oil and it would stay tacky for a couple of days. Trying to buff it before it hardens up enough will only result in a poor finish.
-
I have a small table top Ryobi drill press that works well. Bigger than the micro press but also more capable. A pin vise can be used to hold very small drill bits. Already pretty rigid but can be made better by filling the hollow column with concrete. Cost about $100 from Amazon and that included shipping. Does need to be bolted down.
-
Found this chart of Janka hardness on the net. Some that are not on it are basswood 410, poplar (tulip wood) 540, American sycamore 770, European sycamore 1,050 and Boxwood 2,840.
- Mirabell61, rtropp, janos and 1 other
-
 4
4
-
Not just reprinted but in a format that is cheap enough that the average modeler can afford them.
Steel's Naval Architecture. Currently available in a limited edition for about $1000
Junks and Sampans of the Yangtze River. Only copy I can find is an old reprint for $112.
How about some $30 editions for the poor but honest average guy?
-
Check out "Building Classic Small Craft," a book by John Gardner. It has plans and detailed building instructions for 47 small craft including a peapod. Great book!
Steve
"American Small Sailing Craft" by Howard I. Chappelle has a section on peapods.
-
After trying different methods of getting the planks to lay down flat on the forms I decided to use the wet bending method. I soak the planks in warm water for about 10 minutes and pin them to forms to dry. Takes several hours to get completely dry but they are much easier to fit. I will post some more pics later.
-
I like Model Shipways smack Emma C. Berry, or the skipjack Willie Bennett.
-
http://www.engineersedge.com/screw_threads_chart.htm
The above link is to a ANSI external screw thread size chart. Only gives diameter in inches but easy enough to convert to metric. BTW 4-40 is .1120 major diameter and 40 threads per inch.
-
Great looking job on the hull.
Lack of instruction in planking the boat is one of the problems with the kit. No mention of shaping or bending the planks and no hints on how to plank the turn of the bilge or the garboard. Midwest would do well to update their instructions.
-
Thank you for the kind comments. Up to the 6th plank on each side there was no need to shape the planks. The next two were steam bent but I am experimenting with shaping vrs bending right now.
-
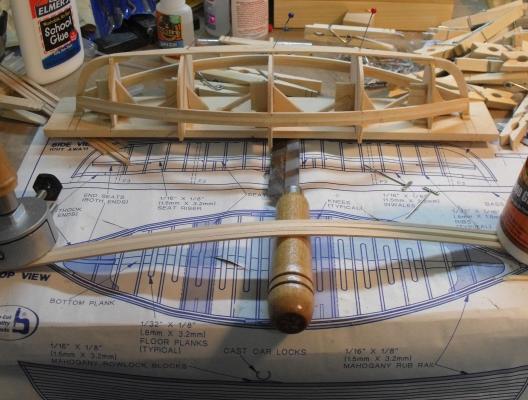
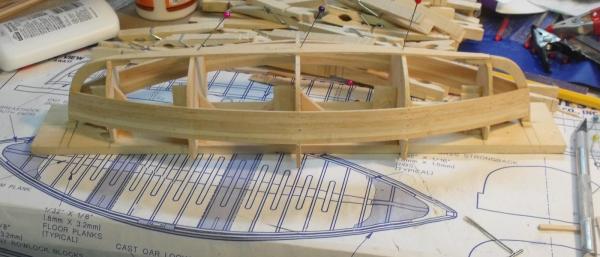
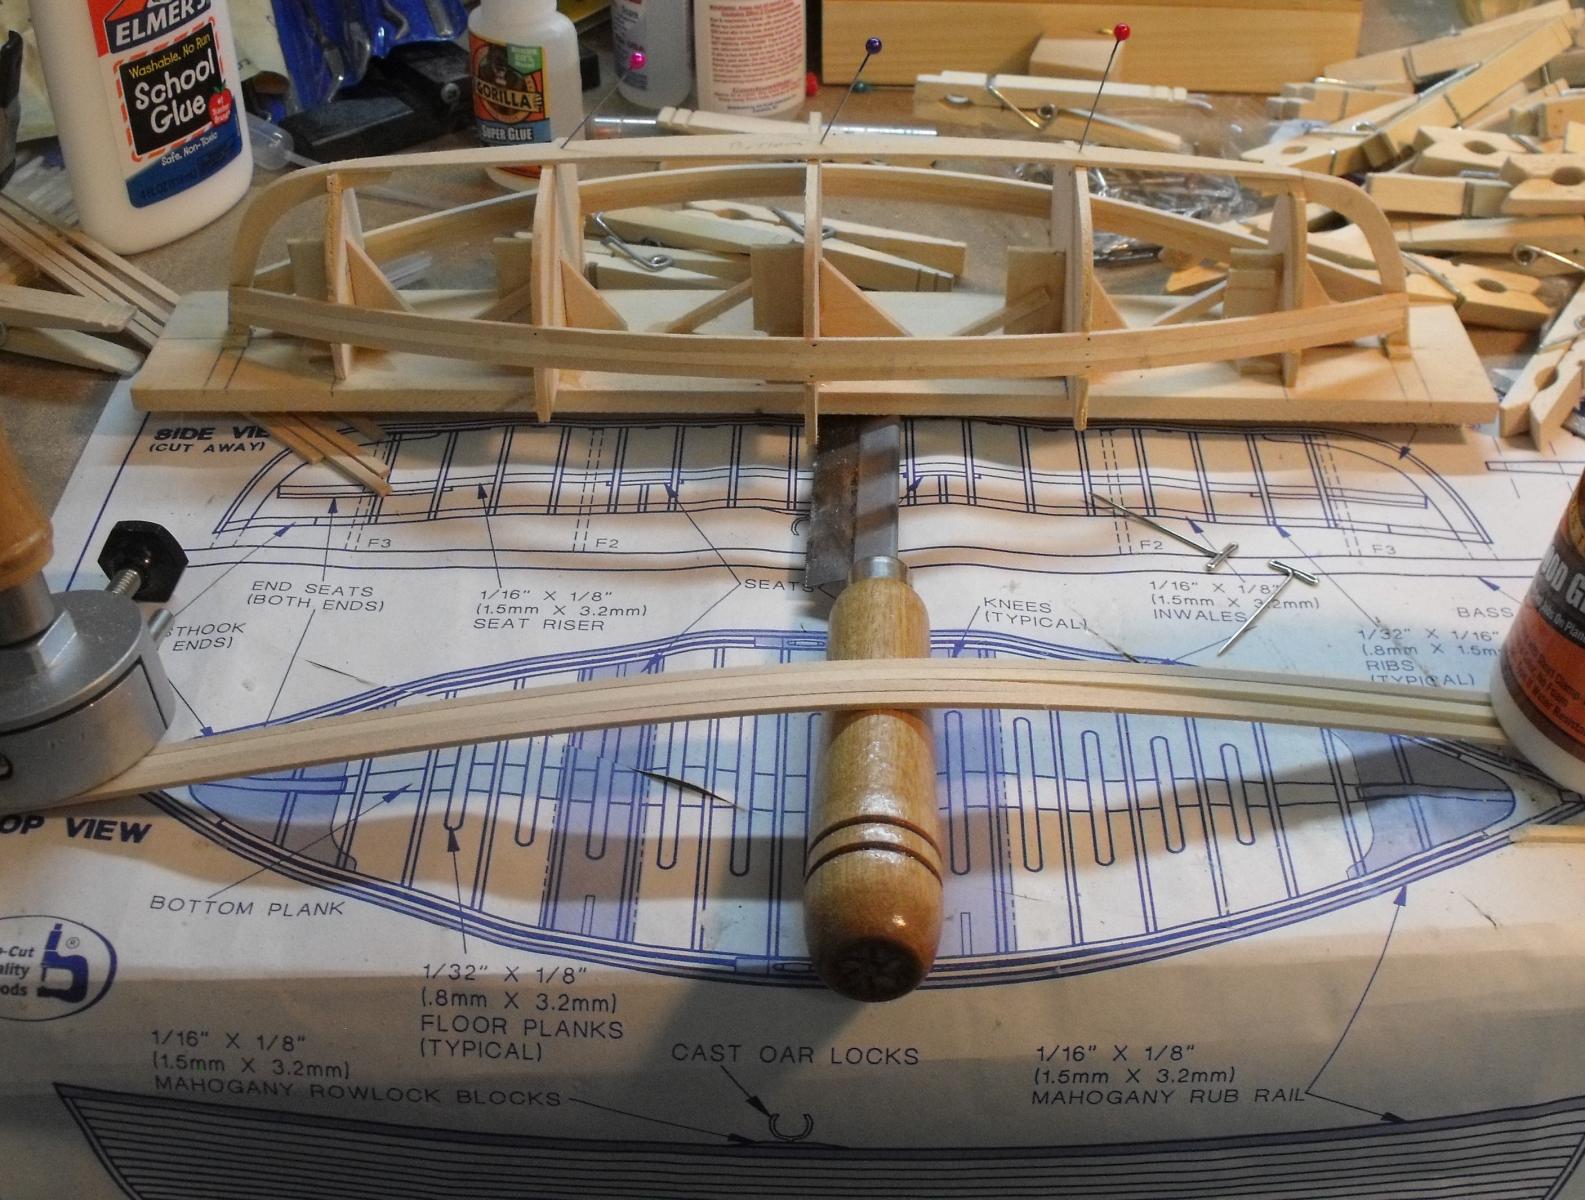
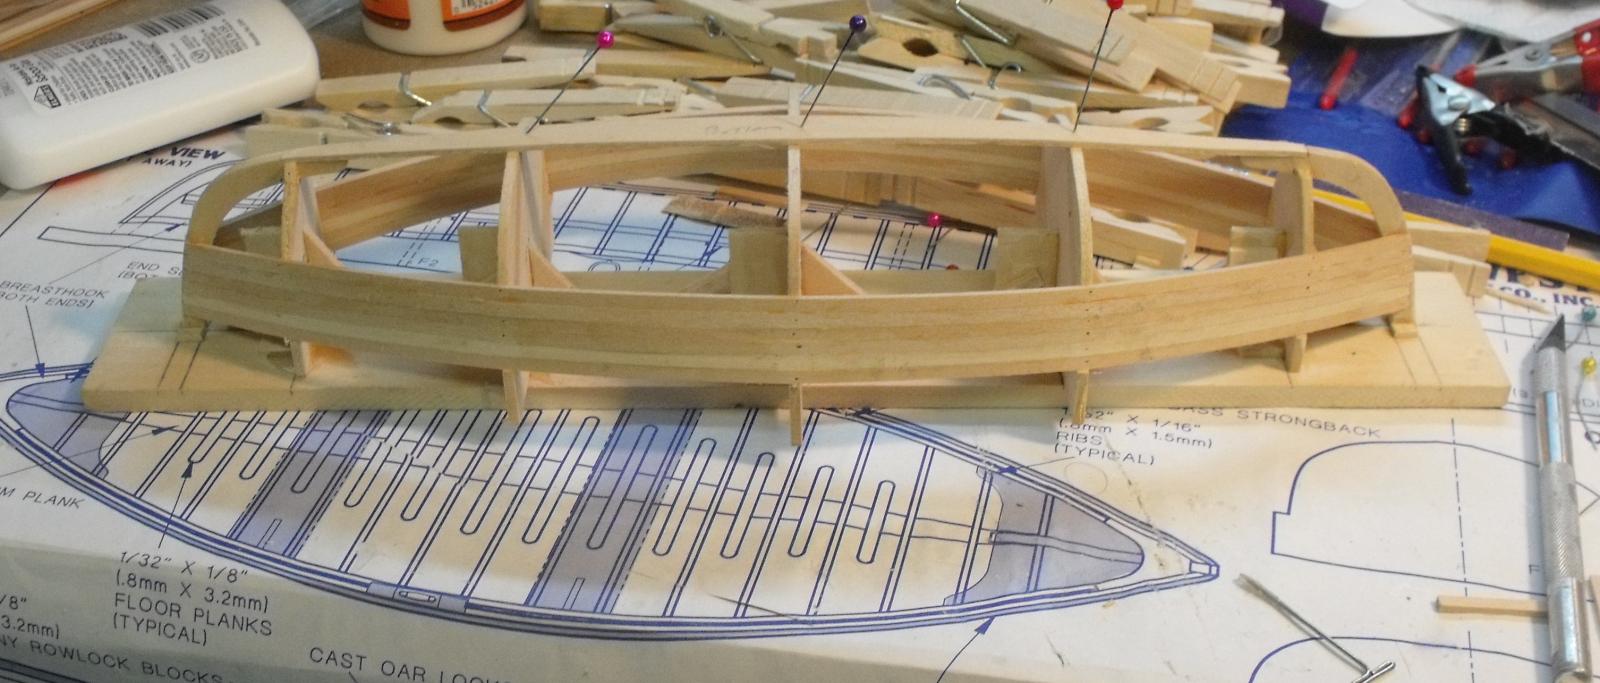
Made a bit more progress. Have learned a few lessons.
Last (should have been first but I managed to get the pics in the wrong order) pic is the model with the 3d plank on each side. This was the first one after my adventure with short planks and the subsequent repairs.
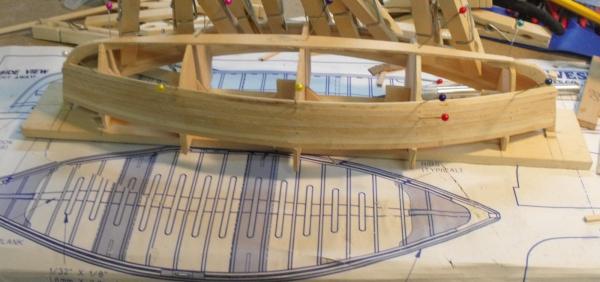
2d photo is after the 6th plank on each side was installed. This was the last one that would go on without modification of the planks. The first thing I tried was steam bending the planks to get some edge set.
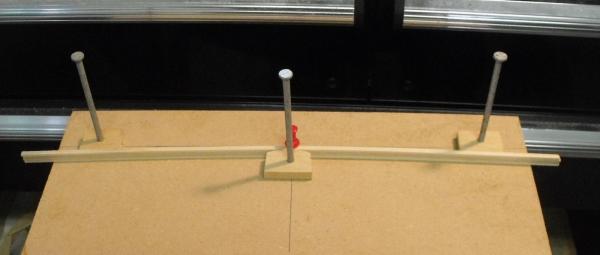
The 3d photo is my jury rigged bending jig. I wrapped the planks in wet paper towels and microwaved them for 3 minutes. Worked ok for the next two planks, see 4th pic, but I think the next ones will require either more bending or tapering. Will post my findings at a later date.
A couple of lessons learned so far.
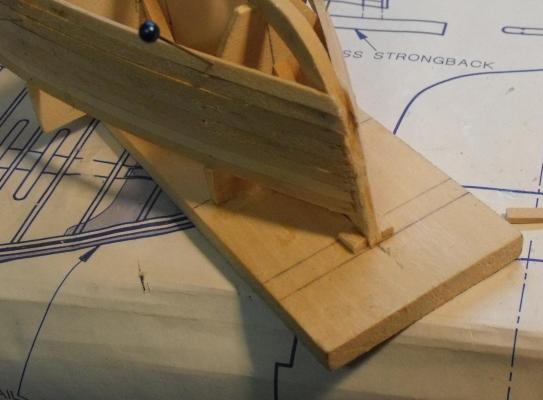
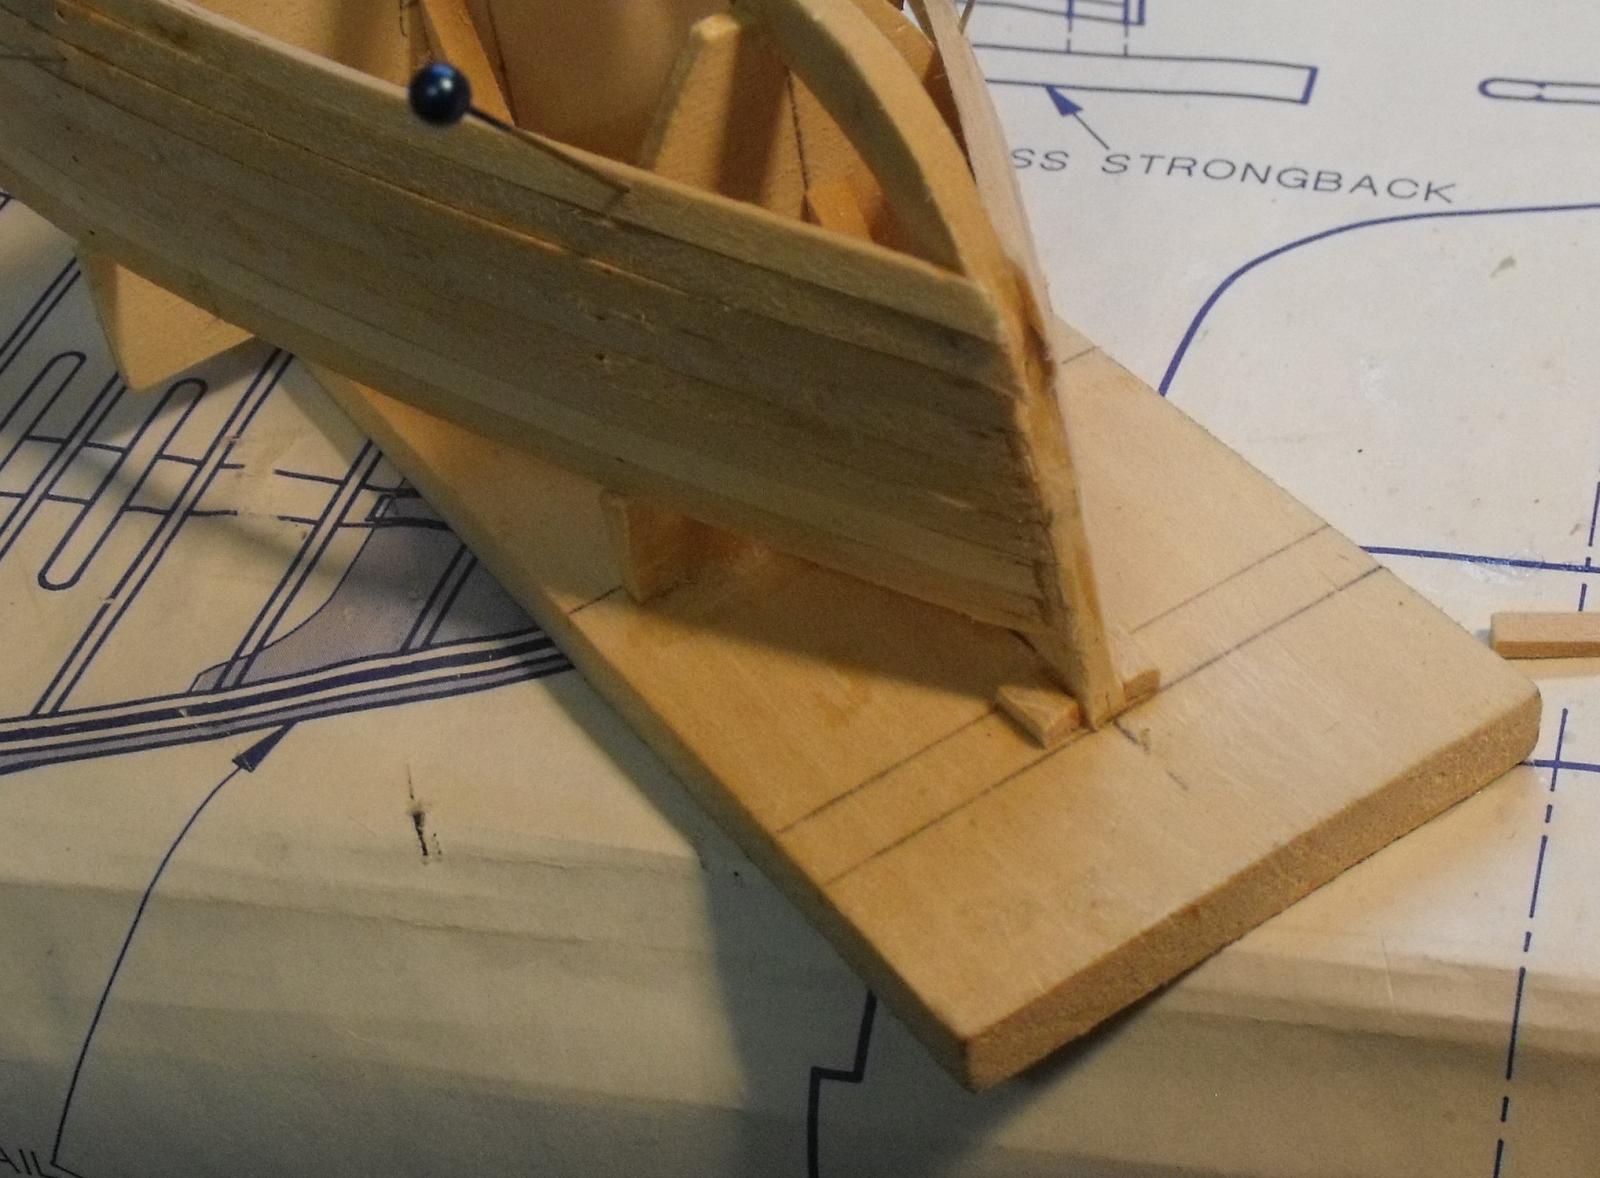
1. Don't try to trim the ends of the planks to fit exactly. Leave a small feather edge to overlap the stem and after everything is glued down come back and trim/sand to shape. The last two pics are the un-trimed ends and the ends after rough sanding to shape. Final shaping will be done when I sand and finish the outside of the hull.
2. pin the planks to the forms very tightly. The have a tendency to lift up as you go down the line gluing the planks together.
3. Use lots of cloths pins to hold the planks in alinement with the one below. If you don't little bumps and hollows develop.
- The Sailor, piperjoe, cdogg and 4 others
-
7
-
Switching between measurement systems can get confusing. When I was a young engineering student one of my professors would give us problems in off the wall units and require us to report the results in other off the wall units like furkins per furlong. I have run across at least 4 different "feet" measurements; standard, english, swedish and french. I am sure there are others as well as units like cubits and chains.
-
Needed some cheap acrylic paint for a project and found some at Walmart. Stuff comes in 2 oz. squeeze bottles and is stocked in the crafts section. Wasn't expecting much from it for $2 a bottle but it has turned out to be pretty good. Maybe not on a par with the high end paints but good. Works very well on wood and isn't bad on metal. Only problem I have had with it is it a bit soft and needs a gentle touch when sanding. However after coating with a clear finish no problems. Brand is "Plaid". Not going to find many "marine" colors lots bright colors and metallics
-
"The Tancook Schooners, An Island and its Boats" by Wayne M. O'Leary
Published by McGill-Queen's University Press, Montreal, Canada
ISBN 0-7735-1172-5
Excellent book about Tancook Island and the boats built there in the first 30 years of the 20th century.
At the end of the 19th century the Tancook builders developed a distinct fishing schooner tailored to their environment. This was an evolution of the Tancook Whalers. About a third of the book is about the boats, the rest is about the people and economy of Tancook Island.
The book contains many photos and line drawings of the boats with some explanation of building methods and materials.
-
Exterior latex house paint works well. White seems to work best but any color seems ok.


Wood ID
in Wood discussion...Where to use it? Where to get it? What types are best? How to Finish it?
Posted
Thanks for the info. Found a website www.wood-database.com that has pictures of several different pine woods. Looks like the hull is most likely eastern white pine. Still not 100% sure but it makes sense that white pine would be used for a model boat hull.