


cor_f
-
Posts
17 -
Joined
-
Last visited
Content Type
Profiles
Forums
Gallery
Events
Posts posted by cor_f
-
-
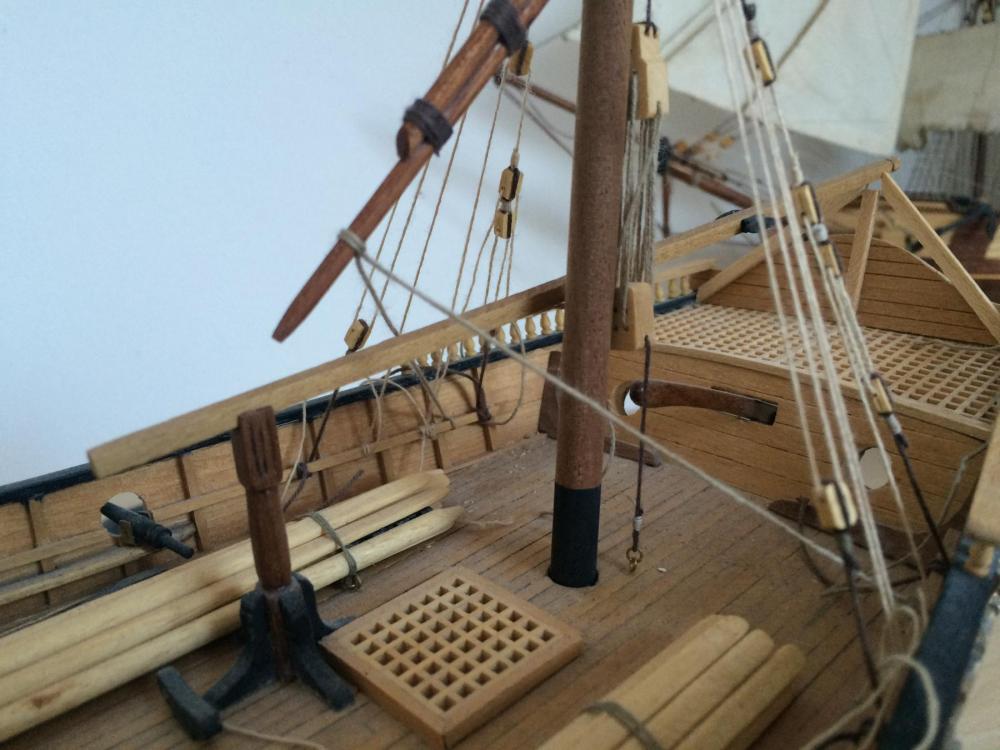
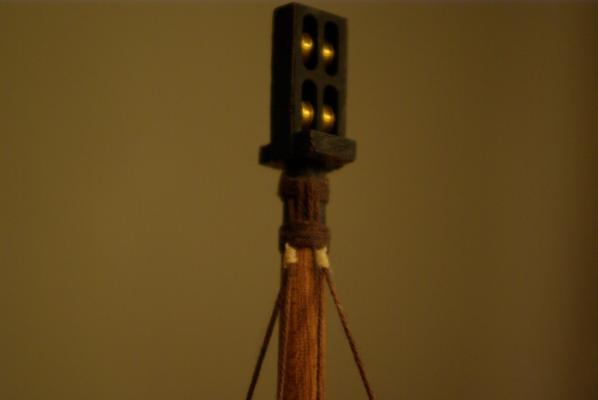
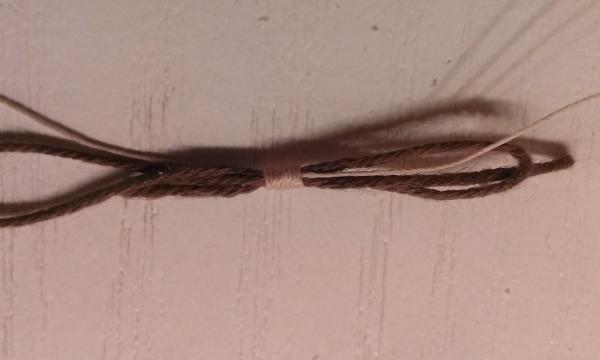
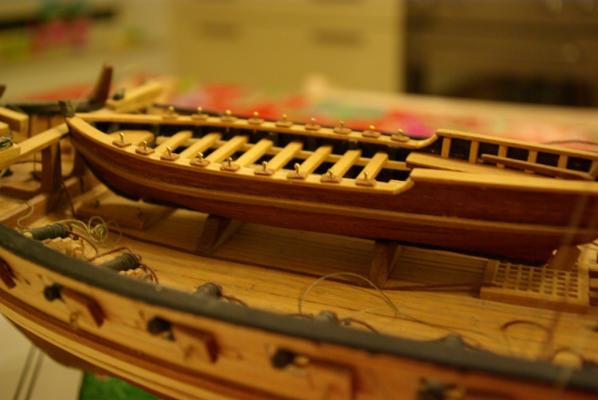
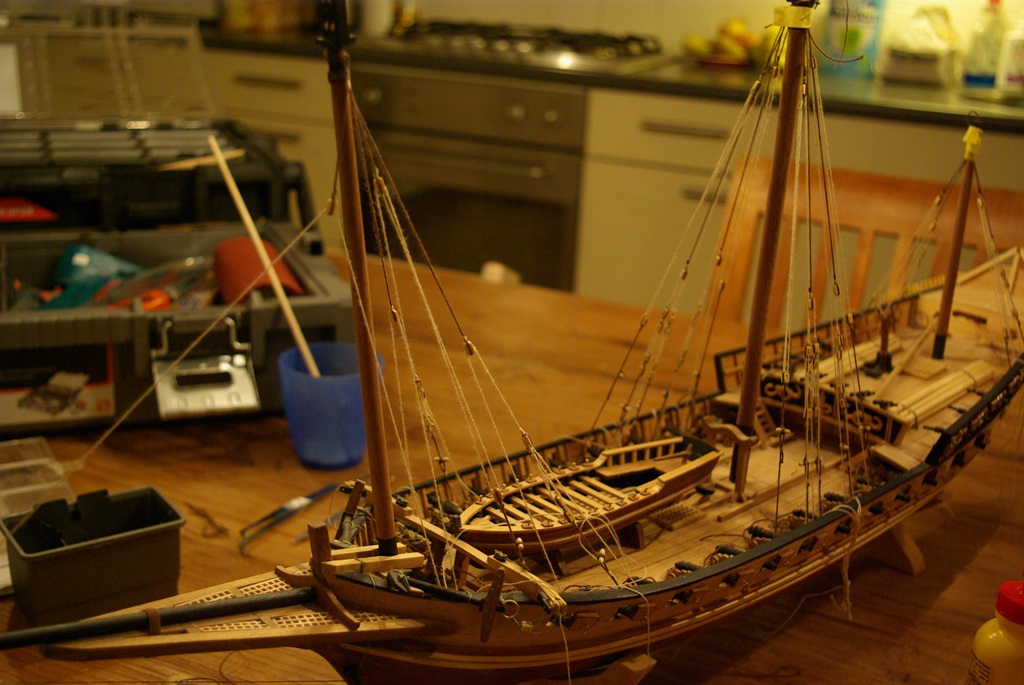
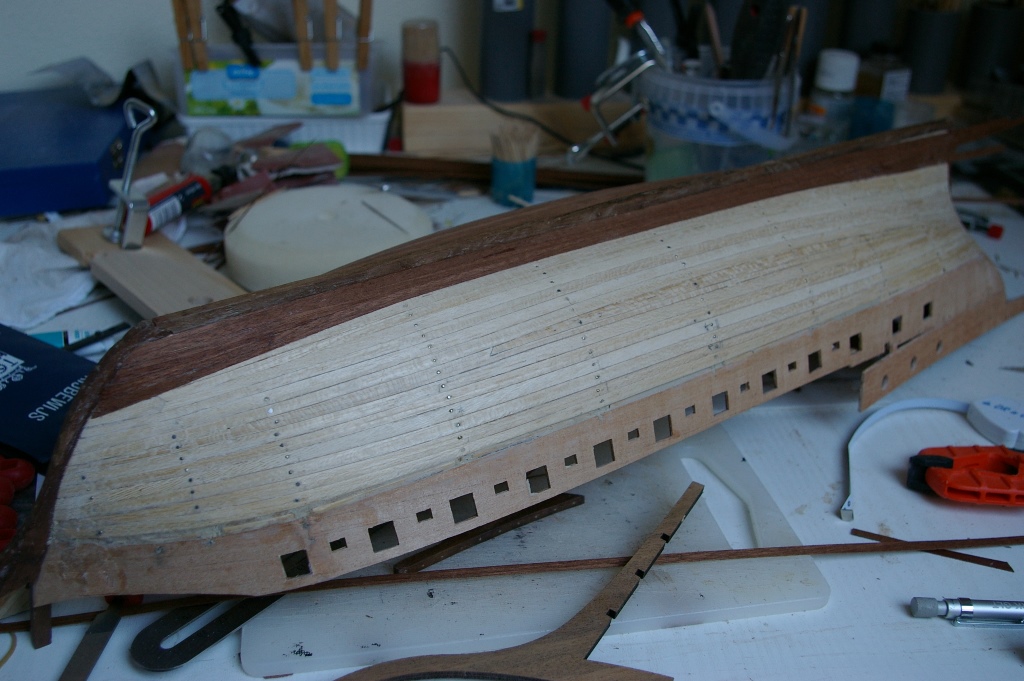
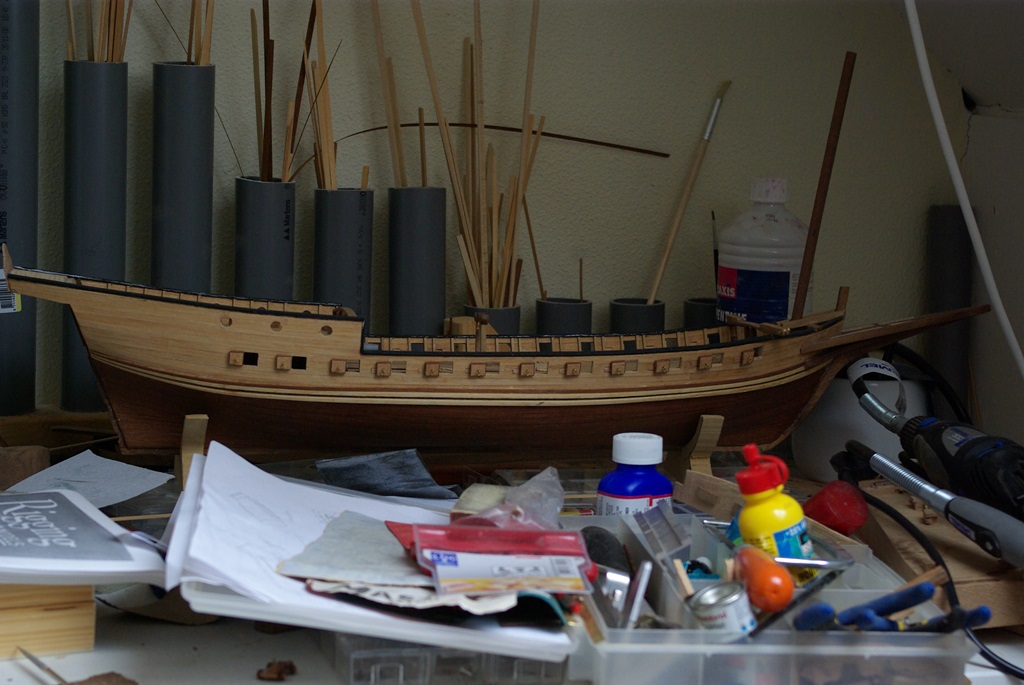
Here are some pictures of te latest status.
I've completed the three masts and booms incluiding all blocks etc.
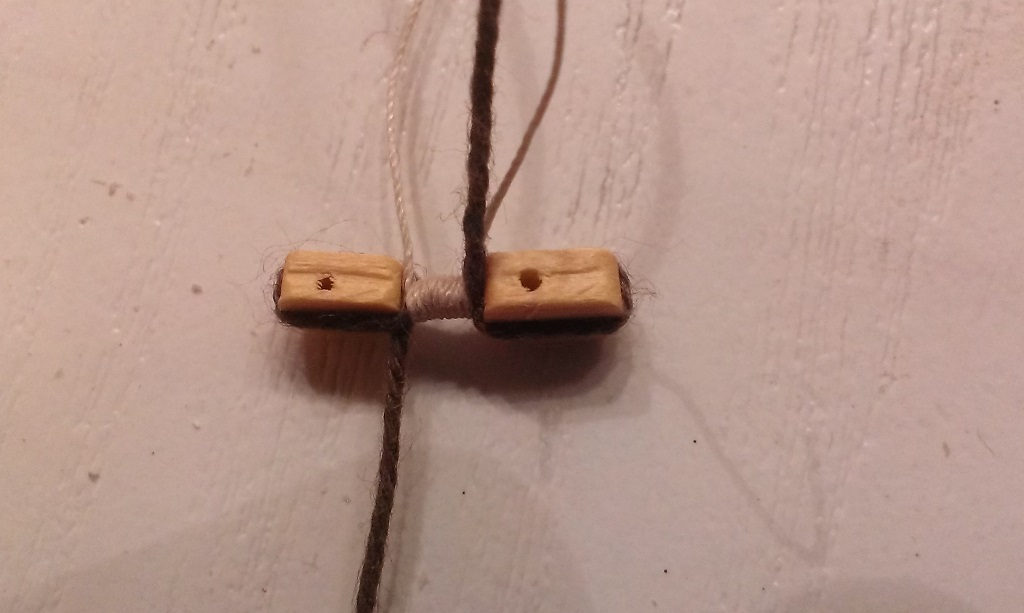
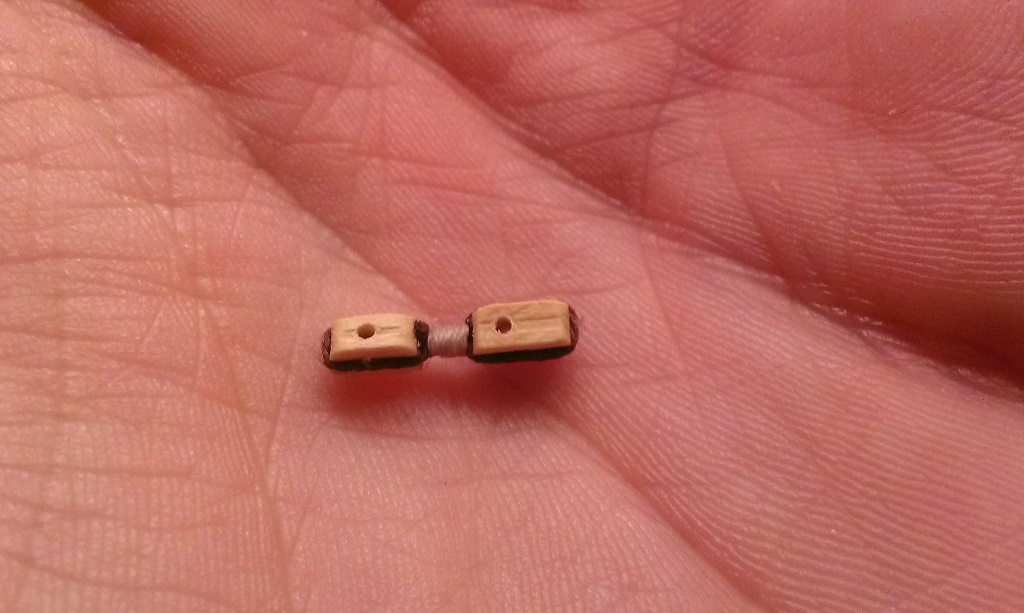
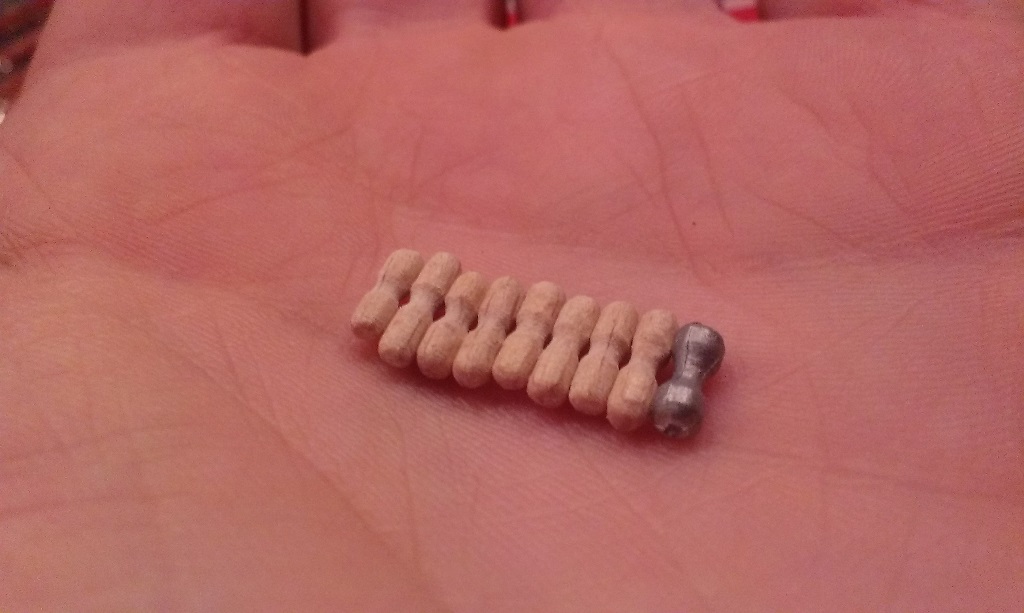
The third mast is already mounted. The other two will have to wait untill the Parrrel Beads I ordered come in.
I also ordered material to create new sails. I was not so happy with the seams of the sails in the kit as you also can see on the first picture. This is still a little tricky I have no clue on how to make them look real. Time for some investigation on MSW


-
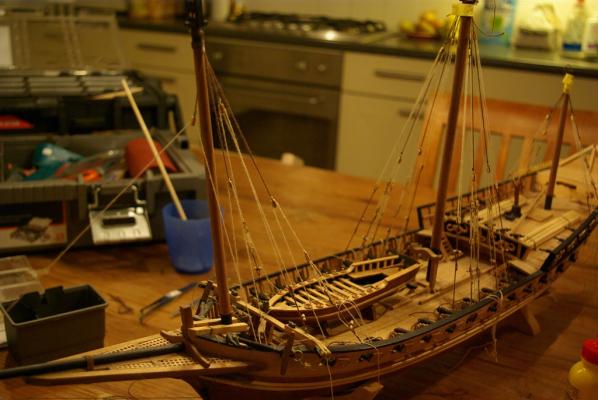
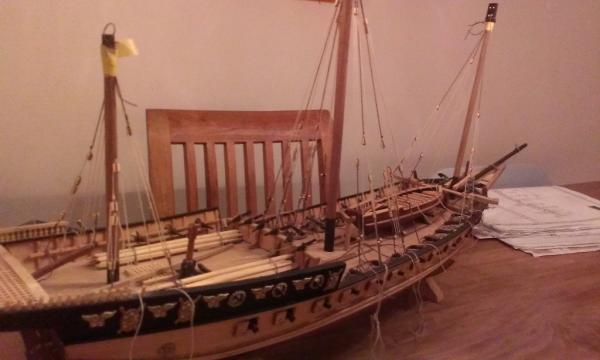
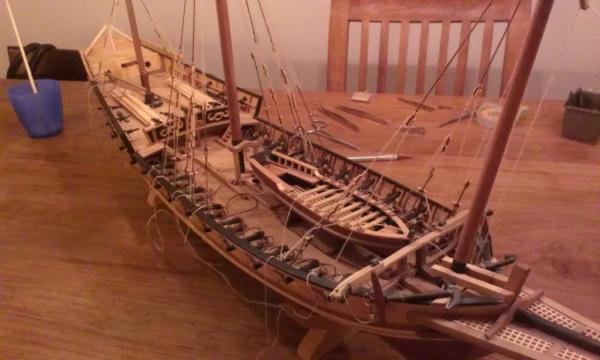
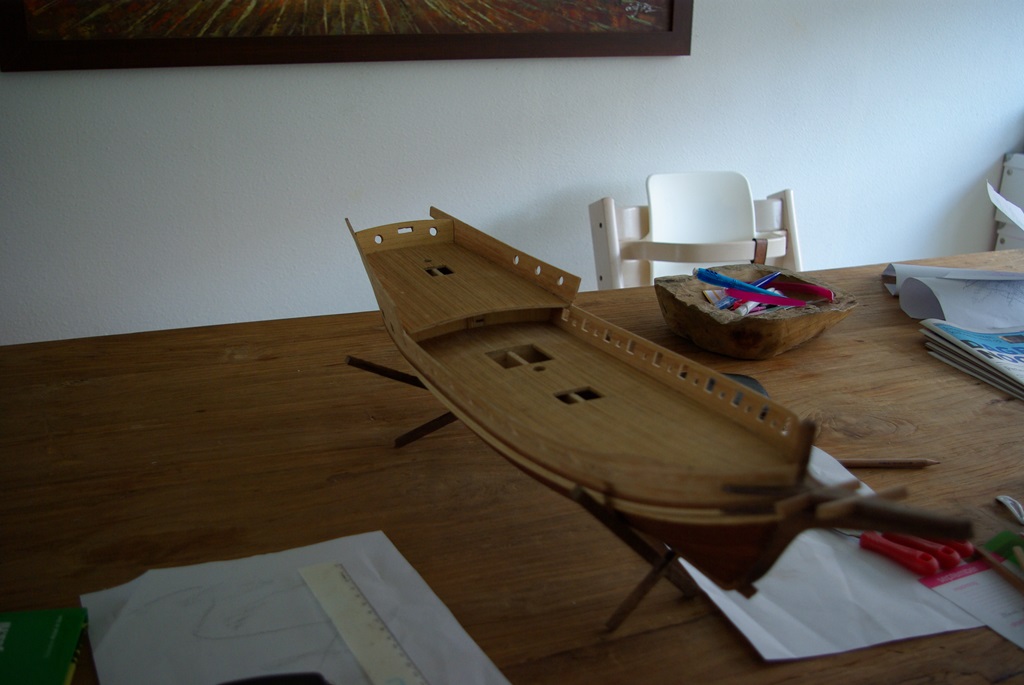
Hello all. After some time I've decided to finish my Xebec ship. The last update is from 2013 and not much changed since then, the ship has been collecting dust
 although it is almost finished.
I'm currently working on fixing the main masts and have ordered some parts online because for some reason Occre added not enough Parrel Beads (?) and the Parrels themselfs are kind of ugly (metal). In the past, somewhere between 2013 and now, when I thought I had some time to continue building, I tried to reproduce these with boxwood but its just too small to make for me.
I'll try to post some pictures soon.
@Don: I have instructions in English but it's for the Occre kit, not for the Amati so I don't think it'll be usefull to you
@Frits: Hi! I'll post some pictures soon but don't expect perfect rigging, I'm still just fooling around

-
-
Hey, guess you're right about the toggles Keith! Thanks for showing me.
Here's a small update. I fixed the mast rigging (don't know the correct terms
 ) to the mast with some tape, now it was time to fix it permanently. I'd better have done this first, because some of the rigging is already fixed. Now I had to make sure I remained enough tension. Also, I used a too much glue and I made the mistake to squeeze the lasings so the ropes are a little flattend now :mellow:
Nevertheless I'm quite content. Two more masts to go.
This needs a liiiittle more trimming.
This time I used a proper camera instead of my phone....
-
Nice work so far John! I'm closely watching you progress, as you are watching mine
Keep the pictures coming!
I know that Occre named their xebec "Cazador" but it has very many similarities with 'Le Requin' (which is extensively described in the Ancre book).
Funny: Cazador means Hunter in spanish. Requin means Shark in French.
(Sciabecco means 'small three masted vessel' in Italian.)
Personally I've never pushed nails in, never tried it either. I have this tiny hammer, this worked great for me.
Best regards, Cor.
-
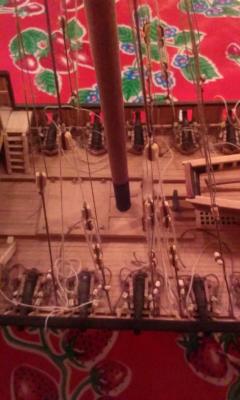
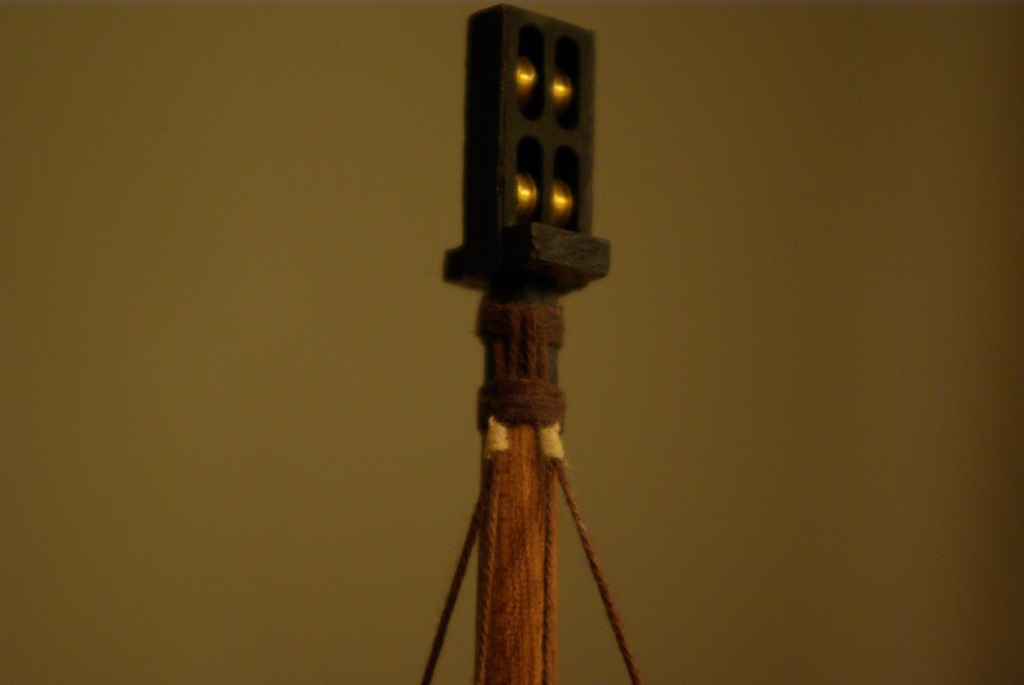
Little update on the rigging: I've replaced most of the green/grey wire, I like the lighter grey better and I got plenty of this.
One problem I keep running into is that the toggles tend to turn. At first, I installed them so, that they where in line with the ship but now I put the lines under a litlle tension, the wires turn taking the toggles with them. I'll try posting a picture of this soon.
I was wondering what I could do, maybe I should fix them in place and put some dilluted glue on the wires to keep 'em straight. Any suggestions would be welcome.
I taped most of the lines to the upper side of the mast because they need some sort of seizing.
-
Hello all!
A litlle status update, I'm working on the rigging.
Only I made a little mistake
I didn't have enough rope because I use a lot with rigging my cannon carts.Of course the kit didn't take that in consideration and I wasn't able to find the exact same rope on the internet. It is a kind of strange grey / green wire. I purchased some 0,15mm grey rope and currently i'm replacing the green/grey ropes.
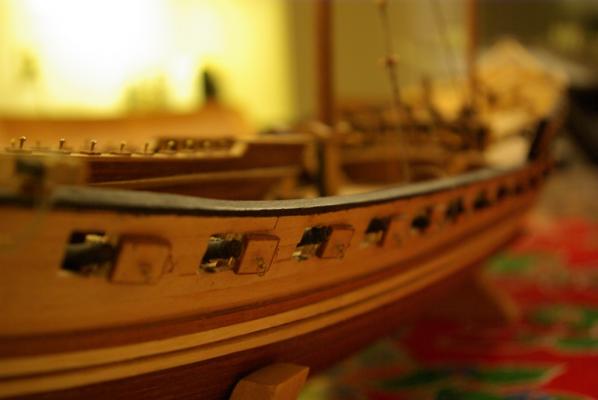
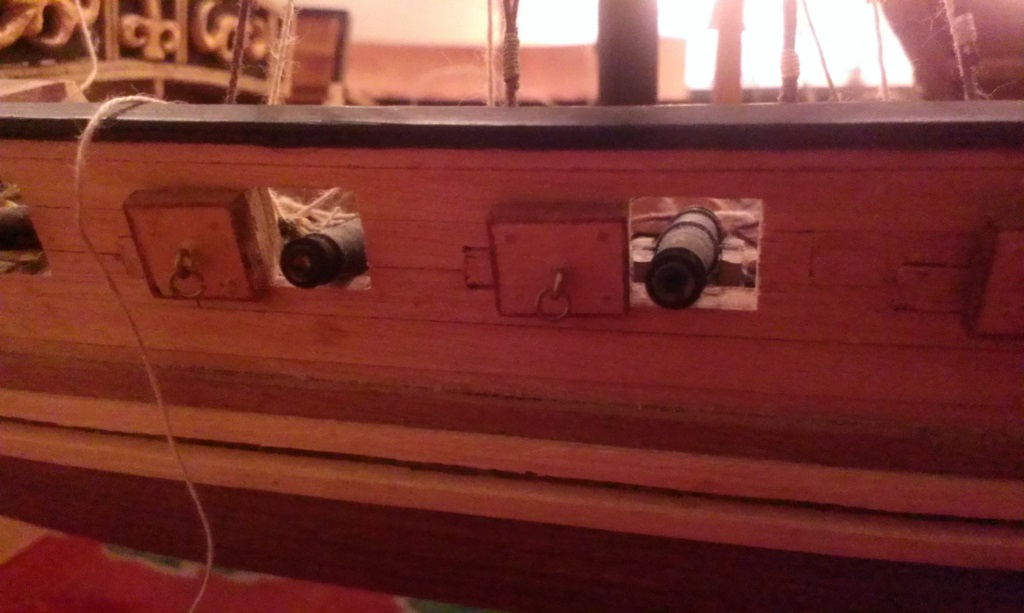
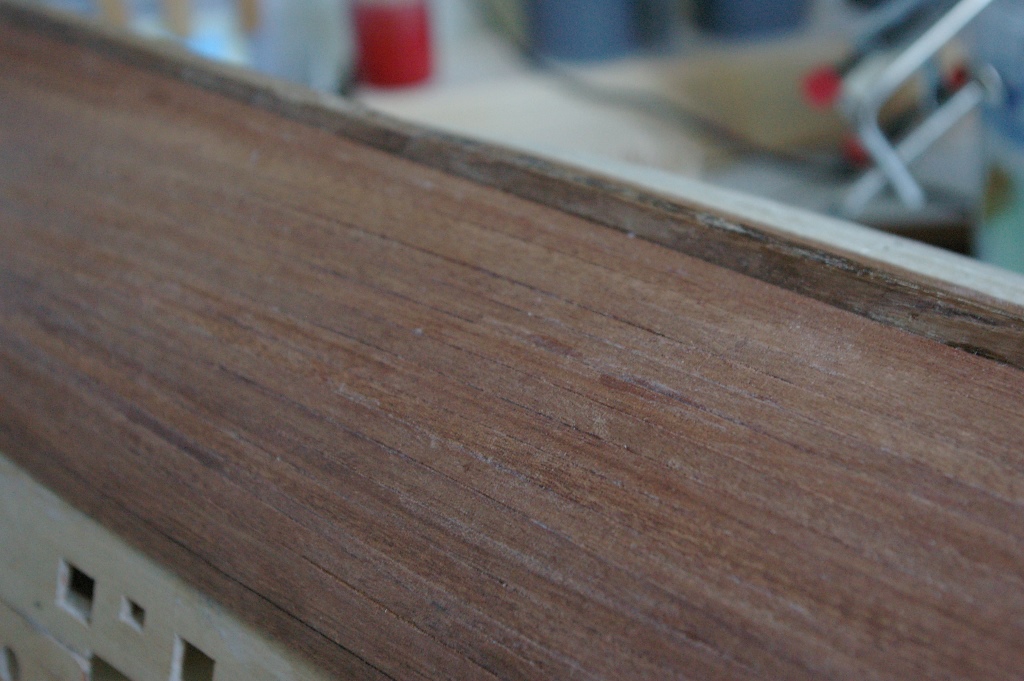
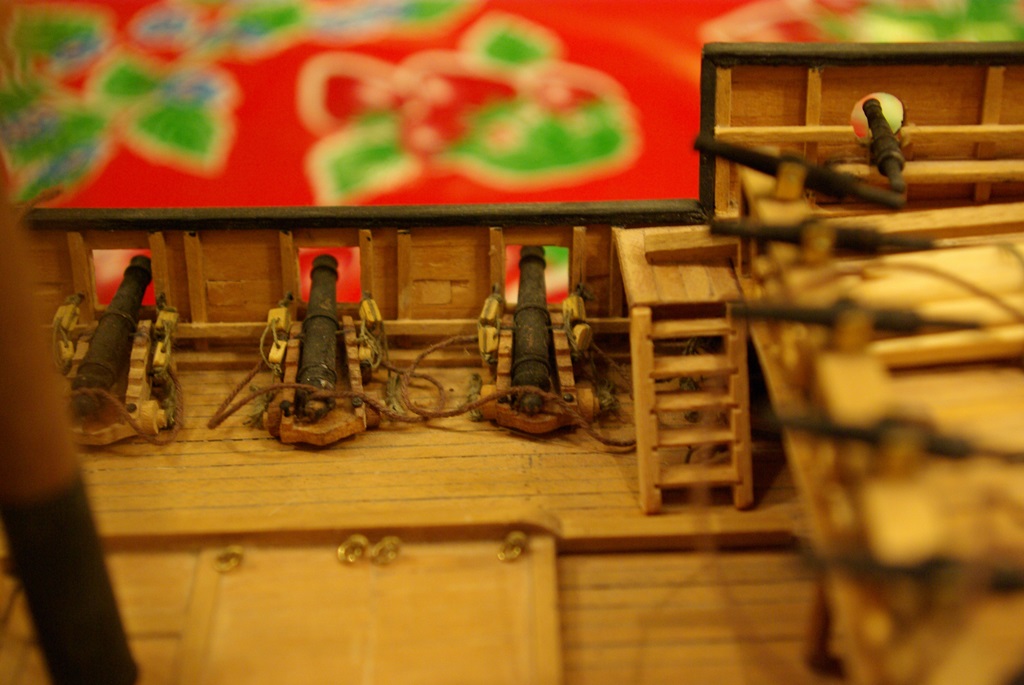
Here a close up of the gun port. I made these not accoring to kit instruction. The manual supposes to make the 'half'. One half on the right, one on the left. Also, I added some treenailing and an eyebolt and ring.

- mtaylor, Auvergne, themadchemist and 3 others
-
 6
6
-
Thanks all for the kind words. Without MSW I really wouldn't have come this far.
I´m just a beginner and this is my second build. The first build was in the pre-MSW era, and I did everything by the (occre book). Now I'm one step further.
On the other hand, the quality on MSW is moslty so high, I sometimes set the sight too high.
(All!) The pictures of Alexander Romaschenko are here: http://rapidshare.co...6FDA3E923E2BBFE (Thanks Ilhan)
-
Very nice video Jay! Very usefull.
I've put something similar in my building log. Thats about making 'tackle blocks'; a large block combined with a small one.
(I'm not sure these are called that way btw.)
Best regards, Cor.
-
Nice of you to step over to wooden shipmodelling Max!
It's looking nice so far, the Half moon is a nice ship, its on my wishlist as well.
imho it better to plank the deck first, and then fit it. But this depends on the kit really.
Great working place you have there btw, do you have any special tools, we wood-workers don't know about?
What do you think of the Corel kit?
Best Regards, Cor
-
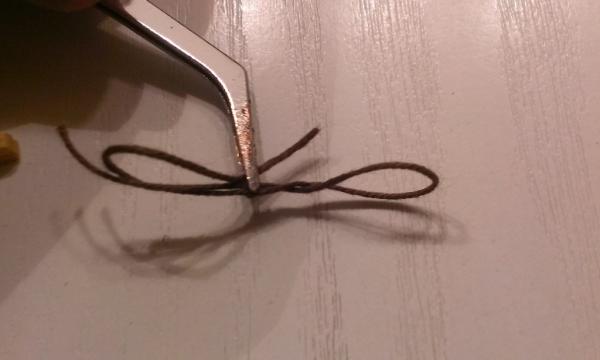
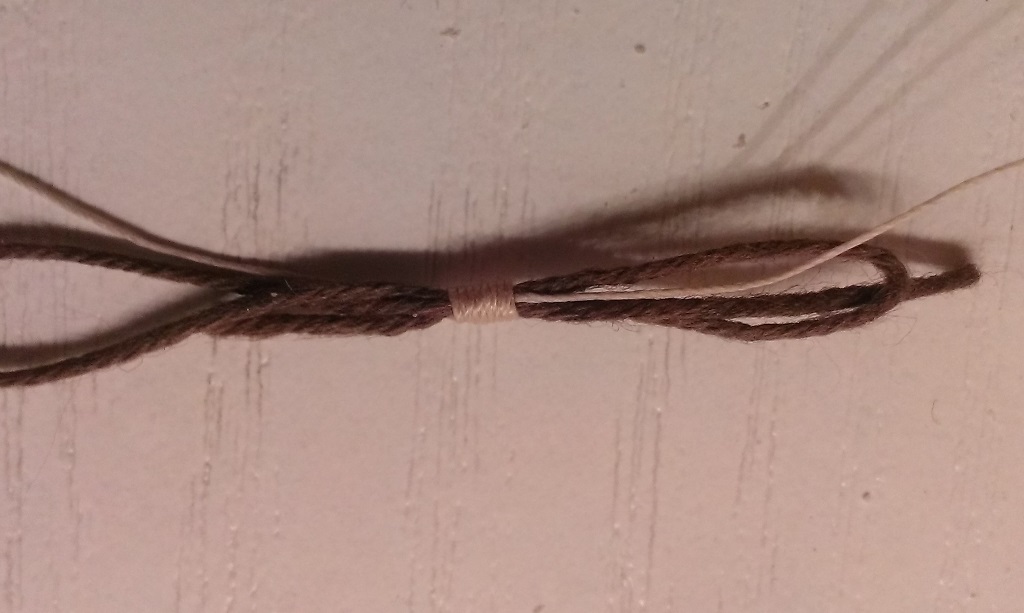
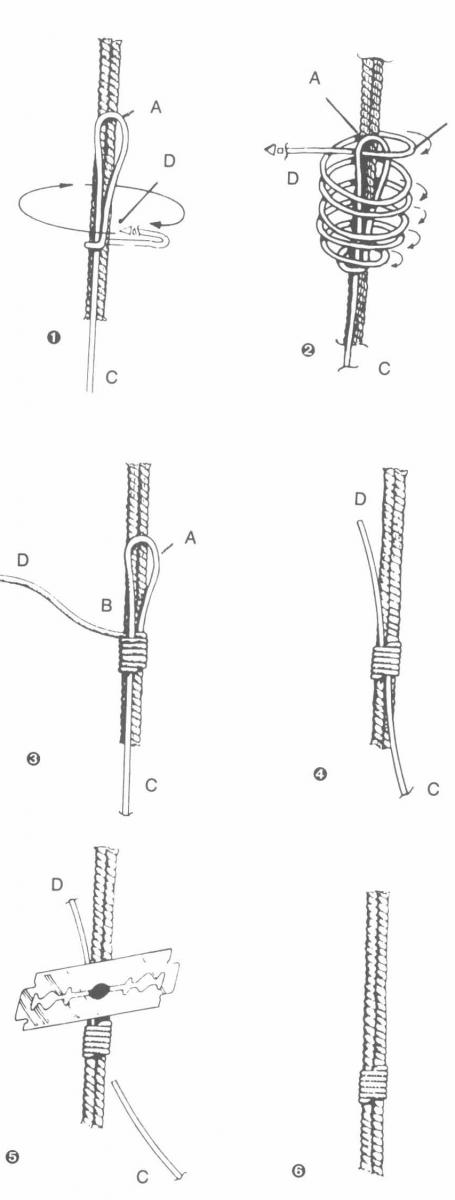
Hello all,
I've been busy mass producing some rigging materials. One thing I had to make was 10 tackle blocks. I'm not sure these are called this way. Also i'm not sure it's historically correct, it looks good to me
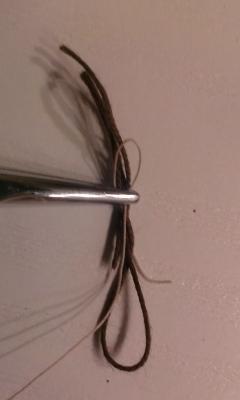
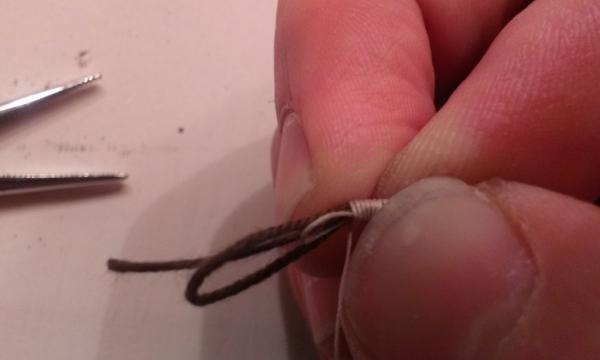
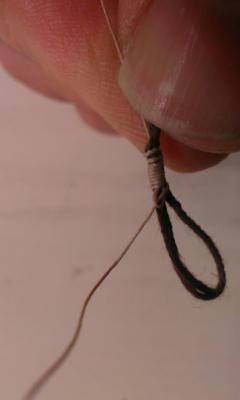
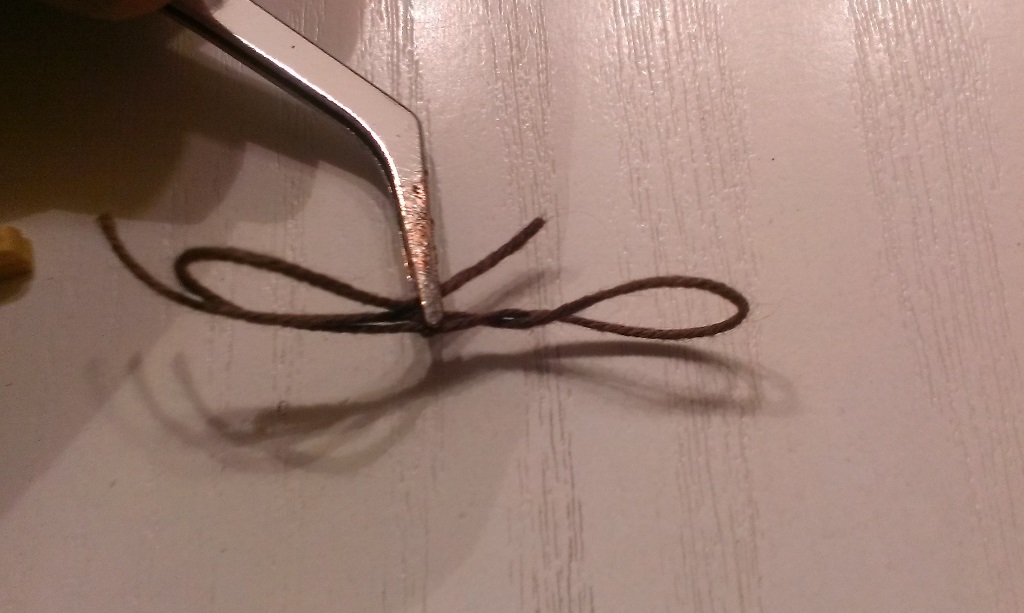
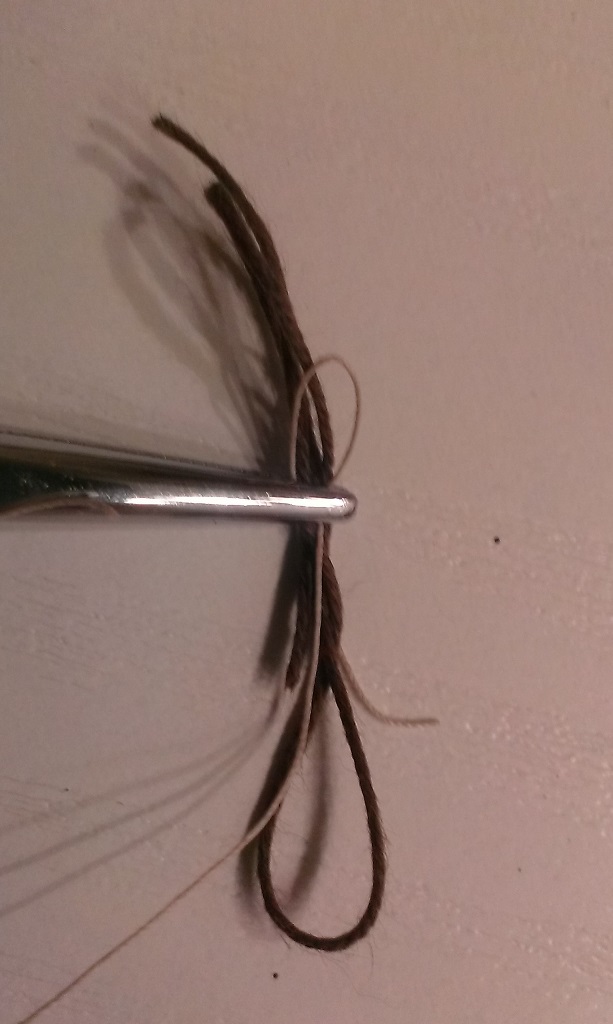
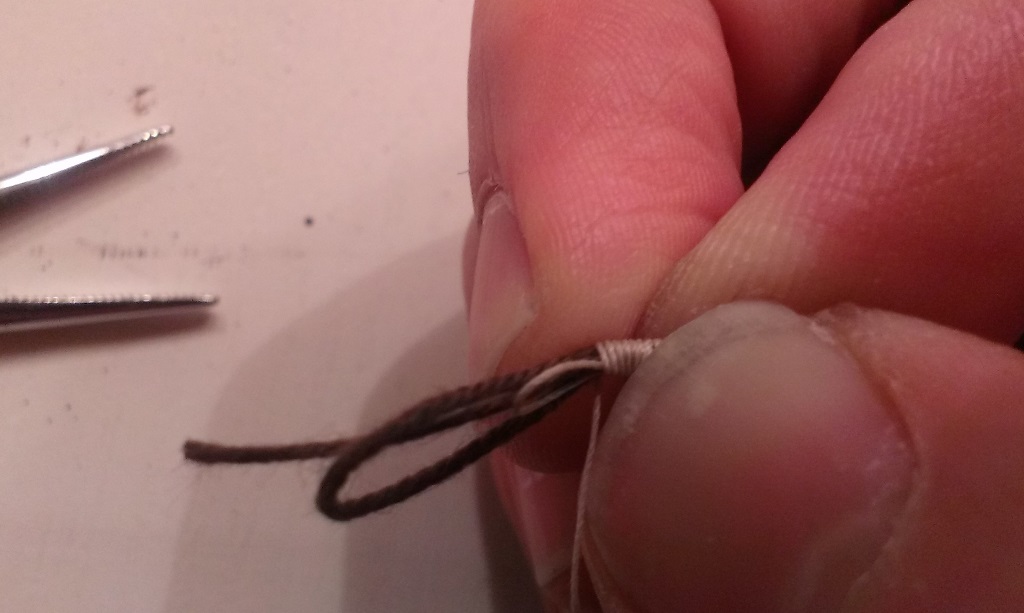
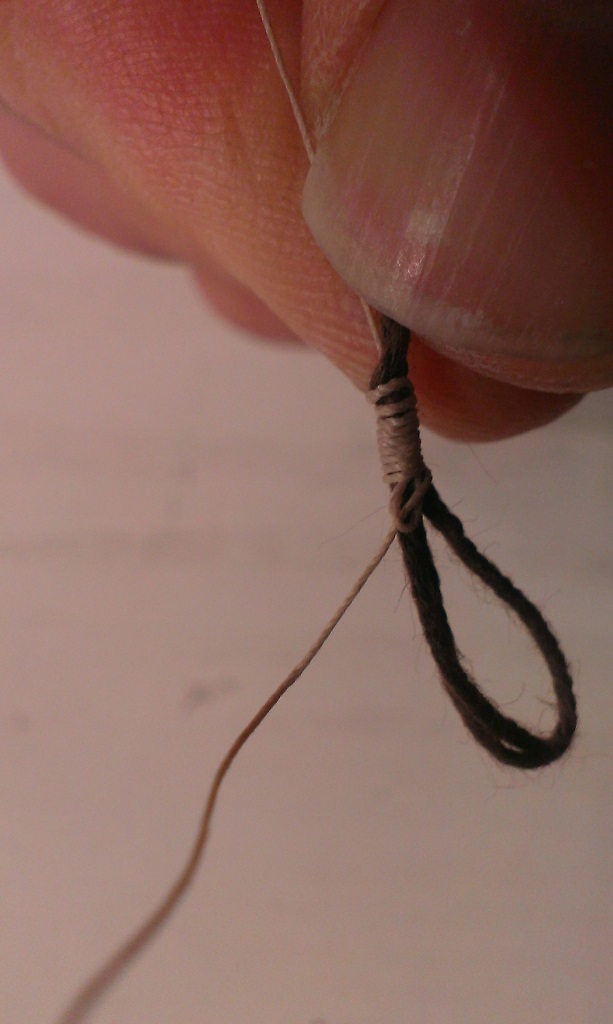
Here's how i'm making these:
First a piece of rope with to loops
Now add the lashing wire
Wrap around a few times
Put the end trough the loop

- yvesvidal, mispeltyoof, WackoWolf and 6 others
-
9
-
-
-
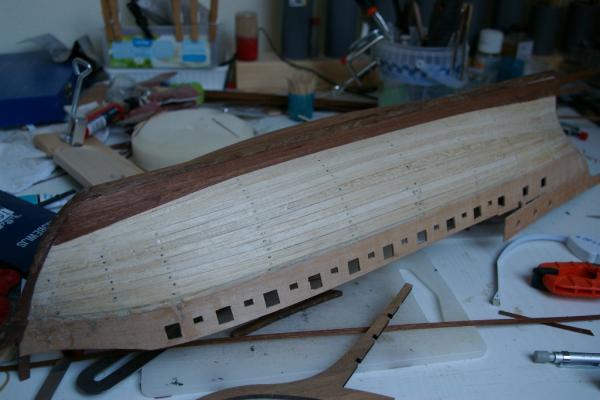
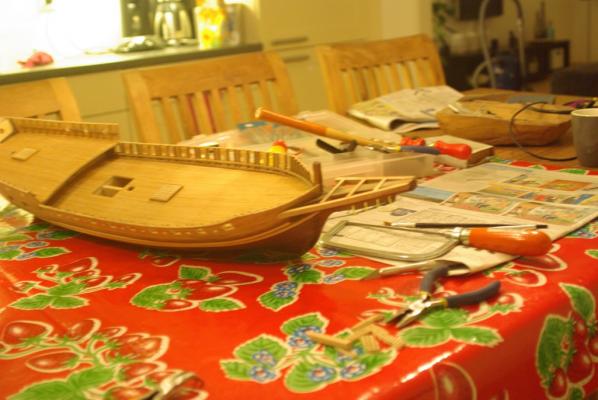
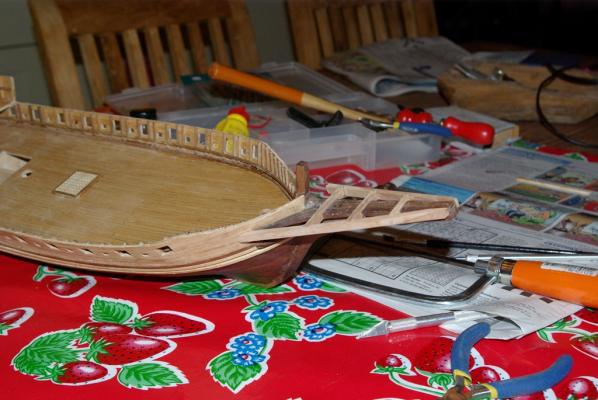
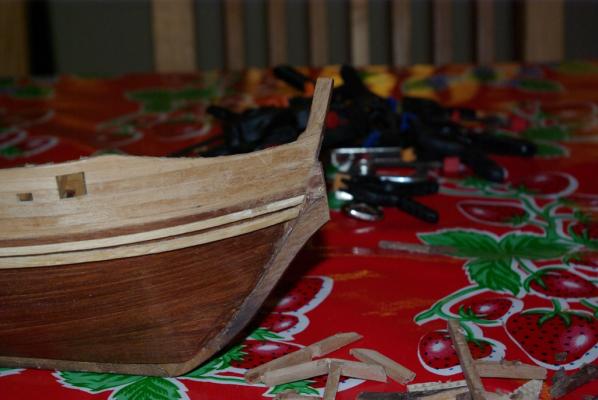
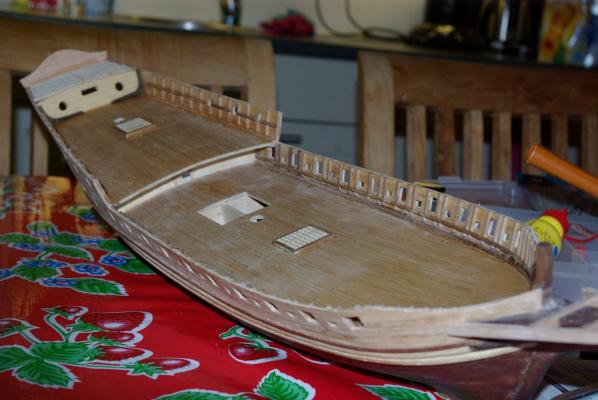
So I decided to start a small log of my progress on my Occre Xebec "Cazador". Mainly because there's no other log of any Xebec on MSW2. On the old MSW there where several, the log from Alexander Romaschenko has been a great help. Luckily Ilhan still had the pictures....
I'm not too happy with the quality of the Occre kit, I have the feeling it's not complete i'm missing quite some parts and as always there's not enough rope. I've thrown away quite some parts as well. All metal parts and plywood, precut parts.
I've made the cannon carts and rigged them. Also i've put the cannons in Brass-black to make them look (they actually are) oxidized. I'm using pear and wallnut for remaking the plywood parts.
I've started in 2009 and have been working on and off. I have 4 daughters so got my hands full from time to time
2010:

So that's quite nice but not nice enough.......
2011:

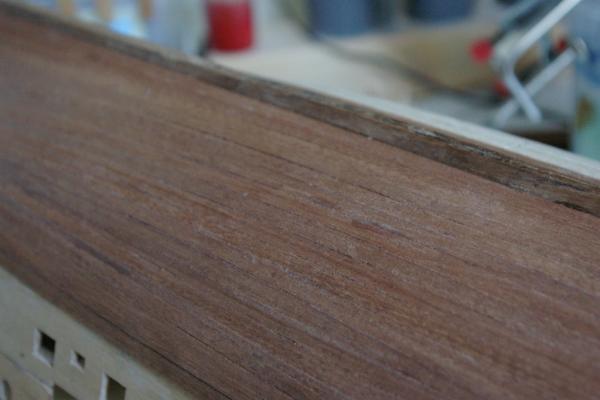
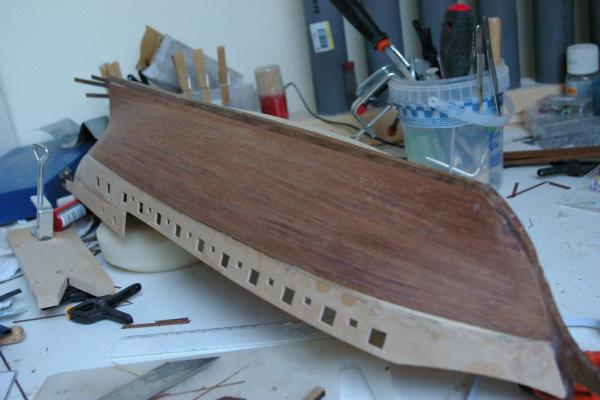
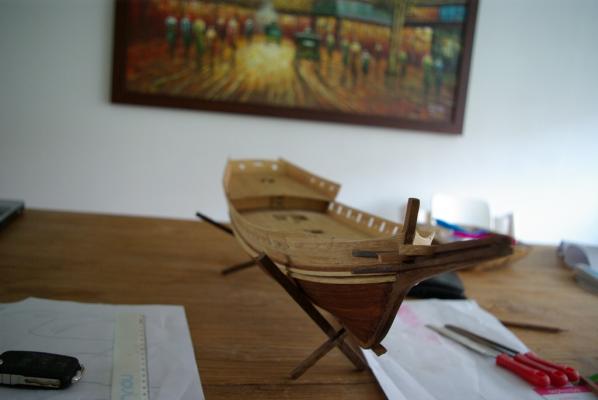
Current state:


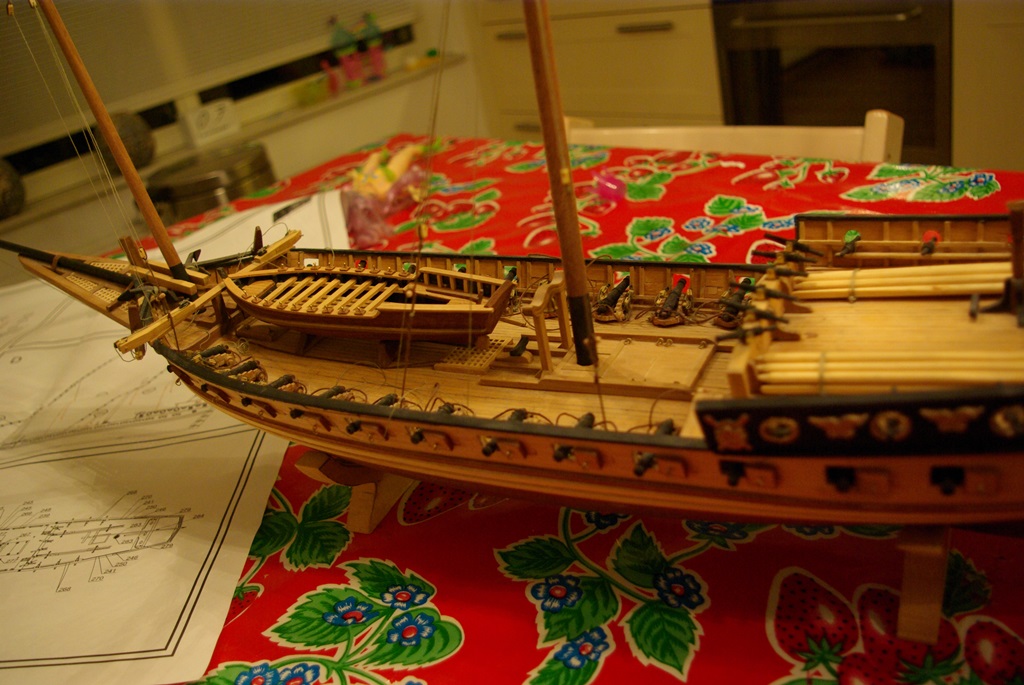
Xebec Cazador by cor_f - OcCre - 1:60 - kit bashing 2nd build
in - Kit build logs for subjects built from 1751 - 1800
Posted
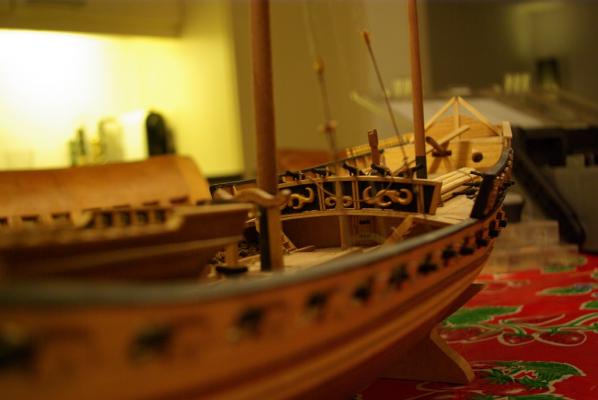
Here are some pictures of the latest status.
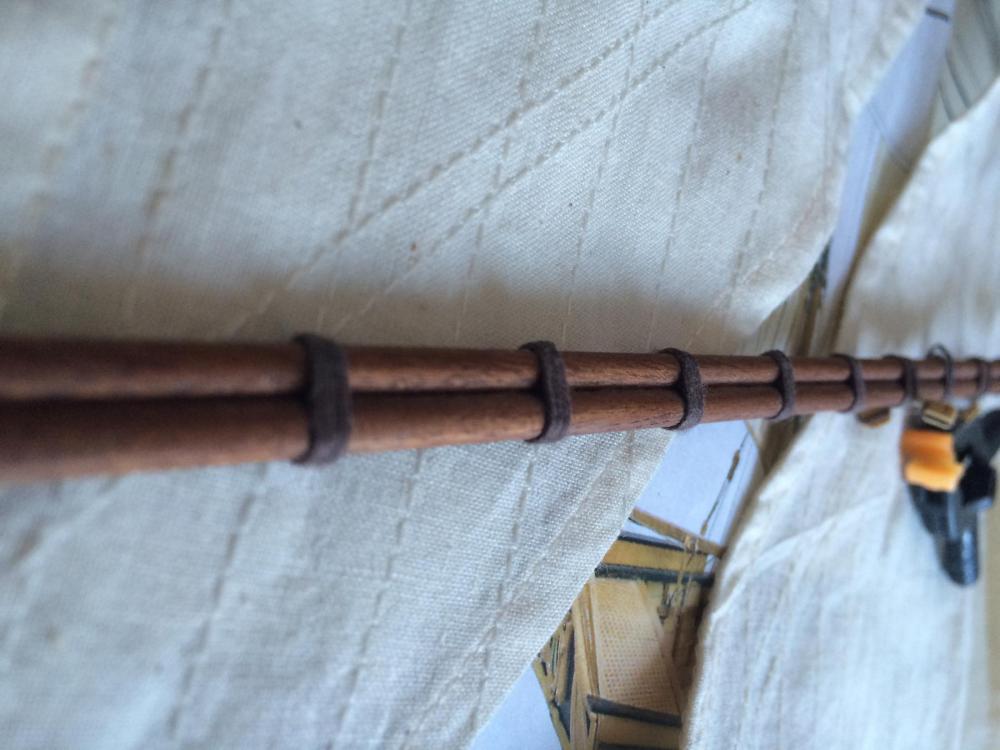
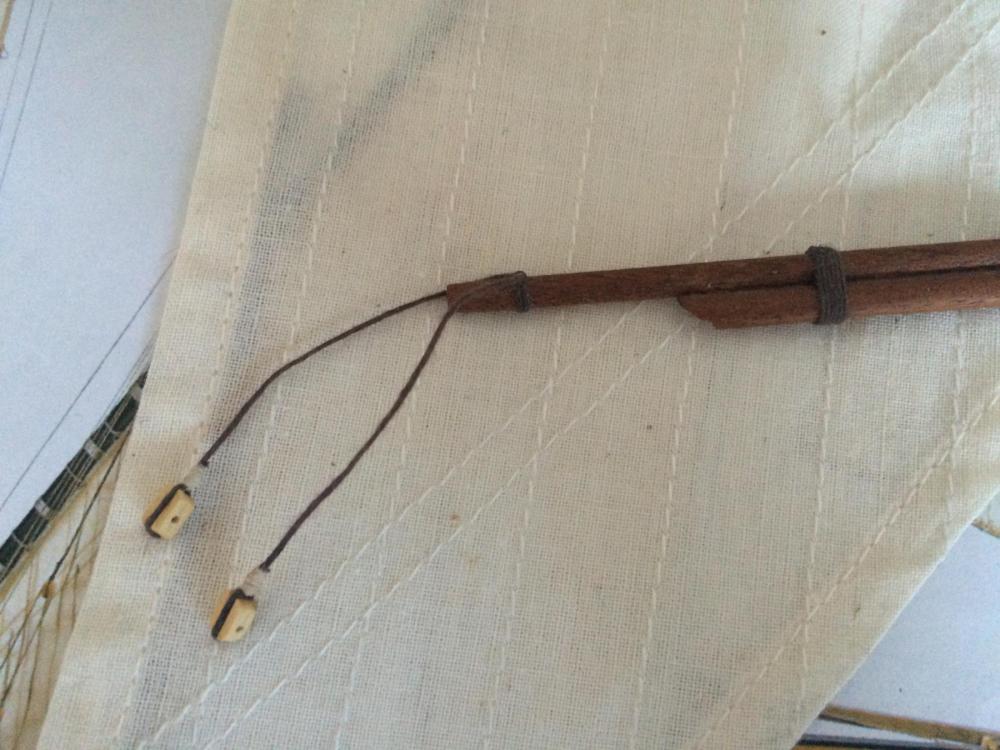
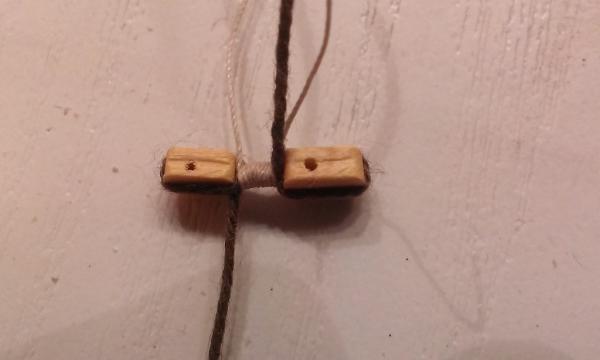
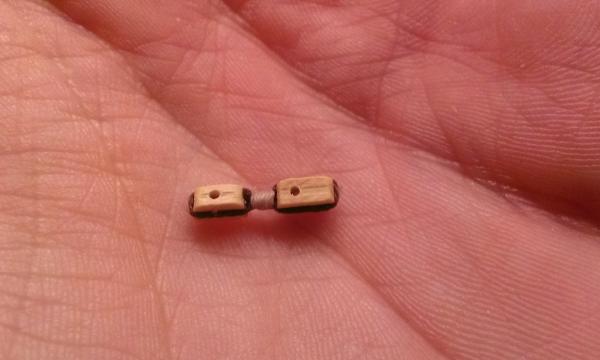
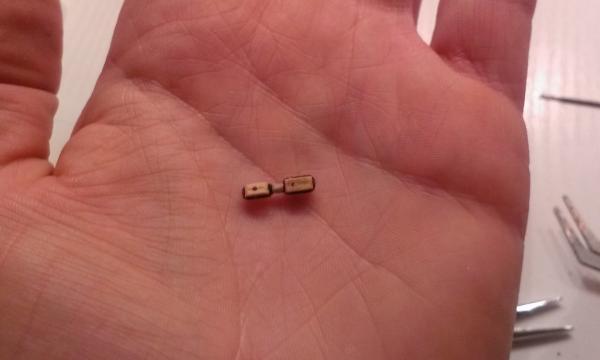
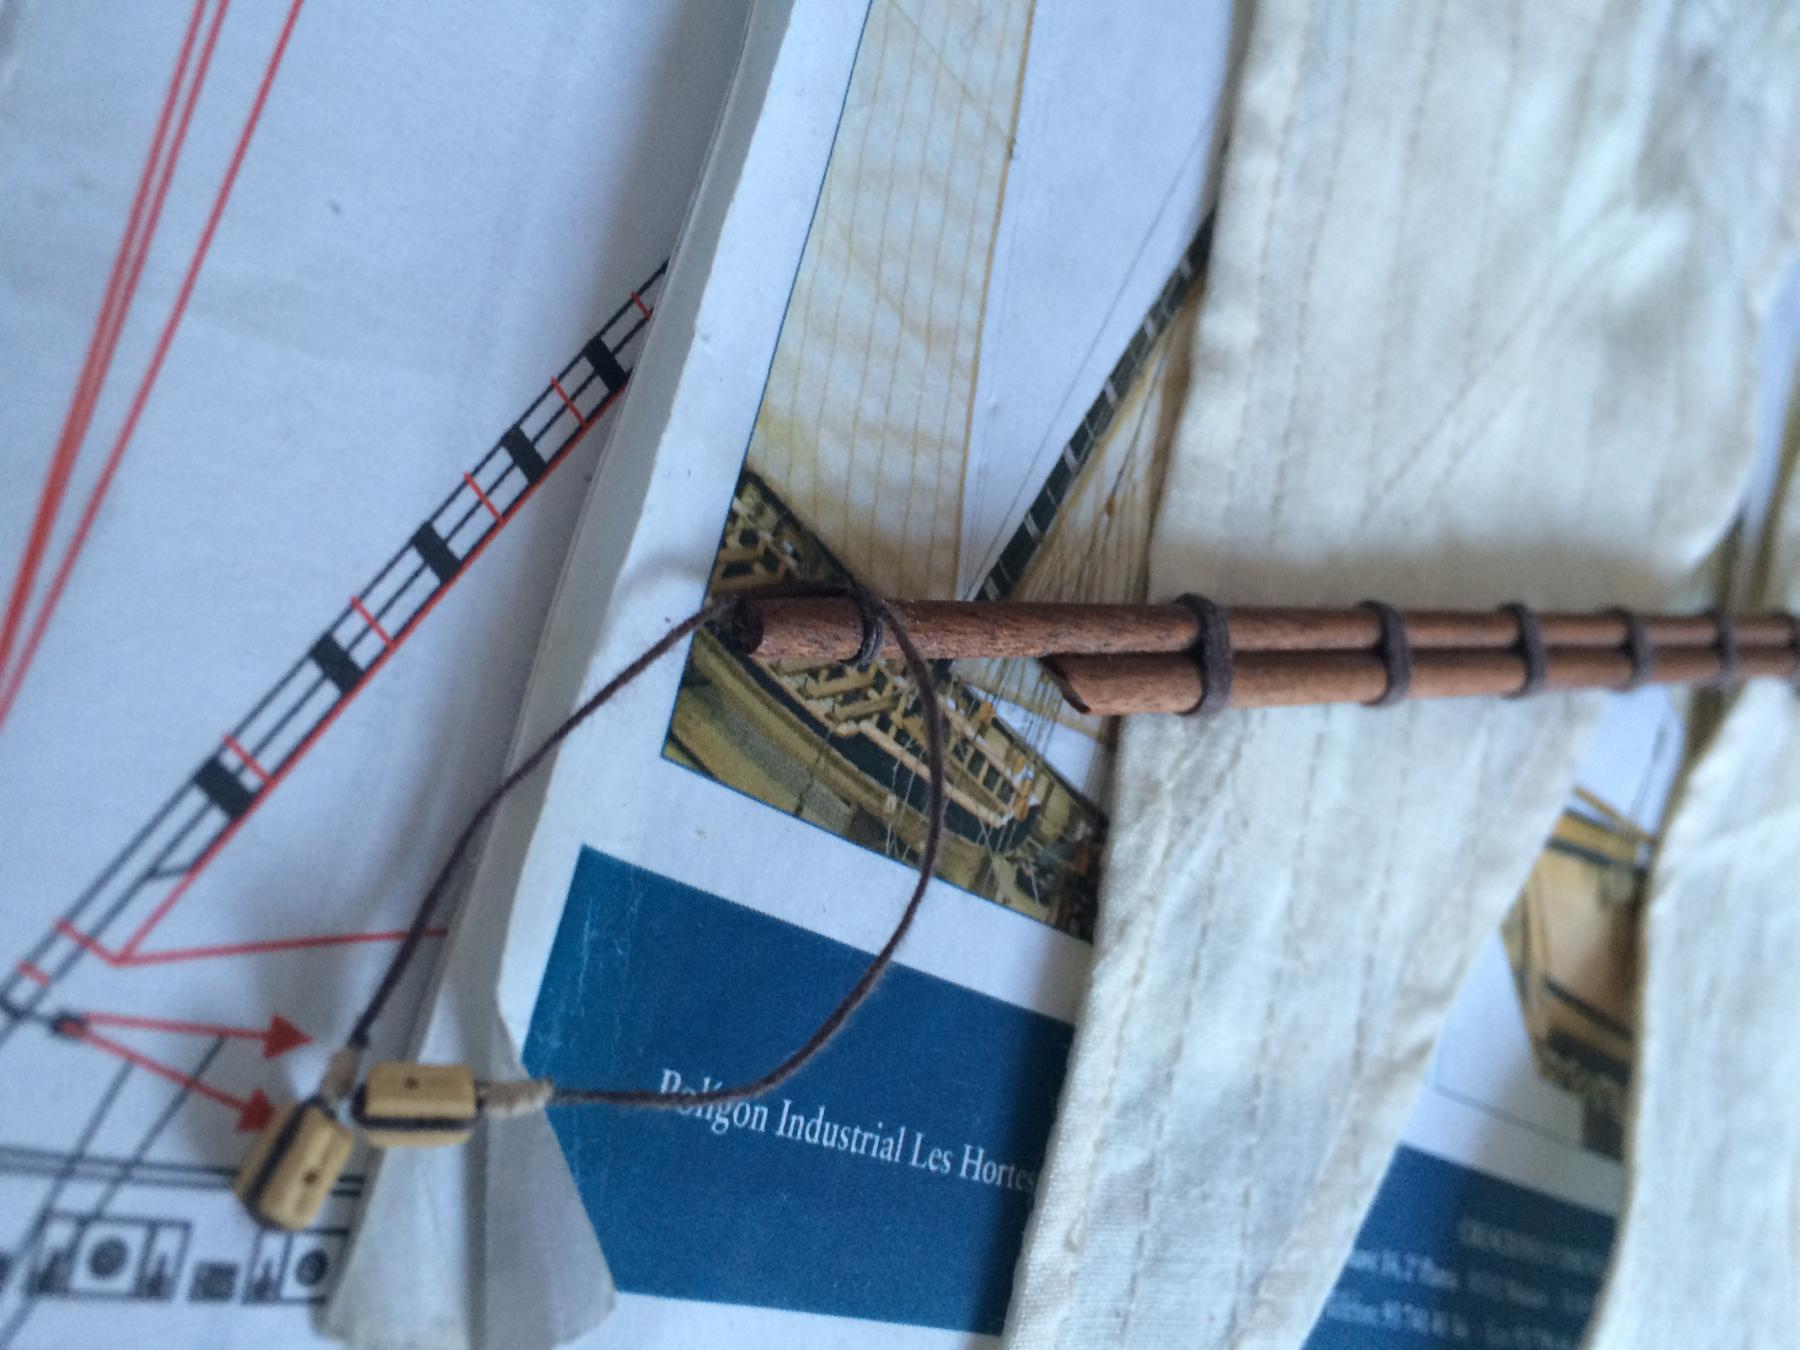
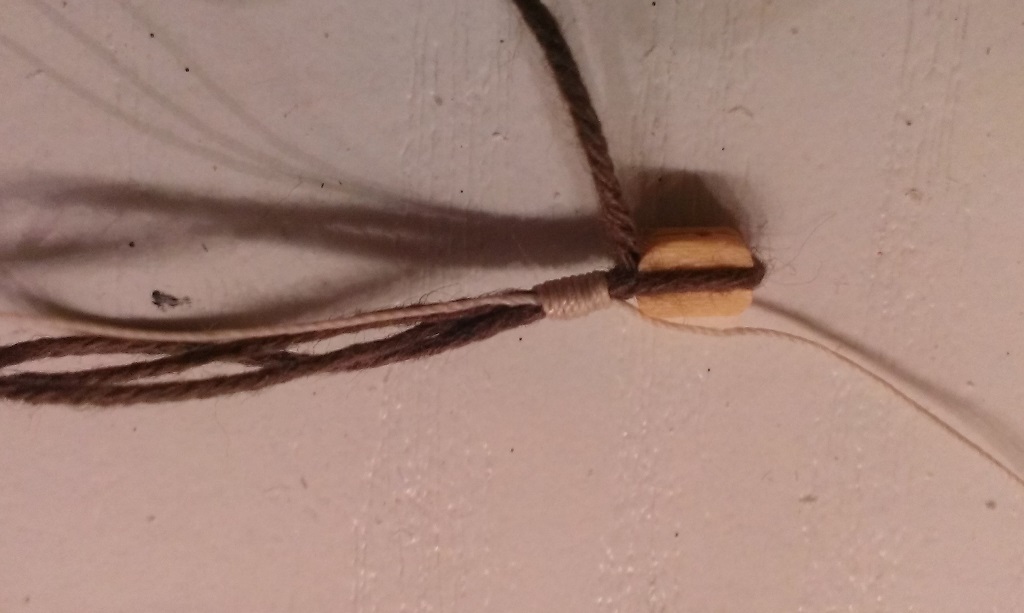
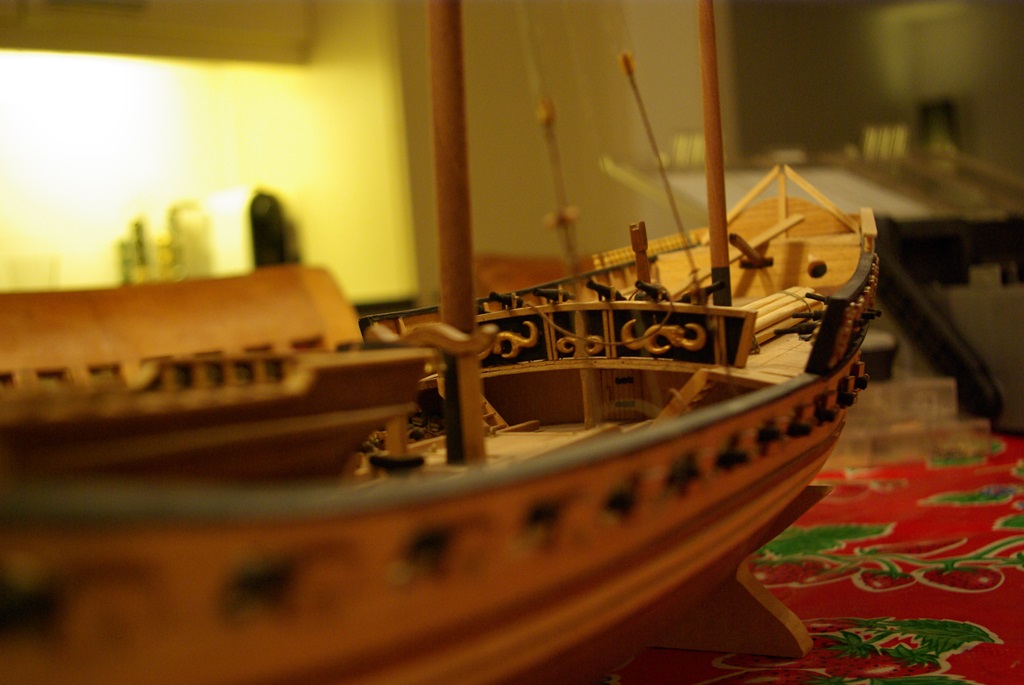
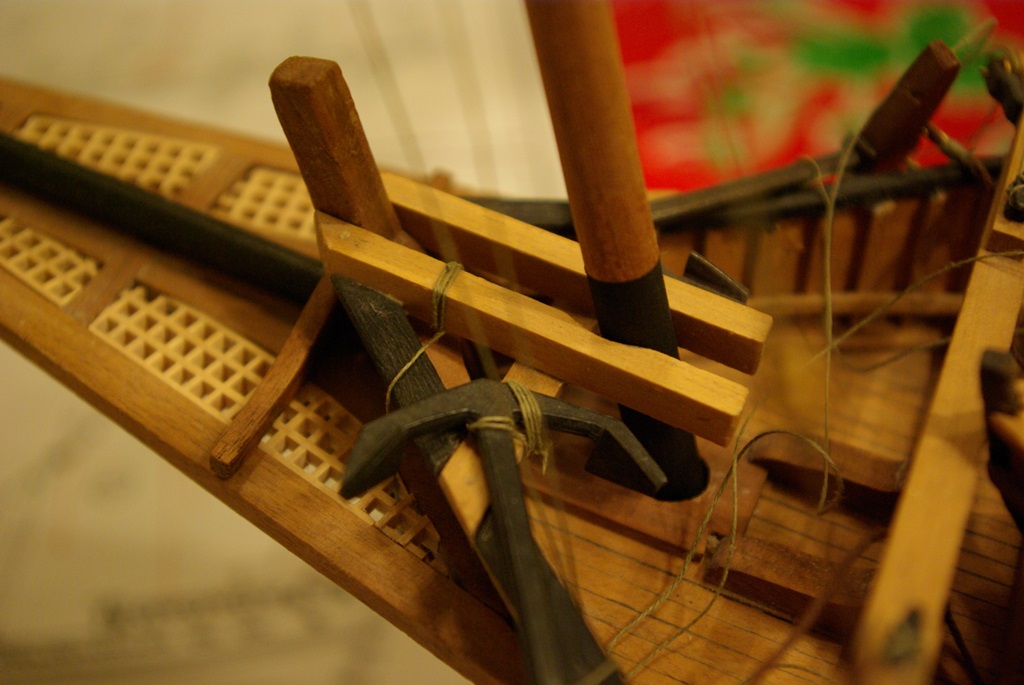
I've been working on the rigging, mainly the attachment of the main boom.
I actually don't think this is the correct way of attching a parrel to a wire but using 4 individual wires will get very messy when fixing them to the boom.
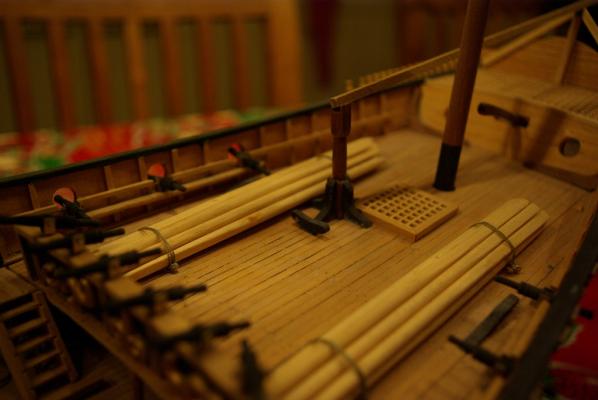
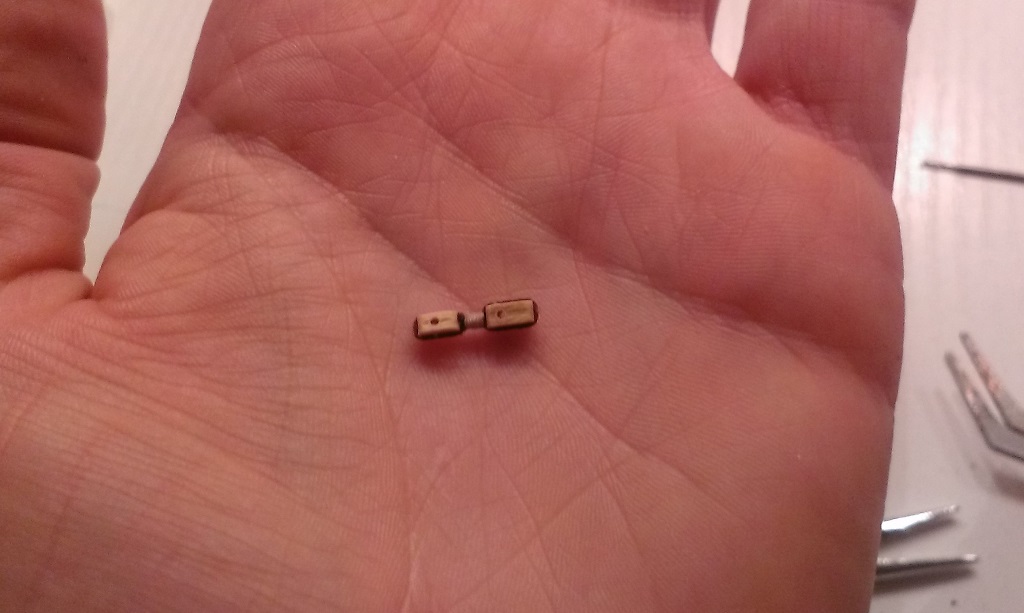
This is the original (violin?) block
and this is my own version made from boxwood.