Edwardkenway
-
Posts
3,047 -
Joined
-
Last visited
Content Type
Profiles
Forums
Gallery
Events
Everything posted by Edwardkenway
-
 Thanks Tony, I didn't think of that, trying to be too clever instead of taking a step back. LS the gun looks ok now but that Is the 3rd attempt!! But thanks for the encouragement. I don't think that Tonys answer will do for your build as Ballahoo has carronades doesn't it, so I would suggest double the length of the slide, Good luck
- 84 replies
-
- 1
-

-
- sherbourne
- caldercraft
- (and 2 more)
-
Hi Will, having only joined MSW a few months ago I've seen lots of build logs for Syren so it will be great to follow this one from the very start. Good luck and have fun.
-
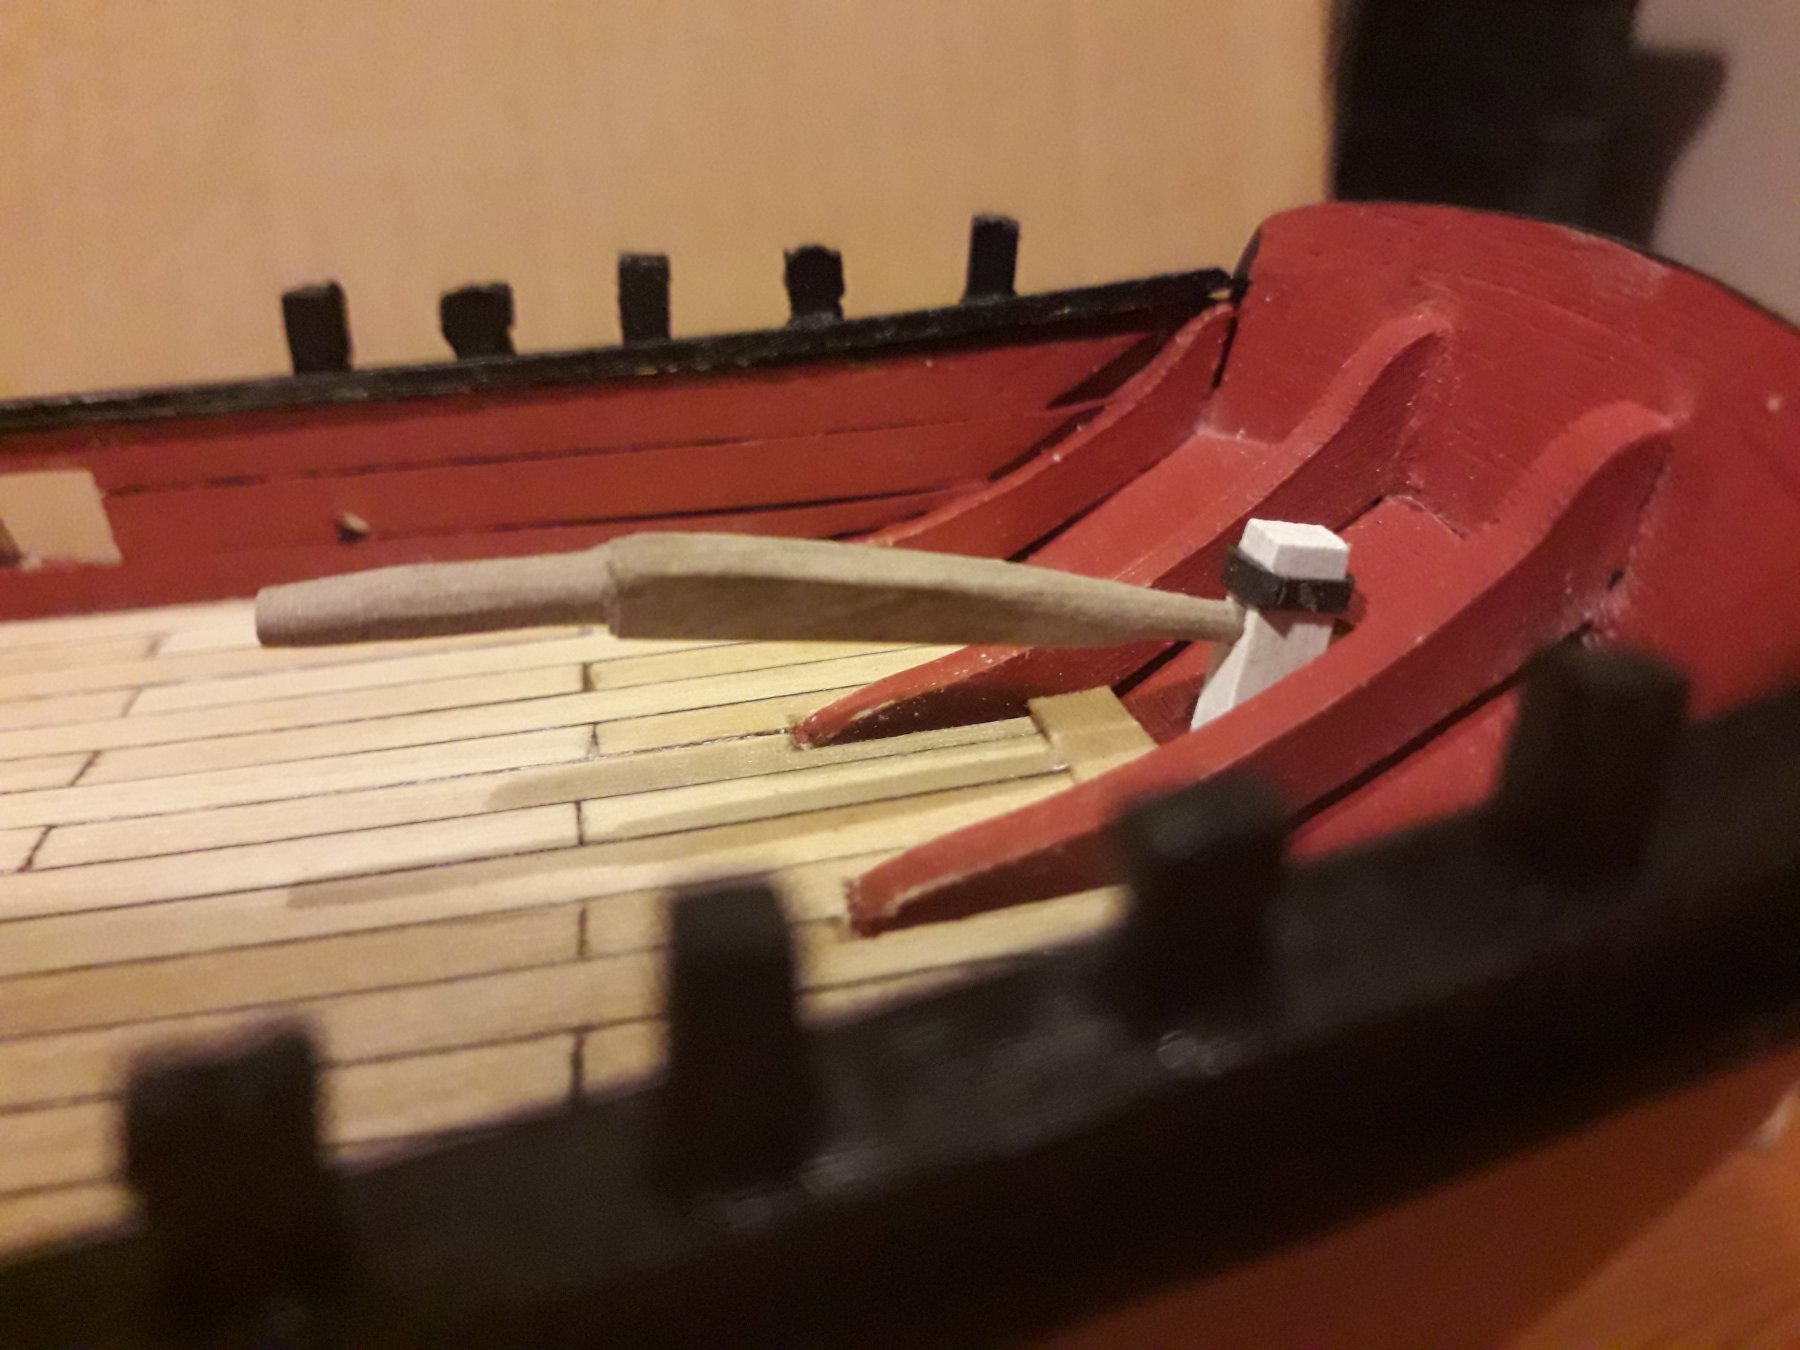
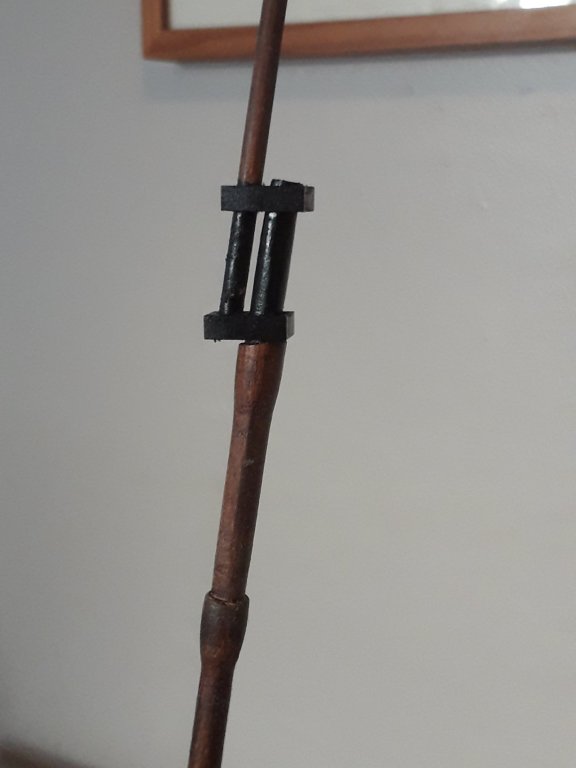
Hi all, Managed to do a couple of hours on Sherbourne this evening, put the pumps together, dry fitted, might need a bit of something but we'll see. Fixed the rudder in place. Assembled and fitted a swivel gun, still needs painting so looks a bit rough. I have also rigged one deck gun🤬. How long should the rope be? I read somewhere it's 3 times the length of the gun barrel but was well too long as the recoil would send the cannon smashing into the companion hatch. So HELP please to get it right first time instead of having to redo it 3 or 4 times. Any suggestions welcome. Thanks


- 84 replies
-
- 5
-
-
- sherbourne
- caldercraft
- (and 2 more)
-
Looking good, you'll be rigging soon😃 Re rudder, I know you don't want to think of it but once you've done it you can go "YESSSS" , it is fiddly but you get a sense of achievement.
- 65 replies
-
- 1
-
-
- ballahoo
- caldercraft
- (and 2 more)
-
I was going to do 3 plank pattern but forgot to put shorter plank in so became 2 plank. I could of kicked myself 😖
-
Thanks LS, it took a couple of hours to get them to look half decent 😅
-
Hi all, I could really do with some help. I've got some Humbrol clear Matt varnish but when used on the painted deck fittings it dries with white patches and looks terrible. I've tried doing a couple of very thin coats but get same results, how do I stop this or should I use different varnish?
-
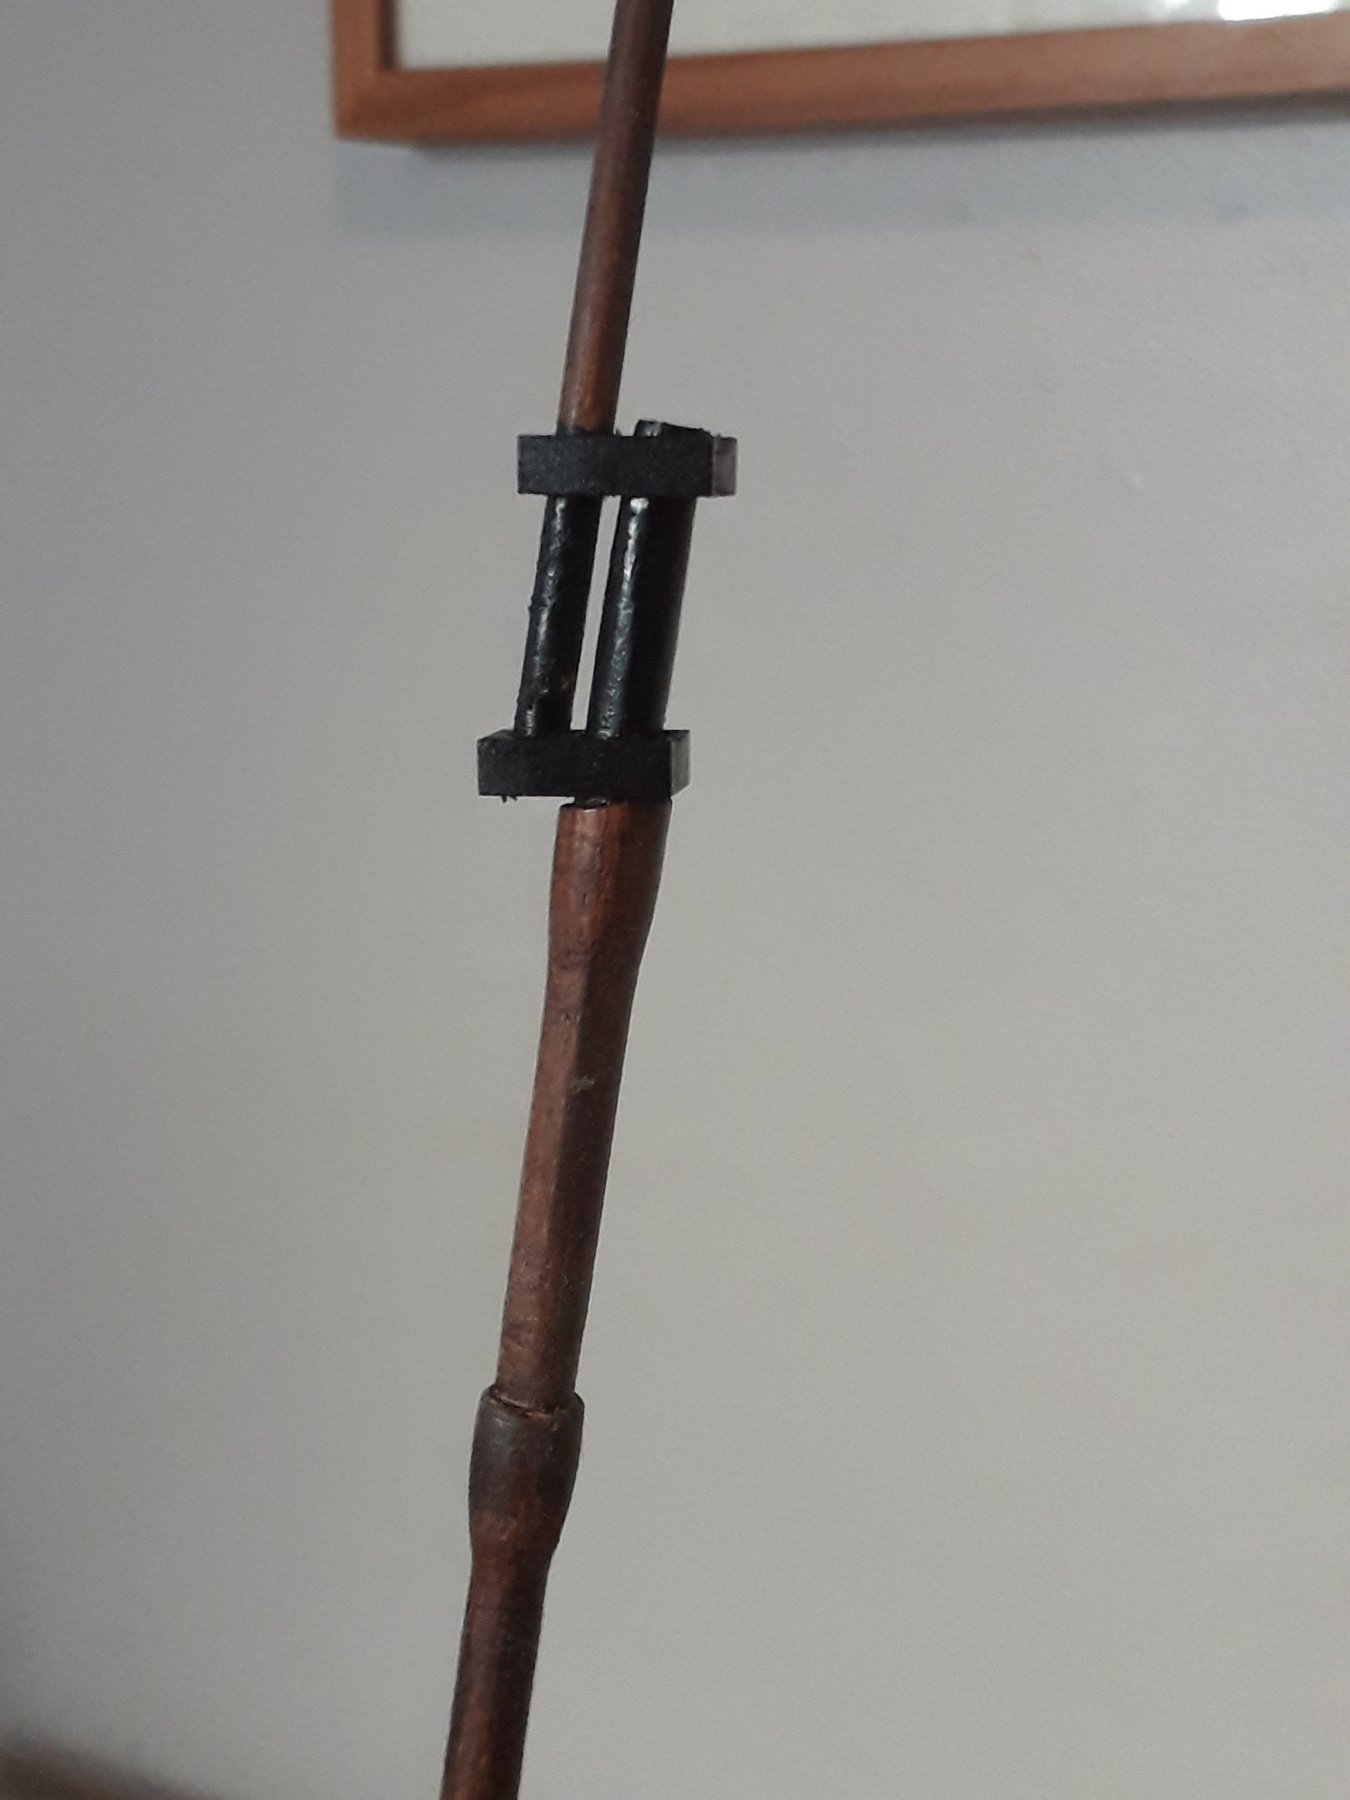
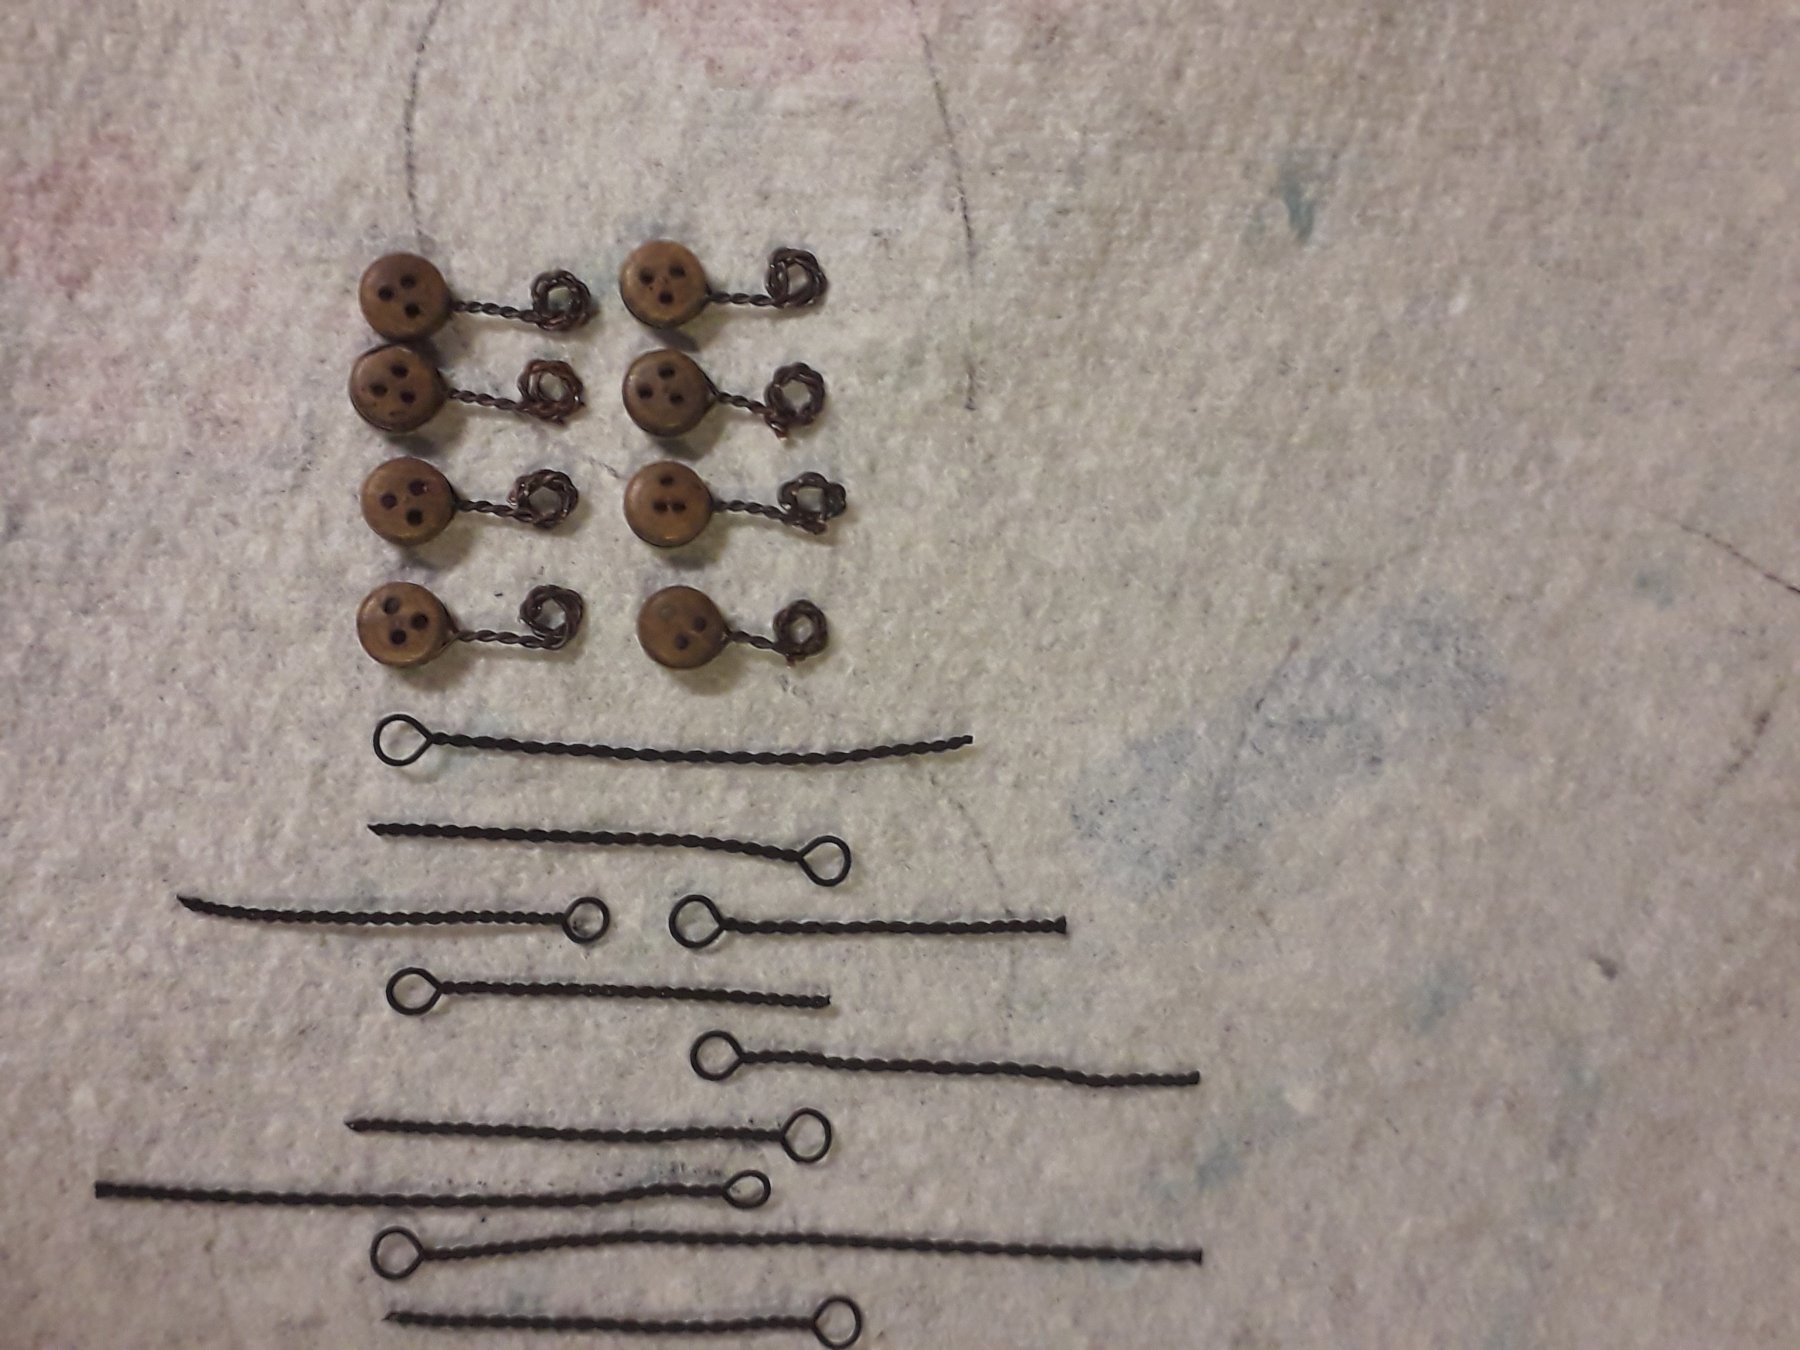
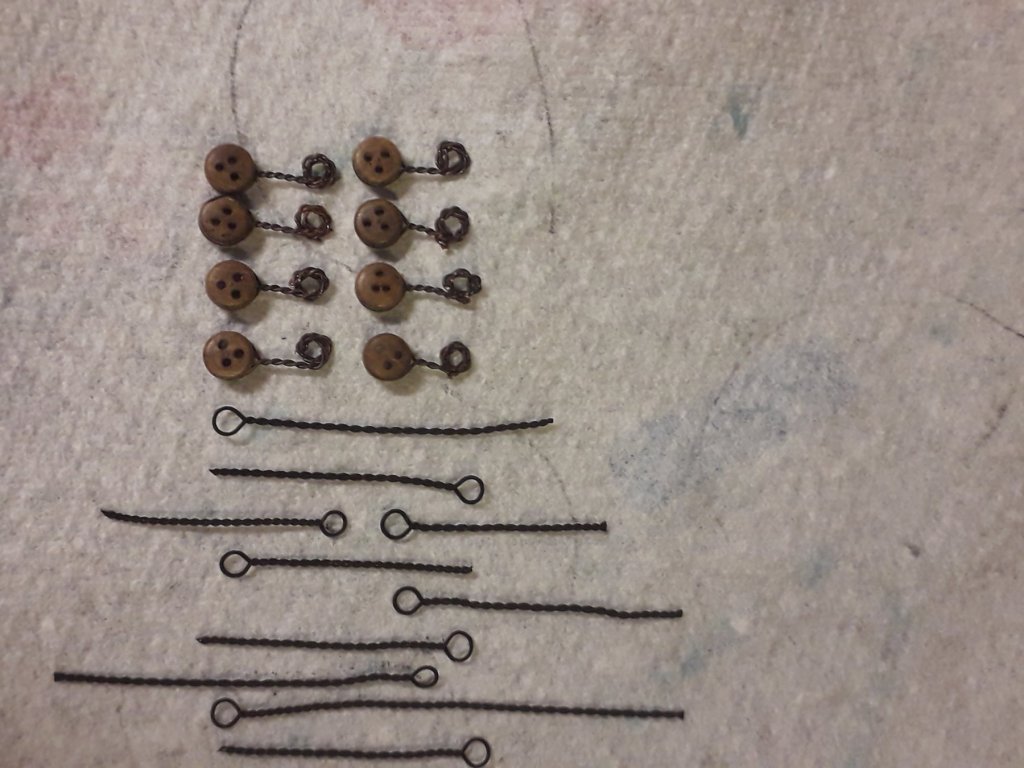
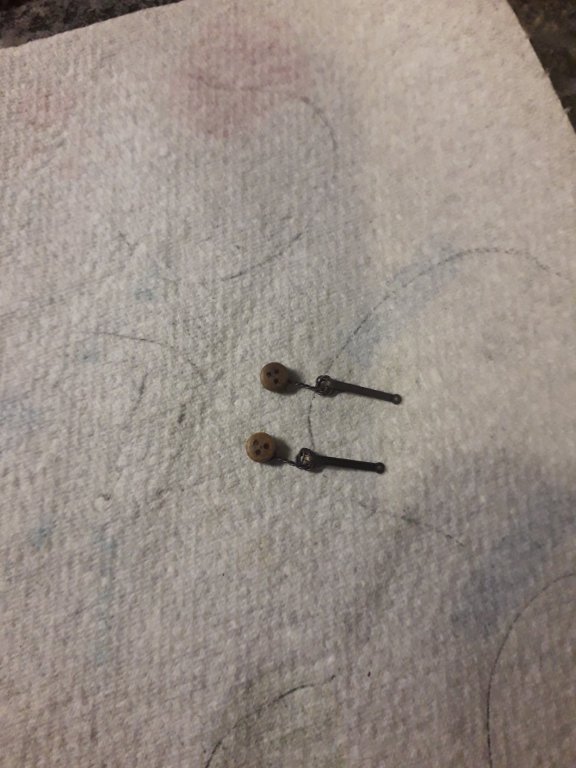
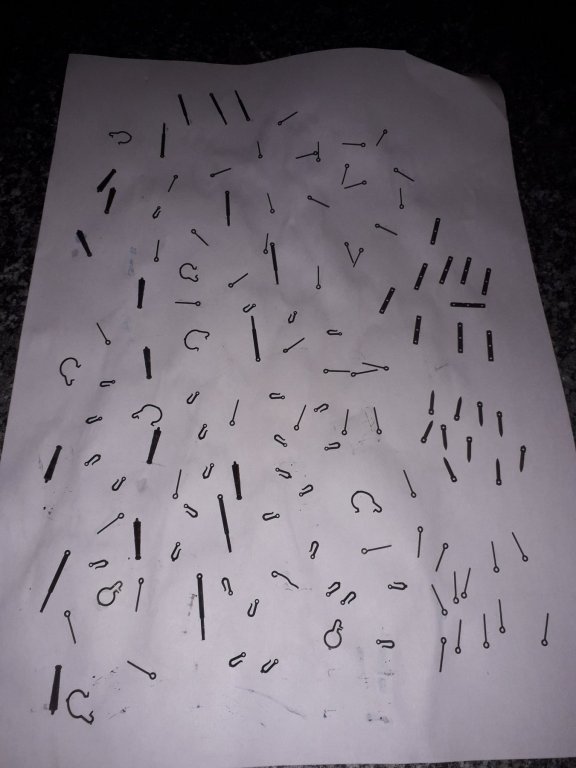
Hi all, just a quick post. If you have seen The Lazy Saints Ballahoo build log you know he had problems with the deadeye strops not fitting the cut-out in the chainplate channel, I've had the same problem so ended up making my own strops from copper wire and blacking it. Also made a few eyelets as well. Results below : I think they will suffice. Til next time.
- 84 replies
-
- 5
-
-
- sherbourne
- caldercraft
- (and 2 more)
-
LS I'm glad to see you got your chain plate problem sorted😀 I also started my mast on Sherbourne by hand but then saw a simple jig in the mast and rigging forum where you use a cordless drill and I got it sanded much quicker. Keep up the good work 😃😃 Sorry I don't have a photo of my jig
- 65 replies
-
- 1
-
-
- ballahoo
- caldercraft
- (and 2 more)
-
Hi LS, I have same problem with my Sherbourne build and have gone down the making my own deadeye strops route, to which end I've ordered some 0.4 mm copper wire to make them. When the wire comes I will post some photos of my new homemade strops. Hope you get yours sorted soon as you are flying with your build. Looking good by the way.
-
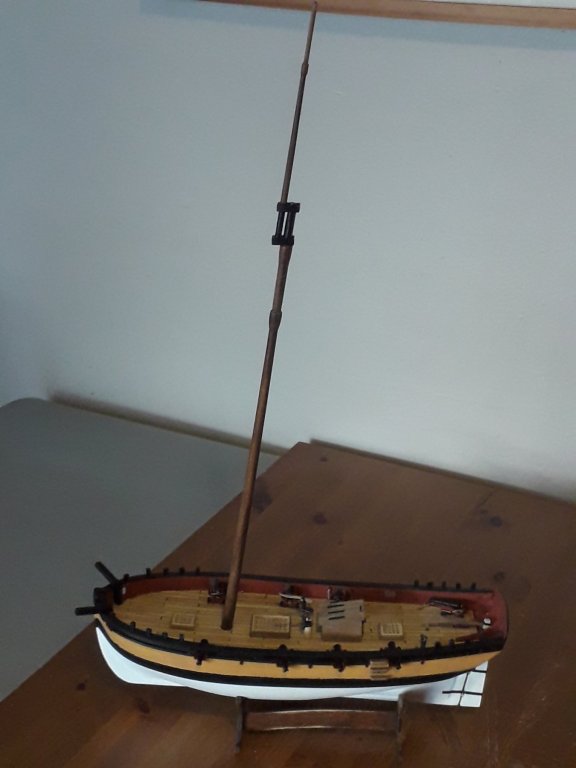
Hi everyone, not done a lot on Sherbourne for a bit so I thought I'd have a couple of hours or so. Ok I've tapered mast and topmast, wow how much dust???. For this I put together a really simple jig I'd seen somewhere on this forum, Thank you to whoever posted it. Using my cordless drill and the jig I just sanded as it turned. Finished putting the cannons together and started to blacken the PE components with Birchwood Casey Brass Black made some boarding steps and fitted them, fitted catheads, put rudder in place with my own take on a tiller based on an actual canal longboat tiller.Ta-dah she's been named and as the champagne bottle would have crushed her I drank it instead! Well that's it for now, ta-ra til next time


- 84 replies
-
- 4
-
-
- sherbourne
- caldercraft
- (and 2 more)
-
Looking nice Lazy Saint
-
Chris, I'm hoping that this will be my next project as I've always liked the look of brigs of war and Speedy was definitely warlike. I don't know when I'll be getting it as my house is a one in one out house. So I've got finish Sherbourne first Cheers keep up the good work.
-
Jörgen nice to see you back with Sherbourne I will be following all the action. Jon
-
Nice work, I must admit I did not much like 1st planking, perhaps it's because I didn't prepare the bulkheads enough, but as there is a second layer it came right in the end (with a lot of filler and sanding). I'm sure you'll do well.
-
Thanks Chris, I had to paint her because I'm like a preschool kid with glue getting it everywhere but where it should be. Thanks to all for likes and encouragement. All the best Jon
-
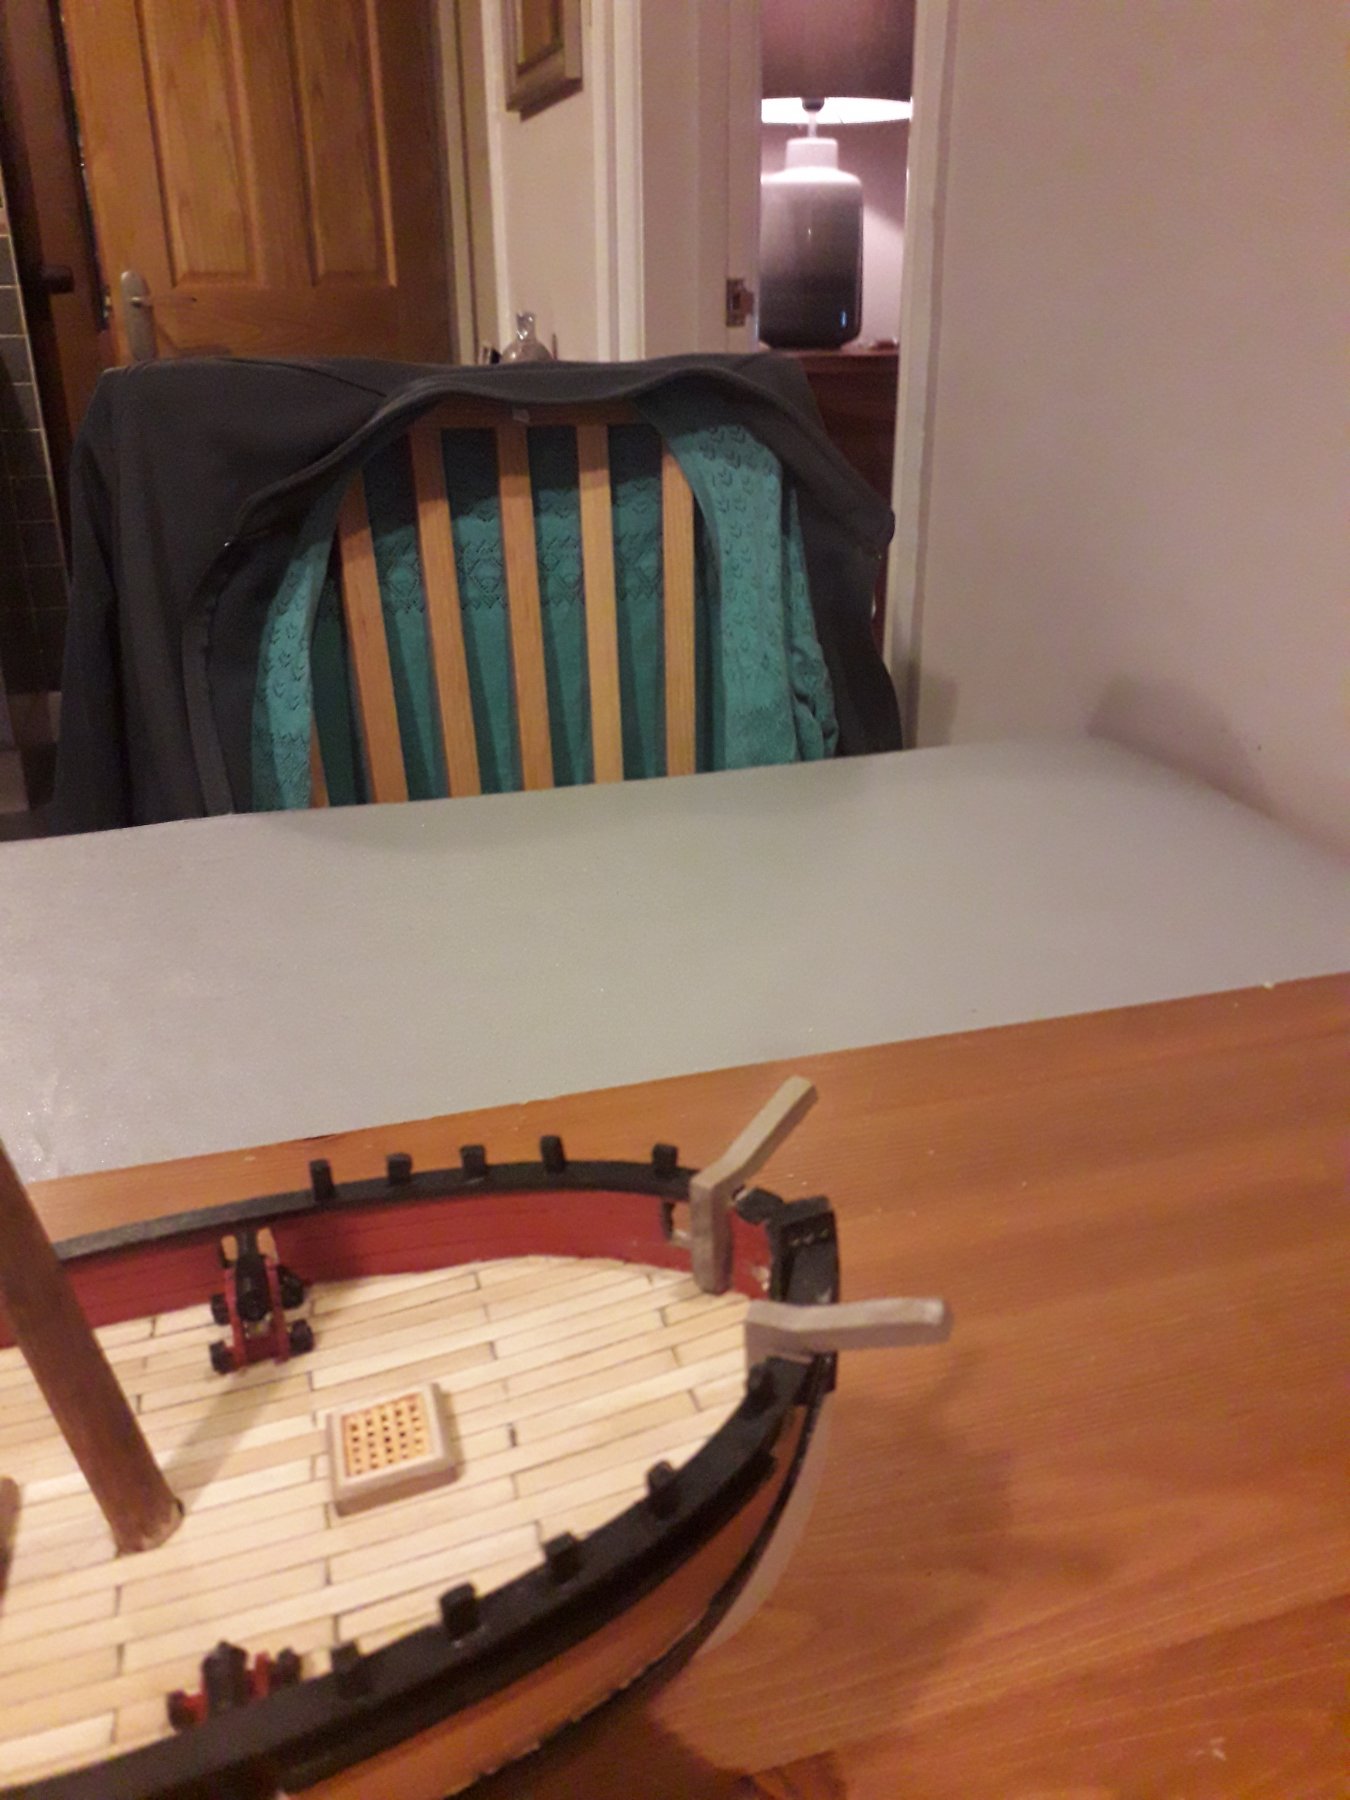
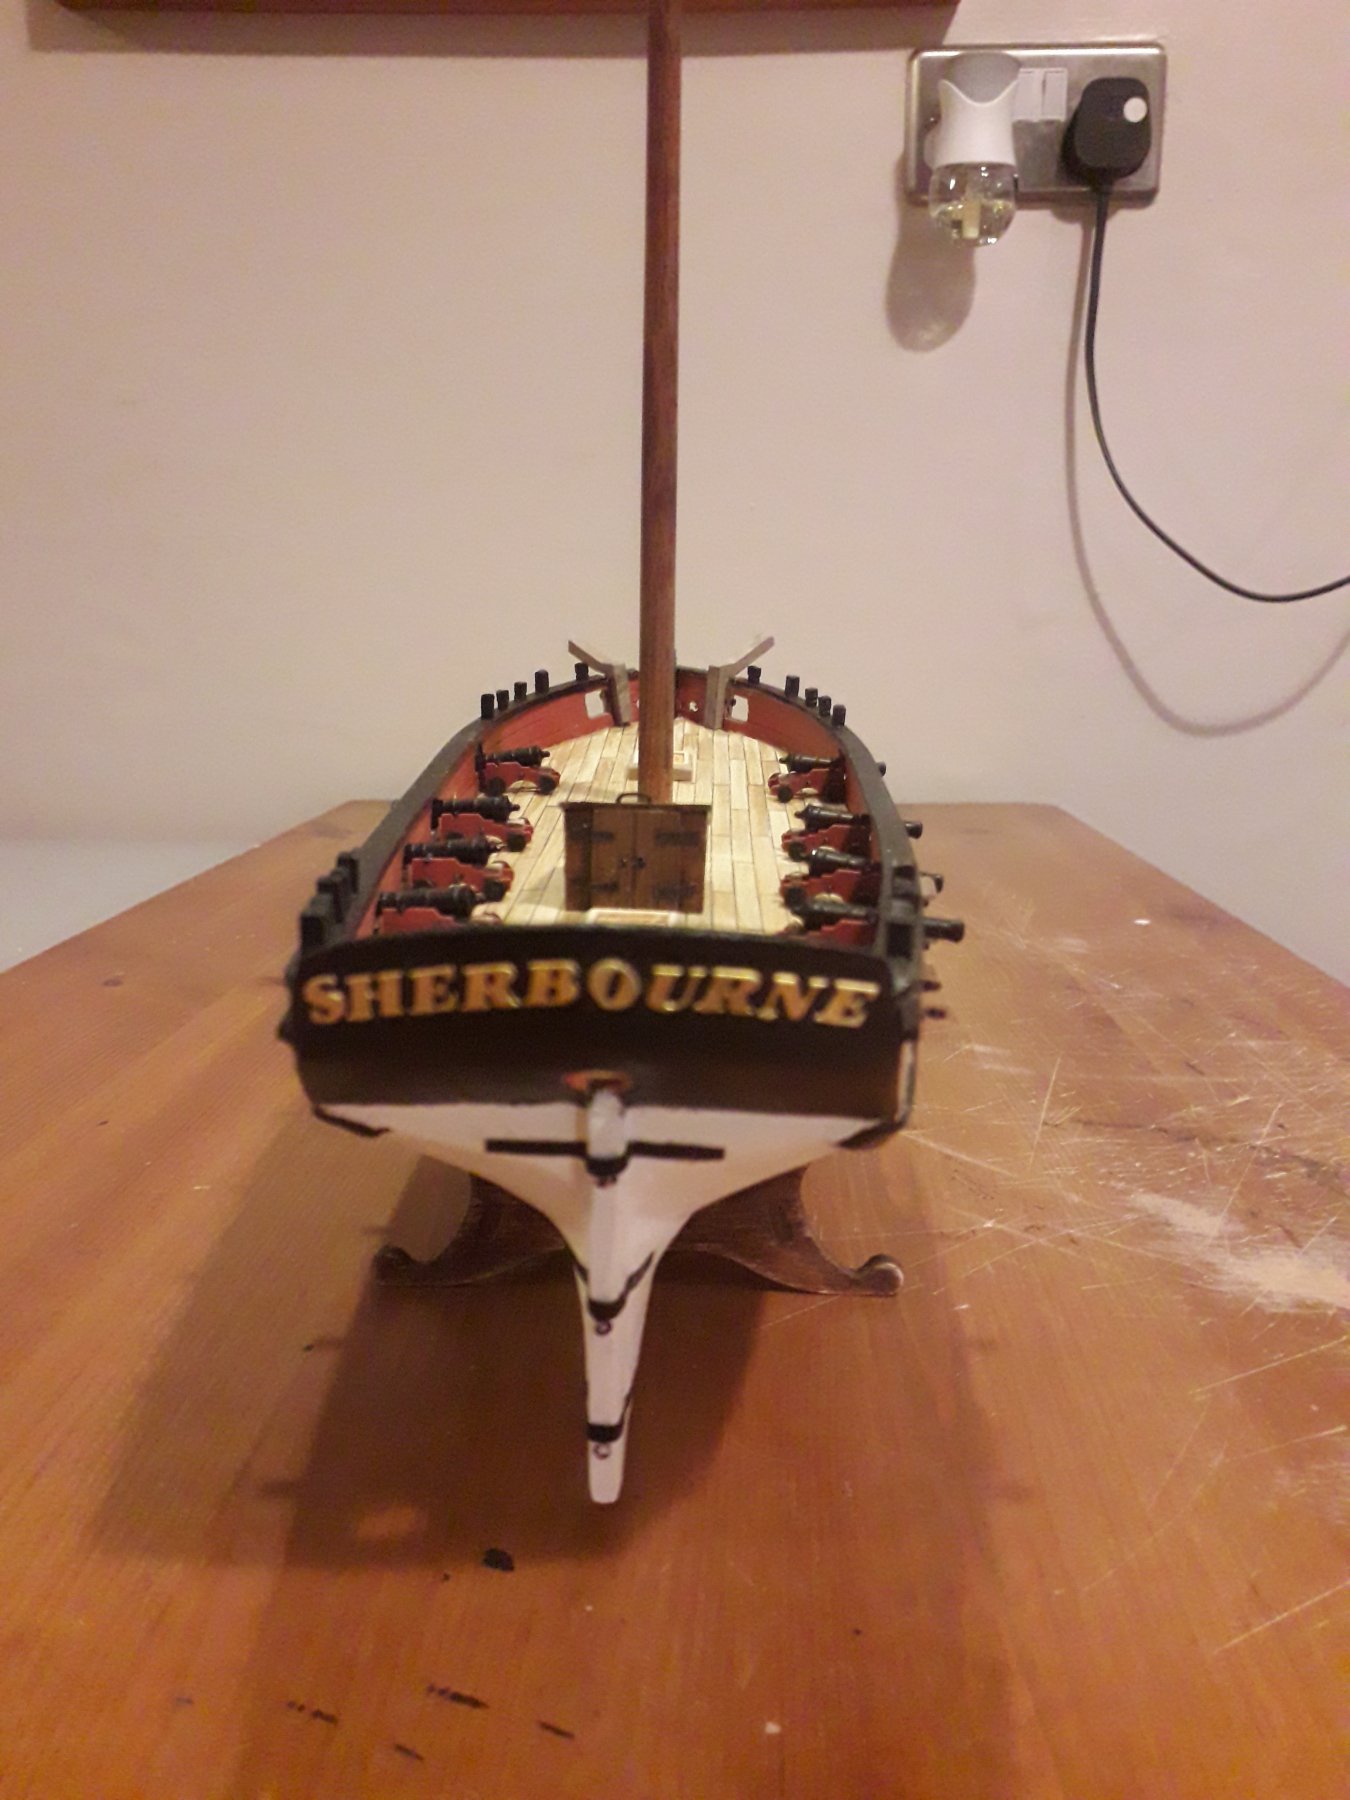
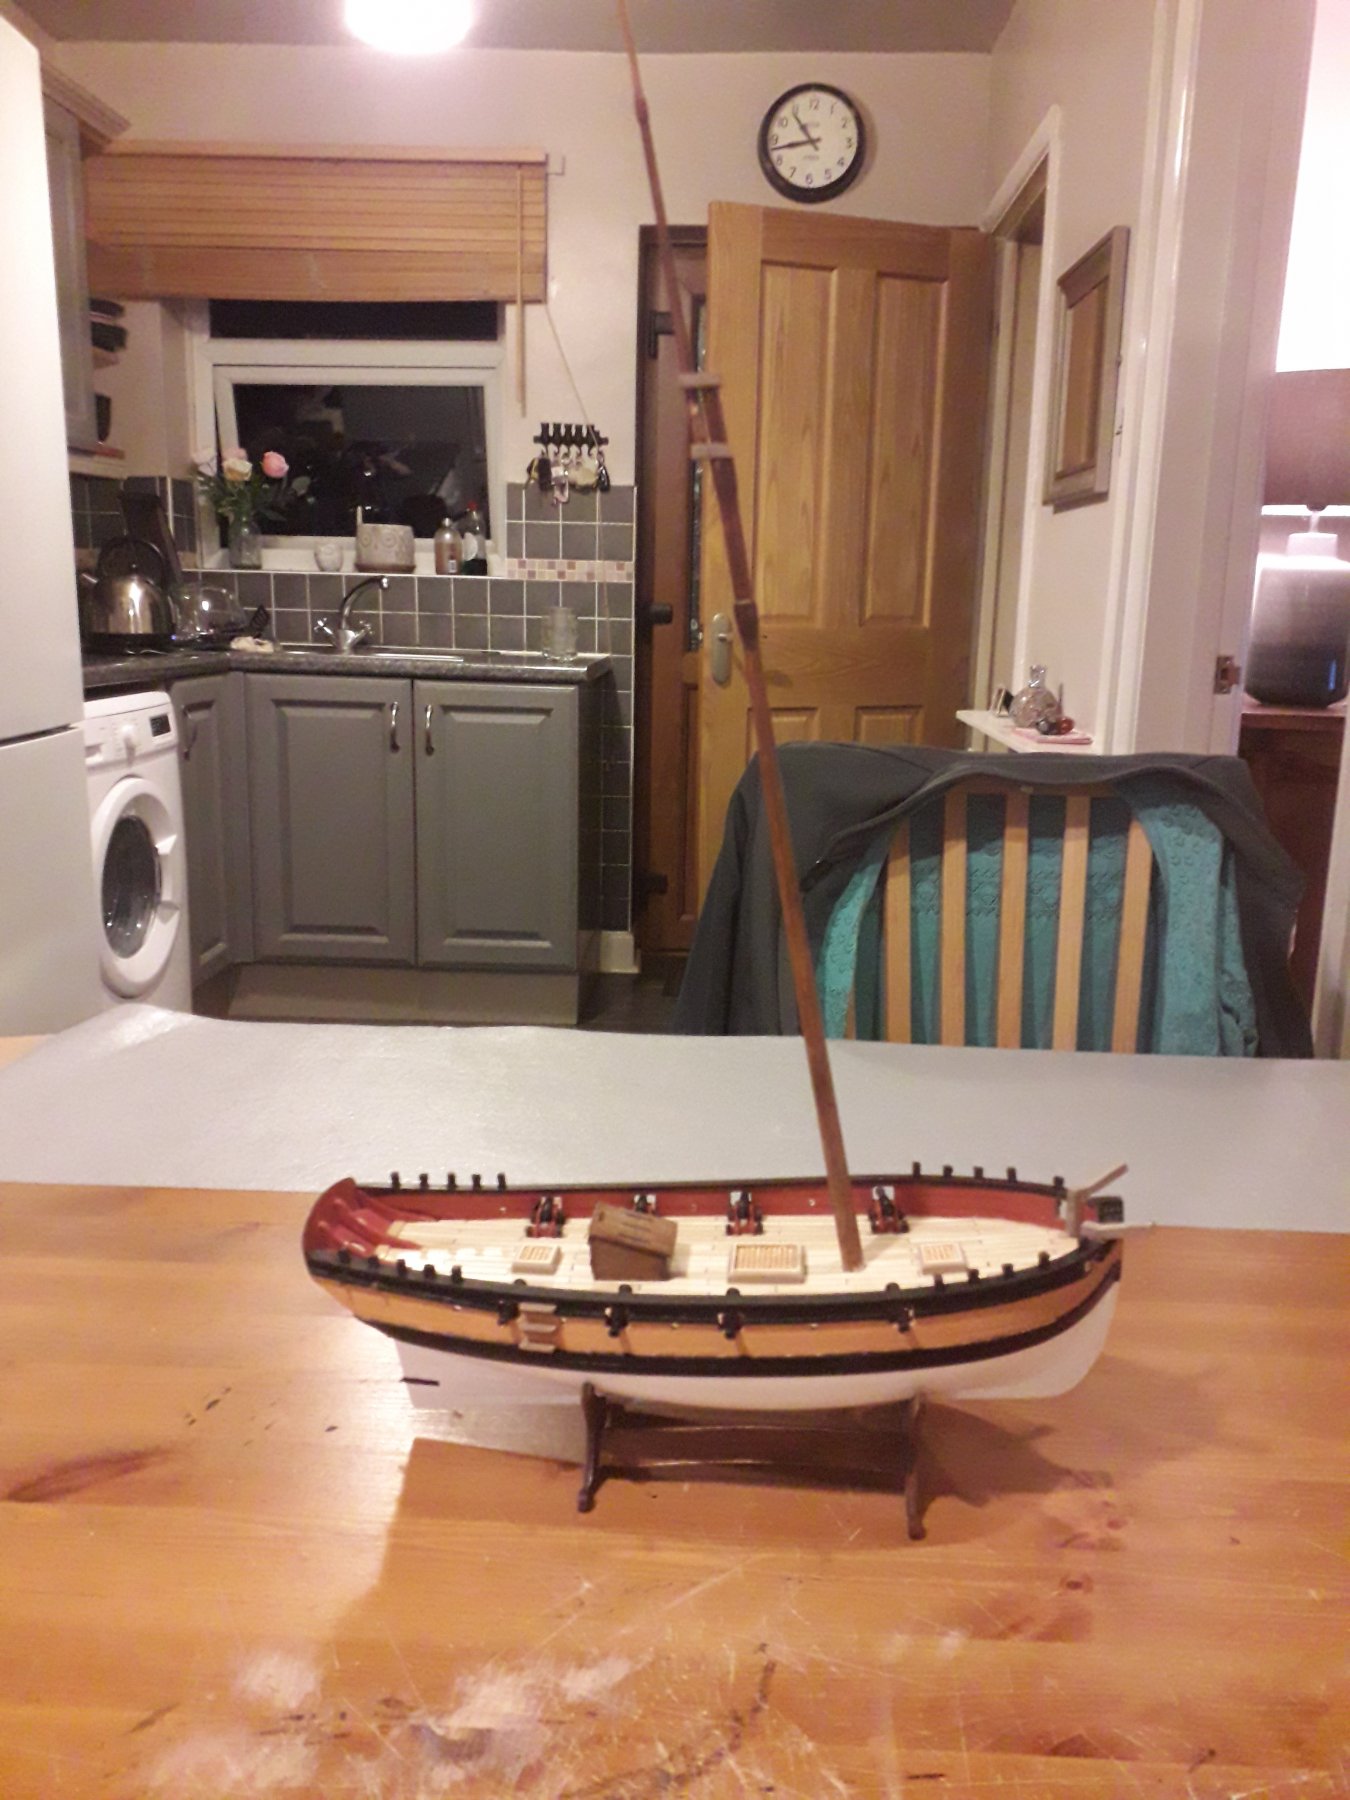
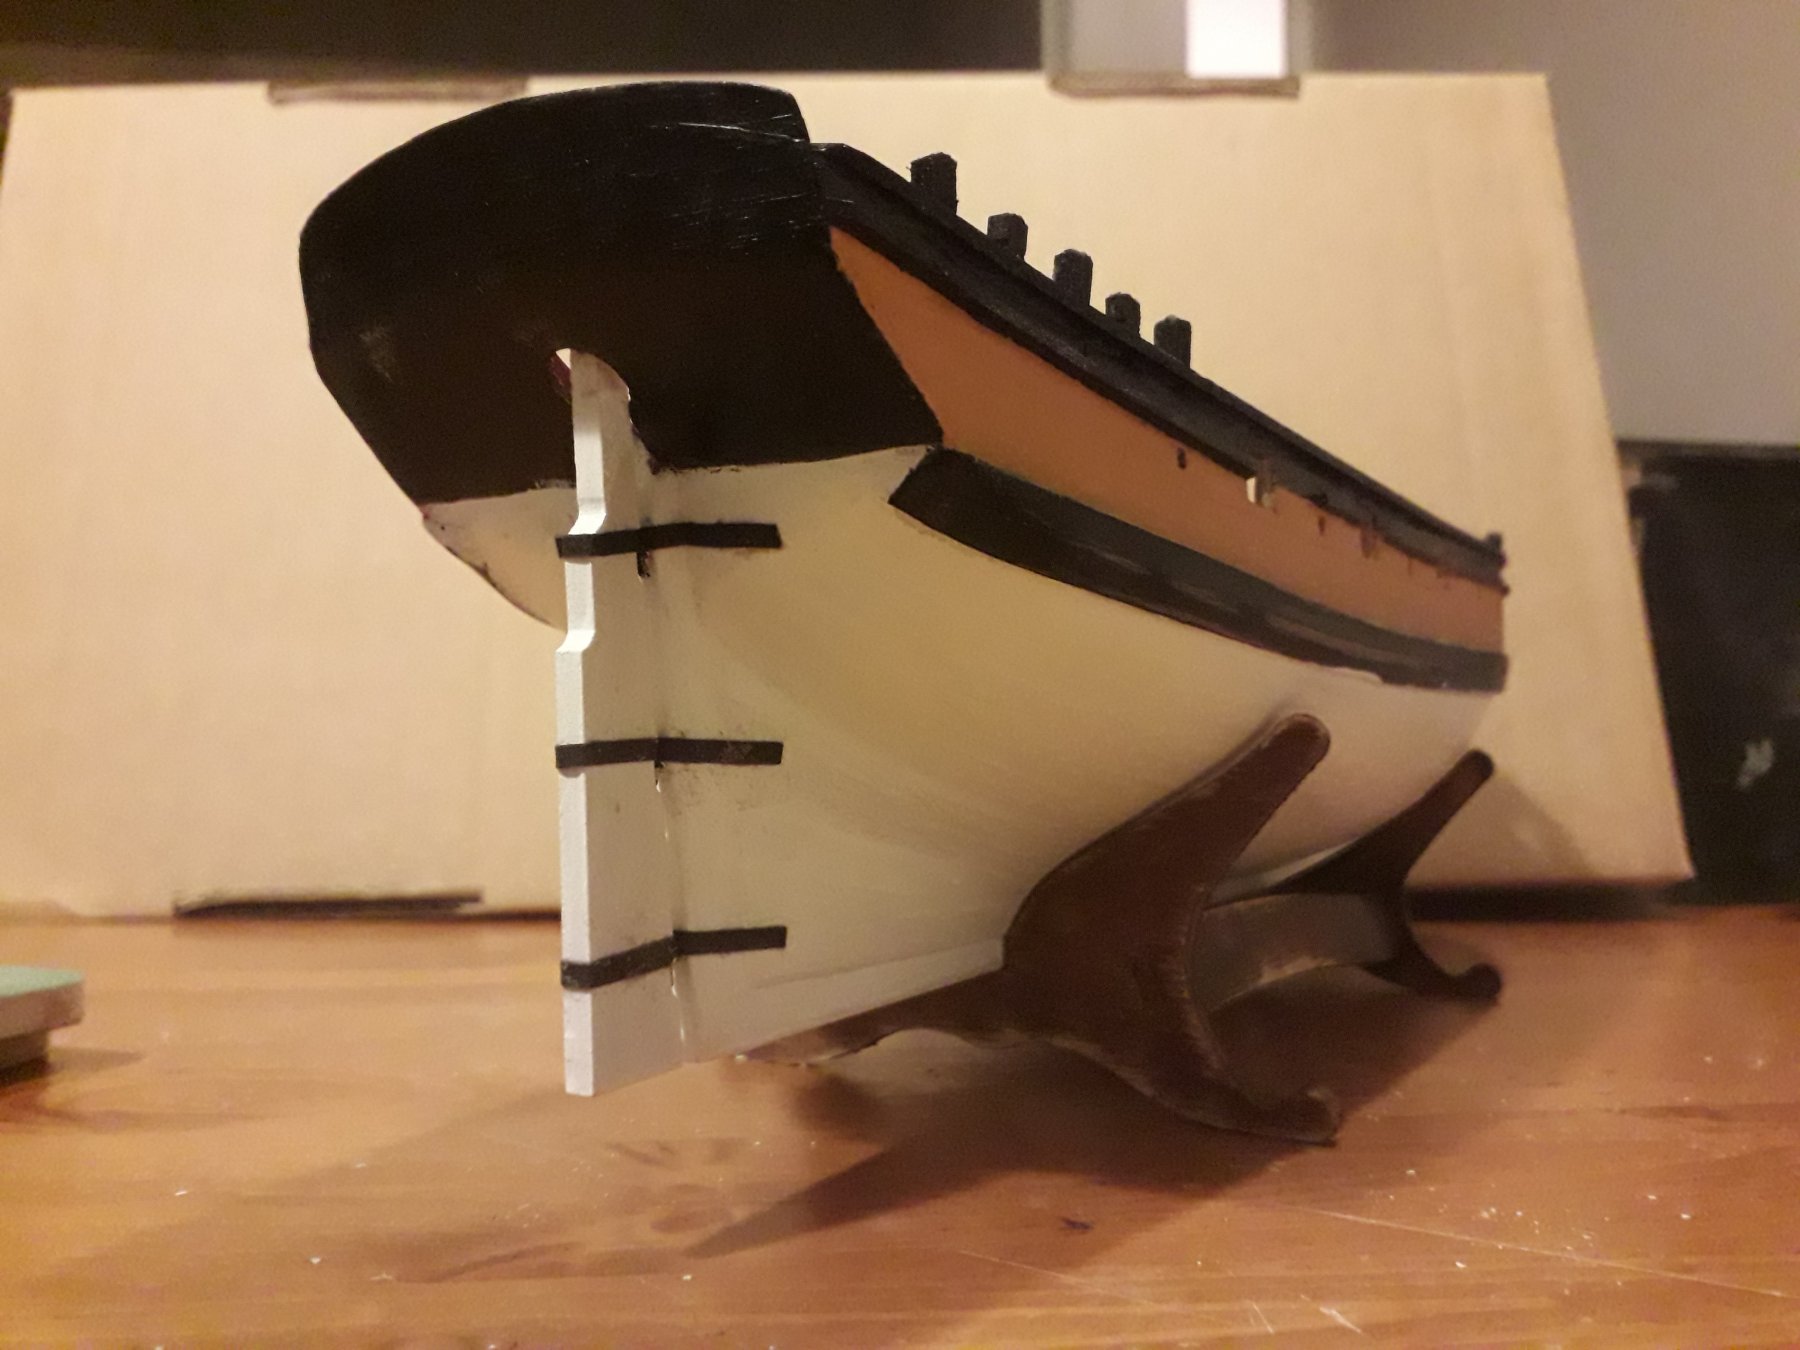
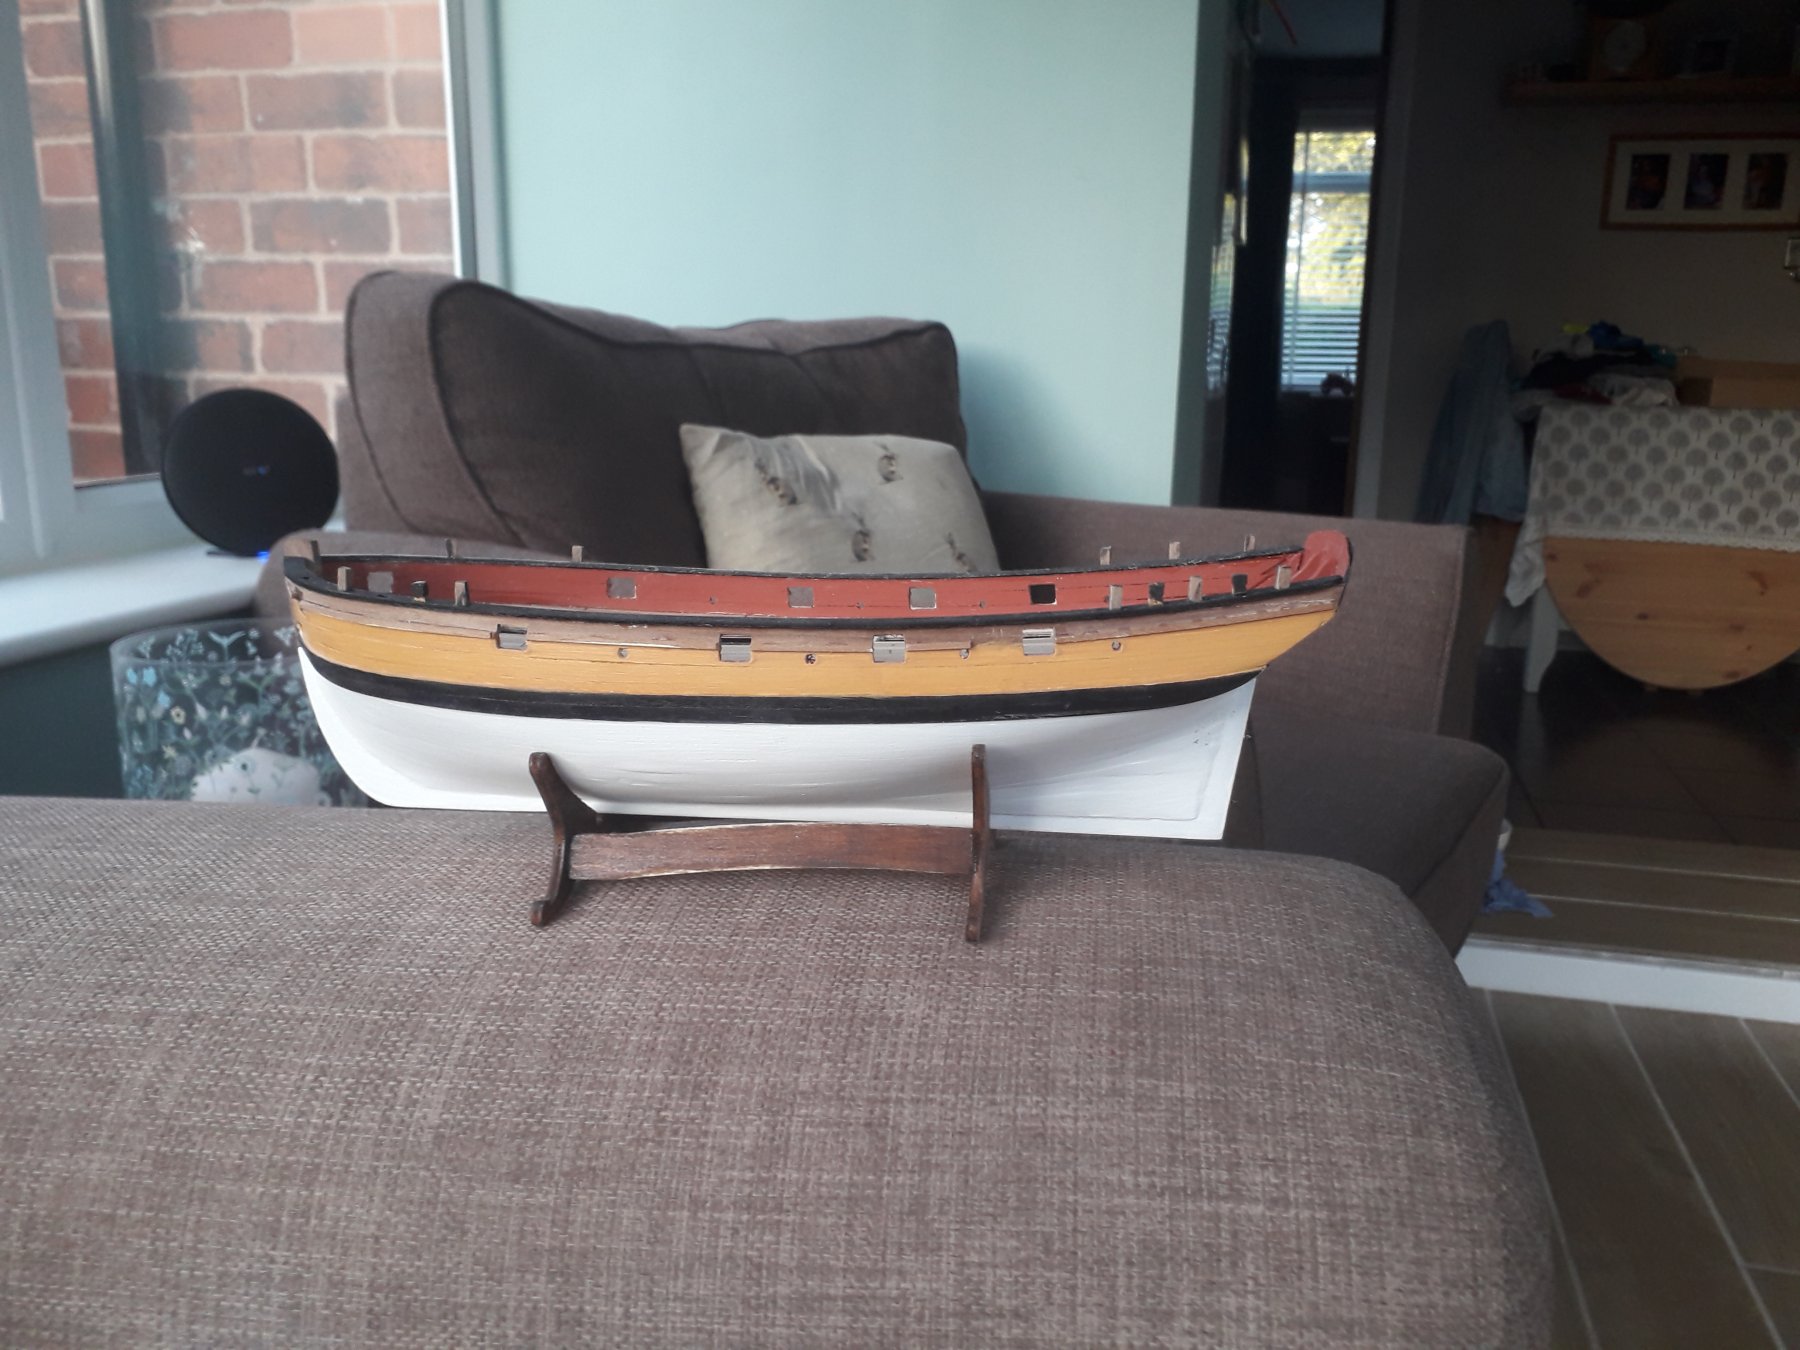
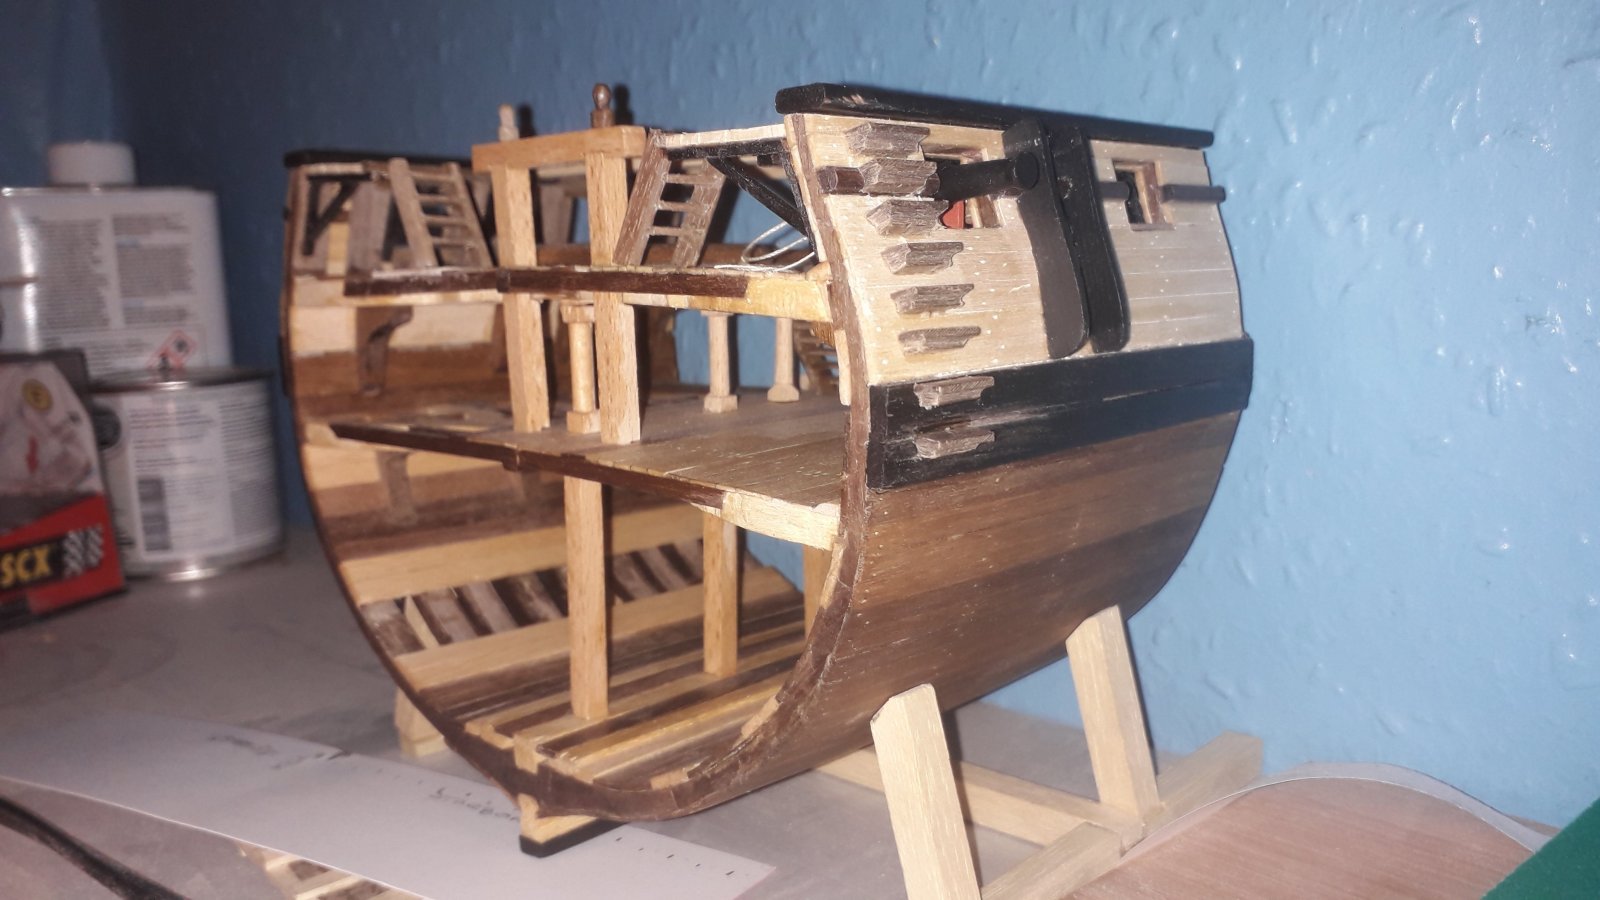
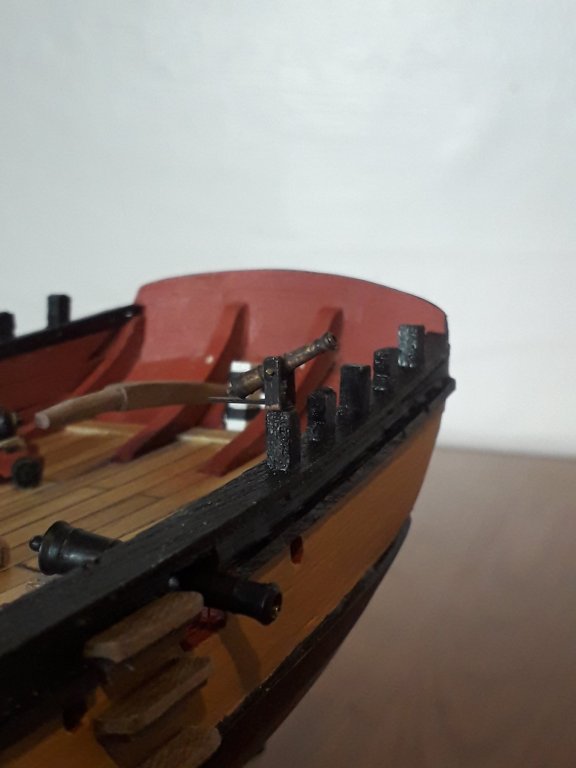
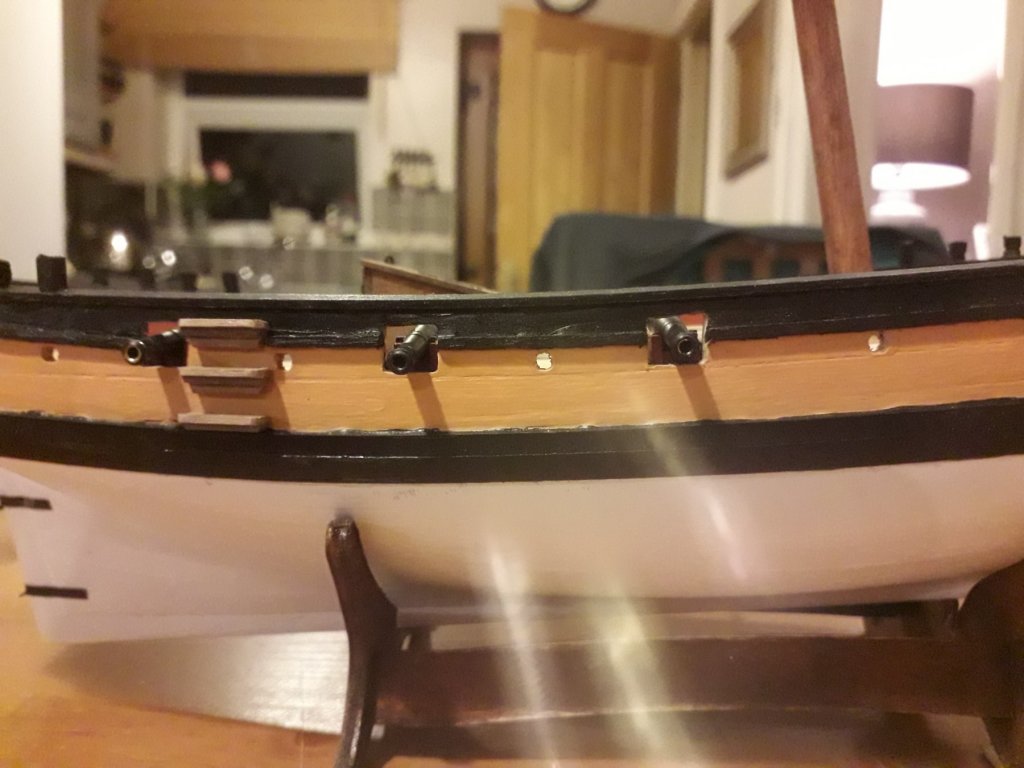
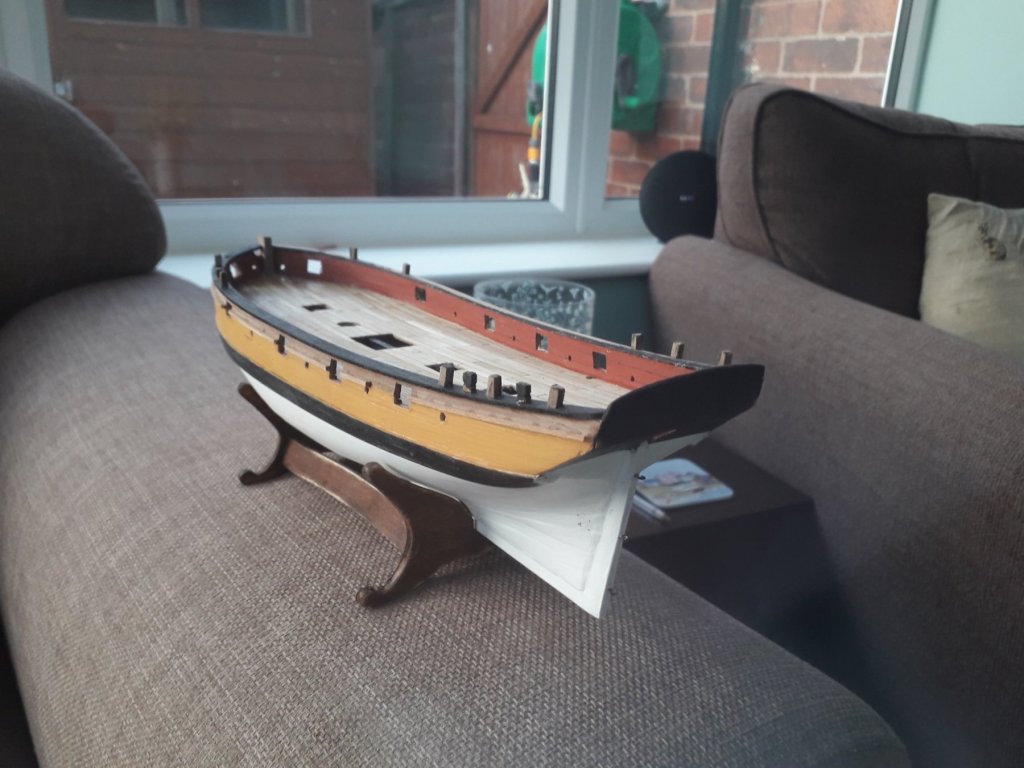
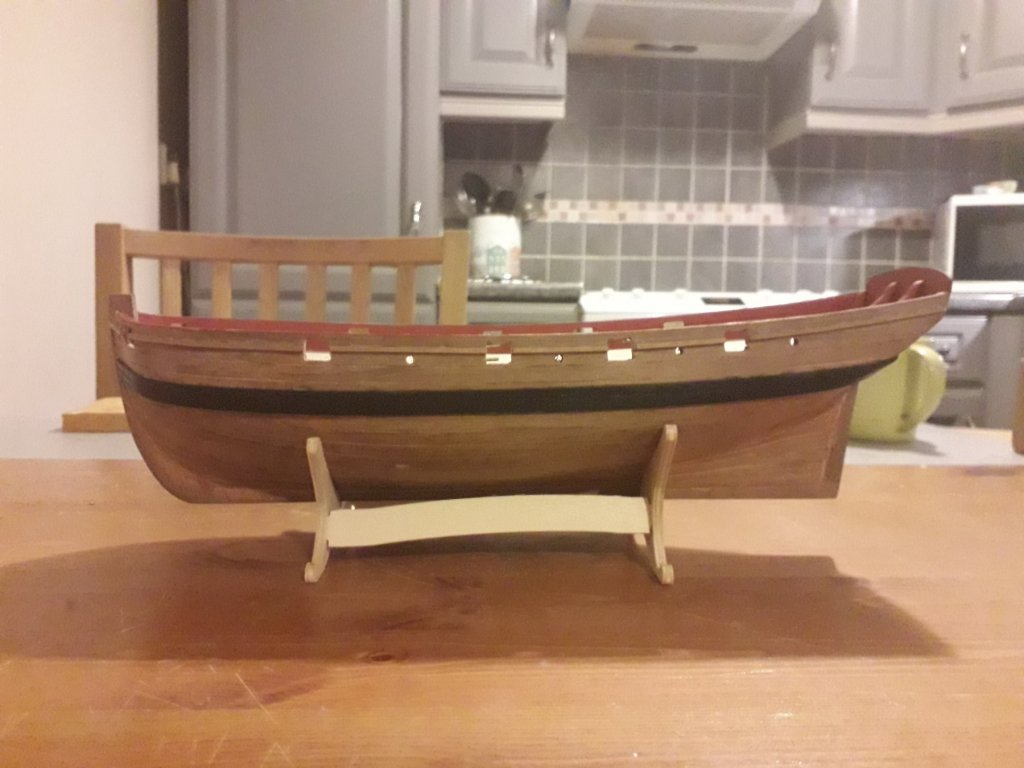
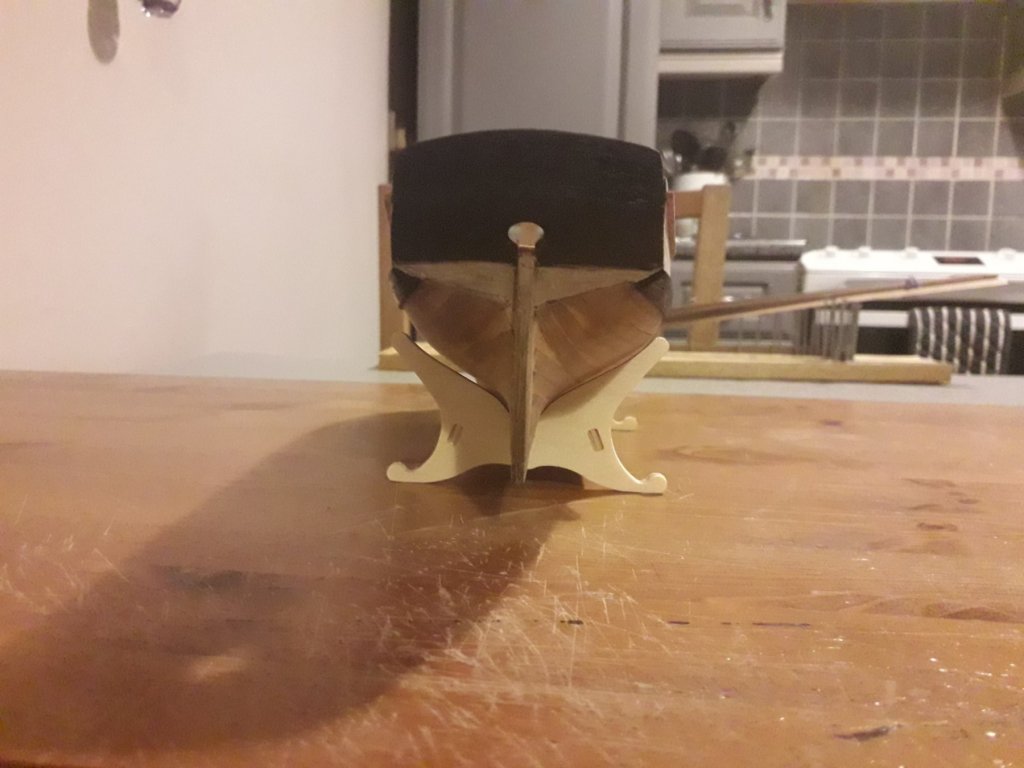
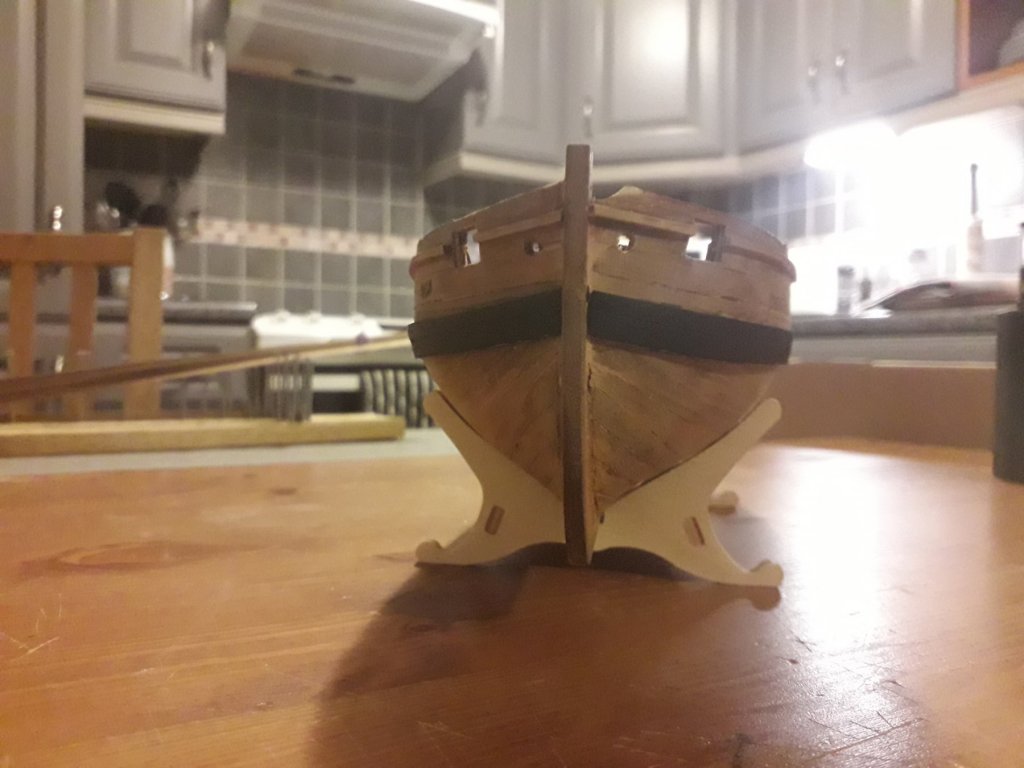
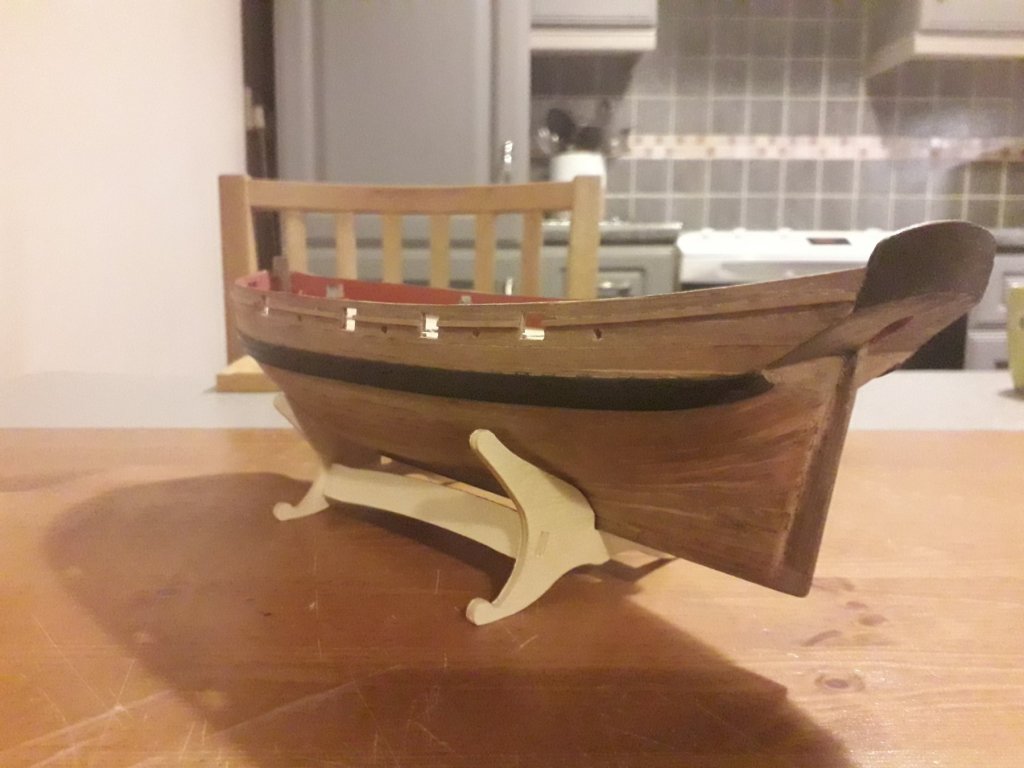
What with the great weather here and life I've not had a lot ot time to go shipbuilding. Tonight though I've got the watch alone as my other half has gone out "on the town"! So fitted the cap rails, swivel gun posts and timberheads, these small parts had quite a bit of char on them and now I haven't got any skin left on the ends of my fingers. Also sanded and varnished the deck, I'm happy with it😊 As you may notice the hull between the wales is now painted, this is because I can't used glue sensibly and got it all over the planking and once again daren't sand to much as it's only .5mm timber. So the yellow and black Royal Naval colour scheme is press ganged into service. It's a shame because I liked the natural wood look😥 Off to North Wales in a couple of days for a week and a bit of mountain climbing (only Snowdon via a path) therefore Sherbourne is going to sit on a shelf for a while.


- 84 replies
-
- 7
-
-
- sherbourne
- caldercraft
- (and 2 more)
-
That's a great planking job you've done captainhash😀 looks like you will have a beautiful ship at the end. I will be following you to the finish.
-
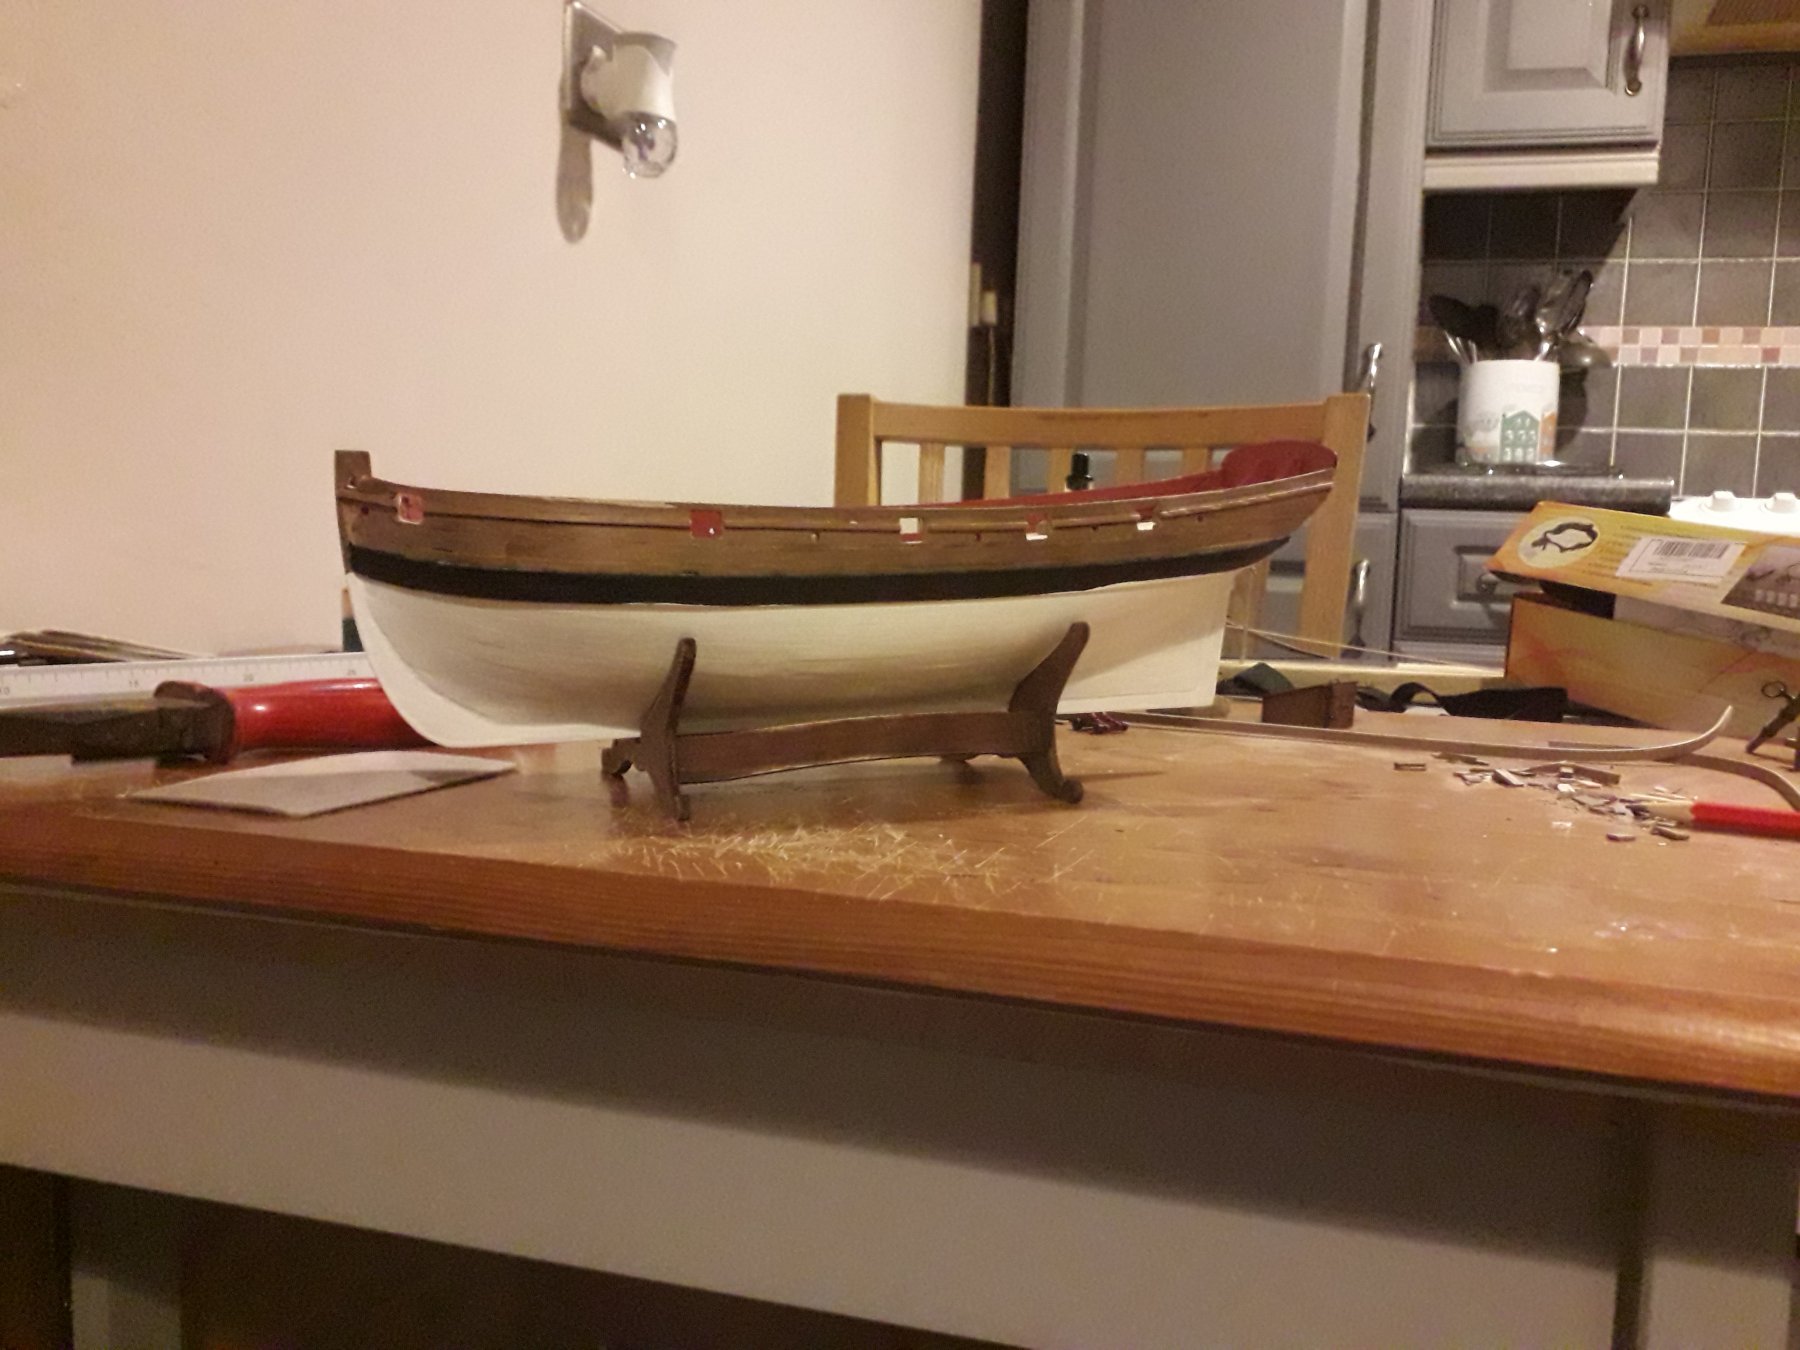
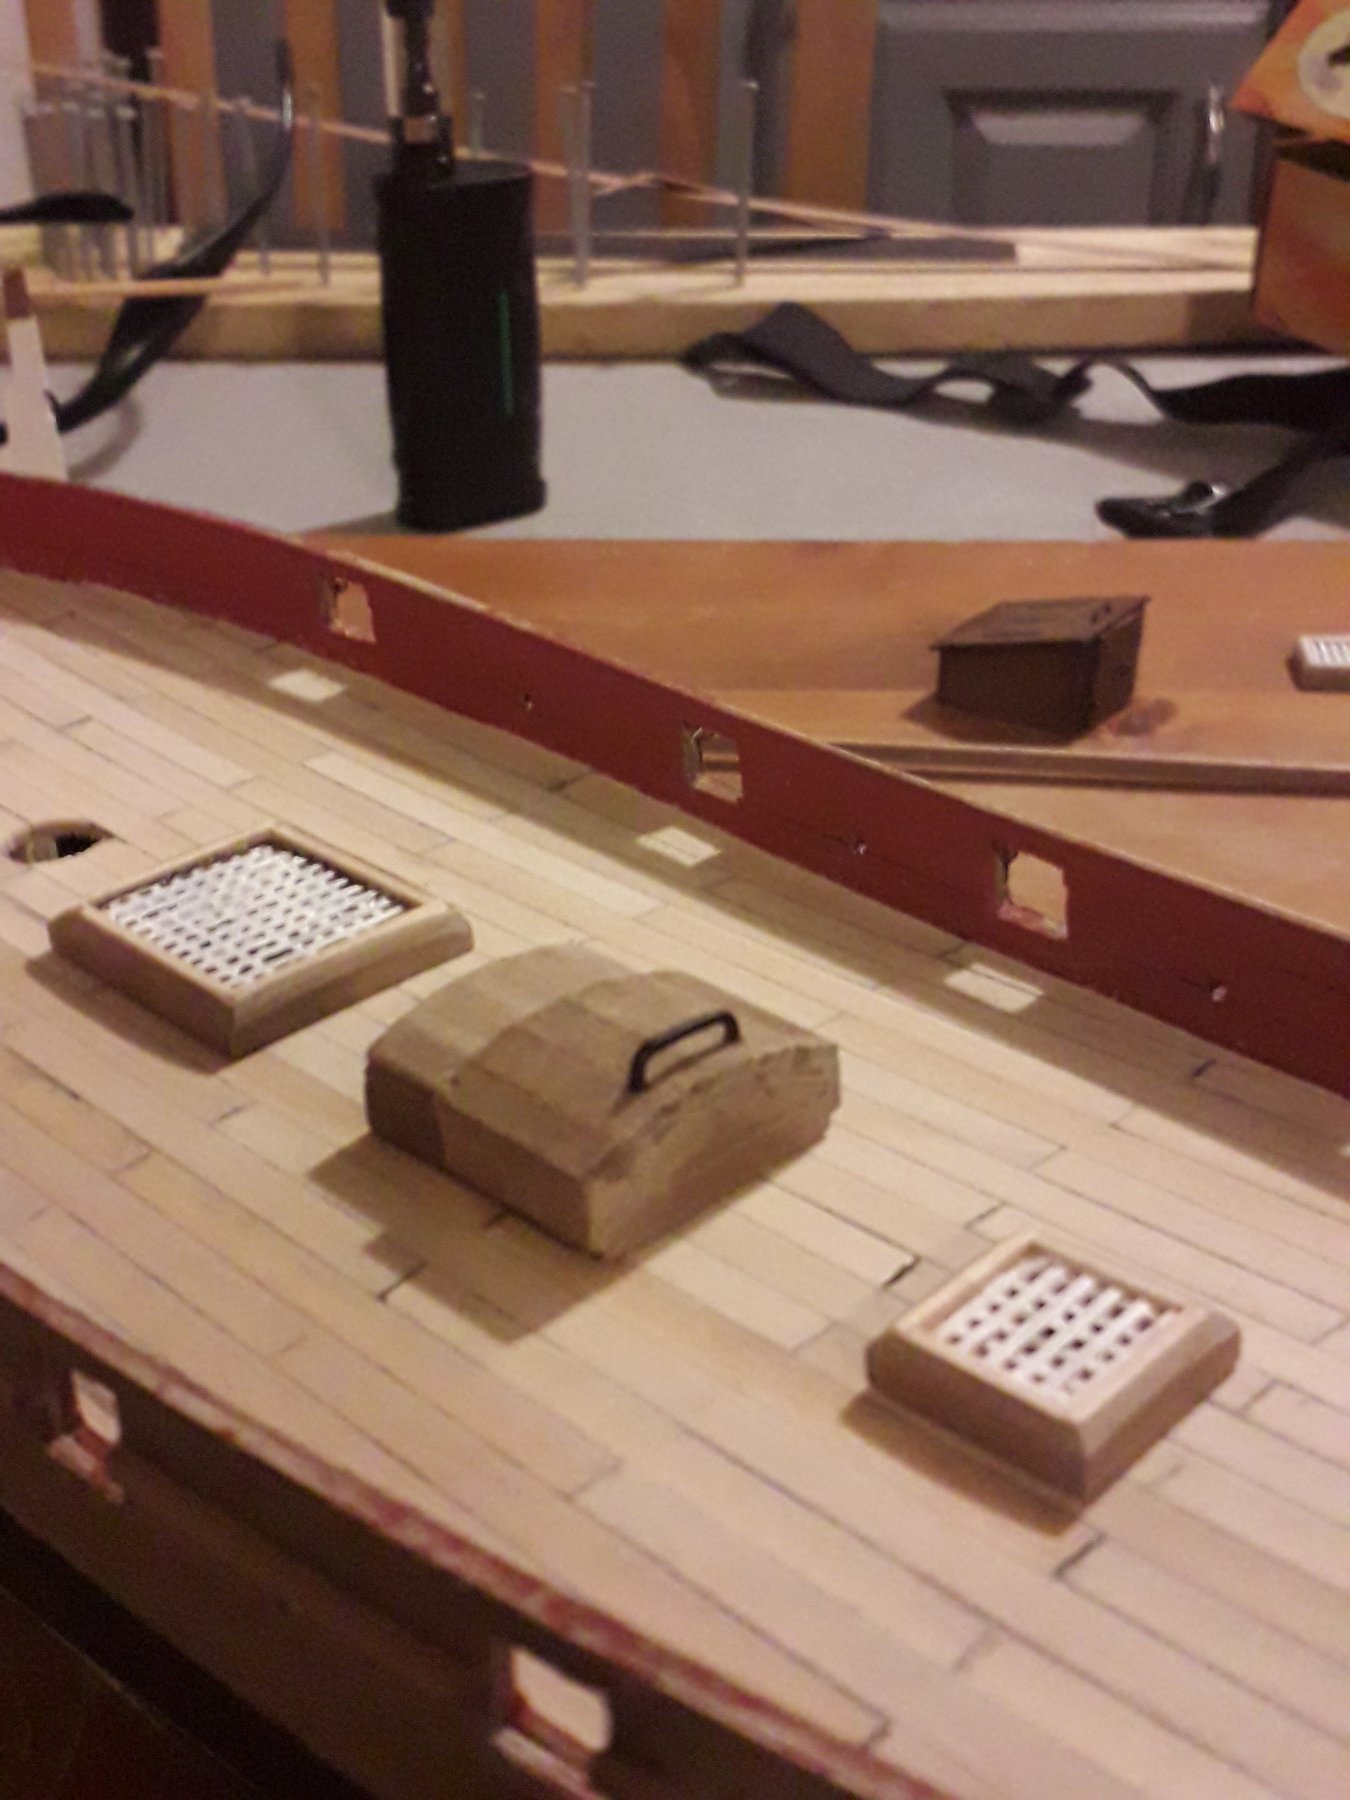
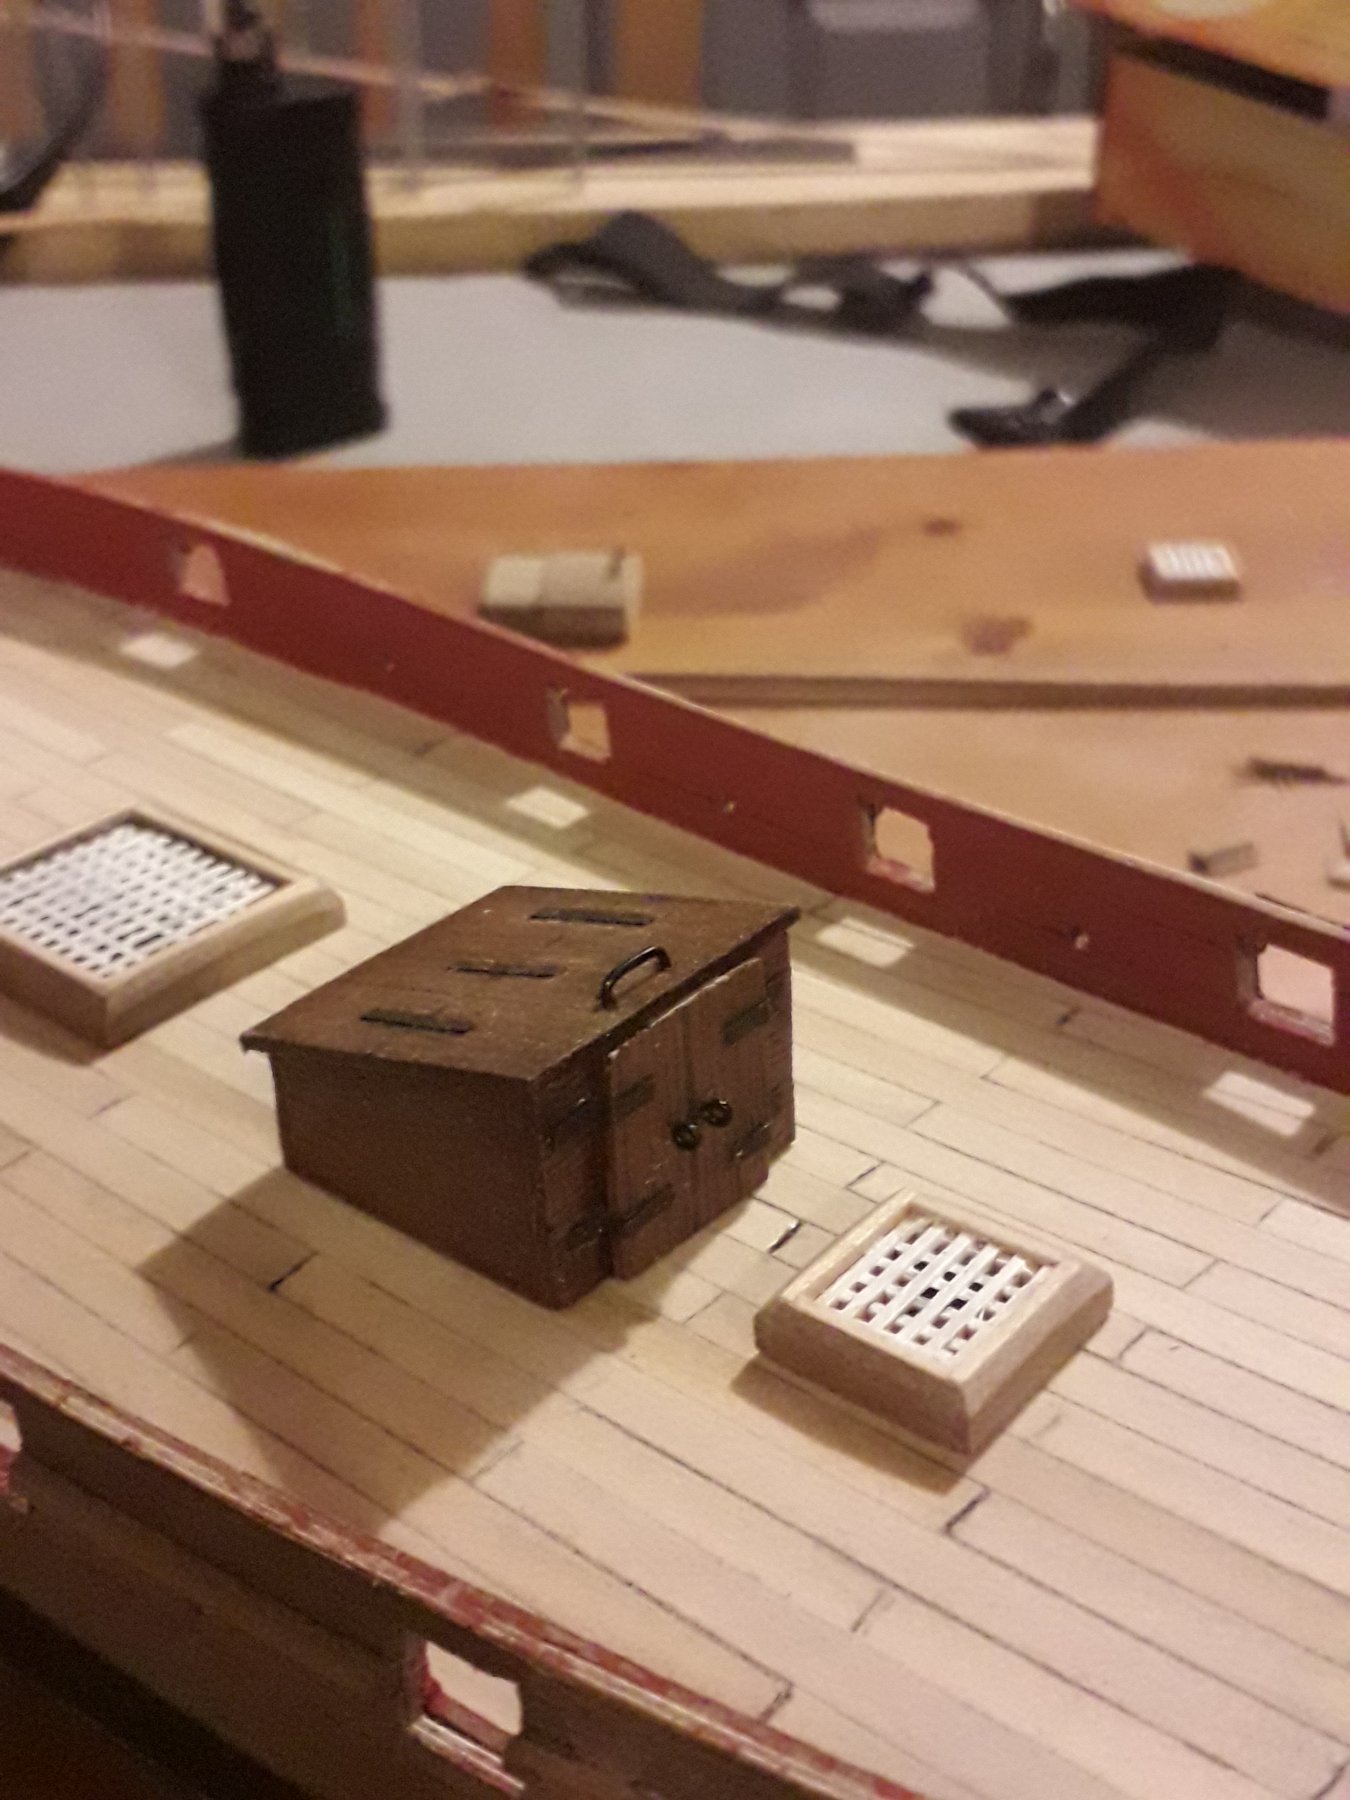
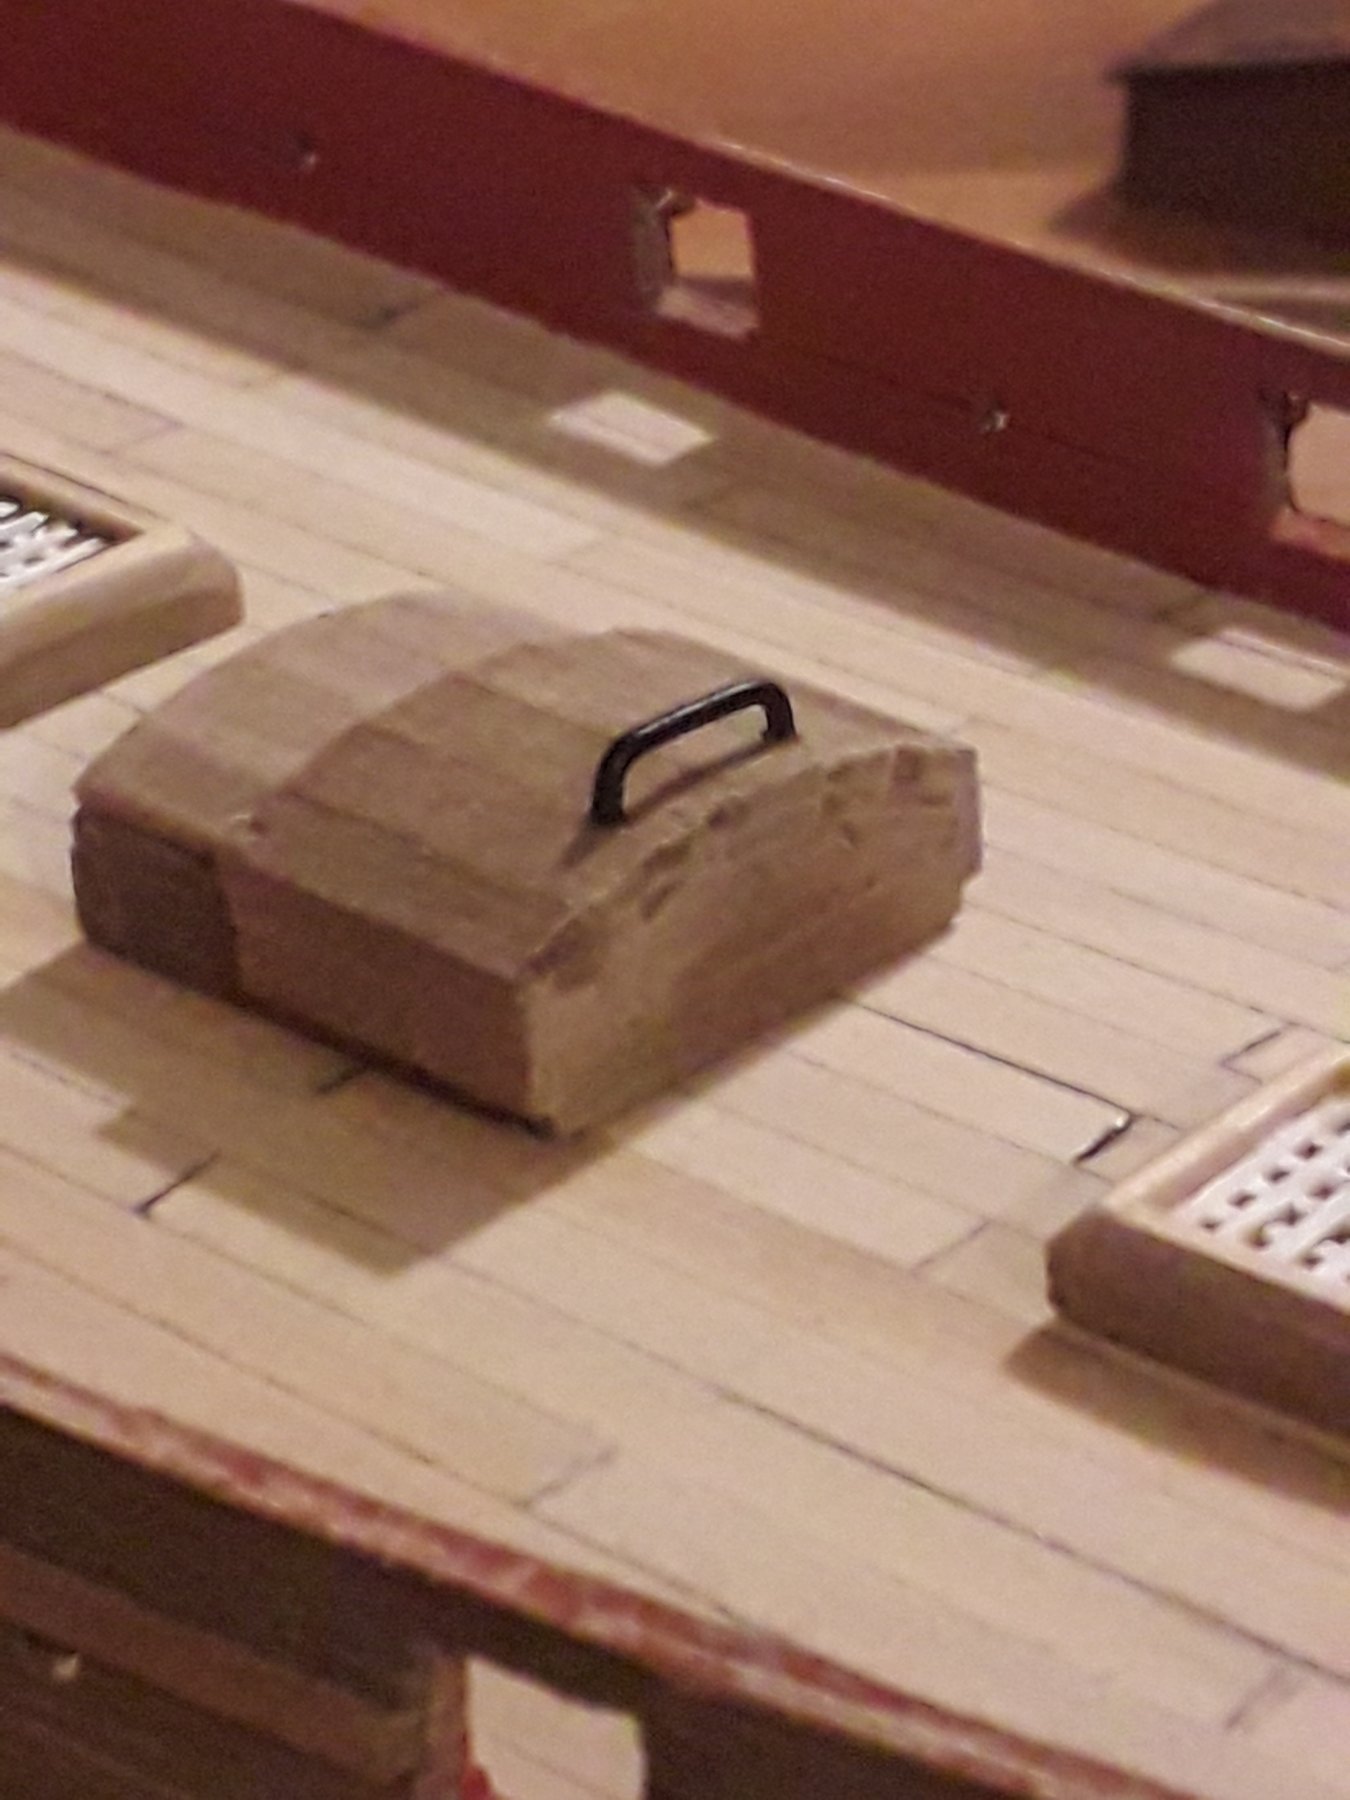
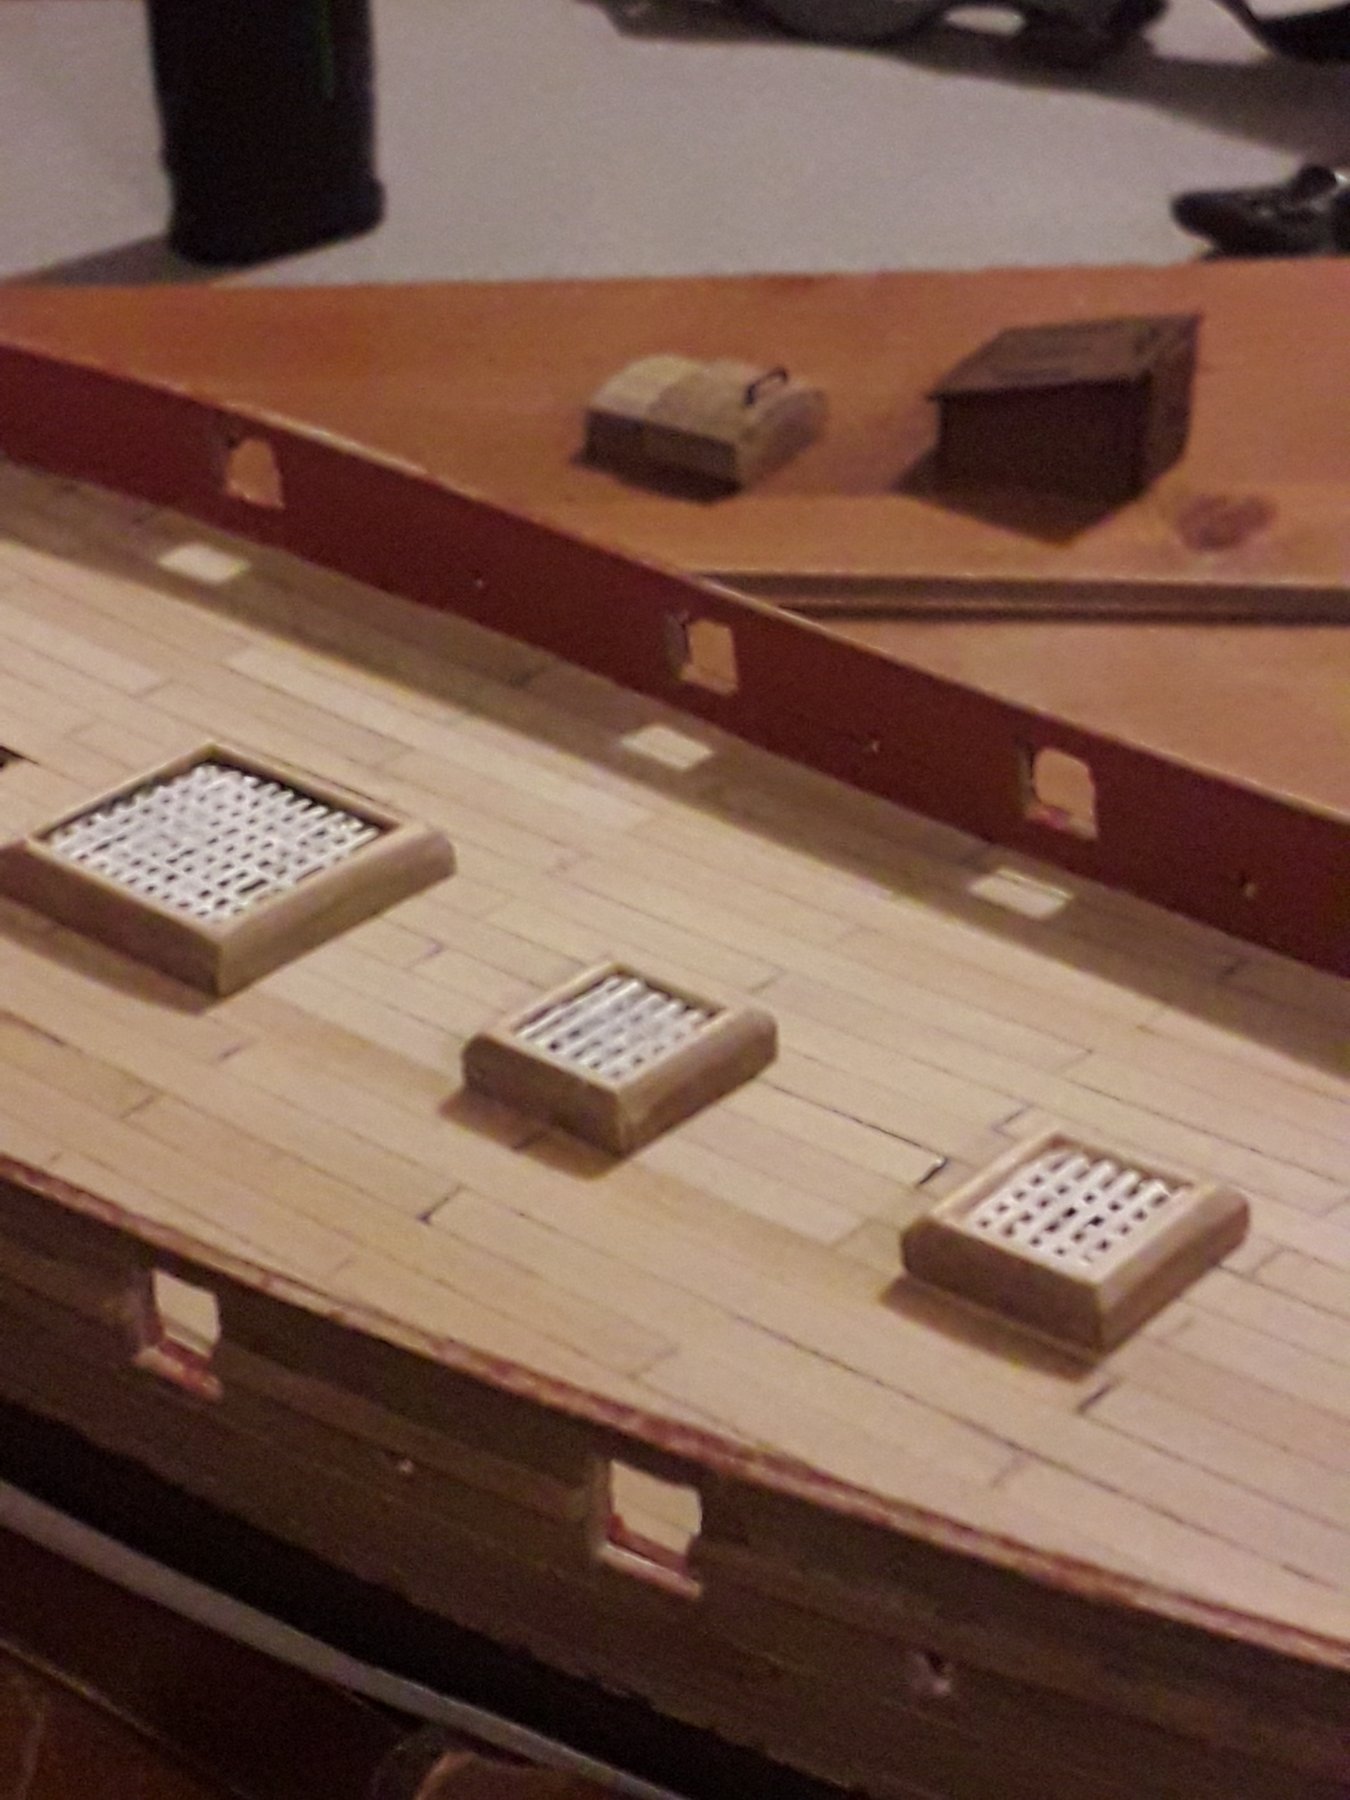
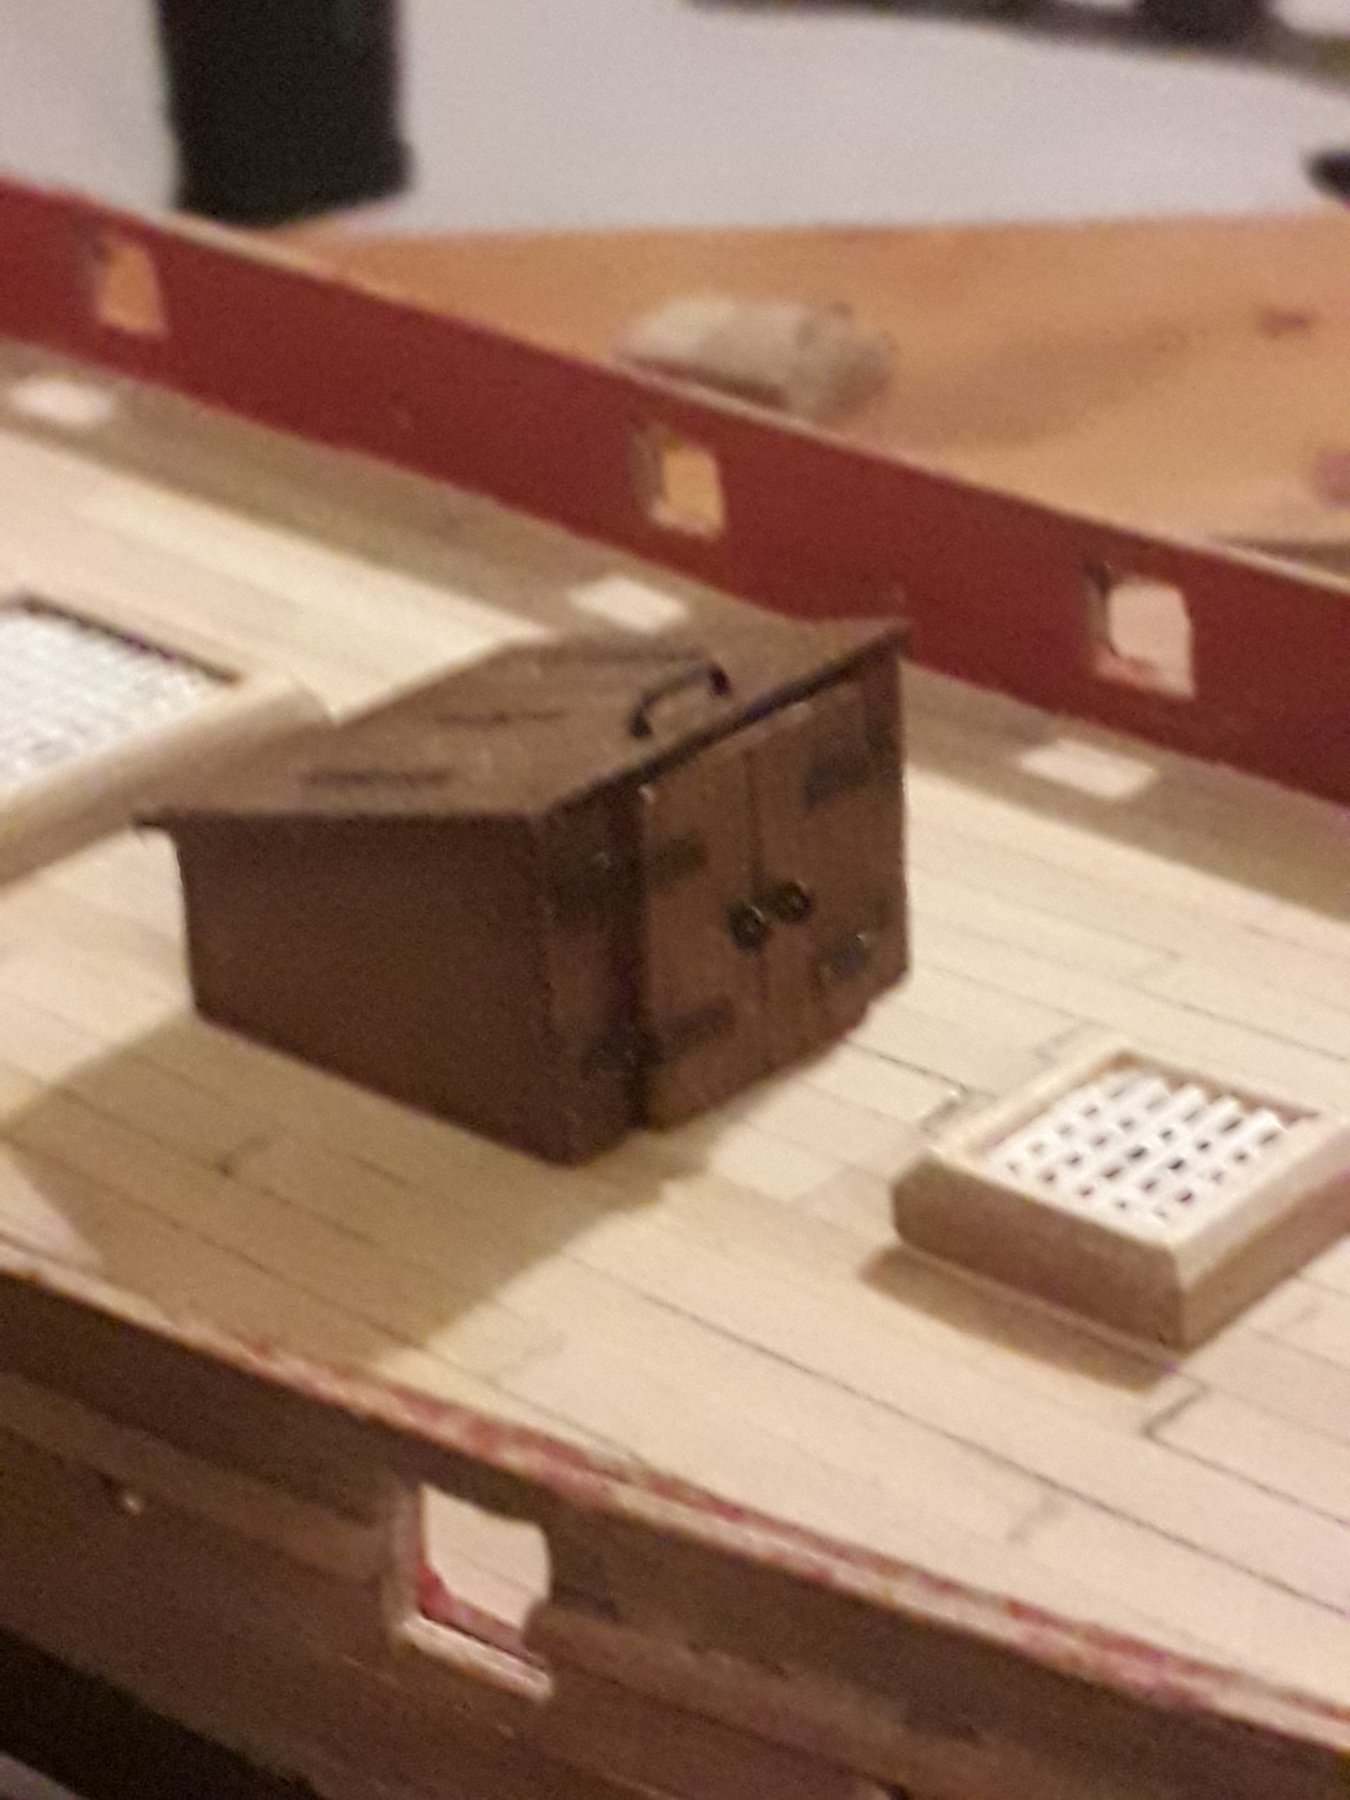
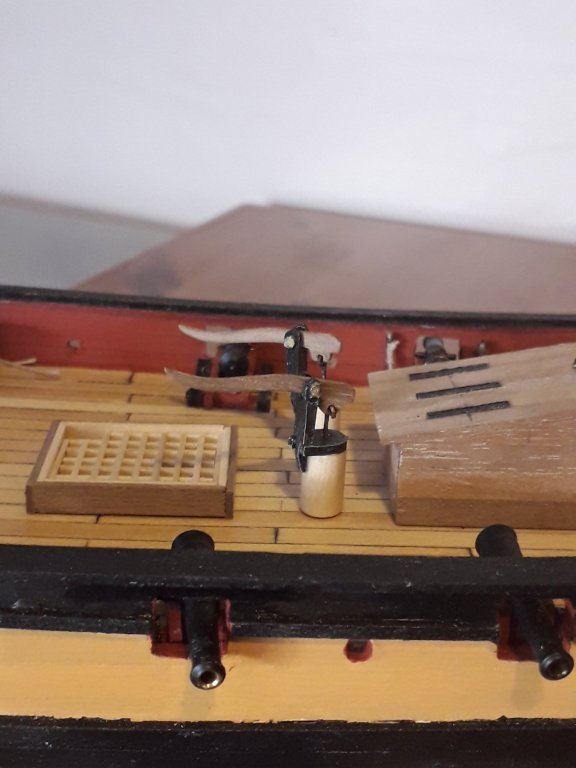
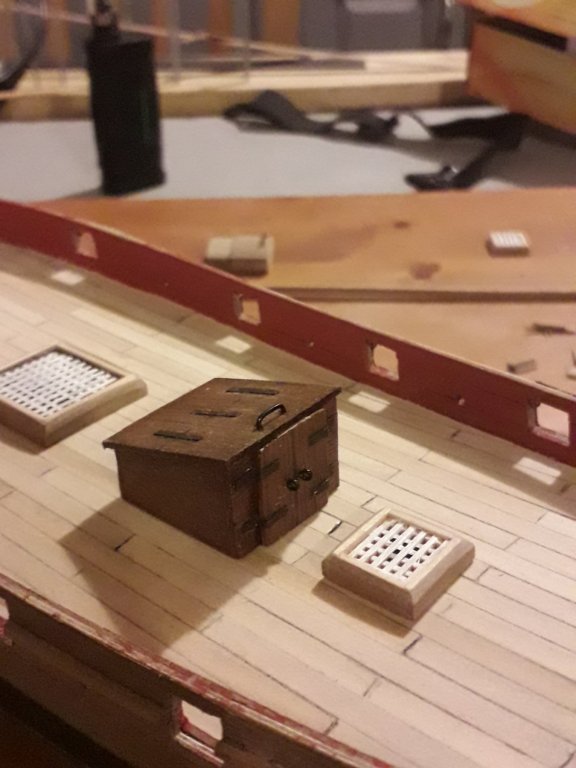
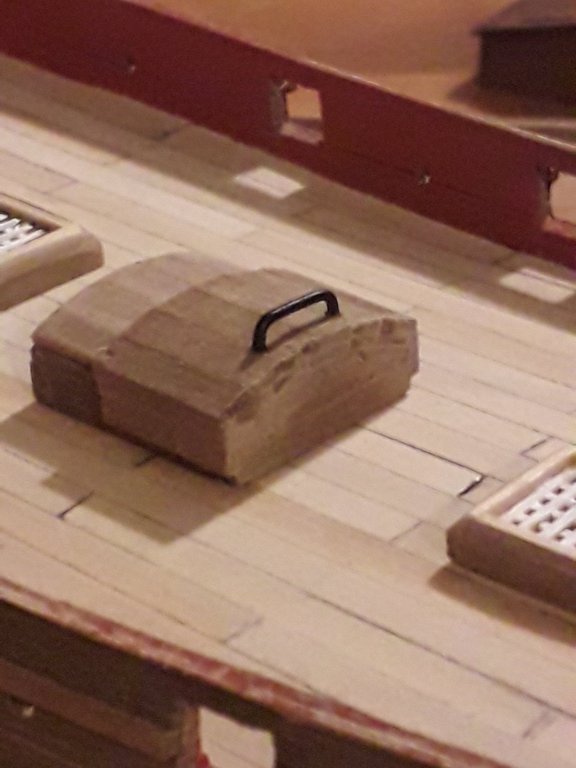
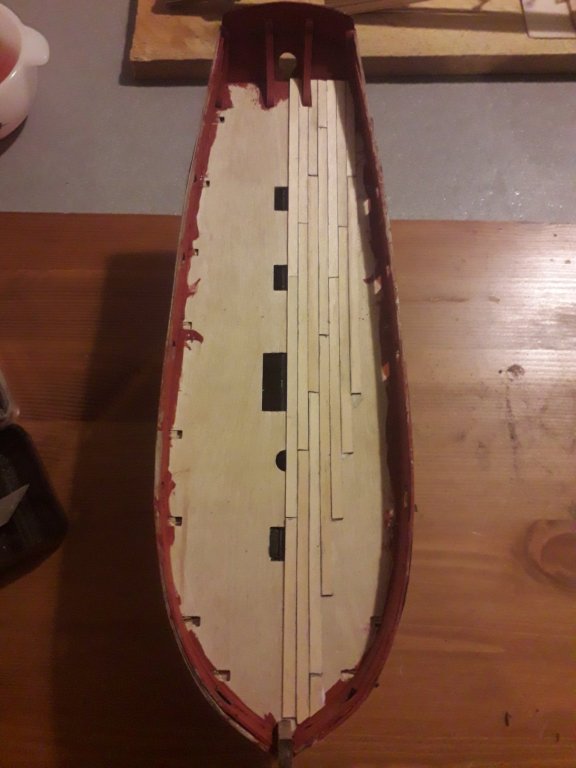
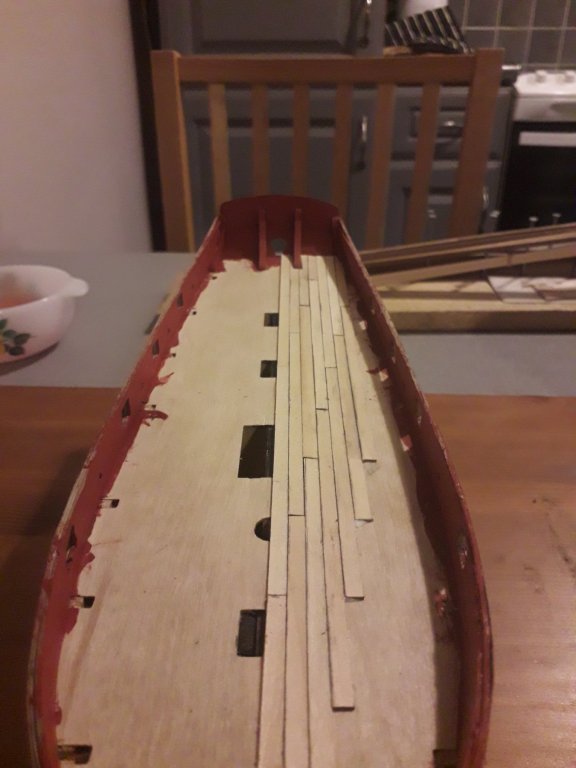
I've just been pottering about with bits for the deck fittings. The main thing is I can't decide which companion hatch to use. I've posted a few photos of my options . I was planning to leave the hull natural wood but when put first coat varnish on their were a few glue stains and no matter how much I sanded they were stubborn so it ended up being painted white. My father's day present from my daughter's helped a great deal with the small work ,so cant recommend having magnifying lens enough.


- 84 replies
-
- 3
-
-
- sherbourne
- caldercraft
- (and 2 more)
-
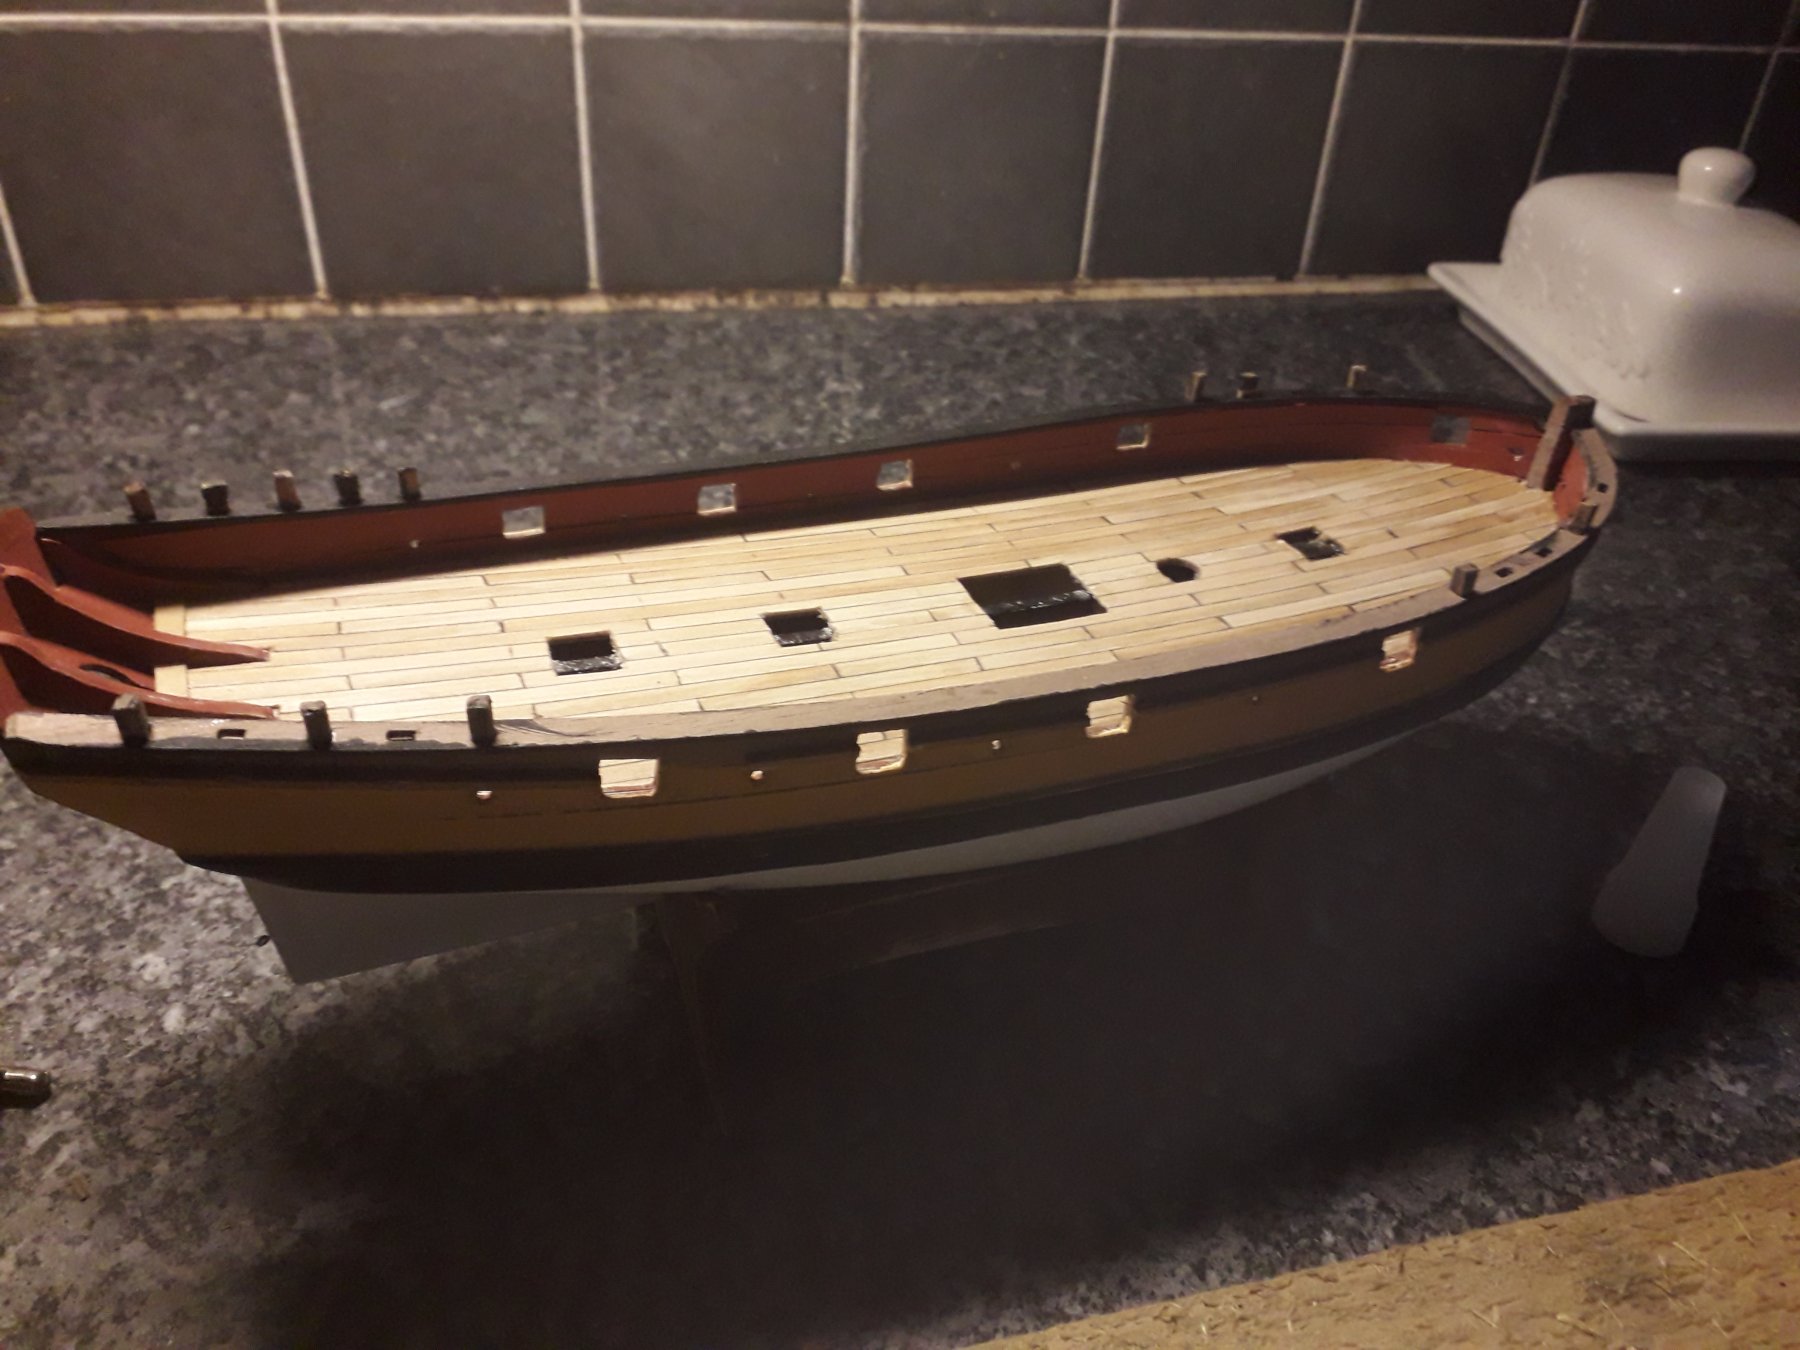
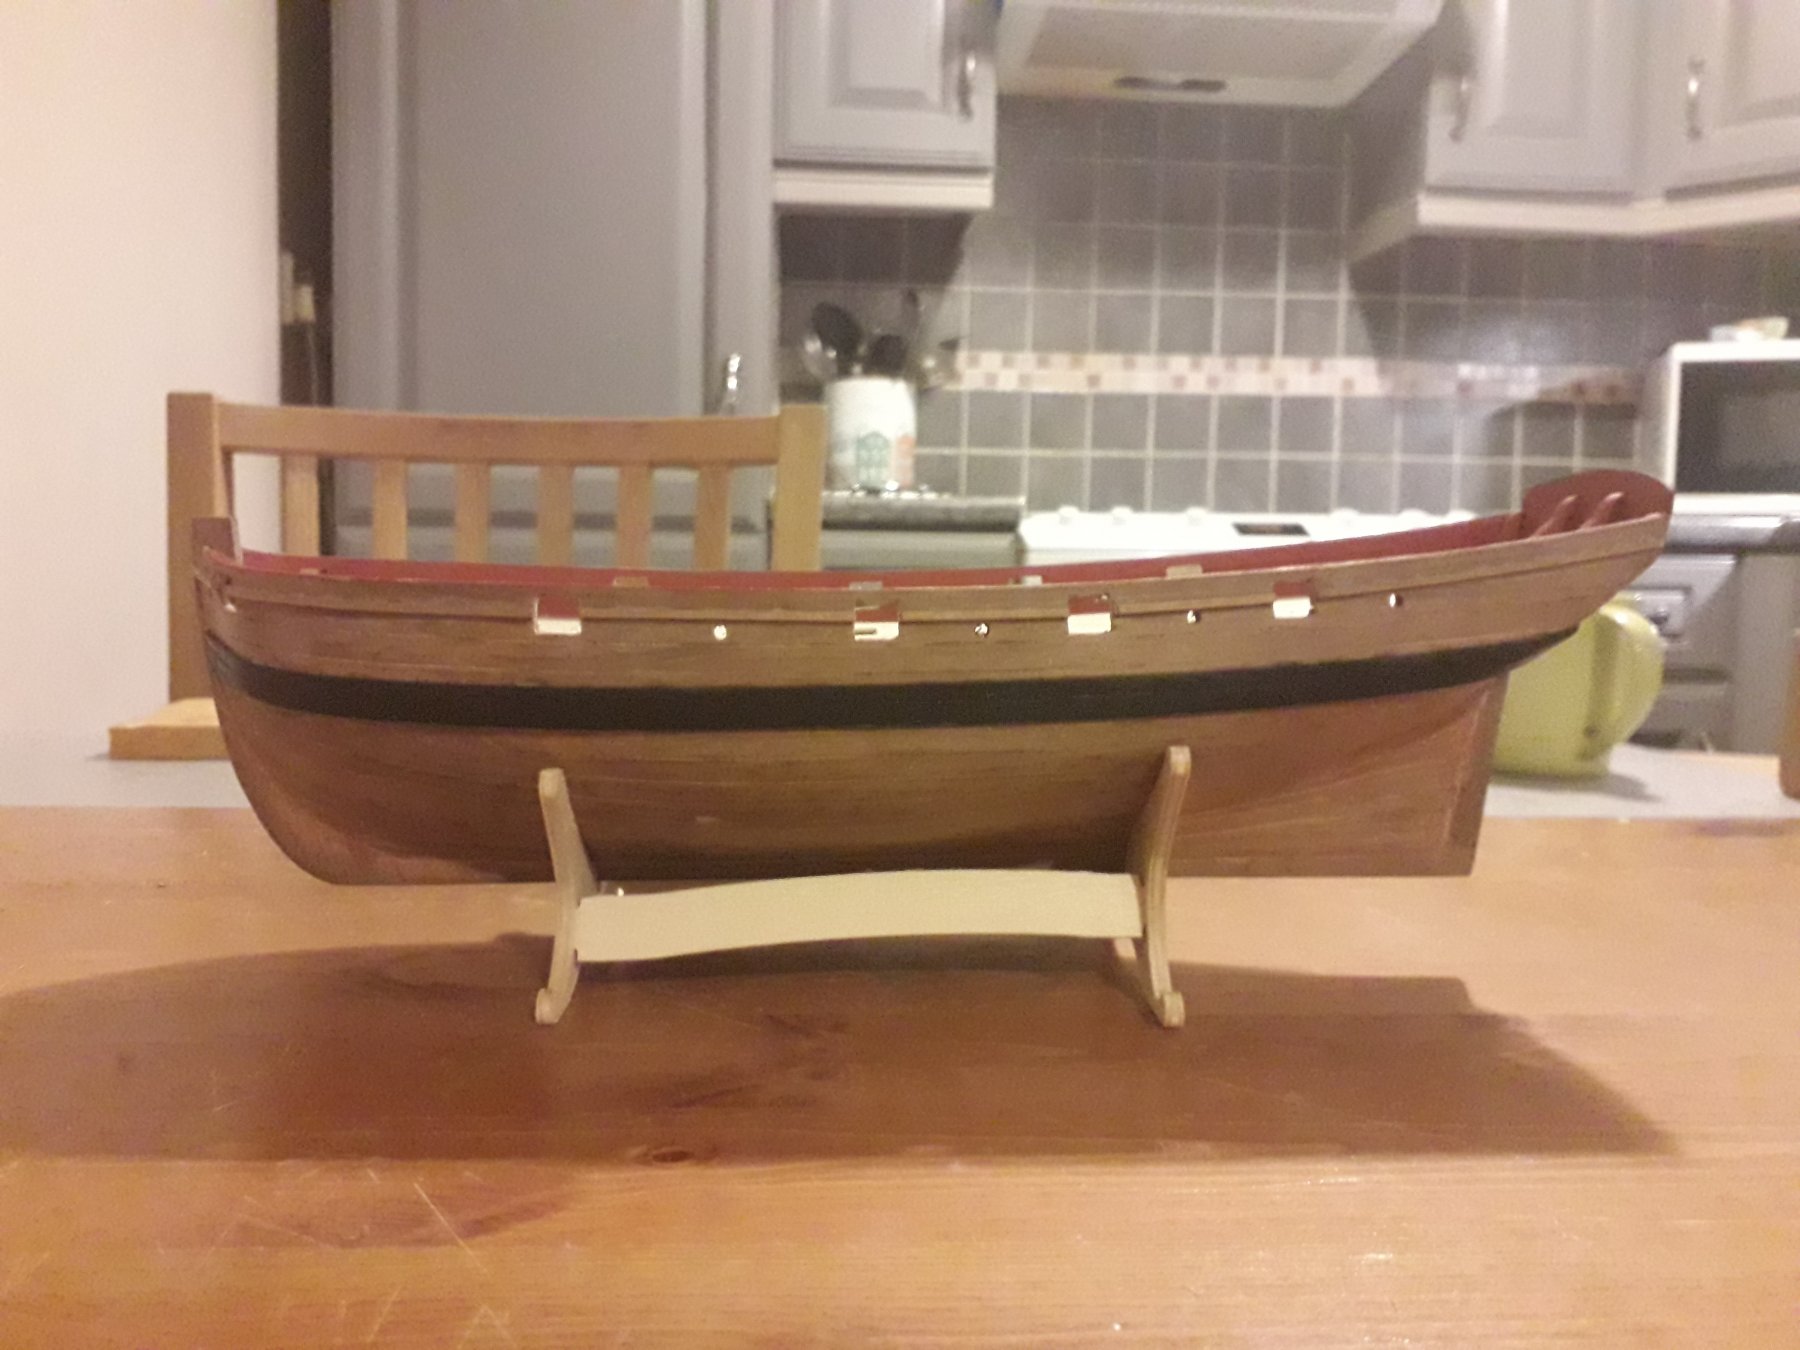
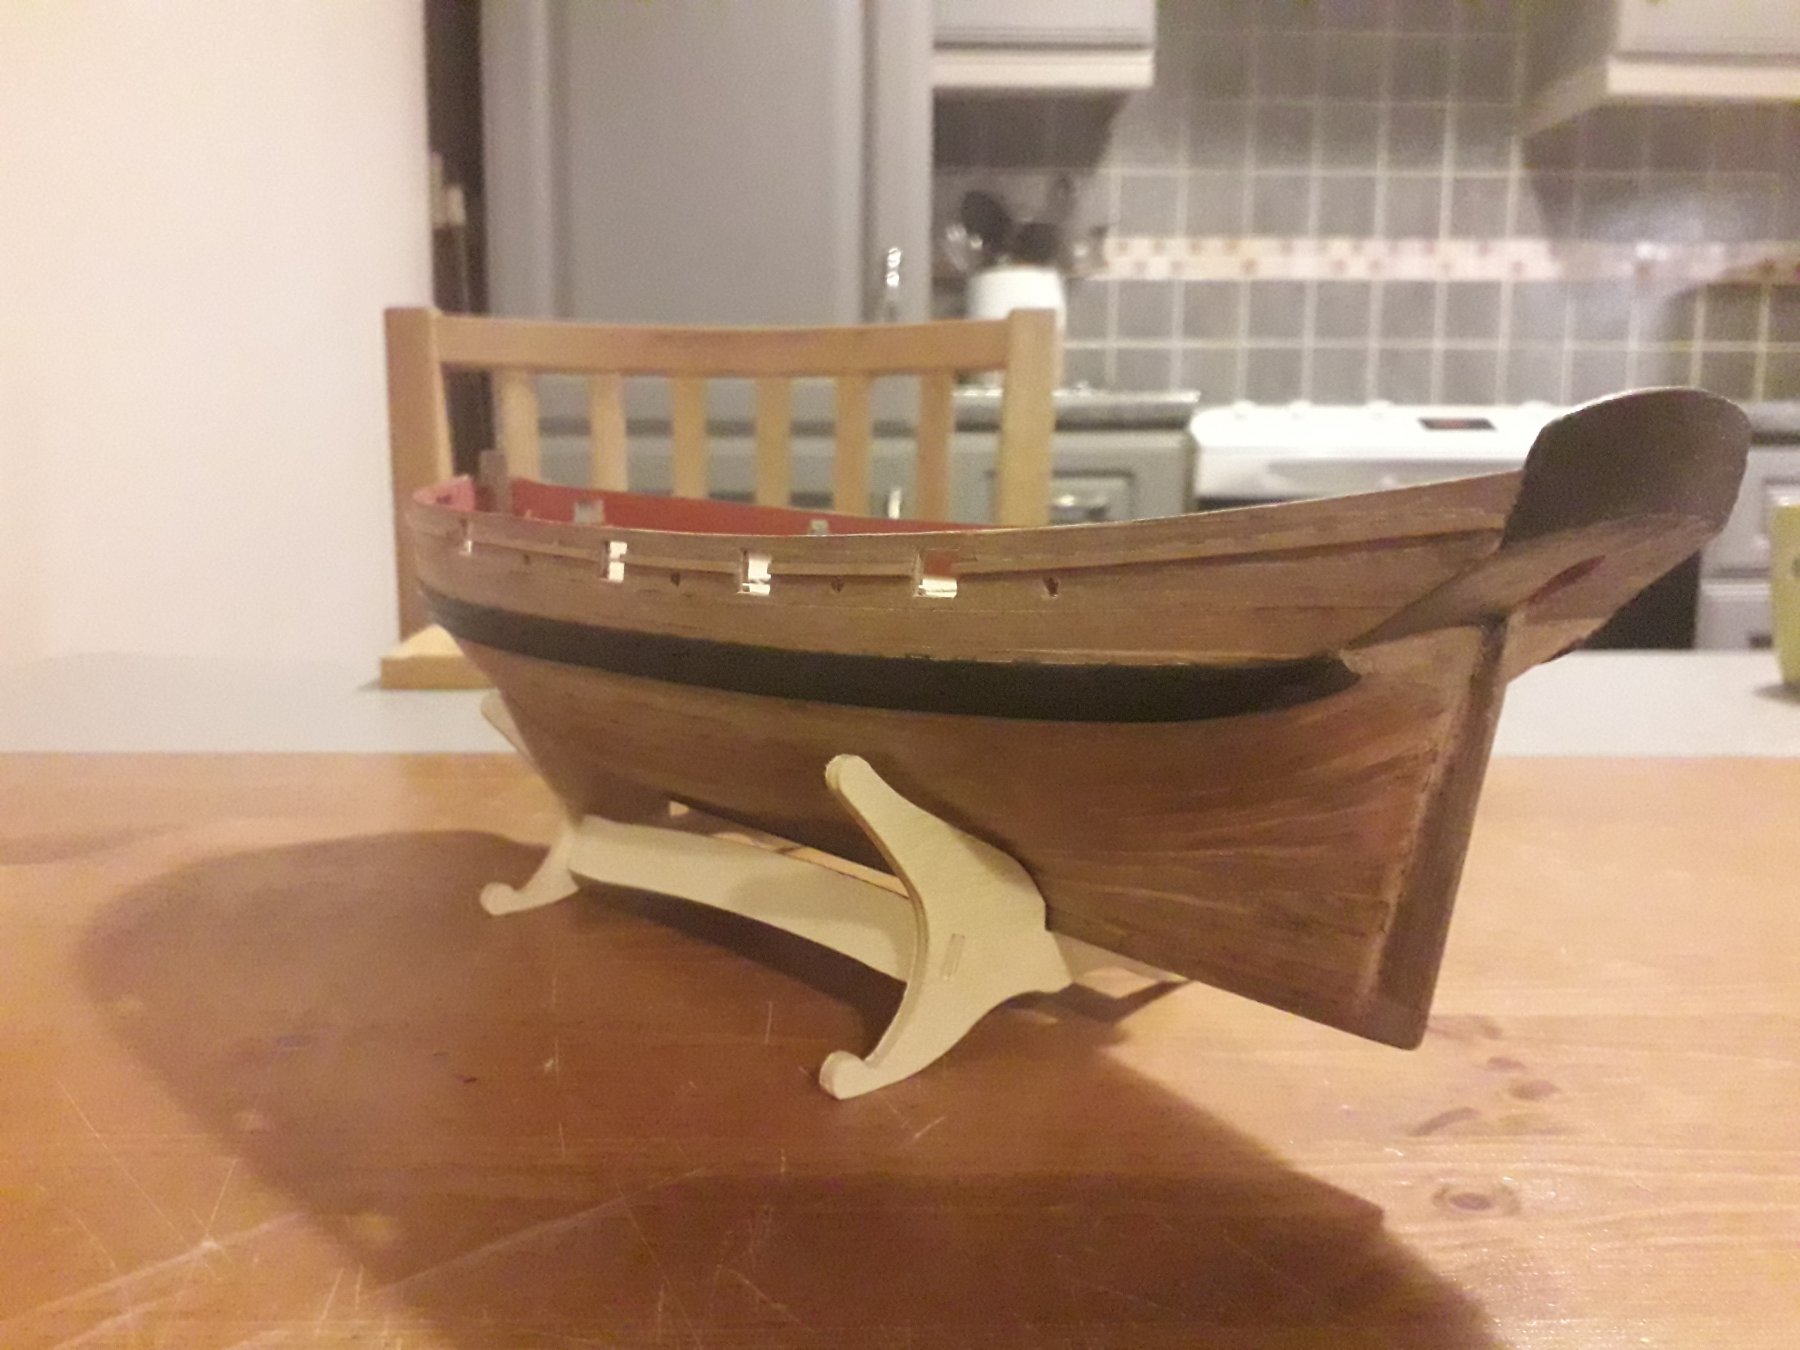
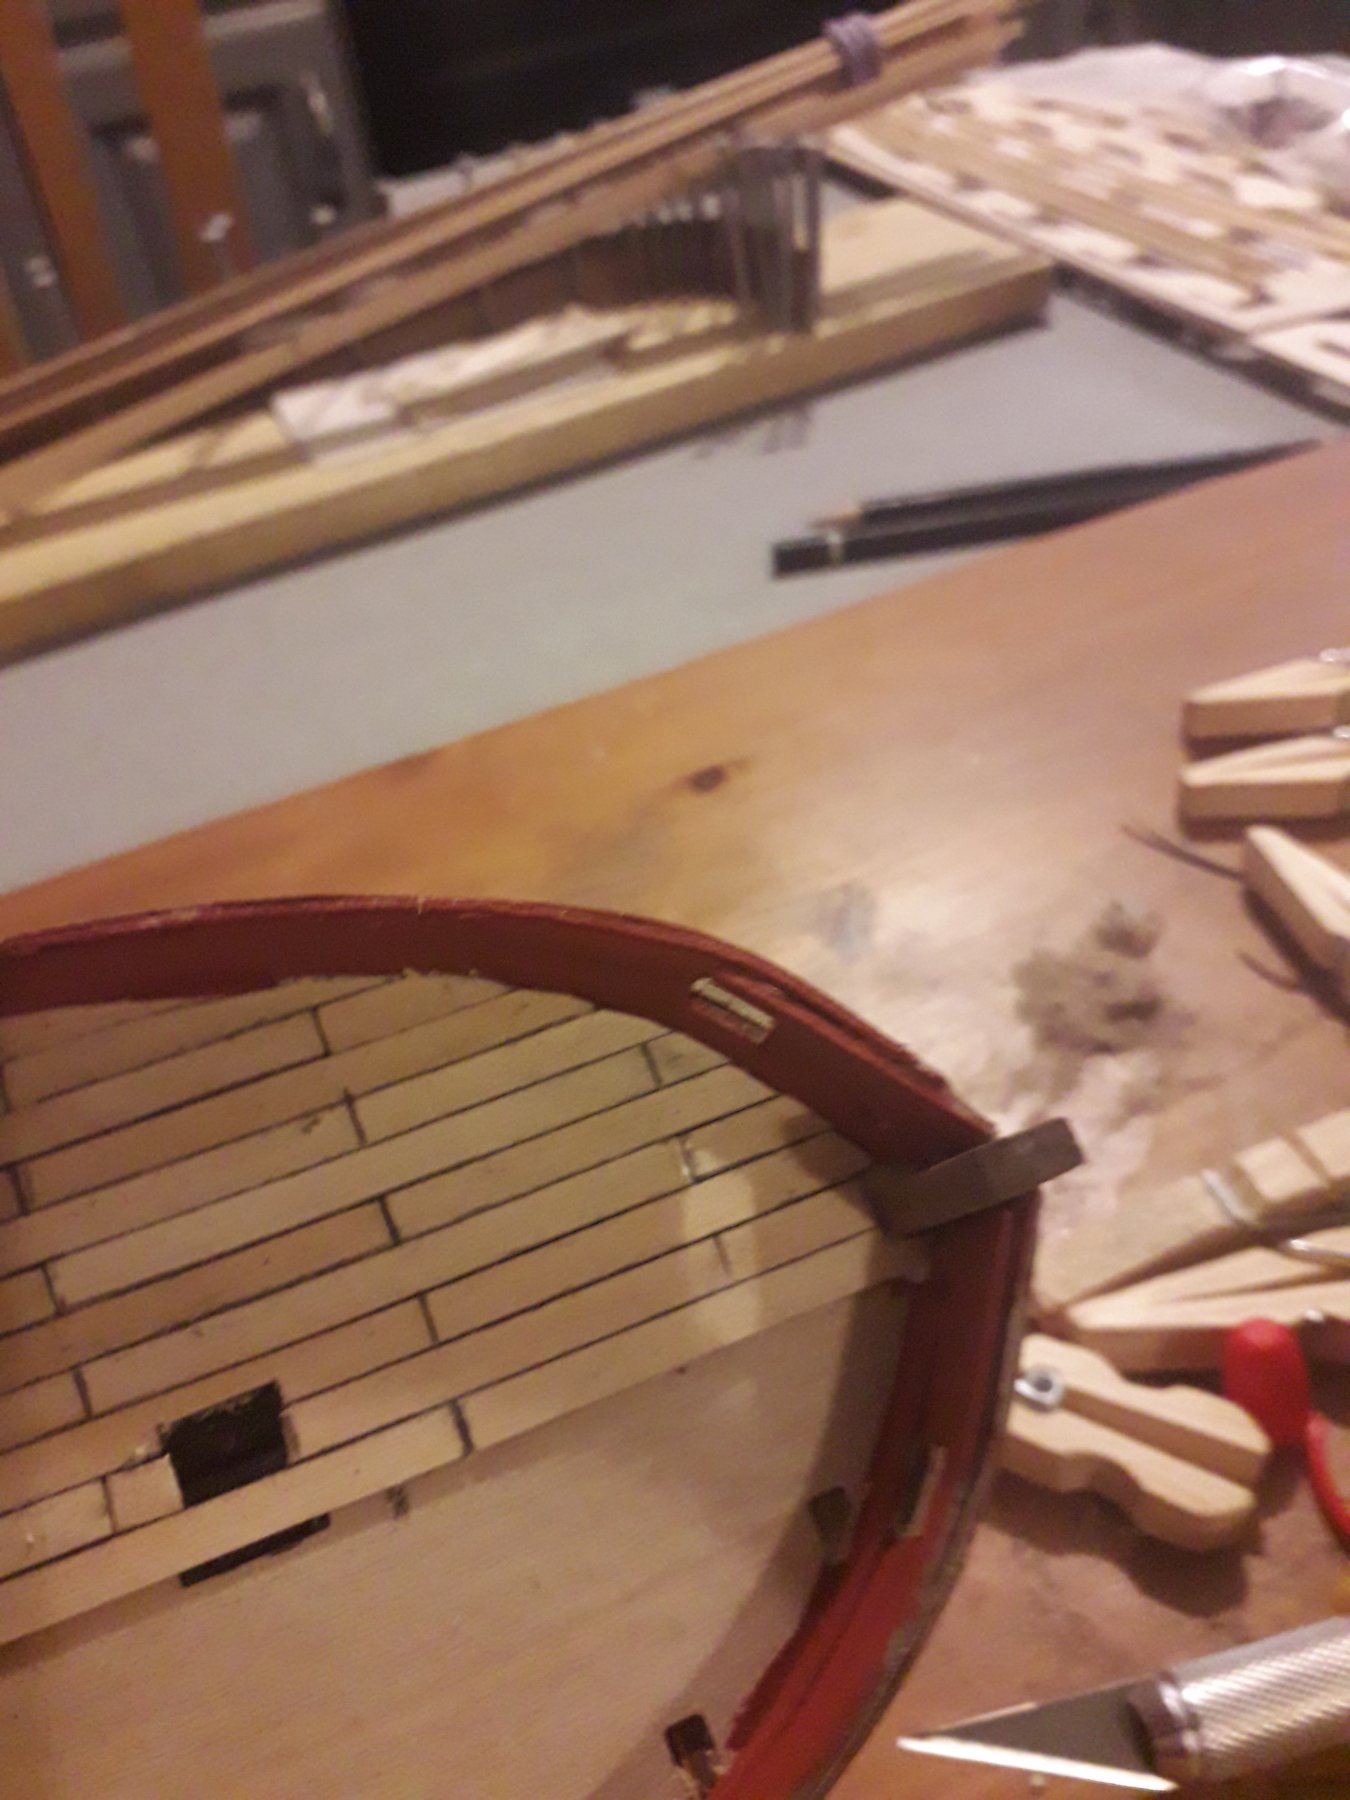
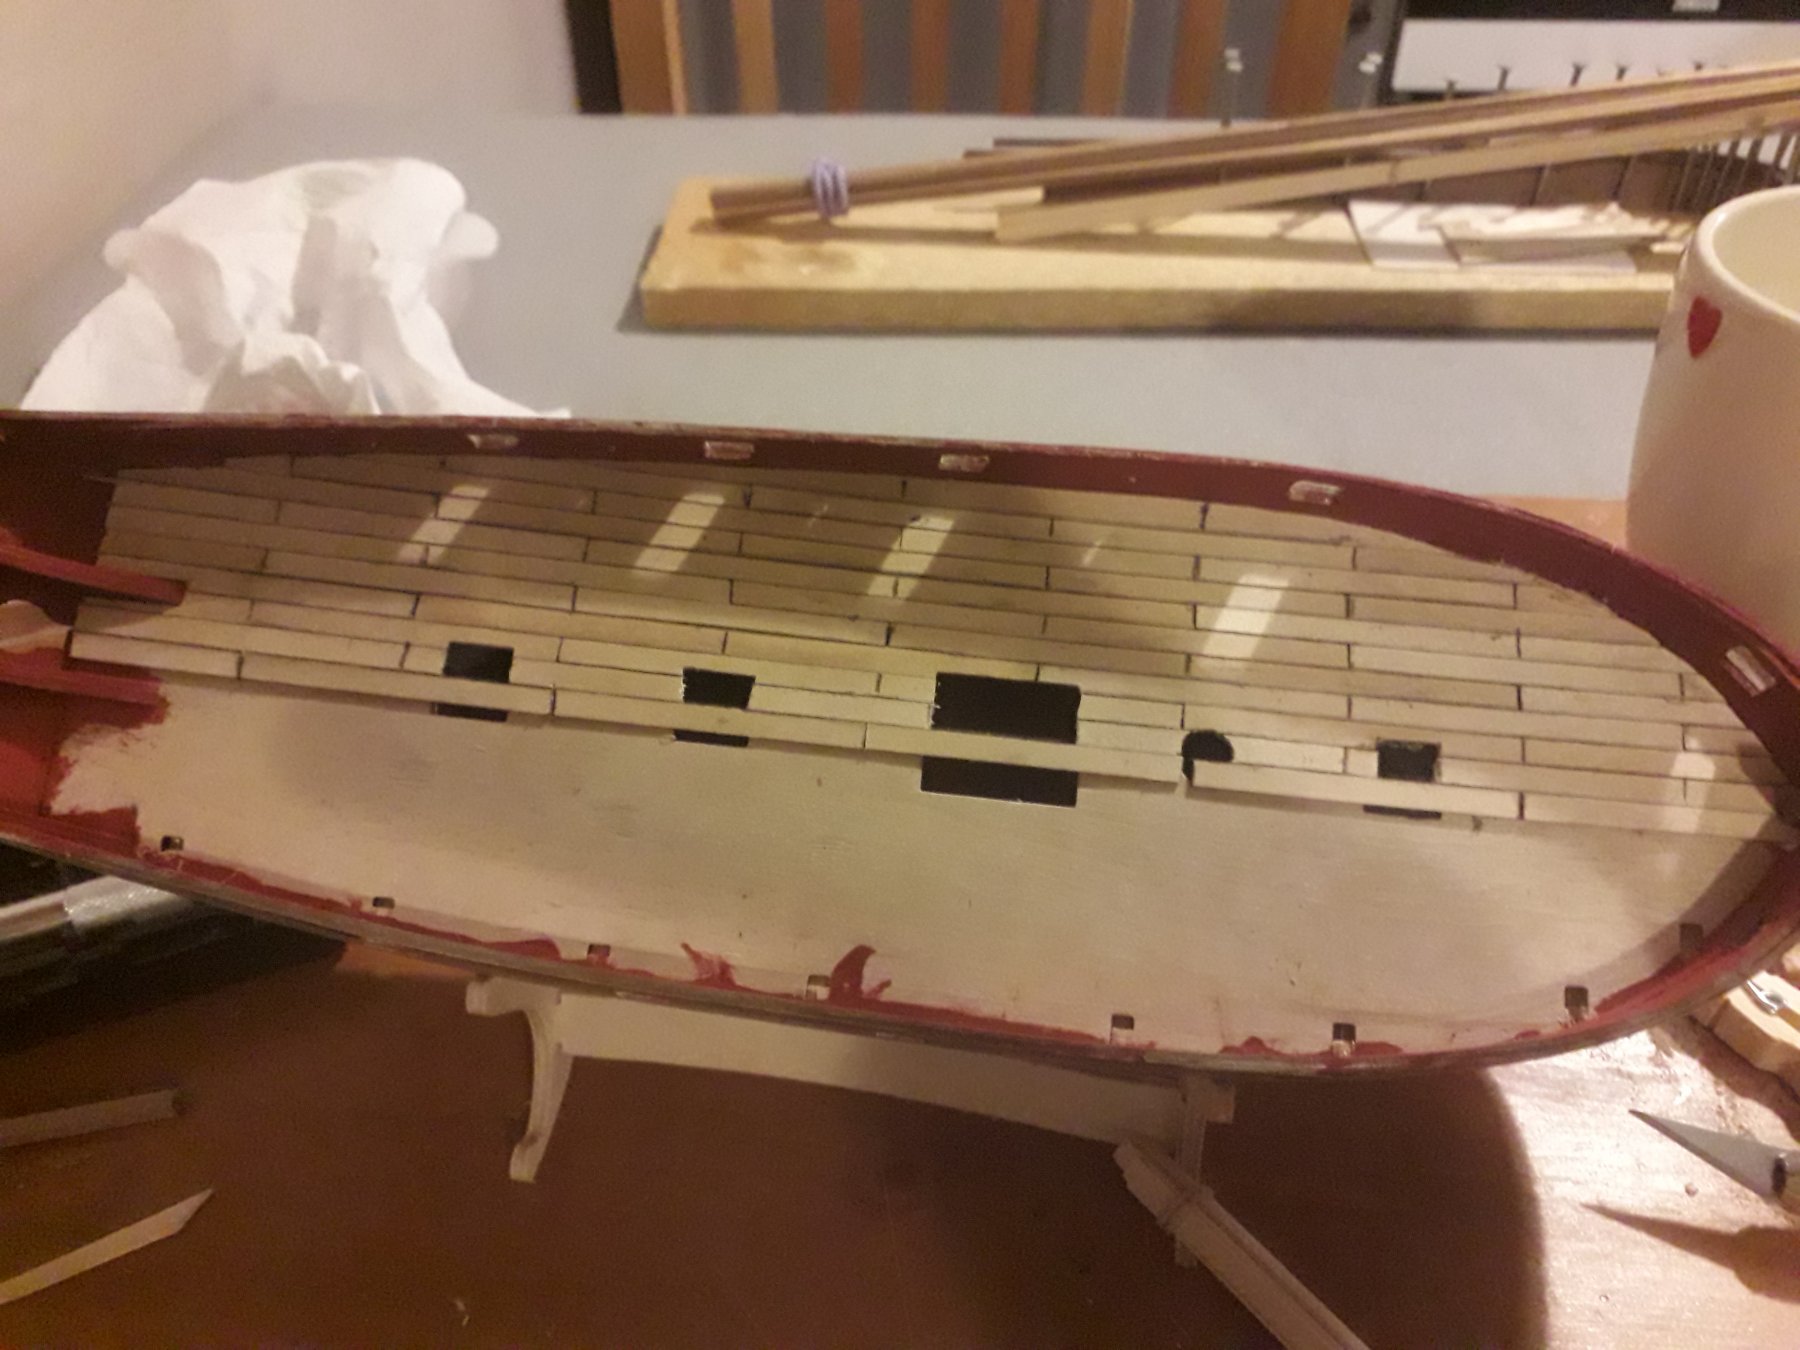
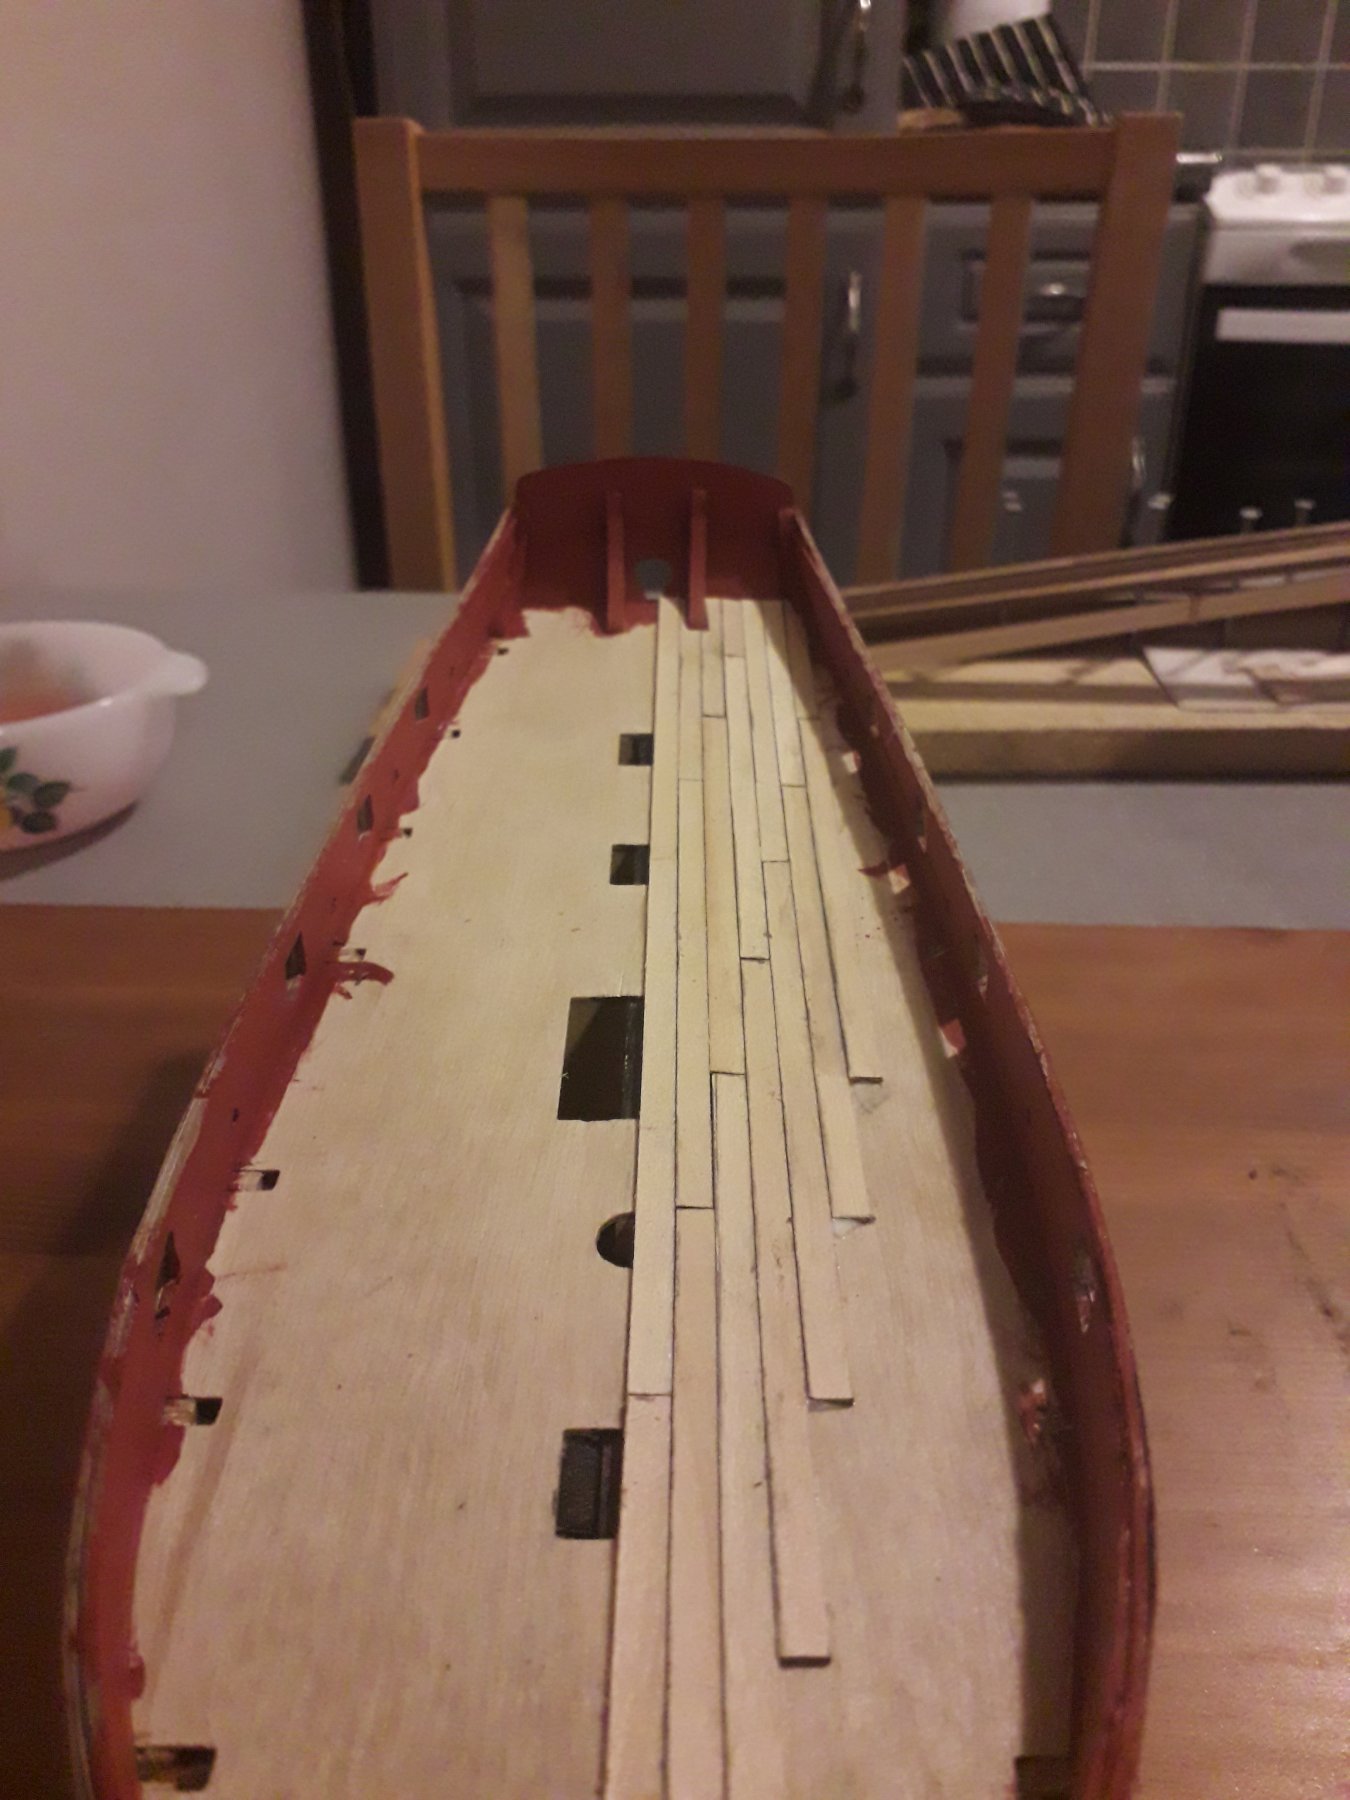
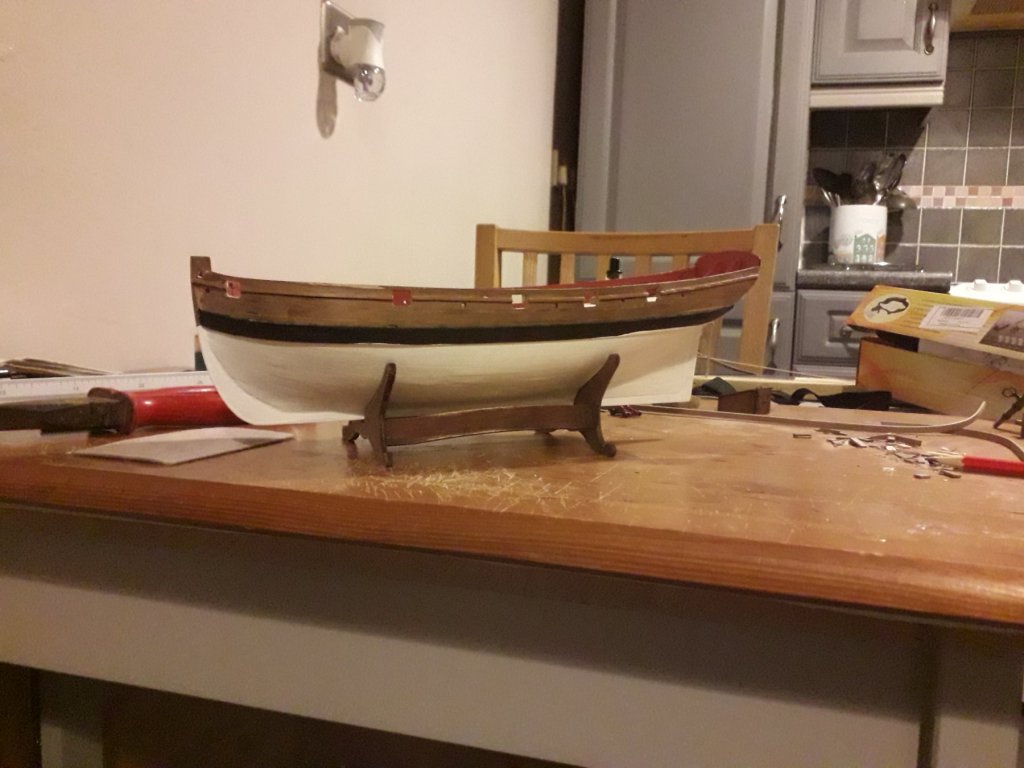
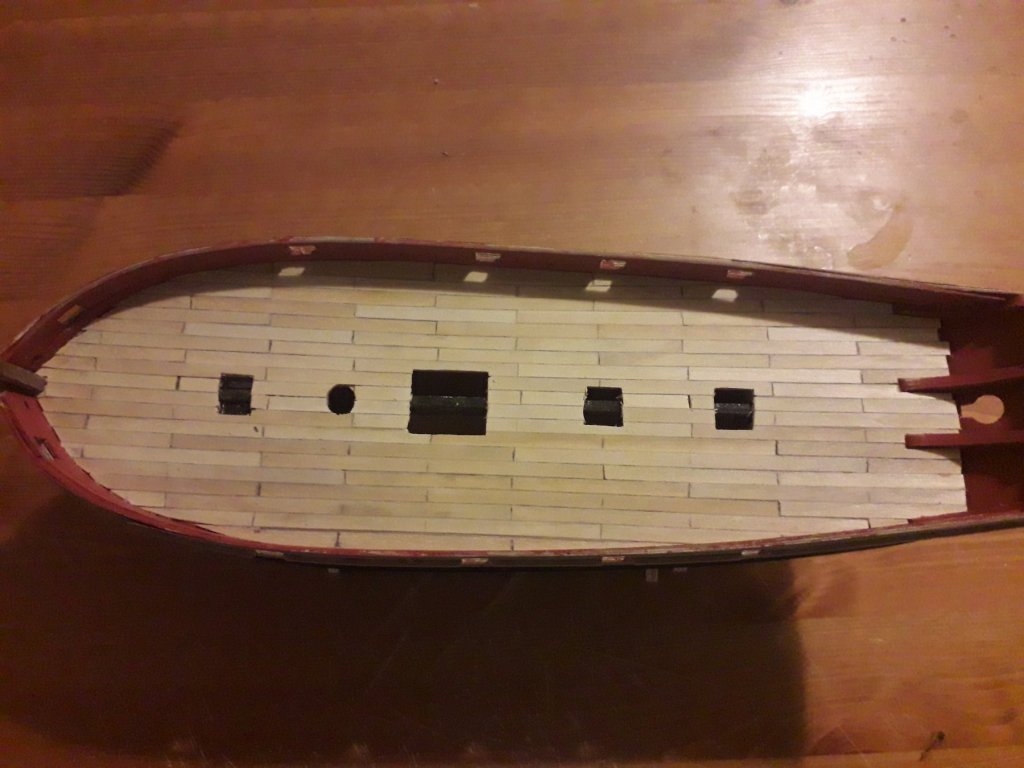
Well fathers day, my girls came round, grandkids with them, got the usual chocolate but then they gave me a jewellers lens head set, going to be perfect for all the small work and rigging. Ok so finished planking the deck, just need to sand it. I have decided not to do treenailing as I have got a few wavy butt joint runs. Fitted the wales and the gun wales, I think that what that strip between the gun ports are called?? Painted the wales before fitting and then again after sanding, I maybe will give another coat of paint. Next time I'm starting to do all the deck fittings. We'll see if my new glasses help at all 🤓
- 84 replies
-
- 4
-
-
- sherbourne
- caldercraft
- (and 2 more)
-
Thanks Russr. Tony I will probably use that method on my next build as for now I have scribed the planks to the bulwark. I kinda like it that way because it has grown on me with it being quite simple!! Thanks
- 84 replies
-
- 1
-
-
- sherbourne
- caldercraft
- (and 2 more)
-
The decking is started. I must admit I did want to edge it as Tony did his but not enough skill plus lack of a compass or dividers left me pulling what is left of my hair out!!😤
- 84 replies
-
- 6
-
-
- sherbourne
- caldercraft
- (and 2 more)
-
Hi Jörgen, I will definitely give treenailing some thought but for now I'm not going to do it Jon
- 84 replies
-
- 1
-
-
- sherbourne
- caldercraft
- (and 2 more)
-
Tony, Henrik The deck will be laid without treenailing, then I have the option to do it later if I change my mind. Thanks for your opinions
- 84 replies
-
- 2
-
-
- sherbourne
- caldercraft
- (and 2 more)