HOLIDAY DONATION DRIVE - SUPPORT MSW - DO YOUR PART TO KEEP THIS GREAT FORUM GOING! (Only 68 donations so far out of 49,000 members - Can we at least get 100? C'mon guys!)
×


Long9Ron
-
Posts
222 -
Joined
-
Last visited
Content Type
Profiles
Forums
Gallery
Events
Everything posted by Long9Ron
-
It's looking great Pete. Nice job
-
I was thinking of building myself a waterline marker and was wondering if any of our members had a good design that I might be able to follow in some way. I did a search on MSW and the web, but didn't come up with much. I would like to build one that is not mickey mouse, one that will last be for some time to come. So, if anyone has some pictures of their DIY waterline marker, could you please post them here. Thanks
-
Thanks Russ
-
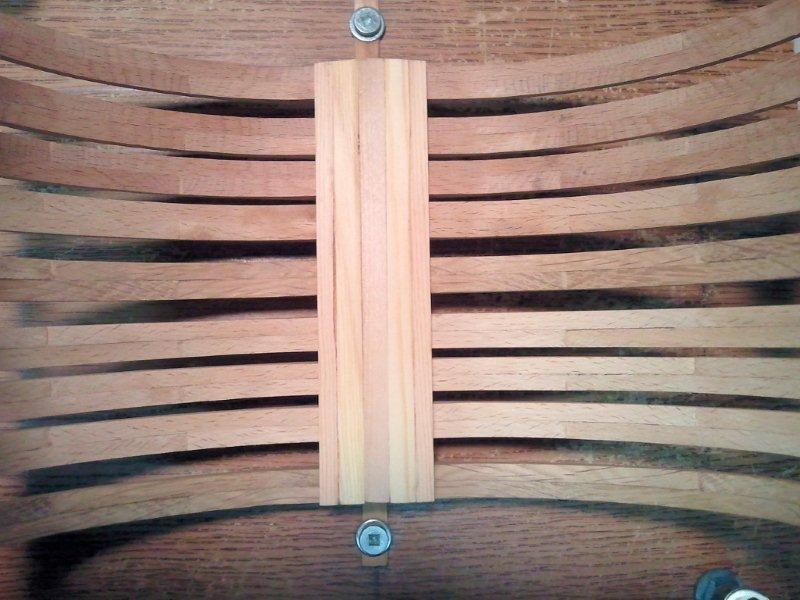
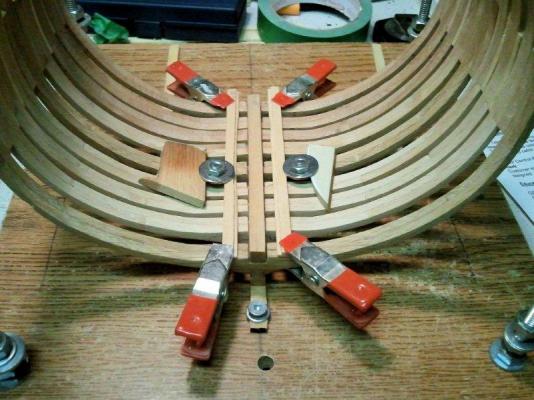
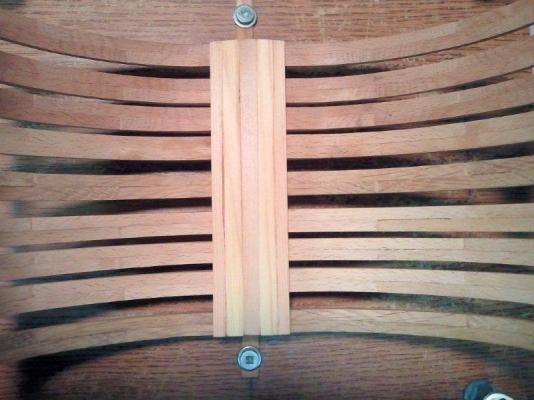
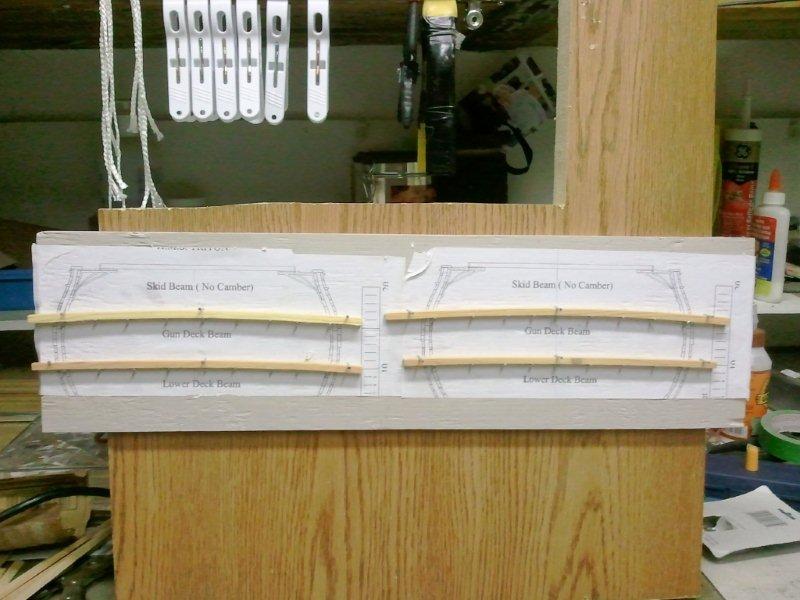
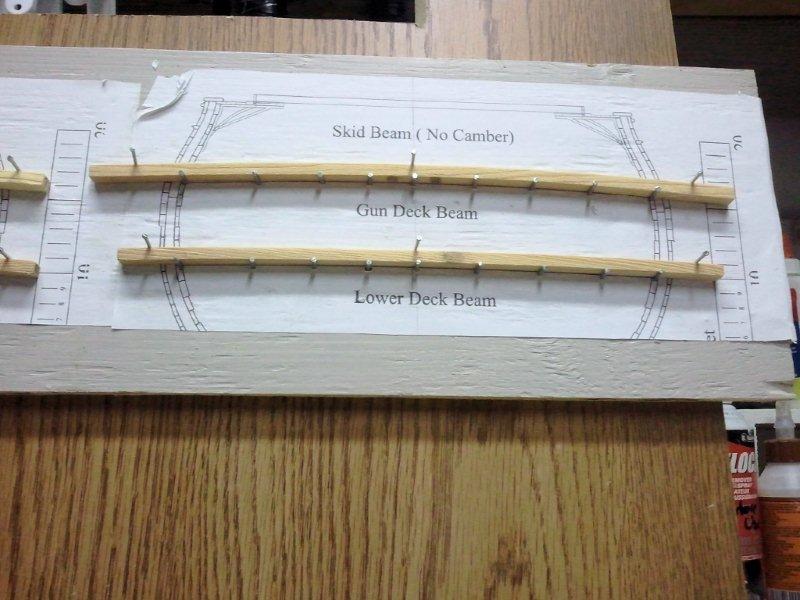
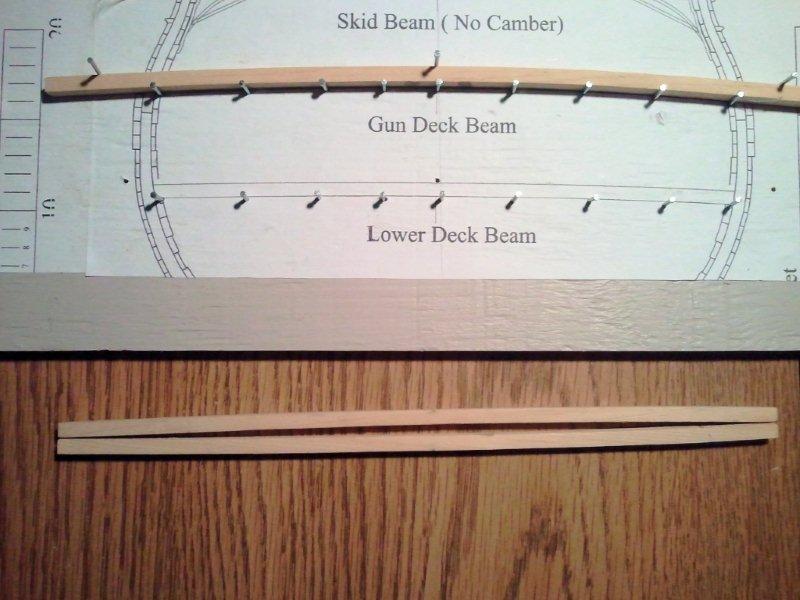
Mark Nice answer.. Grant I made the new limber boards and drilled holes every 5 feet and then sawed a line across them for drainage and handling. I think they will look okay. Next step is to apply Danish Oil to this point once I have masked the areas off that will require glue. Question: I have the Lower Beams ready with the right camber and was wondering if it is best to glue them in place first before cutting s the notches for the carlings or should I cut the notches first and then glue the beams into place?
-
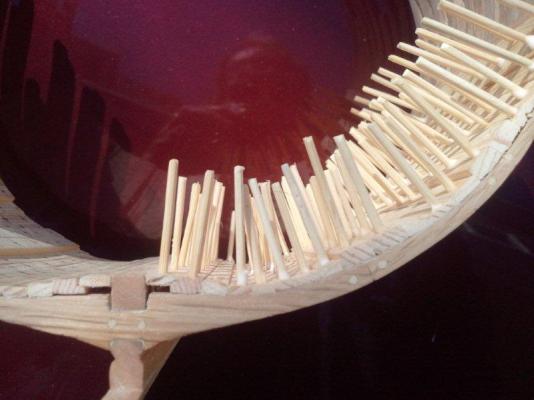
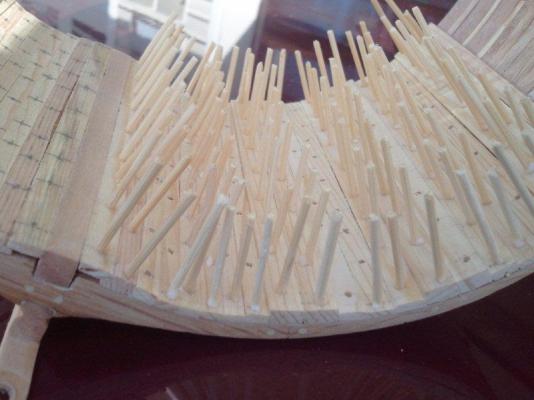
Thanks everyone on how to cut and sand. I first cut the toothpicks at the base and then I started to sand the them down by using my Dremel tool but quickly stopped as it was not the thing to do. I then did as Snowmans suggested I used a small block of wood wrapped with 150 grit and sanded each board. Slower process but it worked just fine. Learn as you go.. Mark I already had the treenails installed in the limber boards, so I used Isopropyl alcohol to loosen the wood glue and then removed them. I will be making new ones soon. But. thanks for the suggestion. Question: Do you think that when I make the new limber boards that I should make them to scale as you suggest (3 to 5 feet long) or just one single piece? All the ones that I have seen are one piece.
-
Grant Thanks for the comment on the limber boards. I didn't know that. I will try and repair that somehow. Also, I have about 360 treenails that I have to sand down flush. Do you know of a good procedure for doing that?
-
Thanks everyone. The neighbors are very nice. Also, gave me a table saw with a 1/2 hp motor and a 15 inch scroll saw. Now I have two scroll saws, in case one breaks down. I love it when they clean out the garage in the spring. Well back to cutting down my forest. Time to harvest.
-
Nice start Dr. Like Larry said. I too would be a basket case cutting that. But, no waste right. I gave myself a little more room to do the cuttings.
-
It's looking great Pete. Very good idea on the frame jig. As I mentioned before, I didn't do that procedure and I am regretting that now. My frames are not aligned properly and I have been having to work around it. I sure wish I did it your way.
-
Larry Your Cross Section is looking great. That's a lot of treenails, eh. Eh, is because I'm from Canada Eh. I like the color of the outer planking.
-
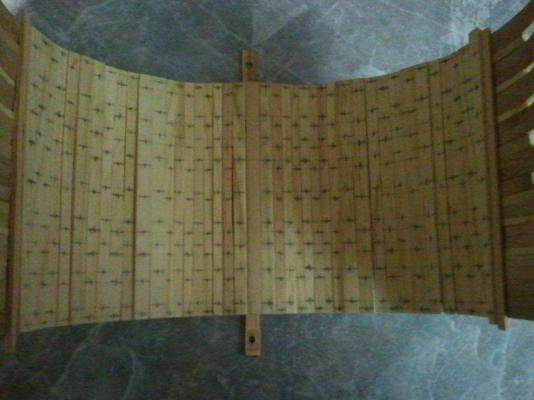
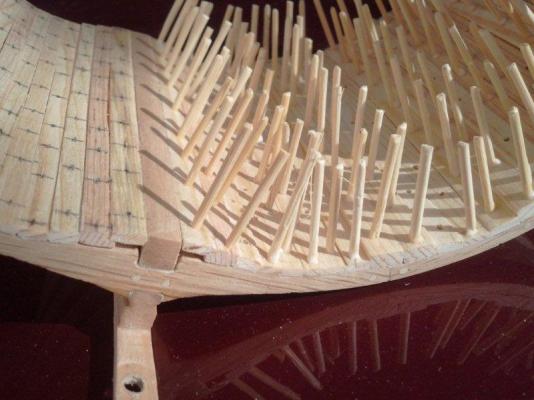
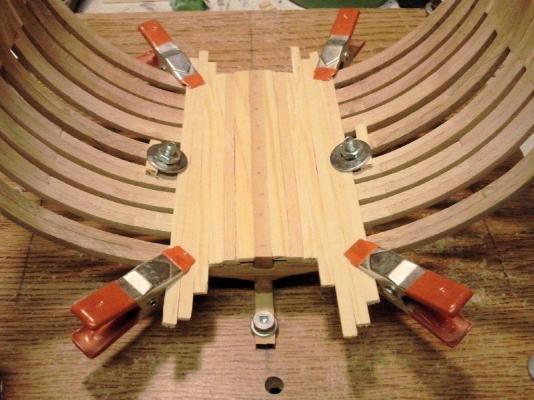
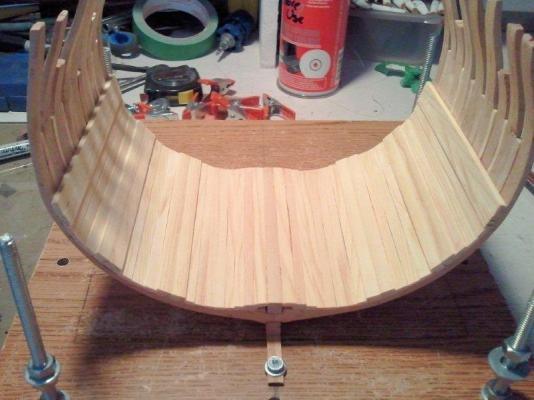
Checked on the second batch of bending the beams. They turned out okay. Meanwhile, marked the treenails holes (360 holes). Drilled 180 holes by hand and installed natural colored toothpicks in most of the holes. Toothpick forest. I'm almost halfway on the treenails... Will be installing toothpicks for a while and then sanding them all down flush. Will take a while. Found out that my frames are made of Oak and the planking is Douglas Fir. The wood was from an old recliner that was taken apart. Meanwhile, my neighbor has given me some solid maple and some nice looking Yellow Cedar. He says that I can get all the wood off of him for free, he is a cabinet maker. Cool. I like saving money.
-
It's looking great Snowmans. I like the natural look. Good choice on the oil. Did you do any experiments with Tung Oil or just the Danish?
-
Making gratings
Long9Ron replied to marius's topic in Discussion for a Ship's Deck Furniture, Guns, boats and other Fittings
Marius You might want to check this site out. http://gabierschimeriques.free.fr/modelisme/caillebotis.htm -
Nice work Snowmans I just marked off the planking for the treenails also. Wow, that's about 360 holes to drill... That's a lot of toothpick sharpening.
-
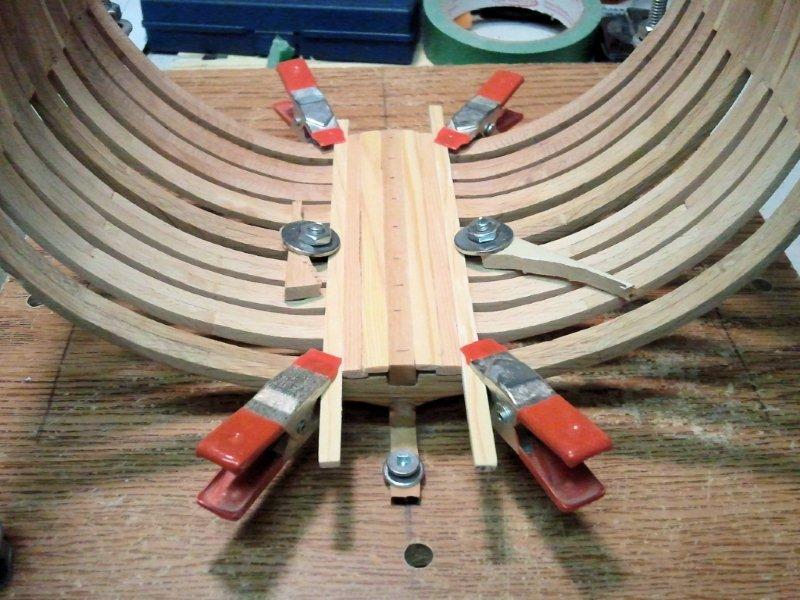
Just a note: I had to re-soak my second batch of beams because when I set them up I allowed for a little over bending and when they dried they didn't dry to the proper camber of the beam. So, I'm trying it again just with the proper camber only. The first batch came out just fine.
-
Very nice Pete. Frames are looking very good.
-
Paddy Your build is off to a great start. Very nice cut.
-
Marius Yes, nice looking frame jig. That's one thing that I didn't do. Wish I had. Your build is looking great. Looking forward to seeing more.
-
Thank you everyone for your kind words. I have learned from my mistakes and the mistakes of others. I will most likely make more along the way, but oh well, that's the learning process and that's how I will end up making a better model next time. Right? So, when I get my corrections done, I will post some more pictures.
-
Thanks for the kind words Pete and Paddy. I believe that my build will be a build for other ship modelers to learn --- WHAT NOT TO DO ---- I have done some planking and it will be a while before I will be doing any beam work. I will be doing some treenails first among other things. But, meanwhile I have found that when I temporarily laid the beams across for the lower deck to see how everything lined up, I noticed that one corner was higher than the other three. Oops I contribute this to my making of bad frames and rushing the job. . I considered starting all over, but have decided against it due to the fact that this is my first build in 50 years and I will be able to correct this by adjusting one of the planks. Also, after I have finished the model, it will be a reminder to me of the things that can go wrong unless you take the time to think things through. Lesson # 2 Think twice before doing anything. Lesson # 3 Follow the plans closely and anticipate what is ahead. Anyway, A few pictures of what I have to this point. No pictures of the beams out of alignment because I'm in the process of correcting the mistake (or covering up my mistake).


-
Pete Your build is looking great.
-
Yes very nice frames Marius. Just make sure when you mount them that you line them up with a very good jig. Otherwise you might be out a bit like I was on my frames and now I have to make an adjustment to correct it. My frames were not that great because I rushed the job and was not paying attention to the future alignment of the planking and beams. But, that's another story.
-
Well the beams bent ok, let them dry for a few days. I can see a little mold spot on one of the lower beams.
-
Same here as 42rocker said , only one picture on the first page.
-
Bob Welcome aboard the Triton Cross Section build. Hope you have fun with it.