HOLIDAY DONATION DRIVE - SUPPORT MSW - DO YOUR PART TO KEEP THIS GREAT FORUM GOING! (Only 13 donations so far - C'mon guys!)
×

.jpeg.7d7eba14c97a2e1d9f79cd2c97f6424a.jpeg)
EricWilliamMarshall
-
Posts
986 -
Joined
-
Last visited
Content Type
Profiles
Forums
Gallery
Events
Everything posted by EricWilliamMarshall
-
.thumb.jpeg.fc5d633a7b34428fcf19419a73d56d55.jpeg) Apparently I forgot to add a pic of the ‘finished’ product!
Apparently I forgot to add a pic of the ‘finished’ product!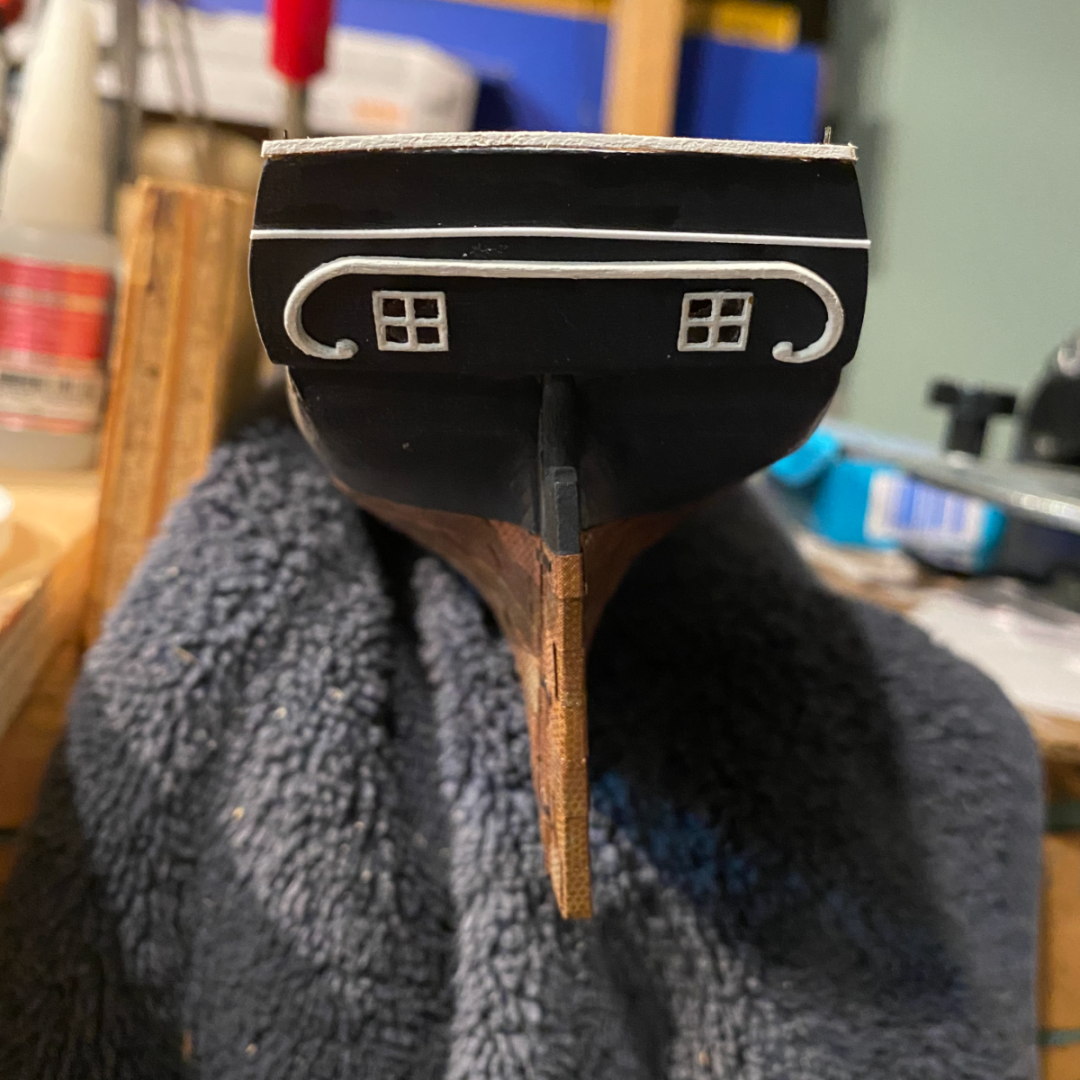
-
Amazon sells mica sheets, so the post will delivery some in due course. As always, thanks for the ‘likes’ and sage advice as always!
-
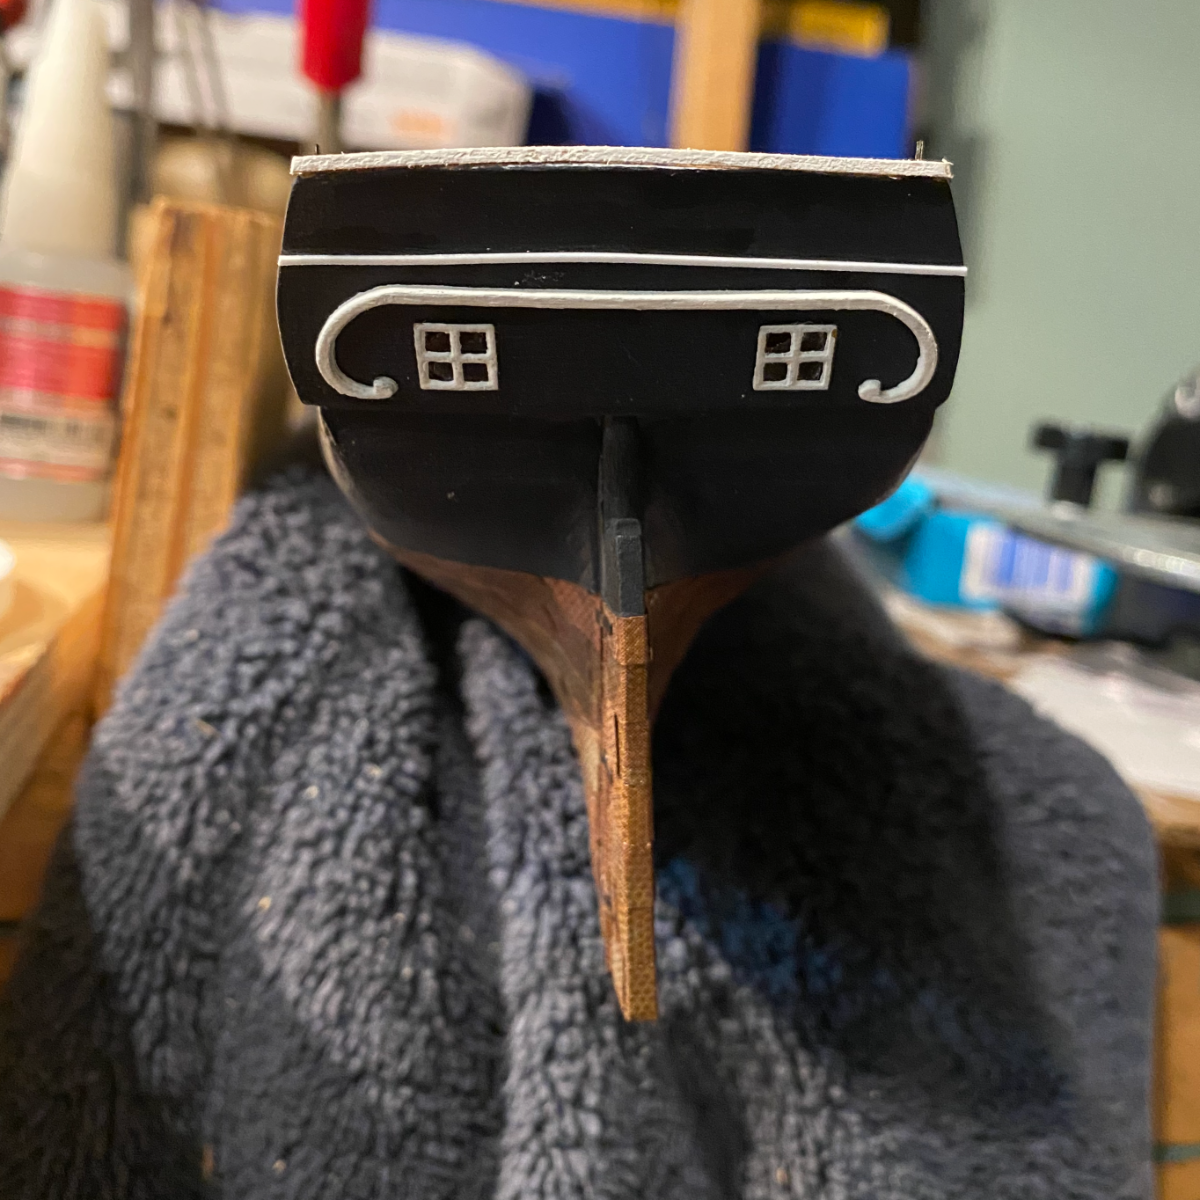
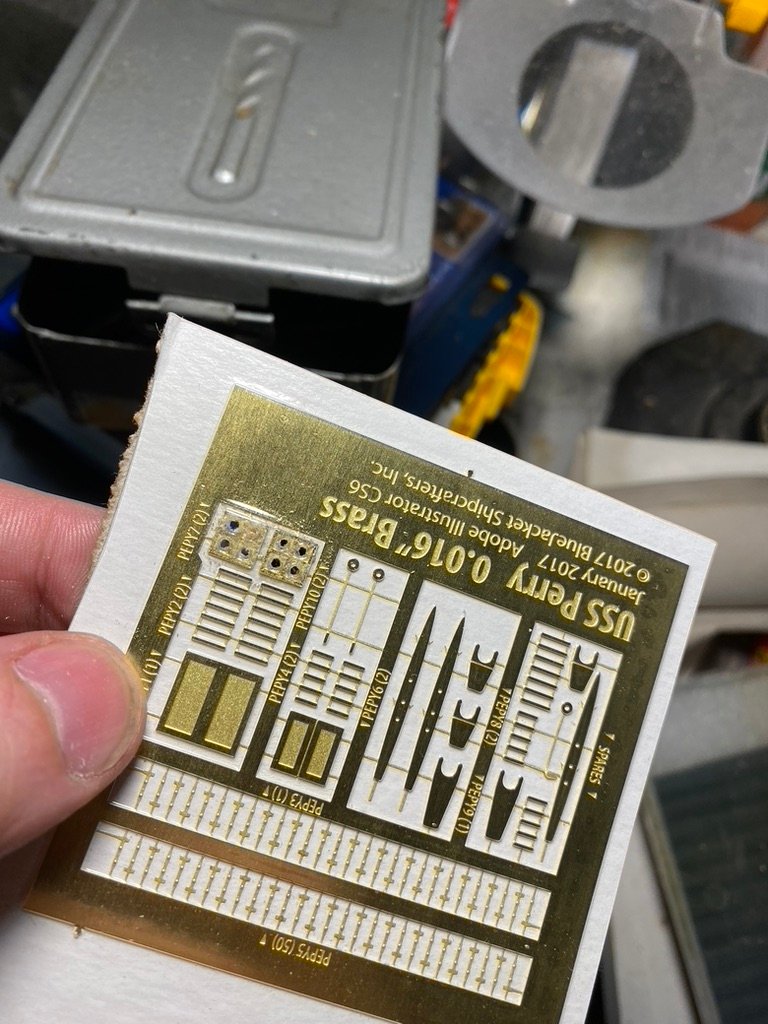
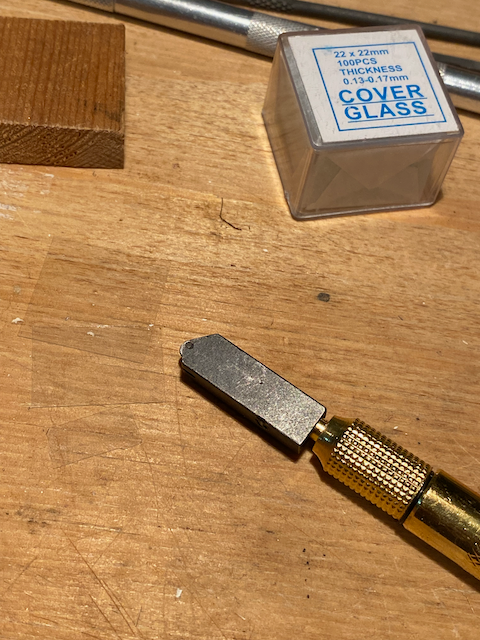
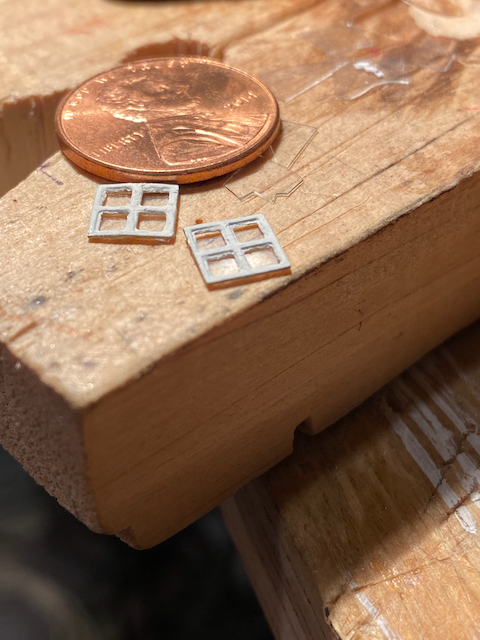
This kit has brass etched windows. I didn't like the look of thses 'solid' windows (which most folks paint blue) so I drilled out the solid part and then tried to file the edges. I don't have files small enough to work those surfaces. Larger ones mangled and bent the brass. I then spent way too much time trying to cut glass of the windows. It turns out that a regular glass cutter works best. I used glass slide slips/covers as my glass source. The first cut would go well (after a bit of initial practice). The second cut is always very difficult. Very taxing of what little patience I have. I'm not sure if I would recommend this path for everyone but it isn't an expensive detour but merely tricky detour.
-
No worries; this is a hobby not a job. And, yes, we are fine seeing more frames. It is much easier to watch than do.
-
Cheers to solid foundations! I wish you peace and while nothing is perfect, I hope your work on the Tennessee provides a slight respite.
-
How goes it?
-
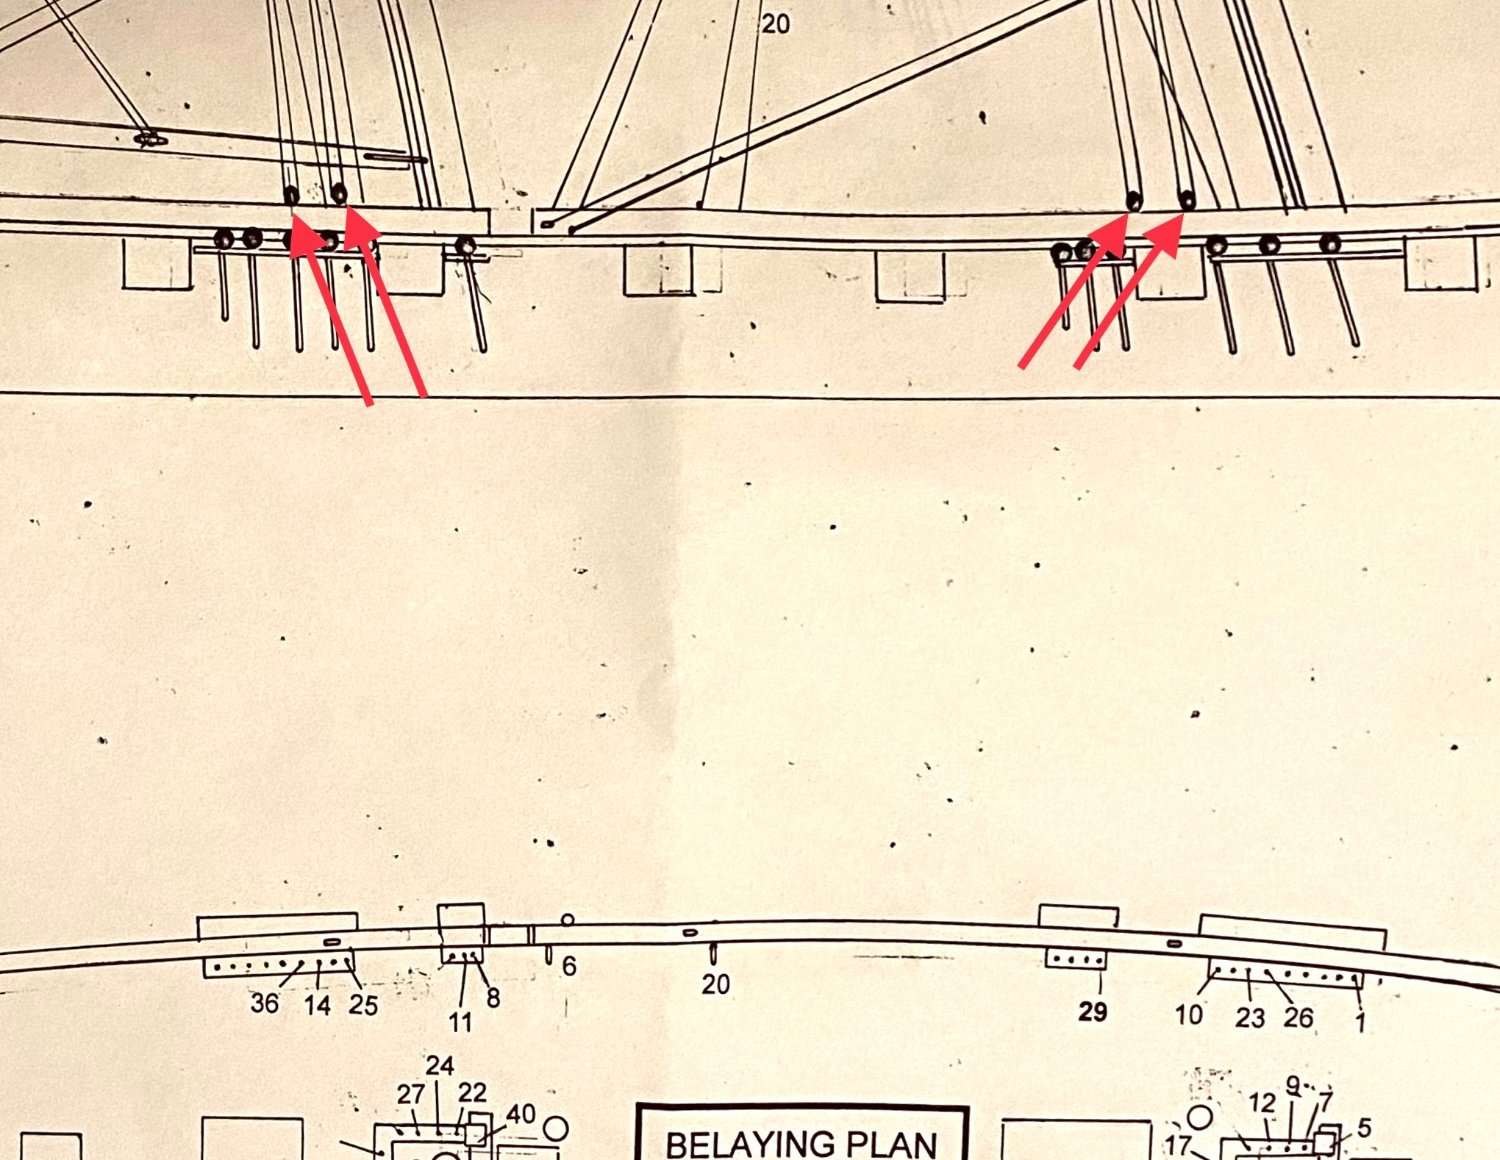
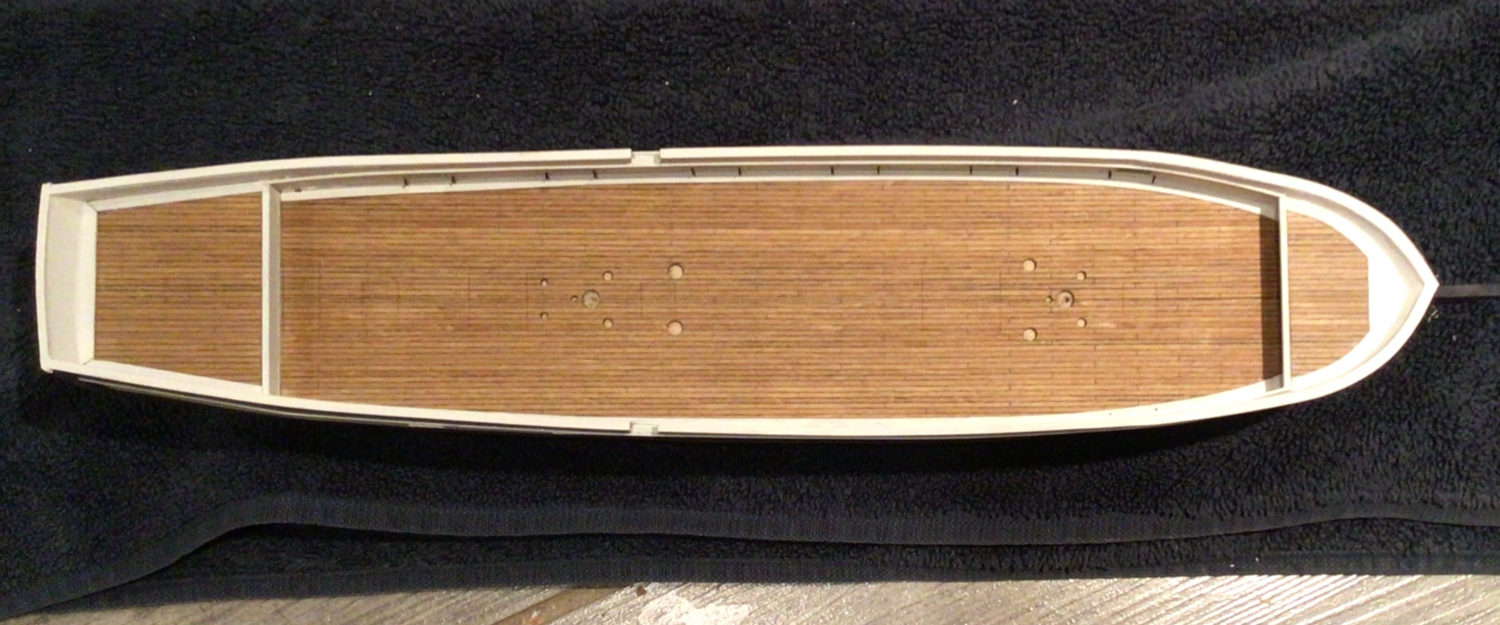
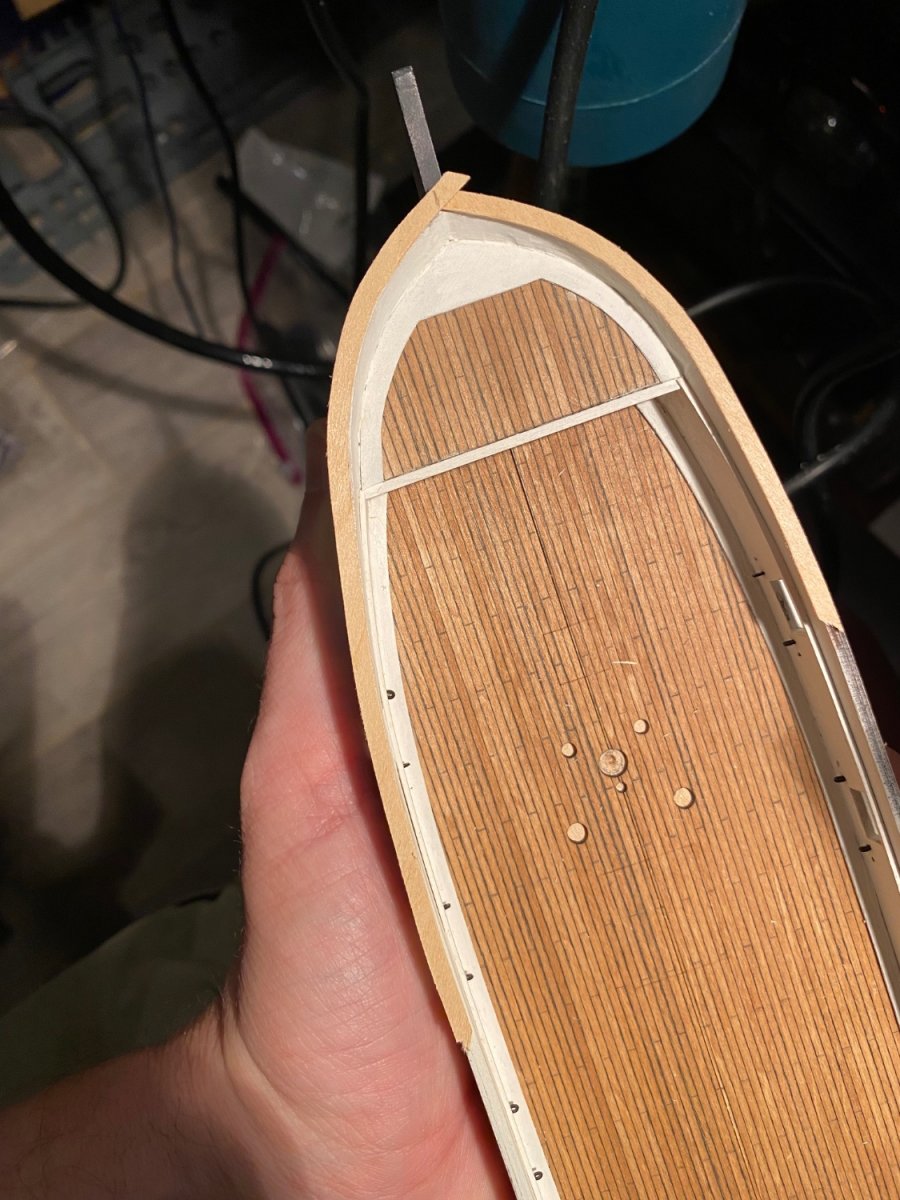
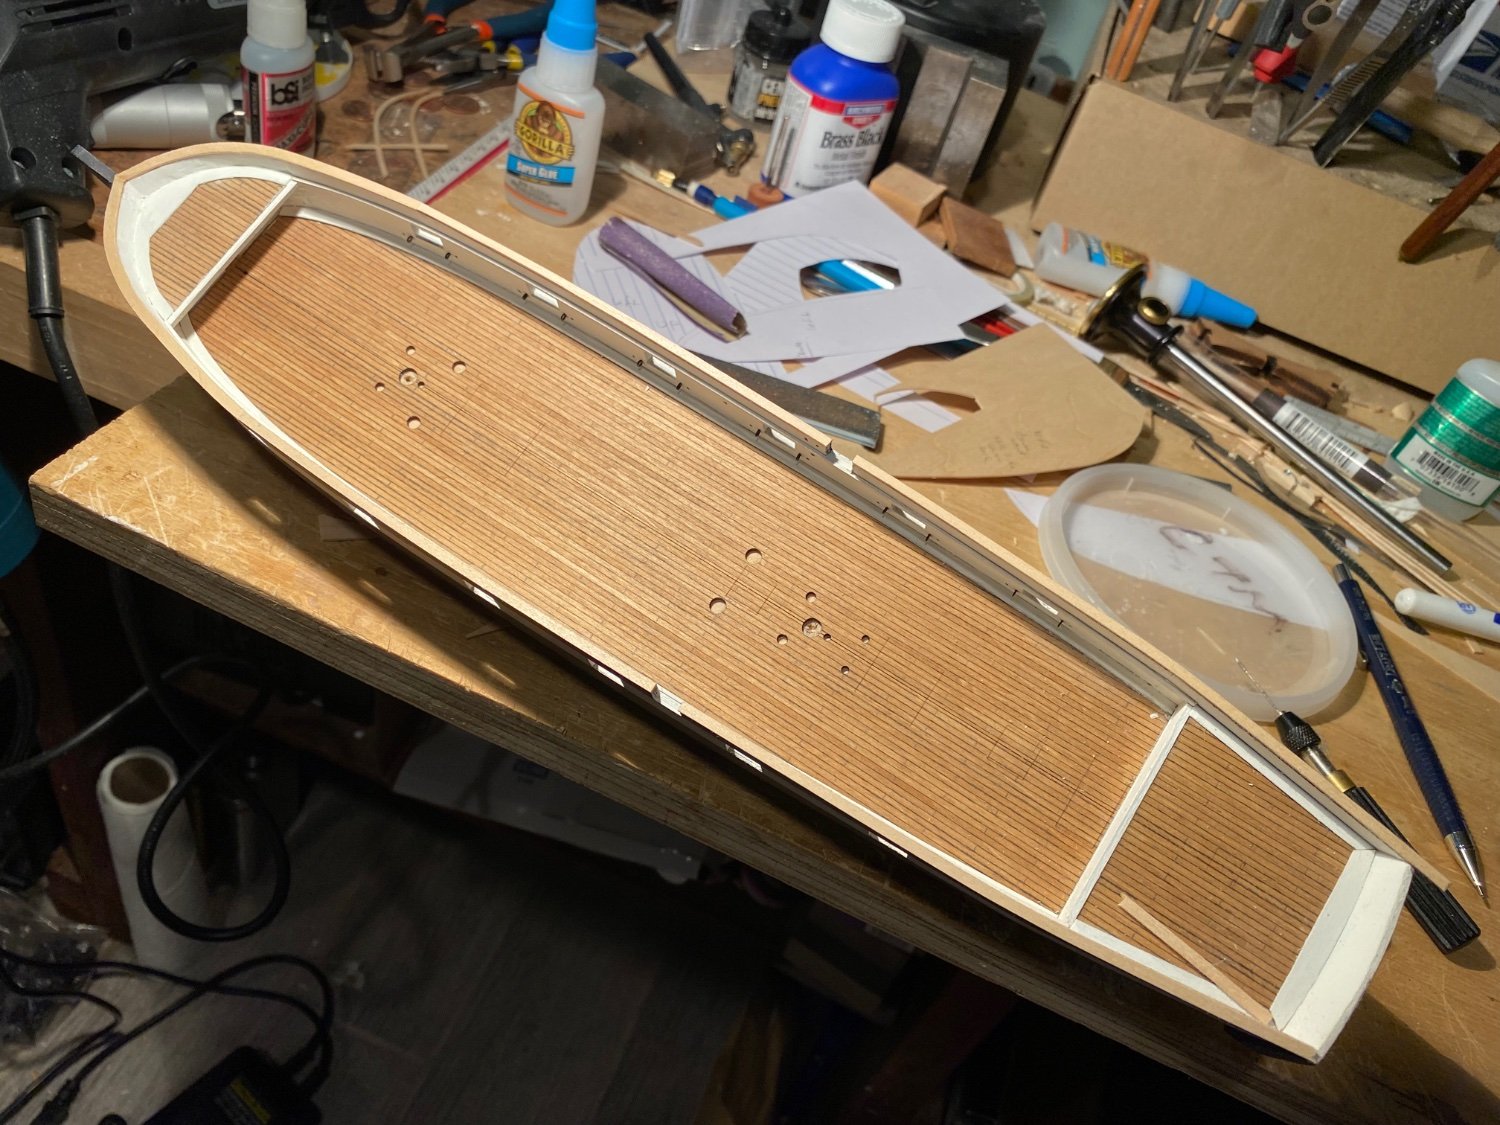
A bit of tail chasing as I tried to decode the instructions and redo some work. I foolishly spent an afternoon trying to look up brace holes (main and fore) in my little library to no avail. I will also note that the overhead view of the ship doesn’t show eight “blocks on the cap rail caps” but the side view implies eight, so I went with eight. Little by little.
-
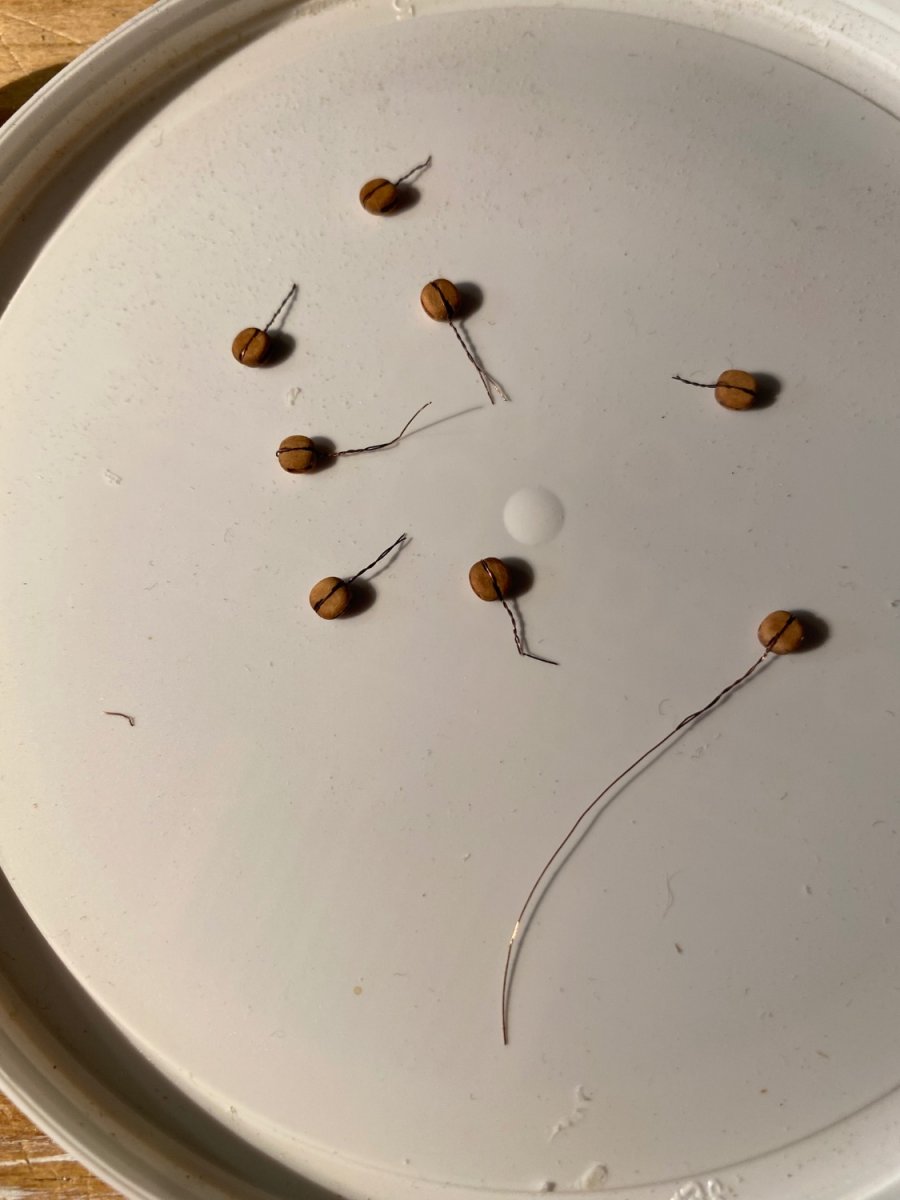
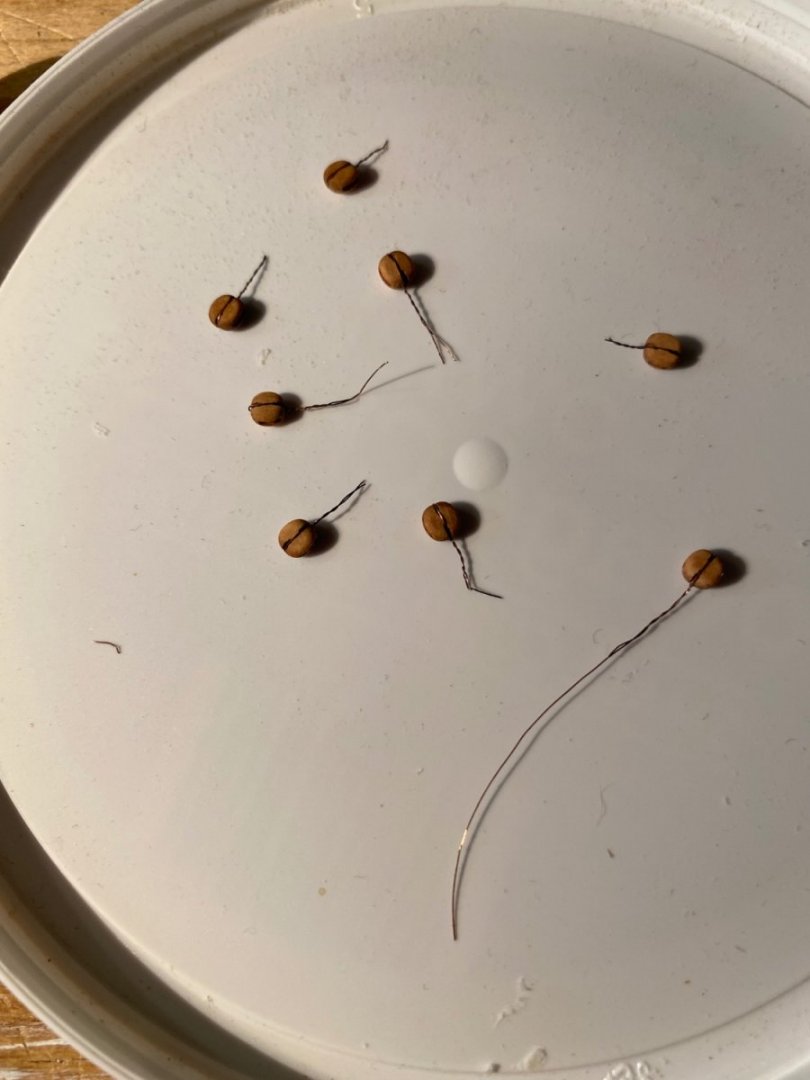
A quick bit of dye for the delivered blocks.
-
Thanks for the kind words and the advice!
-
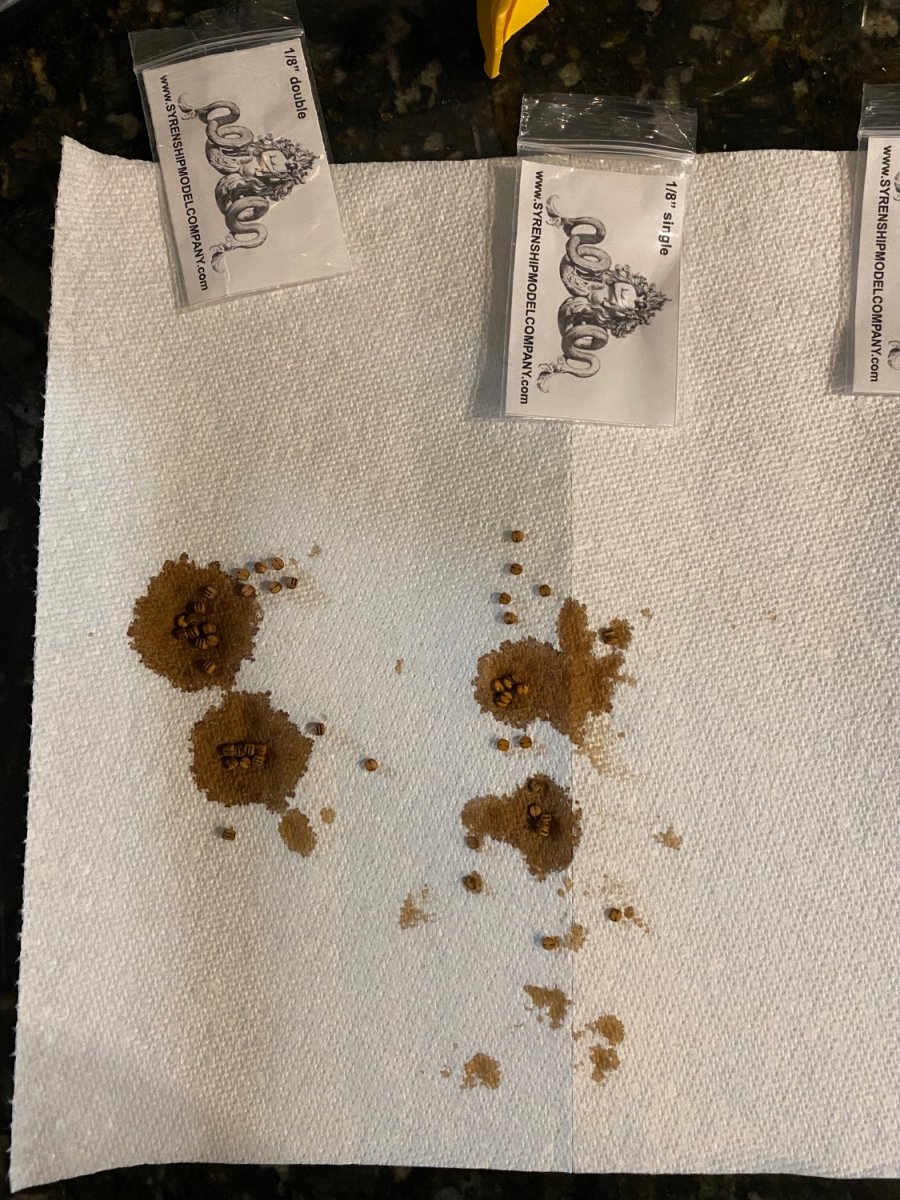
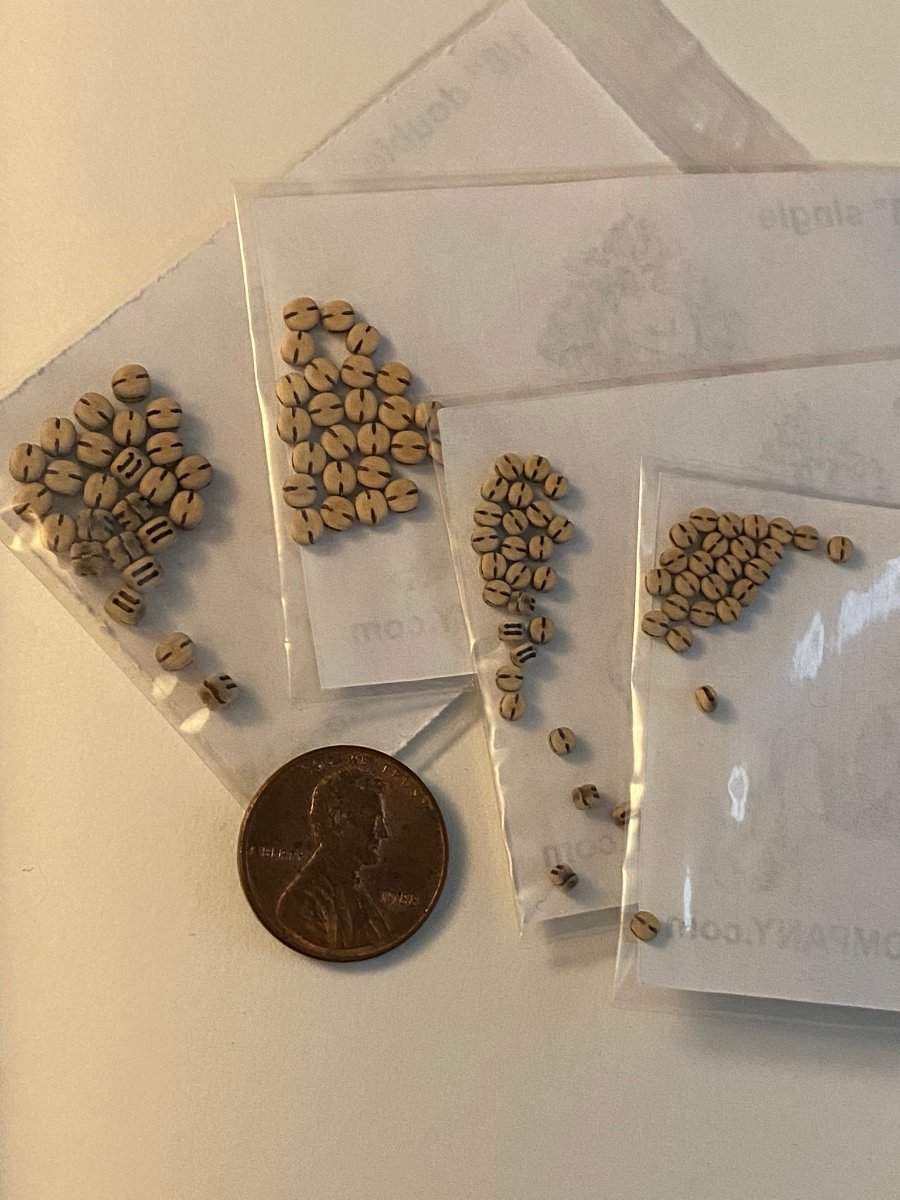
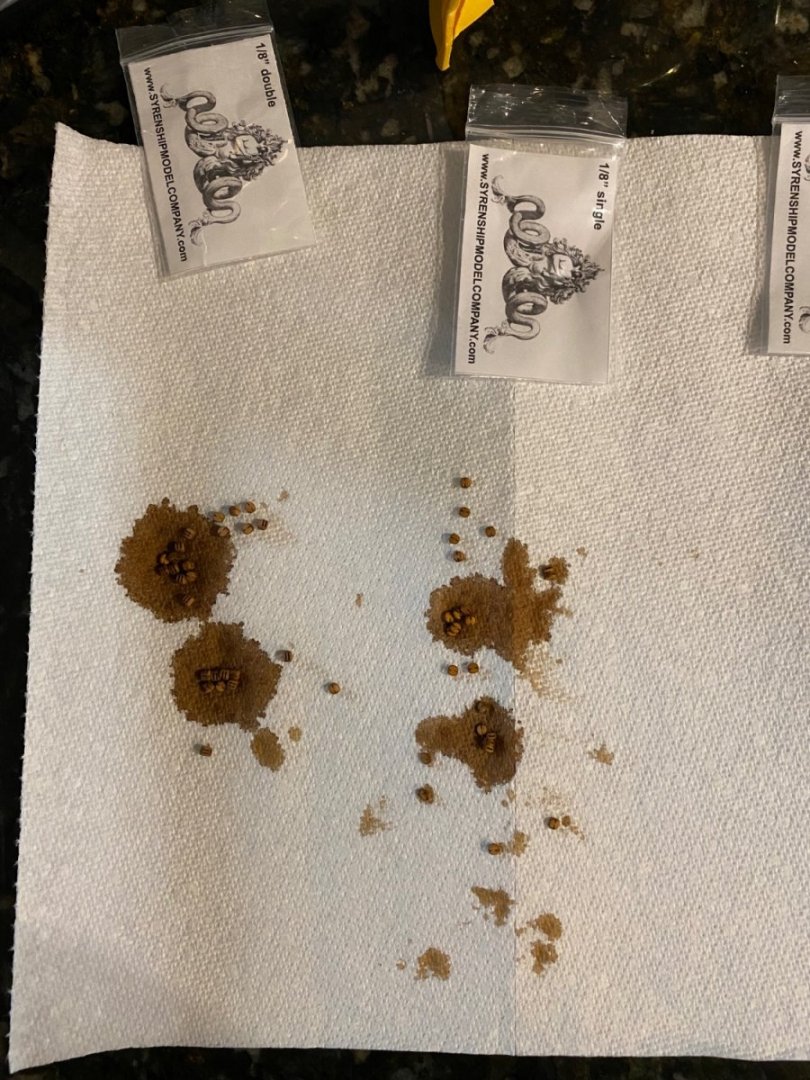
I would like to tip the hat to @Chuck Passaro at Syren Ship Model Company again for the quality of his products as well as his speed!! I ordered Monday evening (5:55 pm) and I have the blocks in my hands as of 1pm on Thursday! Thanks again!! The blocks that come with the kit are beautiful but made of metal. They are heavy and I'm tad worried about the tension needed to keep the lines looking 'natural' (yes, a load word if ever there was one). Since I had issues with my number of previous builds, I thought it prudent to check my options before commiting all in.

-
I’m back to decoding the instructions after a long hiatus due copper plates. I assume “Mark the location of the blocks on the cap rail caps.” refers to these:

-
No worries - this is a hobby not a job! Thanks for the update!
- 51 replies
-
- 1
-

-
- Model Shipways
- Baltimore Clipper
- (and 1 more)
-
Well done so far!!
-
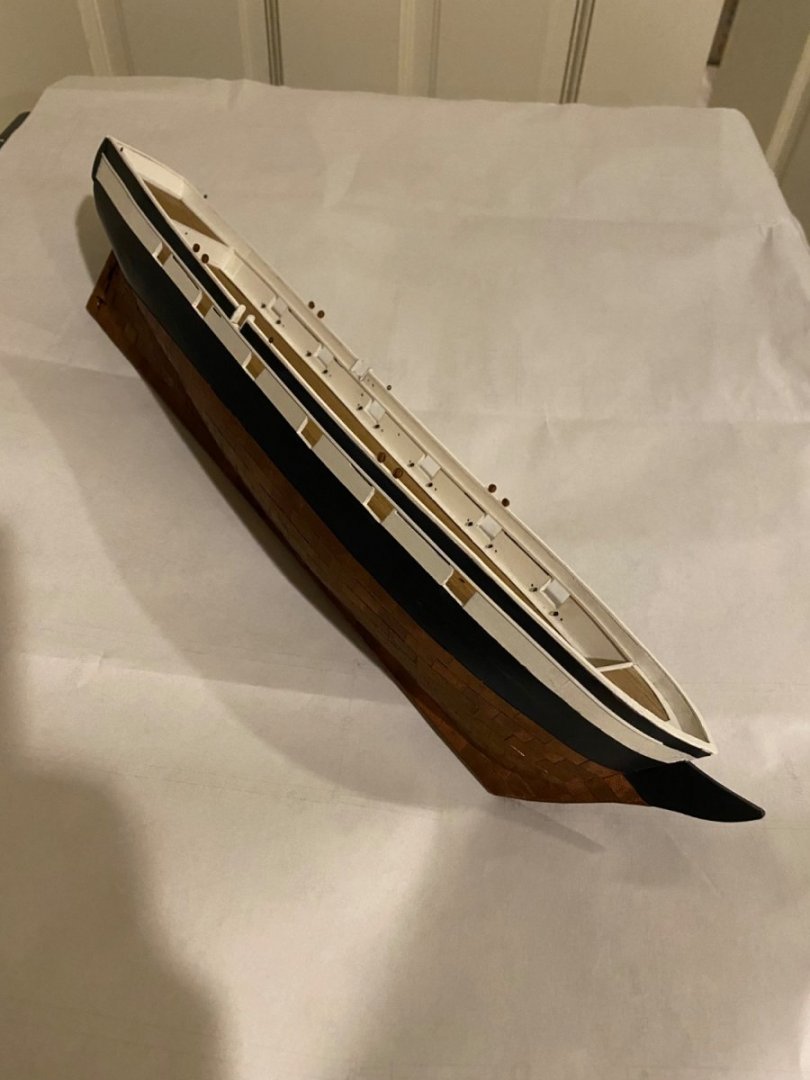
I believe I used 1/32 x 3/16. It doesn't run as long as the others. I found that I'm not picky regarding the brand of glue, but I found that thicker 'gap-filling' glue works best for me. I use a pin mounted in a pin vise to apply it from a drop or two on some plastic recycling (yogurt lids in my case). No complaints! I'm happy with the techniques and the overall look of the model. In hindsight, I wish the planking was cleaning and the carvings thinner, but nothing to lose sleep over.
- 123 replies
-
- 2
-
-
- Model Shipways
- Pinnace
- (and 1 more)
-
How's the build going?
-
Adding rails. The pre-cut shapes don’t match my curves, so I’ve cut some new ones. The tolerances for the strip wood are very close and I suggest any proceeding as per the instructions, make sure that the rail is exactly placed. I should have painted it before applying as well.


-
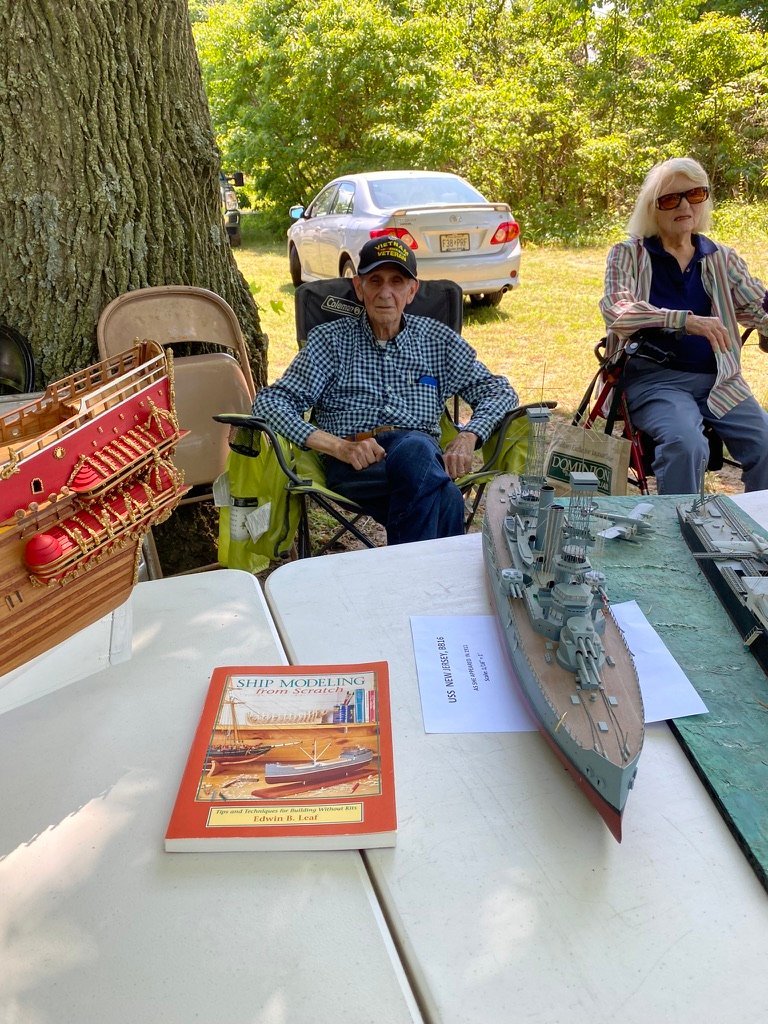
I displayed my humble efforts at the Pennsville Township Historical Society's outdoor event. I was luckily enough to meet Edwin Leaf, author of Ship Modeling from Scratch! (Seen here with his model of the USS New Jersey.)
-
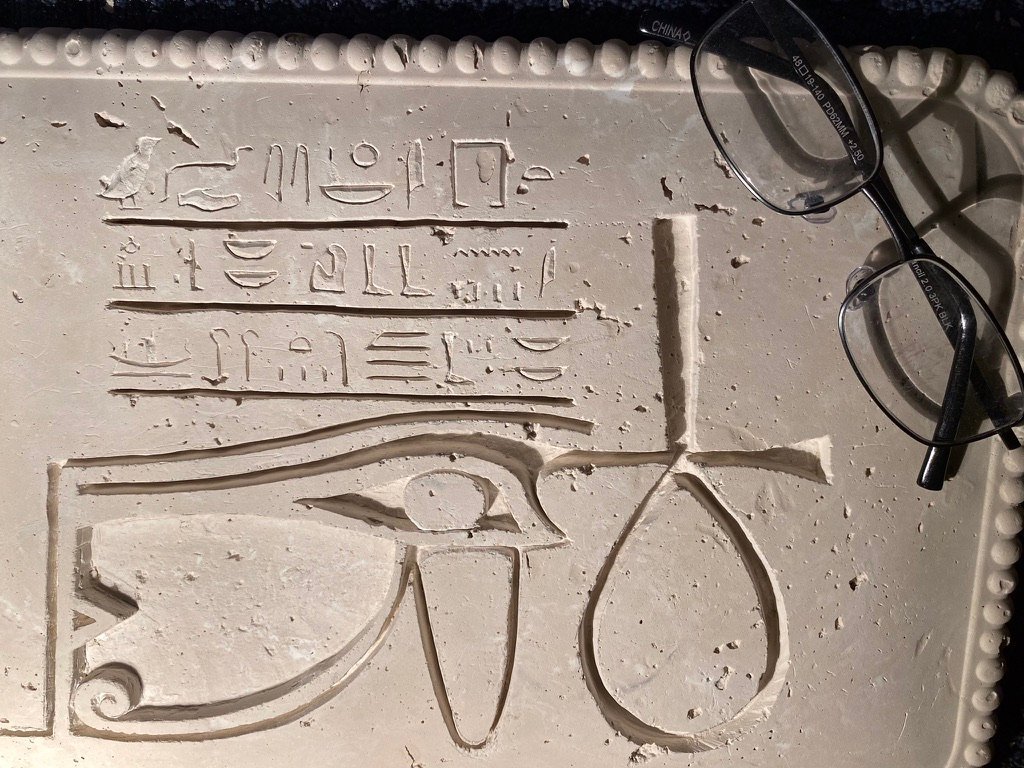
I finished a theatrical prop for Call of Cthulhu made of plaster of Paris. A material surprising easy to work with.
-
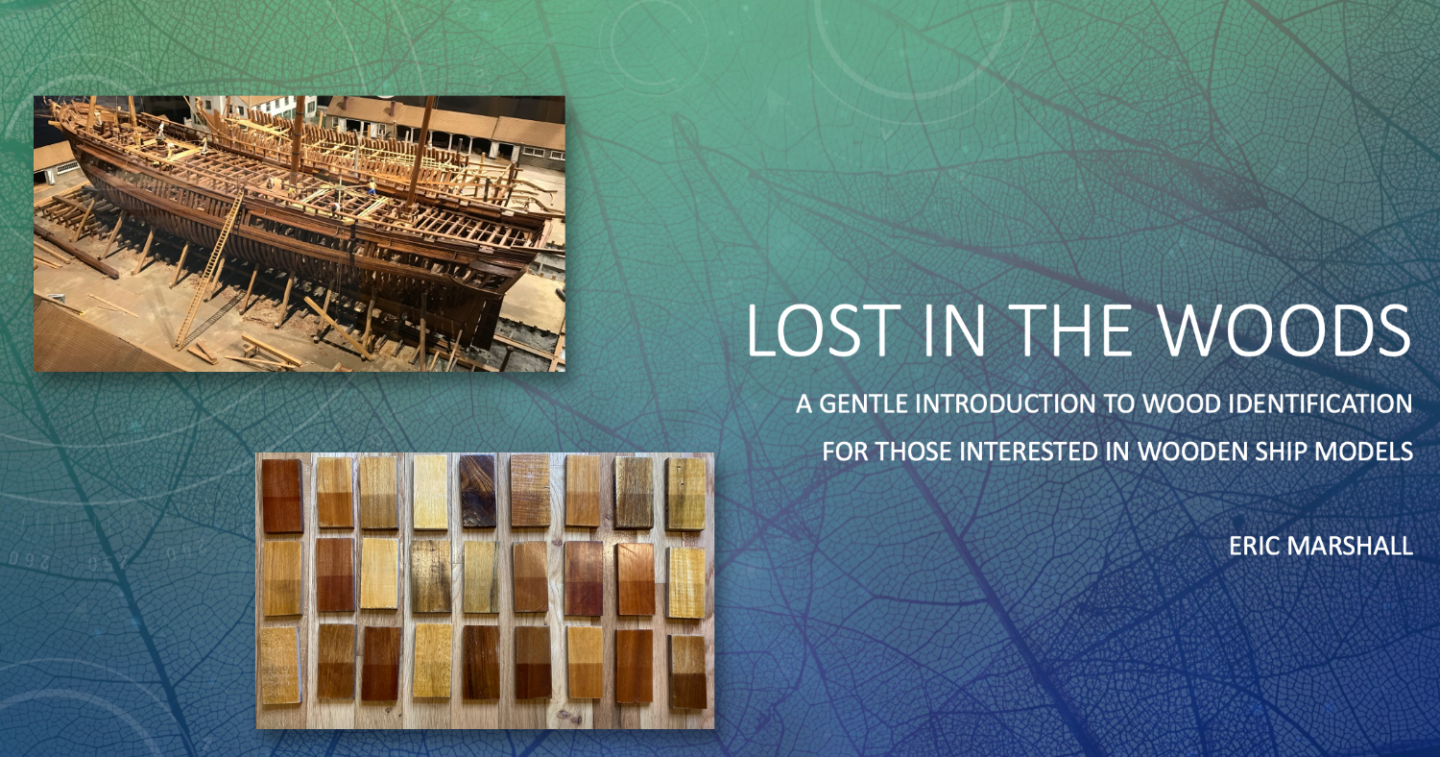
Attached is a pdf of a presentation I gave recently at the Ship Model Society of New Jersey about wood. Lost_in_the_woods-EricMarshall_Apr2022.pdf
-
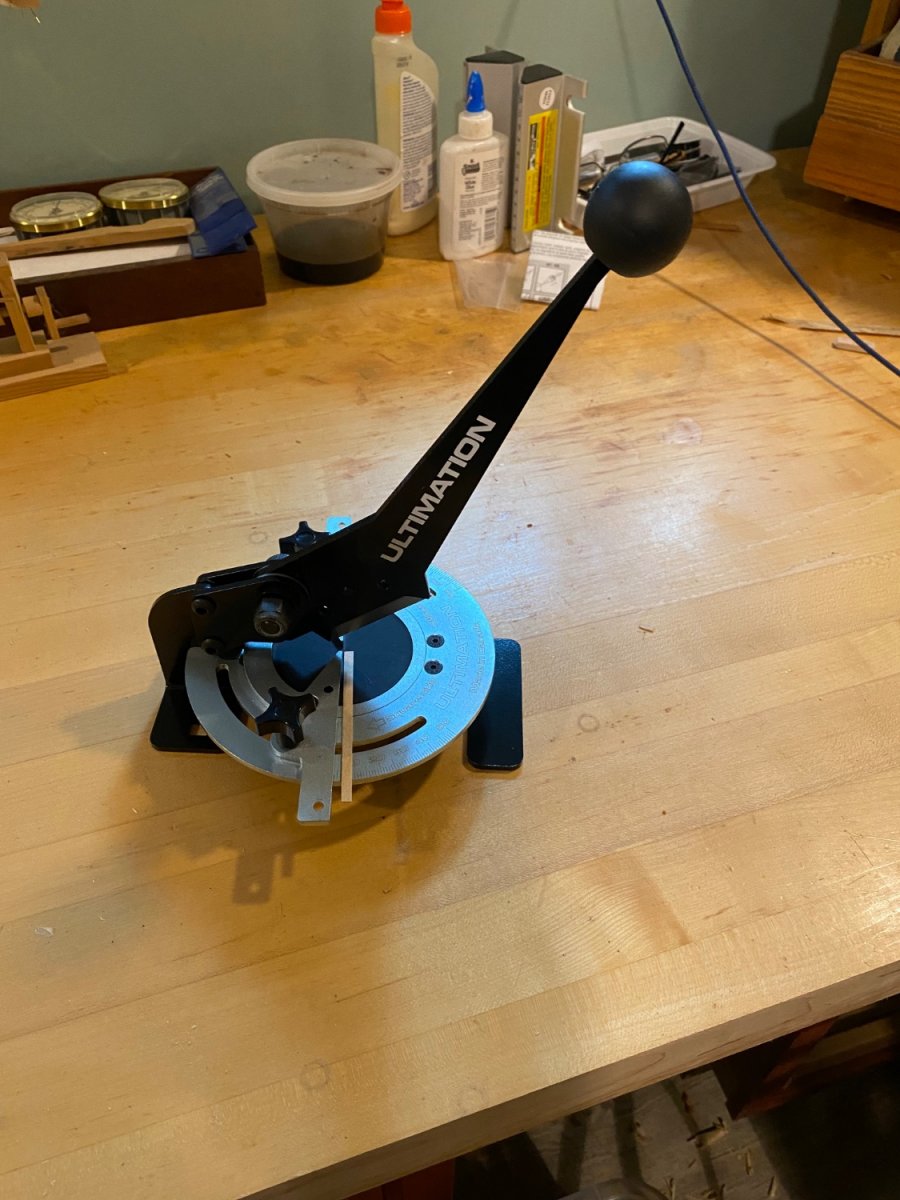
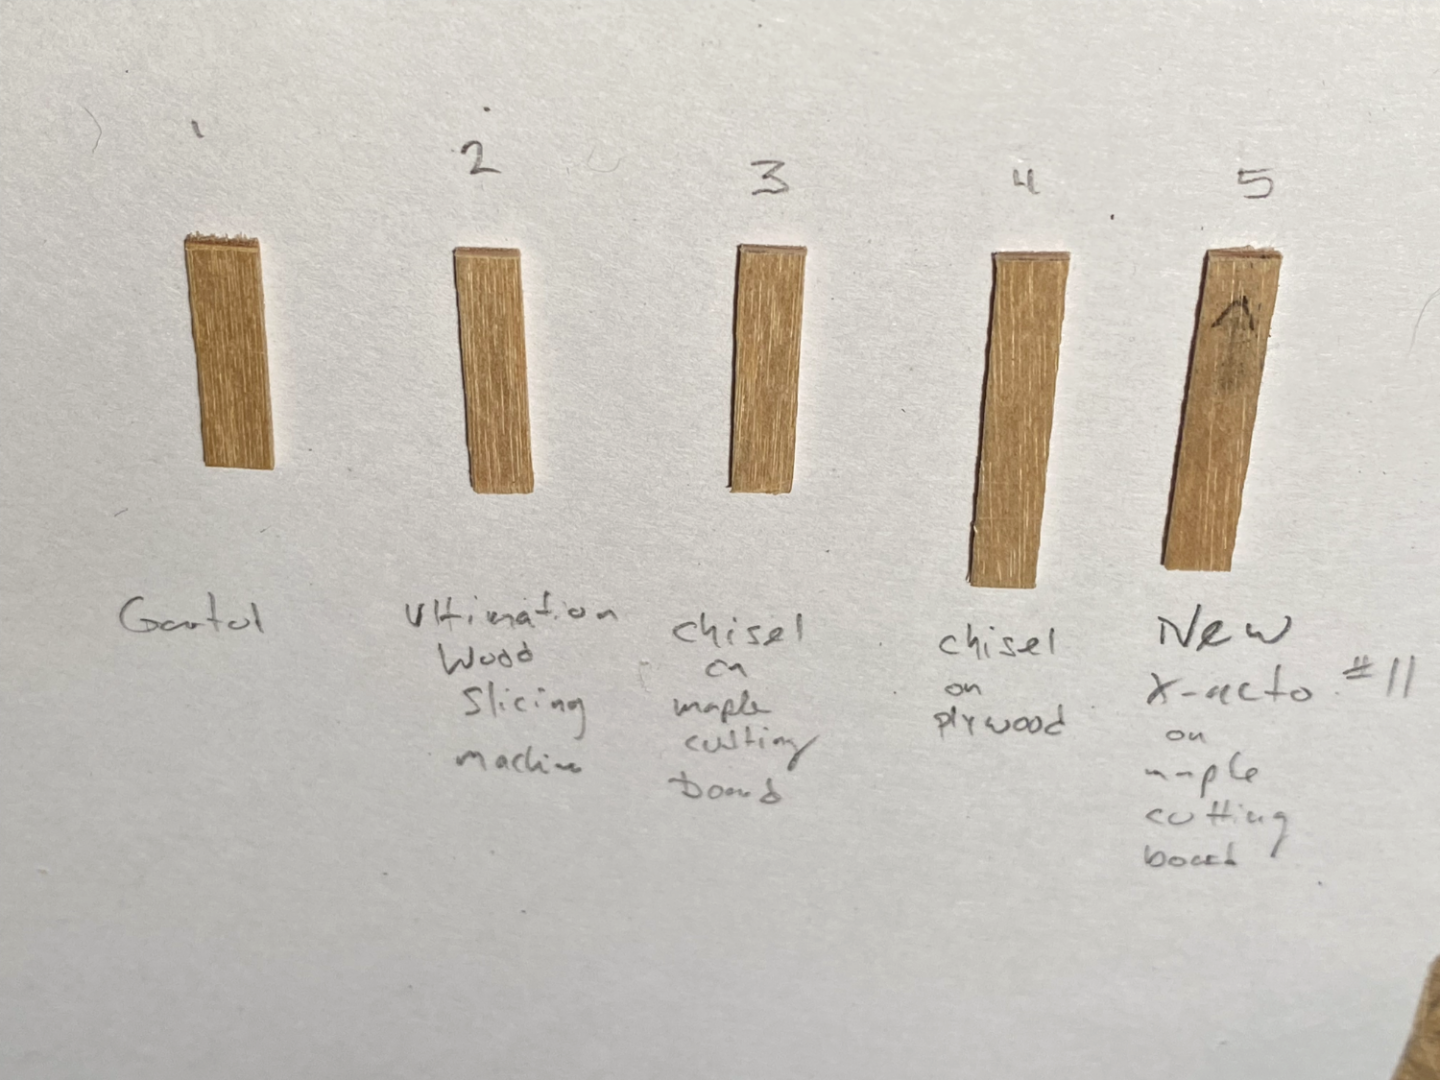
Unfair tool comparisons! I compared the cutting of the Slicer to ye olde #11 x-acto blade, a sharp 3/4” wood chisel and a much cheaper tool, Gartol miter shears. I found the Slicer to cut better than the x-acto and the Gartol. The wood chisel was just as clean as the slicer (and I hadn’t bothered to strop nor sharpen the chisel before the comparison). So if you are comfy the care and feeding of wood chisels, there is not much to be gained by the Slicer. However, if money is no issue, the Slicer is fast, easy to use and rugged. And, perhaps, your repeat cutting depth gauge will work.
-
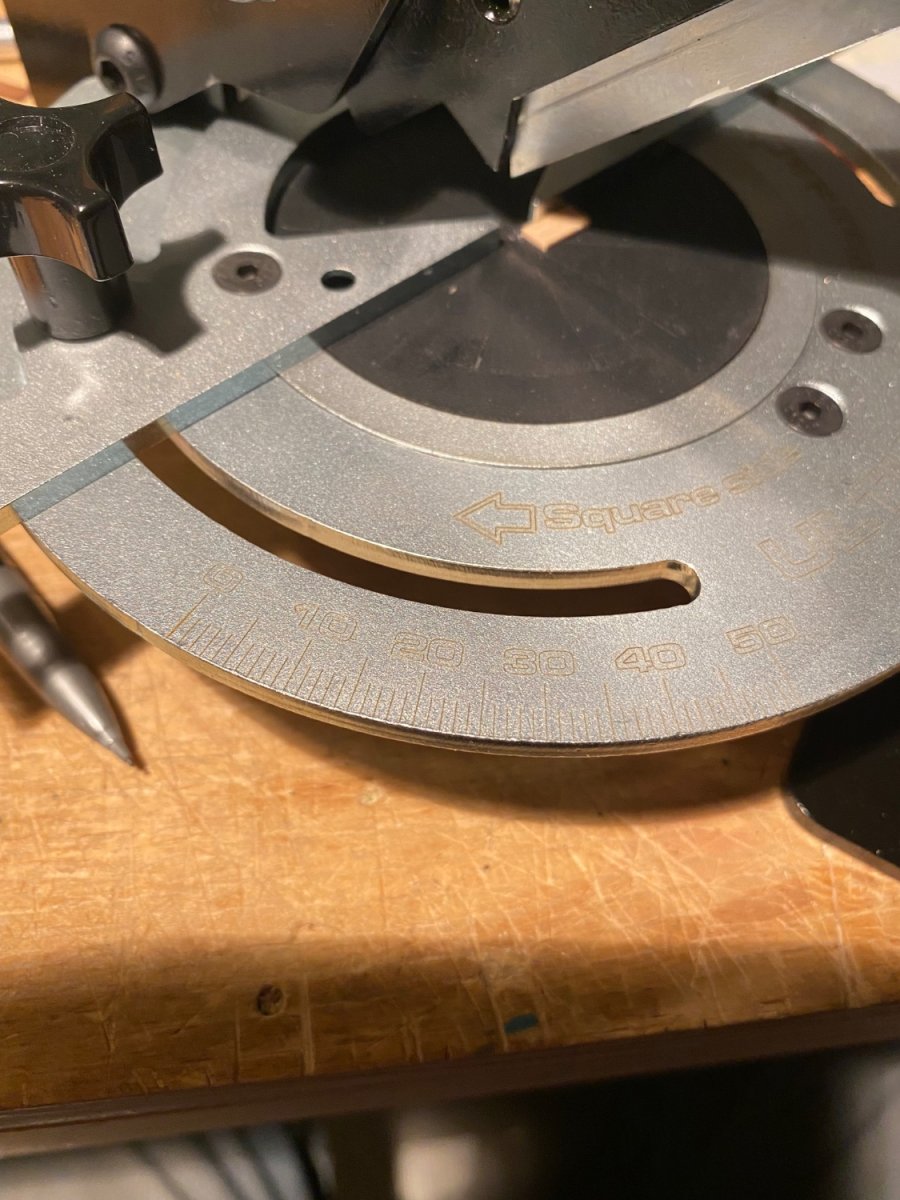
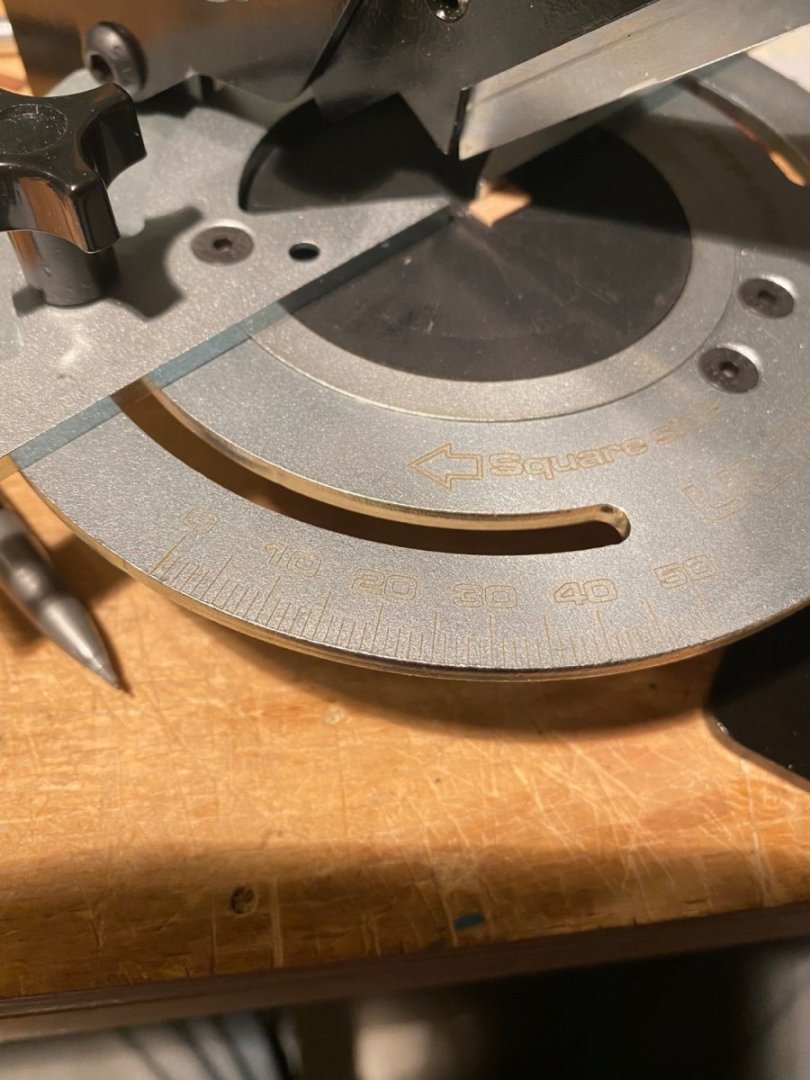
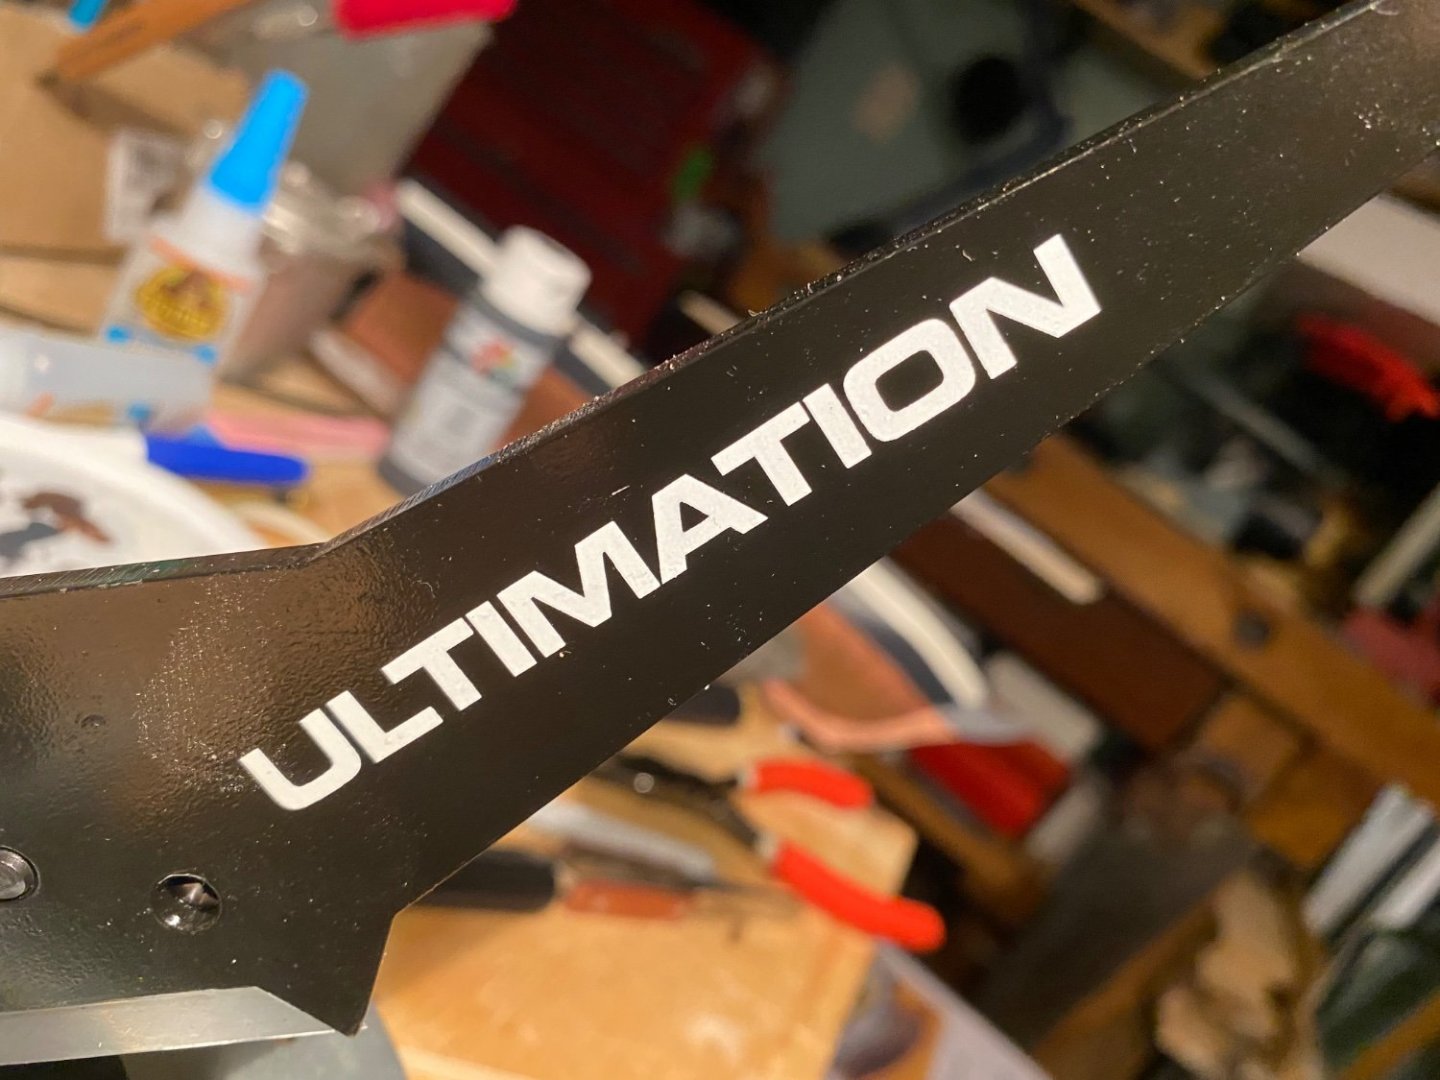
I now have a newly acquired tool - the Ultimation Slicer which came to me via the latest Northeast Ship Model Conference raffle. Pros: Solid platform, which can be mounted. Cuts cleanly! Plenty of leverage. Plentry of visibility. Blade doesn’t make contact with metal but instead with self-healing cutting matt material. Blade beveled on only one side Adjustable fence for full range of cuts Detailed etched protractor for making cuts of exact angles. Fence tightens firmly in place. Cons: The adjustable stop for repeat cuts did not work. That is to say, it was slightly mis-machined and the guide could not travel with in a couple inches of the blade. This tarnished the idea of this being the “ultimate” chopping tool. I did my tests with that assembly removed. The etched surface is in a low-contrast color, making it hard to see sometimes. It would be nice if the protractor was 270 degrees (or more) instead of only 180. I keep finding myself looking for a degree and staring a bare metal before look to the other side. It would also allow one to clamp exactly to angle you wish. Very slight play between the base and the fence. Not a deal-breaker, perhaps not even noticeable to most folks. No way to quickly and exactly find common angles like 90, 60, 45, etc. Again not a deal breaker, but many similar tools boast quick-set ways to select such angles. Two knobs to tighten the fence, instead of one. It is priced at $175 (US Dollars).

-
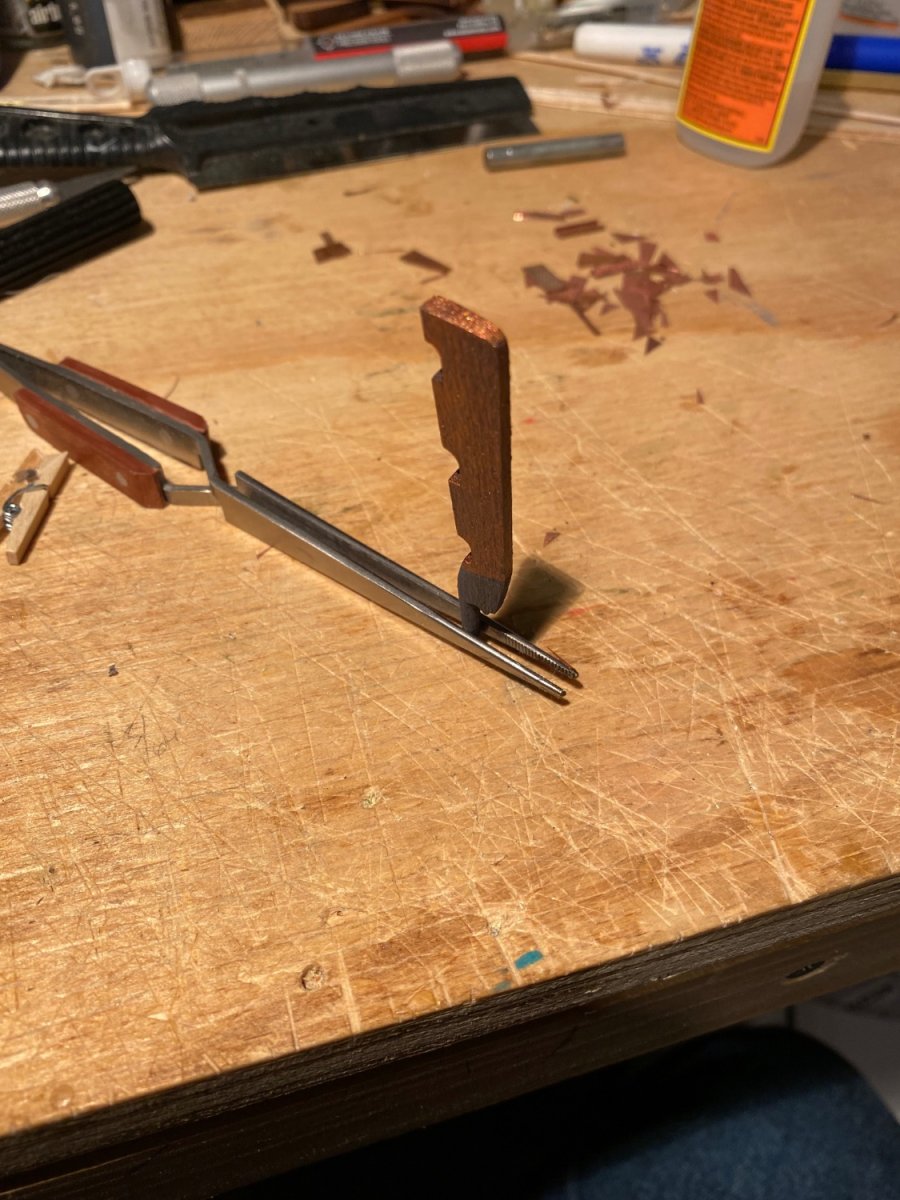
Rudder work: after a few attempts and redos, I might be happy enough with this one.

-
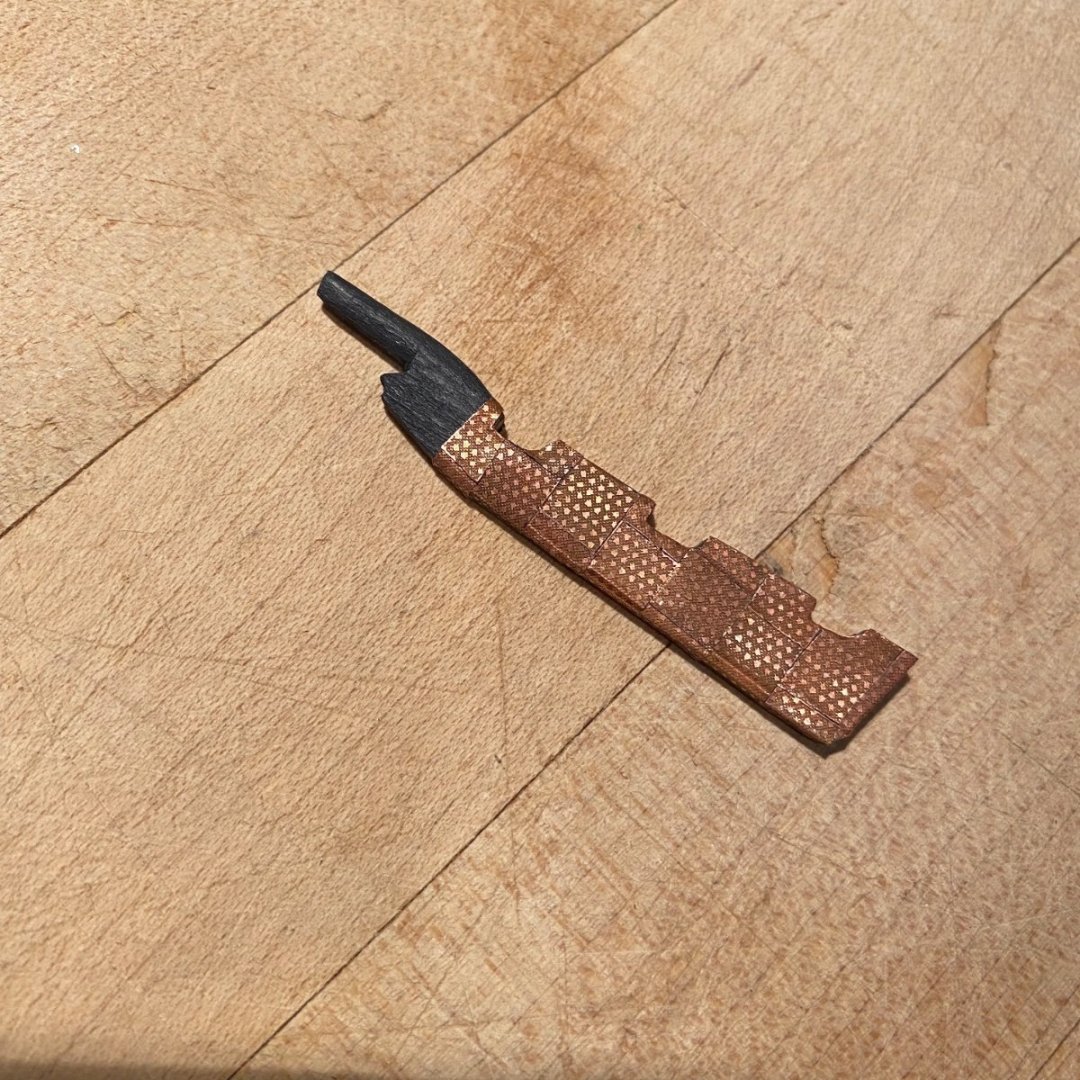
Thank you for the kind words. (And nice to see at the convention although we didn't chat much!) And for everyone's likes!! As for the plating, I still see the errors, glitches, etc. but for my first attempt at copper, it looks better than it ought to. I have to say copper is a wonderful material to work with (at least in this context).
-
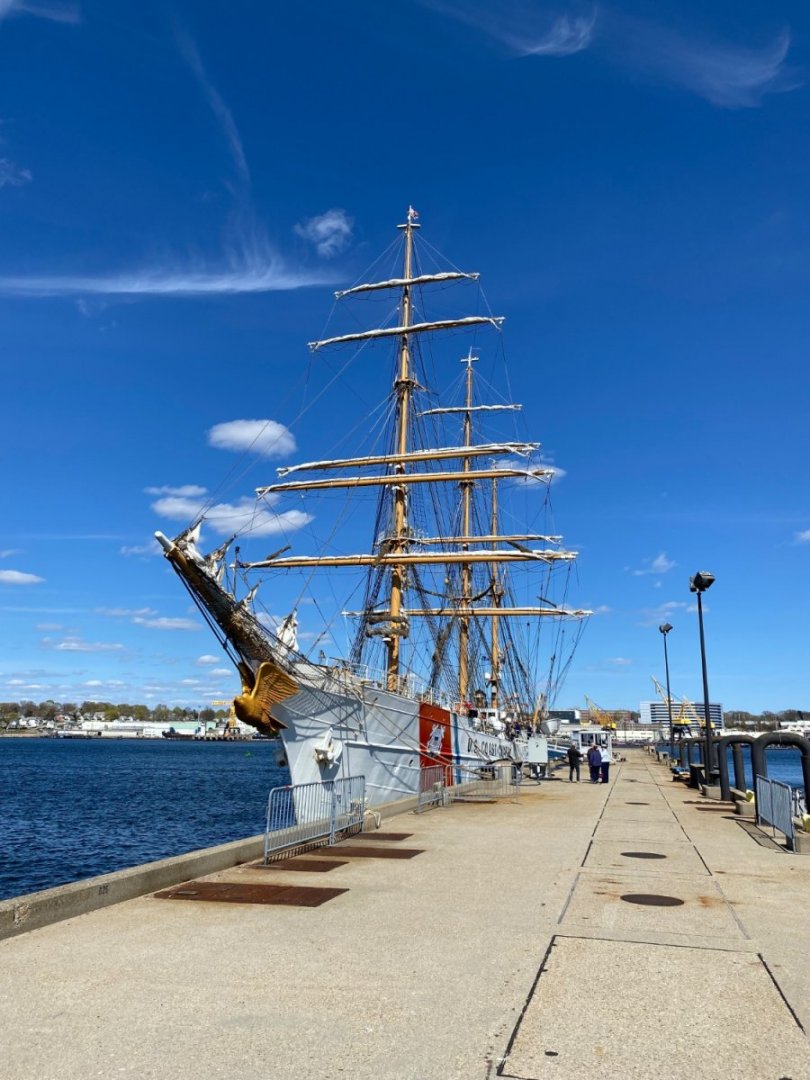
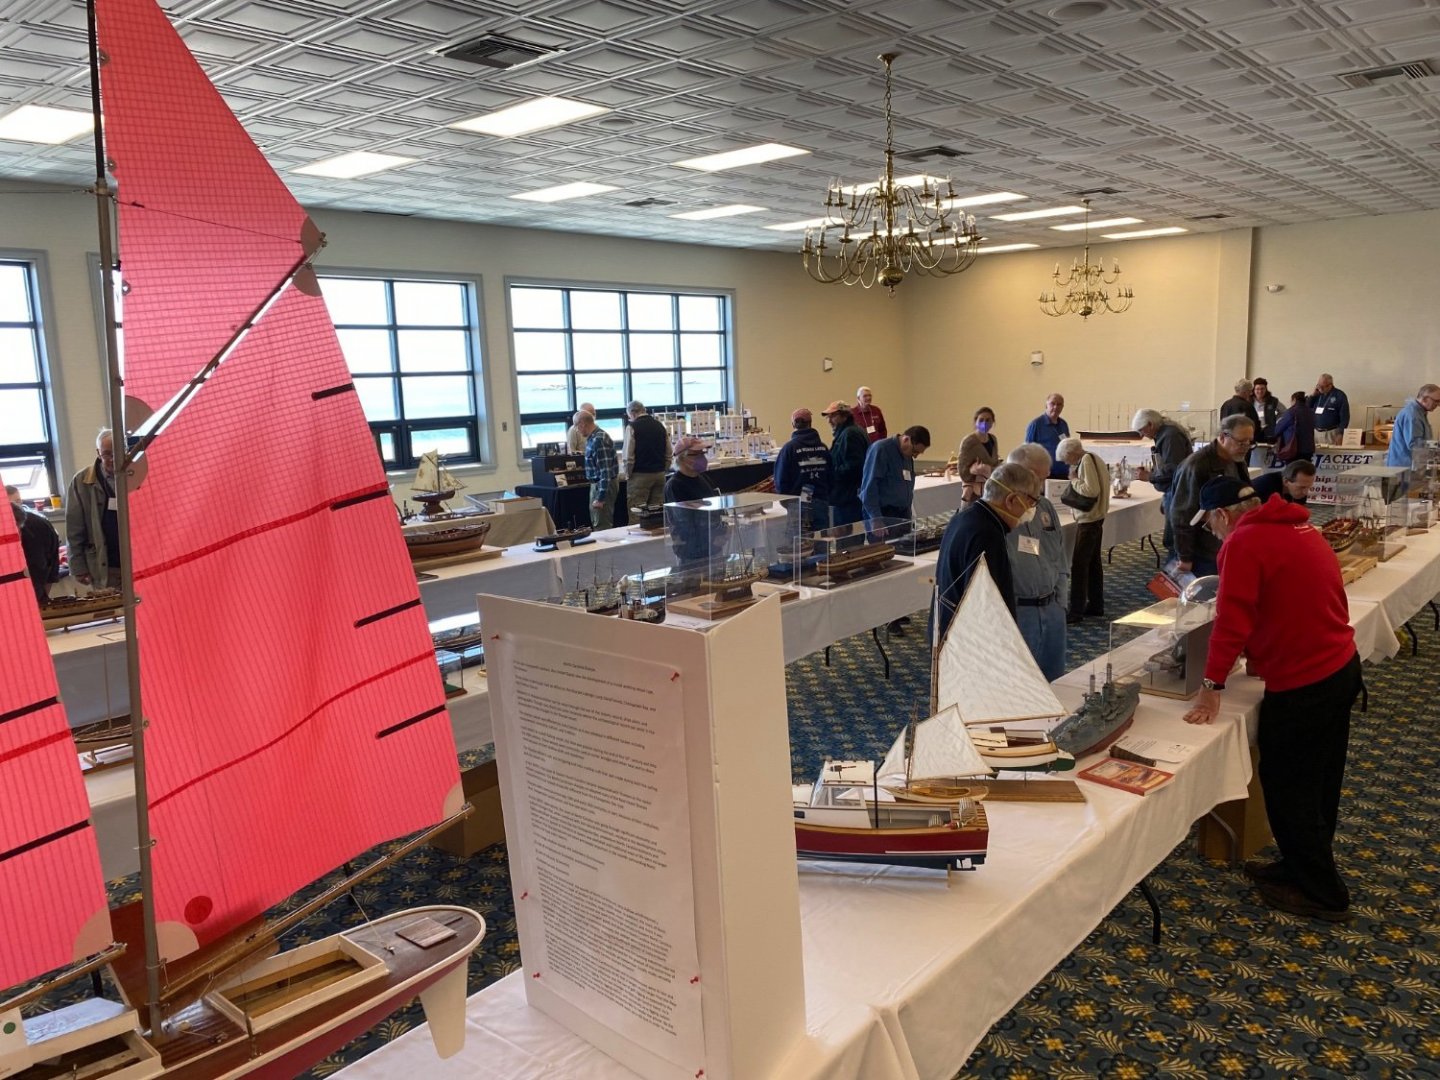
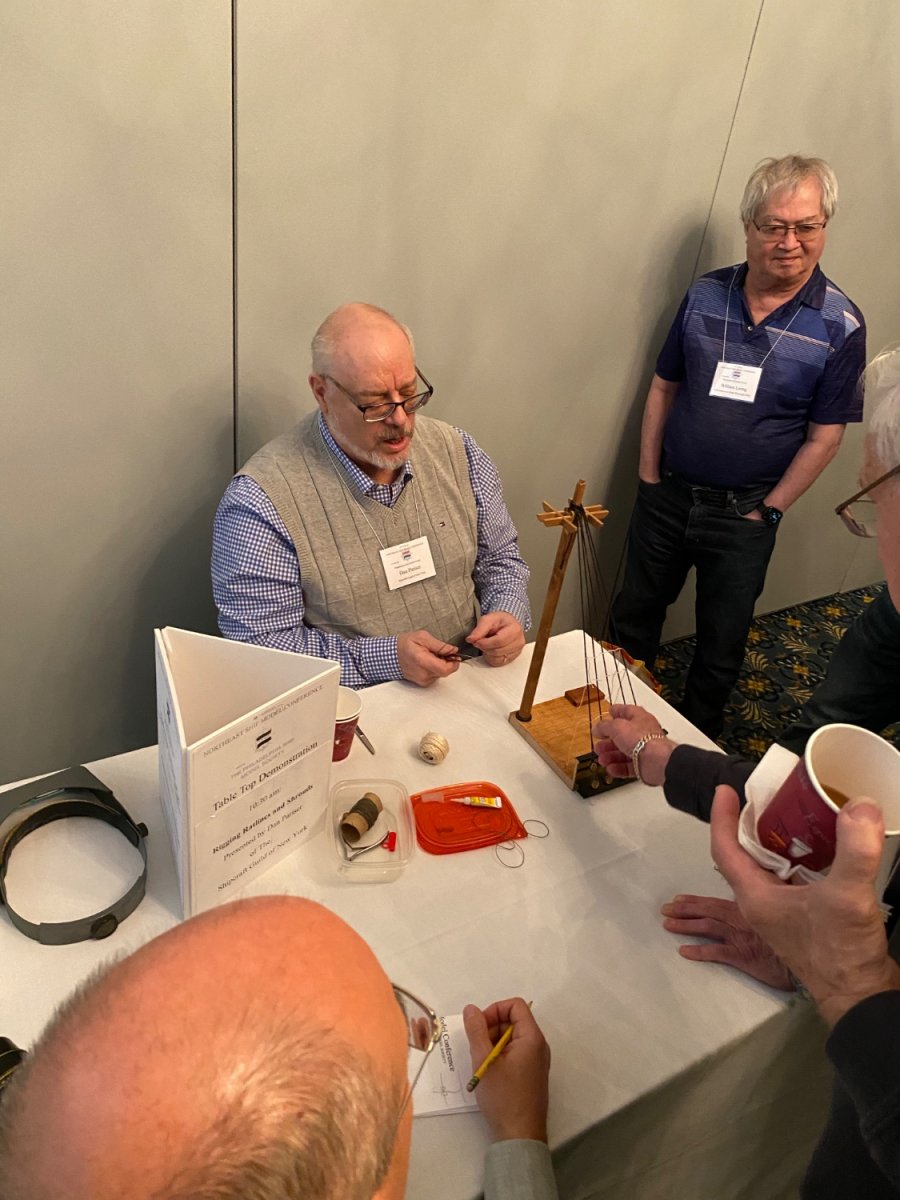
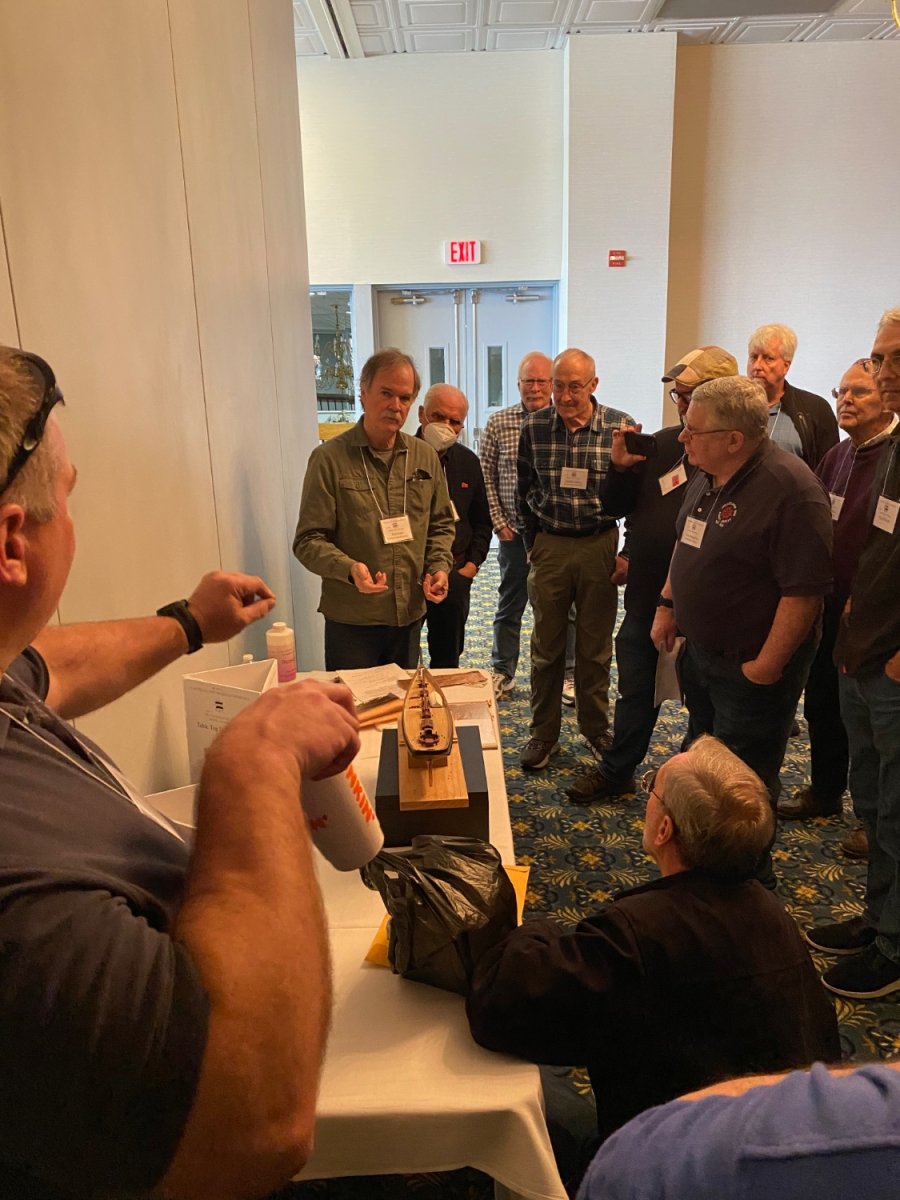
I squeezed in as much as I could to my visit to the conference. I hit Mystic Seaport, Battleship Row, H.P. Lovercraft’s grave and the USCGC Eagle. Sail Master Melissa Polson presented at this year’s conference and is seen here shipside answering questions. Here are some action shots of Dan Pariser aka @shipmodel and Rich Lane (https://richardlaneart.com/) teaching the finer points of rigging and applying copper leaf respectively.