HOLIDAY DONATION DRIVE - SUPPORT MSW - DO YOUR PART TO KEEP THIS GREAT FORUM GOING! (Only 13 donations so far - C'mon guys!)
×

.jpeg.7d7eba14c97a2e1d9f79cd2c97f6424a.jpeg)
EricWilliamMarshall
-
Posts
986 -
Joined
-
Last visited
Content Type
Profiles
Forums
Gallery
Events
Everything posted by EricWilliamMarshall
-
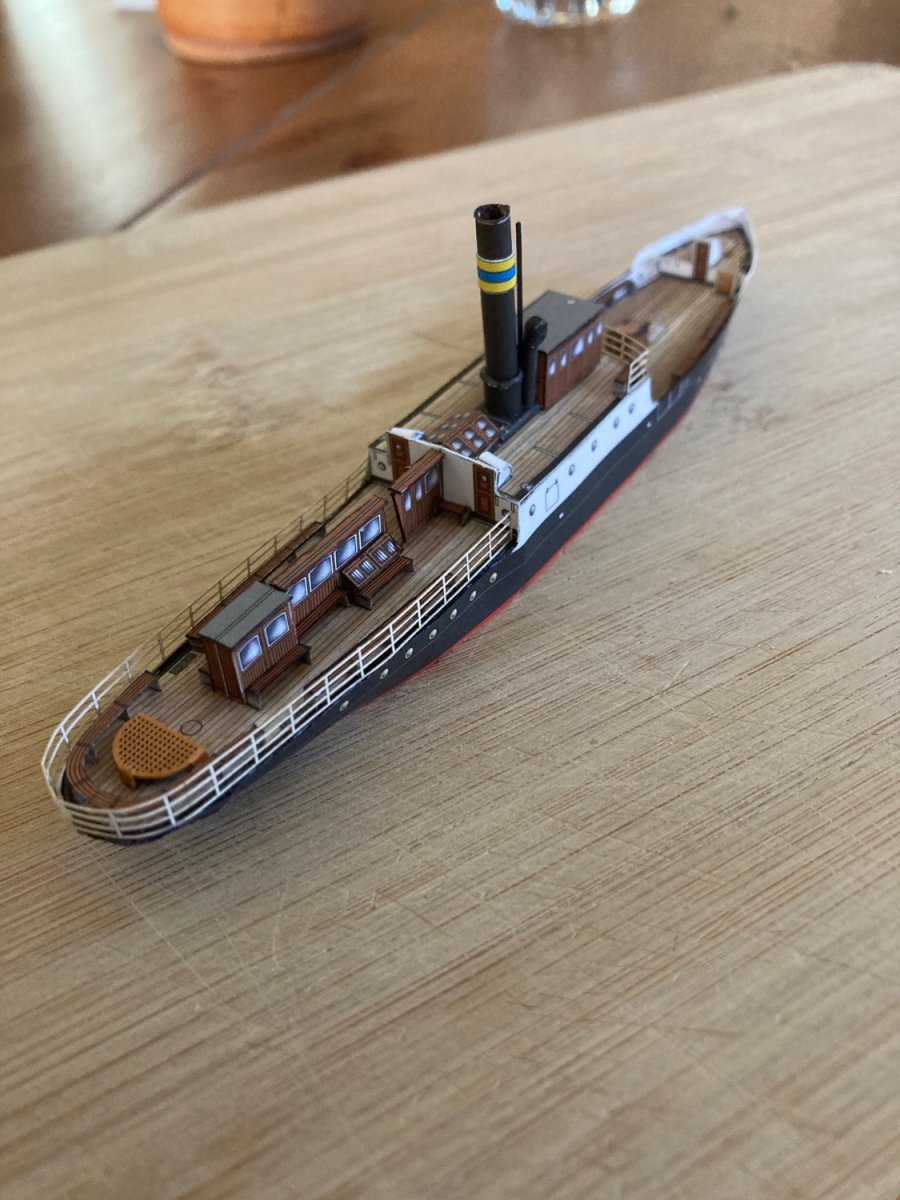
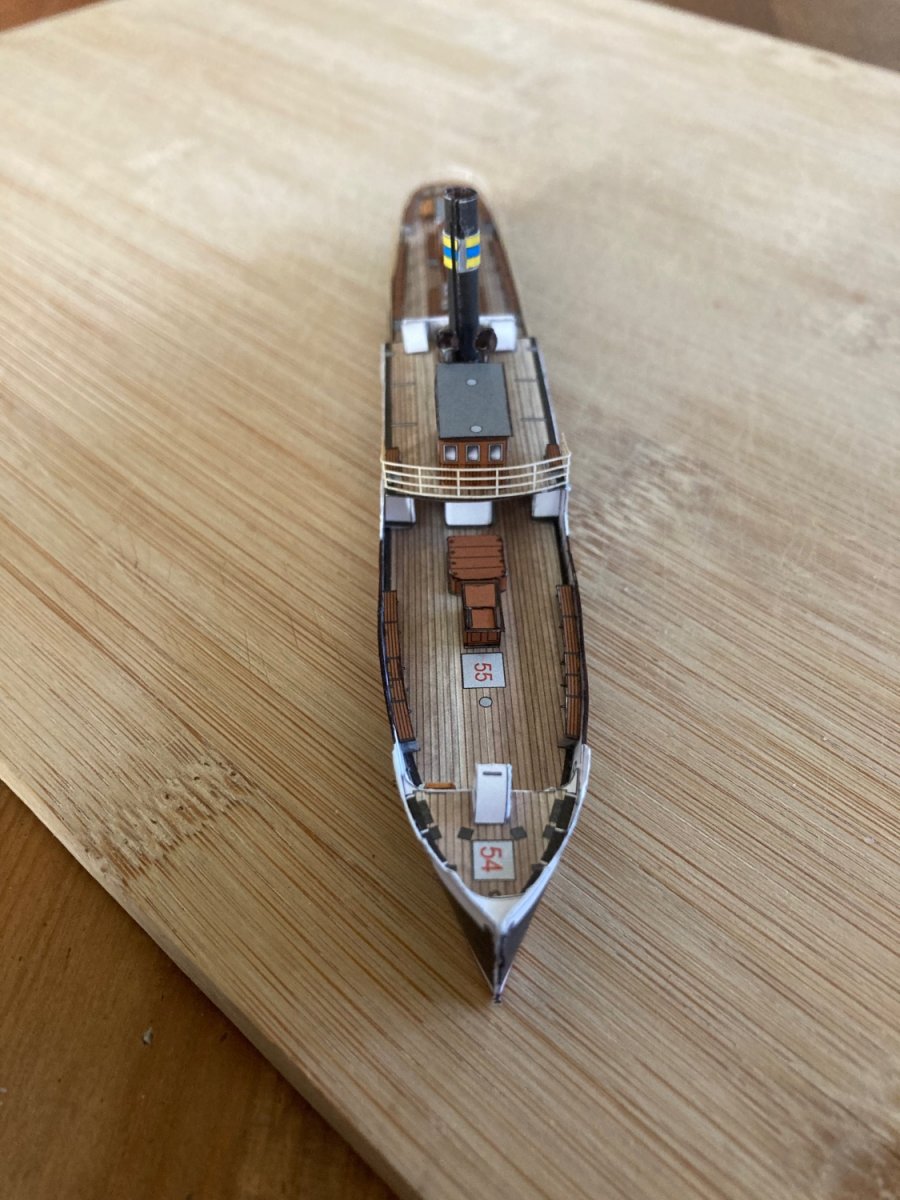
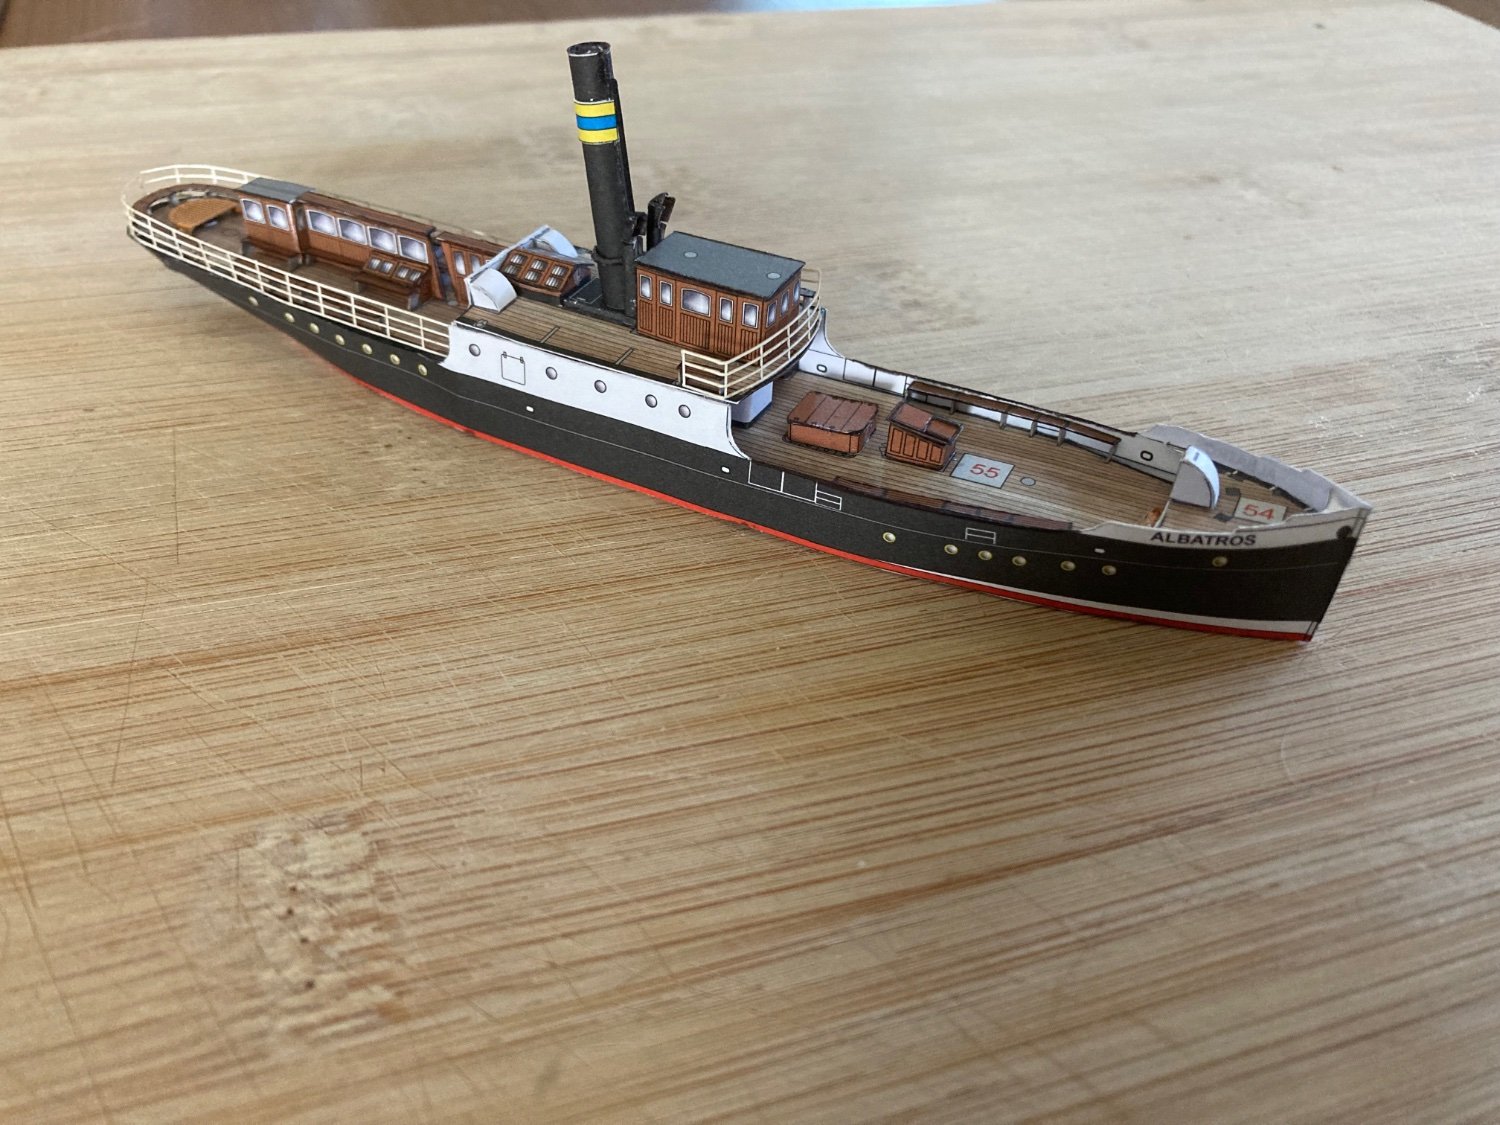
.thumb.jpeg.fc5d633a7b34428fcf19419a73d56d55.jpeg) Thanks for your comment and for your energy and flag-waving for card models. I wouldn't have tried my hand if it wasn't for you! It came out better than I expected it would (especially given it is my first card model as well.) For everyone else, come on in the pool. The water is fine. (Ignore my blue lips and shivering!)
Thanks for your comment and for your energy and flag-waving for card models. I wouldn't have tried my hand if it wasn't for you! It came out better than I expected it would (especially given it is my first card model as well.) For everyone else, come on in the pool. The water is fine. (Ignore my blue lips and shivering!) -
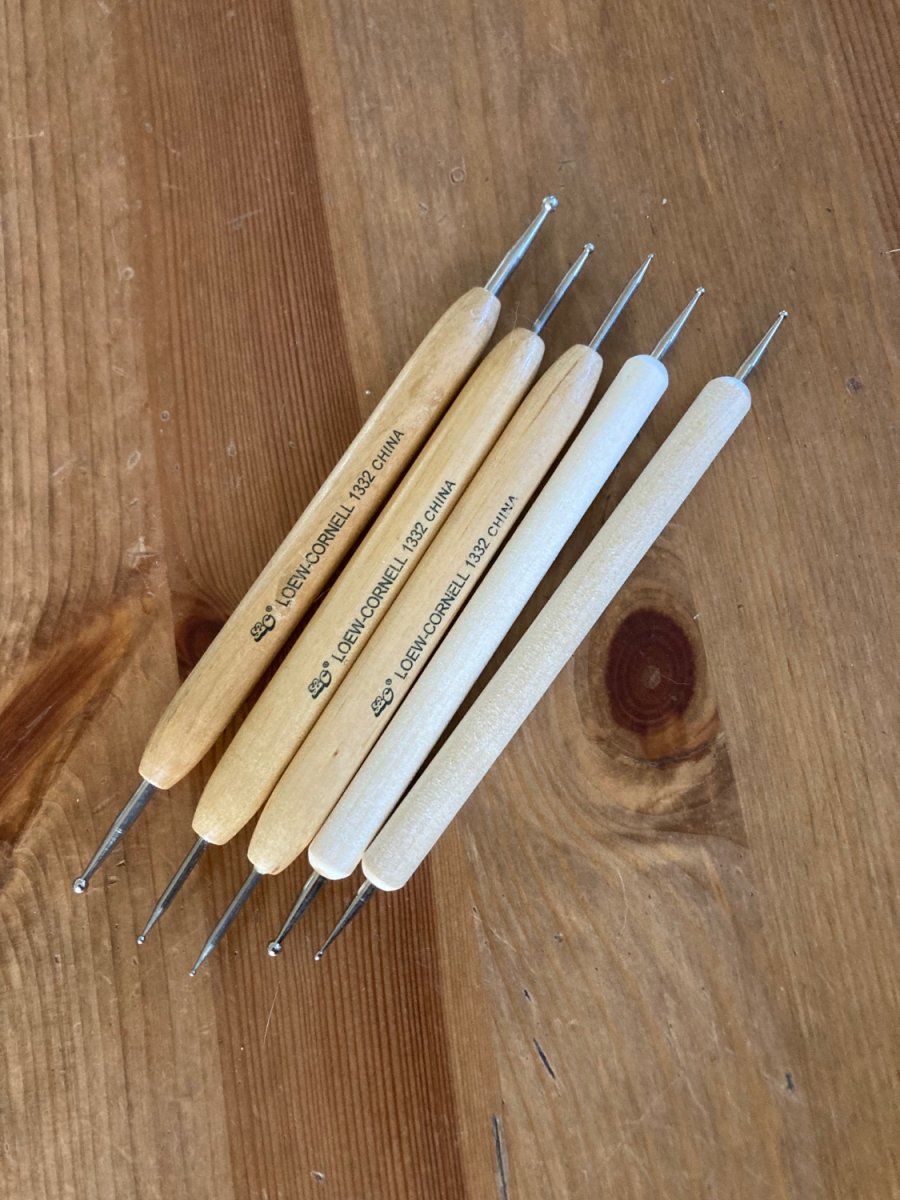
Can you tell us about you dapping set?
-
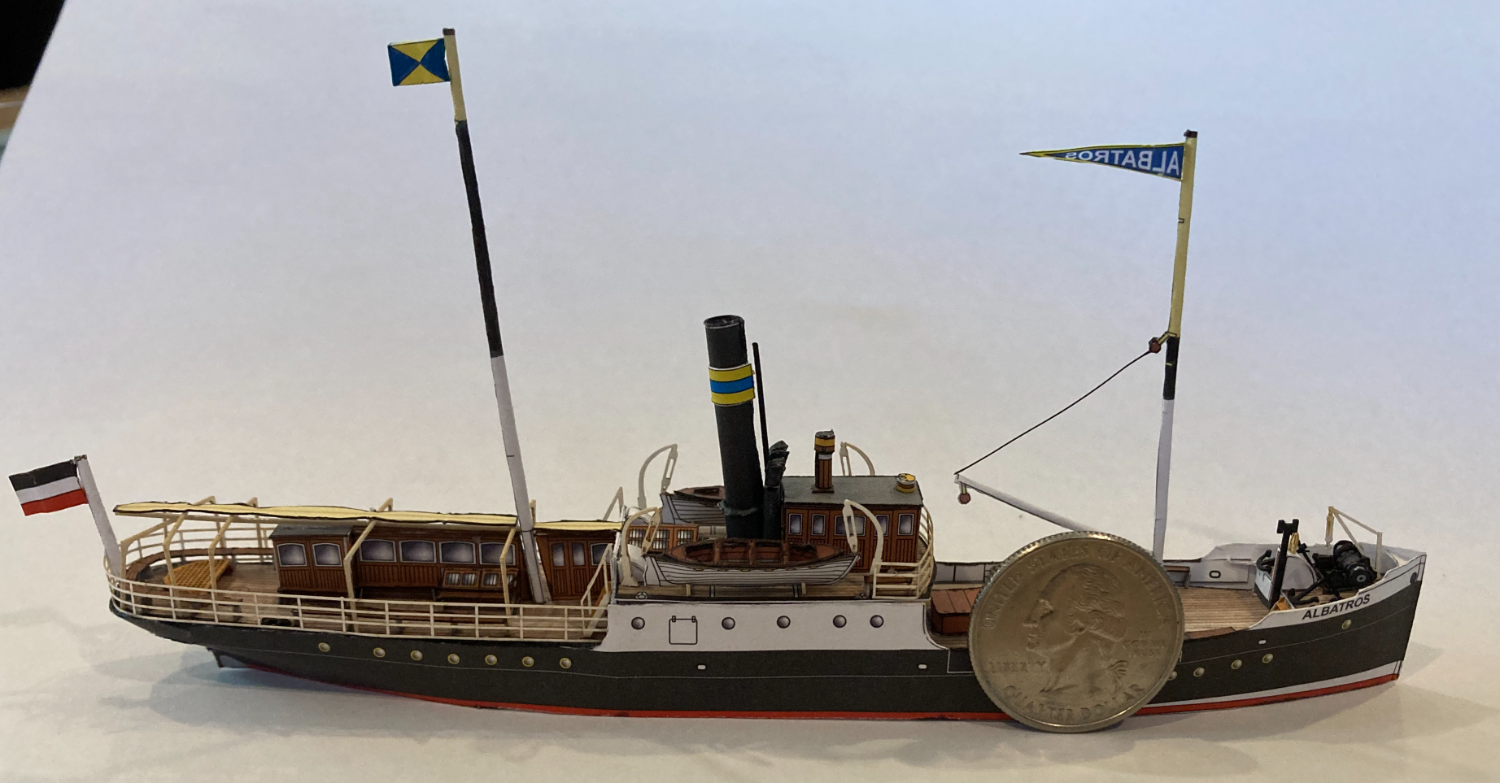
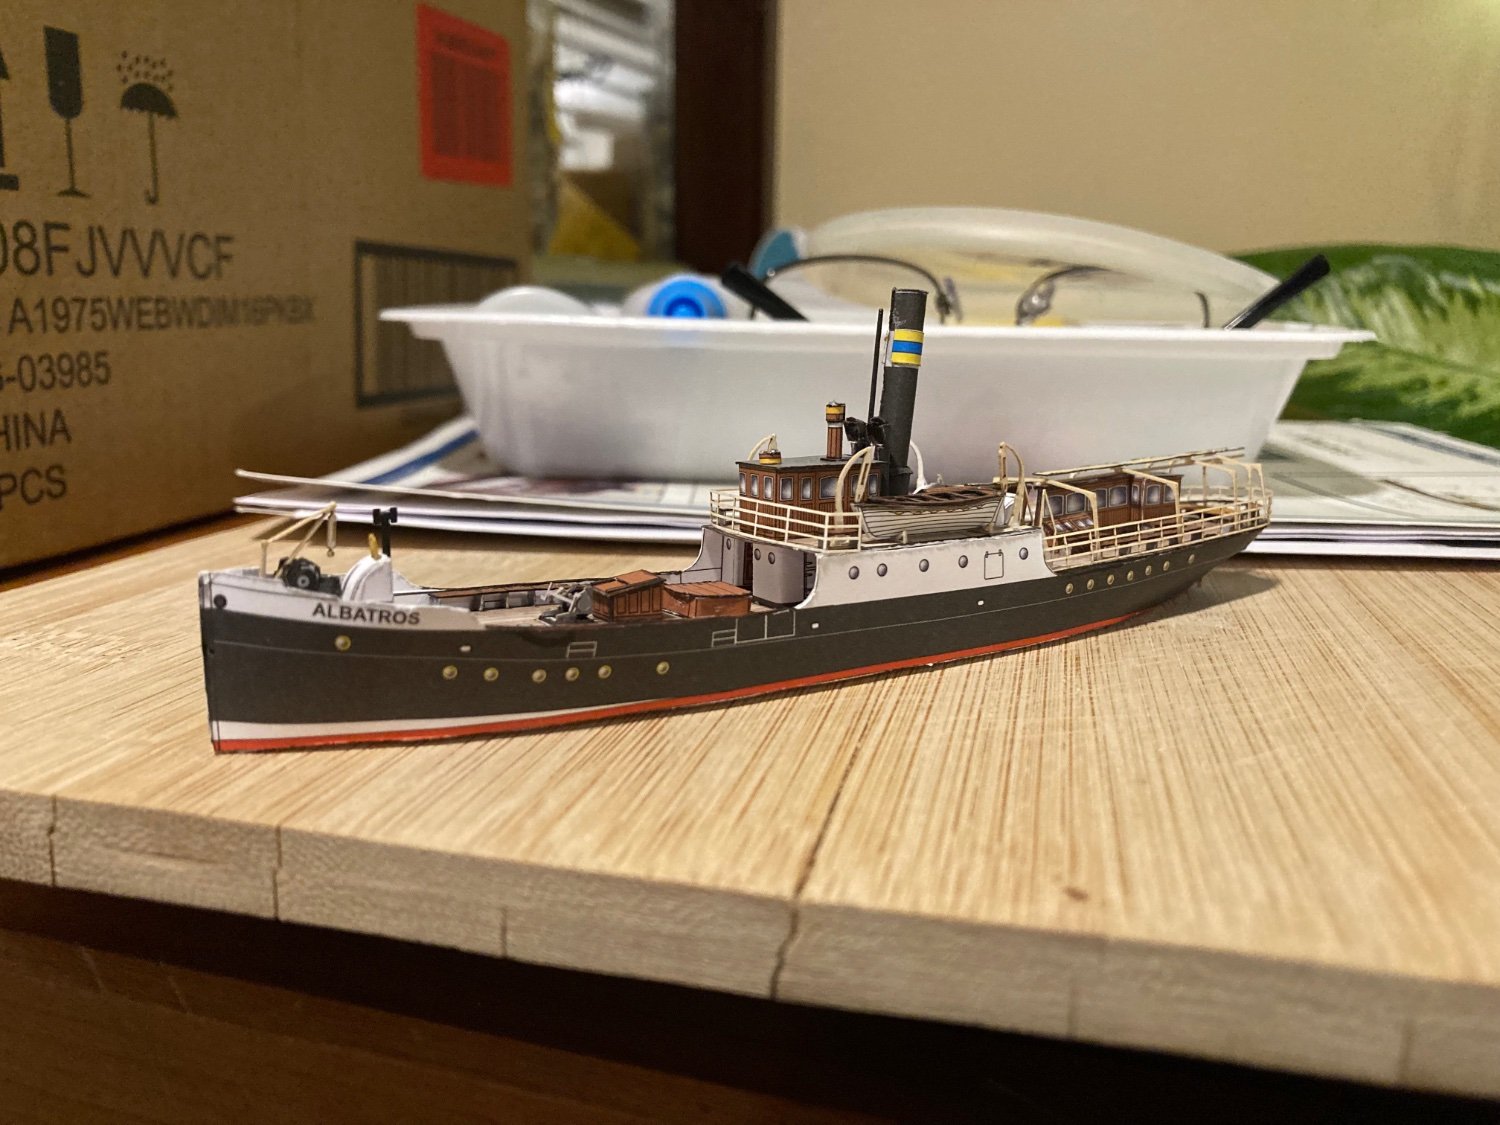
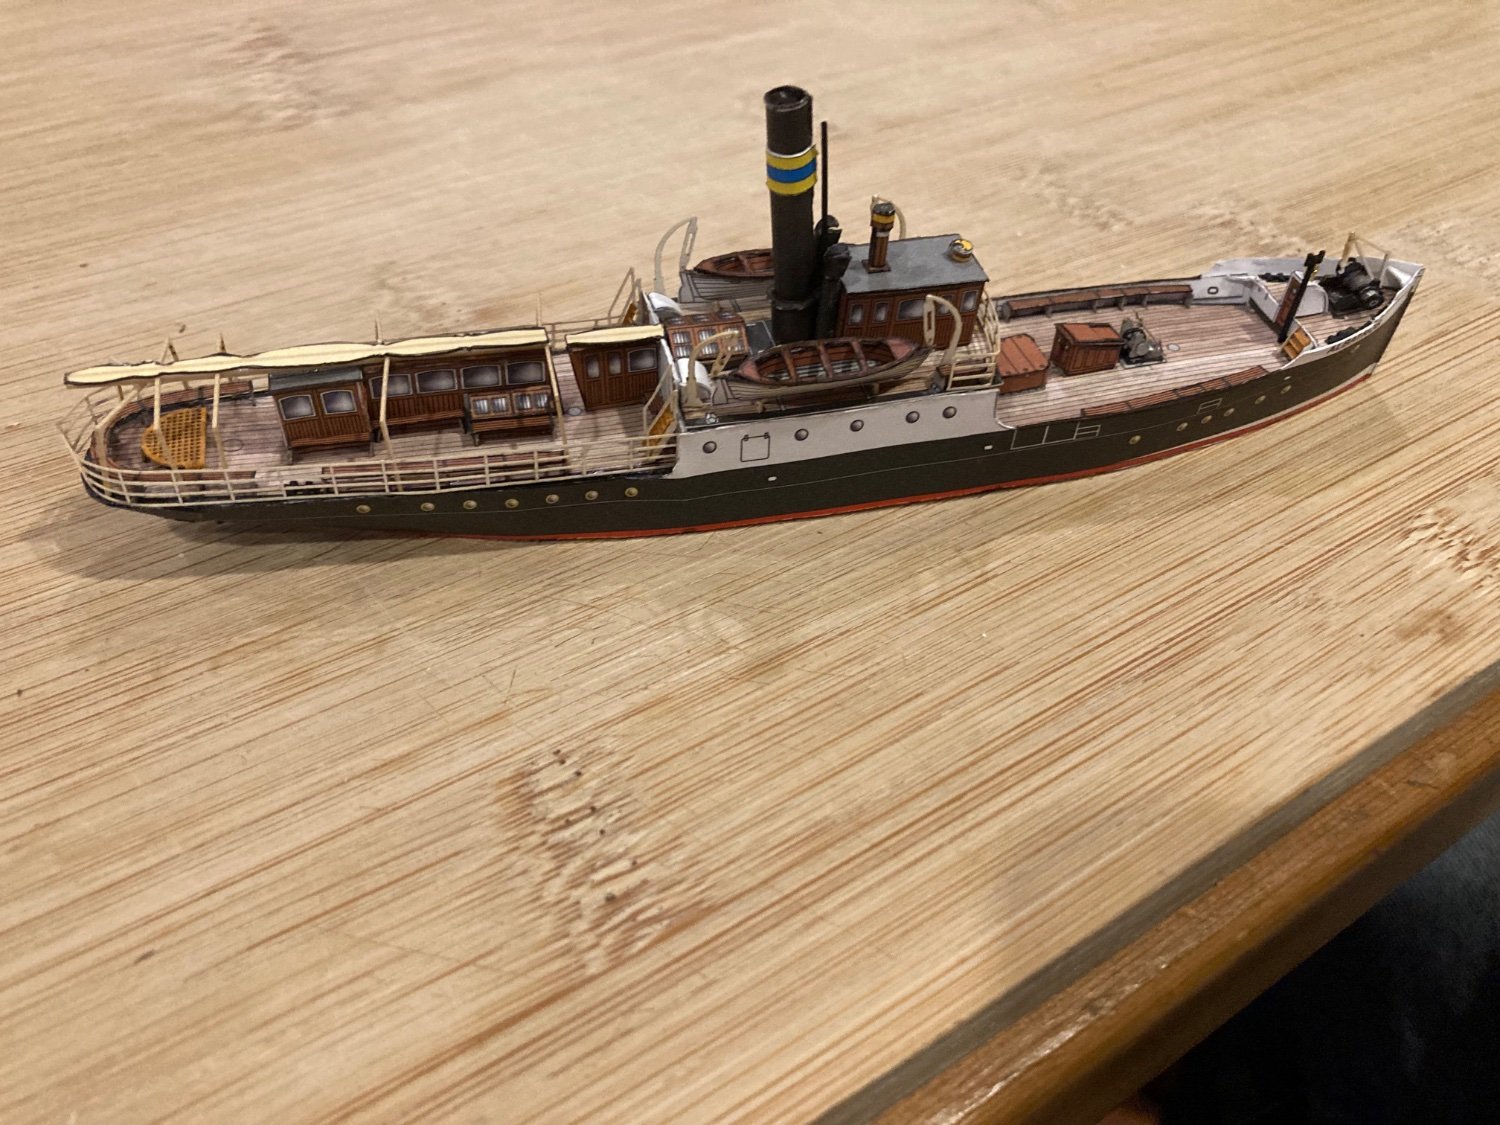
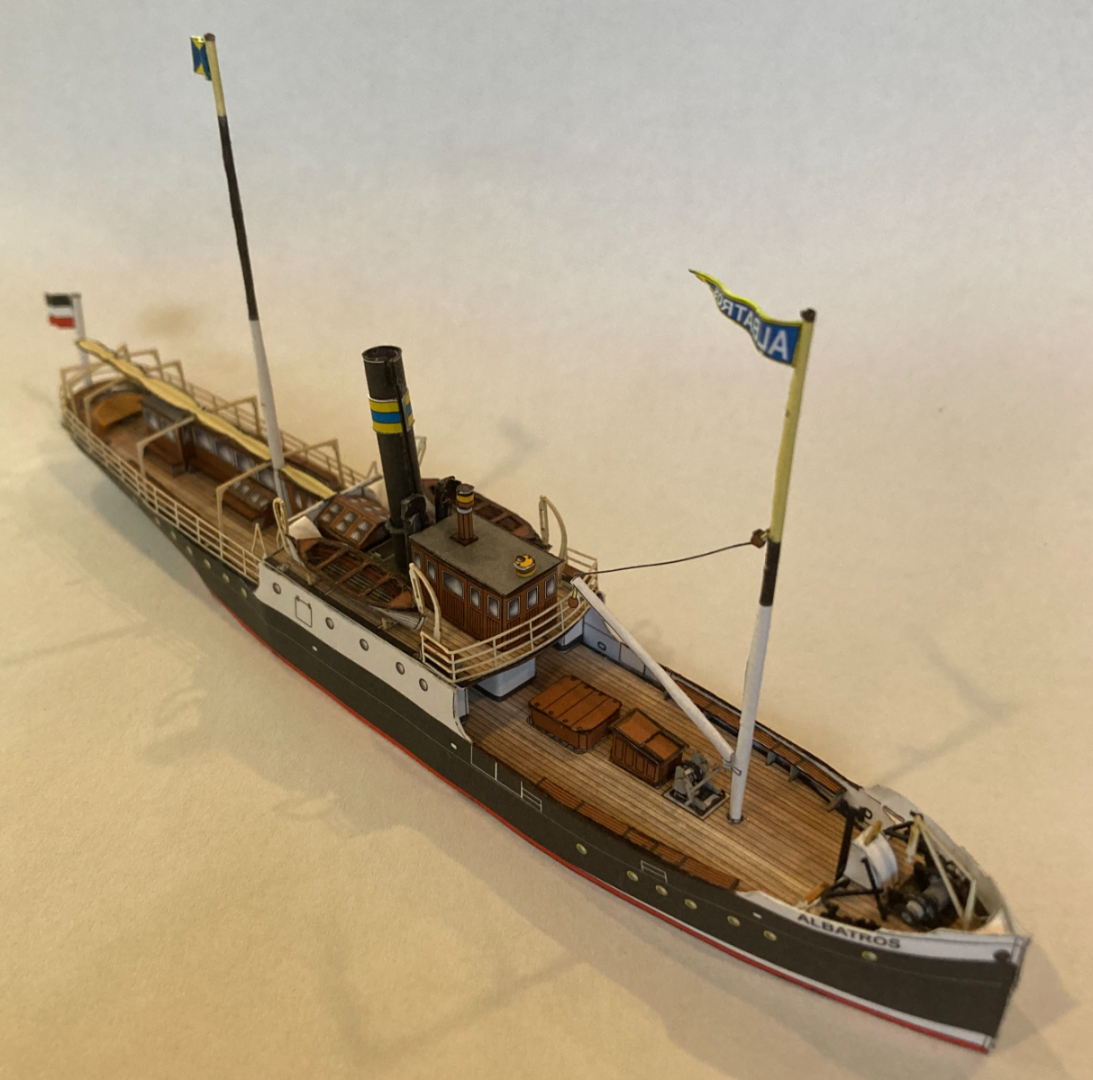
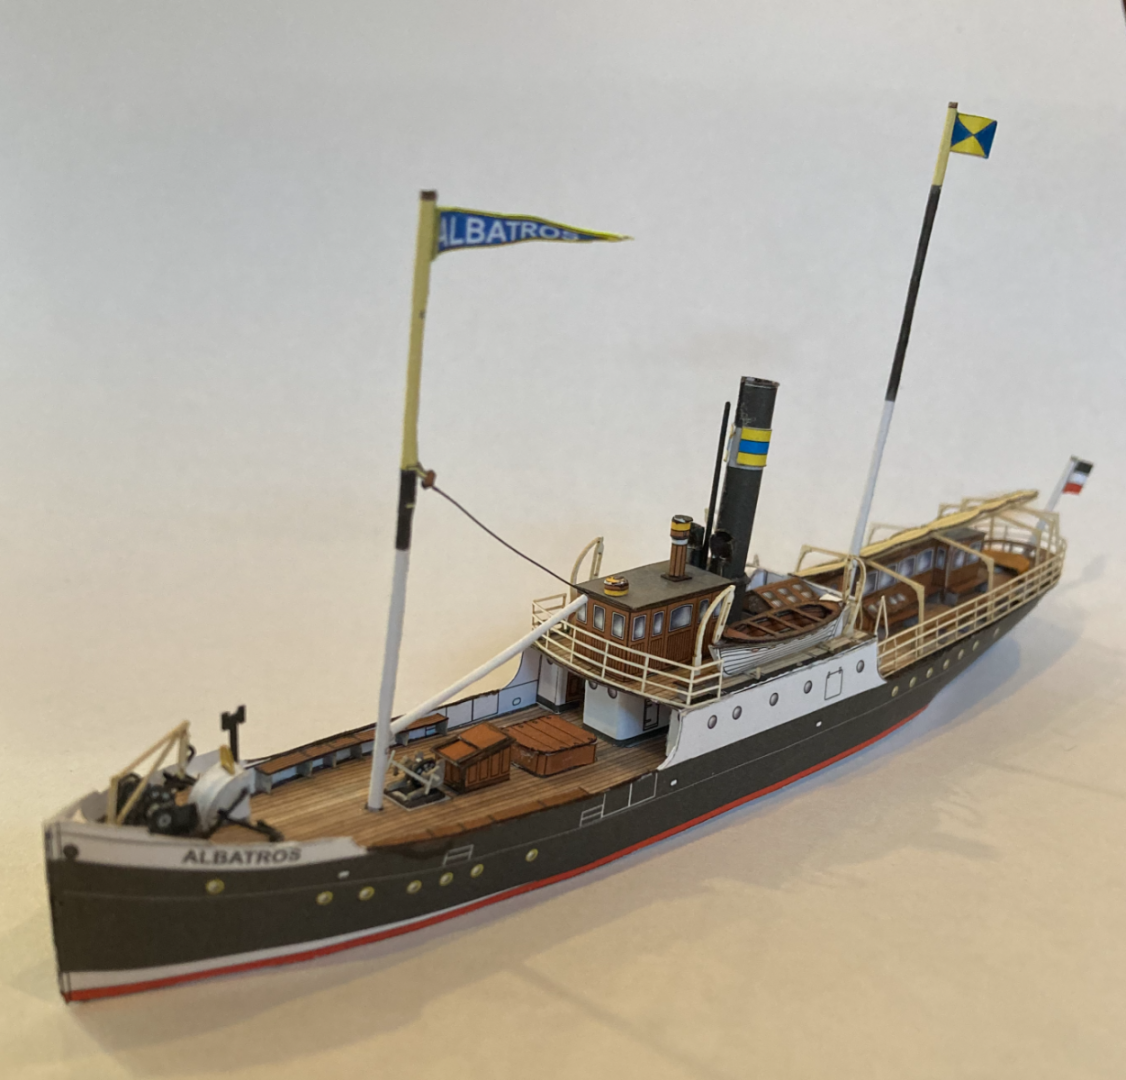
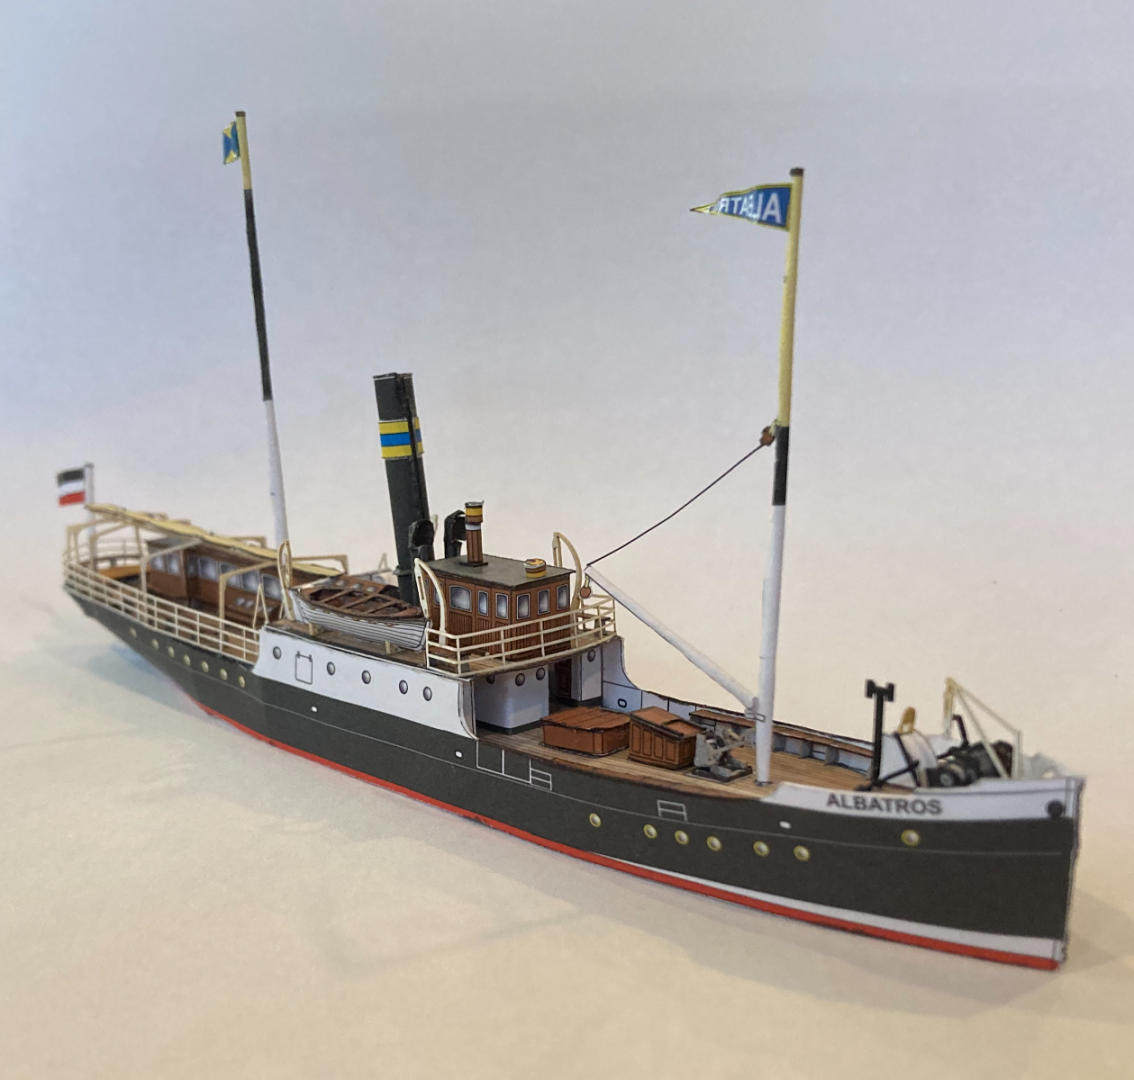
After too much time trying roll paper masts, calling this experiment done! This paper has a tendency to delaminate. I used that to my advantage and I peeled the backs off of the masts before rolling them. And rolled them with needle as a core. I’m punting on the rigging shown on the cover photo (it isn’t covered in the instructions either). I used 32 gauge craft wire for the solo bit of rigging I did do.

- 43 replies
-
- 17
-

-
I blink and your done! Congrats on another beauty!
-
I trust you survived the crazy weather this weekend!
-
I purchased a copy in November of 2021, which took a while to swim the Atlantic (due shipping delays) to reach the Eastern shores of the US. Note: it was posted in a day or so of purchase and I was emailed tracking info as well. So it is still possible to get a copy. It is a good read so far and has the feel of build log one might read here but with better prose and diagrams (also with less comments ). The author was kind enough to autograph the tome as well! (George, thanks again!) I like to think we all will improve with a decade or so of practice and reflection!
- 10 replies
-
- 2
-
-
- Sherbourne
- Jotika
- (and 5 more)
-
I’ve come to the conclusion that no business, at all, is good for the eyes. These wondrous organs are not built to last and I’m thankful that, at least, they degrade over time instead of straight-out fail all at once!
- 2,696 replies
-
- 6
-
-
- heller
- soleil royal
- (and 9 more)
-
I found a cheap set of paper embossing tools useful to make the funnels. I also found small drill bits (which every modeler has) to be useful for rolling cylinders.

-
The seawatch site now states: " This site is temporarily closed pending the possible sale of the company. More news should be available soon. Thank you very much for your patronage and your patience. Check back on this site in January. -- Cathy and Bob"
-
Understood! I have asked twice for replacements from Model Shipways and each time they shipped quickly. Note that one time they shipped without letting me know so it was a small surprise. I would ask for a replacement regarding the paint as well.
- 51 replies
-
- 1
-
-
- Model Shipways
- norwegian sailing pram
- (and 1 more)
-
2nd hand items
EricWilliamMarshall replied to Mary-Ann Cockburn's topic in Modeling tools and Workshop Equipment
My condolences and thanks for trying to find a home the parts of hobby he was passionate about. Googling 'ship model club perthshire scotland' brought up several clubs, slightly farther afield but still somewhat local : https://www.scotfishmuseum.org/model-boat-club.php https://www.facebook.com/dundee.model.boats/ http://www.ayrmodelboatclub.org/Links.html were some of the responses. -
She is coming along nicely. I'm sorry to hear notes of frustration - these things creep into these projects a bit more here than elsewhere. But I can say that, they become much easier to deal with as your experience grows. Or at least it has for me over the last couple projects. I hope you are pleased with the results so far. As for the nails, if you email the kit manufacturer, they will send you more. As for enlarging holes, lots of options but I suggest mounting them to scrap wood (double-sided tape, white glue, etc.) then use a small drill bit mounted in a pin vise. But skipping them, is more elegant and less work.
-
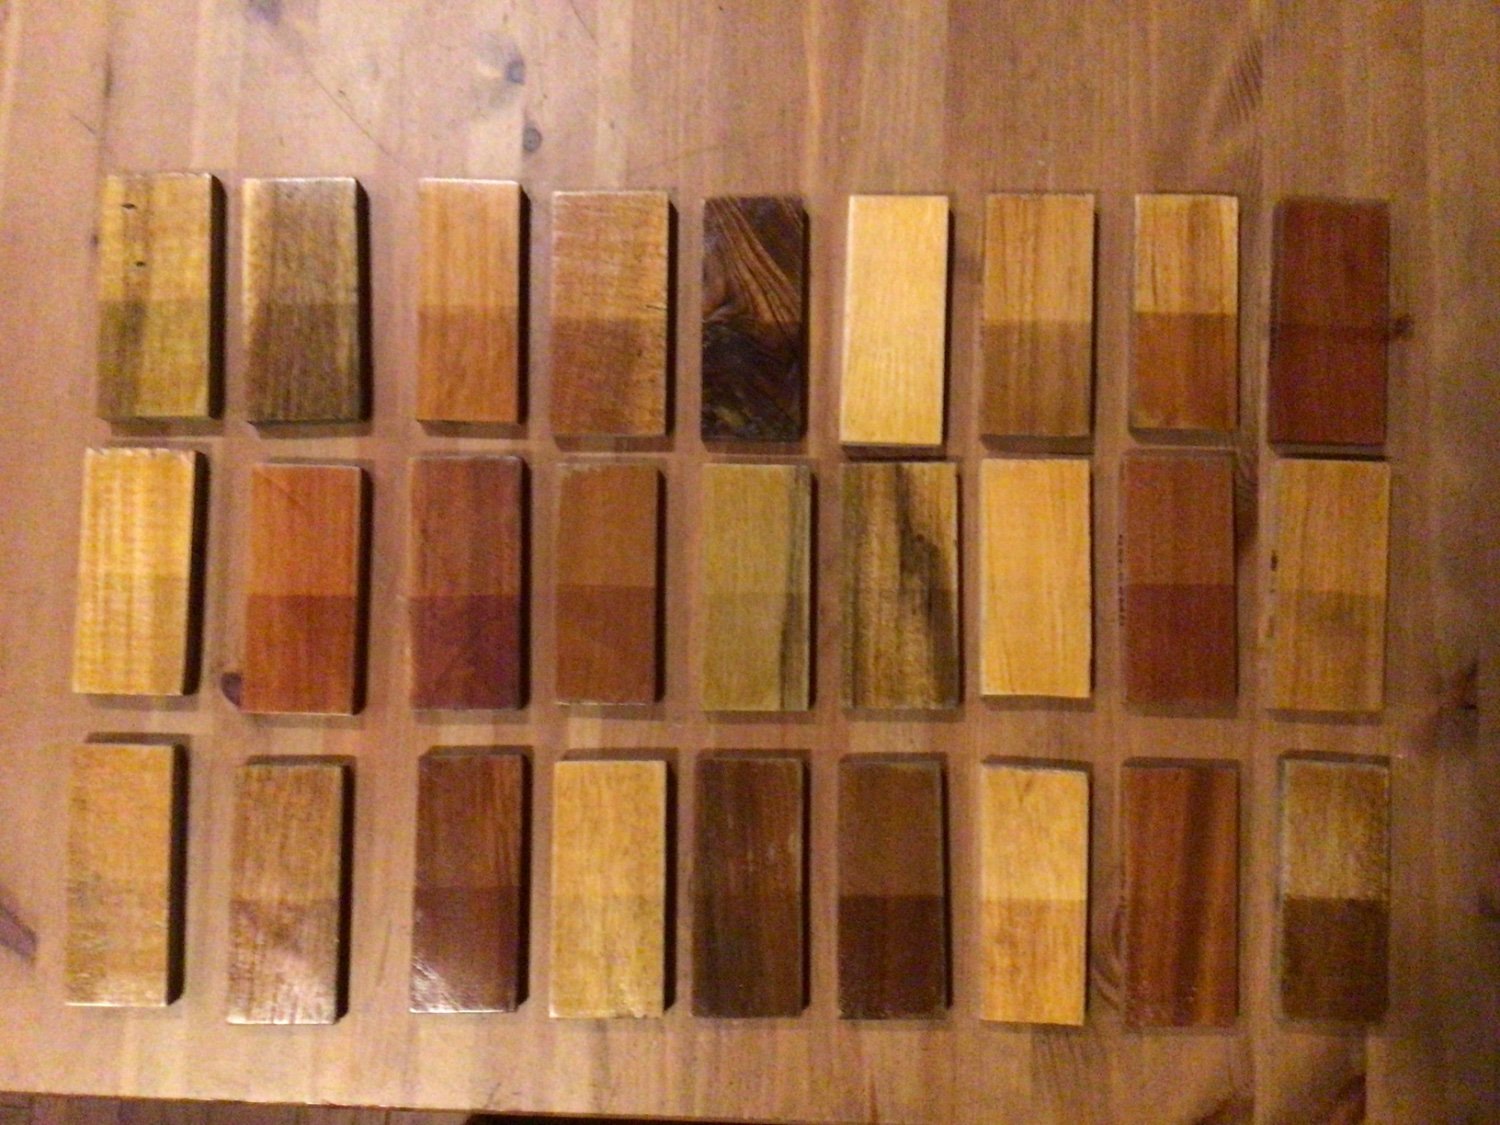
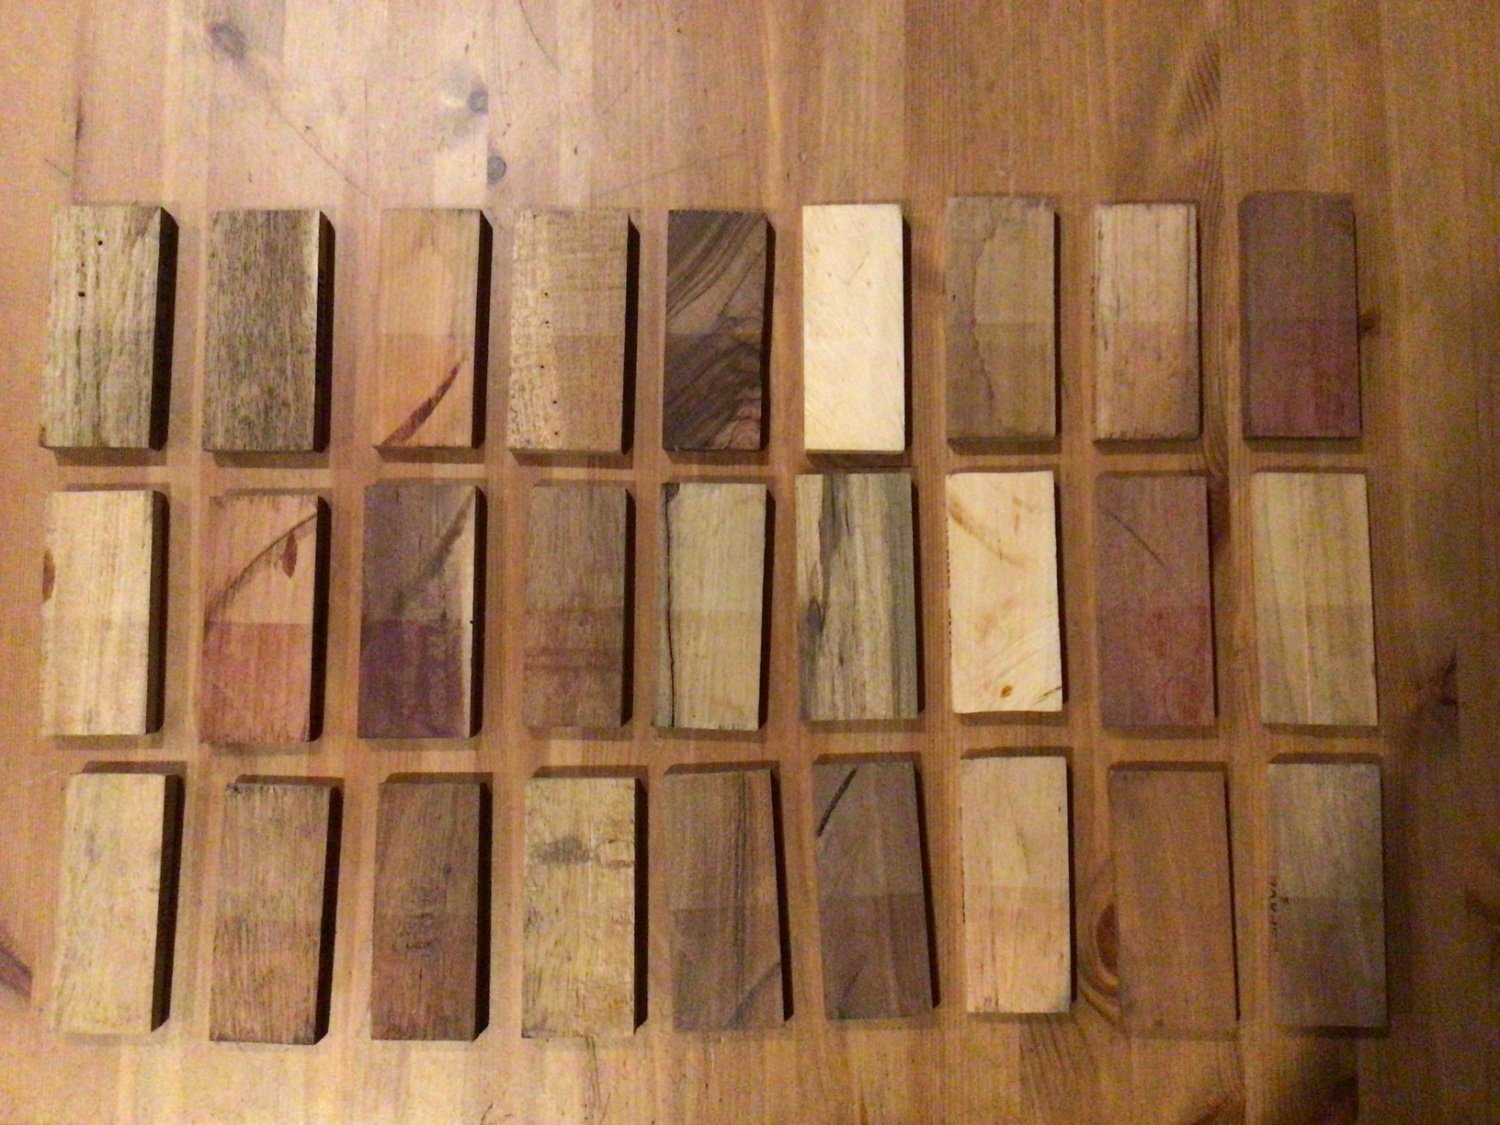
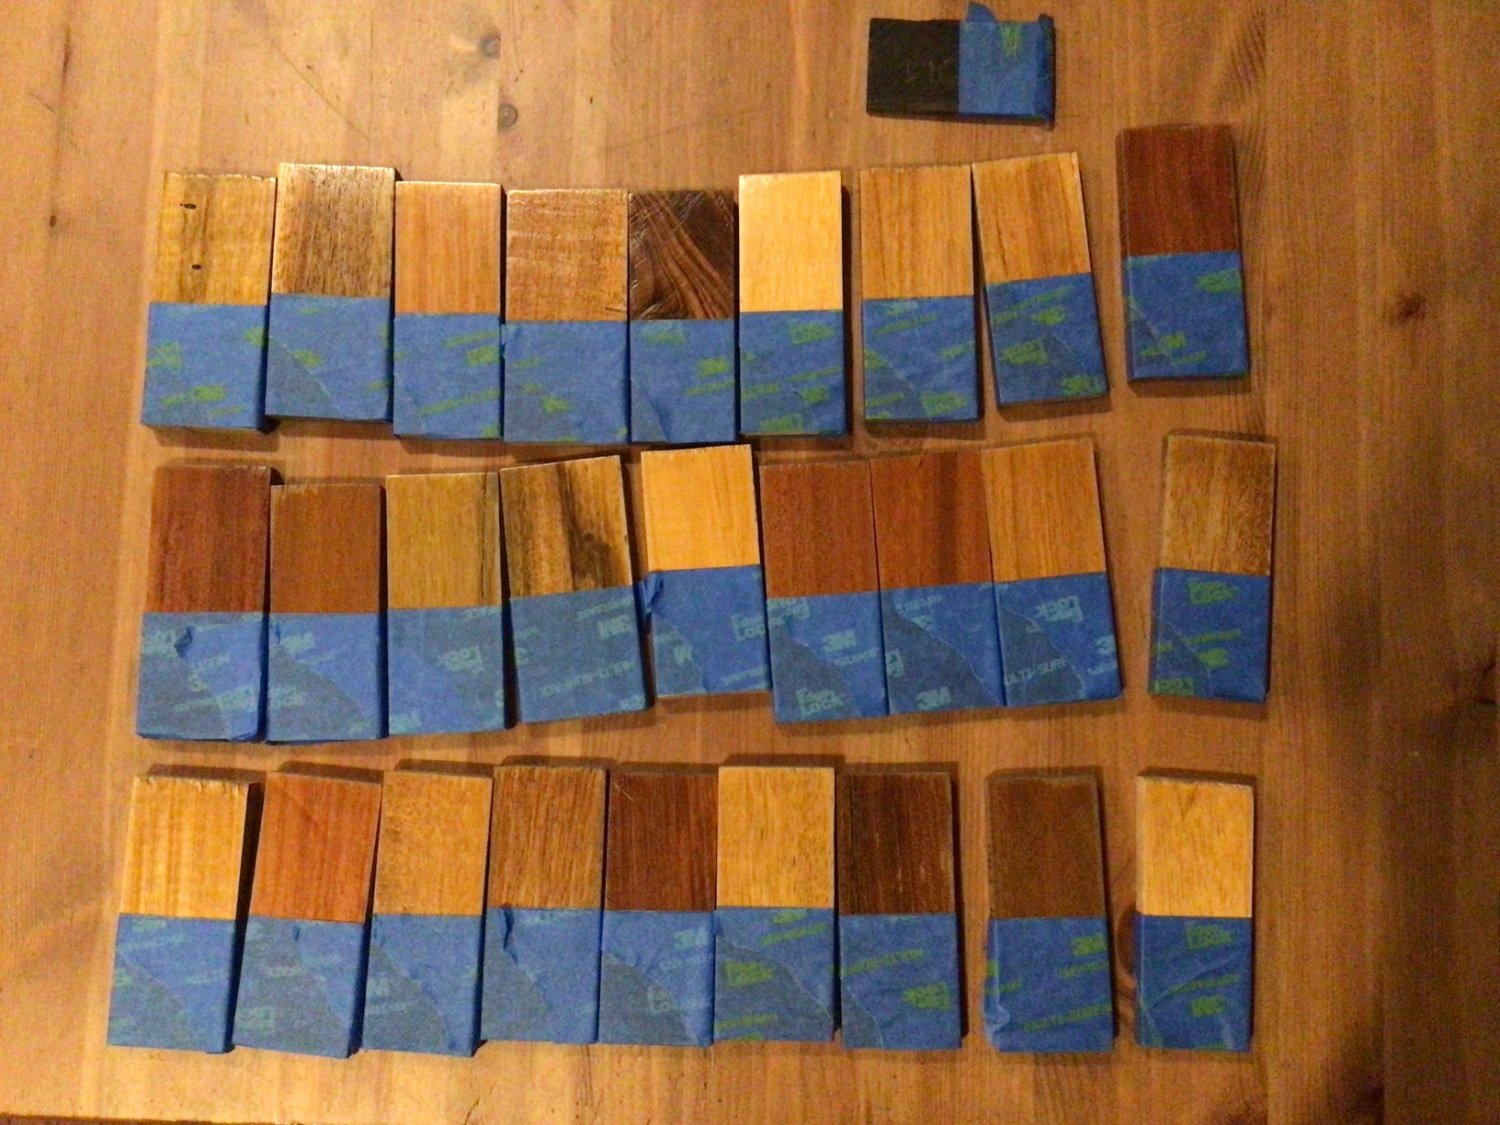
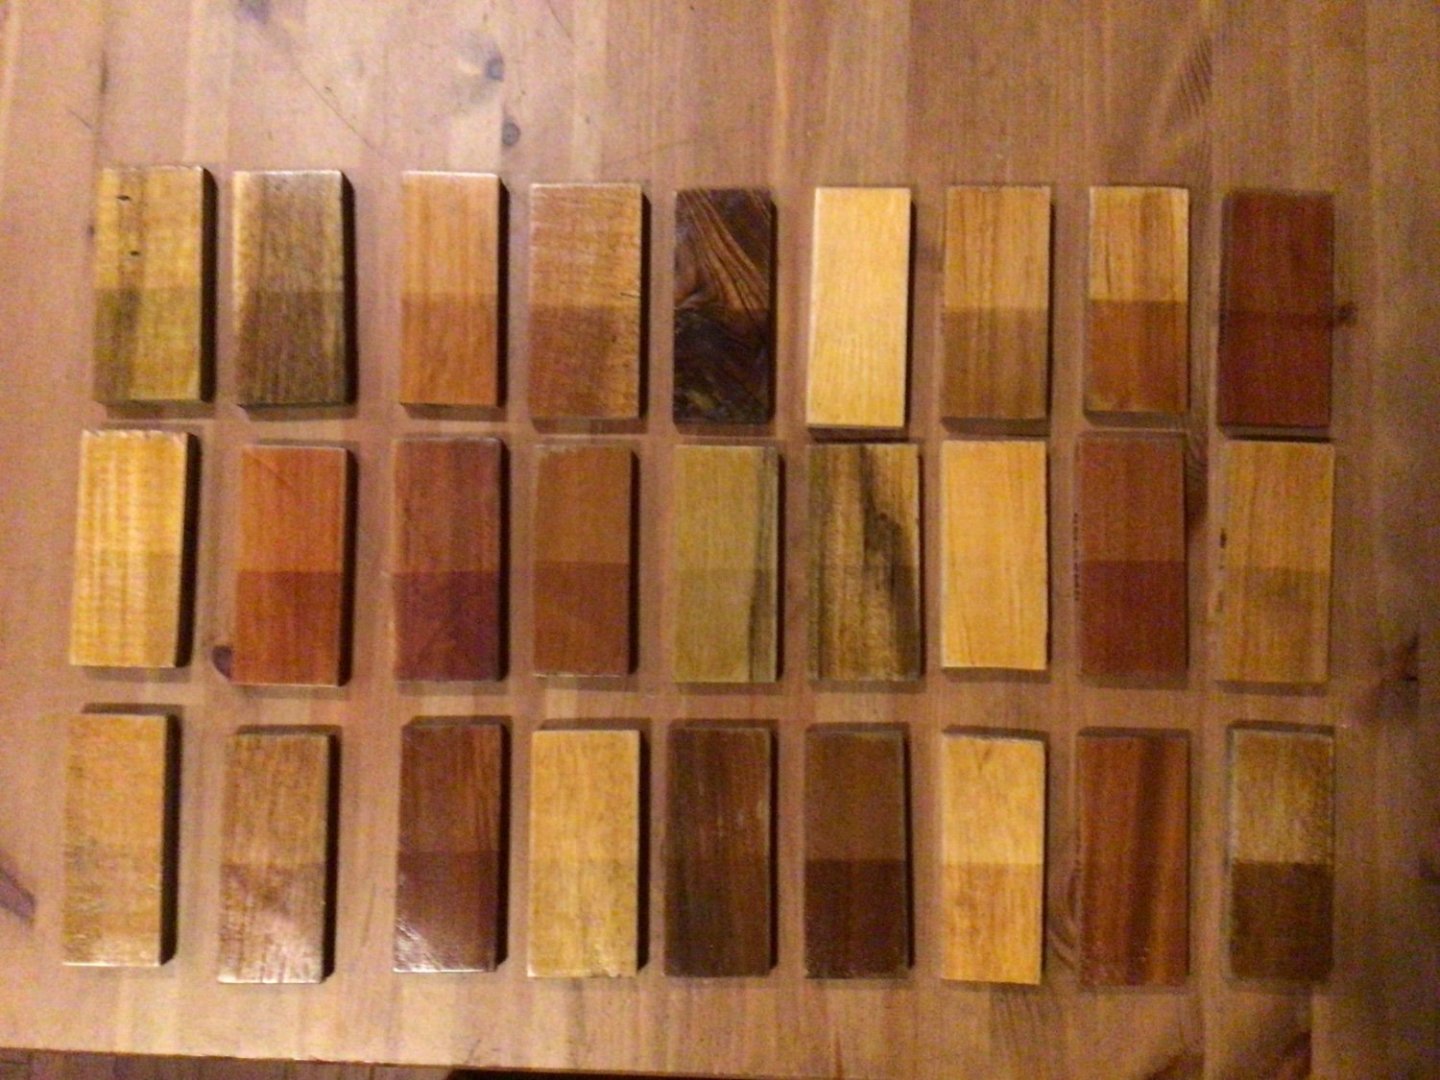
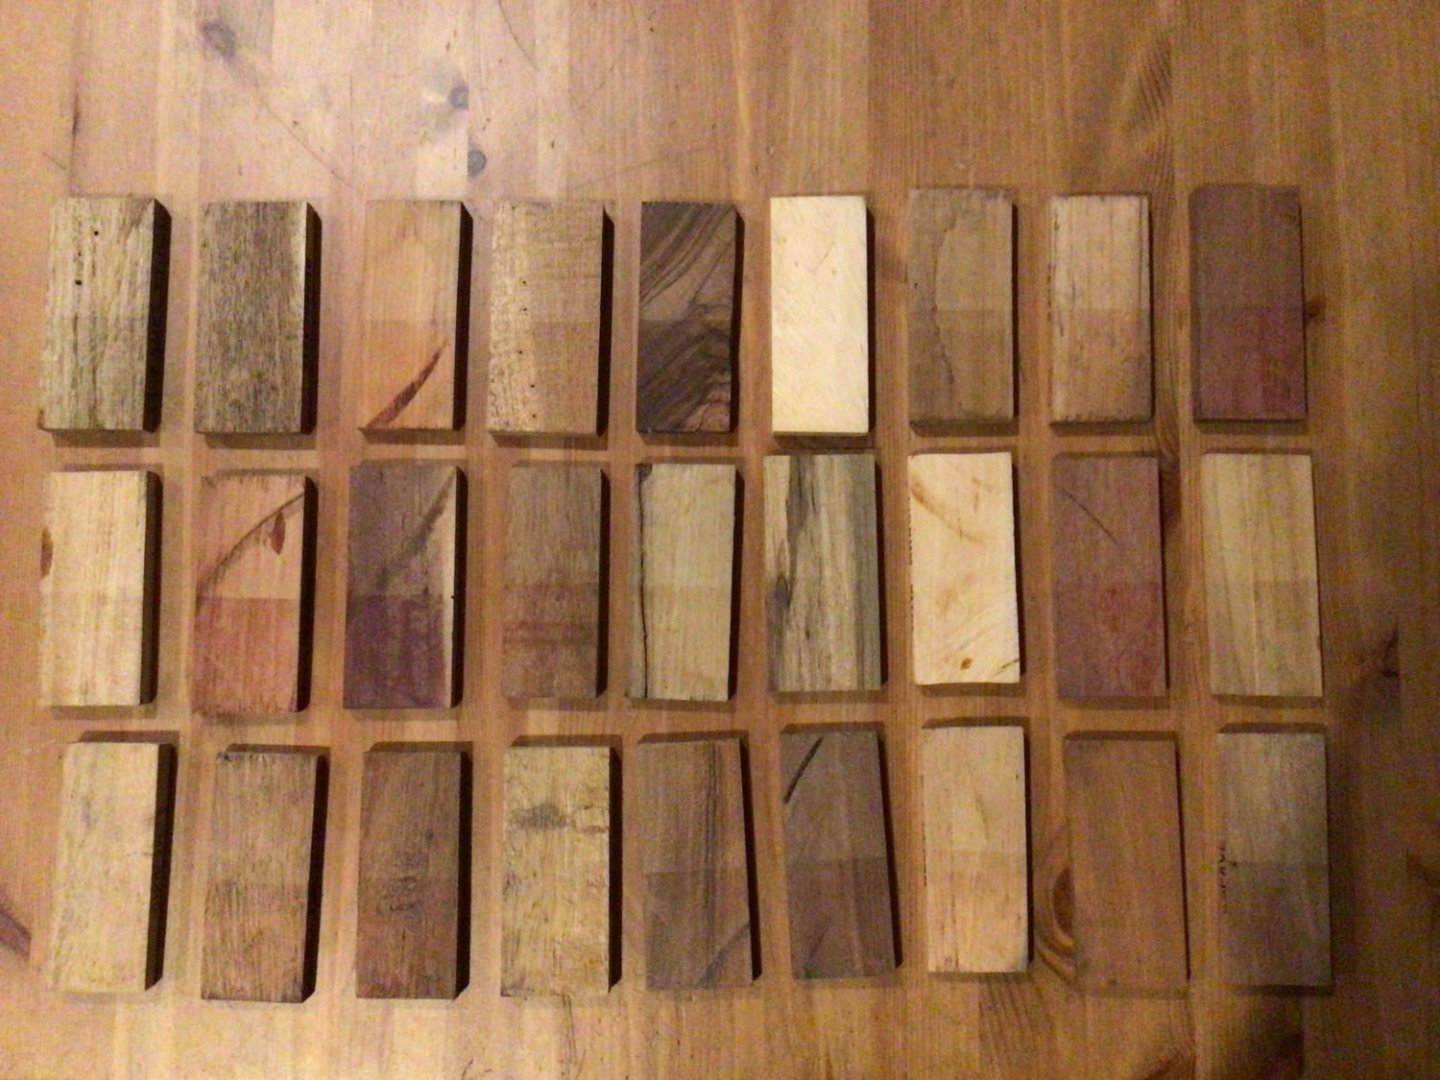
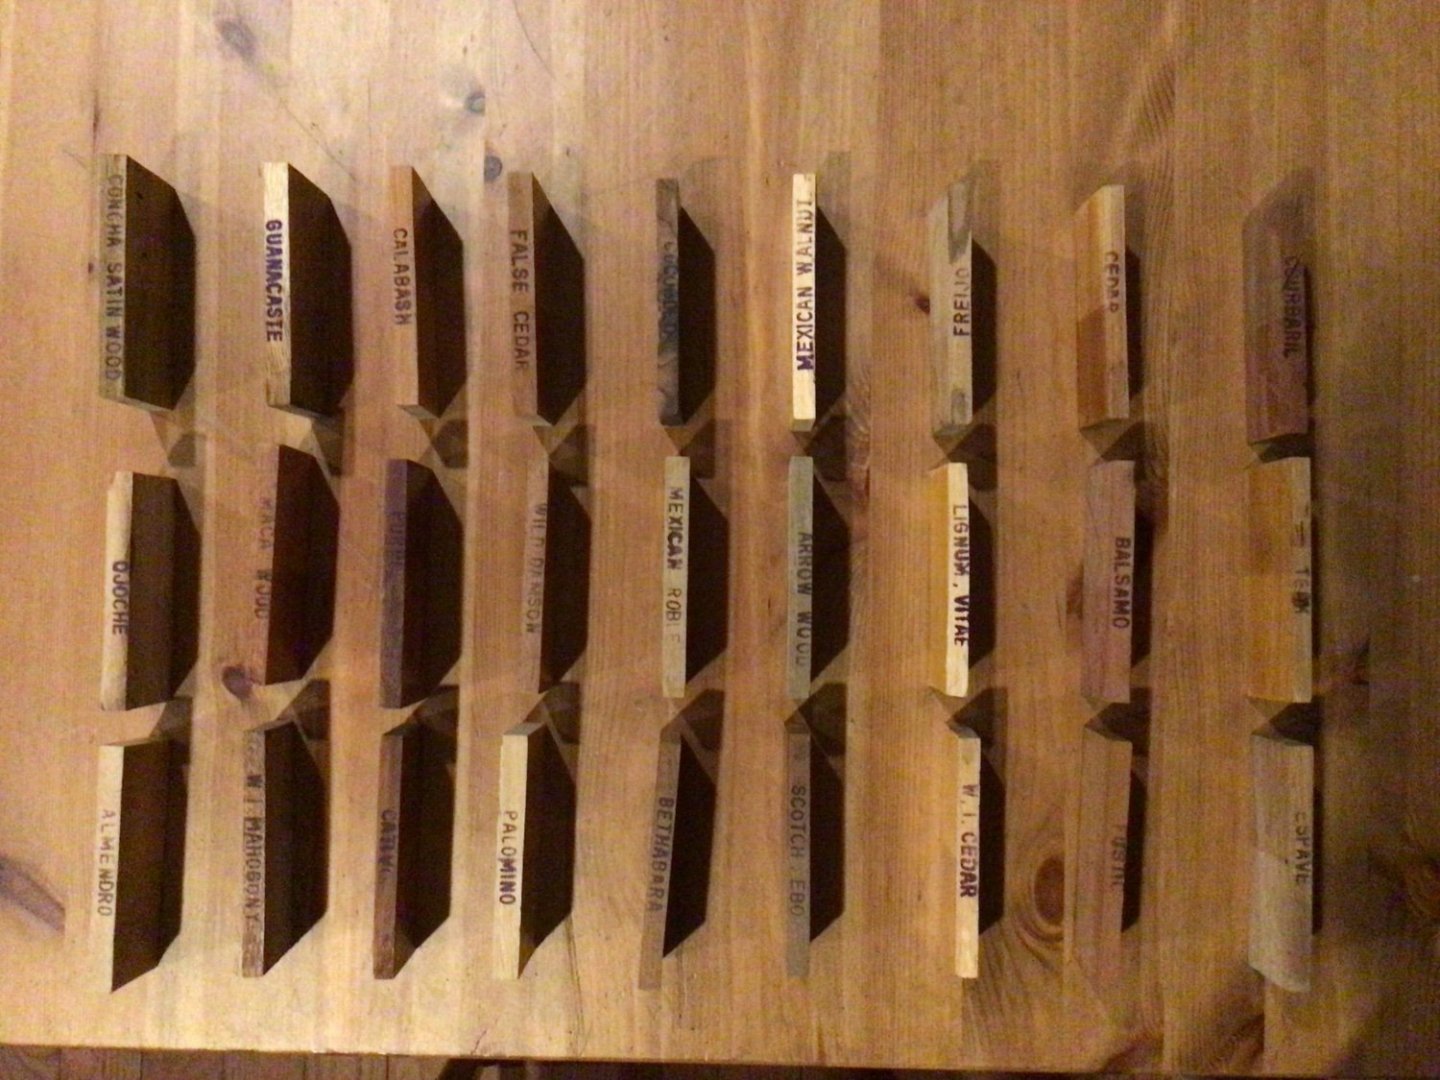
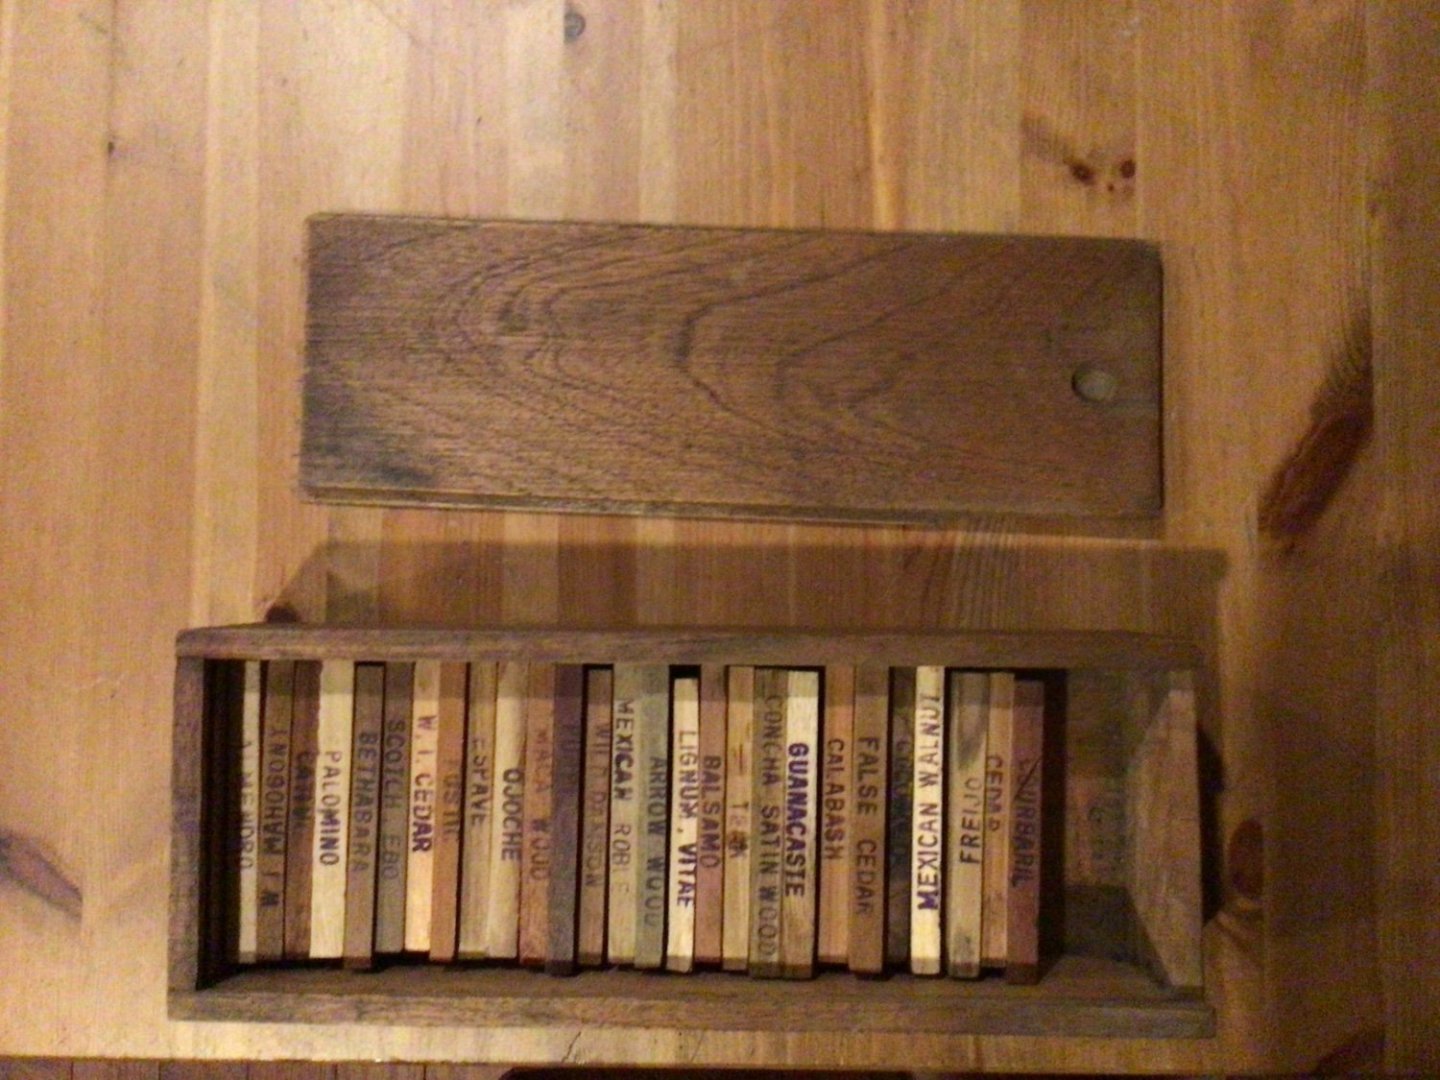
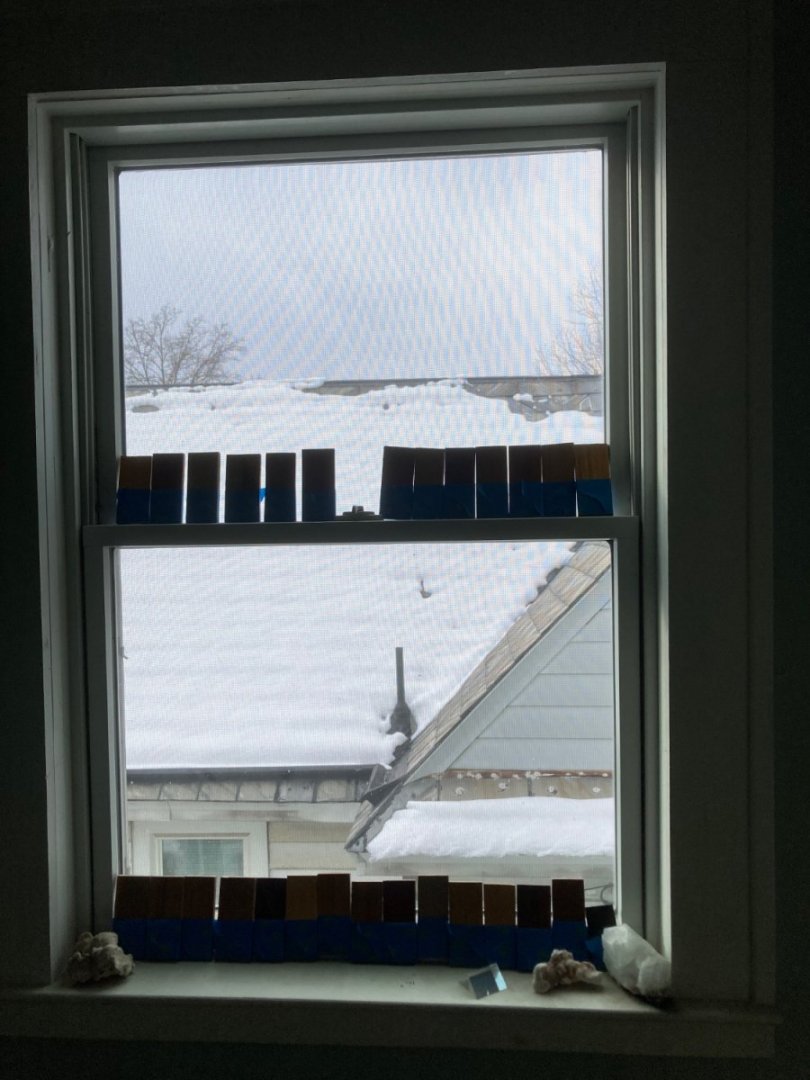
Most of the color change happened of the summer. It doesn’t take years for wood to fade, It take exposure to UV light. A more clever me would have taken a photo of the wood samples when put in the box years ago. The colors didn’t change noticeably over the years in the box. And while exposure to air may be a factor, the finished side would slow those reactions as compared to the unfinished side. I should mention they were flipped over half way through the summer, so both sides would receive similar light during the summer.
-
Here are the results: one side with shellac, one side without (and pictures of the names of the wood).
-
Of possible interest to ship-making folks: I just finished an experiment regarding the fading of wood. I took a number different types of wood and coated one side with a finish, shellac in this case (via French polish) and kept them in a closed box once everything was stable, dry, etc. Fast forward 25 years to the time of Covid. I pulled out the wood samples and covered one half with painters tape and put in a window for about a year to see how much the wood would fade.

-
Thank you! I'm still following your handy 8-step guide: Apply all the plates butting against another vs. layered. My skill wasn't great enough to layer them without it looking horrible. Form each plate to the shape of the hull before trying to glue Cut the plates that need to be cut to shape before applying Apply the plates to the keel starting with the base. Apply to the side of the keel a single row. Apply a single row of plates along the waterline all the way around. Start in the center of the ship starting at the keel and tiling your way out with an overlap. The bow section and stern are the most difficult and require cutting each tile exactly to shape.
-
Thanks for sharing - this is information is useful to nearly everyone at MSW!!
-
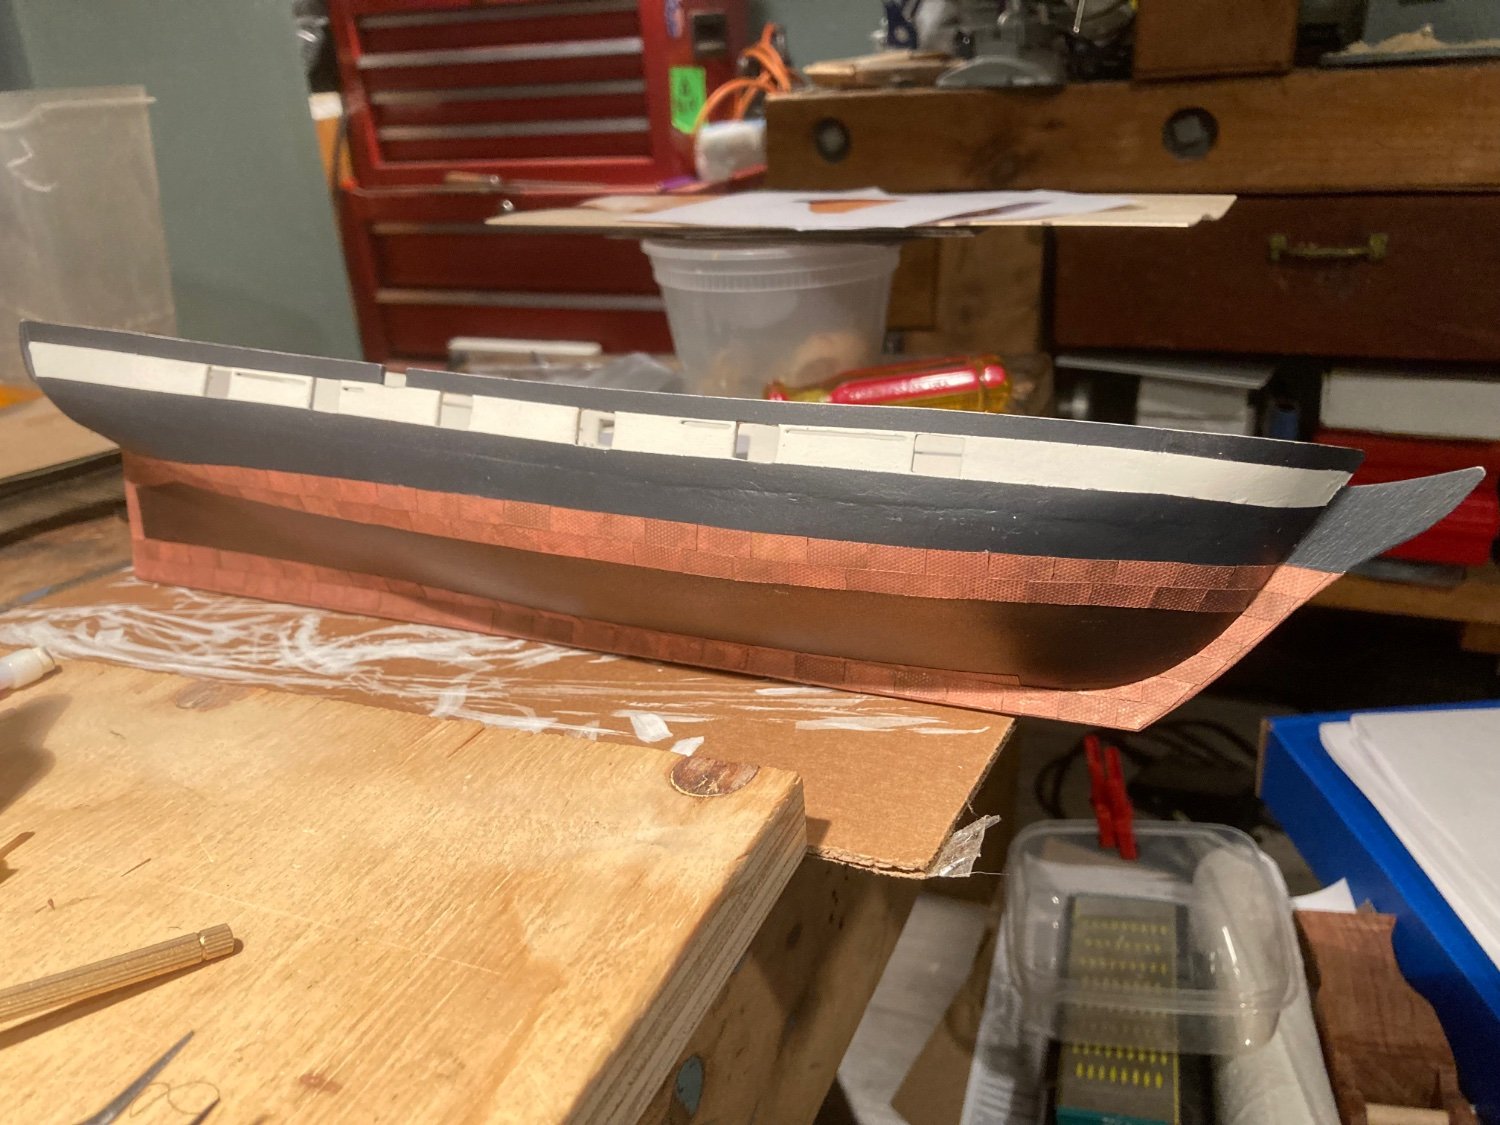
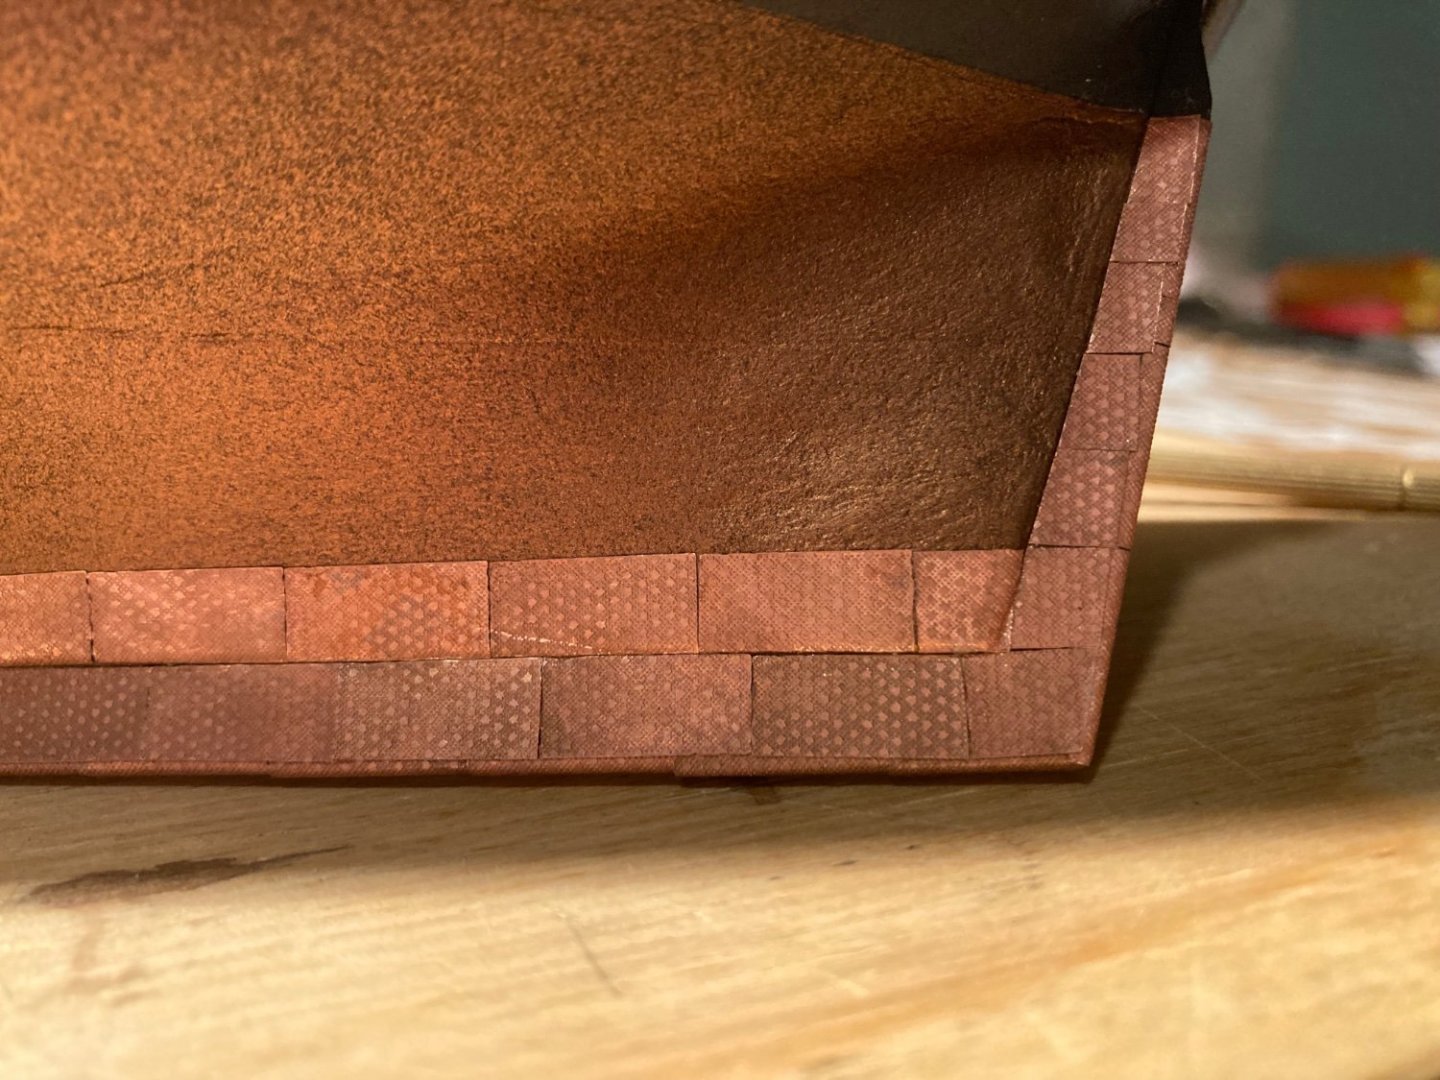
News flash: I’m not fast at the copper!
-
A fair point. A number of items on my build aren’t to scale: my decking, my bulwarks, the exactness of my waterline, the symmetry of the hull, etc, These are all off a bit due to the materials and my abilities and my patience or lack there of. I did think about two other approaches to coppering the hull. One, airbrushing to suggest plating - a technique used in plastic models of 20th century warships for decks or to suggest plating. The other, using copper leaf applied to paper to create plates. Copper tape seems to be the path most folks follow. For those who read my previous build log may remember I tried my hand at oil gilding for a carving I made. @sjanicki used plates on his Perry and I thought I would give it a shot. I couldn’t find any period/contemporary information regarding plate size or dimensions of the copper sheets or gore lines or number or pattern of copper nails used, etc. Most of the information I could find is from non-naval ships of half a century later! So a couple thoughts and a question: Do you have a reference for the dimensions of the plates or colors? I agree they would be thin but I couldn’t find any information regarding length or width other than perhaps being four feet in length. Nor consensus regarding what a coppered hull should look like “at rest”. I did find an article by Jim Roberts suggesting colors as you have and found a mention about the wear and tear of merely sailing in salt water on copper which leaves the copper fresh. But have found countering color suggestions based on the source and manufacturing of the copper or if the ship was at rest or sailing, in the water or out (and for how long). I’ve thought about aging copper in salt water just to see for myself! There is also the issue @Keith Black suggested as well. Very few models of this period or earlier are displayed weathered, worn and otherwise shown as used (or abused). While I haven’t discussed it here, when looking for details in photos of nineteenth century vessels, they are often messy; I don’t understand the clutter of a working ship enough to model it, let alone the skill to model it. (I have never seen a doll house with laundry on the floor or dirty dishes or unmade beds…) So I’m following the conventions of present day modeling as a rough guide to learning the skills needed to do this work. These issues will arise for me again regarding sails and crew later, items usually skipped by modelers. I have to admit, a bit green patina and a overspray of tint on the copper would hide my sins with copper so far! Thank you @Roger Pellett for the suggestion and nice work on the.Royal Navy Longboat!
-
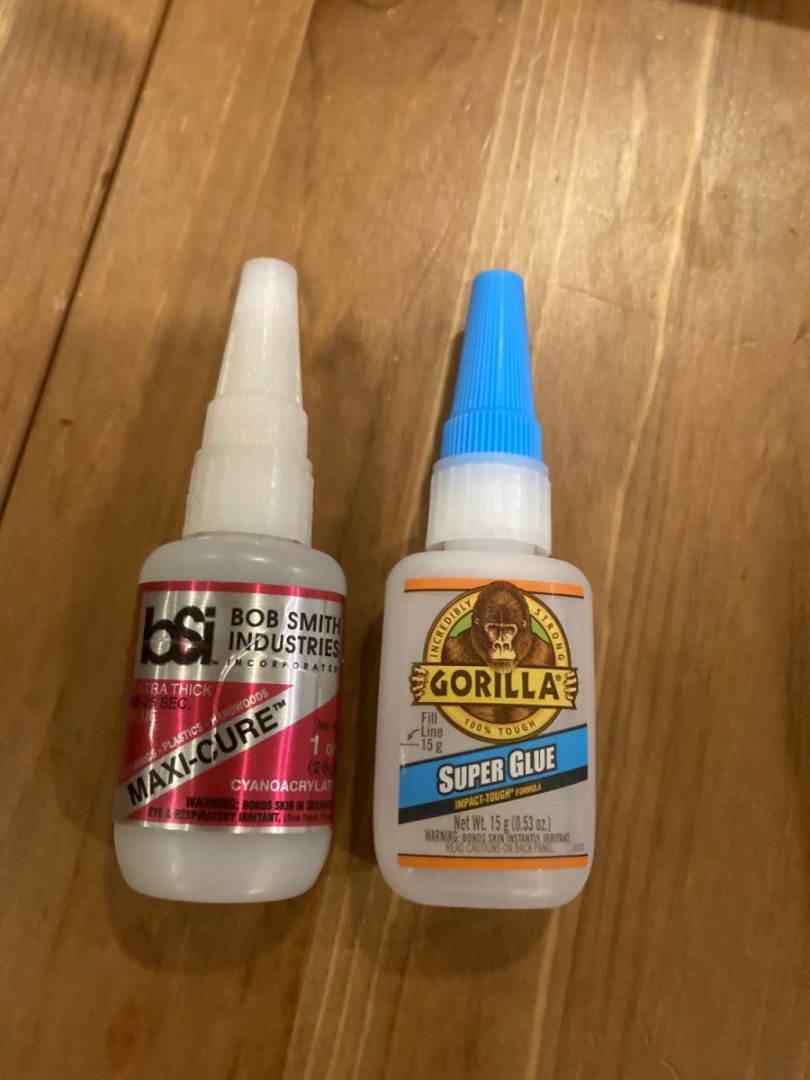
Someone asked via direct message for a photo of the glue I use. These are the two bottles I’ve used so far. In the past, if there is an option I buy gel or gap filling CA.