HOLIDAY DONATION DRIVE - SUPPORT MSW - DO YOUR PART TO KEEP THIS GREAT FORUM GOING! (Only 13 donations so far - C'mon guys!)
×

.jpeg.7d7eba14c97a2e1d9f79cd2c97f6424a.jpeg)
EricWilliamMarshall
-
Posts
986 -
Joined
-
Last visited
Content Type
Profiles
Forums
Gallery
Events
Everything posted by EricWilliamMarshall
-
.thumb.jpeg.fc5d633a7b34428fcf19419a73d56d55.jpeg) I hit the same problem. I find if I submit and then ‘edit’ the entry I can retry to upload with success. Beautiful build!
I hit the same problem. I find if I submit and then ‘edit’ the entry I can retry to upload with success. Beautiful build! -
I hit this often myself. I have found if save my entry and edit, I can add the missing image without issue.
- 2,696 replies
-
- 4
-

-
- heller
- soleil royal
- (and 9 more)
-
Congrats on weathering the surgery and the build looks great.
- 505 replies
-
- 8
-
-
- vanguard models
- Sphinx
- (and 1 more)
-
Ryland, thanks for the kind words! I will try flames as well! Thanks for the tip!
-
It says: “ This site is temporarily closed pending the possible sale of the company. More news should be available soon. Thank you very much for your patronage and your patience. Check back on this site in January. -- Cathy and Bob ”
-
I’ll give that a shot and see how it goes. Thanks,
-
In this case, Gorilla Glue and earlier in this build a rebranded version from Maplewood Hobby. I haven’t noticed a great difference between brands. I have noticed is regarding viscosity. Over time any glue I have opened becomes thicker. The same is true for dab of glue sitting on the lid. Thin glue spreads easily and will run along folds, seams, etc. where as thick glue will fill gaps and can be deployed in ‘lumps’. Thank you, thank you, thank you! I’ve have noticed, if I move quickly, I can sometimes wipe away excess CA glue before it dries, that it can sit on a piece for a bit and still be good and not be afraid to ‘do over’ if I screw up. I try to be extra careful not to have the glue squeeze out. No great insights or dark magic at work here.
-
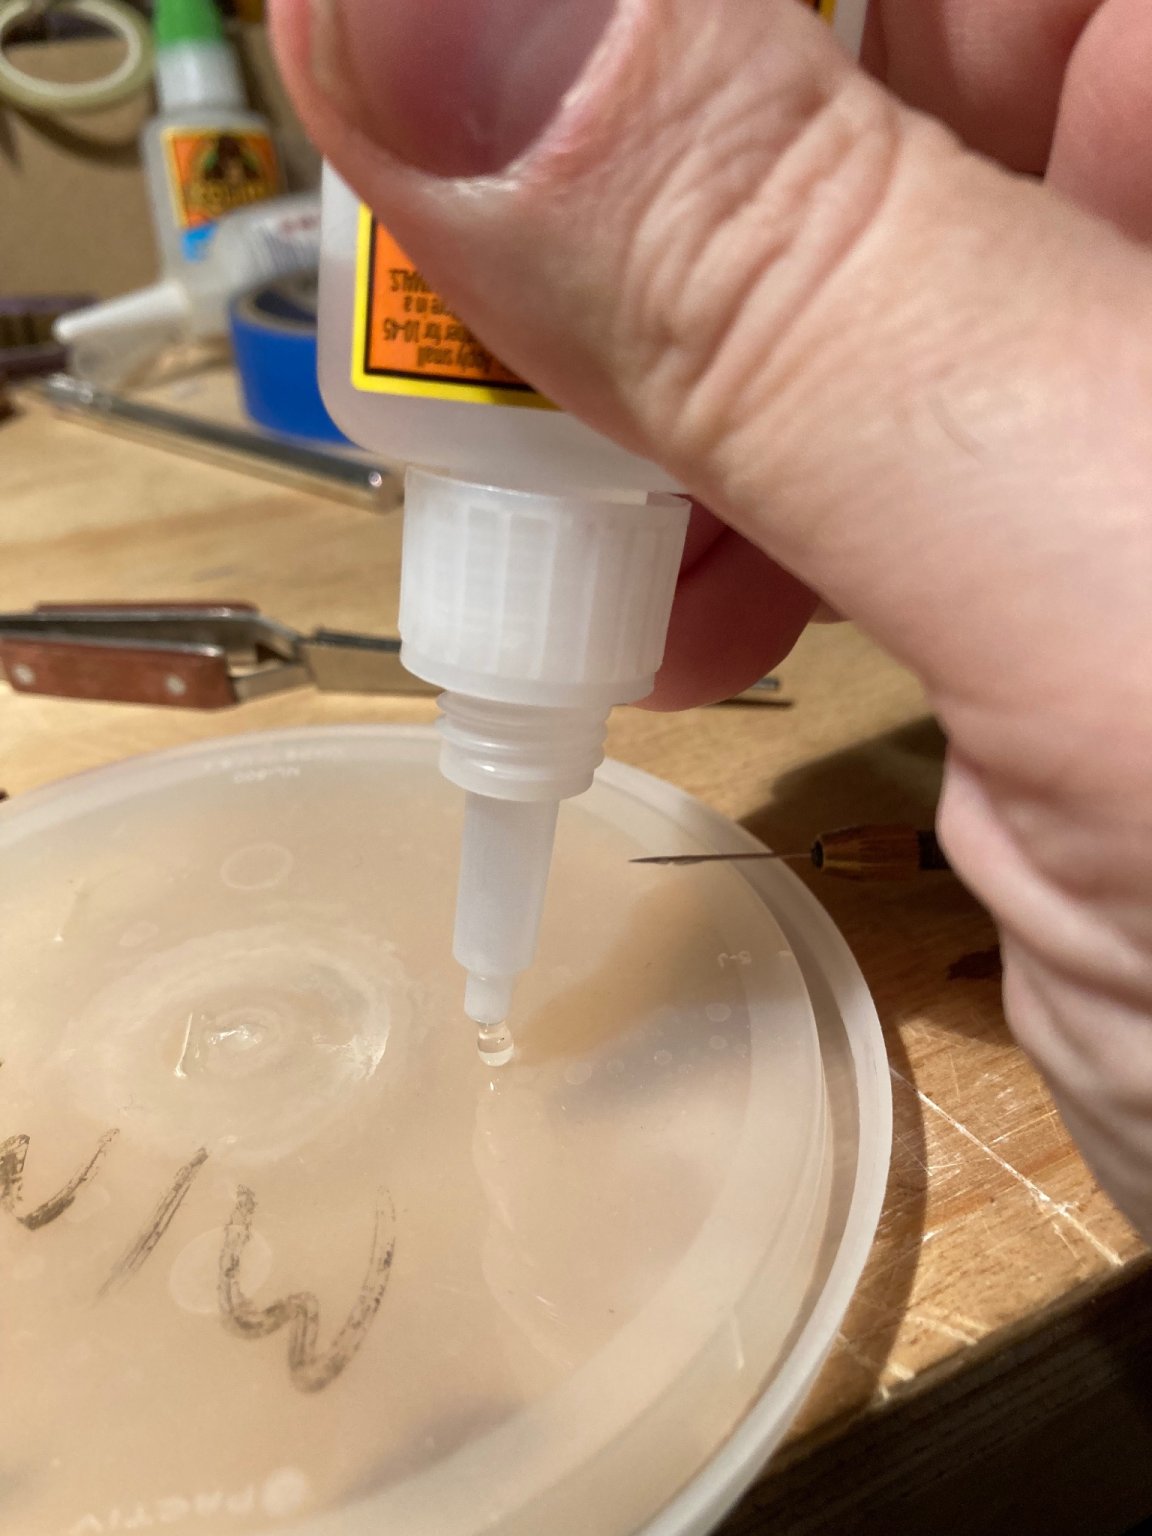
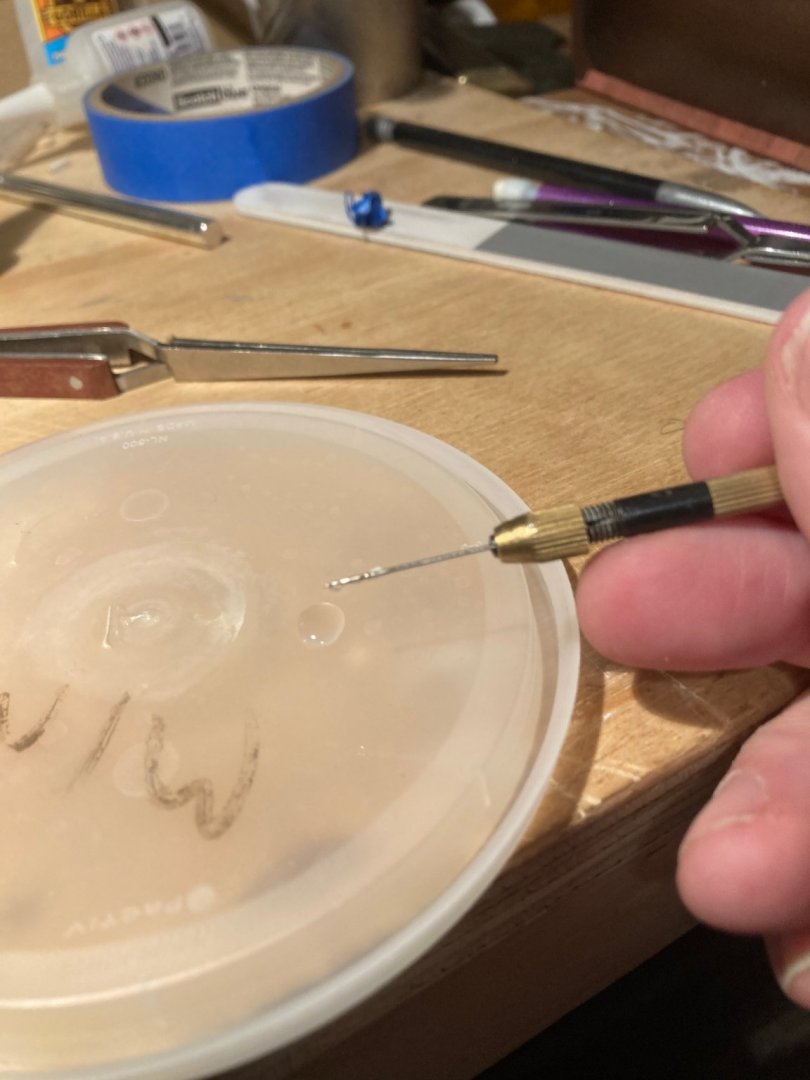
How do folks apply glue? As for myself, I use a needle mounted in a pin vise. I put a drop or two of CA on to an old lid from take out food or similar. The drop stays liquid for roughly an hour or so. I find using this setup conserves glue, reduces the fumes and gives great control. The glue will build up on the pin. This is easily popped off the pin by scraping the pin against an x-acto blade. I use the back of the blade so not to dull the blade. It is also a nice reminder of the limited strength of CA glue to bond to metal.

-
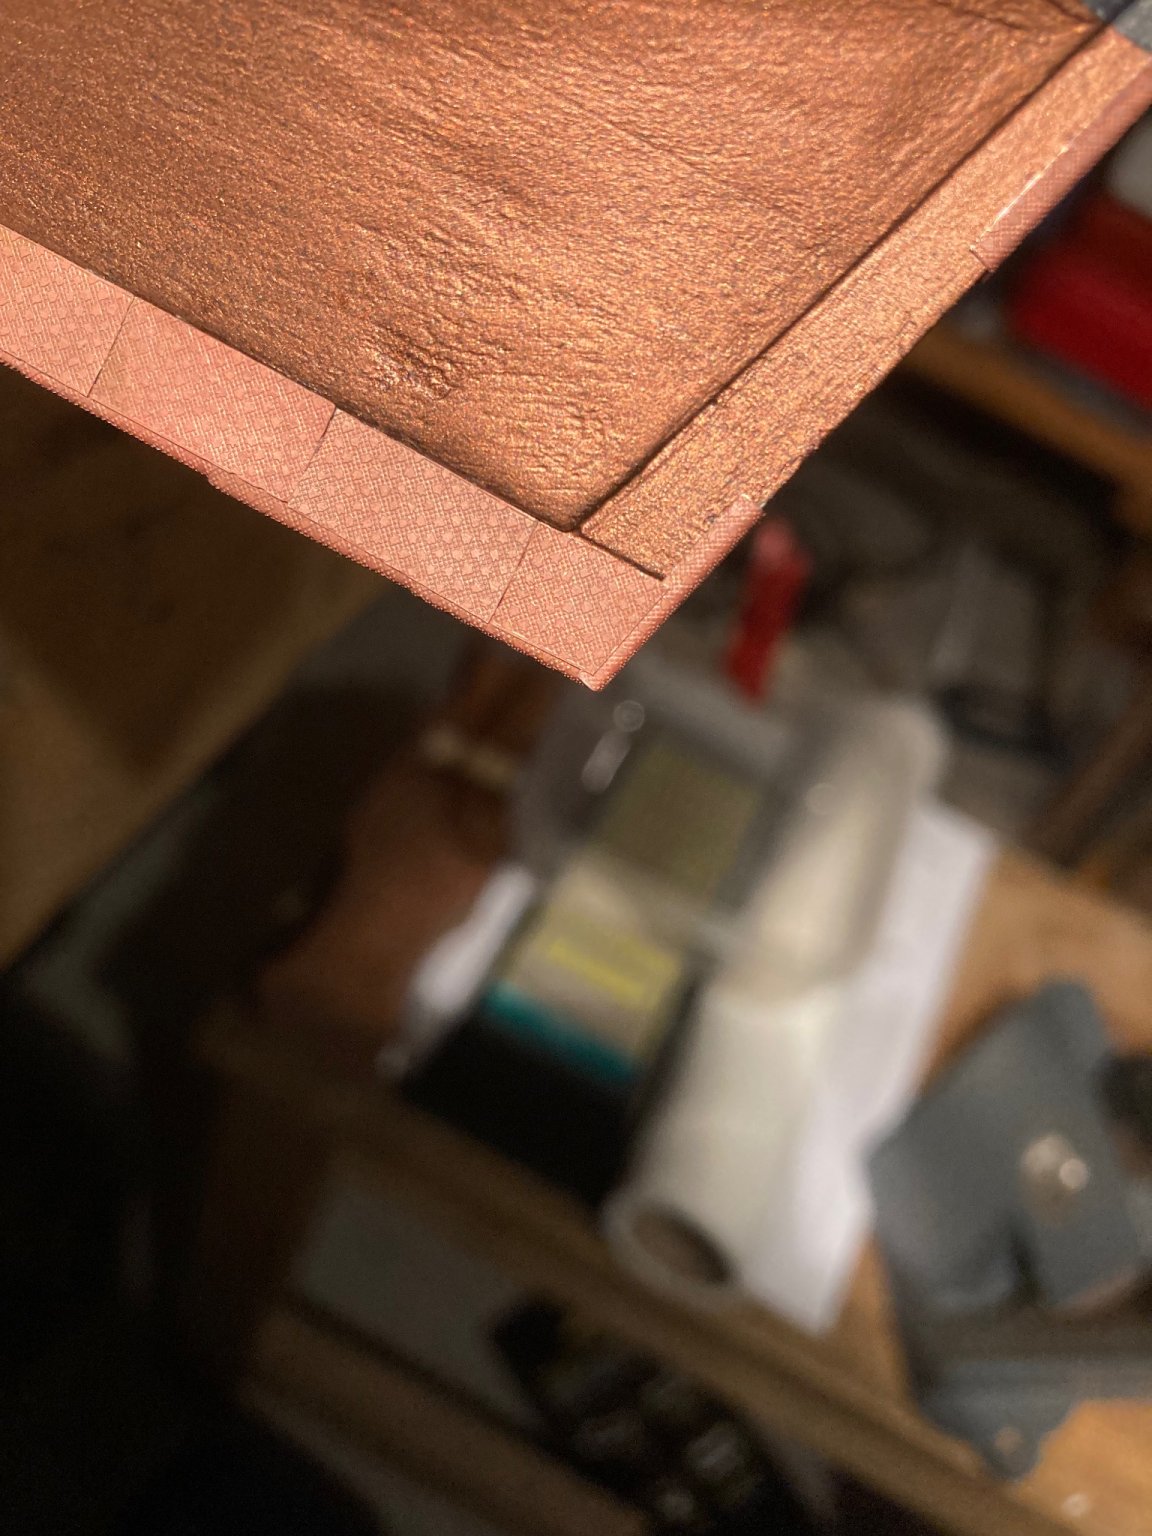
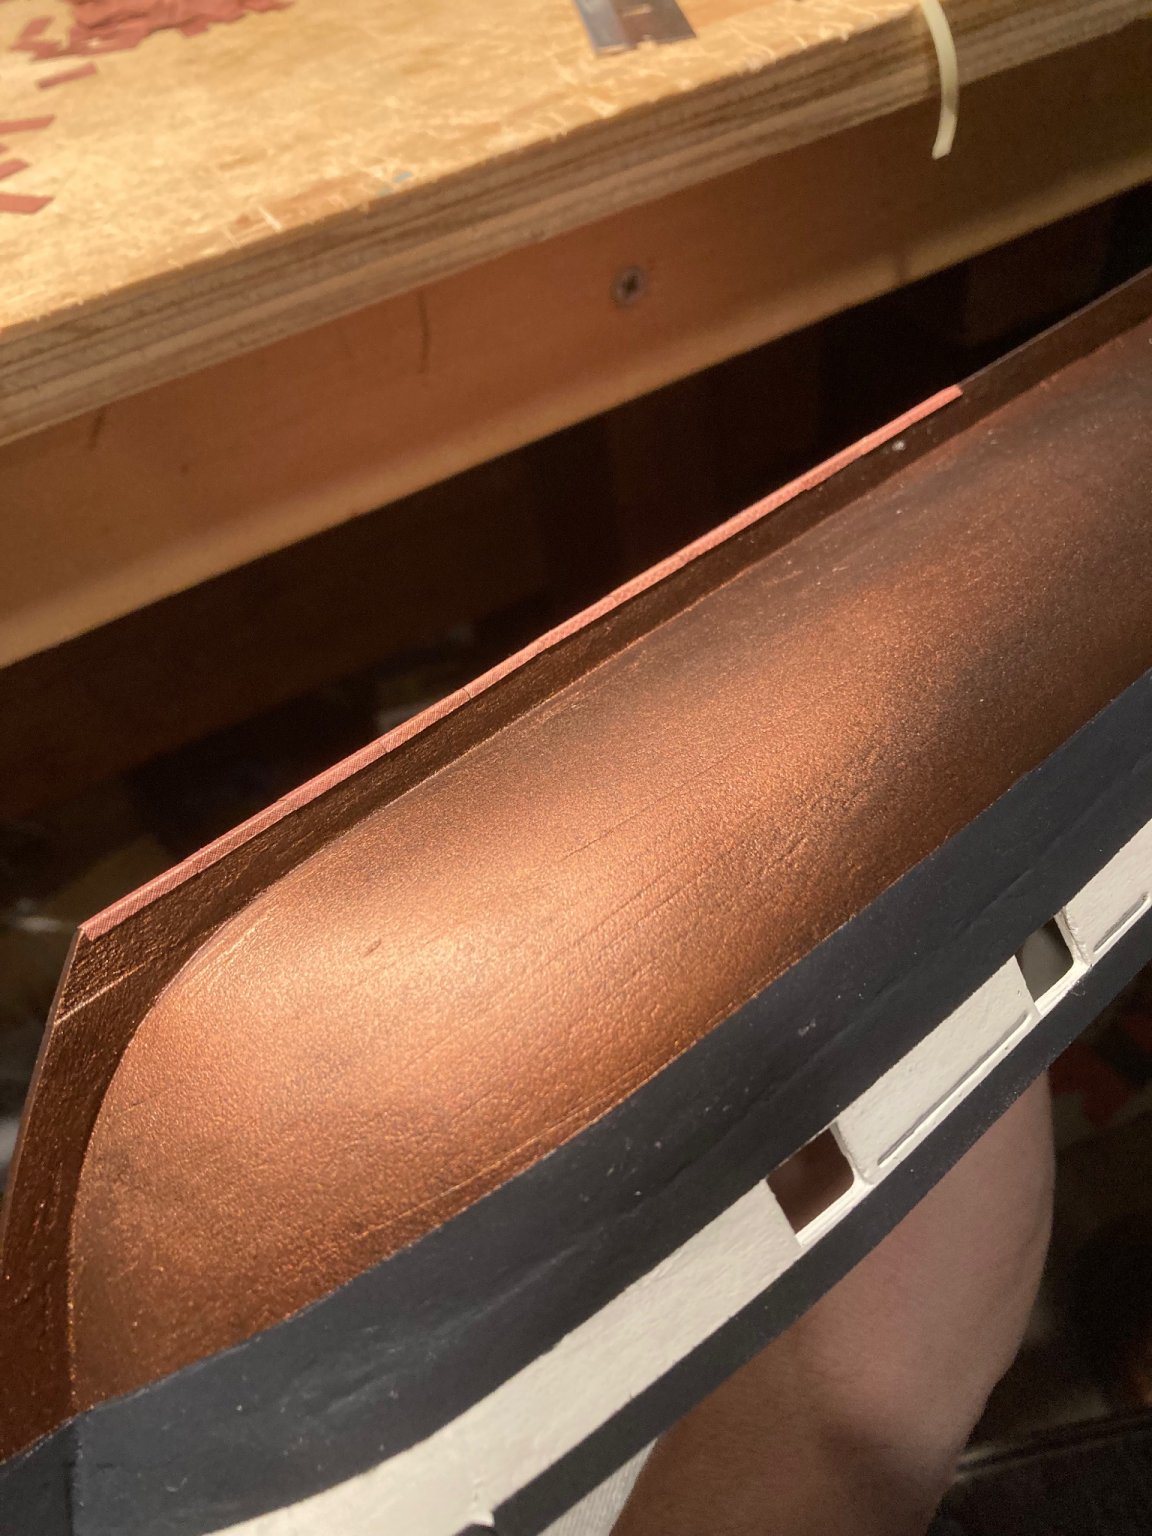
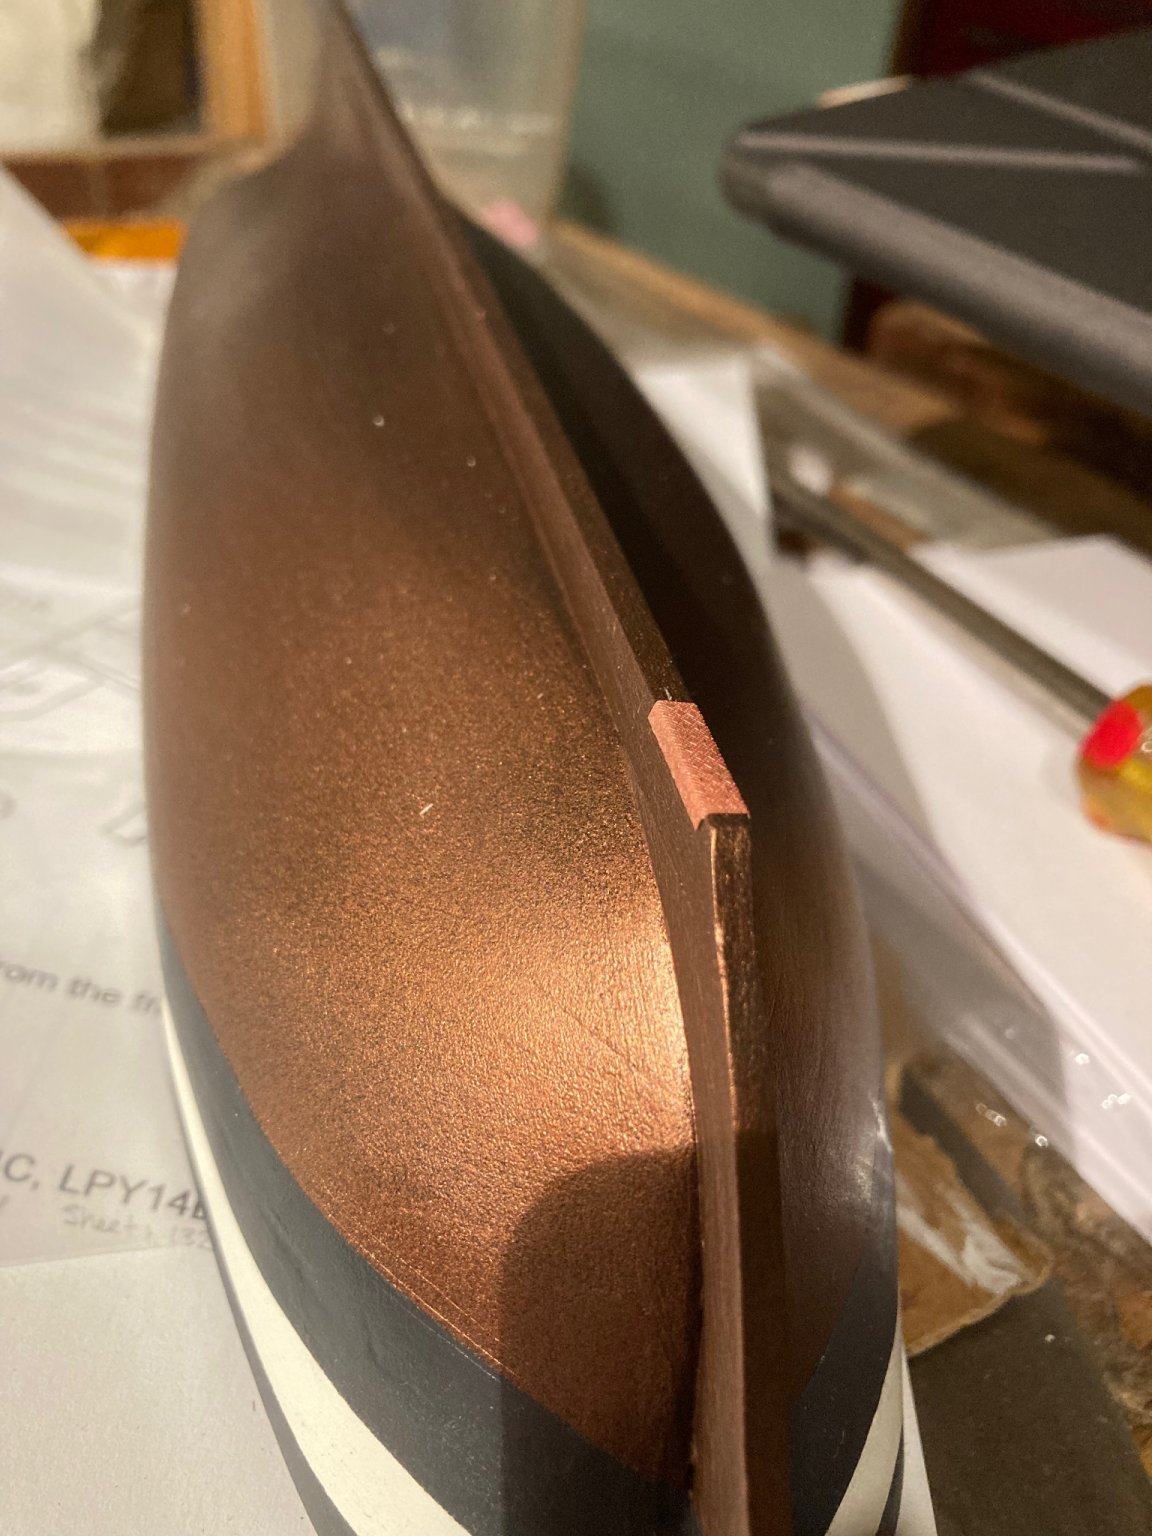
Not much to report. Still working on the coppering of the hull. I started with the keel, which is nice and flat; so works as a nice safe place to start. The annealed copper is easy to unbend (by rolling the handle of my x-acto knife over the bend piece).


-
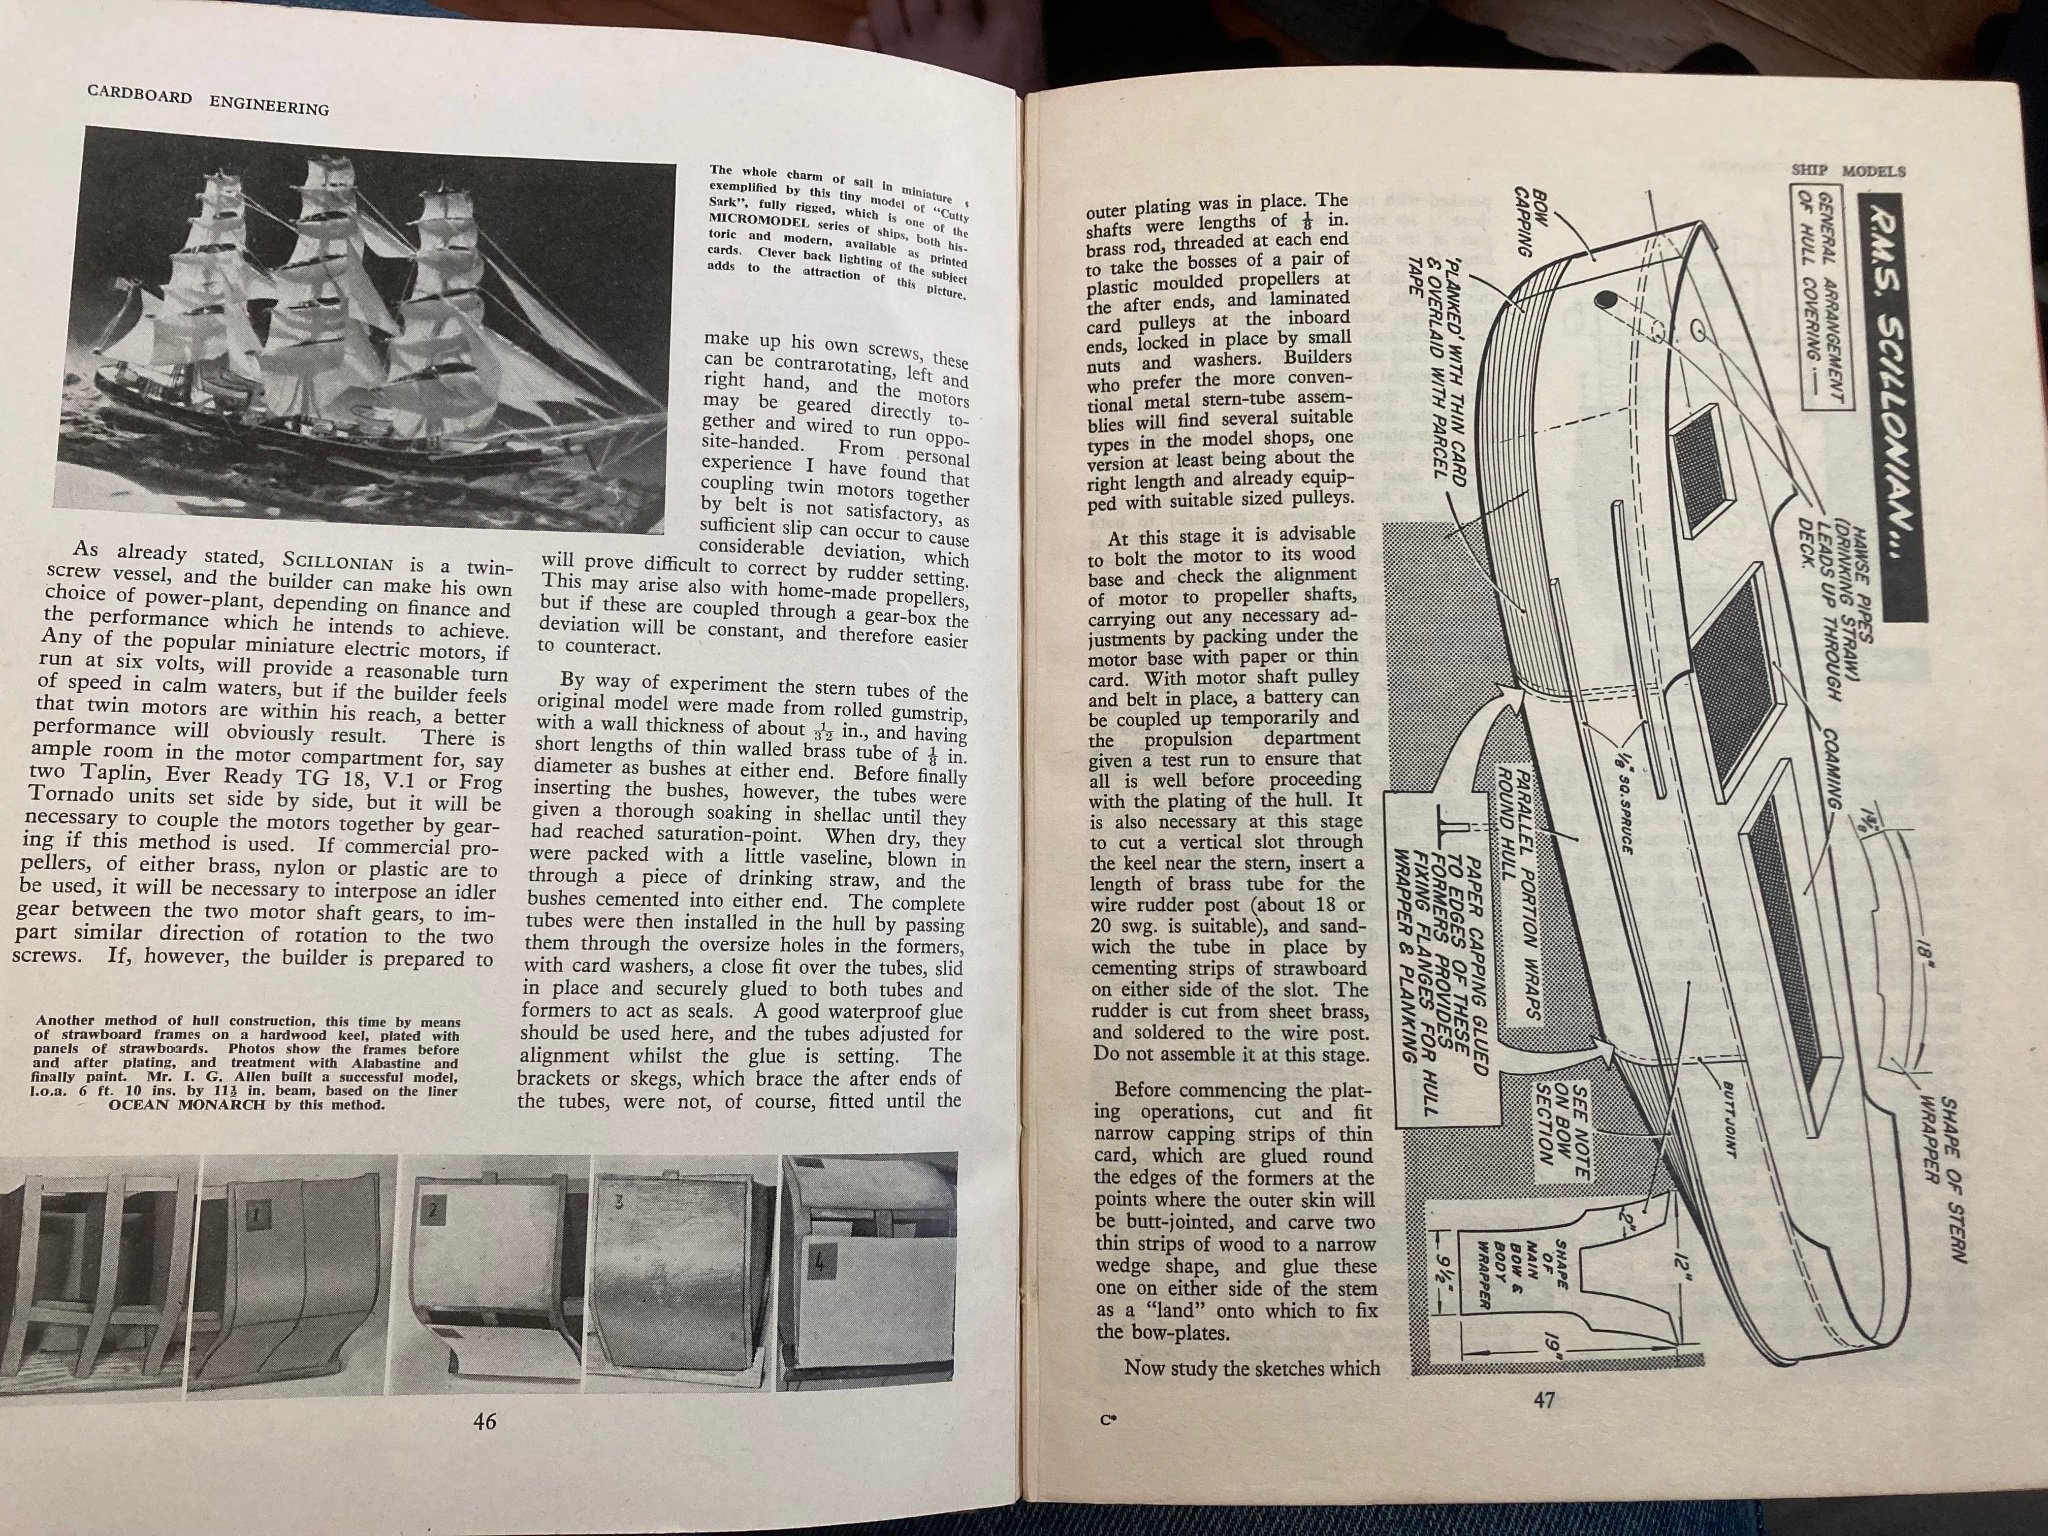
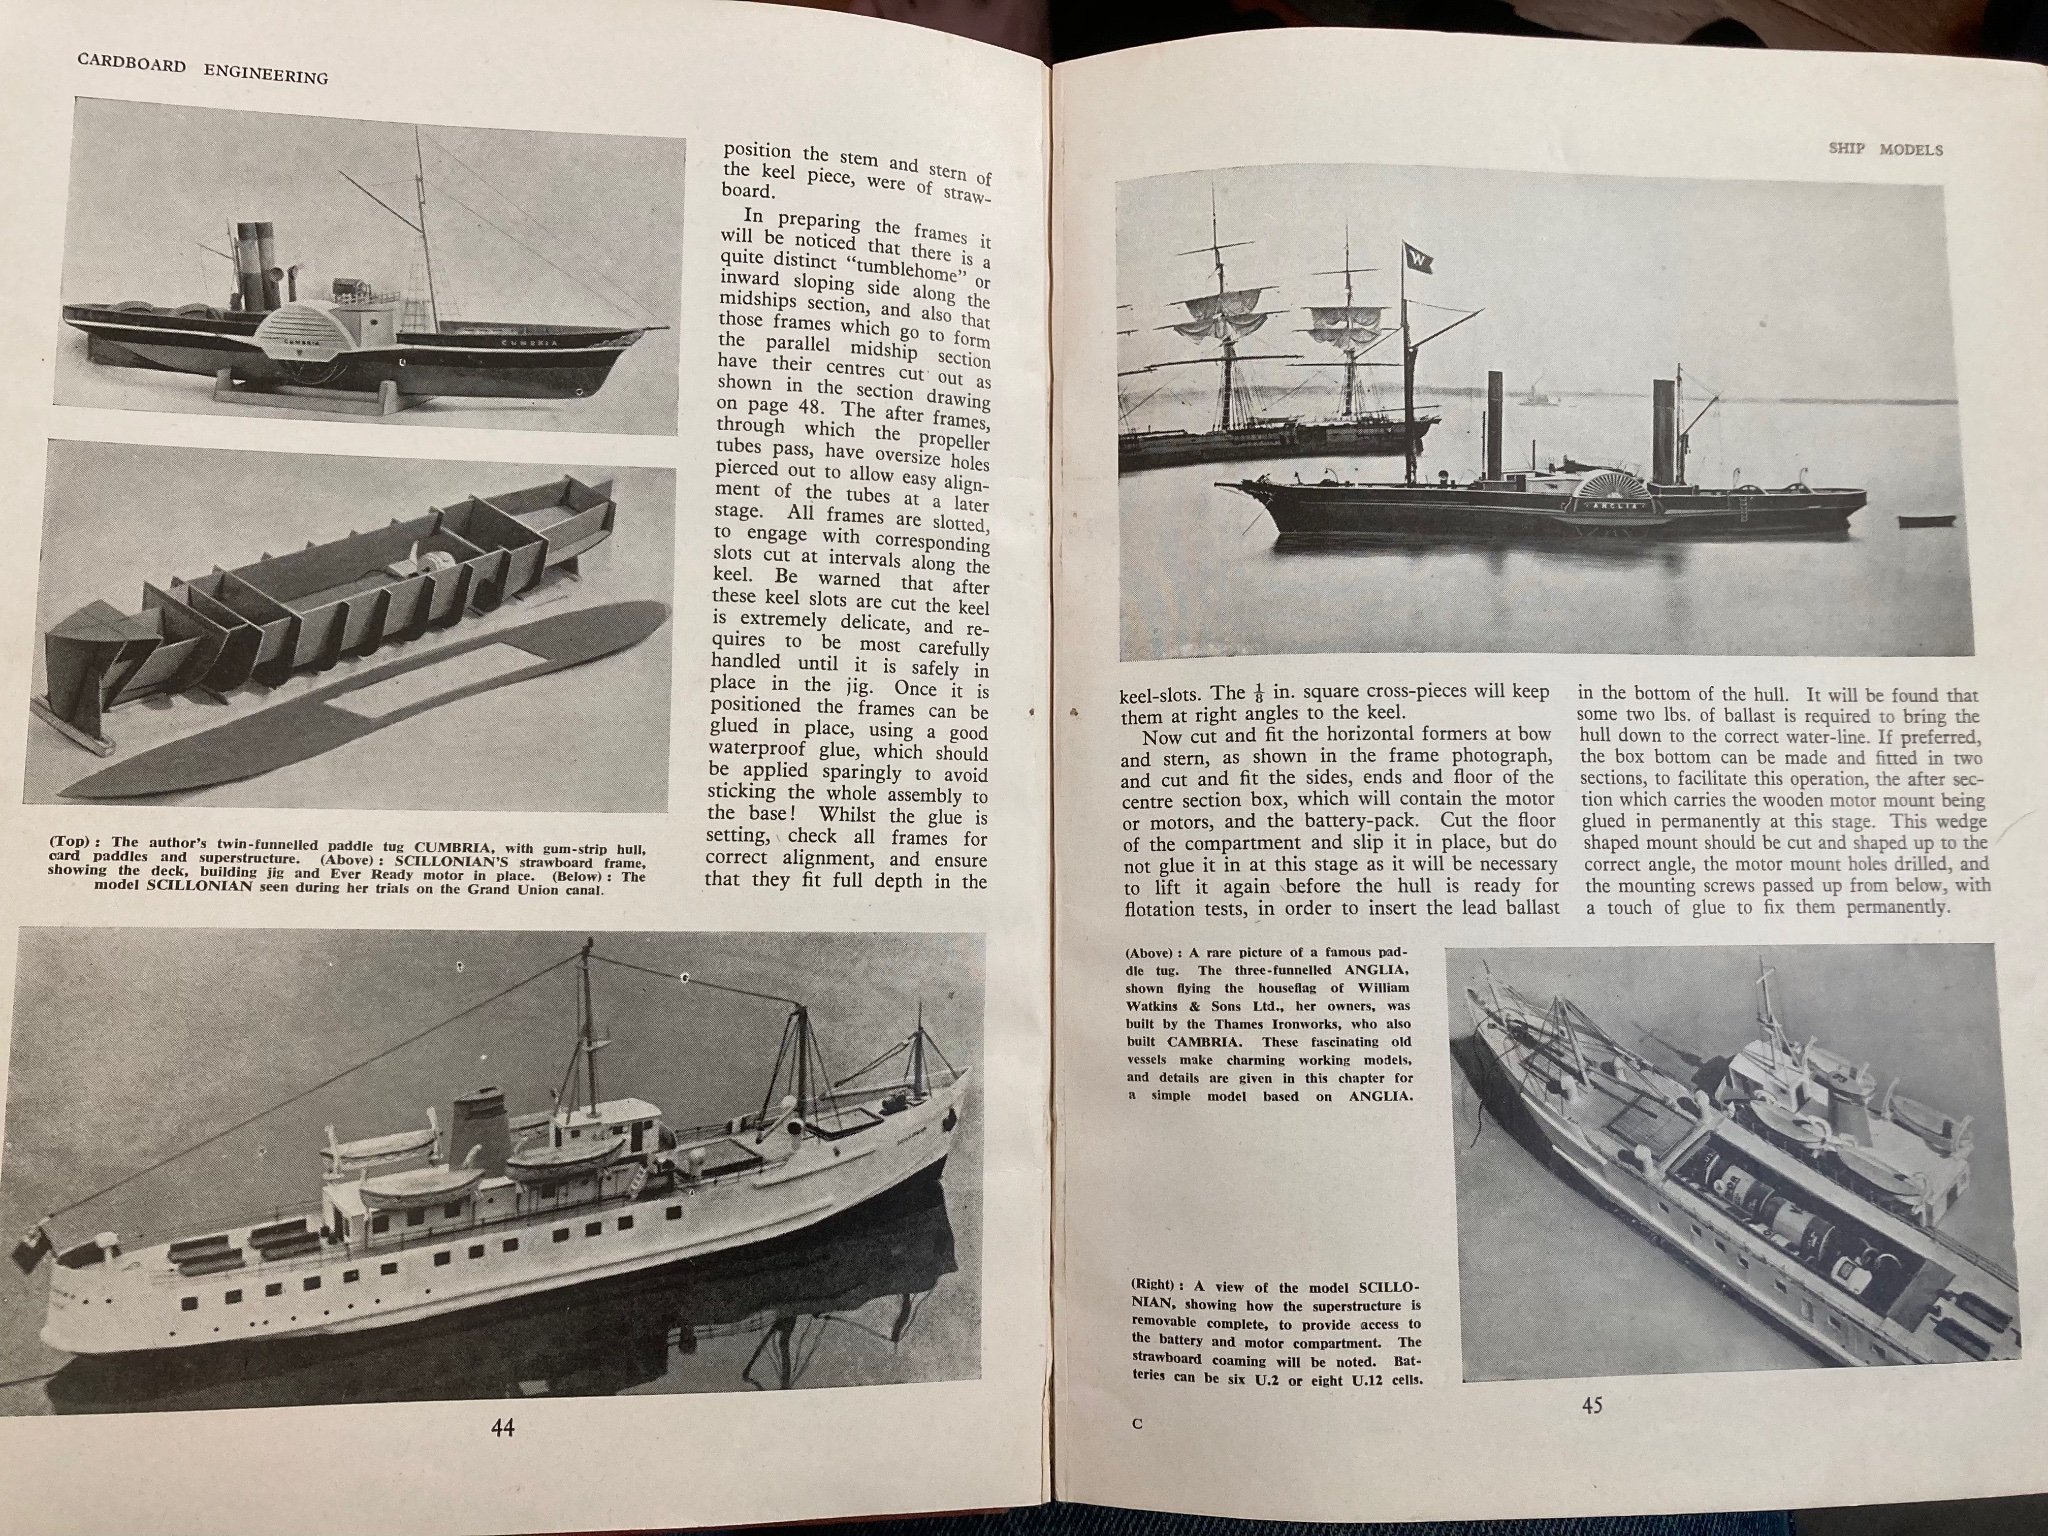
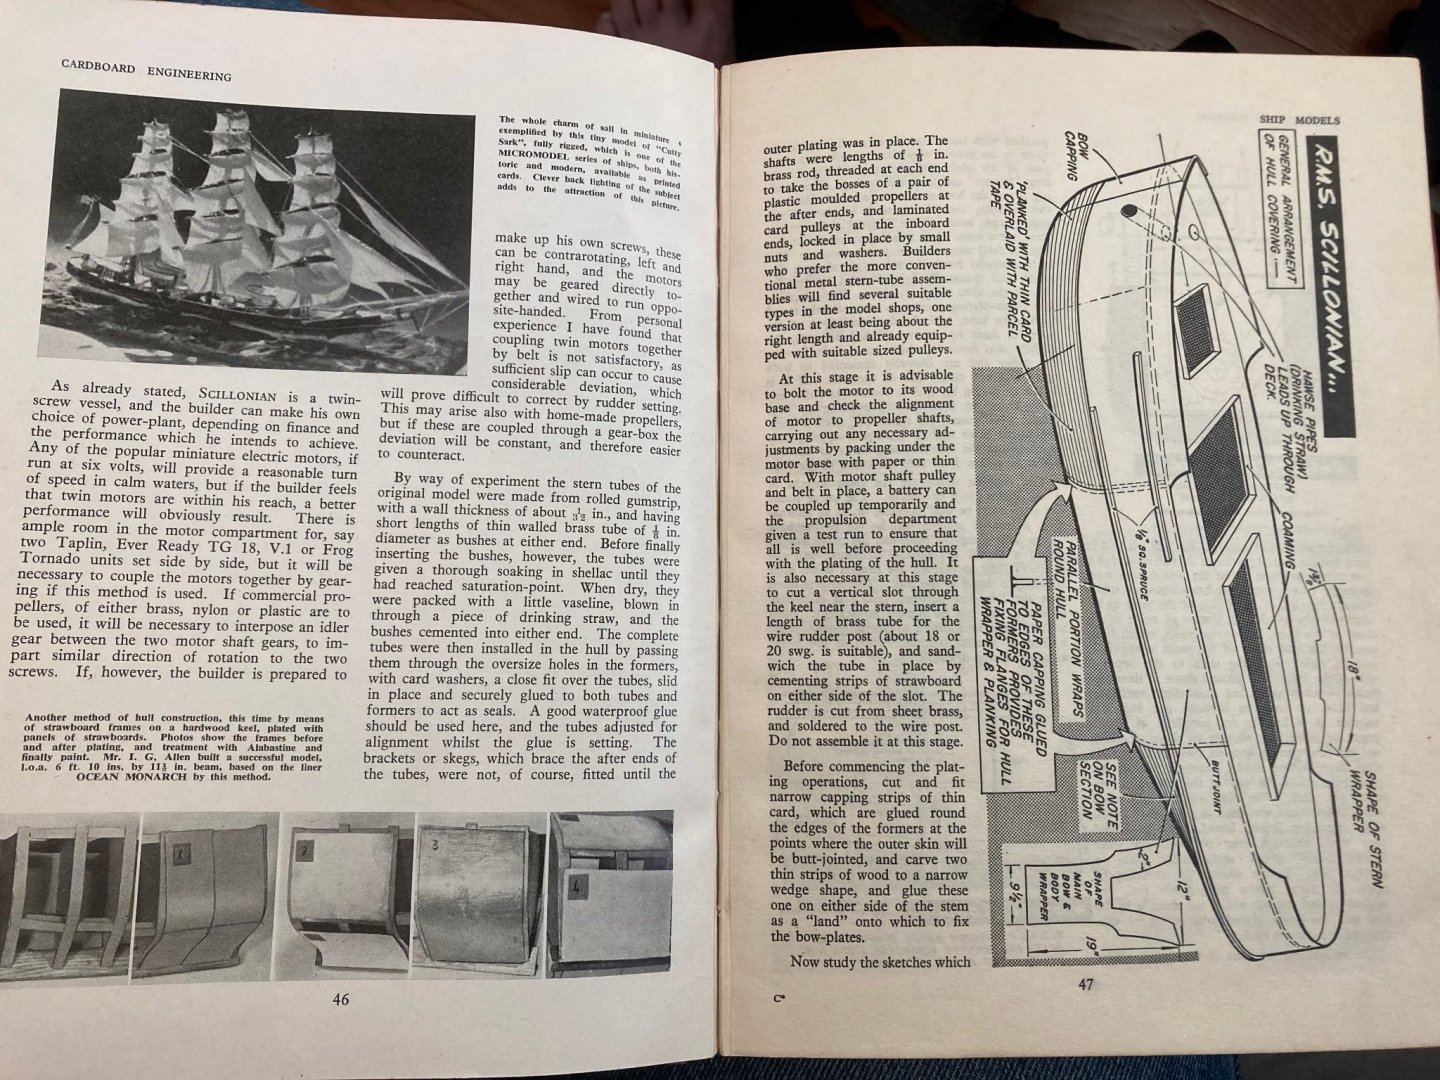
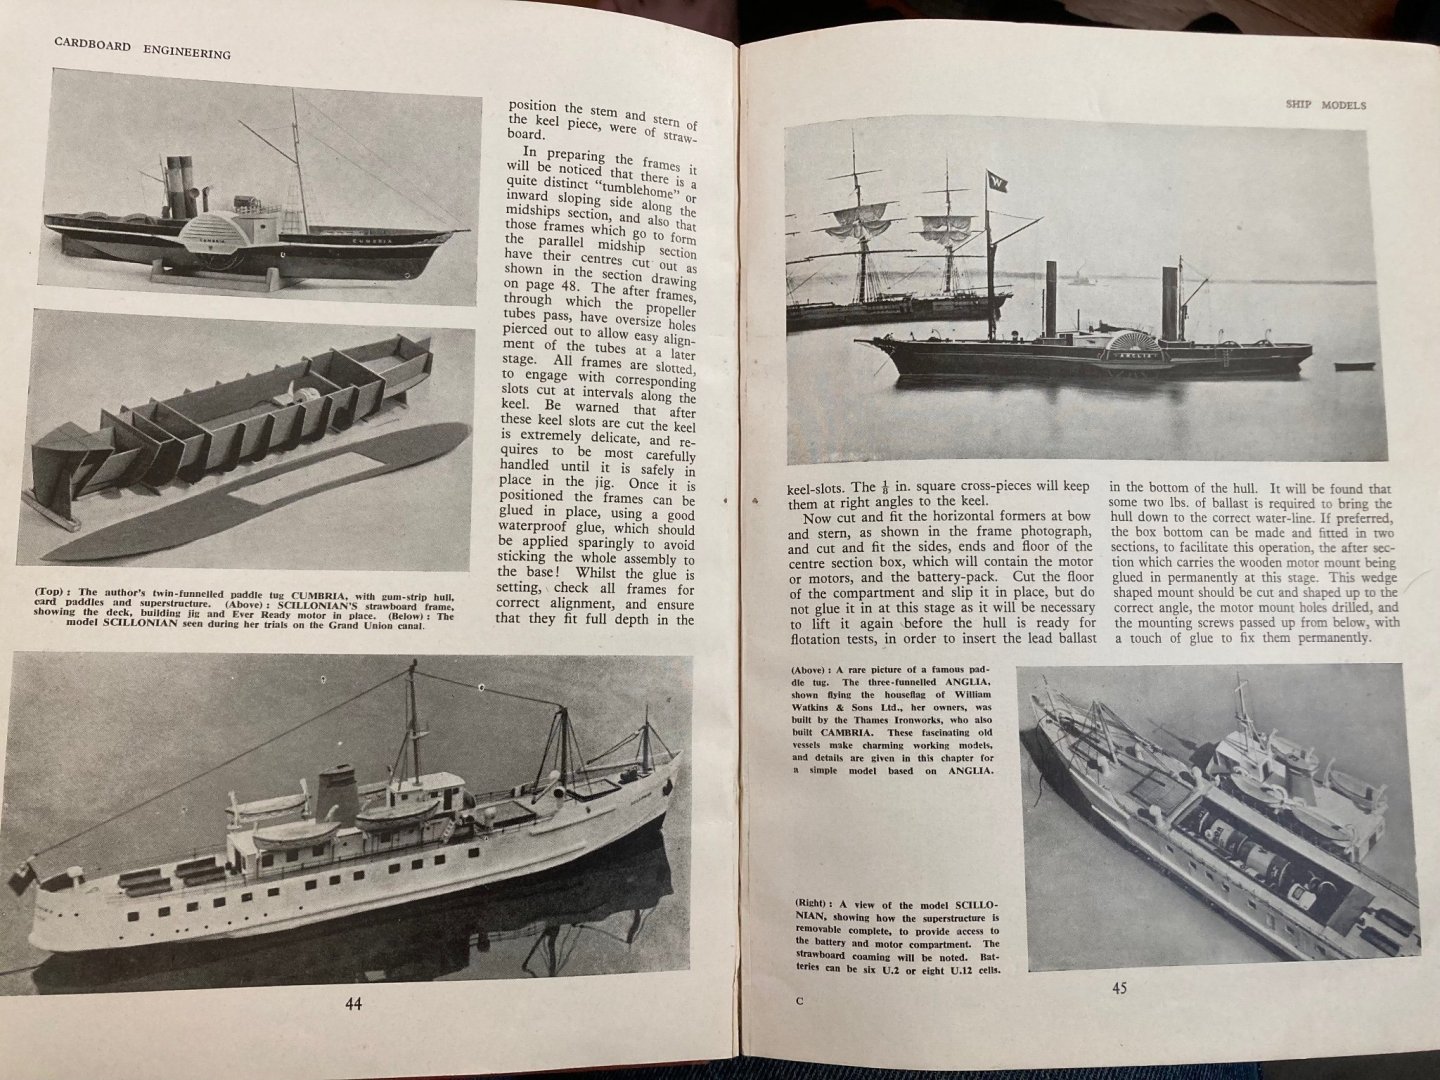
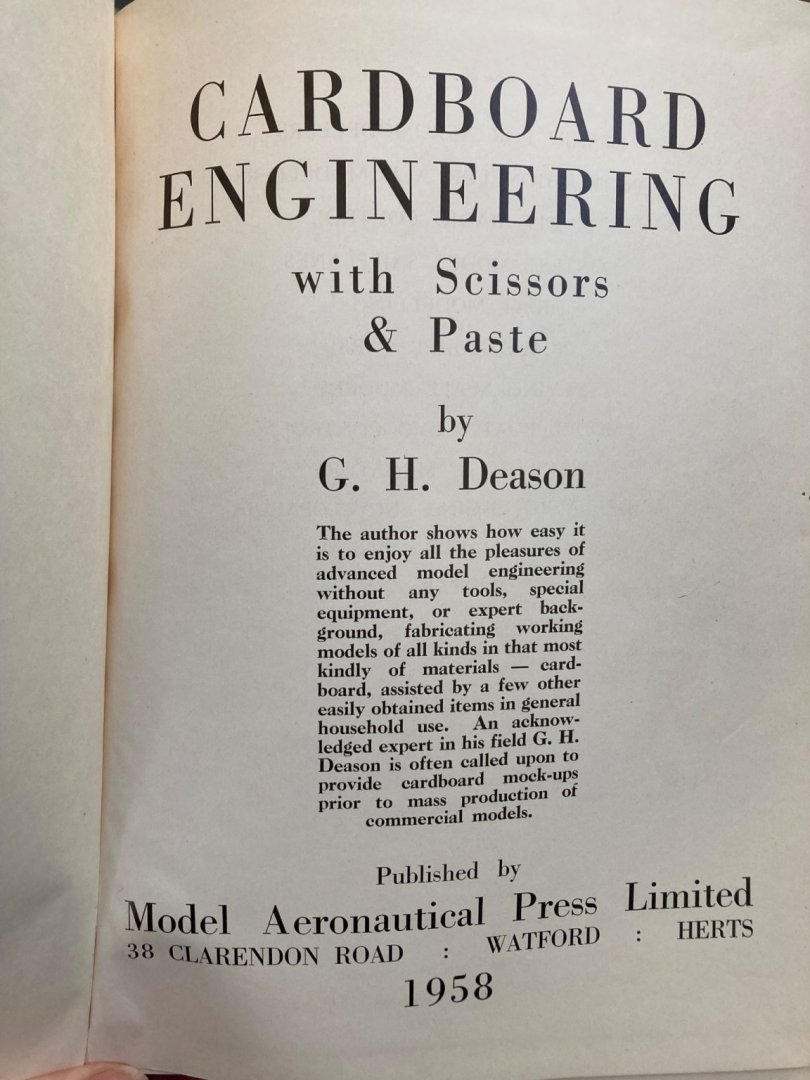
Via the inter webs, I found an interesting book on paper models. It has a couple chapters on general techniques then a chapter each for different models: trains, cars, ships, etc. Does anyone have other favs books on the topic?
-
I’m grabbing a seat and popcorn to watch the festivities! Best of luck on this monster!
- 130 replies
-
- 10
-
-
Regardless of the value of Hunt's work, I believe as a beginner, one yearns for something that will cover everything completely. I still do, but the truth is nothing covers every nook and cranny. Mistakes will be made, some items may not be understood until much too late, some things will be overlooked and somethings will not be spot on. That is the nature of the beast. If you want perfect, build a couple dozen and pick the best. It will still have errors but only you will know where. I also noticed for myself, what is perfect information today, is 'obvious' tomorrow and was over my head yesterday. That is the perfect instructions are a moving target assuming you improve even the slightest bit. I'm not commenting Hunt or similar, just the wide nature of this hobby makes it tough to hit all the needed skills easily. Conversely, it is that width that makes it interesting.
-
Thank you for the compliment! While I'm not doing anything fancy by MSW standards, I'm hoping to do the basic work well. A weird side-effect of entering this hobby when I did, is Covid hit right after. I haven't had a chance to see that many models in person, so I'm working from a slightly idealized notion of how they look in the real world. Plus of the few I saw, were of the caliber of Chuck Passaro's work! Here, I tip the hat to the Ship Model Society of New Jersey for having members who are killer craftfolk. Any tool can be a tool mis-used!! It is a nice tool and has a few features that weren't apparent at first glance. Thanks for the recommend!
-
Ha, the truth hurts. Seriously, @Old Collingwood it is a low-risk field of endeavor and you will have a 'feel' for the realm of card models after a single afternoon and with kits priced at FREE, it is hard not at least to think about it. I also think that some of the skills in paper crossover to wood kits and vice-versa. @Landlubber Mike thanks for the kind words! Not to worry, I still have time to make a nubie misstep or two.
-
If it doesn’t work out or looks awful, I just take them off, start again and have learned a bit about coppering a hull along the way.
-
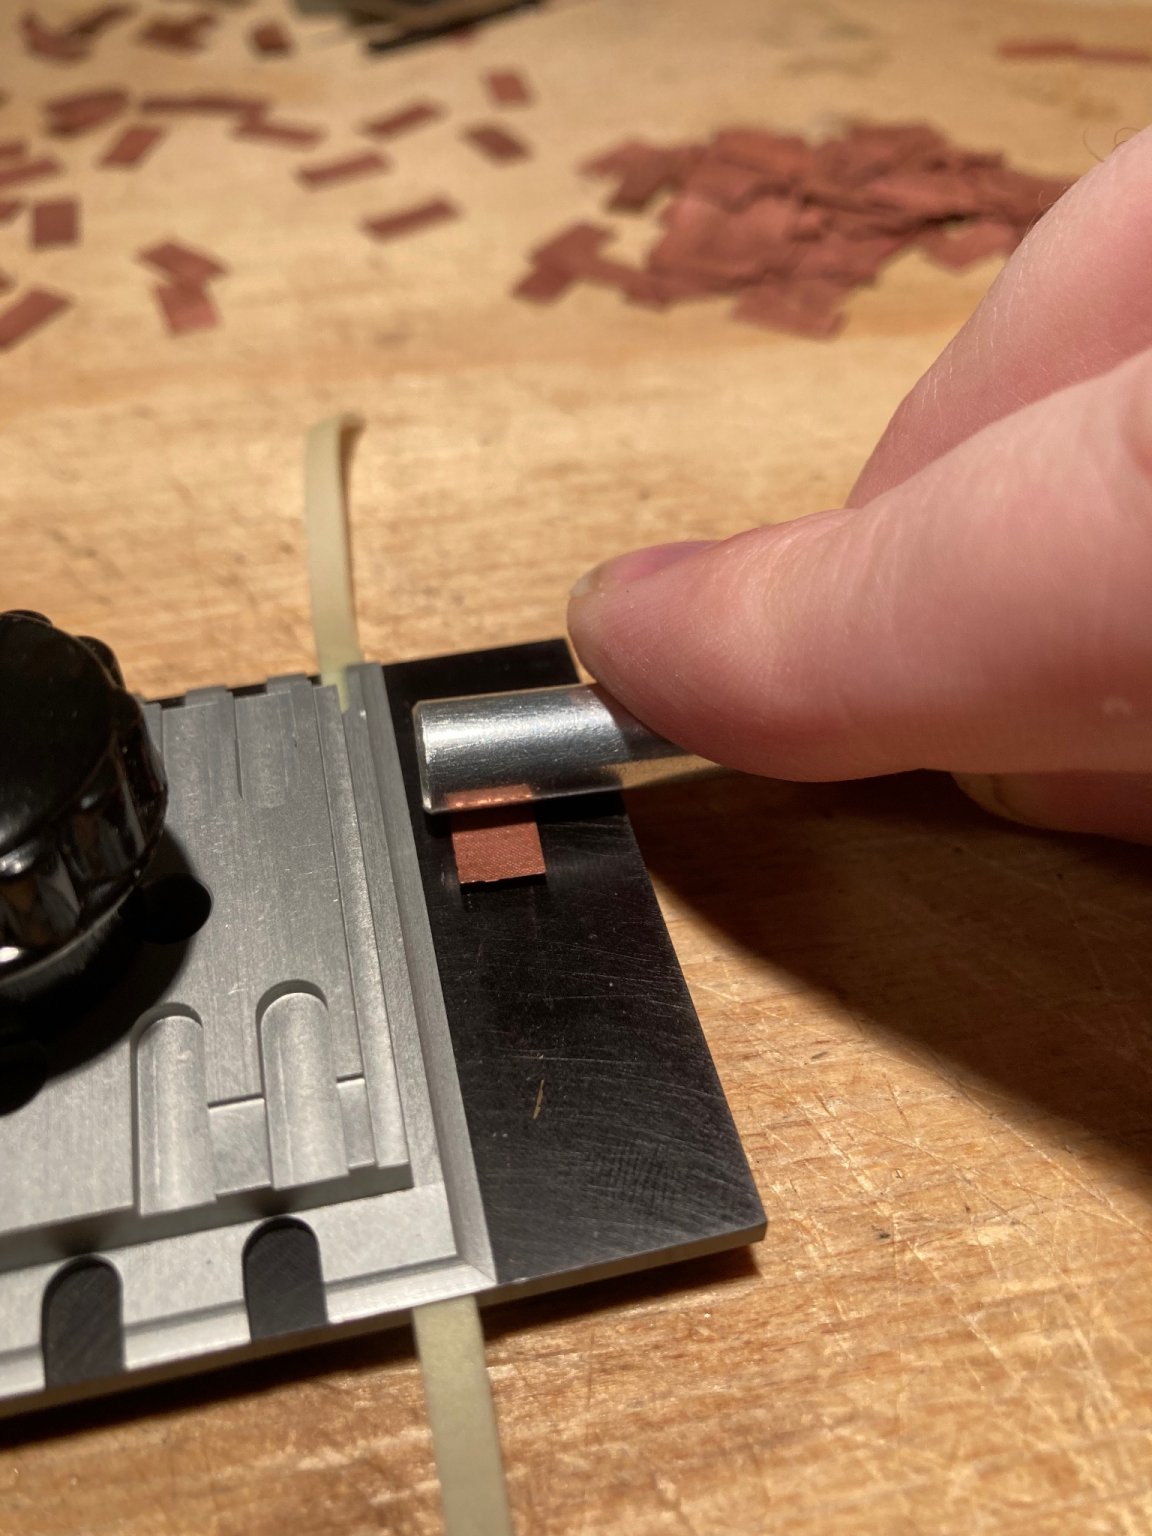
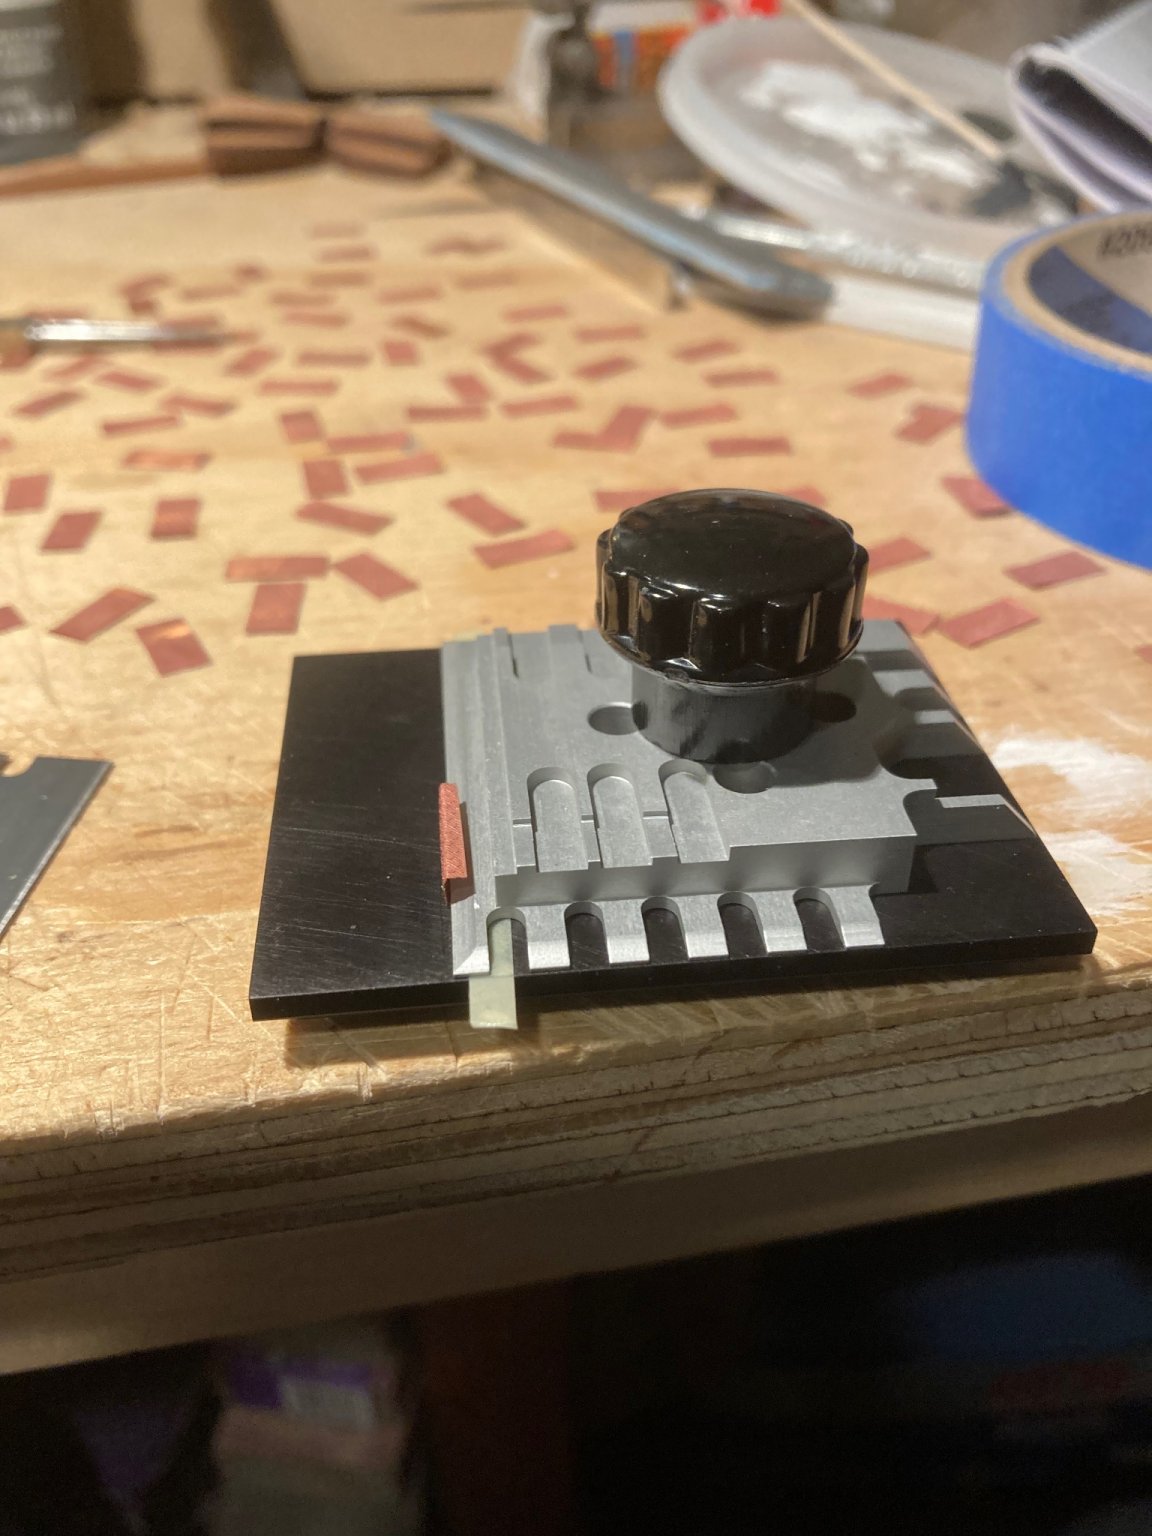
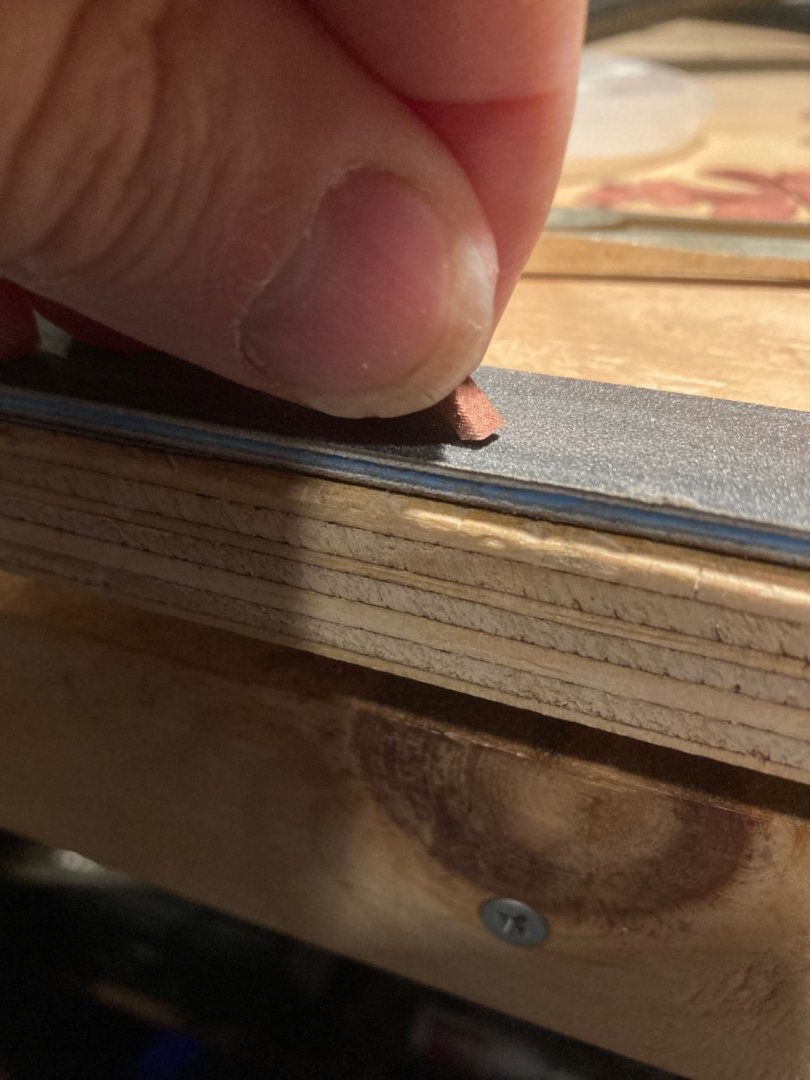
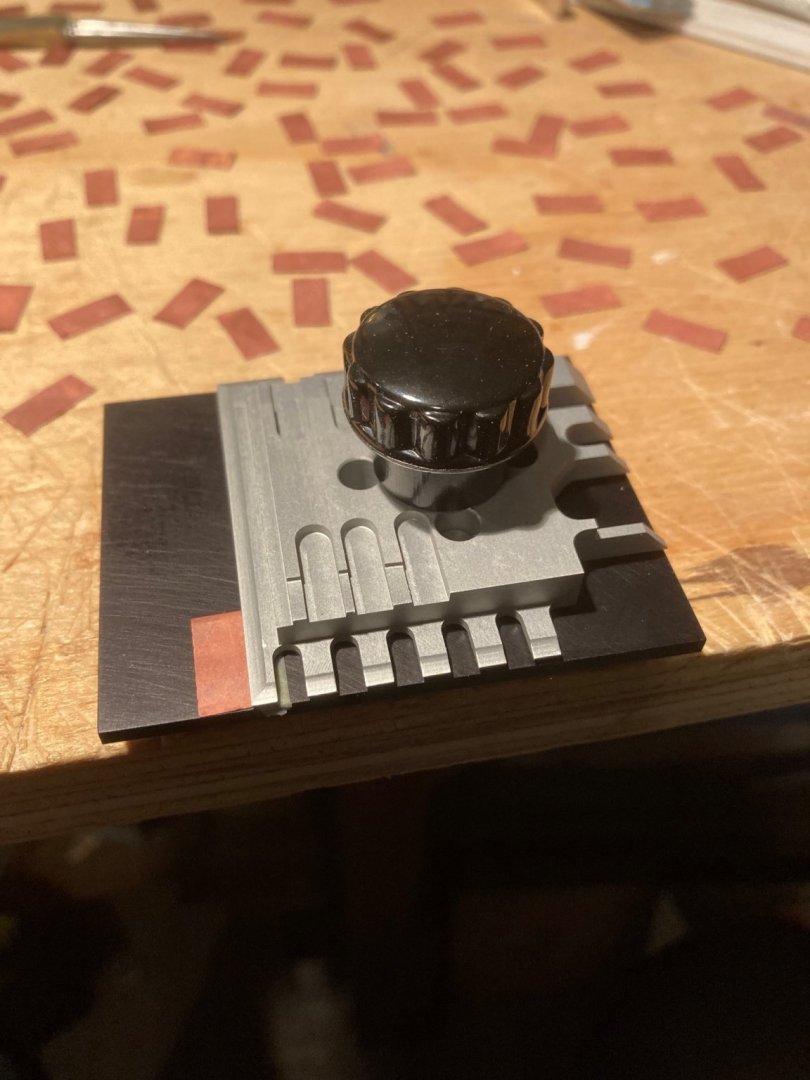
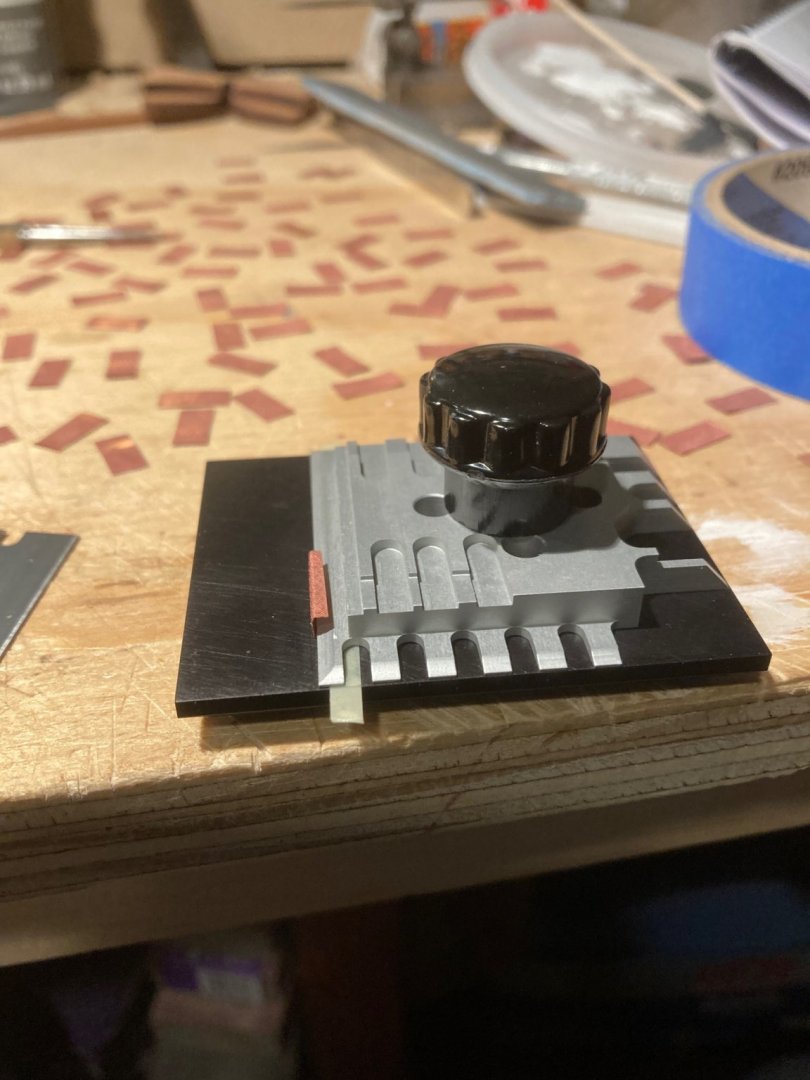
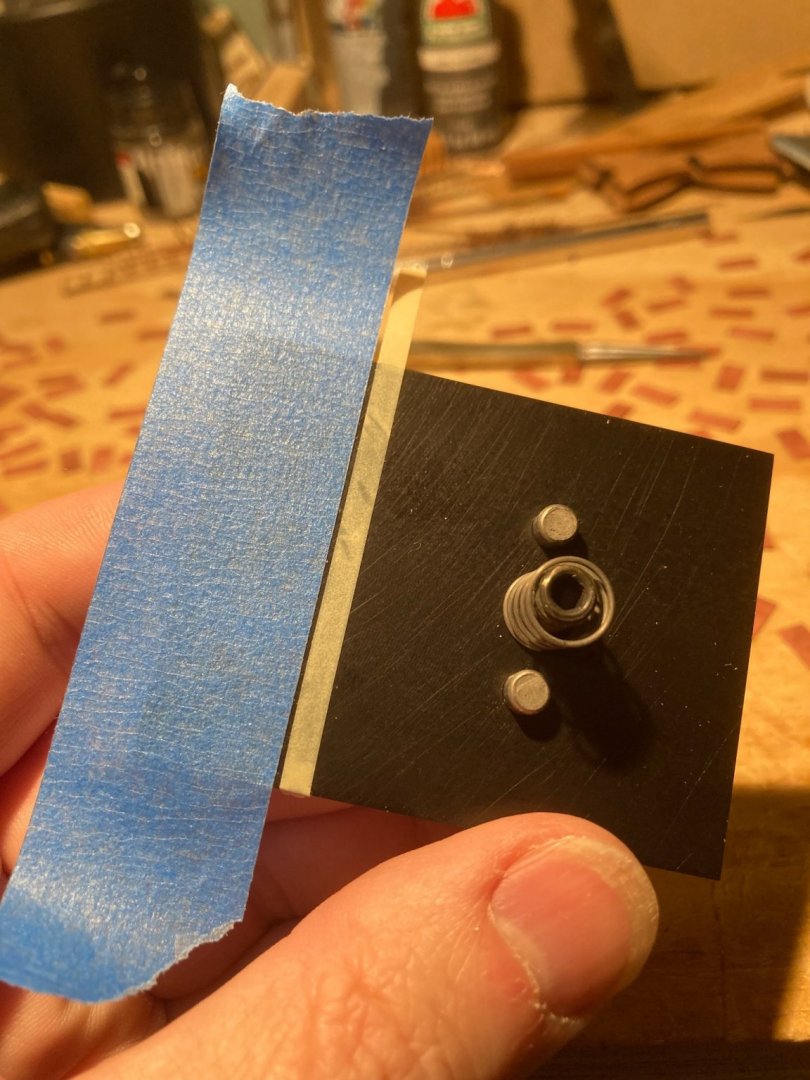
It has been a week of trills and spills! And as result, we are shopping for another car. On the plus side, everyone involved was able to walk away with at most a few scrapes and cuts and a story to tell. Regarding my humble project, I decided to clean the plates and give a go. As backup, I have copper tape if I lose faith in the plates. I wondered how I might make consistent bends in the plates for the keel. I started to think about mini sheet metal brakes and such. Eventually, it occurred I already had the perfect tool on hand. @Landlubber Mike kindly recommended the ‘Bug’ for photo-etch and the like for another project I’m flailing a way at. With a little bit of tape, I converted the Bug into a jig for bending my little plates uniformly to fit the bottom of the keel. I added the blue tape to show the edge of the clamped area then removed the top and added the tan tape as an automatic ’depth-gauge’, so every piece would stop at the same point, resulting in the same bend for each piece (in theory). There is a little variation and later I added a second piece of tape to thicken my brake. The bent copper fit snugly on the keel. So far so good.


-
That is a great door! Remember: "He who laughs, lasts!" –Mary Pettibone Poole
-
Wow! Rock on! Thanks for taking a moment to share that.
-
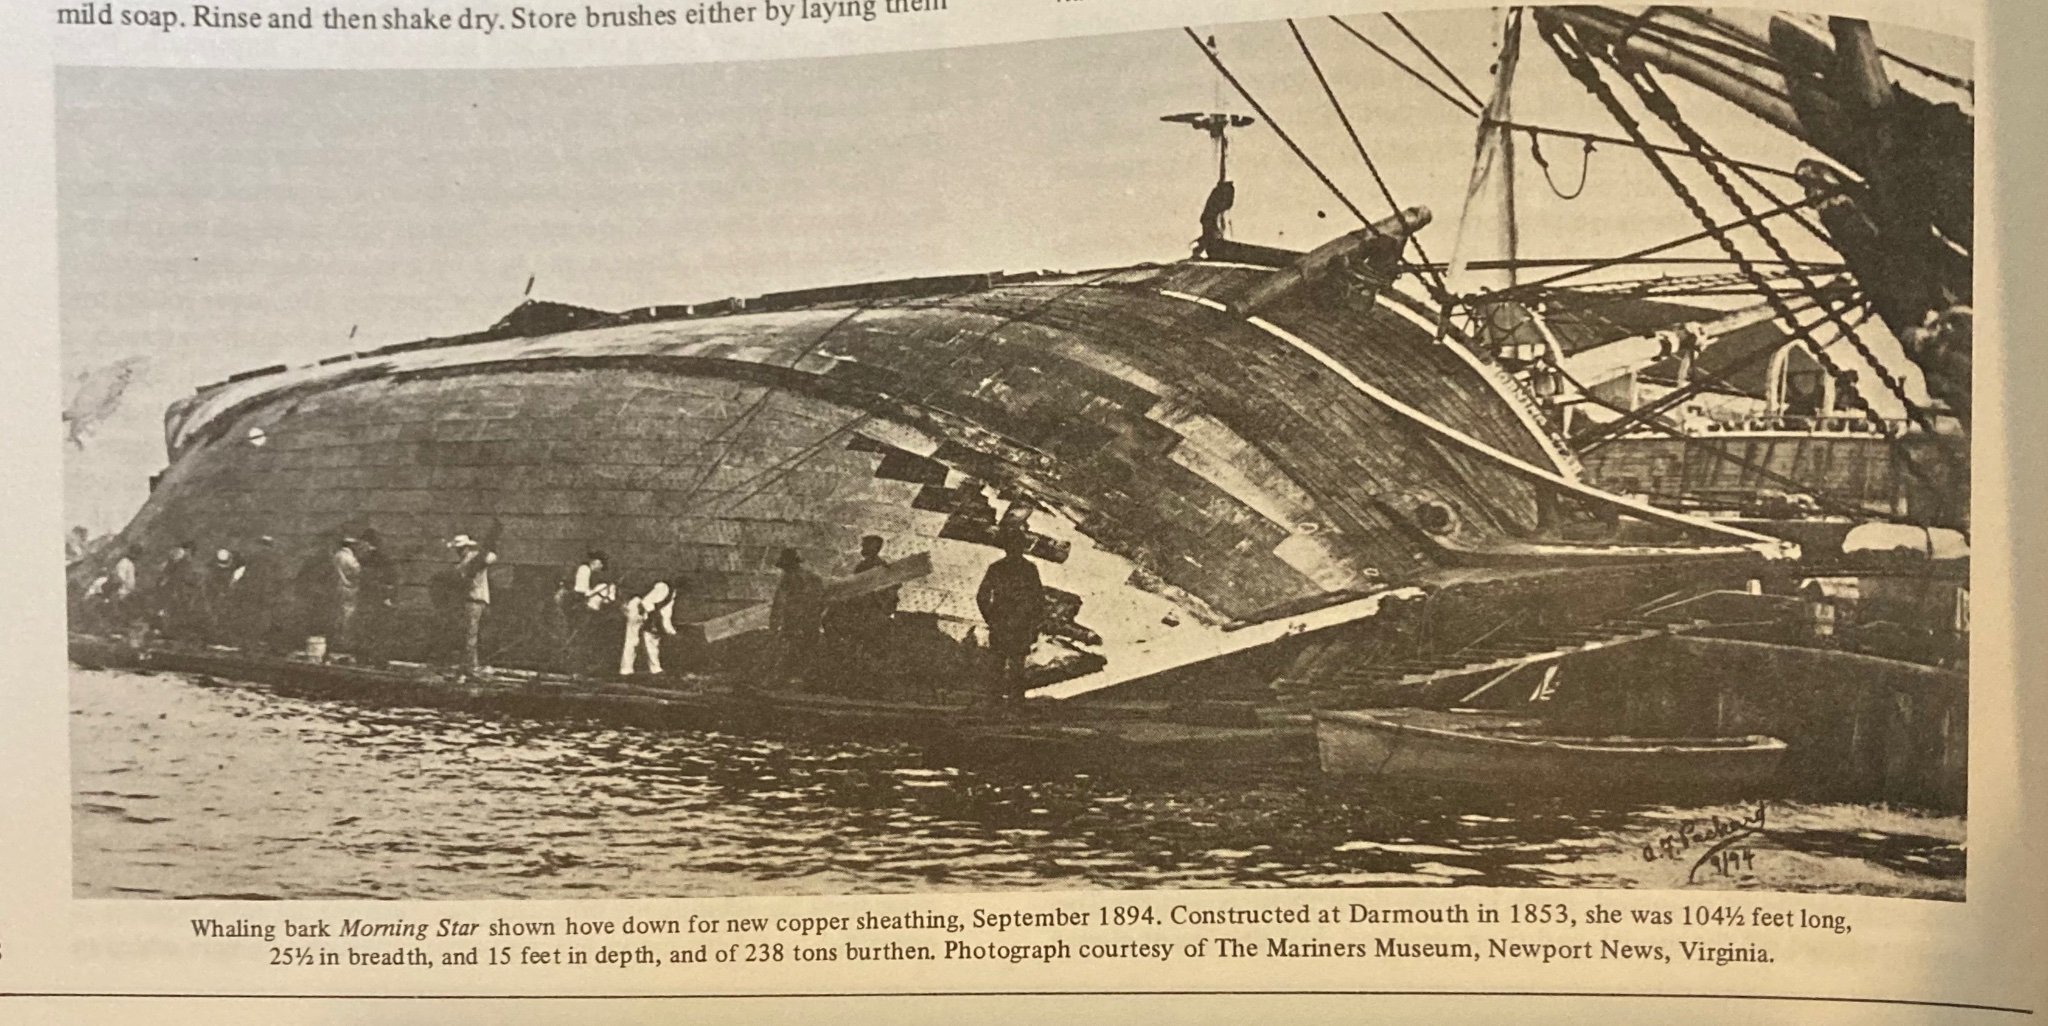
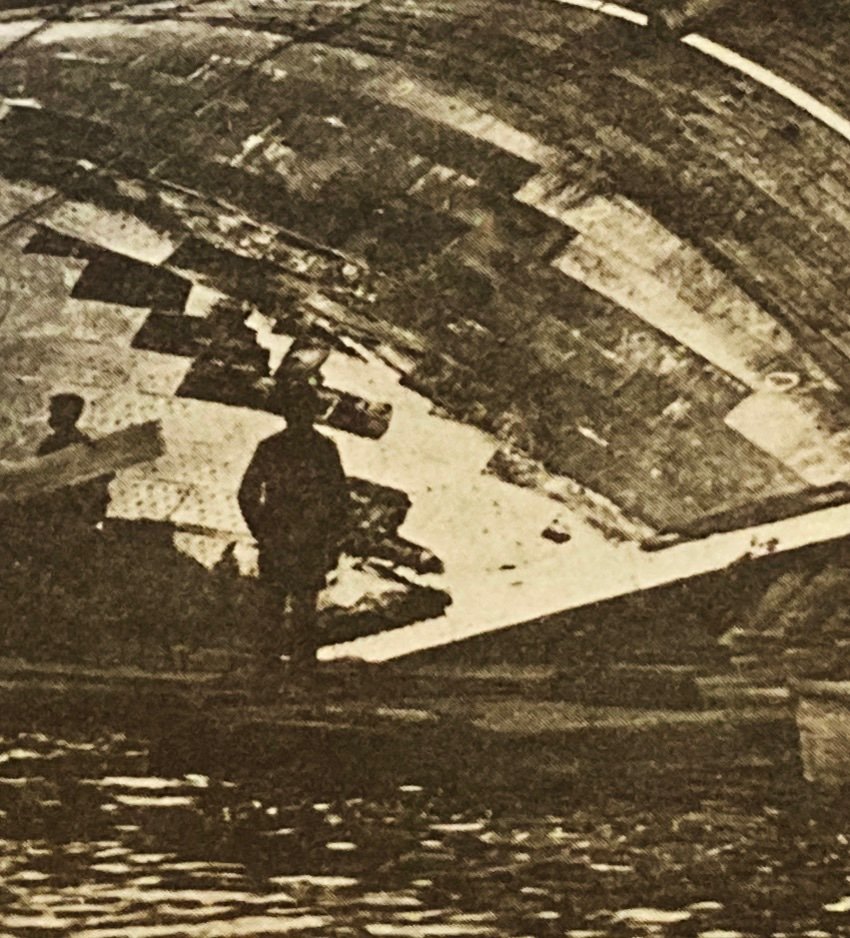
I did find this image in the Ship Modeler’s Shop Notes (rights reserved, Nautical Research Guild and The Mariners Museum). One is the image directly and the other is a closeup, where you can see the texture of the coppering.

-
Haha, agreed! Sadly, I believe you are correct Keith and I should try again with fresh copper. I might try another shot at chemically cleaning cleaning the ones I have. I’ll also dig about and see if I have something to steal from the “backlog” to work with.
-
Inquiring minds want to know! Your legions of follows now have nothing to do and who knows what mischief they will get to…
-
What a neat part of the history of the kit and the company!! I was wondering about the connection between the plans! I have the two plans side by side in my workshop and keep staring at them. They seemed related and I wondered if one draftsman had seen the other! Your set is much easier to work with by far! And rigging is much more clear. Is the photo set of the kit your work? (I love having the photos and have them ‘open’ most days.) How did you wind up as a kit designer? I assume it is a round-about path with a few interesting turns!