HOLIDAY DONATION DRIVE - SUPPORT MSW - DO YOUR PART TO KEEP THIS GREAT FORUM GOING! (Only 13 donations so far - C'mon guys!)
×

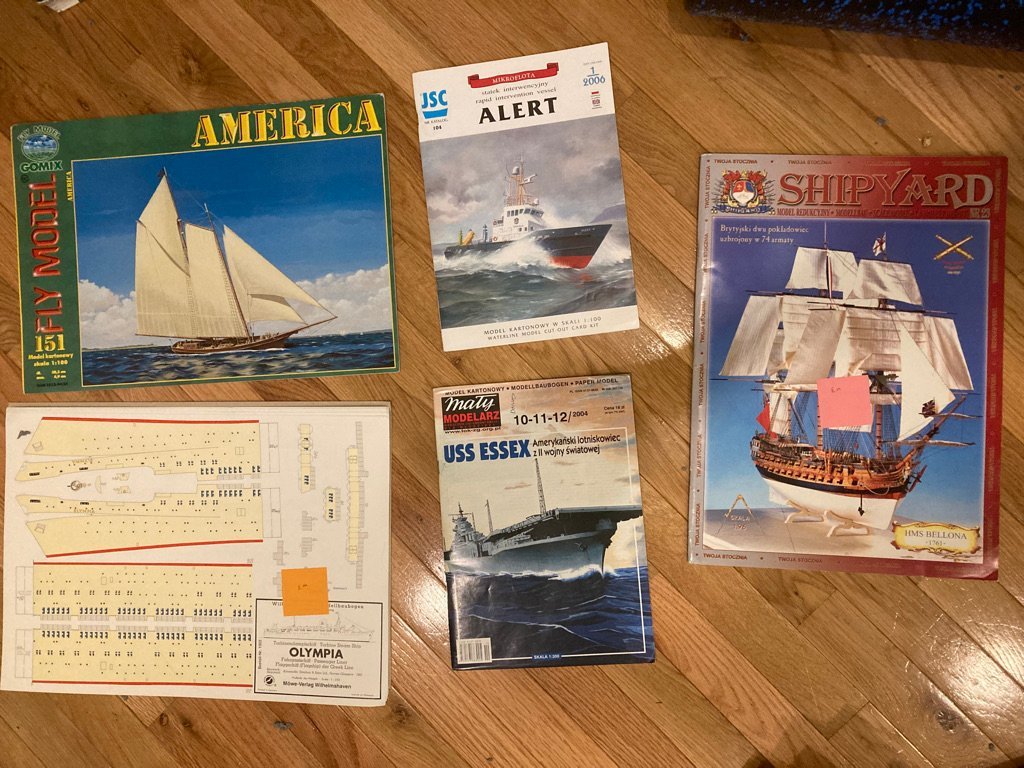
.jpeg.7d7eba14c97a2e1d9f79cd2c97f6424a.jpeg)
EricWilliamMarshall
-
Posts
986 -
Joined
-
Last visited
Content Type
Profiles
Forums
Gallery
Events
Everything posted by EricWilliamMarshall
-
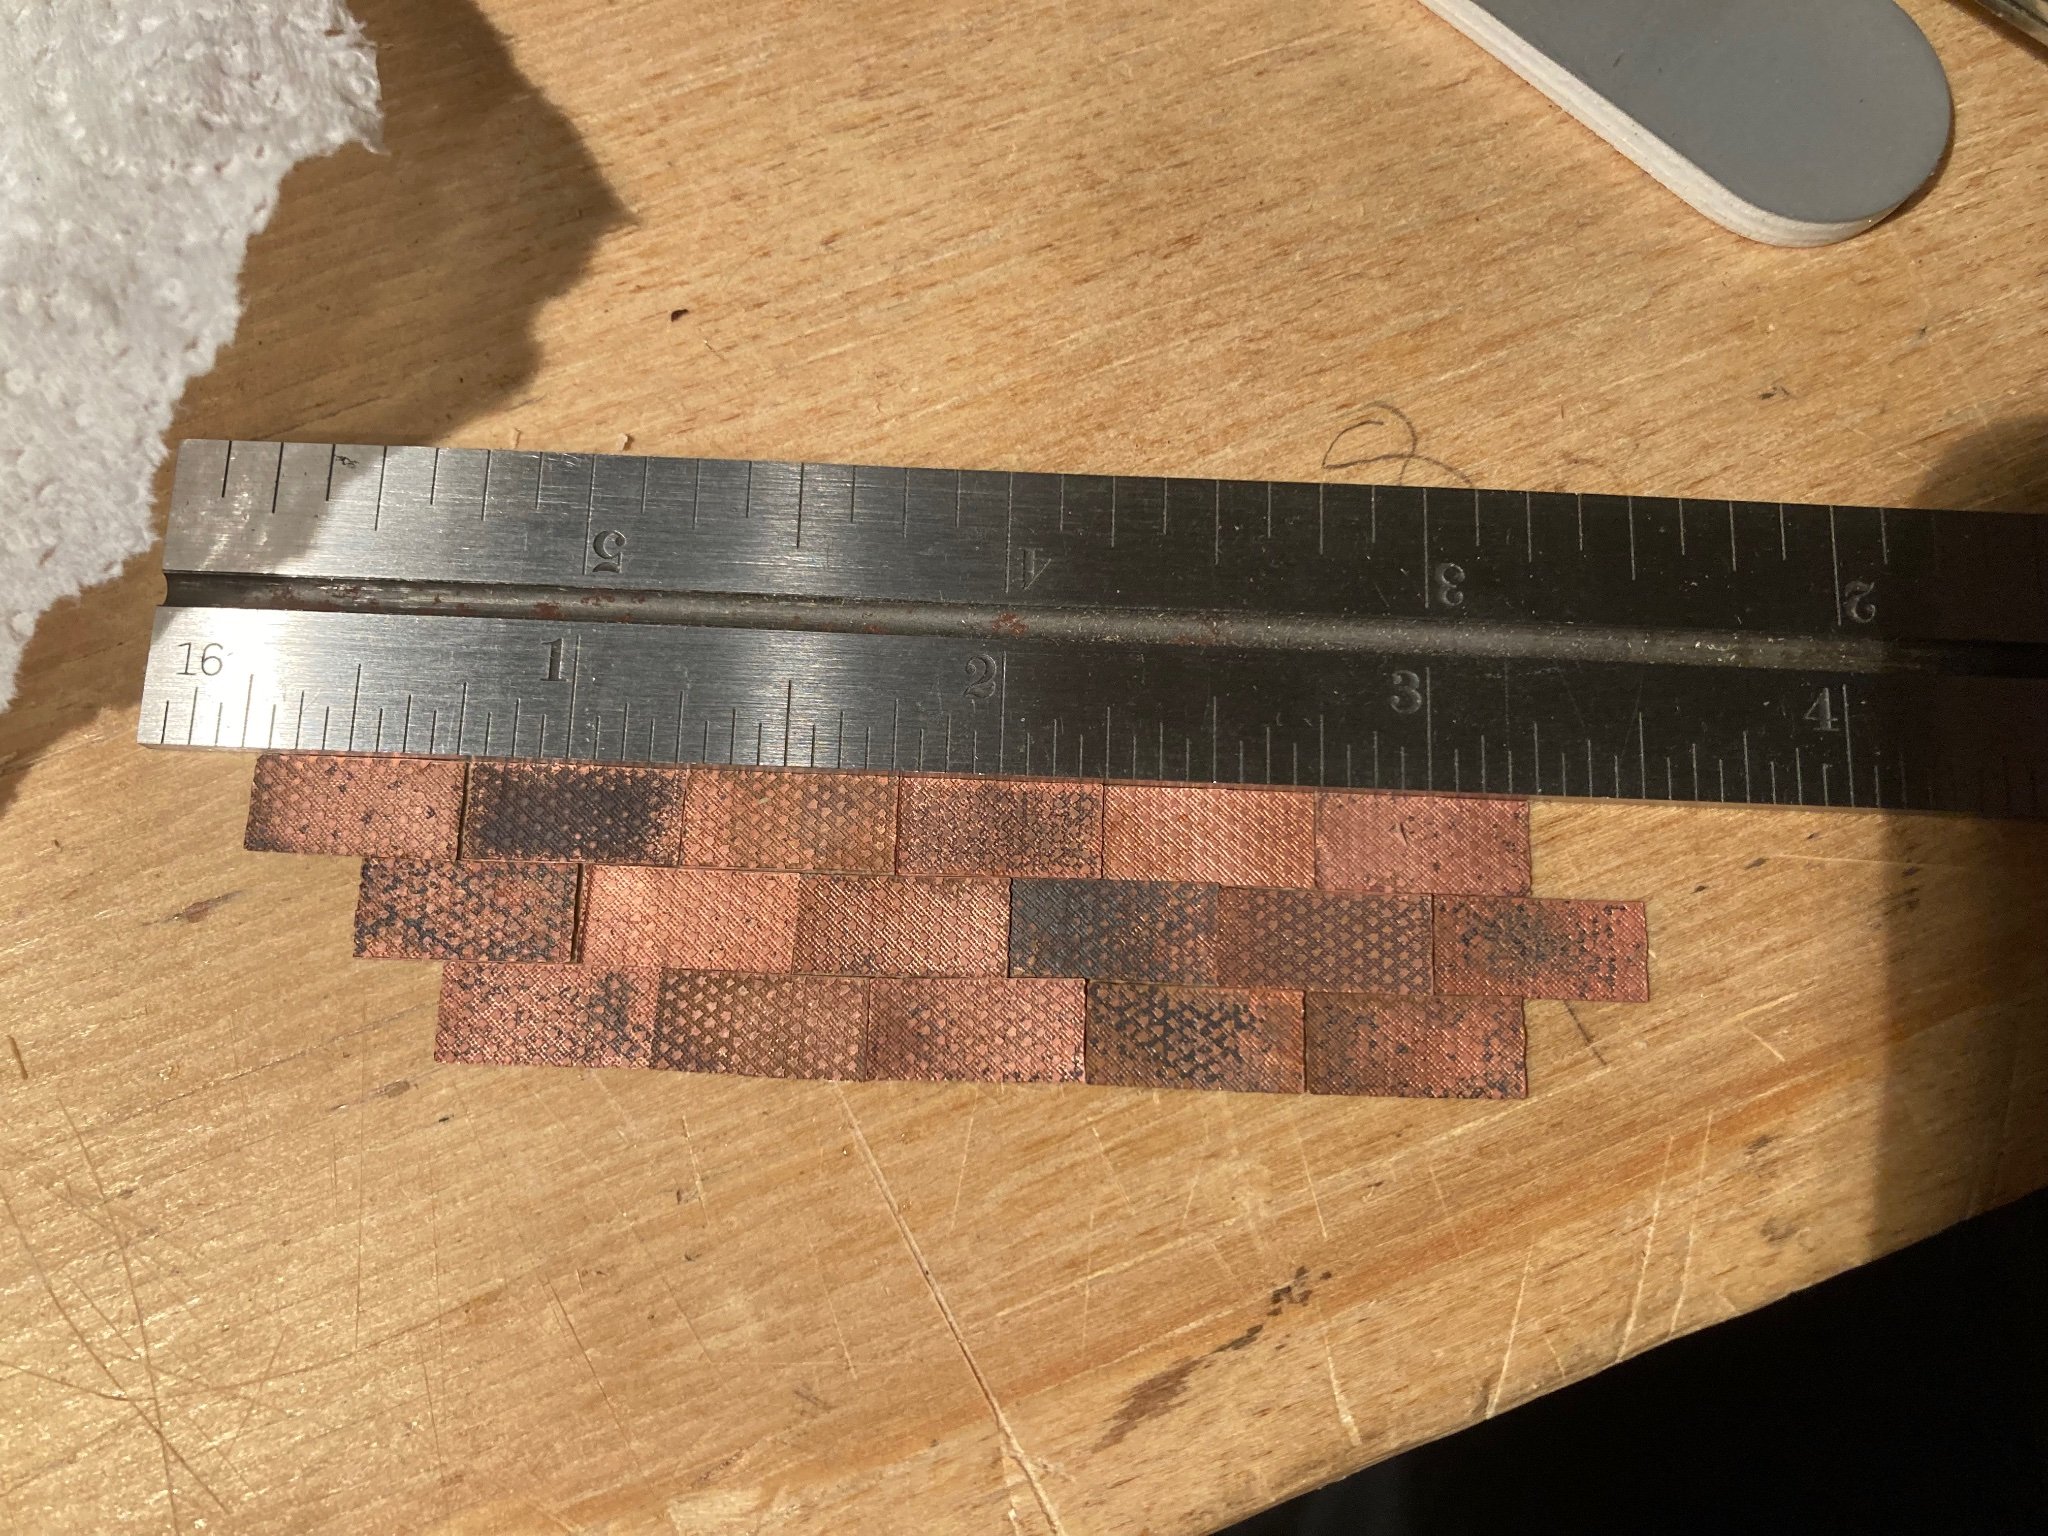
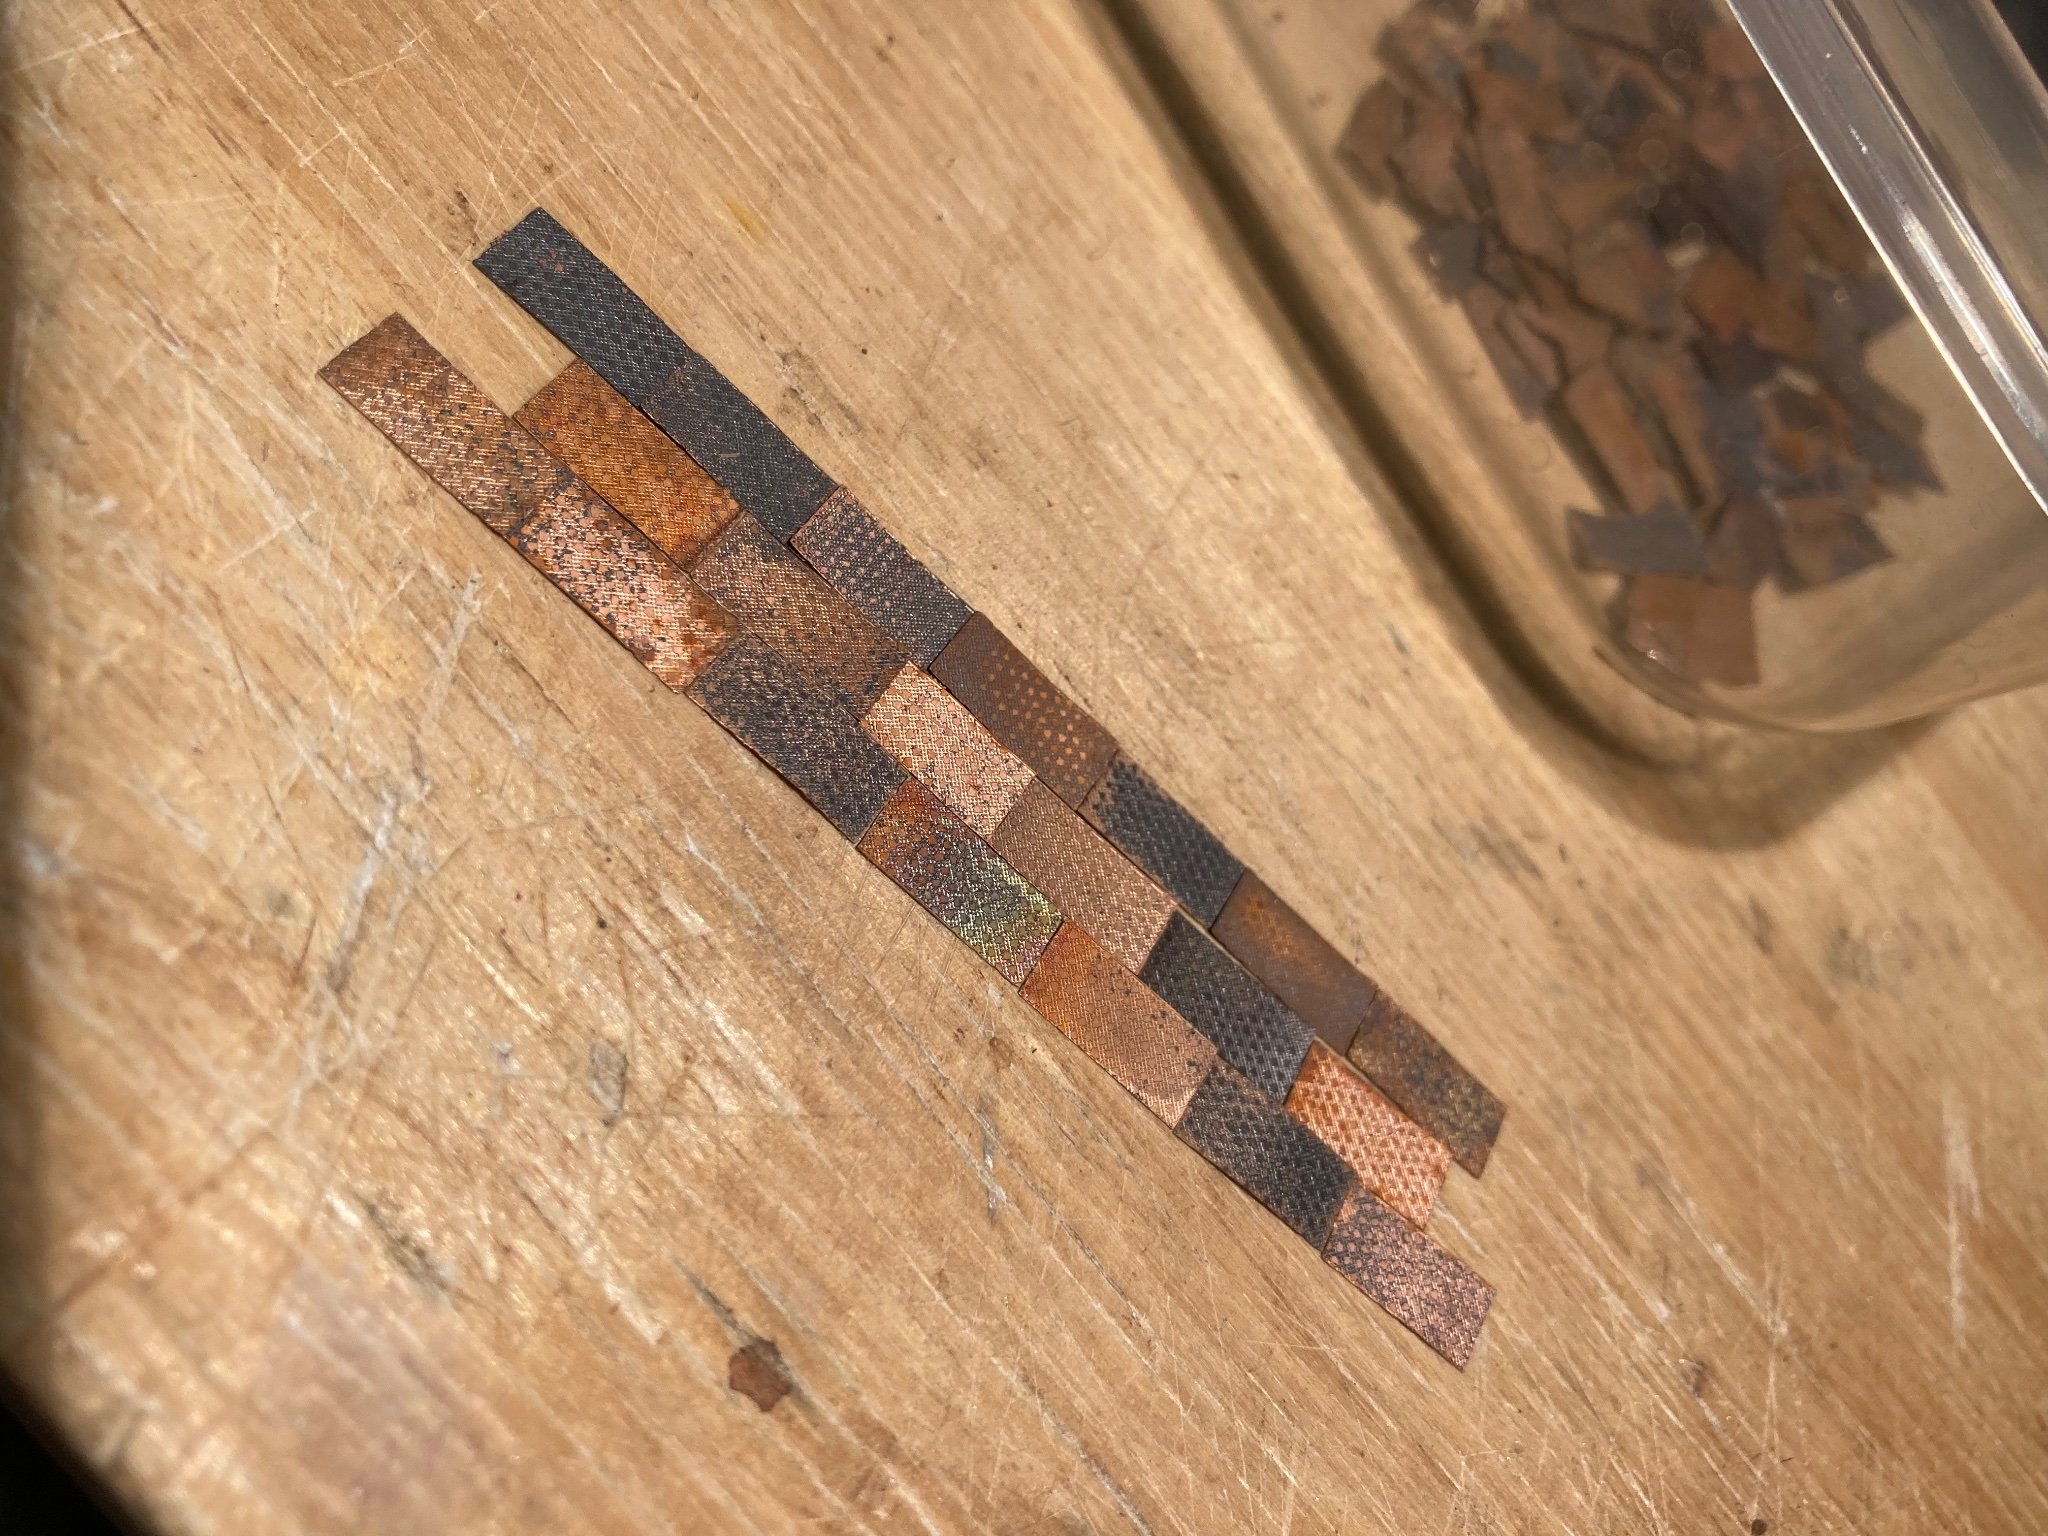
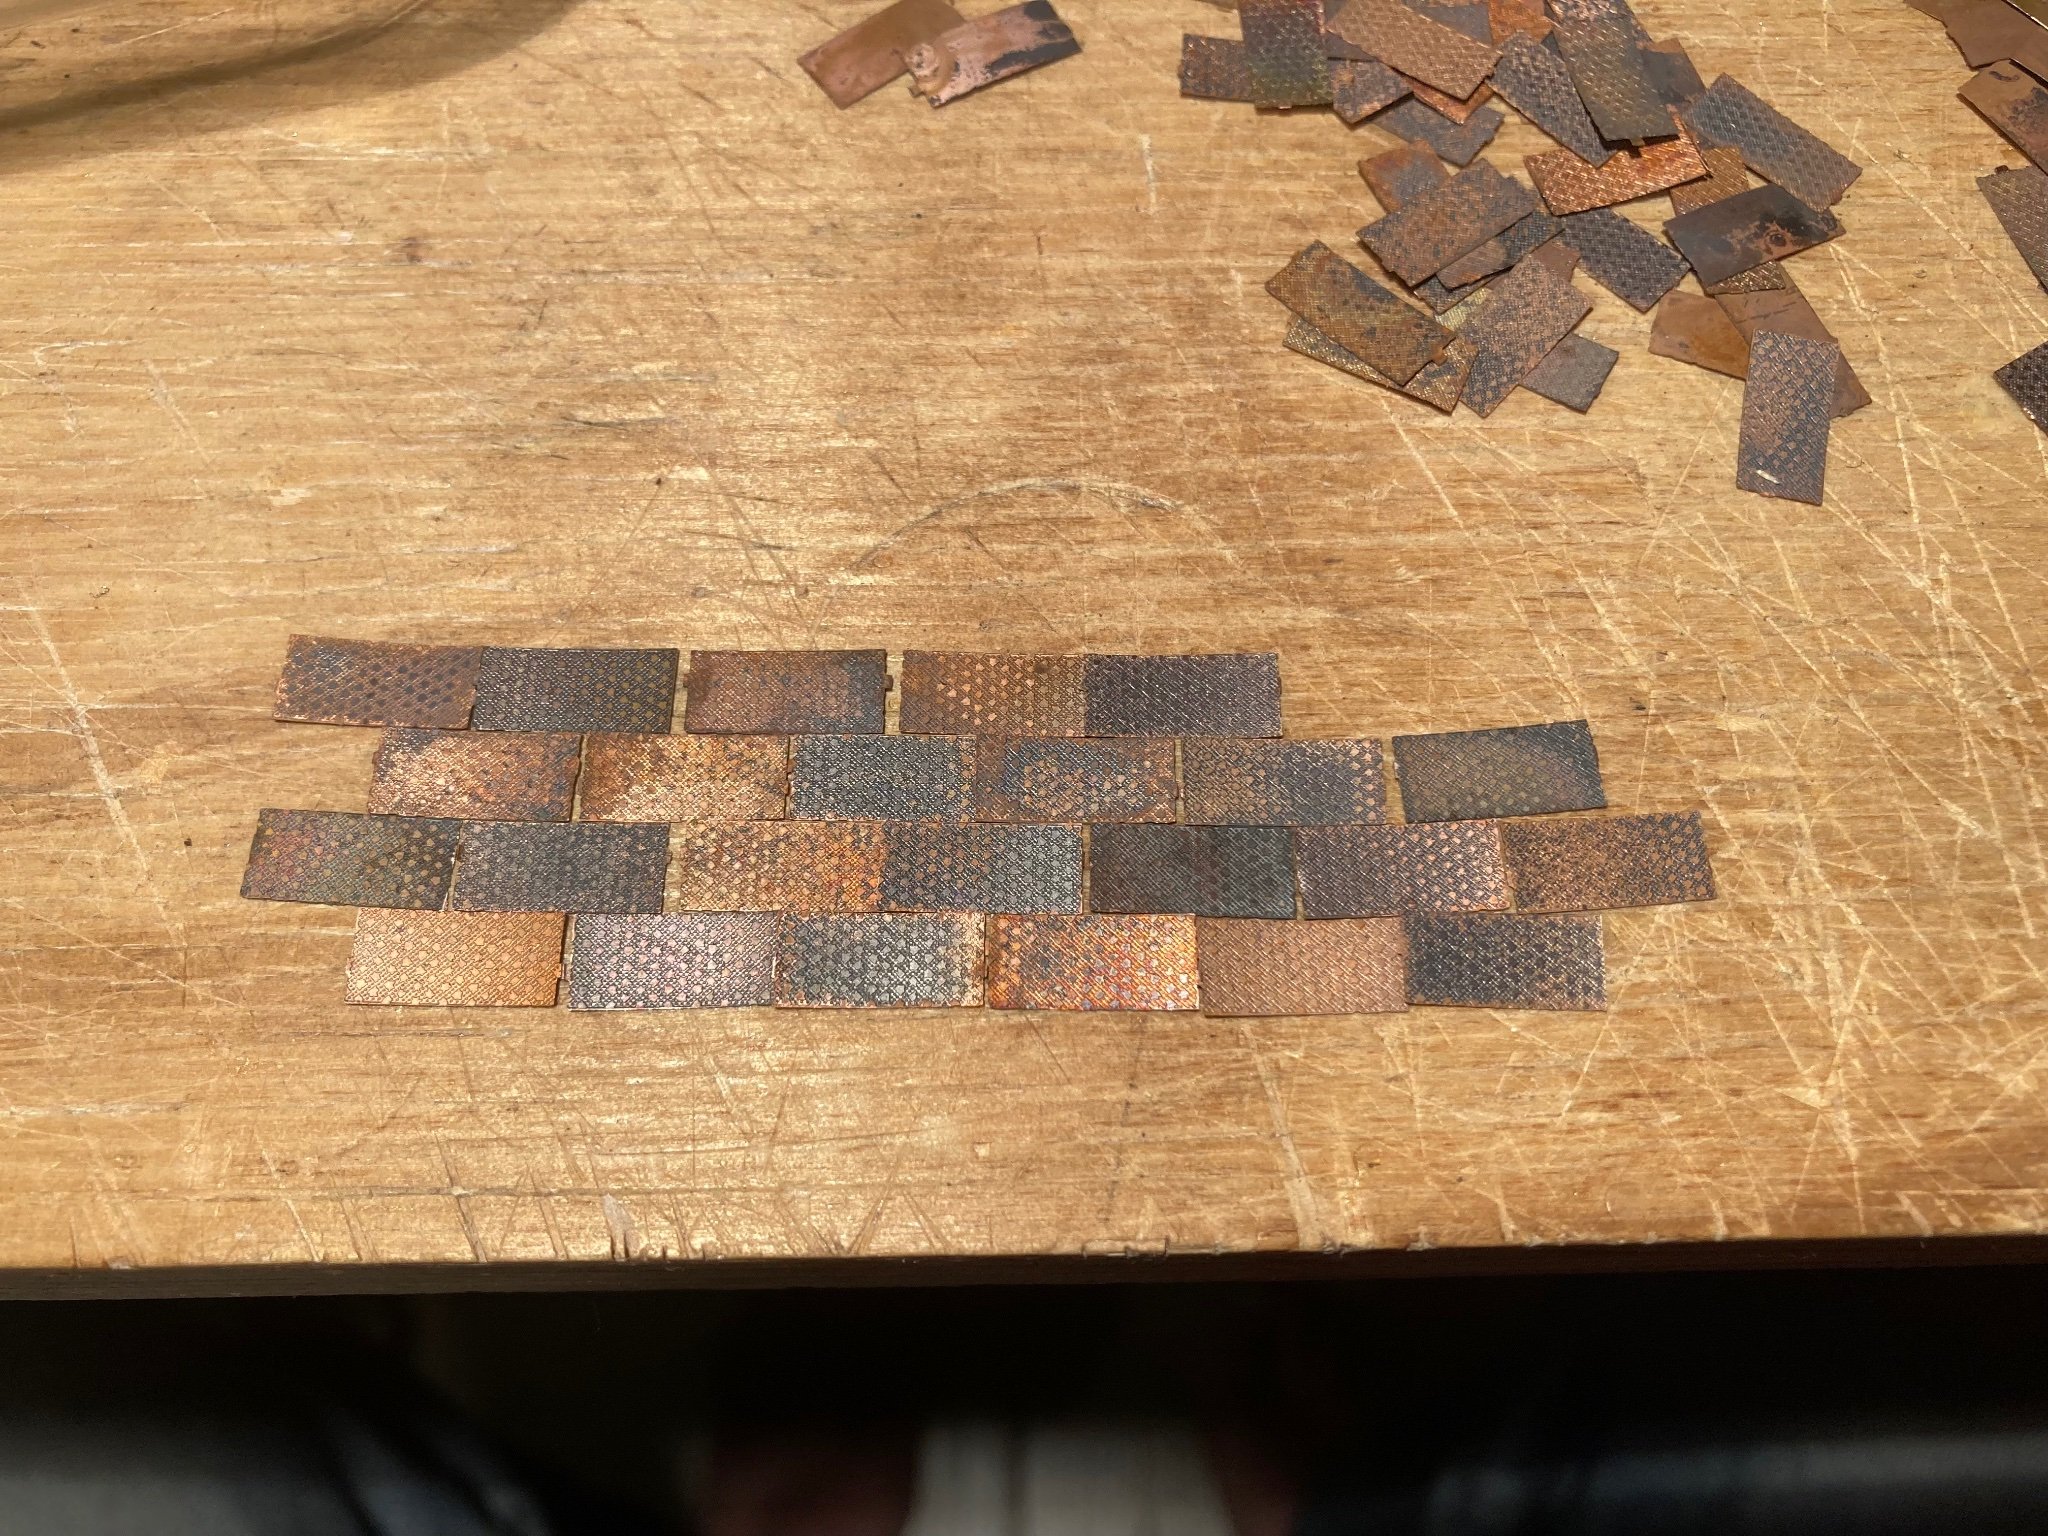
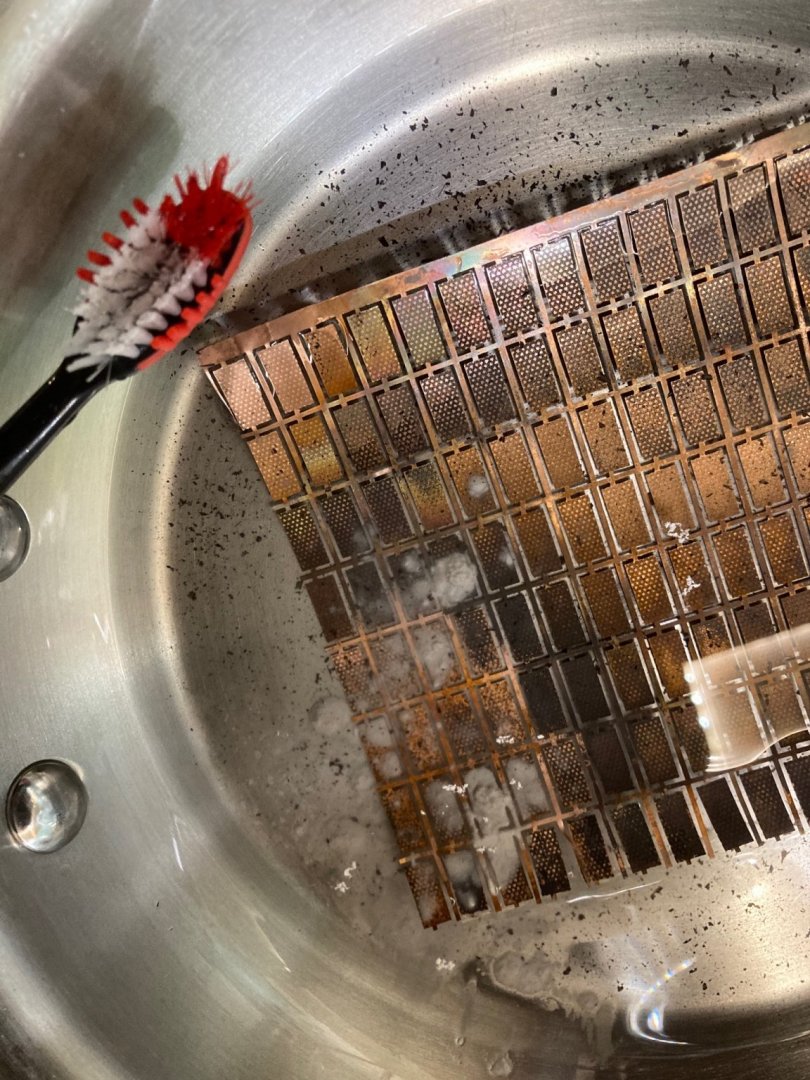
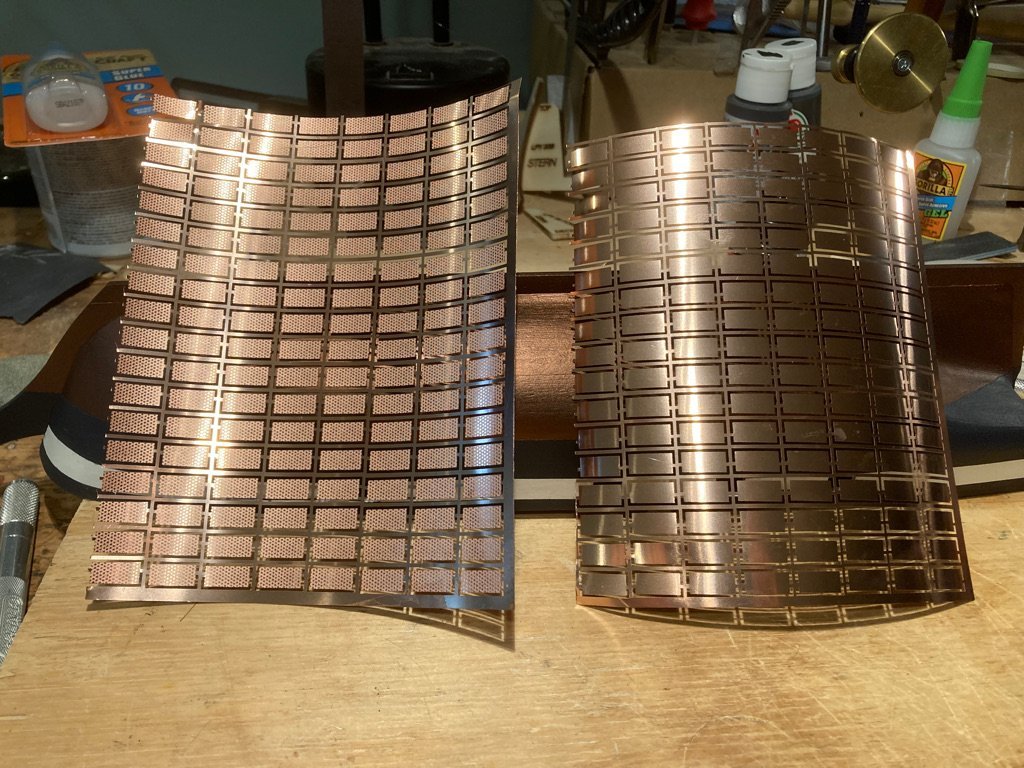
.thumb.jpeg.fc5d633a7b34428fcf19419a73d56d55.jpeg) I now ask the assembled sages and scholars, should I use these plates? Should I buy more and try again (just go with shiny and let change on its own) or try something else? Careful observers may note the second set of photos of lined-up plates look less weathered. I used a mixture of vinegar, table salt and hot water to clean them. (Then a rinse with baking soda w/ waterand then a rinse of water and then drying.) I’m still thinking about what pattern the plates should go on the hull.
I now ask the assembled sages and scholars, should I use these plates? Should I buy more and try again (just go with shiny and let change on its own) or try something else? Careful observers may note the second set of photos of lined-up plates look less weathered. I used a mixture of vinegar, table salt and hot water to clean them. (Then a rinse with baking soda w/ waterand then a rinse of water and then drying.) I’m still thinking about what pattern the plates should go on the hull. -
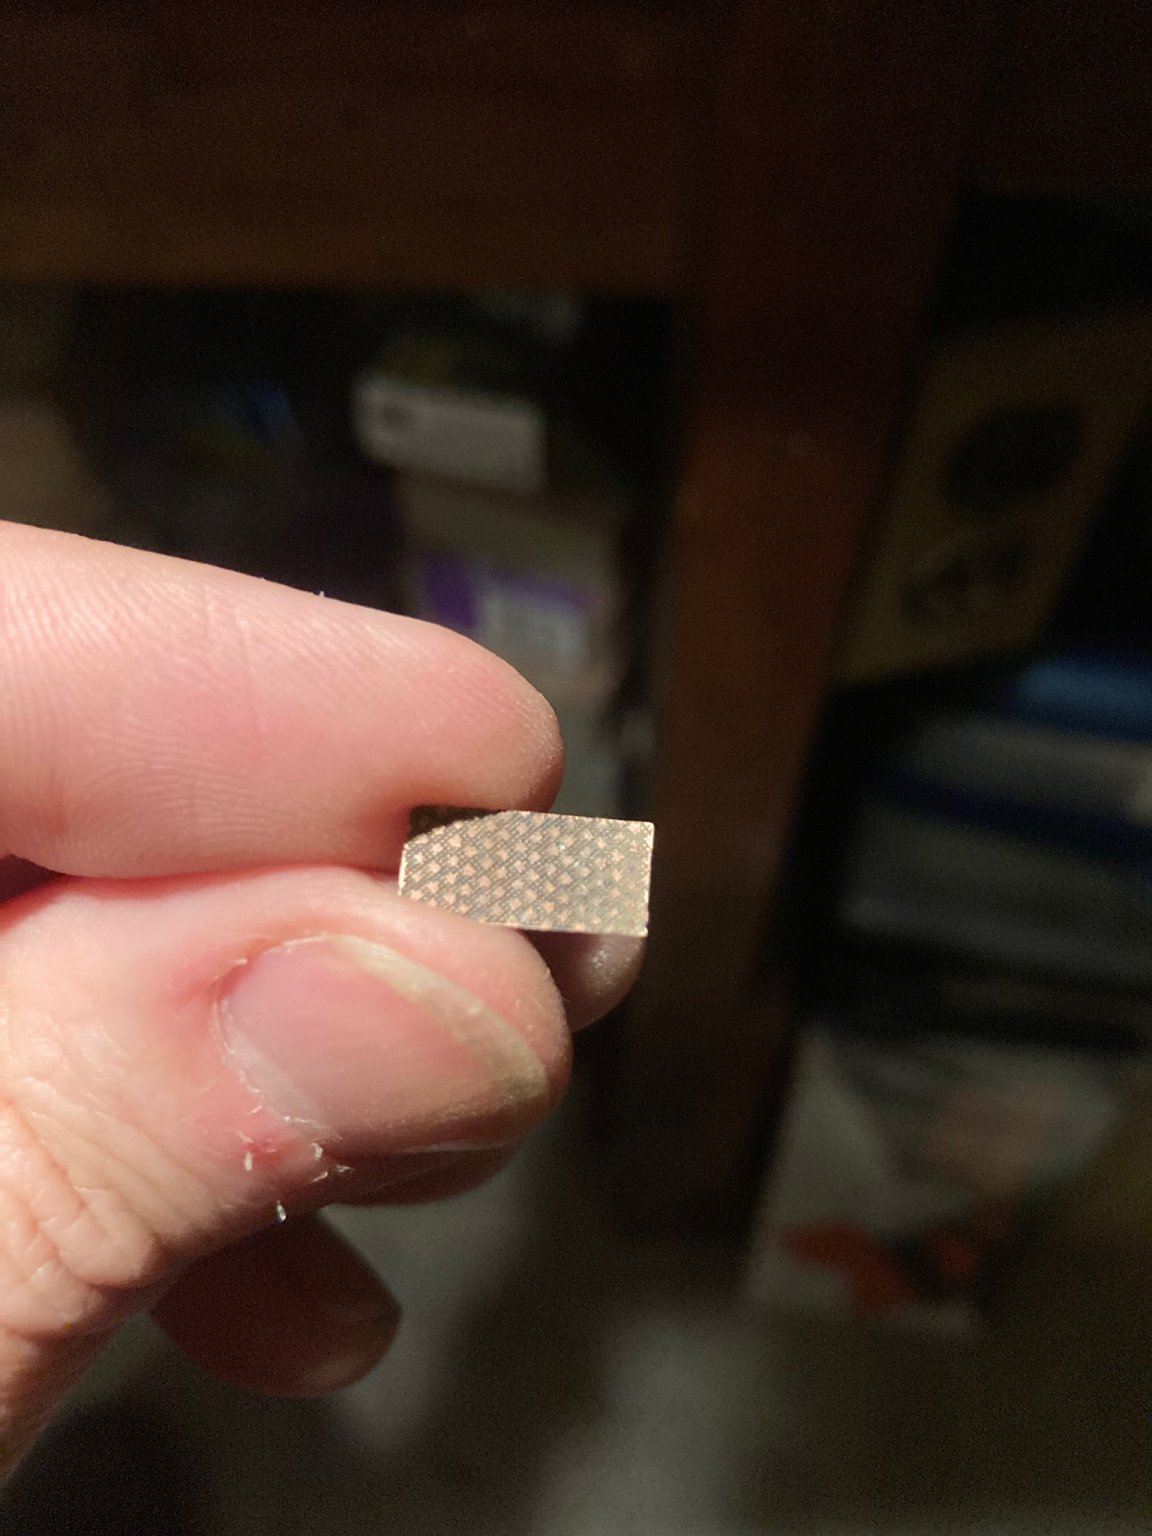
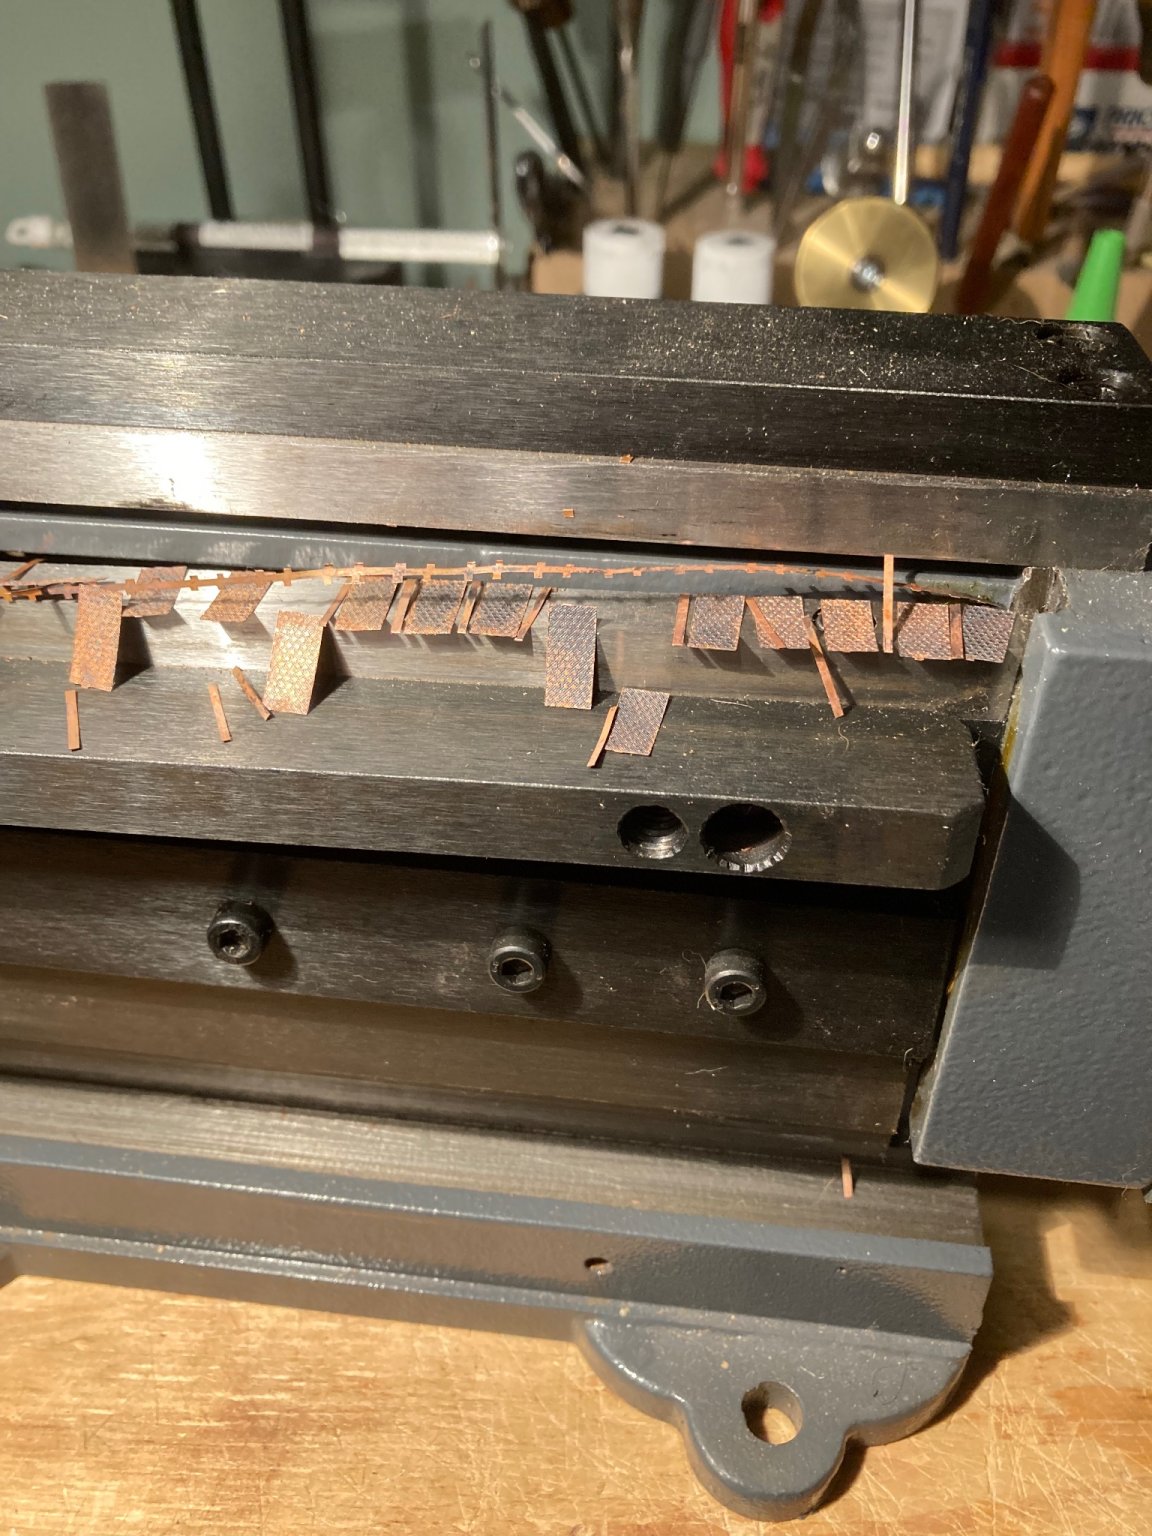
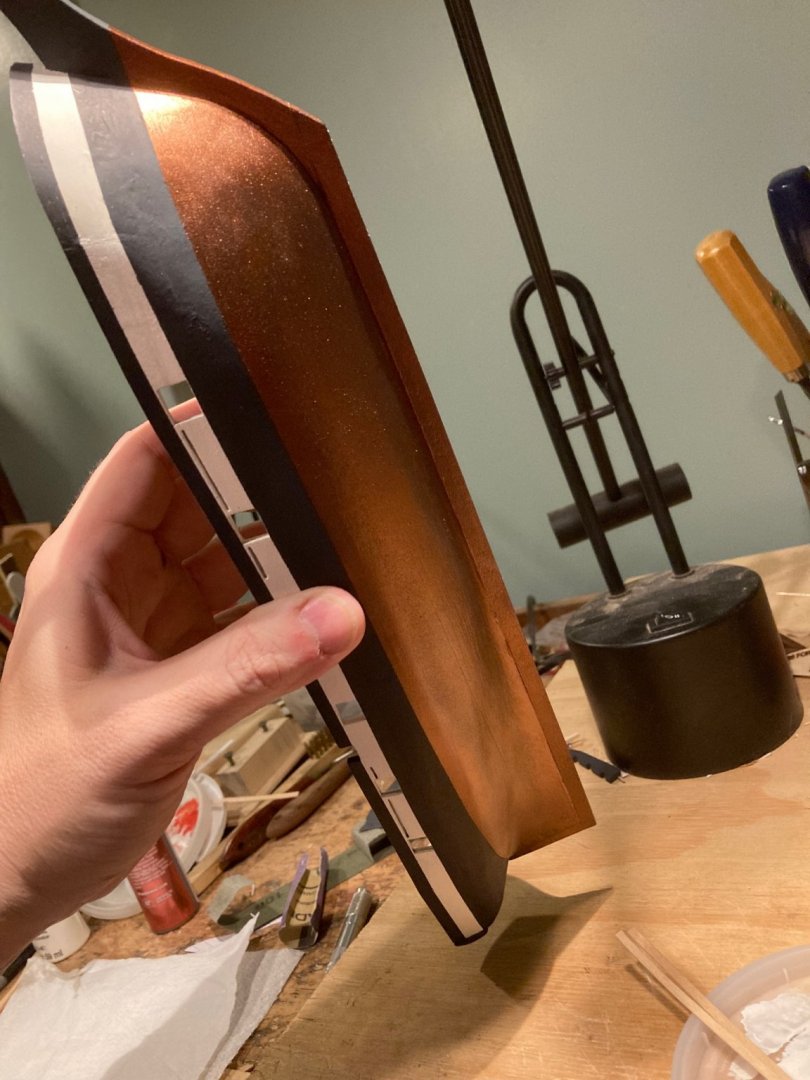
I experimented with sanding block and with rotary tool to remove the burrs left on each of the plates. Both worked well but the rotary was much faster. After a bit of tedium, the plates could abut cleanly and longer look like I used toe-nail clippers blindfolded. Now you can see my weathering of the plates was too successful.


-
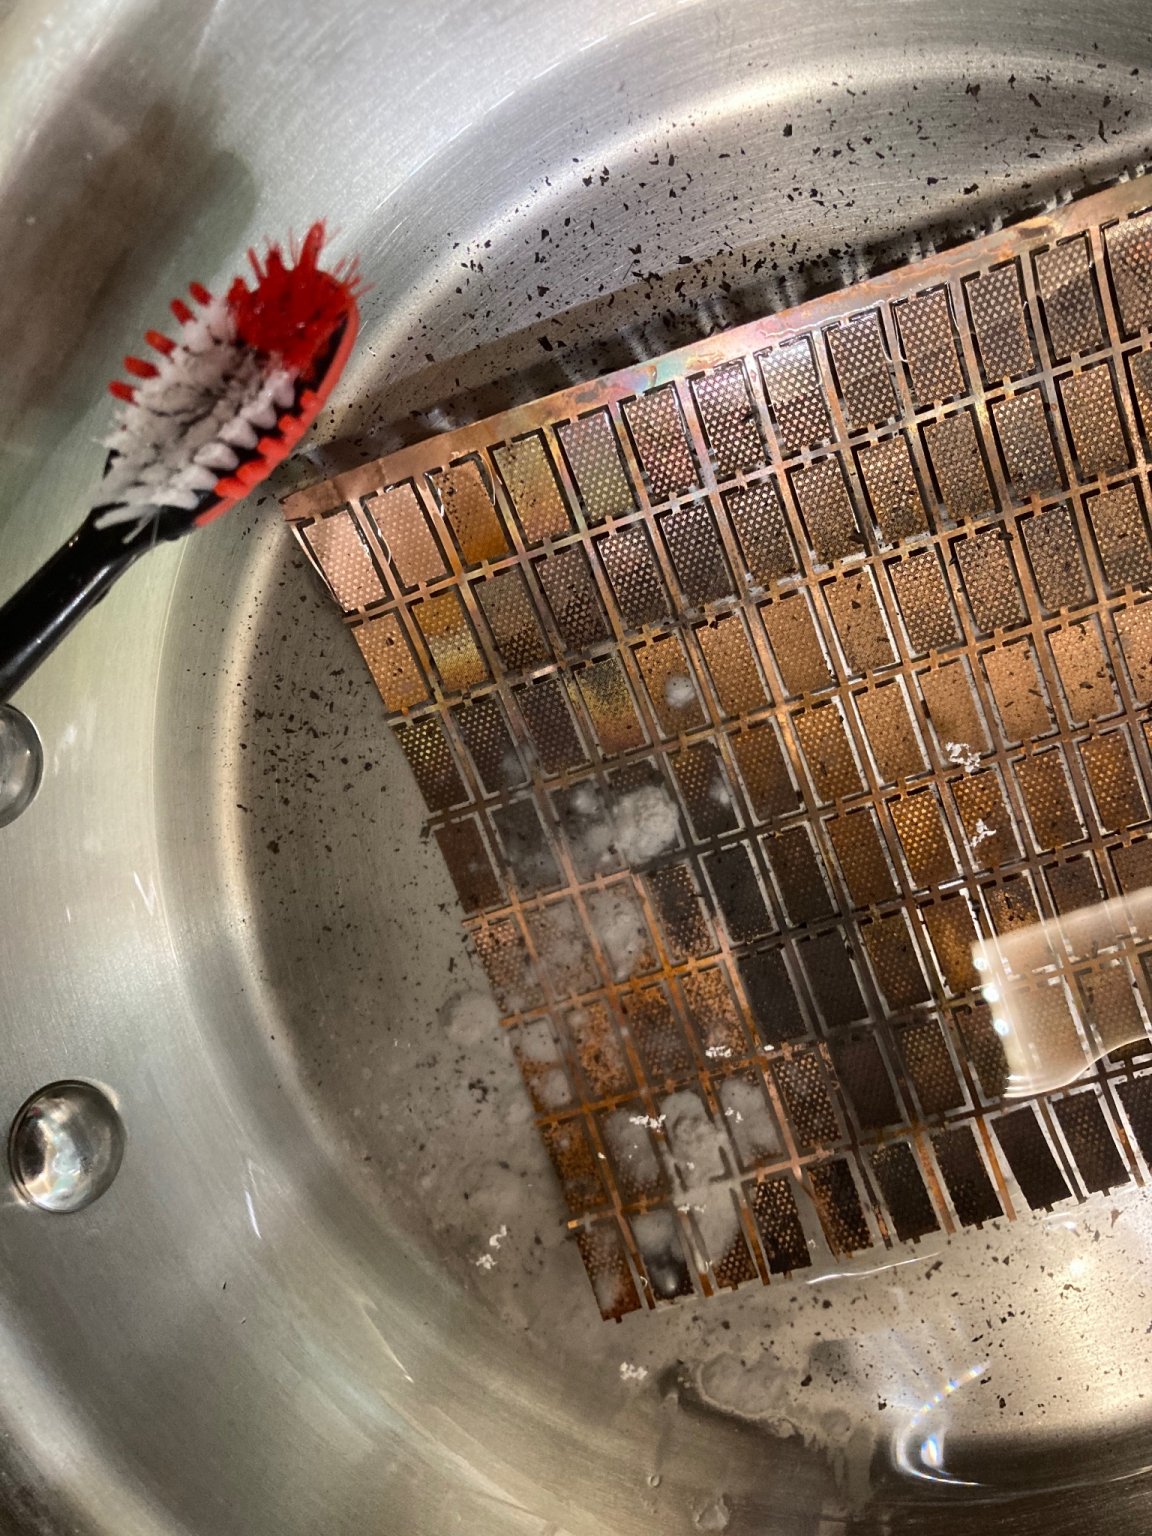
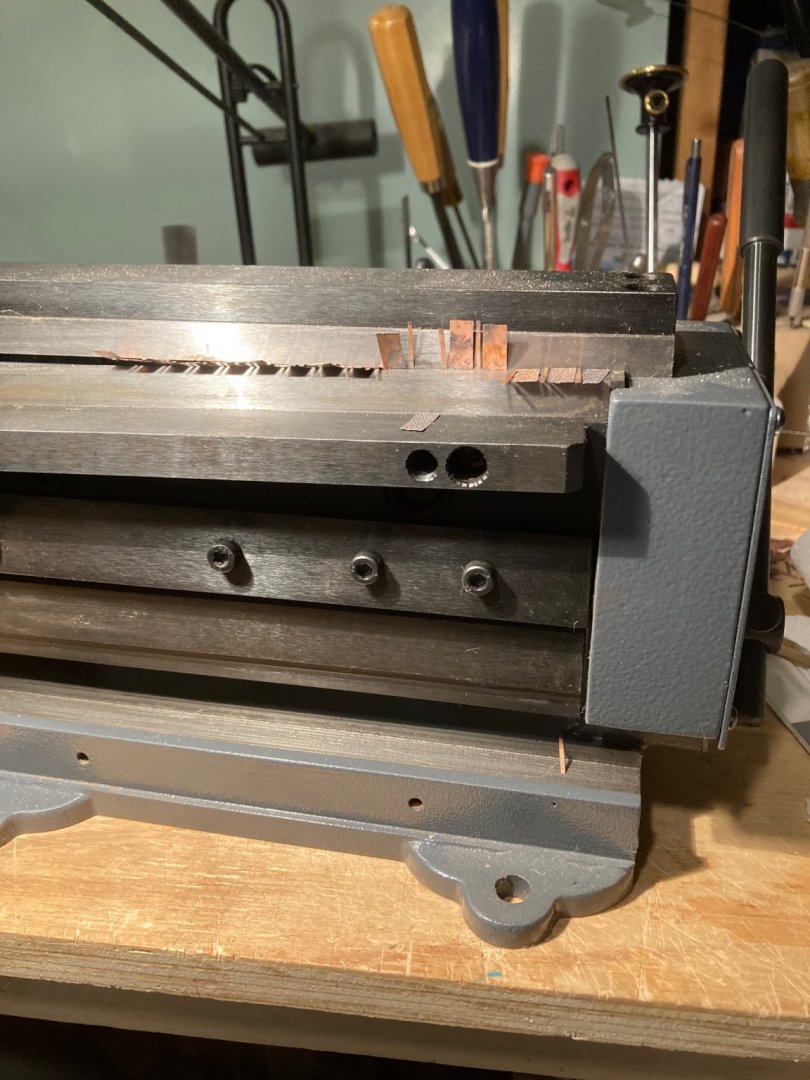
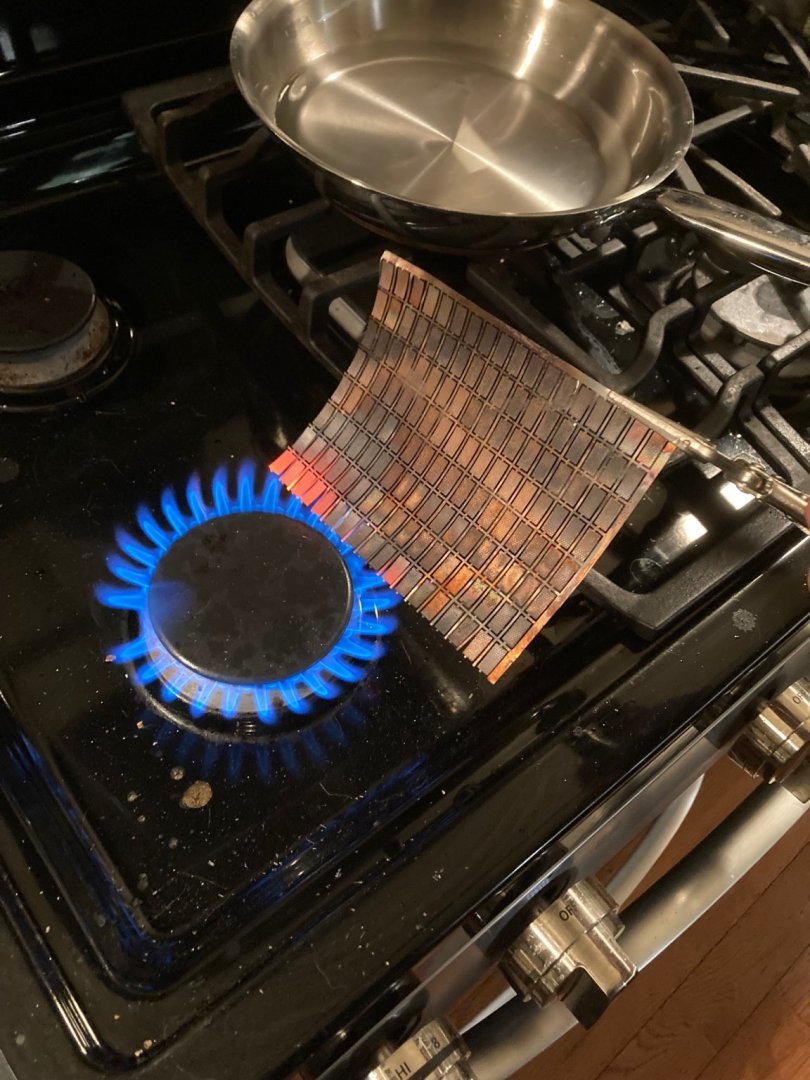
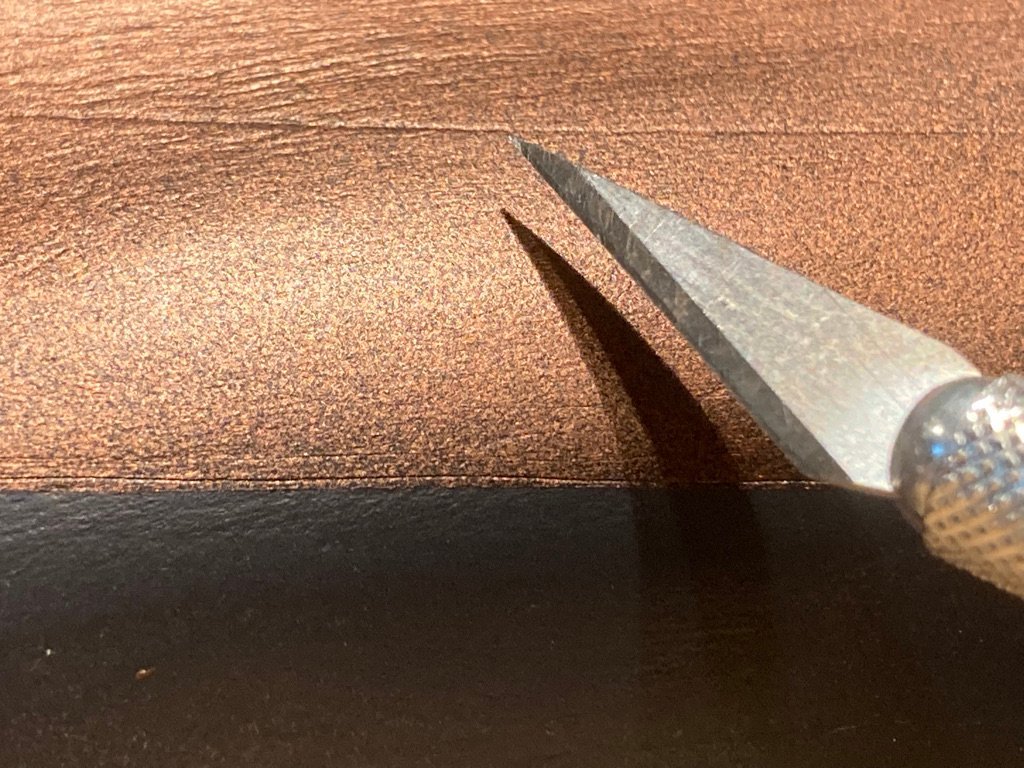
Coppering the hull! Well, not just yet; more like just coppering! First look at this image of the Cutty Sark https://en.m.wikipedia.org/wiki/Cutty_Sark#/media/File%3ACutty_Sark_stern.jpg (CC, Wikipedia) One does see much texture on the copper plates on that hull! I’ll return to the issue of texture in a bit. I wanted to removed some of the shine and give some variation in color to the copper plates. I heated them on the stove, which worked too well! I used the open flame of my stove. I then cooled them in a pan of water and used a toothbrush to remove the soot. I have liberated the 280+ copper plates in purchased from the two sheets they were attached to. I first used an #11 x-acto blade cutting the copper sheet on a wooden cutting board, which worked just fine but was slow. I then used a small sheer I bought last year for my I’ll-fated Dapper Tom project. That also worked and much faster.


-
Heller HMS victory 1/100
EricWilliamMarshall replied to George 311059's topic in Masting, rigging and sails
Forgive me but what is IMIA? -
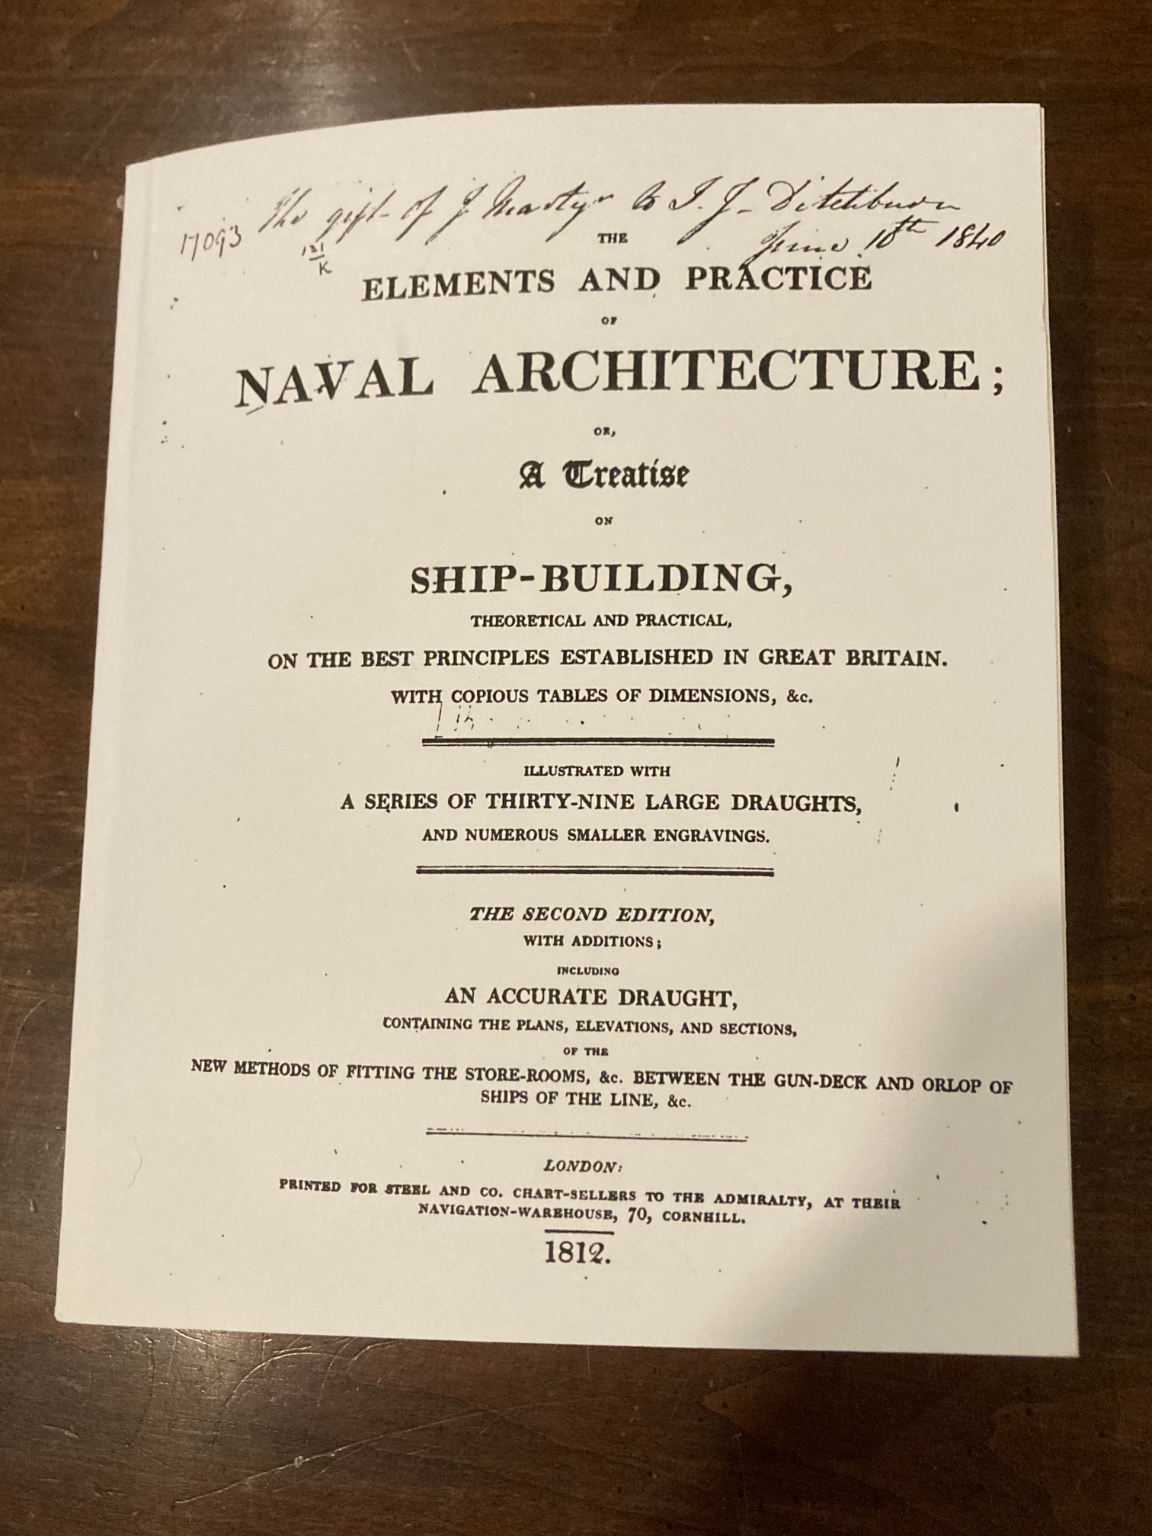
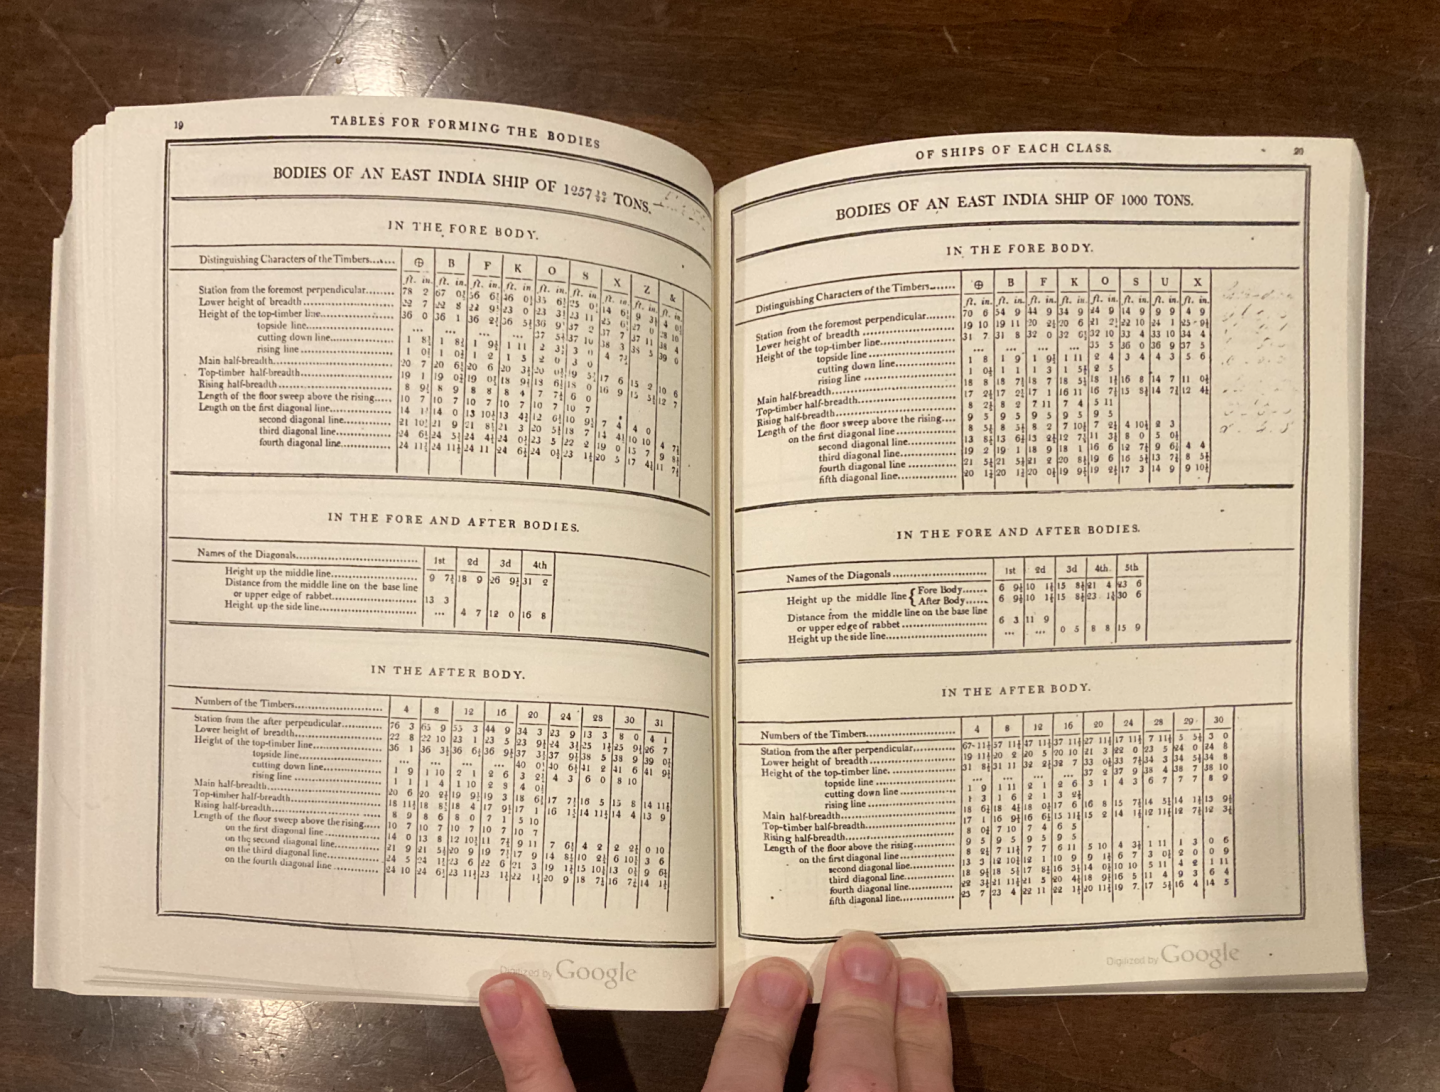
I received two items I ordered in the beginning of November. First is a set of plans for the USS Perry from the Taubman Plan Service. Their website is dense and sprawling. I ordered via the web form and received no feedback. I emailed them on November 10th asking if the order was received and received a short affirmation and a hope to ship by weeks end. It arrived today! Their plans are the set by now-long-gone Boucher company (and match the set I found earlier (see entry #60 if curious) I still haven’t heard back from the Smithsonian regarding their USS Perry plans. Oh well. The second item is a print on demand version of Steel’s book on Naval Architecture, which has charts to figure out all the lengths for masts and spars, and other interesting tidbits. I’m not ready to part with $500 dollars for ‘real’ version but I was willing to risk twenty bucks plus shipping for a copy from the Harvard Book Store. The experiment was a success! I will also note this exists as a free copy from Google as well.if one wishes.

-
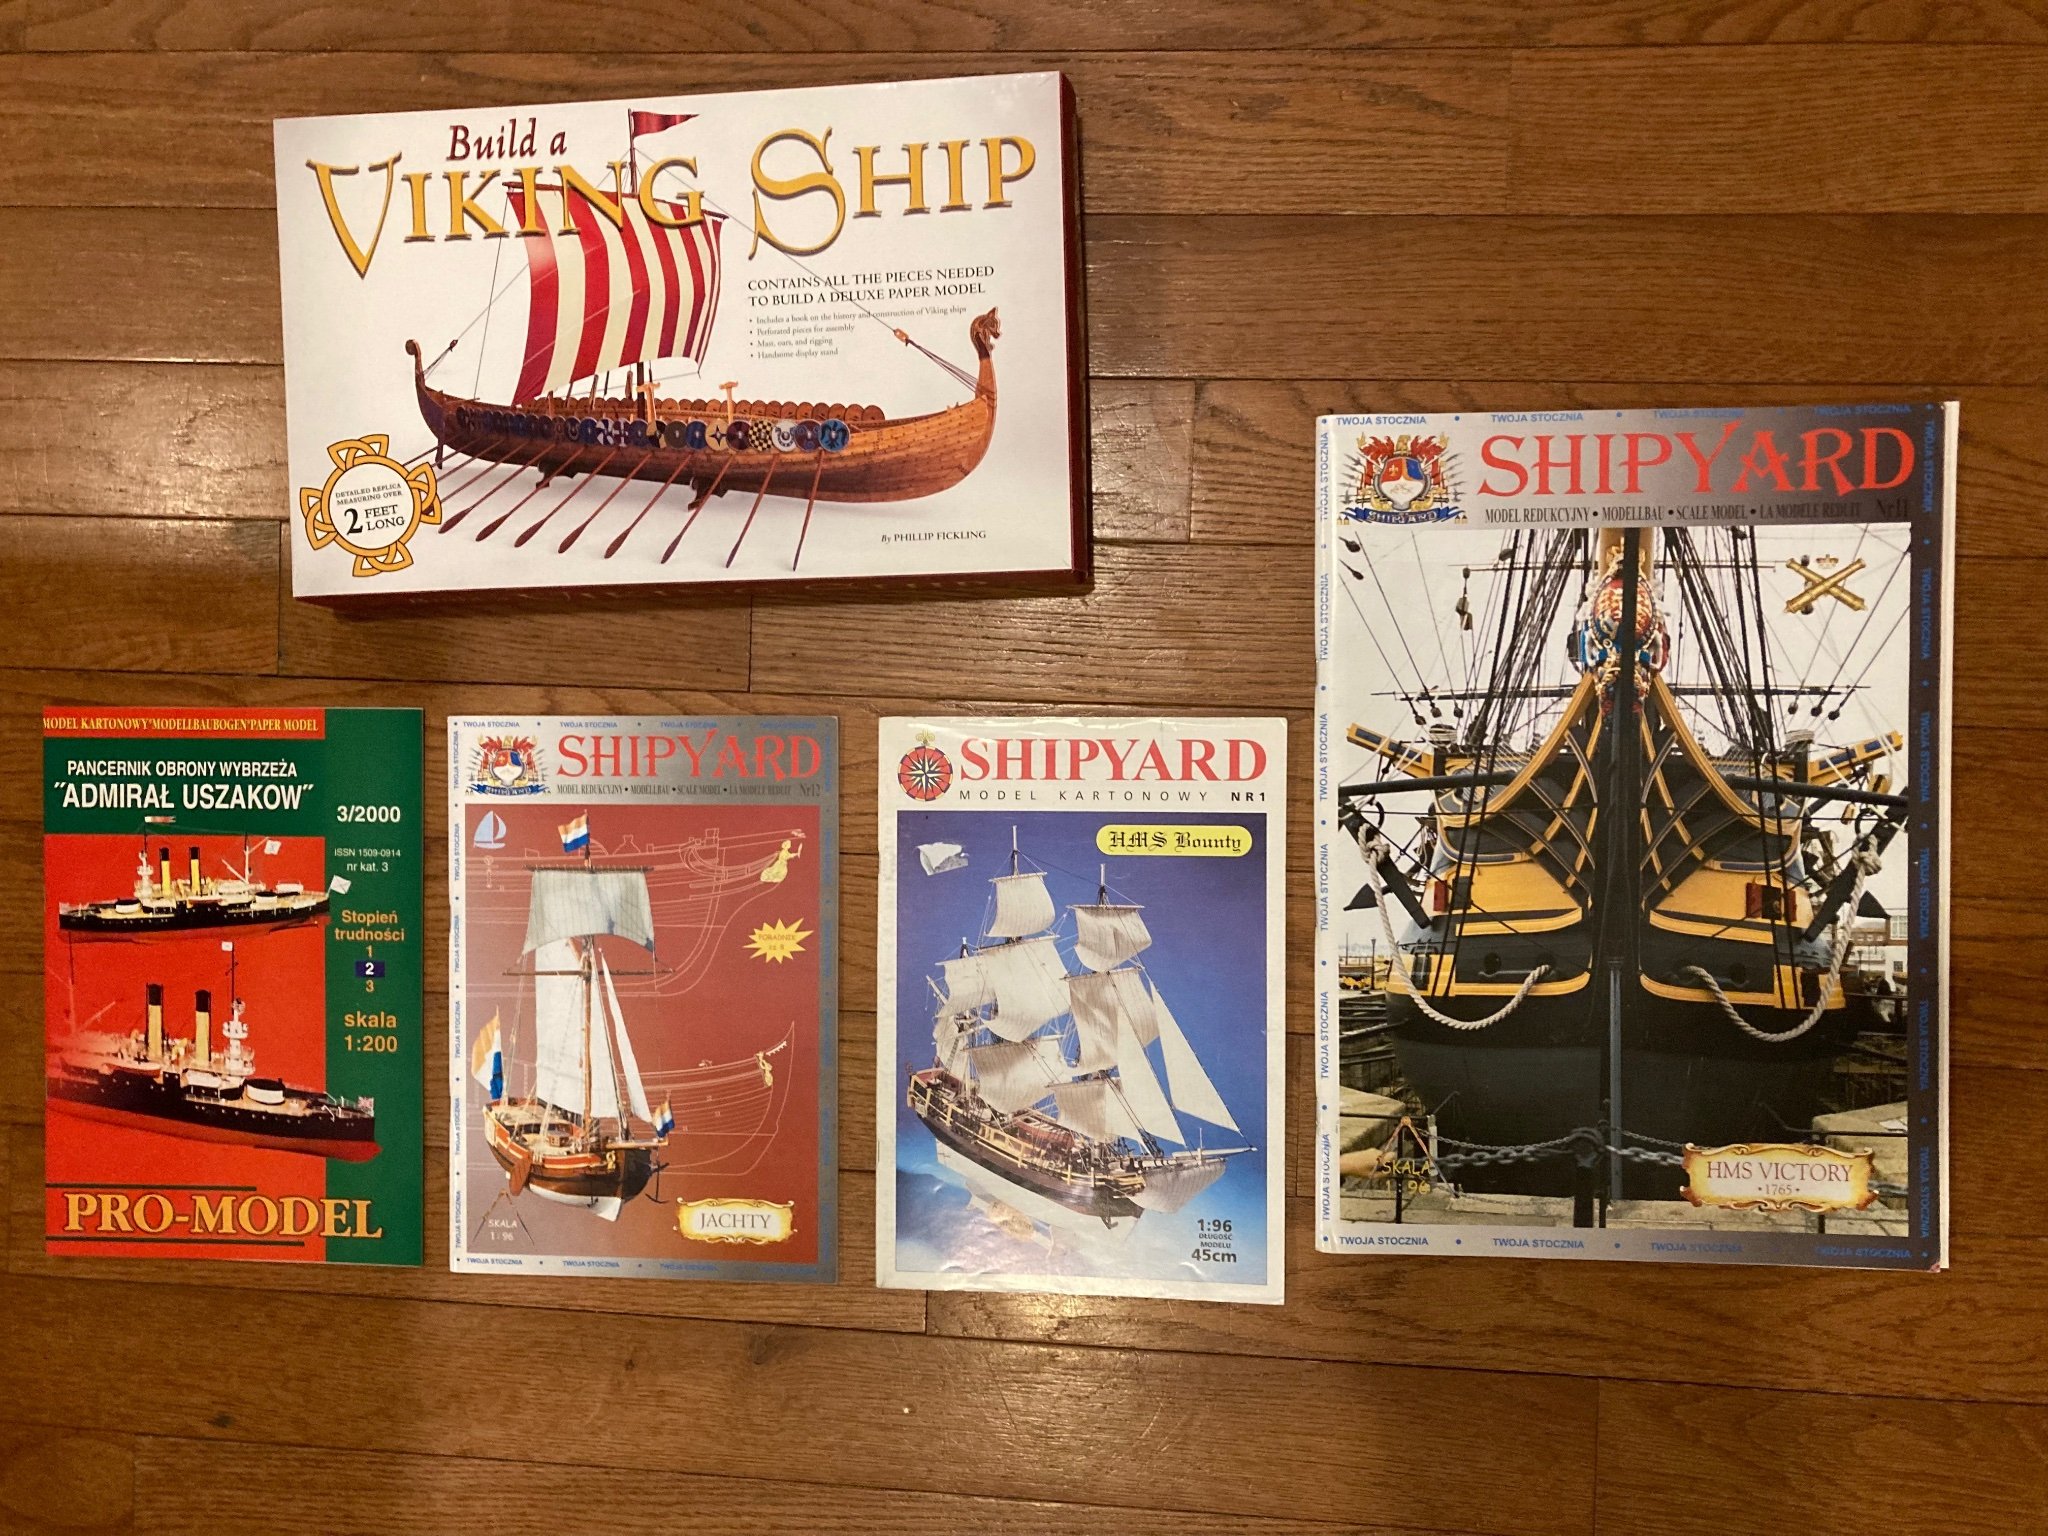
I also received a package today.

-
Thanks @sjanicki for sharing your hard-won wisdom!
-
It took me a while to find but I highly recommend Chris' excellent work - an overview and tutorial in eight parts (and you can follow along with a free model. Originally I was going to build the V108 (the model he builds in the tutorial) but I couldn't find the collection in the wilds of MSW until much later. Hey Chris, when are you going to write the book!!
-
a) Thank you very much! b) The card kit does most of the hard work - yes, I stumble but this is my first attempt in the realm of paper and card. c) For the fellow who has painted thousands of buttons, I believe this work is well in reach. Really!! For the rest of my gentle readers: check out OC's build & paint log:
-
The ship will wait! I hope all is well and let us know how you are doing!
-
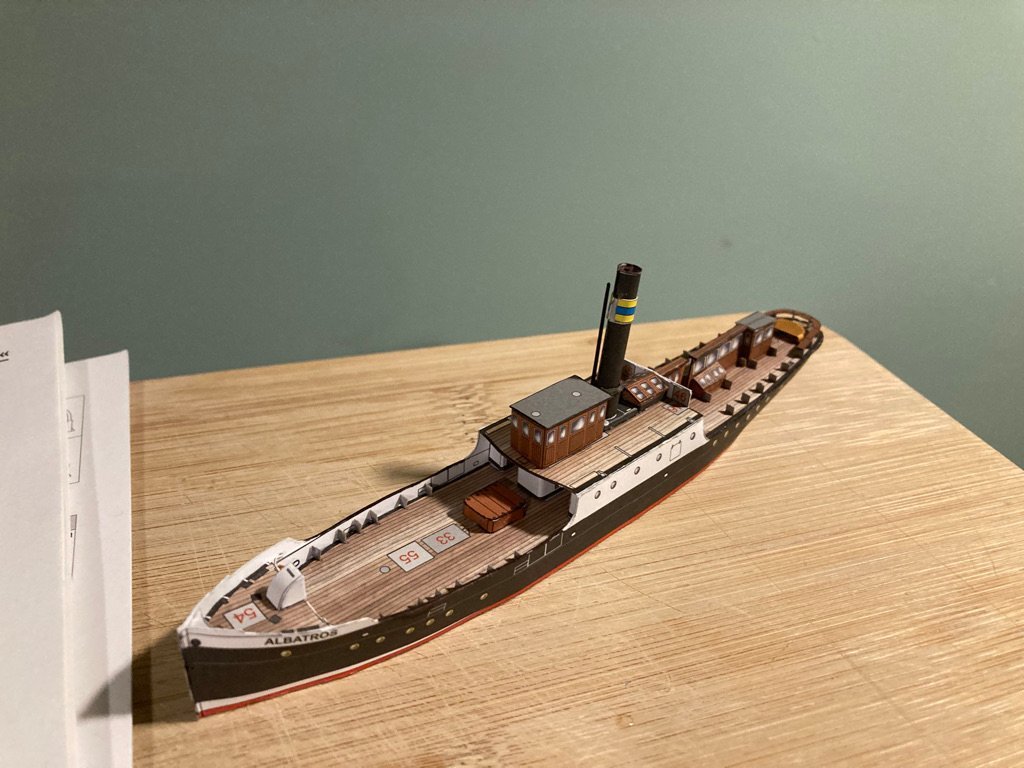
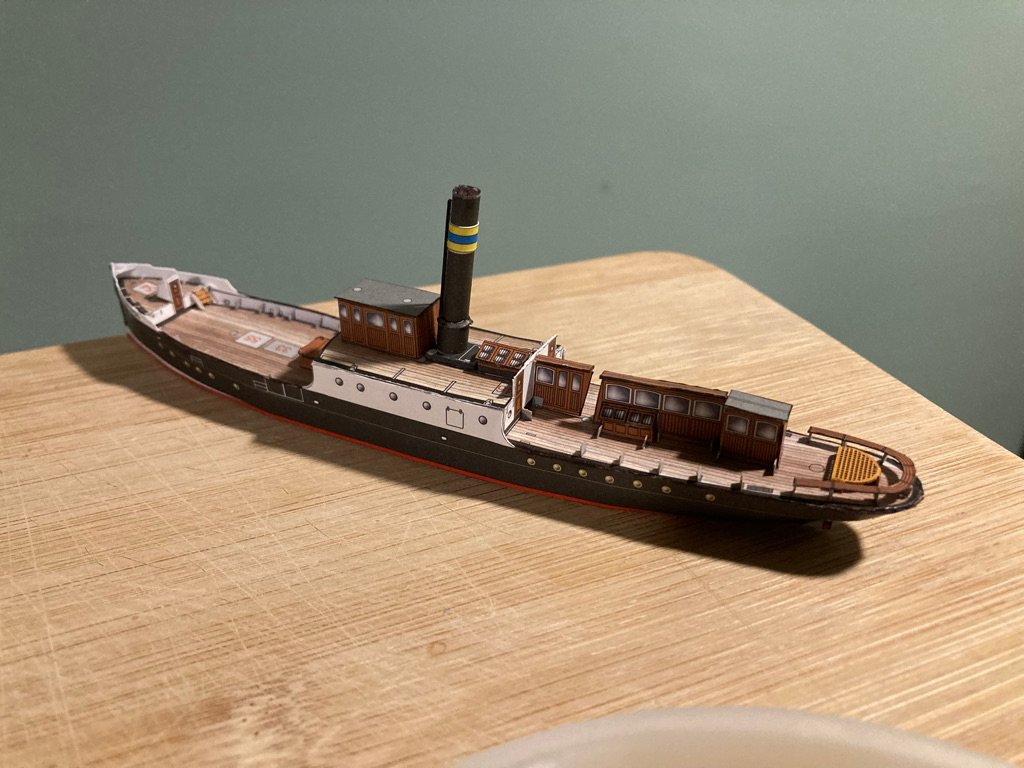
I wasn't clever enough to use that on funnel but there was one for a flimsy box that the designer had, so I reached a bit of enlightenment. Perhaps there is one for the funnel. I'll know at the end if there are 'extra pieces'. I also need to hunt about to create a collection of different diameter rods. There are two curved funnels also lurking in my future! I made a bit of progress with the deck goodies. Thanks again for everyone's kind support. I know there are many more interesting, skillful build logs here at MSW you should be reading instead of this! It is a free country though, so you are all welcome and have my appreciation! I've started working on the deck seating, of which there is a great many, I'll be doing more of that for the near future.
-
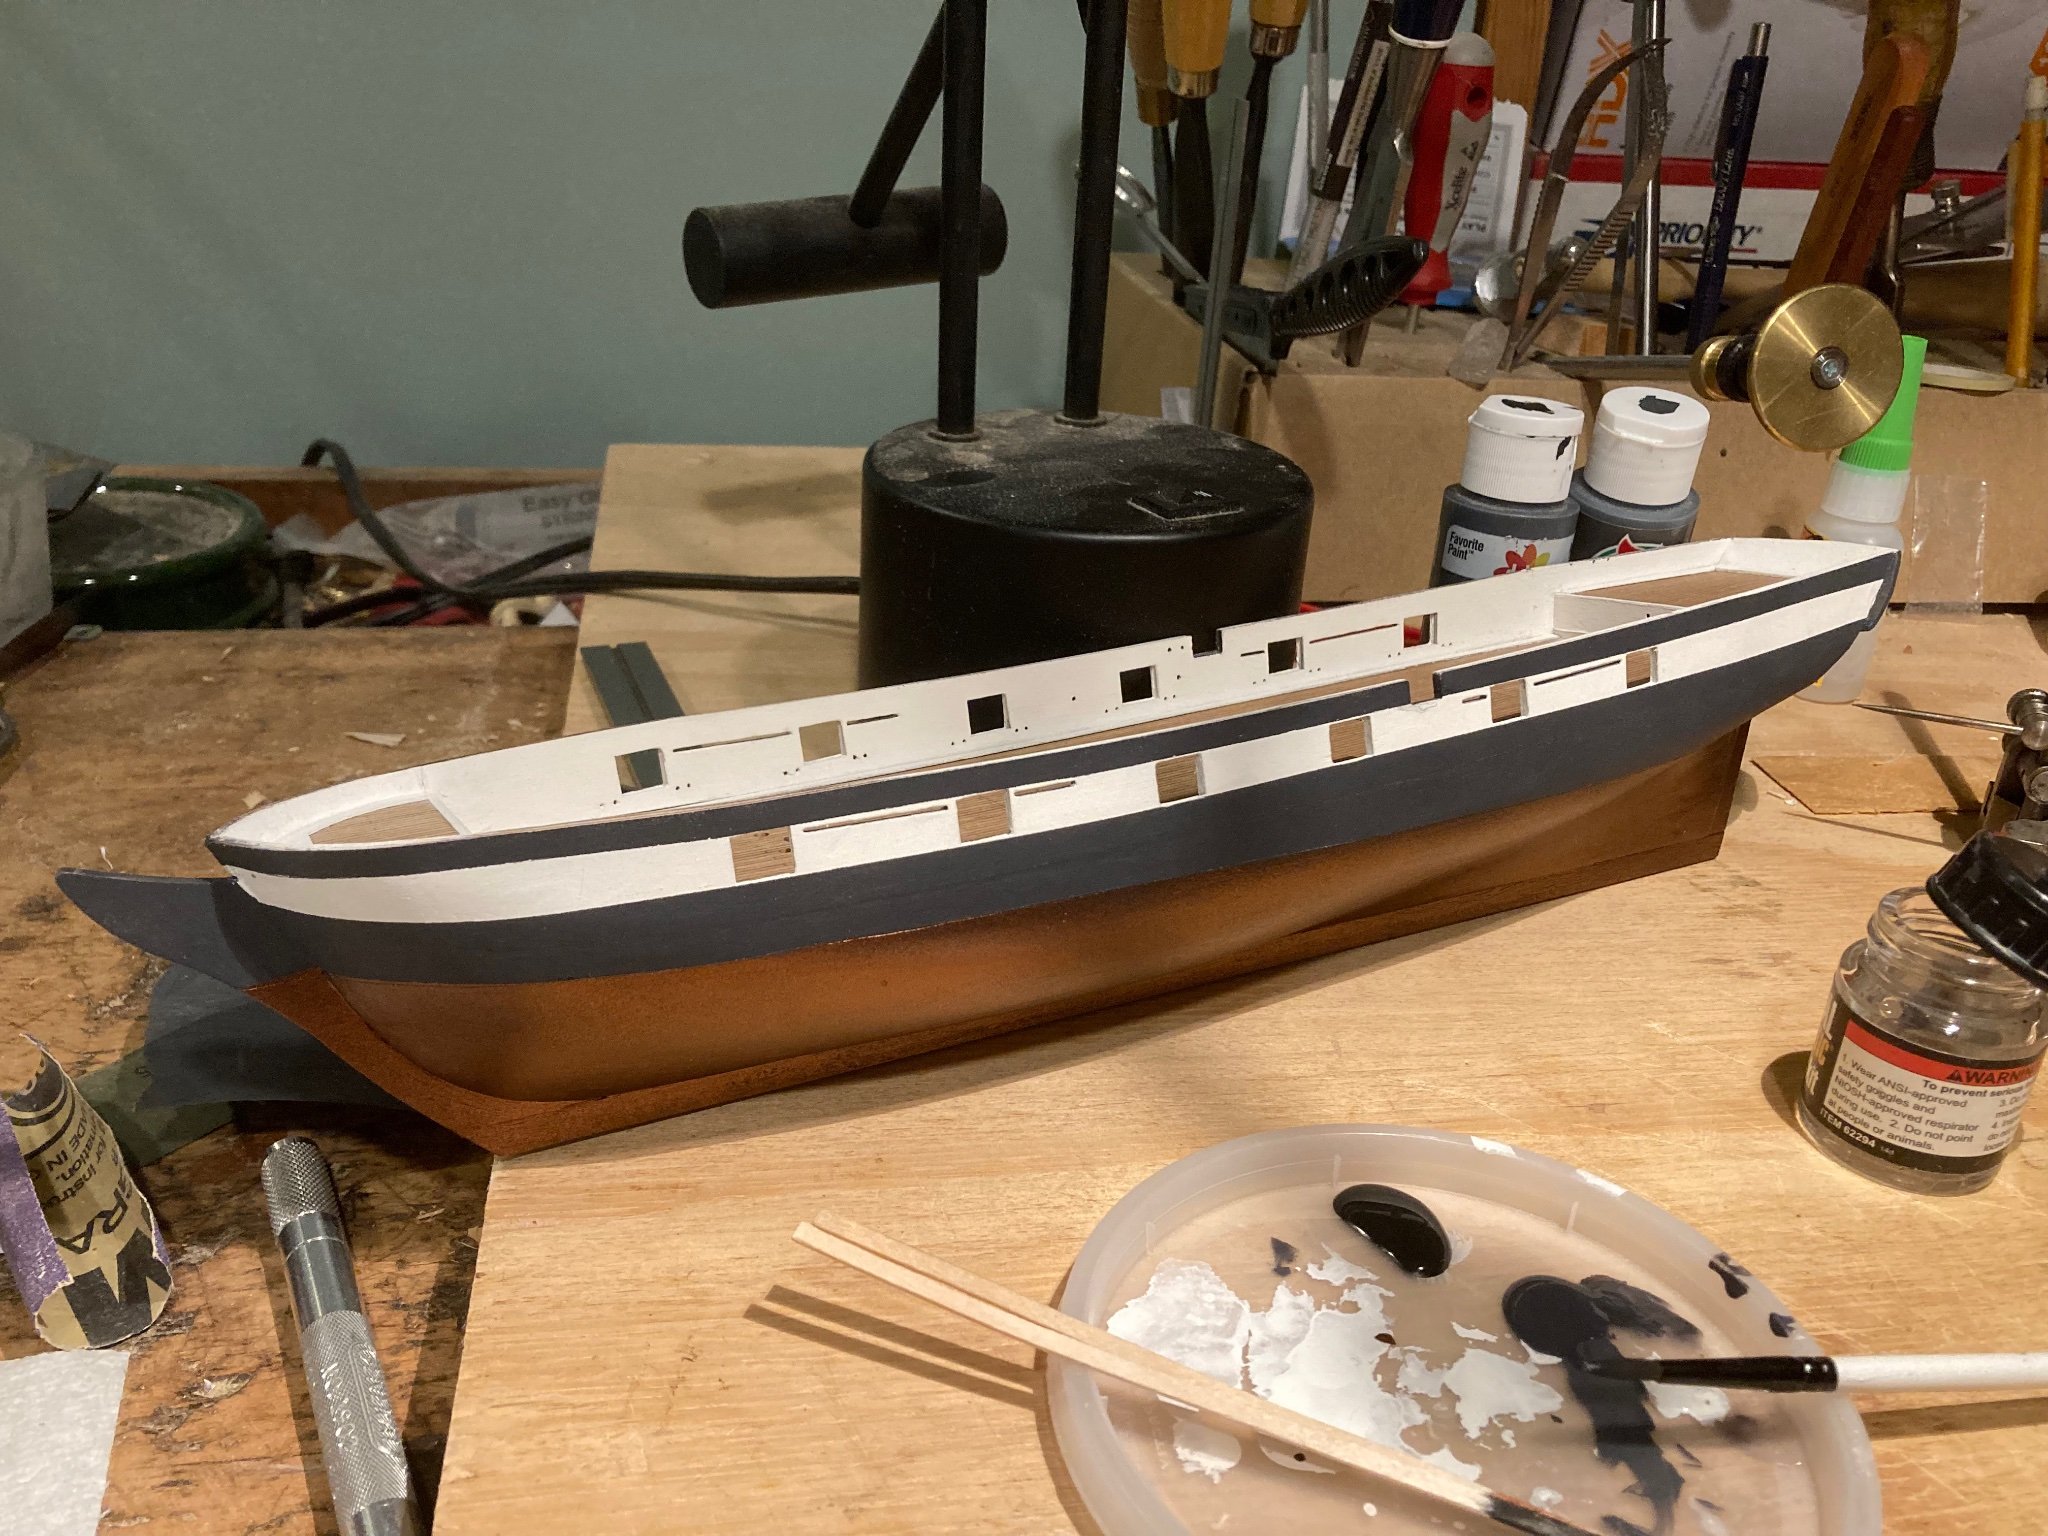
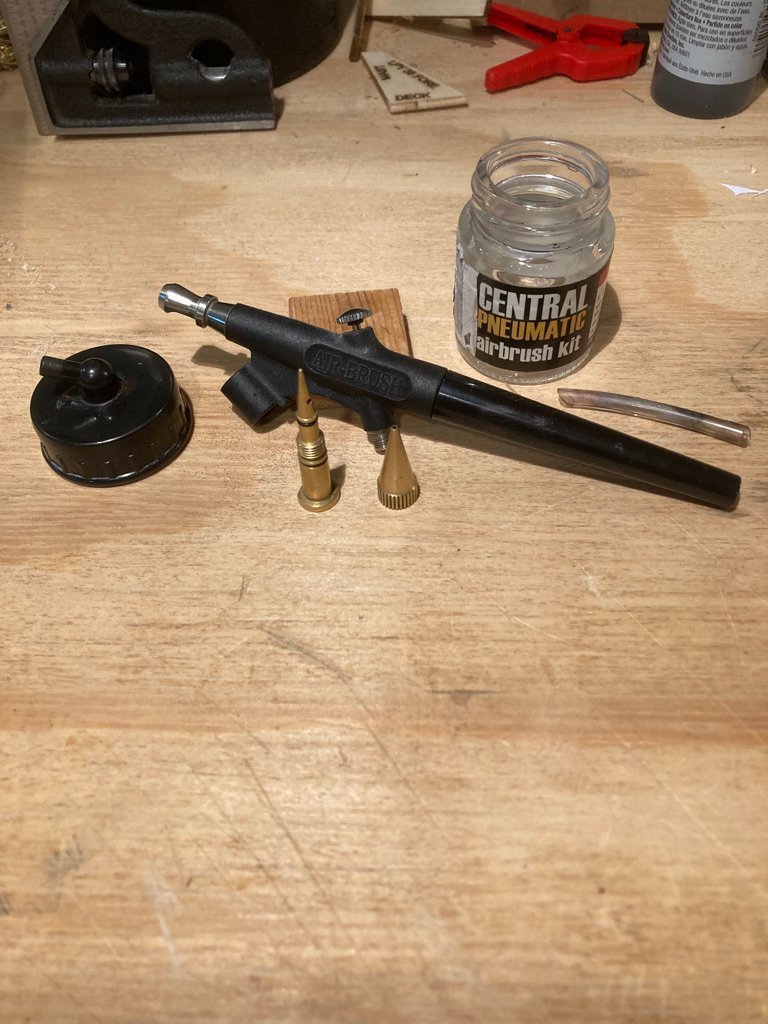
I did put on poly as you suggested Keith - thanks again for the just in time suggestion! Here is my not-snazzy airbrush set-up. It is the cheapest rig I could put together and is a bit funky to use. If I tighten the hose to much then the air stops reaching the airbrush. I, in fact, own a nicer airbrush. But I since I still don't really know how to use and maintain an airbrush I keep using this one. For a few years now. The copper paint is so shiny, you can see the glue joint on basswood block where they laminated it before machine-cutting the hull. There is also a picture of the copper plates that I ordered from the folks at Bluejacket. Next up a bit of research about coppering the hull! 4B1C2CB2-3D06-4ACE-B55F-E899FECCE05A_1_201_a.heic
-
Just because! I one point I had to stop my son from making a peanut butter and jelly sandwich while on the unicycle. Ok, one proud dad moment and I'll get back to a build log! This my daughter a couple of years ago. She is the one in the center.

-
I also have an another delivery creeping towards the East coast.
-
Thanks for the heads-ups. I will do that! Keith, you do get around! Texas, Michigan and if I recall from Marc’s blog, Alaska as well!
-
In preparation for the copper bottom, I painted the bottom of the ship a proper dark black as a base for the copper and then some copper paint. I must say, if you want a color to show every imperfection in one’s hull work, metallic copper is the bomb! I got remembered to seal the painter’s tape this time so that looks better.

-
Yes! Where do I buy a ticket! Very nice; beautiful work and I must say very nice selection of lumber. You mentioned your interest in Art Nouveau before. I’m glad to see to see them. Do your children skate board? We have some similar issues with unicycles in our house. I presume the forums at Fine WoodWorking are good. I left woodworking before I had access to the internet. I read every issue of the first 20+ years of the magazine. My father had a few feet of them he keep in a stack, that I’d go though as a youngster. I’m glad there are a few items that will be in your family. I look forward to seeing you try your hand a wooden ship model (but I’ll have to wait; you stay have a ways to go: finish building the current one, write the book, go on the book tour, possible movie of the book? And then the research for the next one. I might not last that long!) @Keith Black, wow, I love your taste in small convertibles! Usually folk wench some muscle car or perhaps something from the ‘50s but you found a whole trove of nifty beasts. Well done. How did you get from cars to ship models? Is there an intermediate step with1:12 scale model cars with working windows and working steering?
-
After a brief frenzy of fold and hold research, I had ordered the Bug that @Landlubber Mike mentioned and it finally arrived. It is nicely made, and well designed, to my untrained eye. So thanks for the recommendation! I wrestled the stove pipe/funnel. I found it quite tricky to glue the vertical edges of the cylinder together. I also struggled with keeping strips folded into square shapes, um, staying square or even square-ish. What else vexed me? The colored pencils I dug up didn’t work well for coloring the edges of the cut paper. All part of the learning process.
-
And you, Chris, what did you get?
-
Nice work! For anyone reading this blog, the tutorial mentioned can be found here:
- 106 replies
-
- 3
-

-
- digital navy
- v108
- (and 3 more)
-
Tools described
EricWilliamMarshall replied to bruce d's topic in Modeling tools and Workshop Equipment
Table Saw - storage area. Also device for lowering the maximum number you can count up to on your fingers. See also Drill Press. Circular Saw - Similar to table saw but without the storage. Also used to cut saw horses. Ruler - a device used to determine the correct length, if it was only a couple of inches longer. Jig saw - a device used to bend jig saw blades Clamp - a device used to leave permanent marks on a piece of work indicating the use of clamps. -
Funny that. I thought all the models I ordered were older ships and in my excitement I didn't check kit maker & model. Lesson learned, folks reuse names for ships. On the other hand, it is interesting to see what the same and different in the different models and scales. So, I'm happy nonetheless. As you can see, Greg was able to get them to me intact!
-
I received my kits without issue. Go for it!