HOLIDAY DONATION DRIVE - SUPPORT MSW - DO YOUR PART TO KEEP THIS GREAT FORUM GOING! (Only 20 donations so far - C'mon guys!)
×


desalgu
-
Posts
363 -
Joined
-
Last visited
Content Type
Profiles
Forums
Gallery
Events
Everything posted by desalgu
-
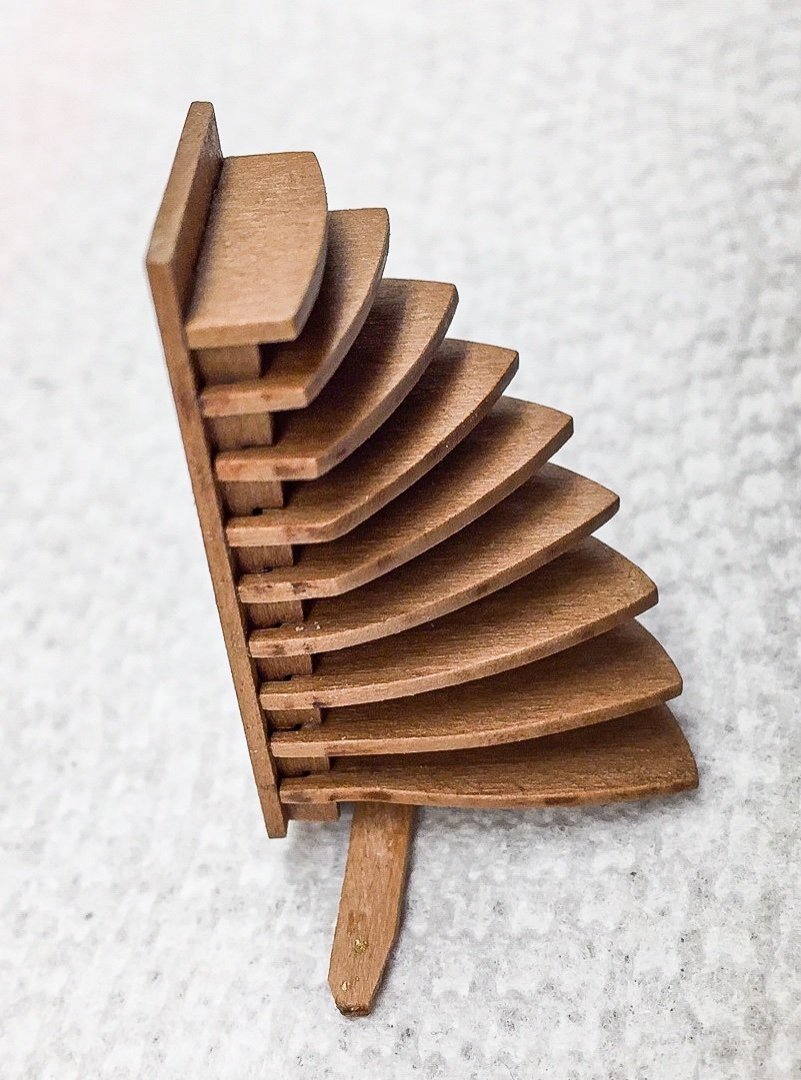
While letting glue or paint dry, I've been working on the spiral staircase. It went together without any problems.
-
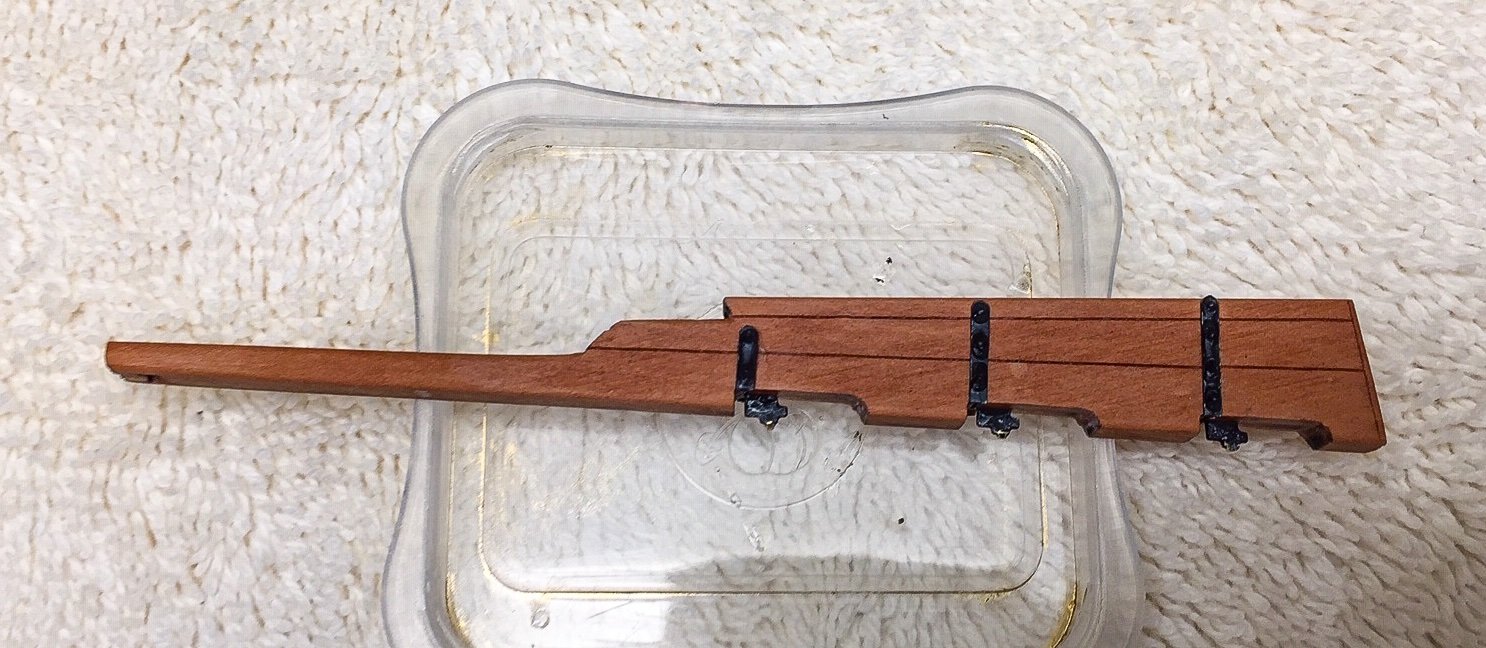
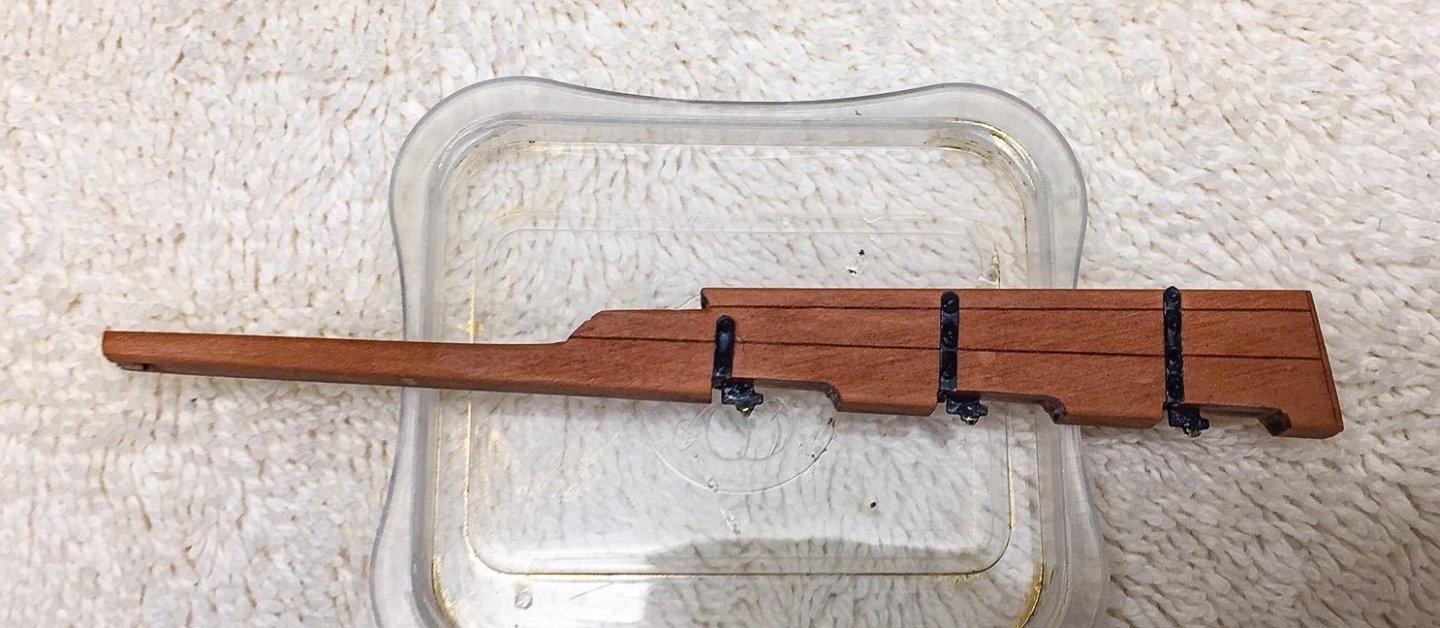
The channels are pinned to the hull, so first step is to put small wires in hull as shown in photo. Predrilled holes show where to put them. I drilled them slightly deeper for a little more strength. I used 5-min epoxy to install the wires, and I'll cut them off a lot shorter before gluing channels in. The channels are two pieces of wood (the channel and a channel edging strip) glued together which form the holes for the chains. The manual says to glue channels on hull first and then glue on the channel edging strips, but I decided it would be better to glue the channel and edging strips together before mounting to hull. That way it's easier to clamp them together, and I can sand the channel and edging strips as a single piece.
-
Here are ladder steps glued to side of hull. Spacing is not even because of the bulwark decorations. I followed the plans best I could, and positioned them by eye. They are supposed to be parallel to the keel, but I ended up with them aligned in between wales and keel. It's such a small angle, I decided it was ok. Photo editing I do exaggerates contrast, so it looks like I didn't sand edges enough. But it looks a better when viewed by eye.

-
Thanks for posting drawing of spirketting and waterway. Syren has the waterway, so I'd seen that before which was why I was thinking of adding it to Duchess. The drawing makes sense and looks like what I expected. I'd never heard the term spirketting though. Looks like it strengthens the joint between deck and frames.
-
I love the print also! And I agree, you have too many "toys" like the router! I really like the spirketting between deck and bulwarks. I have been thinking about that on mine to clean up the joint and make it look better, but didn't know if ships normally had something like that, although it sure seemed logical. You may have inspired me to give it a try, but without the nice tools. I also like the idea of snipping off nail heads, something I never thought of, although I was also thinking the nail heads looked out of scale on both the brackets and rudder. I left the nail heads on rudder, but used a layer of CA on top of them to mute the effect. I used similar method, aligning strap temporarily with tape, drilling first and last holes, and putting in nails to secure. And then adding remaining nails. I used CA and found putting nail in dry, and then medium CA on nail head and smearing it around slightly, it would penetrate thru the hole and hold the strap on. Seemed to work ok. And now I know I need some good flush wire cutters...my plain wire cutters leave too much of the nail. I always need another tool! 😅
-
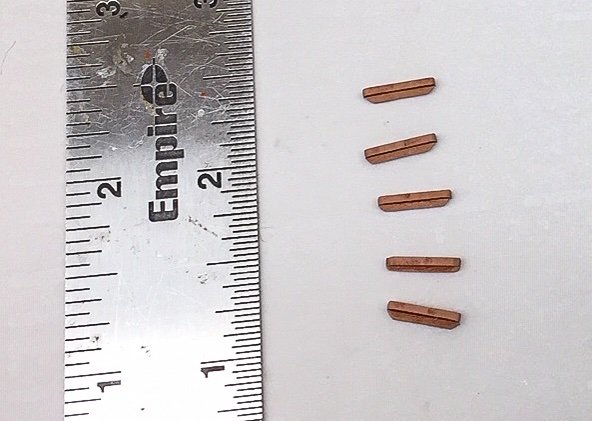
Tiny pieces! Here's steps for the ladder on the side of the hull.
-
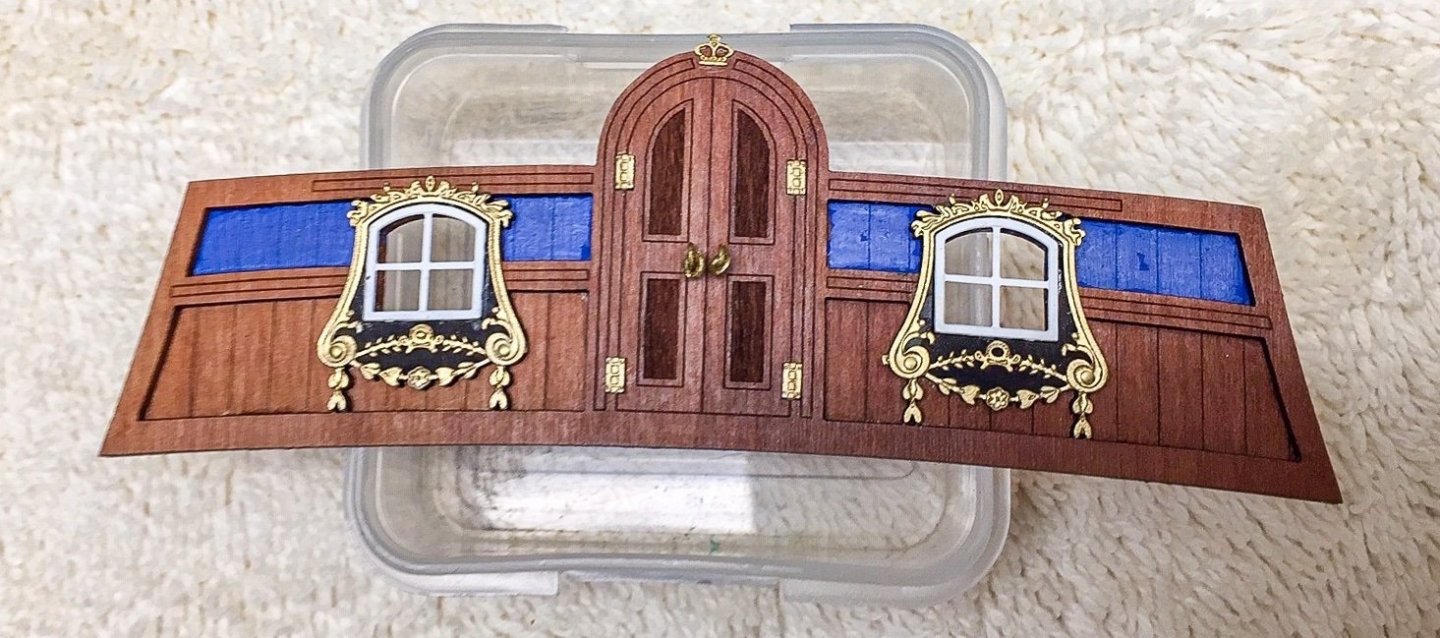
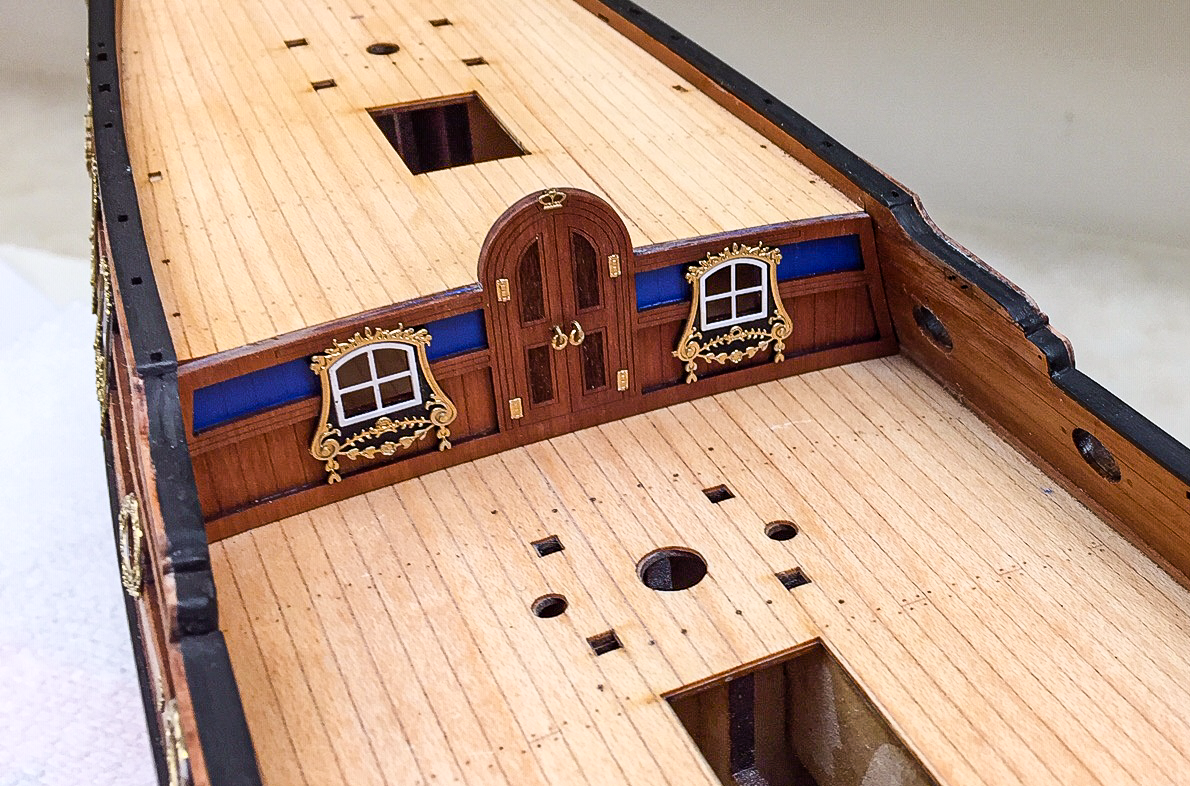
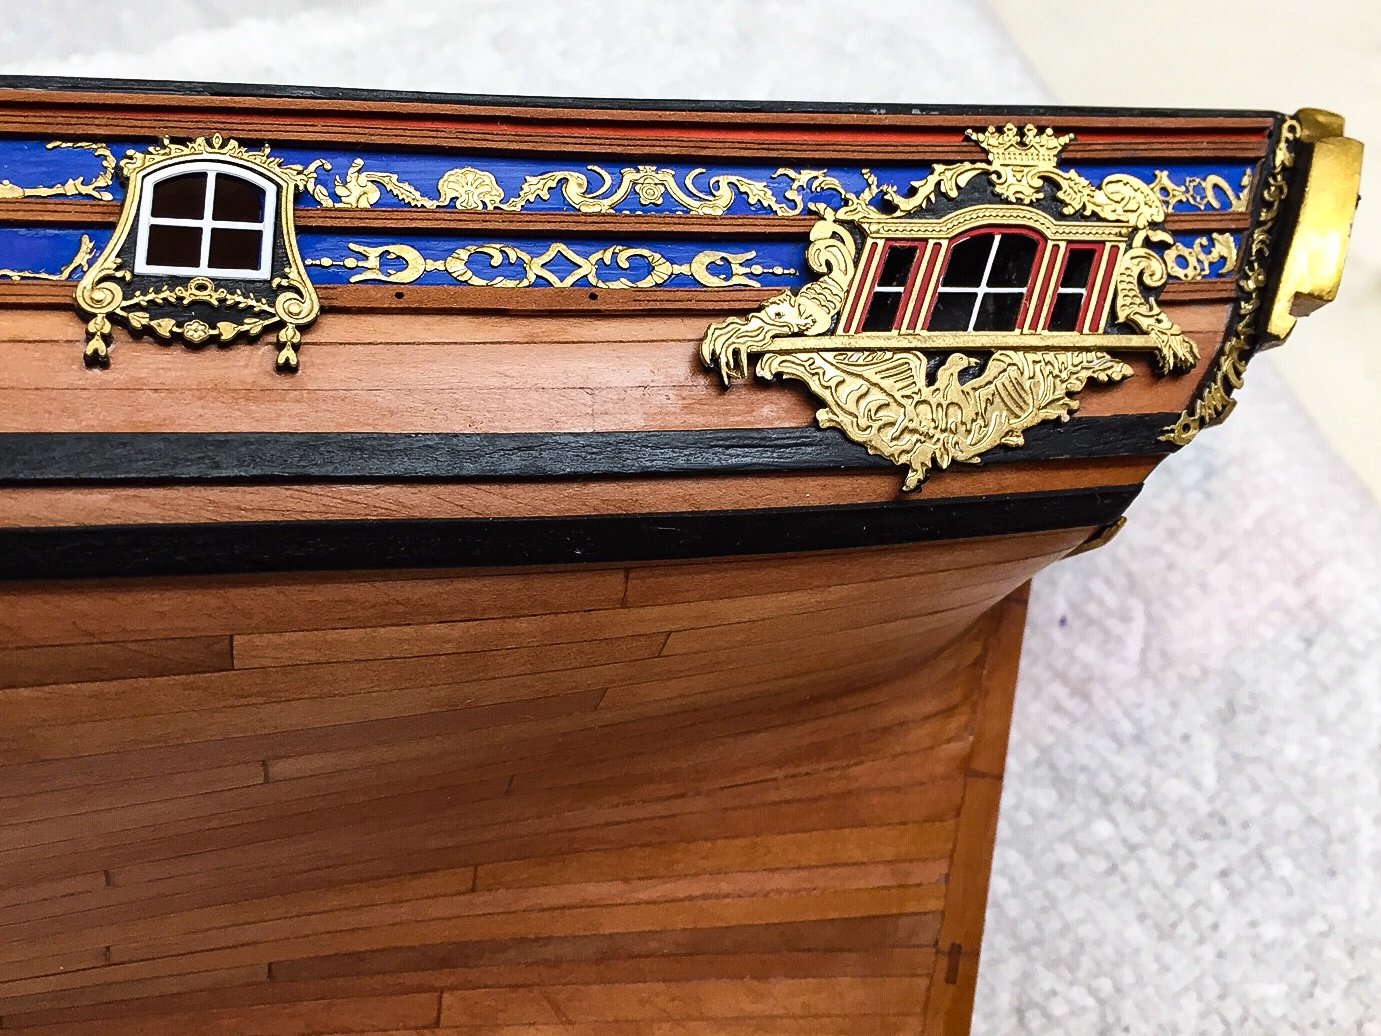
Here is the fancy quarter gallery door and windows leading aft. The laser engraving adds some very nice detail. Extra thanks to Gregory. After upload error, I converted 2nd photo to .PNG in LR and it uploaded ok.
-
Thanks Gregory for the suggestion on uploading. I'll certainly give it a try if I run into problems again. And thanks Theodosius (should I say emperor?) for compliment. This kit allows someone with my limited experience to make a halfway decent model. It's one of the most intelligently designed kits I've ever made (I've only made a couple of ships, but many airplanes). I made and installed the rudder without any major problems. The straps are held to the rudder and hull with nails that have been cut off to shorten.
-
I have apple also, iMac, but suspect it's a problem with server, not those of us uploading. Maybe it was an upgrade to server software? It's gotten better. All but one uploaded fine this time and same last time. Couple of weeks ago I couldn't get anything to upload. Thanks everyone for compliments and "likes". It keeps me going!
-
Photos uploaded the same as I cropped them, so I'll continue. Still have no idea why a few of them won't upload - I get an error message from the MSW server. Only one photo gave me problems this time. It seems very random.


-
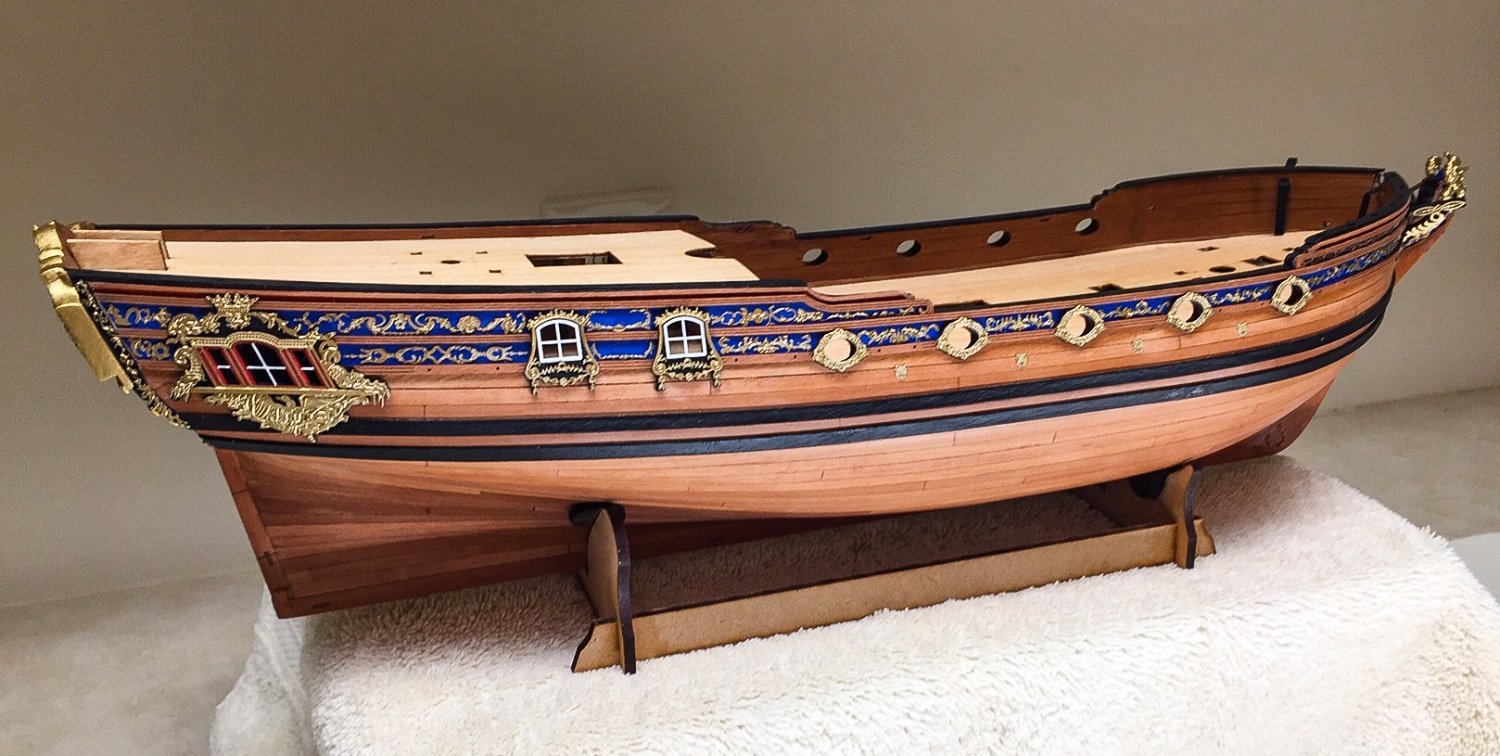
I finished up adding PE decorations to the hull, so reached a good point to stop, clean off work area, and take some pictures. Still having trouble uploading some photos. I cropped some of these to non-standard aspect ratios, so it's unclear if that's a problem. Looks like uploading changed how I cropped photo. Might have to edit these again.

-
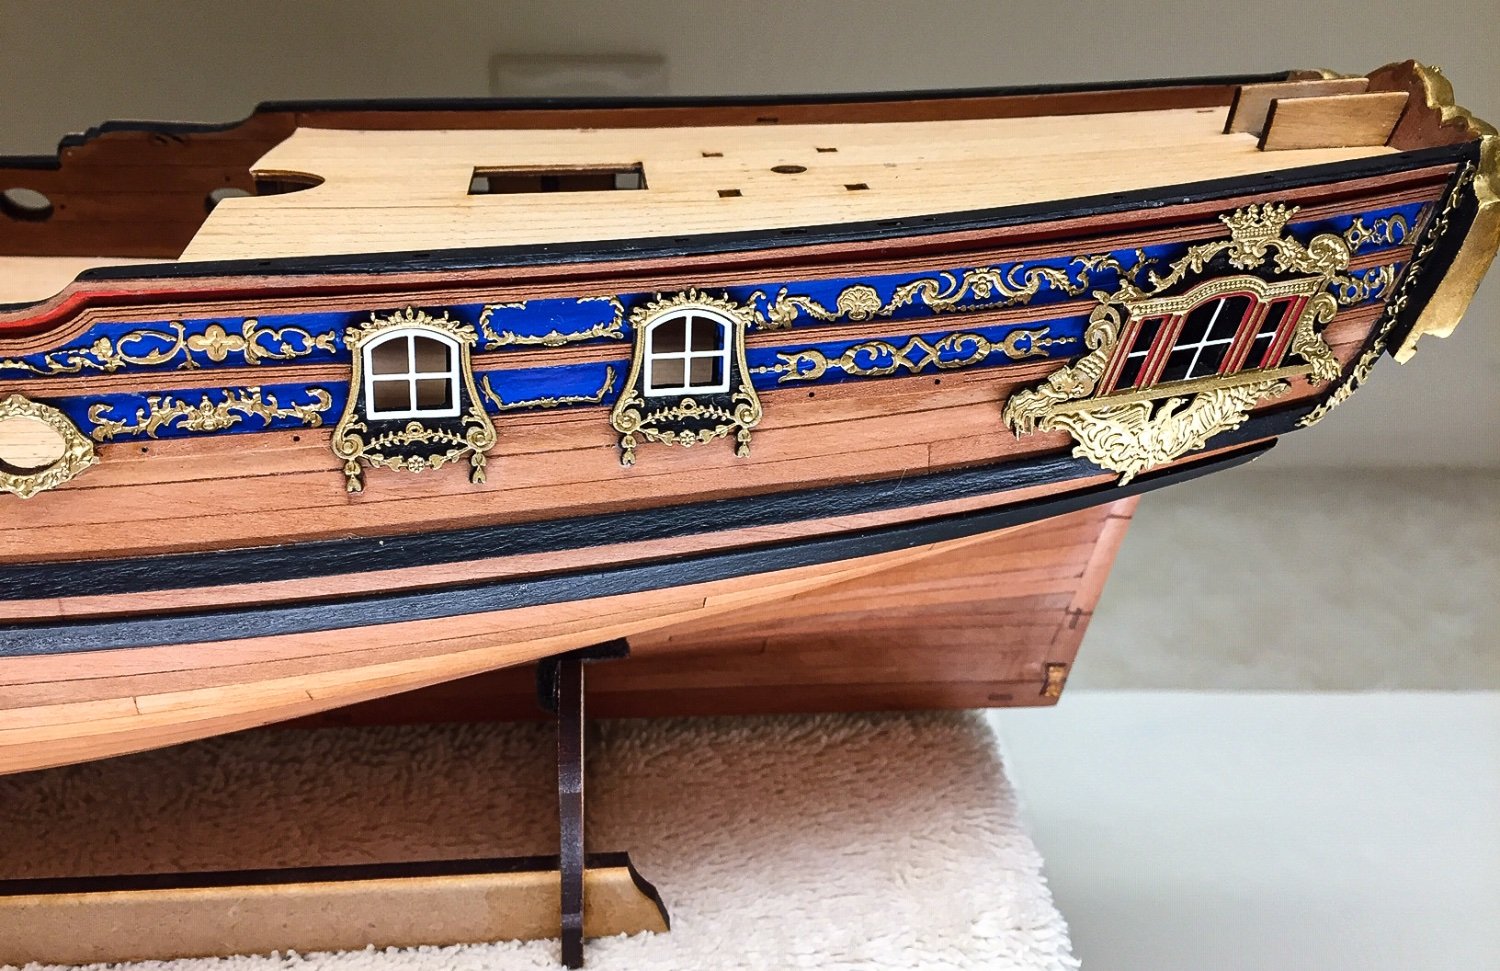
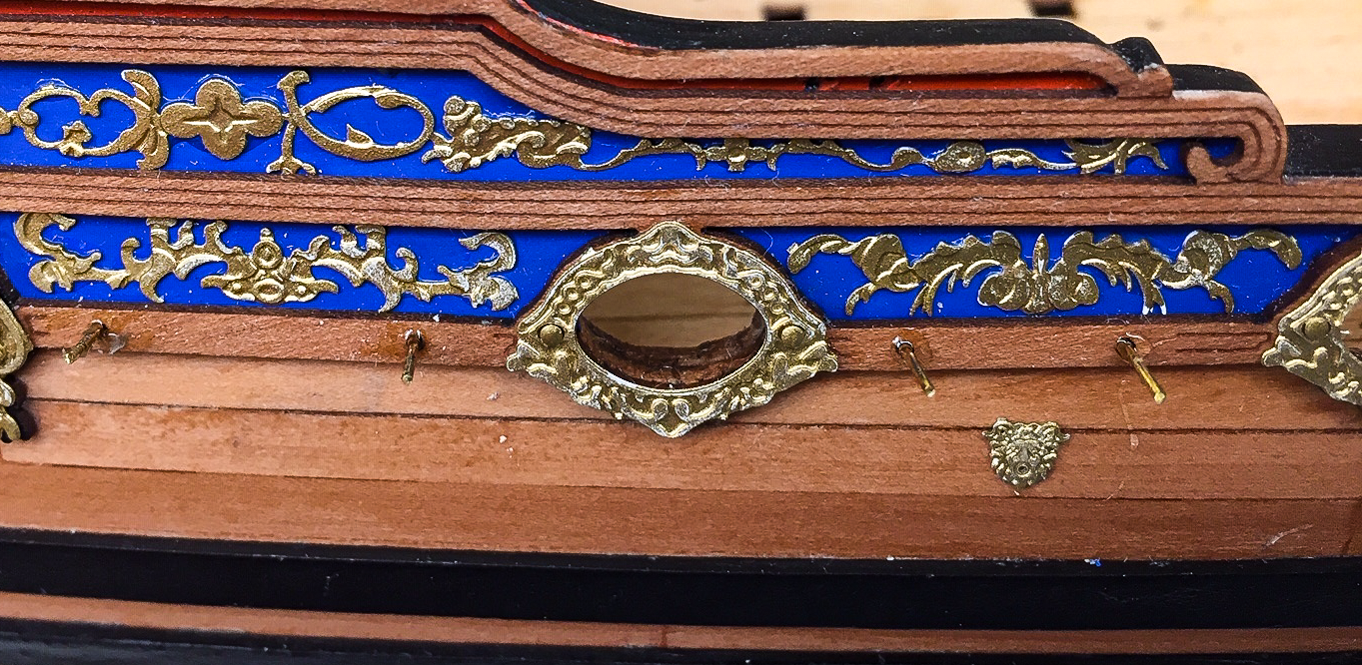
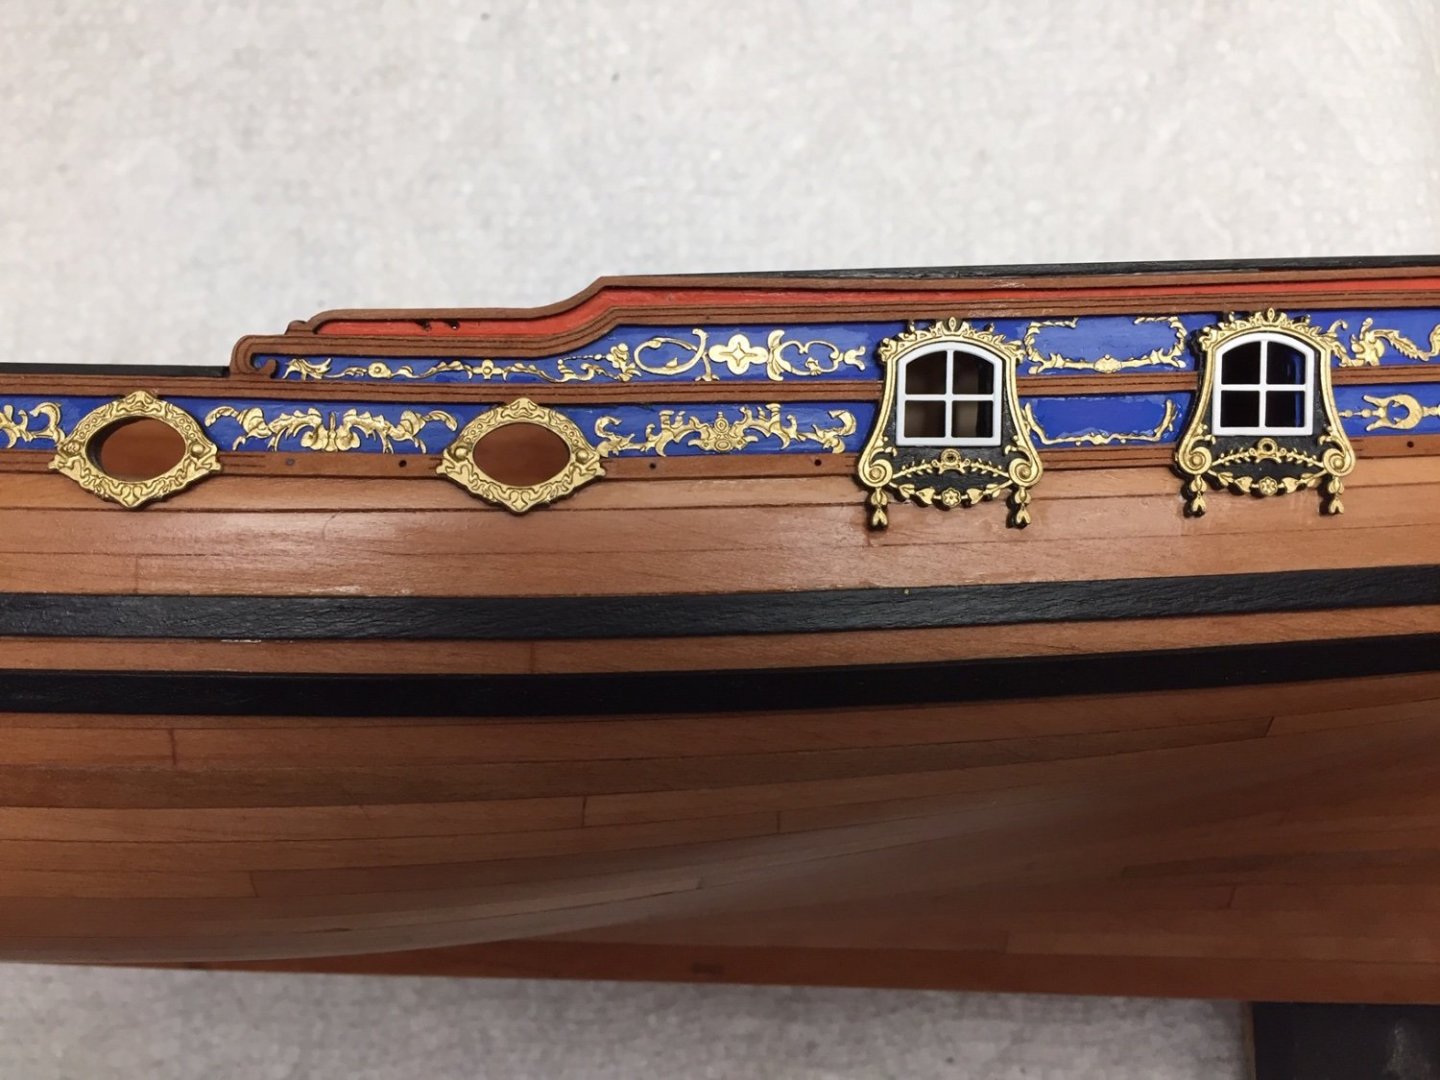
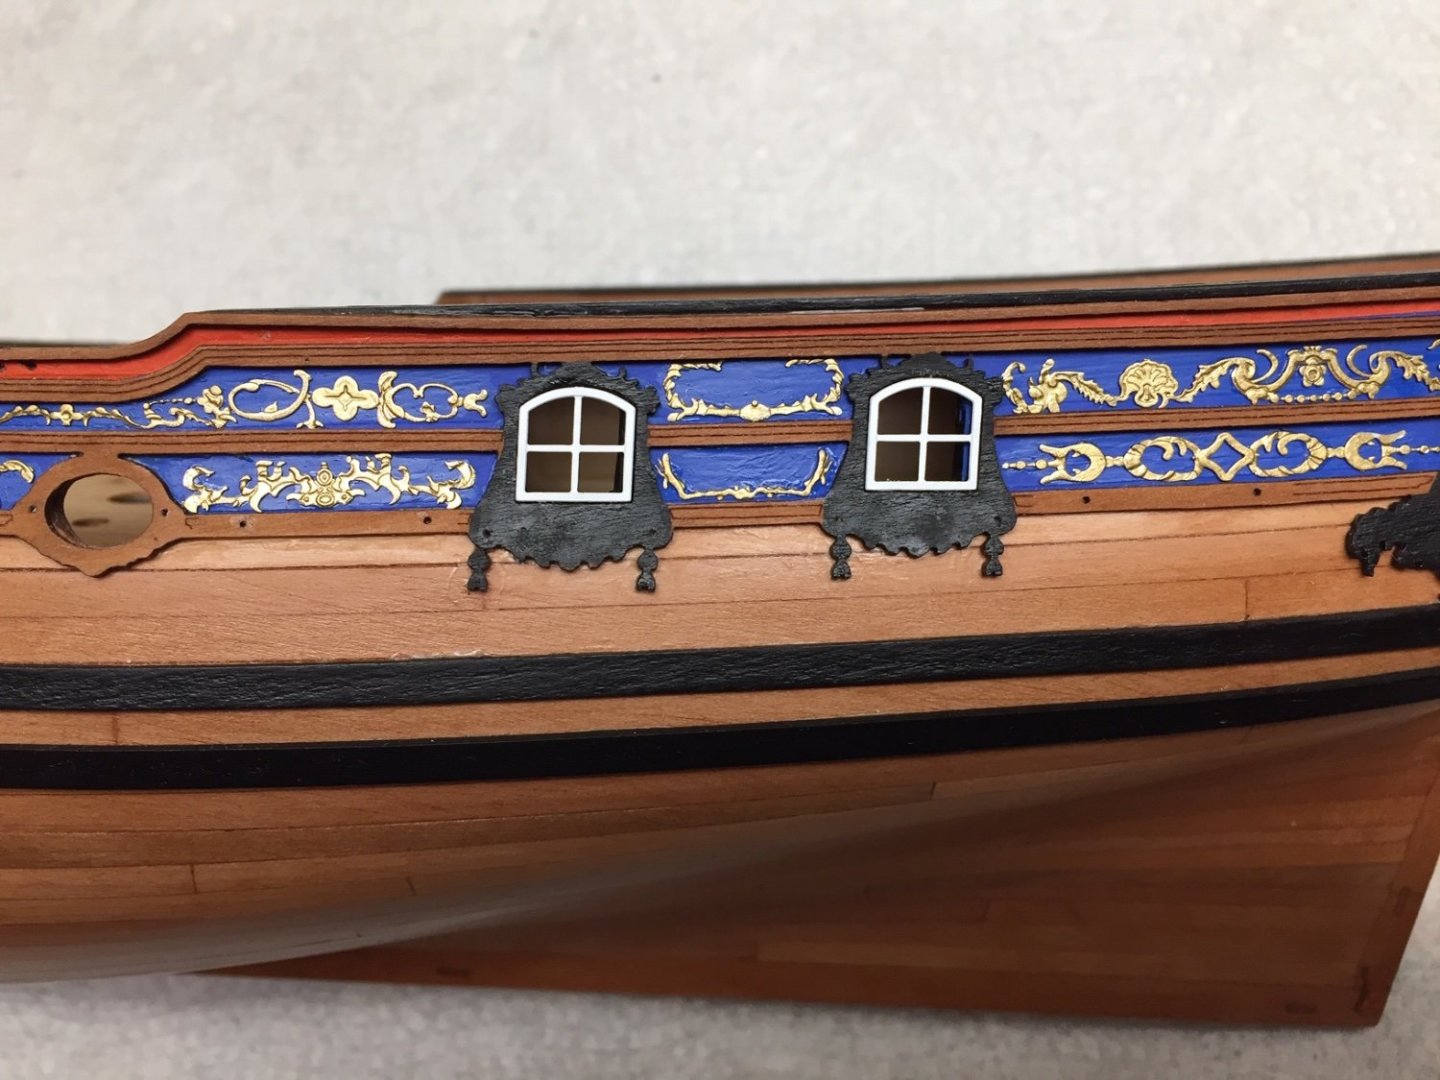
Here's the decorations for the quarter gallery windows. These were built up with 2 layers of highly detailed PE parts. I assume this is the duchess's cabin, and the captain slept on deck😄
-
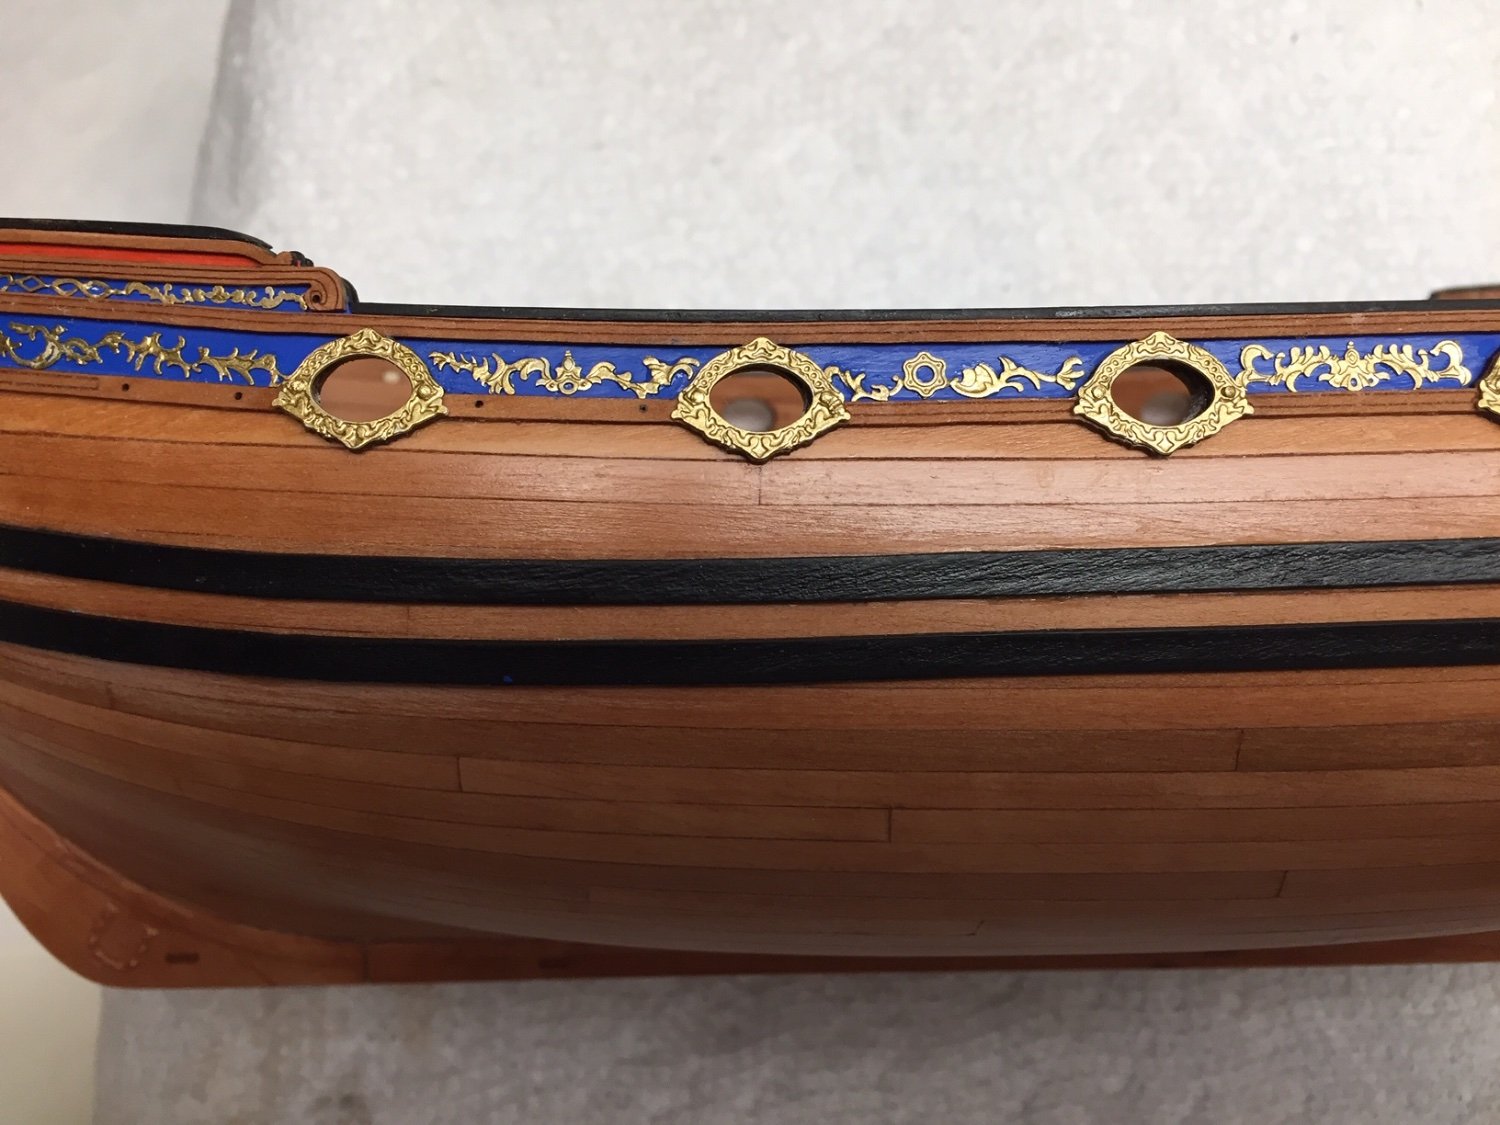
The gun ports also have a gold surround on them which you can see in the previous picture. The window and gun port surrounds are aligned with nails or pins going thru predrilled holes. Other than working with the tiny nails, this makes alignment easy. This process goes surprisingly quick, which is a huge credit to the designer.
-
The 2nd layer is a gold surround. I had broken off a couple of the little tabs that dangle below windows and glued them back on. However, I didn't get them glued in quite the right place, so I popped them off and first glued the surround on, and then fit the little tab back in underneath the gold piece. It worked great, and probably should have done it this way to begin with like Derek. (He's always thinking a step or two ahead of me, ha!)
-
The side windows are made up of 2 layers. The first layer are white window frames. Frames for starboard and port are slightly different, so I had to be careful.
-
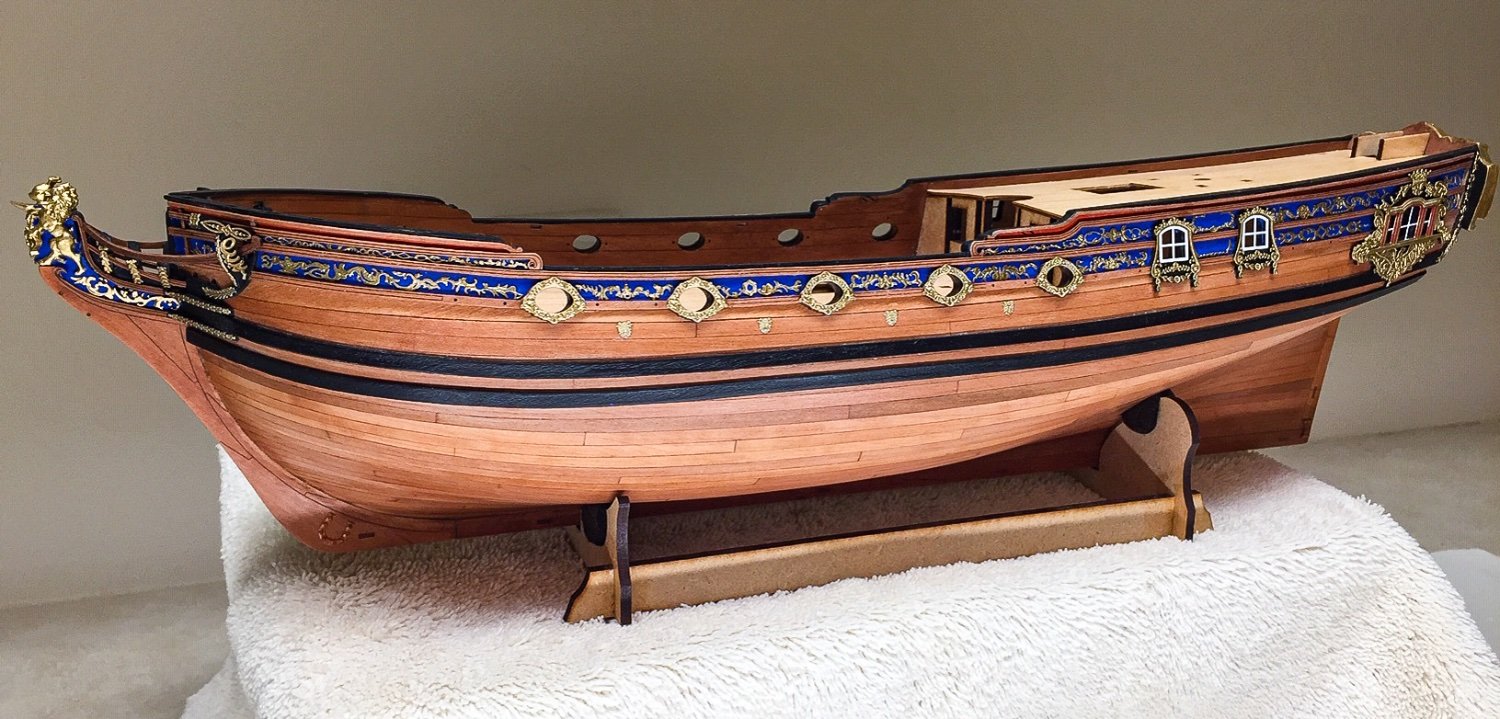
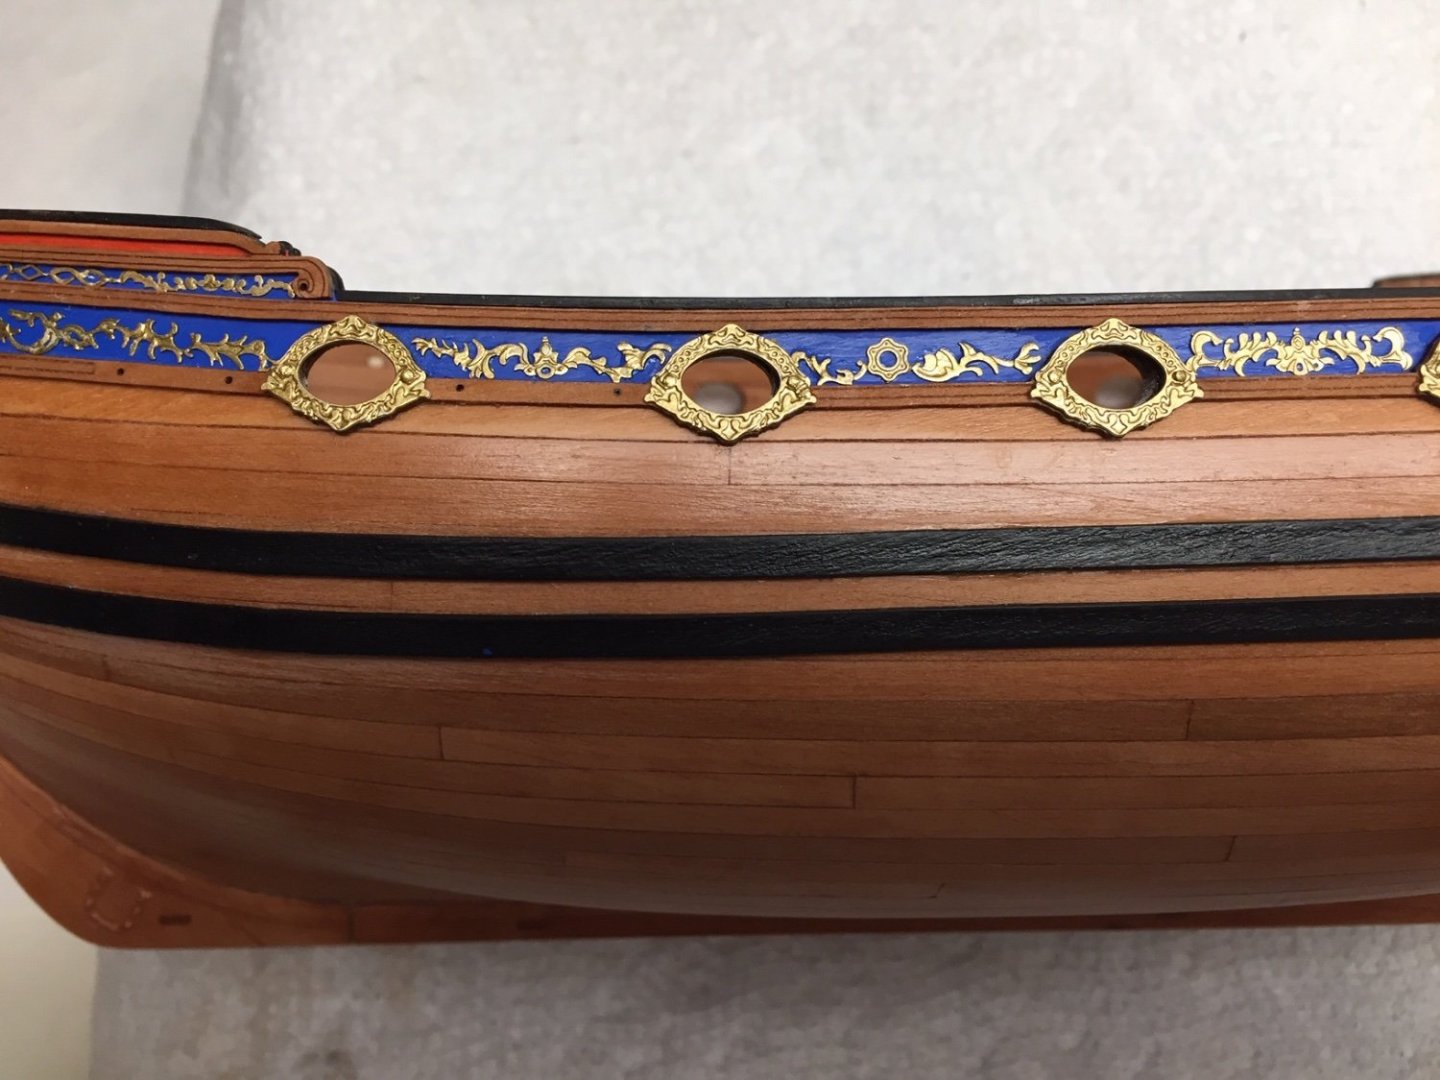
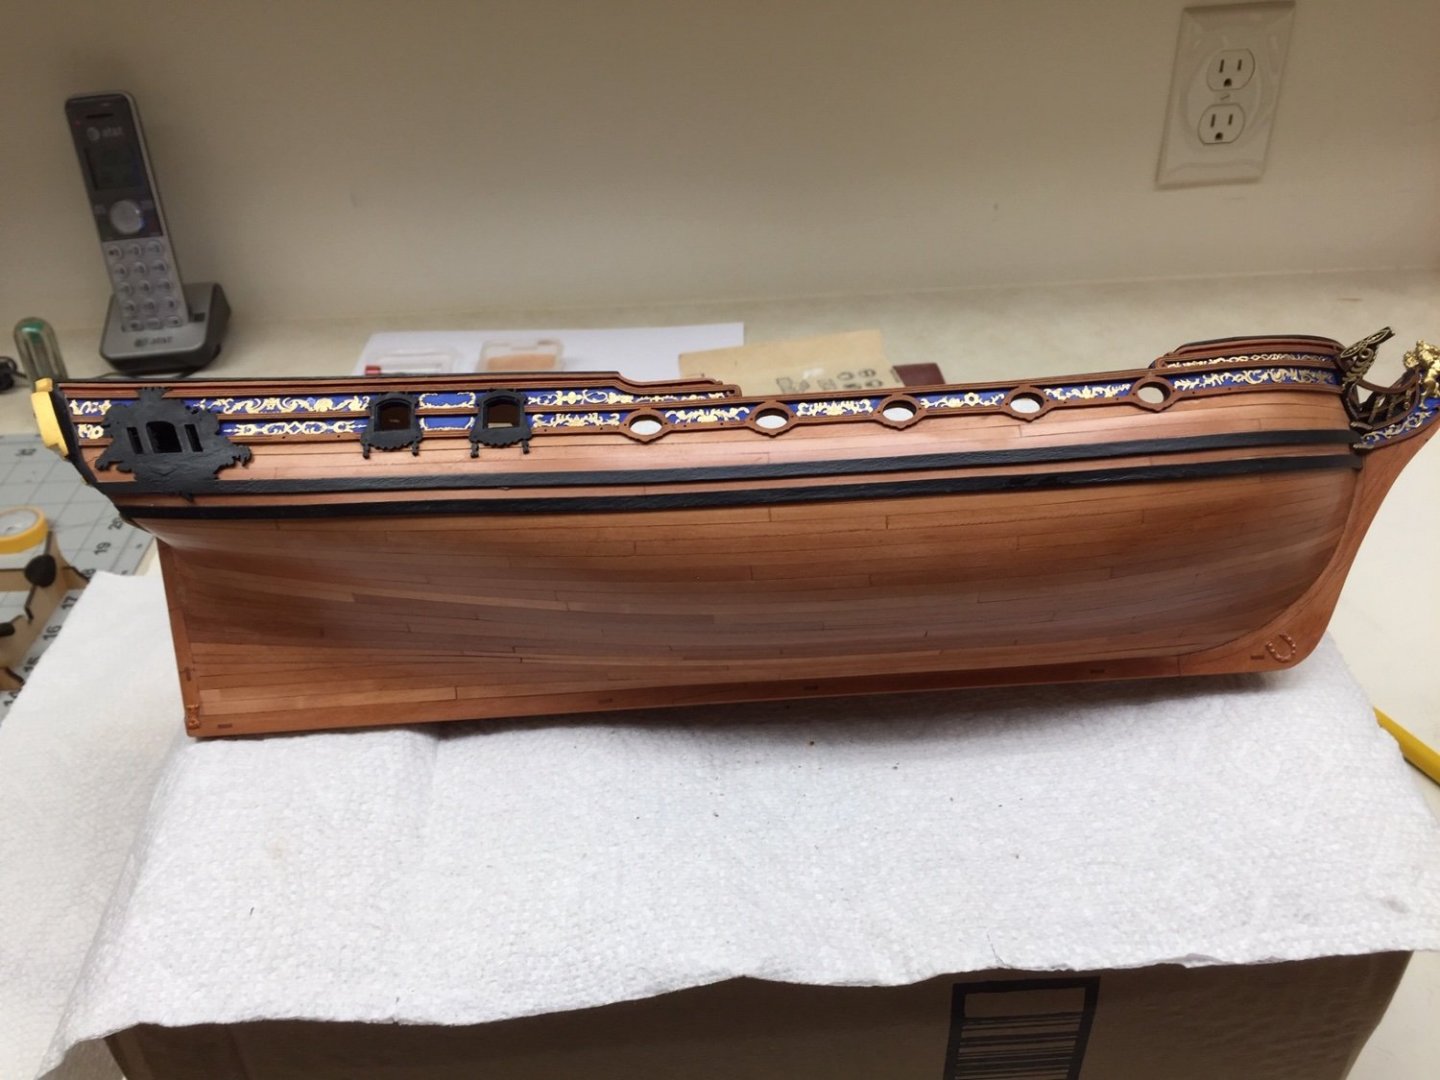
The next step is to add gold decorations along the bulwarks. This went fairly smoothly. I had to trim the stern pieces slightly, but most PE fit real nice. I used CA, and this time I used odorless CA. I've been having sinus trouble and thought it might be contributing to it. I can't tell much difference using either version of CA except the odorless doesn't have the fumes of regular CA, so think I'll stick with it. FYI, odorless is sold as "foam safe" glue. "Foam safe" was on the bottle in big letters, and "odorless" was on it in small, hard to see letters.
-
I can only echo what others have written, beautiful work! Very impressed with your window glazing technique. I'll remember it and give it a try sometime. The gold decorations look super nice against the boxwood hull. You're teaching me what can be done with this most excellent kit. Hope you are enjoying the holidays and wish you the best for this next year! David
-
I managed to get 3 of 5 photos uploaded, so that will have to do. It's unclear why some upload fine and others do not. I just started getting this problem this past week.
-
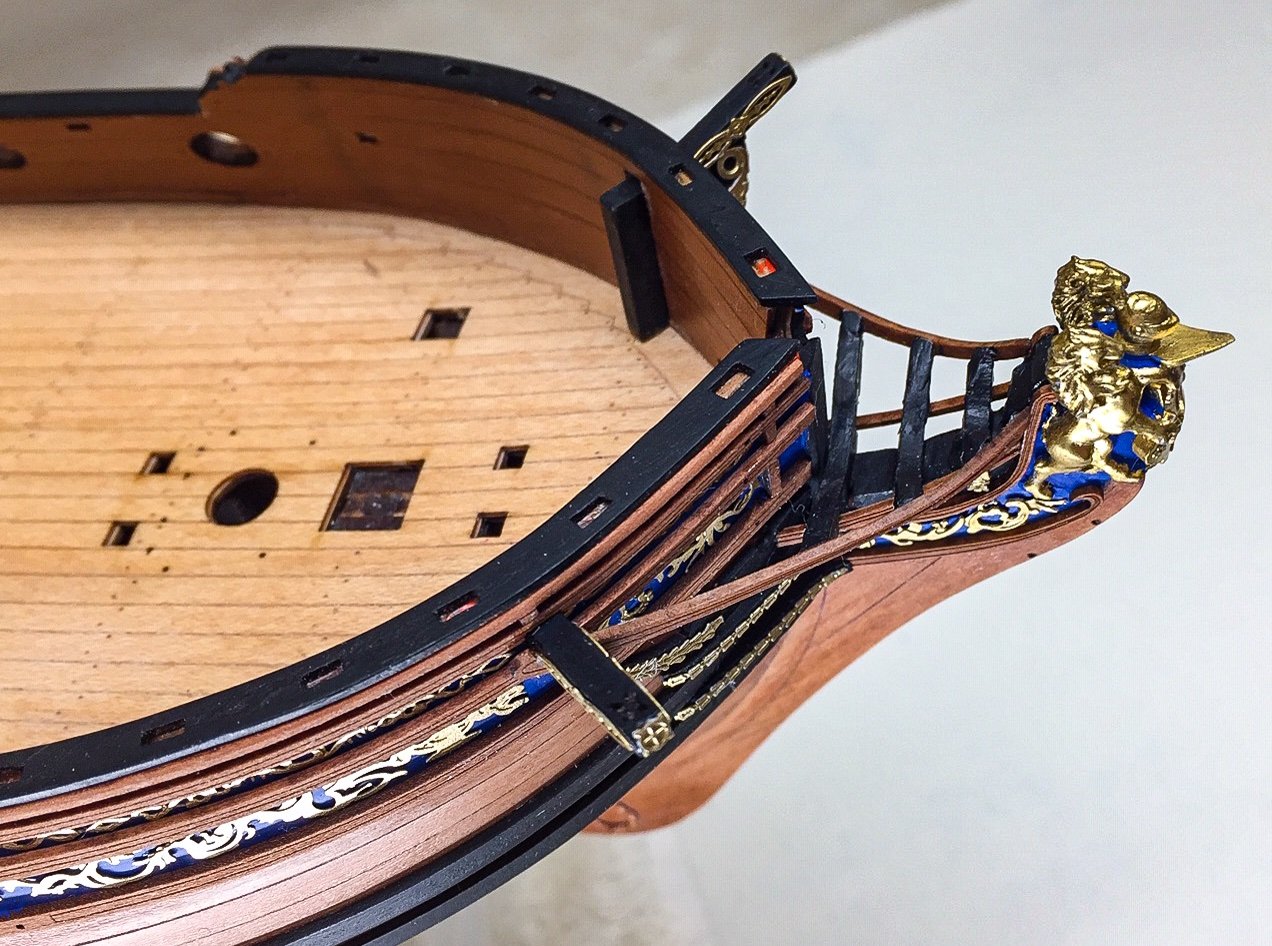
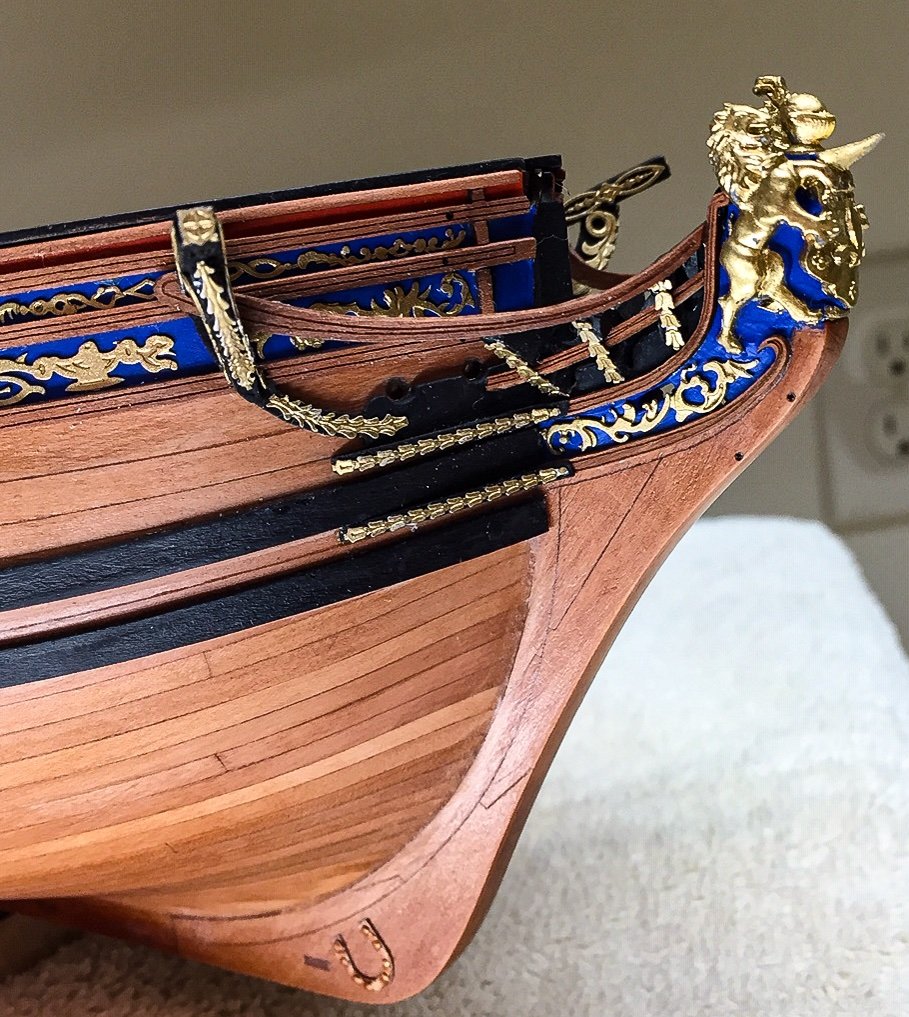
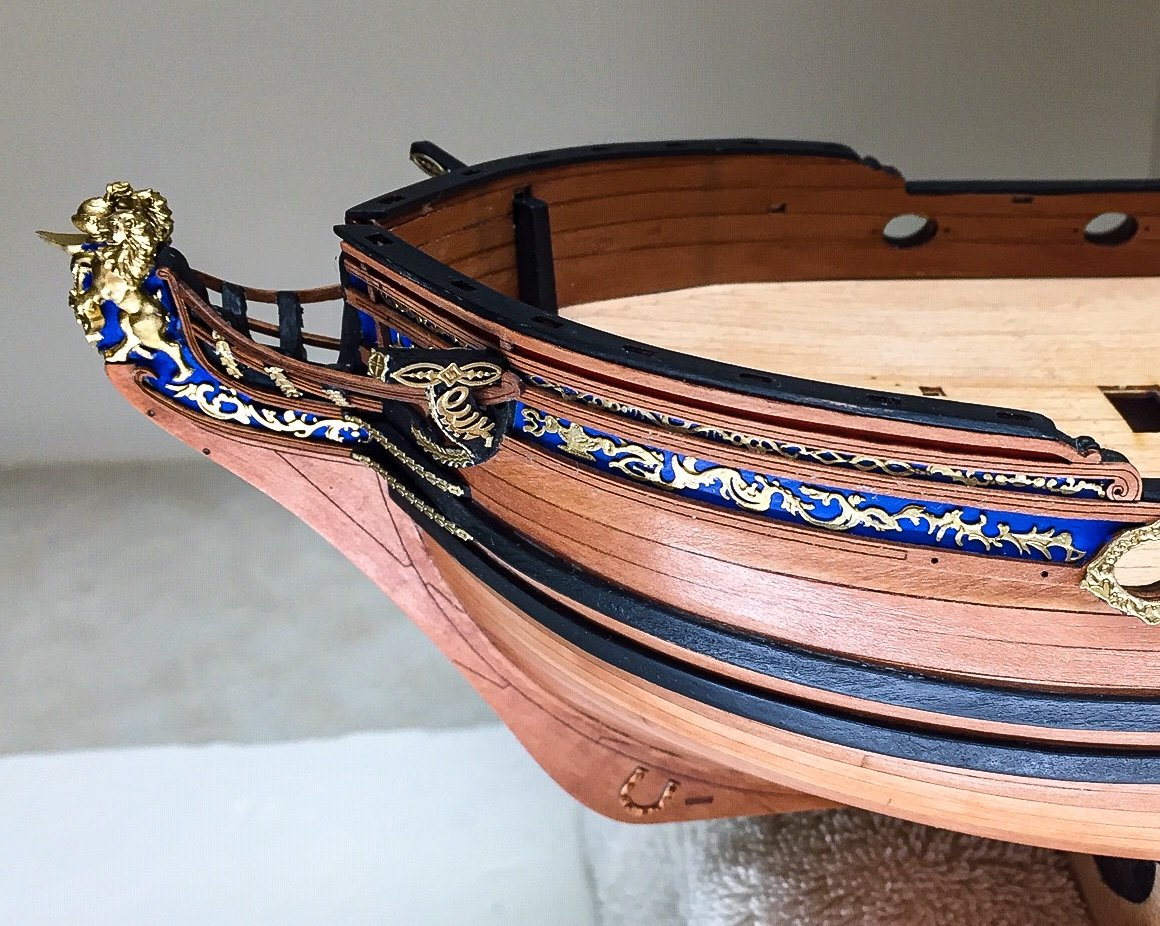
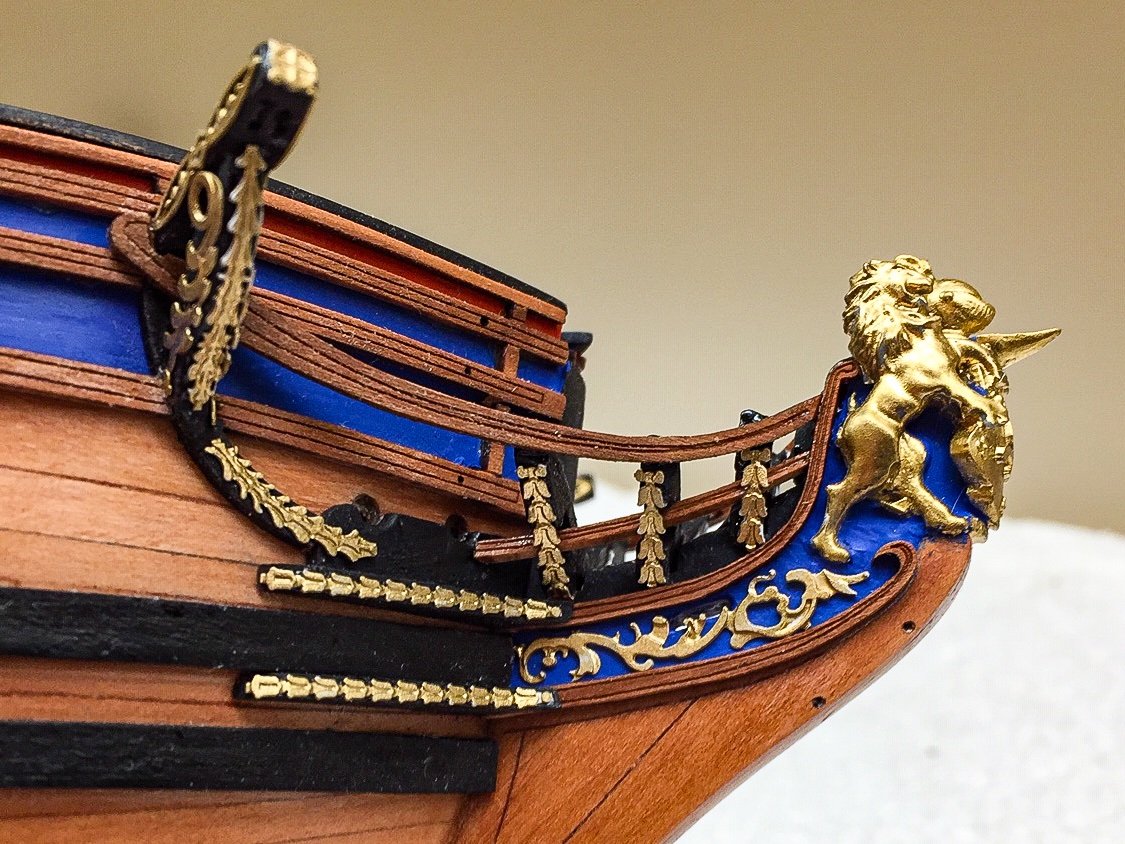
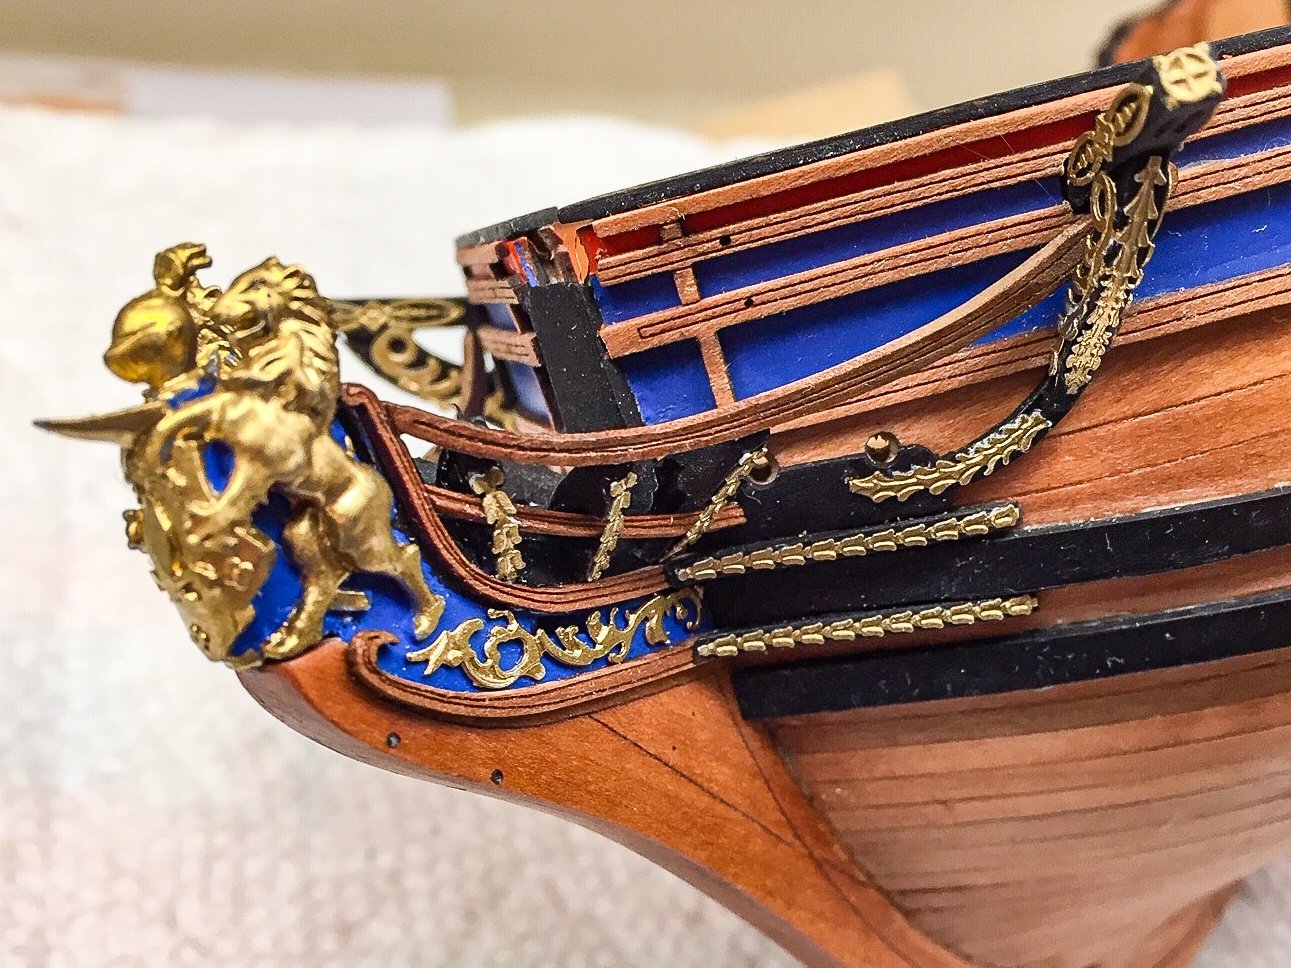
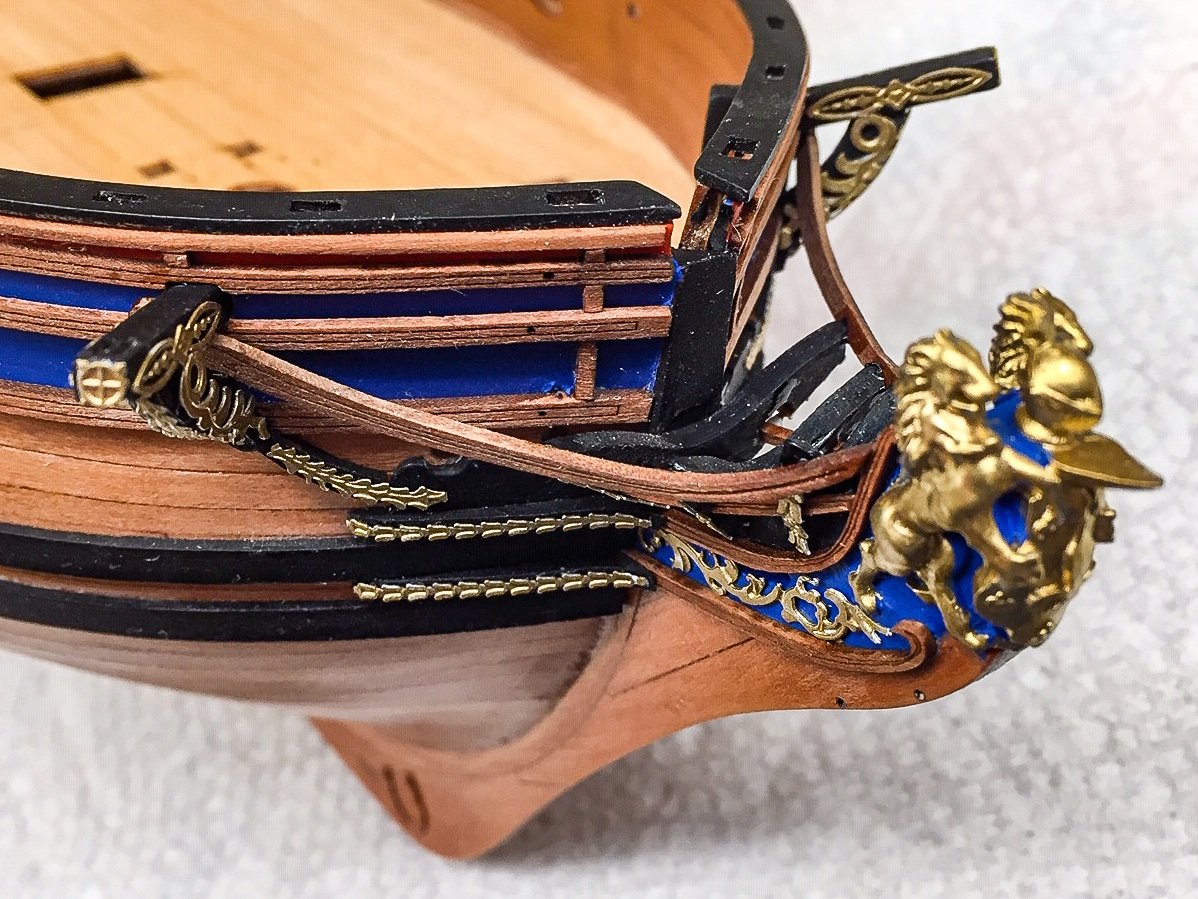
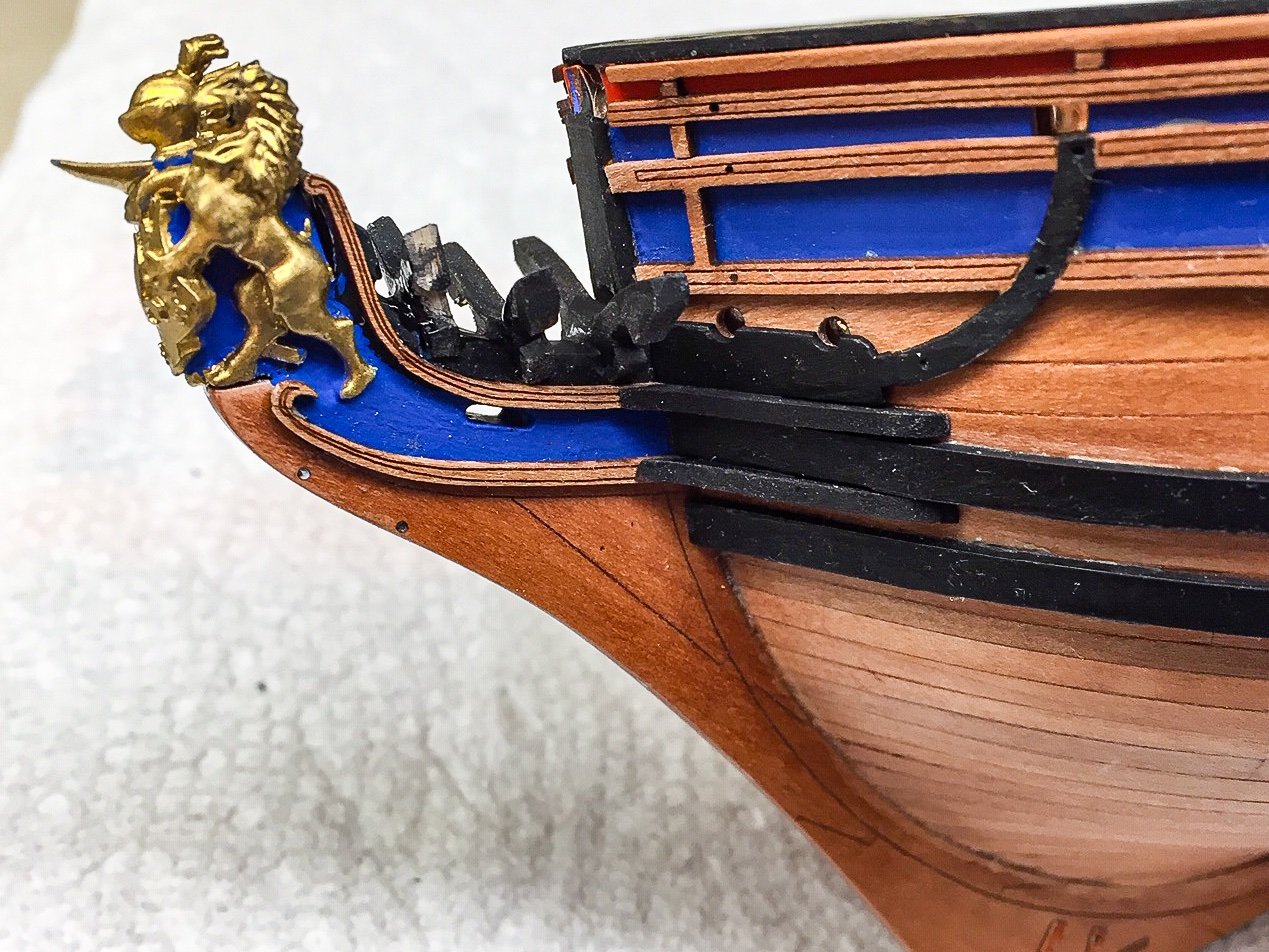
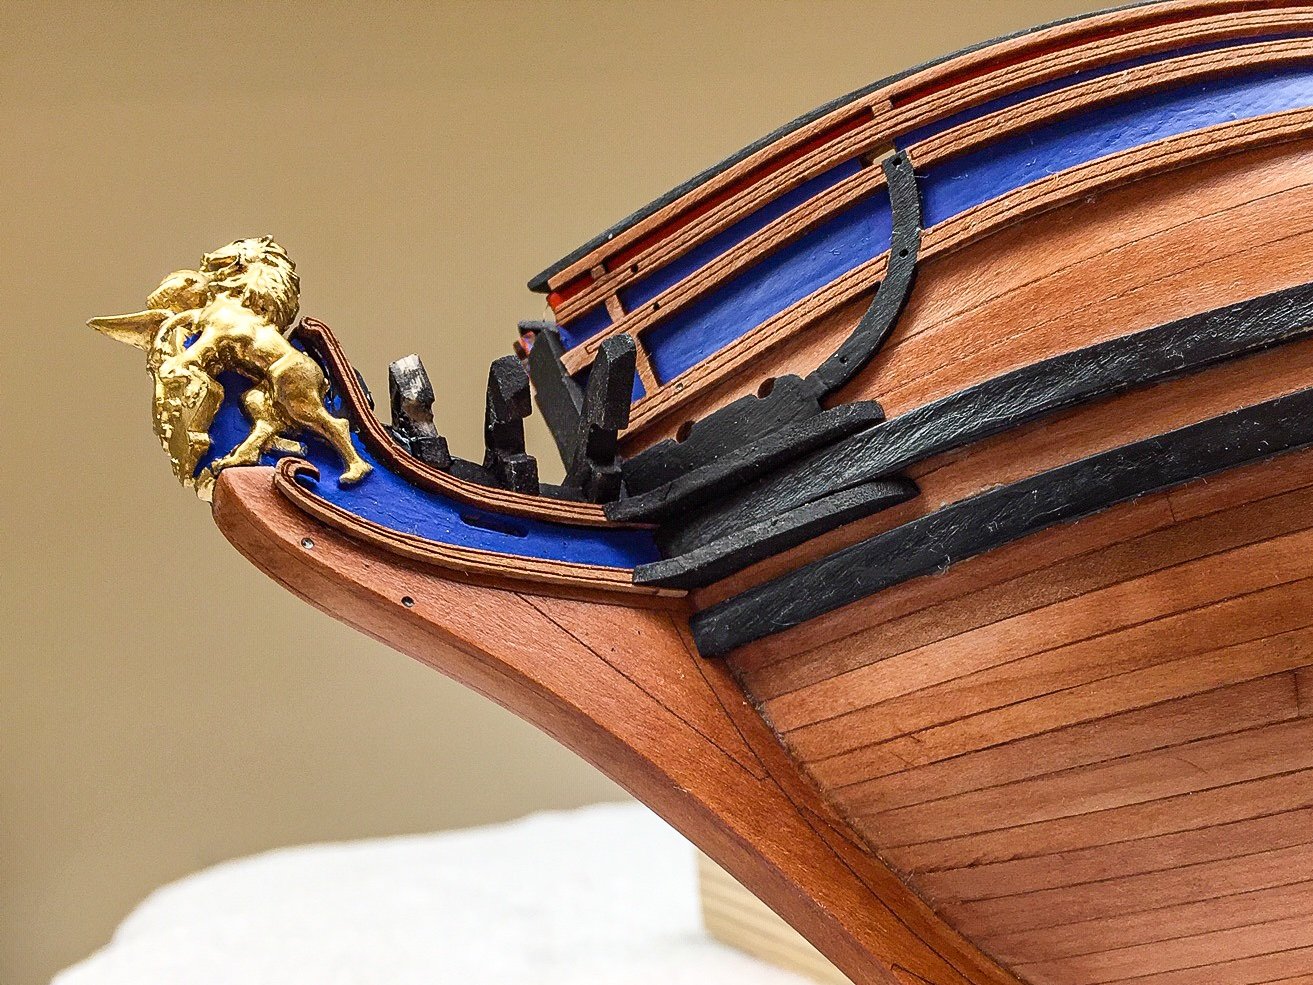
I added the last rail to the bow structure and finished the bow decorations except for some touchup. As usual, after taking photos I can see some places I need to either fill in or file and touchup. I expected this considering I had some difficulties. As Derek pointed out, I had a bit of a struggle getting the upper rails to fit. The upper cheek rail shown in previous photo goes thru slots in the bow v-frames and I had to fiddle with it quite a bit to get it to fit in there. But the next rail gave me the most problems. Another upper rail goes from under the catheads to the tip of the bow and lies on the bow v-frames. The manual has you bevel the v-frames before installing them in preparation for these rails, but you have to guess at how much to bevel (or at least I did). I had to file a notch in the end of the rail that goes under the cathead to get it to fit in there, and I didn't bevel the v-frames correctly, so it didn't fit very well against them. I had the same problem on both sides. You can see in photo I need to fill in a little in some places and file a little off in others. It shouldn't be that difficult to make it look better. The decorative PE goes everywhere. The detail in the PE is very impressive and at this scale looks like carvings. It's hard for me to imagine drawing this up and creating a computer model. Chris must have infinite patience. On the cathead pieces I wished the PE pieces were slightly smaller. I messed up a little fitting the cathead support pieces, so the decorative PE barely fit. I had trouble using CA and positioning the pieces accurately along the various edges. Tweezers didn't work too well, so used my fingers. It worked but the pieces are very small to work with, and I had to hope I got them in the right places. Here's a bunch of photos of the bow. Apologize for lack of depth of field in photos. I just used phone for snapshots instead of my good camera. Well, more problems uploading. I'll change filename and try again.
-
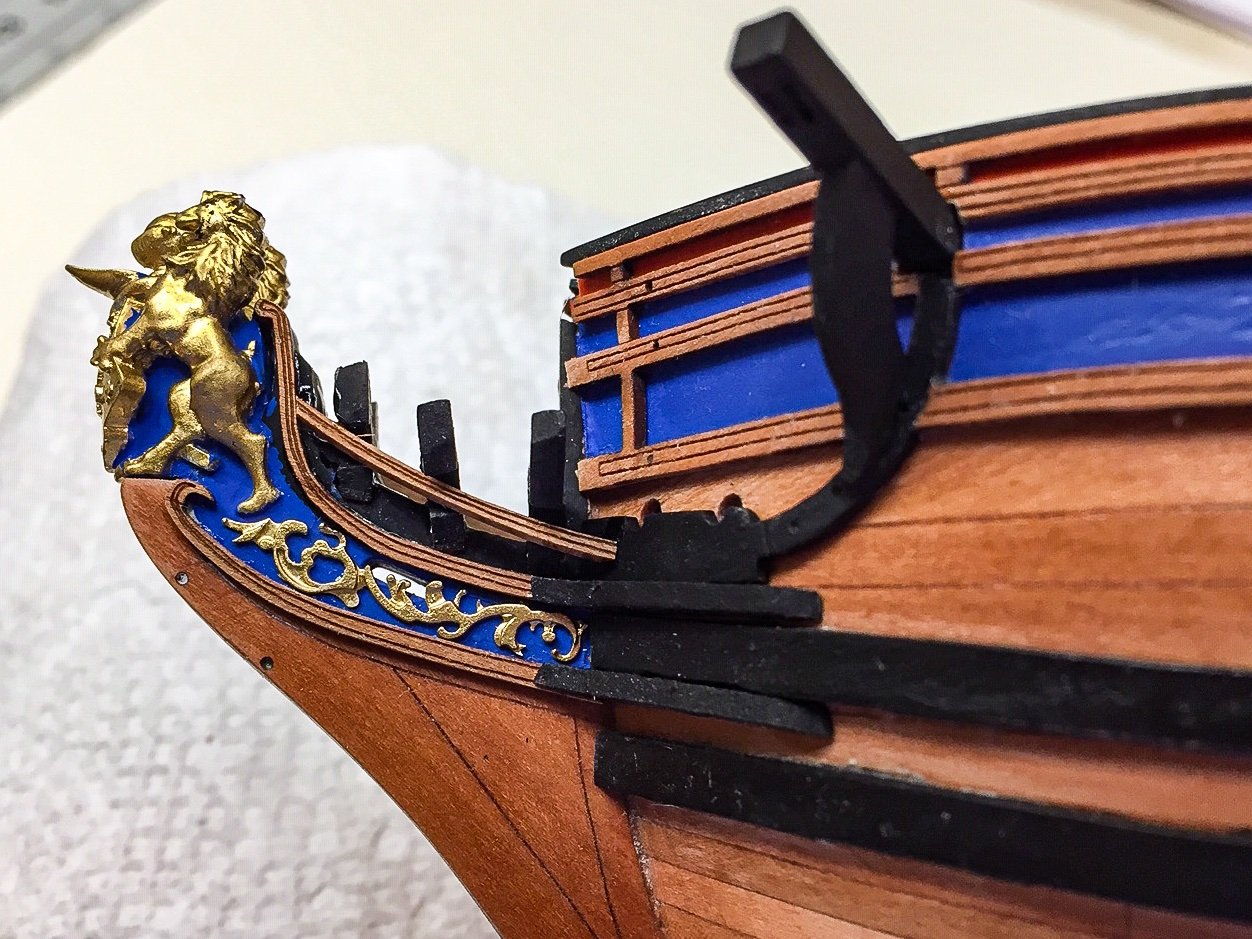
I've been working as time permits. I did an experiment with the first pieces of decorative PE using CA to glue one and flat clear acrylic to "glue" the other. As far as I can tell, both glued it on fine and you'd have to get a knife blade or something similar to pop it off. CA dries quickly, almost too quickly, so you need to get it positioned just right and then it's stuck. Acrylic takes time to dry, so you have working time, but it doesn't stick until it dries some which takes time. I decided to use CA for the remaining bow decorations because some of the pieces go on edges with curves, so the piece needs to bend around the contour. I don't think acrylic would work at all to glue these. In this photo I've added the cheek rails.
-
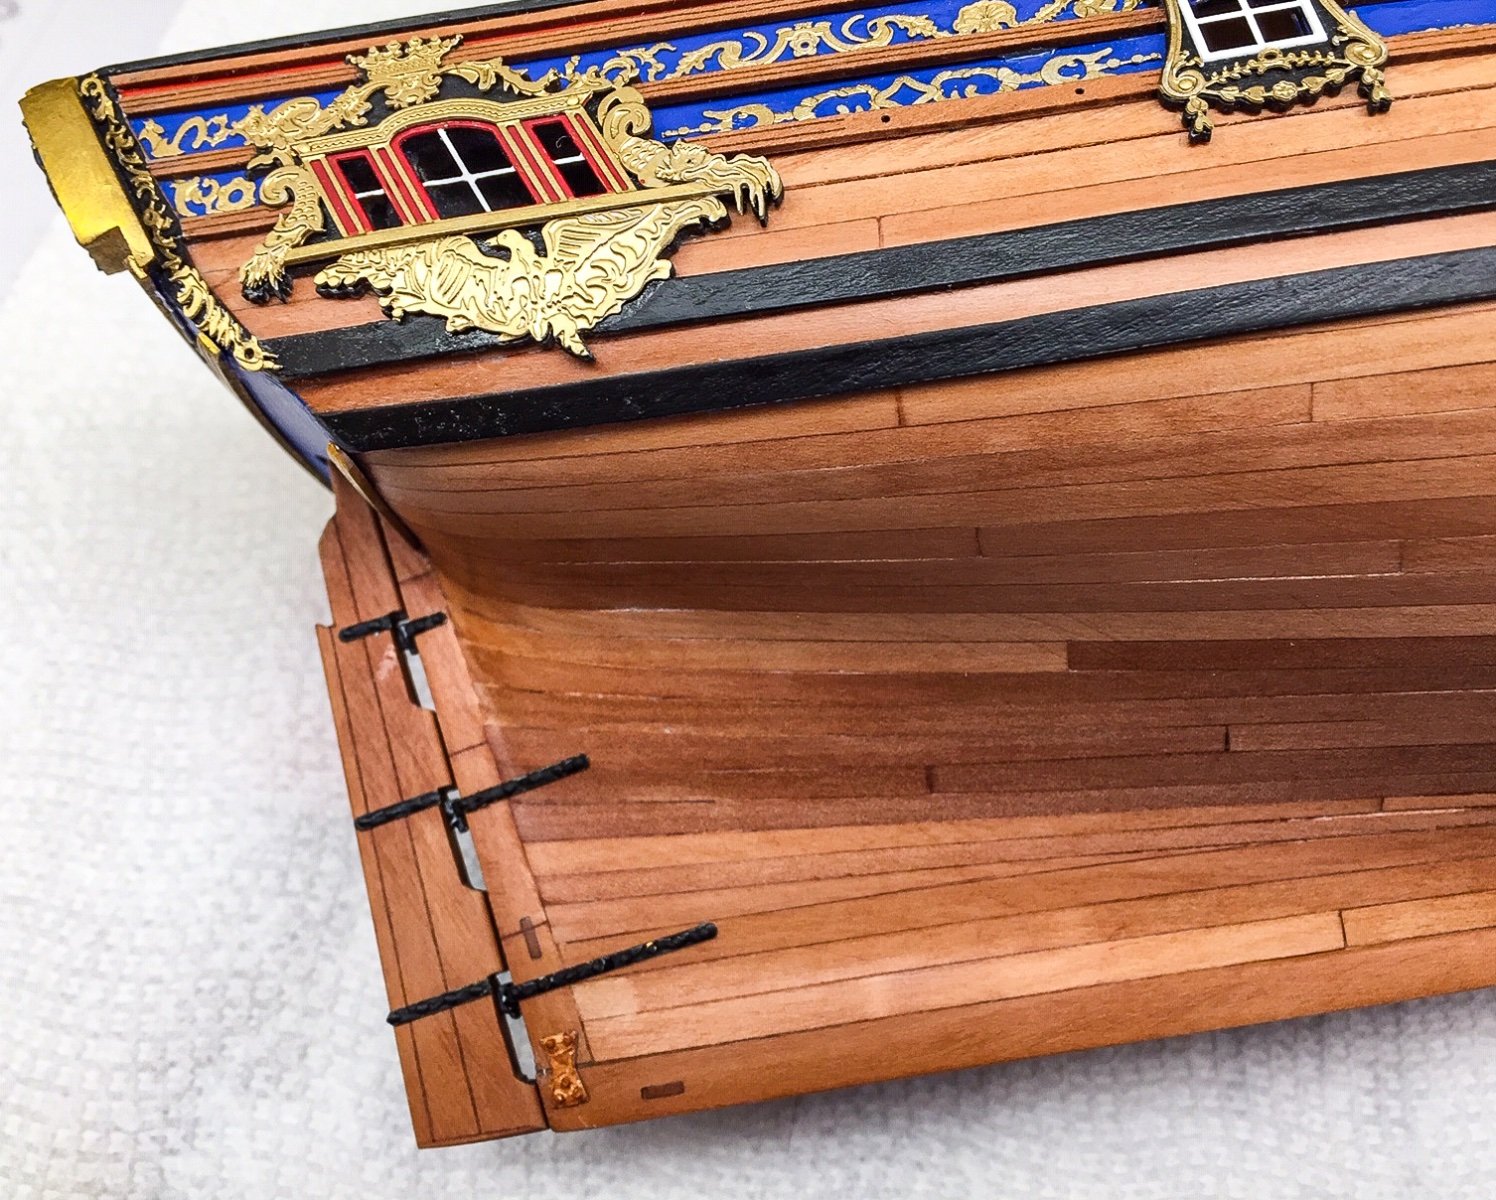
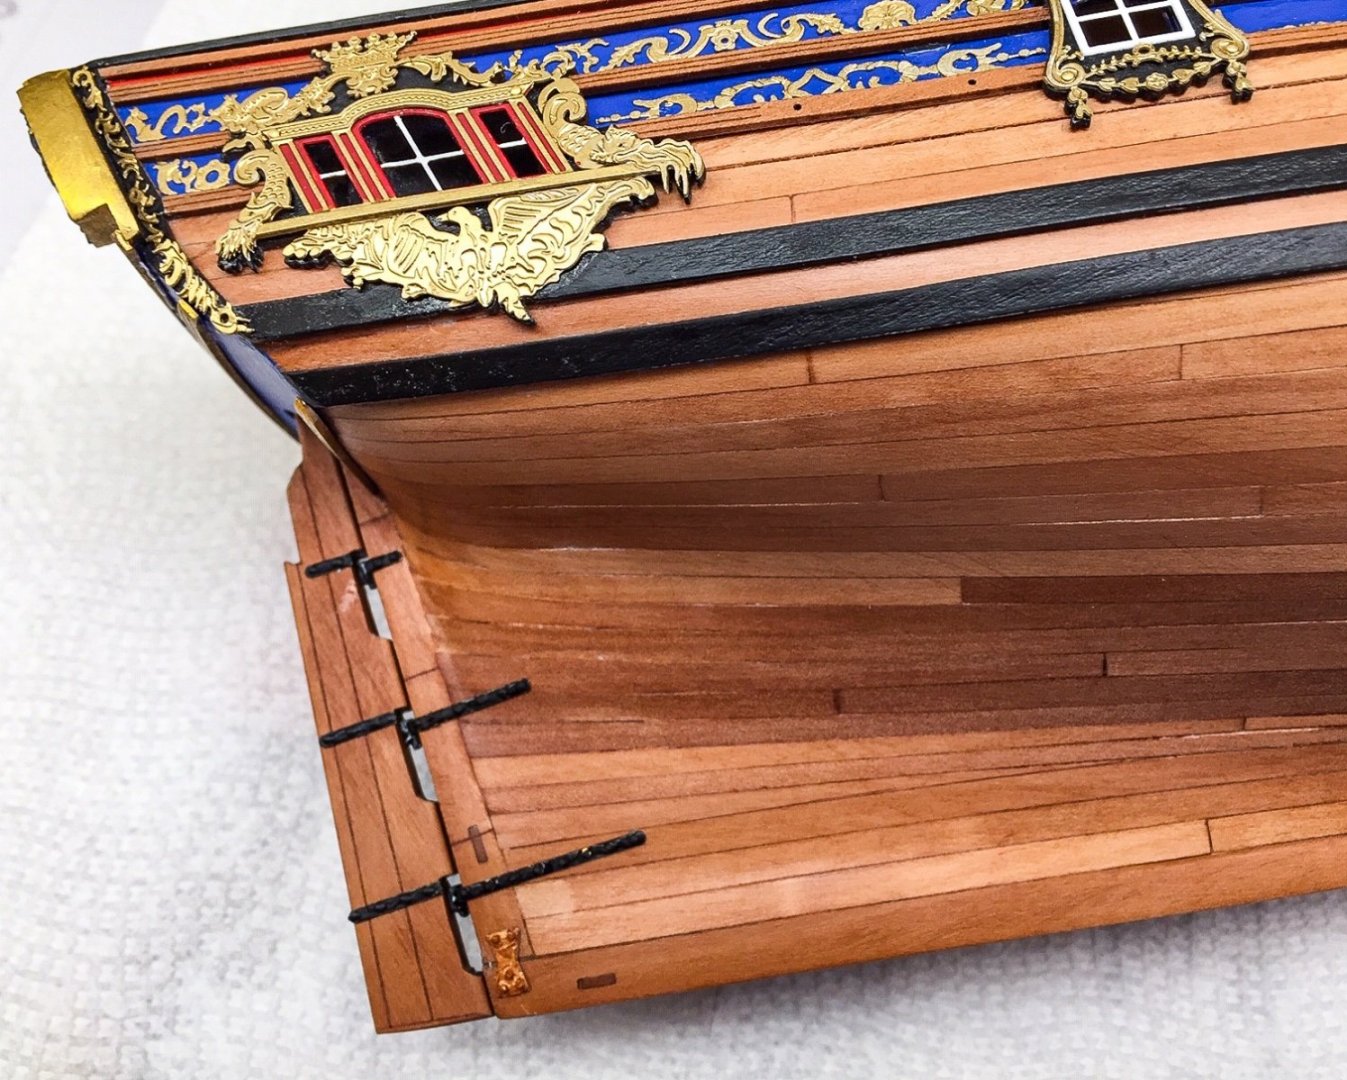
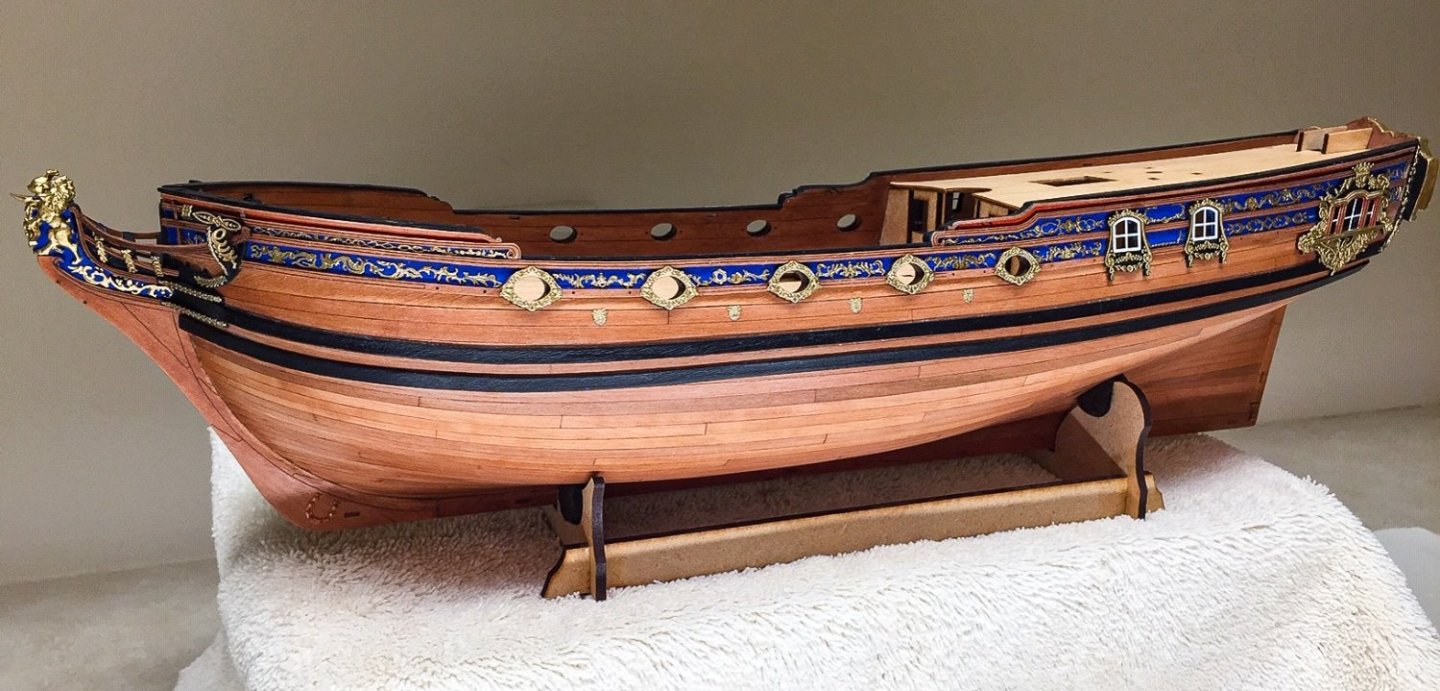
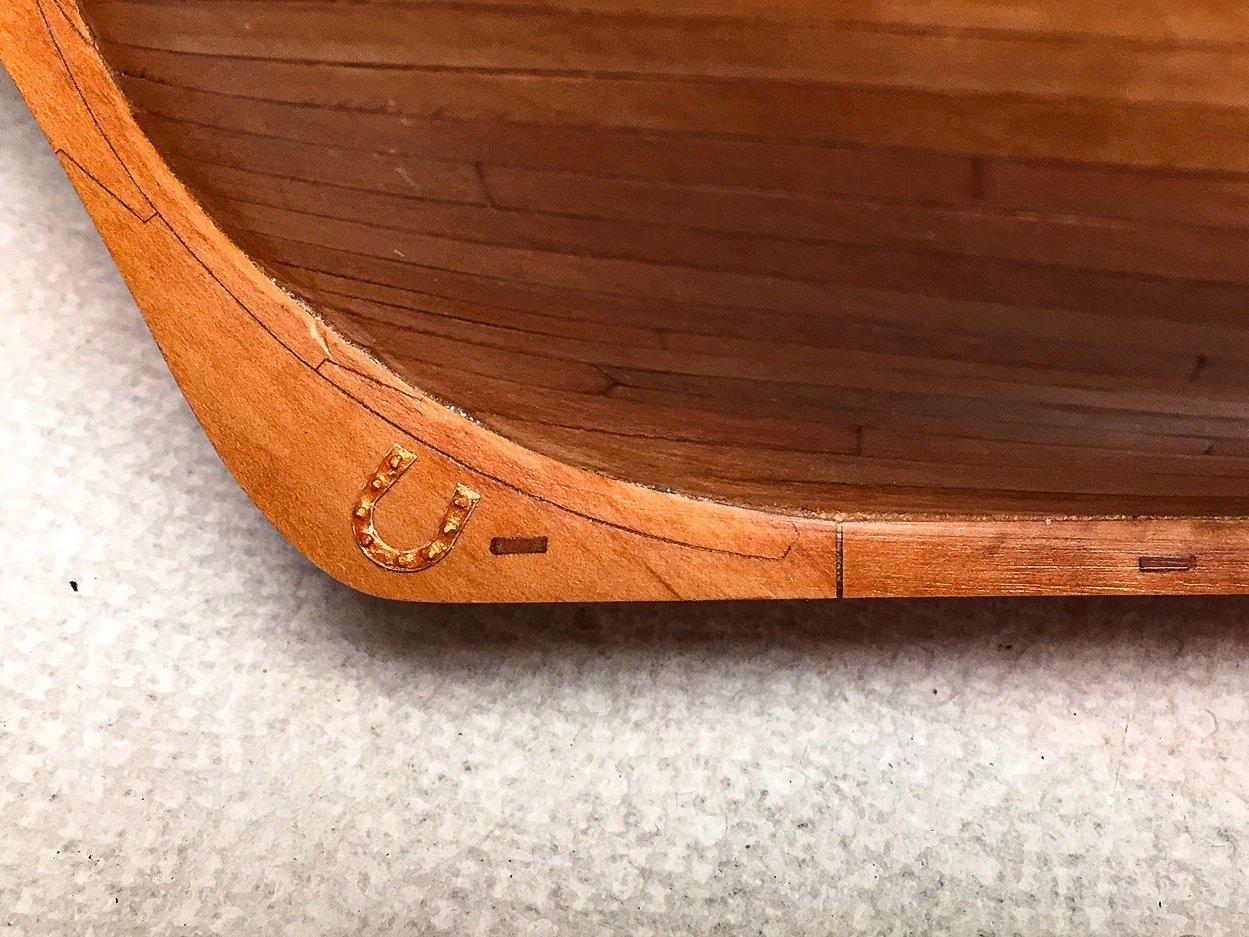
Thanks Walrusguy! Here's couple of photos of hull details. I thought everyone might be interested in how they look on a non-painted hull. They are small PE pieces that are held in place by nails pushed thru holes in the keel pieces. Holes lined up perfectly, which is kind of amazing. I painted them copper as shown in manual, which on my hull, is close to the wood color. You can compare this to others that painted hull white, and to Delf's beautiful boxwood hull left natural. When I look at his, I want to try working with boxwood!

-
I've added bow cheek rails, bow v-frames, bow brackets or braces, and hawser bolsters. Here's couple of pictures showing what bow looks like so far. No major problems, just a few tweaks fitting the parts.
-
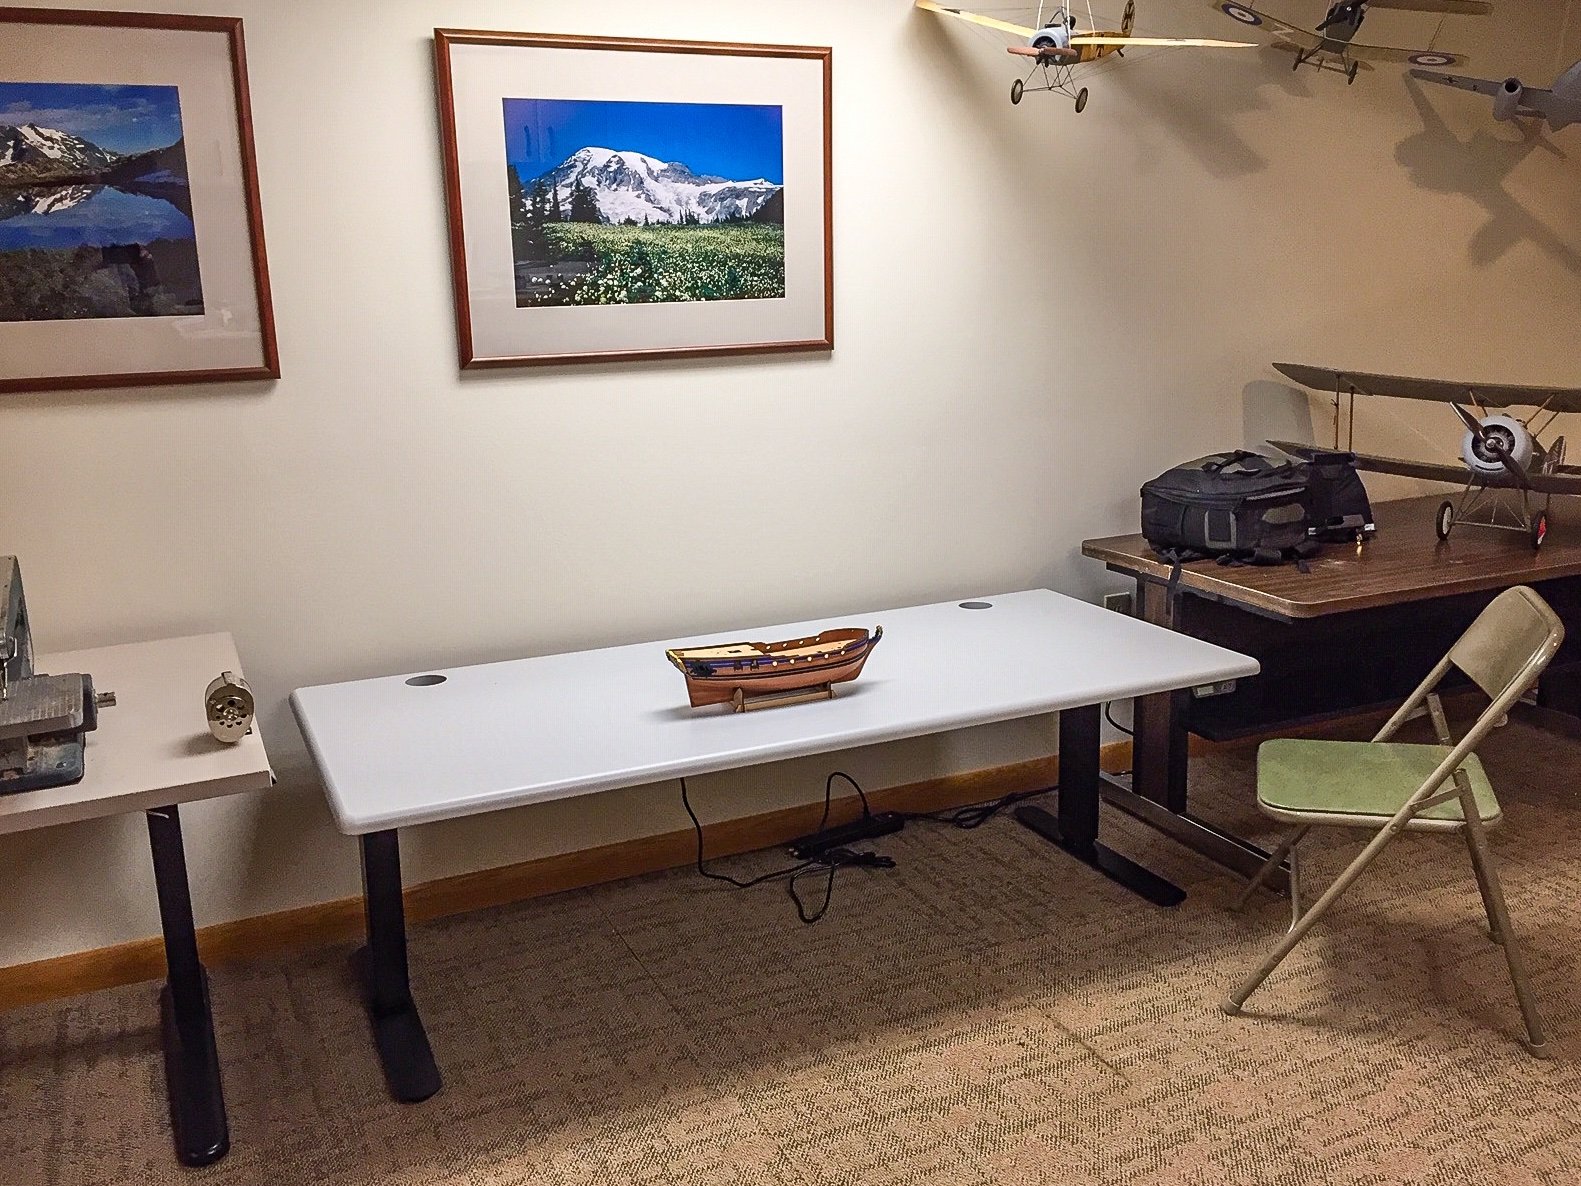
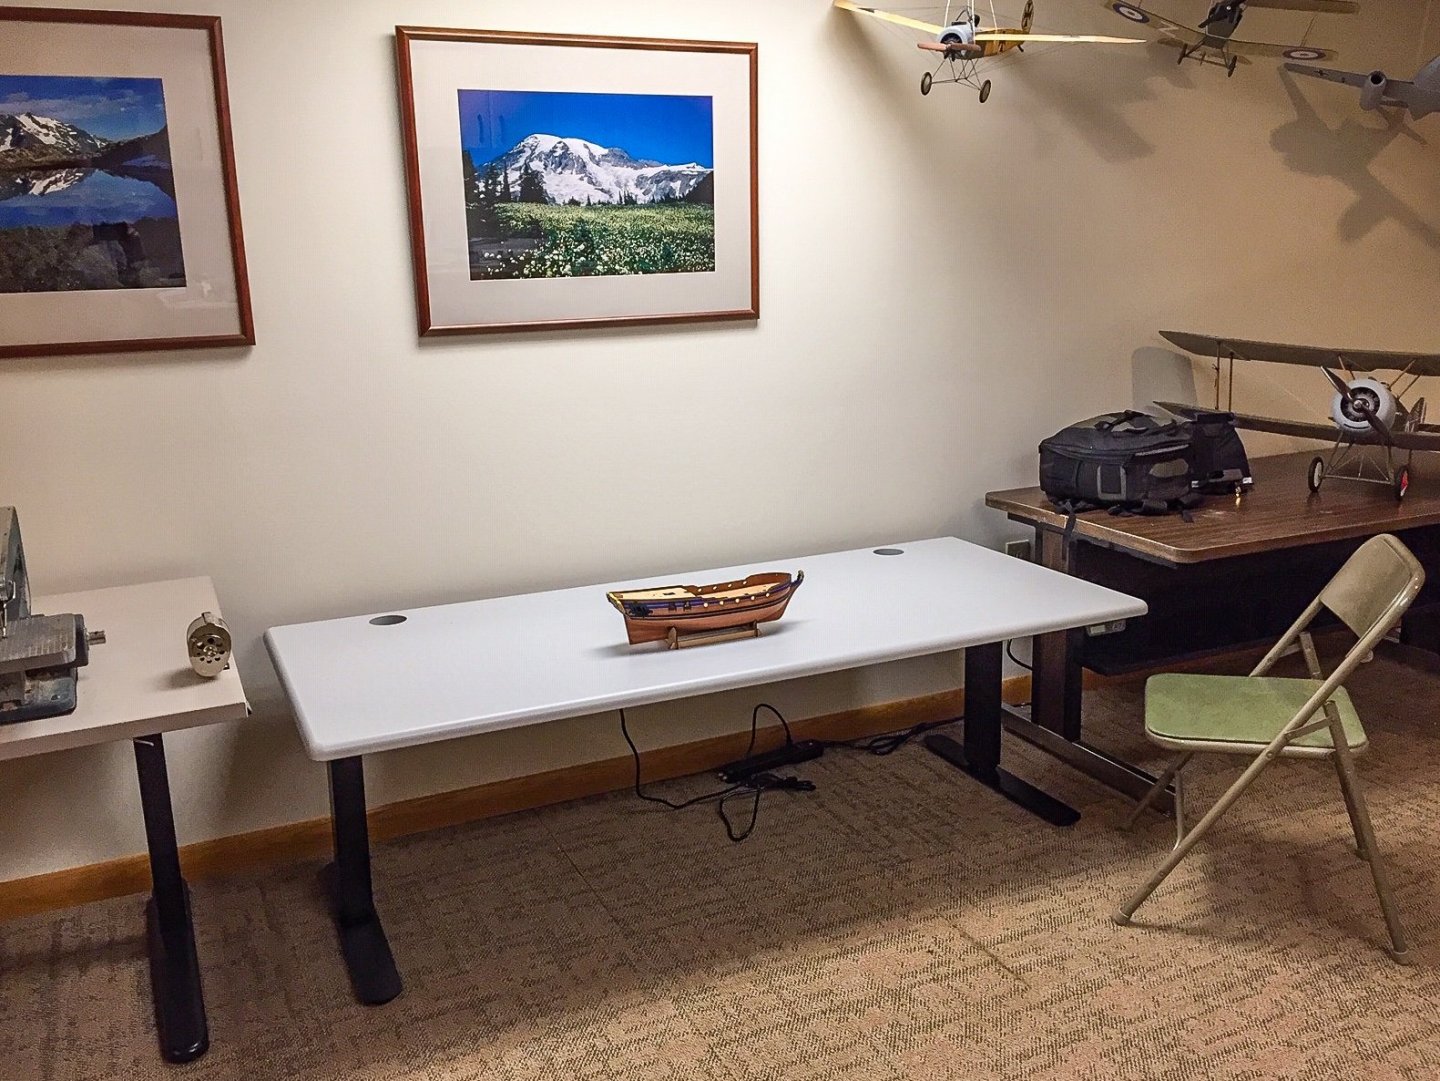
Thanks for suggestion Derek. I use Lightroom and just changed the name, tweaked the cropping slightly, and saved. Now they both uploaded ok. Very strange! So, here's my new adjustable height "computer desk" that I'll use as a work table. I already have a large hobby room in the basement, but this will allow me to spread out even more. On Syren when doing rigging I was constantly moving it to a low table, back to a work bench, and then up on a box sitting on a workbench. With all this moving around every time I worked on it, I'm kind of amazed I didn't drop it or bang it into something. This table should make it a lot easier. I'll find out when I start masts and rigging on Duchess.
-
I'm still getting error message when I try to upload photos, so I'll wait a few days and try again.
-
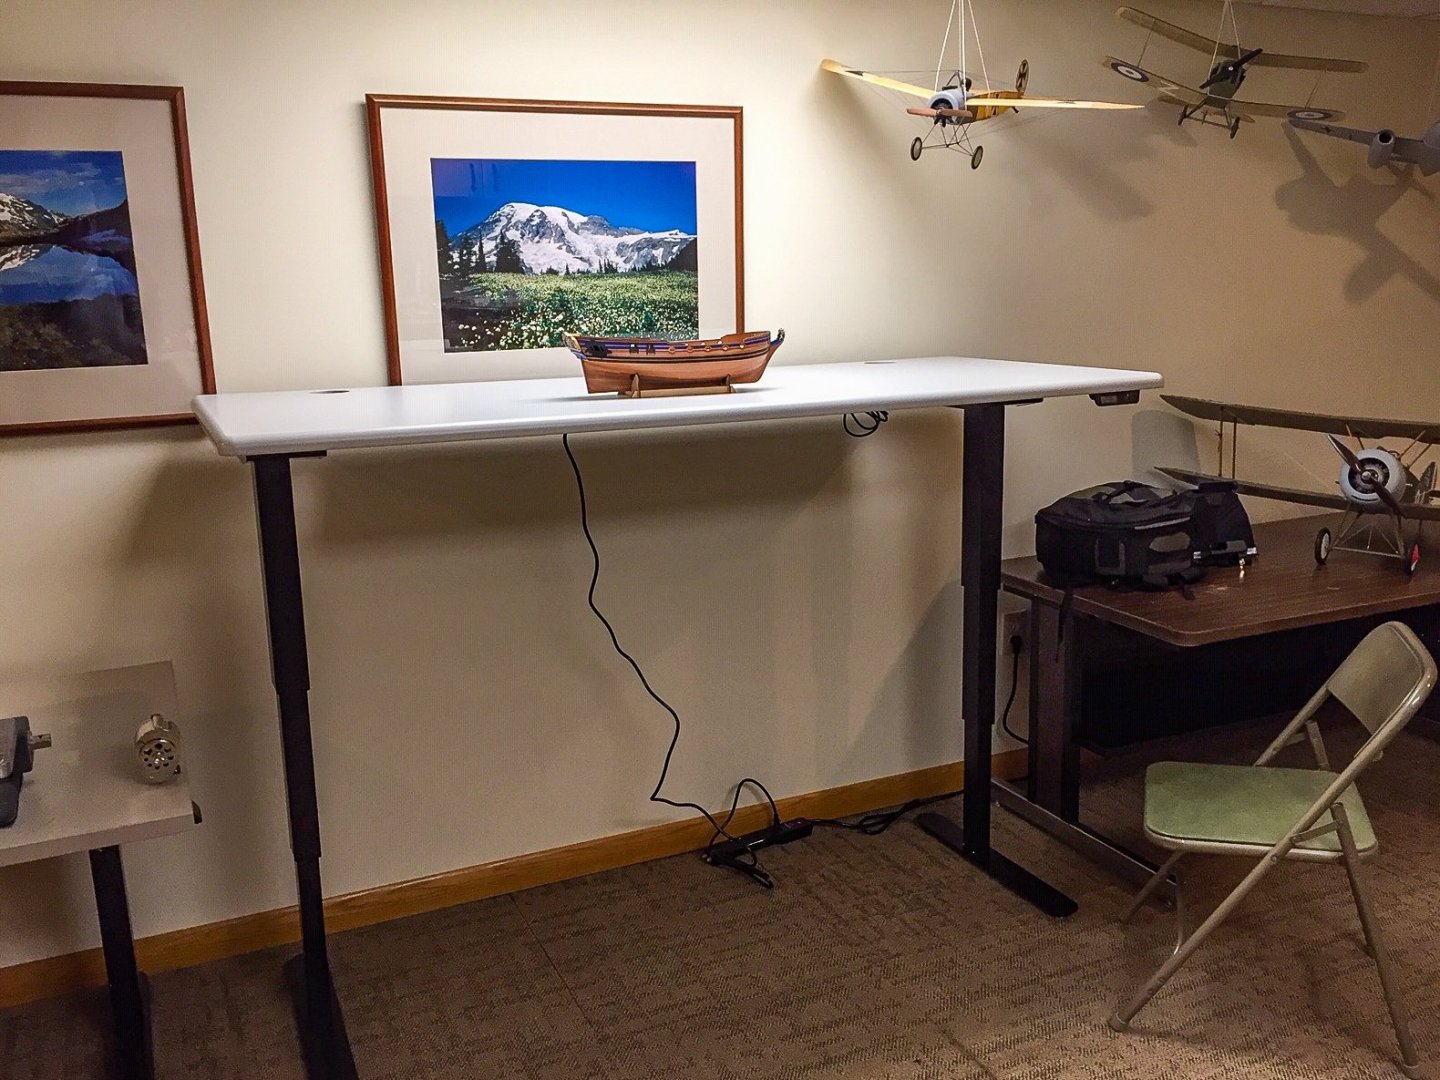
Thanks Bob. I struggle with the detailed painting and do lots of touchup. I splurged and got an adjustable height "desk" or table for building models. I'm sure this was fancier than I needed, but was easy to assemble and made in US rather than China. There are many brands to choose from. They are made to be used as computer desks, and I've used a smaller one for years. I thought it would work good for models. You can never have enough table space. Here's pictures of it lowered and raised. The lowered will work good for doing masts and rigging. Probably won't use it much raised all the way, but I'll use it raised up to a comfortable height to work on hull. Thought you all would be interested. Hmmm, it won't upload photos this evening. I'll try again tomorrow.