HOLIDAY DONATION DRIVE - SUPPORT MSW - DO YOUR PART TO KEEP THIS GREAT FORUM GOING! (Only 20 donations so far - C'mon guys!)
×


desalgu
-
Posts
363 -
Joined
-
Last visited
Content Type
Profiles
Forums
Gallery
Events
Everything posted by desalgu
-
I'm still planking, so not a whole lot to report. I finished the upper section of both sides of the hull, and did some rough sanding. I wasn't paying close attention (a problem of mine) and randomly grabbing strips of pear wood for planking. But pear has different shades, some strips darker, some lighter. I'll remember next time around to try to use strips of a similar shade next to each other.
-
Glenn, thanks for the suggestion on build log. I'll try to do that next time. Got pretty carried away with last block of text. I'm kind of bad about writing too much! Started planking upper part of port side today.
-
I had divided the hull into two sections, an upper and lower. I've gotten the upper section of one side planked. I've done a rough sand on it, but it needs a lot more. It looks pretty good, but when I take closeups, there are gaps between planks, and little areas that need a little bit of filler. I'll save some dust from sanding, so I can make some filler with dust and thinned titebond. I'm going to have to use closeups more, so I can see mistakes sooner. l've been beveling the planks, bit it's still hard to get them to sit together with a perfect fit. I've ended up with tiny gaps here and there. I'm pretty sure wipe-on-poly will go in a lot of the gaps and it will look fine, but I don't have much experience at this. I would like some of the edges to show subtly. With pear and being hull planking, I haven't used Chucks pencil on the edges, because I didn't think it would show like on a lighter color wood. I'm hoping the little gaps, when covered with wipe-on-poly, will show the edges about right. I would like to leave the hull "natural" instead of painting it white below the waterline. This is just a personal preference of mine. All that work planking and then you paint over it is a little hard for me to accept even if it's more historically accurate. I feel the same about copper bottoms, and I just like the look of wood, always have. It will make my models a little different from others, the same way when different modelers decide to paint different areas, and with different shades of colors. On Syren, I didn't take closeups at this stage of planking, so nothing to compare to. In general planking this time is going much easier and better than what I did on Syren. I didn't know to edge bend planks when I made Syren, and I kept wondering why I was having to force planks to sit on the hull. I managed, but I knew I was missing something. Edge bending has made all the difference in the world, and I've been surprised at how much edge bending is required. I'm using CA to glue the planks. I'm getting them to lay pretty good along the hull with edge bends and a bow or stern bend. I discovered how good CA holds the planks when I wanted to remove one to make an adjustment and get a better fit. They are on there and not going anywhere! So if I discover an error or little gap, I'll just have to fill it. I believe most of what I'm seeing now can be handled with more sanding. I haven't done that much sanding so far. On the stern I had the planks running off the edge of the hull about an inch when glued them on. I always do this when building models, and try to trim to fit after gluing as much as possible. I couldn't see the joint with the counter, but tried to hold the plank tightly to the hull while the CA set. However, after I trimmed the planks along the counter, I can see I didn't get a couple of them firmly glued down to the counter. I'll use filler to fix this. It's something to watch out for when I plank the other side. I'm a little hesitant sanding near pieces with laser engraving, like the counter, the bow stem, and keel. I'm going to have to sand these pieces lightly to remove some CA fingerprints and get nice joints, but don't want to remove the engraving details. I'll have to be real careful doing it. Not sure how others have handled this. The other area that will need some filler is at the rabbit on the bow stem. I'm ending up with a small gap between the bow stem and planks, probably because I sanded the first layer of planks more than I should have. I don't see this as a huge problem. I'll just have to use minimal filler and be careful sanding. At the stern, some of the planks curve into the bottom of the counter, or at least that's the way I understood it and what made sense. So planks have to fit good at both the bow and stern. I decided to do the bow plank and stern planks first, leaving a gap in between that was hopefully close to 5.5" in length. That way I could cut and bend the bow and stern planks so they fit tight agains the bow stem and counter, without worrying about having to also fit the other end of the plank. It's much easier to get both ends of a plank in the middle to fit right, because it doesn't have much of a bend or taper. So, here's some pictures.
-
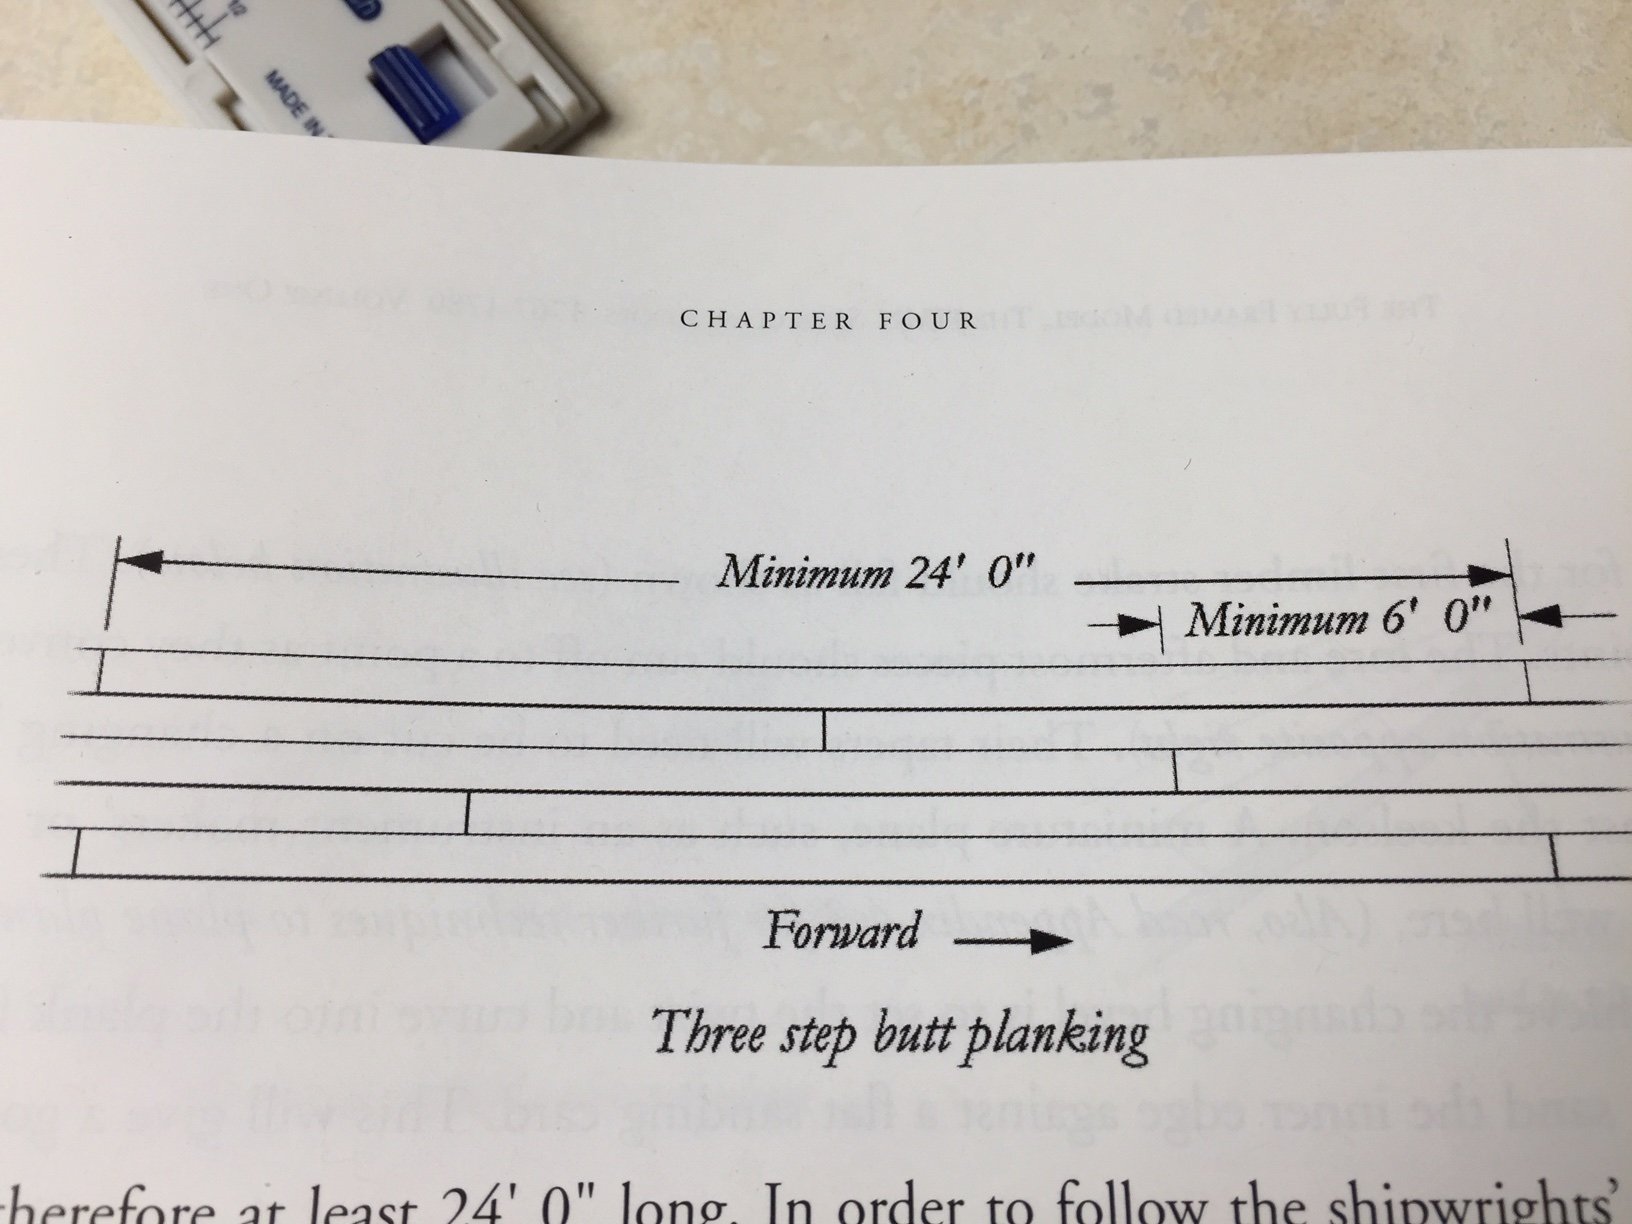
Here's the planking "pattern" I'm using from the Swan book. I found that I could make planks 5.5" full length and go the length of the hull with 3 planks. This length of planks scales to about 29-ft full size, so that's a little longer than the 24-ft minimum shown. As I've worked along, I've tried to follow the pattern, but have made a few adjustments to get things to work out better. And when I first started, I made a mistake and had to work around it. It took me a while to figure out how to do the pattern. With this pattern, one row of planks starts with a very short plank, 1.375". Another row starts with a 2.75" plank. Short planks are tough to edge bend, so I learned to make a plank that was 5.5" plus the 1.375" or 6.875" (6 7/8"). I edge bent this plank and put in the bow curve getting it to fit. When I had it fitting good, I cut it into the two planks I needed. I did the same for the row that starts with the 2.75" plank, but now the plank I edge bent was 8.25" long.

-
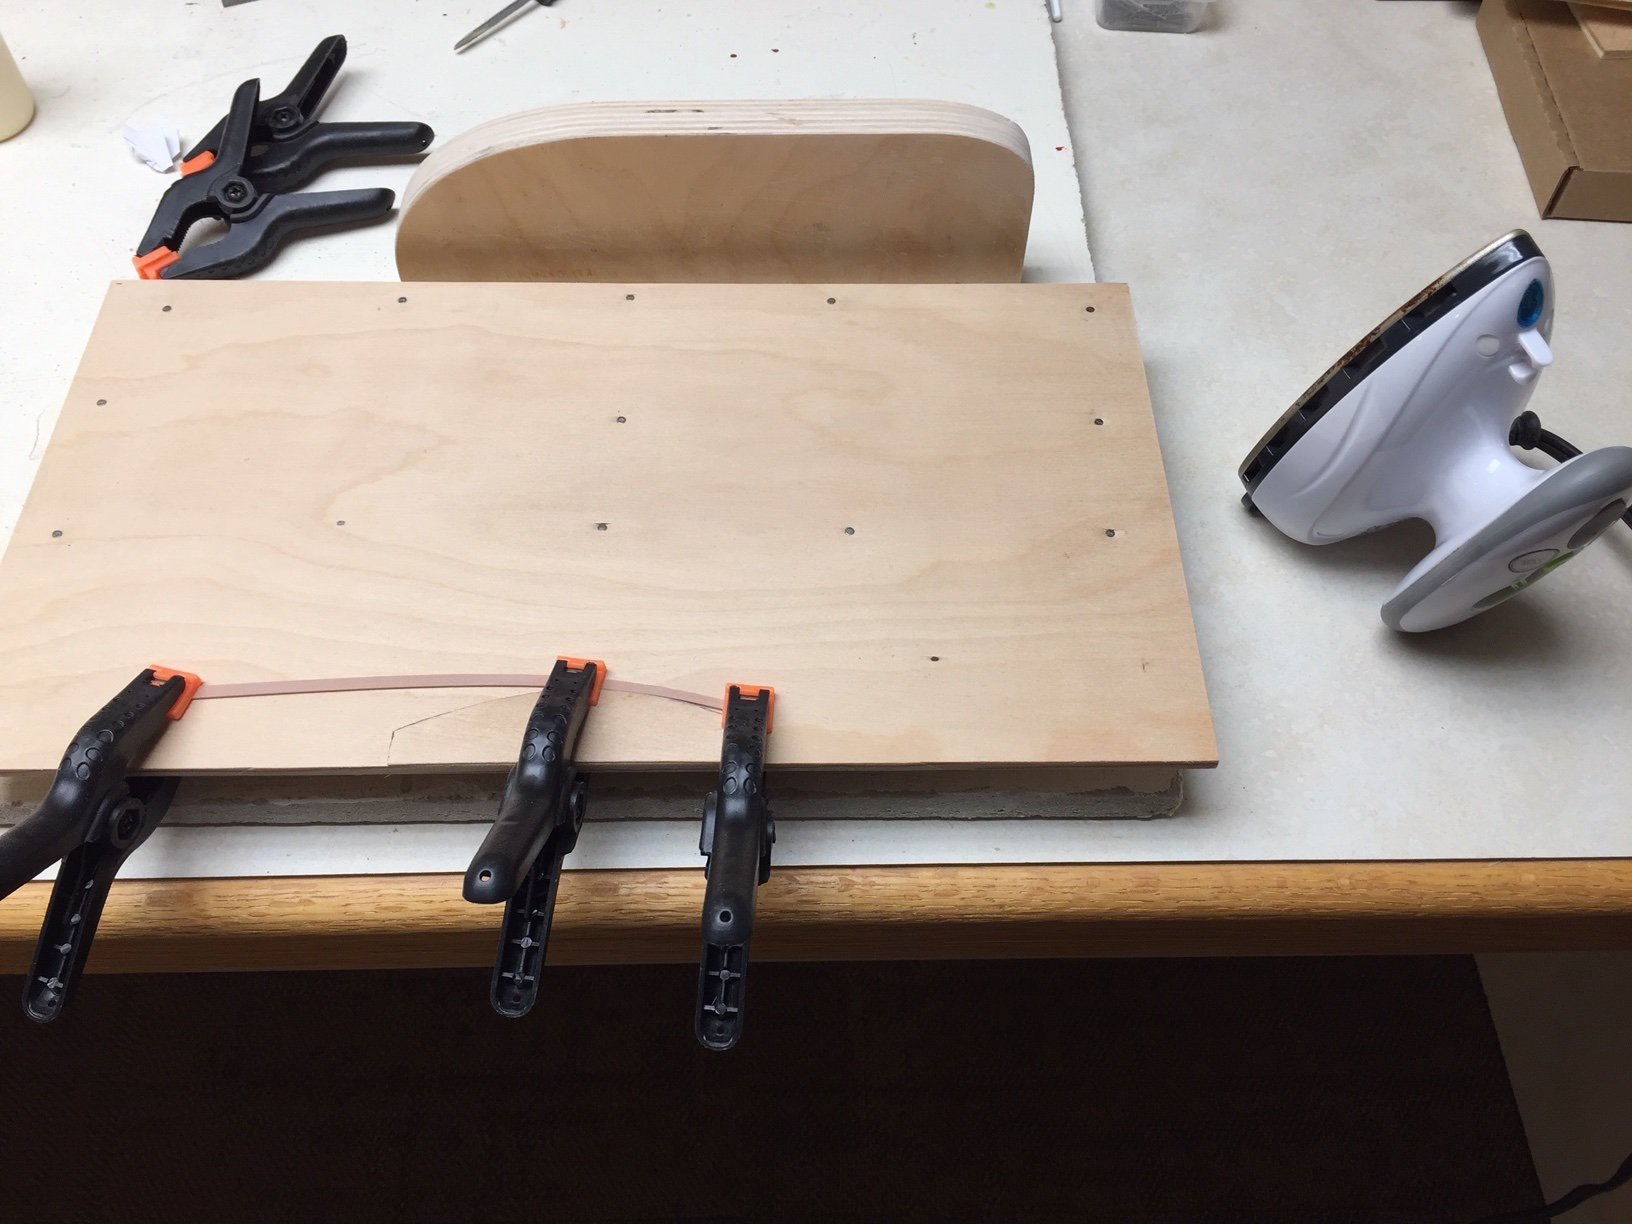
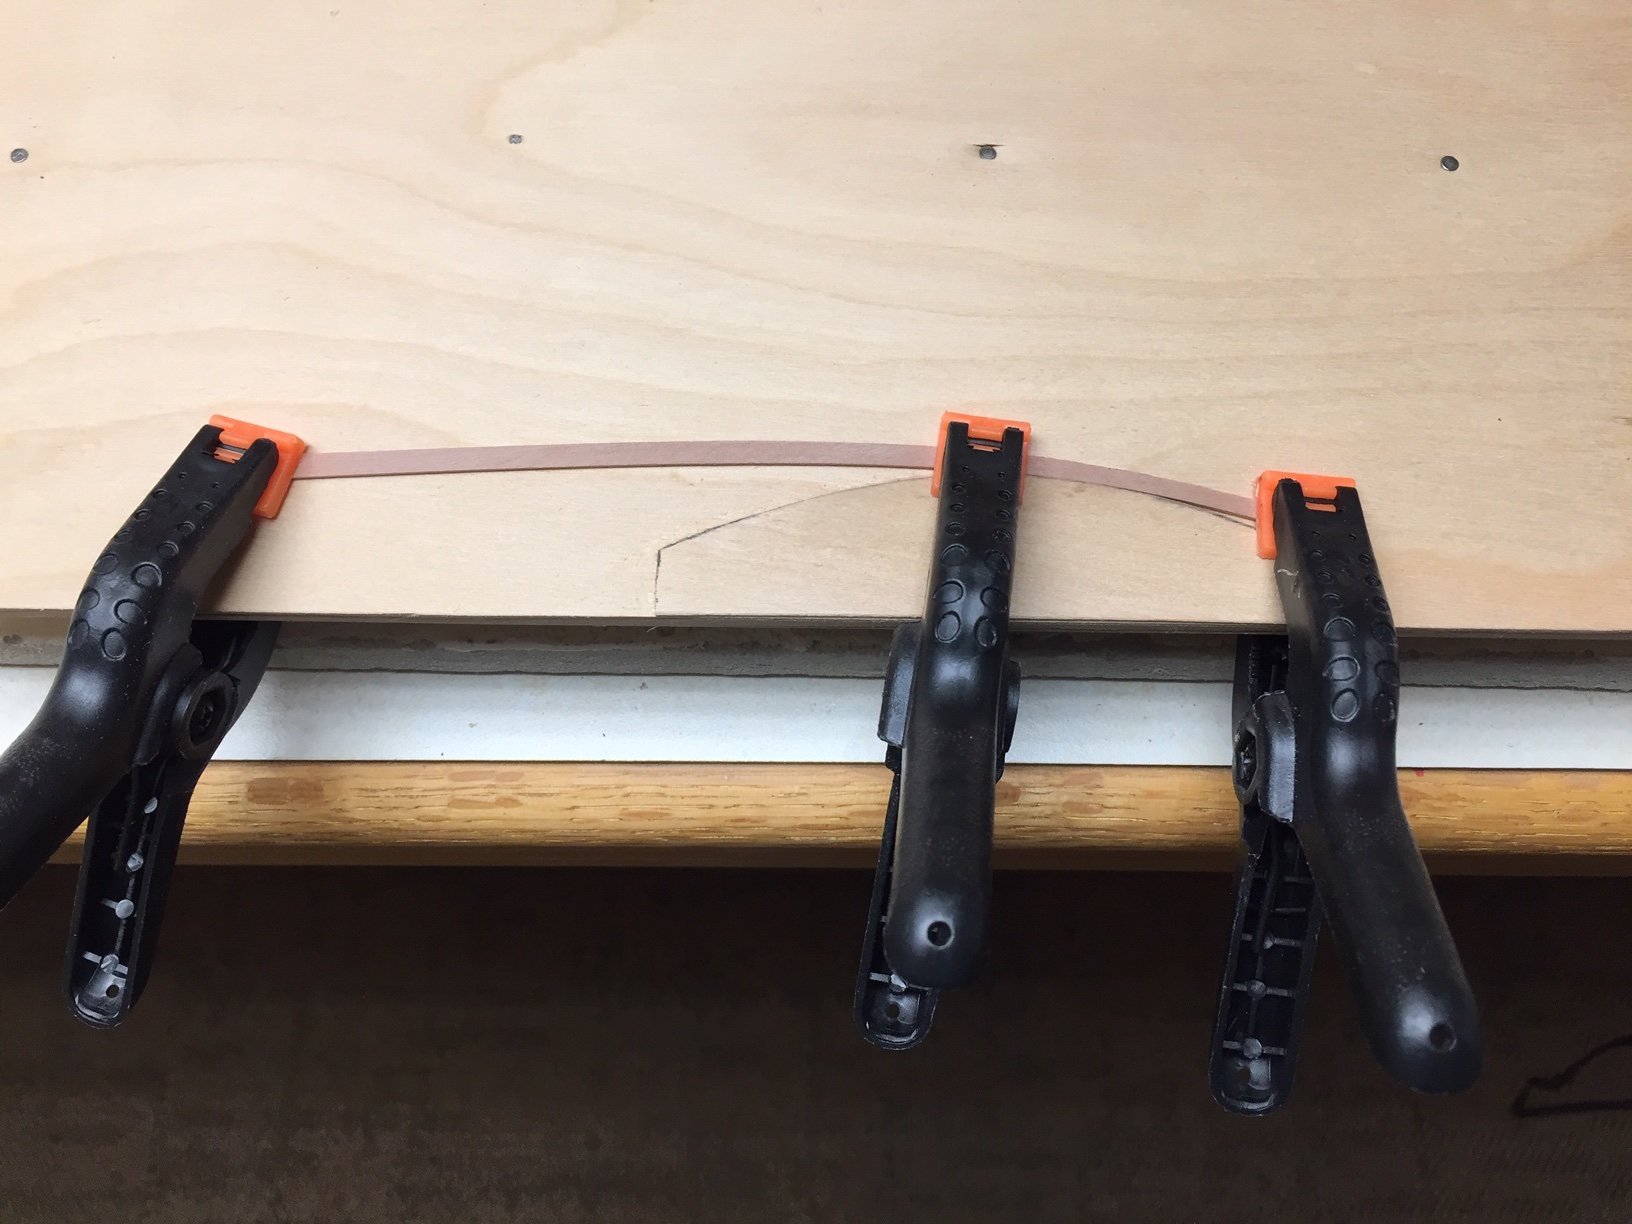
It's been a while since I posted anything, but I've been reading other's build logs, and asking some questions. I really appreciate the quick responses and the effort others have put into their build logs. It's a great help for someone like me just learning to build model ships. I know there are a lot of Duchess build logs out there, so I could skip over a lot of what I'm doing, but I've found it helps to put everything in one place even if it duplicates what others have done. If you're following along and new to this like me, I'll try to put everything I'm doing in this log. First off I modified my plank edge bending "station" to be more like what I've seen on the web. I still glued the bending form down, but after using it a while, I understand now why a lot of people clamp one or more forms to bend against. It does the same thing and it gives you more flexibility curving the plank. I've learned each plank curves a little different, and for me, the easiest way is to make several smaller bends gradually working toward what fits. So it's estimating where to make a bend, making the edge bend, test fitting, and repeating several times. I'm edge bending by wetting the top of the plank with my finger and then applying heat with travel iron (thank you Chuck!). I don't let it cool or set that long, maybe minute or two, and then do a test fit. It's a lot of trial and error, but works good for me. I had no luck trying to figure out what edge bend I needed ahead of time and bending to that shape. I'm sure it can be done, but I found the trial and error method was simpler and faster. At least for me it also gave better results. I'm not too good at cutting parts to close tolerances.

-
Looks great! I can't get over how big it looks, which probably shows my inexperience.
-
Thought I'd let you know I'm following along and love your build logs. You do incredible work! I've wanted some mini chisels so now I know what to get and that I need to learn how to sharpen them even before 1st use. I have a chisel like xacto blade, but I believe these will work much better.
-
I got eager and put the first plank of the 2nd layer on. It's probably the easiest to do. I decided to use 3-step planking pattern, and came up with 5.5" length planks as the best. That means 3 full length planks run the length of the hull. And then I realized I had planned to mark off the hull so I could taper planks at the bow so everything works out nicely. I've always done this "on the fly" or by eyeball in the past. It's worked out ok, but I thought on this model, I'd be more careful and try to do better. Of course, I forgot, and the first set of planks will remain as is. I divided the hull into two sections, an upper and lower. I used tape to try to make the two sections approximately the same width, and I wanted the dividing line at the stern to be where the stern post and counter meet. Then I used a fan type pattern to mark off plank widths at a few places along the hull. I'm just using this as a guide for tapering planks, and it's certainly better than guessing. I feel like there's no way it's all going to work out perfectly, so I'll do the best I can, and then fit in whatever I need at the end. In last photo, I've started adding the 2nd row of planks

-
Here's the Duchess ready for 2nd layer of planking. The bow stem and keel outer facings have been glued on.
-
I found it amusing that I use same #11 xacto blade knife for tapering planks and that I have the same travel iron for plank bending. My forms that I bend around are a little different, but I like what you did, and I believe that's what Chuck did in his video. I thought mine would work as well, but they don't, and I think this will work better. Plus it's simpler. Love the Byrnes sander! Had to look them up and I see they make small table saw also. Do you have one? or any of their other tools? I do it the old way with sanding blocks, so I can't be very accurate. I assume extra accuracy make a difference, it usually does. I will lookup your Cheerful log. I've thought about that being my next model.
-
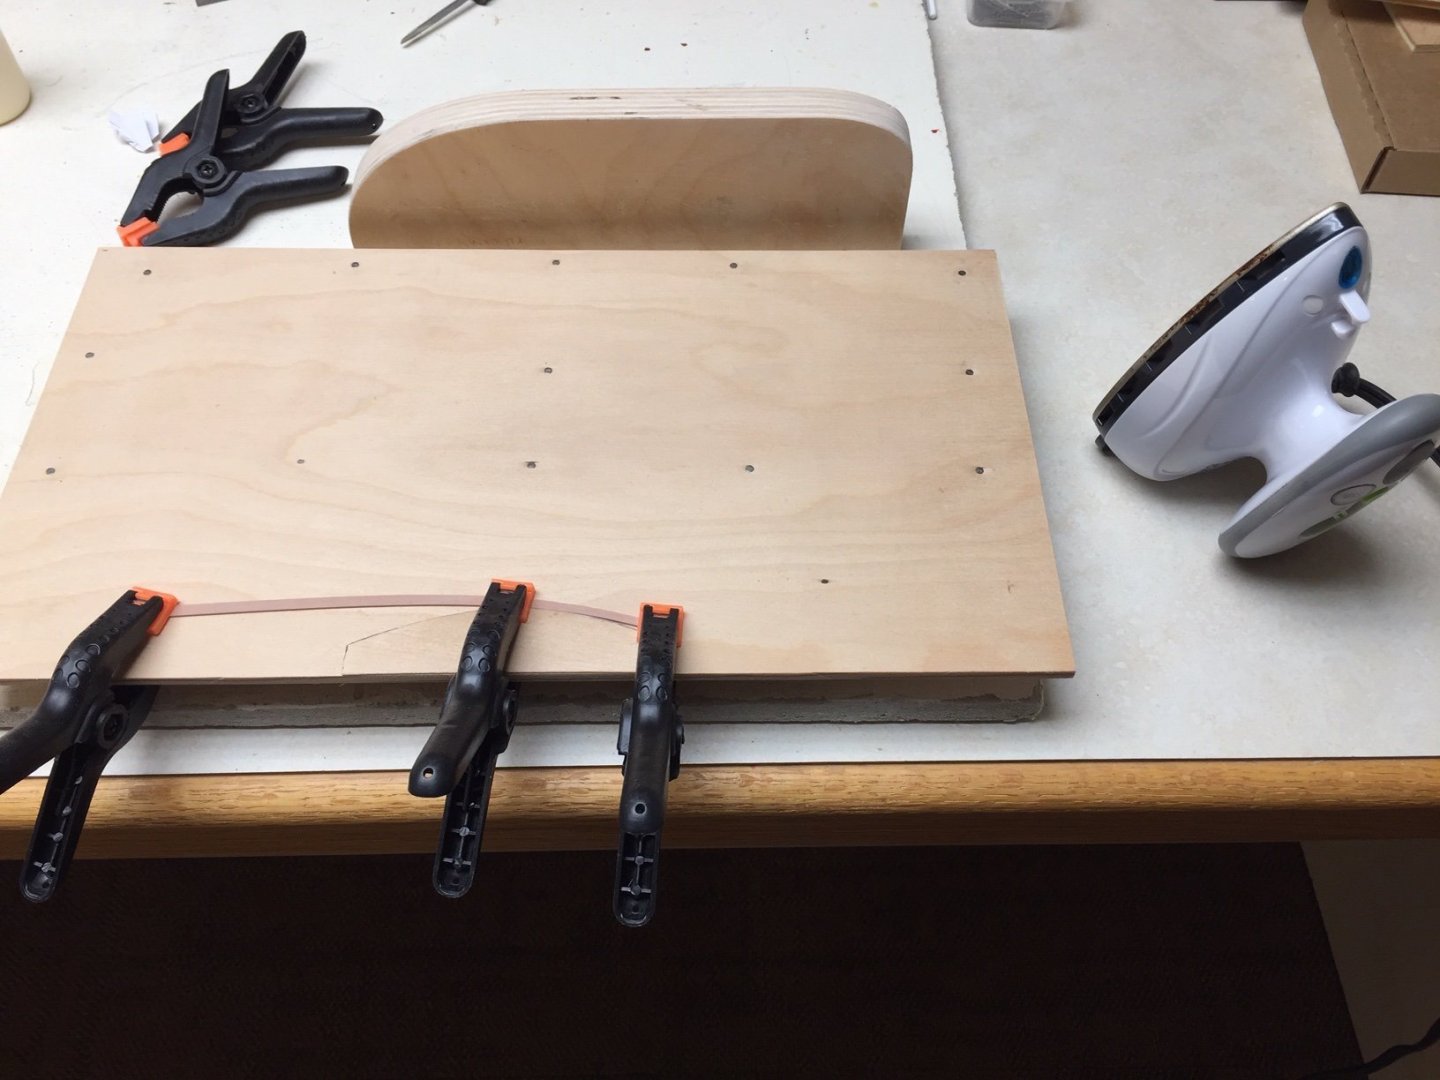
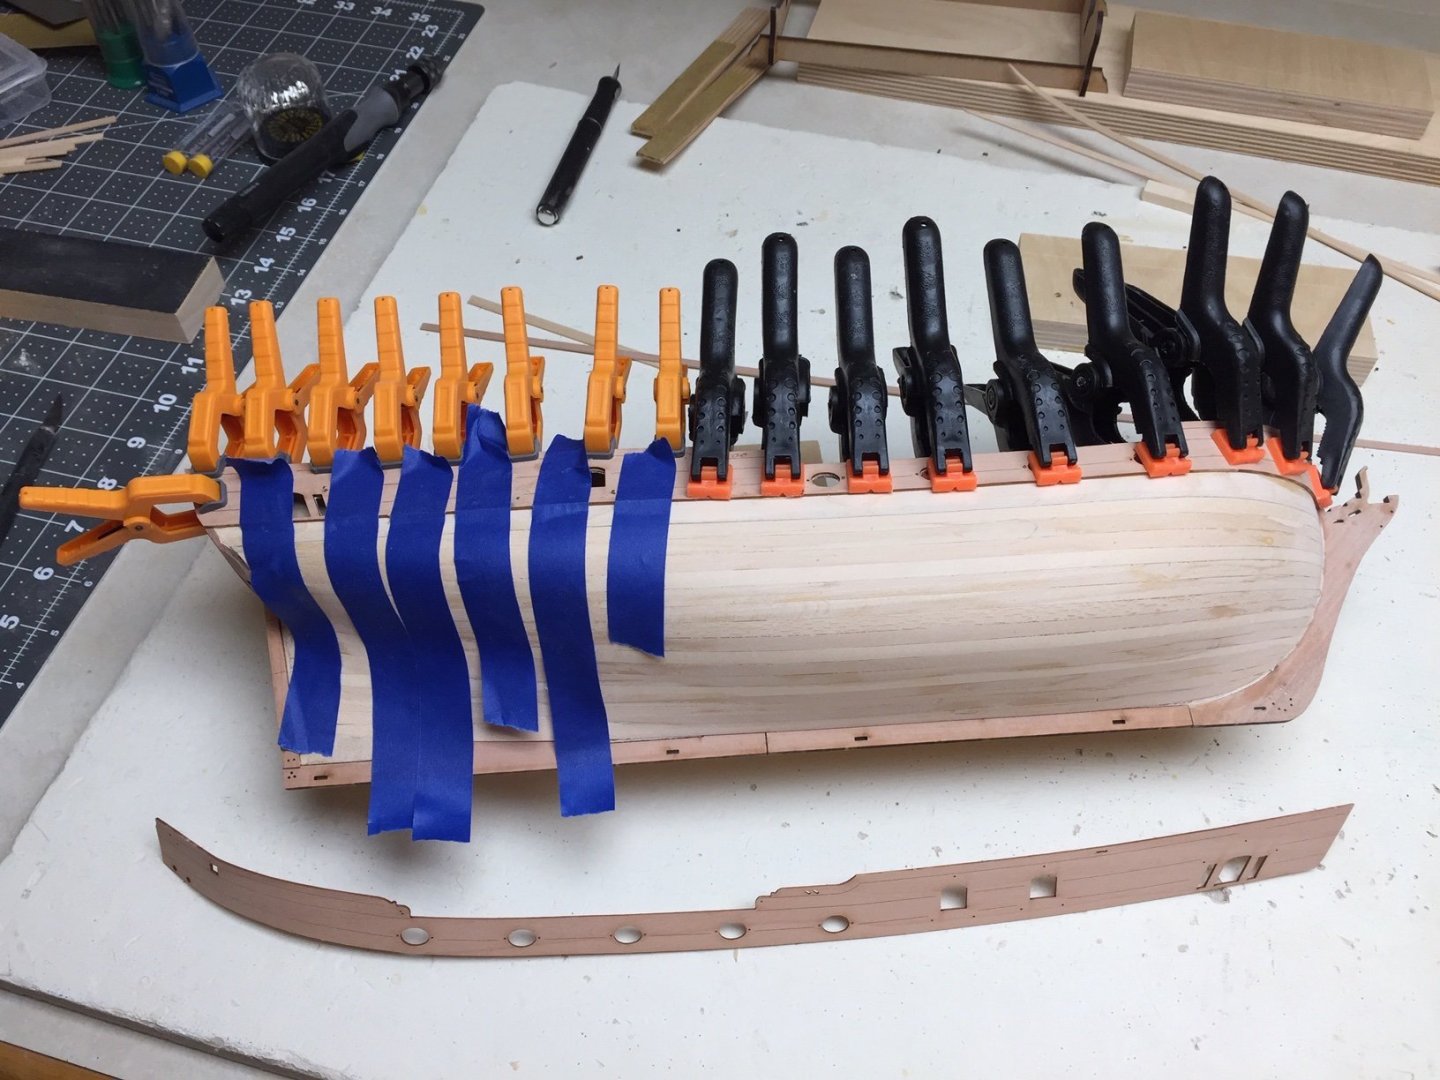
I found some bar clamps I'd forgotten I had to use on the 2nd bulwarks piece. They worked much better than tape. You can see them in top left of photo. I used the small alignment holes but had some trouble getting nails in them. Ended up using may half dozen of the holes. I used regular titebond and it started setting up, so between gluing, clamping, and trying to get nails in position, I needed 5 hands. I also discovered that nails have to go in straight or you still can have alignment problems. The 2nd side ended up glued slightly higher than I wanted. I think I would have gotten closer if I'd stopped worrying about the nails and just aligned by eye using windows and portholes. It's a minor issue and shouldn't cause any problems later on that a little sanding won't fix. Since then, I've glued on the outer facing pieces on the bow stem. These use little rectangular pieces of wood as alignment aids, and I much prefer them to the nails. They are easier for me to handle, and almost force things to align properly. I'll add photos when I get the bow stem and keel pieces glued on.

-
Here's the stern post and counter glued onto model. I've also glued on the first outer bulwark piece. It took a lot of clamps! and I used some tape to hold part of it. Wasn't the greatest, but seemed to work. I had no trouble soaking and bending the bulwark pieces. It was easy using the plywood bulwarks as the form.
-
Glenn, I'll check out your Flirt log on plank bending. I've watched Chuck's videos, but they might be worth another look. I've been using his travel iron method. I think a major problem was I didn't realize how much edge bending was required. I got better as I did more planking, but I'm always looking for better methods. I've also looked in reference books (TFFM HMS Swan) and saw how to determine how much edge bend is required, so I'm going to give that a try. I was doing a lot of guesswork on the first layer. I need to use these reference books much more than I do, but there's so much detail, I get a bit lost. On Syren I did no edge bending and struggled with it, but still ended up with pretty good results. I knew I was forcing planks a lot more than I wanted to. Being inexperienced, I never realized that you could bend a plank edgewise without much trouble, and that would make it much easier. At the time I was thinking it was some kind of odd twist that I needed. I've planked a lot of model airplanes over the years with balsa, and never did edge bending. Of course, balsa is super flexible, so it's not an issue. It's similar to planking first layer where you don't have to be very precise and can use a lot of filler. This is a whole different ballgame.
-
Hi Glenn, I got my drill (actually called a screwdriver) and mini-drill chuck adapter from Micromark, but looks like they still sell the chuck, but not the same screwdriver. Looks like they are selling perhaps a better version. The one I got is cheap and cheaply made, but it's worked. I'm sure there are higher quality ones if you look for battery powered screwdrivers. This one is very low powered and turns a drill very slowly which I like for model work. You have to be patient with it, especially on harder woods. The chuck adapter handles very small drills. I've used 1/16" down to number 80 drills. I used (and broke) a lot of number 77 drills making starter holes for nails on the first layer of planking. Next time around I'm getting a nail pusher! I saw amazon is selling the drill/screwdriver I have. I guess no surprise since they have almost everything. But I couldn't find the chuck adapter I use. It's all very simple, cheaply made, low powered, etc., but I've had good luck with it and use it all the time instead of pin vice. Here are some links: https://www.amazon.com/General-Tools-500-Precision-Screwdriver/dp/B002XZLTQO/ref=sr_1_21?crid=3GC4X77QPQG9C&dchild=1&keywords=battery%2Bscrewdriver&qid=1629327553&sprefix=battery%2Bscrew%2Caps%2C330&sr=8-21&th=1 https://www.micromark.com/Drill-Chuck-For-Ultra-Tech-Precision-Power-Screwdriver
-
Thank you Bob, Derek, and James! Very interesting about the two types of sterns, round tuck and square tuck. The other two models I've built had the square tuck, so I had never seen this type. Glued the stern post on, and will do the counter shortly. I'm back making progress. I don't think I'll be ahead of you for long, Derek! I go pretty slow, especially this time of year. This kit really has gone together quite easily. I've been very impressed. It's by far the best kit, airplane or boat, that I've built. Sometimes I forget that there's supposed to be some work involved, challenges, and problems to solve. Dave
-
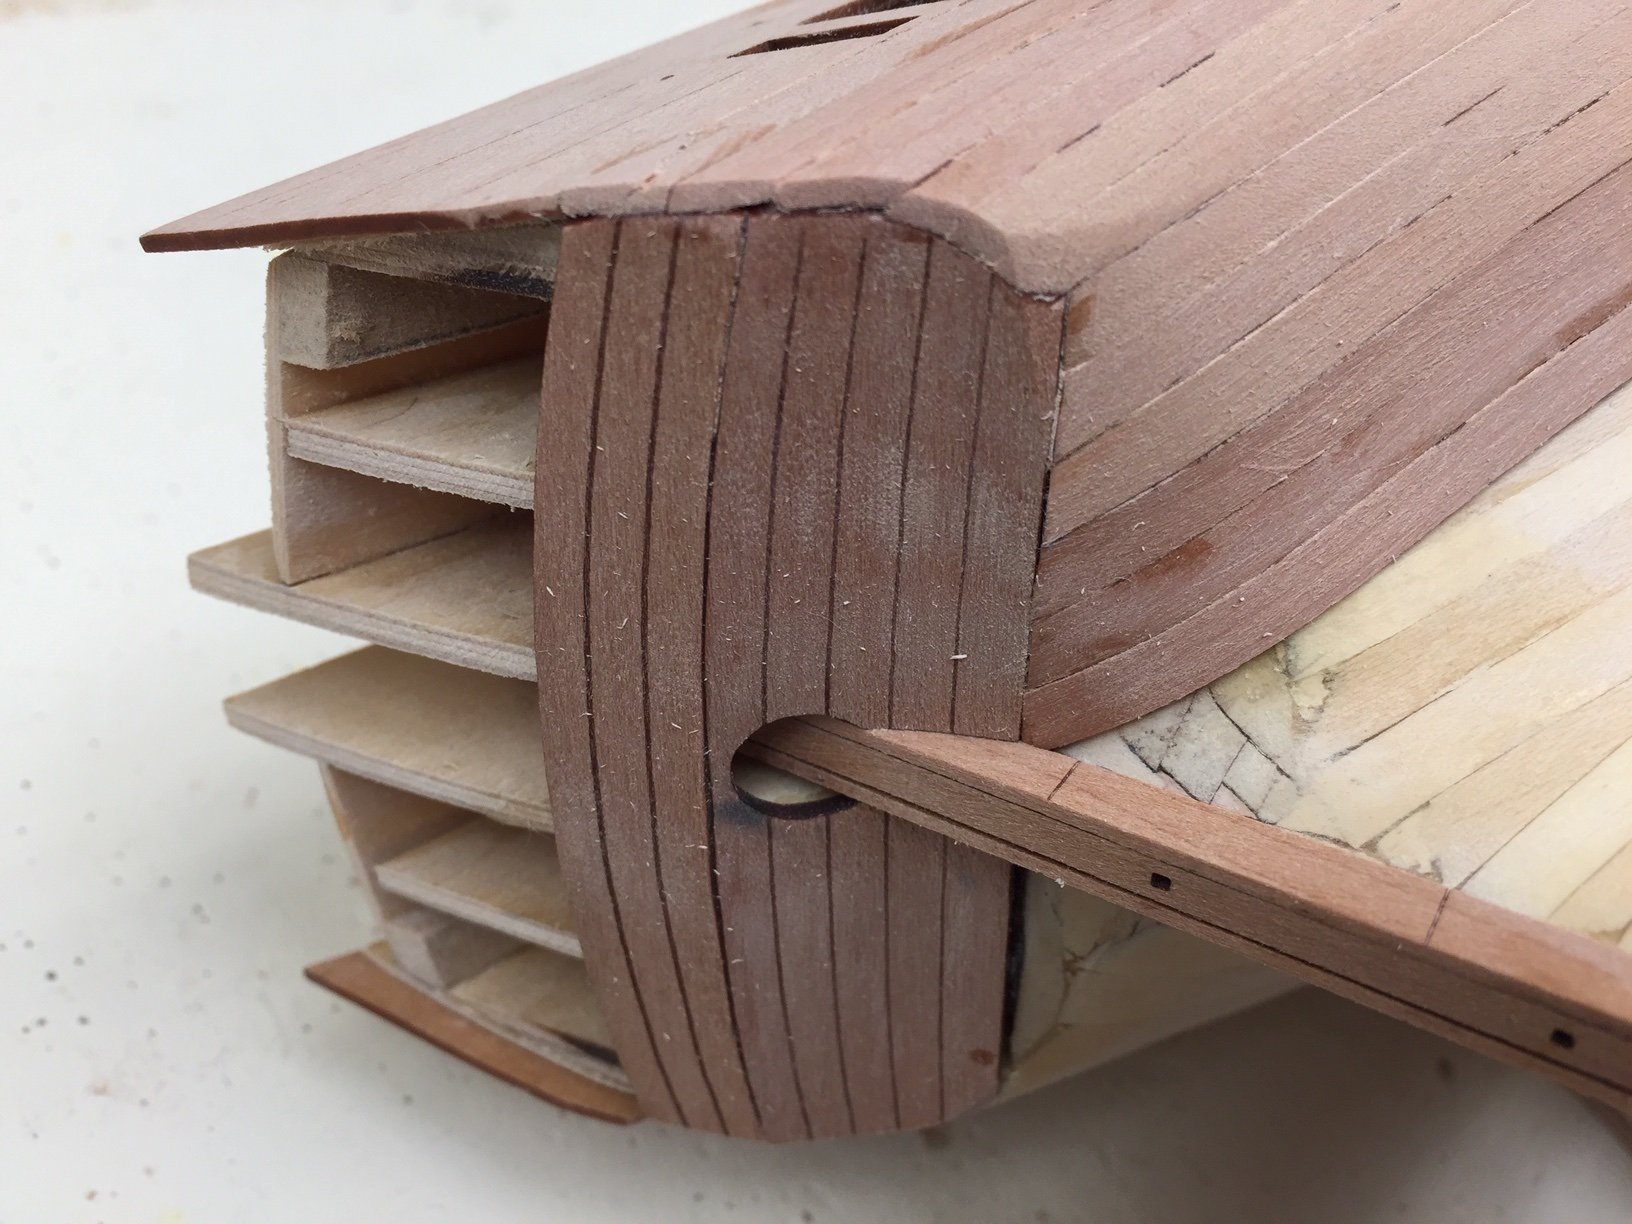
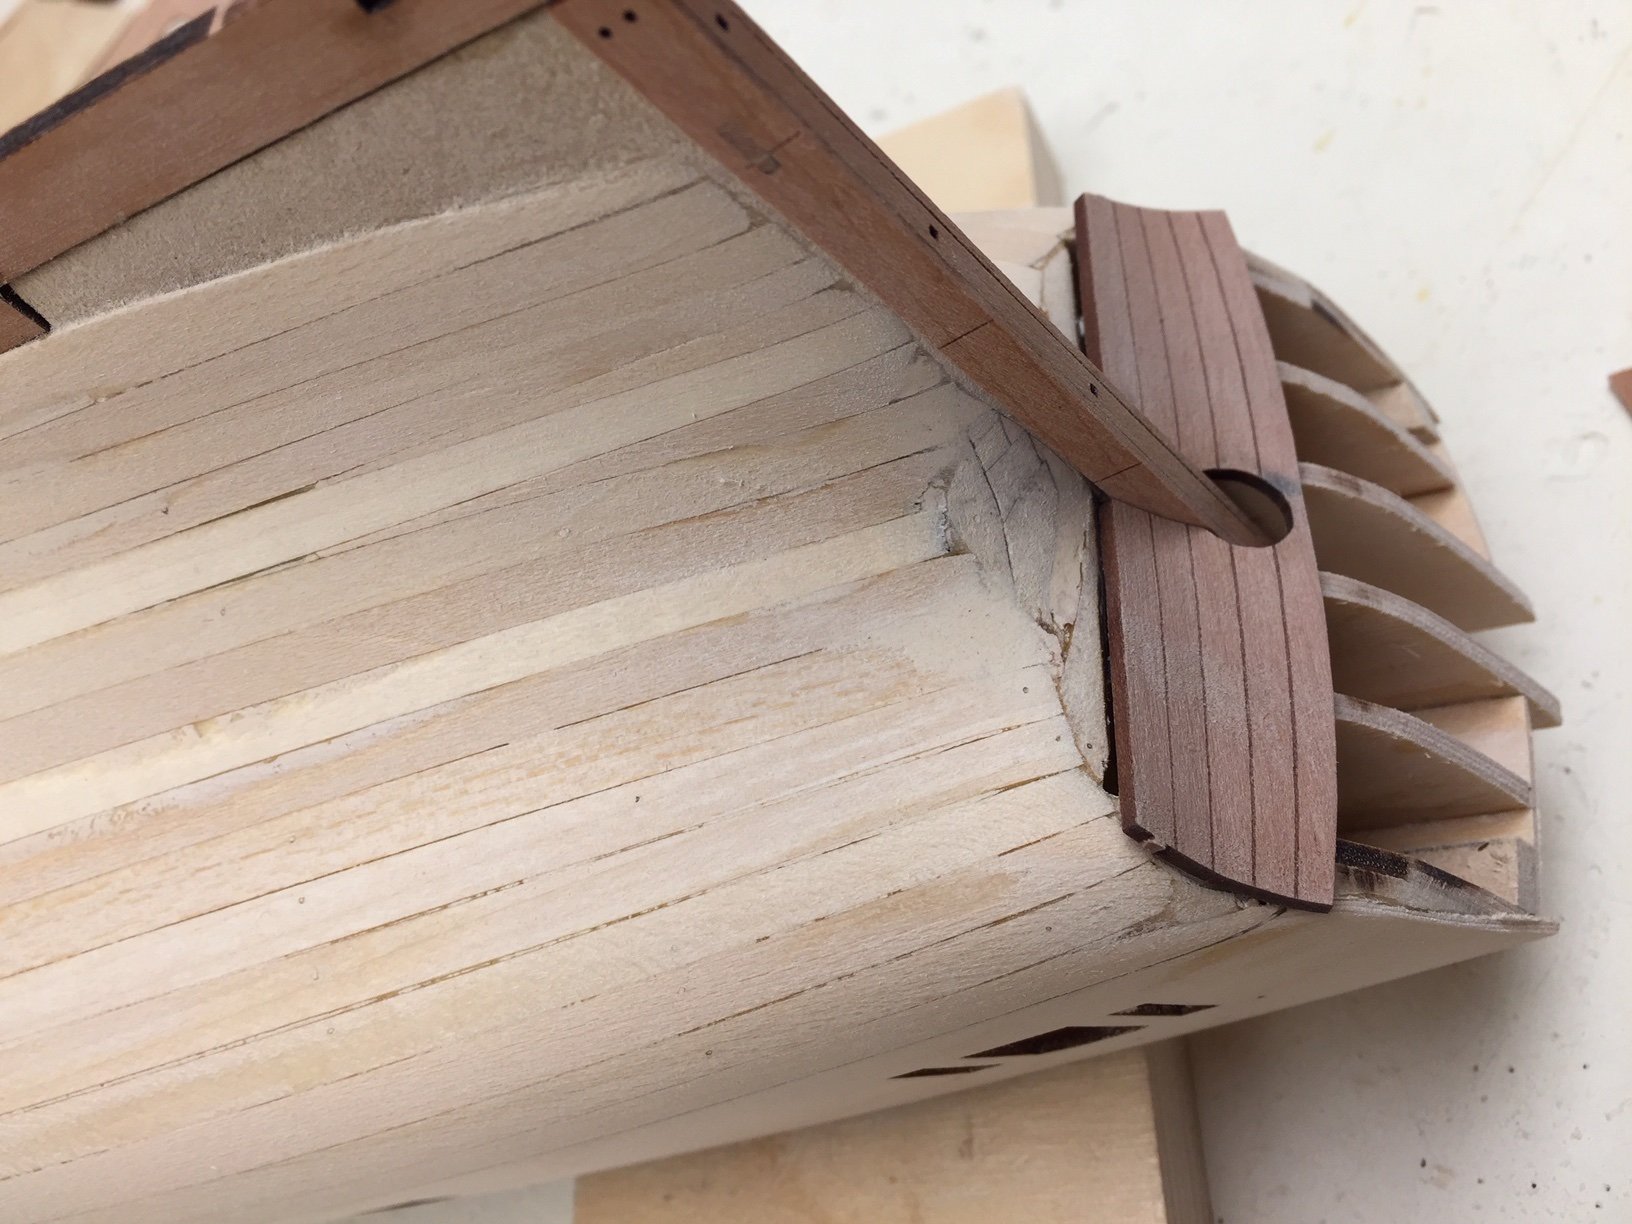
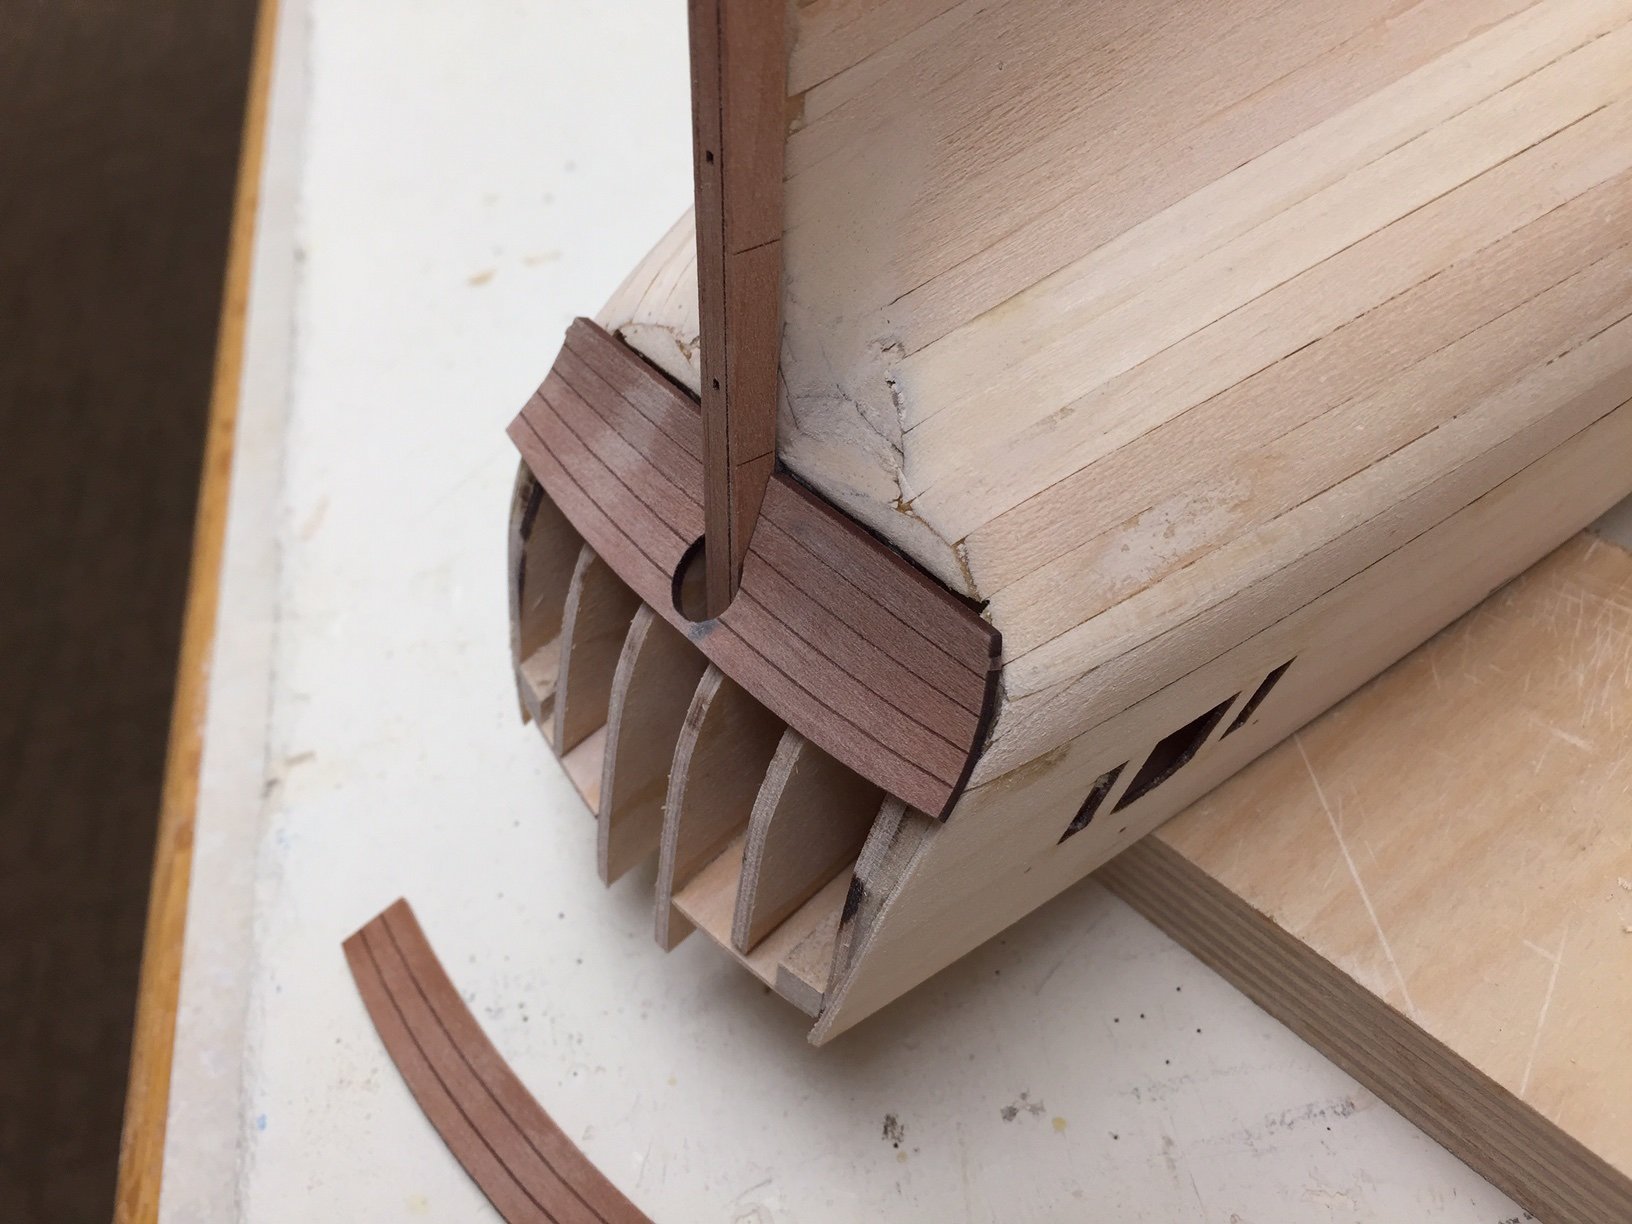
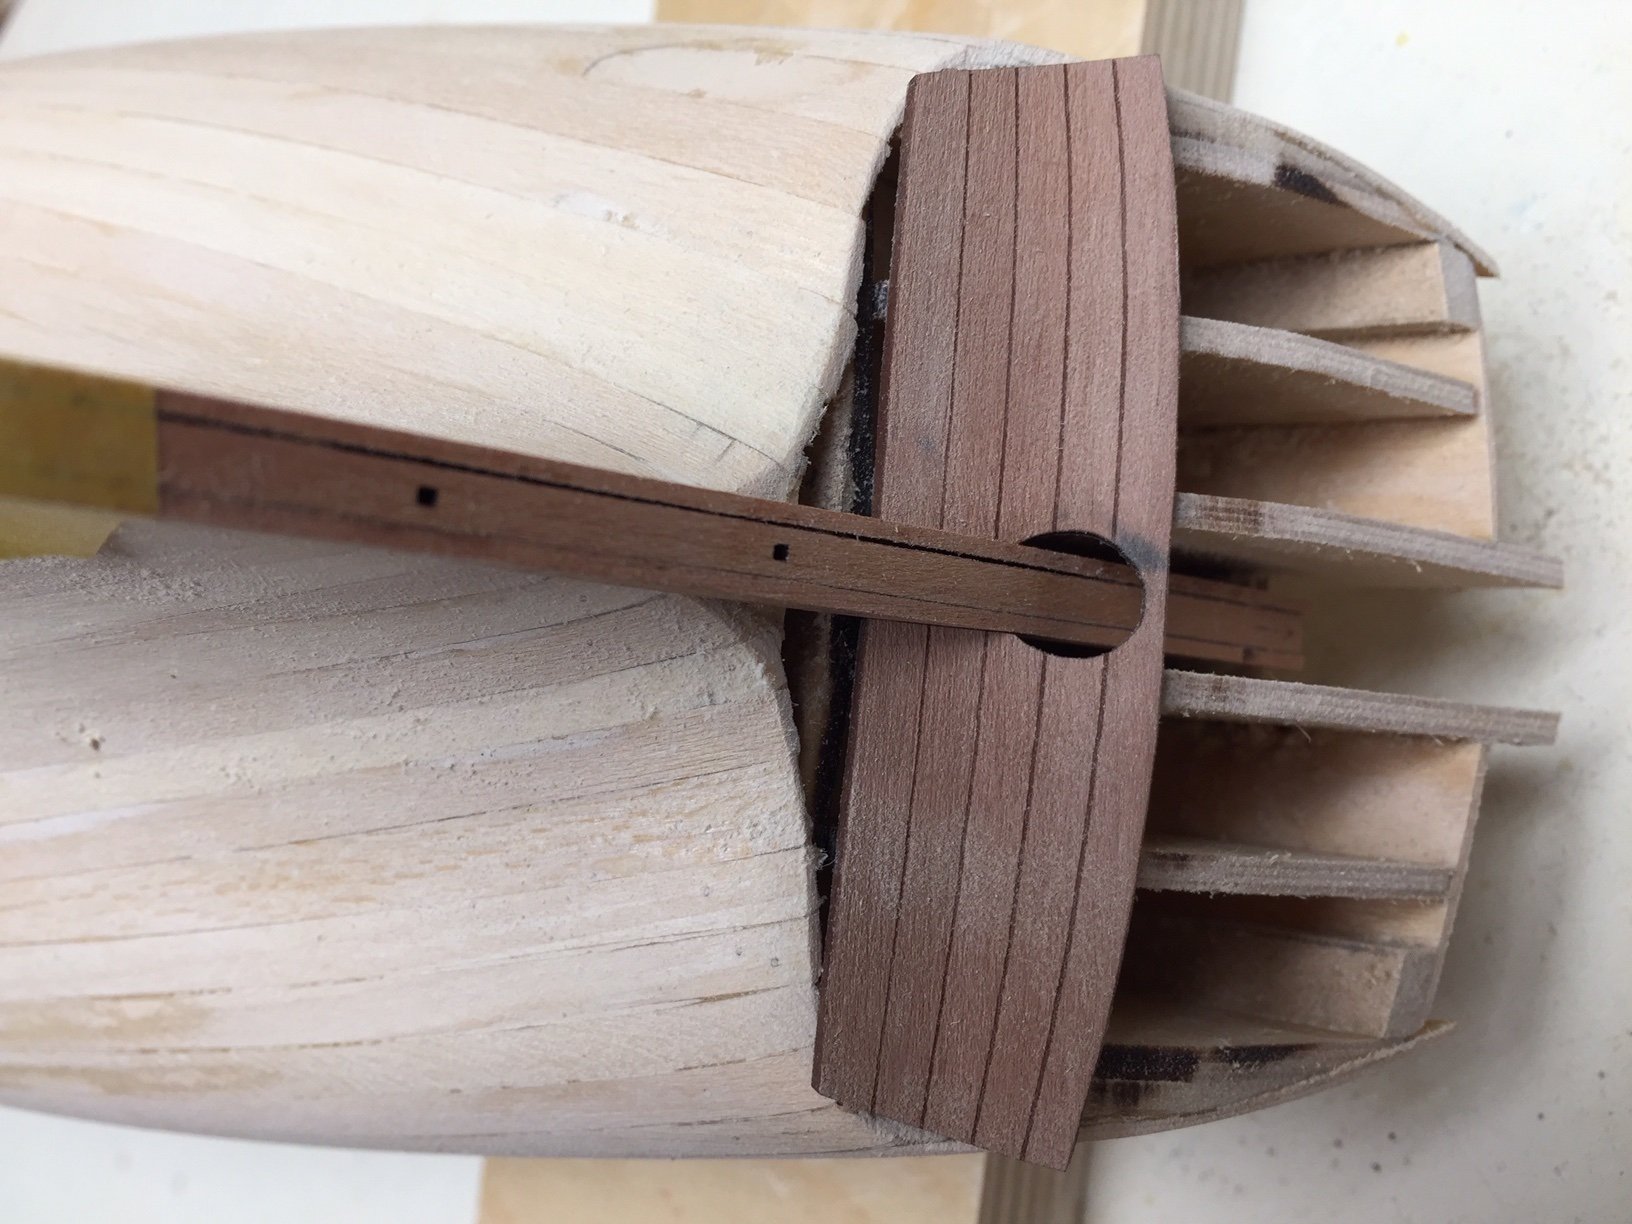
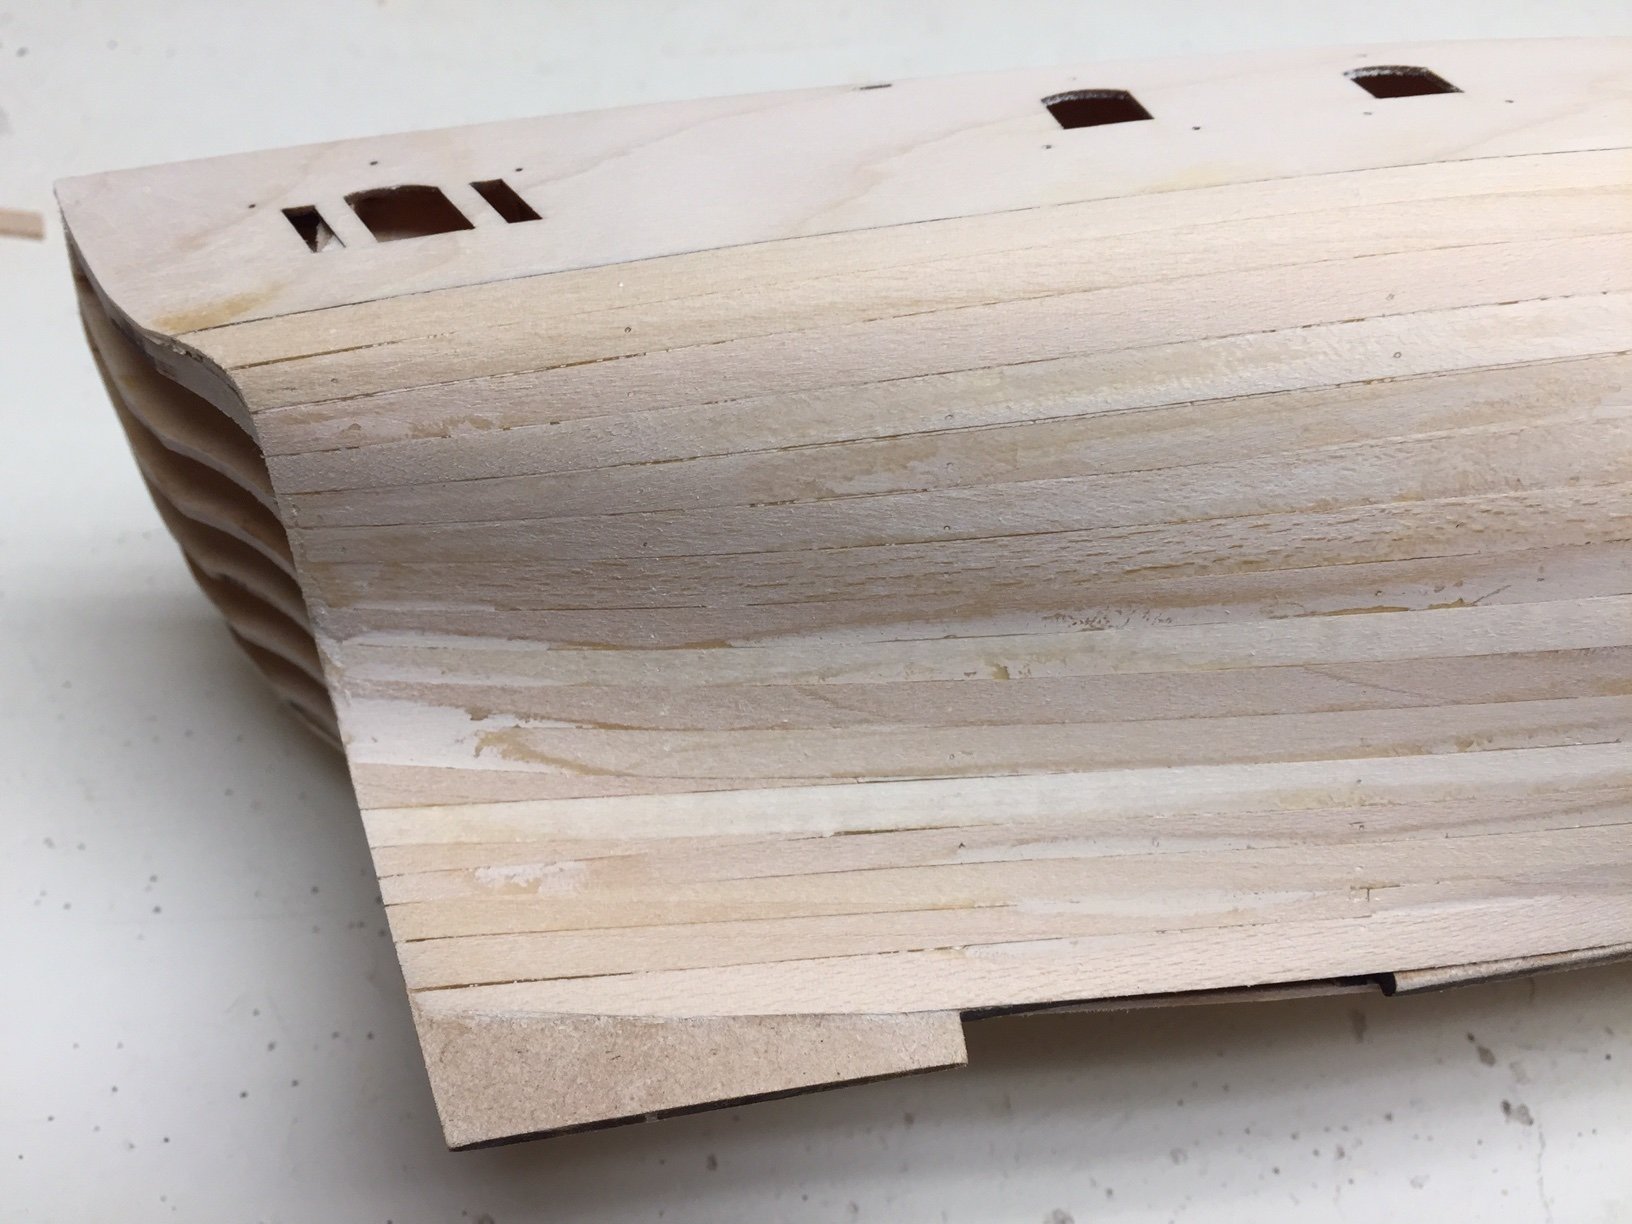
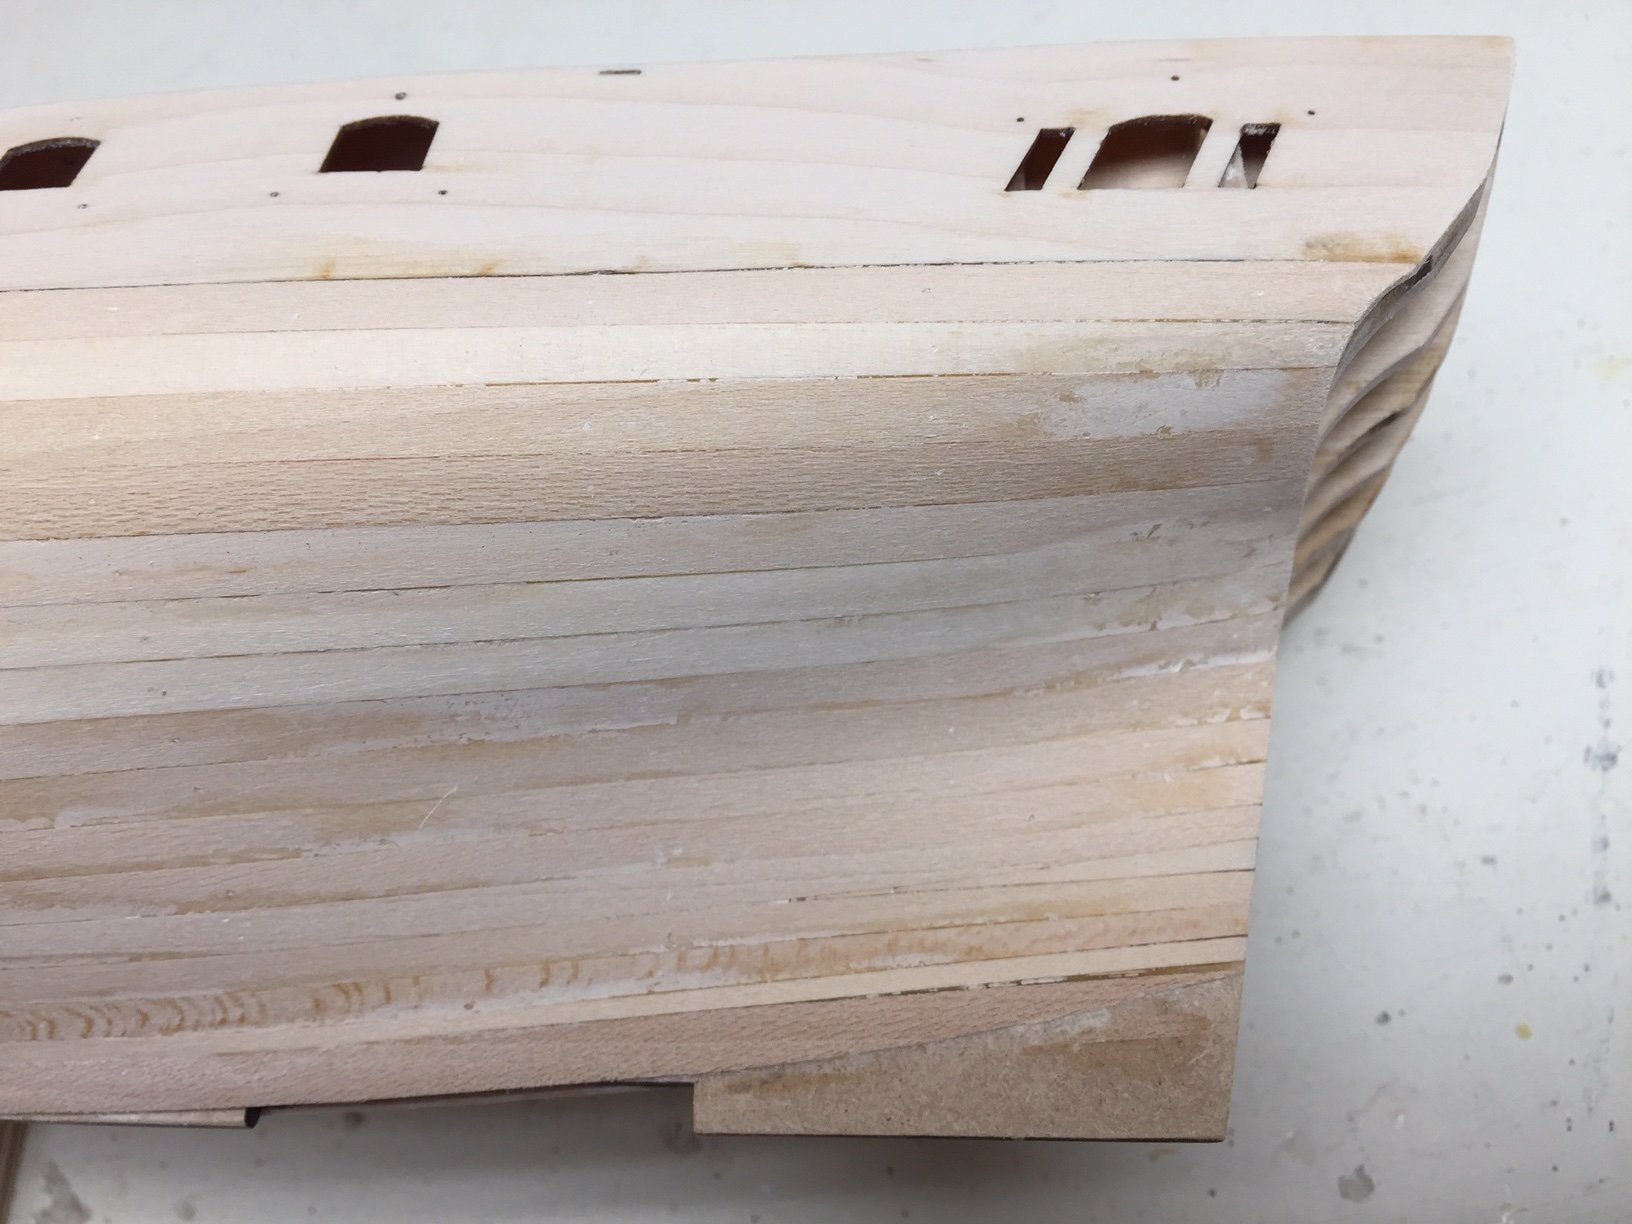
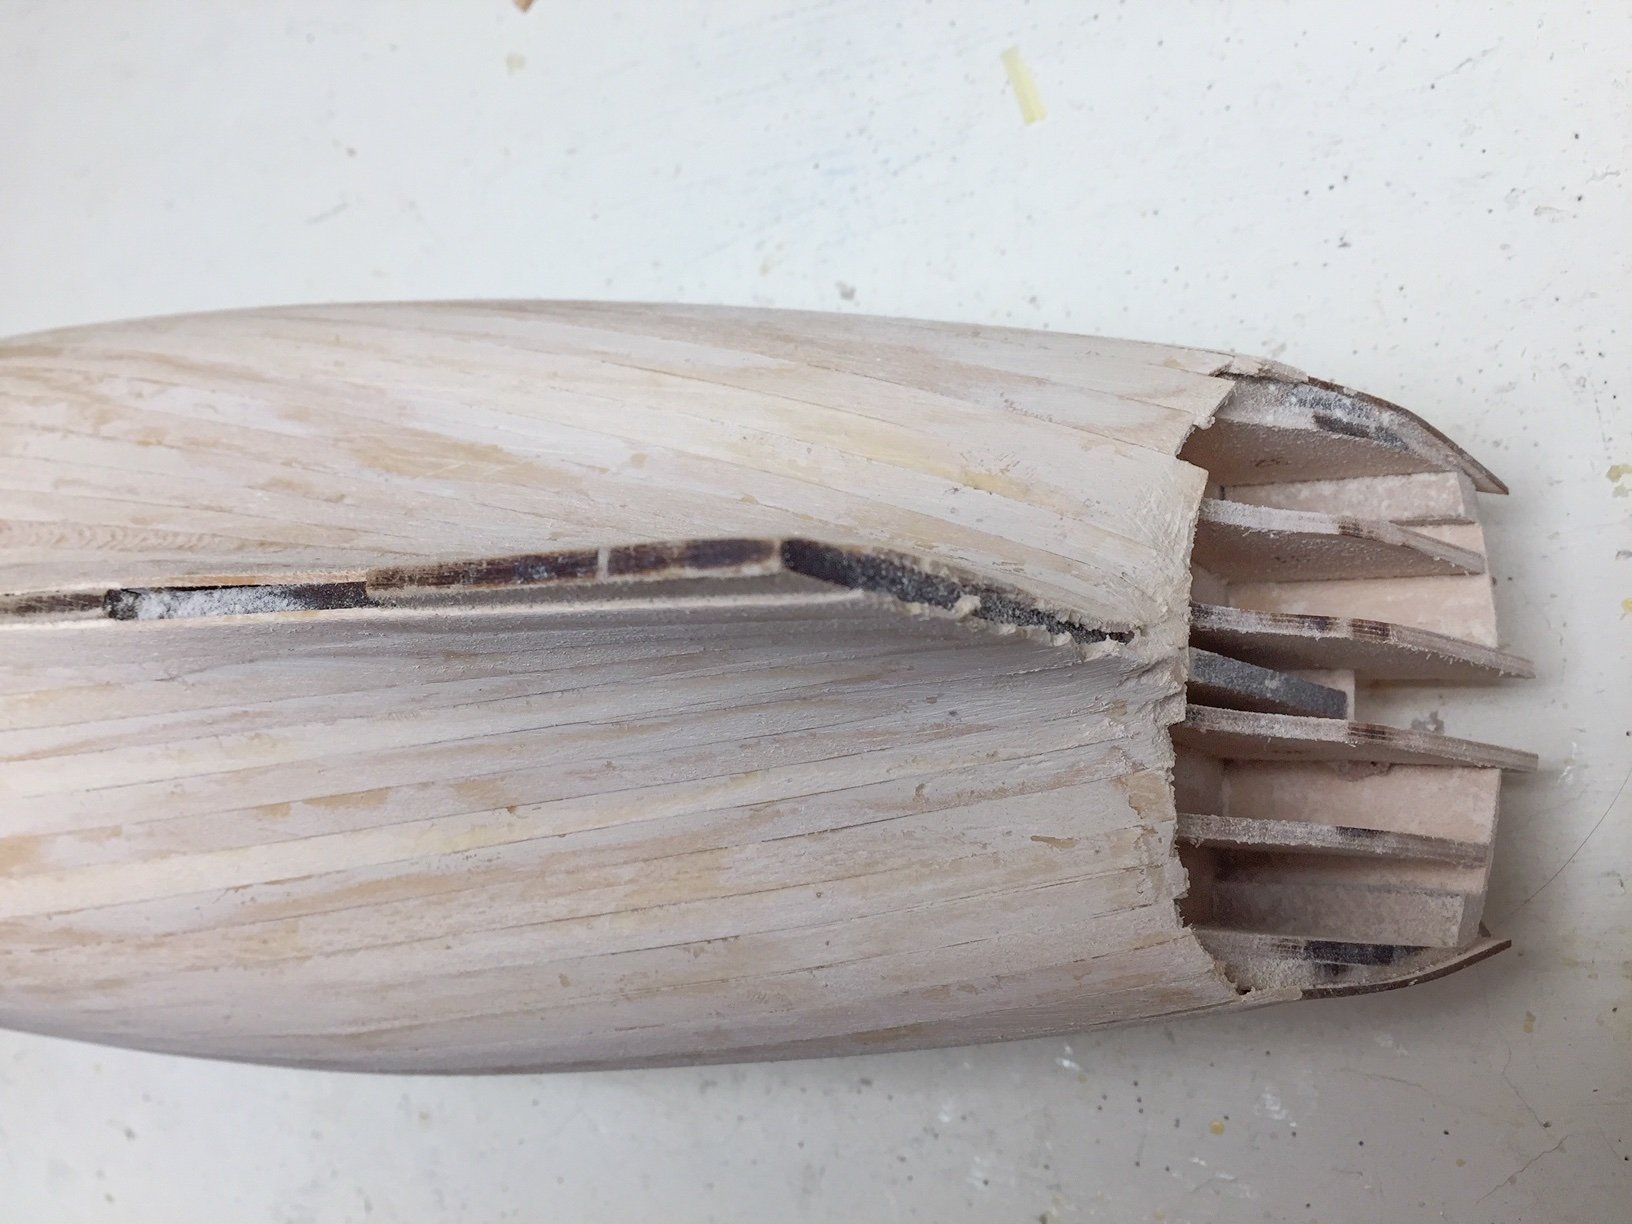
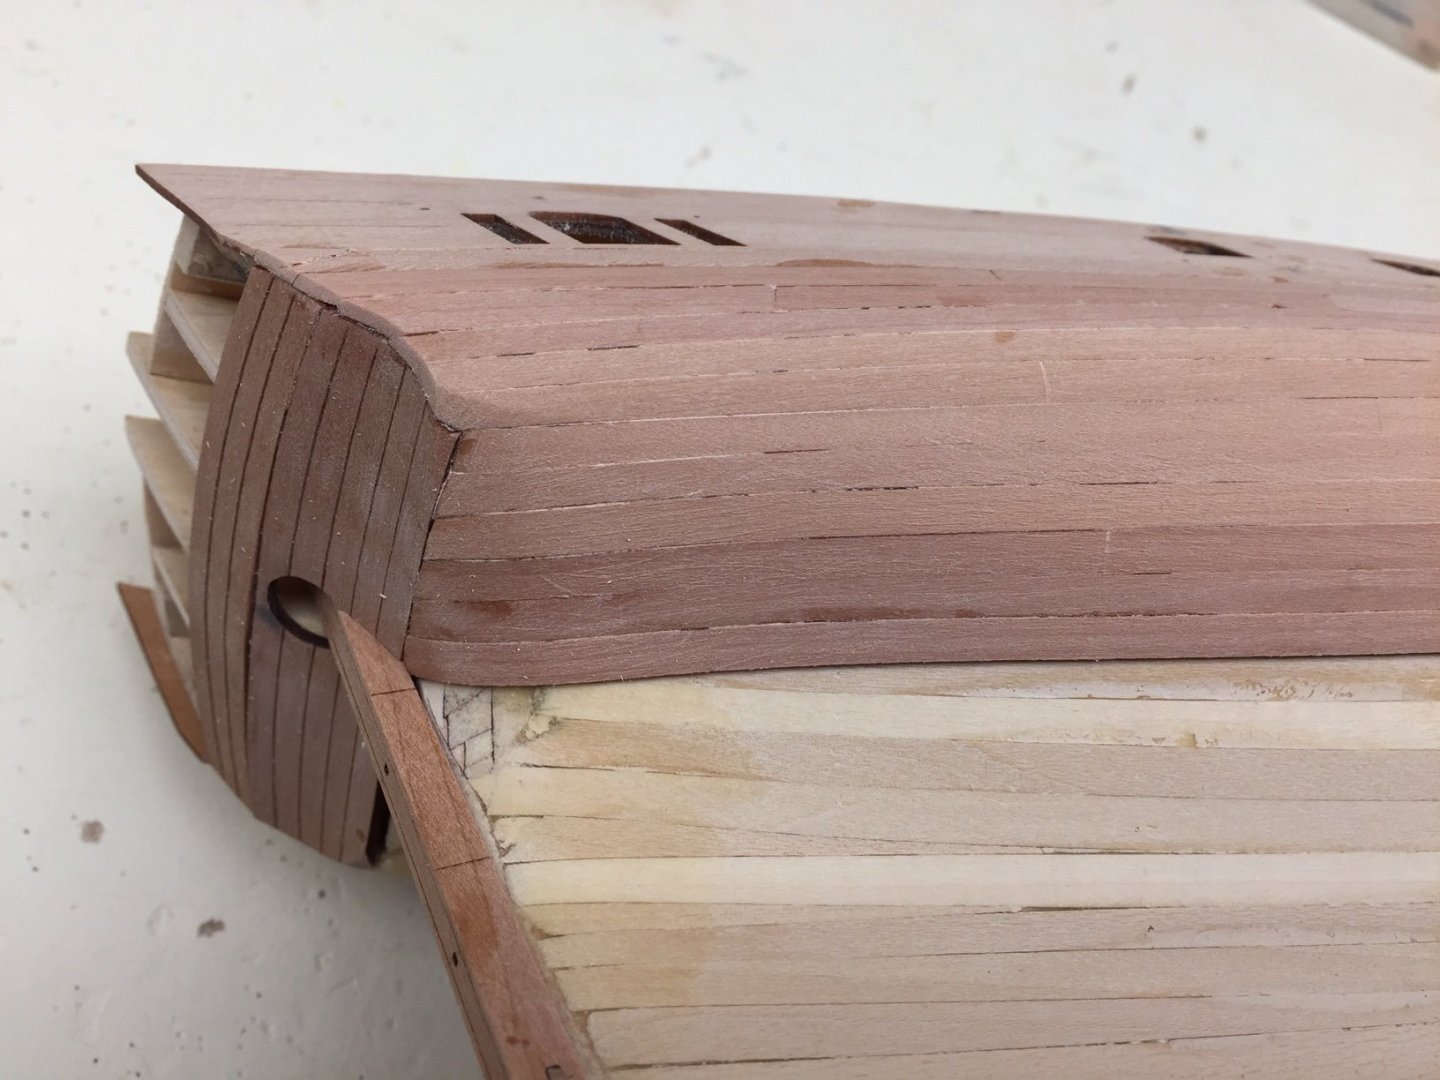
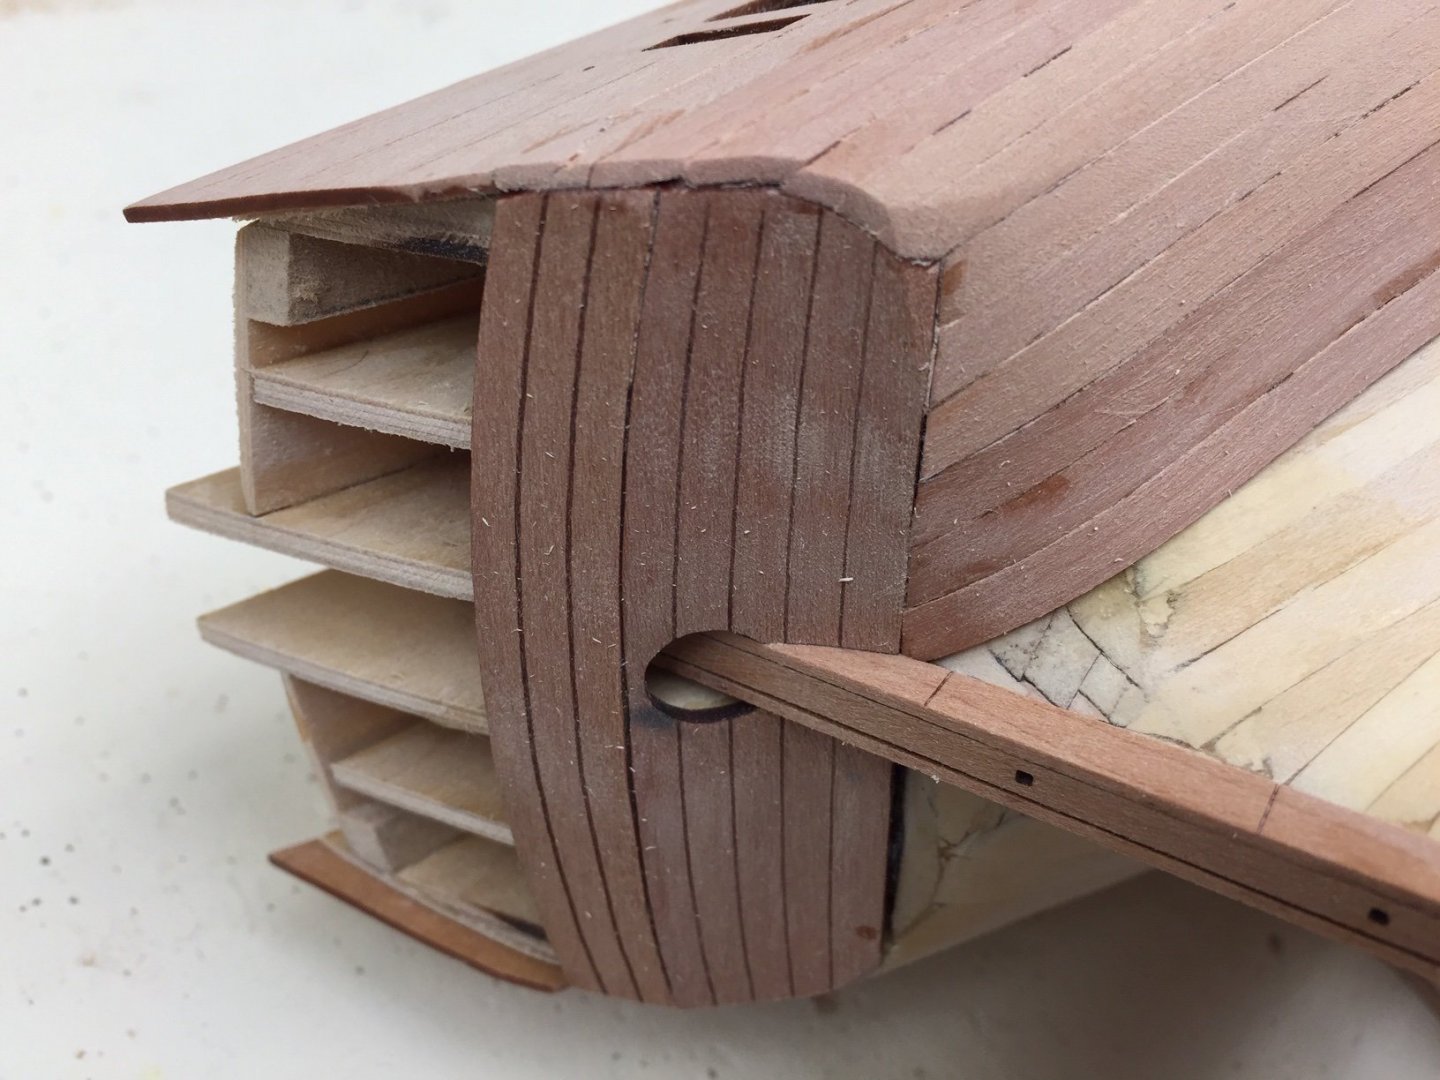
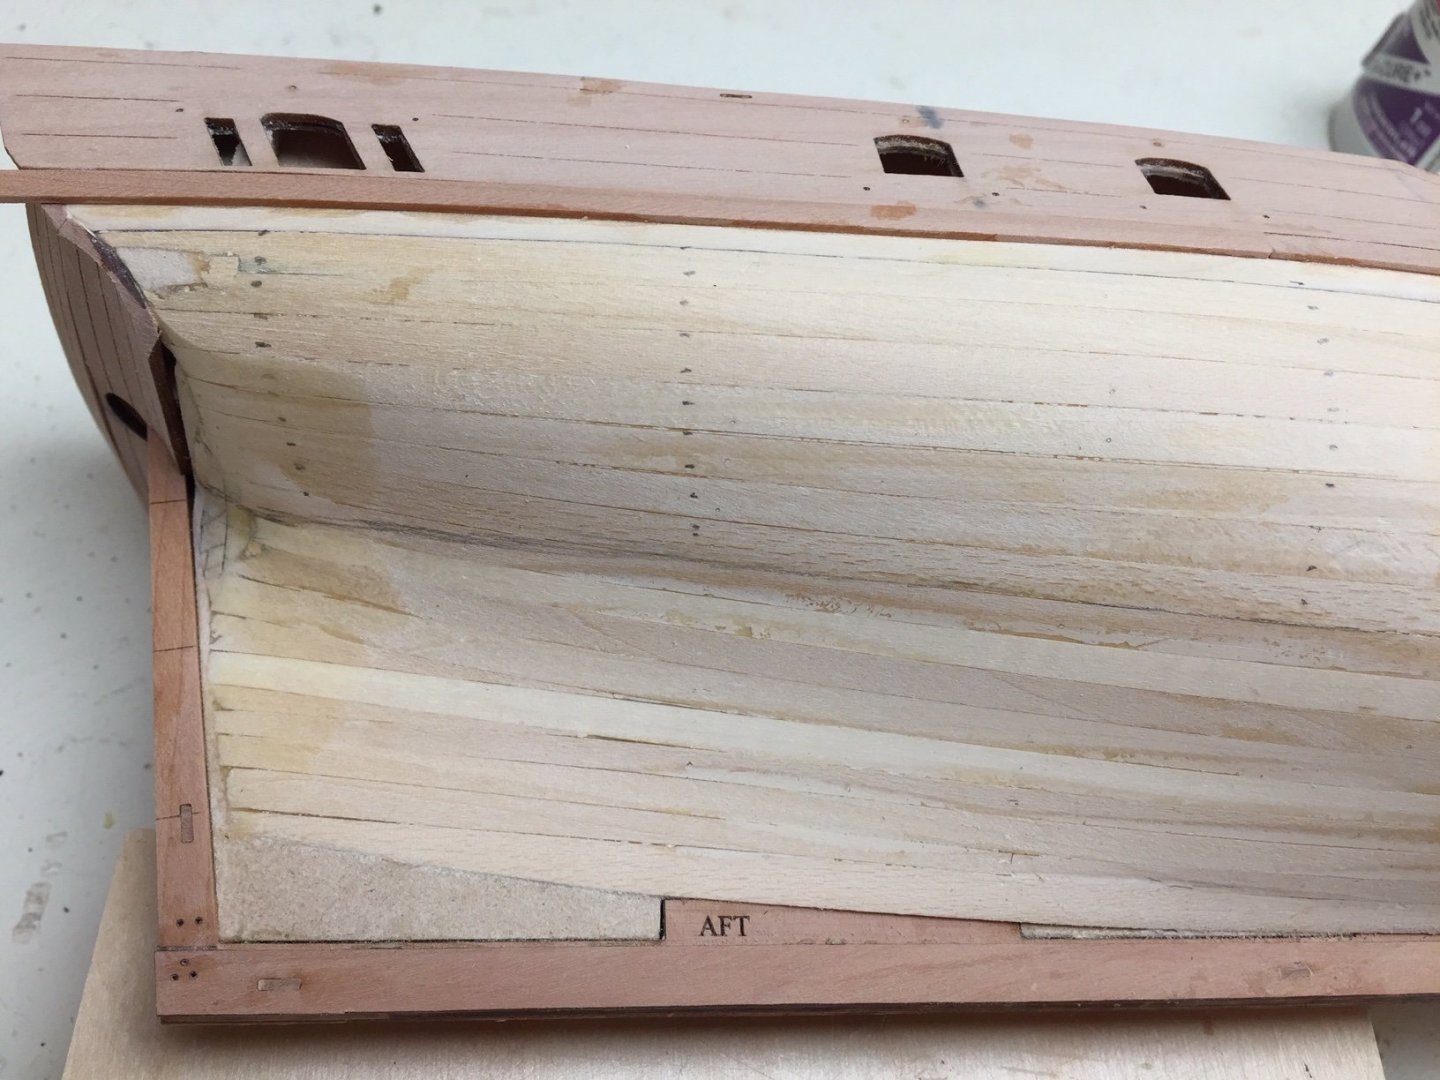
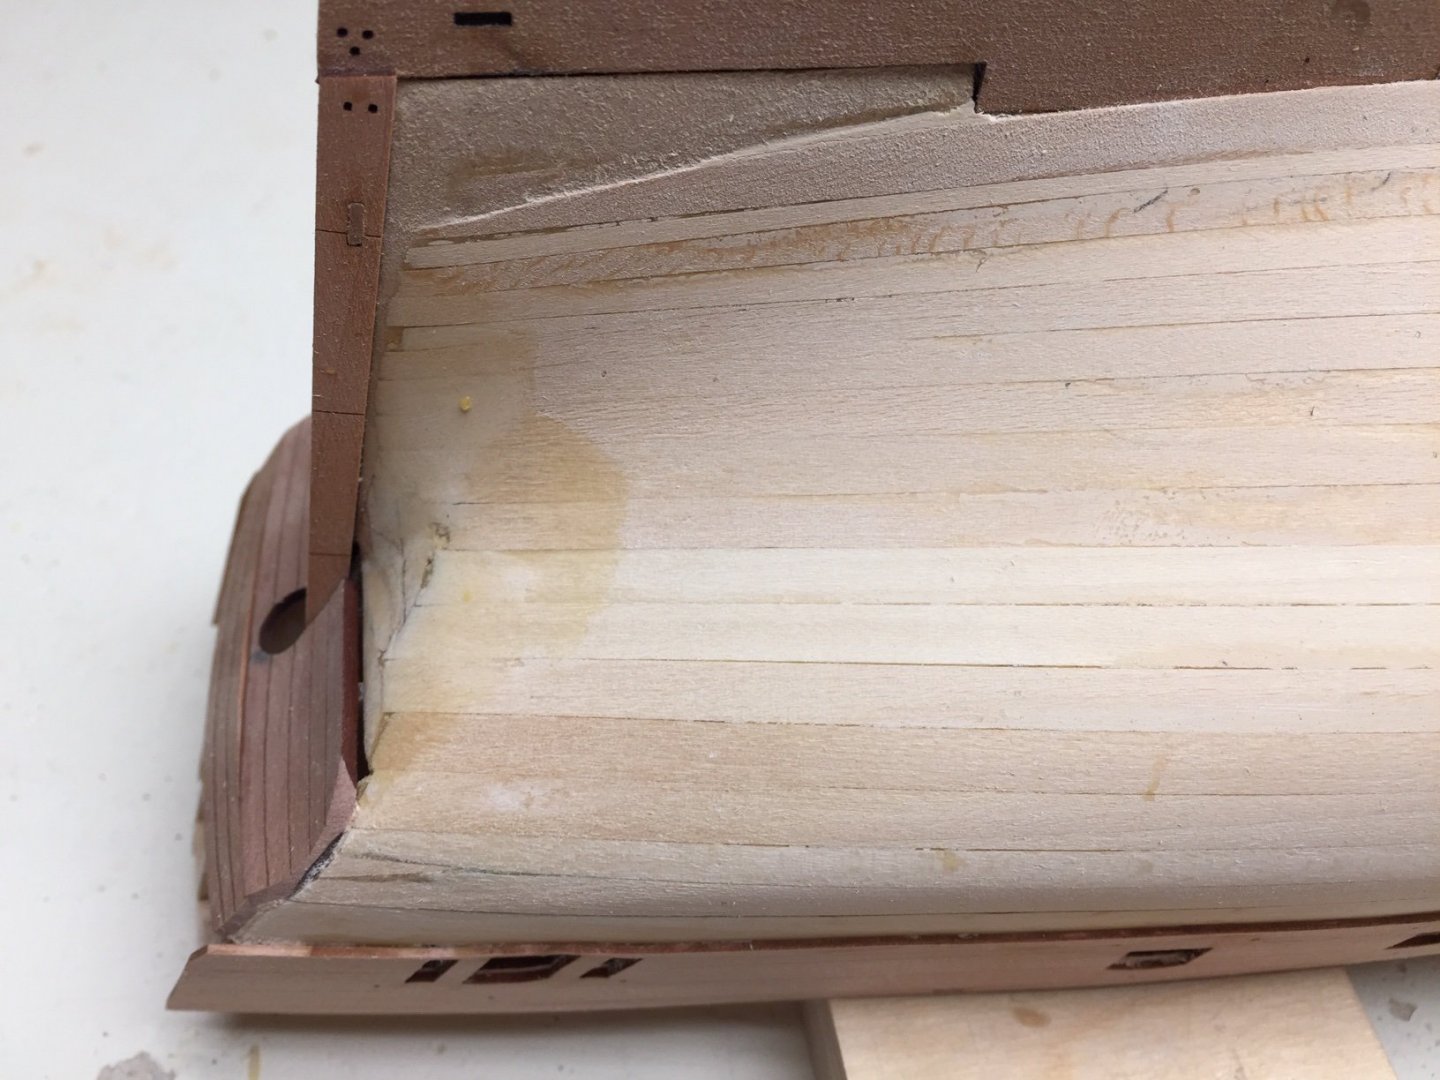
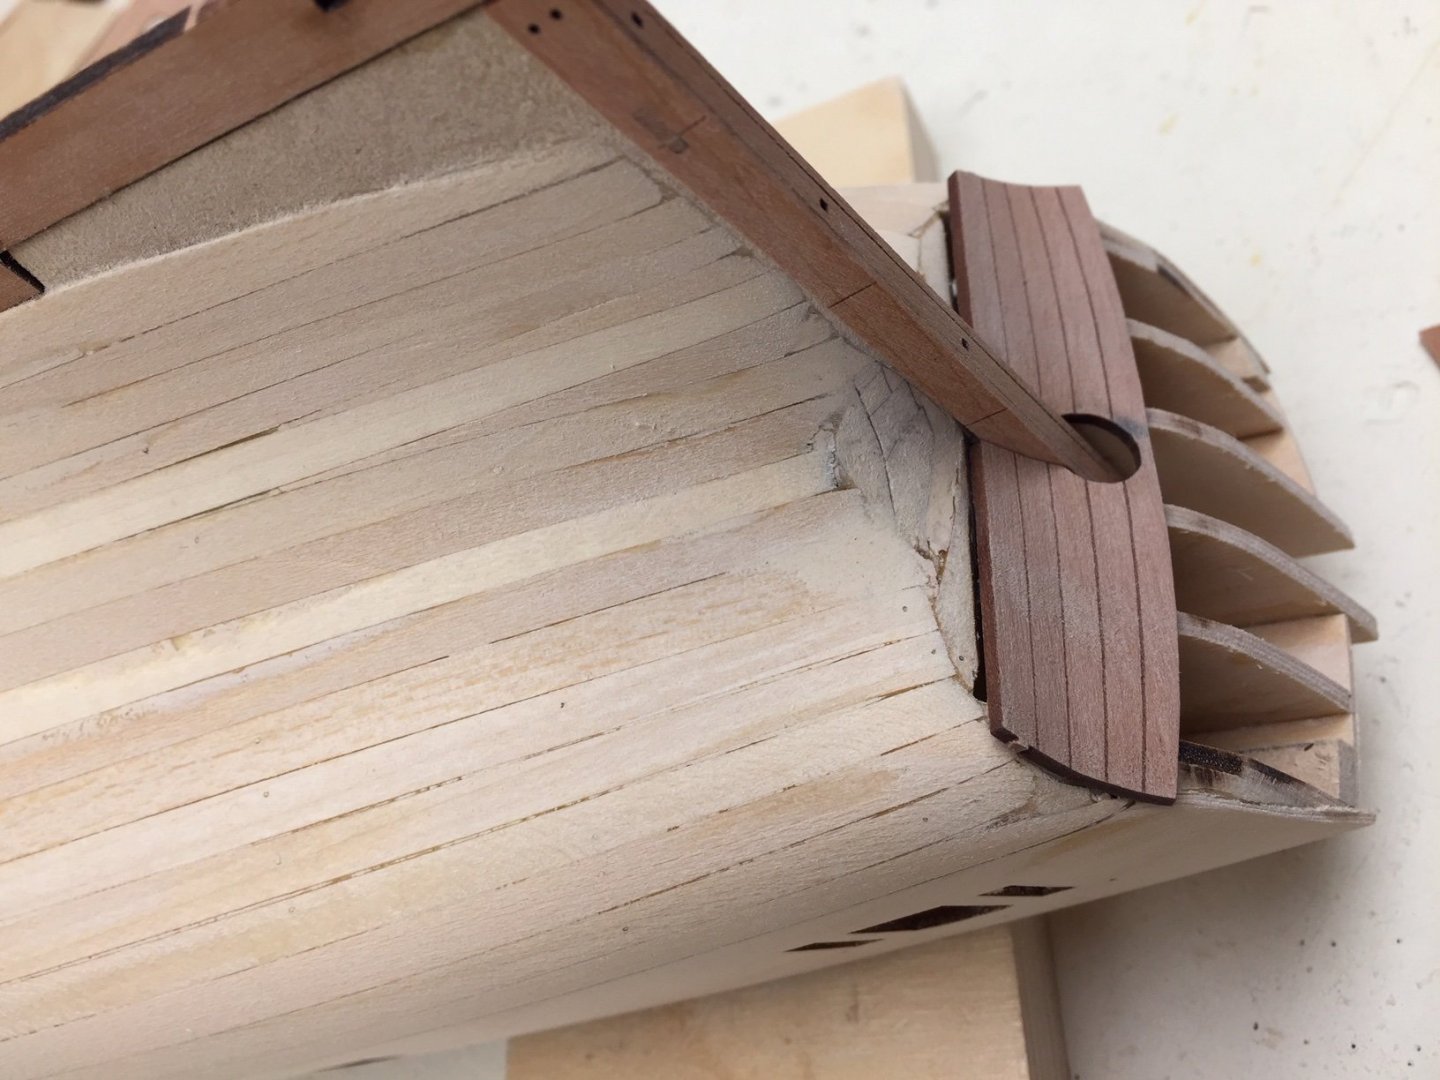
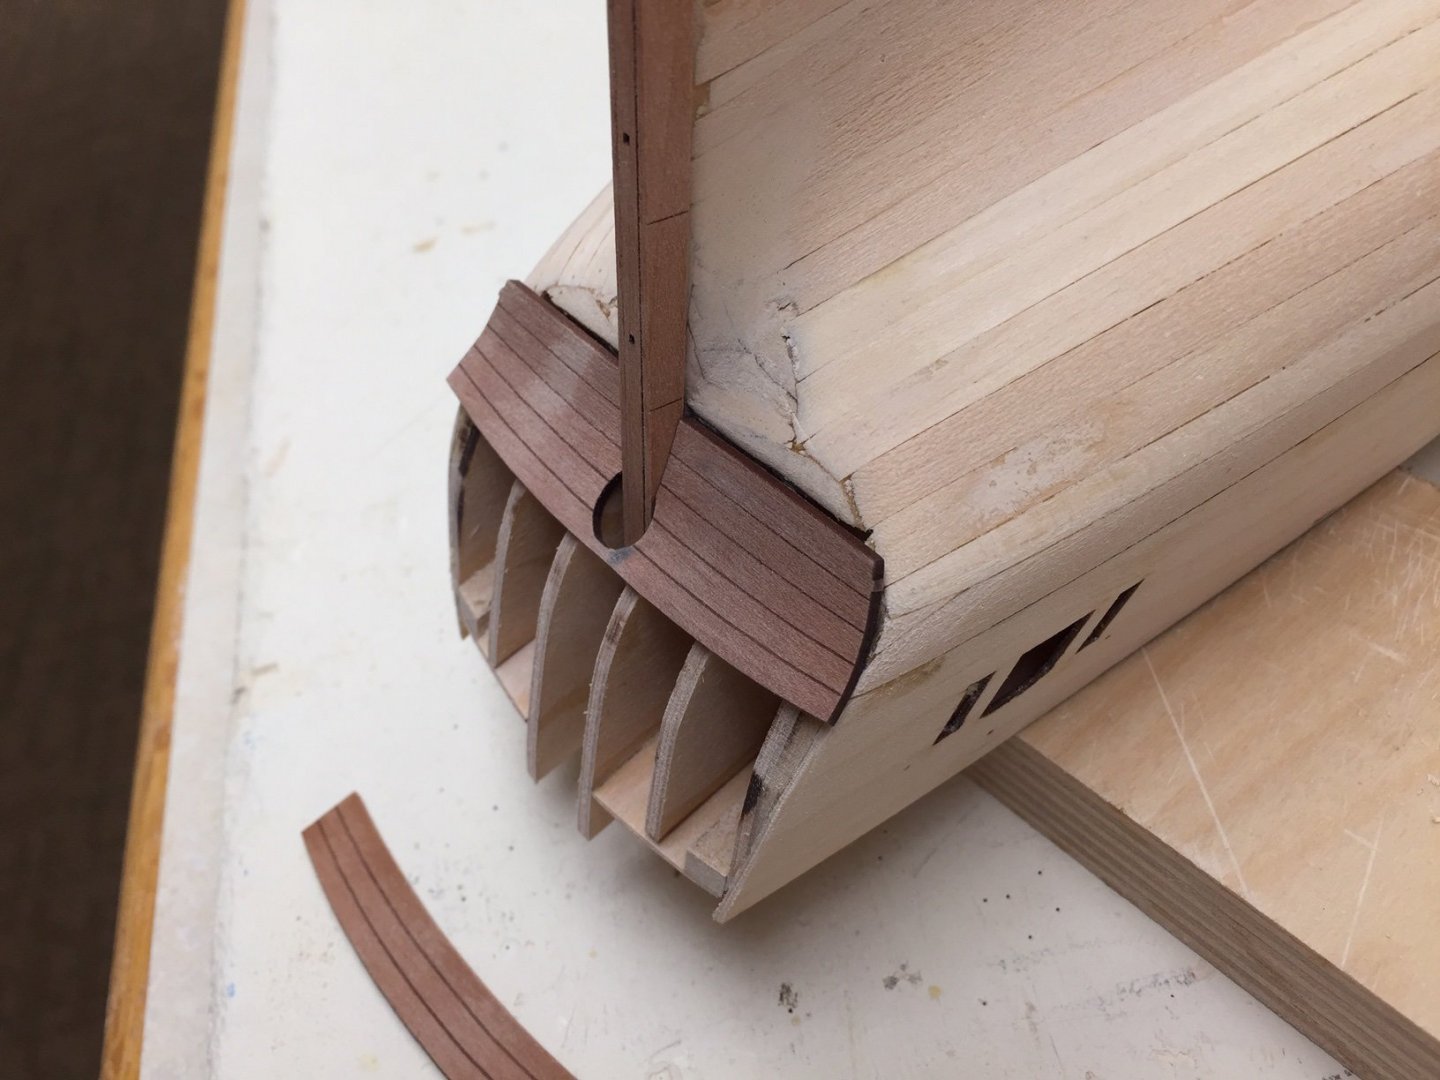
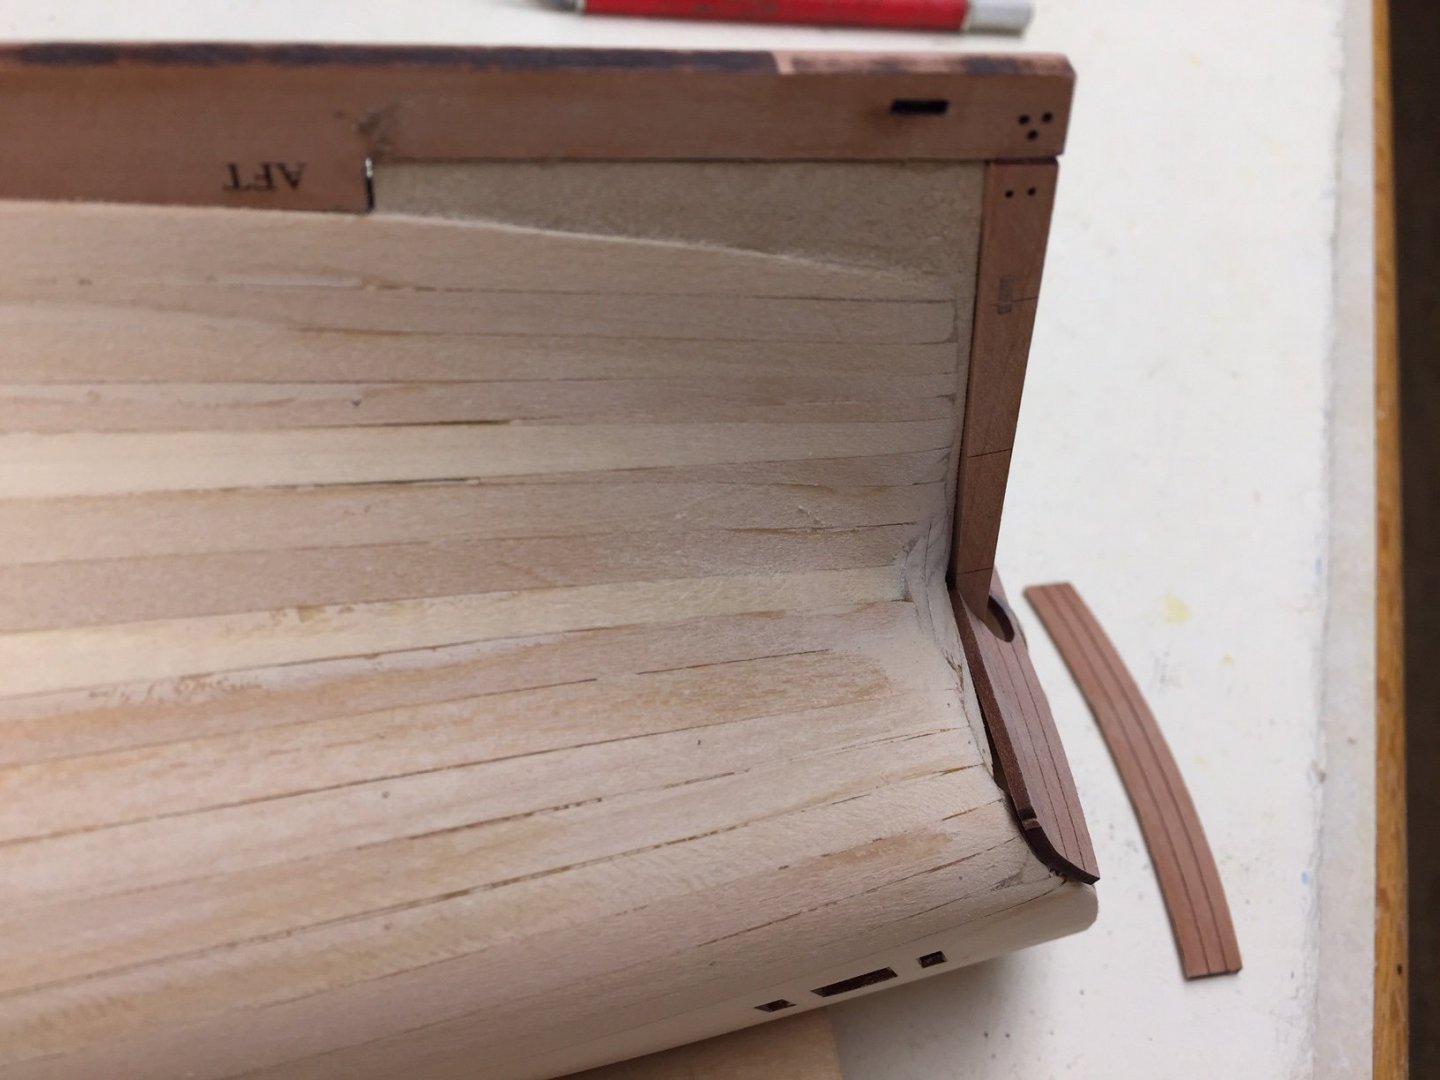
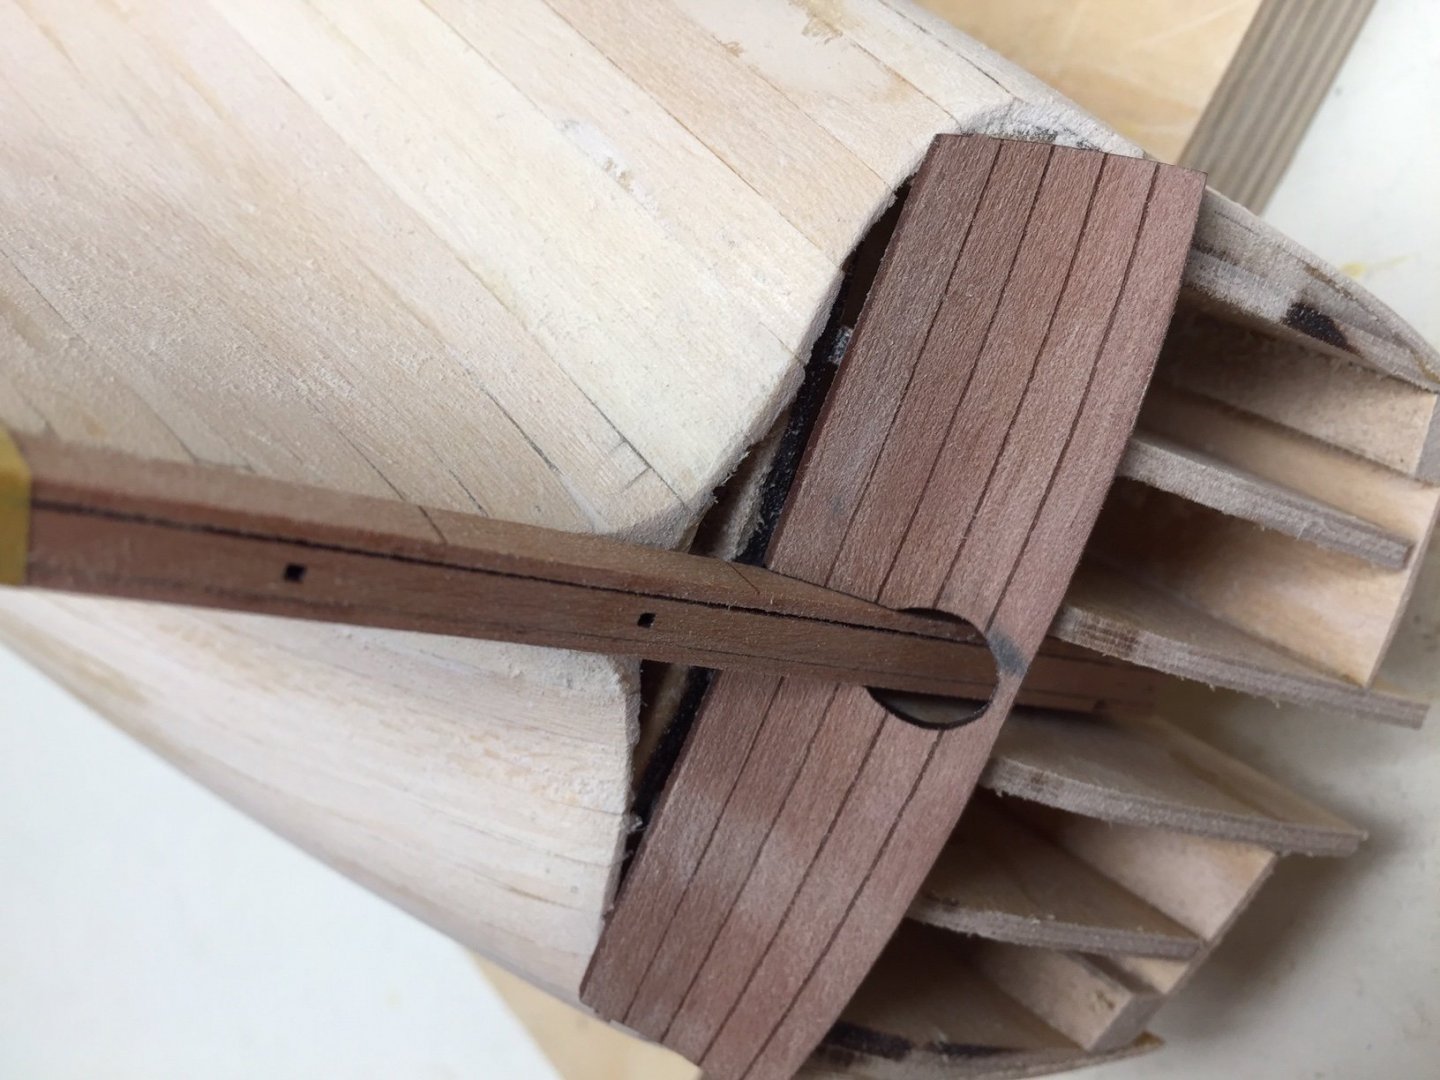
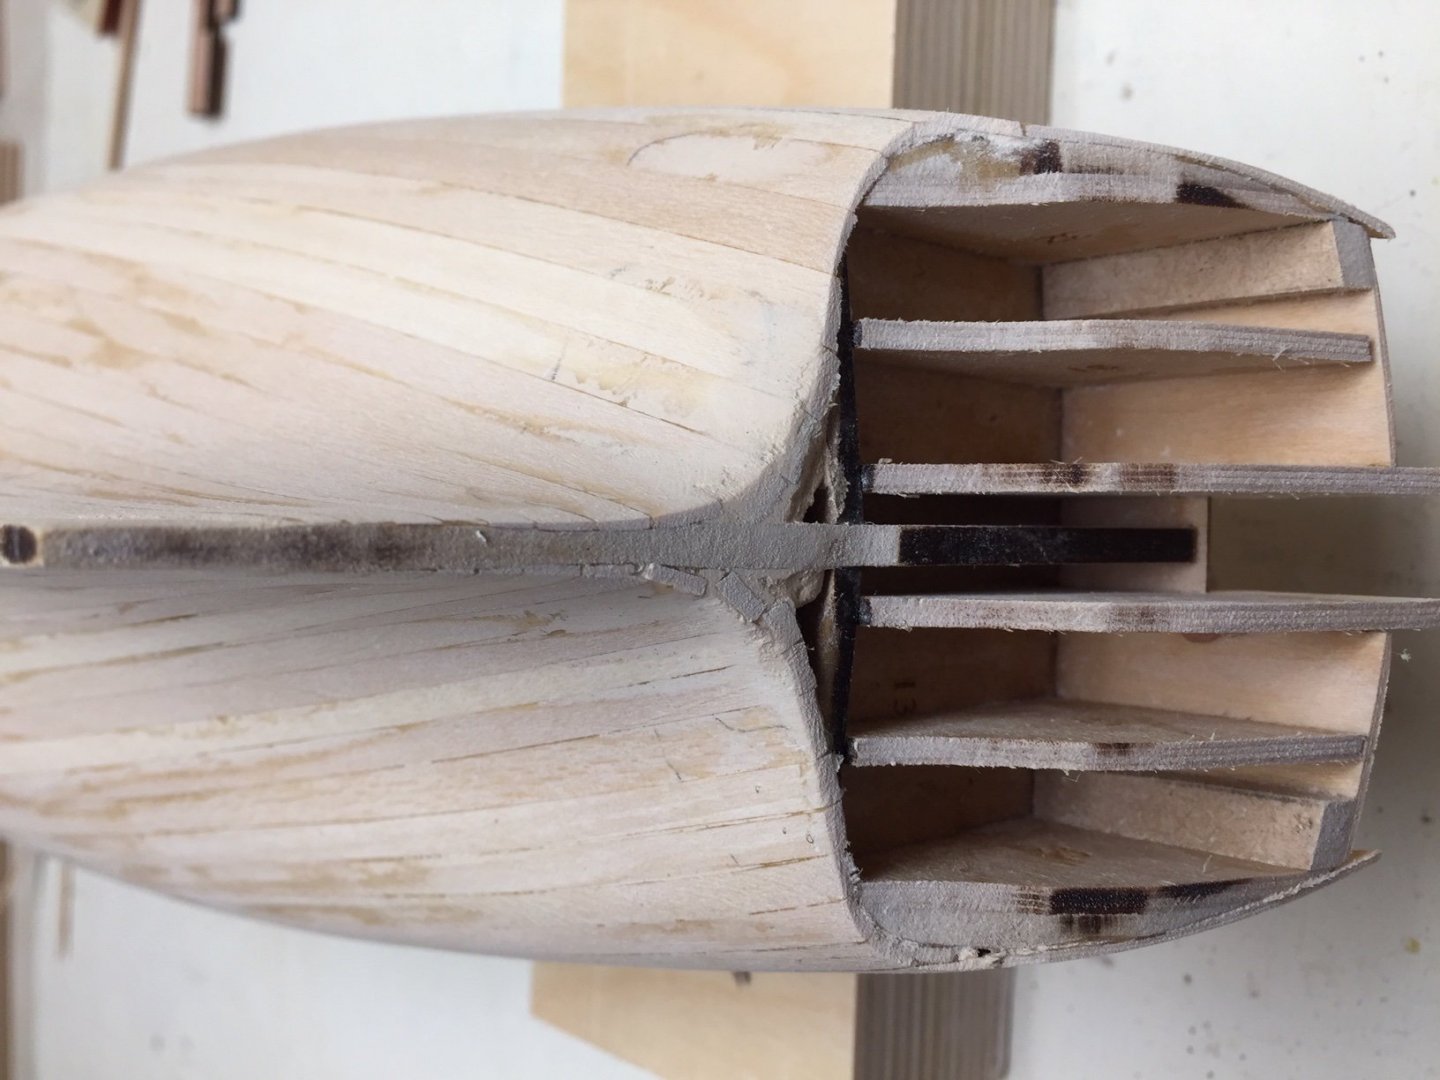
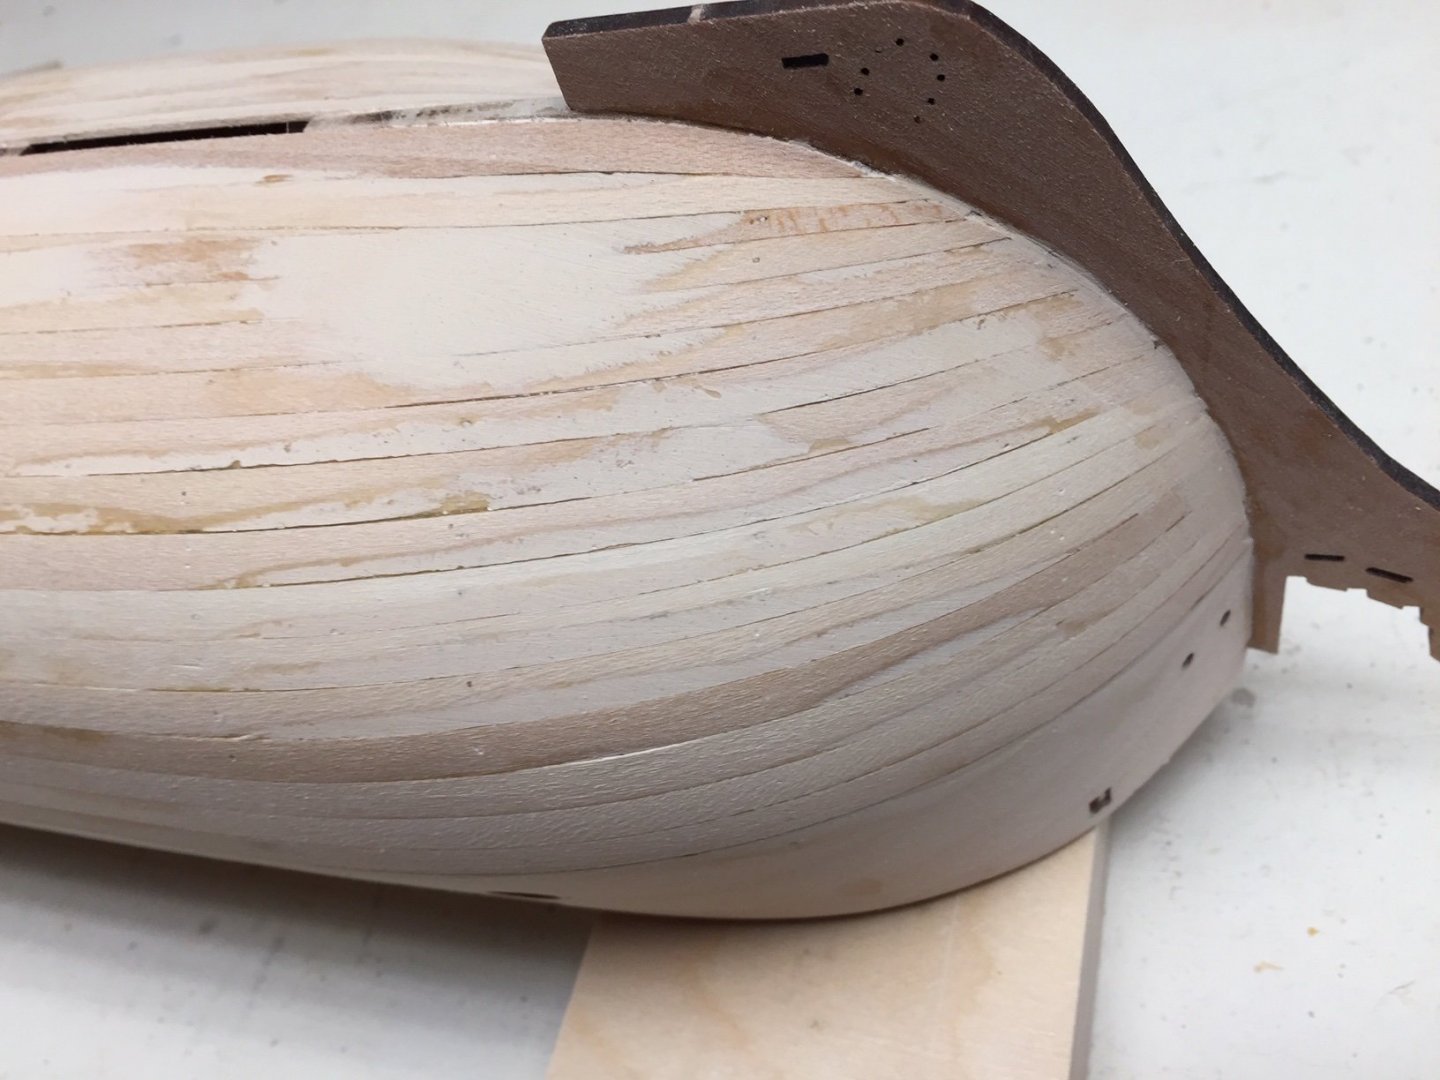
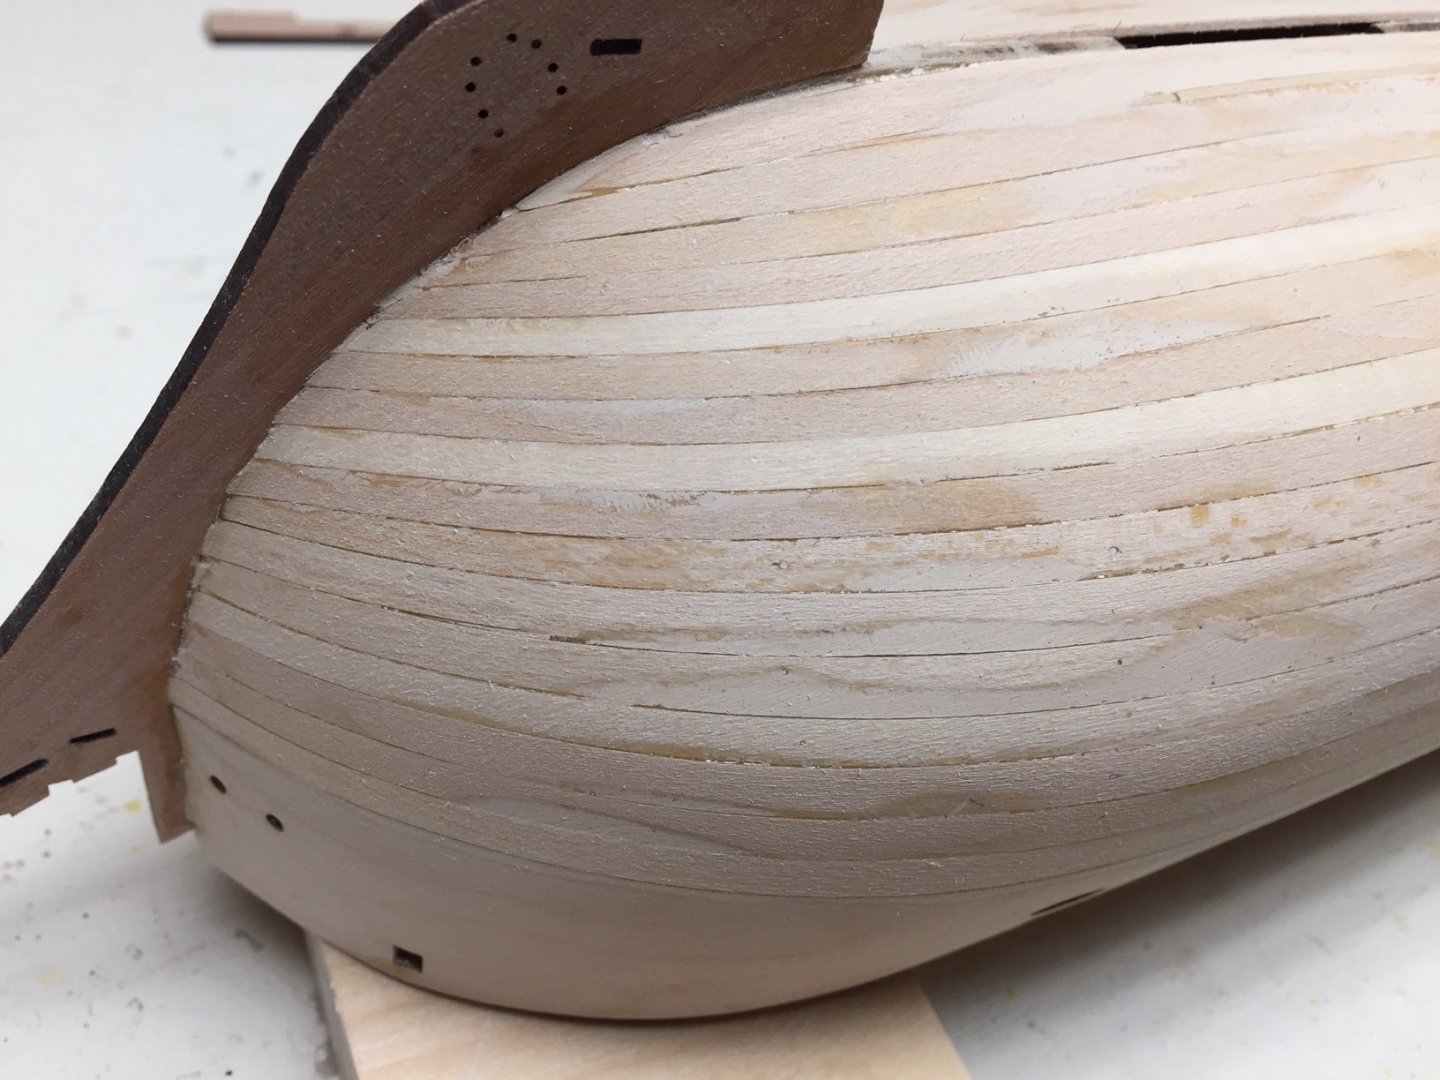
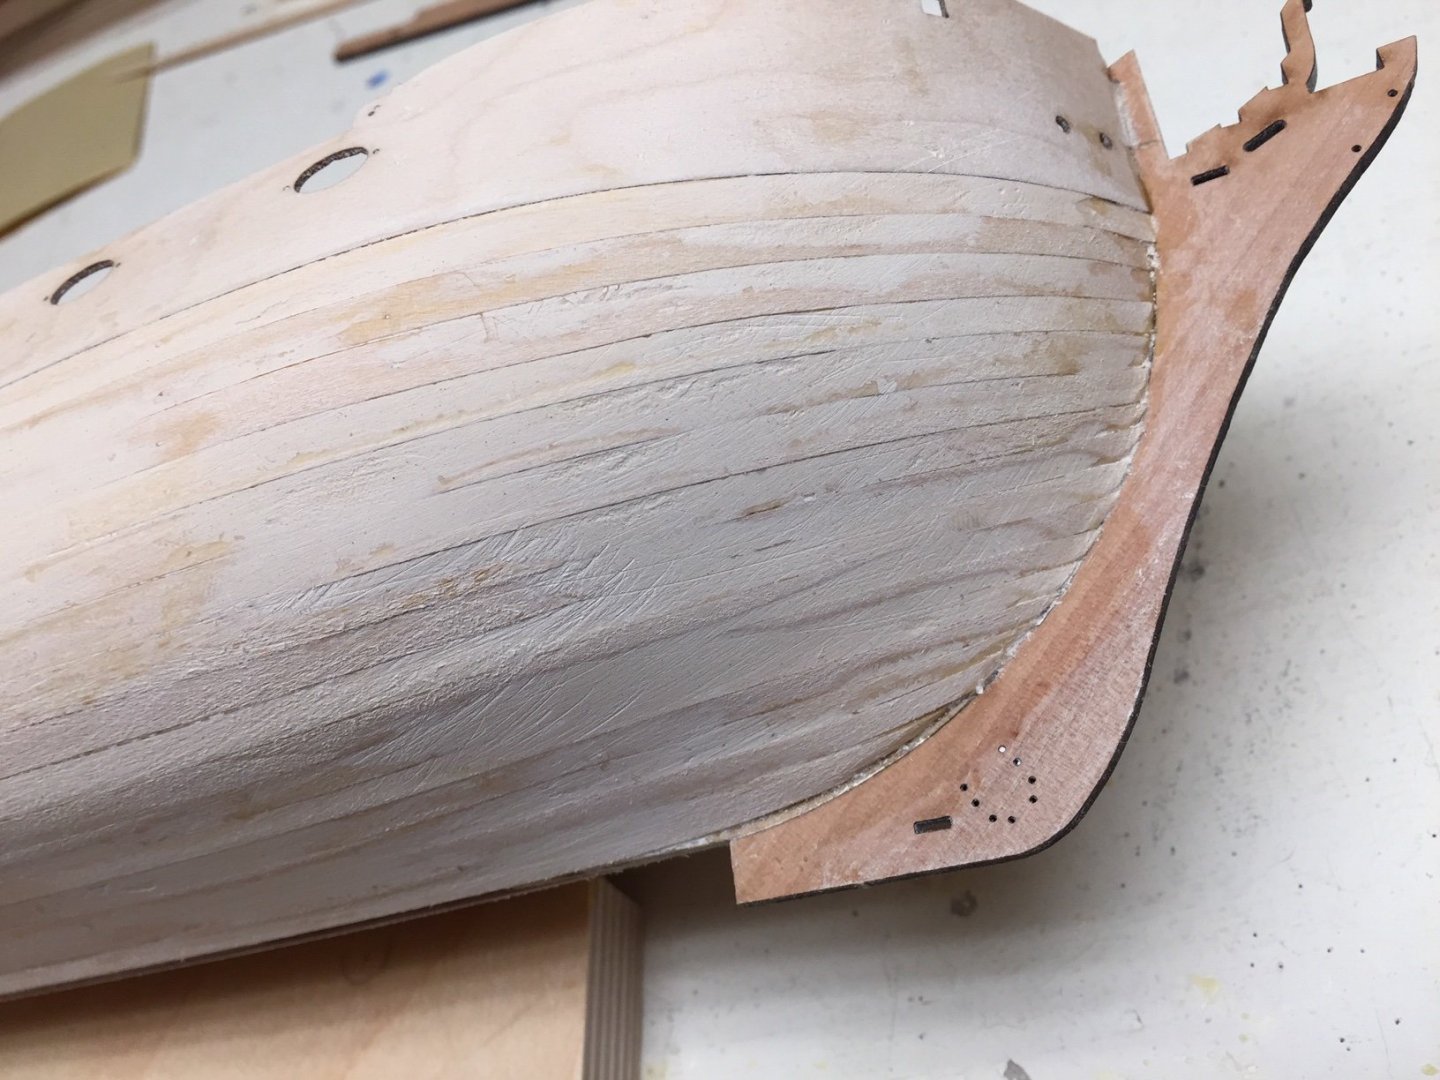
I think I've got the stern planking/counter area fixed. As I trimmed thru my planking I found the filler pieces that were part of the kit. I hadn't sanded them enough when fairing the hull which caused most of the problem. I'd rounded them off smoothly, but it took a lot more for planks to bend toward the counter like they're supposed to. It took some trimming and sanding, and I added some filler, but that probably wasn't necessary. It turned out an easy fix, and I didn't need any extra wood. Here are photos of a test fit of stern post and counter after a little reshaping of the stern. Now I'll be able to have 2nd layer planks fit up against the counter and stern post. If I do it right, the top plank on the stern post will also hit the counter. This is the first model I've built with this type of stern counter. Many thanks for the quick responses to my question. I'm very impressed with this web site and wish I'd gotten involved sooner when building the Syren. There's no one around here that build model ships that I know of, and it wouldn't surprise me if there's no one in the state that does this, so I've worked very much on my own until this year. You all have no idea how nice it is to get suggestions on how to do things and lots of encouragement.
-
Thanks so much for your quick response. I heard from James H also, with a larger version of one of the photos. For some reason I didn't realize how the planking curved into the counter. I saw how it tapered to the stern post lower down, but got confused in the stern post/counter joint, and didn't understand how 2nd layer of planking fit in that area. This morning I was thinking I can trim back some of the planking a little, and put in some scrap wood pieces and shape them so they curve into counter and fit into the stern post. Then I saw James' response said the same, so I've got a plan of attack. Might be a relatively easy fix. All I need is a reasonably smooth surface for 2nd layer of planks. It doesn't have to look pretty at this stage.
- 345 replies
-
- 1
-

-
- Duchess Of Kingston
- Vanguard Models
- (and 1 more)
-
Wow! Thanks James for the quick response! I have been coming to the same conclusion this morning. I think I can trim back existing planks and put in some scrap wood blocks and shape it the way it's supposed to be. This may end up being a relatively easy fix. I found a small drawing in a book I have that shows planking in this area, and it's not like I thought. I should look at this book more, but it's so detailed, I get lost pretty easily. I can see how the 2nd layer of planking would fit over yours and look like it's supposed to. Just my inexperience. I never realized how planking in this area of stern post was done. Always learning! Thanks again!
-
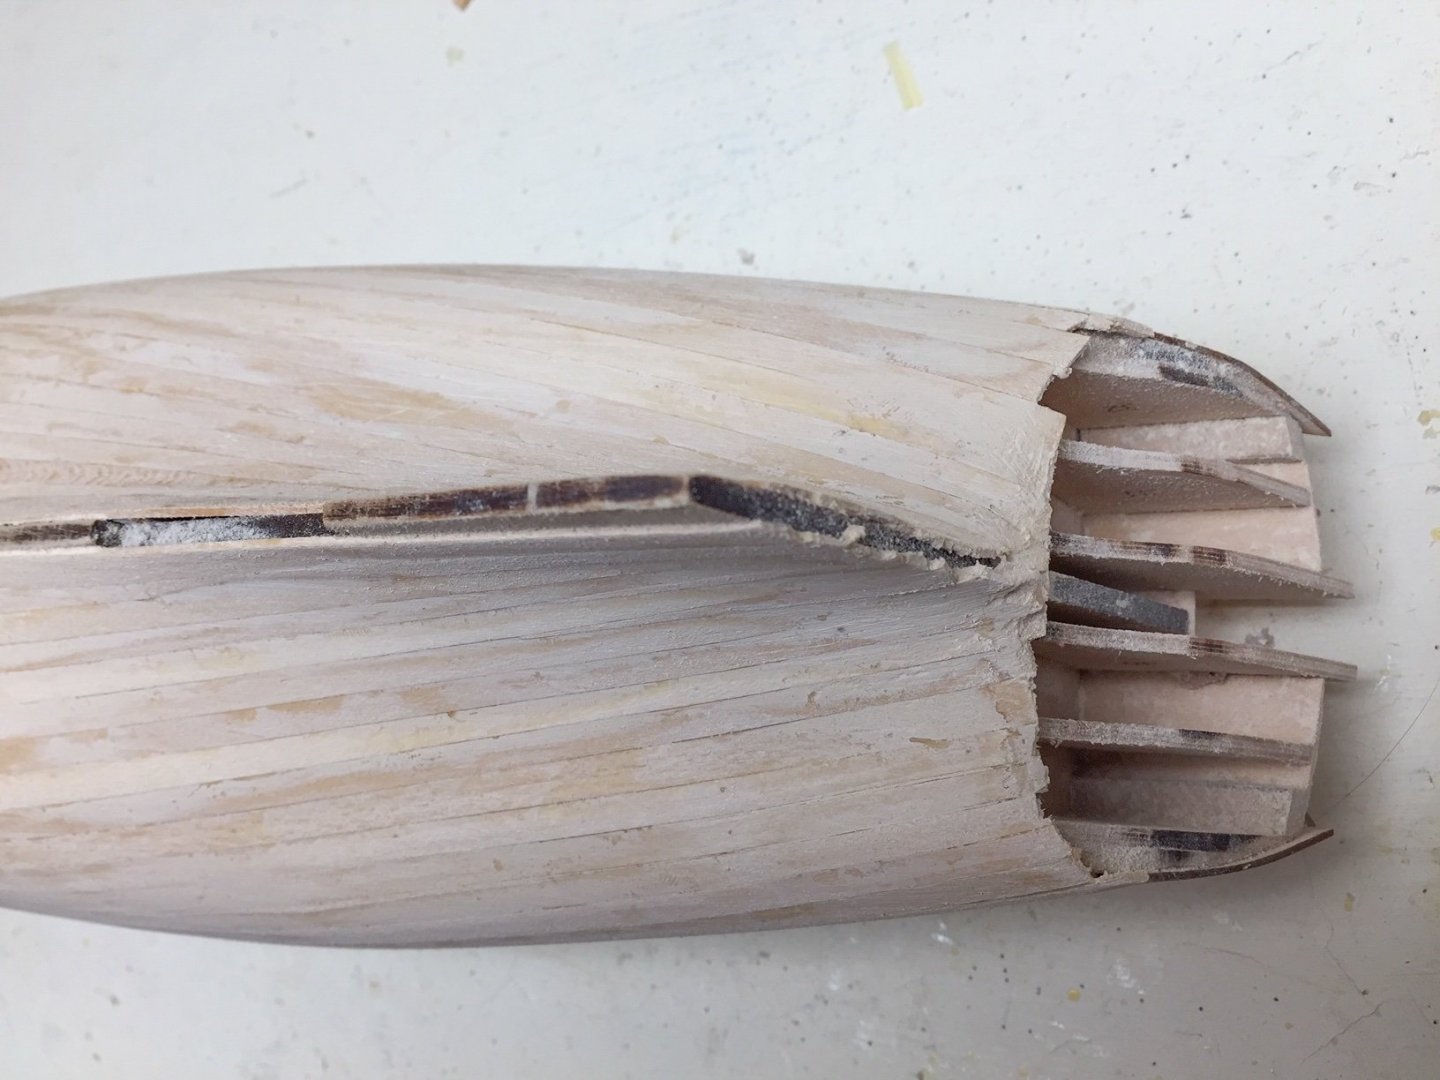
I agree with you Thukydides. Bulkhead fairing was fine, but I found it took a lot sharper edge bends than I originally thought, and each plank required a little different edge bend. I was just starting to get the hang of it when I was done. Hoping not to forget on next model! Now I've got another problem to deal with. I did some test fits of the stern post and counter. Not quite sure how to explain this, but in the area where the planks curve from the stern post to the counter, I have them forming a concave curve. Looking at the few pictures I can find on other logs of this area, it looks like others have kept planks along counter and then have them making a 90 deg turn at the stern post. So the planks transition from the concave curve to a sharp 90 deg joint between counter and stern right at the stern post. Mine don't do that and if I glued stern post and tried to plank 2nd layer, the planks wouldn't hit stern post. They'd be hanging off the stern. In fact for the ones on the counter, I'd be doing good to get the planks hitting the edge of the counter like the side planks will do. Thinking I need to trim back first layer and redo the planking or add some filler wood to get things to match up better, so when I add the 2nd layer, they'll fit to both the counter and stern post. I didn't put much of a downward bend in the first layer planks right at the stern. It would be a real sharp bend to hit the counter, which I could have done, but didn't. My inexperience shows, not knowing how this stern section goes together. Pictures in the manual look like 1st layer planks were almost cracked to get this bend in. I saw that, but didn't match it thinking it was something that would be trimmed off. Has anyone else run into this?

-
We are about at the same place building Duchess. Yours is looking good. I'm looking at how the stern post and counter fits and don't like the how my first layer of planking looks against the stern post. I've been looking at other build logs, and pictures of stern are few and far between. I allowed the planking to follow the aft bulkhead so there is a distinct concave curve to it looking from aft. But when I put the stern post in there, the planking doesn't hit it up near the counter, so a 2nd layer wouldn't either. It looks great lower down, but not up near the counter. I'm inexperienced and never have quite understood this little area of the stern. Looks like others have bent some 1st layer planks a little inward to the stern post and others toward the counter. And one plank in between has angle cuts with one side along the counter and the other along the stern post. I've sanded on my some, but not quite sure what to do other than trim some out and redo a small area of planking. How does yours look with stern post sitting in there? For me this is a tricky area.
-
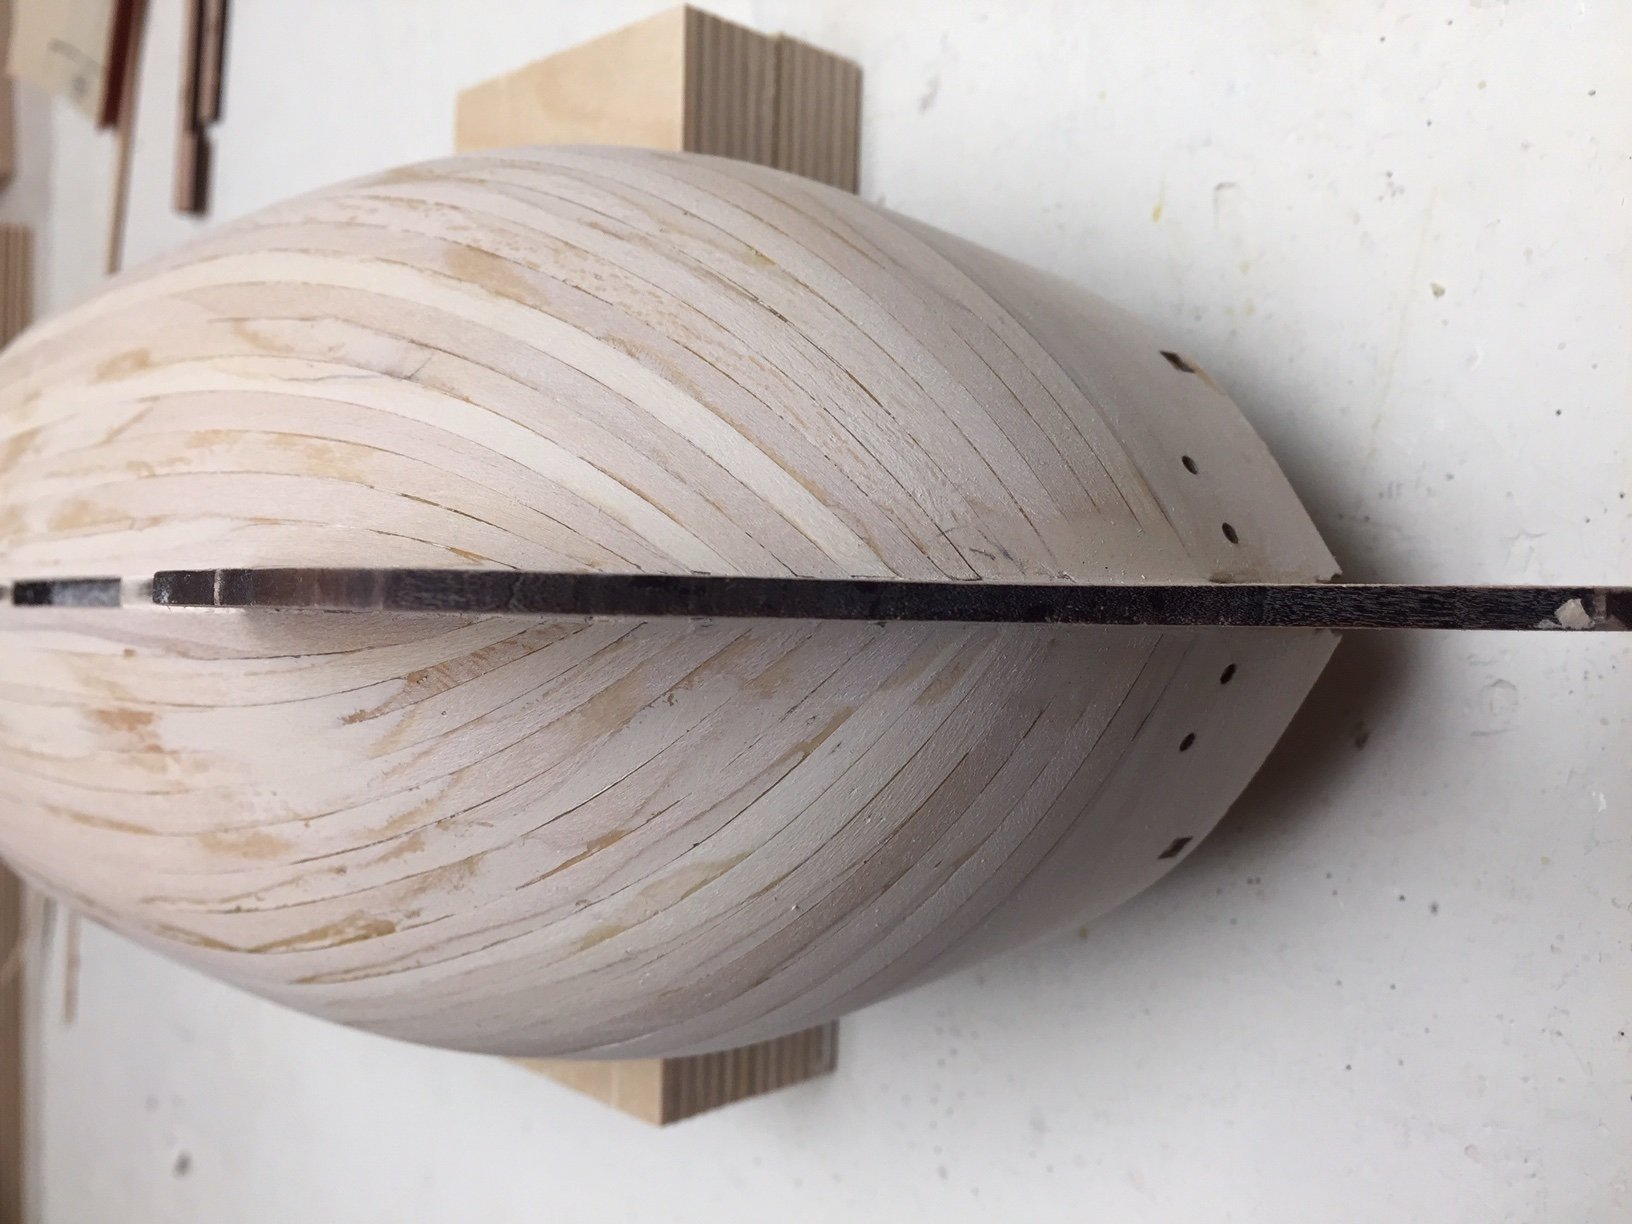
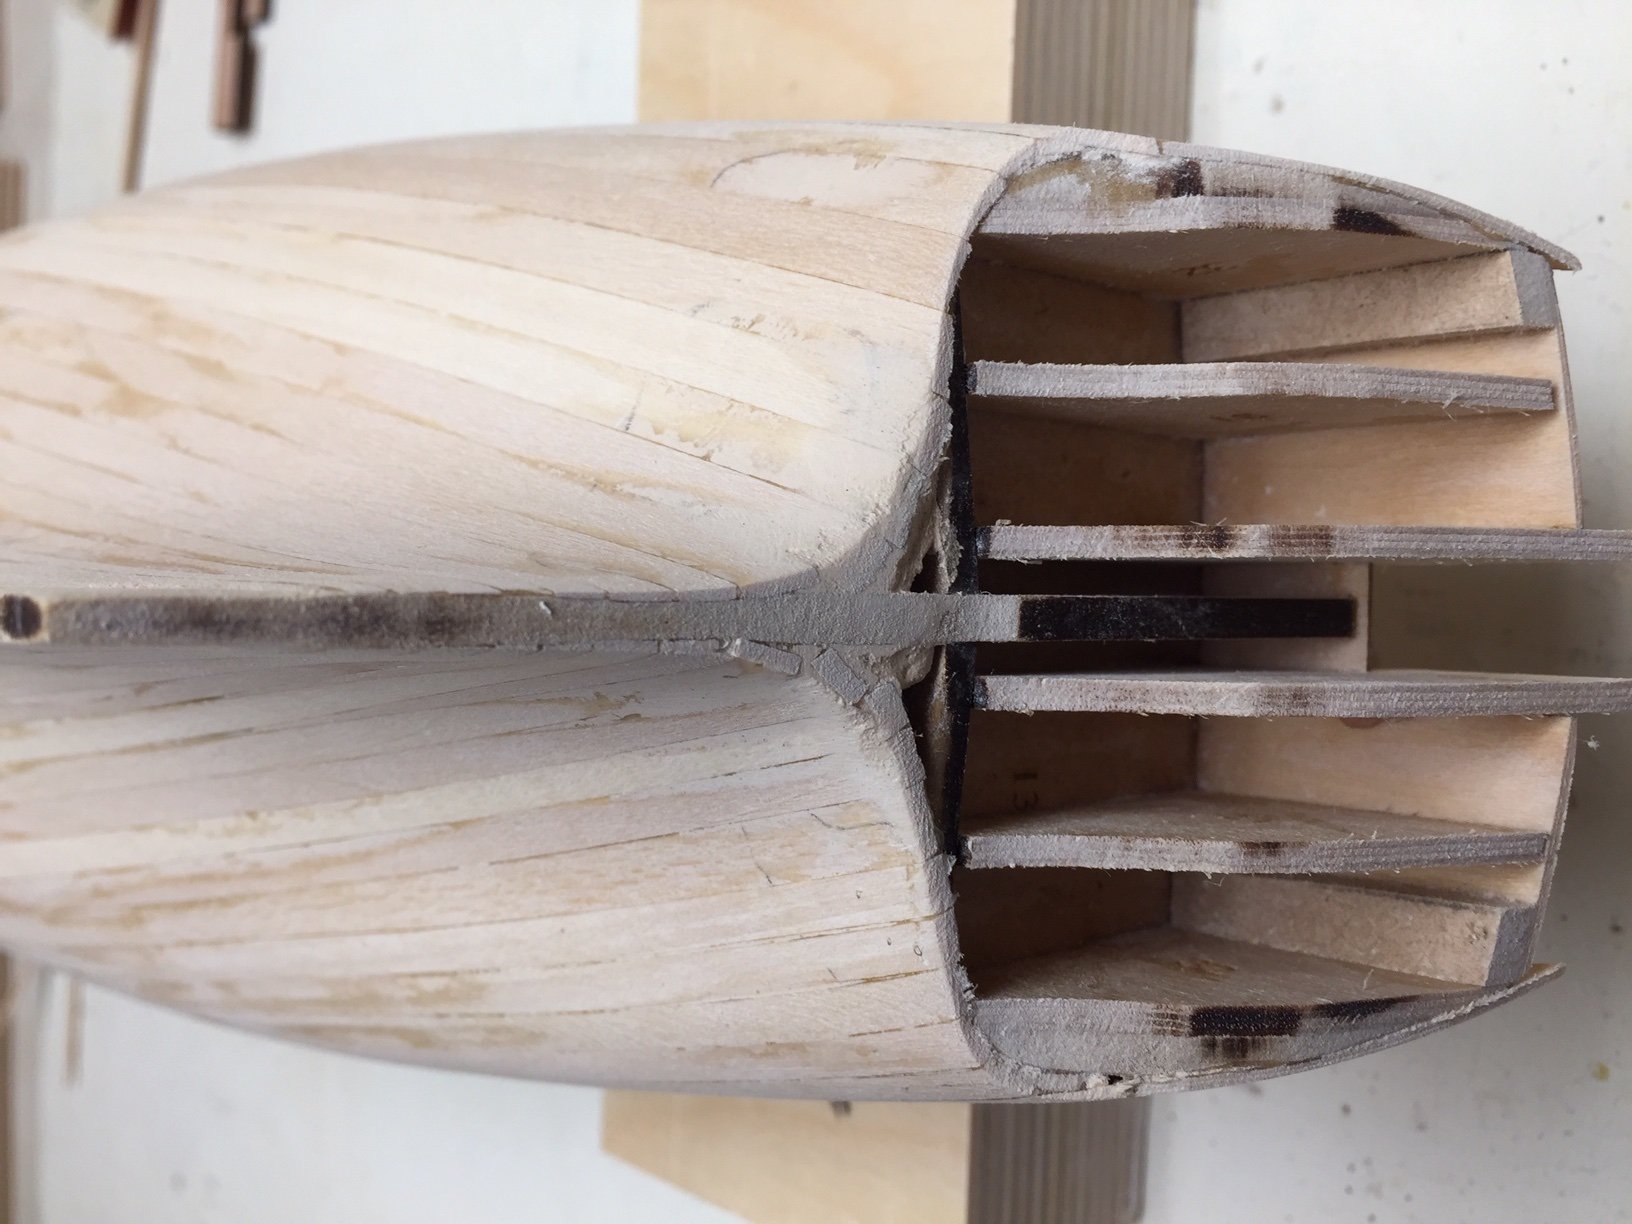
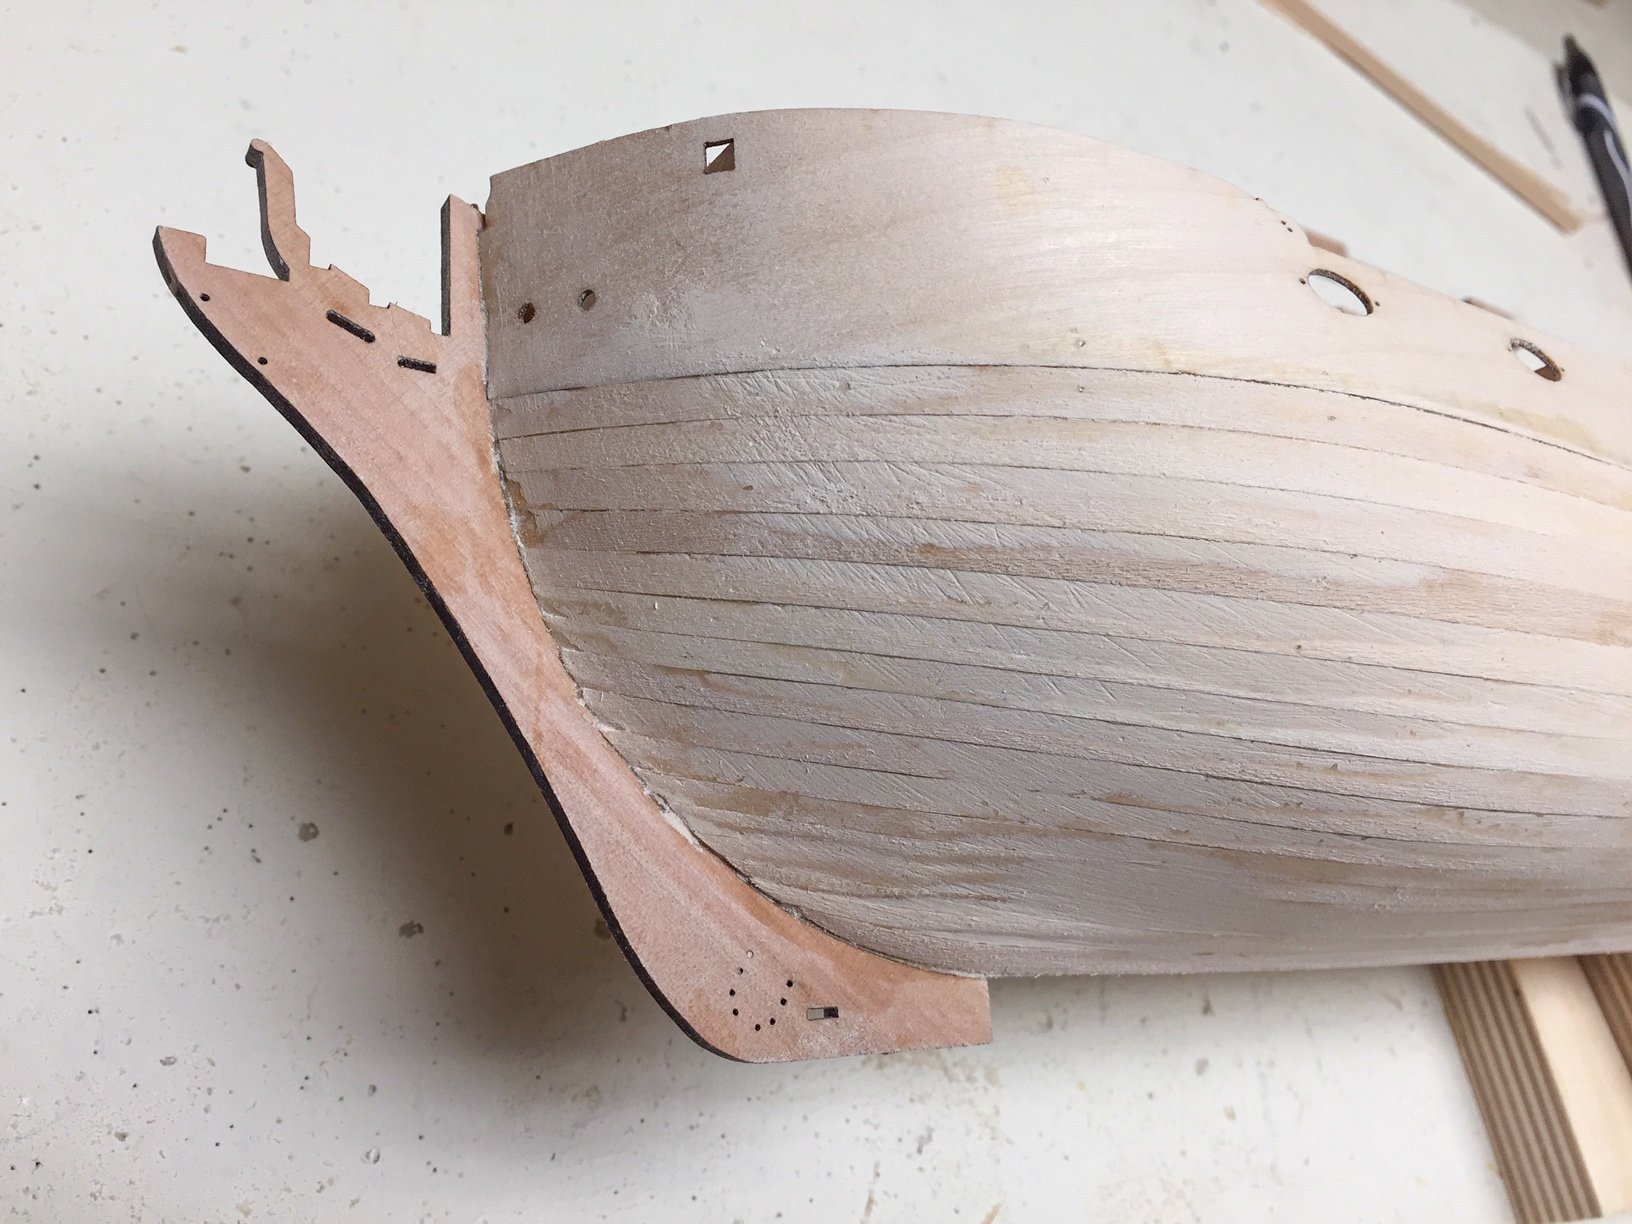
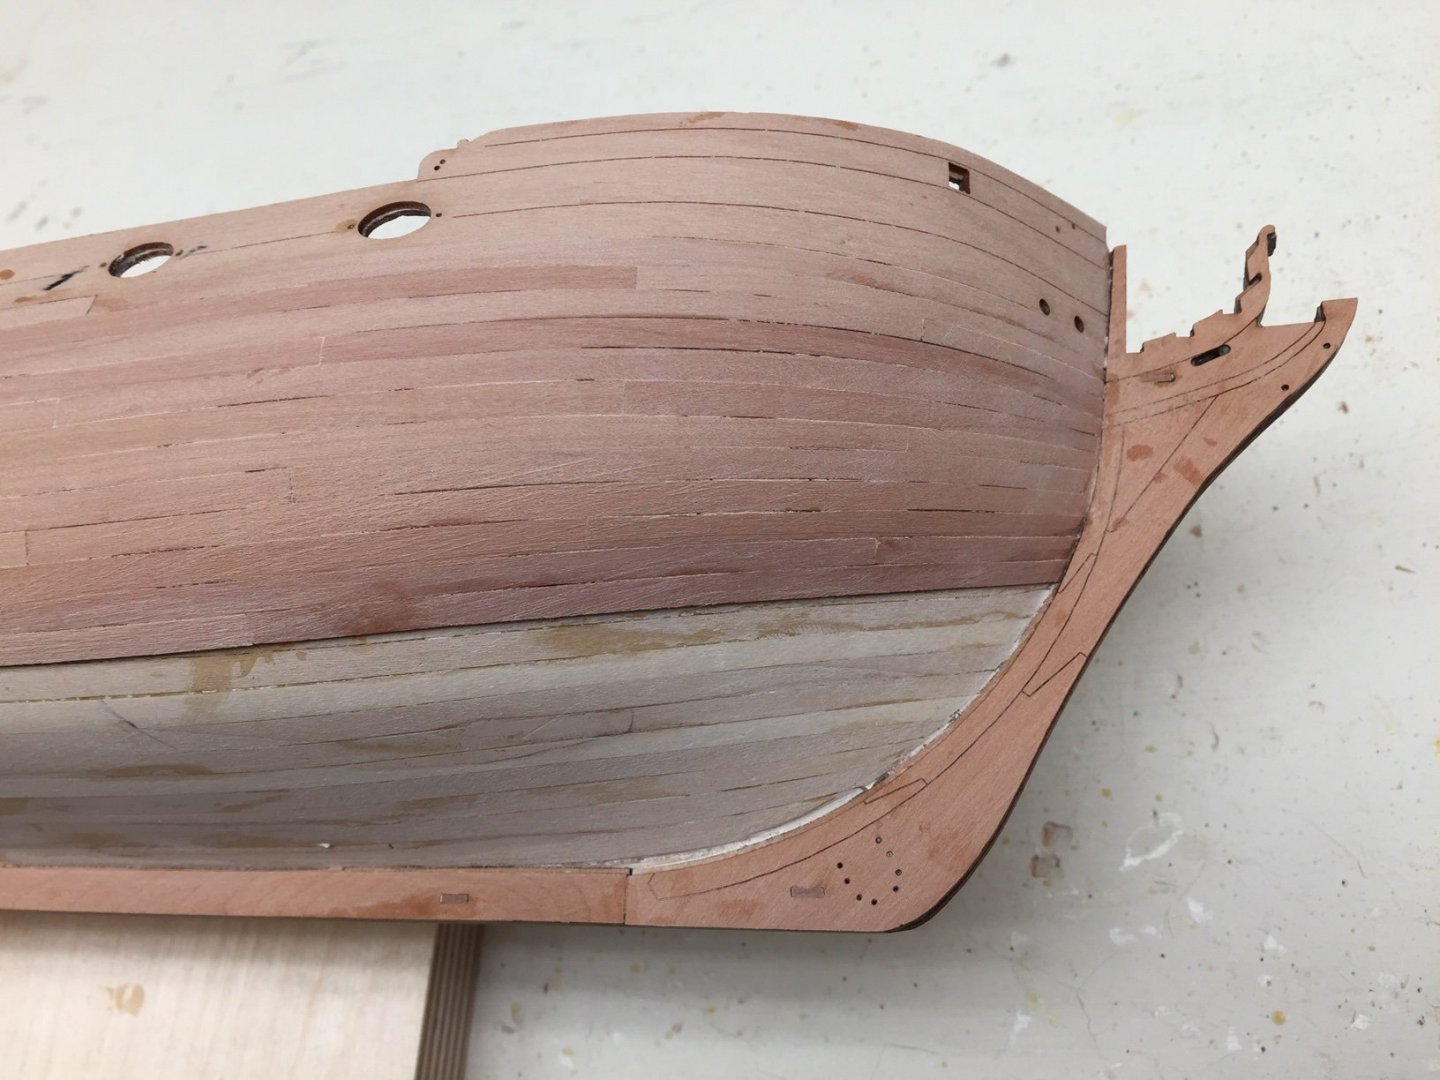
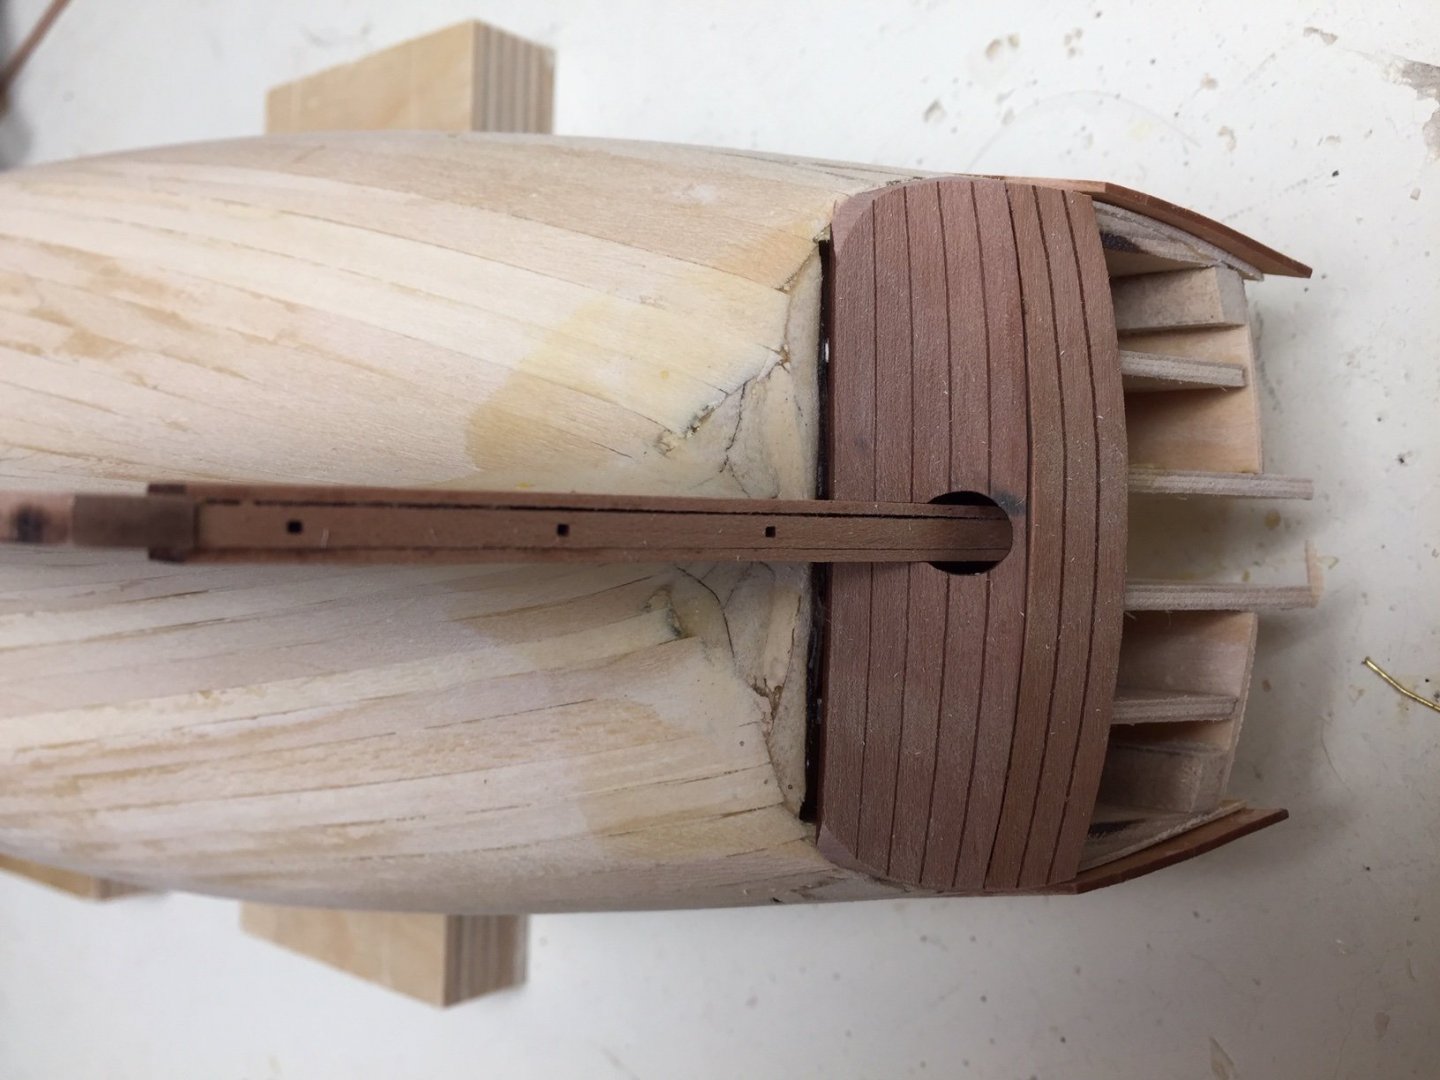
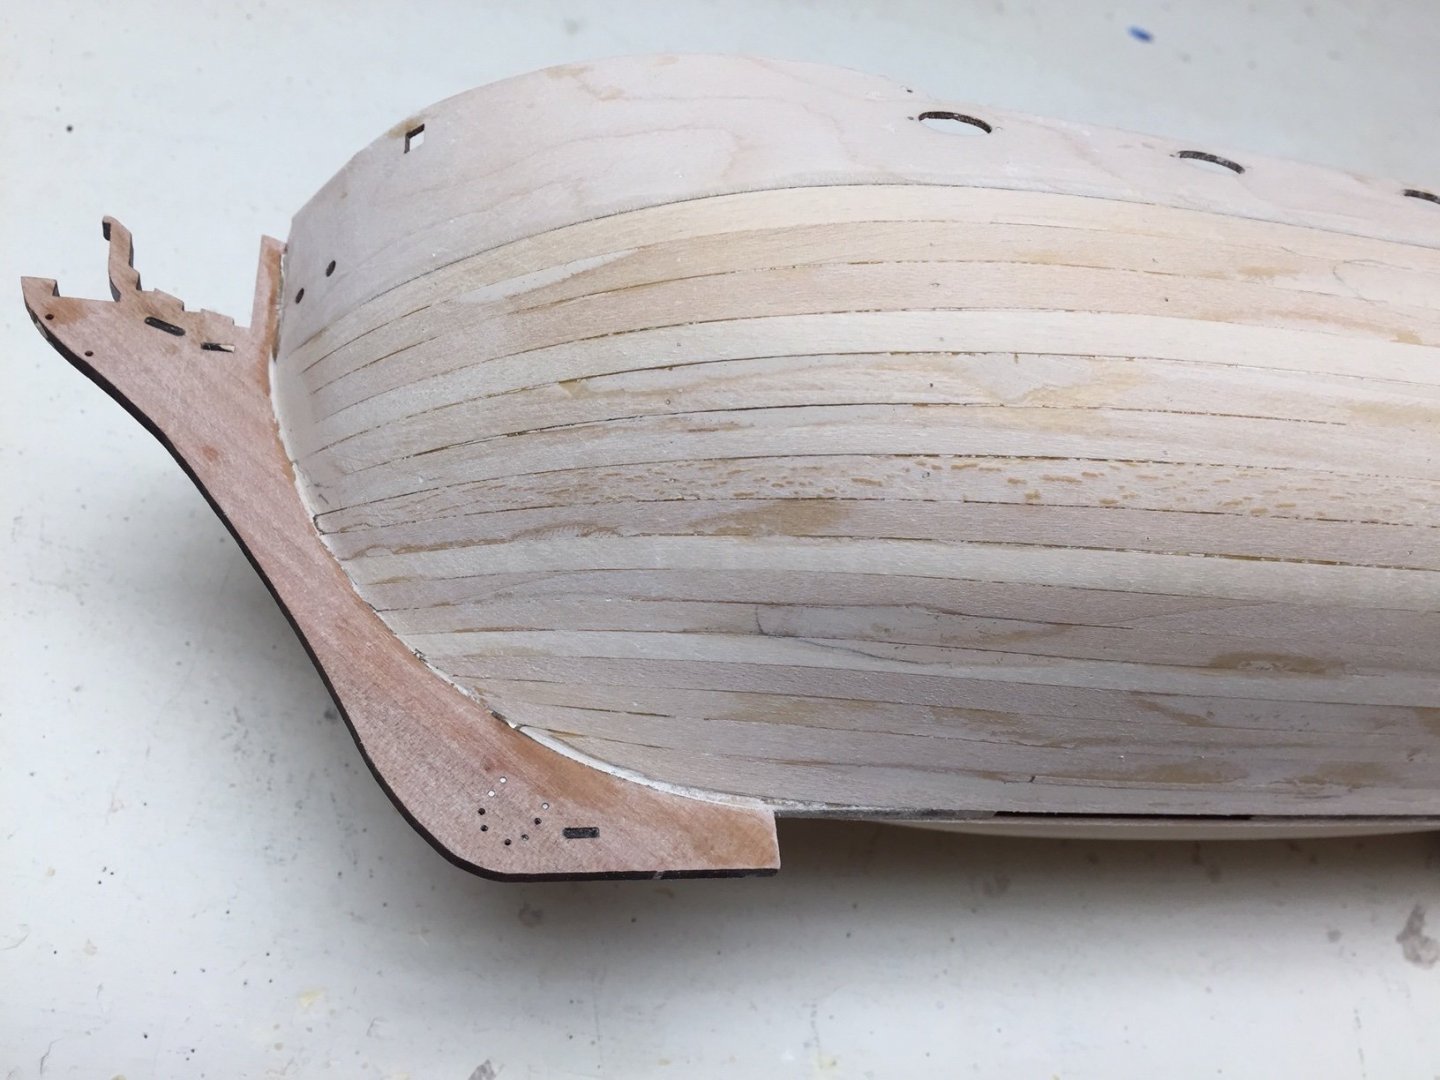
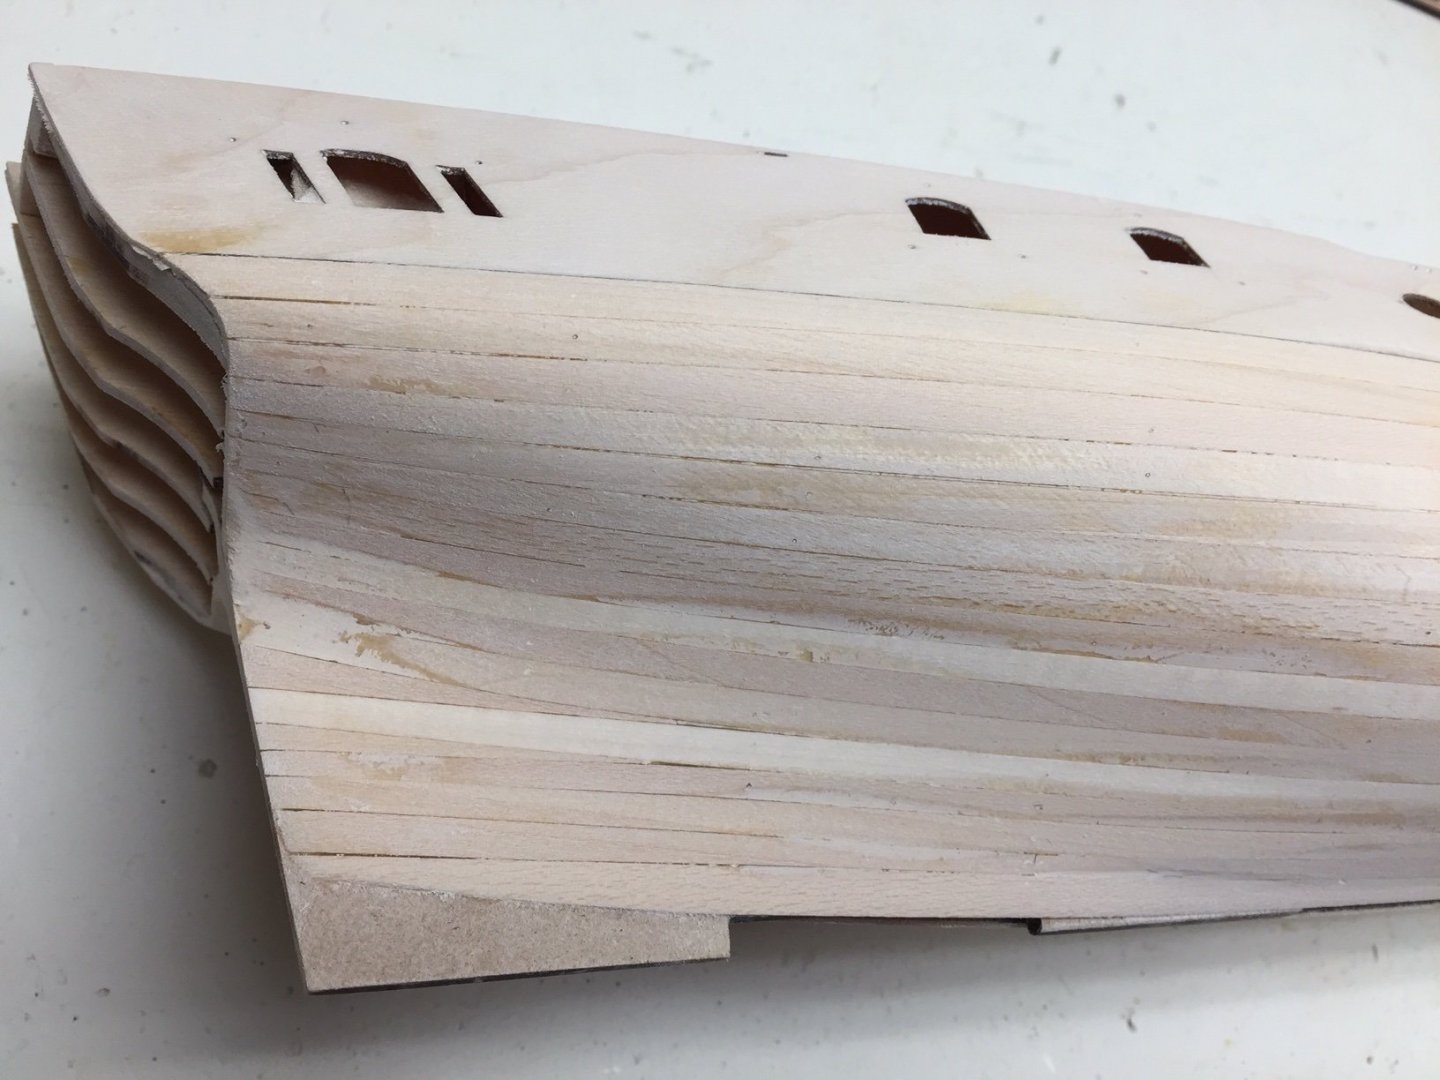
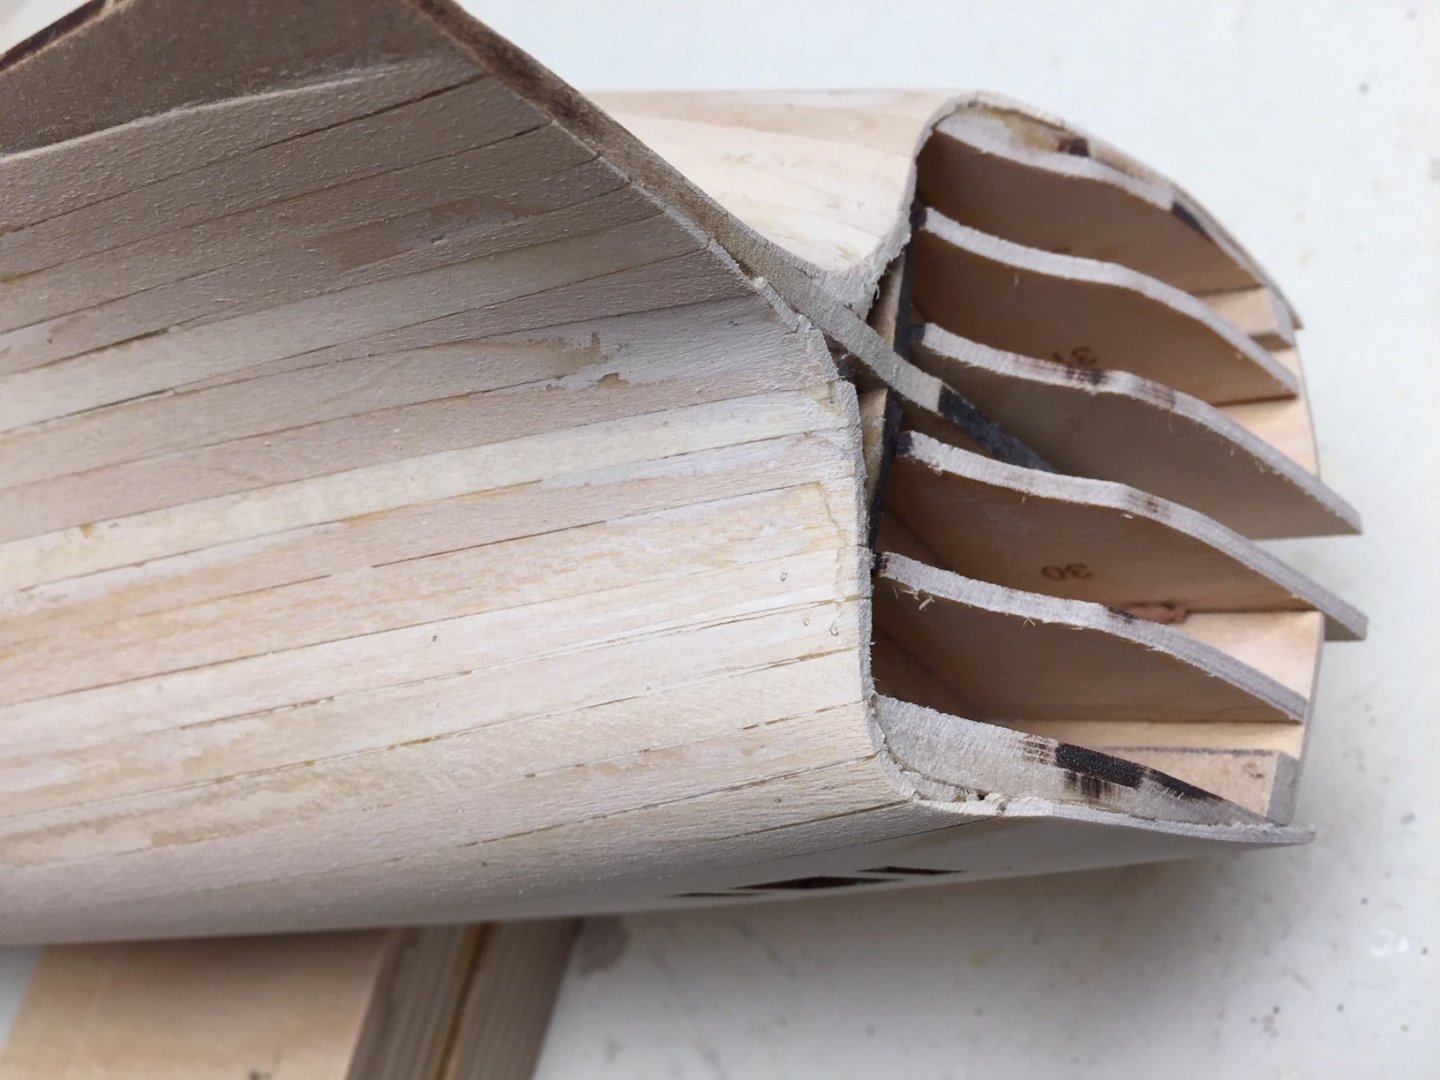
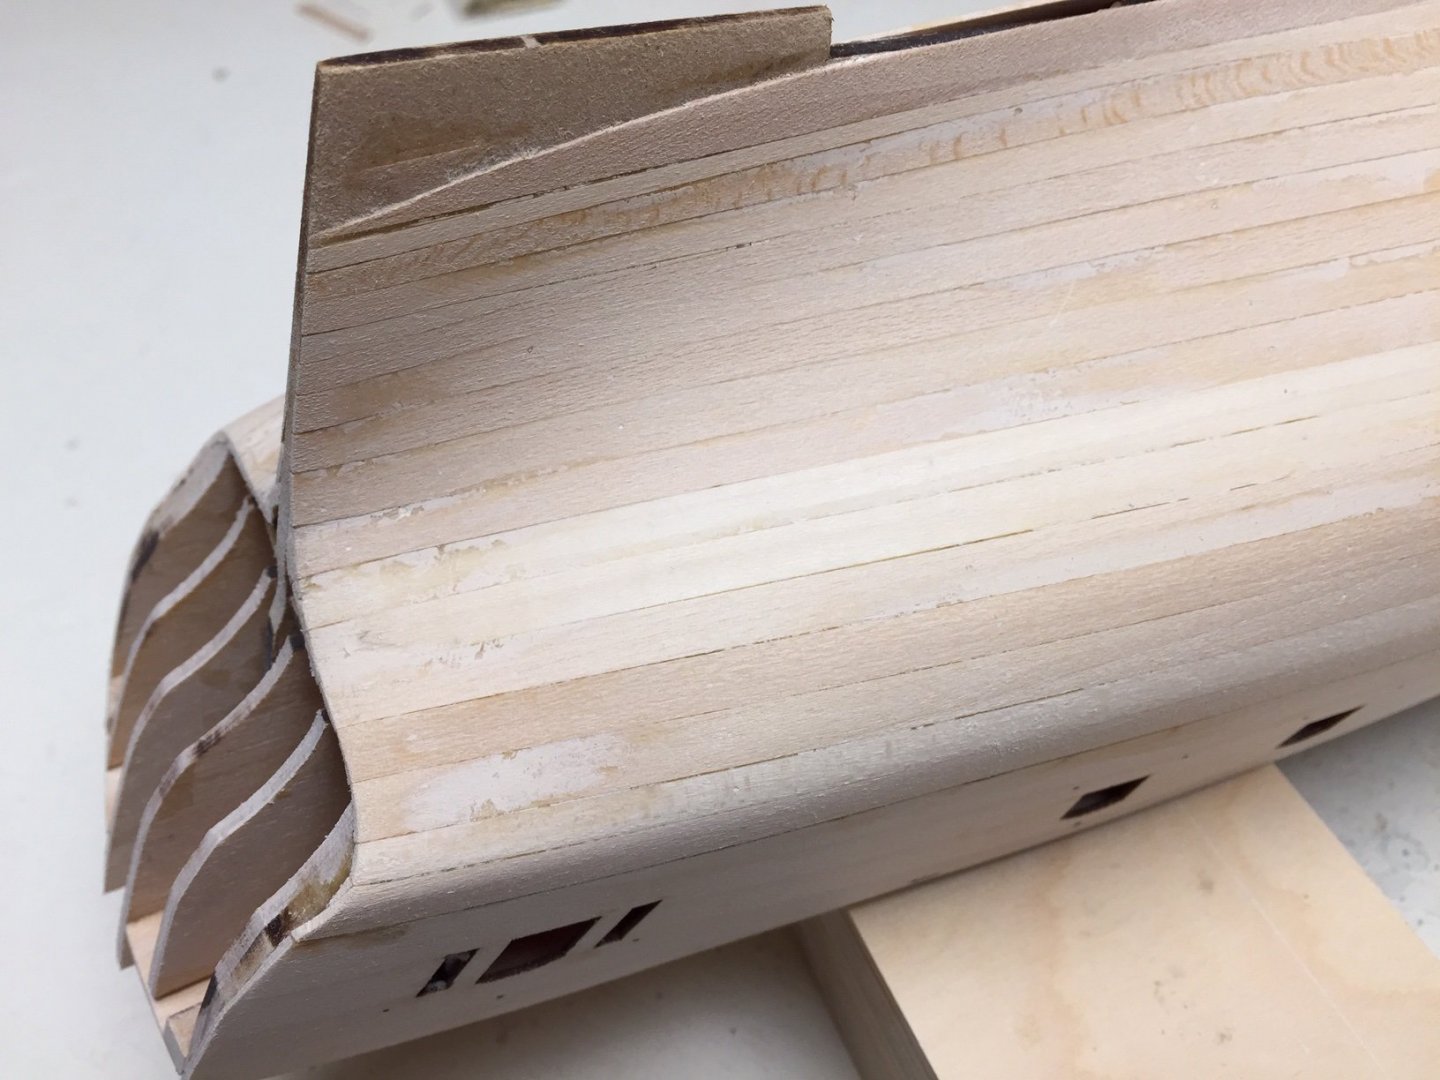
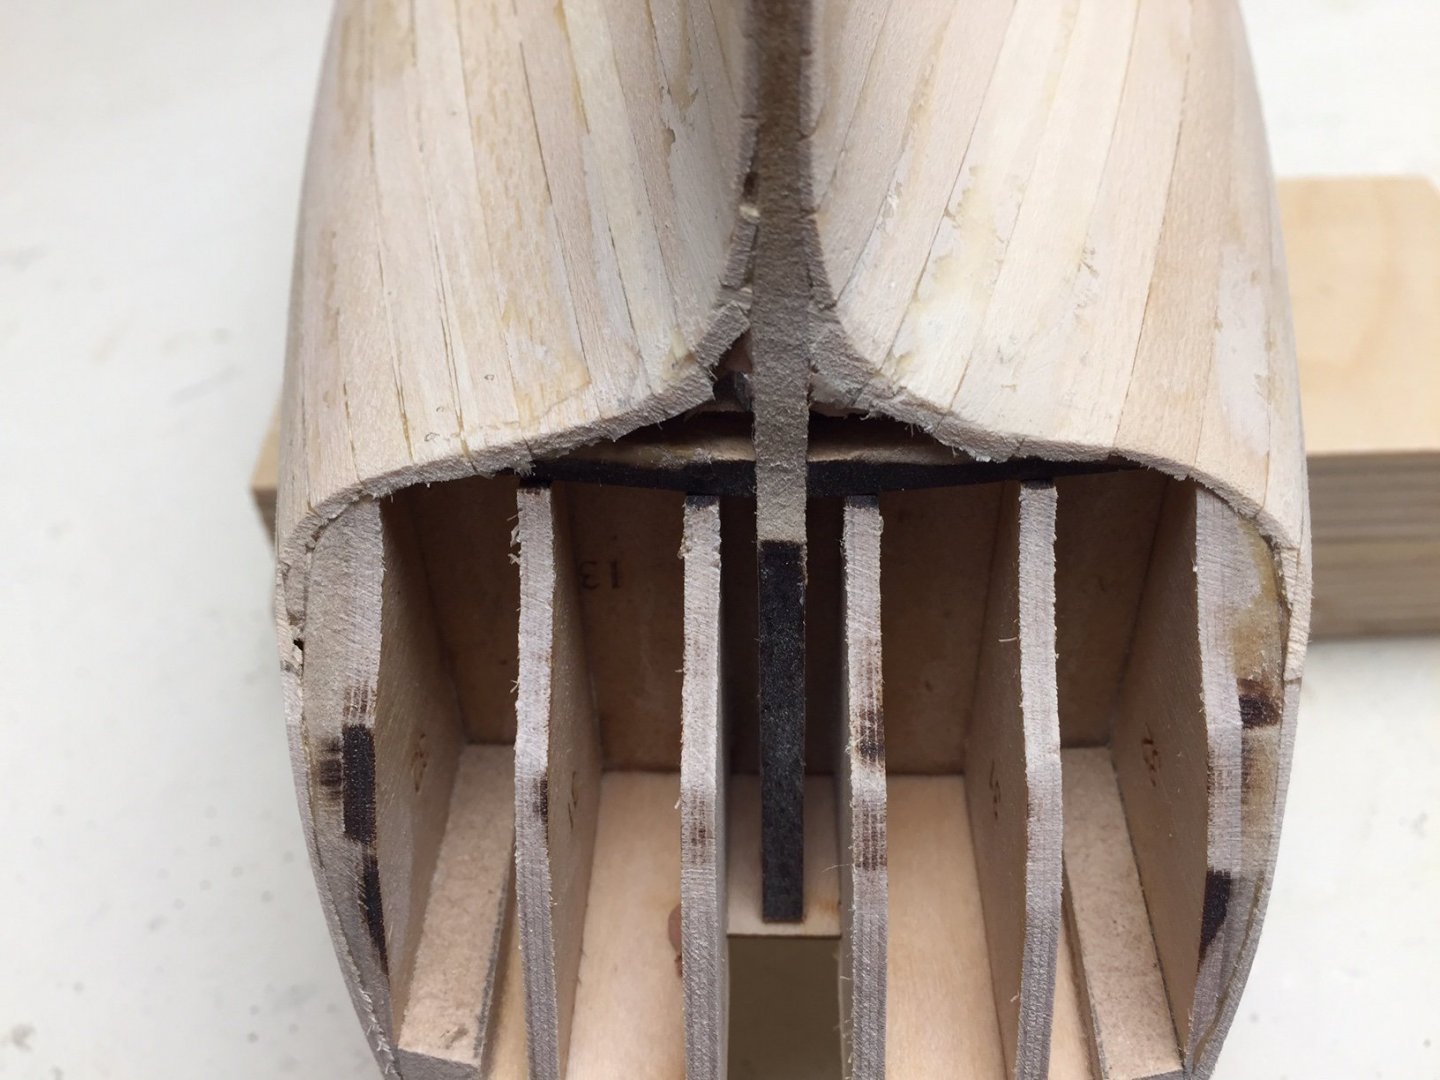
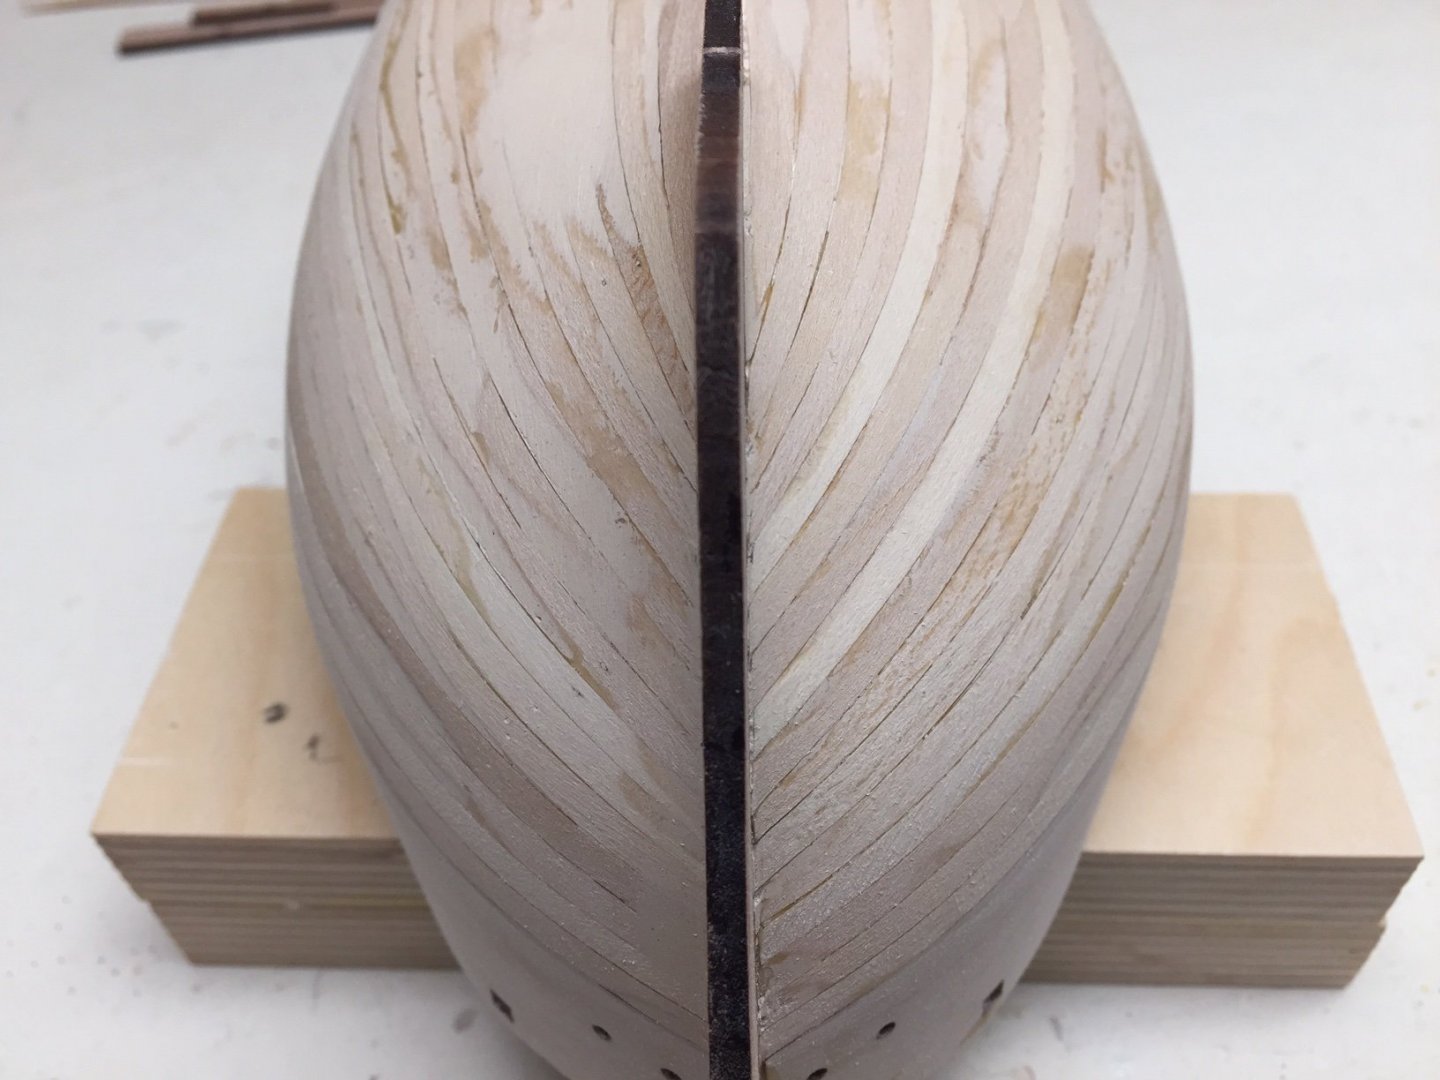
Here's views of bow from the front and stern from the back.

-
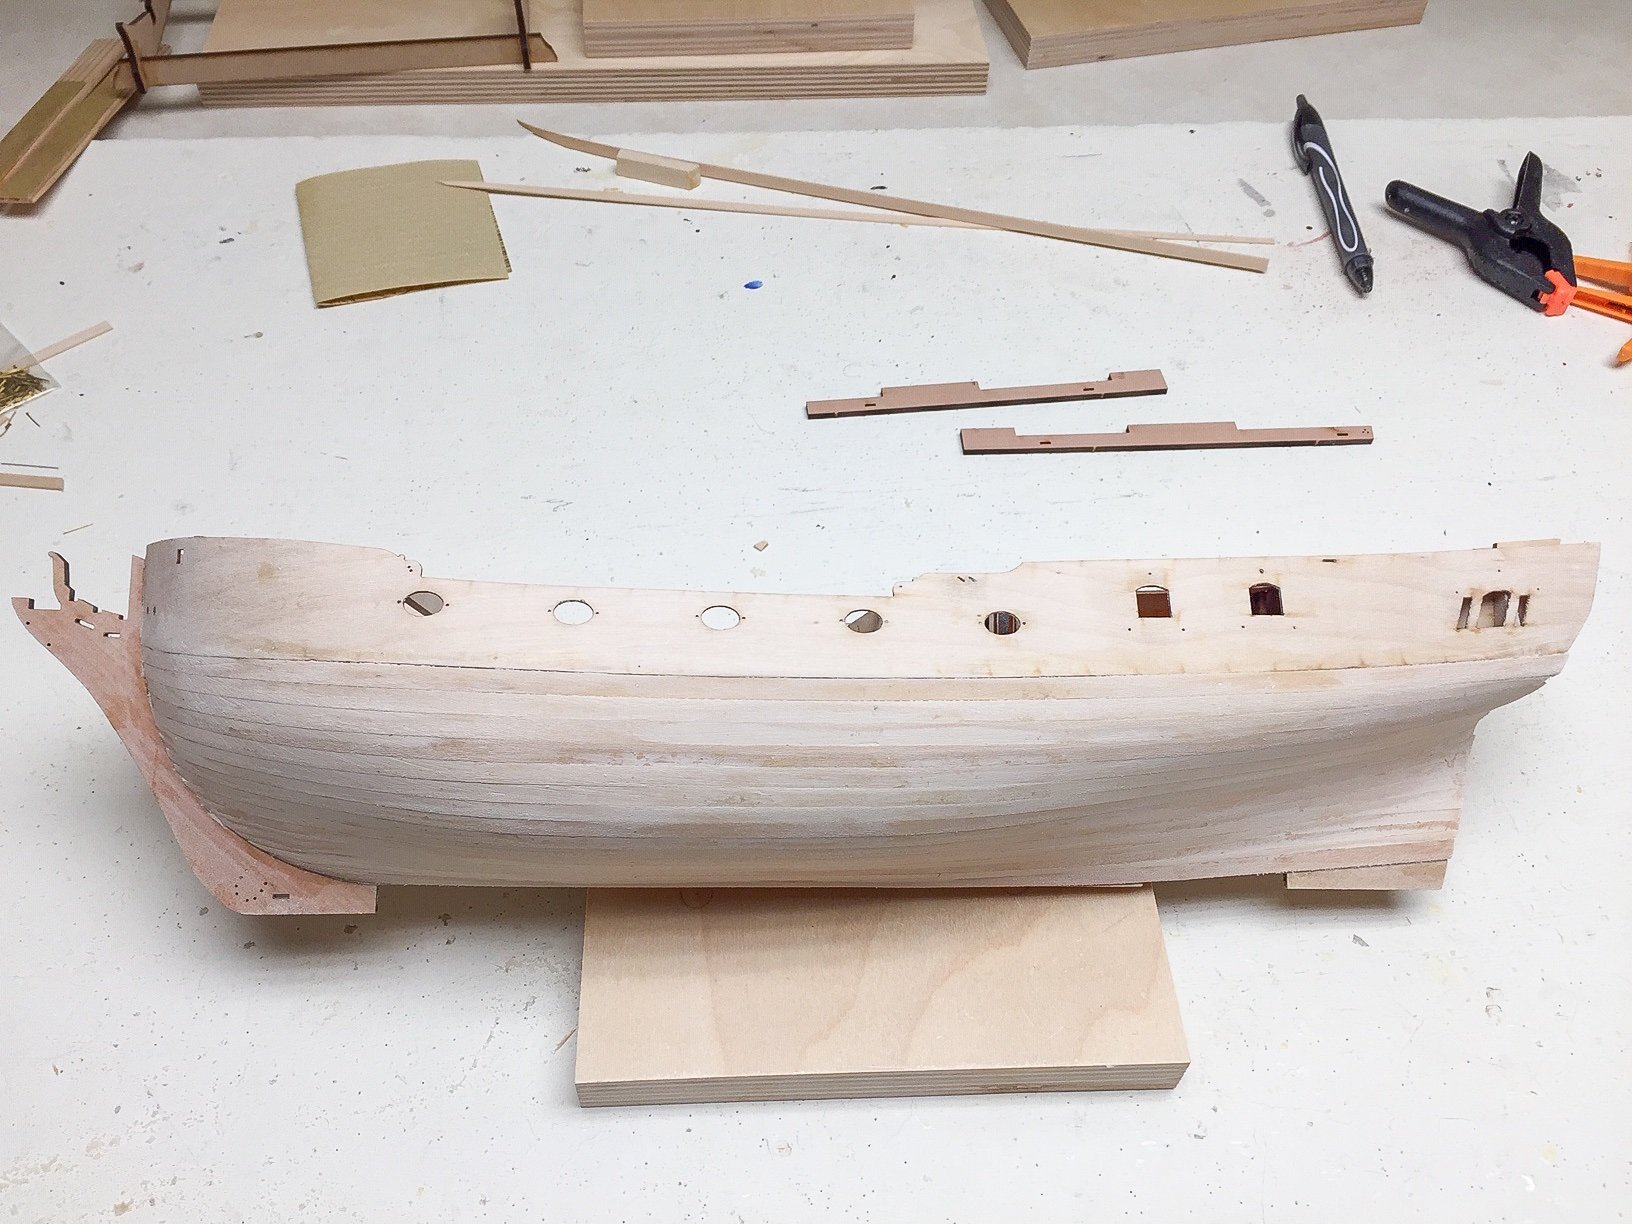
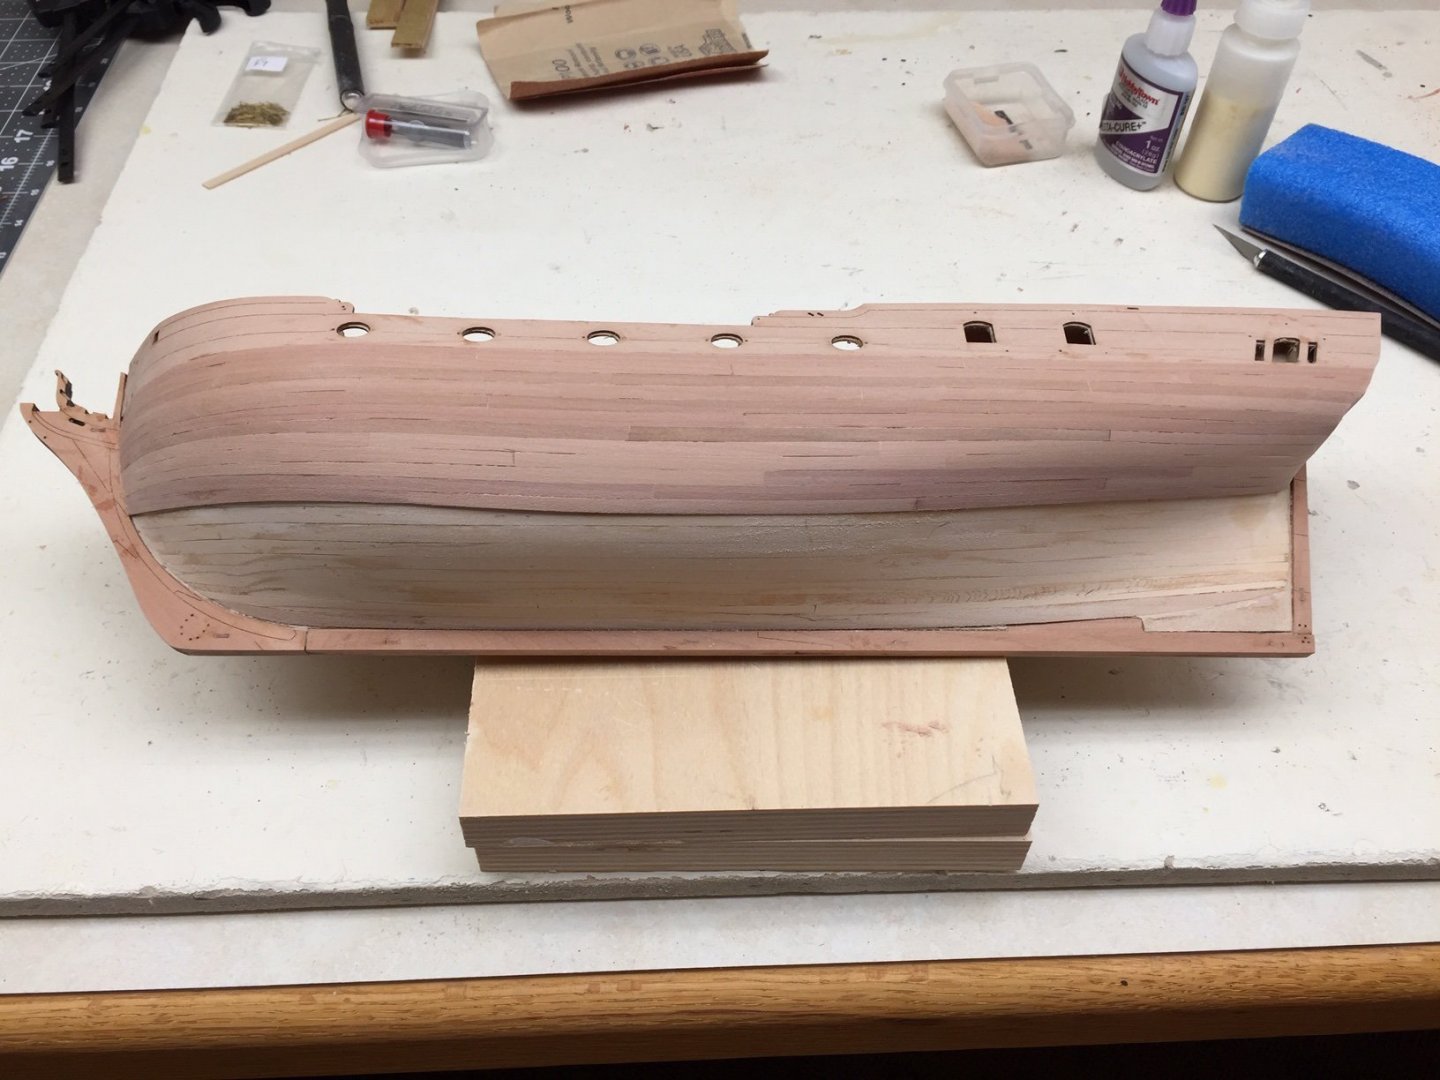
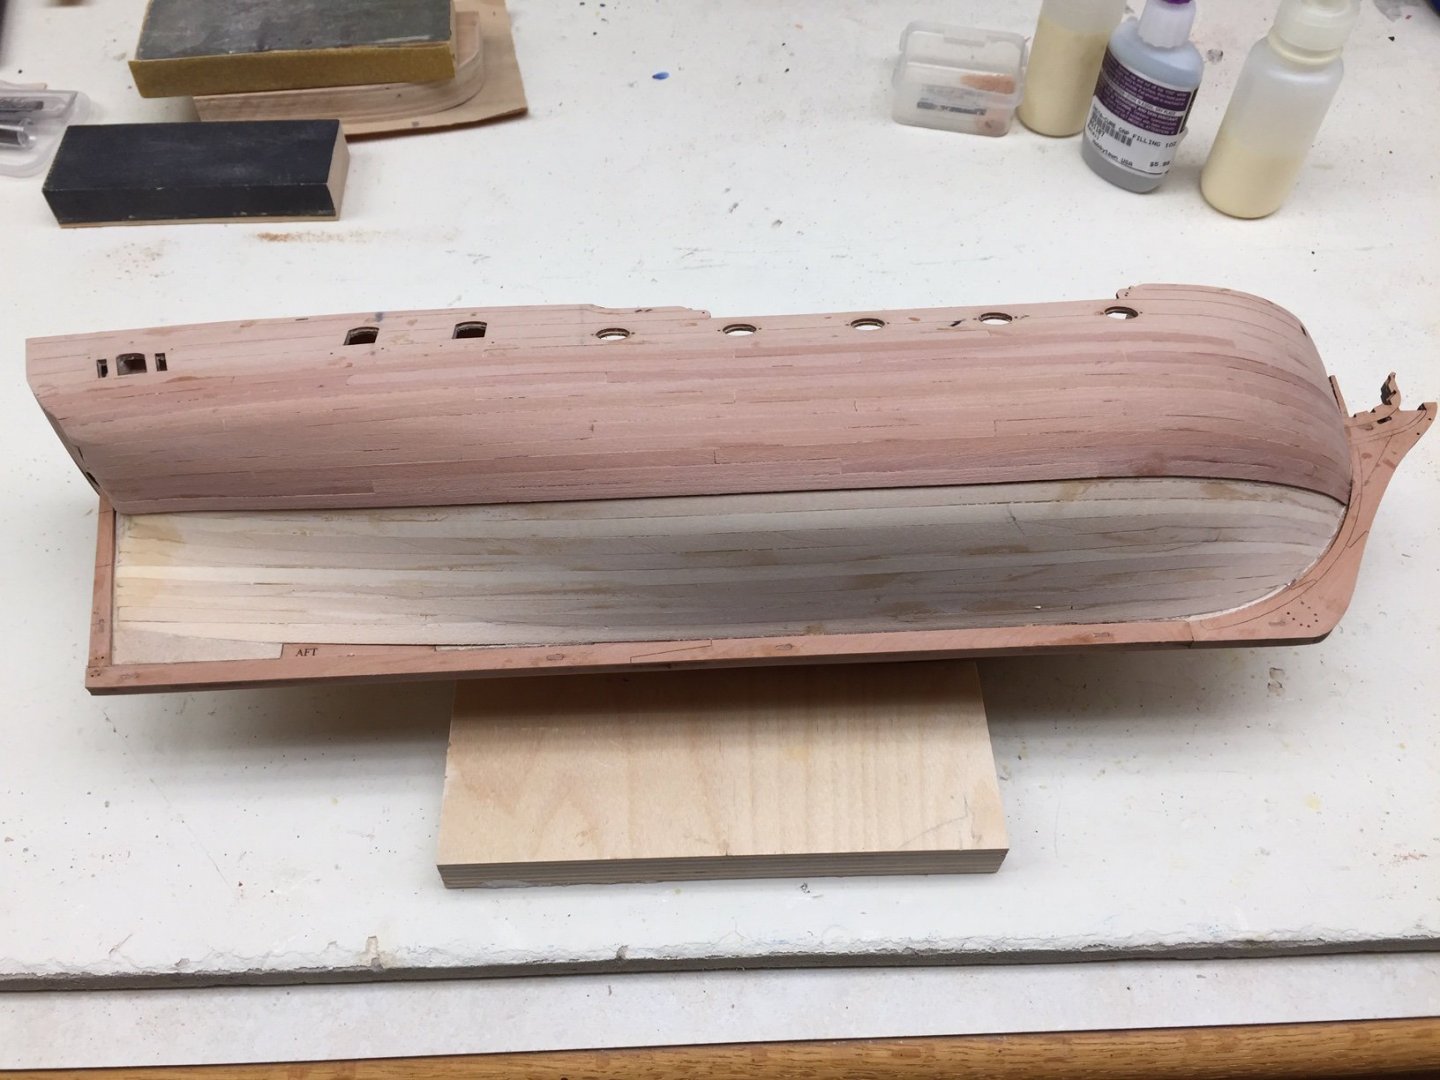
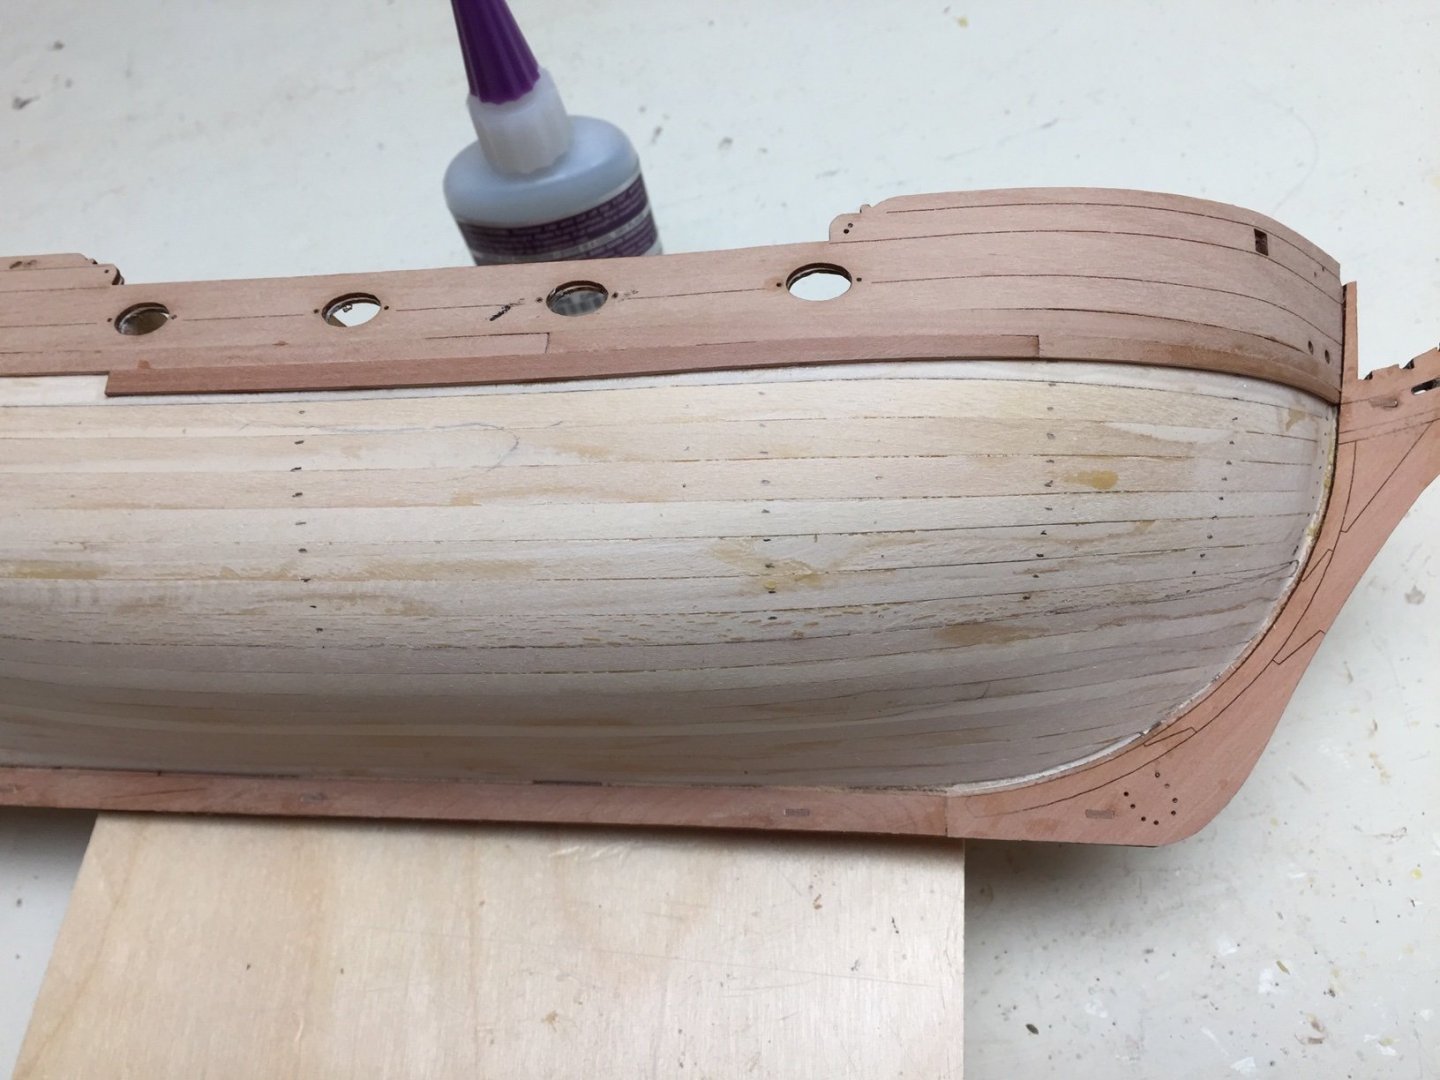
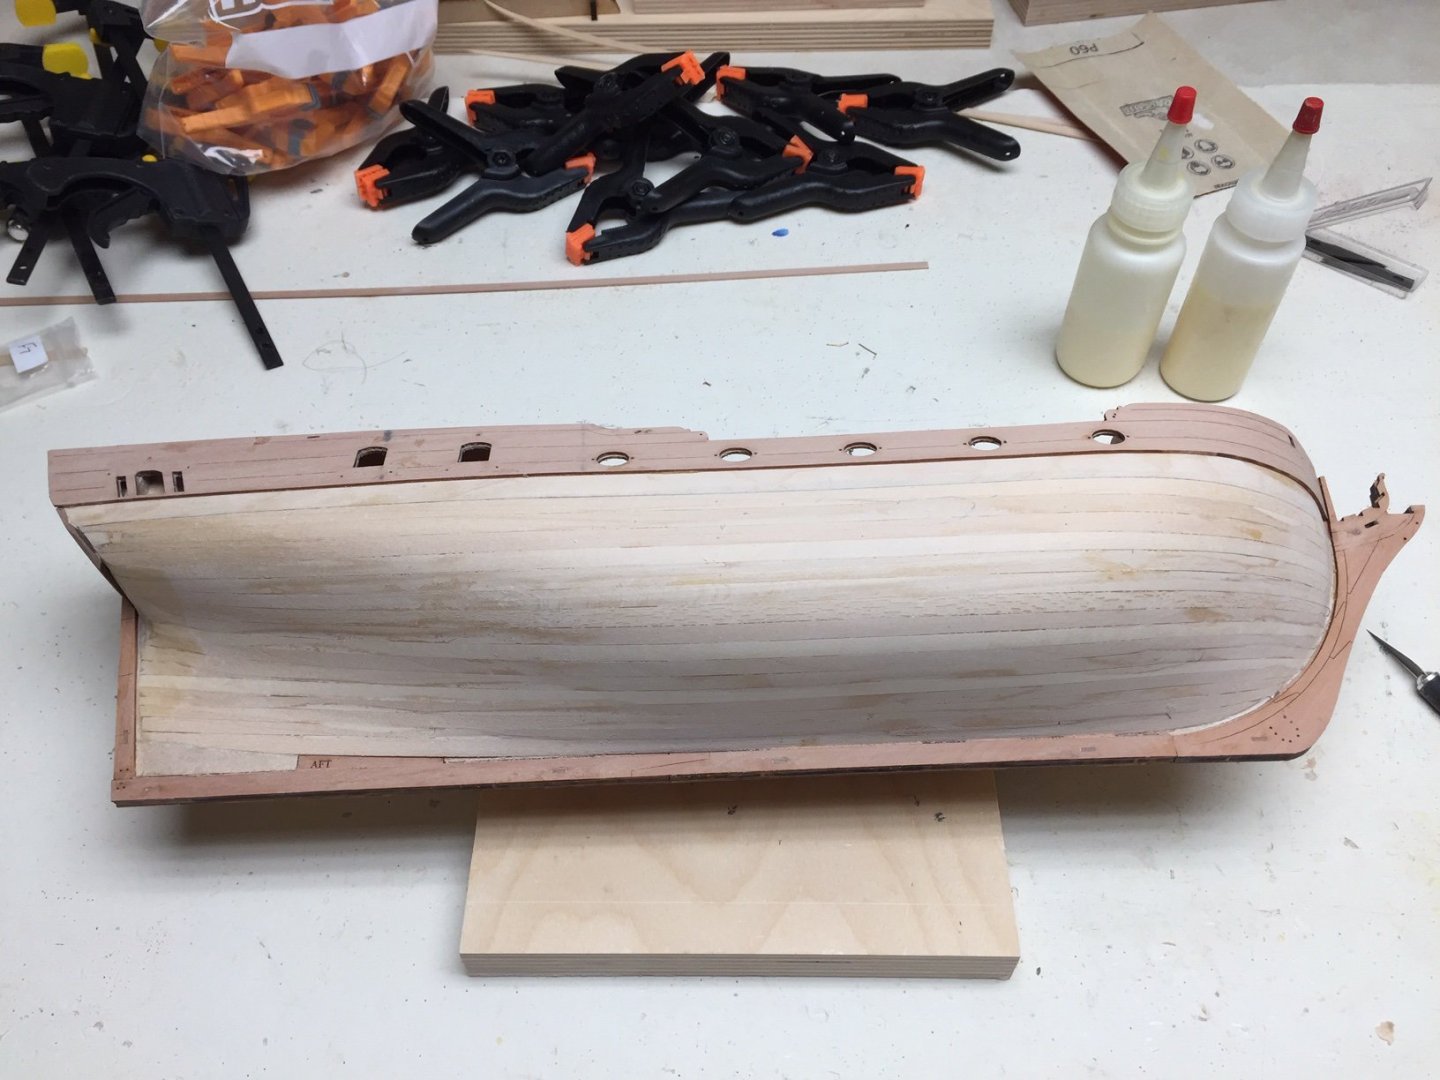
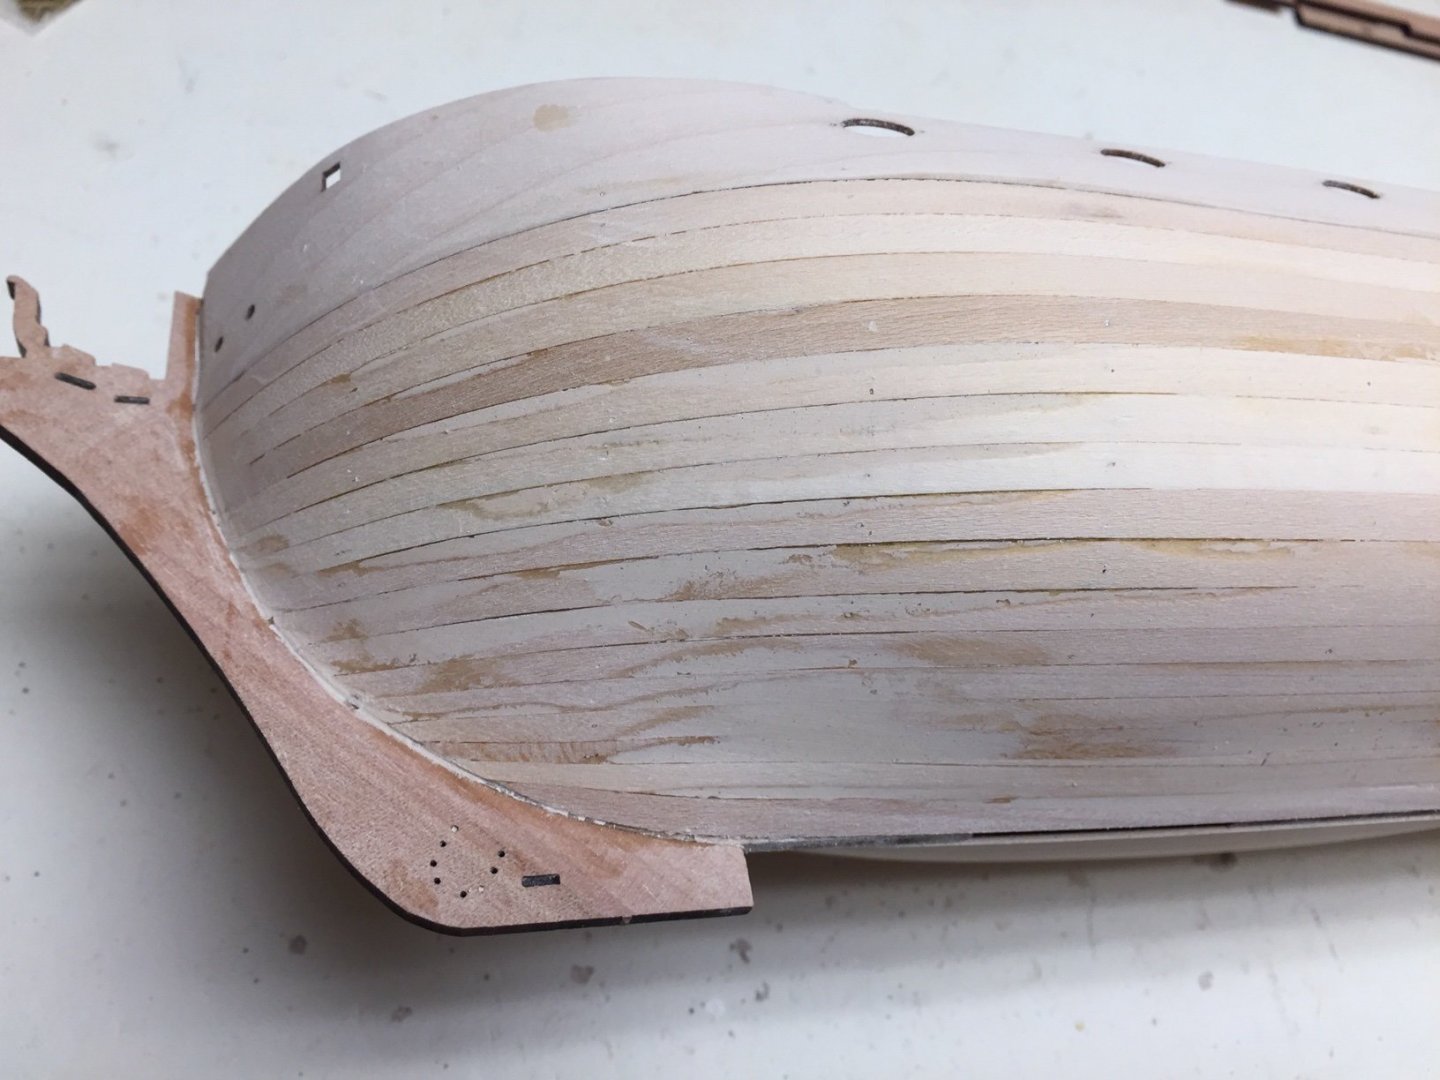
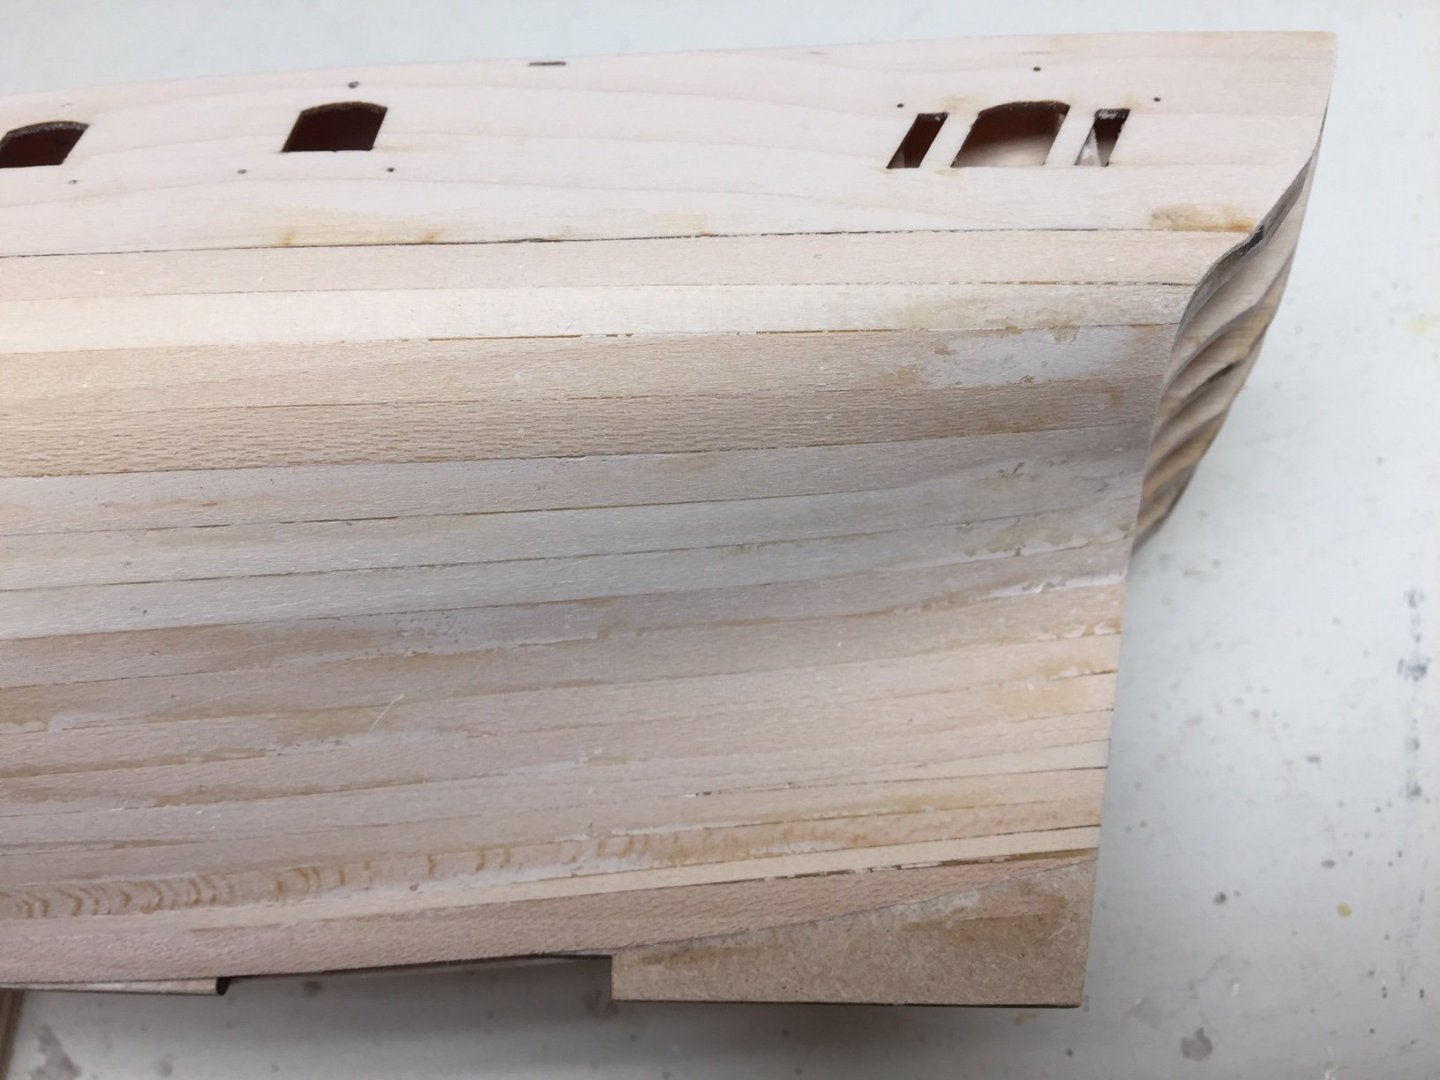
Thanks Derek! I did a couple more 45 min sanding sessions, and have declared it "done". Here's some things future builders might want to think about on the first layer of planking. I planked from keel downward. About halfway down the keel I added the first plank along the keel. I felt like this gave me a target to shoot for as I got closer to the keel. Originally I was going to plank down from bulwarks, and upward from keel and meet about 2/3 the way down toward the keel. But once I got going, I didn't feel like this was necessary. When I got to the end, there was a small, less than 1/8", gap that tapered to fine points. I chose to fill this in with two pieces, split roughly at the halfway point, with the joint on a bulkhead. It was much easier to fit in the little sticks doing it this way, instead of trying to fit one piece for the entire length. I tapered all the planks at the bow. Not a lot, but I'd guess around 3/32" to 1/8". I also did an edge bend downward at the bow. I found it needed more edge bend than I thought right at the bow. I think that's one reason I couldn't get them to lay flat on the bulkheads in that area. There may also be a twist involved, but I didn't try to bend that in. The problem area for me was around bulkhead 2 about halfway down. On the first side, I tried to force the planks down to the bulkhead and hold with nails. It would be ok at first, but after 10-15 min, the planks would raise up a little from the bulkhead, often just on one side, the lower side. I did better on the 2nd side by adjusting the edge bends, making more or less edge bend as required. It meant playing around with the edge bend quite a bit to get it to fit, but it's worth the effort. On the first side, I didn't taper the first half dozen planks at the stern. But it started looking like I needed to taper them to get them to run right along the hull, especially when going around the concave curve at the stern. So I started making a long slight taper of about 3/32" over about 6 inches. I ended up adding a small stealer plank right at the stern on first side. On the 2nd side, I tapered all the planks at the stern. Same kind of taper I did on the first side, but did it to all the planks. This helped going around the curves at the stern, and the planks seemed to lay along the hull easier. However, as I got closer to the keel, I needed a couple of small stealer planks. These are easy to do to fill in the gaps, so I'd recommend tapering planks to the stern. I used a water based wood filler which worked fine. Started with 100 grit sand paper, then 120 grit, and finally 220 grit. Saw no need to go any finer on first layer. I feel like you kind of want a little "tooth" to the wood for glue to stick to. I thought about painting hull with acrylic with some pigment, so I could see humps and bumps better. But ended up decided not to do this. It was easier to take closeup photos to see areas that needed more sanding. I also felt along the hull with my fingers for bumps and places to sand, although I found I had to wipe off sawdust with damp cloth before doing this. Sawdust makes your finger slide across hull and it feels a lot smoother than it is. Here's some photos. Surface is smoother than it looks. There's wood, filler, glue, pencil marks, etc., so all this makes it look rougher than it is.
-
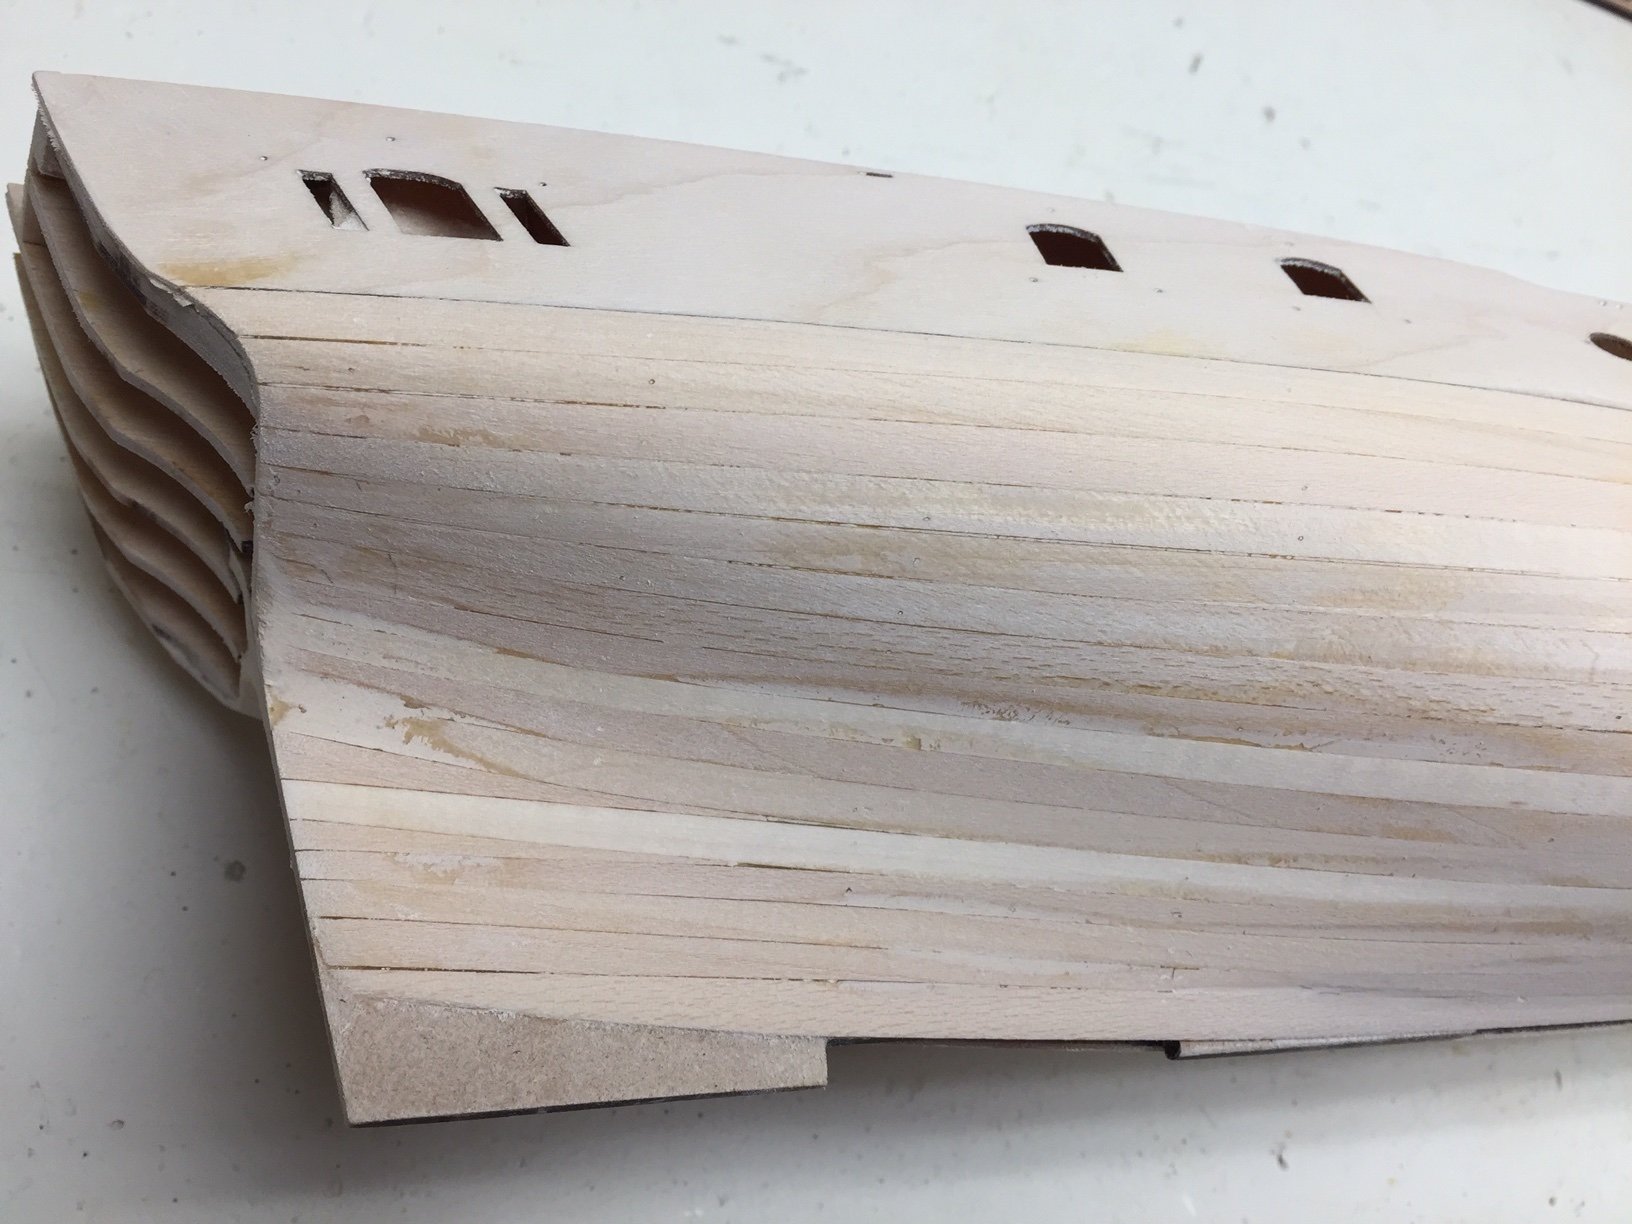
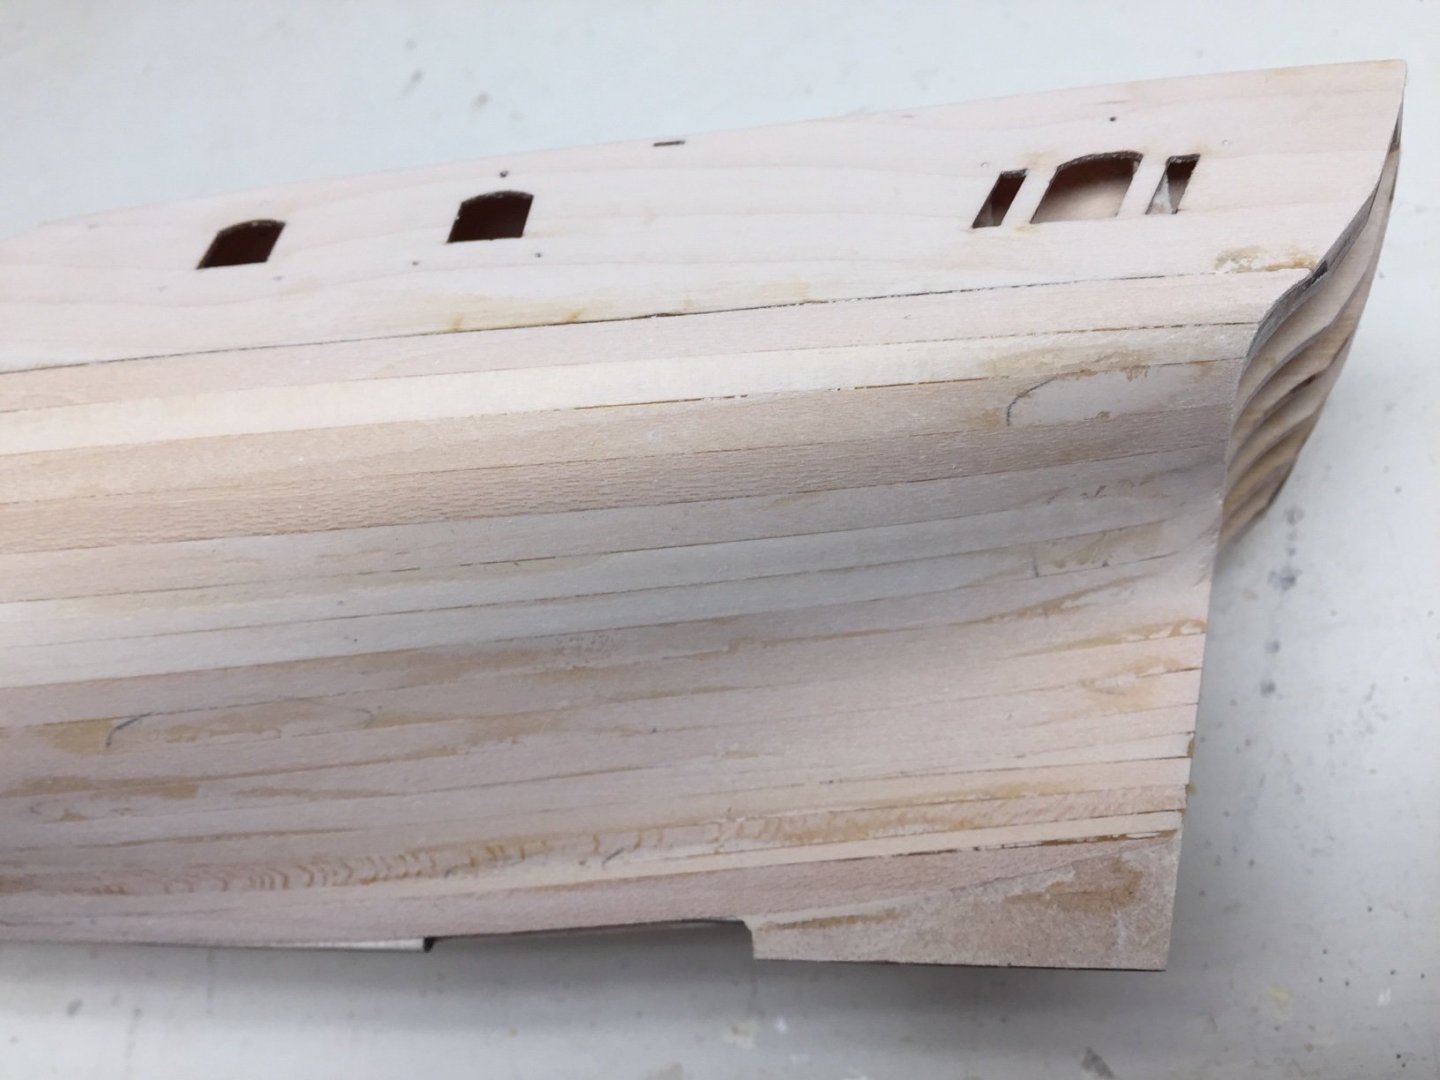
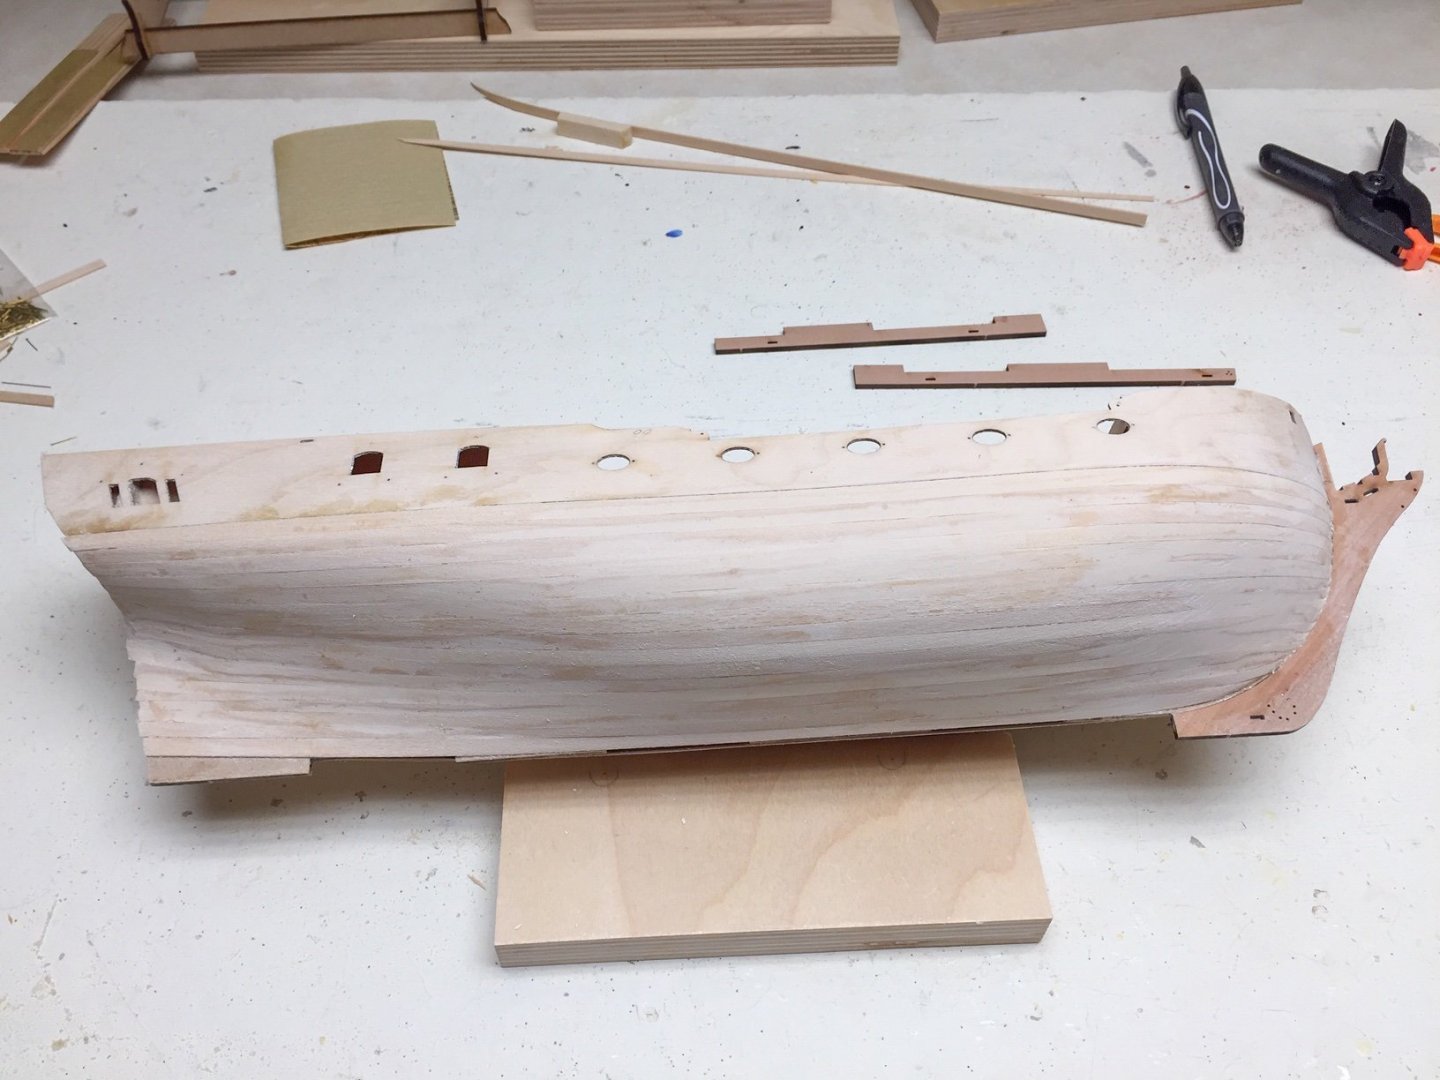
Here's more pictures after a few hours sanding today. I trimmed off excess planking at the stern and sanded it to match contours in stern frames. For some reason I'm always a little confused by the stern, how stern planking and hull planking come together, so looked at pictures in the manual and tried to make mine look the same. Photos in the manual are excellent. I've never seen an instruction manual as good as this one. Photos are real useful to show you areas that need more sanding, so I've been taking quite a few. Looking by eye and using my fingers to feel for bumps, I miss a lot of little stuff. It's probably good enough now, but I'll spend couple more hours sanding some places I see in photos. It won't hurt.

-
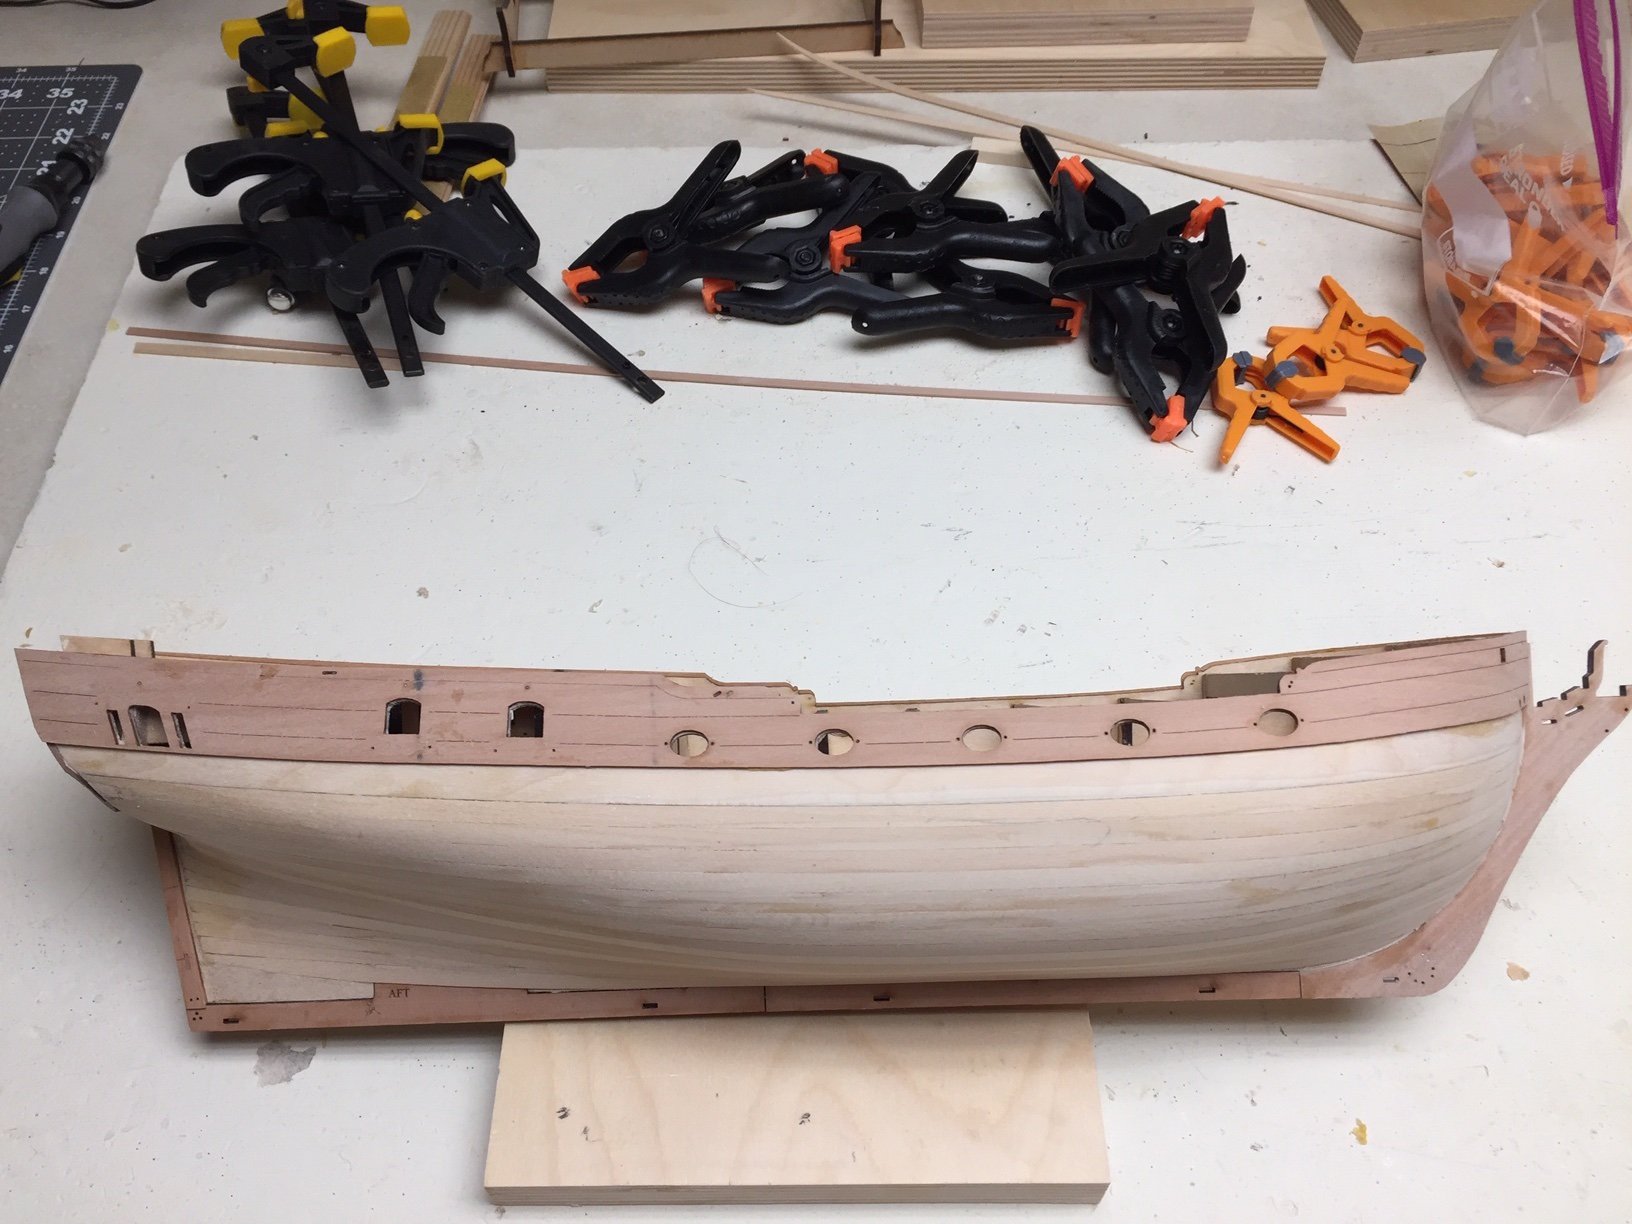
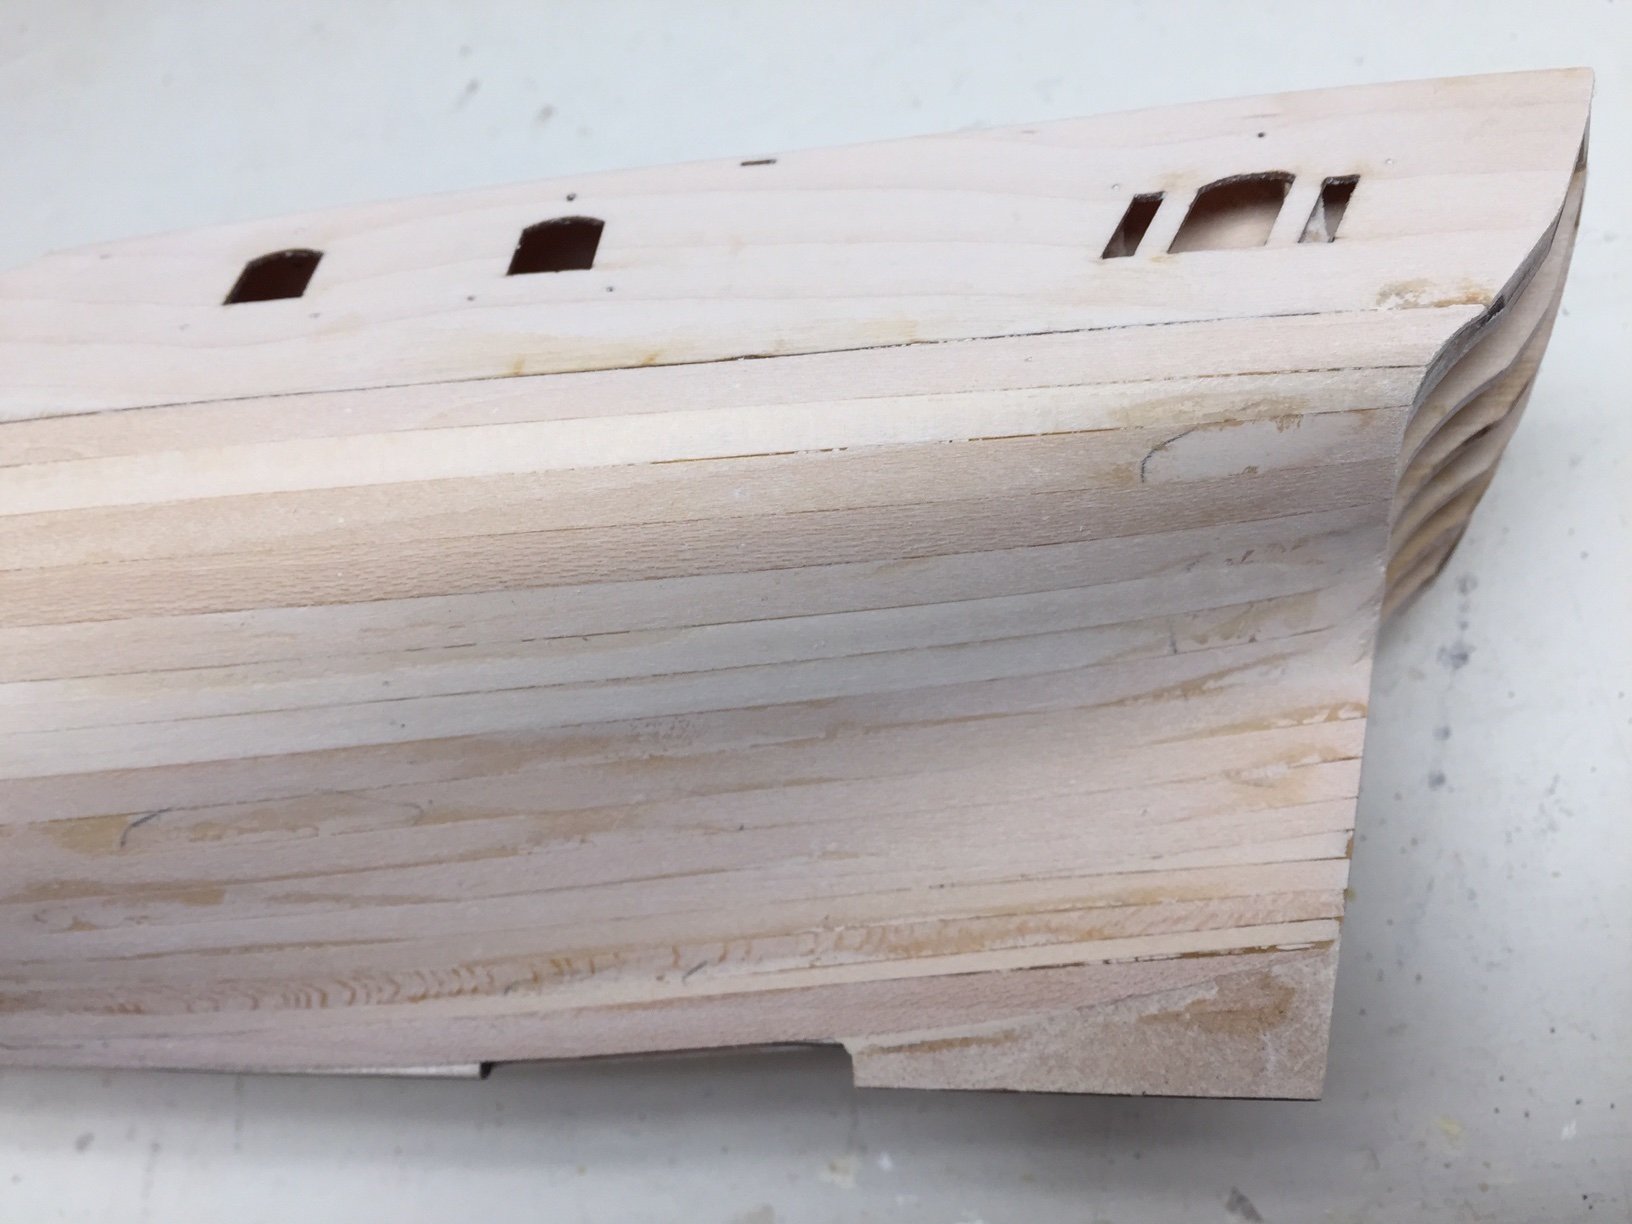
Finished planking the hull last night. Put some filler on and did first sanding today with course sand paper. I can see places, like on the bow, where I need some more filler and sanding.


-
Very nice work getting planking on gunports to align with planking on stern. I know that's not easy and takes a lot of time. I see on the picture of finished model, gunports are closed, so it looks nice to have planks aligned. Made me wonder if builders of the real ships worried about things like this, or to save time and effort made gunports with whatever they had. Considering the decoration on the stern and the time that took to make, they probably had it all aligned. This really is a step up in difficulty from Syren!