HOLIDAY DONATION DRIVE - SUPPORT MSW - DO YOUR PART TO KEEP THIS GREAT FORUM GOING! (Only 20 donations so far - C'mon guys!)
×


desalgu
-
Posts
363 -
Joined
-
Last visited
Content Type
Profiles
Forums
Gallery
Events
Everything posted by desalgu
-
I used tamiya yellow tape. I've used it for years, mostly on model airplanes. It's expensive, but you don't use a lot of it. You have to use piece of wood with flat end or something similar (on Duchess I used end of small standard screwdriver) to flatten the tape edge where you're going to paint. You just run it along the edge of the tape, pressing a little bit. On some models I haven't been able to do that because surface was too fragile, and then paint bleeds thru a little.
-
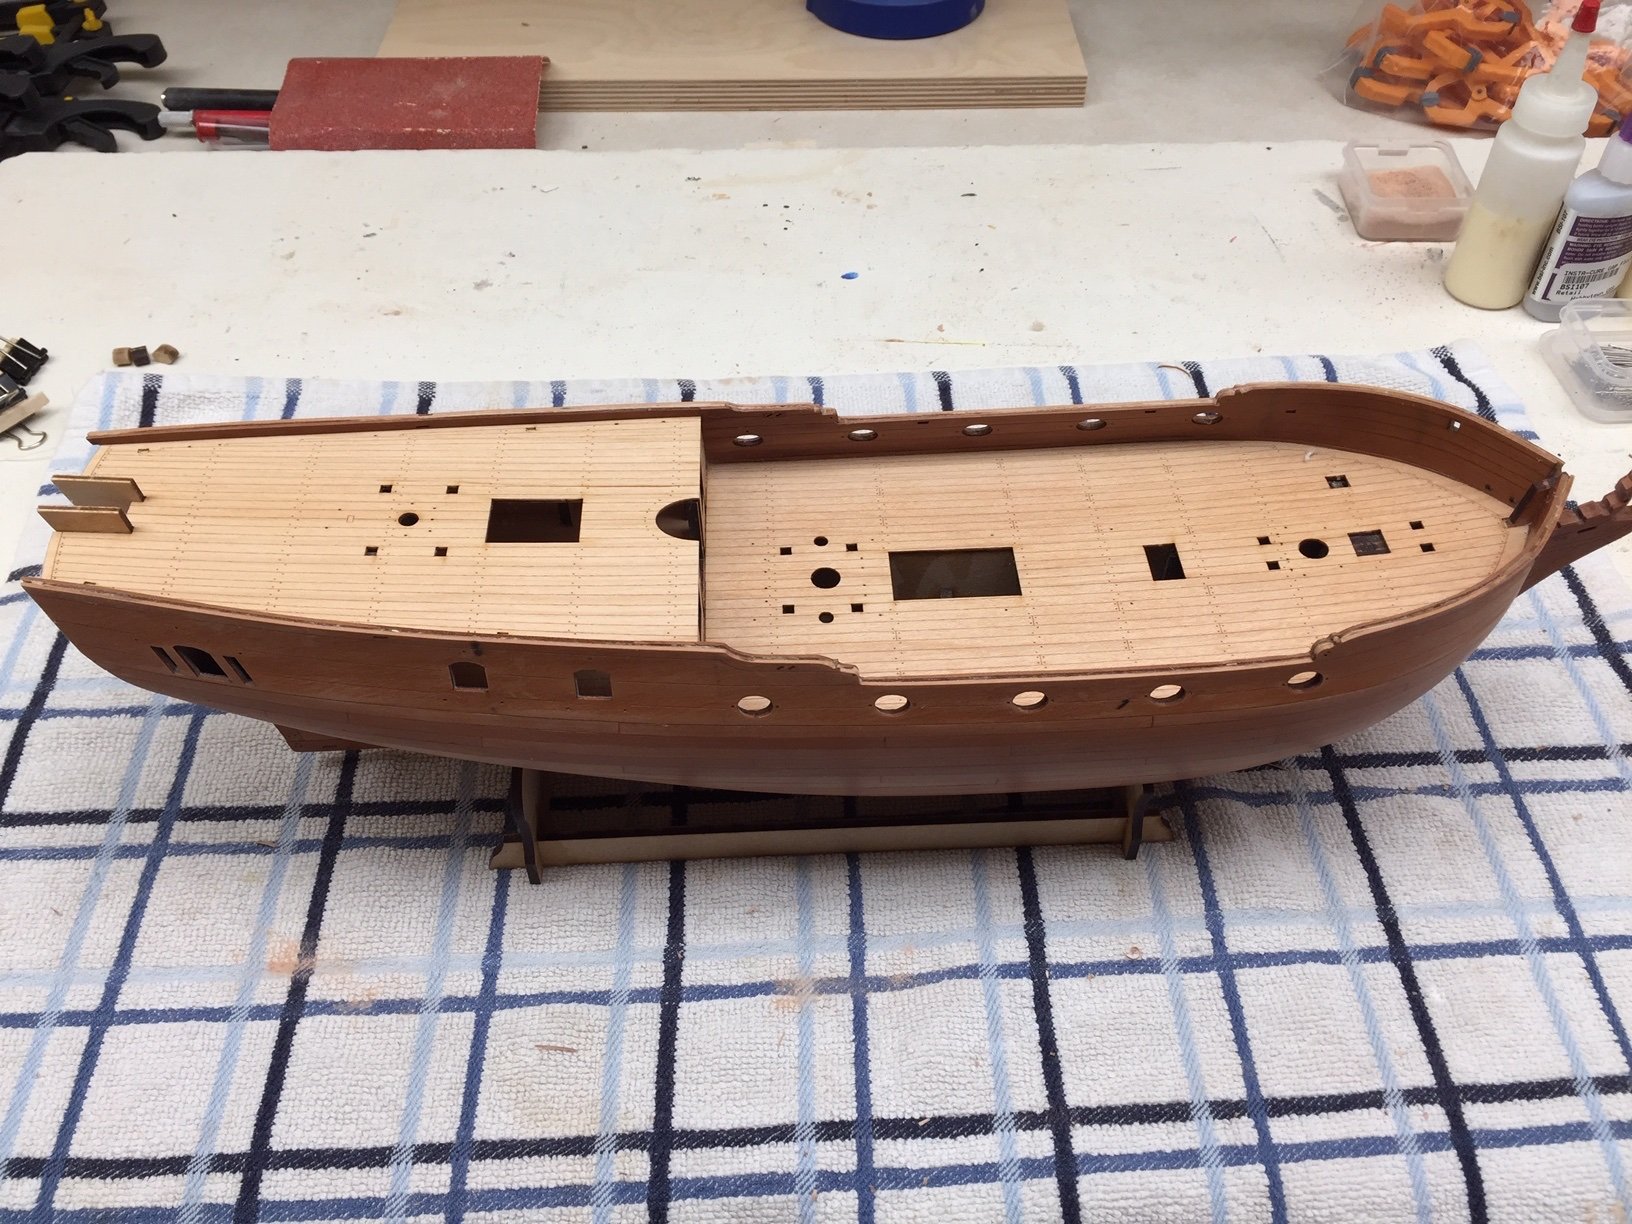
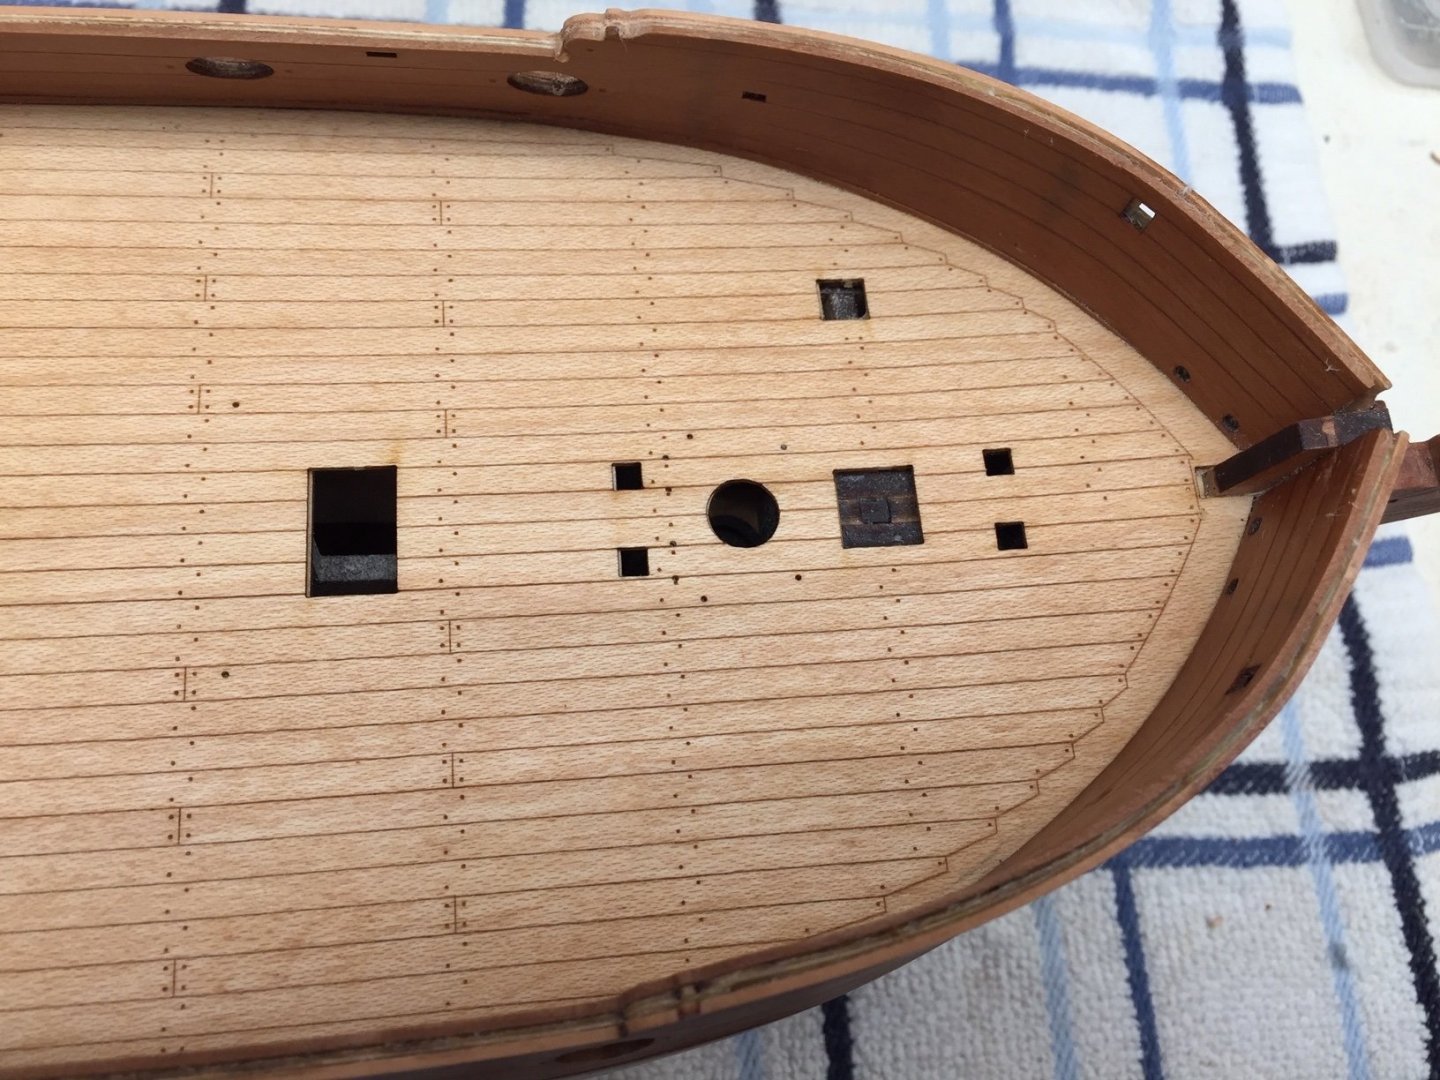
Hi Derek, I was able to easily cut out the hole in the deck. It aligned with the hole in the subdeck, so I just needed to lightly cut thru the deck laser cutting. I'm glad I didn't have to trim or cut the plywood subdeck. I just didn't realize the little rectangle on the deck was a laser cut instead of laser etching. If I'd just looked at the manual or plans a little closer, I would have seen this, but probably got going too quickly and got careless. This is common problem I have! It now looks the way it's supposed to. I really appreciate it that you brought this to my attention! I agree with the design of this kit, that's it's excellent. The deck cutouts will make it easy to locate deck fixtures and make the joints strong enough so no need to pin them. And there are holes to use pins for location items. Offhand the only real trouble I've had is with the plywood bulwarks, but that was from my inexperience. It's good to fight thru those difficulties and learn for the next time. I'm amazed at how Chris made all the metal and laser etchings for decorations. He's got way more patience than I have! Hi Bob, After I finished planking, I put a very light stain on (Minwax golden pecan) and then two coats of wipe-on polyurethane sanding in between, and a little steel wool afterward. I did some tests and it was debatable whether to include the stain or only use the wipe-on poly. There was very little difference between the two, but I felt like the stain brought out the grain slightly more. I'm using vallejo acrylic paints for colors. They go on fine over the oil based wipe-on poly, but I don't know about vice versa, so I'm going to do a test. I also tested a couple of different vallejo gold paints, and much prefer the "model color" gold versus the "model air" gold.
-
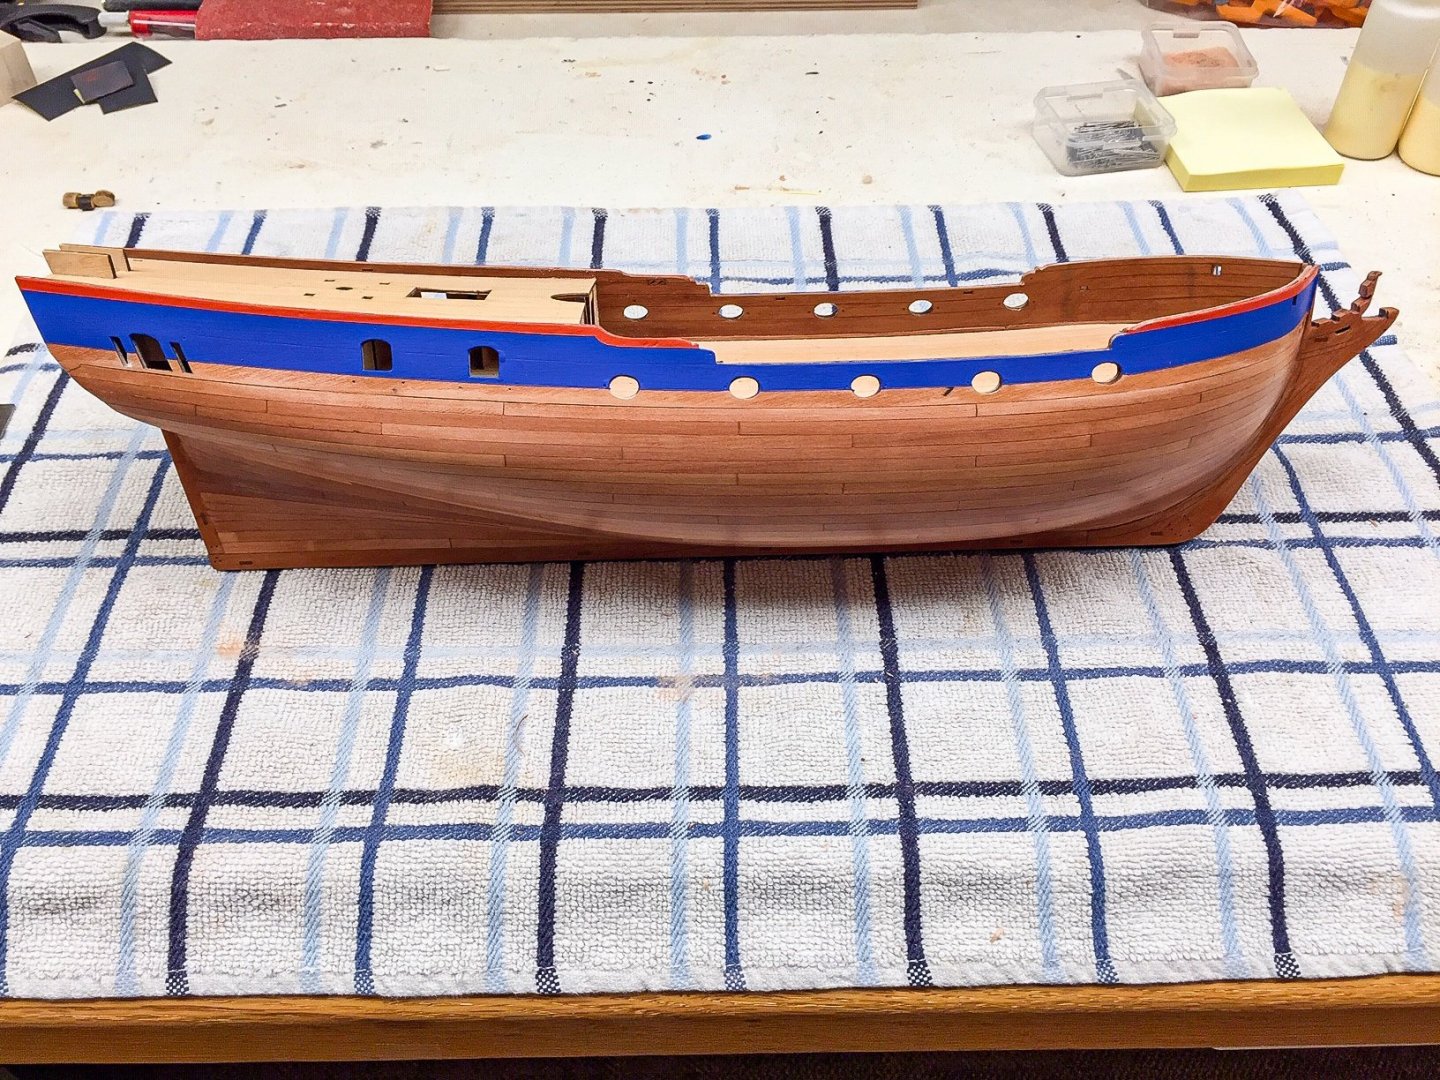
I've got the upper bulwarks painted blue and red. Most of this looks like it will be covered up with decorations. I find it interesting how the decorations are built up in layers.
-
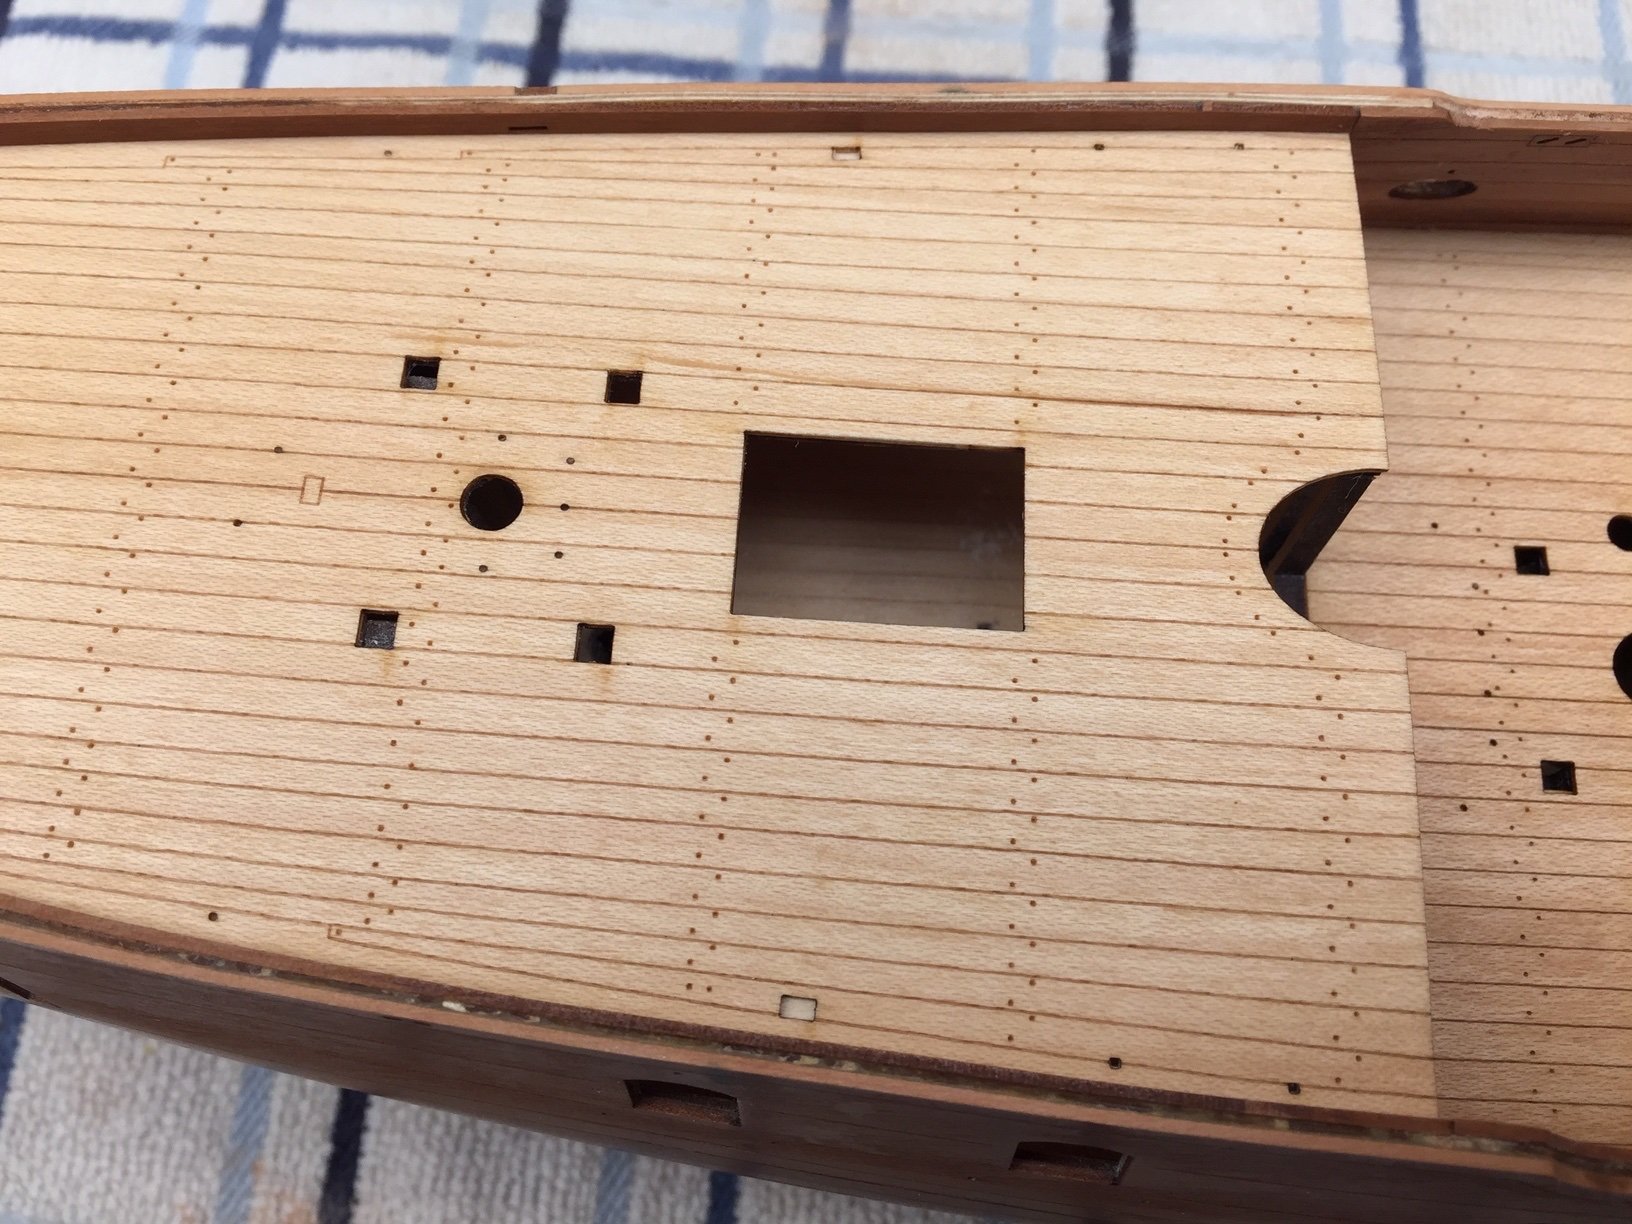
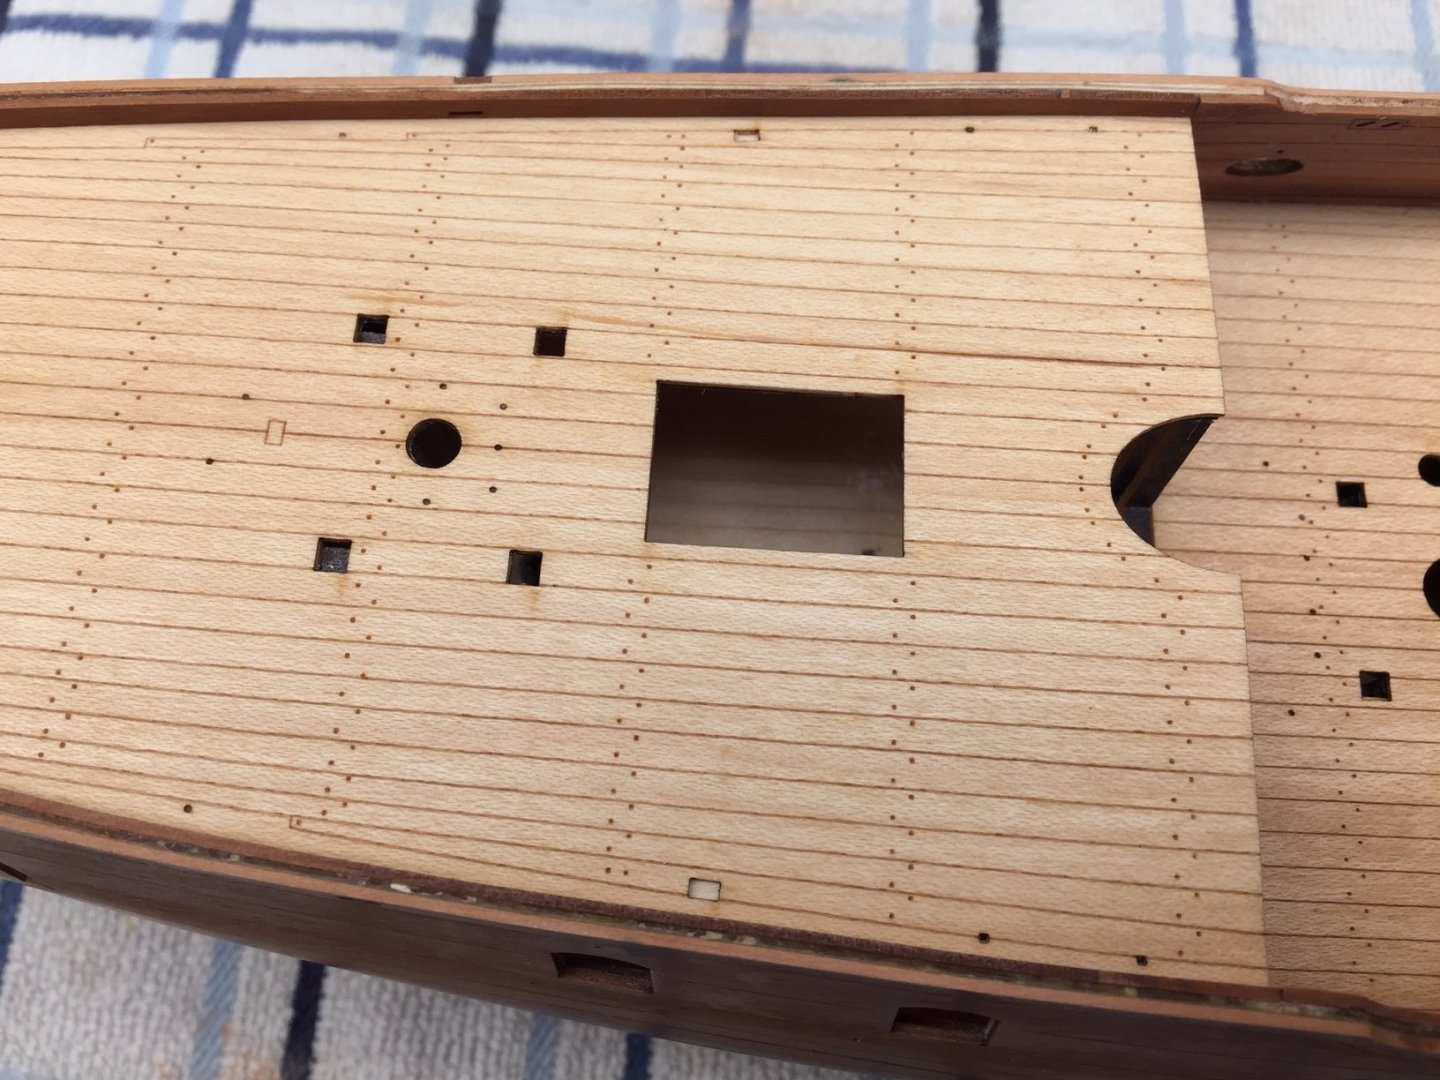
Derek, Thanks for spotting that small cutout on the deck, that I didn't punch out! I never noticed it until you pointed it out. I looked at plans and that should be a hole in the deck. And although I read about a hole not lining up, I didn't look at it close enough to realize I was missing a cutout. All the holes looked ok, so I didn't worry about it. I'm hoping it's not glued down too tightly and I can carefully cut it out. Much better to fix this now instead of later on. On plans it looks like it might be for mounting the wheel & structure.
-
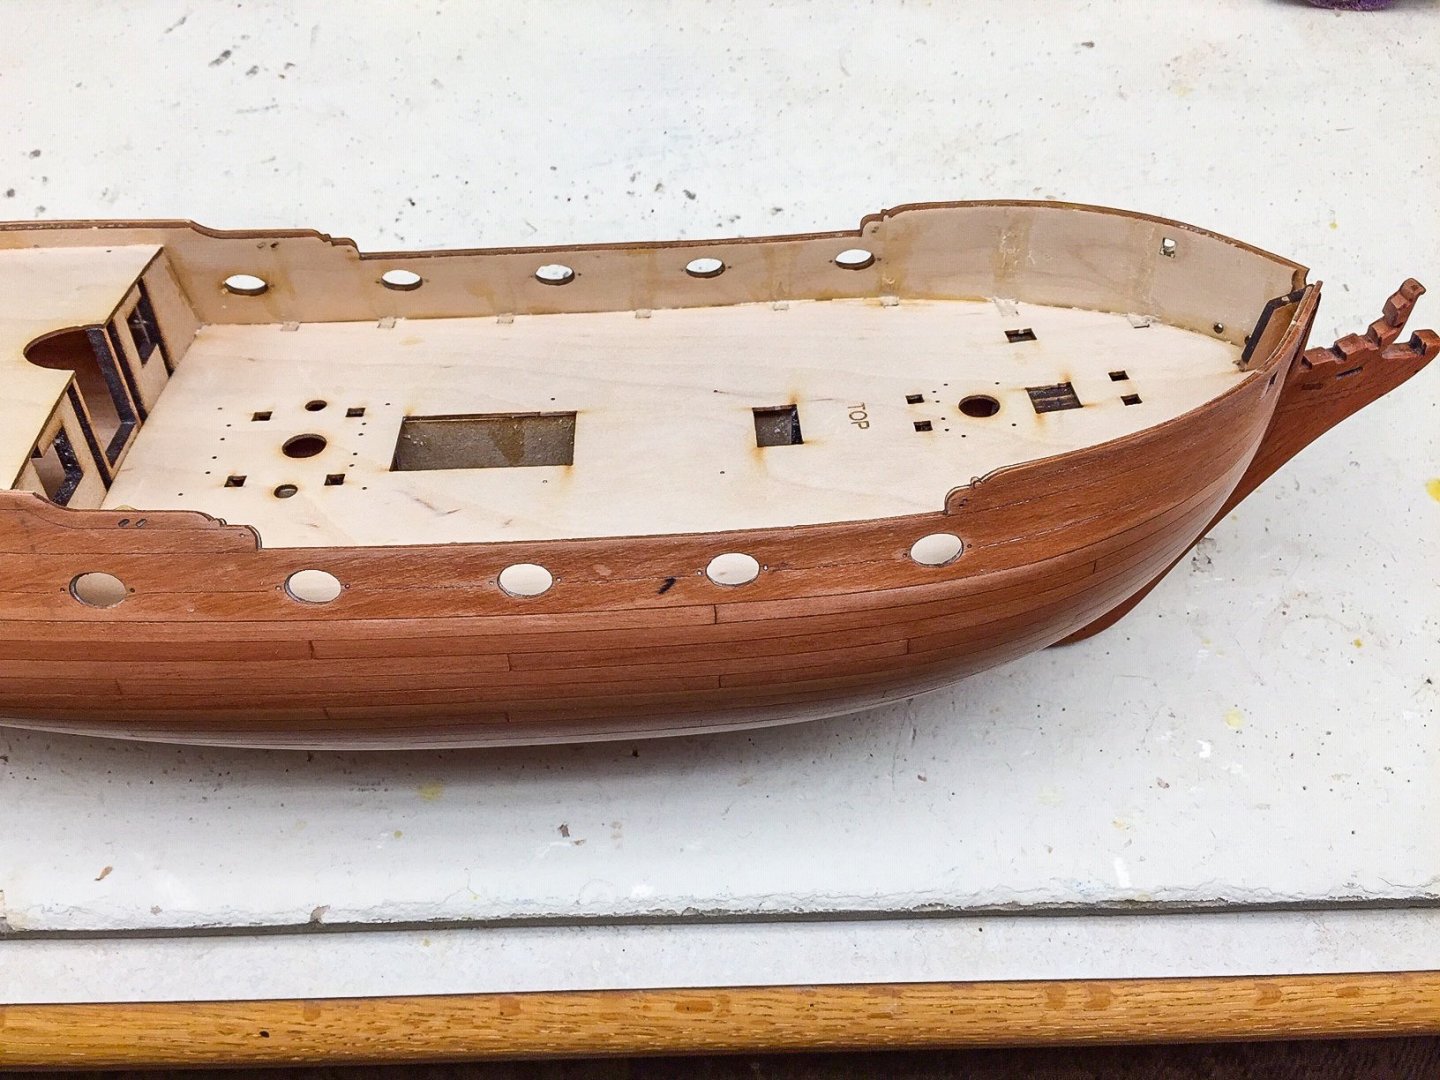
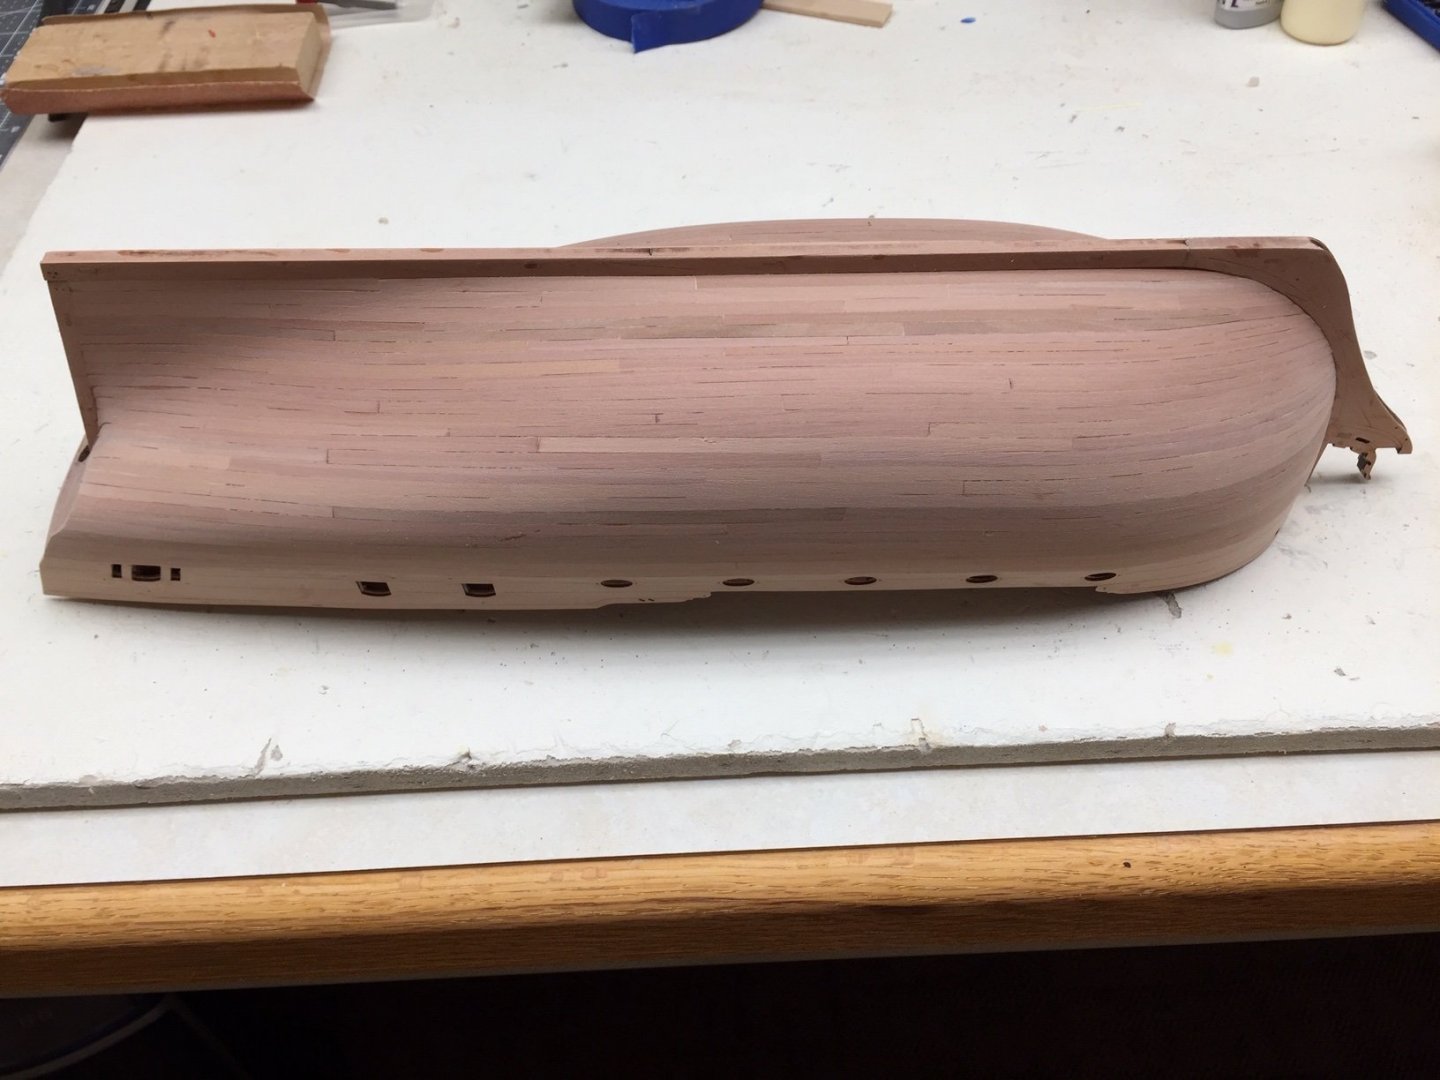
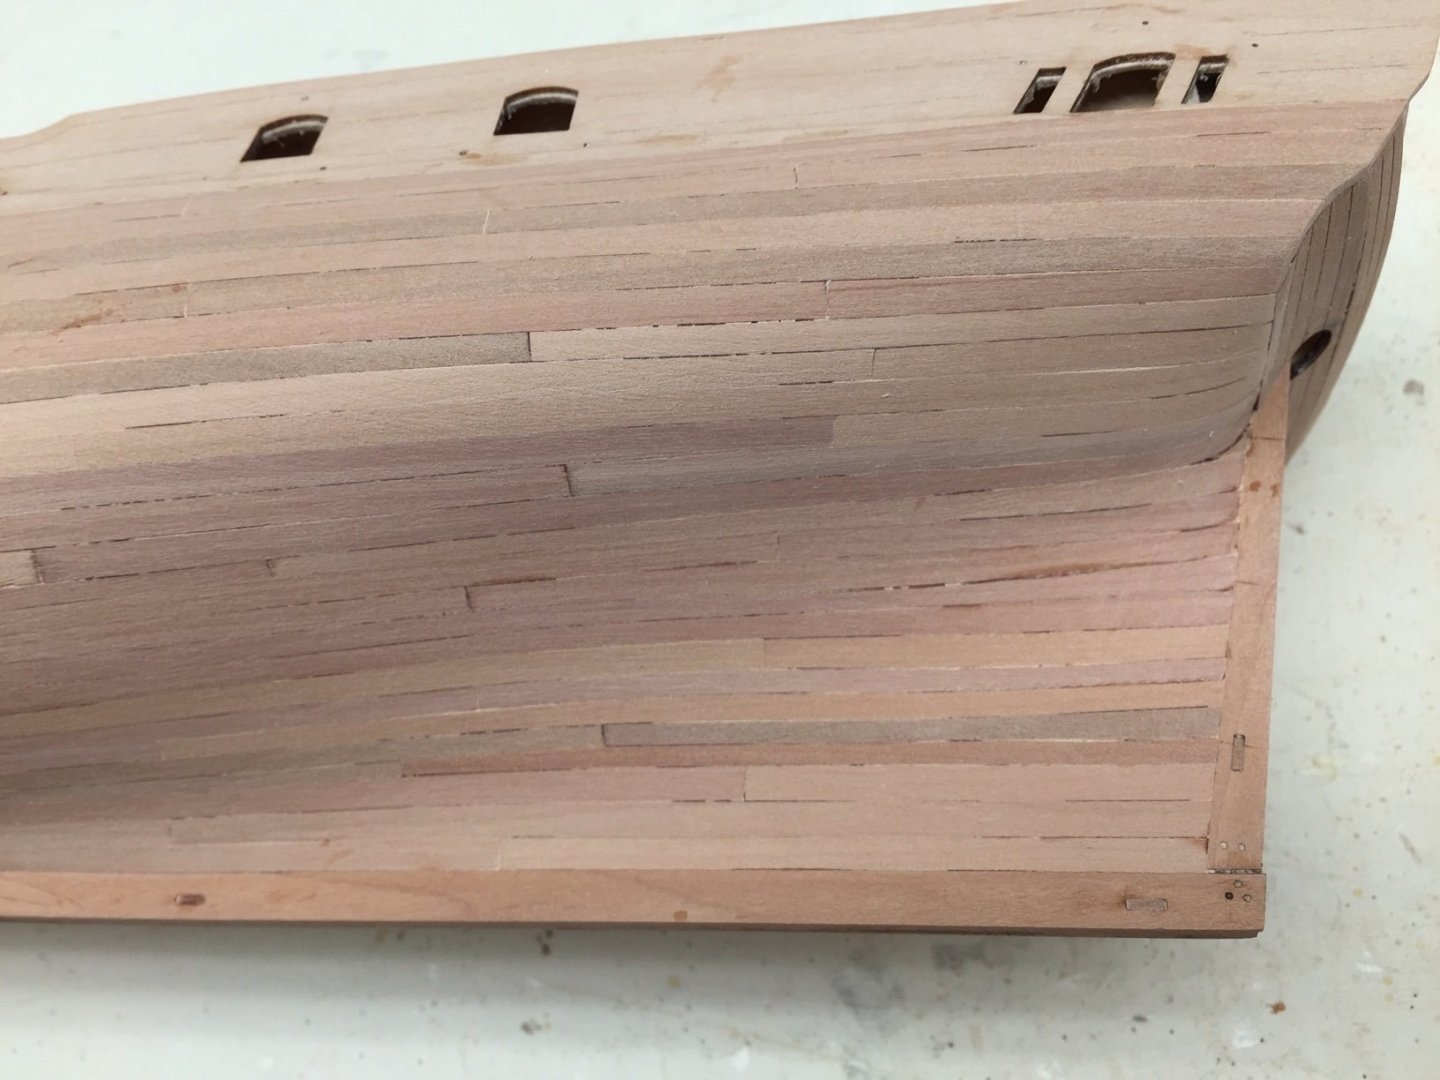
I put in the laser cut inner bulwarks pieces and ran into a problem. (I thought this step would be easy, but nothing is ever easy building one of these models!) Apparently at some point I ended up with bulwarks on one side slightly higher than the other, about 1/16". There's several places I could have made the mistake, so I'm not sure when it creeped in. One side (one piece) of inner bulwarks fit good, but the other was short about 1/16", so I made a thin strip of wood to fill in the gap at the bottom. I didn't have a choice on where the gap would be, because I had to line up the inner bulwarks piece with the oval gun ports. I test fit the pieces and it looked like everything fit good. But when I glued them in, I couldn't get the little piece in the gap. I managed to force it in, but it never really set in there like the test fits. After some trimming and sanding, it doesn't look too bad, especially if the light isn't on it just right. Once cannons and deck fittings are in place, I doubt it will show. I had pre-stained the bulwarks pieces and gap strip, but after gluing and sanding in place, I had to stain them again. Somehow I managed to get some stain on the deck. Fortunately, it's not a dark stain, but it didn't look good with part of the deck stained. I decided to go ahead and lightly stain the entire deck. That's why in photos it may look a little darker than you might expect for maple. I've also done some sanding and filing on top edge of bulwarks trying to even them up a little bit. It's not perfect, but I didn't want to remove any more material. I've also wiped on a couple coats of poly. I'm not going to assume any step will be "easy" from now on!


-
I put in the main and aft laser-etched deck planking pieces. They only required a little sanding on edges to fit. This is my first experience with laser-etched deck planking. It's a little different look compared to my other two planking efforts with more detail around the joints at the bow. Probably a matter of opinion, but plank edges look a little better on the real planking. Obviously the laser etched planking pieces were much, much easier and faster.
-
Thank you for going into a lot of detail on how you built and rigged the tiny pop-gun cannons. I struggled on Syren, and I can see part of the problem was doing it with the cannons already glued to the deck. Much easier to do as much as you can before mounting. I'm one of those that needs some lessons in tying knots. No fishing experience, and I've seen the standard knot diagrams which I find a bit confusing. I can see quad-hands is very useful for this, and I'm sure many other things, so will get one of those. In general, I've gotten frustrated doing knots, so invariably resort to simple overhand ones. Unless you take closeups, it's often hard to tell the difference, but I'd still like to learn how to do it the correct way. There's always a reason why certain knots are used. I've used weathering powder a little on model airplanes, there are many brands. On Syren I used some on the white hull of the long boat to dull it slightly making it look not quite so clean white. Also used it to darken or take the shine off the tan rigging line a little by rubbing line between by fingers with weathering powder (this was with model expo rigging line included in the kit). Some of the airplane guys do incredible weathering on their models. Might be something to think about on future model ship. I'm always amazed at how good your work looks in closeup photos!
-
This is really looking nice, beautiful work as always! You're making great progress, and I like the tree nails on the keel. I guess I'm a little confused about what was inaccurate about the hull plans. Is it just the plans that aren't right, but the bulkheads are shaped correctly? Or did you have to modify shape of some of the bulkheads to get the "right" contours?
-
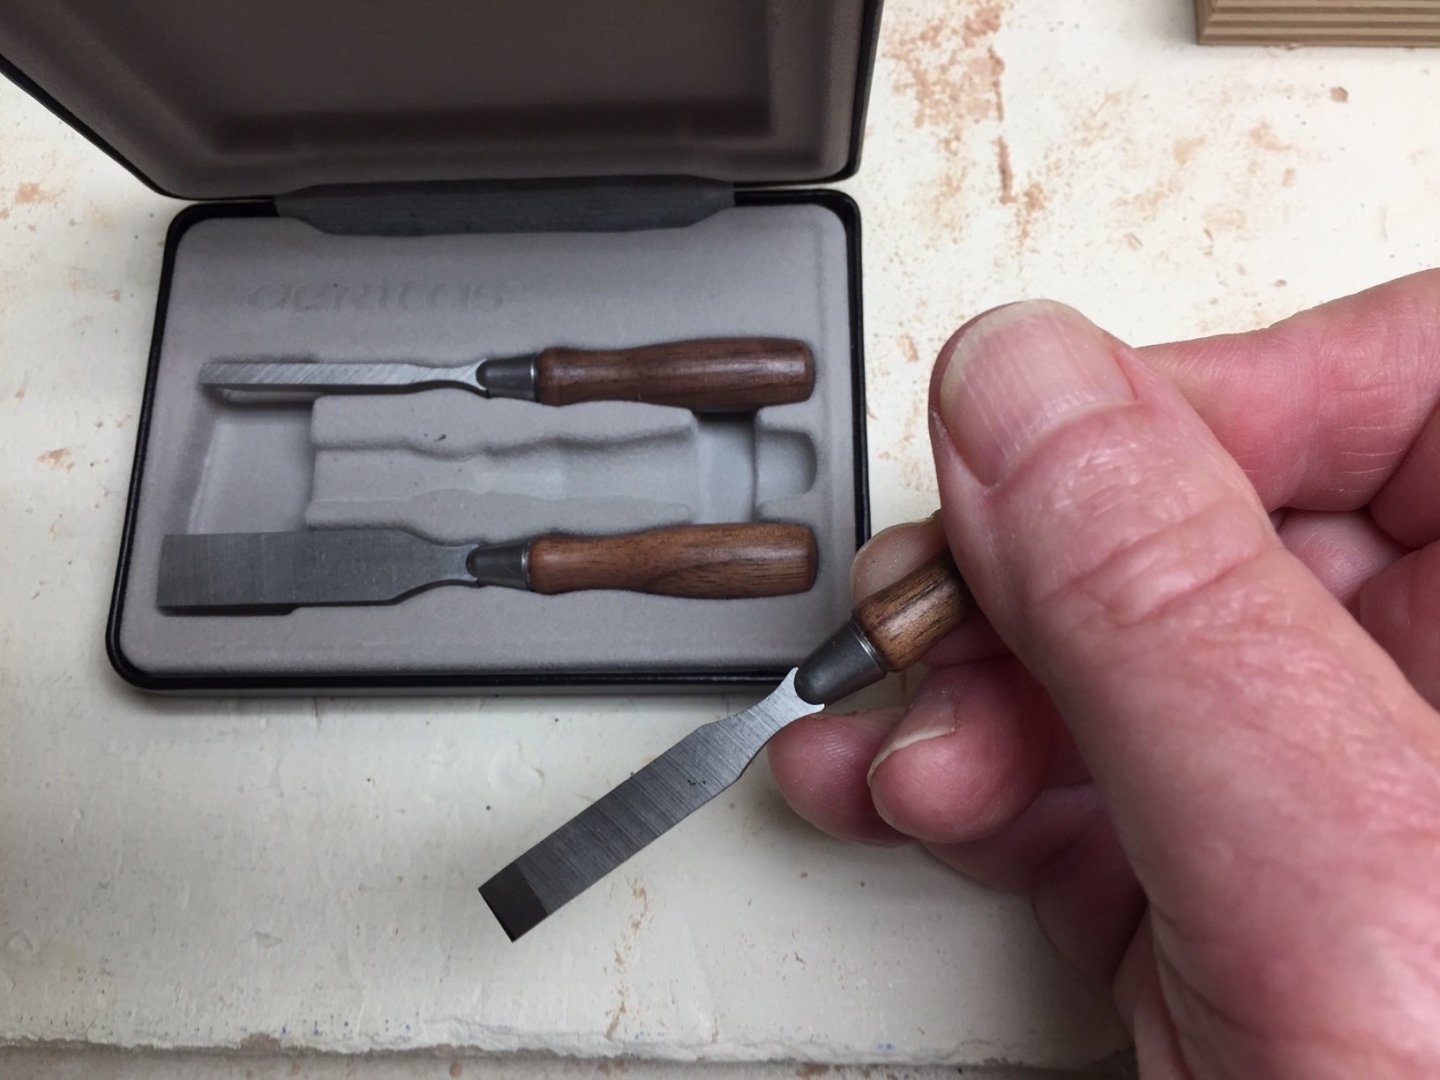
I removed the strengtheners and bulkhead tabs along the bulwarks and cleaned them up with little chisel and sanding. I had no problems doing this, and the mini chisel made smoothing things out easy. Now I have a clear sub-deck.
-
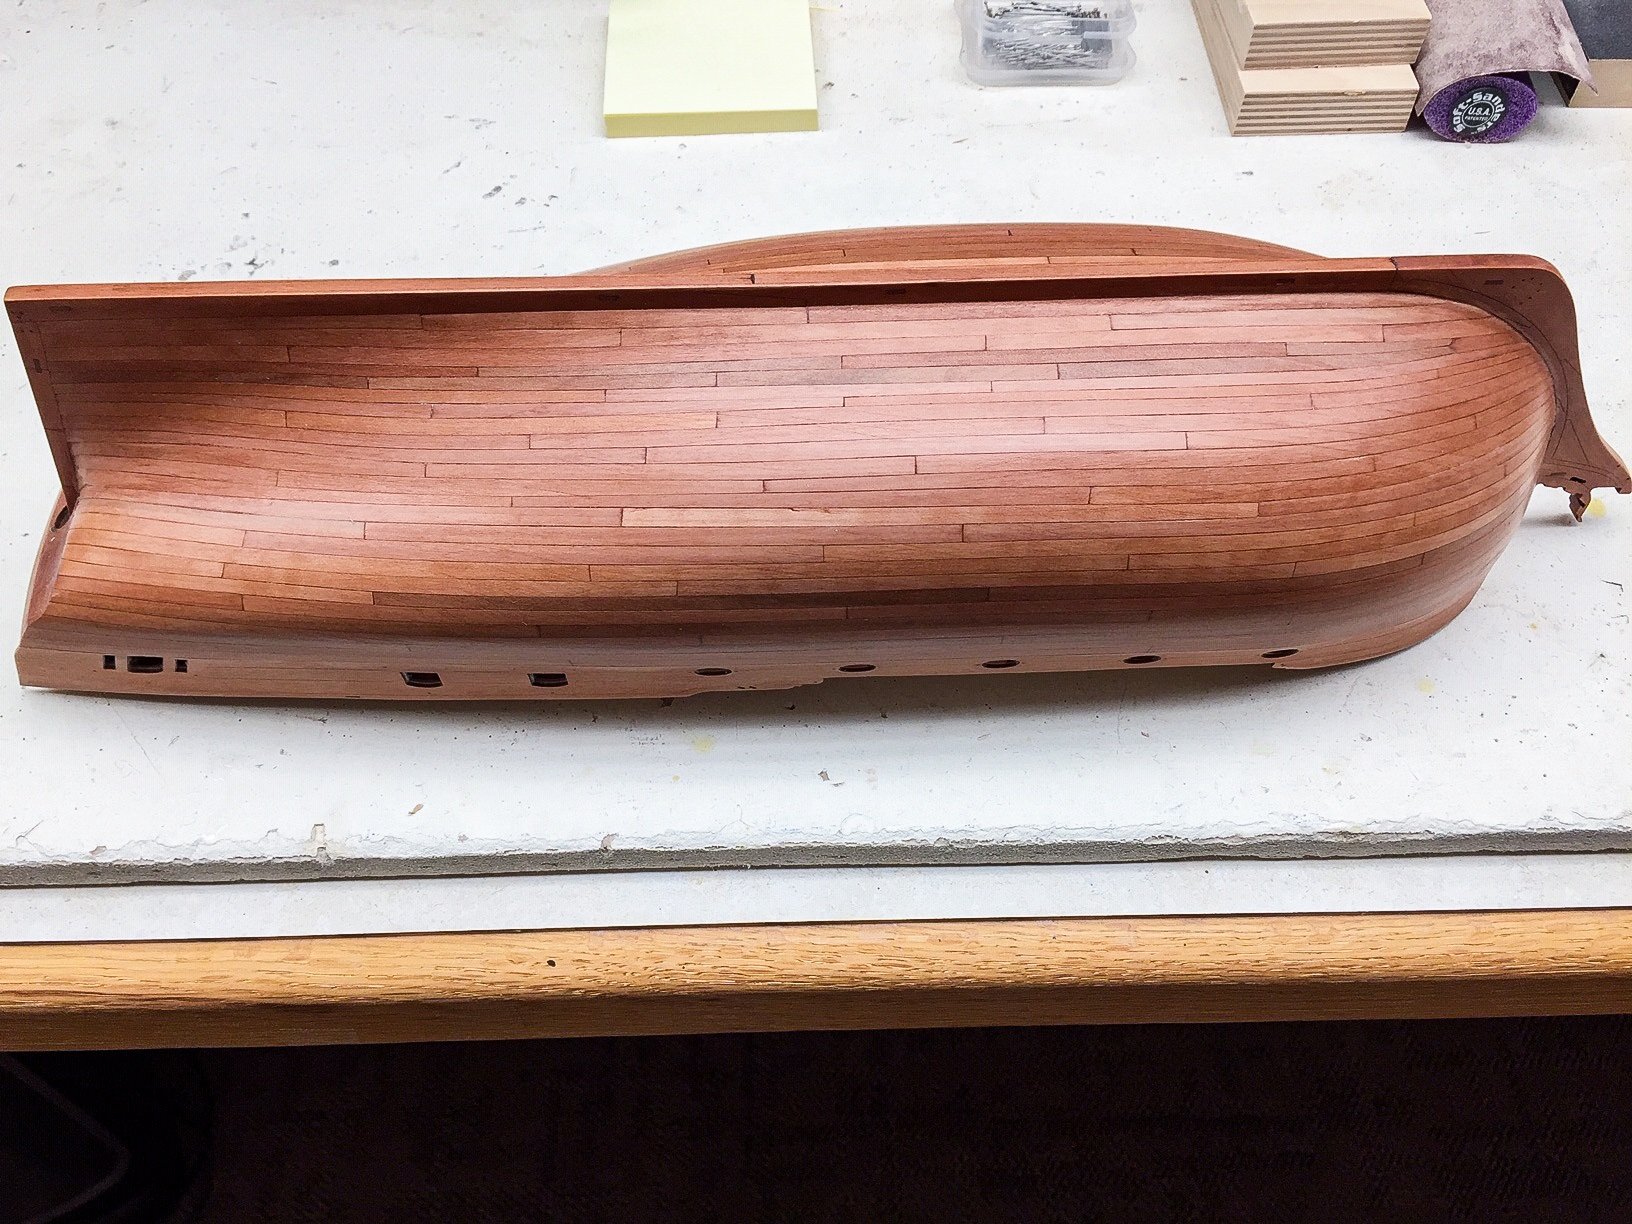
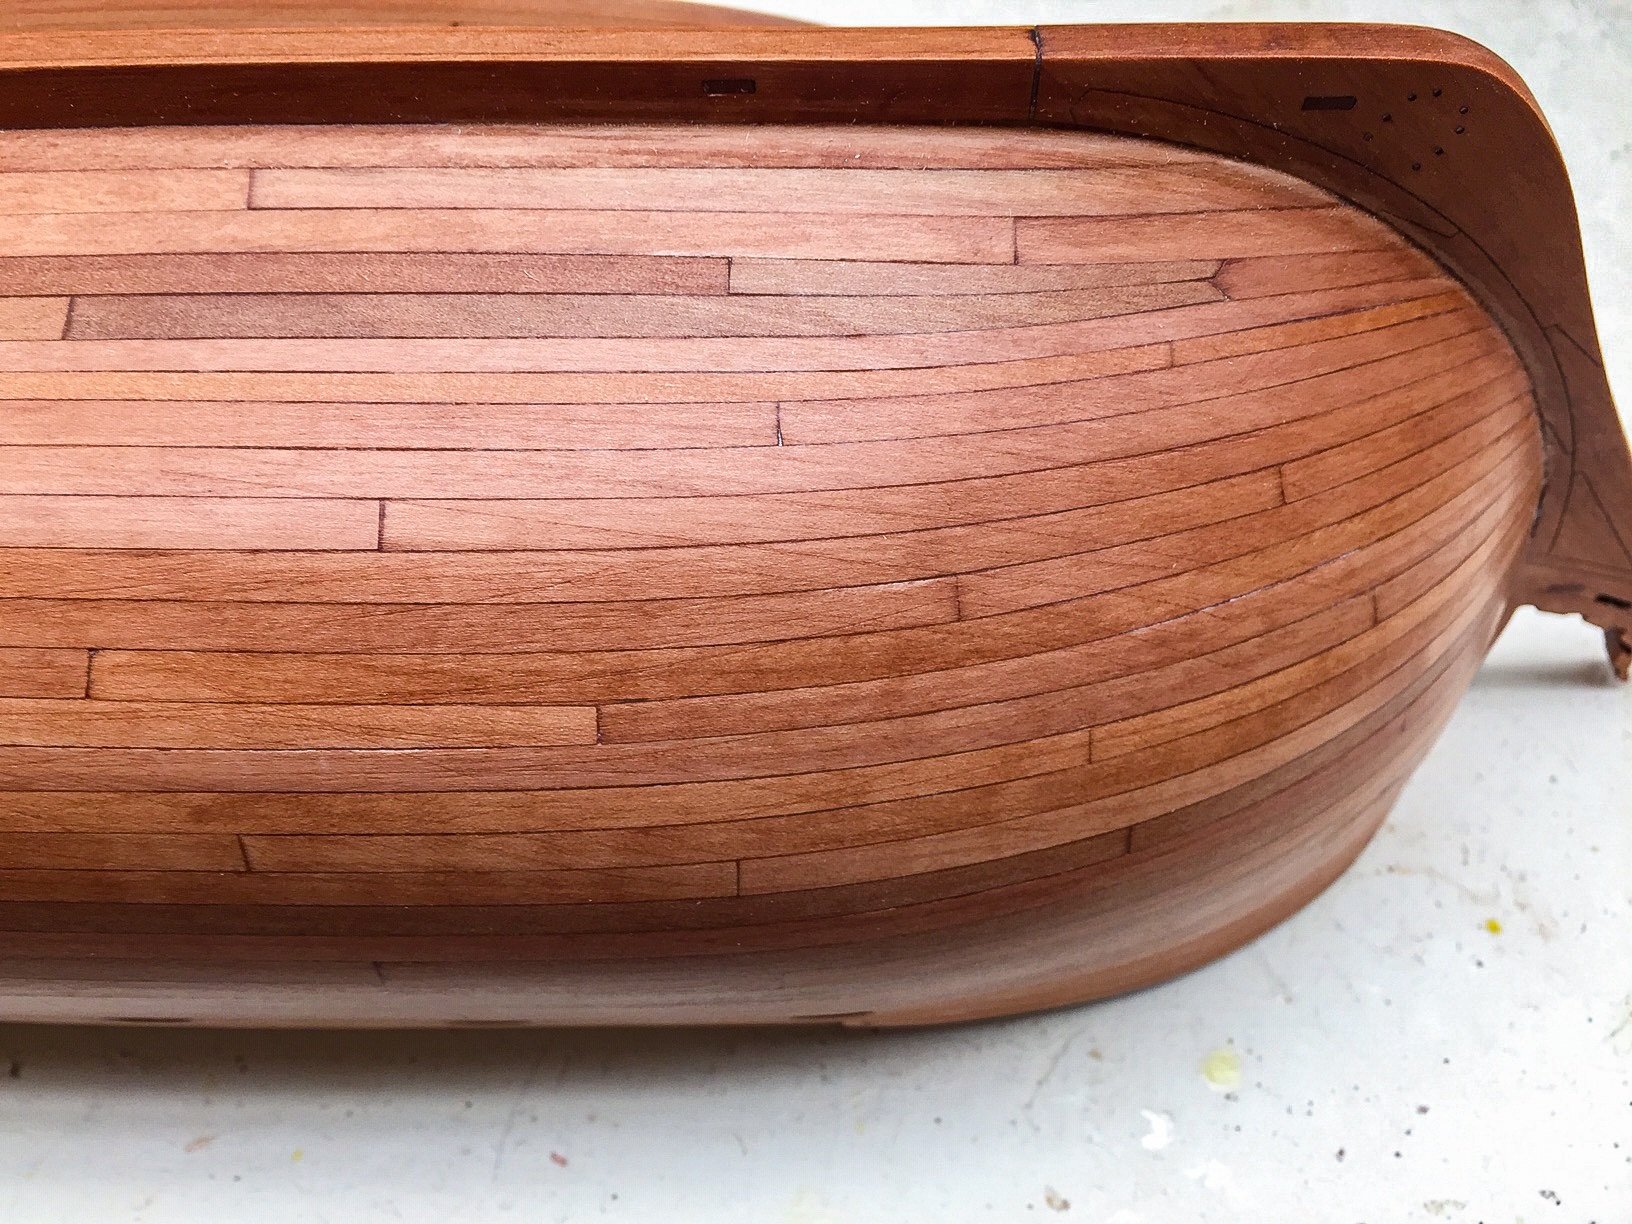
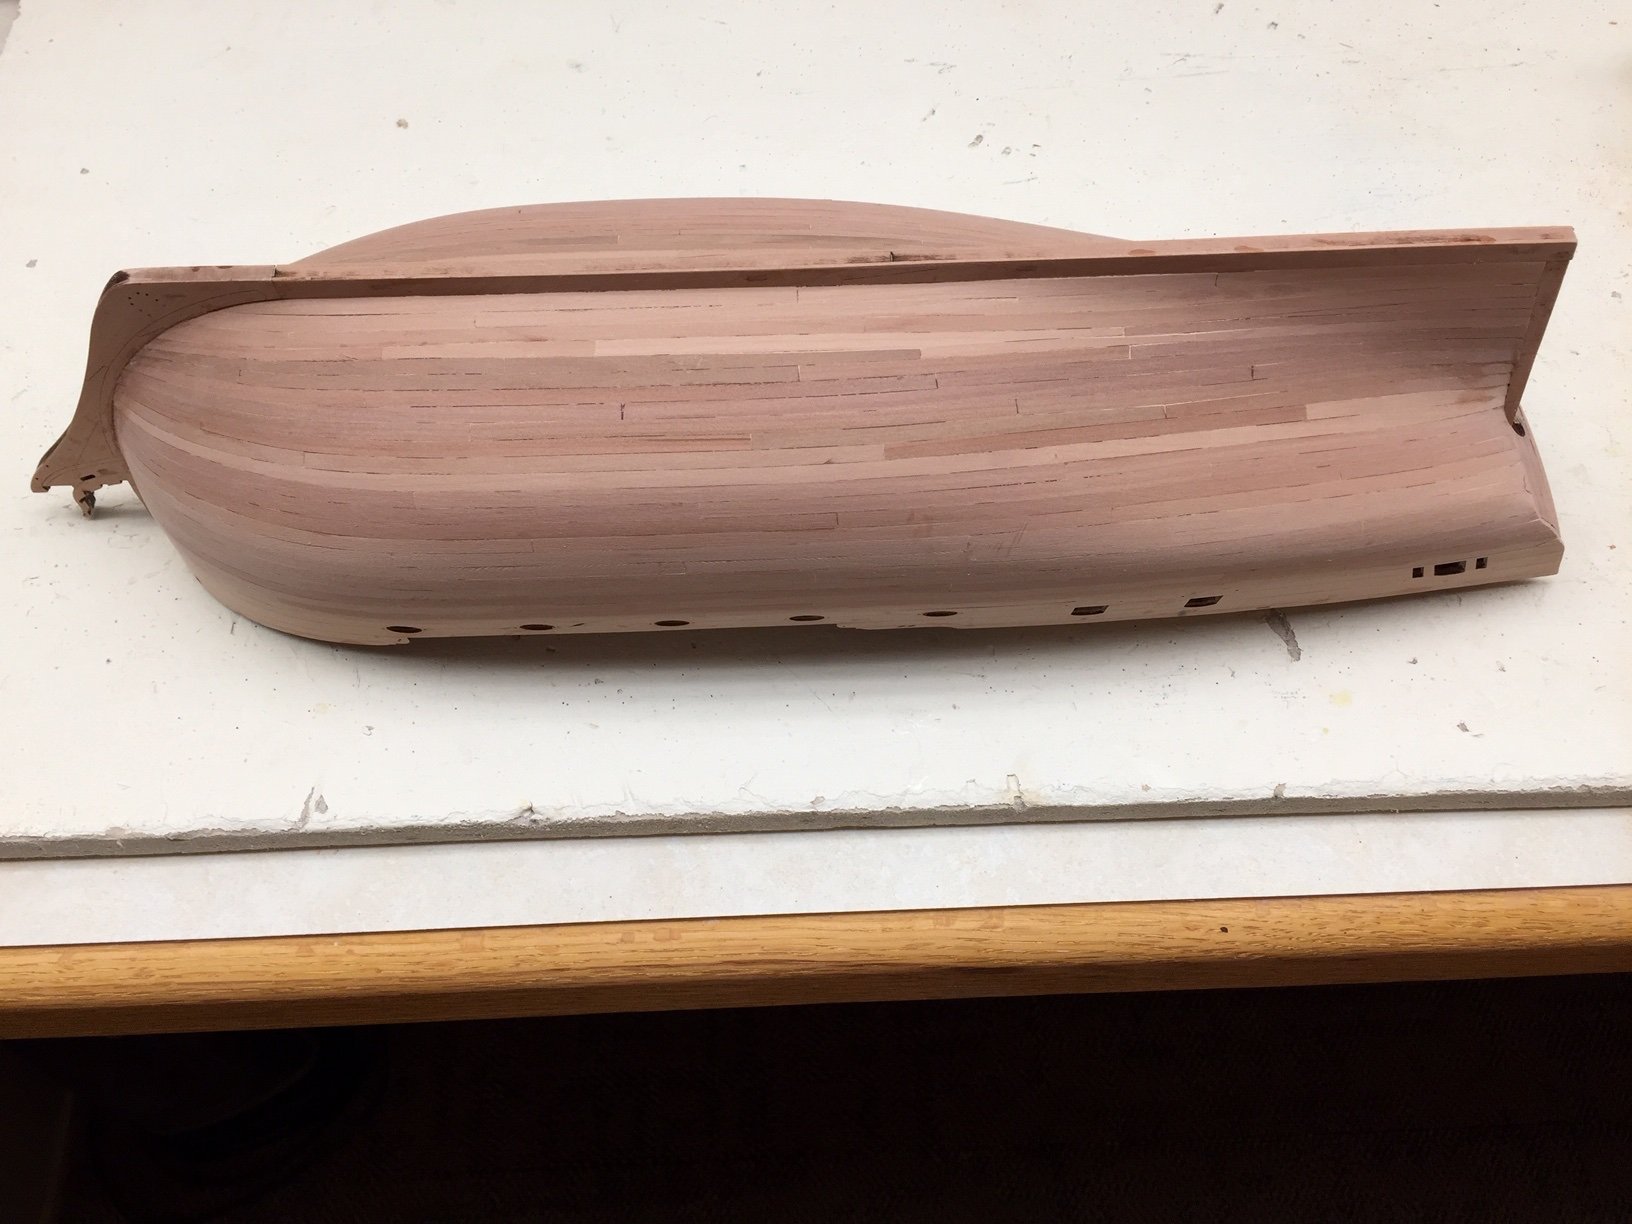
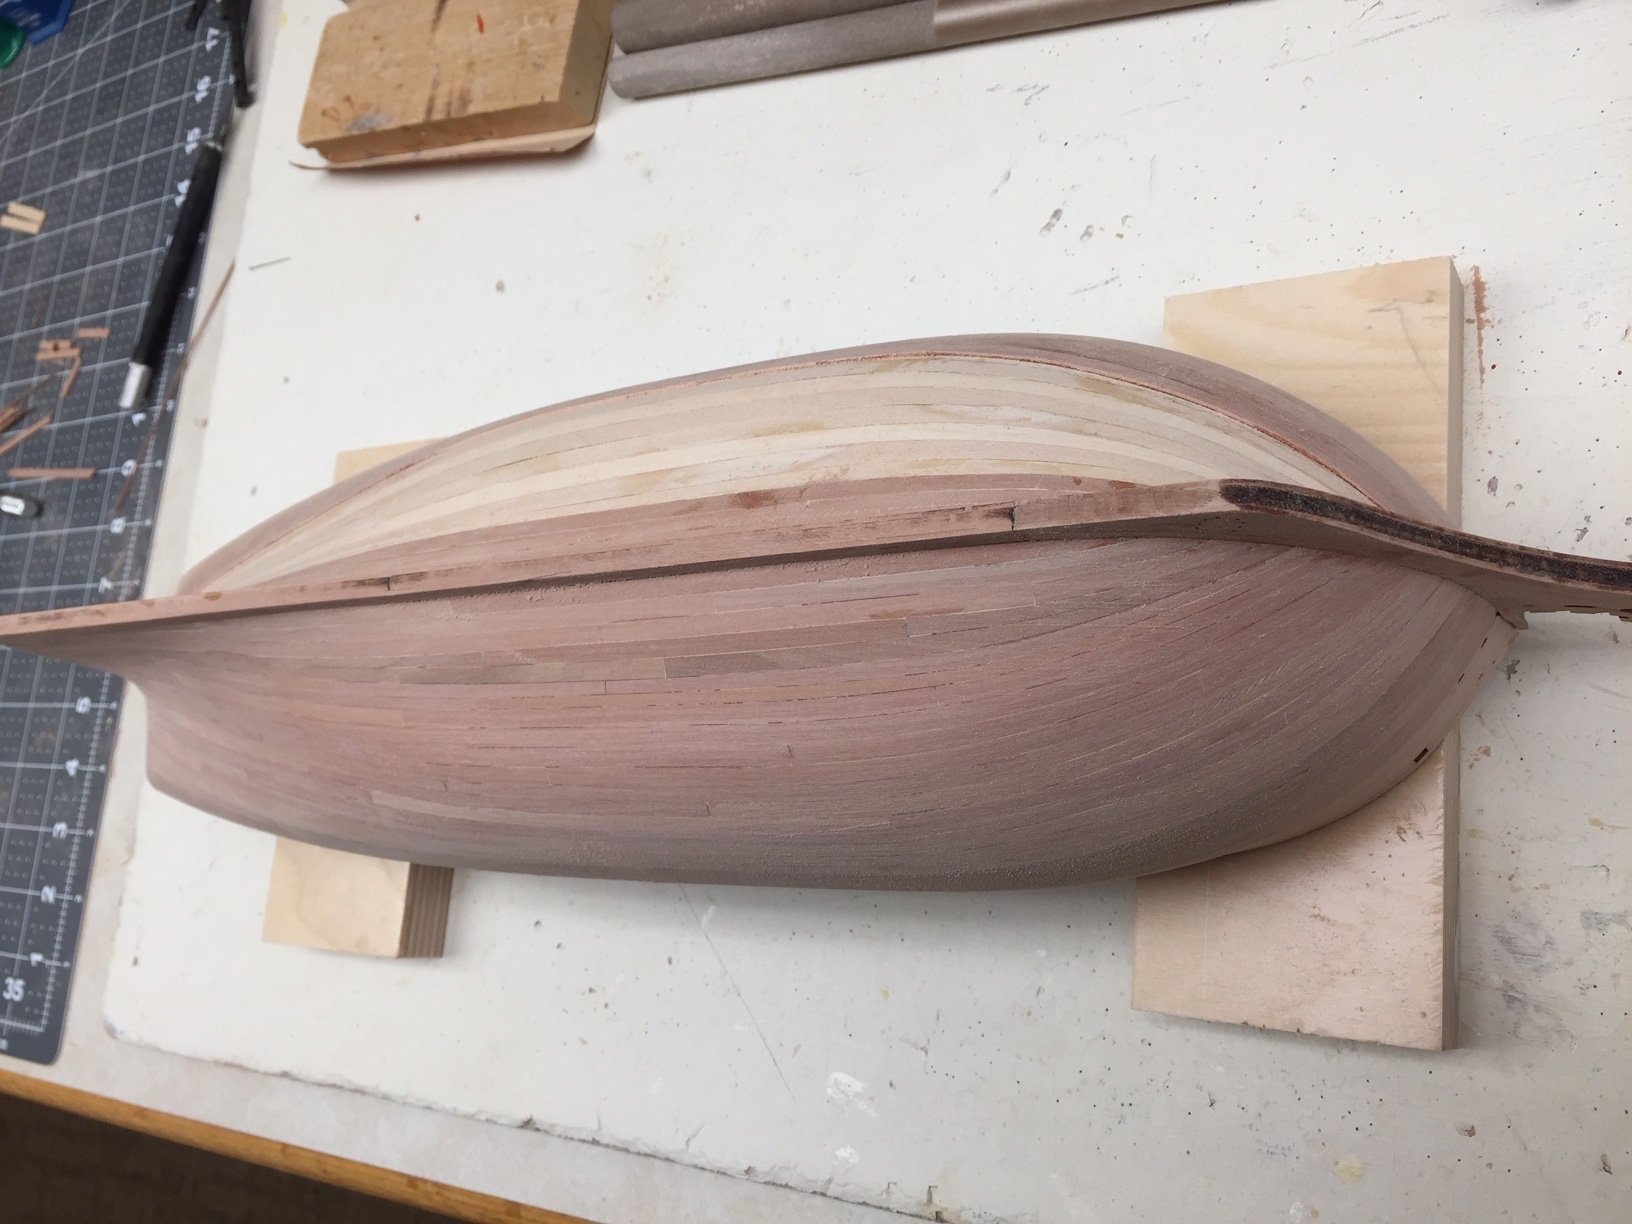
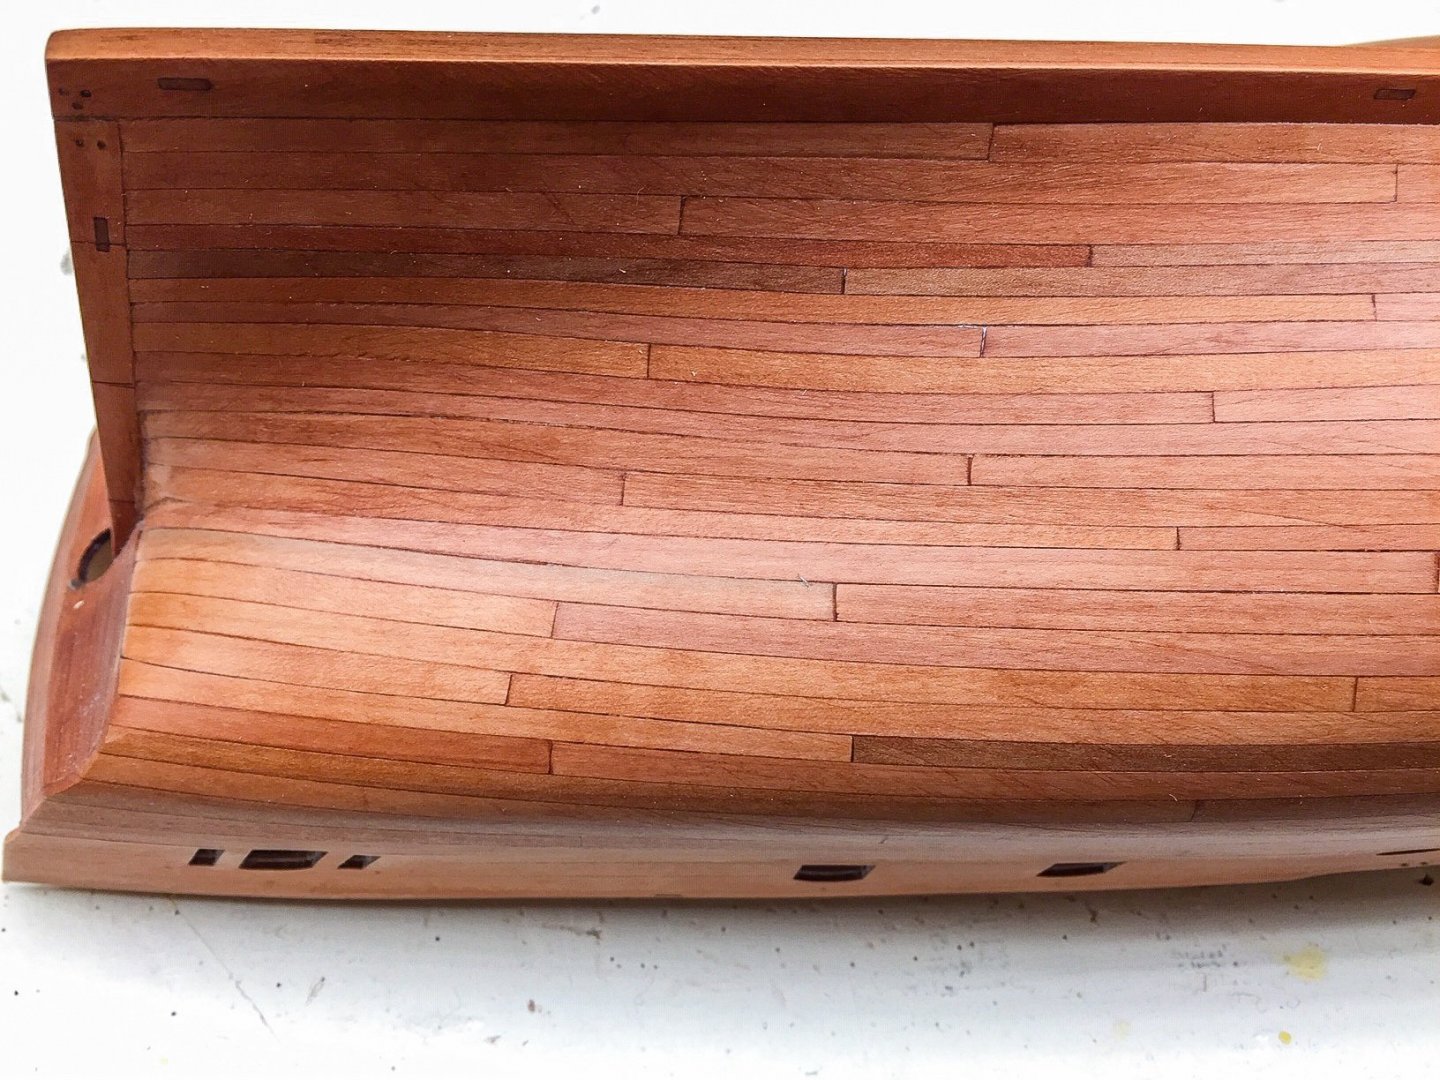
Since I've been thinking I'd not paint the hull below waterline white, I wanted to see how it would look stain and with coat of wipe-on poly. I used a "golden pecan" stain which is not dark. From tests it's not much different than using wipe-on poly without stain. Here's some pictures:


-
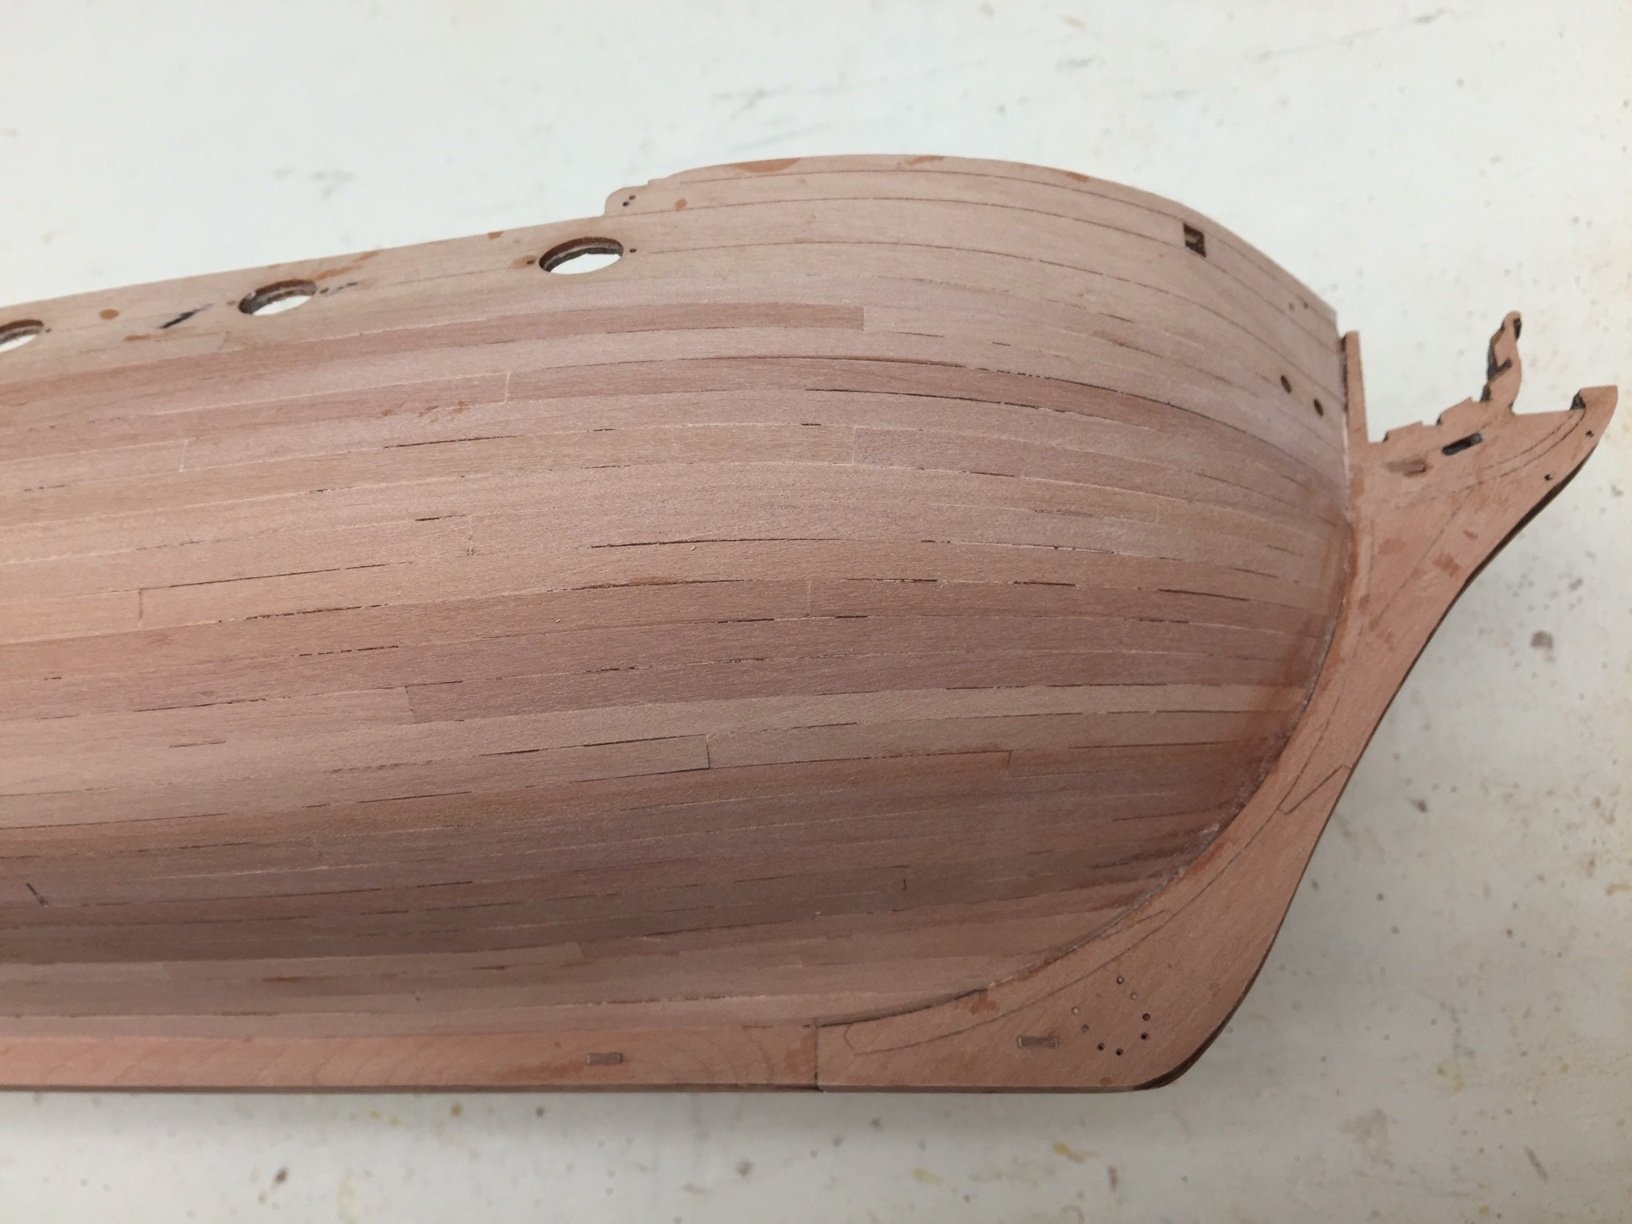
And here's port side.

-
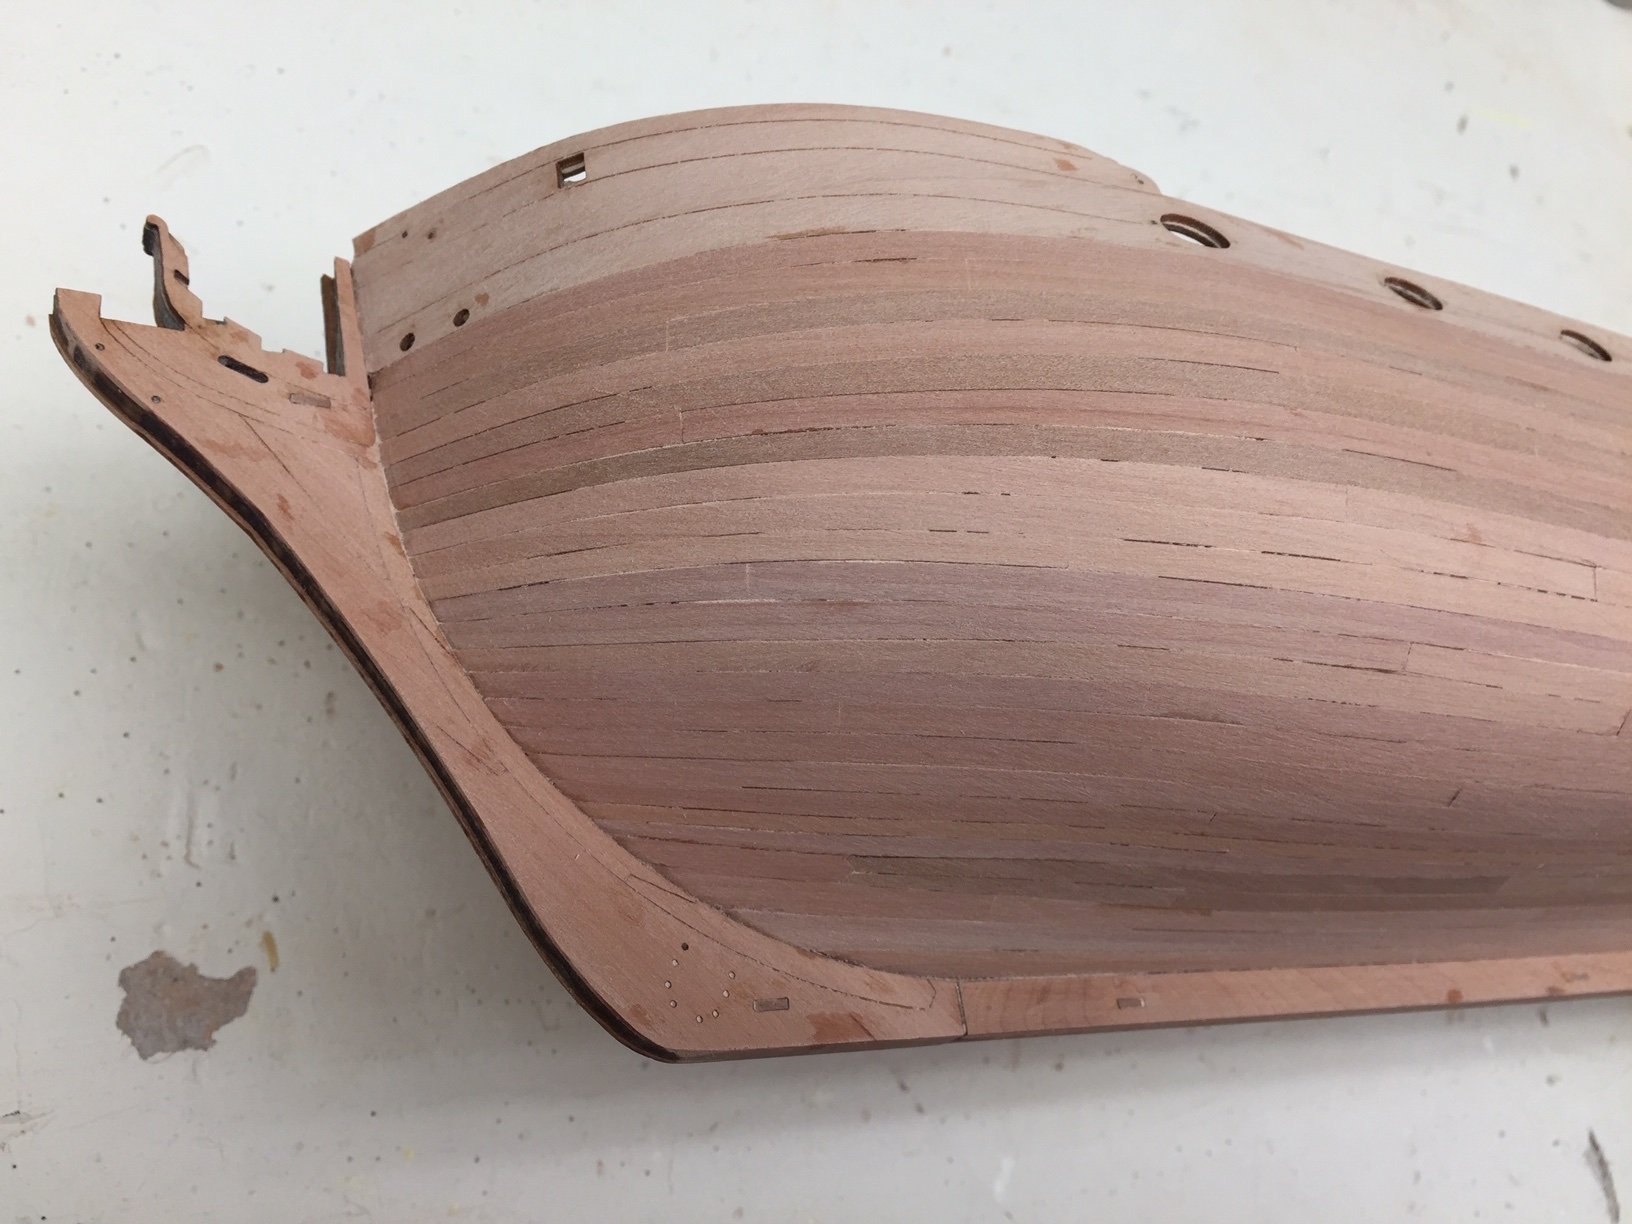
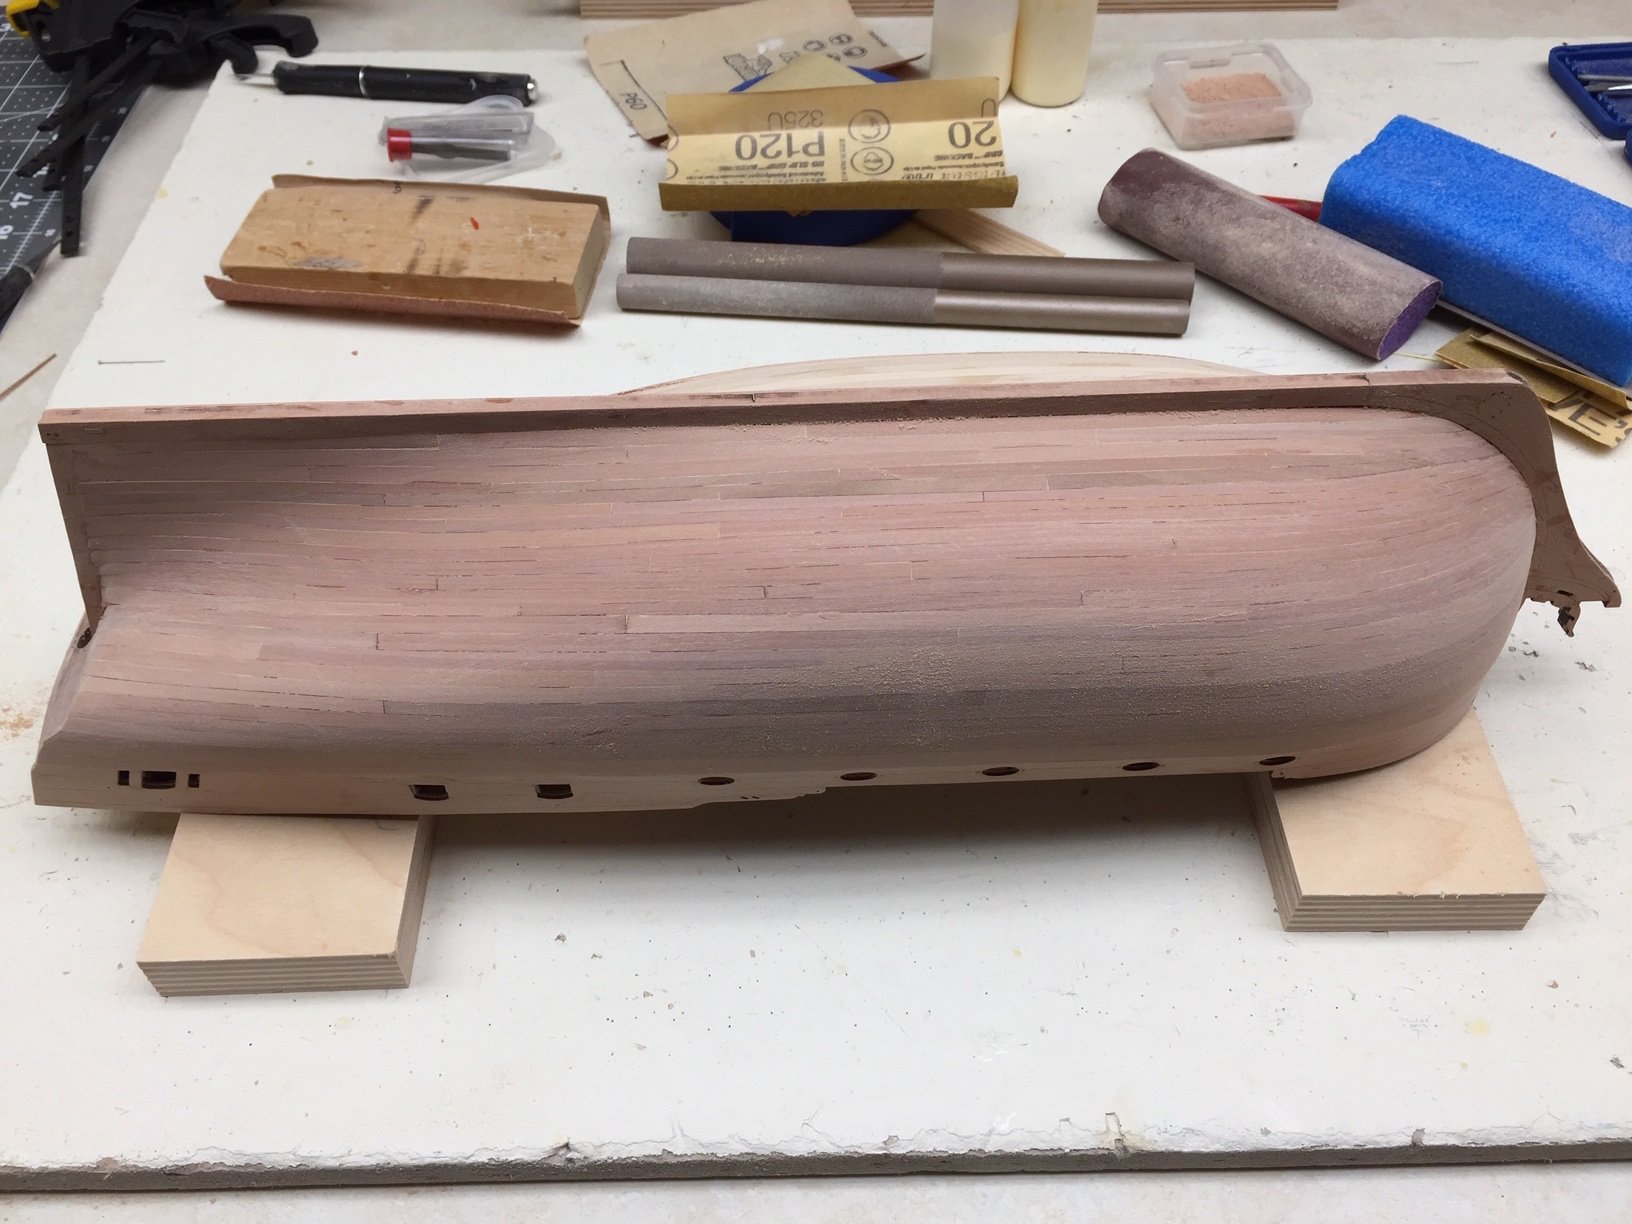
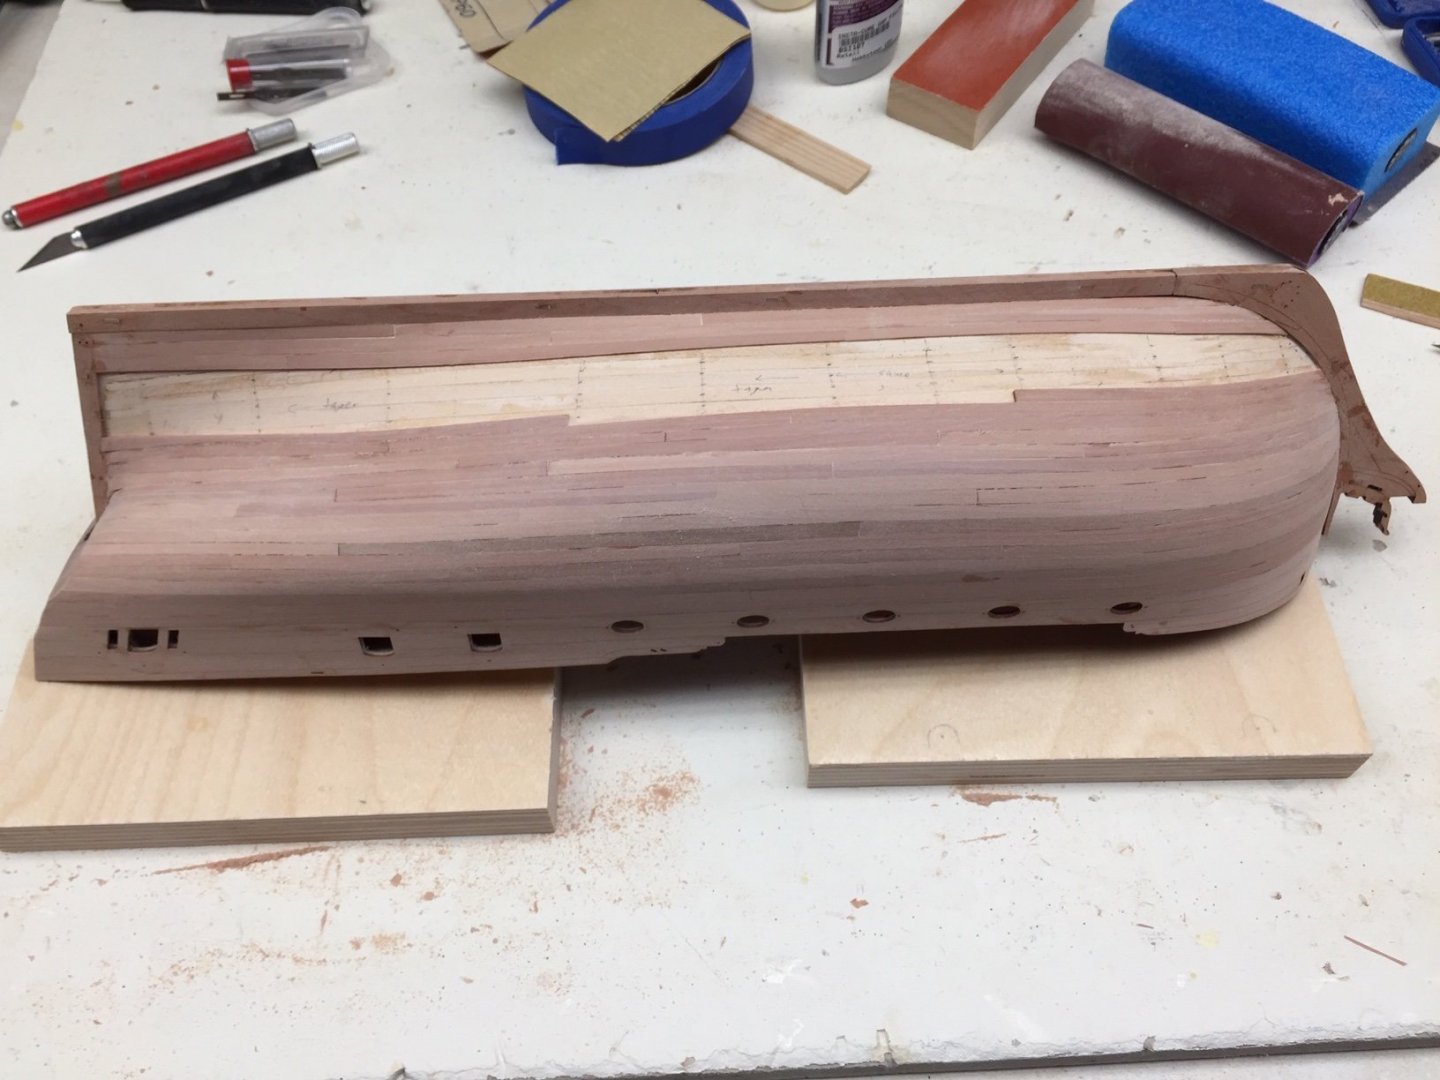
Finished planking hull! I enjoy planking until I get about halfway, and then it starts to get old. I've never been too good at repetitious stuff. Here's pictures of starboard side. Closeups always look worse than it actually does, but show where I need to do more sanding, and perhaps a little filler, although I'll go real easy with filler.


-
I bought Shapton ceramic sharpening stones from Lee Valley. Probably overkill, but they should last for a long, long time. Both sharpening stones and Krell honing guide have been recently delivered, but haven't tried them yet. Looks like they will work great. I like Derek's idea of using wet or dry sandpaper (I have some 600 and 1500 grit) on glass. That's a great idea and would have saved some money buying stones. Oh well! I'll certainly use chisels when I start cutting bulkheads along inner bulwarks, and I'm sure I'll find many other uses.
-
Also ordered Veratas mini chisels and they look very useful. For some reason I was surprised at how small they are, but perfect for building models. Also ordered Richard Krell honing guide and a couple of sharpening stones which I should get before too long. I learned about these tools from reading build logs. Many thanks to everyone for writing them!
-
I haven't posted for a while, because I haven't been working much on the Duchess and it's just planking. I finally got one side planked. Fitting in the last ones was a bit tedious. I ended up needing a drop plank, but didn't realize it until it was too late to do it the correct way, so I improvised. I made one plank transition into two planks near the bow. I'll probably be the only one that knows (and now you all, ha!). Here's couple of photos of current status. I have the lower section of starboard side left, plus a lot of sanding.


-
I agree, excellent explanation of your technique. I found it very interesting, and I like the idea of using wood battens. For some reason I never thought about that. Seems to me like they would lie on the hull more smoothly and more like a plank than thread or tape (I tried tape and ended up sketching line with pencil based on tape...it was not very precise). Thanks for taking time to write it up!
- 345 replies
-
- 1
-

-
- Duchess Of Kingston
- Vanguard Models
- (and 1 more)
-
Your planking is looking awesome to me! Planking around gun ports looks very clean and neat. You could certainly give me a lesson or two! I agree with all the comments above about small differences between the two sides. It would take strips of wood cut to extremely close tolerances to get both sides the same. Only way to have a chance of doing that is to cut your own. But I don't think it will matter for reasons pointed out above.
-
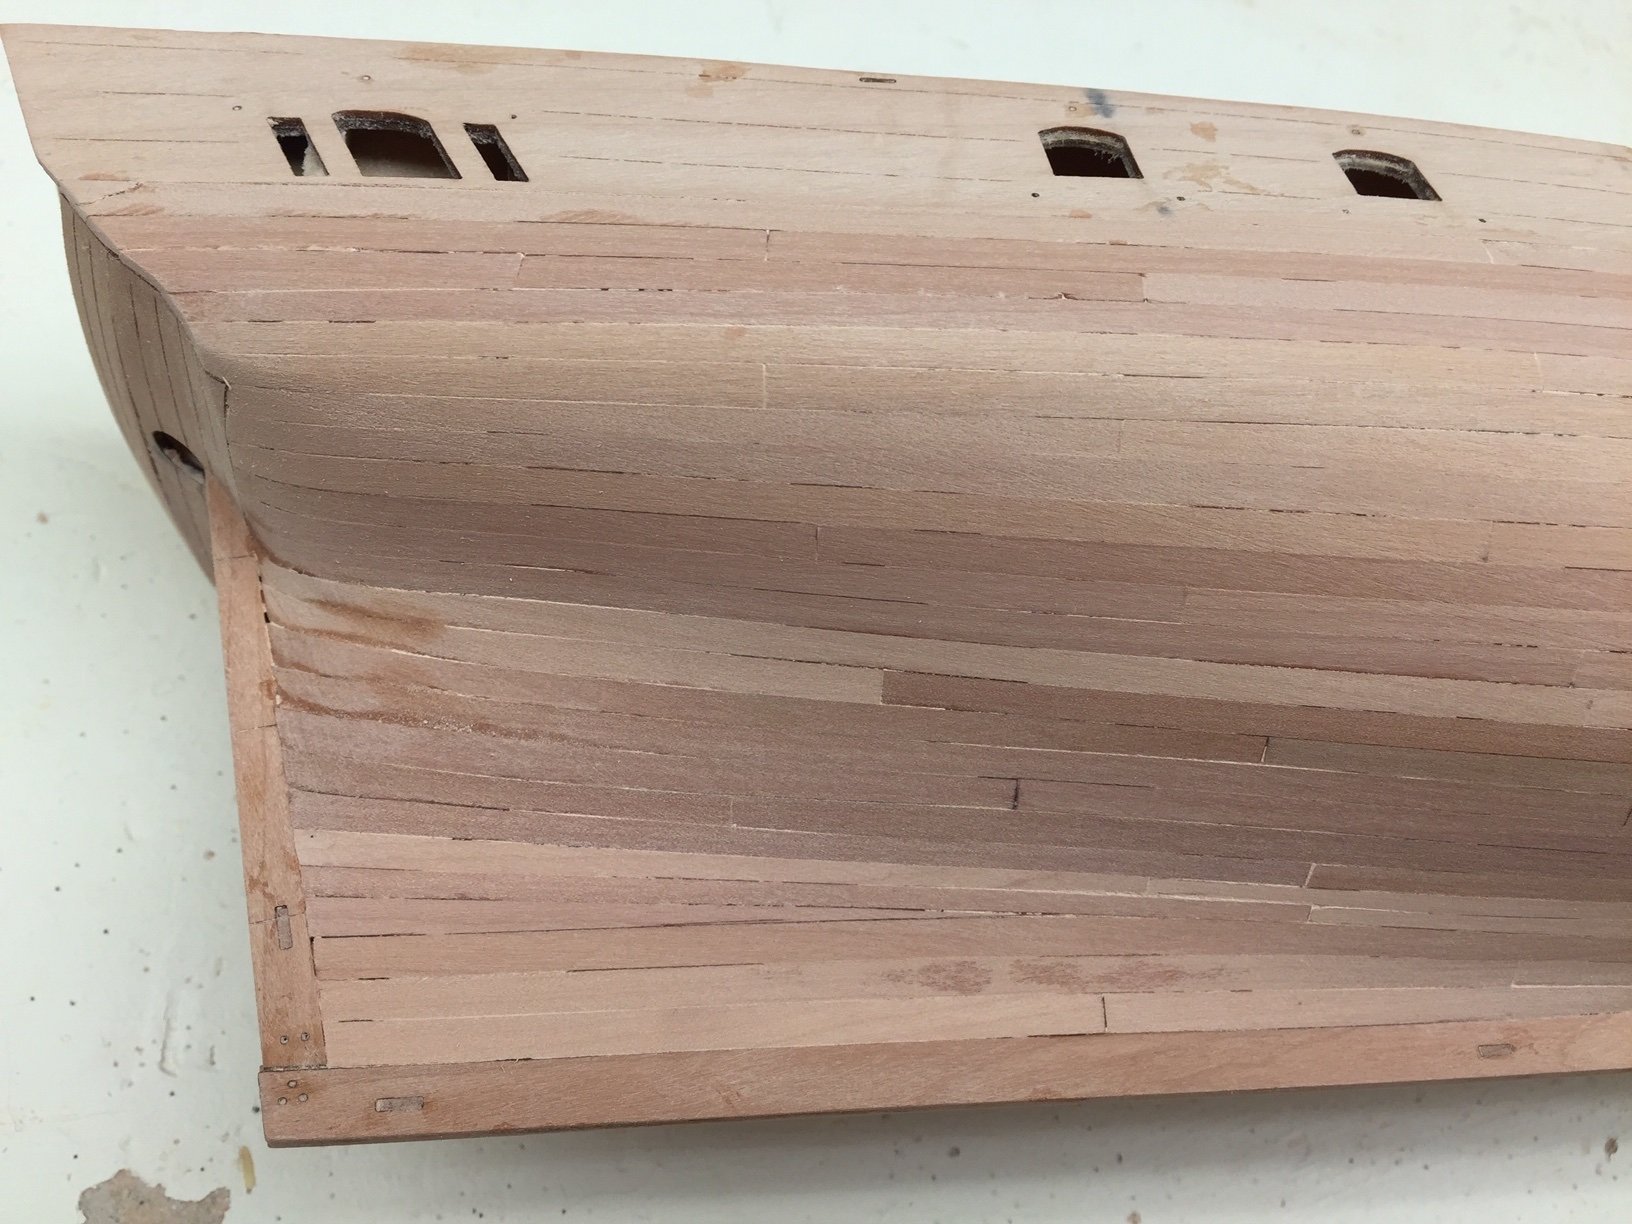
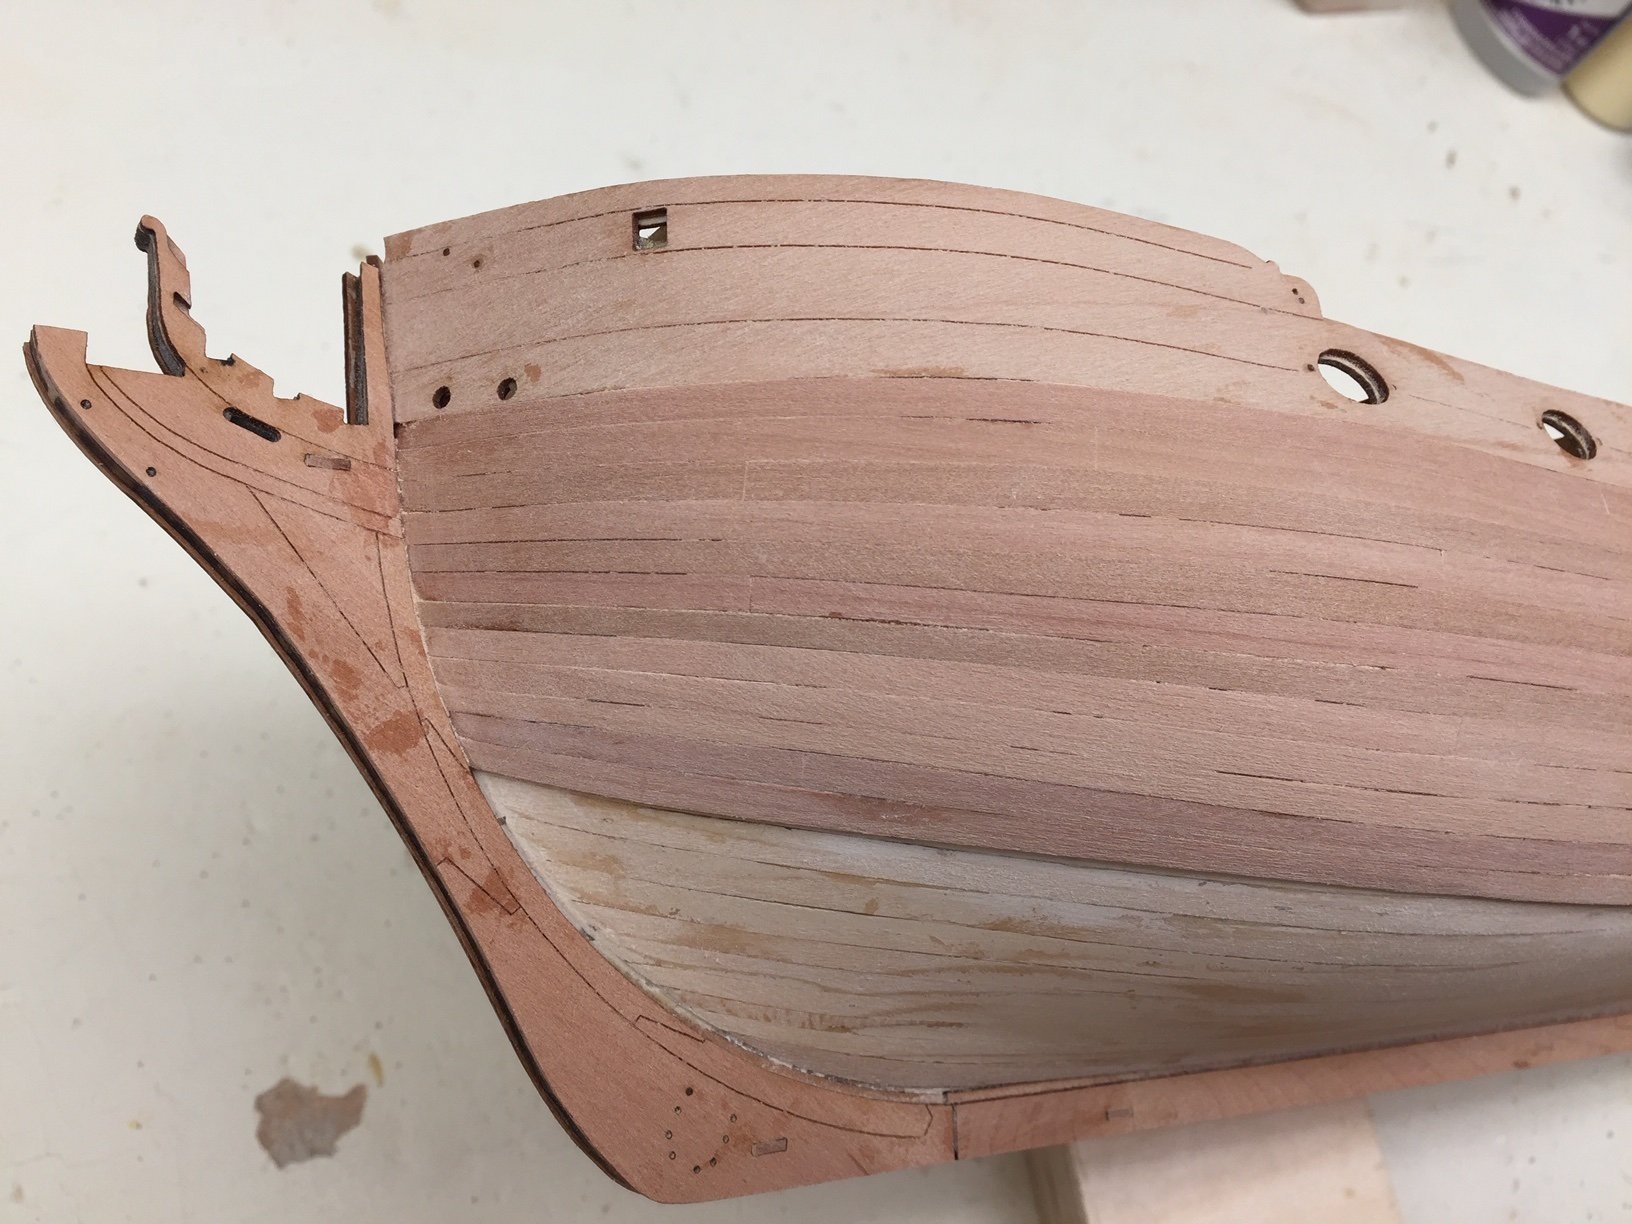
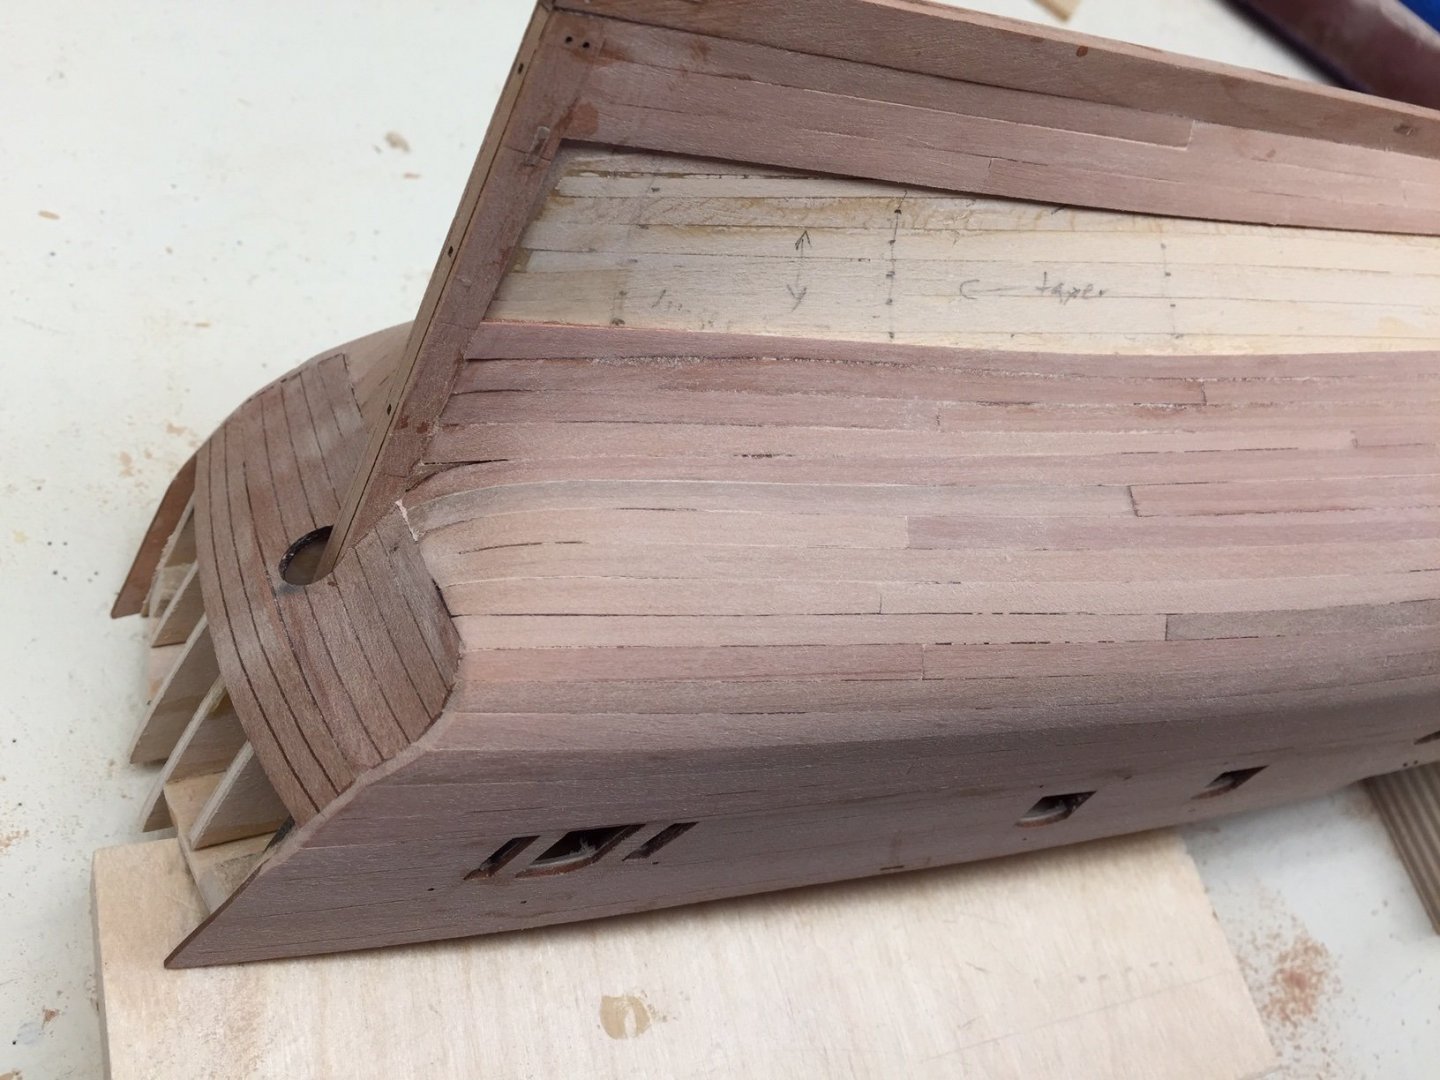
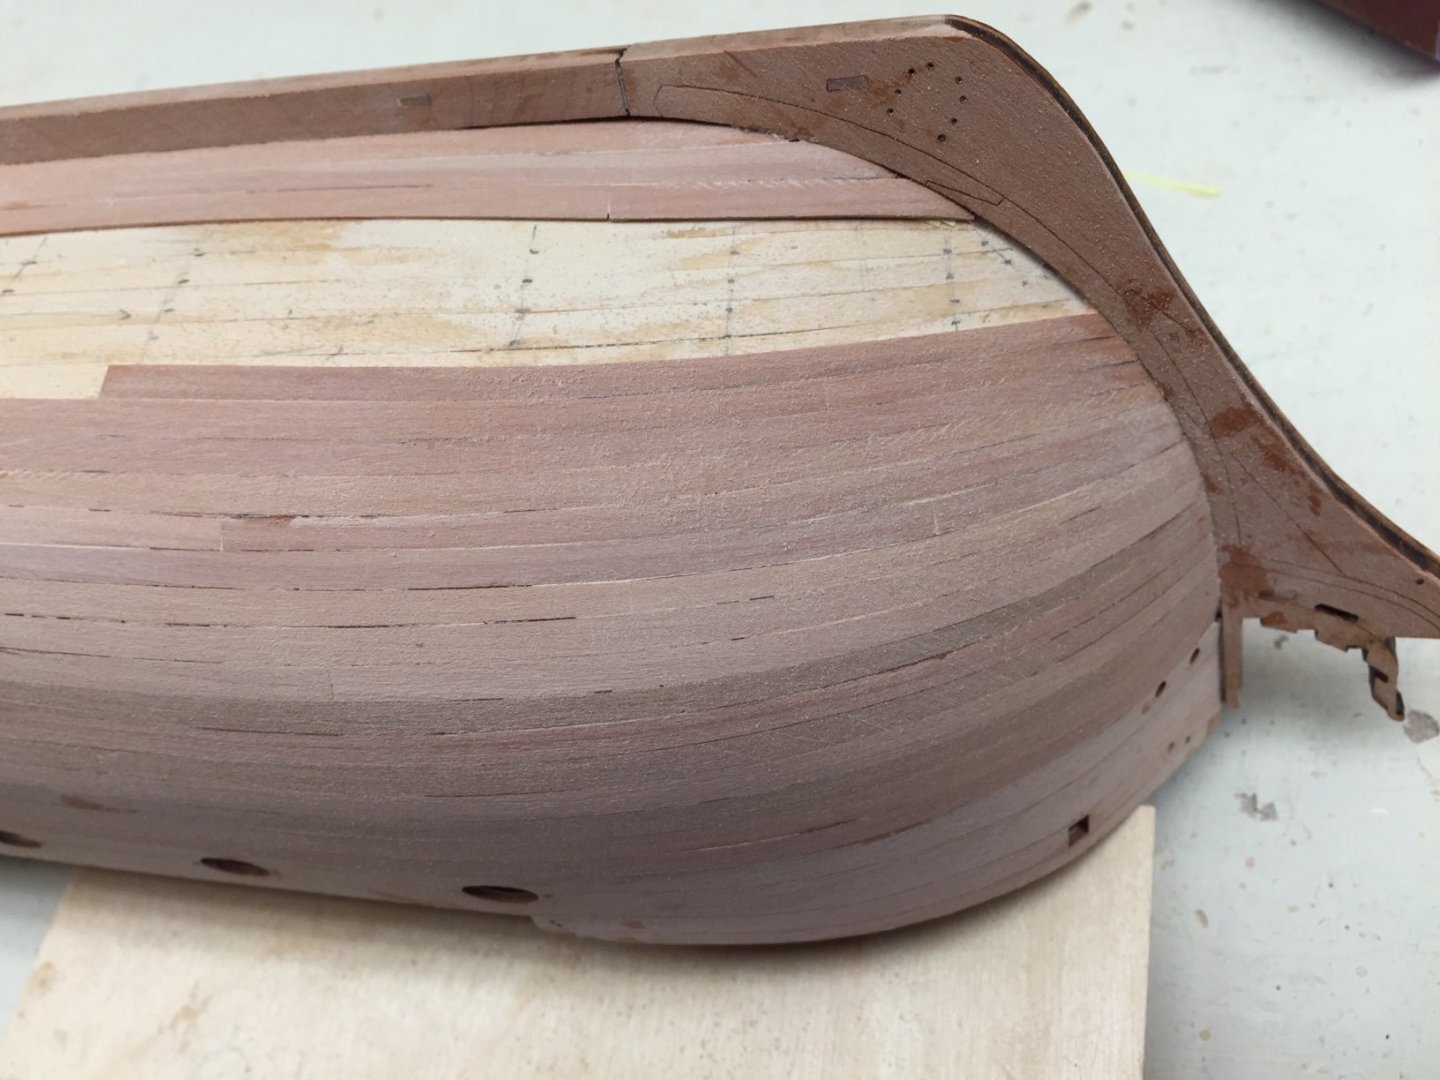
And here's photo of planking in what I'm starting to call the dreaded stern area. I suspect this is more difficult for me because this is the first time I've planked this type of stern. Like anything, it obviously takes practice. I ended up having to put a tiny piece of filler wood between two planks about where the stern post and bottom of counter meet. I needed a plank with a sharp edge bend and was unable to make the bend without cracking the wood. Later on I realized I probably could have tapered the adjacent plank more to avoid as sharp of edge bend. And of all things, I've had a little trouble fitting planks in the stern post rabbit, which I thought should be easy. I'll think I have it fitting good, but then apply glue, and hold it in place, only to find out I didn't get it positioned exactly the same way. I'm using medium CA glue, so there's only a few seconds working time. I should know better than to think something is "easy"! I'm hoping with adequate sanding I can get it to look decent. At least it's in an area that won't show too much when the boat is finished. Of course, I'll know it's there. I get to repeat this process on the other side of the hull, so hoping I can do a better job.
-
Here's closer view of the bow planking. I've just done rough sanding on it. As a side note, I bought the foam soft sanders and find them very useful.
-
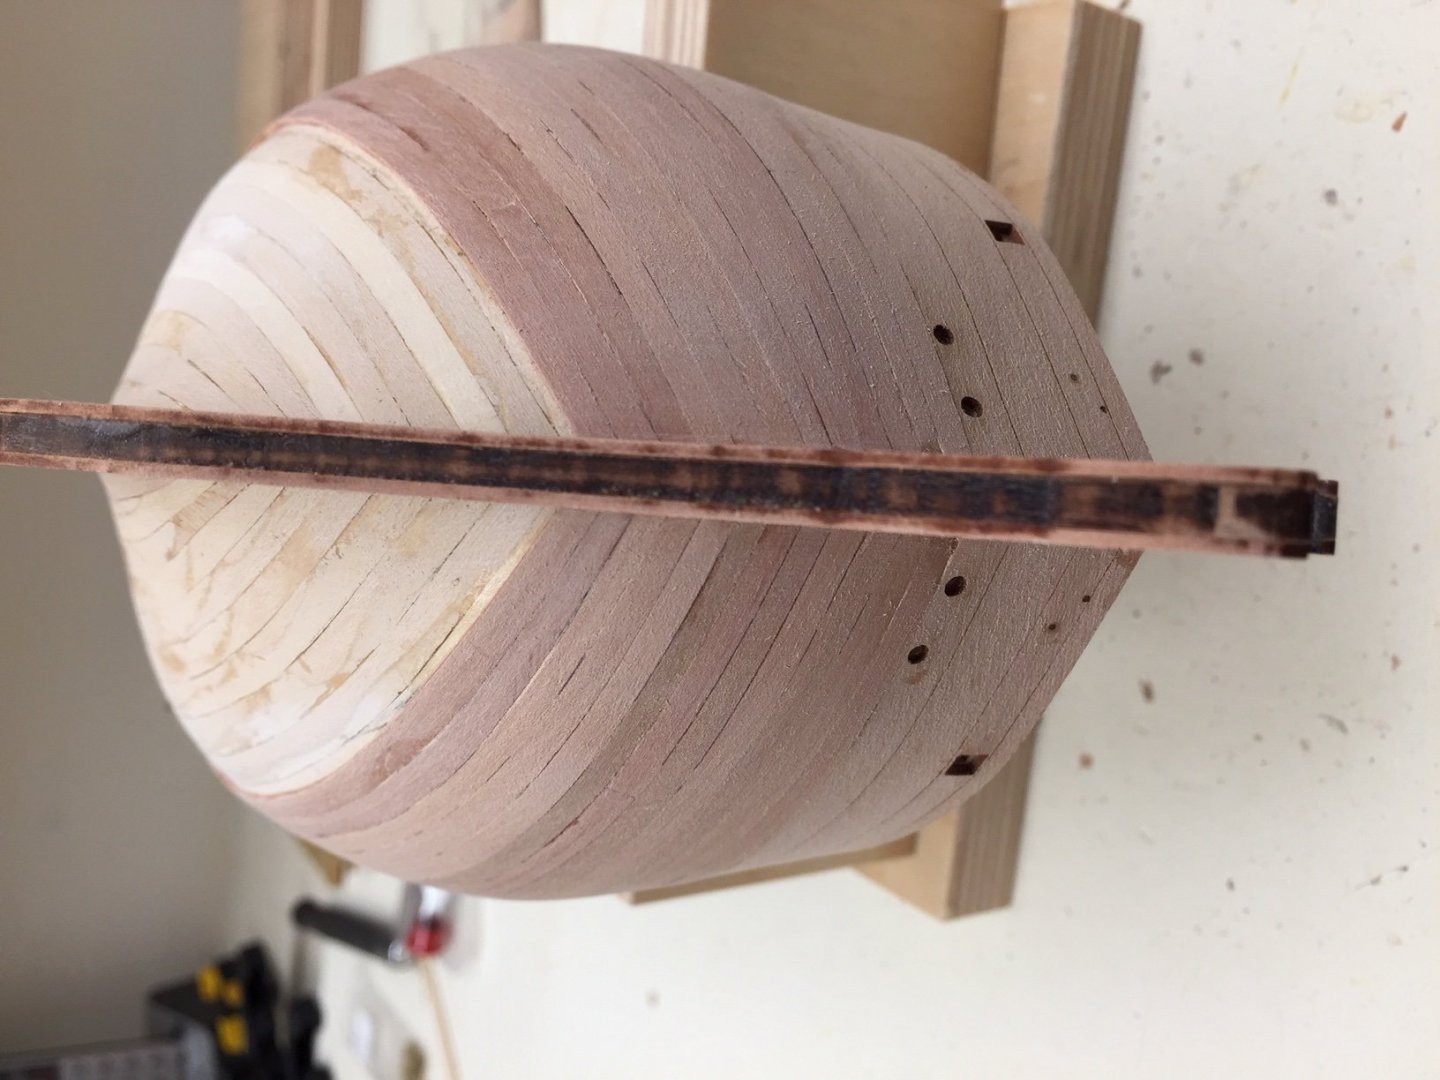
I haven't posted anything in a while. Got a little sidetracked with other stuff, plus I've been going real slow with planking. I think I'm doing ok on the bow, but the stern area has been giving me problems. Here's photo of where I'm at. You can see I did the garboard plank along the keel plus 2 more rows of planks. Then I started working down toward these planks. About 6 more planks should fill in the gap.
-
I sometime use one or sometimes the other. I usually try the chamfer in your diagram, because it removes the least material. If that doesn't fit and it looks or feels like a bevel might work better, I try that. I try to only take off what I need to. I think it's easy to overdo and take off too much. I think I've done that a few times. I'm learning too on this. I think tapering or contouring the plank is more difficult and critical than beveling. I get impatient and sometimes when I can't get a perfect fit, I glue it anyway. Other times I think I have a good fit, but when I apply glue, it doesn't seem to fit as well as my test fit, and it's too late at that point. I'm better about this now than last time around, but I'm still constantly fighting it.
-
Glenn, don't worry about adding to my log. I find everyone's comments real interesting. Just wanted to let everyone know, this is what I do also. I only taper the top edge of plank and then bevel the top edge of the entire plank. I'll bevel it a little first, test fit, and then bevel a little more in places, if I think it needs it. It takes practice, and I'm still learning. In general doing better than Syren, but I certainly feel like I could do better. Too often I don't realize it's not quite right until it's too late. I've had a minor problem planking across a joint. Sometimes the plank widths don't match perfectly. I try to sand them to get them fitting real nice, but have missed a few. If the width of the two planks at a joint aren't all but perfect, then the next plank down won't fit right. I've been a little surprised at how "perfect" the fit has to be. It's another of those things that's a matter of feel, literally! And lots of practice.
-
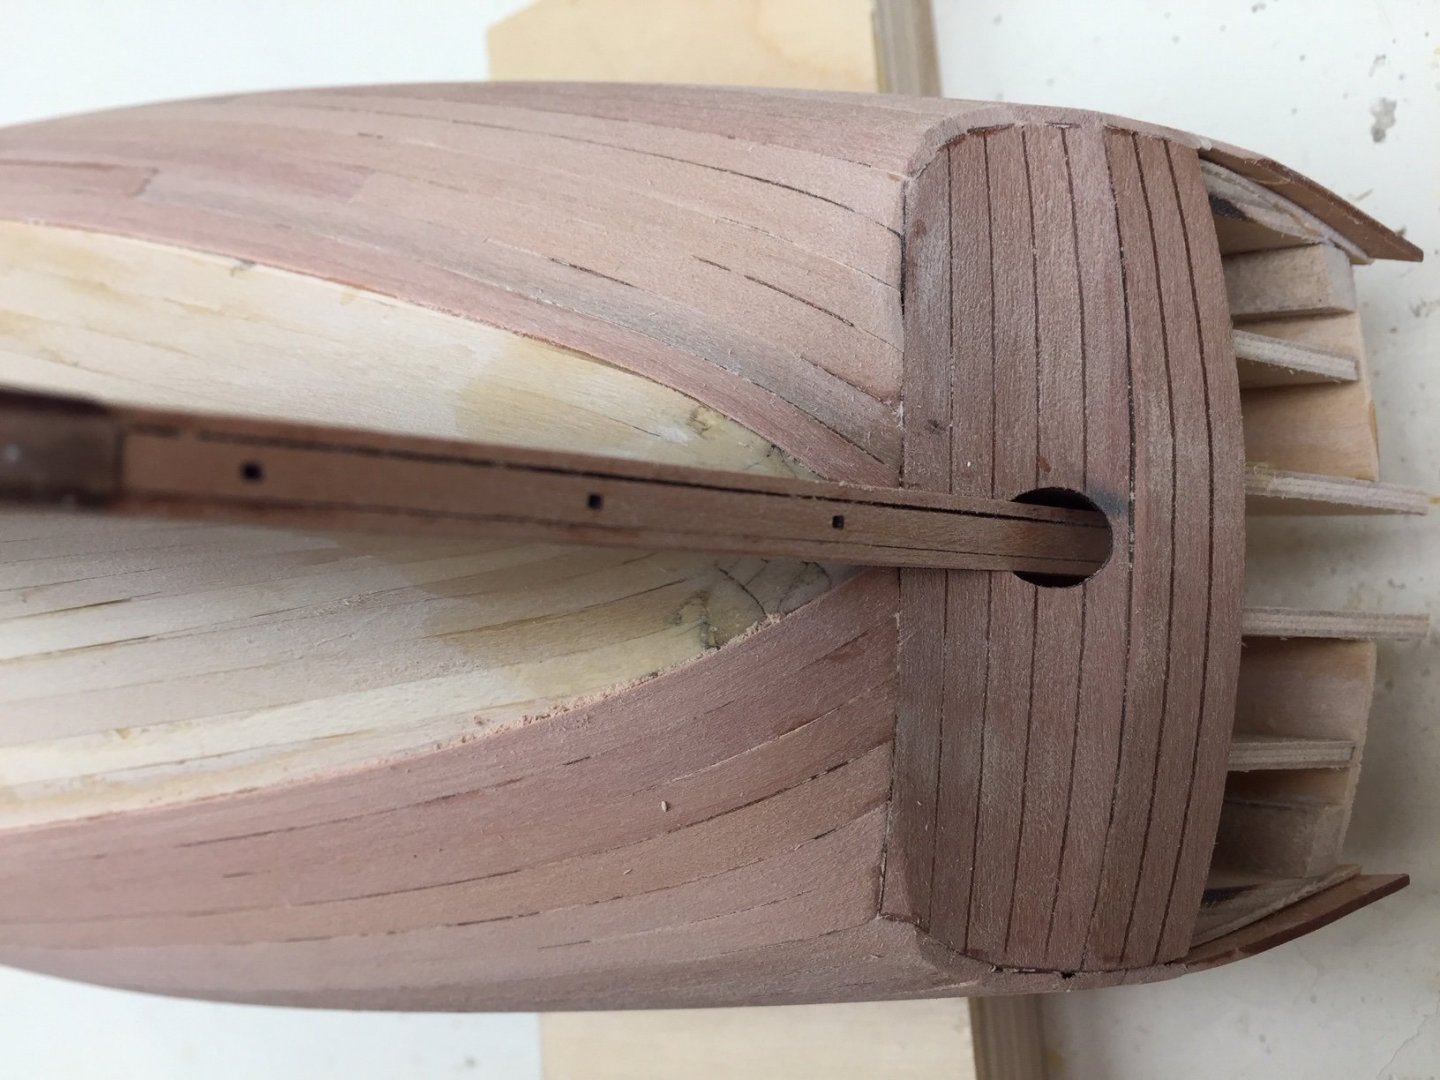
Here's photo looking straight on from bow. Ideally planking on both sides should match up, but I'm off a little. Tells me I didn't taper planks same on both sides. I used tick marks on hull, but found it difficult to transfer marks to planks, and then cut/sand planks to match the tick marks. So after 2-3 planks I'm off track. I may redo tick marks more frequently as I plank further downward, and of course, try to taper planks more accurately.
-
Here's a closeup of the stern planking. For a first try at this style of stern, it's ok. I thought I held planks tightly while gluing, but still missed a couple. Either that or a small glue-filled gap appeared after a little sanding, probably from not getting beveling right. I don't see any of this until I take closeup photos and then know where to look. I doubt anyone will notice when finished, but I'll know!
-
Here's port side bow. I believe I've gotten better bending planks to fit, but need a lot of practice tapering planks.