desalgu
-
Posts
363 -
Joined
-
Last visited
Content Type
Profiles
Forums
Gallery
Events
Everything posted by desalgu
-
Really appreciate all the likes and comments! I'm probably thinking too much on this build, but I'll throw this out to see what you all think. What about adding a ship's boat to the deck? The Duchess is bound to have had one, and there appears to be room between the fore and main masts if it was mounted above the deck a little bit. I know Vanguard has a variety of kits for ship's boats.
-
Thanks Bob! I've had similar thoughts about the the hooks, eyebolts, and belay pins. I noticed 2 differences on eyebolts & hooks: the flat side of the PE parts, and the "wire" or iron on PE part was larger diameter. I only noticed the flatness if I took closeup photo or looked at them about an inch away. From any normal viewing distance, the PE parts look fine, so decided I'd use them. Since it's my first time with PE parts, it's also a chance to see how it goes. I seriously thought about replacing the belay pins, but decided to also stick with the kit parts. I think when ropes are tied around them, they'll look fine. It's a bit of an experiment.
-
Thanks Derek! I was happy with the first end post, but didn't do as well on the other posts. I've always had problems with repetitious tasks, I think because I start doing them a little faster without realizing it. I know that, so was trying to tell myself to go slow. The other posts will be ok, but not as good as the first. I'm about to finish up the railing, and I've been working on the some of the other deck fixtures.
-
Thanks Derek! I hadn't thought about pine tar being used back then, and photo of Victory's shrouds in sunlight definitely looks dark brown. The two sailing ships I remember seeing were from late 1800s or 1900, so "modern" and had iron/steel hulls. Don't remember rigging looking like painted cable, but they might have. Or they certainly could have used modern tar. I've seen photos with greyish ropes for running rigging and cannons, but it didn't really register that this is what it probably looks like after being exposed to sun and weather. And I agree, those shrouds and deadeyes on Victory are bloody big!! 😅
- 345 replies
-
- 1
-

-
- Duchess Of Kingston
- Vanguard Models
- (and 1 more)
-
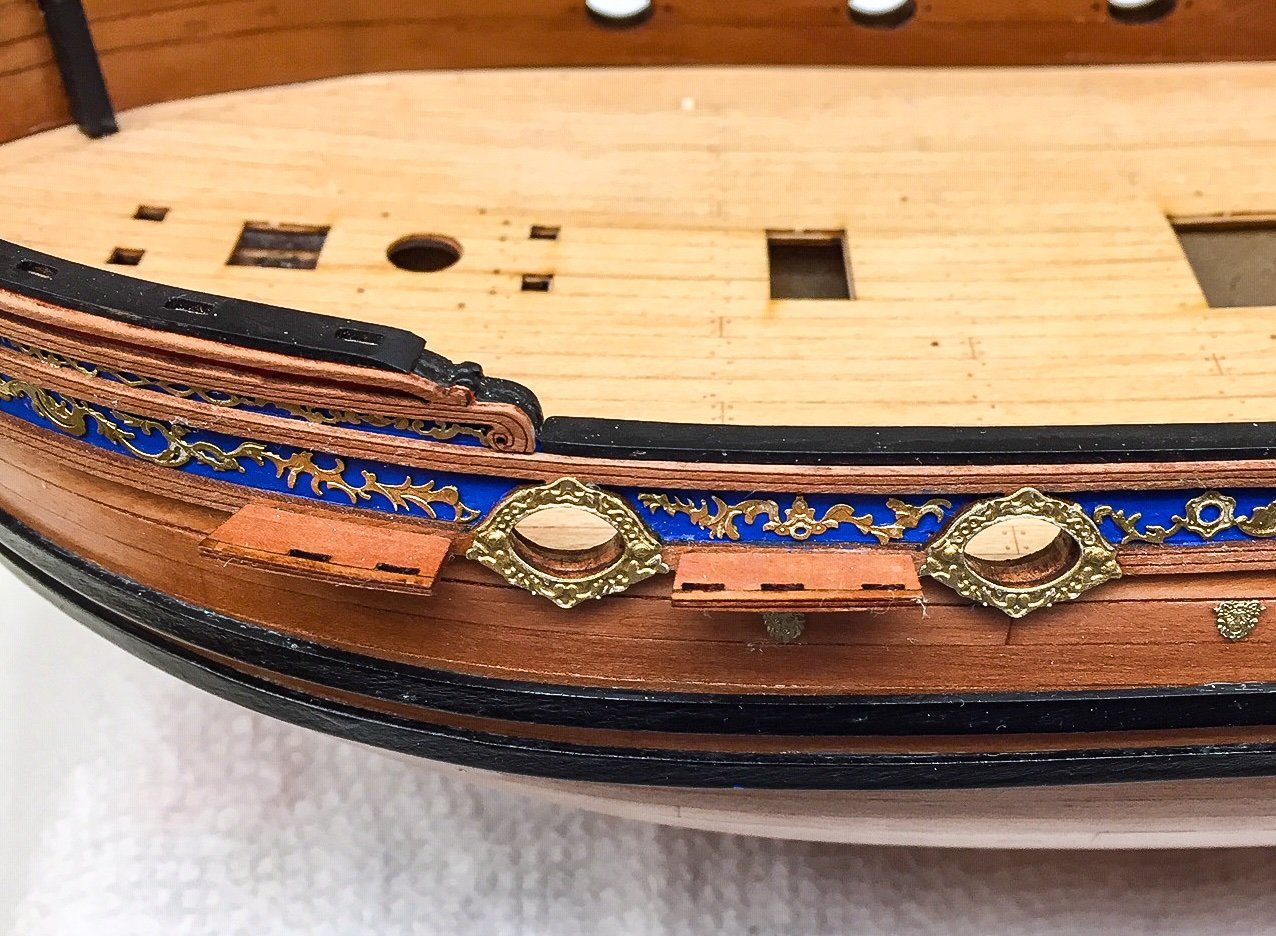
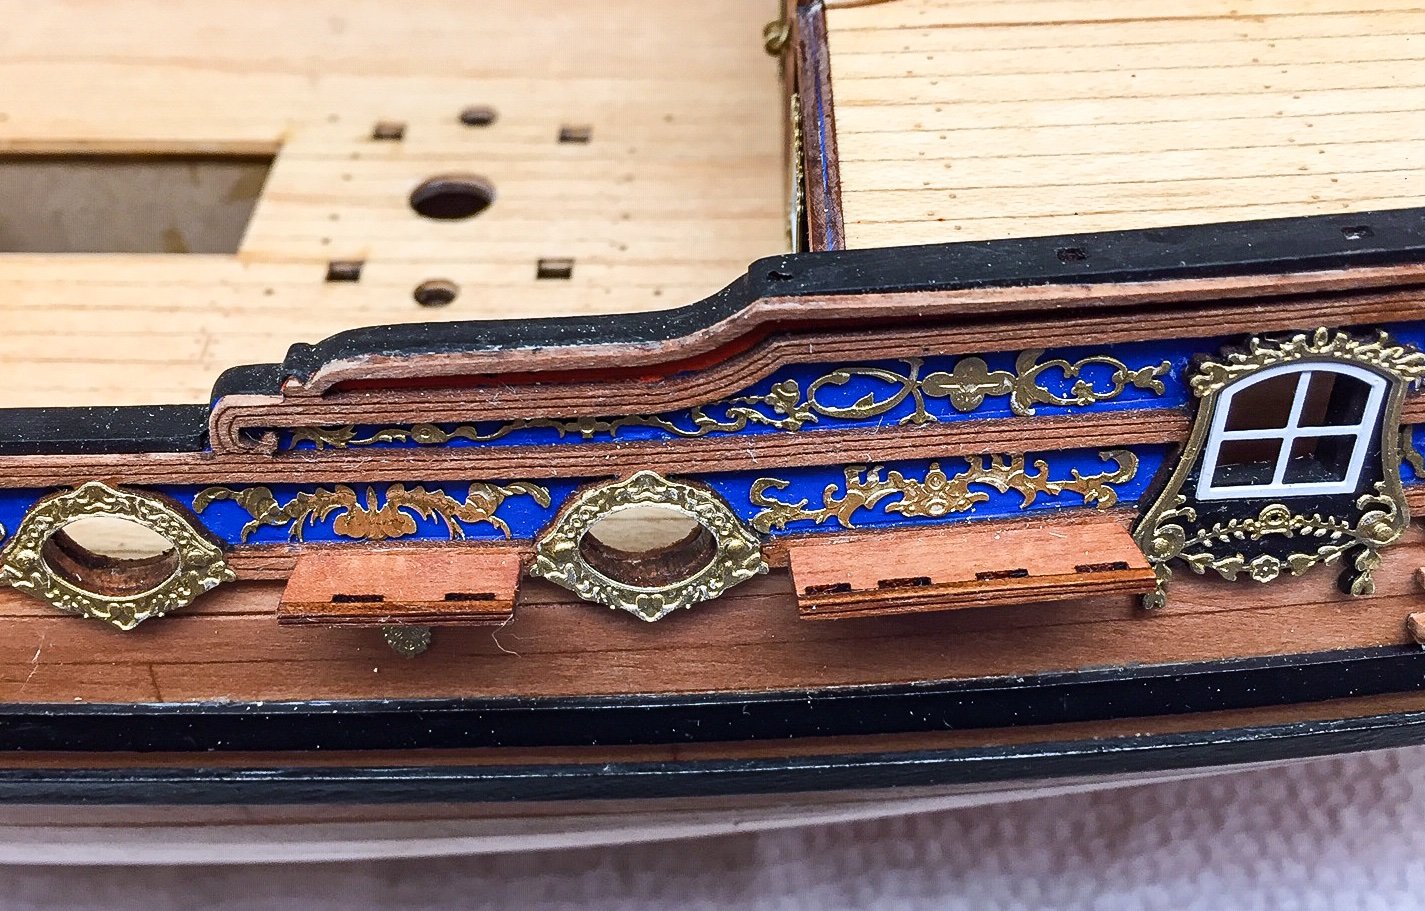
There's a railing around the staircase with a lot of decorations done in PE. One side is flat, which doesn't look as good as it could. I saw that @DelF had modified it by making his own end posts. I wanted to do something along those lines, but don't have the tools, so it had to be something I could do by hand. I decided to glue a thin strip of wood on the back of the 4 end posts and carve to match the PE shape on the front side. I've done one post and am happy with how it looks. The left side of photo shows the thin strip of wood I glued on, and the right side shows it carved and with a coat of primer on it. Kind of wish there were front side and back side PE parts that you could glue together to give it 3D detail. The detail on the 3D parts is amazing, but when they are out in the open on the deck, the flat side shows.

-
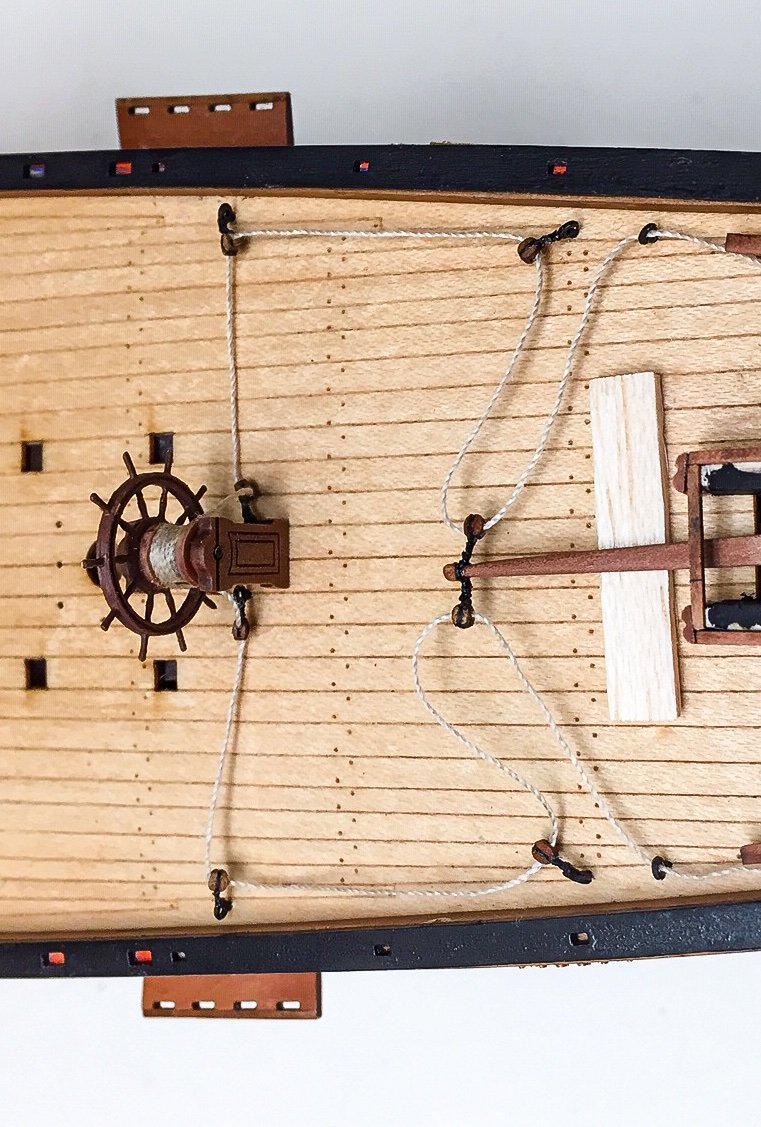
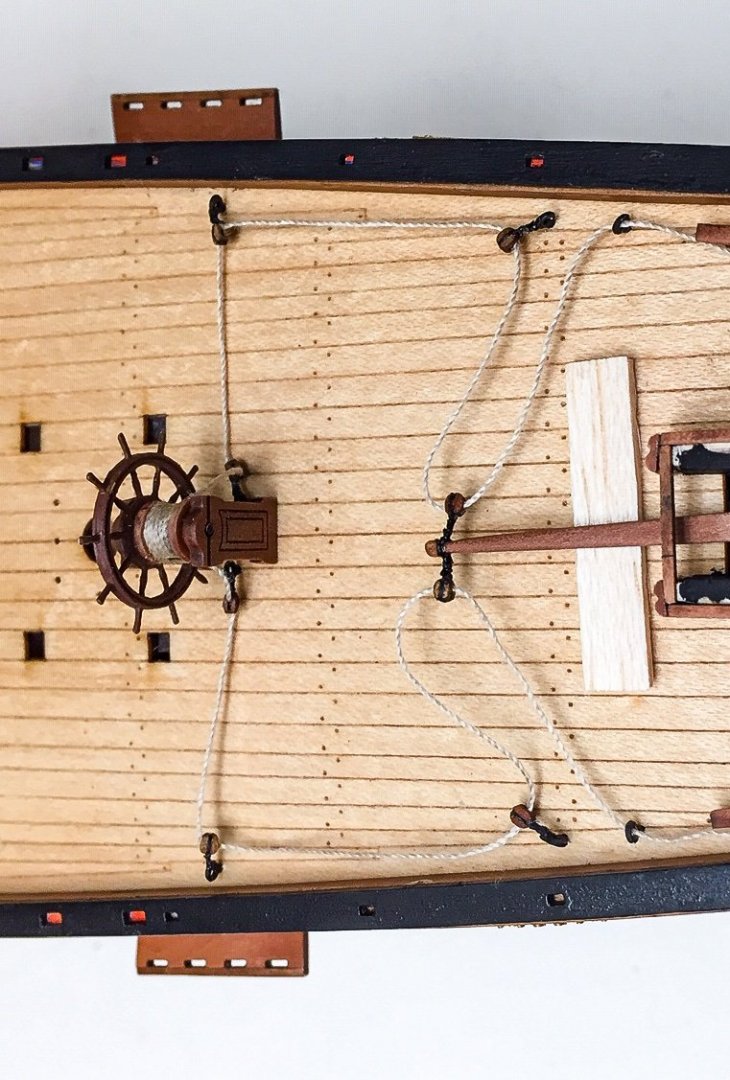
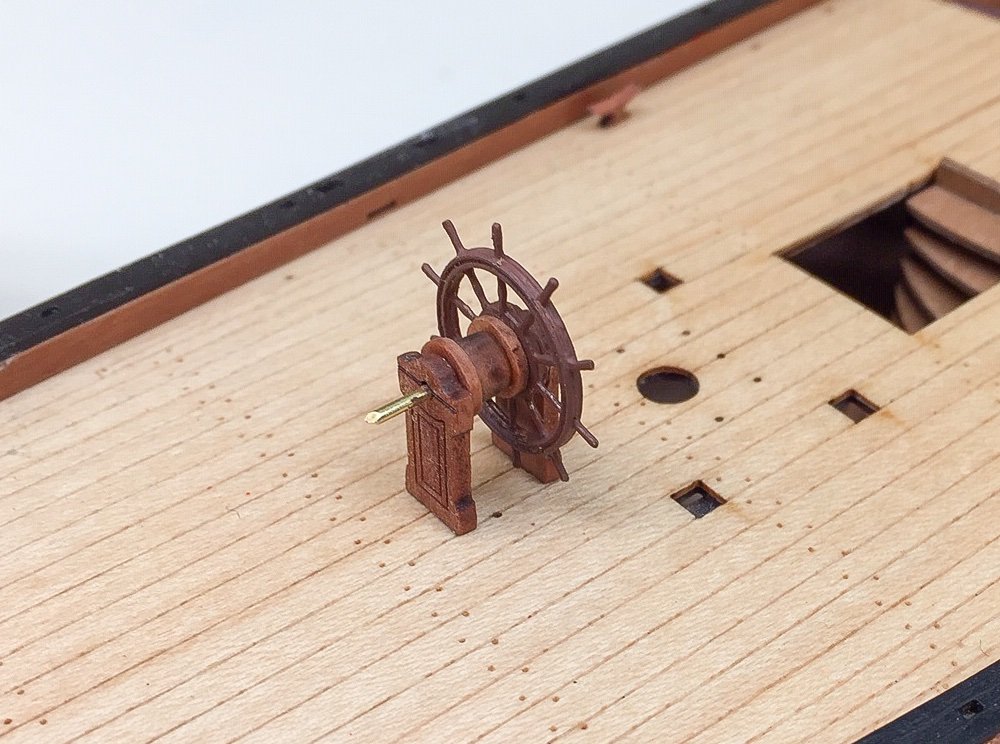
It looked good, so glued the wheel, eyebolts, and tiller. Tightened up the rigging and added the tiller housing roof. Only problem I had was I didn't get the front of the wheel into the slot in the deck tight enough. I thought I did, but later on after CA was well set, I realized it wasn't pushed all the way in. It's up ever so slightly and you don't noticed except in closeup photos. I'll have to live with it.


-
Then did a test fit on the boat to make sure it all fit like it was supposed to.
-
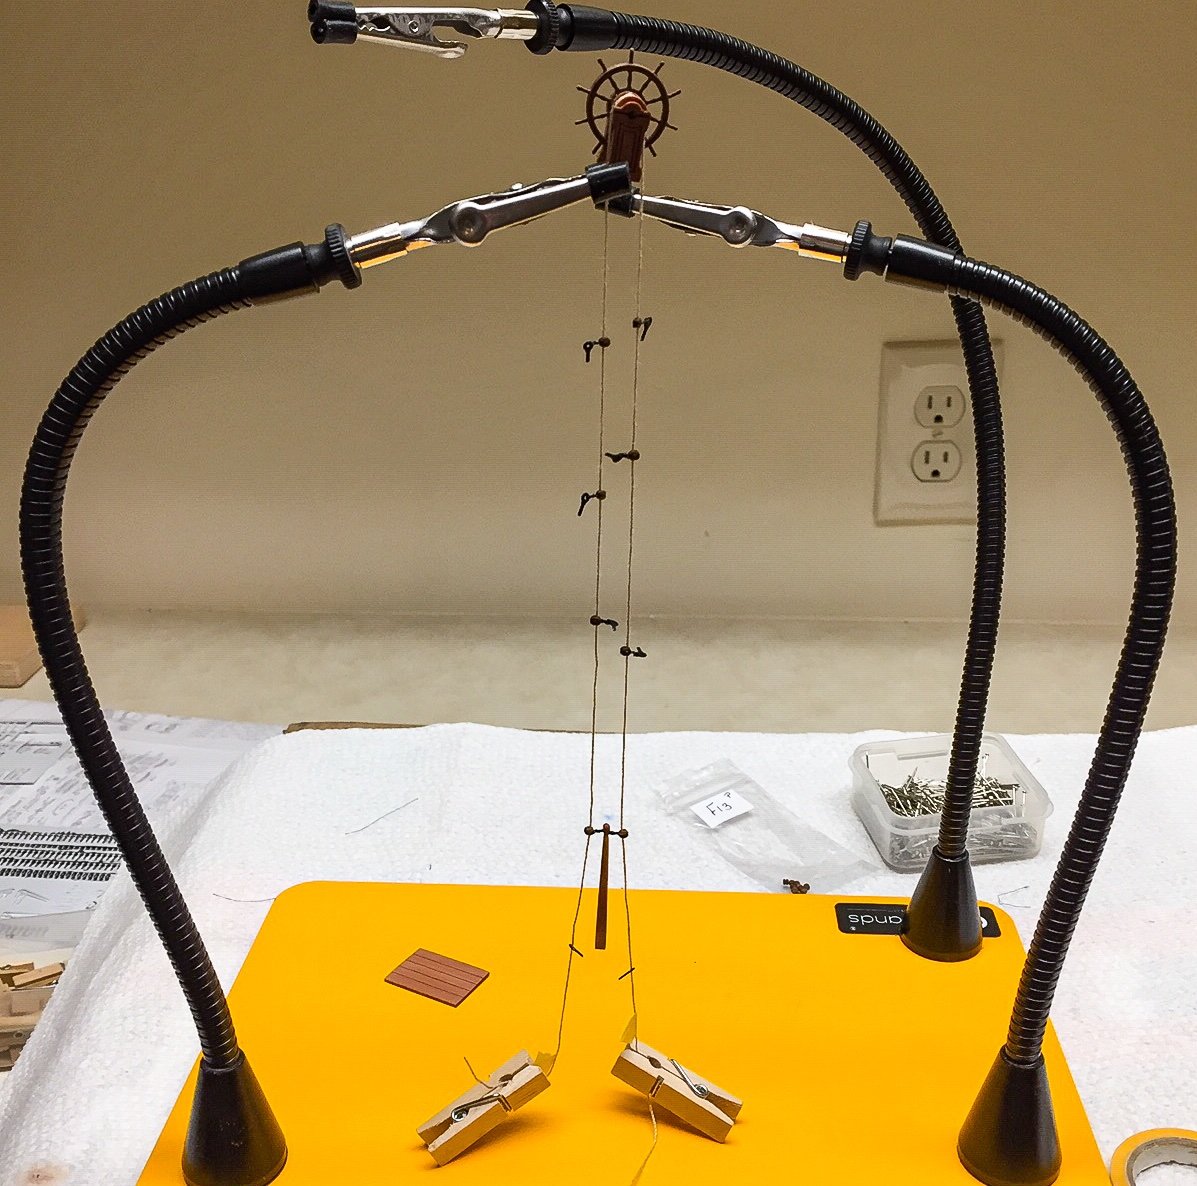
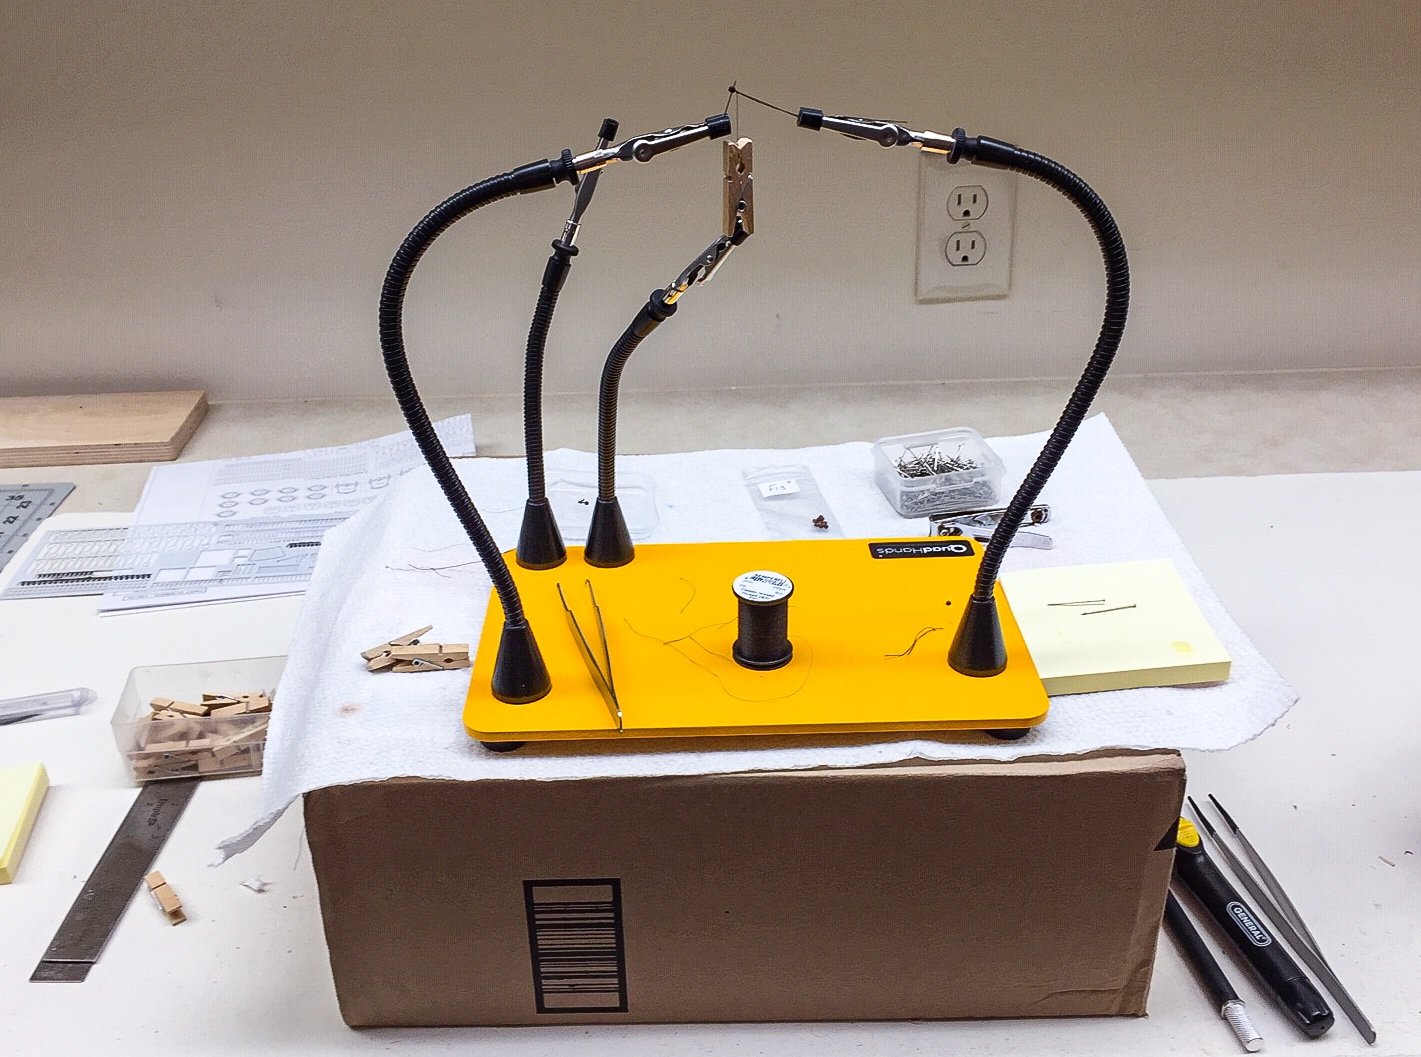
I rigged the tiller and wheel in a similar manner to @DelF, threading everything in Quadhands first.

-
Nice looking rope & rigging! I used similar method to rig tiller/wheel, doing it offline with quadhands. I got distracted, so haven't glued in eyebolts or posted pictures yet. I'm curious about using dark brown for tarred ropes. I've seen quite a few people mention this when making their own rope, but don't quite understand. I've only seen a couple of square rigged sailing ships, and I remember standing rigging looked black to me. I suspect it's just my landlubber inexperience, but it got me thinking, tar is black so makes sense to me that if applied to rope, seems like it would be black. I don't remember running rigging on those ships, but don't remember it being lighter tan like on most models. I'm guessing darker tan or a dirty brown color is probably right. We haven't gotten this far yet, but I'm also curious what you think of the straight-line foot ropes on the yards. Vanguard models are the only place I've seen it done like that.
- 345 replies
-
- 1
-
-
- Duchess Of Kingston
- Vanguard Models
- (and 1 more)
-
Great fix! It looks seamless.
-
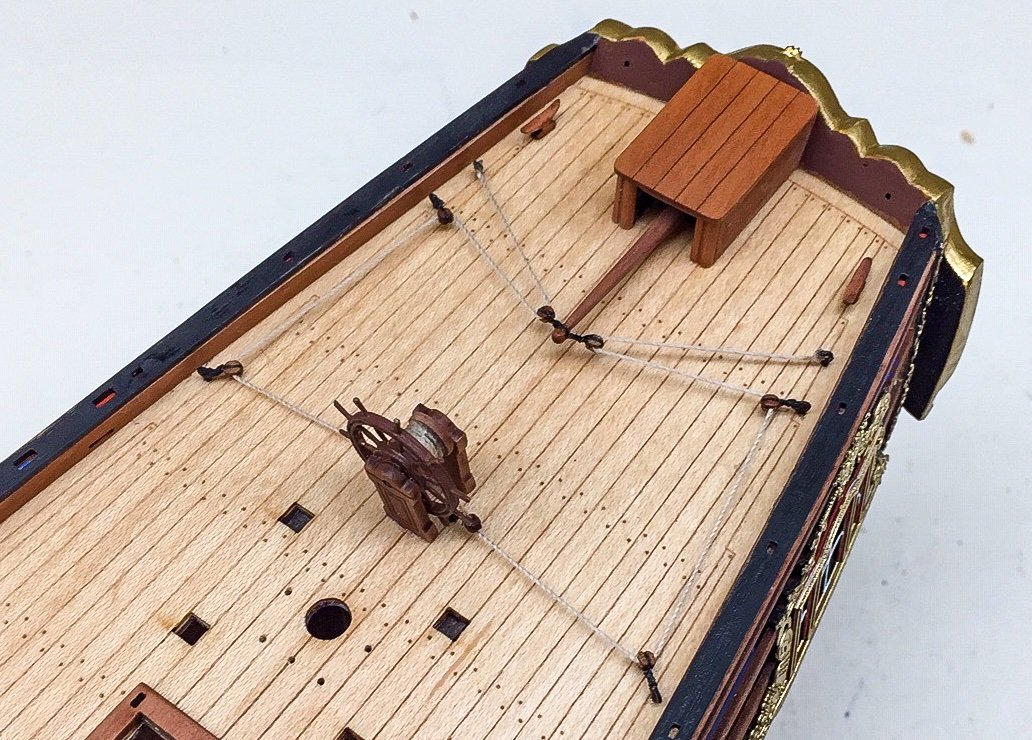
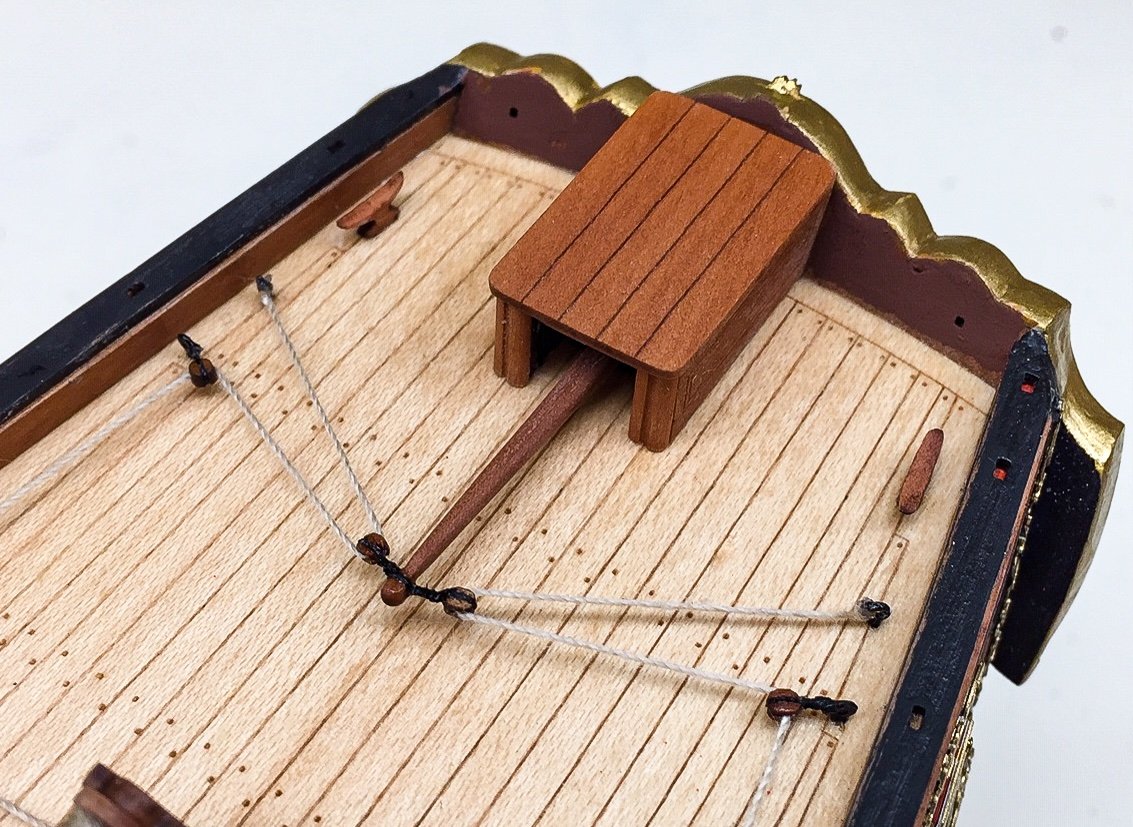
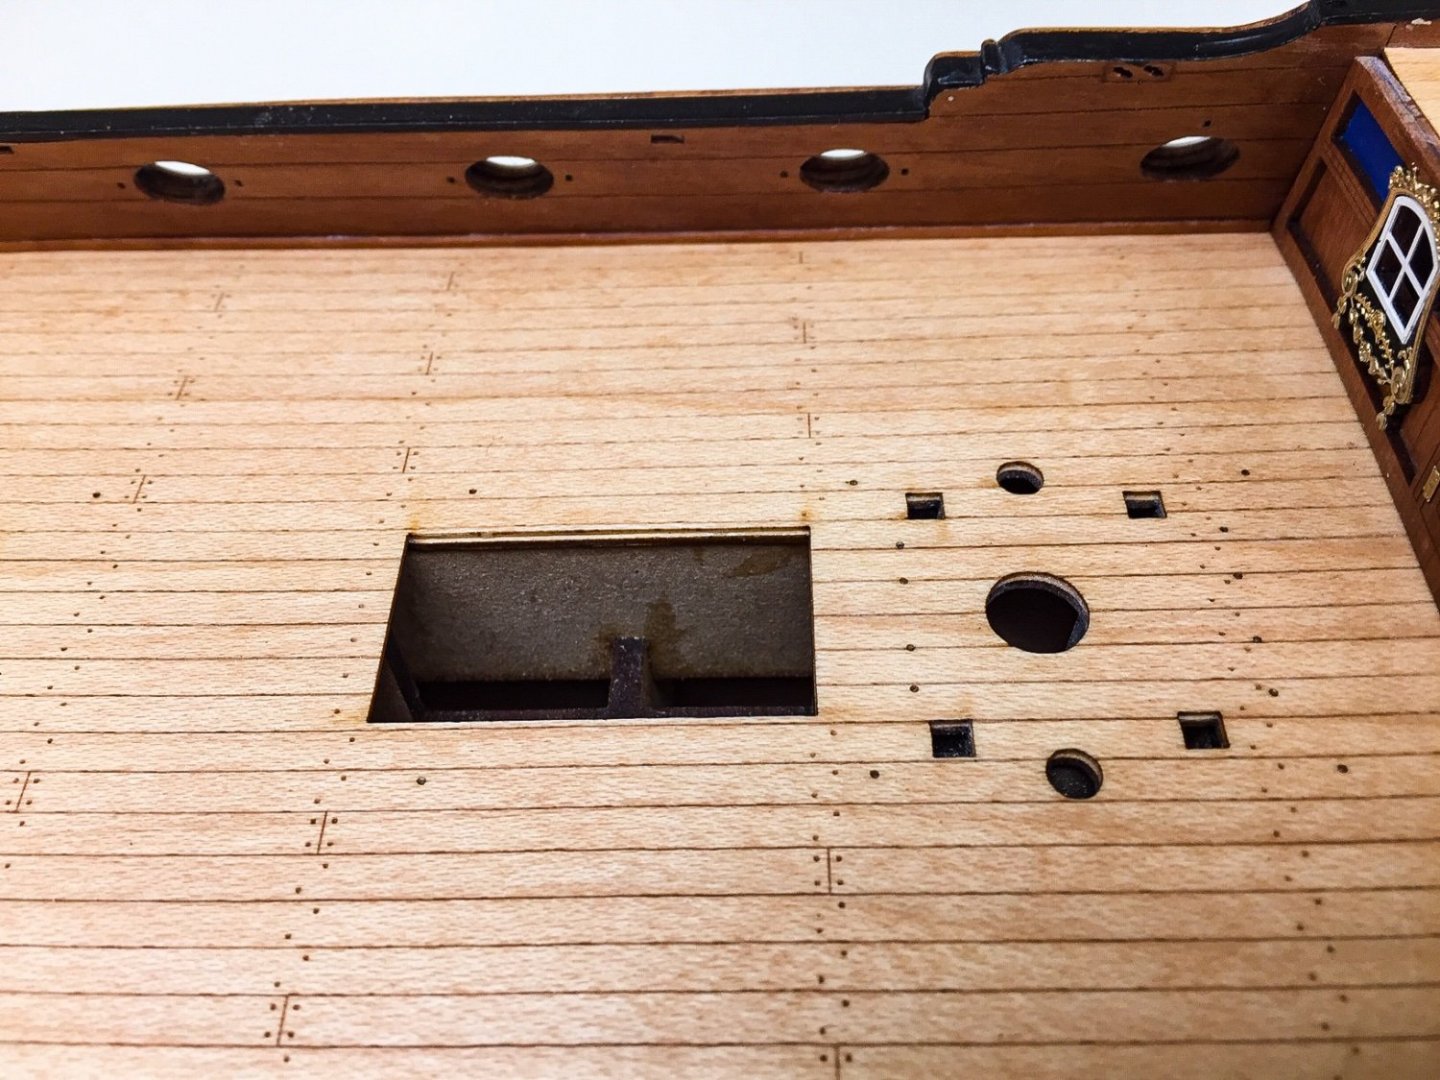
After seeing how @DelF upgraded the front of the rudder tiller housing, I did something similar. It's a fairly minor upgrade, but I think it looks a lot better. I sat the roof on top to see what it would look like, it's not glued yet. I'm about ready to rig the tiller and wheel, and then I can glue it on. I also added 4 cleats to the aft deck, and two are shown in photo. One cleat managed to pop off my tweezers while trying to install and went flying. It must have landed on the floor, so it's pretty hopeless to find it. I have carpet squares in the basement, and the pattern hides everything brown or grey colored. I've been on the floor before looking for pieces like this, and it's a great mystery how these little parts manage to disappear. I used another one from the laser cut sheet, so hoping extras were provided.

-
It's too late Derek, I flunked the class! 😅 If I'd used my old wire cutters, which are old and well used, I know I would have done exactly what you suggested. But since I had a new toy, I did a test cut and it looked great, so I went for it. It also looked great until I took photo and enlarged. Still not bad though.
-
I got a chuckle out of the amount of thread you got, but don't blame you. You never know when something is no longer available, and there's nothing to match. I'm impressed with making your own rope. I've seen the Syren rope maker online and noticed how many people do it, so I've been tempted, but not that tempted yet 😅. It looks great in the photos and doesn't have the bit of "fuzz" on it like in the kit and other rigging threads I've seen. What's in the kit is such a huge upgrade from what I've used before, that I'll stick with it for this model. Love the updates to the bits and rudder housing. I've also thought the front of the rudder housing looked plain, but didn't think to come up with an improvement. I'm still at the stage where I'm hesitant to make changes. Amazing how a little change looks so much better. I'm very impressed with what you can do with your mill. I'm afraid that might be one more tool to add to a long list!
- 345 replies
-
- 2
-

-
-
- Duchess Of Kingston
- Vanguard Models
- (and 1 more)
-
Apologize Professor Glenn!! I'm such a hoser as they'd say up north 😀 I got concerned about drilling out the blocks because they are so small. I've crumbled some in the past doing it. I've never worked with blocks of this quality and was pleasantly surprised.
-
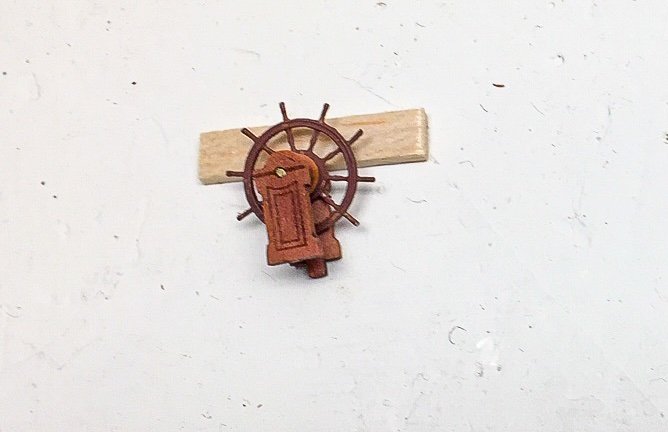
I was hoping you and Derek would get a laugh out of that, but I've sure used your build logs a lot and appreciate all the helpful suggestions. Your write ups and photos are very well done and excellent for teaching various methods. The manual says to use 0.25mm natural thread to rig the wheel to the tiller, but looking at it, I couldn't see how it would feed through the tiny blocks. I usually rub a little CA into the end of a thread to make it easier to feed through a hole, so I did that, and then measured diameter. I got numbers that averaged to around 0.4mm, not 0.25mm. So the thread not only looked a little larger, it was a little larger. I thought about using the 0.10mm thread, but I think the 0.25 will look much better. I have been cleaning out the holes in the blocks with a #79 drill which is about 0.36mm if I did the conversion right. I tried putting the 0.25mm thread through this hole and there was no way it was going to fit. So based on my measurements, I decided to try a #76 drill bit, which is little over 0.5mm diameter. I was a little surprised I was able to drill out the hole without the block crumbling, but the pear wood block held up fine. After that I was able to feed the 0.25mm thread through the hole, so now I know what to do. I also assembled the ships wheel and have it temporarily sitting on the deck. I'll get to use my new flush cutter to trim off excess brass rod.

-
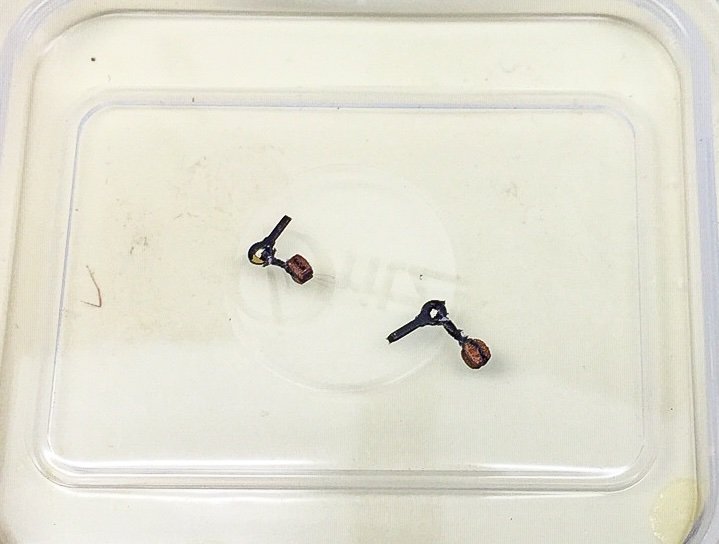
Here are the blocks attached to the tiller, and some blocks attached to eyebolts. I can see the eyebolts need a little touchup.

-
As mentioned previously I decided to paint the dome behind the quarter gallery door silver with a little gold mixed in. Brushing silver didn't work, so used airbrush and got good results. Here it is installed.

-
Here are some photos of other little details I've been slowly working on. After reading what @DelF did, I made some small triangular strips to simulate waterways, and this turned out not as difficult as I thought. I carved the triangular shape with xacto #11 and finished with light sanding. I got them fitting fine, and everything was going smoothly, so time to glue. I thought I'd just tack glue or spot glue them in a few places and that would be enough to hold. But it didn't work. For some reason, maybe lack of glue surface, the strips would not stick and hold. I ended up using much more CA than I wanted, but managed to finally get the strips in place without making too big of a mess. I'll have to put on a coat of flat clear acrylic, because I got some CA on the waterways and bulwarks fumbling around trying to glue and hold in place. The joint between bulwarks and deck is not 90 deg, so that may have been why the waterway strips didn't want to stay glued. Plus they are awfully small, so hard to hold in place. But after it was done, I think I like the look.
-
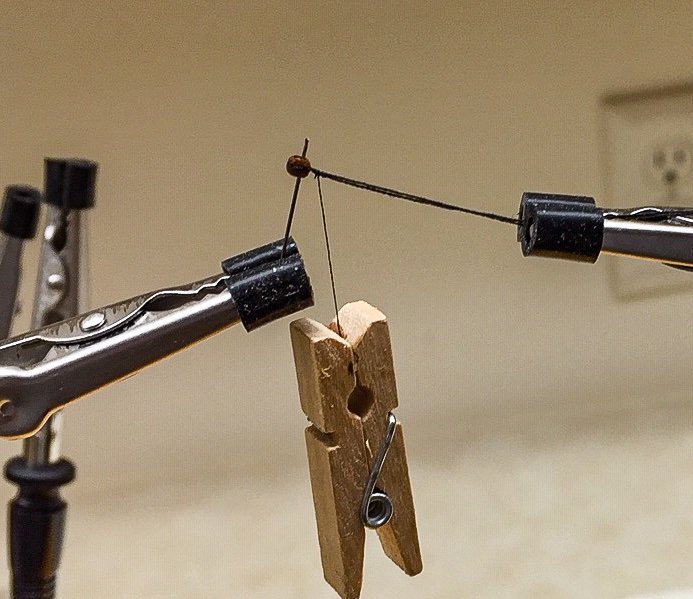
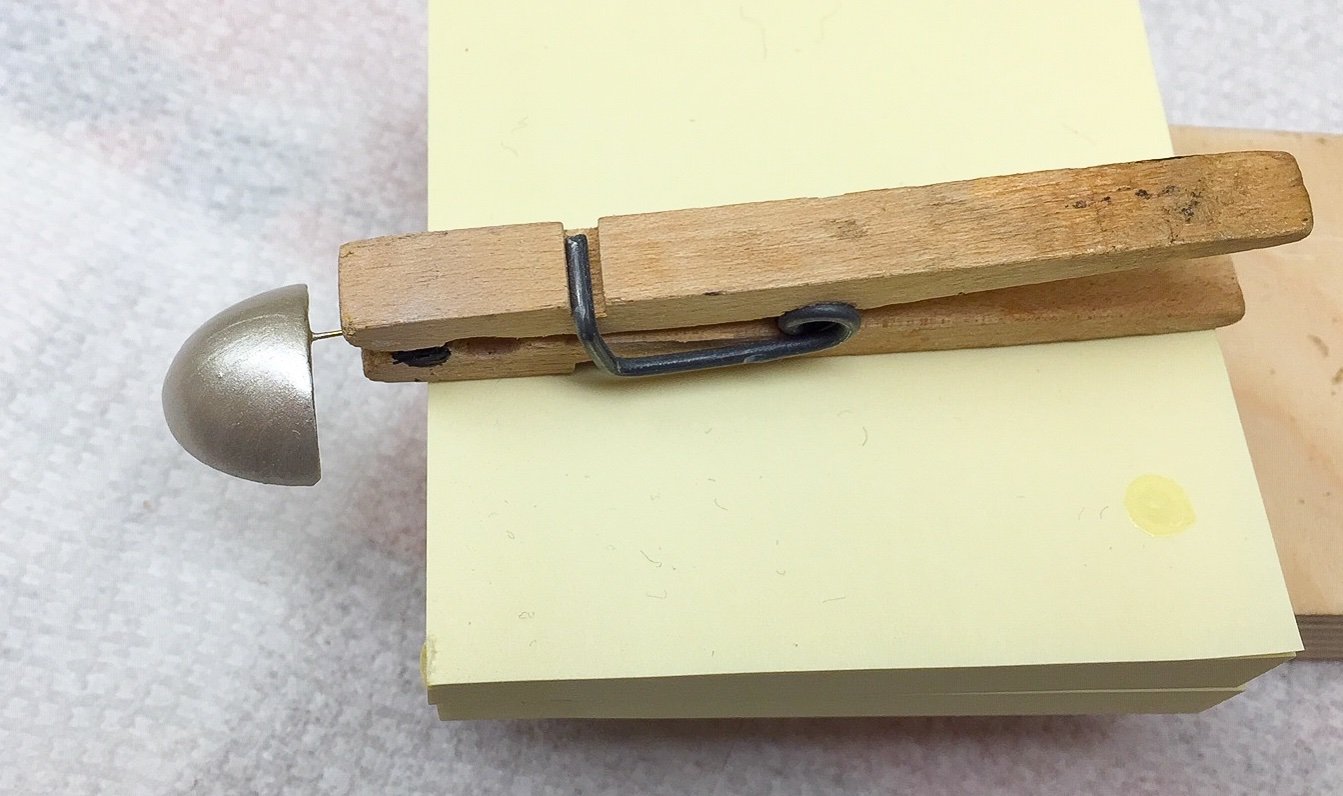
When I measured, my blocks are the right size also. I agree, it is amazing how much detail is in the little blocks, and I have no idea how he makes them. I've been drilling them out with #79 drill bit (0.0145"). If it removes any material, it's an extremely small amount. I've also been leaving the drill bit in one of the holes so I can handle and clamp the block. I haven't tried threading them yet, so I may have to drill out slightly more. It will depend how accurate thread sizes are. I've been seizing them to the tiller and eyebolts, and gradually getting better at it. I did the tiller before the quadhands arrived. I've been doing better with quadhands, much easier, and I'm sure I'll get better the more I use it. I should have used Professor Derek's advice and bought this a long time ago! Here's photo of my new quadhands and a closeup of a block clamped in using the drill bit as a "handle". I used 0.10mm thread to go around block, and very fine fly tying thread for seizing. It's so fine, all I can do is tie an overhand knot and then wrap about 5 times. At this size it's very difficult to handle the thread (or in my case even see it), and when finished I don't think you can tell what kind of knot is used. I put a little medium CA on it to hold threads. The clothespin maintains tension while CA sets. I'm using the same fly tying thread I've seen others use. I had no problem finding it online. I'll attach photo in case you haven't seen it in other build logs.
-
Thanks Bob for the suggestions! The turntable looks real useful for lots of things. I'm gradually acquiring various tools. Just got Quadhands so am giving it a try. I can tell it will be very useful. I got the small dome painted and it took all of 2-3 seconds to spray. I'm sure I could have done that even when cold. The paint doesn't smell, so could have gotten everything ready indoors, gone to garage for minute or two to spray, and then brought it back indoors to dry. I just wimped out with this being first cold we've had this year. I mixed a little gold in with the silver, but it ended up looking mostly silver. I'm happy with it though. Now I'm dealing with the tiny 2mm blocks, which are only 2mm if you stretch them. They are the smallest blocks I've worked with, and look smaller than what is shown in the manual. I got the pear blocks, and they are dark in color and nicely made. I decided to use 0.10mm thread instead of 0.25mm. I thought the smaller thread looked better on the tiny blocks. I reread @Delf and @glbarlow build logs for ideas on how to seize them, and I think I'm doing better than I did on the last ship, but not as good as I'd like. I'm going to start calling them Professor Derek and Professor Gene for their well written and extremely useful logs!
-
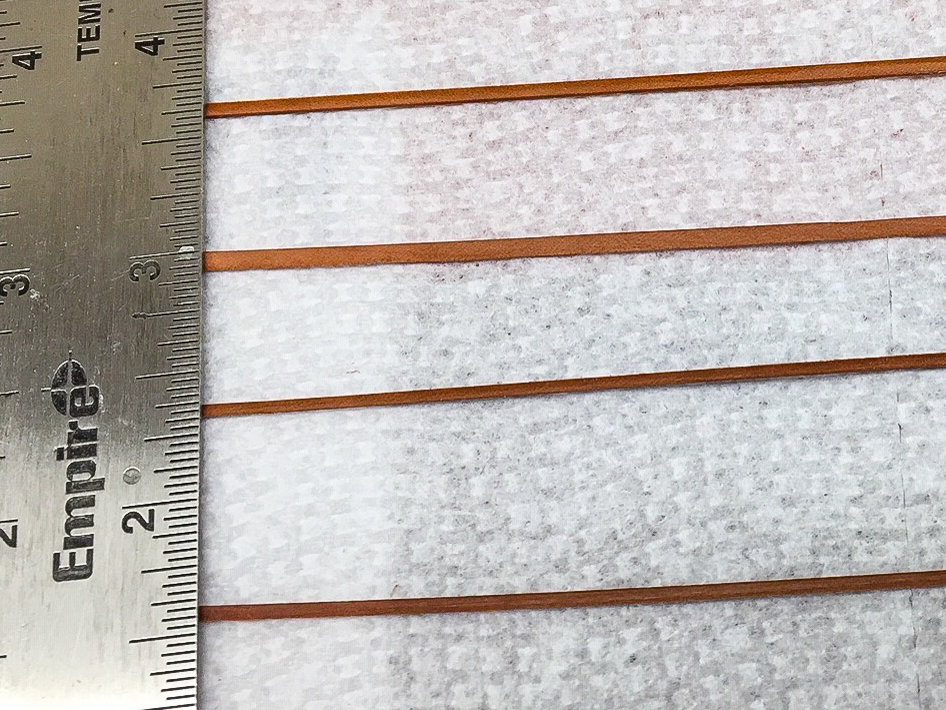
I finally finished mounting the channels. I didn't have any problems, it just took some time to glue & pin them to side of hull. They look a bit funny because they stick out quite a ways from the hull, but once rigging is installed, they'll look "right".
-
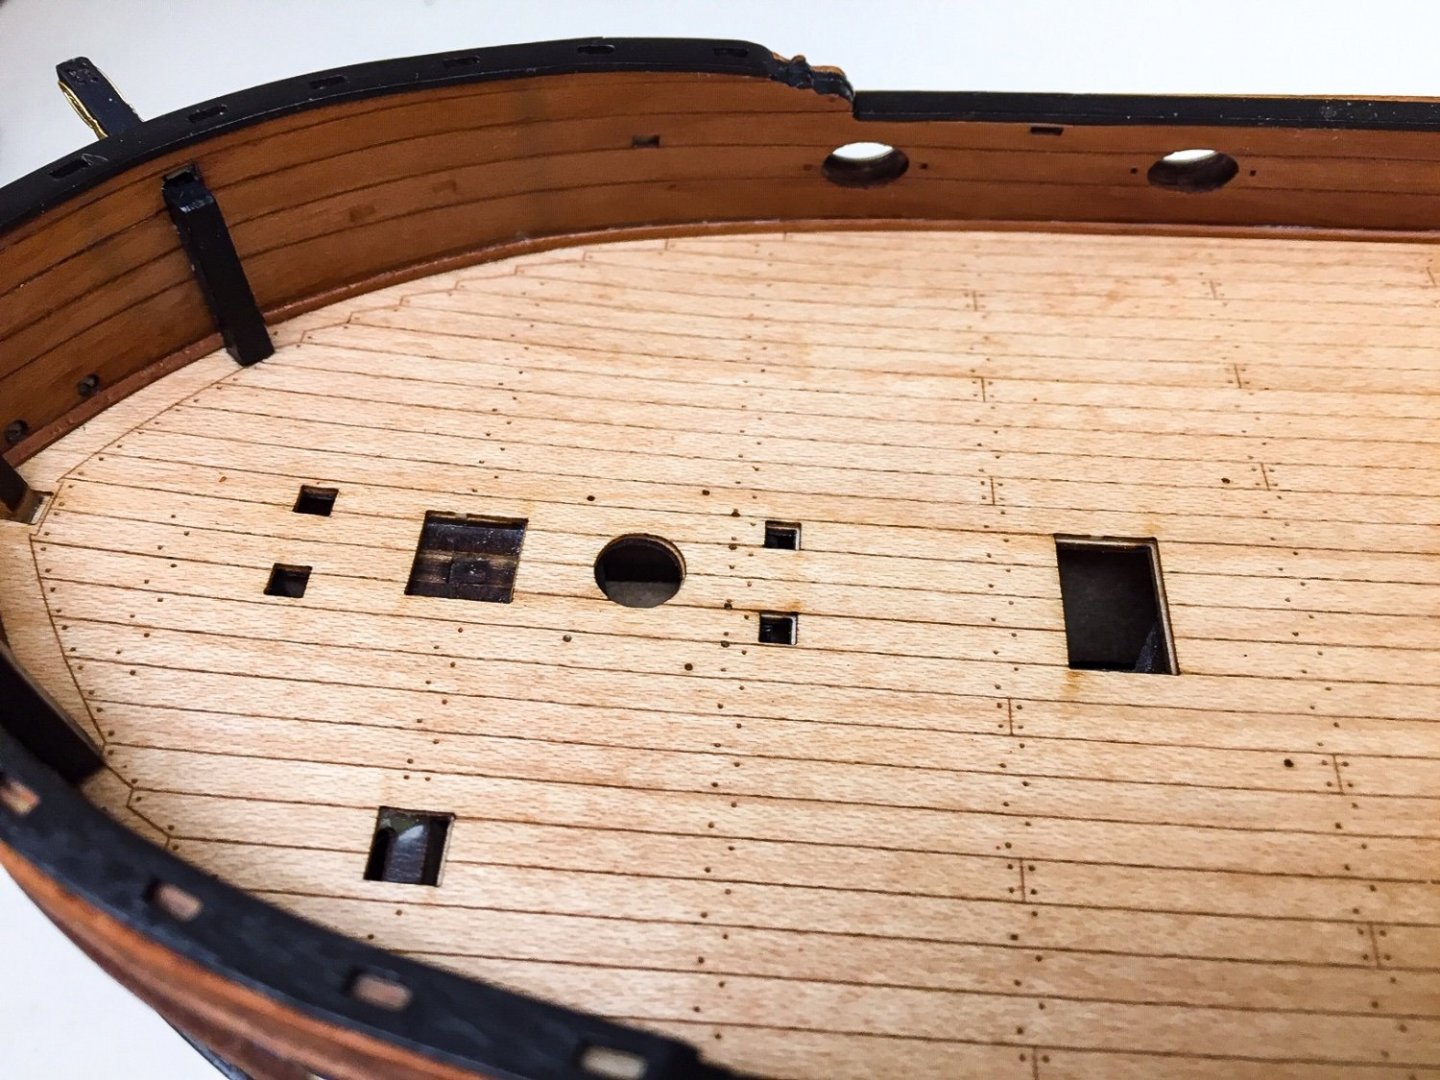
The tiller connects to the rudder post inside a small box on the aft end of the deck. The box has laser cut front, sides, and top. Photo shows the sides and front installed (top installed later on). I did a tiny bit of carving and quite a bit of sanding to shape the tiller. Photo shows a test fit into the rudder post.

-
I've been working on odds and ends, one being the resin molded dome behind the door to the quarter gallery. The manual shows it being painted a copper color, but I thought a silver/gold color would work better. The first problem was to make a "handle" or some way to hold it while painting. I was able to drill a small hole and glue in a little brass wire for a handle. A clothespin can be clamped to the thin wire for holding it. The wire will be easy to cut off, or perhaps pull out when finished painting. It's been cold here, like 10 deg-F or lower, which is too cold for me to airbrush in garage, so I tried brushing metallic paint. I've never had much luck doing that, and this was no exception. I've done 3-4 coats and brush marks still show. It's supposed to warm up tomorrow enough to try airbrushing, so hoping that will solve the problem. The color I'm using is vallejo silver with a little gold mixed in, approx 3-1 silver.
-
Derek (@Delf) made waterways on his Duchess. I'd thought about it, because in a couple of small places, it would improve the look of the joint between bulwarks and deck. He inspired me to give it a try, so I've been trying to make small triangular shaped strips. I don't have a Brynes table saw yet, so used xacto and sanding block. I started with edges of laser cut 1mm sheet pear from kit. On my first try (the top 2 strips in picture) I sanded an approx 45 deg angle along the edge of the sheet, and then used xacto to cut off the strip giving me a triangle shaped strip. This is same process you'd use on a table saw or pretty much any tool. It worked, but my "45 deg" angle wasn't too great, it was a bit too rounded looking. I decided to try again using xacto to carve the angle and then lightly sanding to clean it up. Then I cut off a strip like before. I think this worked better and the strips are definitely smaller which is a good thing. If I can manage to install these without getting glue all over everything, I think I'll have waterways. I wouldn't have tried this without seeing Derek do it, so thank you Derek!
-
Installed the spiral staircase after some ham-fisted struggles. I managed to drop it under the deck and had a hard time getting it back out. A few appropriate words helped the process, ha! There is a slot in the lower deck and you fit a tab in the bottom of the staircase into the slot for positioning. Very handy, except you can't see the slot, so it's all by feel. I also found the tab on the staircase needed to be shortened some, which is easy, except you can't see how it's fitting very well. I did a lot better by shining a small flashlight thru the windows so I could get glimpses of the fit. Ended up being fine. I forgot to stain the staircase, so wood color doesn't match the rest of the boat, but it's minor, and something I can live with.