KrisWood
-
Posts
314 -
Joined
-
Last visited
Content Type
Profiles
Forums
Gallery
Events
Everything posted by KrisWood
-
 Ok no photos of my own project today. I totally butchered my practice keel by the time I got the hang of cutting rabbets so there's nothing photo worthy. I have no idea how anyone else cuts them. My tool idea only works if the angle is consistent. My keel is a continuous curve in three dimensions so the angle changes over the entirety of the keel. My idea was to sandwich an x-acto blade between two pieces of wood parallel to the keel, which would only work if the angle was the same along the entire length of the keel. It's a non-starter. So, how the hell would you cut rabbets along a curved keel? How do you know if you're cutting at the right depth and angle? I don't think I could manage this step even if I had a mill with my current skill level. 😣
 -
@yogi, I don't really understand what you're trying to communicate. Can you provide pictures of the process? @bigpetr, the problem with this method is that the Oseberg keel is curves in all three dimensions. I'd have to bend the top layer to get it into place. This means knowing ahead of time how the material will deform while bending. I could certainly flatten the surfaces in Rhino but there's no guarantee the wood will deform the same way. I haven't been able to find a single photo of this method being used with a curved keel on MSW though I've found examples of it being done for keels with a flat profile. The problem with my current method of using vertically sliced layers 1/32" thick, is that it's incredibly fragile. On my last attempt I got three layers built up when the joint between the keel and sternpost snapped while simply aligning it with my jig to check the fit. It turns out that layered overlapping butt joints are still butt joints, and are no stronger than the thinnest layer between them. I'll post pics shortly. At the moment I'm leaning toward going back to basics and doing it the old fashioned way. My plan would be to cut the horizontal part of the T the same way a rabbet is cut, then plane down the | vertical section to the correct thickness. I have an idea for a simple handmade tool to get the correct angles and depth, too. I'll practice on one of my failed keels and post pics today.
-
Minor update: I ordered my blueprints from Office Depot today! They should be ready tomorrow. My fiancee and I worked out our differences and the project is back underway! Now down to business. I'm looking for different methods of crafting the T shaped keel. I've got multiple Dremels now, a table mounted jigsaw, and a very large assortment of hand tools that I didn't have last time around. I do not have a mill but I'm considering making or buying one. Could you folks help me look up various ways of making the keel with or without these tools? Thanks! Kris
-
Side note, the boxwood is still alive! I could have swore it was dead, but it's surprised me before. I cleared all the dead leaves from between its branches and found a few branches with green leaves still on them and several branches that were still green, too. I think it might actually come back this spring. It's a bit on the small side but I found several branches off the trunk that might work for knees or decorative carvings. I also checked the cherry wood stacked on the side of the house. It's several months old and is exposed to the rain. I'm thinking of chopping it into kindling and keeping aside any wood that splits perfectly for modeling instead of worrying about milling it. (The Vikings used axes instead of saws anyway, of course then I'll have to figure out how to season it...) Fortunately the Saga Oseberg book details exactly how (on cross section) logs should be hewn for each type of part so I think this might actually be doable. Hmmm.... In any event it'll have to wait until I have time to work on the project again. I'm considering just ordering nicer wood than basswood when I'm ready to get back to making sawdust, but we'll see...
-
Hi @Cathead, This part is really the core of it. With Asperger's, communication is my weakest point in life. I told her about your reply and she agrees. This experience is an opportunity to improve our communication and to learn how to resolve issues like this together. 🙂
-
Thanks everyone, such great advice here, I almost cried! @Cathead, I think you nailed it. The real question is, "is it fair?" My fiancee isn't "Mrs. Wood" yet so I feel odd saying that, and she's going to keep her last name anyway. I use Admiral out of respect, not deference, so I didn't think of the harpy angle. There needs to be a better term for the person from whom time must be taken if we're to pursue a hobby while in a relationship. Full disclosure, I have Asperger's, and my boat is what they call in the Autism community a "special interest". I lose myself in it completely and can spend hours looking at plans and figuring out how things line up in 3D. I have a hard time stopping work on it once I start, and often drift off in conversations pondering how one part fits with another instead of listening to what people are saying. It's more than a "hobby" to me, it's more like an obsession. The question then is, is it even possible to balance an obsession with the rest of life. I think the suggestion of only during scheduled hours is the way we'll end up going, but we're not there yet.
-
The Admiral and I have been debating the viability of my project, mostly in terms of how much time I spend endlessly researching and tweaking lines in the plans. It seems I'm waaaaay over budget in terms of labor, and she's concerned that I'm spending too much time in the shipyard and not enough time in the Admiralty office. Does anyone else have a problem where they spend so much time on their projects that their relationships/parenting/jobs suffer as a result? I'm going to have to get my life on a schedule so I can balance how much I get done both in the shipyard and out. Once I find that balance, I'll be back to making sawdust.
-
Nevermind, I looked into it and it's way beyond my time and energy to mill and season wood. I don't have time for modeling the stockpile of basswood I've already got. I don't have a bandsaw or any of the other tools needed for milling wood anyway.
-
Life came up so I need to put my project on hold for a while. As I wait for such a time as I can start working on this project again I'd like to put forth a question: How hard is it to harvest modeling wood from natural sources? I assume the old Navy board modelers before mass production must have gotten their materials from somewhere... I'm my yard I've got the dead English boxwood I'd previously mentioned, half a cherry tree that fell on my house from the neighbor's yard last summer (which he helpfully cut into firewood for me and is now stacked under my eaves) and dozens more young cherry trees as much as ten feet tall which continuously spring up from the roots of another neighbor's cherry tree. With this abundance of free wood, I should be able to build a fleet of ships, but how does one turn a tree or shrub into miniature planks? I'm considering building a miniature sawmill... I'm already thinking the boxwood would be best carved rather than milled, so would be better for the decorations, but the cherry from both sources I'm not so sure.
-
There haven't been any Staples in my area in years but Office Depot provides the same services. I am planning on doing that in the next few days. Taping these tiled pages together is a pain!
-
The jig half of the plans won't fit on my office floor while the planks and keel half are there so I'll take a photo after the first half is aligned and taped and cut away from the jig half. 🙂
-
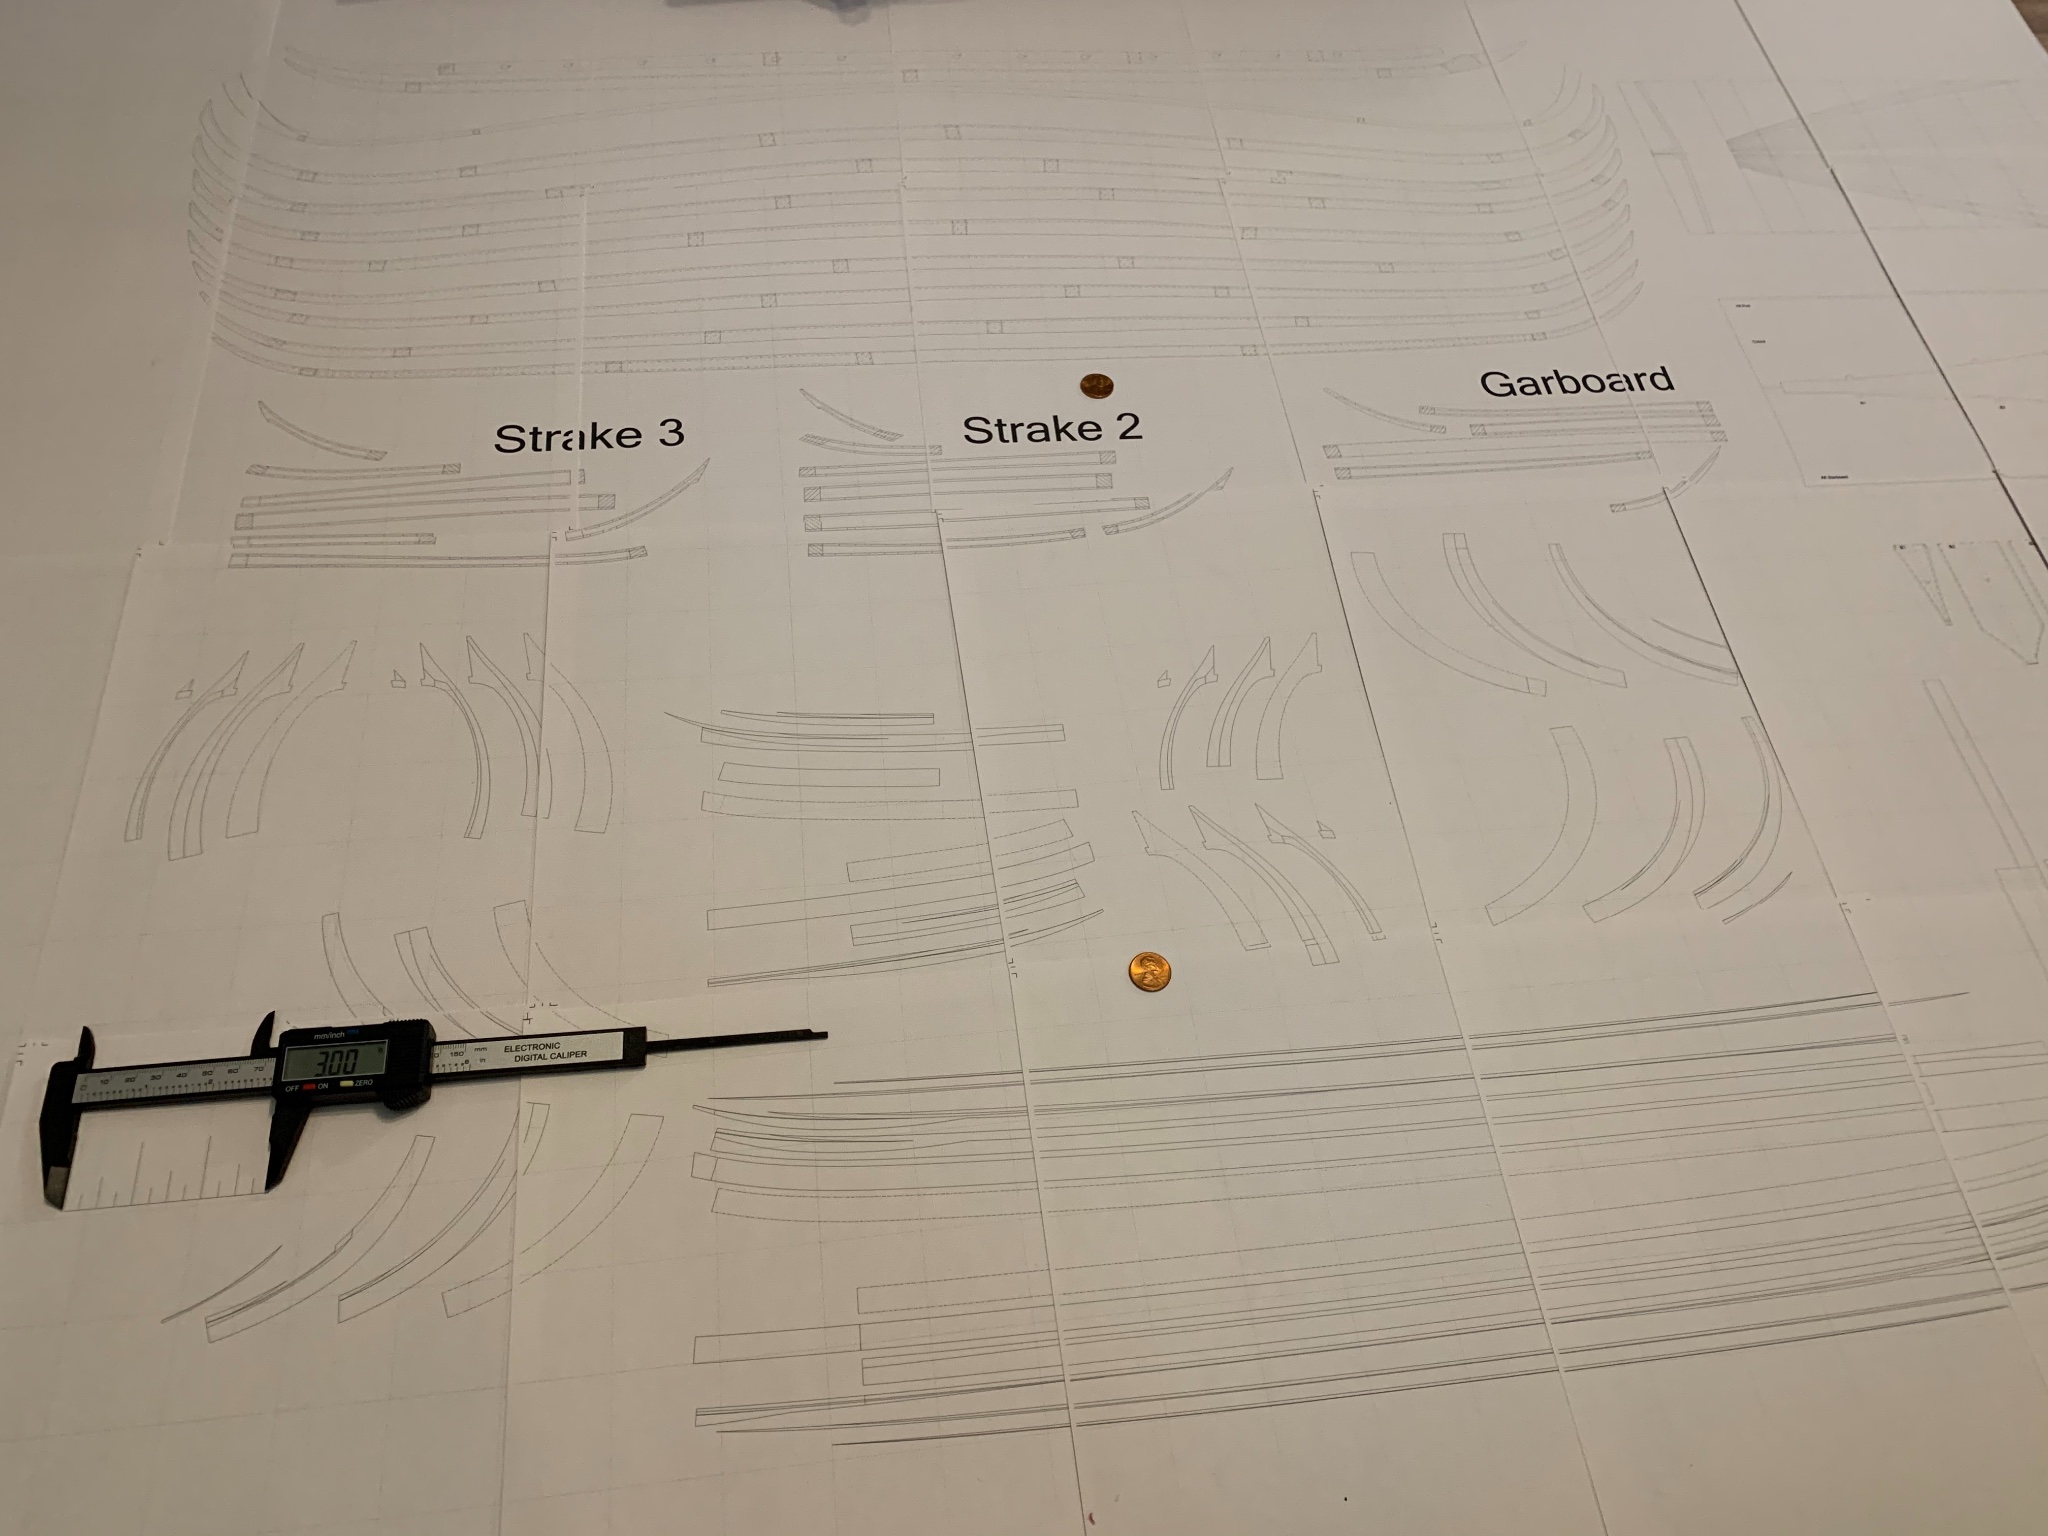
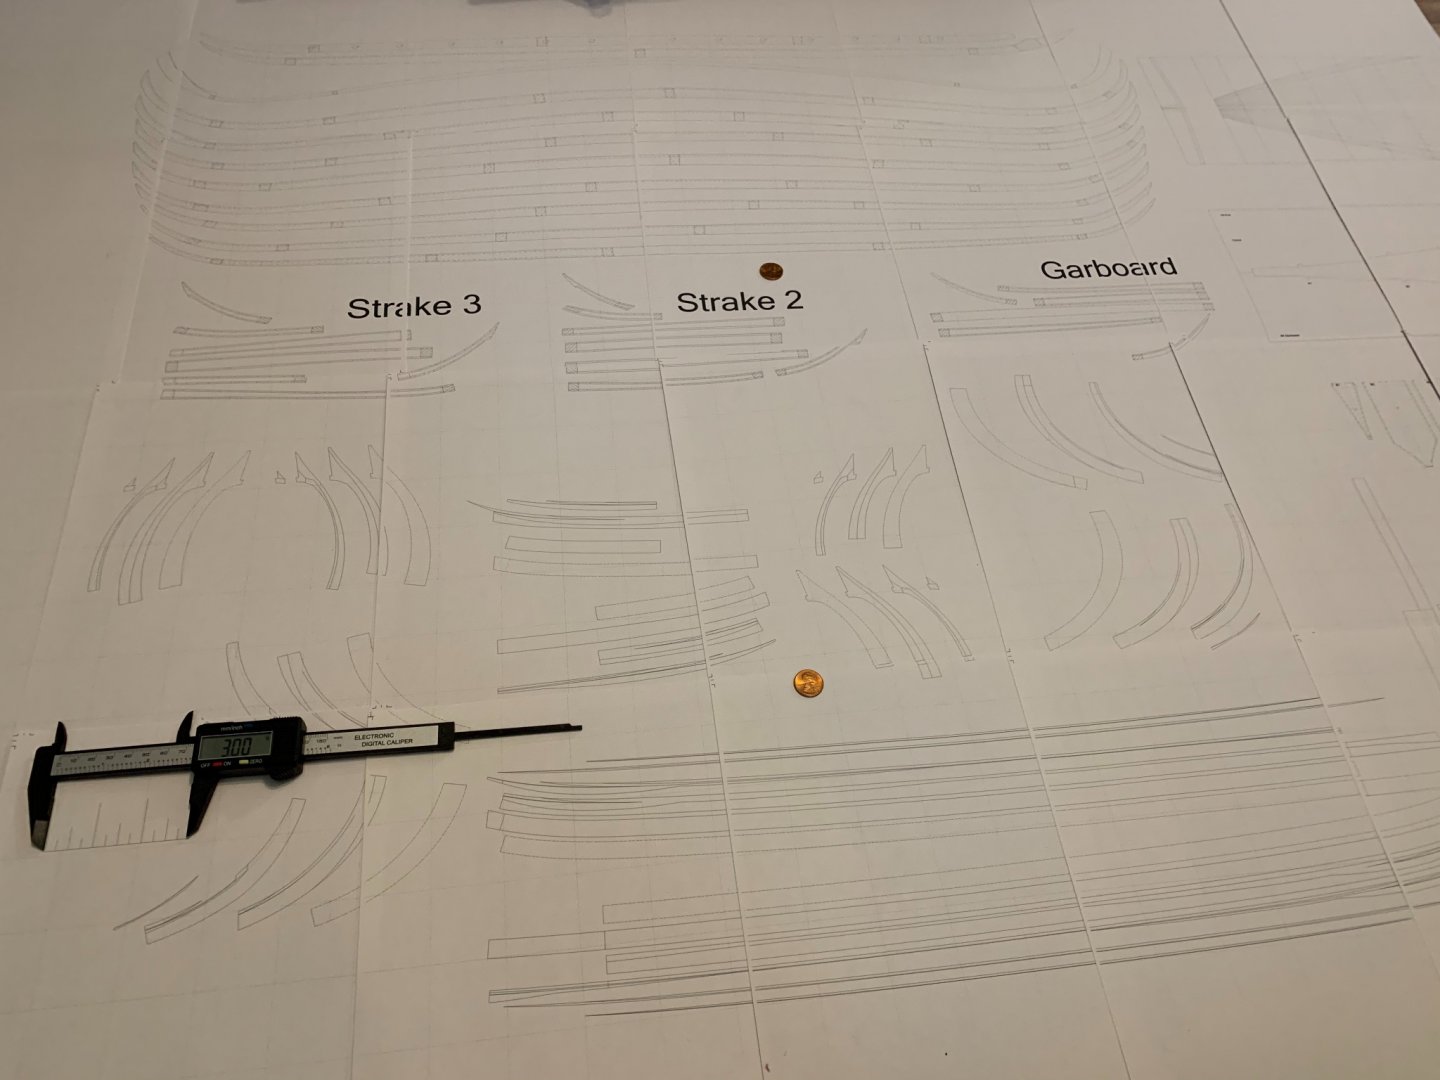
Printed plans (tiled but not taped together yet) this time with a printed scale to verify it's all the right size! I've got some work cut out for me here...
-
Hi @bigpetr, While trying to figure out how to print the plans on paper in the first place, a year ago or more now I think, I had changed a number of print settings in both Rhino and Acrobat Reader. I changed them all back to the defaults except for two things: Print scale in Rhino (1:25 instead of the default 1:1) Print in Greyscale in Acrobat Reader Once I had everything except those two set back to the defaults, it printed correctly the first try. Because I do not own a large format printer I had to print it tiled as a poster in Acrobat Reader. I'll try taping together my tiled pages and building from that. If that still doesn't work (mostly due to inevitable errors in the angle at which I tape them together) I'll take my plans to the local printshop and have them print it at blueprint scale (they go up to ARCH-E 36"x48") and buy a lot of carbon paper to transfer it to the wood. I hope to have updates for you all in the near future!
-
Btw, for resources on viking sails and rigging, the best source I know of is here: https://www.academia.edu/37851682/Vikingetidens_sejl_form_og_proportion
-
Hi @bigpetr, Have you made any progress lately? It's been a while! I'm eager to see what you do next on this beauty!
-
I've been using the Rhinoceros 3D trial version. It expires tomorrow on this computer, but I managed to print out all my plans at the correct scale, so I'm back in business! I don't have much poplar but I'm going to try building most of the keel with that. We'll see how it goes!
-
@Larry Cowden, I second @Jaager's suggestion that you scrub your email from your post. I sent you an email, so you no longer need it there anyway. It's too easy for identity thieves and other ne'er do well's to make use of when posted on a public forum.
-
@Larry Cowden, Thank you for all your comments! The only thing I've ever done in AutoCAD is export drawings to other formats. Yes, Rhino can natively export to AutoCAD dwg format. I think you may be correct about the diagonal frames resisting the vertical action of waves. Viking ships were built to flex with waves, which is why the frames are lashed to the planks rather than nailed. I wish I was better at CAD work, regardless of the program used, because I'm really struggling to draw the parts that are not planar, like the frames. @Jaager, I'm currently in the process of drawing all the parts I'd missed with my previous computer's Rhino trial. Once I'm done with that I'll be getting back into the wood. I am currently using basswood for my ship model and plywood for the building jig. There will be no plywood on the model itself, though I have some poplar I was thinking of using for the frame timbers and meginhufr (equivalent of a main wale on later ships). What is it about basswood that makes it unsuitable? What species of wood would you recommend instead of Basswood? Also, I had a boxwood bush die in my yard last summer during the drought, and I'm thinking about pulling it out and cutting it into frame timbers with my dremel saw attachment. I could have swore I'd read somewhere that boxwood makes for good ship modeling wood.
-
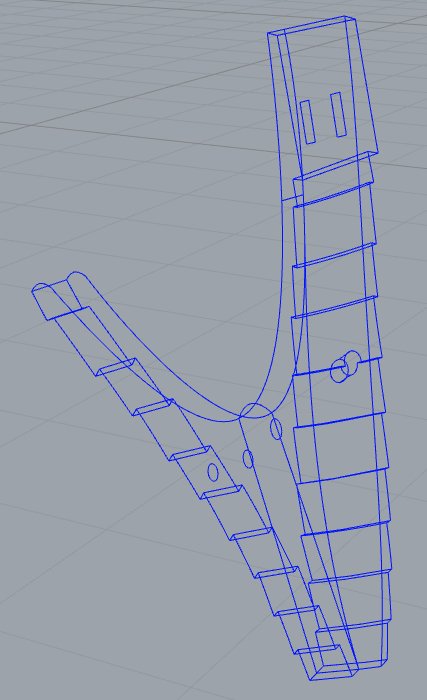
Hi all! Since my last post, I've got Rhino working on my personal laptop and have been hard at work drawing the few remaining pieces before going back to printing again. The rudder frame was by far the single most complicated part to figure out in 3D in this entire project. Sooo many complex shapes! I've got a couple more parts to figure out in 3D before going back to printing. Stay tuned!
-
Hi @Cathead, Good idea! I looked it up and the Office Depot near my house does same day blueprint printing, so that might work. Alternatively it occurred to me that if I export my plans as one really really REALLY big PDF I can print all the pages at once with the same scale settings. Then it would at least be to scale with itself. It's not as big an issue that it be exactly mathematically to 1:25 scale with the actual ship as that all the parts be to scale with each other. I think I'll try printing the pages together in one big PDF first, and if that doesn't work out I'll try Office Depot.
-
It's been slow going these last few weeks. I've started a new job and it's taking up all my time and concentration. I've been gradually getting parts cut out, little by little, and assembling them. I accidentally glued the aft stem at the wrong angle, tilting too far aft. While attempting to pry it loose with a sharp knife, I accidentally snapped my keel in half. 🤣 Well, that'll teach me not to try that again. So I reprinted my keel templates, cut them all out of wood, and lined them up with the parts I'd already cut out but hadn't glued yet. They didn't fit! 😢 I carefully double checked all measurements and found that when I'd printed the templates on paper, the scale of each print was very slightly different, within a range of up to 2mm over the length of the ship. Well, that's a problem. That means nothing is going to line up perfectly! My question now is, how can I print paper templates at a consistent scale??? I'm already setting Adobe reader to print at 100% scale / actual size for my 1:25 Rhino drawings. I'd assumed that meant the resulting prints would all be at the same scale but obviously that is not so. I'm stumped and would greatly appreciate any advice for printing consistent scales between drawings, especially for the parts that consist of multiple pages taped together when they're longer than one page.
-
Looking good! I'm going to have to hurry my own project along to catch up! 😀
-
I went and got more 1/32" basswood yesterday. I'm back in business! Pics to come soon.
-
It turned out widening the notches on the jig was super easy, next to shrink my keel layers. XD
-
I finally made more sawdust! Armed with my new plans I thought for sure this time things would work out correctly. Then I started trying to assemble my parts and ran into two terrible errors on two very important thicknesses... I misremembered my keel layers as being 1/16". They're 1/32". I don't have any 1/32" basswood long/wide enough to make some of the pieces. I'm either going to need to buy some sheets of 1/32" basswood, or I'm going to need to redraw them at 1/16" thickness. I also drew all my jig parts for 1/8" plywood, but my plywood is 1/4". This means none of the parts fit together. I'll need to either cut all the slots wider than drawn, or redraw them at 1/4". Back to the drawing board, and this time without CAD. XD