DanielD
-
Posts
653 -
Joined
-
Last visited
Content Type
Profiles
Forums
Gallery
Events
Everything posted by DanielD
-
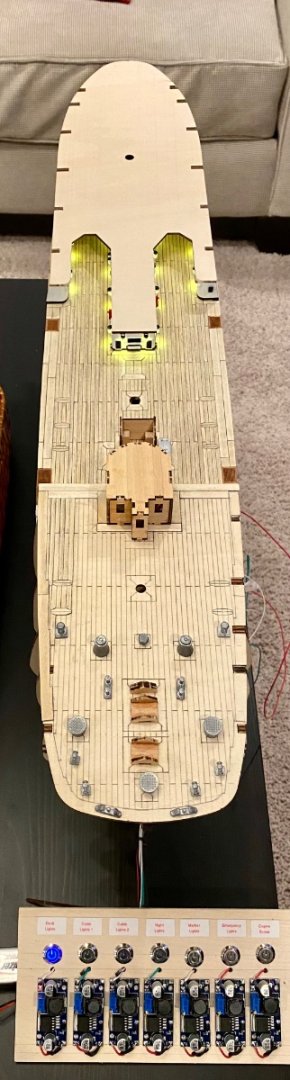
 Good morning VitusBering, The voltage regulators that I used I purchased from Amazon (https://www.amazon.com/dp/B09L49XQYD?ref=ppx_yo2ov_dt_b_product_details&th=1) specifically because each regulator can tolerate up to 3 amps and is adjustable from 1.5v to 35v with an input capability of 3-40v. Currently I'm running everything on a single 9v battery, but in the end all of the regulators will be built into the stand and plugged into a 3 amp 12v power brick. As it turns out, I love the adjustability of these regulators because I am able to easily adjust the brightness of each channel, so the deck lights can be turned down to a dim illumination. I use 3mm 1.8-2.3 volt various colored LED's with resistors that came with the LED's matched for 6v running voltage for full brightness at 20mA. I'm currently running my deck lights at about 3 volts, enough to turn on the LED's but allowing them to be dim, just to cast enough light that the viewer is able to see that the lighting works. My calculations indicate that I should be able to run about 150 20mA LED's on each regulator, but in reality, I'll cap out around a 200 LED's total for the project across several regulators. I hope this helps! UPDATE: More helpful information (I hope)...The output voltage maximum will be 1.5 volts lower then the input voltage. For example, an input voltage of 9v, as with a standard rectangle battery and the way I have it running at the moment, the maximum output voltage will be 7.5 volts thus making the adjustable voltage regulator operational from 1.5 to 7.5 volts in this configuration. My final version will be operated from a 12 volt 3 amp power brick, thus giving my operating output range from 1.5 to 10.5 volts. Since I'm rigging my ship to run on 6 volts, all the 3mm LED's and the 6 volt motor for the propeller, this adjustable voltage regulator works perfectly. Given these specs, I can run a total of 400 LED's at full brightness (@ 20mA) and the 6 volt motor all on a 3 amp power brick. With my newest projected configuration for the lighting of this project, I anticipate around 200 LED's and the 6v motor...which allows for some power to spare. However, I really don't think everything will be on at the same time, but it could! Final bit of information, if anyone is interested...Below is my temporary control panel which allows easy access to the output voltage adjustment. When finished and the voltages all set for the final model, I will build them all into the stand with just the switch visible with a nice description tag. Currently planned, 1) Deck Lighting - all the outside visible lights, mostly on the main deck, 2-3) Cabin Lights 1 and Cabin Lights 2, my plan is to be able to have two sets of port holes light up, one set with scattered lights or compartments that will have a realistic look of some port holes lit while others are dim, and the second set just the opposite giving me the ability to choose one or the other, or both to have all the port holes lit, 4) Night lighting which is what the Amerigo Vespucci is famous for, the Green, White and Red deck lighting that casts colored light up into the masts, 5) Marker Lights, you guessed it, the red (port), green (starboard), white/amber (stern) and the white lantern that sits on the Mizzen boom, 6) Emergency lighting - only a single red and a single flashing red emergency lighting located on the main deck (unless I discover that more exists on the AV), and last 6) the motor which is in the bowels' of the ship and will turn the single propeller at about 35 rpm, about 1 revolution every 2 seconds, really quite slow but don't want to injury someone. Well, that's the plan...we will see how it goes, but so far, so good.
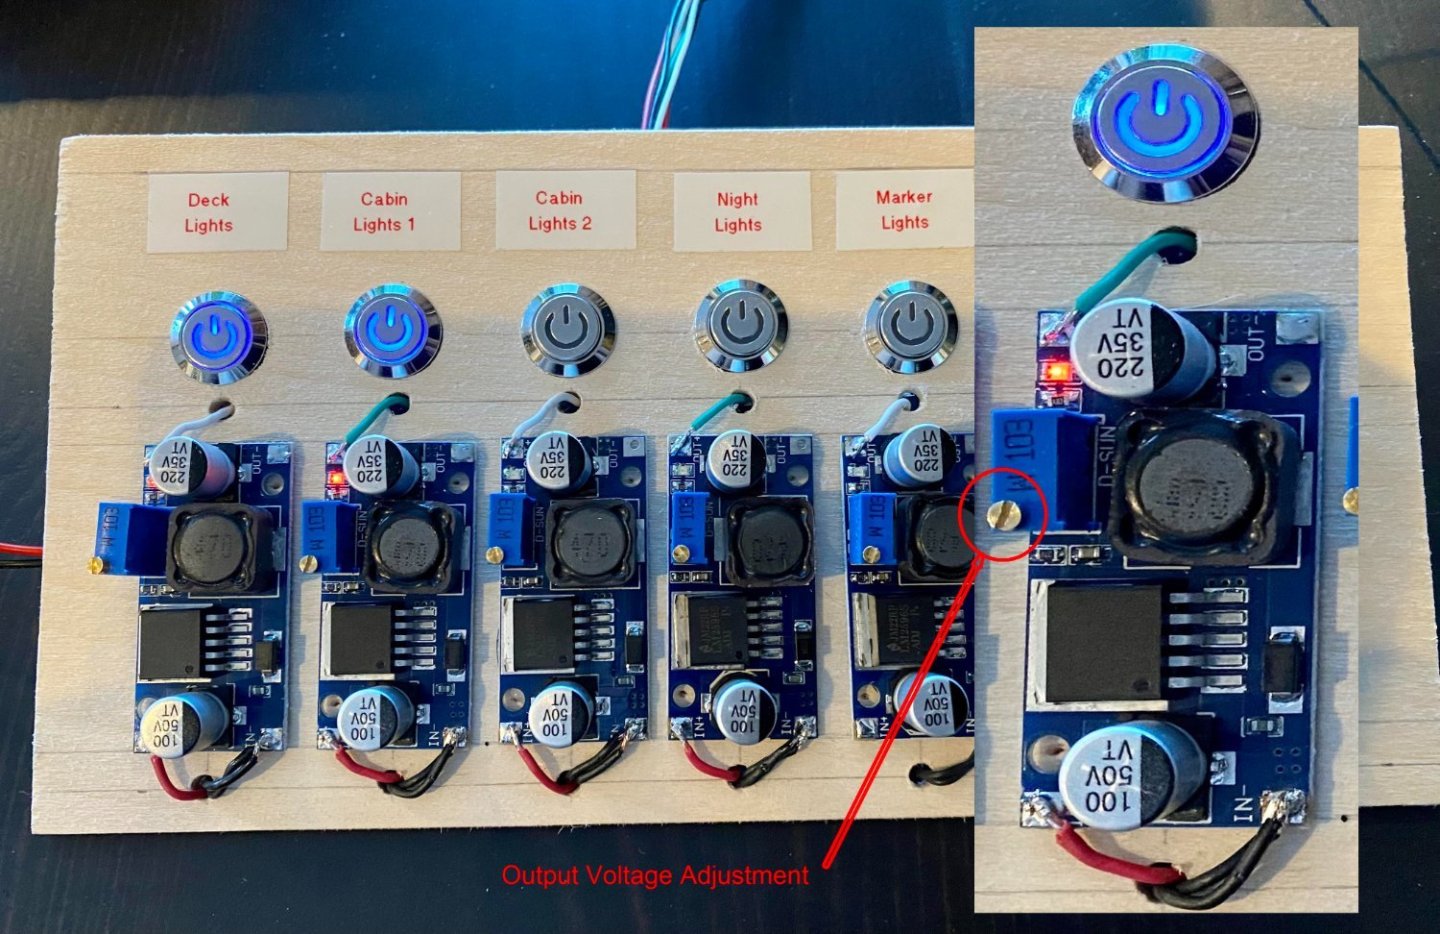
-
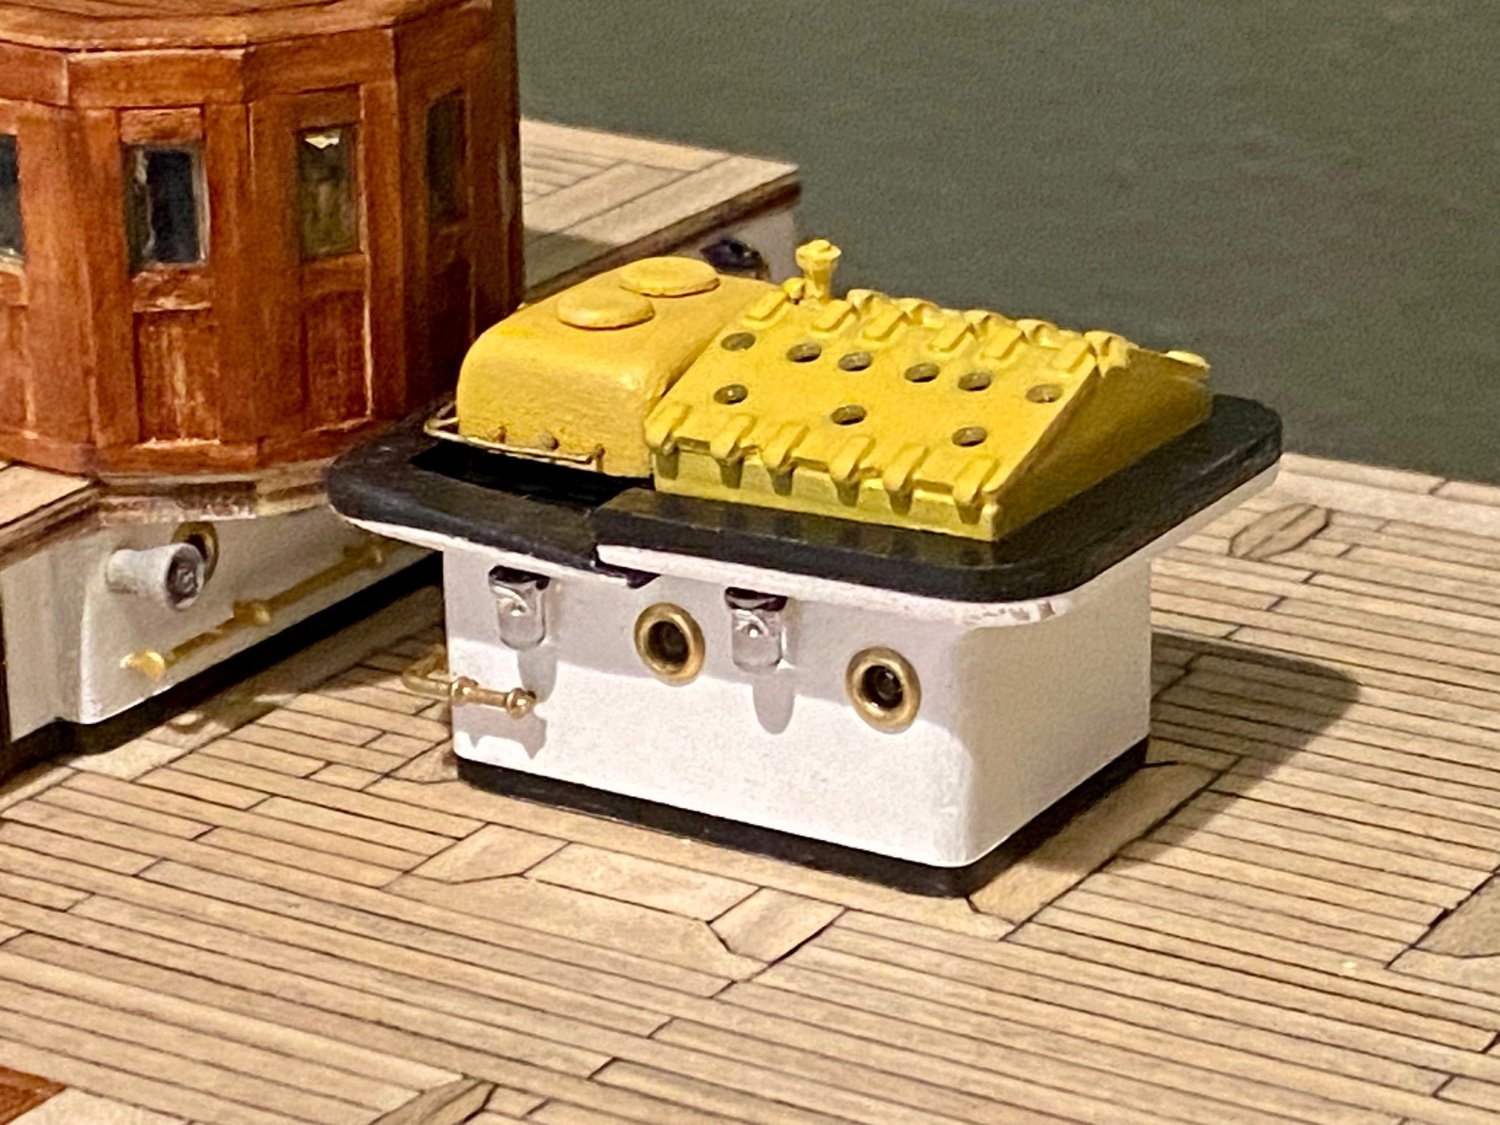
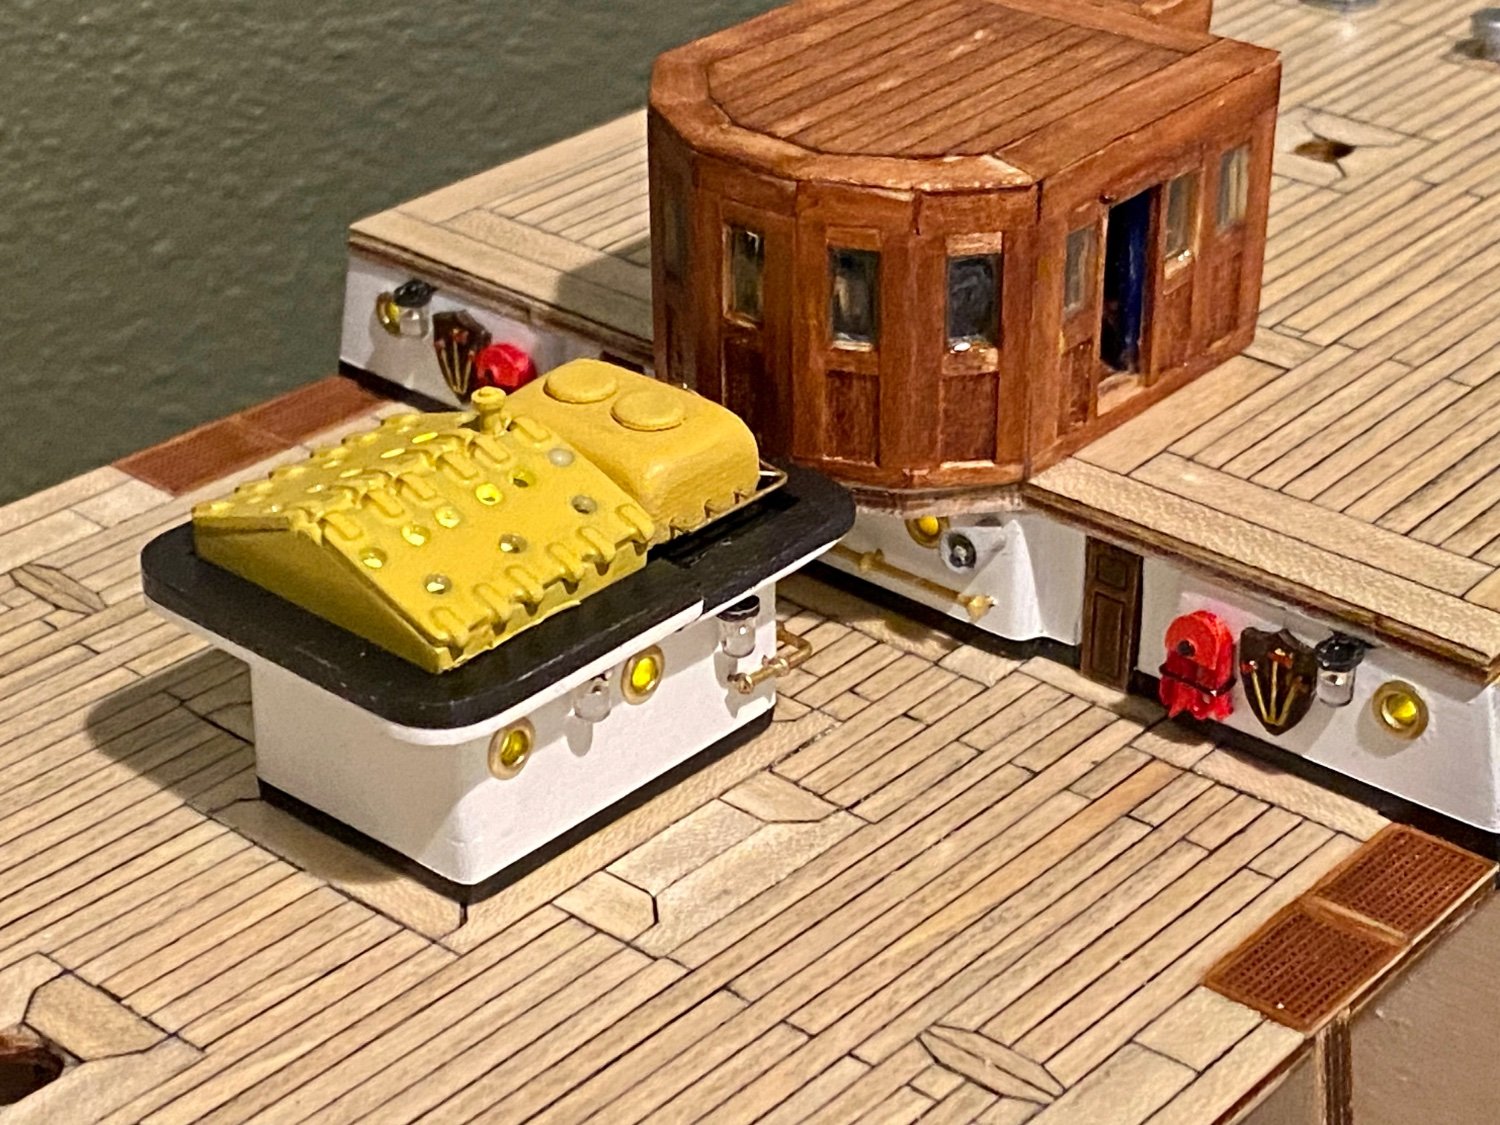
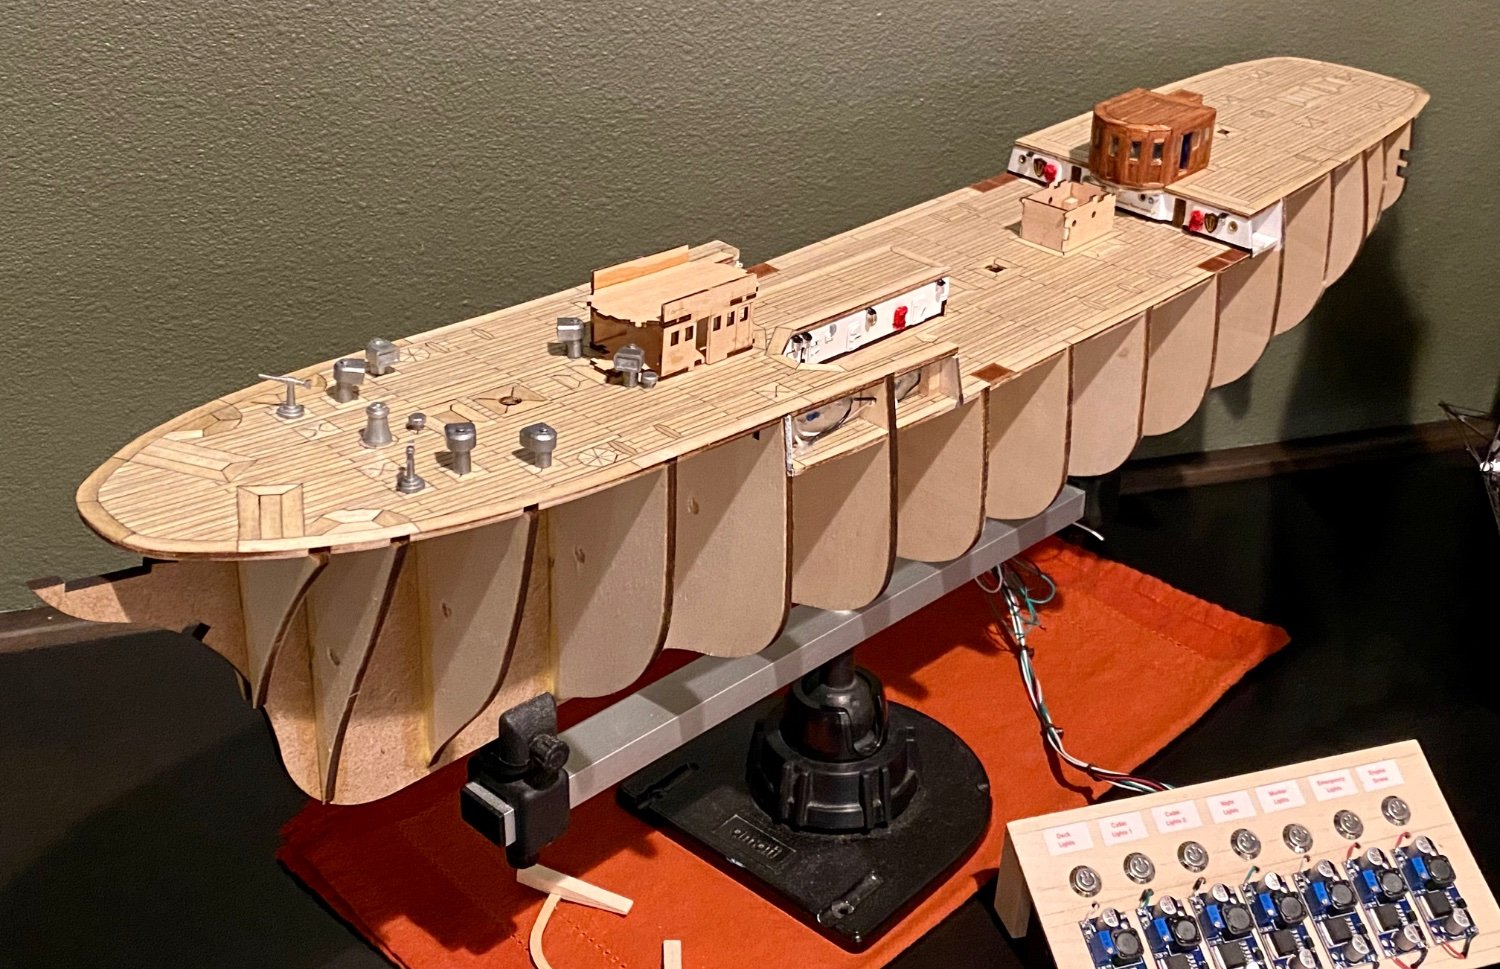
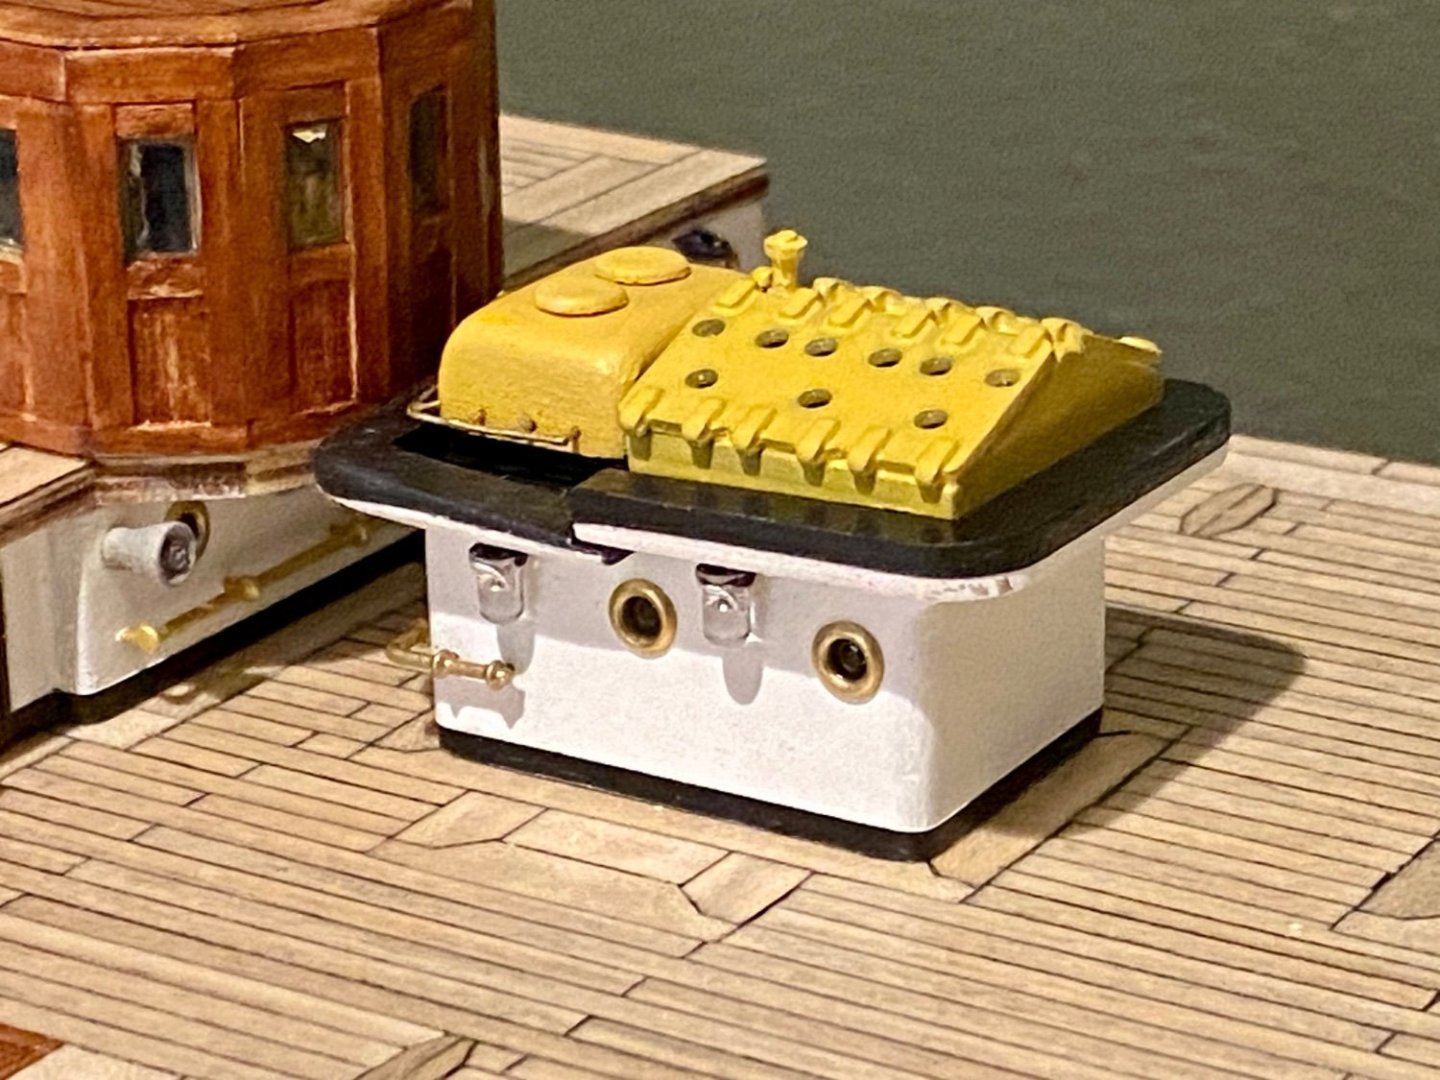
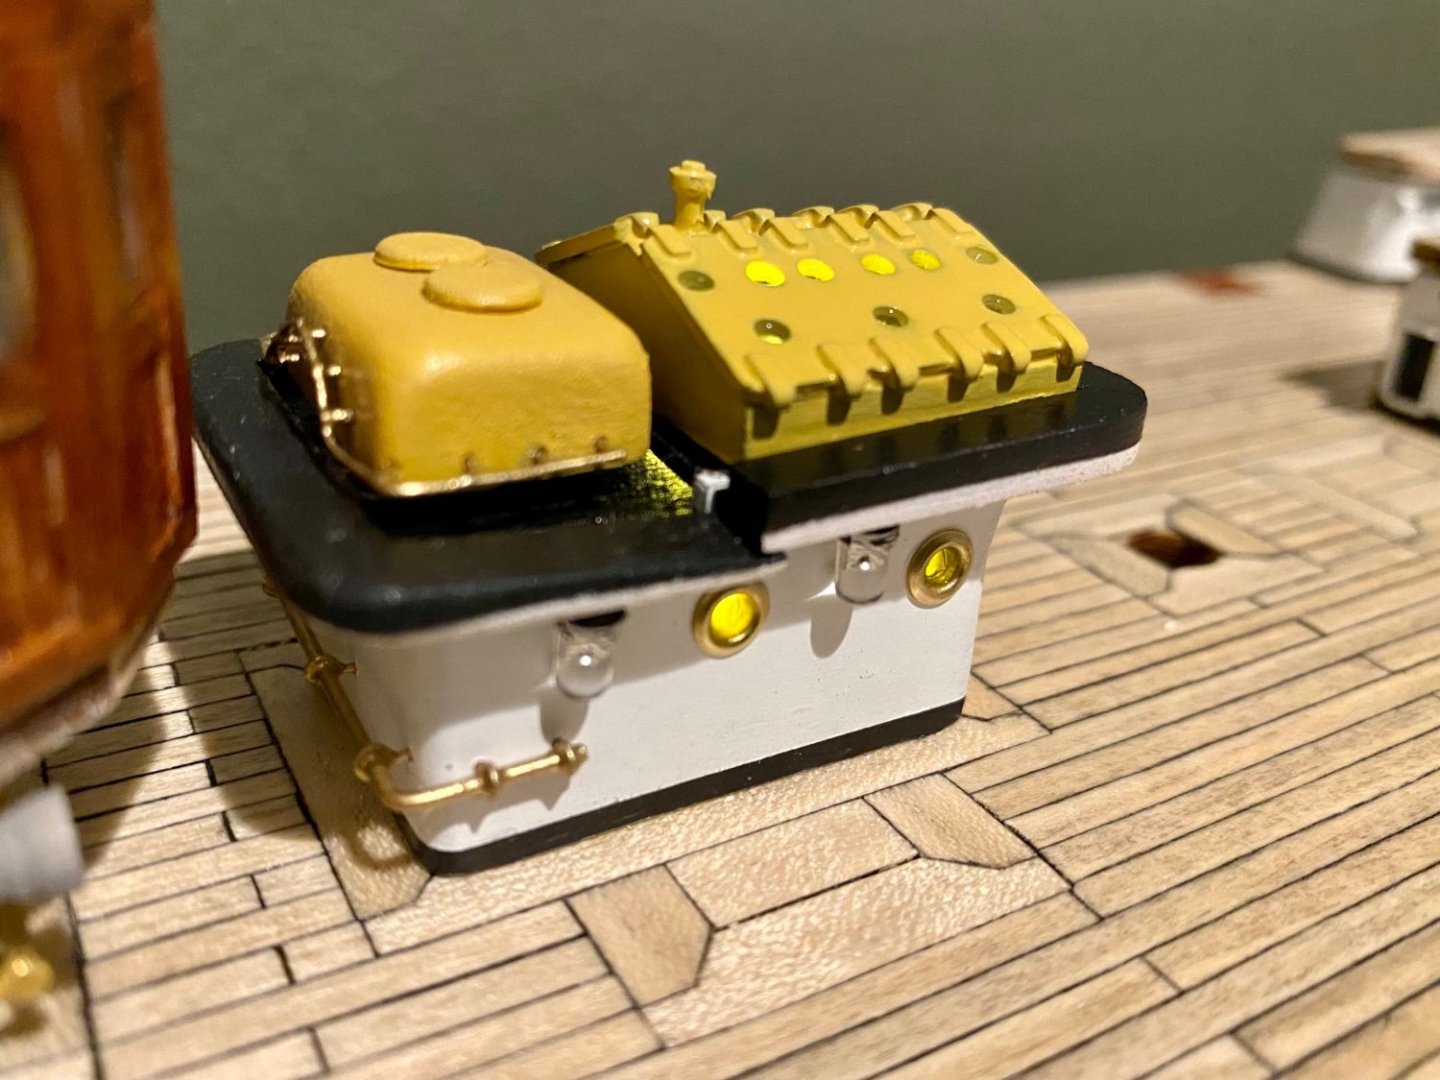
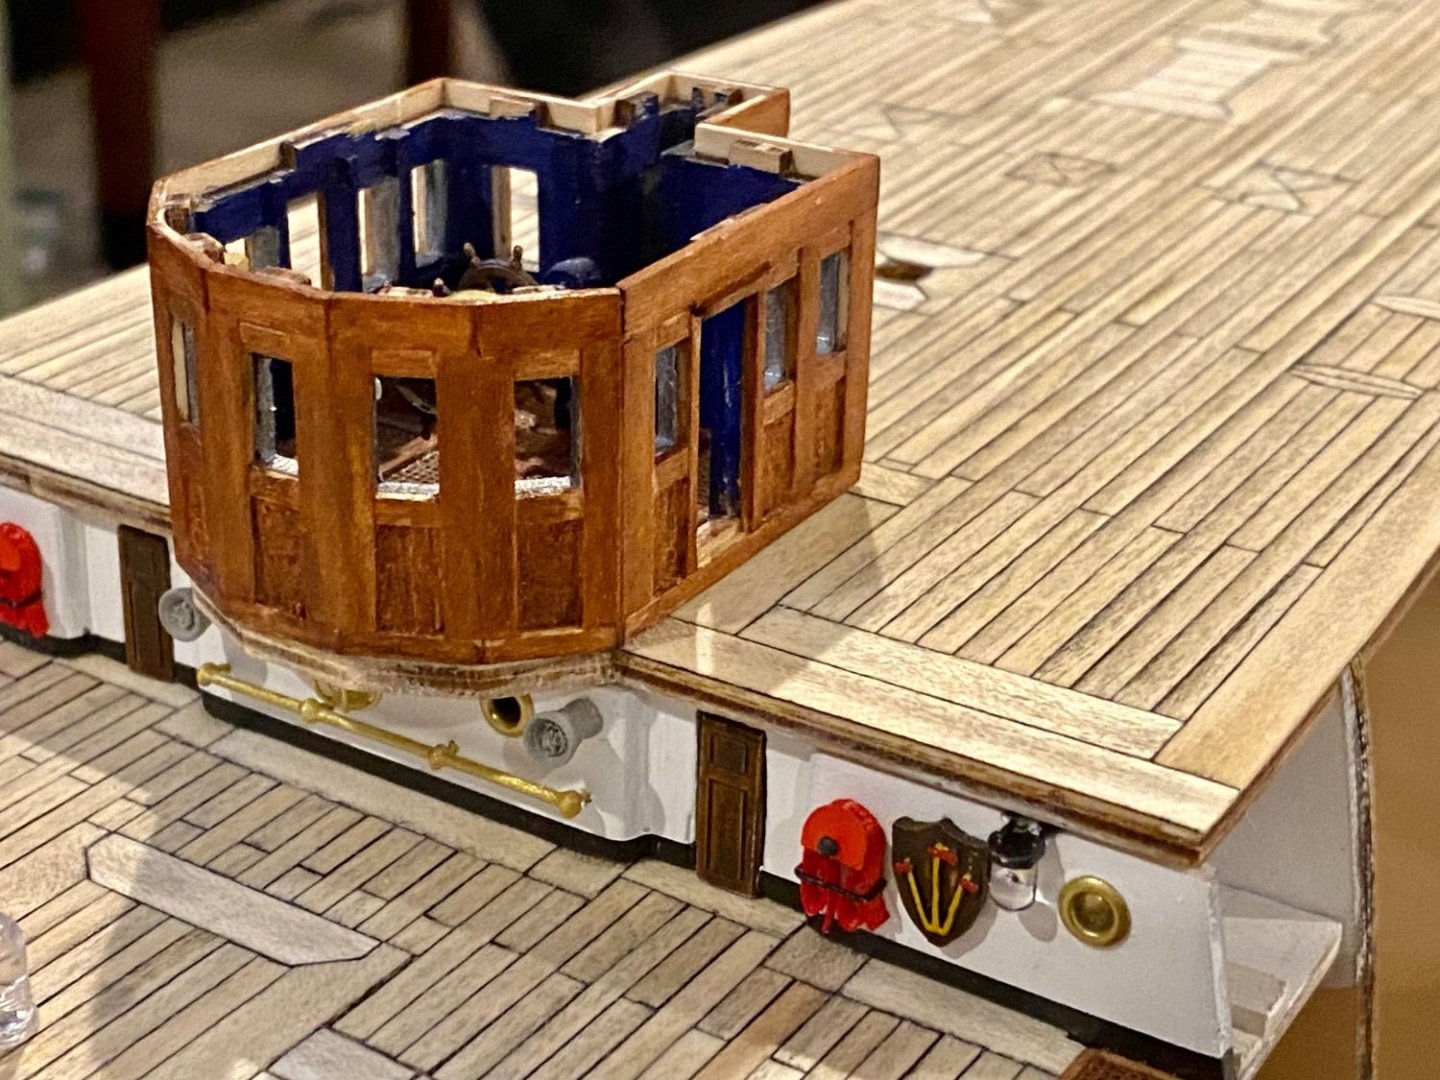
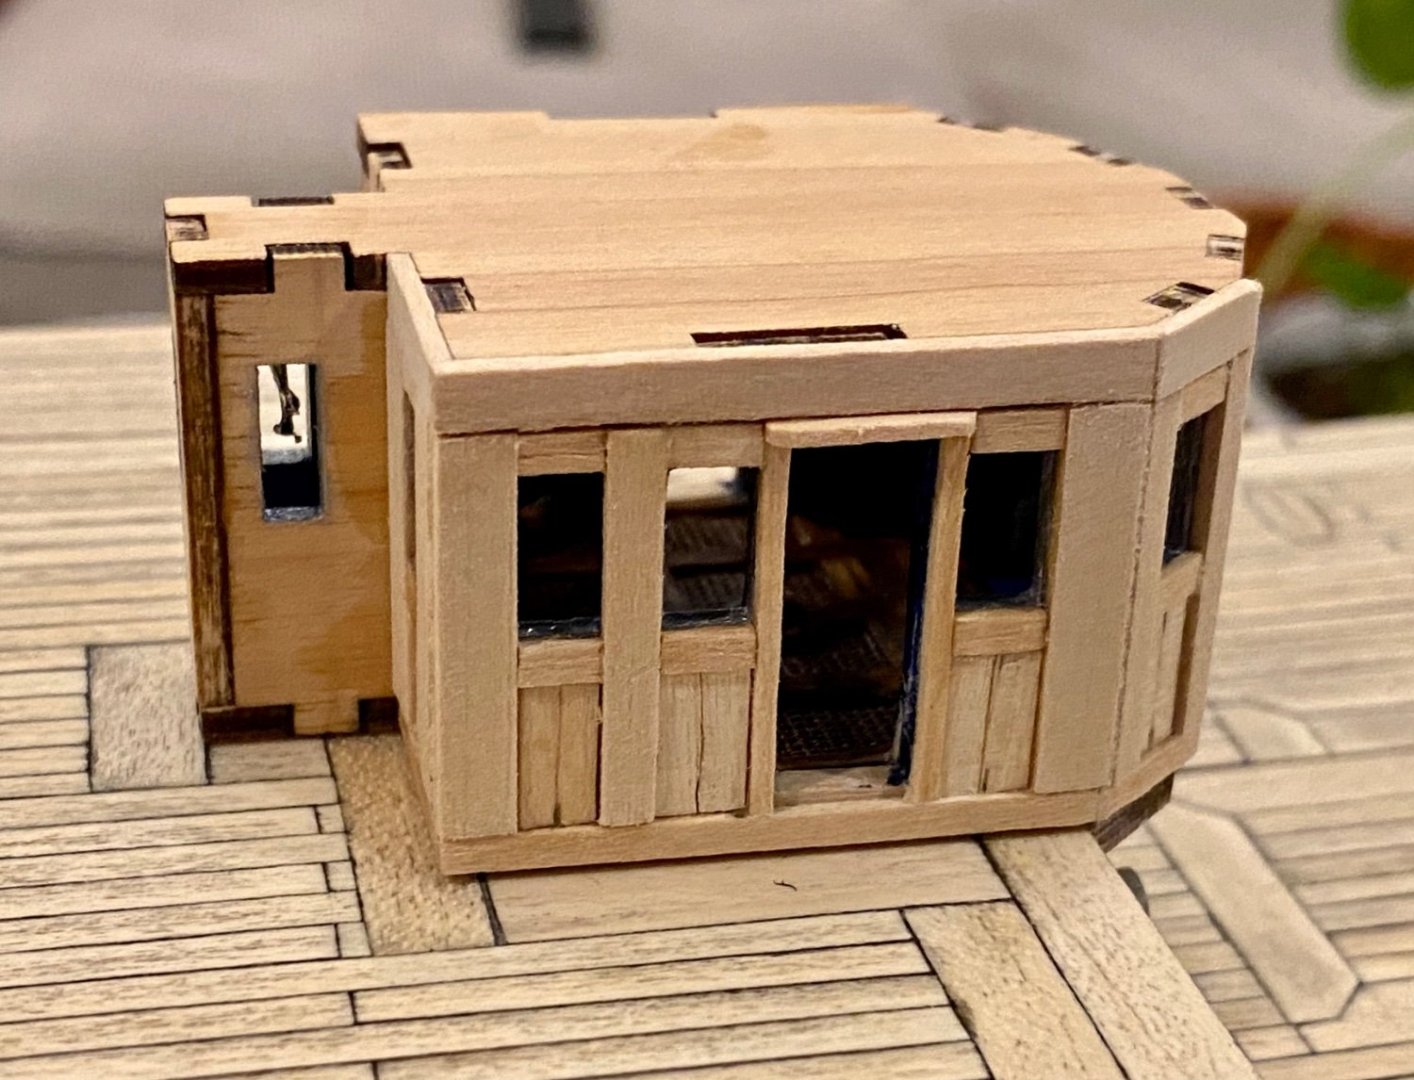
Good evening mates, time for an update. This weekend I spent time with more lighting. This time on the small structure on the main deck. This structure is only temporarily placed, but I have everything working. Also, while impossible to see in any of these images, I installed the window glazing on all the port holes and skylights (not sure what the nautical name is for these) of this structure. Just a little more work to do and this one is finished.

-
Mike, I'll keep that in mind. Right now I'm so far away from planking...I have so much more lighting to get finished, but now that the deck is completed, there should be rapid visual progress forthcoming.
-
Well, I guess this is a personal decision for the AV. Since it has a metal hull, our attempt is to plaster the wood and make it look like metal. So a second layer is probably not necessary. I’ll probably add the second layer because the two other models I built, some areas sanded to get a smooth finish thinned out making the wall somewhat transparent with bright lighting inside. So I was glad to add the second layer. Not sure how this one will turn out.
-
Mike, the equipment is only temporarily mounted, with a 1mm rod mounted into the bottom of each piece and drilled into the deck. Just a little twist and the pieces come off. I won’t have them in place when doing the planking. I have lighting that I need to place, not in the way of the equipment, and I have to have lighting and wiring all working before doing the hull as once the planking is done, no more access to the wires.
-
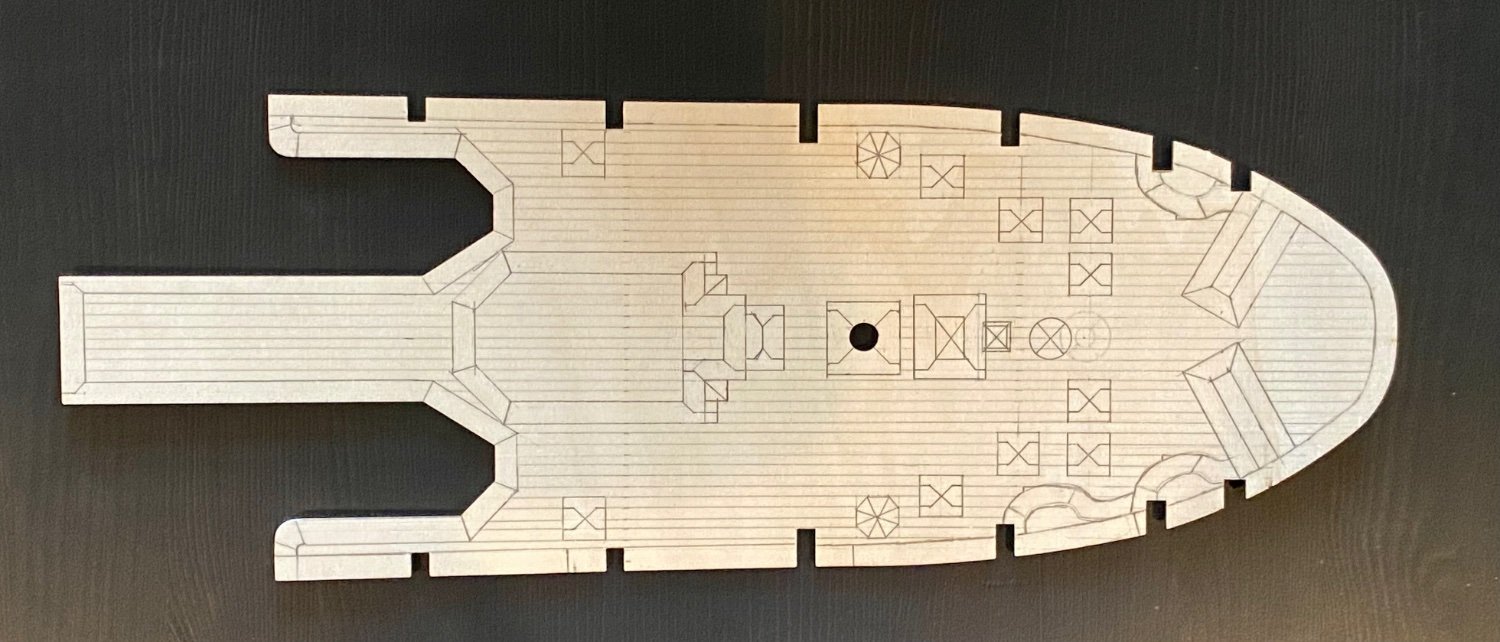
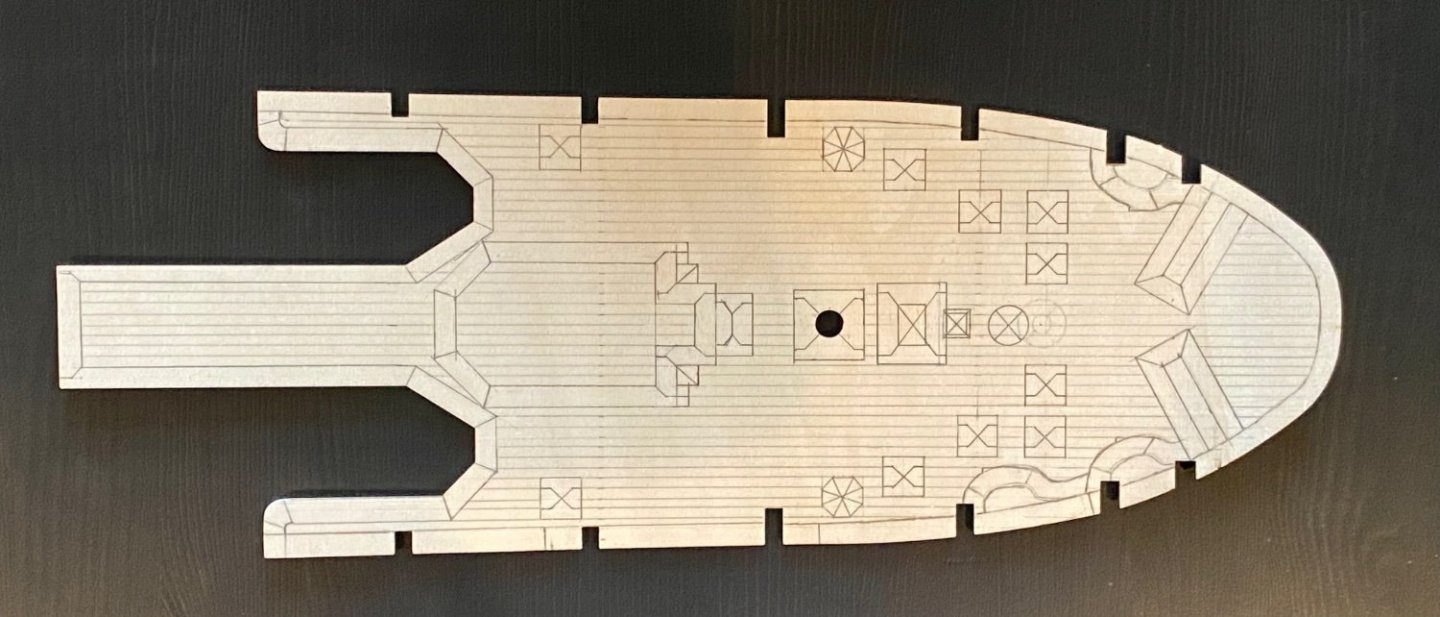
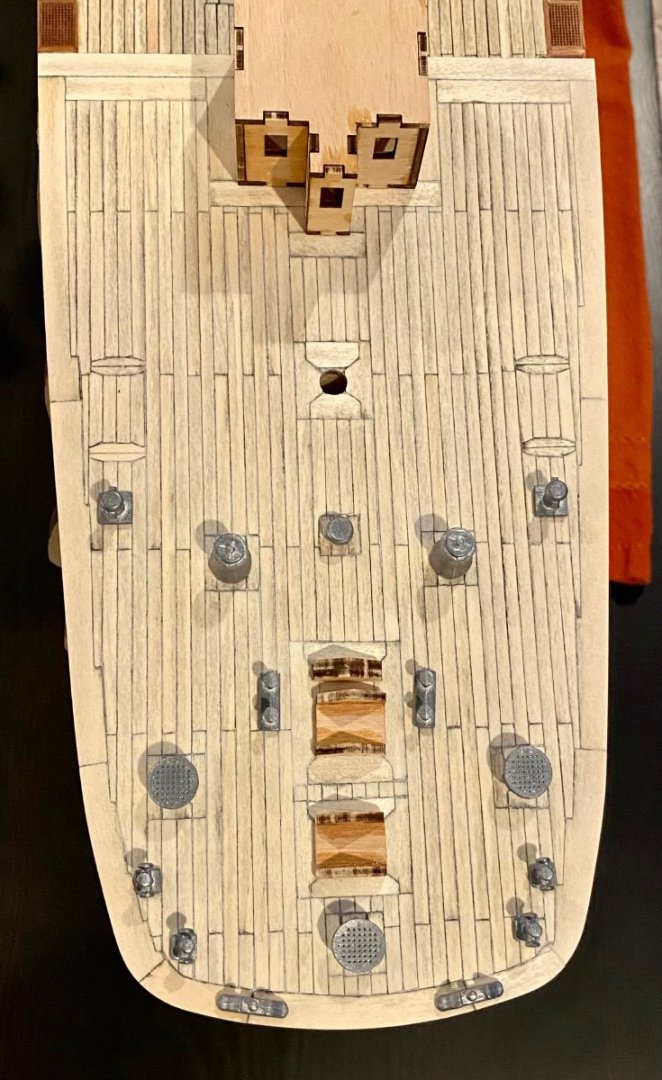
Good evening everyone, it’s been a while since my last post. This week I was working on the fore deck with all the extra Amerigo Vespucci inspired inlay. I’m happy with the final product and started to temporarily place the deck hardware. To hold each piece of equipment in place I’m adding a 1mm post to the bottom each piece and drilling a hole in the deck for placement. So far, it’s all working well. Thanks for spending a little time with me on this journey.


-
Good afternoon mates, I have finally finished the drawing my design of my Amerigo Vespucci inspired fore deck inlay pattern. Now time to start building.
-
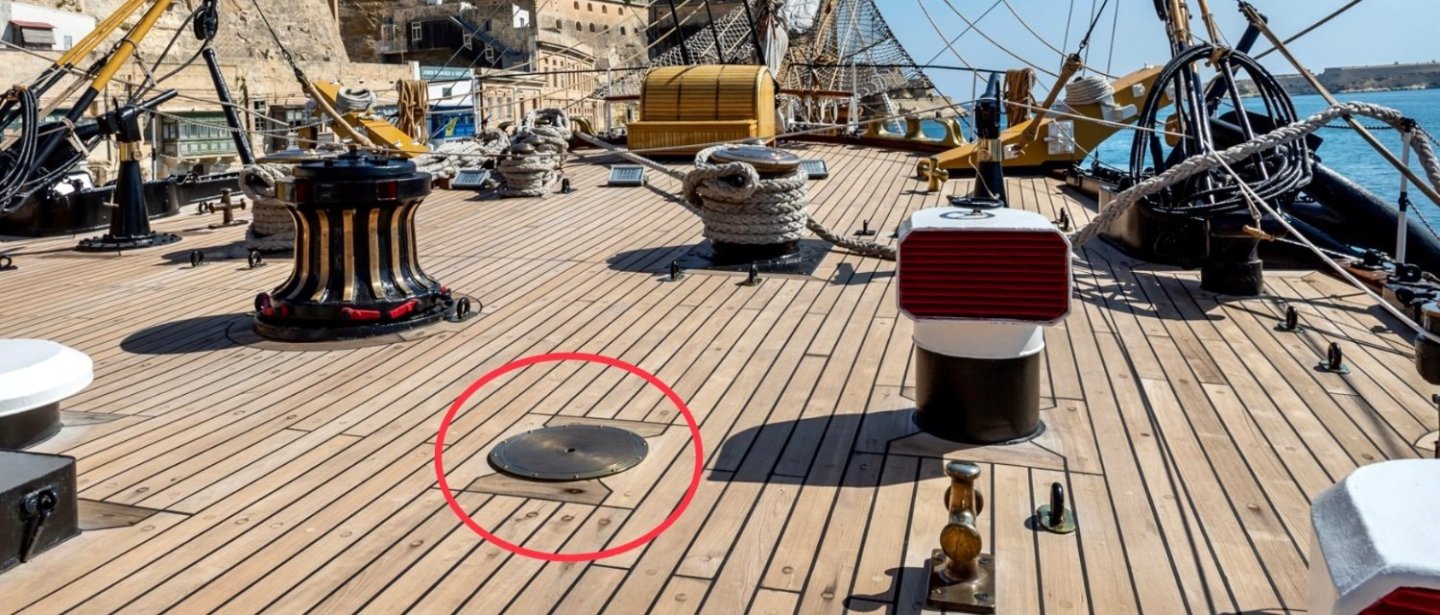
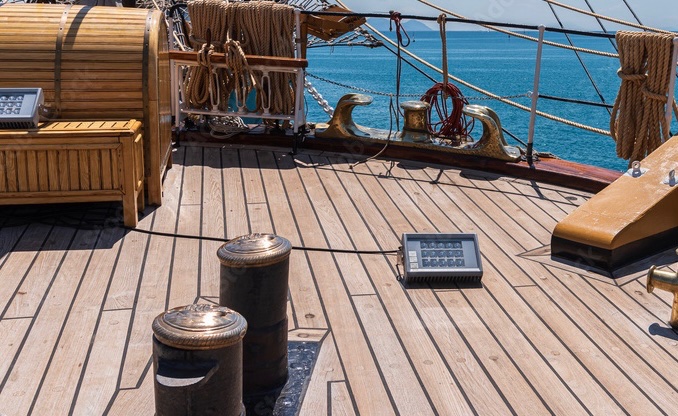
I really have no idea; however, from the hint Keith gave, I did some research. It appears that a “scuttle” can be a type of water proof hatch, use for various tasks, one of which can be escape. Other uses I found include loading coal, diesel or food and even be opened for ventilation. I presume that the hatch opens in some way allowing direct access to the deck below and easy loading/unloading of supplies. Also, it appears that scuttles can be installed on the side of the ship as well, but they are more commonly called…a port hole.
-
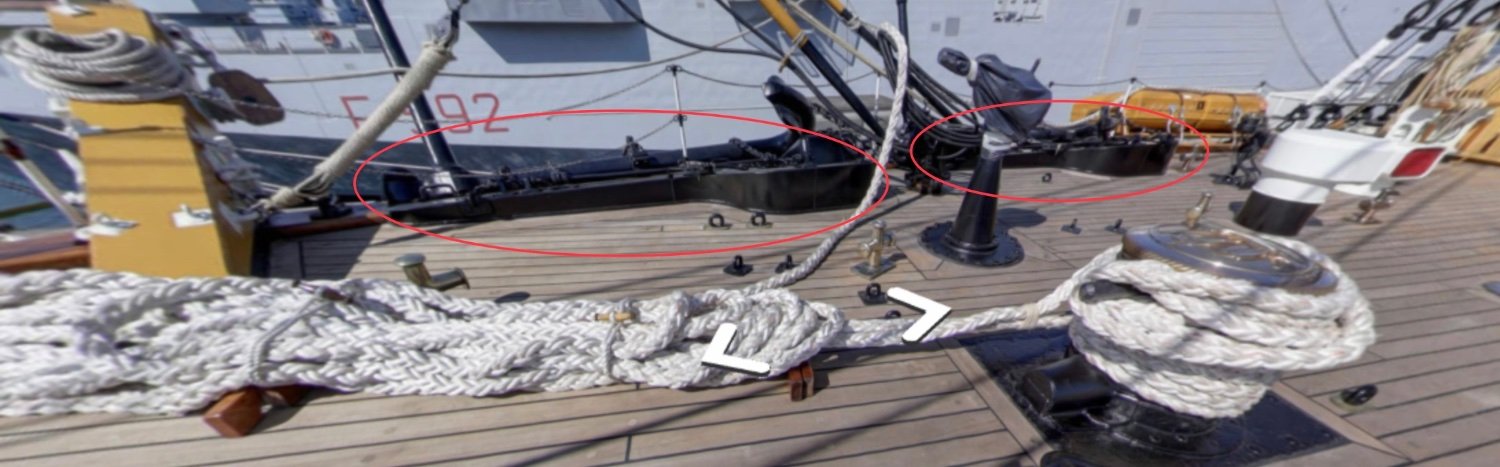
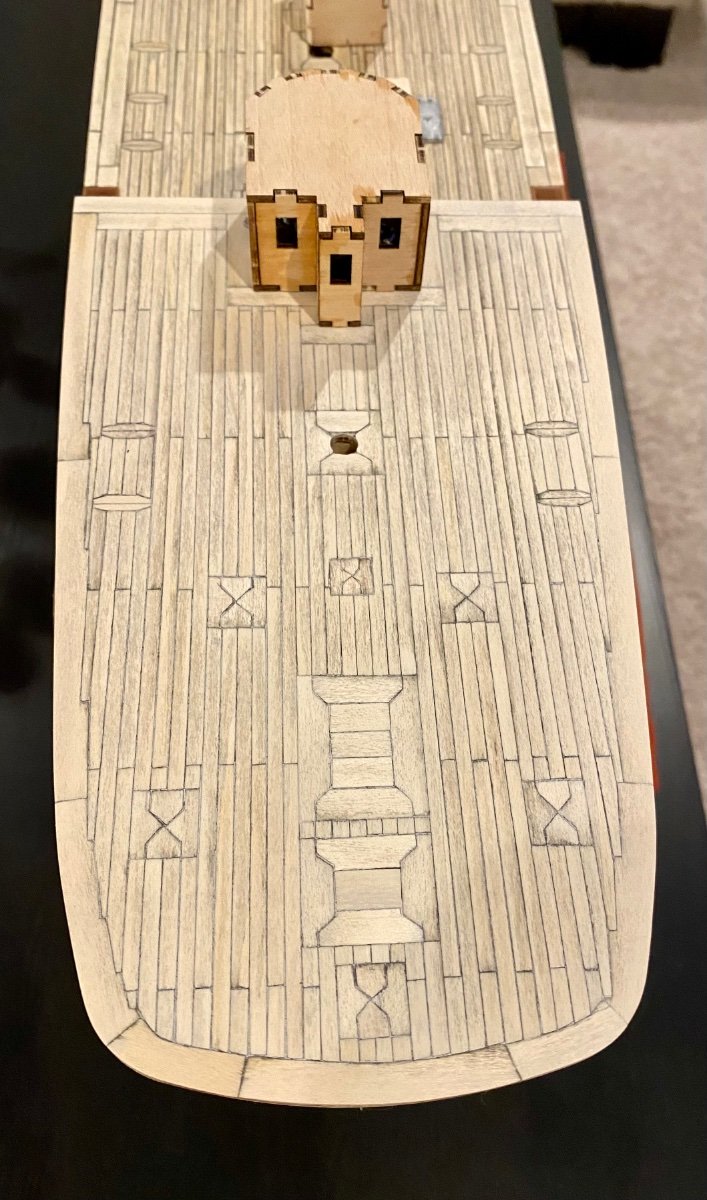
Good evening mates, I have a question for those more knowledgeable about ships than I am. In the image below, what is the area on the deck marked by the red oval? The Amerigo Vespucci has at least 4 of these that I have found so far, but I have no idea what they could be. Any ideas?
-
Mike, I appreciate you discovering this. I’ll keep it in mind. While working on my Amerigo Vespucci inspired fore deck, I discovered that OcCre has made a mistake on the deck equipment, that as far as I can tell the other model manufacturers got correct. There are two fore anchors on the starboard side but only one on the port side, but the OcCre instructions and kit contain two anchor kits for each side. I have double checked photographic images, and it’s true, two on the starboard but only one on the port side.


-
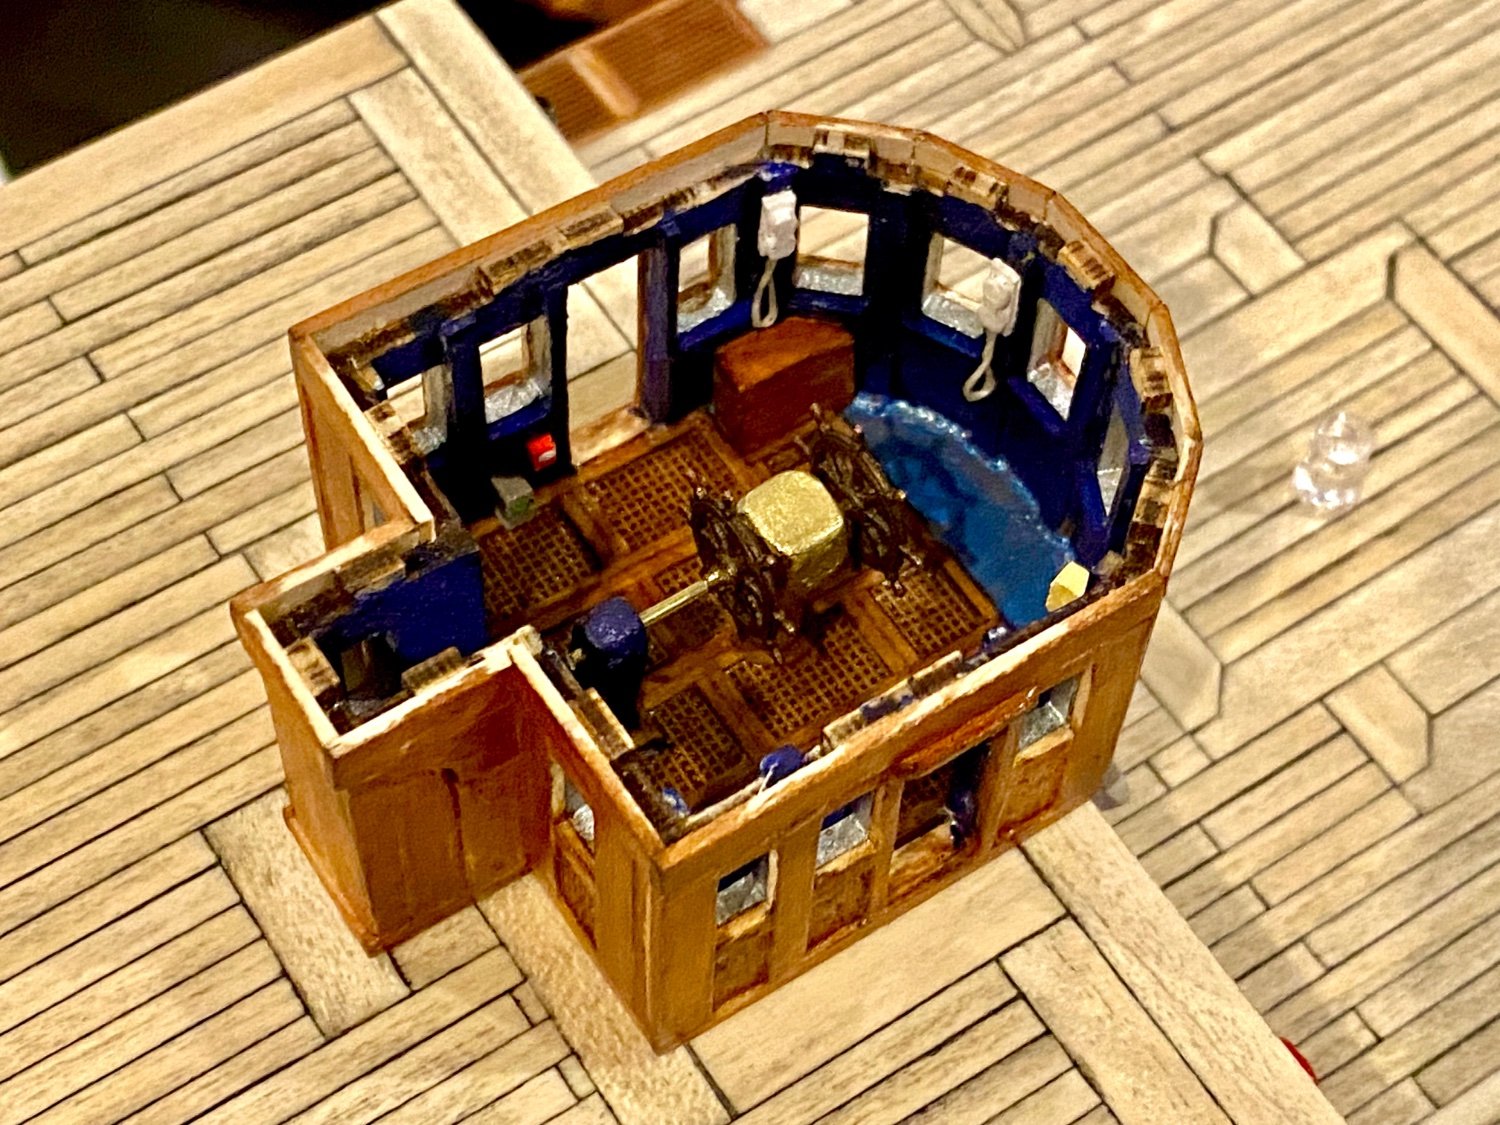
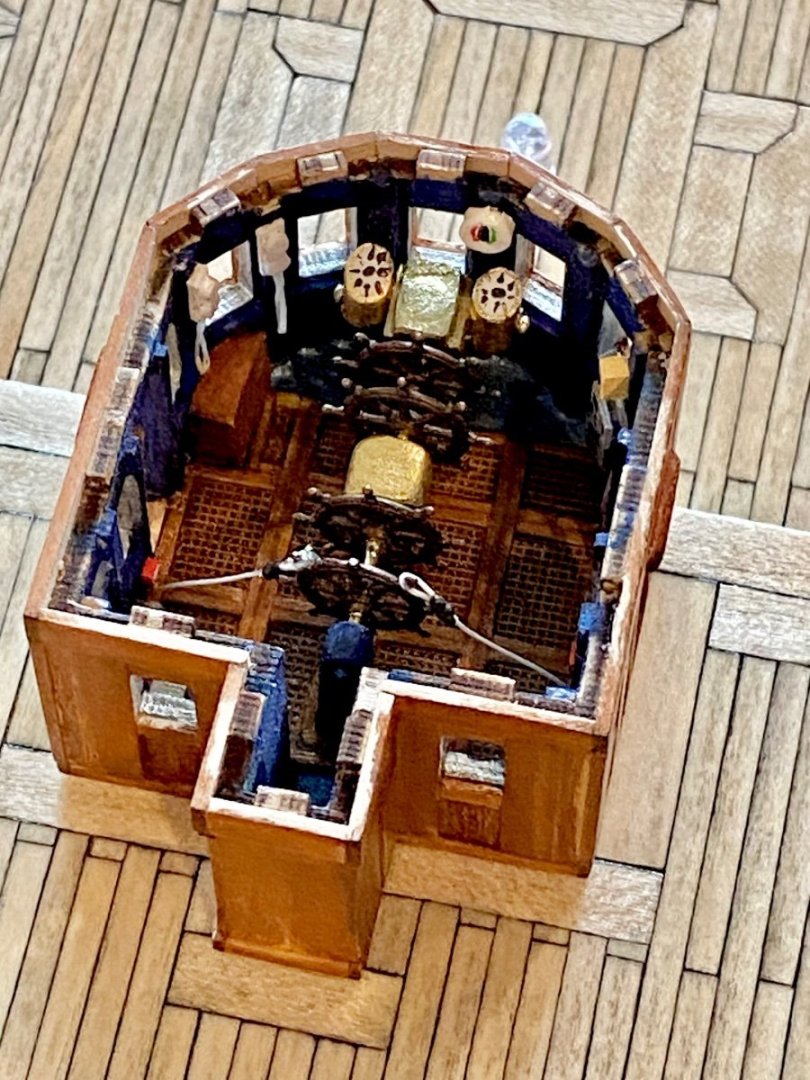
Good afternoon mates, I have finally finished the inside of the wheelhouse. Now that I have that out of my system, back to working on the deck and lighting so I can start the planking project…

-
Keith, I am thinking the same thing…
-
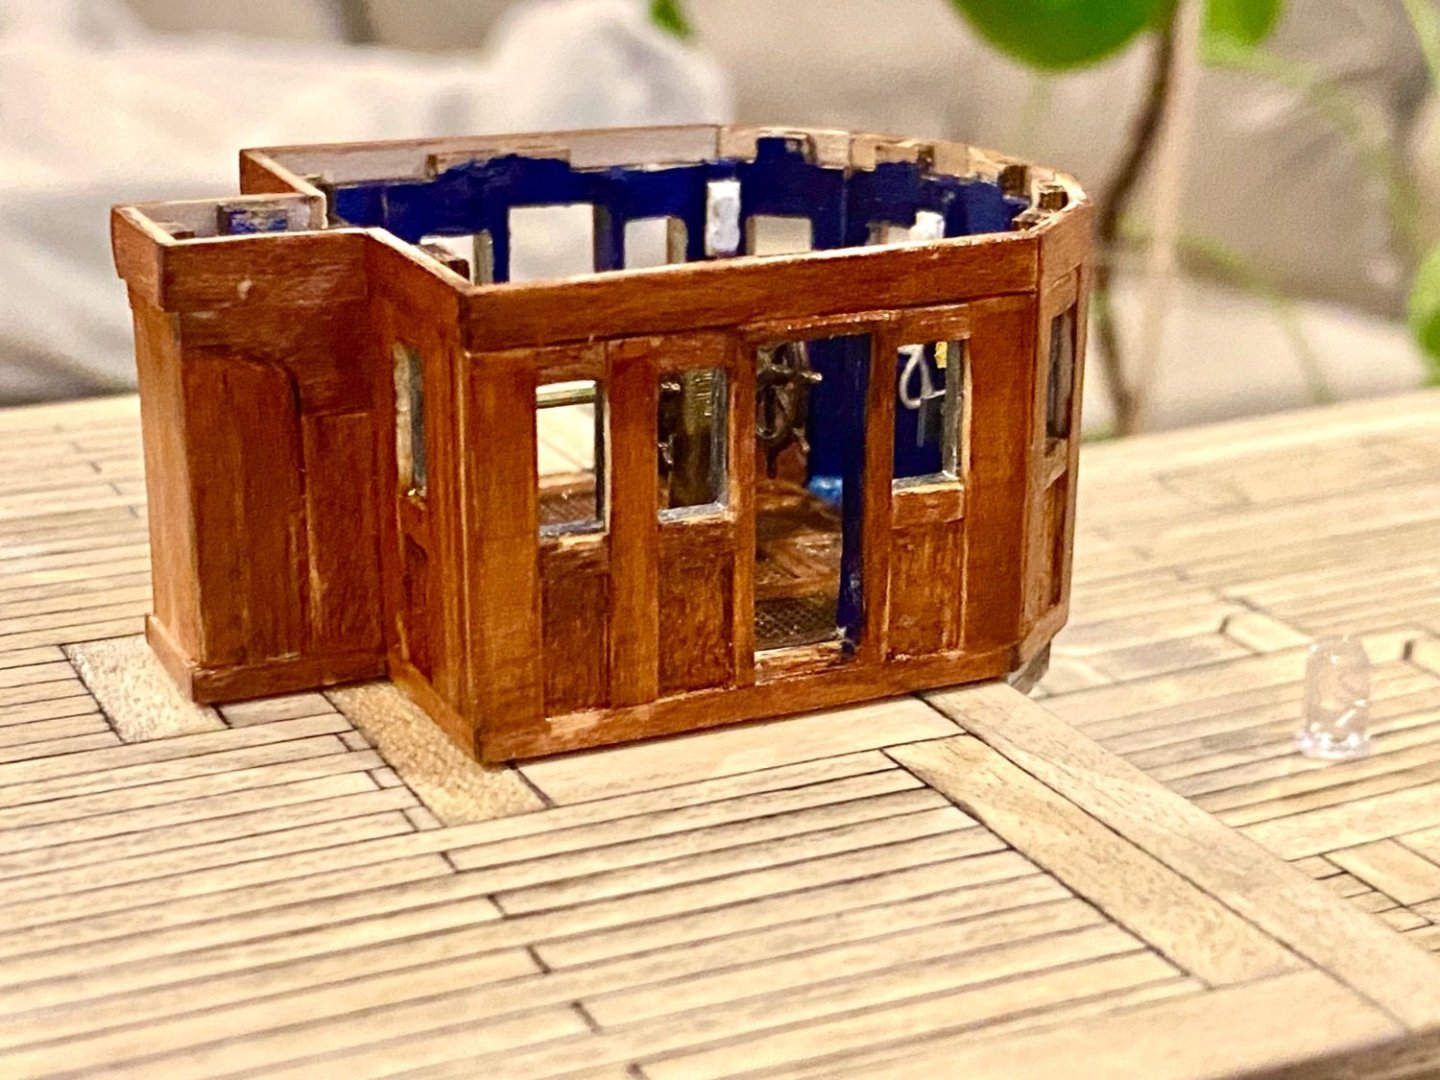
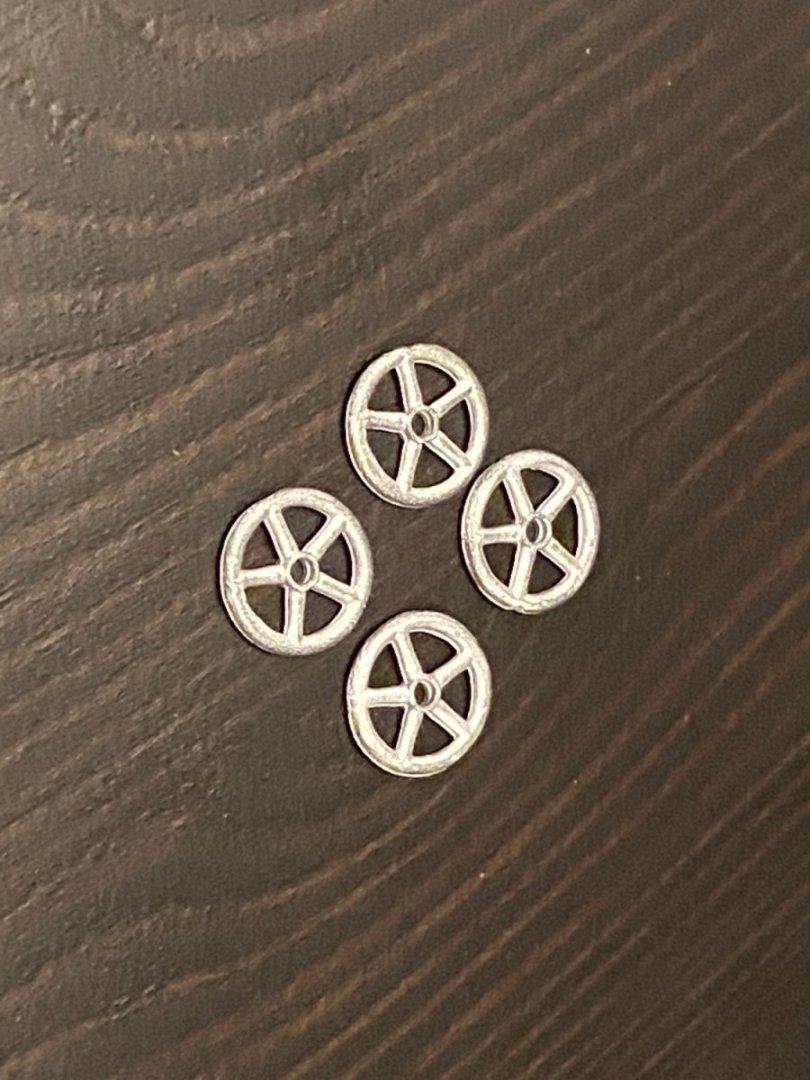
Good evening mates, this week was spent working on the shell of the main bridge. Oh, and my helms wheels came in today. Sadly though, I need 5, but I only ordered 4. What was I thinking 🤔. Also, I’m experimenting with some liquid brass leaf. Basically is like brass paint and supposed to have the luster of real brass…I think I like this stuff.

-
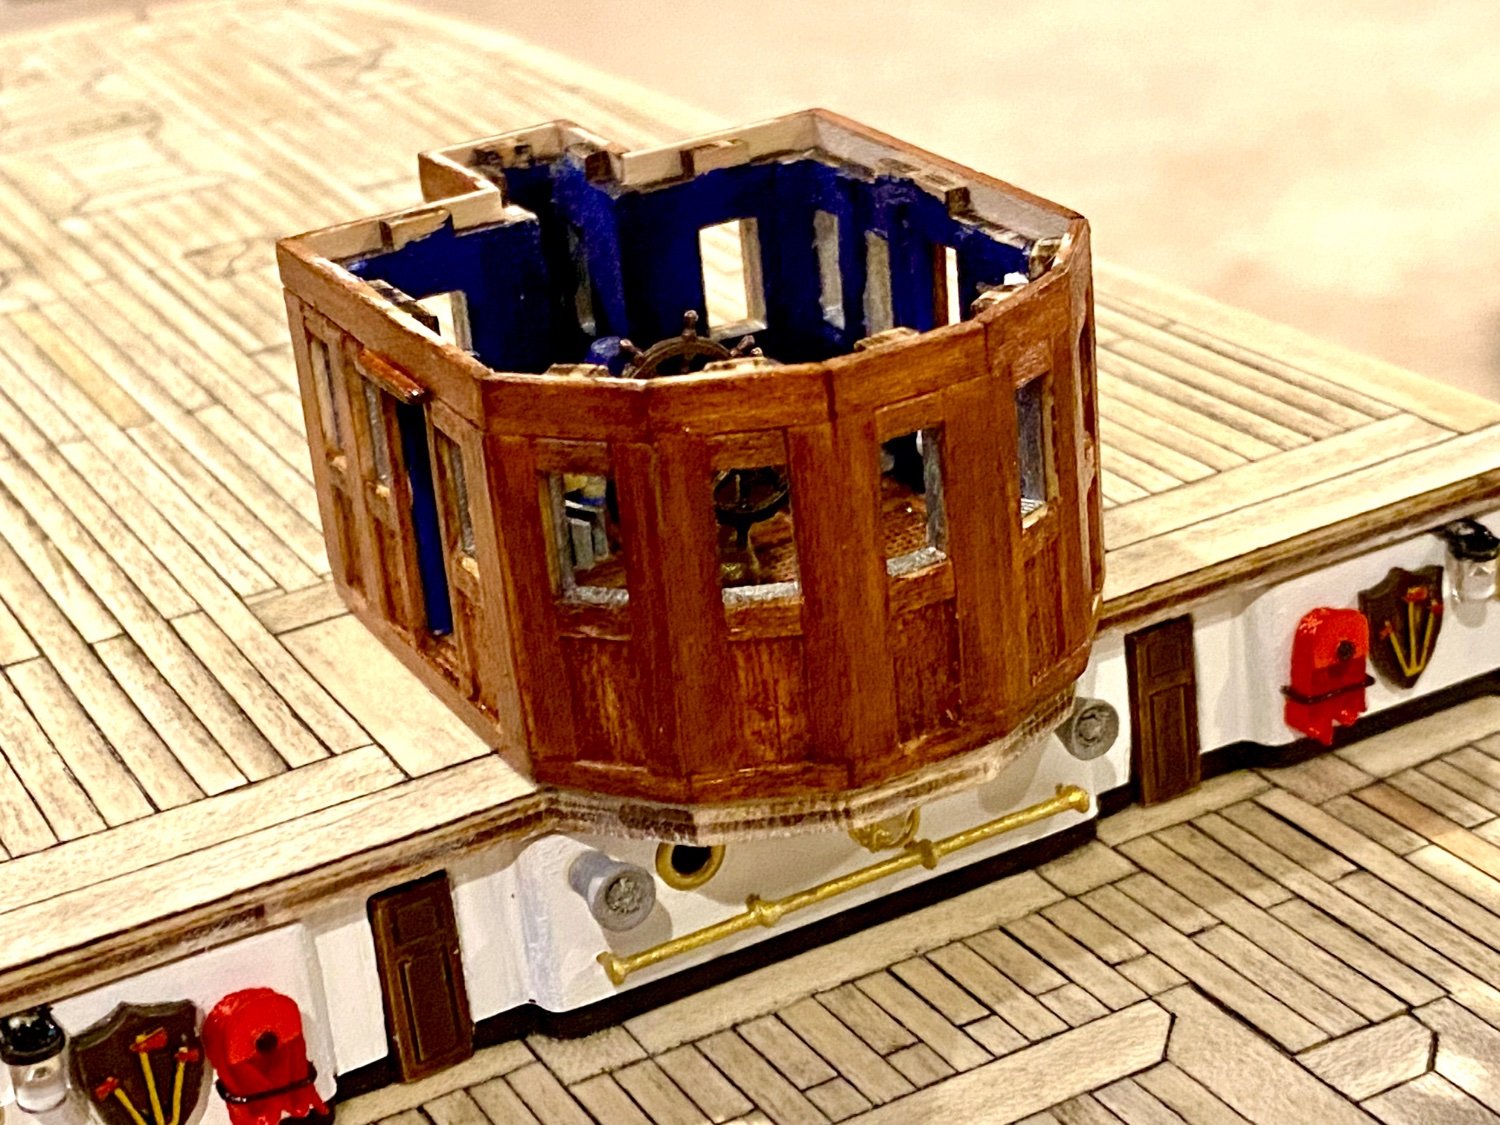
Hello everyone, welcome aboard. Here is an update for my weekends effort on my main bridge. I can’t finish the inside as I had to order some eight spiked wheels as OcCre did not provide them in the kit. However, I did make some good progress. Built some equipment for the bridge and started the woodwork over the bridge shell. I’m having a quandary though, maybe you can help. The AV bridge of course has glass windows. The OcCre kit provided clear thin plexi to use for the windows. Should I install the windows which will hamper the ability to look inside? Or just leave them out, will still look like windows, but easier to view the bridge?
-
Keith, I think this case is worse than the Terror where at least OcCre provided an 8 spoked wheel instead of the historically accurate 10 spoked version. In the OcCre version of the America Vespucci kit, the real AV has four 8 spoked wheels, but what was included…well, see below… 😞 but not even a proper helm.
-
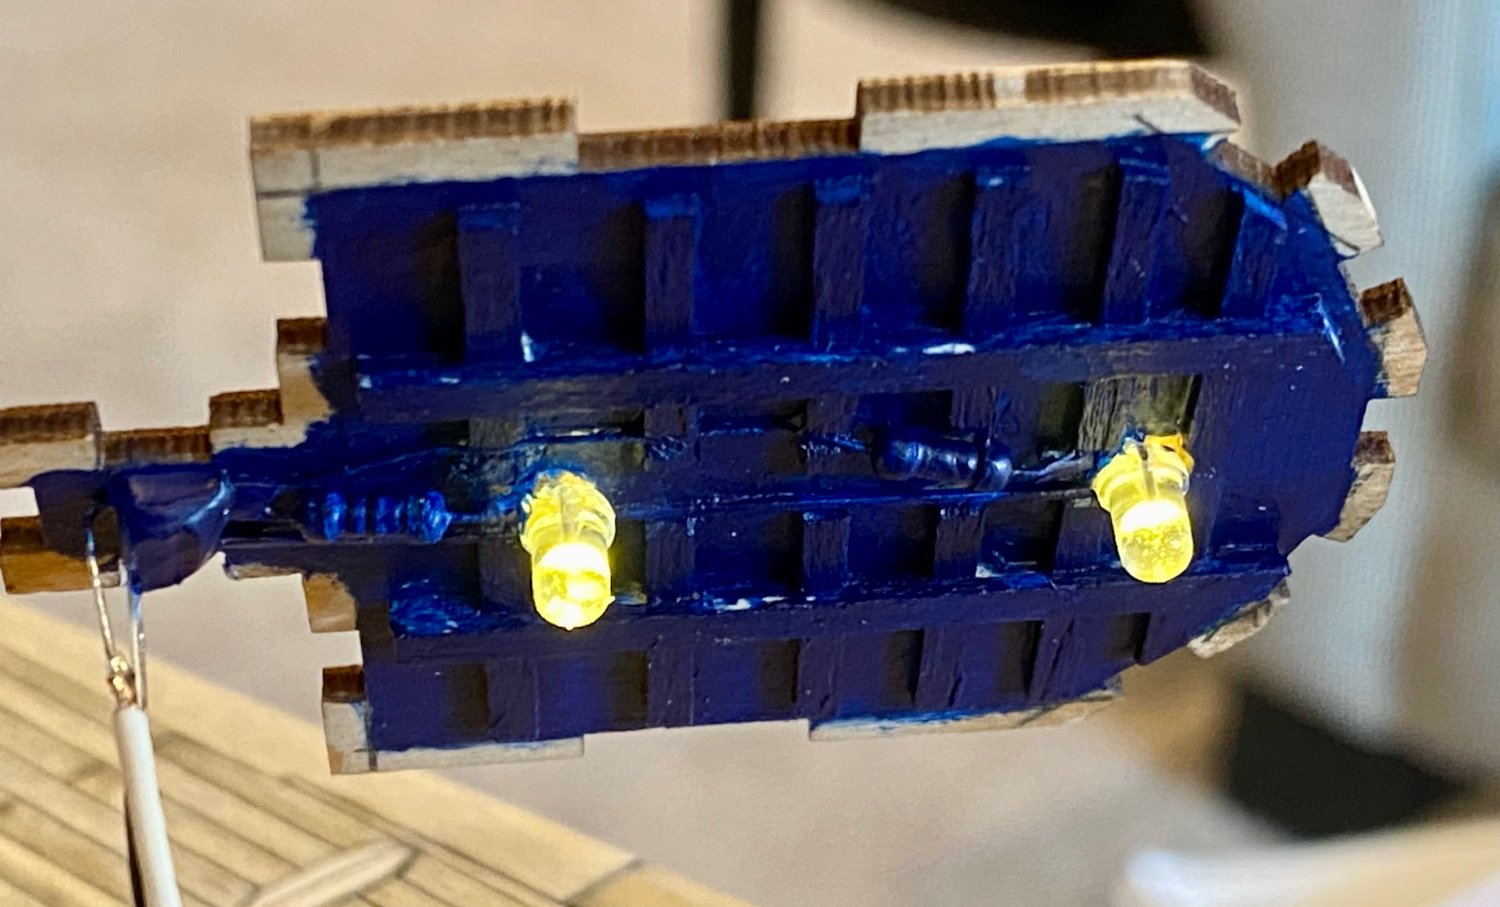
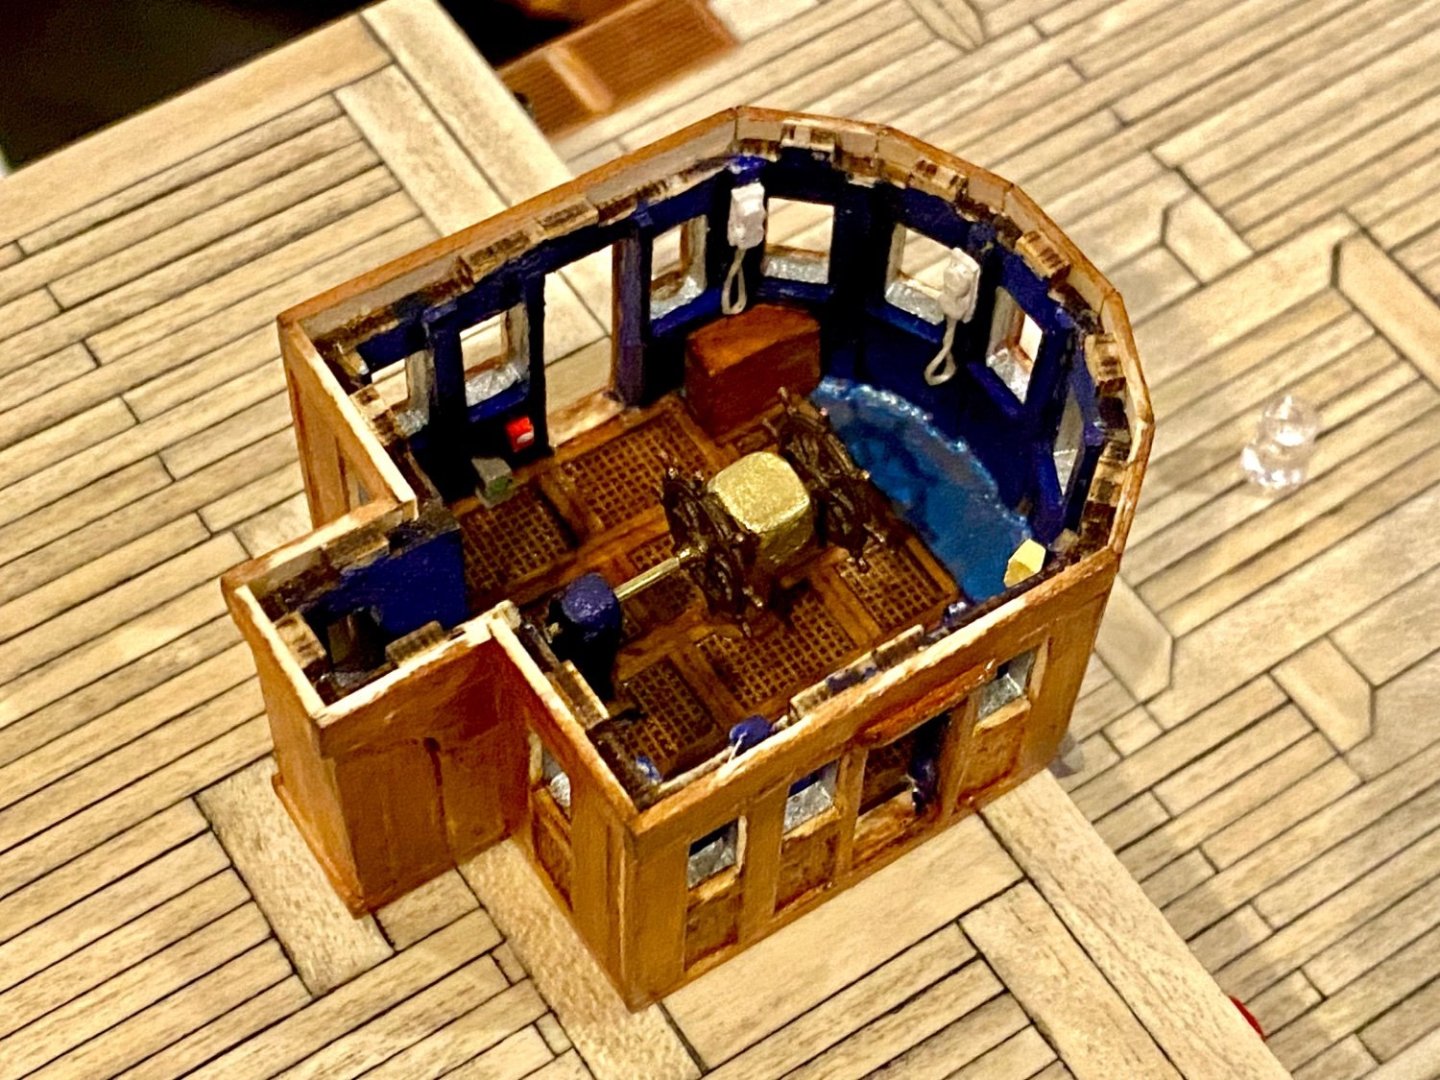
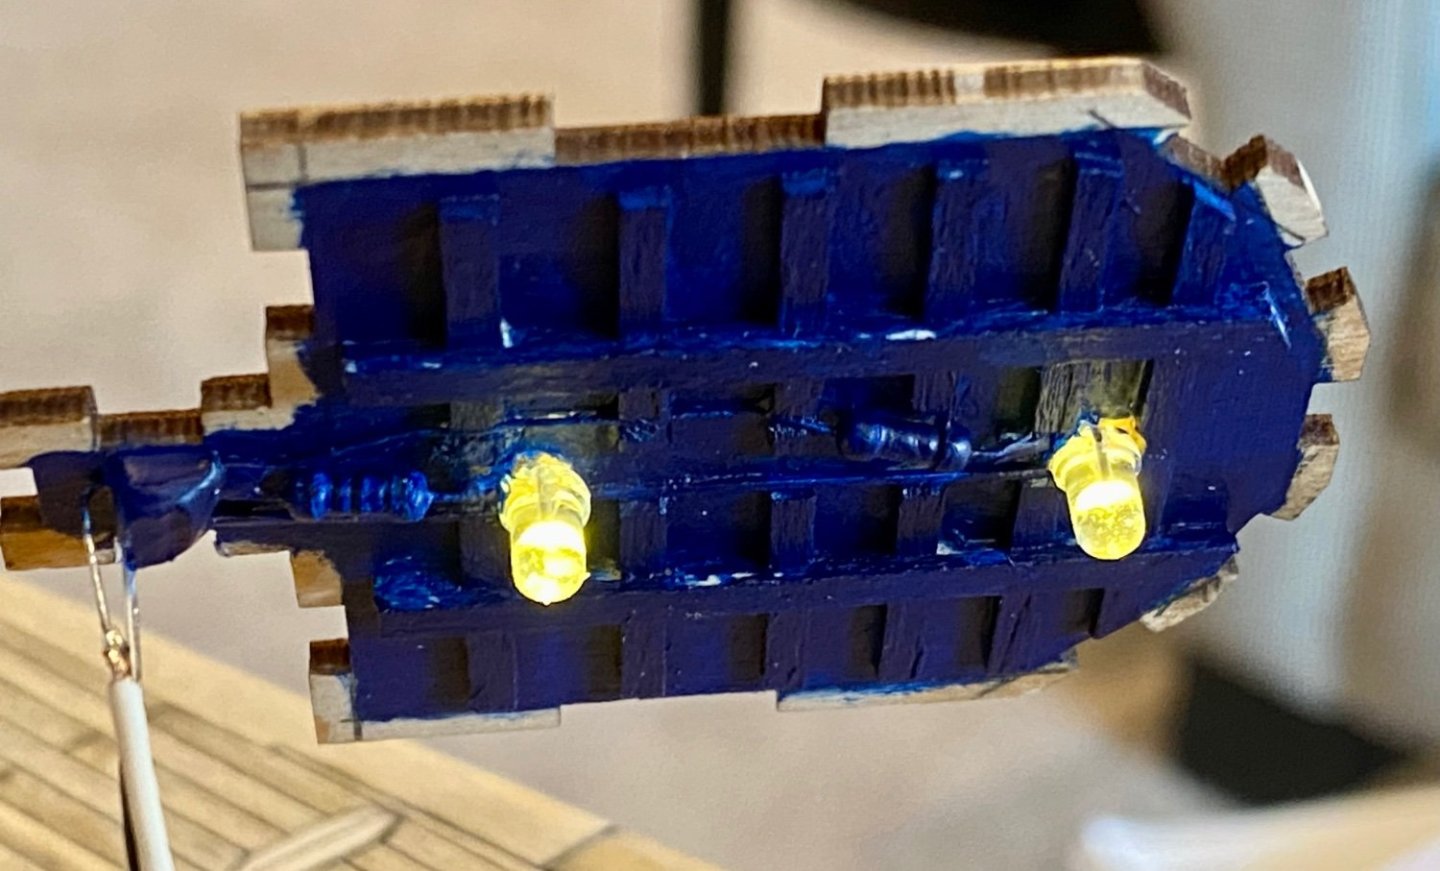
Good evening all, here is todays update on the main bridge. Added some bracing to make it look more like the real thing as well as lighting and the very dark blue/purple paint that makes the bridge dark to enhance visibility. It’s slowly coming along. One note, I’m a little disappointed in the OcCre kit in that they didn’t even try to get the steering wheels correct. 😞


-
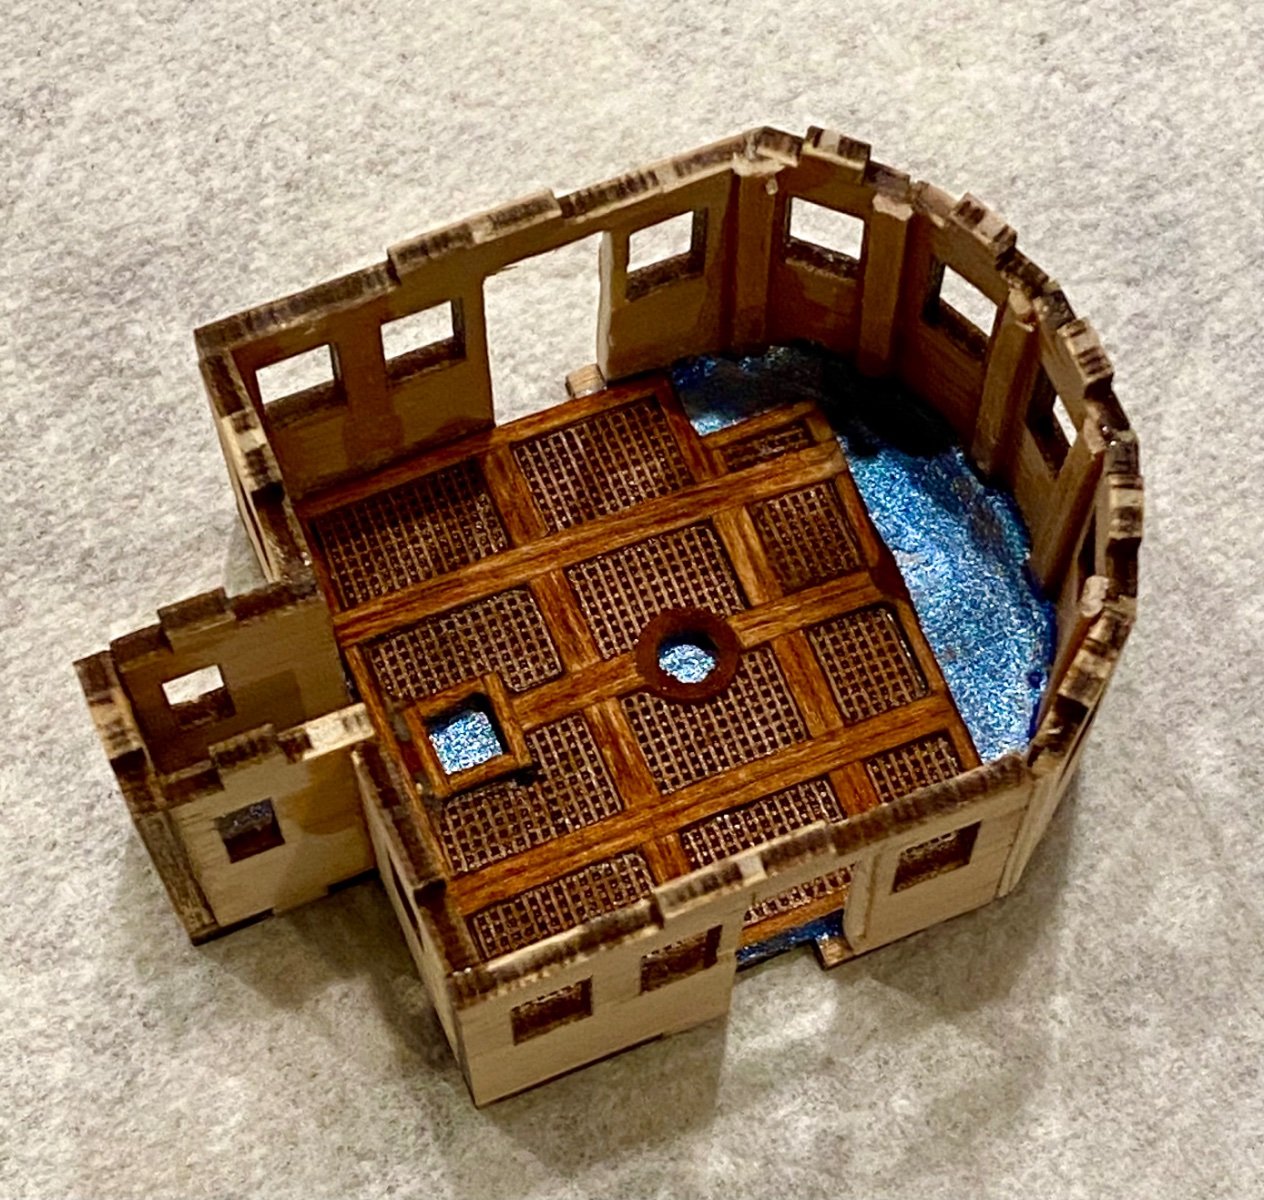
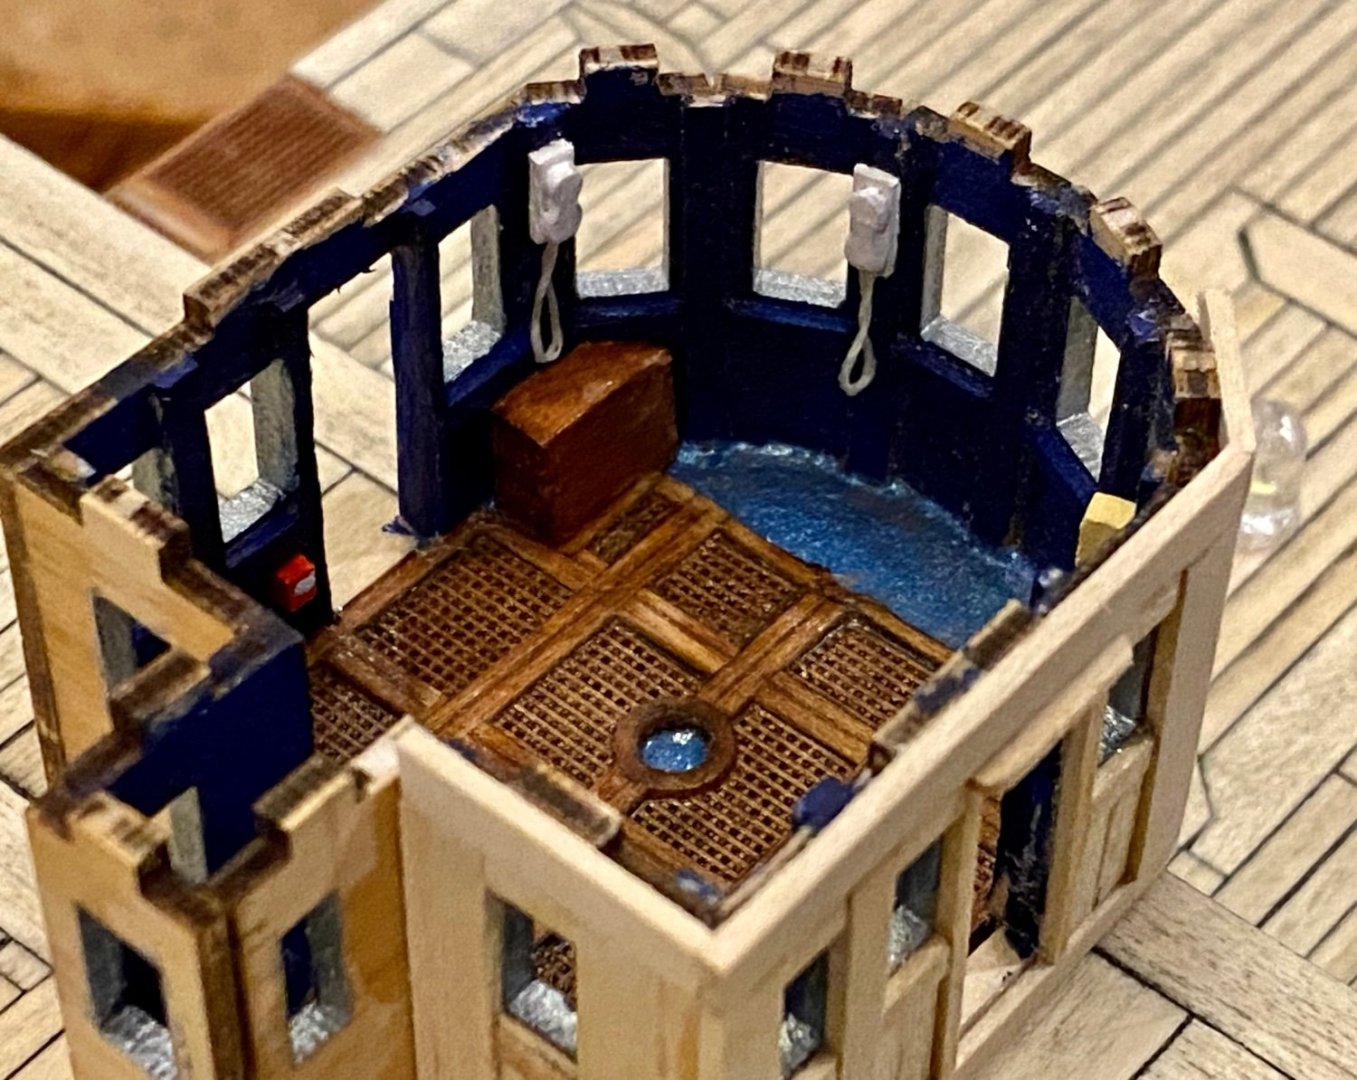
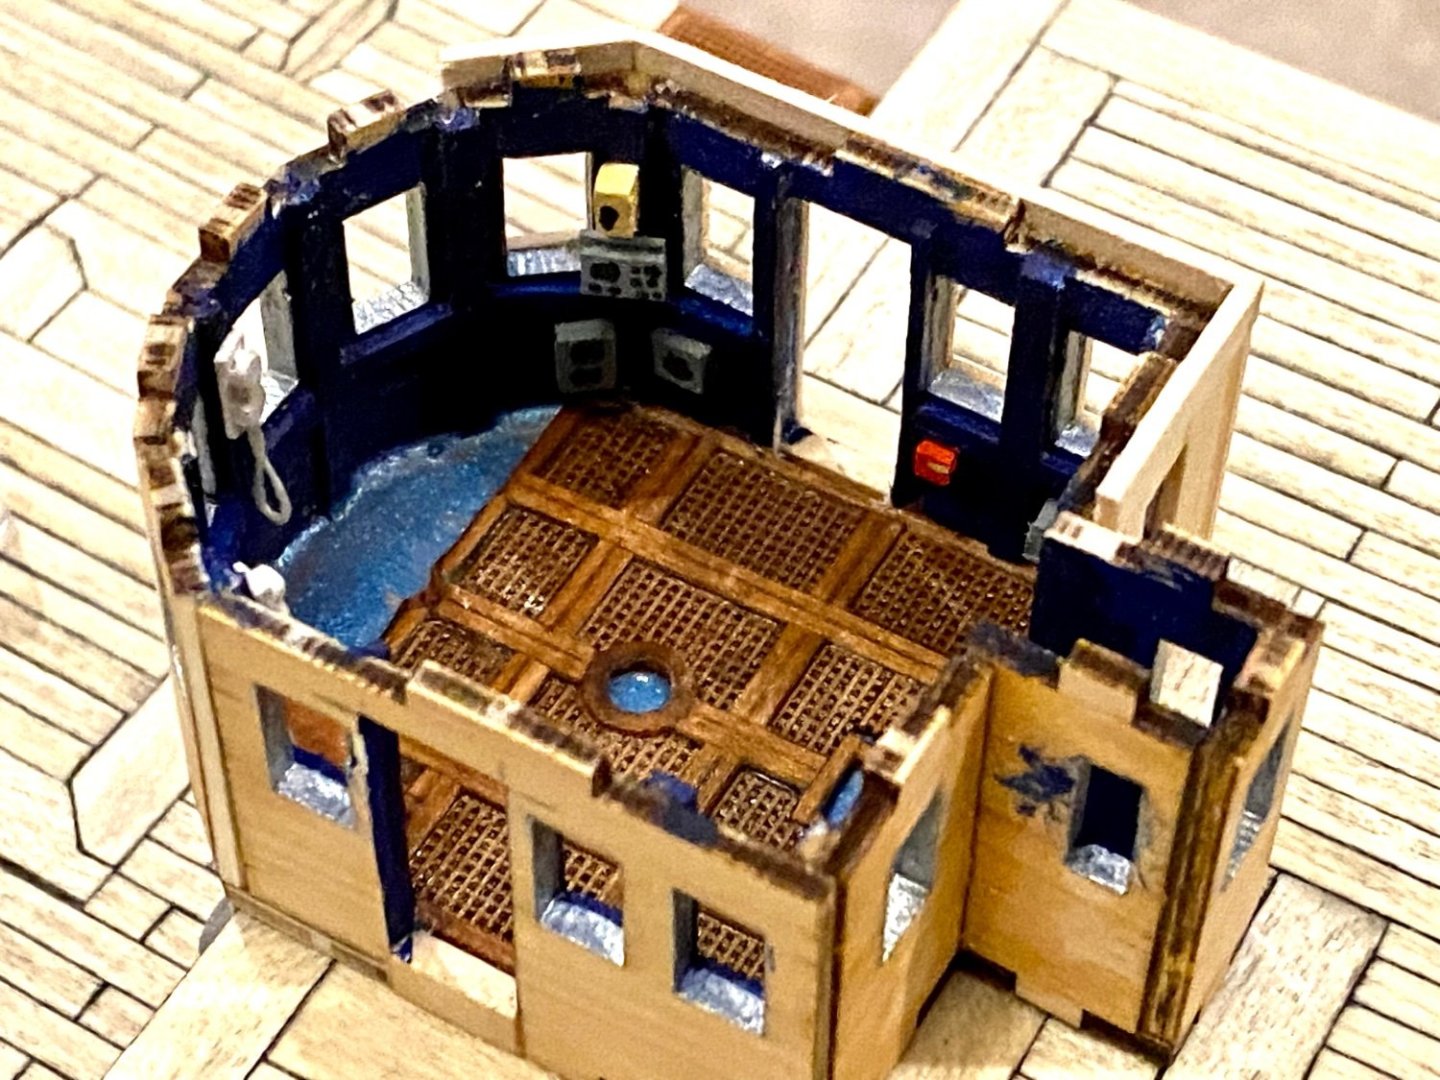
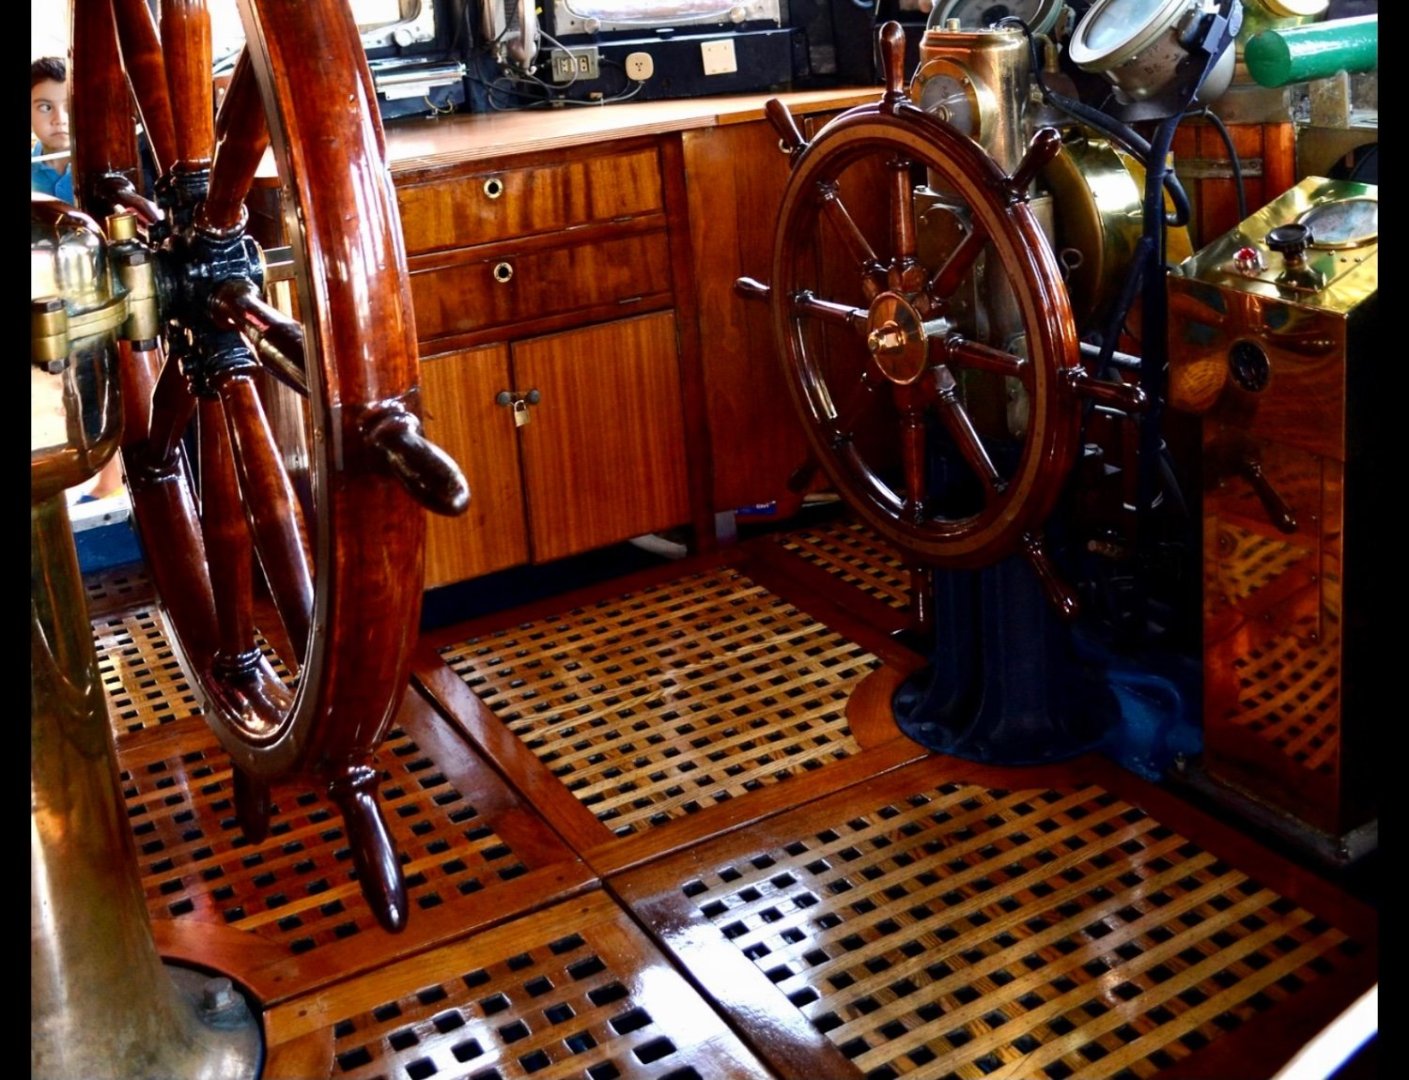
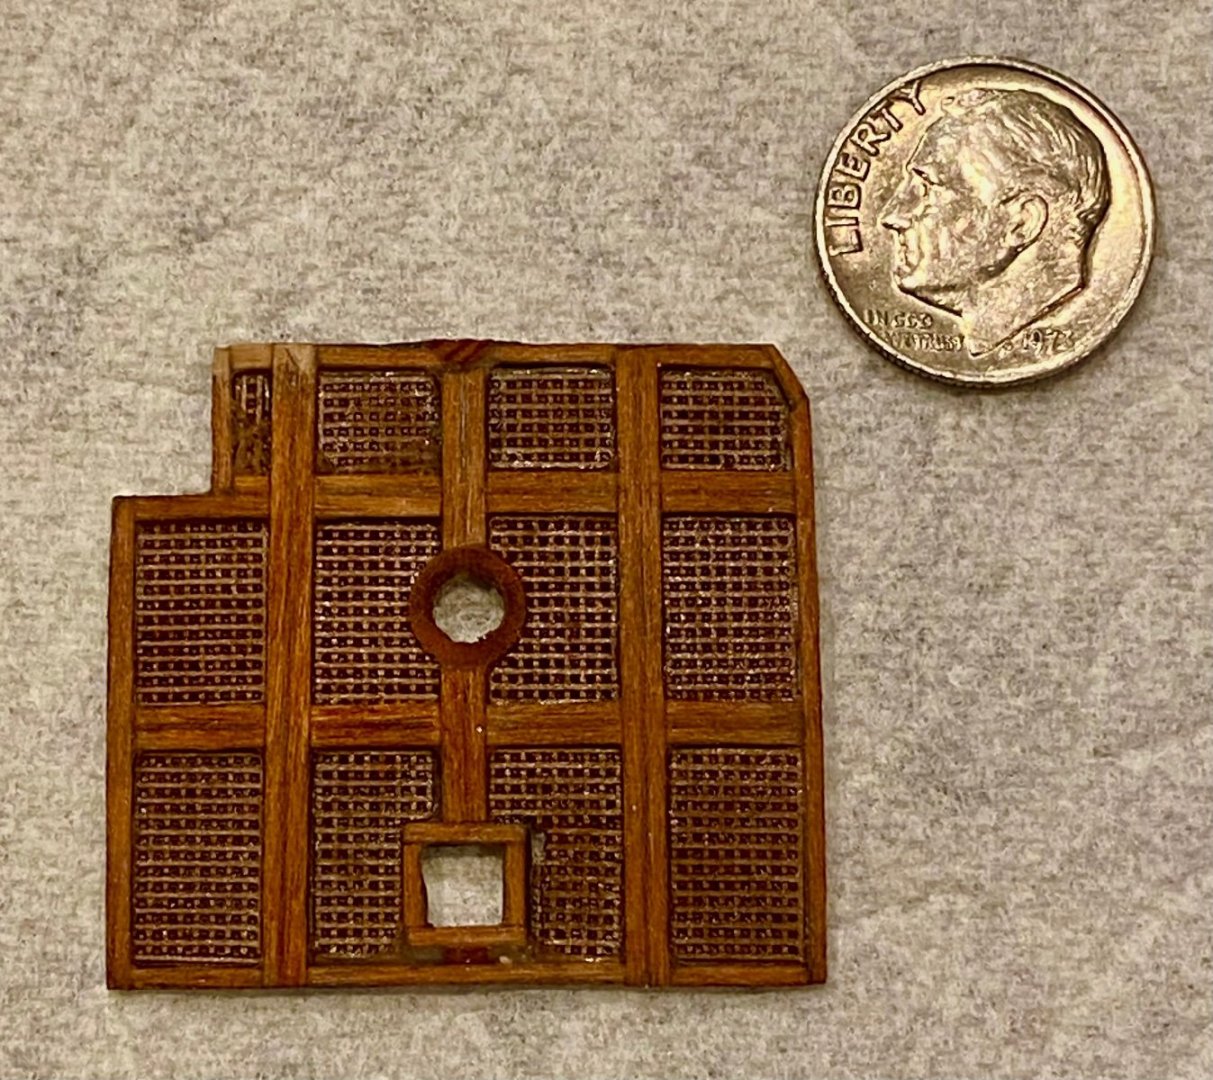
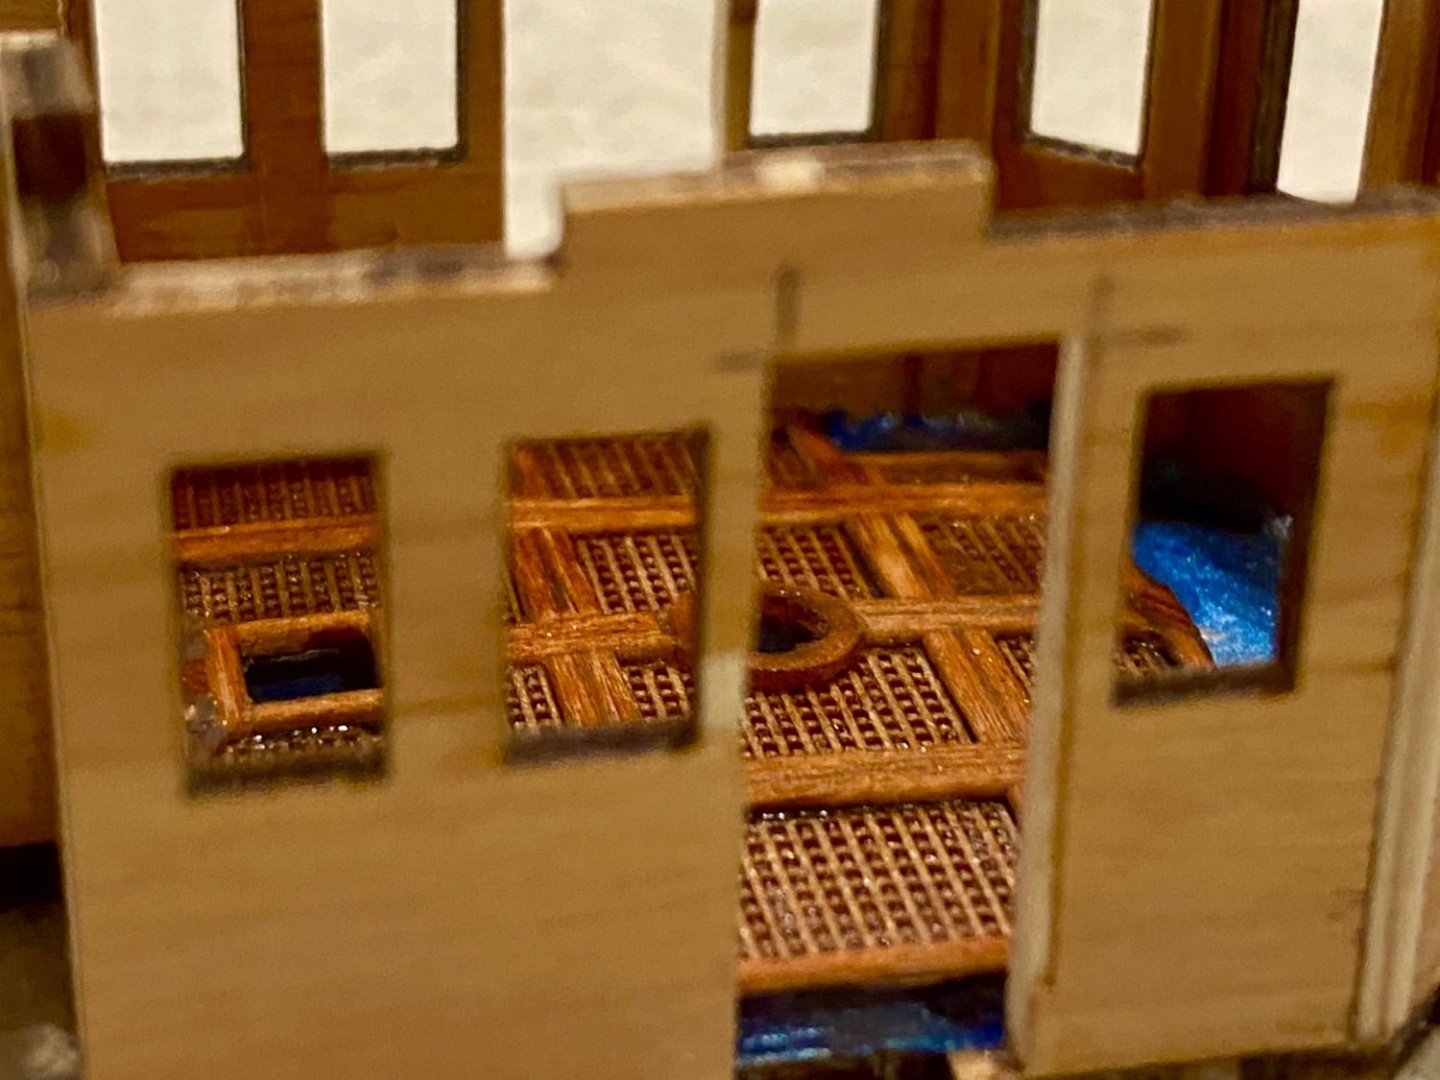
Good evening everyone. I became tired of working on the deck, so I switched gears to do a little experiment. The goal for my AV is to have the doors open on the main bridge. The OcCre version of this ship does not plan for this, so on my own I go… The first image below is the real bridge. In my experiment I’m working on the floor. This is very small detailed work with my huge fingers, but I’m fairly happy with the outcome. The second image is my version of the floor compared to a US dime, our smallest coin. Third image displays the floor set in place in my bridge structure and finally a close up looking through the door/windows. Thanks a lot for stopping by…


-
And…this is how the aft deck will look with the hardware installed.
-
Good evening mates, this week I’ve not posted on my progress because well, it’s kind of boring. Made good progress on the aft deck inlay. I’m happy with the outcome.

-
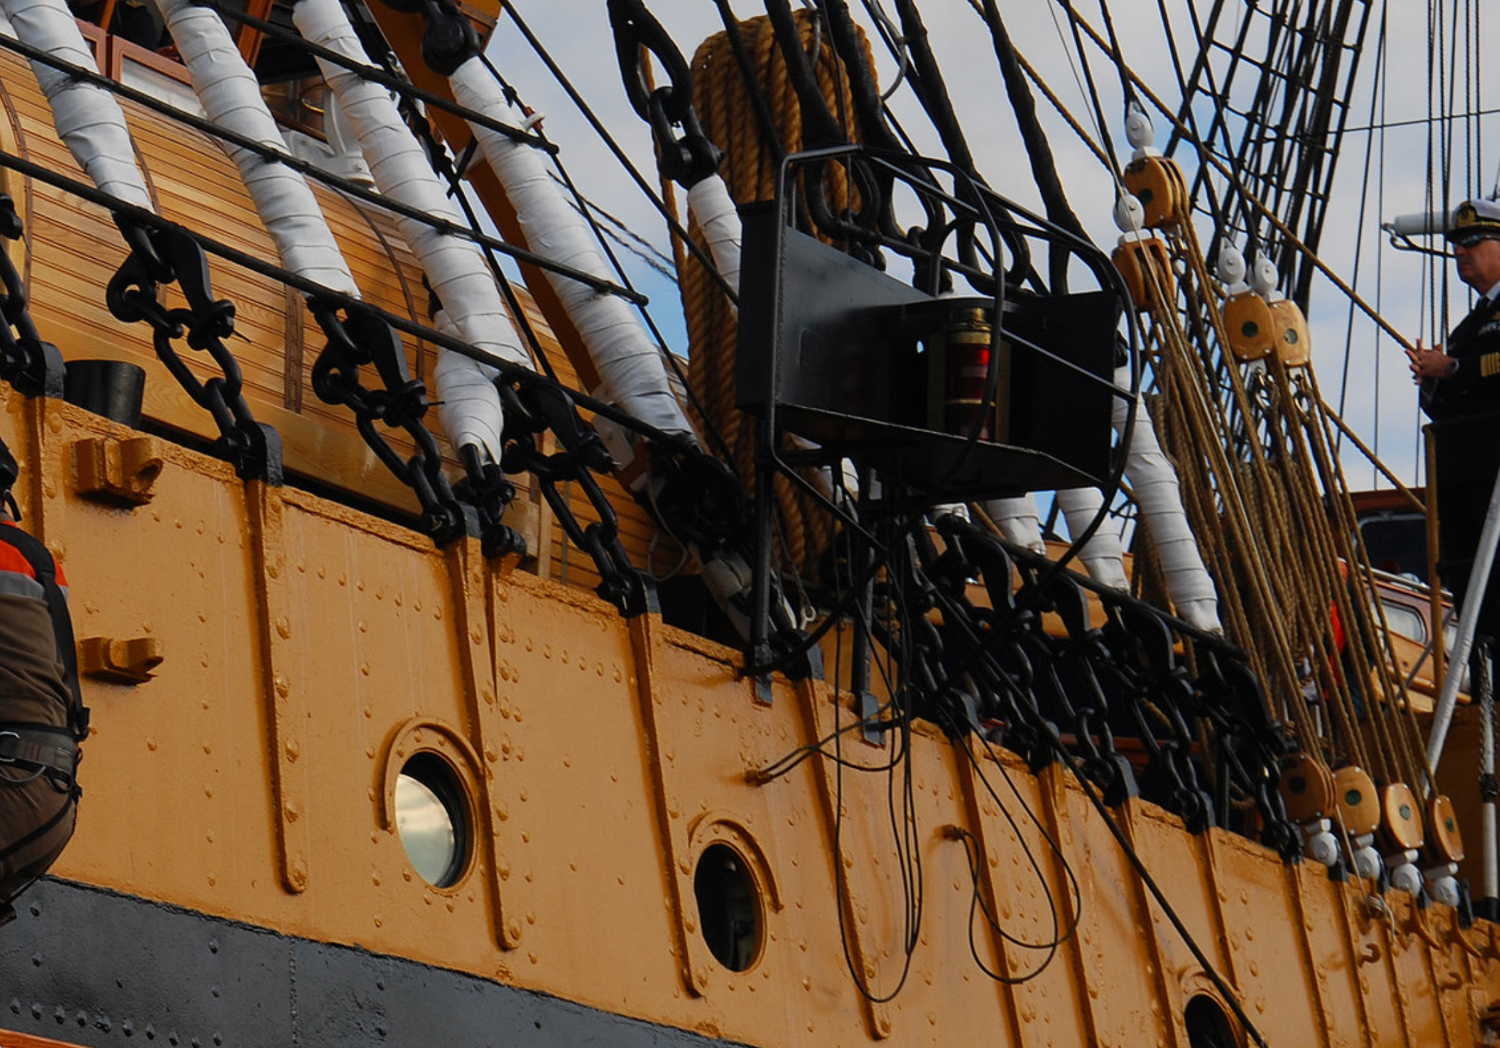
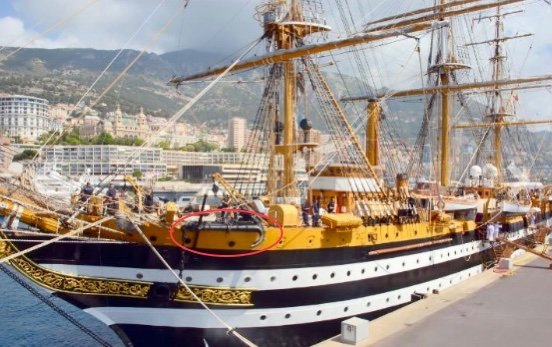
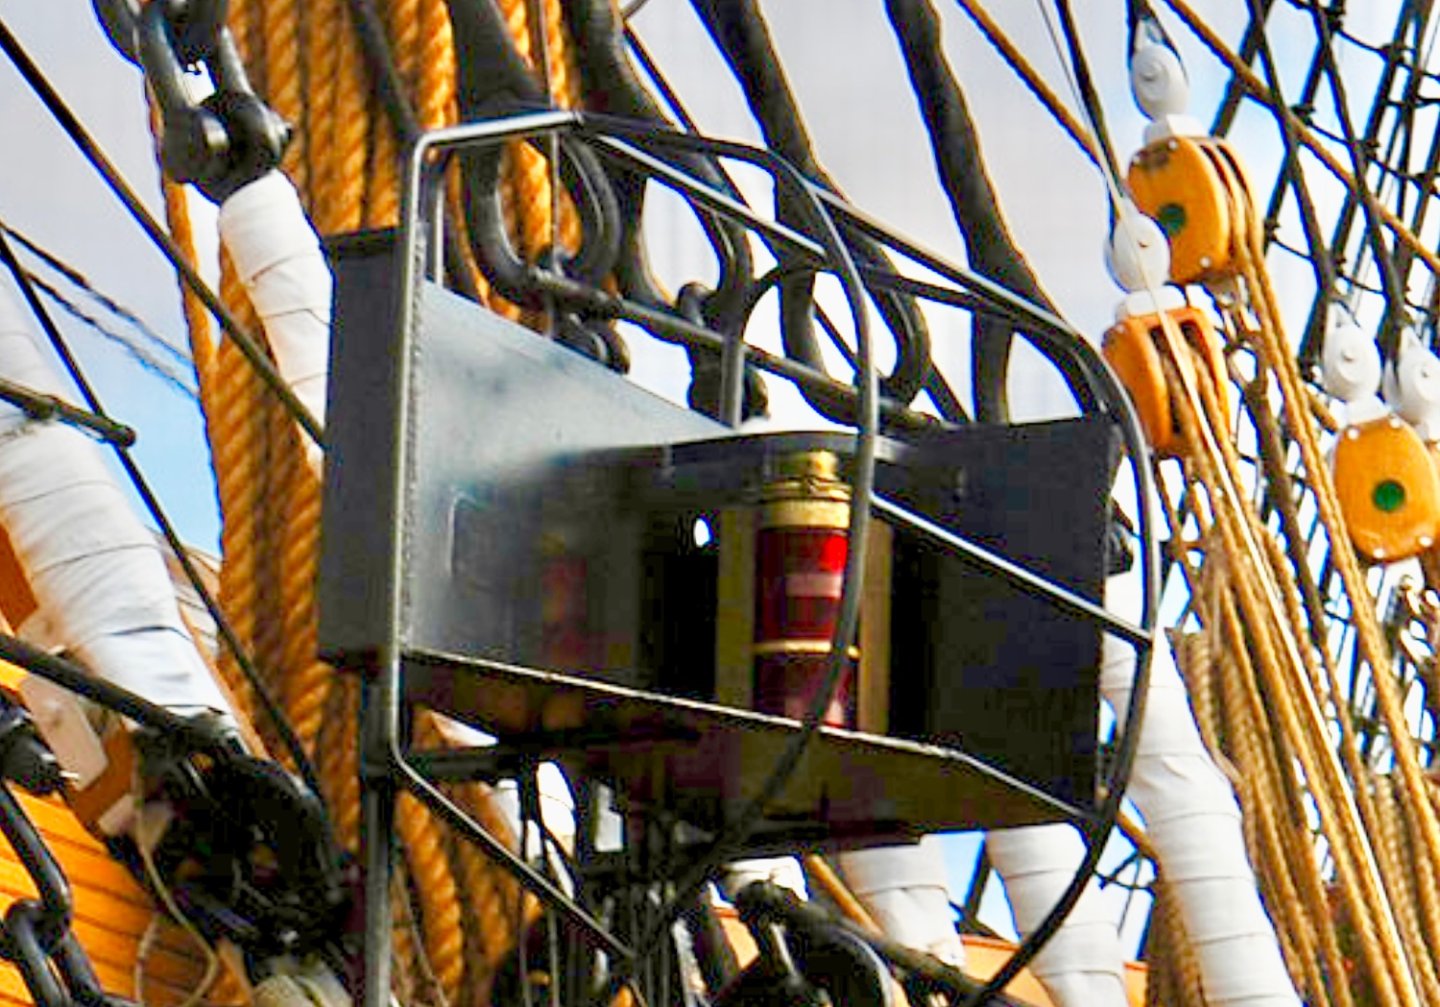
Well mates, for those that have been following along as I have been looking for an image of the side marker lights on the AV…I have good news. Below is the very best image I have found including a blown up version with some photo enhancements. I don’t think I’ll find anything better. Now if I could only find some images of the bow bridge,

-
Mike, some of the wires can be visible, they are on the real AV. Just look at the aft marker light for one example. While I’ll do my best to hide as much of the wires as possible, I’m not worried about the ones close the the fixtures them selves. I’m also planning on the green/white/red night lighting the AV is famous for, those lights are strung together in series with the wires just laying on the deck surface. Let me see if I can find that image…

-
Here is the latest in my research on the AV side marker lights. It’s the clearest image to date I’ve found.

-
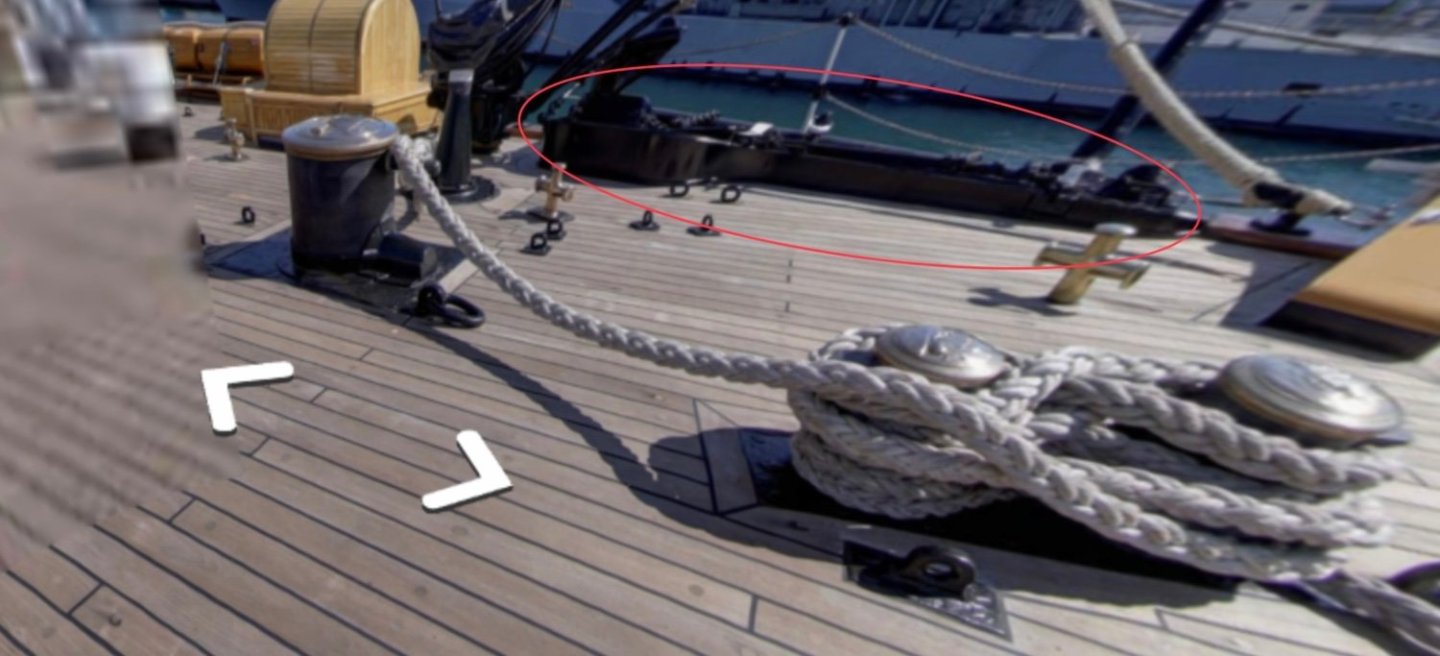
Mike, the daunting task of hiding the wires…I feel your pain. While we now have the location for the side marker lights, I see that it needs to hang off the side to allow room for the shrouds. Hard to see in this image, but it’s the best I’ve found so far. Mike, do you have a build log for your AV?

-
Mike, now that I know where to look and what to look for, I have been finding the side marker lights in a lot of images. The main problem is that, unlike the image above by Mantua, the housing in all the pictures I have seen is black. This has a very profound effect of making it nearly invisible. And since it’s black, the details are obscured in all of the images. This is a close up zoom of an image I found, the best one that I’ve found, but still hard to make out what the housing looks like or how it’s attached to the ship. I believe it is similar to what Mantua has designed but painted in all black except for the lens when the light is on.

-
Good evening mates, this weekend I started the planning of the aft deck. I drew the AV inspired pattern on the sub-deck and started planking. A long way to go, but it’s a start.