DanielD
-
Posts
653 -
Joined
-
Last visited
Content Type
Profiles
Forums
Gallery
Events
Everything posted by DanielD
-
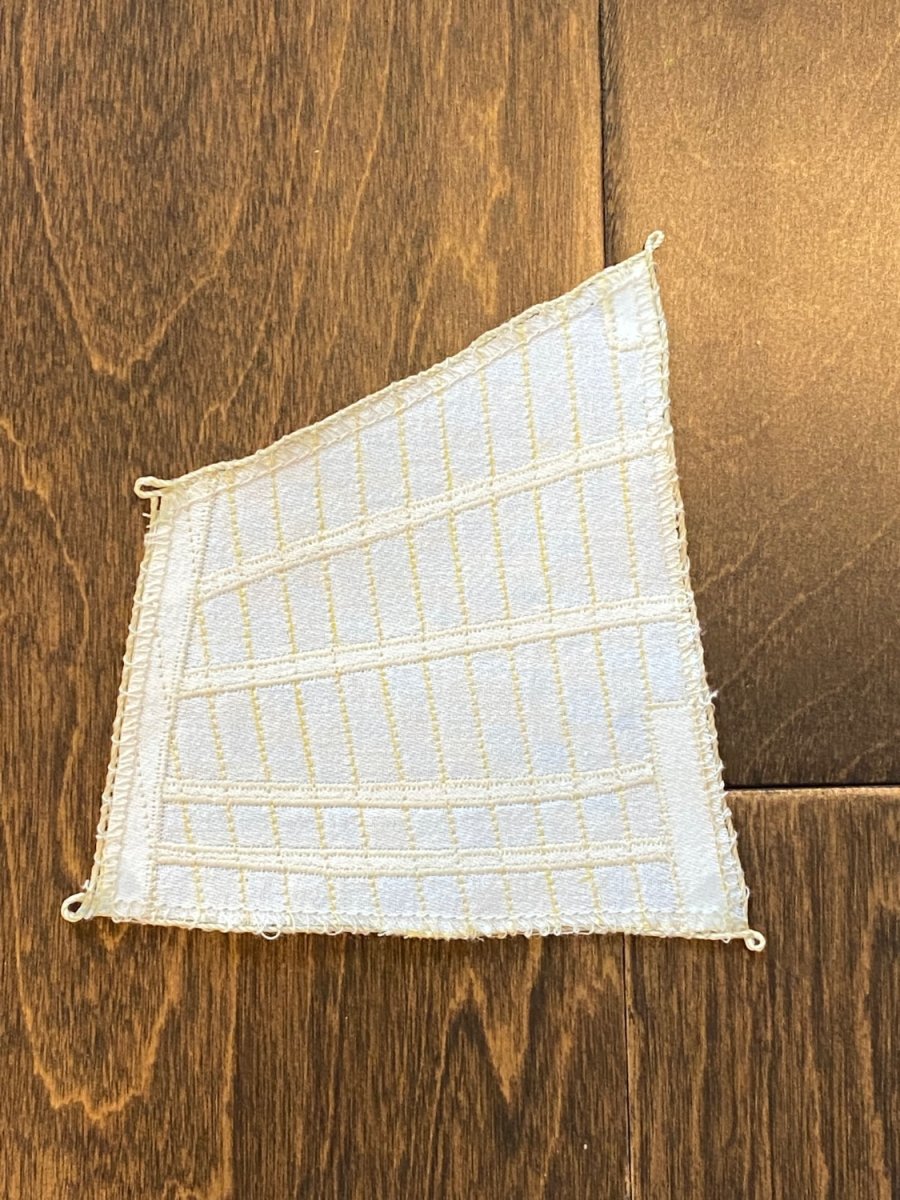
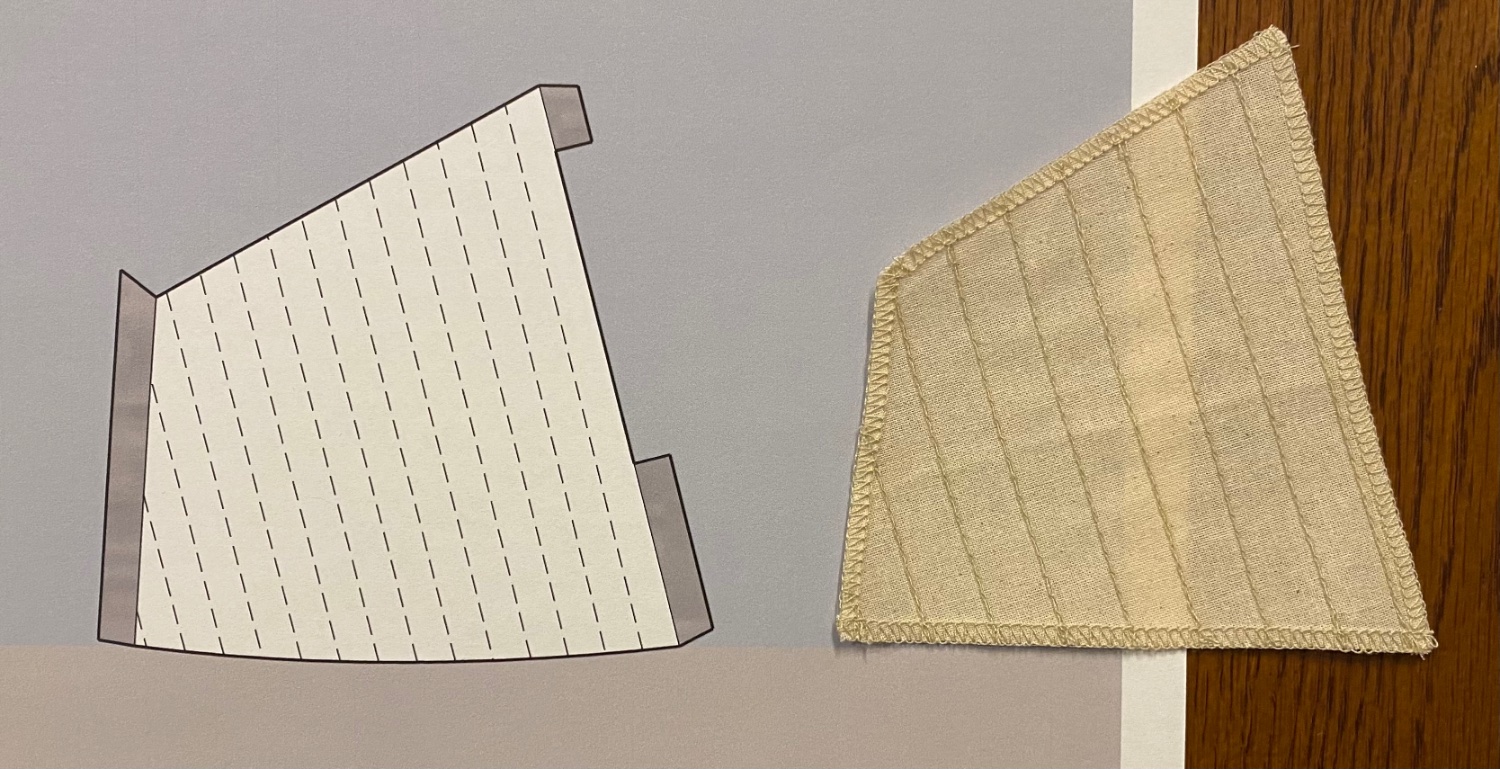
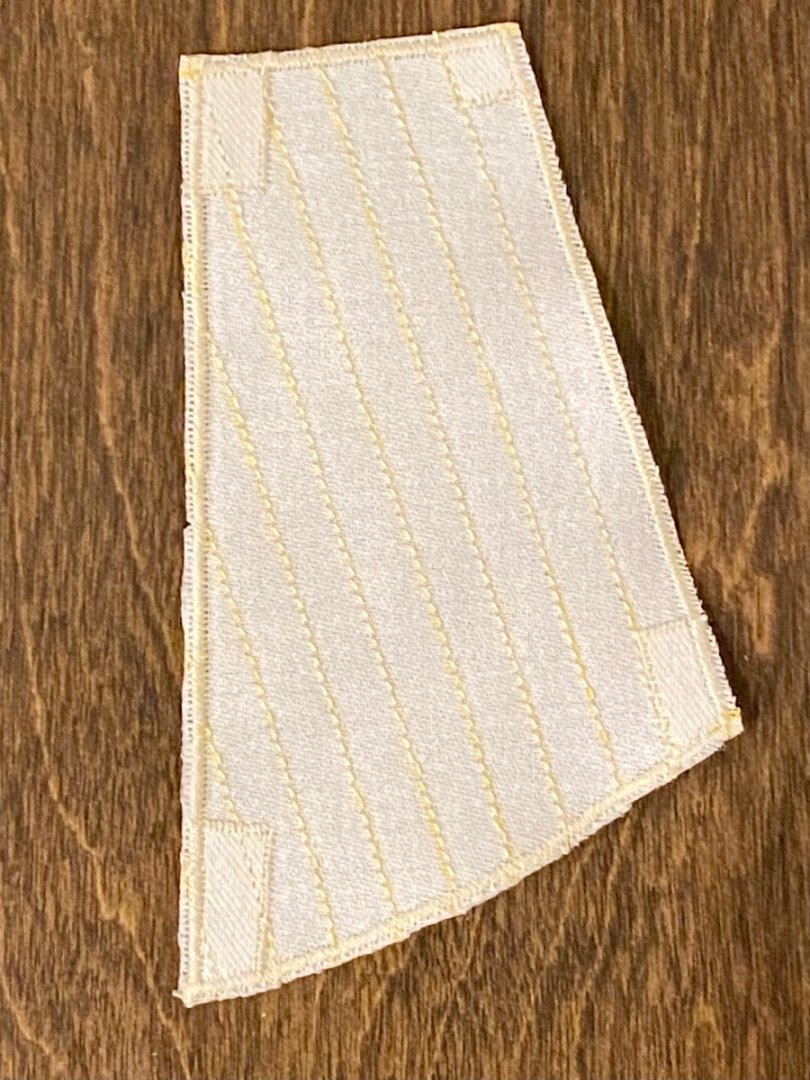
 Good evening all, here is the next iteration. The spanker with corner reinforcement, proper panel width highlighted with stitching and the cord with attachment loops at the corners as depicted in Lee’s book.
-
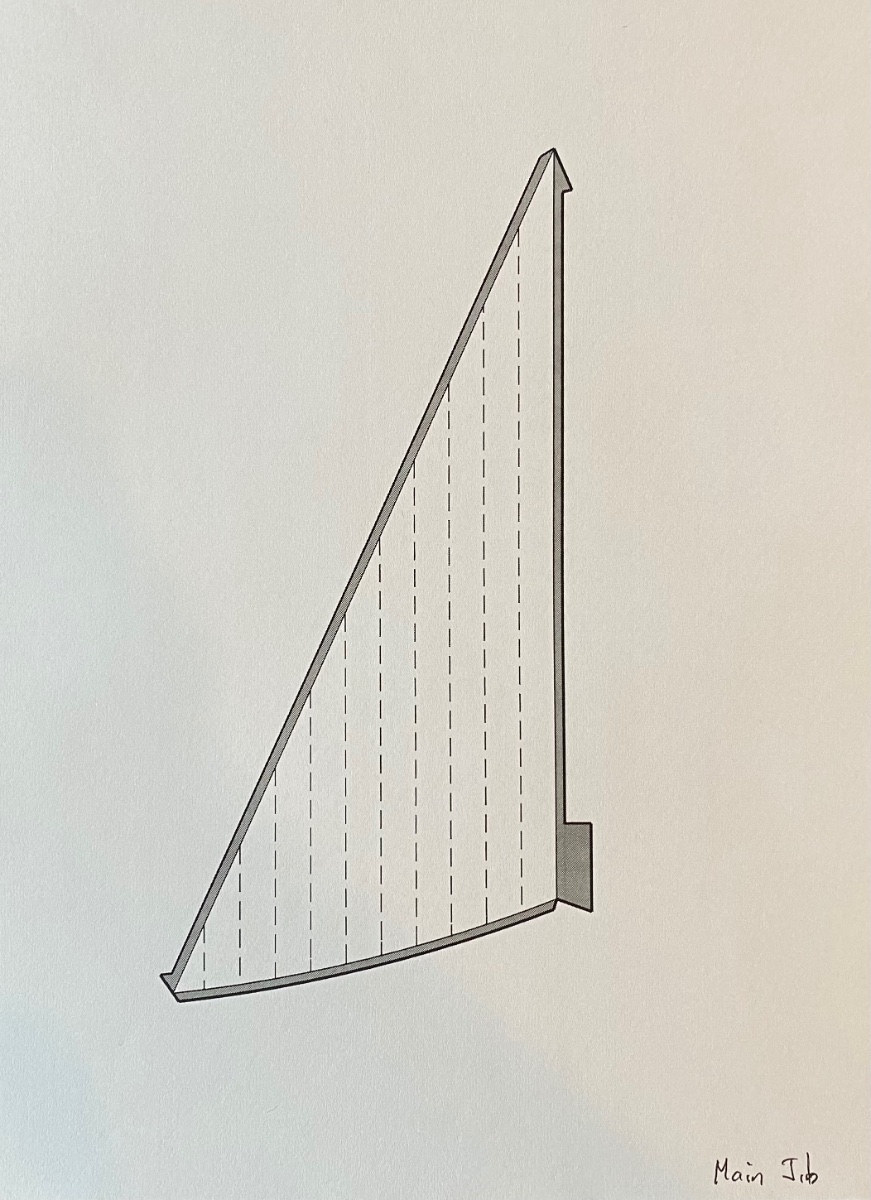
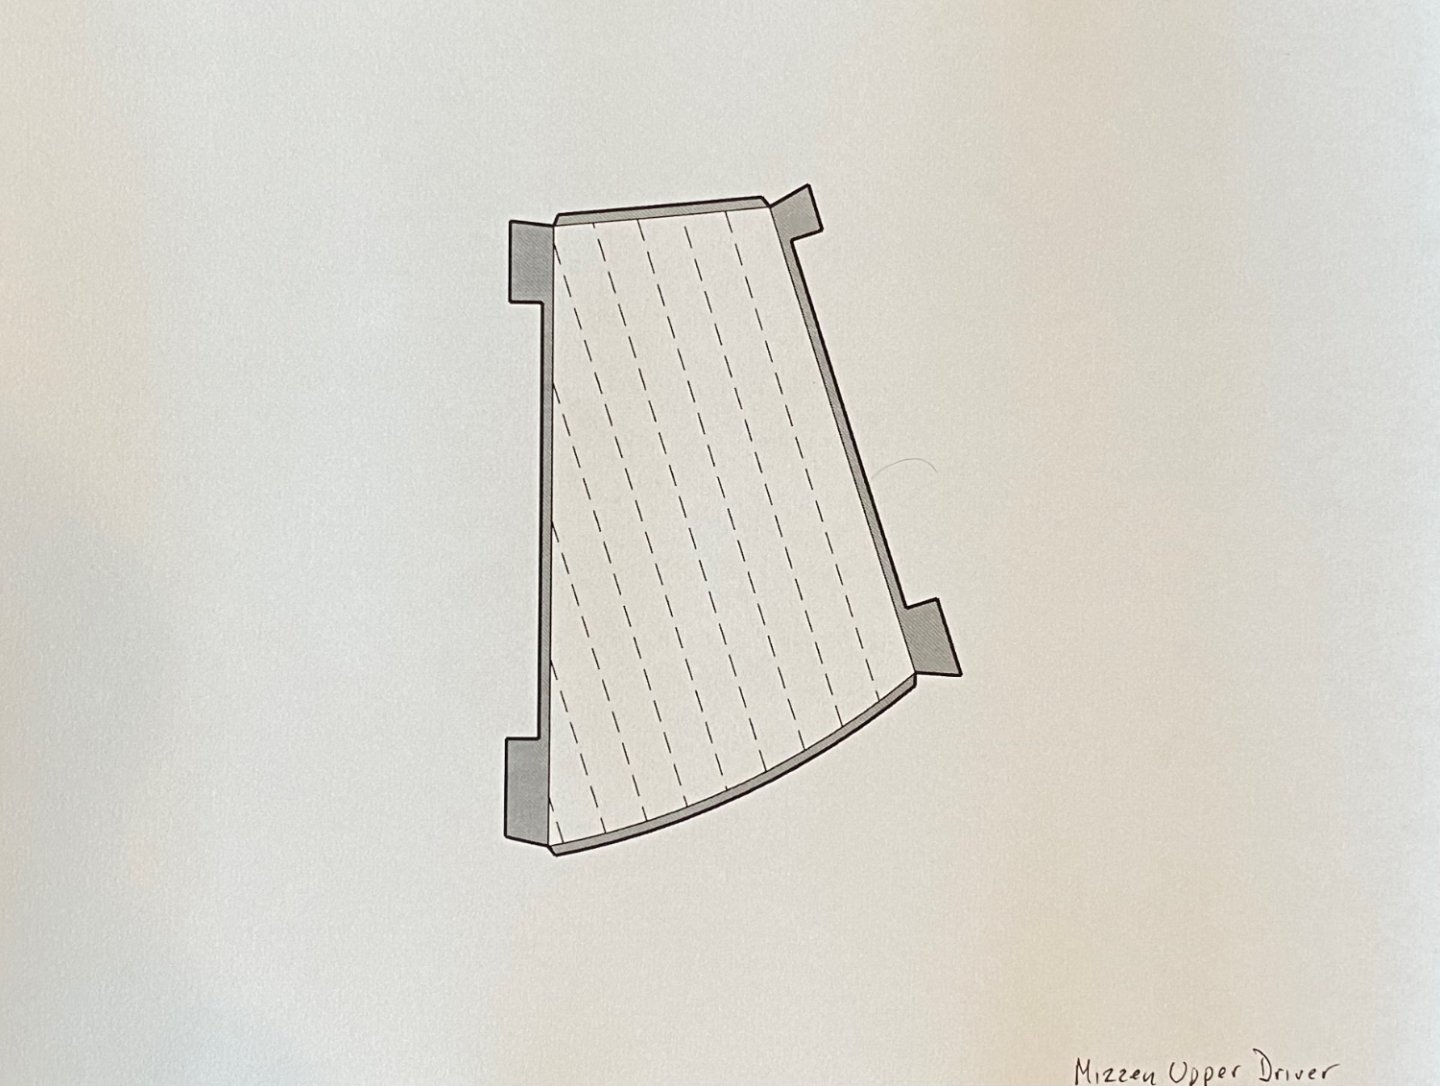
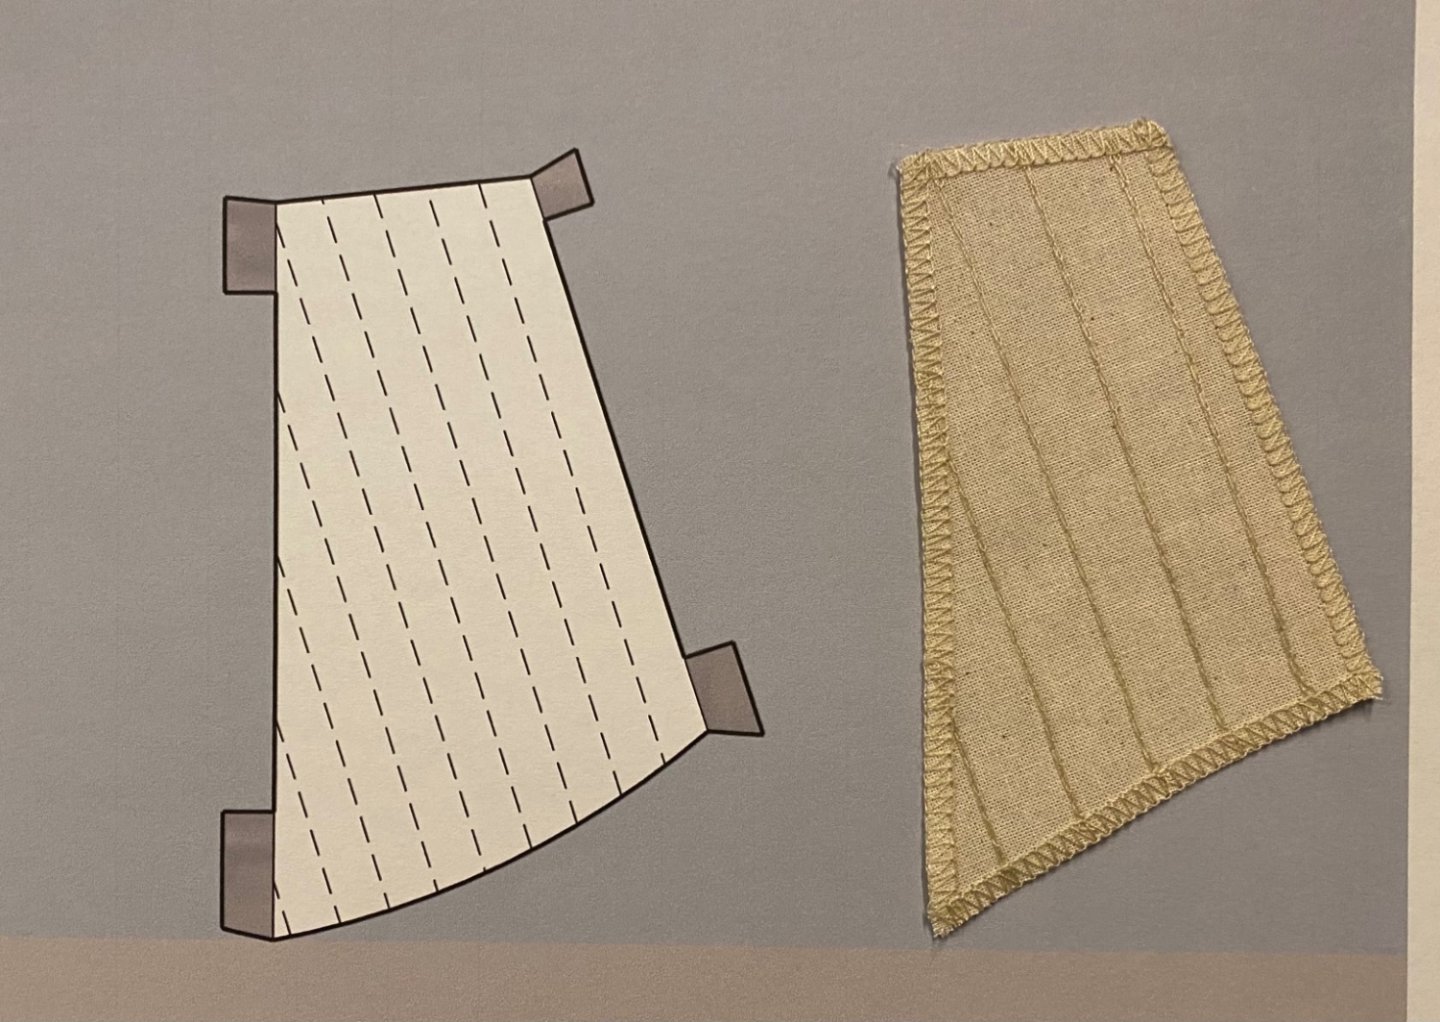
Good evening all, I’ve been working on my technique in making sails. I’ve had to adjust my patterns some and re-learn how to sew. Here is my 3rd attempt (the first 2 attempts were horrible) at making the mizzen upper driver. Of particular note is the correct, or very close panel width and the corner reinforcements. Next I will attempt to add the cord around the sail with the proper loops for rigging and attaching to the yard.
-
I might still chicken out, I spent a couple hours using scrap cloth to see how things would work…not successful yet! 😞
-
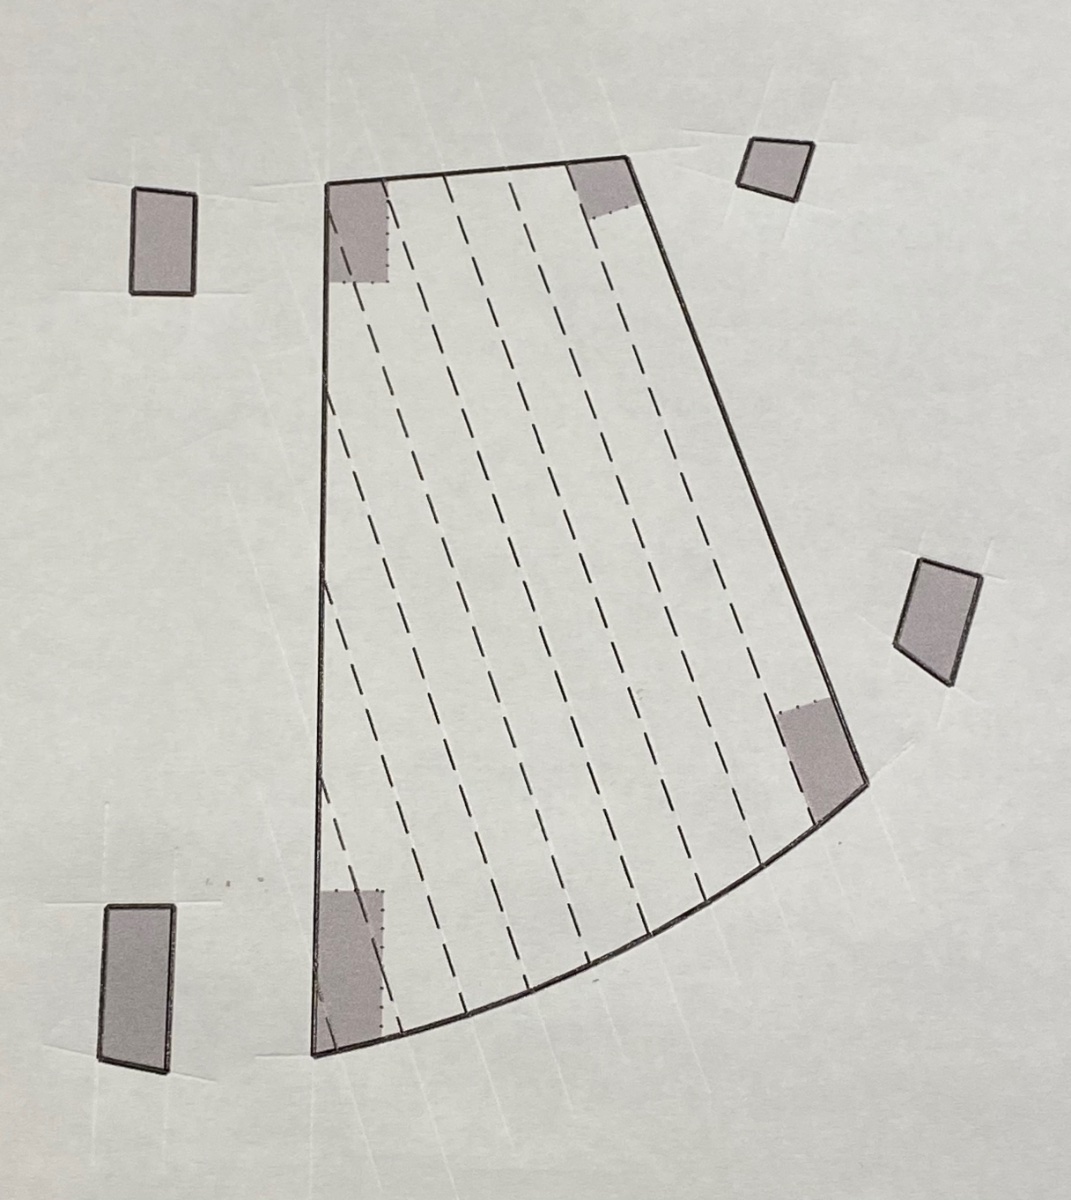
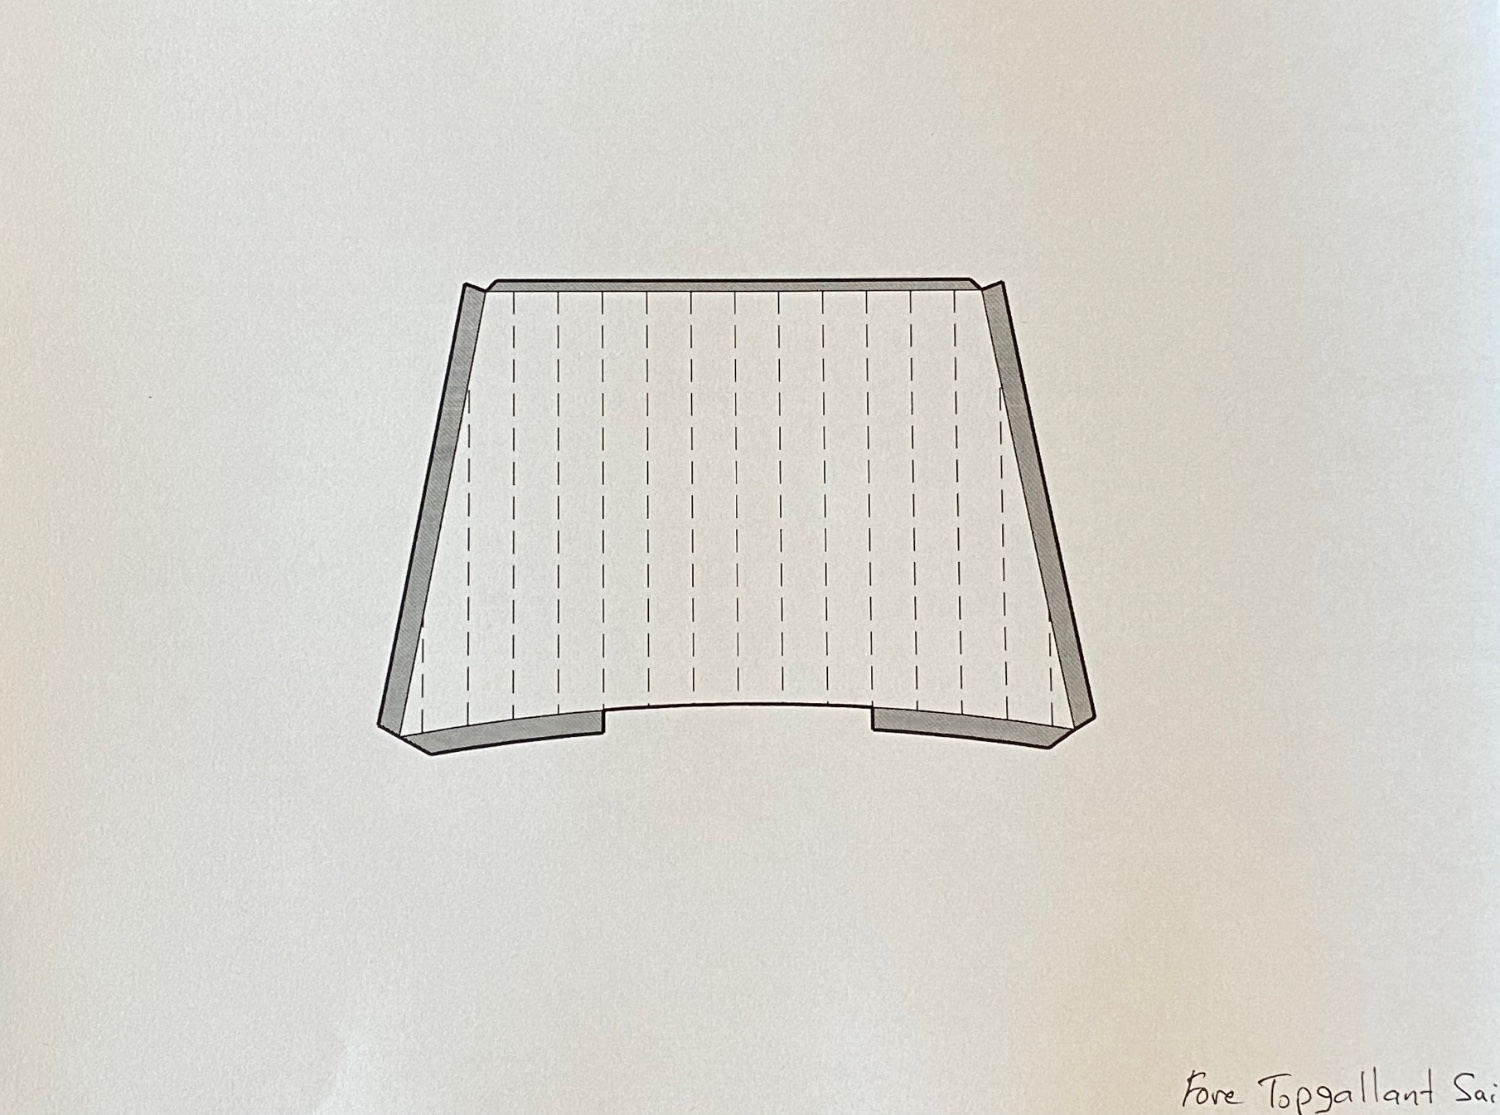
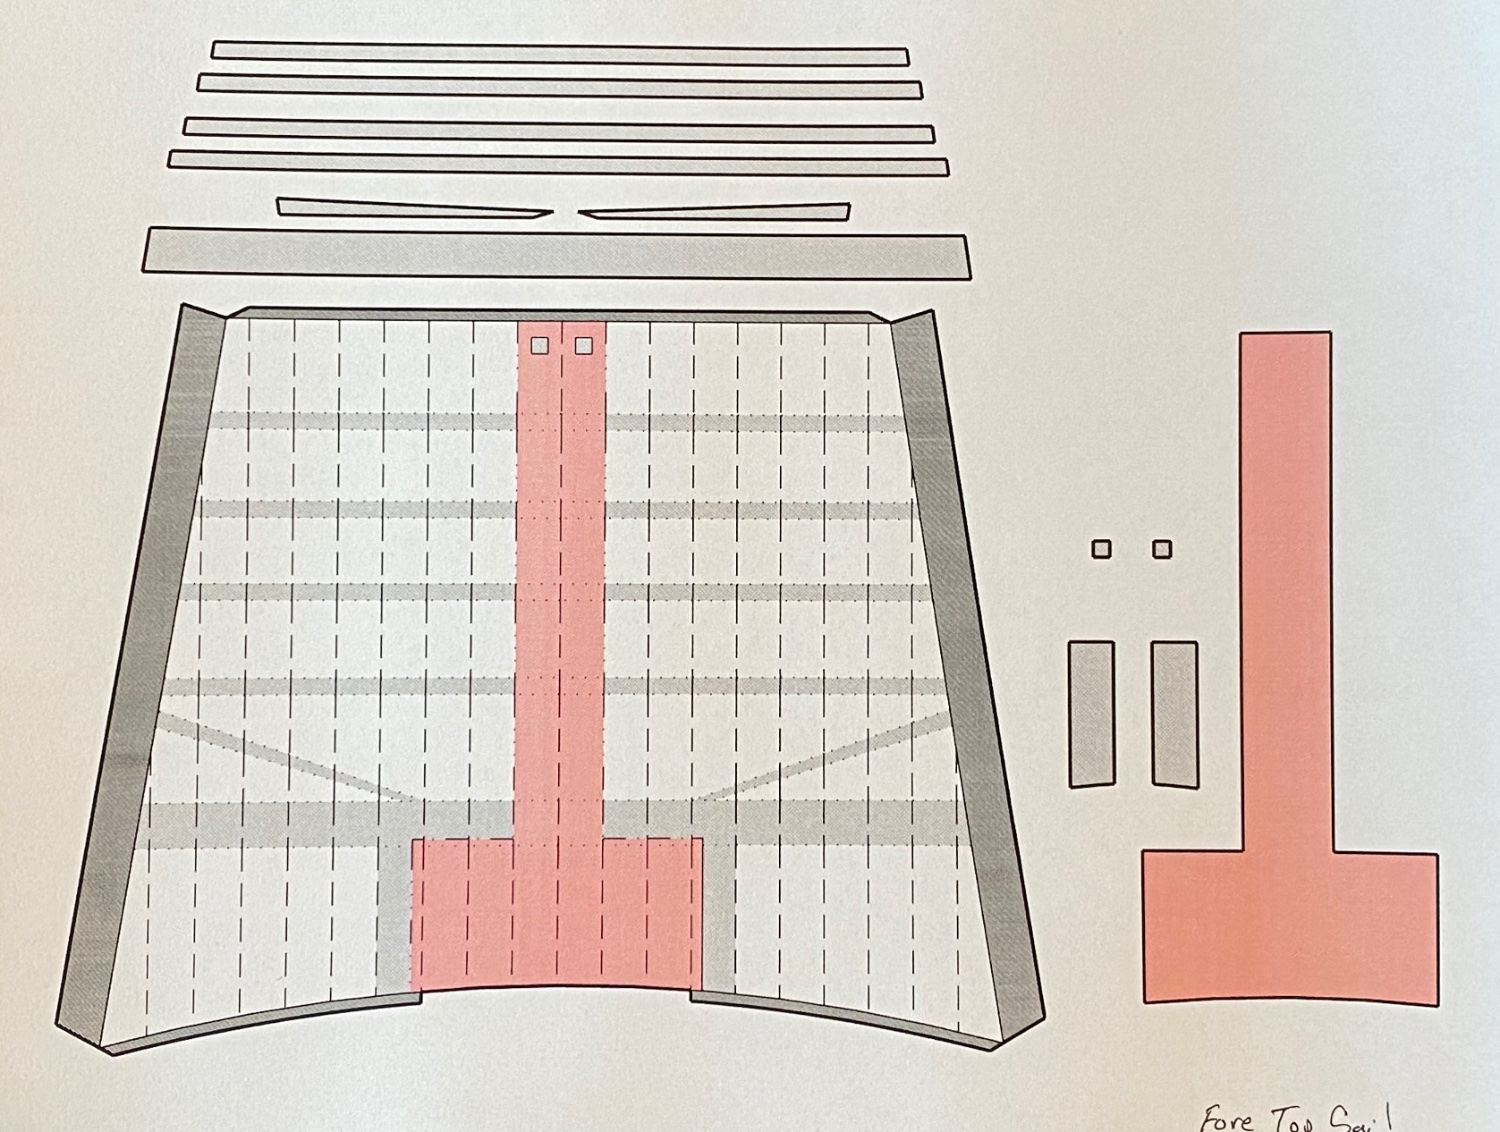
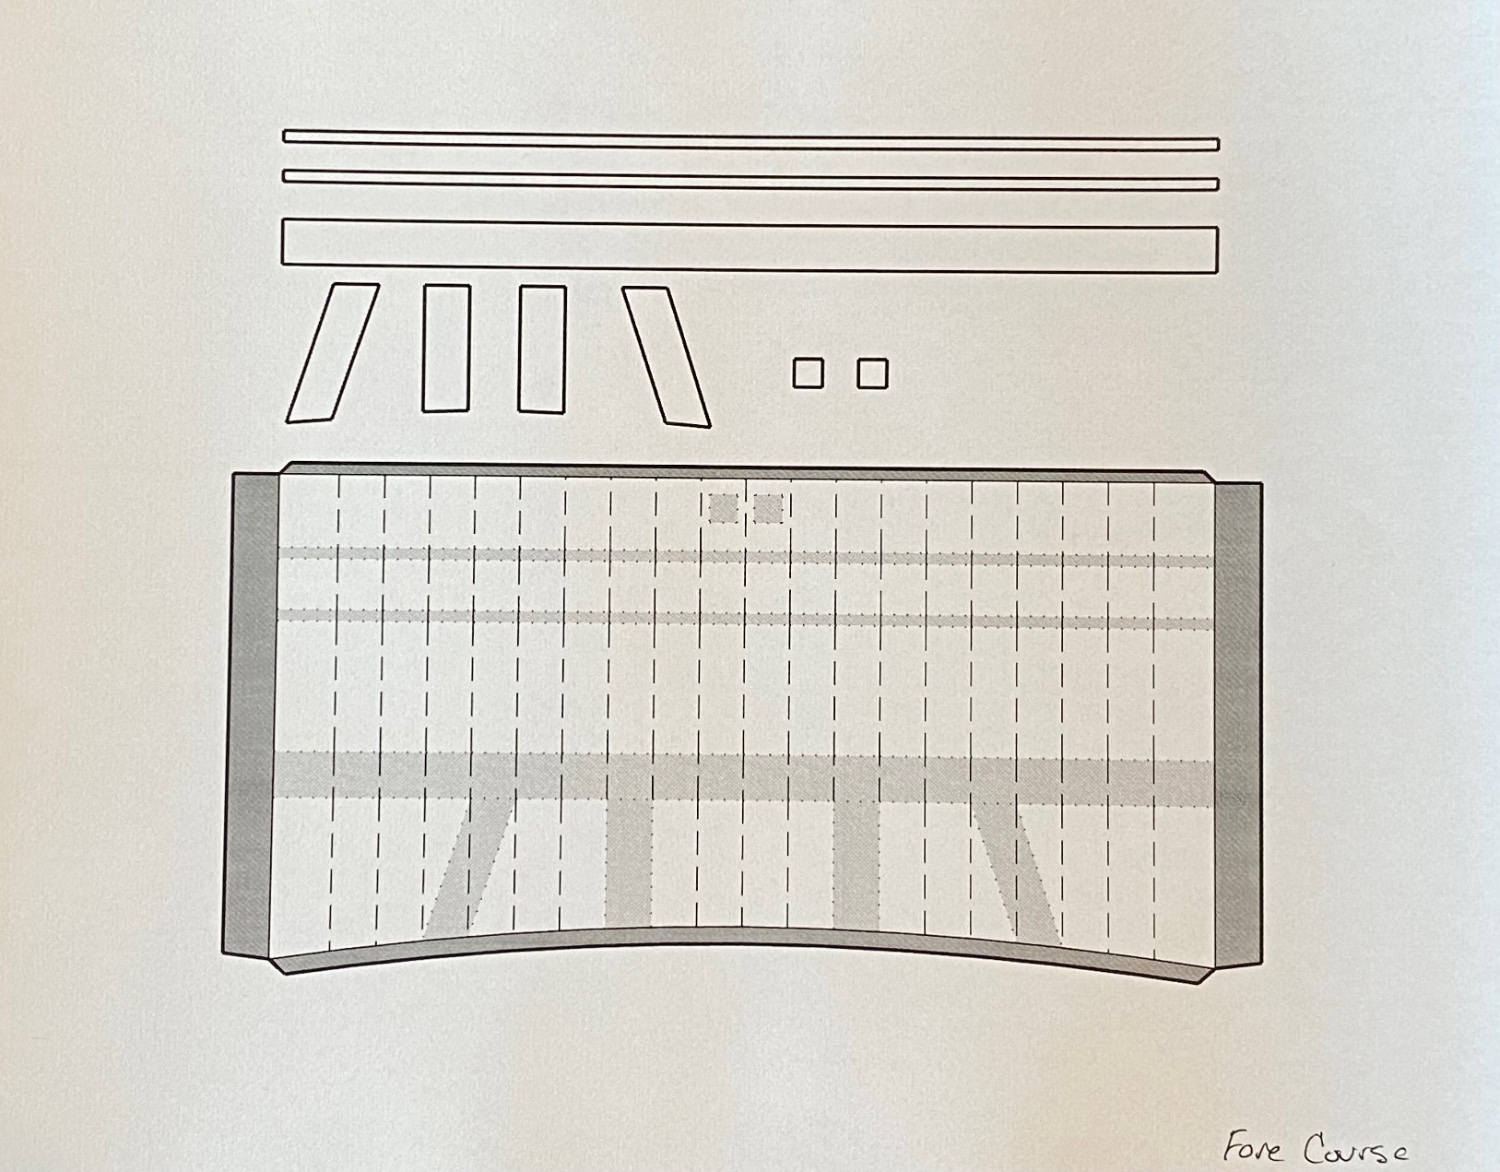
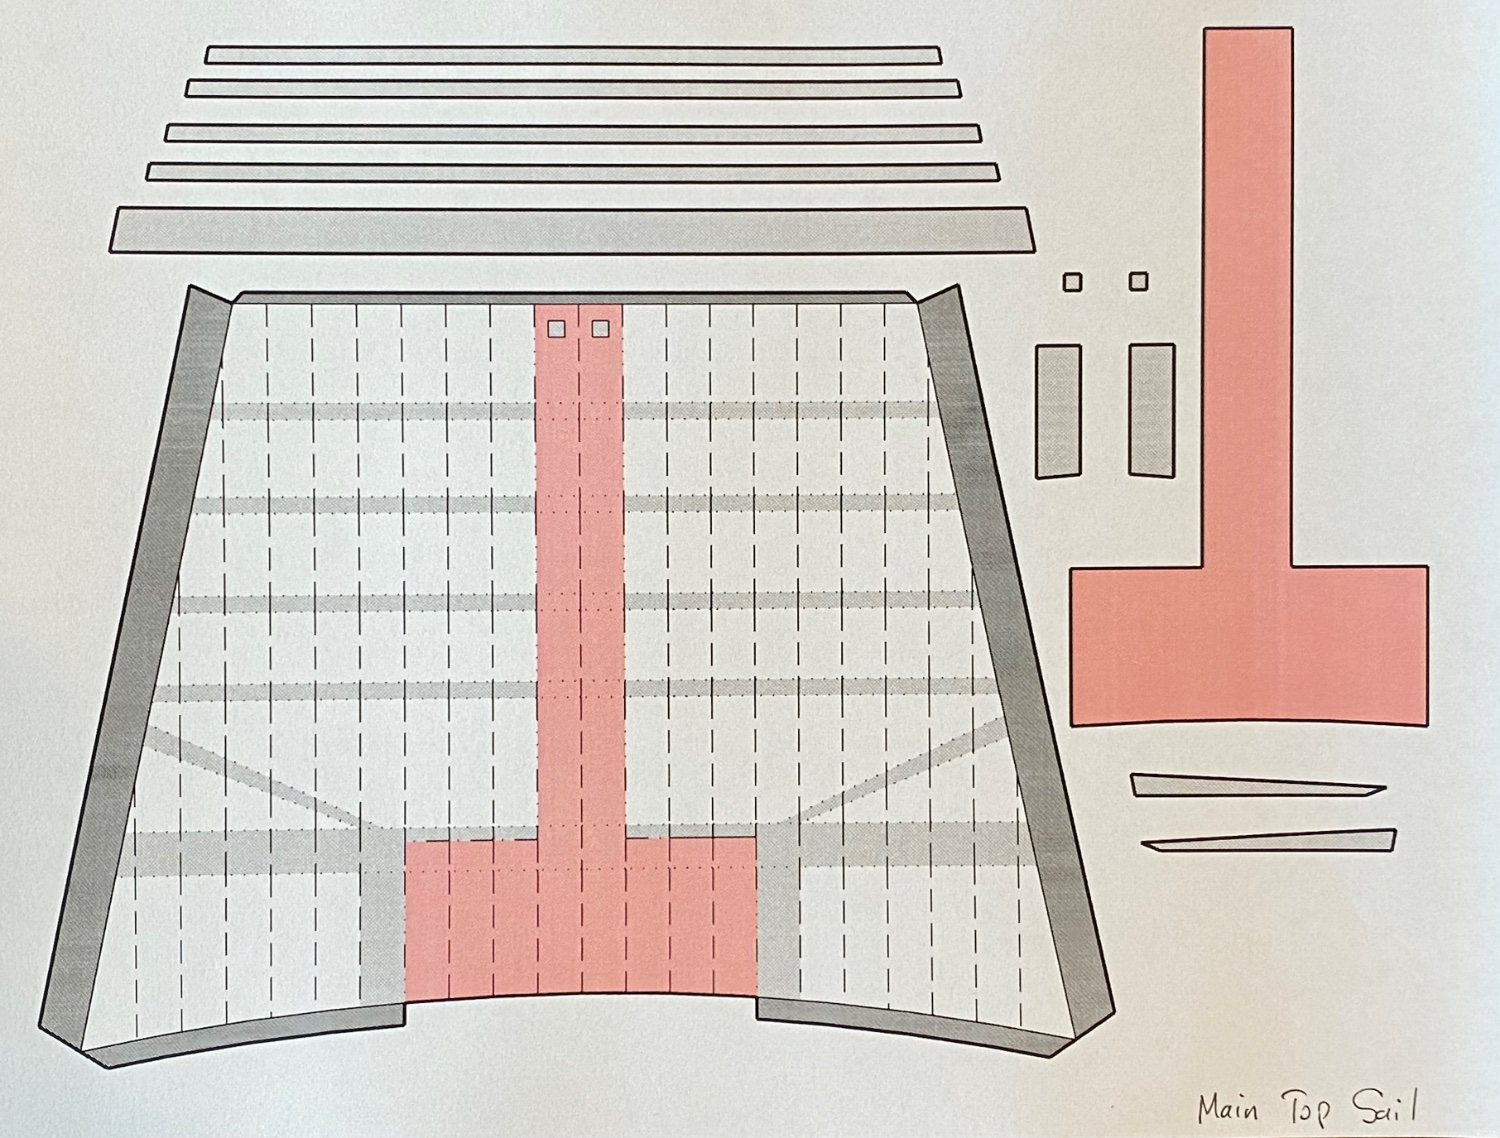
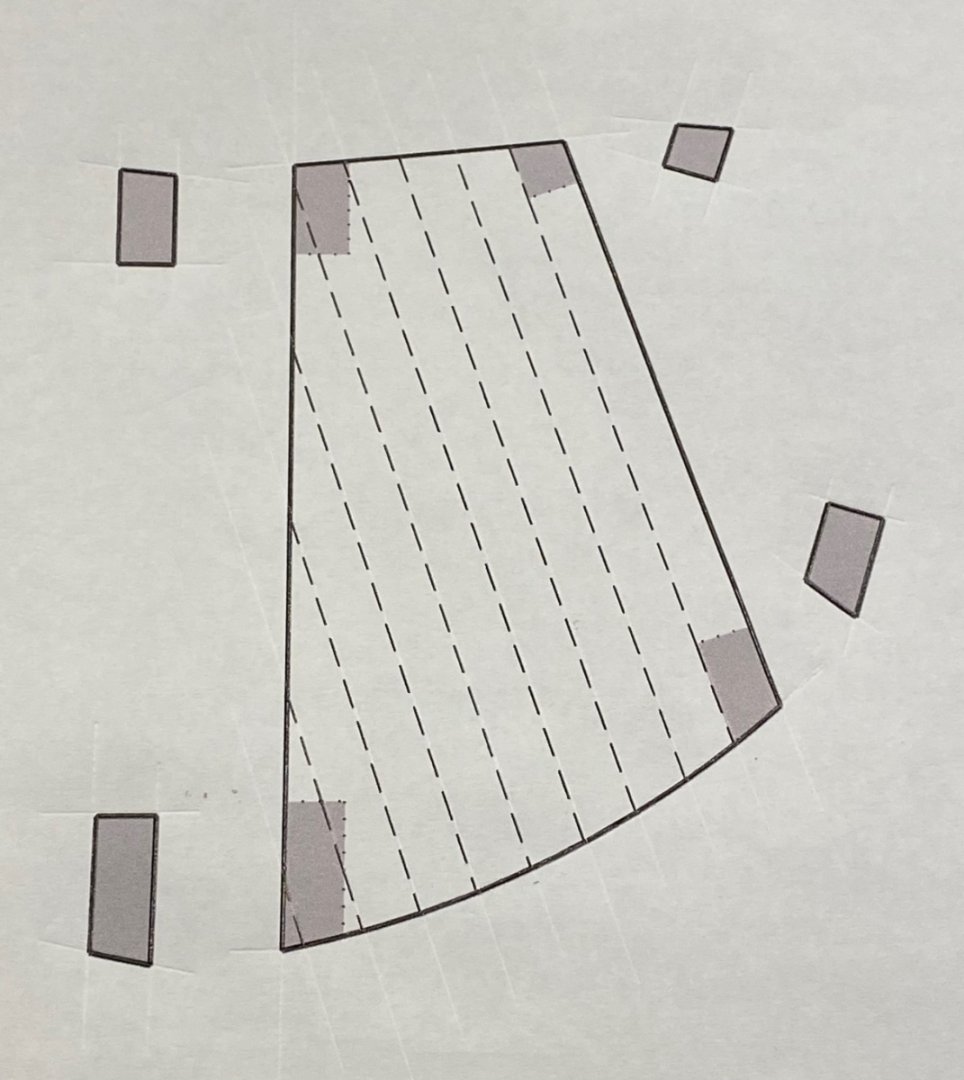
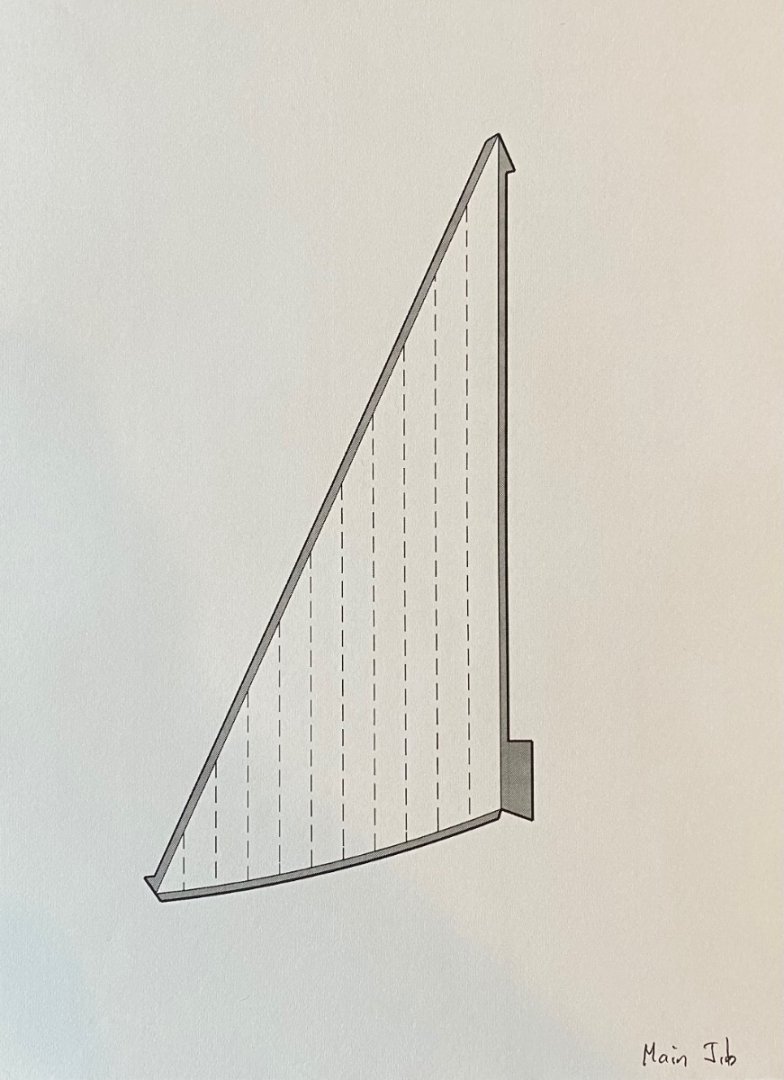
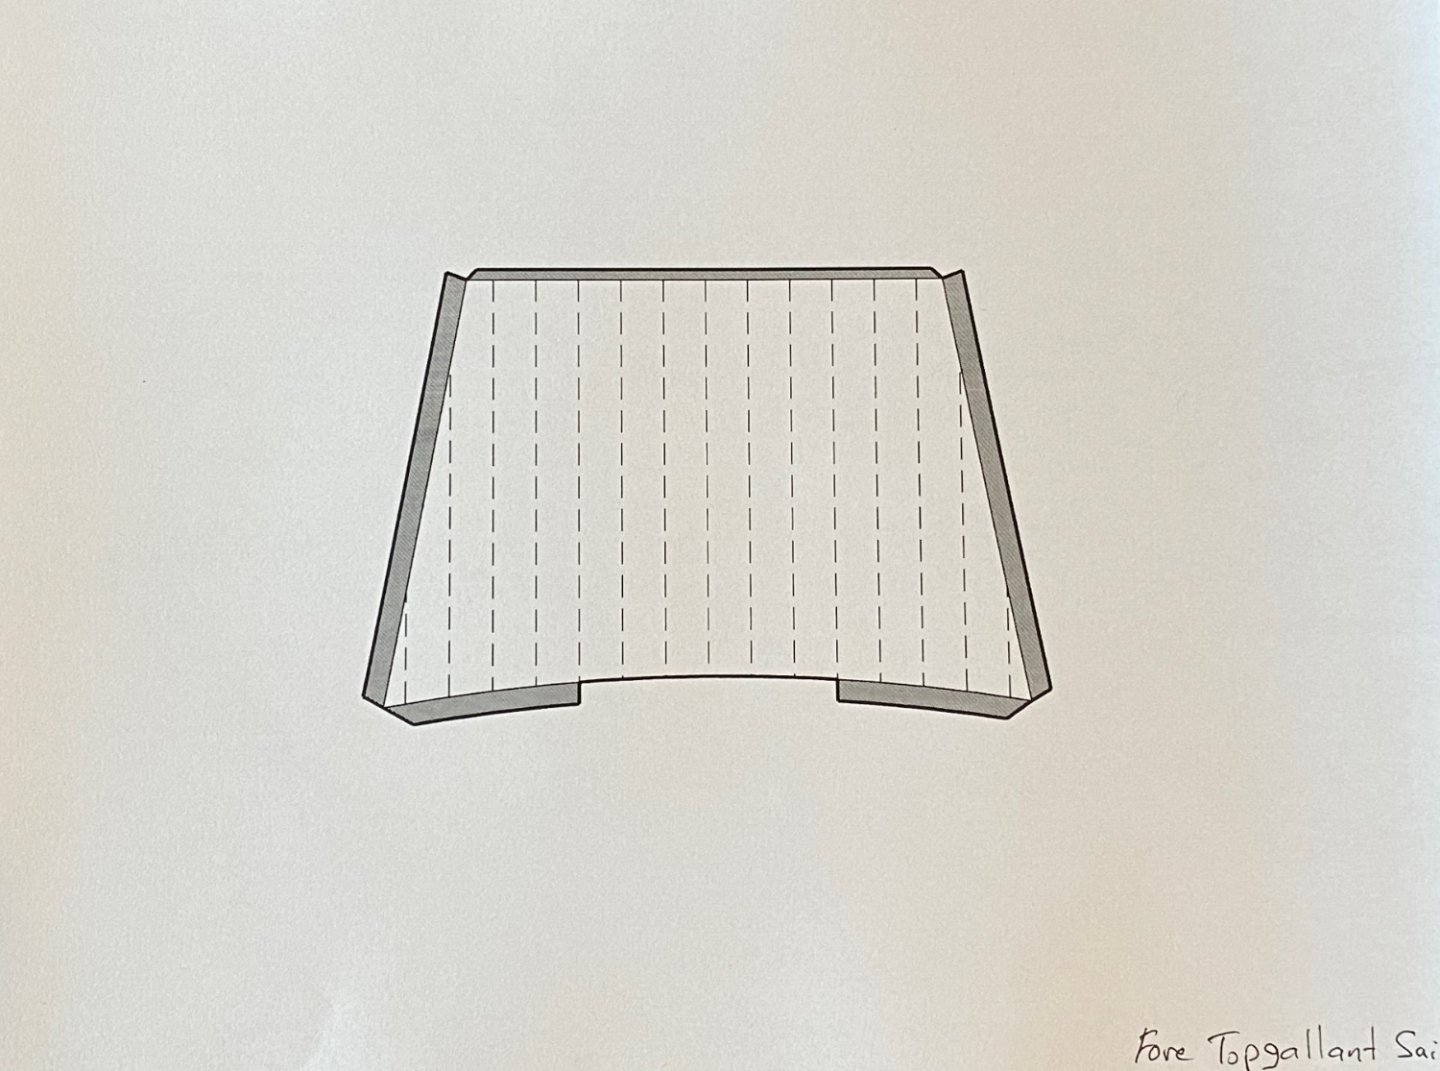
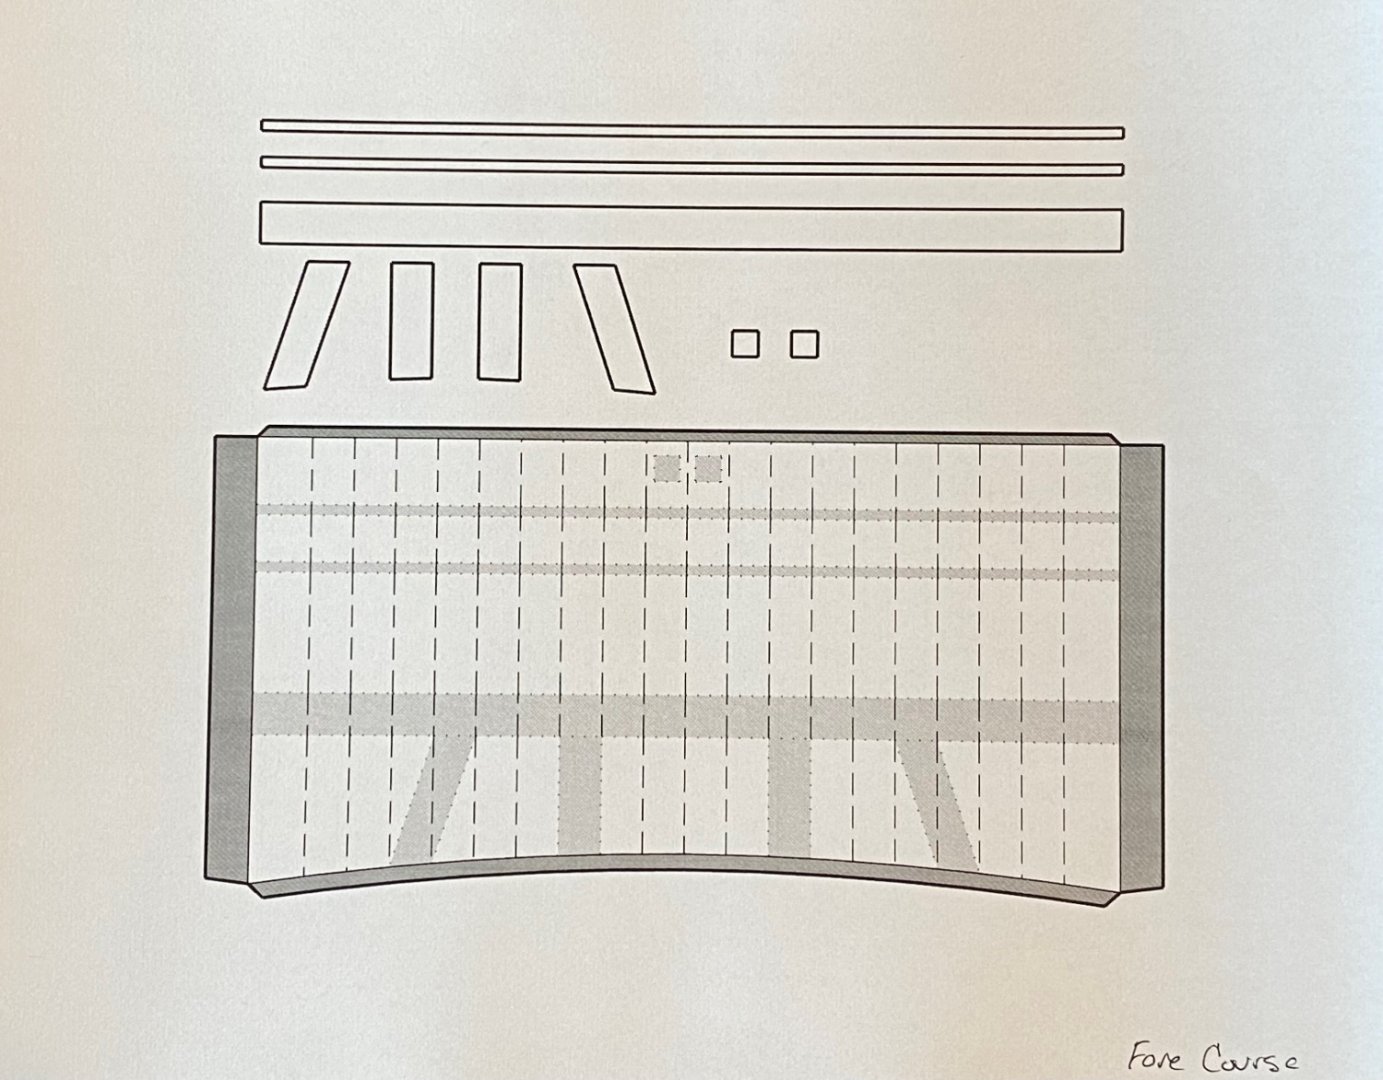
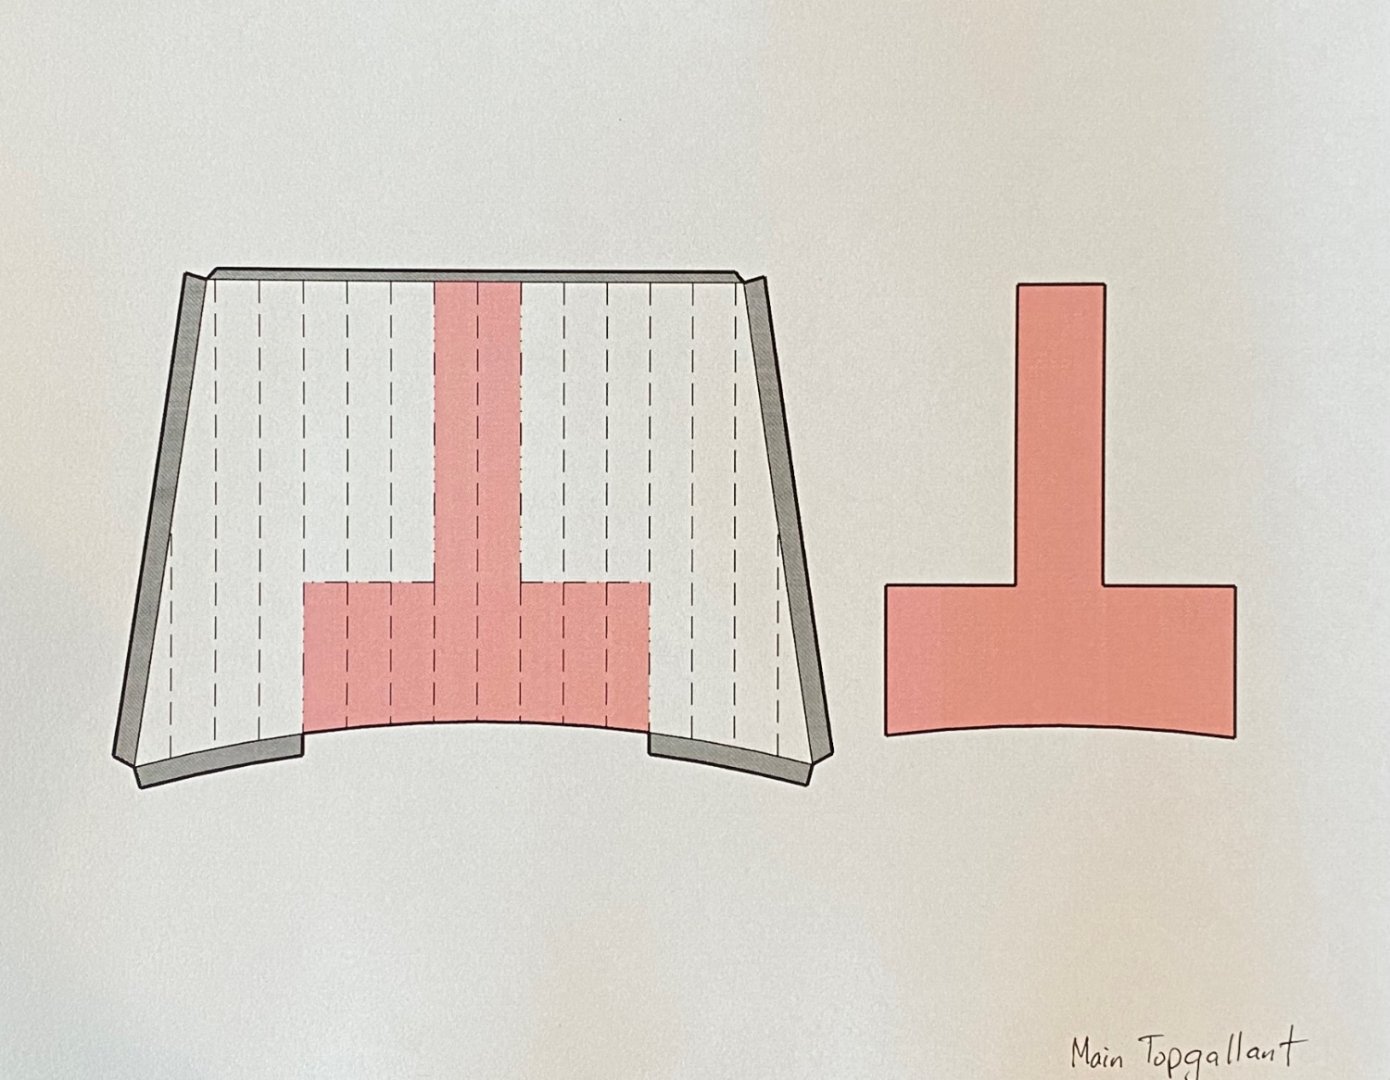
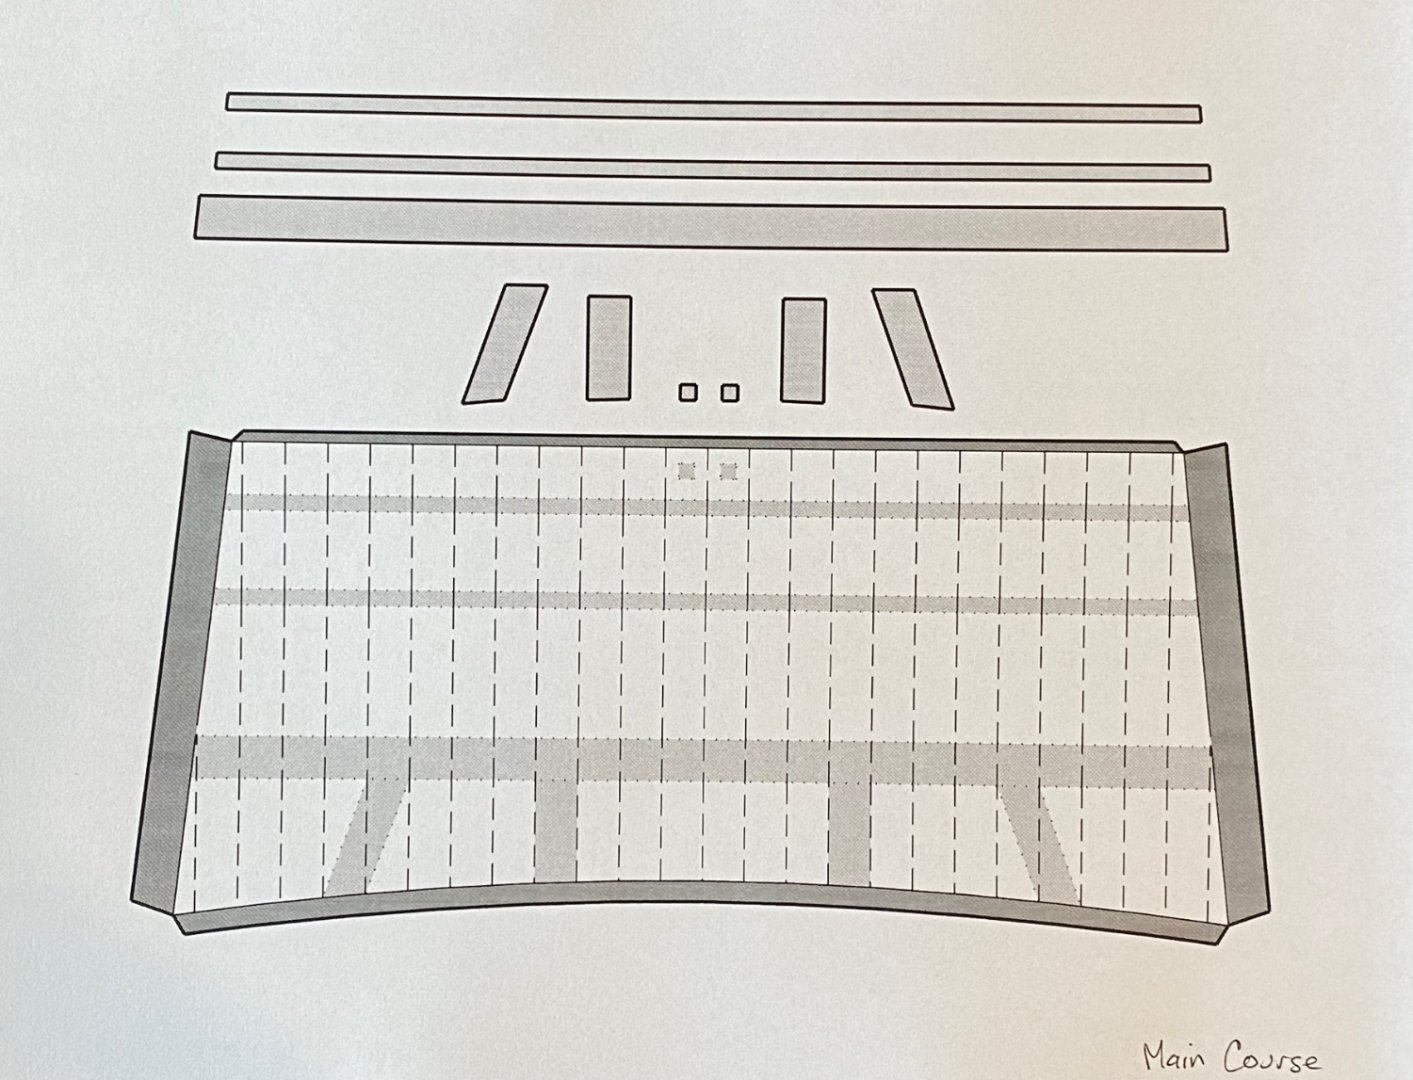
Good afternoon all. I have completed the templates for all the sails on the Terror. I have played around with using paper for the sails and I’m not liking the look, even though it may be more to scale as far as thread count. So I will be using some sail cloth from one of the big ship model manufactures. Here are the templates to date… changes possible once I start assembling. The grey parts are installed on the forward part of the sail and the red areas are for the aft portion of the sail.


-
Once I had the first sail done, the next one took a fraction of the time. Here is the mizzen driver.
-
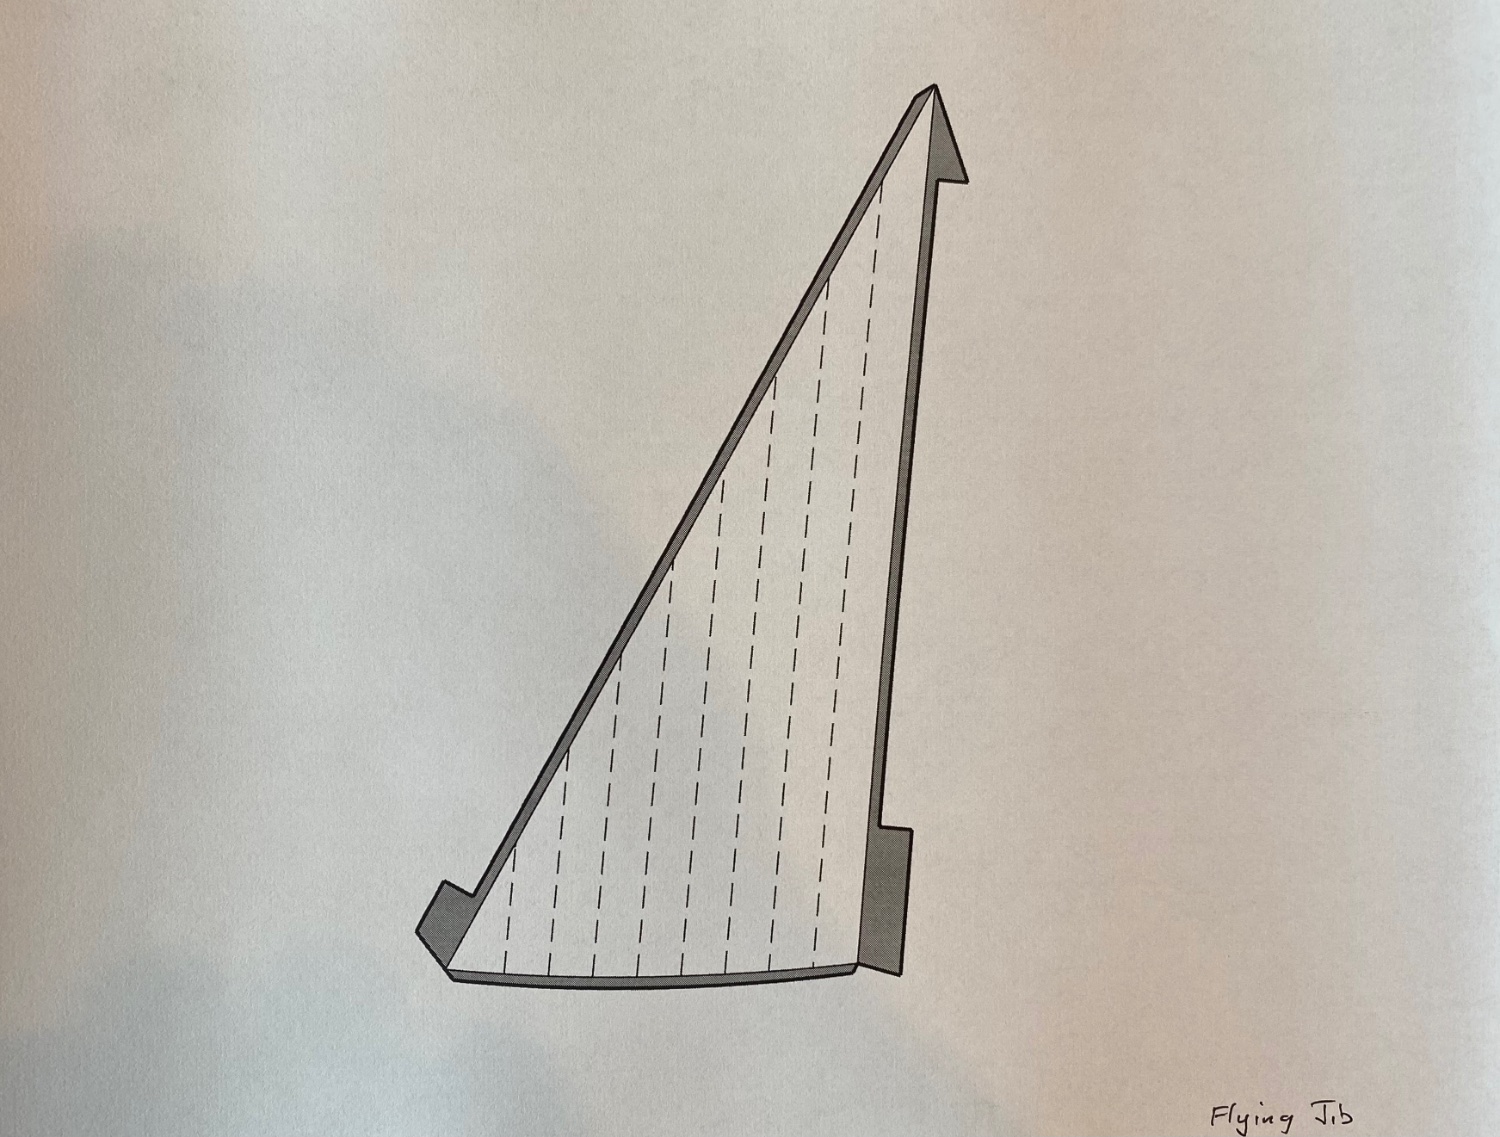
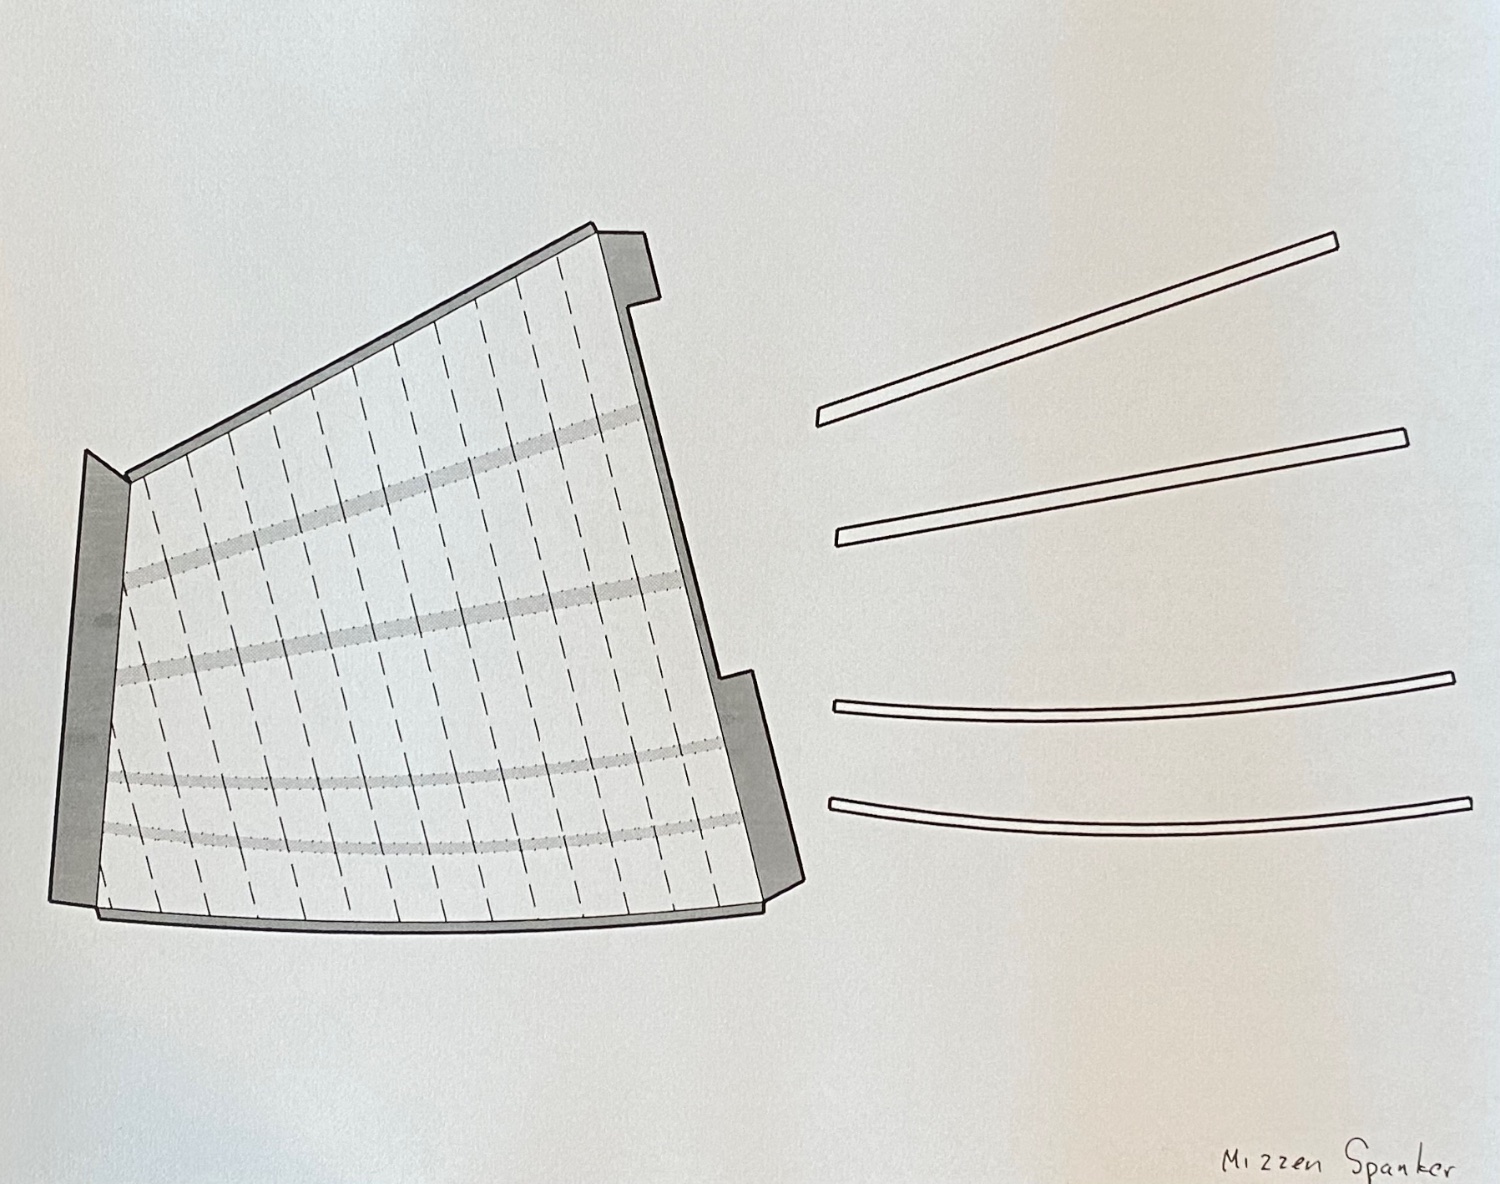
Good evening, today I finished up the yards for my HMS Terror and started on the next project…the sails. I have put so much time and effort into this model to make her as accurate as my skill level will allow, that using the out of scale sails that came with the kit seems like a slap in the face. So, I have decided to make my own sails based almost entirely out of Lees The Masting and Rigging of English Ships of War 1625-1860. Step 1: create a pattern to scale including the necessary corner or edge reinforcements. Below is my initial pattern for the mizzen driver (spanker) sail as compared to the kit version. The major difference is the panel seams.

-
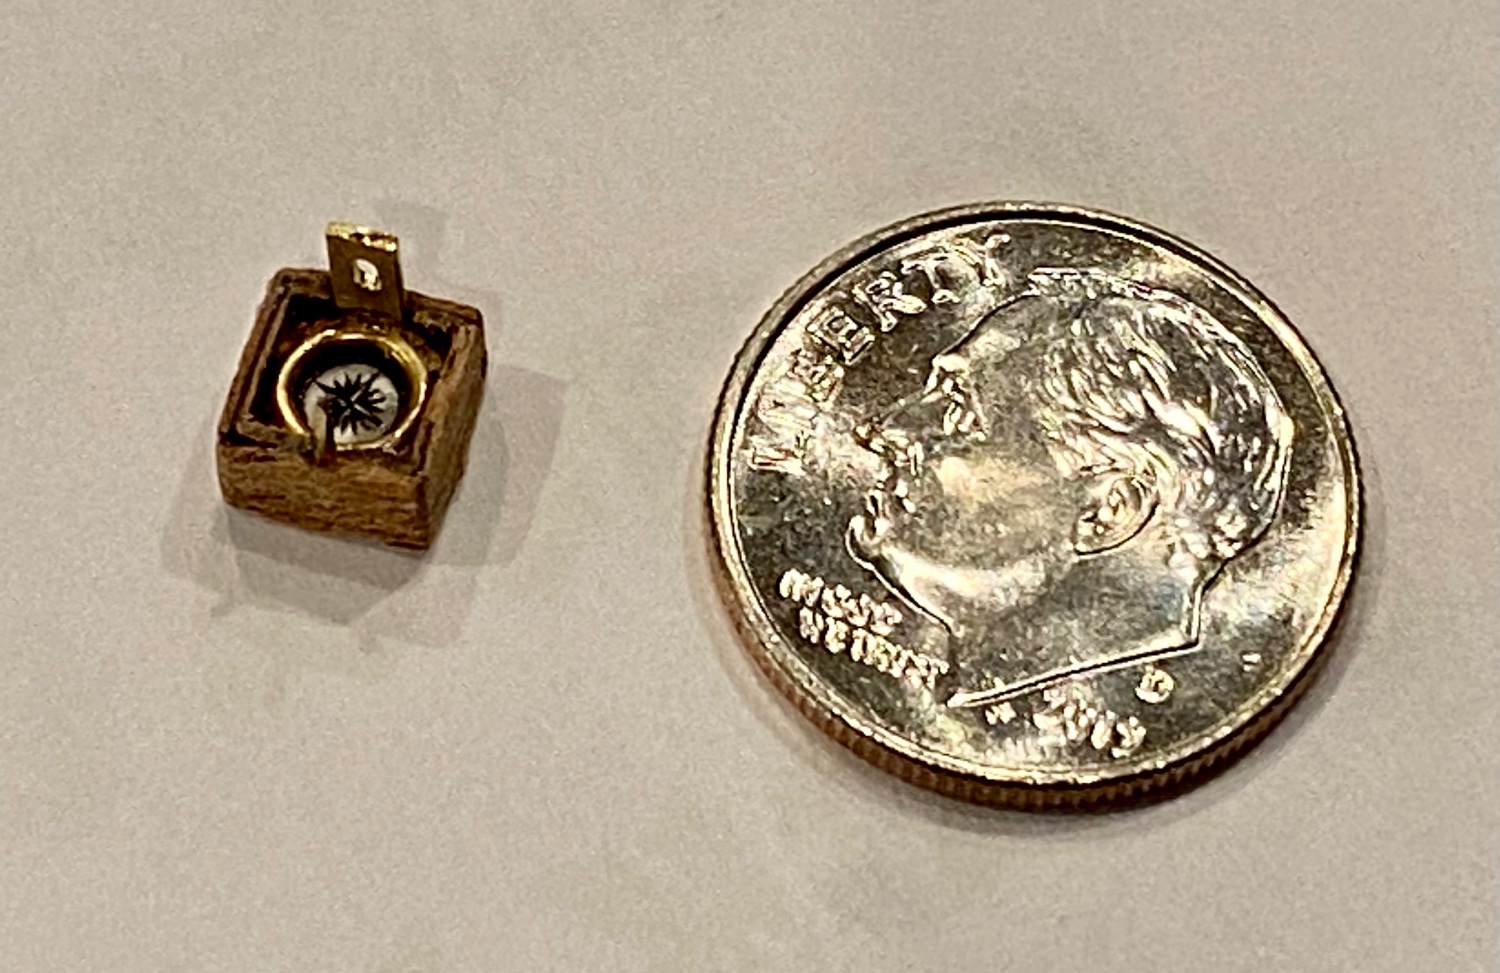
I just might be crazy! The azimuth above is about 4.5-5mm square x 3mm high (3/16” square). To make the compass dial I found a TrueType font of just compass roses and printed one to scale. A little brass work (😂 see what I did there) and some trim pieces…yes, a bit crazy.
-
Azimuth post created and square hole in table added. Another terror mystery solved thanks to Keith (clearway), Keith S, Keith Black, and Craig (iMustBeCrazy).

-
Thanks again to all the helpers in research for this wonderful ship HMS Terror! Todays task, the azimuth that will sit on top of the mysterious post next to a US dime for comparison.

-
Good evening all. I’ve been working on the sky bridge that somehow I missed in all the time I have poured over the drawings. Thanks to Clearway (Keith), Keith S, Keith Black, and iMustBeCrazy (Craig) for all your work in helping figure all this out. Here is my interpretation of the Terror Sky bridge.


-
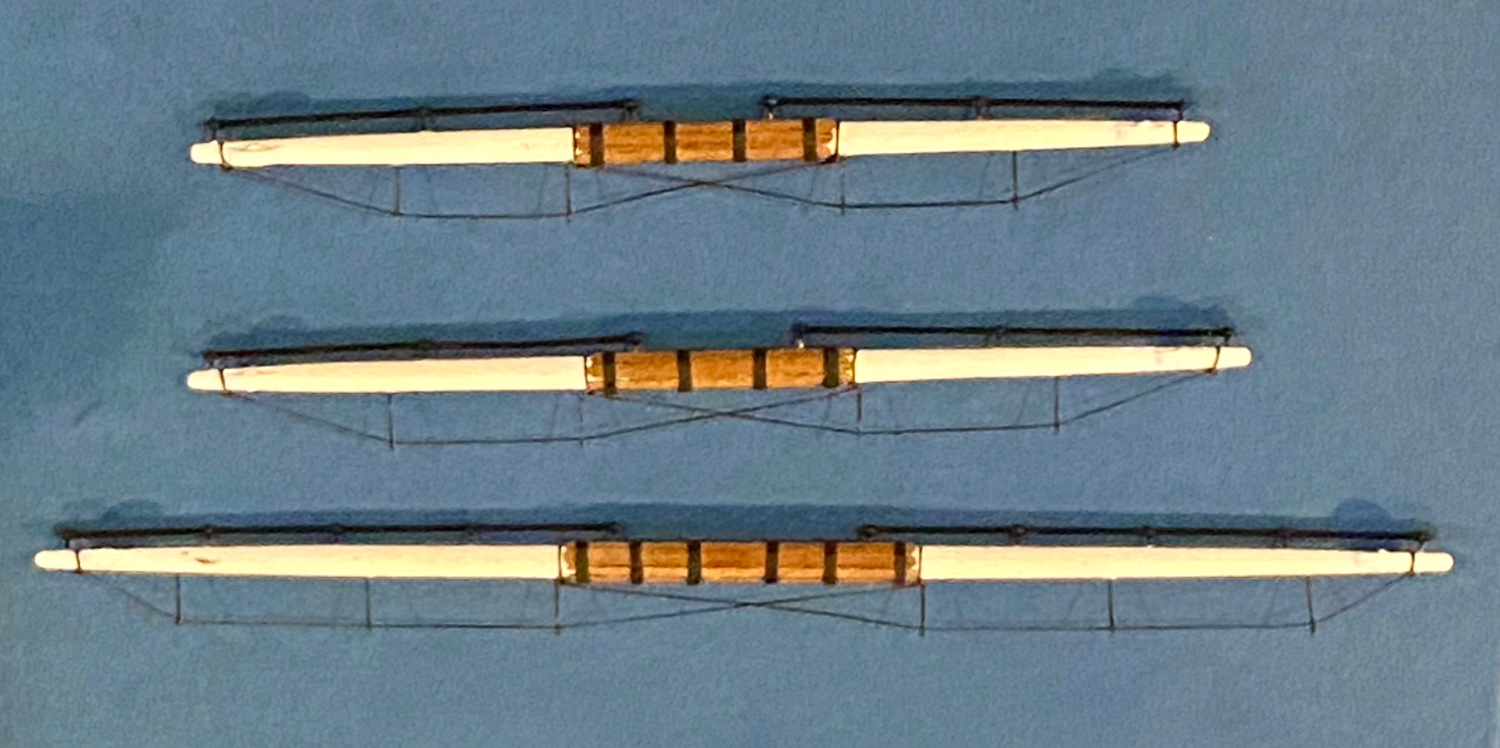
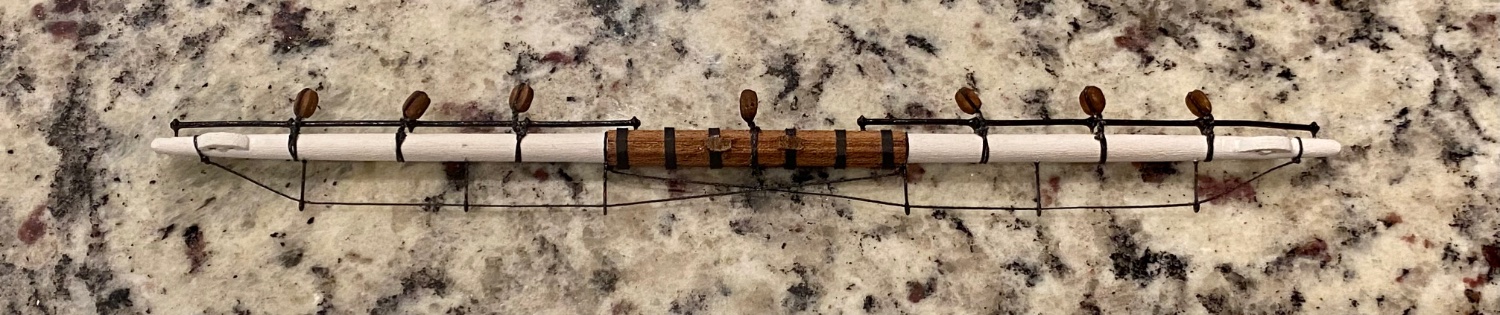
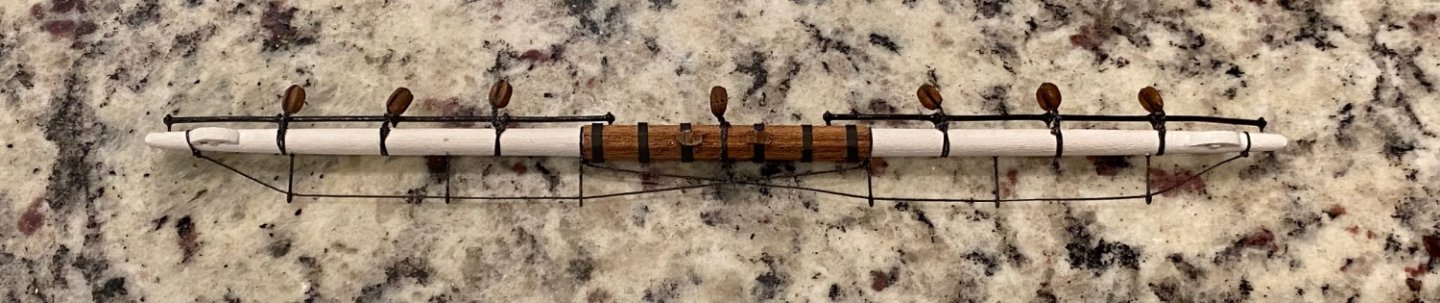
Good evening, I’ve been busy mass producing yards. So much work goes into these pieces. Still not finished, but made good progress today.

-
An Alexander steering azimuth compass, designed by Baharie Alexander in 1844. Image below is as close as I could find, may not be an Alexander design, but his would have been very similar, c 1844-1845, which would have been the "latest and greatest" design to have on board.
-
Here is a "prototype" Kater azimuth compass, c 1811, designed by Henry Kater, which incorporates a mirror that allows the reading of scales at the same time as observation of a distant object through the sight.

-
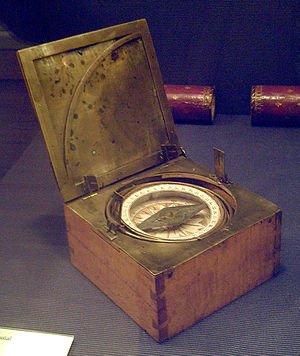
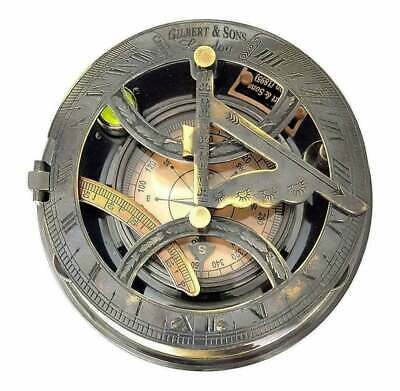
Just some more historical information that is mentioned by Dr. Bets in the pages above. Gilbert "sundial" azimuth compass, made by Gilbert & Sons London.
-
Keith, here is the page in question. this is a quote from the book HMS Terror: The design, fitting and voyages of the polar discovery ship, by Dr. Matthew Betts, page 101-102 ”As was common in many polar expeditions, Terror appears to have shipped two binnacle compasses, one each on the port and starboard, a prudent option in higher latitudes with variable magnetism.15 The 1839 Terror and Erebus upper deck plans show the probable location of these on the quarterdeck, as indicated by gaps in the row of casks lining both sides of the bulwarks. Once the compasses became unreliable at higher latitudes as the magnetic poles drew nearer, these would have been removed. Parry provides a good description of the likely procedure employed: ‘the binnacles were removed, as useless lumber, from the deck to the carpenter’s store-room, where they remained during the rest of the season, the azimuth compass alone being kept on deck.’16 So important were the azimuth compasses for Arctic exploration that five were provided for the 1836 Terror expedition, including two Gilbert and two Kater compasses, and well as an Alexander steering azimuth compass.17 All these models of azimuth compass had been used on previous polar expeditions, and the procedures for using them in high latitudes were well established. Remarkably, the 1839 Terror and Erebus upper deck plan shows that a special charting table was bolted on the quarterdeck and that the azimuth compass was mounted in its centre.18 It is likely that Alexander’s azimuth steering compass was mounted here when in high latitudes, as Ross had experience with this model and its significant advantages from his polar expeditions with his uncle, Sir John Ross.”
-
Great work on your Terror so far!
-
Great work Keith S, Keith (Clearway) and Craig (iMustBeCrazy). You guys are awesome in research and finding the odd piece of information to fill in the blanks. Again, thanks for all your hard work on the Terror project.
-
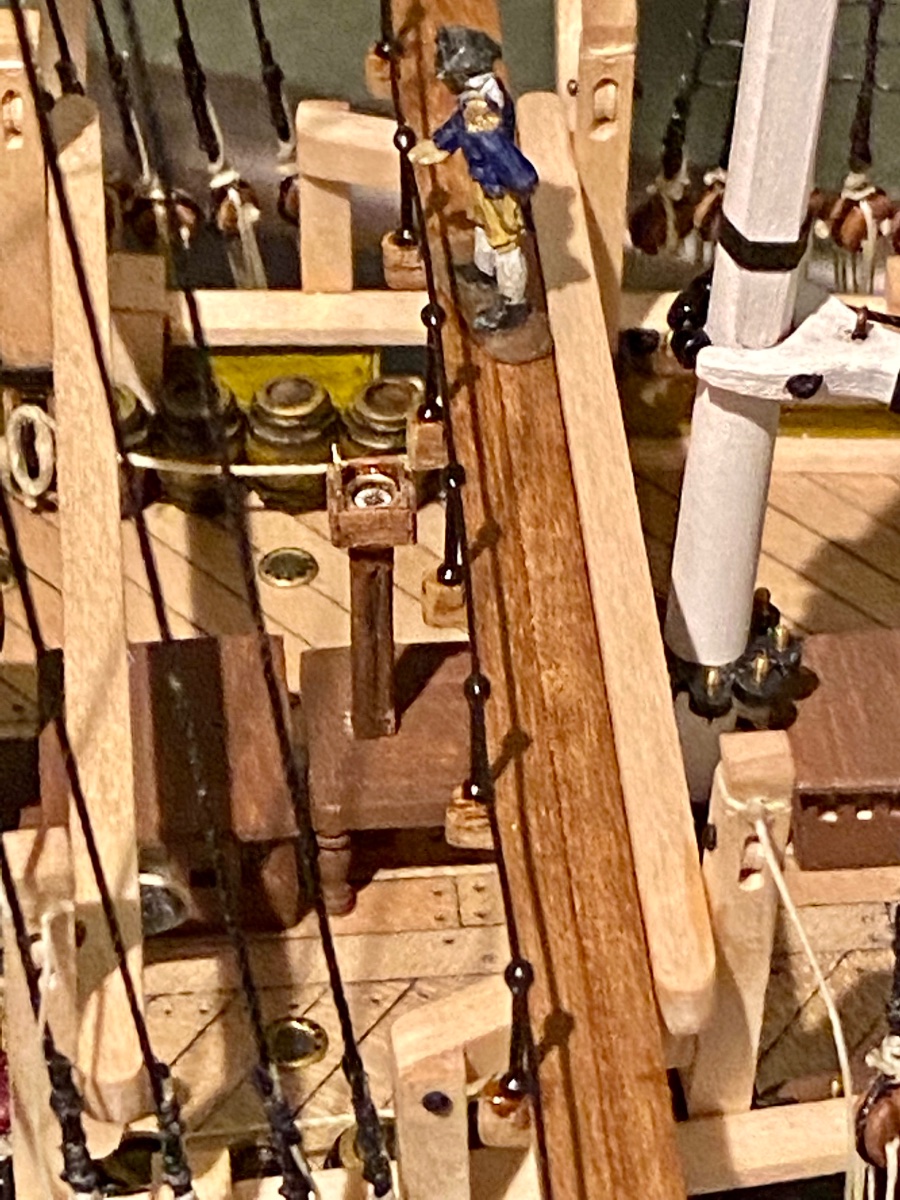
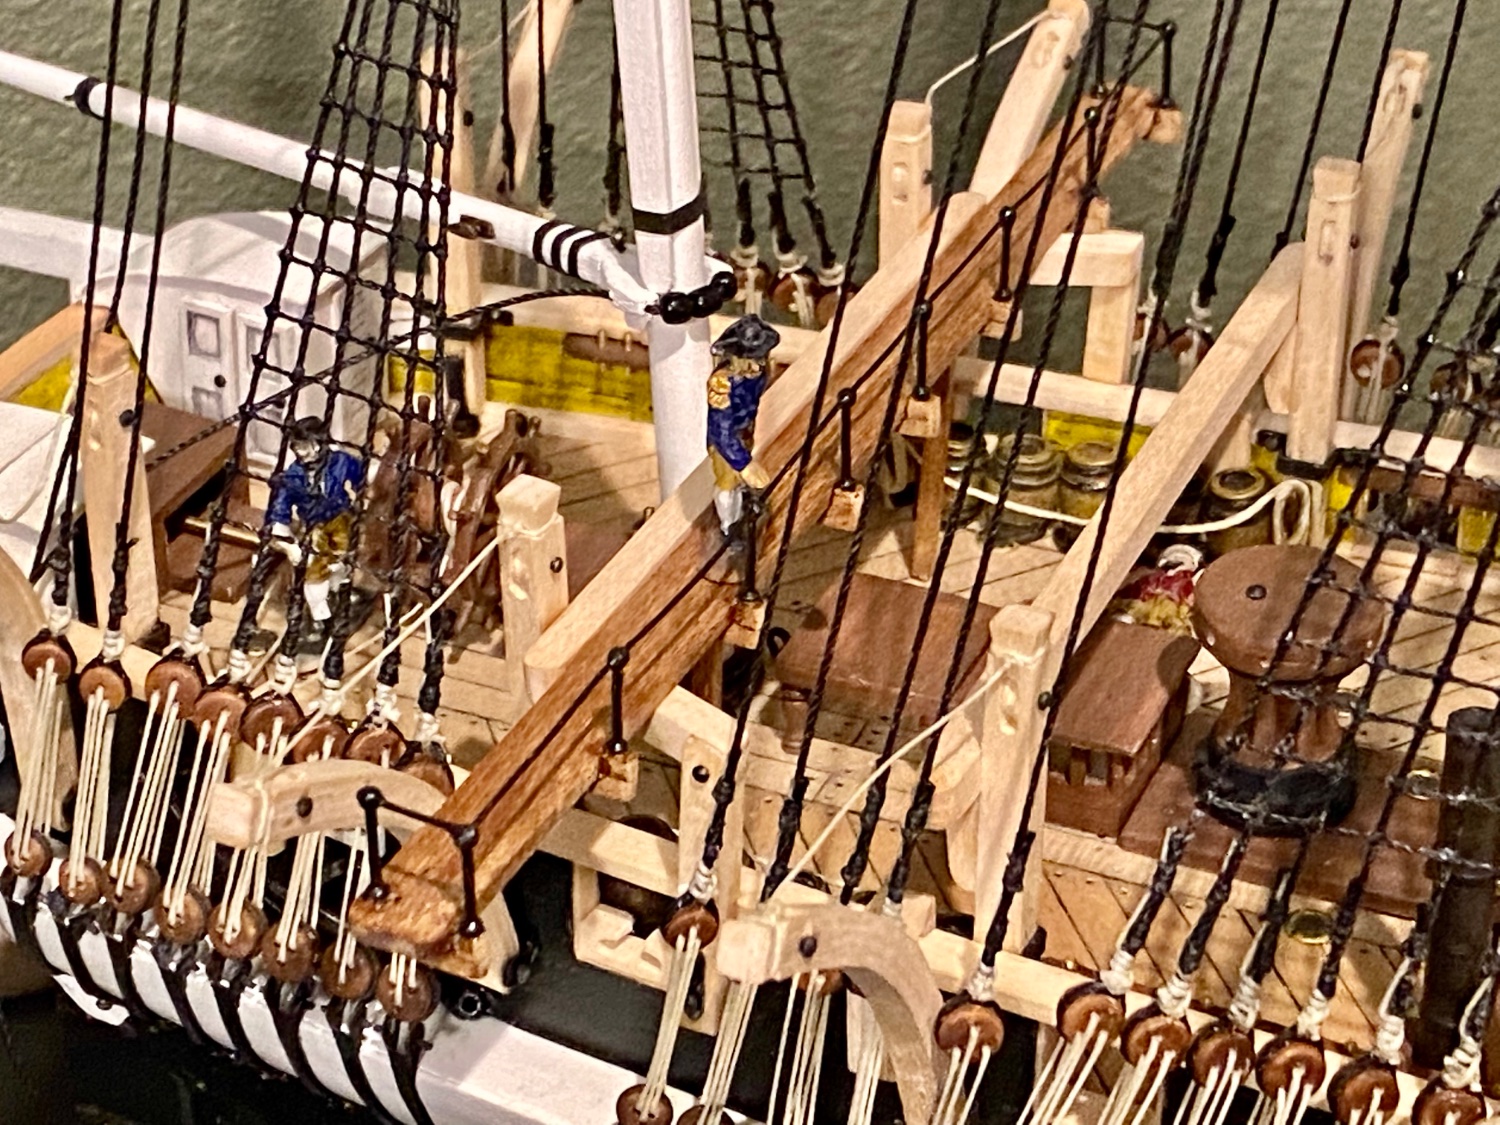
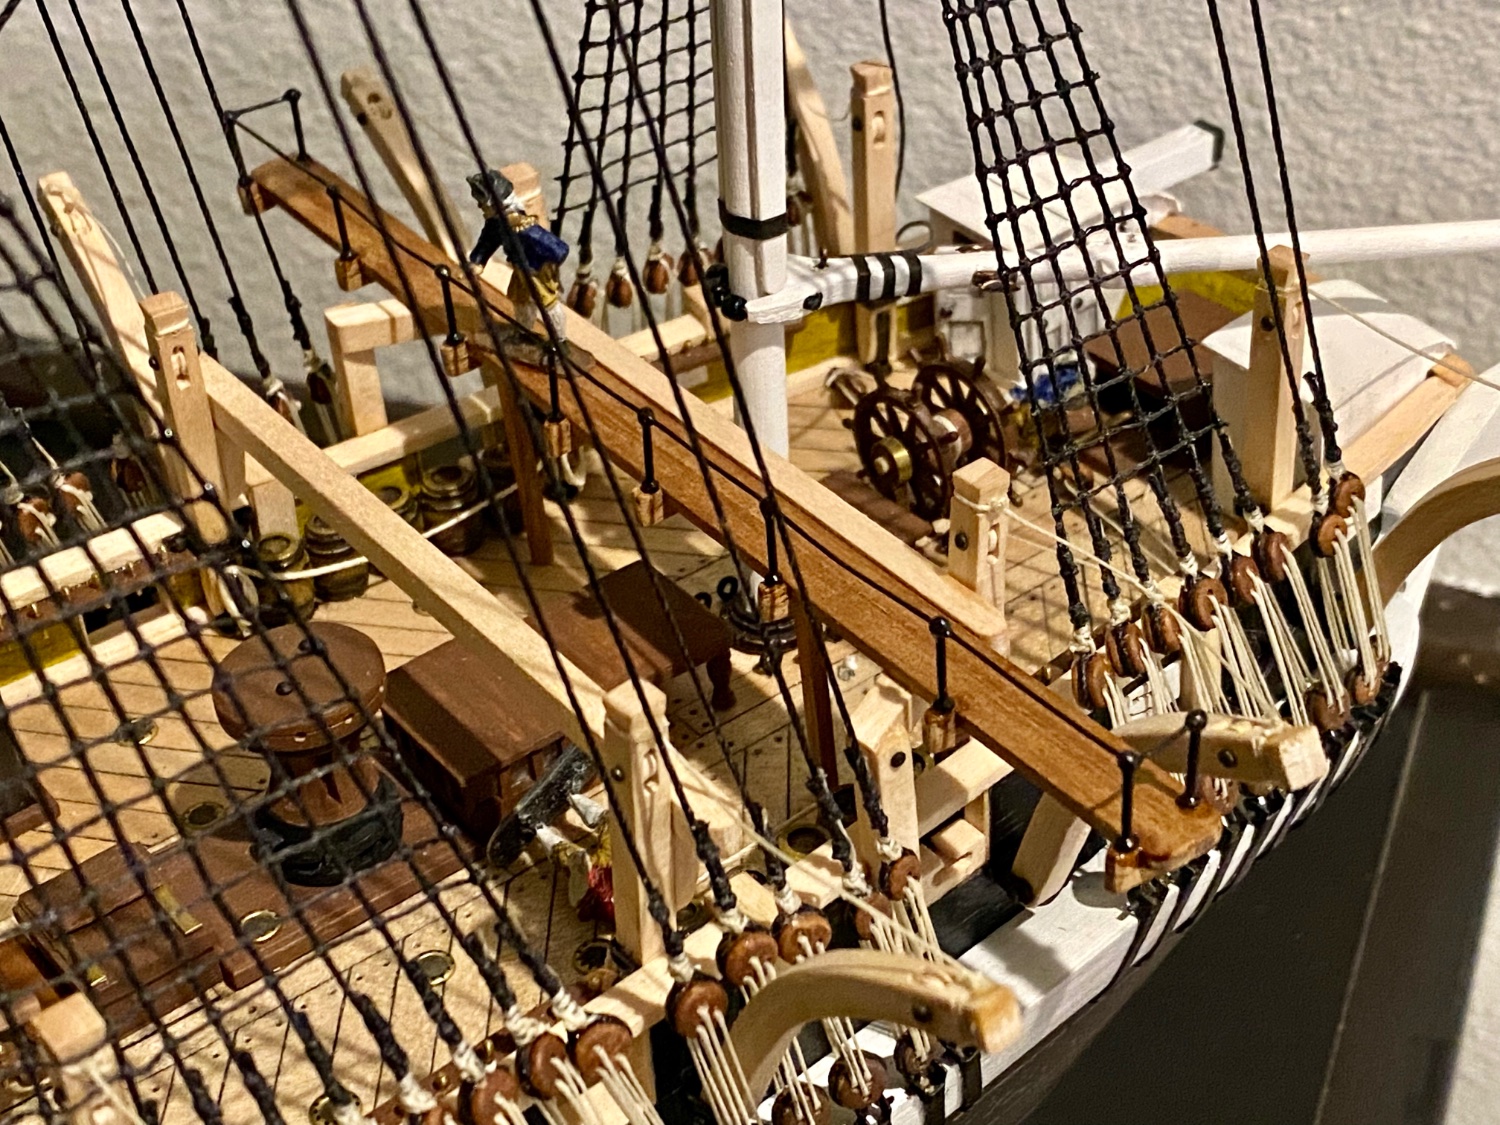
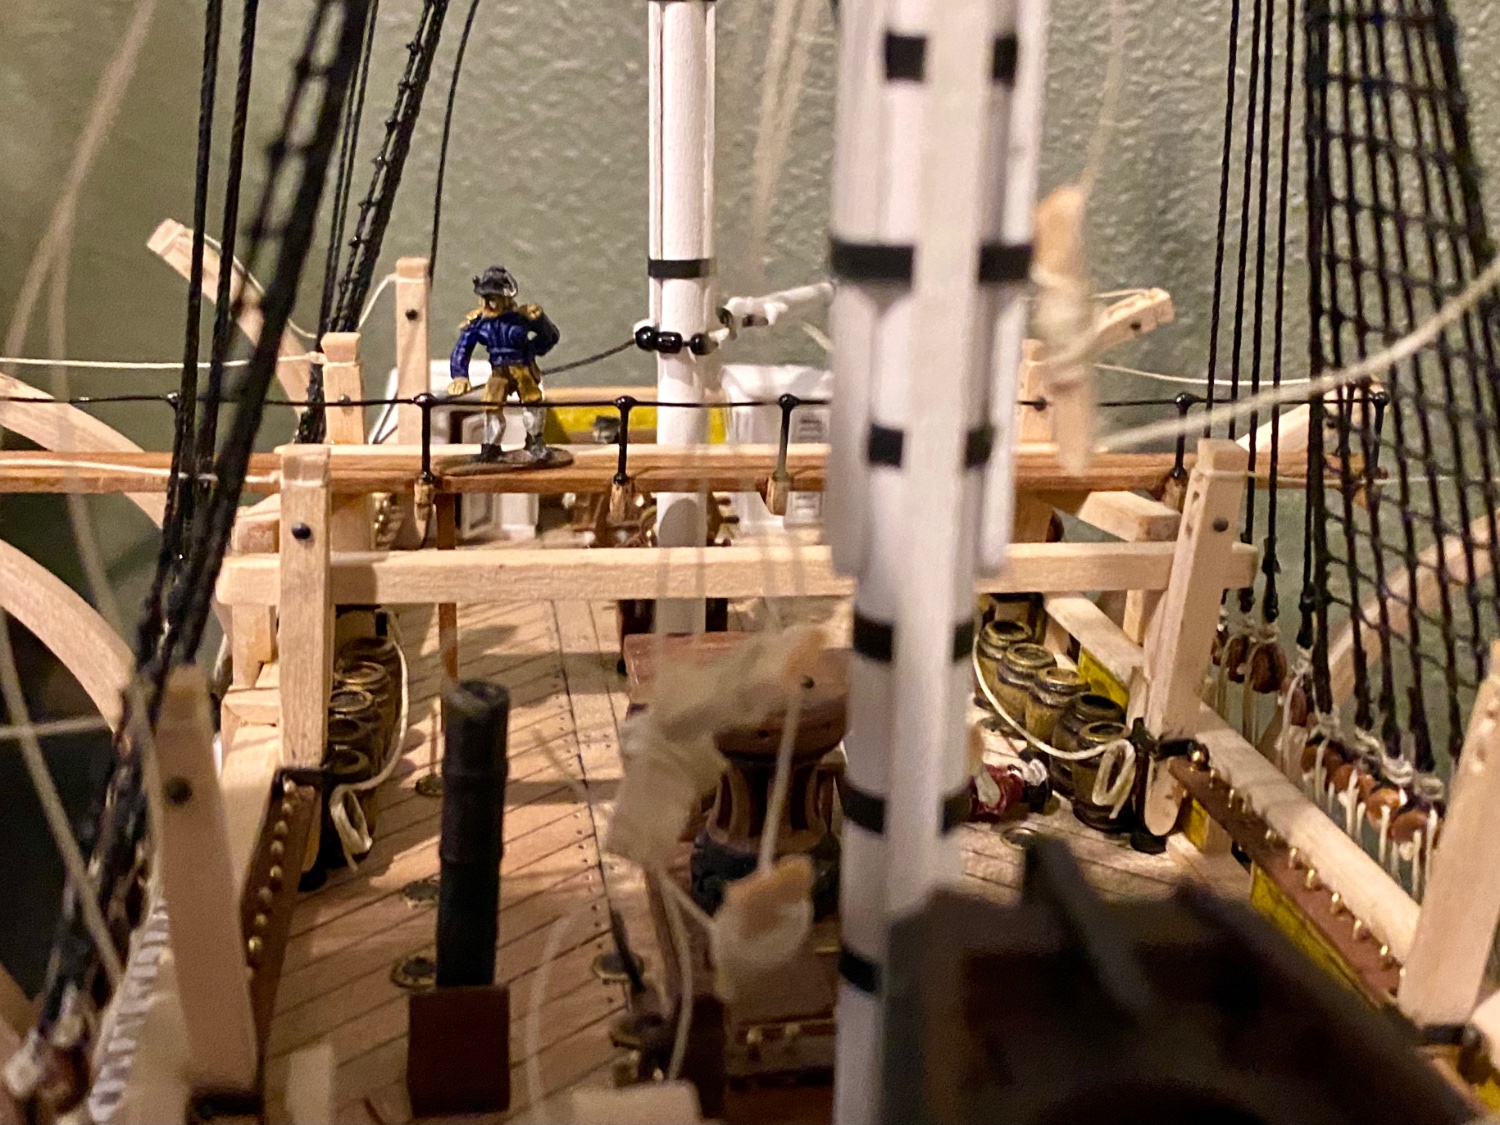
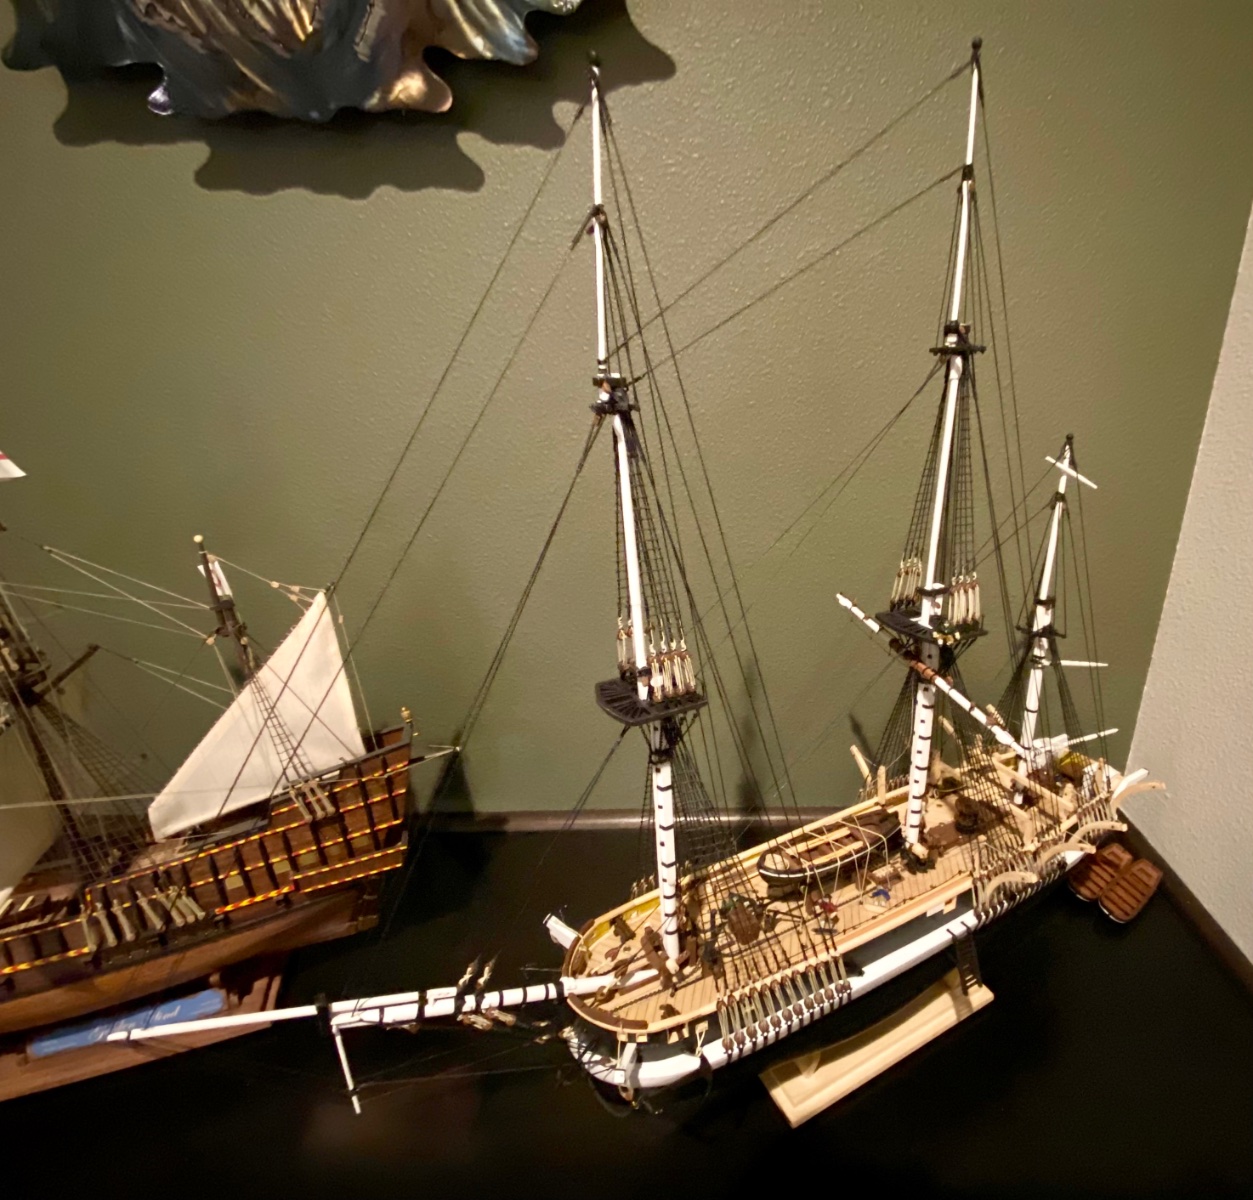
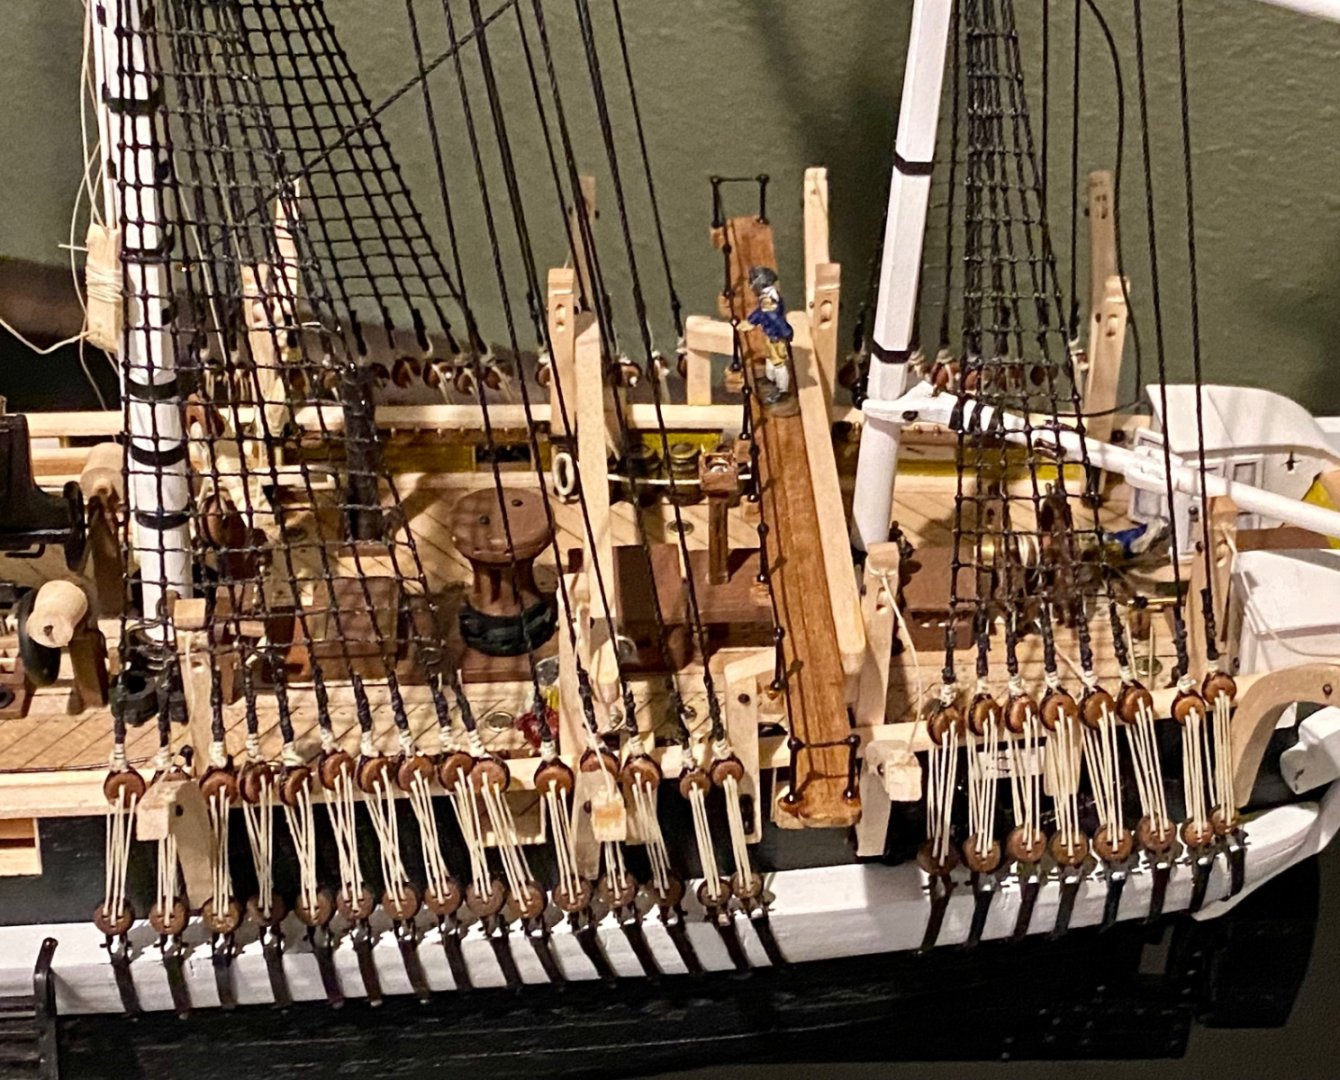
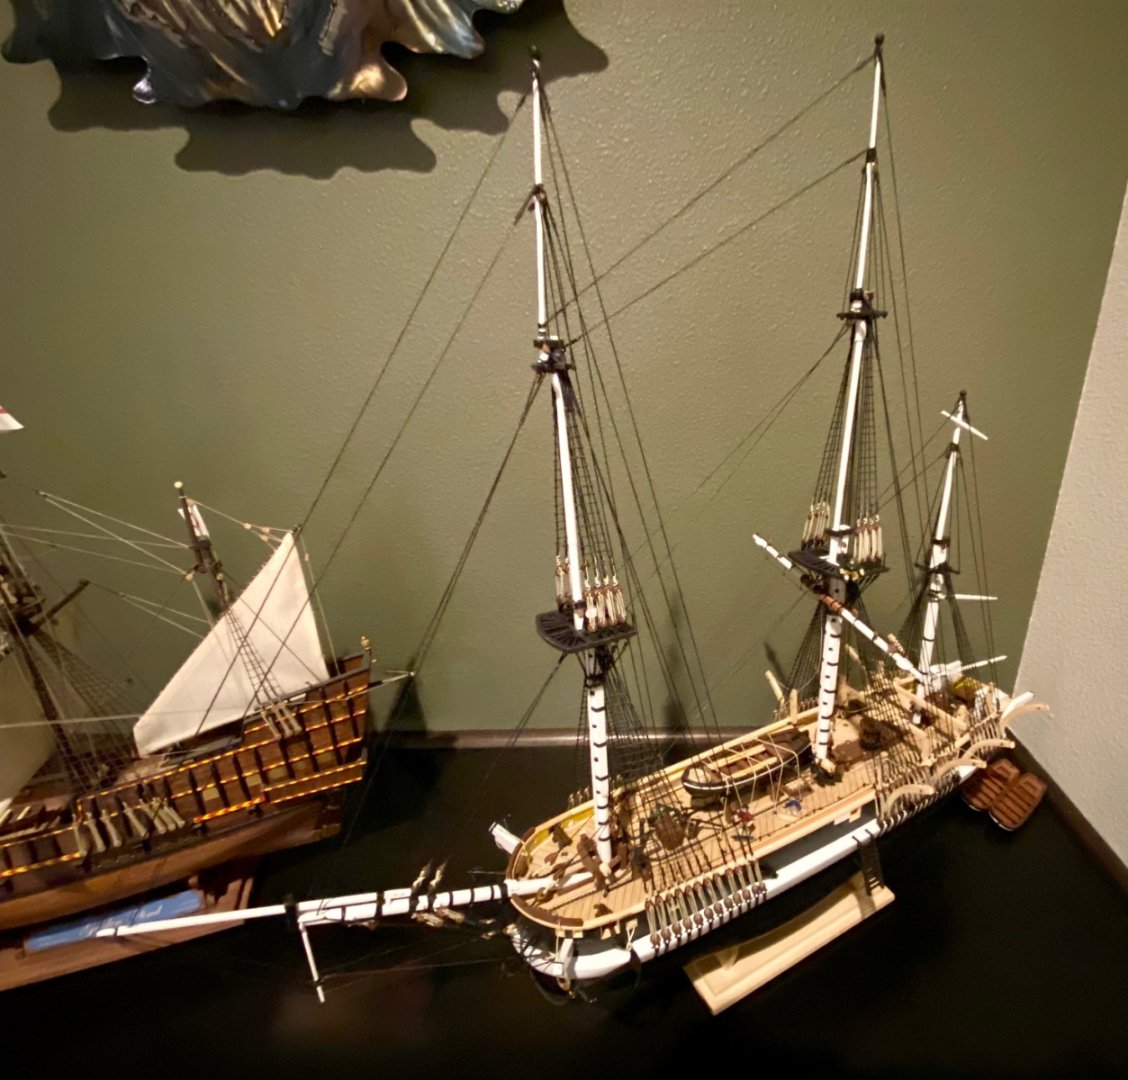
Here is the latest image after temporarily attaching the yards and gaff’s that I have completed.
-
Good evening everyone. It’s been a while since my last update but I have been busy. I can’t believe how much work goes into the yards and gaff’s. Thanks for the great examples Keith (Clearway) and for the info stores in Lee’s book. I could not do it without you.
-
Good afternoon Keith(s), all of you… Great work on all the research on the ice bridge and this compass post!
-
Wow, keeping track of all the Keith’s is a bit of a challenge This ice/sky bridge for the Terror, I’m sure it was rudimentary at best as an early example, anyone have an idea what it might have looked like? I can’t seem to hallucinate this ice bridge in any of the Terror etchings that I’ve seen…
-
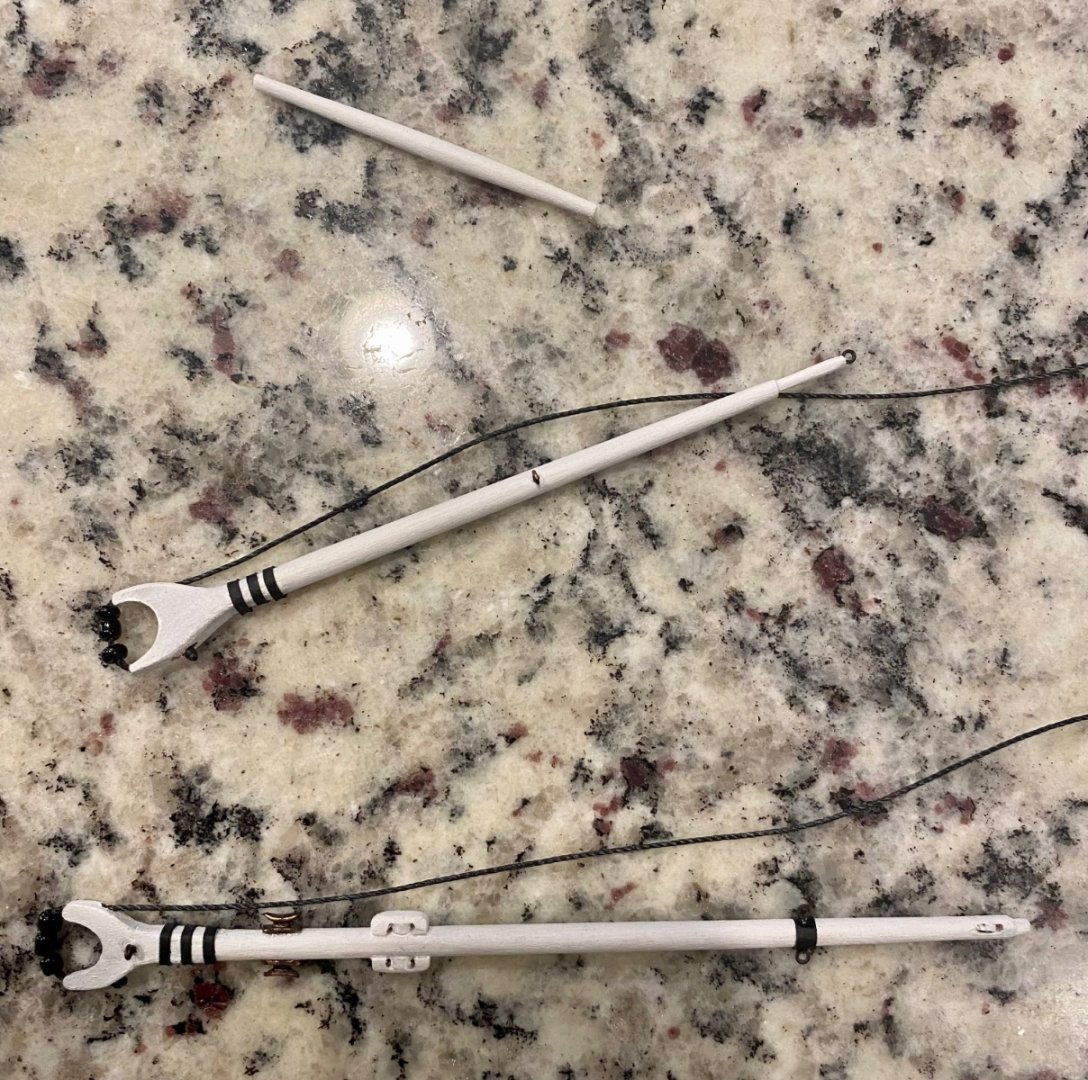
Good evening all. Thank you Keith (clearway) for your help in making me understand these boomkins. More or less finished the bow. I guess is on to design the yards.
-
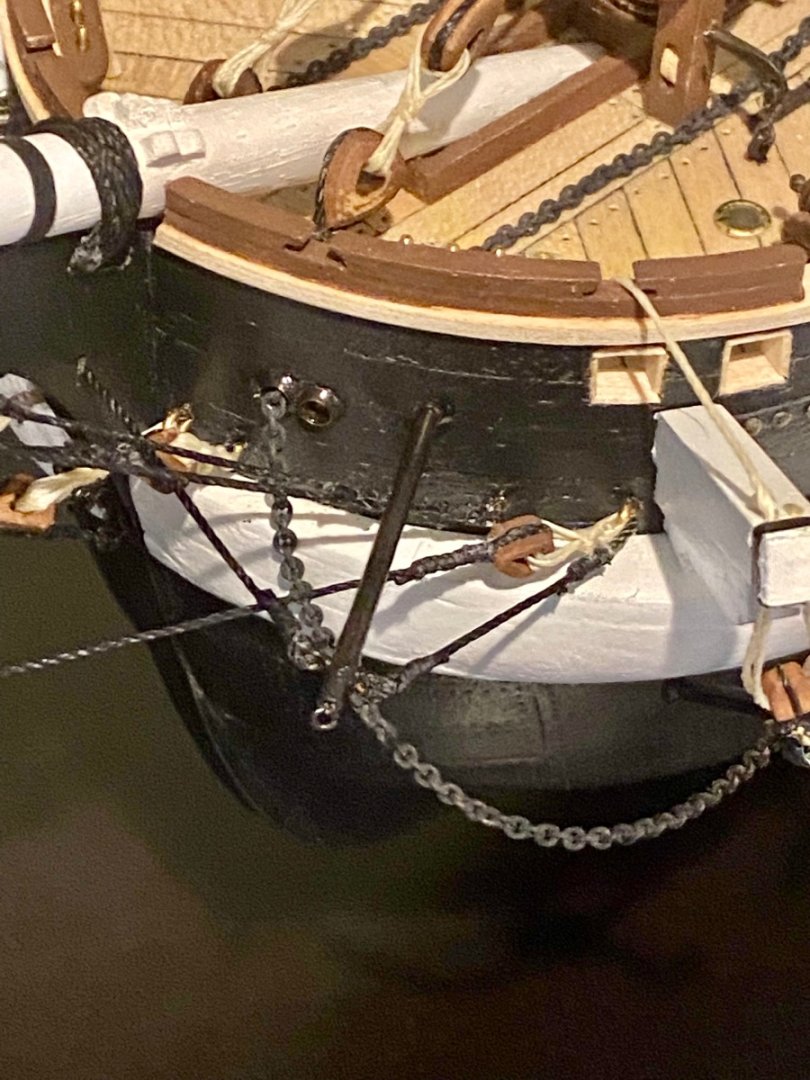
Keith, I did notice that detail and have installed the two near the stern; however, they are black, as I think they should be, the hull is black, and they rest just inside the shrouds of the mizzenmast. All of this makes the detail hard to notice and very difficult to photograph. Thanks for your help on the boomkins! I’ll post updated image when I finish that detail.
-
Allen, interesting thought. This is only my 2nd ship build and I know nothing about making sails. On the other hand, I’ve put so much thought, research, and time into making this ship as accurate as my skills would allow, maybe I should tackle the sails. May I ask, what specifically is wrong with the sails? How could one improve on the kit provided versions? Where is a good source on model sail making? I have Lees rigging book, maybe some information in there. Where is a good source for obtaining sail fabric? Many versions of the Terror are rigged with full sails, maybe I should rig it with the sails furled. So many questions…