DONATION DRIVE - SUPPORT MSW - DO YOUR PART TO KEEP THIS GREAT FORUM GOING!
×


DanielD
-
Posts
648 -
Joined
-
Last visited
Content Type
Profiles
Forums
Gallery
Events
Everything posted by DanielD
-
 Keith, I started to "review" gloss over the book and realized that I don't know what "Class" of ship the Terror is, which is apparently important to lookup mast sizes, etc. How does one figure this out? Is it in the book? If so, I've yet to come across that. It seems that the Class 10 calculations seem to work out closest to what you and the other Keith have said about the mast diameter. I'm not trying to prove you wrong, please don't take it that way, I'm just trying to follow along and come to the same conclusions as you both did. Daniel
 -
Exciting day, I finally received my copy of James Lee's The Masting and Rigging of English Ships of War 1625-1860! This book can range from $50-$350 US, so I waited and looked, was patient (at least for me) and finally found one in the states for $80. Thank you ClearWay for pointing me to the AbeBook store as that is where I finally was able to find one close to where I live. Now to find time to read it...
-
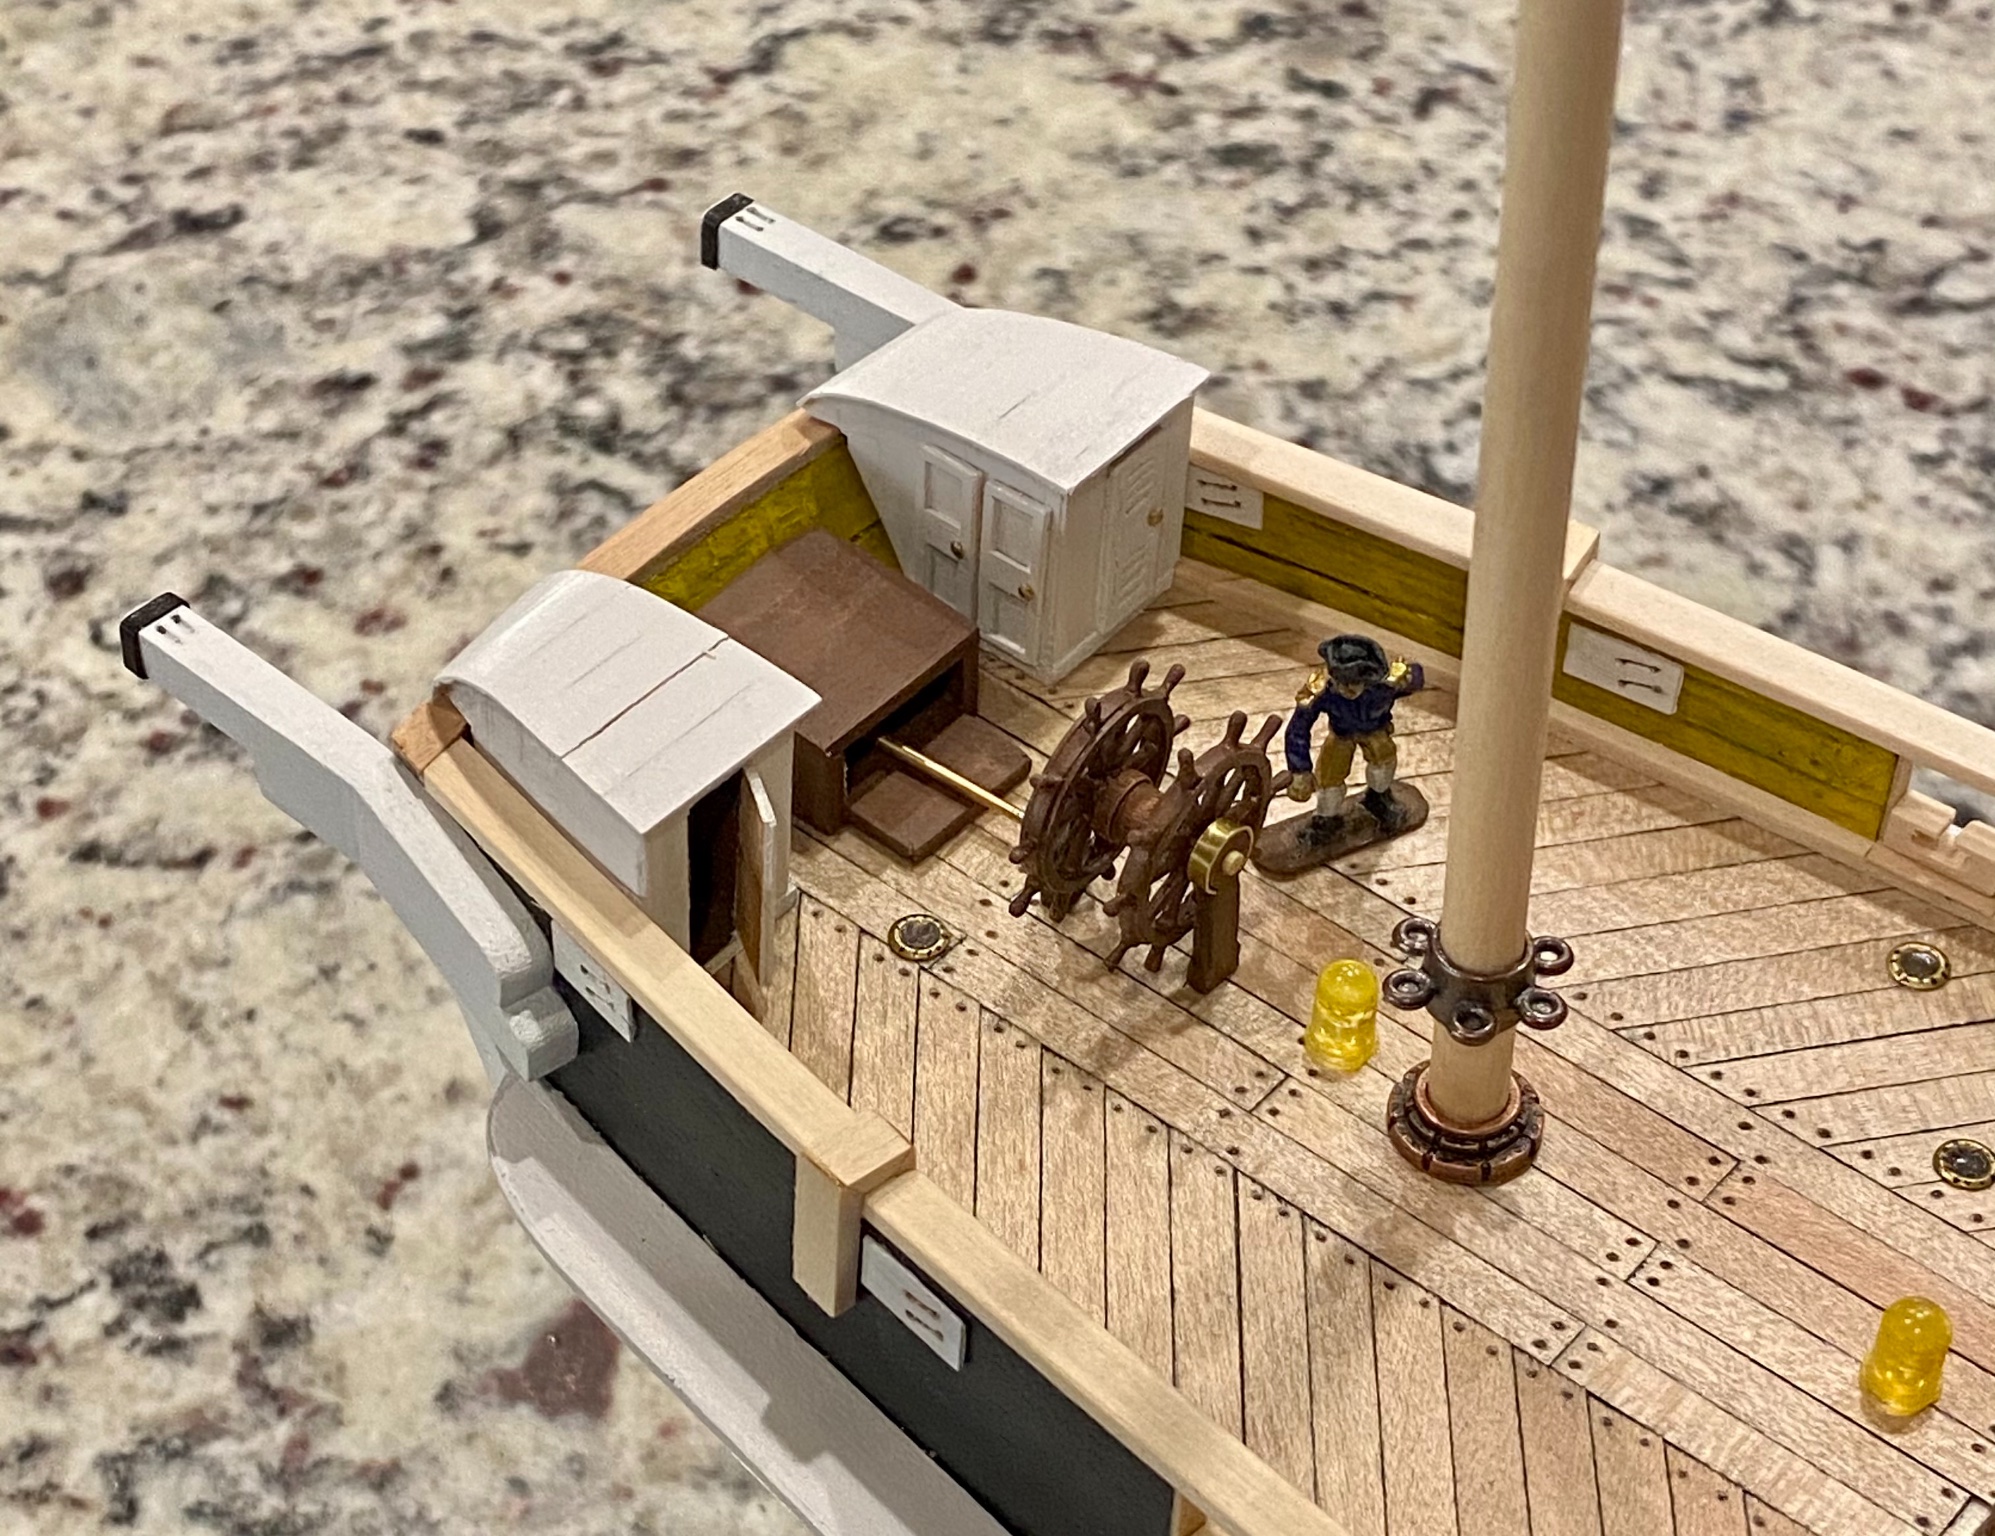
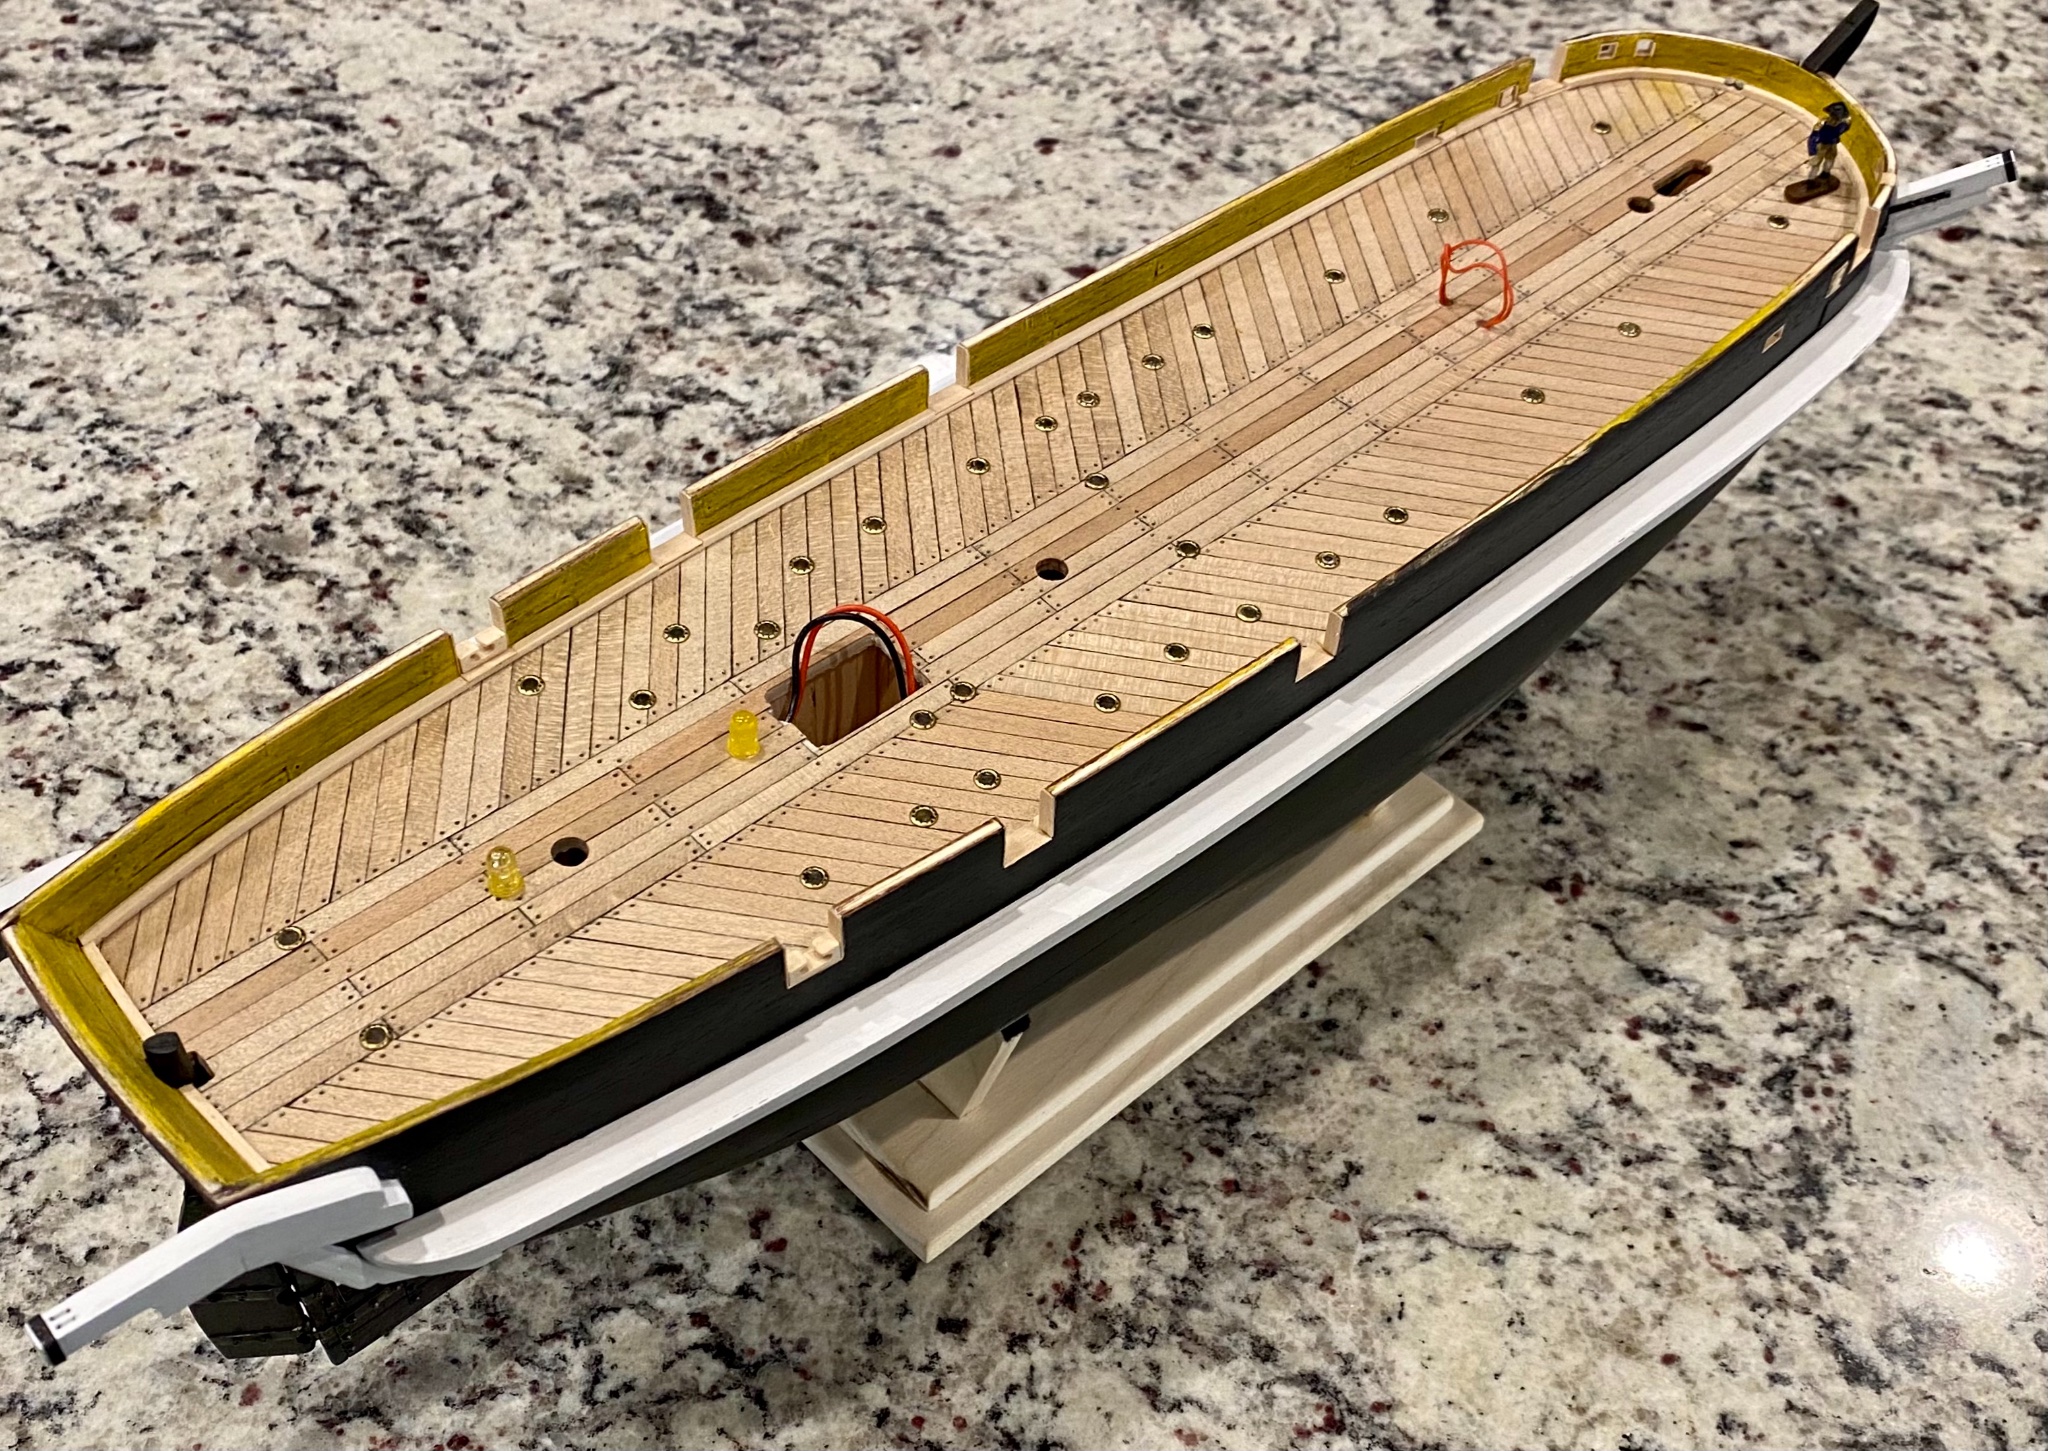
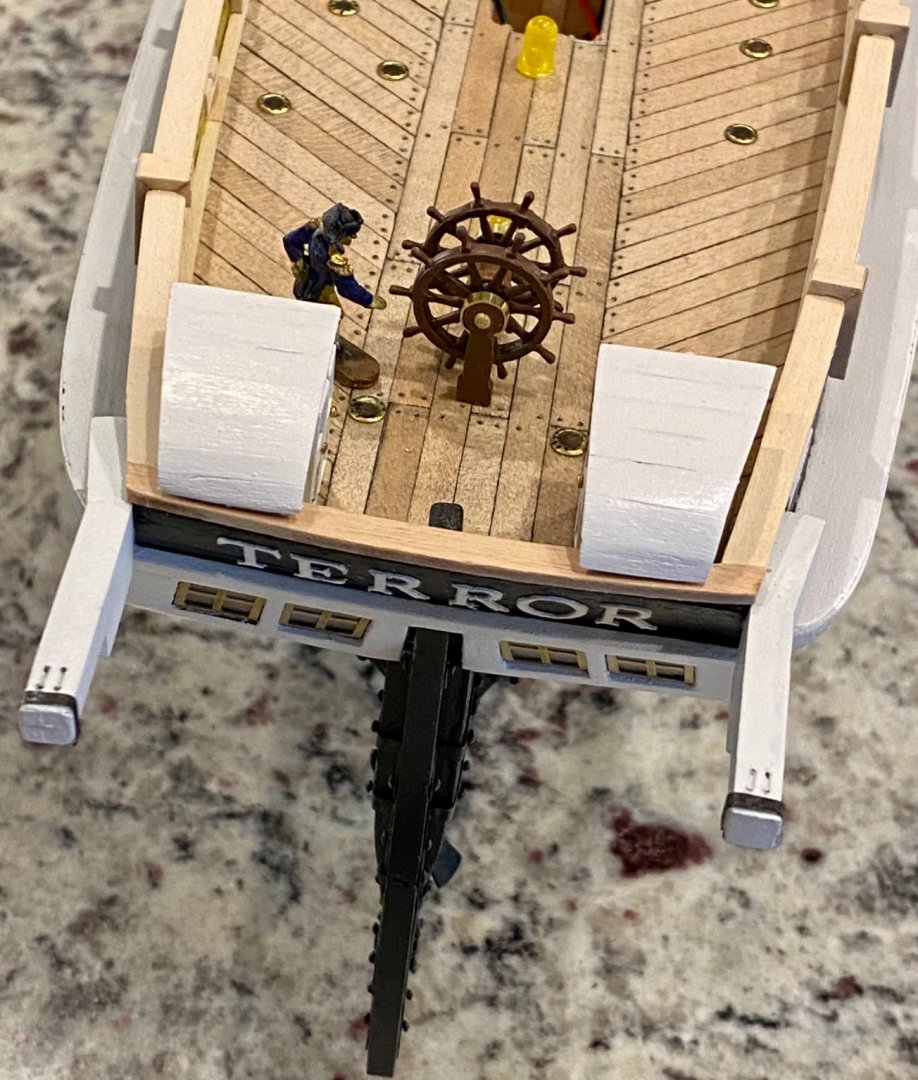
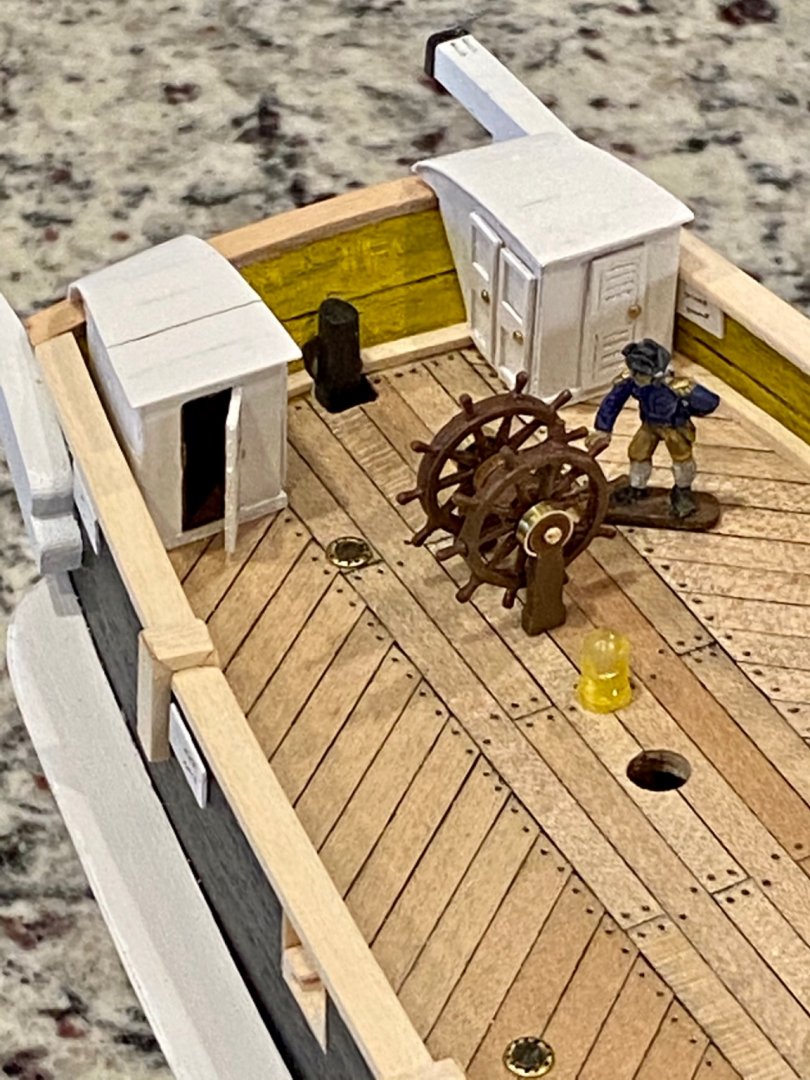
Thanks for all the views and likes everyone. Today in the shipyard I finished building the 10 spoke ships wheel that I obtained from from syrenshipmodelcompany.com. This is an upgrade from the 8 spoke wheel that comes in the kit, but we know from the discovery of the Terror that she has a ten spoke wheel. The kit from Syren is wonderful, just be patient and take your time building it. Took me several hours, each! But worth it in the end.
-
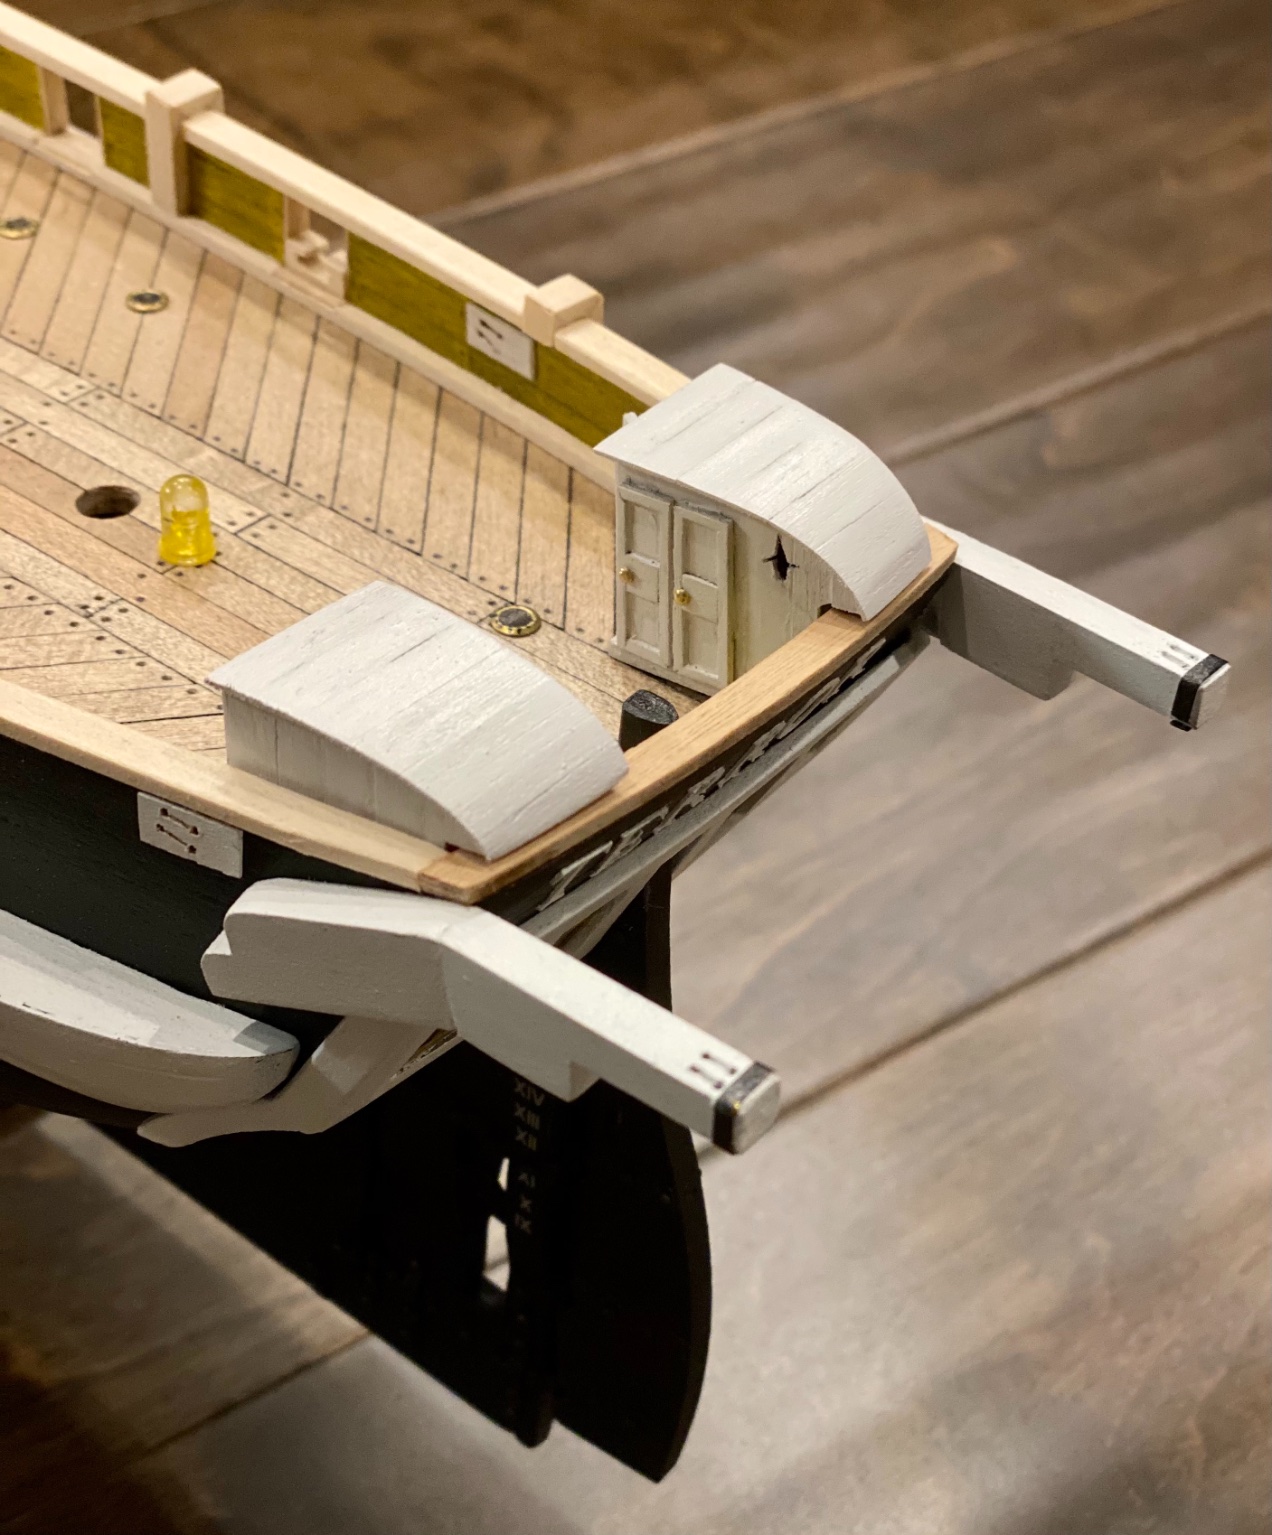
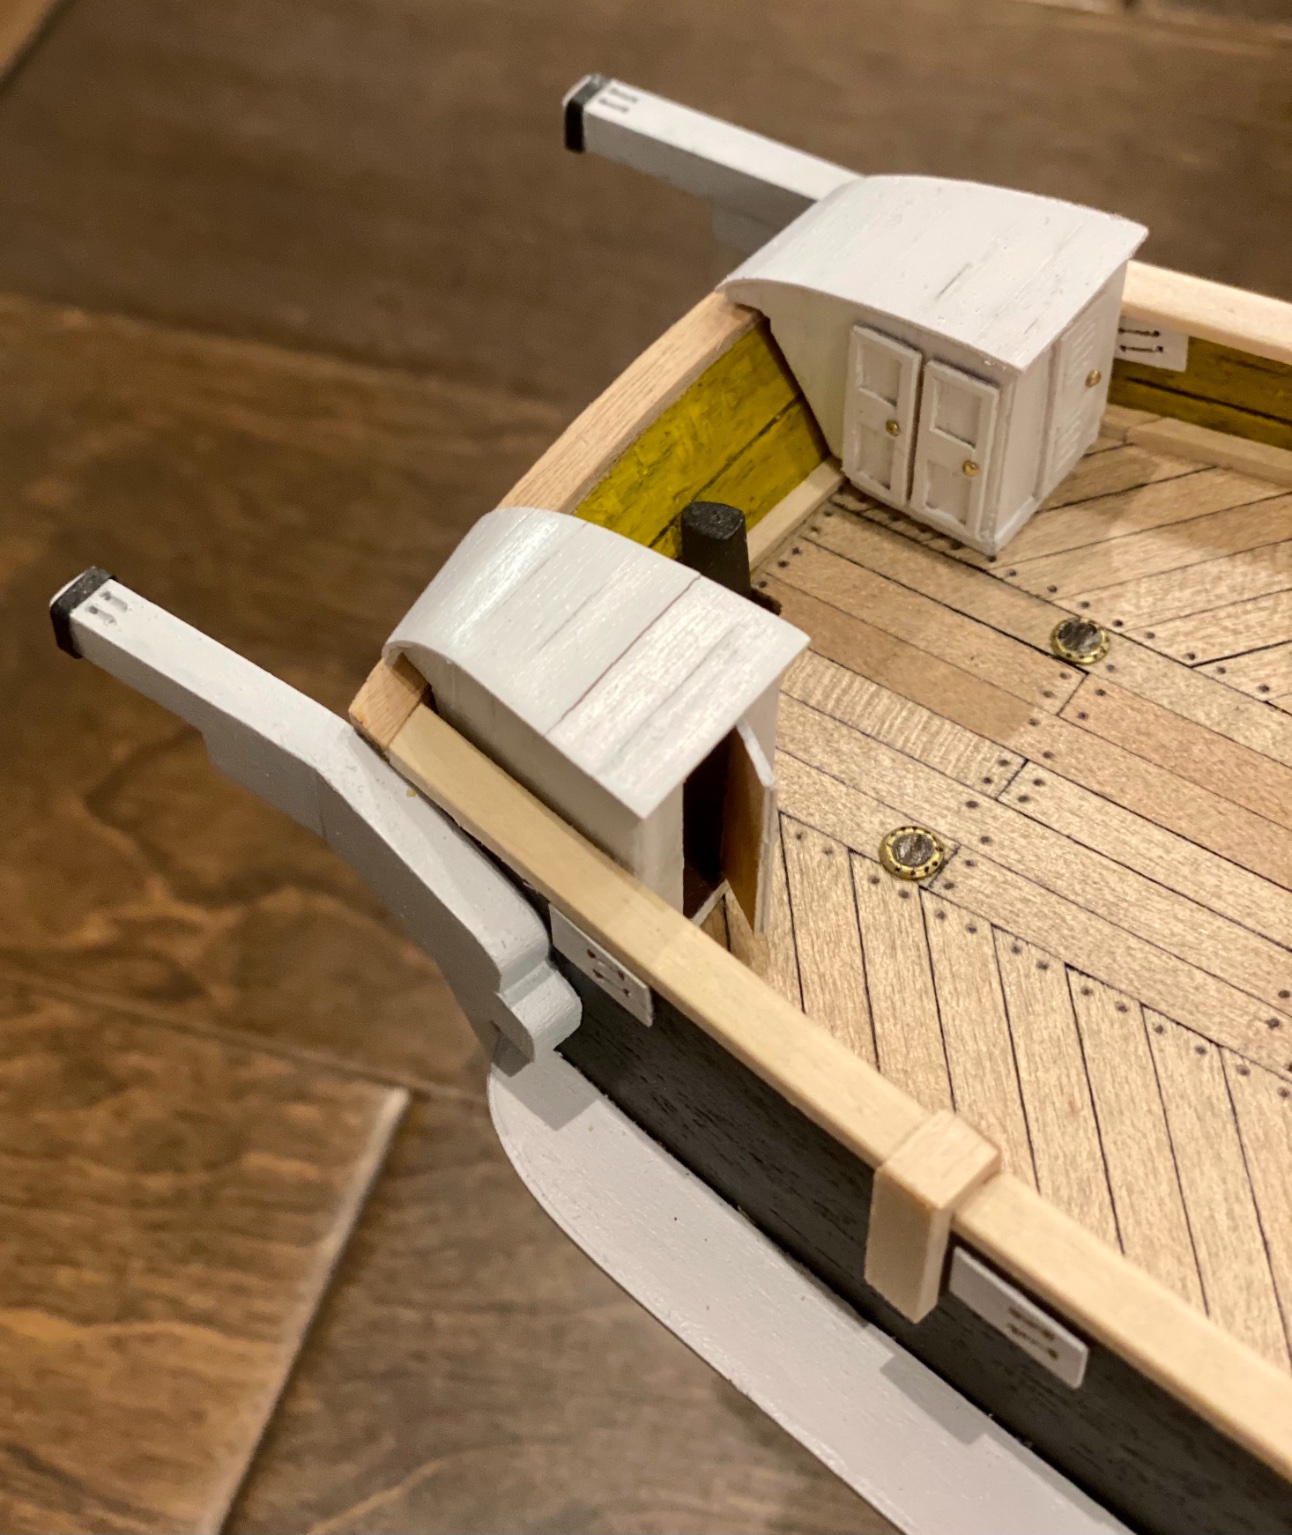
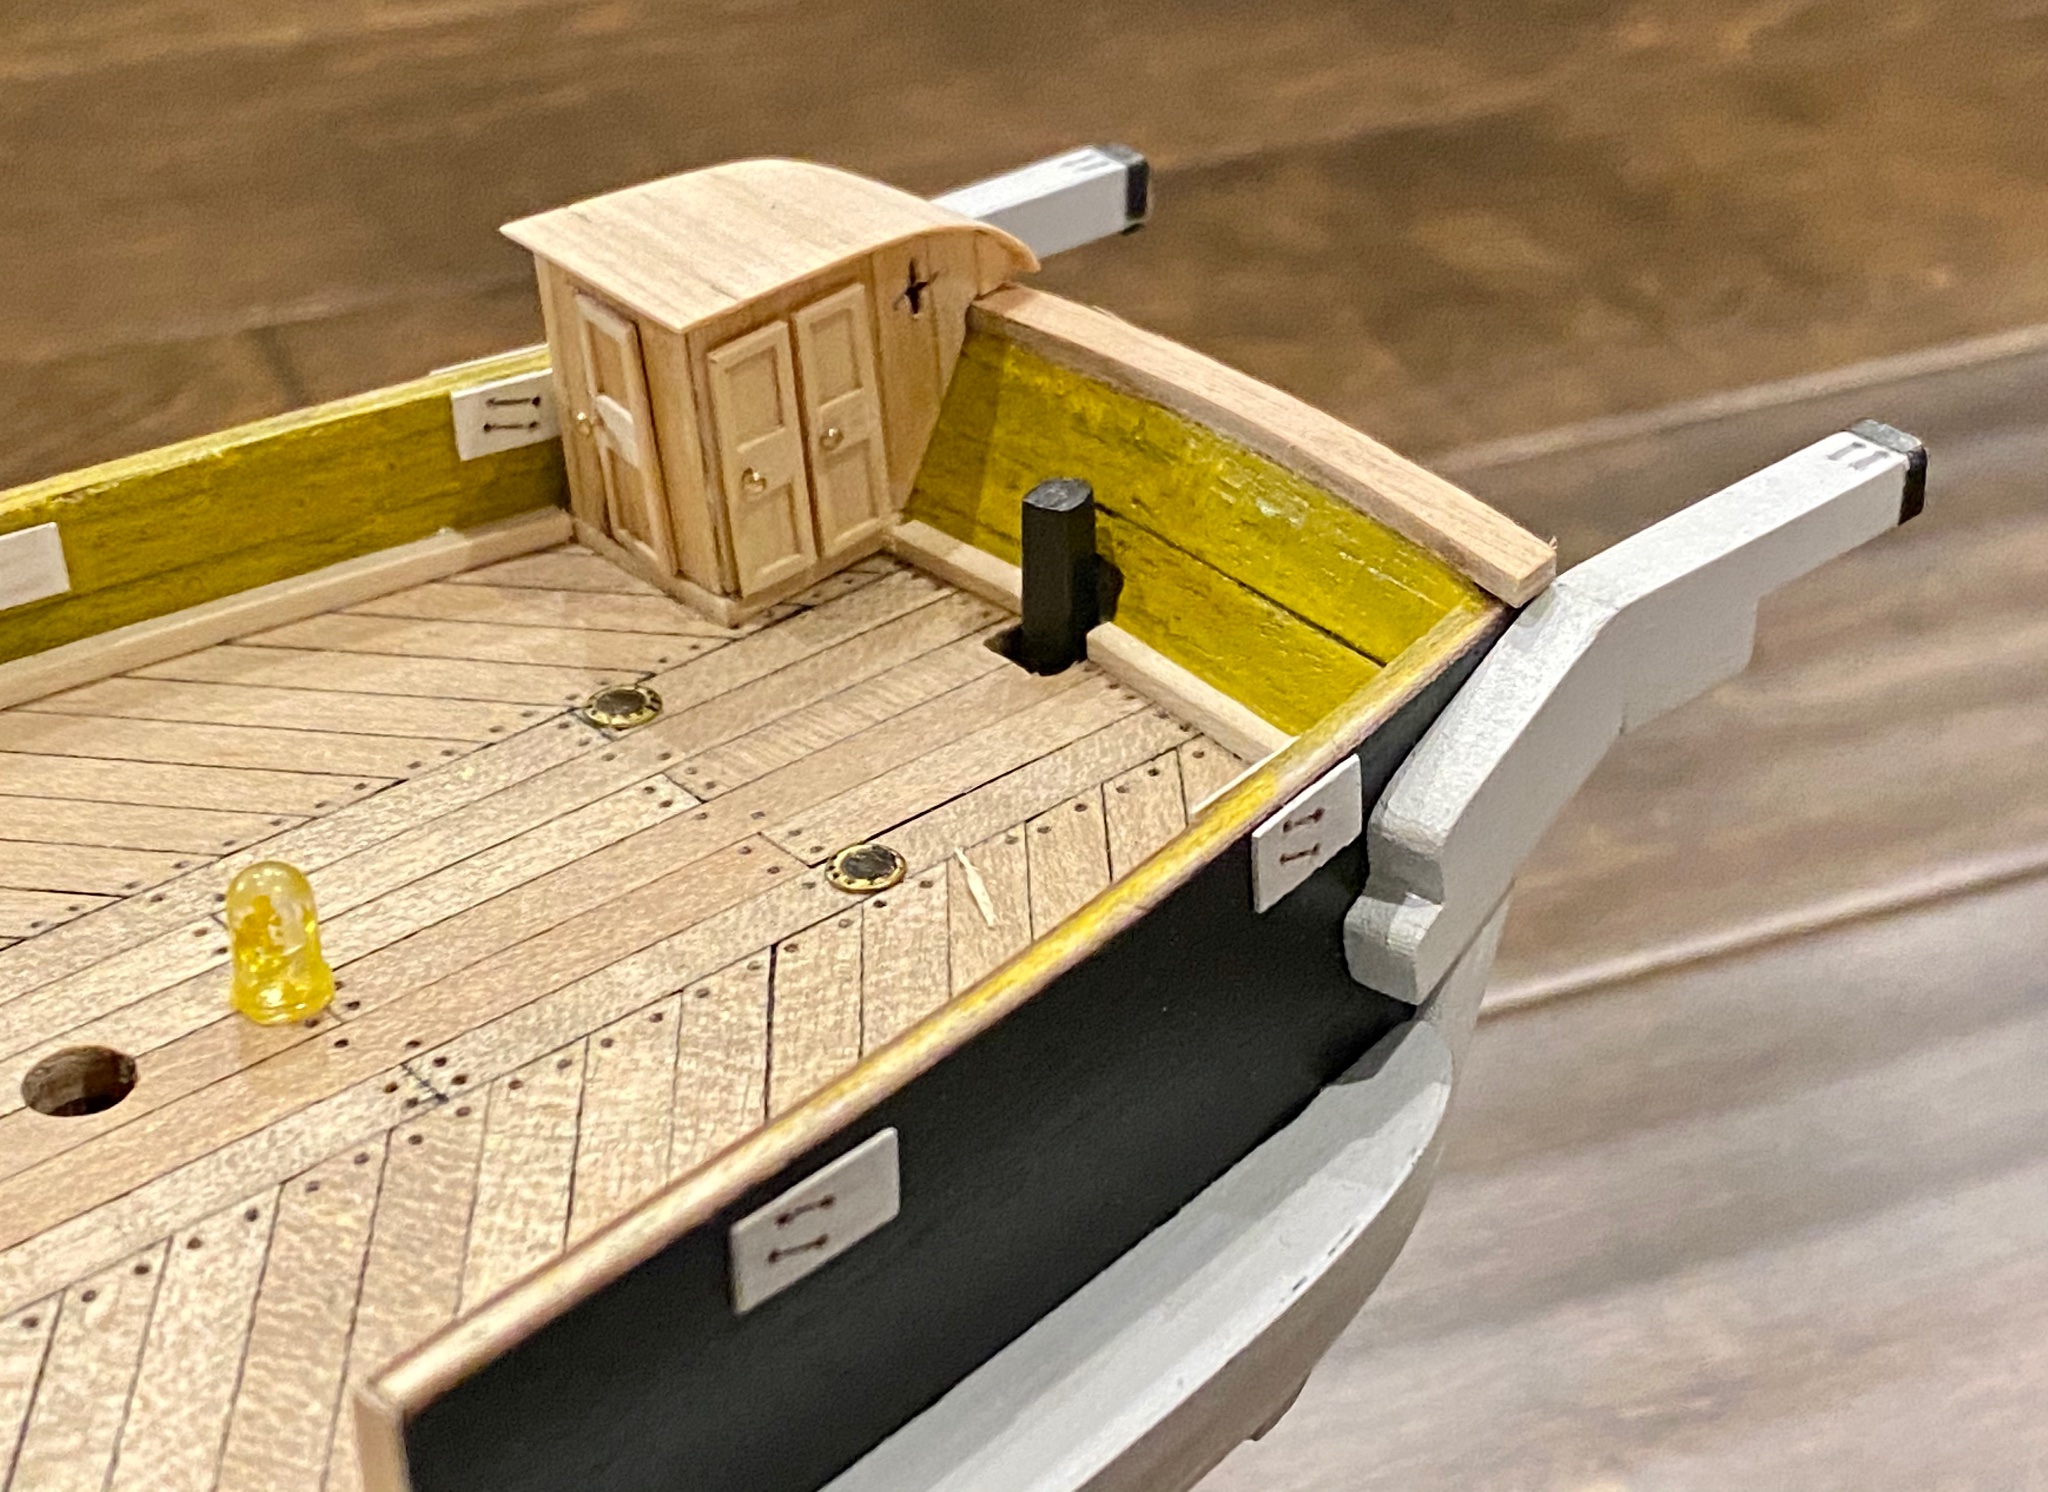
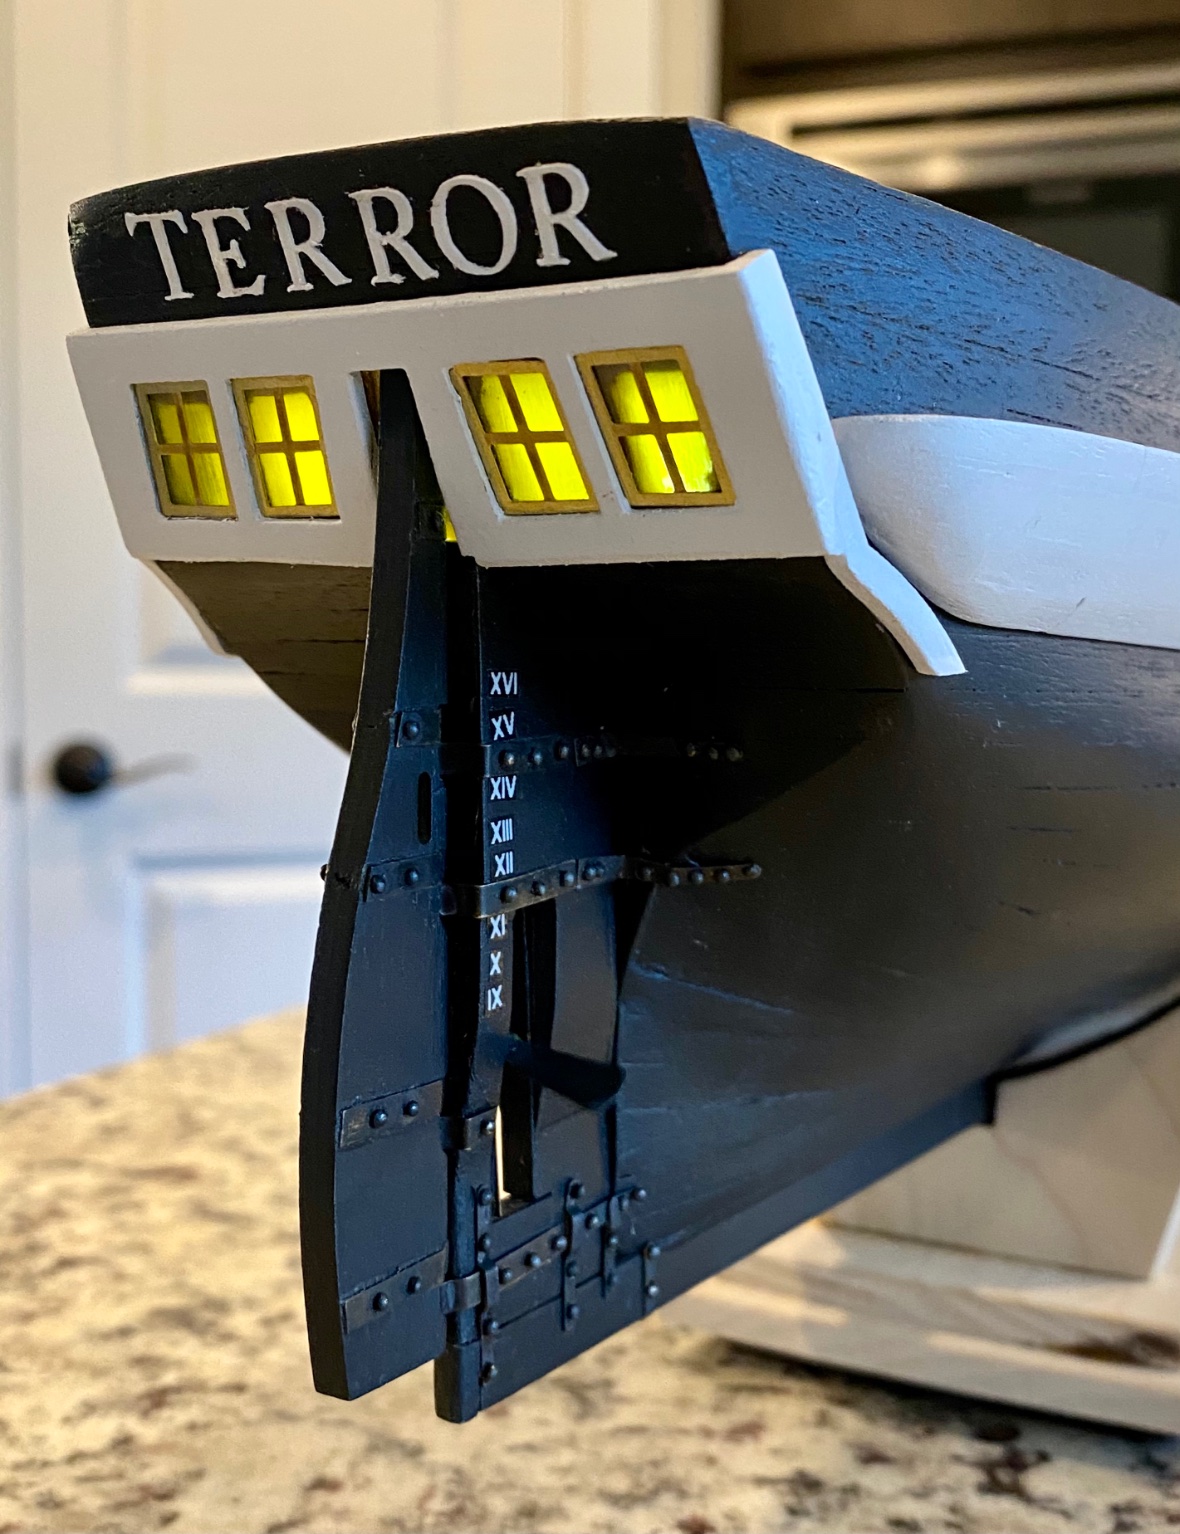
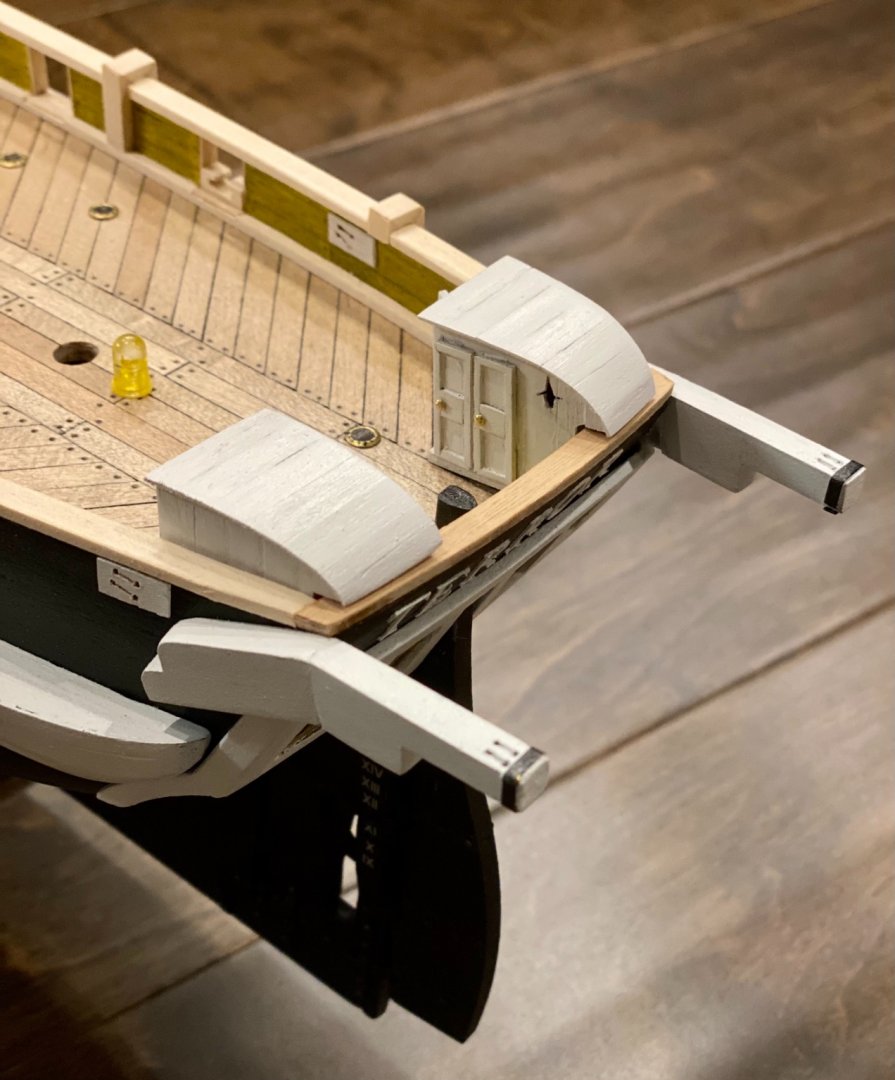
Today I took the plunge and painted the stern structures white. Now trying to decide to leave the door knobs gold or chemically tarnish them black...


-
Chuckle....I know what you wrote is English, but I’m going to have to do a bit of nautical research to have any clue in what you said. I would not want to miss understand a “spanker-boom sheet.” Sorry, just caught me off guard.
-
Keith, have you completed the work on your masts? Any good pictures of them? While I'm not there yet, I am planning. Keith S already has me ordering larger dowels for the main and mizzen masts and told me about the change in upper shrouds that I should consider, changing them to chain if I recall correctly. Have you discovered any other major changes? I'm still very new at ship building, but willing to learn. My first attempt at getting a copy of James Lee's book has failed as I'm looking for a copy already in the US. But I won't give up. Thanks, Daniel
-
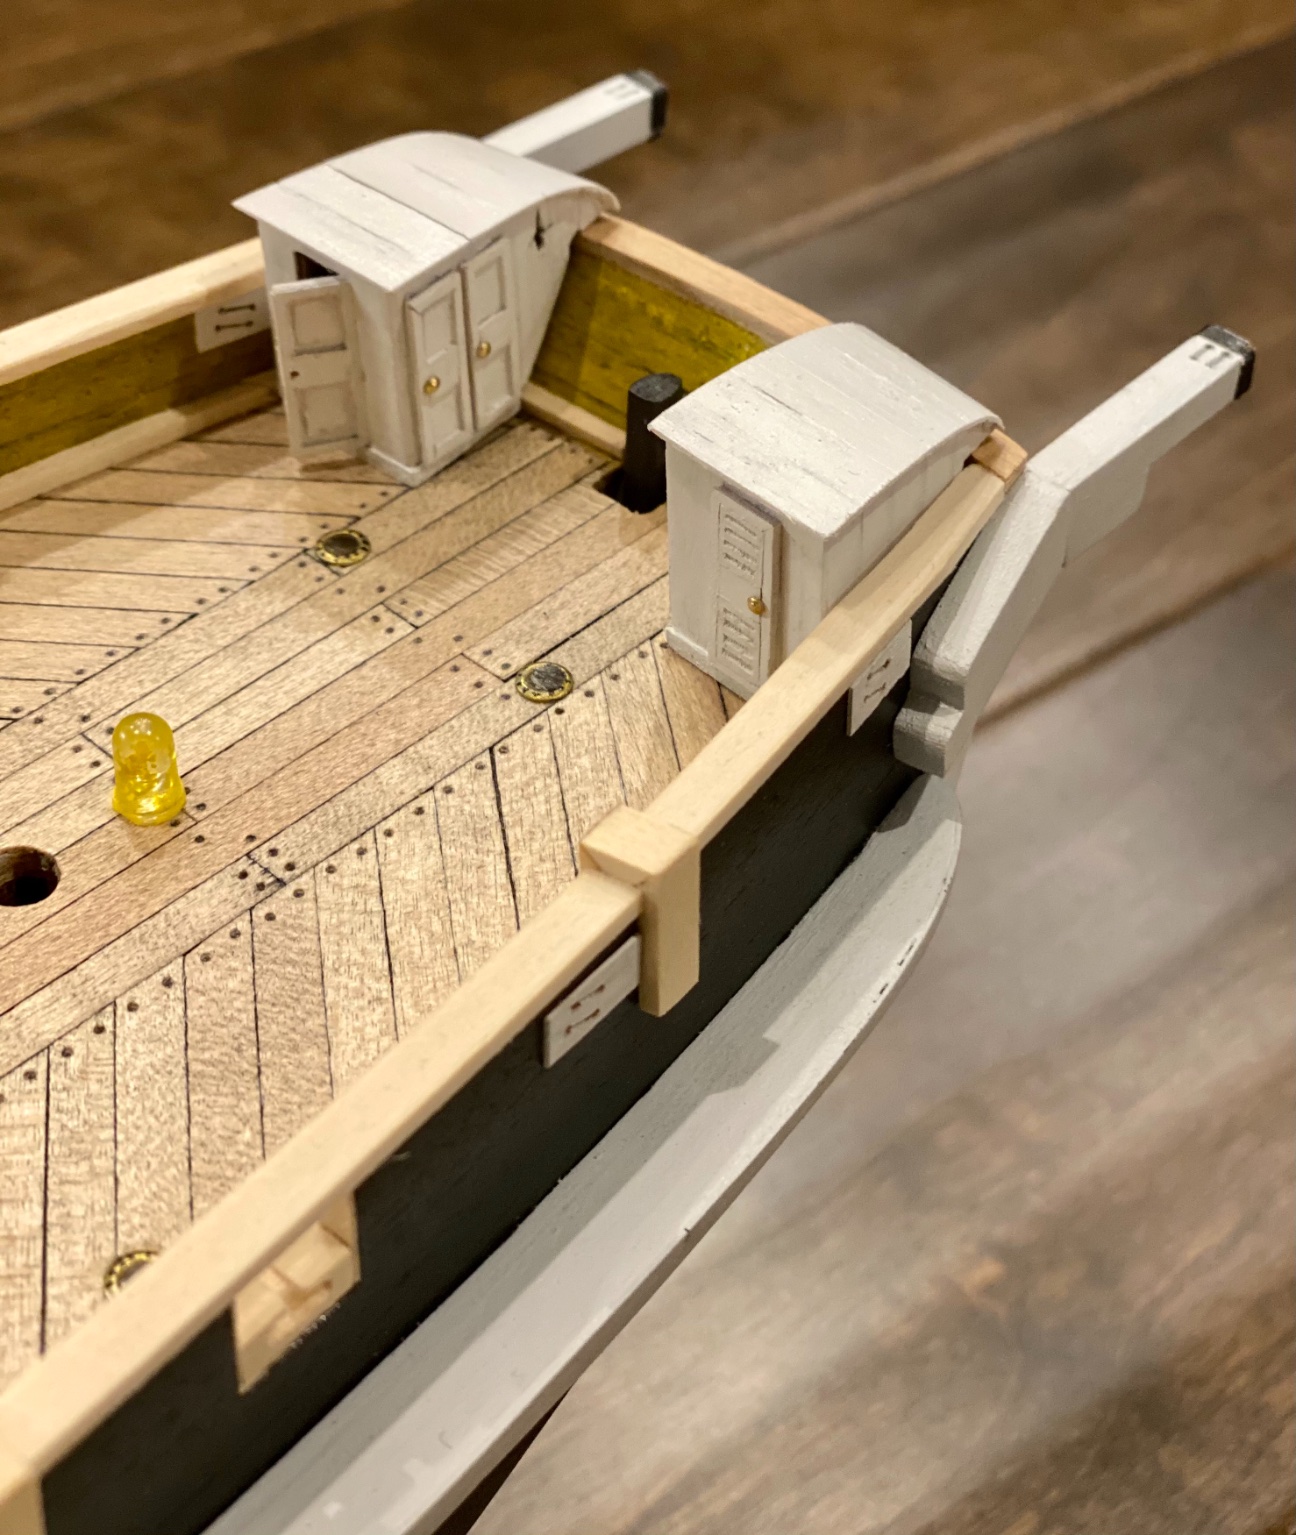
To help with the "starkness" of the white, I think I might try a bit of black or brown wash to tone down the white a bit and to highlight the detail on the doors. If it doesn't work, I can paint it white again, my airbrush setup if fairly quick. Daniel
-
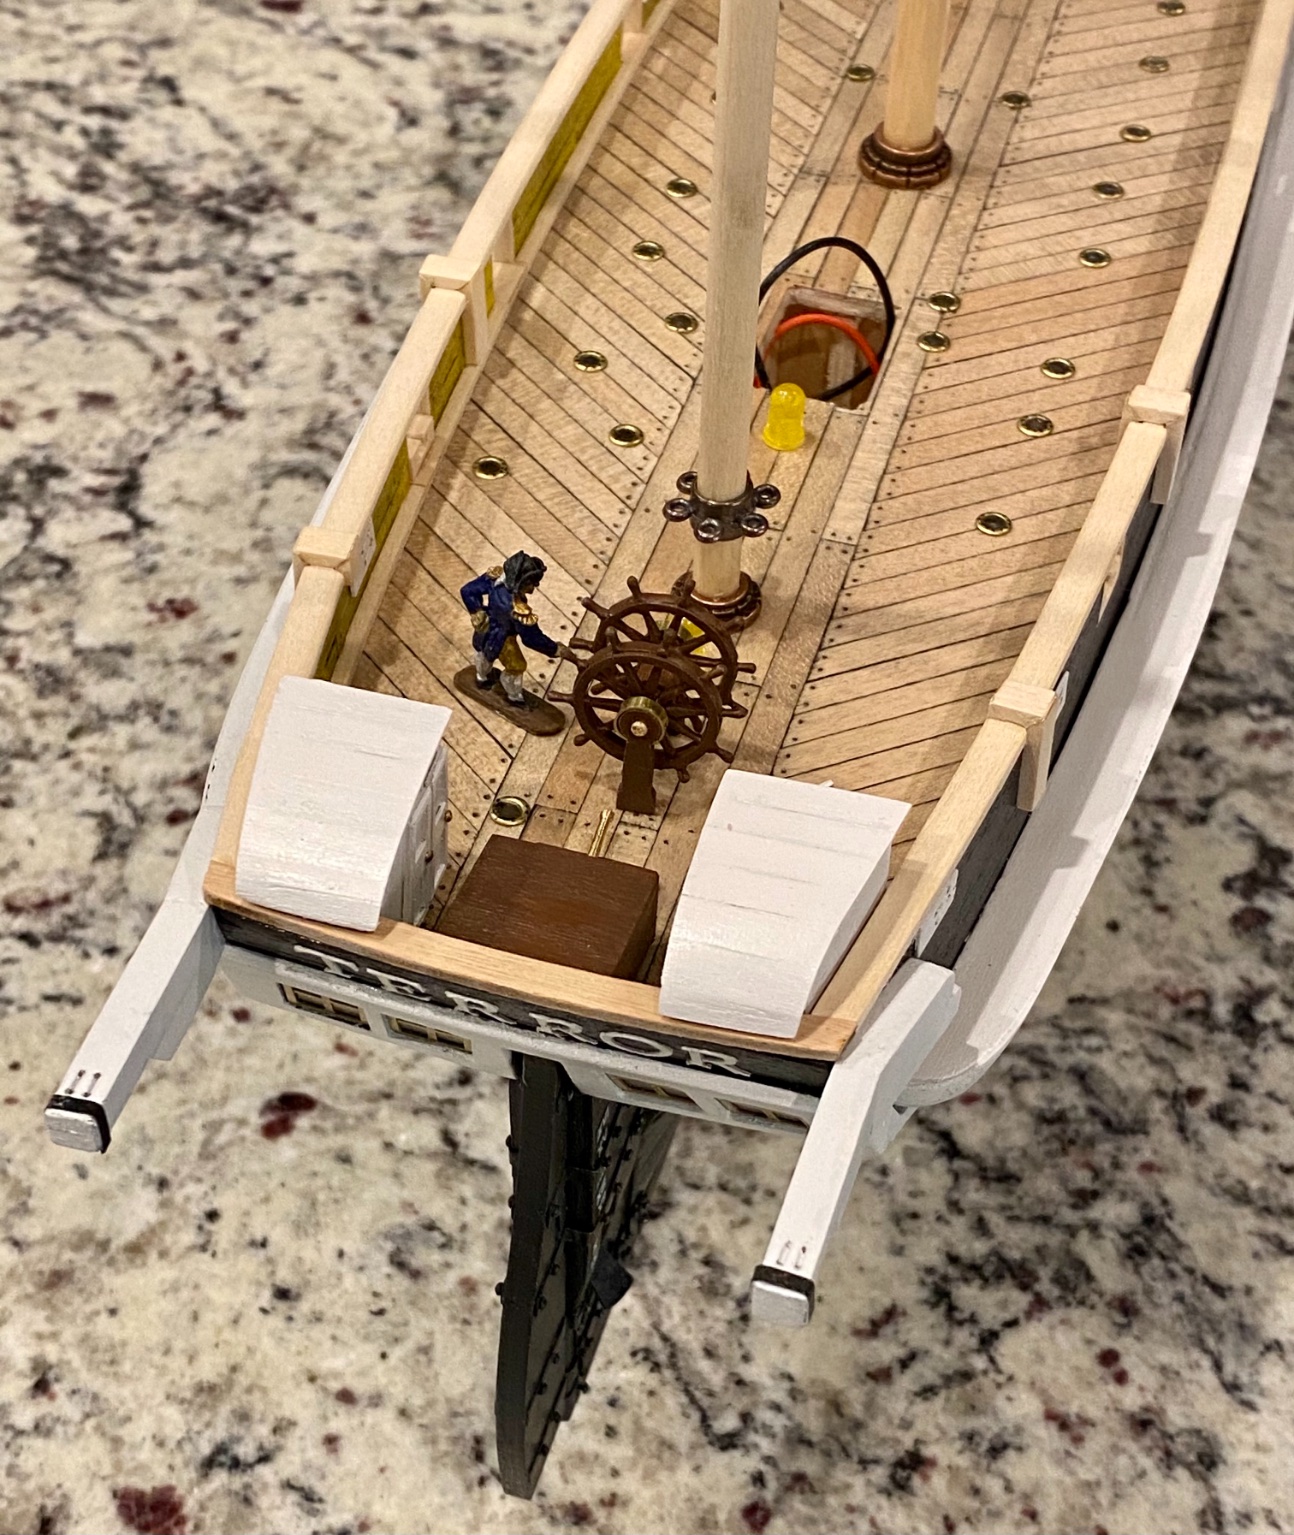
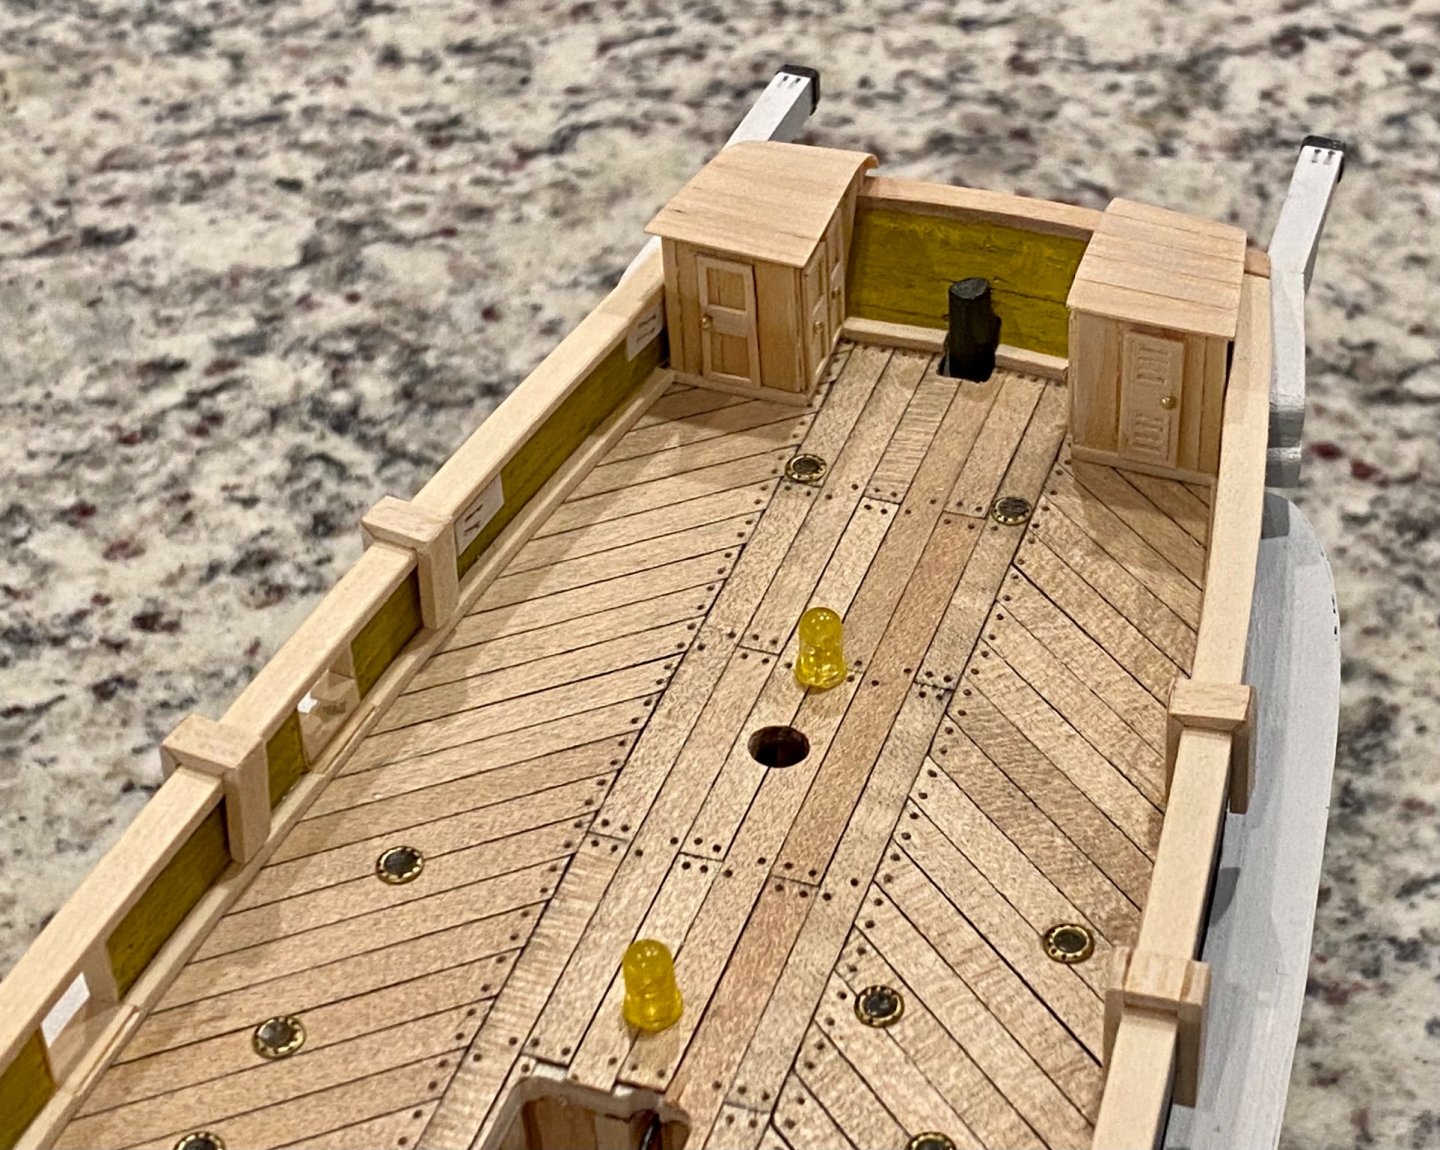
It’s been a long week at work so little progress on the deck works. I did finish the second stern building. A little more sanding and then ready for paint. I think I will be true to the Terror and paint them white. I could always make new versions...
-
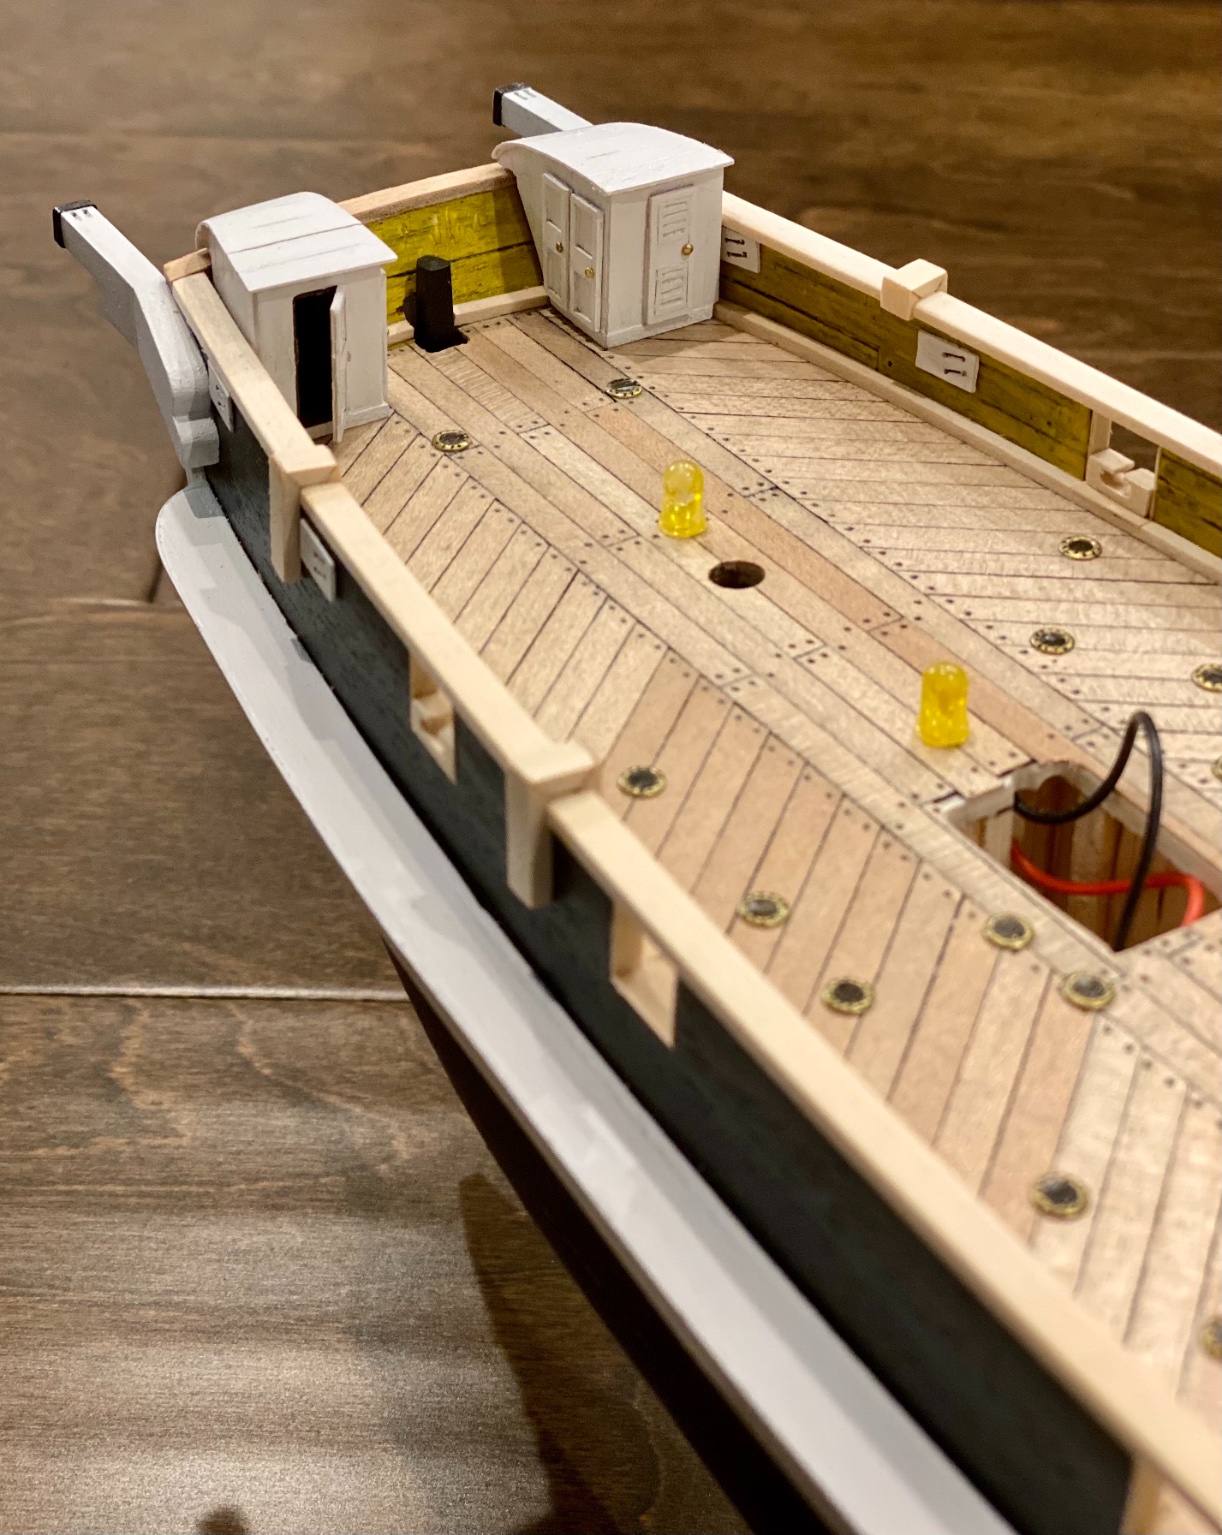
As with other Terror builders, I have come to the dilemma of painting the stern deck structures white (more historically accurate from what I can find) or to stain them like the other deck structures will be. It's a lot of hard work making these little houses just to cover them up with paint. Keith S and clearway choses to stain theirs and they look great. Do I chose to make them blend in with the other deck structures or paint them white (historically more accurate) but take the chance that they will stick out like a sore thumb. Thoughts and opinions appreciated...
-
I’ve discovered that building small things is not an easy task. This is the first of two structures on the stern to build. These structures are not a part of the OcCre HMS Terror kit and are based on the plans of Dr. Matthew Betts build log.
-
The method that VTHokiEE works well, but I have also had good success with a needle threader. Available at most sewing machine and fabric stores for just a few cents. The idea being, push the threader through the hole of interest and create a larger guide on the opposite side of the hole to thread the line (rope) through. Then gently pull the line through the deadeye and repeat.
-
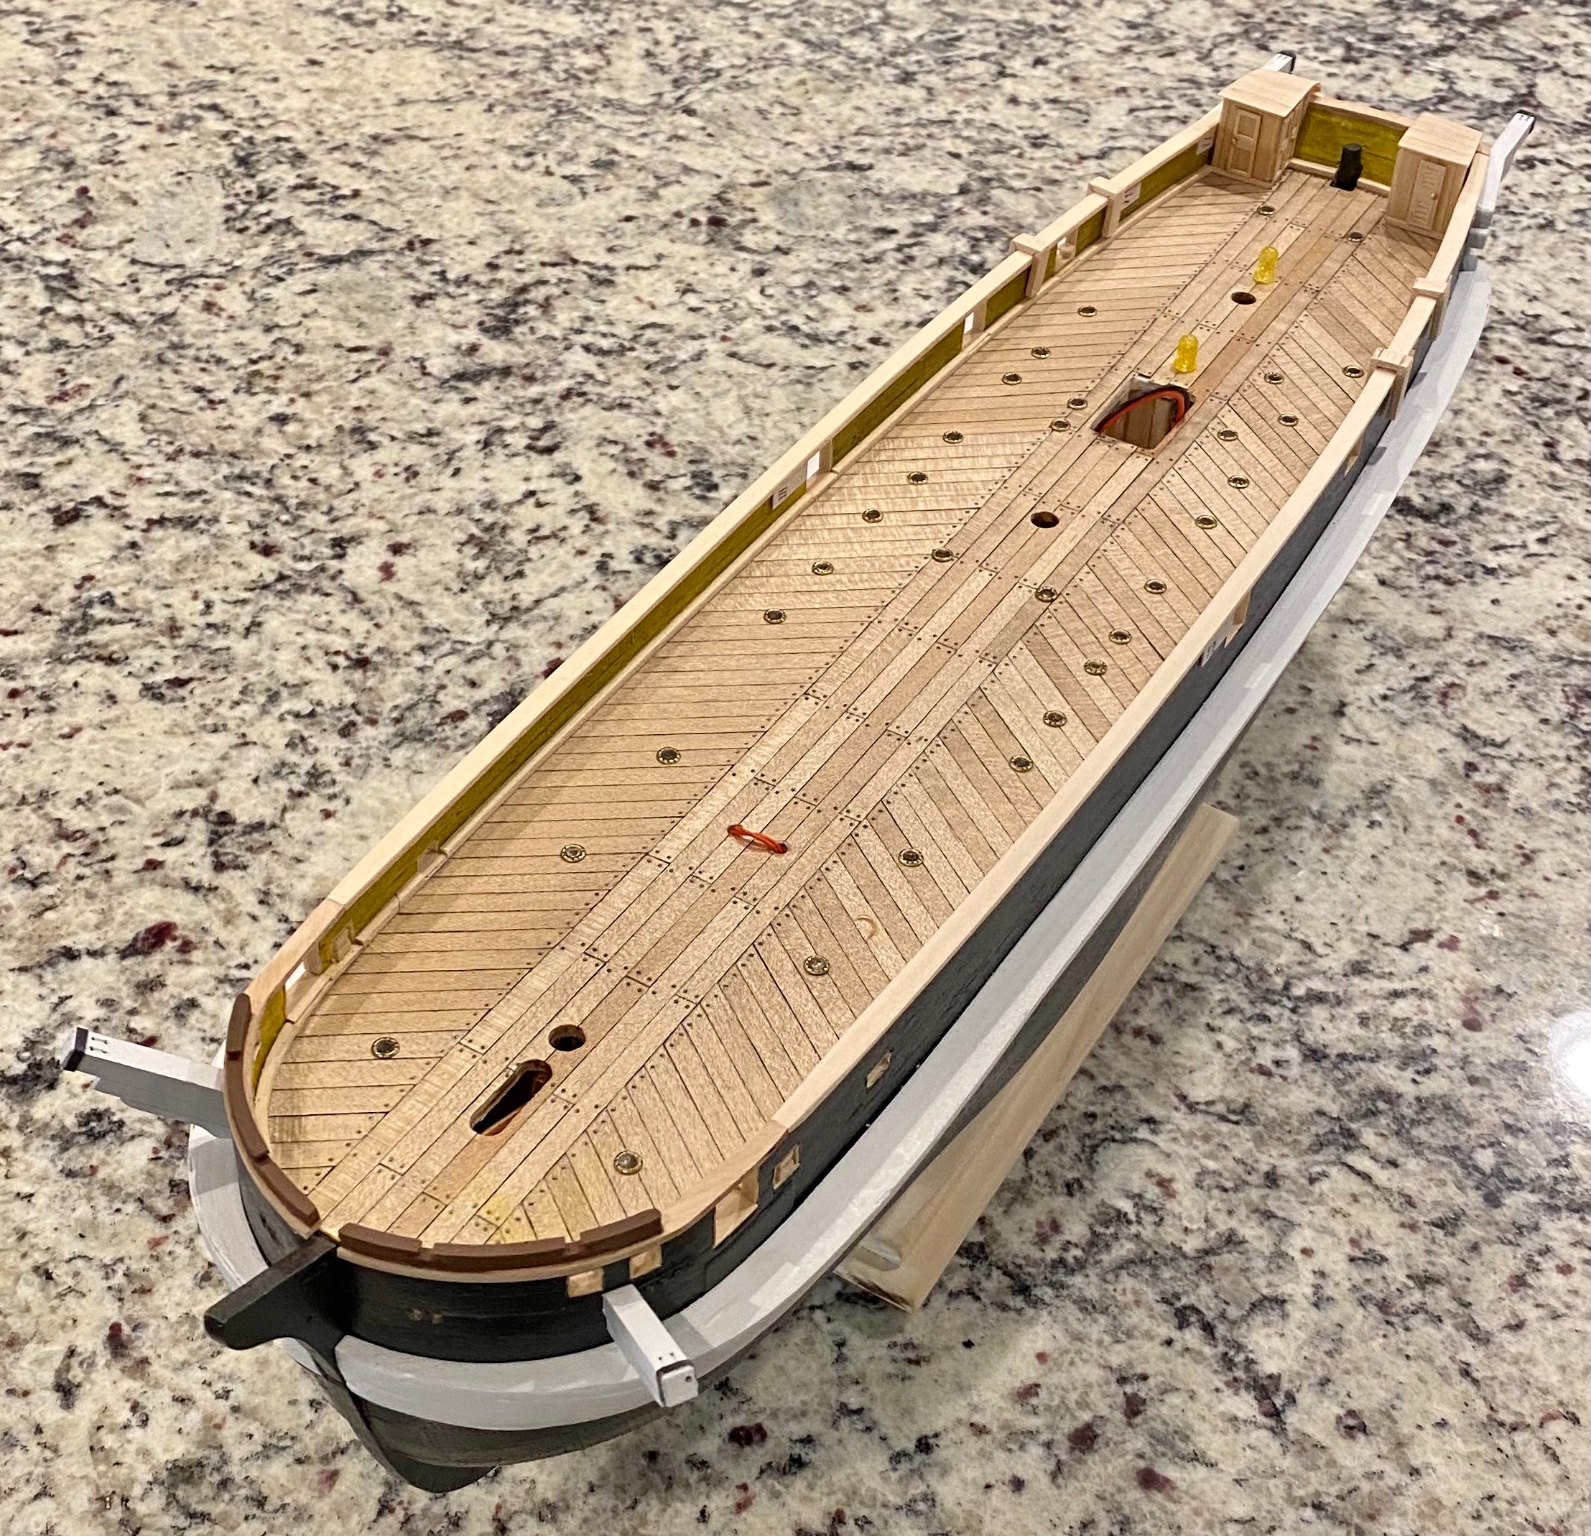
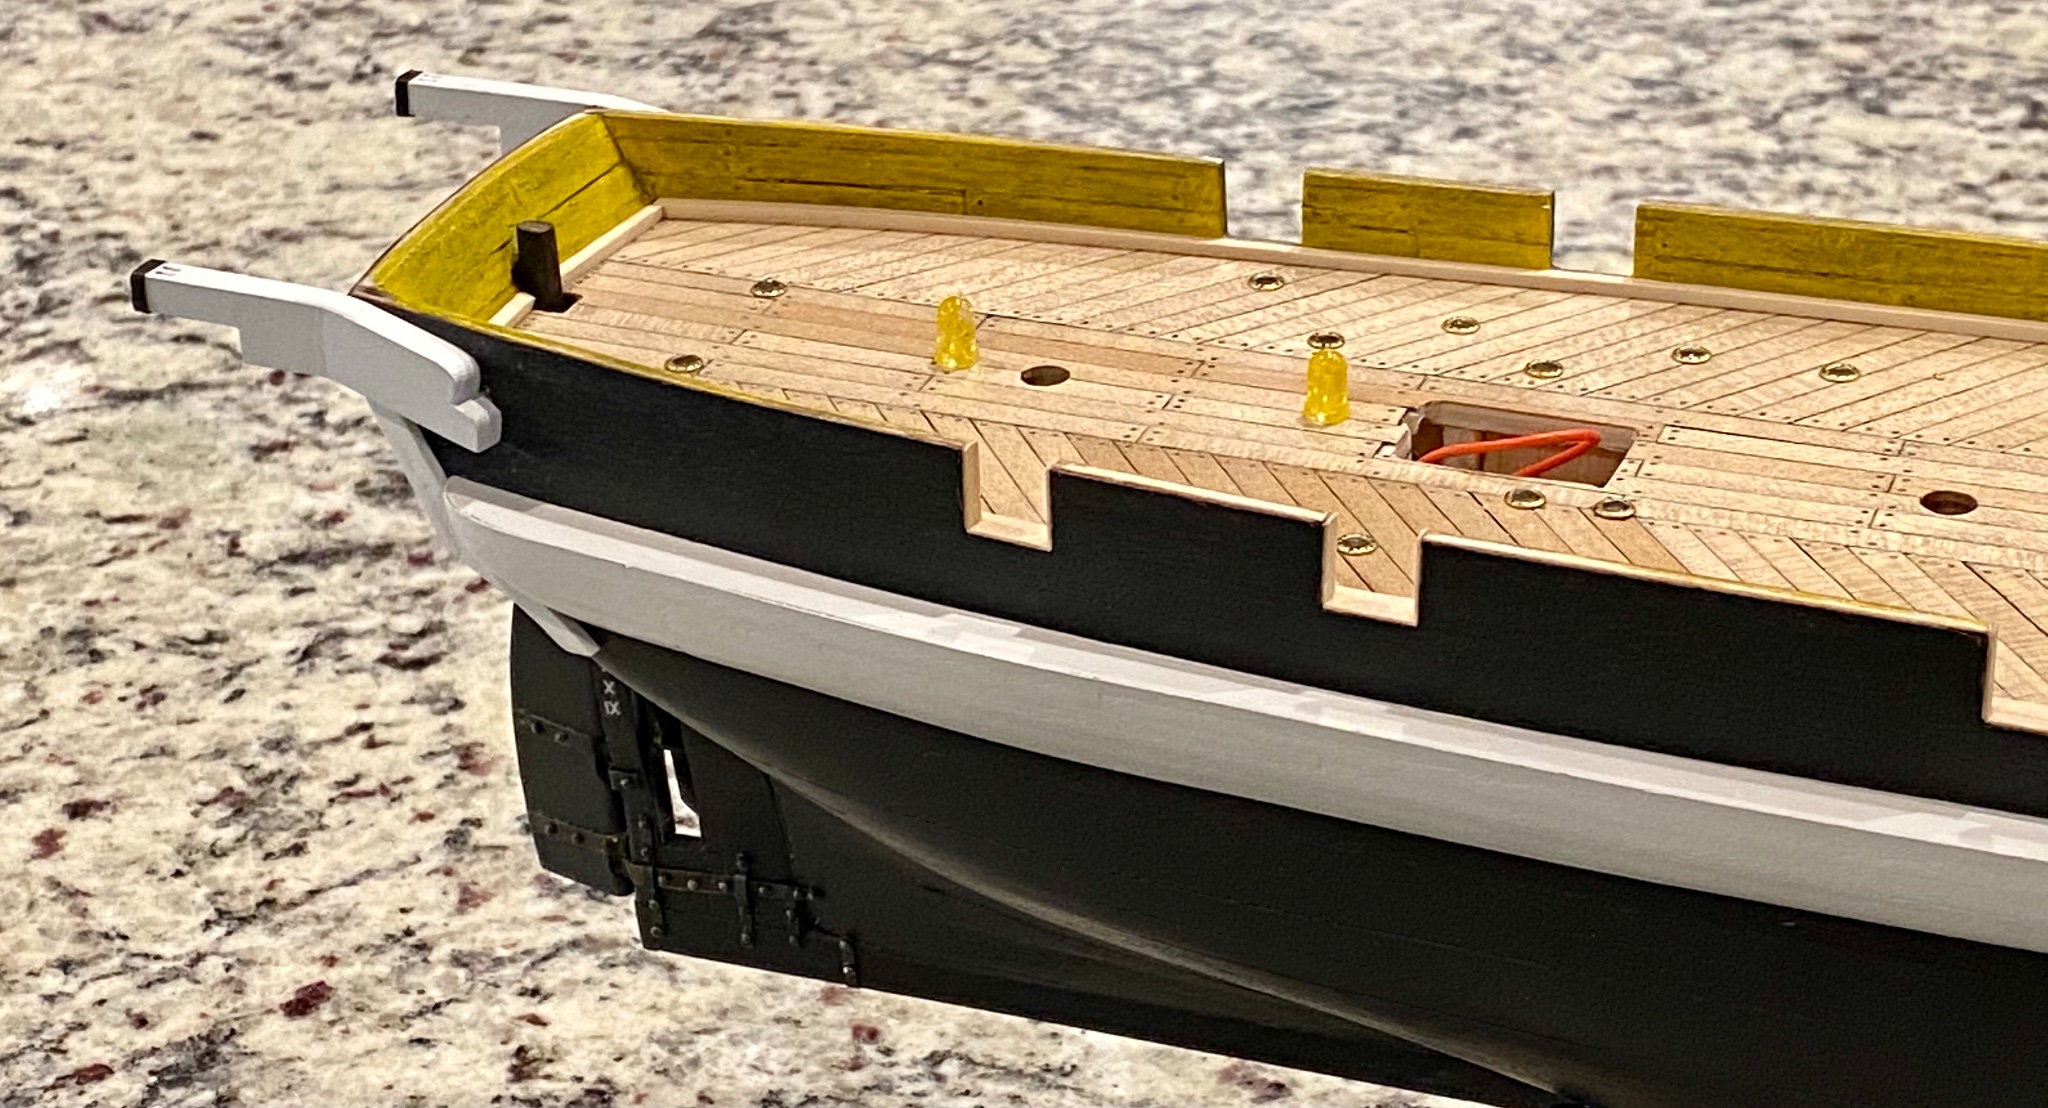
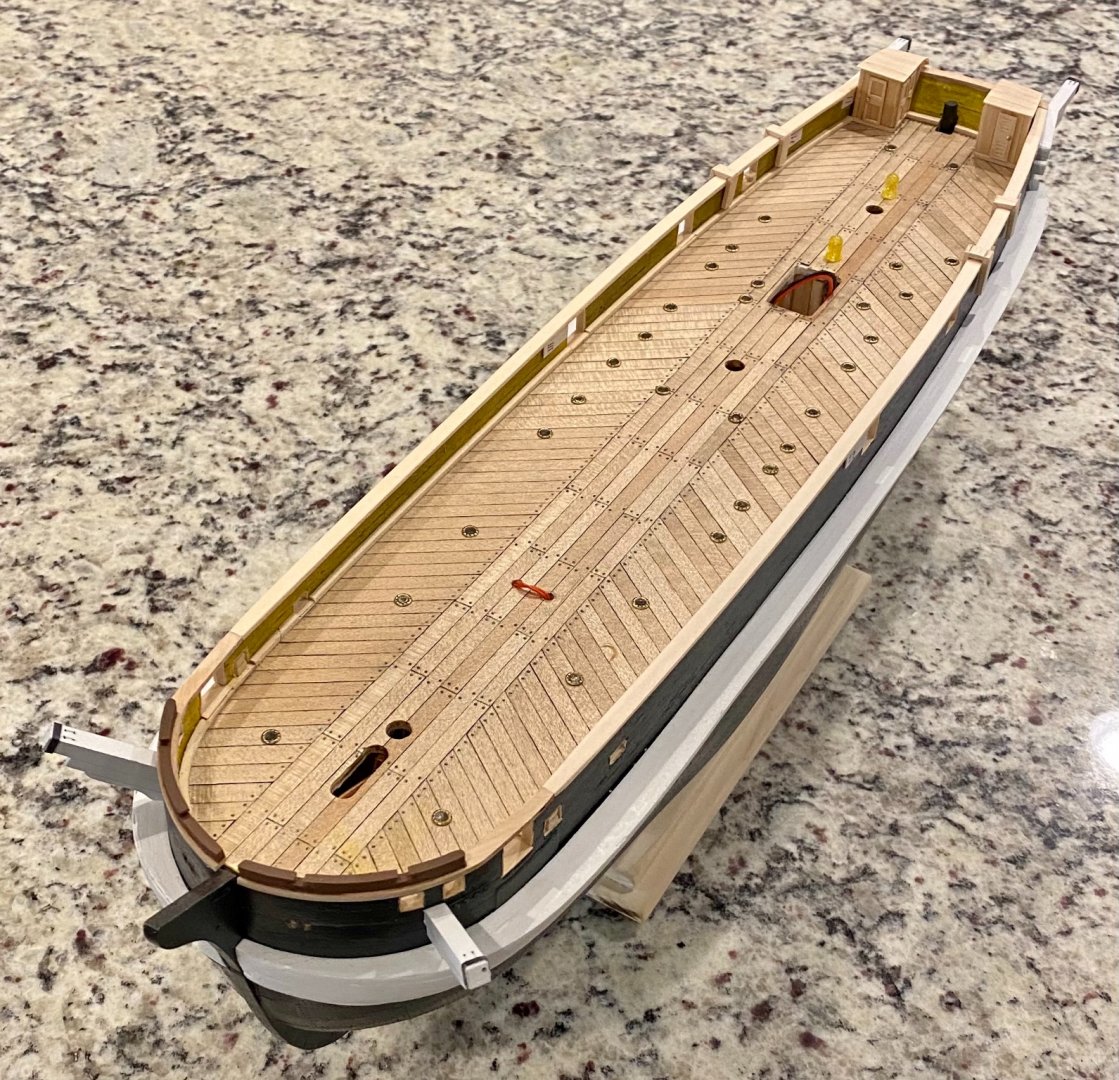
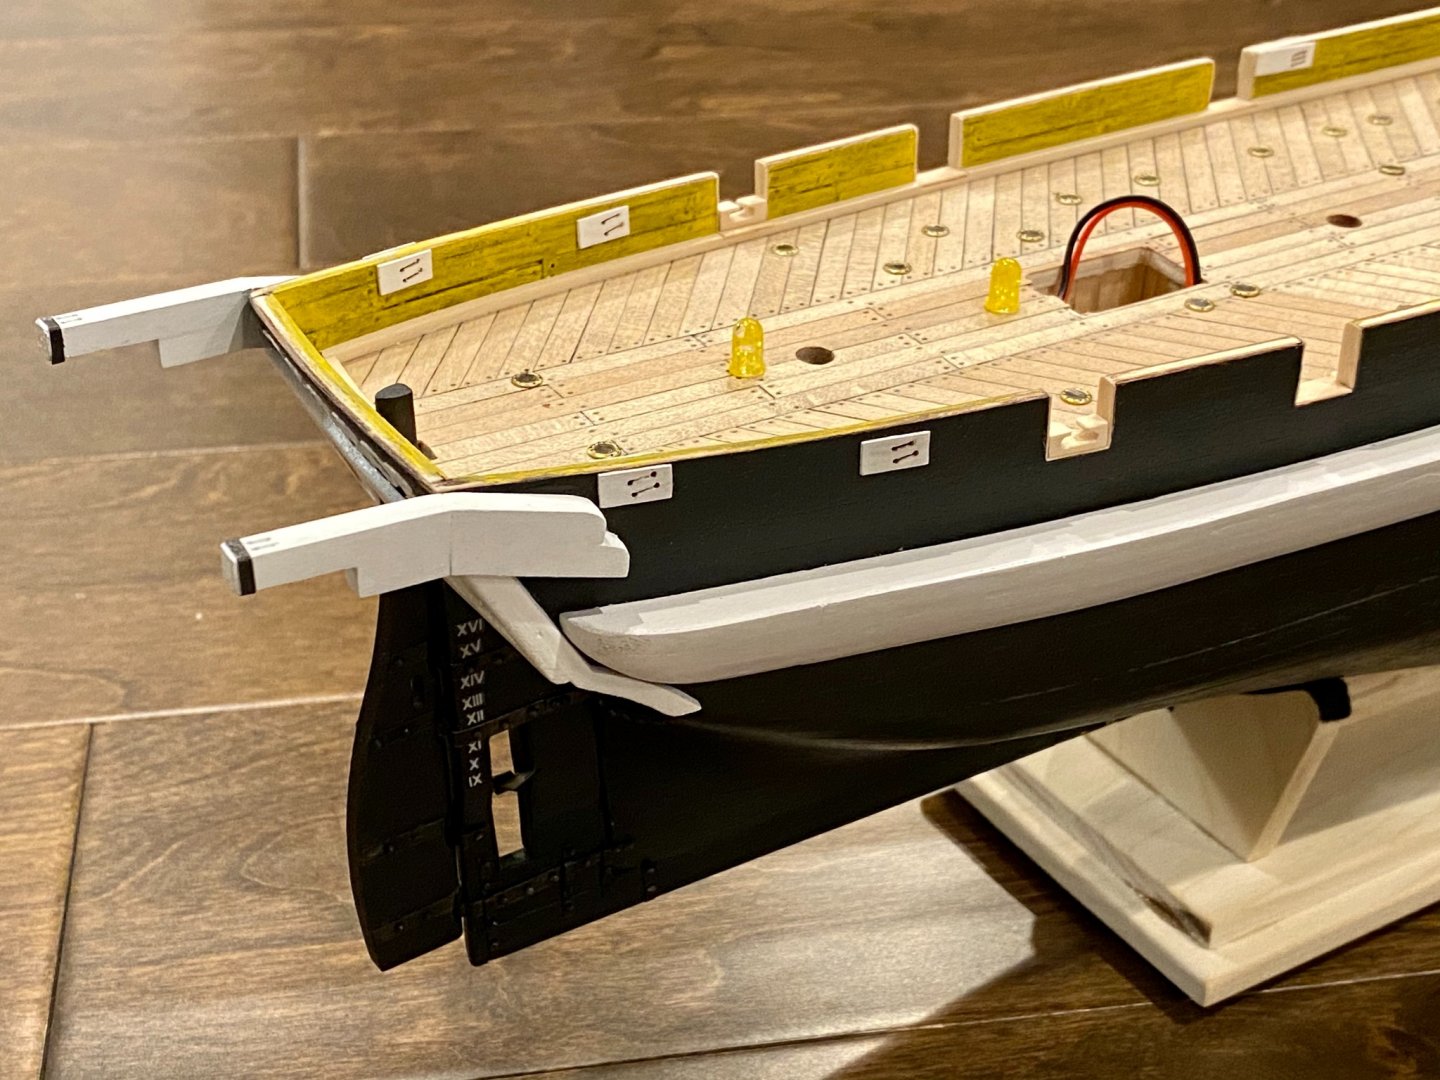
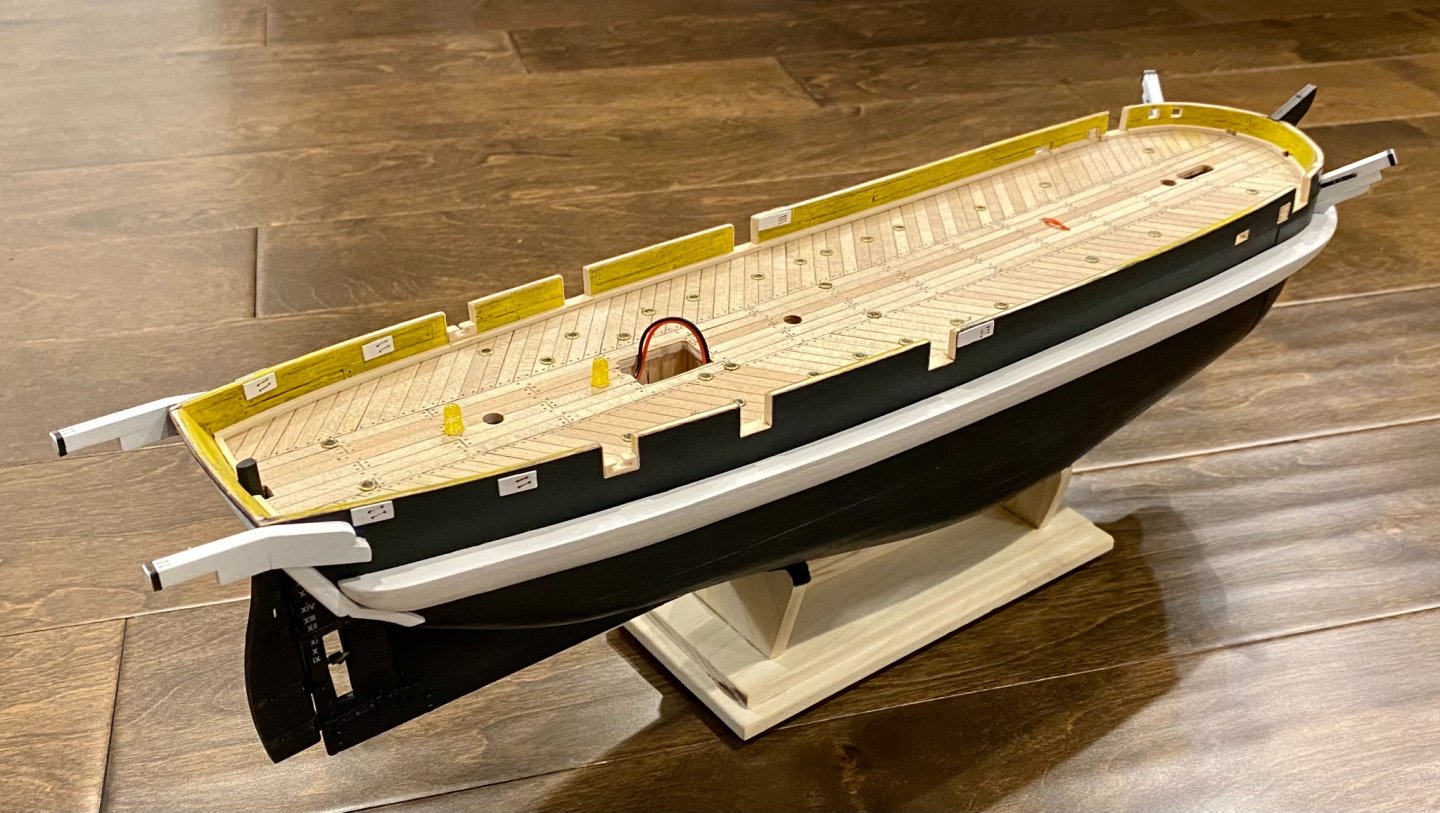
Well, that took longer than I thought it would. Today’s project, make the sheaves that go on the side of the bulwarks. The hull is nearly ready for another coat of clear protective varnish, after a few touch ups.
-
Thanks for the book store idea. Is their a difference between the editions? I typically like to get the latest edition; however, in this case its a huge price difference. The 1st edition in 1997 around $80 US, 2nd edition (harder to find) 1984 for around $80 US, and the 3rd edition printed in 2001 for $110-200 and even as high as $350 US.
-
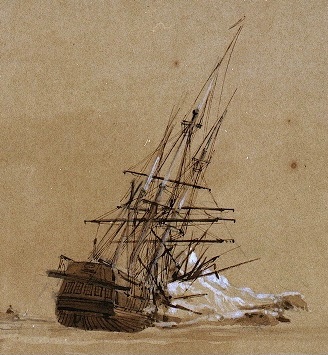
Keith, thanks for the information. I knew the image was from a prior expedition and before the retrofit for the 1845 journey, but I'm not that familiar yet with the early history of this great ship. While I have poked around Google for information with some results, my concentration has been after 1845. I don't really know or have not yet found a good book for the history of the Terror. I am also looking forward to Dr. Betts book, but alas not until August 2021. On another note, the book you suggested, The Masting and Rigging of English Ships of War, 1625- 1860 by James Lee, is becoming hard to find, in any edition. I'll keep my eye out, or maybe look at a digital version from Amazon although not ideal, oh...and expensive for a book.
-
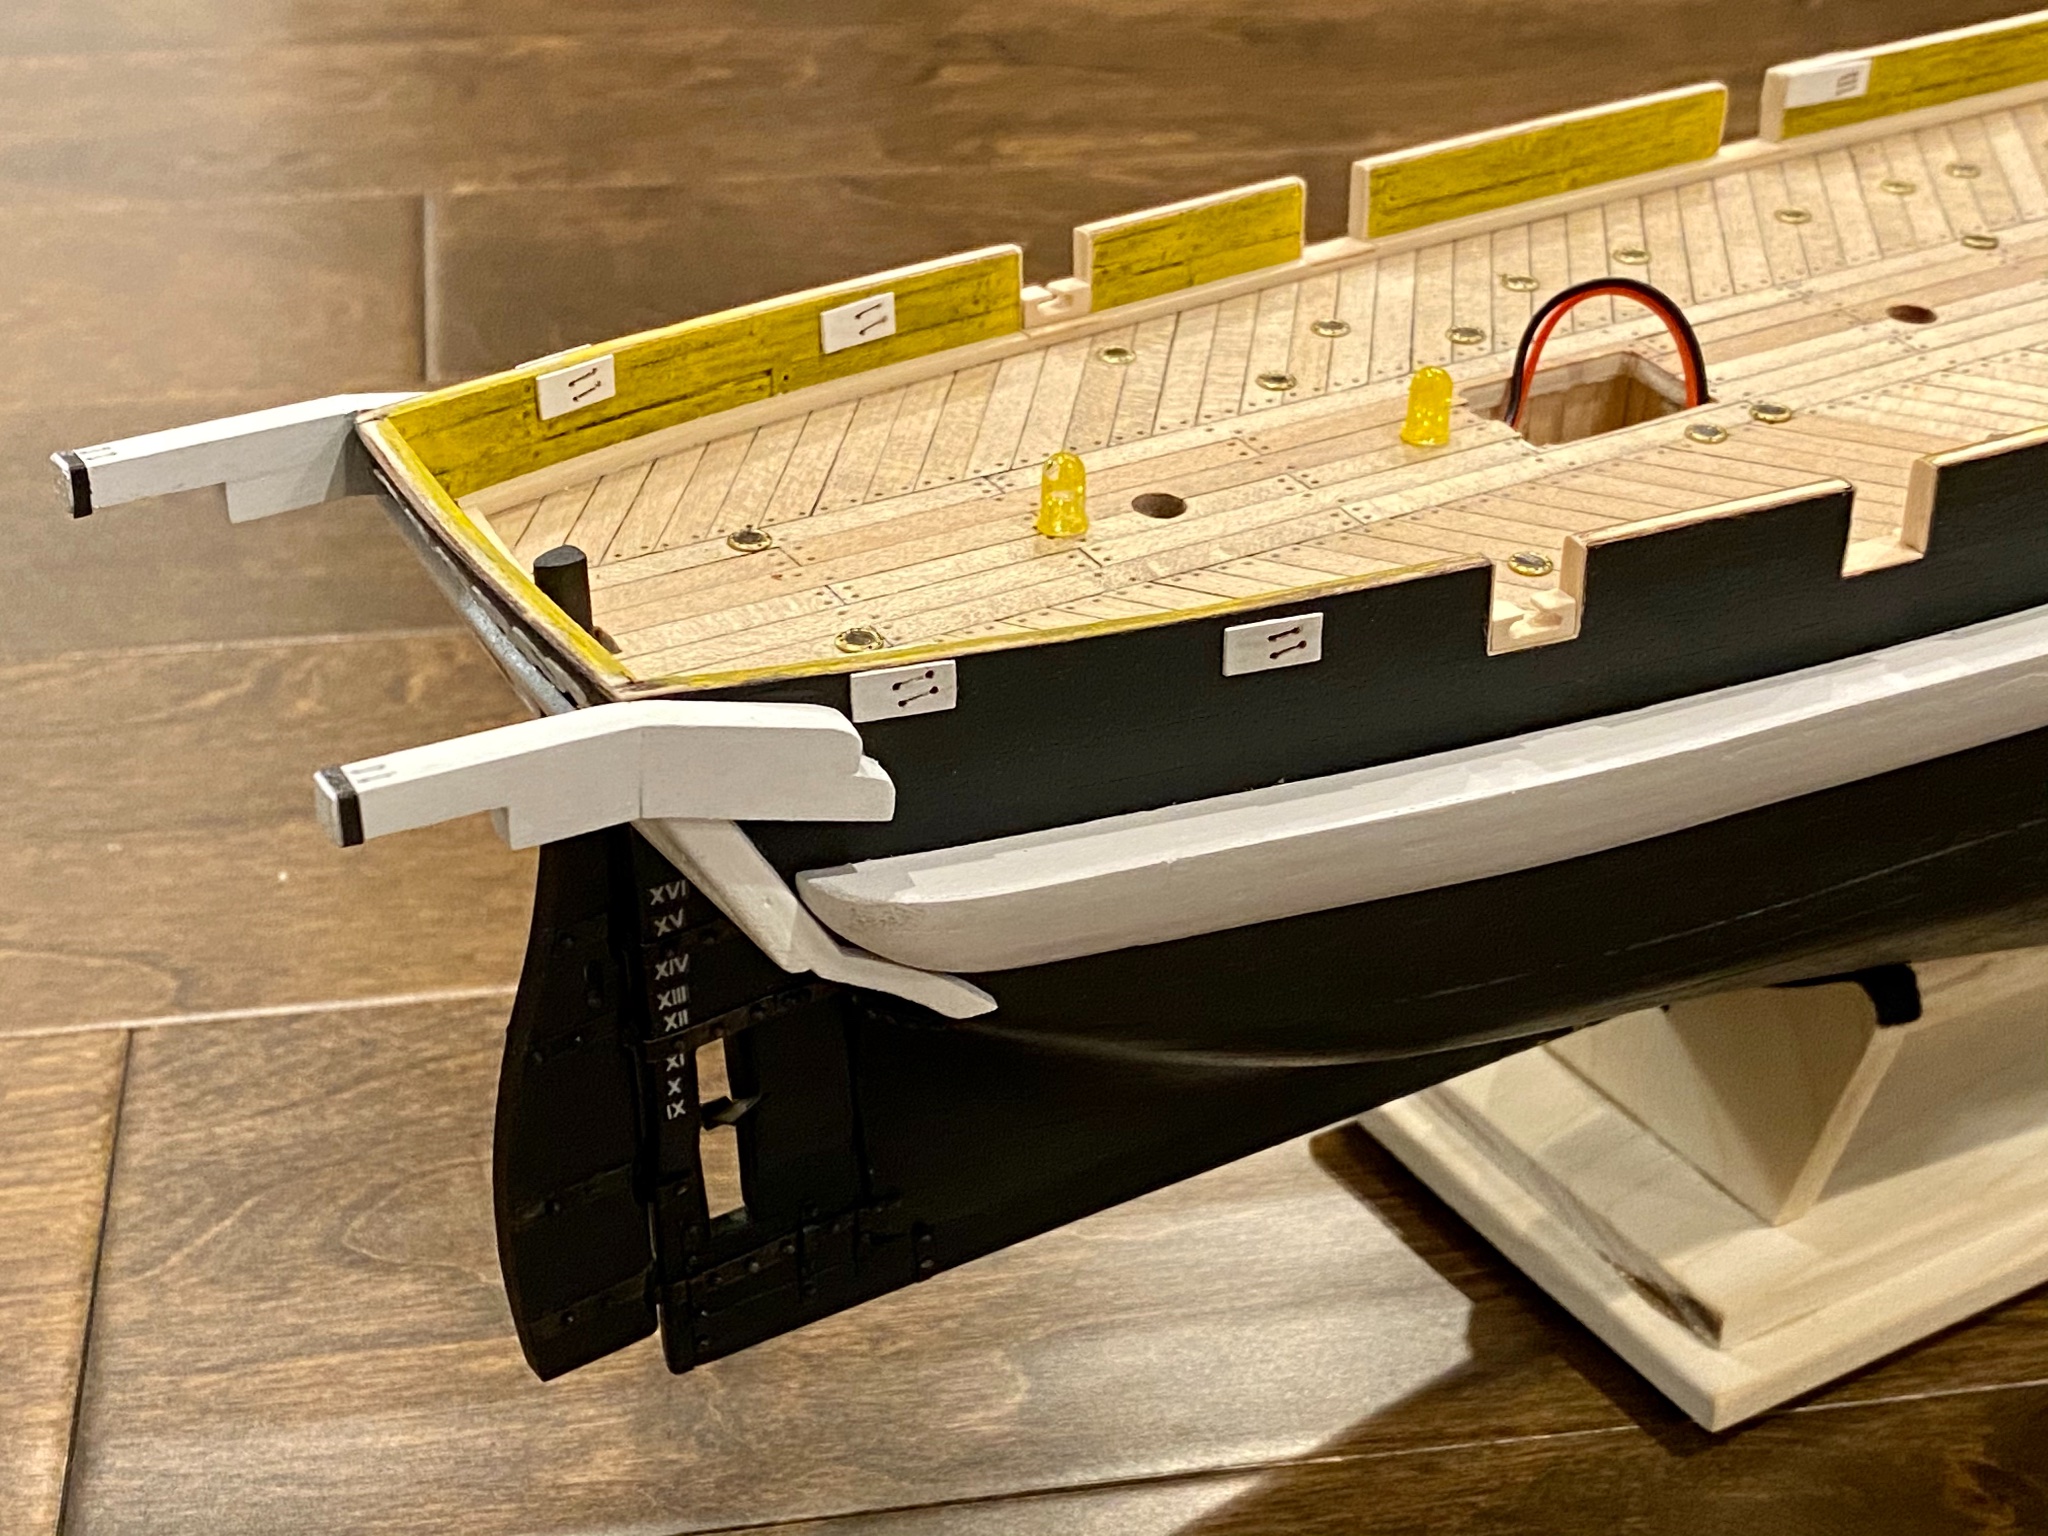
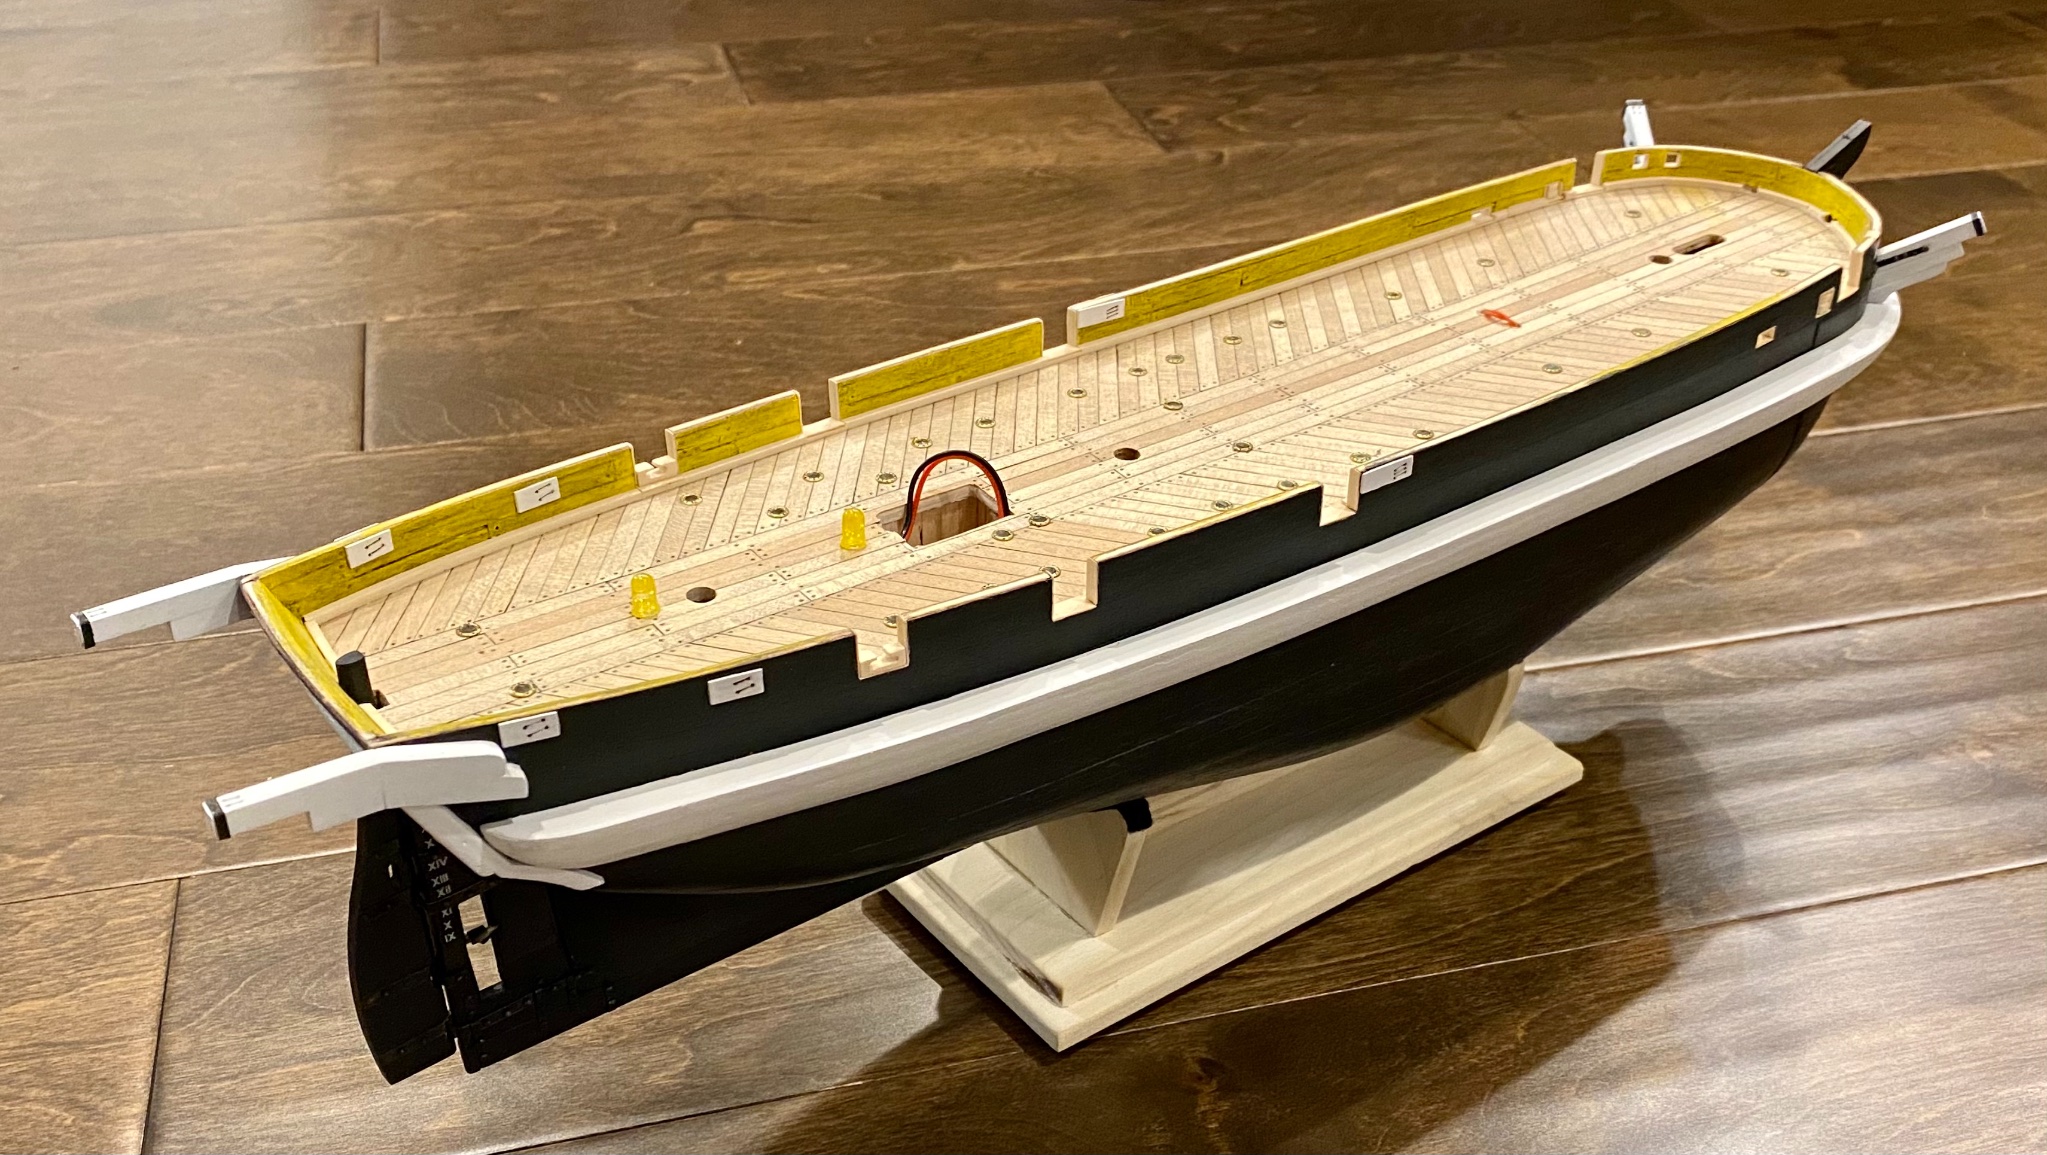
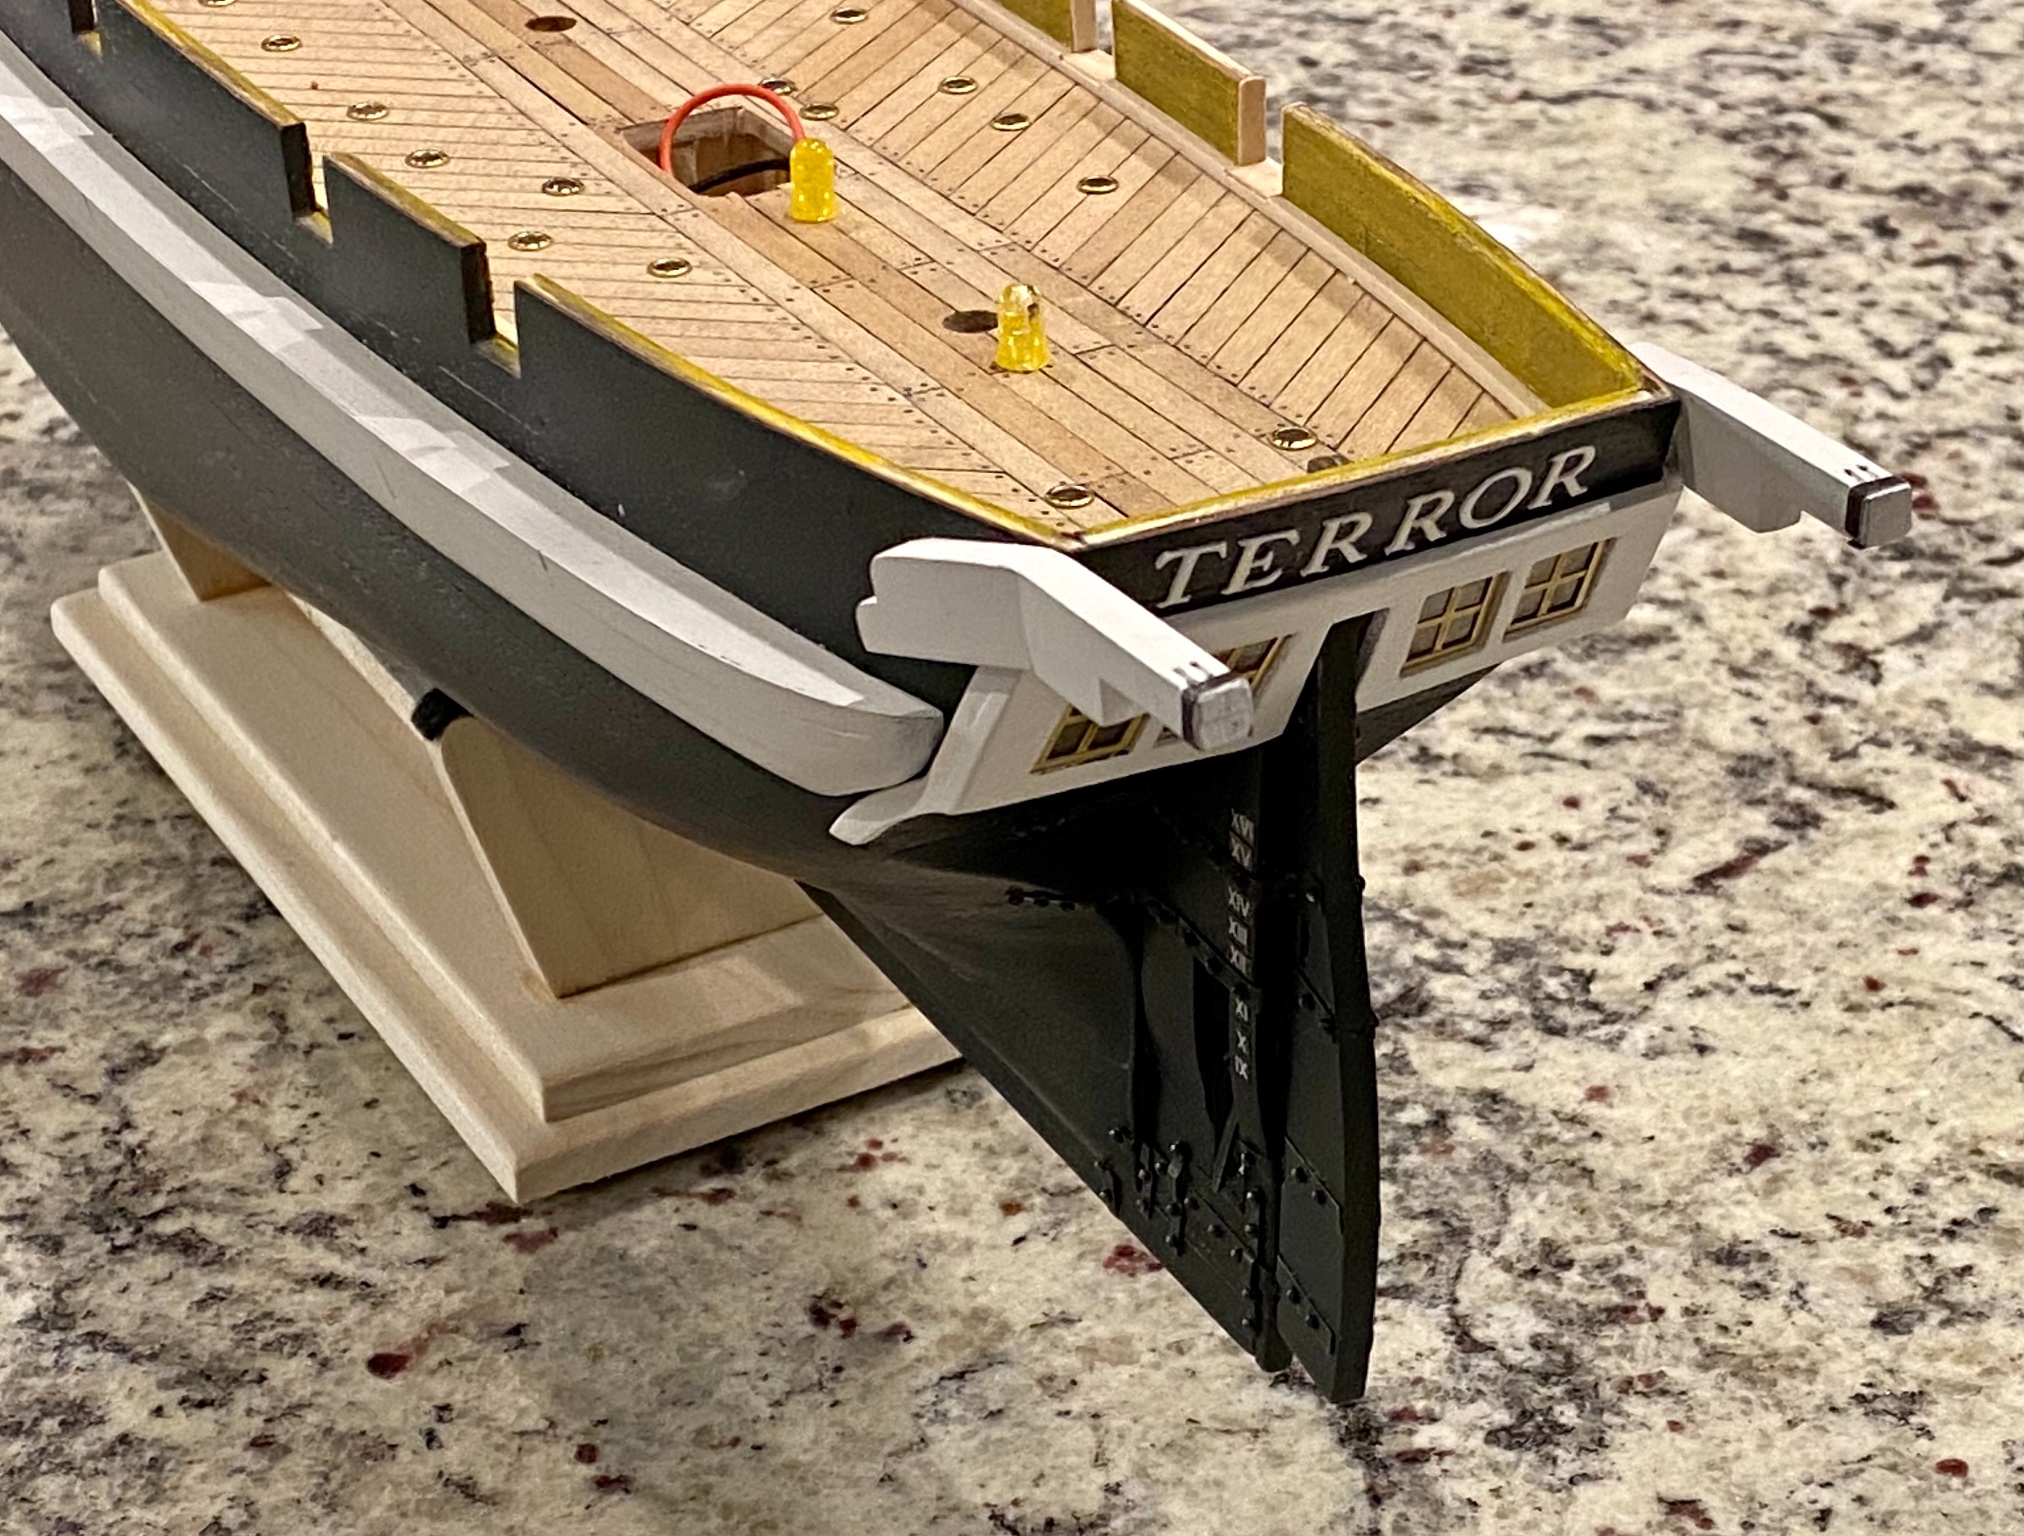
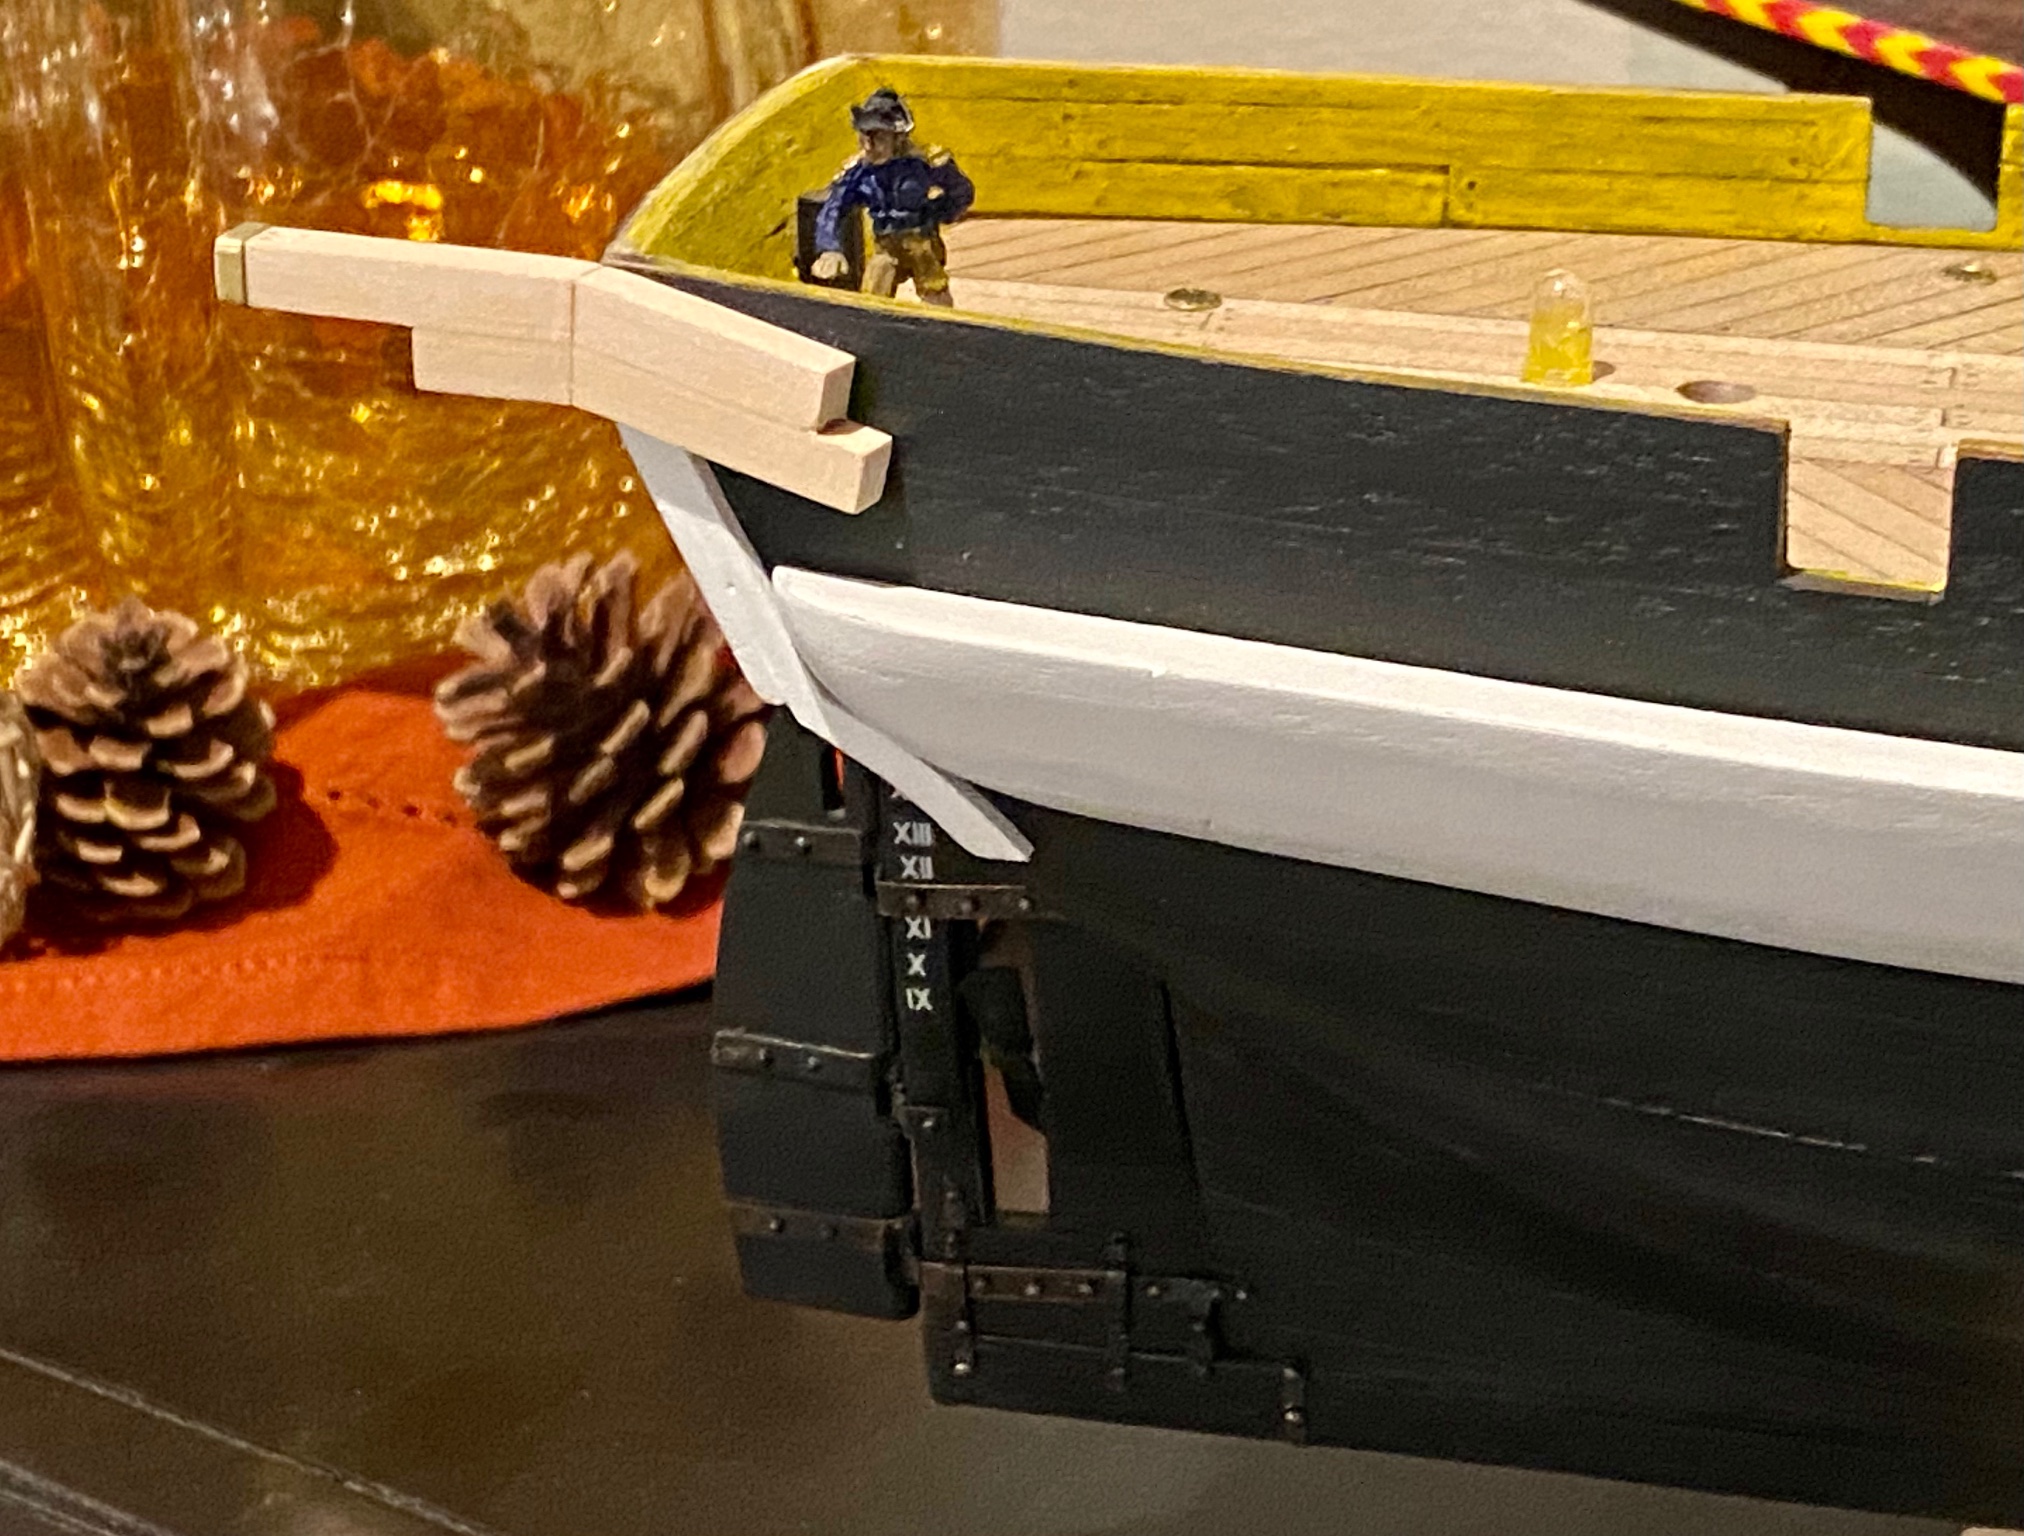
Today’s project, finish the stern davits and start working on the bulwarks. Overall, a good day.


-
These sheaves (pulleys) then run through the bulwark? In the OcCre Terror kit they are simple blocks of wood glued to the bulwark. But on Matthew Betts drawings, they do look like sheaves. Thanks Keith, I appreciate your help.
-
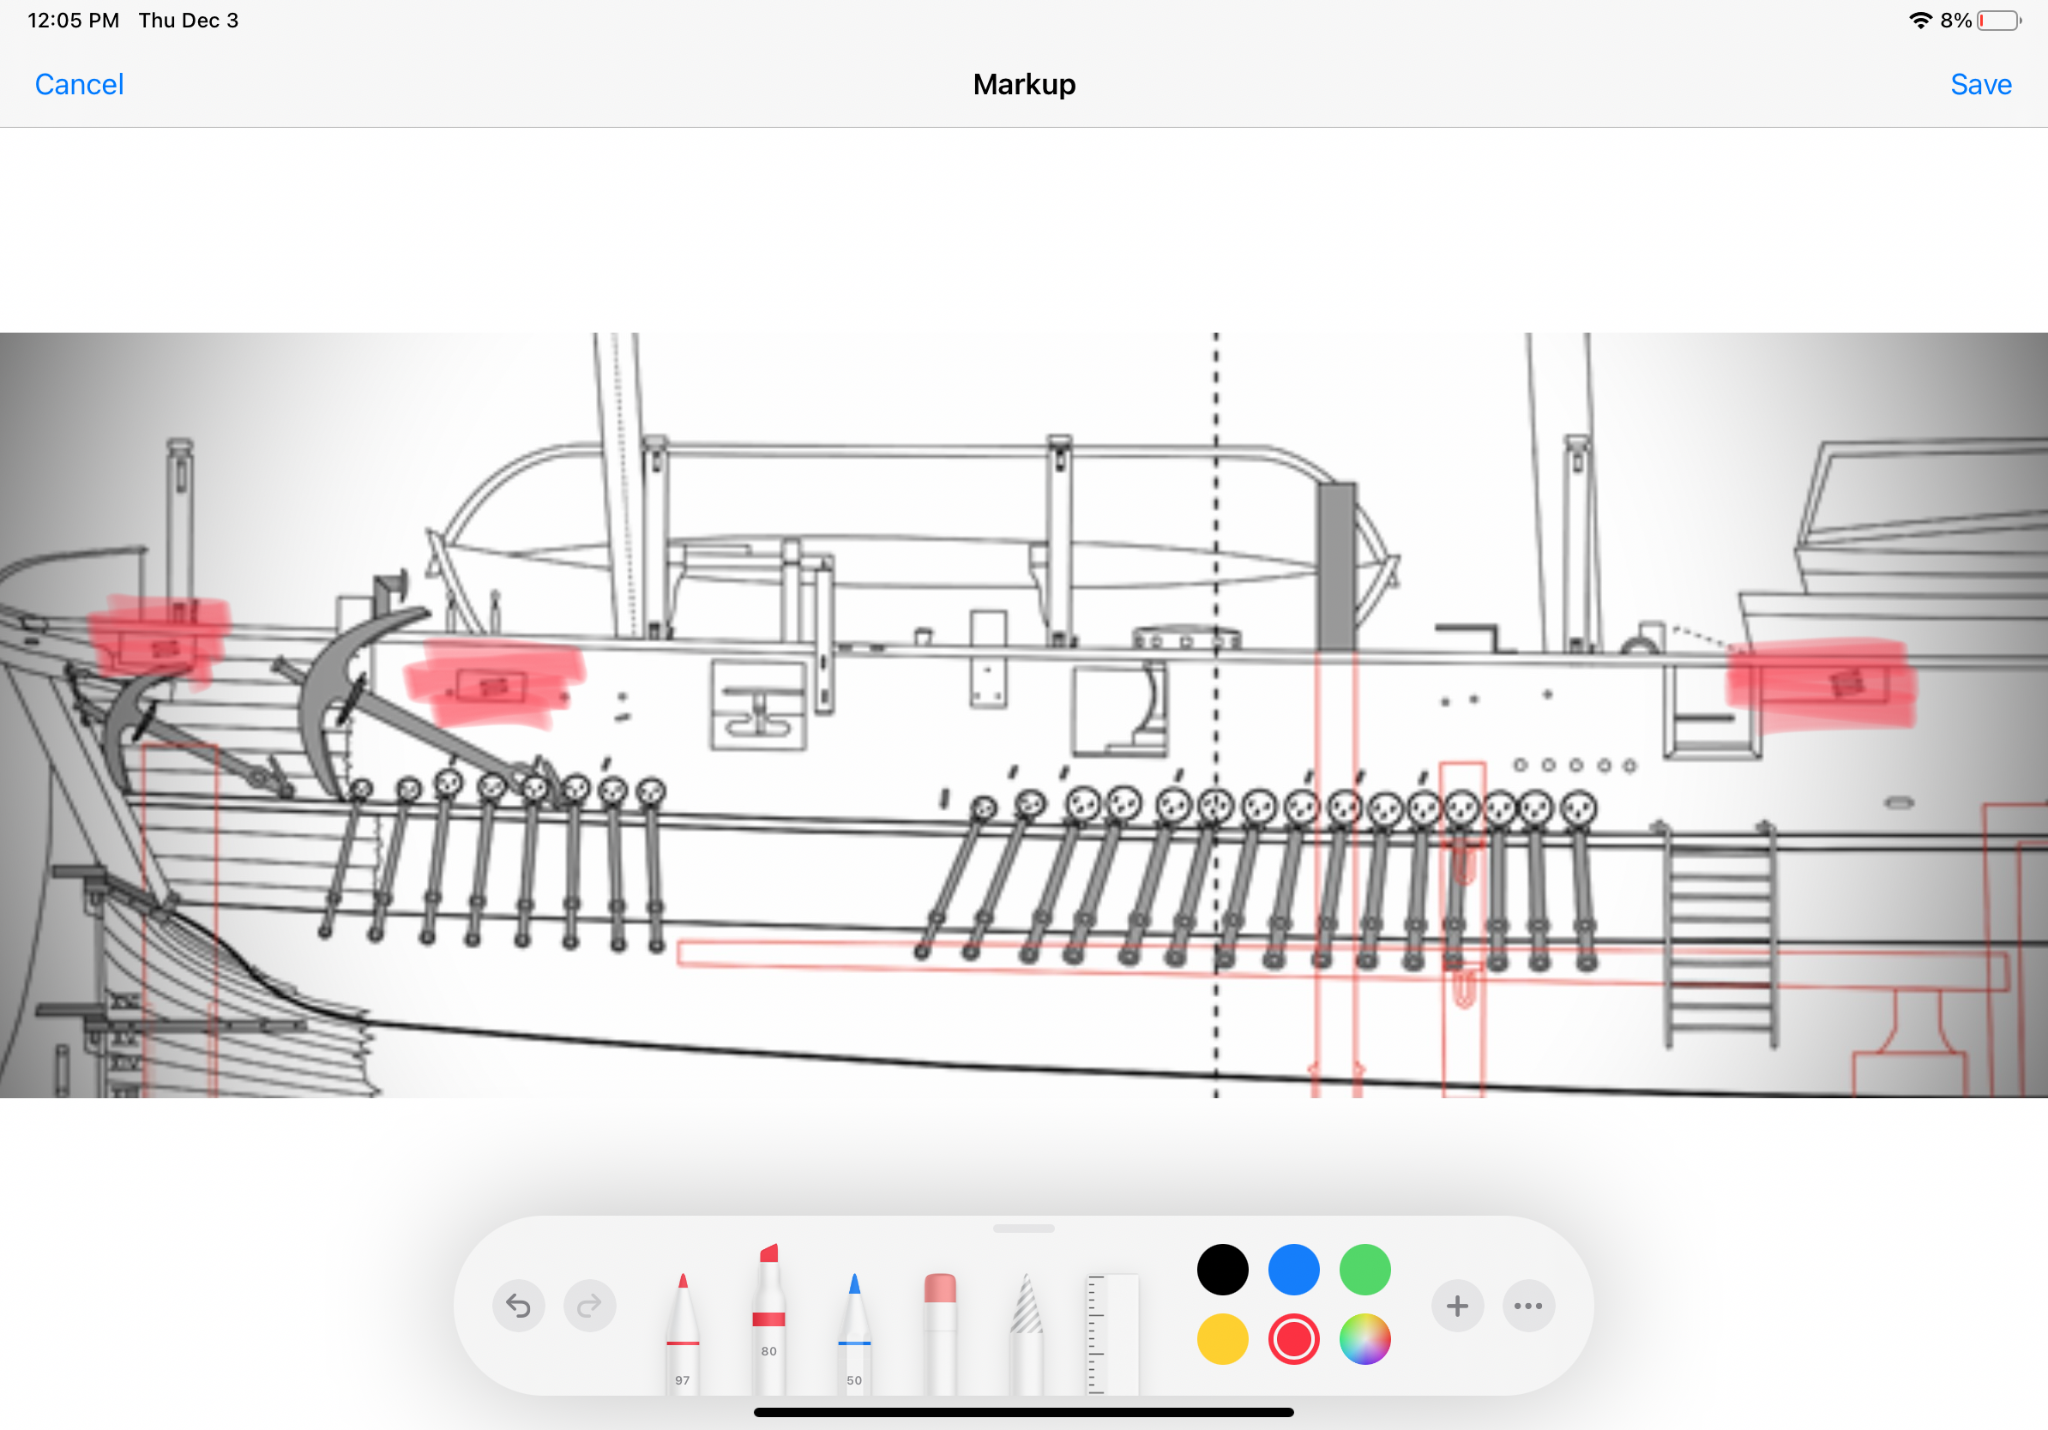
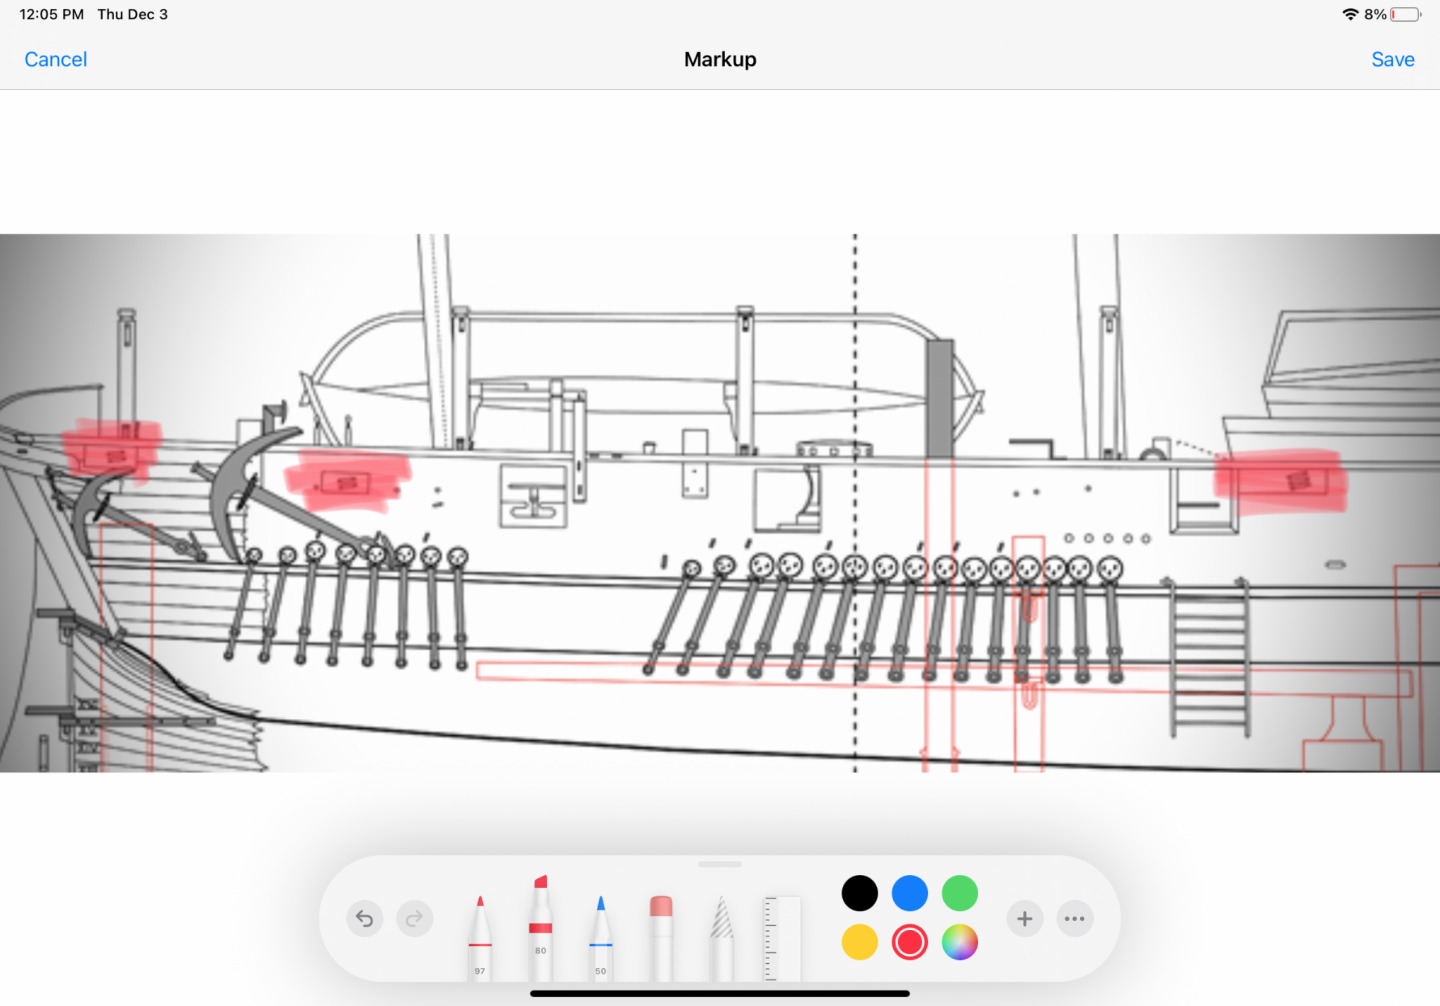
Any Terror fan know what the highlighted areas below are? While I want to represent the model the best I can, I am having trouble researching these as I don’t know what they are or called. Any ideas?
-
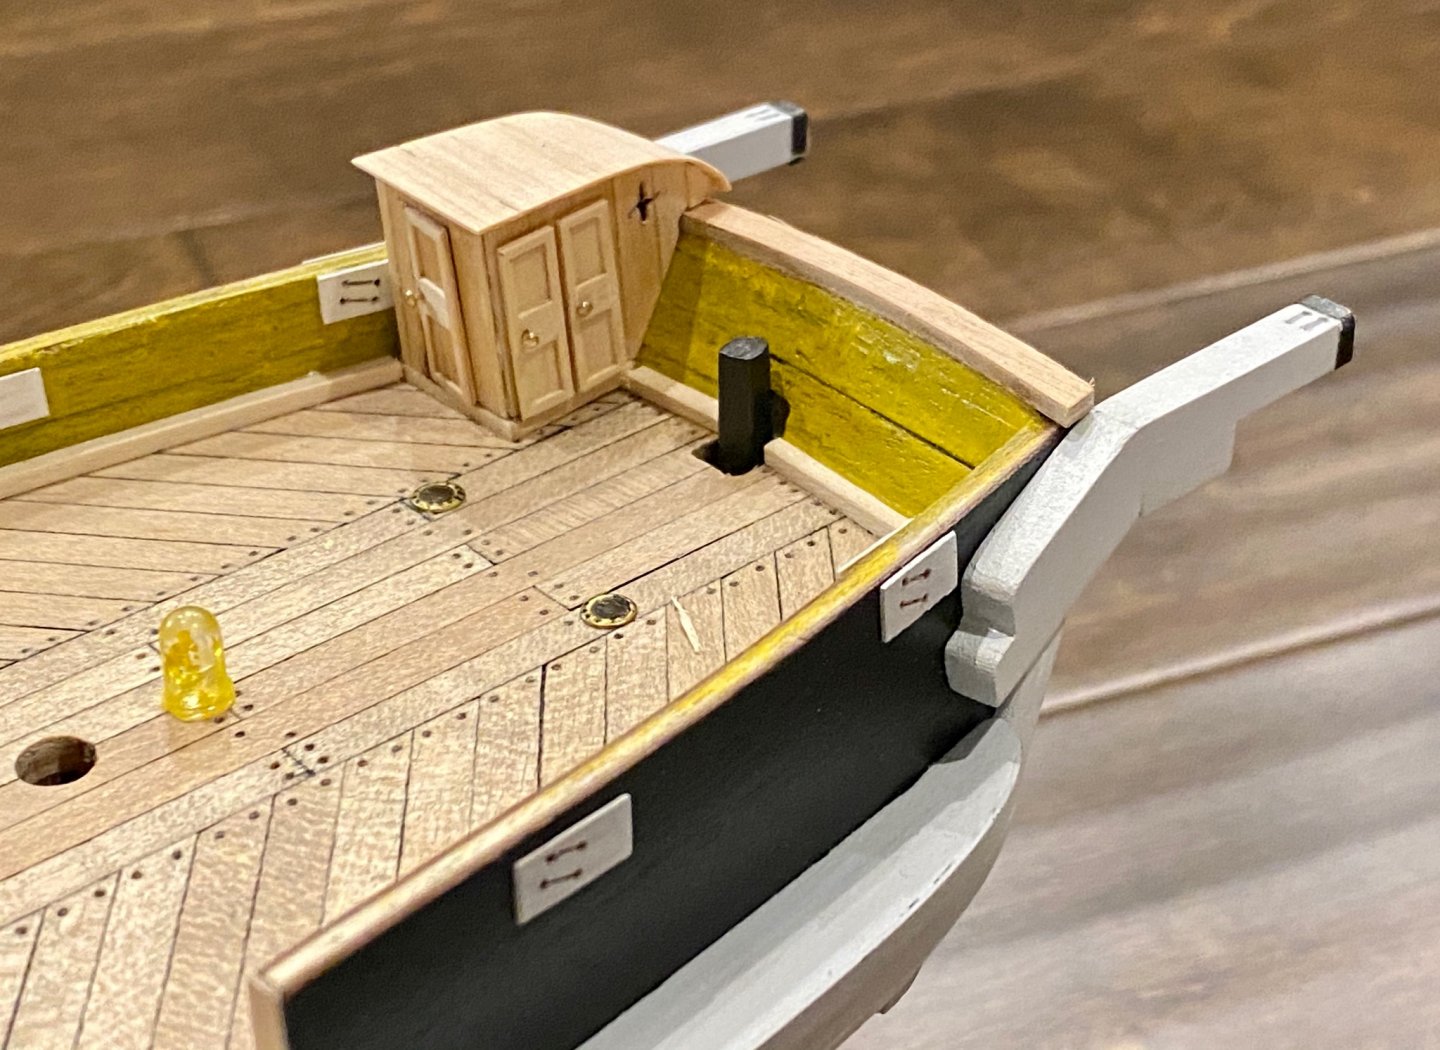
Stern davits, how will I ever remember all of these new terms... I did some research on the Terror and could not find any text or images of the stern davits being used to hold the ships small boats, as these seemed to be held on the sides. However, I did find one image from an earlier expedition that shows the spare rudder being hung from these davits. I know there is storage for a spare rudder mid ship, I may use this opportunity to have something a little different and make a spare rudder from scratch and hang it from these stern davits. Just thinking at this point...
-
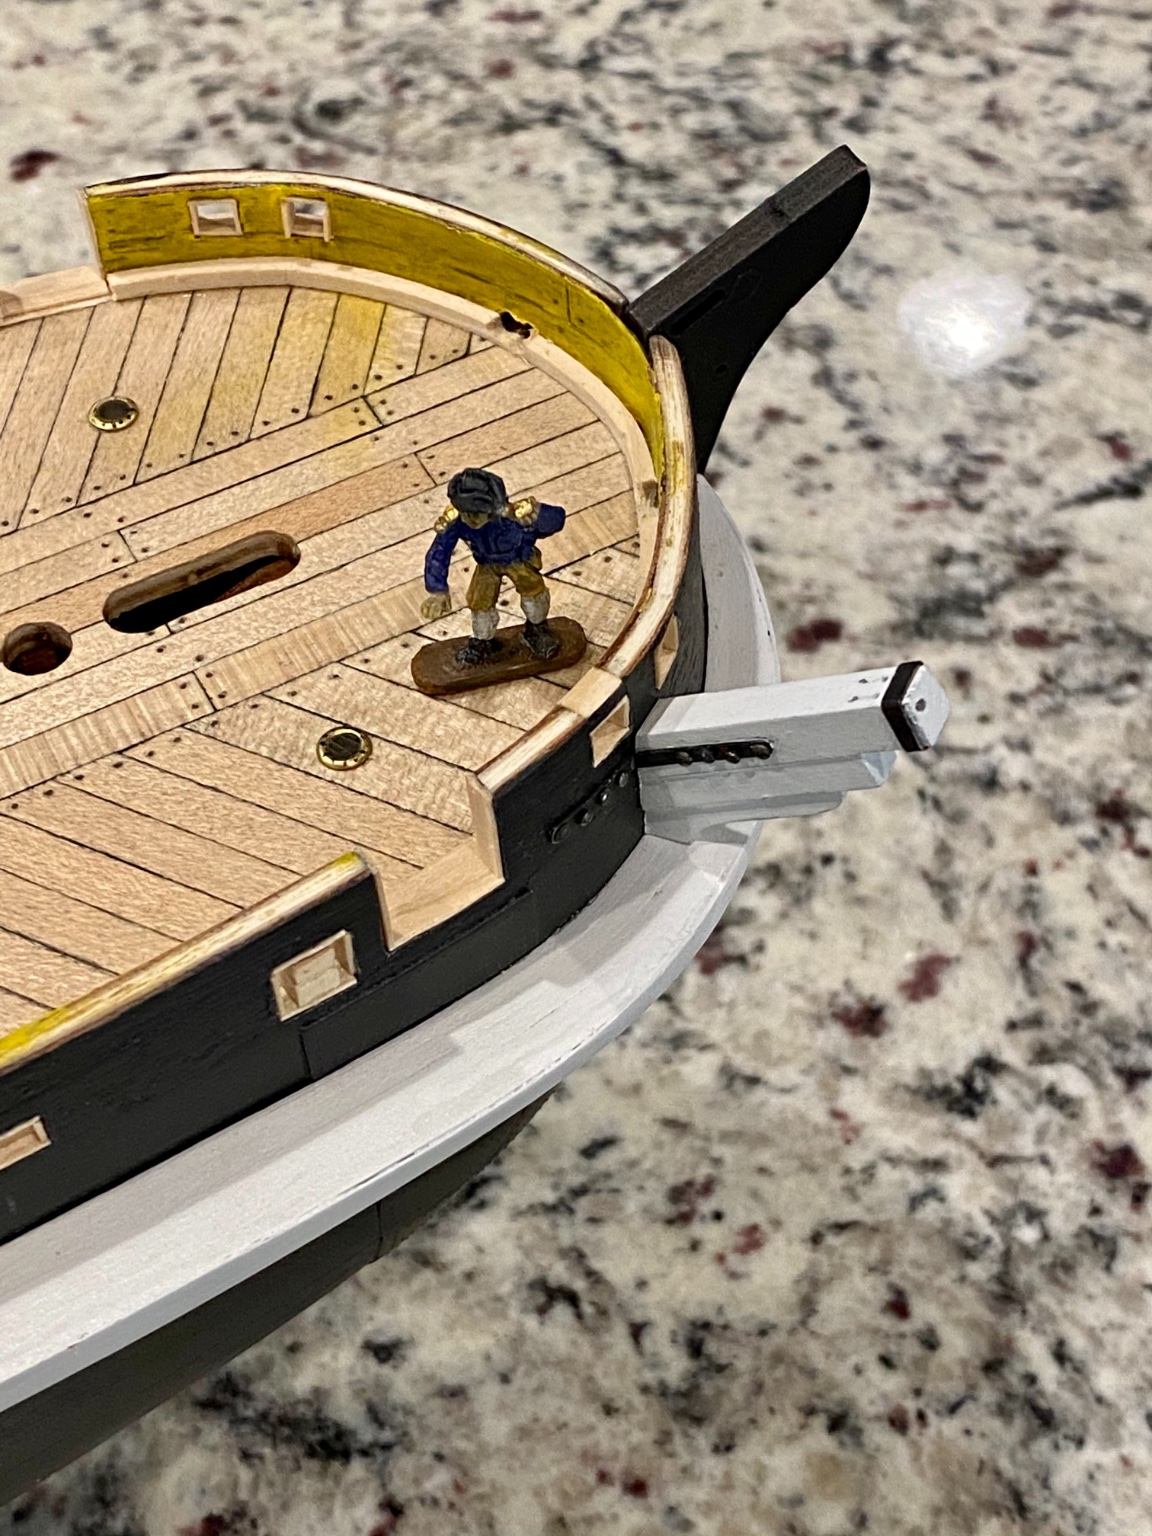
This evening I started working on the... well, I don’t know what they are called. But the timbers/woodwork at the stern. Now to replicate for the port side.

-
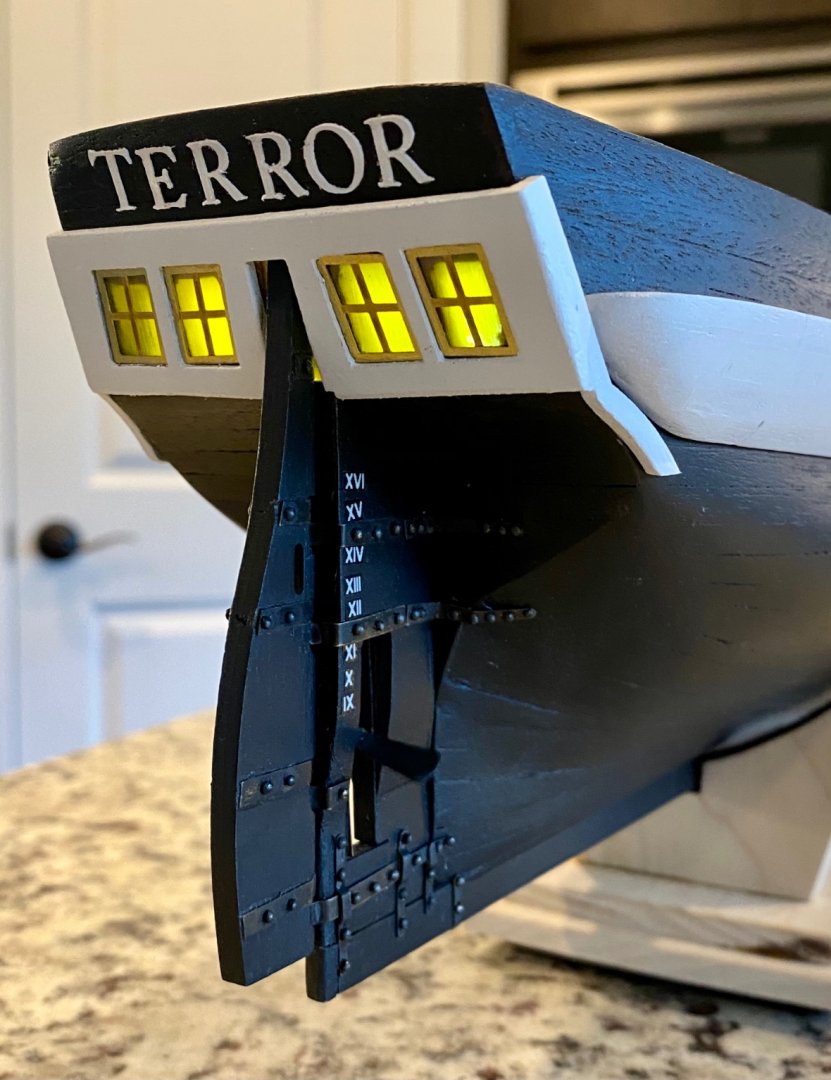
Well, I didn’t think making 3D letters would be so hard. My goal was to make the letters TERROR with a bit of depth, maybe a millimeter or so. I attempted making them with wood, and when that didn’t work a new batch in plastic. The letters are just too small to do the intricate carvings of the letters without damaging them or myself. Then I remembered my wife has a Cricuit machine. I ended up making the letters out of card stock, then a coat or two of white paint to match the model, and finally affix them in place. Initially I made the letters a little smaller, but they didn’t look correct. Below is my final result.