Mirabell61
-
Posts
7,406 -
Joined
-
Last visited
Content Type
Profiles
Forums
Gallery
Events
Everything posted by Mirabell61
-
 Thank you very much Andy, as usual I make the final photos by using my wifes adjustable ironing board and a fluffy black blanket hanging from a preliminary support. I have 4 LED spots that are turned towards the model for a good lighting. Some pics with flash, some without Nils
 -
Andy, I just wish that my house would have a larger entrance hall with straight walls Nils
-
Hi Peter, I very much appreciate your kind words. I do`nt know if there will be any next model as there is no space in the house (11) ships and in my hobby museum alone there are 8 ships in glass cases and one still without case Nils
-
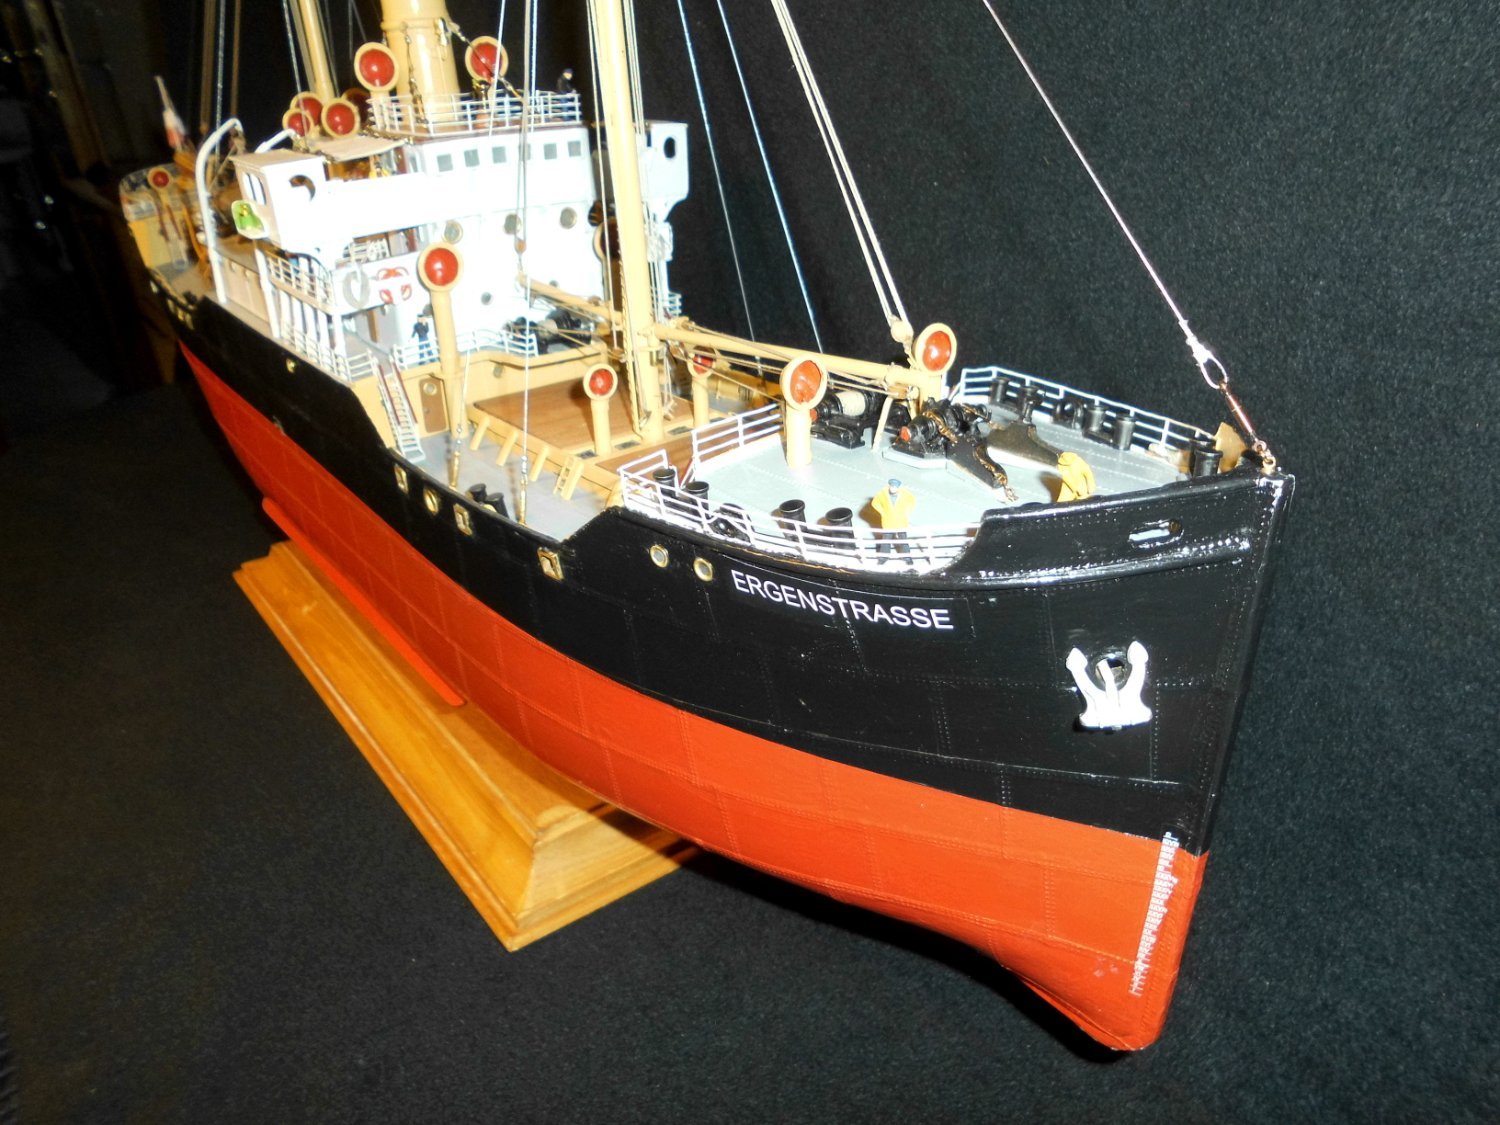
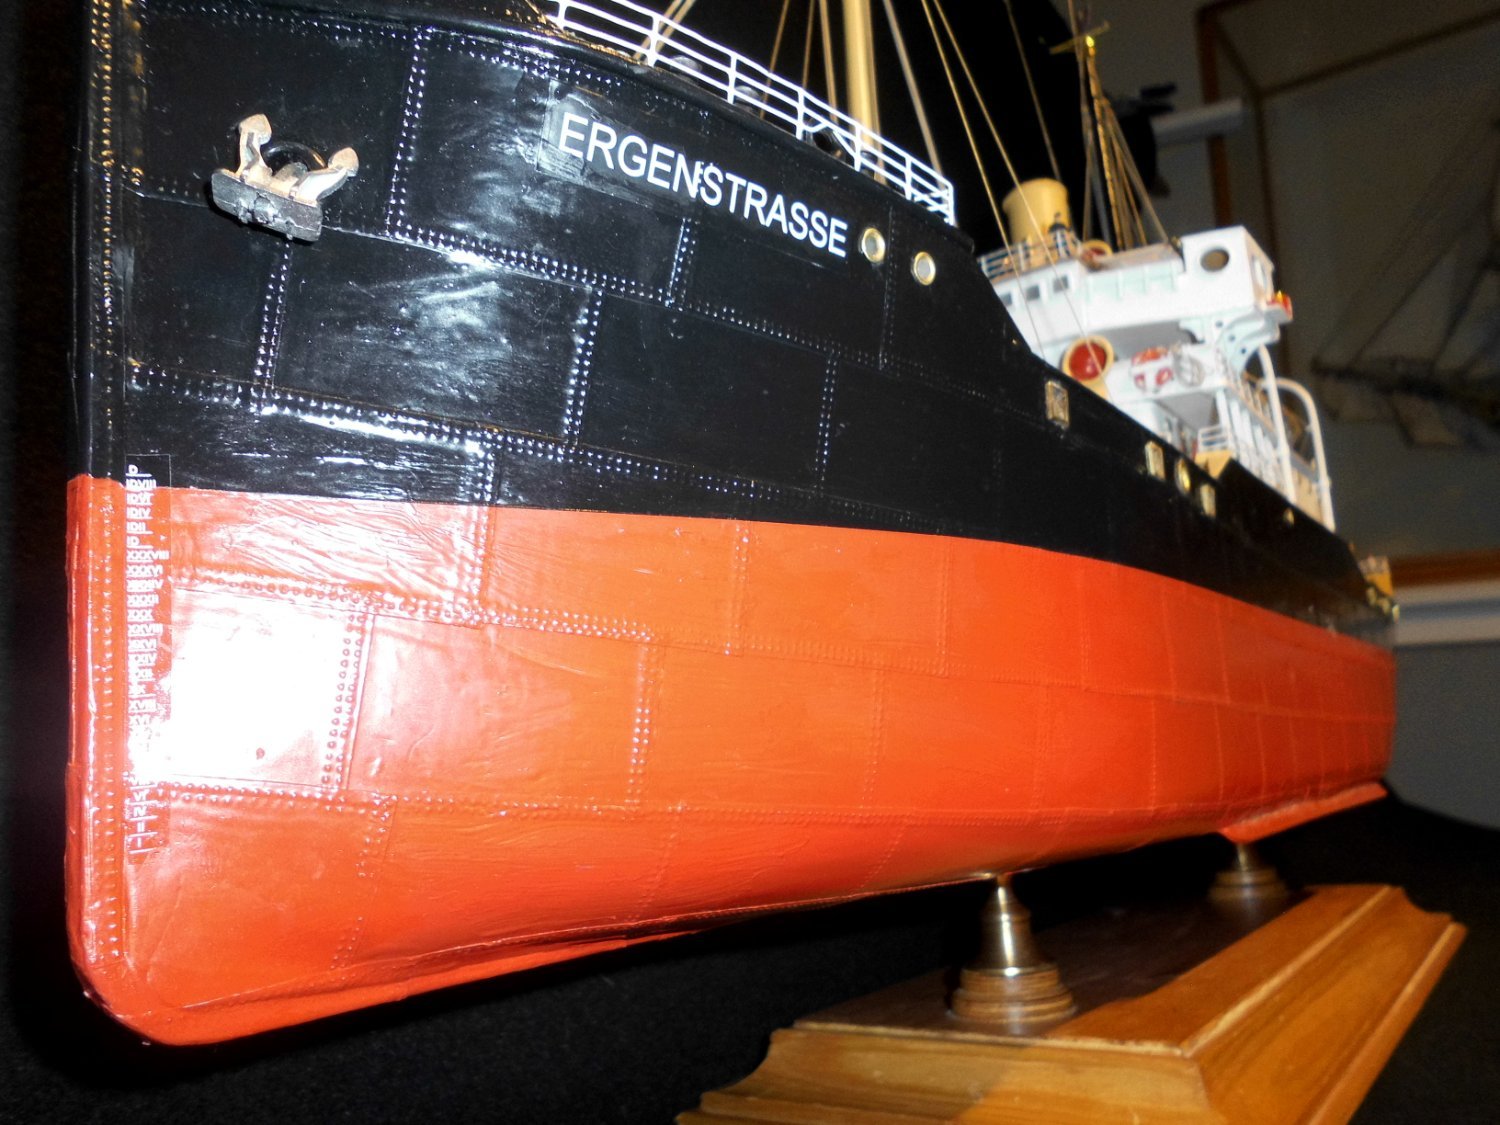
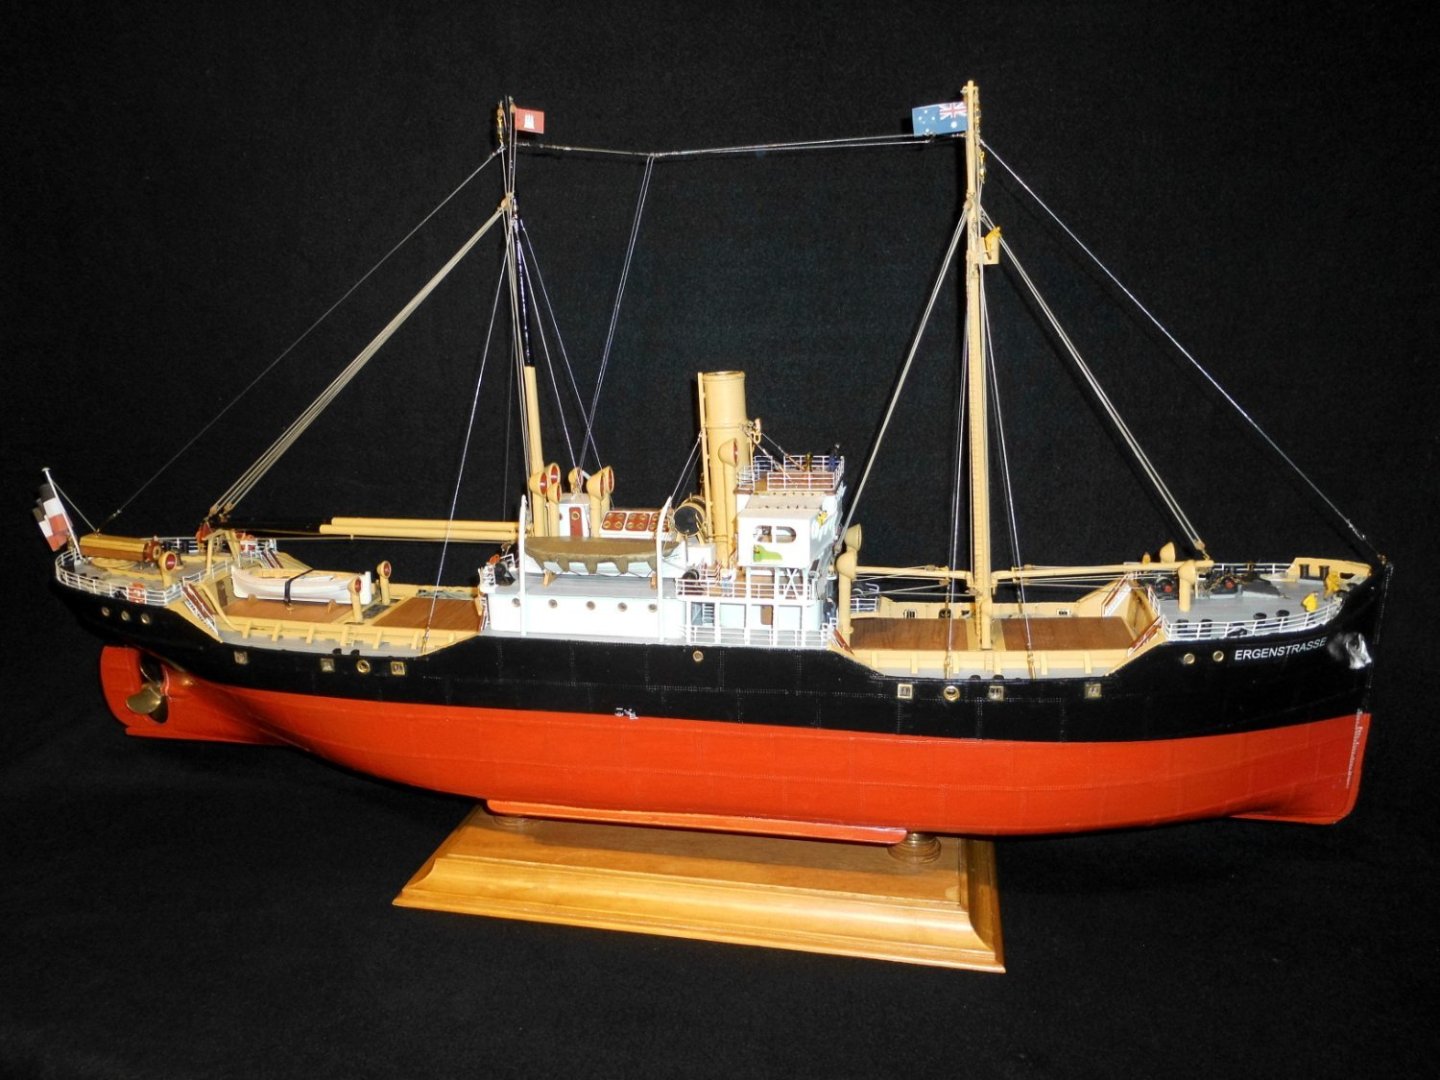
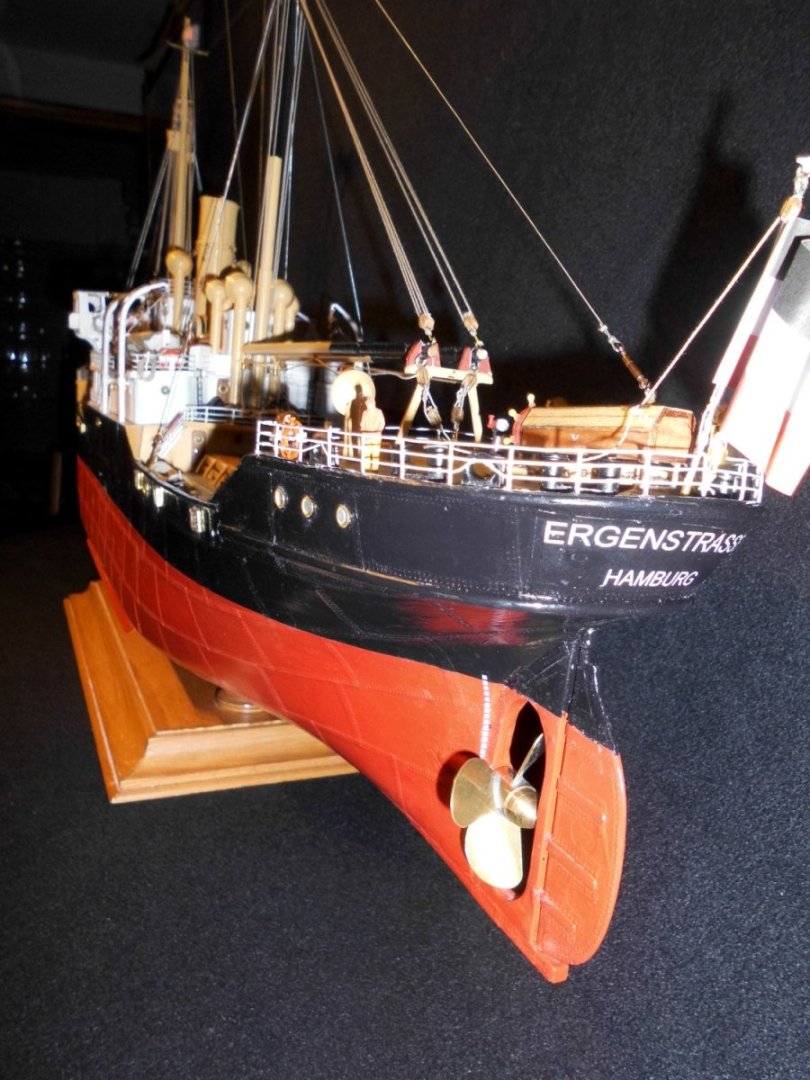
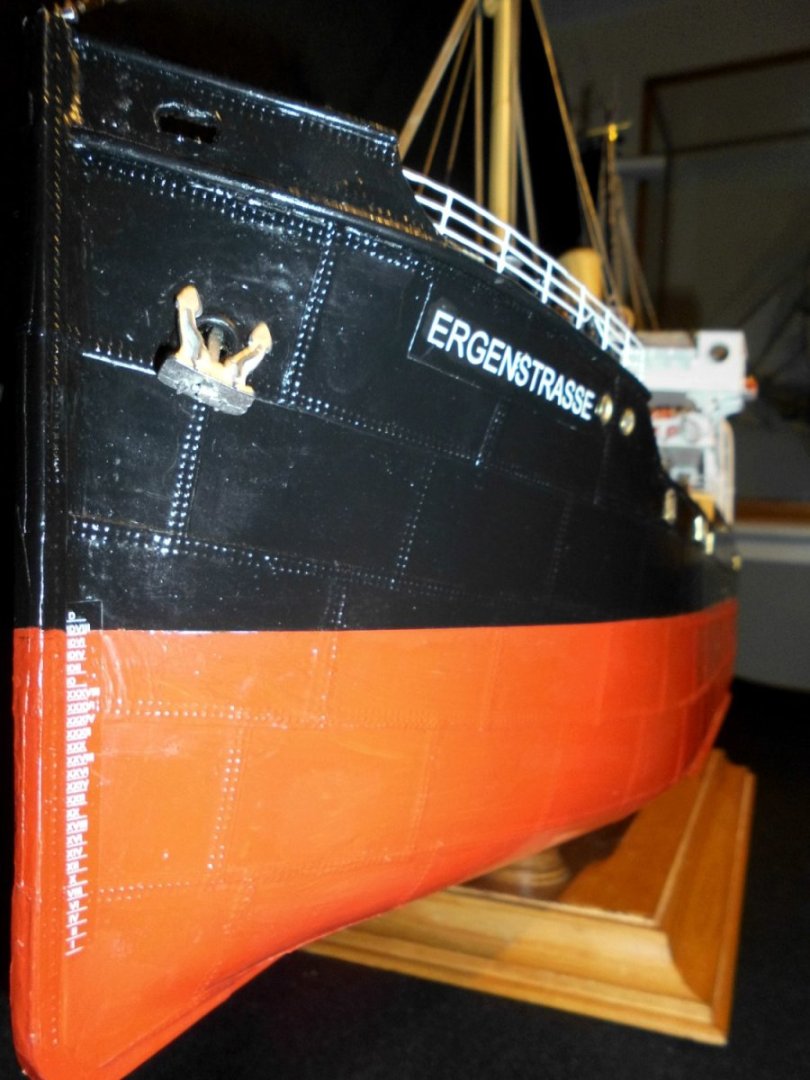
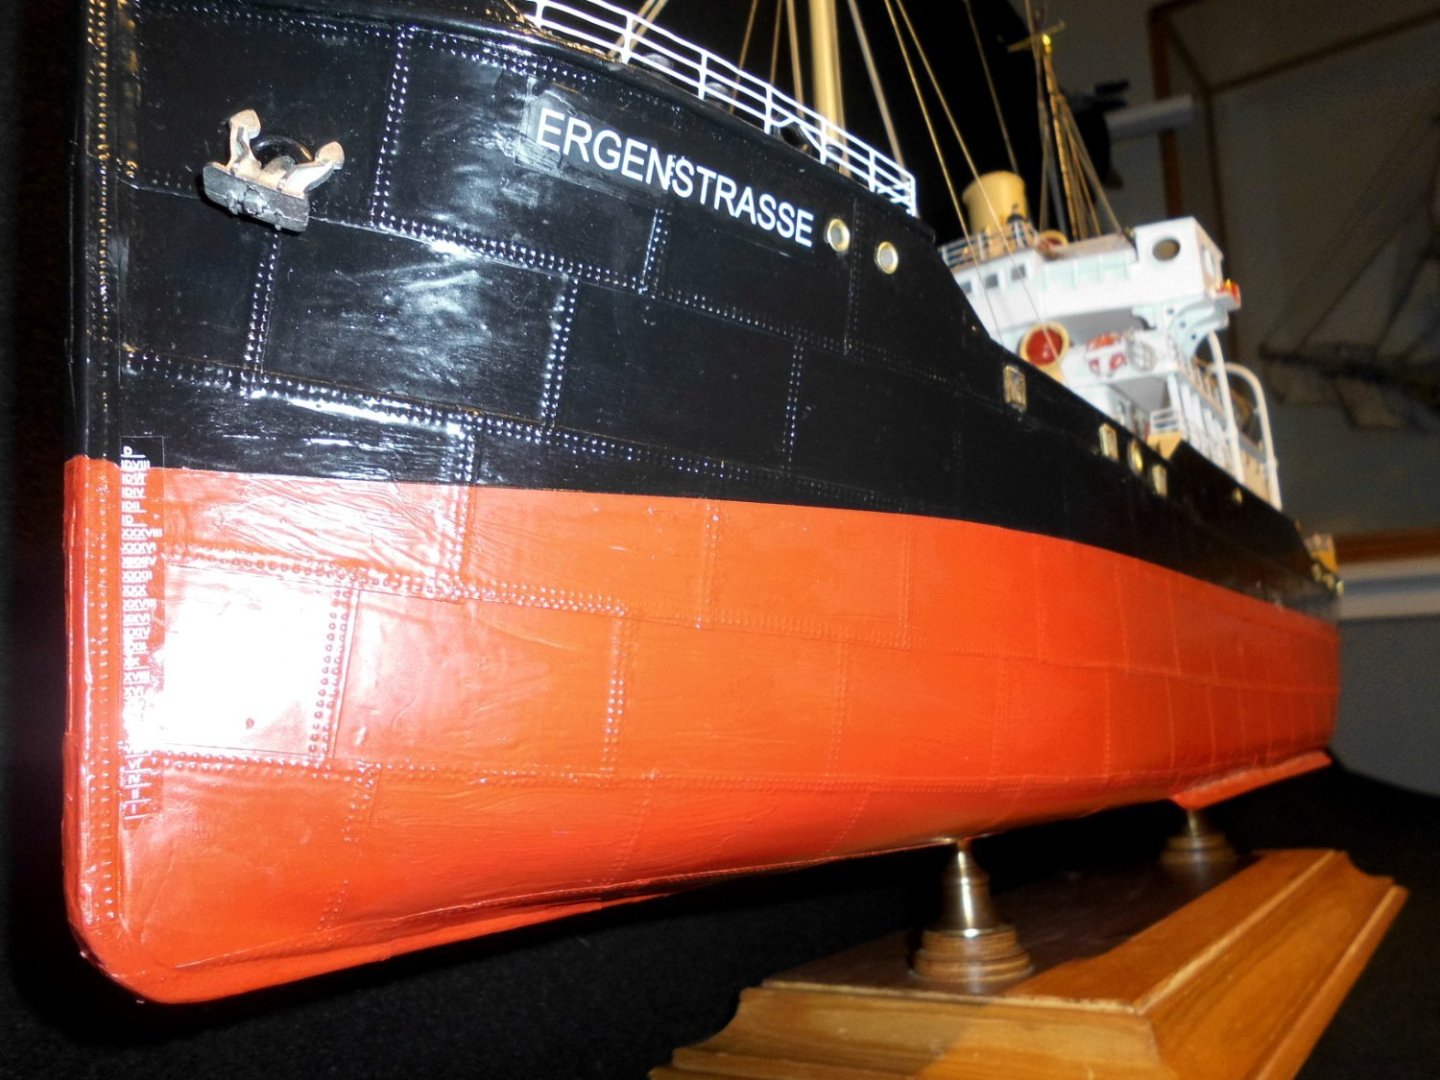
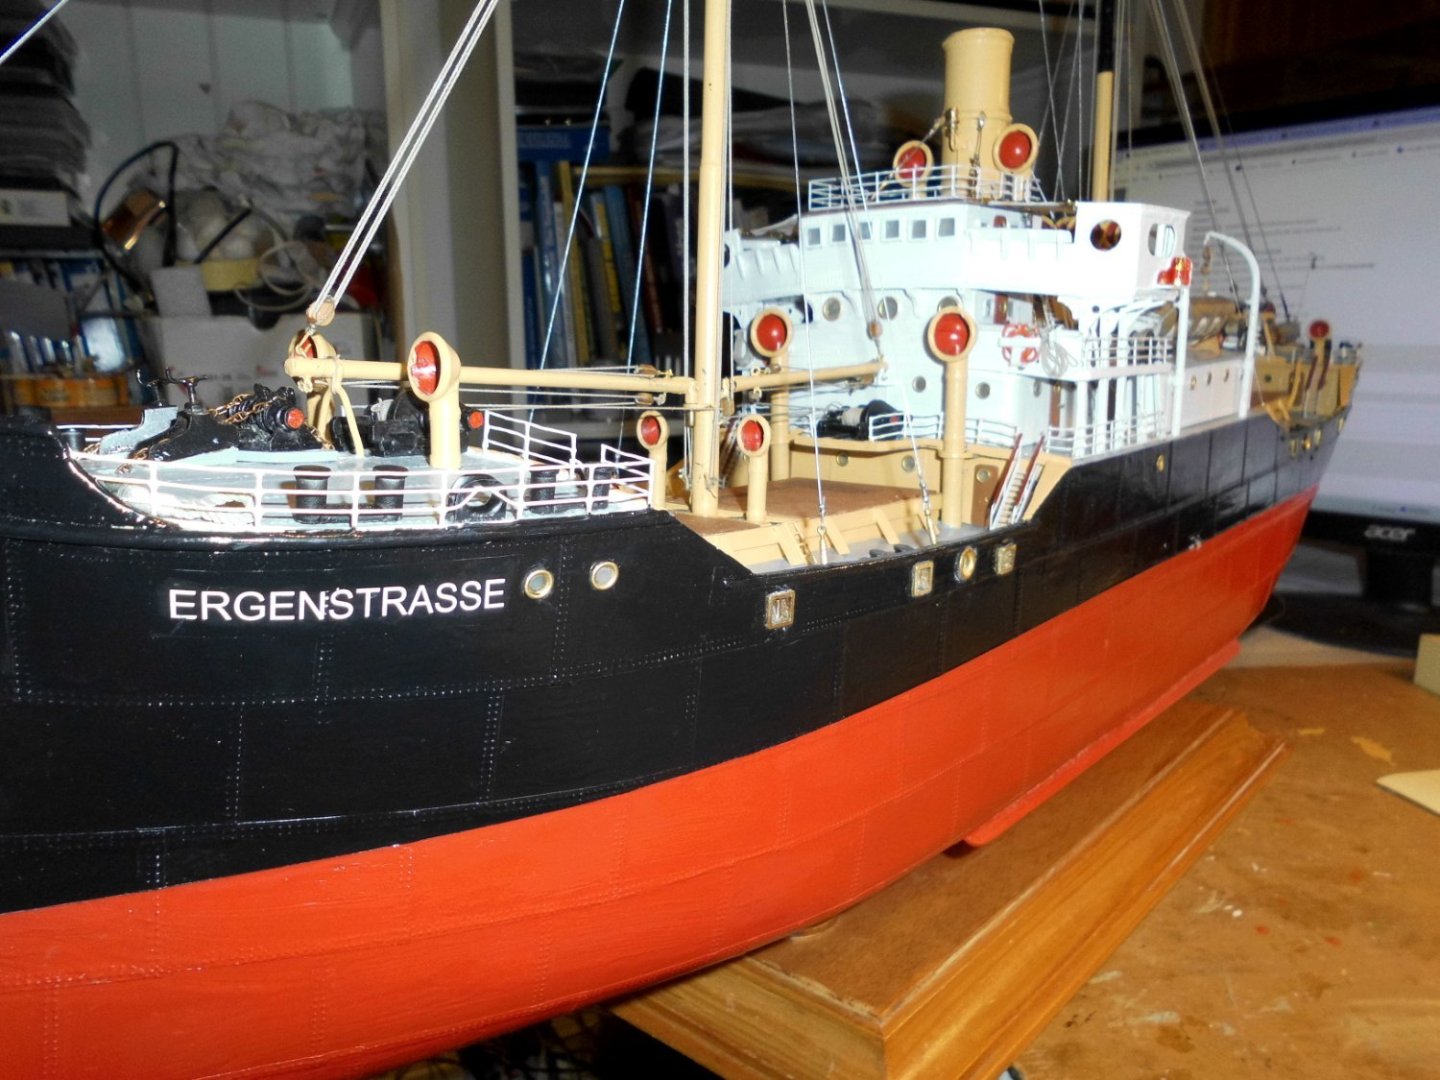
Bob, I`m very pleased that you like the model and thanks for your kind comments. You`re right, I tried to put a bit of that 1918 oldie Laker-steamship "charme" into the build. It was not easy to start with, because I had no build plans, except a frameplan of an appr. equal tonnage and length Ferris type freighter. I was facinated of the feeling transmitted through the manyfold careful watch of the "Sea Chase" movie, german movie name "Der Seefuchs". All details were adopted from stand-pics I made from the movie video (Free available on the web). For the figures, 1:87 (H0 scale) I preferably use chosen out Preiser figures, in this case also from Artitec Nils
-
Paul, John, Gary, KGstakes and Keith, Thank you all for your nice appreciations and for following this build Nils
-
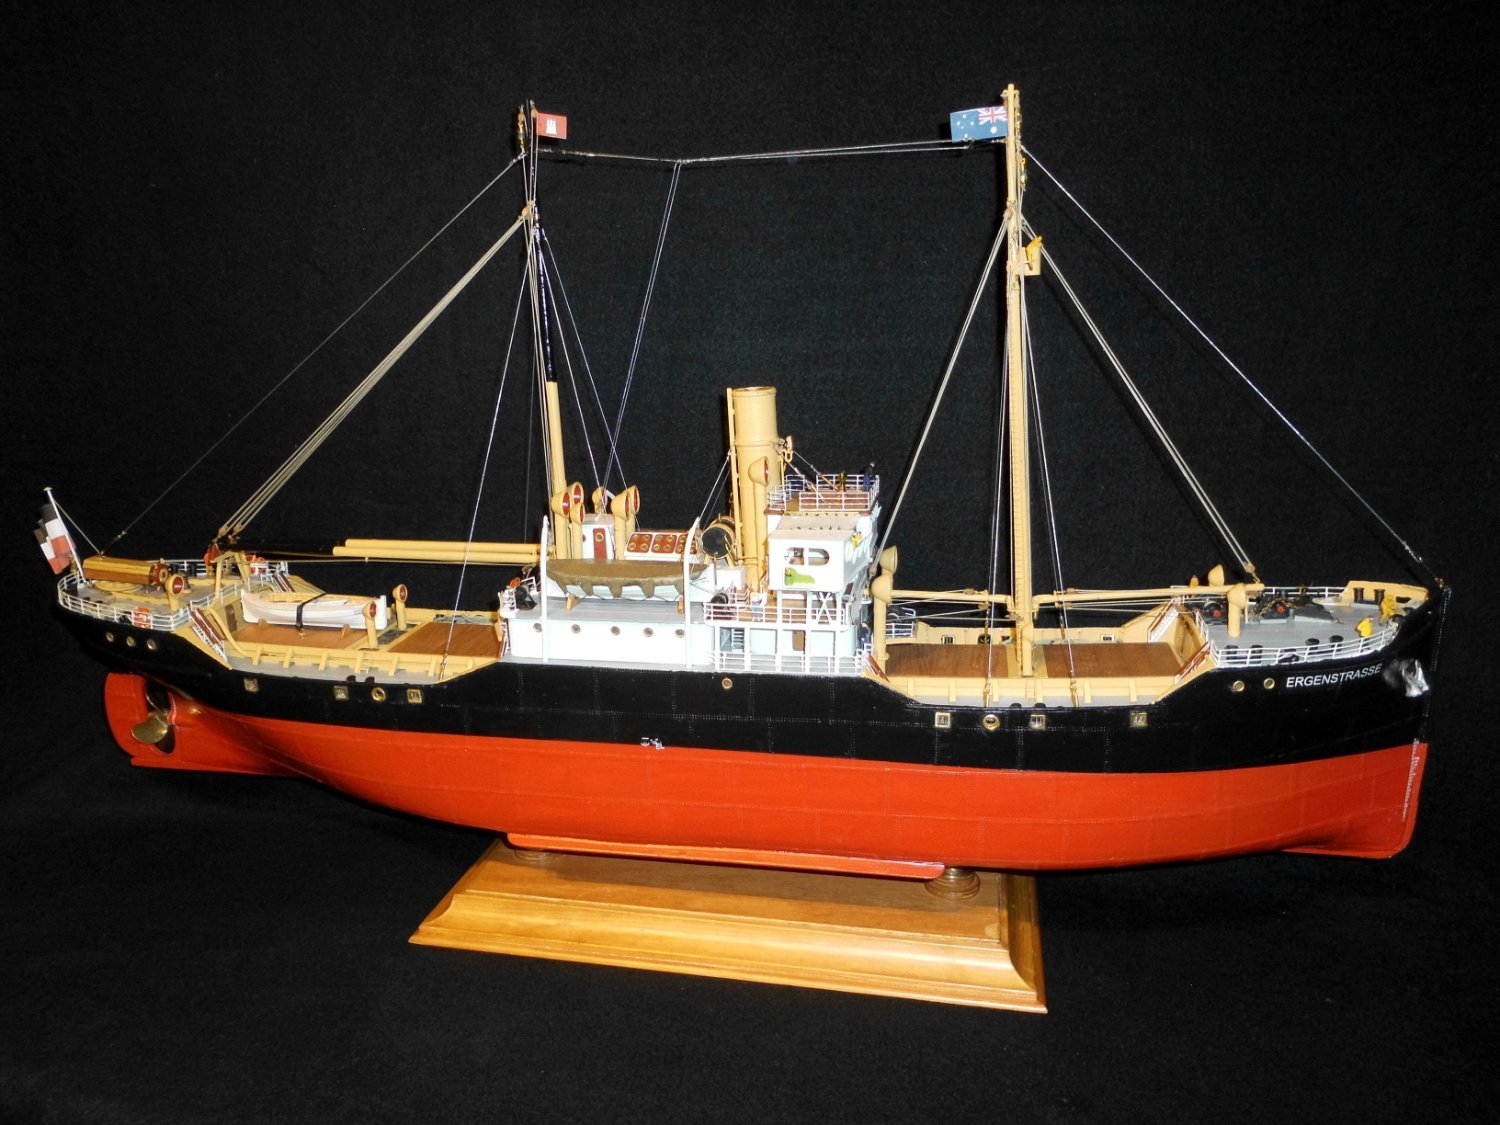
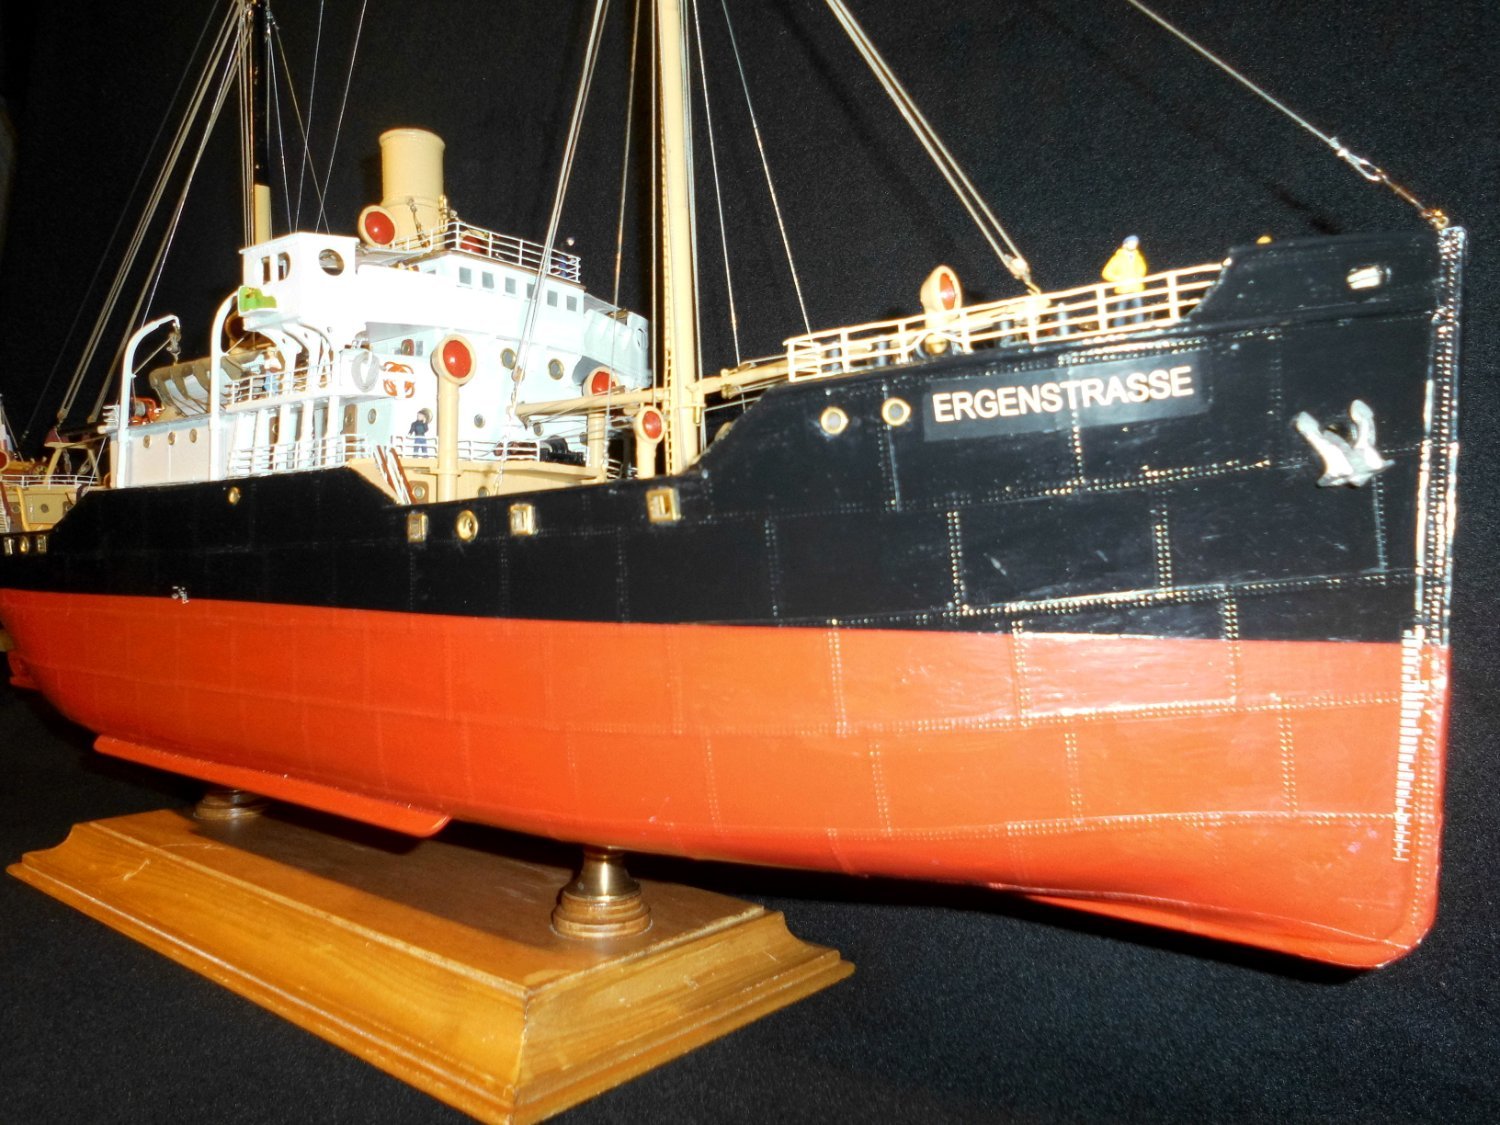
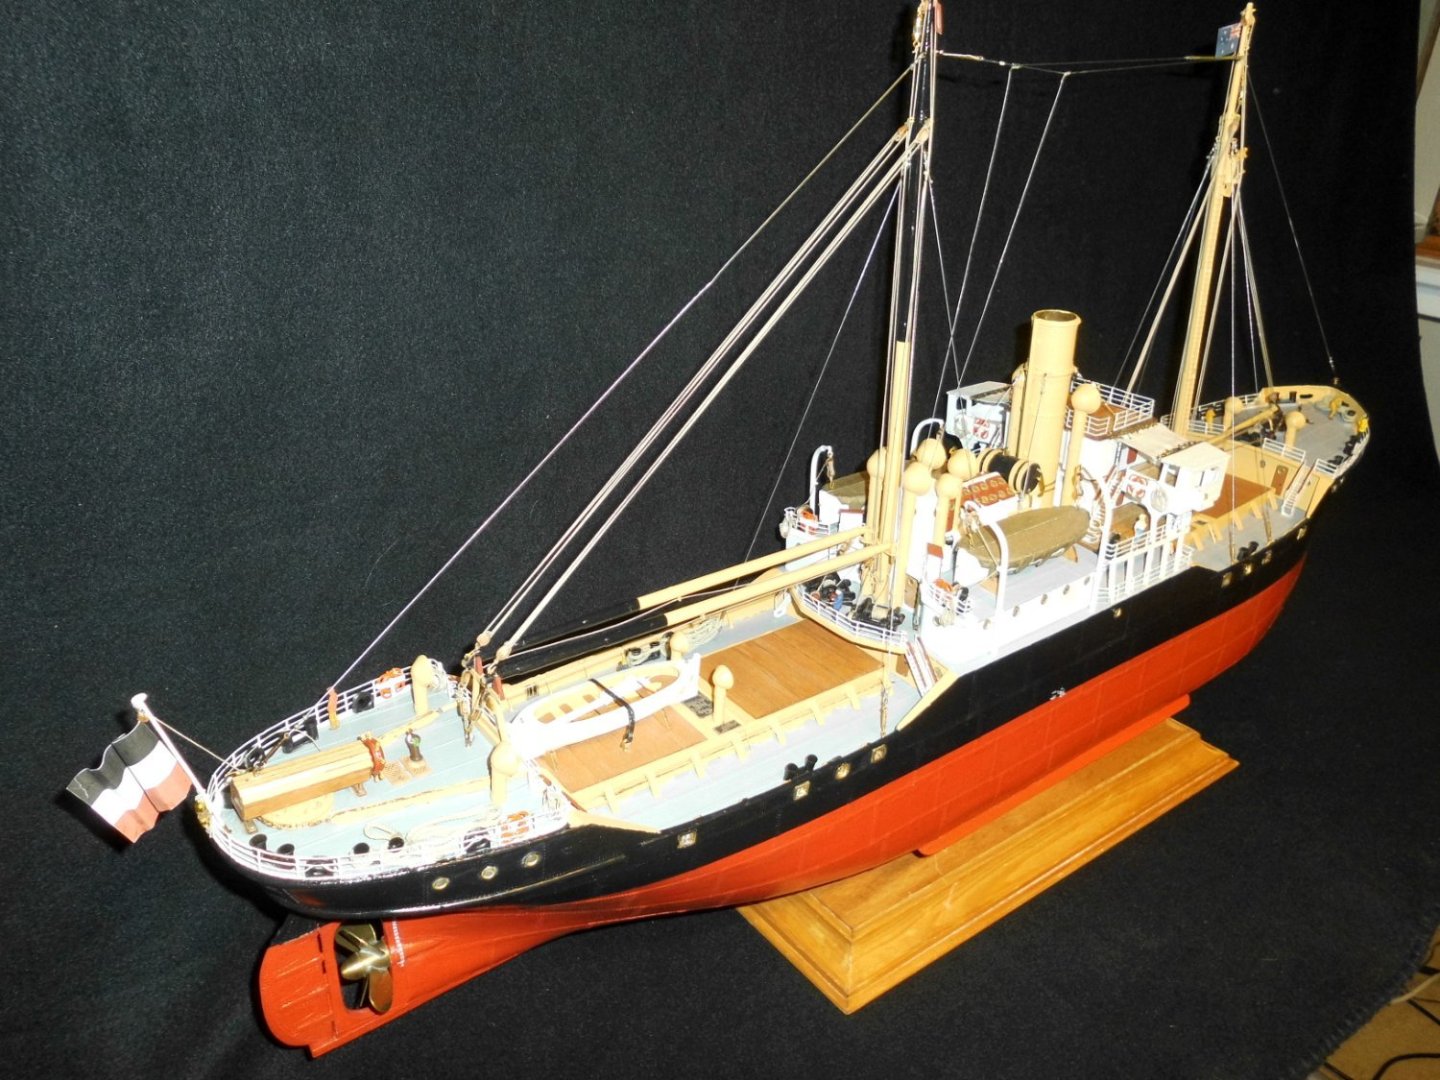
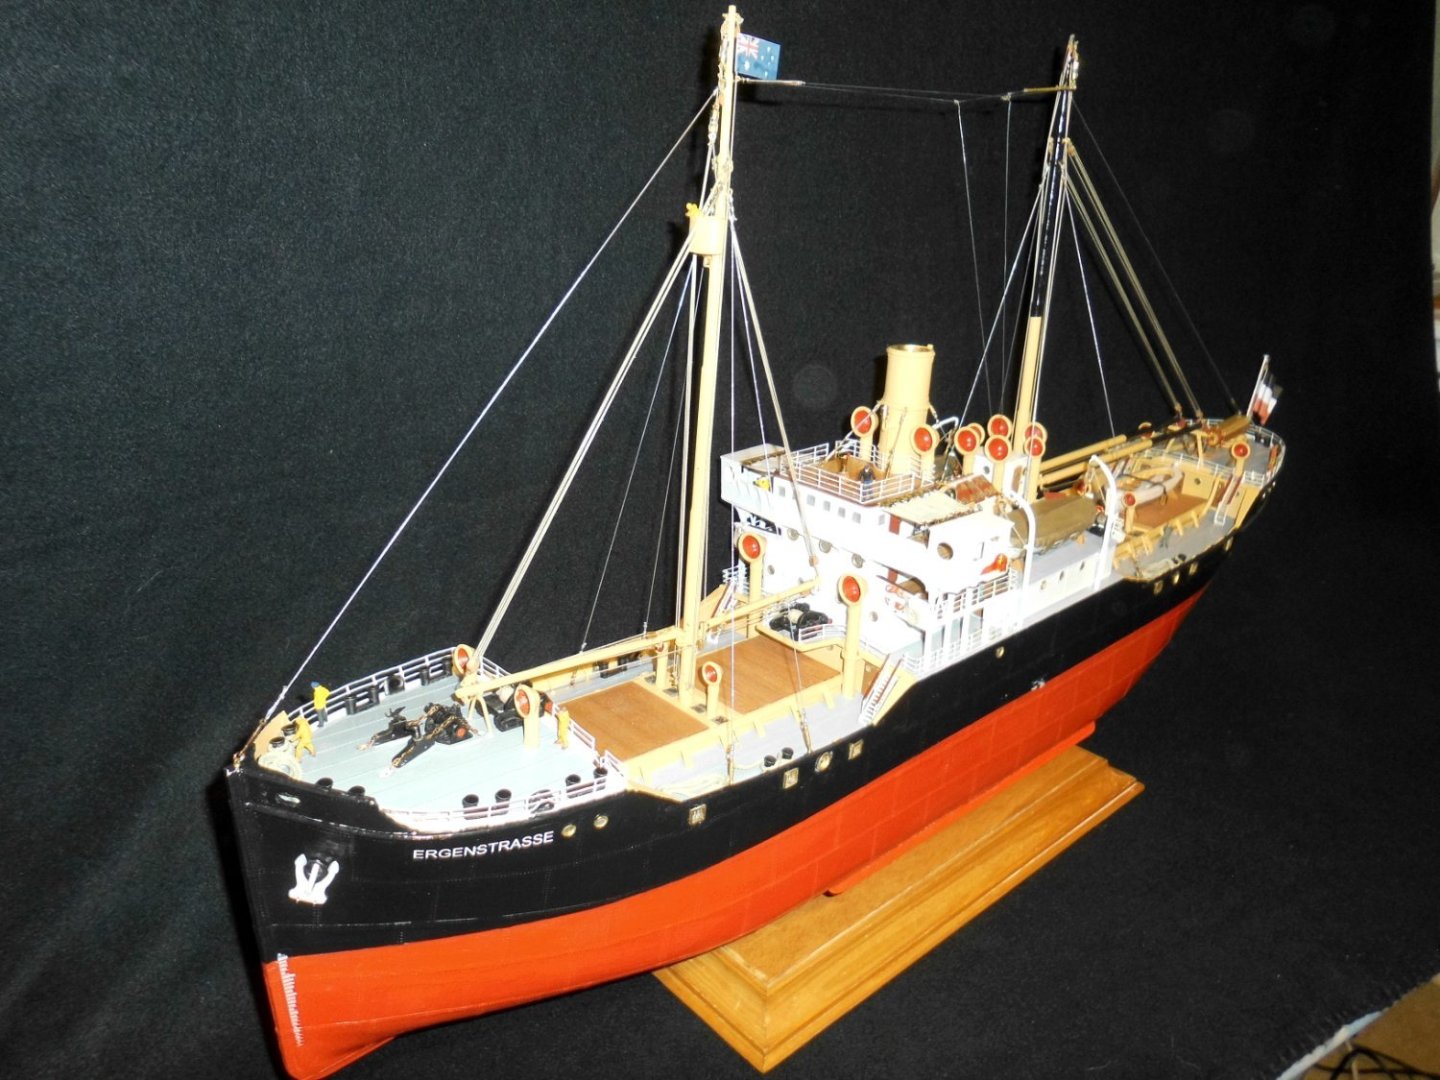
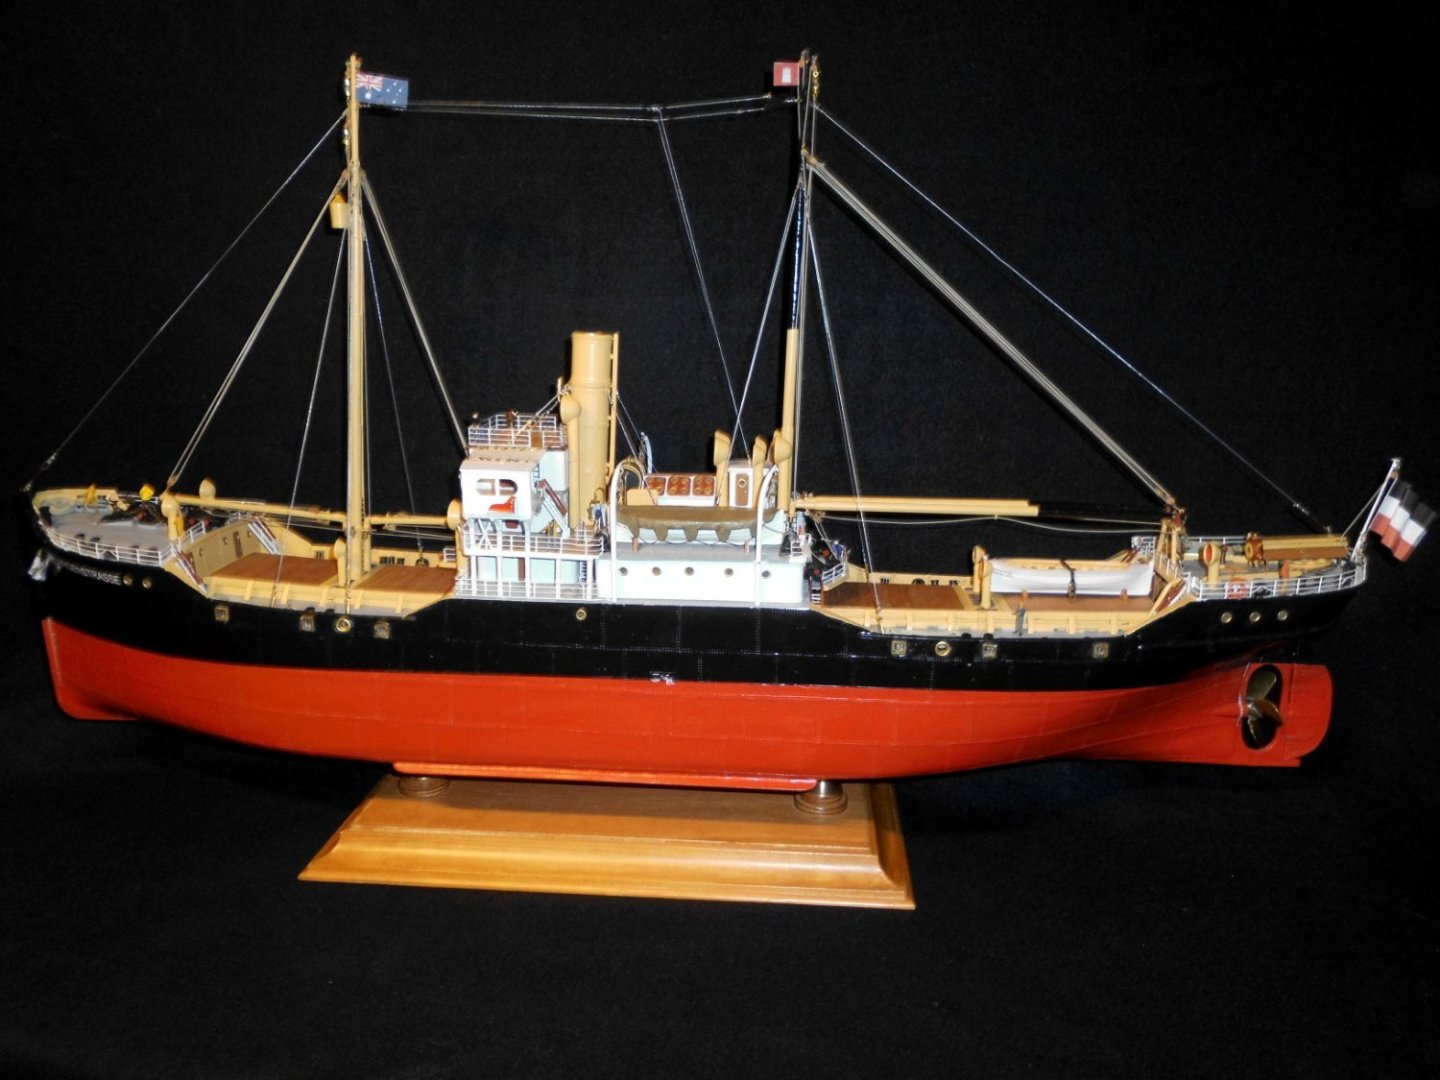
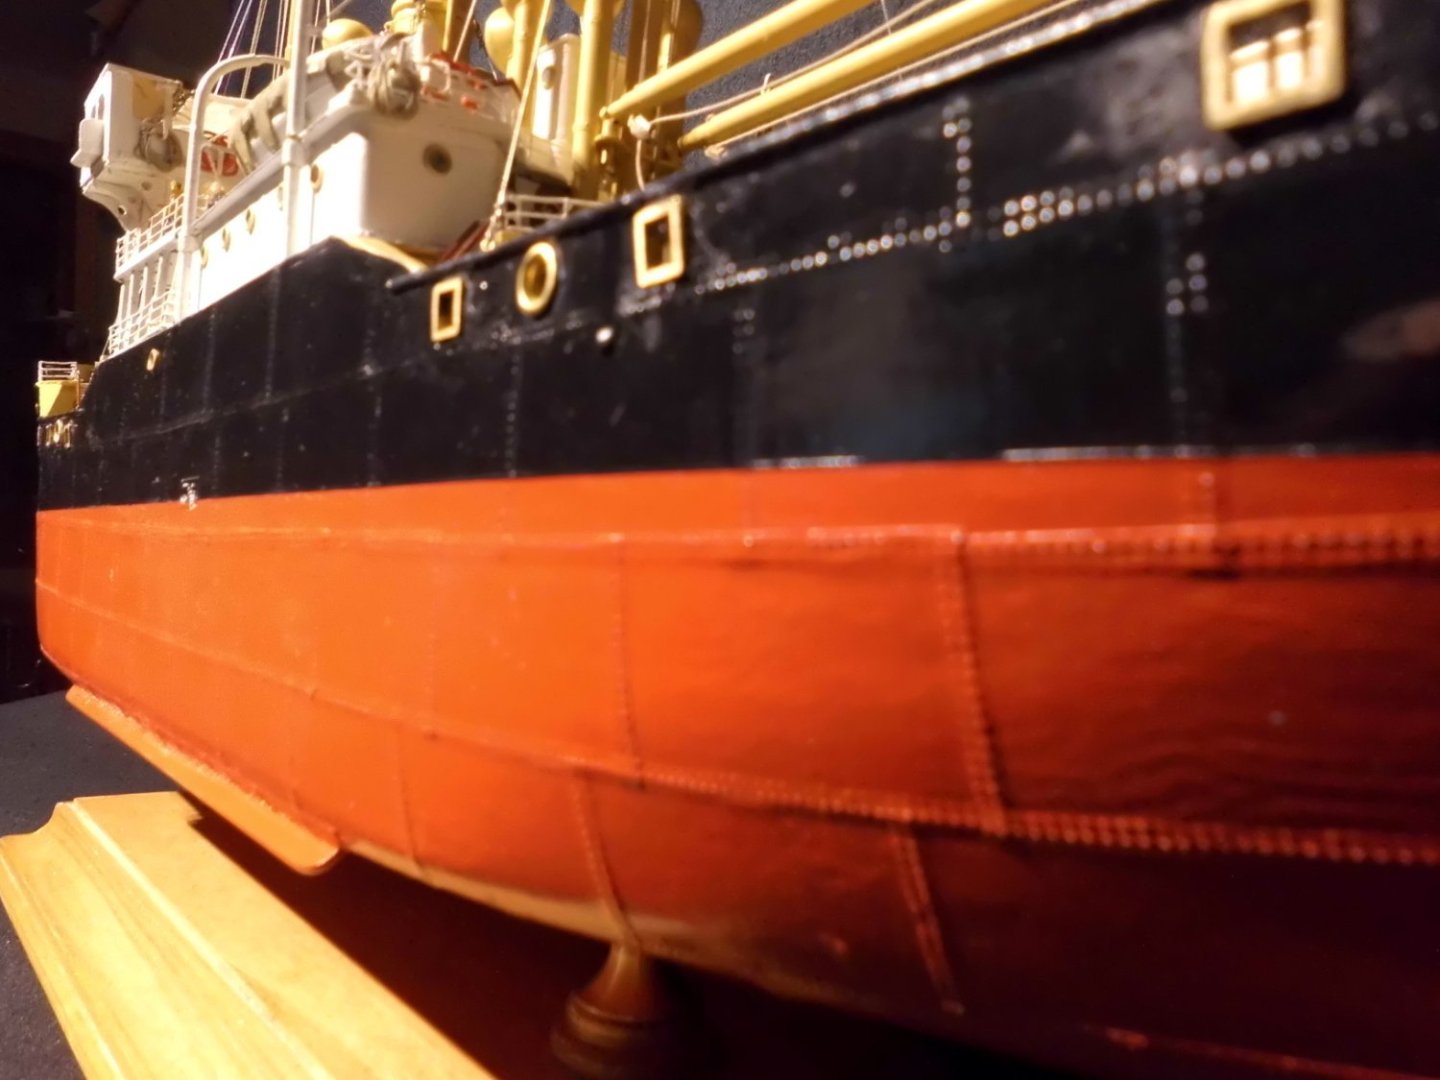
FINISHED The Laker-steamer Ergenstrasse of birthyear 1918 is now finished. Will still have to build the glass case for it Enjoy the pics. I shall choose out some of them and create a new album for these..... Nils


- 330 replies
-
- 30
-

-

-

-
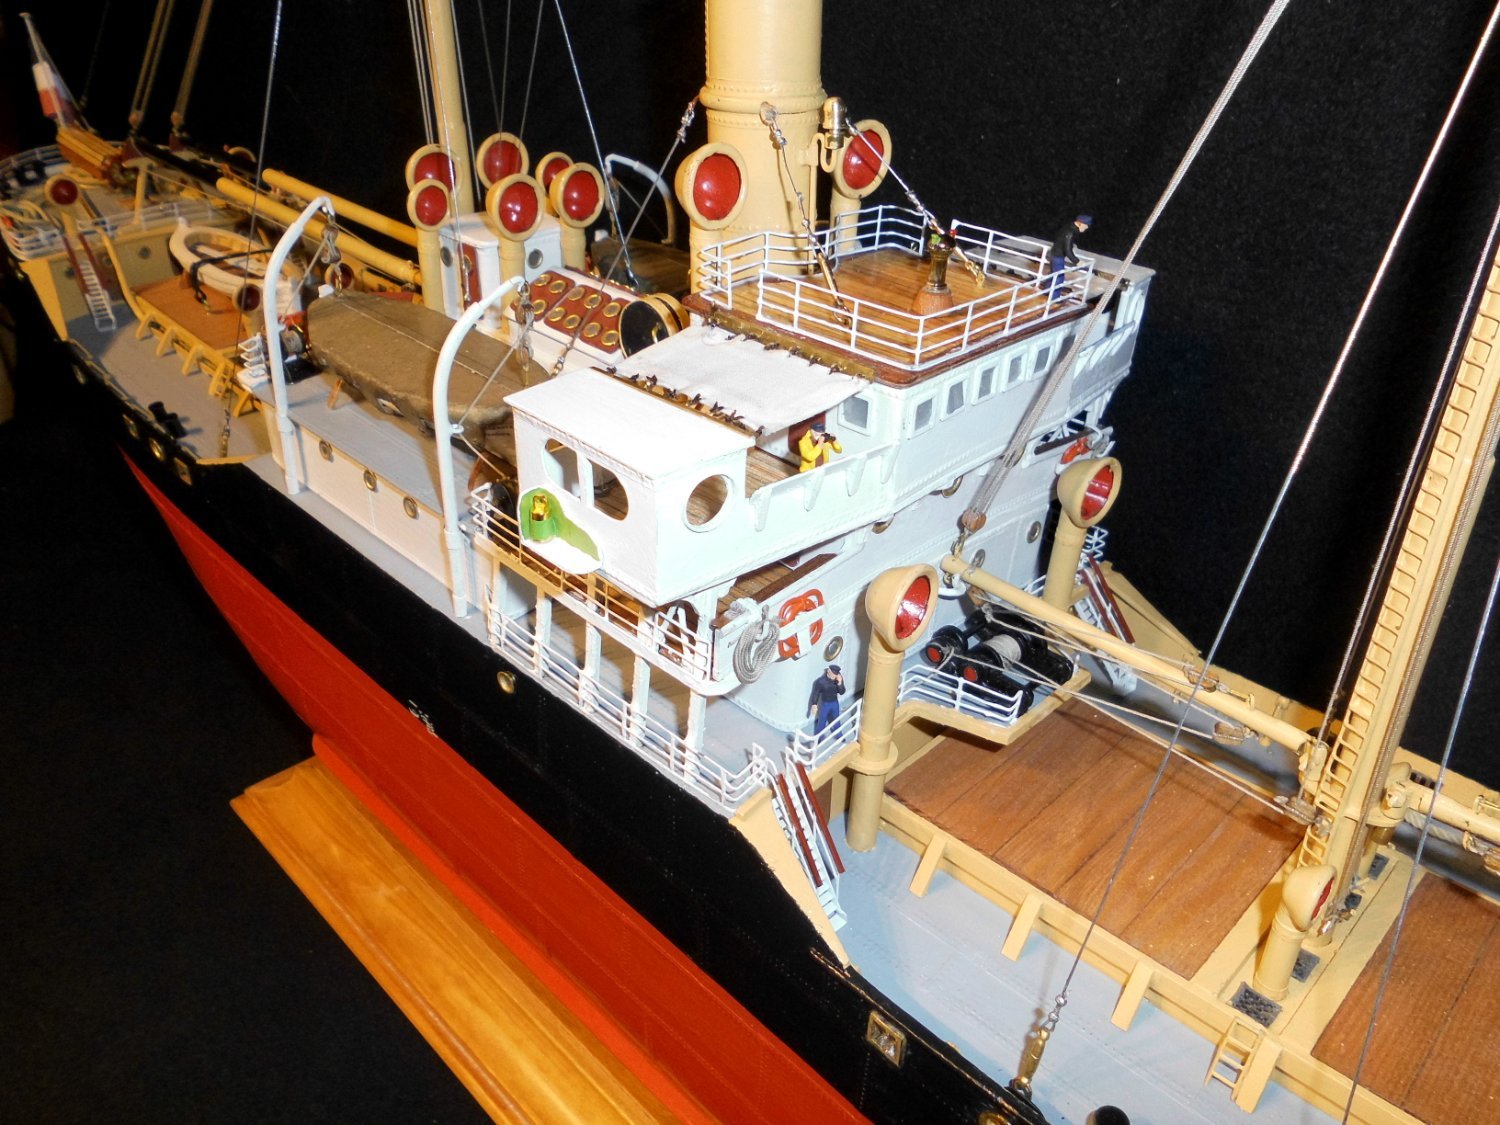
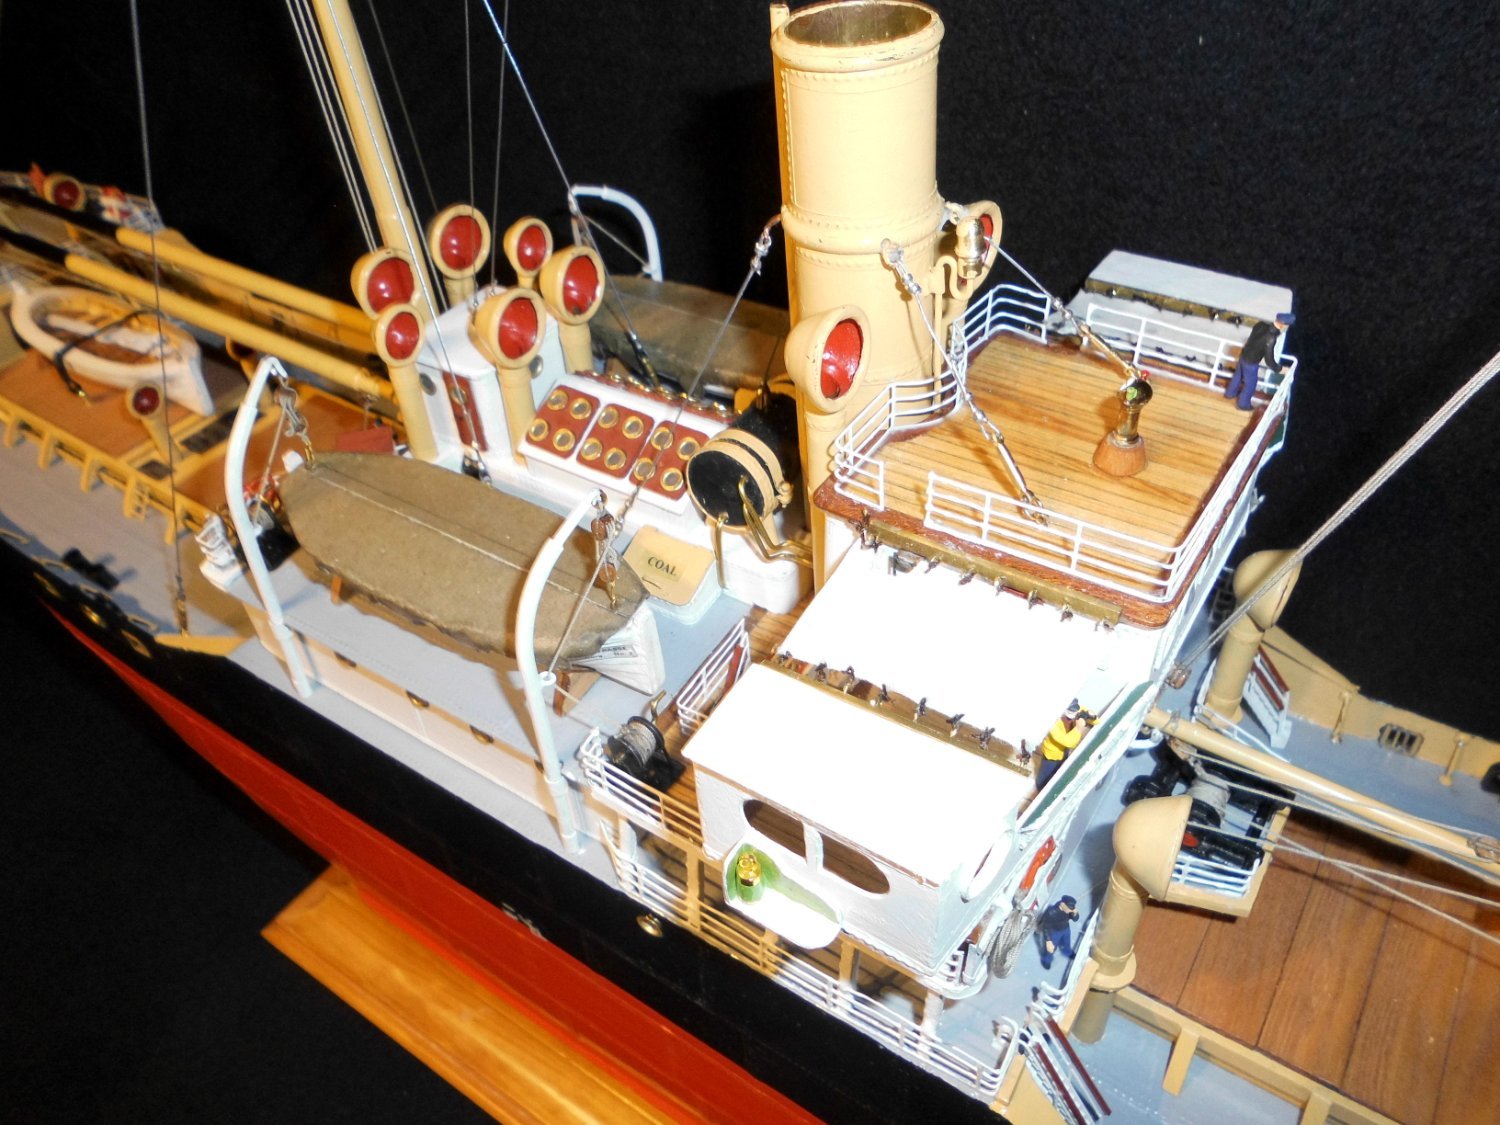
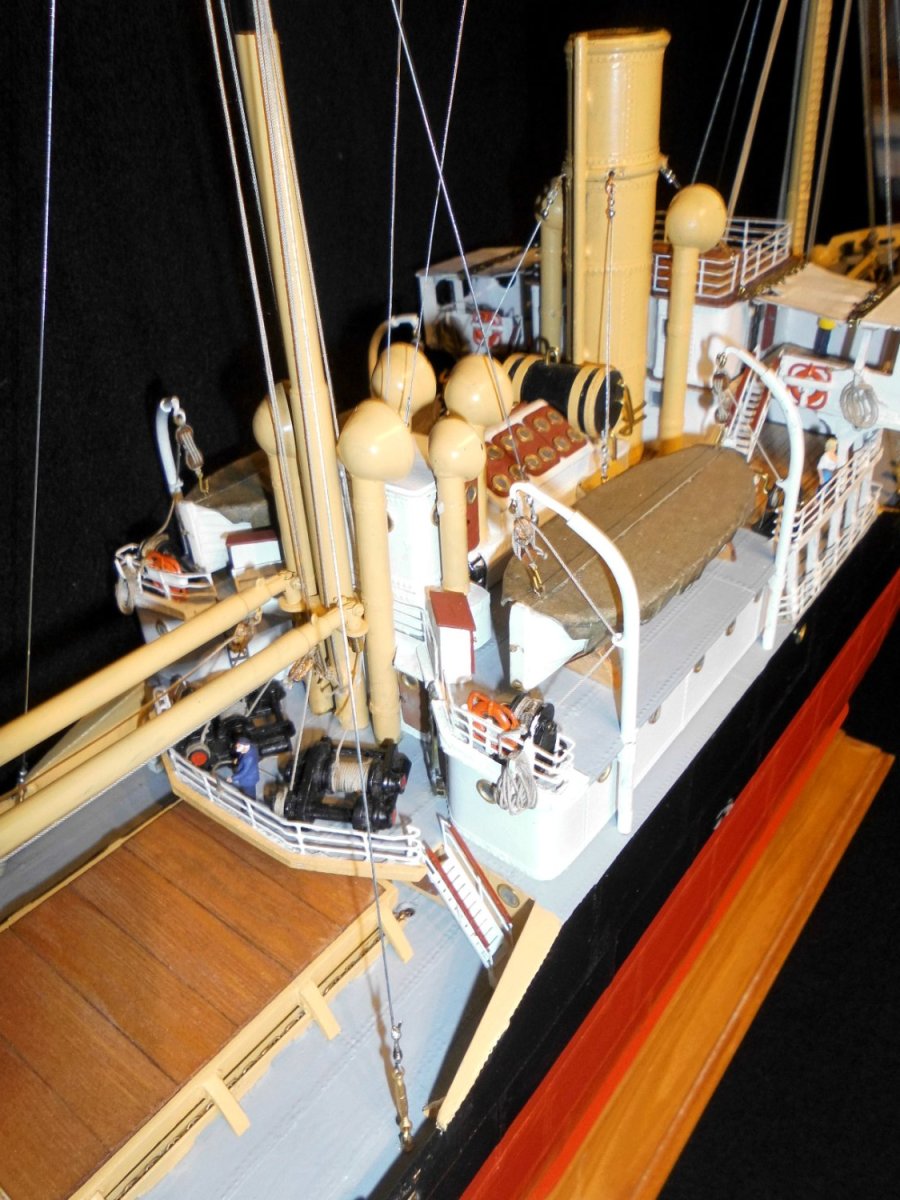
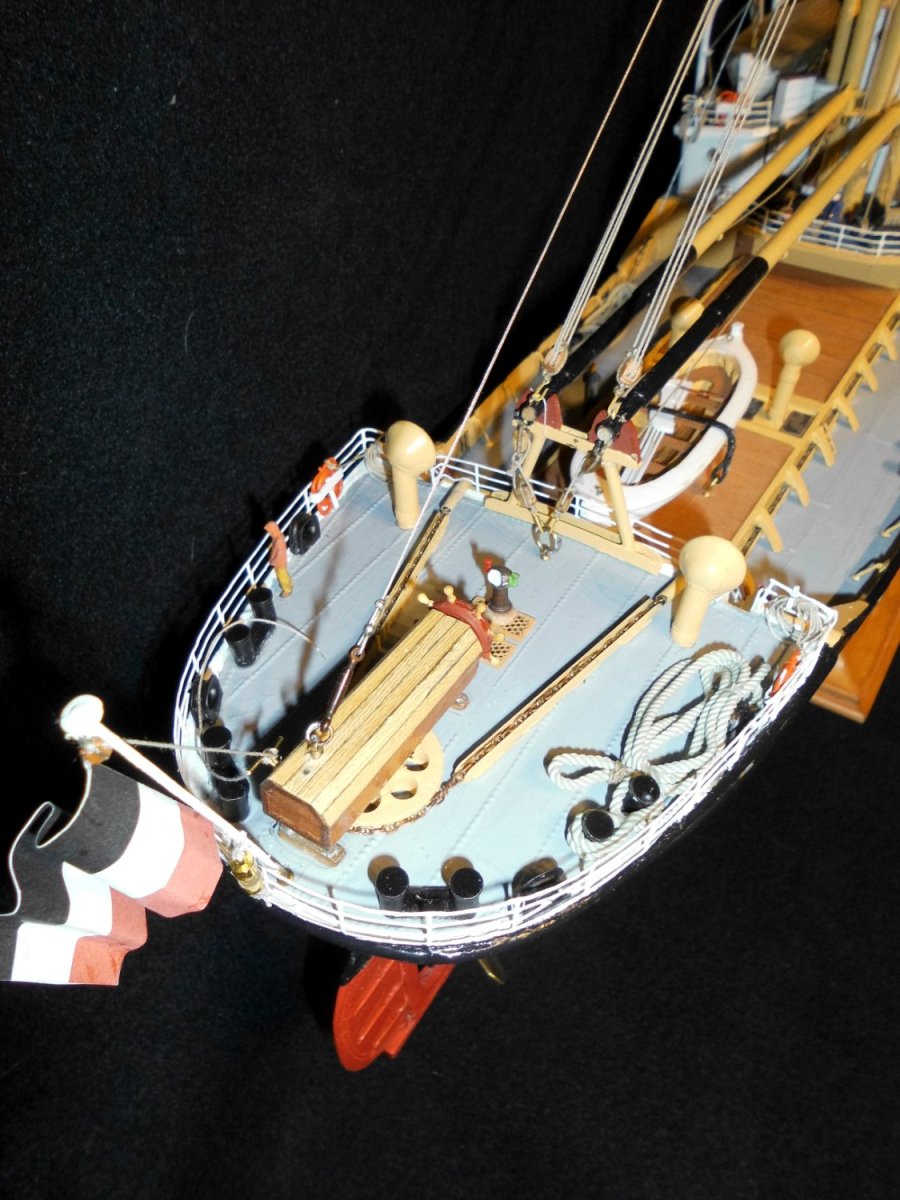
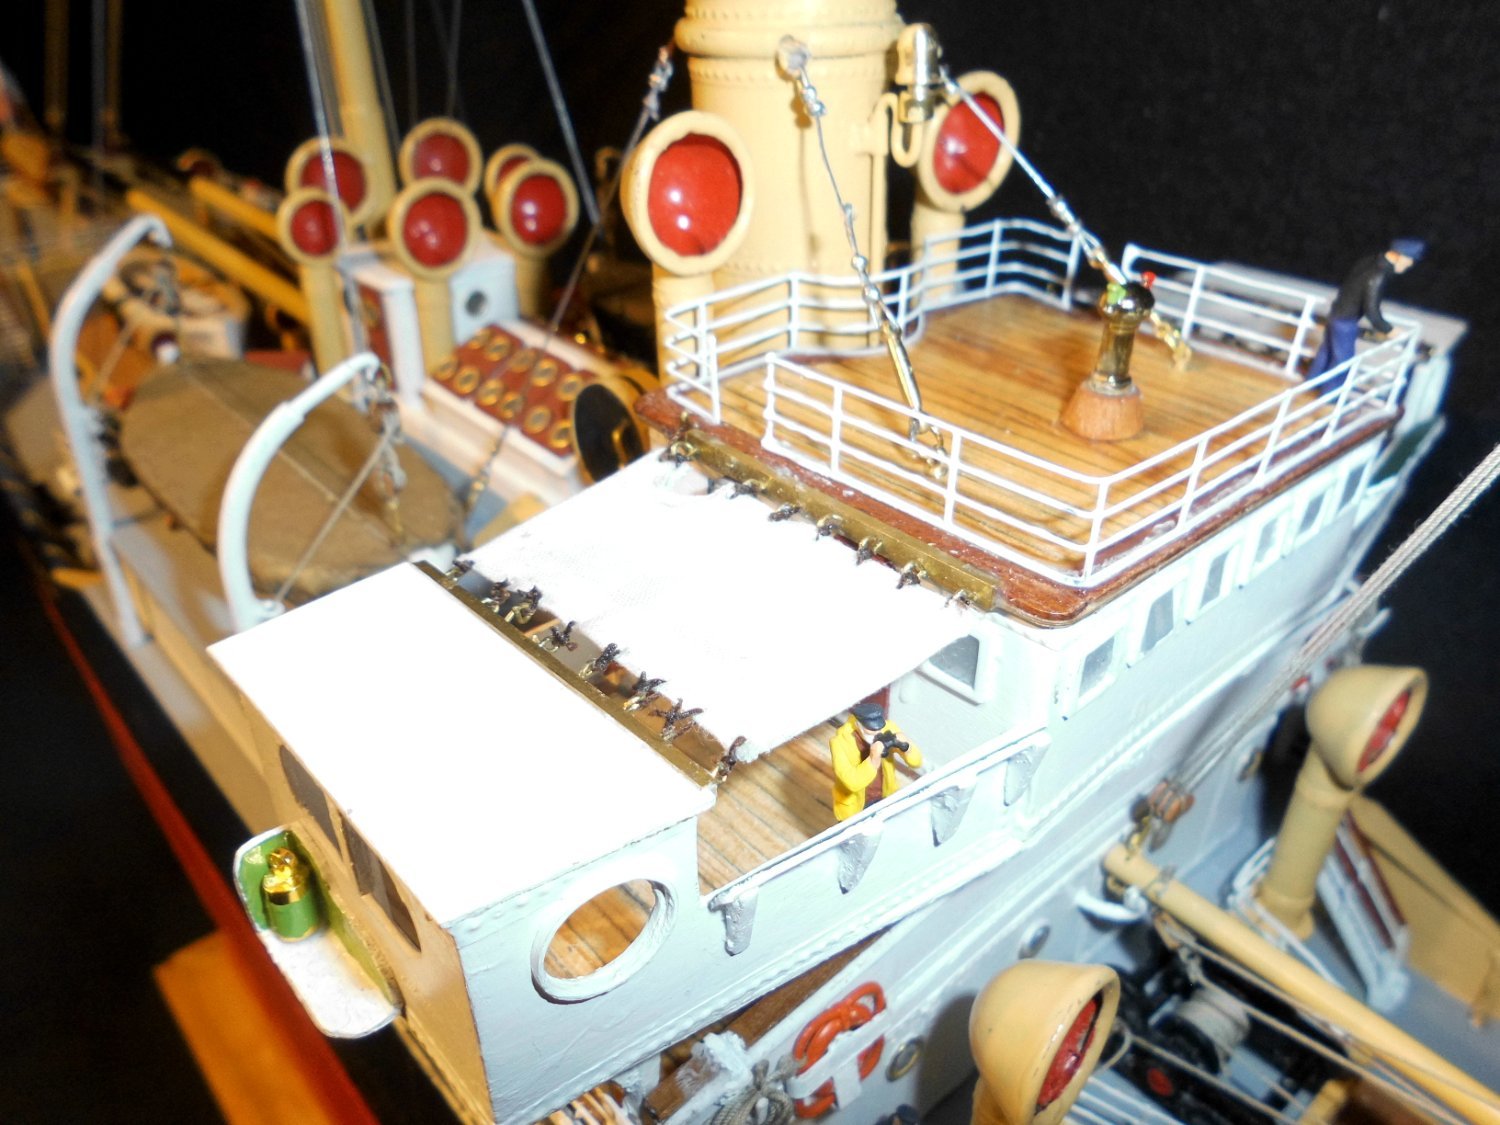
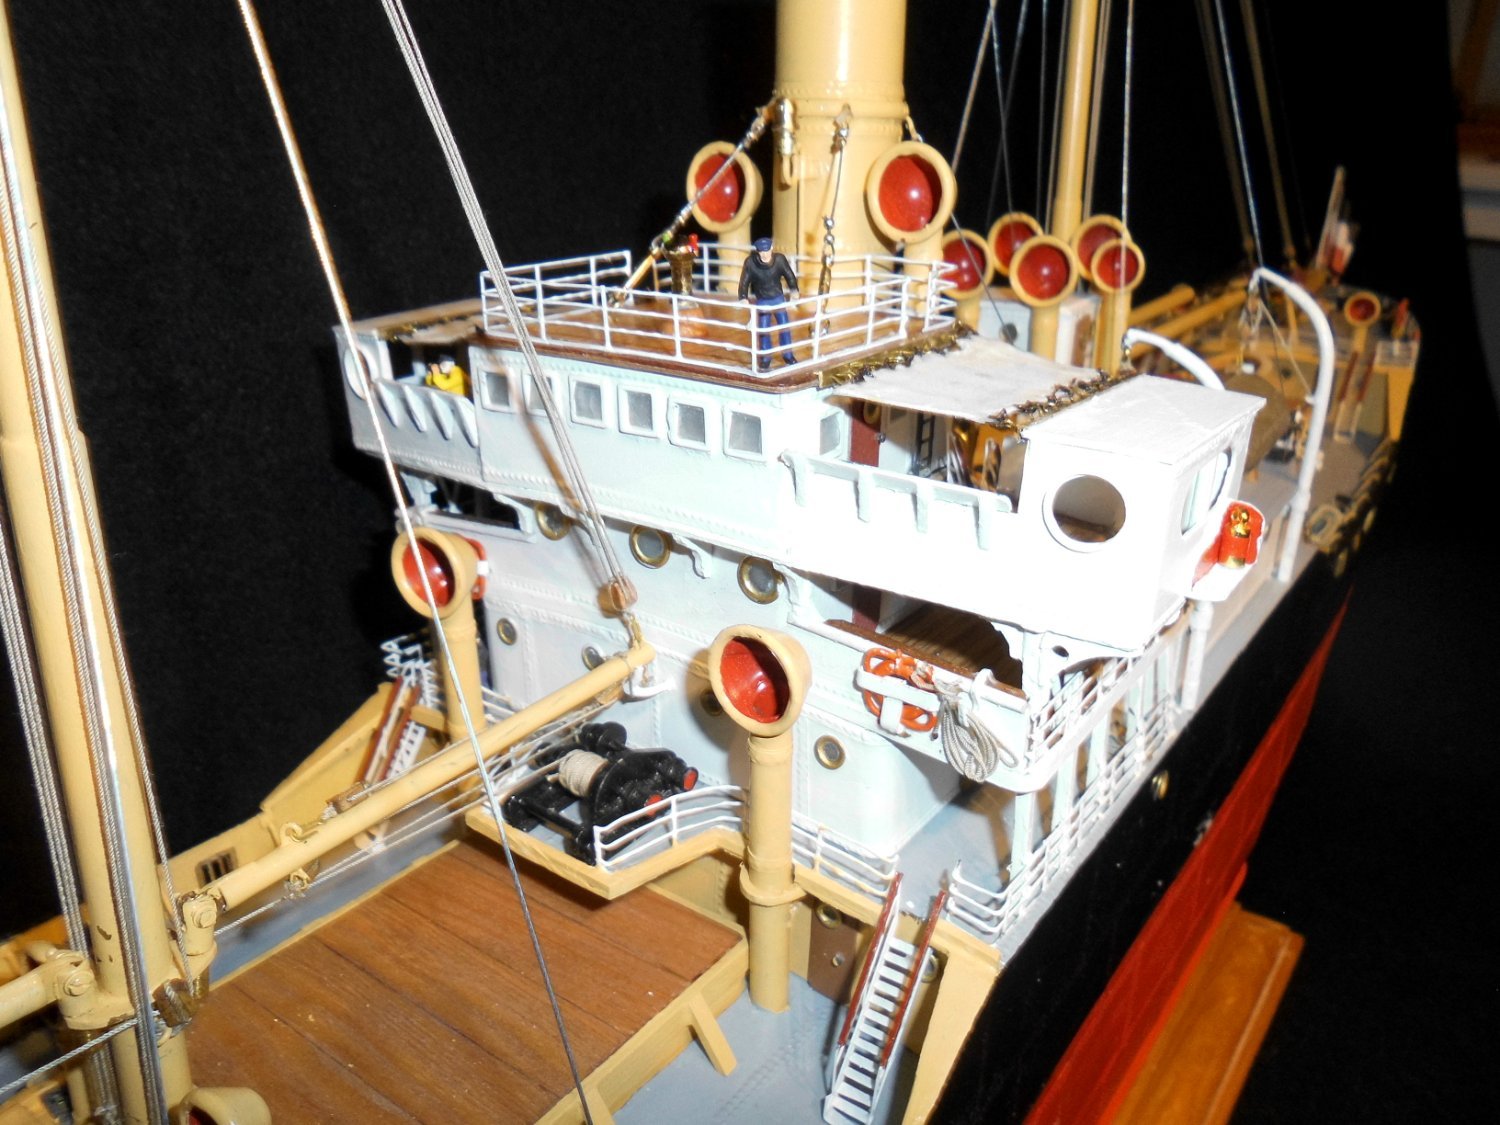
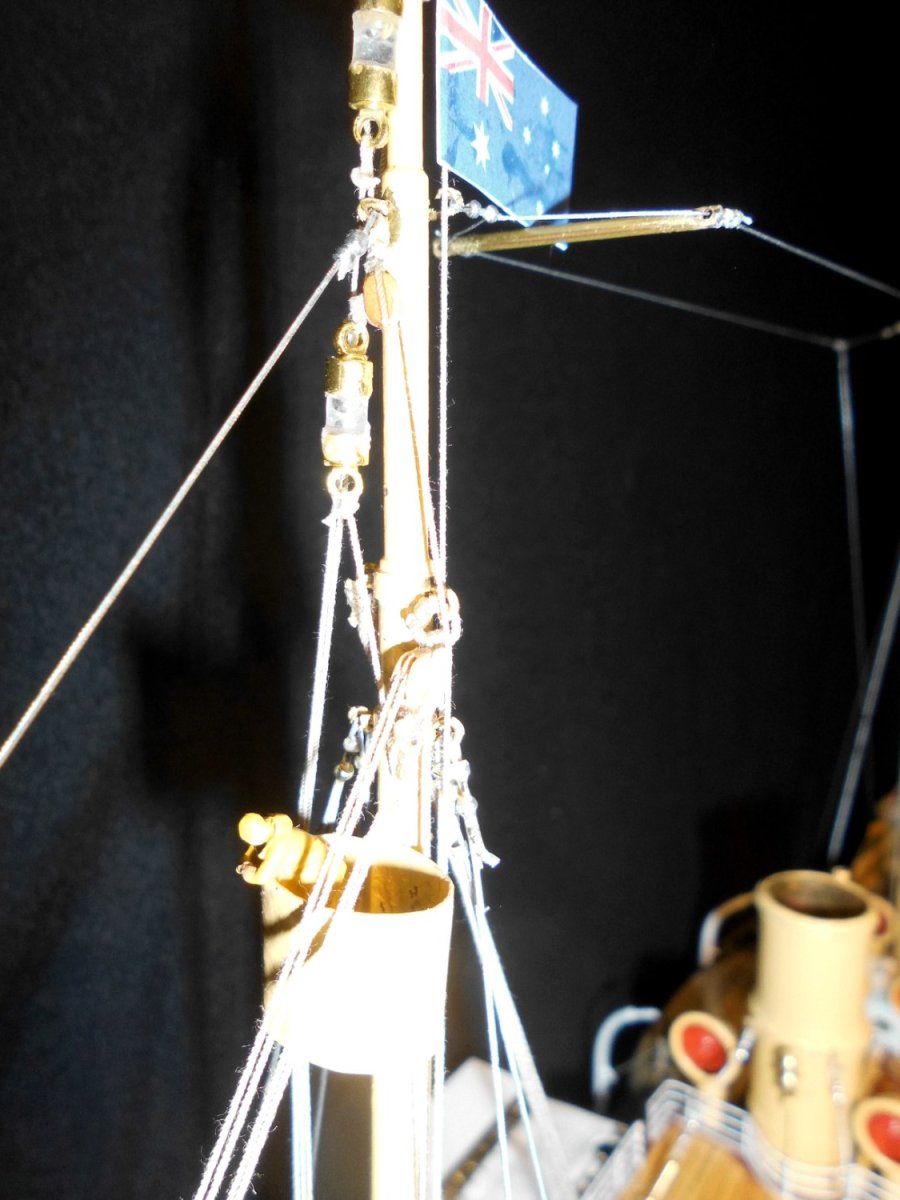
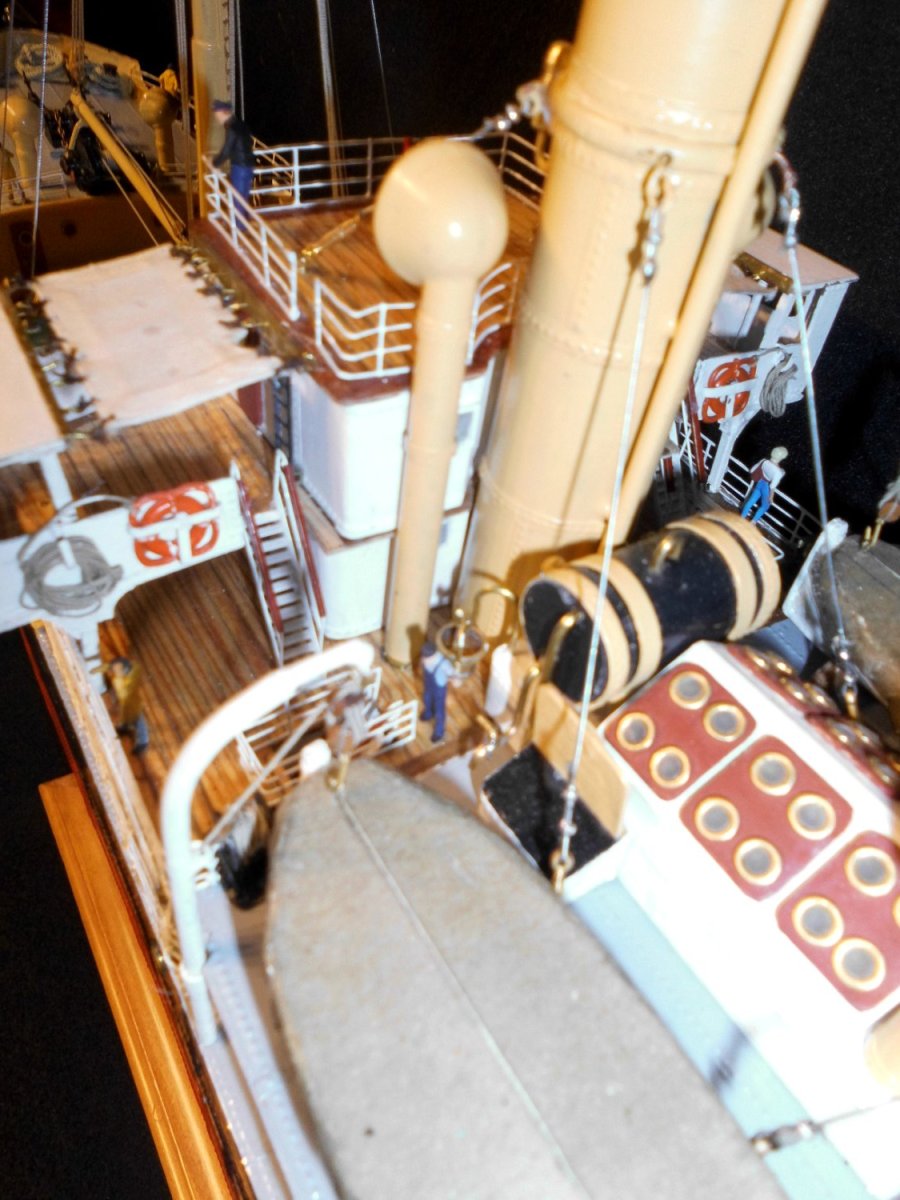
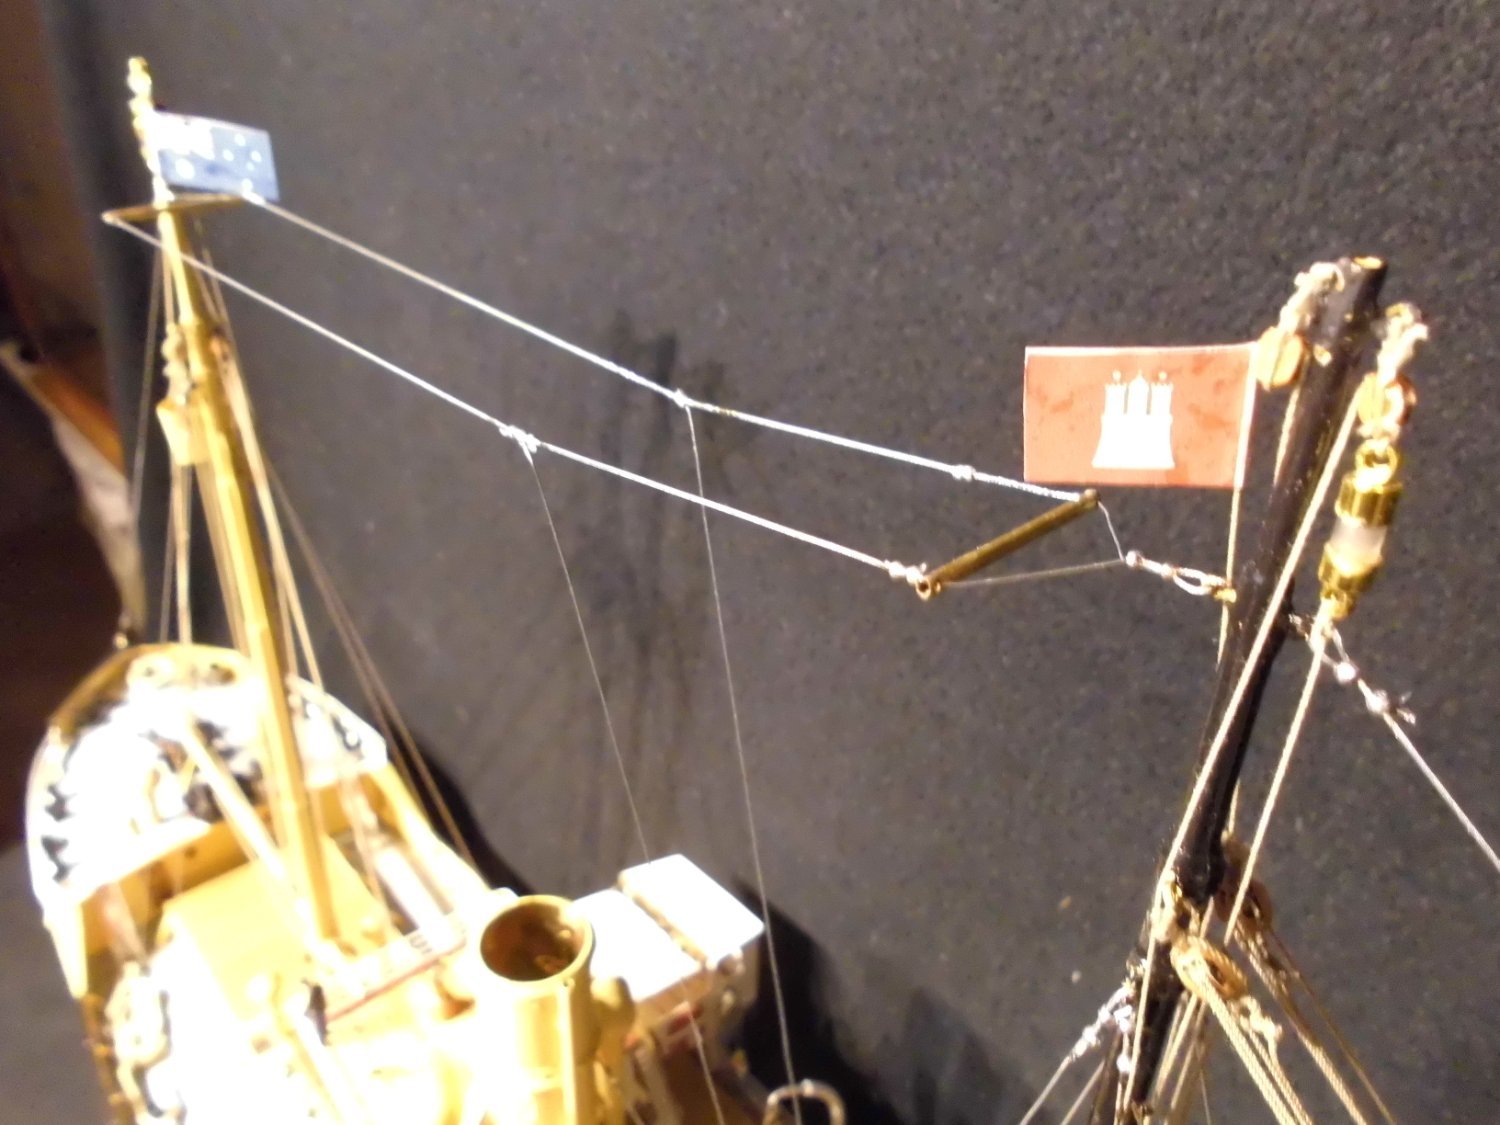
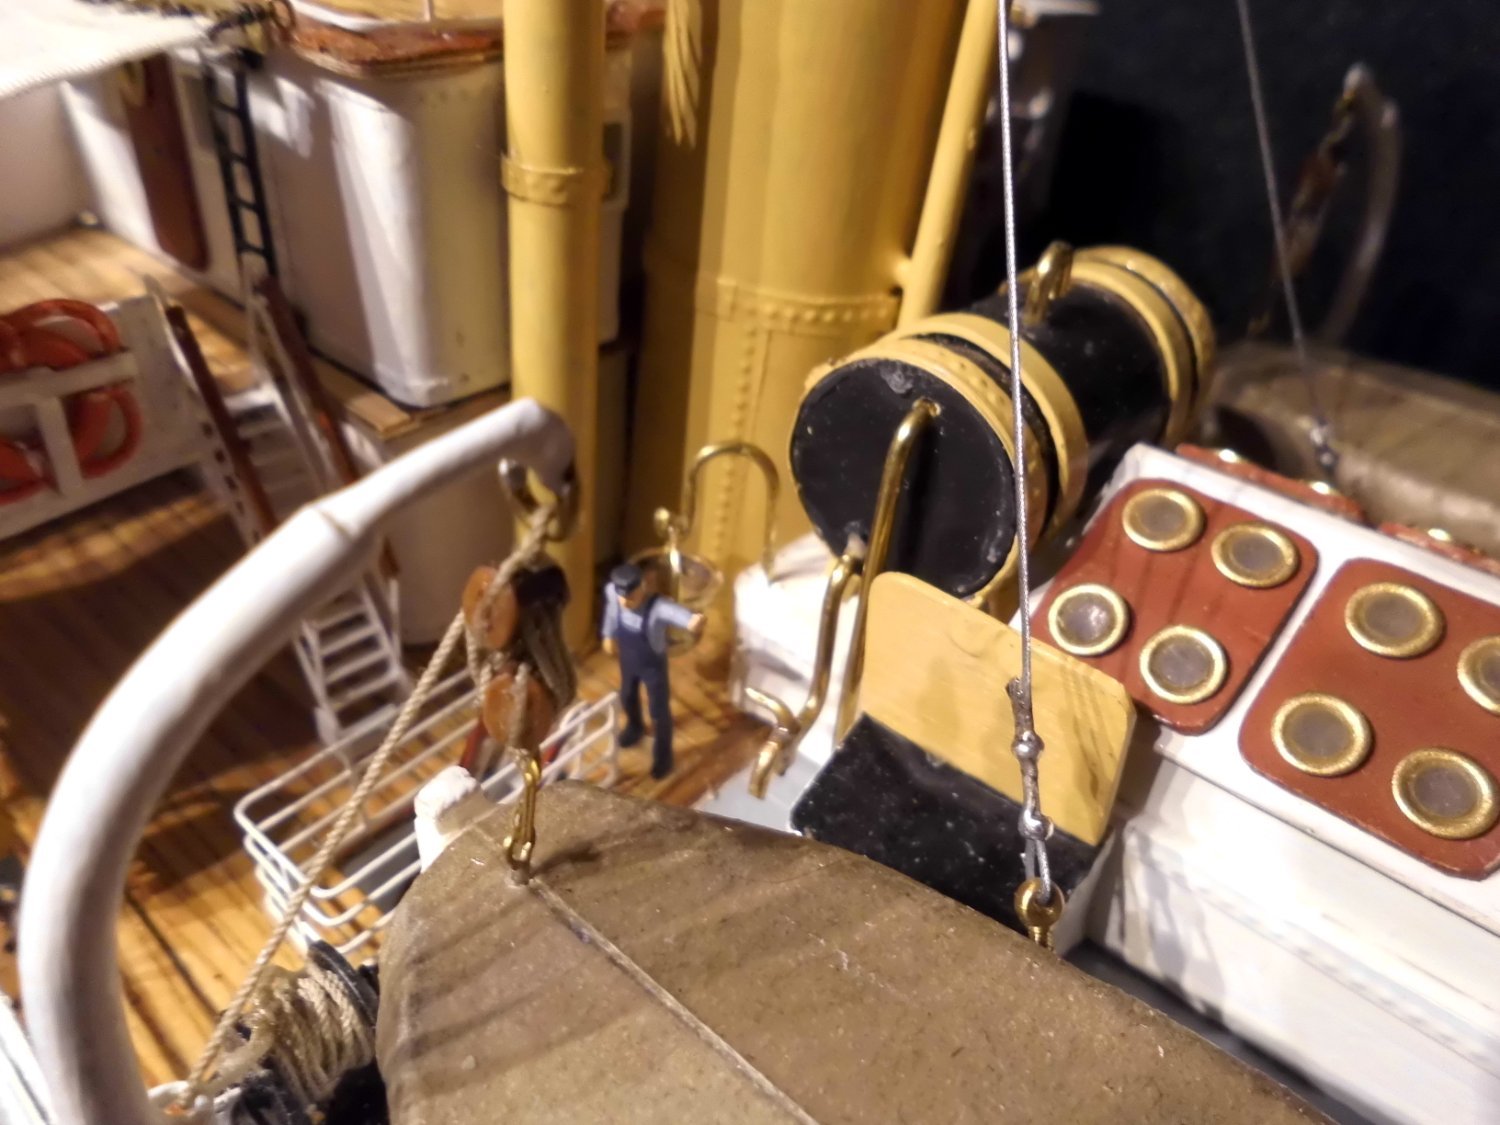
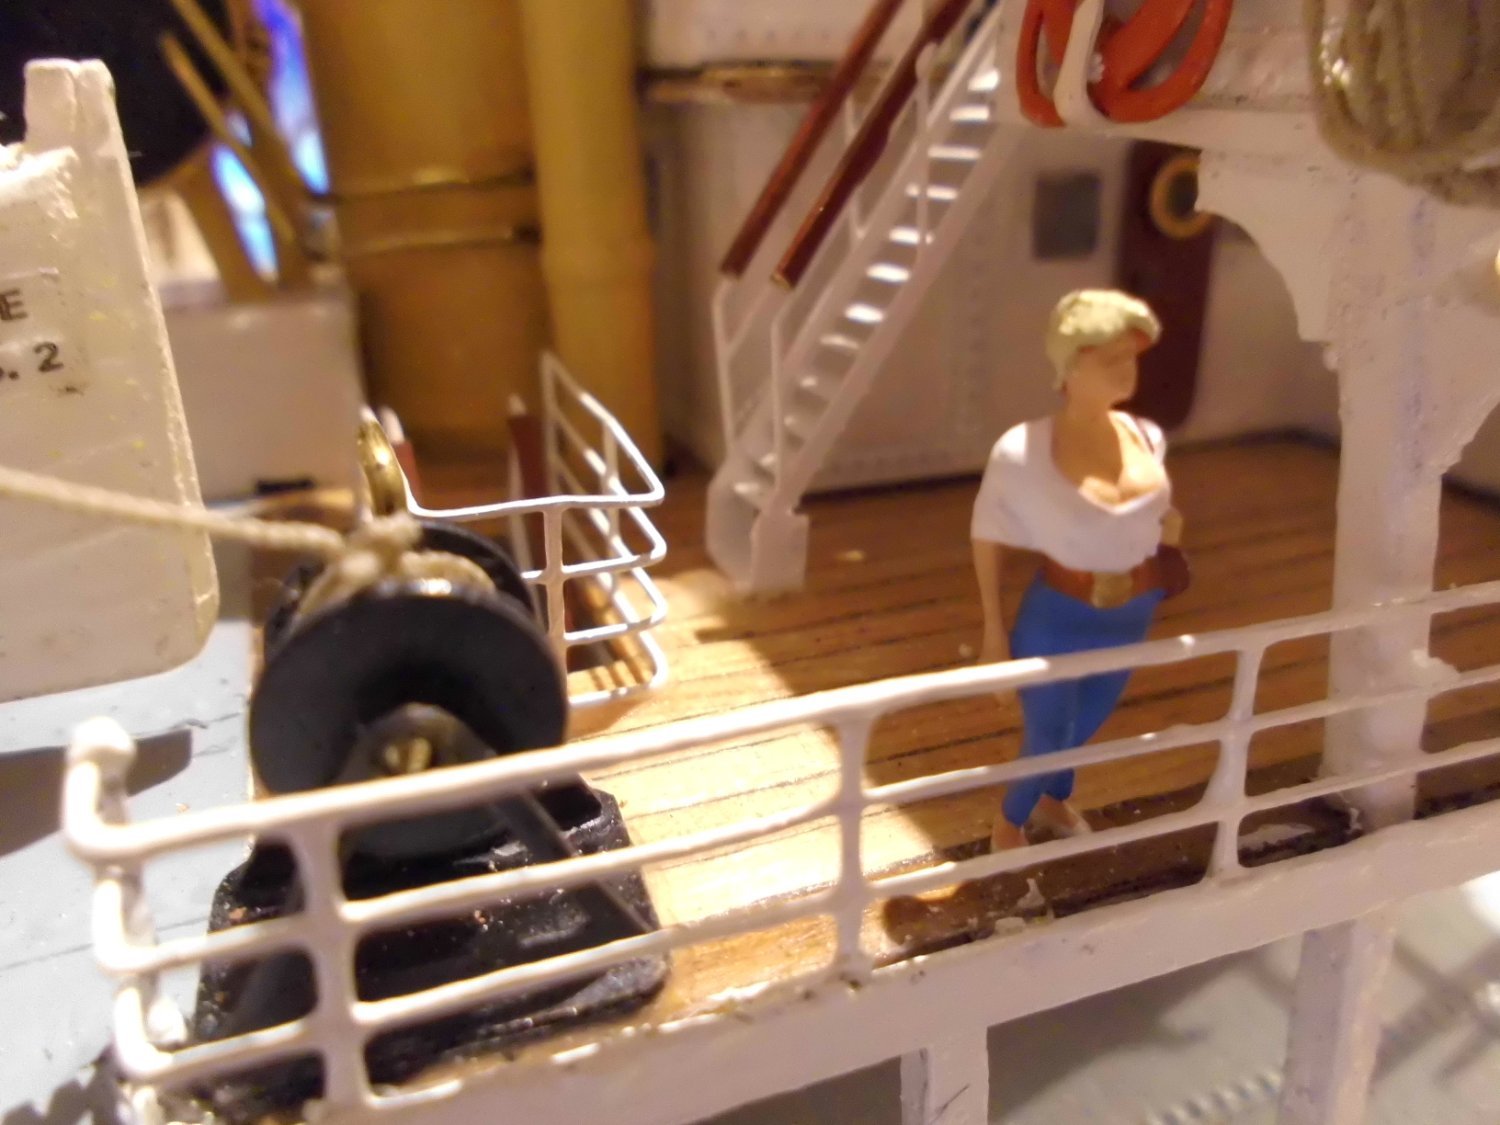
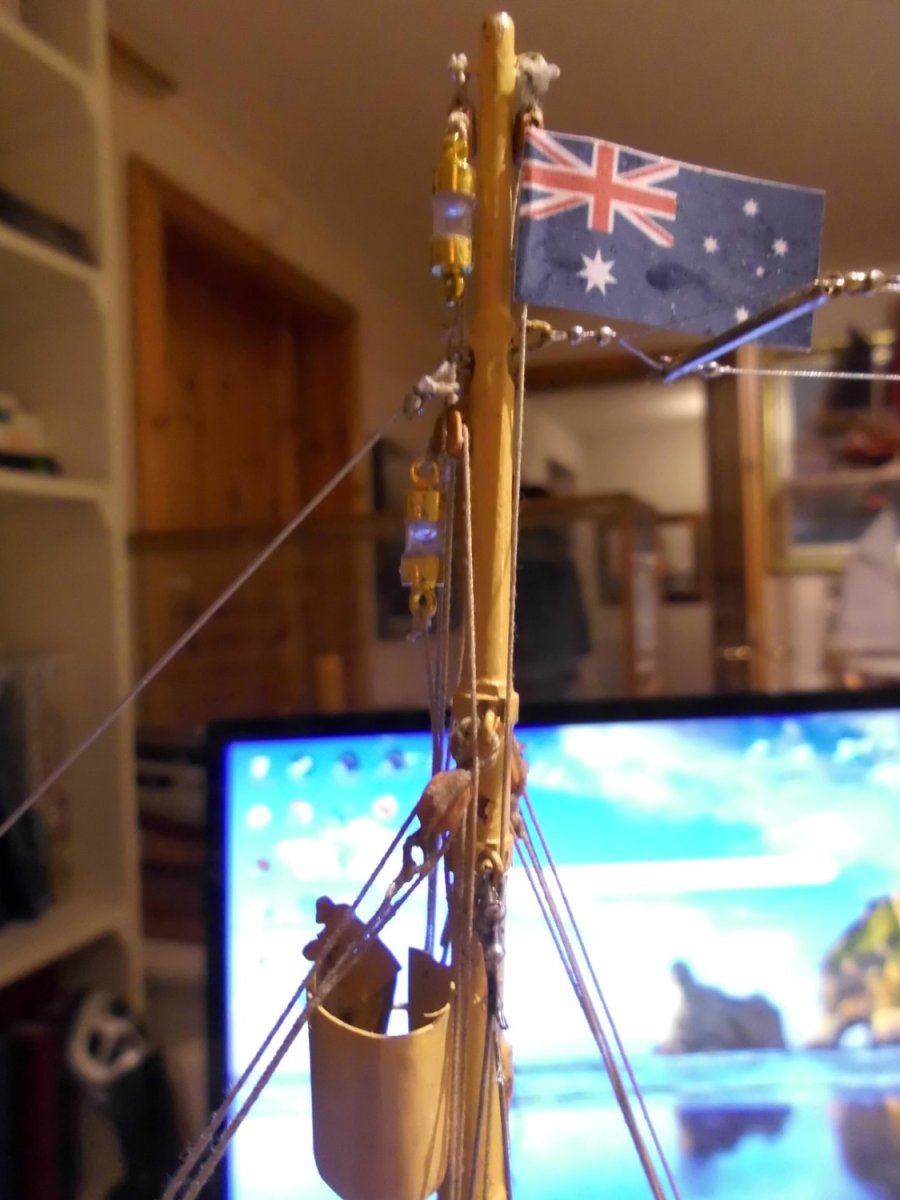
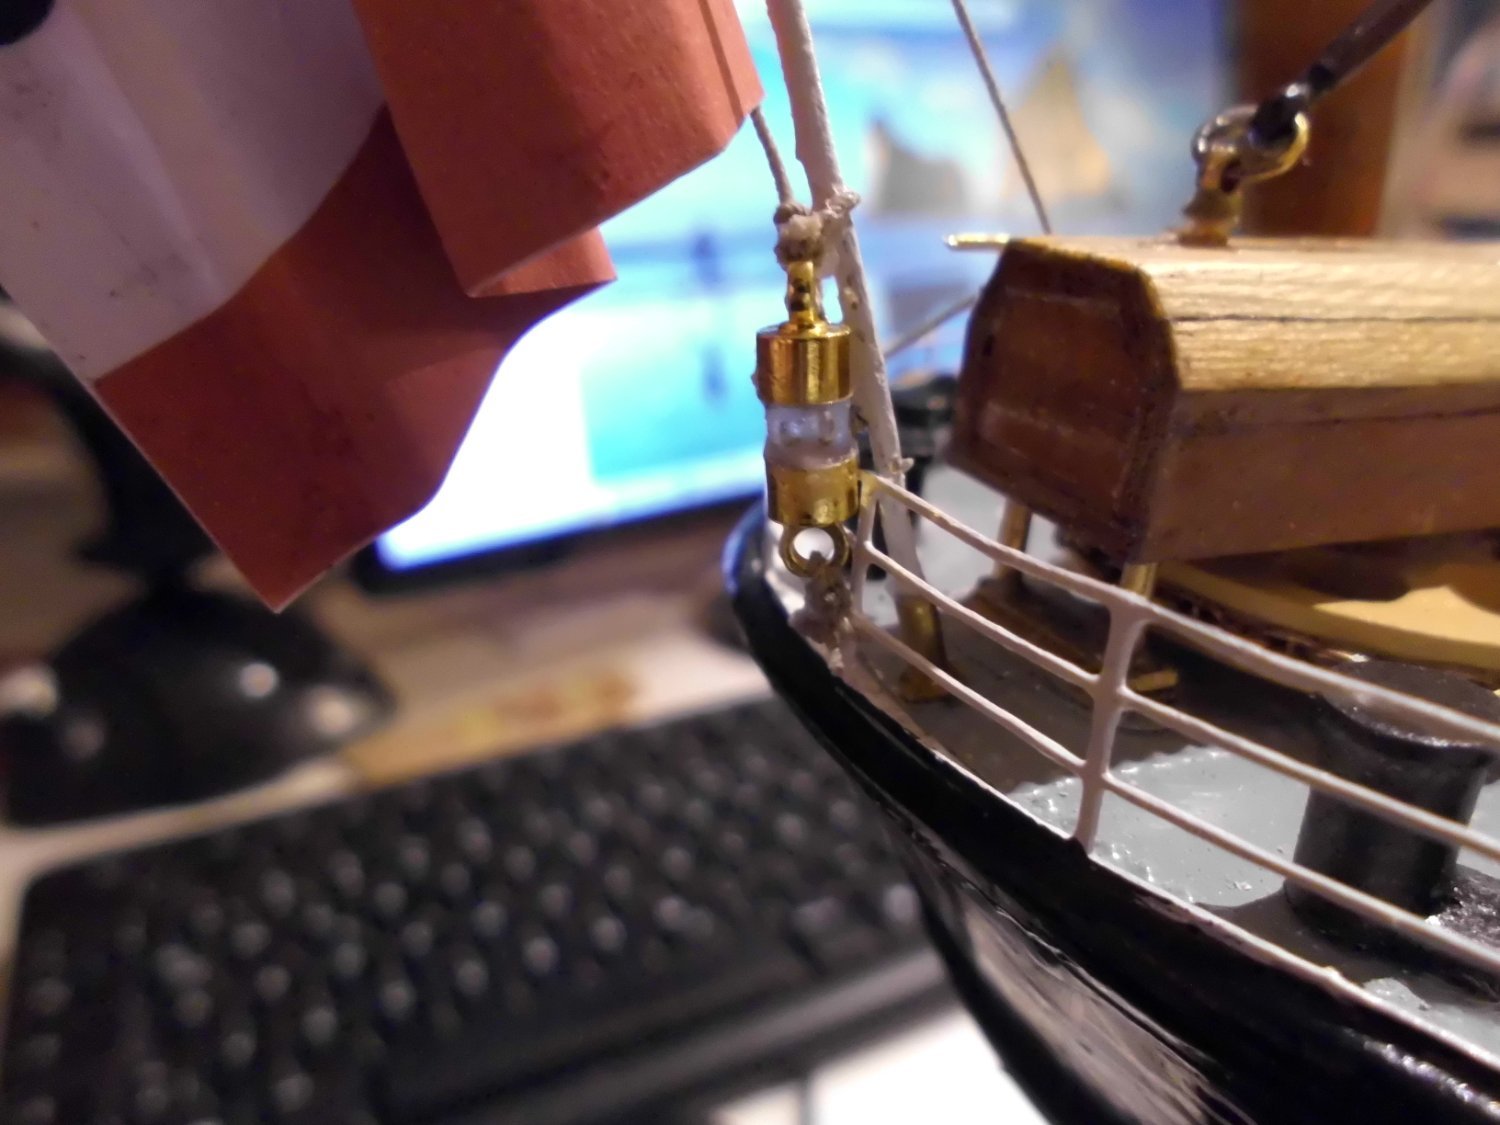
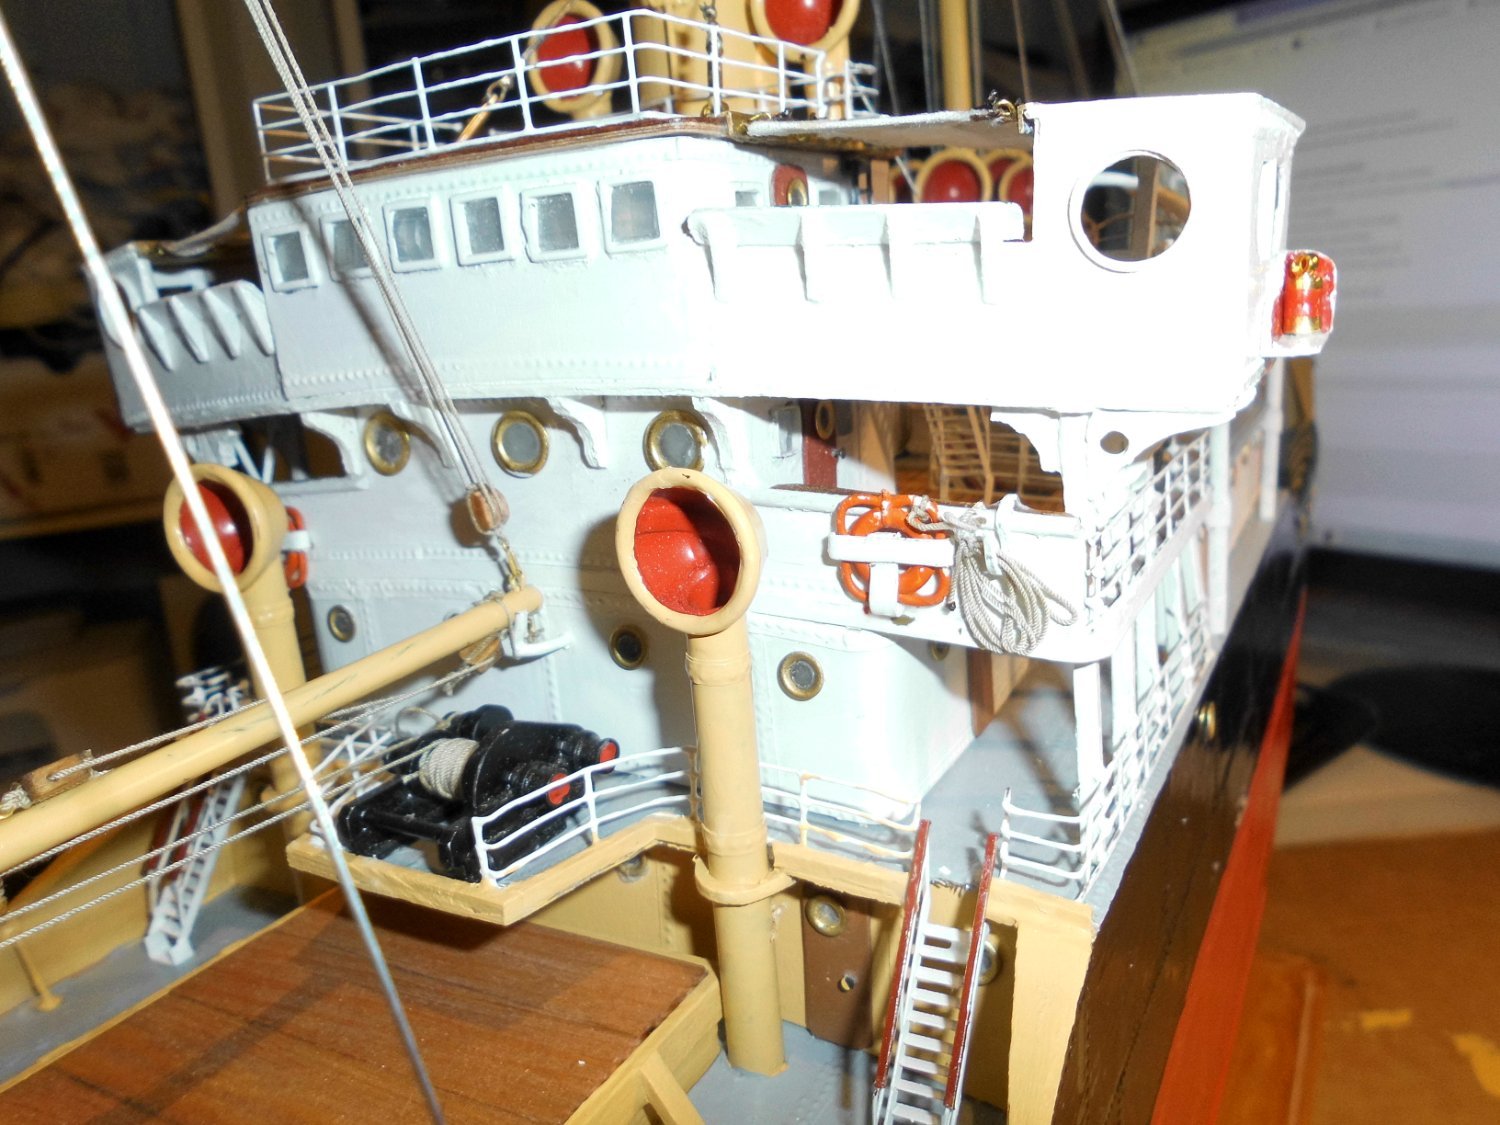
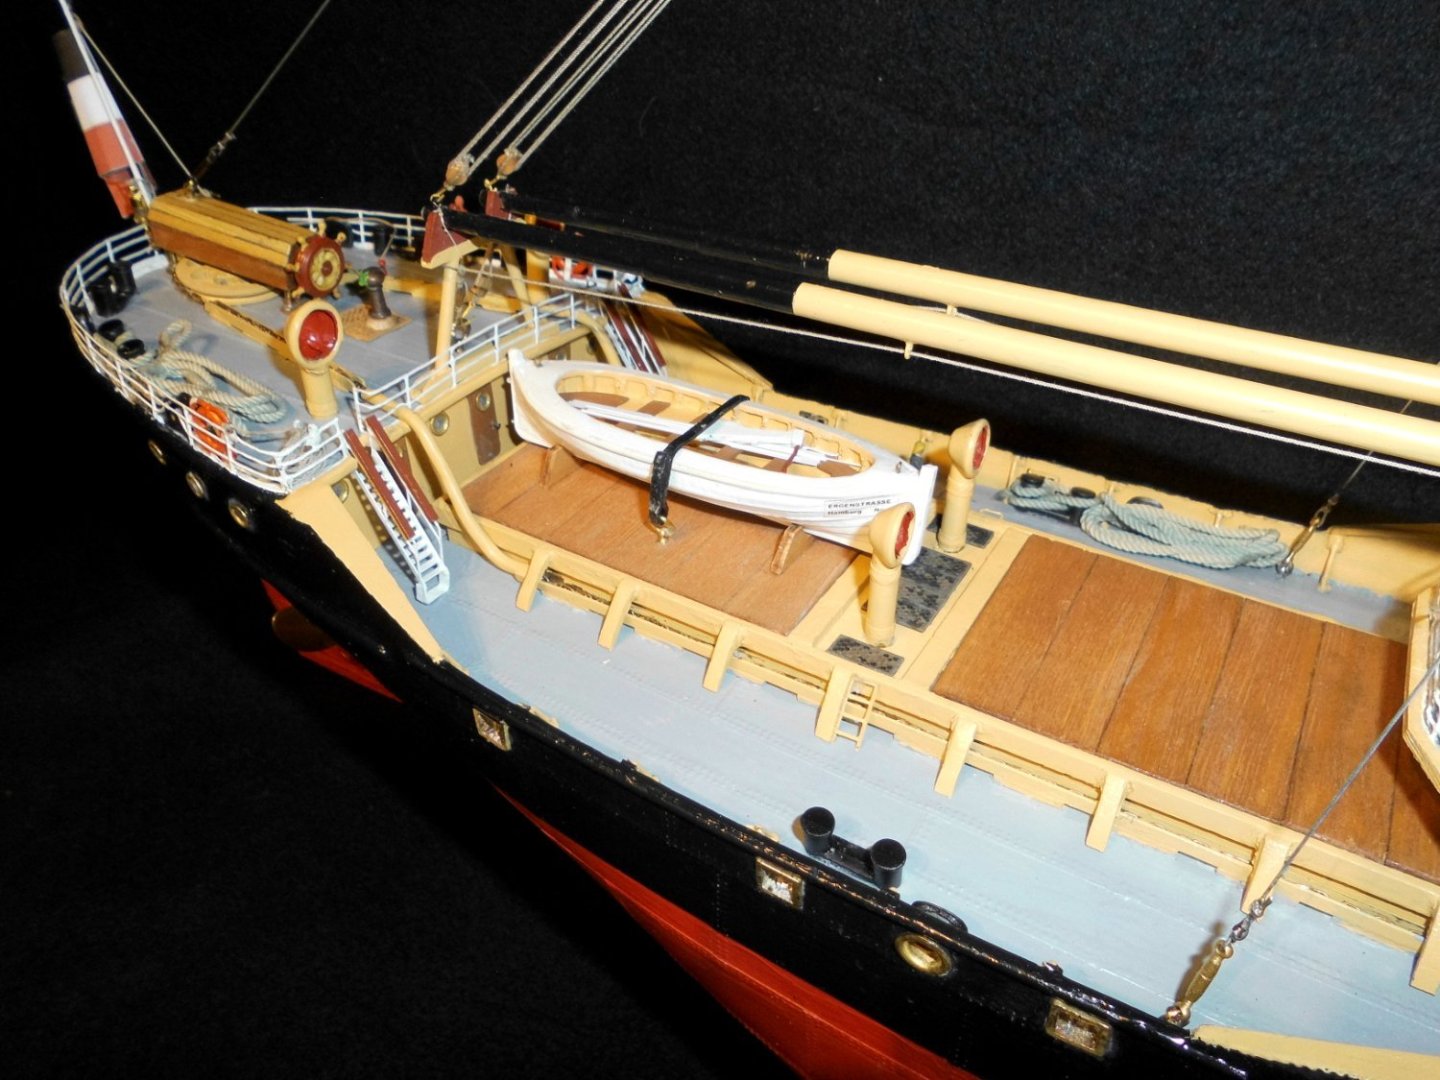
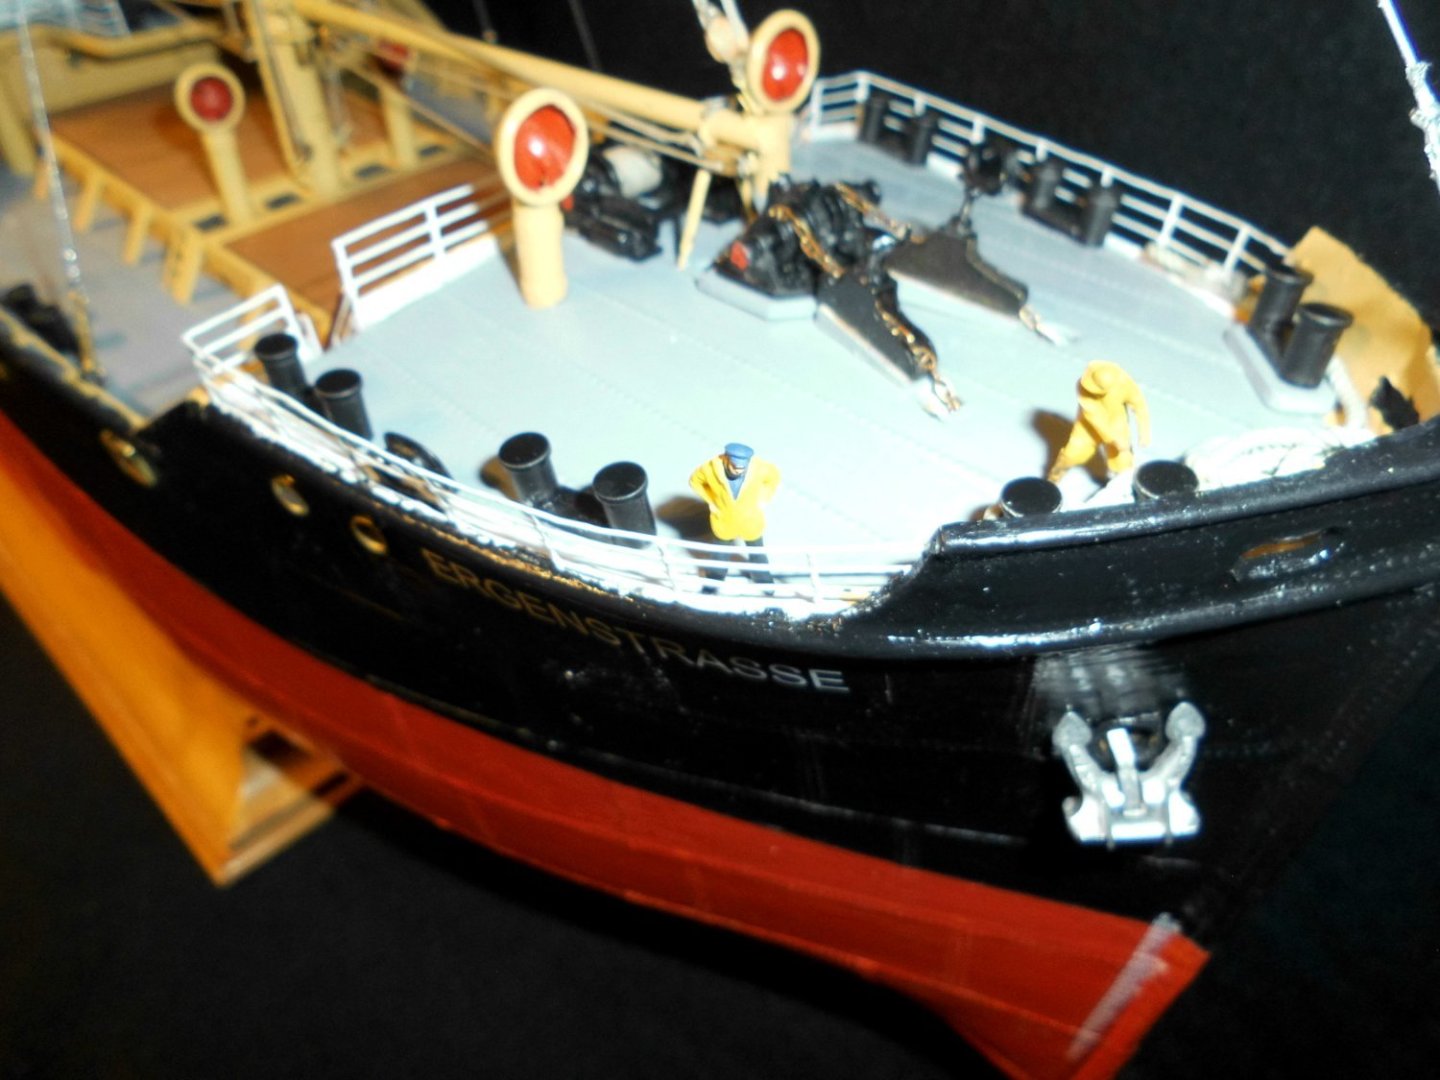
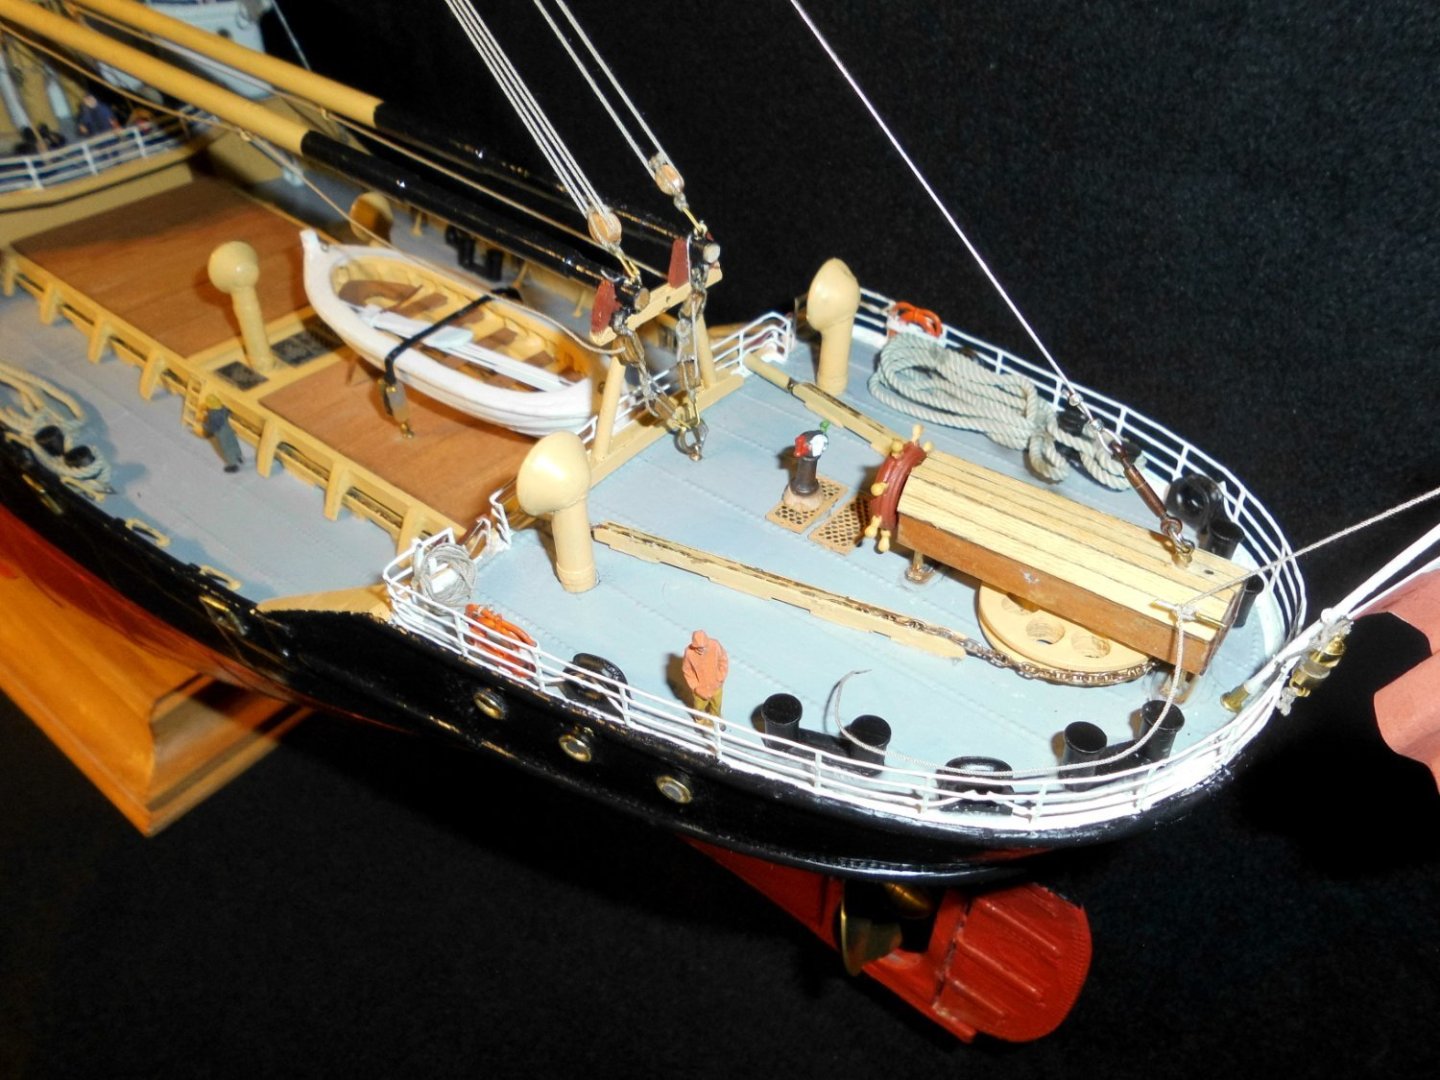
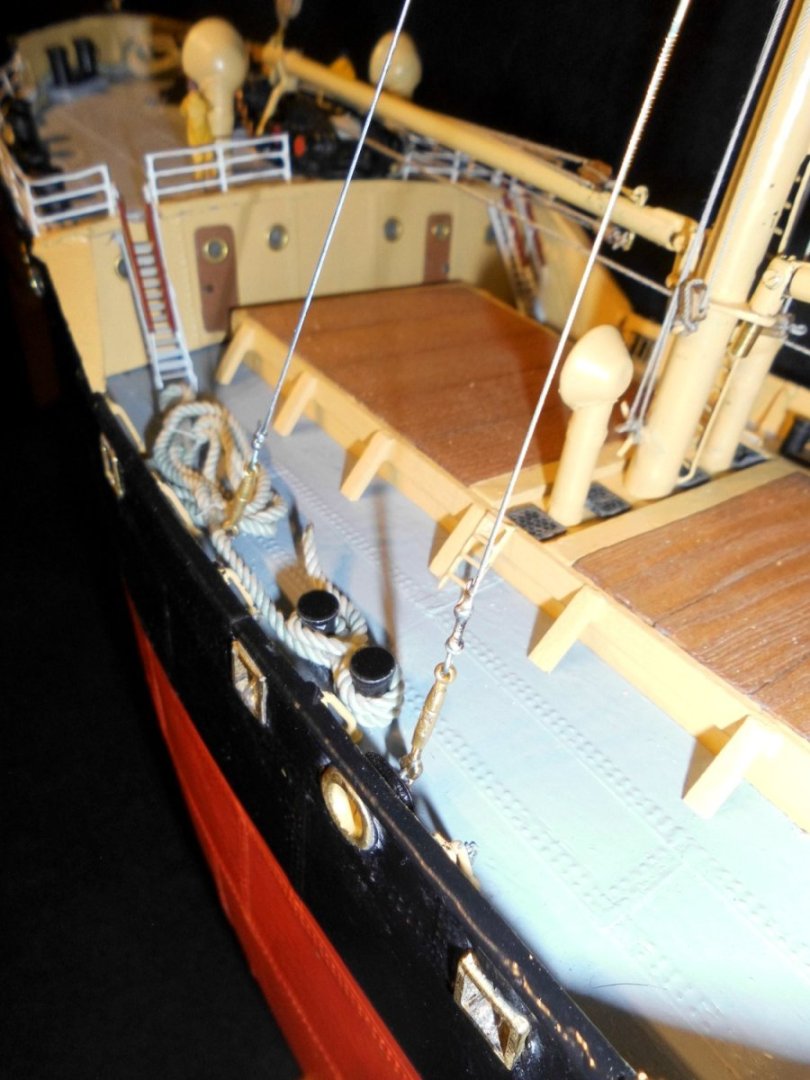
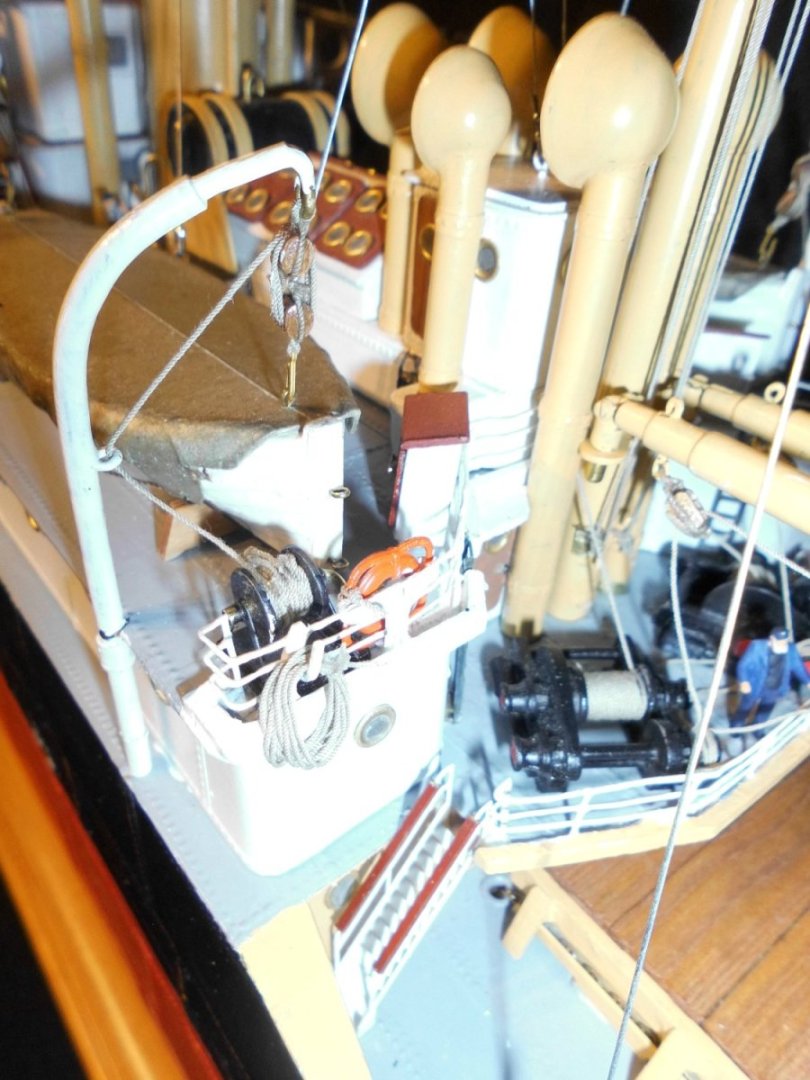
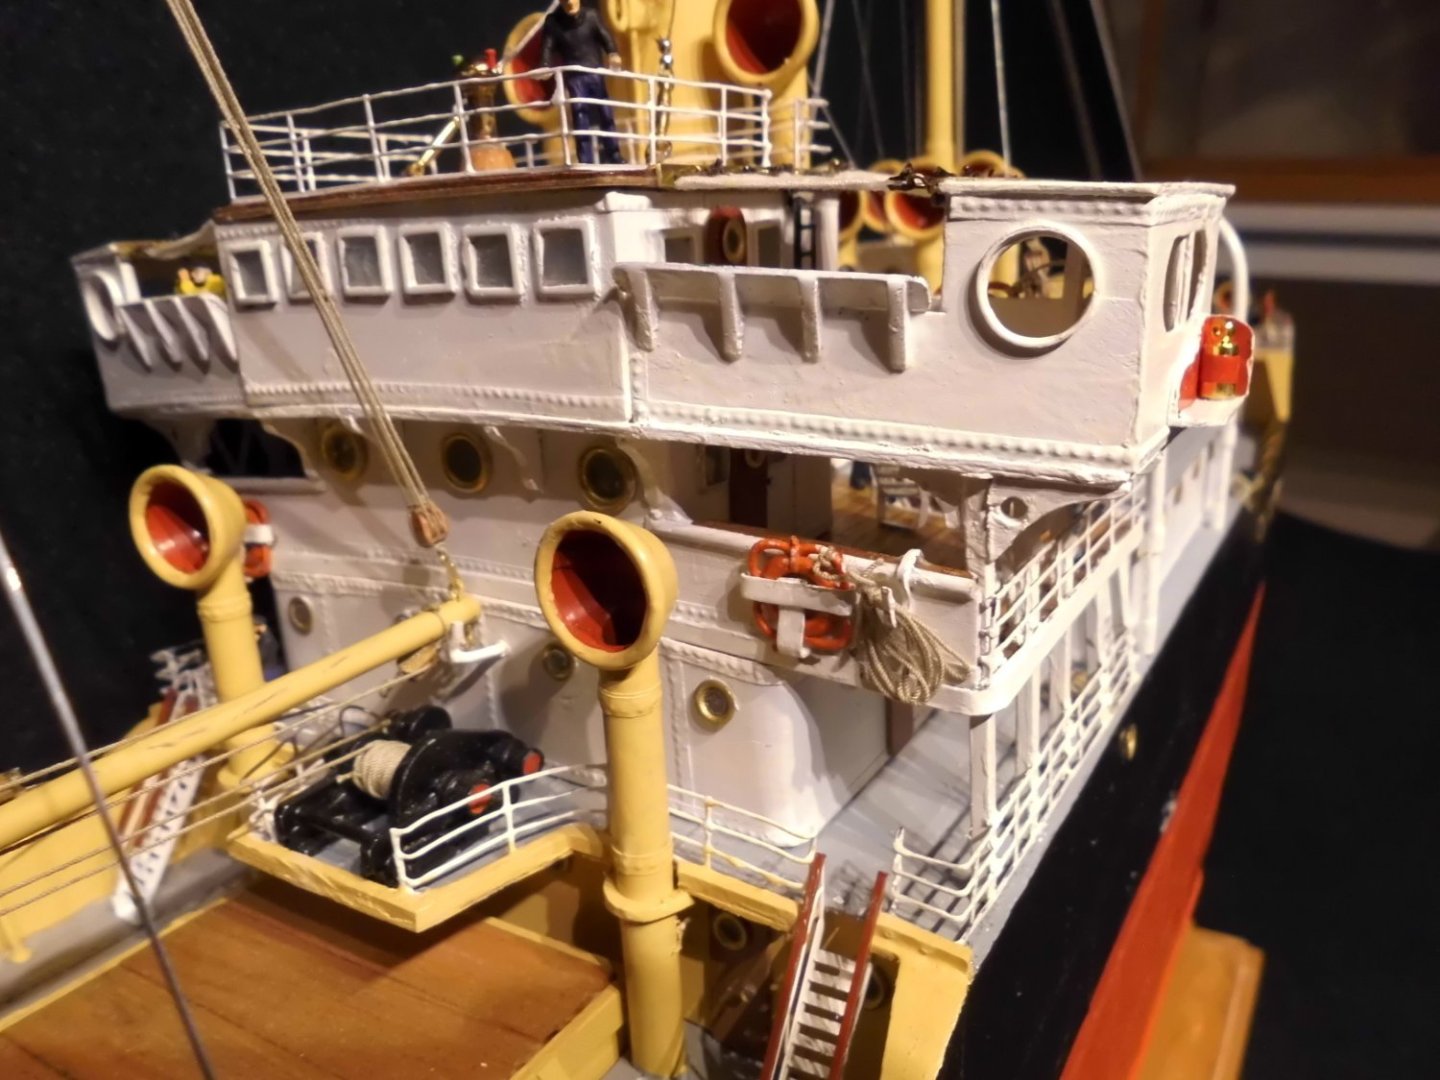
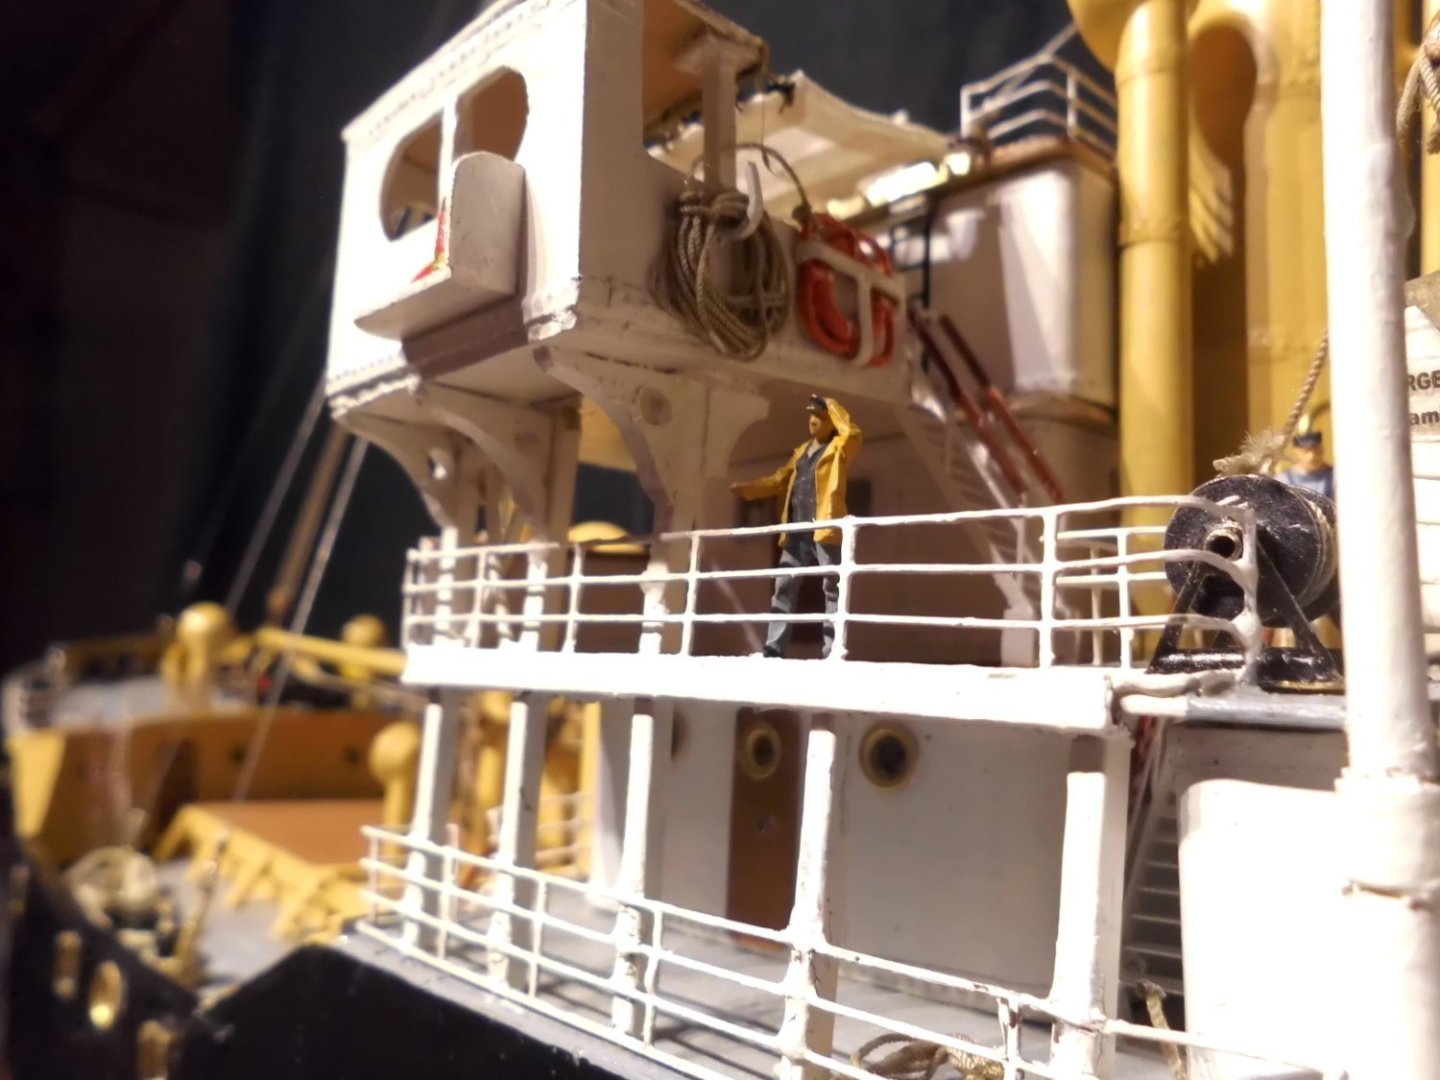
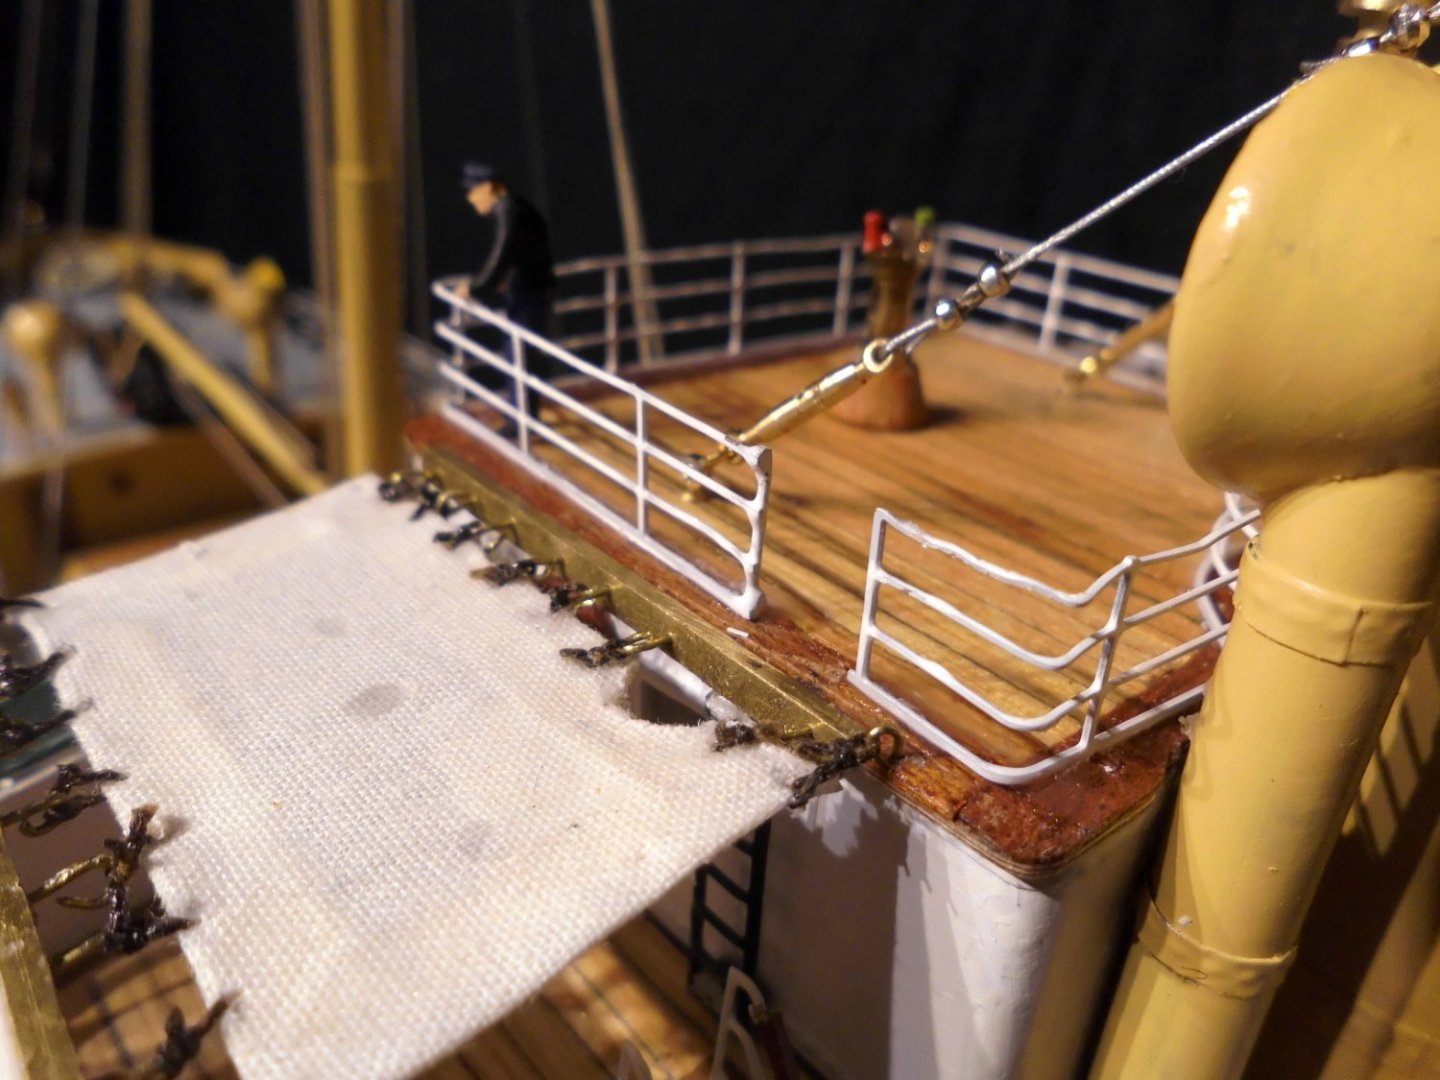
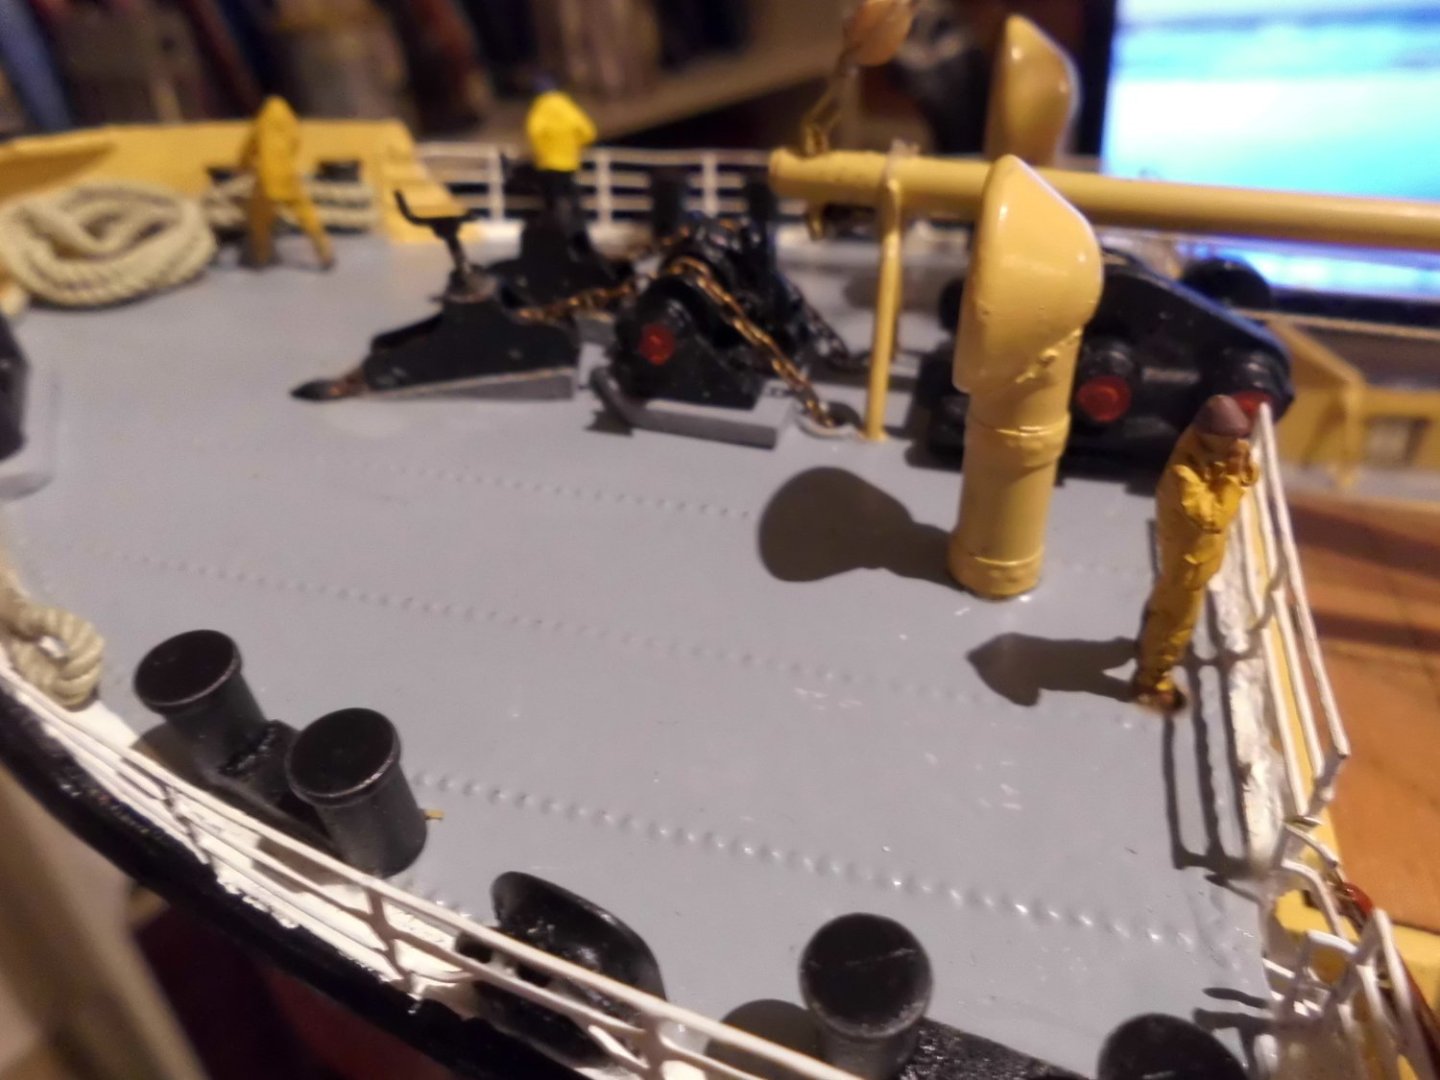
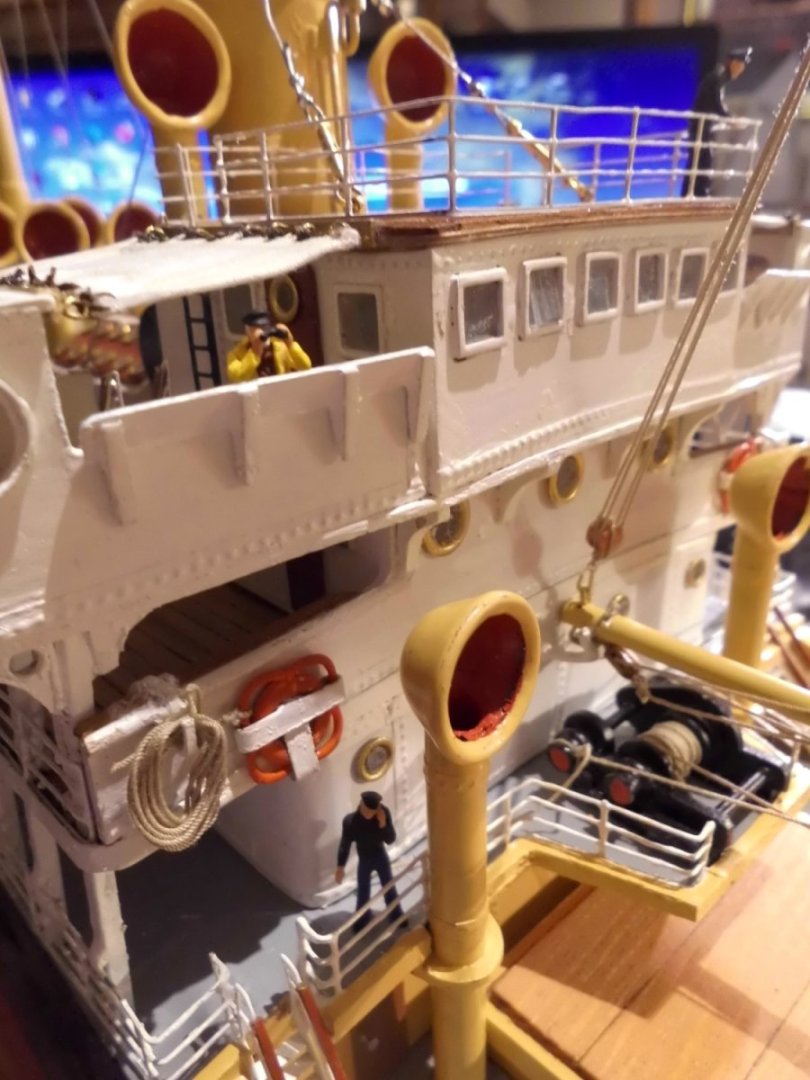
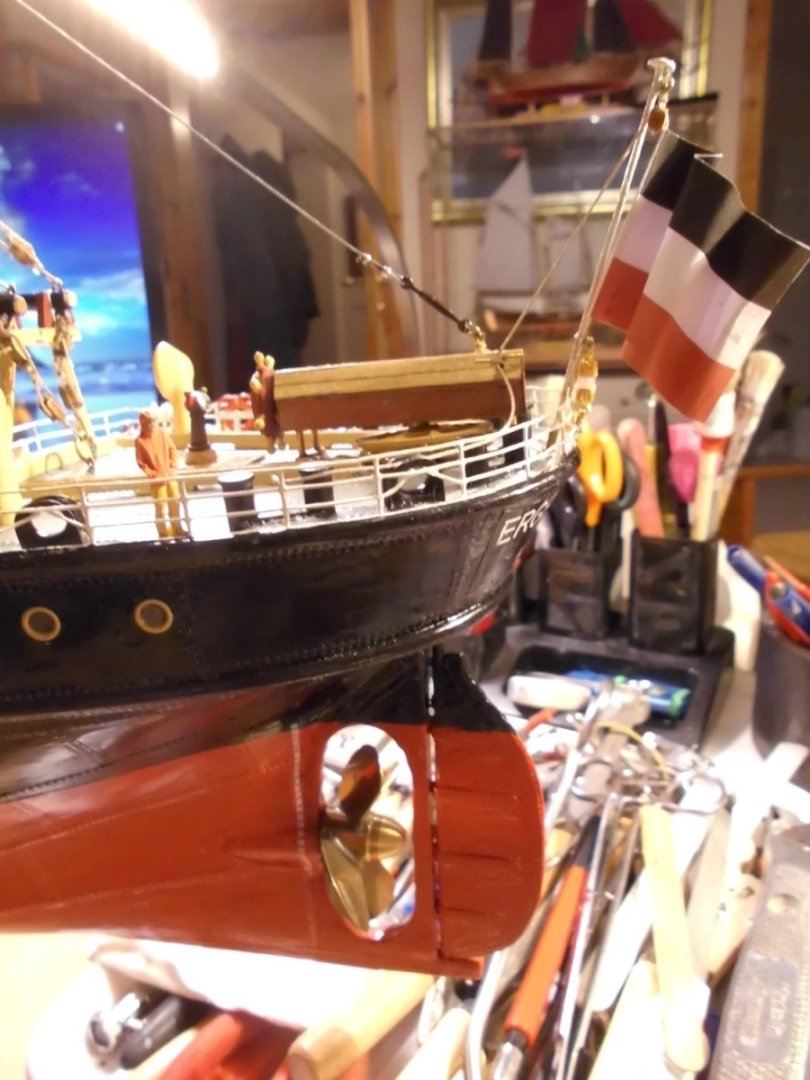
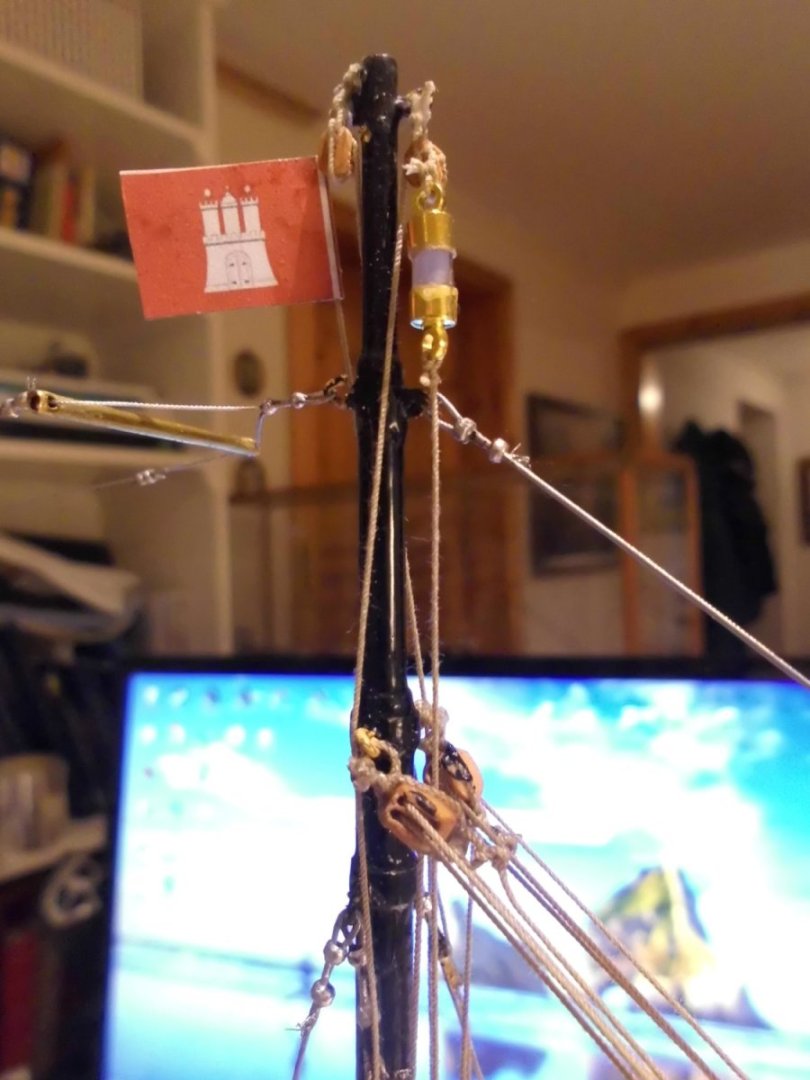
Update The crew and a passenger have boarded, the flags are set and two lockers (1 each Stb. and port) for lifevests and signal equipment are placed at the aft end of the boatsdeck. the lantern are set, The compass on the monkey island will be attached this week. I shall post a set of final pictures to round up this 8 month project and for the appropriate album in the next days Nils three crew members on the forecastle deck, sorry for the not so good quality (taken without flash) capt. looking out from the bridge, first officer on monkey island and donkey-man on front deck winch platform the blonde young lady on the front Stb. boatsdeck is miss Elsa Keller, the only passenger, (aka Lana Turner in the movie) The nationality flag ( my wife did in no way allow me set the historic correct flag) Hamburg is port of registration, and aft toplamp flag of destination country (Sydney harbour), top of foremast and toplamps and lookout in crow`s nest lockers for lifevests and signal equipment taillamp


- 330 replies
-
- 18
-
-
-
Thanks Tim, I wish you a lucky hand for your next cutaway ship project In my hobby office there is the Pegasus on a shelf and my grandchildren love to look into the model which is in head hight in a glass-case (dust protection) Nils
-
beautiful build Tim Nils
-
Thanks Chris, These HMV card ship plan sets are great, I would love to see your Schwan here at SMW. When I scratch-built my Kaiser Wilhelm der Grosse I extra bought a pre owned newworthy HMV- Plan from Ebay in order to take the details from after magnifying them to the desired scale and for placing the arrangement of the many super structures Nils
-
right John, Thanks for your comment, the compass is one of the still missing items, it is already on order Nils
-
excellent planking job Wintergreen, the beautifulul lines of the hull show up well Nils
-
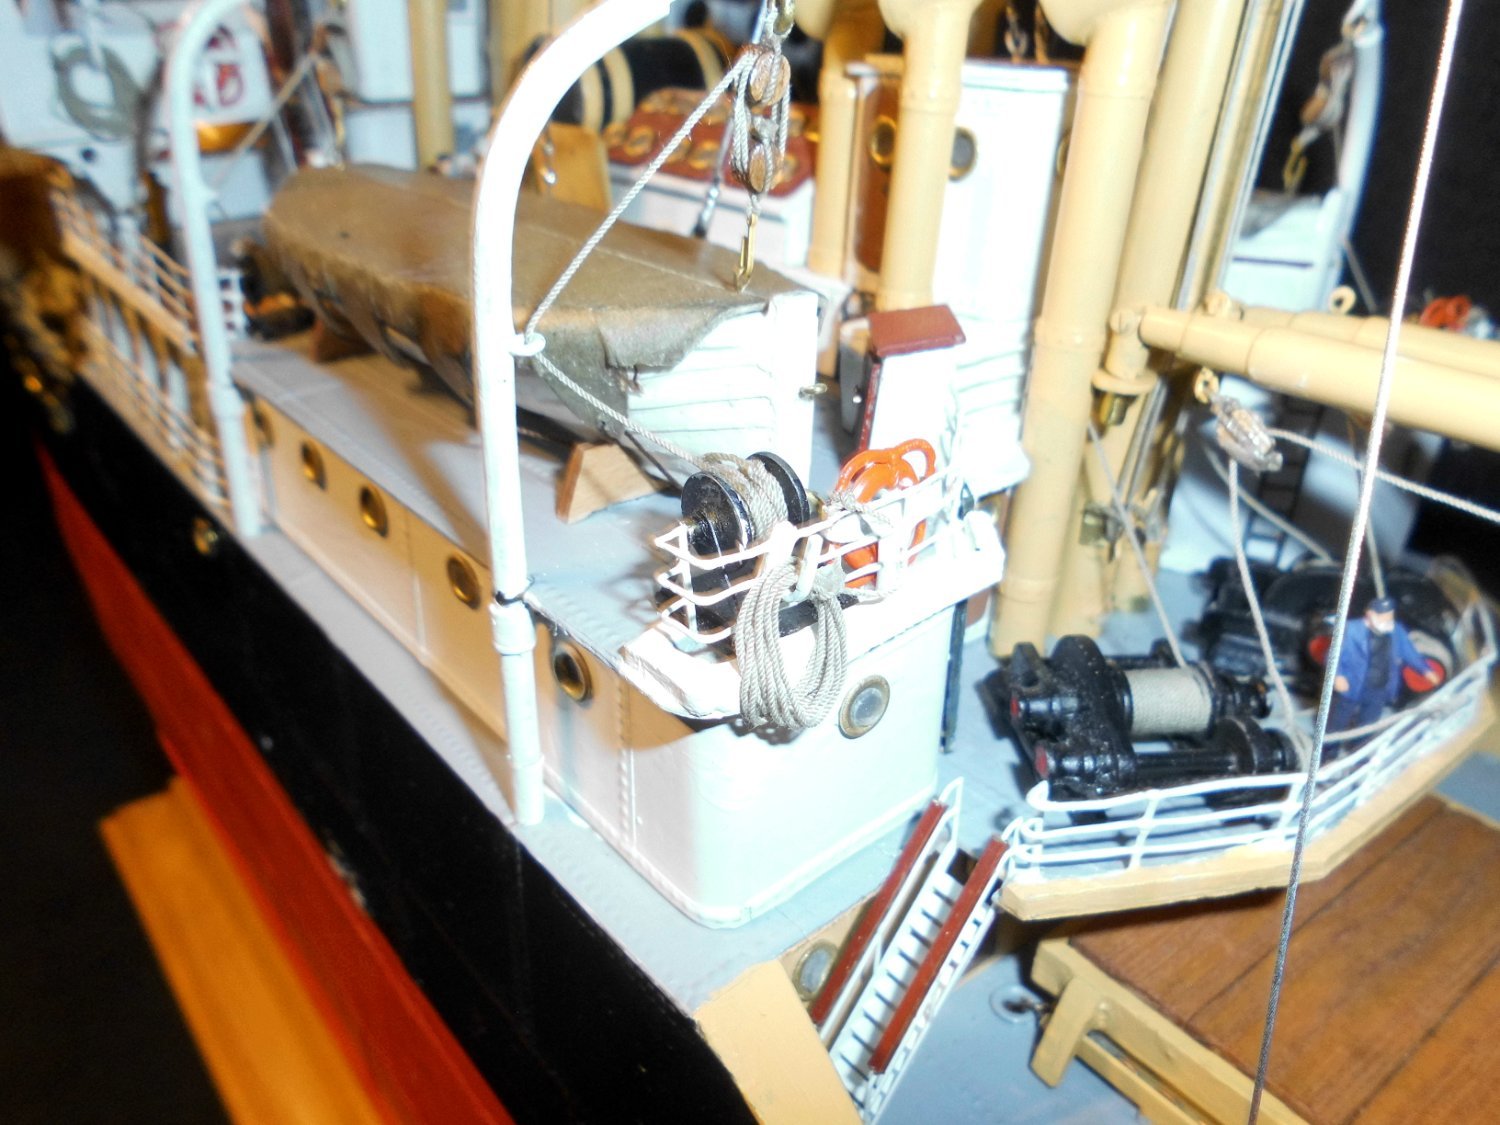
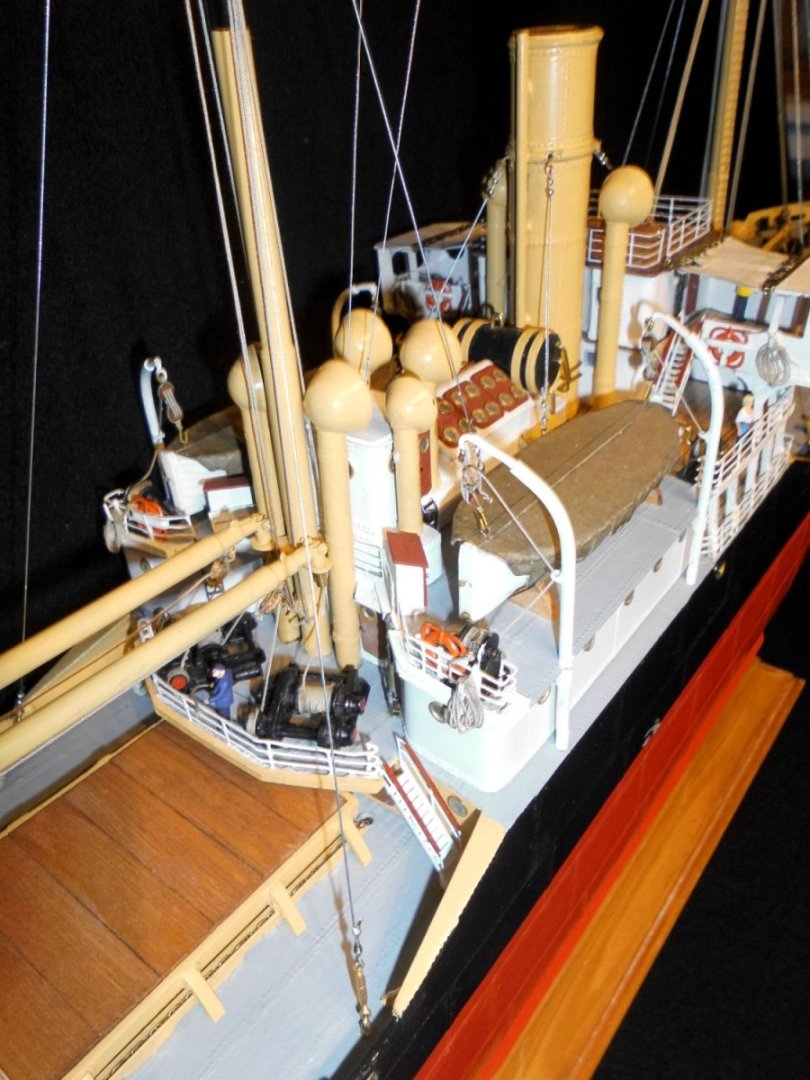
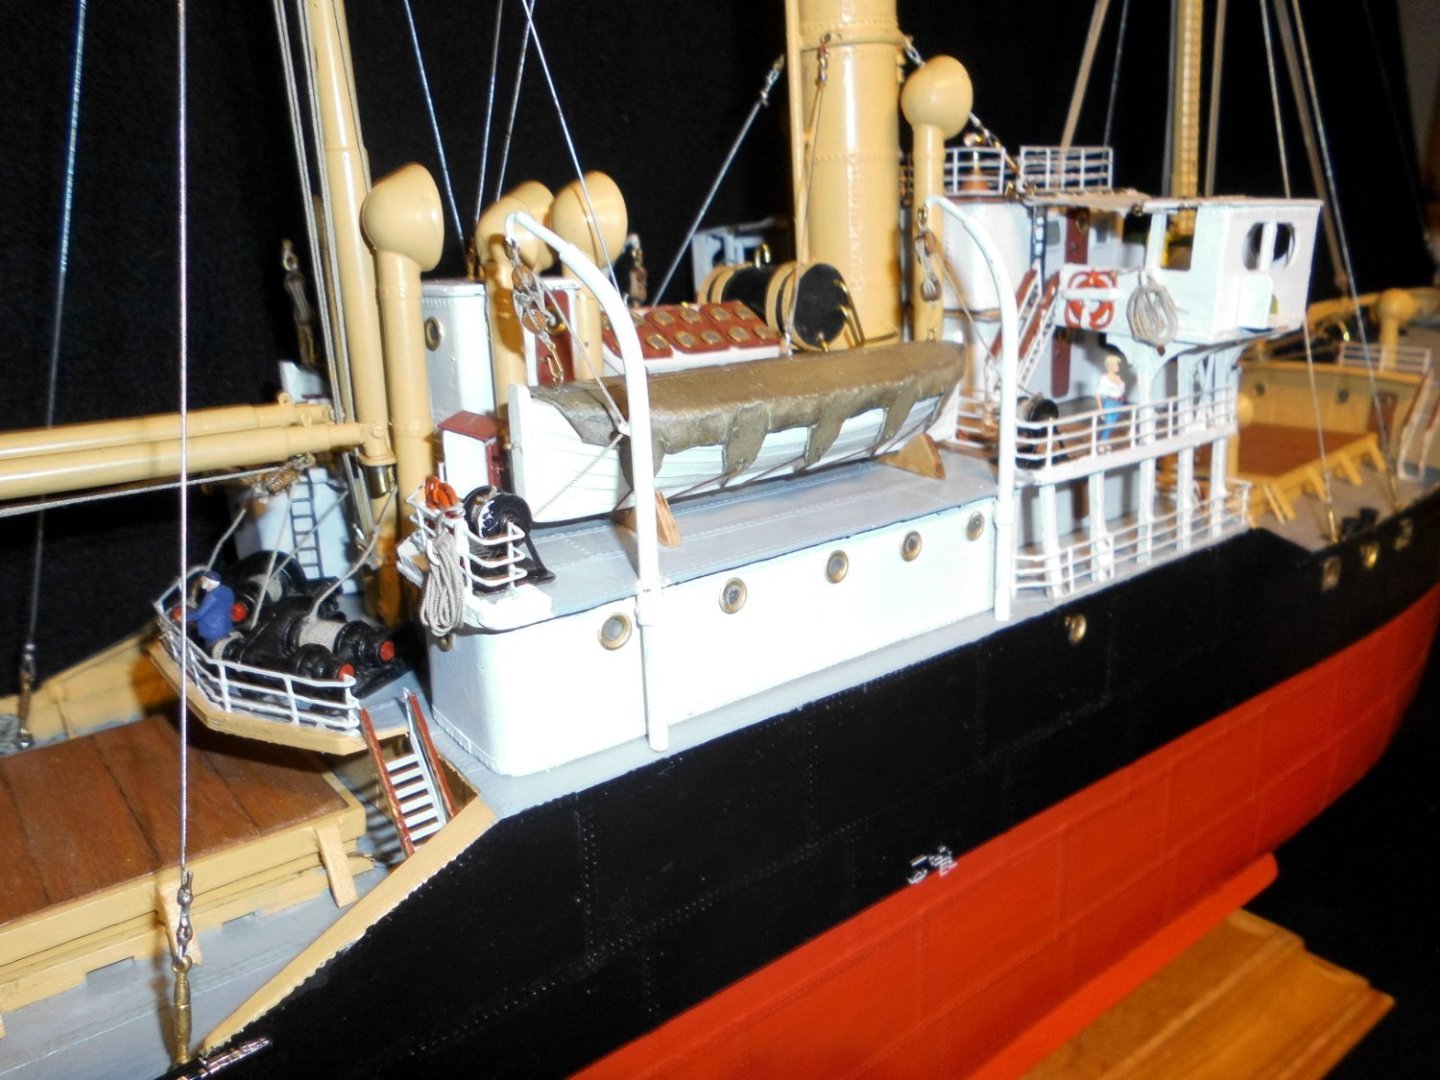
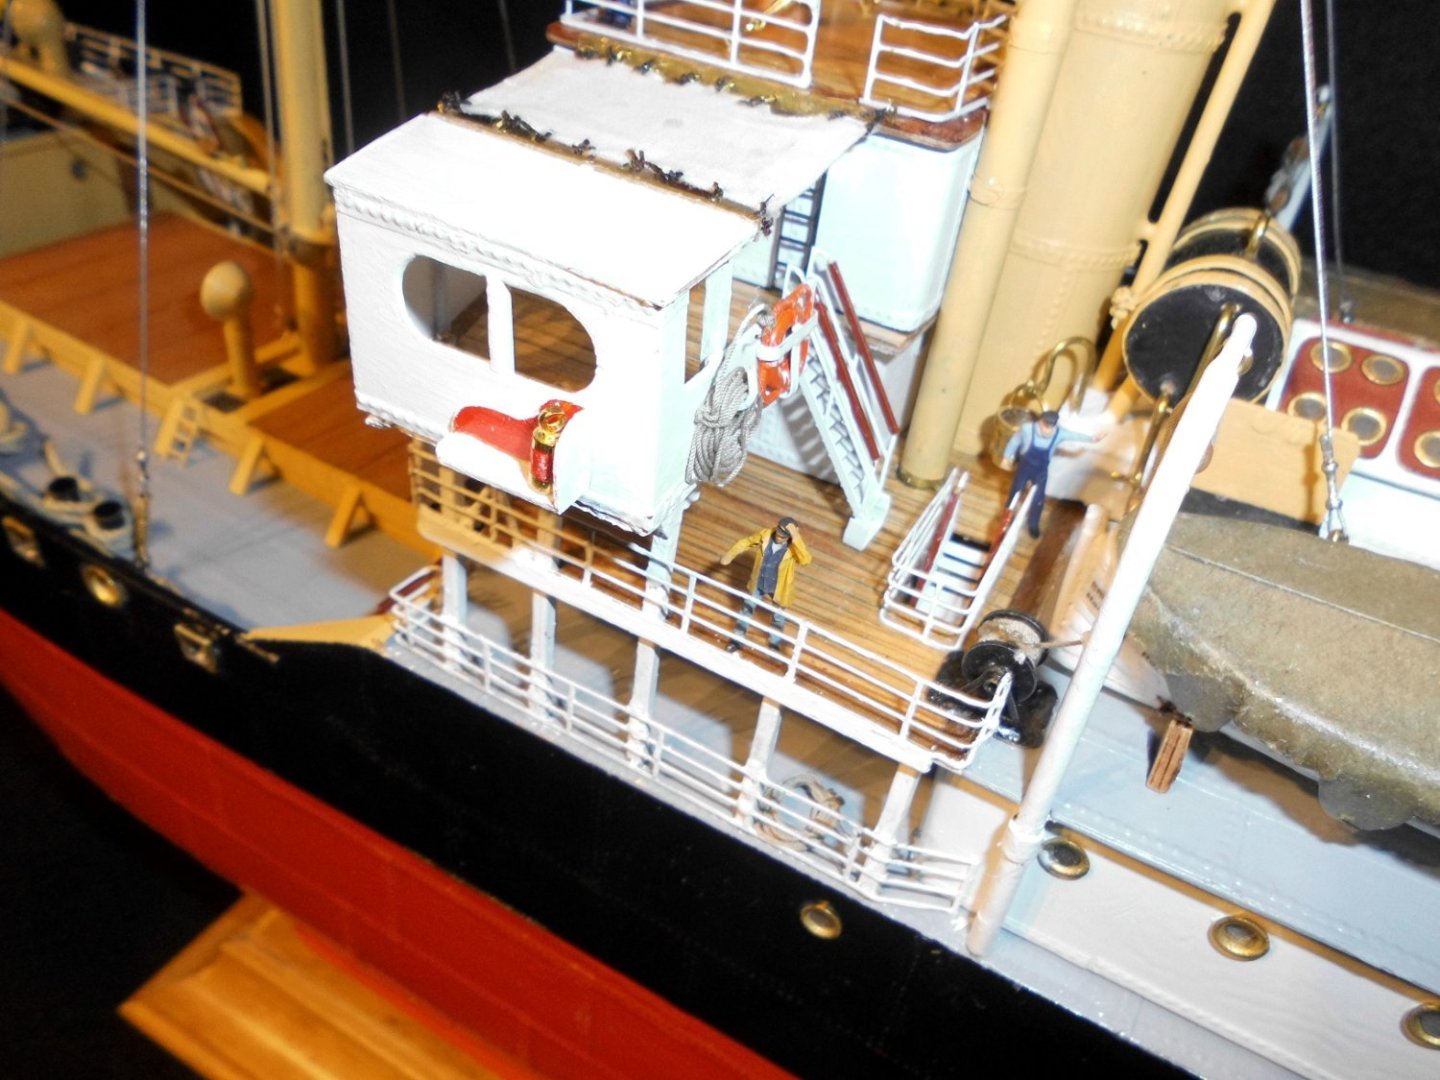
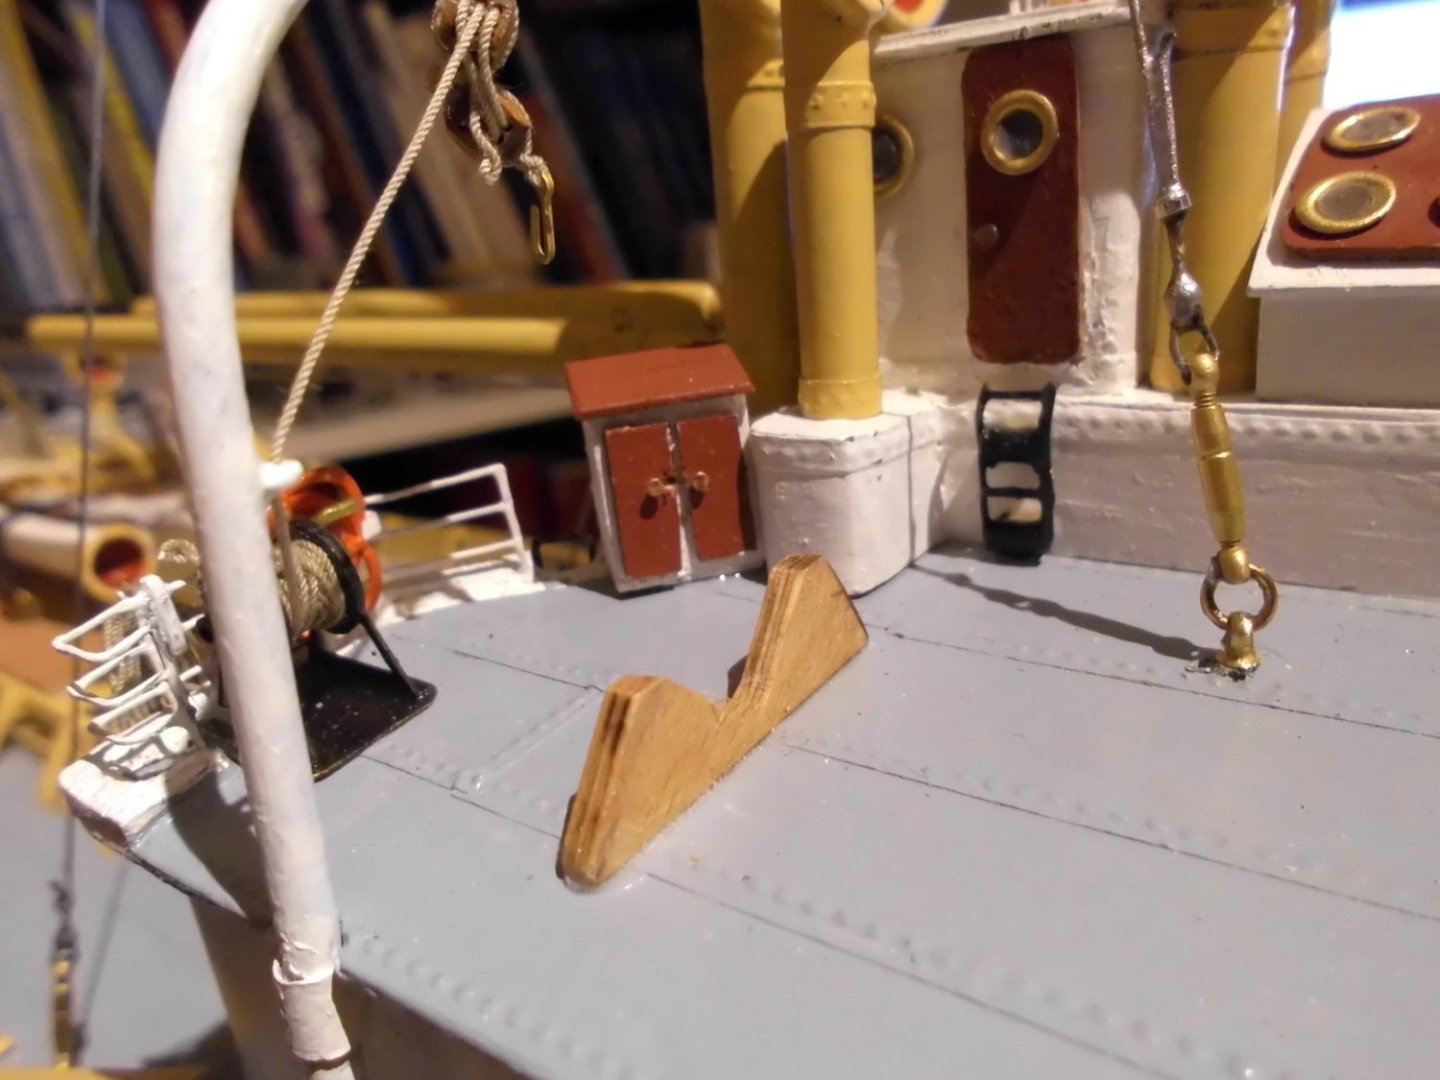
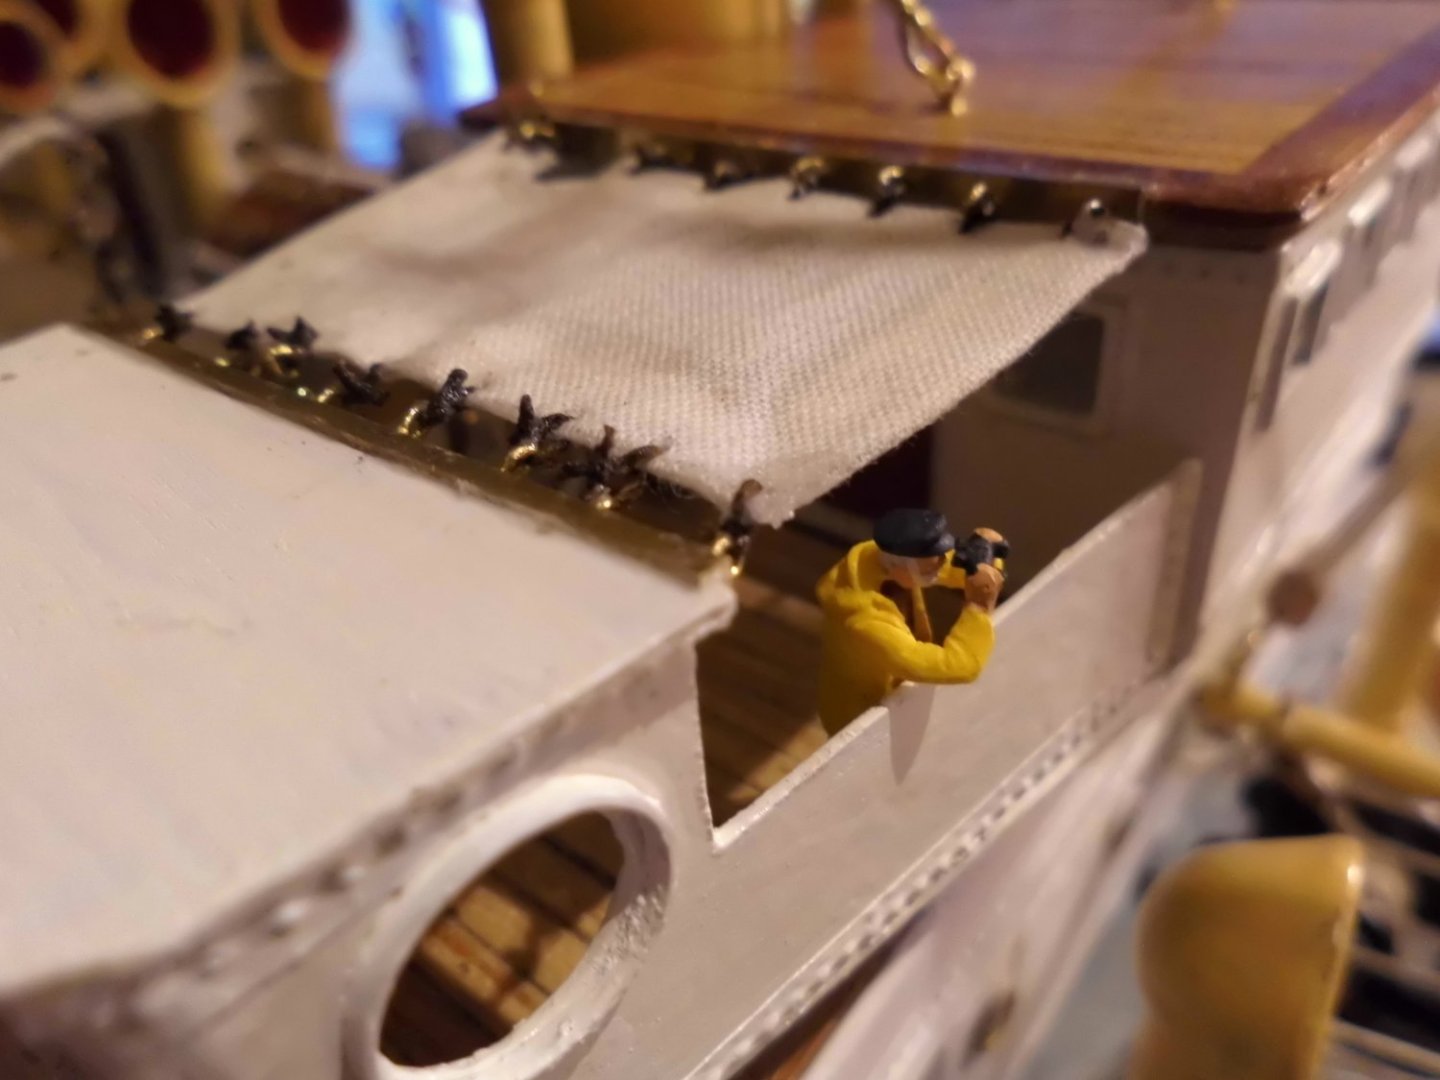
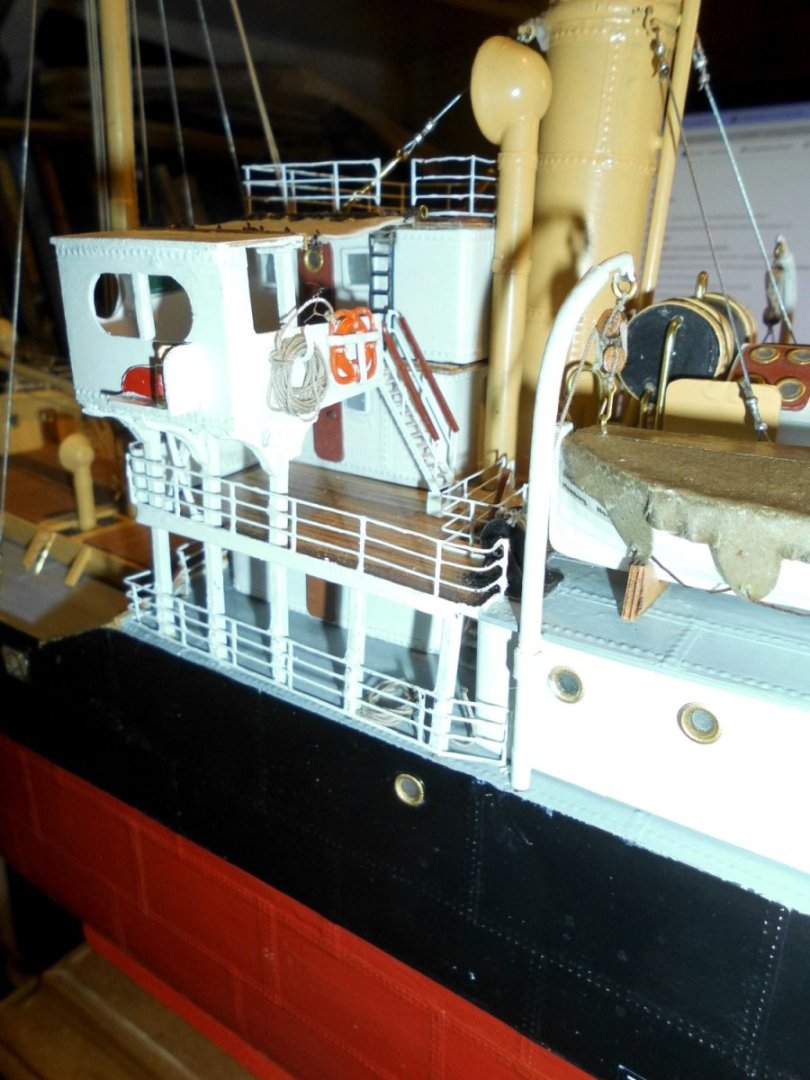
Update Ergenstrasse is almost complete, New are : Bridge awnings bothsides and frontpannels with stiffening out brackets, mokeydeck railings and front funnelstays, and several bracket supports for the bridge and its wing cabs ..... Also mounted lifesavers with ropes in 8 places Nils sun protection awning bridge wing pannels with supporting brackets and monkey deck railing

- 330 replies
-
- 18
-
-
-
Congrats Vladimir, a wonderful model, you can be proud of. It certainly will be very inspiring and also a benchmark for other clipper fans... Nils
-
Beautiful and interesting boat Phil, I like to see other nation`s boats here at MSW.... Nils
-
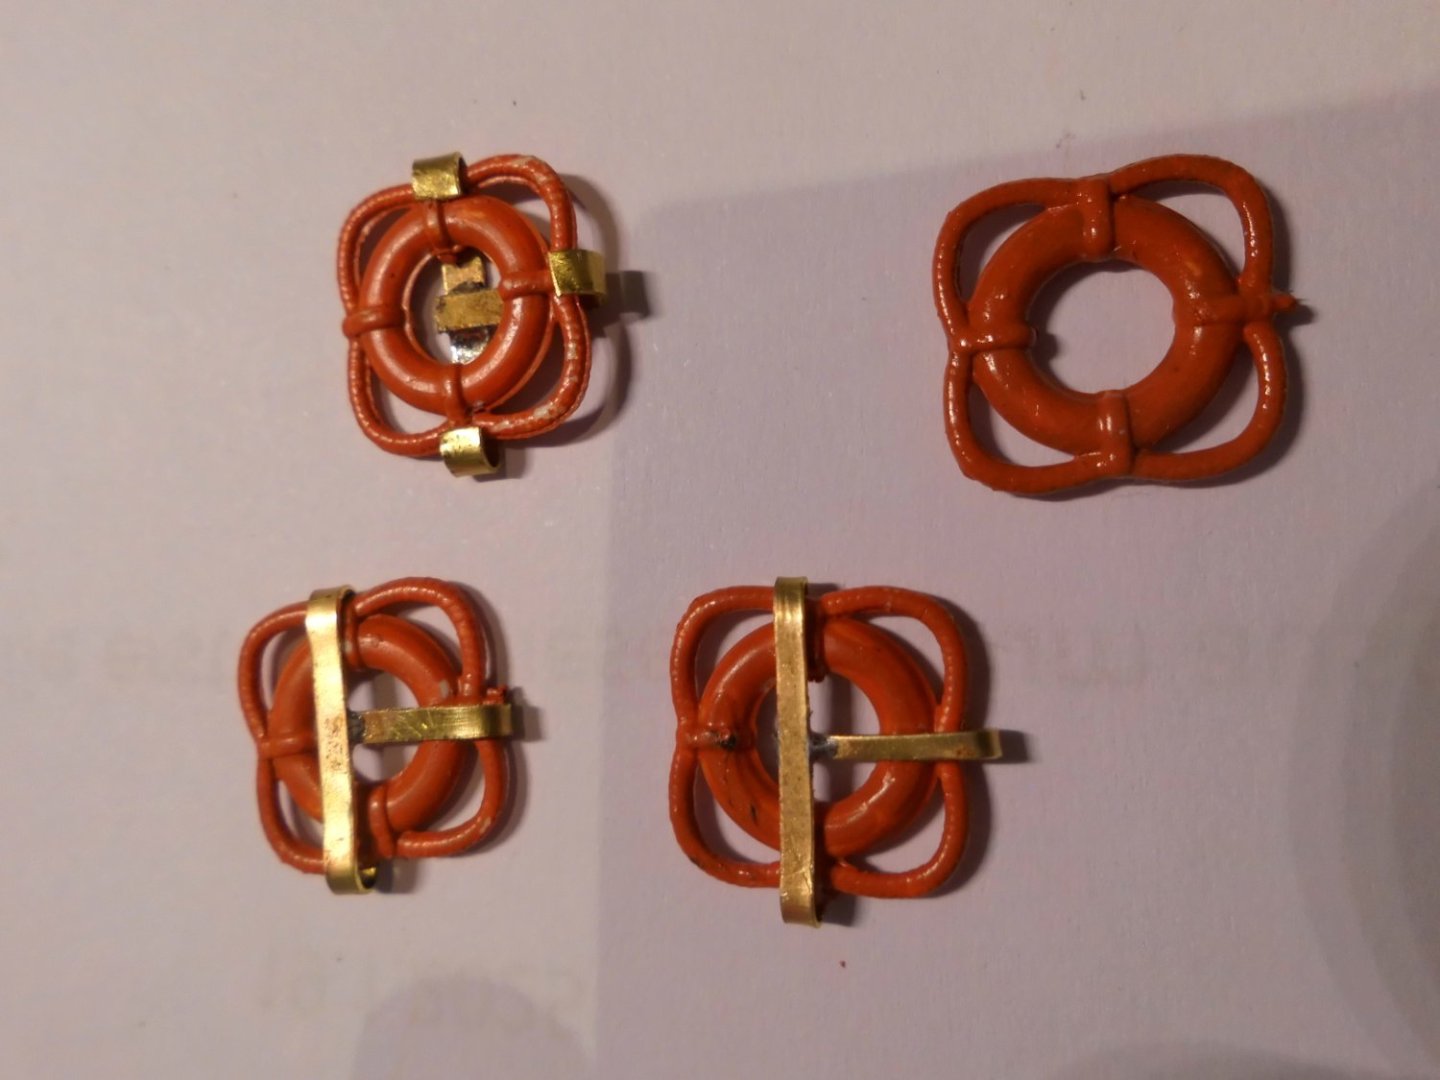
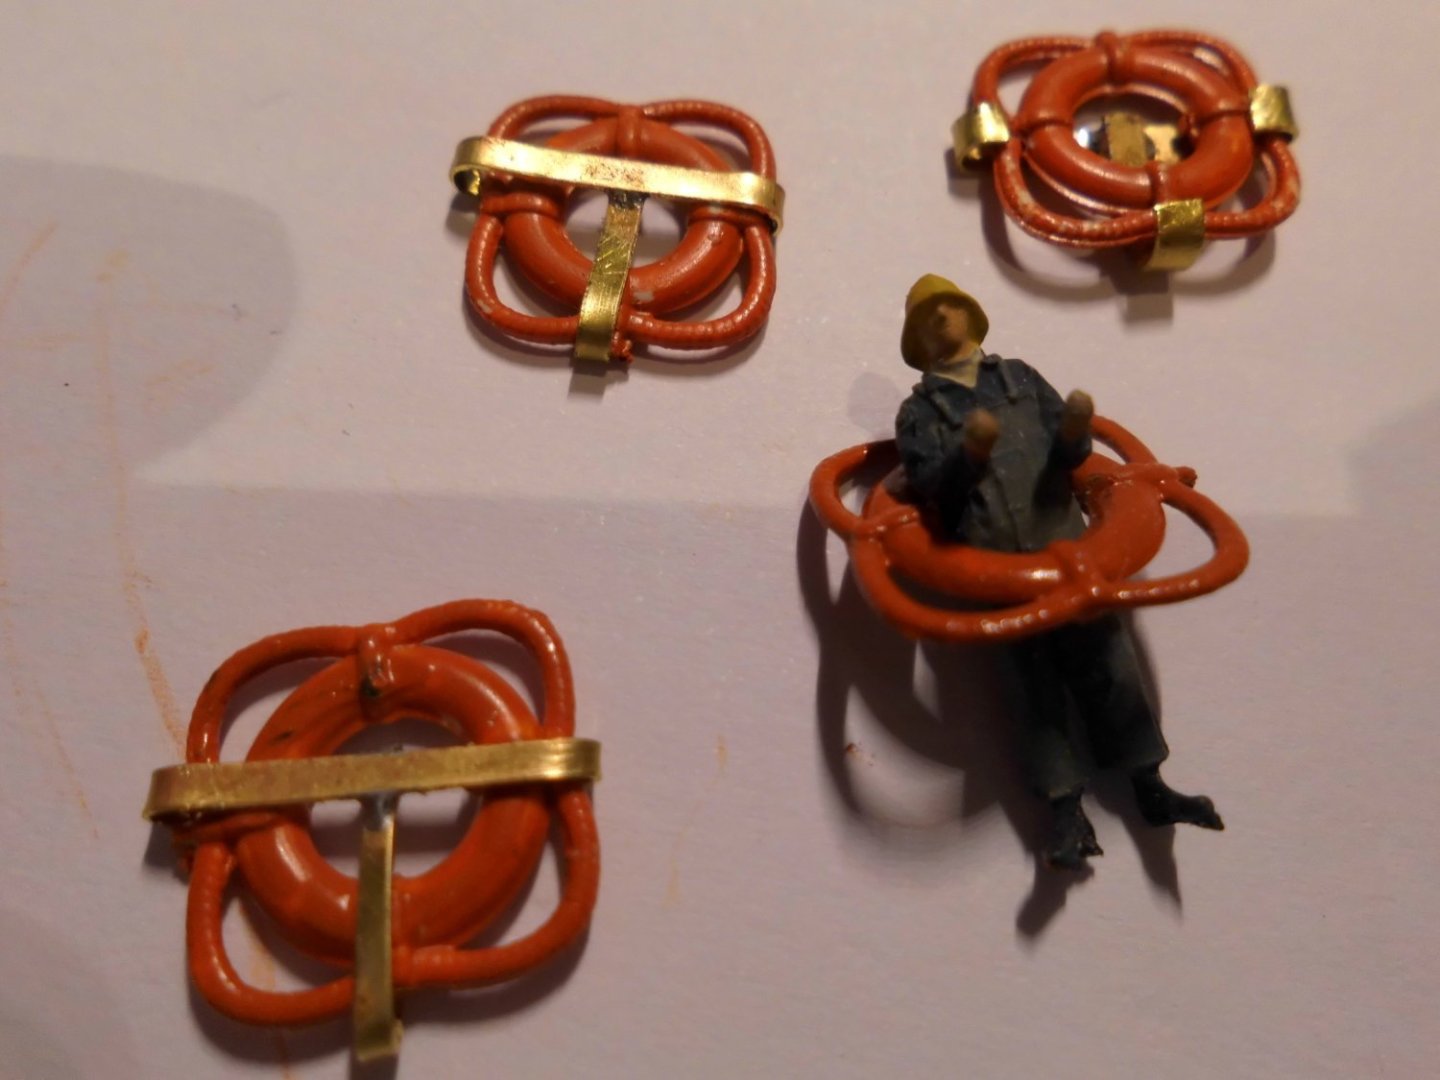
Update There will be 8 lifesaver stations on board. Made some holding brackets in brass to fasten the lifesavers to the superstructure walls resp. railings. Will also have to attach some ropes to them. Have a happy new year everyone and a good start for 2024 Nils Lifesavers in scale 1:87
- 330 replies
-
- 14
-
-
excellent scratch building Keith, I love those beautiful lines Nils
-
Thank you Keith, I thought it would work out better, but still I`m pleased with the look, and leave it as is ... I wanted to sew a bolt-rope all around, and after several attempts in vain, for the bin, I only glued the edges of the cloth. My wife`s sewing machine goes back into its case again Nils