modeller_masa
-
Posts
950 -
Joined
-
Last visited
Content Type
Profiles
Forums
Gallery
Events
Everything posted by modeller_masa
-
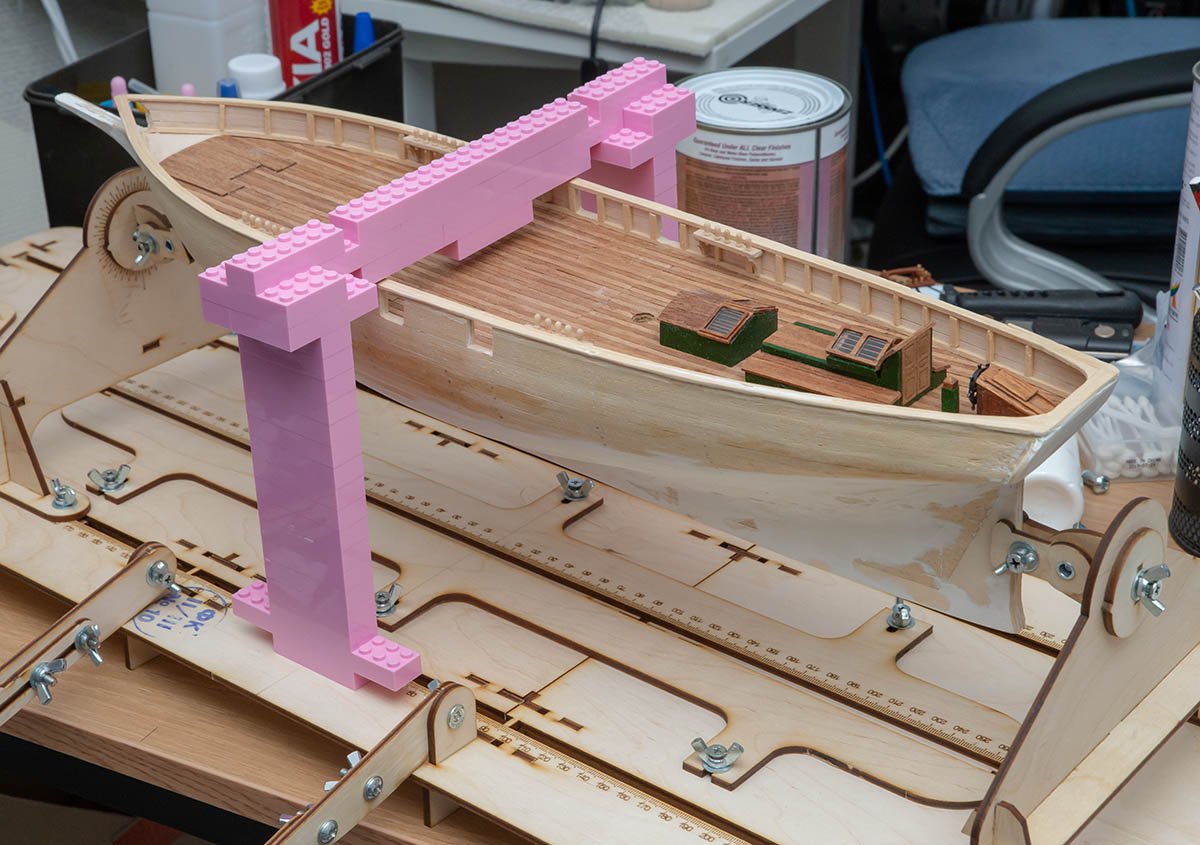
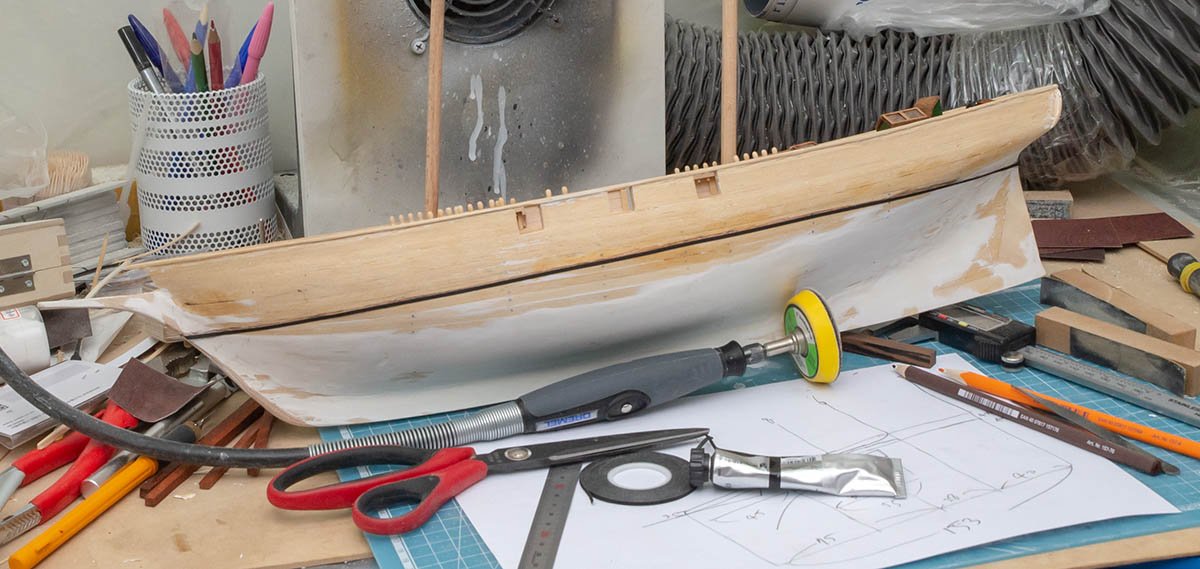
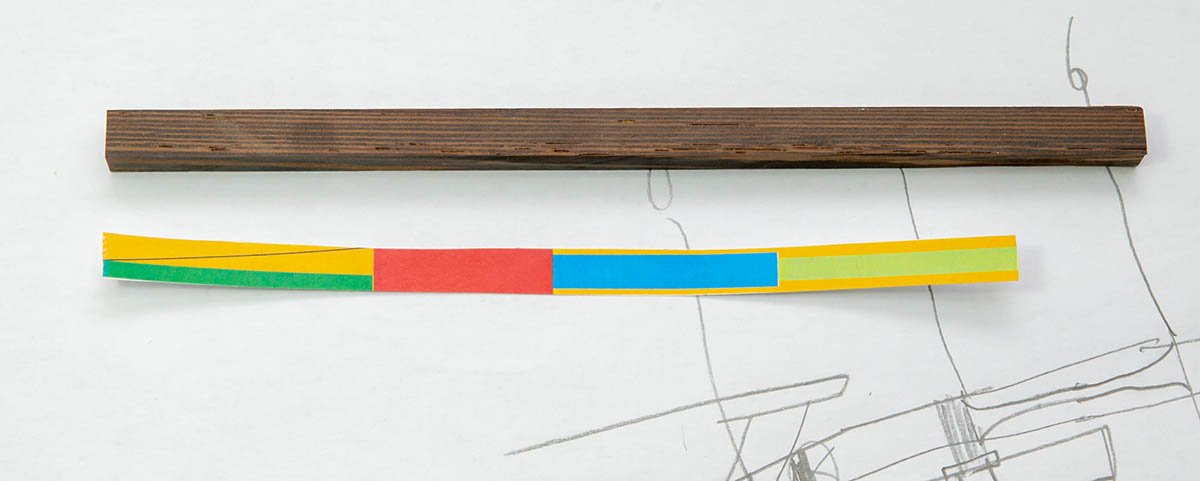
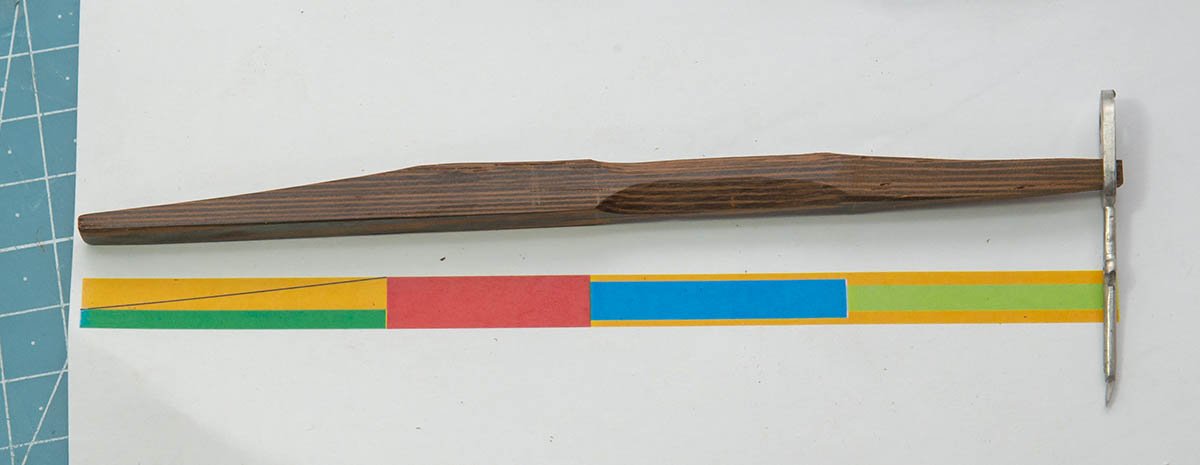
I couldn't start a work again easily, so I decided to make a todo list. The first homework is drawing waterline. I made a LEGO deck crane to get a level. 😉 It didn't work. My ship is twisted by wrong planking. 😥 Waterline seemed to be ugly. I changed a way to draw waterline. I made three points and connected them. Not good marker for tight spot... I drew well looking waterline and painted it slightly. I'll complete a painting job after the next work. I used an wenge wood which is one of the strongest wood in the world. It is 5.5 times stronger than basswood. 🤩 https://www.wood-database.com/wenge/ I'll turn on a switch of wood lathe tomorrow.

-
Sail cringle holes with eyelet
modeller_masa replied to modeller_masa's topic in Masting, rigging and sails
Thanks for great tips, wefalck! I'll use 1mm rivets I ordered for other decoration parts. -
Sail cringle holes with eyelet
modeller_masa replied to modeller_masa's topic in Masting, rigging and sails
https://www.ebay.com/itm/273600722266 I got the data chart from ebay seller. The 0.4 x 0.6 PCB rivet has 0.9mm head diameter. If a ship model's scale is 1:64, it is 57.6mm or 2 1/4 inch cringle which is fairly feasible size. If there is 0.2 x 0.3 rivet, it may be the best size for any case. In addition, I may be able to tin the copper rivet to black color for realistic expression. The price of tiny rivets is pretty high. (1000 pcs with punching tool is 150 Euros.) I'll keep it on my bucket list.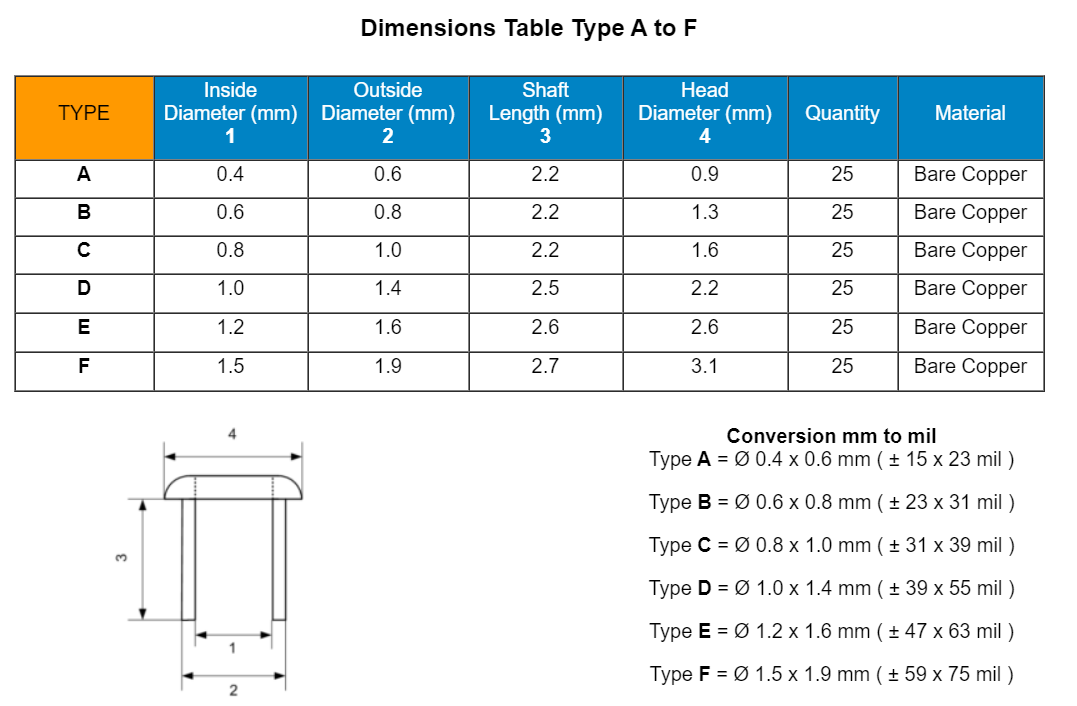
-
Sail cringle holes with eyelet
modeller_masa replied to modeller_masa's topic in Masting, rigging and sails
I'll research about it soon! Thanks, Thanasis. -
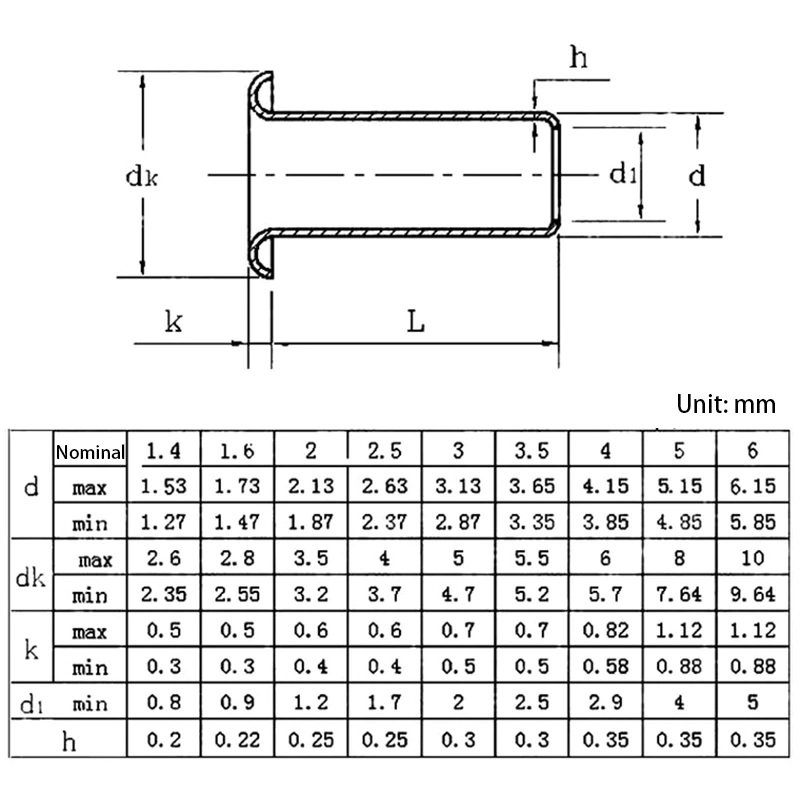
Hello. I have question I thought about cringle holes of sail. https://en.wikipedia.org/wiki/Sail_components https://en.wikipedia.org/wiki/File:Hals_(Großsegel).jpg I would like to use a rivet or eyelet to protect sail when it is under tension stress. These are rivets or eyelets I'm looking for. https://www.amazon.com/Ochoos-1000Pcs-Tubular-Double-sided-Circuit/dp/B07MXPSYFR A common eyelets is down to 0.90mm inner diameter and 2.50mm outer diameter, but... The smallest eyelet I can purchase is 0.40mm inner diameter and 0.60mm outer diameter. I would say that this is not bad for small scale ships such as 1/24 modern boat. Will it work with 1/50 or higher scale ships? I'm in doubt. A hot needle may be enough to protect if I choose suitable sail fabric...
-
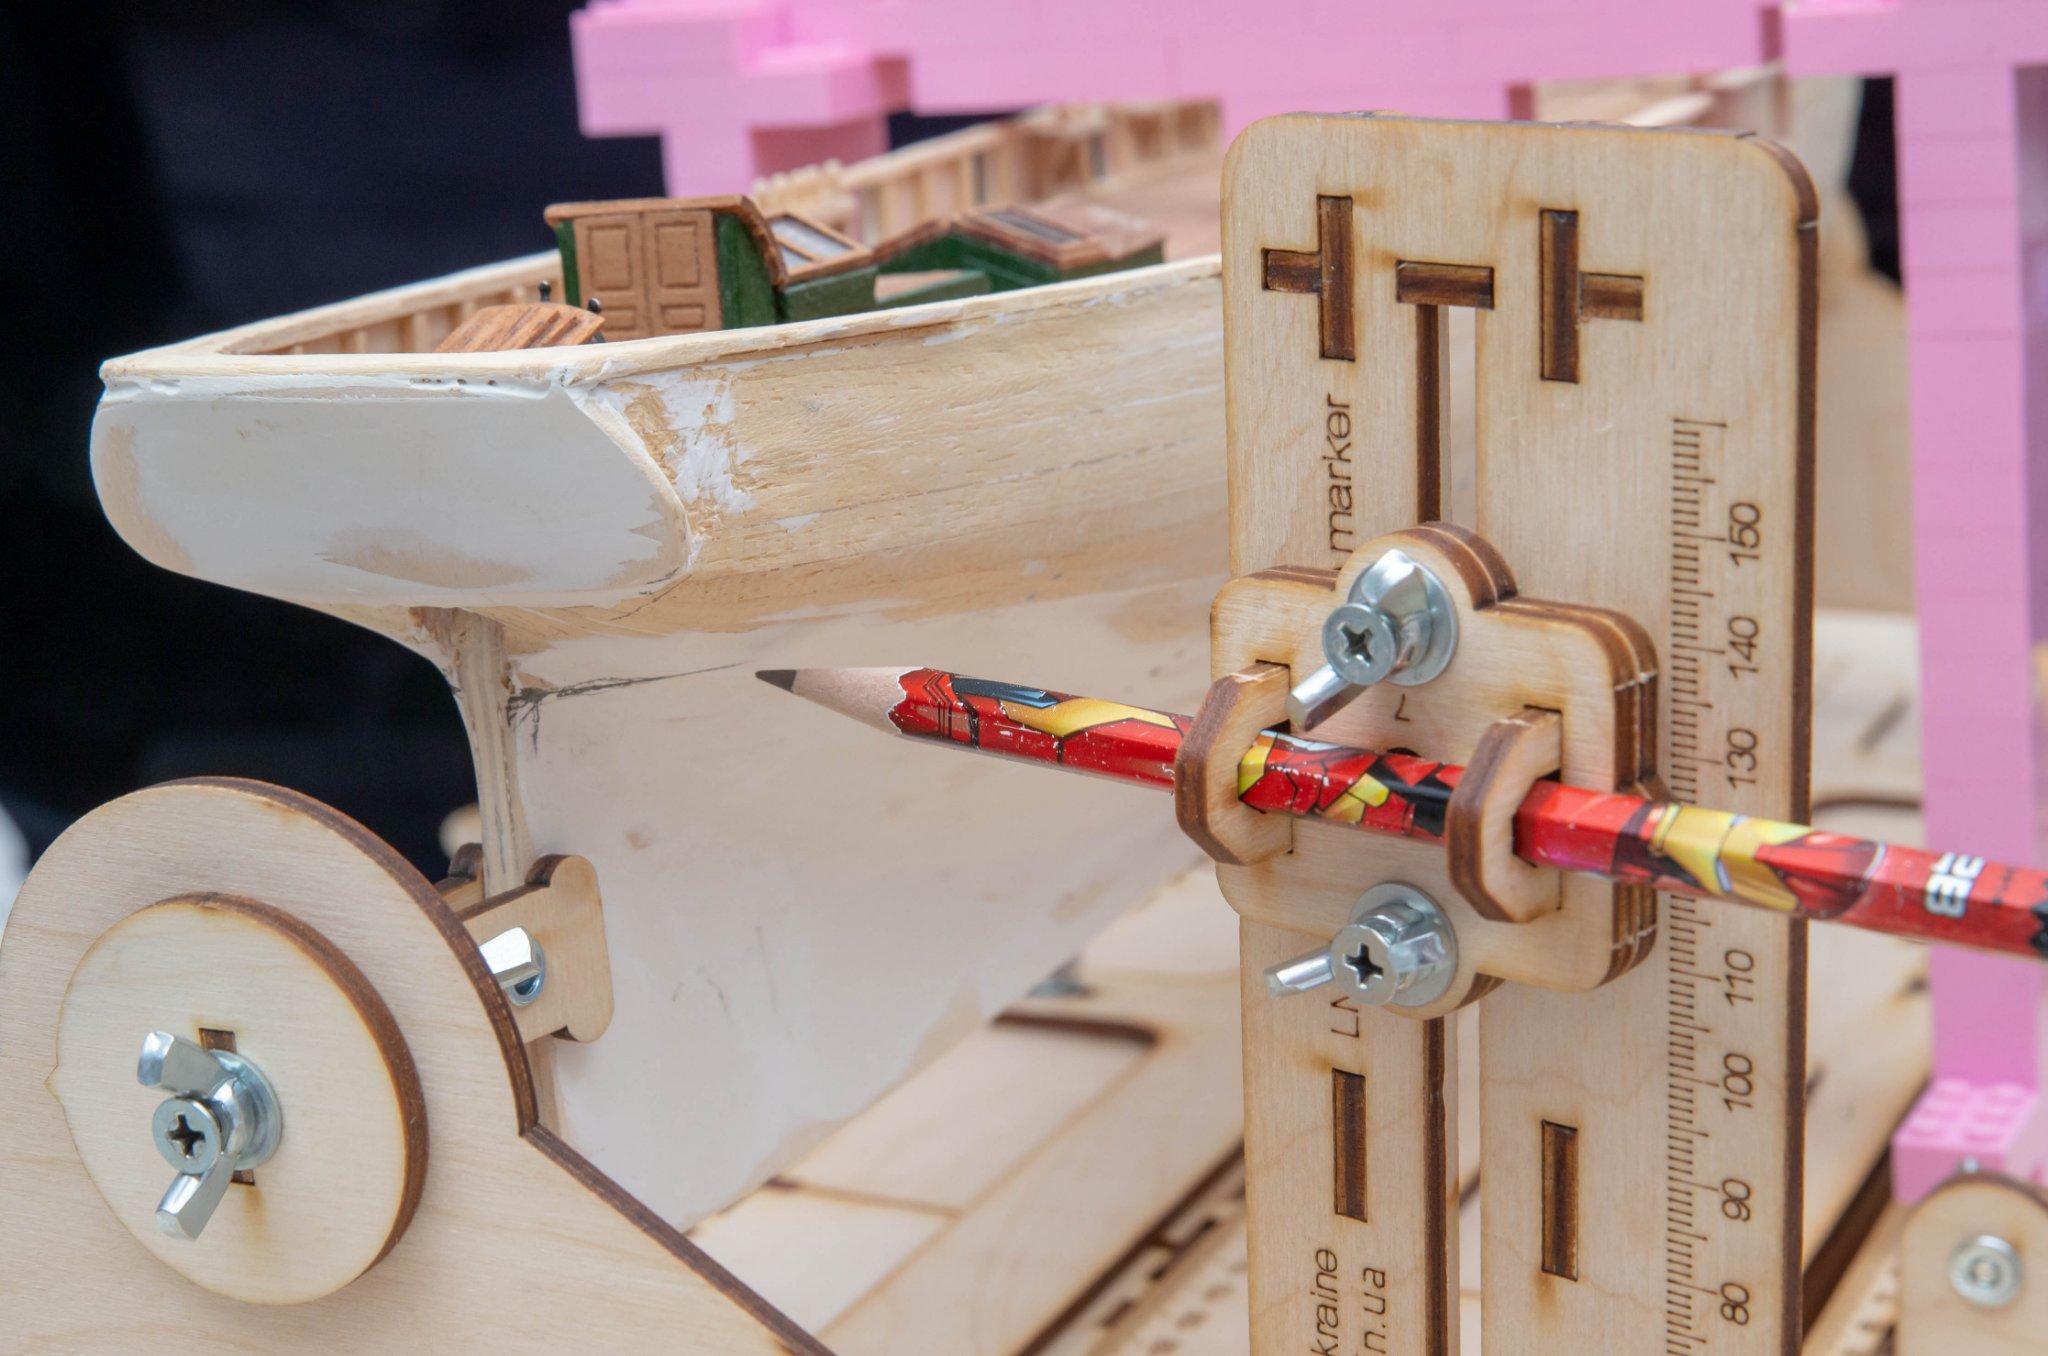
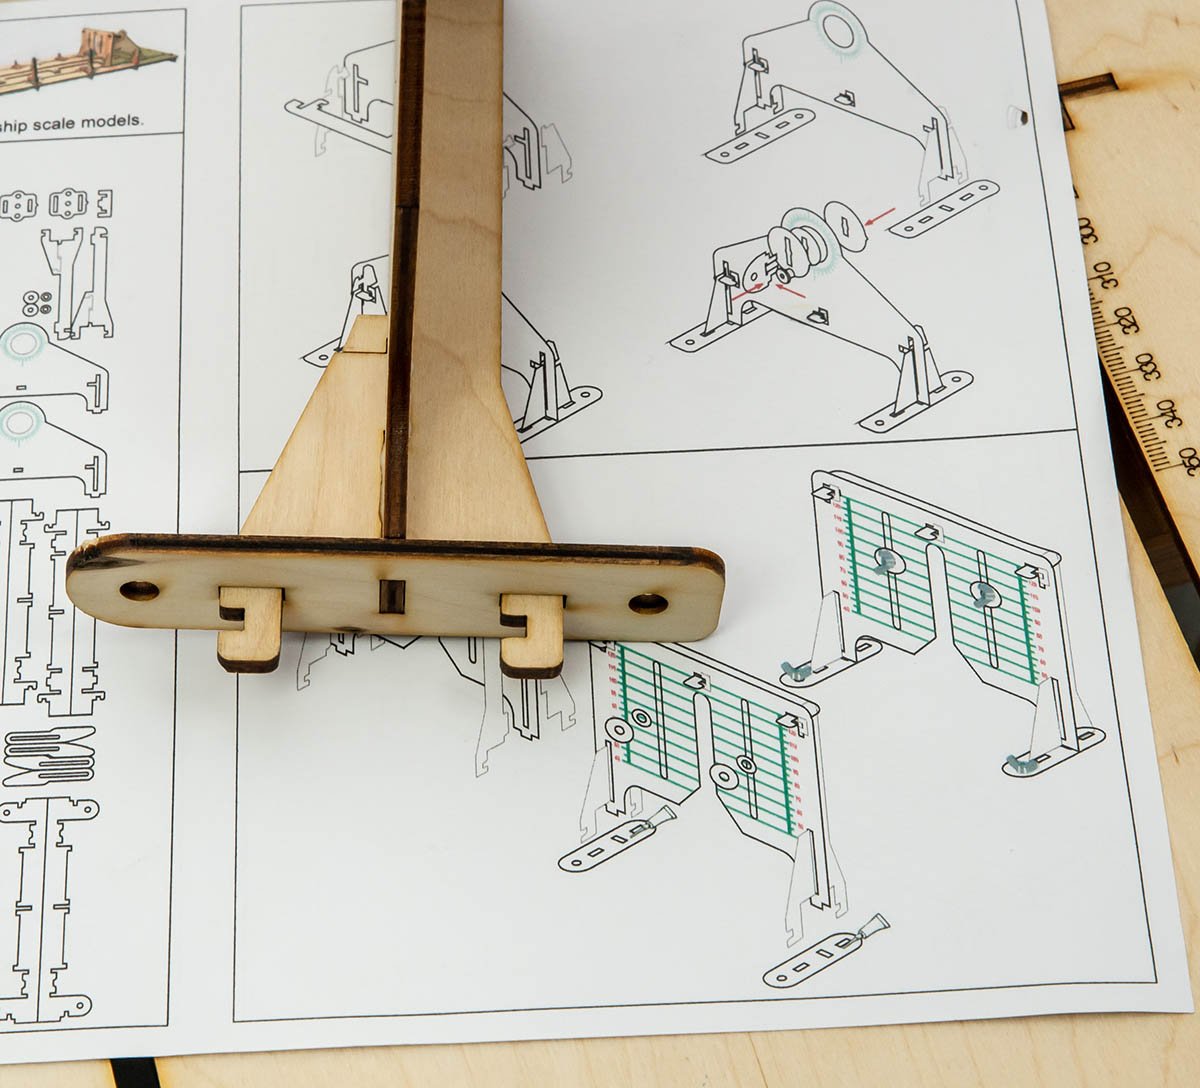
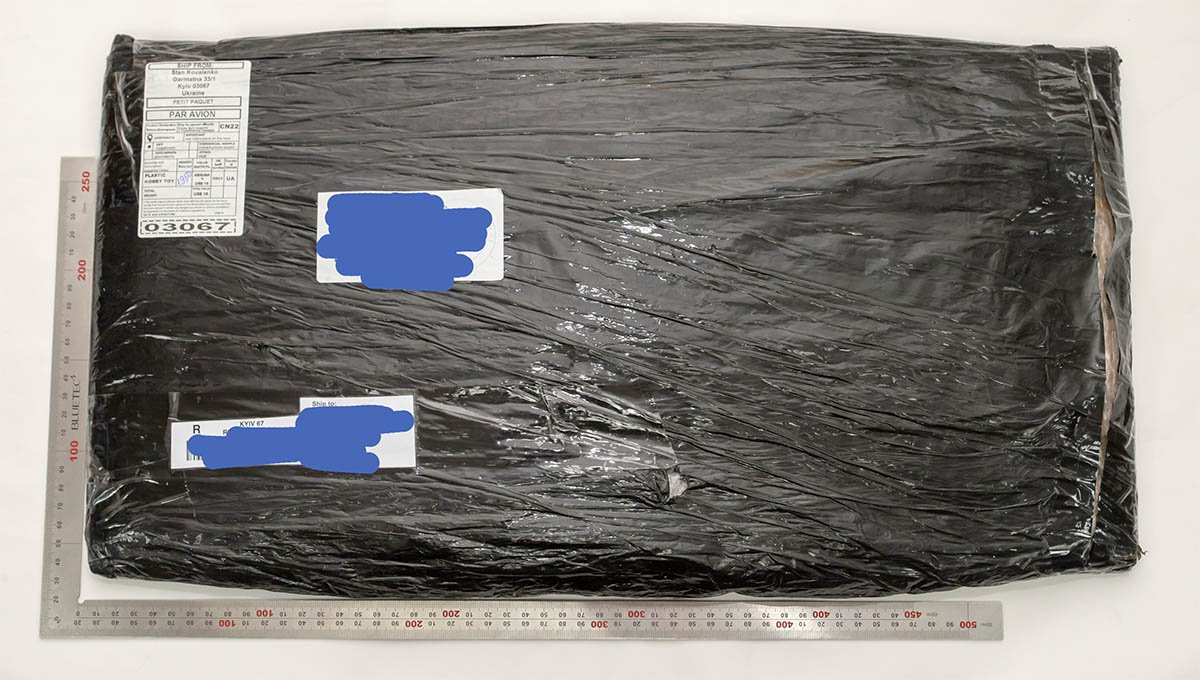
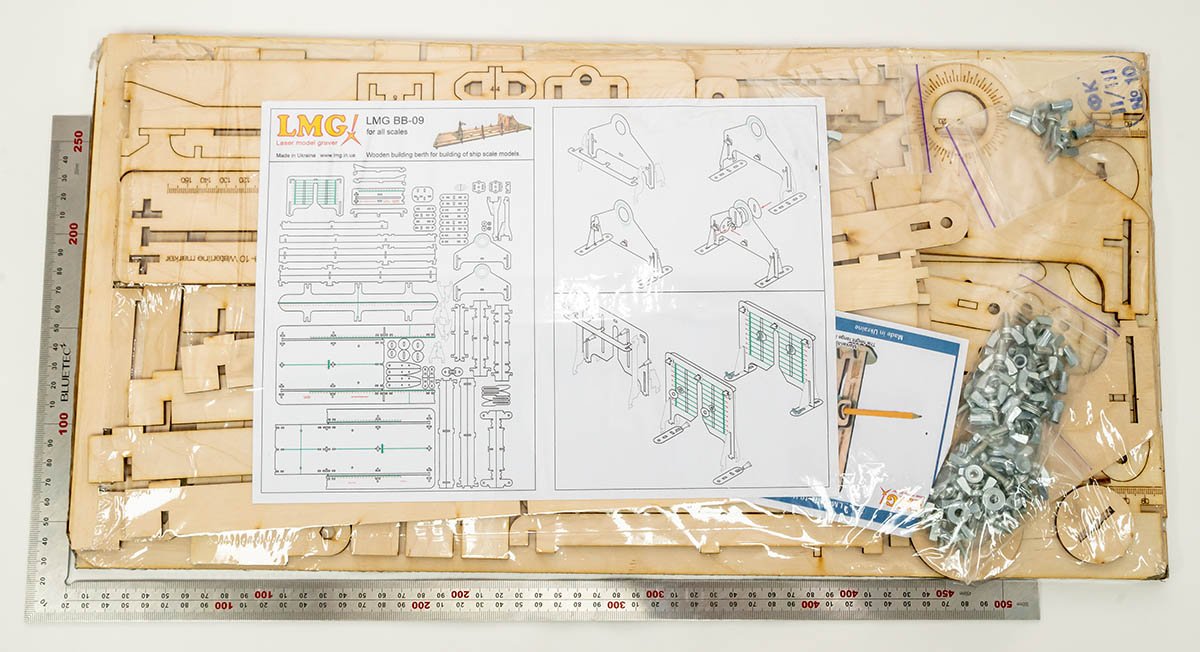
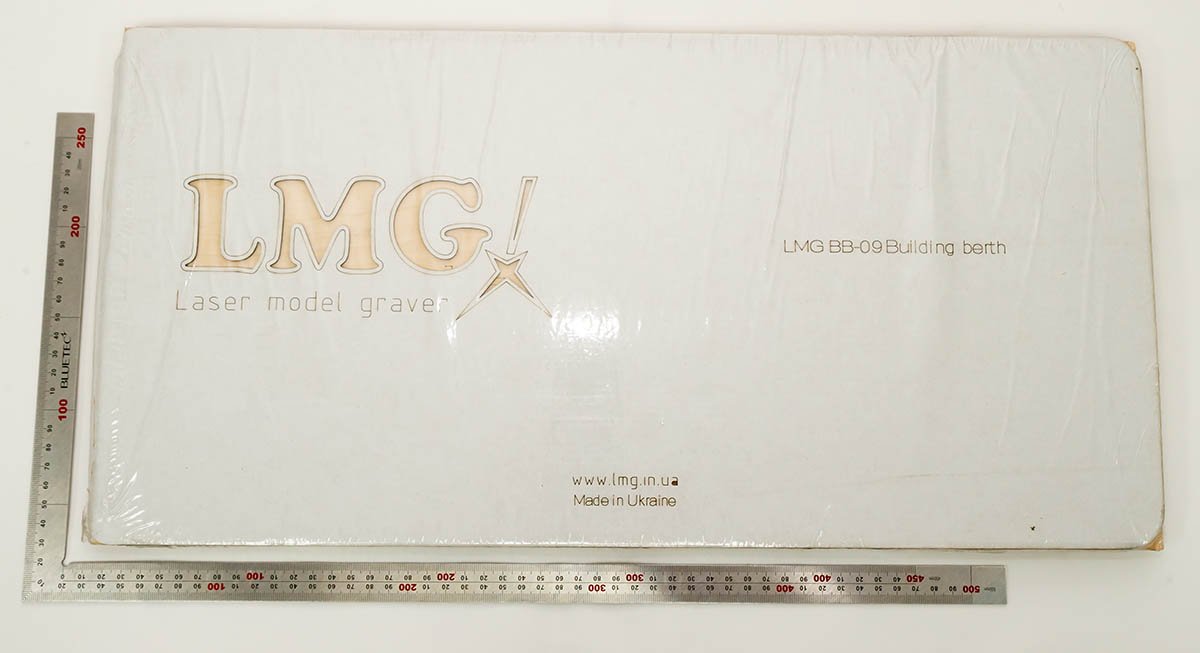
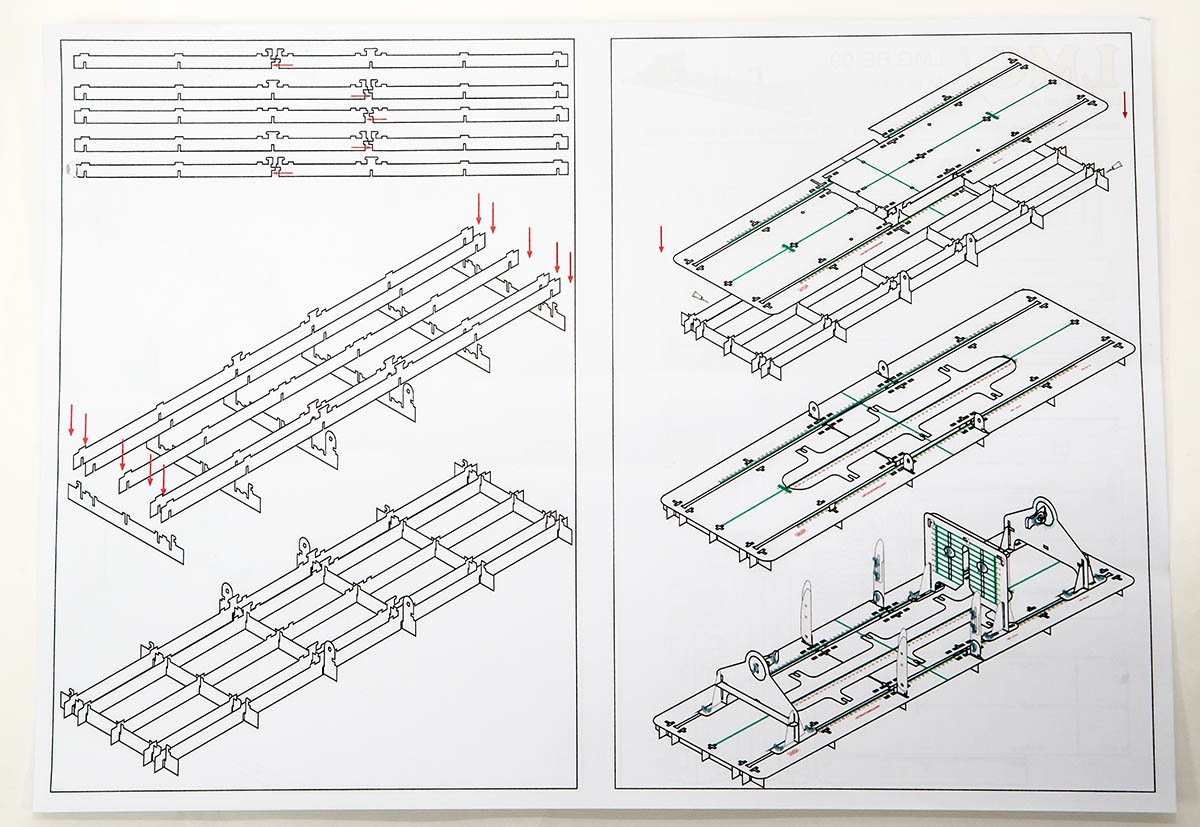
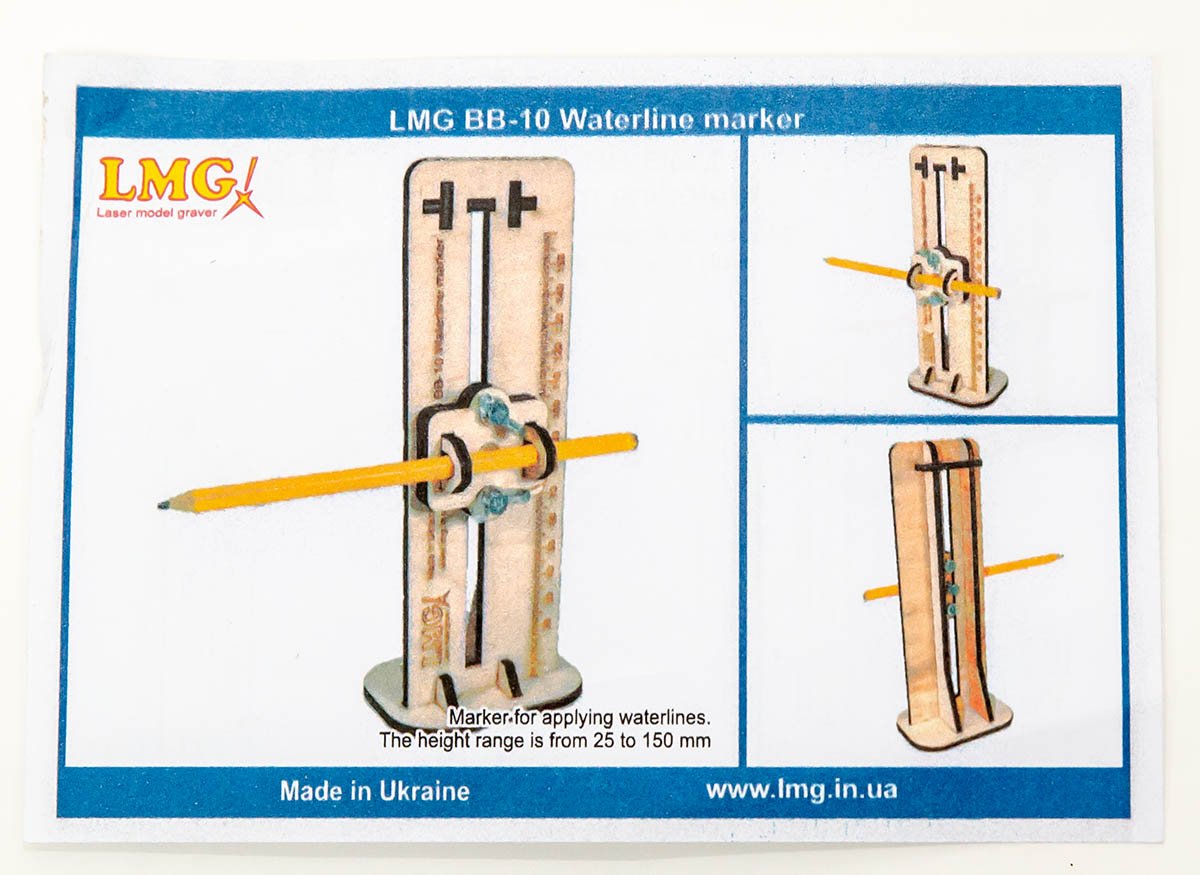
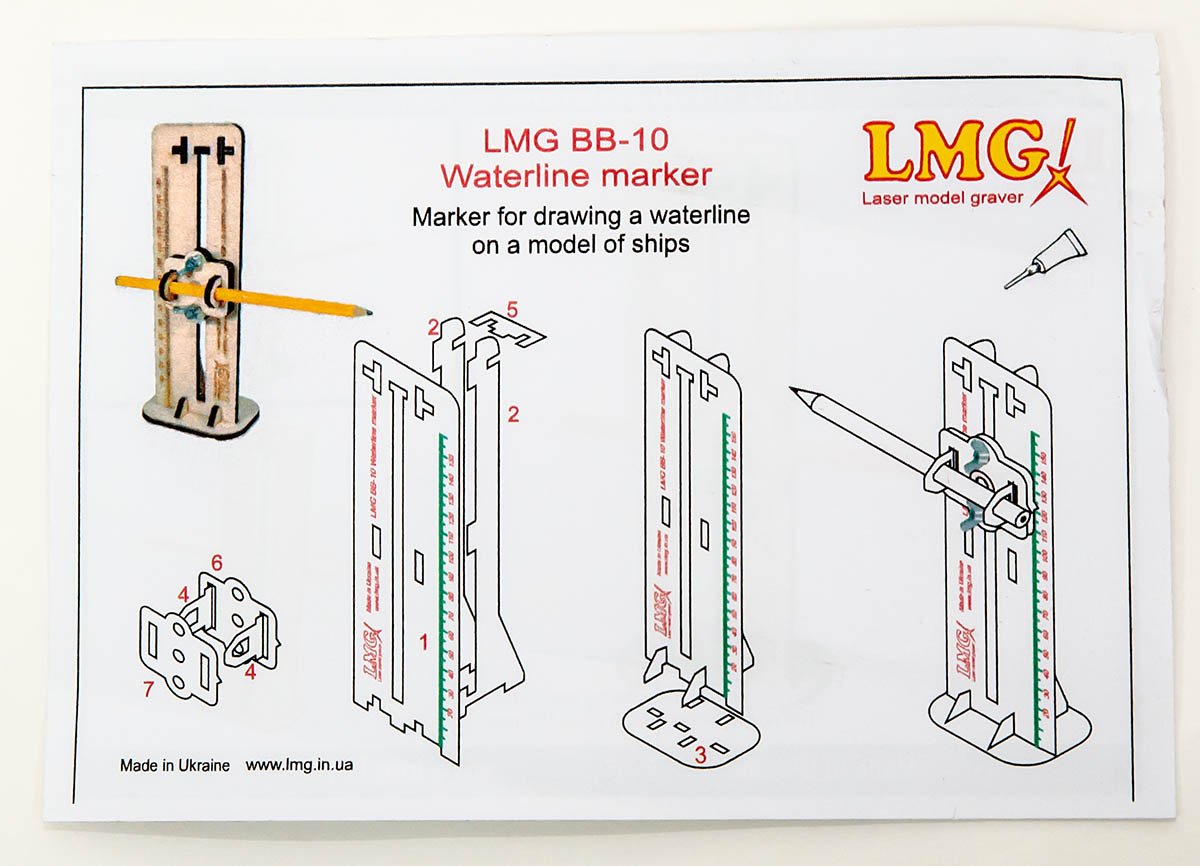
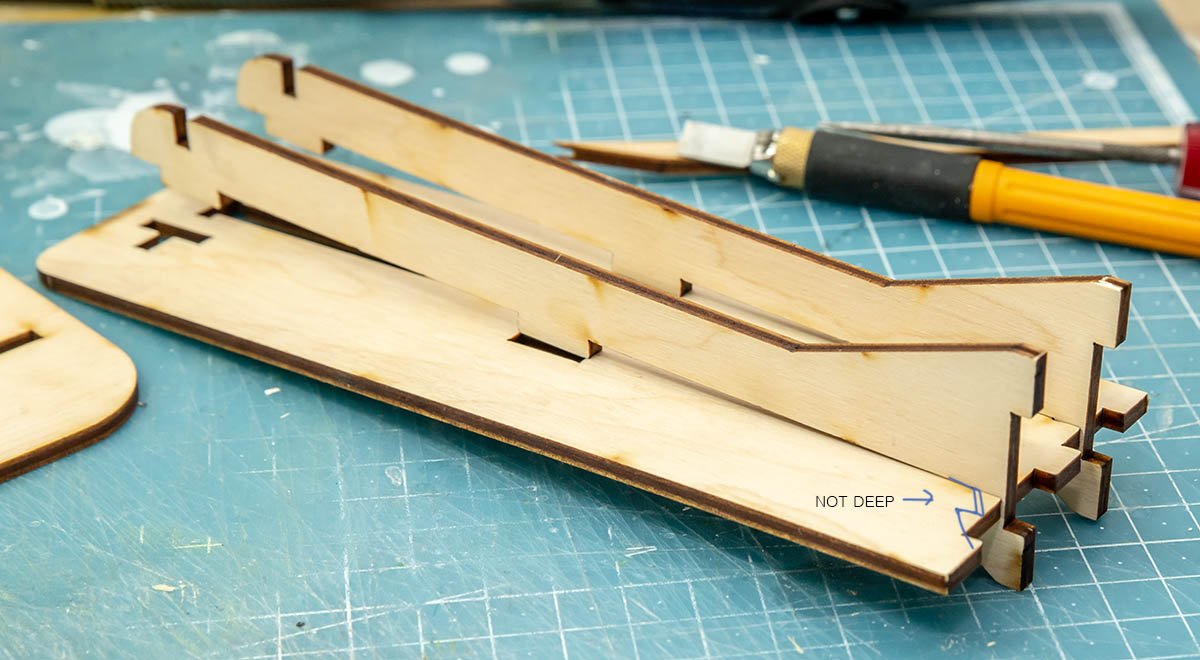
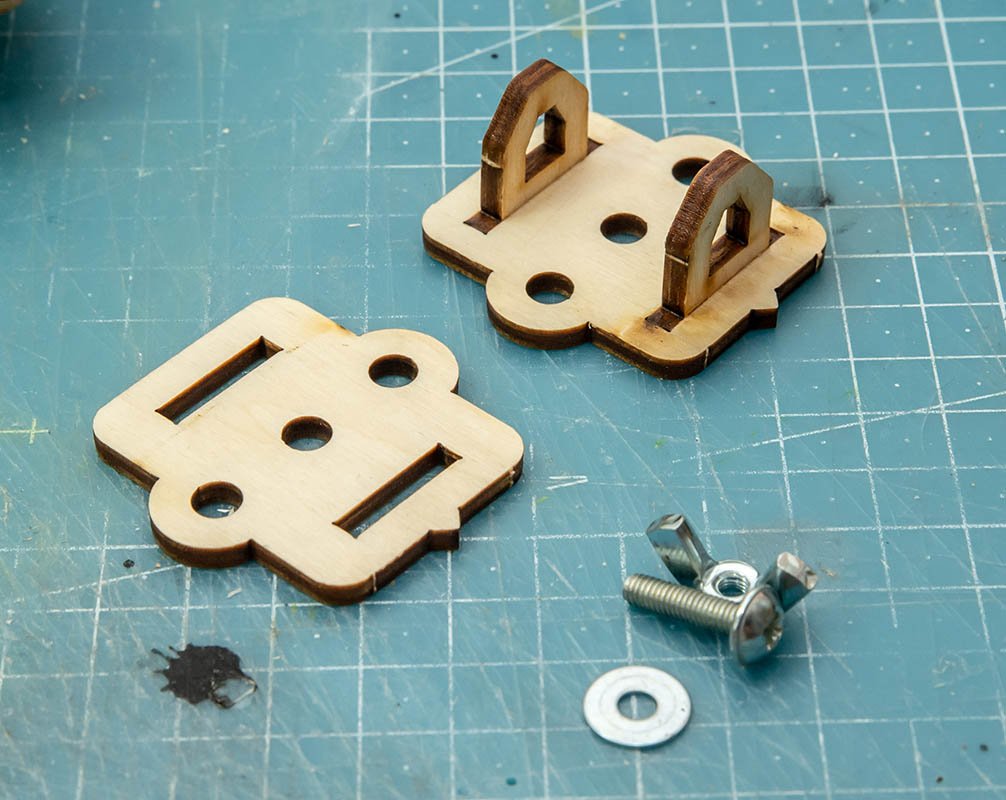
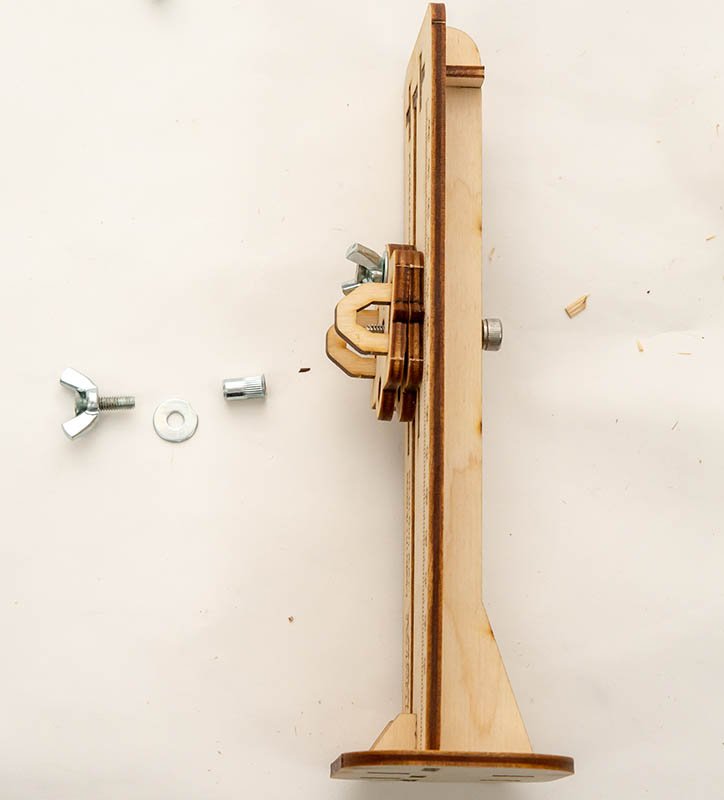
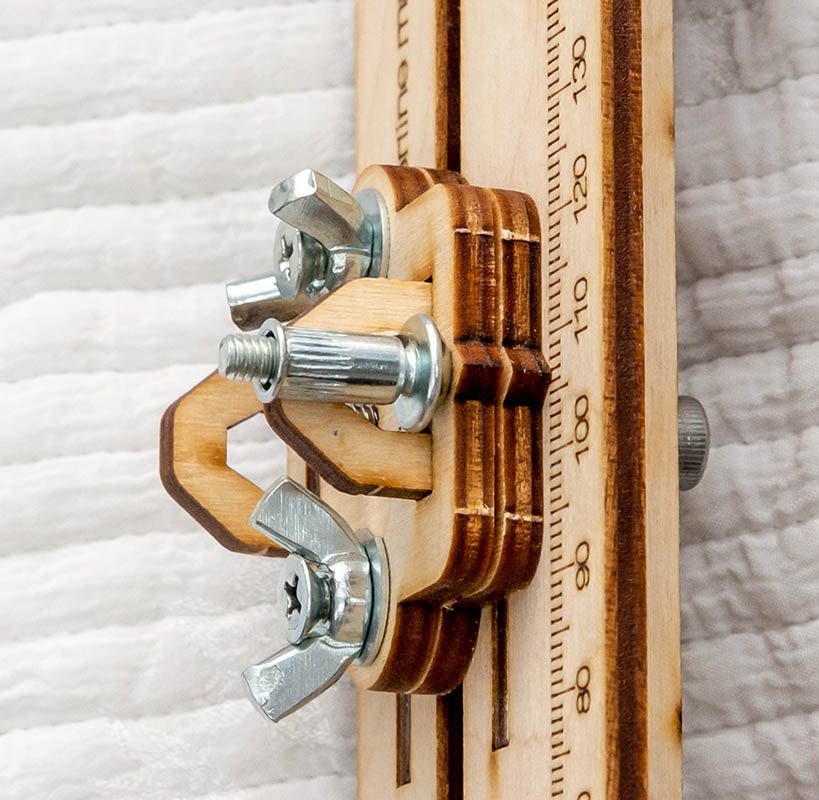
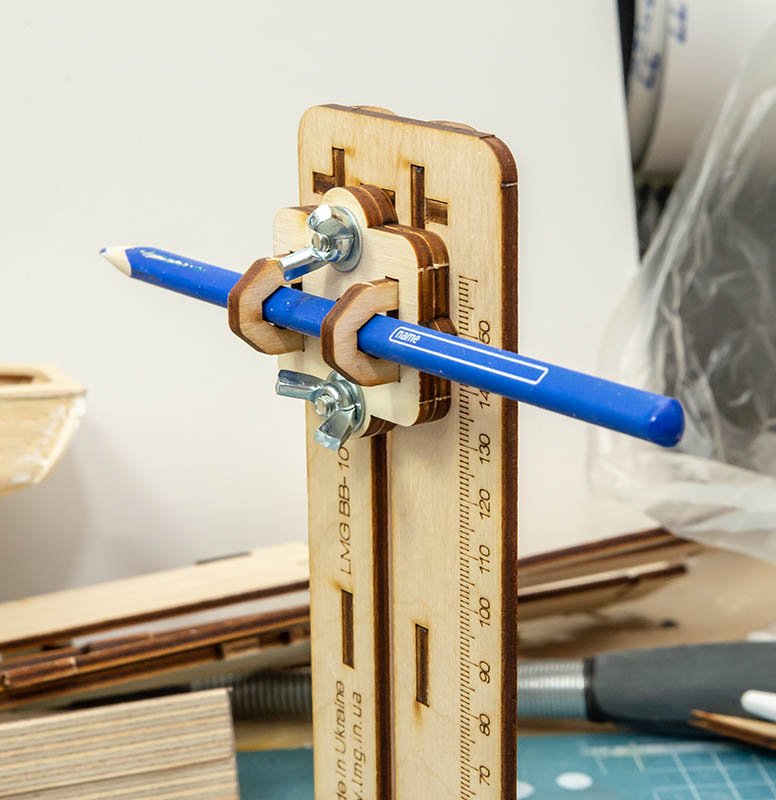
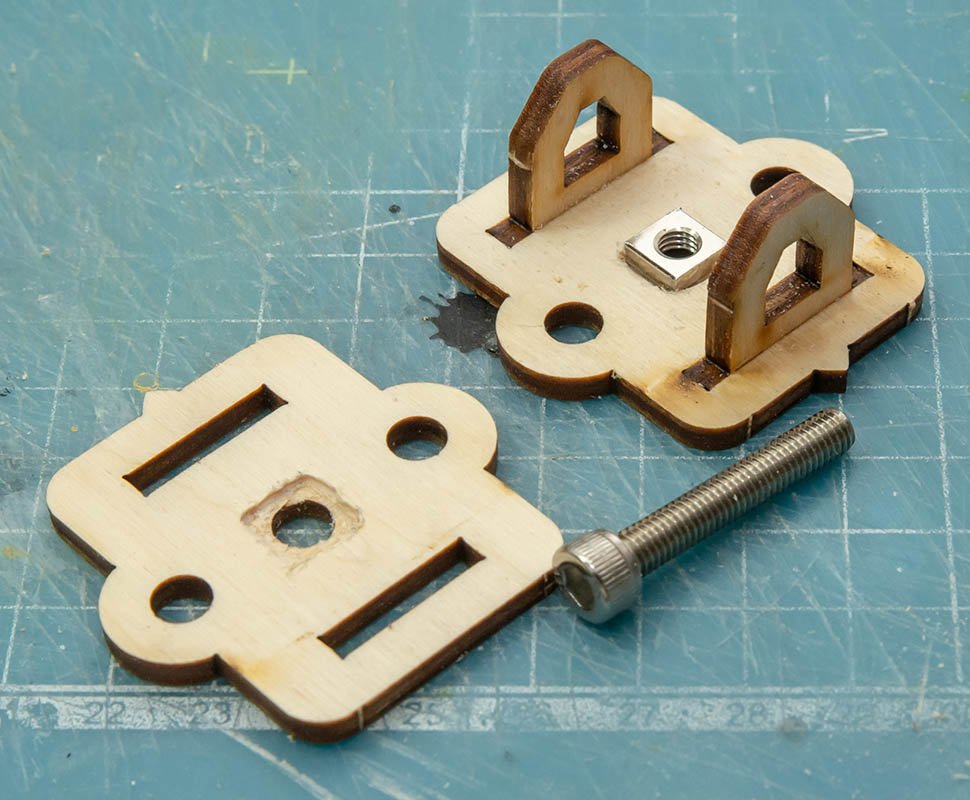
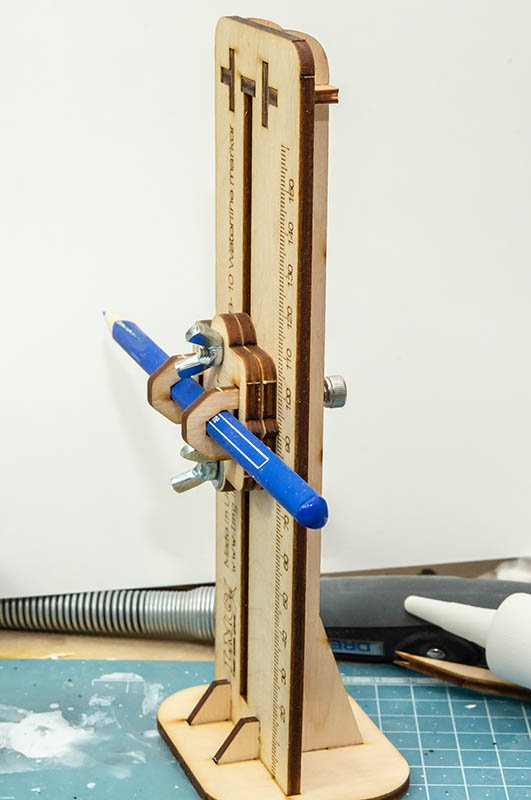
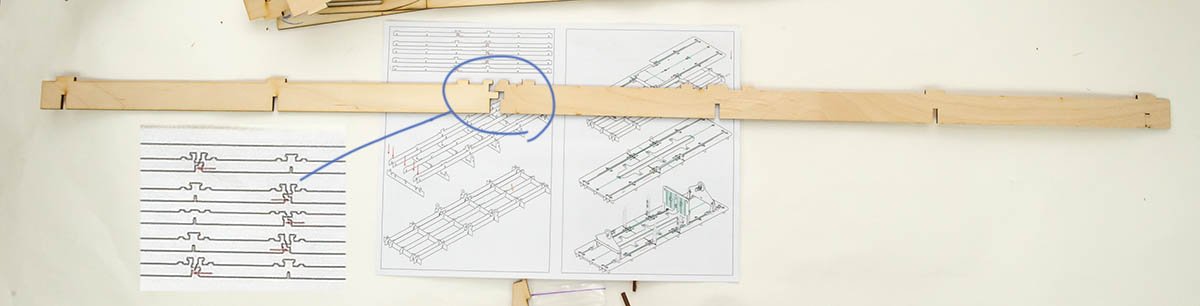
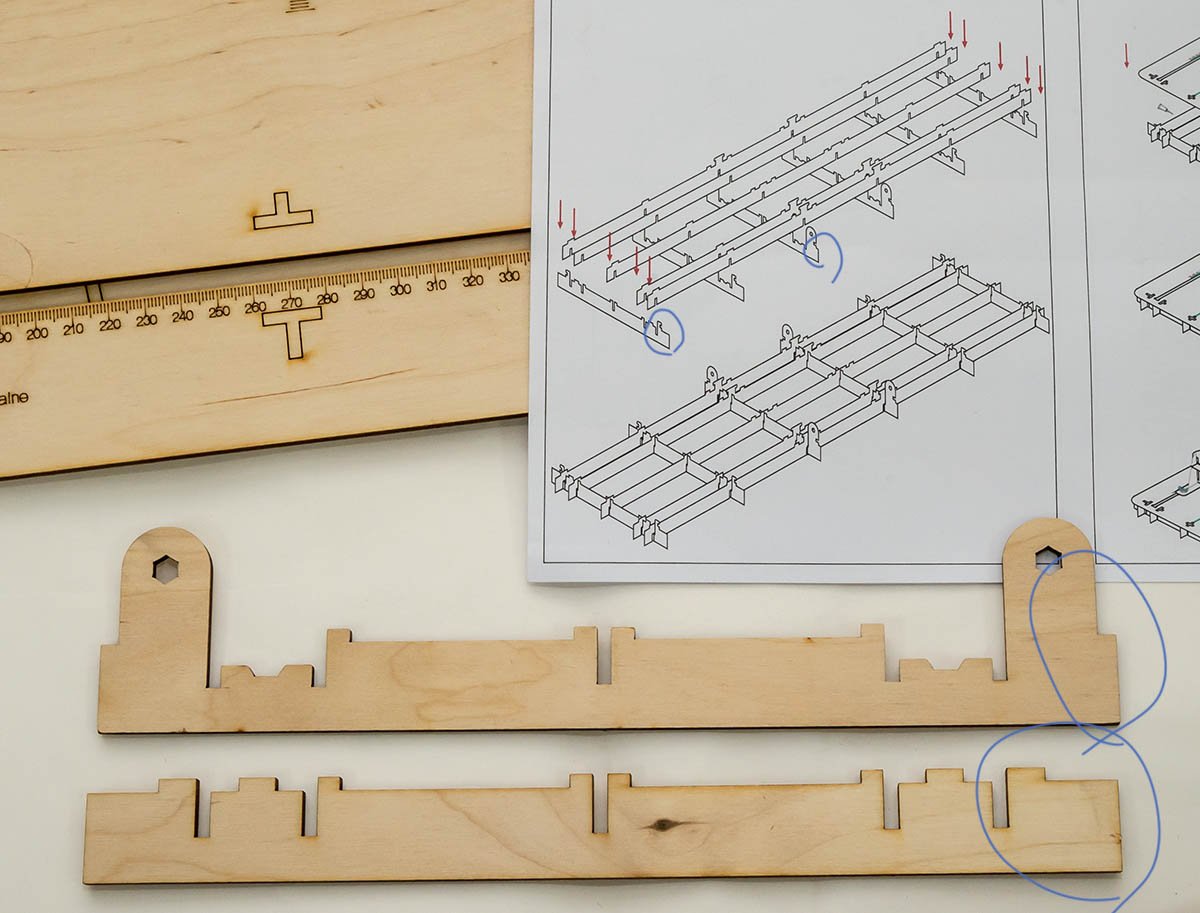
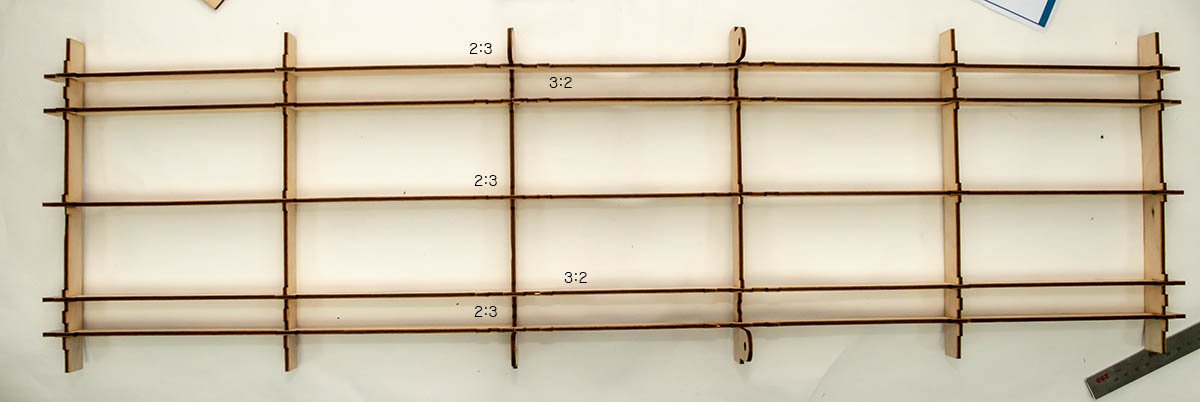
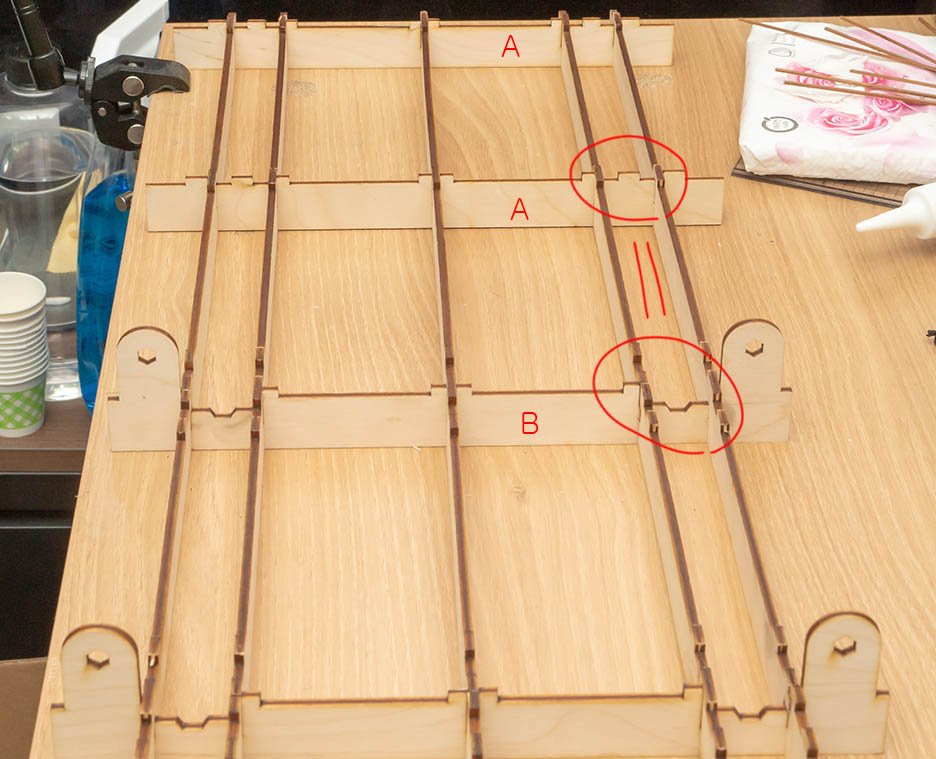
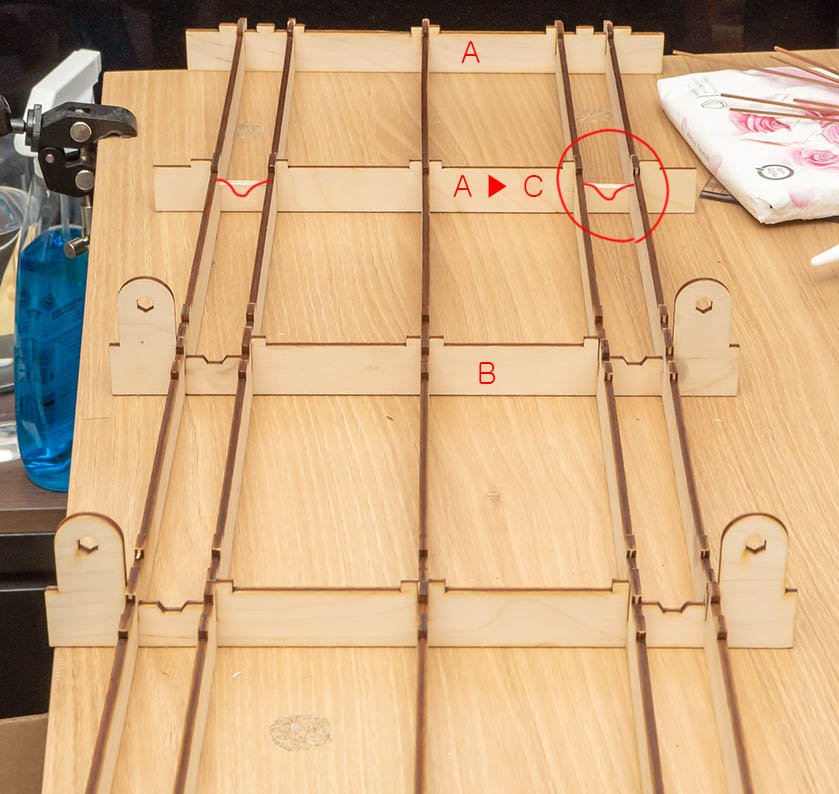
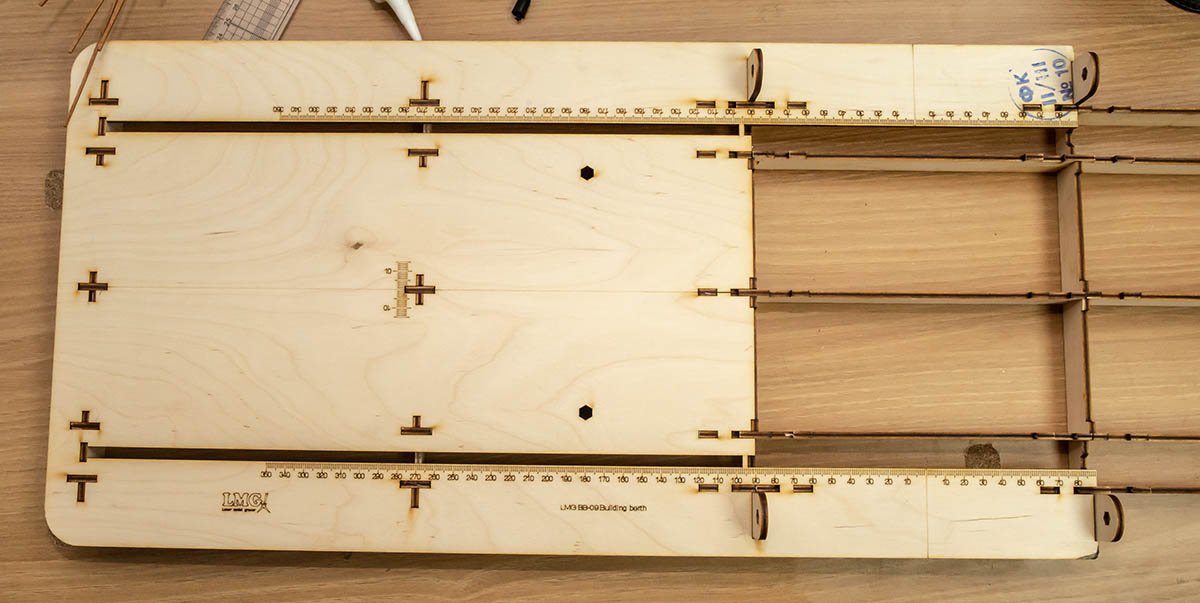
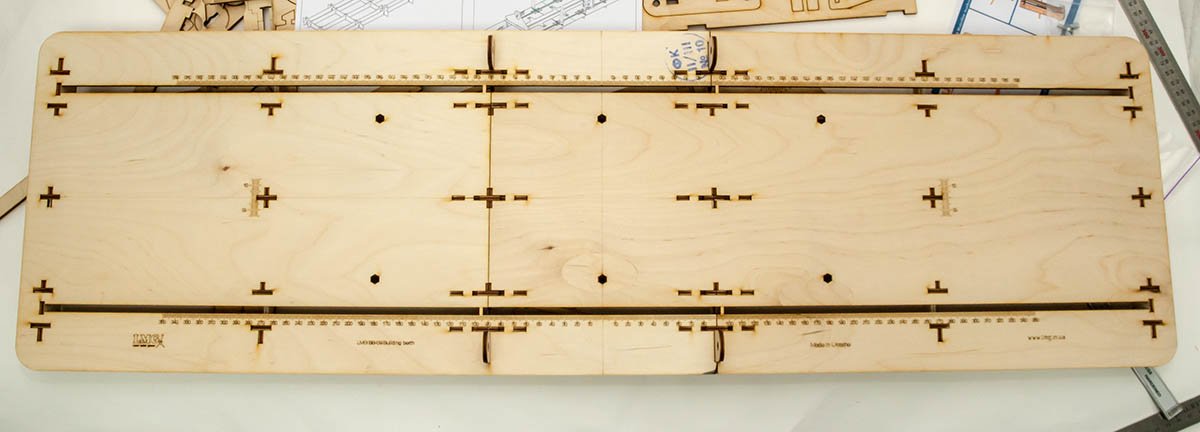
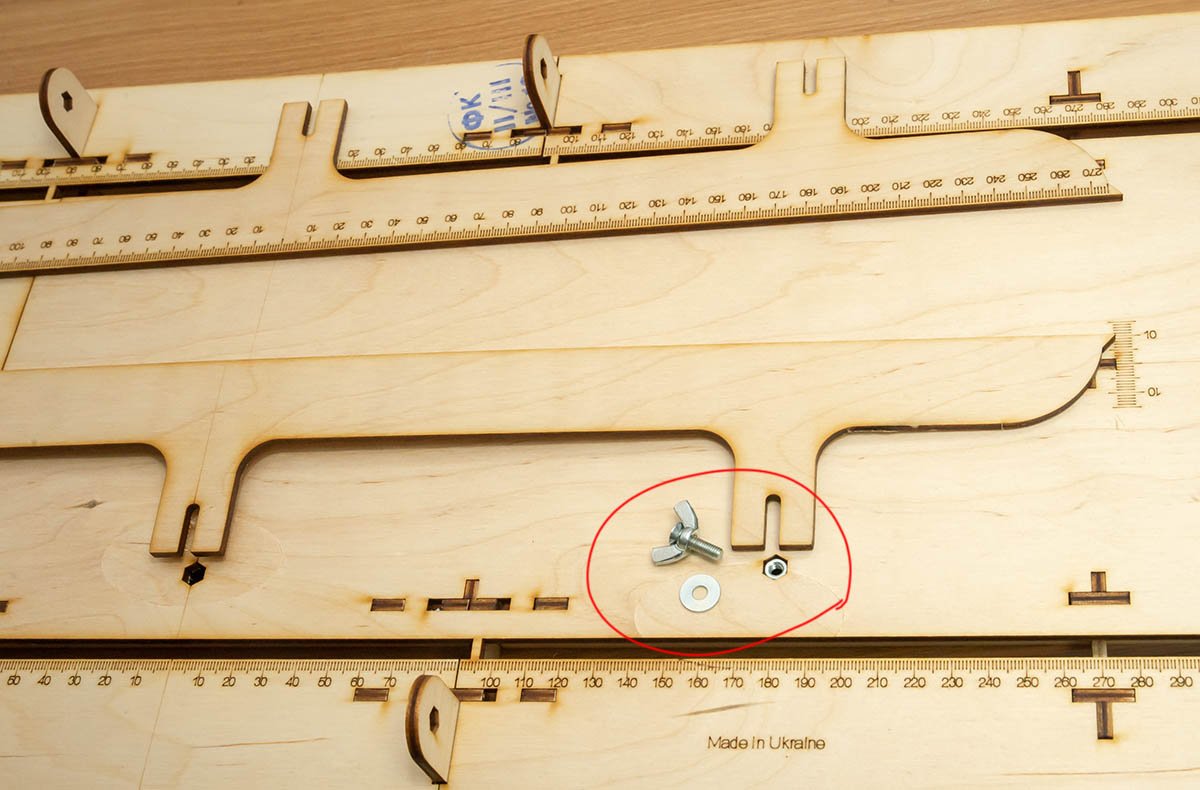
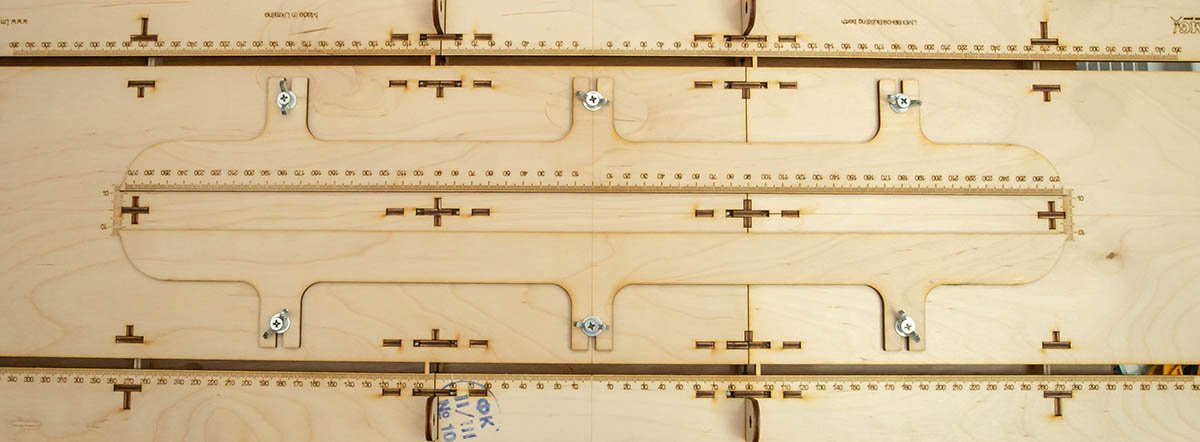
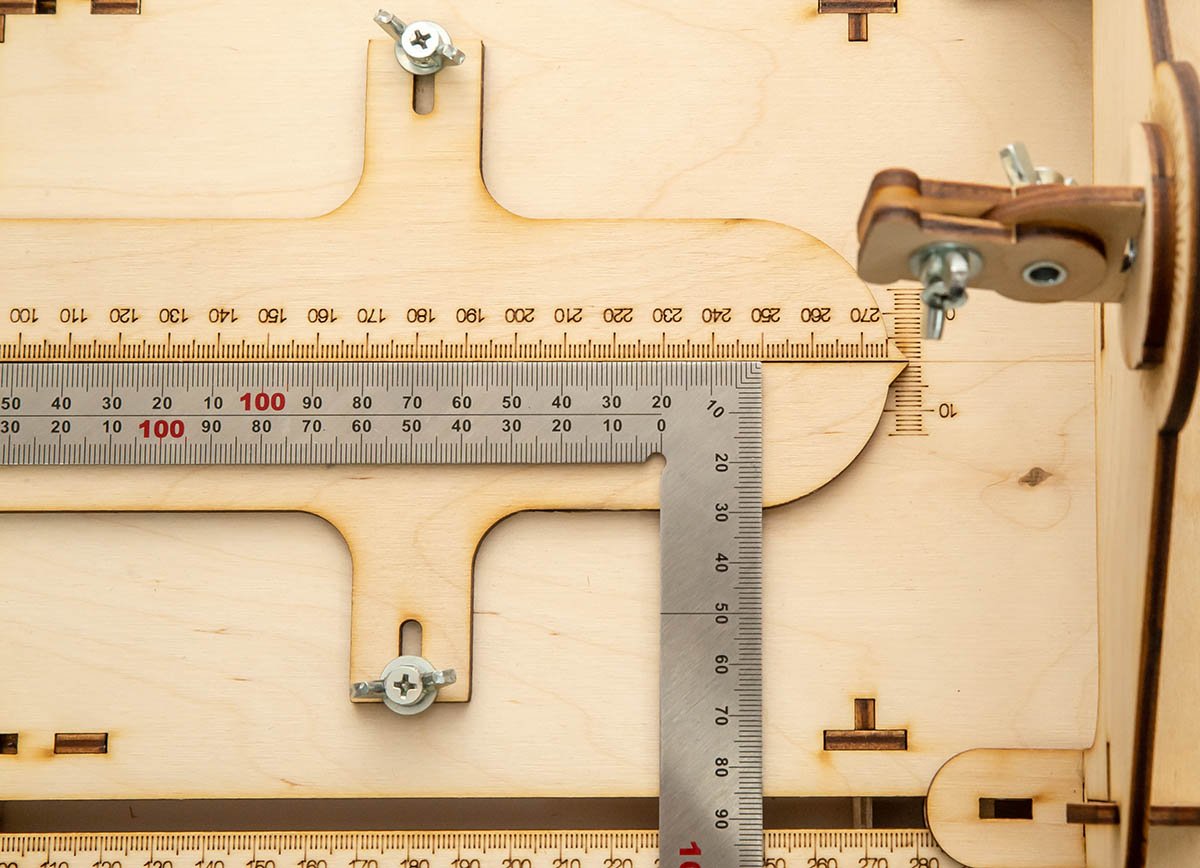
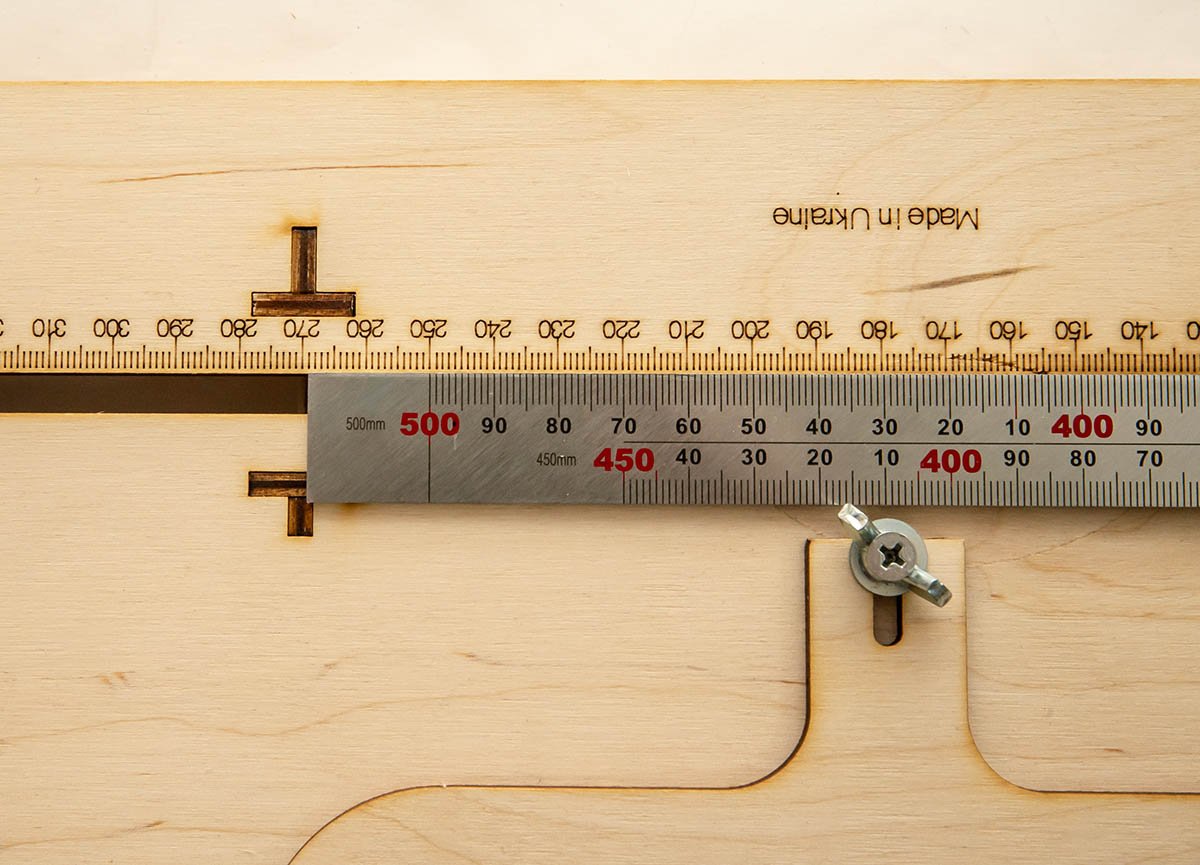
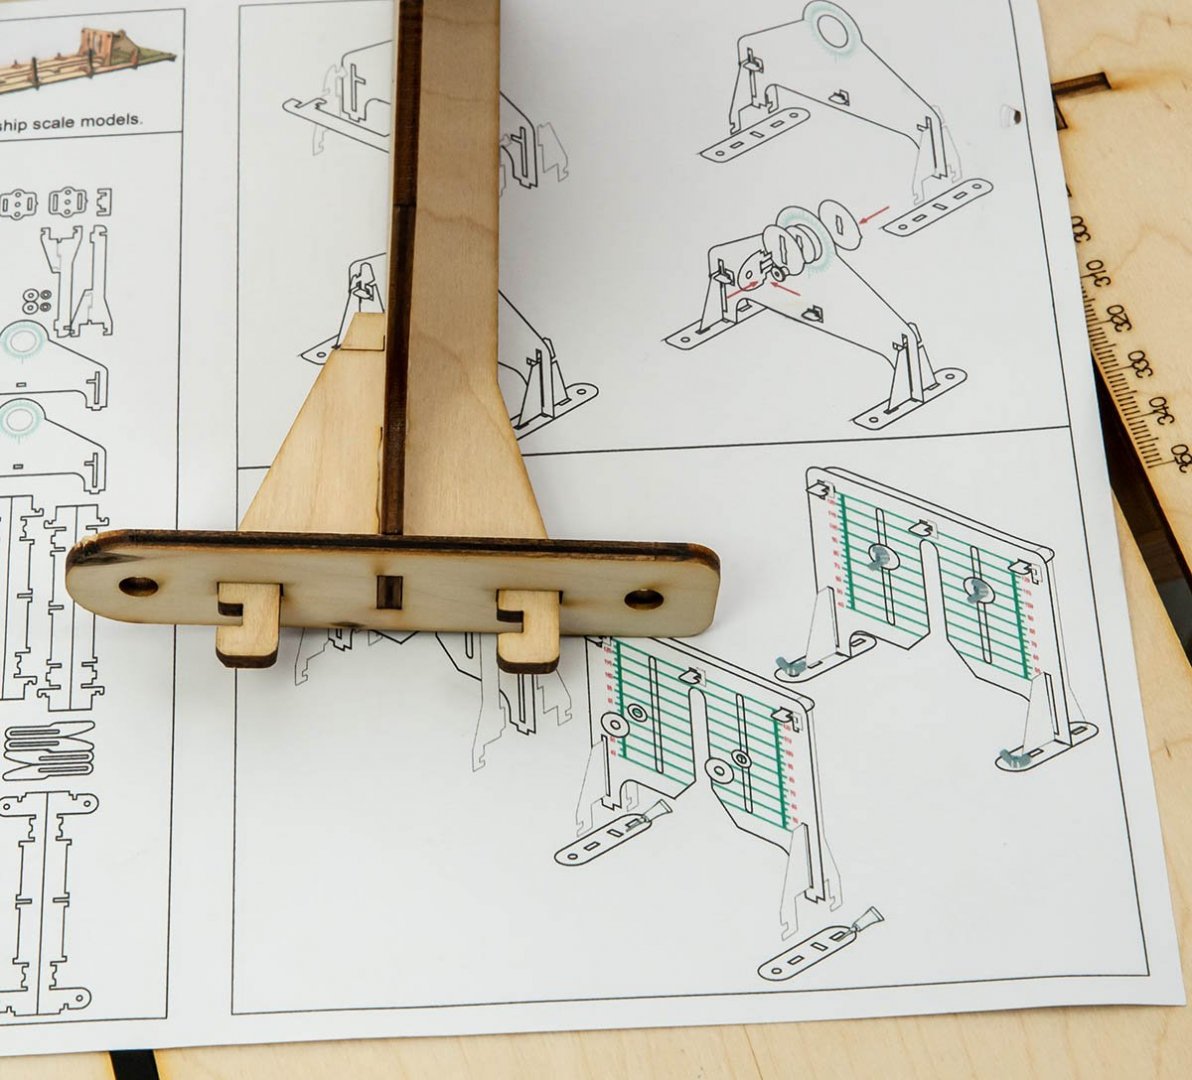
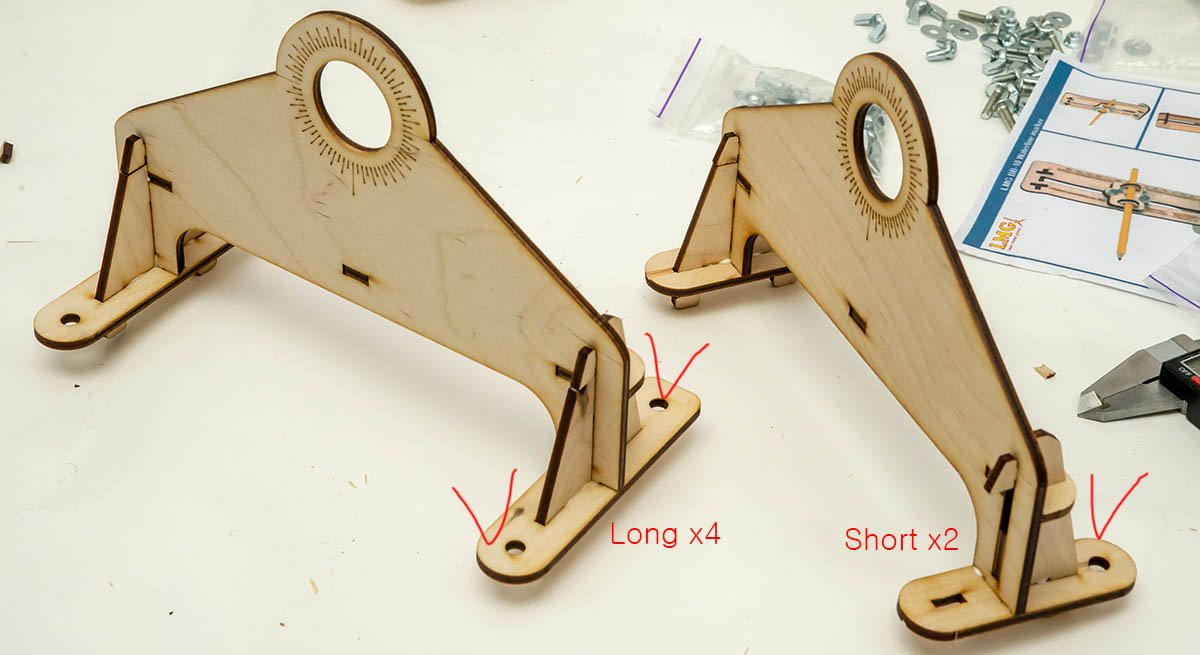
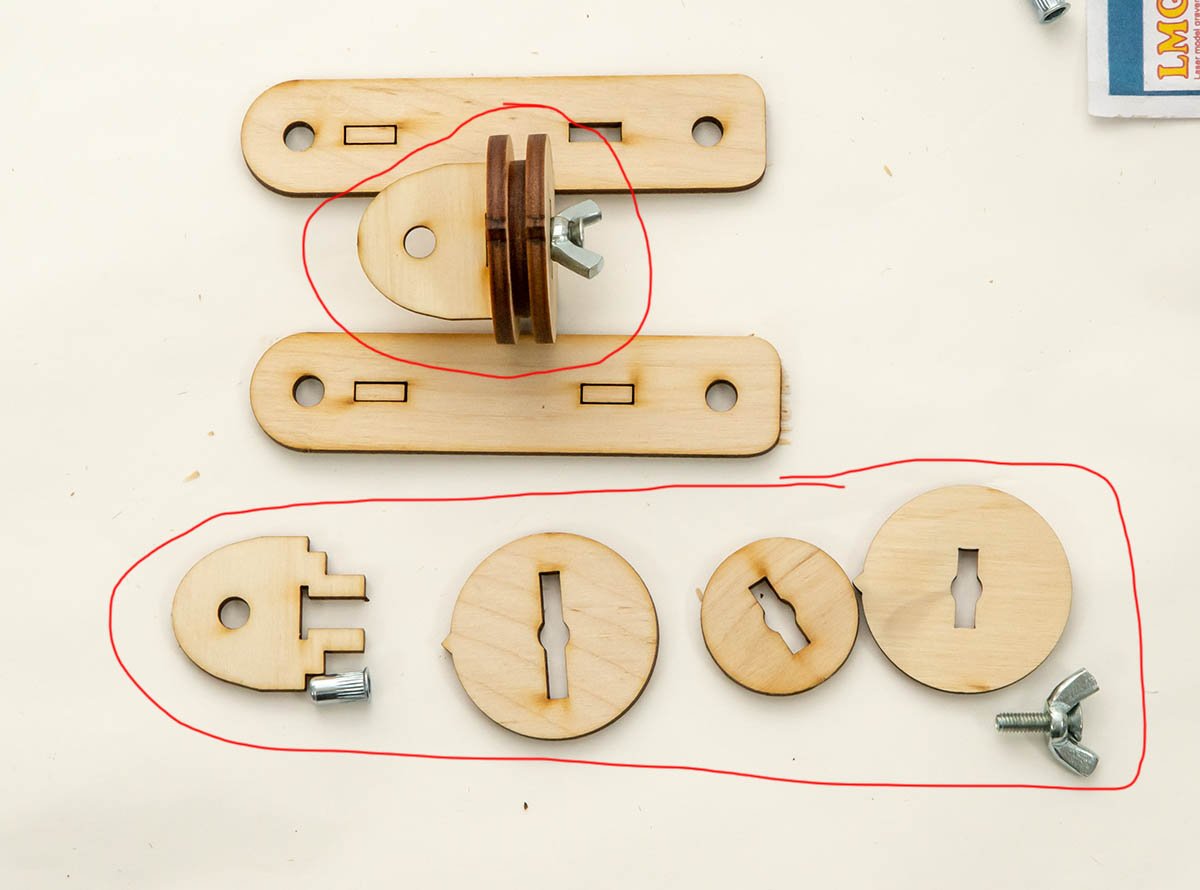
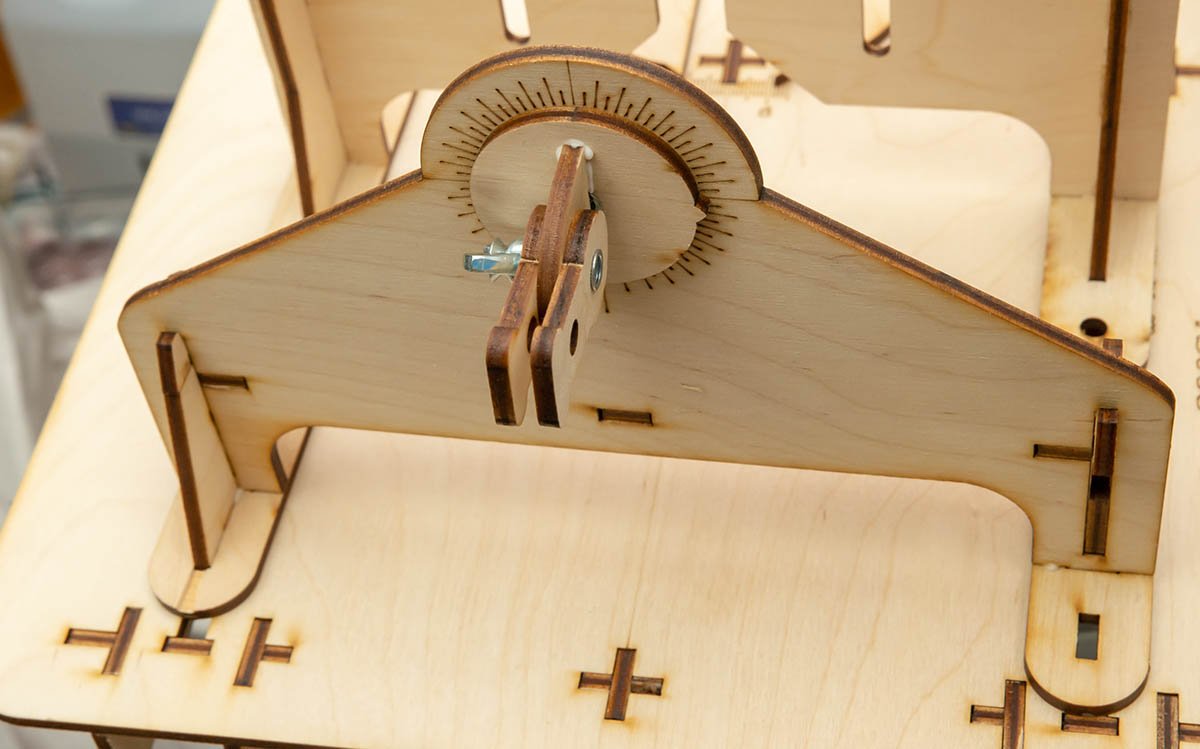
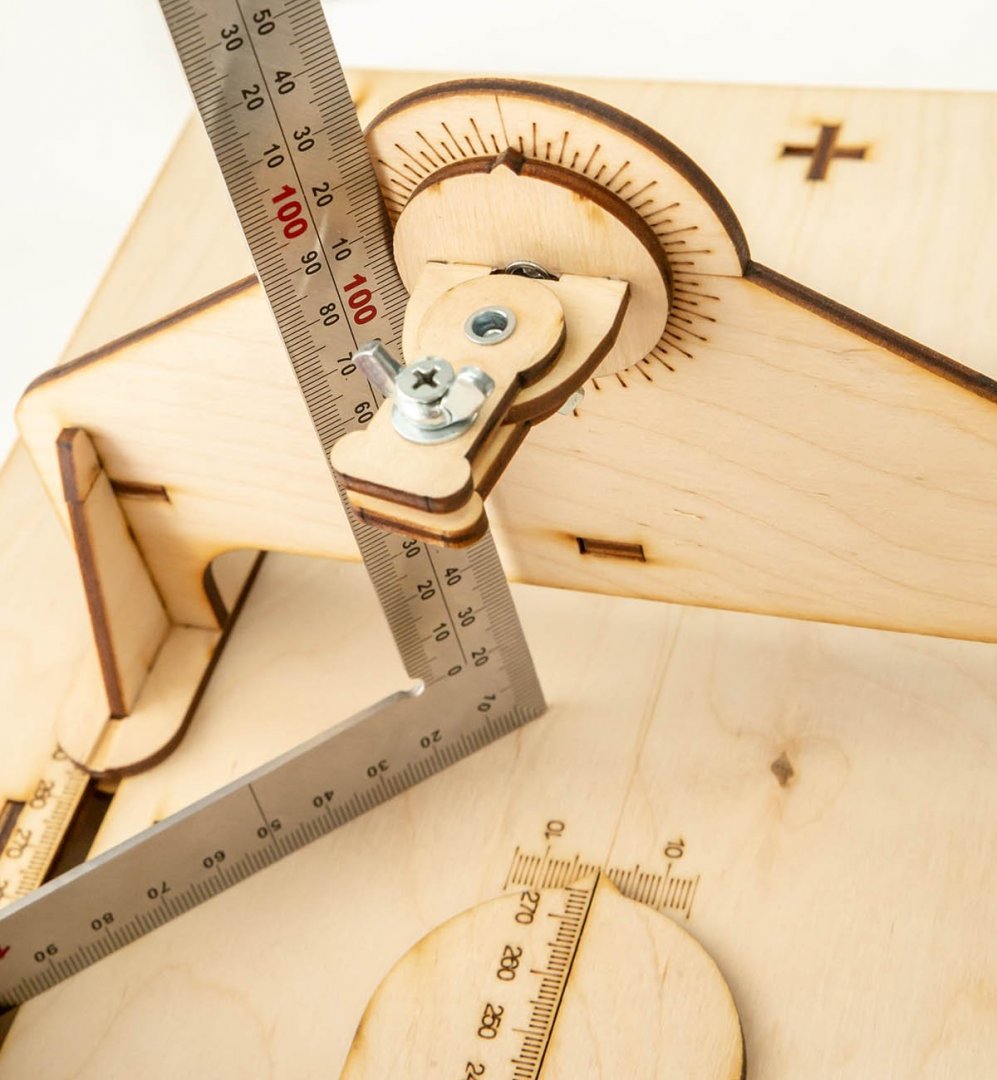
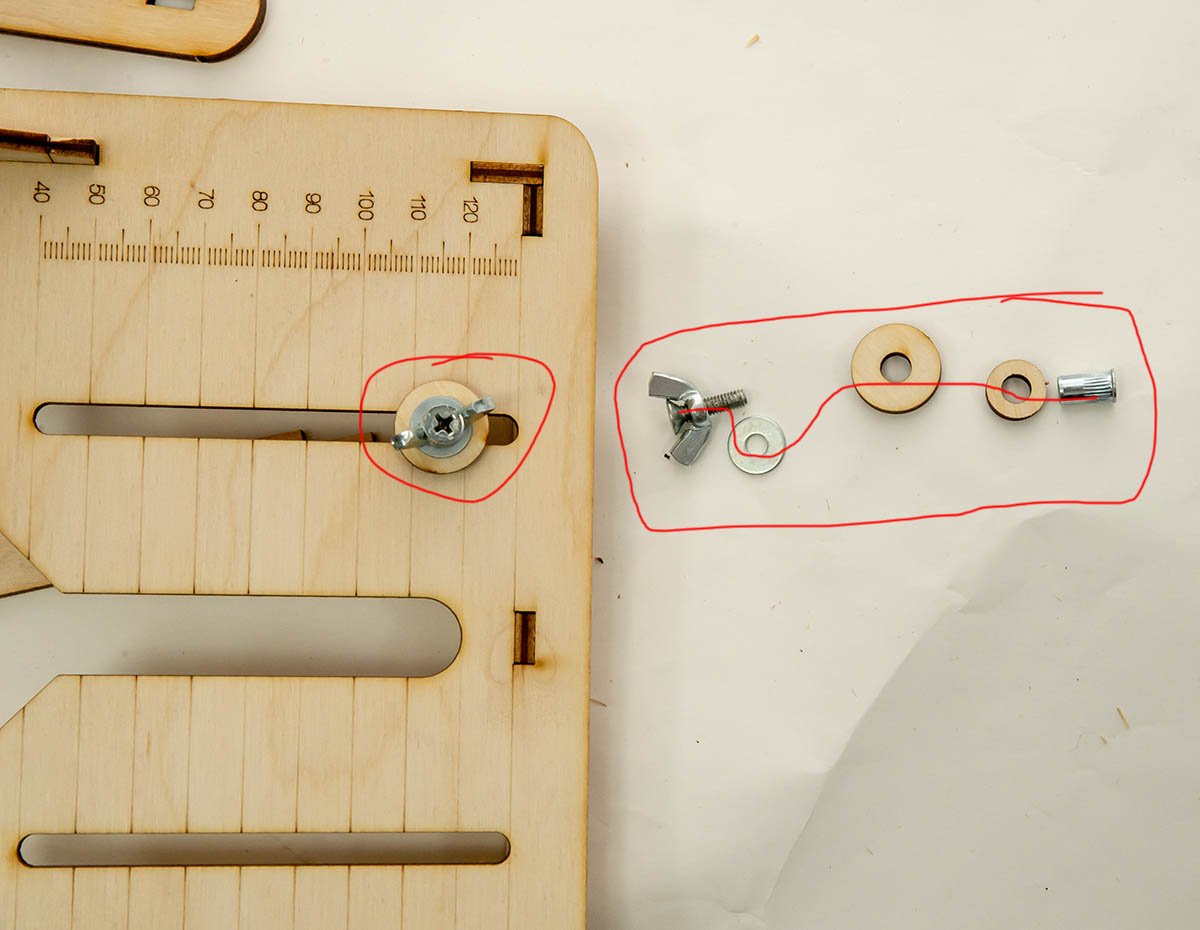
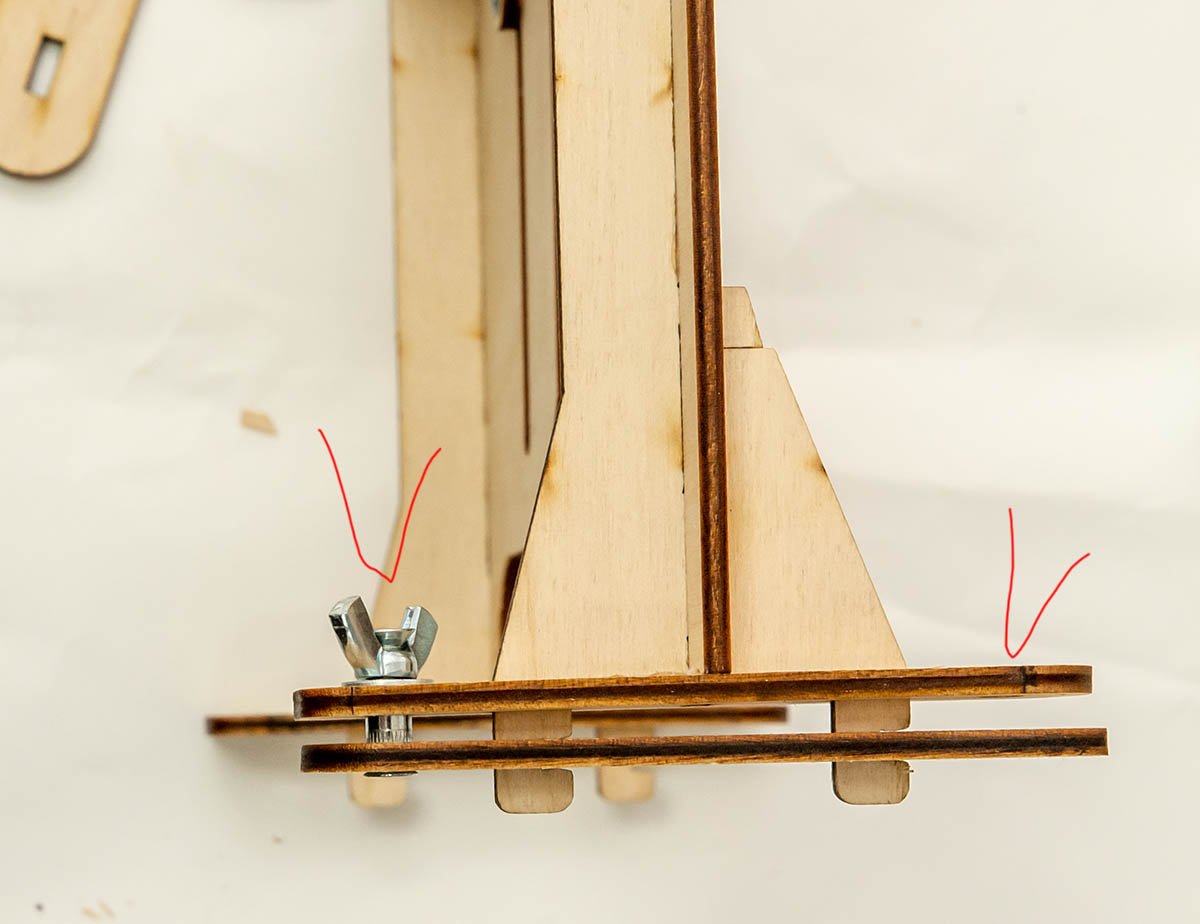
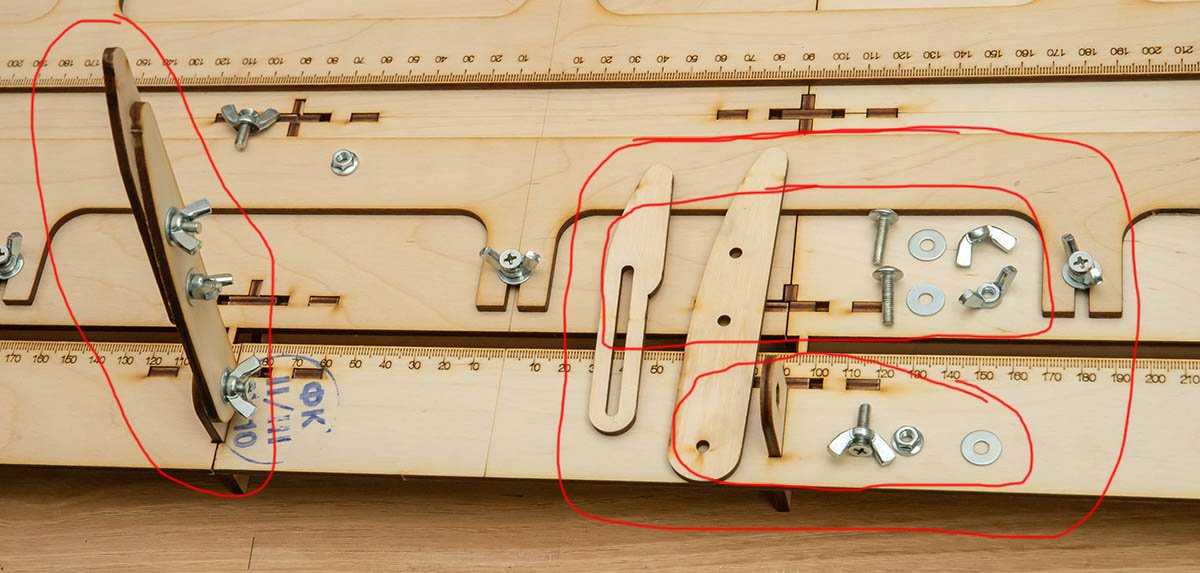
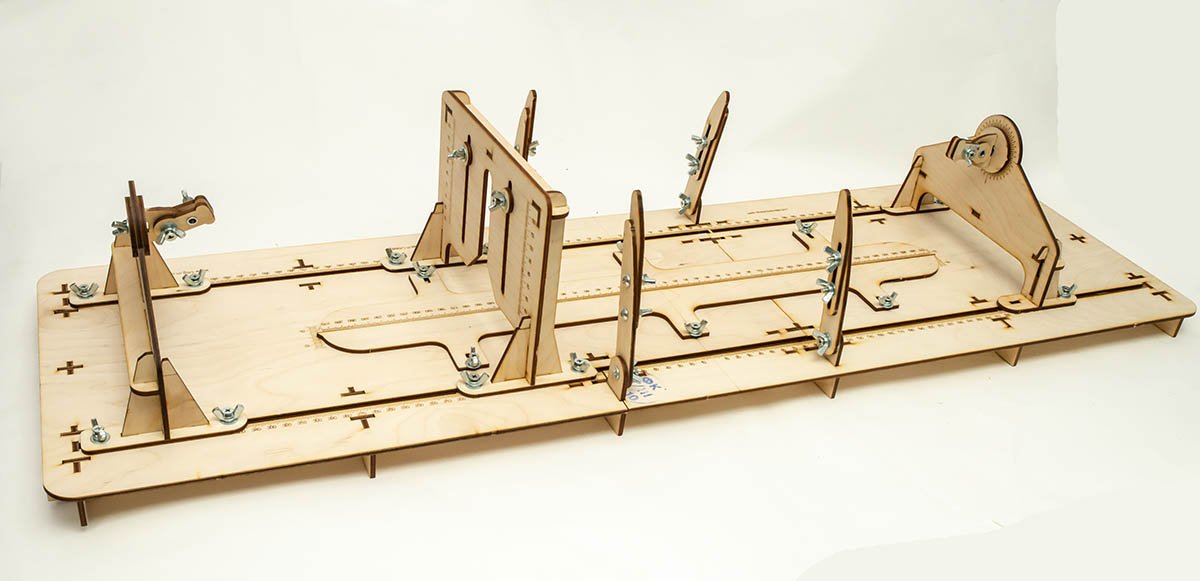
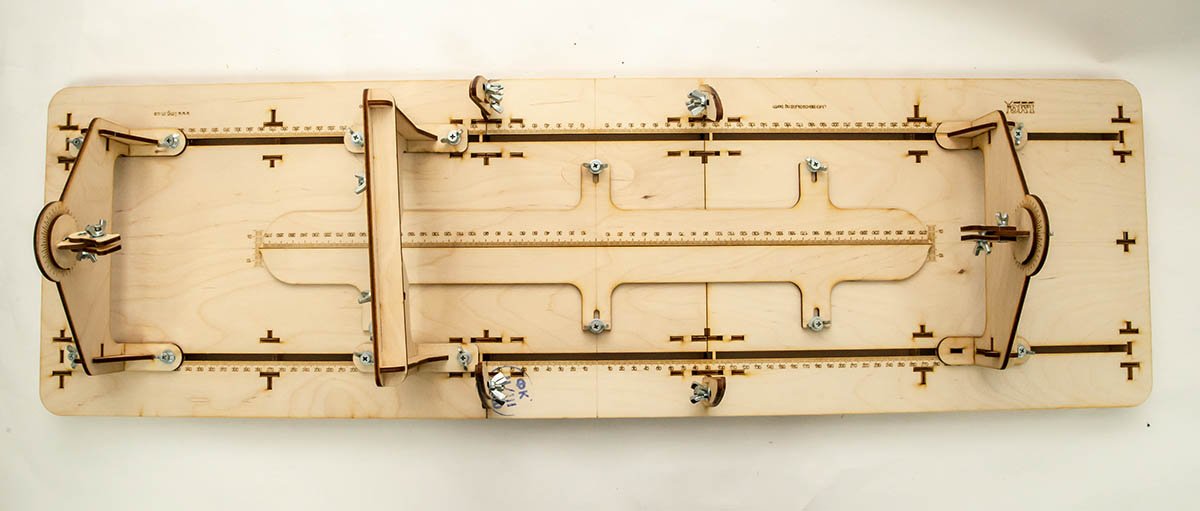
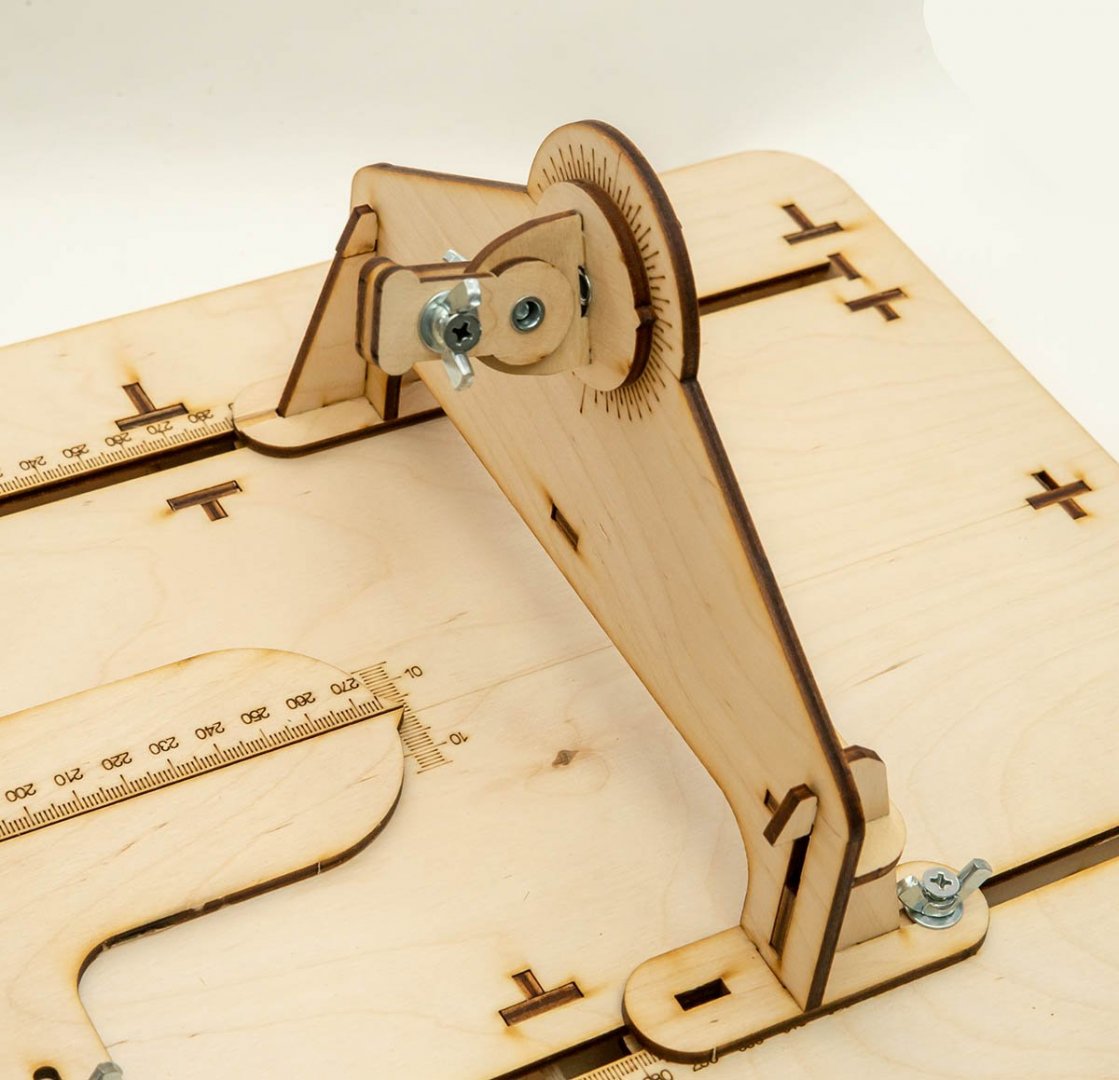
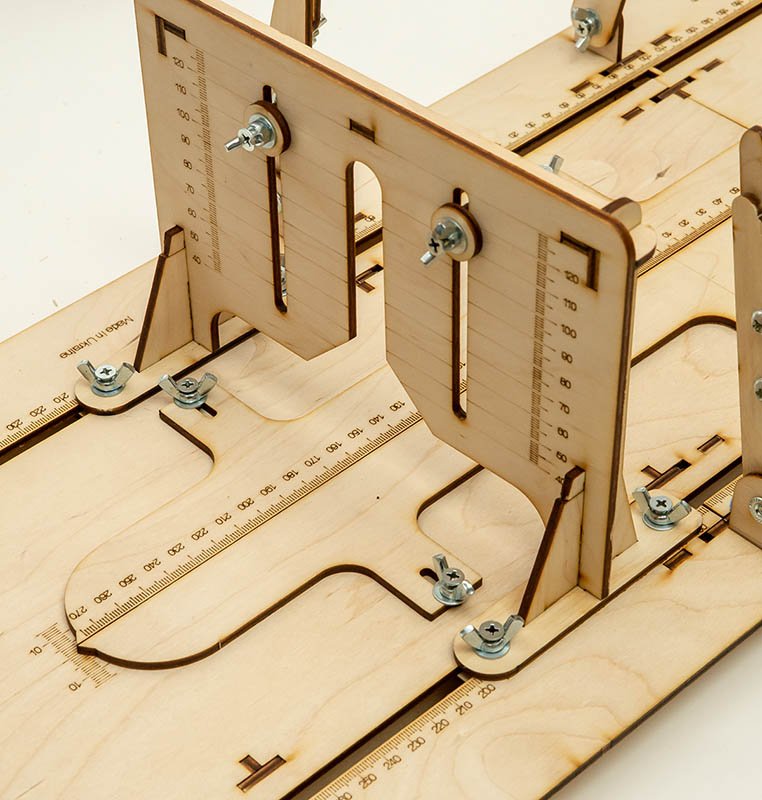
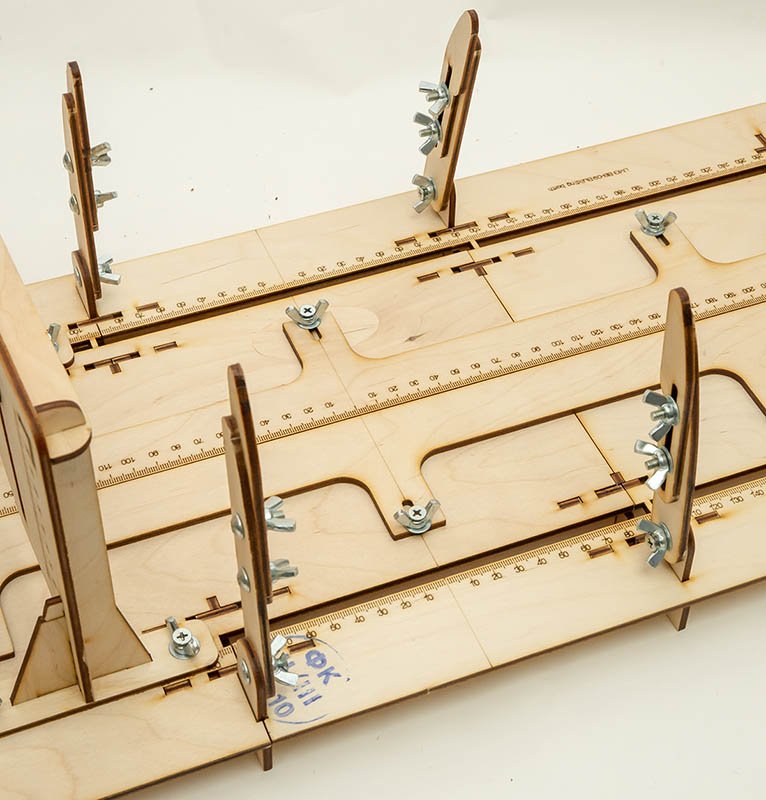
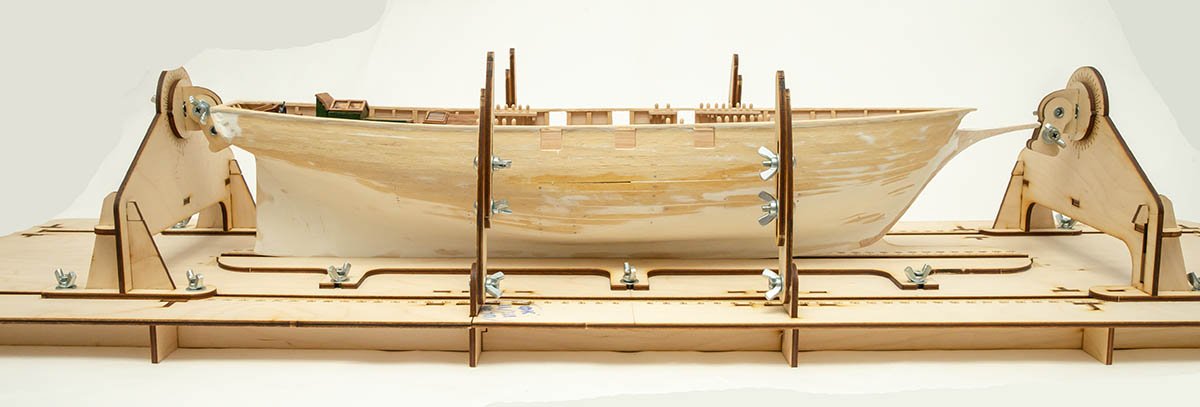
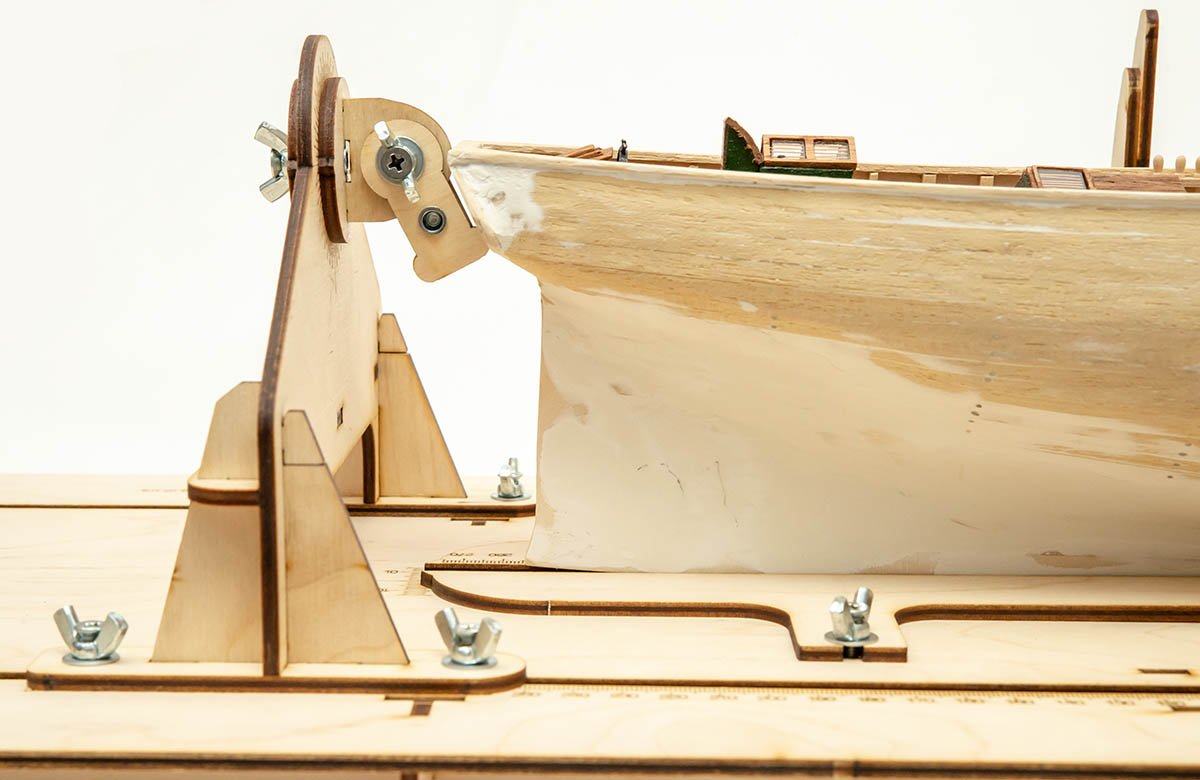
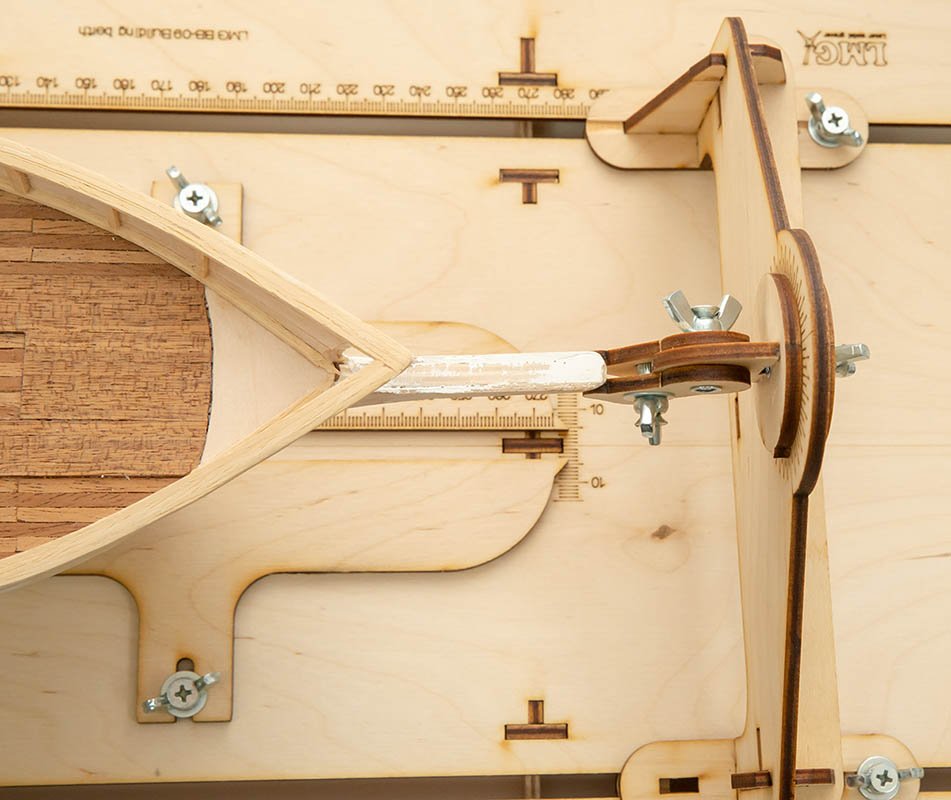
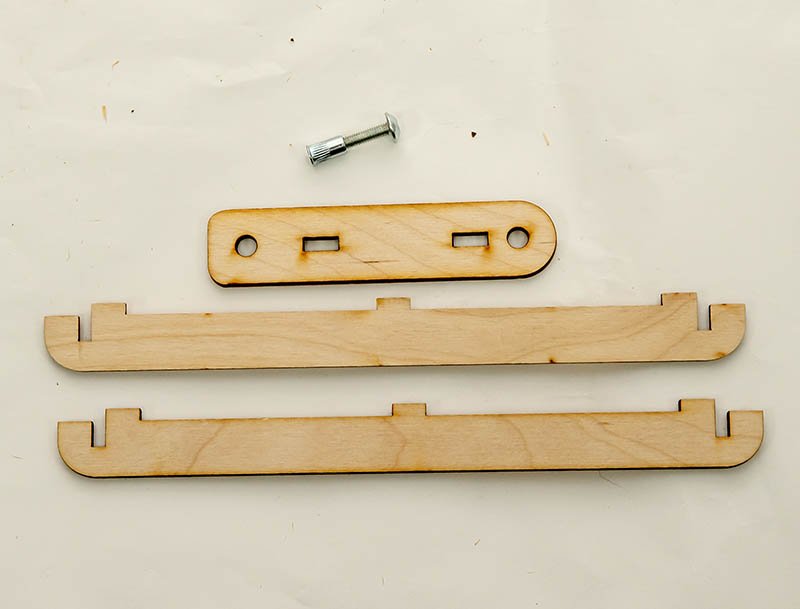
Before I introduce this product, I would like to show you a cheat sheet for better and cheaper building slip solutions. 😉 http://www.hobbyworld-usa.com/Store/index.php?id_product=2074&controller=product&search_query=hobbyzone&results=64 (Soldout) http://www.hobbyworld-usa.com/Store/index.php?id_product=9610&controller=product&search_query=hobbyzone&results=64 (Small size, but in stock) I bought this Ukraine building berth due to out of stock last December. Sarcasm warning! I was surprised when I received a package. This building berth covers up to 850mm, but the package size is only 600 x 300mm, and its weight is 2~3 pounds... Compact package with bubble cap. LMG! Only one paper. Not user friendly, hard to notice each parts. Spent several hours to assemble. This is a bonus item. However, as you know, this is really not useful item and I already have it. Carefully cut the inner corner. Forget the bolts and nuts. This is a proper bolts and nuts for upper and under holes. You can't use other bolt because this kit has no excess bolts. The center bolt holds pencil, but it is inconvenience. I modified the pencil holder using my bolt and nut. By the way, should I use this waterline marker? No. I have much better marker with angle change function. Also, its smell is really bad. I'll paint it with shellac. Even if I didn't have any waterline marker, I would have paid $1 for this one or made my own marker. Let's start to make a building berth. As I said, this kit's package is smaller than an assembled item. This kind of structure is not reliable. As you see the picture, an actual part and manual picture are different. It happened again and again. Here is another different point. I crossed 3:2 strips to get structural strength. Found the first critical error. Fixed. Glued. It looks good, but it's not flat. This berth is easily twistable. If you want flat surface, you should place an inch thick MDF panel under this berth. I'm showing you an assembly knowhow a manual never say. A keel holder is done. I checked the ruler's accuracy. Both center and sides are very good as laser engraver usually does. This is also very tricky part. The manual is very confusing. Why they didn't make same 6 long rails? The manual doesn't show these details. The height of an axis is about 100mm. I'm not sure this is correct, but it is the best way to clear exceed parts. This is a hidden part. How may minutes I spent to understand this part? Sub arms. It's done. Surprisingly, surprisingly, it works. Unbelievable! Each part works as planned. Let's try it. Uh-oh.... 😨 The arms are too short! And its thickness is more narrow than my ship's keel! The building berth's plywood has 1.4 inches thickness. (3.60mm) It can't hold my ship's keel that has 8.00mm thickness. It is not a bad end. I can make my own arm and change the bolt and nuts to fit my ship. Also, I'll fix and add some features to catch my fancy. Most of all, I'll paint it with shellac it at first because of strong smell causing headaches. However, I never recommend this kit to anyone. I spent hours to assemble with unfriendly manual. Also, I could have bought the Hobbyzone's building slip at same price if a seller had stock. Please consider this post as a case of failure. remaining parts.


-
- 5
-

-

-

-
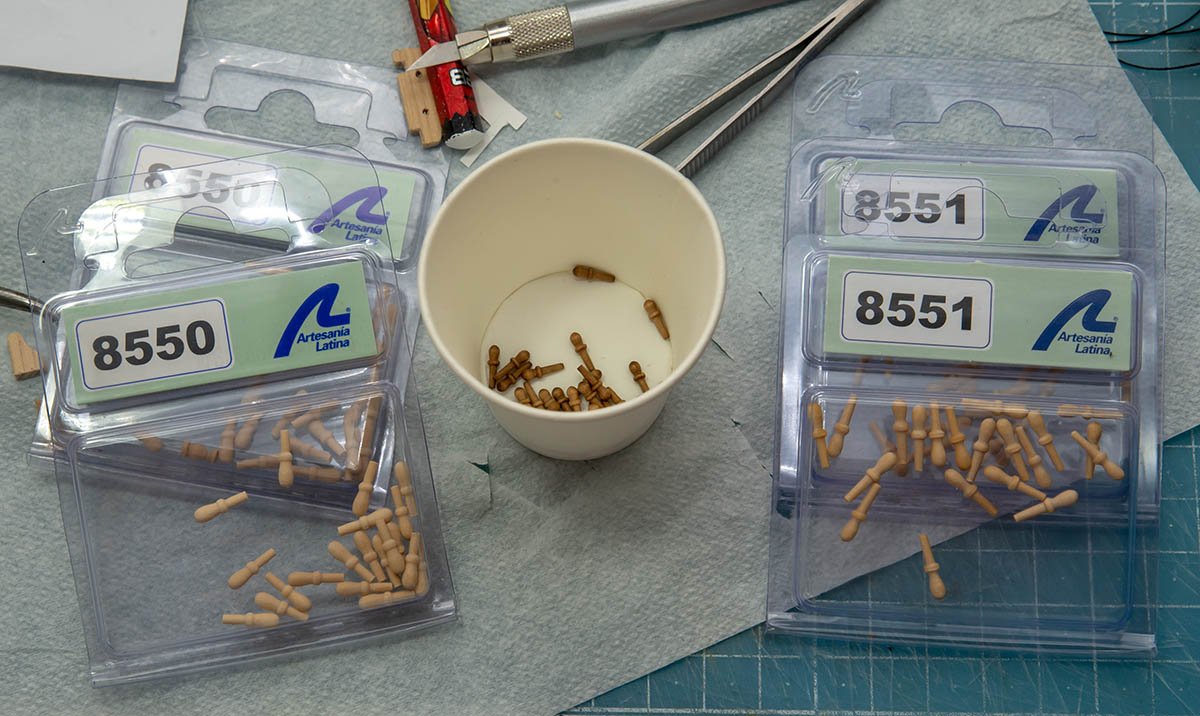
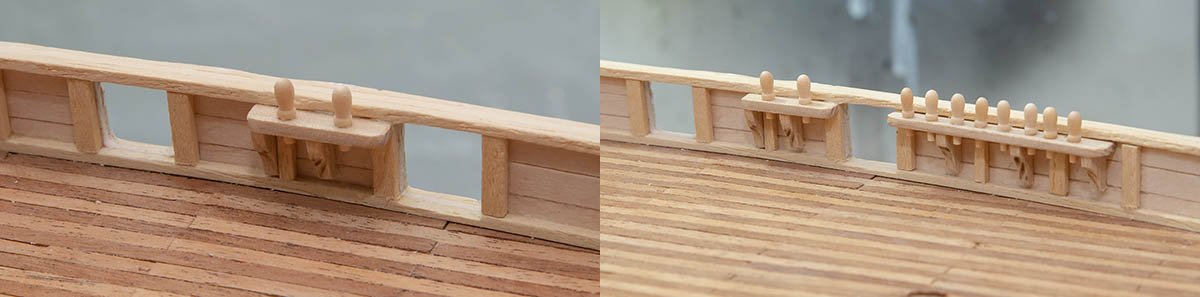
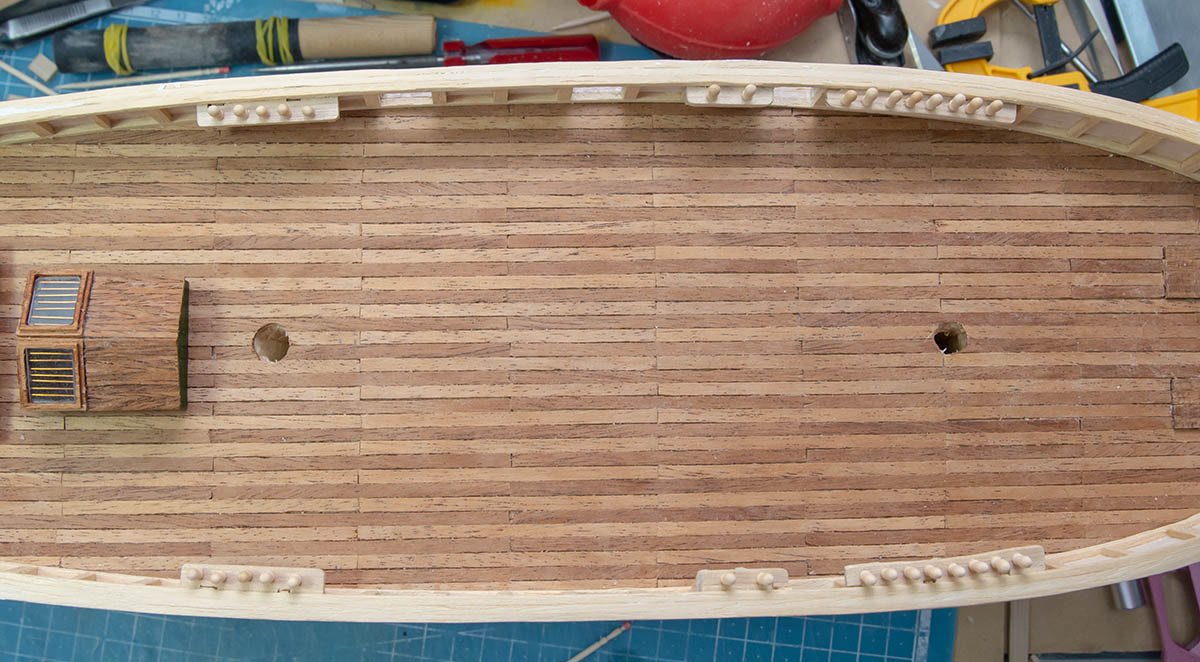
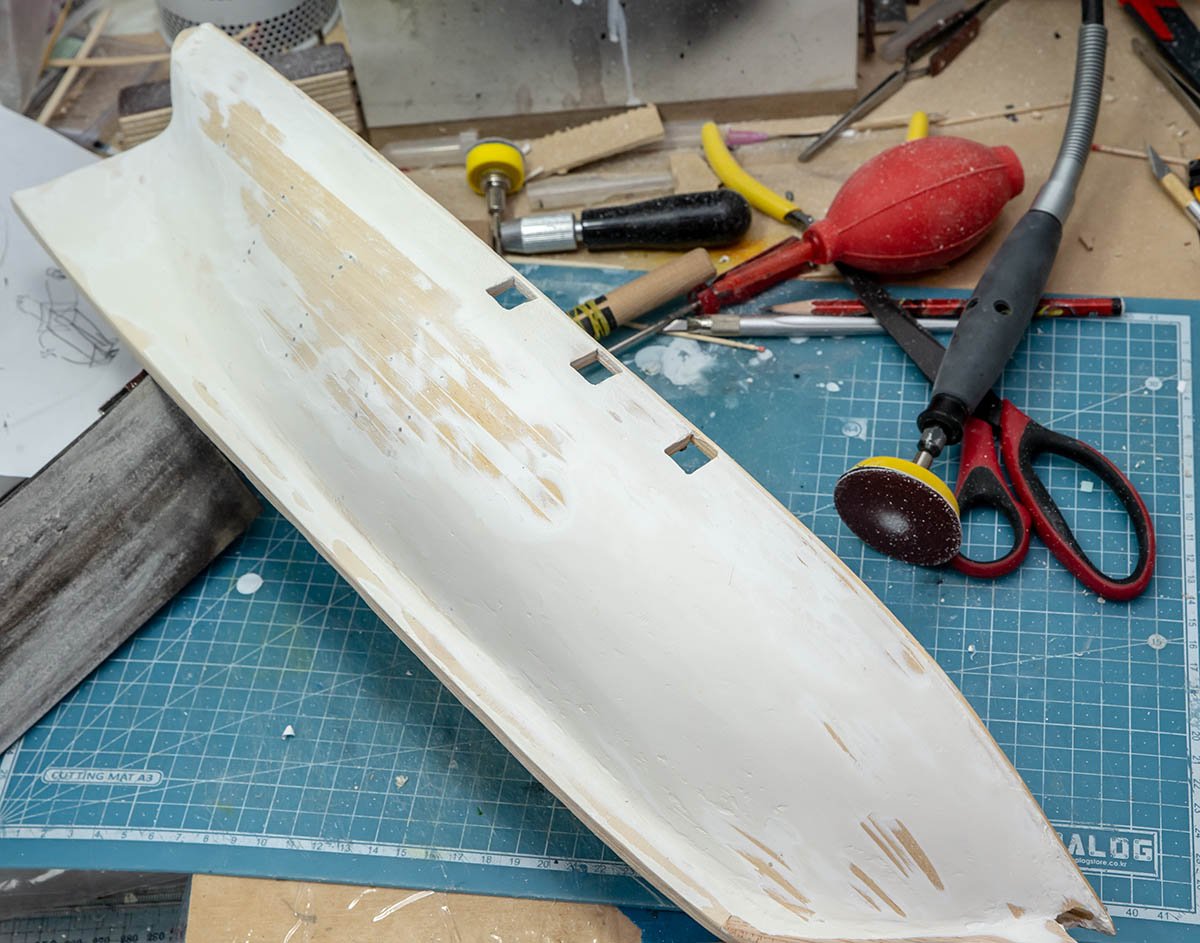
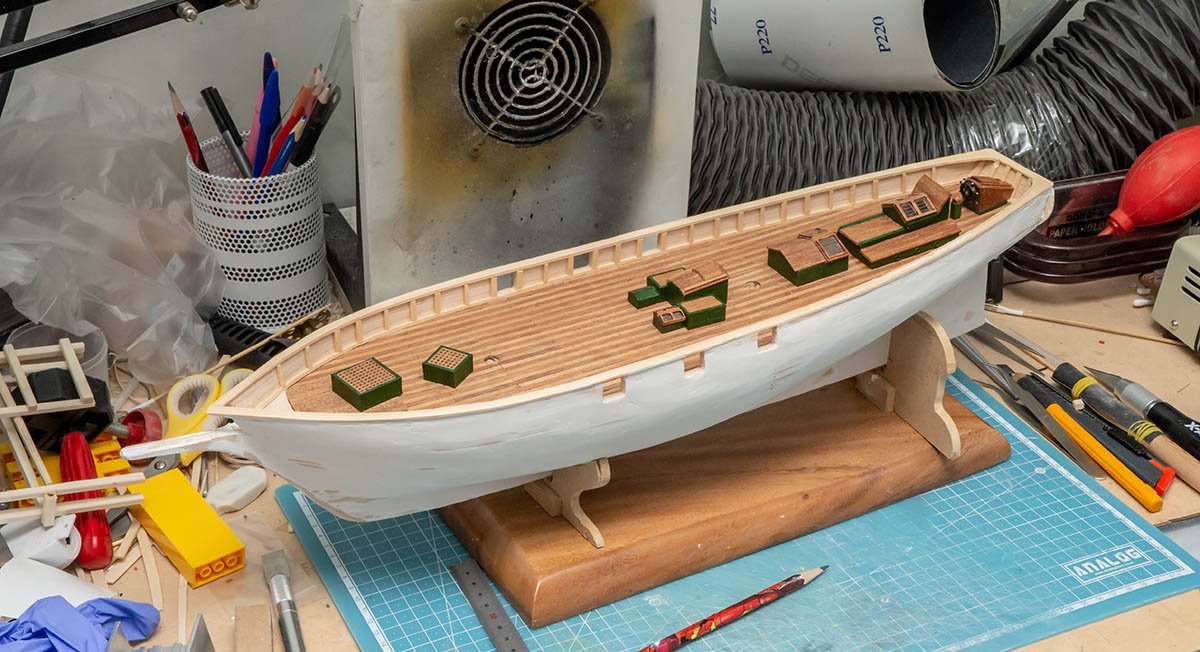
I bought extra belaying pins due to lack of same parts in a kit. It always happens when the kit is cheap. I added support bar under rails for future rigging work. One of three canon door is not located in proper place. I didn't know how to use drawings two years ago. 🤪 This is the most awkward and horrible work I've tried to ignore...... I attached modeling paste and crack filler for bathroom tiles on plankings two years ago... to get a smooth surface...... Now it strikes back at me with non-adhesive surface! I'll scrap all the white surface to use PVA glue. The surface is strong as stone. 😂😂😂😂😂
-
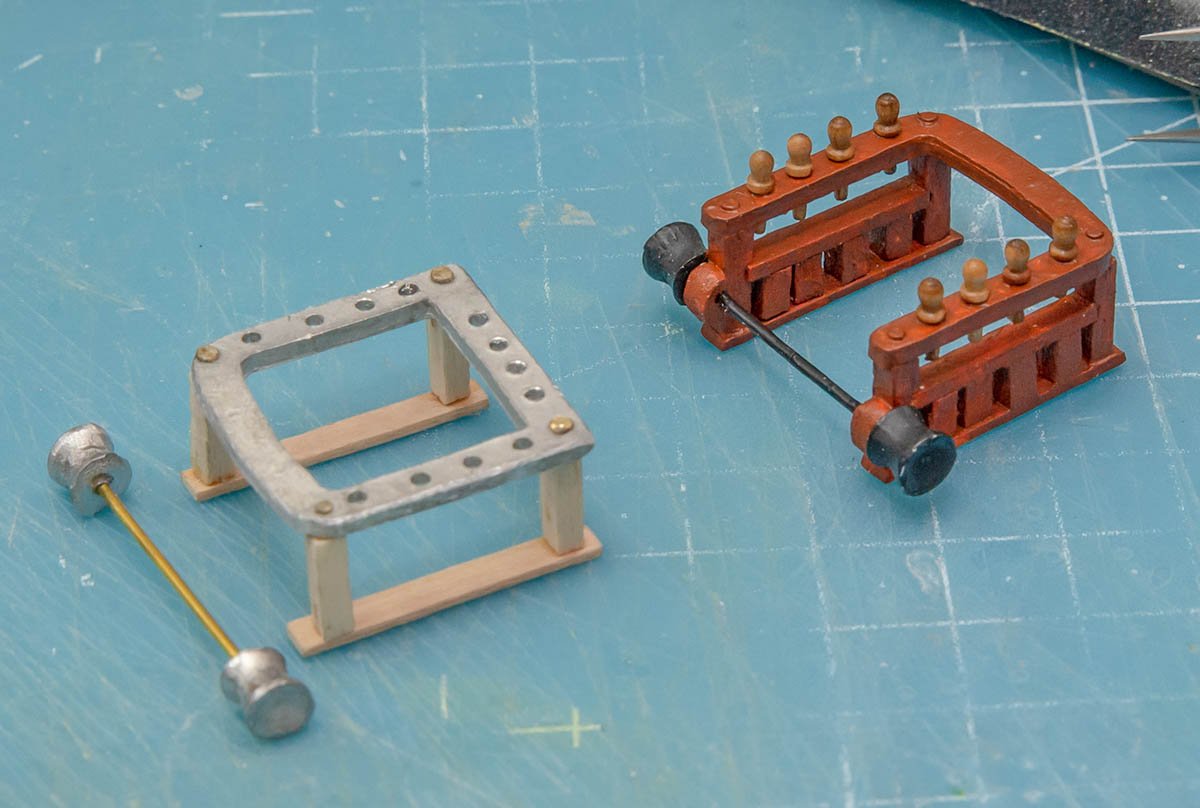
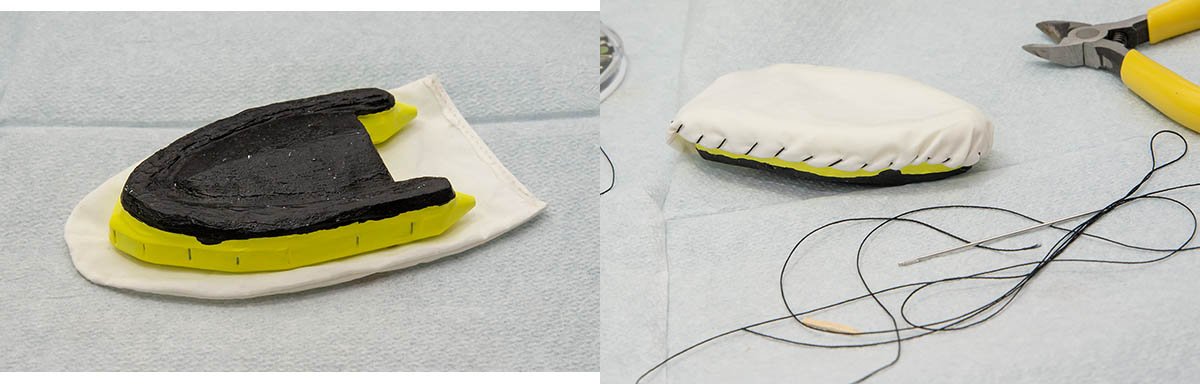
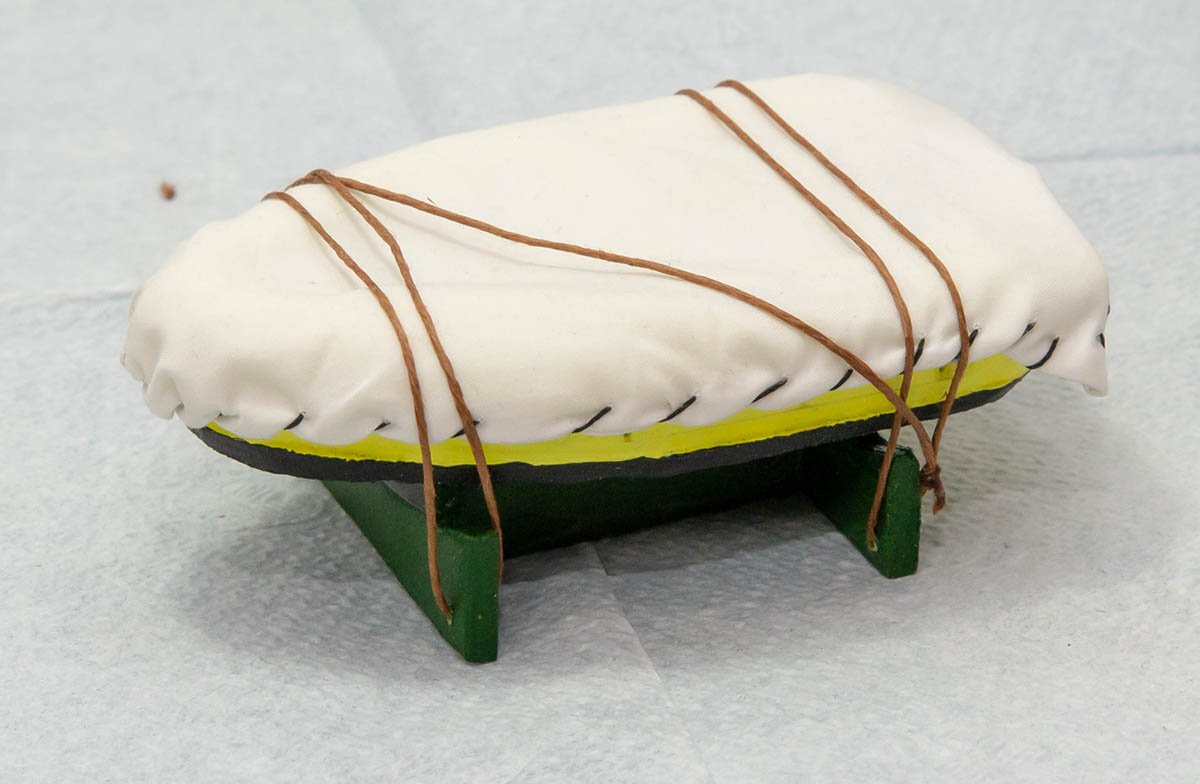
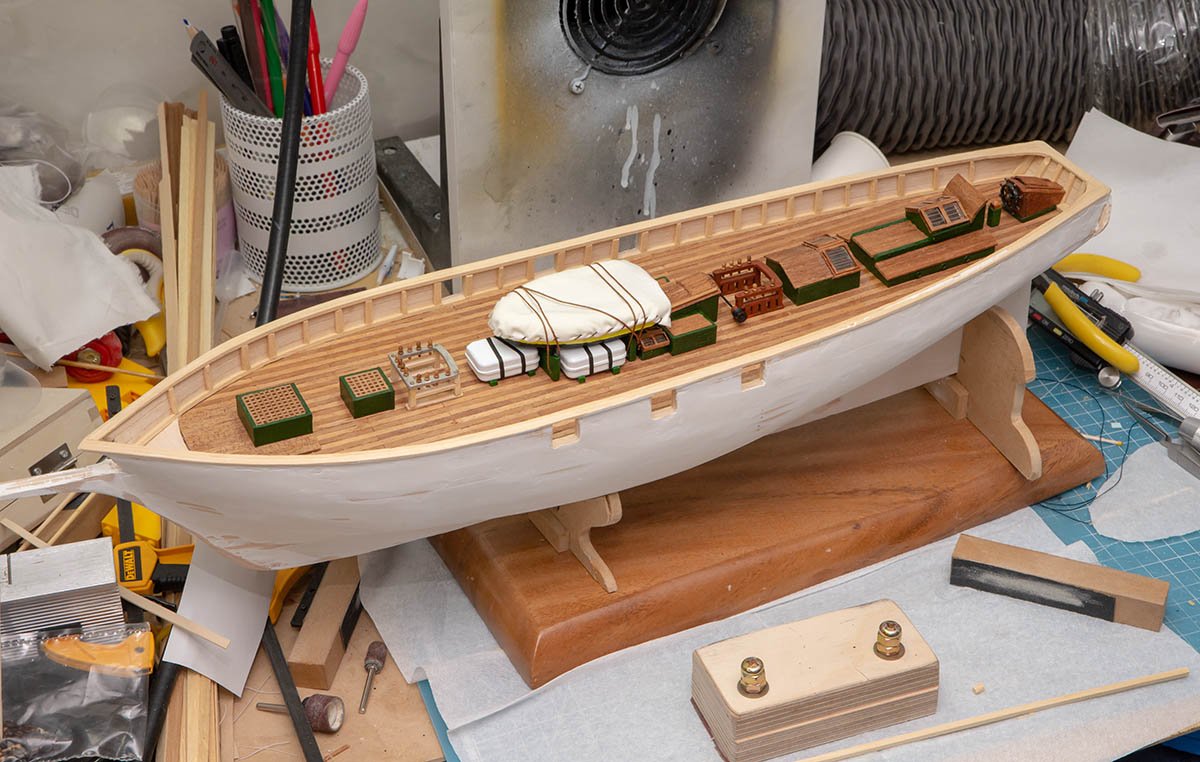
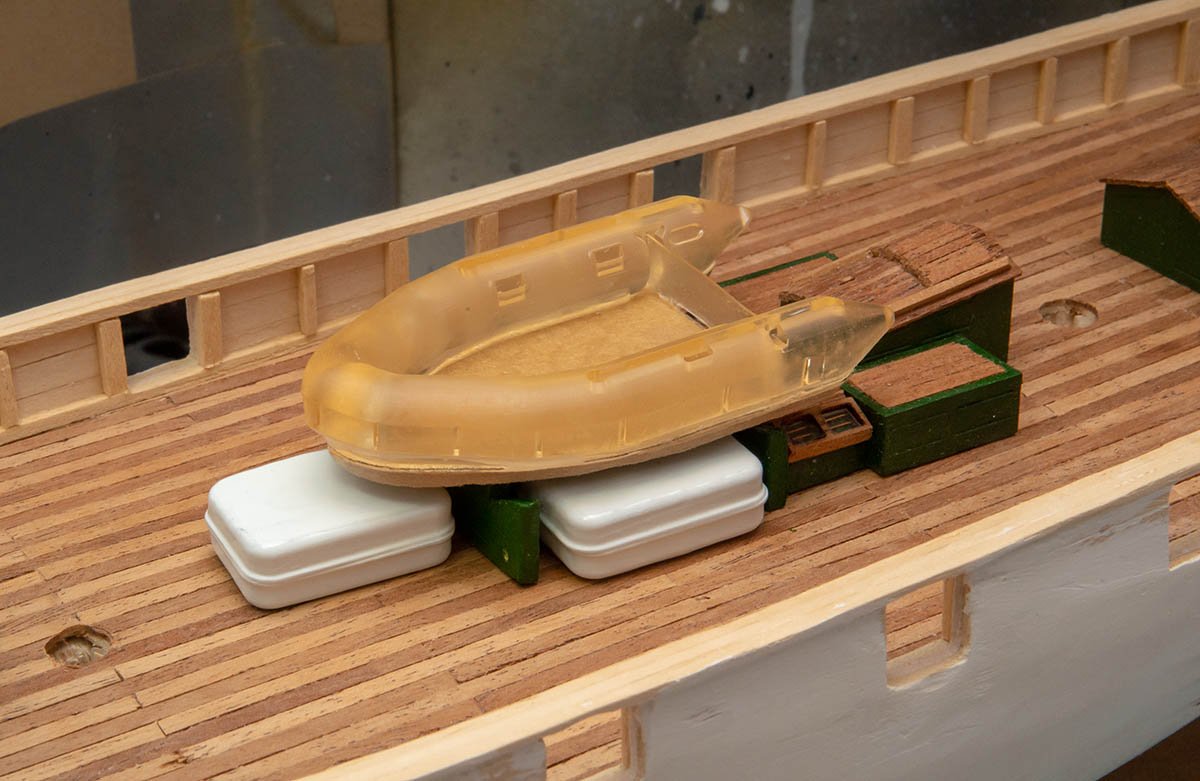
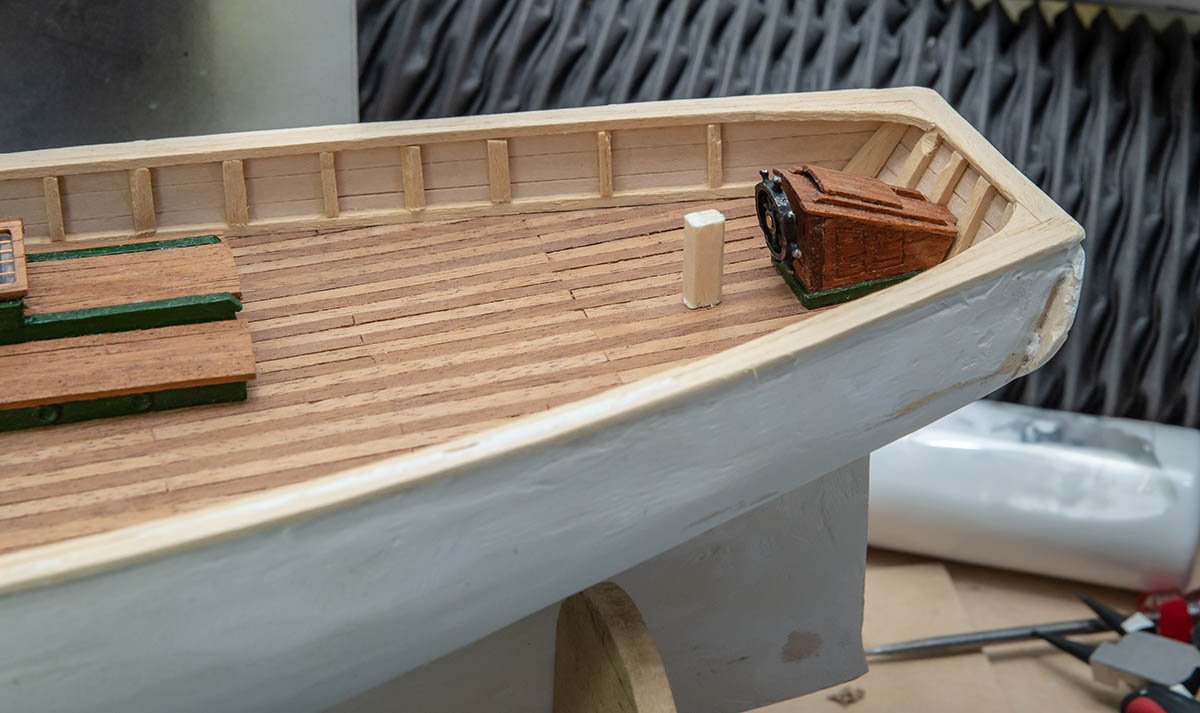
Let's finish the lifeboat part. I added some decorations based on internet pictures. Fake rigging. Fake rigging. 🤨 I don't know a name of this part. Anyway, I couldn't find much information about this part, so I made some of it based on my imagination. A picture before I go to sleep.
-
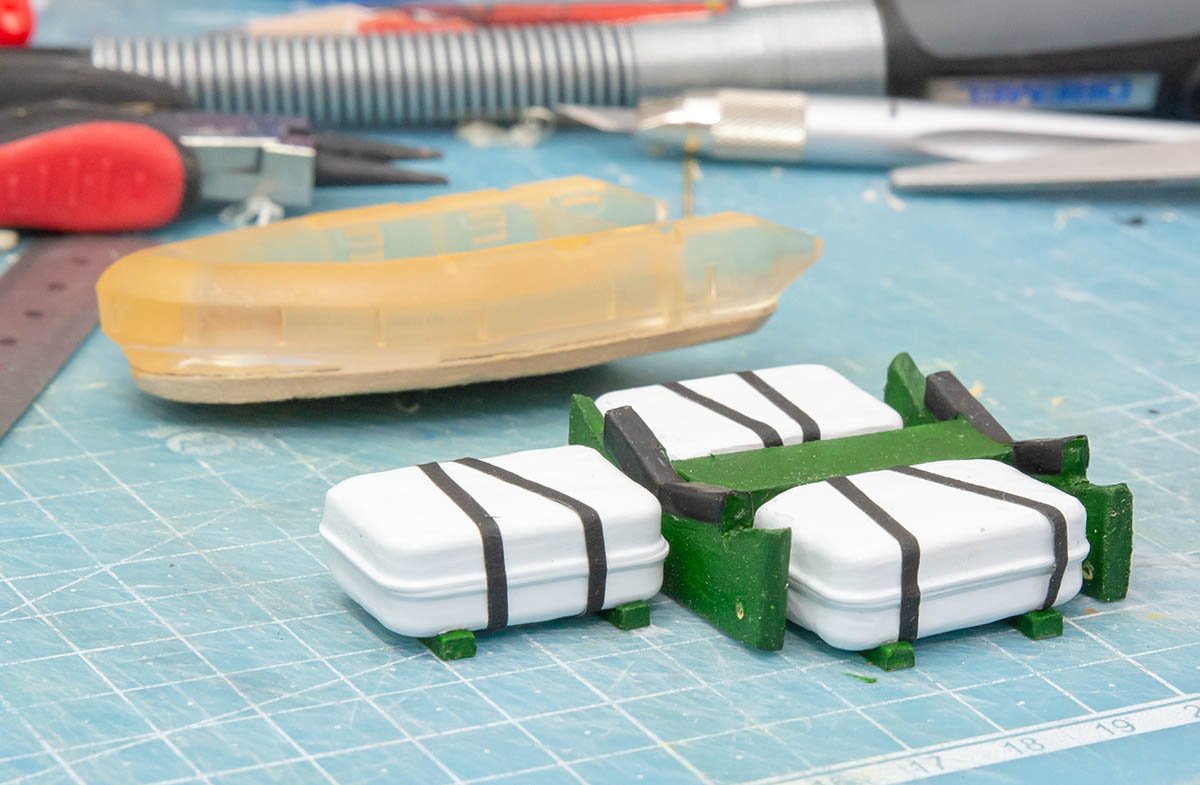
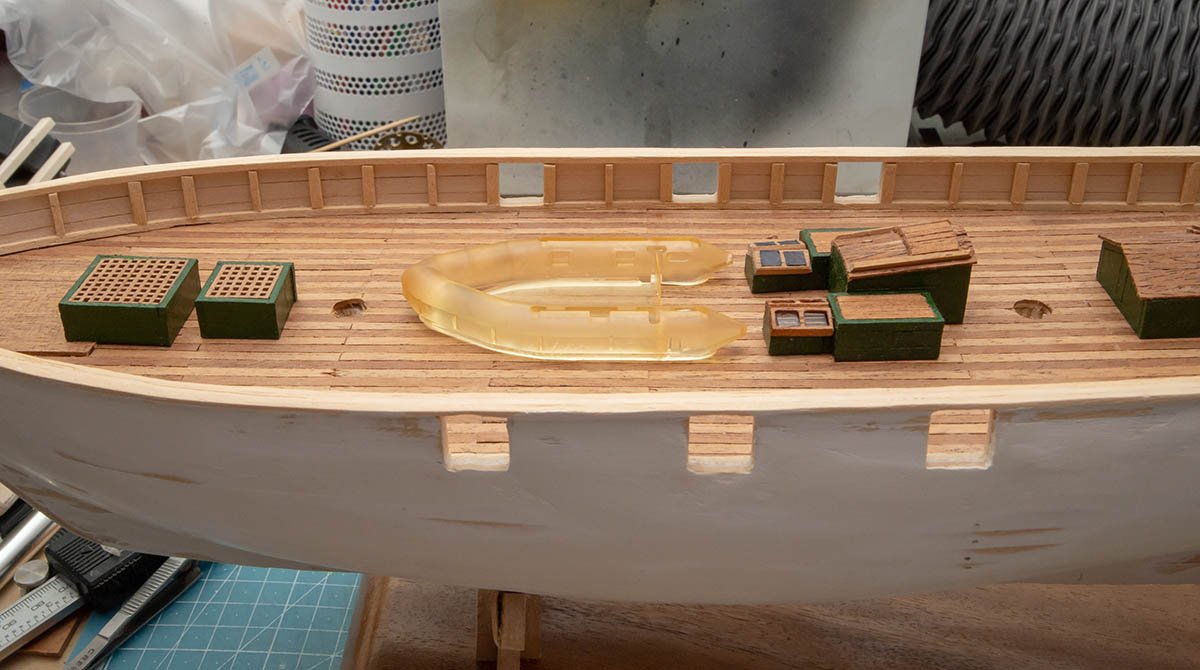
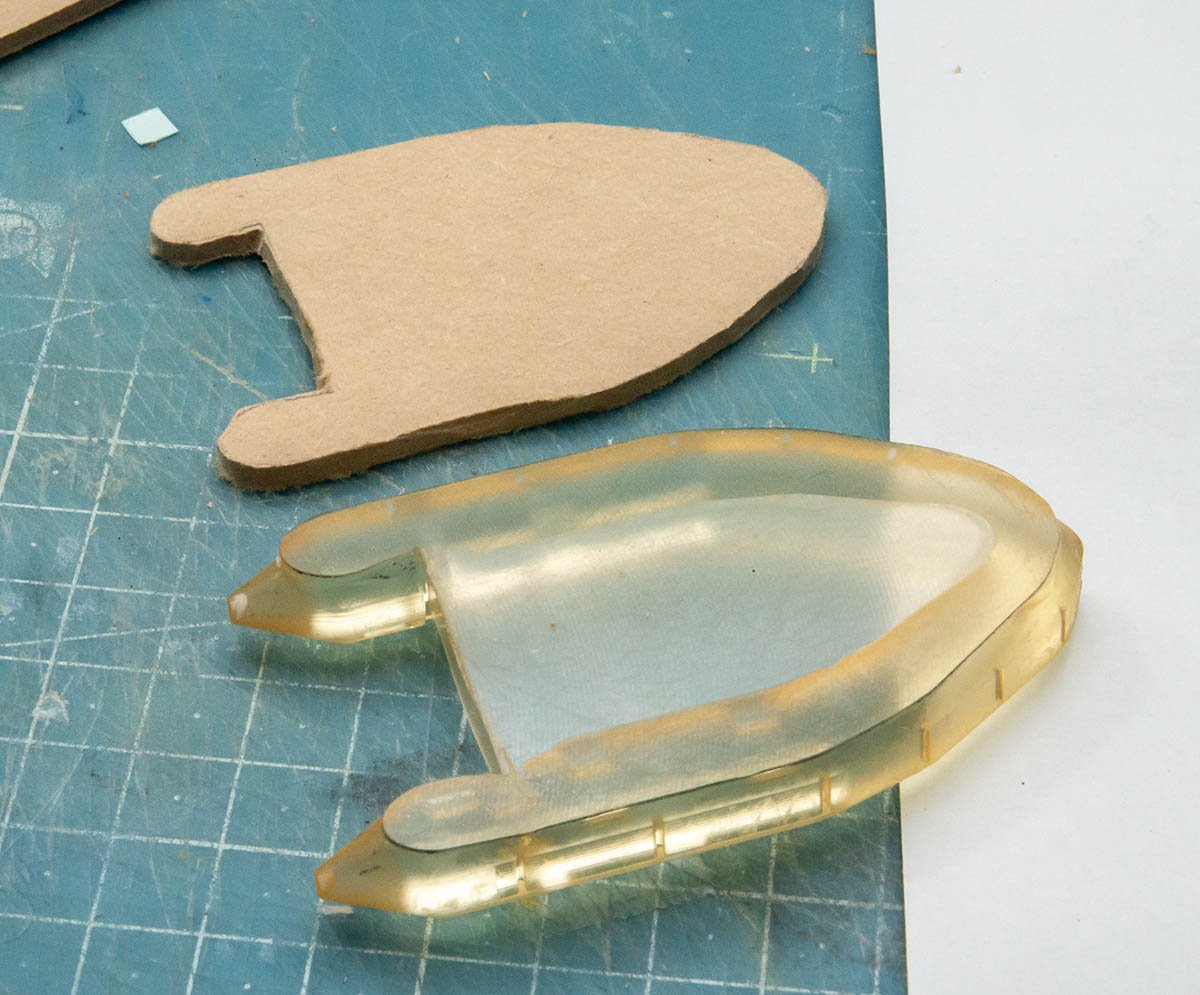
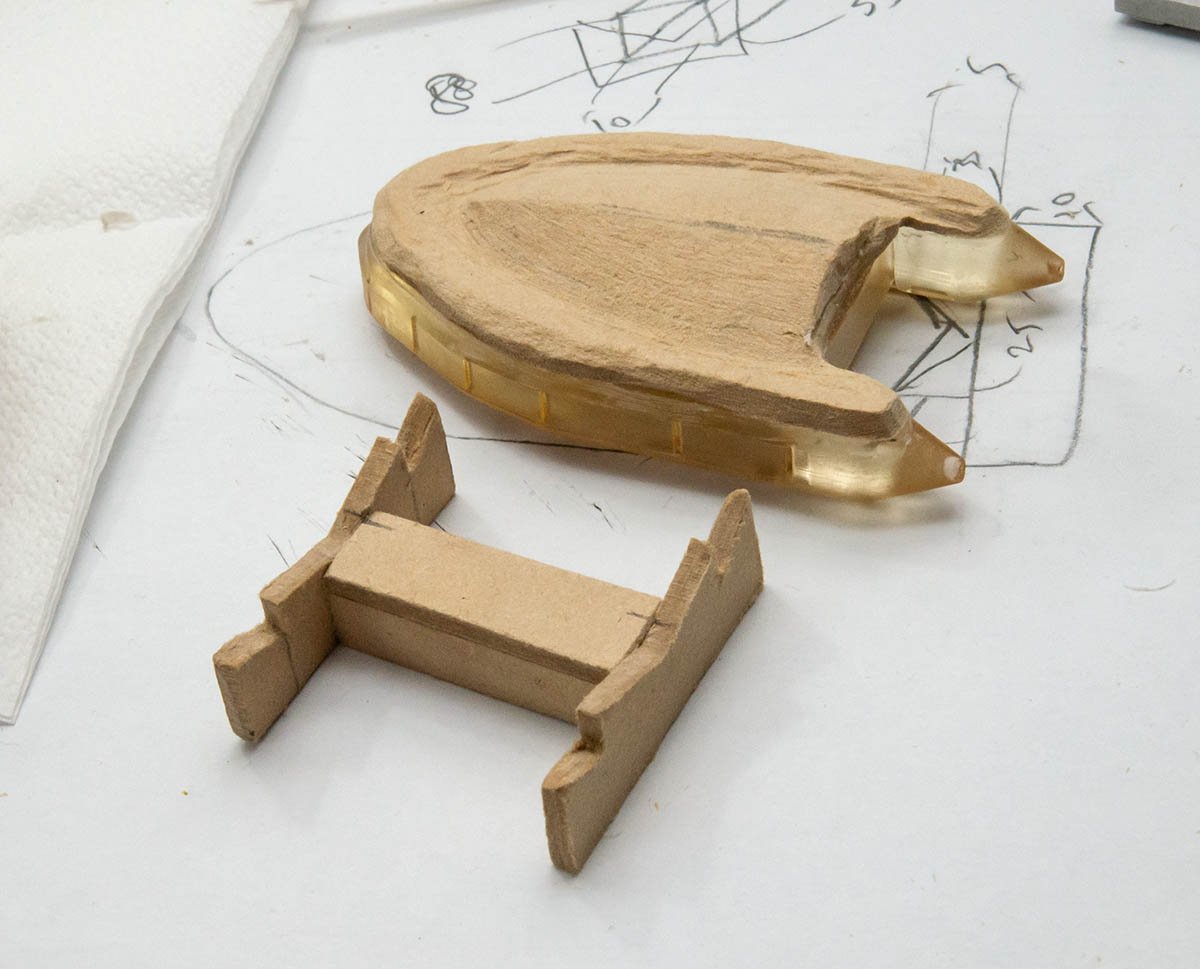
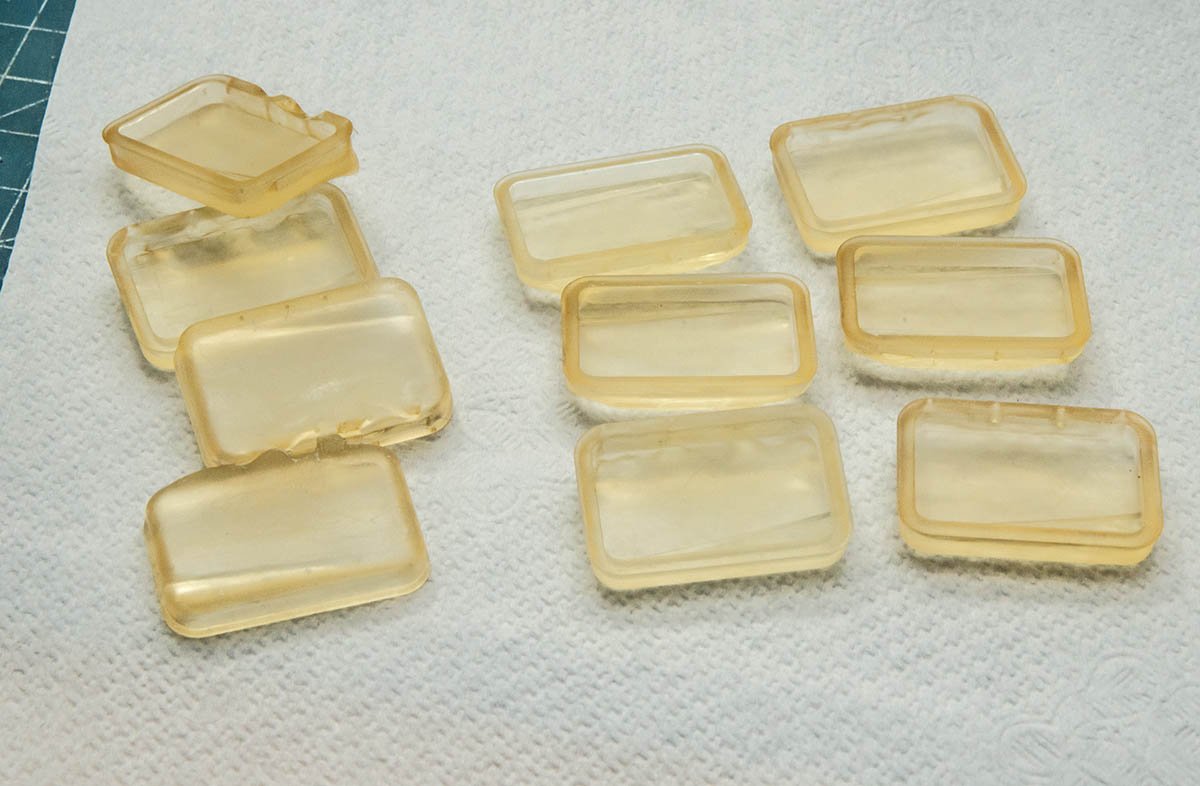
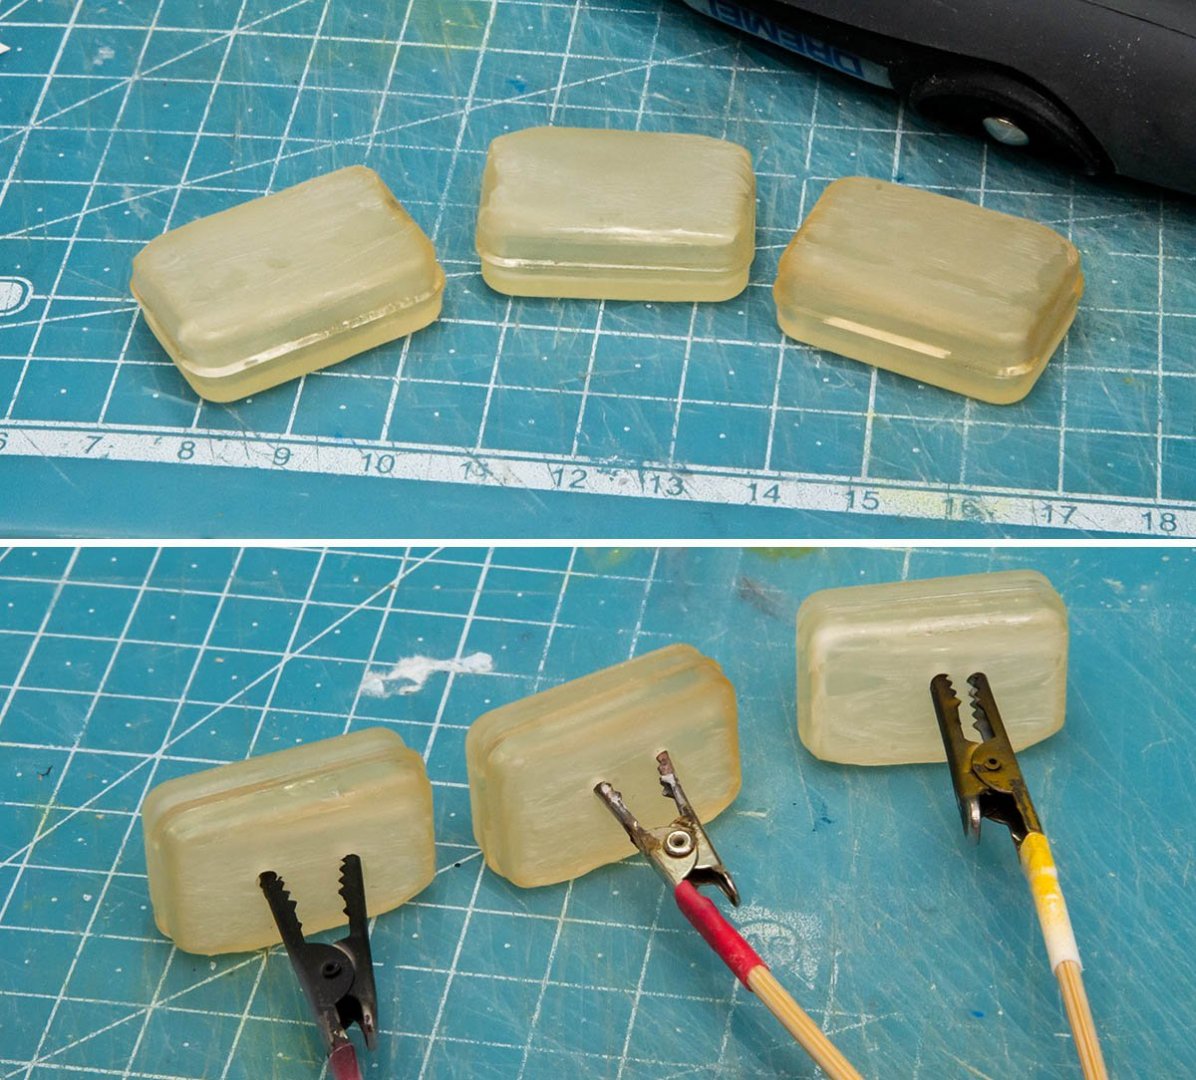
The original kit has no lifeboat. I printed 3d model boat from this link. https://www.thingiverse.com/thing:918300 (Free download, Free cultural work license) This 3D model has 35 parts to be a complete motor boat, but I don't need all the parts because of my plan. The bottom of the boat is only part I need. And stand. I also 3d printed storage cabinets. I made my own 3D model. 3D printer resin is quite expensive liquid. The storage cabinet is designed to be empty to save resin. 70% of lifeboat part is done. I'll finish it soon and go to a mast work. ofencer29350 // It is amazing to know that someone in this forum lives near Brest. I completely understand your motivation to build more realistic scratch model of la recouvrance. When I visit Brest in France someday, I'll also try to build a scratch model of her based on thousands of my pictures I'll take.
-
Artesania's brand new kits in 2020
modeller_masa replied to modeller_masa's topic in Wood ship model kits
https://artesanialatina.net/en/163-ship-models-new-generation Updated. Looks like not all of 'new generation kits' are brand new. Some of them added new parts or new format manual such as DVD. < NEW > New Viking (1/75, 2020, 19001N - new) https://artesanialatina.net/en/modelcrafts-initiation/432-wooden-model-ship-kit-new-viking.html New Santa Maria (1/65, 2020, 22411-N - new.) https://www.youtube.com/watch?v=Z0EWRrA624k 10x metal figures for Santa Maria (1/65, 2020, 22411F) https://www.youtube.com/watch?v=QjYQQkbyAIo New VASA Swedish Warship (1/65, 2020, 22902 - new) https://www.youtube.com/watch?v=WLelz8Z1EWo < UPDATED > New Mare Nostrum (1/35, 2020, 20100N - manual) https://artesanialatina.net/en/modelcrafts-intermediate/451-mare-nostrum-mediterranean-fishing-boat-model.html TugBoat Atlantic (1/50, 2018, 20210) https://artesanialatina.net/en/modelcrafts-advanced/59350-wooden-plastic-model-ship-kit-atlantic-tugboat-1-50-rc.html New Swift (1/50, 2020, 22110N - manual) https://artesanialatina.net/en/modelcrafts-initiation/463-new-swift-wooden-model-ship-kit.html New Galleon San Francisco II (1/90, 2020, 22452N - manual) https://artesanialatina.net/en/modelcrafts-intermediate/4853-new-spanish-galleon-san-francisco-ii-model-scale-warship.html I'll try the new Santa Maria. 😍 -
I just realized that the Artesania Latina revived in July, 2020. The company's site looks under construction, but some of its SNS channels are actively promoting. https://artesanialatina.net/en/ (renewal site) https://www.instagram.com/artesanialatina_oficial/ https://www.facebook.com/ArtesaniaLatina.net https://www.youtube.com/channel/UCIzu-_drkkuu_5I1-Y7J1wQ/videos (Youtube channel) When I was sightseeing their youtube channel, I found that they launched new kits with new box design. Actually, the AL introduced new box design with Fokker Dr.I in 2017. I gethered and rearranged their new boxes by reference number. This is not a complete list. I might have missed a few item. Santa Maria (1/65, 22411-N - They said 100% brand new model.) https://www.youtube.com/watch?v=Z0EWRrA624k 10x metal figures (1/65, 22411F - figures for Santa Maria) https://www.youtube.com/watch?v=QjYQQkbyAIo The new VASA Swedish Warship (1/65, 22902 - new) https://www.youtube.com/watch?v=WLelz8Z1EWo Sopwith Camel (1/16, 20351) Messerschmitt BF109G (1/16, 20356) https://www.youtube.com/watch?v=rk8q-IGG4Bk I don't know that AL will renew or redesign all the legacy kits and box designs. I hope they update legacy kits properly if they do reboxing. Good luck, Artesania Latina.
-
One of my irony is that I've never seen any REAL sailing ships... If there was no COVID-19, I would visit Europe and watch real HMS Victory or La Recouvrance last year. Until that day comes, I'll fill my shelves with model ships. 😉
-
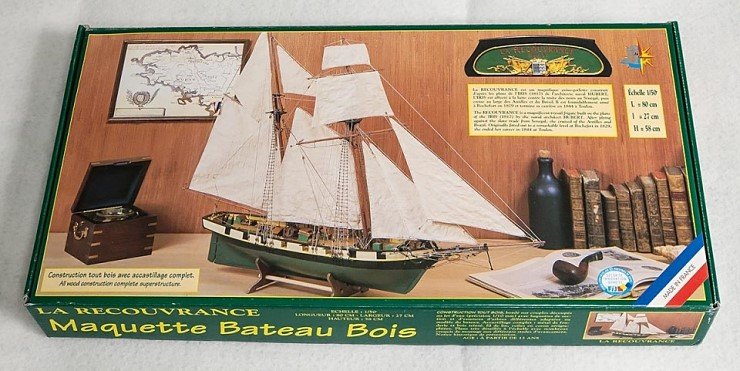
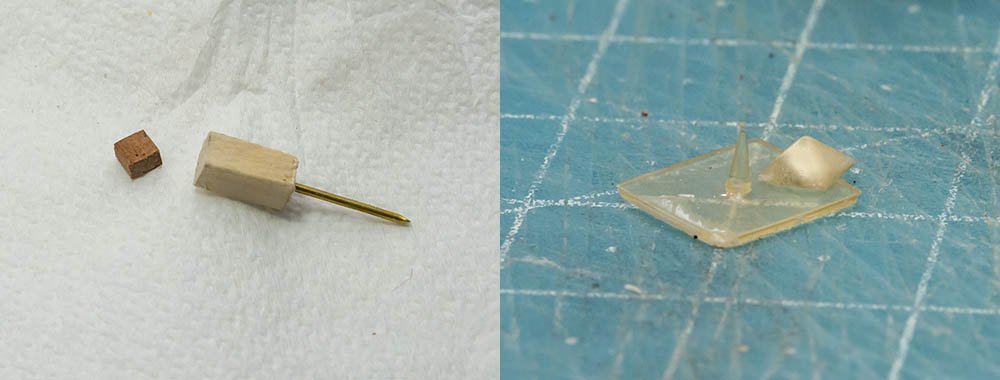
Hello, La Recouvrance from Soclaine made in France is a cheap $100 wooden model ship kit. La recouvrance at brest is a modern sail ship based on 19th century's original name ship. When I started this kit, I had to choose between old 14-canon la recouvrance and modern 6-canon la recouvrance with screw. My choice is...... following a historically inaccurate kit manual due to a lack of skill. 😥 Some of you may remember that I introduced a metal cored mast technique when I joined this forum an year ago. I encountered heavy technical issues I didn't know, especially durability and corrosion, and I decided to stop to build this ship until I solve the issues and prove the metal cored mast is cool new technique. A year has passed. I had no chance to solve the problem because of COVID-19. All public libraries shut down, and material application science was not my major. I don't give up to apply multiple material compounds with wood to wooden model ship, and still think it is a cool idea, but it is time to wrap up 'this kit'. I will finish this kit regardless of metal cored masts. Therefore, please forgive me for not updating the article for years.😪 I didn't touch this kit for an year. All the parts were assembled in 2019 when I wasn't a member of MSW. Here is new comer. I didn't notice this compass tower an year ago. I didn't know how to read drawings properly... and now too. Using 3D printer, I printed out the 4mm x 4mm x 2mm transparent compass chassis. I agree that I'm lazy man. 🤪 You may see many inaccurate or unrealistic parts due to lack of my knowledge and skill. Please don't hesitate to tell me any issues. I may not be able to fix all the issues, but I'll try to reduce them. One of member finished same kit in 2013.

-
If there is no ready-made accurate Jolly boat kit, I have to learn how to make a scratch build from the plan paper. Thanks, Gregory.
-
Happy New Year! I have question about HMS Bounty's jolly boat kit. I'll make the Sergal's HMS Bounty kit (1/60 scale), and I'm looking for historically accurate lifeboats for her. I'll buy a ready-made kit at first, and then downsize the kit plan to 1/60 scale to make a 1/60 scale scratch build boat. https://modelexpo-online.com/Model-Shipways-HMS-BOUNTY-LAUNCH-116-SCALE_p_1024.html I already ordered the Model Shipways' Bounty Launch 1/16. No one can't argue that the kit is the best among Bounty launch boat. (The OcCre launch boat is not accurate relatively.) However, when I researched about Bounty Jolly boat, I couldn't find more than one kit. The Artesania Bounty Jolly boat kit is not accurate like the OcCre launch kit. It may be an interesting and challenging idea that I make a scratch plan of Jolly boat using the Model Shipways kit and John McKay's Anatomy of the ship book, but I would like to ask you before I dig into the hole with no clue. Is there realistic HMS Bounty Jolly boat kit or plan I can purchase?
-
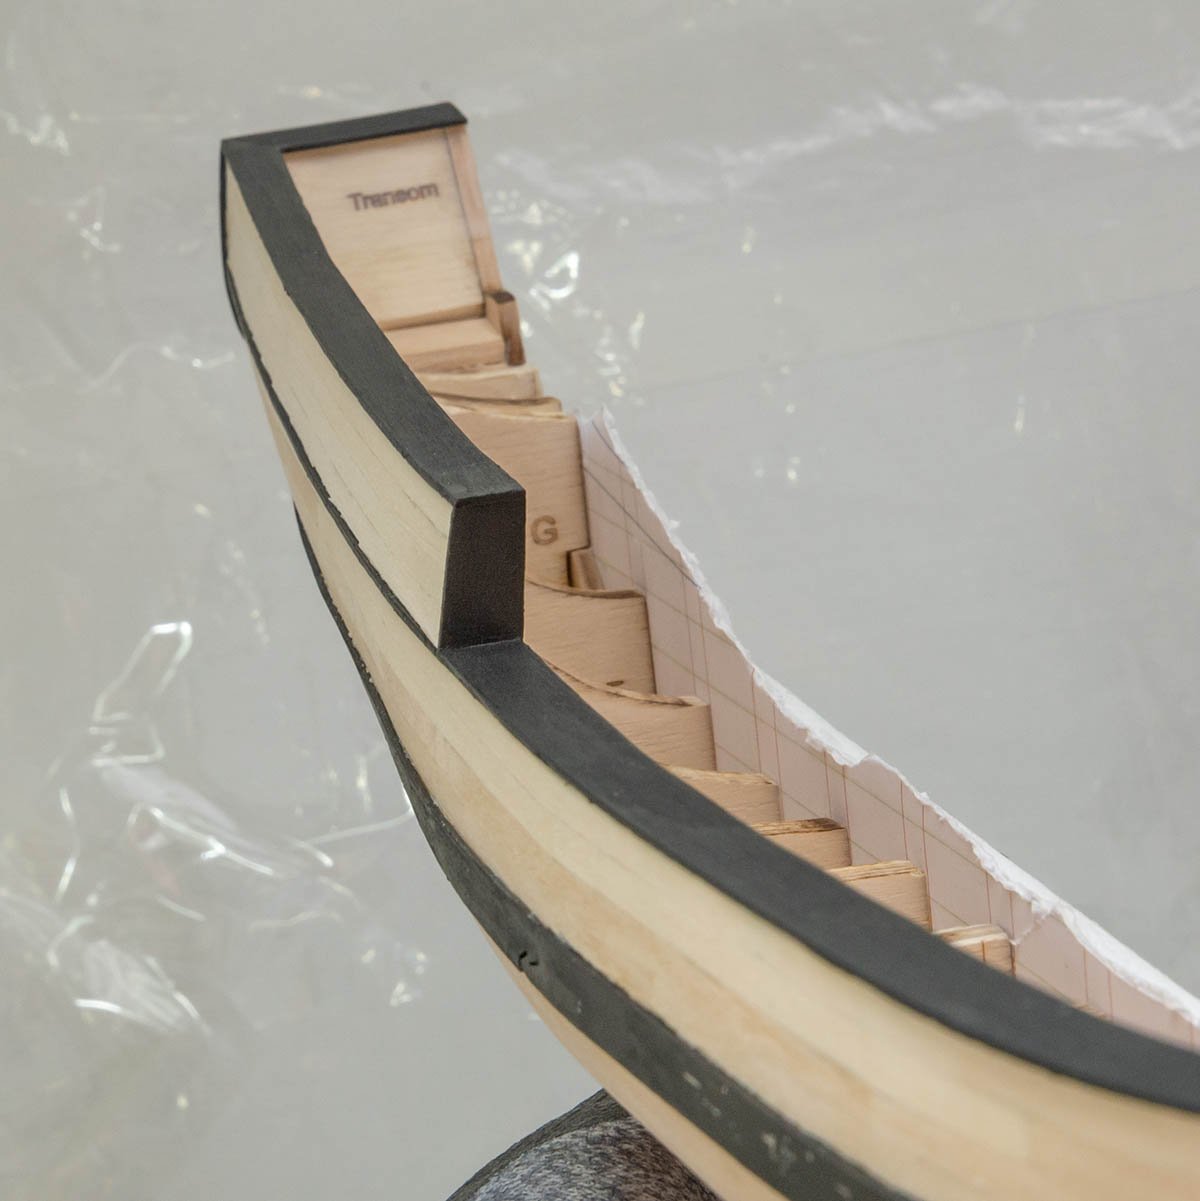
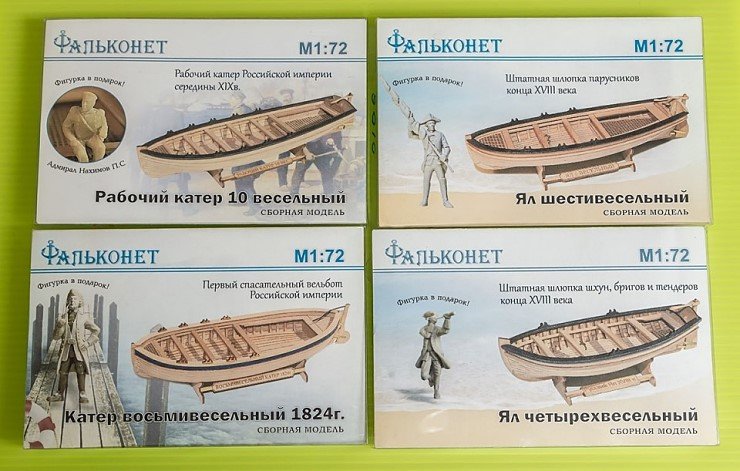
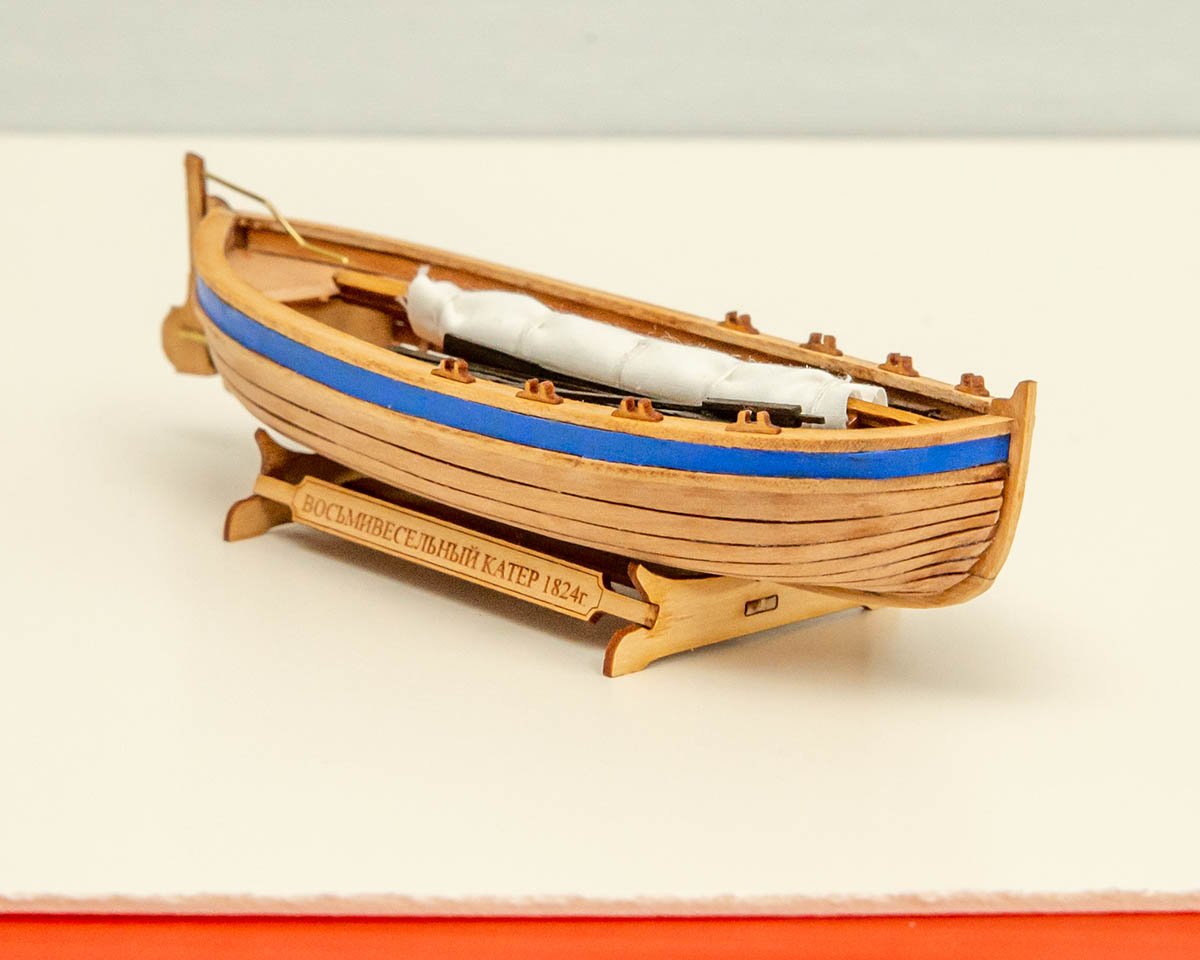
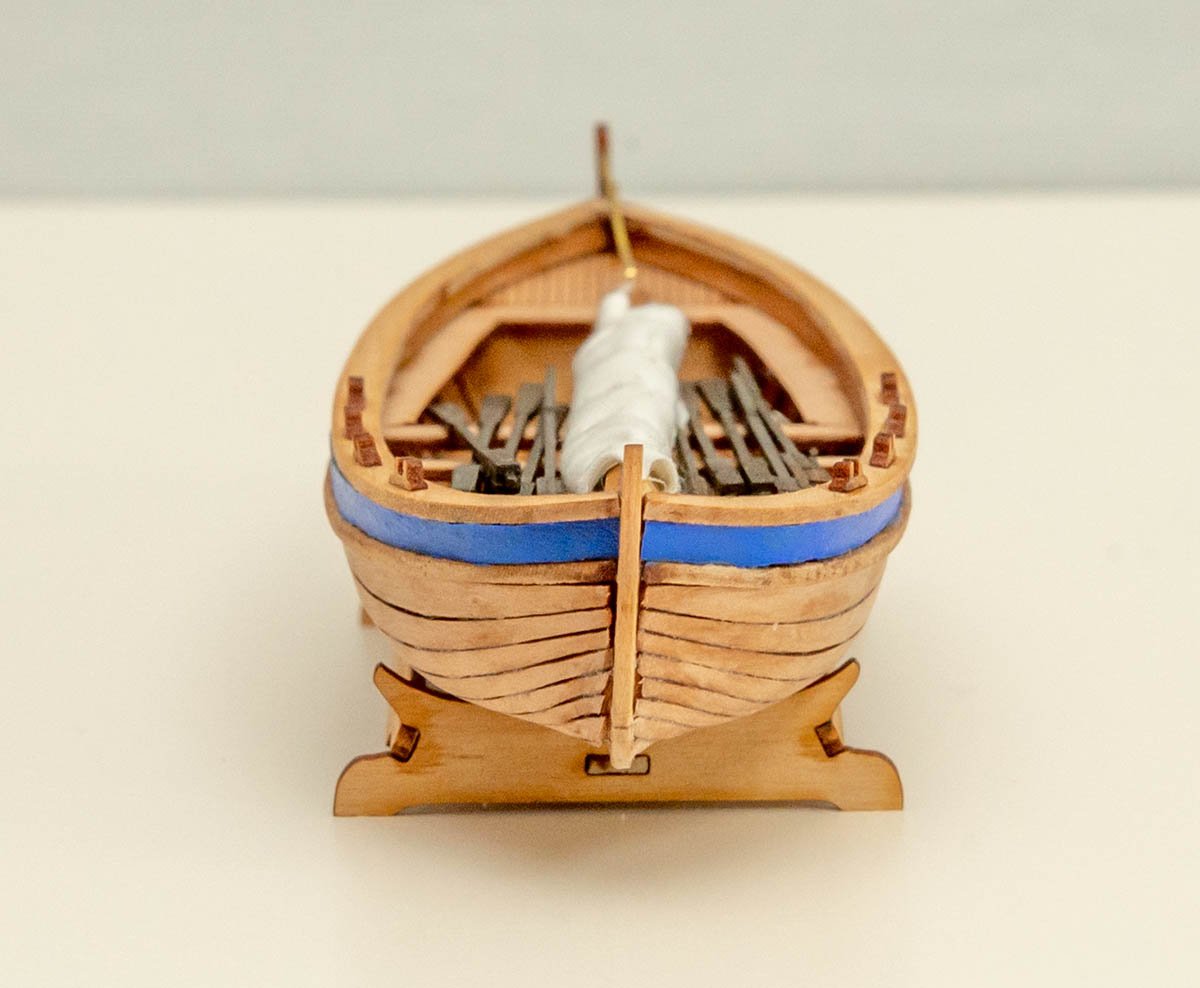
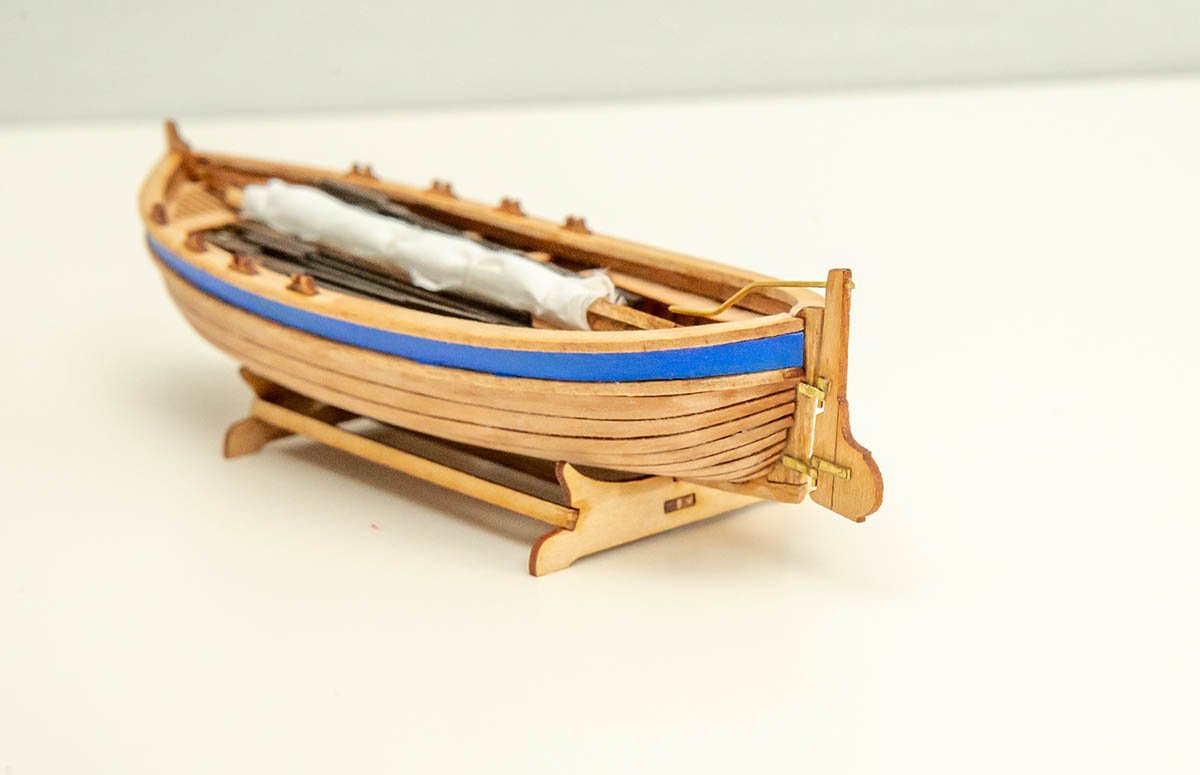
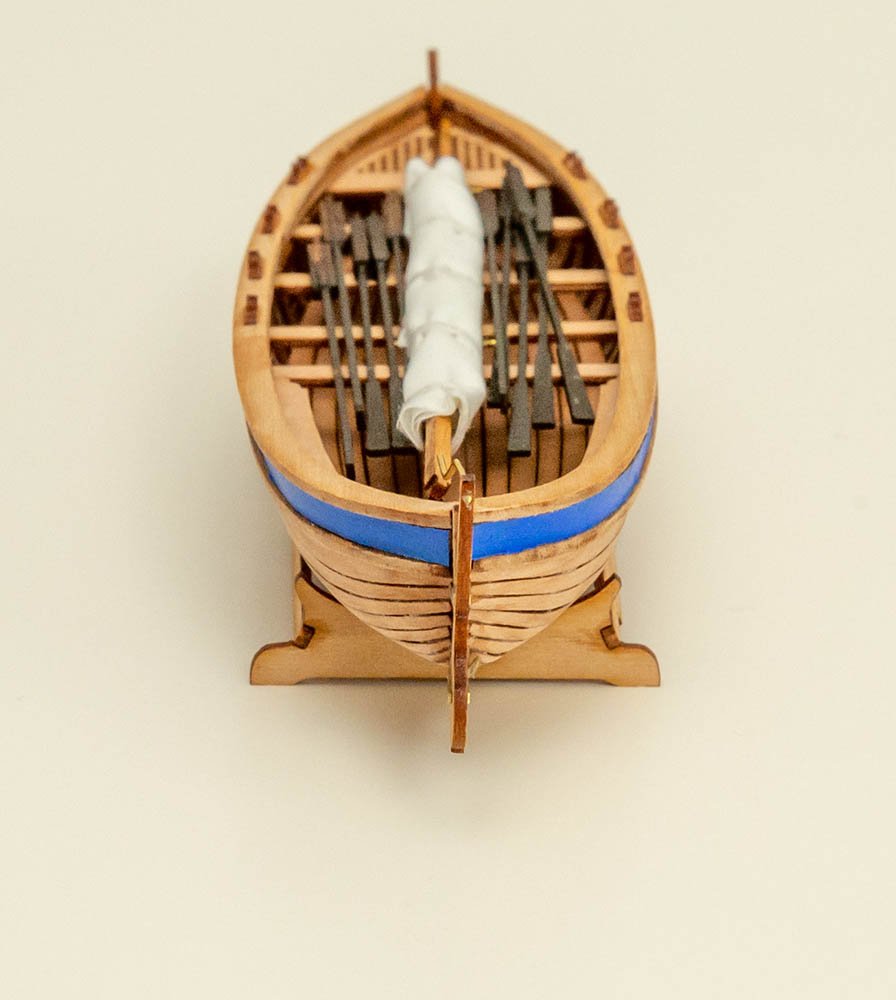
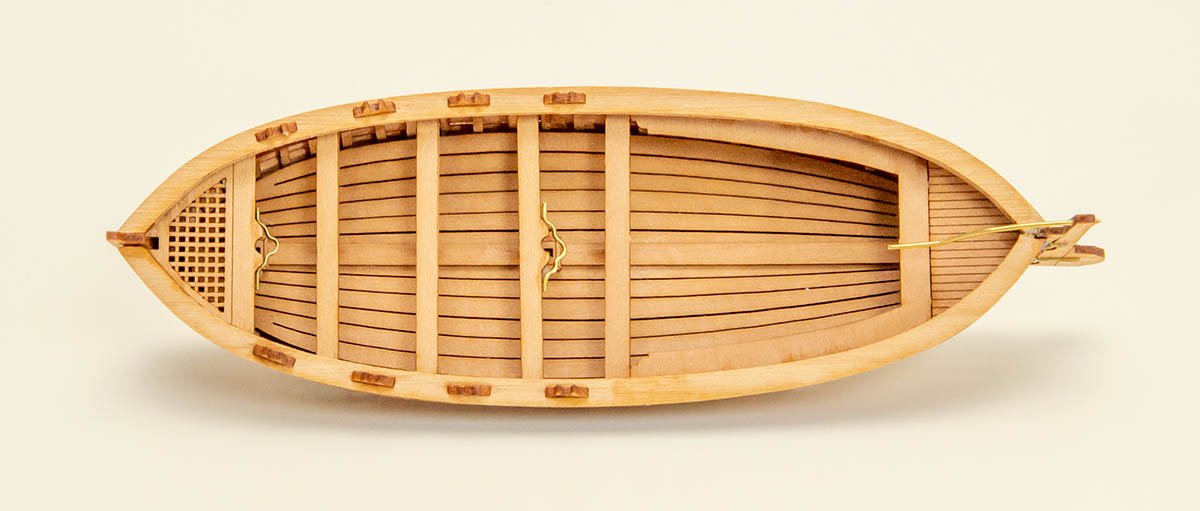
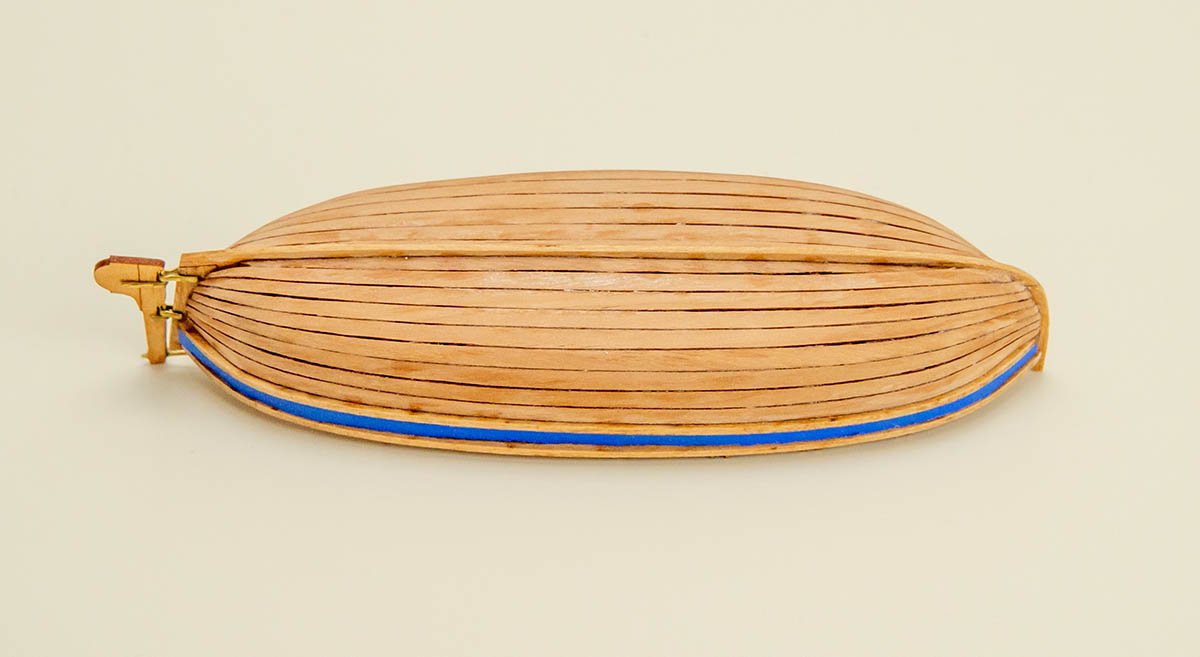
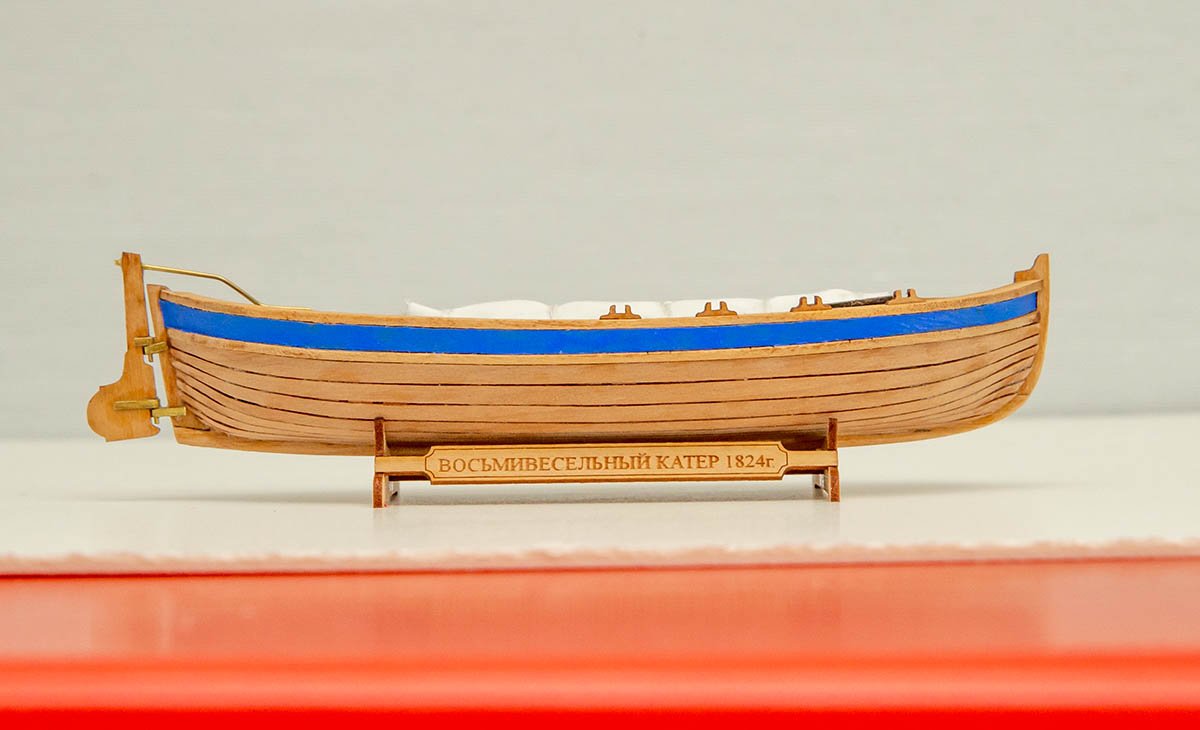
Happy new year. This is my first project in 2021. The model name is 8-oared boat 1824 by Falkonet made in Russia. You may find simliarity with Master Korabel's small boat series. I asked to moderator @Chuck, but he hasn't find any sign of piracy suspicion of the company yet. This kit is surprisingly accurate and designed to make the realistic lifeboat in 18~19th centuries. All parts are 99% accurate, and only human error causes gaps or imbalanced hull. An assembly process is so systematic that I was able to finish this kit within 3 days with CA glue only. If you are expert modeller, you can finish this kit within a day with CA glue, or a week with PVA glue and museum grade polishing. Of course, this kit is a bit sophisticated for beginners. When I bought this kit two years ago, I gave up due to no understanding on planking. After the NRG half hull planking kit, I decided to try this kit again, and now I can fully understand an instruction manual of this kit. I hope my experience helps your choice to improve lifeboat included in 1/60~1/84 kits. https://www.abebooks.co.uk/9781861761149/Boats-Men-of-War-W.E-1861761147/plp Also, if you want historically accurate lifeboat, don't forget to buy this book I was recommended here.
-
- 5
-
-
- Eight-oared boat
- Falkonet
- (and 1 more)
-
Thanks for professional advice, Bradley. I expected that it will be sphere eventually, but didn't test it for that long time. Even I didn't know how to use this tumbler properly. Also, your interesting explanation gives me some idea. It may be too early to throw away this machine...
-
Sorry about not updating this article. I gave up to use this tumbler machine because of no benefit. I shifted to much viable and convenient way than this one. I leave this article as a case of failure. I'll be appreciate if someone finds another use of this kind of machine. 👍
-
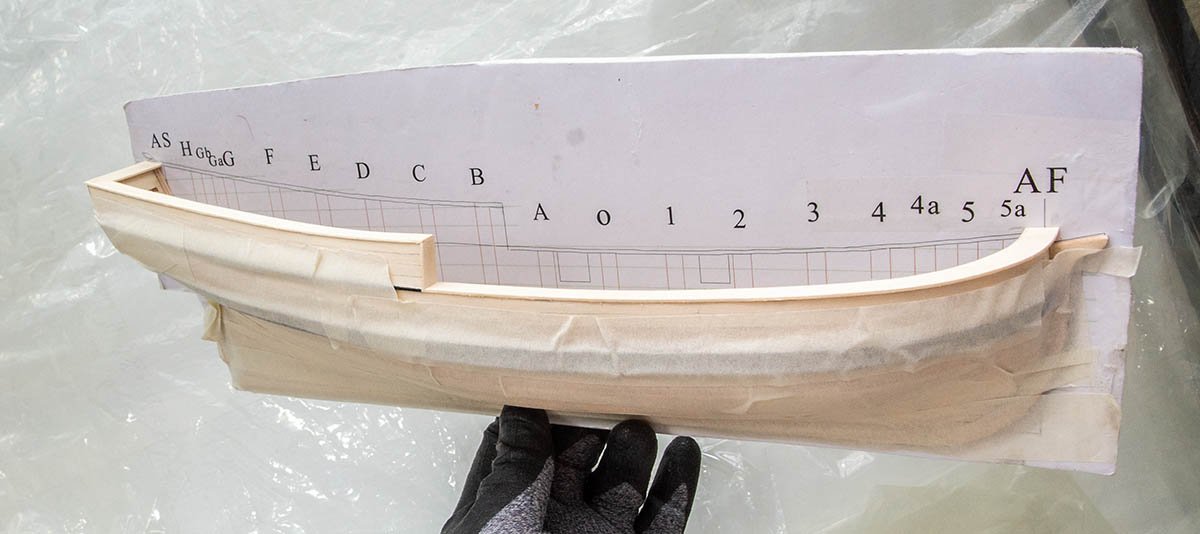
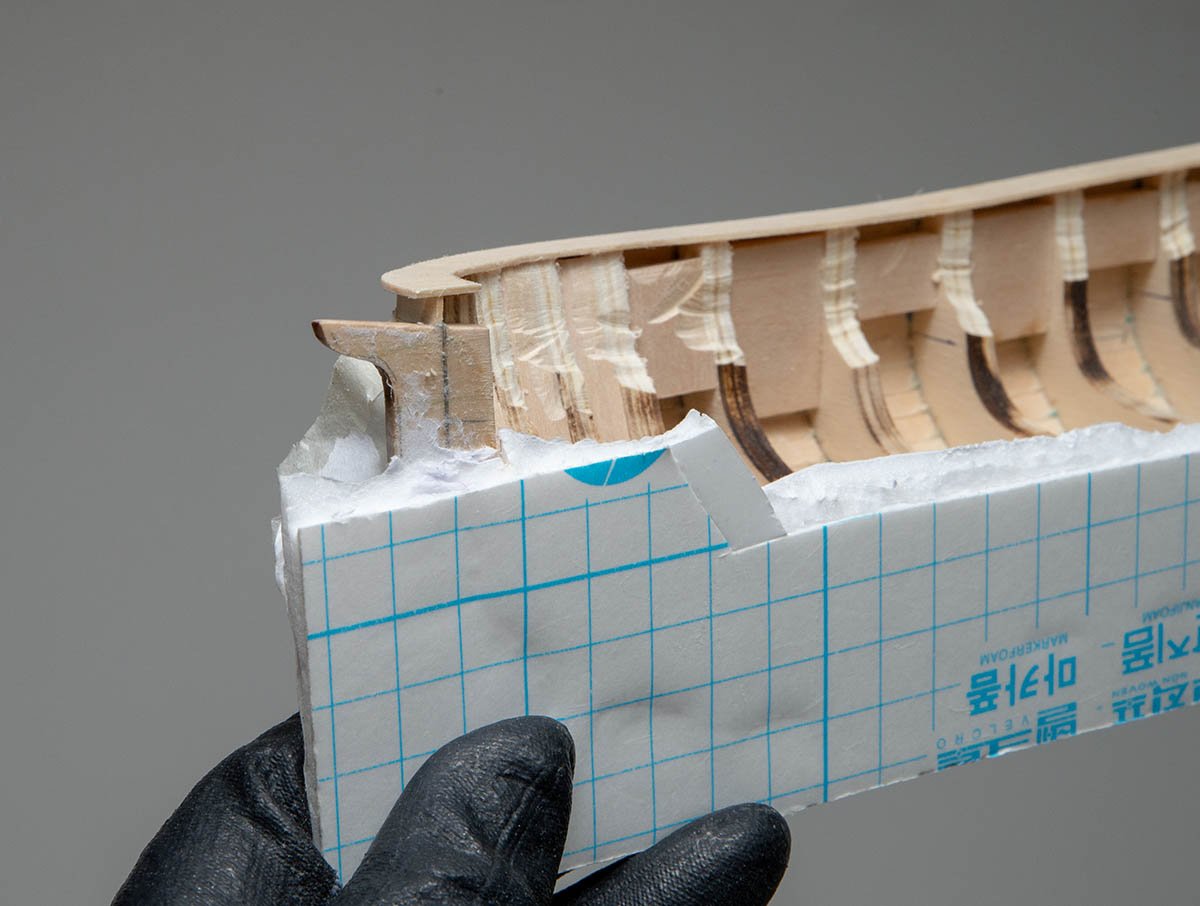
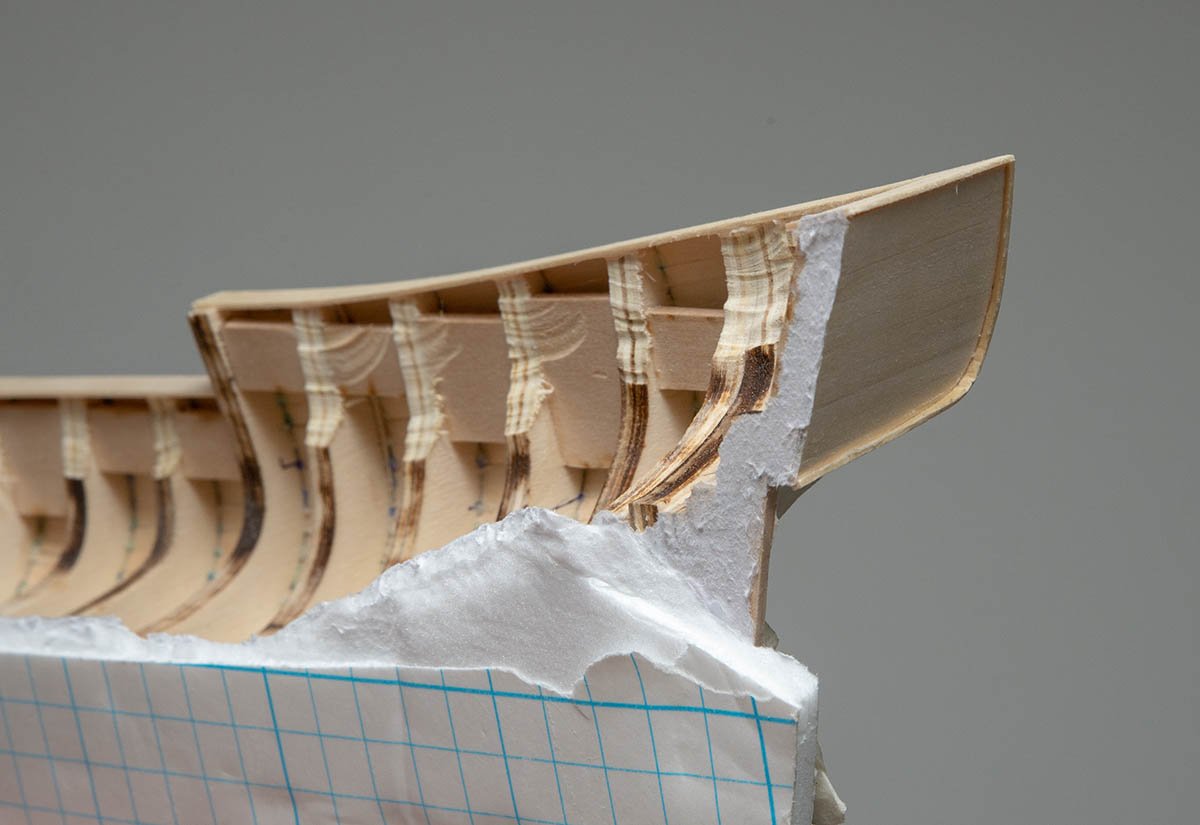
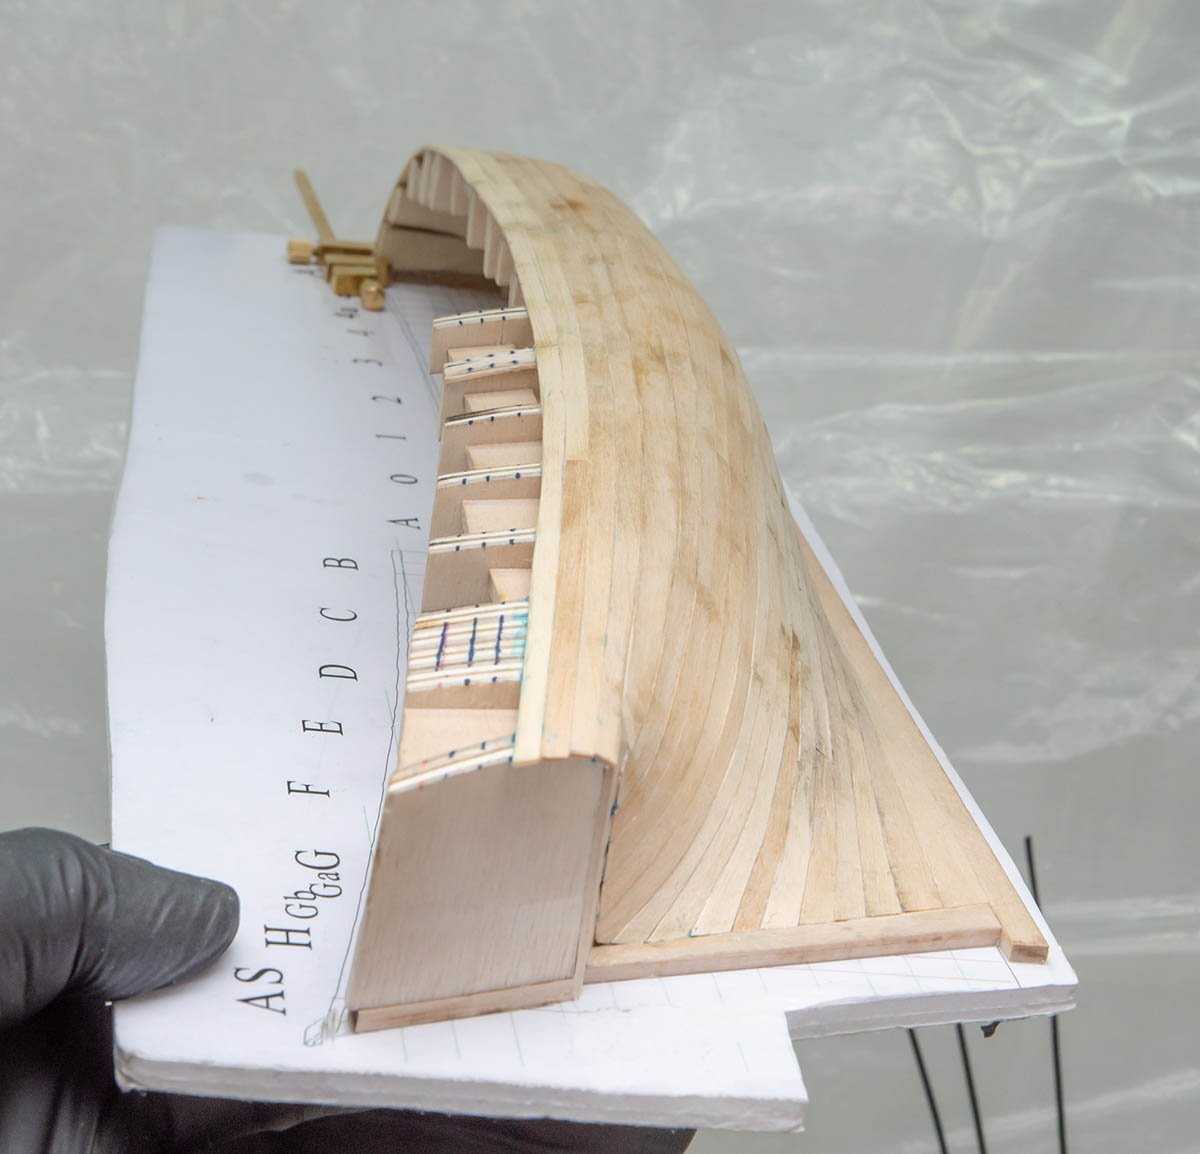
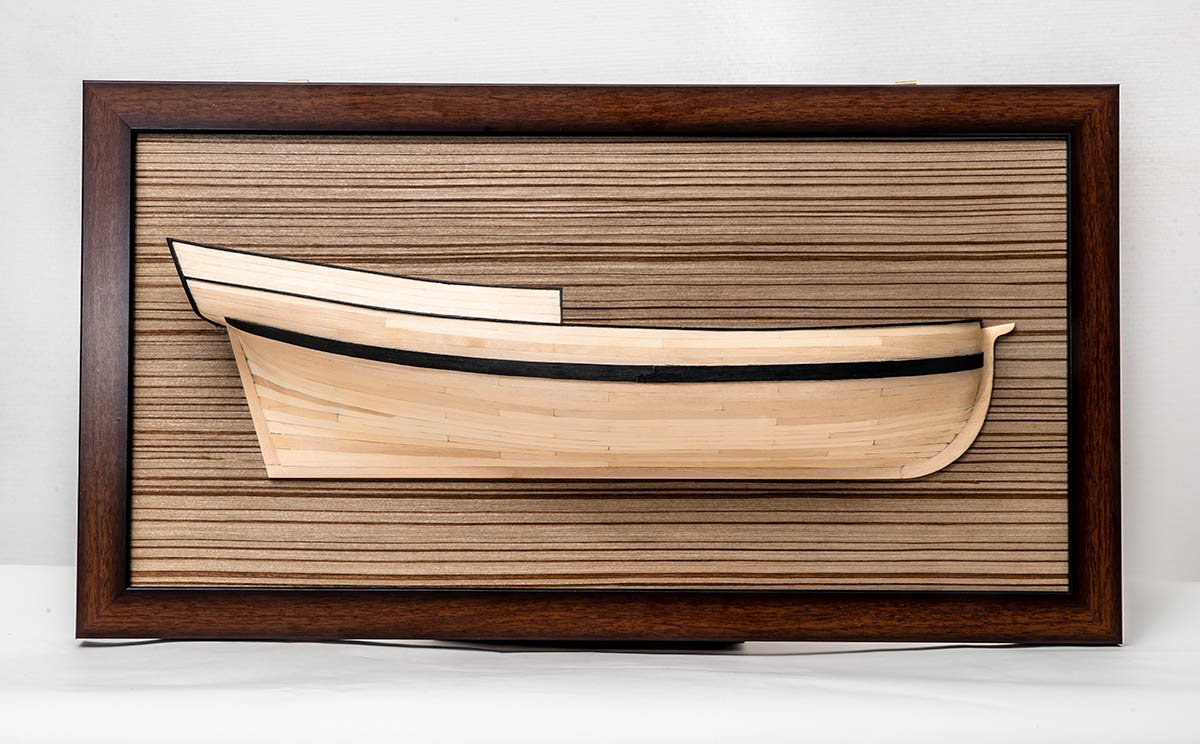
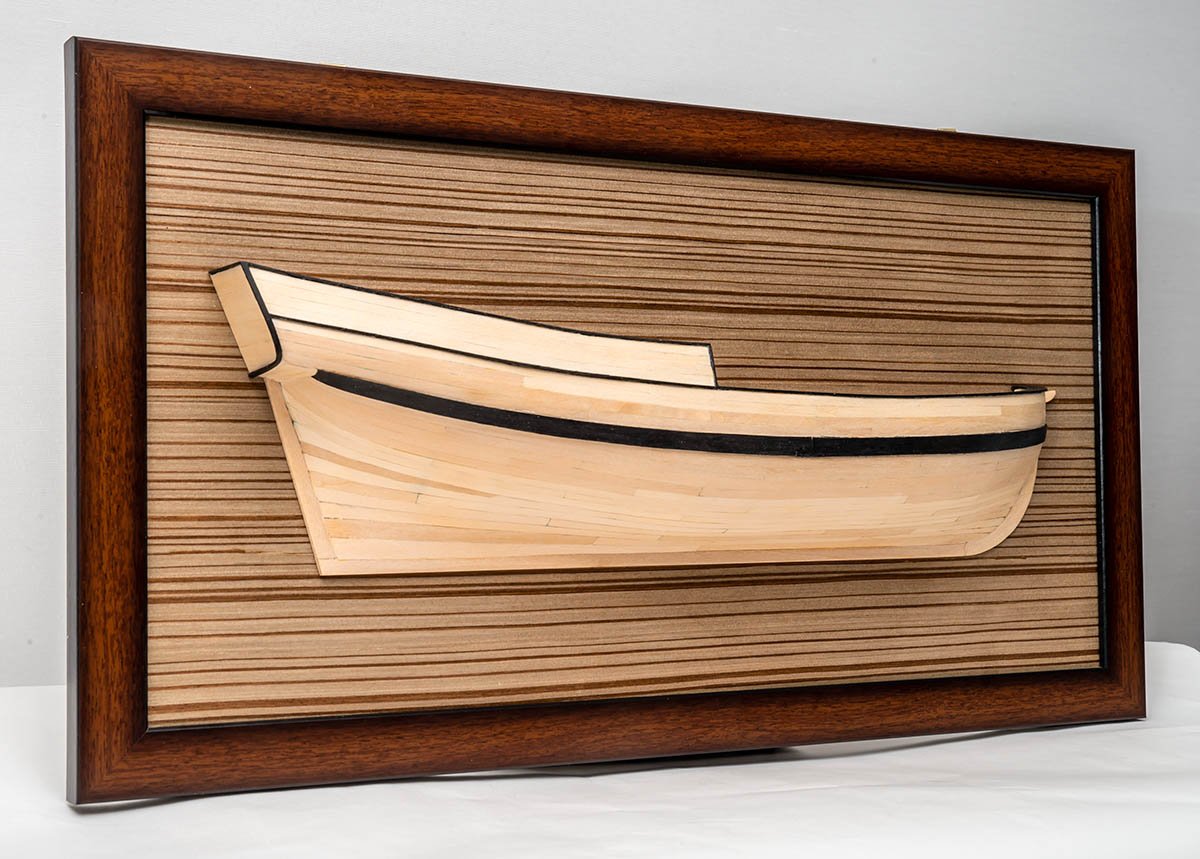
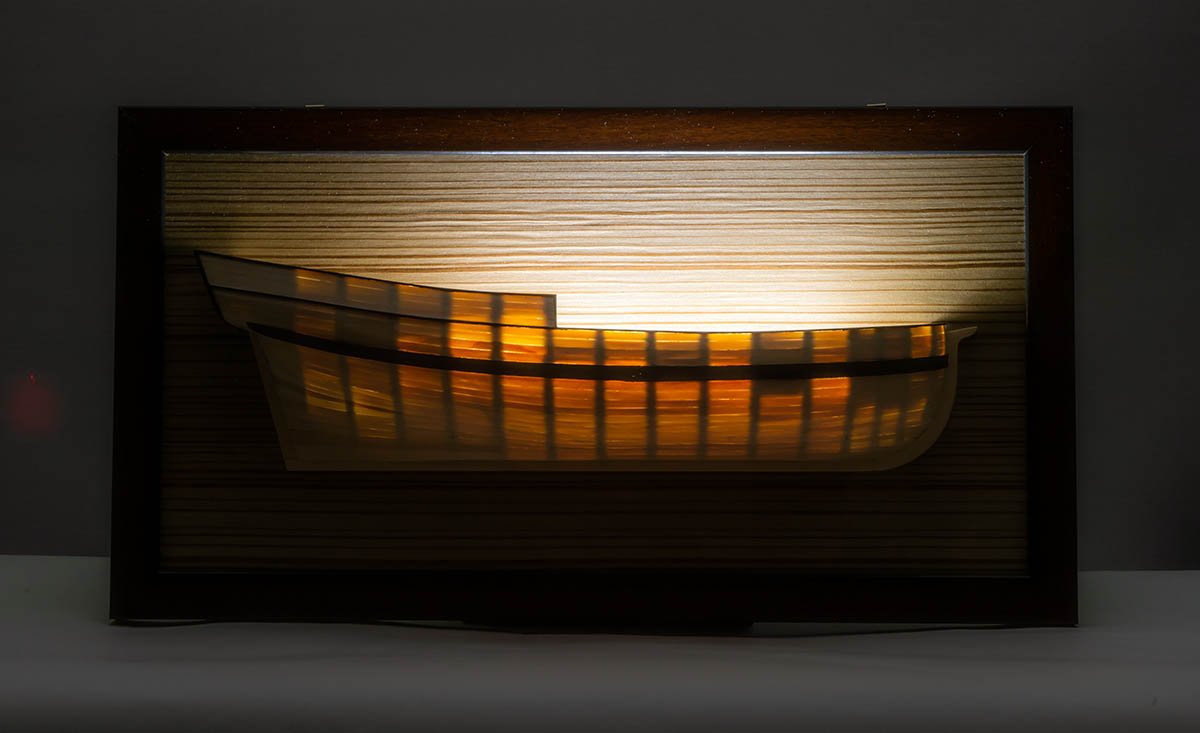
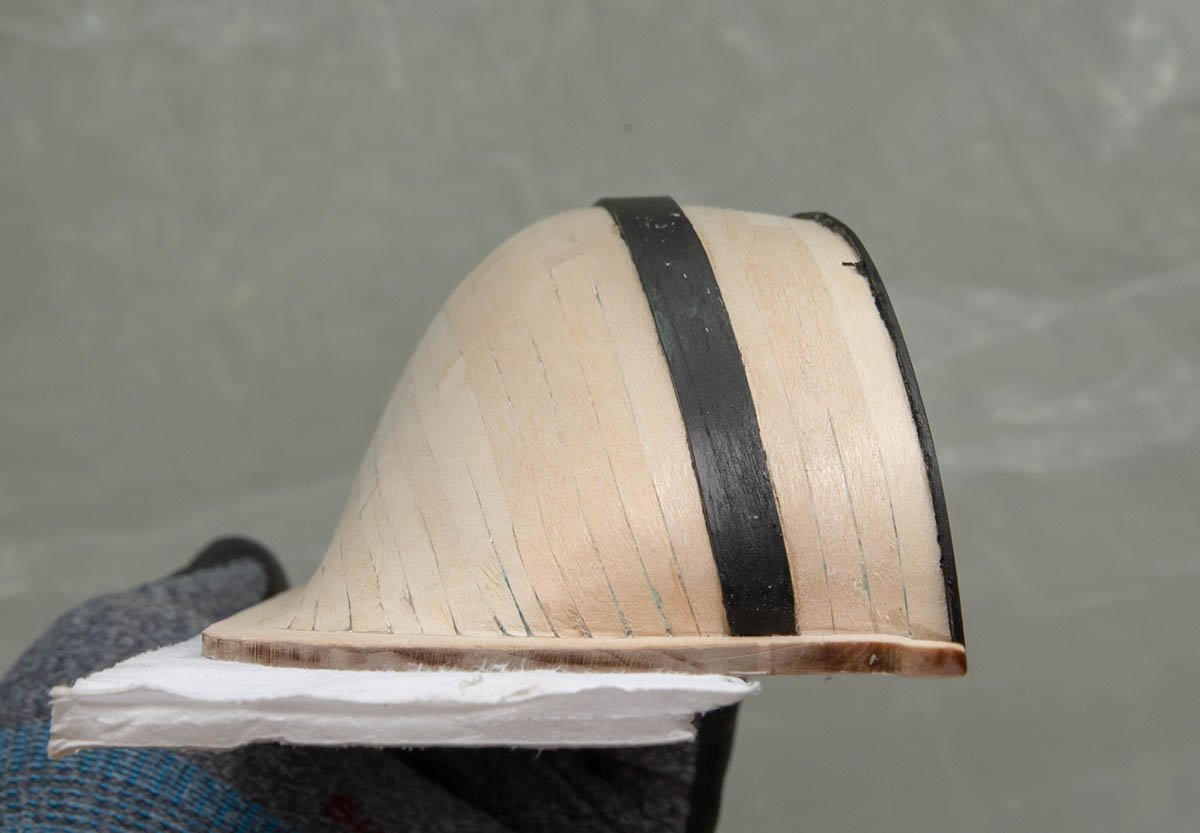
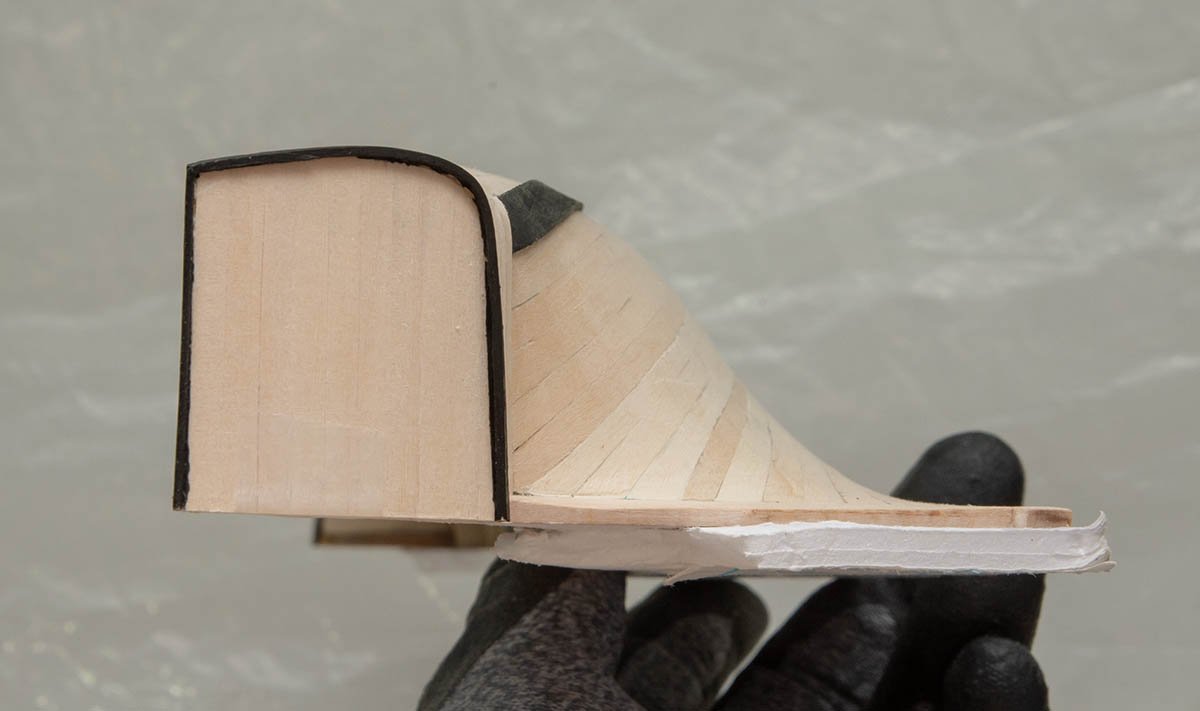
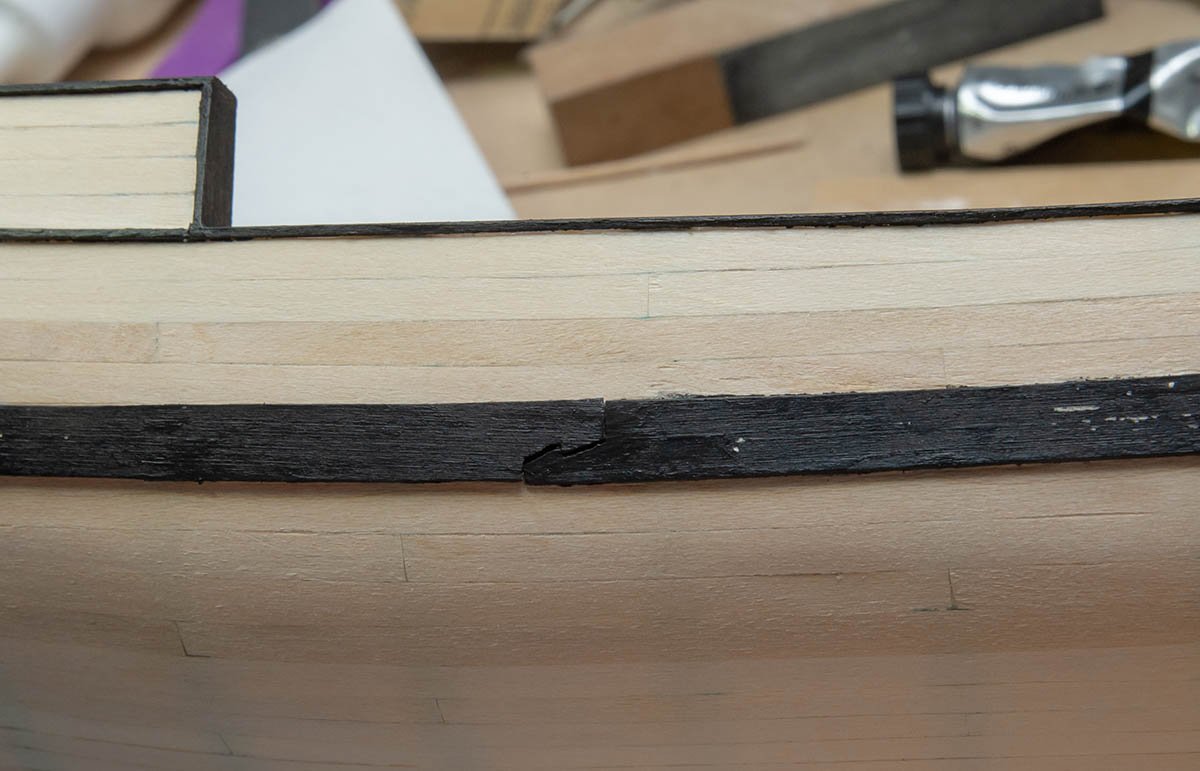
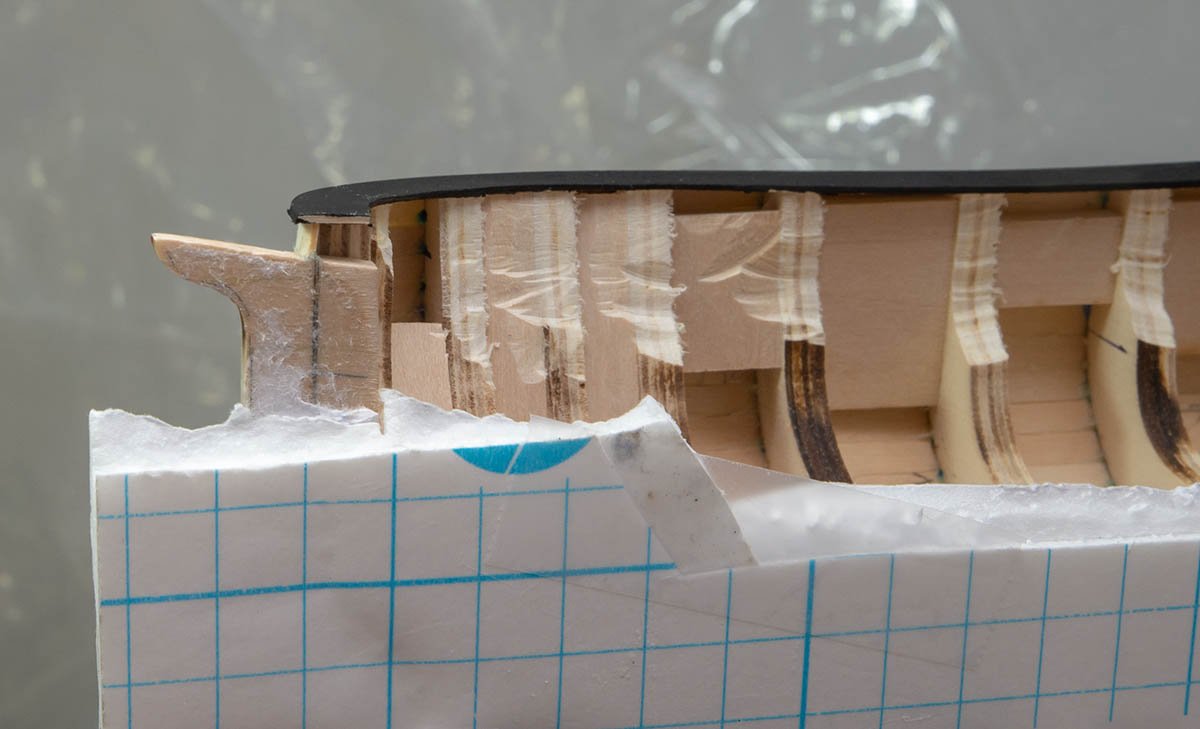
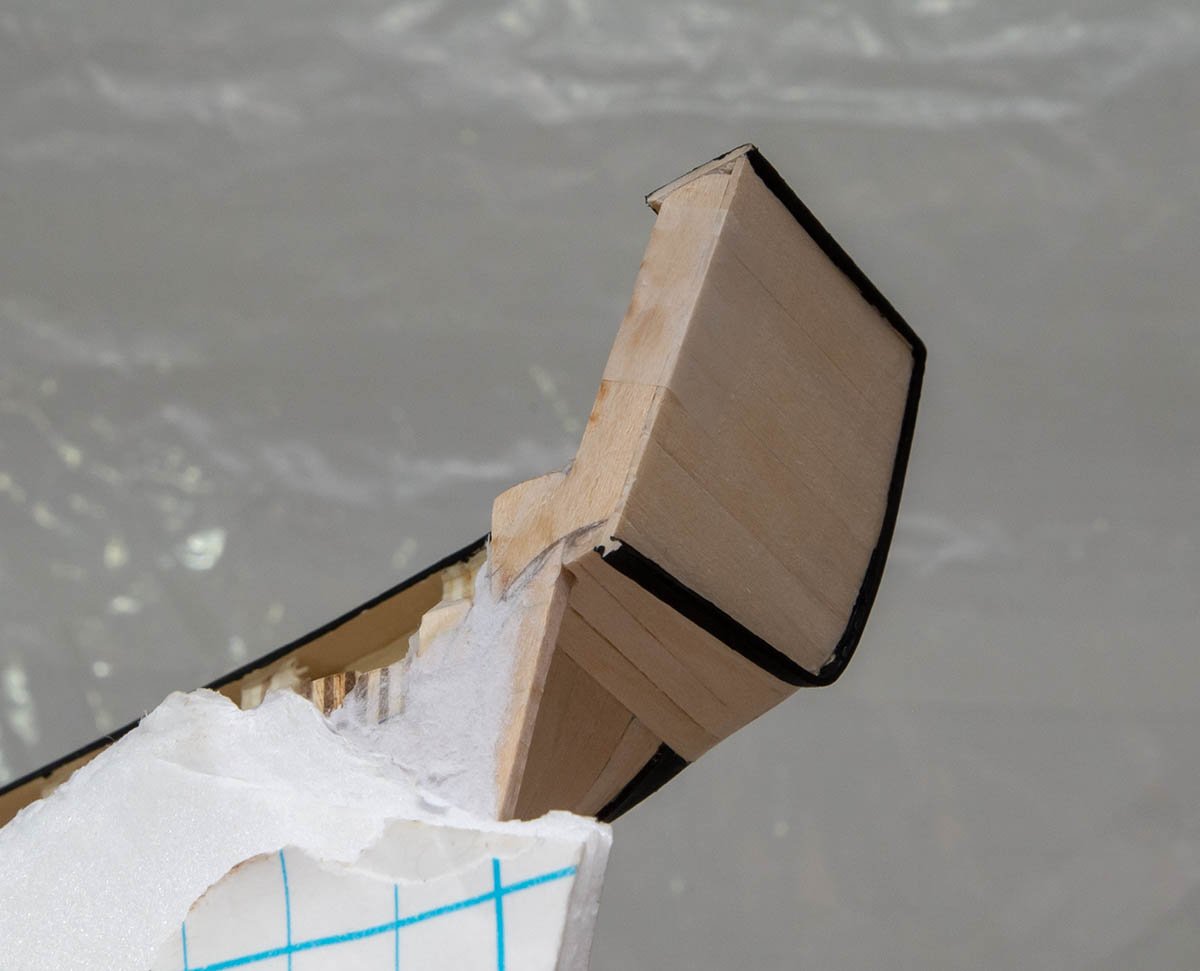
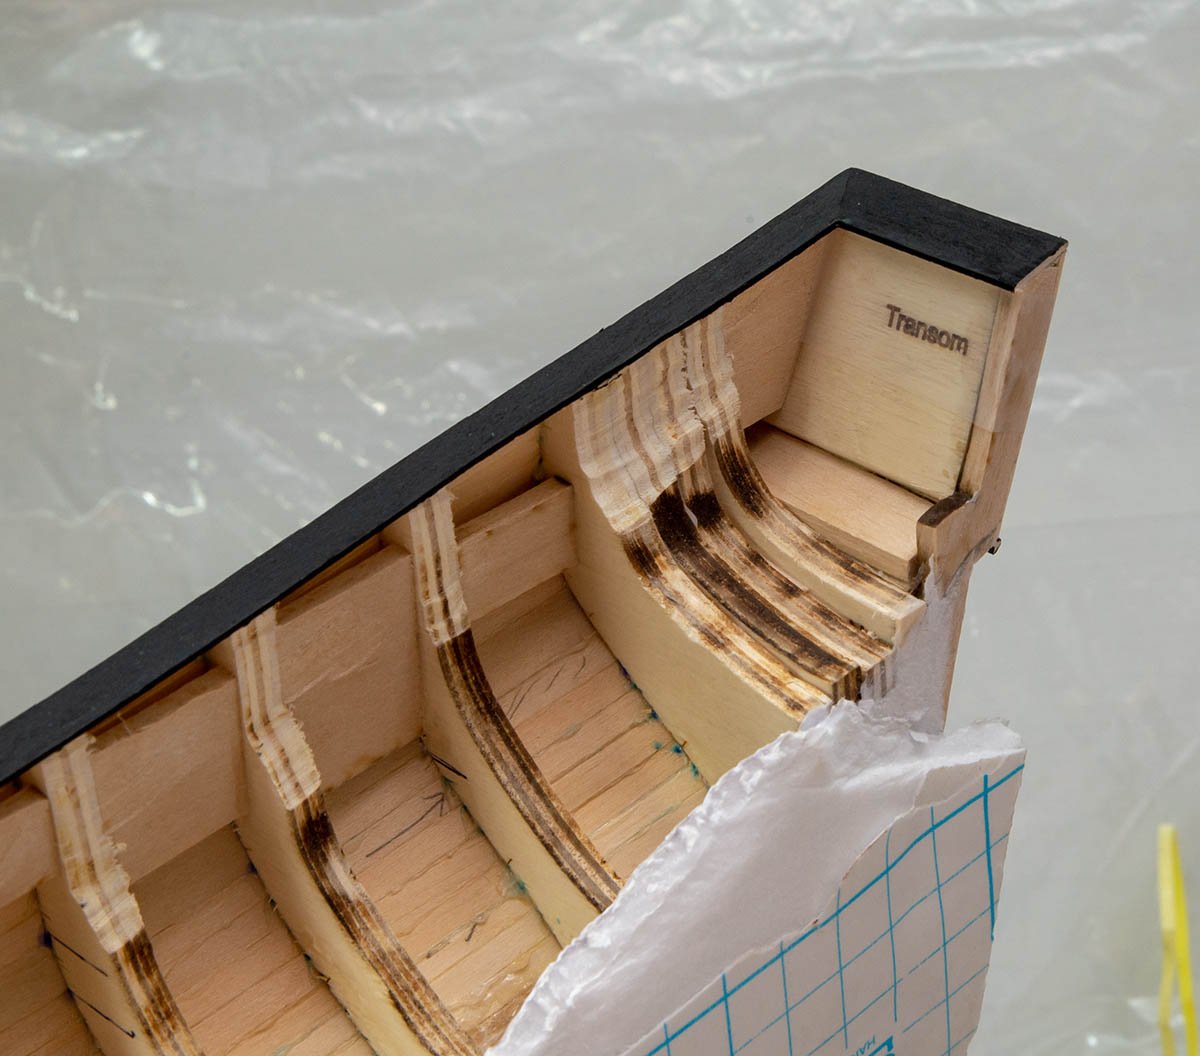
Definitely. Toni's education kit is a bit difficult to swallow at once, but now I'm full of confidence. Here is a bit bitter critic of this planking kit. I know some people who began build logs of this kit occasionally stop at a particular point : Hull fairing and a little amount of planking work. I understand why they stop. I also stop at the stage, and restarted after 4 months with encouraging myself. It was quite difficult to overcome 'the monster stage'. I don't think the Toni's instruction is wrong. Just... 'the planking technique' is a bit tough to swallow at once. Now I'm tasting the sweetness of knowledge, and understood that everything she wrote is correct and each word includes several meanings in various perspectives. In this case, a simple way to get over it is just following the planking progress without fear of mistake. My first part (garboard~#1 section) was terrible because of poor comprehension on manual. However, as I made more planking with tons of mistake, I was able to find what is wrong, understand what should I do in the next time, and reduce my mistakes. This is a tutorial kit. It is understandable that you who are new to ship model may want to make this kit nicely, but not all of you need to make a coursebook nicely when studying. Consider this kit as a textbook. Don't hesitate to break planking strips and draw dirty marks on it. It is true that this kit is difficult for new comer, but not far beyond your powers. Only thing you need is guts. And...... if you overcome it and finish this kit, taste of knowledge is so yummy that you won't wait for the next ship build. This is what I want to say to people who stop build logs of this kit.
- 13 replies
-
- 5
-
-
- half hull planking project
- NRG
- (and 1 more)
-
It's done. The present time in South Korea is Dec 24th 11:30 PM. Merry Christmas!
- 13 replies
-
- 8
-
-
- half hull planking project
- NRG
- (and 1 more)
-
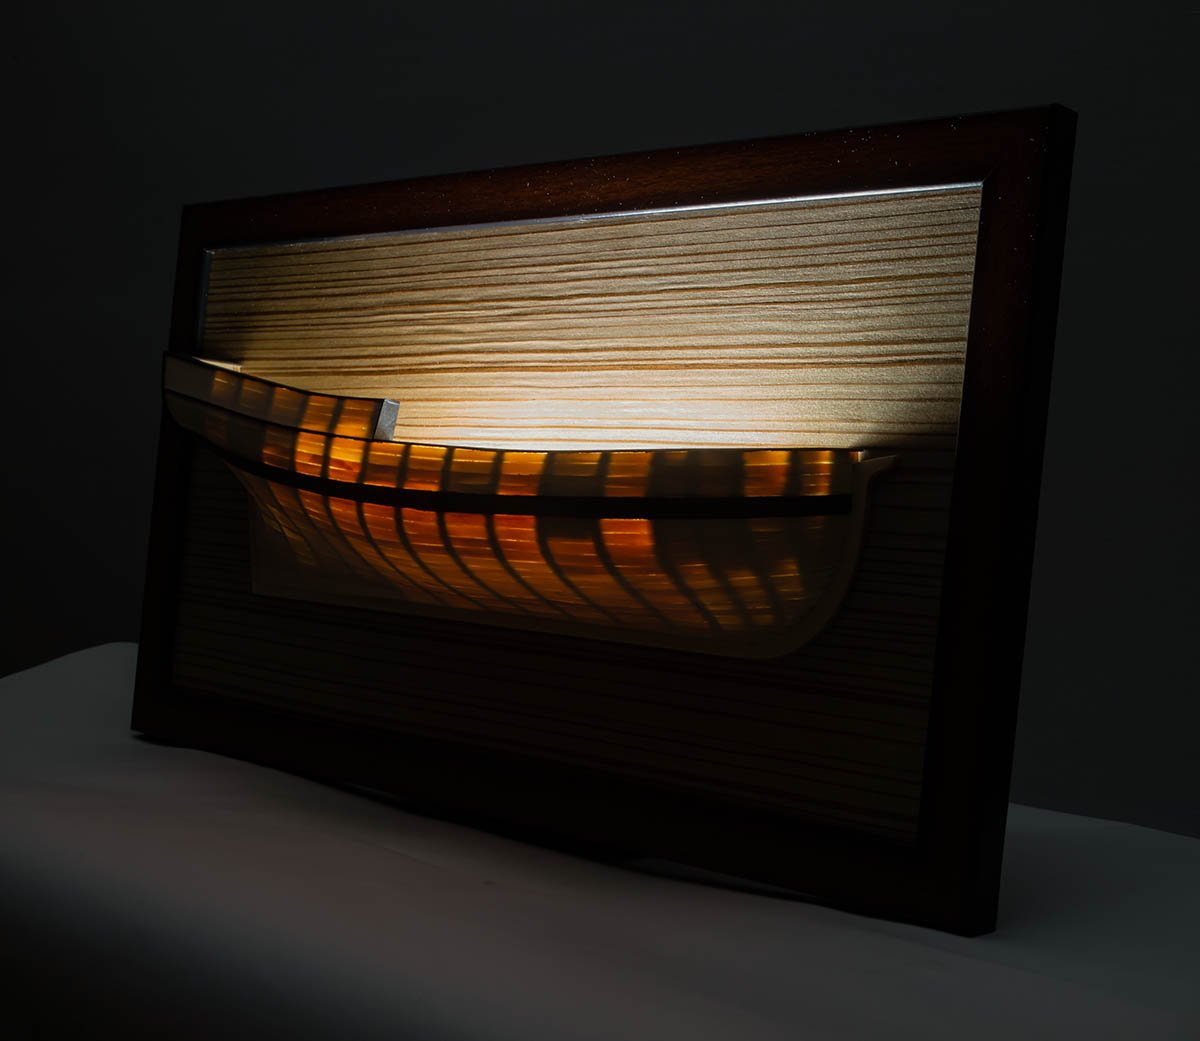
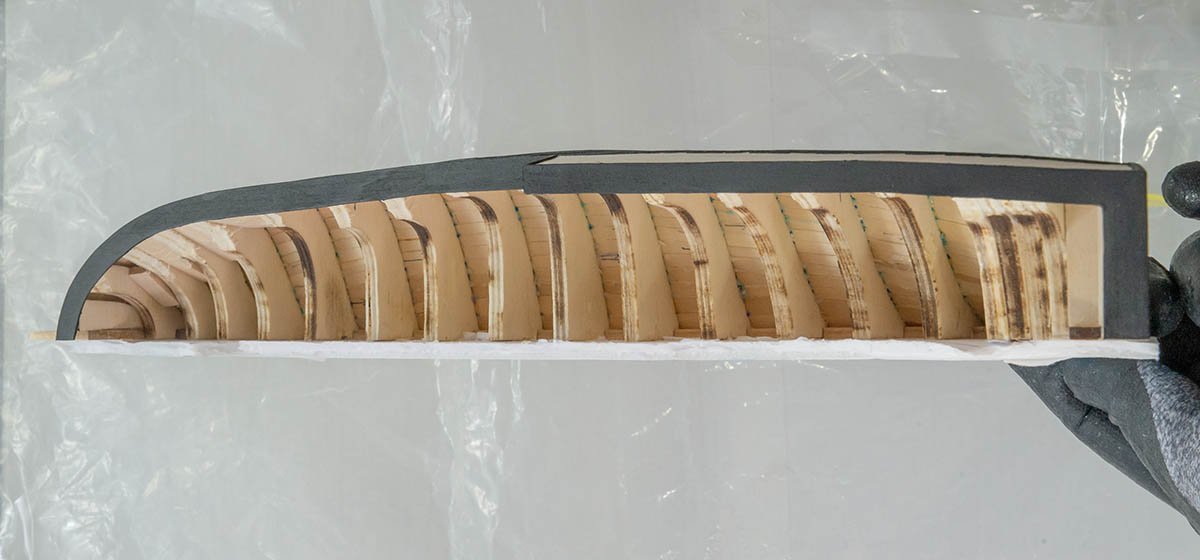
I took pictures before I apply varnish. I'll apply the Black Bison wax polish. The last work is making mount. It will take about a week.


- 13 replies
-
- 3
-
-
- half hull planking project
- NRG
- (and 1 more)
-
https://thenrgstore.org/ Here is new link. You can get additional discount if you join the NRG digital membership with $40. The quarter term NRG journal has worth more than $40.
-
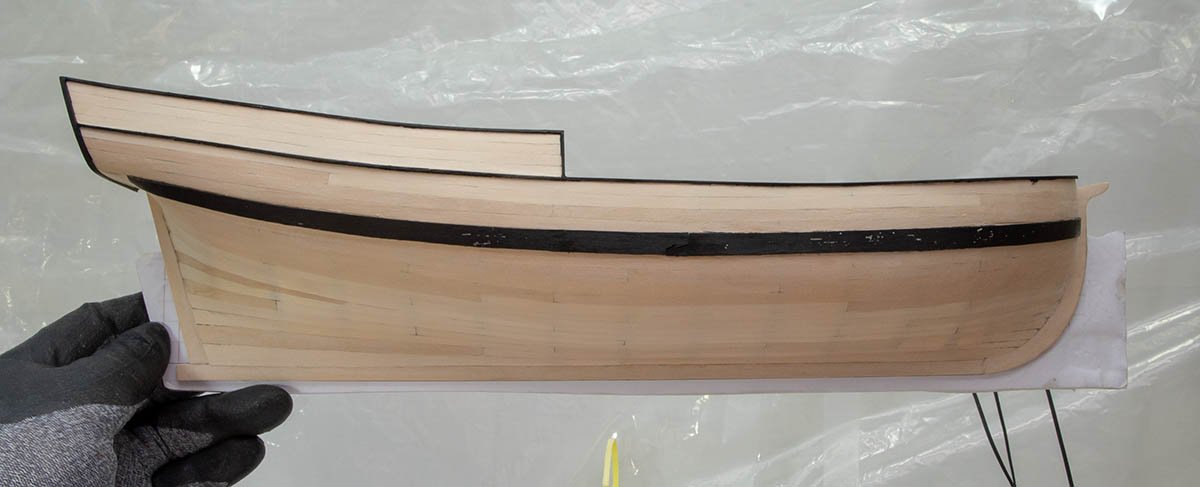
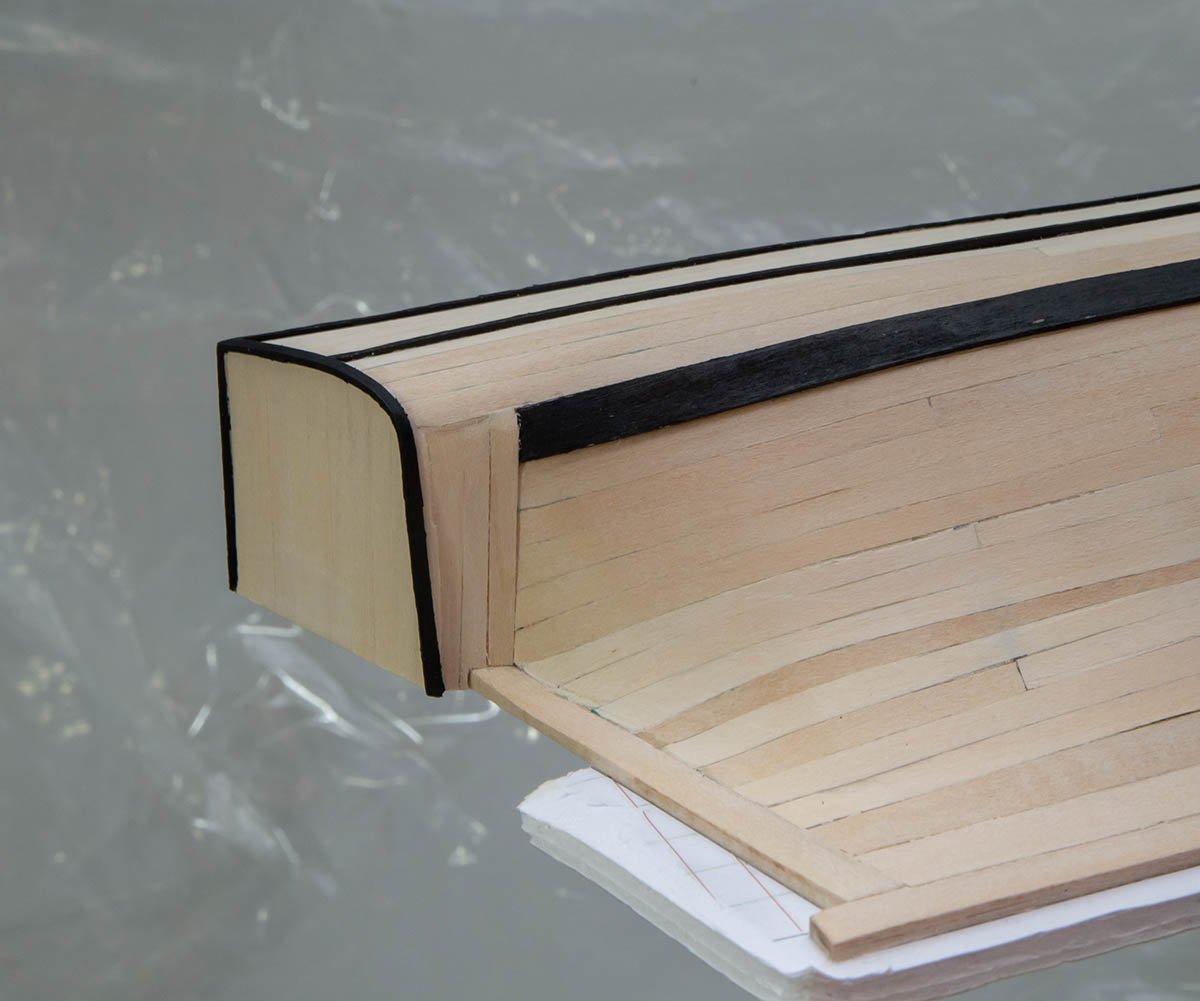
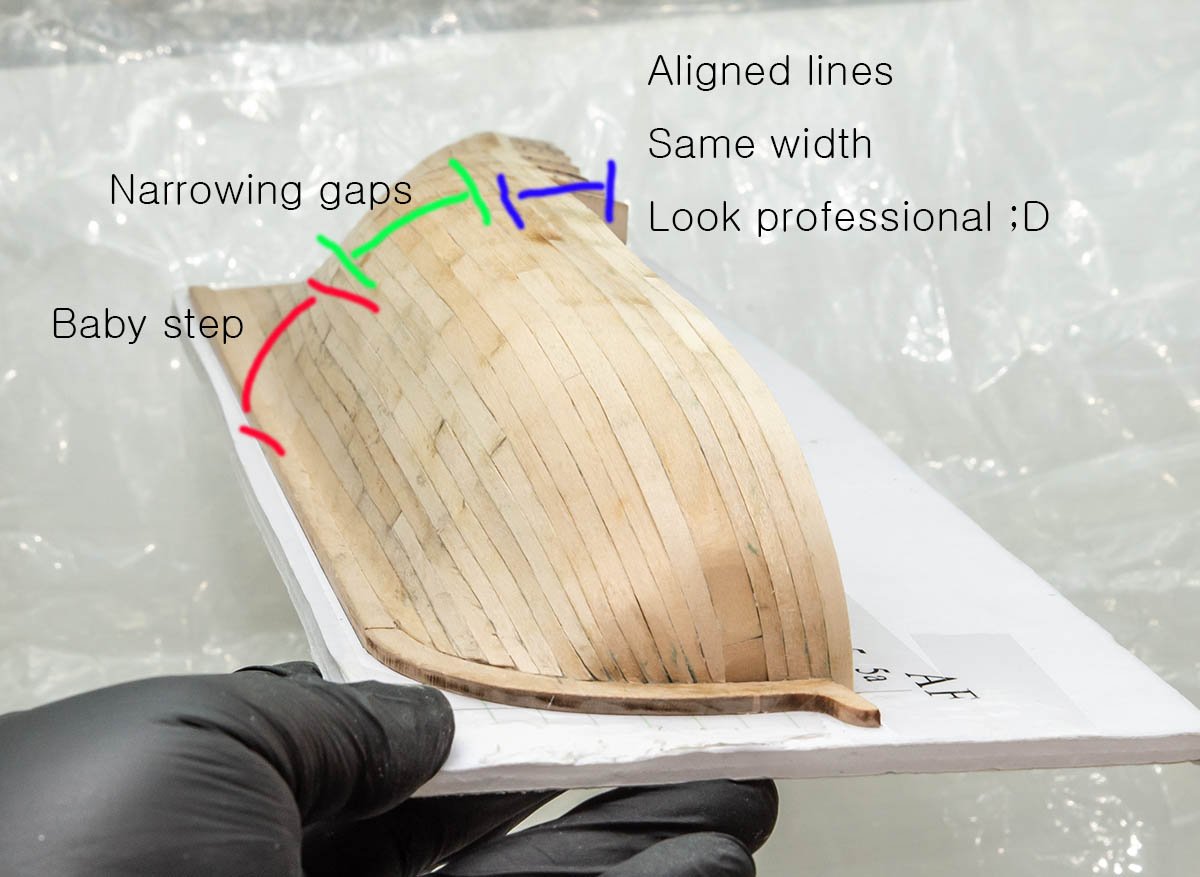
I just finished most of the progress. As I make a new plank, I'm doing better than before. The last result is almost identical to the museum grade wooden model ships! ...... in my delusion. The finish line is just around the corner. I'll do wet sanding tomorrow and run to the end.


- 13 replies
-
- 2
-
-
- half hull planking project
- NRG
- (and 1 more)
-
Thanks for the comment, but I just moved the kit from workbench to unused desk a few months ago. 😏 Actually, I dropped the whole kit once and one of the wood chimney (left side) was broken. That's all. No crack on block walls. It has unbelievably stubborn and solid structure! 😮