HOLIDAY DONATION DRIVE - SUPPORT MSW - DO YOUR PART TO KEEP THIS GREAT FORUM GOING! (Only 20 donations so far - C'mon guys!)
×


Brewerpaul
-
Posts
190 -
Joined
-
Last visited
Content Type
Profiles
Forums
Gallery
Events
Everything posted by Brewerpaul
-
Steven - thanks for the "shopping list" Sea Hoss - I'll definitely check out the Siren plans.
-
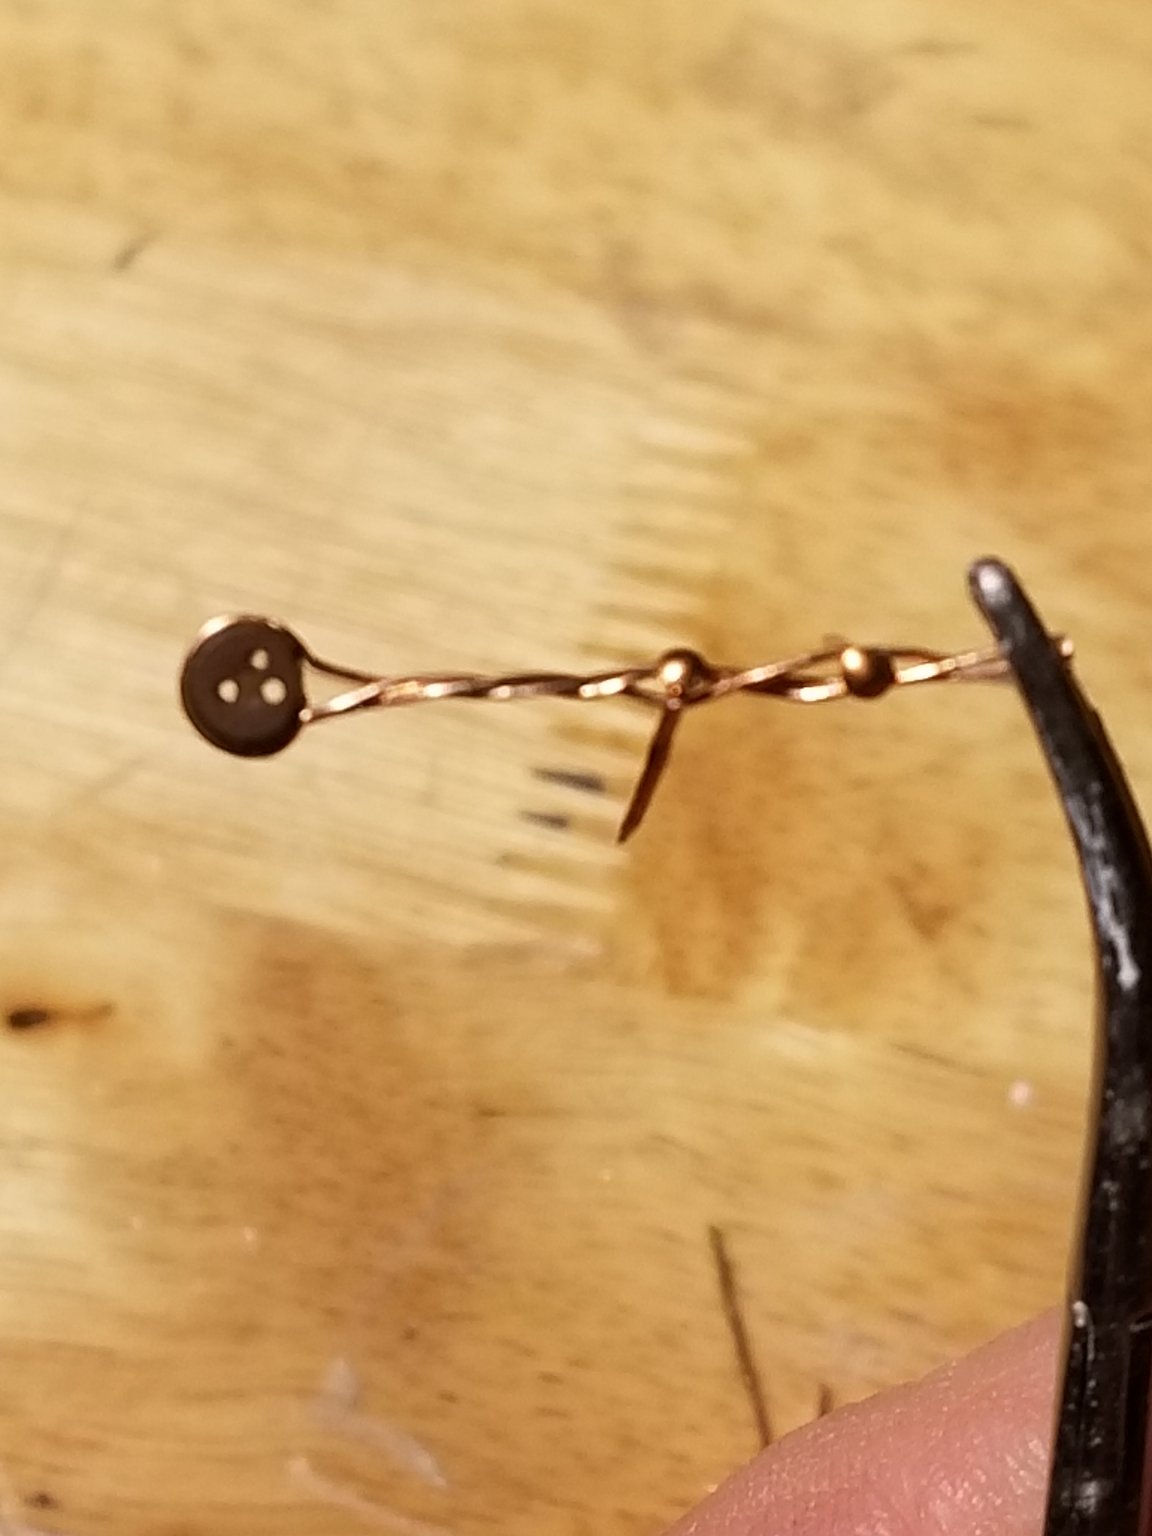
I started putting the metal strops on my lower deadeyes and discovered that the strops for the smaller stay deadeyes are missing. All of them. When I bought the kit some 30 years ago, I wasn't so careful about checking parts lists, especially if they're in Italian! Here's my tentative workaround. If anyone has a better idea I'd love to hear it. I have an old book on model ship building which suggests this method,and soldering the twisted wires,then flattening them on an anvil and drilling mounting holes. In my test piece, the ends of the wire are secured with CA glue but if I soldered them that wouldn't be necessary except maybe as a temporary measure before I got around to soldering. Speaking of mounting,I experimented with trying to get one of the copper nails into a spar piece of hull planking and was unable to push it through. I'm assuming I'll have to drill small holes and glue the pins in place?

- 48 replies
-
- 1
-

-
- mamoli
- constitution
- (and 2 more)
-
Deadeyes and ratlines and shrouds, oh my!
Brewerpaul replied to Brewerpaul's topic in Masting, rigging and sails
Wow-- thanks for all of the valuable information. You guys * have already saved me from a lot of potential mistakes and hours of trying to figure out how to do this rigging. I never would have imagined that just getting a couple of pieces of string 😉 attached to the mast and hull could be so complex! I'm further from that point than I had imagined, but it'll come. Question-- is there any reason why I can't start/do the standing rigging before I make my yards. Getting that task behind me would be a relief and I could go back and forth between rigging and spar making to keep either from becoming too tedious. Popeye--your comprehensive tutorial contains some terminology I'm not certain about and I'll compile those and ask you about them later. Again,thanks all! *as I typed "you guys" I wondered how many women build model ships. There's obviously no reason why they couldn't do as least as good a job as we menfolk and it's been my experience that most women have more of the requisite patience needed for this hobby. -
My hull is about as finished as I want it for now. I've left the cannons off since they look like they'd just get in the way of doing the rigging. I have the parts for the fife rail and the bulwark pin rails cut and shaped, but I'm waiting for 1mm drills so I can drill the pin holes. In the meanwhile, I'll start forming the mast and spars. I finally took a good look at the plans and am amazed how complex the shape of the lower main mast is. As a landlubber, I've always thought of masts as simple cylinders, but with all those flat surfaces, that mast alone will be a bit of a challenge.

- 48 replies
-
- 4
-
-
- mamoli
- constitution
- (and 2 more)
-
I did see that spreadsheet, but I'm spreadsheet ignorant. I'll have to take another look.
-
Deadeyes and ratlines and shrouds, oh my!
Brewerpaul replied to Brewerpaul's topic in Masting, rigging and sails
Thanks-- those are both very helpful. To tell the truth, I hadn't really scrutinized the rigging part of the set of plans yet and for some reason just assumed that the shrouds went up one side,down the other. Special, what do you mean by pendants of tackles? -
I'm working through a USS Constitution cross section which I originally bought some 30 years ago. Next up is the Pride Of Baltimore II. We moved to Maryland about 3 years ago so this ship was a natural choice. I bought a kit on eBay which someone started but did not get beyond the keel and attaching bulkheads. To my inexperienced eye it looks OK but even if I have to do some "surgery" on it, it will be OK considering that I only paid $50 plus shipping. Your build is gorgeous and this log will be a terrific reference for me. With any luck, I'll visit the real ship this spring/summer and hopefully go for a sail on her.
- 23 replies
-
- 1
-
-
- pride of baltimore ii
- model shipways
- (and 1 more)
-
I've just about completed the hull of my Constitution cross section model and before too long I'll have to tackle the long dreaded process of setting up the deadeyes,shrouds, and ratlines. I have only a slight idea of what order to go about it. It looks like I'd first mount the lower deadeyes to the channels using the metal pieces provided in the kit (irons?). I know I have to run a piece of shroud up to the fighting top and back down the other side and install another deadeye on each end. How do I know exactly where to attach these deadeyes so the lacing of the lanyards comes out right, and each pair of shrouds ends up the right length? I guess what I'm looking for is a basic tutorial on how to do standing rigging,start to finish. I'd appreciate any advice, links to tutorials, etc. Thanks!
-
That's especially true if you're a surgeon!! I'm a latecomer to your build and have recently dug up a partially completed Connie Cross Section and resumed work. I am nowhere near as dedicated as you are for my first build, but I've gotten some good ideas from you so far.
- 113 replies
-
- 1
-
-
- constitution
- mamoli
- (and 1 more)
-
Syren's mail order is down due to Coronavirus, but he plans to reopen soon and I'd like to replace some of the rope on my Constitution. I'm thinking just the standing rigging,which shows a lot more prominently than the running,although I might change my mind once I start the standing rigging. Could you share the diameters and colors of standing cordage that you bought?
-
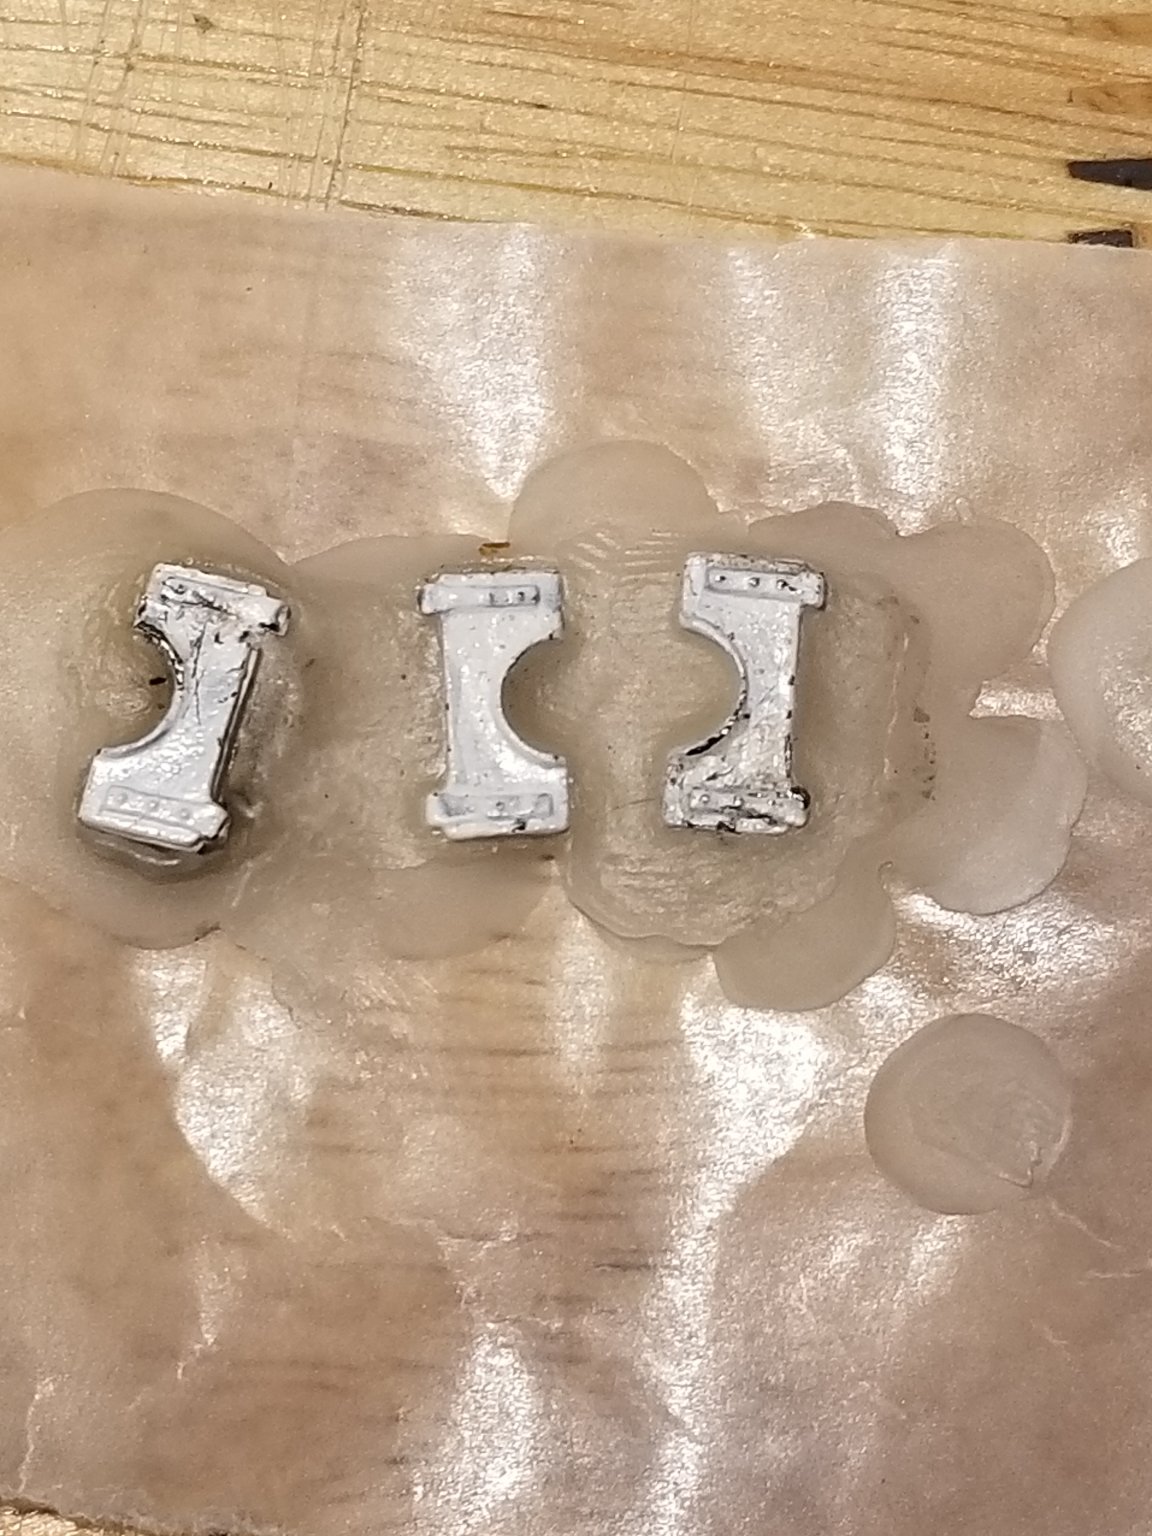
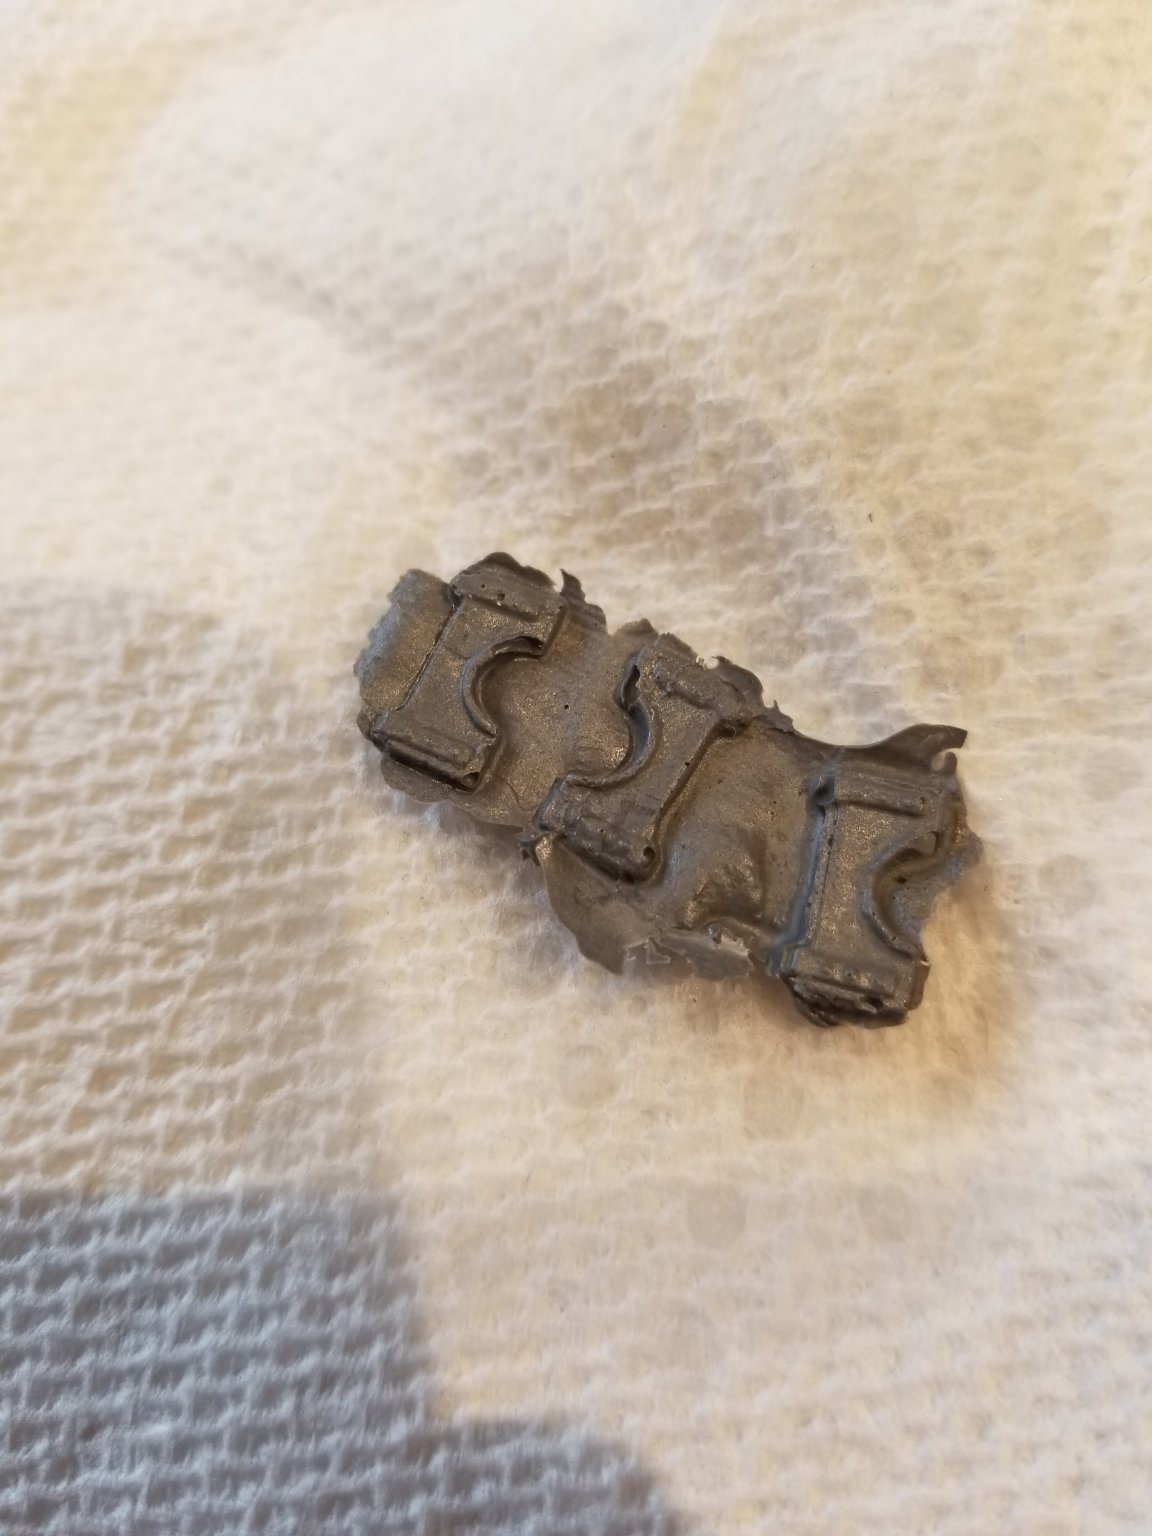
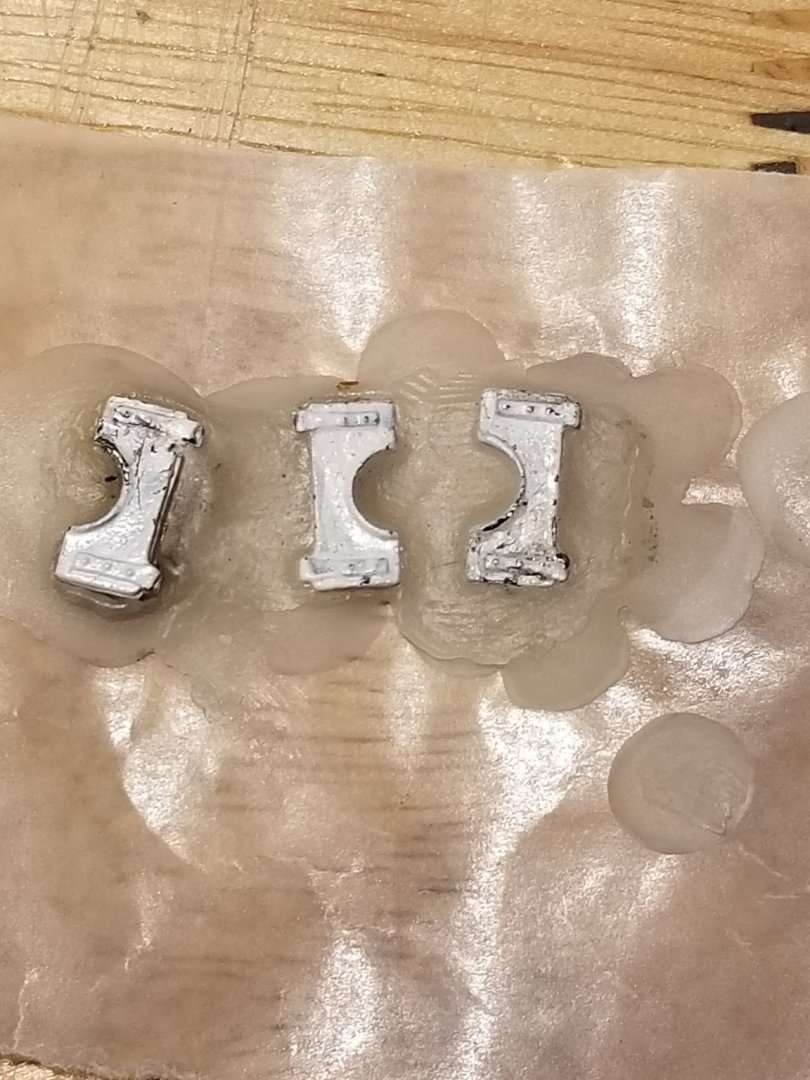
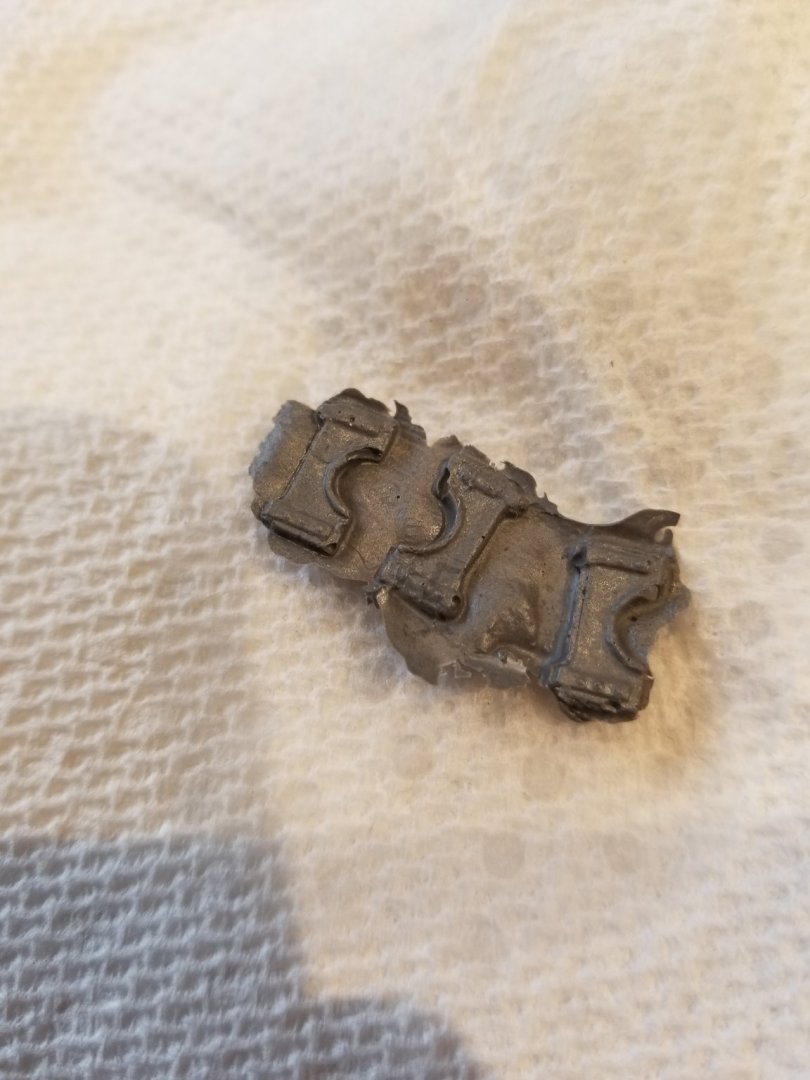
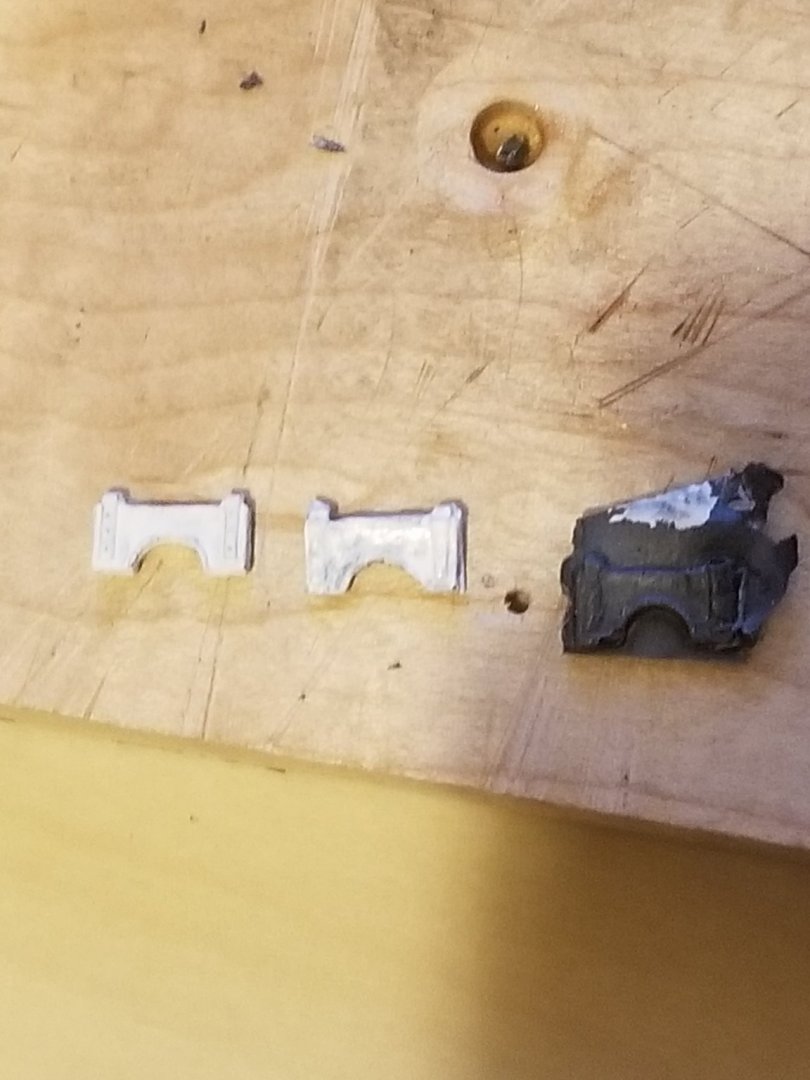
Our house has black hole, where all sorts of things disappear never to be seen again. Such was the fate of one of the cannon port lower flaps. I had all 4, painted them before installation and then there were three :-(. I debated making one out of wood from the kit but realized it wouldn't come close to matching the others. Then, my many years of reading Sherlock Holmes and the like reminded me that a frequent ploy was to pirate a copy of a key by pressing the original into soft wax and using the impression as a mold or pattern for making a workable key. I melted a puddle of candle wax onto a piece of wax paper (very useful stuff!) and when it was still soft pressed the remaining 3 port doors into the surface. When the wax was completely cool I was able to easily remove the metal parts. I mixed up a batch of JB Weld (also very useful!) and filled the mold cavities. I gave it 24 hr to thoroughly cure, then melted the wax off in a warm oven, with the wax placed on a couple of layers of paper towel. JB Weld is stable up to 500 deg so no worries. I now had three decent replicas of the original doors. I trimmed up one to remove the excess, sanded it down to the correct thickness etc then gave it a coat of paint. The result (once I clean it up a bit more and add another coat of paint) should be a very serviceable replacement. I can see this same principle being useful in the future.
- 48 replies
-
- 3
-
-
- mamoli
- constitution
- (and 2 more)
-
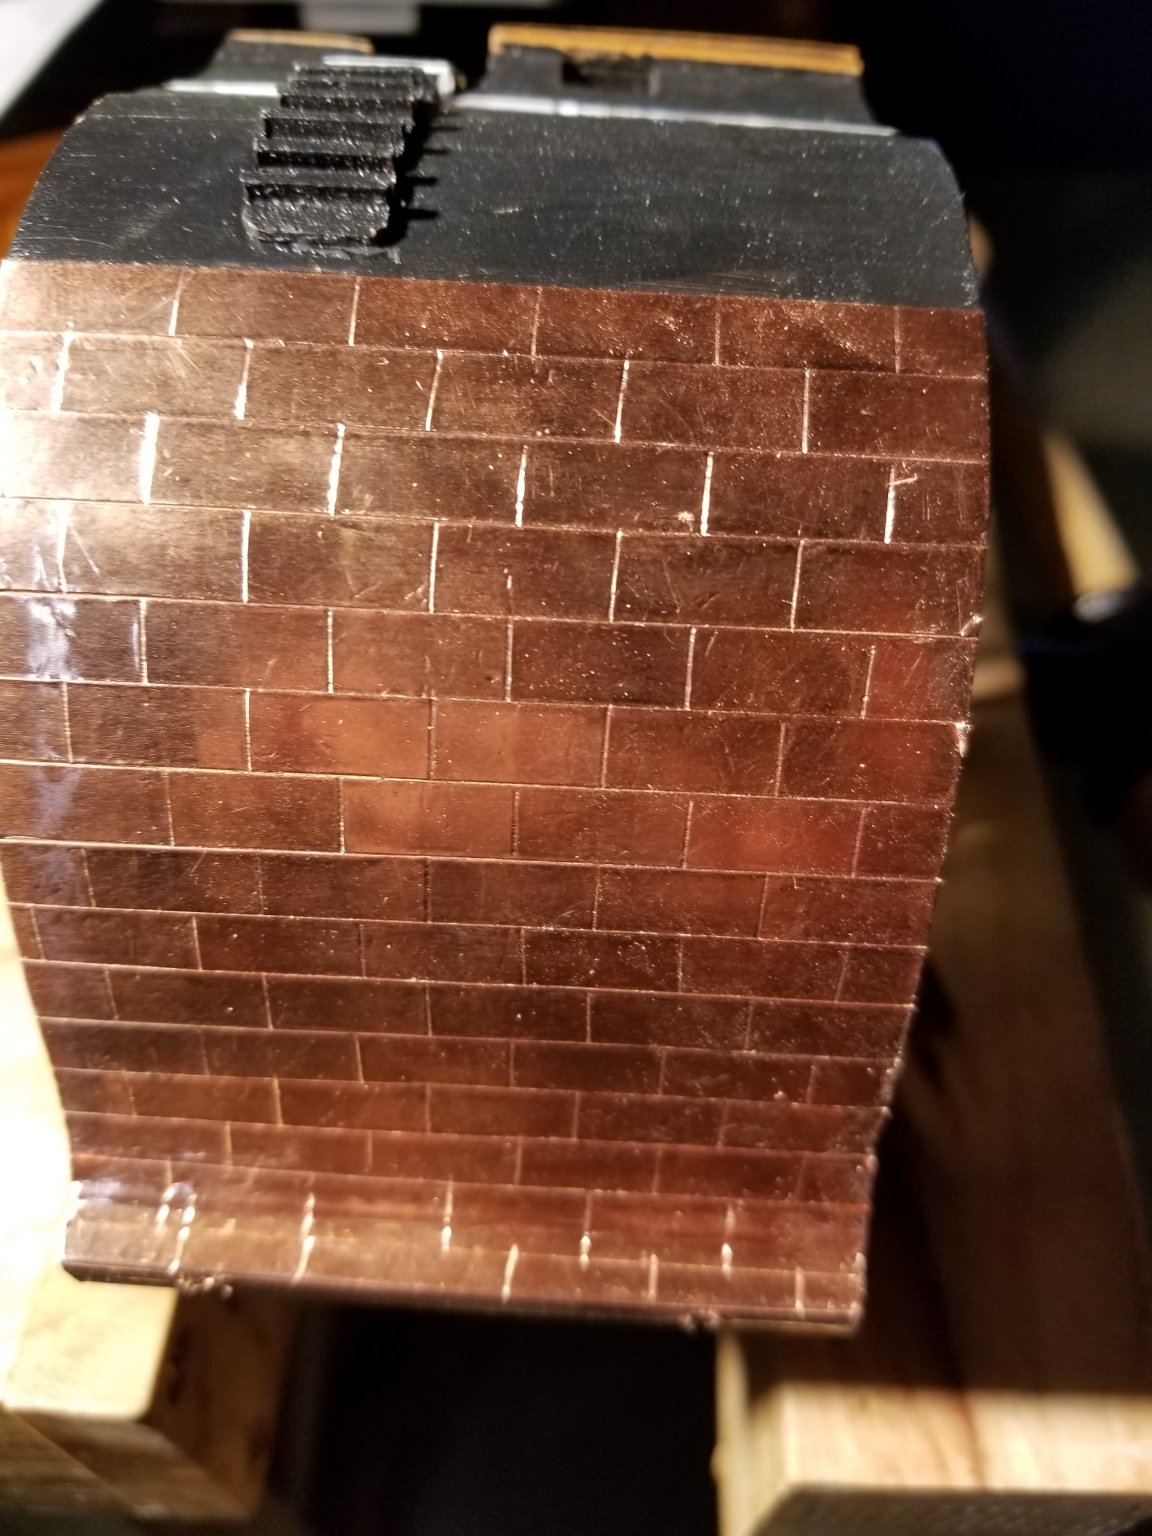
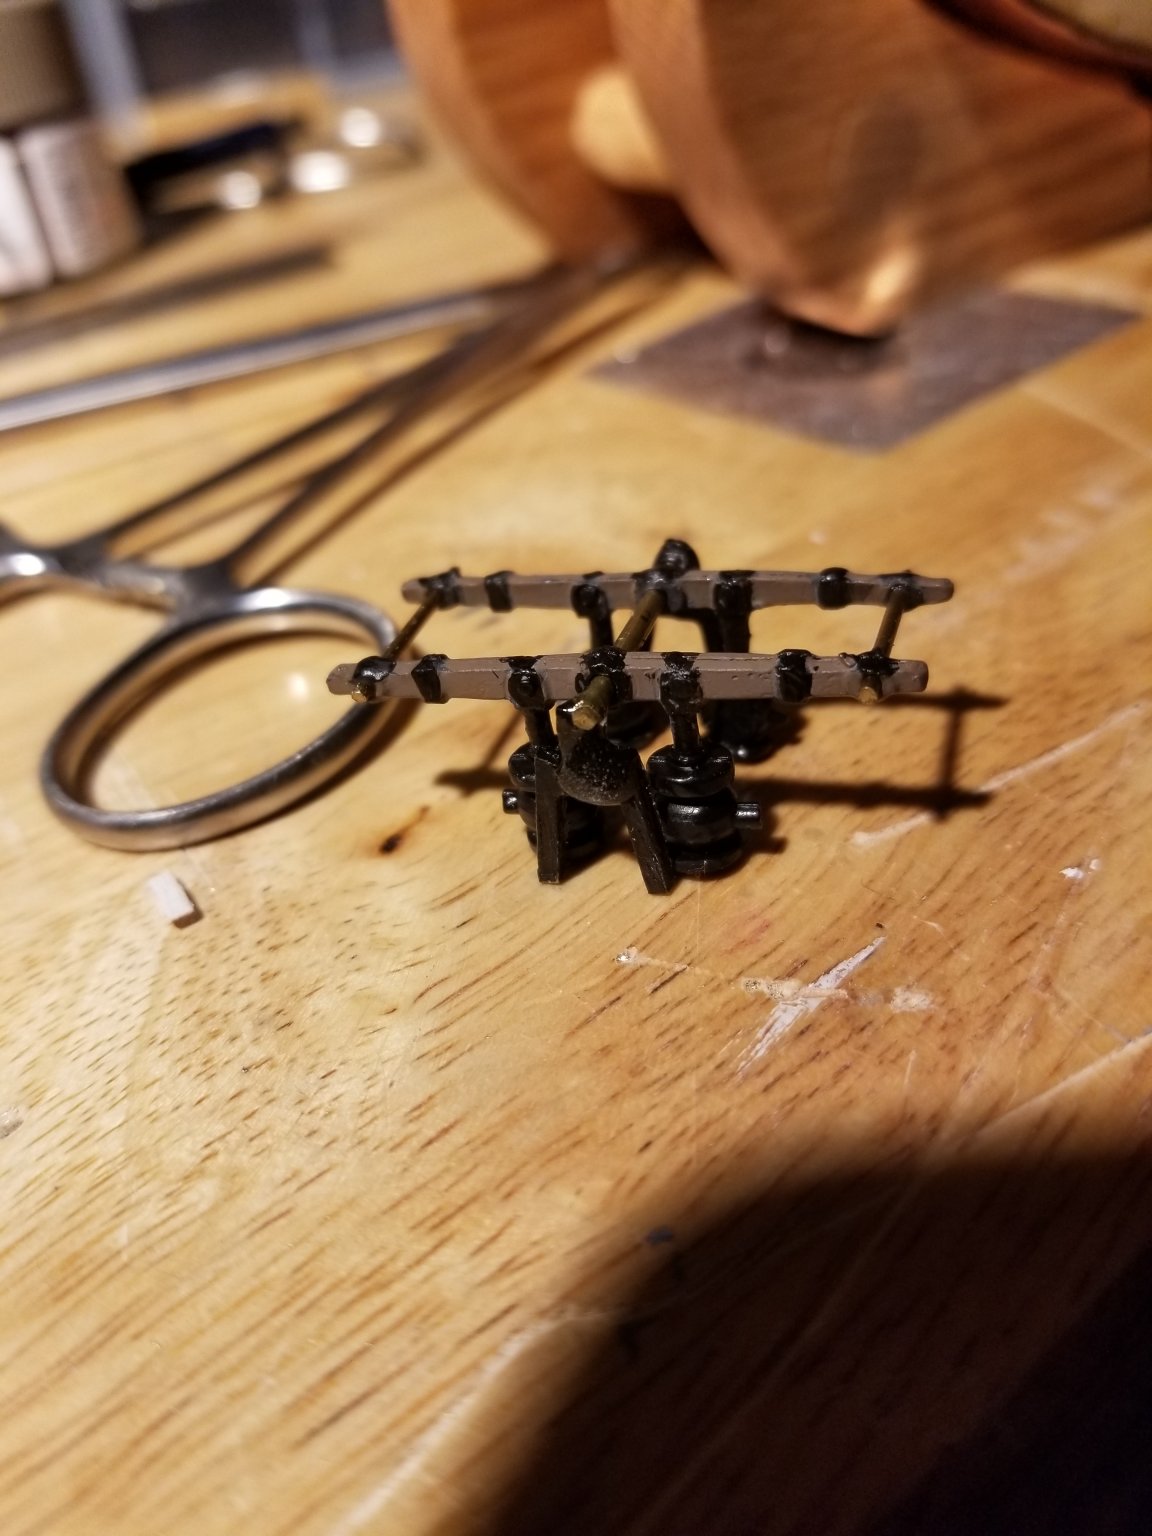
I got the hull copper plated and I'm pretty happy with it. The copper foil wouldn't be ideal for a full hull,but for a cross section where not much of it shows through the cradle, it's fine. As I mentioned in a previous post,I just scored the lines between the "plates" with the back of my craft knife. The ends of the foil strips kept wanting to peel up at the slightest touch. I put some CA glue in a syringe with a fine needle and ran a tiny bead of the glue where the foil meets the rib and that seems to have taken care of that. I don't know if they were missing from the kit when I got it years ago, or got lost somewhere along the way, but there are some parts missing. Instead of three pairs of bilge pumps, I have only two, and only one support for the axle of the pumps. I McGuyvered a replacement from some scraps of wood and painted black to paint the real part it doesn't look too bad. I'll glue that side of the pumps towards the mast so it will barely be visible anyway. I've emailed the people who carry the Mamoli kits now,so maybe I'll be able to get the third pump and supports. The shipping from Eastern Europe may be prohibitive...we'll see. If not, I'll install something else in its place so that space doesn't look too bare.


- 48 replies
-
- 4
-
-
- mamoli
- constitution
- (and 2 more)
-
Mamoli Cross Section - missing parts
Brewerpaul replied to Brewerpaul's topic in Wood ship model kits
Thanks! I'll follow up with them. -
I know Mamoli is out of business, but does anyone know where I can get some spare metal parts for their Constitution cross section? My kit is missing some and I'd like to replace them.
-
That wouldn't be the Constitution cross section would it? I need some parts which were missing on mine.
-
Moving along. I've installed most of the lower deck items and (after I took this picture) planked the middle deck. I haven't glued the ladder to the hatch cover because,looking at the remaining parts, I'm not sure if there's enough to make the two ladders between the main and middle decks,which I think are more important than this one. You folks have probably figured this out already, but I've found that for painting tiny items such as metal buckets and cannon swabs that are too small to hold, sticking them to a piece of painter's tape (which is stuck to my work bench) holds them nicely for spraying or brushing.

- 48 replies
-
- 2
-
-
- mamoli
- constitution
- (and 2 more)
-
Congratulations! That is truly a first class build, worthy of a very experienced builder. The attention to detail you've put into what is a pretty simple watercraft is inspirational. I look forward to further build logs from you! I spotted a little hypodermic syringe and needle in one picture. Did you use that for glue? I'm using a 3cc syringe with a much larger needle (18g,1 1/2",blunt tip) for plain white glue and it's a terrific help. I can make only one tiny critique. That brass ring at the bow of your boat is a bit funky. The cut ends looks like it was made with a diagonal pliers which mashed the wire, and the ends don't meet well. Easy fix would be to rotate the ring into the hole in the wood so the join is buried. That's just a small quibble though, don't sweat it!
- 120 replies
-
- 2
-
-
- crabbing skiff
- Chesapeake Bay crabbing skiff
- (and 3 more)
-
That Model Shipways looks very impressive and a lot more historically correct than my Mamoli. For one thing,as has been pointed out somewhere on the forum, the Constitution has 4 decks while the Mamoli kit only has three. That was probably a good call for the smaller scale, but 4 will really be better. I'm OK with what I have. I mainly want to get some experience with ship modeling and end up with a presentable ship like model to display. My biggest phobia over the years has been getting deadeyes,shrouds and ratlines to work, and this will give me one mast's worth to learn on.
- 120 replies
-
- 3
-
-
- crabbing skiff
- Chesapeake Bay crabbing skiff
- (and 3 more)
-
I use a regular mini miter box and razor saw. It occurs to me that this method may not be good for you. I'm cutting diameters around 1/2" and lengths from 3/4" to 1 1/2" which are a lot easier to handle than tiny sections of 1/16" tubing. The dowel in the bore might help if you can find the dowel,or the next size smaller telescoping tubing. Just a few random ideas which just occurred to me and I haven't had any need to test..Flaring the tubing,if you go that route,might be easier to do if you anneal the tubing to soften it. Heat it red hot with a torch and let it cool. You could easily make a flaring tool to your exact specs by grinding a common building nail to size and smoothing the tip. Try putting the thimble on a block of wood as you tap the tool in,and the tool should hold it in place and keep it from flying. I have to say that I greatly admire the amount of work you've put into this boat and the dedication to authenticity that you, and most other builders on the forum, display. On my current, and first build, a Constitution cross section, I'm nowhere as dedicated and at this stage of my building journey I don't really care. It's a warmup project for my next which will be the Pride of Baltimore II and I'll be more interested in authenticity on her,especially since I can easily go and visit the actual ship. Keep up the great work, and I look forward to seeing your Flattie.
- 120 replies
-
- 3
-
-
- crabbing skiff
- Chesapeake Bay crabbing skiff
- (and 3 more)
-
I use thin wall brass tubing for tuning slides in the wooden pennywhistles that I make. The best way I've found to cut it is with a razor saw and miter box. You'll have rough edges but they're easily filed with needle files.
- 120 replies
-
- 2
-
-
- crabbing skiff
- Chesapeake Bay crabbing skiff
- (and 3 more)
-
Made that oak cradle for my Constitution. It has two coat hanger wire pins extending up from the cradle to the keel to keep her from sliding forward or backward off the cradle. The cradle will have black felt on it to keep the plating from scratching. Started planking the lowest deck,working in from the sides. I simulated tree nails with holes made with a pin,so I'll see how that works out. I laid down two strips of copper tape as an experiment and simply scribed the plate lines with the back of a craft knife blade. Most of the plating will be pretty much out of sight, so I think this will be satisfactory although purists wouldn't agree. I couldn't see cutting hundreds of little plates and trying to get them on there straight. My plan from here is to finish each deck from bottom to top, trim the ends of the decking, then do the plating.

- 48 replies
-
- 4
-
-
- mamoli
- constitution
- (and 2 more)
-
Hey-- I just picked up on your build while looking over recent logs. As an enthusiastic Maryland transplant, I'm interested in anything Maryland and Chesapeake Bay Crabbing caught my eye. Nice job, on a sweet little boat! I see you're continuing the Chesapeake Bay theme with your next build. Maybe you'll get to the Pride of Baltimore II eventually! I have one of those sitting on the shelf as my second once I finish my Constitution cross section. Ever picked crabs at a crab feast? It's great fun and goes on for hours. Remember the old show Homicide:Life On The Streets? It was one of the earlier gritty cop shows and took place in Baltimore. Occasionally some of the cops went out to dinner to eat crab and it just looked like TOO much fun; brown paper on the tables, heaps of crabs with little wooden mallets to crack some of the stubborn claws. I so wanted to try that but nobody in upstate NY did such a thing. I finally got my chance when we moved here 3 years ago, and I wasn't disappointed.
- 120 replies
-
- 4
-
-
- crabbing skiff
- Chesapeake Bay crabbing skiff
- (and 3 more)
-
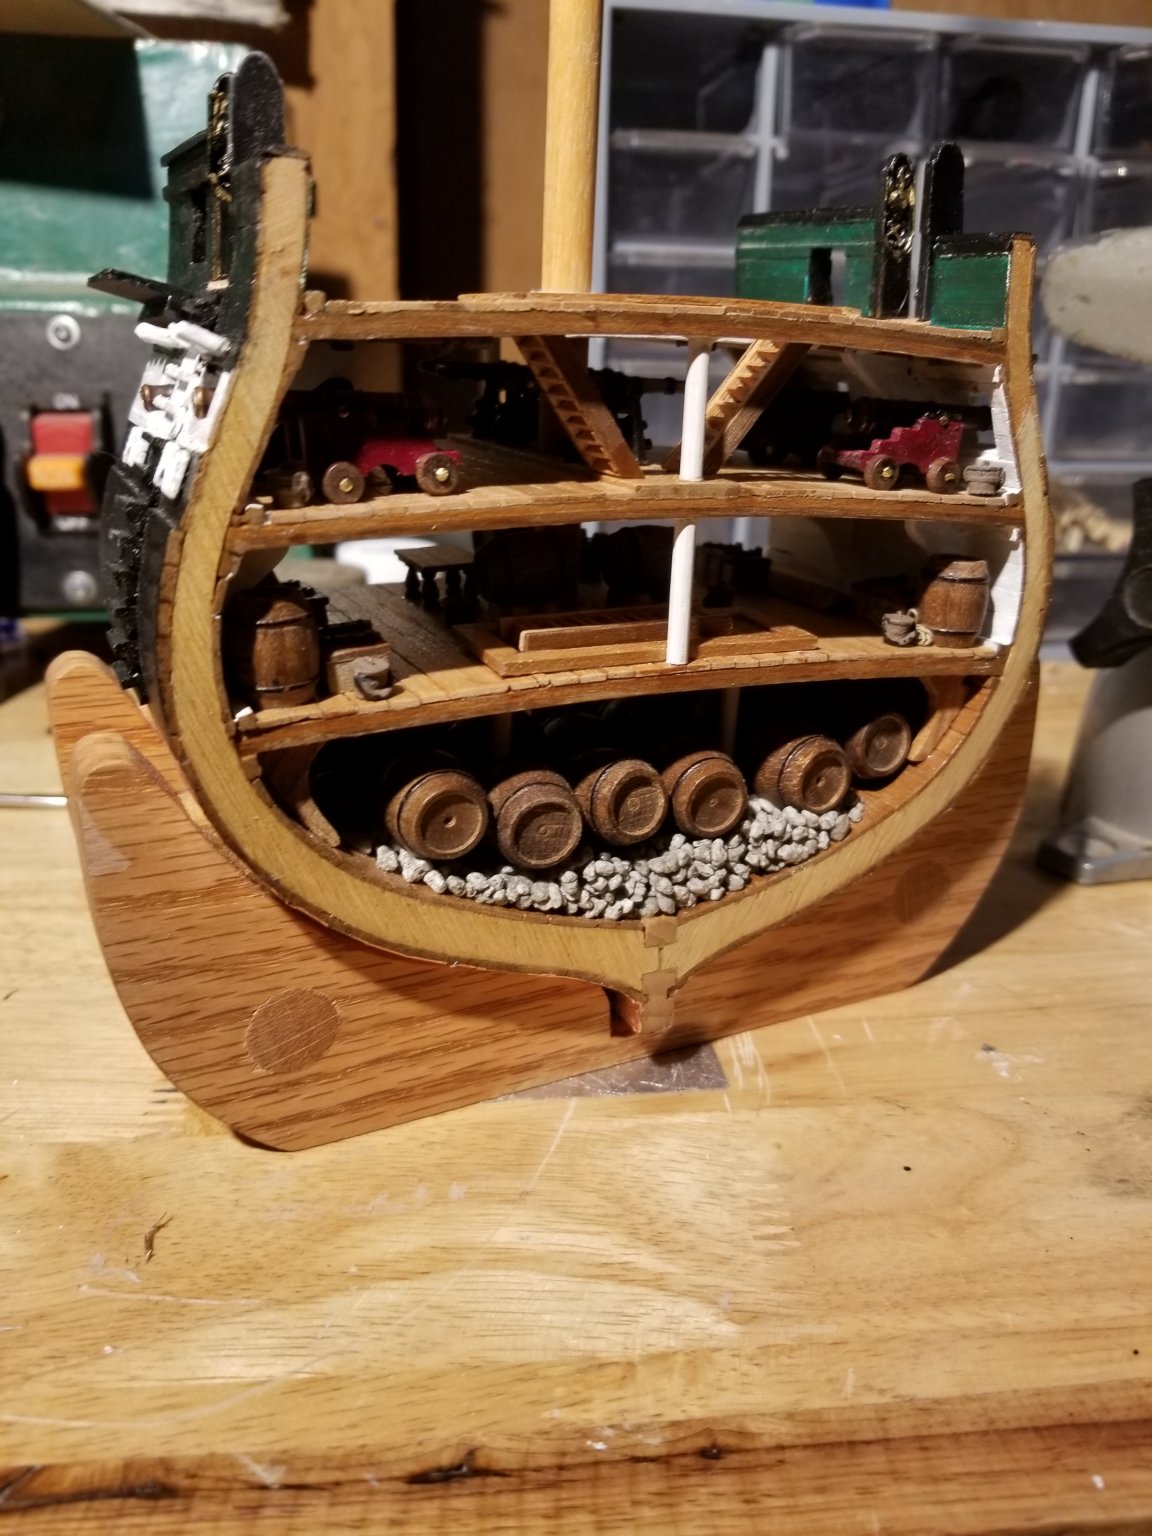
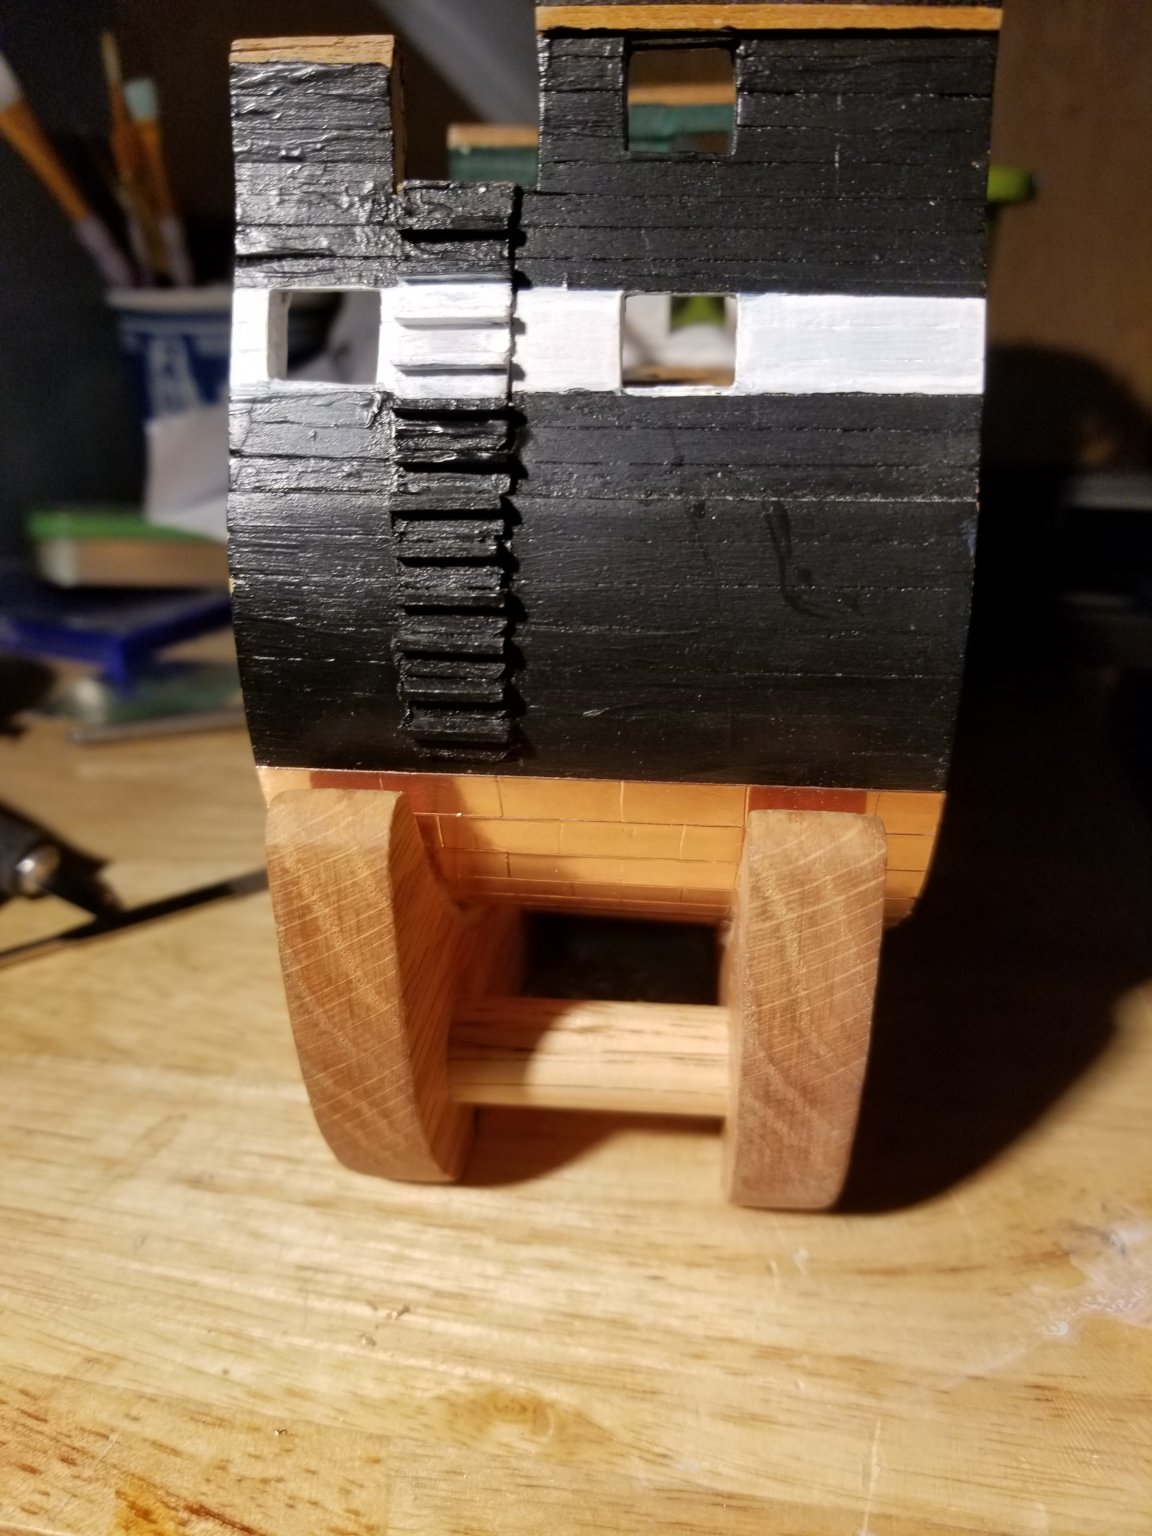
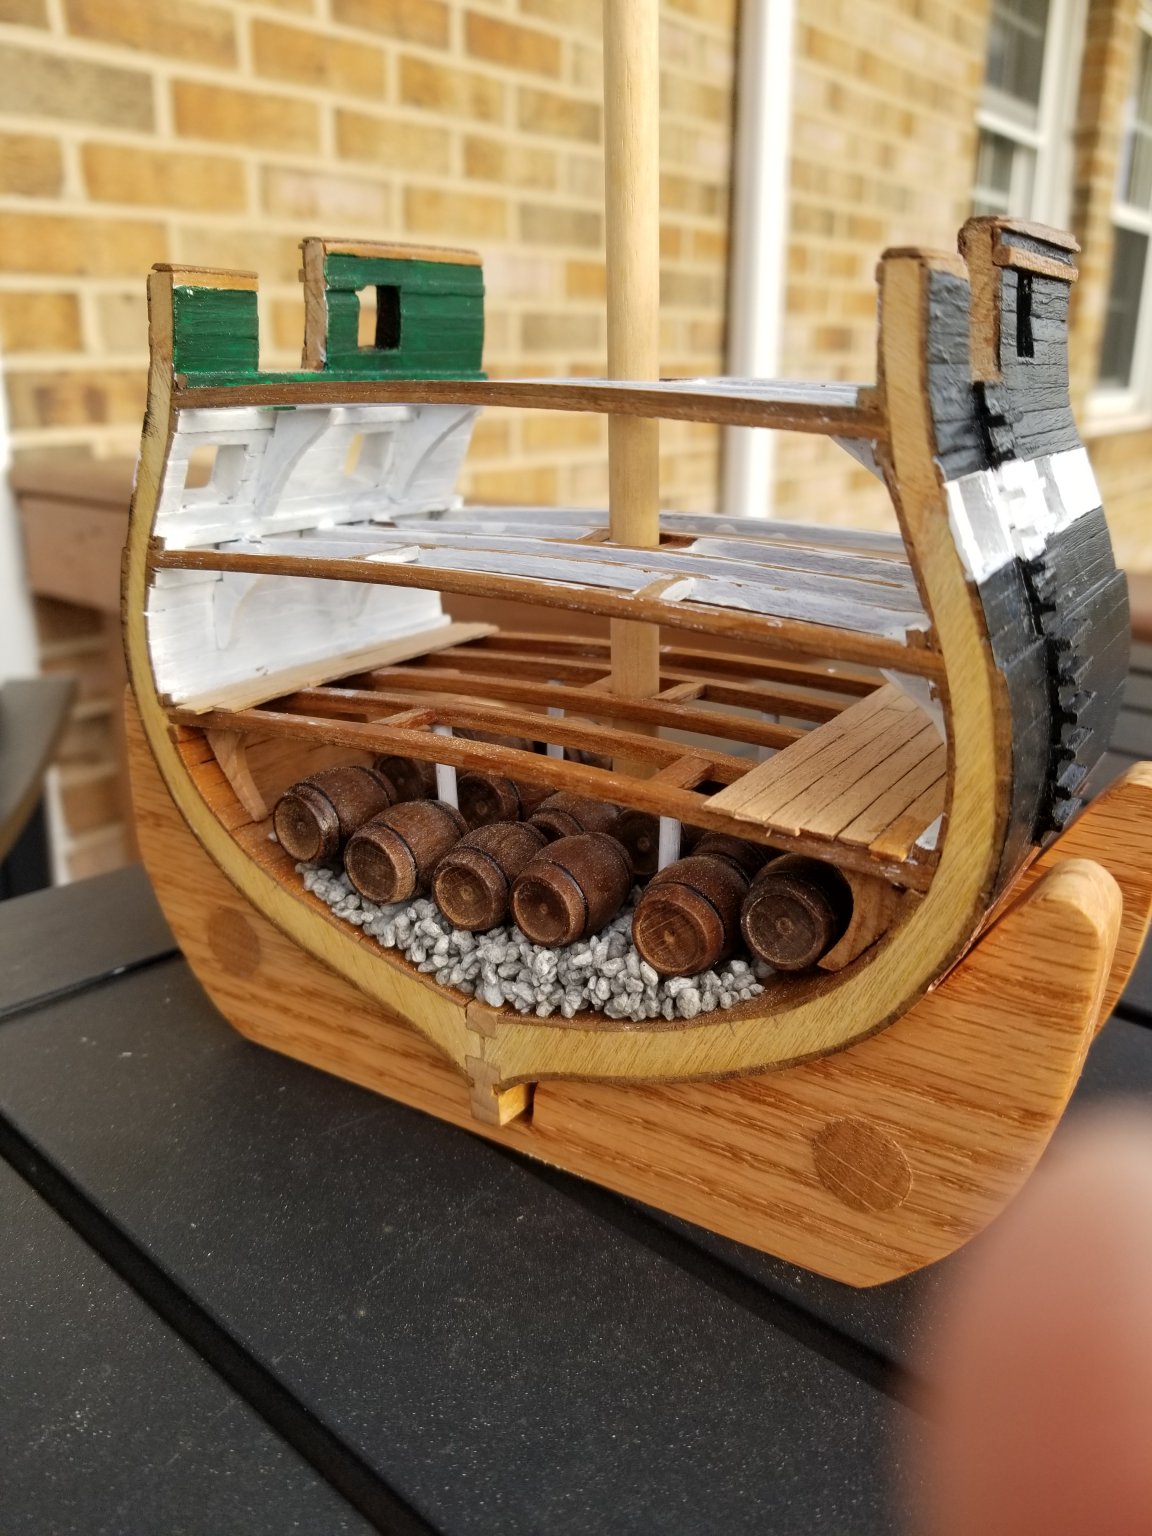
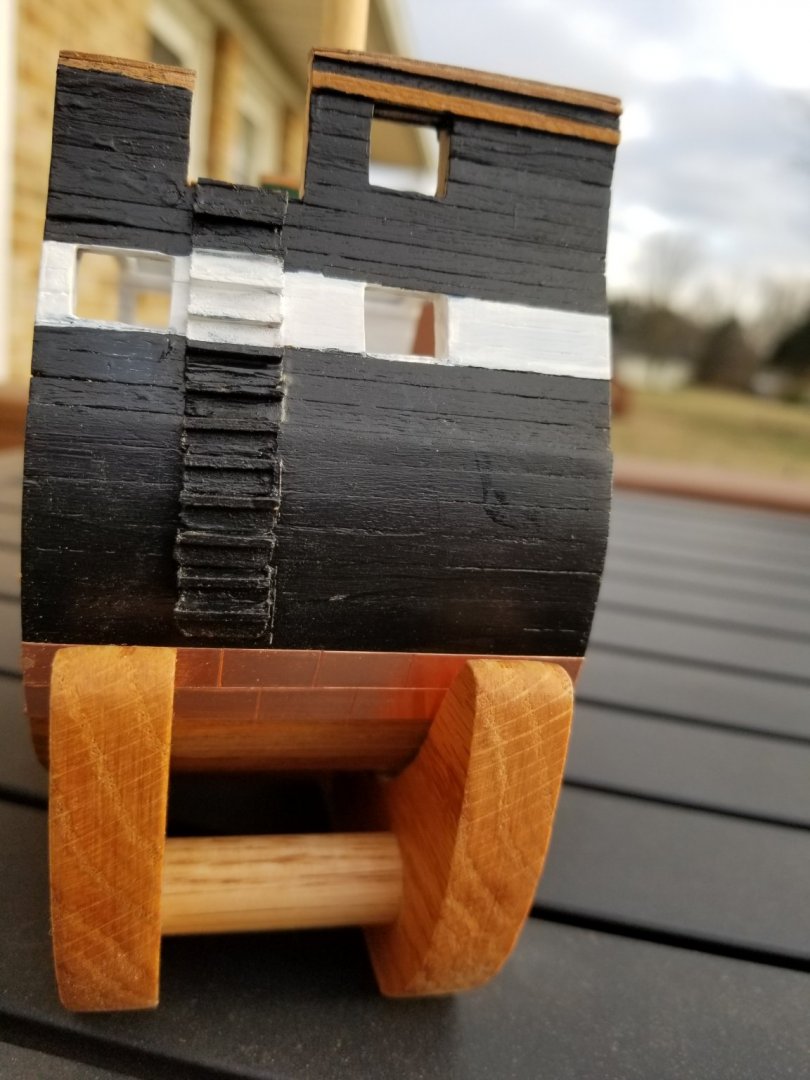
Some progress. I've painted the exterior above the waterline. Below will be copper clad using self adhesive copper tape. After some experimenting I plan on just laying strips of tape down and scribing the individual plates rather than cutting a zillion separate plates and applying them one at a time. On my experimental scrap of wood, it looks surprisingly good,certainly good enough for my purposes. Inside is white. You can't see it but I've already painted the bottom of the deck beams, and I plan on painting the bottom sides of the upper deck' planks white before installing them. The kit was supposed to include some L-shaped wood to be cut into individual boarding steps, but mine didn't have those. I made some using flat strips and they came out pretty well. My ballast is model railroad gravel mixed with water based poly spar varnish as a binder. The barrels are not glued in place yet. The gravel paste comes up over the mast step, so I wrapped the foot of the mast with waxed paper so I can get it out to work on fabricating the mast. I bought some 1/2 thick oak craft board to make a nicer version of my crude work stand for it's final display. As you all know,Old Ironsides got it's name from the heavy oak planking that resisted cannon balls, so oak for the stand seems appropriate. Speaking of oak, I have a nice Buck knife that I got years ago with side scales made from oak actually removed from the Constitution during restoration. There's also a small copper ornamental inlay which was made from similarly sourced copper. I'm really enjoying this project. The best part is the mental stimulation and exercise as I mull over the best way to accomplish the multitude of tasks that need to be done. As I near 70, mental stimulation is vital.

- 48 replies
-
- 6
-
-
- mamoli
- constitution
- (and 2 more)
-
Where would I find that project. An off topic question as long as we're talking about planking. I'm currently on my first wooden ship,which is a cross section of the Constitution. In that short hull section,planking was easy, with no cutting,fitting or bending. I already have my next project;as a recent transplant to Maryland, I bought a used Pride Of Baltimore II online from eBay. Looking it over it looks like a terrific kit but I already have questions. Would it be a good idea to start a build log for the POB now and ask some of those questions even though I won't start the kit for several months at least?