HOLIDAY DONATION DRIVE - SUPPORT MSW - DO YOUR PART TO KEEP THIS GREAT FORUM GOING! (Only 20 donations so far - C'mon guys!)
×


Brewerpaul
-
Posts
190 -
Joined
-
Last visited
Content Type
Profiles
Forums
Gallery
Events
Everything posted by Brewerpaul
-
Thanks. I will indeed check the parts list. I'm only doing single planking on this, unless I really screw up and have a lot to hide 😉 You mean a filler in addition to the nose filler? Easy enough. It just has to match the curve of the bulkheads,right?
-
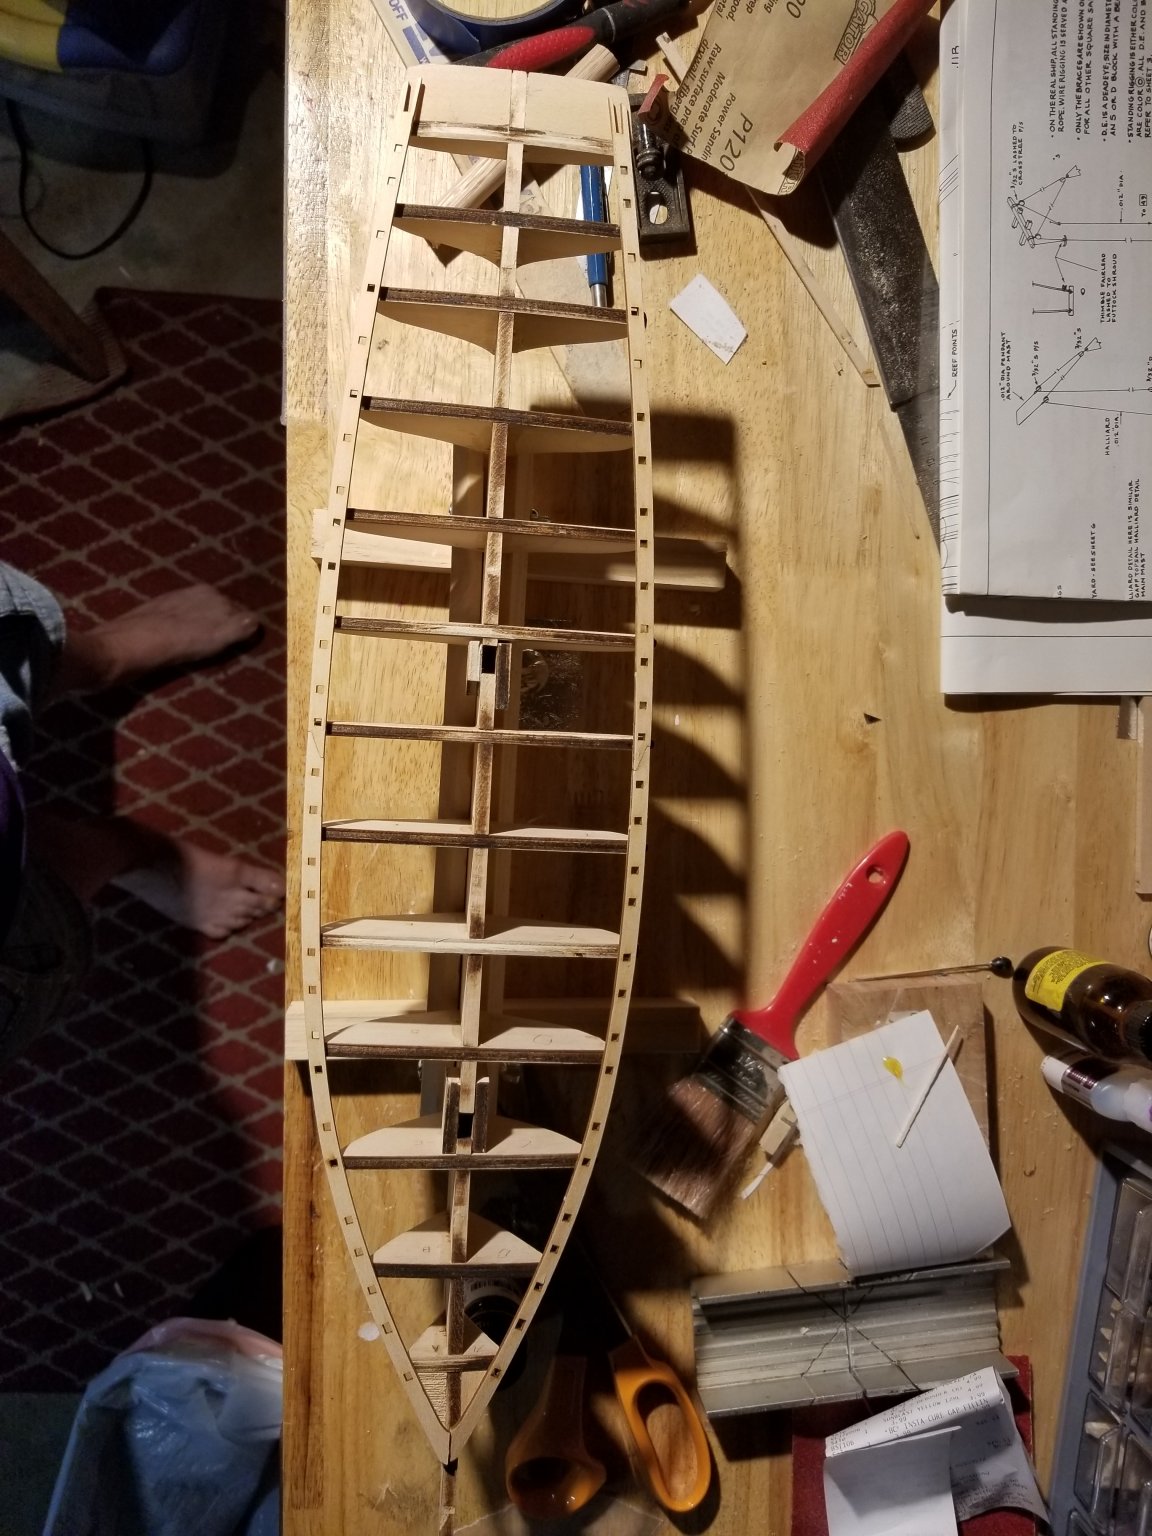
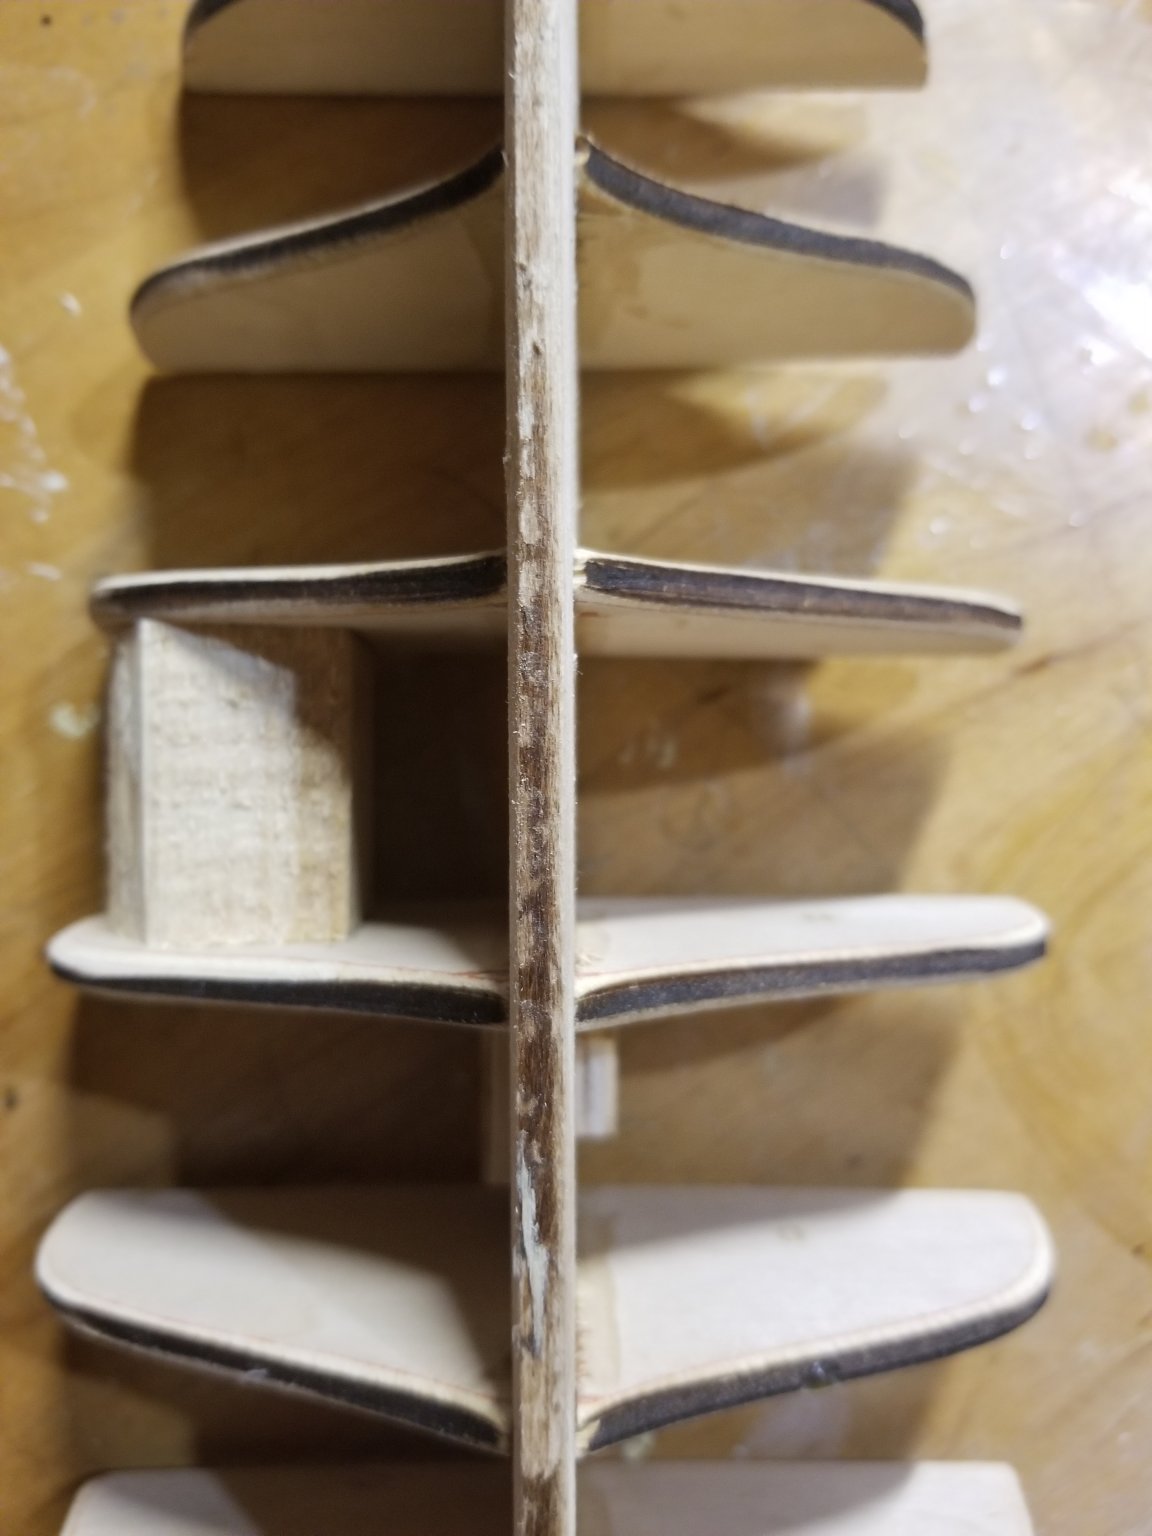
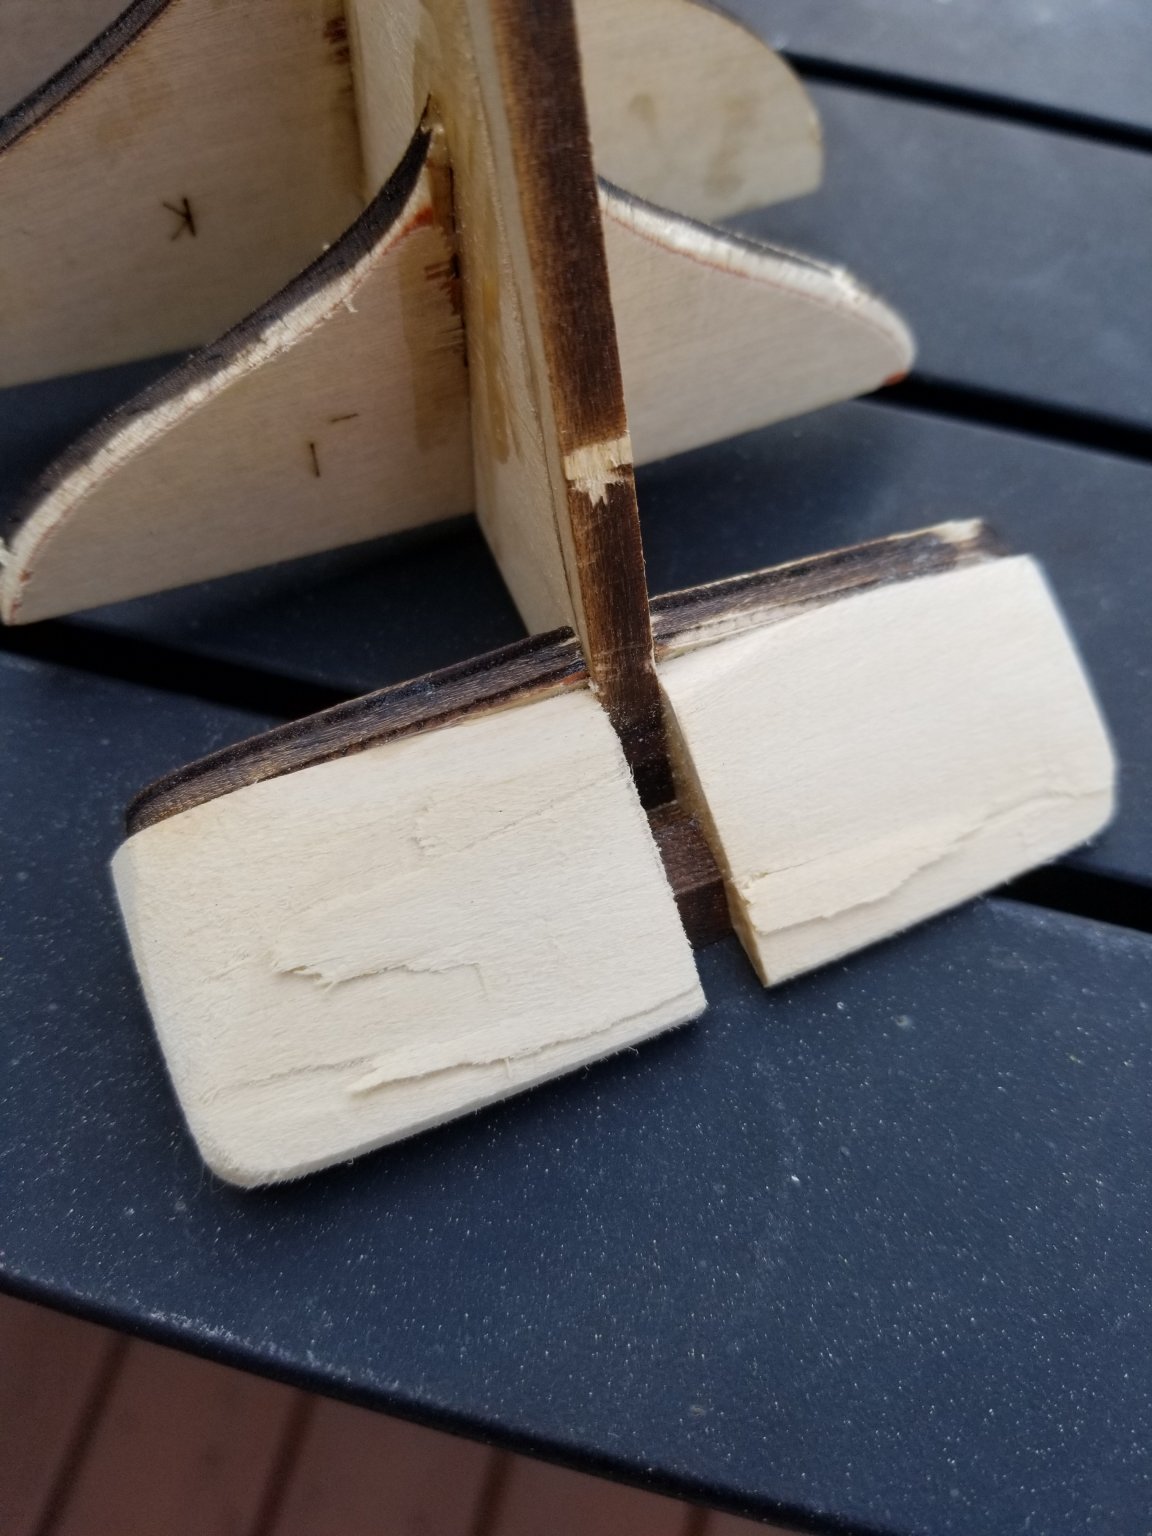
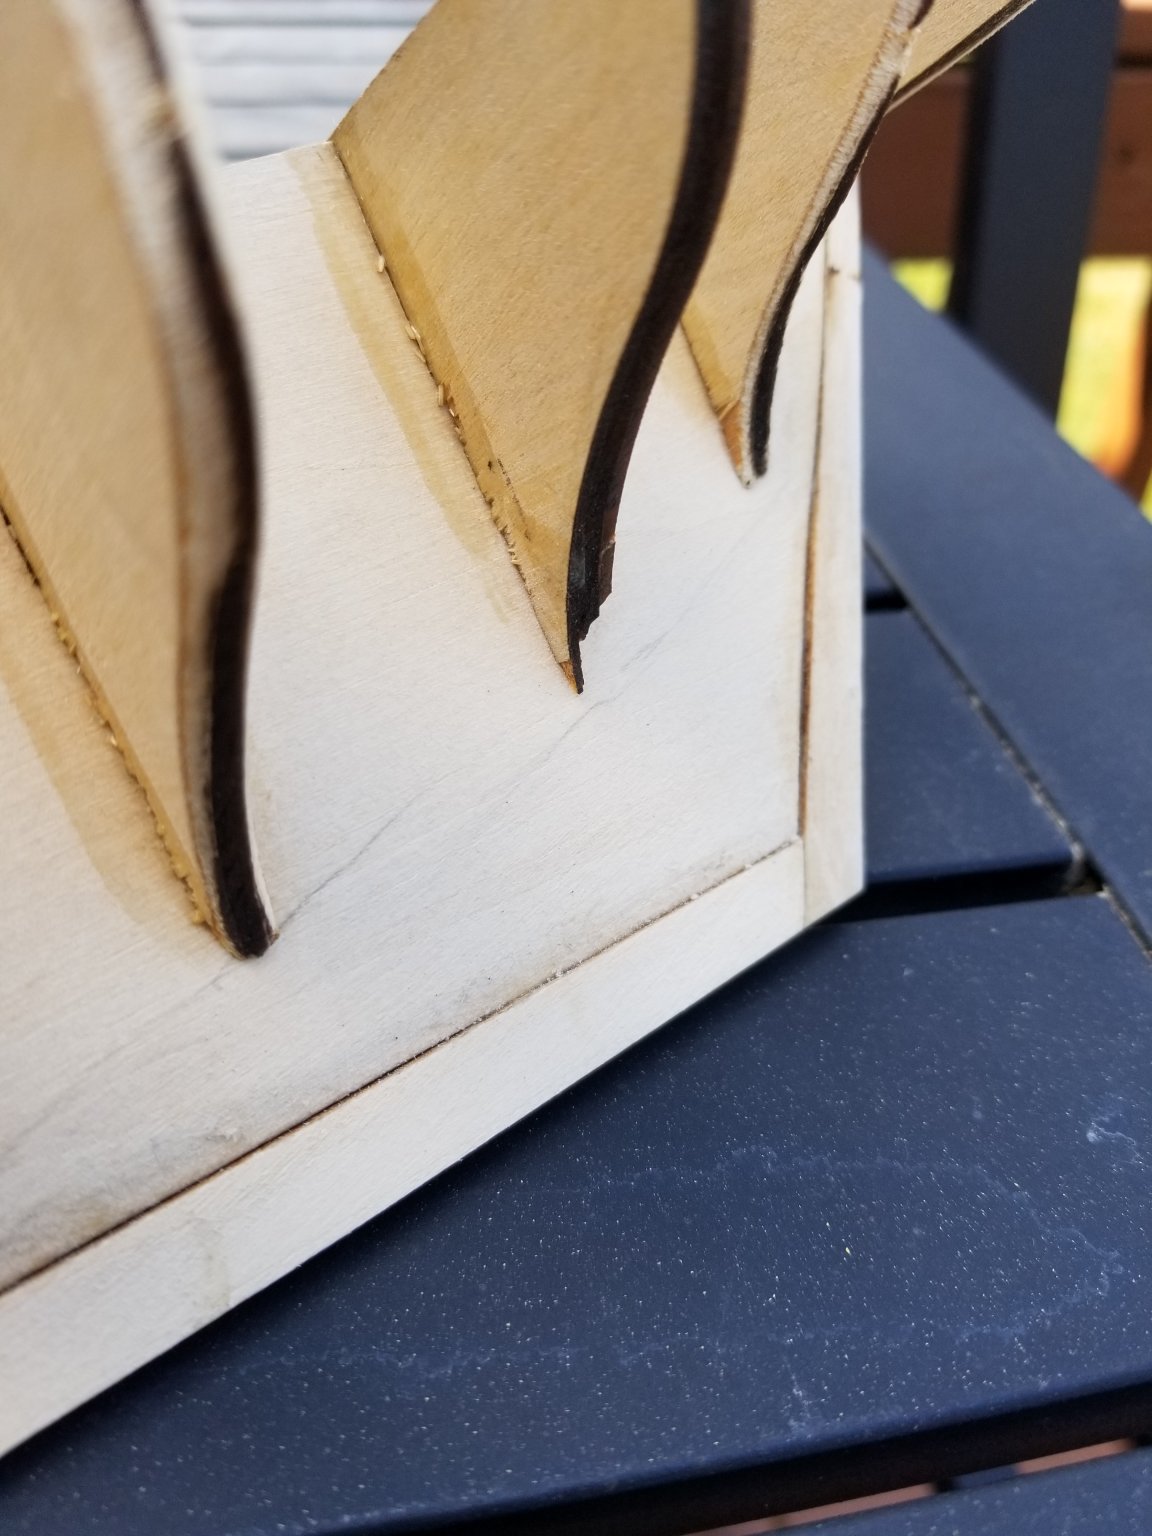
Slow progress, but I'd rather get it right. The keel and sternpost are back on my Pride after I've deepened the rabbet. Every build log that I've seen says that the planksheer is too short, but mine seems to be OK. Should I be worried? I have no idea when this second hand kit was purchased, so maybe MS has fixed that issue. In my photo the planksheer is just sitting on the bulkheads, not glued yet. I've seen some builds that add that first plank at the top of the bulkheads first, then adding the planksheer. Does that make more sense than doing the planksheer first? I think it would give a good reference plane for creating the planksheer overhang. In either event I plan to paint the planksheer,that plank, and maybe the first wale plank before installing them to keep the demarcations nice and sharp. I added new stern filler blocks and have been shaping them. I've found it unexpectedly difficult to turn the 2D images on the plan into a 3D block. I'm not quite done with it yet but I think it's pretty good so far. One thing-- that flat area that slopes forward from the aft end of the stern has come out narrower than on the plans. Does mine look OK? One more question. I'm surprised how relatively few laser cut parts there are, leaving the builder to fabricate tons of parts from stock. I'm OK with that, but not sure the best way to get the desired shapes onto the wood. For the stern blocks, I made a photocopy of the 2D profiles on the plan, cut them out, and traced them. Anyone know a better way? Thanks!


-
Ha ha! I cleaned up my workbench when I finished my last build. I started my POB and a day or so later it looks as disorganized as before.
-
Thanks Glenn-- you've sold me on abandoning the idea of building a whole deck off the ship and then fitting it. I had anticipated the glue stain problem and thought about staining all of the planks before gluing them together to avoid glue rejecting the stain. I'll have to think about putting the stem and keel on before planking. A compromise might be to do the first couple of planks without the stem then see how trimming them works. I'm not there yet though. I kind of didn't think that slight bow would be a noticeable problem, but this is my first POB build so I wasn't sure. I think I'll just leave it alone.
-
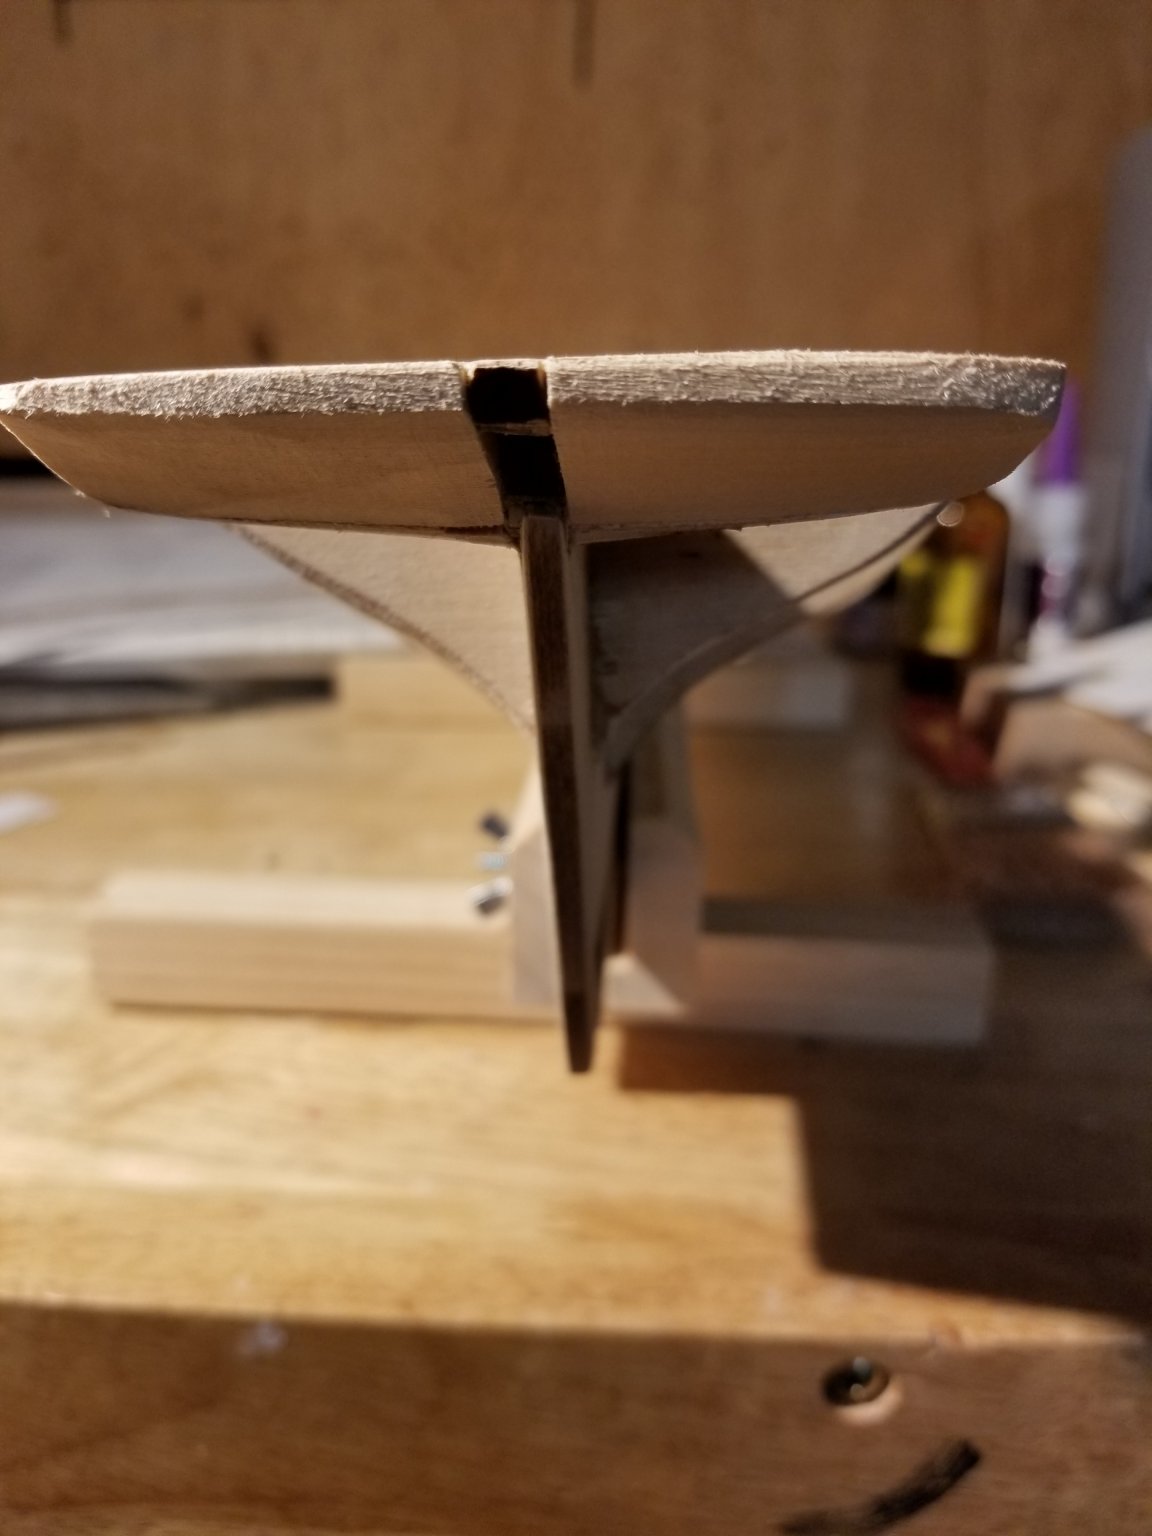
I removed the keel and stempost to give me better access to improving the rabbet. I also removed the stern filler blocks which were pretty poorly done. Luckily I have enough of that basswood piece to make 3 new ones. I discovered one problem and am debating on if it's worth trying to fix. Sighting down the center keel I noticed a slight bowing. Laying a straightedge on it shows a bow of about 1/16". I found that I can straighten this by putting a snug fitting block of scrap wood between two bulkheads in the concave part of the bow, but this brings those two bulkheads out of parallel. Which would be more likely to be a problem; leaving the bow,which is pretty slight, or correcting it and dealing with the out of whack bulkheads when fairing the hull? I'm considering leaving the keel off until after planking. It seems that this would make fitting the ends of the plank easier,rather than fussing to get them to fit snug against the keel. I'd just sand off the extra level with the center keel and then reattach the keel. Anyone done a hull this way? Another unrelated idea which sprung into my head at 2AM one morning. I am thinking of planking the deck with full length strips,scribing individual plank lines afterwards. Why not glue all the deck planks edge to edge FIRST, then make a cardstock template of where the deck will go, transfer that to my glued planks, cut and trim the deck and then just glue it down in one swell foop? Crazy,right? One advantage would be to let me securely attach things like the fife rail from below in addition to just gluing it on top. I could even stain and finish the deck before gluing it in place. Just a thought...

-
I bought my Pride of Baltimore on eBay from a modeler who had started the kit. The keel, sternpost, transom fillers and bulkheads were already glued. The rabbet was cut, but it needs quite a bit more work. I removed the keel and sternpost so I can more easily rework the rabbet without damaging the keel. The transom fillers were not good, so I removed them and will make new ones. Finally, to my question... sighting down the center keel, there's an visible bowing. It's not a whole lot, maybe 1/16" gap when a straightedge is laid along the keel. By flexing the bulkheads ( H and I) in the bowed area, I found that I can straighten out the bow by separating two of the bulkheads on the concave side of the bow. I fitted but haven't glued a block of scrap 2x4 to make the separation. Problem is, this takes these two bulkheads out of parallel. Is it worth fixing the bow as I've temporarily done? Will the out of wack bulkheads be a problem in fairing and/or planking? Maybe split the difference and make this block narrower to partially straighten the bow while keeping the bulkheads more parallel?

-
Micromark cutoff saw?
Brewerpaul replied to Brewerpaul's topic in Modeling tools and Workshop Equipment
I just ordered the Harbor Freight version, whose price has soared to $33 plus shipping 😉 Has anyone tried thin wall brass telescoping tubing with this? I use that for the tuning slides on the Irish penny whistles I make, and I haven't found a terrific way to cut it cleanly without deforming the tube. -
BTW-- I don't know if I'd call it a kit bash, but I'm planning on de-modernizing this ship to make it look more from the age of Baltimore Clippers. I plan on leaving off the radar gear, props, simulated rubber anti-slip pads, etc. Any suggestions of other things I could omit or change?
-
I haven't started planking my POB II but I've been reading a lot about it as planking is the one thing I'm particularly apprehensive about on this build. Planking on my Constitution cross section was trivial, with all short,straight run planks. It seems that a LOT of work goes into trimming and fitting planks so they fit well into the rabbet and flush against the keel/sternpost. Why not leave the keel and sternpost off for now, carve the rabbet and just begin the planking,leaving a small bit of overhang. Once done, it would see that it would be easy to cut or sand off that overhang and only then add the keel and sternpost. Before gluing it, you could check to make sure the planking doesn't need a tad of thinning to sit flush. Anyone do it this way? If not, why not?
-
Welcome to my shipyard! Pull up a chair, 'cause I'll be asking for a LOT of advice as the build goes on I got this kit on eBay for $75 including shipping. Being retired, I have to be a bit frugal, plus I know that this kit will end up costing more in terms of paint,glue and tools. Here's the thing of it; the kit was started by the person I bought it from .You can see the extent from the pictures. The bulkheads seem pretty straight but if I understand it's purpose correctly, I'm not sure the rabbet is well done,particularly where it widens near the sternpost. It doesn't seem deep enough and should have been thinned down more at that wide stern area. It basically needs to be deep enough so that a plank sits flush with the surface of the keel,right? If that's correct, I'll have to modify the rabbet but that seems like it would be difficult to do without damaging the adjacent keel extension. Think I ought to cut that and the sternpost off and then reglue them after I modify the rabbet? The person who started the kit didn't add the waterline reference marks. From what I've read in the kit manual, those are basically for getting the bulkheads to the correct depth on the keel. Mine appear to be OK, so will I need those marks for anything else later on? There's a piece of plank or batten attached, although I don't know why. Any ideas? I'll probably just remove it and add those as needed. Does it look like there's enough "meat" left on the stern filler blocks to shape them properly? Thanks in advance for any and all advice and suggestions. I've bookmarked several other builders' logs and will refer to those often.


-
The slots on my ancient aluminum mini miter box are getting sloppy and while looking for a new and better one I came across this; https://www.micromark.com/MicroLux-Mini-Miter-Cut-Off-Saw Does anyone own one of these or have experience with it?
-
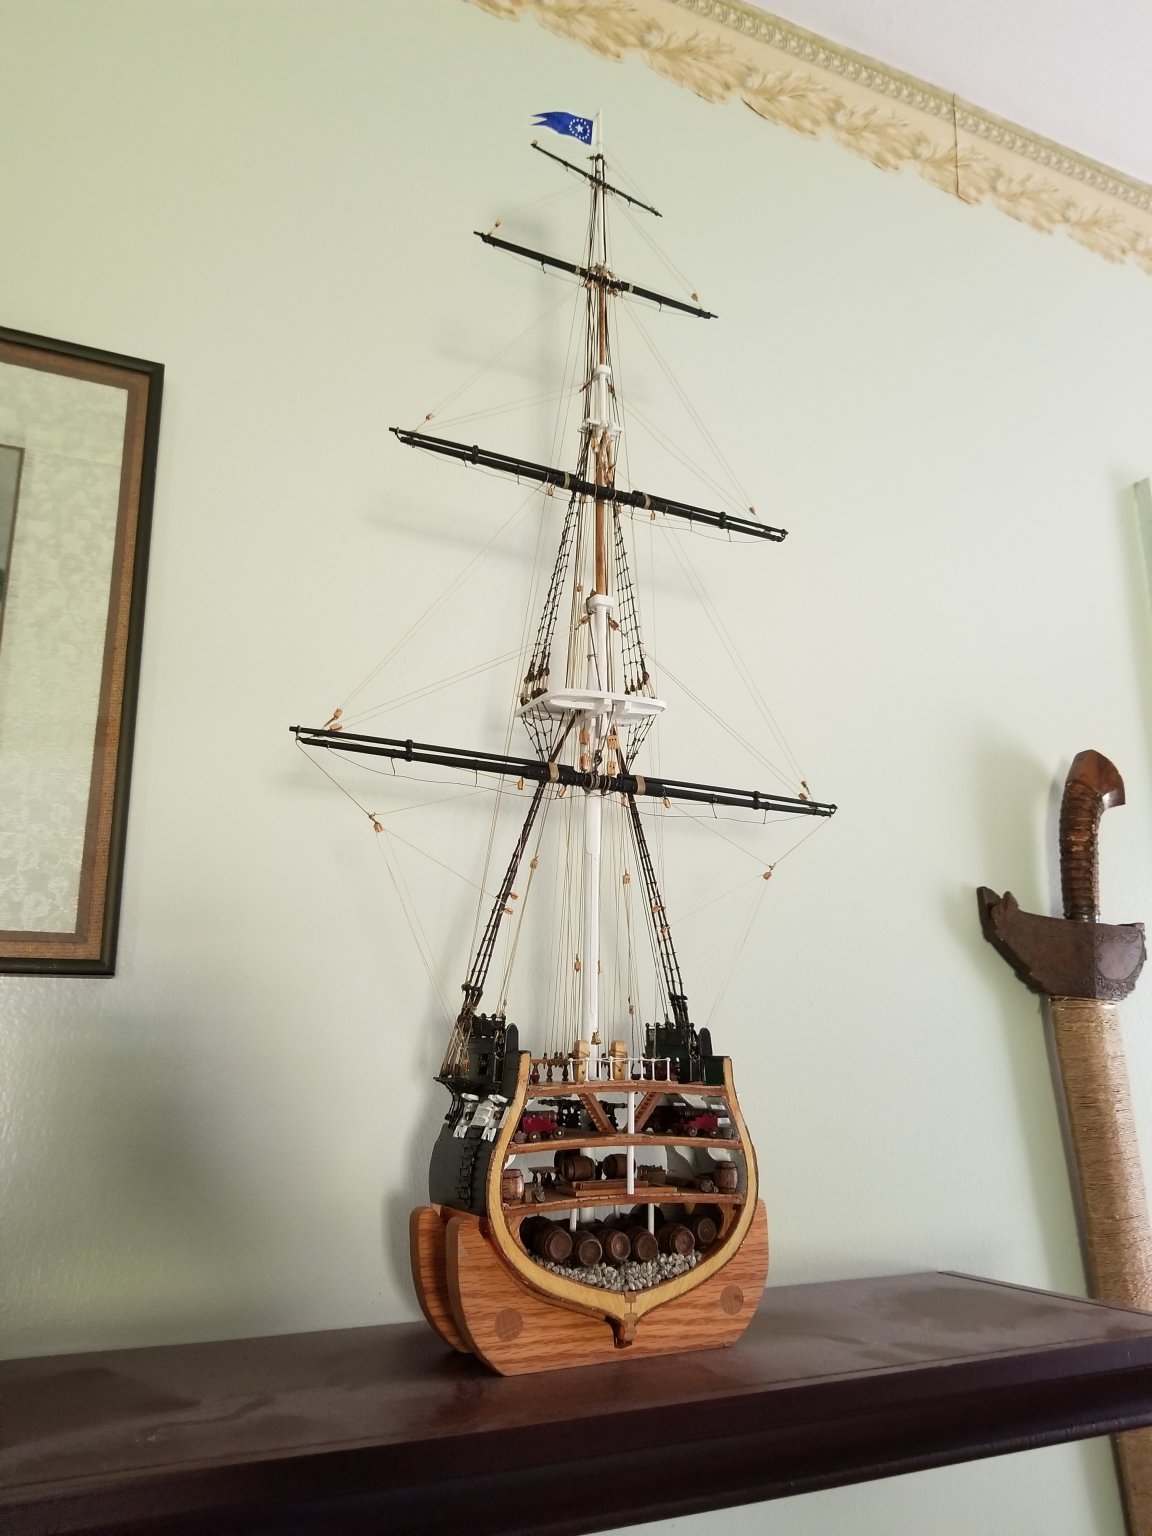
Well, here she is, warts and all! All in all, for a first effort I'm pretty happy with this model. I learned a lot of skills and tuned up my manual dexterity which will come in handy when I start my Pride Of Baltimore II in a day or so. First, I need to clear off the work bench including the small lathe which is taking up valuable bench acreage. Things I wish I'd done better; Deadeyes more level and finished off better. Planned ahead and drilled holes in the hull for rigging the cannons before I got other deck stuff in the way. Figured out a better way to attach the topmast futtock shrouds to the mainmast shrouds. Squared the tops of each mast a lot better. I'll practice on a lot of cheap dowel before I tackle the Pride's masts and bowsprit. I didn't make coils of "rope" for the belaying pins -if I get inspired I may experiment with that a bit and if I come up with a convincing way to do it I'll add them. I had hoped to print a flag from the Constitutions year of launch and fly that at the masthead. Again, I may still do that. Now, on to the next!

- 48 replies
-
- 2
-

-
- mamoli
- constitution
- (and 2 more)
-
I"m nearly done with my Constitution cross section so I'll start my POB very soon, maybe this weekend. I came back to your build to get my juices flowing and now that I have a bit of experience with ship building, I appreciate your work even more. The Chasseur alone is a little marvel! It's such a colorful ship, and your paint job is first rate. I'm bookmarking your build and it will be a sort of practicum for me. Question; how did you form the ribs of the Chasseur?
- 23 replies
-
- 3
-
-
- pride of baltimore ii
- model shipways
- (and 1 more)
-
Thanks. I'll use that. BTW-- wouldn't the Minnow be a fun build?
-
I'm getting near the end of my first build and when I'm done I'd like to mark it COMPLETED in the heading. How do I do that? I see an optiontopic actions but clicking on that brings up a warning of "delete content. Be careful!" How do I make the change I want?
-
That looks great so far. Keep up the good work. Is the width of the kit planks to scale? If so,when I build mine I think I'd like to keep the seams visible through the paint.
-
What's the best glue to fix things onto a deck which already has a finish applied? I ask because when I started rigging my Constitution cross section, the fife rail,which I thought I had securely attached to the polyurethane finished deck pulled off! Luckily I was able to fix it pretty easily and so far it's holding, with only a couple of lines yet to secure there. Is there a better deck finish for gluing? Wood to wood gluing would be the strongest,but that would be a real chore and any glue which got on the deck would screw up the finish. For most deck items strength isn't a big problem since they just sit there, but anything attached to rigging worries me. Thanks.
-
Nice job so far! That kit is next up for me once I finish my Constitution cross section, which should be soon. I'll be following your log in hopes of picking up tips to help me avoid mistakes.
-
Hi-- I was glad to see this log, but sorry to hear about your pup. That's never easy. We live about 45 minutes from Baltimore in Frederick MD so I'm planning on visiting the real thing once the COVID thing is over, or at least a lot more under control. You can't currently visit the ship, but they have a virtual tour which I just discovered; https://historicships.org/virtual-tours We moved here from the NY Capital District 4 years ago, and the area's nautical history spurred me to ship building. Next on my workbench is the Pride Of Baltimore II
-
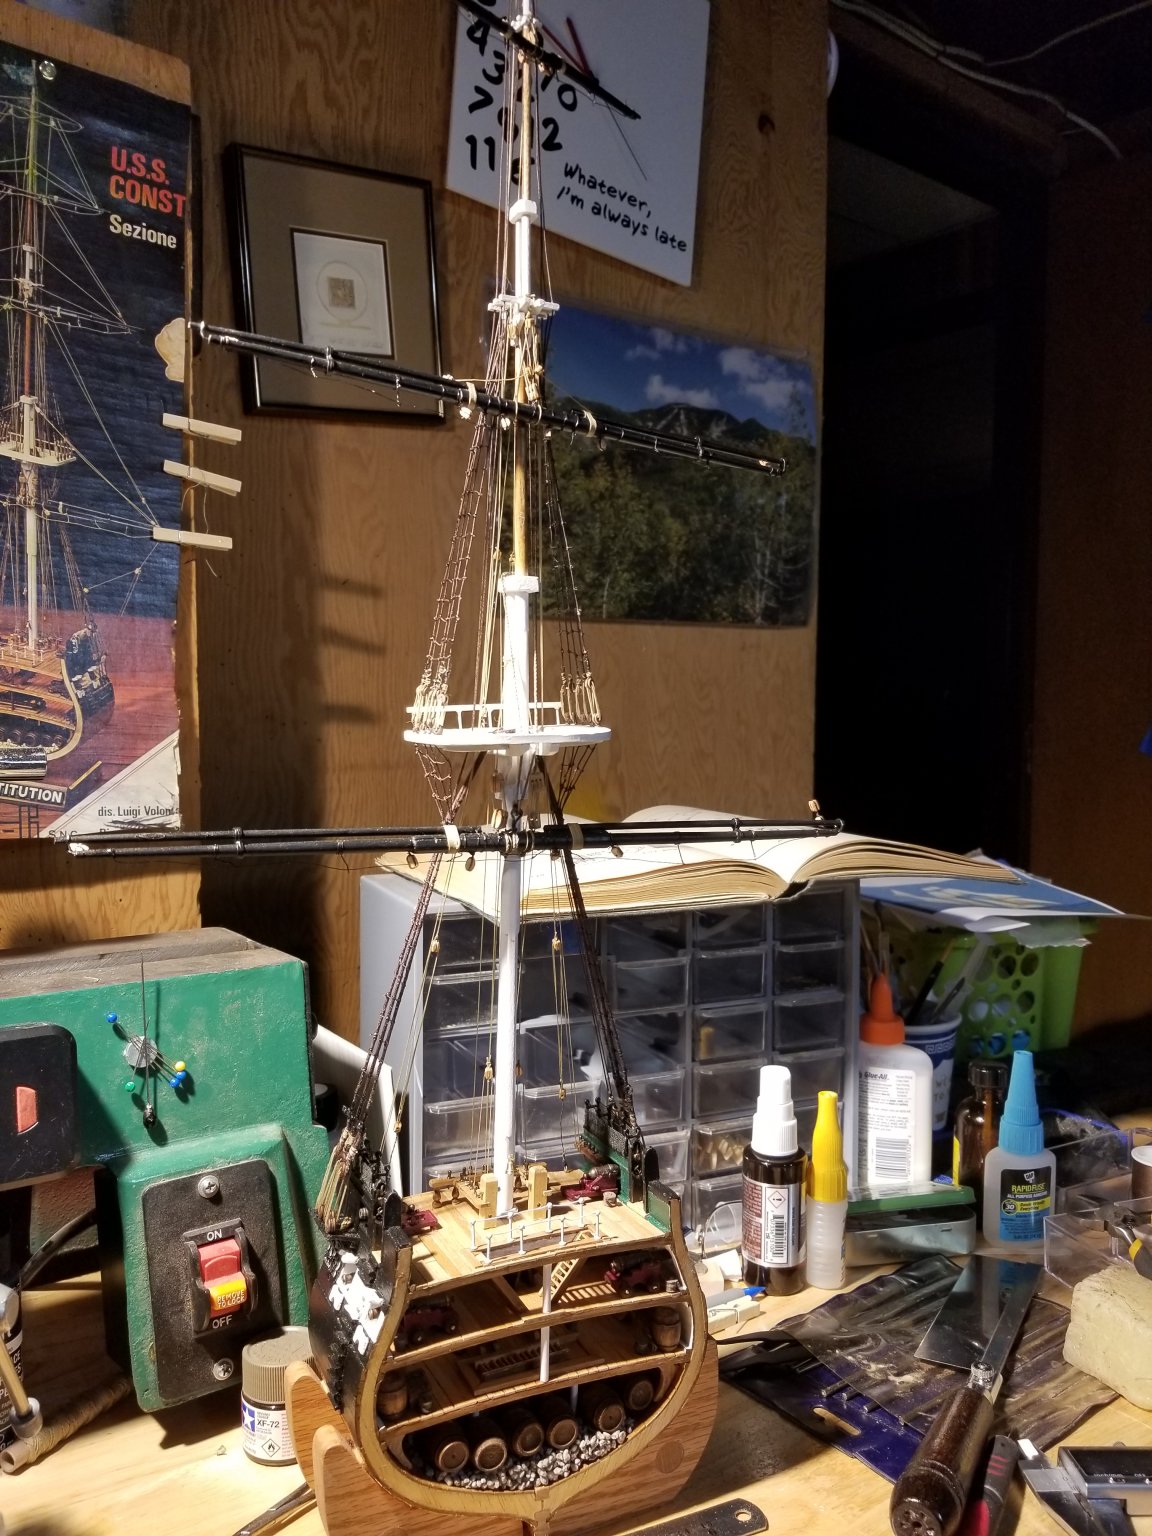
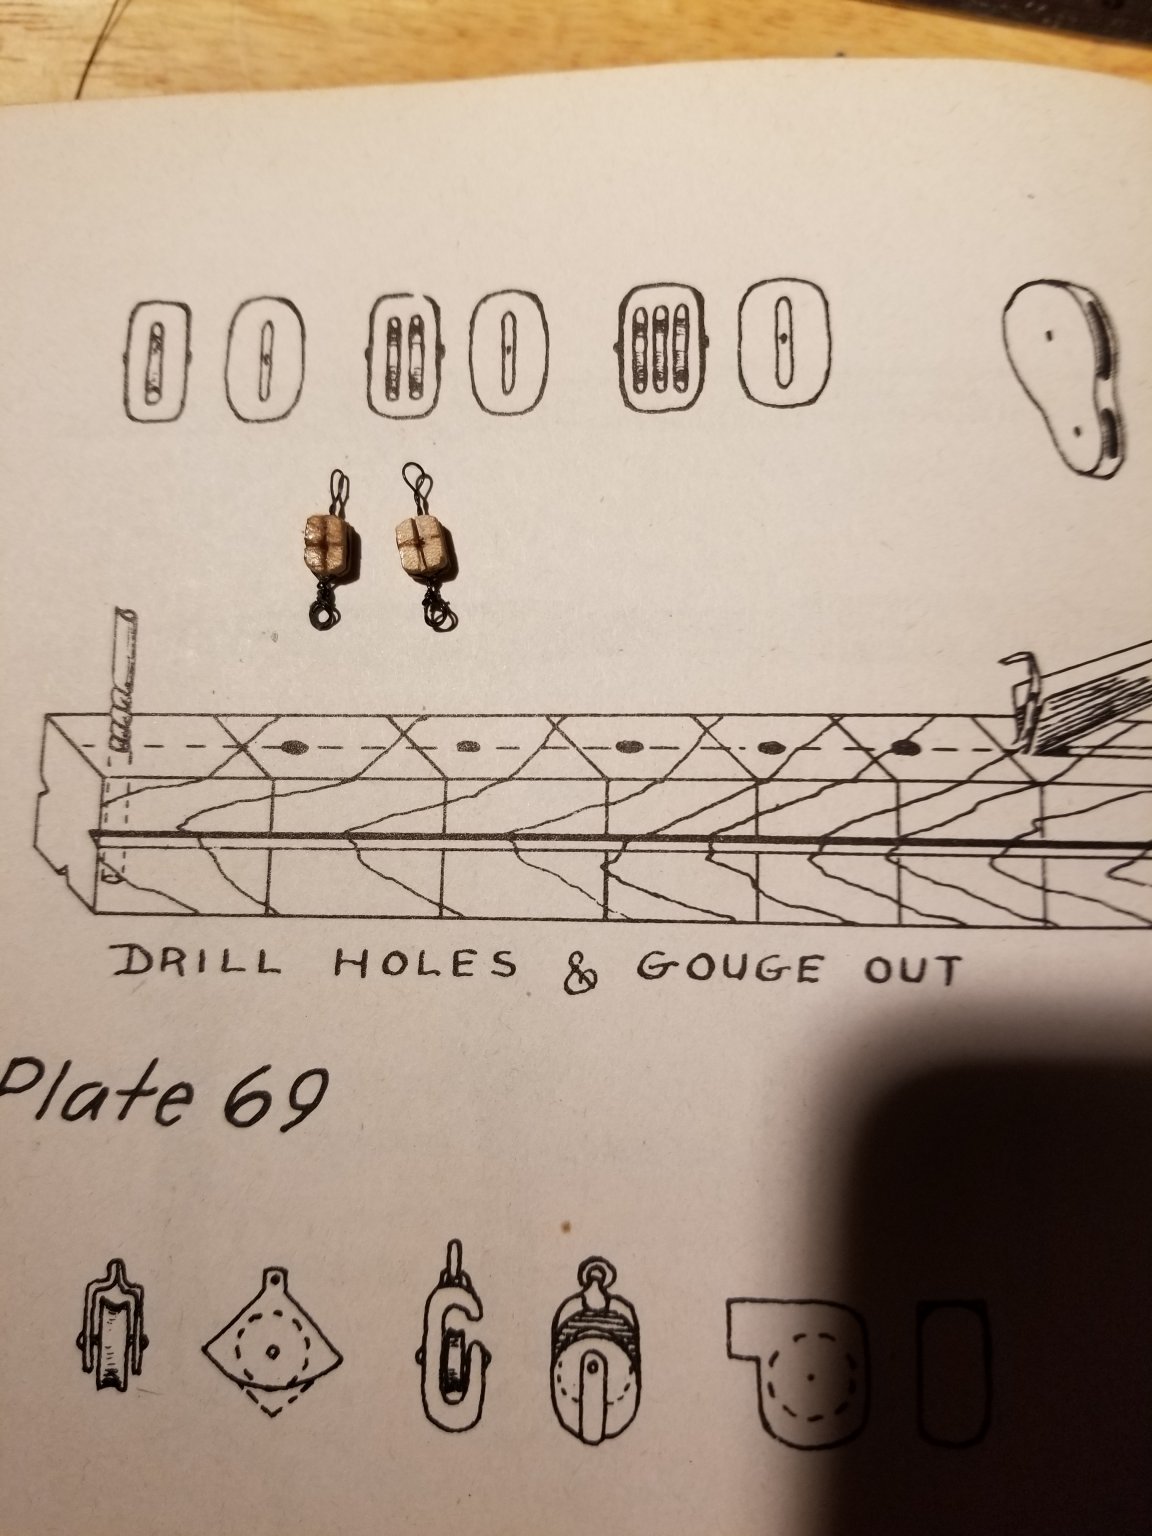
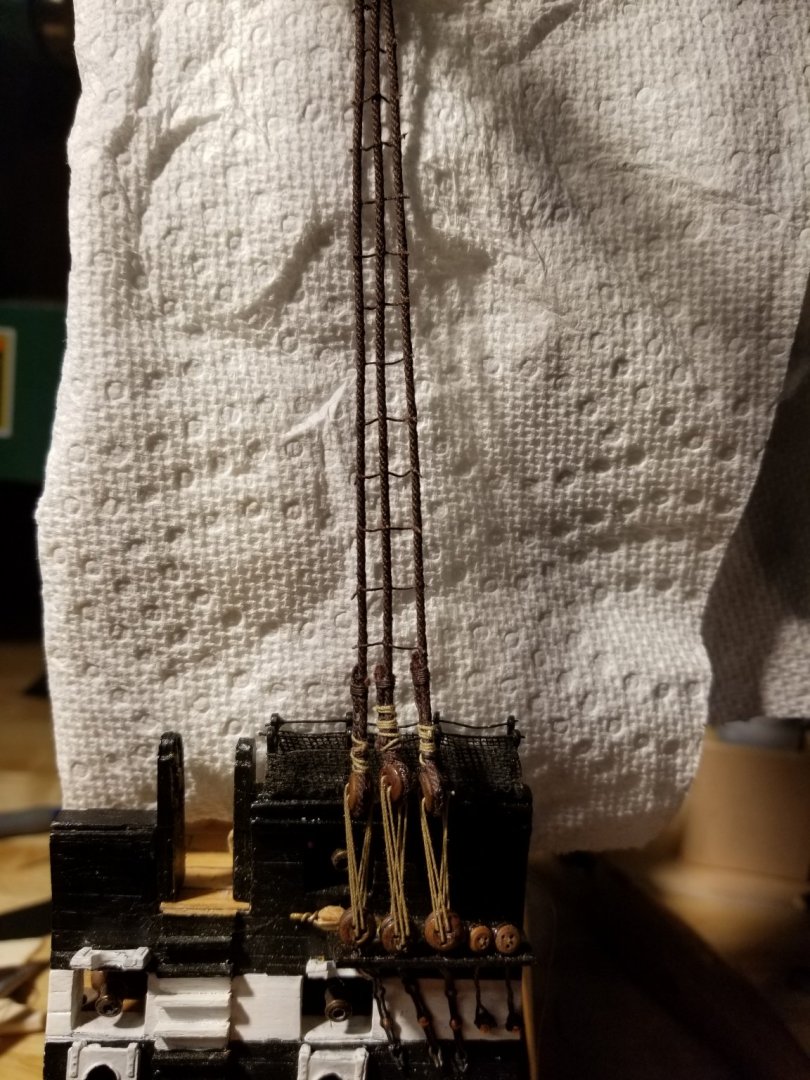
Standing rigging is done! For a first time effort,I'm happy with her so far. By the time I got done with the topmast ratlines I'd gotten a lot better with them,so I tore out the mainmast ratlines and re-did them. One of the things that had kept me from knotting the ratlines was worrying about tying all those clove hitches. I just couldn't figure out how to do them. So, I started the topmast shrouds with a simple overhand knot on the first shroud, then using a little sewing needle hook gizmo pulling the ratline cord through,around the shroud again and pulling through again. That's a poor description of what I was exactly doing, but whatever I did, I ended up with a perfect little clove hitch. Once I realized that, the work went a lot faster and looked quite good. Last night I sent to start the running rigging and right away found that I didn't have any 5mm blocks. Don't know where they went. Maybe I used them in place of a couple of 4 mm blocks by mistake, in which case I wasn't willing to undo them. Then I remembered a picture in a book I"d found in a second hand book store a jillion years ago. The book is Ship Model Building by Gene Johnson, 1944. The picture showed how to carve your own blocks and with the help of that, I made 2 of my own 5 mm blocks. I'm quite happy with them. They're not perfect but once they are mounted they'll look fine. NOW I can continue that running rigging!

- 48 replies
-
- 2
-
-
- mamoli
- constitution
- (and 2 more)
-
We were selecting wall paint yesterday and I was struck by the myriad of available colors and choices of surface finish from flat to gloss. I was wondering if anyone here has used these paints on models? You can buy small sample jars of any color custom mixed, for less than a lot of the official modeling paints. I think they can even scan and match your own color samples. My upcoming Pride of Baltimore II requires a fair number of different colors and was thinking this might be a good option,especially for the green part of the hull.
-
Are those basswood reinforcing blocks in the plan, or your own idea to make the whole thing more rigid?
-
Good luck on what looks like an interesting build. I'm going to follow this one. I'm not planning on building The Syren, but I have a Pride Of Baltimore II in the "drydock" (aka on the shelf) and I'm thinking that I'll learn a lot of useful technique from your build as POB will be my first real planking build.
-
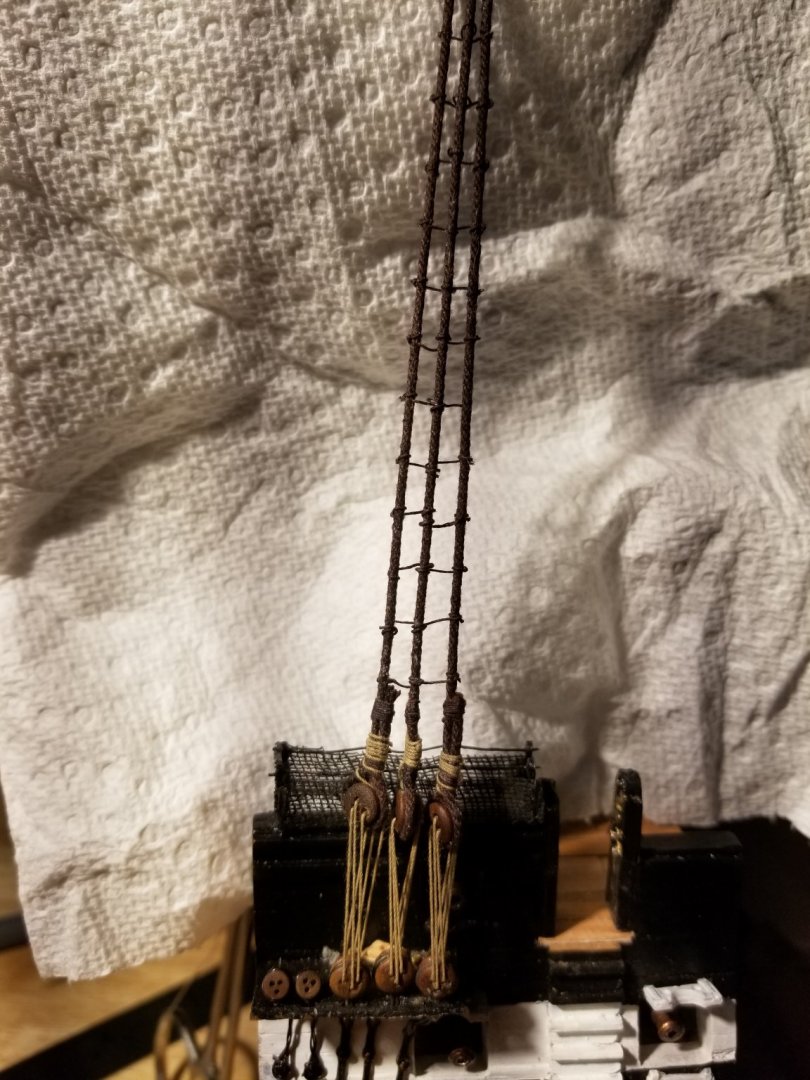
Started lashing the deadeyes for the futtock shrouds. Dang! Working with those tiny deadeyes is tricky.
-
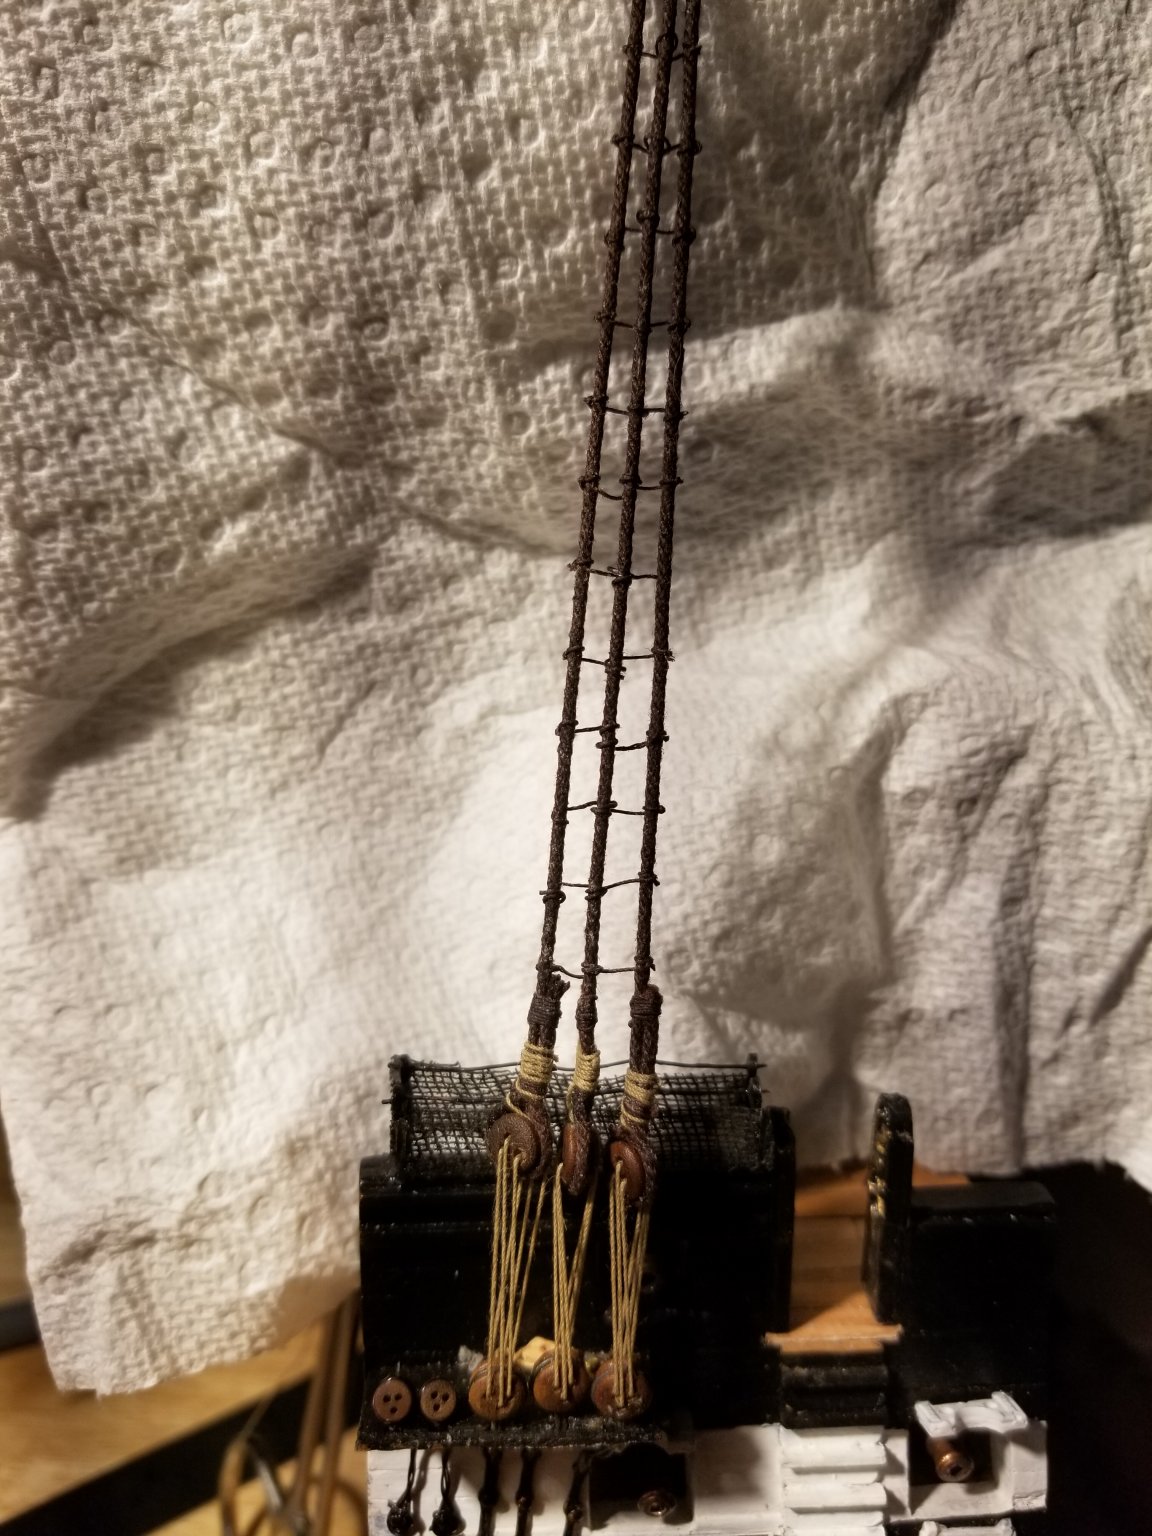
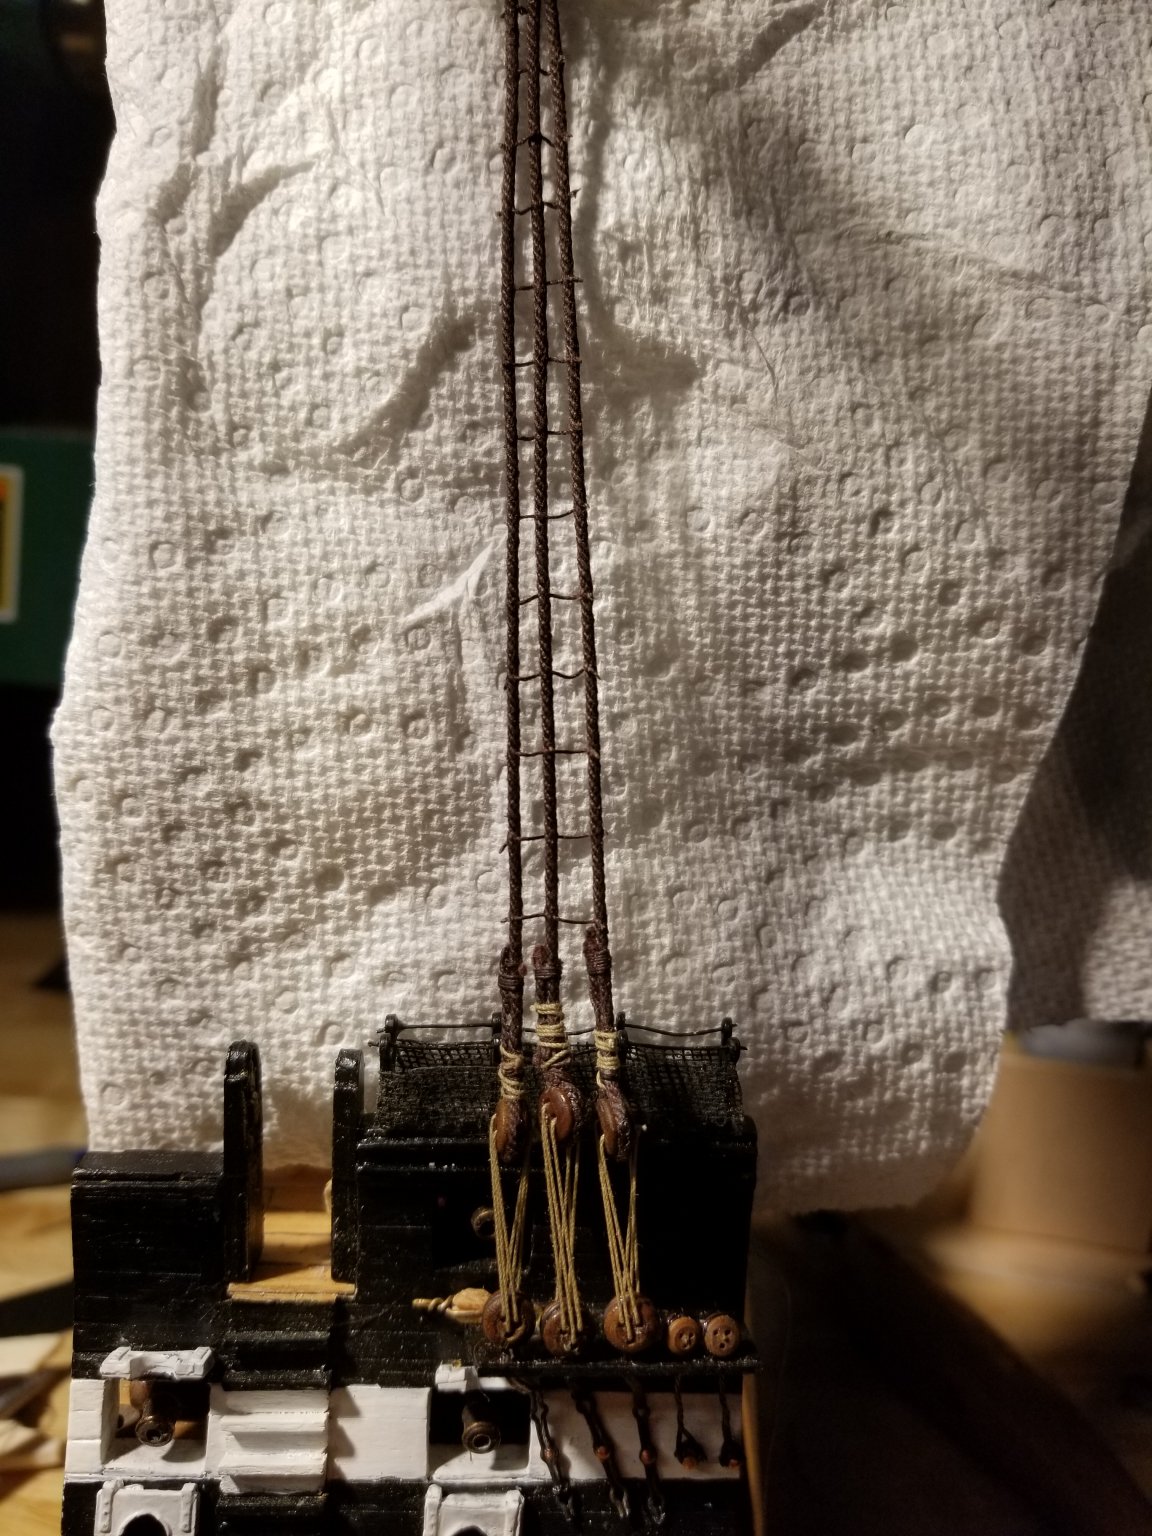
Did the lower ratlines,as described above, using a piece of the right size planking to space them. In the first picture I used the method I showed above,sewing the lines then simulating knots by wrapping and gluing the excess tails around the shrouds, then trimming. In the second picture,all I did was sew the ratlines,glued the ends to anchor them, then trimmed them. I'm happy enough with this easier method for a ship of this scale,especially since as a cross section which I'm mount on a narrow shelf on the wall. Side views won't be a major view. When I build my next (POBII) I'll do them right. BTW-- why are my shrouds and deadeyes twisted? This didn't happen until I laced the lanyards,which I find mysterious.
- 48 replies
-
- 1
-
-
- mamoli
- constitution
- (and 2 more)