Brewerpaul
-
Posts
190 -
Joined
-
Last visited
Content Type
Profiles
Forums
Gallery
Events
Everything posted by Brewerpaul
-
Am I missing something? I don't see a capstan or any other provision for raising the anchors. My POB kit came with a more modern winch but since I'm de-modernizing her I think I'd rather have a capstan.
-
Hmmm... that's not totally out of the question actually. I make Irish penny whistles on a metal lathe so if I could figure out a good way to chuck the metal barrels nice and concentrically, I could give it a try. It's not a CNC lathe, so getting them all to look the same wouldn't be easy. How strong is the white metal with regard to machining? Assuming I could get them properly chucked, I could gently "machine" them using only files and abrasives.
-
I don't know exactly what scale I mean, but some scale that would reduce a tall ship to a length of, say 8 or 9 inches
-
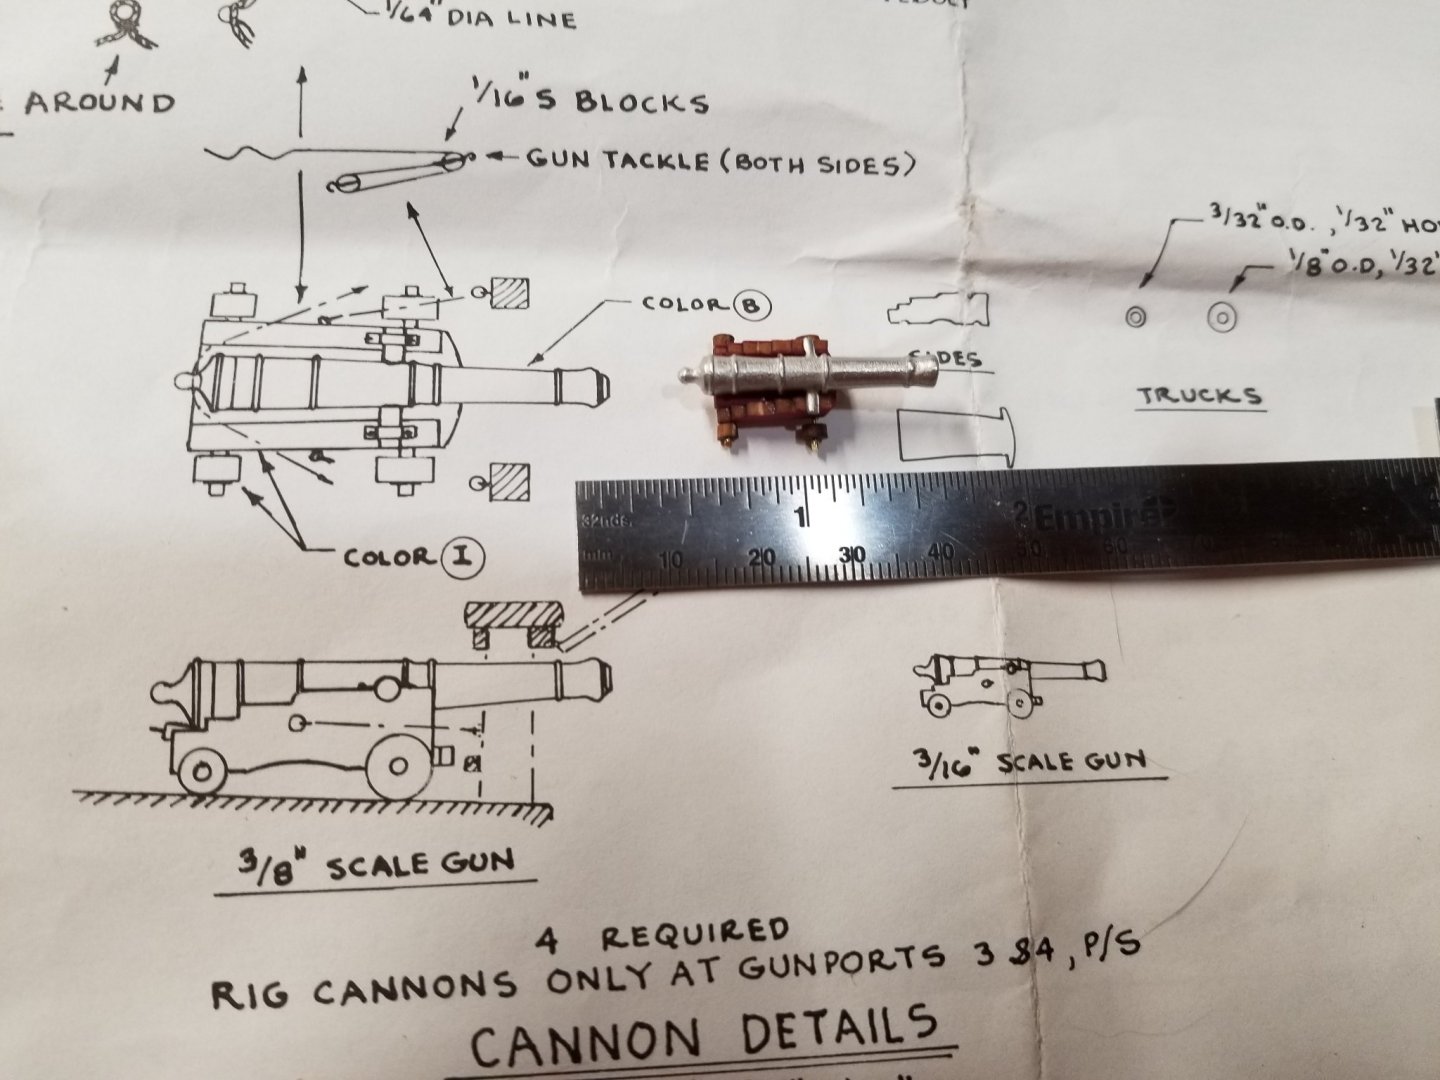
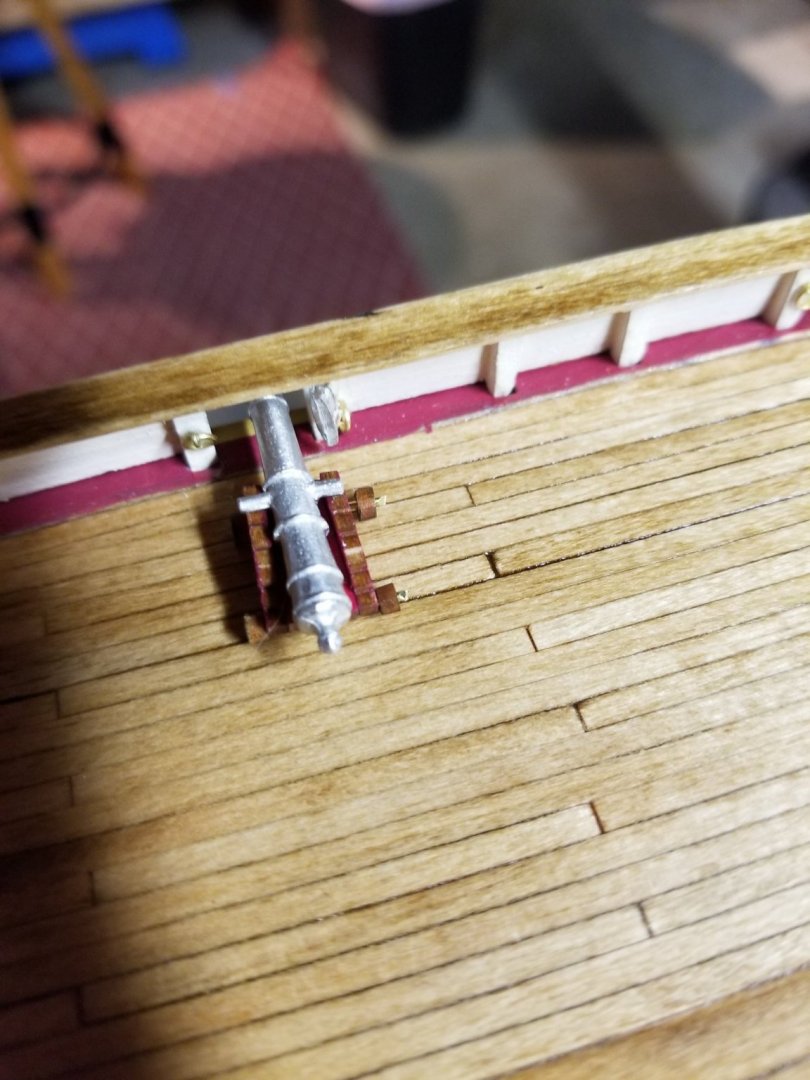
Although I'm nowhere near ready to install the guns on this kit, I decided to put one at least temporarily together to check the guns' clearance of the gun ports, which I seem to recall some builders had a problem with. The kit guns are totally out of scale to the carriages and ,perhaps, to the ship. The laser cut carriage parts match the size of the 3/16" scale gun on the plan. However, the gun barrel supplied is much bigger. It hangs way off the back of the carriage and it's quite a bit longer and thicker than the one on the plan. I have no idea why the plan shows a 3/8" scale gun, but the barrels I have don't match that either. On the deck, to my newbie shipwright eyes it doesn't look too awful but I'd rather have it be closer to scale. What would be the best way to reconcile the size difference?I don't want to spend a whole pile on 4 complete new gun setups.
-
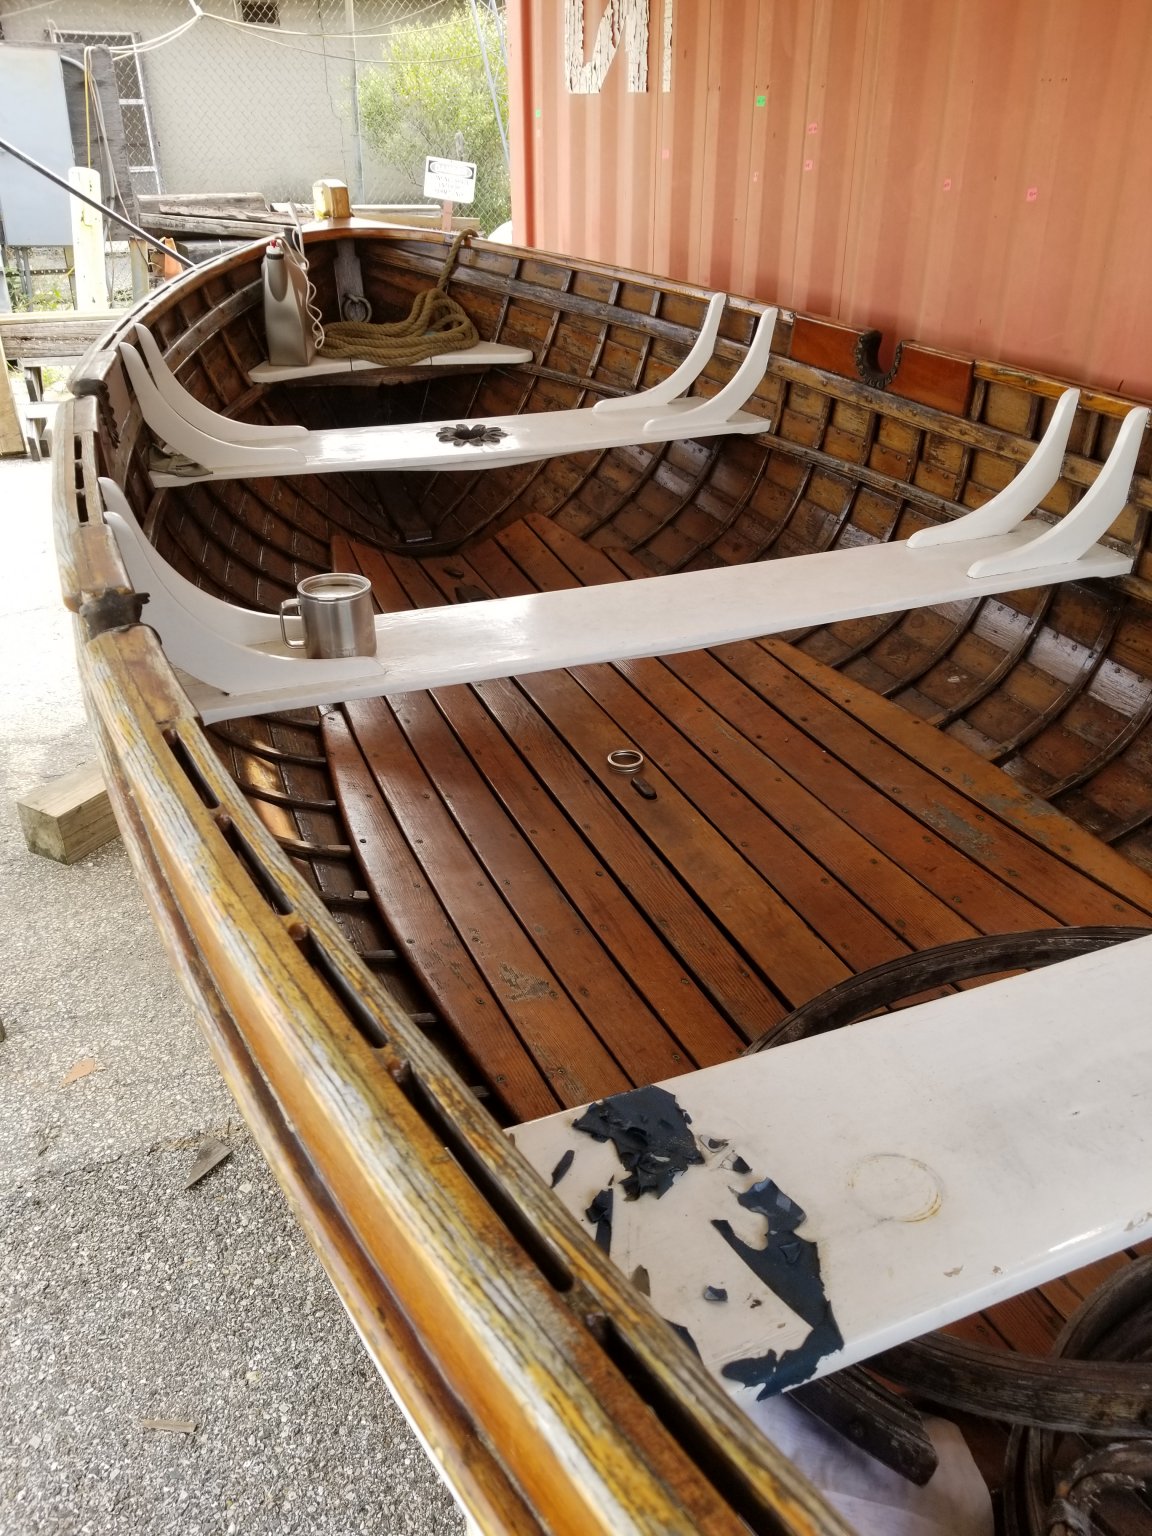
I've been working on my Pride of Baltimore's ships boat and am really enjoying working on this little thing. Are there any wooden sailing ship kits out there in small scale?
-
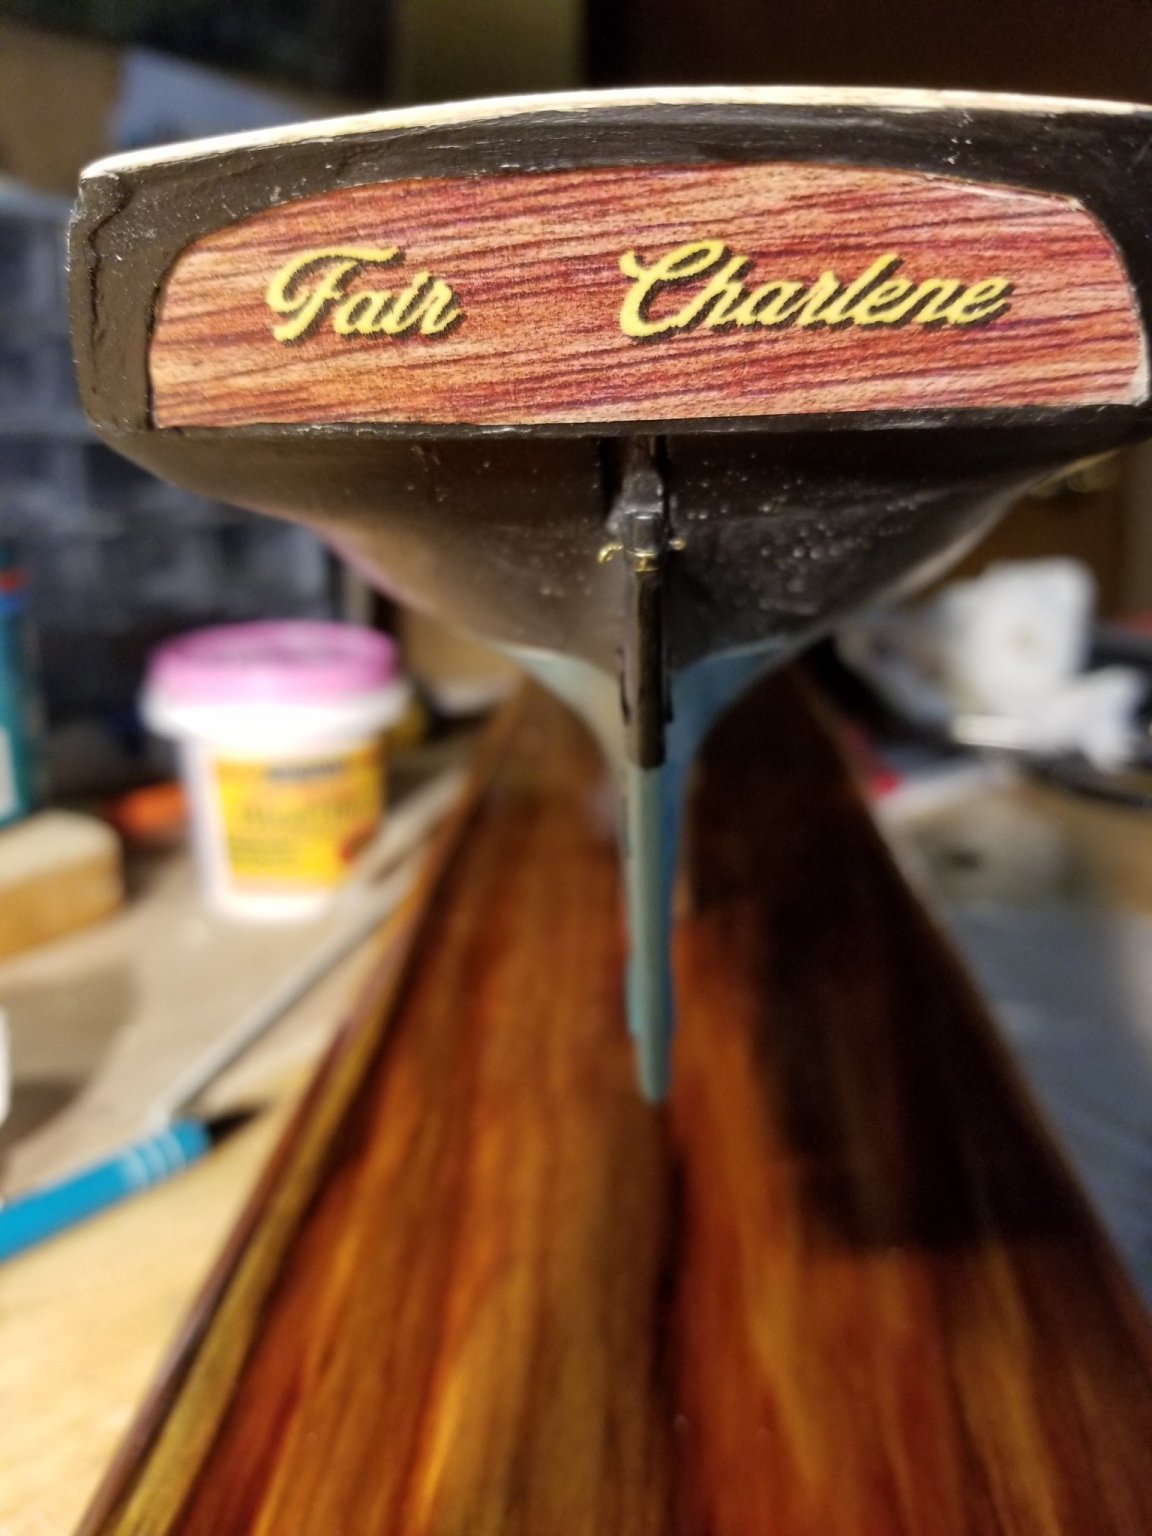
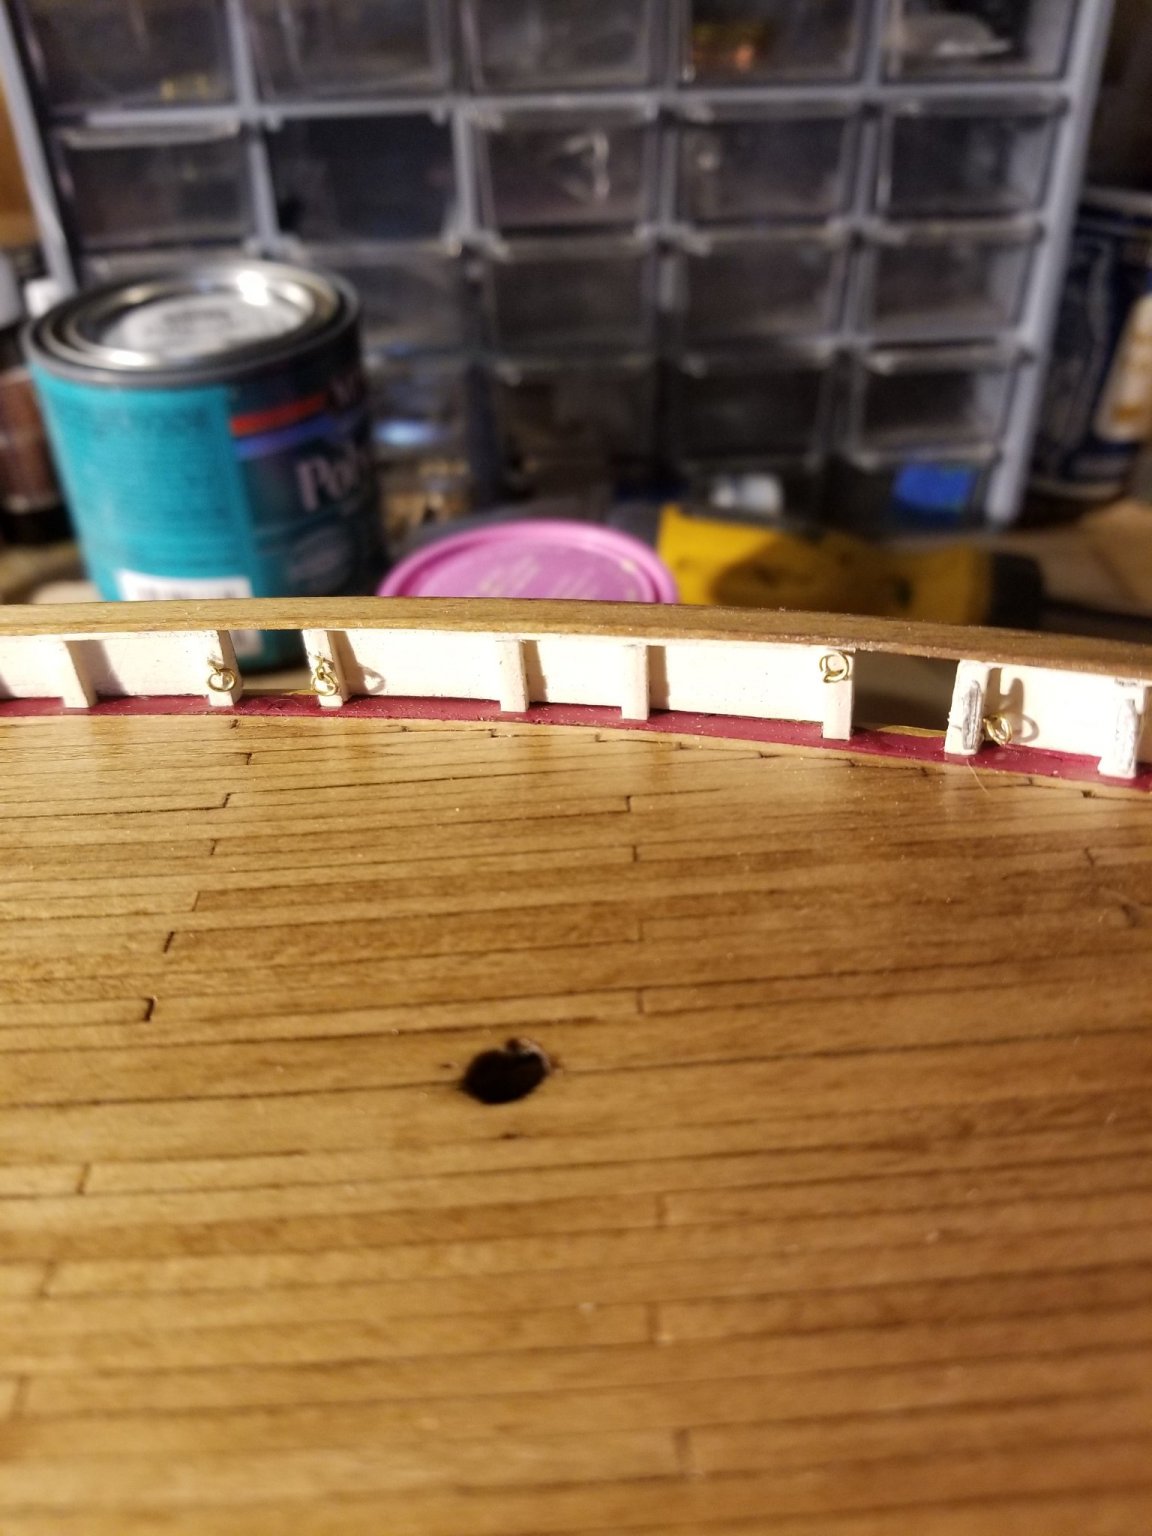
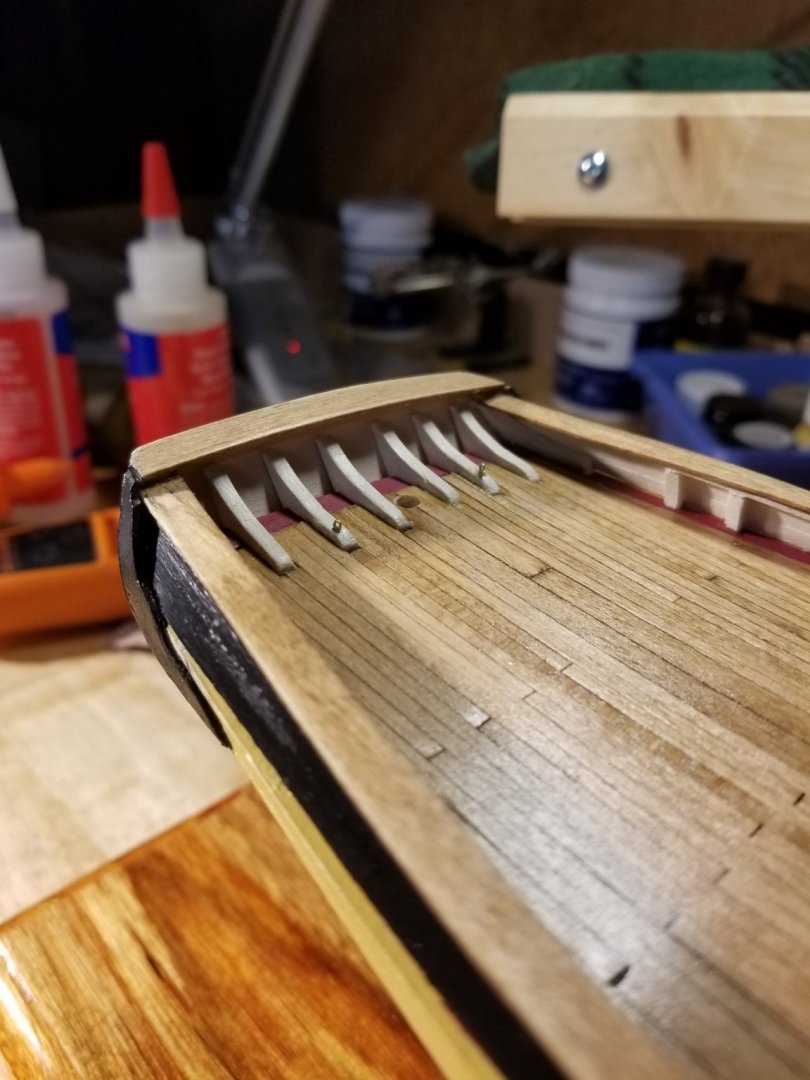
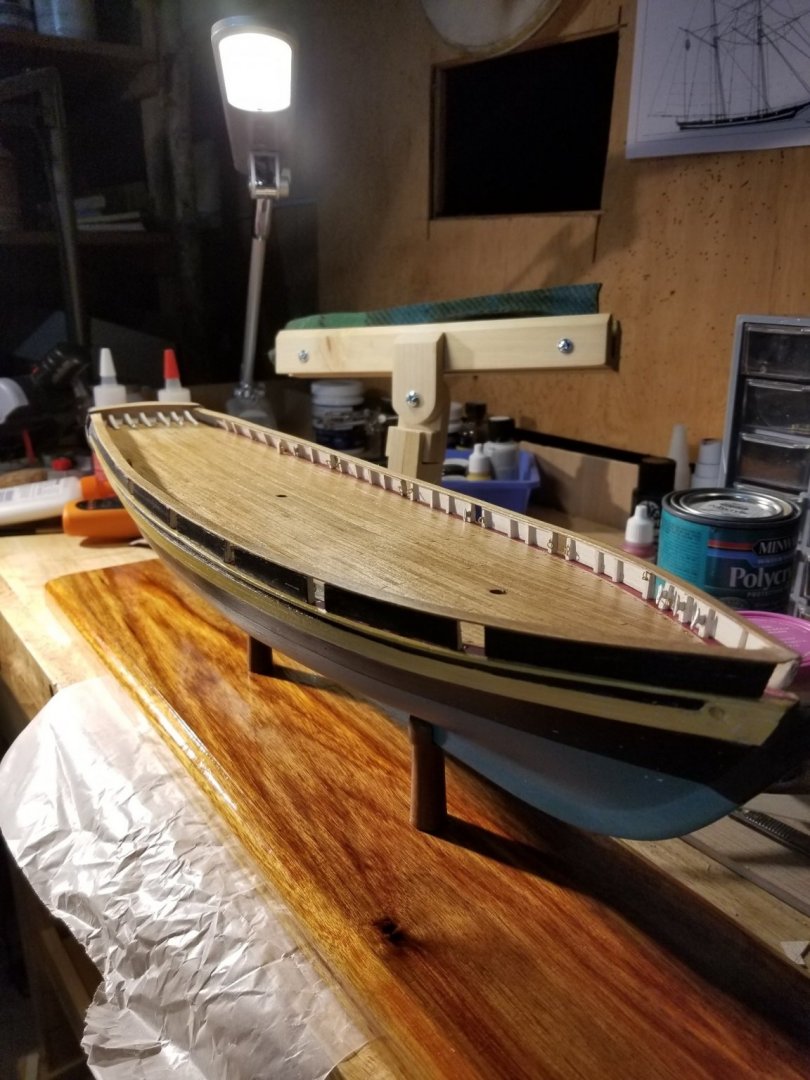
Well, it's taken me forever to get the bulwarks made and installed. I'm glad I built them off the model as painting them neatly was easy,no overrun on the planksheer, and it was easy to add cleats and eyebolts. I can't imagine how I'd drill holes for those once the bulkheads were glued. Those cleats look considerably over scale and a couple ended up touching the planksheer, so I'll have to figure out how to trim them for rigging. The plans call for them to be stark white, but I thought that would look odd on the cream inboard sides of the bulwarks. I just filed them clean and left them metal colored which looks like galvanized steel. Not historically accurate, but I'm OK with that. That darned stern was a concern from day one. The guy I bought the partially started kit had indeed cut the stern filler blocks down too thin and as I result I had no room for the correct POB stern. At this point I've decided to build the ship as a sort of generic Baltimore Clipper,not the actual POBII, so I made a transom to fit. This did not leave much room for lettering more than a single line, so I named my ship for The Admiral who is indeed fair. I also decided not to mount the ship on the building ways, but on a plank with pillars. It occurred to me that a fully built ship wouldn't be on building ways,right? They'd launch the hull and work on her in the water. At the place where I get hardwoods for the Irish Penny Whistles I make, I came across a spectacular piece of Canarywood just the right size so that made the decision for me. I was still working on the Pride of Baltimore bench refinishing job, so I snitched a few brushfulls of the actual POB spar varnish to finish my base. The toprail heights were off as compared to my jerry rigged transom, so I just put a step up at the stern. Not actual, but kind of interesting looking. The ship isn't glued to the base posts, and I'll return it to my work stand once I've touched up the hull paint etc.


-
That's amazing Jerry. I'd love to see her in full sail. I'm doing the kit of the POBII at the moment, but I'm not building it entirely as the ship is today. I will leave off all modern stuff like radar, props,etc. and try to give her a less cluttered deck as probably would have been the case in the 1812 vintage ships. Your Pride is more along the lines of the older ships and I hope to include details like rudder instead of wheel, etc. Your pictures will be a big help.
- 79 replies
-
- 2
-

-
- pride of baltimore
- privateer
- (and 3 more)
-
That's a crazy great level of workmanship! I'm most impressed. Other fruit woods darken with time including Cherry and Plum. I'm not sure about apple. You can take the ship out into bright sunlight if you want to speed it up, but be careful of shadows falling on the wood. They can leave a pale shadow on darkened areas.
-
Your build is where I got the idea. Those 4 or 5 stanchion sections seemed to make sense off the hull. Plus, all those tiny, loose fittings seemed to be crazy hard to get lined up right.
-
Hi-- my Pride of Baltimore II is my first build where I have to make my own deck furniture; hatches, cabins, boxes, etc. How do you make these nice and square? How do you hold the sides at the right angles? Thanks.
-
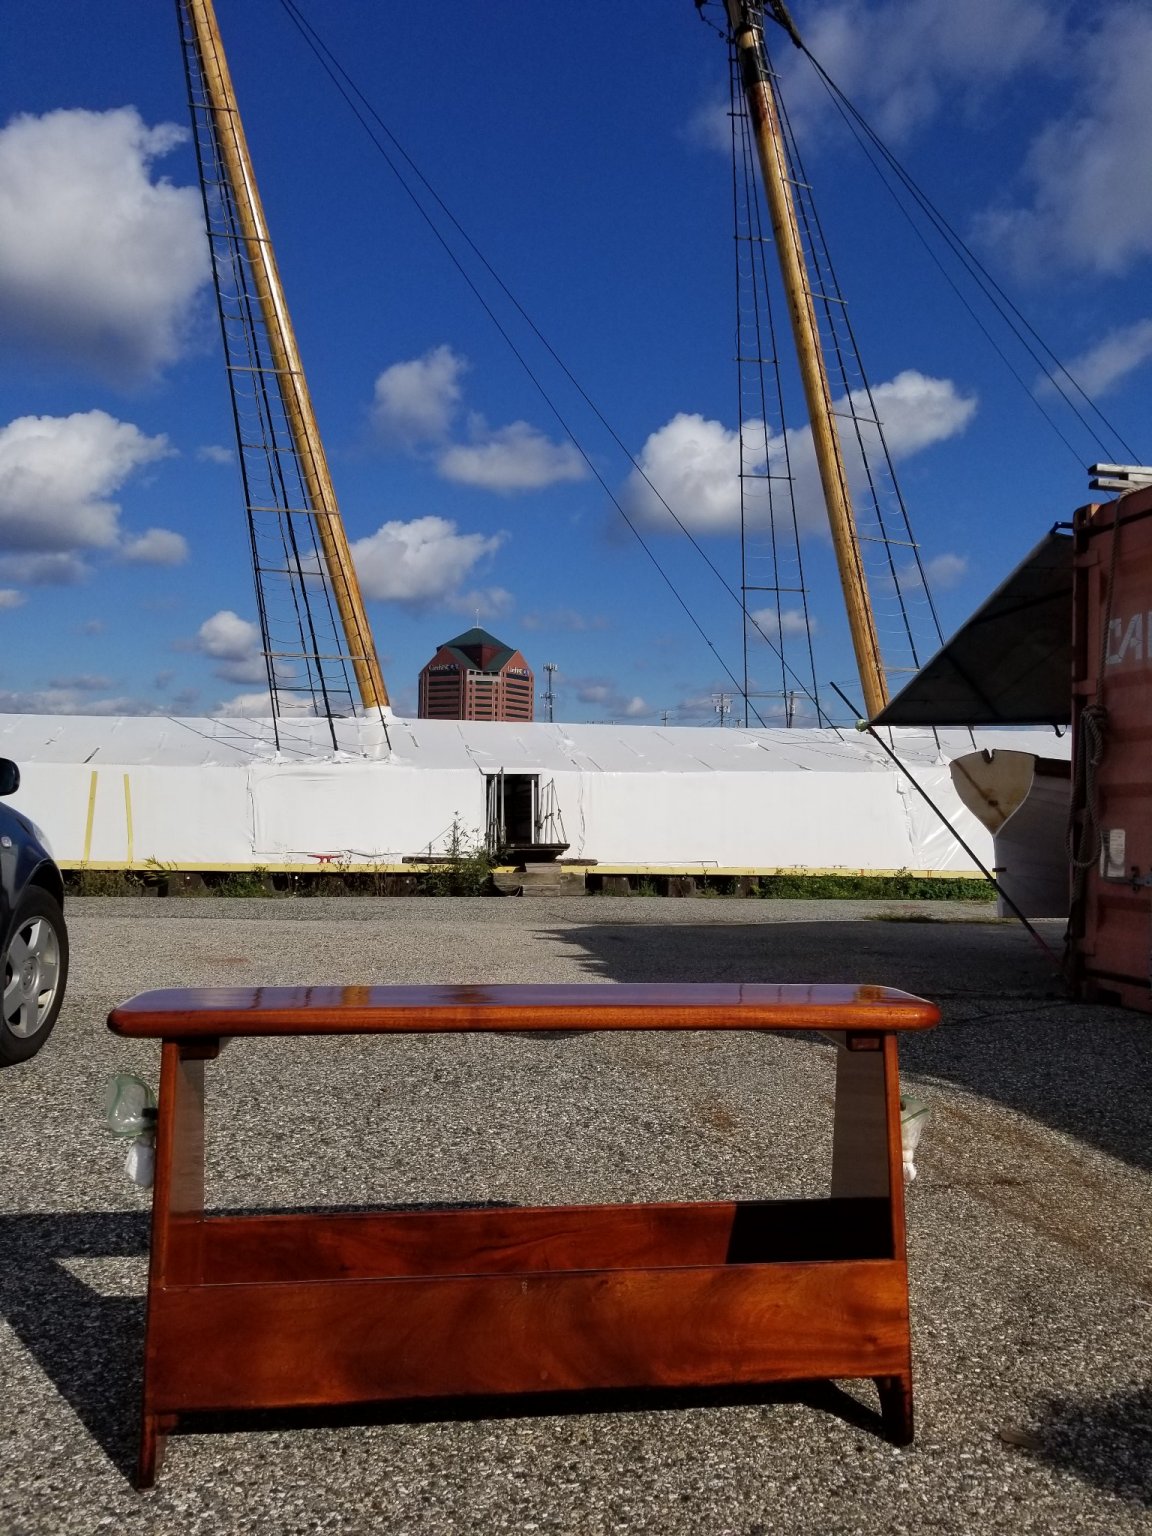
I took the real Pride of Baltimore II's bench back to it's home yesterday. I asked the guy in charge to please let me know when they remove the shrinkwrap and start to refit the ship in the spring. I'd love to go down from time to time and help. He told me the process takes about 3 weeks. I know it's unusual to build the bulwarks off the ship, but I felt that this model lent itself to doing it that way, and would let me do the planking much more easily,which it did.

-
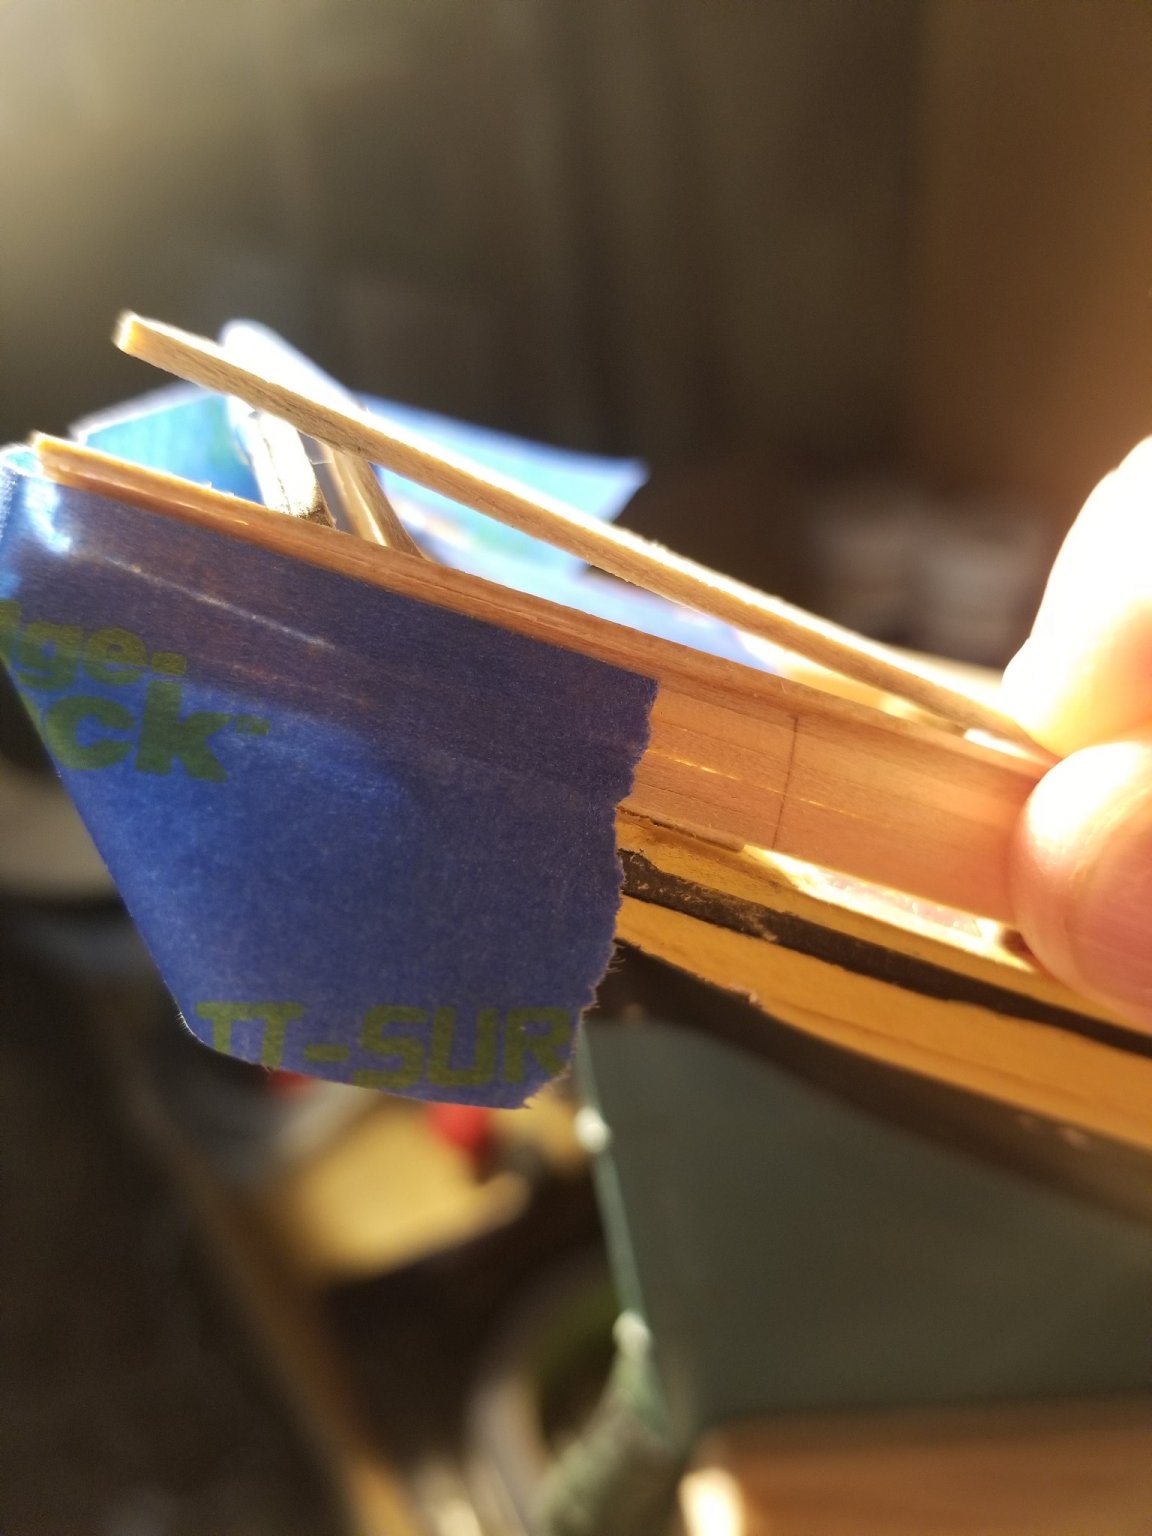
I've assembled the individual sections of the bulwarks off the ship. Before I install them I plan on sanding/scraping them,painting them, and adding any eyebolts,cleats etc which will be easier than trying to sneak them in once masts,spars and rigging are in the way. I'll paint them too. The bulkheads look good but that last section where they meet the transom are posing a problem. That stern has been a challenge from the start. The transom is painted (not lettered yet) but not attached. I wanted to see how it would line up with the transom knees and bulwarks. If I place the transom so the bottom edge is where it should be, the top edge is below the top of those knees and the bulwarks are too low. If I drop the transom down so it's the correct height for the bulwarks, it no longer fits at the sides, which taper. I'm guessing these discrepancies go all the way back to the shaping of my stern fillers, but that's water under the keel now. I could put the transom where it belongs, trim the top of the stern knees and then build the bulwarks up with a tapering extra part. In one of my pictures,you can see a piece of 1/16" timber to simulate the top rail. Or, I could scrap my pretty transom and make a new one to conform with the bulwark height. That would mean trimming those stern knees even more. Any suggestions?

-
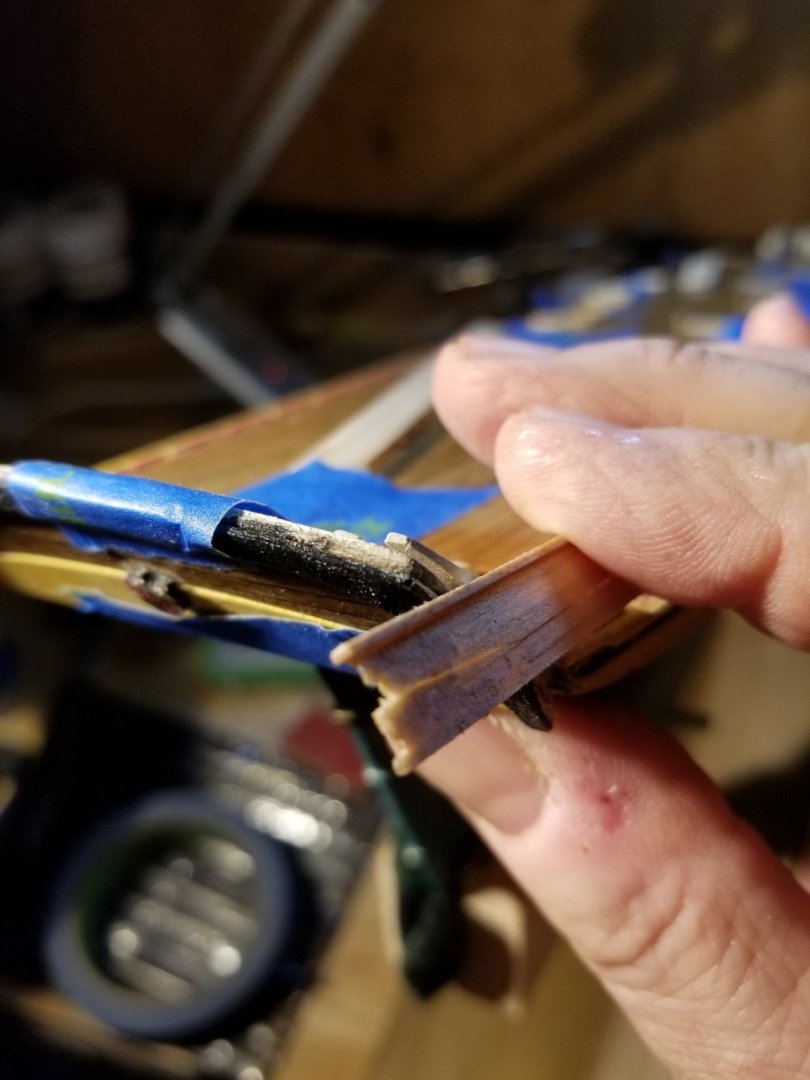
Adjusted the hawse holes last night. I expanded the out of whack holes with twist drill bits, turned by hand without a drill. Once I had them large enough to fit a Dremel side cutting bit I inserted small pieces of dowel of the right size so I could visualize how much out of whack they were and in what directions. Pulled out the dowels and used the Dremel bit to manhandle the holes into shape. That done, I coated the dowels with beeswax for anti stick properties, put them back into the holes at the appropriate angles, then filled the gaps with wood filler. All in all they look pretty good. I think I'll paint the inside of the holes black which will make the irregularities the same color as the hull.
-
Thanks Bob-- be sure to post a log when you start yours. I'd love to follow it. I fashioned and installed the hawse timbers yesterday and have found it be a big pain trying to drill the hawse holes. They run from up to down, port to starboard, and fore to aft. I took my best shot with a 1mm drilled pilot hole but missed the mark. Any good ideas how to do this accurately? I've enlarged the holes with successively larger drills and they're moderately out of whack. My plan for now is to reshape and relocate the holes with small round diamond files, then repair the surrounding damage with filler.
-
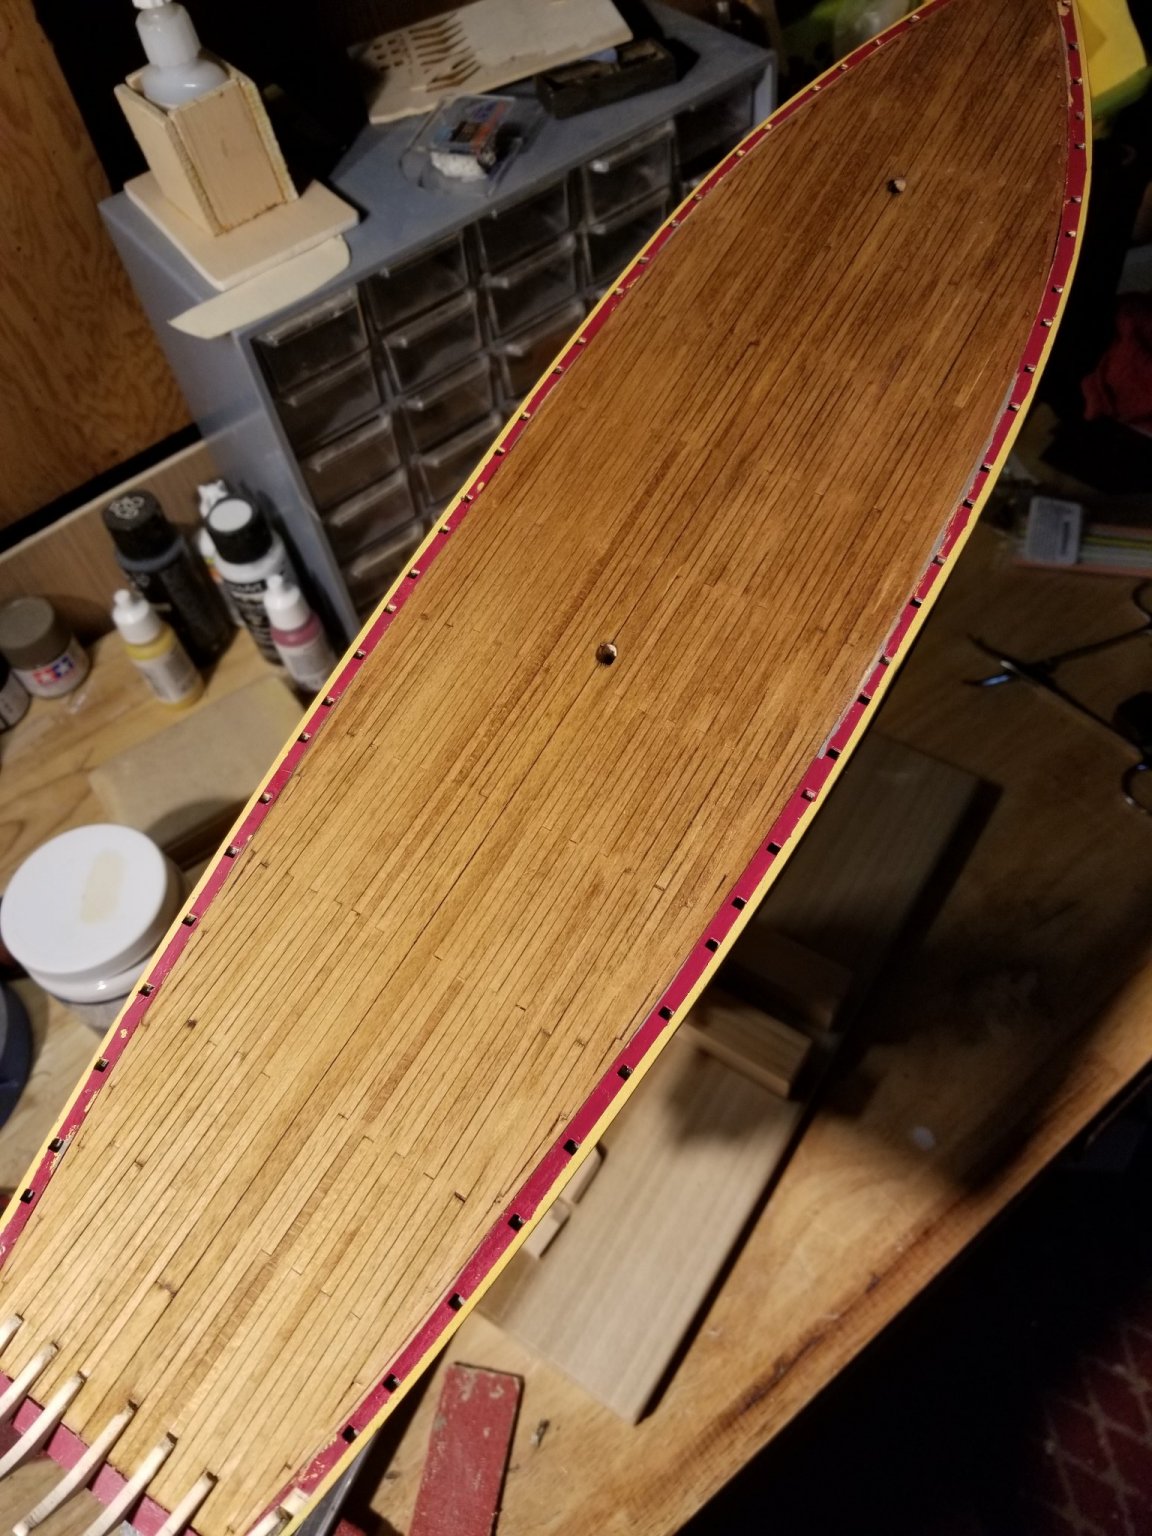
I got the planking installed and stained,Minwax Golden Oak (which I had lying around from an old project). No subdeck, but the planks laid out pretty well with a 3 plank repeat. The first coat of stain revealed spots where glue didn't allow it to take, but I expected that. Sanded and scraped* those down, and the second stain came out pretty even, so I'll quit while I'm ahead. I'll give it a day or two for the stain to fully dry, then poly coat it. BTW-- I didn't bother darkening the edges of the planks, figuring that stain would accumulate there and make the joints visible,which seems to have worked. *I'd used cabinet scrapers before on other projects and obtained a wonderful surface but mine were too big for this model. I found a set of small ones on Amazon and they worked very well on the deck. My visit to the real Pride showed me that the stern knees are mahogany color, but the plans show them painted the cream of the inner bulwarks. Not sure if I want to try to fix that at this point. Next up is the hawse timbers and I'm finding the plans and picture in the instructions a bit confusing. In one place it looks like the larger timber is on top, in another on the bottom. At the bow, they just need to be far apart for the bowsprit to fit through,right? They won't show much once the bulwarks are planked so I won't fret it too much. I'm planning on putting an oversized cap on the timbers which I can sand down as needed when I install the top rail. I'm noticing more and more little things like ringbolts, bits,etc, that would be hard to install when the bulwarks are finished and deck items in place. I'm planning on marking as many as I can find on the plans with a yellow highlighter and install them as soon as possible. As always, comments and suggestions most welcomed!

-
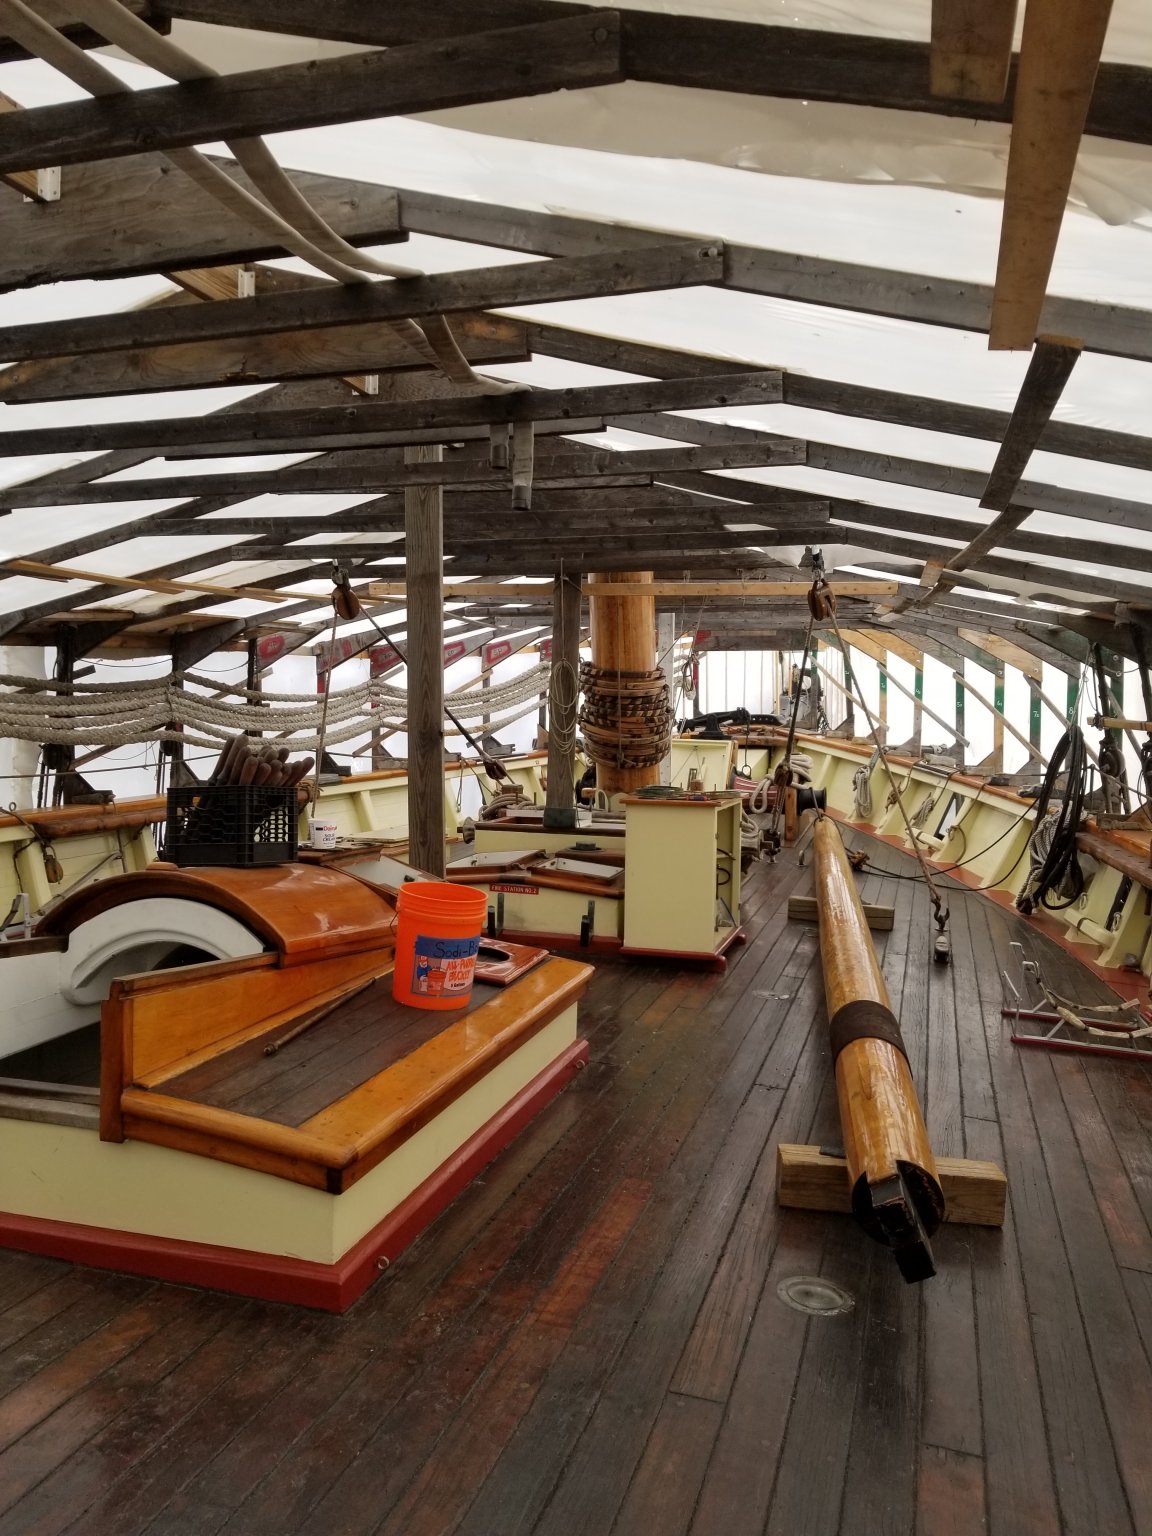
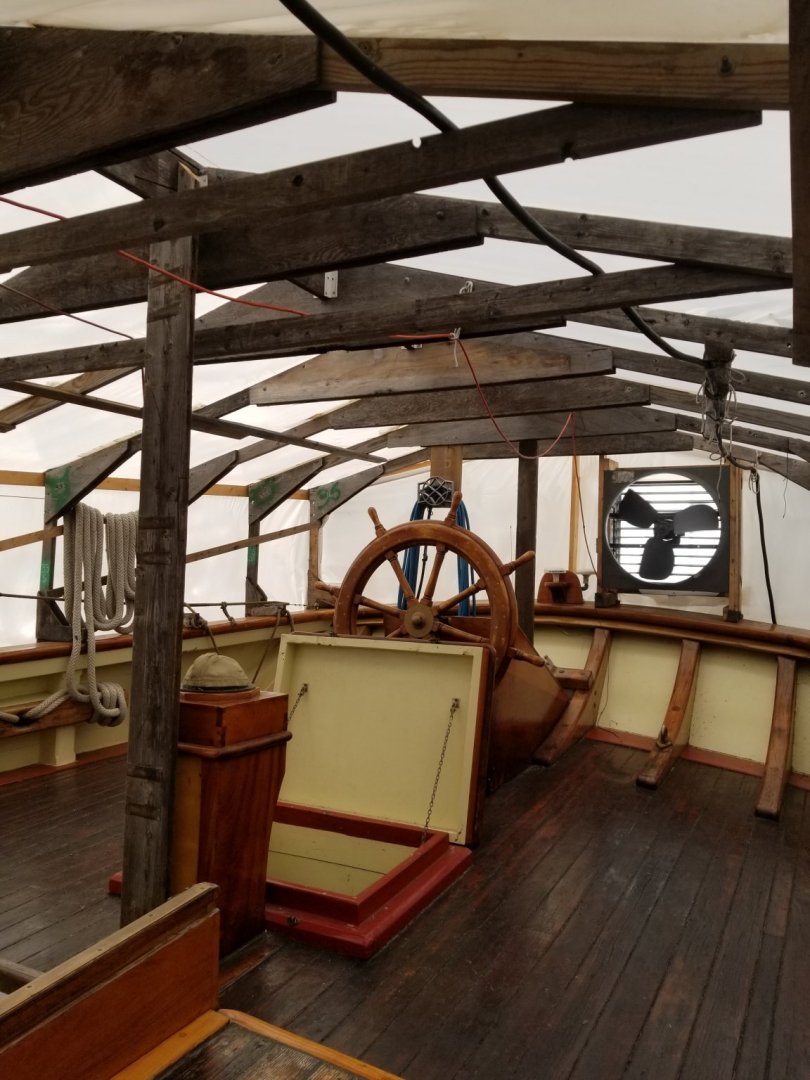
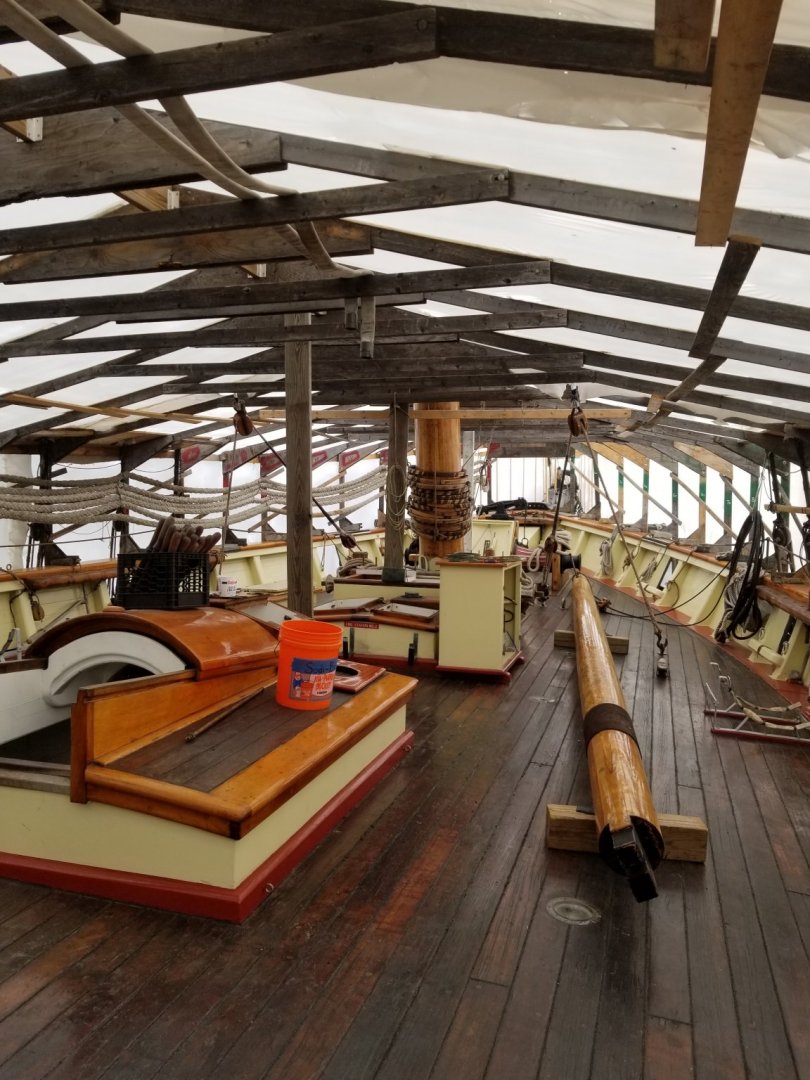
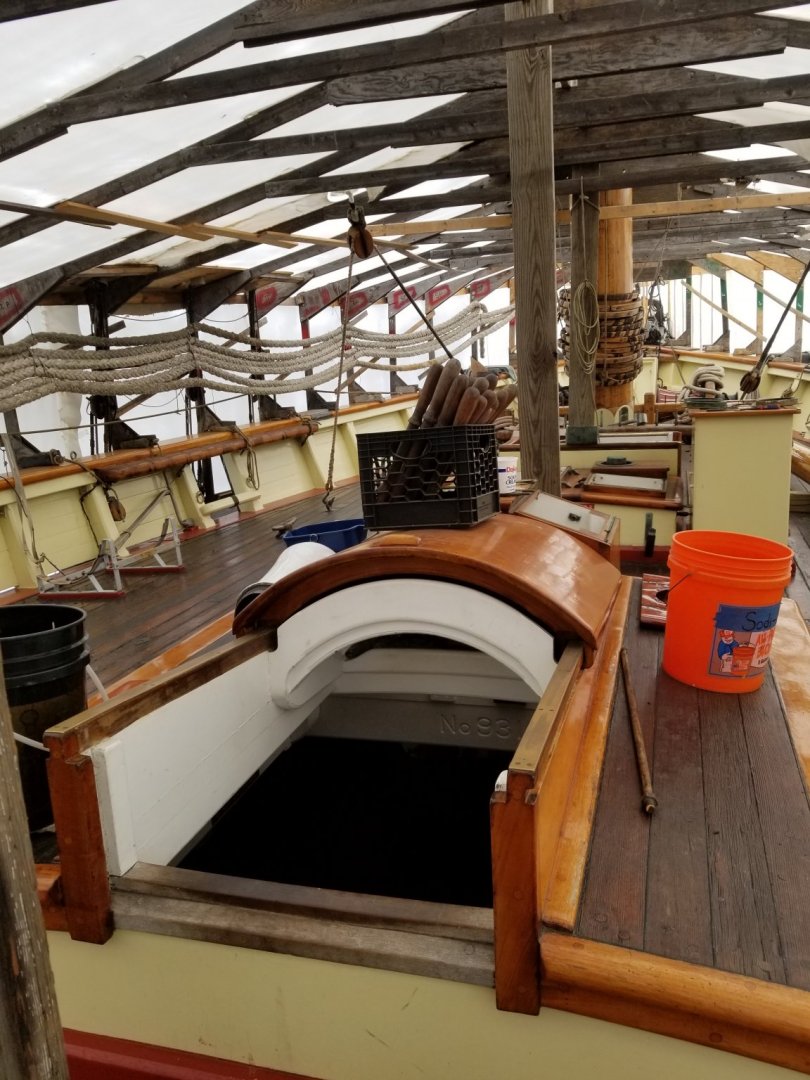
I think I solved the out of whack mainmast problem. While fiddling around with the tenon on the mast, one of the plywood scrap pieces that the former kit owner had glued delaminated so I had to remove the rest of it for replacement. What I found was excess glue from his work inside the remaining scrap piece, enough to shift the foot of the mast and account for the out of whackedness. I temporarily snugged up my somewhat loose tenon with paper and with a new piece of scrap wood (not plywood) the mast looks pretty darn close and should be shimmable to vertical. Went down to Baltimore yesterday and picked up the real POB bench which I'll be redoing. I also got a short tour under the shrinkwrap of the ship which was wonderful and gave me a much greater perspective on the scale of the model. I also got a good look at that pesky transom area from inside the ship. That's the jib boom lying on the deck. The other spars are offsite at their spar shop.

-
Lowe's finest, despite some recommentations against using wall paint. I can supply the exact color for any builders who might want to go that route.
-
That's fascinating information even though I don't plan on any sail on my Pride of Baltimore II. Speaking of which, the POB has been closed this season due to COVID-19 so a lot of the volunteer maintenance done before each season has almost literally gone by the board. However, they are farming out smaller jobs which volunteers can do at home in the form of a "project in a box". I signed up for that and yesterday went down to Baltimore and picked up a mahogany bench from the below decks navigation station as well as all supplies,some tools etc and detailed instructions on how to proceed. So, I'll get to work on my model POB and the real ship at the same time! As a bonus, I got to sneak under the shrink wrap and see the real ship for the first time.

-
Gregory-- you mean you construct the entire deck off the ship and then just glue it down? How do you bend nibbing planks without butting them up against the planksheer? I had speculated on building the deck off the model, but several people advised against it. Update a few minutes later; I just looked at your quarterdeck and answered my own question about nibbing.
-
You ain't kidding Doc! Since my last post I've planked my POB and it came out pretty well, thanks to filler. I still haven't added the transom though. The issue now is how the toprail of the ship,which I haven't installed yet, will intersect with the transom. I'm holding off on the bulwarks and rail until after I do the deck, to make the planking and nibbing more accessible. She'll remain sternless for a while I'm afraid.
-
Thanks for the food for thought. Glenn-- if we have different kits, what was yours? The one I have is the only one I've seen, Offhand, my bulkheads don't look bad having laid a half dozen or so deck planks down on them. They seemed pretty level. I'm thinking that maybe I'll make a dummy subdeck out of file folder material,temporarily glue it down with tiny drops of CA, and see how flat it looks. If it looks flat enough, I could use David's suggestion of a 1mm subdeck and .5mm planks. Cornwall has Cherry strips, and I love the look of Cherry so I'd probably use that even if it's not authentic. Hmmm...cherry top rails would look good too. I'll have to spend some time on the Cornwall site and look for other goodies, and order if the shipping from the UK isn't too ridiculous. I just had a though on how to cheat on the transom lettering...hang the ship's boat from the stern on davits and cover the transom 😄 Again, I'm not looking for a totally accurate POB, mainly I want a decent looking representation of a Baltimore clipper of the period.
-
A false deck would raise deck above the sheerplank I think. Is the false deck to keep the planks even and make it unnecessary to end the joins at the bulkheads?
-
Thanks-- I think I will cut the planks,making sure the joins end up on a bulkhead. I'm not sure how a mast slot could be off in the port/starboard direction since it's just a slot in the keel covered by two scraps. Still, I'll investigate that further. For the bulwarks the plan shows 5 1/32" (x16" I'm assuming) planks topped with a single 1/32x3/64" plank. Those are not in the kit,or even on the parts list. I'm thinking to just use one of the 1/32 x 1/16" planks turned 90degrees. Make sense? On a pretty exciting note, I'm going to be helping to restore the actual Pride of Baltimore II! Since she is not in operation this year, they can't have volunteers aboard the ship to help with repairs and maintenance. However, volunteers with the right tools and experience can still help restore her. They have something called Project In A Box where they will assign portable bits of repair work to qualified volunteers along with necessary finishing materials, etc to take home and restore. I signed up and will be picking up a wood bench from their below deck navigation deck and am eagerly awaiting the the chance to do my share! Too bad it's something below decks, otherwise I could make it's miniature for the deck furniture of my in-progress build . Here's the application, if anyone near Baltimore is interested; https://pride2.org/volunteer/take-home-project-app/
-
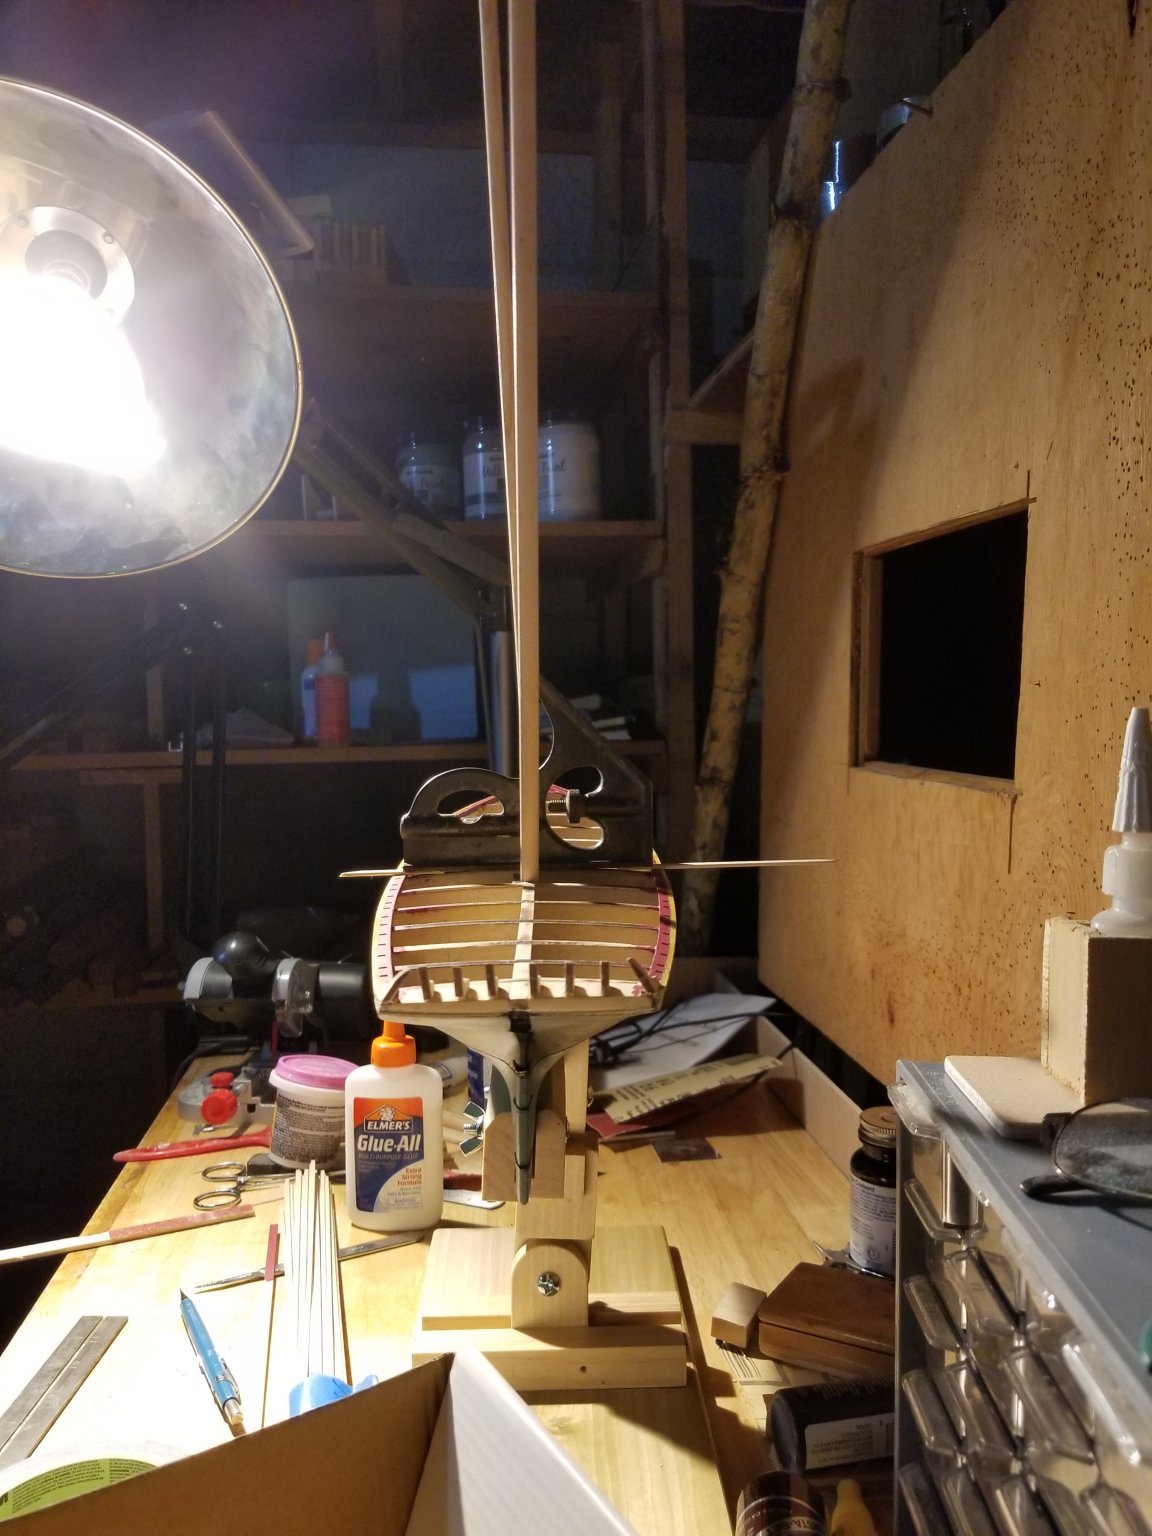
Quandry/problem time. The quandry is whether to do the bulwarks or the deck first. It would seem that doing the deck before installing the bulwarks would be easier since the planks could overlap the planksheer during nibbing. On the other hand, I'm leery about gluing my transom (once I have the lettering figured out) before installing the bulwarks in fear of not having the top rail being level. One option I guess is to make a temporary partial aft bulwark,gluing the planks to the stanchions with rubber cement or just pinning them, to check how the height of the bulwark matches the transom. I've seen build logs where the deck was installed before the bulwarks, and vice versa so I'd appreciate some feedback on that before I proceed. Speaking of planking, the plan shows the planks laid full length, with no joints. I'd imagine that would be much simpler, especially since I'm not sure of how much of the deck furniture I plan on using-- I'm thinking of leaving off or modifying modern additions to the POB for a cleaner deck appearance characteristic of period clippers using deck plans from Chappell's book as a guide. I'd still like the look of plank joints so I'm wondering if simple pencil lines would be convincing, or maybe scribing the joints with my X-acto. Anyone used this approach on a ship? The problem I'm having is regarding the masts and mast slots. I like David Lester's method of turning the foot of the masts down to a tenon,allowing rotating the mast for alignment once the mast is built. This was easy on my metal lathe. Now, the mast slots measure 0.196" (all measurements plus or minus a bit) which corresponds to the thickness of the center keel plank. Measuring the foot of the masts on the plan comes up with 0.297"? Just do the shaping of the mast down to where it meets the deck? Finally, my mast's as of now don't line up as you can see in the photo which was taken with the planksheers level. I believe the foremast to be true and the main mast is out of whack. My dowels are bowed about 1/8" or less at the center when laid on a level surface. In the picture, the curve of the dowels was placed fore and aft so it shouldn't matter in this view. The mast slots should be equal in the port/starboard direction since they come from the same piece of plywood. What could account for this, and how can I fix it NOW before I add the deck?

-
Me again...Andy, did you ever get to finish your POBII? I'm at the point of making my transom and am curious how you ended up doing the lettering. I'm nowhere near there yet but I'd love to see how you did the masts and all spars. Also your paint on the hull.