HOLIDAY DONATION DRIVE - SUPPORT MSW - DO YOUR PART TO KEEP THIS GREAT FORUM GOING! (Only 20 donations so far - C'mon guys!)
×


Brewerpaul
-
Posts
190 -
Joined
-
Last visited
Content Type
Profiles
Forums
Gallery
Events
Everything posted by Brewerpaul
-
Here's that Syren shroud temporarily lashed to a deadeye. I don't think the size is right but I'd hate to invest in smaller line. I can't return this for replacement as, following Syren's recommendation, I've uncoiled it and re-wound it on a gizmo to keep it from snarling. Think I can get away with this size?
- 48 replies
-
- 1
-

-
- mamoli
- constitution
- (and 2 more)
-
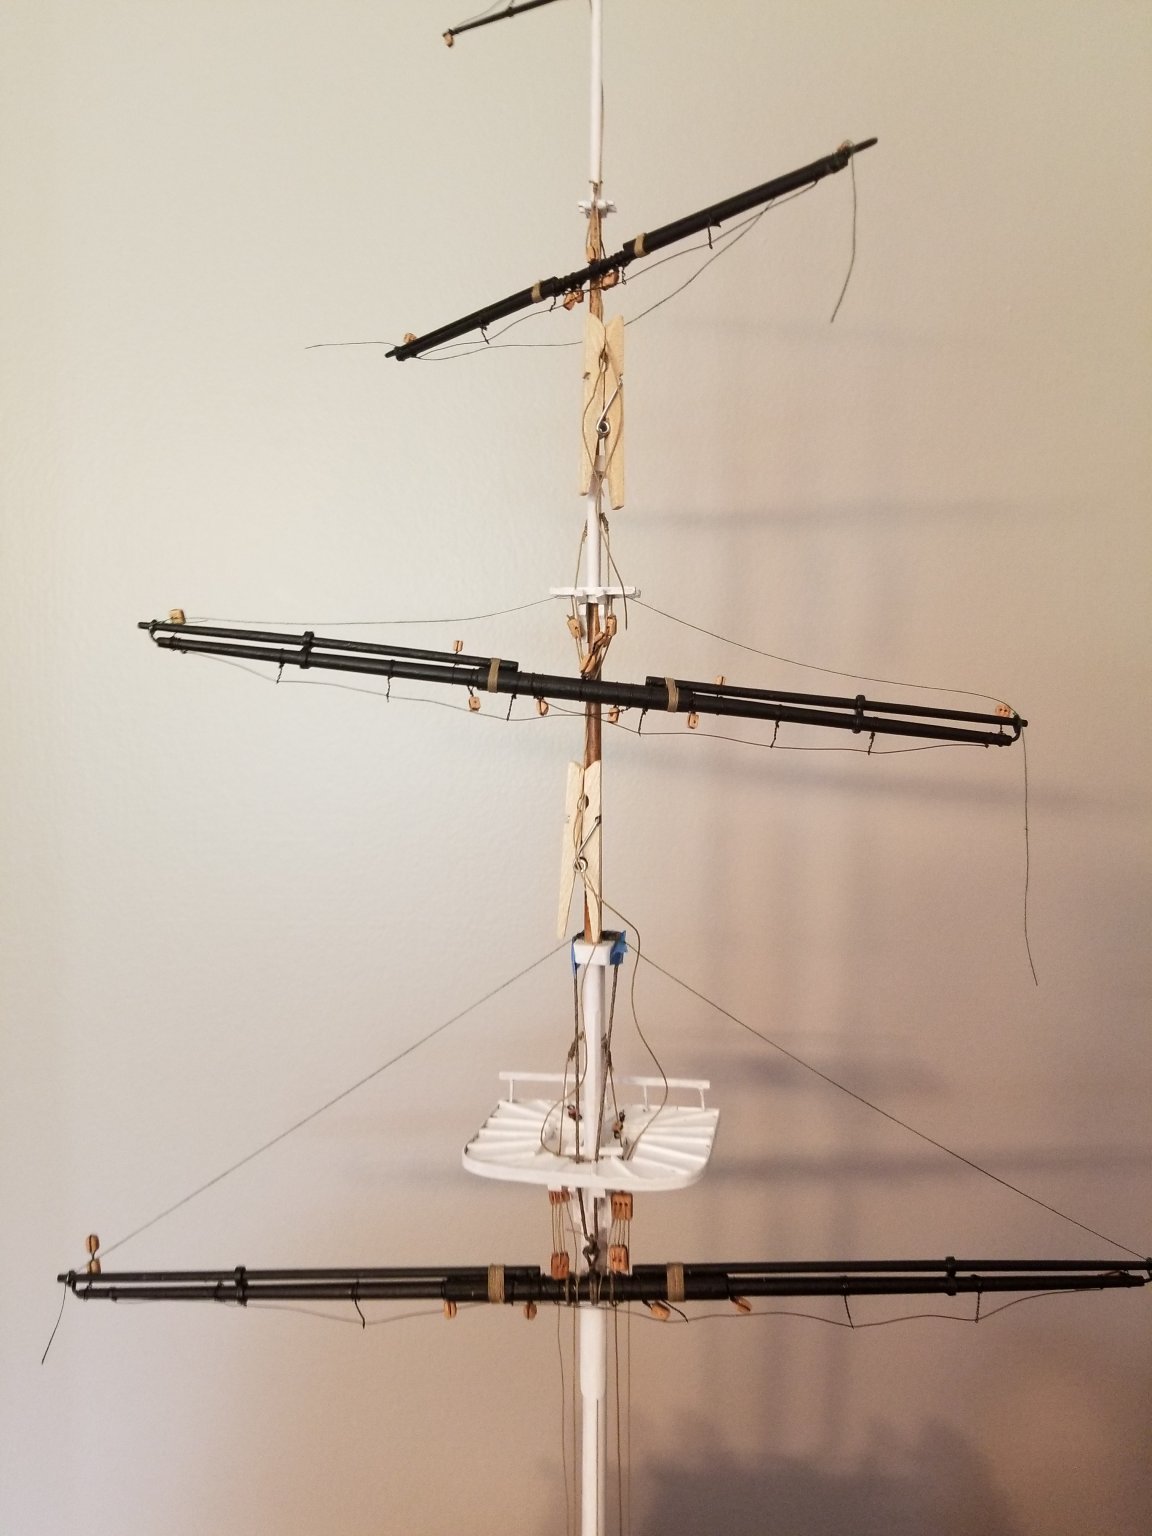
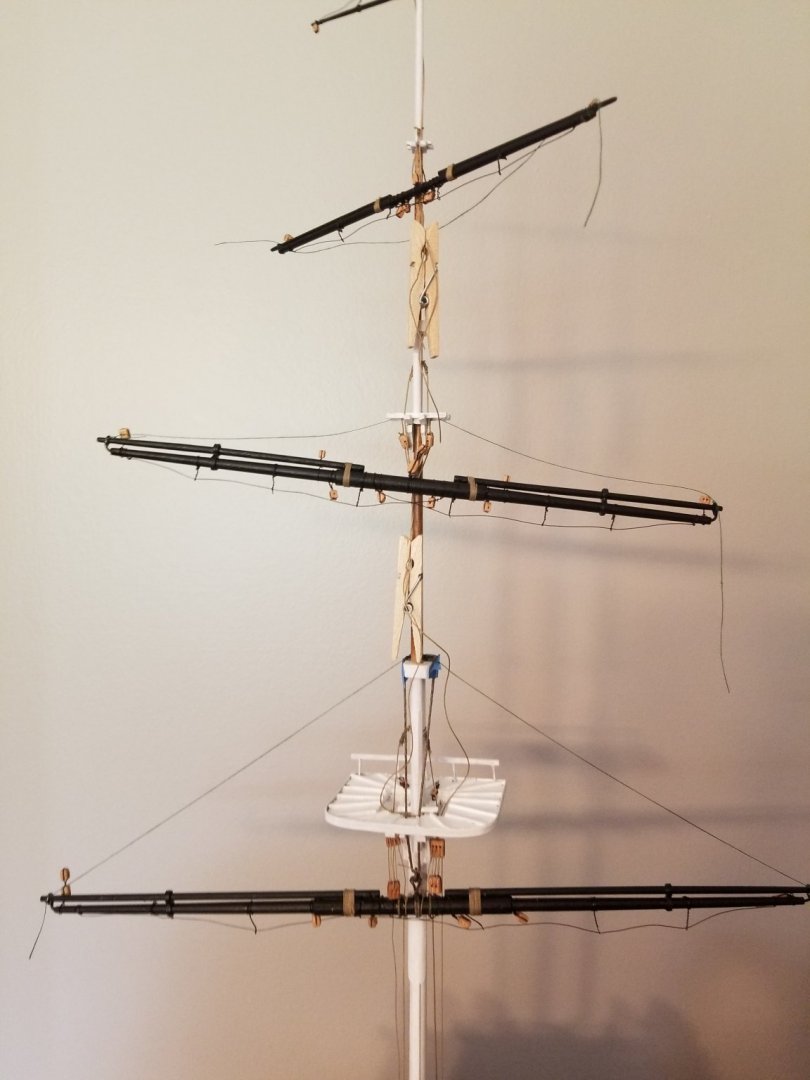
While waiting for my Syren rope I added the blocks that needed to be mounted to the mast. Still no rope, so I thought of mounting the yards to the mast before adding standing rigging. I figured that without the running rigging the yards would still have plenty of play to move them out of the way when I eventually added the shrouds. I thought that rigging slings and jeers would also be easier unencumbered, so I went ahead and did it. I didn't belay any lines to pins, but left plenty of line to do that later. The "lifts" in the picture are merely sewing thread used temporarily. So far I don't think this was a bad idea. In the meantime, my Syren rope has arrived and it's beautiful stuff. One problem...I estimated rope diameters using Syren's chart and the line I ordered for the shrouds looks too large. I'll post a picture later to see what you all think. On a different note, how do you all go about squaring mast tops and bases of bowsprits? Mine are definitely not up to snuff on this model, and I'd like to get it right next time. I saw one video on using a milling machine for that purpose and it worked well but I don't have one of those.
- 48 replies
-
- 1
-
-
- mamoli
- constitution
- (and 2 more)
-
Another question,if anyone is still following... The sling for the main yard is stationary,not adjustable on the real ship,right? If so, how would the main yard be lowered if necessary? I'm guessing that this would rarely need to be done and the sling would just be un lashed then re done when the yard was raised again? I'm also wondering how much of this work could be done with the mast out of the hull? I find it a bit shaky to work with my arms high enough to work on things high up on the mast with the mast in place and the hull on my workbench. For example,would it be feasible to rig the yards into place,leaving enough running rigging attached and bound up in hanks to be attached to the deck or fife rail later on? It looks like I ought to be able to do that and then work around them enough to do the shrouds and stays once they're done and I put the mast back into the hull. I'm waiting for my Syren standing rigging and it would be nice to be able to get the yards in place now,with the mast held low down in my bench vise.
-
Rigging should be enough. That's what holds the real thing,right? I can see pinning as a temporary measure then maybe taking the pin out. The holes on the mast and yard ought to be hidden when all is done,right?
-
Woo hoo! I was finally able to order mini rope from Syren for my standing rigging. I haven't been idle in the meantime though. I've been working on my yards and attaching blocks to them. With a little sanding and cleaning out of holes, the stock blocks will do for my purposes. I've taken the easy way out, using black 28ga wire to attach the blocks. Not authentic but from a bit of distance, they don't look too bad IMO. I've also used this wire for stirrups and footropes for which it has the advantage of holding the "sag" of the footropes. In attaching blocks, I'm learning my way around the running rigging a bit better--literally learning the ropes, which is where the term came from. I see that in addition to the blocks attached to the yards, there are some that I'll want to pre-install on the mast,so I'll rip out the practice shrouds,deadeyes and ratlines that I've done and take the mast out of the hull so I can work at a more convenient height.
- 48 replies
-
- 1
-
-
- mamoli
- constitution
- (and 2 more)
-
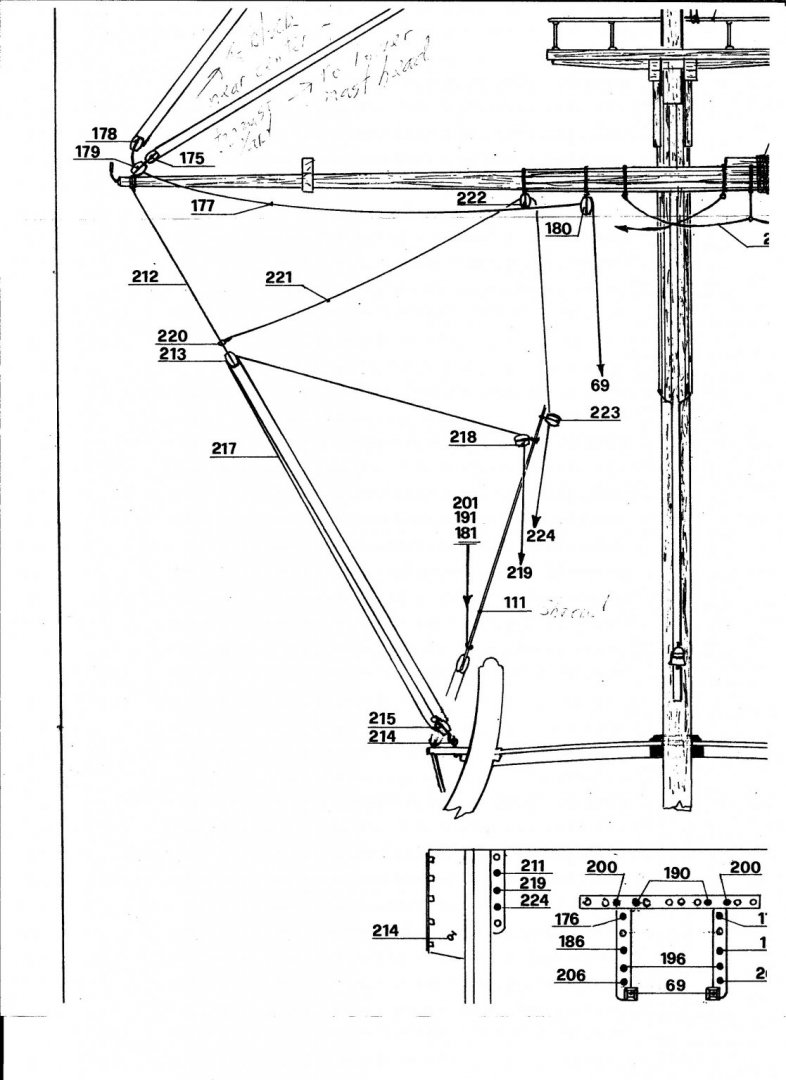
Rigging confusion!Any guidance would be appreciated! I'm trying to get a grip on what these various lines do. Several look like some kind of lifts,such as the one through block 178. That runs to a block on the main top,one end attached to the top yard and the other running down and attached to 111 which is a main shroud. How would this be attached to the shroud? How would that line be used on the real ship,with no free end to haul on? There are similar lines,201,191 and 181 coming down from higher yards and attached to that same shroud. What does line 221 do? Or the line coming down to pin 219 on the fife rail? Is there an online reference explaining what various running rigging lines in general do? Thanks.
-
Space for display is certainly a consideration. The cross section is not very deep, so I'm thinking of putting up a small wall shelf to splay it. Down the road,when I get to building my Pride Of Baltimore, I'll have to have more space due to the yards crossing the deck. Would it be totally inaccurate to mount them at a steep angle, as if the ship were beating into the wind? I realize that when the ship is in drydock they wouldn't do that,but it would save some depth.
-
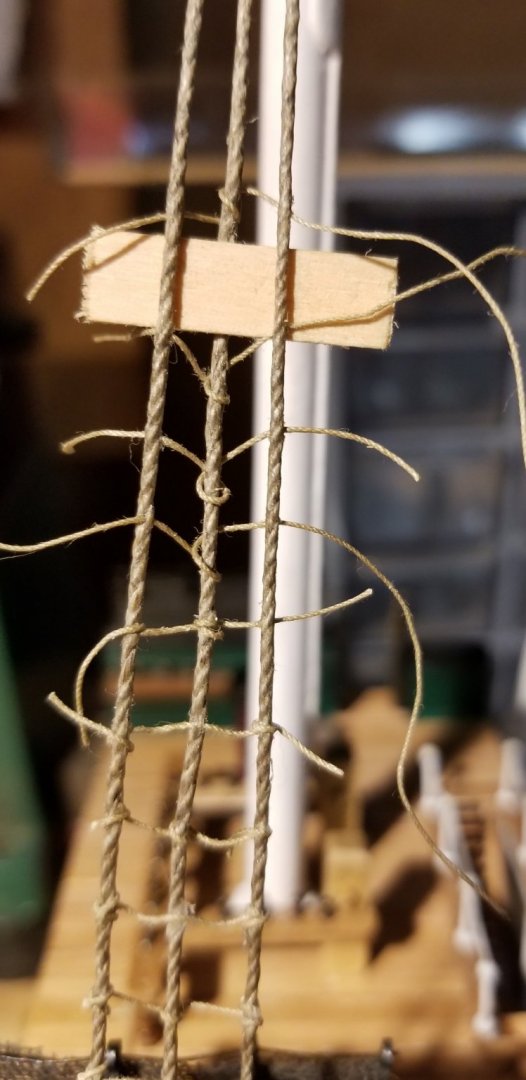
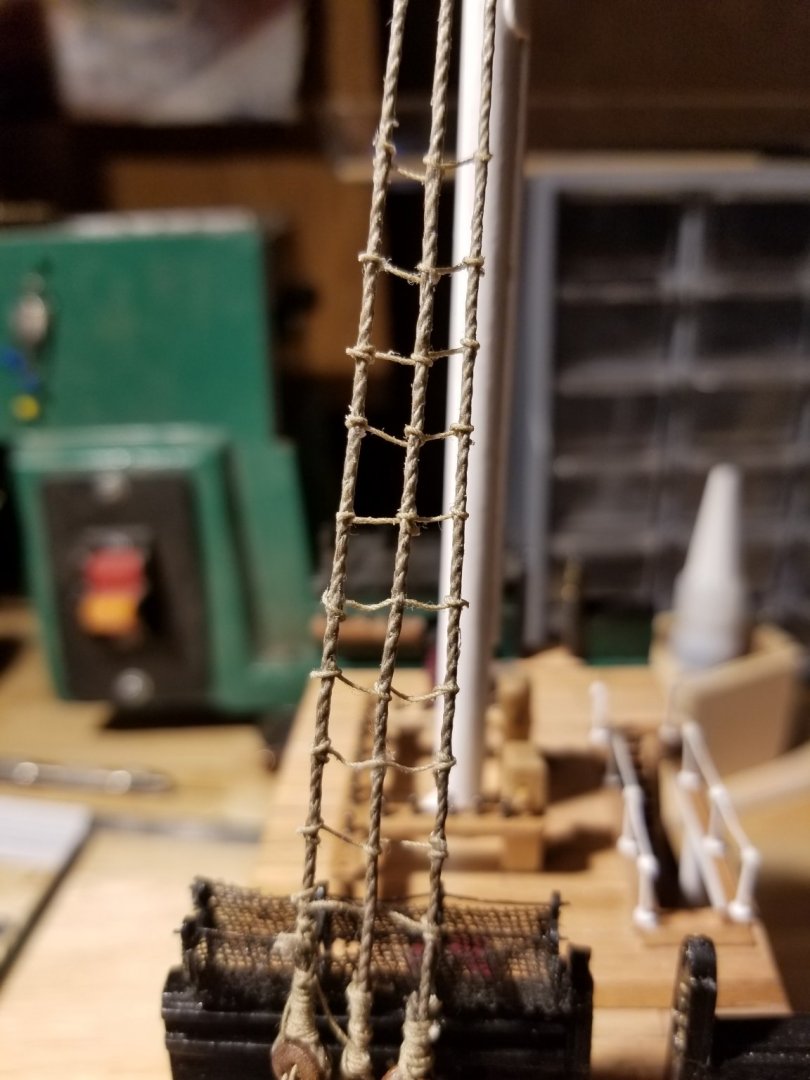
Ratlines! I'm so happy to have the ratline bugaboo out of my head. They're not perfect but for my first few I'm really happy. I used the plan to trace the shroud and ratlines onto a paper to use as a template but it flopped all over the place. All I really wanted it for was to uniformly space the ratlines. I cut a piece of basswood strip the correct width and used that as a gauge for each line.Easy. I think what had scared me in the past was the daunting task of tying hundreds of tiny knots onto the shrouds,keeping the tension right so as not to pull the shrouds together. I saw references to sewing the lines which sounded a lot simpler, but the pictures I saw didn't look right,with the ratline just passing through the shroud,so I came up with a compromise which I'm happy with. Using my strip gauge, I passed the line through the first shroud, wrapped it once around the second shroud, and then through the third shroud. I didn't try to straighten out the ratline at this point; I just left some longish thread at each end. I sewed all of the ratlines that I've done so far all at once, not adjusting any of them. Then I put a tiny dab of white glue on the front and back of each center loop of the ratline,pulling out excess slack and snugging up the loop. I pinched each loop front and back with my fingers which removed excess glue and worked it into the cord. Next, I wrapped the ratline once around the first and third shrouds in turn and secured them with glue as above. The glue dried enough to hold those wraps within a few seconds. Working my way up I did each ratline in the same way, then trimmed all the ends. For a simple "cheat", I think they look pretty decent. Whether or not this technique will pass muster once I get some Syren cordage, or on the larger scale of my upcoming Pride of Baltimore remains to be seen.
- 48 replies
-
- 2
-
-
- mamoli
- constitution
- (and 2 more)
-
I realize that these shrouds and deadeyes don't look very good, but for now, I'm thrilled with them! Rigging these have always scared the heck out of me but with help and examples on MSW plus several good YouTube videos, I have learned how to deal with the particular perceived difficulties that always perplexed me. I know pretty much what is wrong with these and how I can do them better when I do the actual rigging of this model. I'm going to be ordering better standing rigging as soon as Syren has it available,so I figured I might as well learn and practice with the beige cordage supplied in the kit. I'll rip these experiments out when I get the good ropes but in the meantime, I have a grip on how to seize shrouds at the mast top,how to seize a deadeye into the end of the shroud, and how to lace the lanyards,getting them all even. Next up,I'll try some different ways to add the ratlines. By the way, the cord supplied in the kit for the shrouds was nowhere enough for 6 shrouds,even if I had wanted to use it. After rigging these three shrouds, I have enough left for only one single shroud. Sheesh...
- 48 replies
-
- 3
-
-
- mamoli
- constitution
- (and 2 more)
-
Thanks, that's a big help towards understanding this. It never ceases to amaze me that sailors could do all of this sail handling perched on thin foot ropes high above the deck of a pitching and rolling ship, often in bad weather, perhaps freezing, without benefit of modern foul weather gear.
-
Thanks Henry. Do you by chance have a picture or diagram of this? I'm new at the ship building game and am not up on all the terminology yet.
-
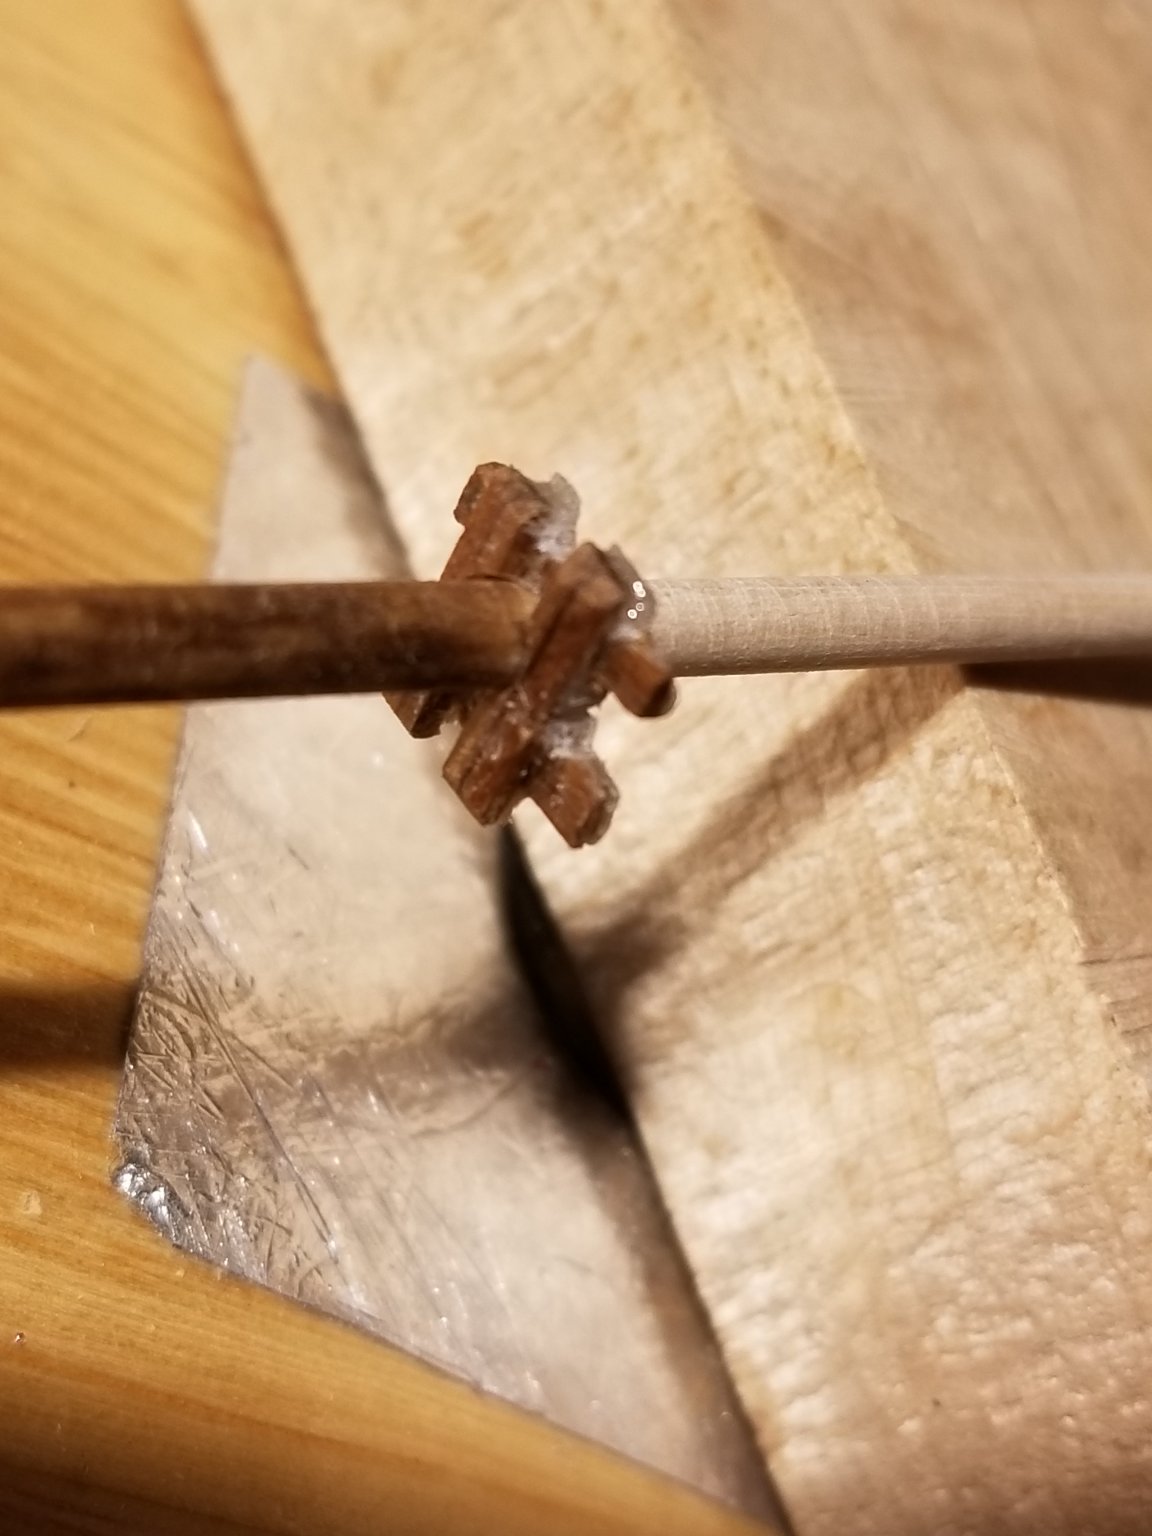
I've been working on the parts of the mast, and another part mysteriously vanished into the black hole in my house. I was thinning down the topgallant (love that word!) sanding and test fitting the tiny top crosstrees, when they simply vanished.They weren't on my lathe table* where I was shaping that mast, and they weren't on the other workbench where I've been building the ship. Gone. I'd already painted it white, so spotting it shouldn't have been difficult. Oh well, time to fabricate one. I did this by gluing two 1x1mm strips together and then using the resulting 1x2 to make the tree. It's not perfect but it's small enough that from a bit of a distance it should look OK. BTW- the plan calls for a hole to be drilled in the topgallant mast for a line to run through. I did that, but it made the mast so flimsy that it snapped. I made another and will figure out another way to handle that line. An amazing coincidence happened today. I was listening to an audio book of Conan Doyle's The Dealings Of Captain Sharkey detailing the works of a pirate chief. At one point, someone recognized a particular ship whose main yard was known to have been split and fished. Not long ago I wouldn't have known what that was. The amazing part is that at that VERY moment, I was applying the fish to my ship's main yard! What are the odds? * have a metal lathe which I use to make wooden Irish penny whistles. It's proven useful for tapering mast parts and yards.
- 48 replies
-
- 2
-
-
- mamoli
- constitution
- (and 2 more)
-
I just started shaping the spars for my Constitution cross section model and was reminded of a question I've wondered about for many years. How exactly were studding sails actually put into use. From my kit plans, and any photos I've seen they don't seem to have any rigging like footropes or rigging to haul them out into place. Looks like they're bound in place with rope at the inboard end when not in use, then run through iron fittings mounted to the yard. To deploy them, did they unbind that inboard end and just push the stuns'l boom out manually, bind it in the out position, and reverse that when they were no longer needed? You couldn't attach the sails to the boom while the boom was in the inboard position or it wouldn't run through the iron fittings. Did sailors have to go out on the boom,minus foot ropes to mount the canvas? Just this second it occurred to me that a more likely plan would be for sailors at the very end of the yard would attach the stuns'l bit by bit as the boom was run out. Anyone know for sure how this was done? However it was done, the image of a clipper with all stuns'ls out is wonderfully beautiful.
-
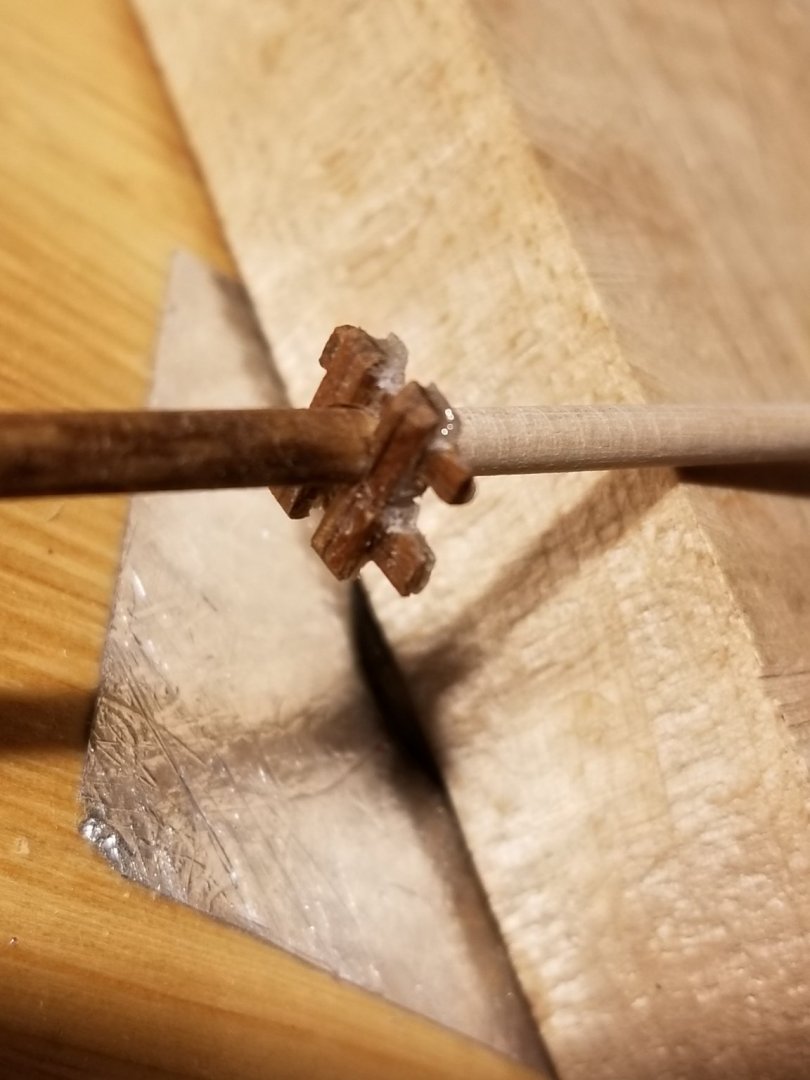
I've shaped the 3 mast sections,built the fighting top minus the rail which looks like it would get in the way while rigging. I drilled and inserted the uprights with no glue,drilled the rail and epoxied it to the top of the stanchions. I'll take it off and put it aside for permanent installation later. The fighting top isn't glued to the cheeks yet,although they're in place. My question now is what attaches the lower end of the second mast section (topmast?) which overlaps the top of the mainmast. The fit between the cheeks is very loose and as far as I can tell from the instructions and other builders' logs it's supposed to be that way. What do I attach it to? I could glue shims to it to give a close fit to the cheeks I suppose. The same will probably apply for the topmost section of the mast.Help!
-
I know what you mean about pre-drilling. This is kind of like a chess game where you have to think 10 moves ahead! Some things I don't think I could have predicted though, such as the holes for cannon rigging rings.
- 48 replies
-
- 1
-
-
- mamoli
- constitution
- (and 2 more)
-
Nice work so far,although I see it's over a year since you updated the log. This ship is my next build, so I eagerly await updates.
-
Andy-- I'm working (muddling?) through the same model. I'm not nearly as meticulous as you are but I'm pretty happy with it so far. This build log will be a major reference for me as I continue! It's already cleared up my confusion about the mainmast to topmast area. I'm doing this long drydocked Connie as a learning project for my next, which will be the Pride Of Baltimore II, so I'll be following your build log for that too.
- 188 replies
-
- 1
-
-
- constitution
- mamoli
- (and 2 more)
-
What are y'all using to drill all the tiny holes on your ships? I have a cheapie set of micro drills and pin vise, but those drills are not all very sharp,and super fragile. I've broken several so far. Ironically, some of the drills broke in the middle of the twisted part, and the broken end was sharper and worked better than the original drill. I wouldn't mind paying more for a set that works and lasts better, as I'll have lots of holes to drill on this build and an upcoming Pride of Baltimore II. How have people drilled holes in really tight locations? I wanted to drill holes for rigging the main deck cannons but found that my pin vise was too long. Thanks for all the great advice and feedback so far.
- 48 replies
-
- 1
-
-
- mamoli
- constitution
- (and 2 more)
-
I have this kit still in the box and am eager to begin it as soon as I finish my Constitution cross section. I love the way you did the transom artwork. Here in Maryland we're VERY proud of our state flag which, in my humble opinion,is the most beautiful state flag. Looks like something a knight of yore might have had on it's shield. We use it everywhere: coffee mugs,key chains, neck lanyards,car stickers etc. I'd been wondering how to get it to look right when I build my Pride and yours is a great solution. In addition to an American flag at the masthead, I'd like to get of make an appropriately sized Maryland flag and fly it somewhere else on the ship.
-
What kind of filler is used for this?
-
I've seen pictures of a little wire gizmo that people have used to maintain two deadeyes the correct distance apart for attaching the shrouds. What kind of wire would I use that stiff enough to hold the deadeyes and still fit through the tiny deadeye holes? I was speculating this morning about perhaps lacing the deadeyes off the hull using my "helping hands" device to hold the two deadeyes. I'd lace them very loosely because they would be tightened after the lower deadeye was attached to the channel and a spacer or template was used to set the proper spacing. Would this be easier than trying to sneak the lacing blindly between the lower deadeye and the hull?
-
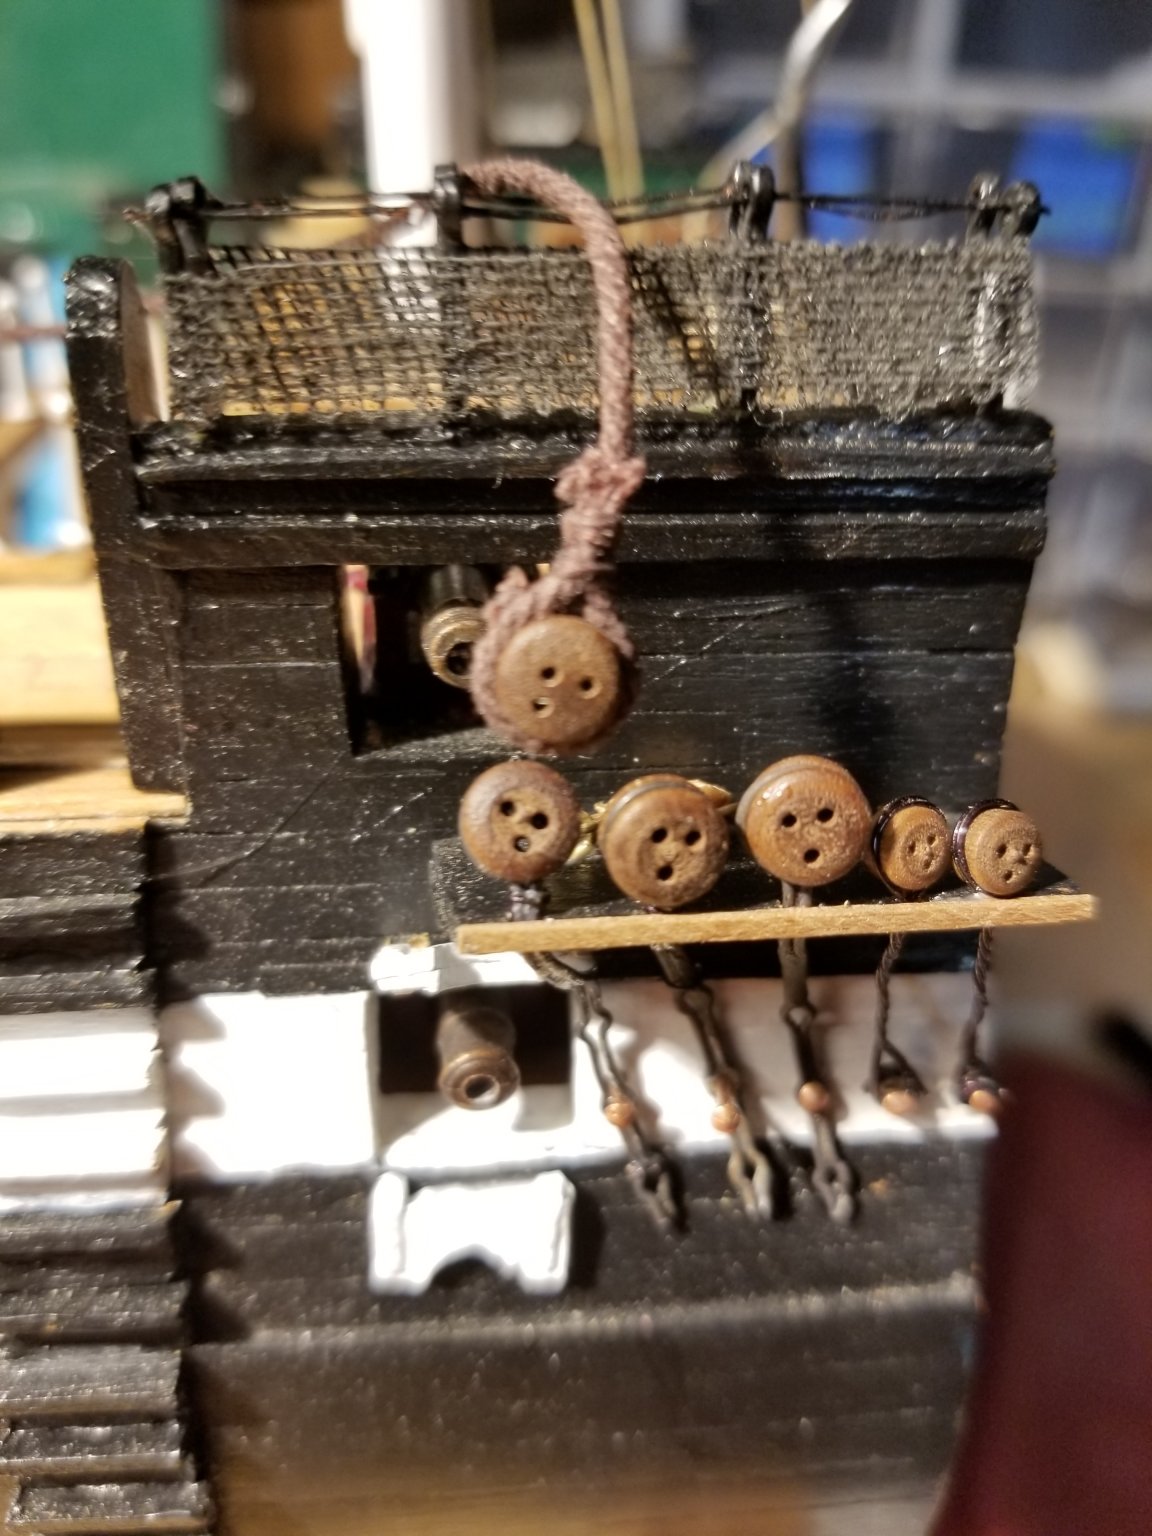
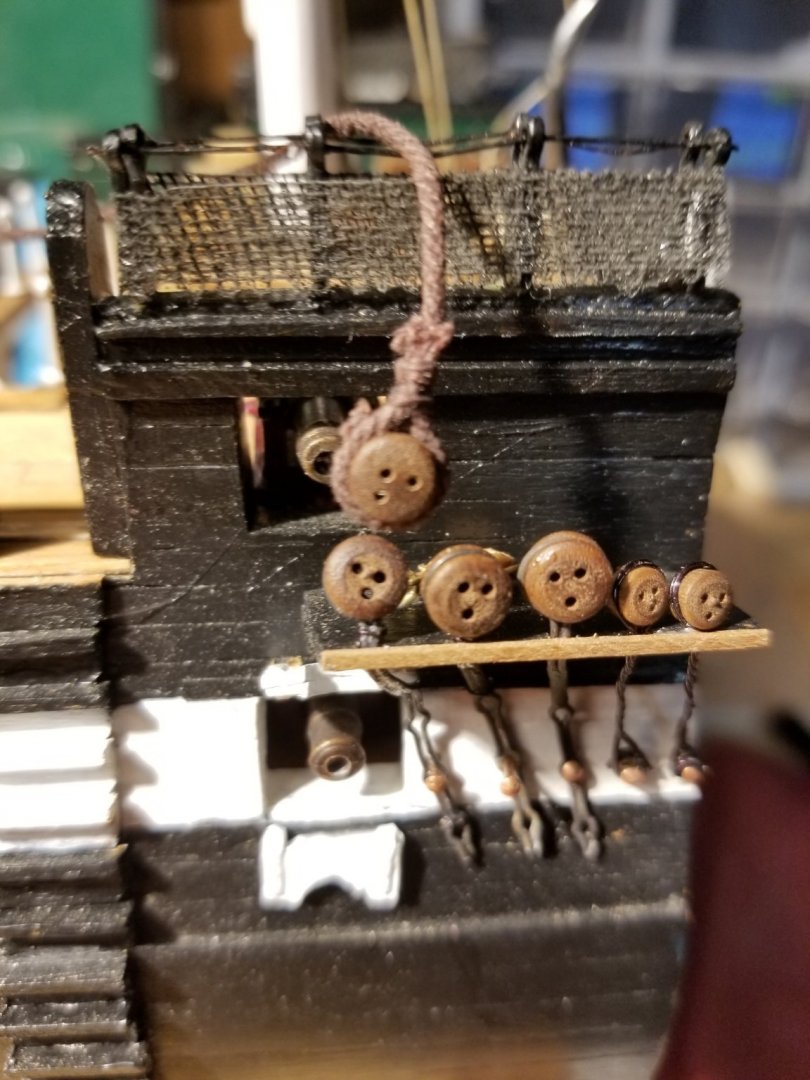
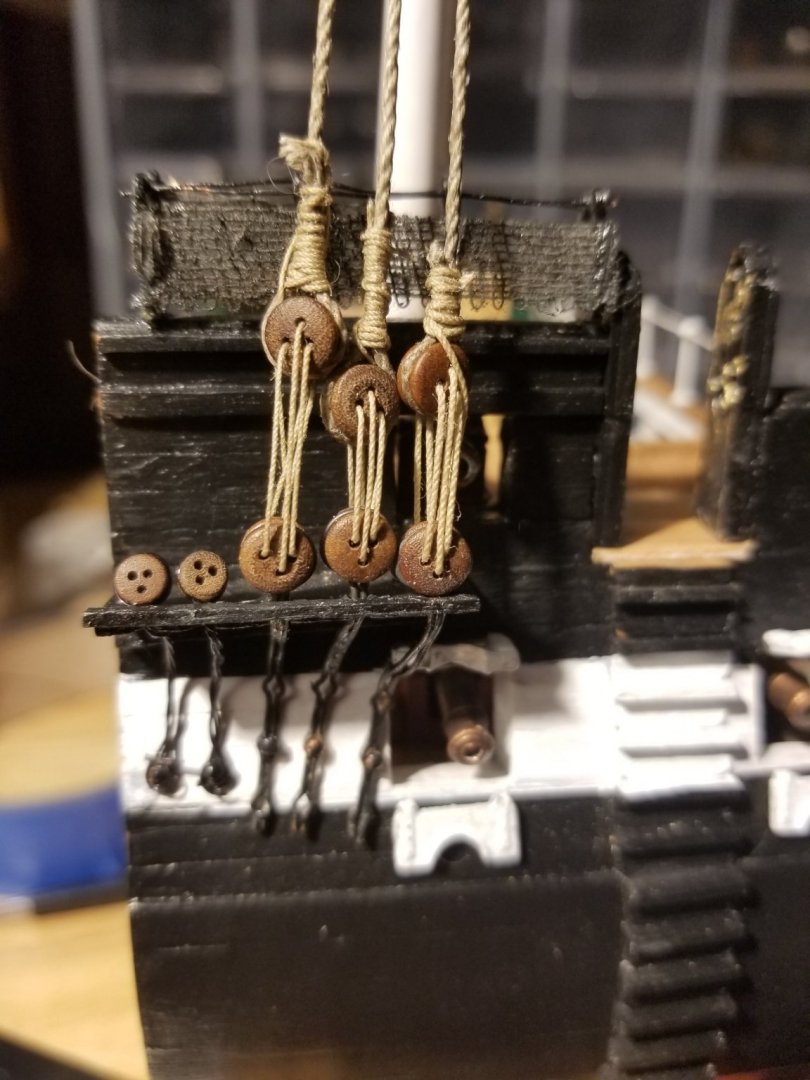
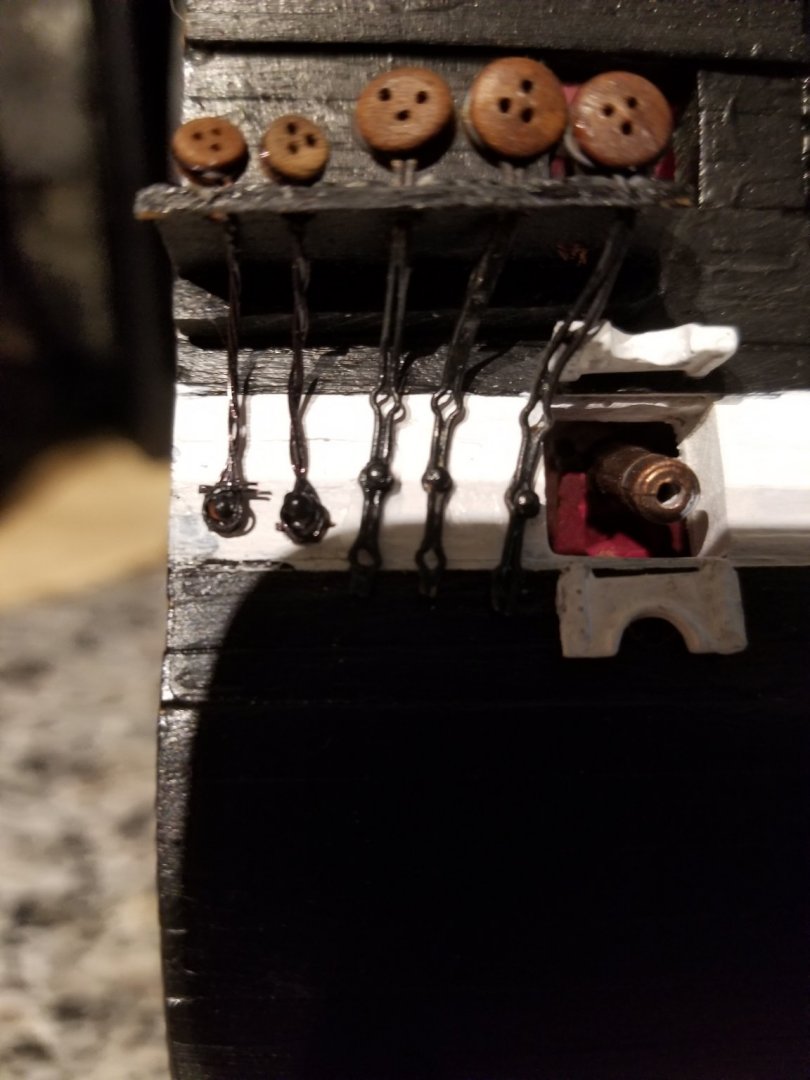
Some progress. I opted to use the hammock netting included in the kit, just spray painted it black. I can live with it as an easy solution. I also added the lower deadeyes on one side of the hull. This was my first time dealing with deadeyes, which have scared the living daylights out of me ever since I considered building a ship. The three larger ones use the included chainplates,using only one copper nail*. I may add the others later. The two smaller ones were done with a quick and dirty approach using a doubled strand of 28g black copper wire. I simply twisted some wire around the deadeye. When the twisted part was the length shown on the plan then wrapped the ends back around a finishing nail to make a loop which I locked with CA glue. The results wouldn't win me any points in a model ship competition 😉 in this case I'm OK with that. I still need to tuck in the ends of the black wire. From a distance and viewed head on as the ship will be displayed they don't show all that much,in the shadow of the channel. Later today I'll do the other side. *Getting those copper nails in was a bear! I tried pushing them through a scrap piece of hull plank and couldn't do it. I have some tiny drills and a drill vise and I finally got the necessary holes drilled. Of course the nails are too long and hit the inner planking so I had to cut them nearly in half. I broke several of the tiny drill bits. My set is pretty cheap, and if you looked at the bit wrong it broke.Ironically, sometimes the broken end of the bit drilled better than the new bit! Any better ideas for drilling these and the many other holes I'll need to be drilling? Looking ahead, how do you lace the lanyards in the tight space between the lower deadeye and the hull? I'm thinking glue on the end of the lanyard, bend the end of the lanyard about 90 degrees, then feed the bent part through the deadeye using a mosquito hemostat. Again, I'd welcome any better ideas.
- 48 replies
-
- 3
-
-
- mamoli
- constitution
- (and 2 more)
-
Hoss-- I found the link to the MS Syren kit plans and printed the pages that you refer to. I do think whose chainplates would work well for my kit. If I get ambitious enough, I might replace all of the chainplates for a more uniform appearance. In looking for the plans, I found the plans Syren company's Winchelsea. Wow! There is SO much information that I'll find useful,especially when I plank my POB which will be my first "real" planking job.
- 48 replies
-
- 1
-
-
- mamoli
- constitution
- (and 2 more)
-
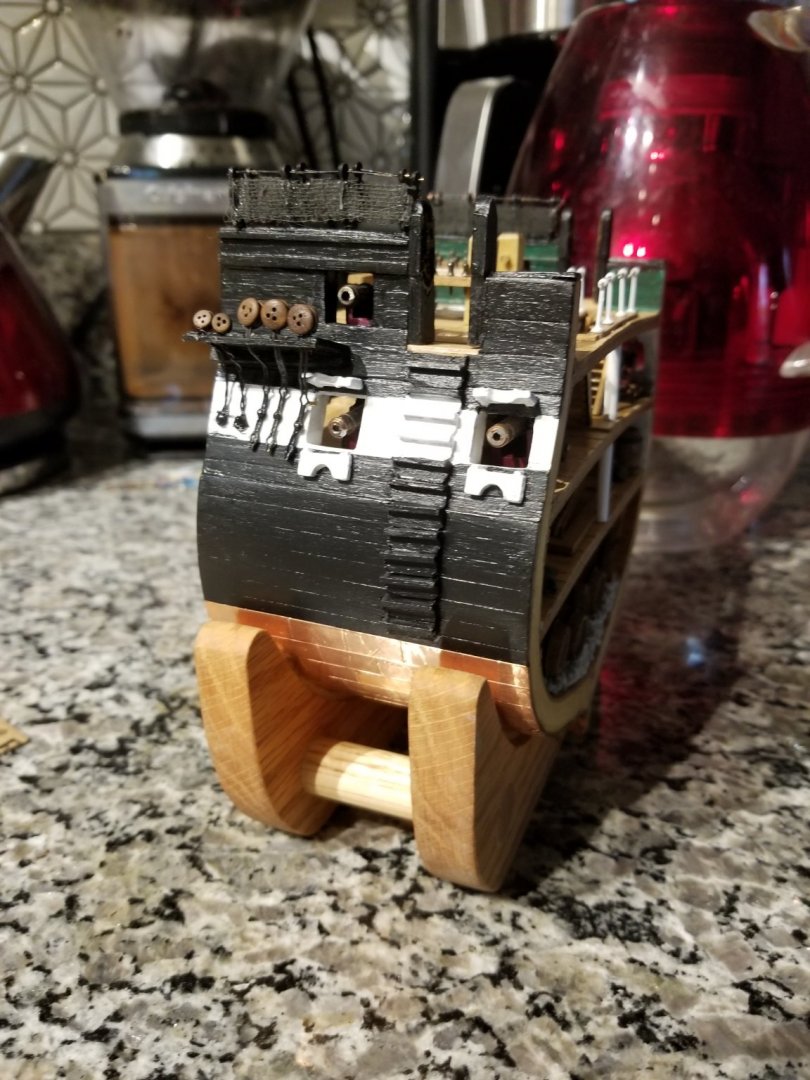
I agree that rivets would be an improvement. I considered using a dressmaker's pounce wheel, which is the same idea as the Trumpeter tool but decided not to for practical reasons. Only a small amount of my copper cladding shows with the model on it's base,and since a cross section will be viewed mostly face on I didn't think this would be too much of a problem. My next ship,whose kit I already have,is the Pride of Baltimore II which does not need coppering (although it would be pretty!). If I ever do decide to make another ship which has copper plating, I would definitely add rivets. Thanks for the compliment on the base,which I'm pretty happy with. As of now the hull is just sitting on it and when I pick up the model to move it, the base falls off. I hesitate to glue it permanently in case some situation arises which would necessitate removing it,although I can't really imagine what situation that might be. I'm considering gluing it with something strong enough to hold it in place enough for moving, but not so strong as to prevent it's removal if necessary. A dab of clear silicone bathtub caulk? Contact cement?