.jpg.bc46b7394042cb22c3a08e1cfbd9877b.jpg)
BobCardone
-
Posts
142 -
Joined
-
Last visited
Content Type
Profiles
Forums
Gallery
Events
Everything posted by BobCardone
-
.thumb.jpg.2abae9c0194e4e915bb097b8a6d5c174.jpg) I think that's why my wife is always telling me to turn down (TV, Stereo, etc). Back when I played out a lot, if you didn't have a backline taller than you than you weren't in a REAL BAND.
I think that's why my wife is always telling me to turn down (TV, Stereo, etc). Back when I played out a lot, if you didn't have a backline taller than you than you weren't in a REAL BAND. -
All things considered, I agree. The darn thing weighs about 20 pounds, tho. I guess I don't have to worry about it turning over...😁 When I was young and dumb I didn't care, and now that I'm old and dumb I'm paying the price. According to the VA, I'm down 40% in my left ear (the side that always faced the drummer) and 20% in my right.
-
Looking good! Based on the excellent longboat you just completed, this should end up a real gem!
-
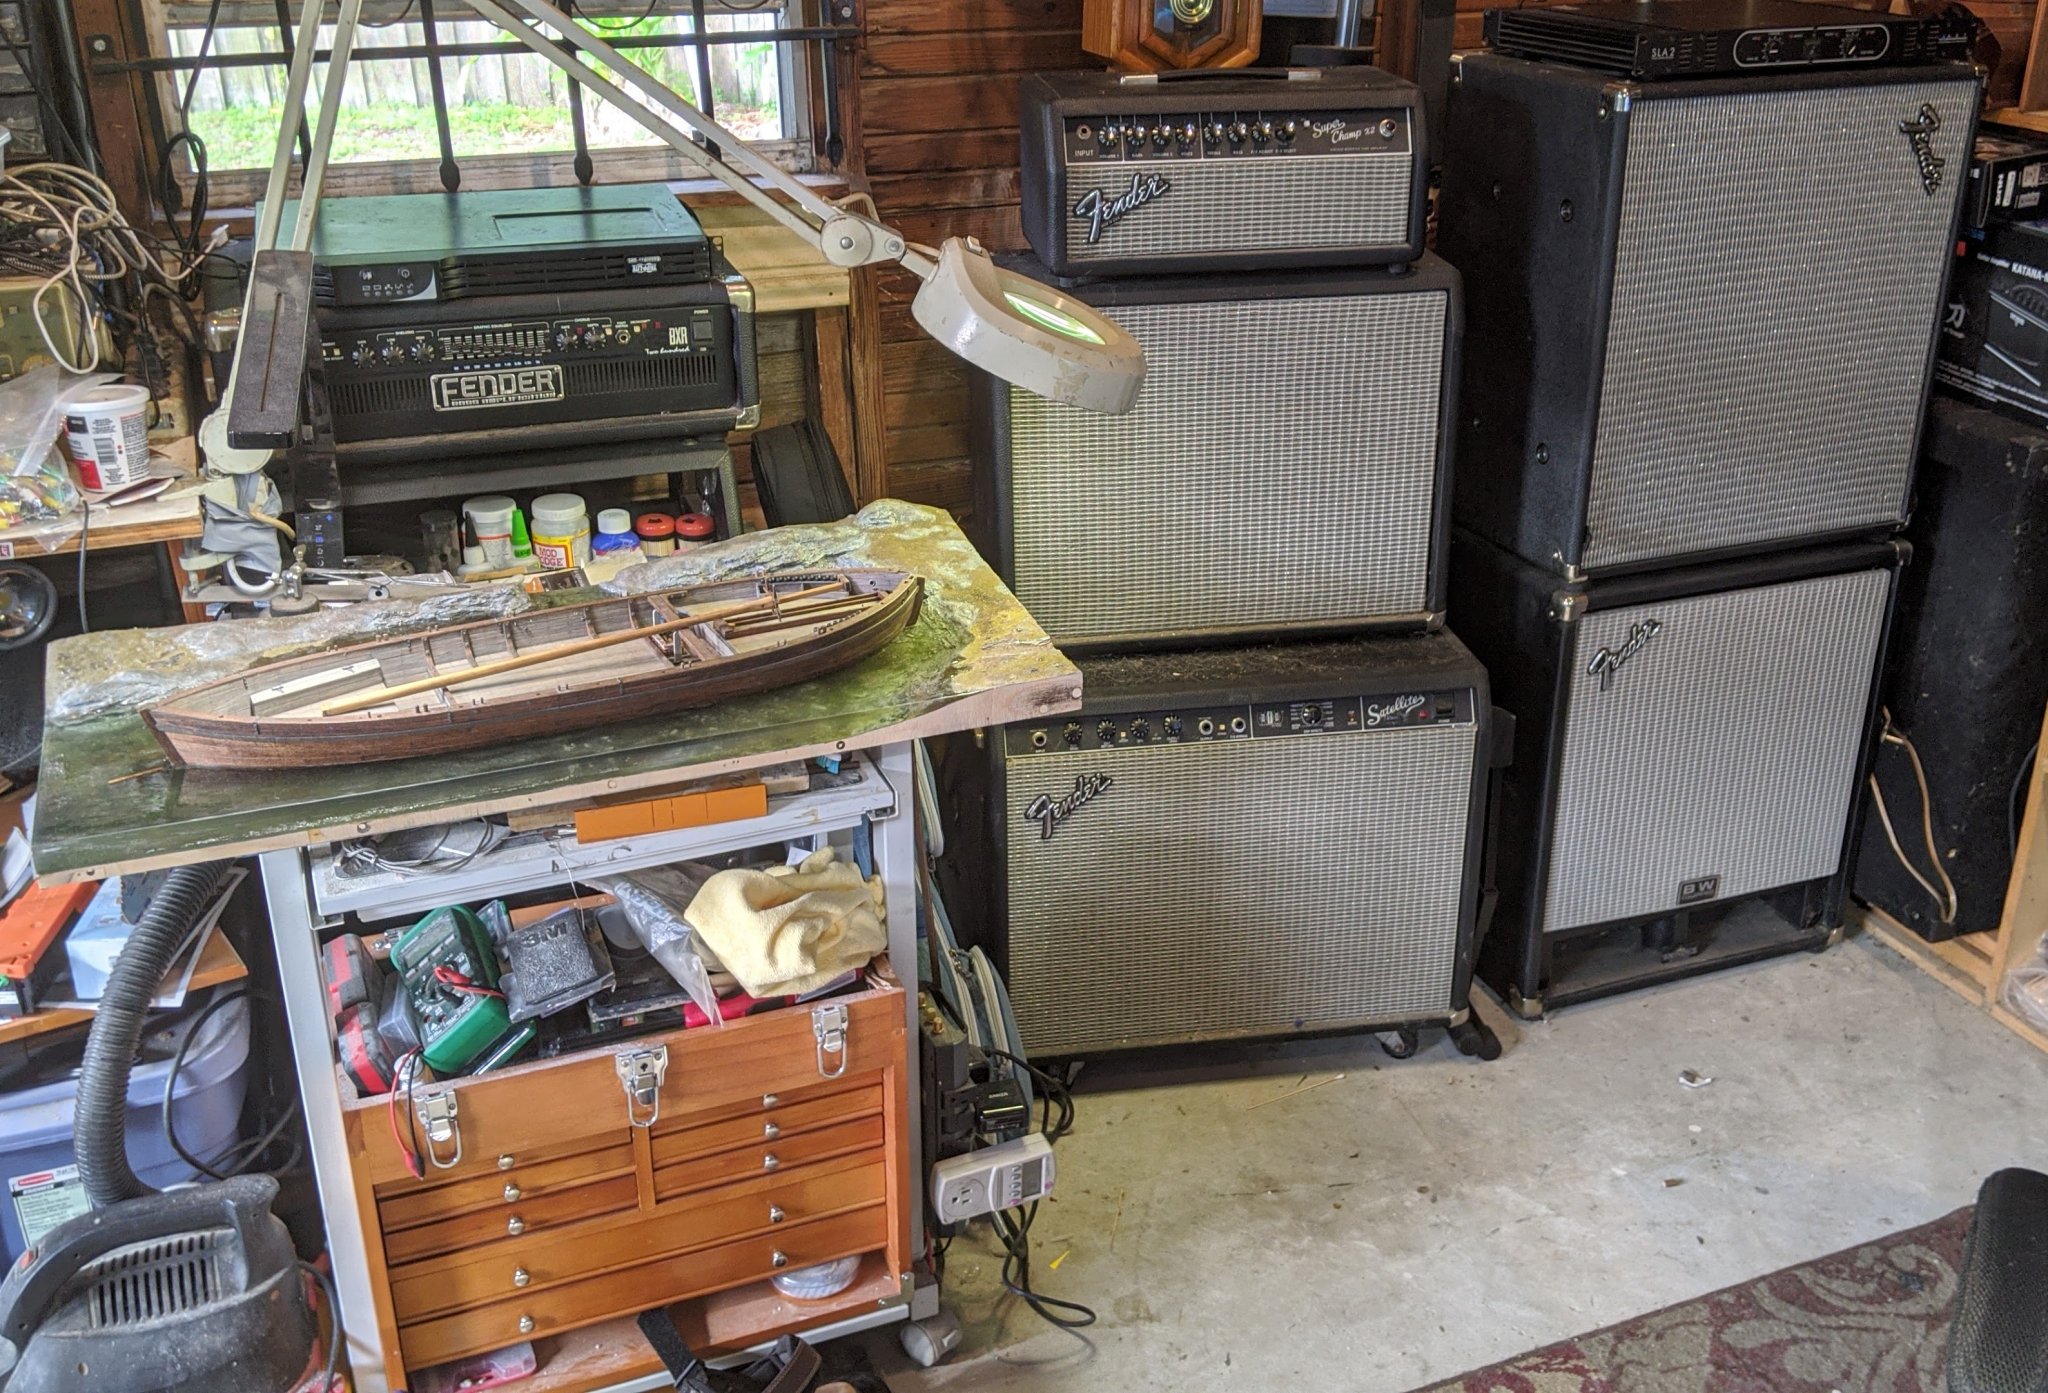
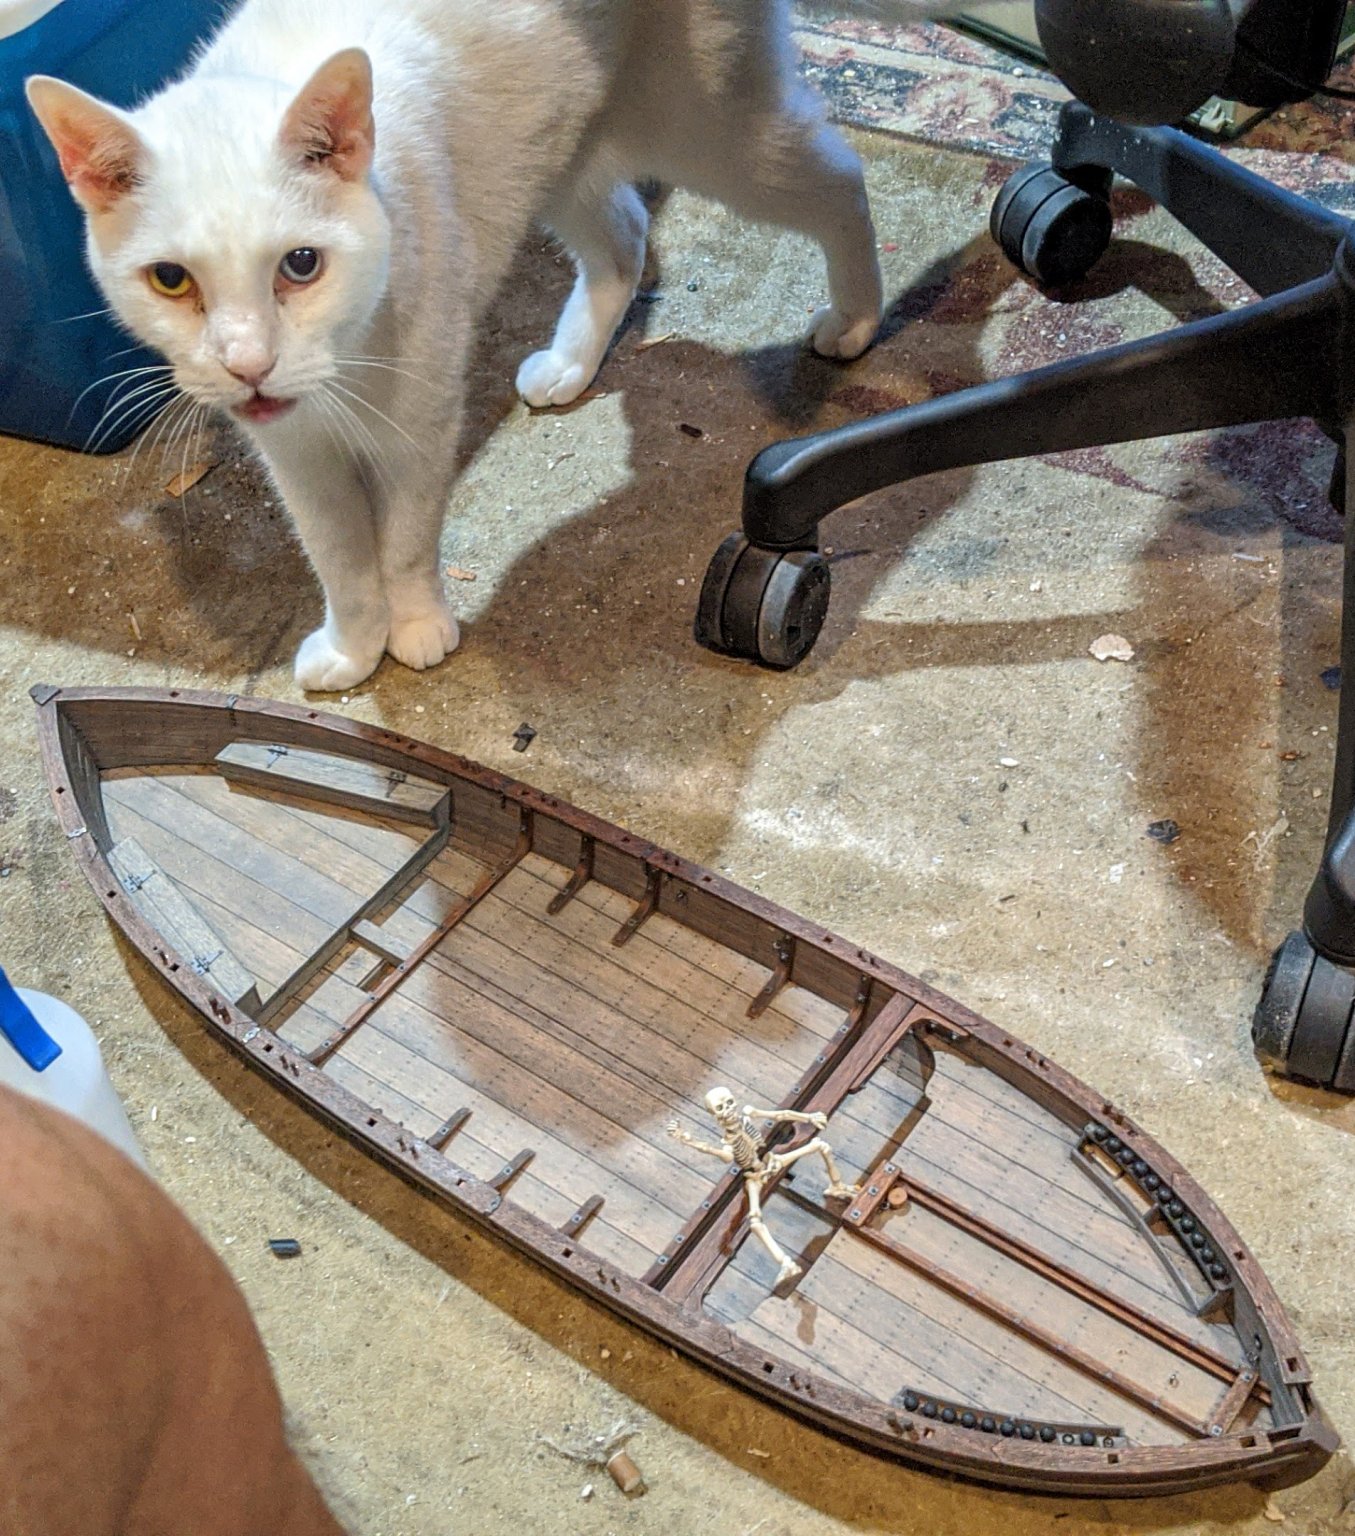
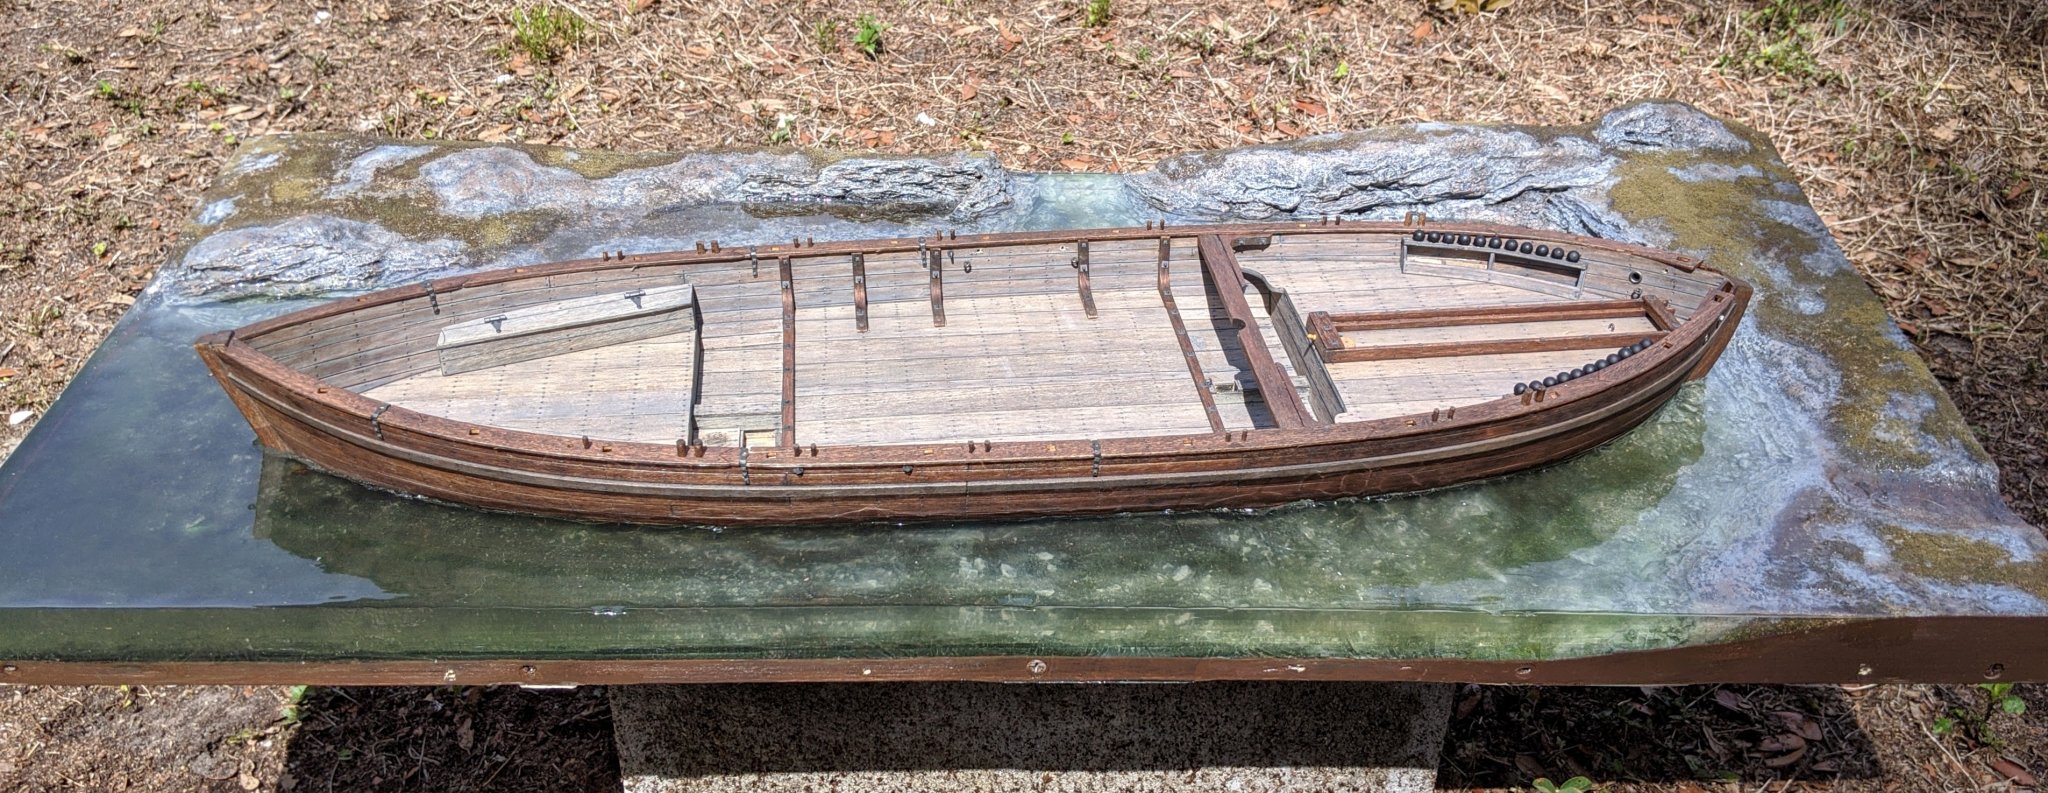
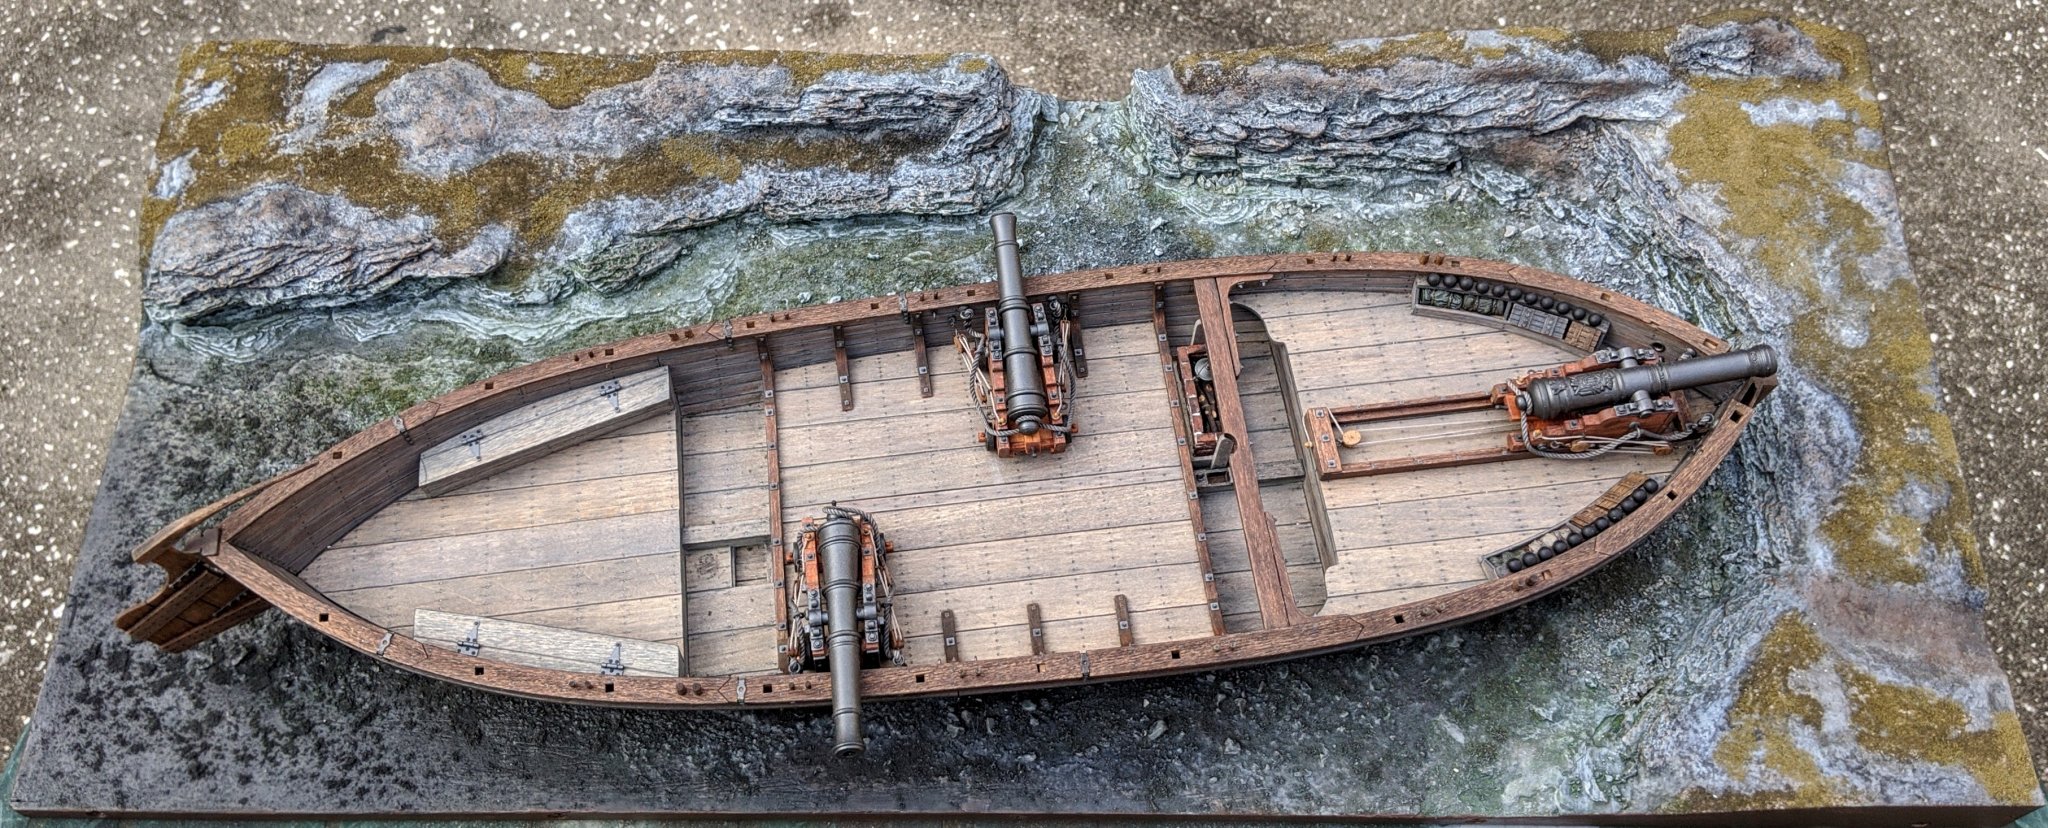
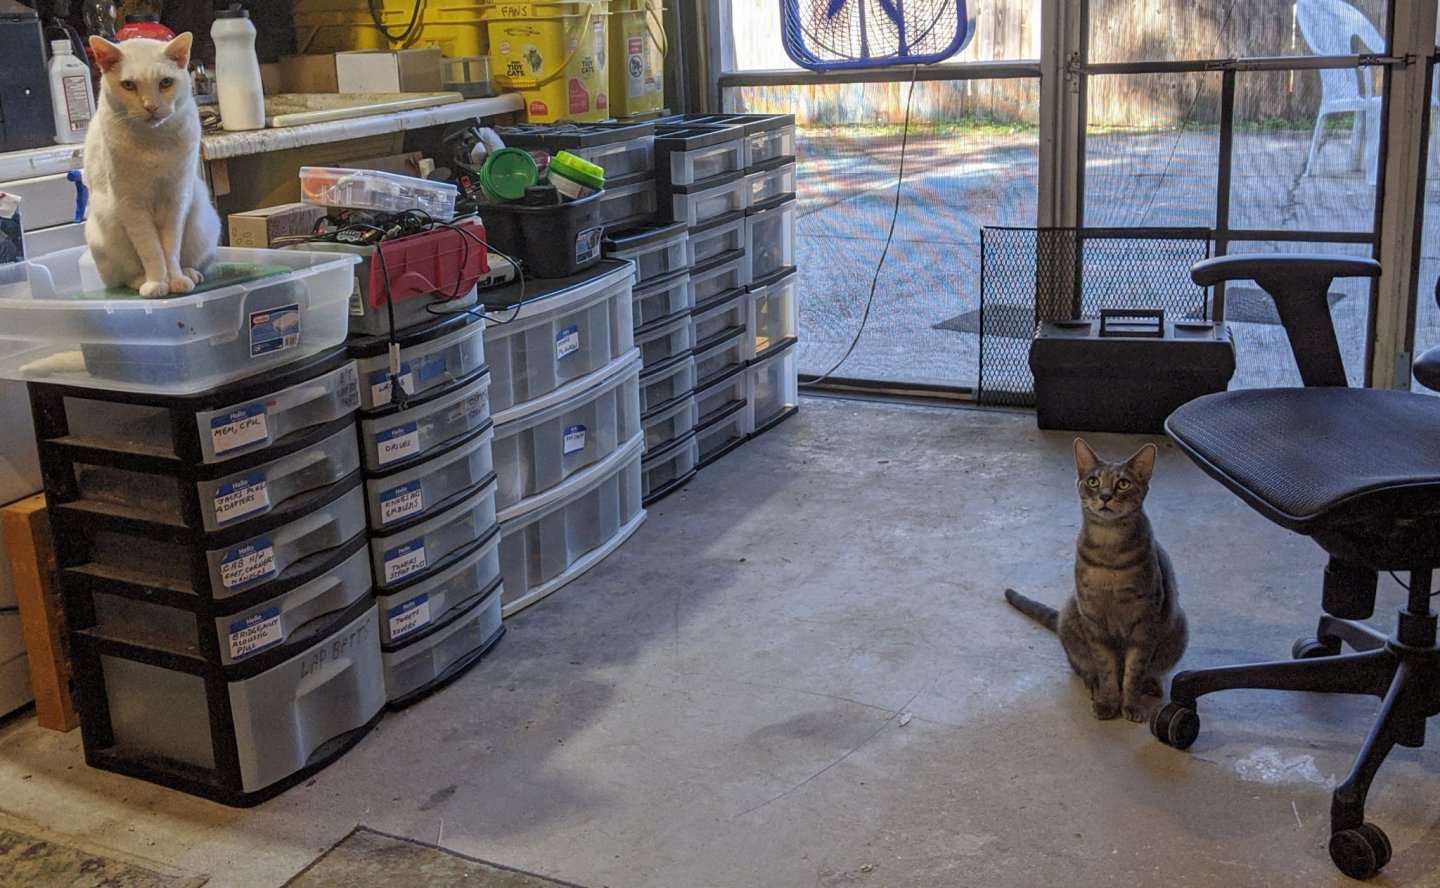
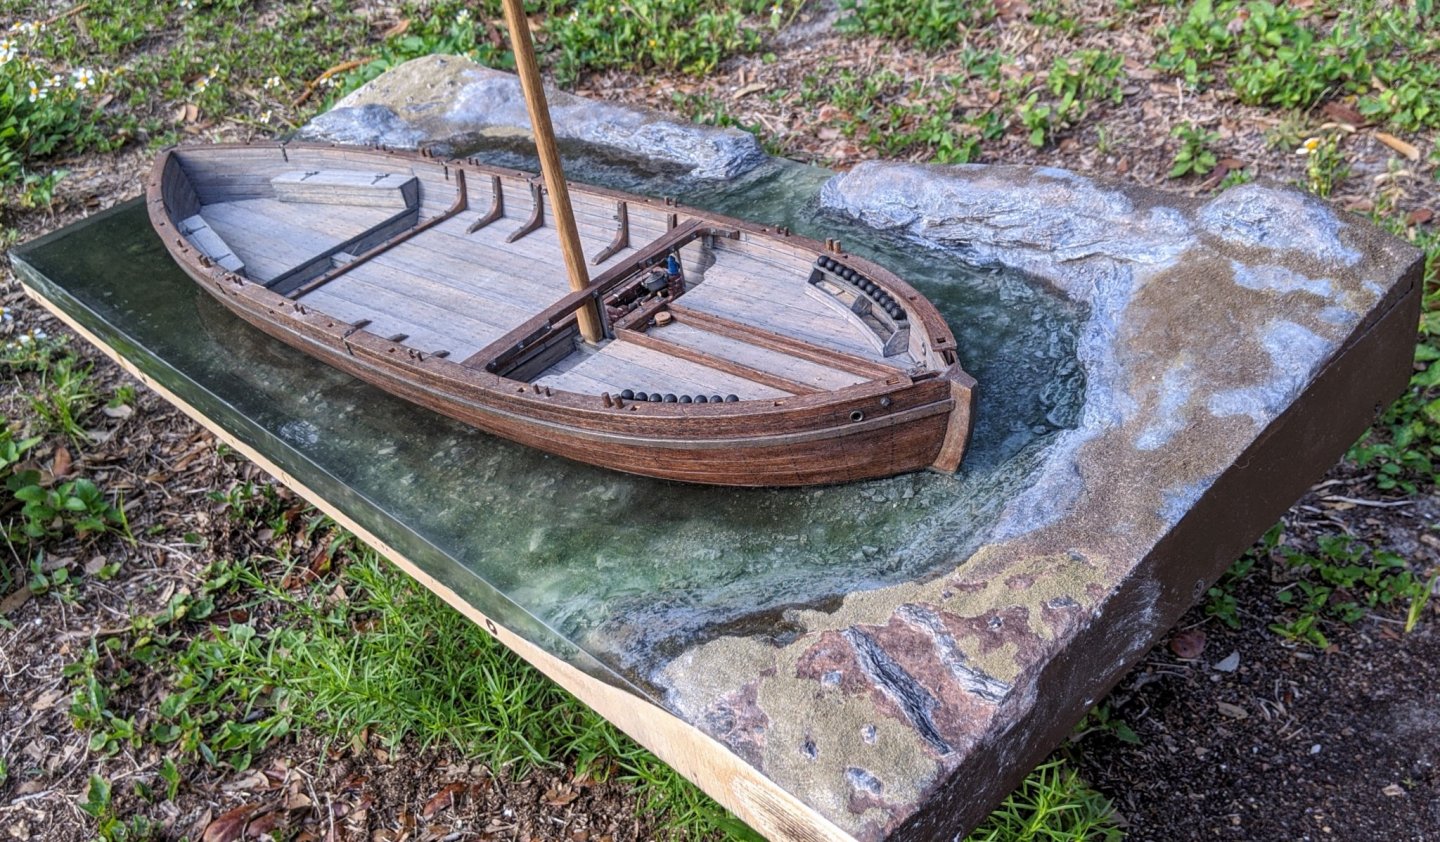
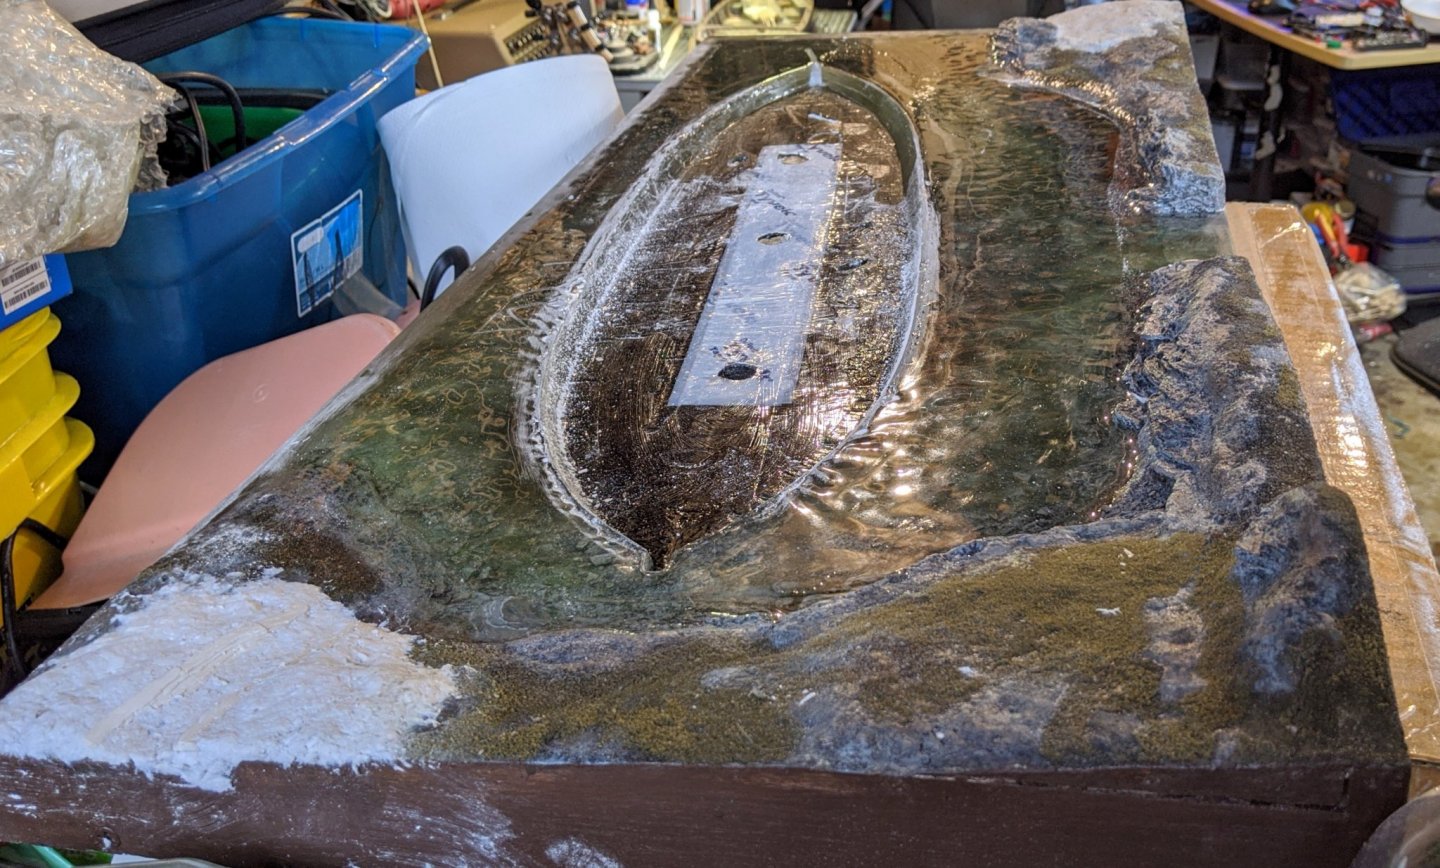
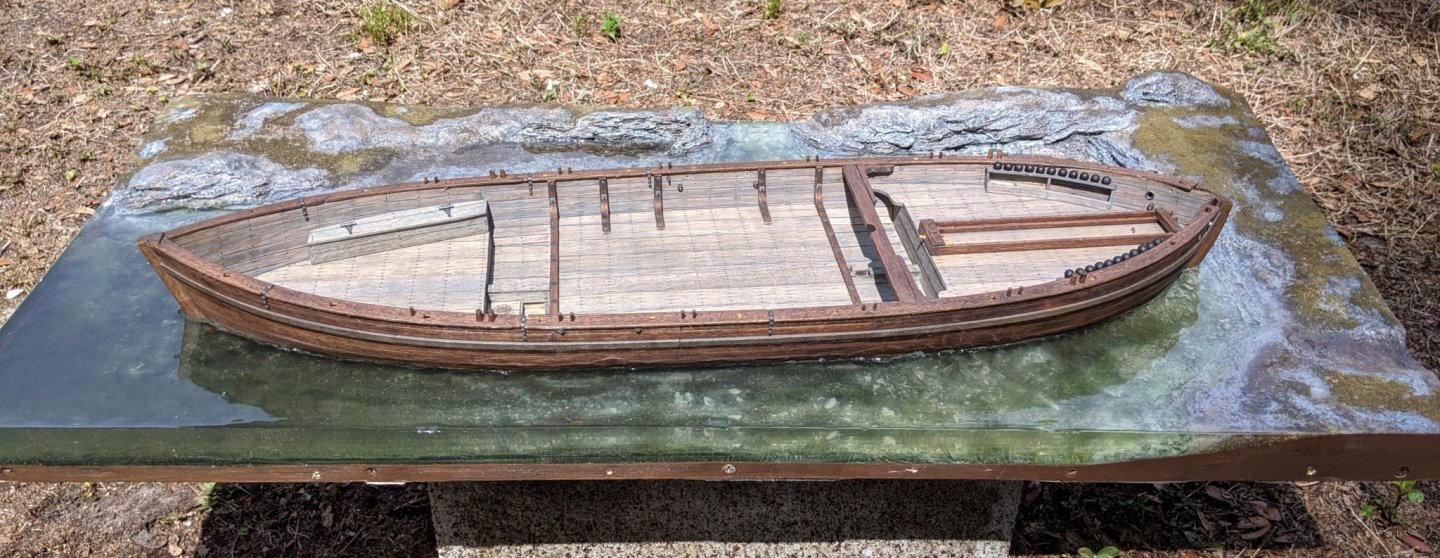
Hi all, It's been a while since any progress on the Philly, but the workshop is finally clean and organized... Mr. Snowball and The Nipster supervised, and then advised me to get back to work on the boat. I finished out the water as best I could, still have some delamination on the front but after sanding and polishing it's a lot less noticeable. Here's some pics as it stands now, and with the workshop revamp completed work on the boat will resume at a faster pace. Next will be re-attaching all the guns, deck stuff and other things removed to make the water pour easier. If I did it over again, I would have made the base much smaller and less complicated. Building it really set me back on the boat construction and made me lose my primal focus. As they say though, in for a penny, in for a pound...

-
Thanks, I appreciate the support! In retrospect, I "went down the rabbit hole" on the base, and lost focus on the main project. I'm guilty of what the military calls "mission creep"; adding features that compromise the objective with little added overall benefit. I've decided to put the base "on ice" for now and get back to the boat. The existing base may be salvageable, or I may make a smaller and simpler version. It is frustrating, but it was fun building it and I won't let some problems take away from that fun! I'm rearranging my workshop, so there won't be much progress over the next week or so. Not to worry, this will NOT be a necro build log. Slim (and Snowball) just won't let that happen...

-
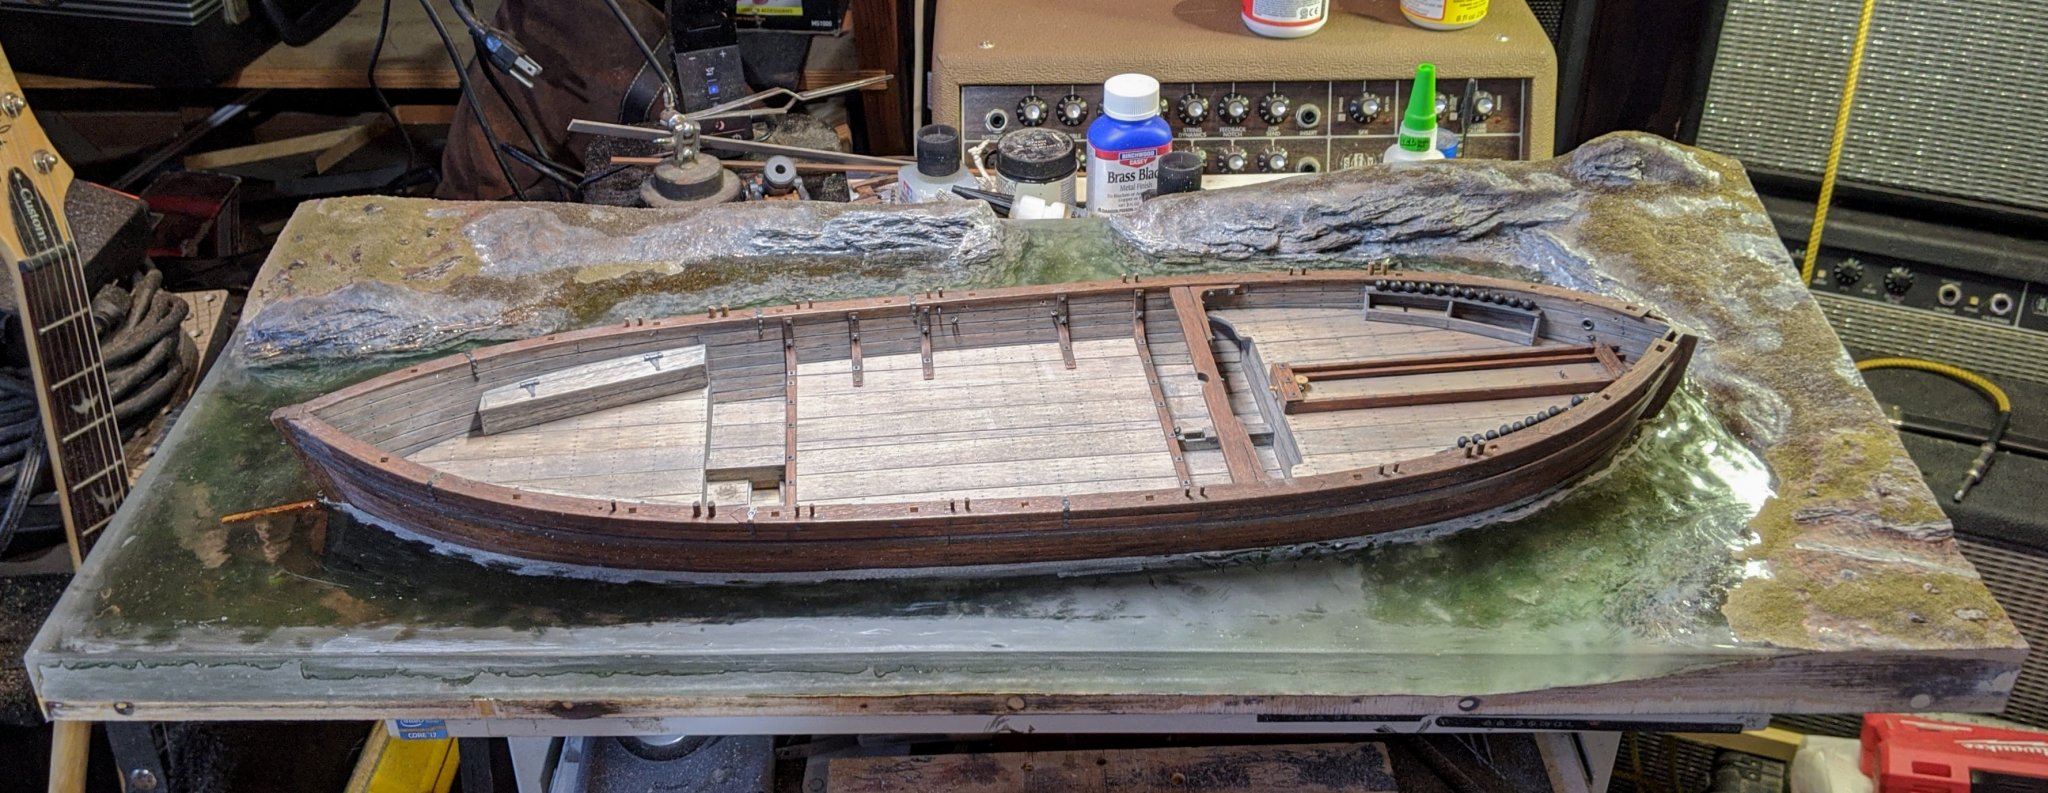
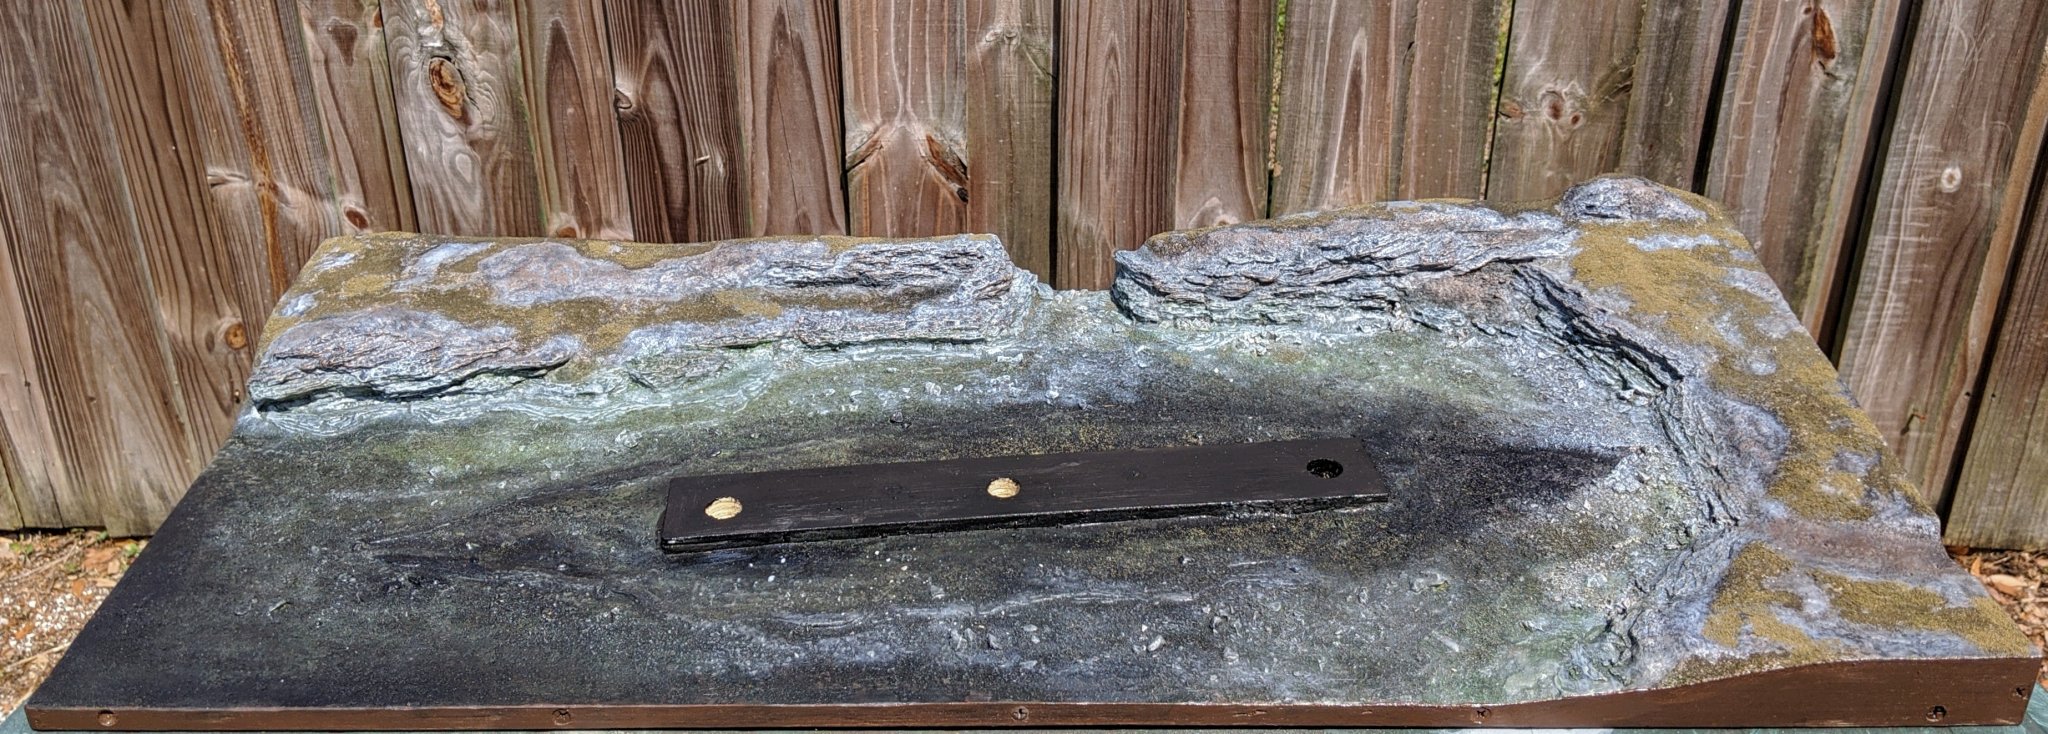
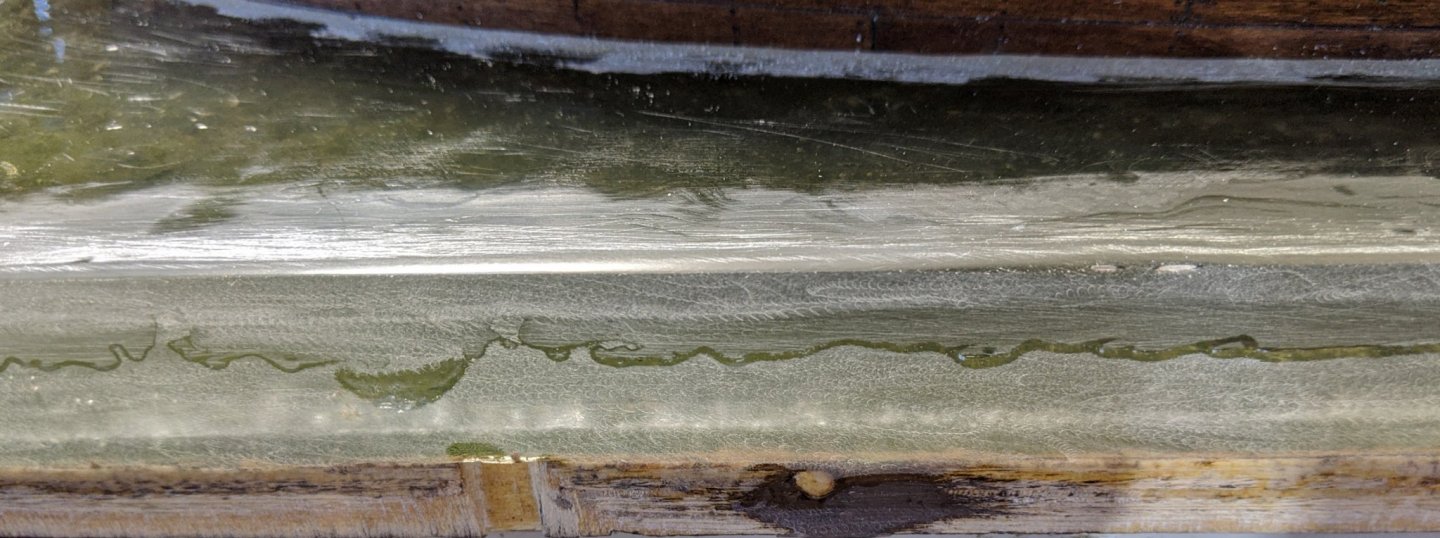
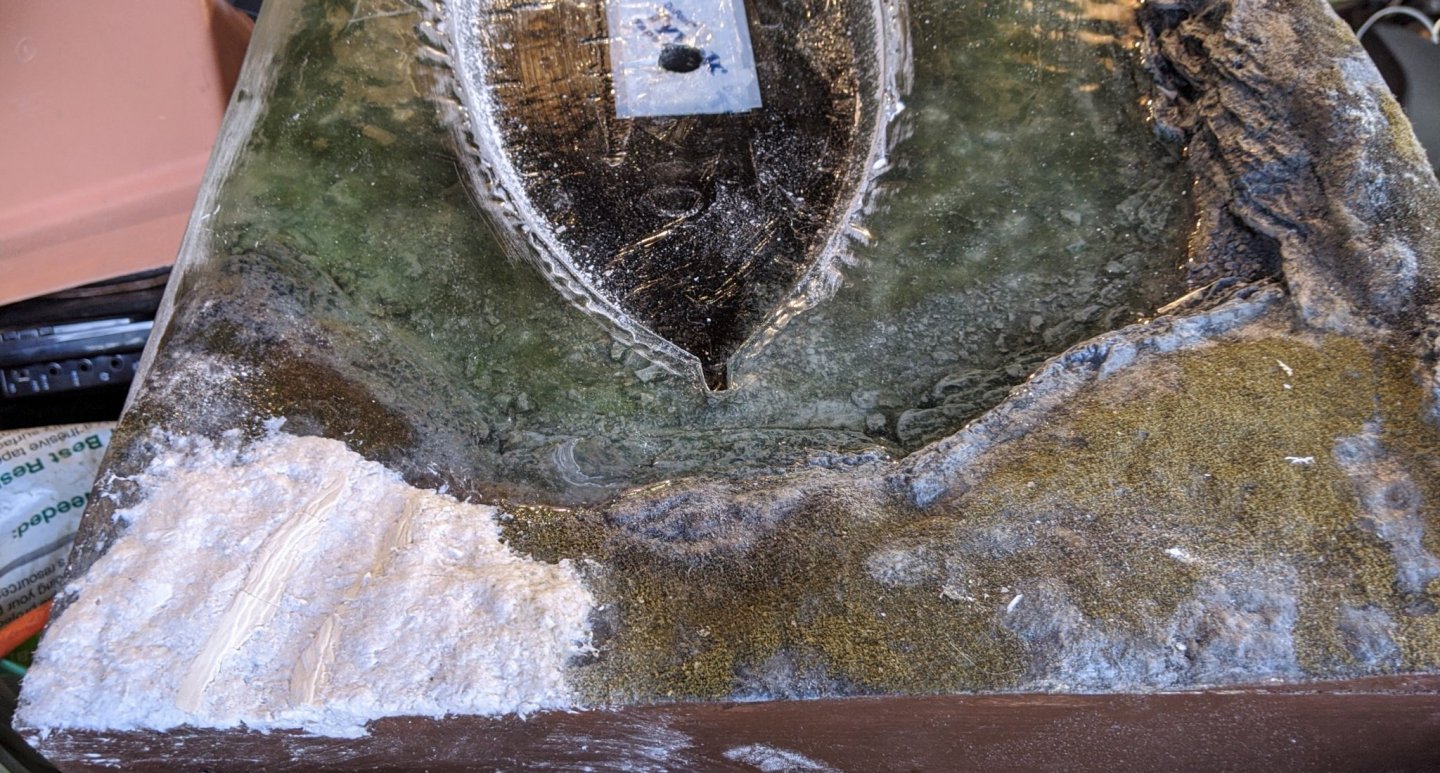
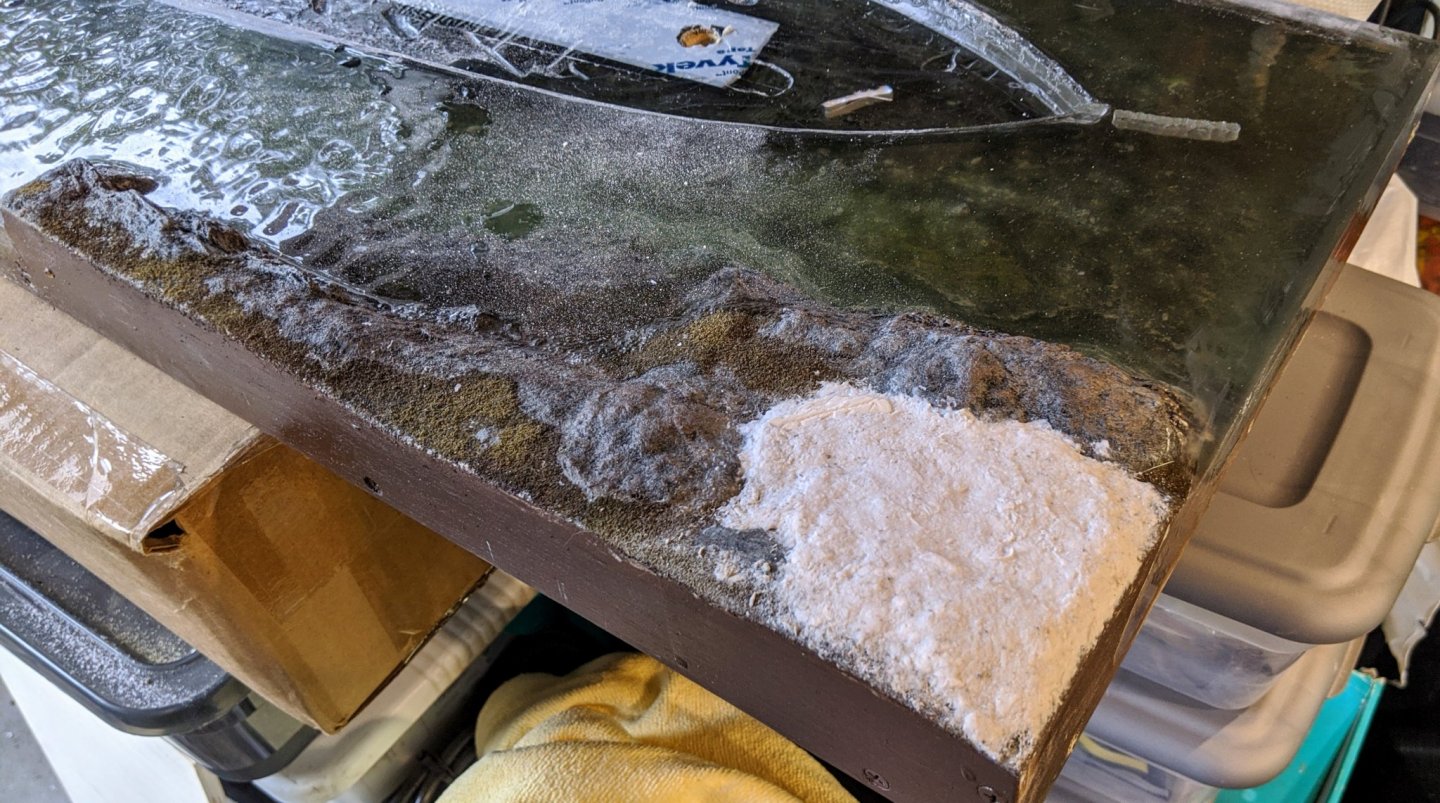
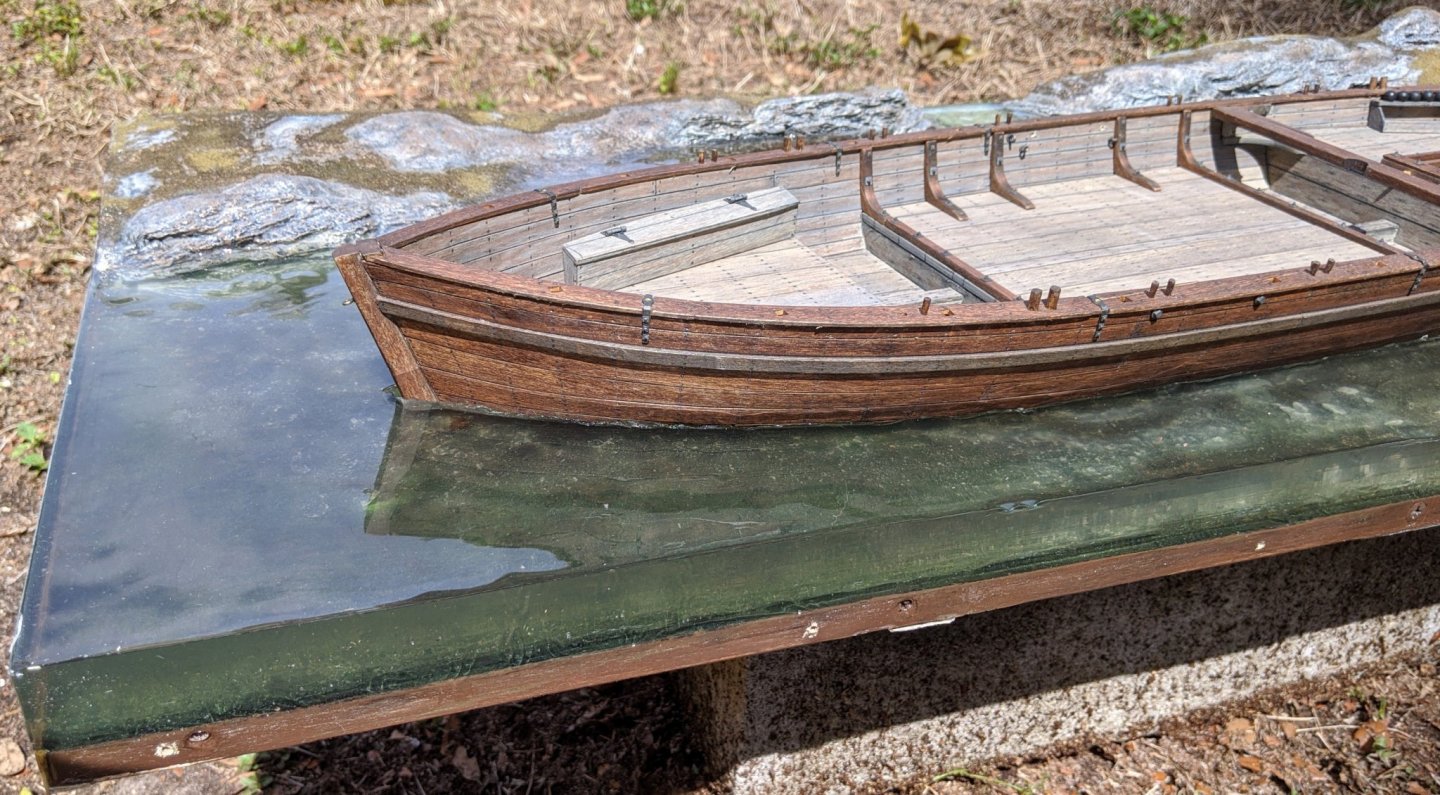
Hi all, Well, had a major failure in the base water resin. Delamination all along the front edge between the first and second pour. It's still structurally sound, but there is a very visible series of air pockets that go about 1/4" horizontally into the water, they look silvery in this pic (under the sanding marks)... I spent all week trying to fix it, but it's there for good. That foils my plan of having the front of the base displayed with the water visible. I guess I'll just box the bottom 2" of the base with the display case I've designed. The good news is the rest of the base is done, with just one very thin coat of resin left to blend all the sanding marks. Here's the state of things... Poor Philly is stripped down, dusty and tired of being handled so much and so roughly. But no more! all the rough stuff is done and I can start putting things back together and moving on to new construction.

-
I think they were one of the more interesting looking examples of WWII German armor. The Panzer IV was made in vast quantities in many variations, and was actually a good tank. Most were used until destroyed or abandoned, so I figured I'd do this as a "close to end of service life" diorama.
-
Superb work, Yves! Now all the small details you put in are combining to make a total composition. A scene that tells a story and gives a snapshot of what it was like in those amazing machines.
- 760 replies
-
- 10
-

-
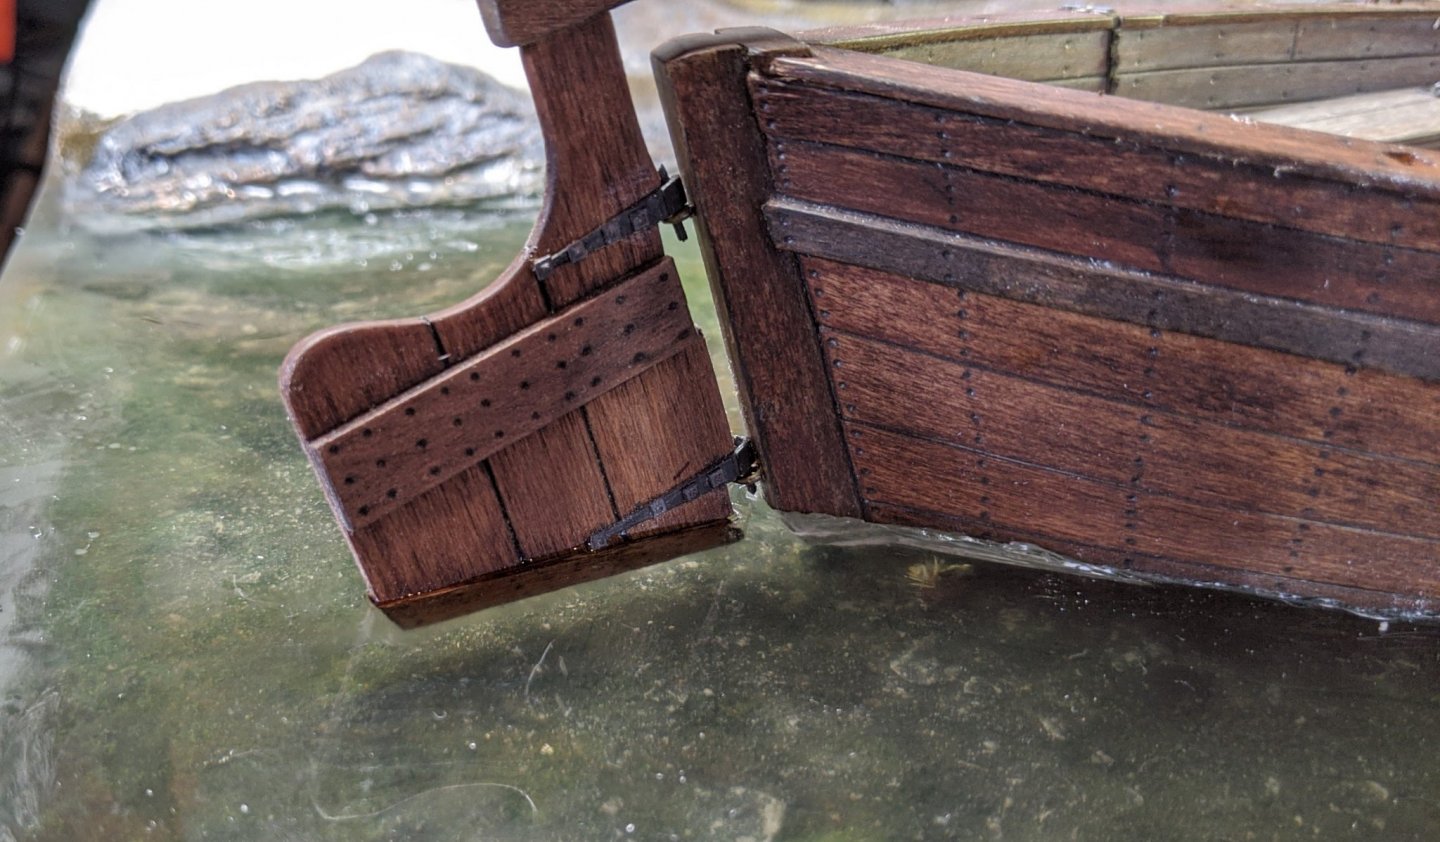
I decided to use resin to embed the rudder bottom. Filled the slot half way with an eye dropper, than inserted the rudder slightly below the water surface. Added resin until it totally covered the slot and rudder piece. Seems to have worked out fine, I can't see any signs of the edges where I cut the slot. Next is to finish sanding the water and hull edges.

-
Resin is funny stuff. I've had problems I didn't expect and success where I expected problems... That's what it's about... learn as you go and be adaptable.
-
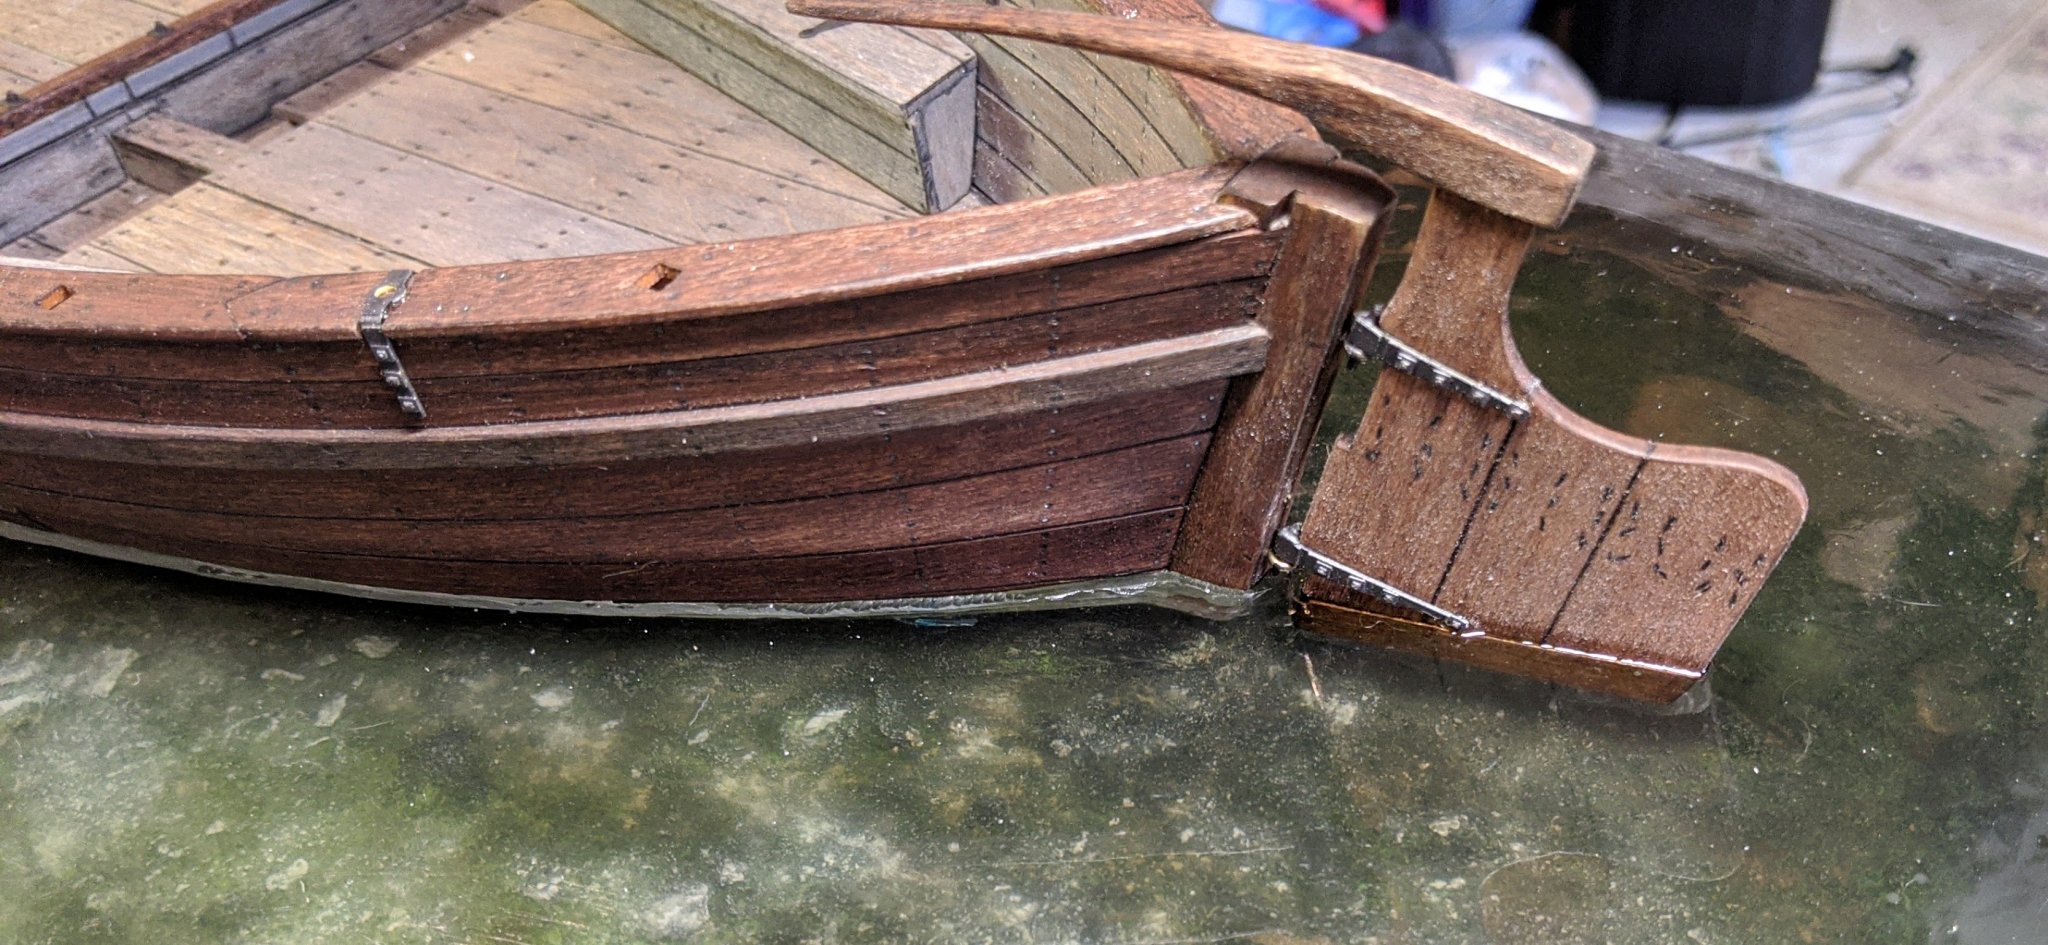
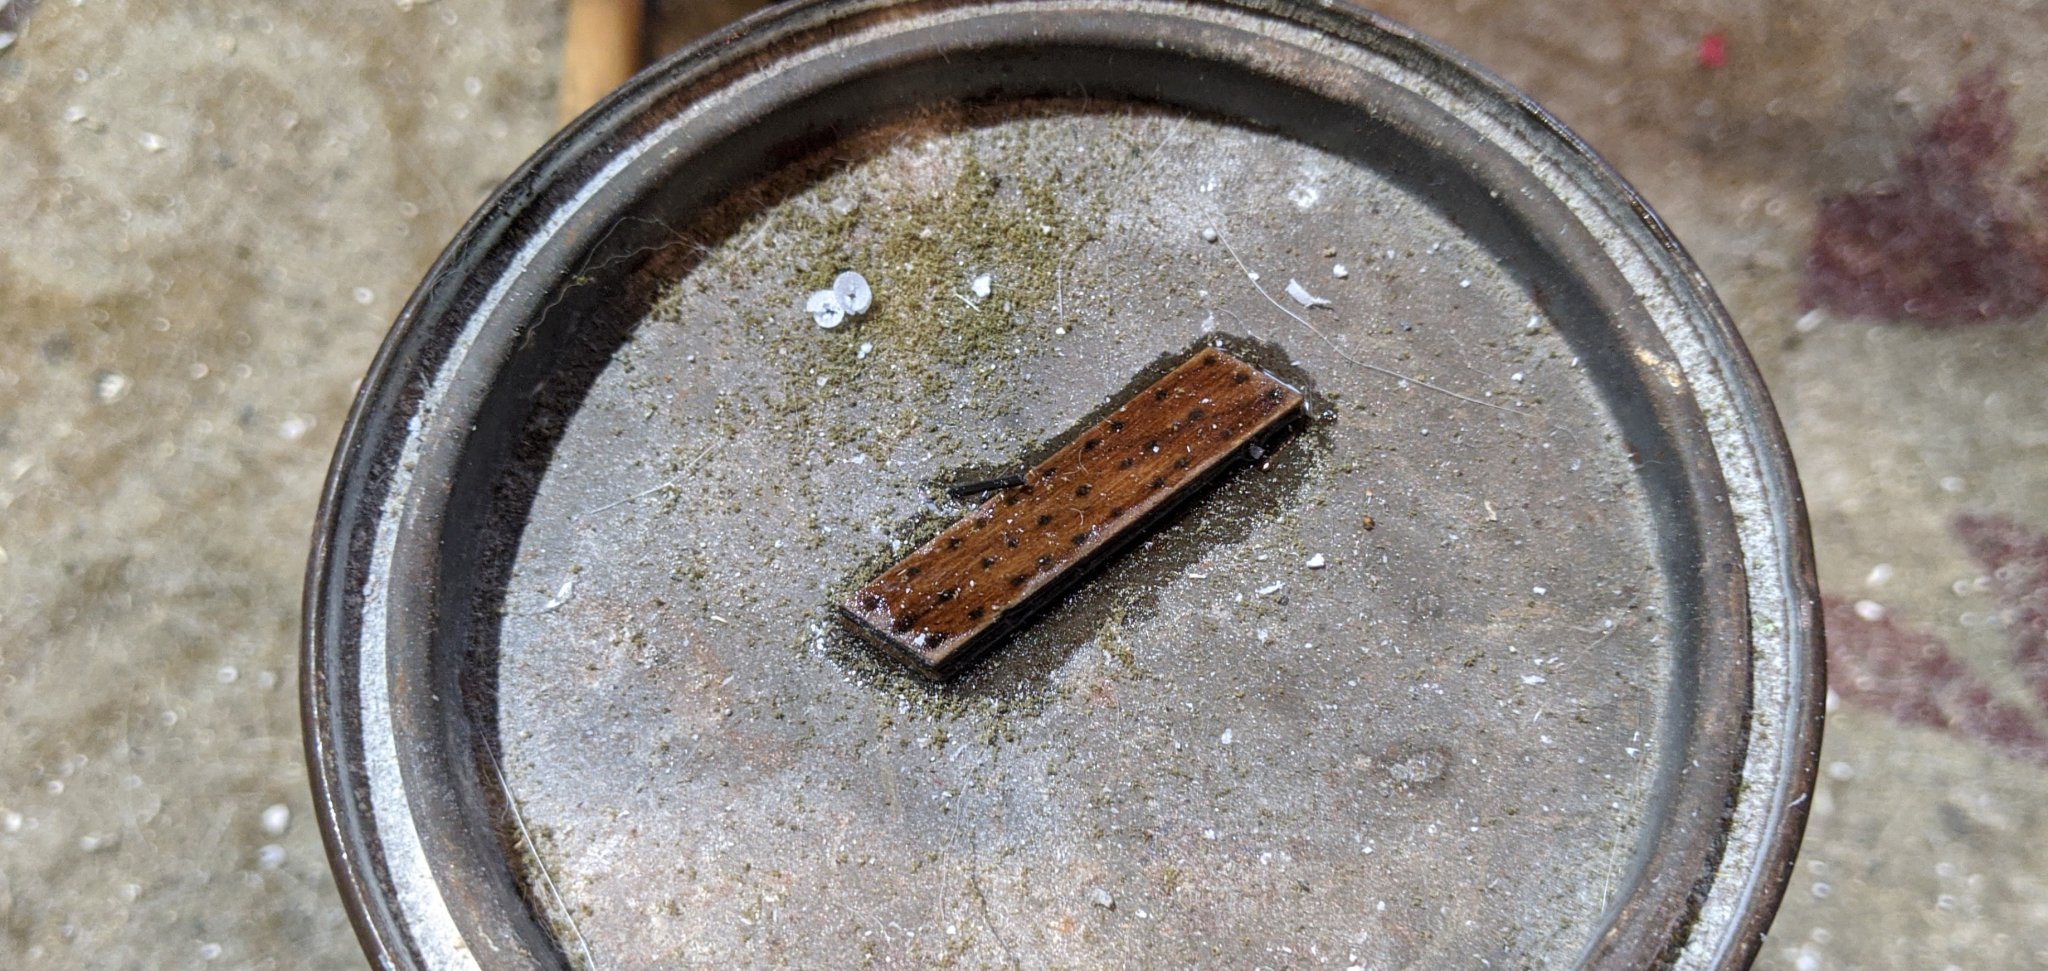
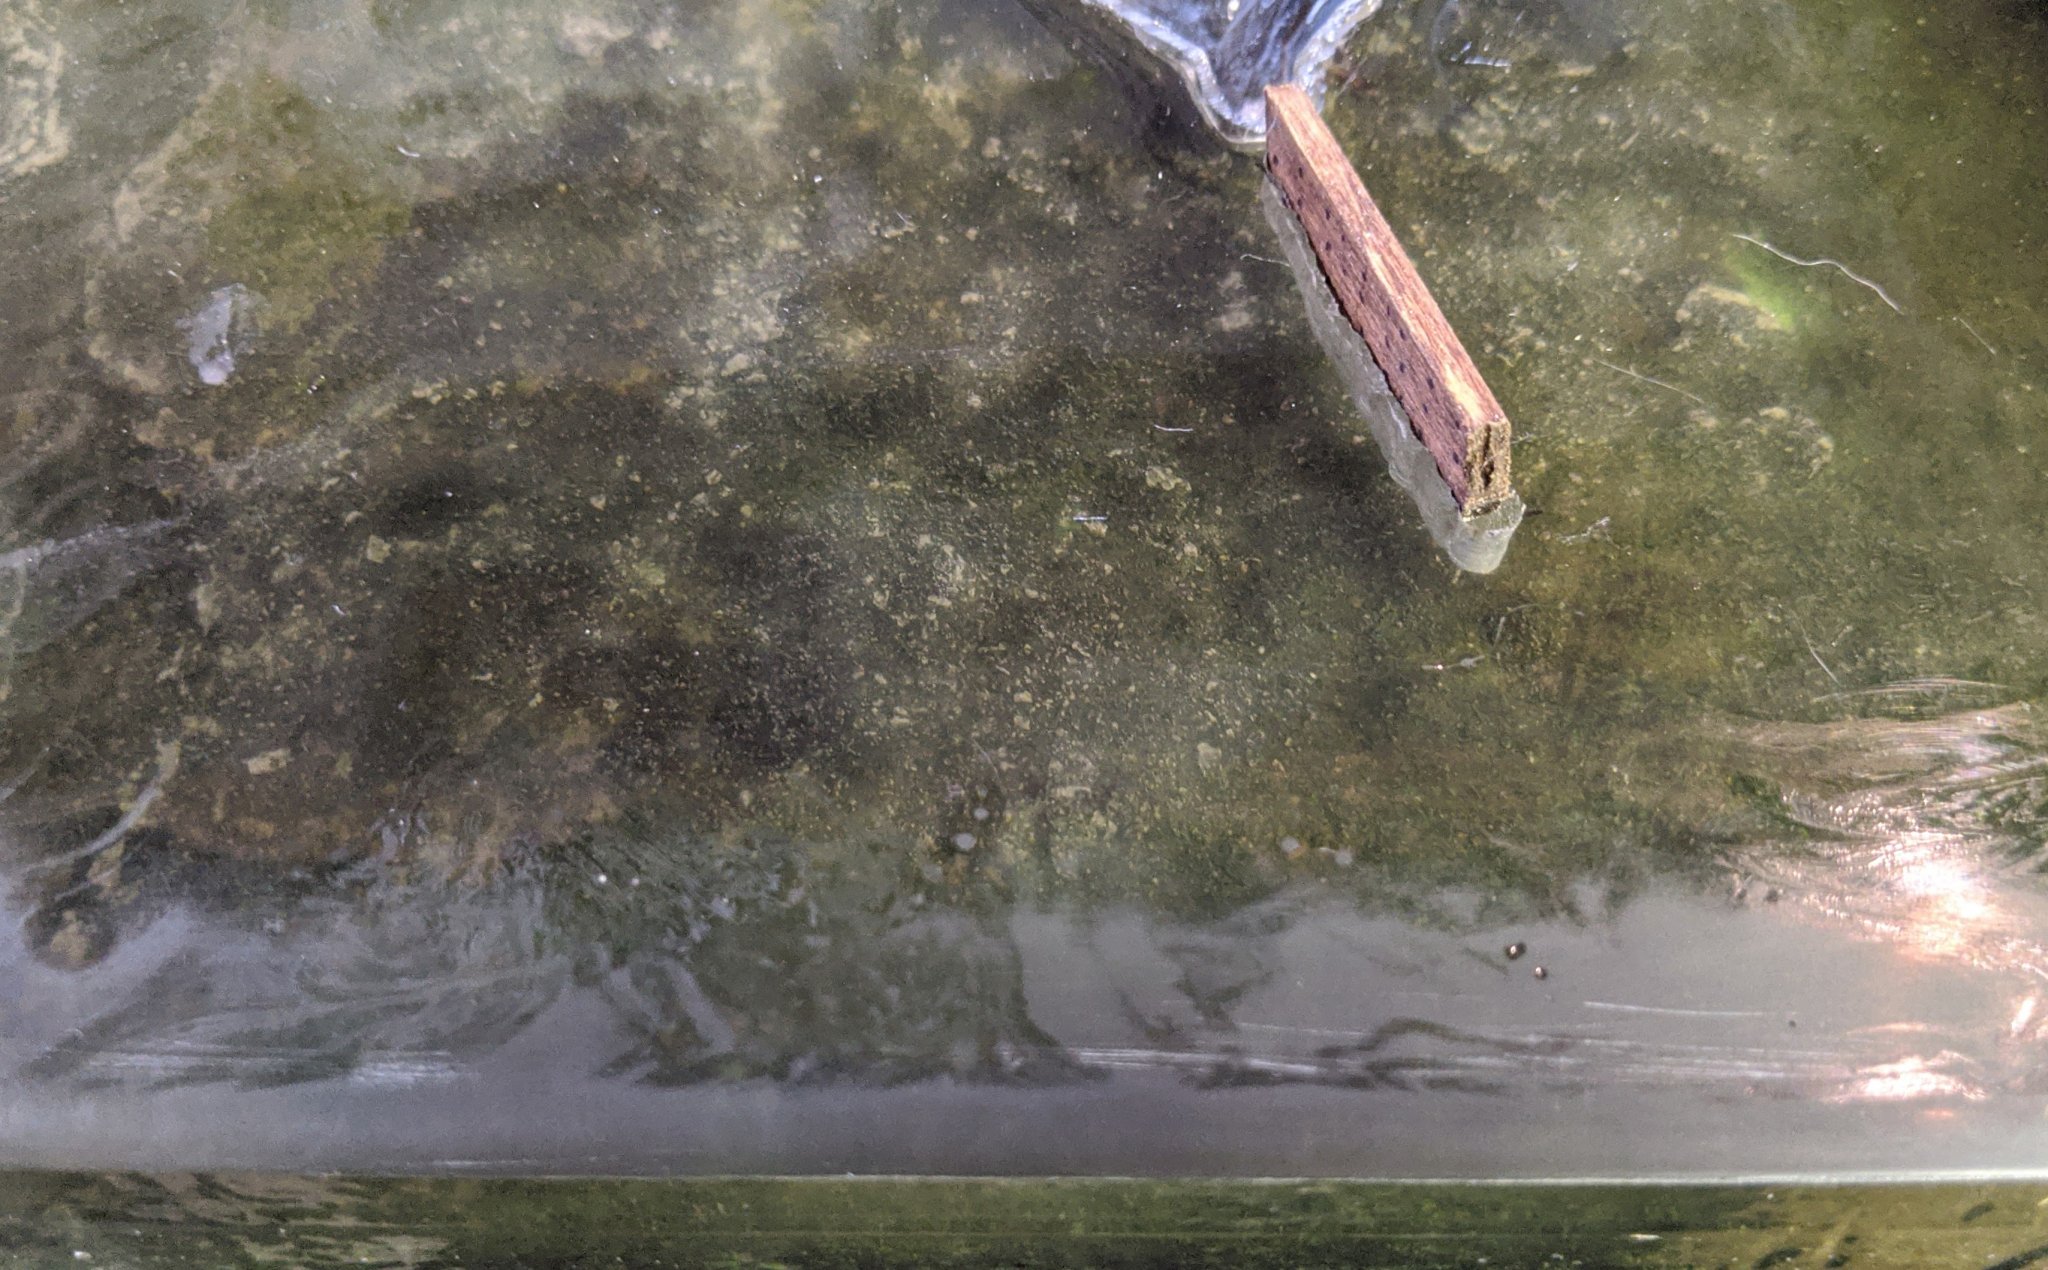
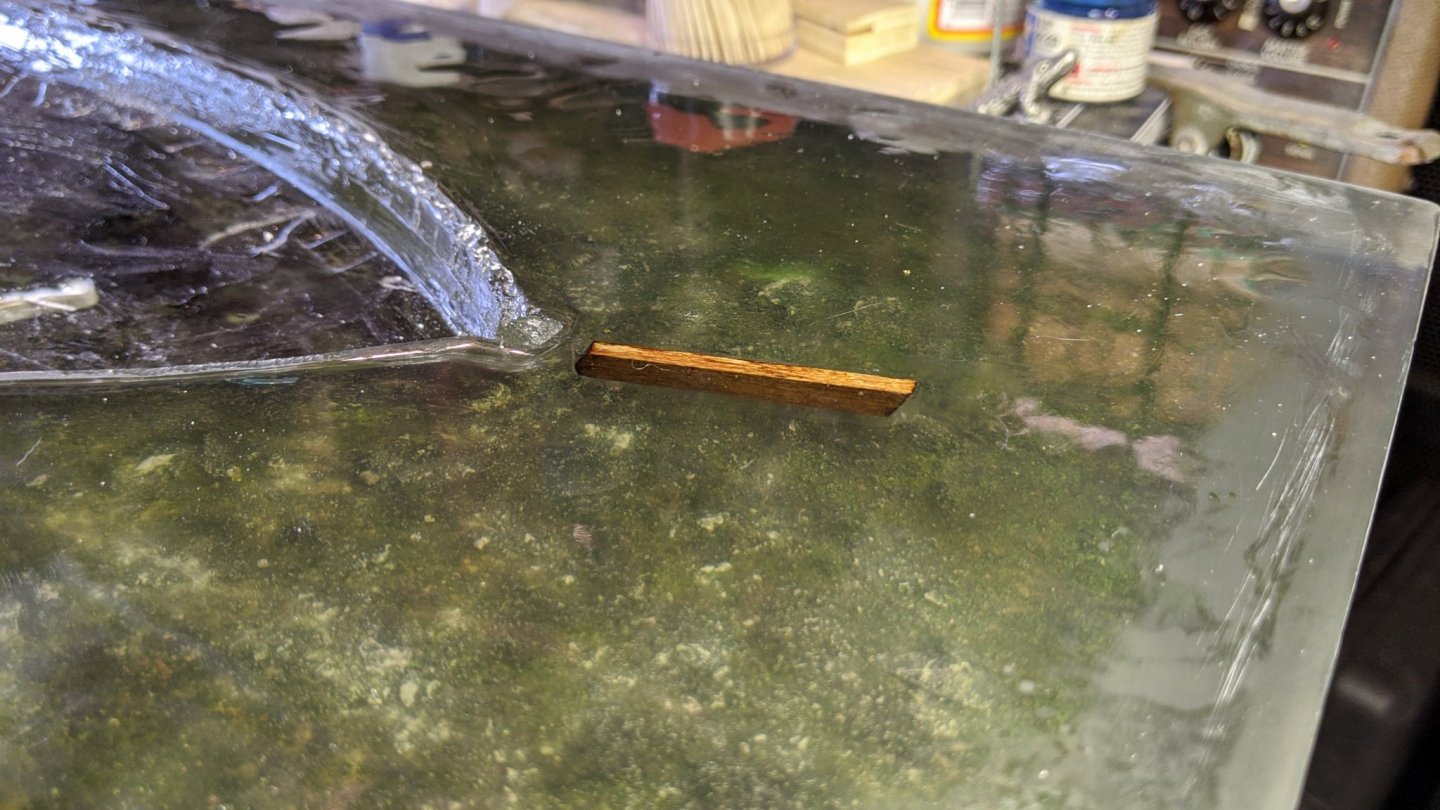
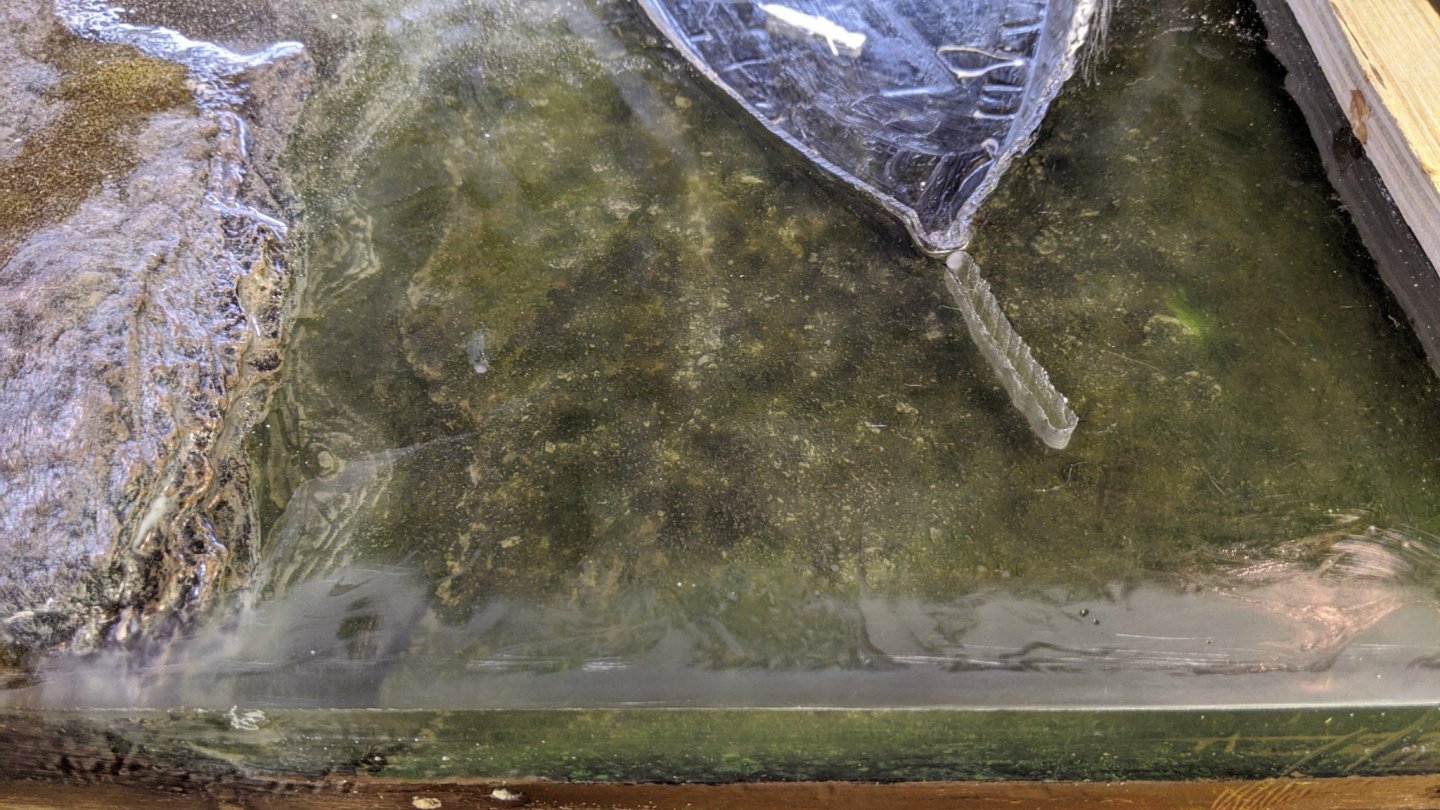
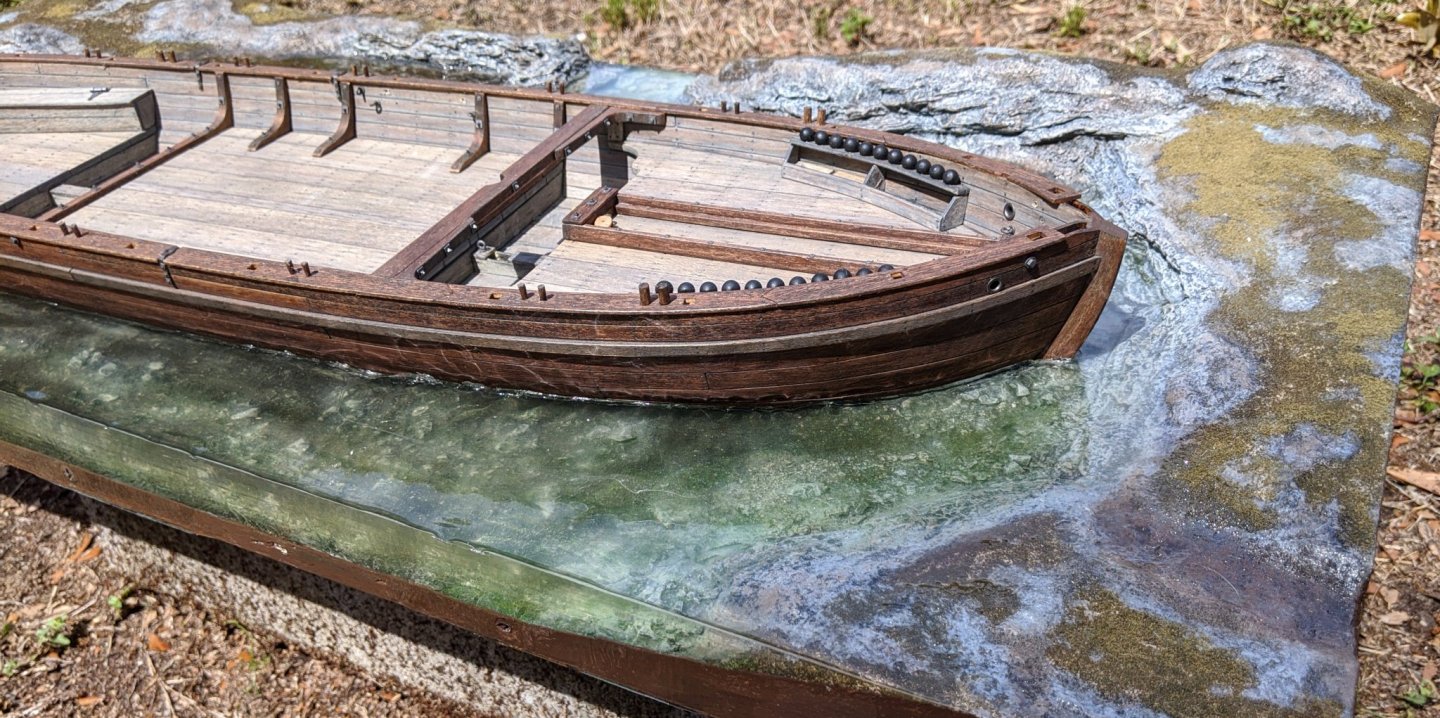
Chuck, it was a real bummer when my rudder "floated away" but I'm not easily deterred⚒️ I cut a groove with a rotary tool for the underwater part of the rudder, and made a piece stained and nailed like the original. Here's the original, forever attached to the lid of my Durham's can.... R.I.P. I plan on embedding the new piece, and I'm testing both resin and ModPodge gloss medium as the filler on a part of the resin pour under the boat (won't be seen, great place to experiment). I embedded a small piece of hull color stained wood in each test, we'll see which one comes out the clearest and blends the best. I believe with some effort I can overcome the rudder fiasco with little visible evidence. I hate resin fillets. You know, the part where the resin "creeps up" any vertical surface it contacts. I believe they really ruin a lot of water effects I've seen, so I take special effort to remove them. If the resin was mixed properly and is fully cured, it takes machining, sanding and polishing very well. You can tell it's OK to work with if you get white powdery dust when sanding. For the fillets around the edge and the hull, I used a hobby knife to cut off the upper part and then started wet sanding at #240. Once the fillets were leveled with the main water surface, I wet sanded in order -#400 -#800 -#1200 -#2500 grits to remove tooling and sanding marks. Once all the edges are finished, I'll use some polish to get rid of most of the remaining haze. I'm not too concerned with a "wet gloss" finish at this stage, as I plan on coating the whole water surface with gloss ModPodge so I can do the final shaping of the water surface and where it meets the boat and shore. The nice thing about gloss ModPodge is it dries "wet look" and is very forgiving to work with. Here's some pics of the rudder groove, the piece partially inserted and the right edge fillet sanded down to #2500. Don't mind the cloudiness, that will go away with polishing and gloss medium later on. While I was at it, I made some elevation corrections. The path on the lower right would have been underwater, and I needed a flatter surface in the upper left corner for a big tree.


-
Here's a video of this amazing guitar...
-
Rudder fail. I originally cut the rudder even with the waterline, with the intention of pinning the underwater part to the base and then attaching the top part after the last pour. I pinned it to the bottom, and of course after the first 3/4" of pours it floated loose, totally soaked in resin and unusable. Now I have to wait for the resin to harden completely and then rout a groove for the bottom of the rudder (of course I'll have to make a new piece). Oh well, this was the only real problem I had, and with some effort I think I can make it look right.
-
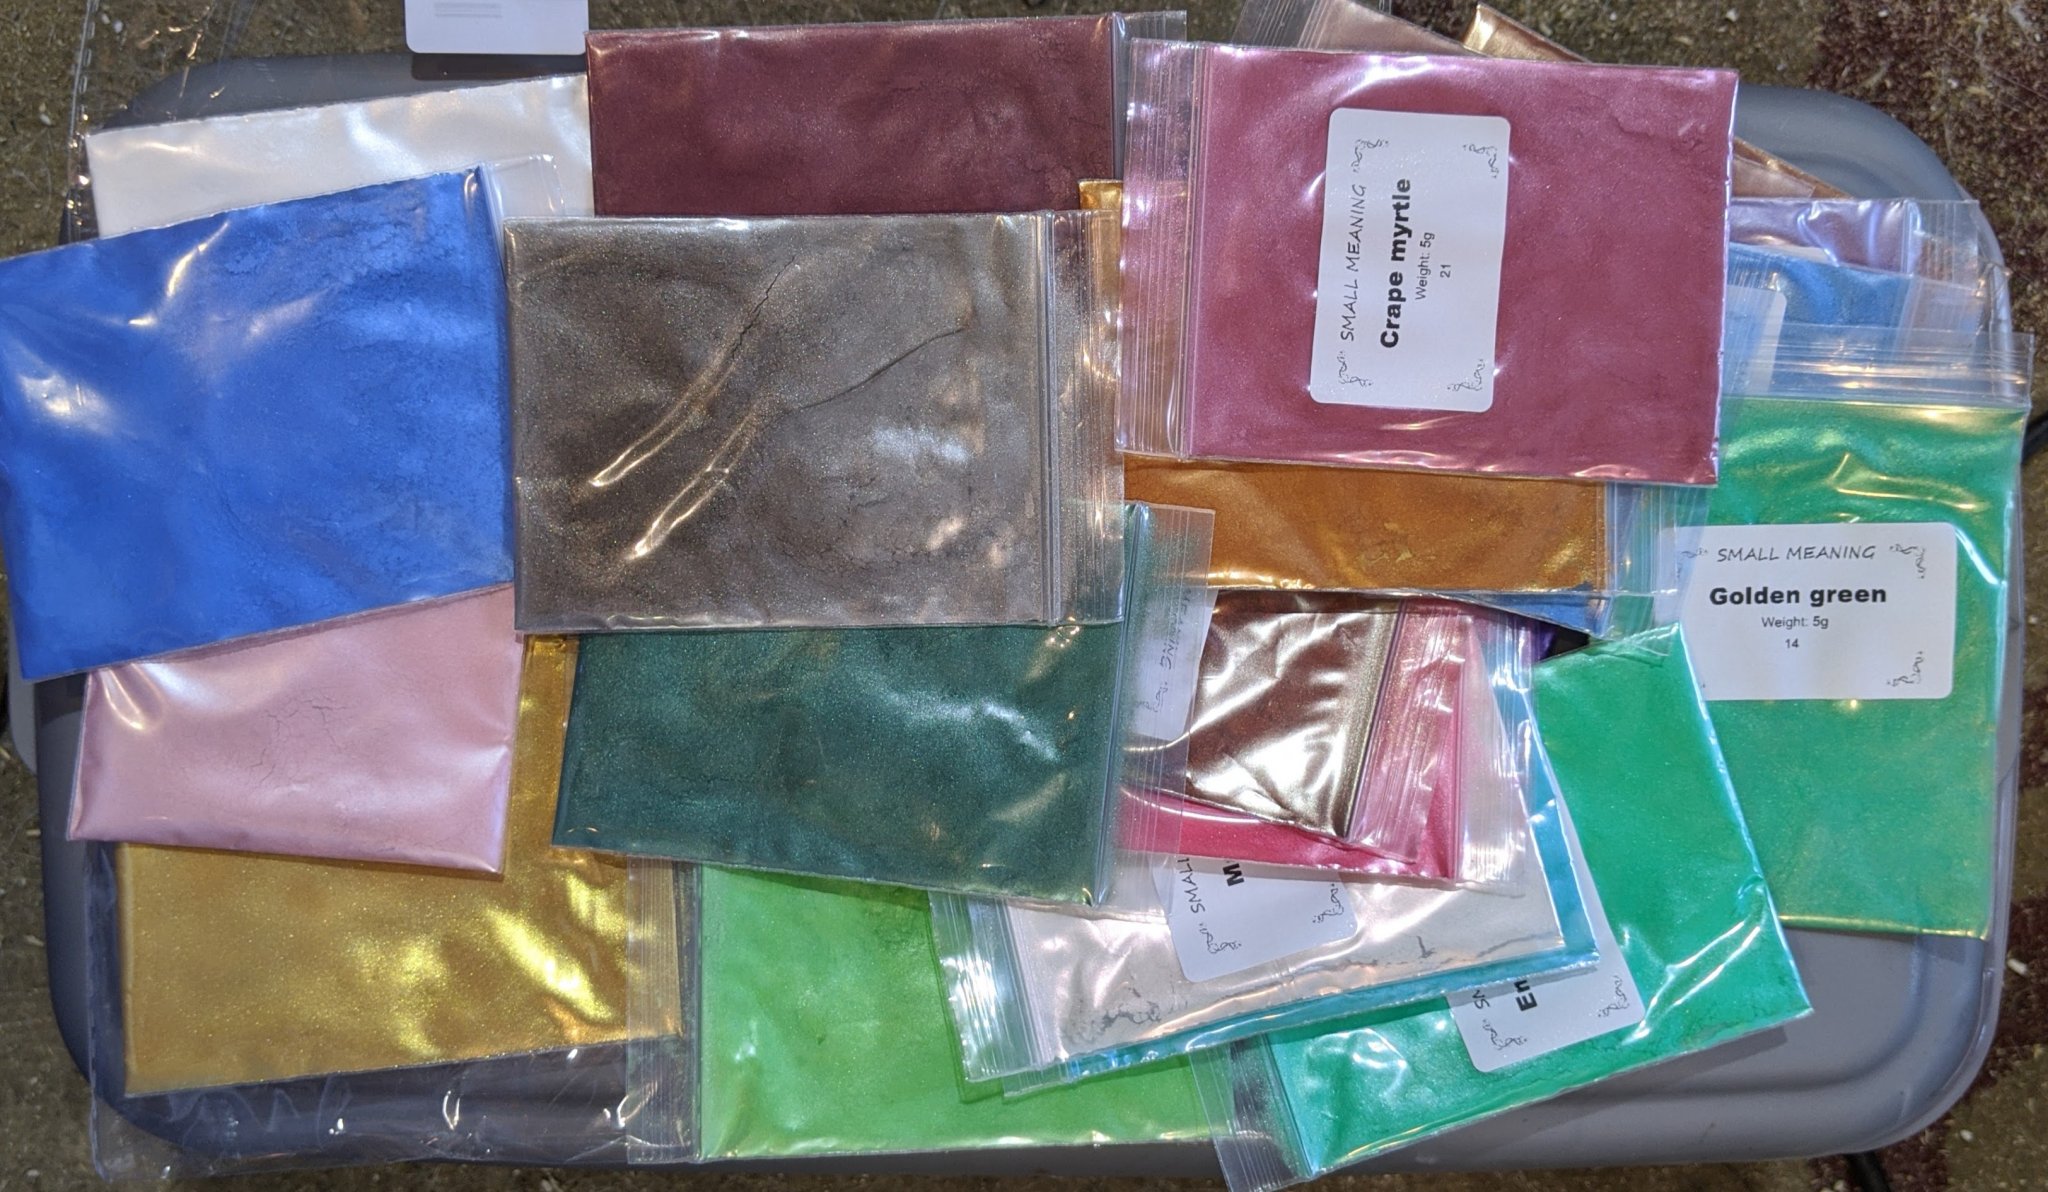
Thanks, Bob! Dioramas are a lot of fun and can really complement a model. I've found that mica powder is the best for tinting about anything. It's very concentrated and finely ground, and blends evenly. I got a set of 24 tints, I used the middle two in the picture on the first pour only. I did most of my pre-shading of the riverbed beforehand with paint, washes and dry-brushing. I wouldn't use paint or food coloring, you might get unpredictable results with the resin not hardening or fish-eyeing. Mica powder comes in some pretty crazy types: sparkle, pearl, candy, metallic and a lot of colors. It's pretty cheap, and it's so concentrated it'll last forever. Very cool! The mica tints would be perfect. There are tons of good YouTube videos of people making "river" coffee tables that use graduated tint techniques that would apply to your didgeridoos. You have some very interesting hobbies, Bob... If you're didgeridoos are anything like your Medway Longboat, I'll bet they're sweet!

-
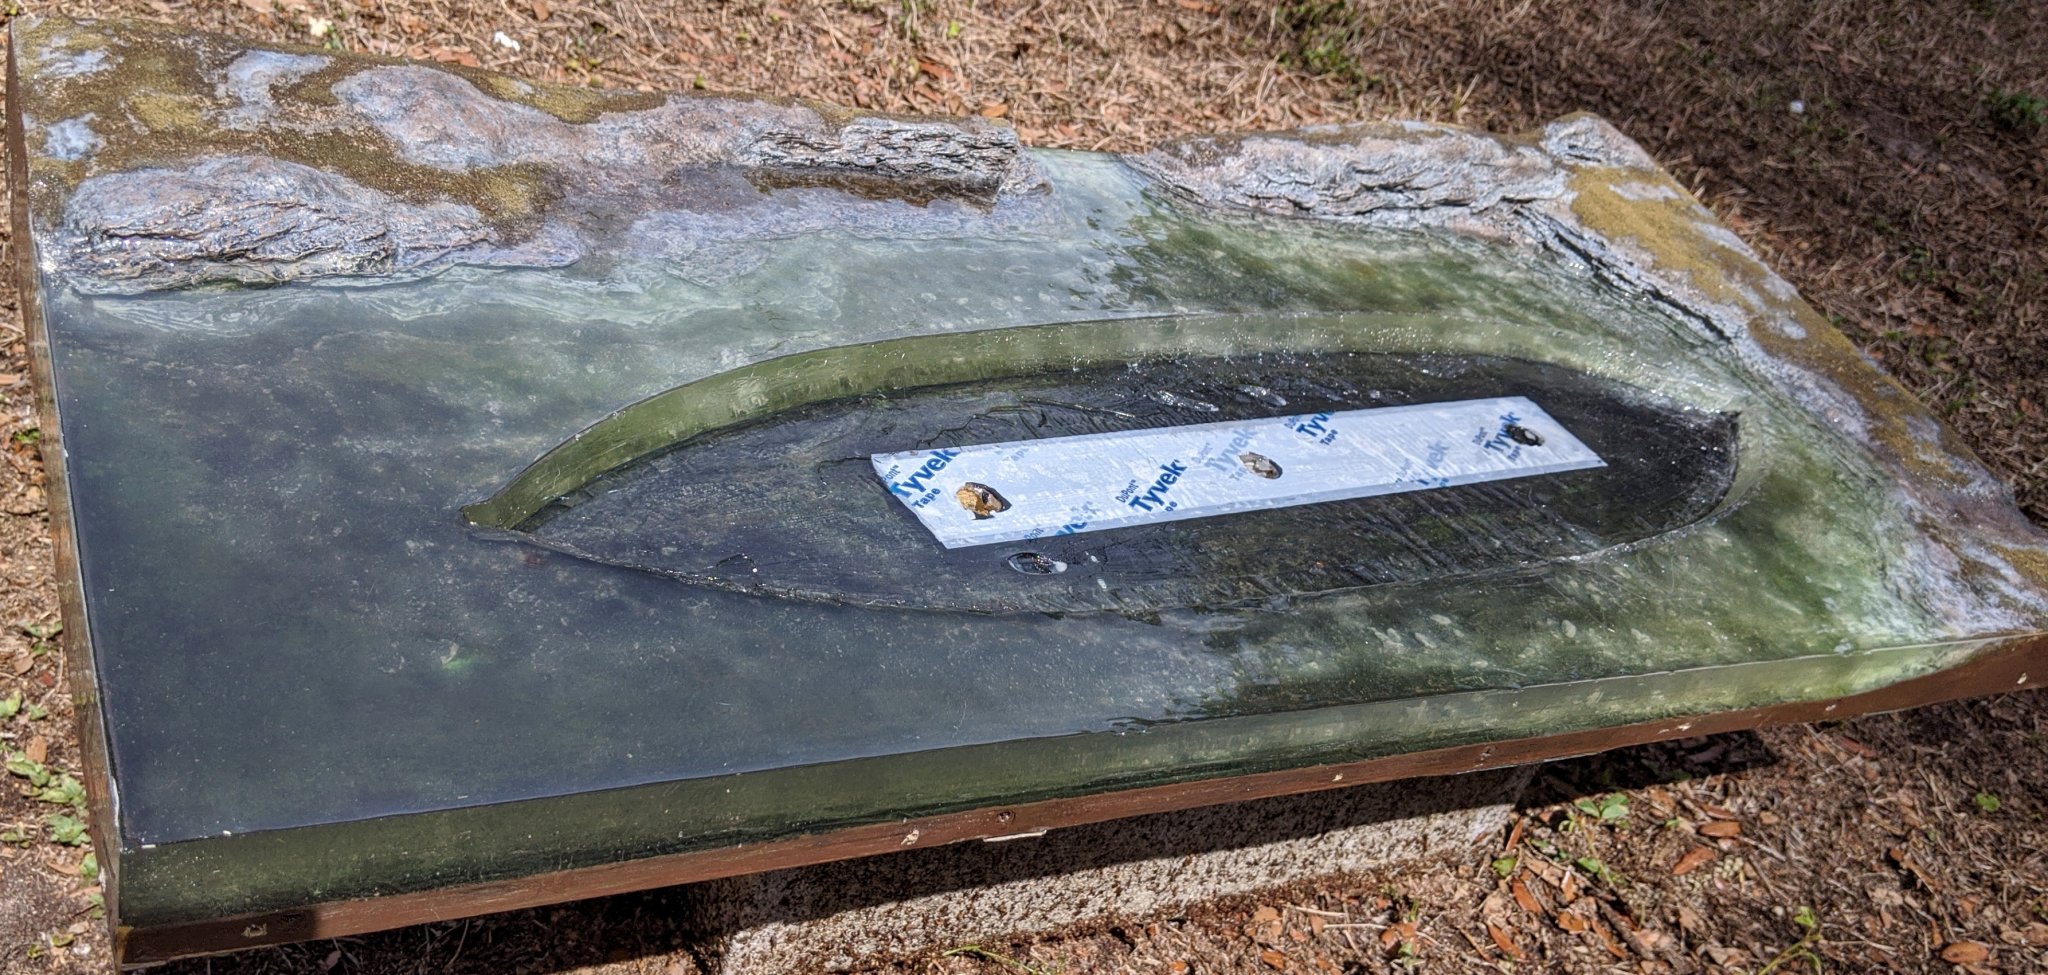
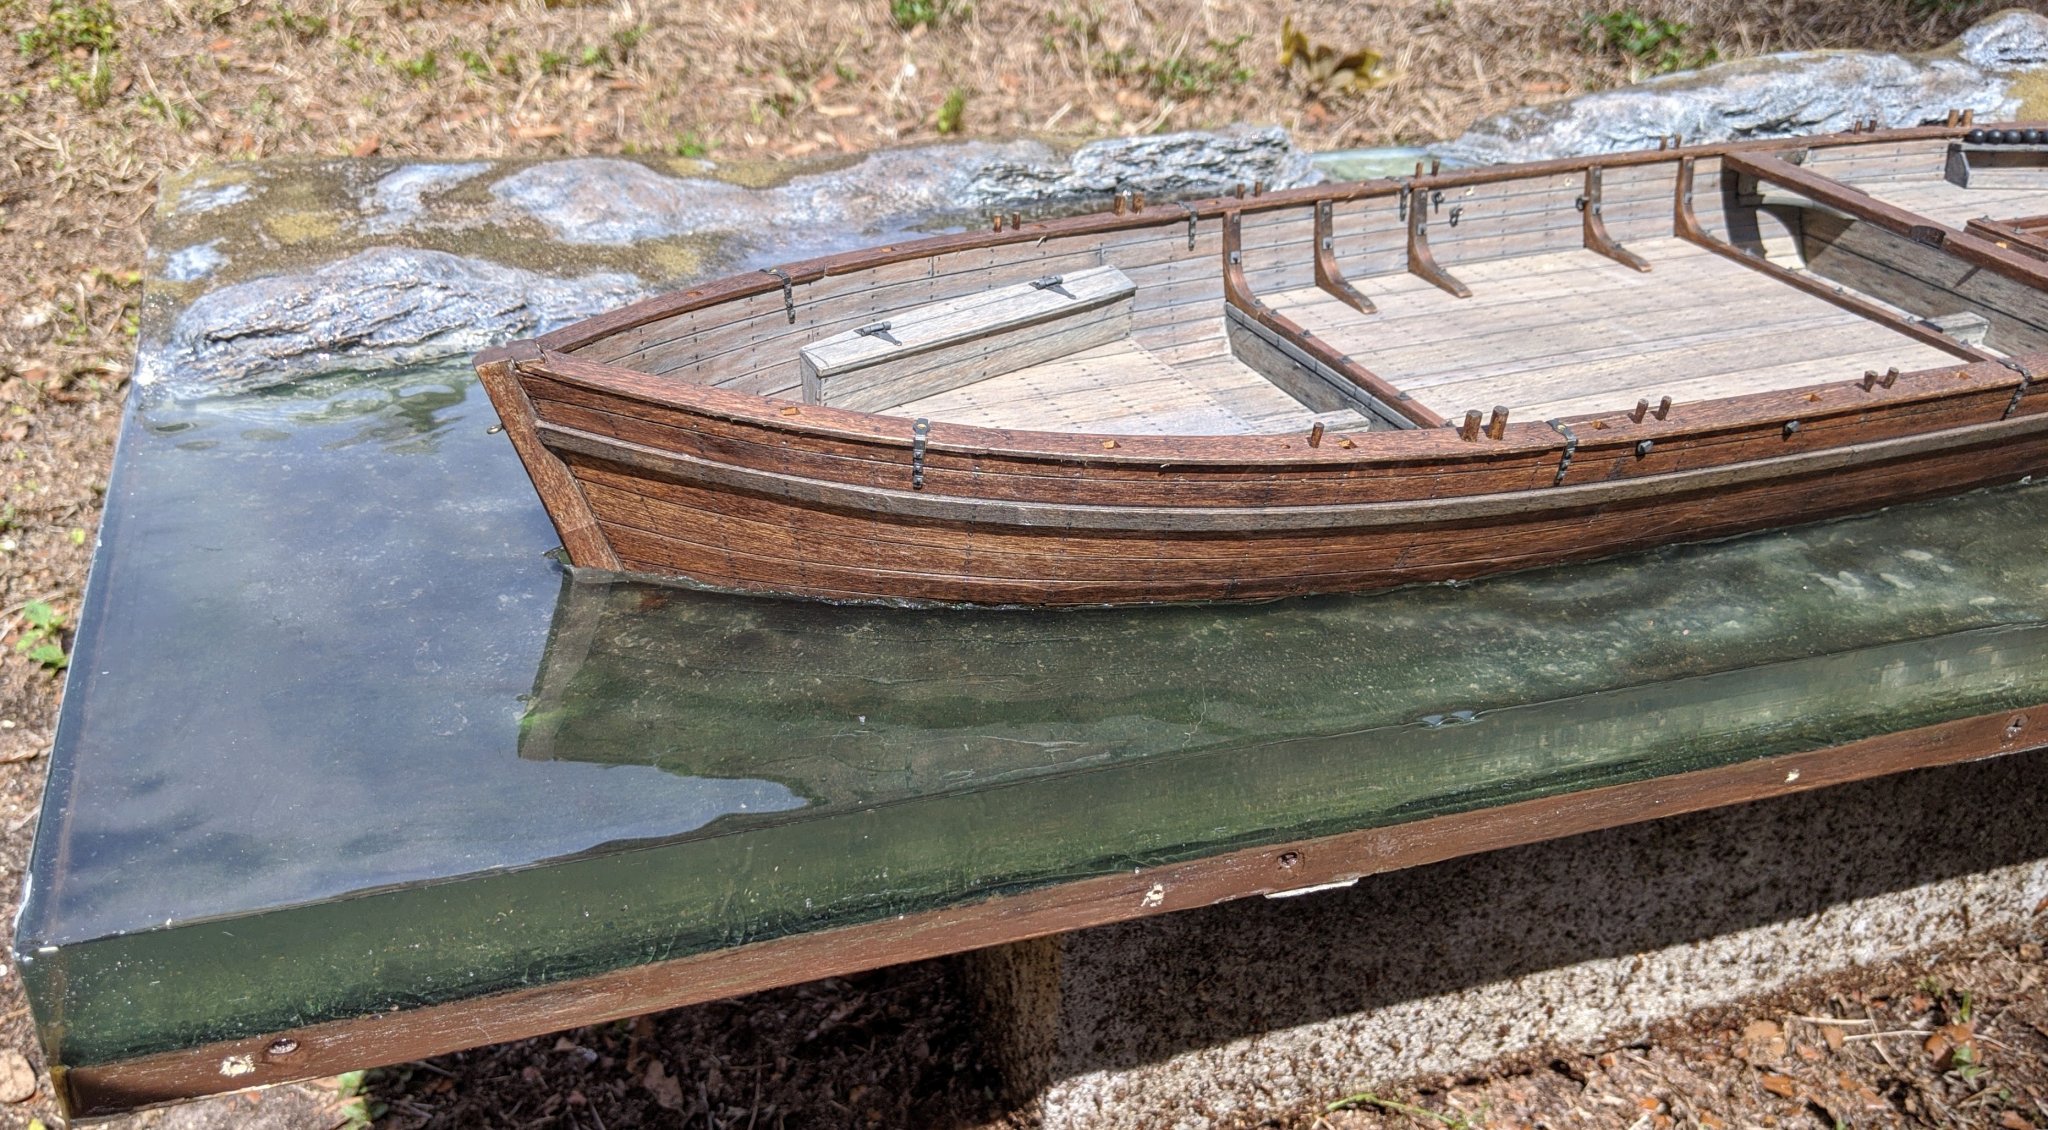
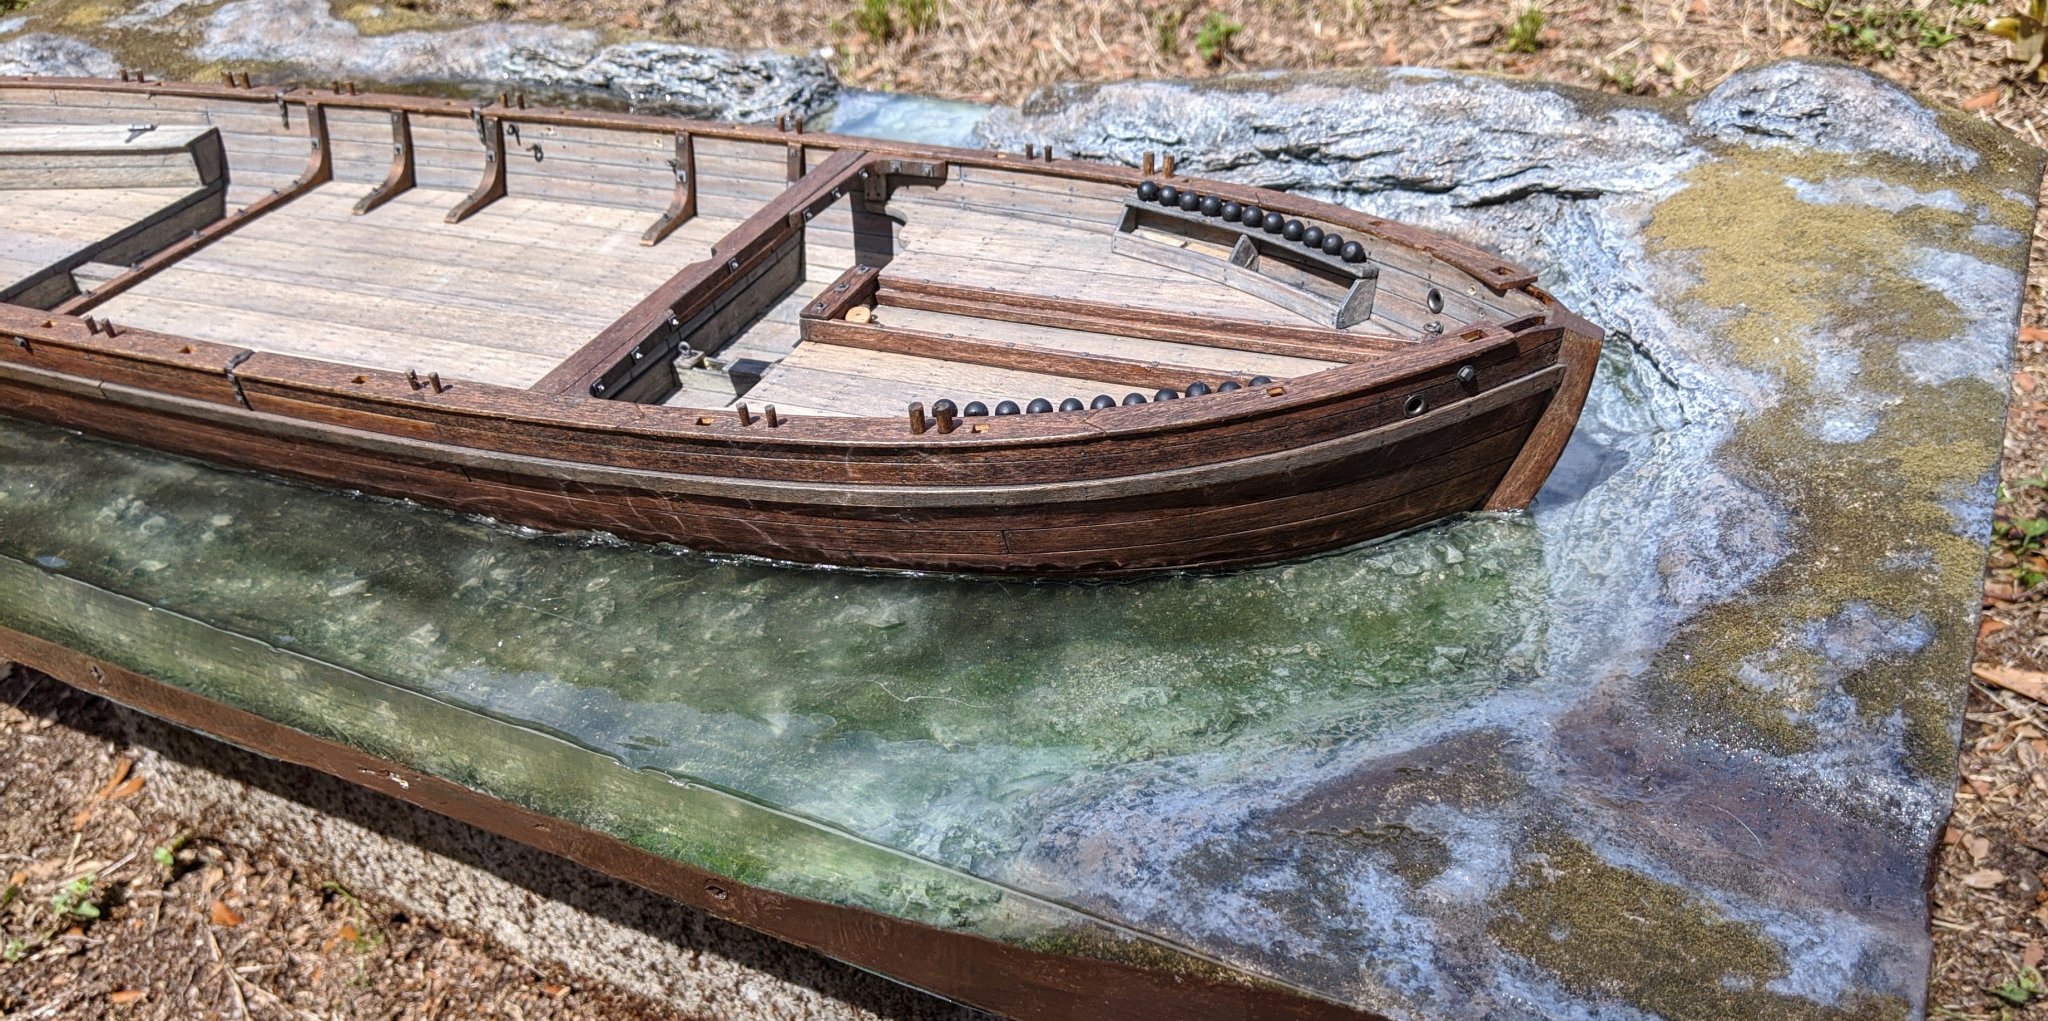
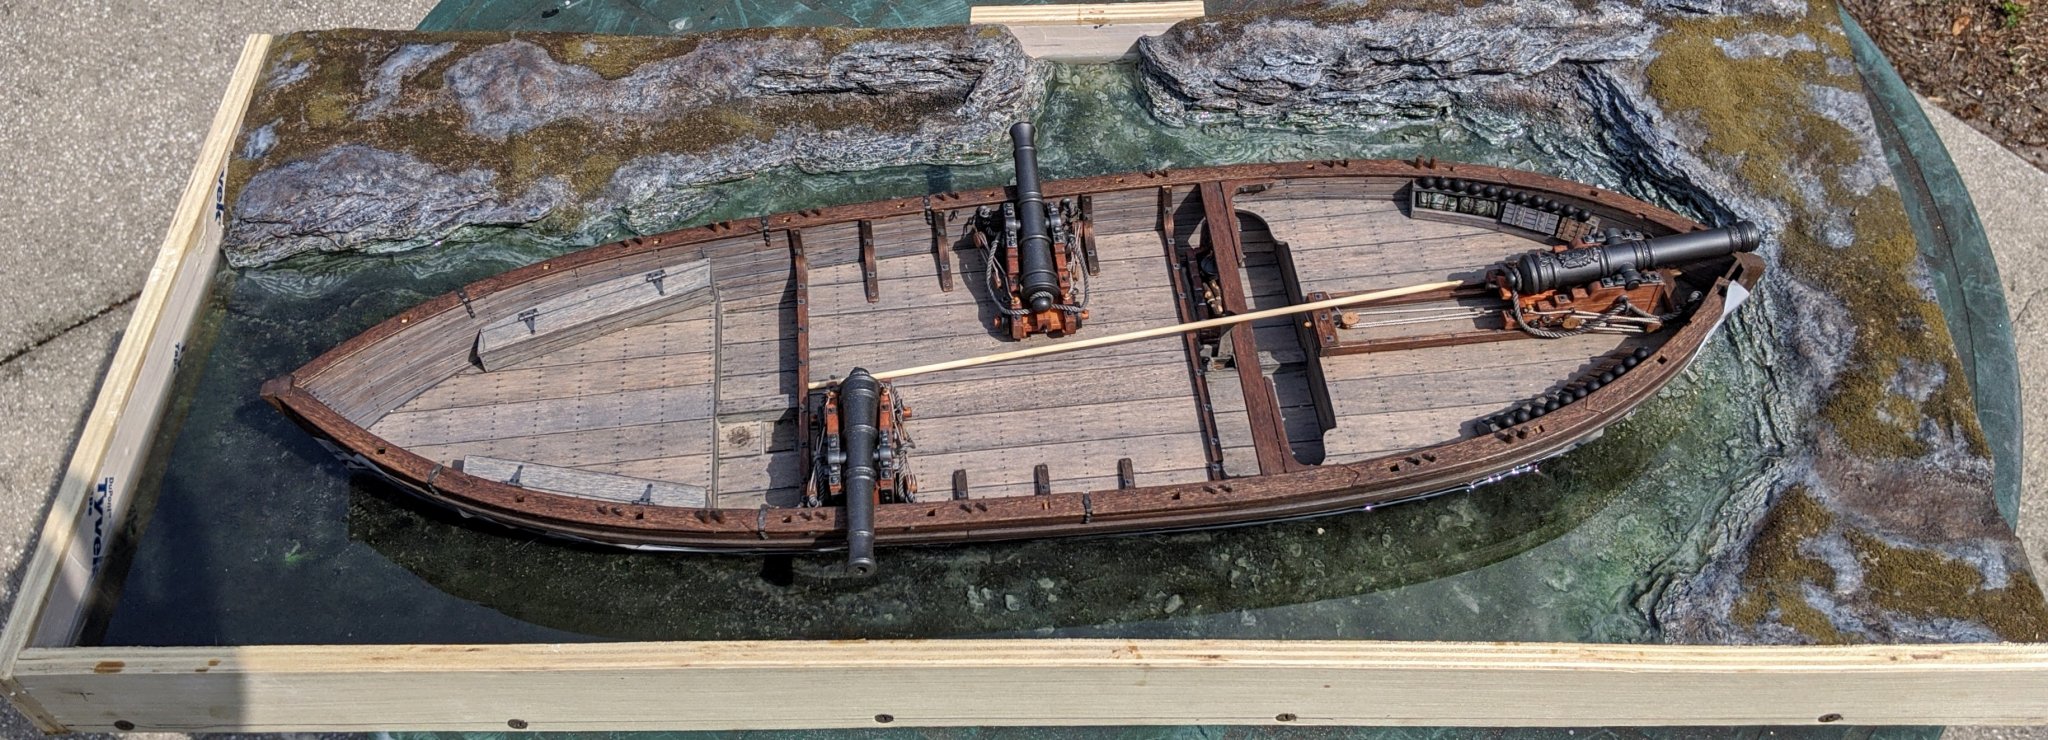
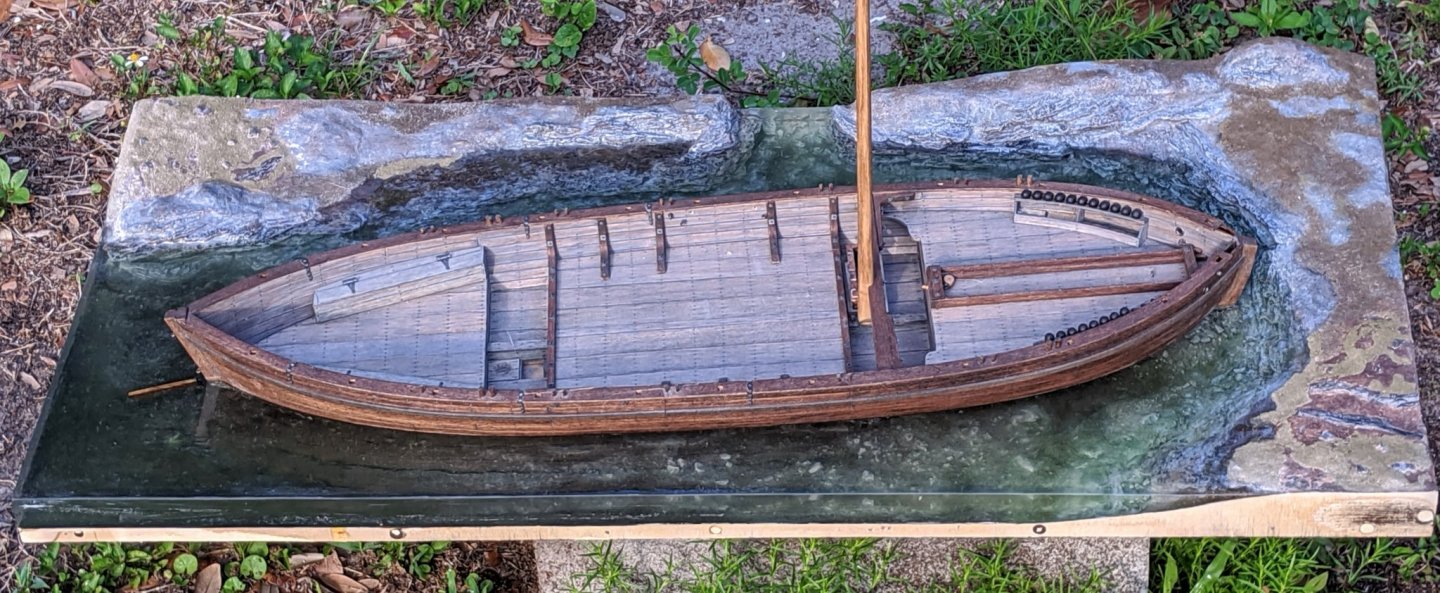
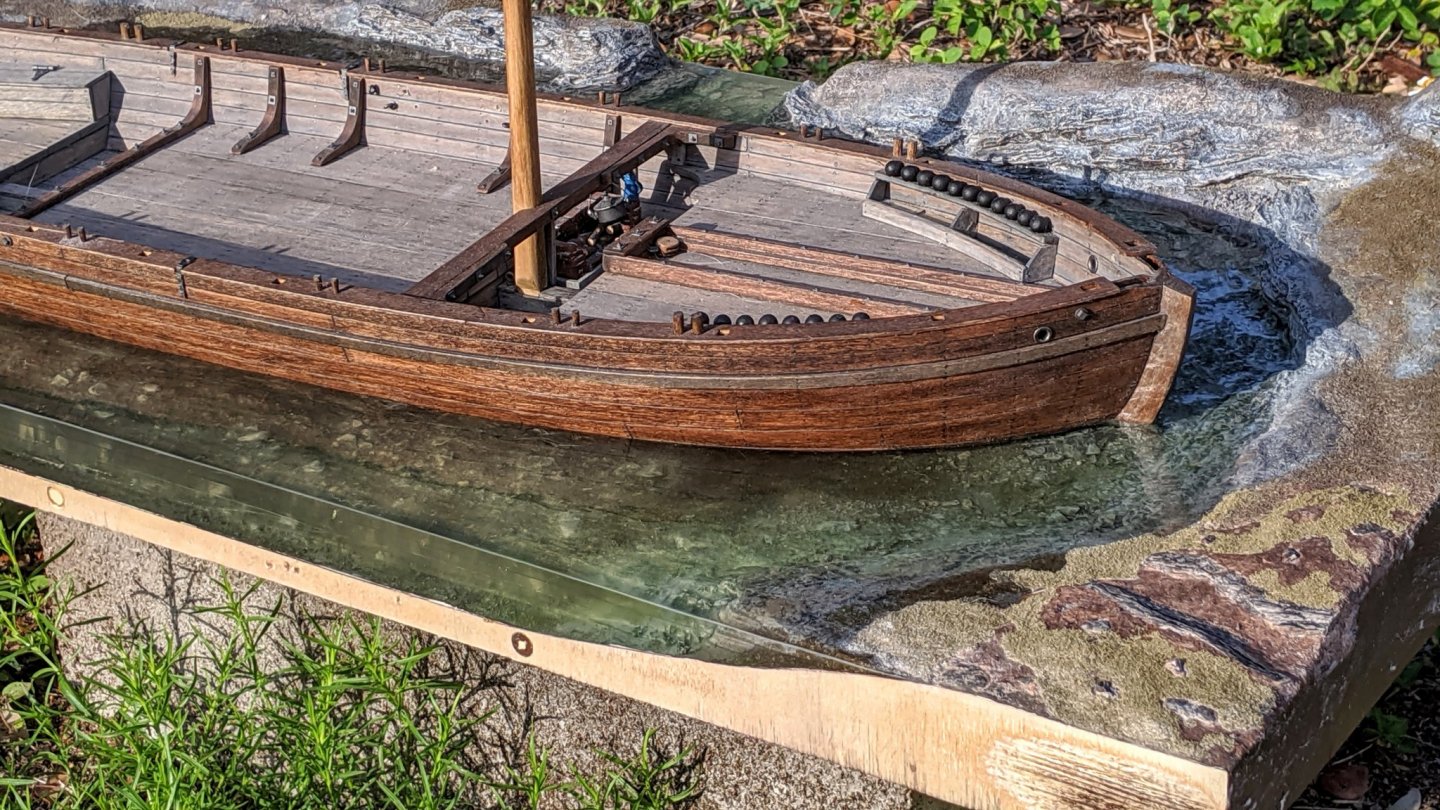
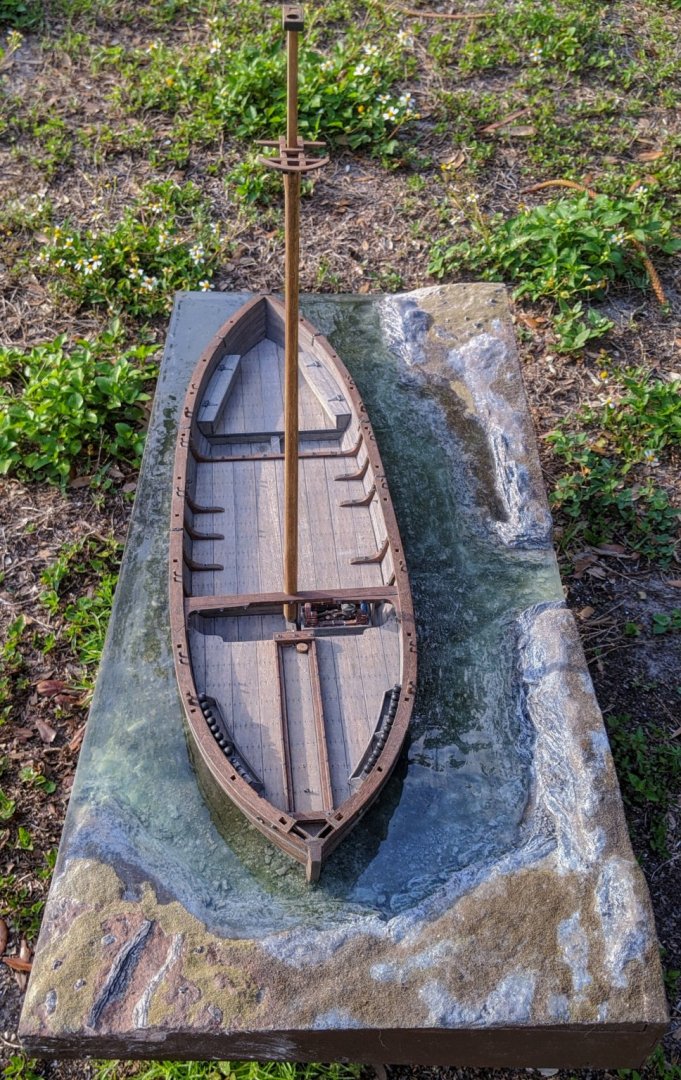
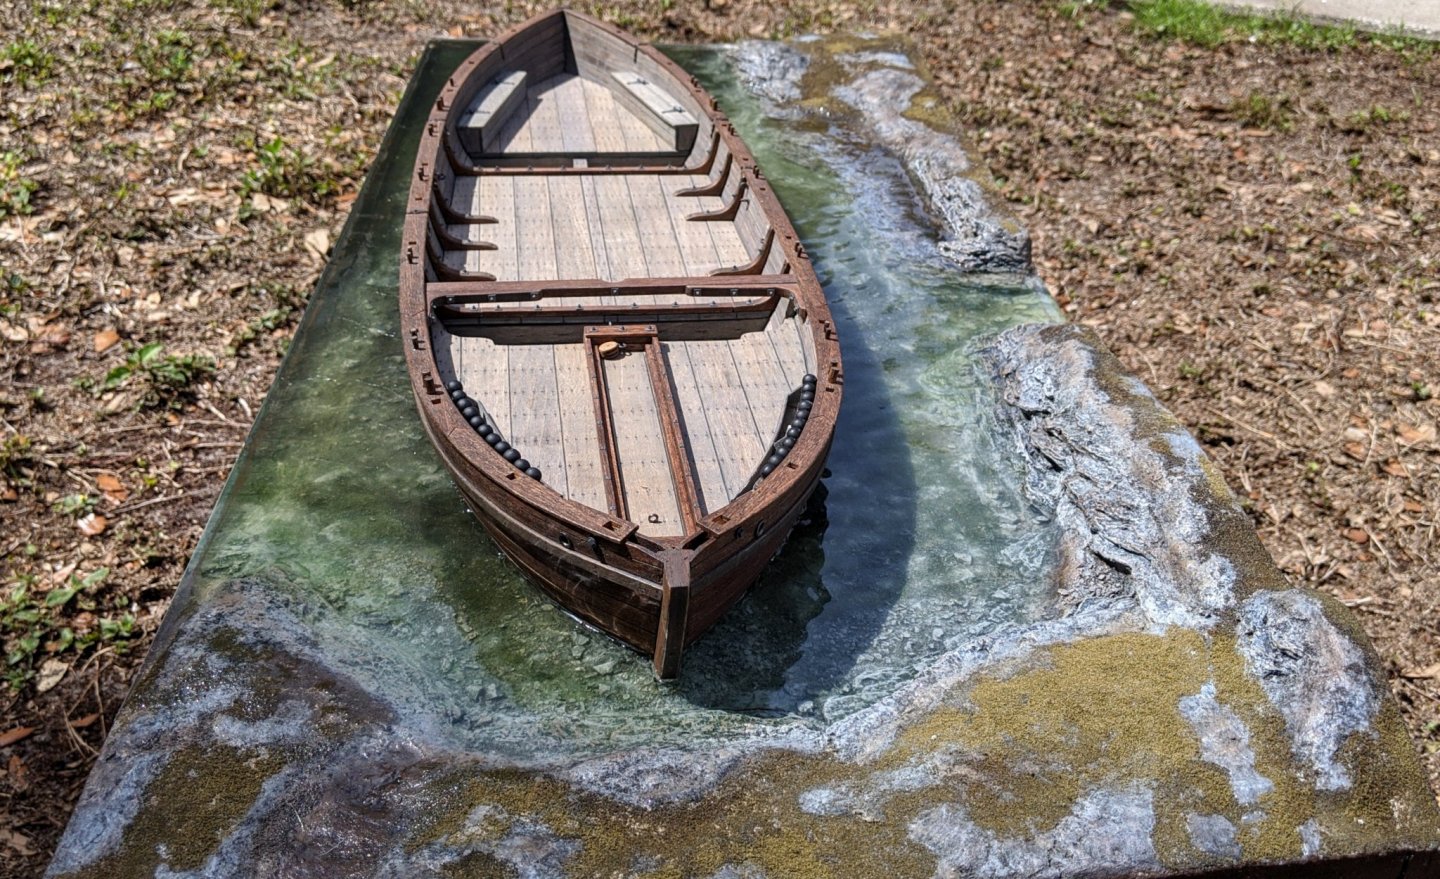
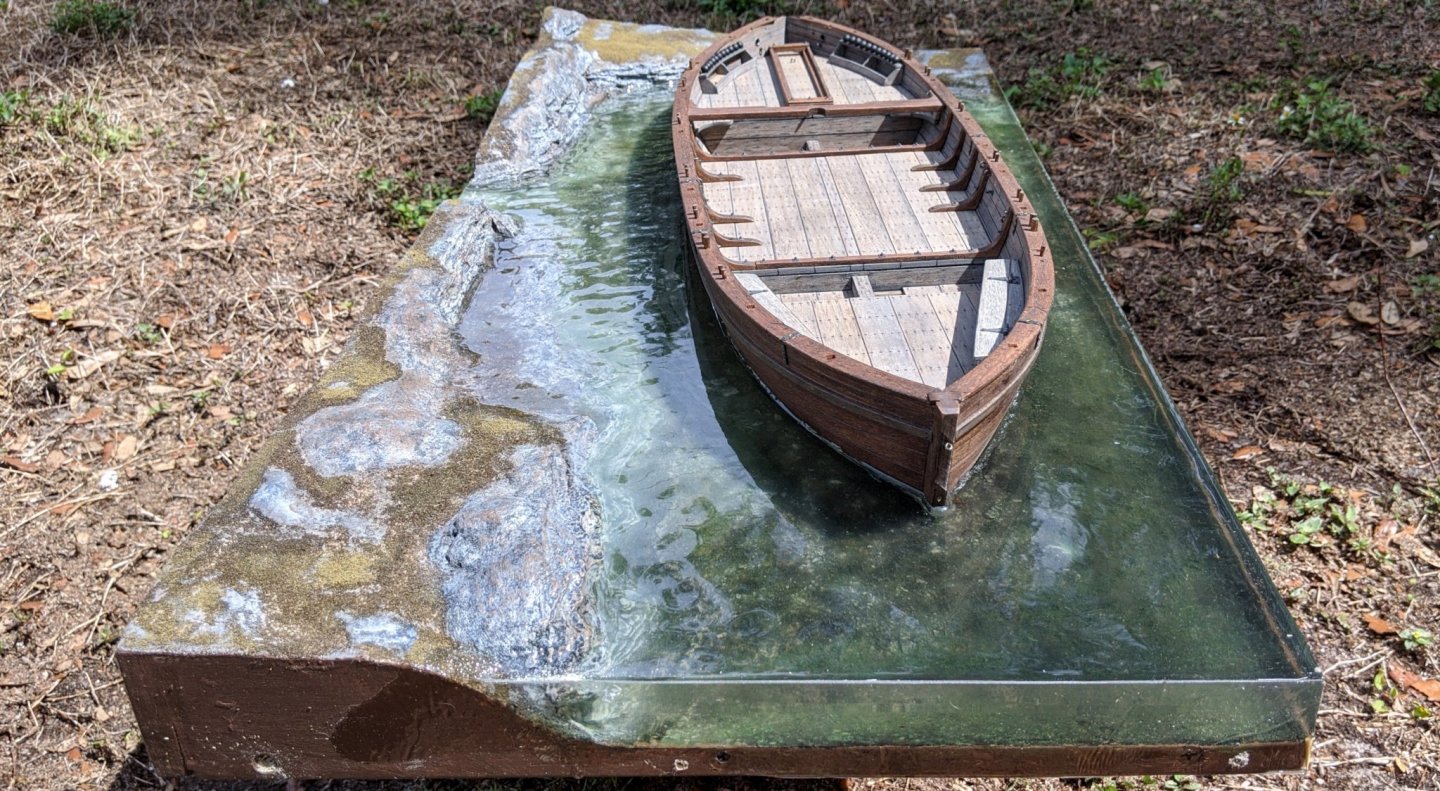
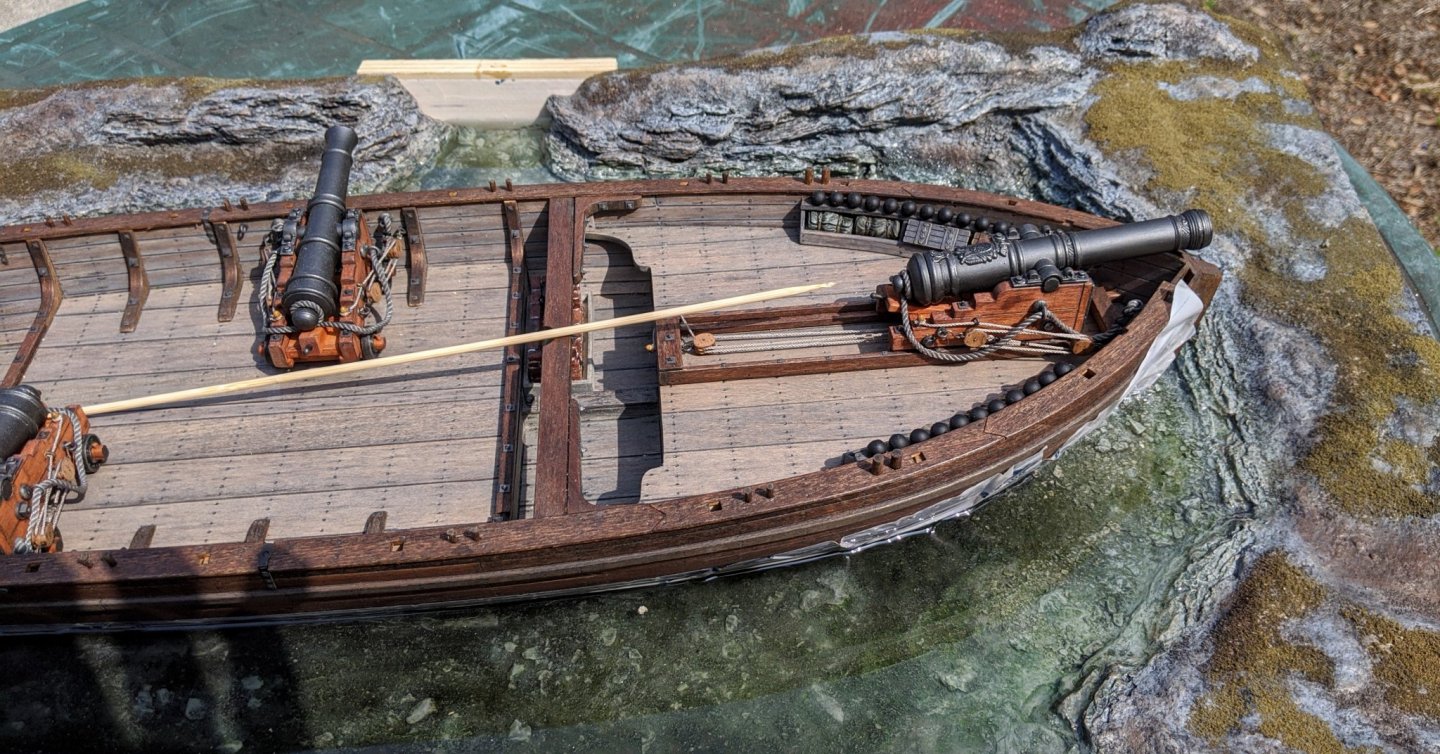
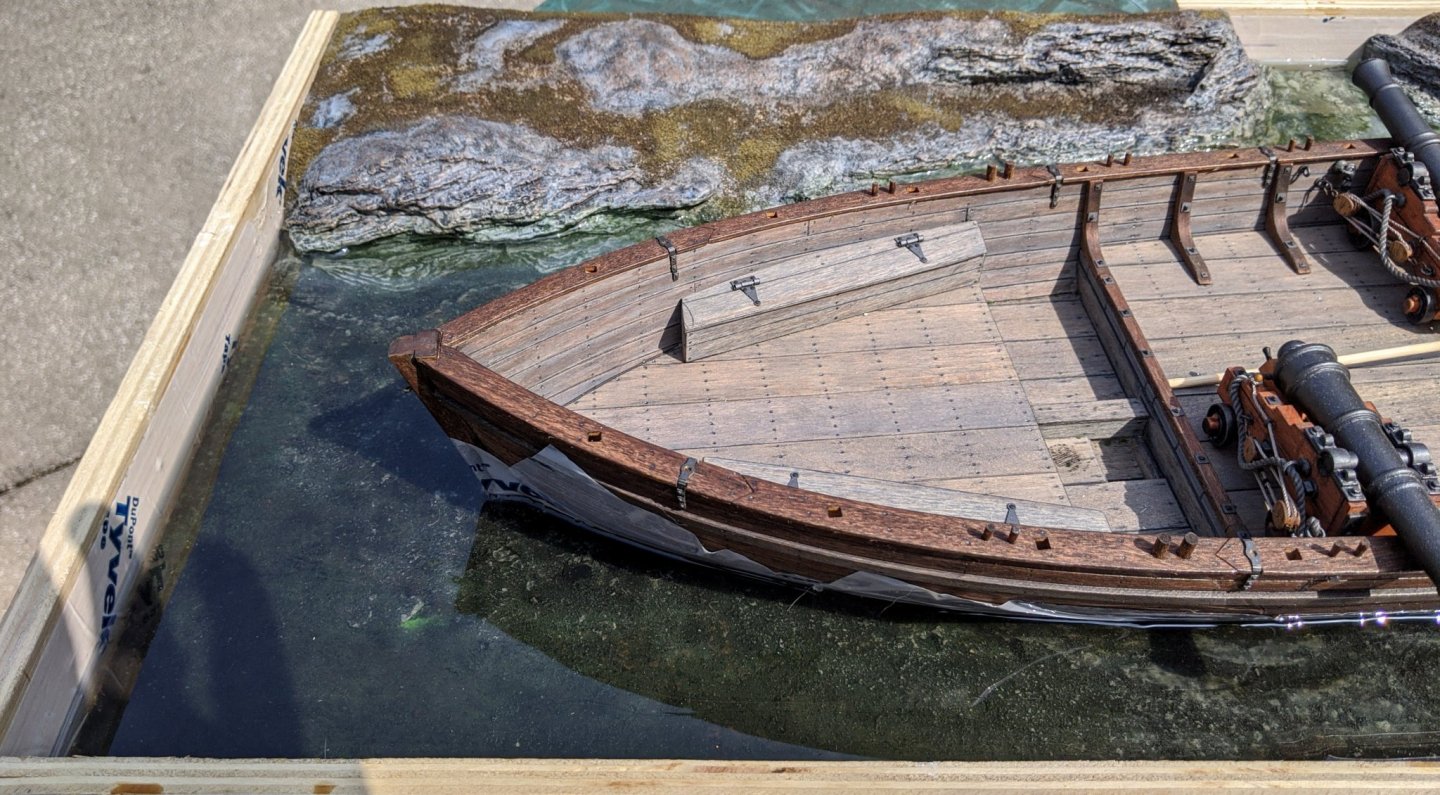
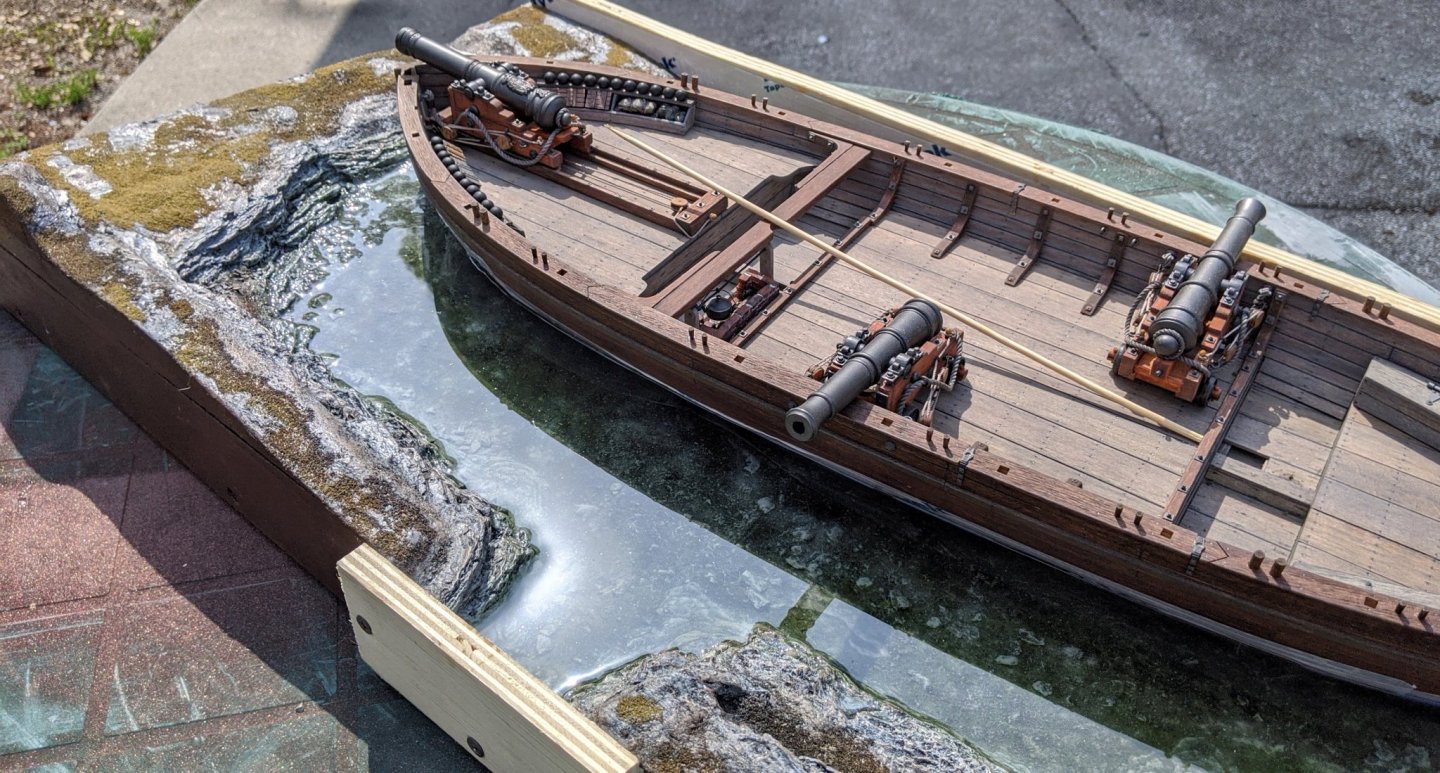
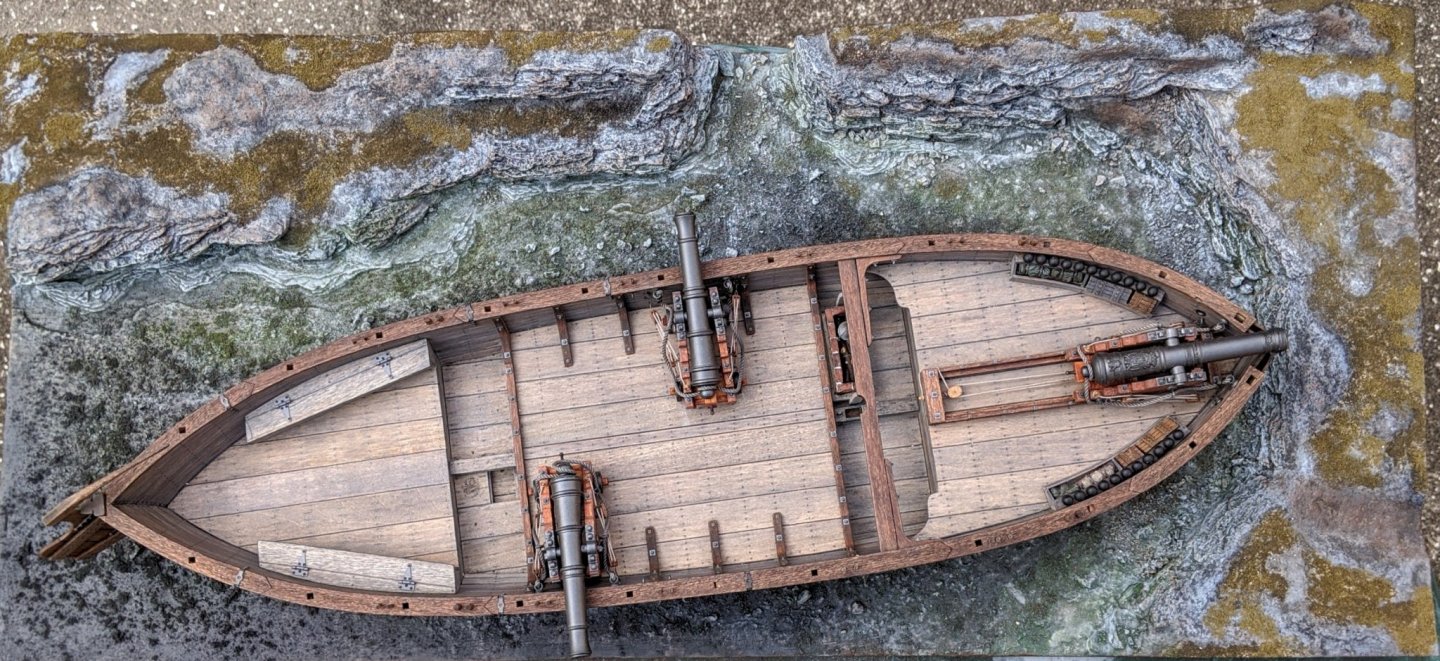
Hi all, Final pours done. The draft ended up about 3/4", and the total depth about 1-1/4". I ended up using the whole gallon, about seven pours total. To facilitate handling the boat, I removed most of the furniture and cannons. I was lucky... the Tyvek and Vaseline trick worked, the only moderate resistance when I removed the boat was some suction (probably the Vaseline). As the final coat set, I poked and prodded it to simulate ripples and swells. After the resin finally sets (about 72 hours) I'll start with the gloss ModPodge to detail out the ripples and edges of the resin where it meets the boat. After that, I'll add the soil, foliage, trees and grass and touch up where the water meets the shore. Now that the hull is finally fitted to the base, I can start completing the boat. All the furniture, masts, fittings and cargo are done, and just need attaching. After that, I'll start rigging. I'm so happy to have achieved this milestone, I was so afraid the boat would be permanently stuck to the base... that would have been very bad... Here's some pics... I like the sun reflections off the water on the hull.


-
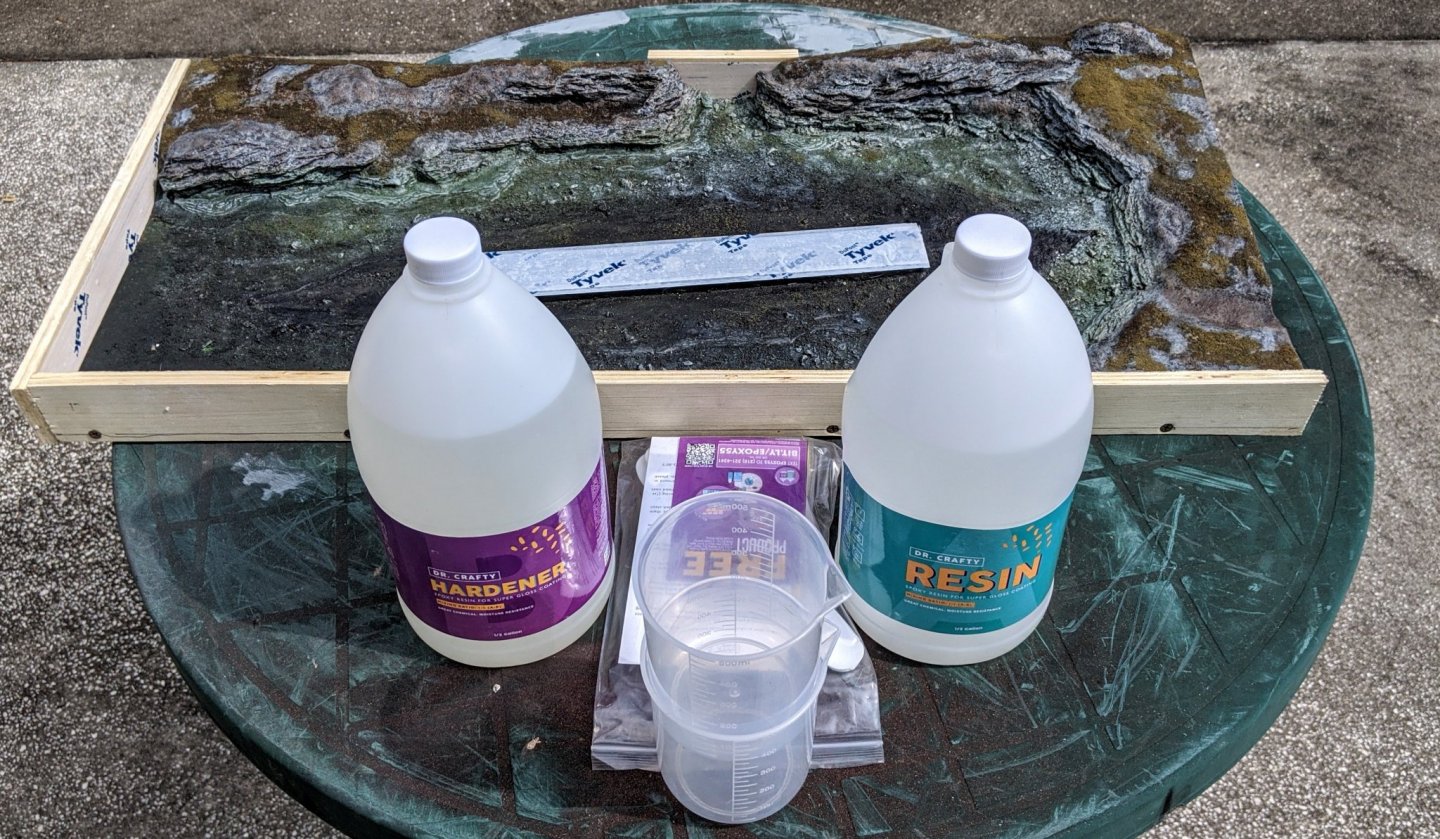
Hey all, The pours have begun!!! First, I put the resin in a sink full of hot water and let it sit for about an hour. I attached the dams, and Tyvek'ed the boat and dam sides. Then I put the base out in the sun to get good and warm. After everything was nice and toasty, I got all the stuff ready for the pours. I attached the boat to the base with three screws to keep it stable. Don't want it to float away!!! I started at 9 AM, hoping to get at least three to four 1/8" deep pours done. Most 1:1 epoxies (if it's a warm day, it's 80 deg F here, and sunny) can be re-coated in about 2 hours, so I hoped I could pour to the bottom of the rudder today. The rudder is a separate challenge, as I will have to cut off and embed the part of it that will be under water. I'll drill locating pins in the resin and also the upper part of the rudder so everything will align properly when the final pours are done tomorrow. Here's the procedure I followed (from the brand I used, but the method is similar for most 1:1 resins). First, I mixed up 4+4 oz. of resin to use as a seal coat. Measure by volume, and stir until the mixture is no longer milky. I then used a disposable brush to apply the seal coat over all the base that would be under water. I did find one small leak in the lower front corner, easily fixed by a toothpick pushed into the gap. When the seal coat was tacky but not sticky (use a cotton swab... if it tacks but doesn't pull cotton away it's OK for the next pour). For my first flood pour, I mixed 8 oz. of resin and tinted it a tiny amount with some green and brown mica powder. I poured some resin in all four corners of the river bed, and evened it all out with a craft stick and toothpick. I was lucky, the seal coat worked well and because all the materials were quite warm, I didn't have any major bubble trouble. The ones that did pop up were easily removed with a heat gun. Doing four more 8 oz. pours, I was able to pour up to the bottom of the rudder (total pour depth so far about 5/8", or half way there). The resin is hardening nicely, even and smooth. The base did get pretty hot as the resin set, but it's cooled off with no apparent damage to the boat. The part I'm apprehensive about is the boat sticking to the base. In a few hours, I'll attempt to remove the boat, we'll see if all my precautions worked... (fingers and all appendages crossed...). Here's some shots after today's pours:

-
That's about what I'm going to do also.
-
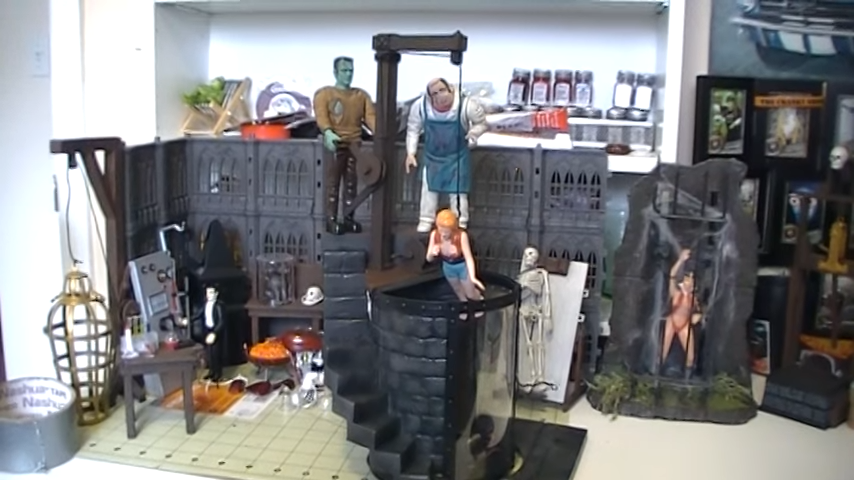
Here's an interesting link about those old Aurora kits. I guess they caused quite a controversy. A screenshot from YouTube of the whole series together...
- 170 replies
-
- 2
-
-
- medway longboat
- Syren Ship Model Company
- (and 1 more)
-
I skimmed through the Philly II video, and in this screenshot you can see there is space under the front gun deck. Looks like a crate with rope handles on the starboard side of the mast and a support between the keel and forward gun deck..
-
Reminds me of the old Aurora Movie Monsters kits... I believe one of them was a torture chamber. I think Polar Lights have the molds now, and are re-releasing them.
- 170 replies
-
- 2
-
-
- medway longboat
- Syren Ship Model Company
- (and 1 more)
-
Very clever idea! Kind of looks like a torture rack for oars though...
- 170 replies
-
- 2
-
-

-
- medway longboat
- Syren Ship Model Company
- (and 1 more)
-
Copy that! Otherwise, I'll have a nicely resined workbench...😆
-
Way too late to change it now anyway. I'm just glad all the bar and chain shot I made will be a plausible addition.
-
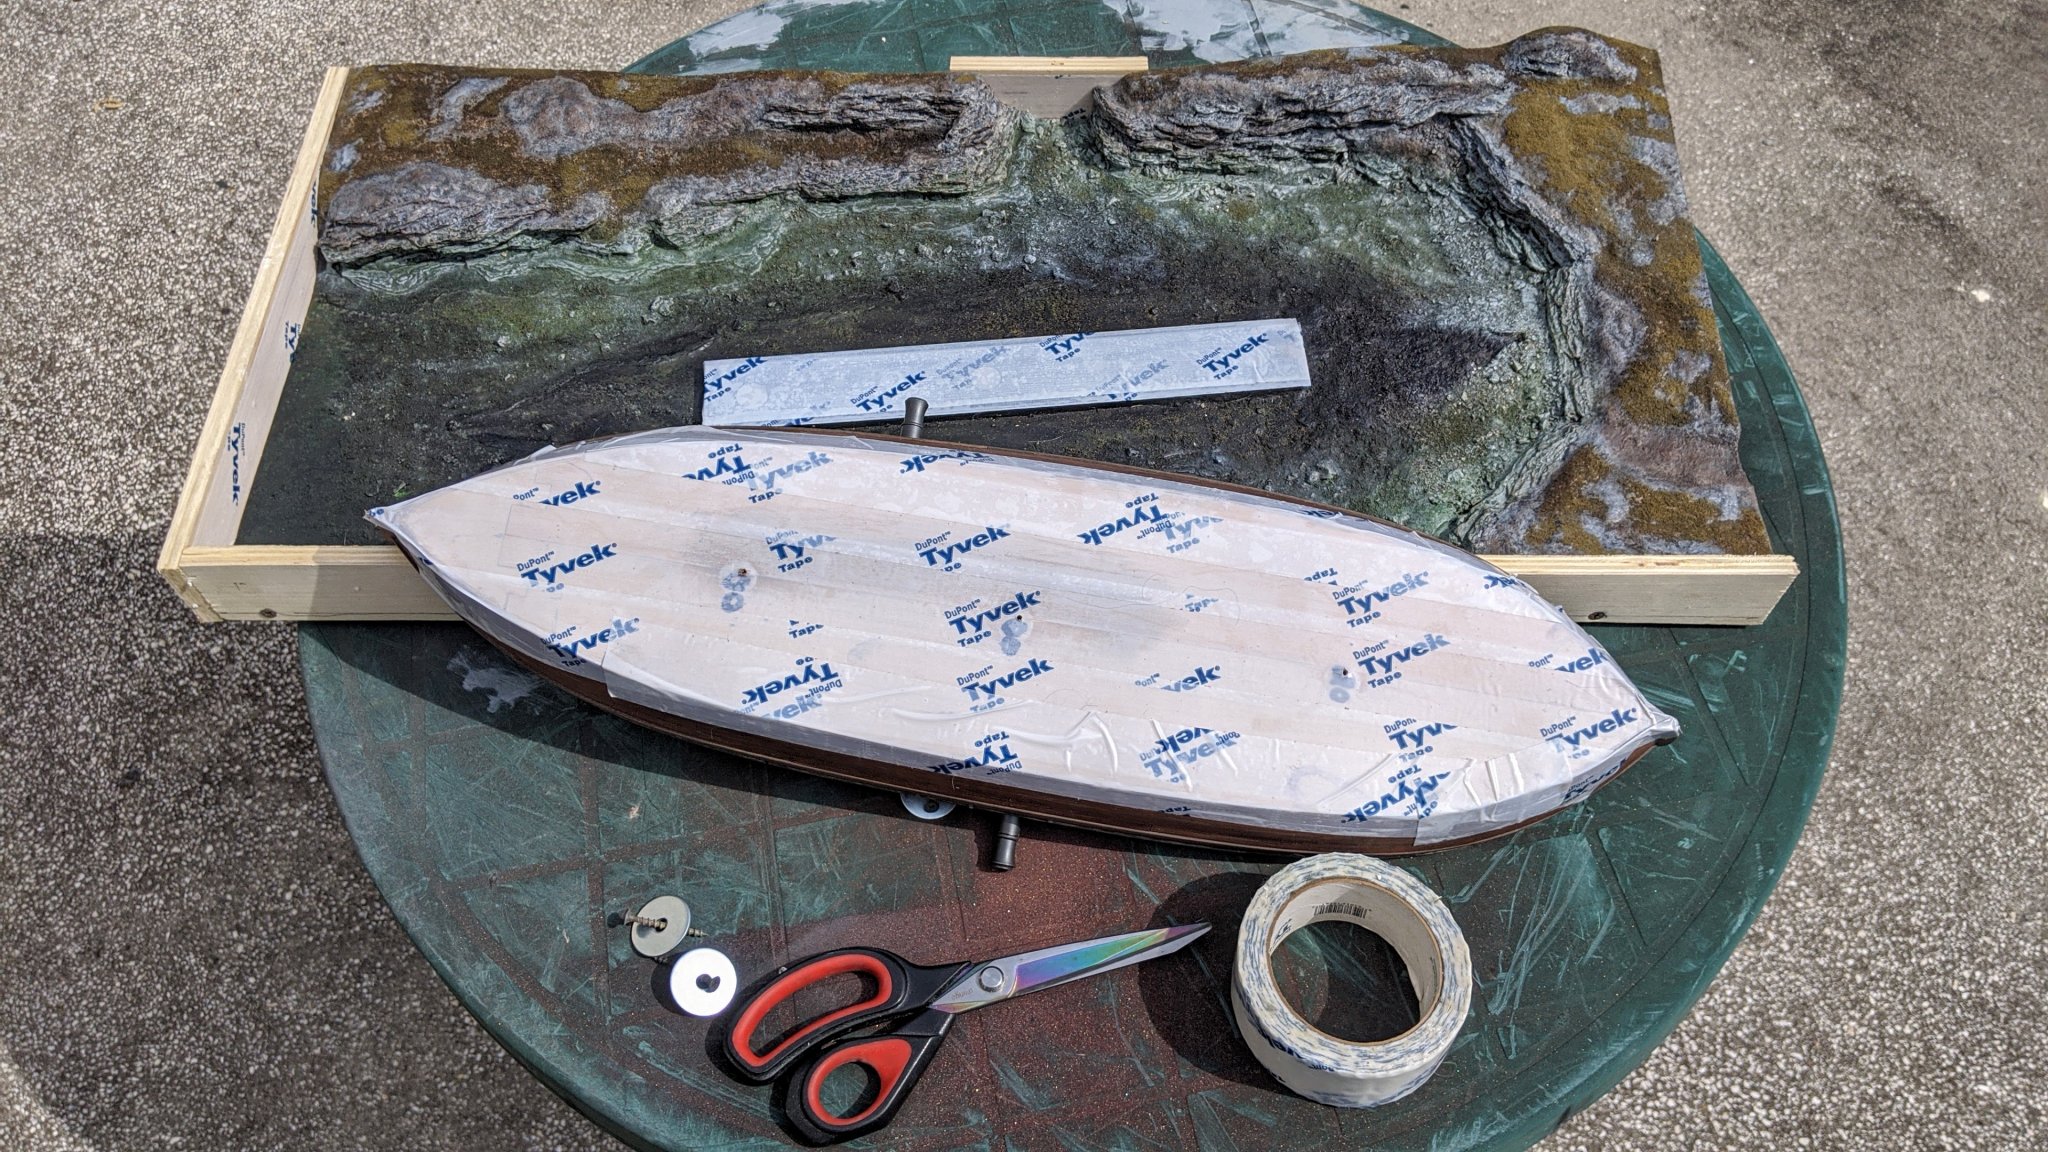
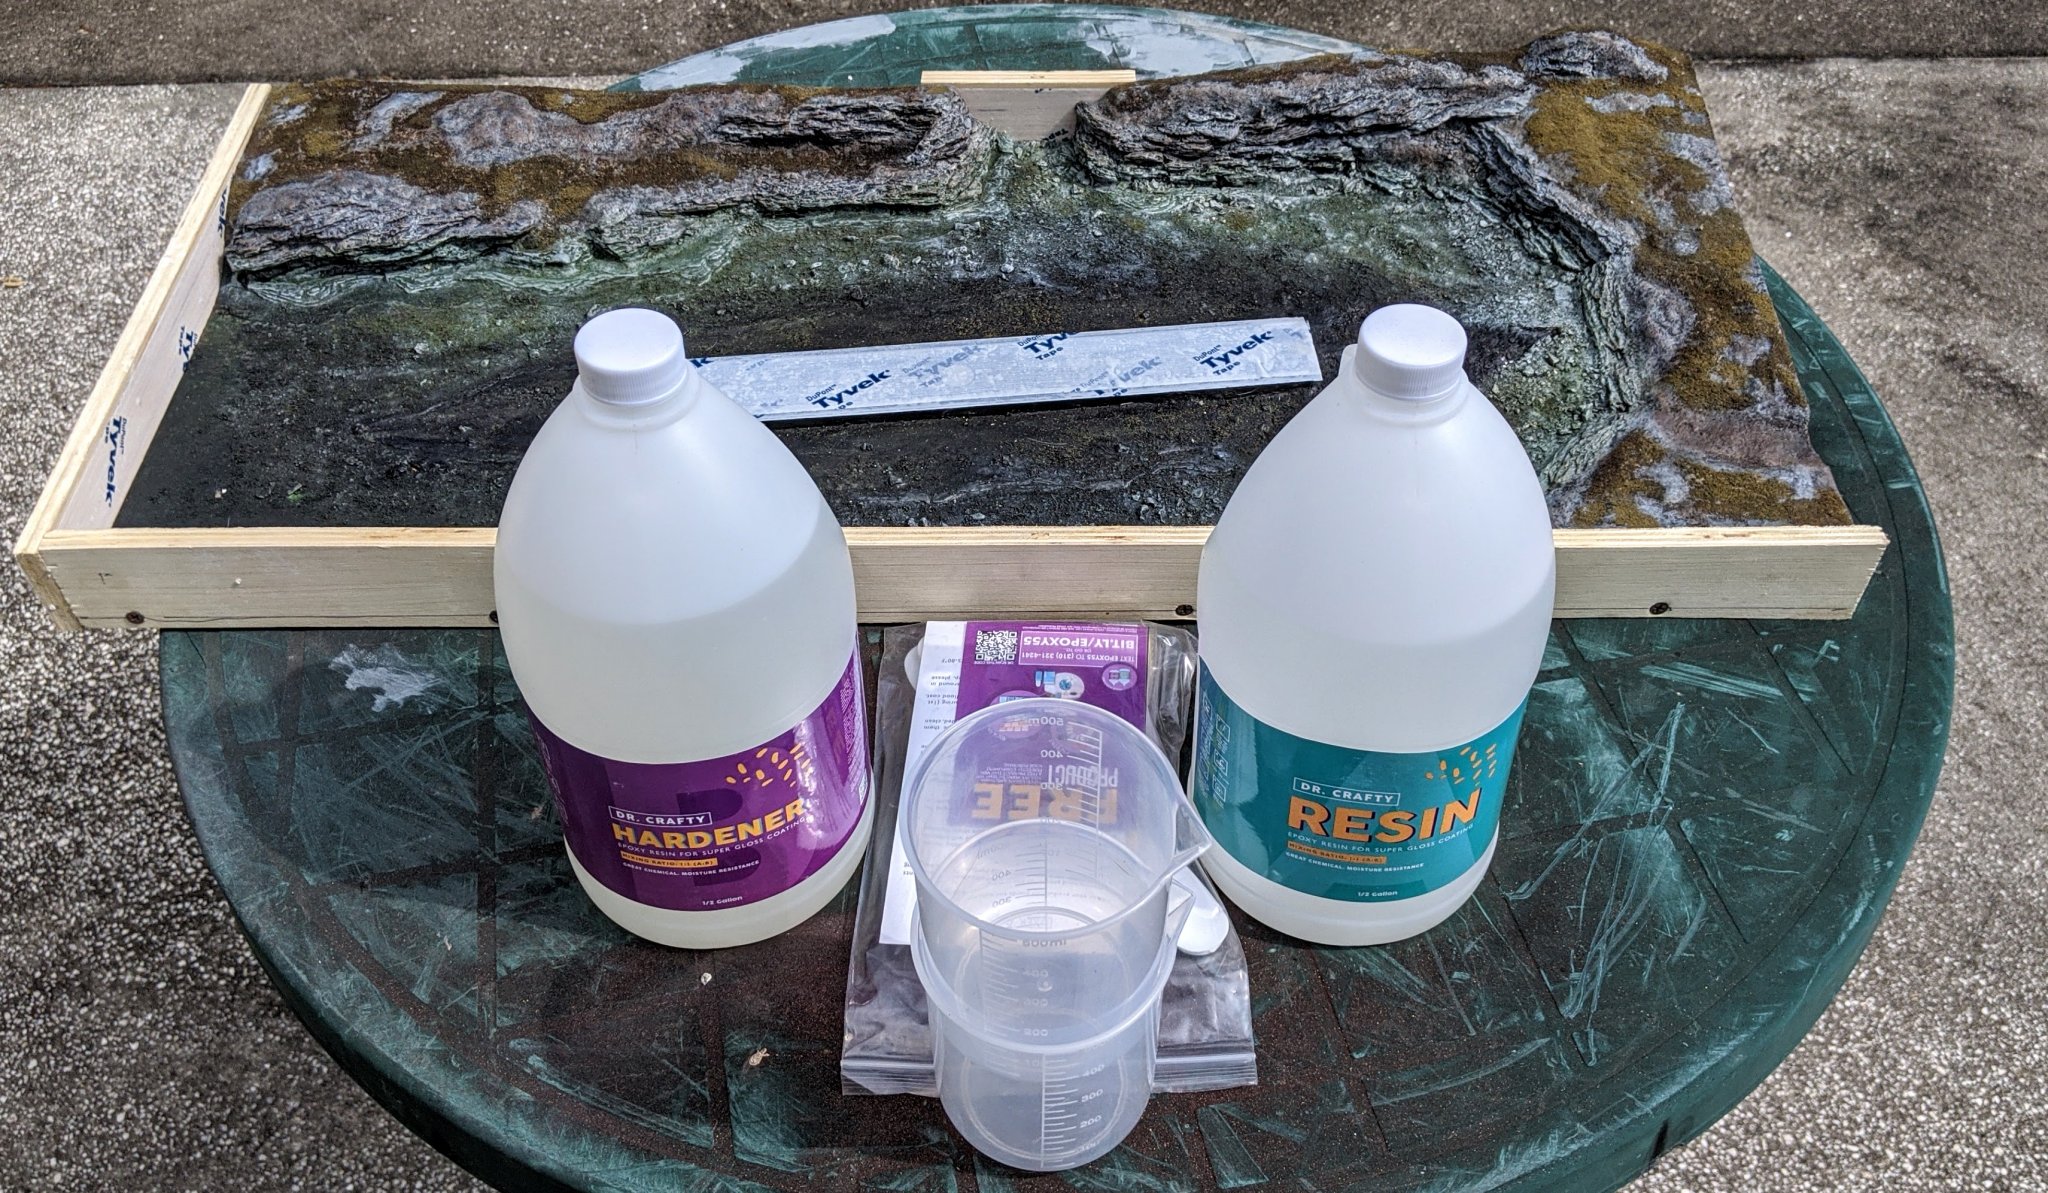
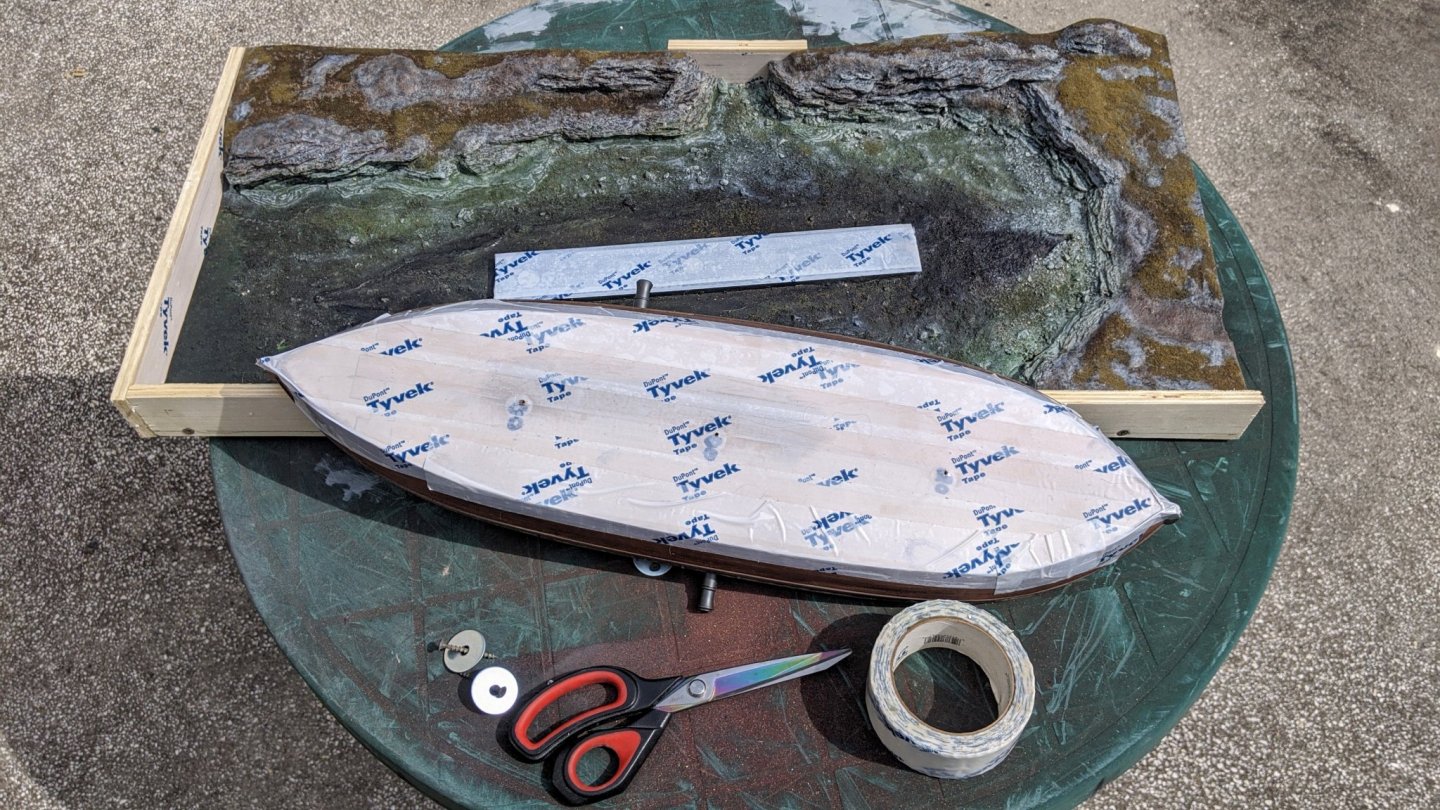
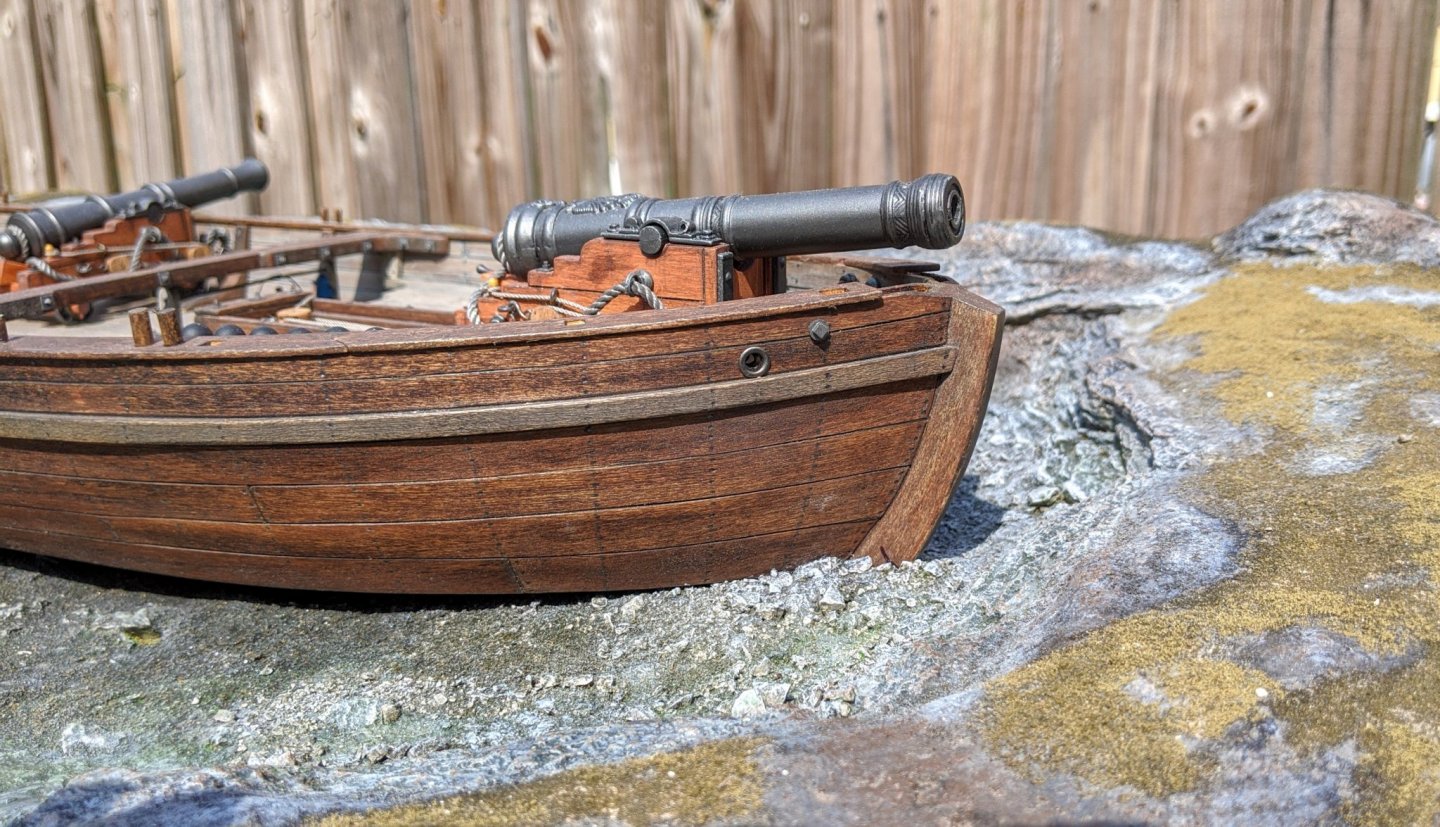
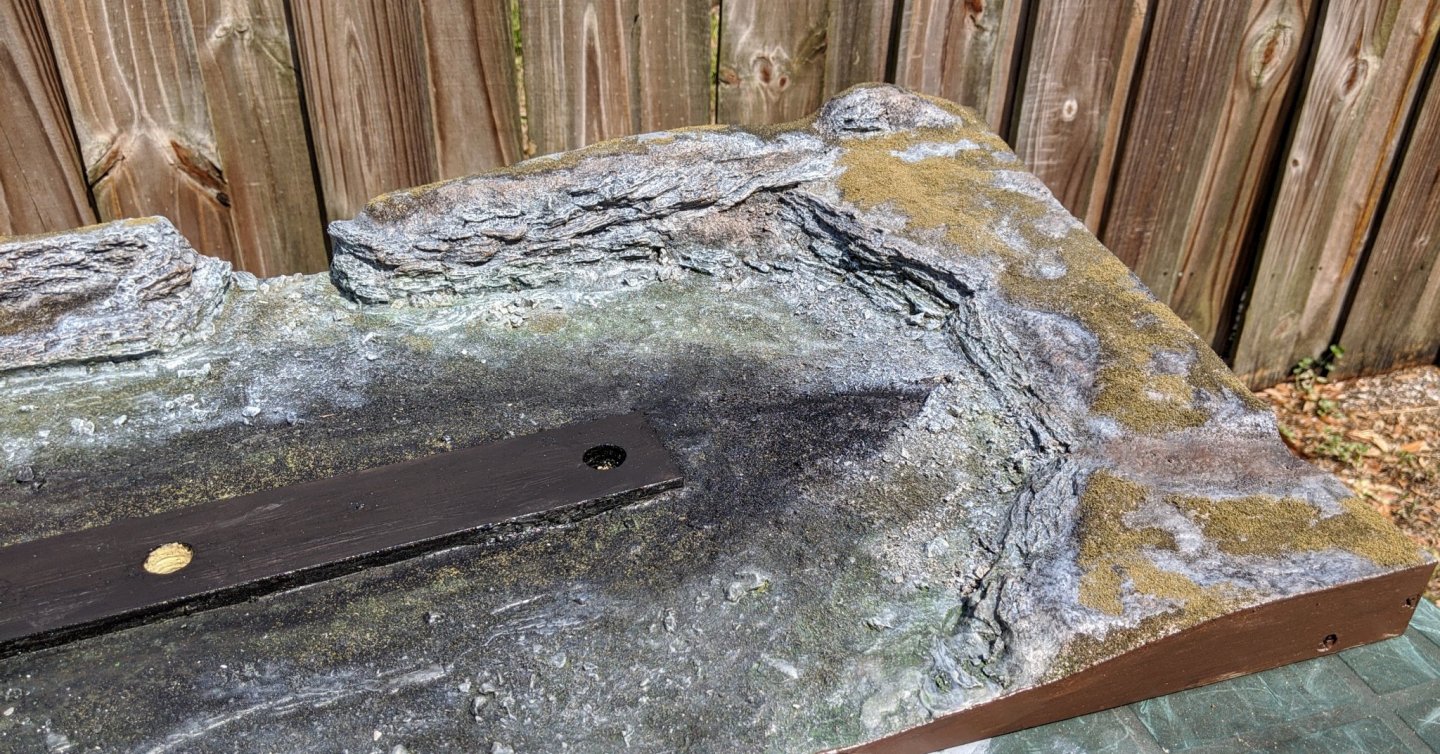
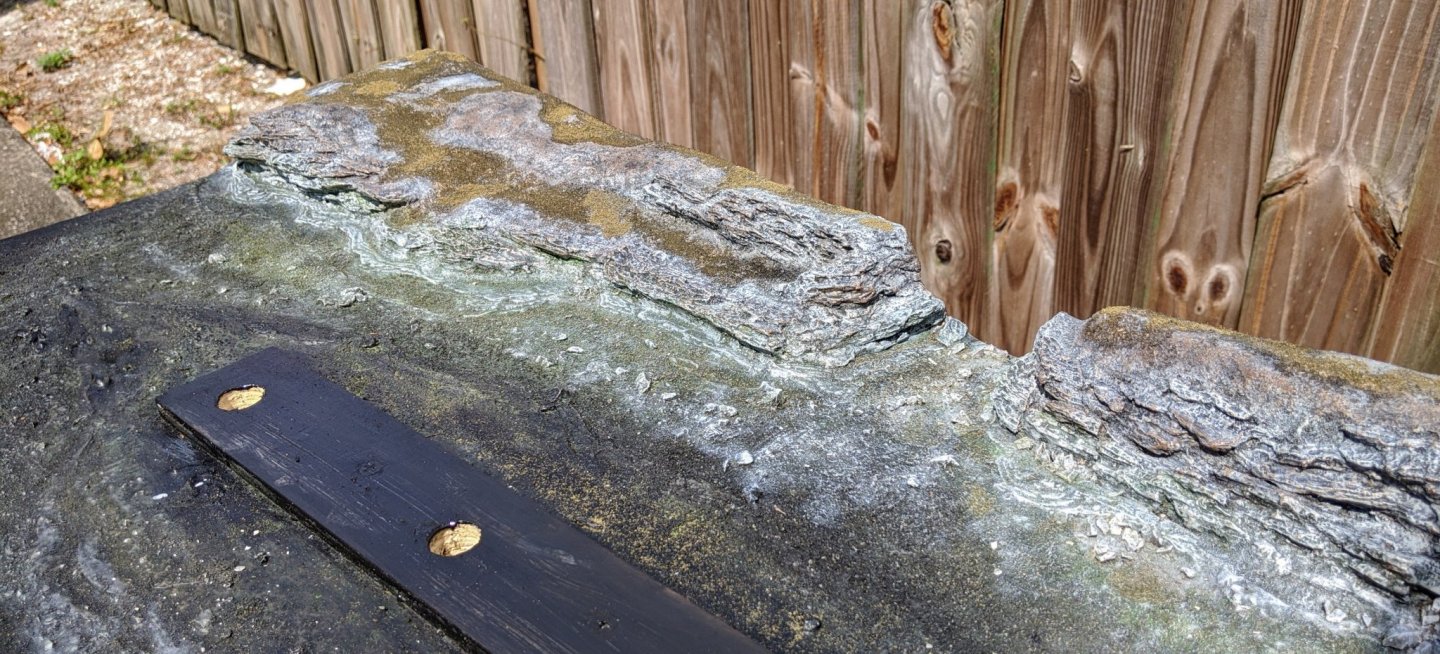
FINALLY! The base is done, and ready for the resin water pours. Two more sunny Florida days and it'll be dry enough for the resin. The trees, grass and foliage will be done after the water. I've got the dams cut for the front, left side and creek areas, and will be using Tyvek tape on the inner faces of the dams (resin doesn't stick to Tyvek, and if the tape is applied without wrinkles, will leave a nice, smooth clear surface). After the dams are in place (and securely sealed from resin leakage), I'll apply a "wet coat" of resin over the whole area that will be underwater. That way I hope I can catch any errant bubbles that are guaranteed to come out of the river bed and stone work, and get a feel for how this brand of resin works (Dr. Crafty from Amazon). After the wet coat, I'll be pouring to a final depth of about 1.25" I'm going to do about 3 to 4 pours, with the first ones tinted with a bit of green and brown mica dyes. That will add some murkiness and depth, with the rest of the pours clear. To simulate ripples atop the final pour, I'll use ModPodge gloss medium, worked with a brush and by blowing on it through a straw. There's tons of good videos on YouTube on how to do this. The tricky part is when the pours reach the bottom of the hull. The plan is to have the boat removable after the pours are done, so I'll have to "resin-proof" the hull. I'm going to use Tyvek tape and maybe some Pam cooking spray or Vaseline to make sure the boat will come out cleanly. I left myself a "get out of jail free" option by drilling three 5/8" holes in the black boat support piece on the base. That way if the hull sticks, I'll at least be able to push (tap...pound...I hope not) up from under the base at the bow, amidships, and stern to free it. When I do my wet coat, I'll experiment with different ways to resin proof the hull. I've never embedded anything this big, should be a real adventure.... Here's some shots of the Philly gently run up on shore... The final waterline will be about 3/4" up from the bottom. Here's three shots of the base with all terrain forming and paint completed (I can't wait to get the water done, I'm so over working on this base...)


-
Thanks! I just got the book on my Kindle and look forward to reading it!