DONATION DRIVE - SUPPORT MSW - DO YOUR PART TO KEEP THIS GREAT FORUM GOING! (91 donations so far out of 49,000 members - C'mon guys!)
×

.jpg.bc46b7394042cb22c3a08e1cfbd9877b.jpg)
BobCardone
-
Posts
142 -
Joined
-
Last visited
Content Type
Profiles
Forums
Gallery
Events
Everything posted by BobCardone
-
.thumb.jpg.2abae9c0194e4e915bb097b8a6d5c174.jpg) Wow, she's looking fit, trim and elegant! You have great skills and have done a fine job, I'm looking forward to your future projects. Any ideas yet?
Wow, she's looking fit, trim and elegant! You have great skills and have done a fine job, I'm looking forward to your future projects. Any ideas yet?- 170 replies
-
- 1
-

-
- medway longboat
- Syren Ship Model Company
- (and 1 more)
-
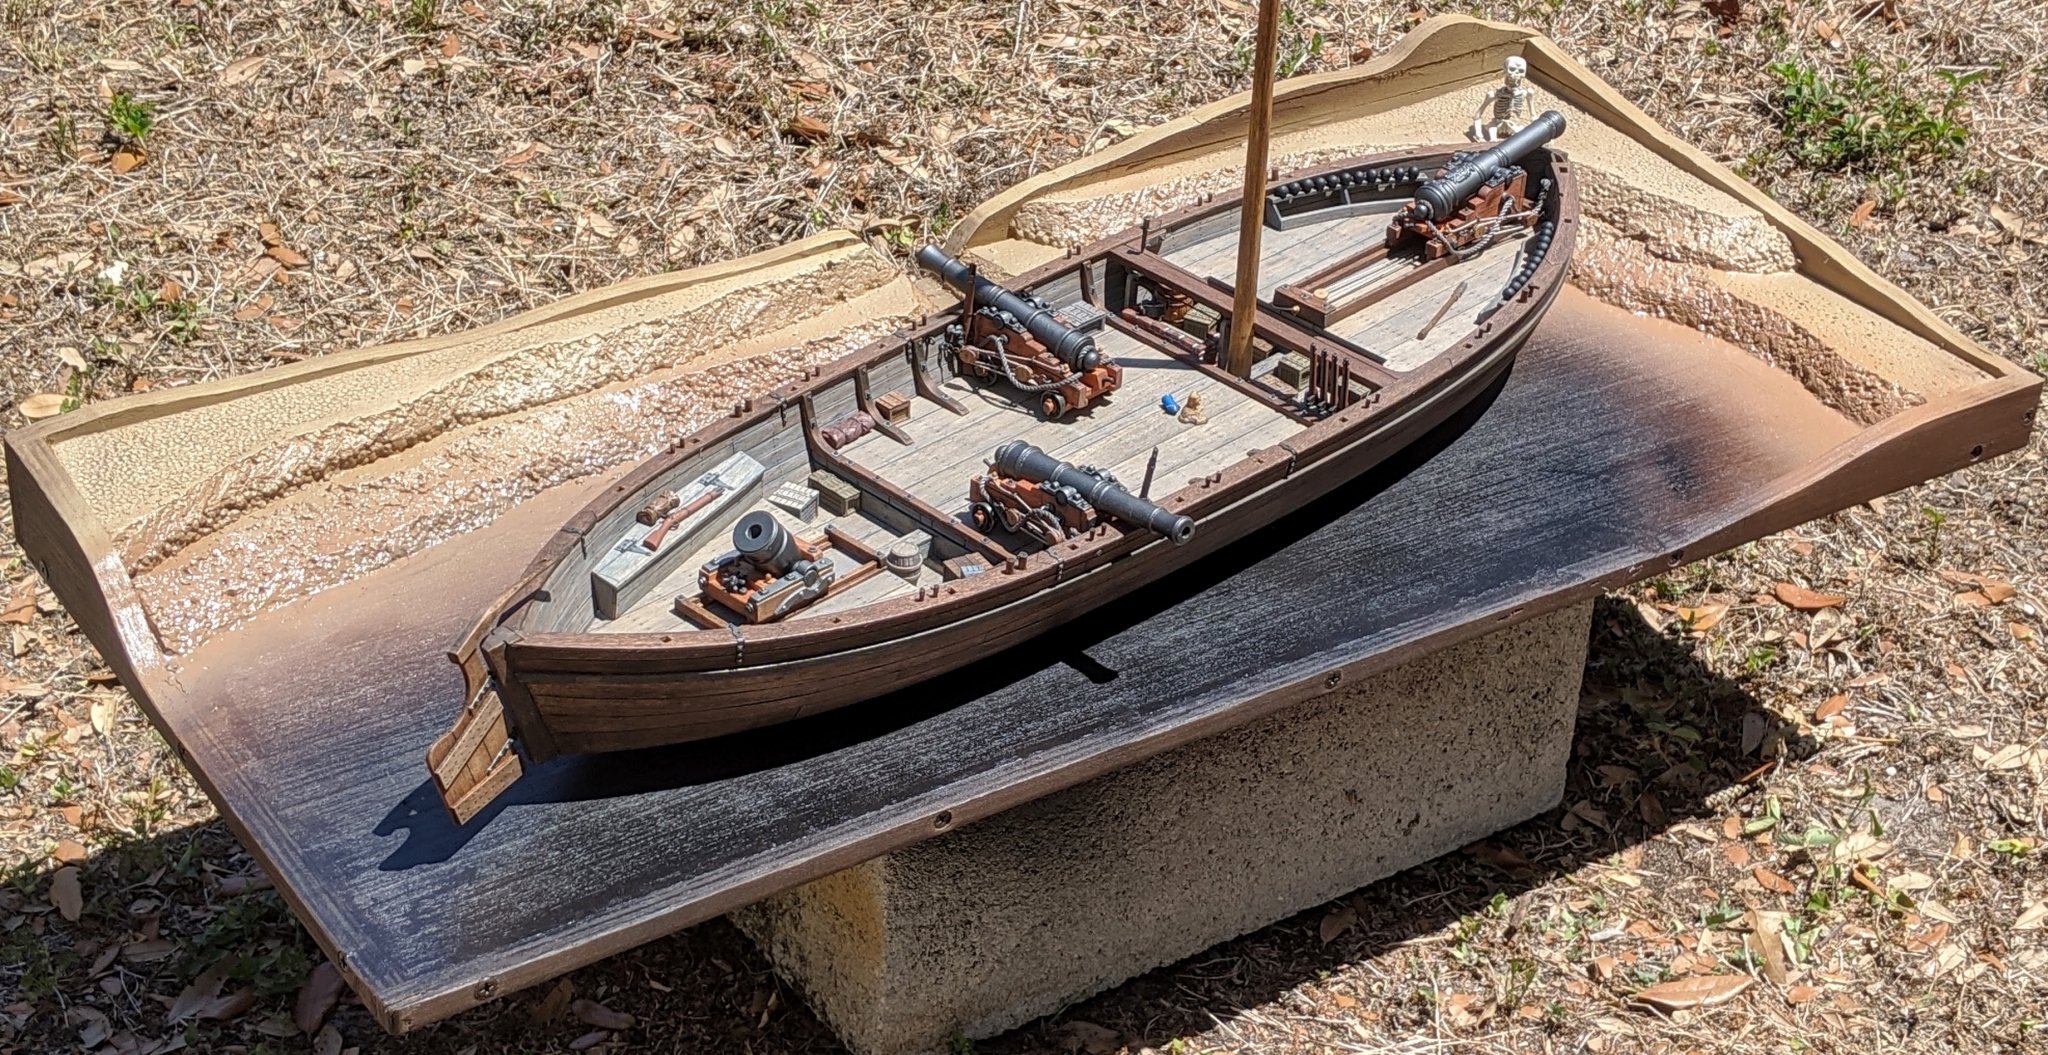
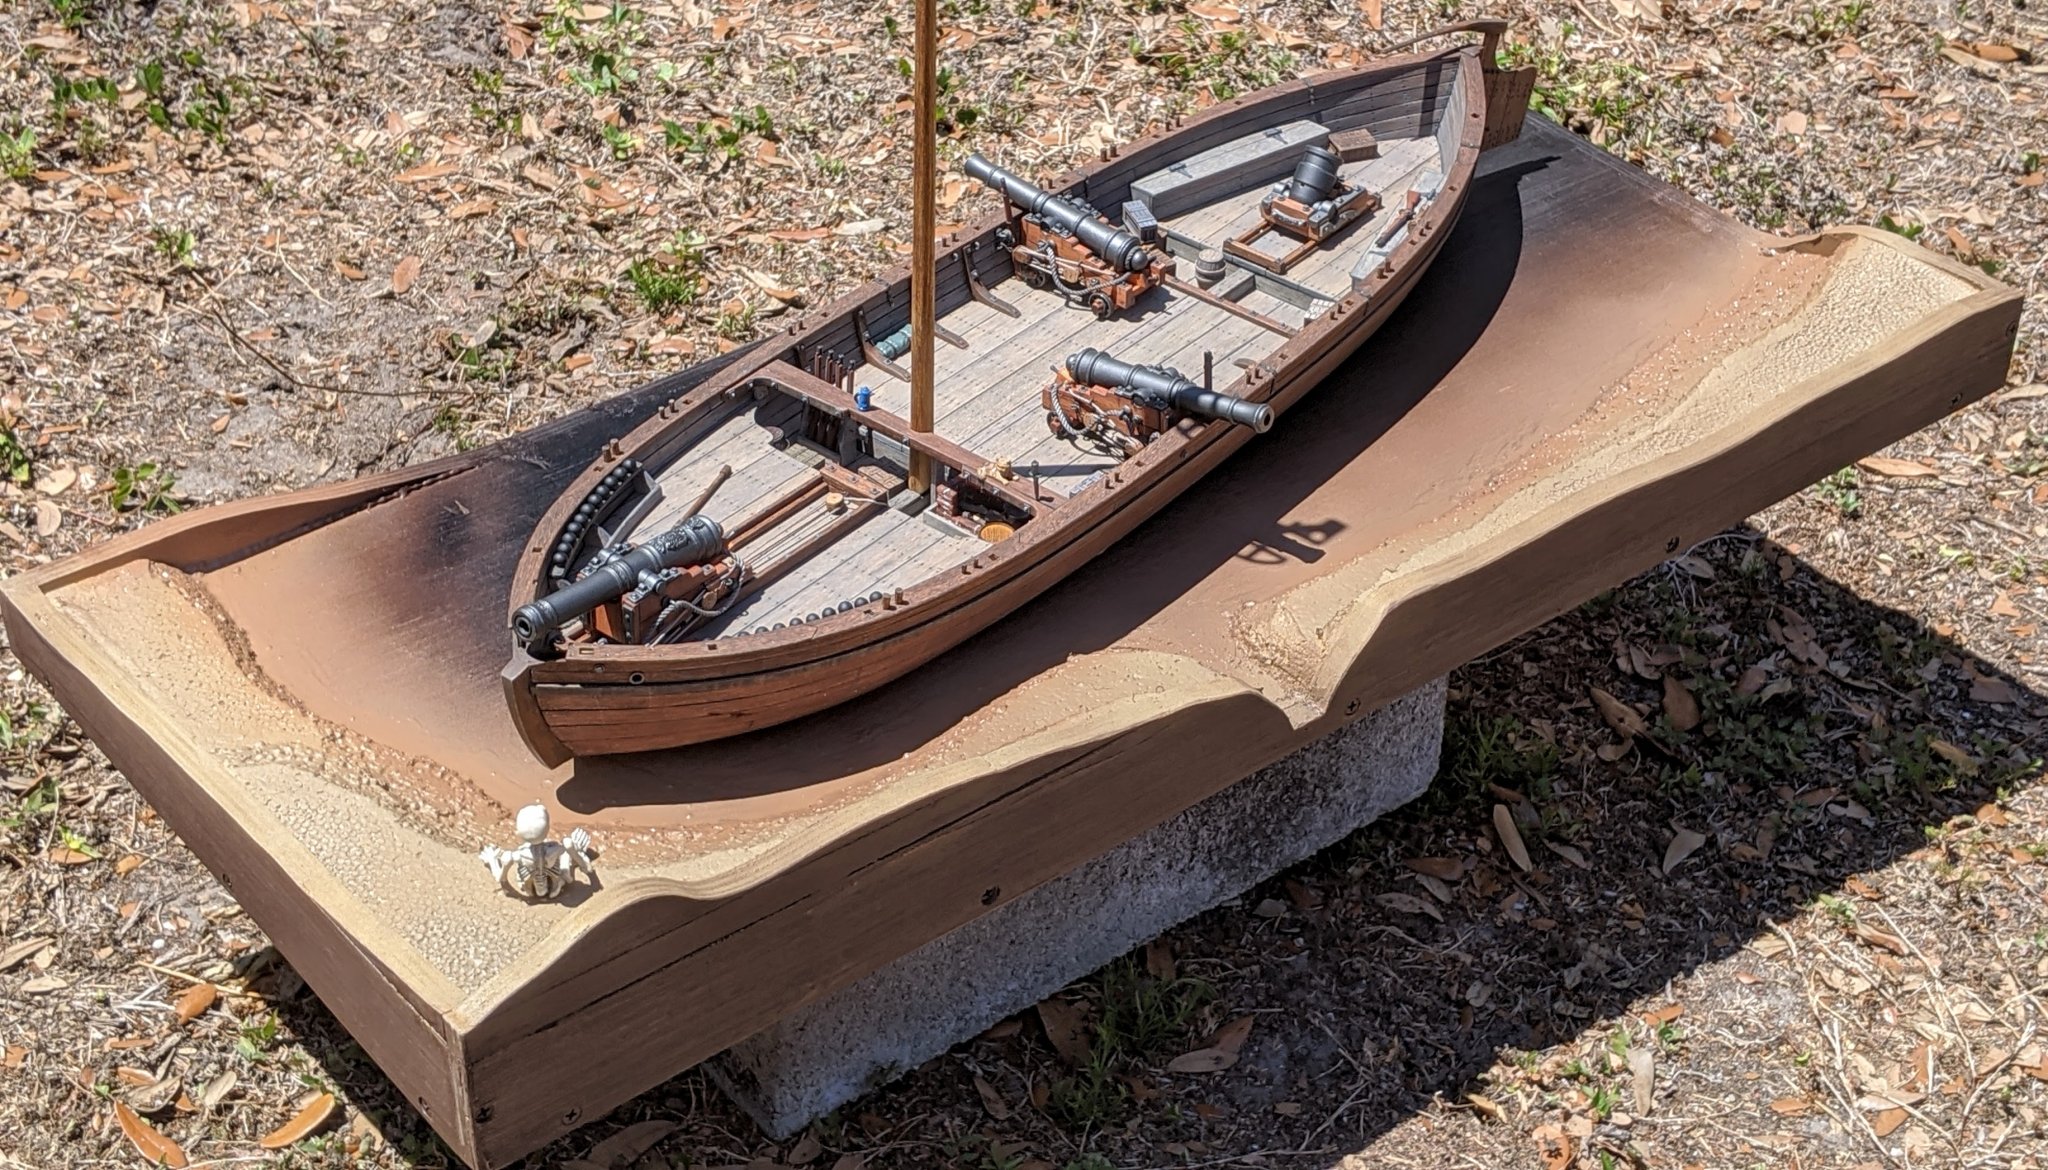
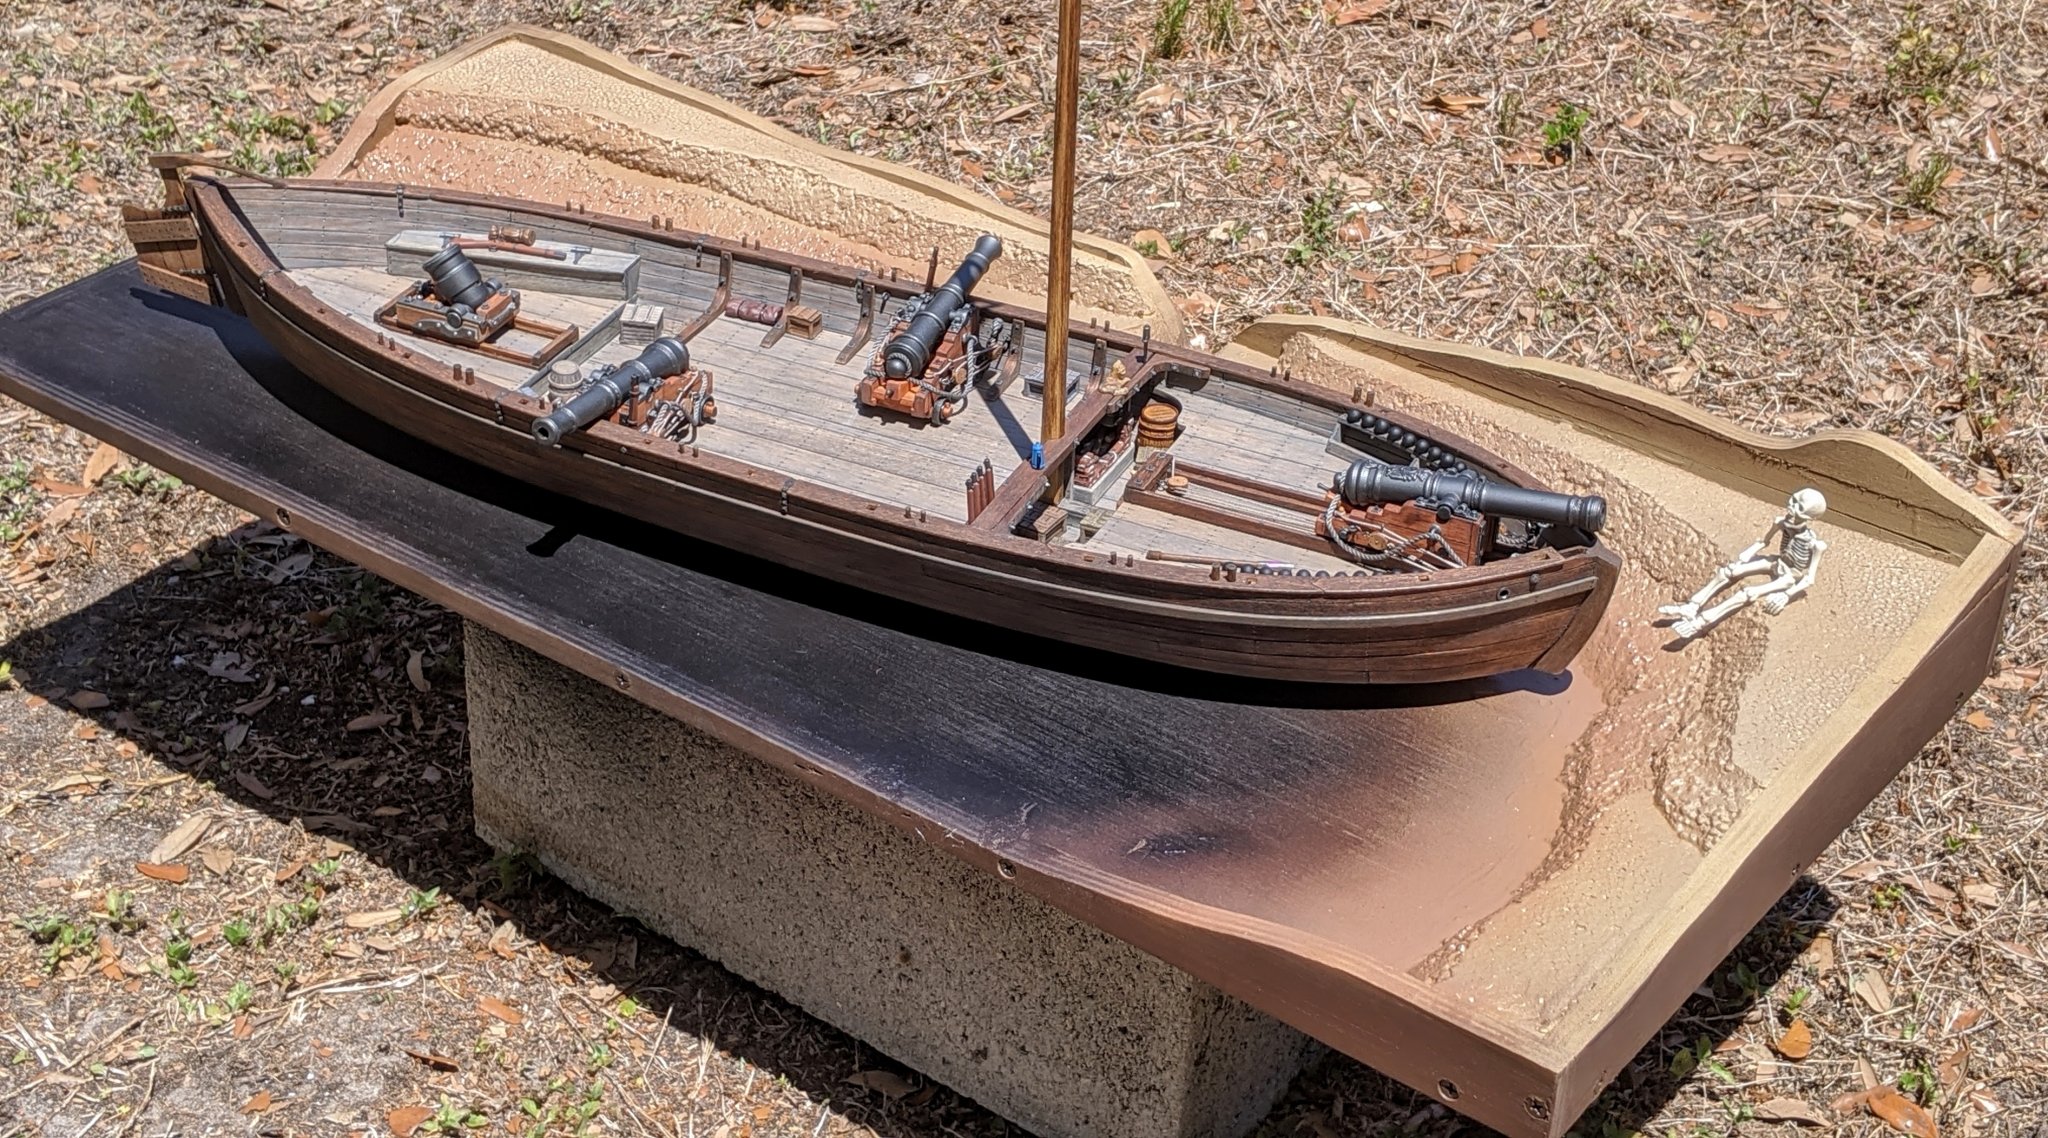
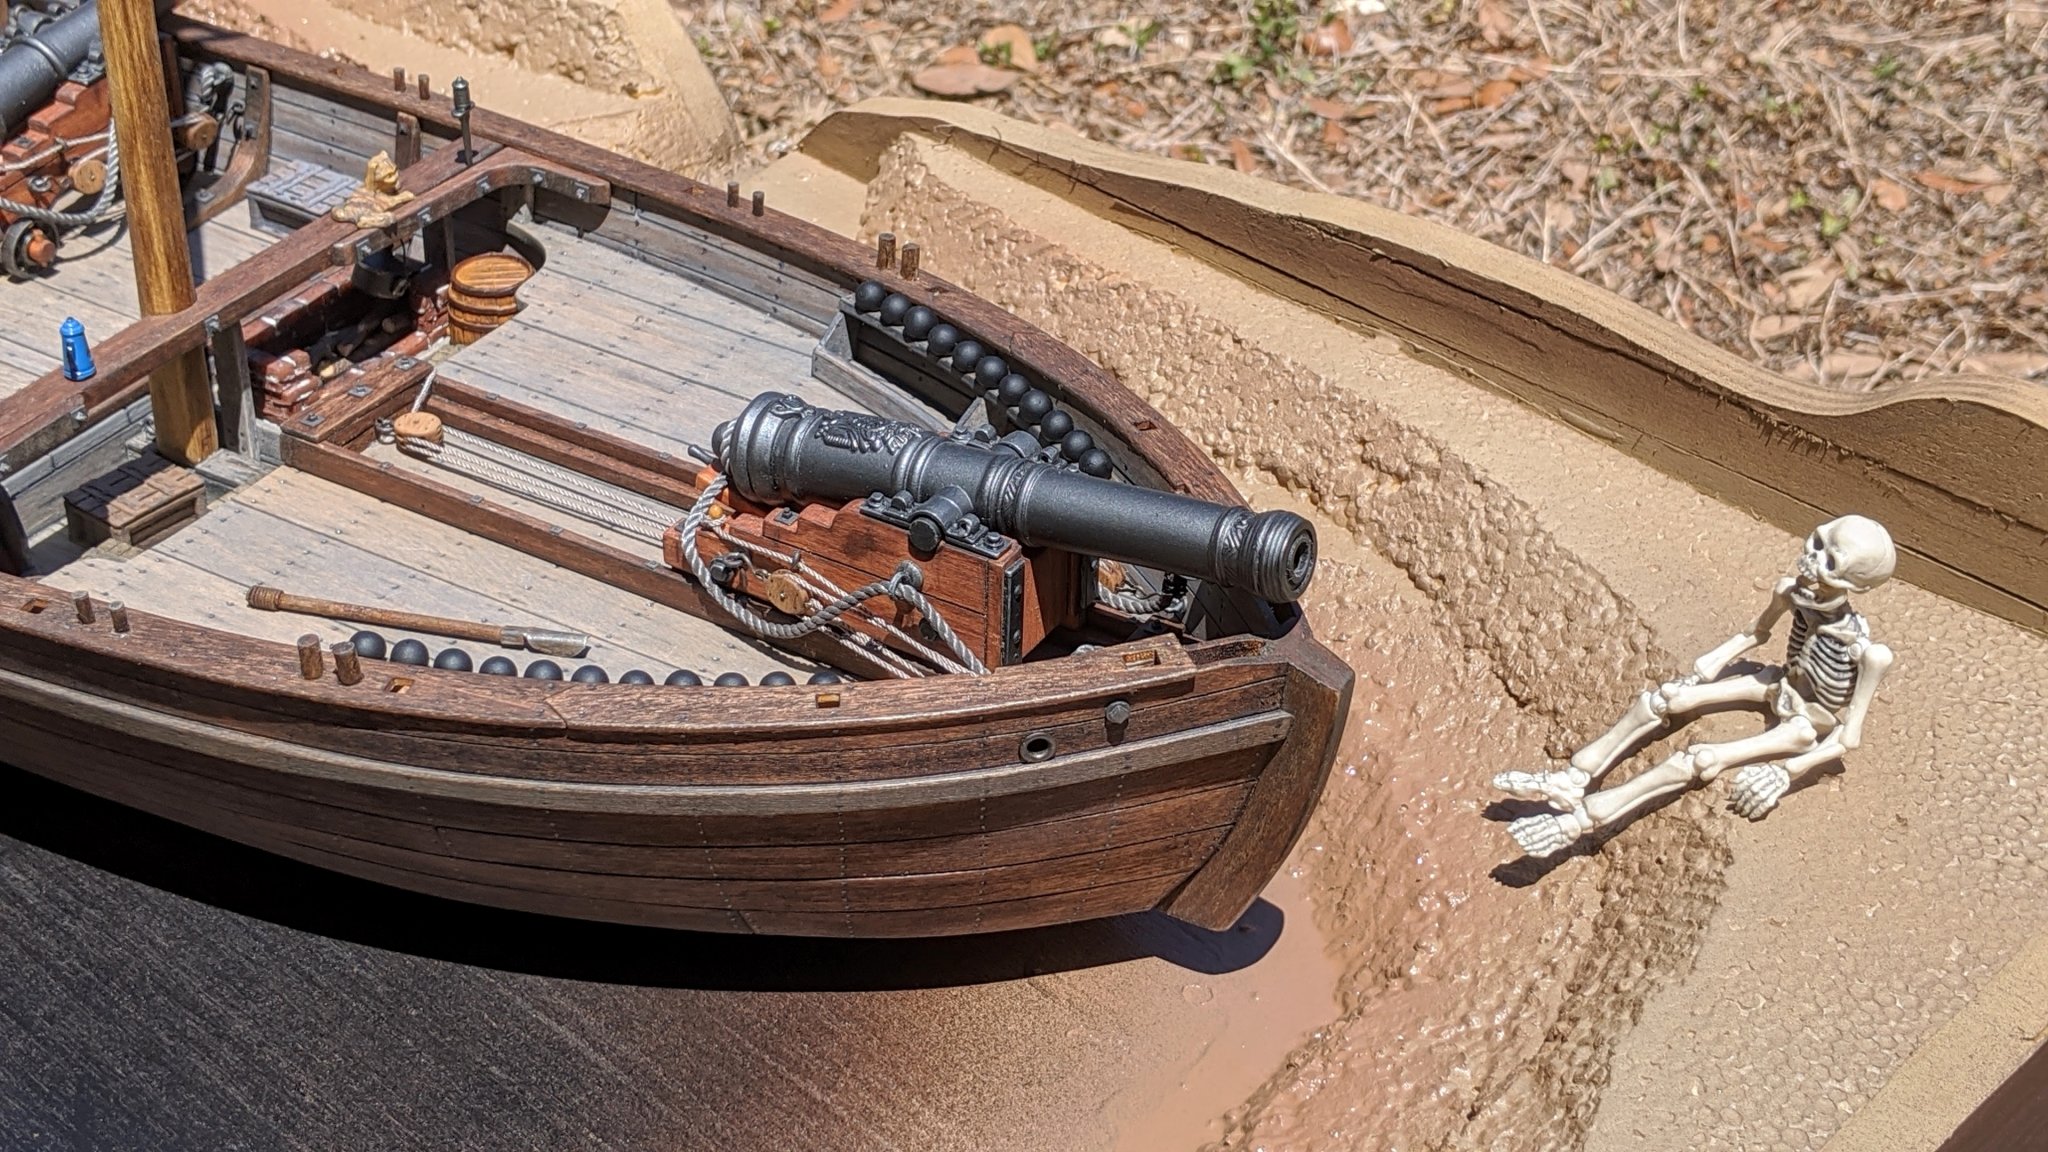
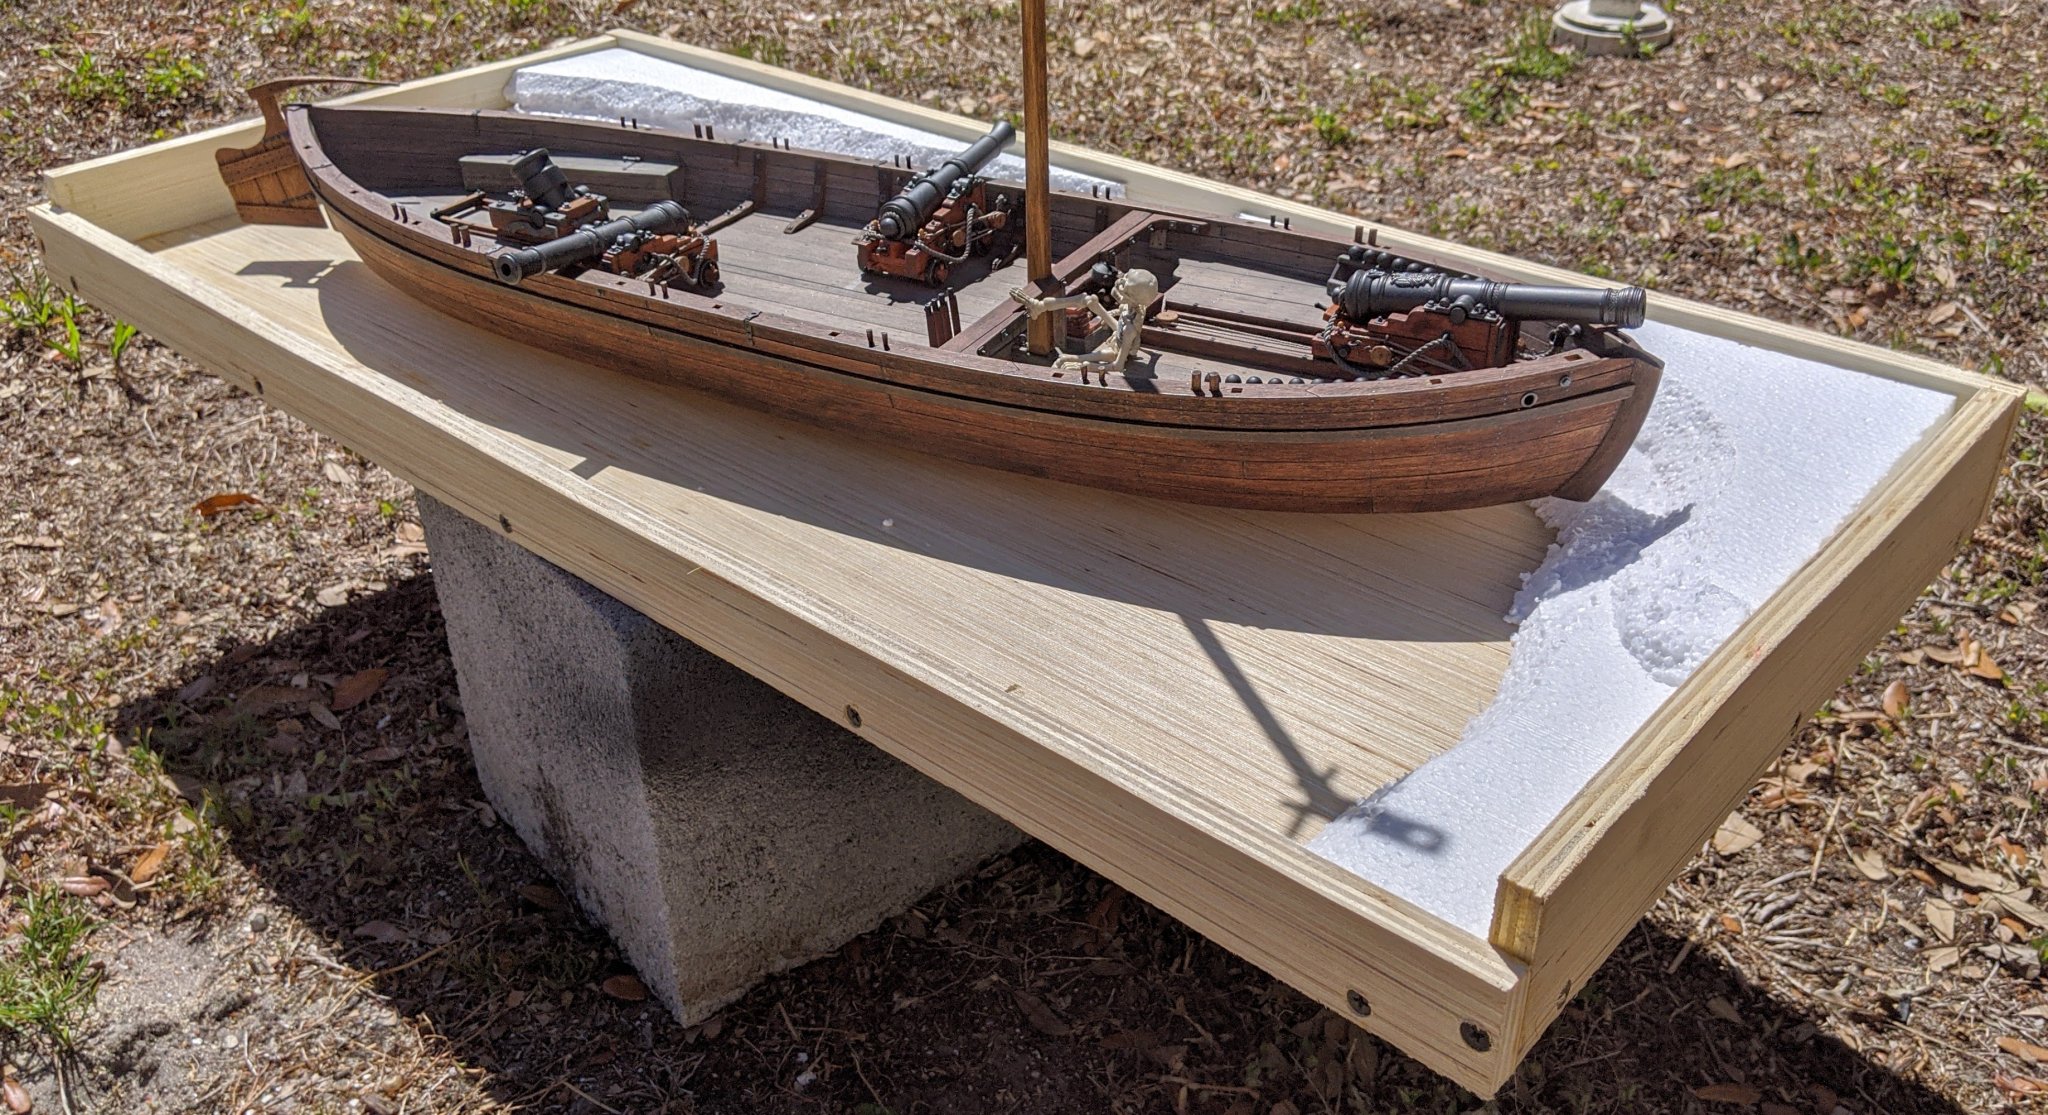
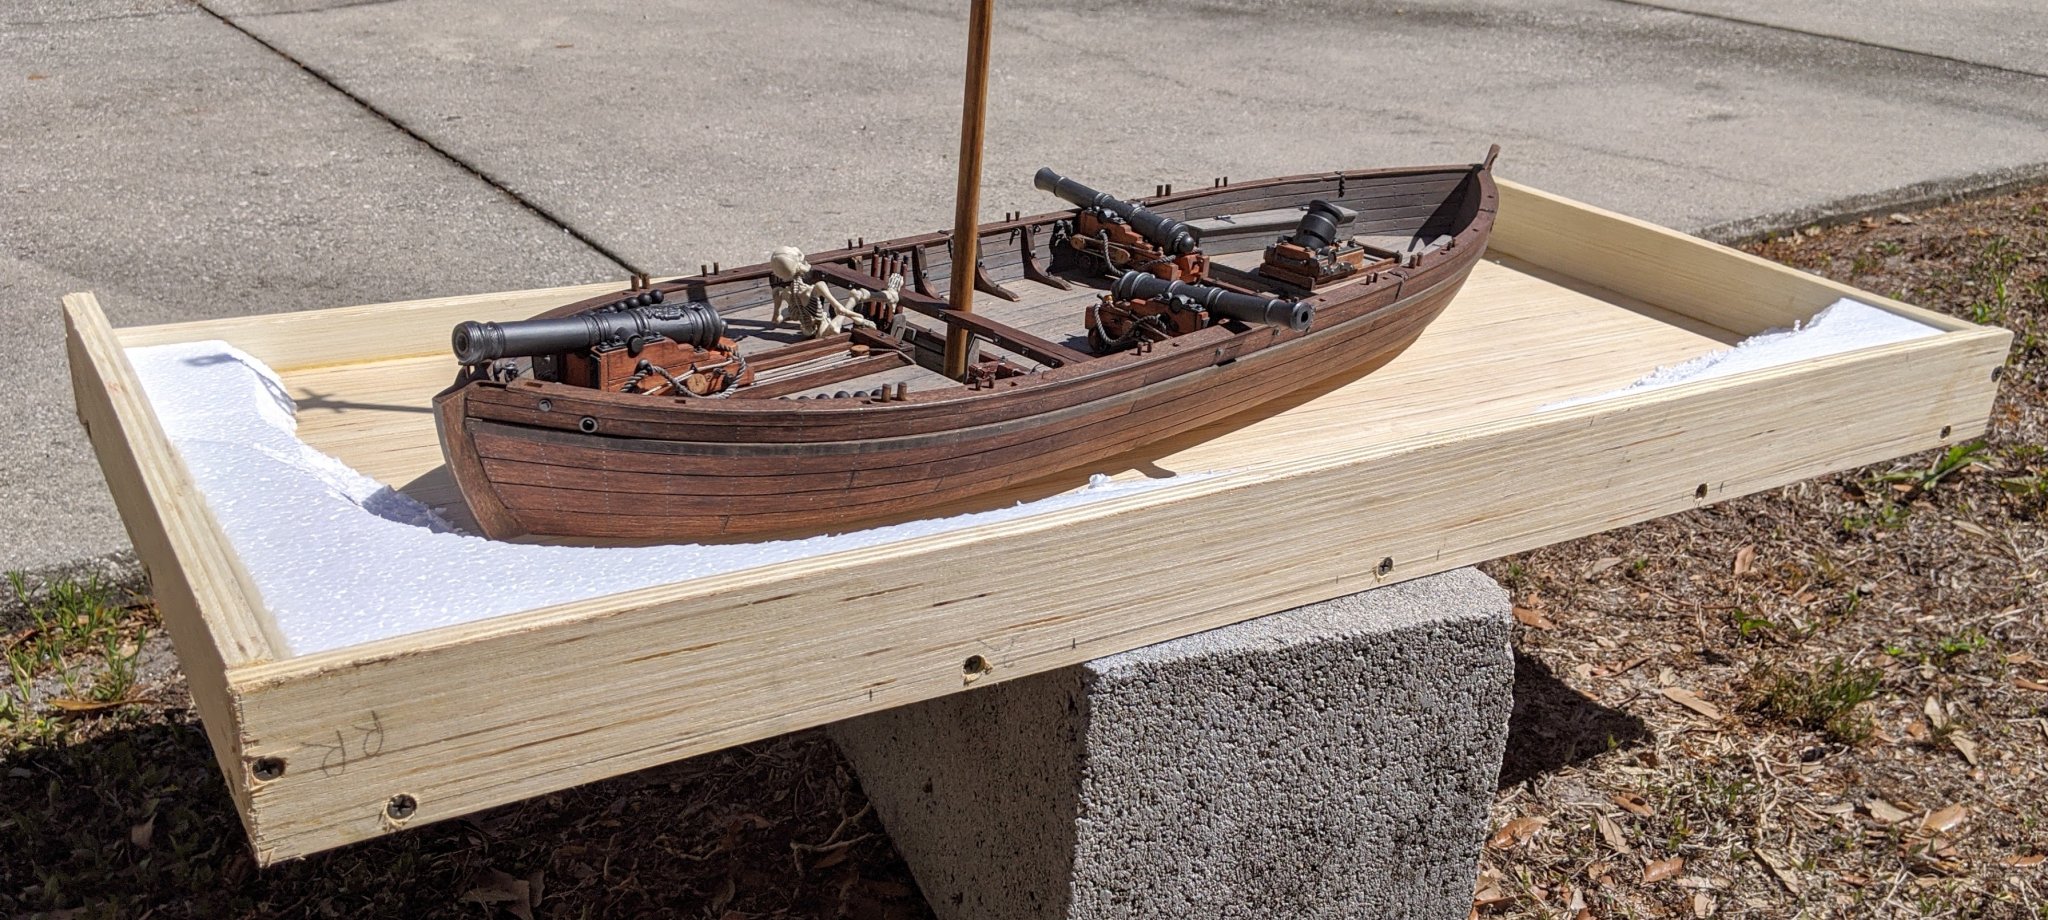
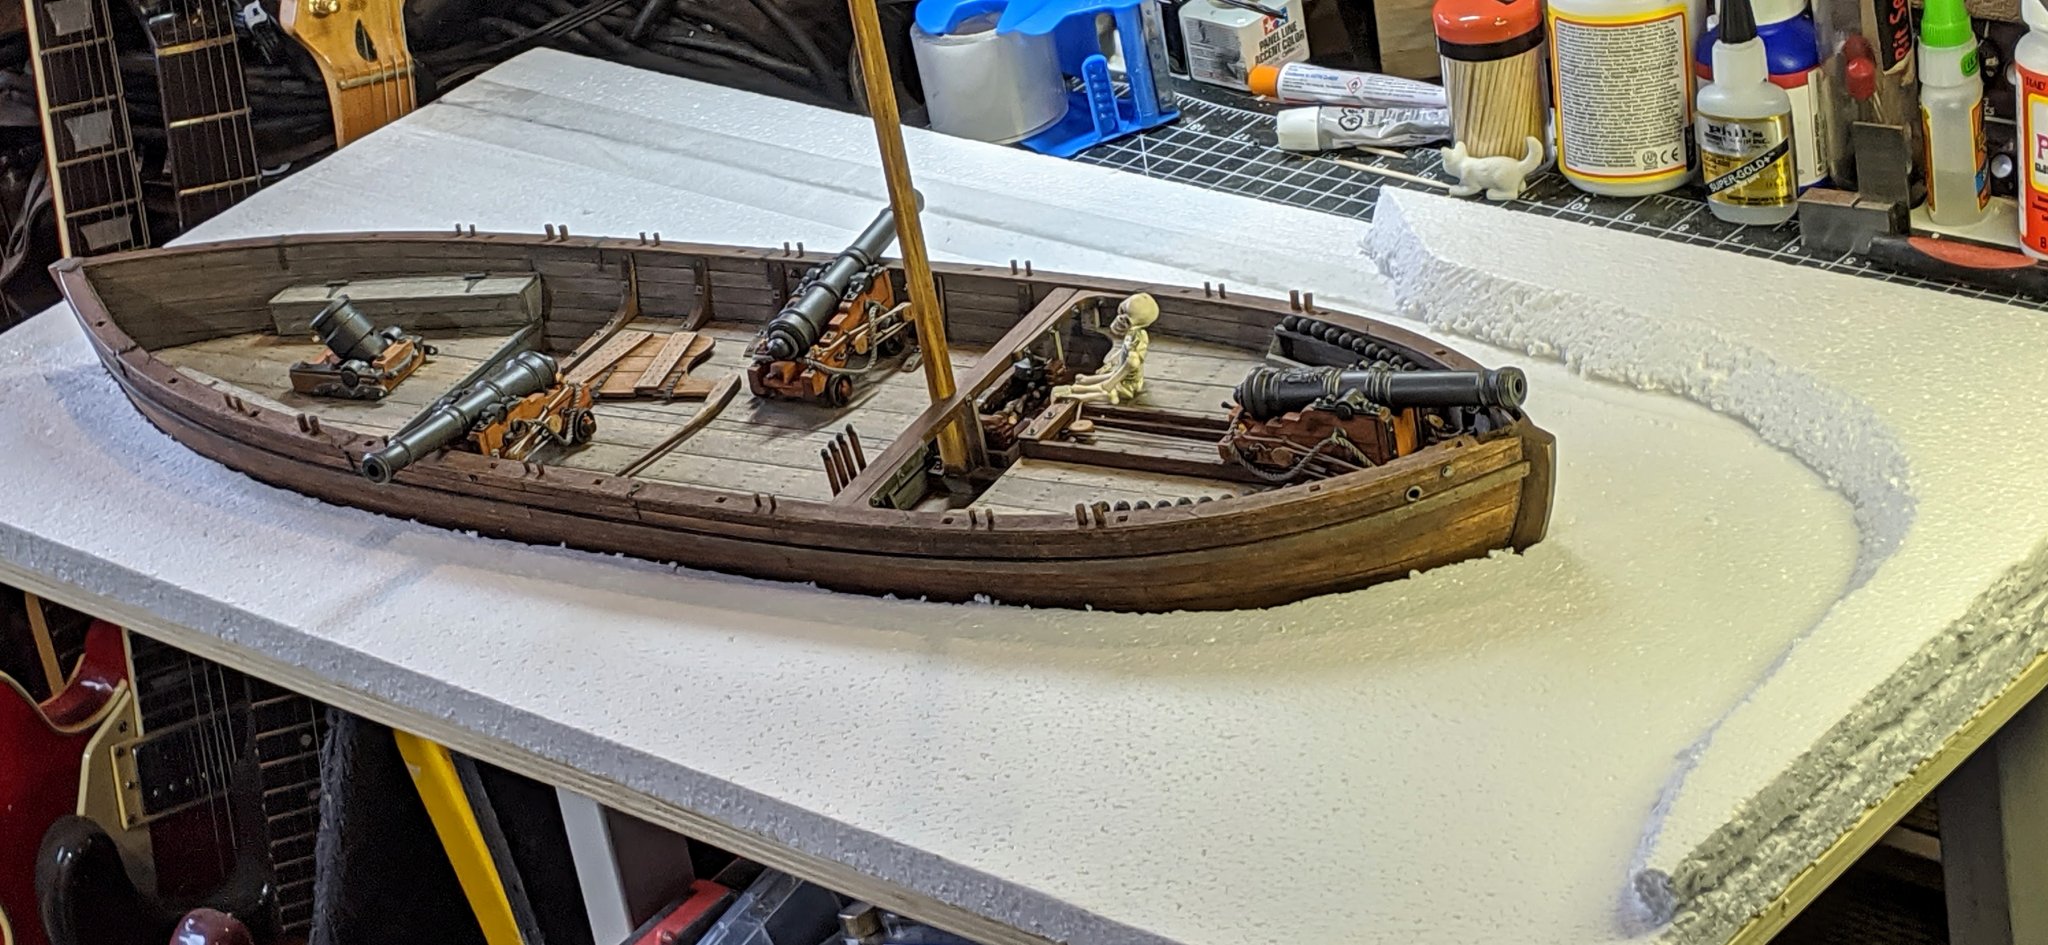
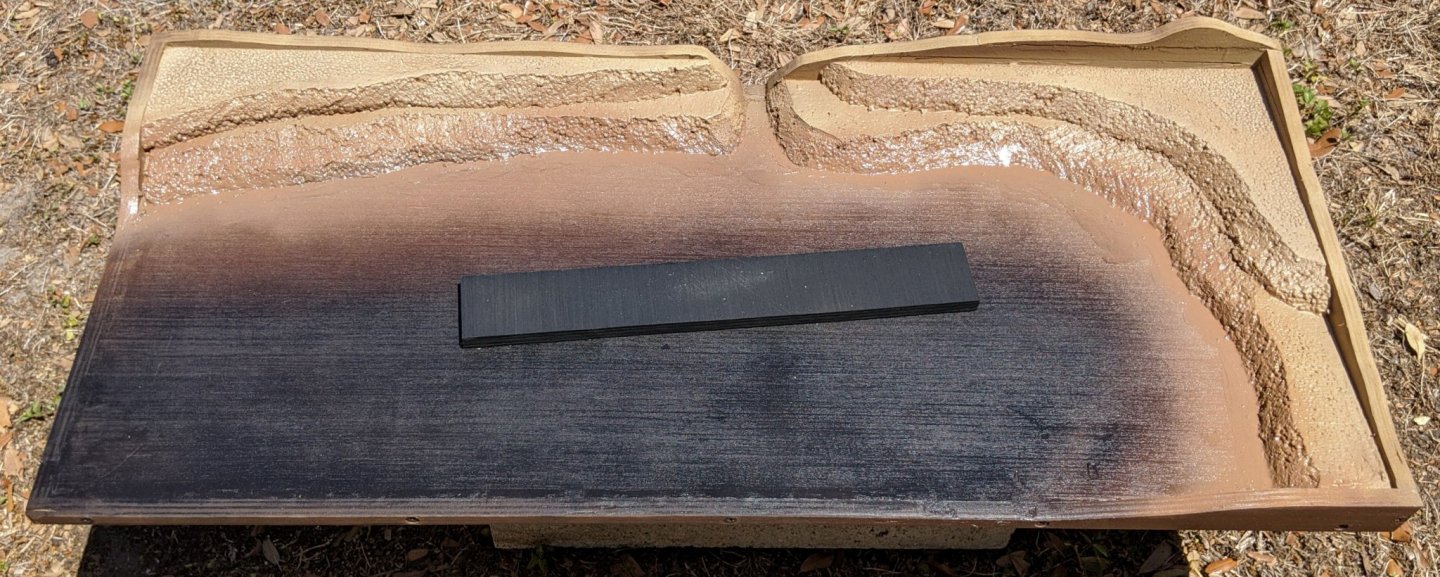
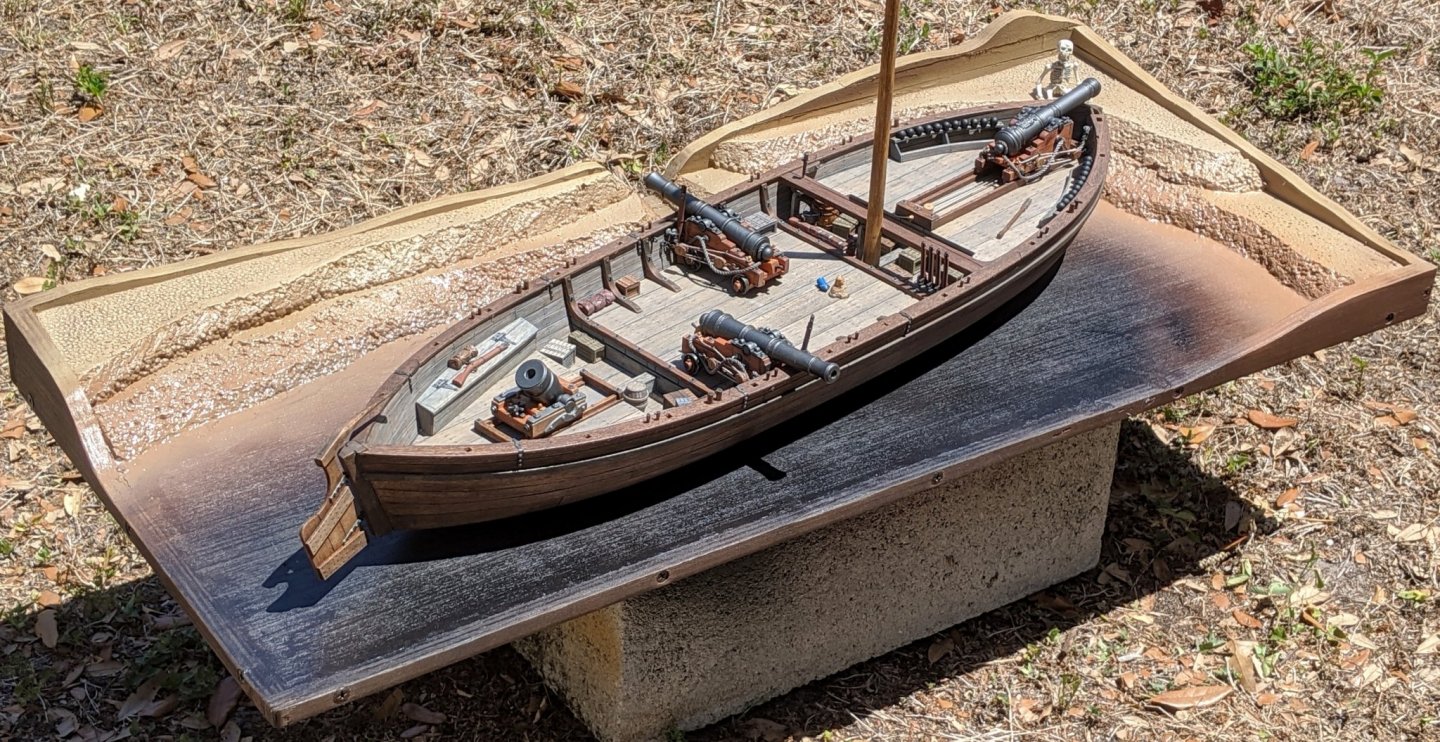
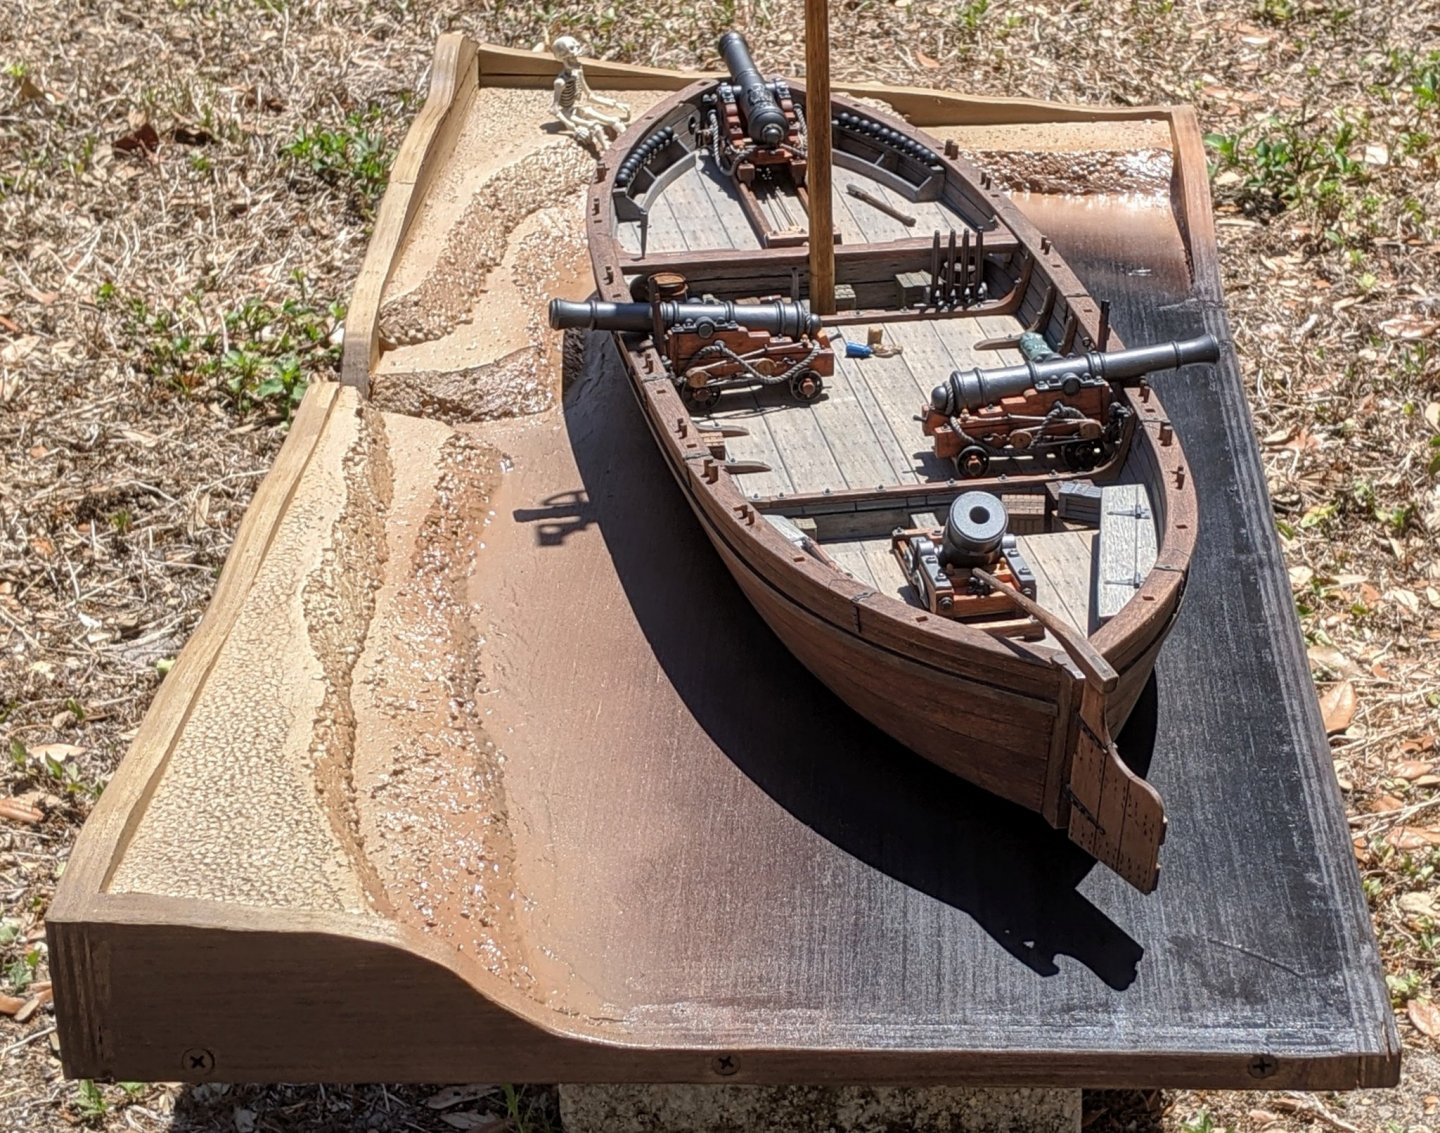
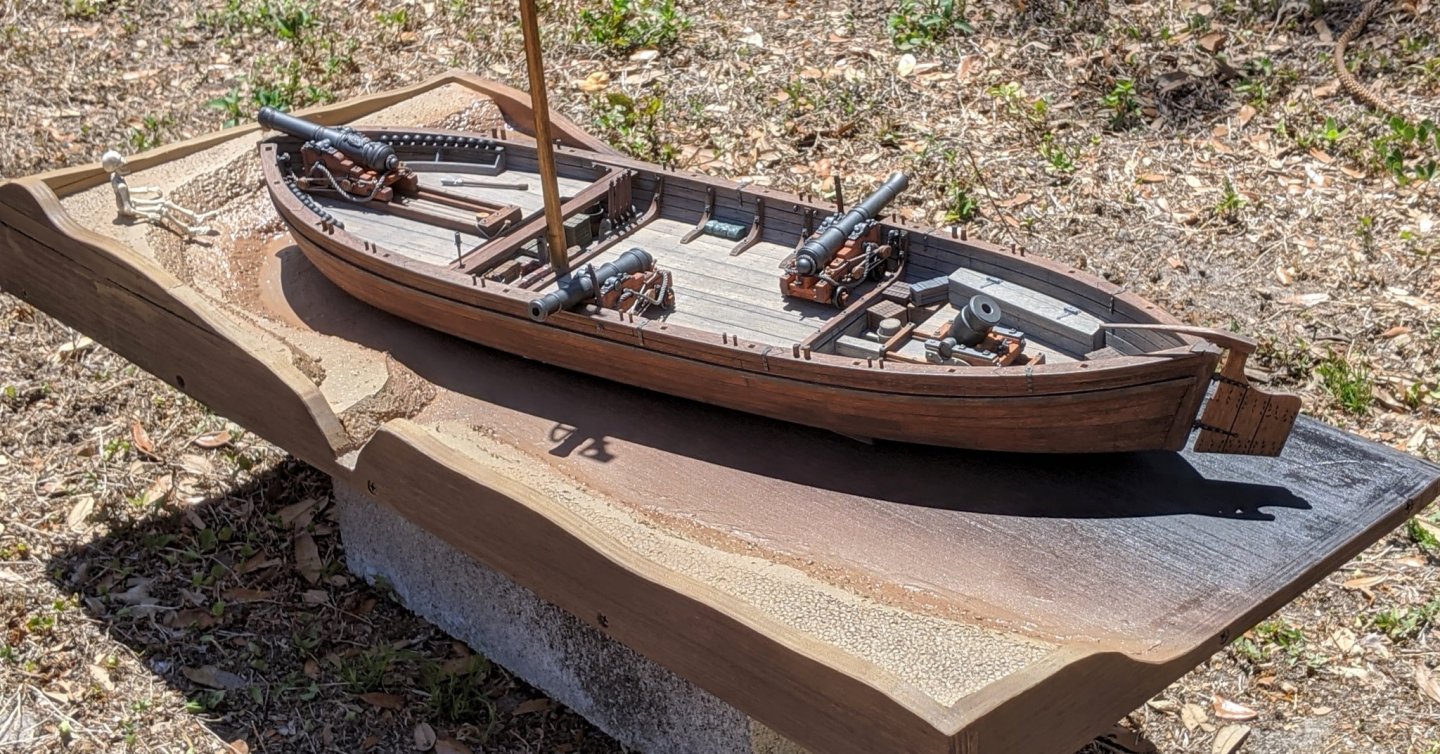
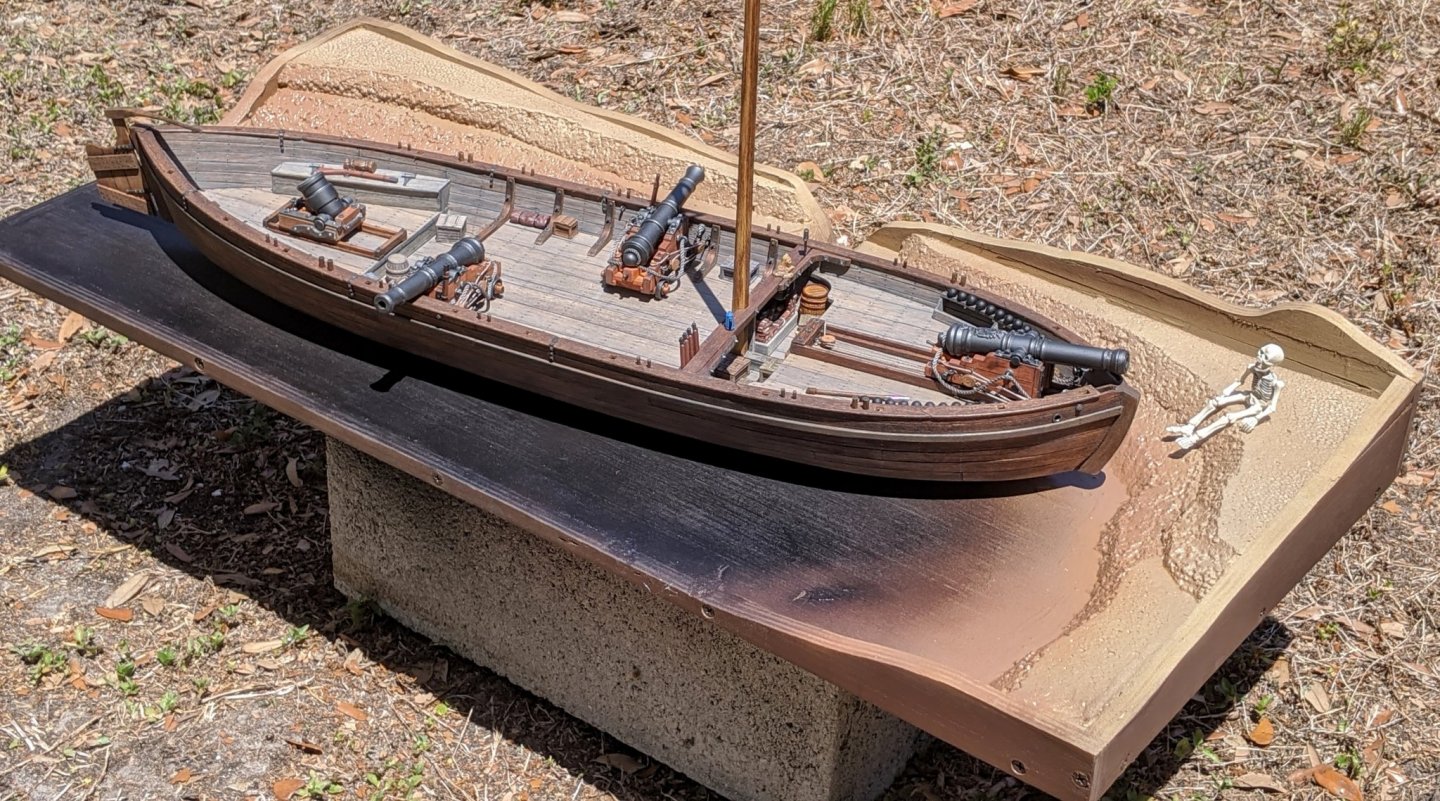
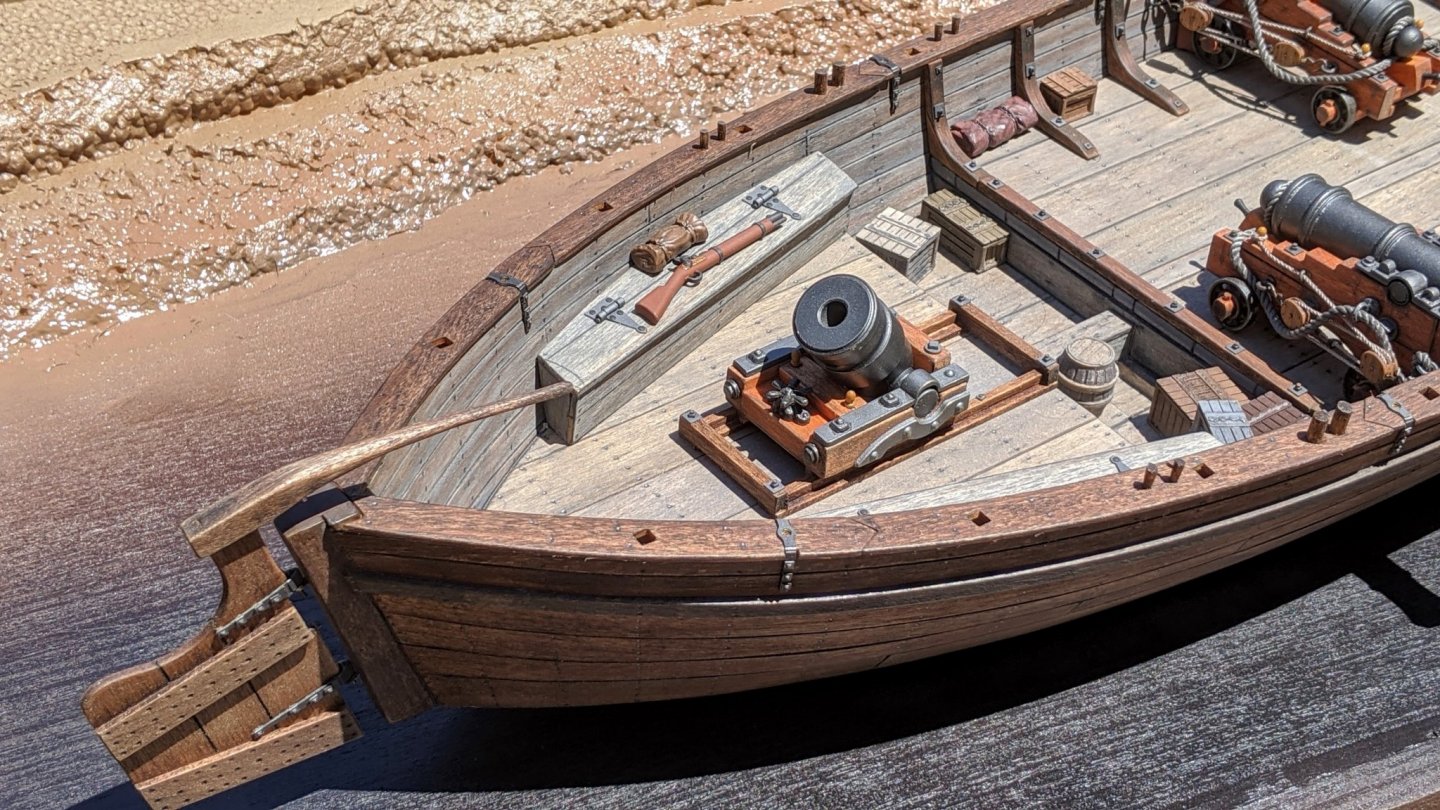
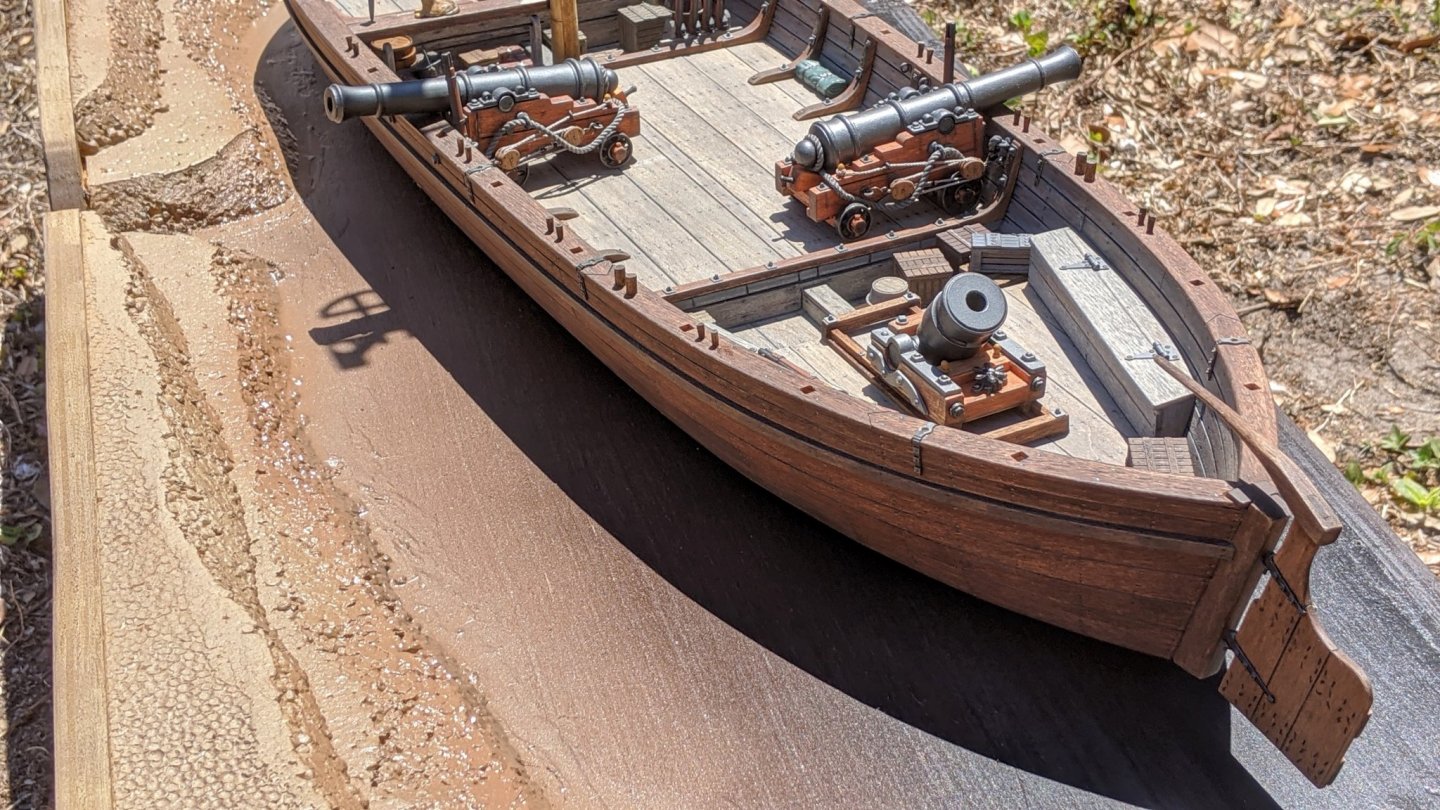
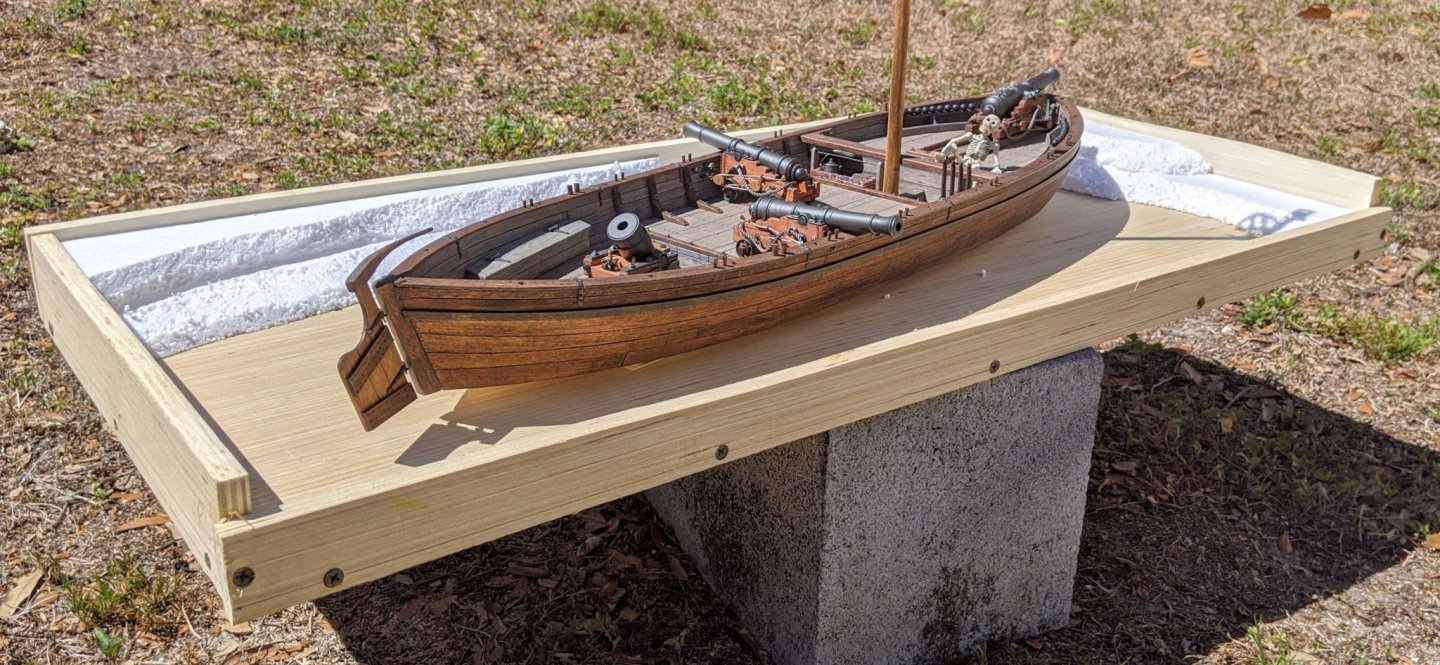
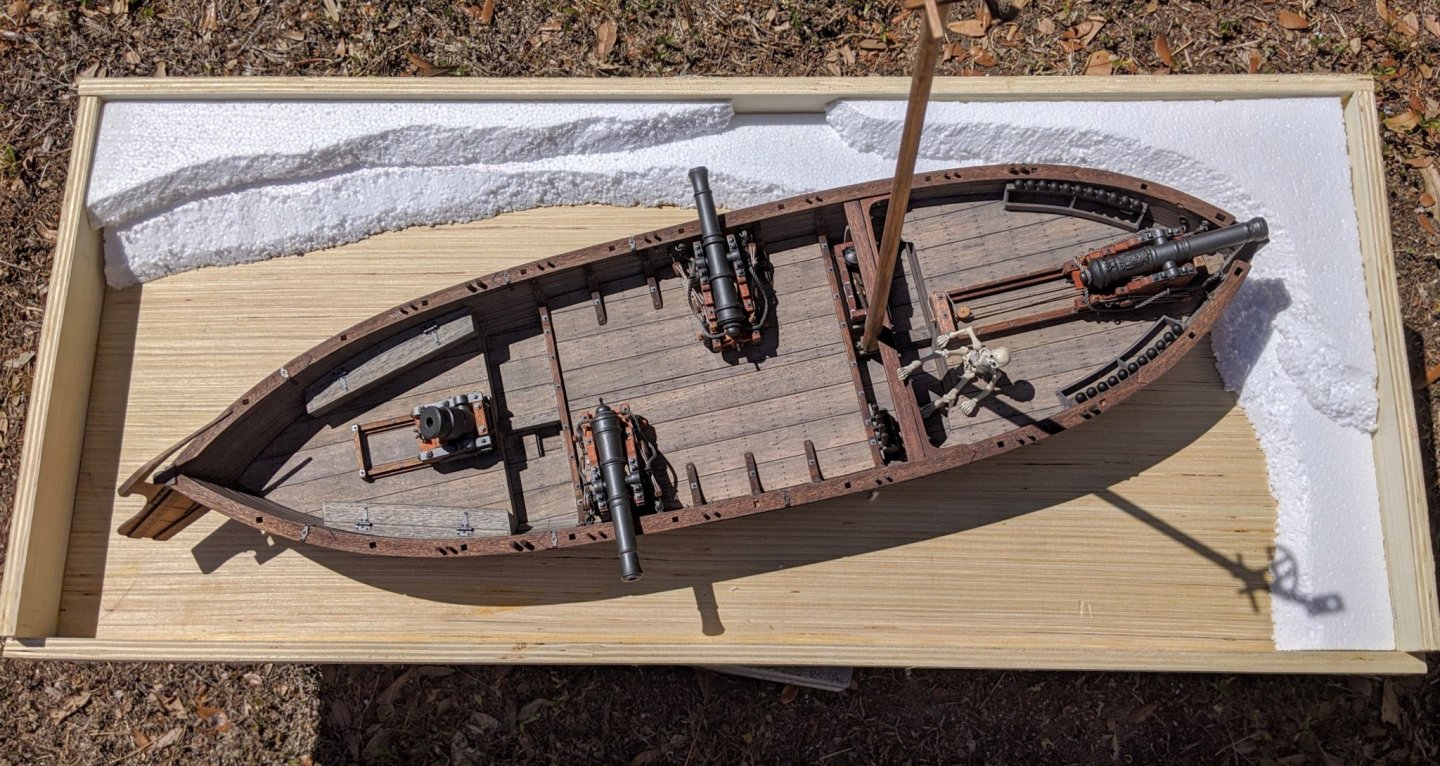
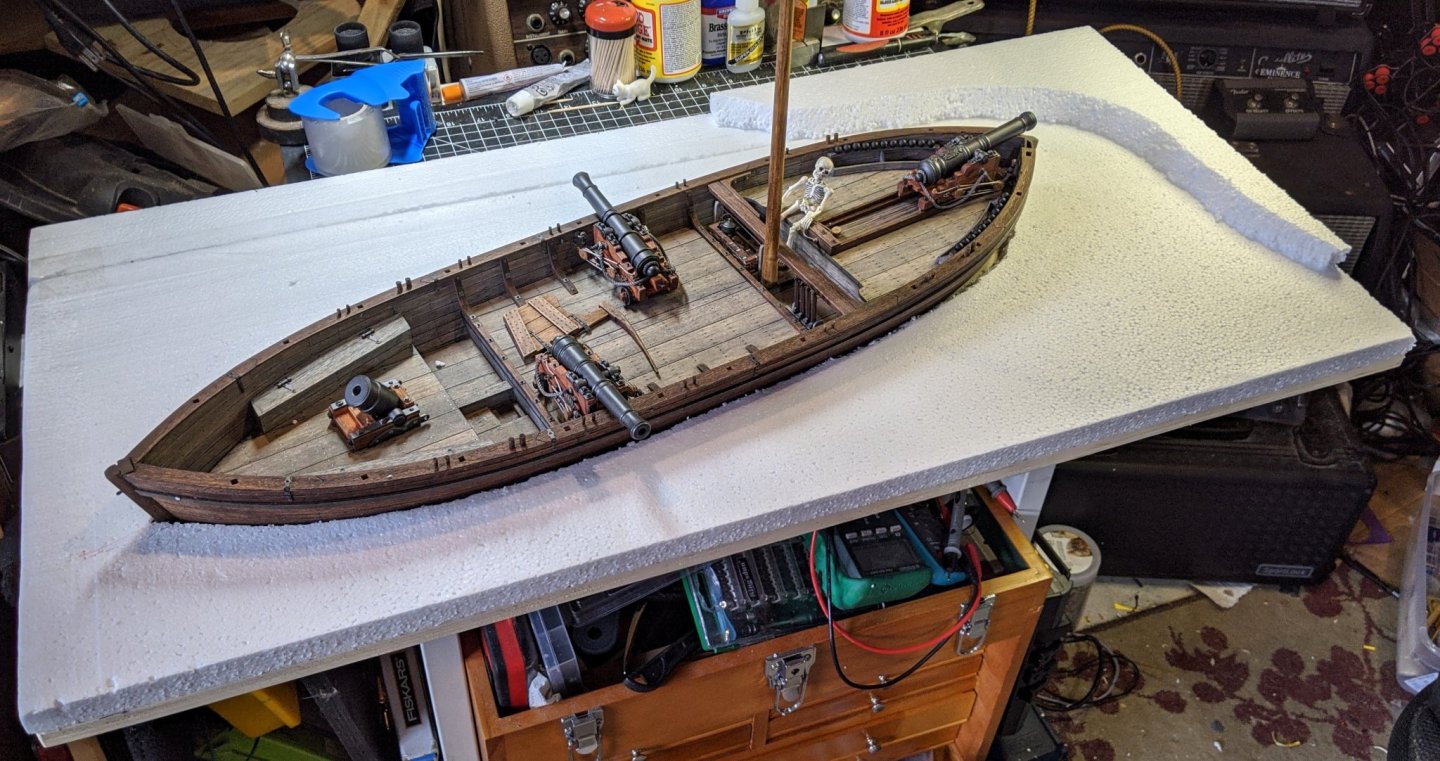
Greetings All, I got a lot of work done on the base. It's time consuming, as I'm using water based stuff and things need to dry out good between steps. Luckily, the Florida sun is assisting nicely, not only for bake-out but also for some more outdoor pics. I love "real" lighting! Here's some of the ideas I use to improve dioramas. First, scenic compression. Most of the real world is pretty spread out and featureless, with interesting stuff scattered few and far between. This means "real scale" distances and dimensions are too great to model effectively. To overcome this, I try to "squish" my interesting sections together more so than they would be in the real world. This trick gets rid of "dead spots" and allows the viewer to focus on the interesting stuff. It also tightens up the display and saves on work and materials. Second, vertical exaggeration. Like scenic compression, this helps overcome nature's boring tendency to make gentle grades. Rapid changes in elevation seem to add more "space" and give more of a dynamic effect. My base (from the second picture onward) has an elevation change of three and a half inches from the lake bottom to the highest part of the frame in a span of only four inches. In scale, this would be about seven feet, much higher than what nature would usually do but effective. Third, use the rule of thirds (bad pun intended). Painters, photographers and other artists divide the work into nine rectangles, and put the focus around the intersection of the four points in the center. Try not to orient either the model or scenery square, this can constrict the overall appearance and pull the user's eye off the display. I like to use a lot of diagonals, they seem to draw the viewer's eye into the display better. Fourth, KISS (not the band...). Keep it simple... reduce the overall size, eliminate anything that doesn't add to the model's presentation and try not to have abrupt transitions. Remember, THE MODEL is the primary focus. The base is just the stage. I'll continue to describe my progress and methods as I go along. Here's the base after the first glue-up. Here's the base after I decided to add a feeder stream and some more elevation. I also contoured the frame and and lowered the part around the water (I'll build a temporary resin dam when I pour the water). Here's the base with some minor changes. I put some reference coats of different colored paint to both seal the work done so far and get an idea of the evolving appearance. The board in the center is to elevate the boat to it's proper distance above the bottom (approx. 1/2") and make the boat appear to be "floating". After all this stuff dries, I'm going to start on the riverbed grade, rock casting and terrain buildup. Here's some outdoor shots with the boat oriented about where it's going to end up. I also scattered some deck ornaments that I've finished in random locations to start planning the deck build-out. Gotta love the Florida sun!🌞


-
I think that is the second most popular statement made by modelers. The first being "Yikes! the piece I'm working on just popped out of the tweezers, flew away and is now lost forever...". Great work on a difficult build.
-
Good progress, she's going together nicely. As far as the gap, look over the plans. If it isn't visible, just ignore it. If you're OCD, cut a piece of walnut to fit in the gap. If you're lazy, just put a coil of rope or a barrel over it. 😁 Watch out for those style clamps, they're pretty strong and will leave a dent on softer woods (I found out the hard way...🥵). Use small pieces of scrap wood between the clamp face and the board you're fitting or gluing. This also distributes the clamping force over a larger area. Also, some GOOD (not cheap splintery ones) wood clothespins work great and have a bunch of other uses. Looks like Zara really enjoyed the run... and what a view in the background!
- 108 replies
-
- 1
-
-
- armed virginia sloop
- model shipways
- (and 1 more)
-
Good advice, Woodland Scenics is an excellent resource for both materials and instructions. There's also a bunch of YouTube videos that are very helpful. Placing both bottles in hot water (about 120-140 F) for about an hour before you mix them helps. Heating the base up also helps (I'm going to leave mine in the sun for a few hours before I pour). When you mix the resin, do it slowly and gently, trying for a thorough mix without introducing any extra bubbles. Wait about 5 minutes before pouring, and pour slowly in one spot and let the resin self level keeping each pour thin (less than 1"). I'll be doing my pours in about 2-3 weeks, depending on how quick the materials and adhesives I'm using take to completely dry. I think it's great. Maybe we can encourage some other Philly builds. Sure would be fun to see some other interpretations. Amazing coincidence! I'll have to get Slim an eye patch.
-
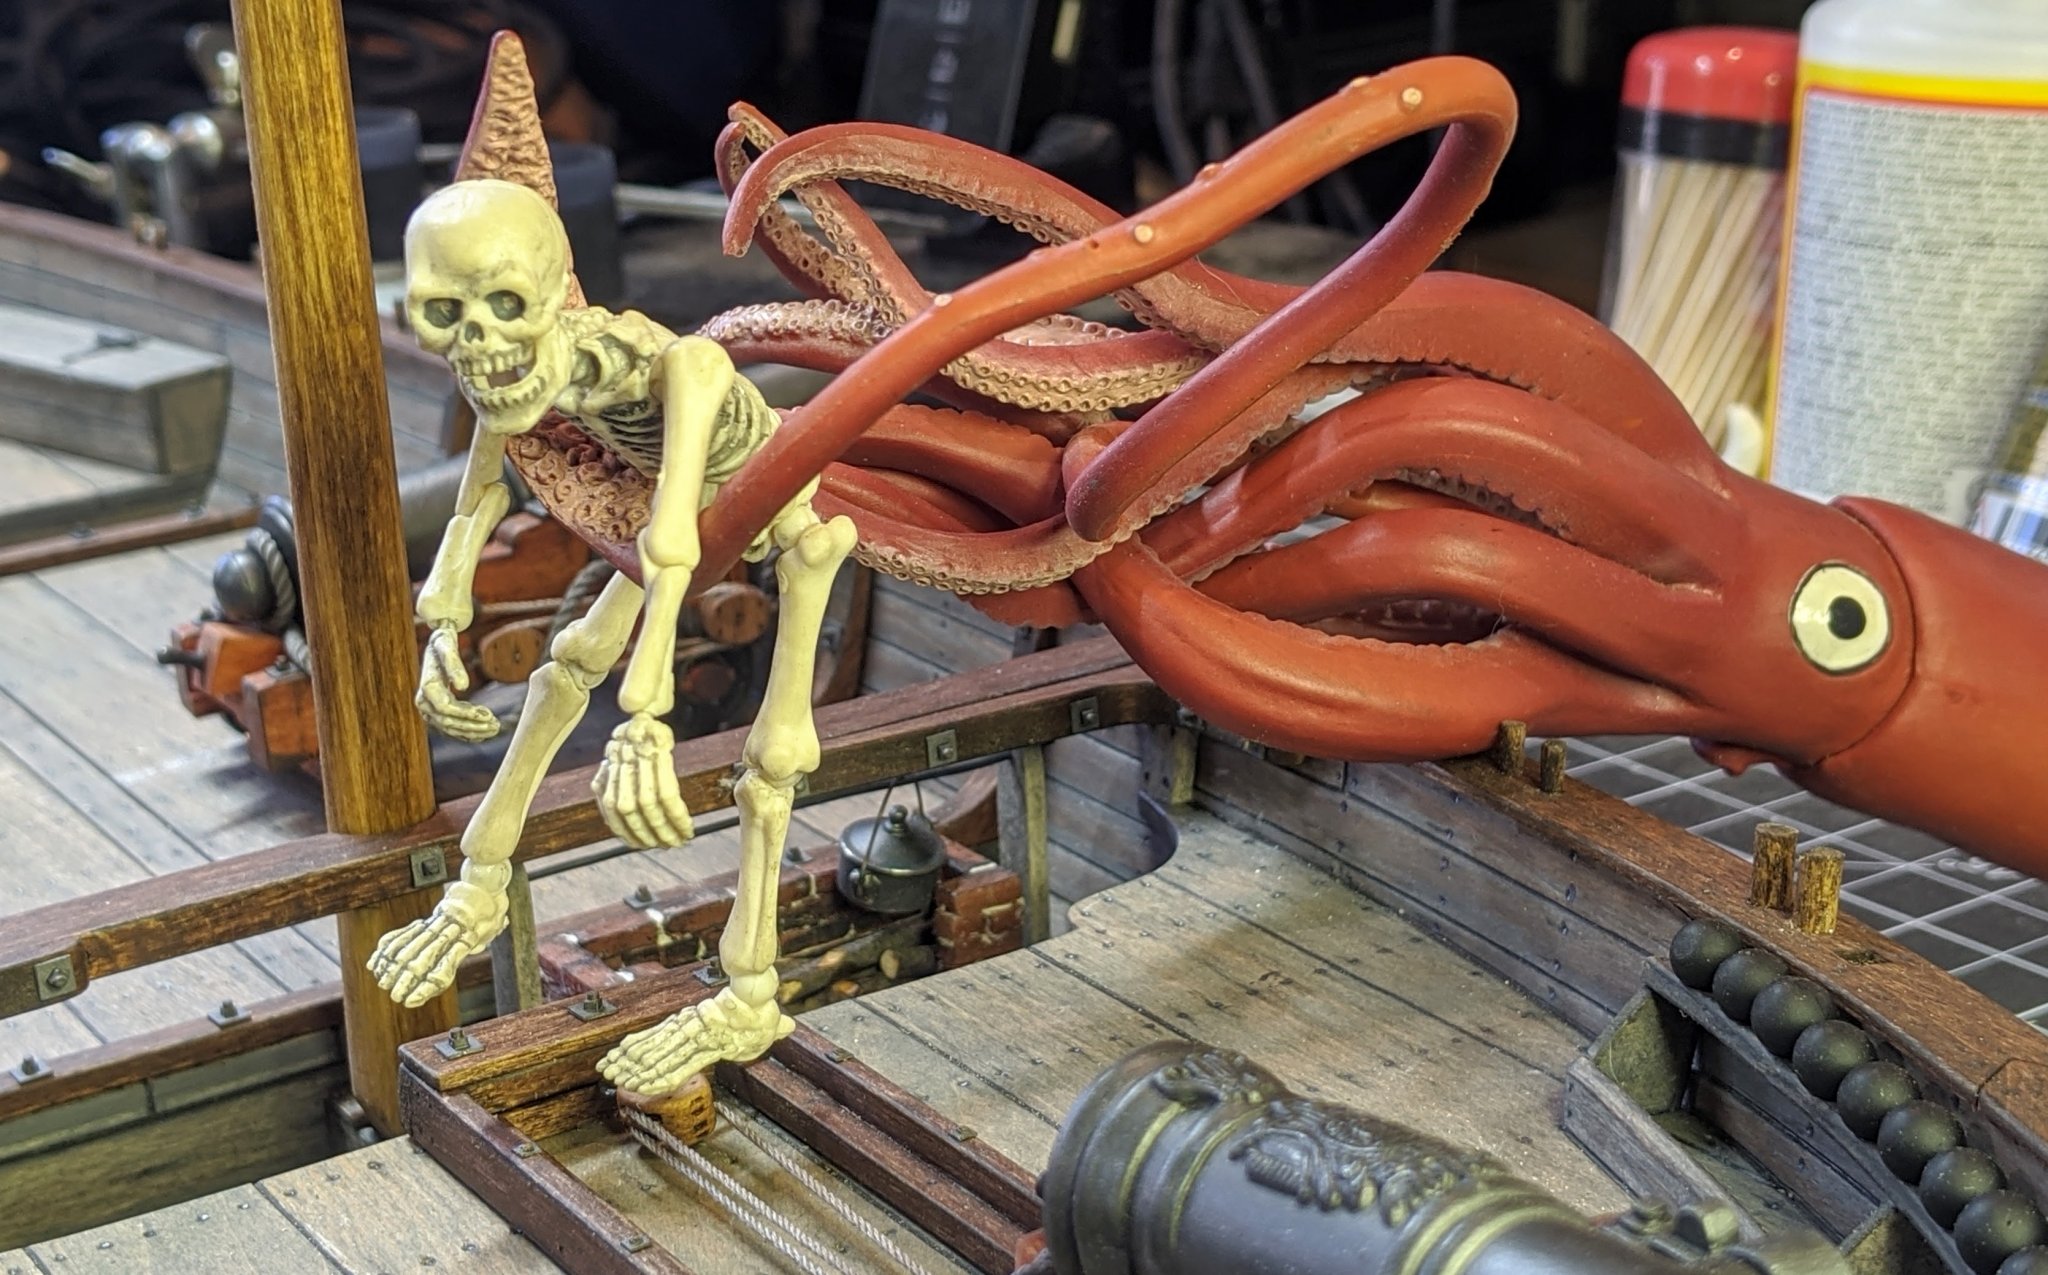
I knew it... The whole animal kingdom is involved. Looks like Slim needs a harpoon this time. APRIL FOOLS! In these times everyone needs a laugh, go make someone's day (and yours) better by putting on a good gag. (I have a great one planned for the wife, It'll probably get me banished to the garage for a week at least). BTW, no cephalopods or skeletons were harmed in this post.🐙

-
Very nice! really sets off the model. You did a great job on the painting, especially the exterior hull. The Syren blocks and rope are top shelf quality, they will be a big improvement. The copper hull looks great, the only suggestion I have is to add attachment marks. Model aircraft and armor guys use a rivet maker tool (the one I have is from Trumpeter, and comes with four different rivet spacing wheels) and would work well with your copper. They're only about $10, and are useful for a lot of things. Nice work on re-creating the missing lower flaps. A similar alternative I've used is to make the mold out of silicone, and use hot melt glue for the casting. This way the mold is reusable.
- 48 replies
-
- 1
-
-
- mamoli
- constitution
- (and 2 more)
-
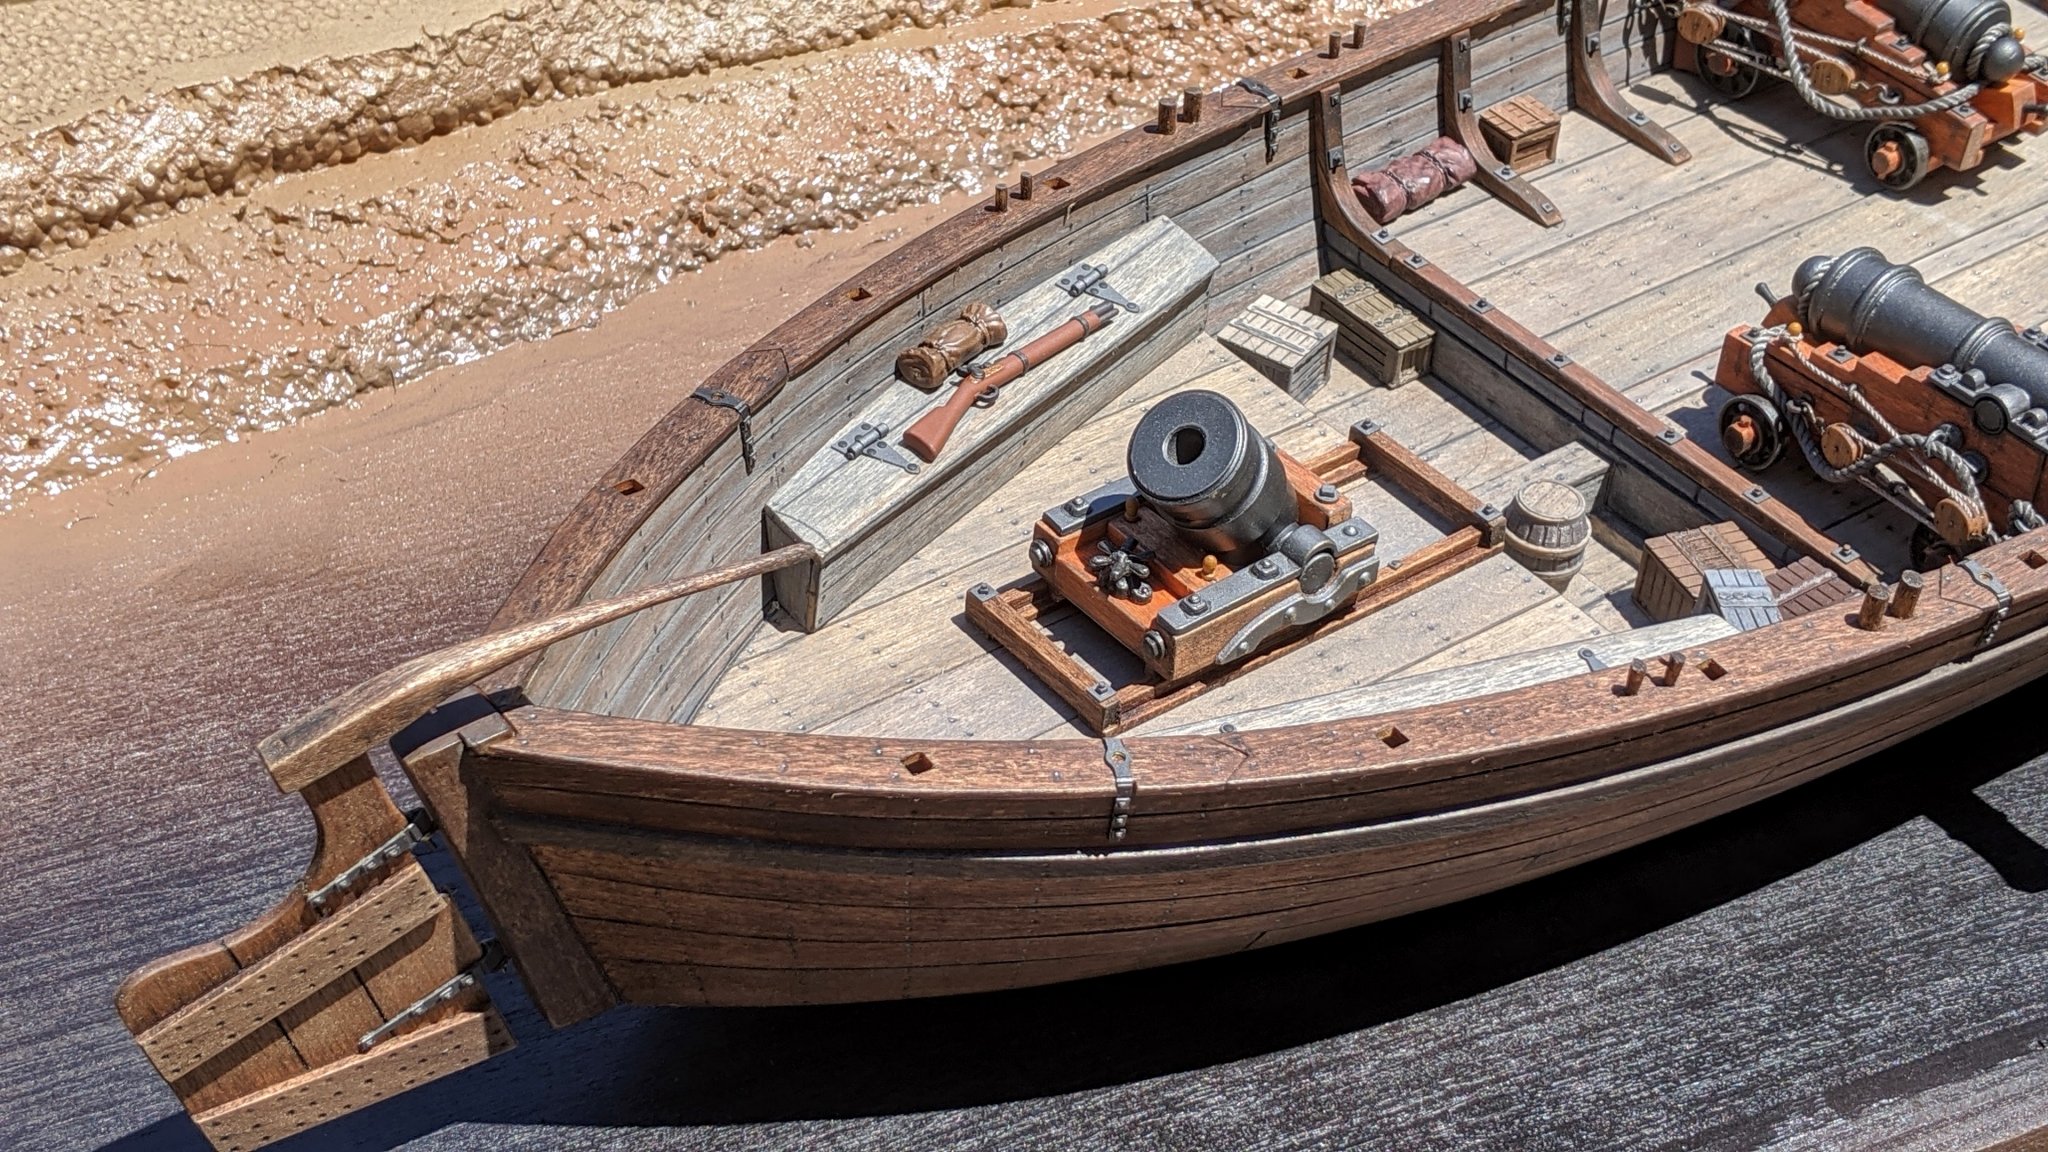
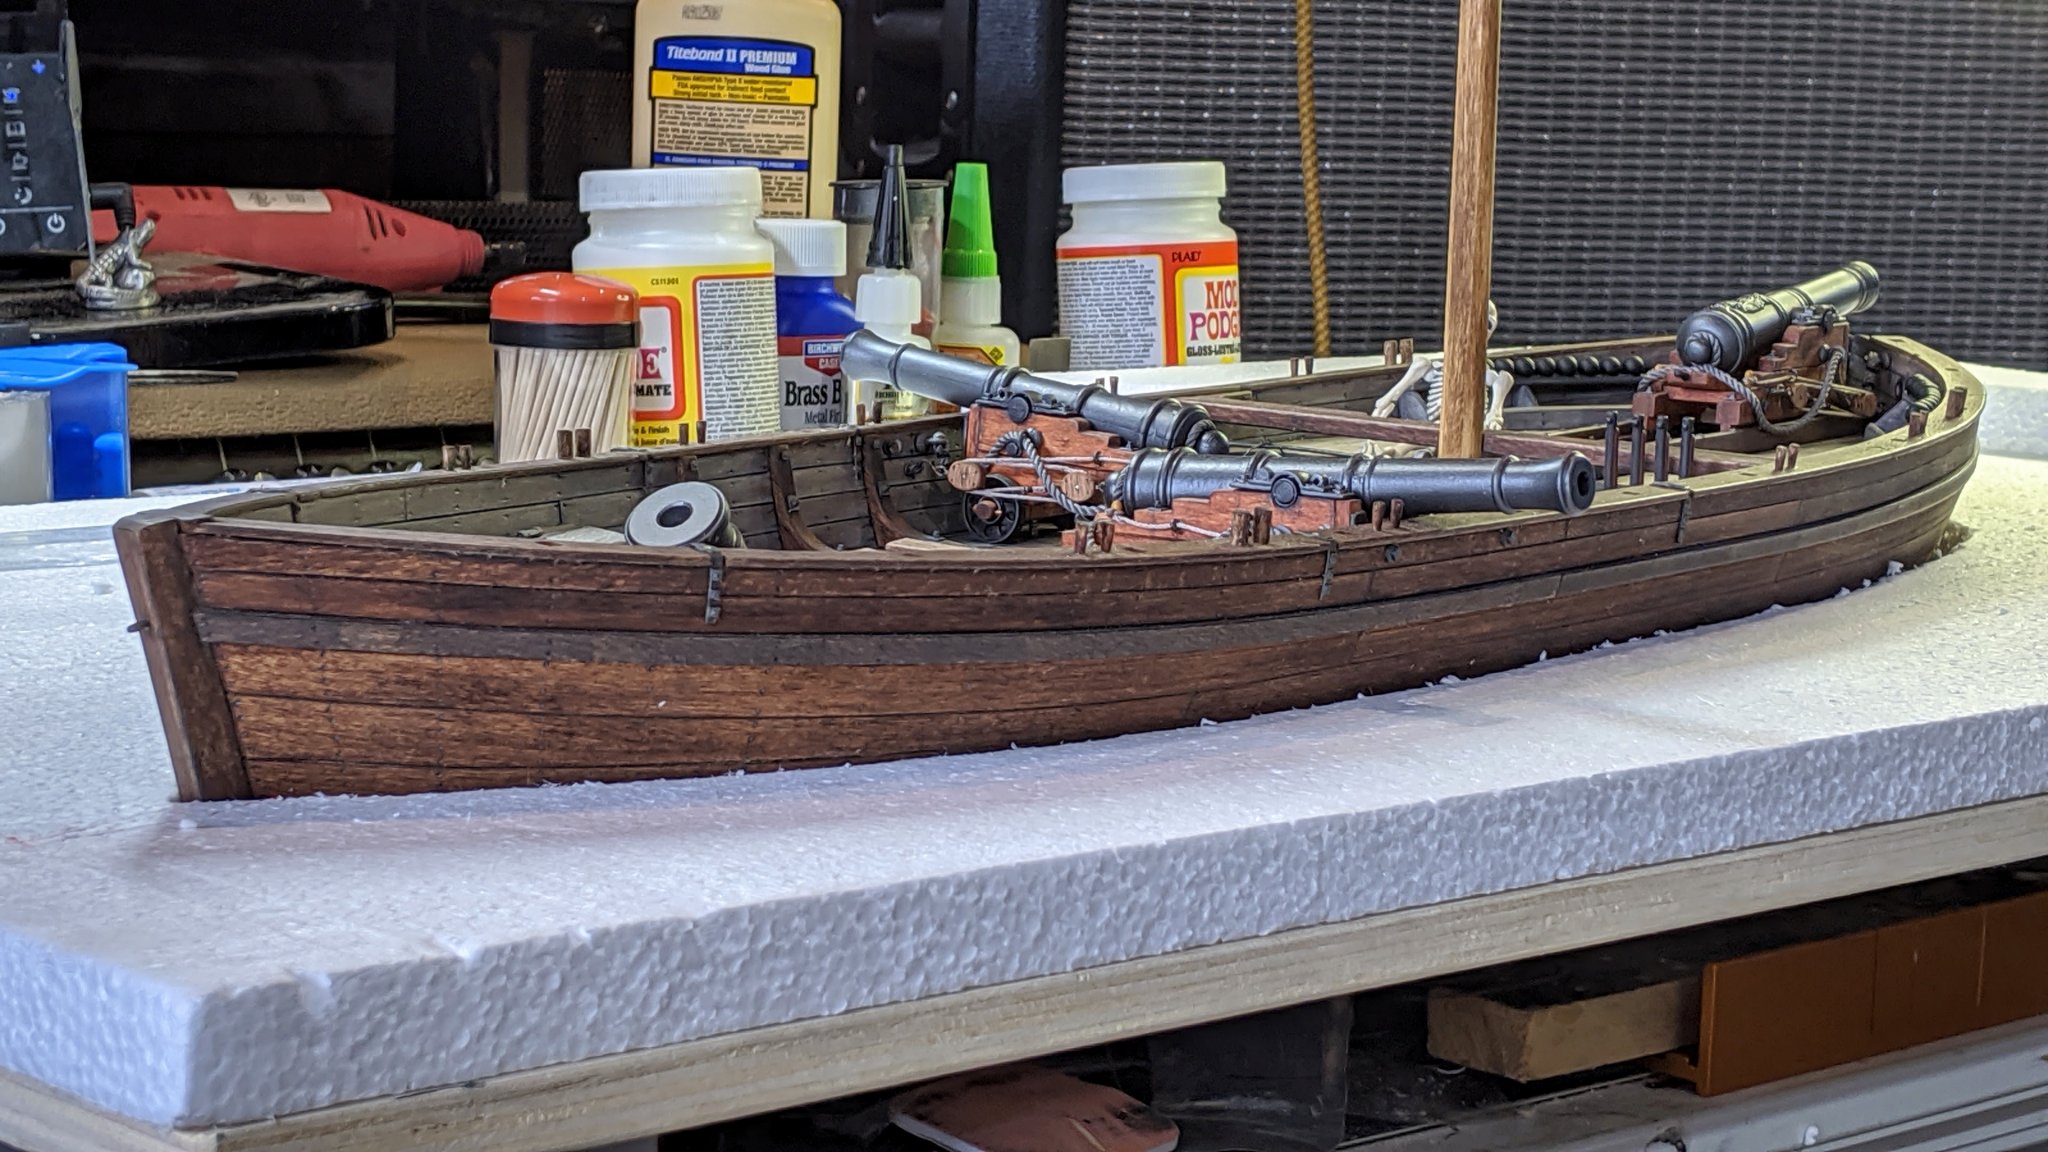
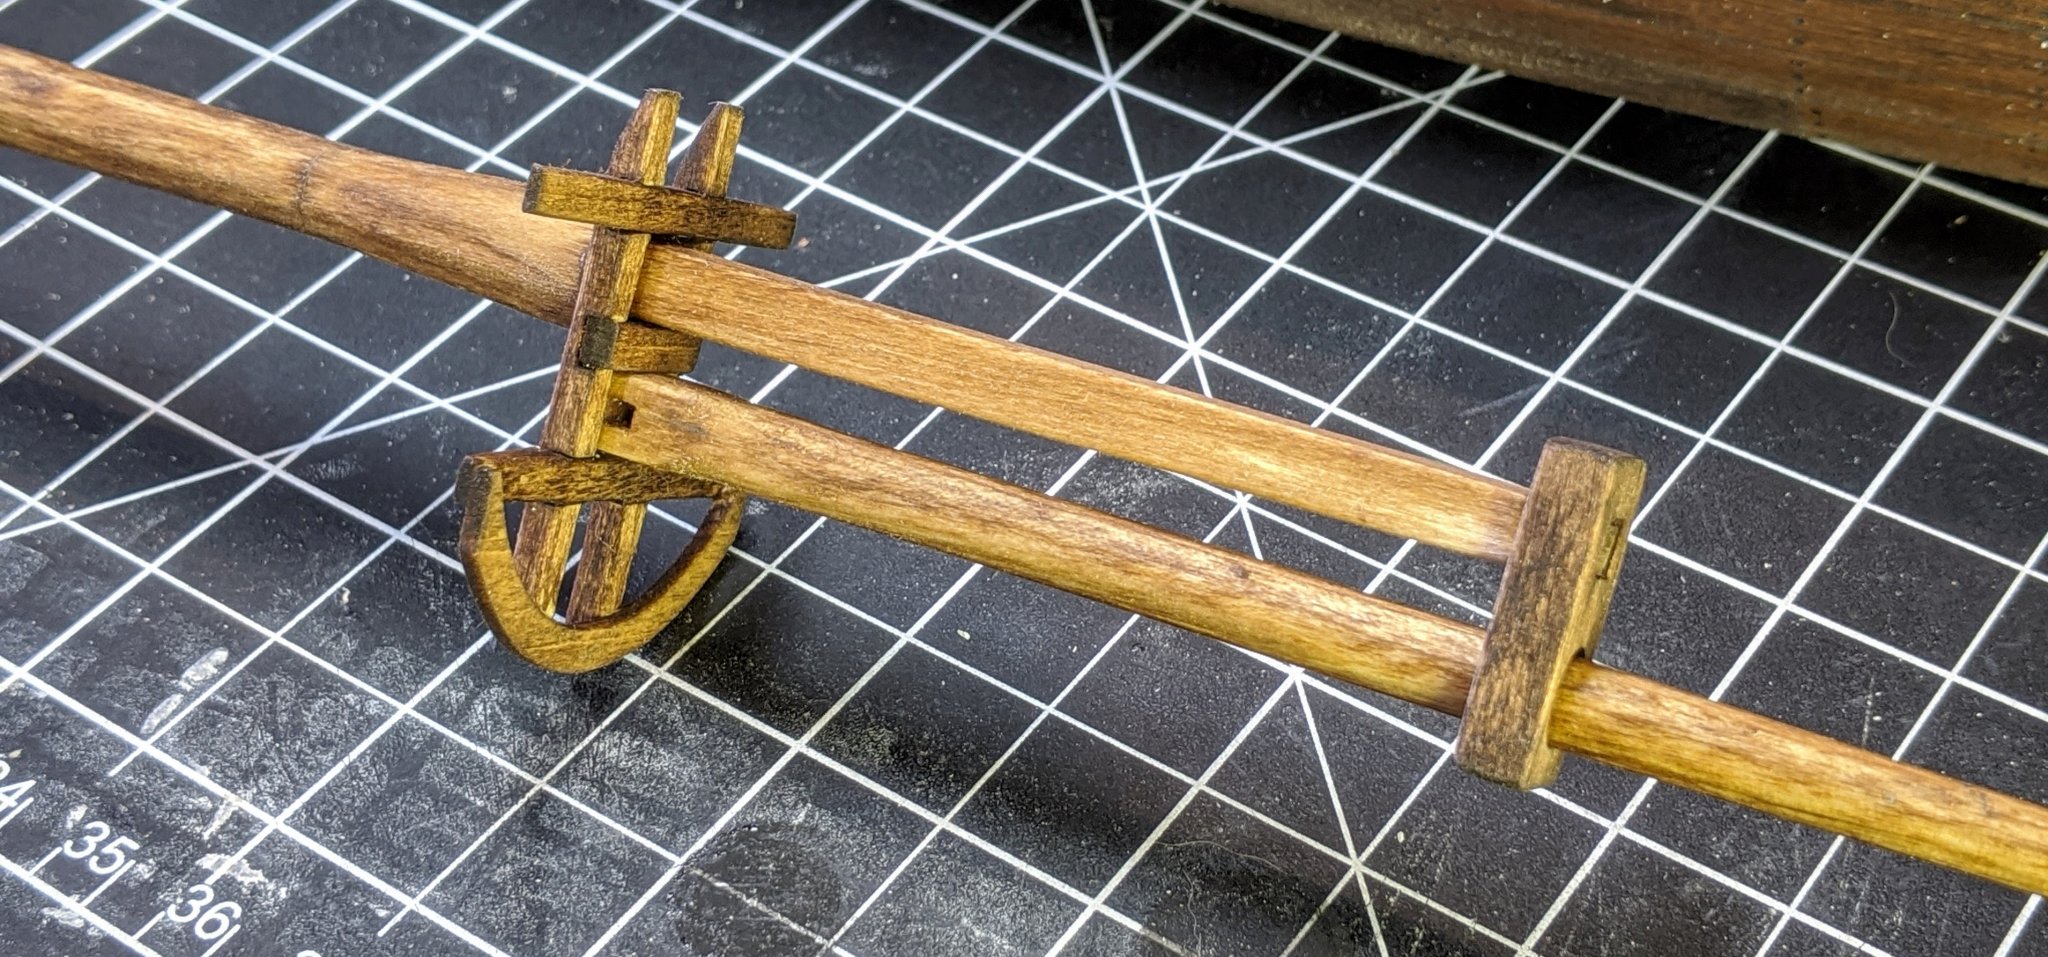
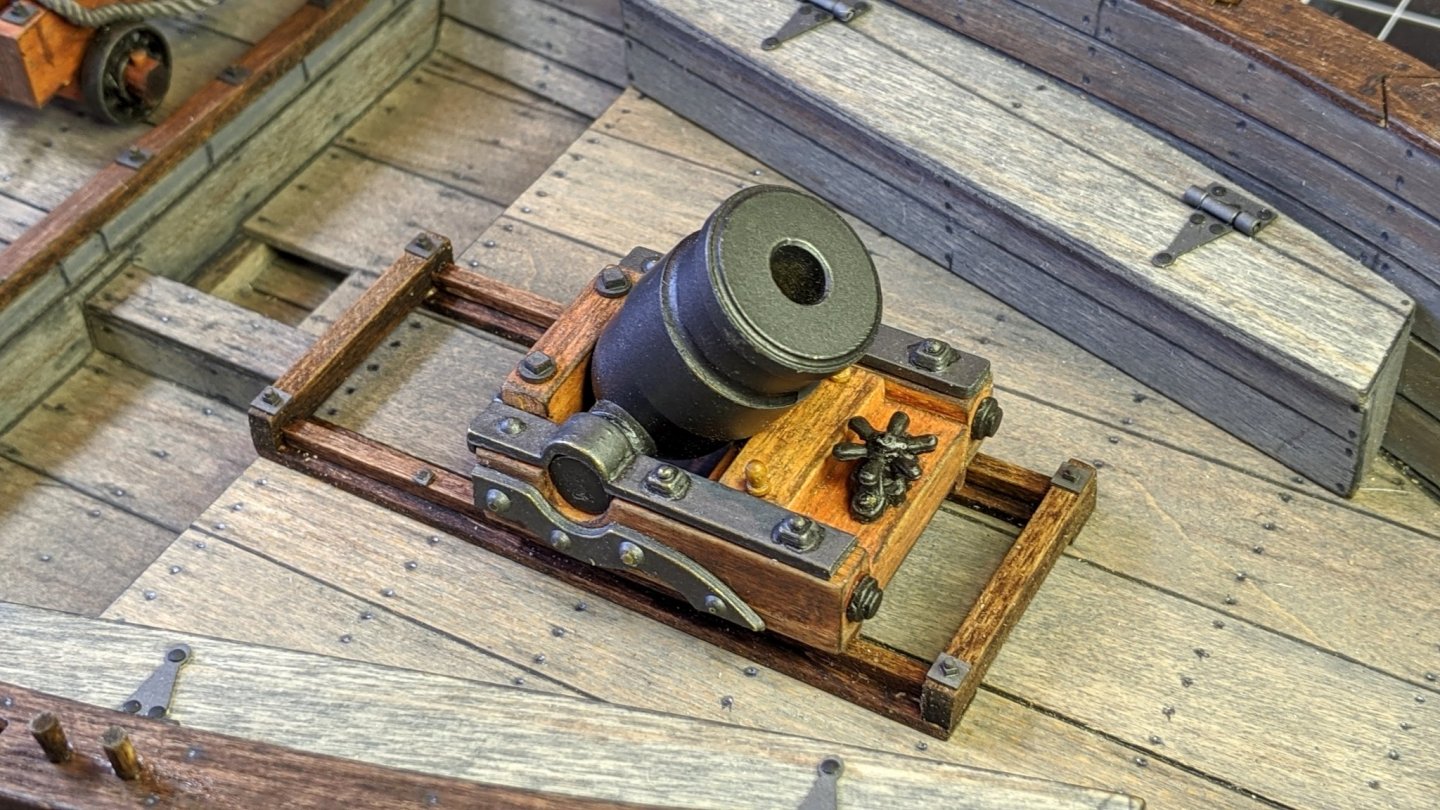
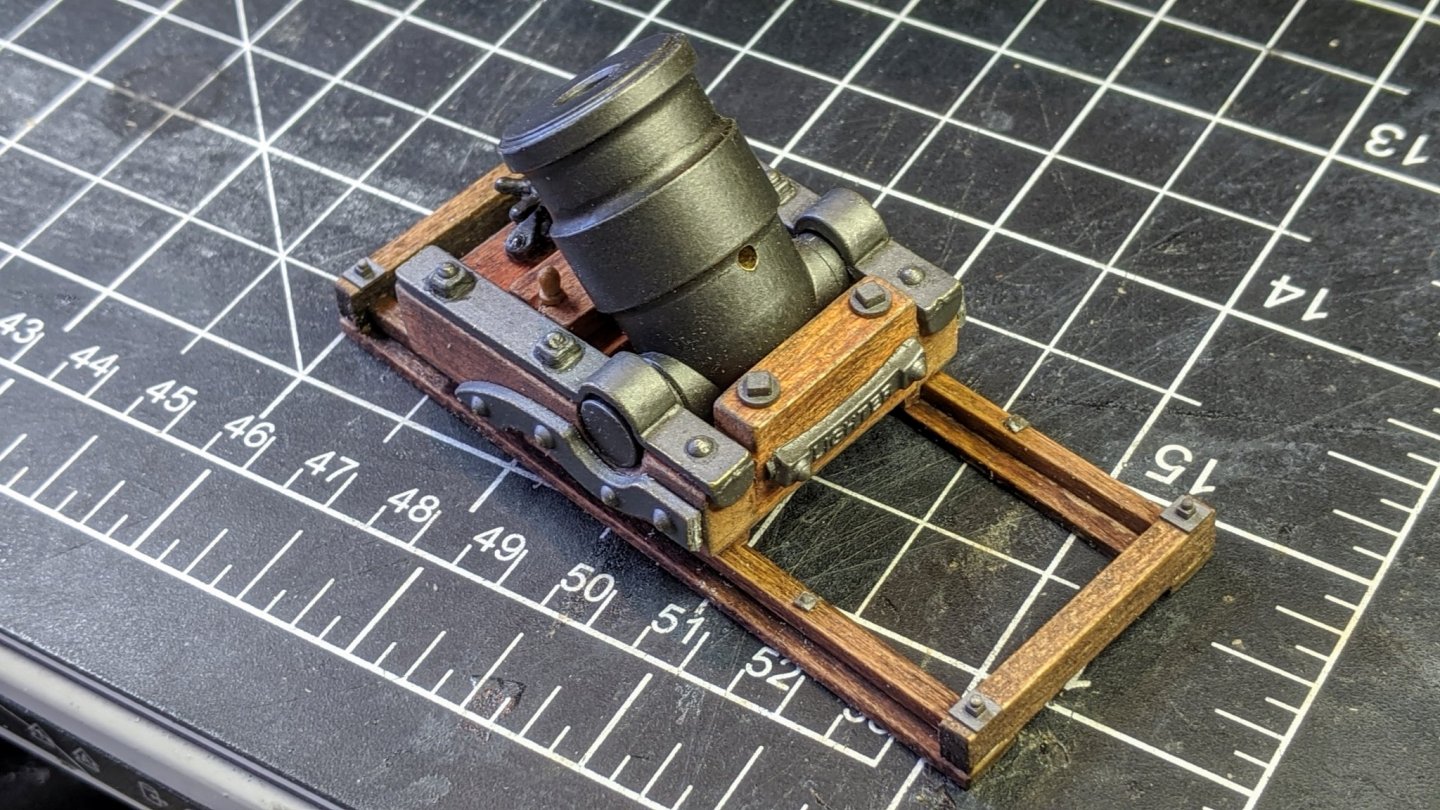
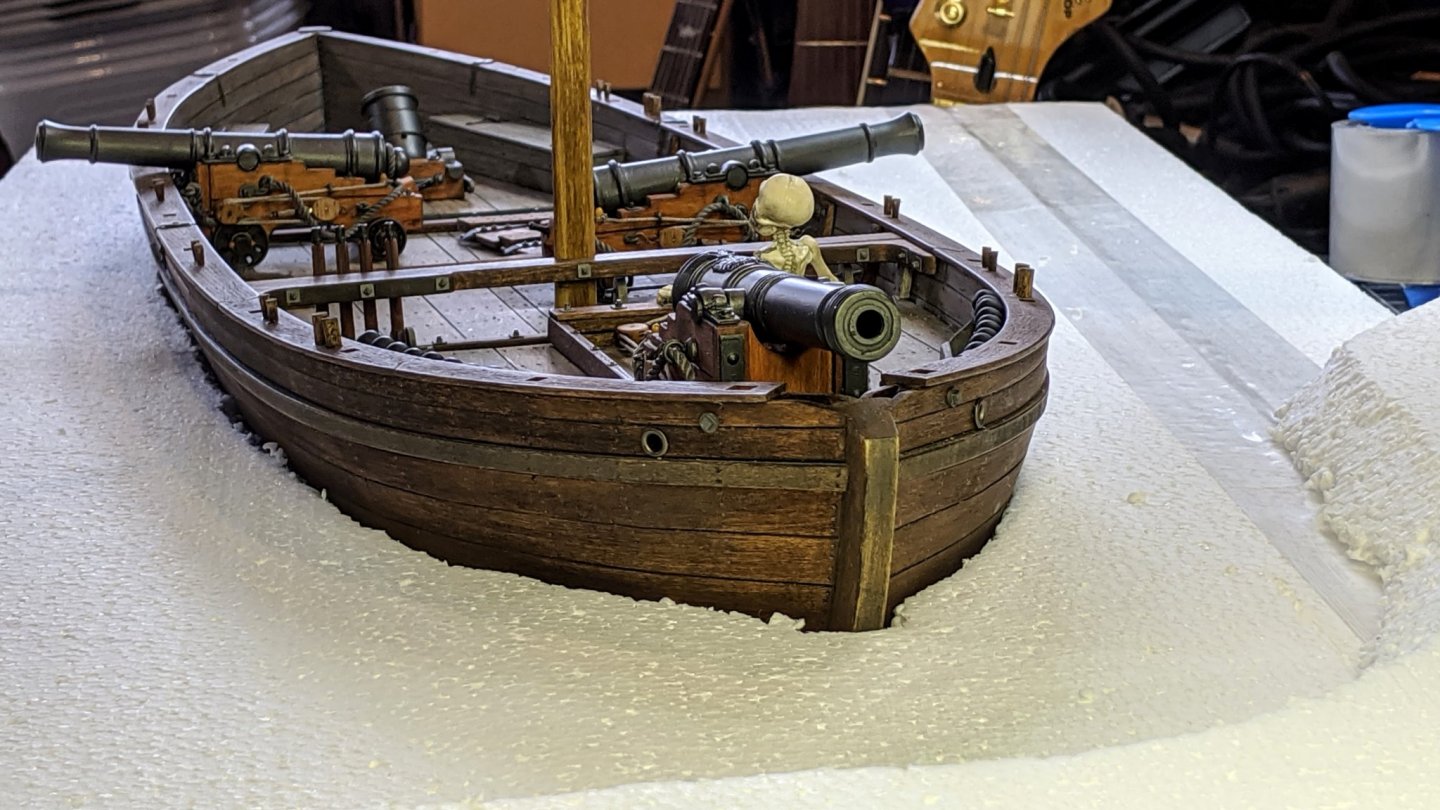
Thanks, Peter! I'll check out the video. I've done some multi-layer pours before, but nothing this big. As far as "resin creep", it depends on what you're pouring around. I've found that a first coat of resin applied as a thin coat helps in sealing the base details as well as prevent bubbles from appearing in later pours. An old model RR trick for any objects that stick out of the water is to cut them exactly even with the top of the final pour. Then take the above water section of the object and glue it directly over the immersed cut off piece. I've done this with docks, trees, seawalls and other structures that protrude from the water surface. This doesn't work well with foliage, rocks and shoreline stuff, so for those I blend in the object with dirt, grass and plaster soaked in matte medium. That way you can hide the resin creep pretty effectively. Slim's a butthead. Everyone in the shop has a beef with him, it's no surprise he has issues with animal relations. All our cats are convinced he's stealing their food... Heck, they probably hired Ole Smiley to provide Slim with some "attitude adjustment". I have a dreadful feeling this is going to escalate... For the oarlocks, I just used toothpicks. if you look at pictures of the reconstructed Philly II, you'll see the oarlocks are tapered. The toothpicks worked perfectly for that. I completed the mortar and carriage rails. I still don't know if I'll use it, luckily I don't have to finally decide until I start the awning battens. Here's the mortar... ( I know, not accurate, but looks cool and fills a "void"). Here's some shots of the base sides attached and ready for finishing. I've got to square up the frame and make sure it won't leak resin (hot melt glue). This looks pretty rough, but everything on the base including the frame will have a finish treatment so won't be visible. The frame top edges will be cut to match the shore and waterline. I'll start this week on the lake bed, rocks and shore. Really messy work, but strangely satisfying to be "slingin' plaster" again.


-
Big scales have a lot of advantages (except they're huge!). She sure is a fun build, with a lot of neat features. Your boat is looking fit and trim, I like the natural interior- it really sets the contrast with the hull and cannons. Really nice workmanship, and I see you installed the rail caps just fine. How is the brass blackening going?
- 39 replies
-
- 1
-
-
- philadelphia
- model shipways
- (and 1 more)
-
Absolutely right, Kurt. The display should enhance and complement the subject without distraction. A good display will also provide context to the 5 W's and H... Who, What, Where, When, Why and How. Like a painting, the display (or background) and subject should combine shapes and colors in a pleasing way and also tell a story. I've seen mediocre models with great displays win contests, and great models with crappy displays lose. I'll be glad to continue to provide the details on the base, shore, casting and lake bed along with the boat's progress. The main thing that's going to be sketchy is the water. I've never done a pour this big and complicated and the old adage applies... "What could possibly go wrong?".
-
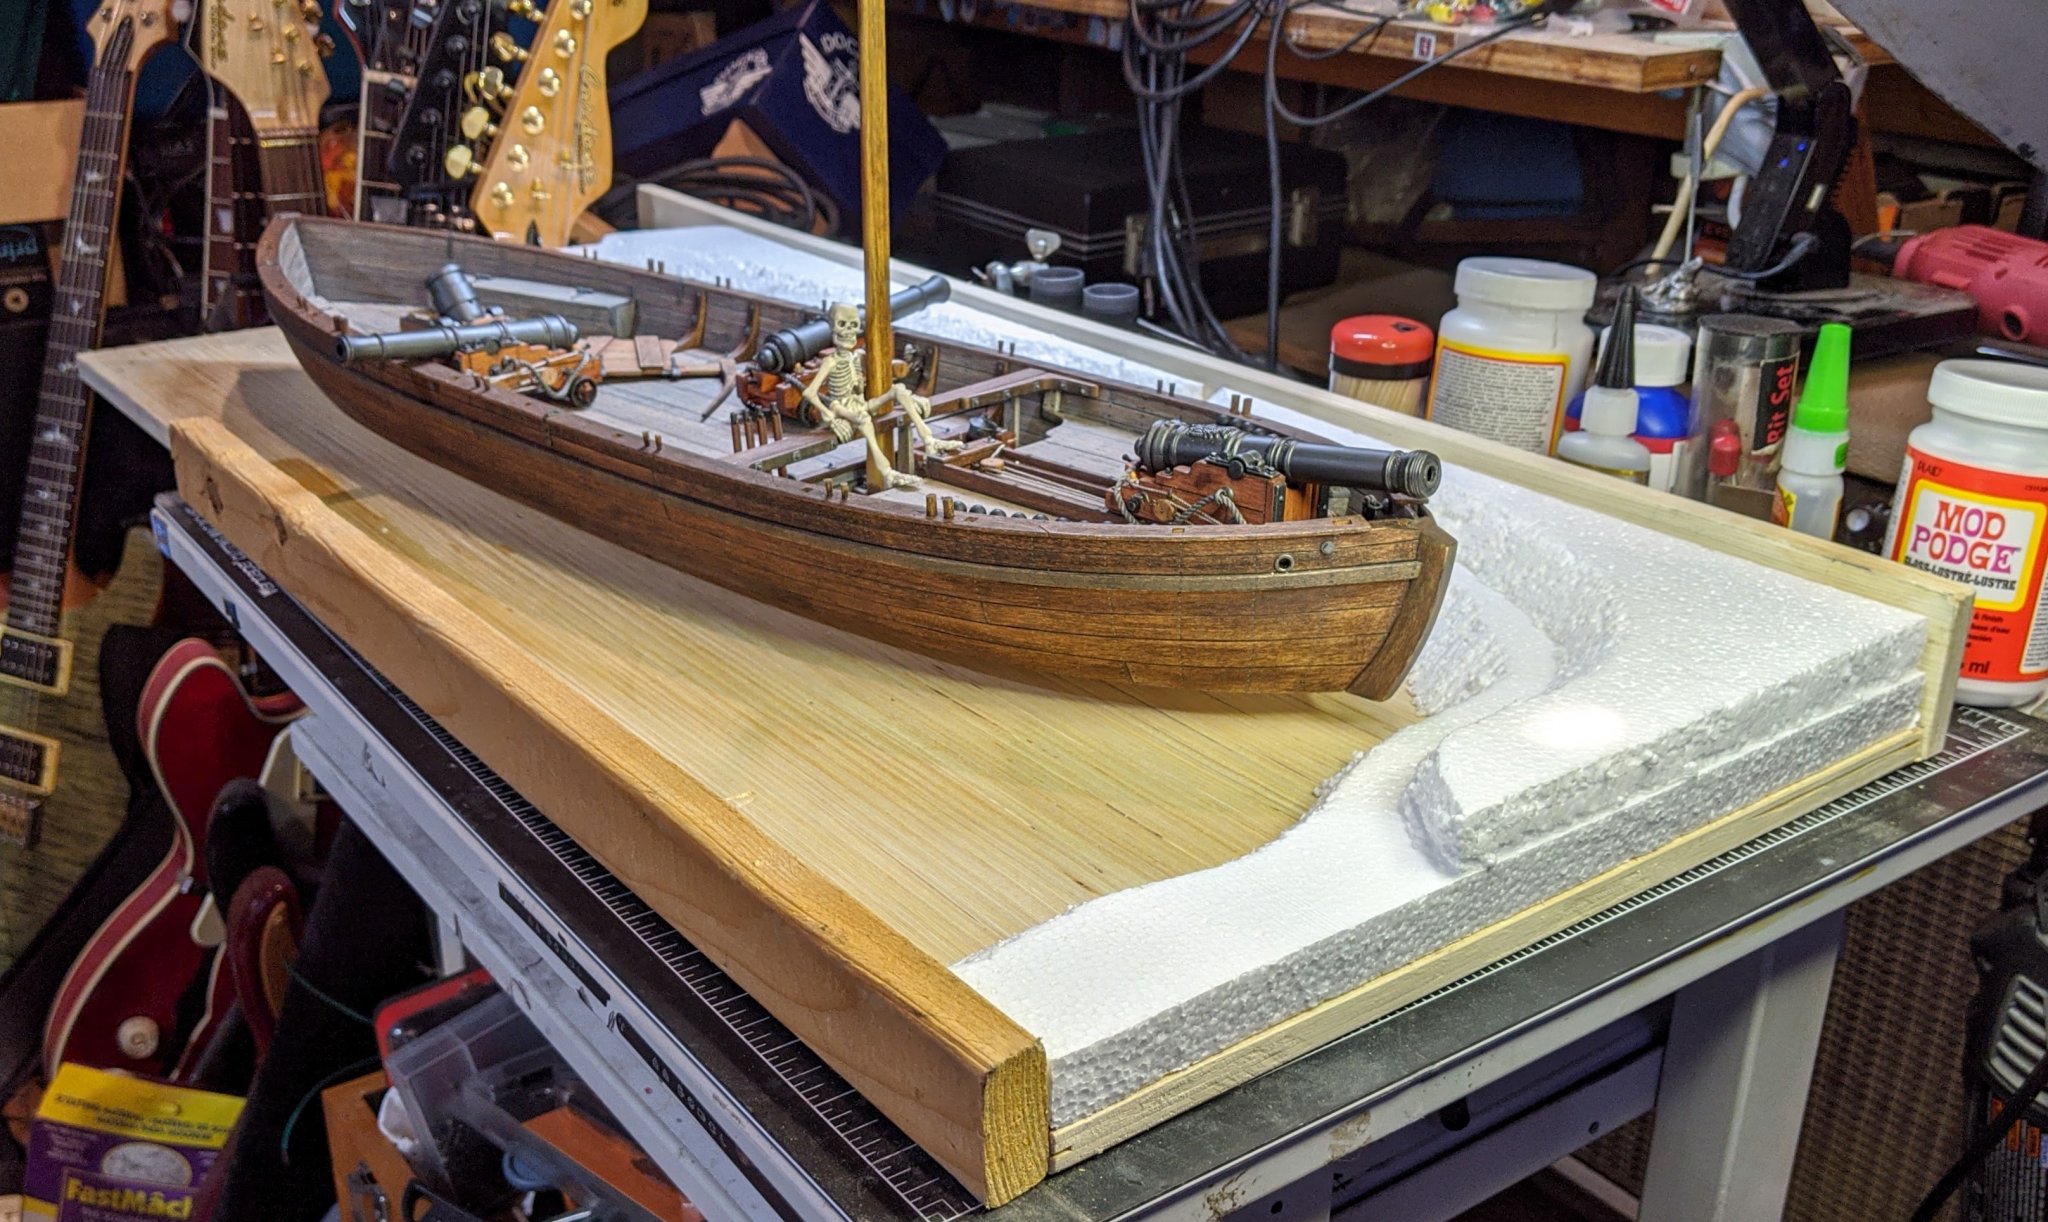
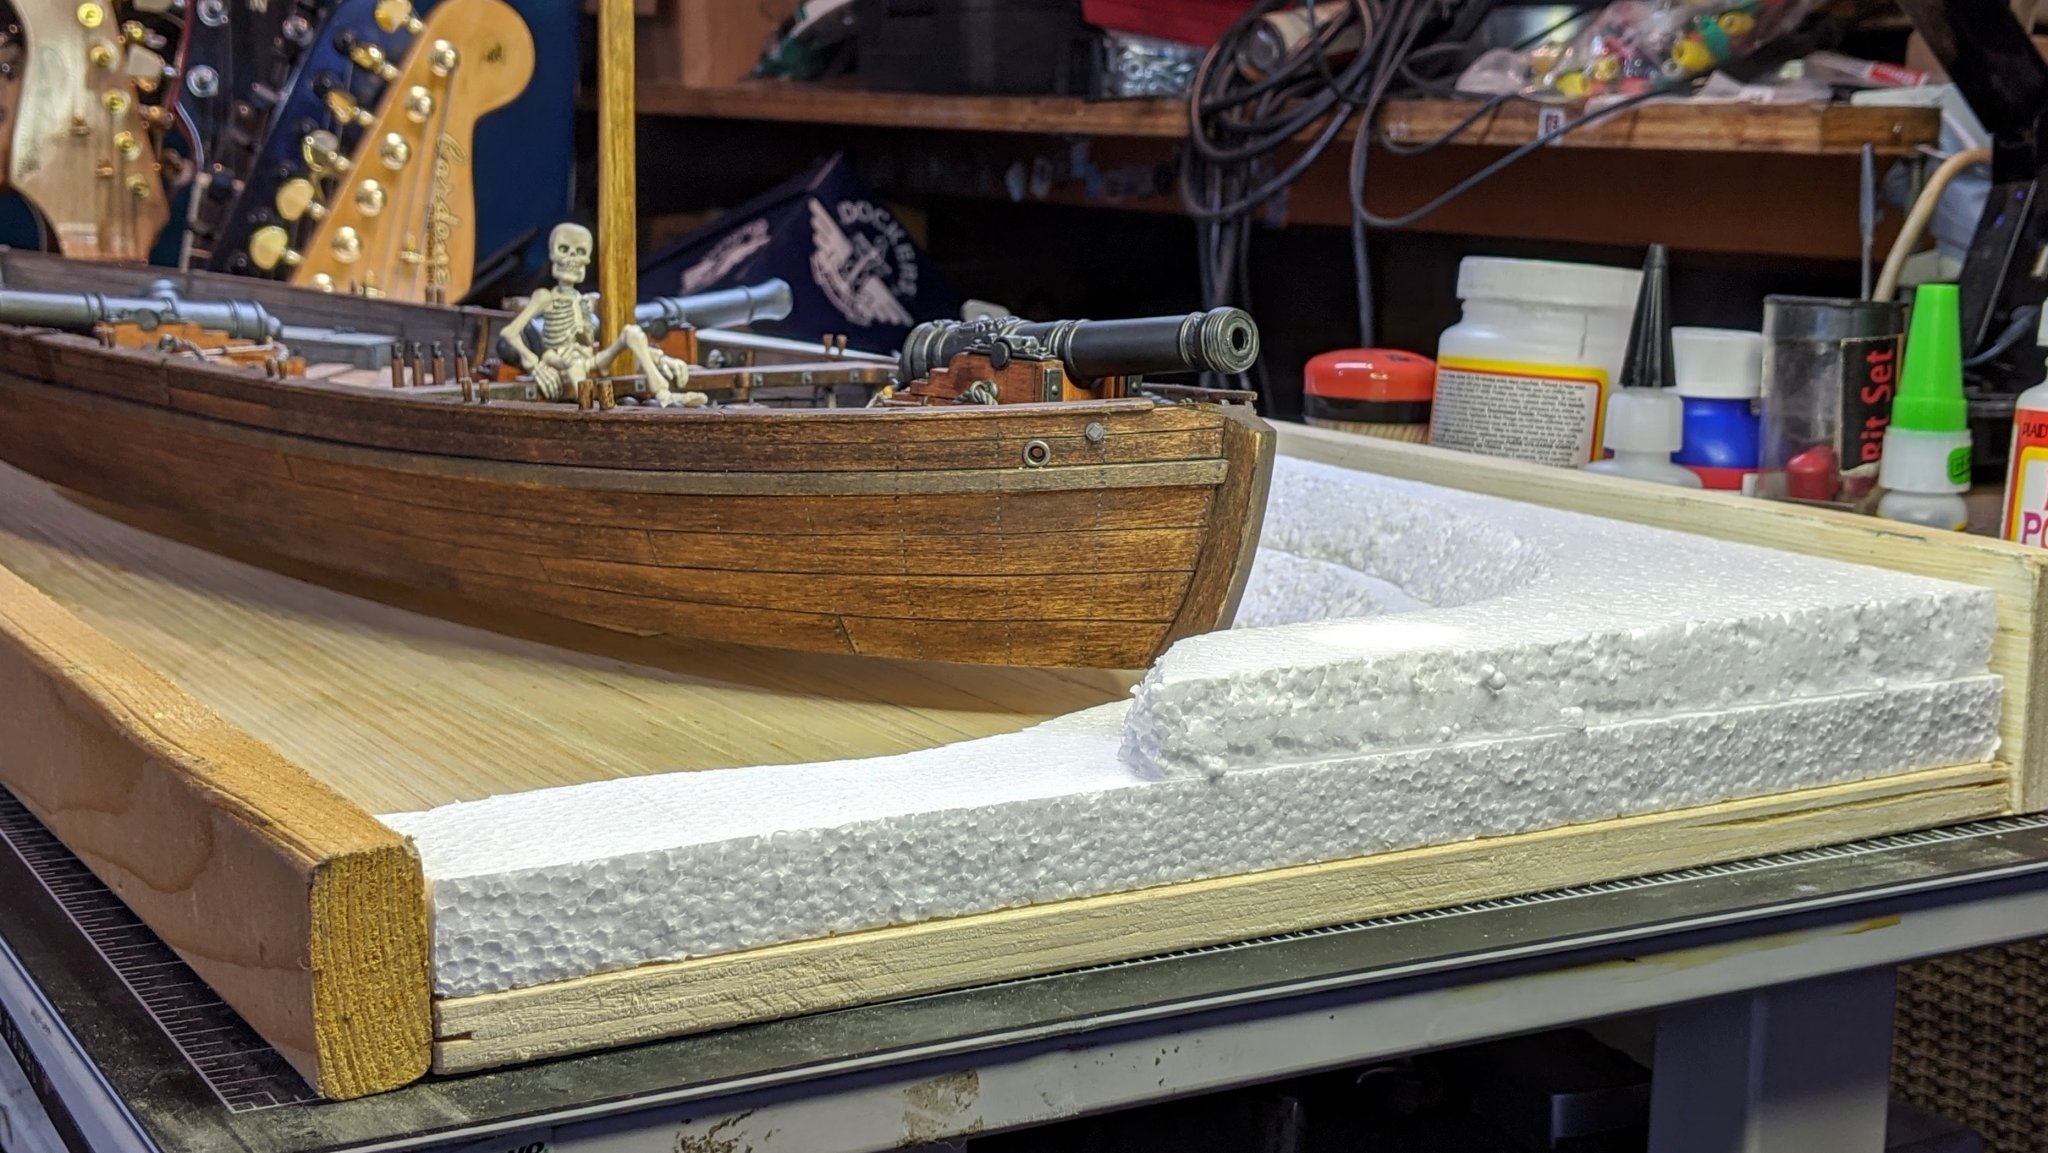
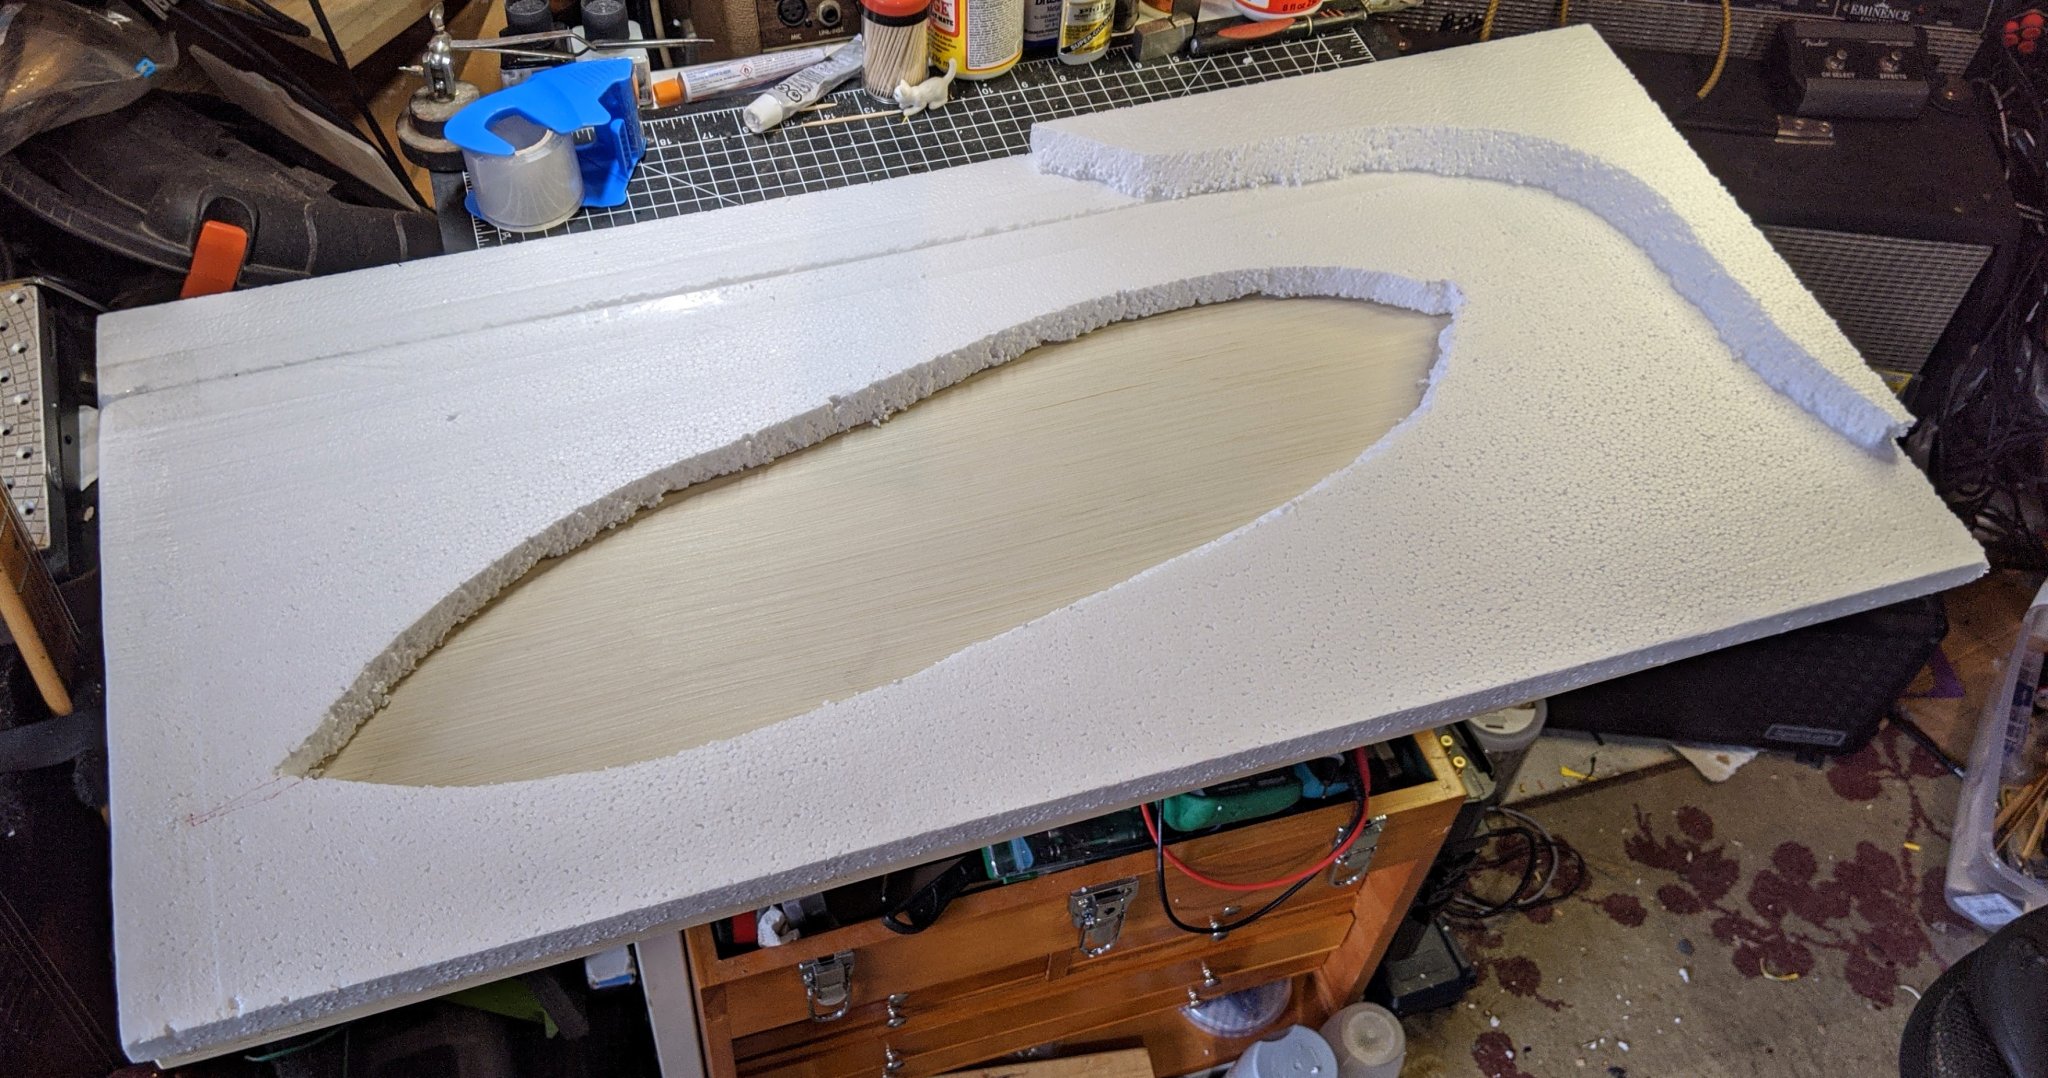
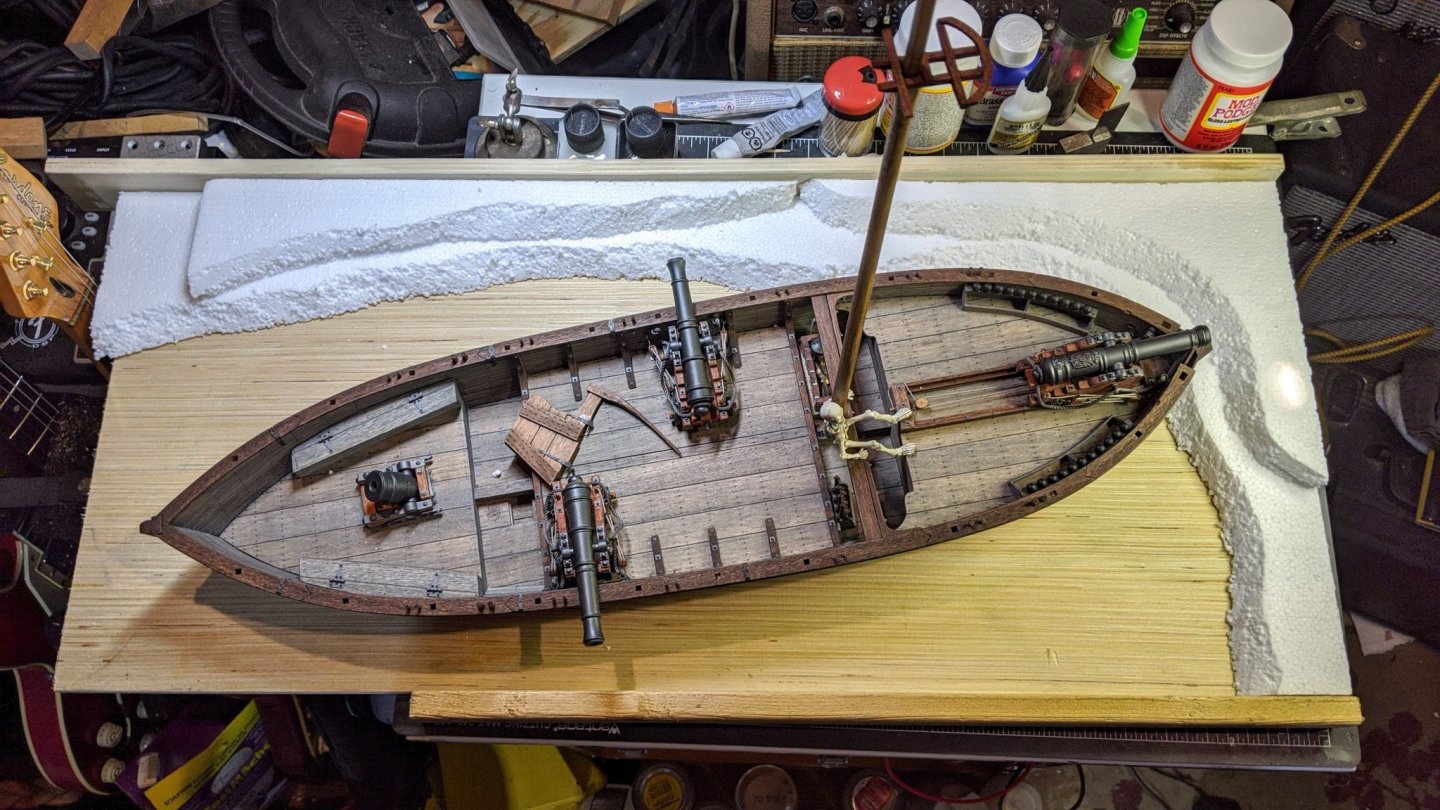
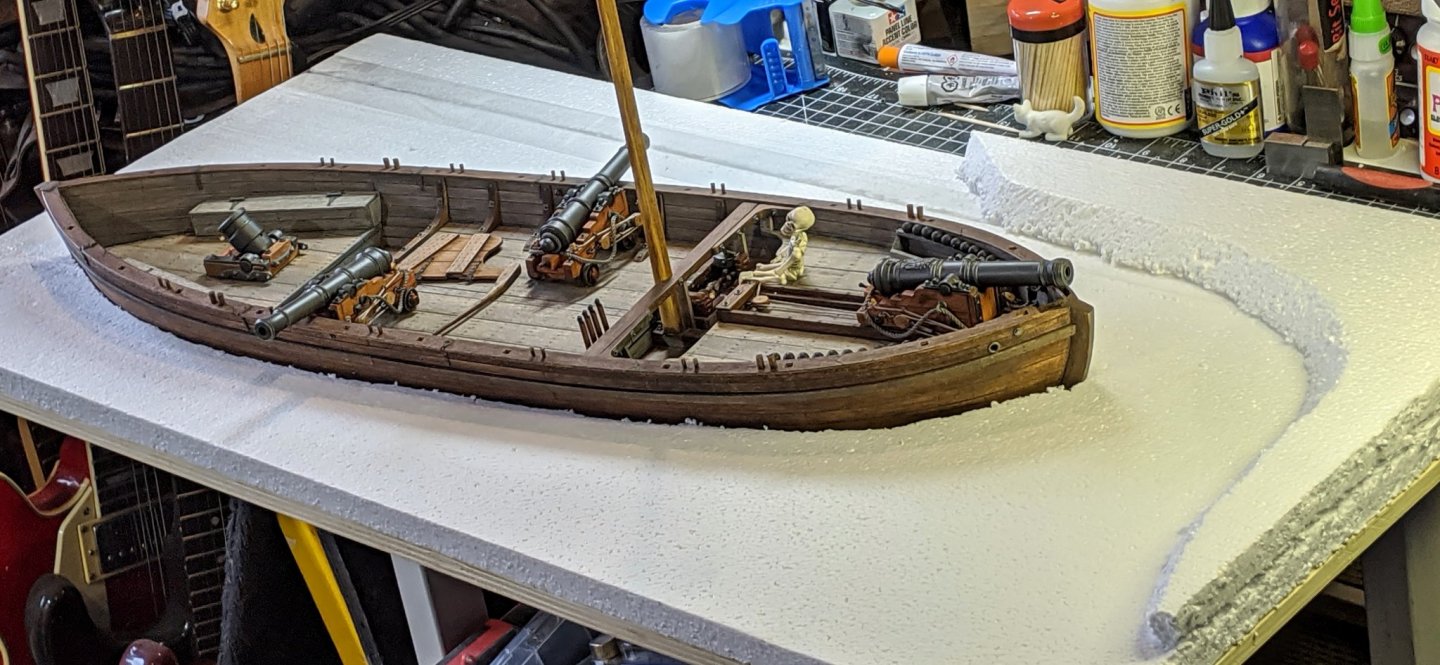
Thanks, Dave! Hot wire cutters are the best to use, I've got a friend who does custom fender flares and body parts for cars and he carves his master molds from foam with one. In my case, the Styrofoam I'm using is only a mock-up. It's quick and dirty 😁 but lets me visualize the layout and make adjustments easier. The final lake bed, shoreline and rocks will be a combination of newspaper, wire mesh, plaster, Durham's Water Putty and a LOT of gravel, dirt and foliage. I've decided to reduce the size of the base from 34" x 16" to 30" x 14" for a number of reasons. First, the base overpowers the boat. As I mentioned in a previous post, everything's got to balance. Secondly, the original size was unmanageable, the reduction makes it much easier to work on. Thirdly, I had to reduce the amount of resin needed for the water pour. The original plan needed about 250 oz of resin...Yikes! Way too expensive and heavy. By increasing the shoreline and reducing the pour depth, it looks like I'm down now to around 125 oz. It'll be done in two or three pours, with tints on the first and second layers to simulate depth. The total pour depth will be 1-1/4", with the boat bottom 1/2" above the base. The boat will actually be "floating" on the first pour, with the rest of the pours done with the boat in place. I'm going to use Saran wrap taped to the hull and then coated with Vaseline as a mold release so I can remove the boat as needed. Here's the latest iteration, it's getting closer to what I'm shooting for. The base will be boxed in all around, with 2-1/2" high boards on the back and sides and a 1-1/4" board in the front. The side boards will be cut to taper down from the back to the front. This build is quickly turning into three separate builds... the boat, the base and (soon) the case. I know that this forum is for ship model build logs, so I'll try and keep the base "in the background" and keep this build focus on the boat itself. Another shot with frame mocked up.


-
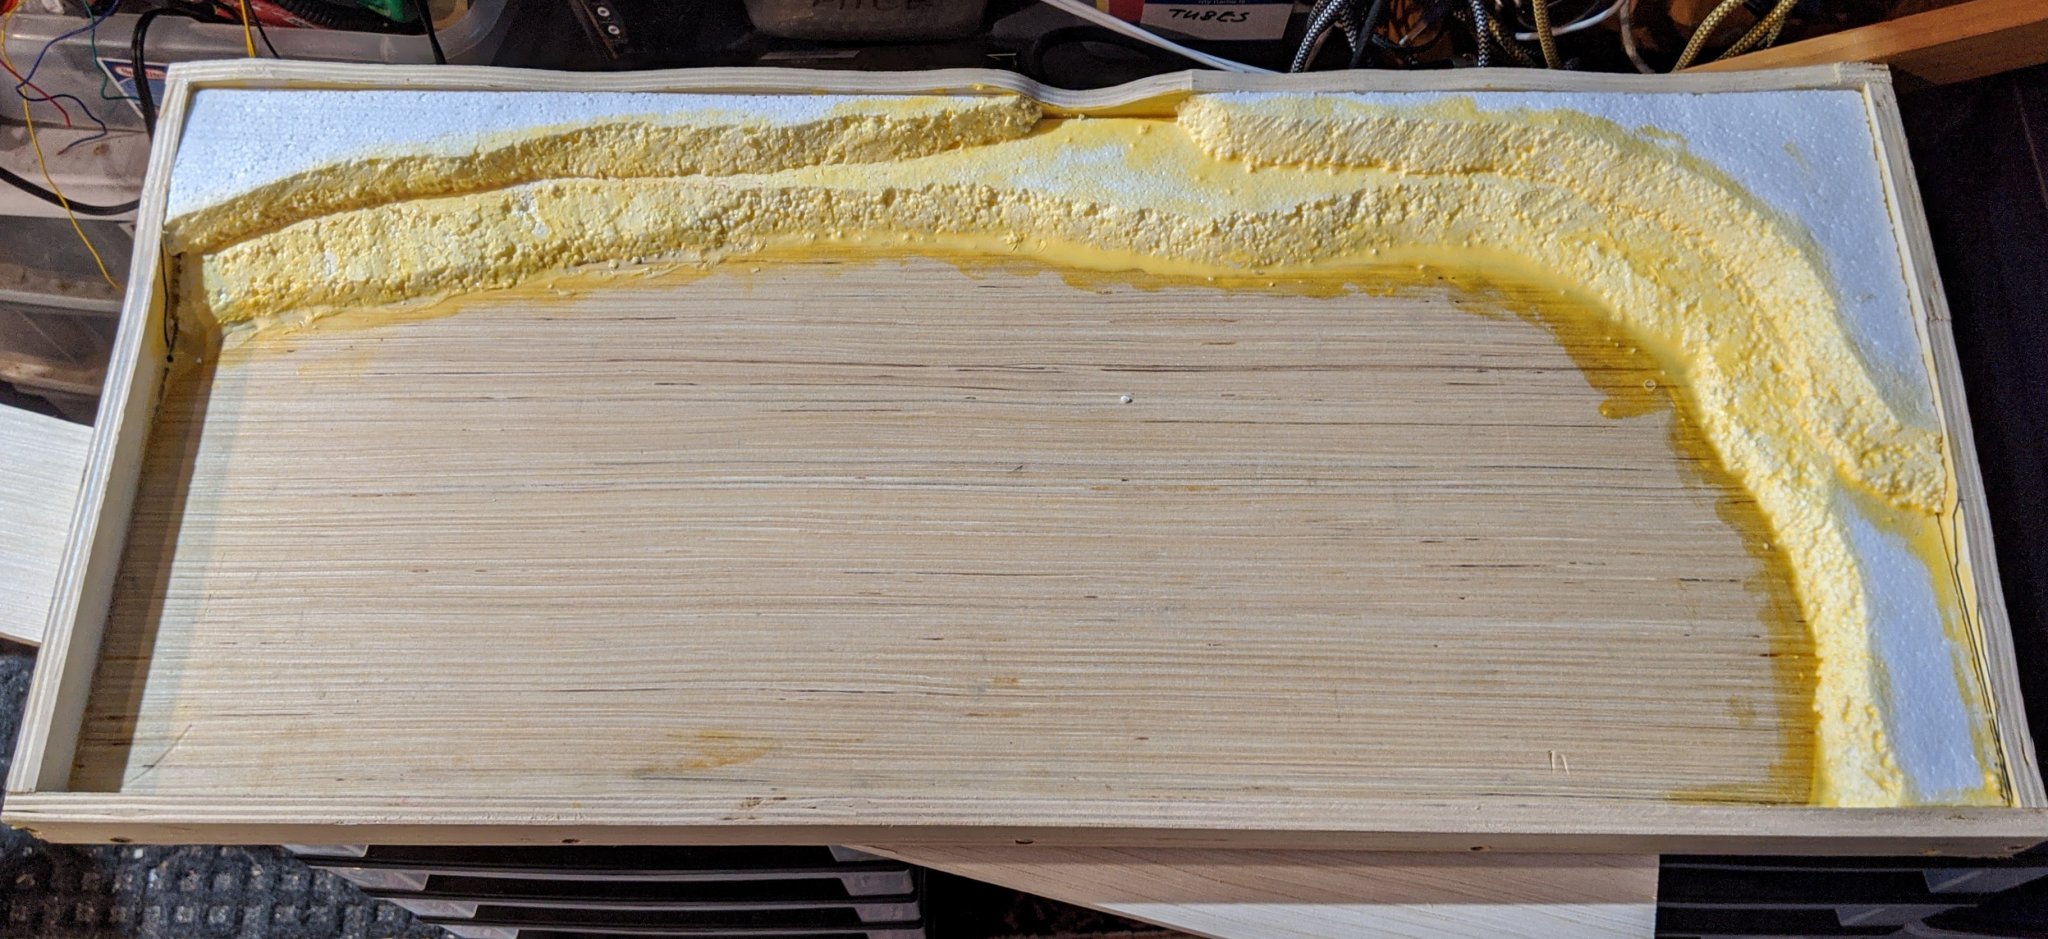
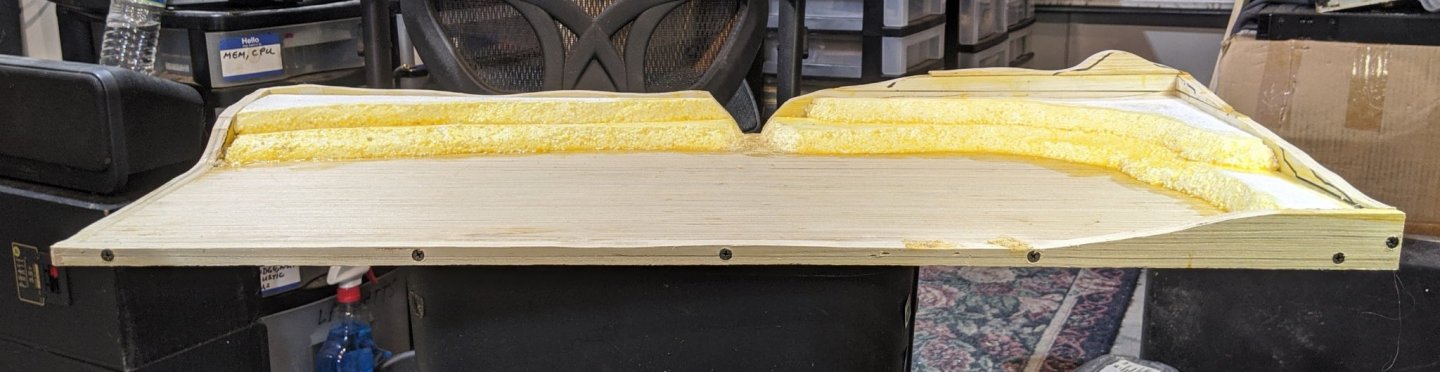
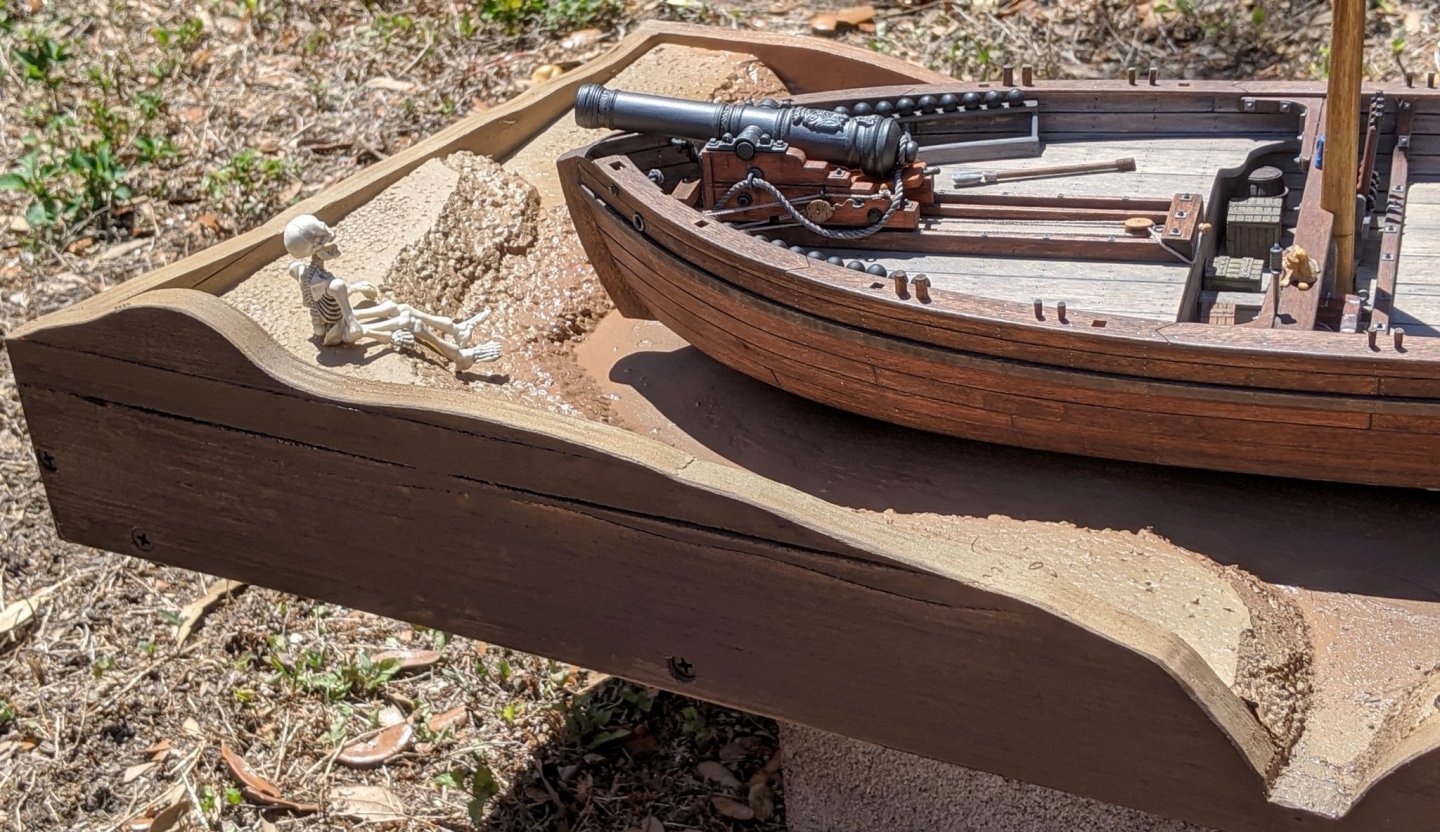
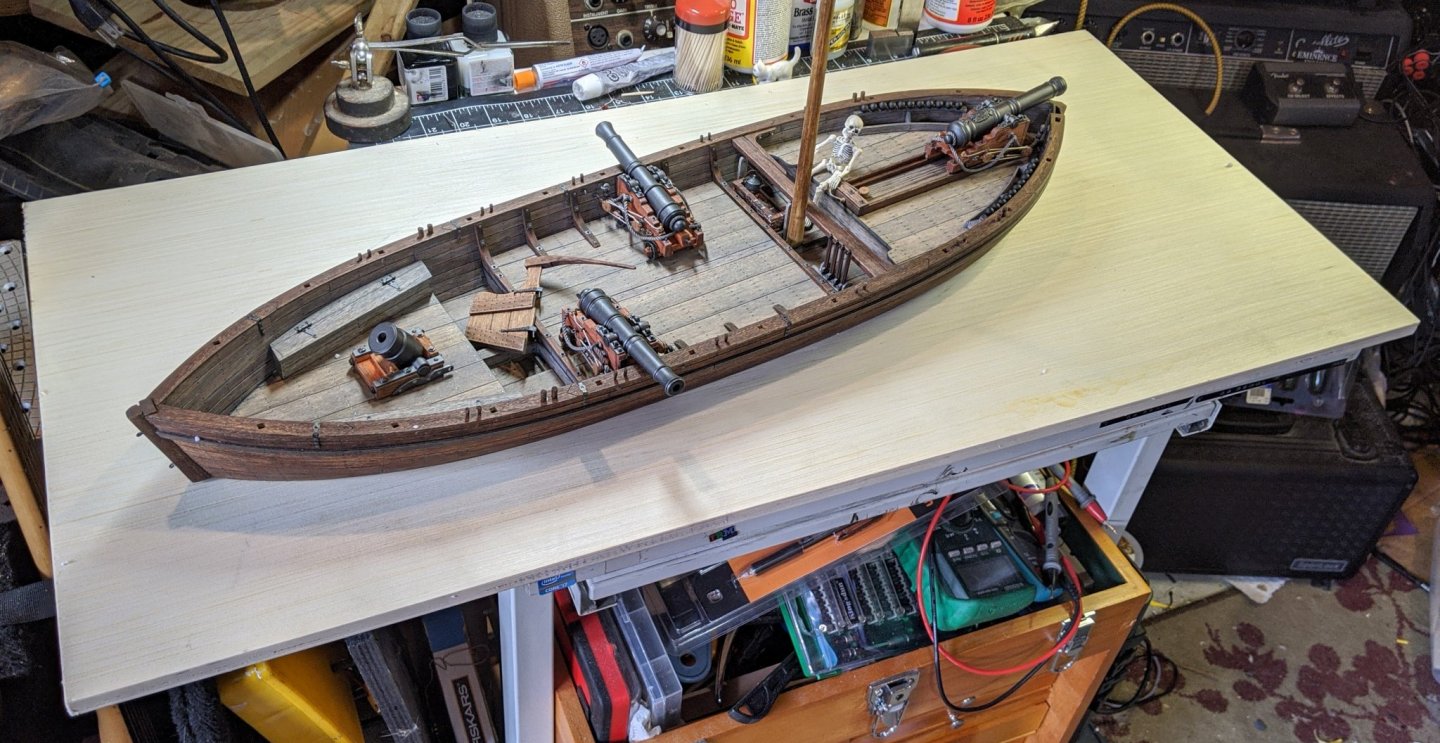
Hi all, Well, I've reached the point where the base and display case need to be addressed. I figure to do the base first, and concurrently design and build the display case as I go along. I want to display the boat with the bow beached in a diorama type fashion, with some rocks, trees, gangplank and foliage. To make this look right, I have to take into account the draft of the boat (remember... even though this is flat bottomed, it is not a waterline model). In this scale, that means the waterline should be about 3/4" up from the hull bottom. First, I finalized the base size. Taking into account the shoreline detail I'm adding, I came up with a length of 34" and a width of 16". Height of the display case will be about 27", that dimension is still flexible. I decided to use 15/32" 5 ply cabinet plywood for the base. Light, strong and smooth. To "recess" the boat to the correct waterline depth I got some 3/4" thick insulation panel foam and cut out a rough outline of the hull. I then fitted up the cutout foam panel to fit the base and started adding elevation. This is a ROUGH draft of the final pose, and will probably evolve as I go along. The diorama detail I'm not too worried about, my previous model railroad scenery building experience will help with that. I'm still not sure on how I'll do the water, I've got some ideas to test out first. One of the things I really noticed after recessing the hull to the proper depth was how more "real" the boat's stance is. One of the tricks of a good diorama is getting the subject "planted" into the diorama so they complement each other without one overpowering the other. Here's some in progress pics... excuse the mess... now I have to get Slim to clean the shop of all the little white Styrofoam chunks. Note to self: Cut Styrofoam outside next time...


-
Absolutely excellent decision. I've found that on big projects, I enter "modelling paralysis" and need to knock out a simple kit or two to get my mojo back. Some immediate gratification inspires and motivates me to continue on the complicated projects.
- 77 replies
-
- 7
-
-
- morel
- master korabel
- (and 1 more)
-
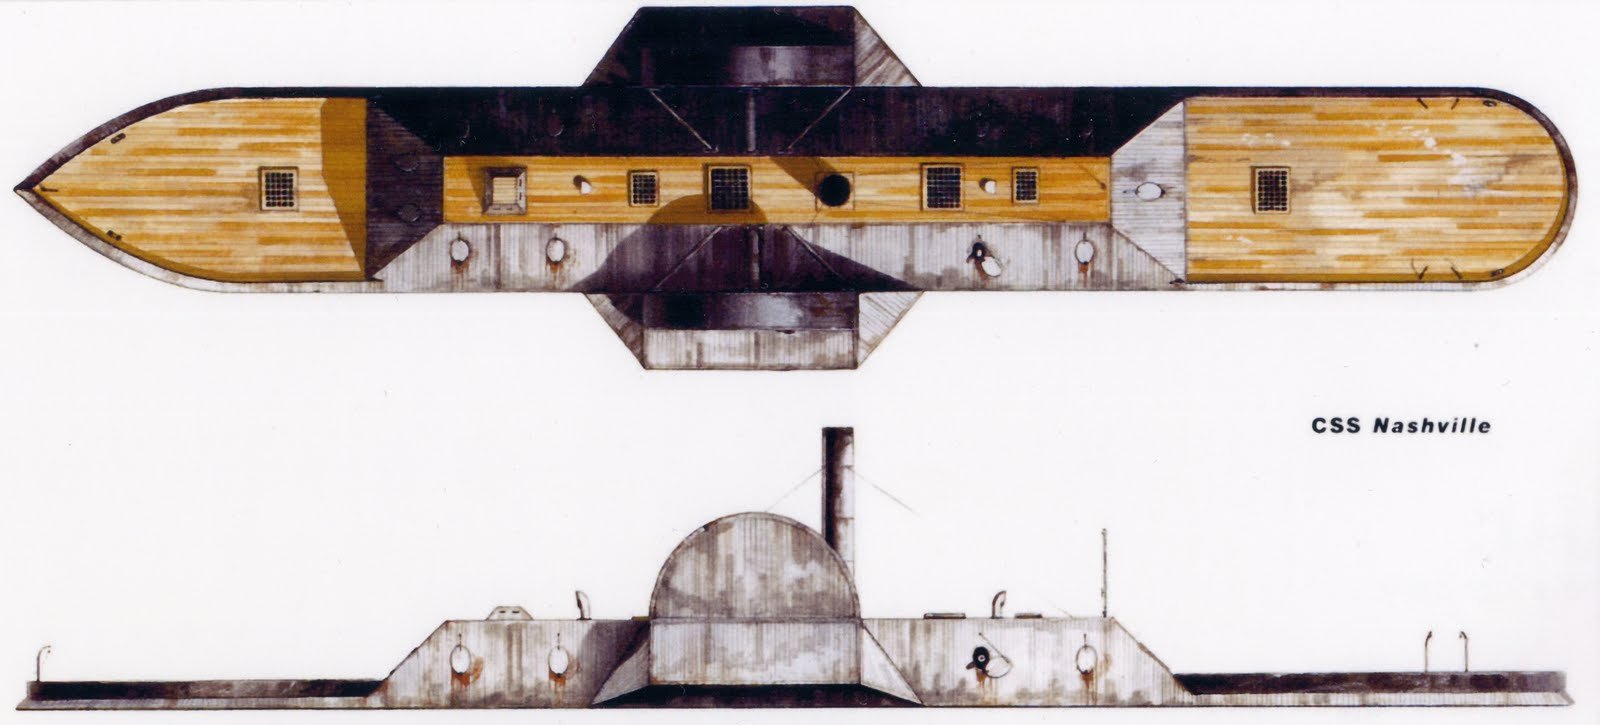
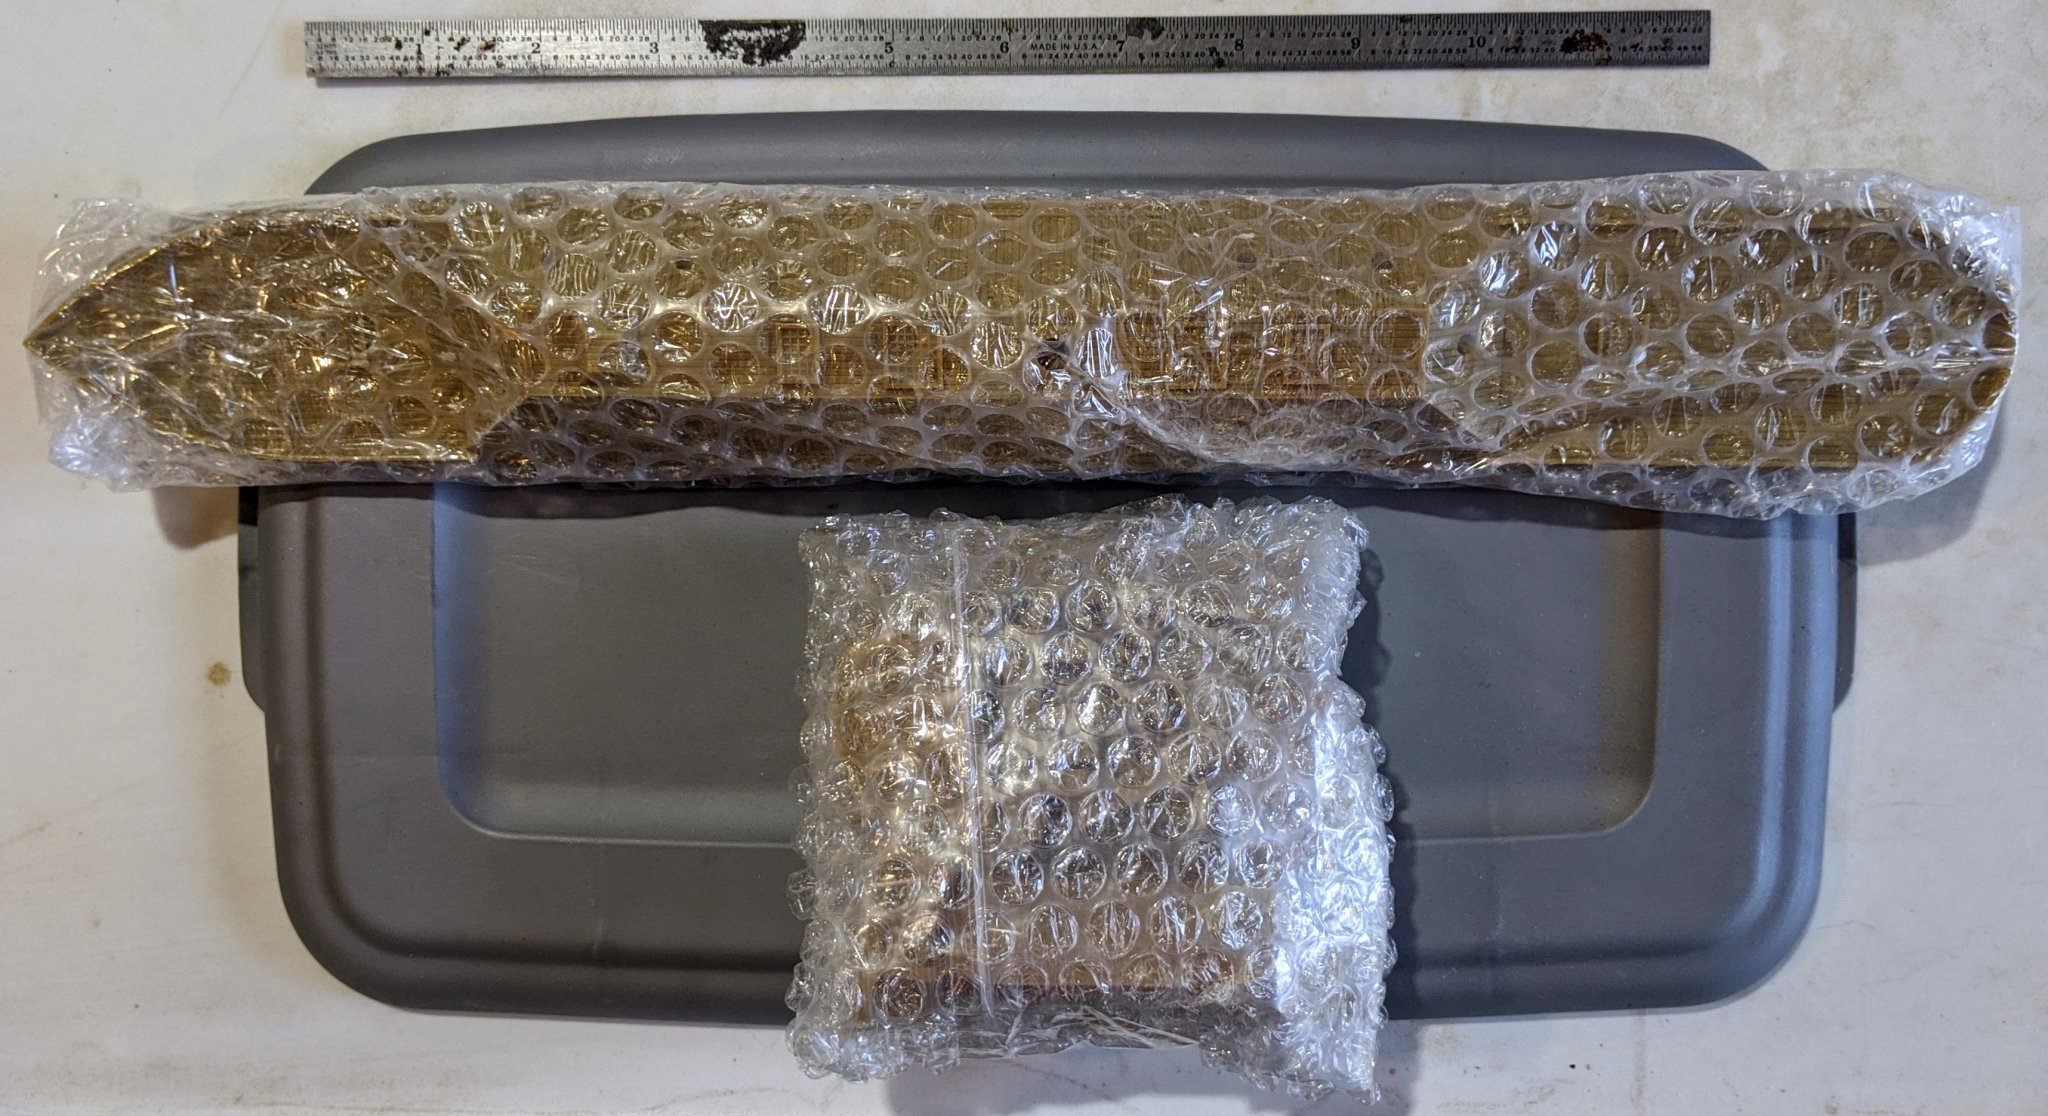
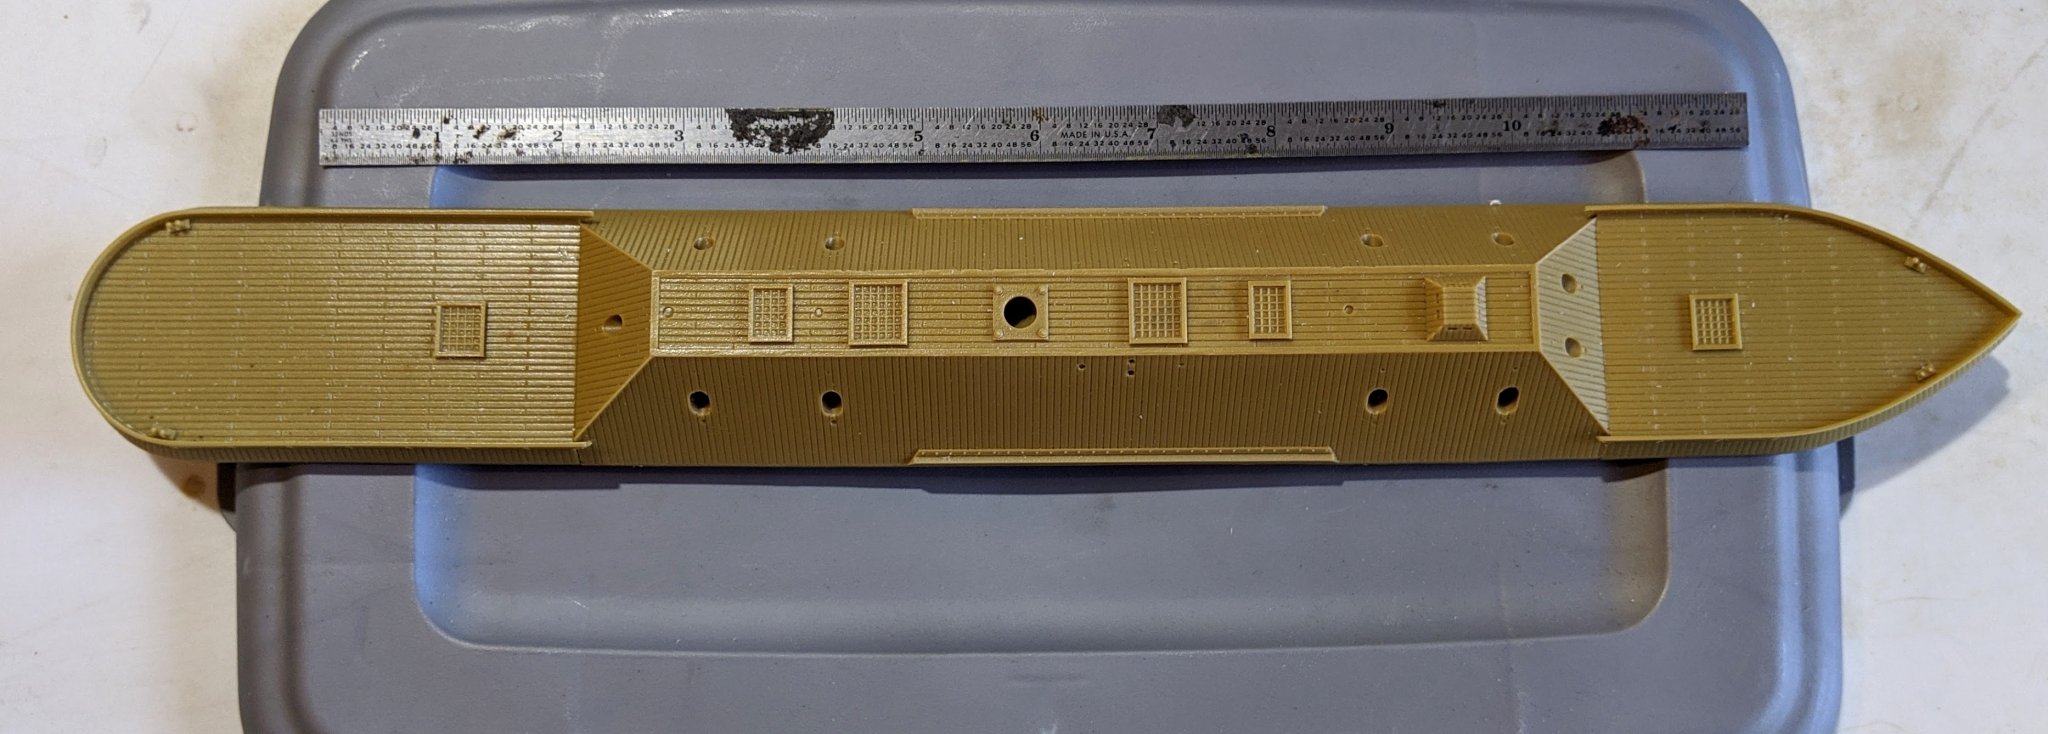
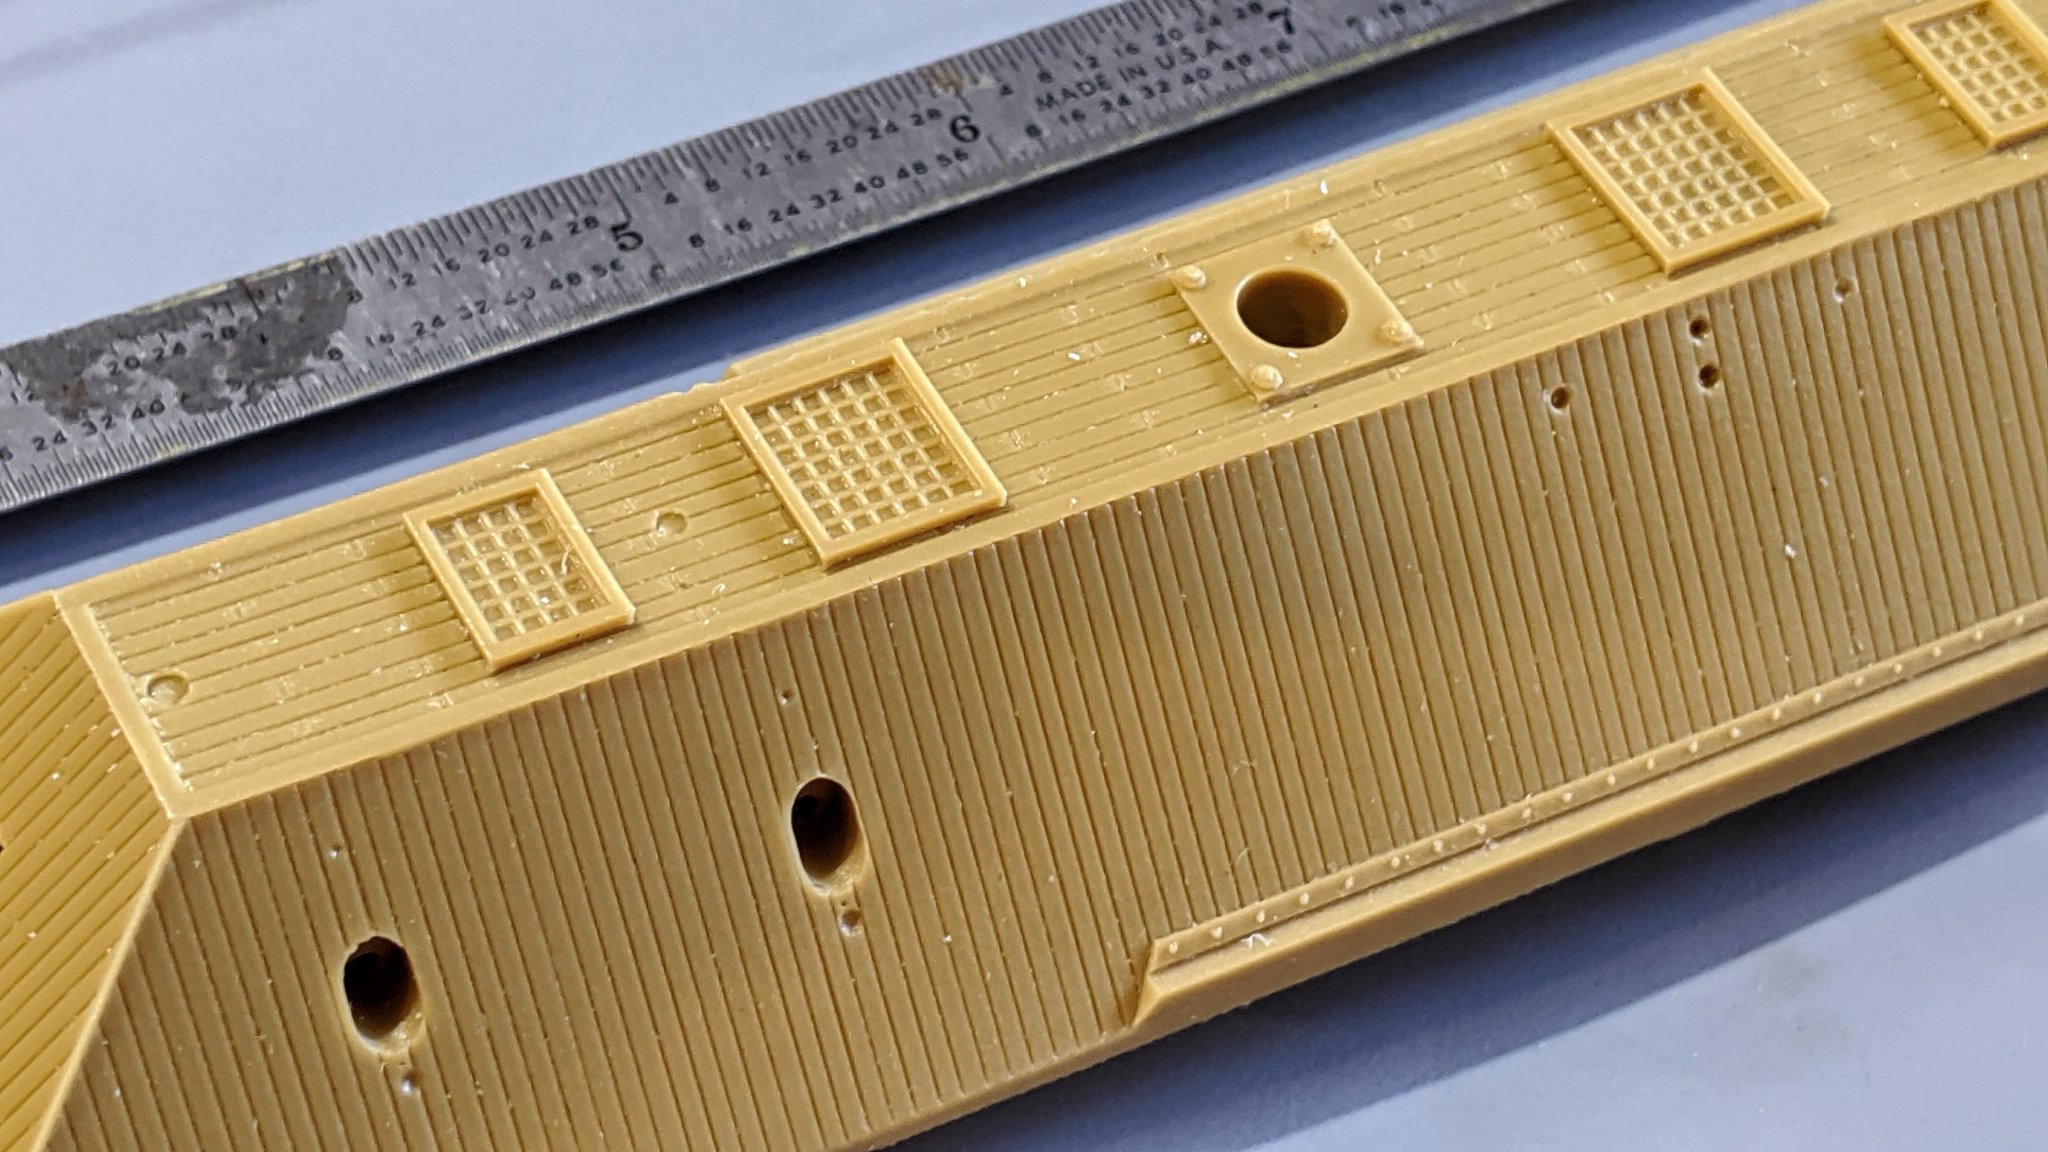
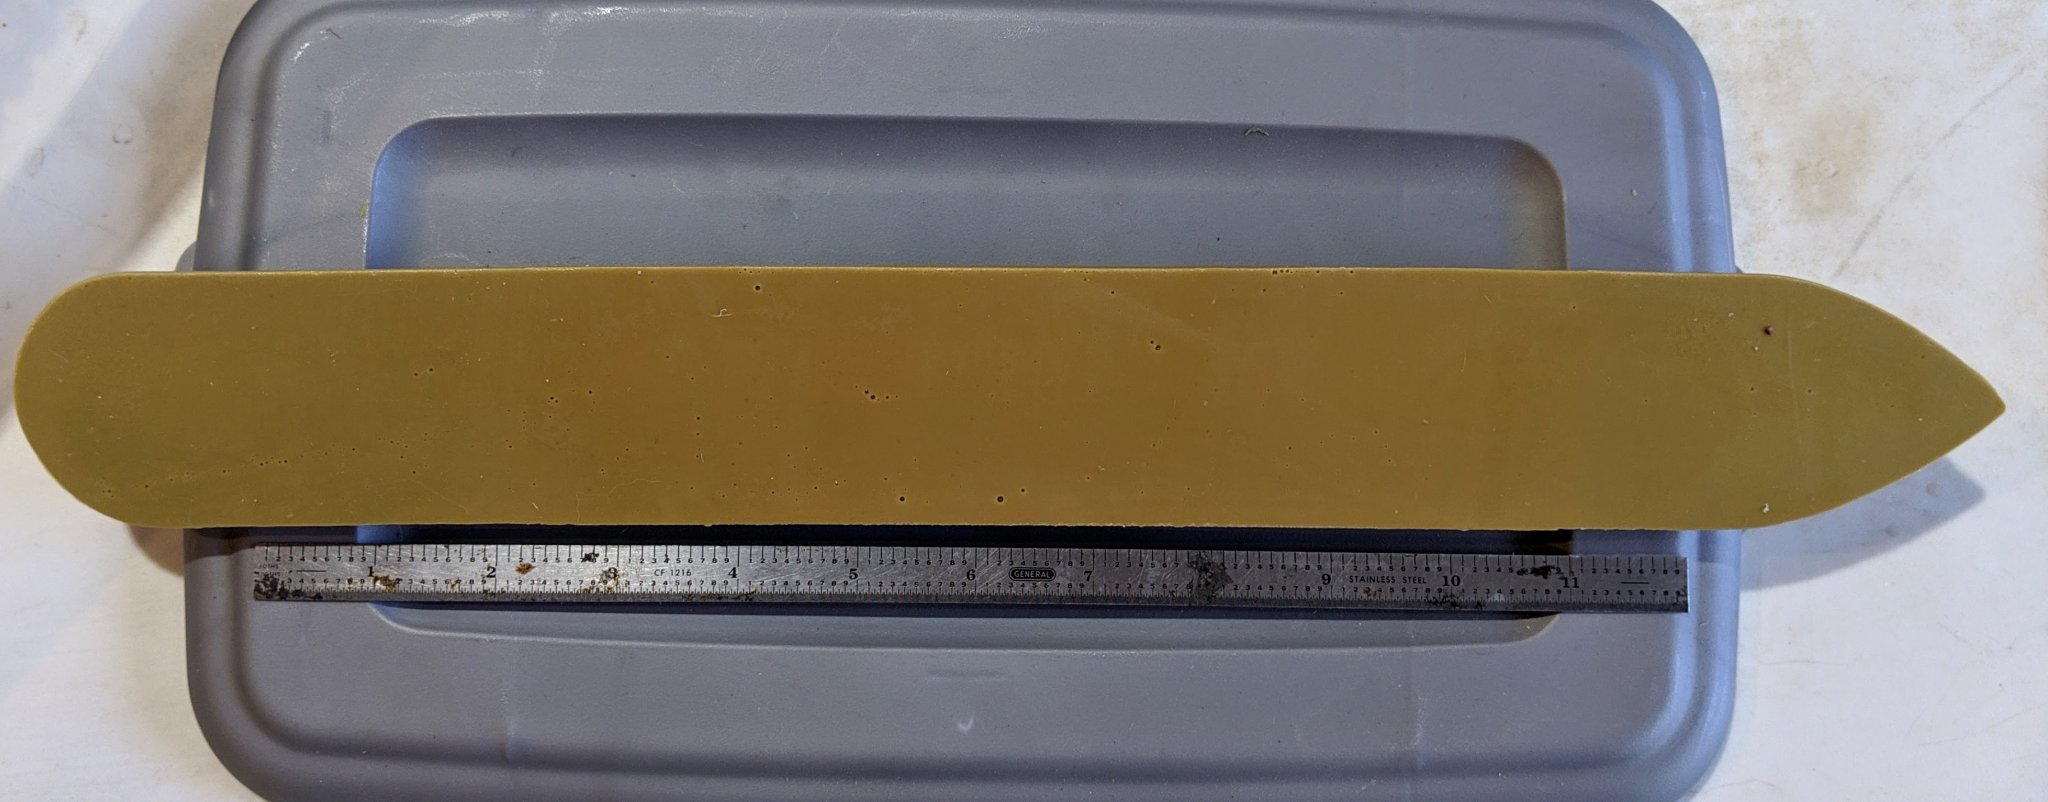
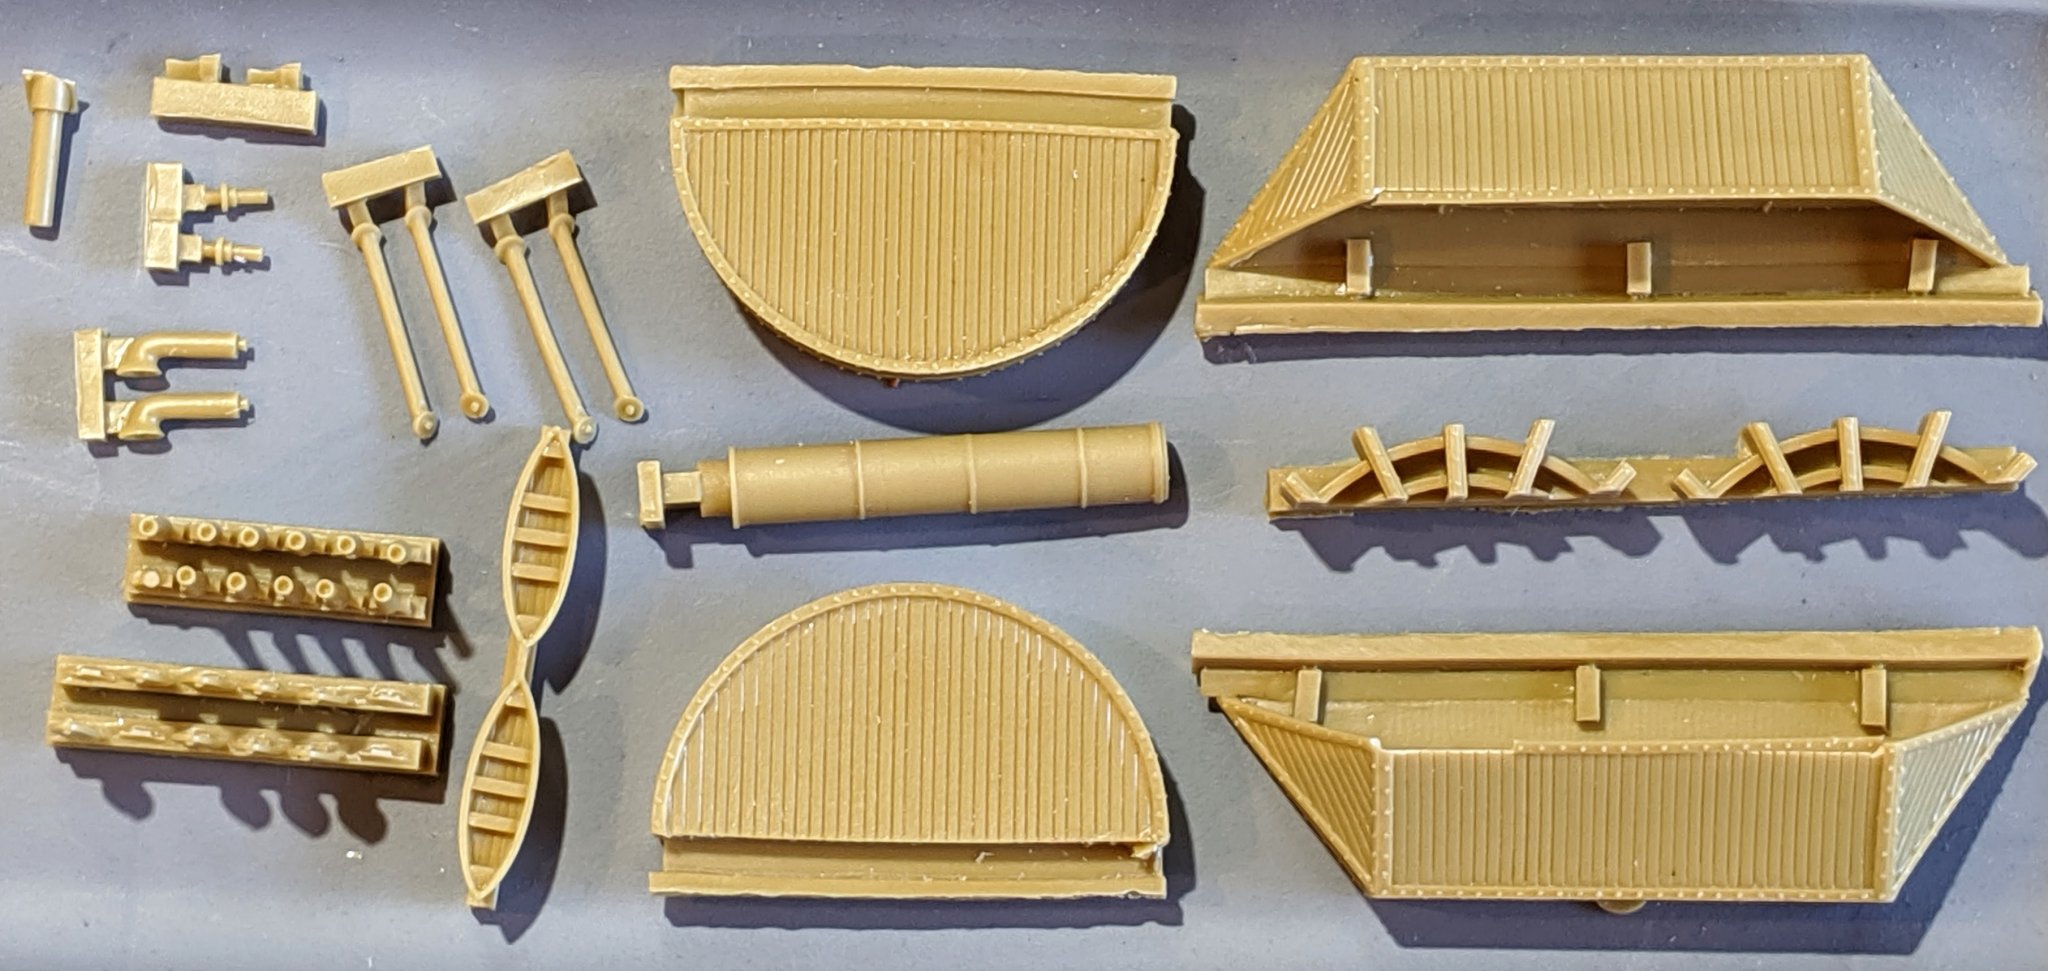
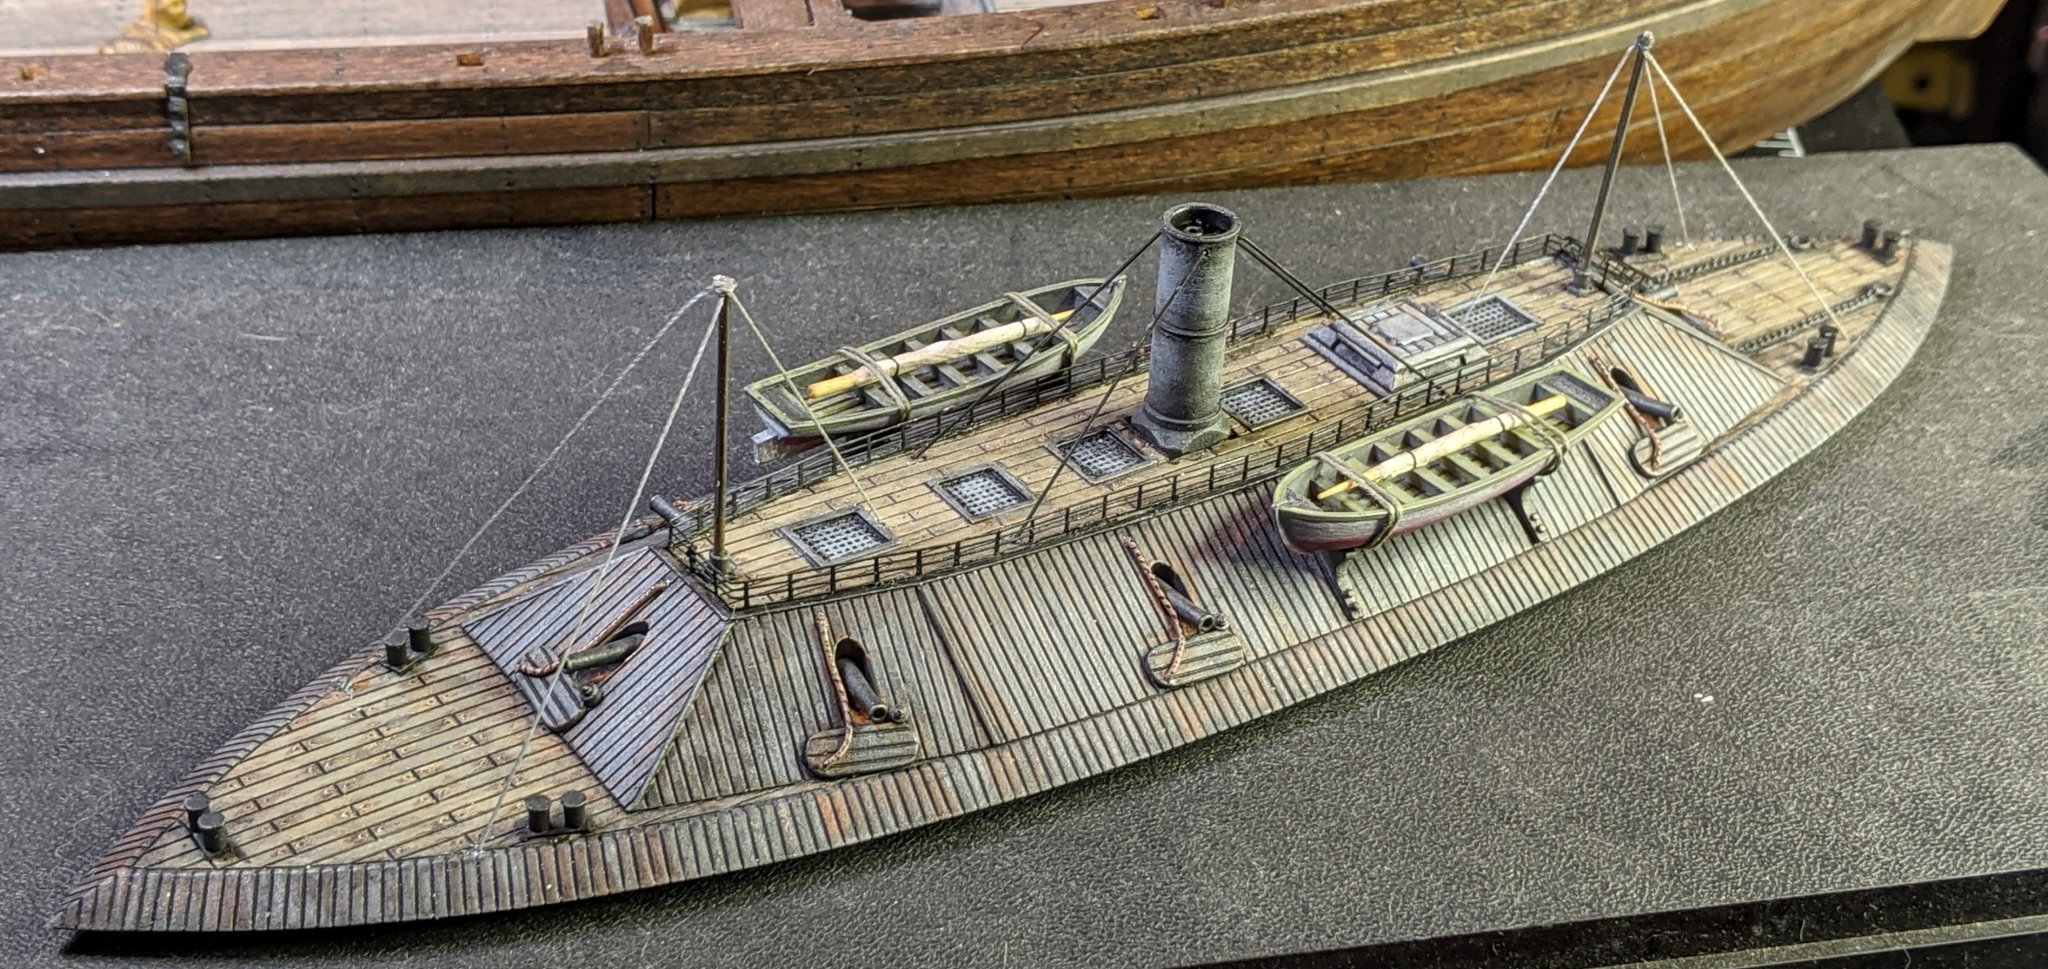
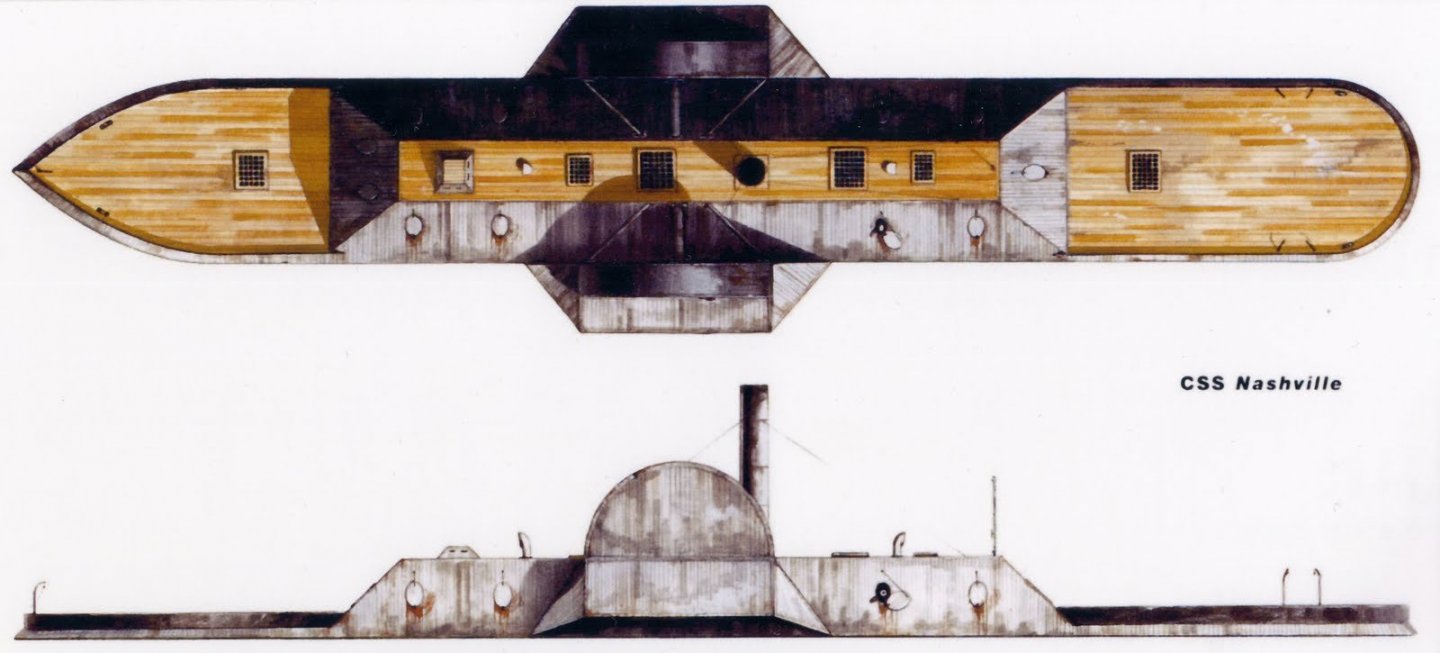
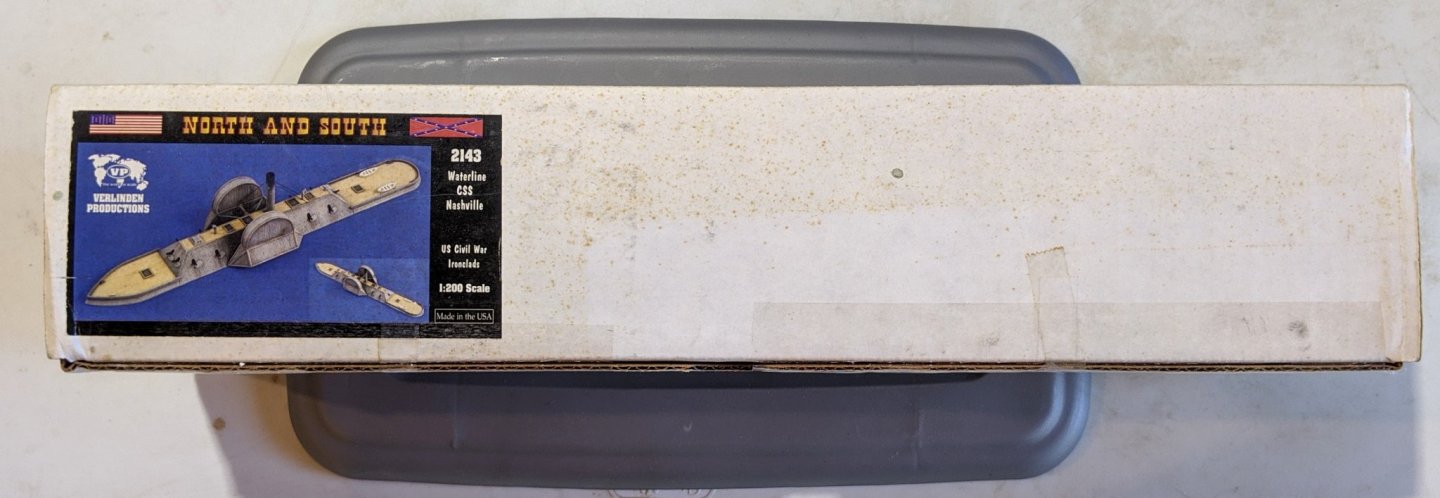
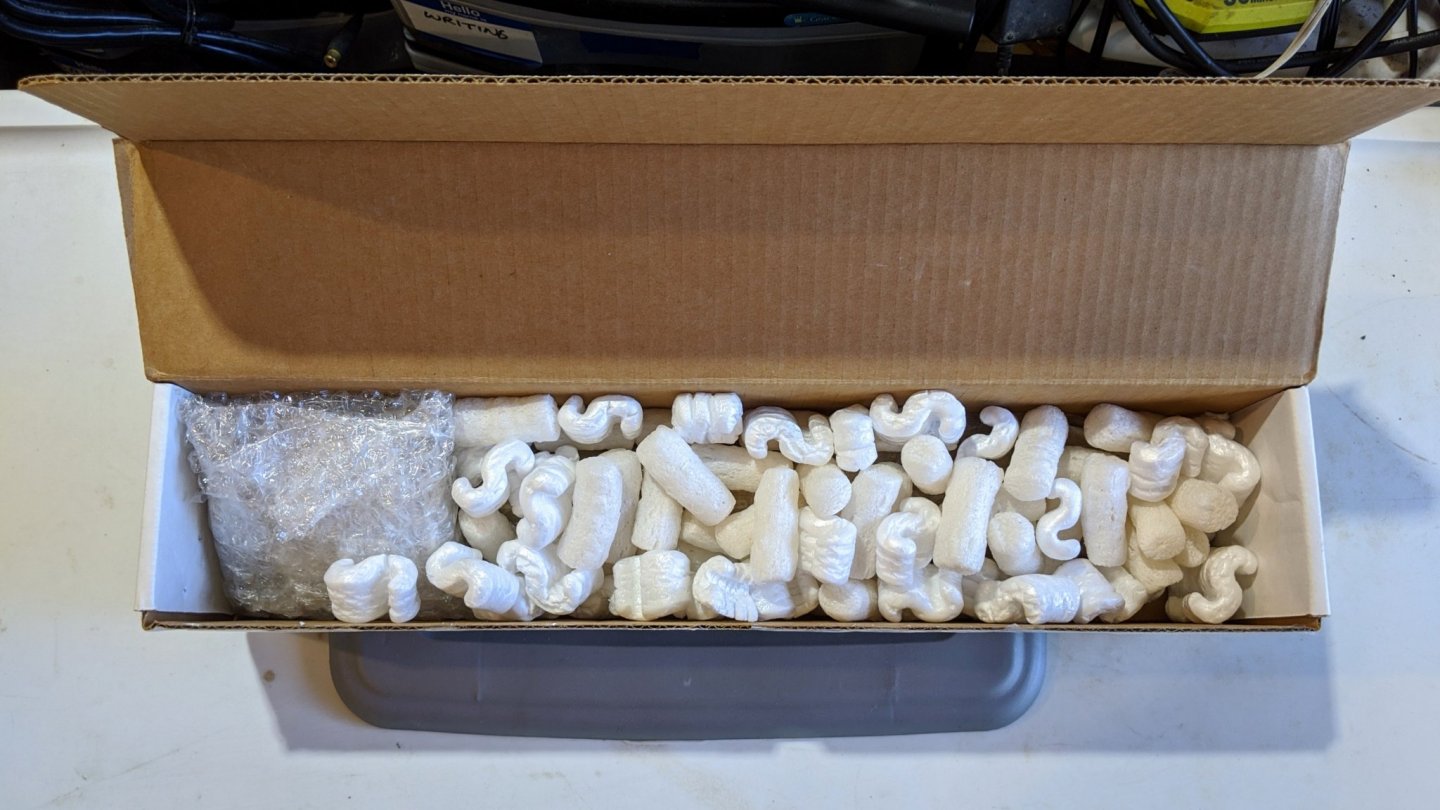
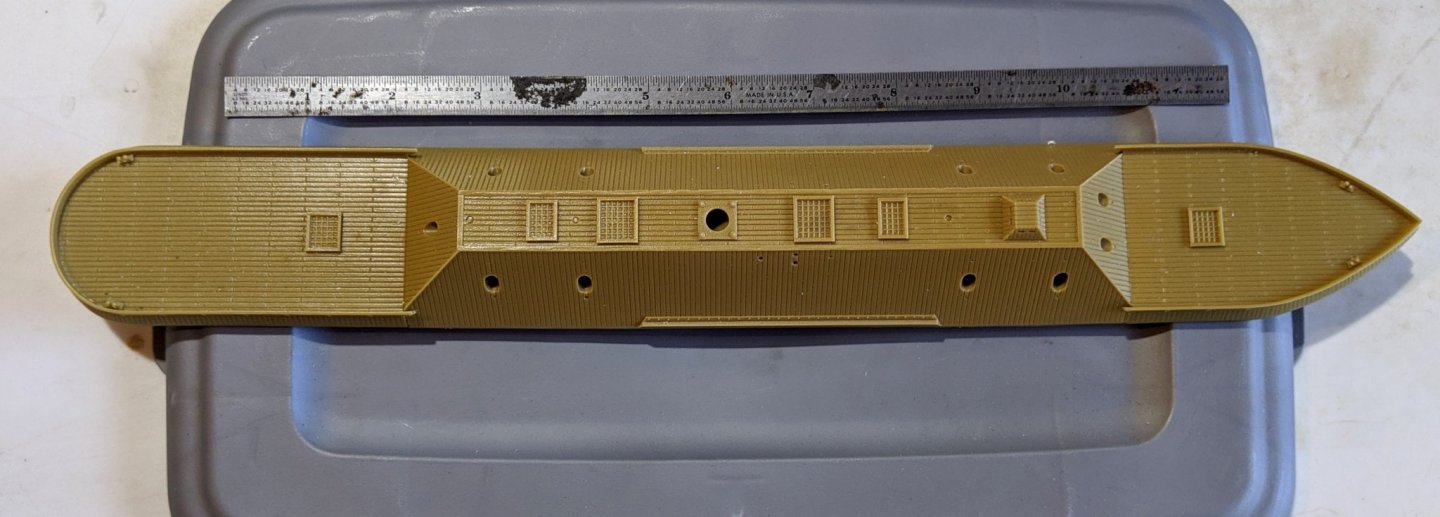
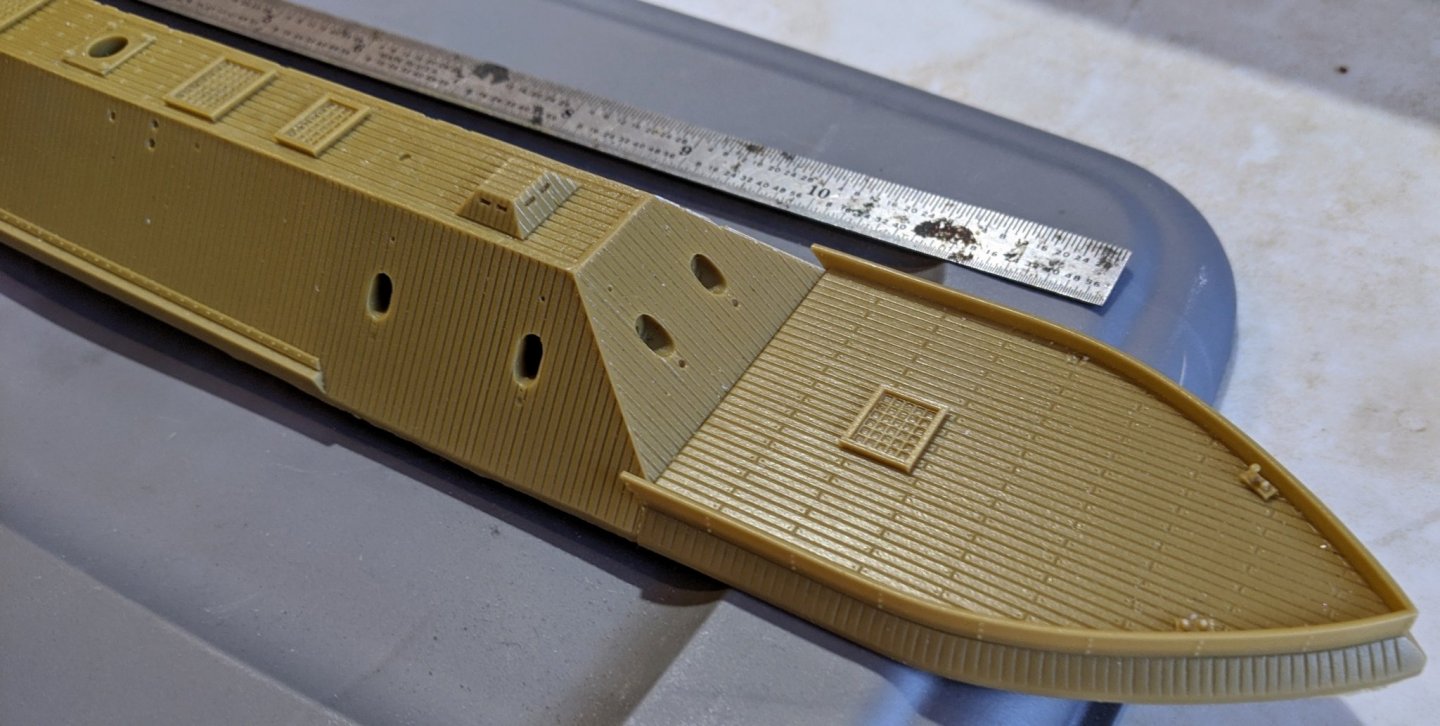
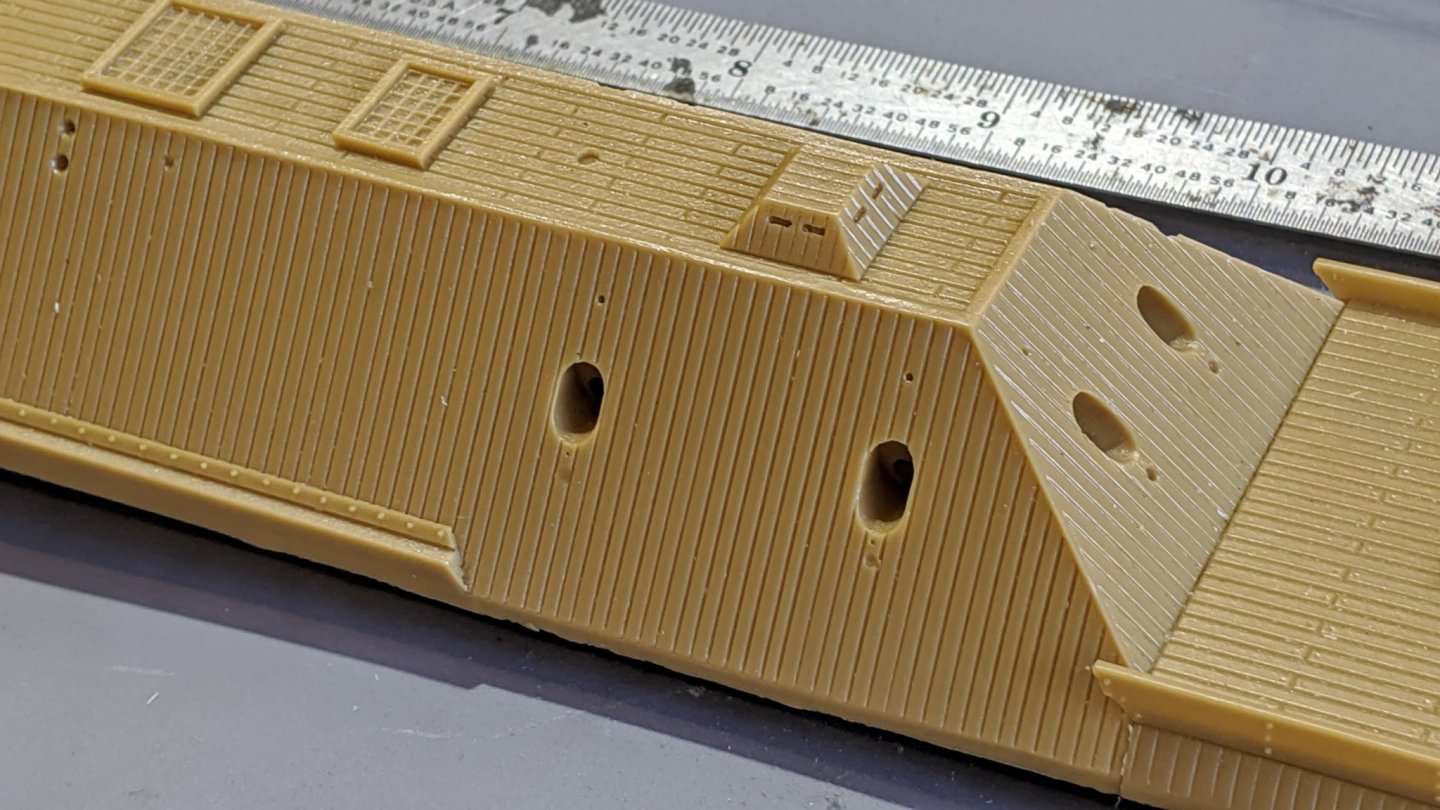
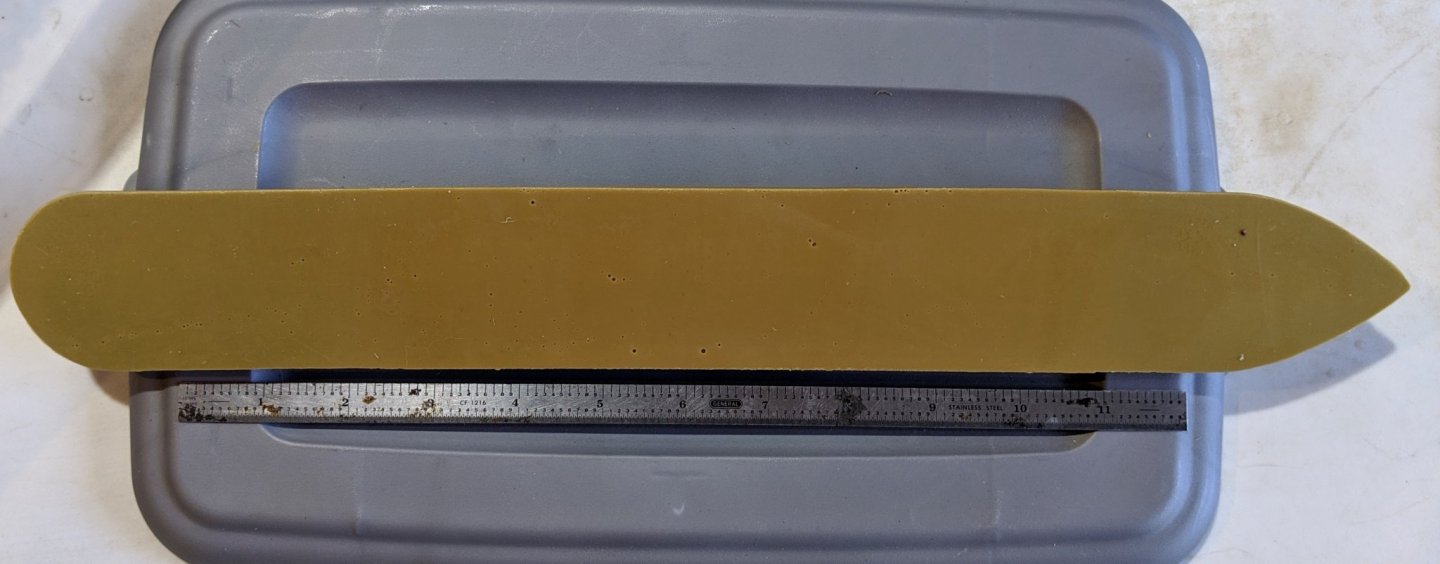
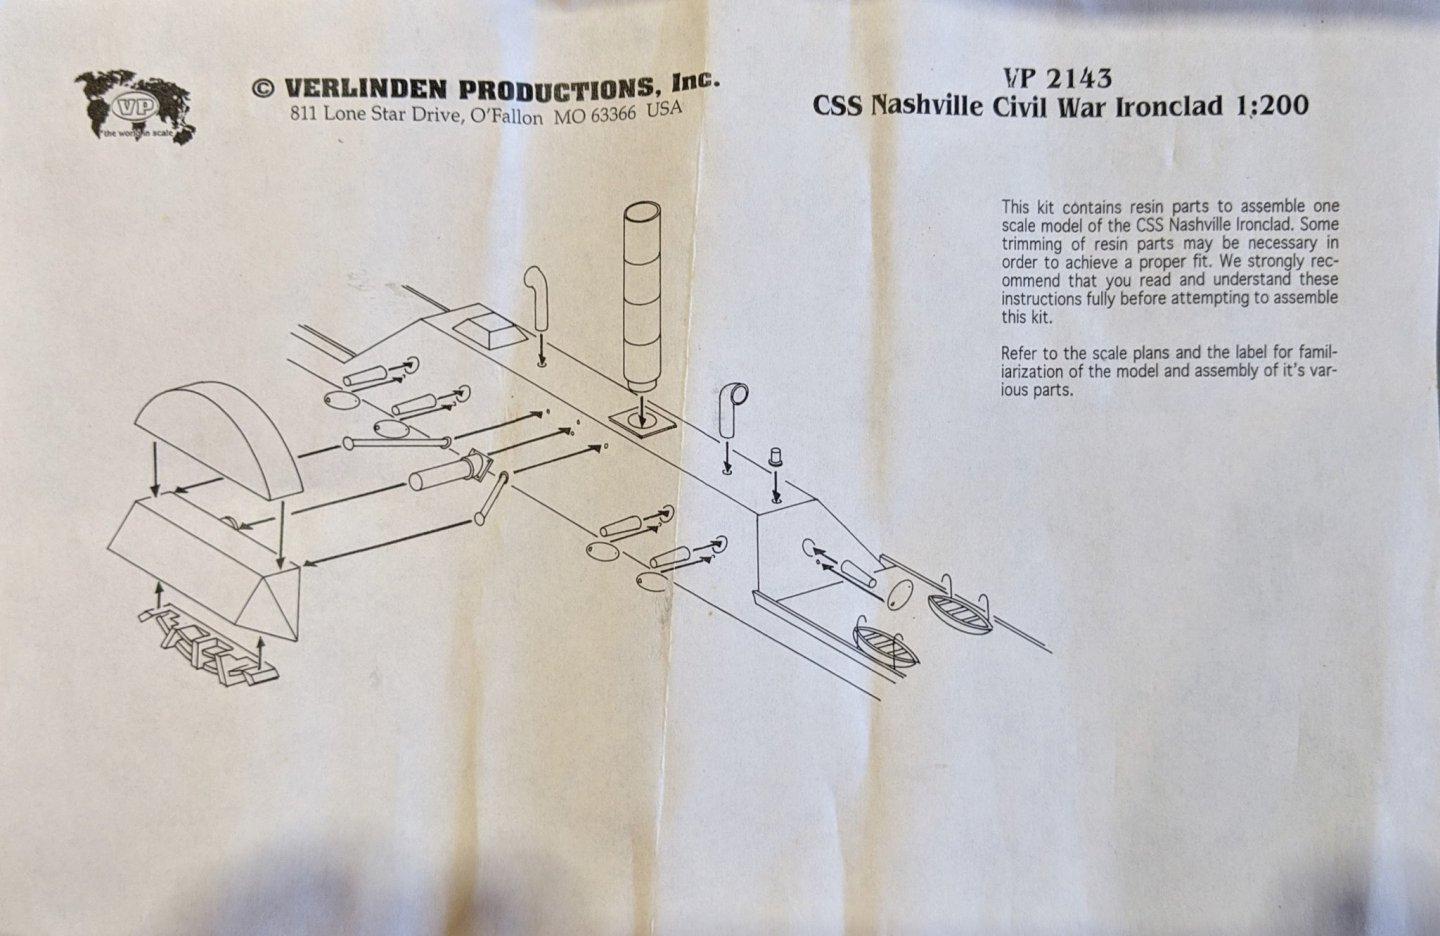
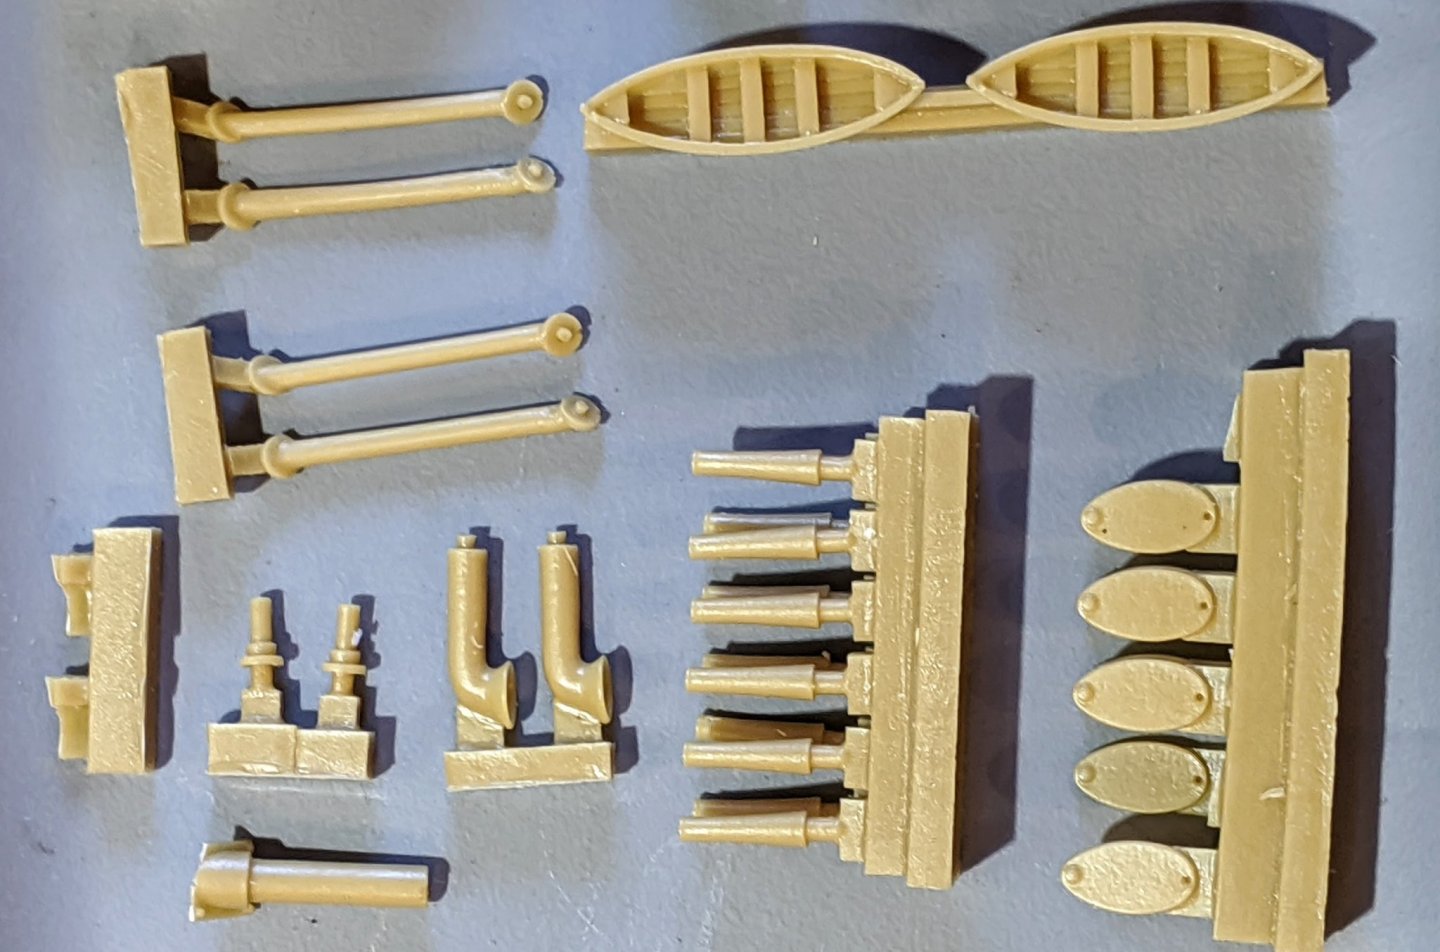
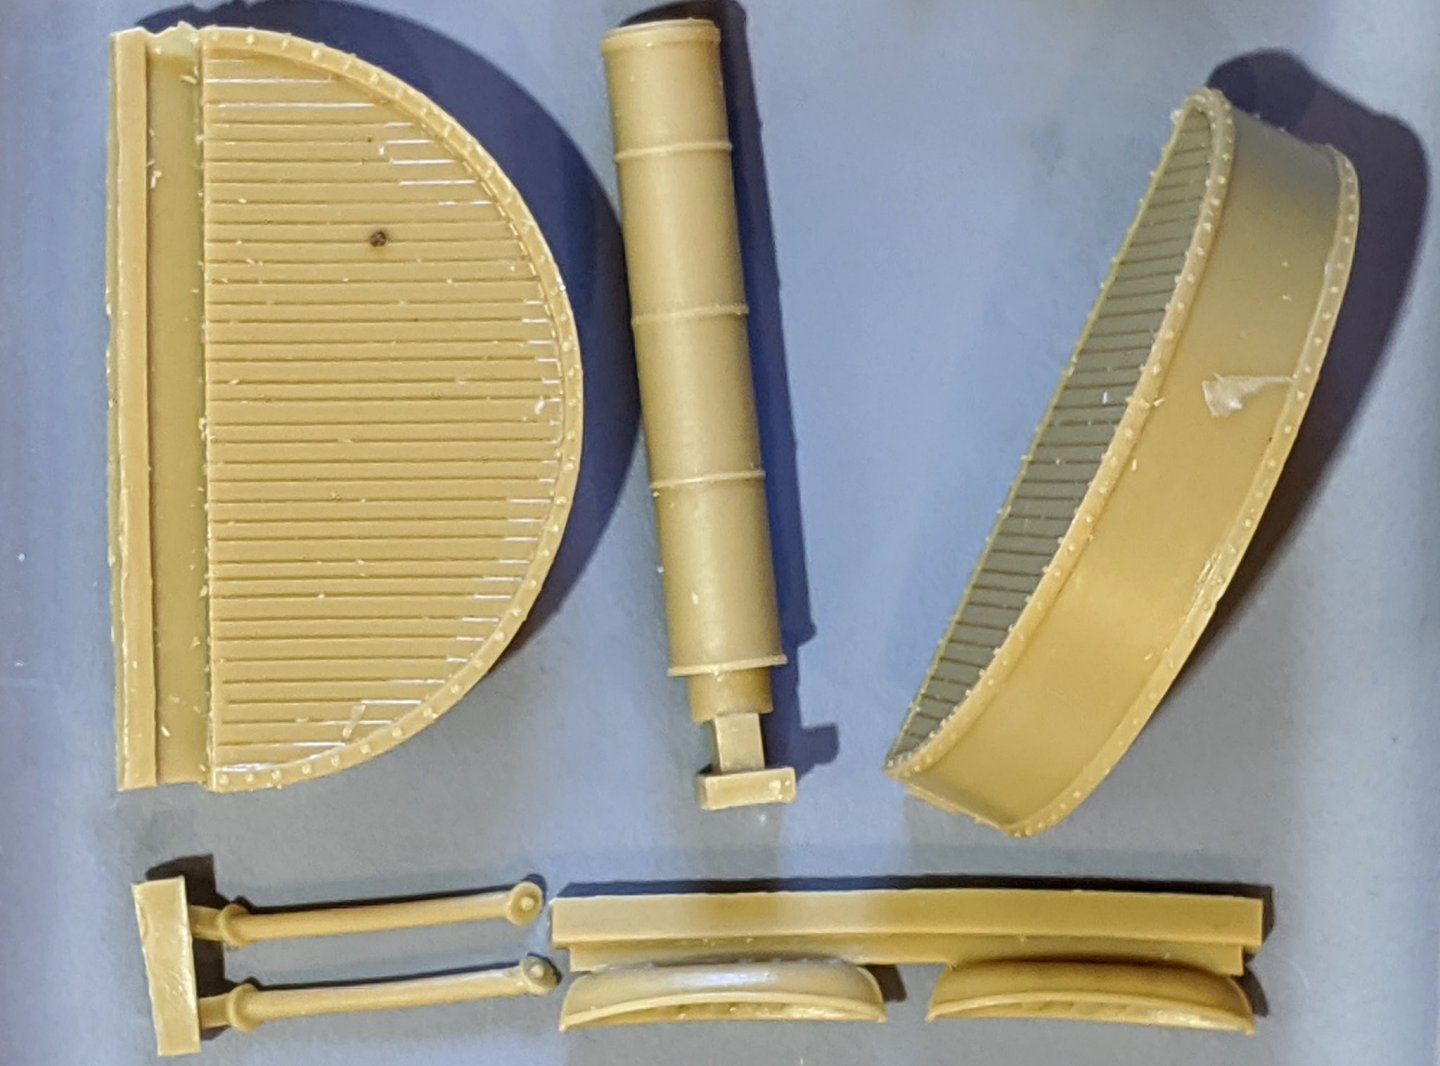
Hi all, I'm a big fan of pre-dreadnoughts , particularly ironclads. There's not a lot of kits available for these beasts, currently Cottage Industry Models offers some really nice 1:192 and 1:96 kits. The 1:96 kits are cutaway with full interior detail and I'll probably build one (CSS Tennessee) in the future. Other current manufacturers I am aware of are Flagship Models, Lone Star Models and Old Steam Navy (There are probably others, LMK). Most modelers are familiar with Verlinden Productions, a company that made some of the best PE and resin add on detail sets for armor and aircraft. Unfortunately, the company closed in 2016 so these fine products are only available from ebay, as NOS or from in-store inventory. What most aren't aware of is that Verlinden released a line of waterline 1:200 civil war ironclads called "North and South". This is an unboxing and quick look at their kit of the Confederate ironclad CSS Nashville. I purchased the kit from Dragon-Hobby on eBay for about $100 shipped. Here's a quick history and description from Wikipedia: "The ship was 271 feet (82.6 m)long overall, had a beam of 62 feet 6 inches (19.1 m) and a draft of 10 feet 9 inches (3.3 m). The side wheels were powered by two steam engines with a 9-inch (229 mm) bore and a 36-inch (914 mm) stroke. She was armed with three 7-inch (178 mm) Brooke Rifles and a 24-pounder howitzer. Nashville was laid down at Montgomery, Alabama because of the availability of riverboat engines there. Launched in mid-1863, Nashville was taken to Mobile for completion in 1864. Part of her armor came from the CSS Baltic. Still fitting out, she took no part in the Battle of Mobile Bay on 5 August 1864. She helped fend off attacks on Spanish Fort Alabama on 27 March 1865, supporting Confederate forces until driven away by Federal batteries, and shelled Federal troops near Fort Blakely on 2 April 1865. The ships retreated up the Tombigbee River 10 days later when Mobile surrendered. She was one of the vessels formally surrendered on 10 May 1865. Although never quite finished, she had been heavily armored with triple 2-inch plating forward and around her pilot house, only a single thickness aft and there had been some doubts expressed that her builders might have overestimated her structural strength. After a survey by a Union engineer, he determined that she was hogged when surrendered and was not strong enough to bear the weight of her full armor, and that she could not live in a seaway. Following her surrender, Nashville was laid up until 22 November 1867, when she was sold for scrap, her armor having previously been stripped for reuse in other vessels. Here's an artist's rendition from Google images: On to the kit... Packaged in a sturdy plain white box with a color label, the hull and parts bag were safely bubble wrapped and surrounded by foam peanuts. Here's the instructions: Here's some shots of the one piece resin waterline hull. No flash, bubbles or distortion. This is one of the nicest resin castings I've ever run across. The cast detail is crisp and the finish is smooth. The hull measures about 16" long, 4" wide (with paddles) and 4" tall (with smokestack). Here's the rest of the parts: Lots of sprues to saw off, but the overall detail is quite good. My kit was missing one cannon port cover, but there are extras included so no problem. One bottom edge of the paddle wheel cover is broken off, but the piece was in the parts bag and should re-attach with no problem. After a good cleaning, assembly should be pretty simple. A coat of proper primer and then she'll be ready for weathering. Ugly as she is, she should build up into an obscure but interesting model. Since these kits are out of production, they're getting harder to find but the good thing is that they can be found for a fraction of their original list price. In conclusion, this is a fine kit. Well cast, nice detail and relatively simple construction. This kit is in my build queue, and I'll start a build log when I begin construction.


-
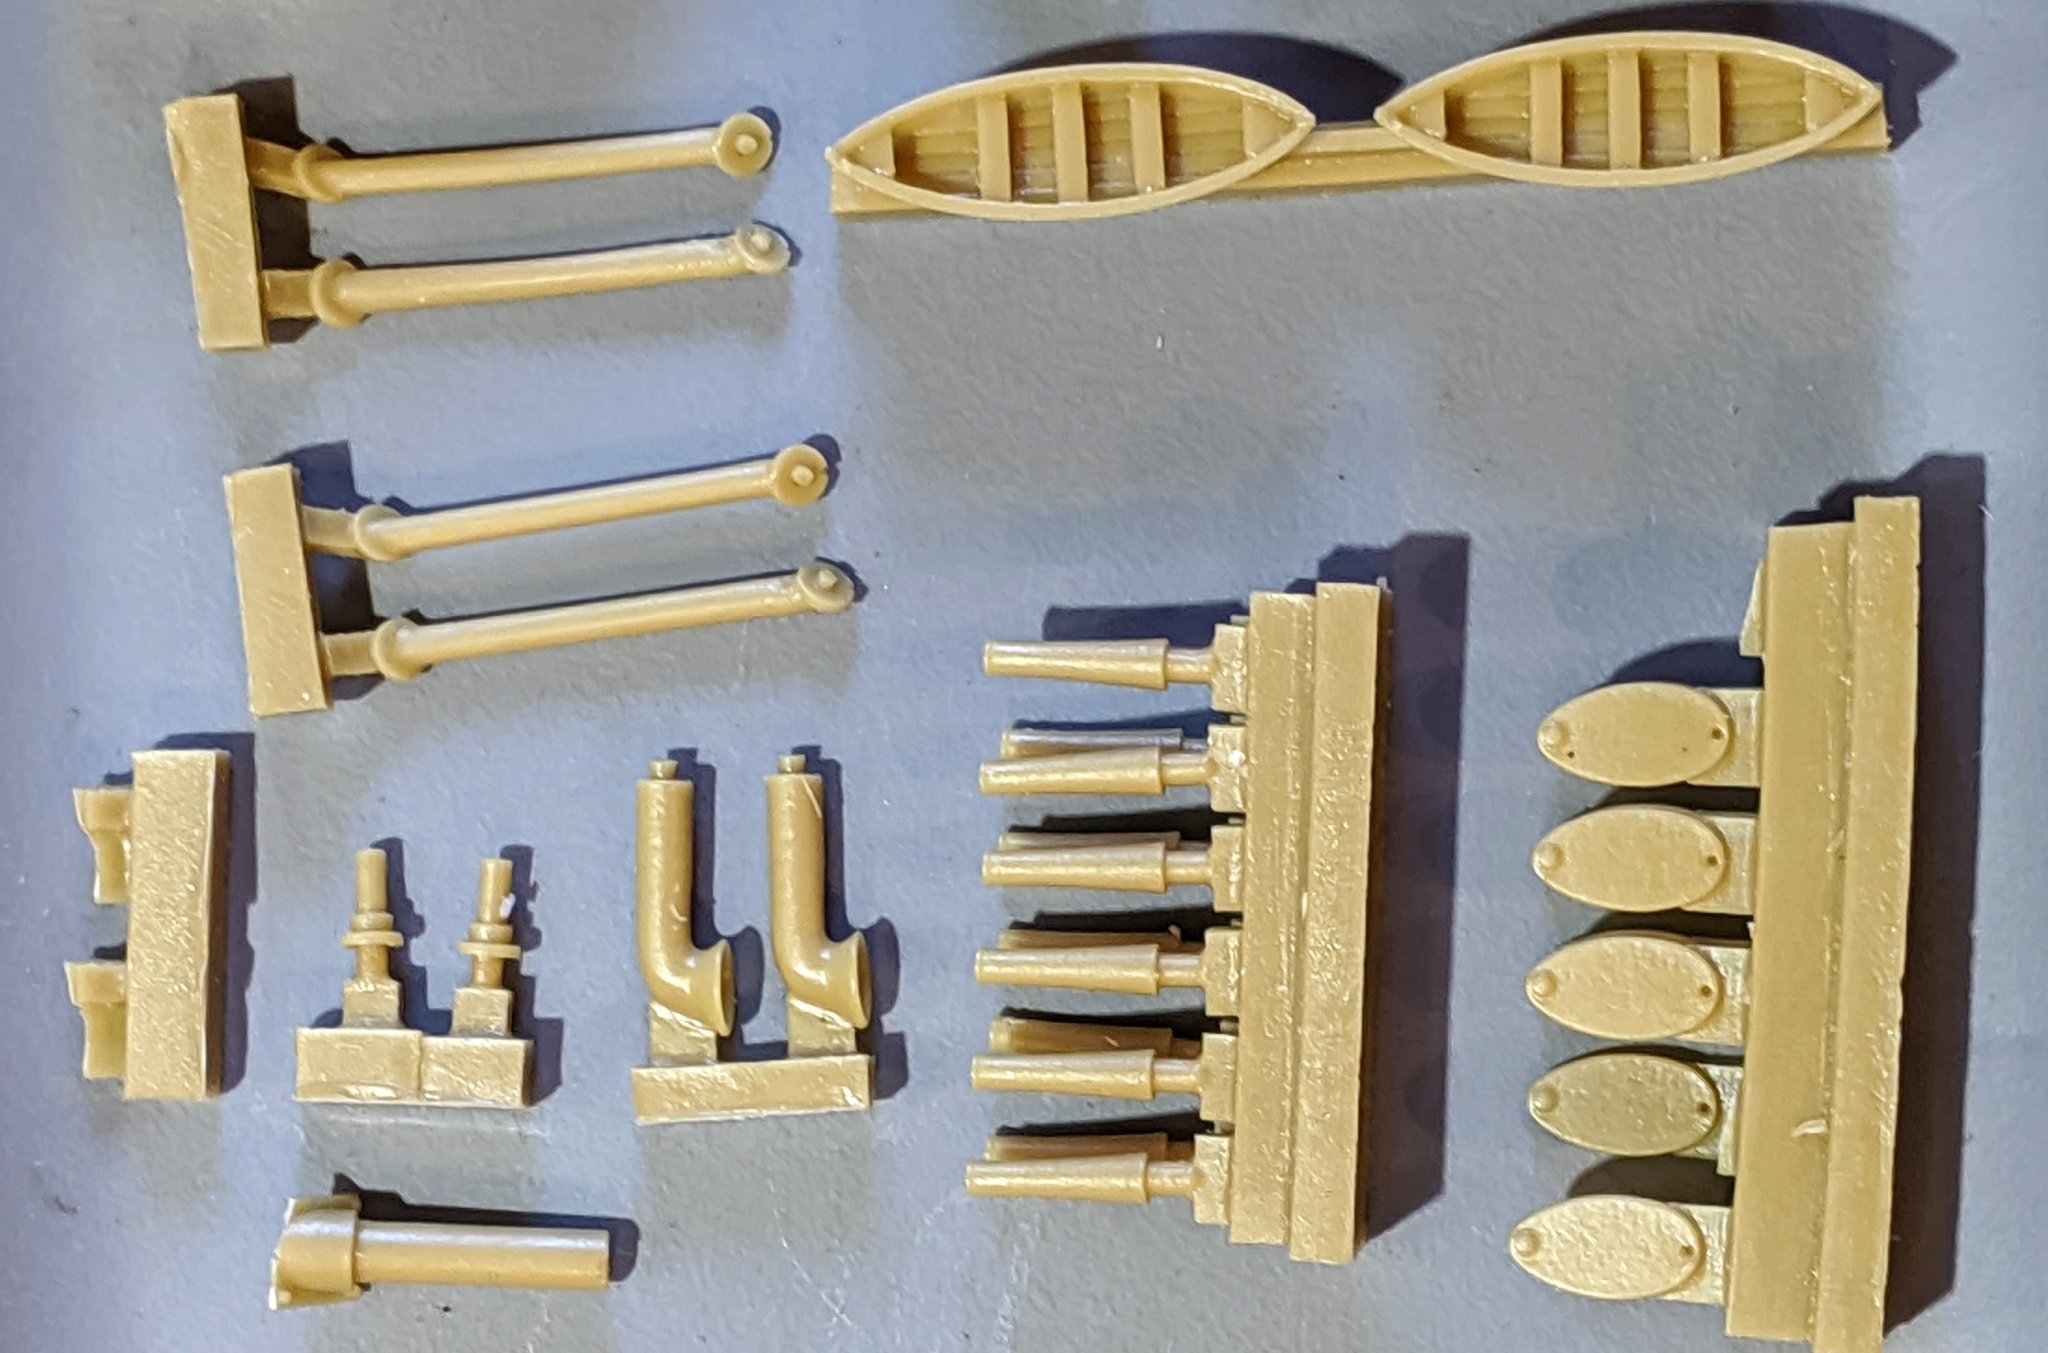
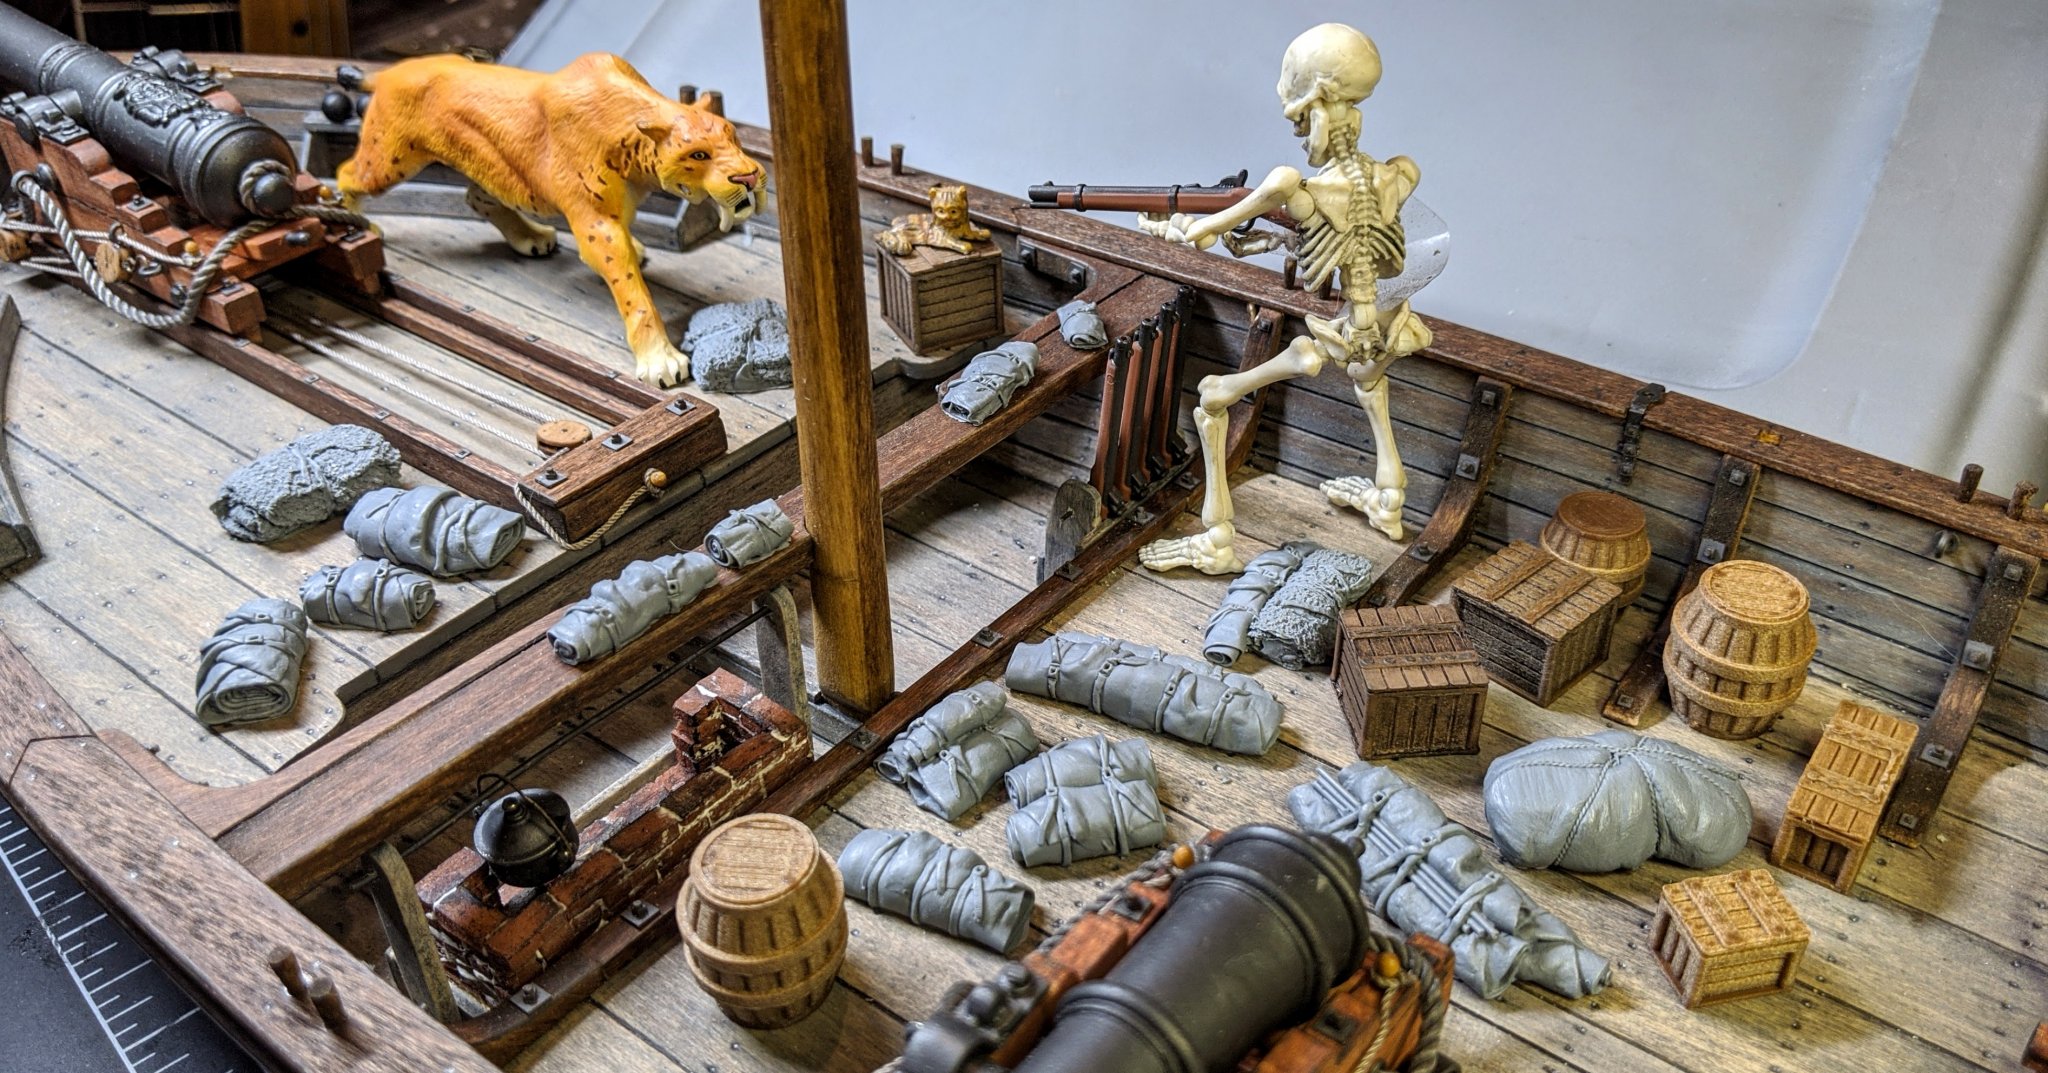
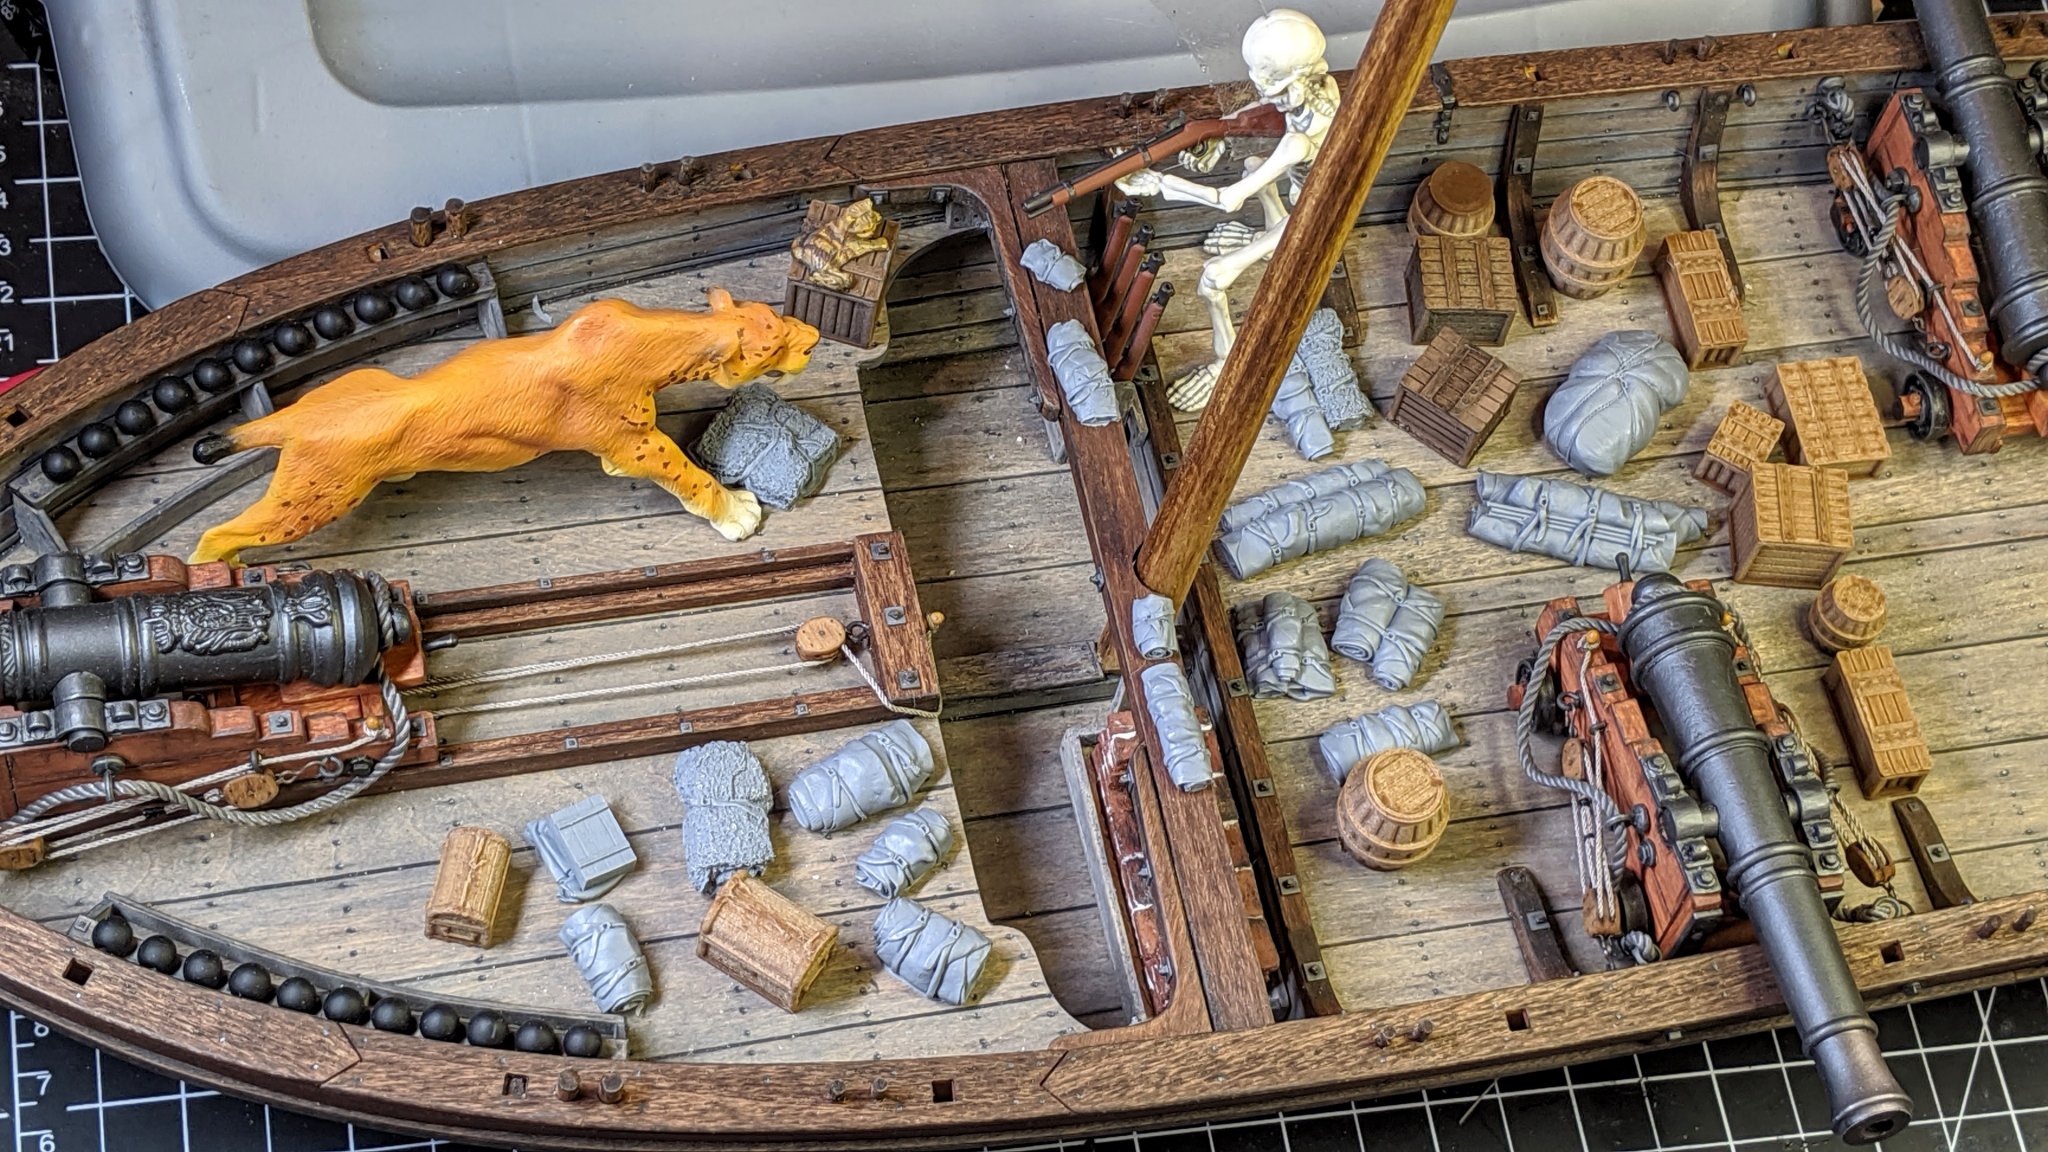
Thanks! Outdoors is always better. You can't beat that really bright thing in the sky for proper color correctness...😎 Unfortunately, most of the pics I take have to be bench shots with artificial light...😖 I received some more 3D printed cases and barrels to substitute for the ones I screwed the paint up on. I'll use the proper primer this time and hopefully they'll come out better than the last ones. I also got some very nicely detailed resin castings of bedrolls, packs, tents, nets and other assorted stuff. The company I got them from ( Value Gear Details ) has about 20 or so packs of assorted accessories, most meant for 1:35 military armor. The one I ordered (universal storage set #16) is pretty generic, and will be appropriate in the Philly timeframe. All I have to do is NOT botch up this batch when painting and weathering. Here's a shot of the unpainted 3D and resin pieces. Slim's got another "visitor", but at least he found the musket rack...


-
Truer words have never been spoken... Fantastic work on a real interesting vessel. Beautiful fit and finish. What's your plan for a stand or display?
- 77 replies
-
- 4
-
-
- morel
- master korabel
- (and 1 more)
-
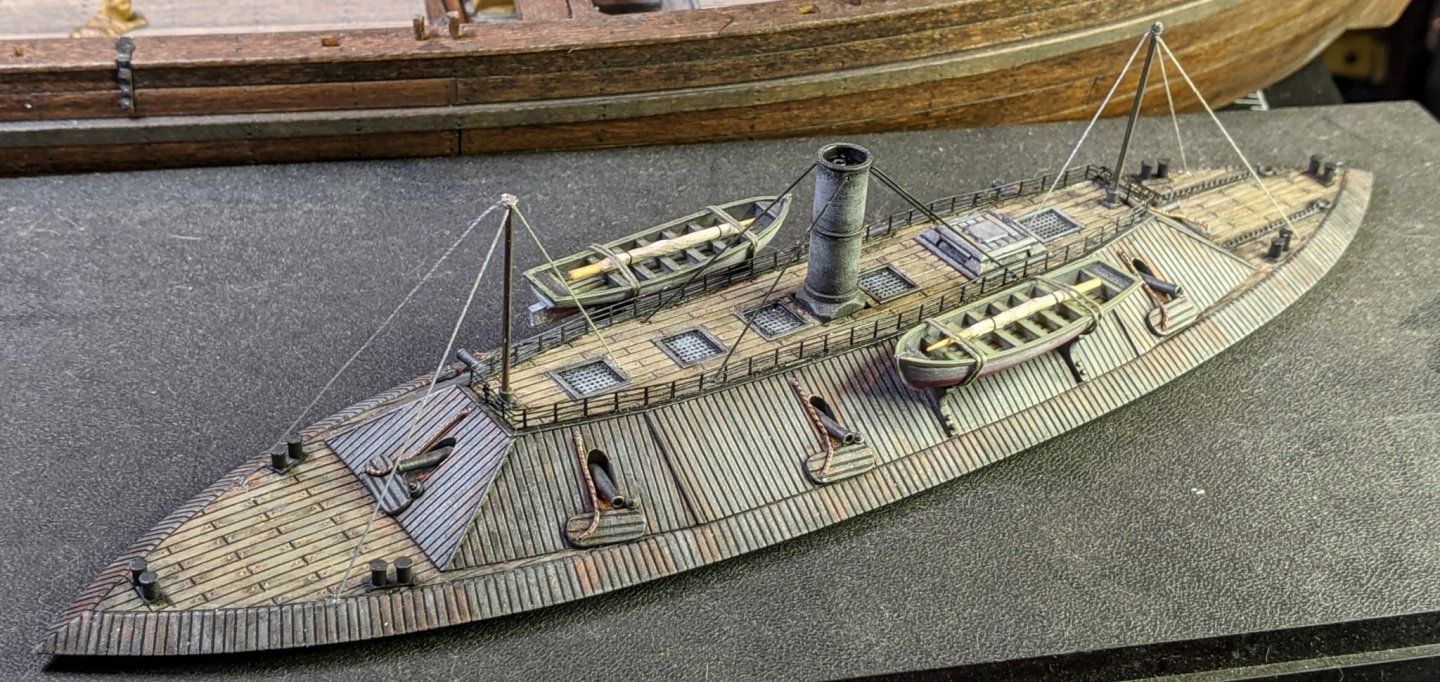
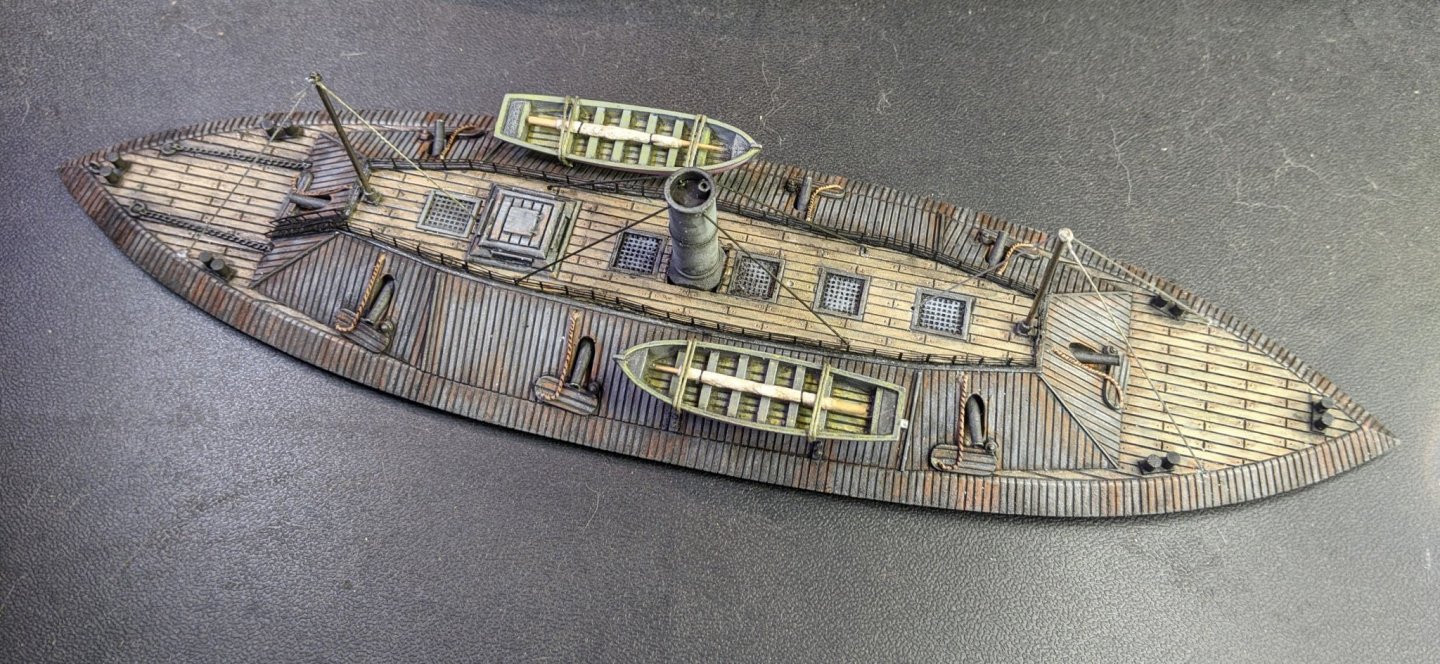
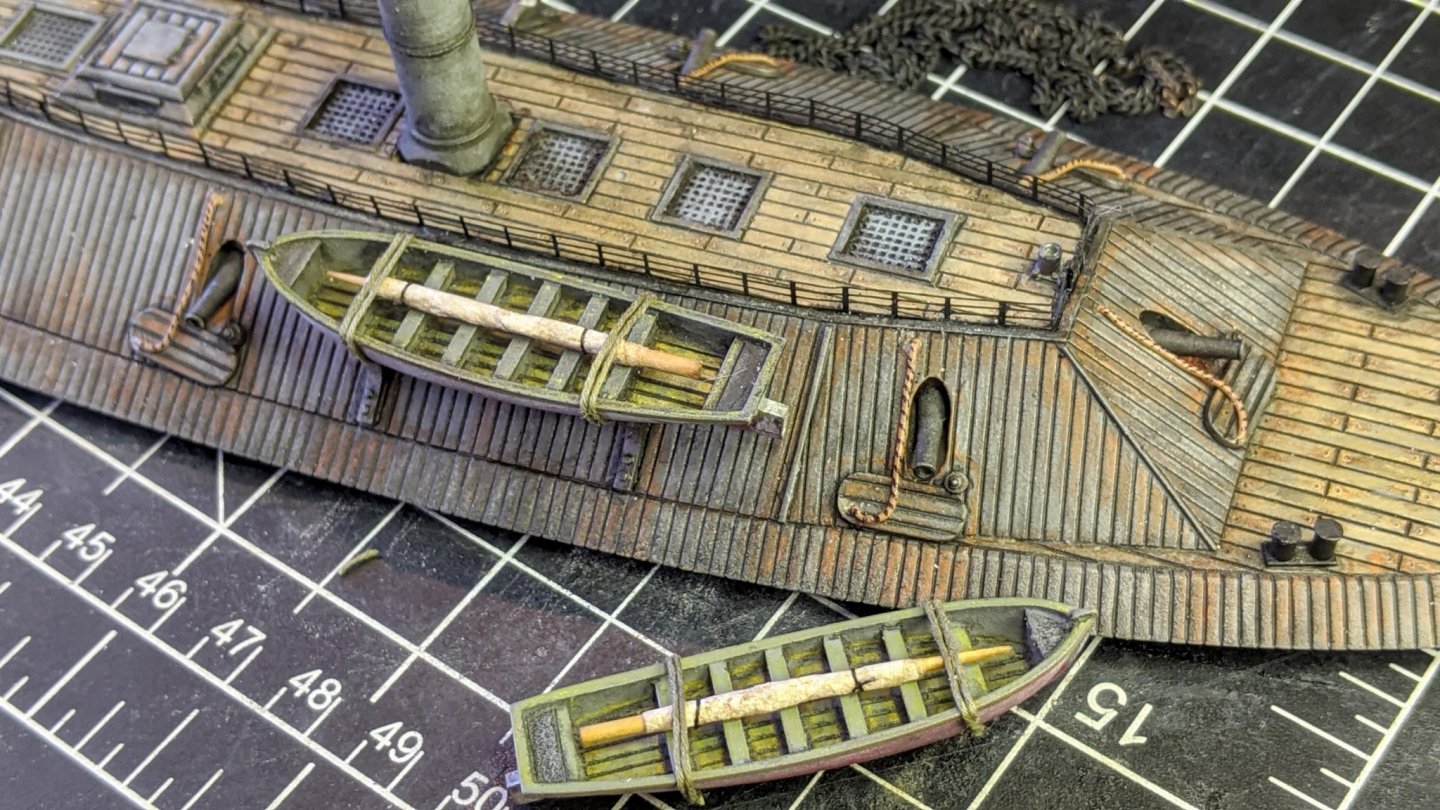
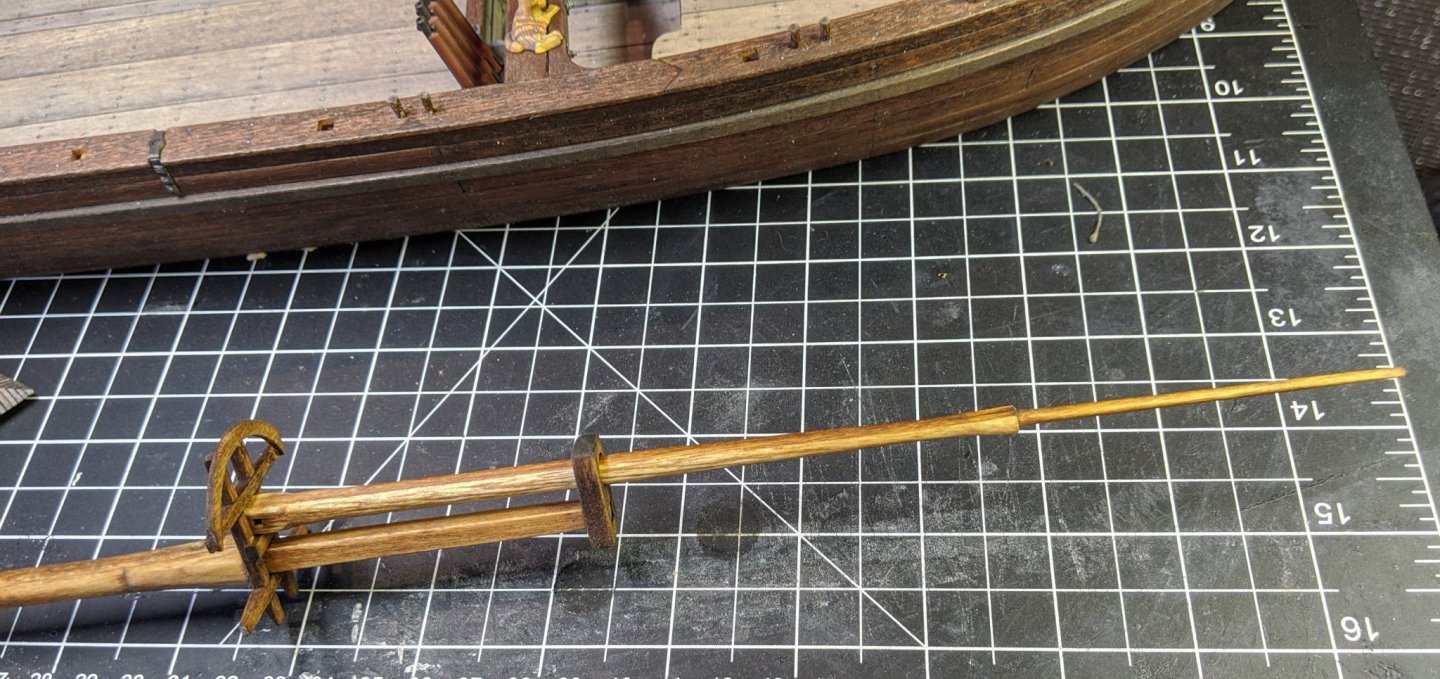
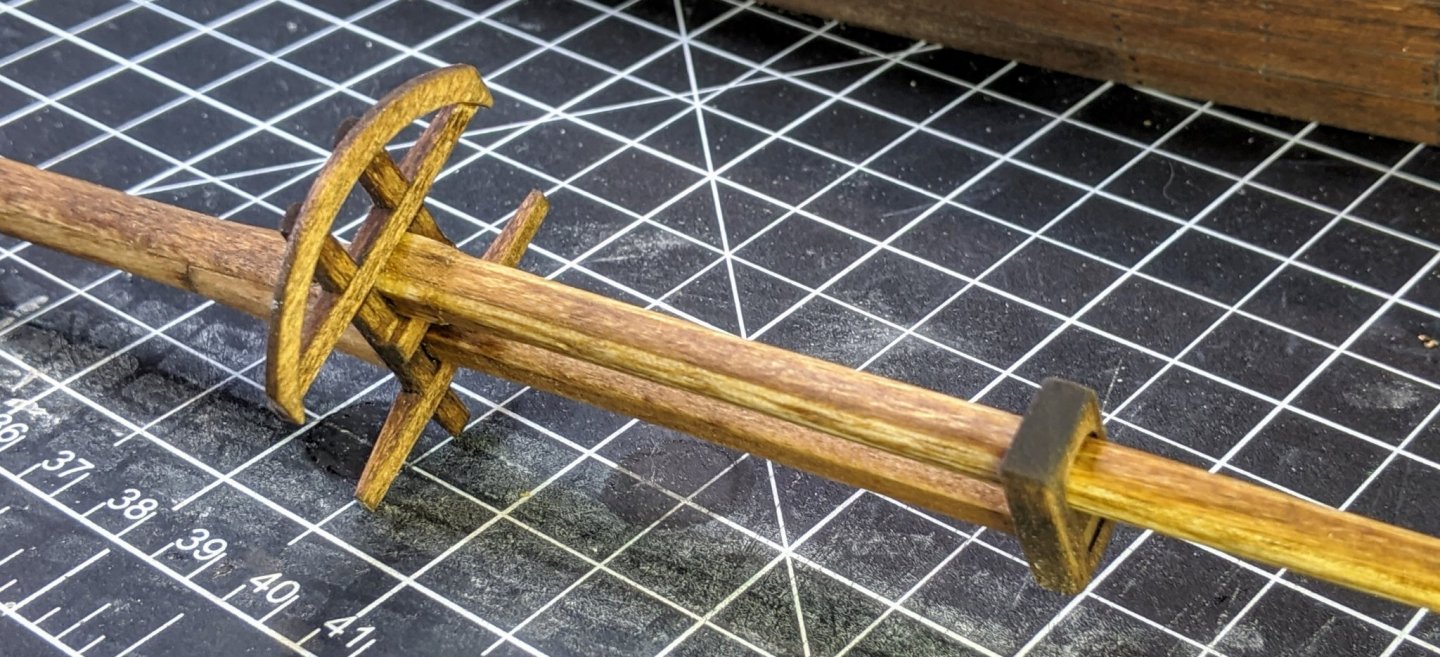
Close to finishing this up while I await parts for continuing the Philly build. Completed the funnel stays, fore and aft masts and mounted the lifeboats. All that's left are the anchors, davits, ventilator (on order- should be here this week) and the spar torpedo (under construction). The display case will be here this week, then I'll attempt the water base. Big change from working on the Philly...

- 3 replies
-
- 9
-
-
- verlinden
- Palmetto State
- (and 1 more)
-
Great work! I'll definitely be following this build... I have the same kit arriving in the mail tomorrow. Thanks for the link to Jim Roger's build and your kit review. This will be my first MK kit, and from what I've gathered they are real gems...
-
Nice work with an excellent descriptive build log. I admire your dedication, and how you hung the plans up for reference... I wish I had the room to do the same. The cannons came out really good looking! Stay safe, keep healthy and keep up the good work.
-
Thanks, Keith! The railway stuff and techniques translate well to this scale. She's an example of the minimum boat required to carry the maximum firepower. "Guns and Tons" without the tons... Rude and crude with a 'tude! Another note on blackening... As others have said, prep is the key for a good finish. This applies to anything- brass, PE, cast metal, plastic etc. CLEAN IT WELL. After you think it's clean enough, do it again. Cool idea! I'll have to try it when eggs aren't so scarce (at least in Florida).
-
Really fine craftsmanship on the woodwork, and your rigging is looking great! You have an excellent eye for detail and She's going to be a real stunner when completed! BTW, you have a nice view of a beautiful yard outside the window over your build bench... Very calming and serene...
- 170 replies
-
- 3
-
-
- medway longboat
- Syren Ship Model Company
- (and 1 more)
-
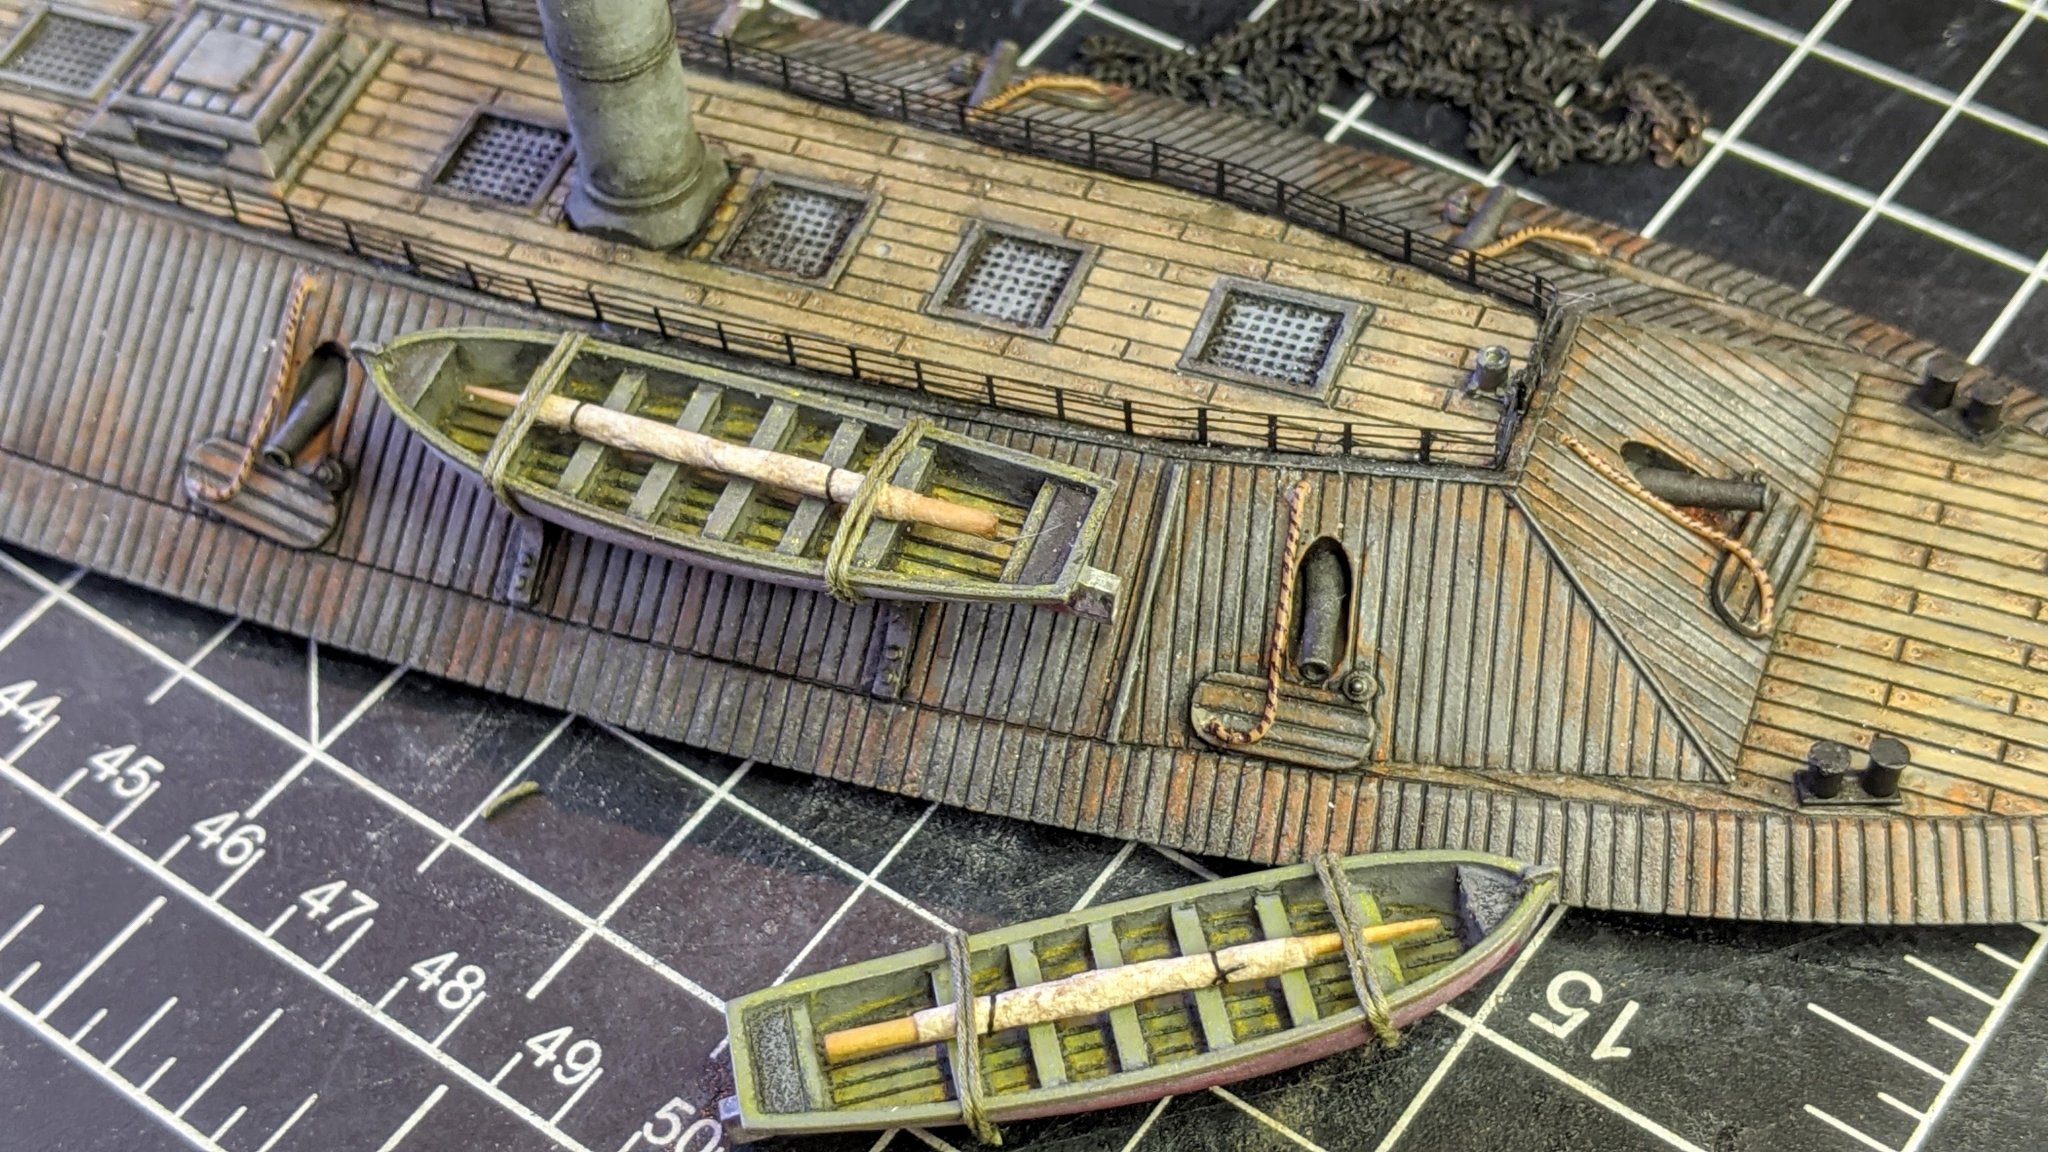
Straightened and touched up the PE rails, next build they will be installed last. I keep disturbing them while working on the rest of the ship. Made the masts and furled sails for the cutters and rigged the gun port cover lines. I used thinned down toothpicks for the masts and a piece of brown napkin soaked in Mod Podge for the sails wrapped around the mast then tied off. Added tiedowns and set the cutters aside to avoud breakage and give me more room to work on the hull. I couldn't figure any good way to simulate the gun hatch cover ropes, so I used solder painted brown then detailed with a fine sharpie. Next are the funnel stays.
- 3 replies
-
- 8
-
-
- verlinden
- Palmetto State
- (and 1 more)
-
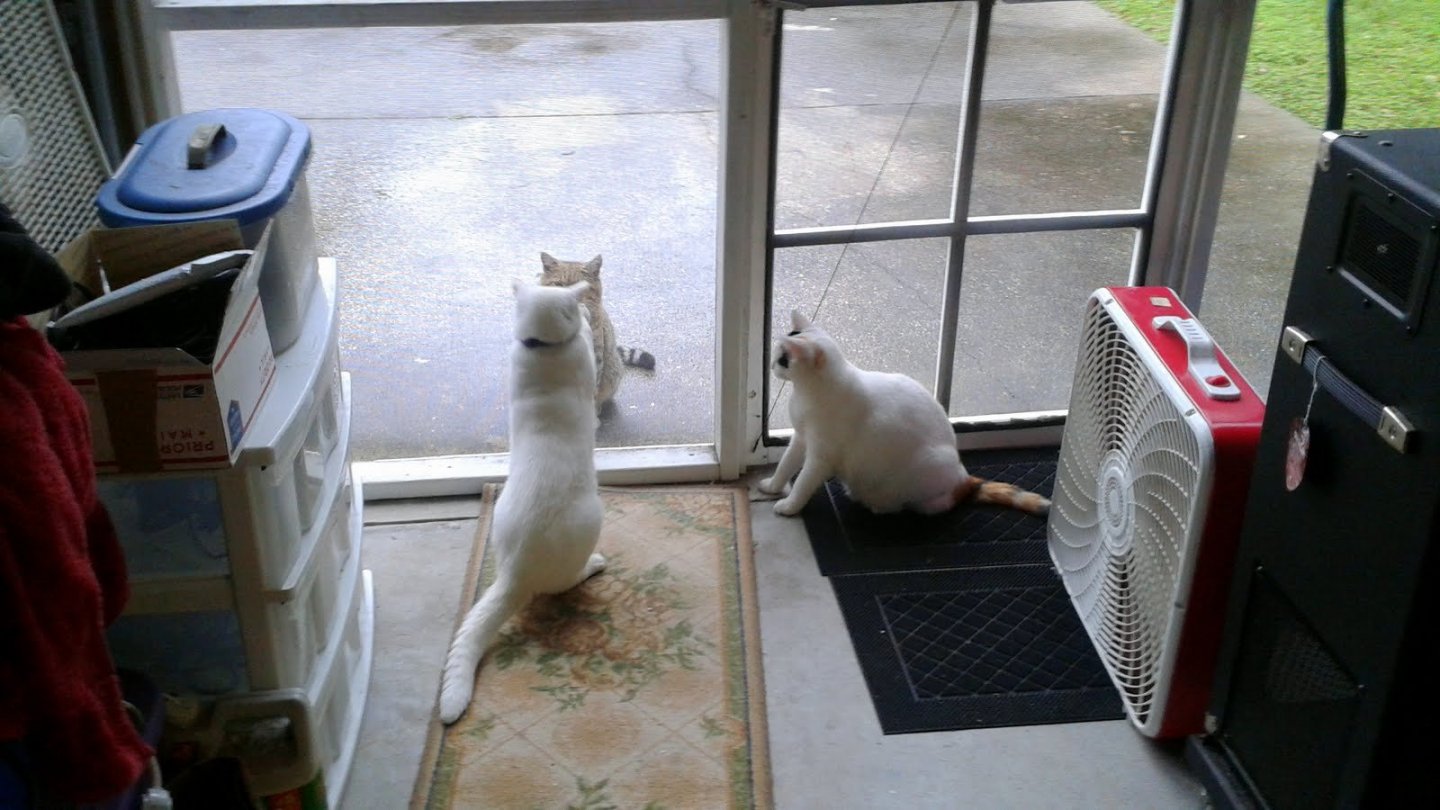
Hmm... A few suspects. My garagecam caught the indoor crew plotting with a local OG to bring in some "outside talent " to persuade Slim to quit swiping their cat food...
-
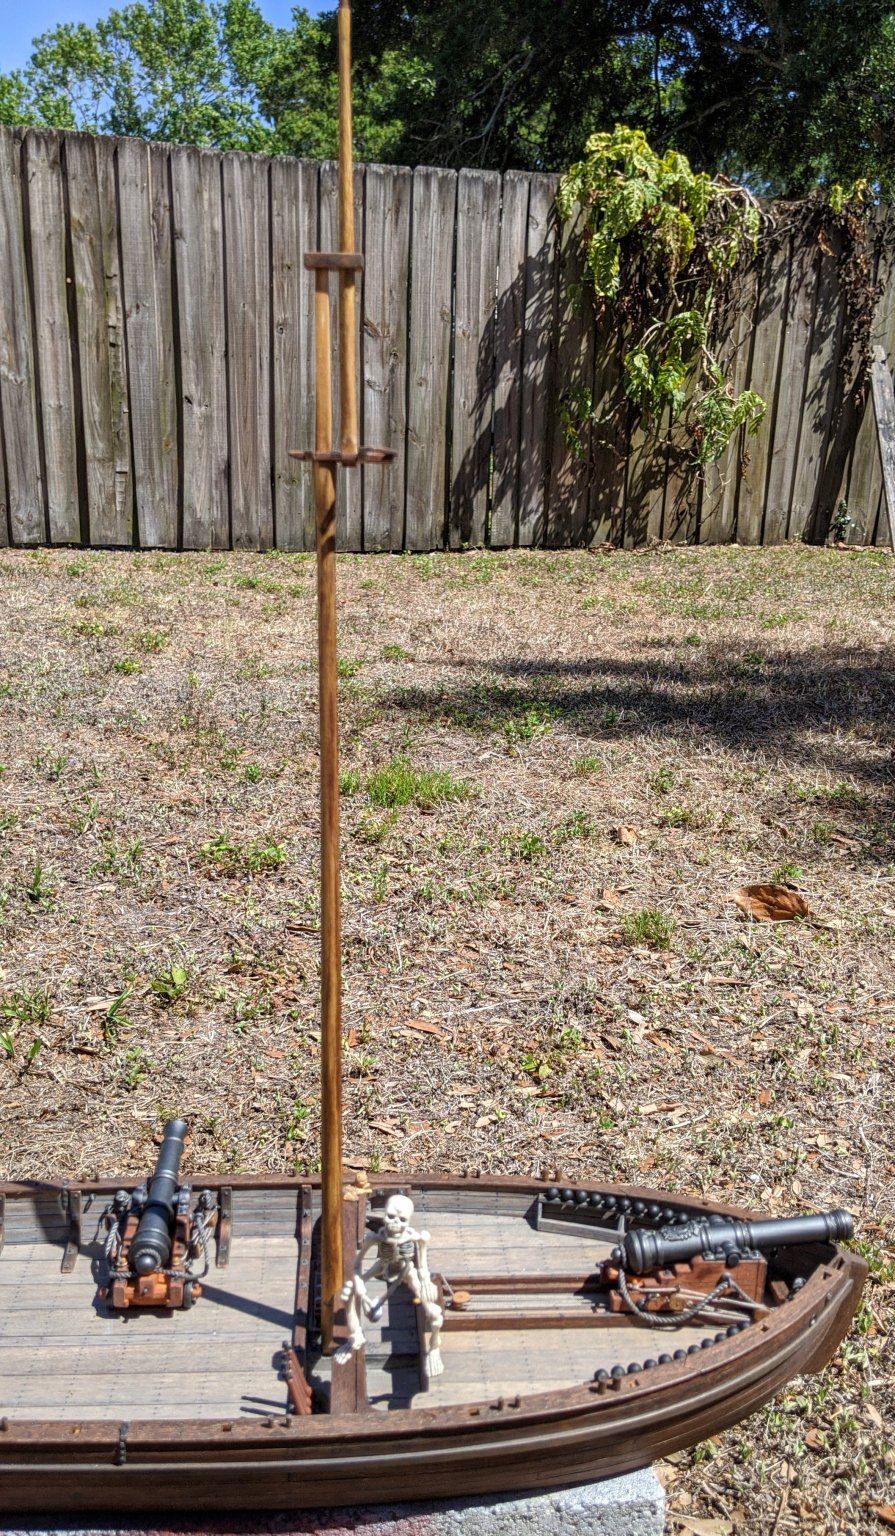
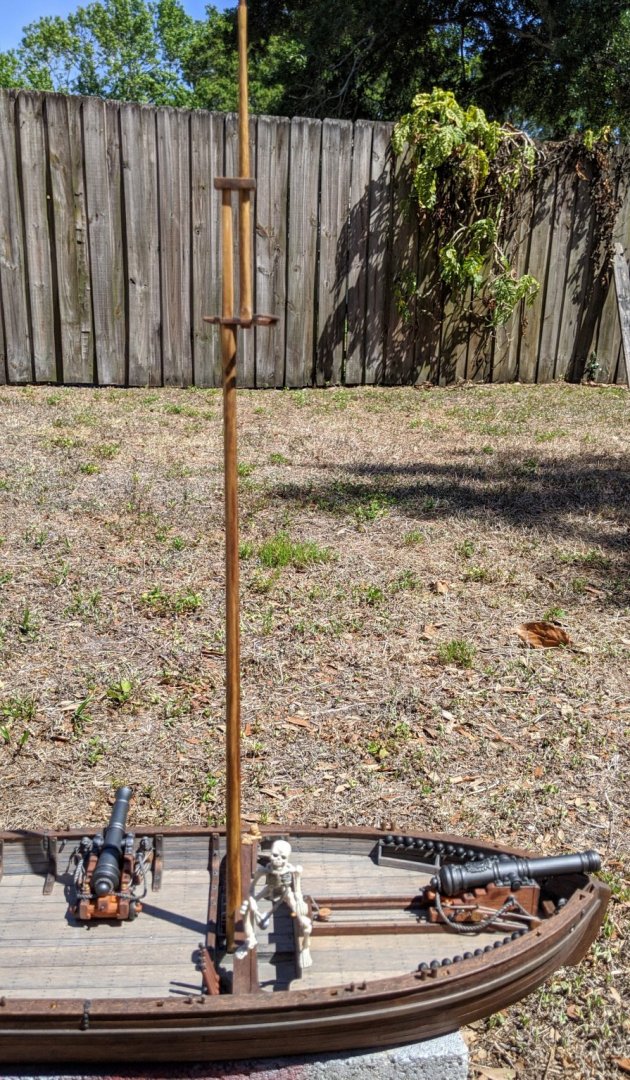
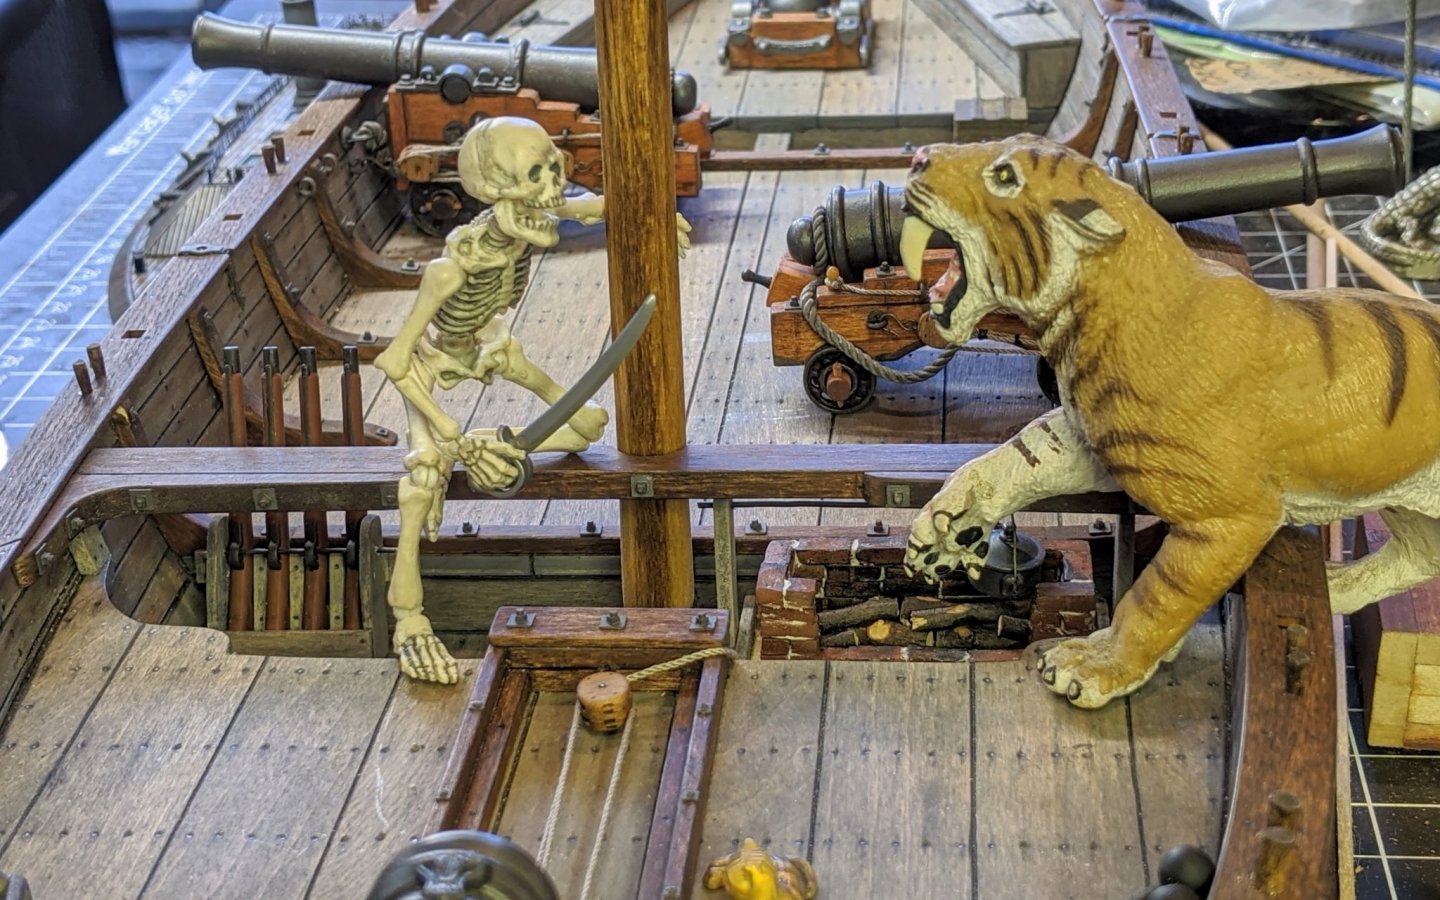
I decided on Minwax Puritan Pine stain for the masts and yards, Minwax honey on the main top and mast cap. Test fitted all the parts of the mast and everything lines up nicely. I've got a lot of deck work and other stuff to do before starting the rigging, but I'm getting closer... I also never comprehended how tall the mast really is... Oh oh... Slim's got a REAL problem now! Should've never left the door open, who knows WHAT could get in...

-
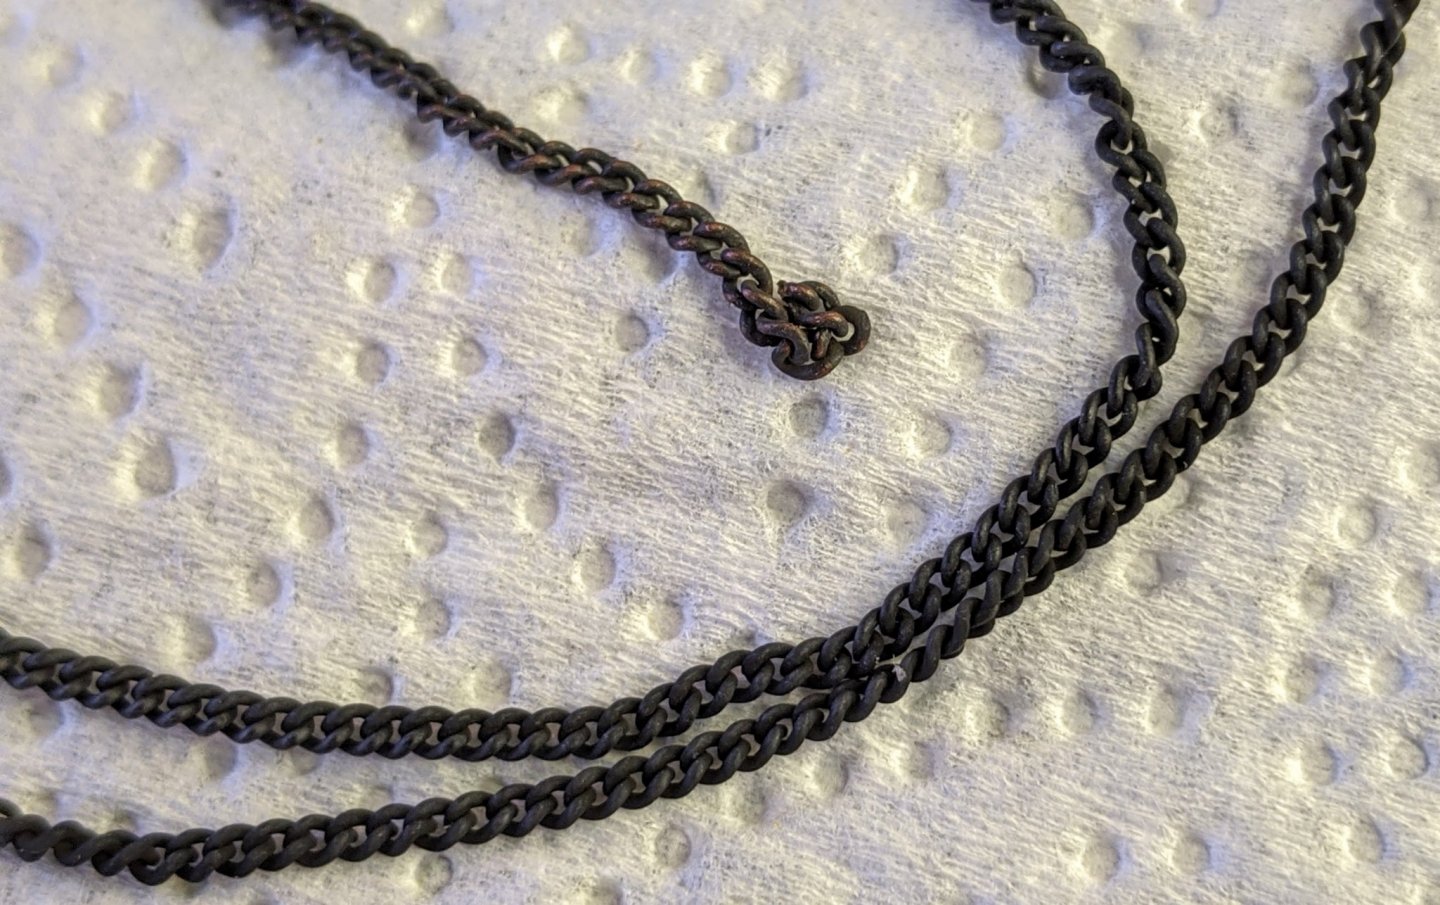
I use Birchwood Casey Brass Black, available online and at sporting goods and gun shops. It blackens brass, copper and bronze, and may even work for some other metals and alloys. It's main chemicals are selenius acid and fluoboric acid, so be careful, it's kinda nasty stuff (if you use it, read the safety notes). It's used for gunsmithing, nameplates, plaques, castings, sculptures and other hobby uses. This is how I apply it, there are better ways but this works for me. First CLEAN IT. Use a good cleaner/degreaser ( I use a small brush to scrub the PE sprue with the parts still attached) then rinse with cold water (I use distilled, no minerals). Next, I abrade the PE sprue with either a fine Scotchbrite pad or ink eraser, depending on the size of the piece. Wash it again and don't touch it until you're ready to apply the black. I use either a cotton swab or small brush to apply the black, leaving it on for about a minute then rinsing with cold water. Keep re-blackening and rinsing it until you get the look you want. Try to keep an even coat with no pooling, a paper towel helps. It dries fully in 24 hours, and leaves a dead flat finish. I've found it's pretty durable, but you can usually touch up any trouble spots with paint. Here's a brass chain I just finished. The sloppy end will be cut off where it was held while dipping.