DONATION DRIVE - SUPPORT MSW - DO YOUR PART TO KEEP THIS GREAT FORUM GOING!
×

.jpg.bc46b7394042cb22c3a08e1cfbd9877b.jpg)
BobCardone
-
Posts
142 -
Joined
-
Last visited
Content Type
Profiles
Forums
Gallery
Events
Everything posted by BobCardone
-
.thumb.jpg.2abae9c0194e4e915bb097b8a6d5c174.jpg) Thanks! The deck was not sealed, but the hull was sealed with Minwax pre-stain sealer. The deck and ceiling finishes are Minwax classic gray penetrating stain (one pass), and the hull and deck fixtures are Minwax honey penetrating stain (two passes). Weathering and blending were done with oil pastels and different hardnesses of graphite pencils. The final finish is about 4-5 coats of Krylon matte clear, both deck and hull. The deck was left matte, and the hull was polished out with a fine Scotchbrite pad to achieve a "satin" look.
Thanks! The deck was not sealed, but the hull was sealed with Minwax pre-stain sealer. The deck and ceiling finishes are Minwax classic gray penetrating stain (one pass), and the hull and deck fixtures are Minwax honey penetrating stain (two passes). Weathering and blending were done with oil pastels and different hardnesses of graphite pencils. The final finish is about 4-5 coats of Krylon matte clear, both deck and hull. The deck was left matte, and the hull was polished out with a fine Scotchbrite pad to achieve a "satin" look. -
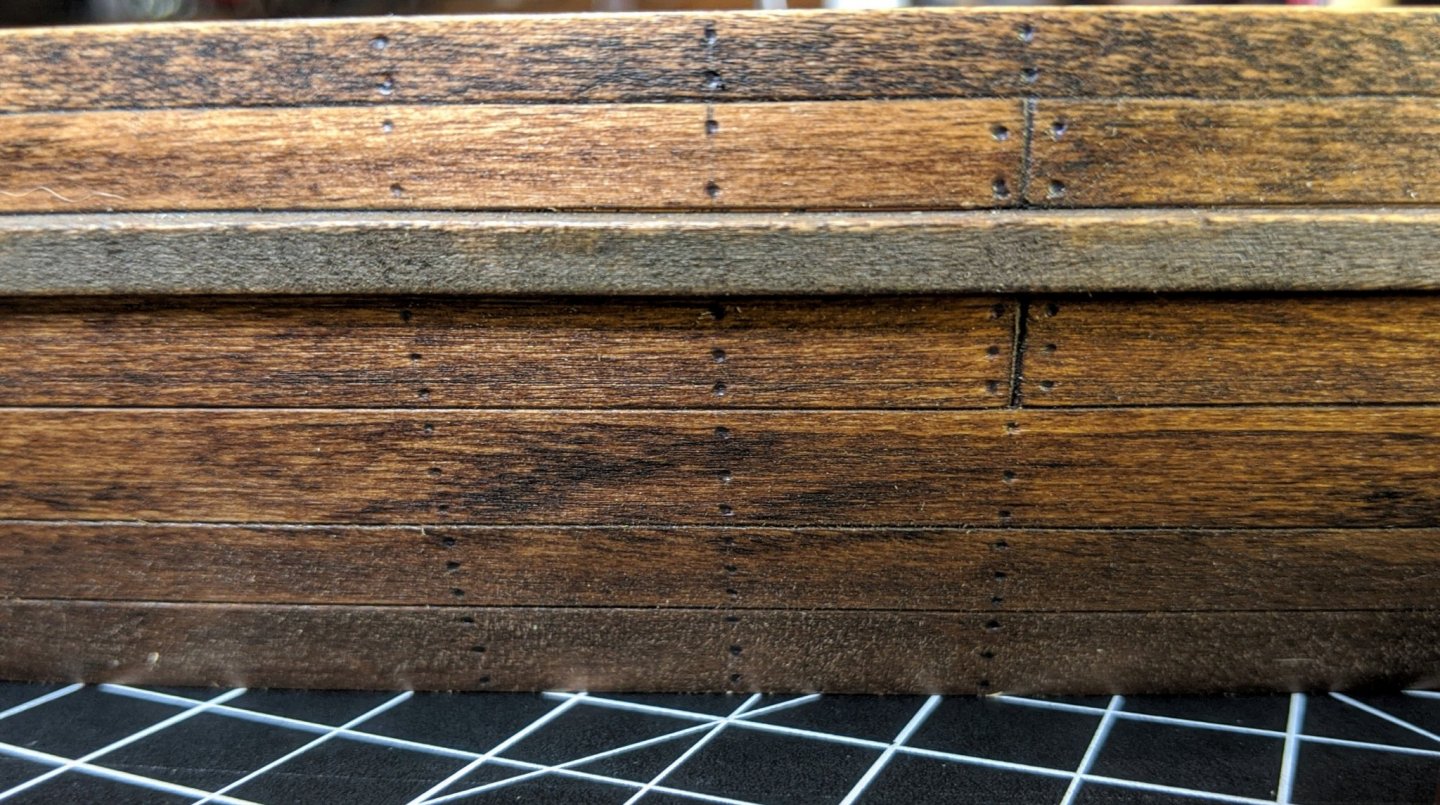
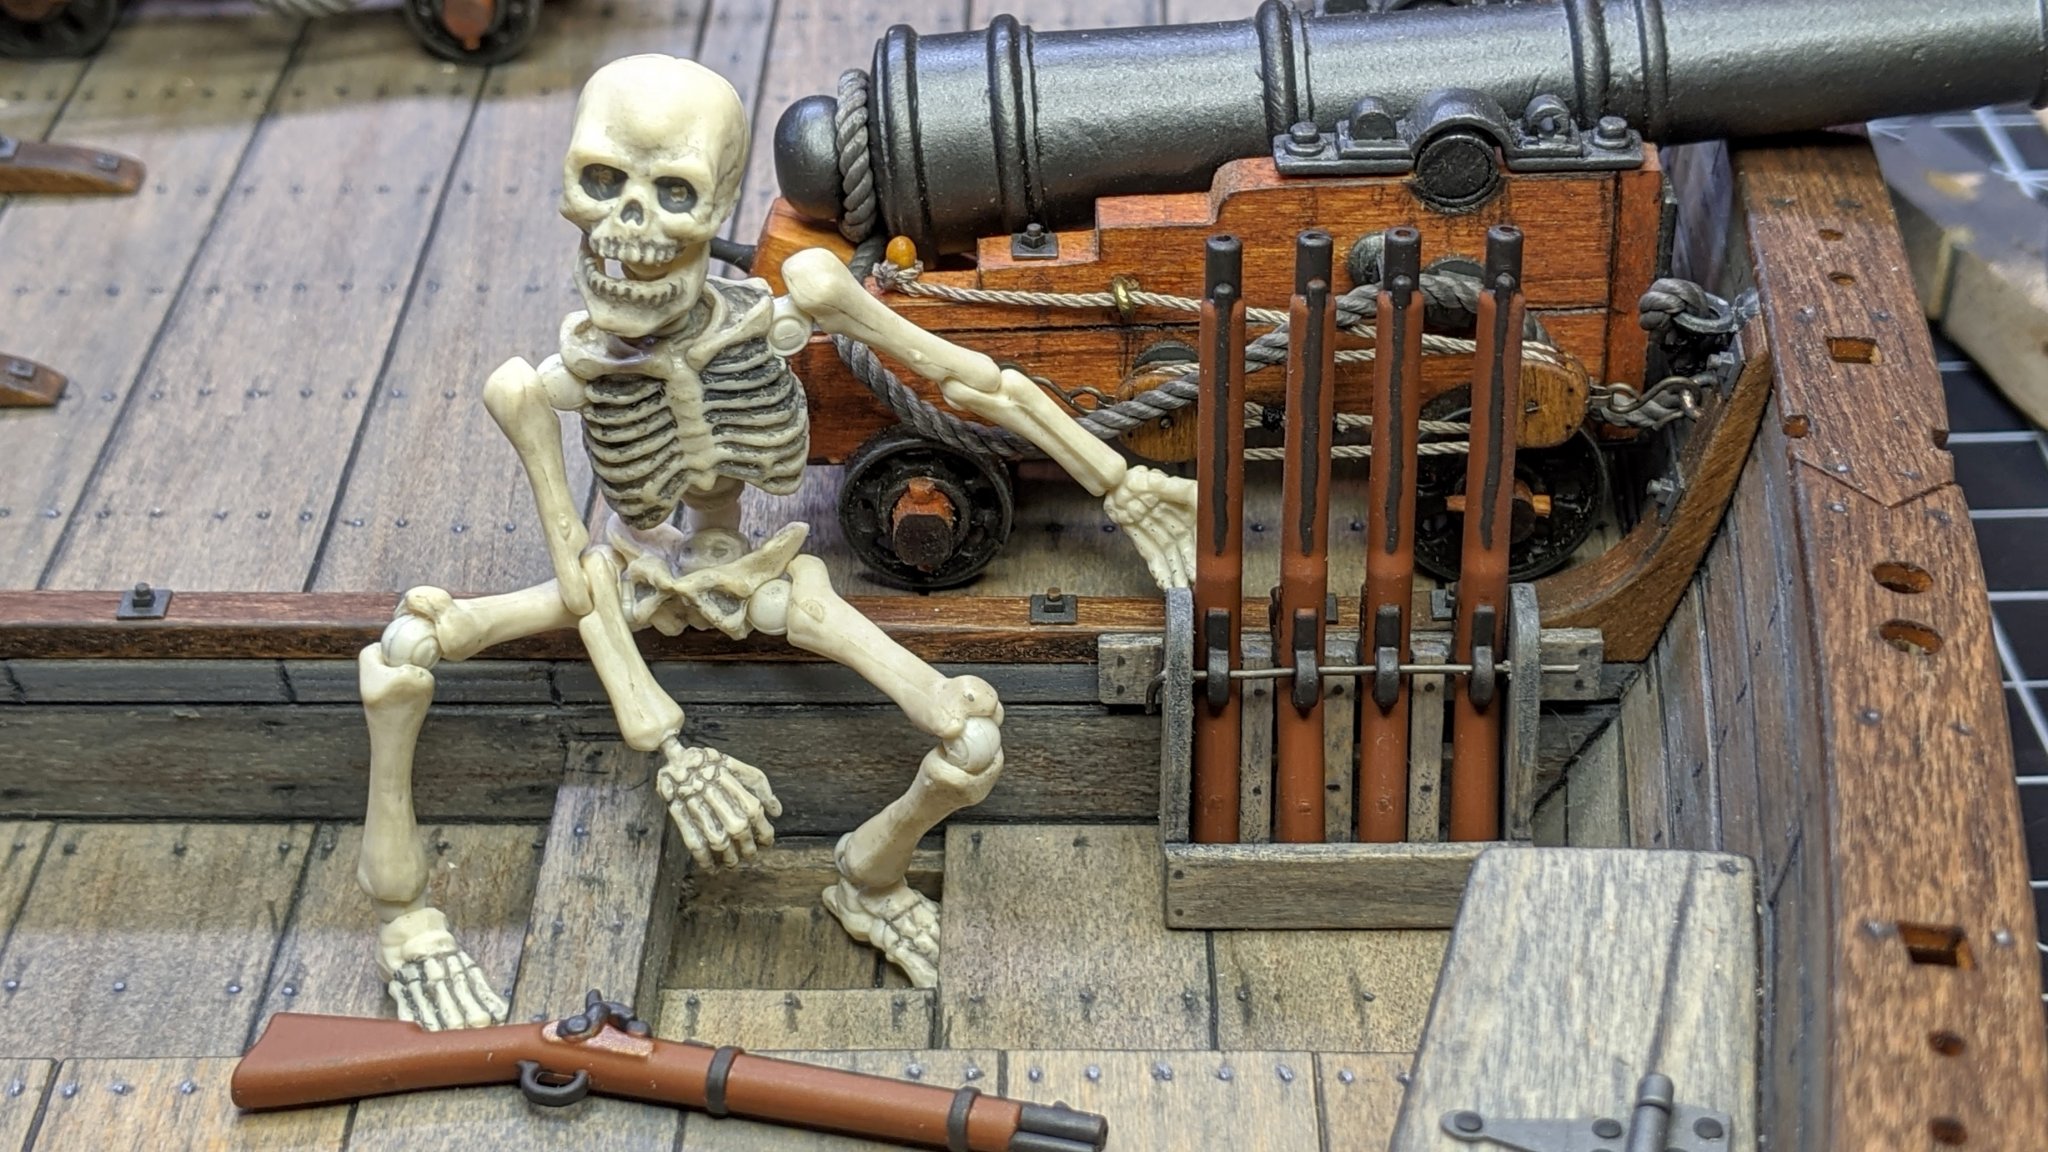
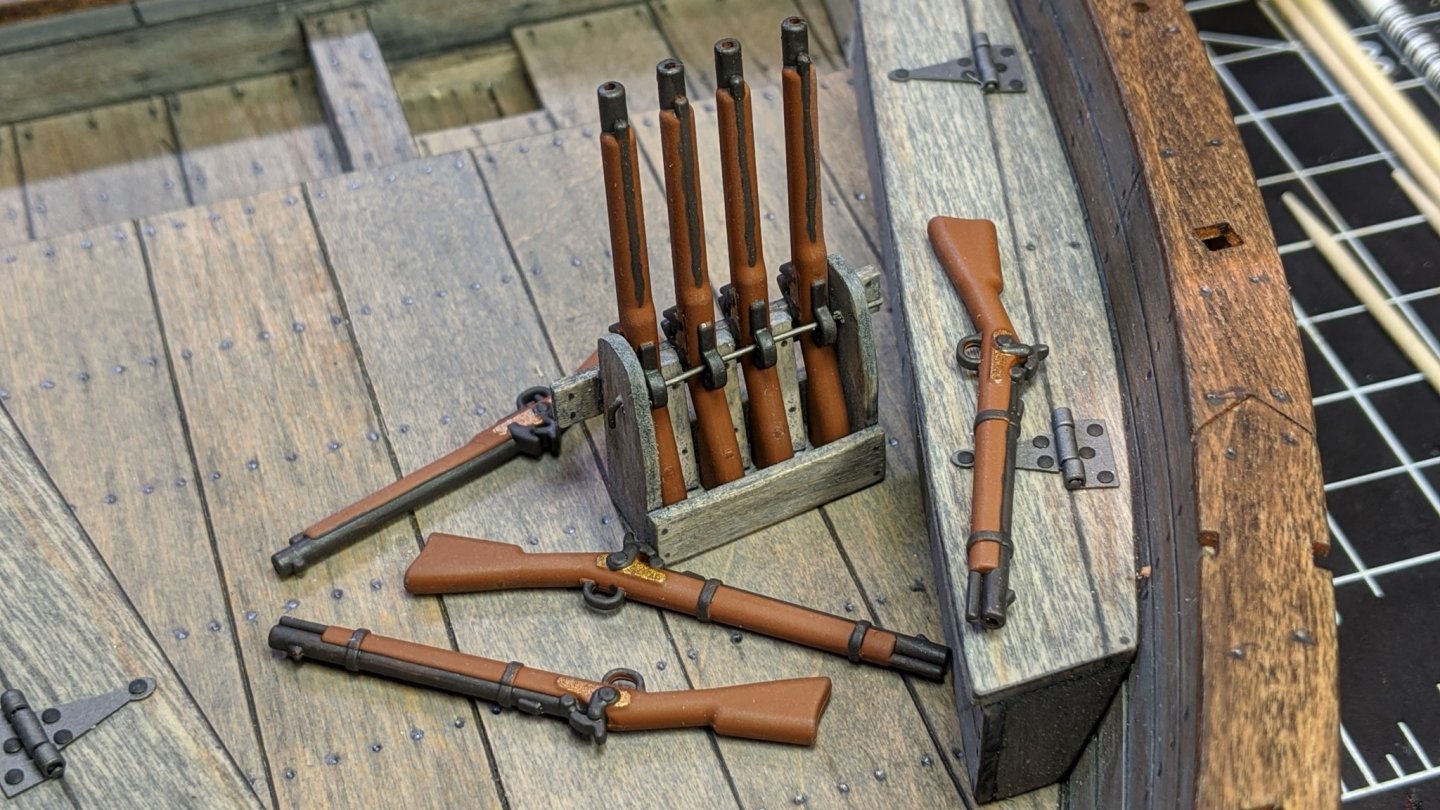
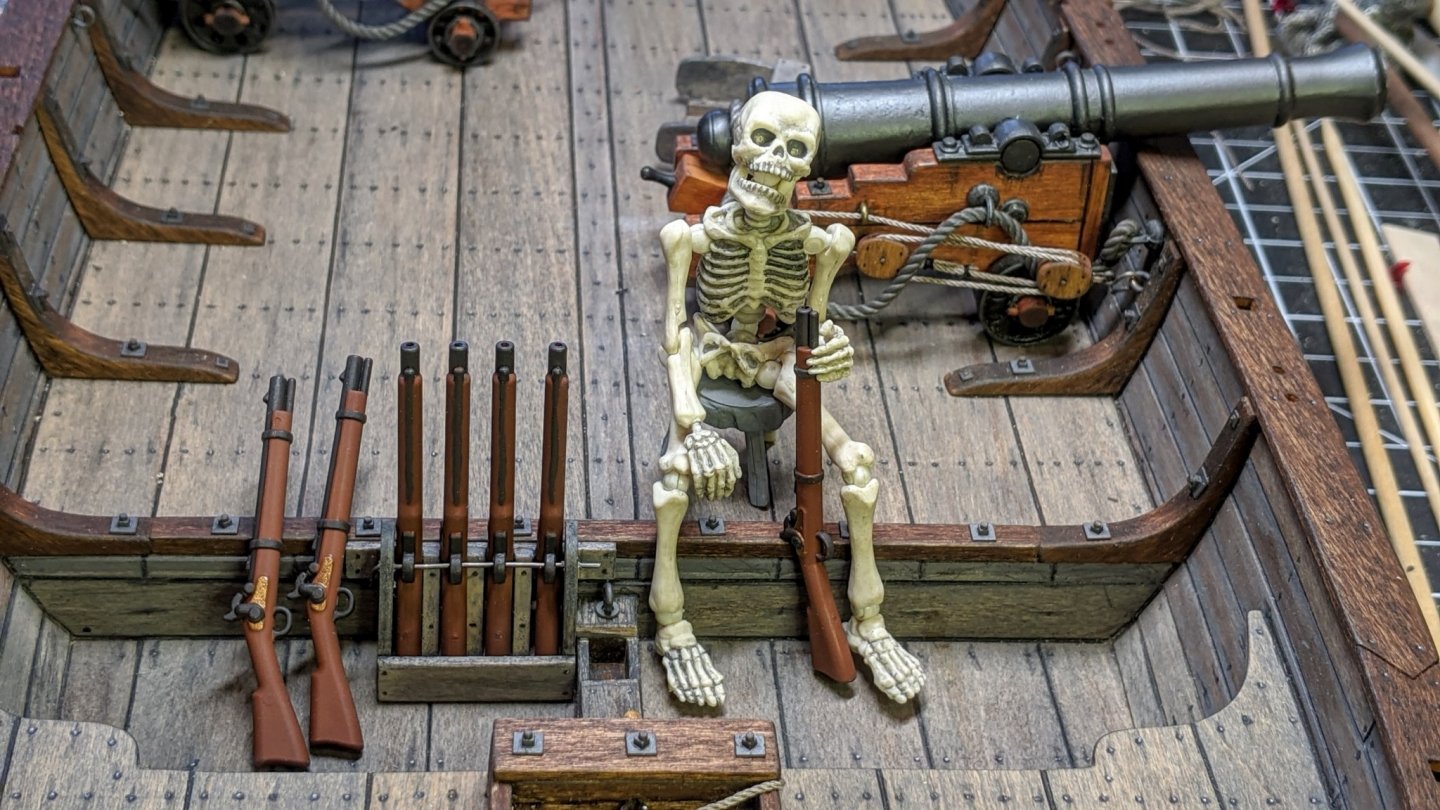
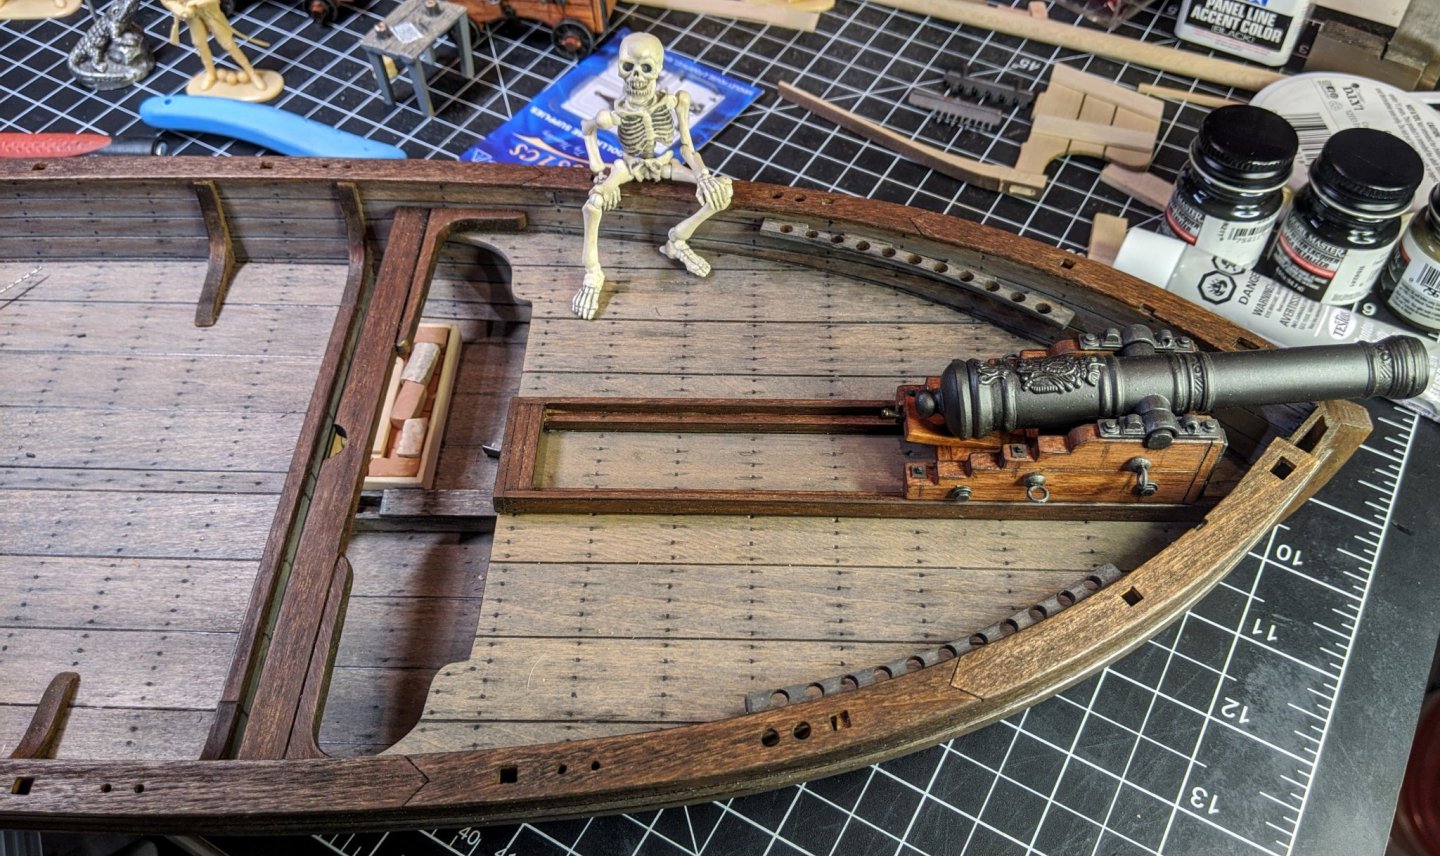
Thanks Bob, as I continue the build I'll try and detail the procedures as I figure them out... I forgot to describe in the previous post how and when I did the nailing. I first did the whole hull with pencil and an ink pen to make depressions before I stained everything. BAD MOVE! The stain swelled the nail depressions back out and blurred the pencil marks... Egad! So I had to go over the whole boat again. Next time I'll do the nailing after using any finish that would swell the depressions for the nails. Lesson learned... I finished this addition today... muskets! BrickArms Brown Caplock Muskets meant for Brick Minifigures from ebay. They measure 2" long, which would make them 4' long in real life. They are molded in brown plastic with some pretty good detail. The line also includes swords, axes, knives and other cool stuff that are about 1:24 scale. Reading about how the British hired local Indians to snipe at the Americans, I figured they would like to return the favor. I've got 8 muskets, so I decided to make a rack that holds four and distribute the rest around the boat. I washed the muskets with soap and water (they were pretty oily) cleaned up the mold lines and then shot them with matte clear. Drilled out the barrels and added brass and gunmetal detail paint. Still have some touch-up on sloppy paint and more detailing, but I think they'll make a nice addition. I still need to figure out where they will go... with all the stuff I plan to scatter around the deck space is rapidly becoming a premium. By the time I'm done, the boat is going to be SERIOUSLY over-gunned. All three carriage guns are about 15% larger than the kit ones, and I'm adding the mortar as well as two more swivel guns (total of four) and eight muskets. Only thing missing is the kitchen sink! I know that in the real world all this ordinance probably would have pounded poor Philly into splinters when fired. As I mentioned in the beginning of this build, this is not a faithful reproduction of the actual boat but an imagining of what could have been possible. I know lots of things I'm doing go against common nautical sense, but most of the models I've built have been slightly exaggerated... I find the look more "real". Slim's got him some shootin' irons now...

-
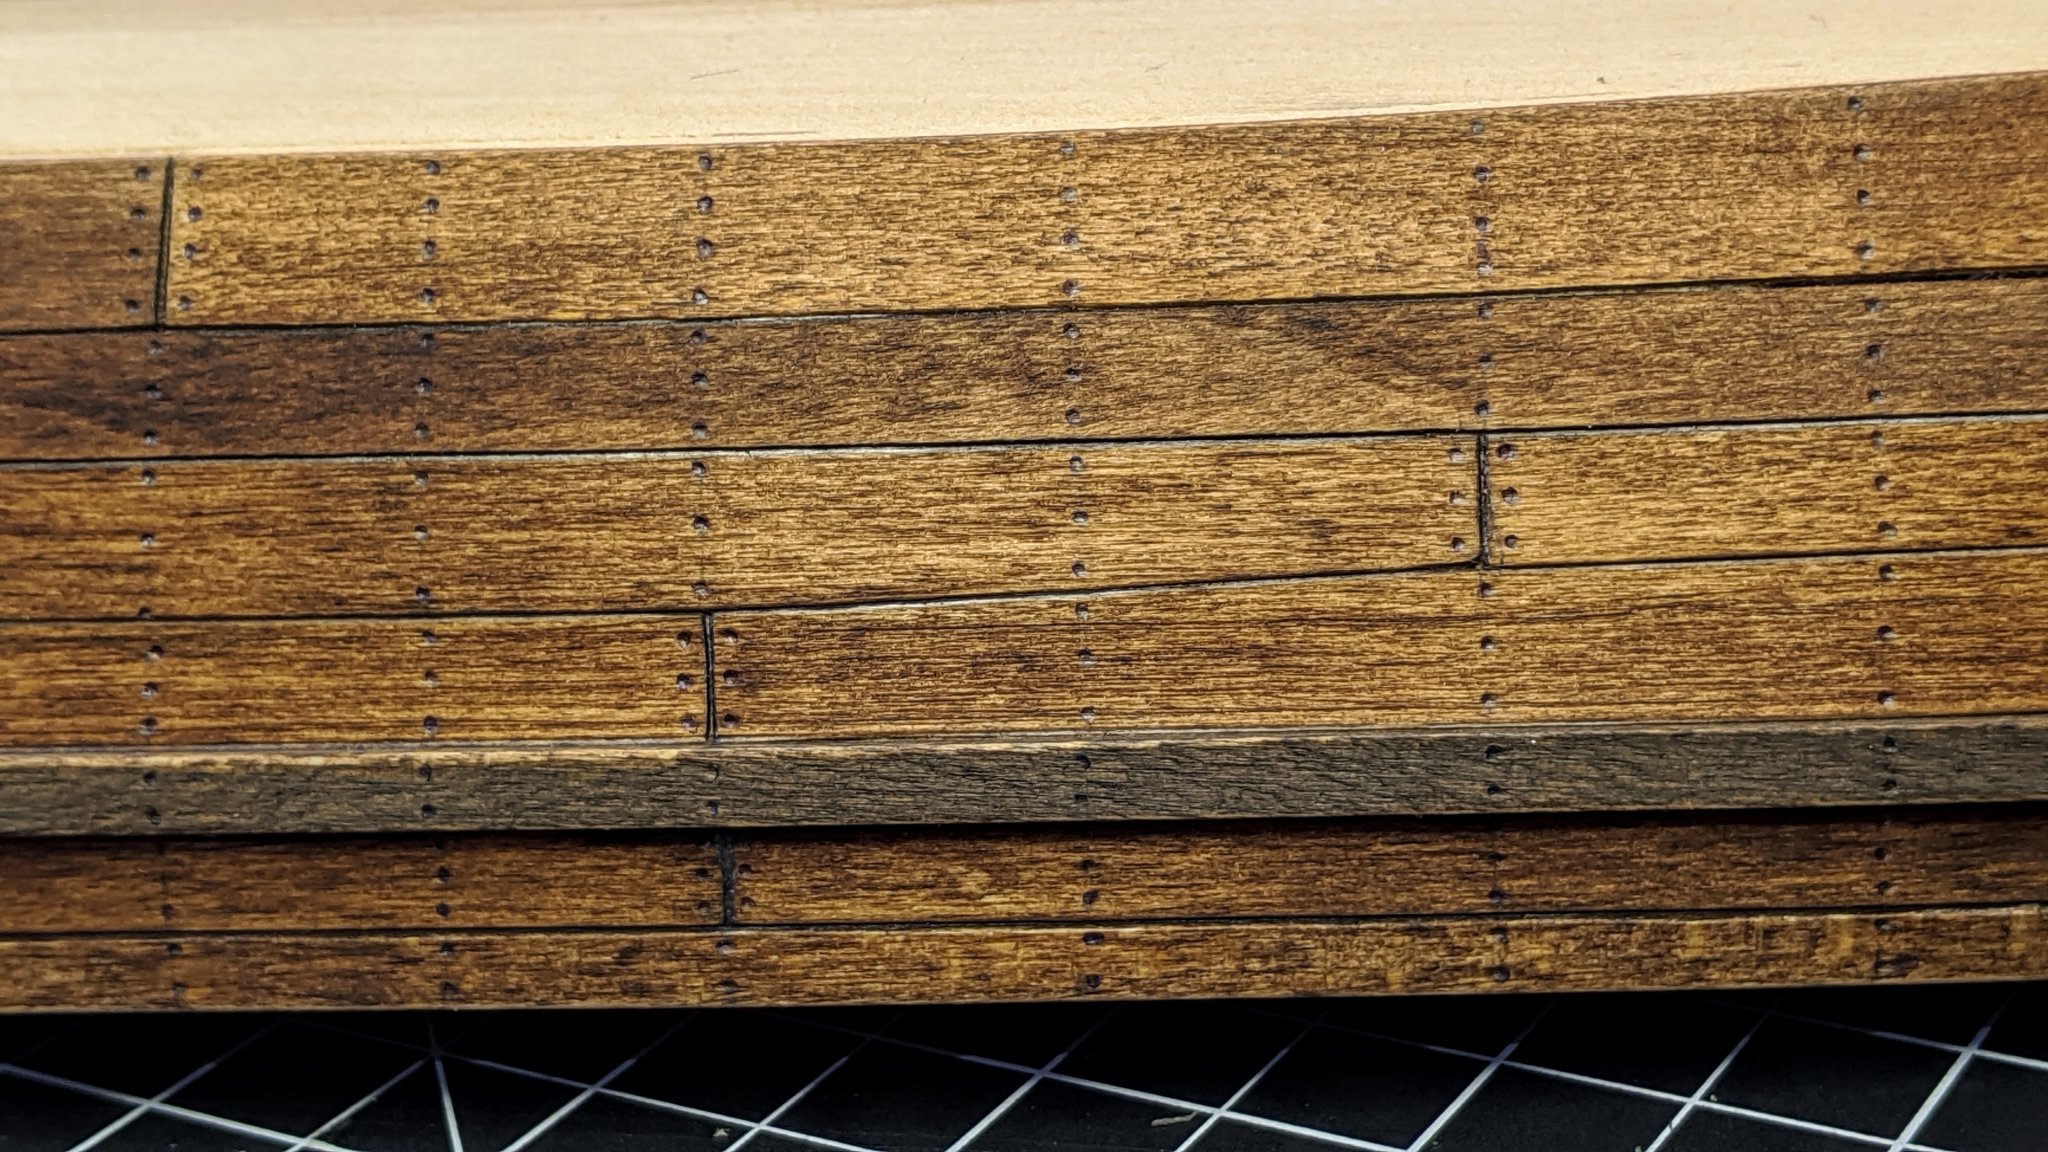
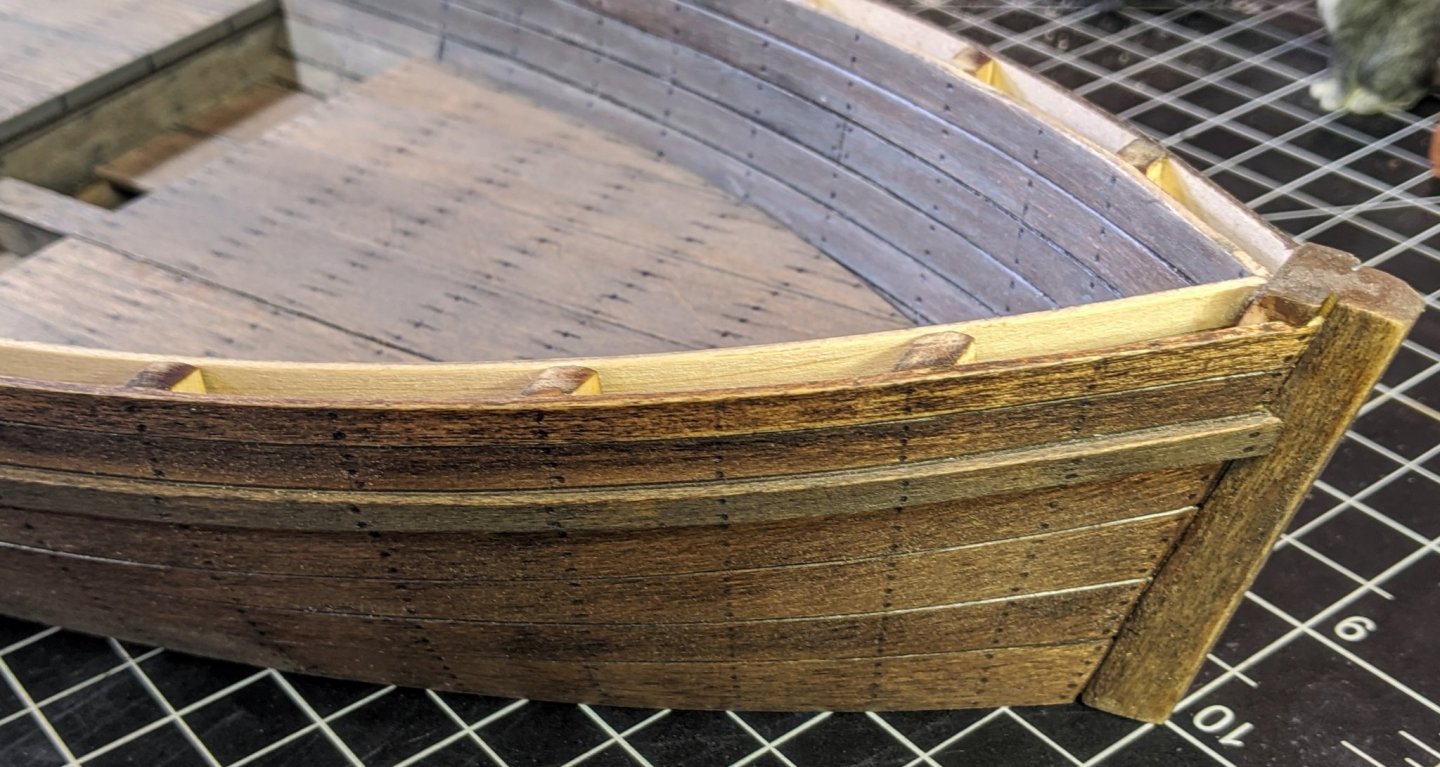
Hey Bob, All the wood is kit supplied (basswood) except the deck planking which came from Midwest (basswood also). Basswood is nice to work with but it takes stains poorly with lots of mottling. I assembled all the pieces first before staining, sanding with #400 grit then beveling ALL edges before assembling. The beveling really makes the individual planks stand out, and allows a pencil to be used for tar simulation much easier. I tried a bunch of ways to stain the basswood without any mottling, and found a quick pass with Minwax pre-stain sealer really helps, especially on the end grain. After sealing, another quick pass with #800 grit to get the fuzz off. Next I did two quick passes with Minwax honey stain, and after it dried another sanding pass with #1200 grit to really smooth it out without removing any stain. Then I started with the weathering. To disguise the mottling that remained I used a brown oil pastel pencil and for the edges a soft black graphite pencil, then blended all the pencil work together by rubbing with my thumb. I heartily recommend getting a set of oil pastel pencils, they have a ton of uses. After the hull was completely built and weathered I applied about 4 light coats of Krylon matte finish (go light otherwise you'll get the dreaded "white blotches"). Next I went over the entire hull with a very fine scotchbrite pad to add a bit of "satin" finish overall. The Krylon removes the "shininess" from the pencil work and ties the whole finish together nicely. I did have to go over all my nailing again to get the "shiny nail head" look back... what a pain... Present times are truly surreal, it's both interesting and scary to see the changes throughout society. I consider myself fortunate that I'm retired and have about 20 years of kits on the shelf to build, plus about a dozen guitars to noodle on and customize. Cheers, and LMK any other questions, I'll be glad to share any techniques I've used.
-
Yves, superb work and attention to detail! Some may ask "why detail what you won't see when it's done" miss the point. You, the modeler knows it's there and the satisfaction that comes from that is precious. I'll be following this build as a template on how to do plastic at the highest level.
-
Excellent work, Michael! The cherry is really sweet, and the crimson makes a nice combo. For the final crimson, you might want to fade it a bit. I've found that to make color look "real" in scale it's best to lighten up and tone down colors. I'm looking forward to the rest of your build, and these Syren kits are looking quite inviting!
- 221 replies
-
- 2
-

-
- queen anne barge
- Syren Ship Model Company
- (and 1 more)
-
Any questions, fire away, Bob... I'd be glad to help. I hope you're doing OK in California, at least you have lots of time to play guitar now. It looks like in Florida we will probably have "shelter in place" by next week, so I'll have lots of time to work on the boat and play guitar myself.
-
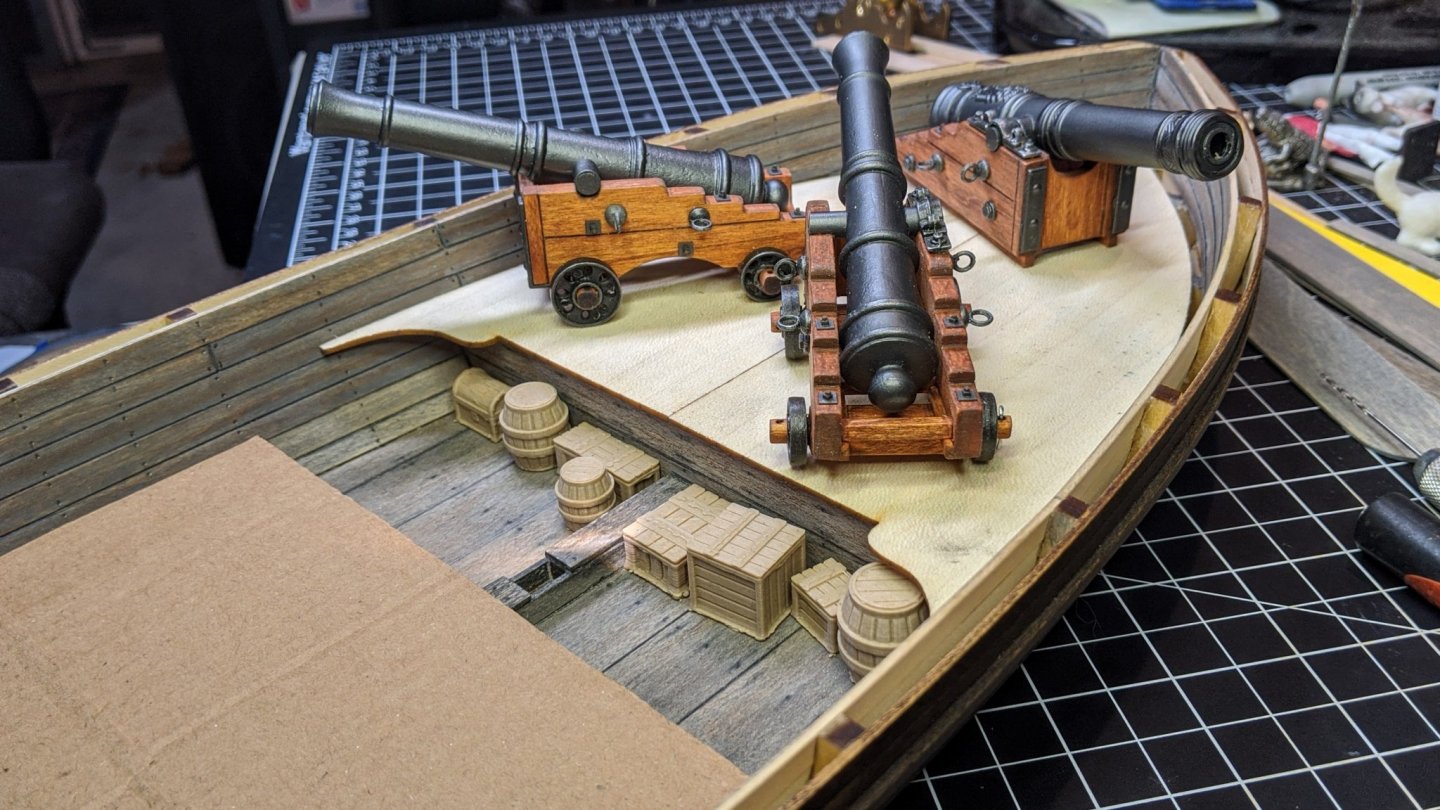
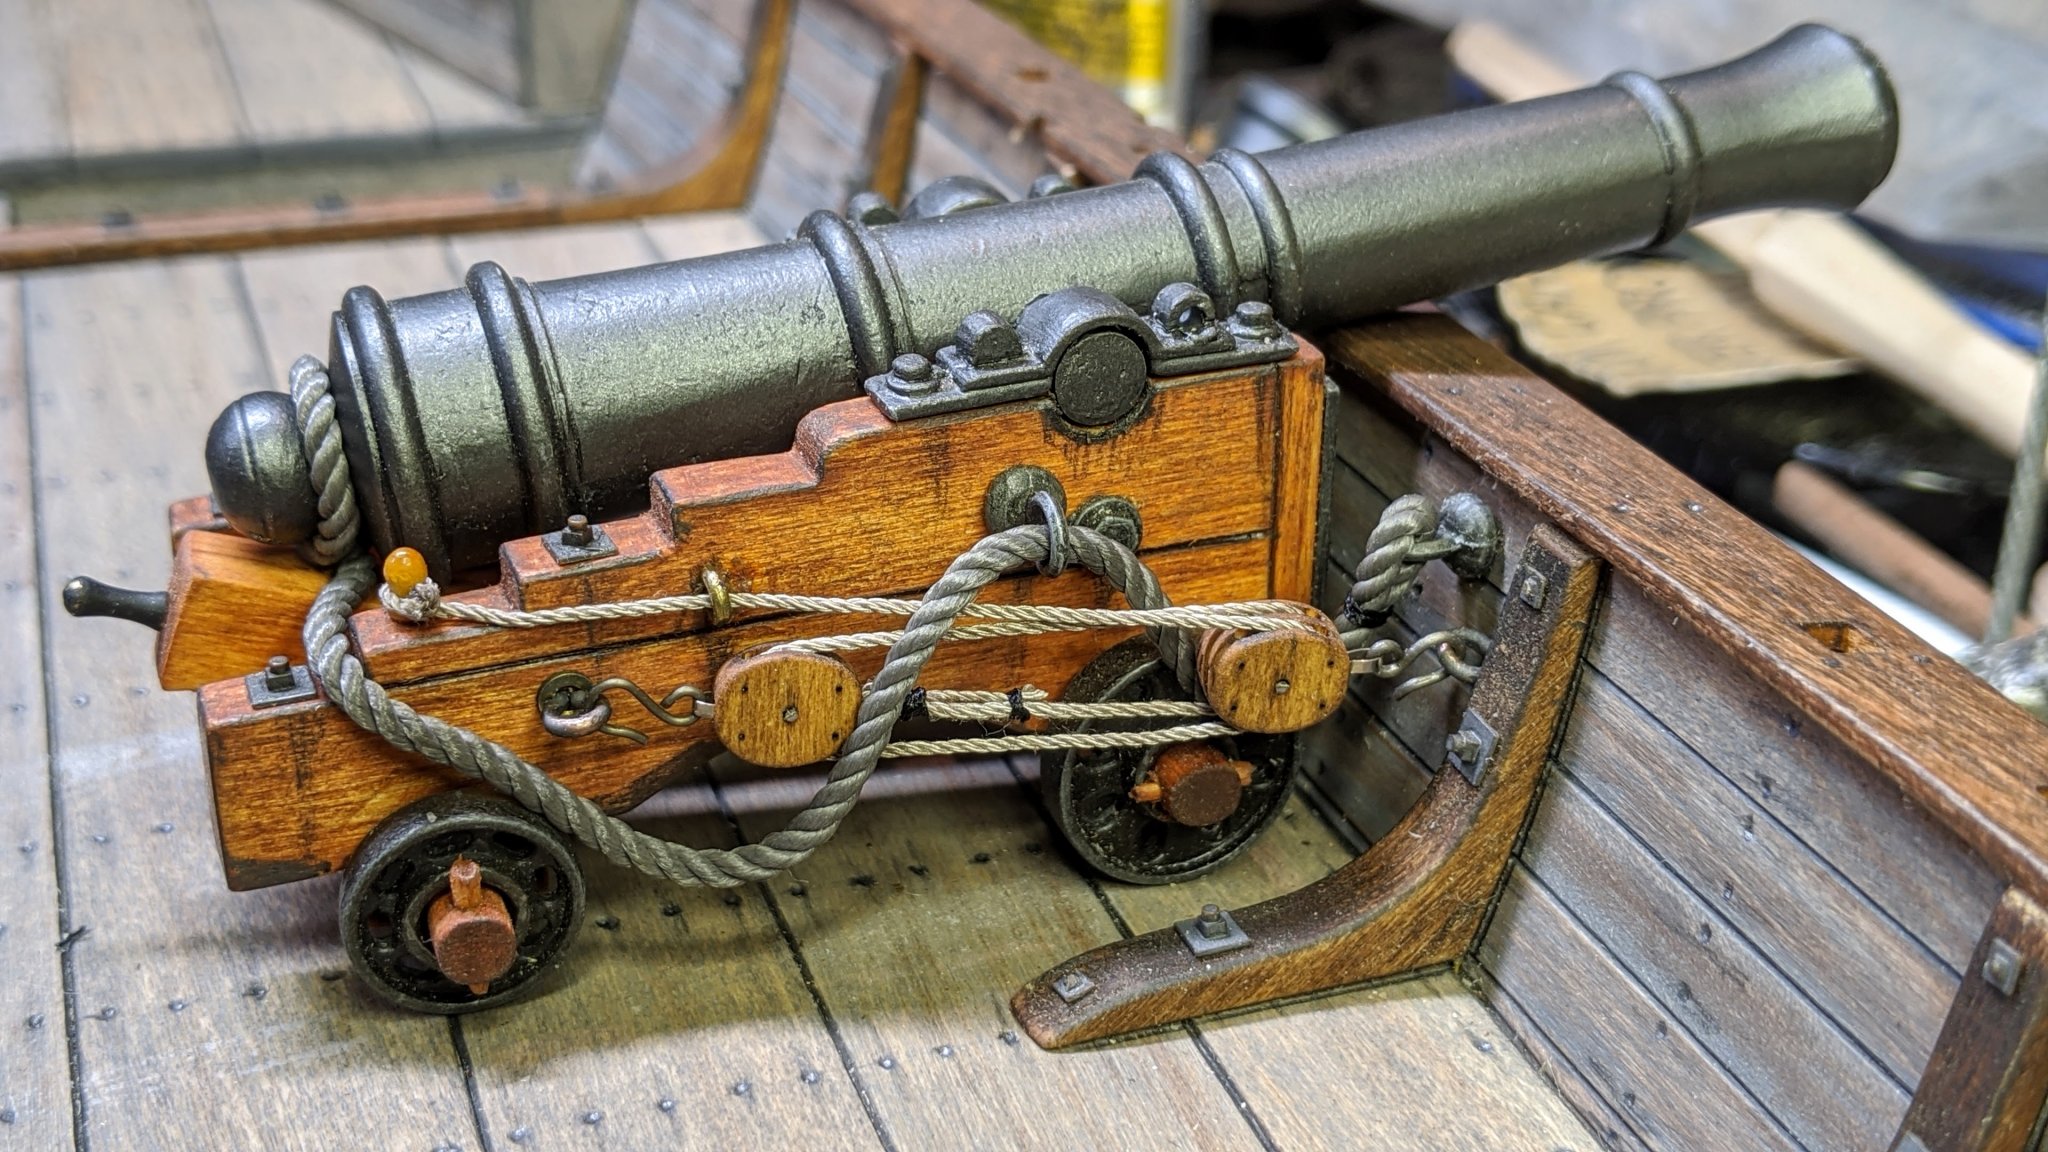
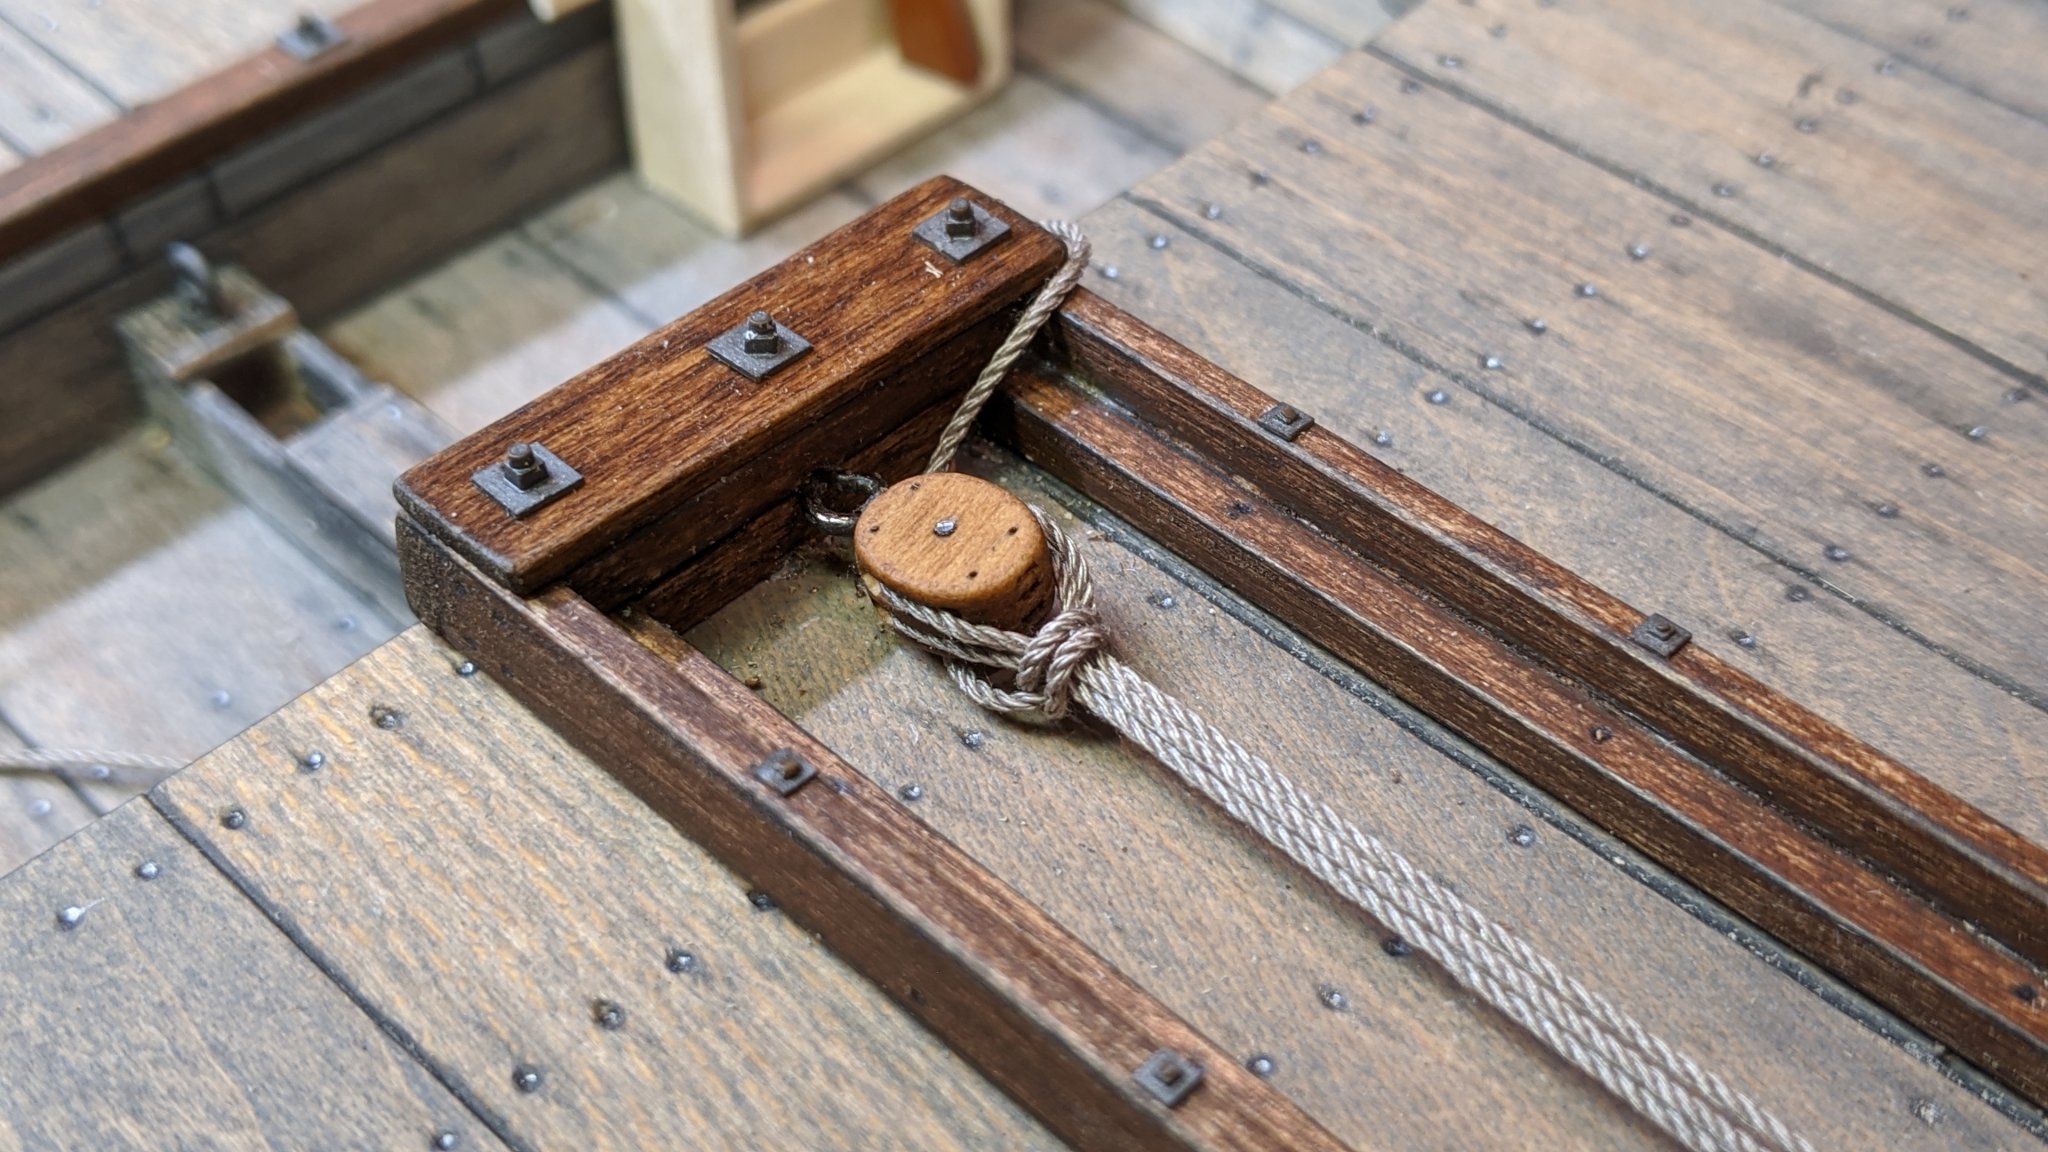
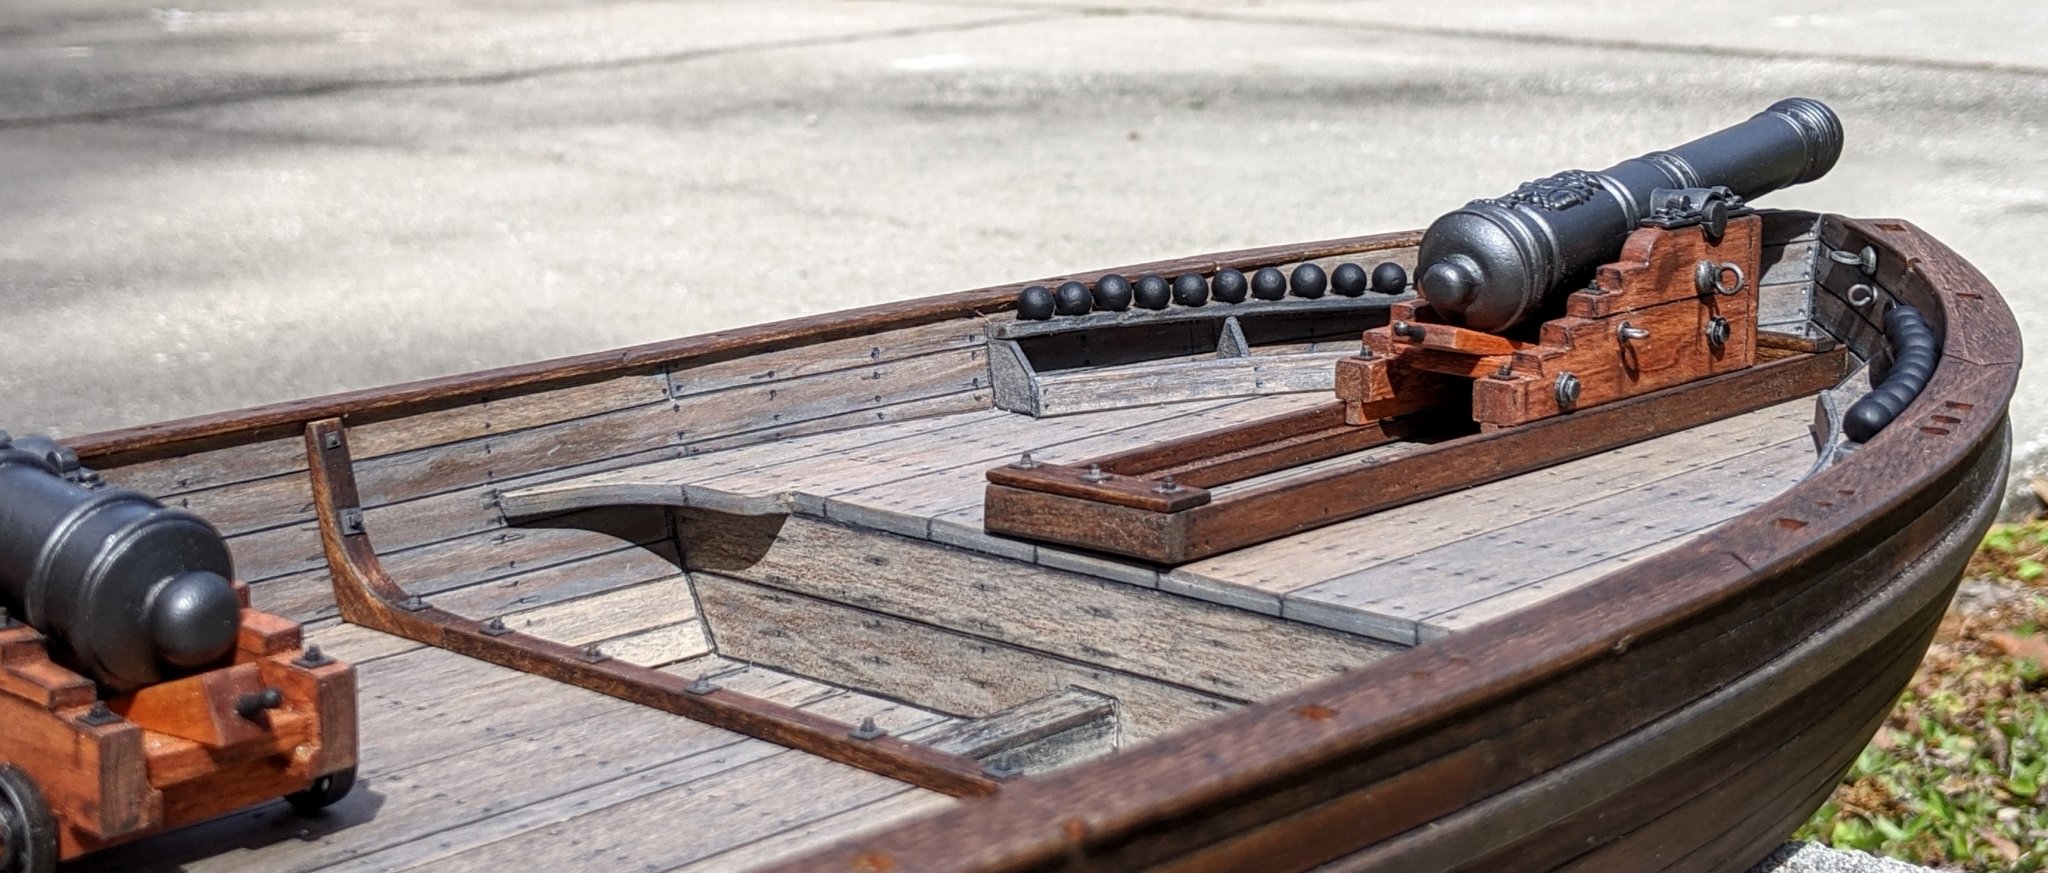
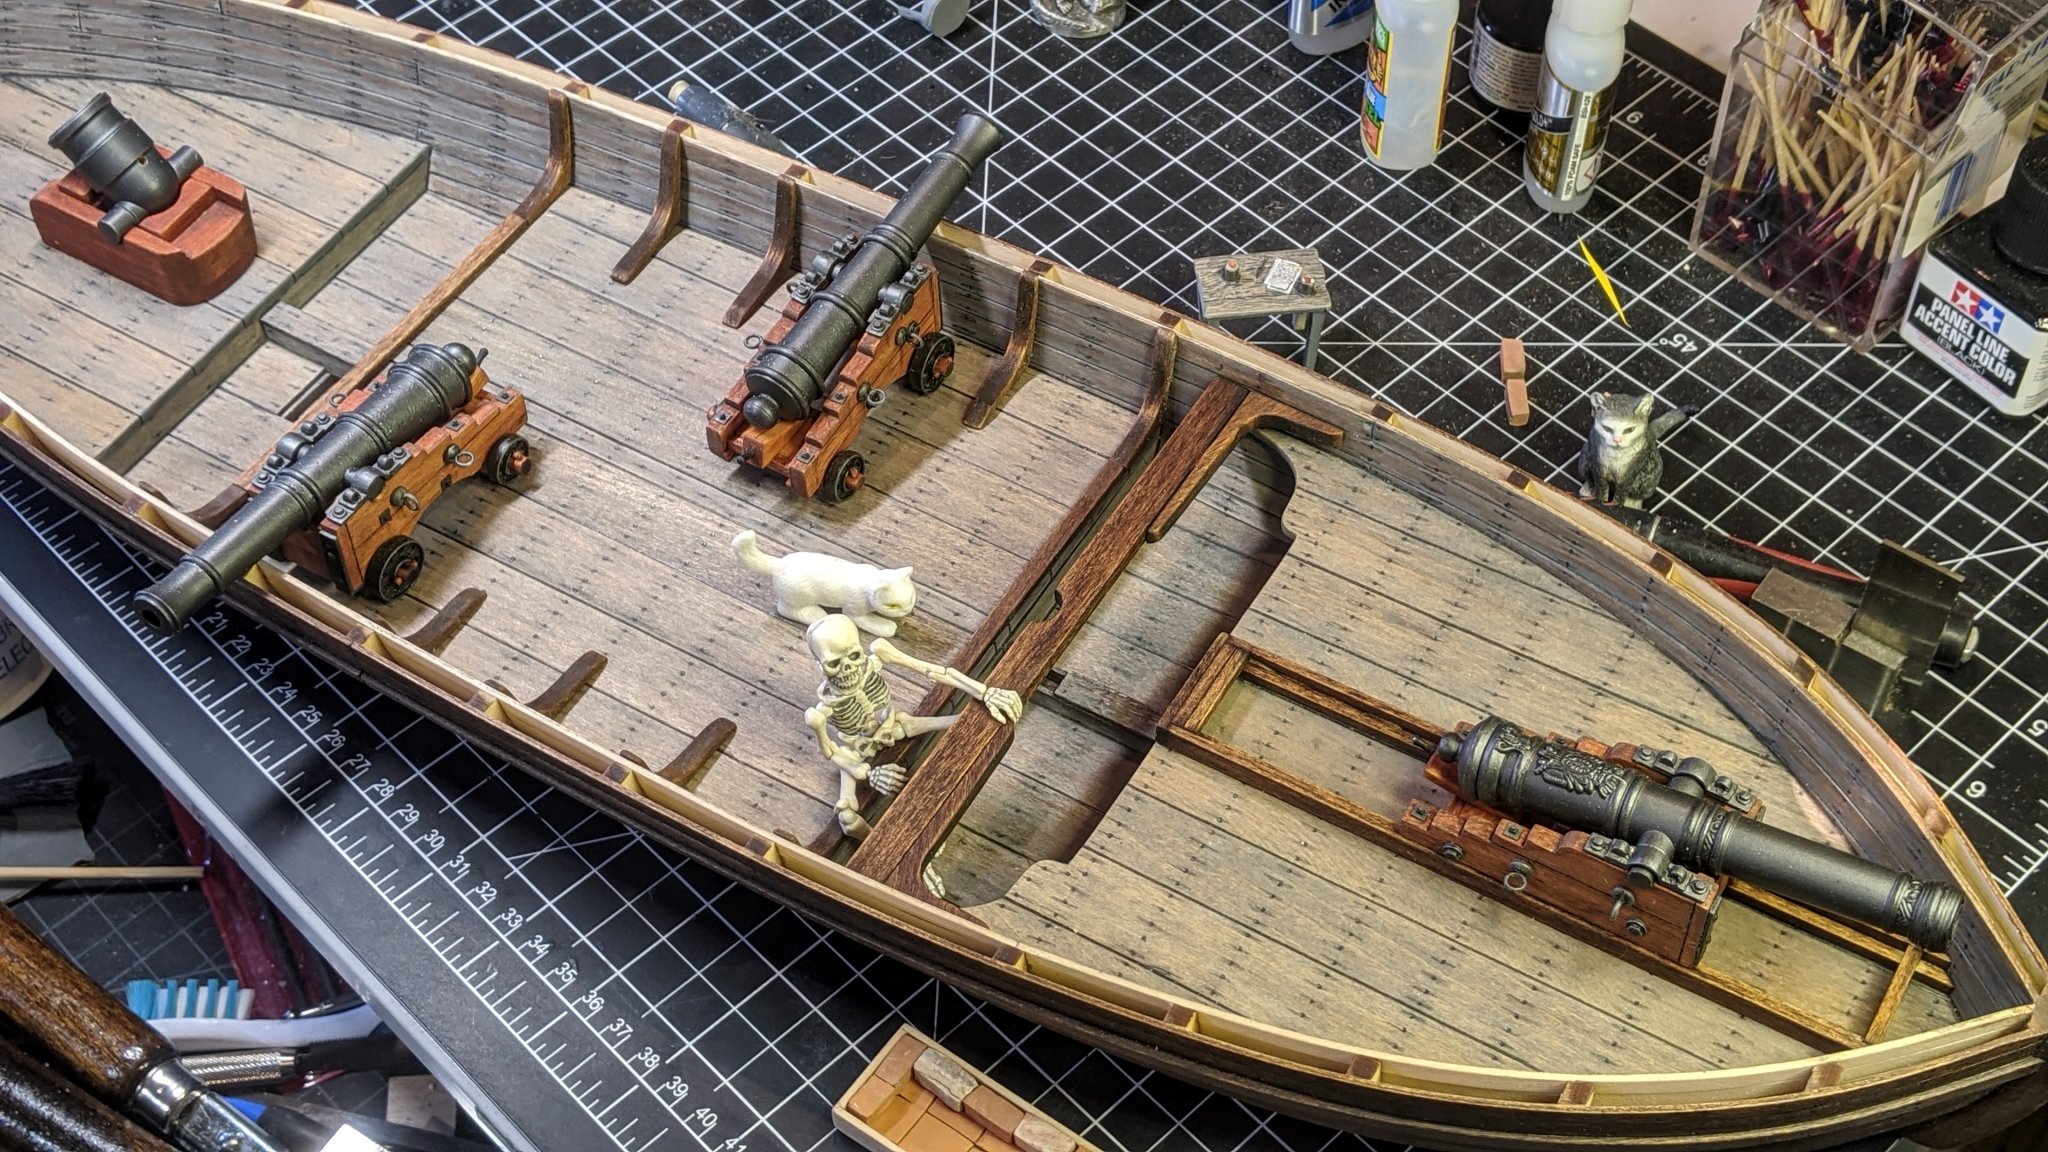
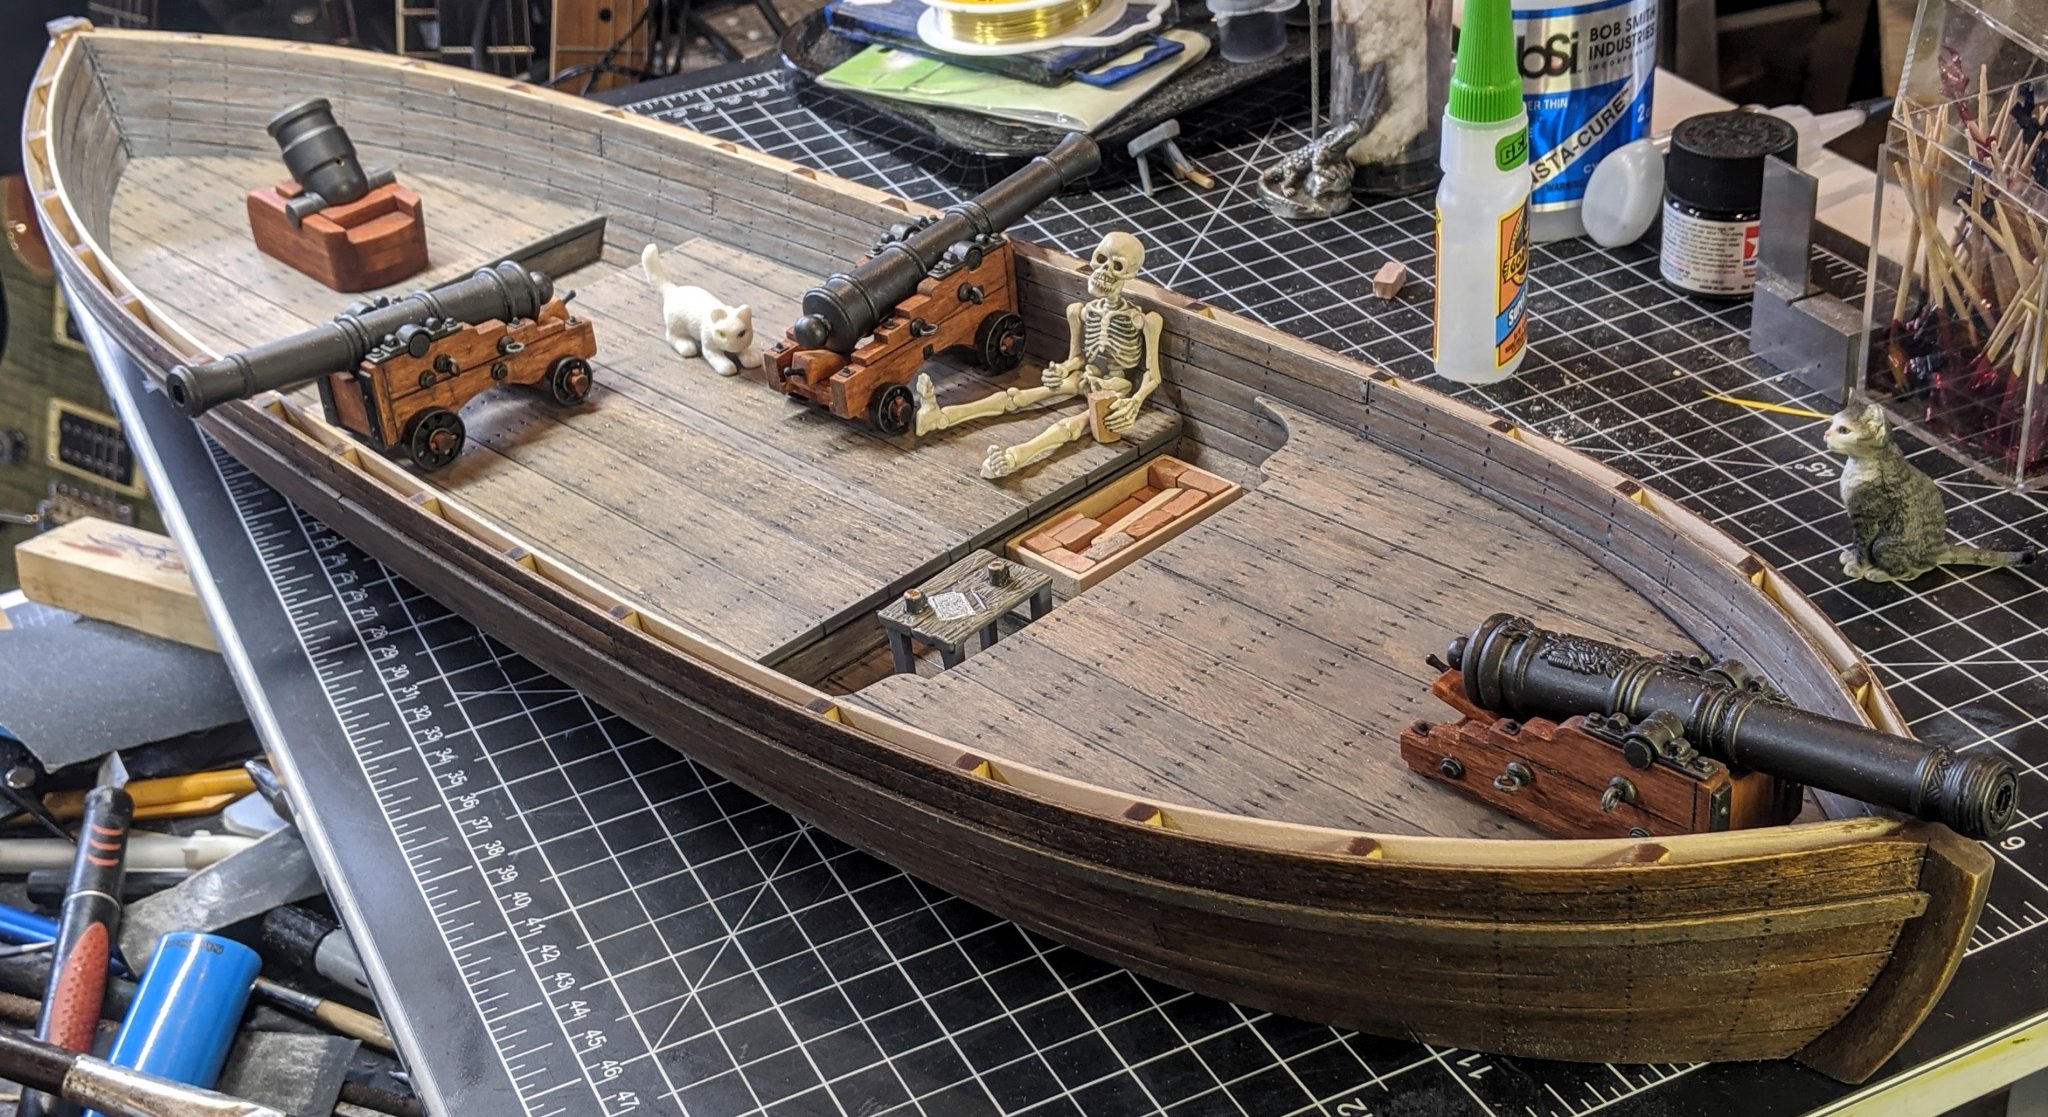
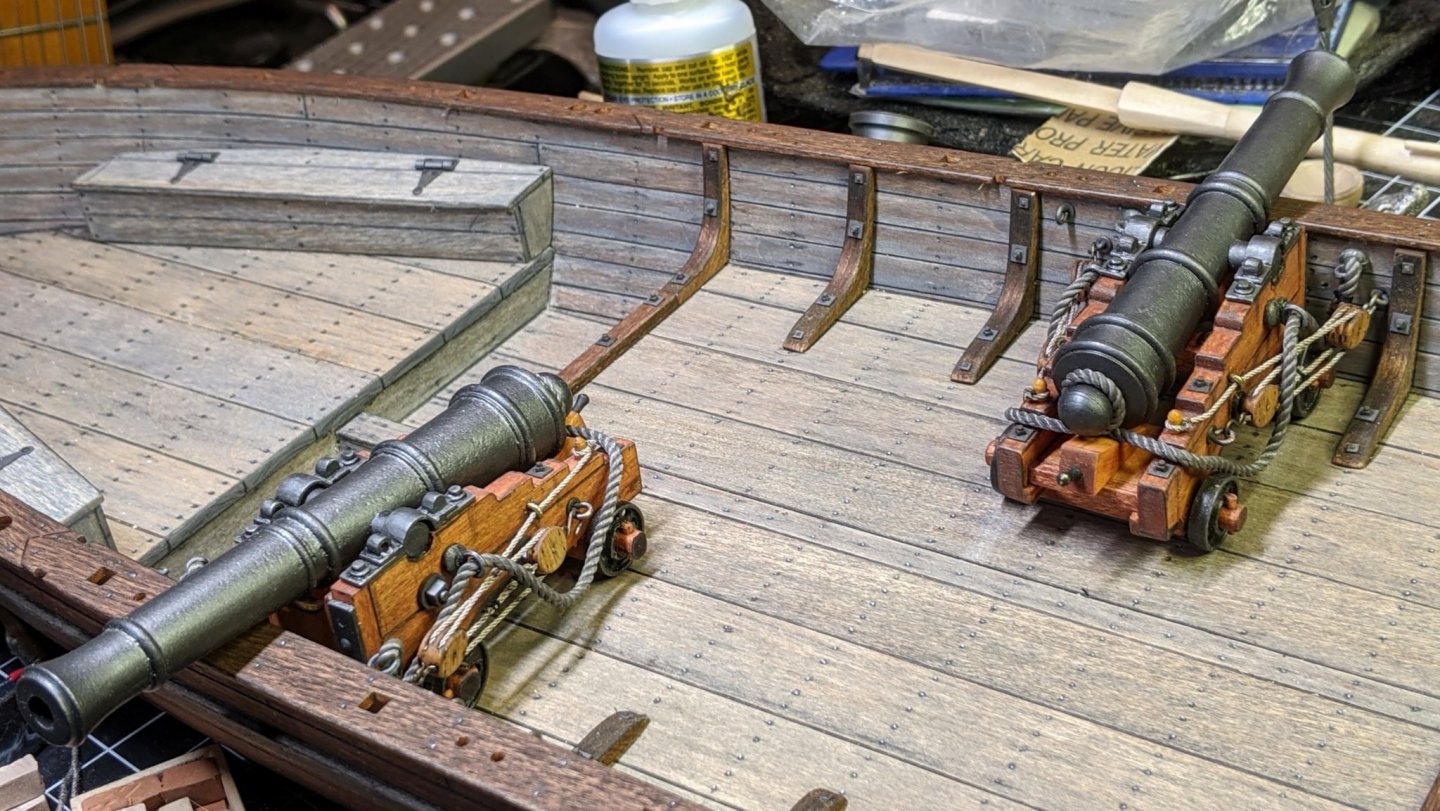
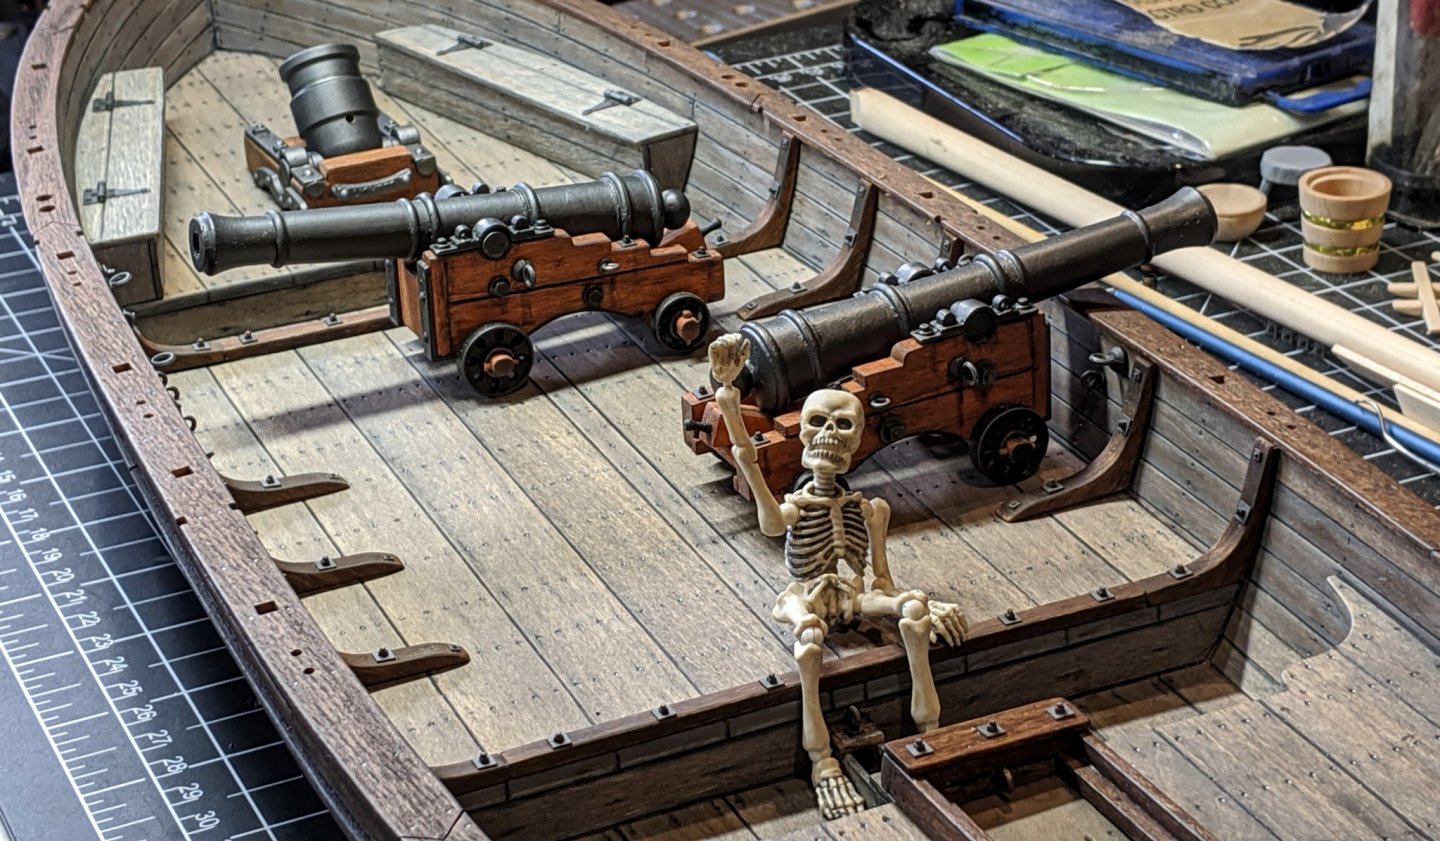
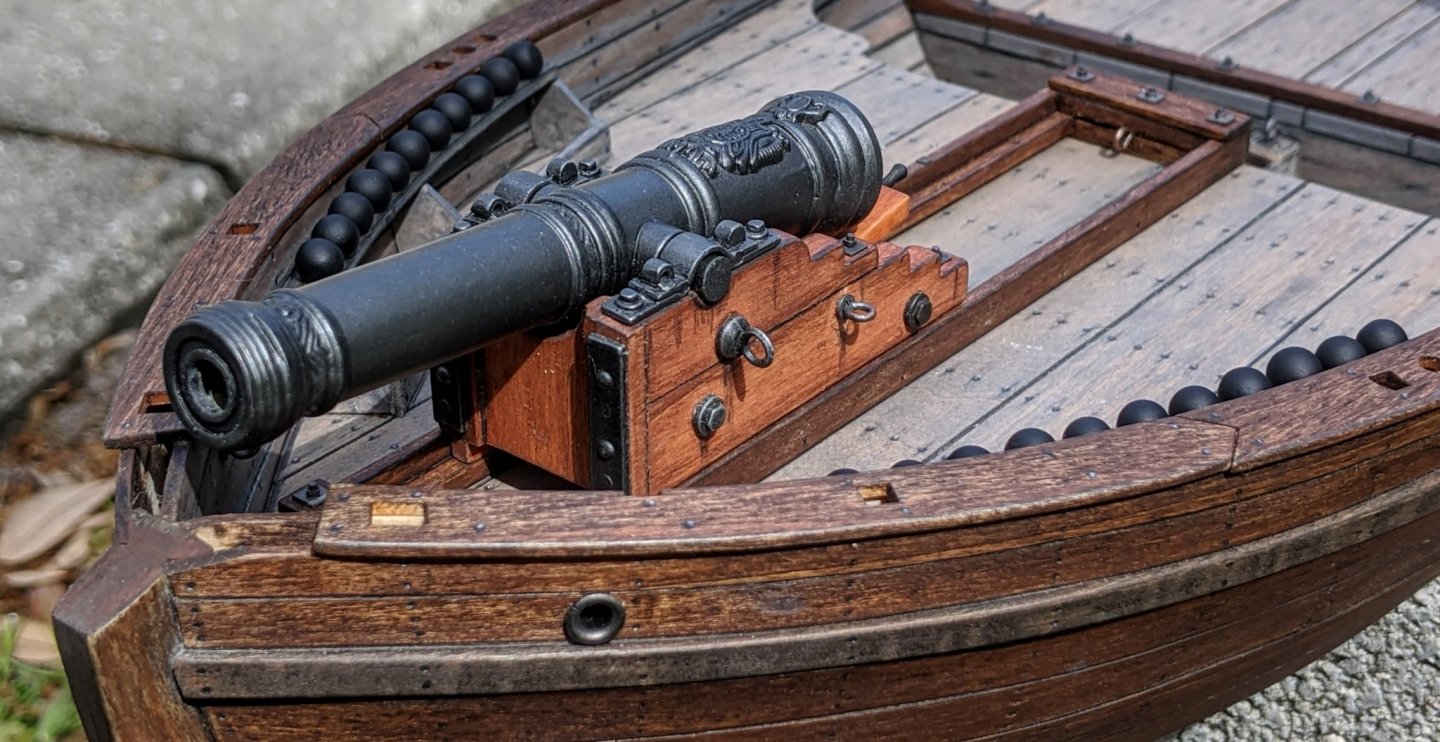
Hey all, Whew! Cannons are permanently mounted and gun and breeching tackles installed. I still have to dress the breeching rope to simulate sag from gravity. Some problems popped up because of "unforeseen consequences". To fit the larger cannons I had to widen the carriages, and so the block and breech rings had to be moved to compensate. I also wanted to open up some space to show off those sweet Syren blocks, so I moved the single block of the gun tackle back about 1/4" back on all the carriages. I used the kit supplied breeching rope and weathered it by dipping it in Tamiya dark gray panel line accent color. After dipping, I wiped it down thoroughly to remove the color from the outer twists of the rope, leaving the lower areas darker. I think this makes a good representation of weathered rope. I also added two belaying pins to each cradle to add (in the future) hanging rope coils for the side tackle falls. Next will be fabbing up some touch hole aprons and (possibly) some tampions for the cannons. Next up is the deck furniture, fireplace, mortar (yes, I'm going to use it) and a whole bunch of boxes, crates, barrels and buckets. Slim got roped in to helping...


-
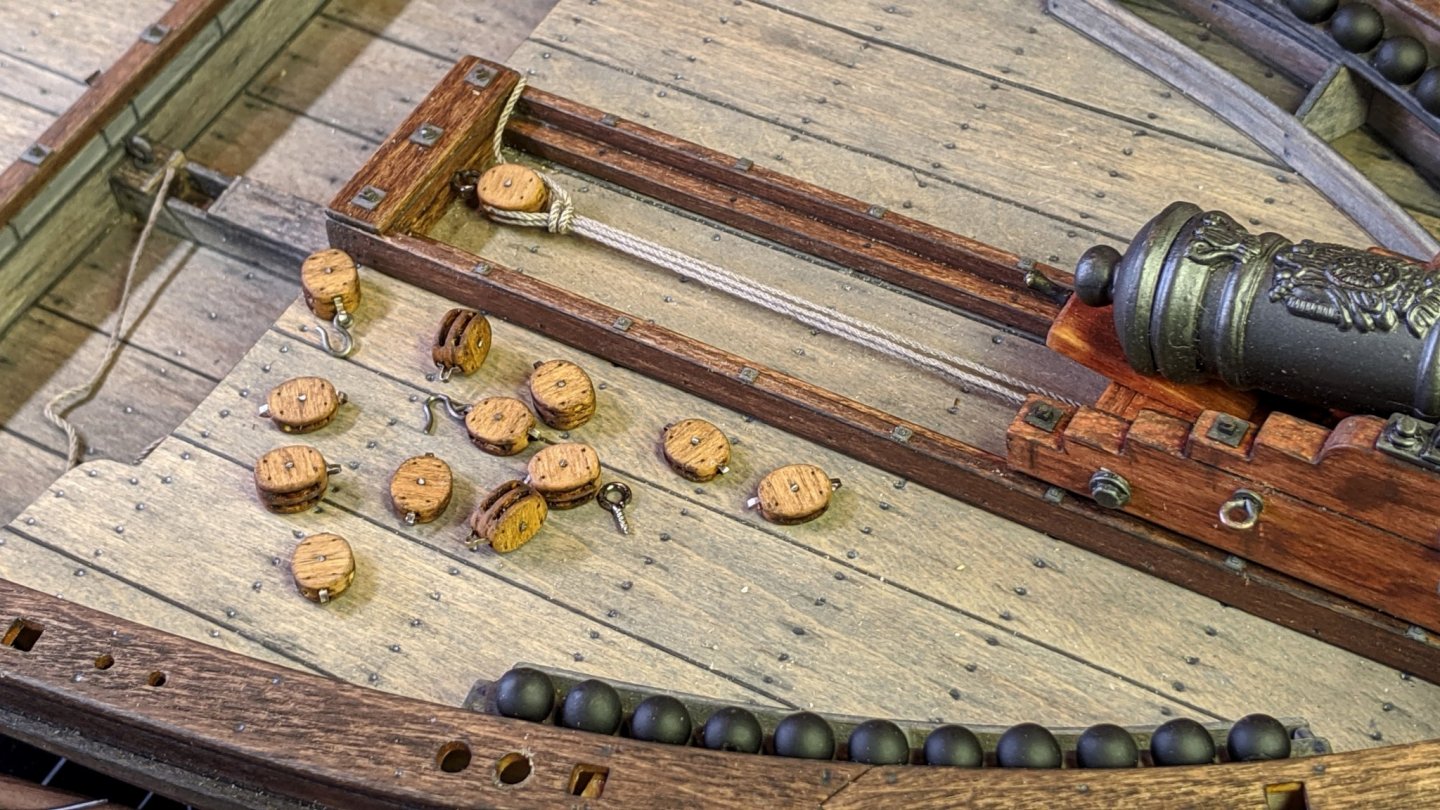
I've completed the 10mm blocks from Syren and am ready to rig and mount the carriages. The Syren blocks are exquisite, and are easy and quick to build if you follow the instructions. I used the modified Block Buster as dzerbato did and stained them hull color then attached the metal bits. I then ran a drill bit through the line holes to make sure the line I selected (some stuff from the parts bin, origin unknown) would easily pass. I still have to touch up the metal parts with Metalizer and make the hooks but I'll do that while the carriages are mounted and rigged. I'm going to remove the cannons from the carriages and then mount the carriages to the deck using small screws. Then I'll rig them, then leave the barrels off and out of the way while I build out the deck stuff. My first attempt at rigging... After reading a ton of info on the forum, I realize I'm out of my "comfort zone". None of the projects I've ever done until now required any real work with rigging. The first wooden ship model I ever did never made it to the rigging stage... it's an ugly but funny story from about 12 years ago... The kit was a Missippi river boat (don't remember the name or manufacturer) about 24" hull length with a colorful box about 24" long. I had completed the hull and decks and was digging the build progress when my house was broken into... They stole the box with all the masts, hardware, metalwork, wood stock etc. along with some other stuff. But they left the hull and superstructure! The box was sitting right next to the ship, with a big color picture of the completed vessel on the top! Even the responding officers were amused... Oh well, that ship has sailed. Now comes the unknown zone of rigging. Of course, Slim's gotta get his shot in...


-
Thanks for the link, I'm going to start them tonight. It's nice having well designed hardware to begin with instead of having to "polish a turd". Thanks Mike, I've been building models for 60 years (mostly styrene and railroad) but I still have a LOT to learn about model shipbuilding. It's a whole different class of modelling, with a bunch of new nomenclature and techniques to learn. I really liked the ebony planking on your Charles W. Morgan! Your builds are great and your build logs really well done.
-
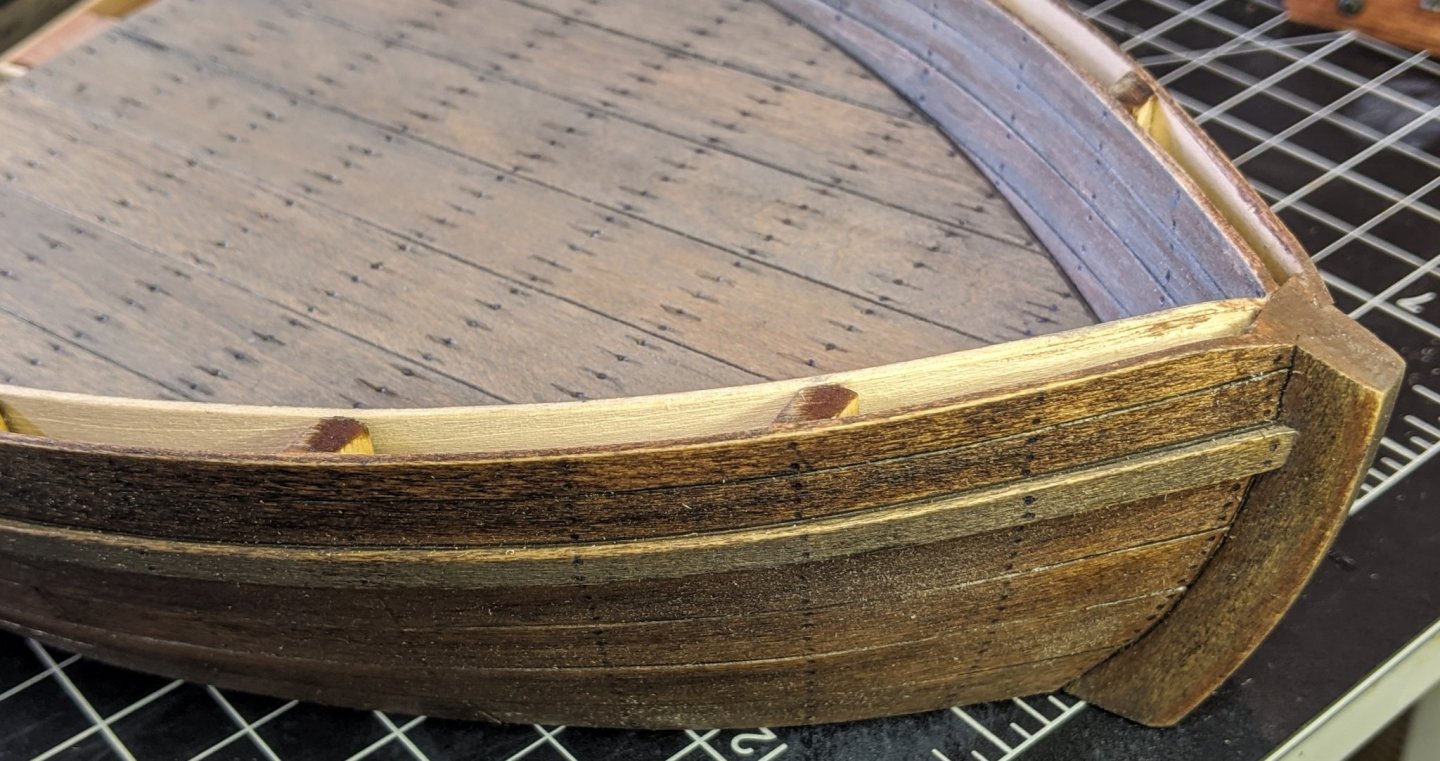
Thanks dzerbato! It's really cool having two concurrent builds and being able to swap ideas. I used the kit supplied rail caps. I was dreading the fit, but they dropped right in place where they are supposed to be. I installed mine much earlier than the instructions suggest so I could blend them with the hull. Watch out on the bow and stern curved sections... the wood grain runs across the boards and will split if not careful. My Syren blocks arrive today, as well as my Model Shipways block tumbler and 50mm metal anchors. I'm looking forward to finally mounting the ordinance. The mast and spars are done, as well as a lot of deck ornaments. I'm debating having one 9 pounder run out in battery and possibly the other one in recoil position with the associated cleaning and loading paraphernalia surrounding it. Slim finally wandered home! He's looking pretty thin, gonna have to fatten him up. Plenty more work to do...
-
Thank you, gentlemen! This forum is indispensable for tips, tricks, how-tos and discussion. I'm learning so much by searching and just browsing... BobC
-
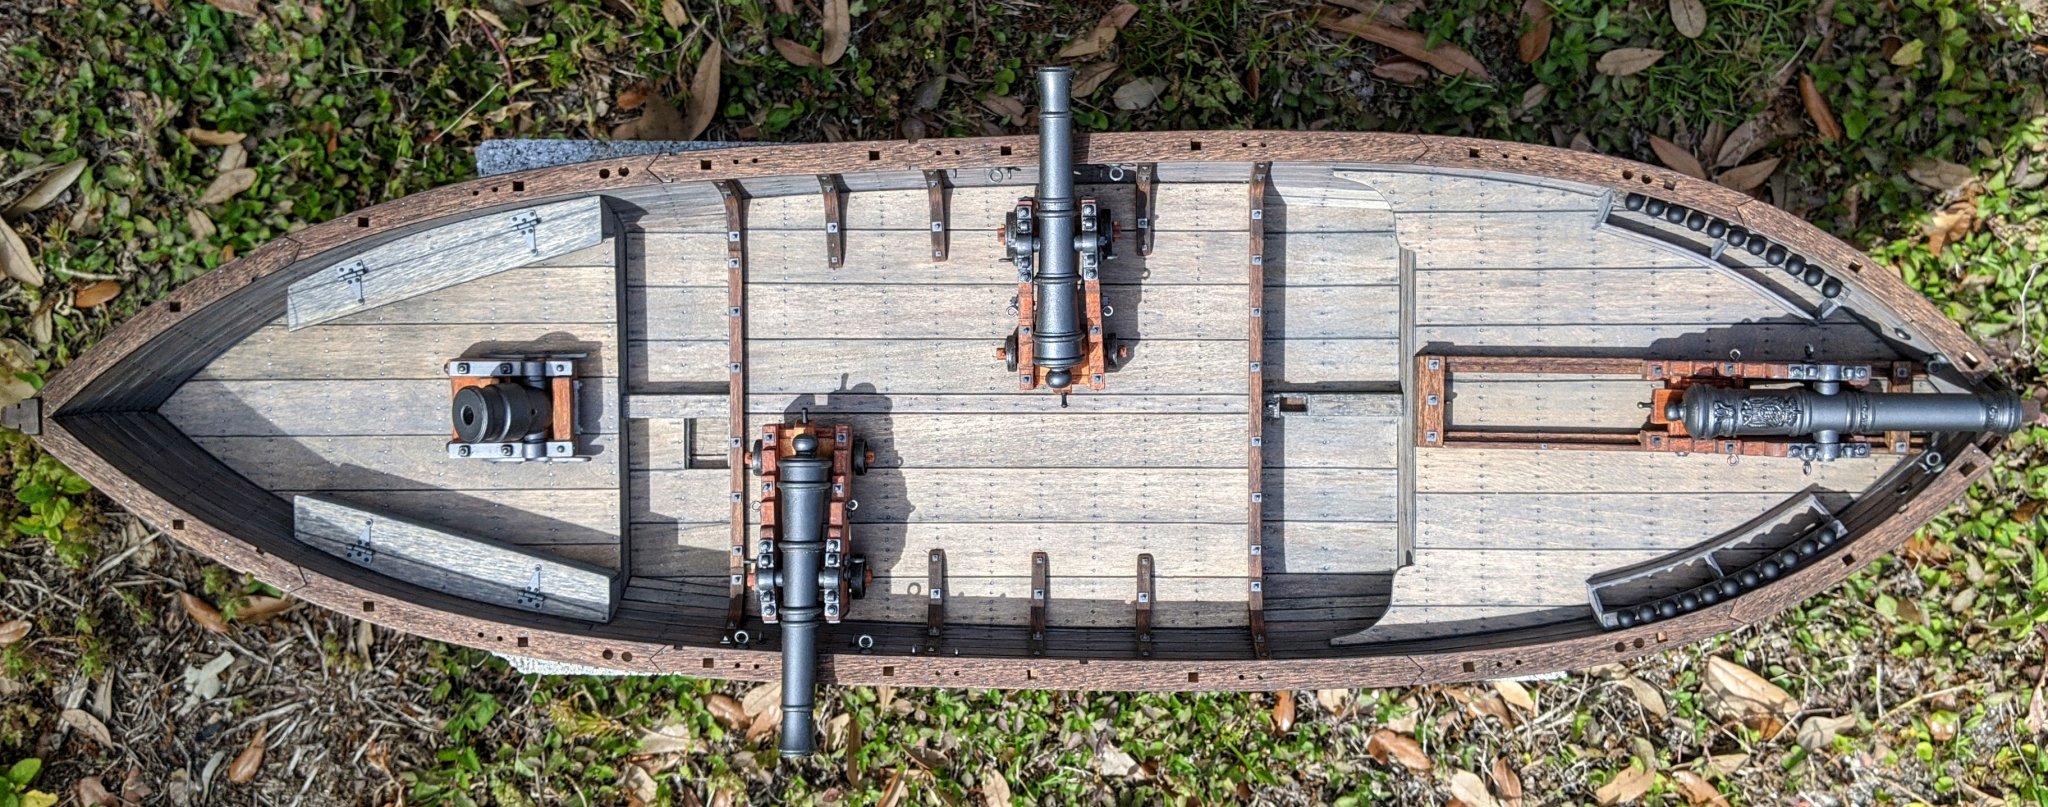
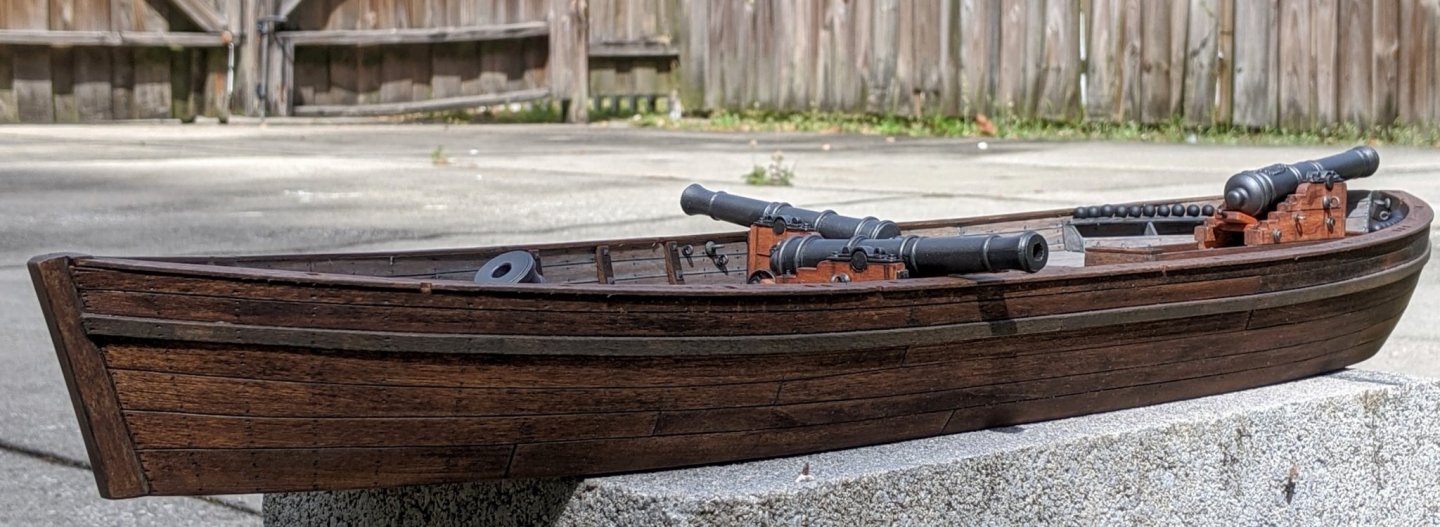
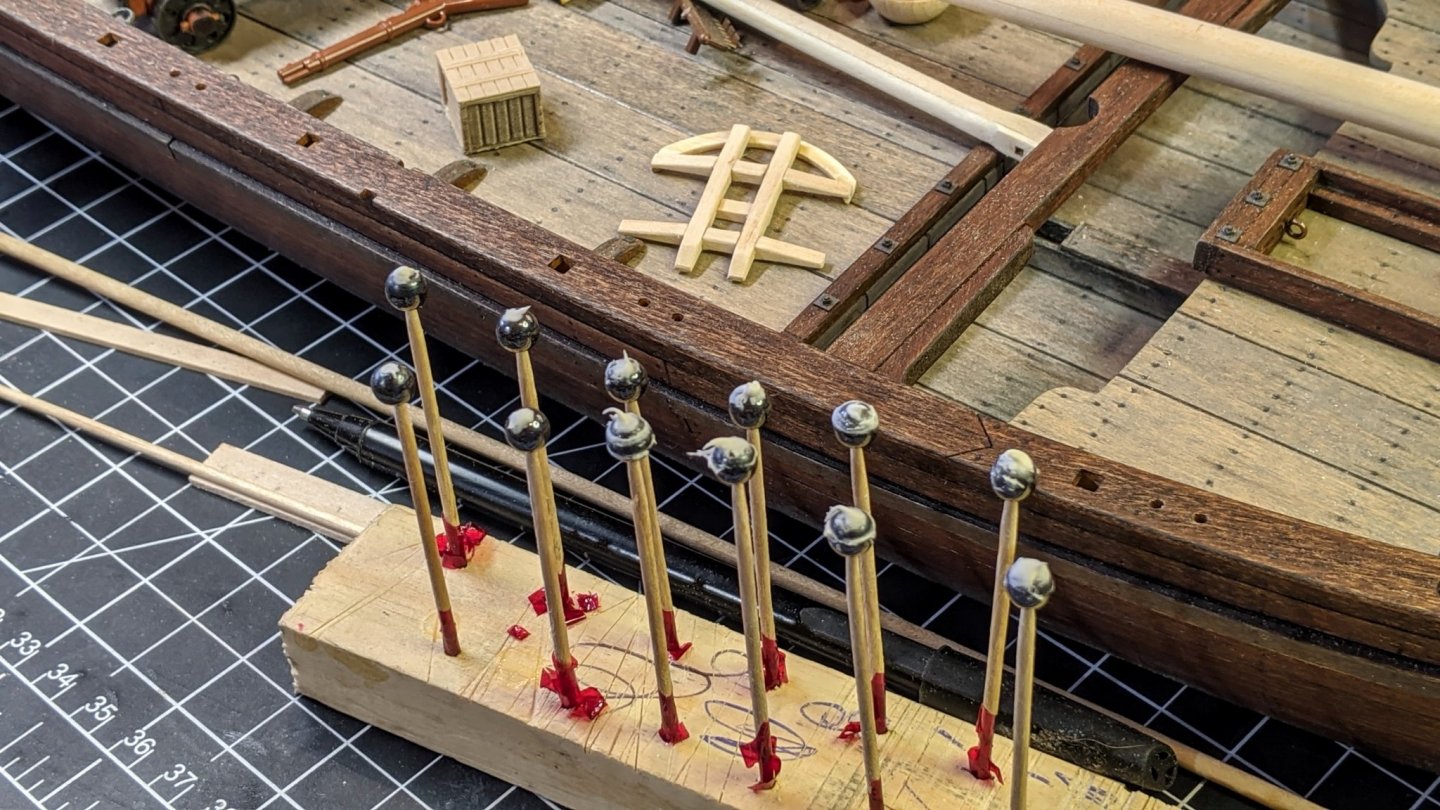
Thanks, Bob! My first experiences as a kid were with model railroading. You know how the model RR guys love to depict everything weathered and beat up. I guess it stuck... Well I finally completed the hull... yay! I did a few more passes with the pigments, pencils and erasers and then applied about five thin coats of Krylon matte clear. I made some 12 pound cannonballs from a string of 4mm beads from Goodwill (great place to find cool stuff) by unstringing them then filling one hole with Testors putty. A coat of primer, some touchup and then a coat of Metalizer burnt iron. I also have some 3mm beads to use for the 9 pounders. I'm waiting on some Syren blocks and then I'll rig and permanently mount the gun carriages. I'm really undecided about the mortar. I finally made a carriage I'm satisfied with and would really like to include it. The stern seems so empty... I'd have to make some mods to the awning battens and other stuff but it's doable. I'm getting close to having to make a final decision before I go much further... any yeas or nays? BTW, Slim"s not DOA (although technically he IS dead...) and he'll be back! Here's some progress shots outside in sunny St. Pete FL:


-
Great! The deck plank beveling really shows up well. The bricks came out very realistic and those Syren blocks look nice. I'm also going to pre-make the rope coils and install them later. Is that the kit supplied carriage rigging? Fine work, I'm really enjoying and learning from your build log. BobC
- 39 replies
-
- 1
-
-
- philadelphia
- model shipways
- (and 1 more)
-
I just ordered Syren blocks and deadeyes, there's no way I can make the kit ones look as good as theirs. You're right... this big of a scale makes everything more obvious! I have some wiggle room on my mast partner so I plan on mounting it after I drill for the lower deadeyes. That way everything "misses each other" correctly.
- 39 replies
-
- 2
-
-
- philadelphia
- model shipways
- (and 1 more)
-
Looking really nice! I like the Syren blocks, much more realistic than the kit ones. I also found the templates somewhat off when mounting the hardware for the cannons. I haven't fixed the mast partner or drilled for the lower deadeyes yet on my build, after seeing the issues you had I'll take them into account. Thanks for pointing this out! BobC
- 39 replies
-
- 1
-
-
- philadelphia
- model shipways
- (and 1 more)
-
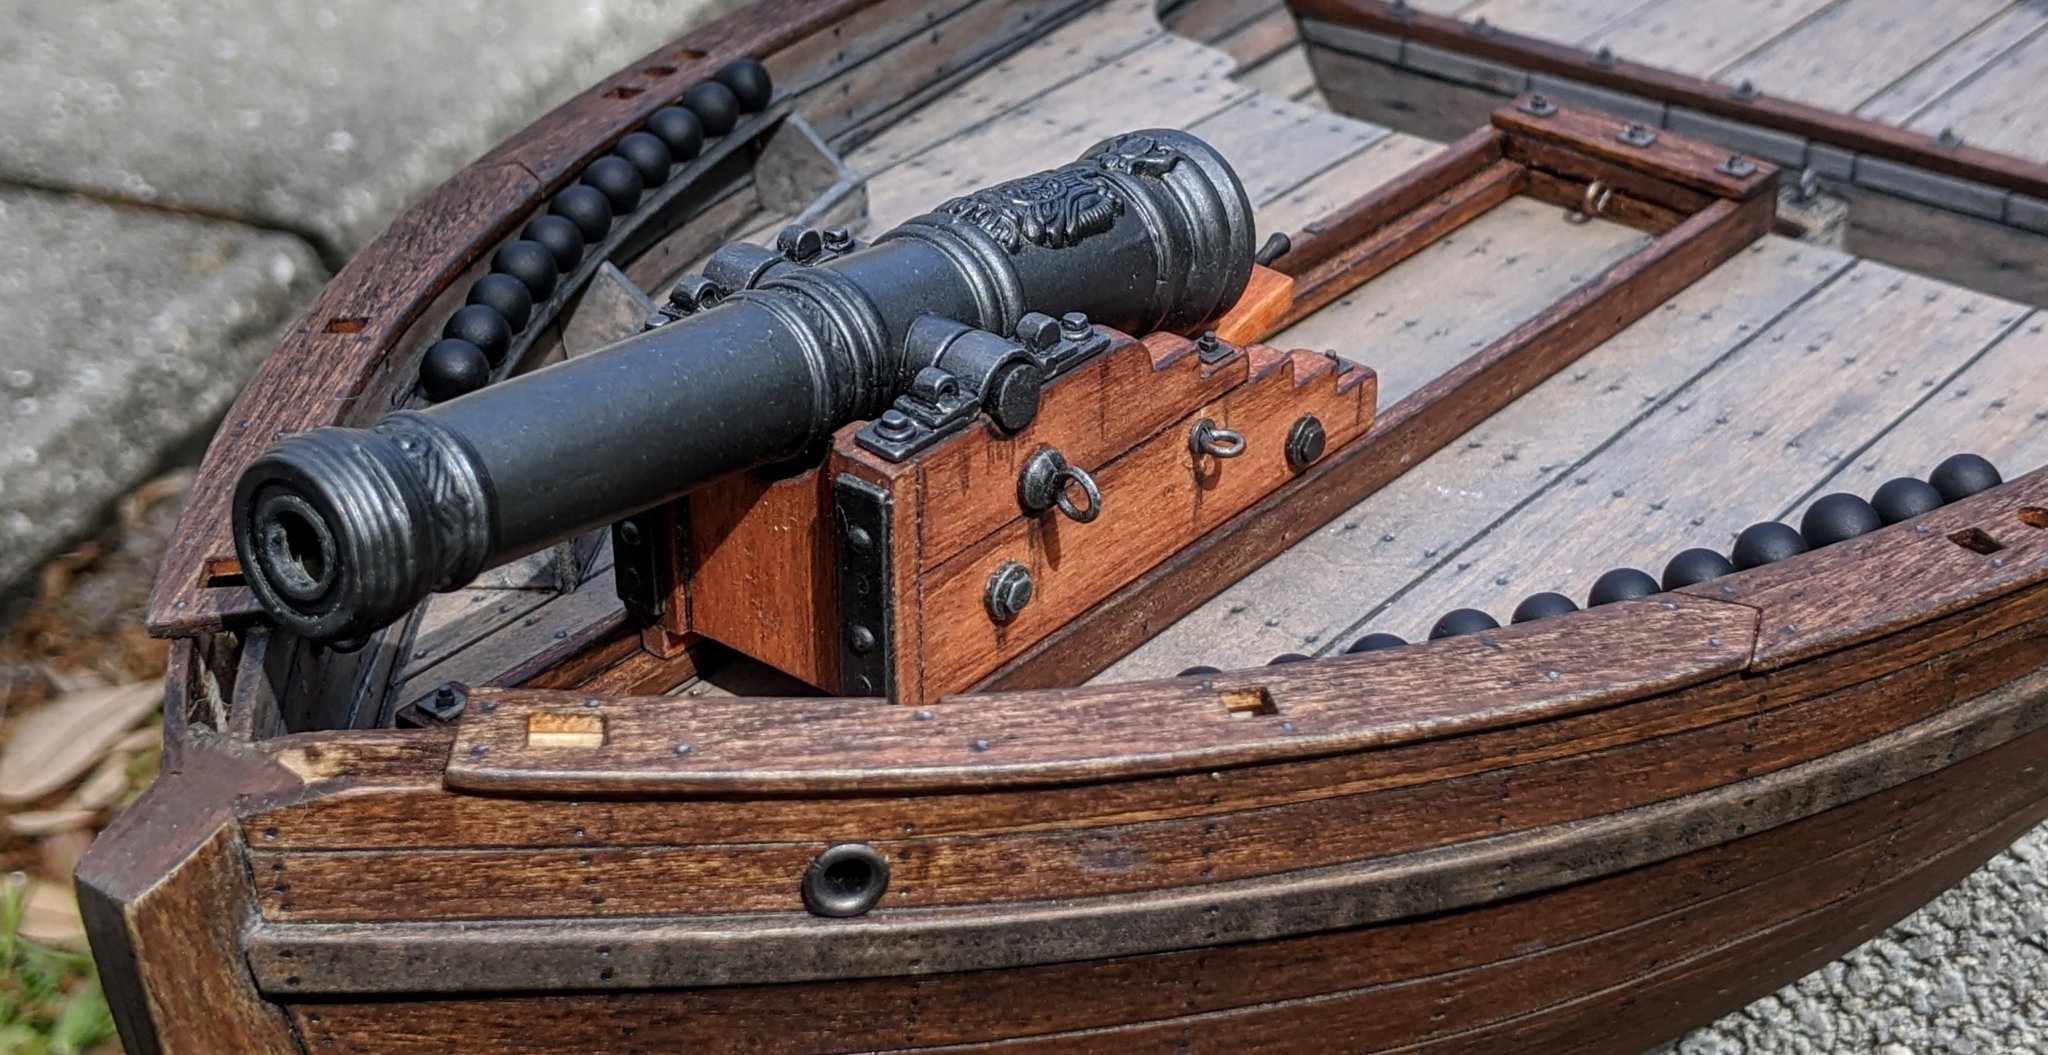
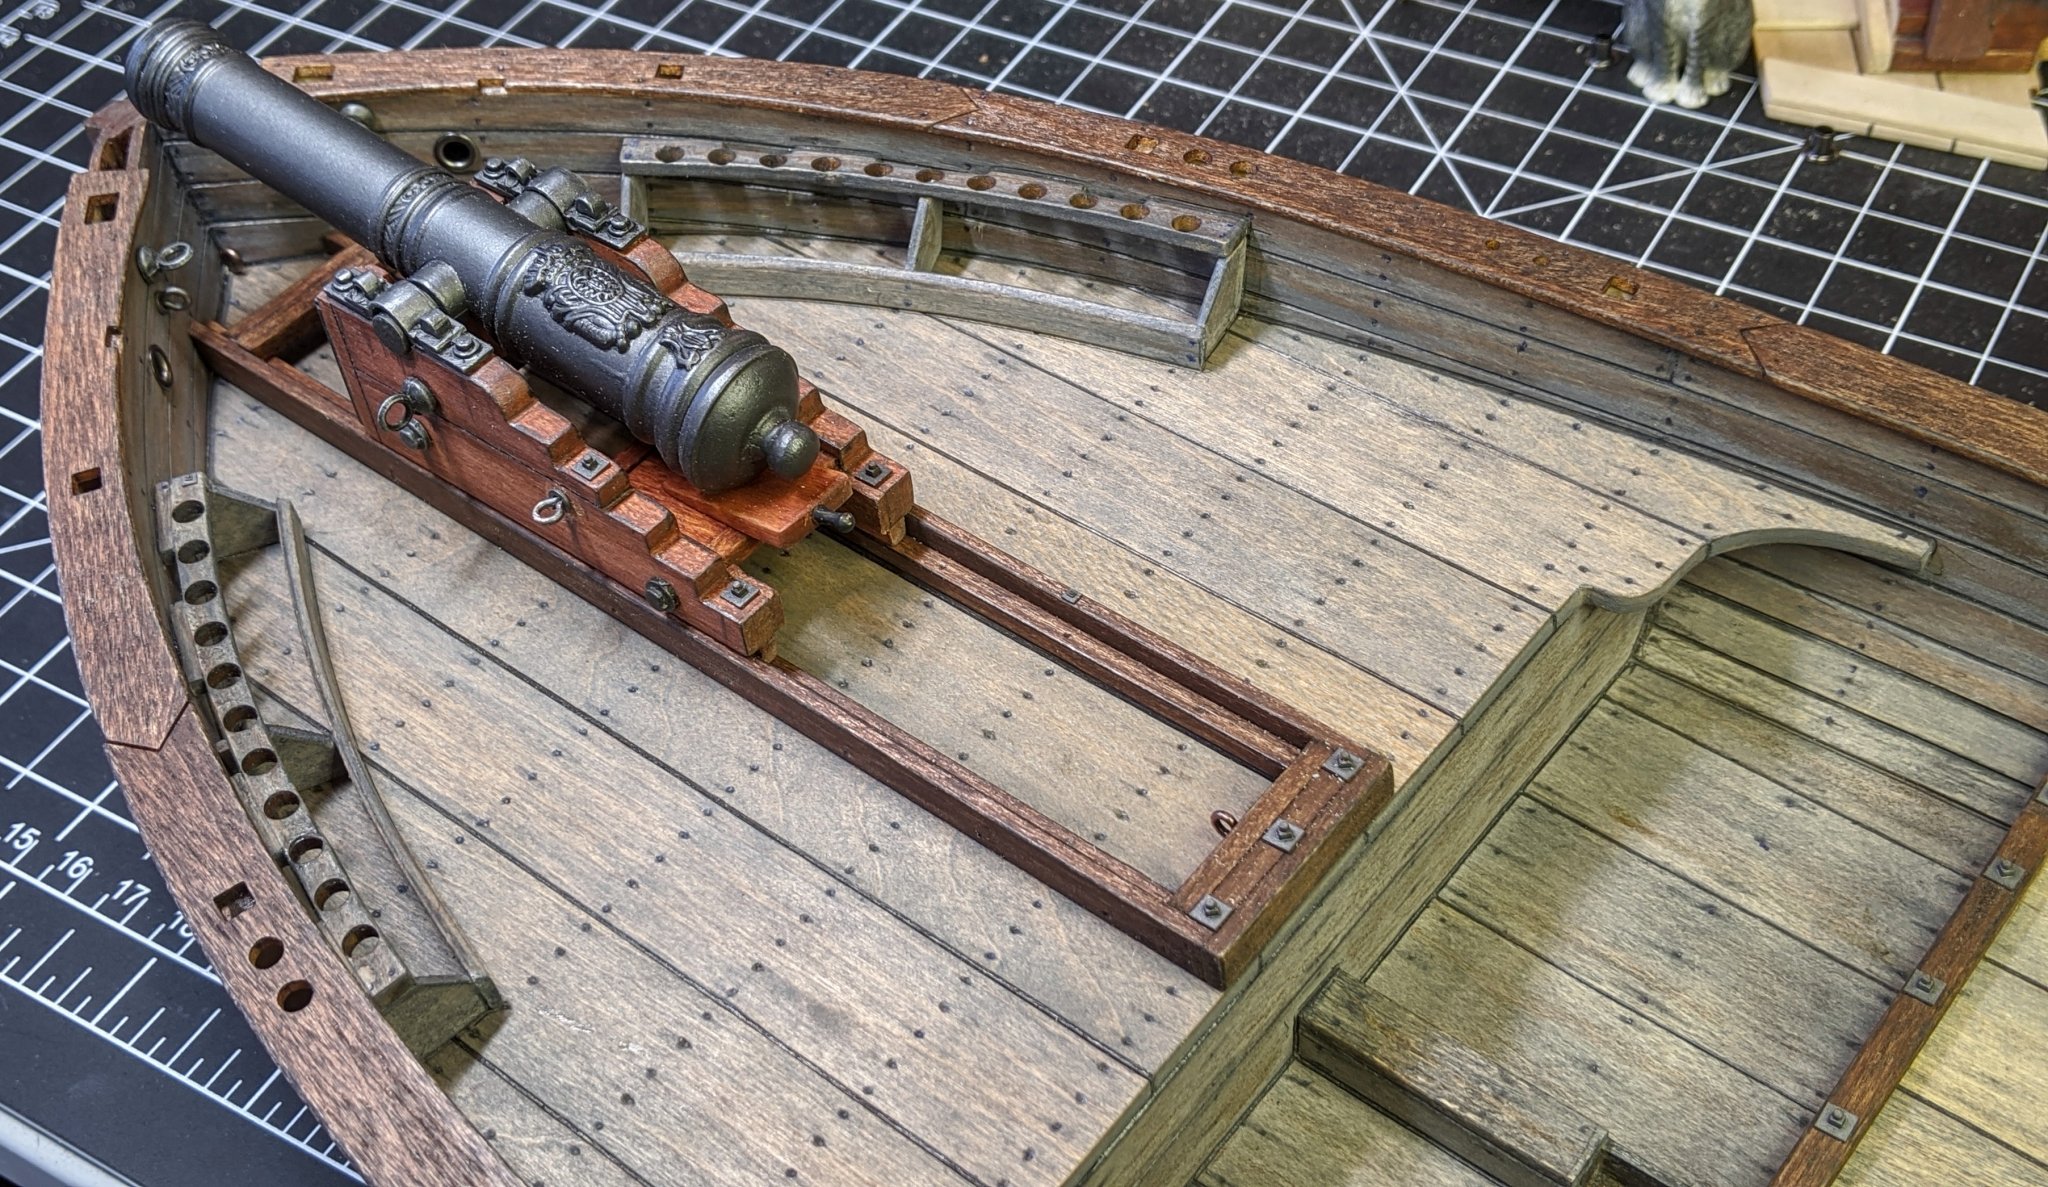
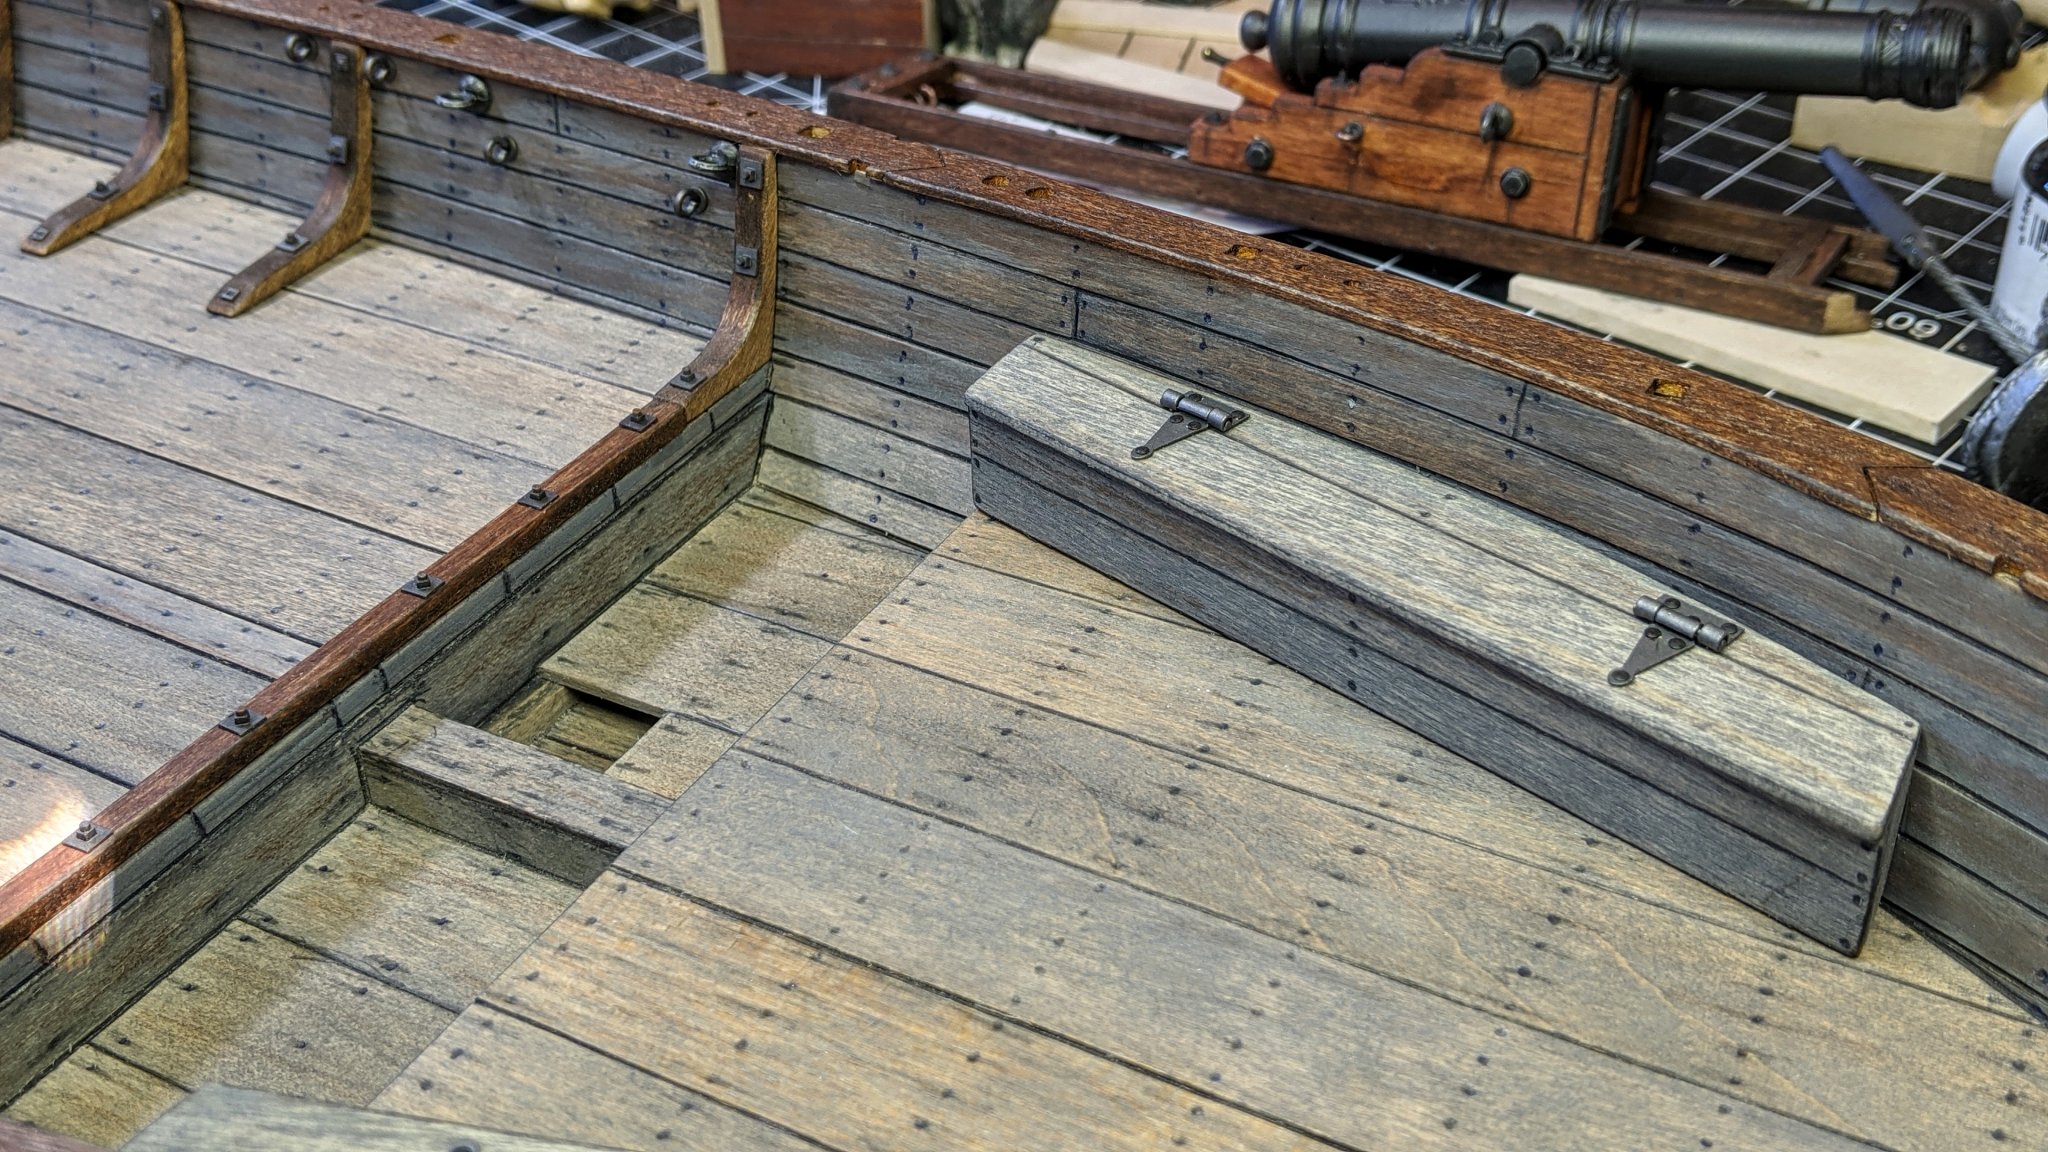
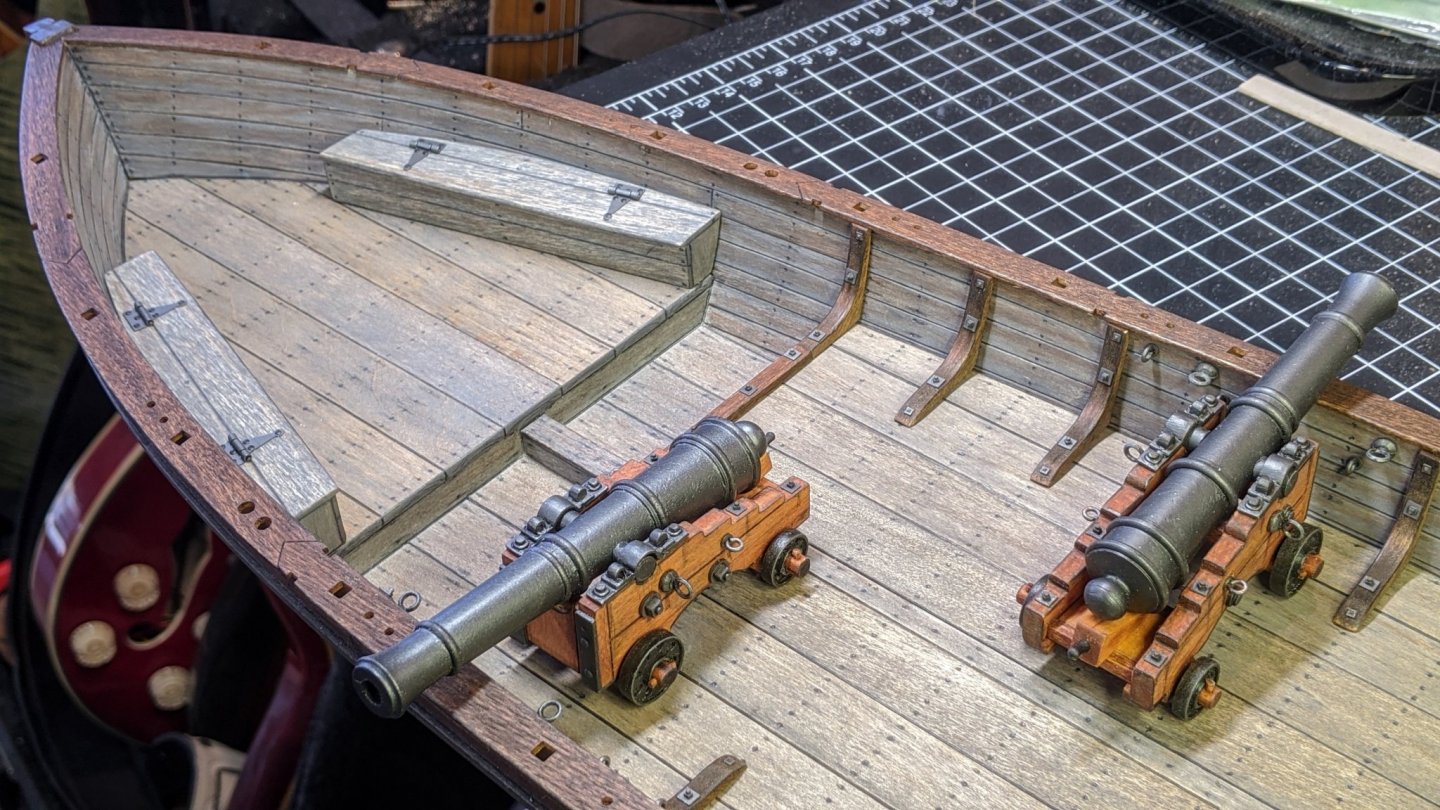
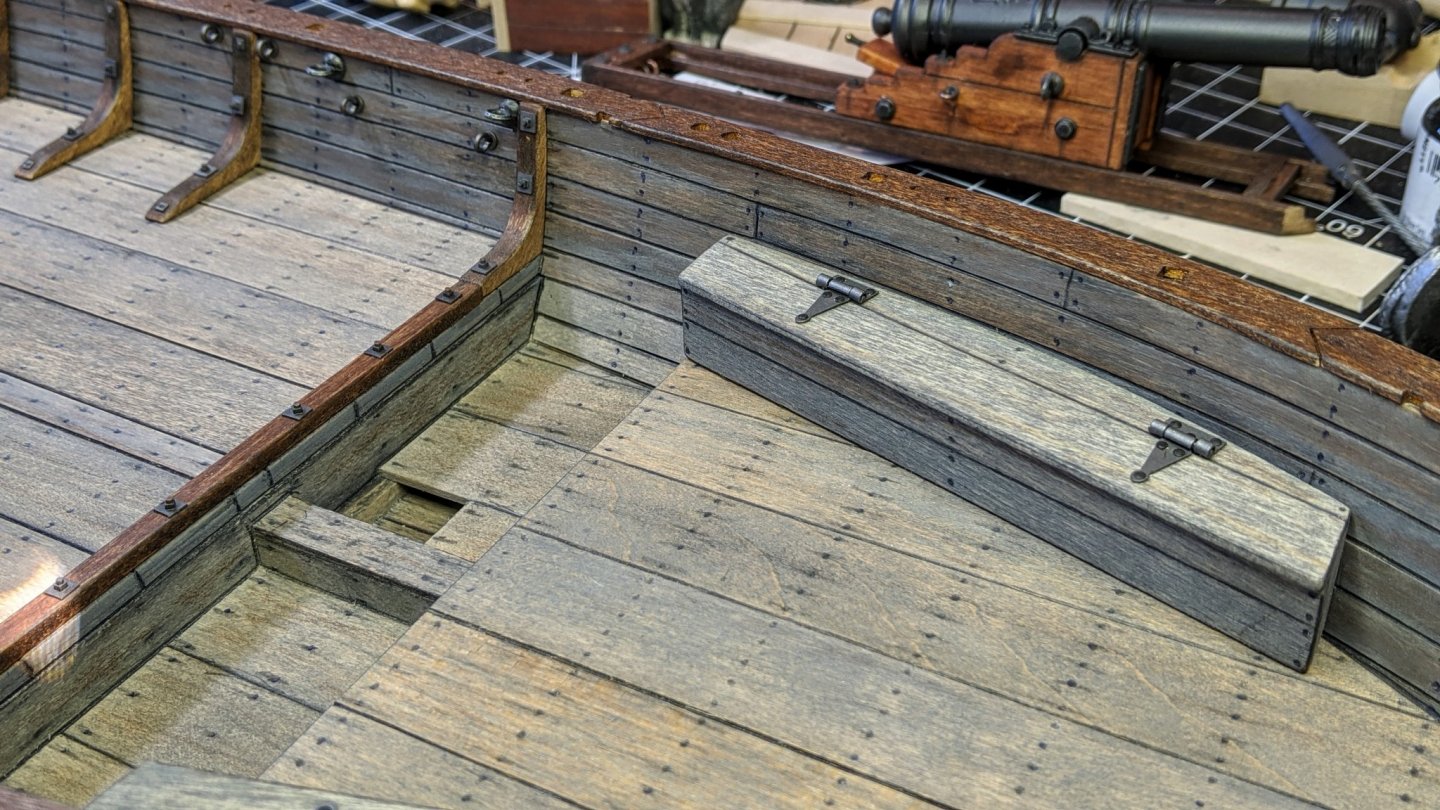
Hi all, I got a lot of detail stuff done, not real obvious but necessary. I decided to tone down the nailing with an eraser and generally even out the overall "patina". I rebuilt the 12 pounder cannonball racks, adding storage underneath for bar shot, chain shot and other stuff. I finished the storage cabinets in the stern, using doll house hinges (not functional). Added a bunch more bolts and nuts, and installed all the inside hardware. Next is to mount and rig the cannons, then start on the mast and other deck stuff.


-
Thanks, BobG! Testor's metalizer paints are awesome... I got the gunwales installed and started work on deck paraphernalia. I had a real problem with the 12 pounder cannonball racks though. They are VERY delicate so of course I ended up breaking both of them...😬 After some fiddly repair they are installed but I'm still not really happy with them. Even though they are prototype, they just don't look substantial enough to hold all those cannonballs. I may end up scratchbuilding some improved ones. Progress shots:

-
good progress, I like the contrast between the ceilingwork and the hull. When you do the cannonball racks by the 12 pounder, be very careful. Even with delicate handling, mine broke in two places and were a real pain to repair. If I could do it over, I'd scratchbuild some more substantial ones... (I still may do that). Again, I'm enjoying your build log.
- 39 replies
-
- 1
-
-
- philadelphia
- model shipways
- (and 1 more)
-
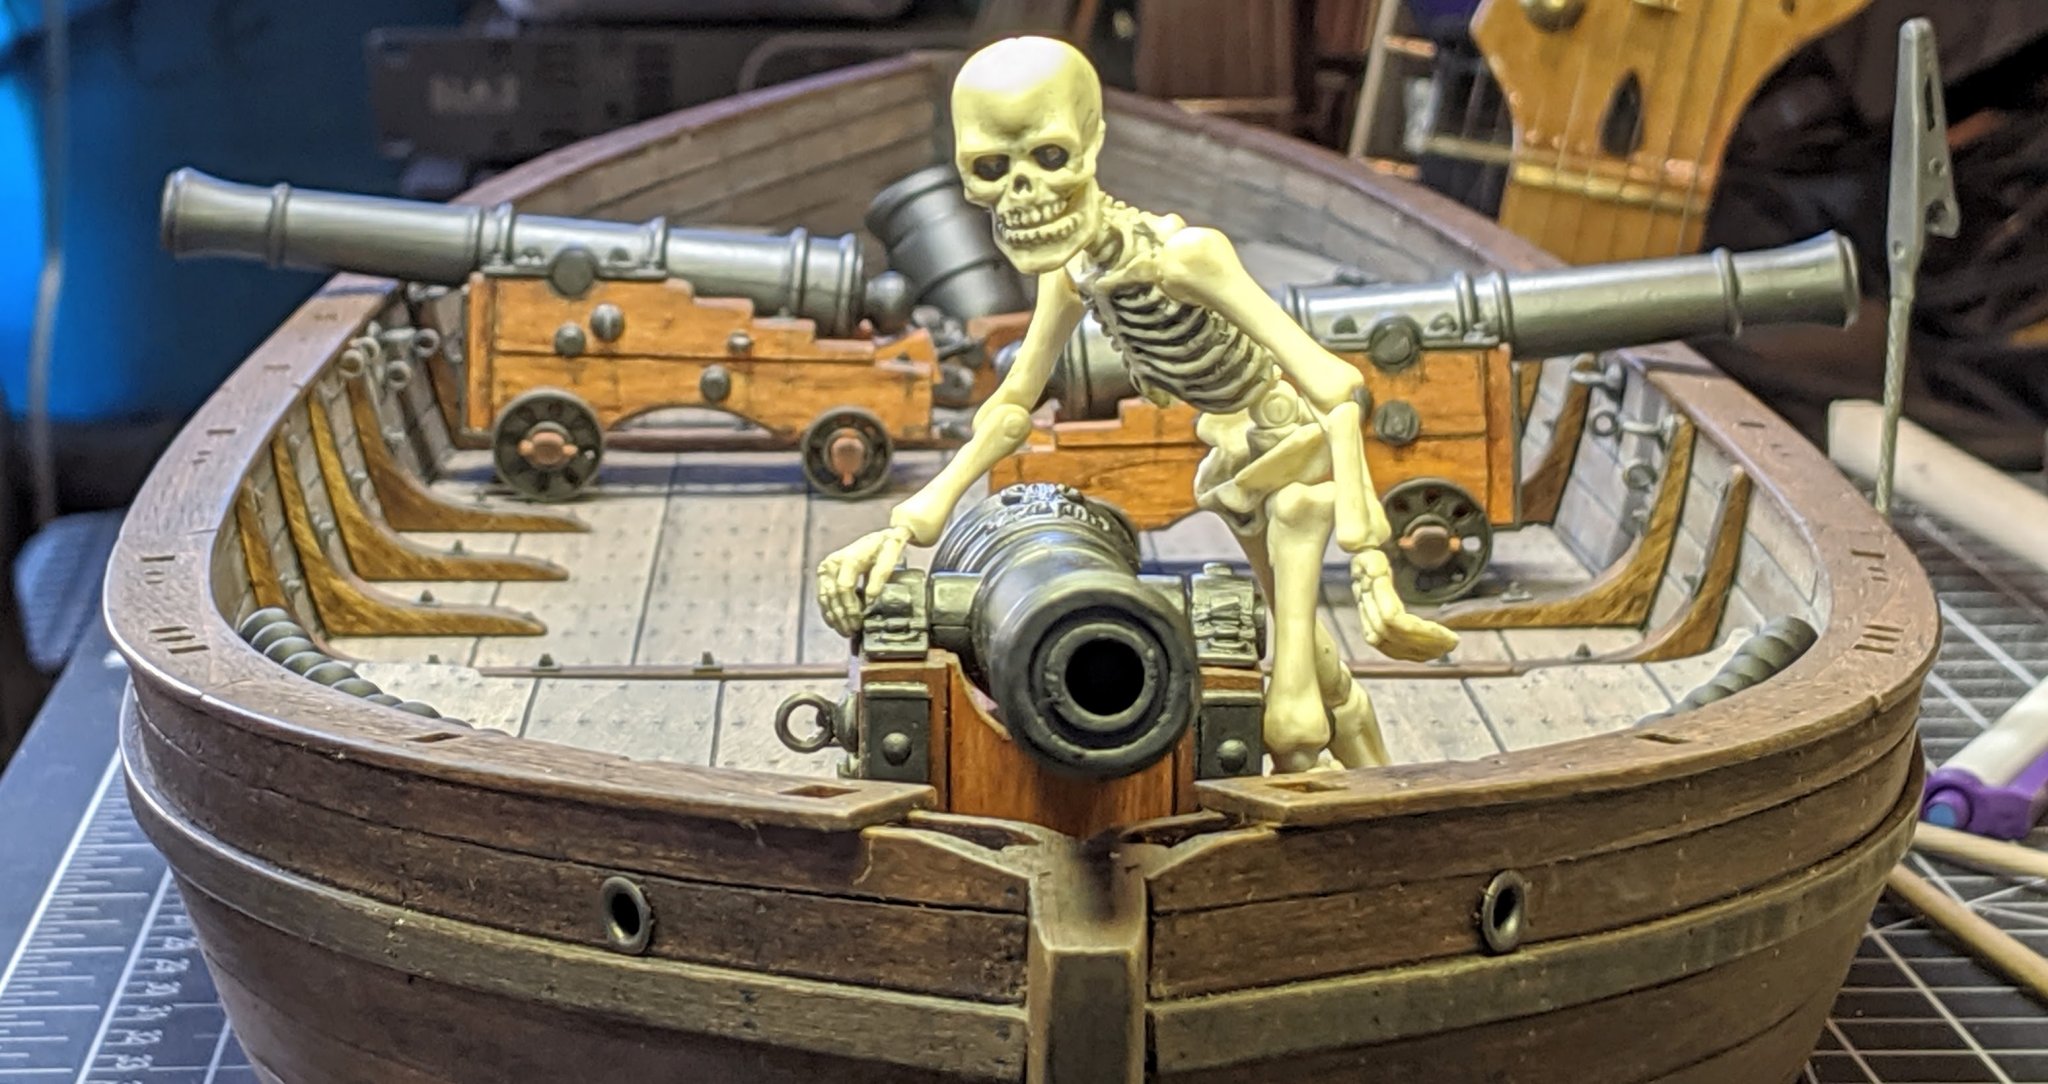
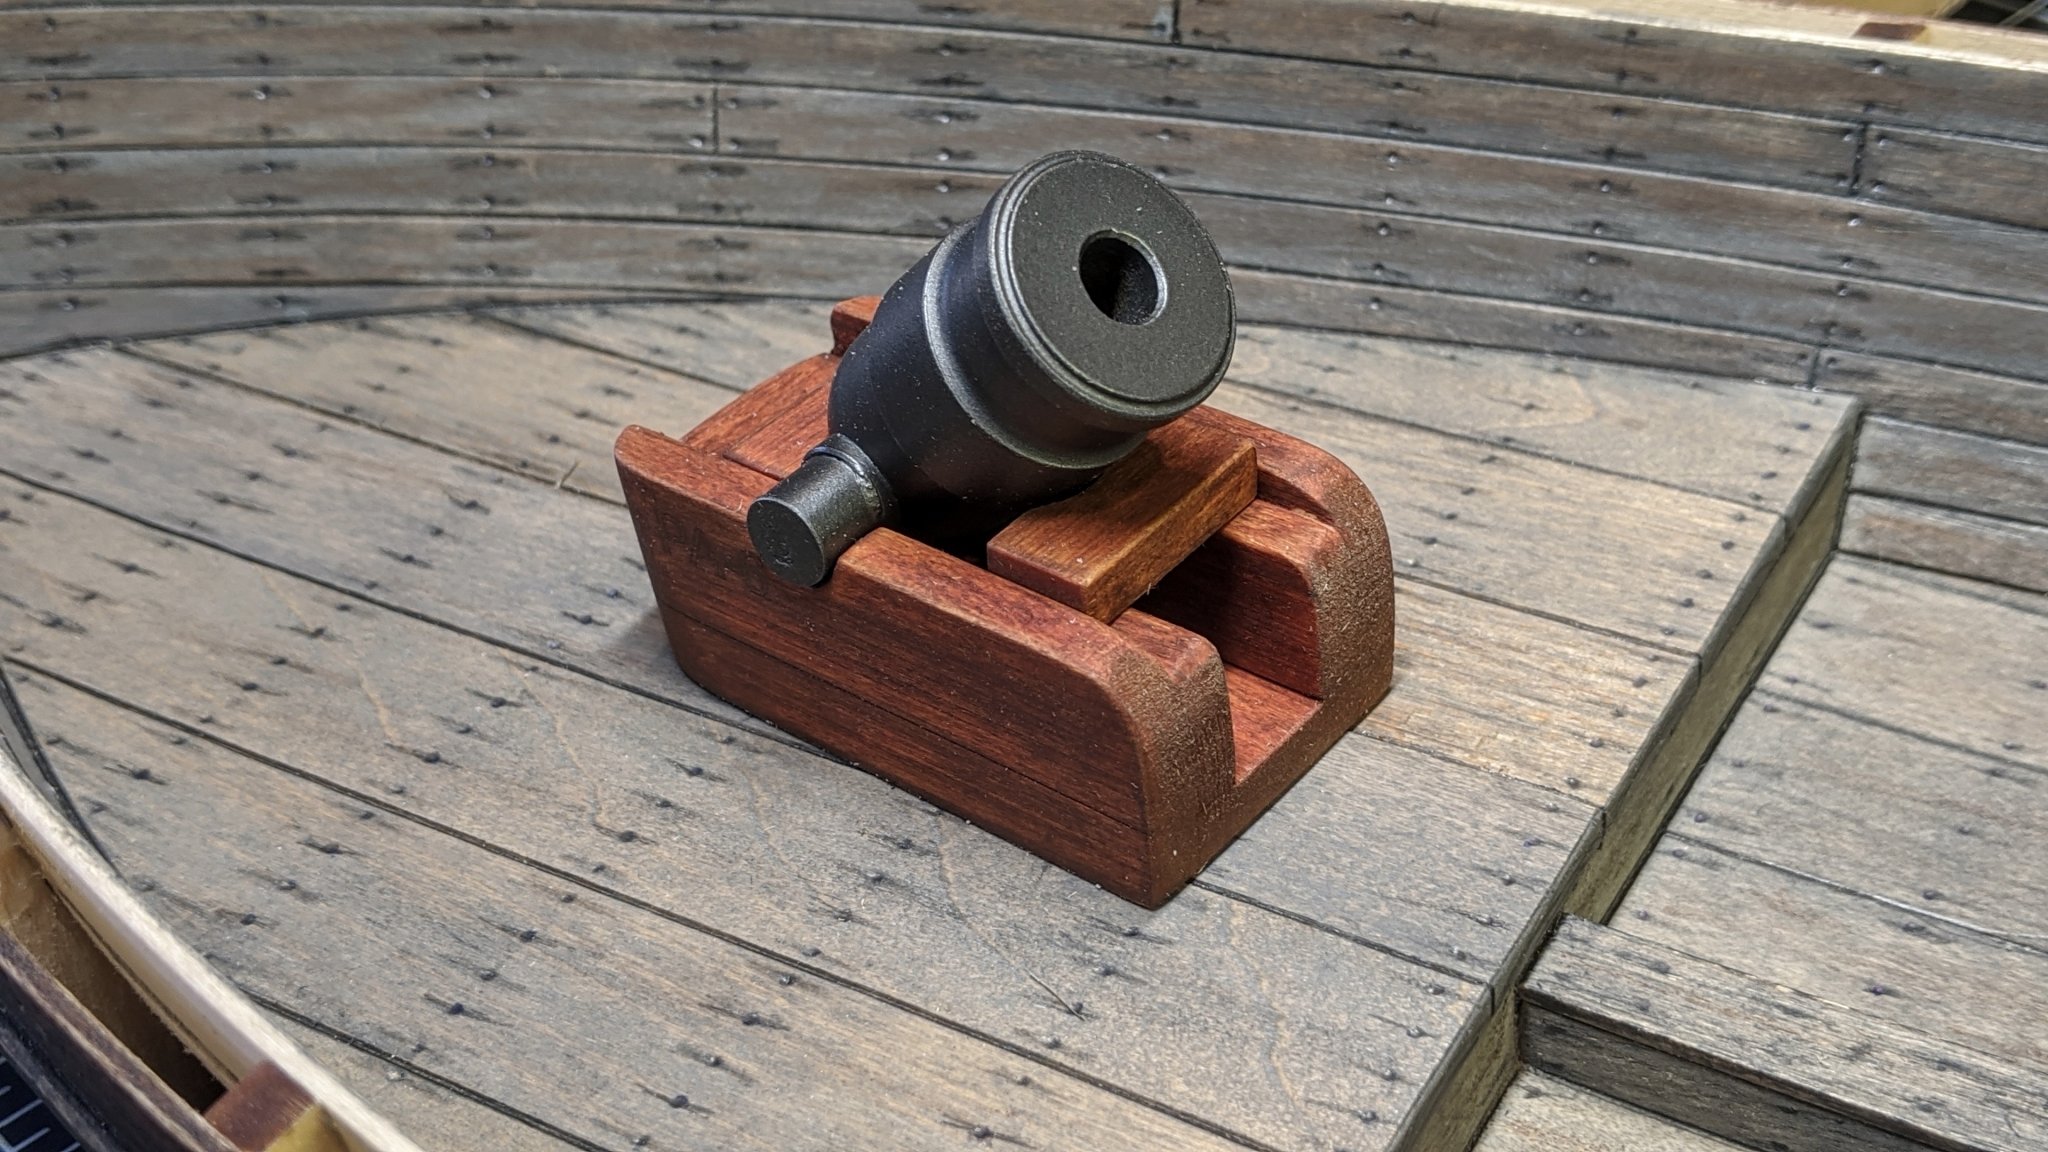
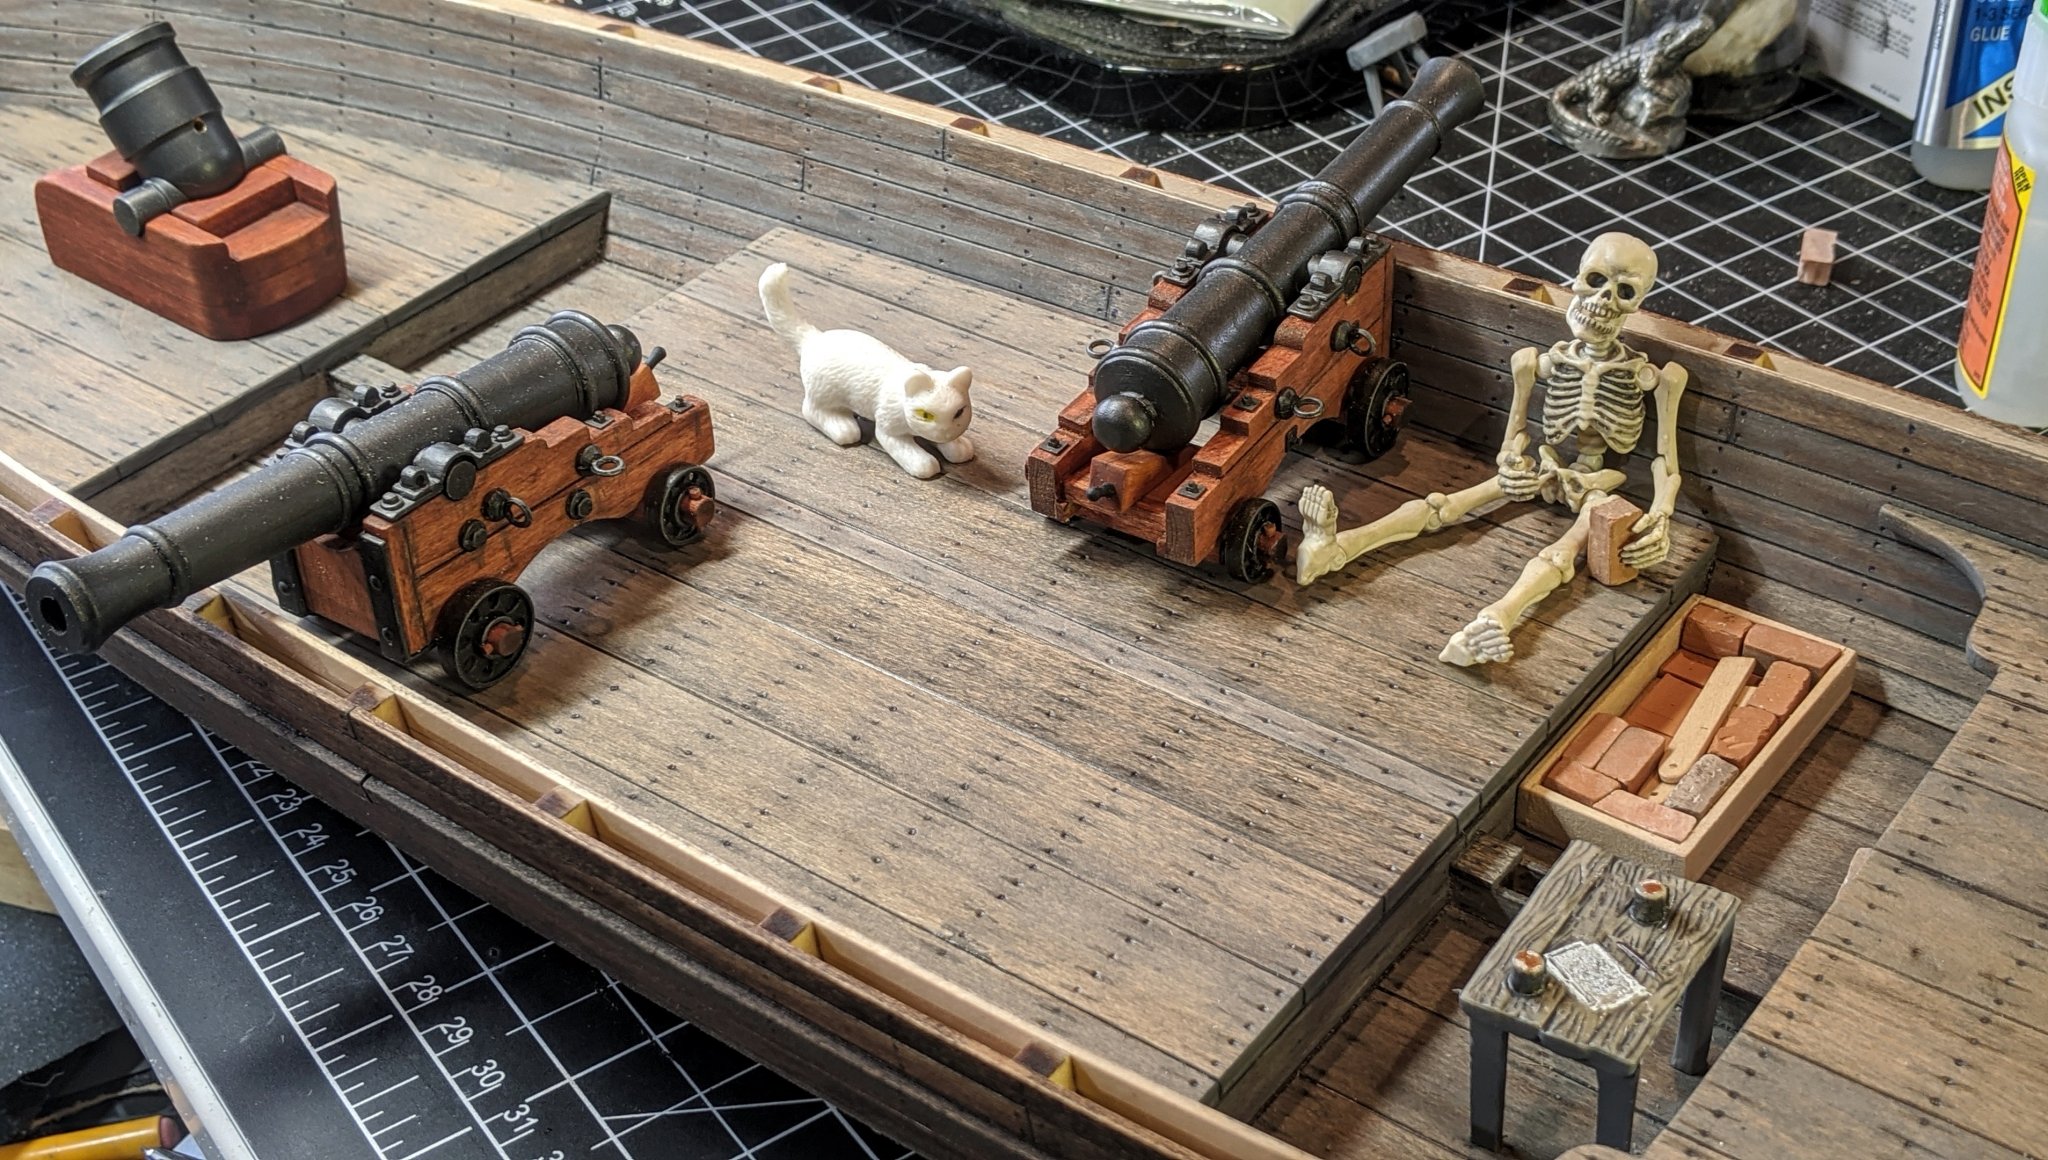
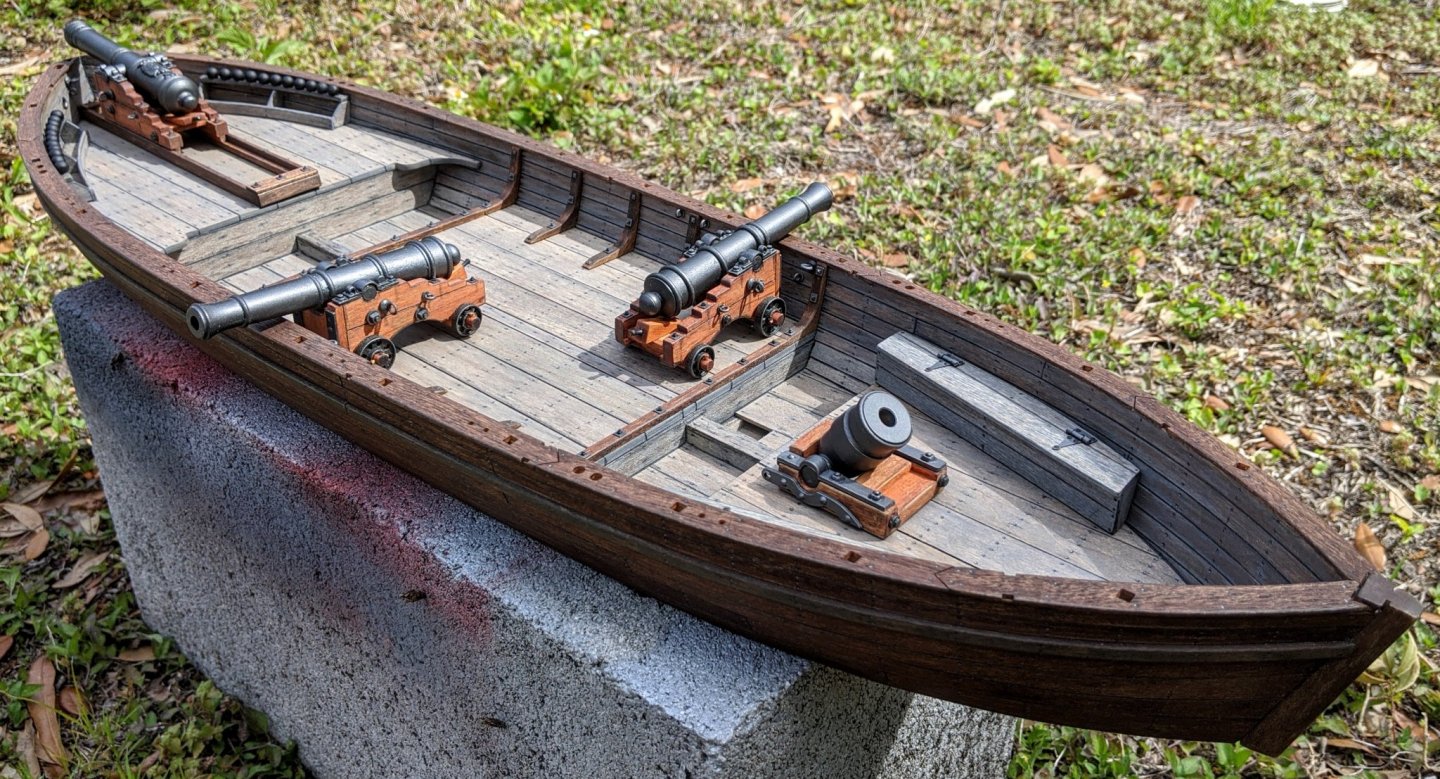
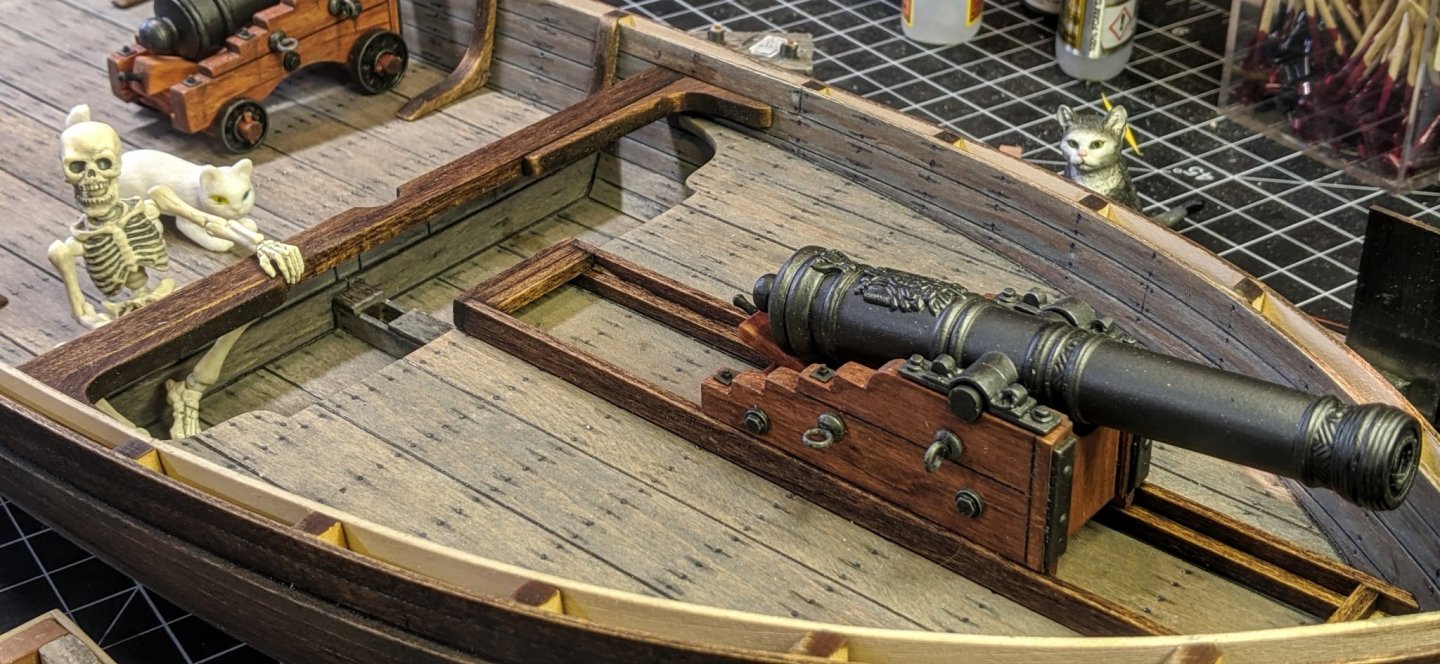
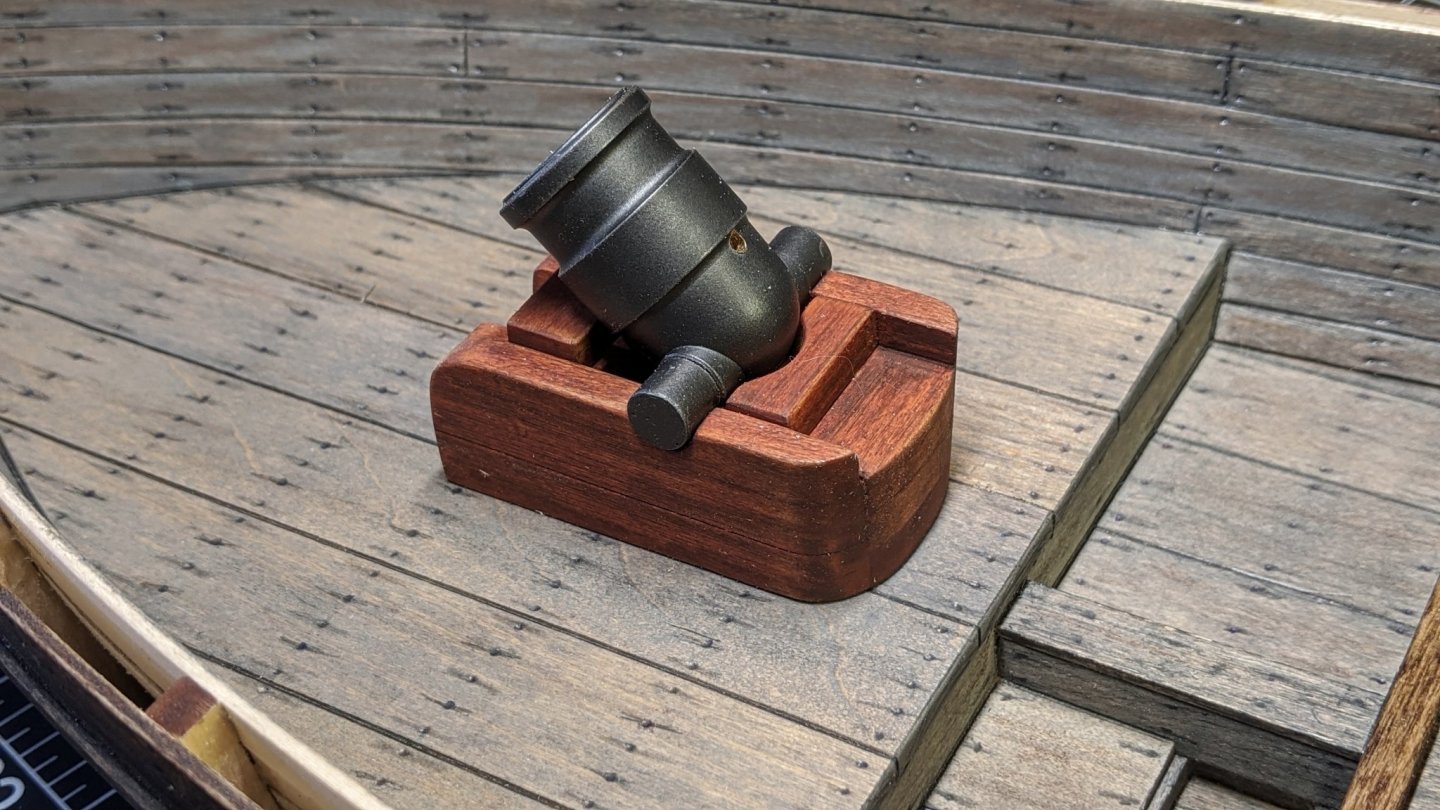
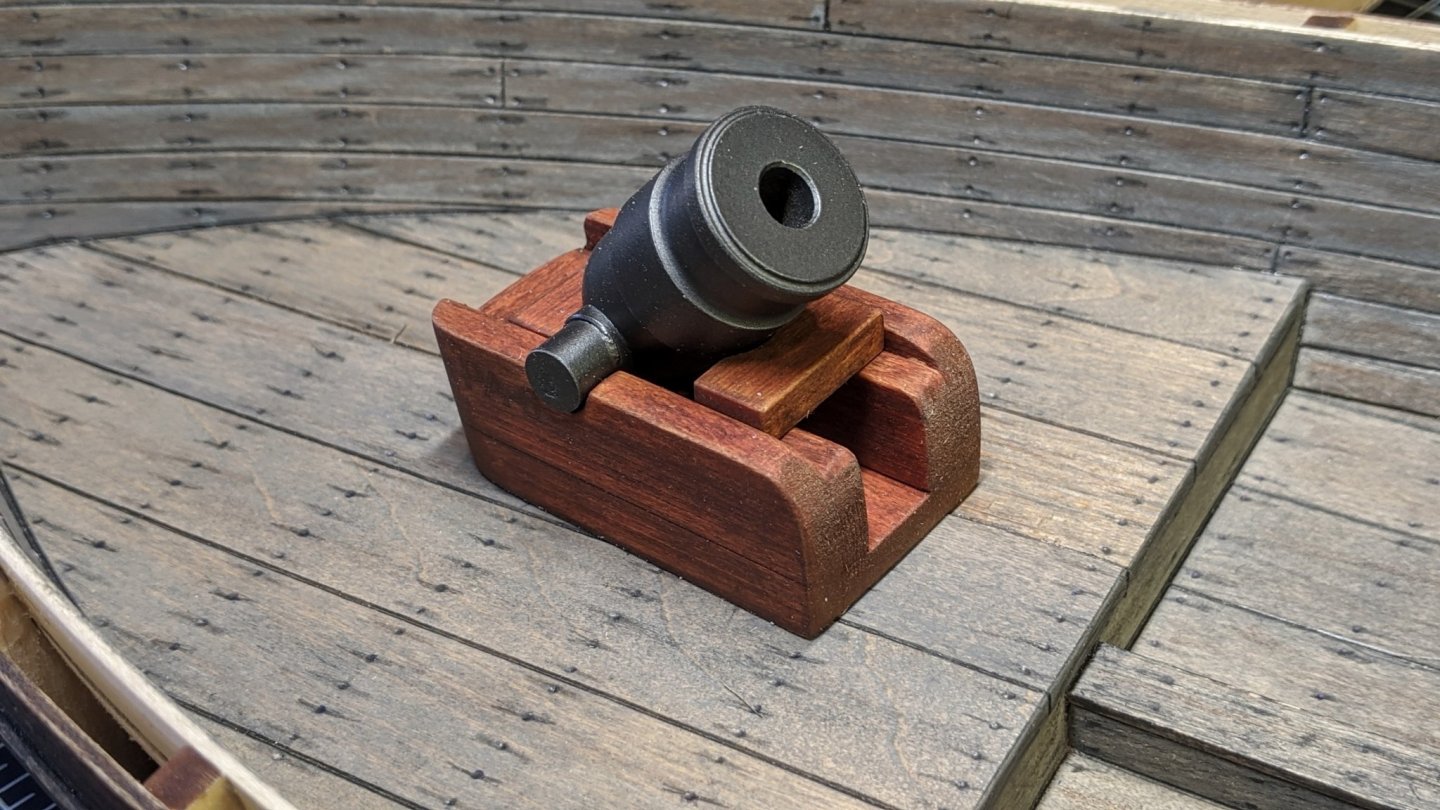
Thanks, leclaire! Most of the hardware on the carriages came from the three Goodwill cannons. The rest came from Hobbylinc, ebay and Amazon. As kurtvd19 suggested, that hardware is superb. Another manufacturer called Tichy-Train has a whole assortment of styrene nuts and bolts in different styles and sizes I use that are really nice. Grandt line, Meng, Scale-Master and a lot of other manufacturers make hardware that works great also. Hinges, brackets, grommets and lots of other stuff is available for dollhouse scale (1:12) that can also be used. For this scale (1:24) model car detail parts are a good source. I'm also using some 1:35 and 1:60 stuff depending on what fits and looks right. I have a huge stash of photoetch, brass, styrene, cast metal and wood detail parts that I dig through when I need something, so I guess I'm lucky. I am seriously debating using the mortar. Since I decided in the beginning of this build that it wouldn't be true to the original I have a lot more leeway in what I can do. This build is ending up being a "typical" gunboat (or gundalow) that could have been used by many nations during this approximate time period, based on the Model Shipways Philadelphia. The mortar was part of the original plan, anyway... Now that the decks are done, the fun begins! Slim is stoked... I've given him a grog ration... Here's the mortar with the scratchbuilt carriage. It would be fixed on the centerline (no swivel) with variable elevation only. I'll add a lot of nuts, tackle, chains etc. to detail it out.


-
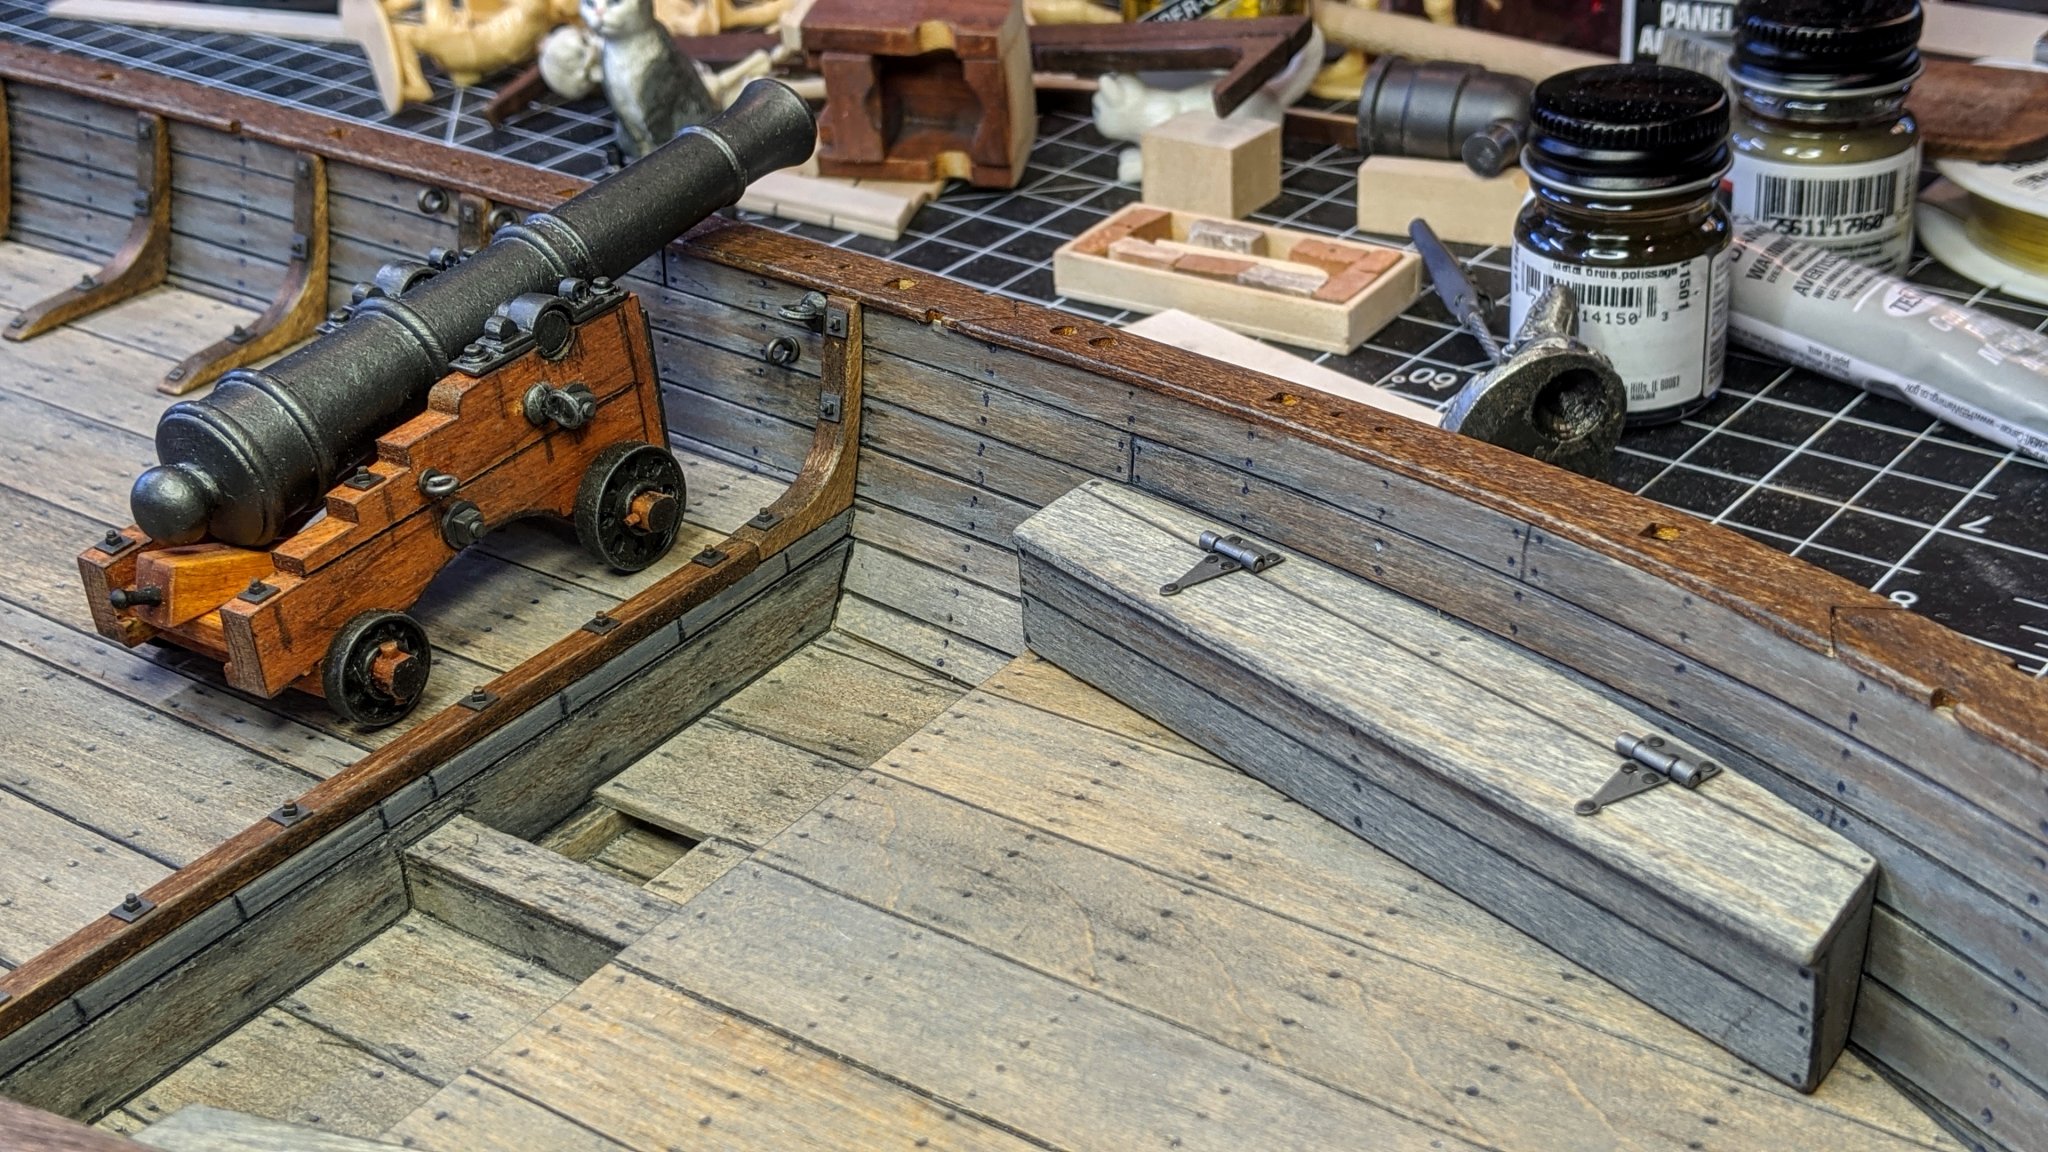
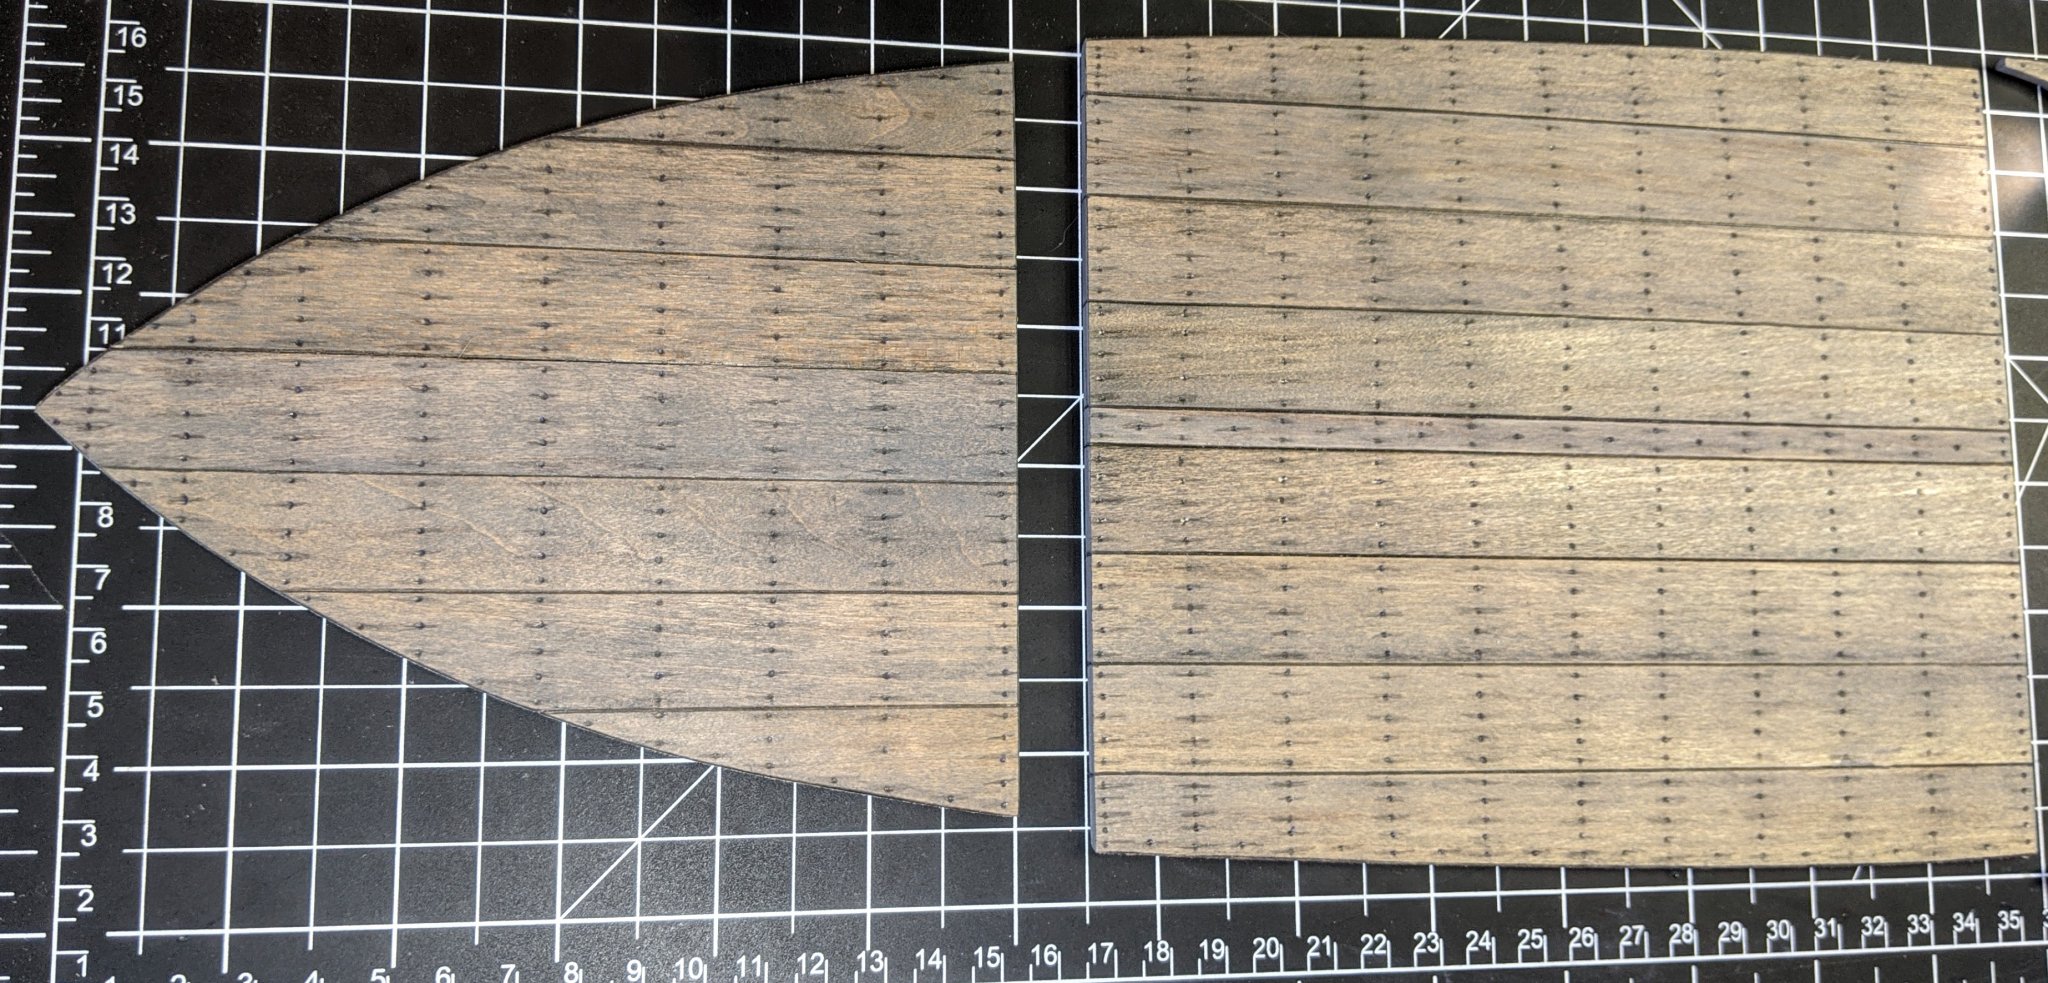
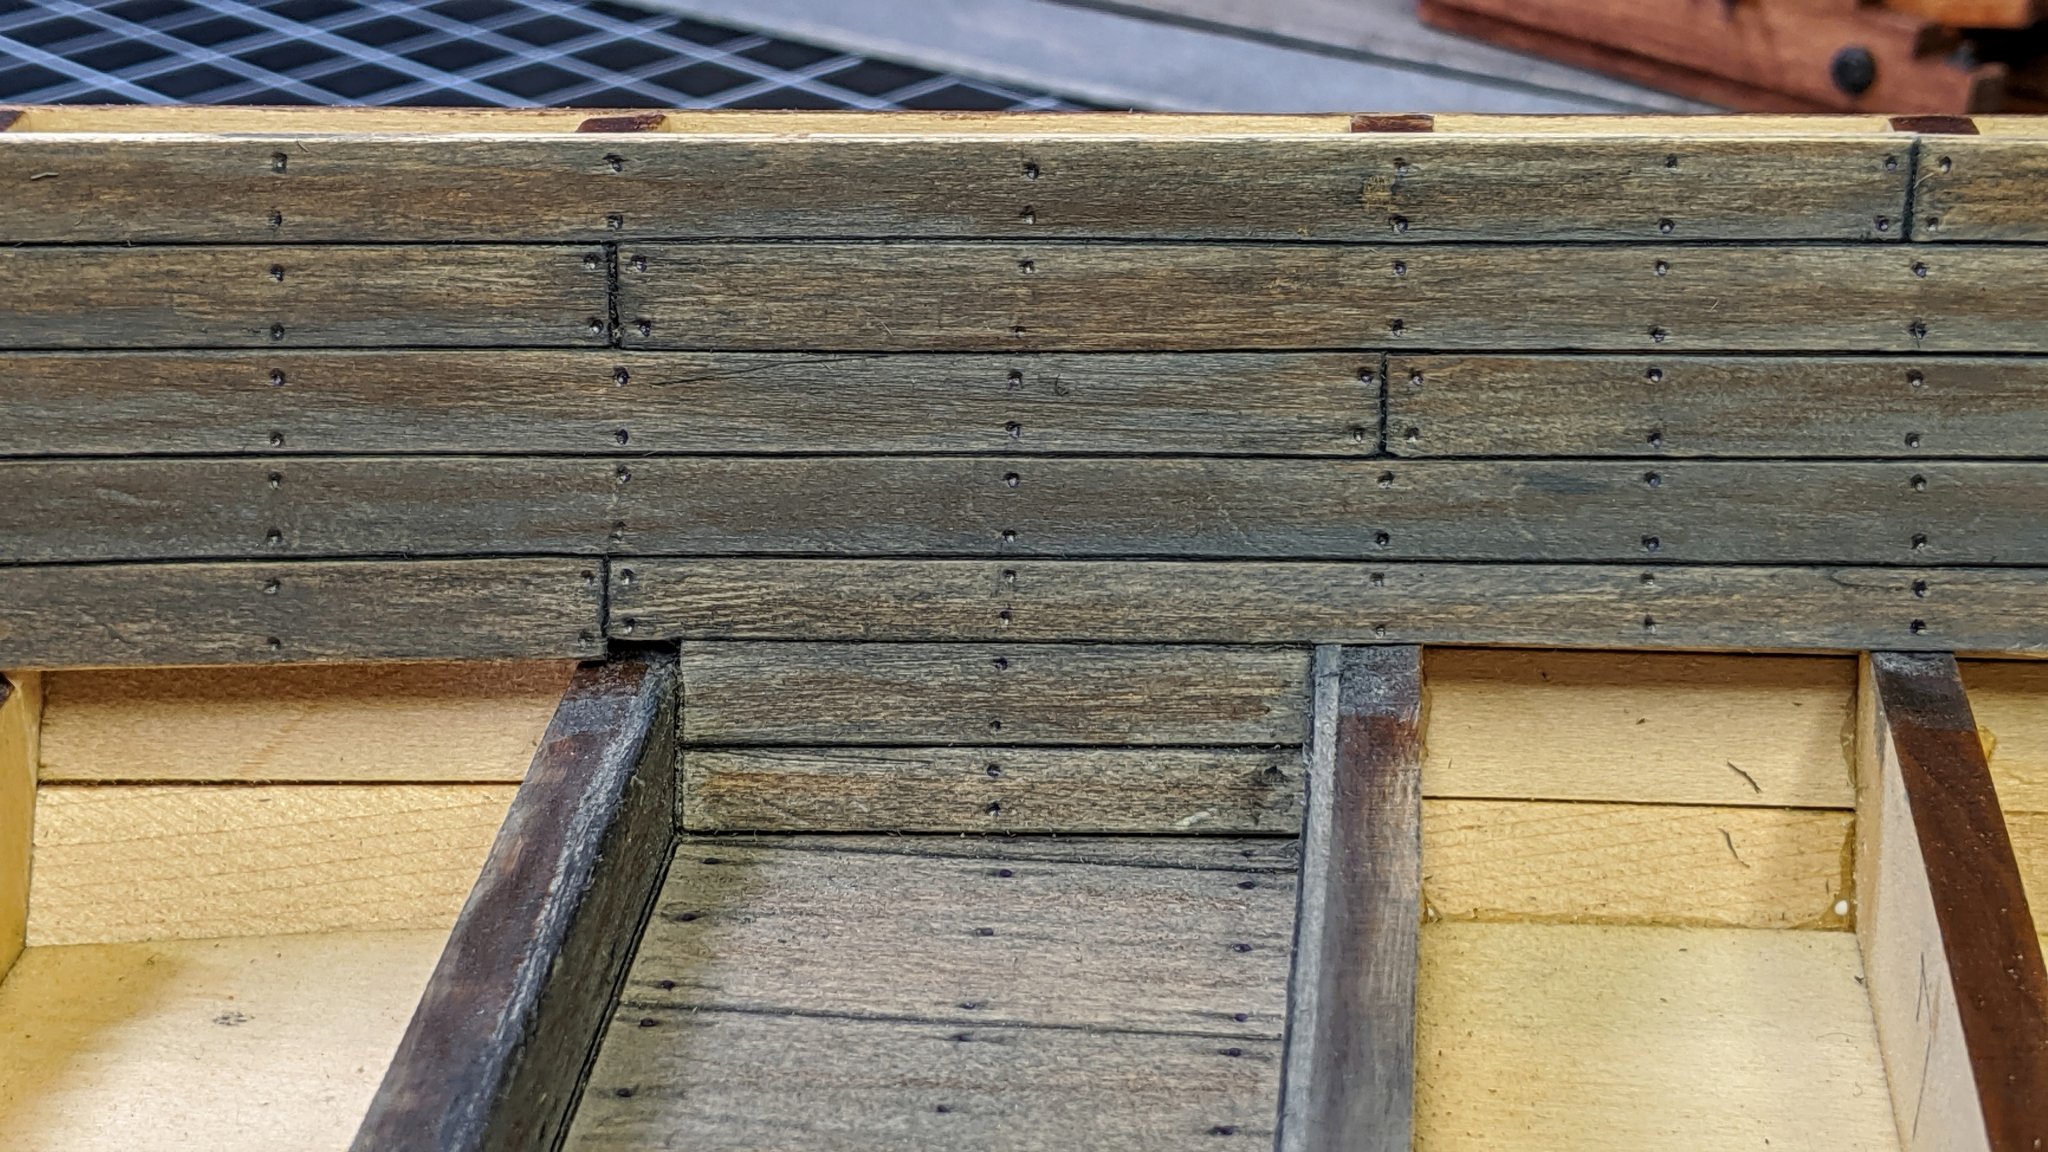
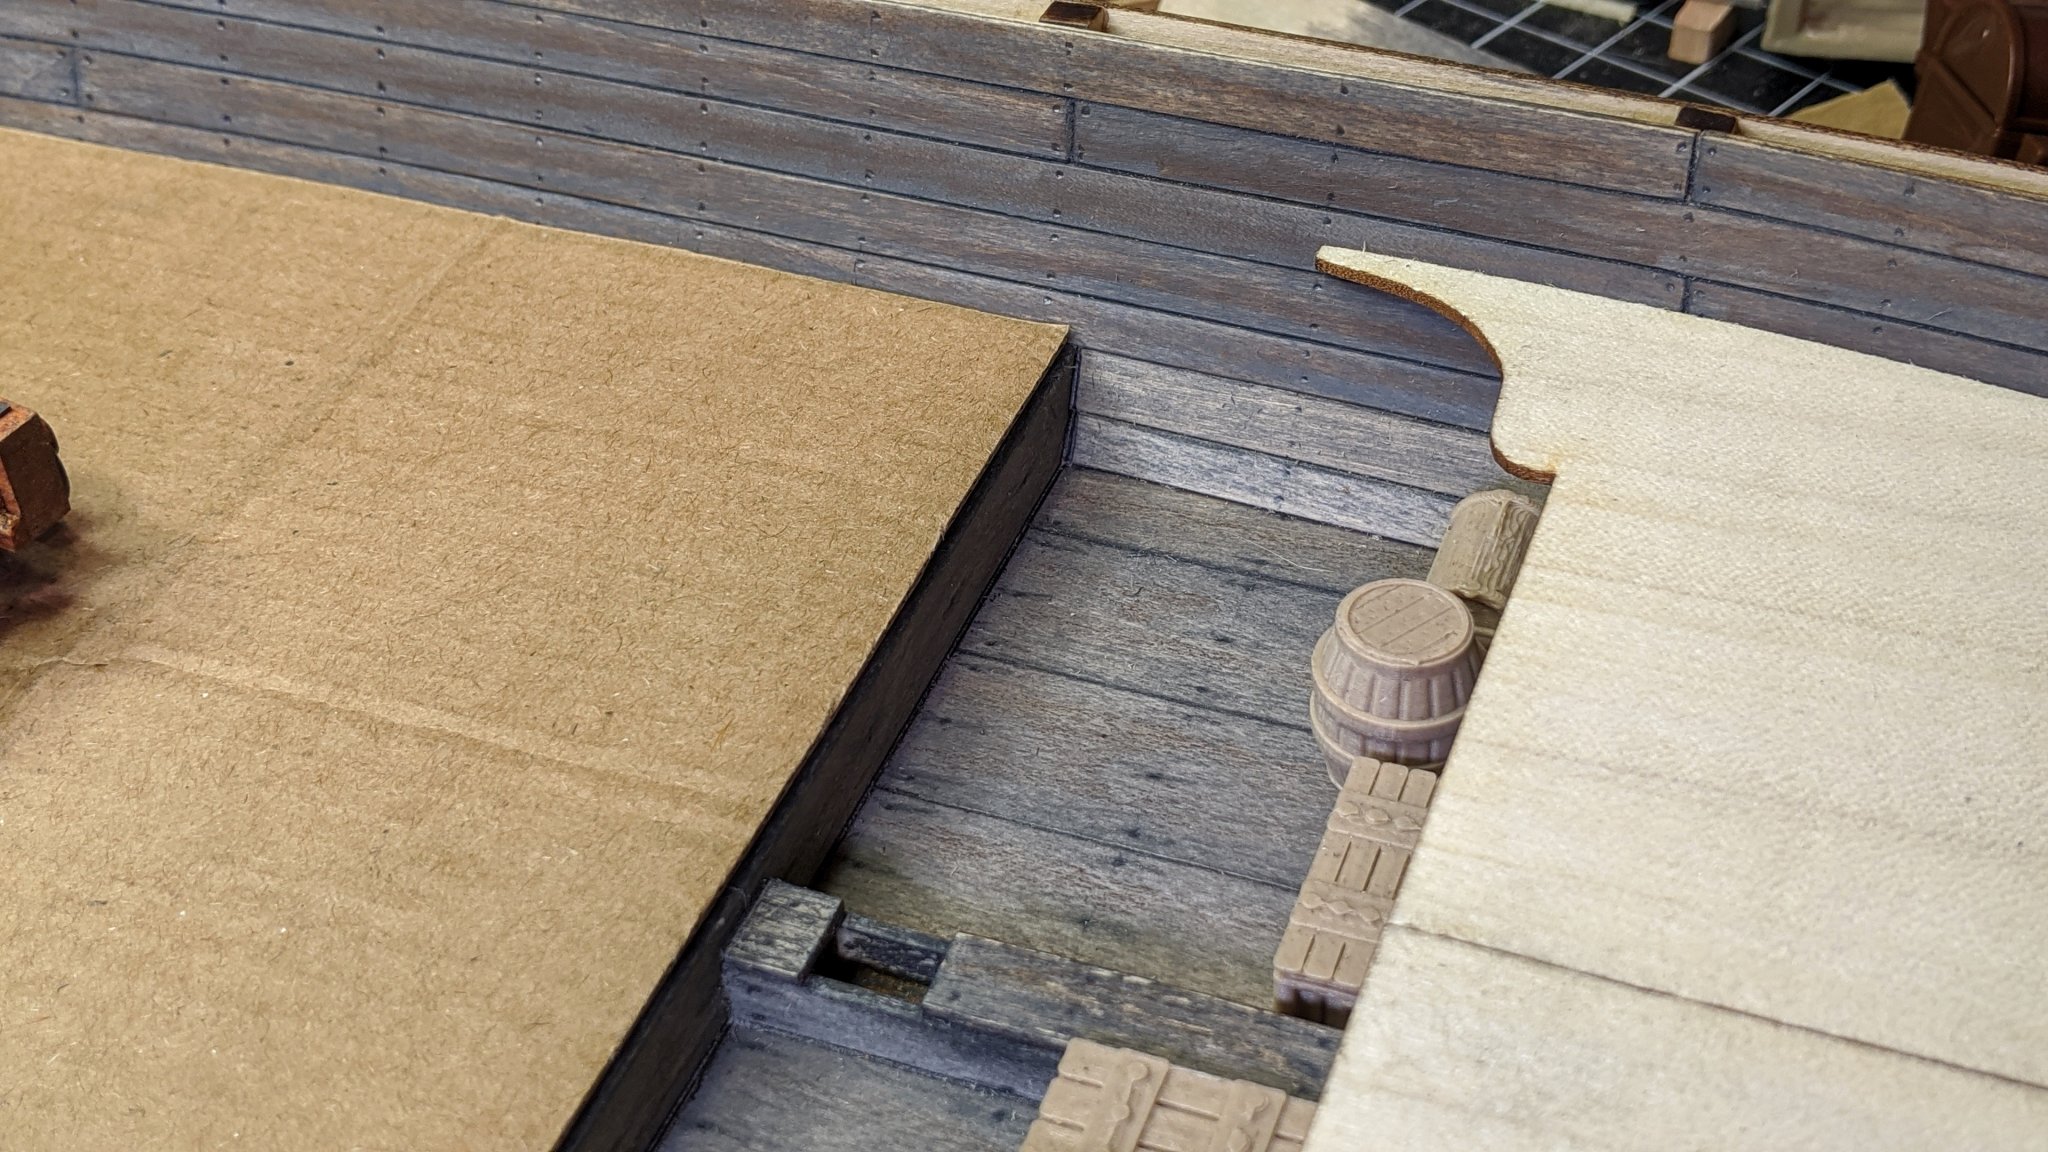
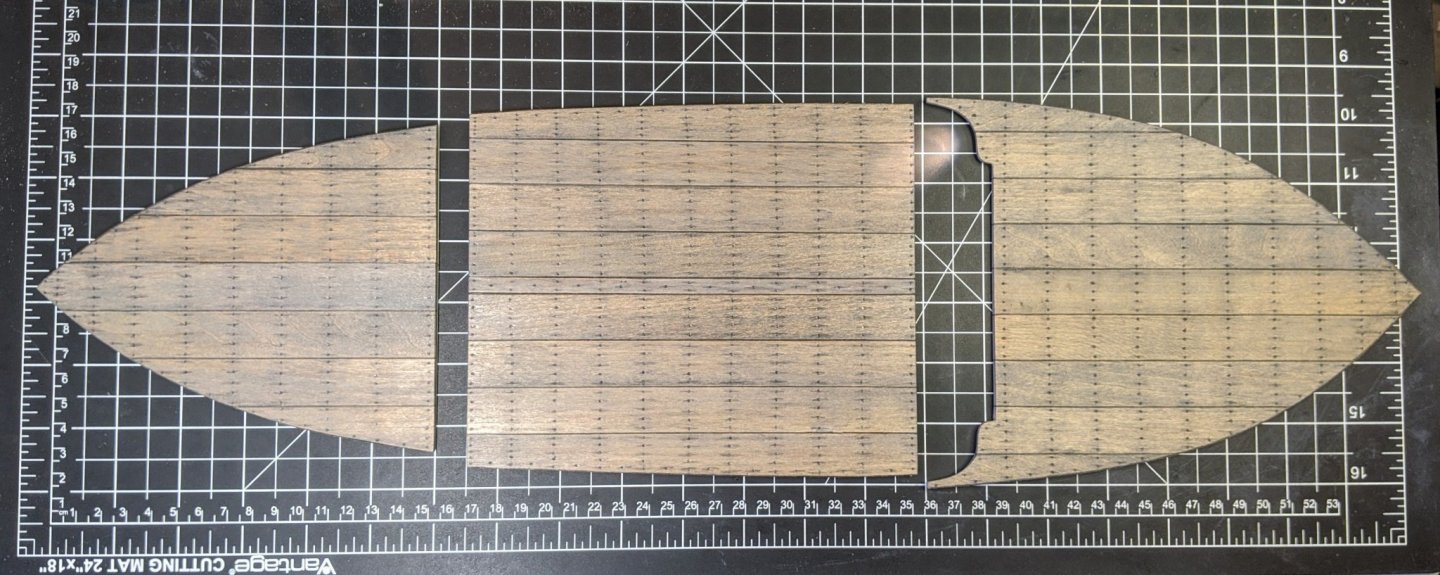
Deck materials finally arrived and finished. Just some minor touchups to do and then they can be attached. I went through about three iterations of how I wanted to do it before I found one I liked. I first tried 1/8" thick planking, but it was too hard to shape and didn't look "real". Second try was the kit decks with 1/16" planks but the warpage was unacceptable. Third and final method was to use the kit decks as templates to cut out some 1/16" three ply birch plywood and then attach 1/16" planks over them. No warpage and easier to fit to the hull. Next will be the knees, supports and gunwale caps. With the hull finally done, all the cool stuff can start to go on. Speaking of cool stuff, what about the mortar? Supposedly Benedict Arnold originally wanted to mount a mortar in the stern but the hull couldn't handle the recoil. I had this mortar (it really fires!) kicking around, and built up a carriage for it to see if I could use it. I know it's not "prototype", but I think it adds interest. Any thoughts? Thanks for all the kudos, this is sure getting to be a fun build!


-
With basswood in this scale it works well and is quick and easy. There are a LOT of nails, tho and with multiple passes it does take some time. If you want to get rid of the pencil shine, just spray with dullcote or a equivalent matte clear. I really like the color combo you selected, it really sets a nice contrast and color balance. I used your technique on my deck planking and it makes a huge improvement. It's cool to have common builds and be able to share tips and tricks.
- 39 replies
-
- 1
-
-
- philadelphia
- model shipways
- (and 1 more)
-
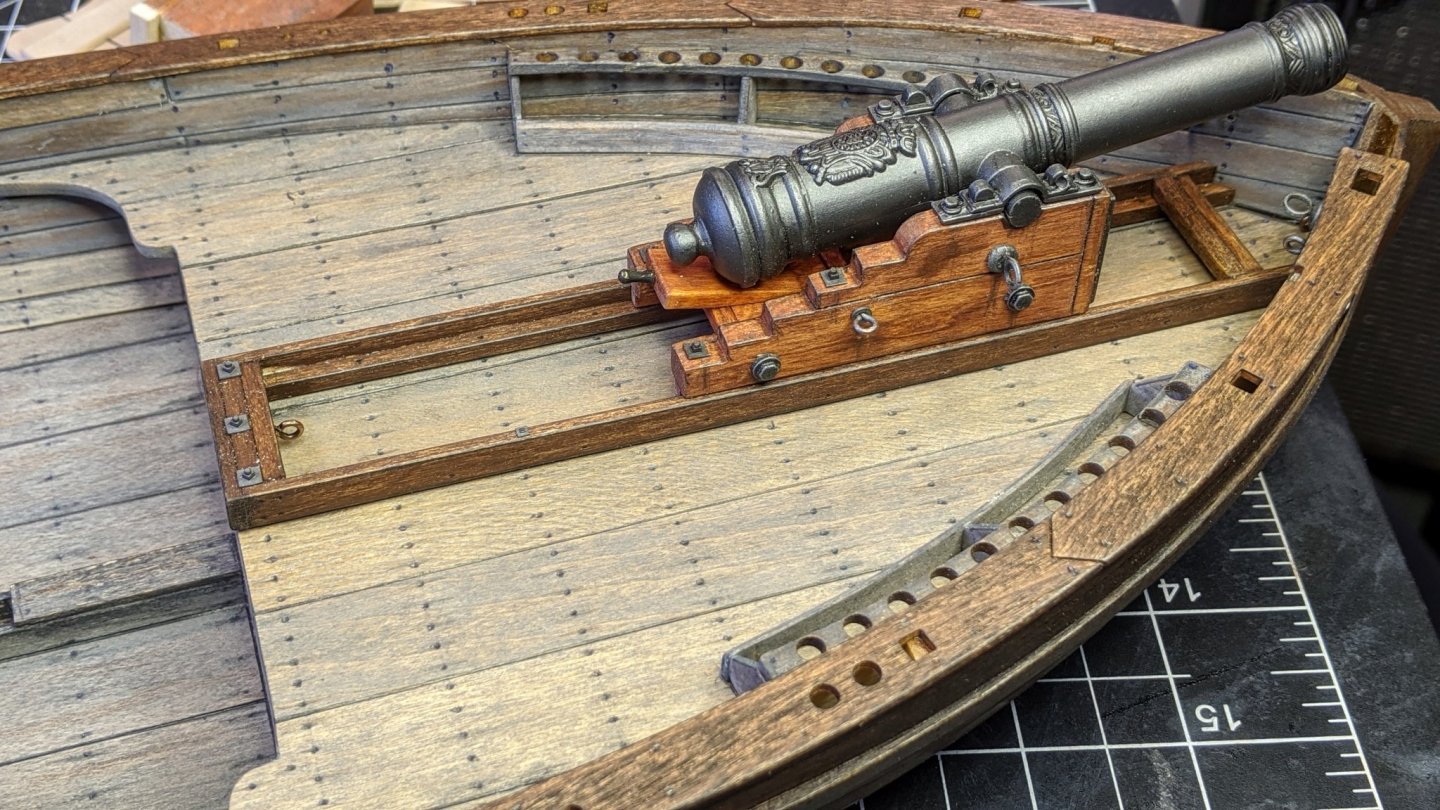
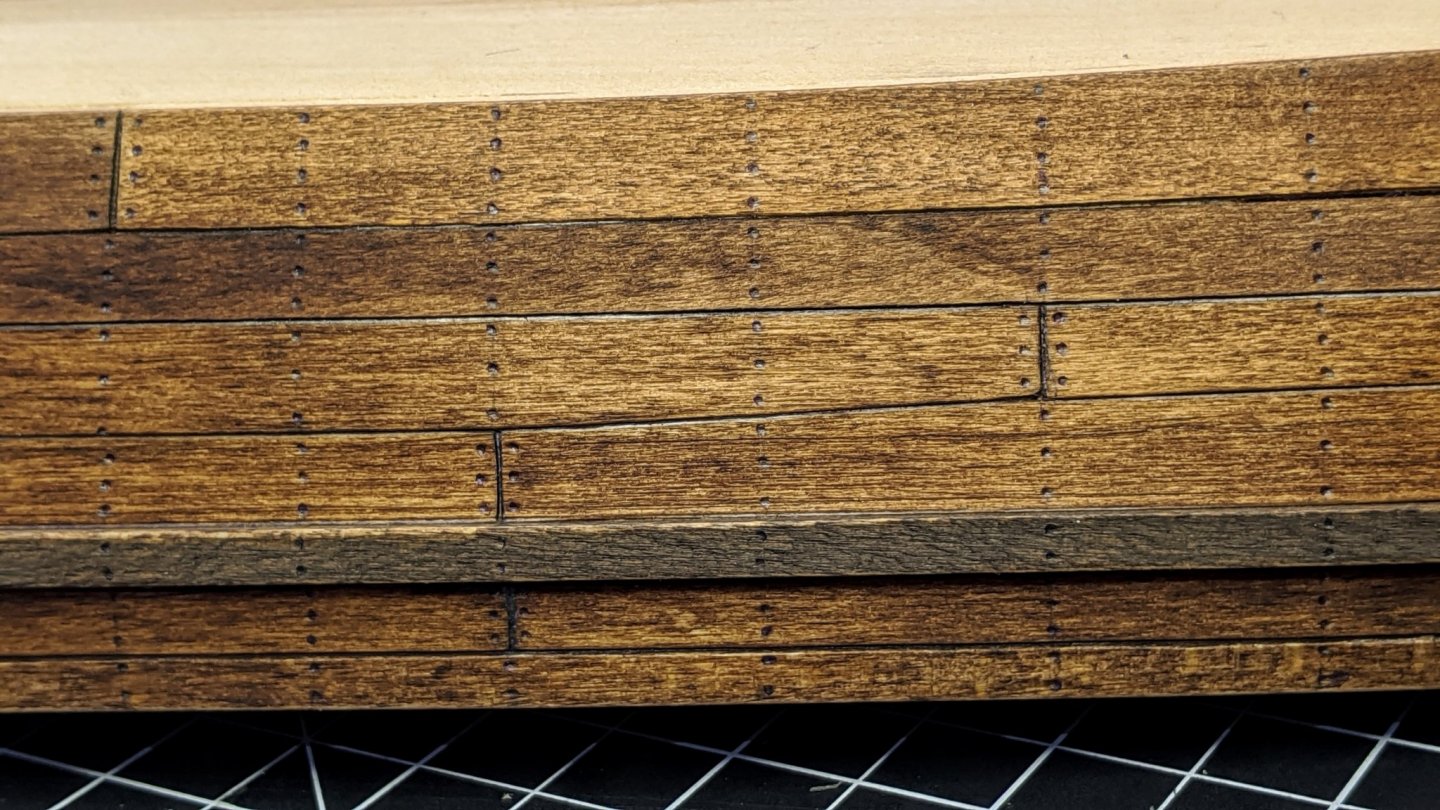
I don't think there's one "smoking gun" problem with the cannon level issue (bad pun intended)... here's what I think caused it. 1) had to to widen and lengthen all three gun carriages to fit the new cannon barrels. Also, all three barrels are larger and recess deeper in the cradles and the wheels on the 9 pounders are slightly smaller than the kit ones. 2) started planking the hull and ceiling slightly higher on the frames than indicated in the plans to give myself some "wiggle room" when fitting the gunwale caps. 3) still believe that all three decks should be 1/8" planks instead of 1/16" sheet. By increasing the deck to 1/8" planks, lowering the gunwales a bit and raising the 12 pounder track I think the problem is solved. The 1/8" x 3/4" and 1/8" x 1/2" planks I ordered should be here this week, than I'll know if it all works together. I did all the nailing after staining. The procedure slightly changed as I went along, here's what I finally ended up doing. First I lightly drew reference lines both inside and out, including lines for the "missing" kit frames. I then did a pass with a .07mm mechanical pencil with medium pressure, to leave a pencil mark and start the "nail dent" as well as outlining the planks. Second pass was with a black fine ballpoint pen (out of ink), pressing harder to emboss a nice even circular depression in the wood with the pencil mark at the bottom. Third pass with an eraser to remove the reference lines. Fourth pass with some light gray and dark brown paint to cover up and correct mistakes (I had a few...😬). (edited to add pics).

-
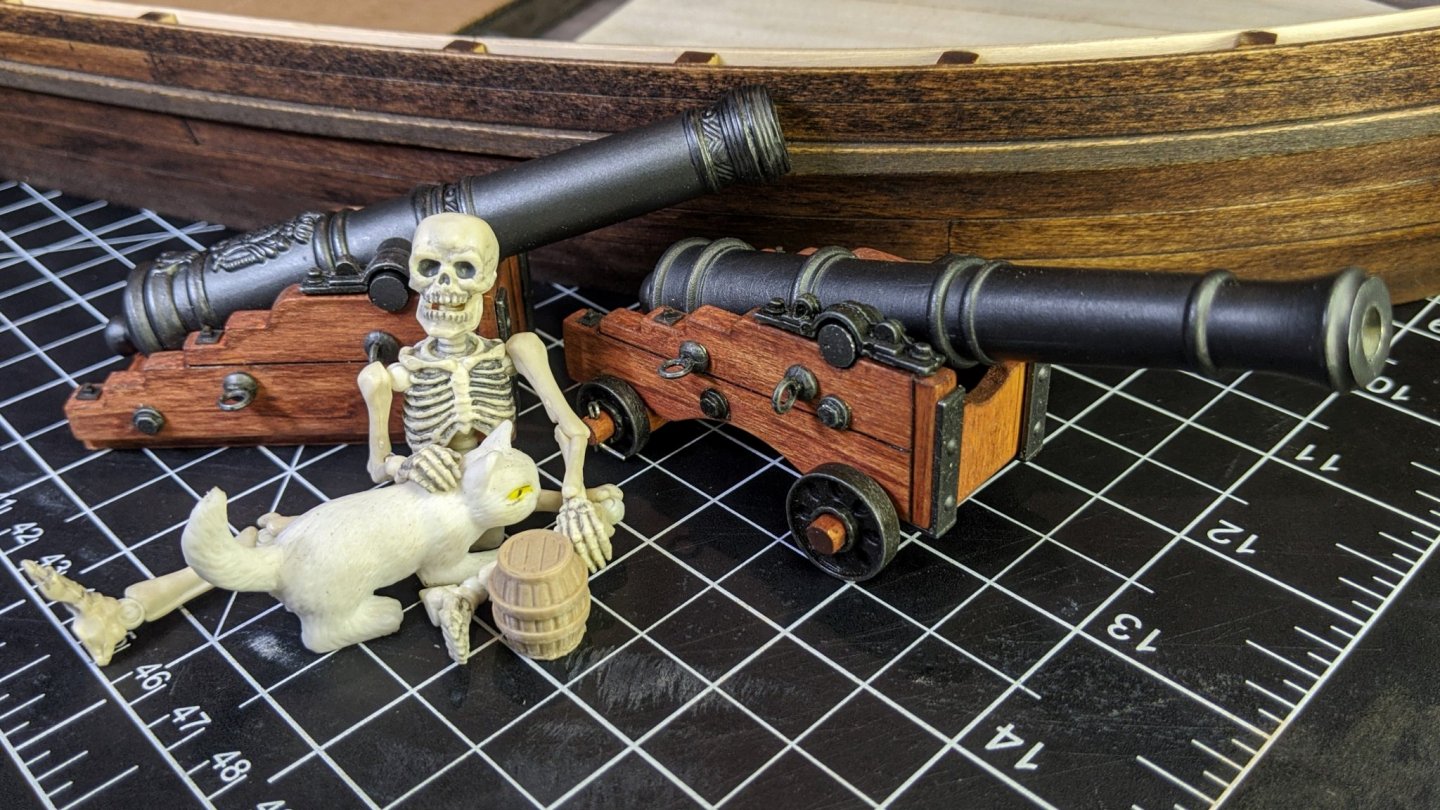
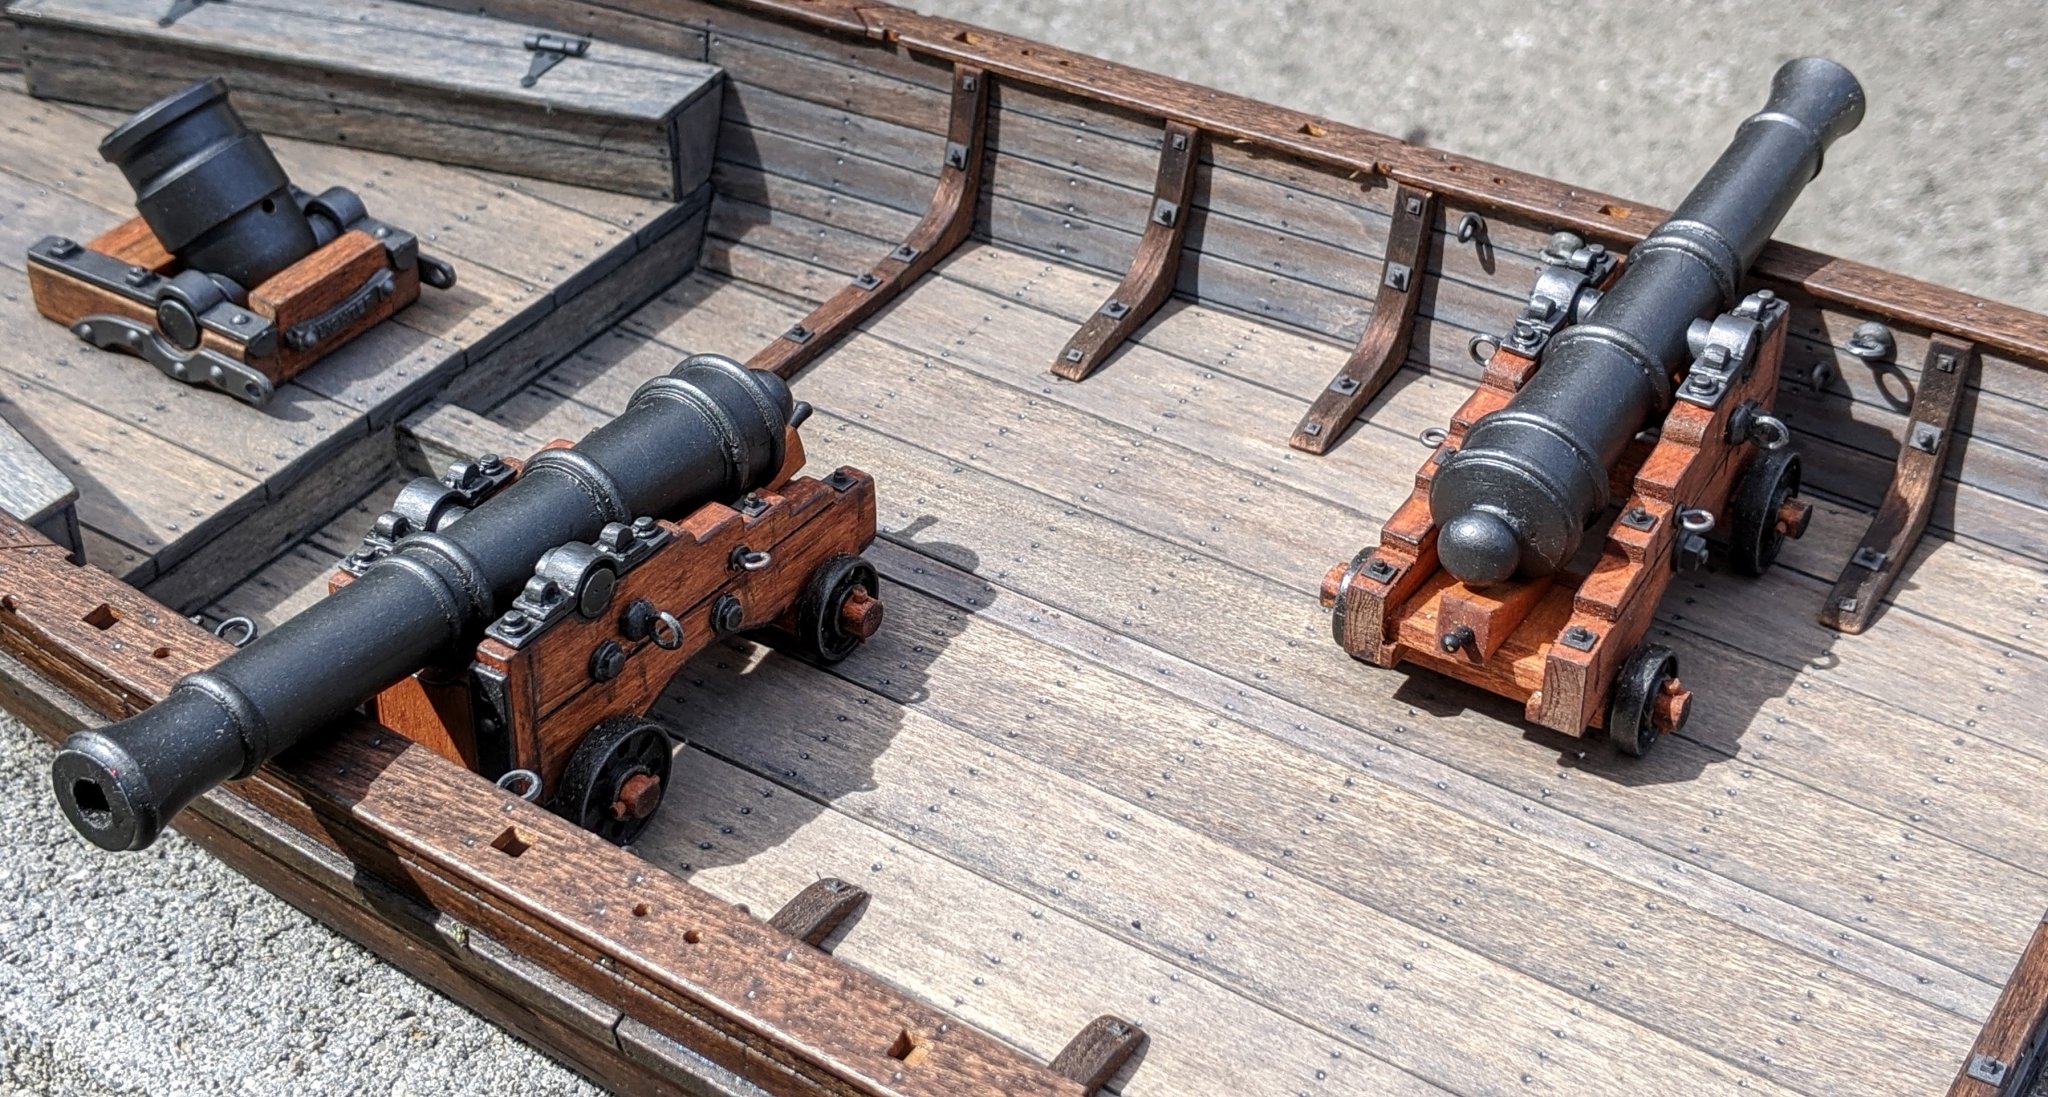
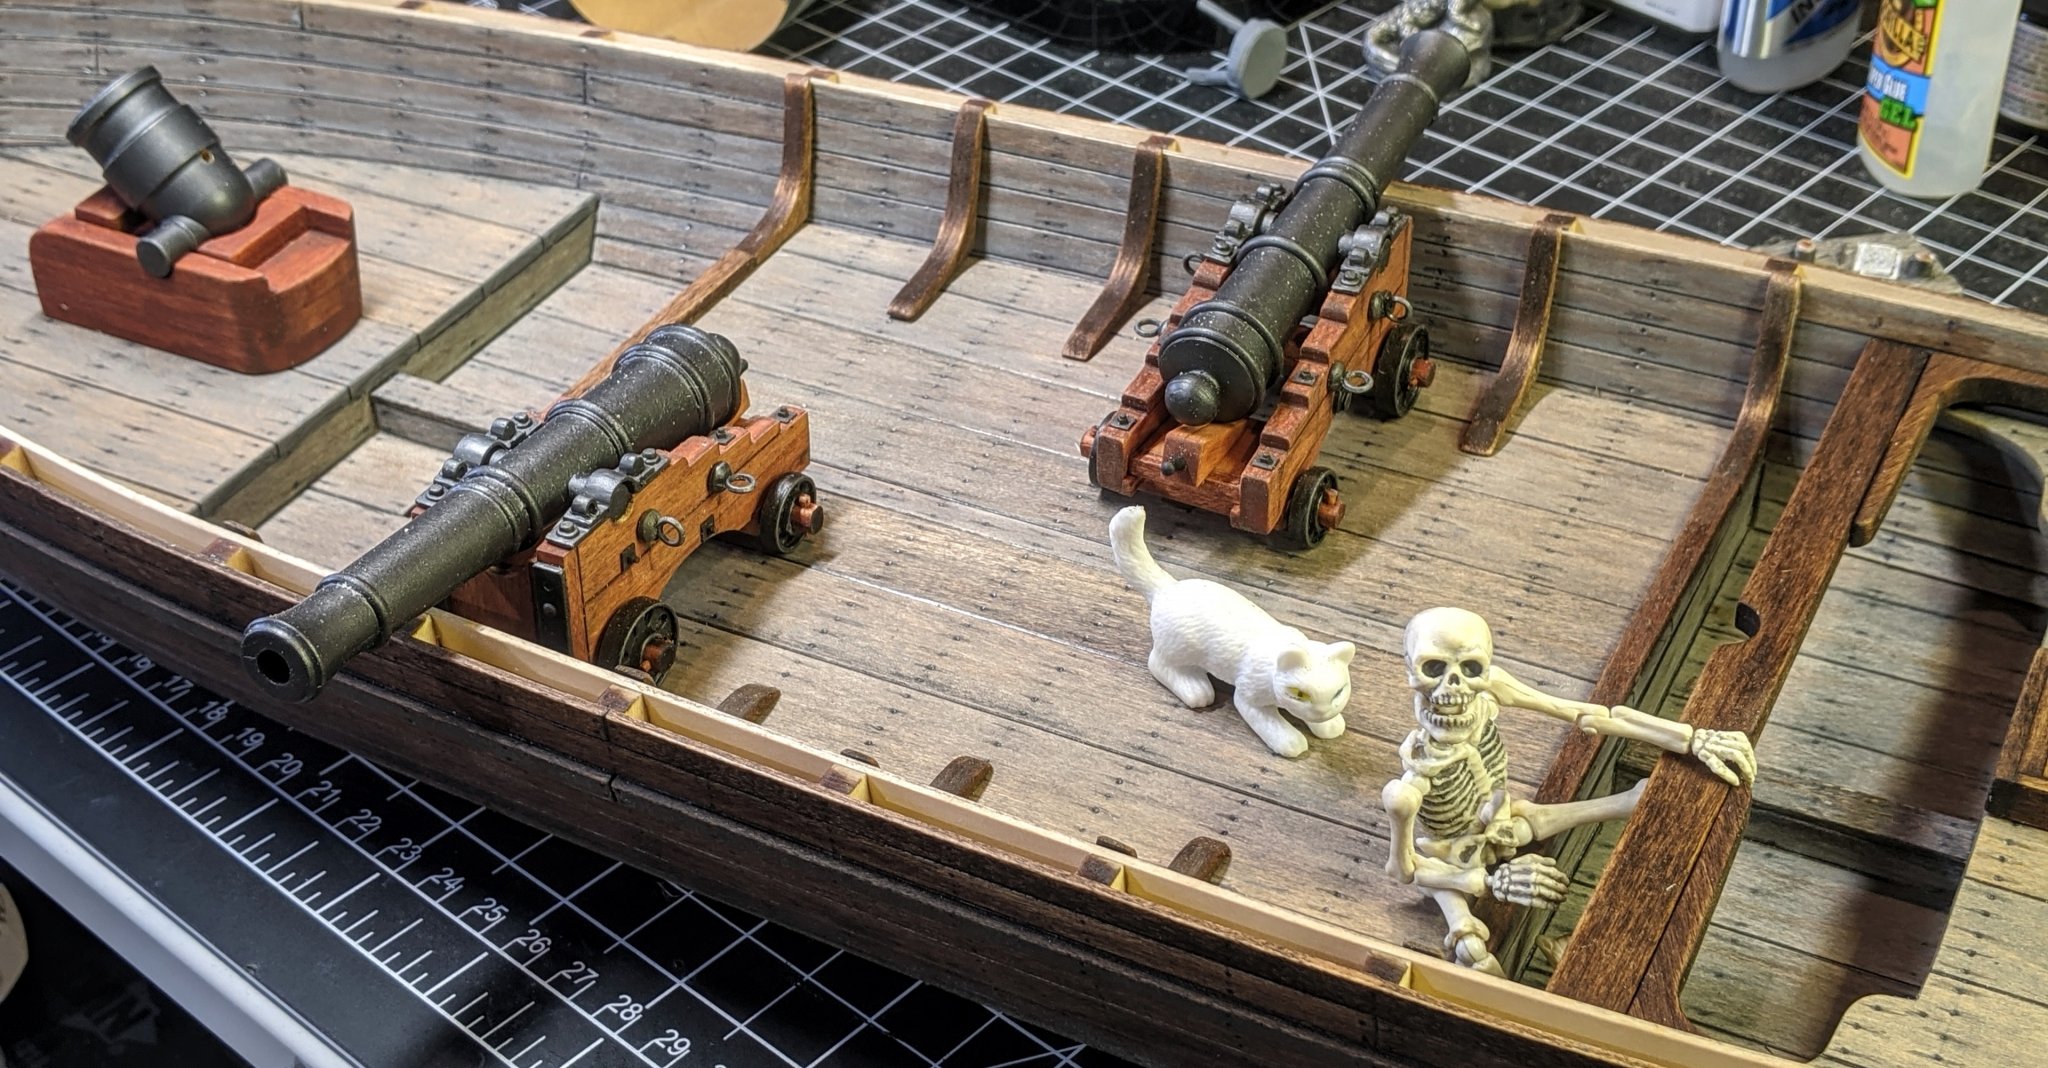
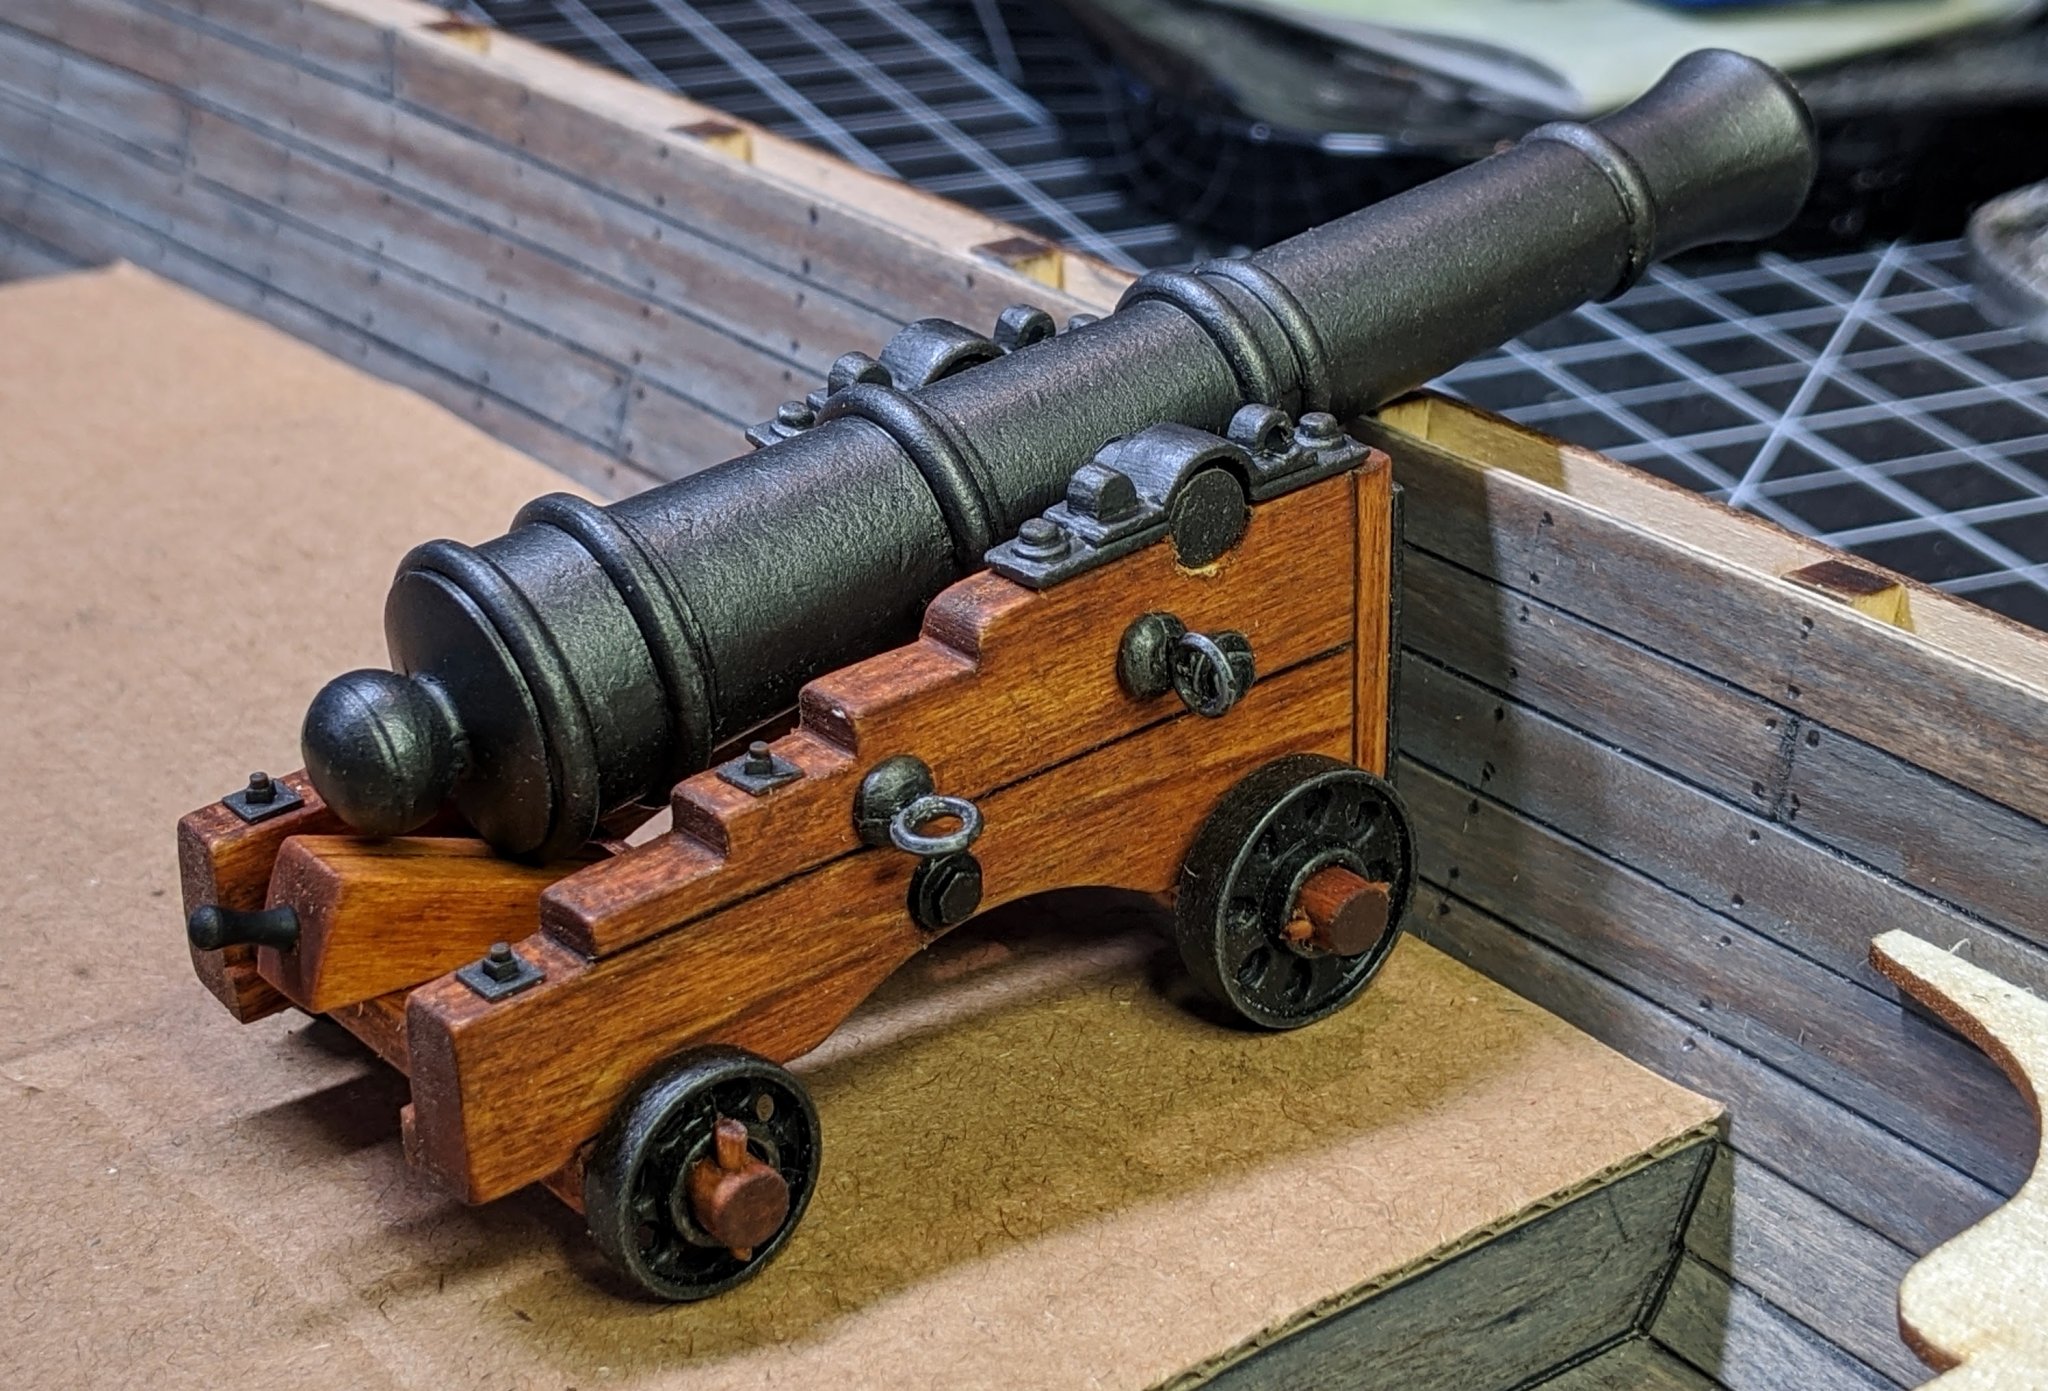
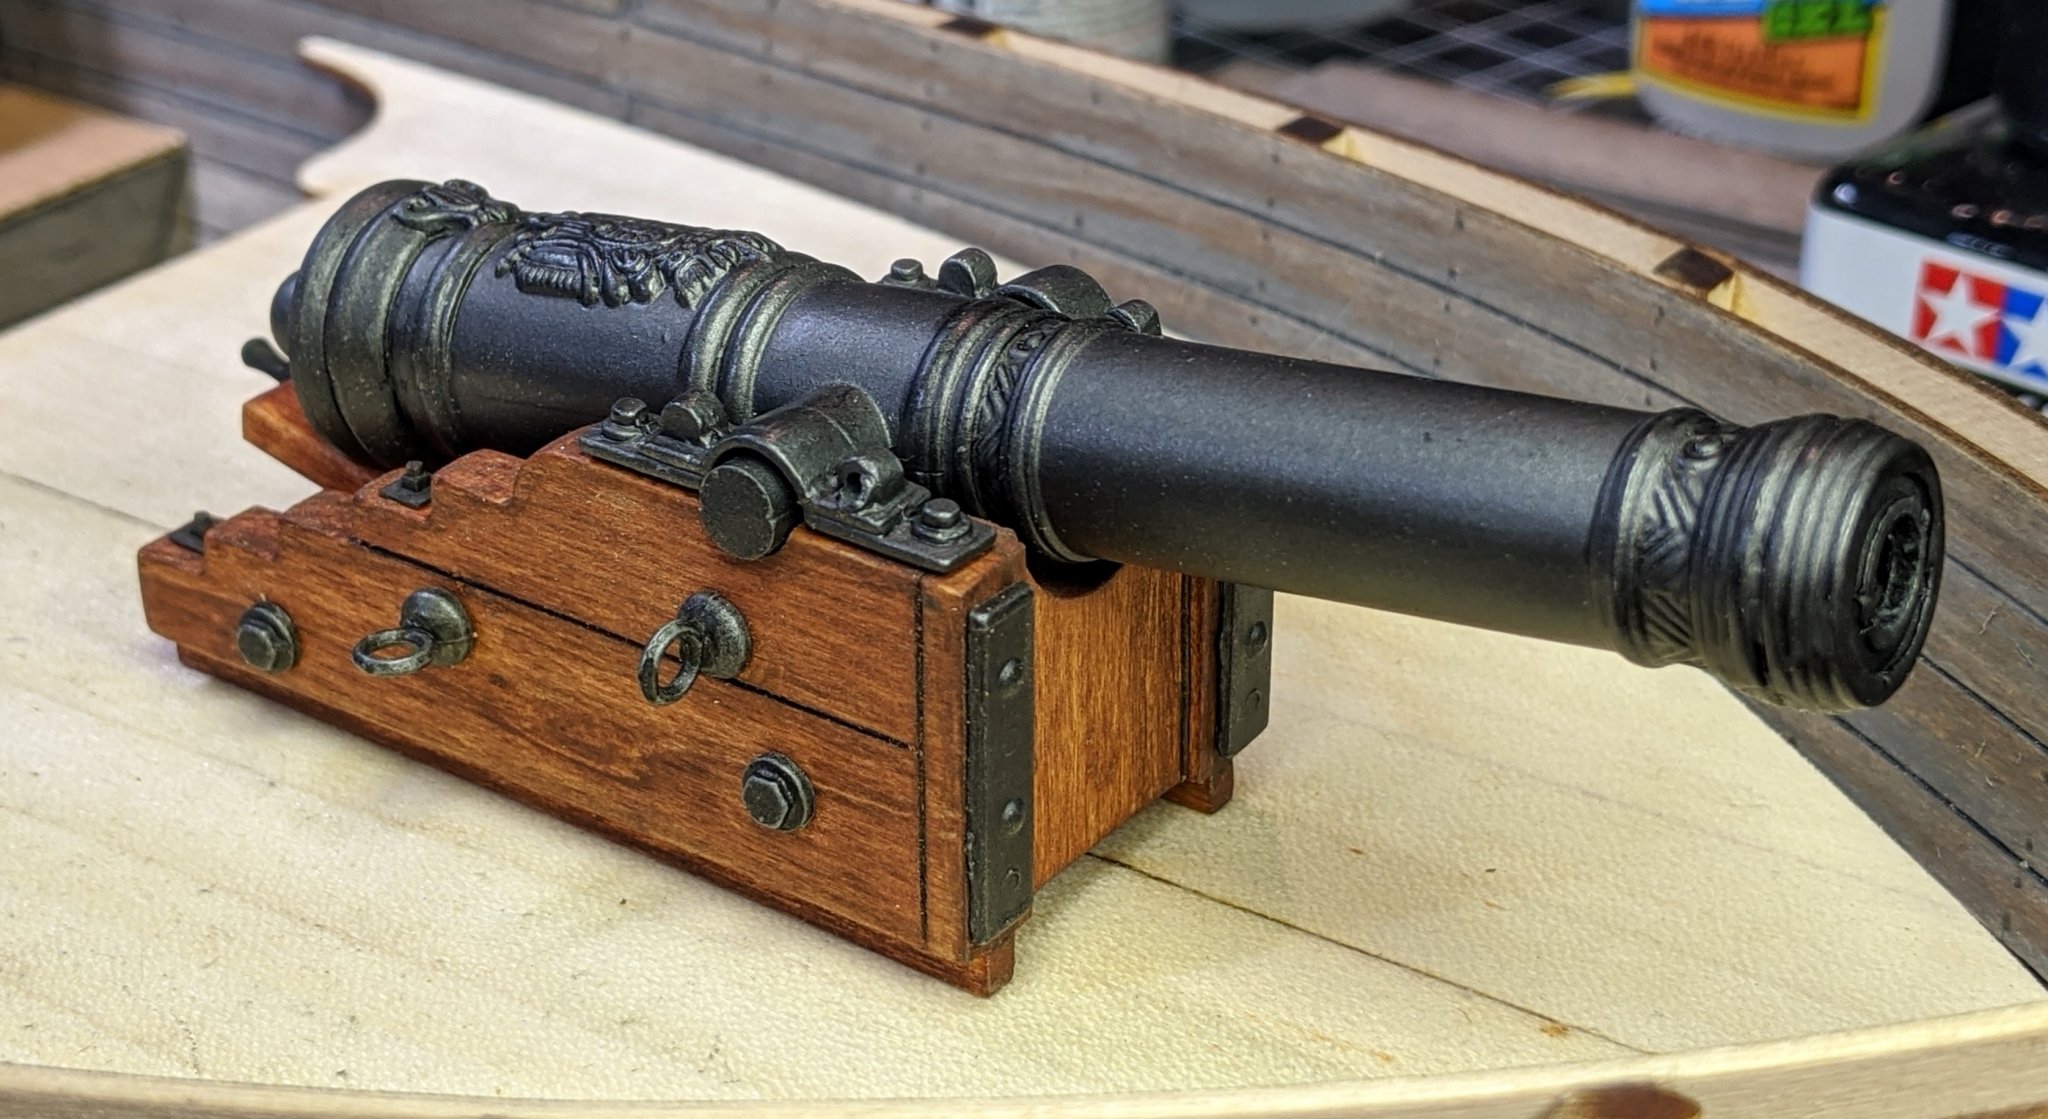
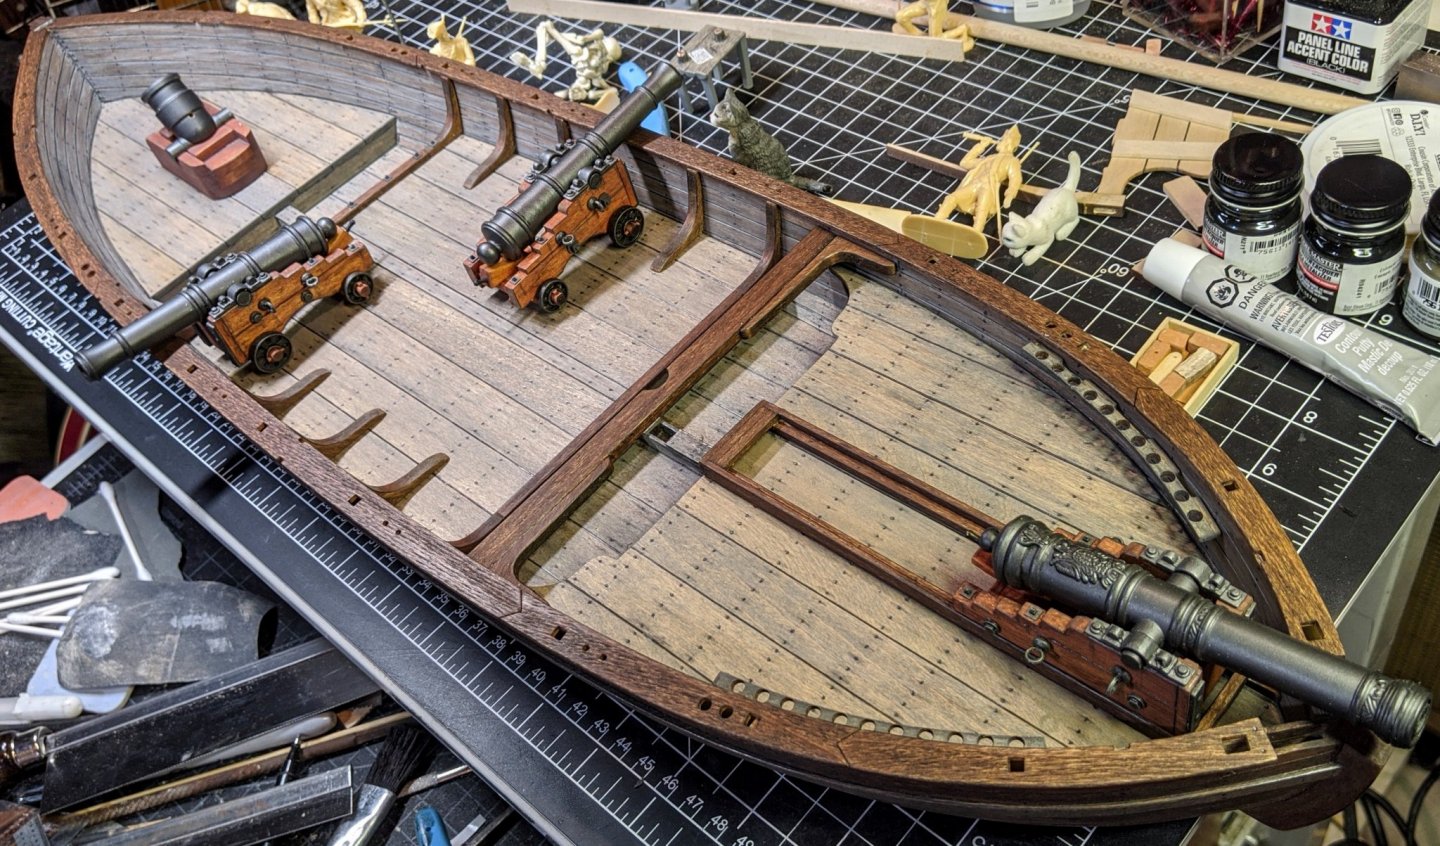
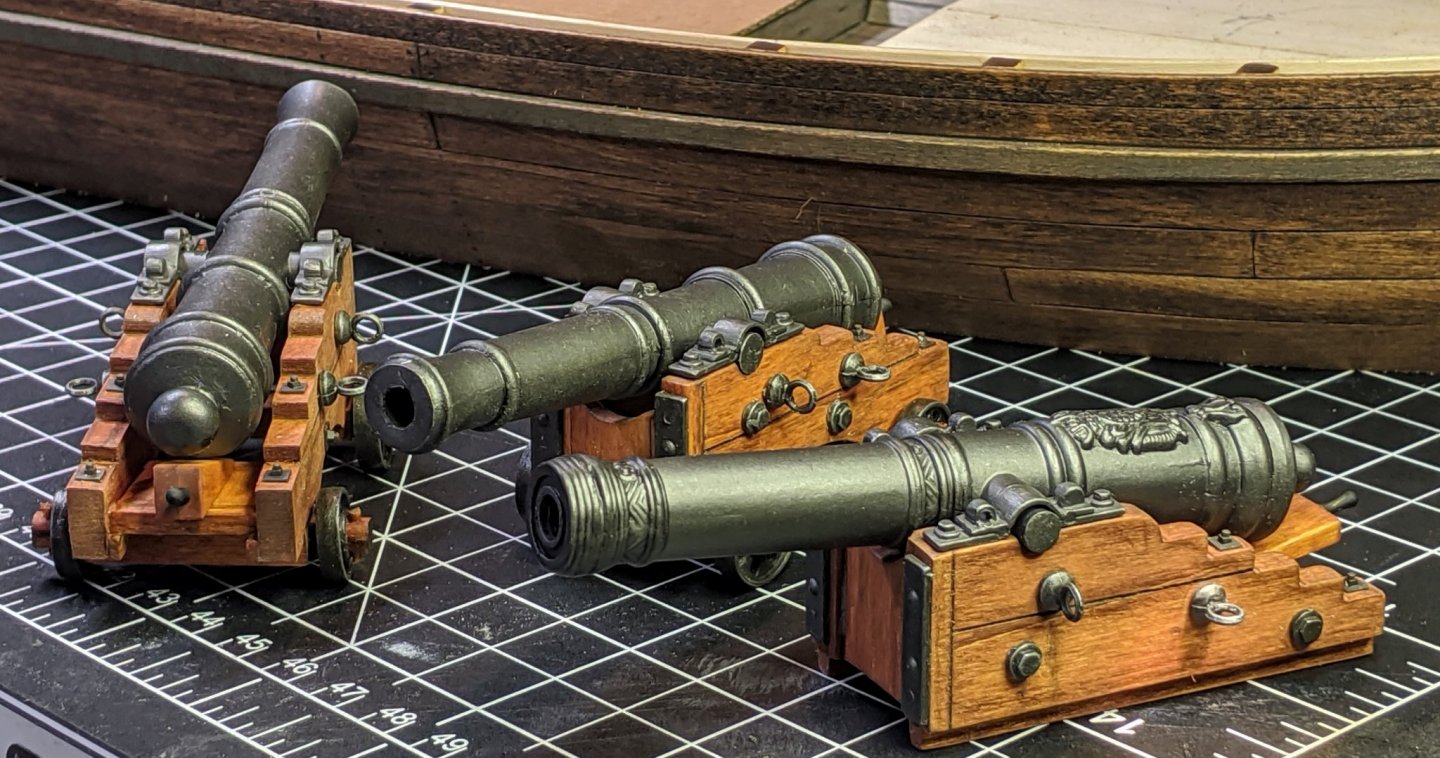
Thanks, BobG! A shame the kit cannons were so poor, but that made me get creative... Yes ASAT, Slim just needs a cowboy hat to wave around... The cannons and carriages are done, and the nailing is just about completed (phew!). Because of some "unforeseen issues" (I screwed up) I had to come up with a different way to plank the decks. I'm waiting on the materials to do this, and since the deck is kinda important further work on the hull is on hold until the material arrives. This has been a blessing in disguise, as I've had time to really go over the work already completed and tweak it up. Here's some cannon pics:


-
Good idea on the lockers. Your planking looks great, using individual boards makes it easier and has a better look. What colors are you going to use for the hull and ceilingwork? I wonder what kind of stuff was stored in those lockers... on my build I may have one open... Enjoying your build!
- 39 replies
-
- 2
-
-
- philadelphia
- model shipways
- (and 1 more)
-
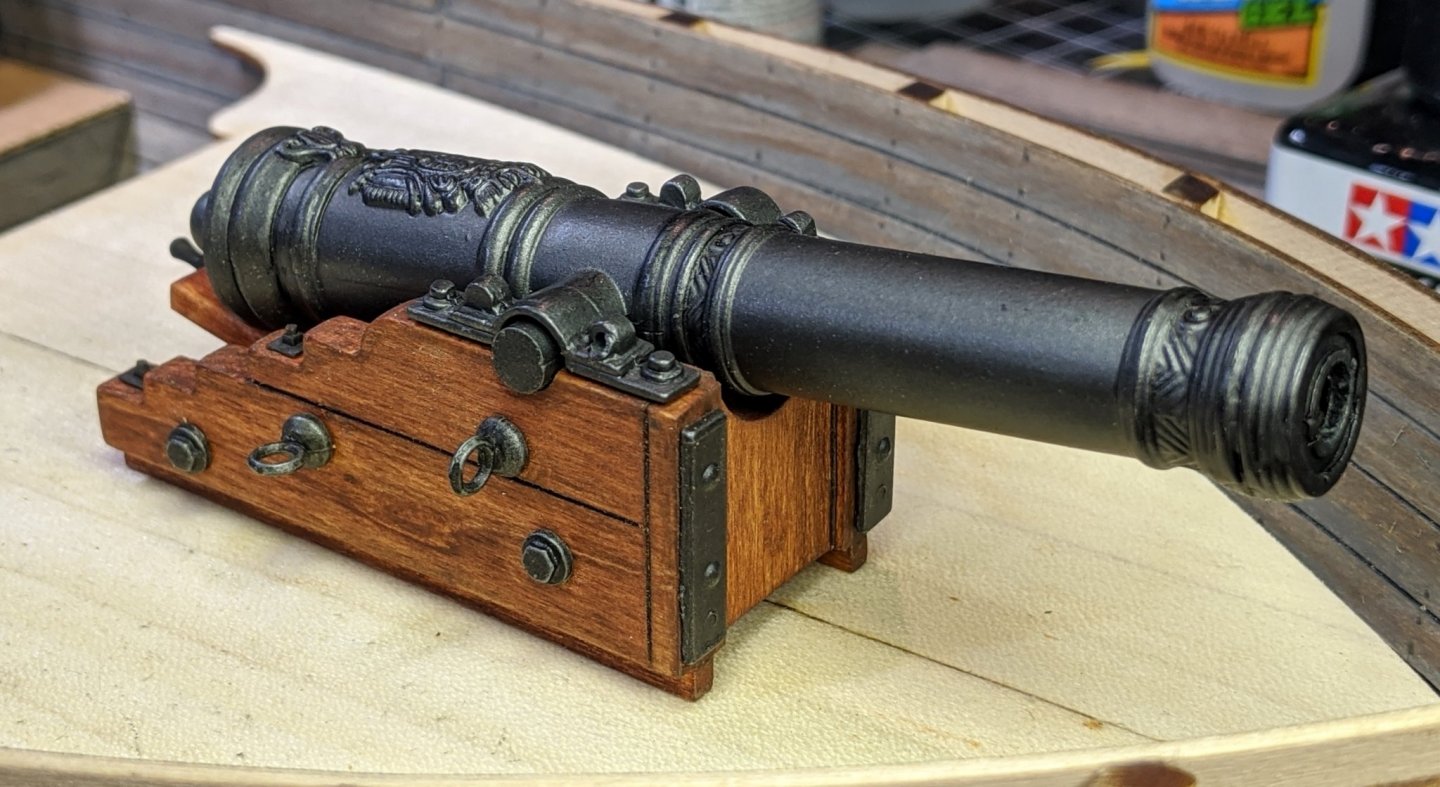
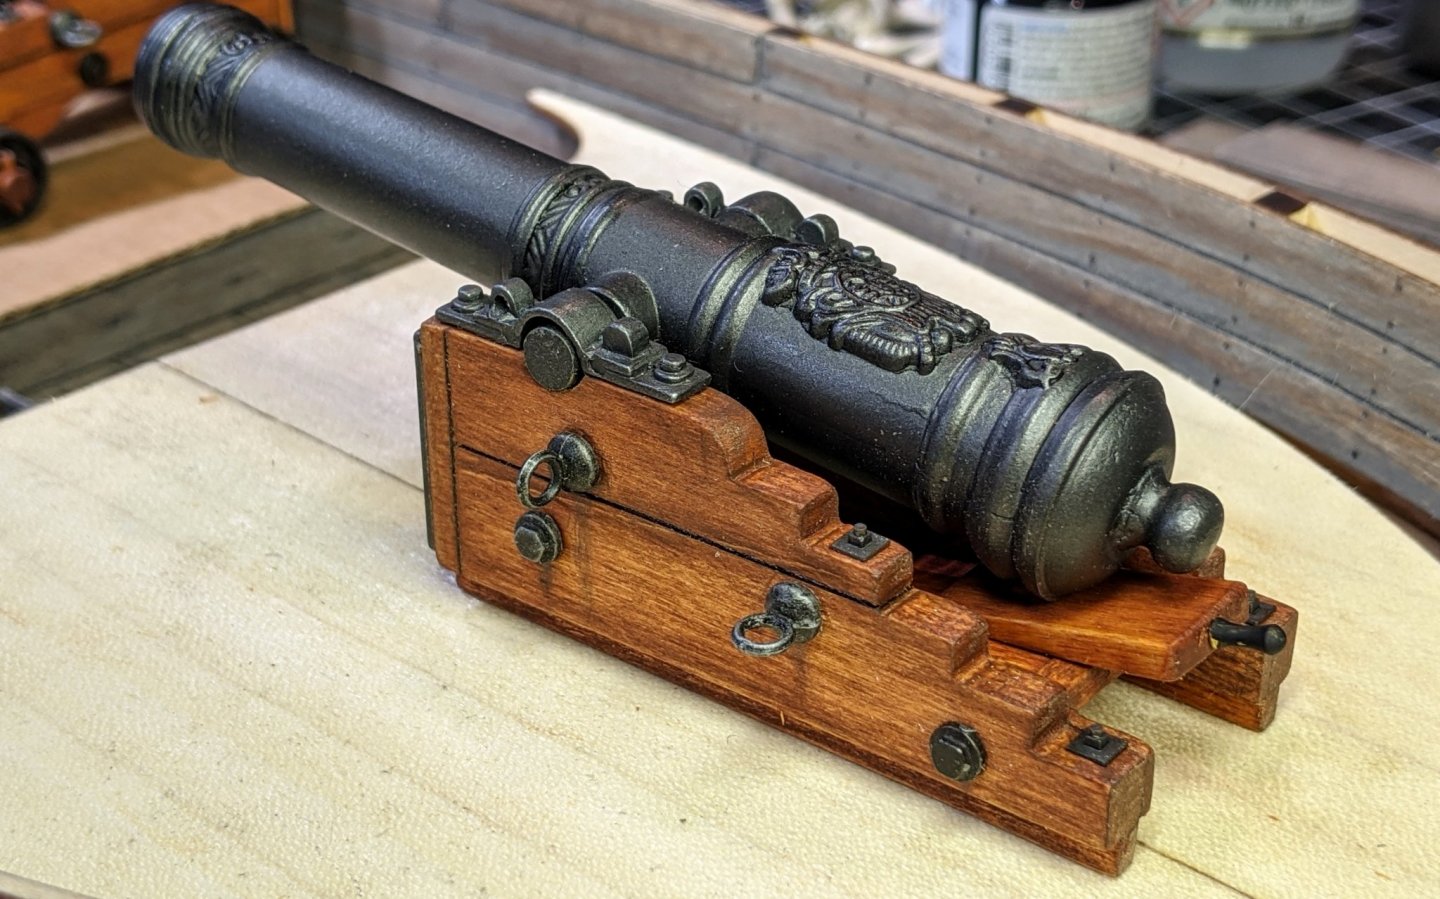
Thanks, Kenneth... Slim is sure getting a workout. I also think he's been stealing the cat's food. Sounds like it must have been a challenge tossing around and trying to play in those rough seas, Bob. I've also found a new appreciation of playing just for fun. I'm still waiting on the materials for the deck, so I've been working on the three cannons and the nailing. The Goodwill cannons were a treasure trove of very nice parts. I know that a lot of it is not prototype or accurate but altogether they achieve the "look" I"m going for. I used gunstock stain with oil pastel shading on the carriages. The Goodwill cannons supplied the bolts , rings. trunnion caps, wheels (for the 9 pounders) and barrel (for the 12 pounder). The rest of the bolts are Grandt Line. The 9 pounder barrels came from the MS4005 kits. I'll be doing a few more passes with tints and light weathering then final assembly. The barrels were primed with Krylon gray primer then shot with Testors buffing gunmetal metalizer. I added some highlights with Testors nonbuffing burnt metal metalizer drybrushed on and then a thin wash with Tamiya black panel accent color. The crates and barrels I got at a hobby store that specializes in tabletop wargaming, which I think is 28mm (1:60). They're 3-D printed and are superb castings. I started in on doing the nailing and tint work on the hull and think I have a system. I lightly draw out the frame lines with a pencil for reference on both the inside and outside, then press in moderately hard with a .07mm mechanical pencil on each nail location. After that pass, I take a fine black ballpoint pen and press it hard on each nail. The pen leaves no ink mark but creates a perfect round depression in the wood with the black pencil mark at the bottom. I know the real nails were square, but I couldn't find any square pencils... And here's Slim and Snowball kicking back after a long day... I think Slim found a keg of grog...