Check out our new MSW Sponsor Innocraftsman
×

.jpg.bc46b7394042cb22c3a08e1cfbd9877b.jpg)
BobCardone
-
Posts
142 -
Joined
-
Last visited
Content Type
Profiles
Forums
Gallery
Events
Everything posted by BobCardone
-
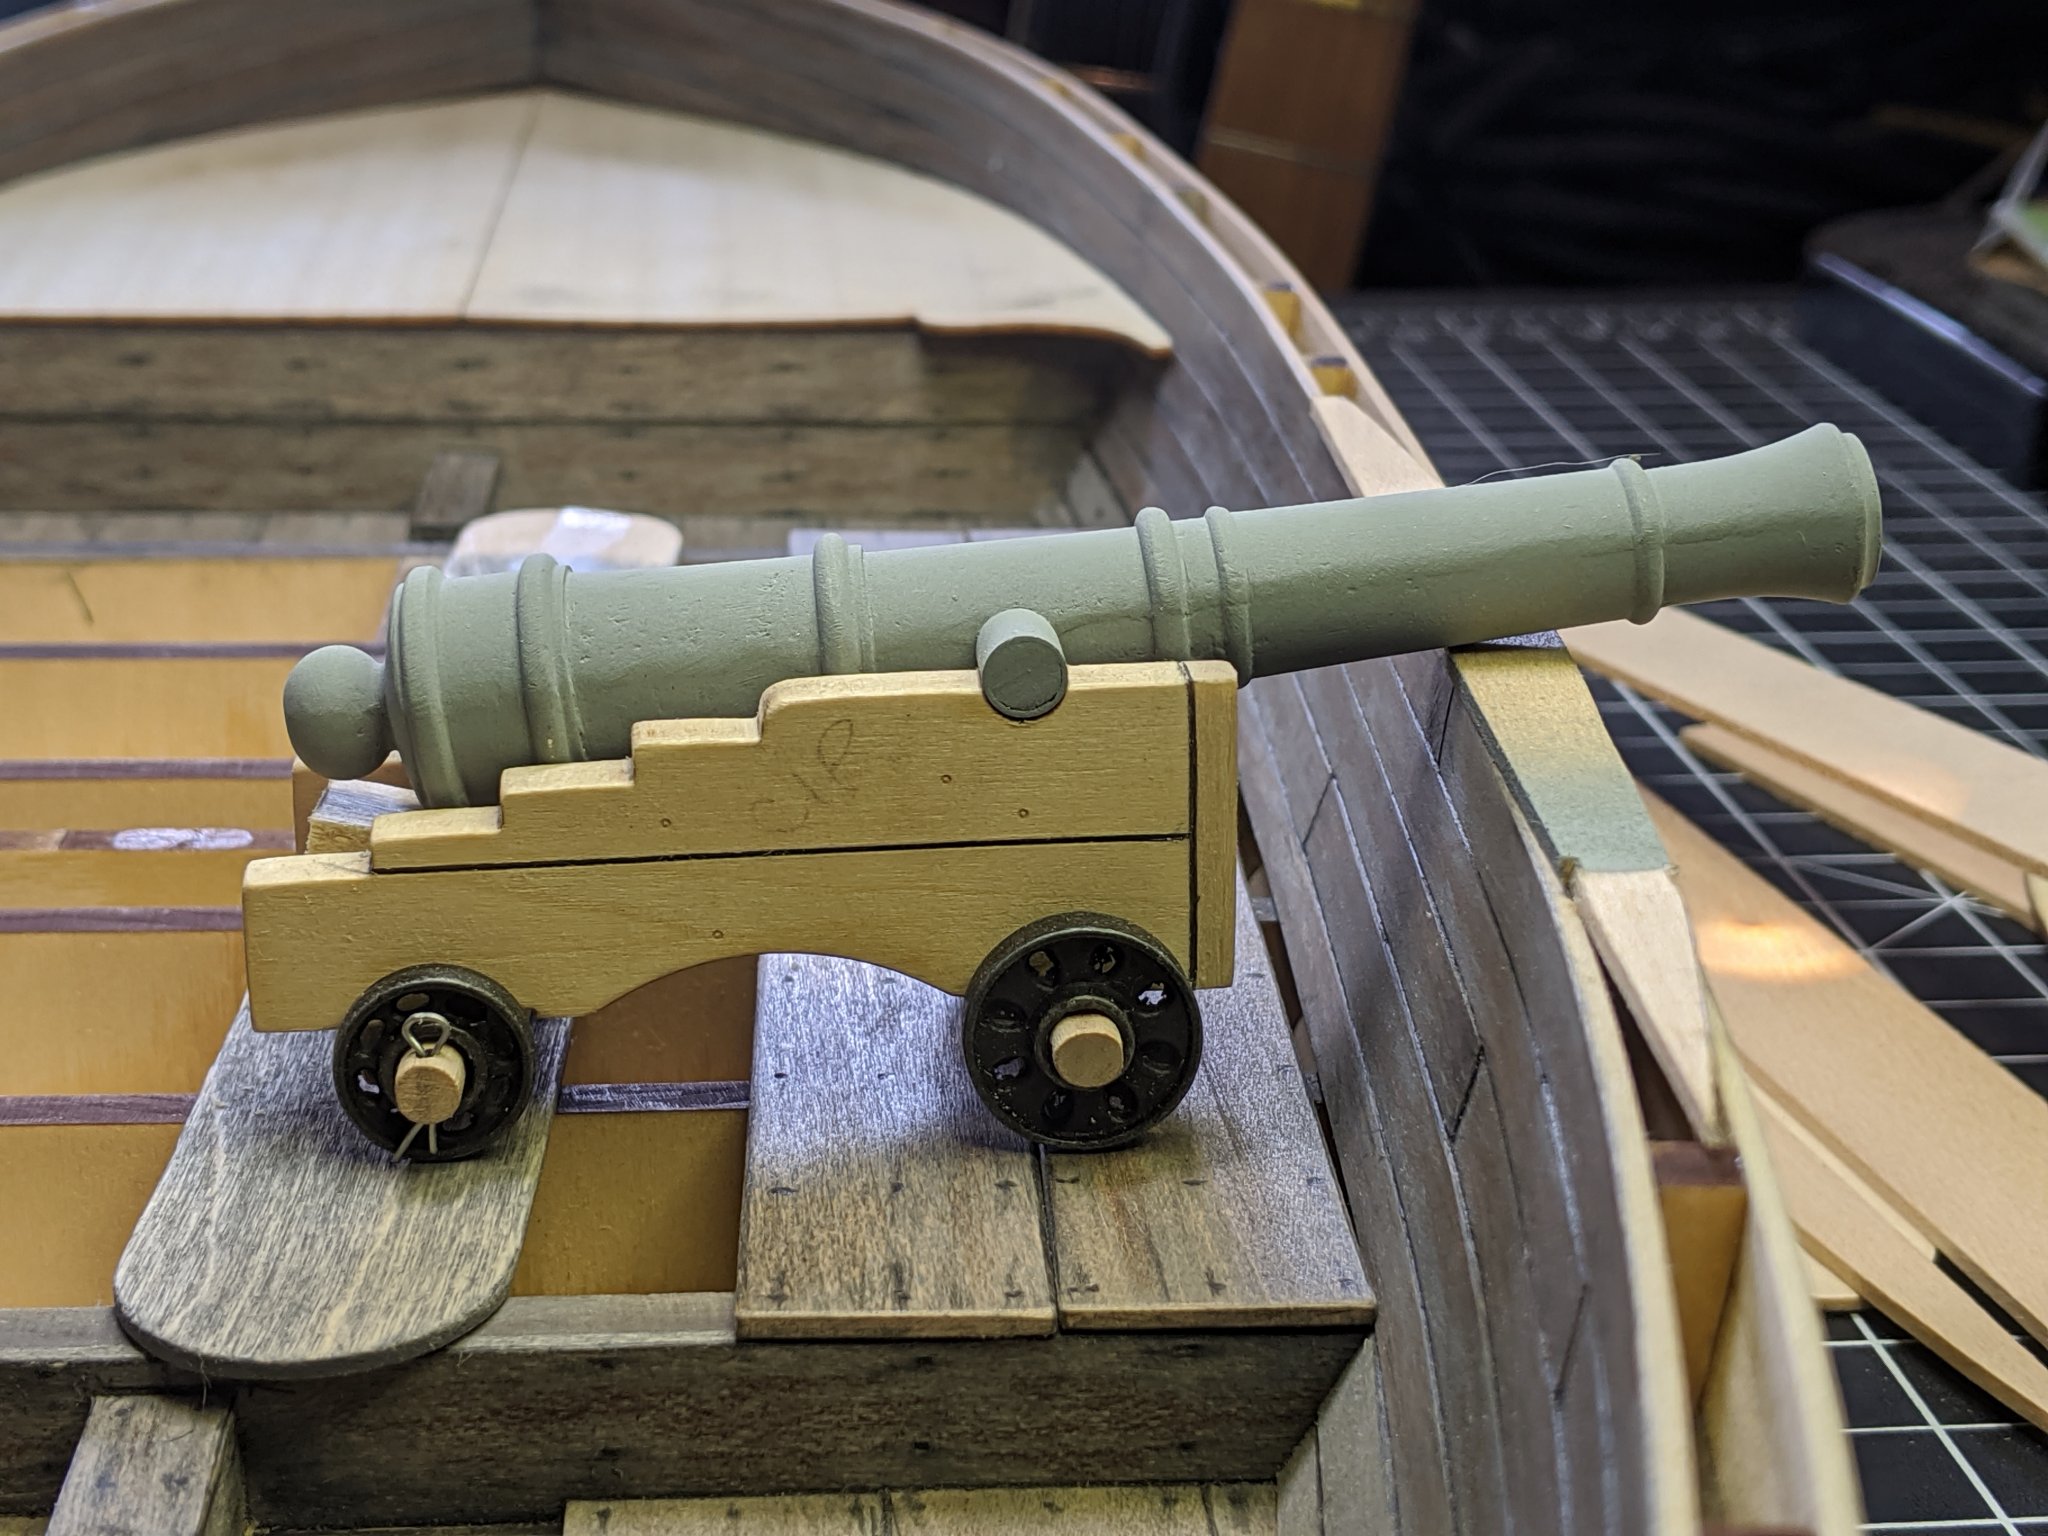
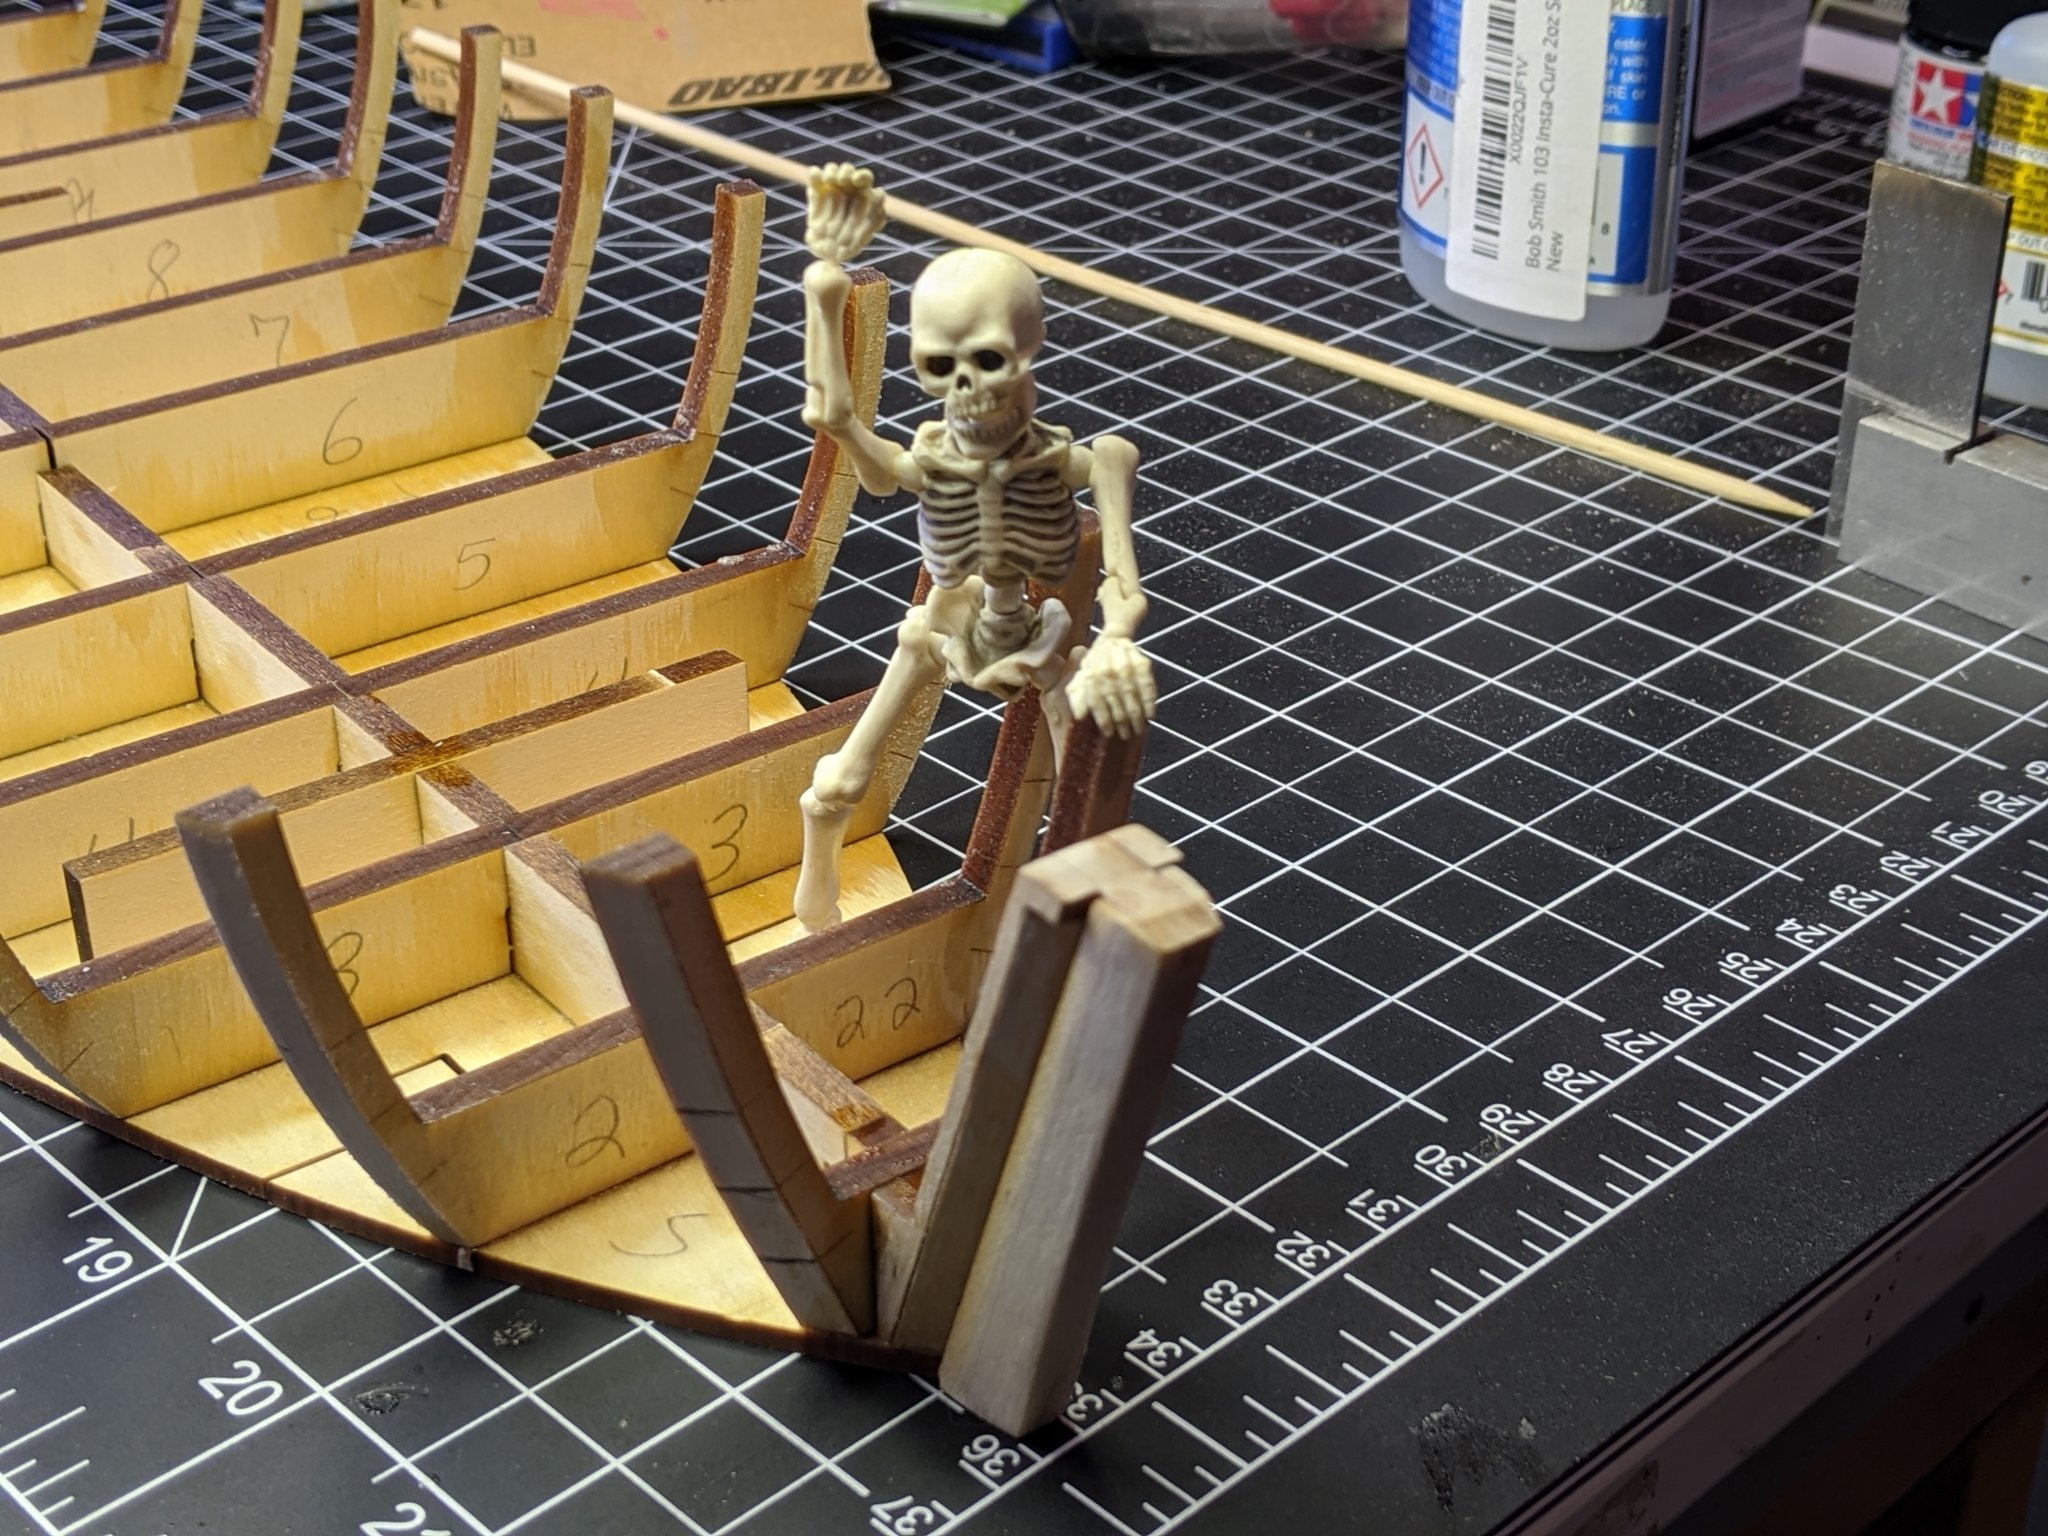
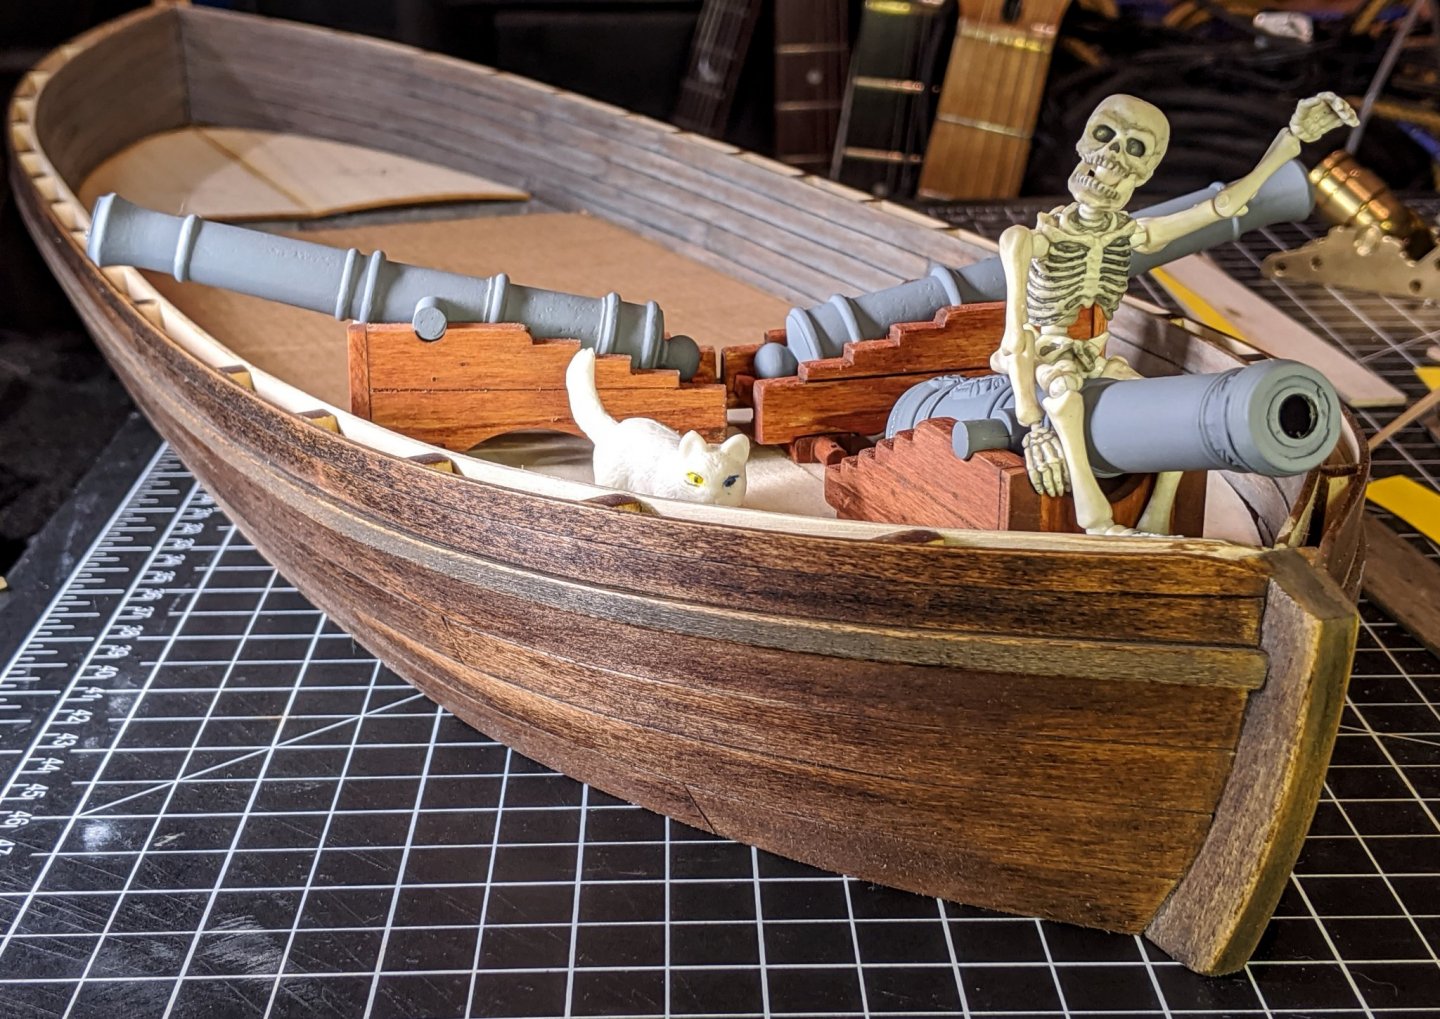
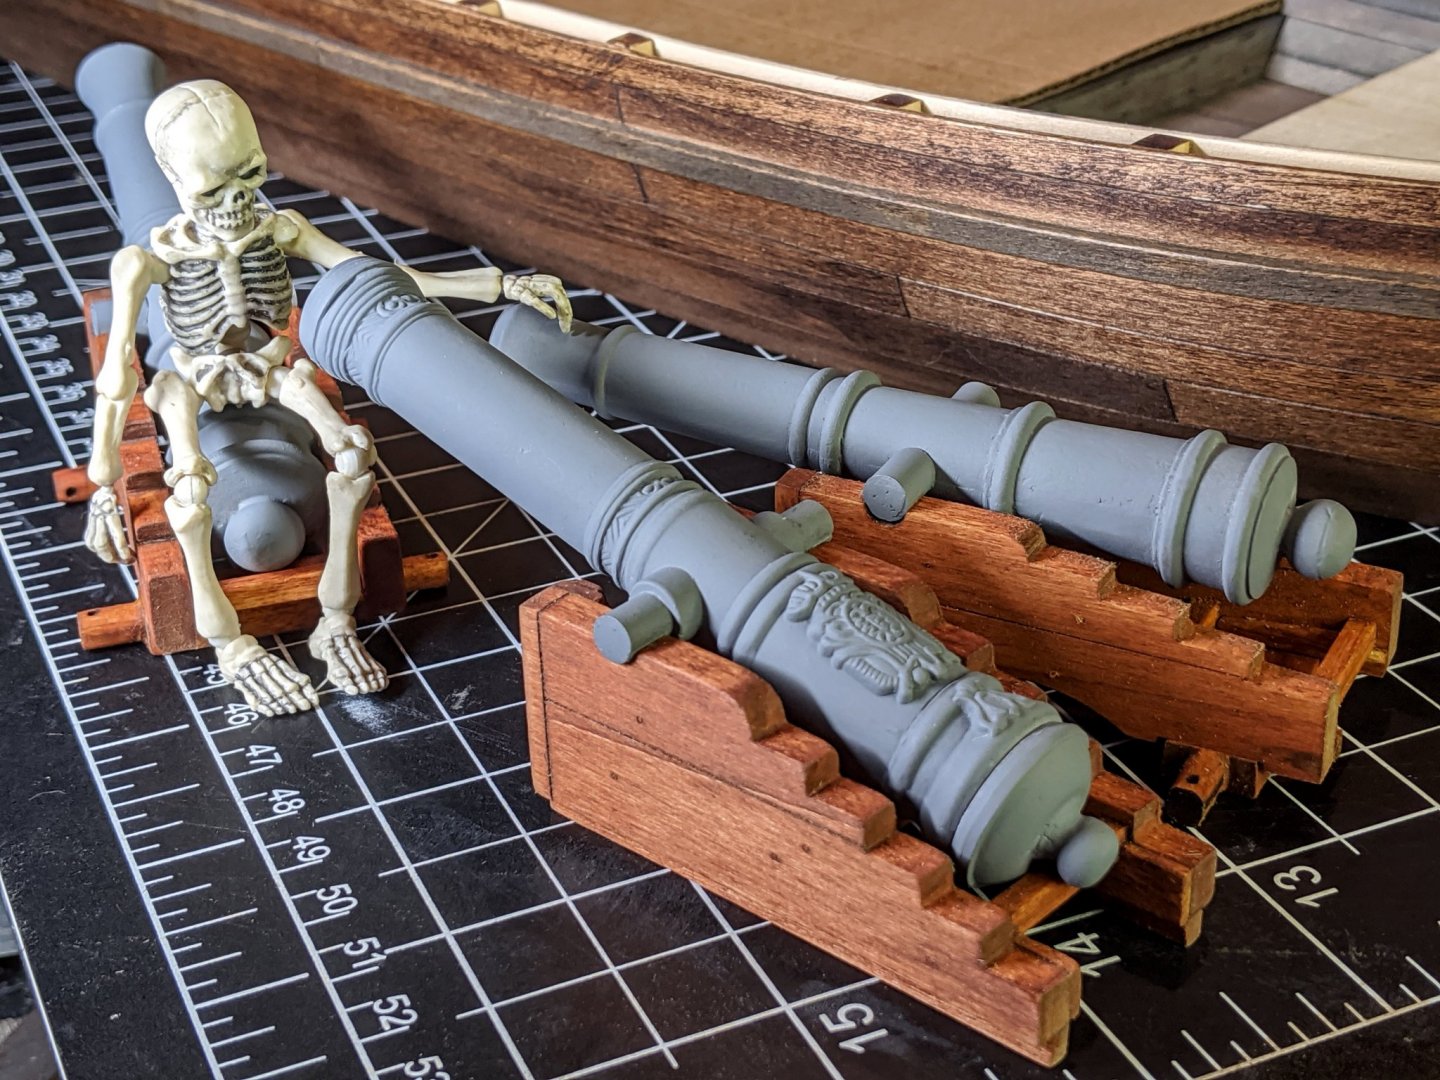
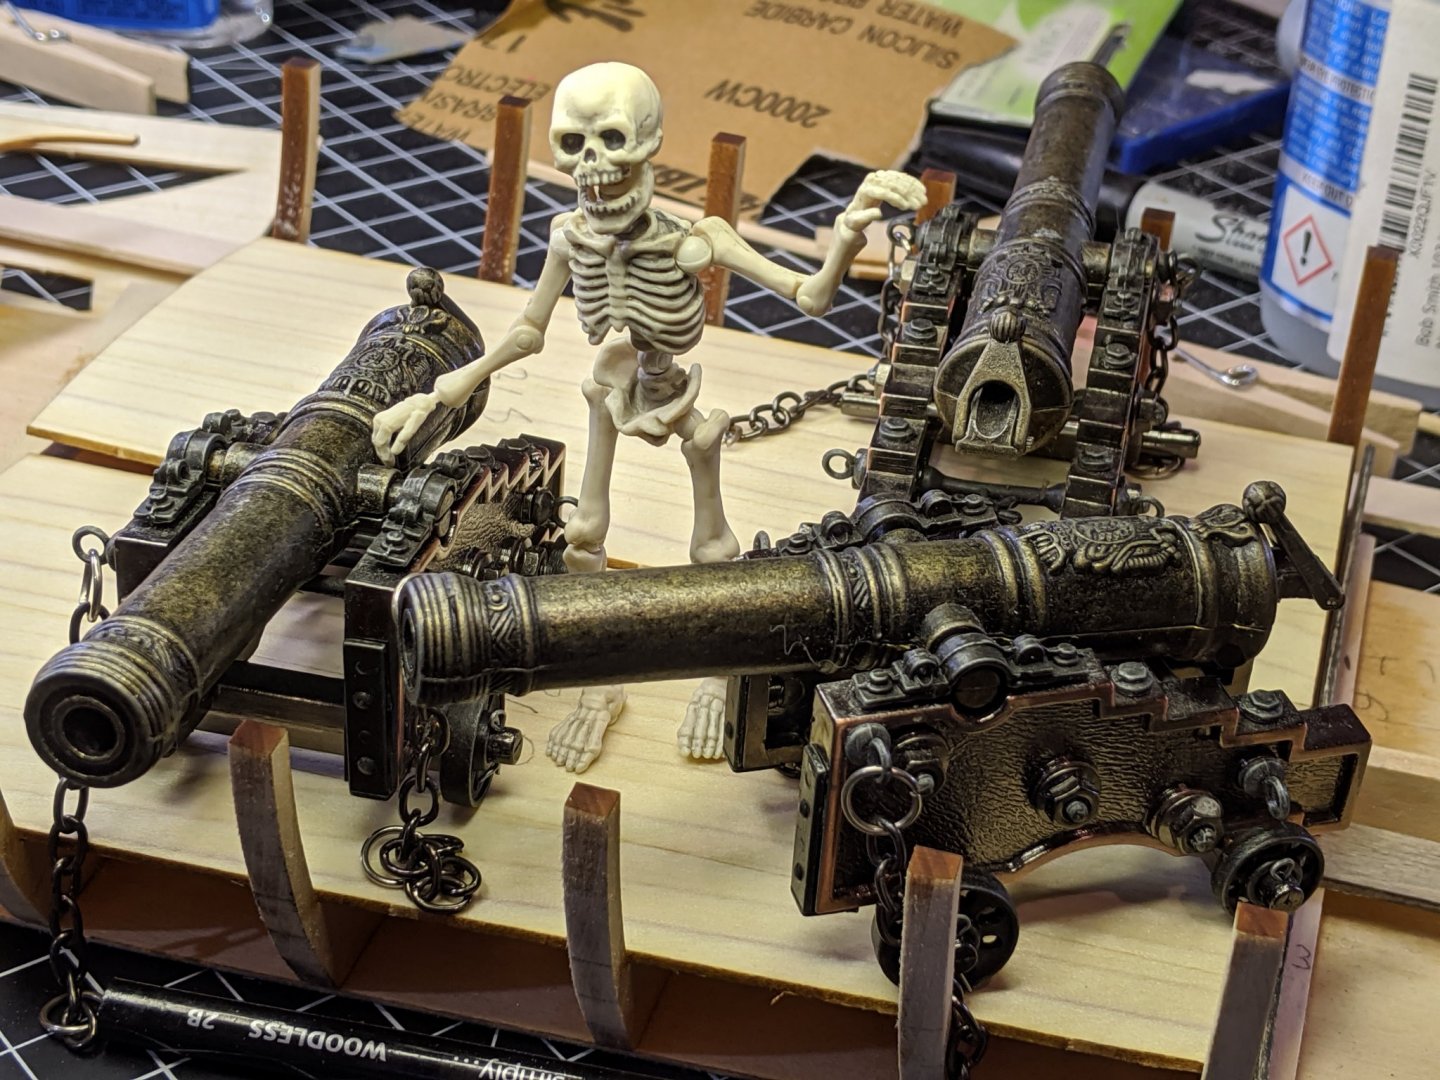
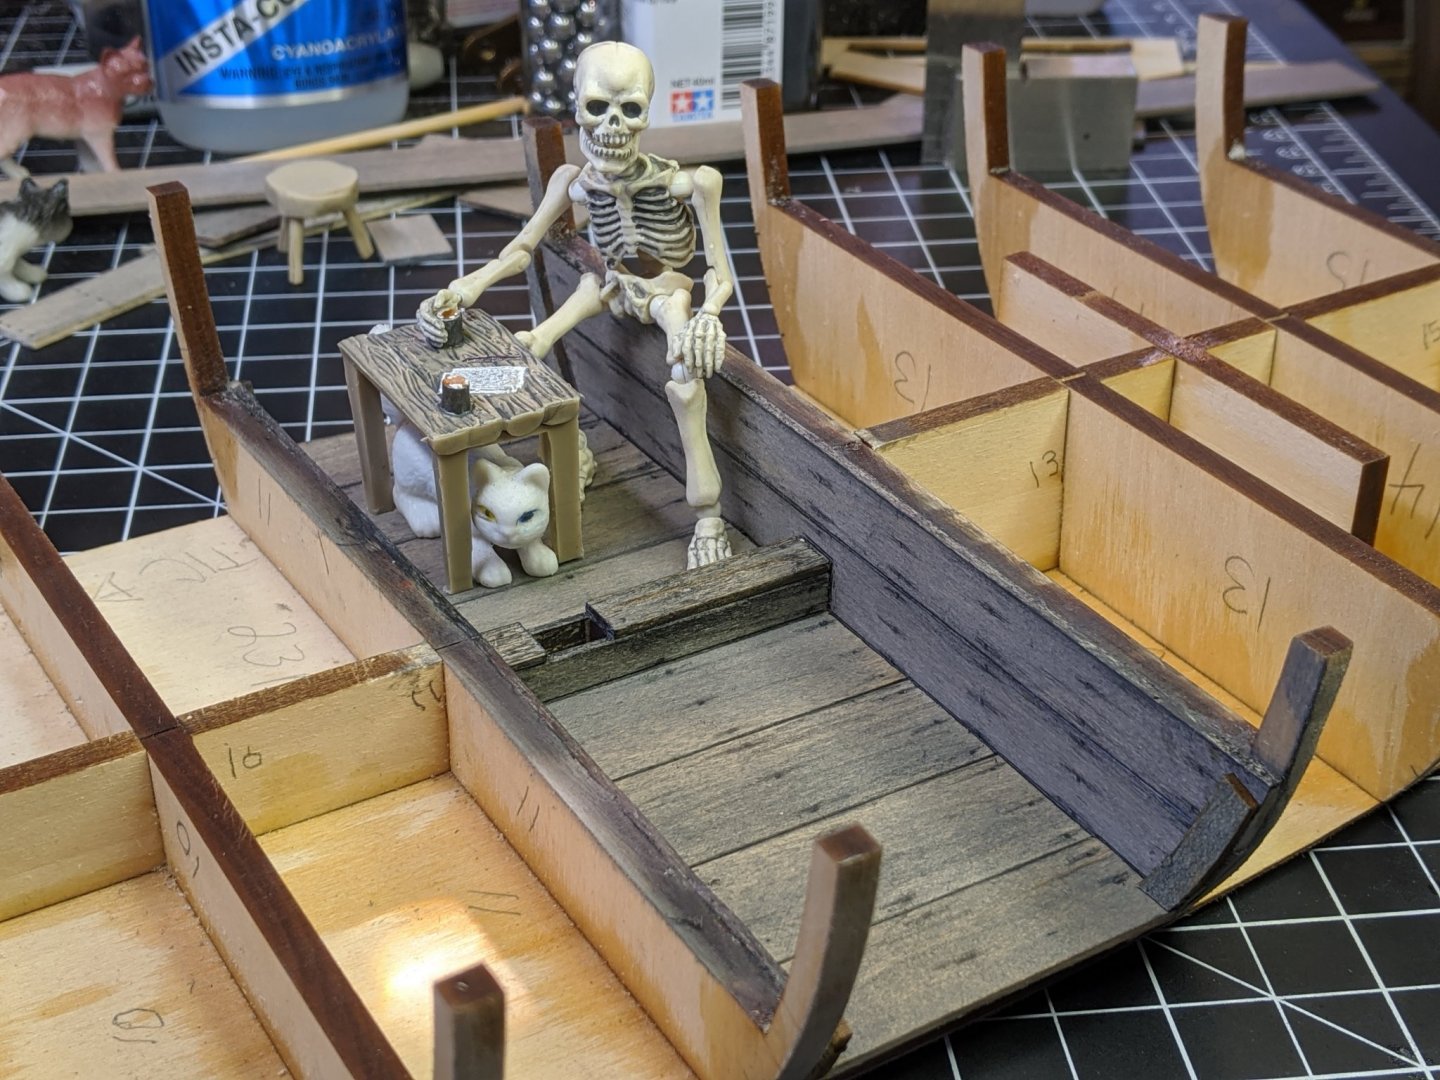
.thumb.jpg.2abae9c0194e4e915bb097b8a6d5c174.jpg) Bob, I've played electrics up until about four years ago. I got too old and burned out with the band gigs so I "retired" to an acoustic and just do beach bar duos now. I still get the Fenders out occasionally to "blow off the dust" and make some noise. It sounds like you got the bug good... nothing like it, huh? Finally settled on a hull stain and did it. I went over the hull with a #400 grit final sanding, then a quick coat of Minwax pre-stain (5 min) than a wipe. Minwax Honey was the final choice, applied with a paper towel all over than immediately wiped off to make sure it didn't get too dark. A second pass got it to the shade I wanted. I'm still waiting on materials to finish the deck (should be about a week), so I guess I'll get started on some sub-assemblies and the dreaded "nailing". There sure are a mess of them, and as others have said in their Philly builds... keep them subtle. As well as the nailing, I'm also going to do some shading and coloring to bring out depth and detail (my old model railroading habits). After all the nailing and stuff is done I'm thinking of using Minwax clear satin poly rattle can for a final finish, I'll do some tests first. No, I don't work for Minwax, there's a Lowes 4 blocks away and that's what they carry... While waiting on deck parts, I'm starting on the weaponry. All three kit main guns were not good enough, so for the 9 pounders I got a couple of Guns of History Naval Smoothbore kits (MS4005) for a super low price (thumbs up to Model Shipways sales!) that will work nicely. about the same size and a much better casting. Things got weird in the 12 pounder hunt. Bu some cosmic coincidence while shopping at Goodwill I ran across these... A trio of beasties just the right size and mostly made of metal. I believe they were meant to shoot plastic pellets, thus explaining the wonky stuff on the ends (I cut that off and used the kit one). Besides the barrels, there's a bunch of other cool pieces I'm going to use. The extra two barrels will be used for the Guns of History kits, so no waste. I built and stained the carriages with (you guessed it) Minwax Gunstock. Here's the carriages stained and barrels primered. Slim got into the armory... And here's Slim doing his Slim Pickens thing (BTW, he's 1:18 scale) and Snowball the cat is 1:12. Cheers, BobC
Bob, I've played electrics up until about four years ago. I got too old and burned out with the band gigs so I "retired" to an acoustic and just do beach bar duos now. I still get the Fenders out occasionally to "blow off the dust" and make some noise. It sounds like you got the bug good... nothing like it, huh? Finally settled on a hull stain and did it. I went over the hull with a #400 grit final sanding, then a quick coat of Minwax pre-stain (5 min) than a wipe. Minwax Honey was the final choice, applied with a paper towel all over than immediately wiped off to make sure it didn't get too dark. A second pass got it to the shade I wanted. I'm still waiting on materials to finish the deck (should be about a week), so I guess I'll get started on some sub-assemblies and the dreaded "nailing". There sure are a mess of them, and as others have said in their Philly builds... keep them subtle. As well as the nailing, I'm also going to do some shading and coloring to bring out depth and detail (my old model railroading habits). After all the nailing and stuff is done I'm thinking of using Minwax clear satin poly rattle can for a final finish, I'll do some tests first. No, I don't work for Minwax, there's a Lowes 4 blocks away and that's what they carry... While waiting on deck parts, I'm starting on the weaponry. All three kit main guns were not good enough, so for the 9 pounders I got a couple of Guns of History Naval Smoothbore kits (MS4005) for a super low price (thumbs up to Model Shipways sales!) that will work nicely. about the same size and a much better casting. Things got weird in the 12 pounder hunt. Bu some cosmic coincidence while shopping at Goodwill I ran across these... A trio of beasties just the right size and mostly made of metal. I believe they were meant to shoot plastic pellets, thus explaining the wonky stuff on the ends (I cut that off and used the kit one). Besides the barrels, there's a bunch of other cool pieces I'm going to use. The extra two barrels will be used for the Guns of History kits, so no waste. I built and stained the carriages with (you guessed it) Minwax Gunstock. Here's the carriages stained and barrels primered. Slim got into the armory... And here's Slim doing his Slim Pickens thing (BTW, he's 1:18 scale) and Snowball the cat is 1:12. Cheers, BobC

-
Yes Bob, it's a Fender Super Champ X2 head and 1-12" cab. Sweet little hybrid tube 15 watt amp that's got really good tone. I find if I'm stressed out model building (or with anything, really) a little time on the fretboard evens the strain out nicely. I take it you're a player also?
-
Thanks, BobG! I used my Google Pixel 3A for all the photos... best phone camera I've ever used. Digital zoom at 2X to get some depth of field, than a little cropping and color adjustment. Here's one of the "characters" supervising the build: The REAL Snowball...

-
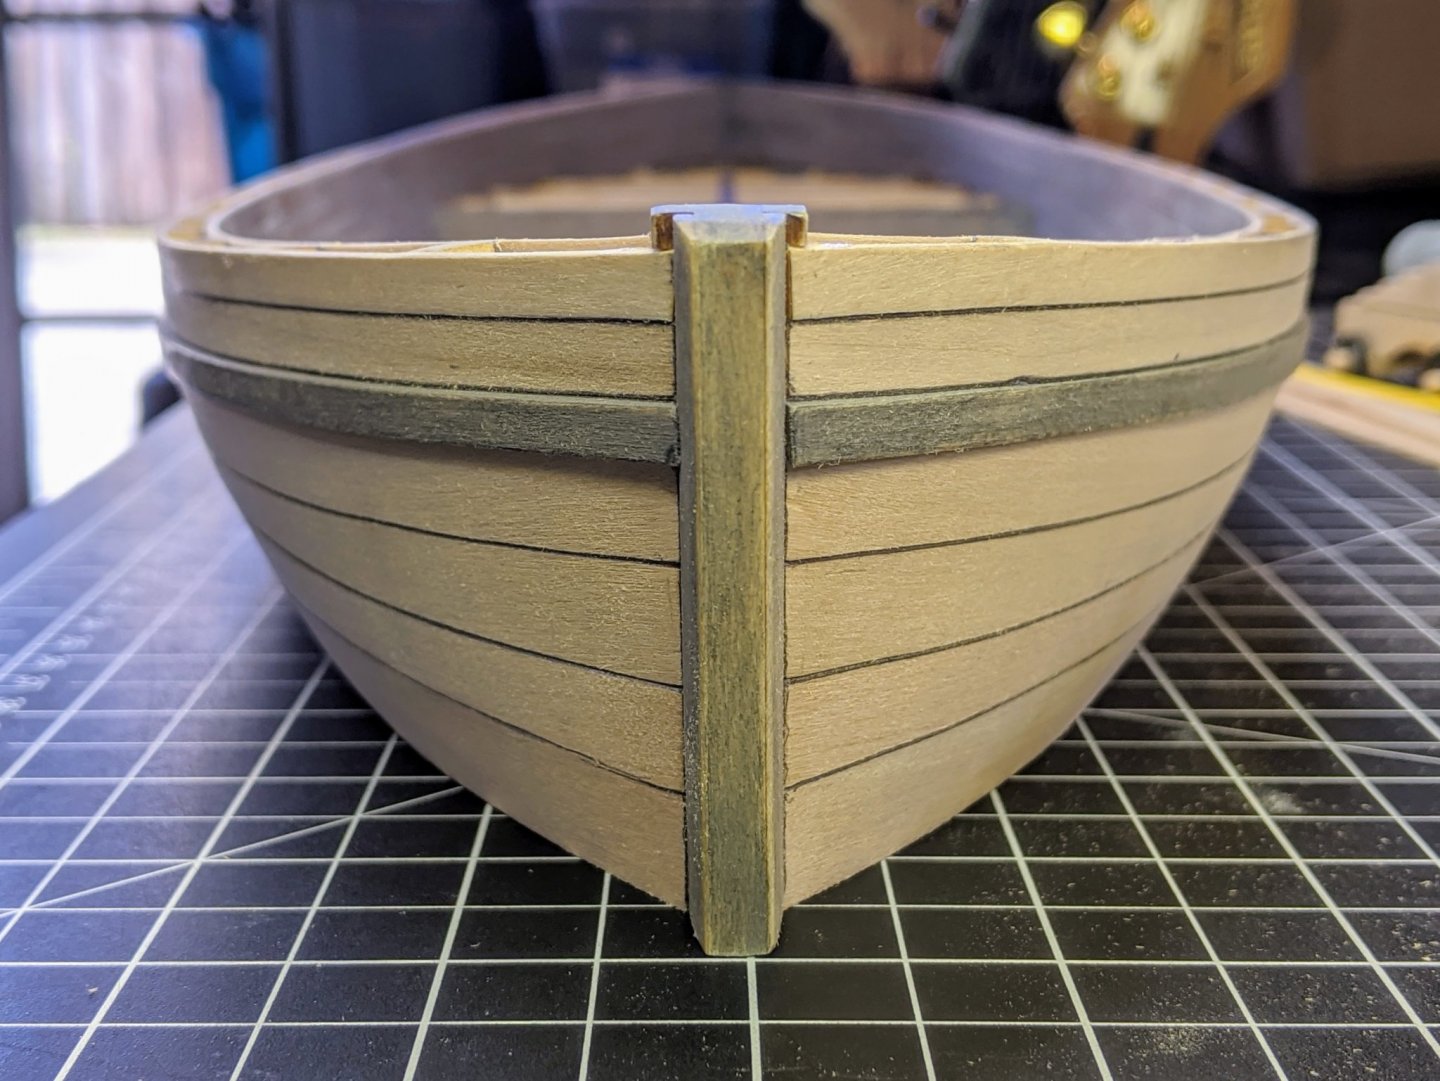
Hi all, Finally got the spiling done on the hull. This is the first time I've done this, and I was pretty apprehensive about how it was going to work out. I used cardstock for templates, and I was lucky that each template worked for both sides. Very fiddly and fussy fitting but all things considered I'm satisfied with the results. Now I can decide what color stain to use on the hull. I used Minwax Classic Gray for the ceilings and decks, as well as the wale, stem and stern posts. For the gun carriages and other bits I used Minwax Gunstock. I'm leaning towards Minwax Weathered Oak for the hull, but that may change. Now I can finish the decks and do the nailing and weathering. Getting the hull completed was a real hoot, and I'm excited to start on all the other cool stuff in the kit.


-
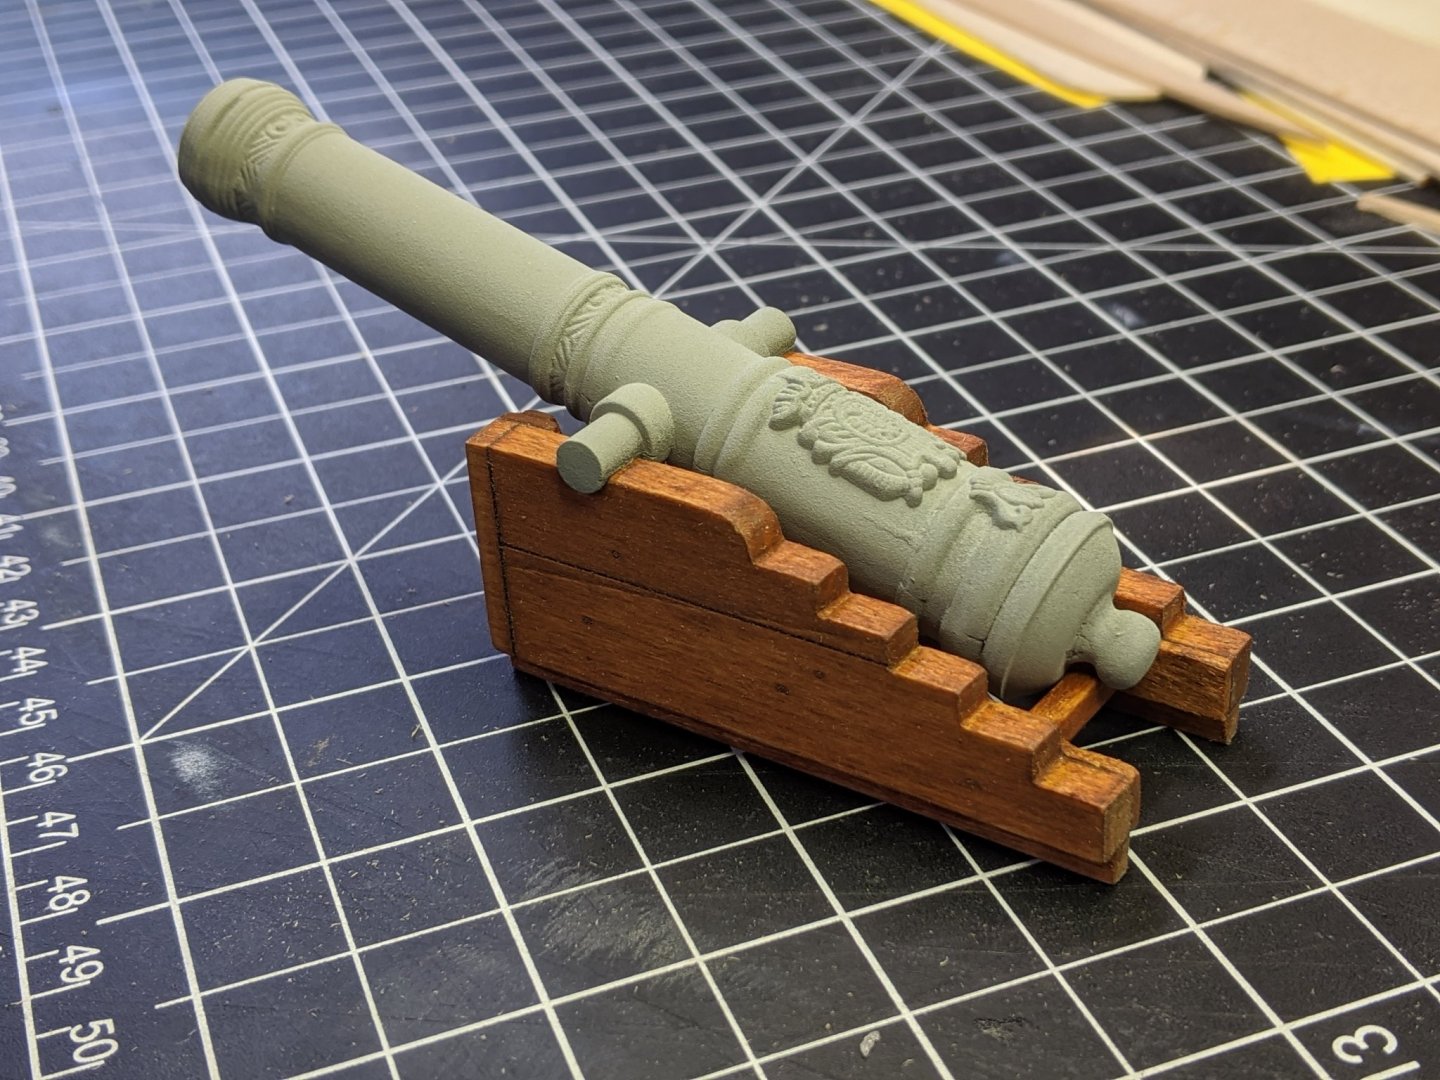
I think I can fix it by shimming the gun deck about 1/16"-3/32". The fore and aft decks are fine. The cannons came from Guns of History Naval Smoothbore kit # MS4005. Model Shipways had a sale 39.95 regularly 49.95 with 40% off that price so I got a pair of kits for $48.00. Much easier and better solution than trying to fix the kit ones. I'm still going to build the two Guns of History kits using the Philly cannons. The wheels came from a trio of toy cannons I got from Goodwill. I'll be using a cannon barrel from those for my 12 pounder. I'll document that in my build log. Thanks on the carriages, a lot more work to do with stain, bolts and rigging. Here's a shot (in progress) of the 12 pounder with the heavily modified Goodwill barrel. Stain is Minwax Gunstock. Here's the cannons as they came from Goodwill... lots of cool parts I'm going to use. I believe they were meant to shoot small pellets, so I ground off the end and grafted the one from the kit on.
- 39 replies
-
- 5
-

-
- philadelphia
- model shipways
- (and 1 more)
-
I see it looks like you have enough travel to clear the gunwales on maximum cannon depression. Maybe your gunwales came out a little bit lower than mine, even though it doesn't look like it. If I put a piece of scrap to simulate the gunwale cap this is a shot of what my issue is... Now I'm using a different cannon barrel and carriage wheels, but I don't think that's an issue. I don't know what the normal operating elevations on the cannons is supposed to be, but it seems to me that a greater depression would be desirable. Perhaps an armory expert can chime in...

- 39 replies
-
- 5
-
-
- philadelphia
- model shipways
- (and 1 more)
-
One thing you might want to look at is the deck height. I found that when I dry fitted the cannons and deck that the cannons do not depress enough... they hit the gunwales. I think the kit was supposed to have a layer of 1/16" boards on top of the 1/16" laser cut decks. That raises the deck enough to give the cannons a proper range of elevation/depression. My fore and aft kit decks are not warped, so I'll use them as a substrate for planking with 1/16" x 3/4" boards. My center kit deck is totally warped beyond saving, so I'll shim up the frames under it 1/16" with scabs and then lay the plank. I think the manufacturer cheapened the kit with the poorly cast cannons and removal of individual deck planks.
- 39 replies
-
- 2
-
-
- philadelphia
- model shipways
- (and 1 more)
-
Your Philly is progressing nicely! I had the same issues with the decking, and decided on about the same solution you did. Luckily, my local hobby store had some 1/16" x 3/4" basswood in stock so now I have enough to do the decks. I cut templates for the spiling as you suggested, and so far (I'm on the third course now) it works excellent. Now if I could only quit denting the wood with my fingernails...😬 I agree that the 9 and 12 pound cannons are really poor quality. On this kit the cannons are kind of the "center of focus" and need to be done right. Good work on making them decent. I'm really enjoying your build, have you decided on stain or finish yet?
- 39 replies
-
- 1
-
-
- philadelphia
- model shipways
- (and 1 more)
-
I got a lot of planking done and started on some other subassemblies. I still have to finish the inside work and get the decks completed. Lots of stain and pencil work to go but she's starting to look look like a whole thing instead of a bunch of parts. Slim and Snowball have been busy, it's nice to have a good crew.

-
Looks good! Did you use templates for the spiling? I'm thinking of using cardstock mockups and then cutting the planks from those. It's cool that there are two new builds if the Philadelphia in the build log now. I'm looking forward to your progress! BobC
- 39 replies
-
- 1
-
-
- philadelphia
- model shipways
- (and 1 more)
-
Hi Renato, Excellent work! What color did you use on the hull? I see you have a helper. All scale shipwrights should have a familiar...
-
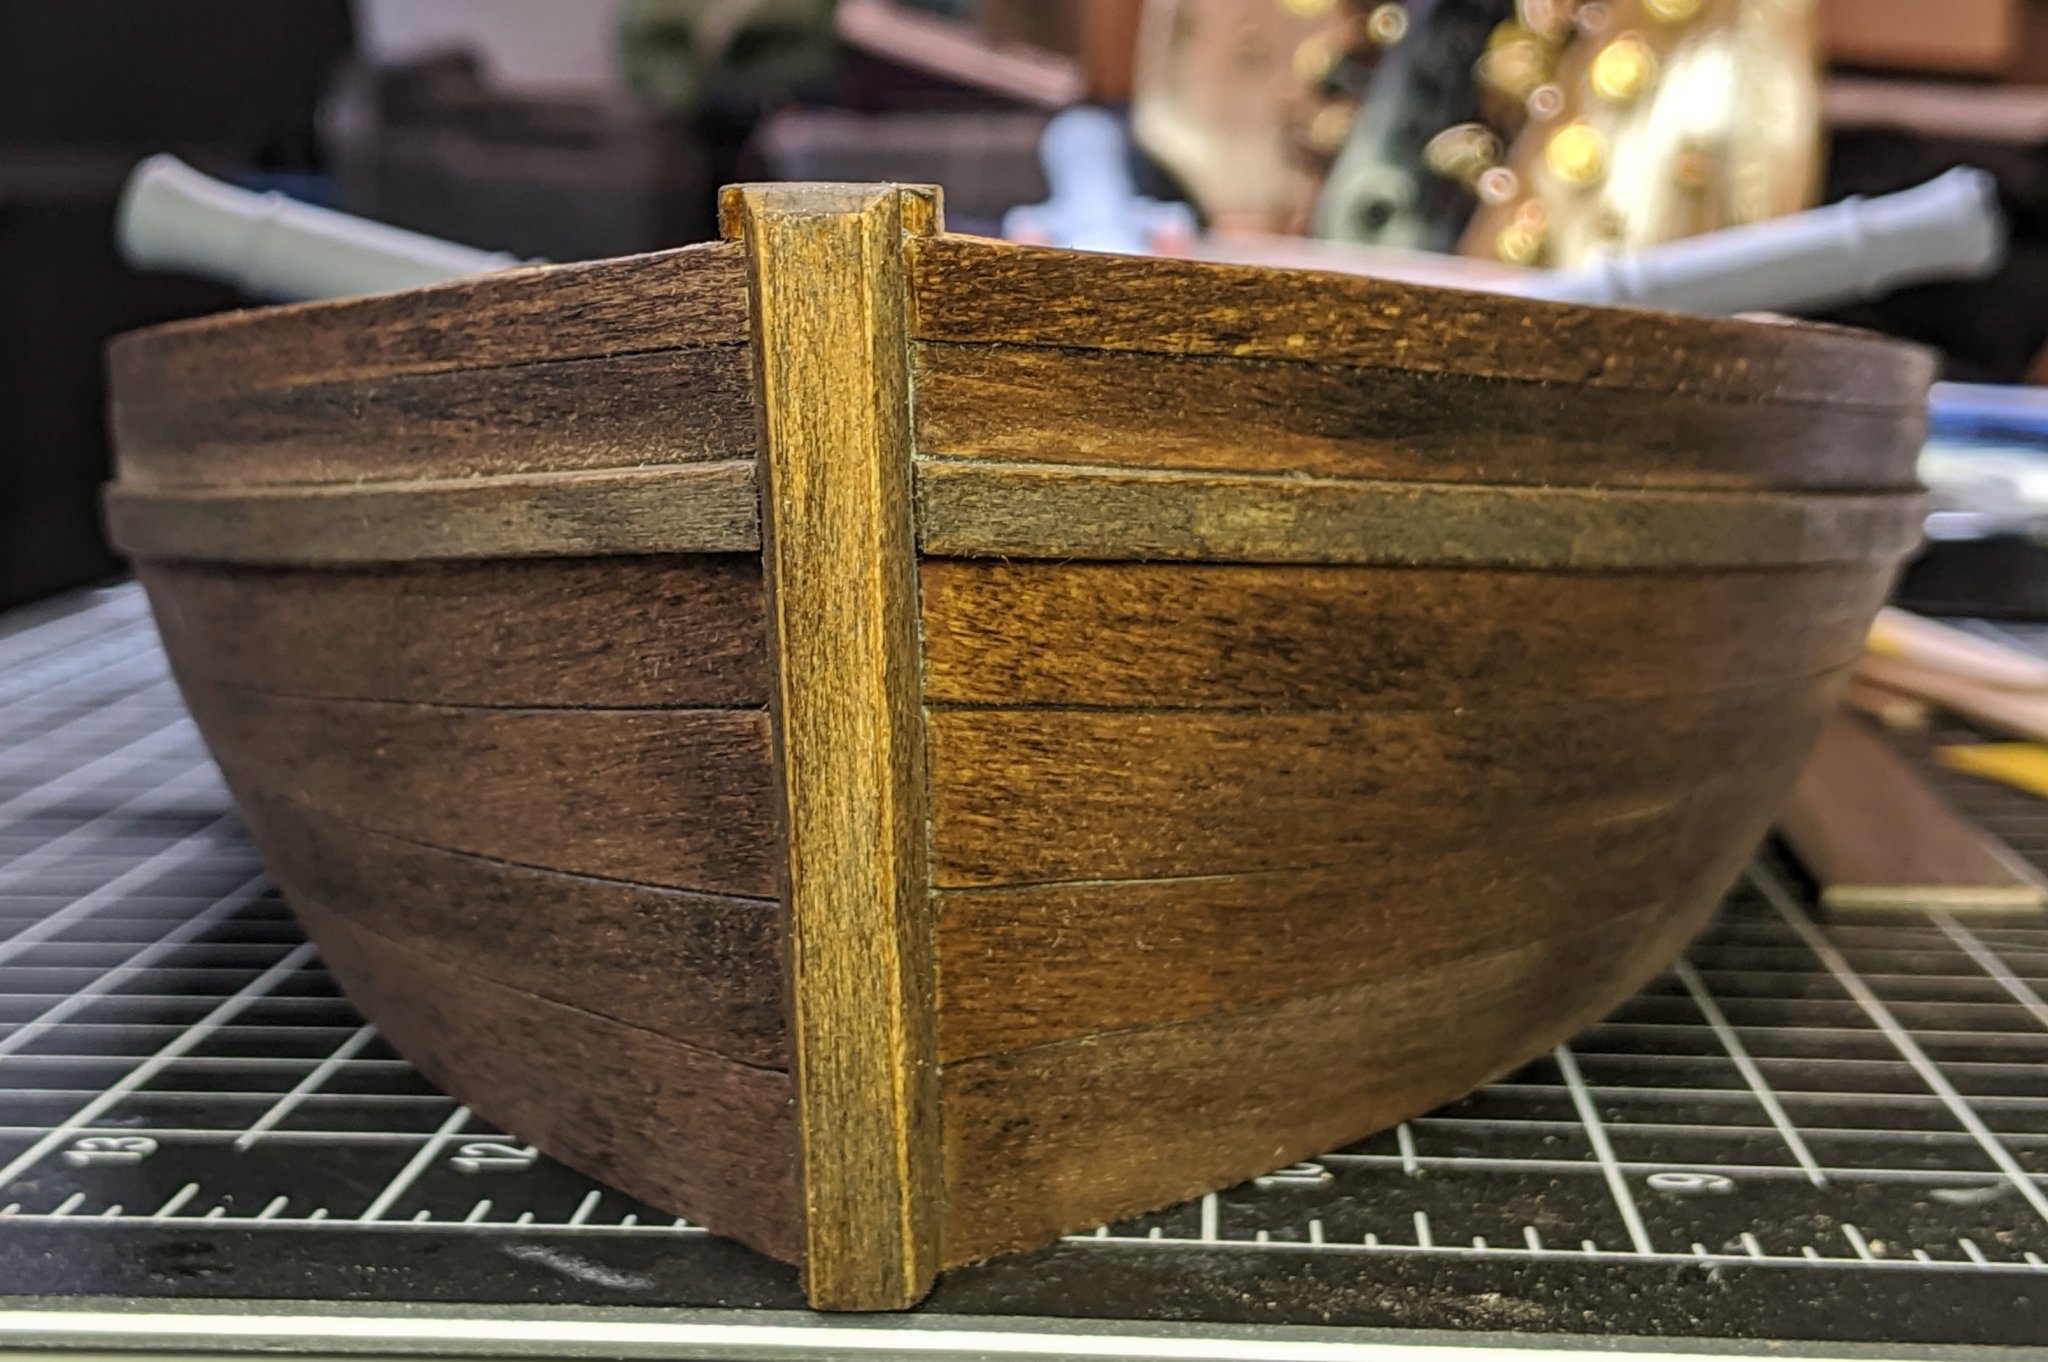
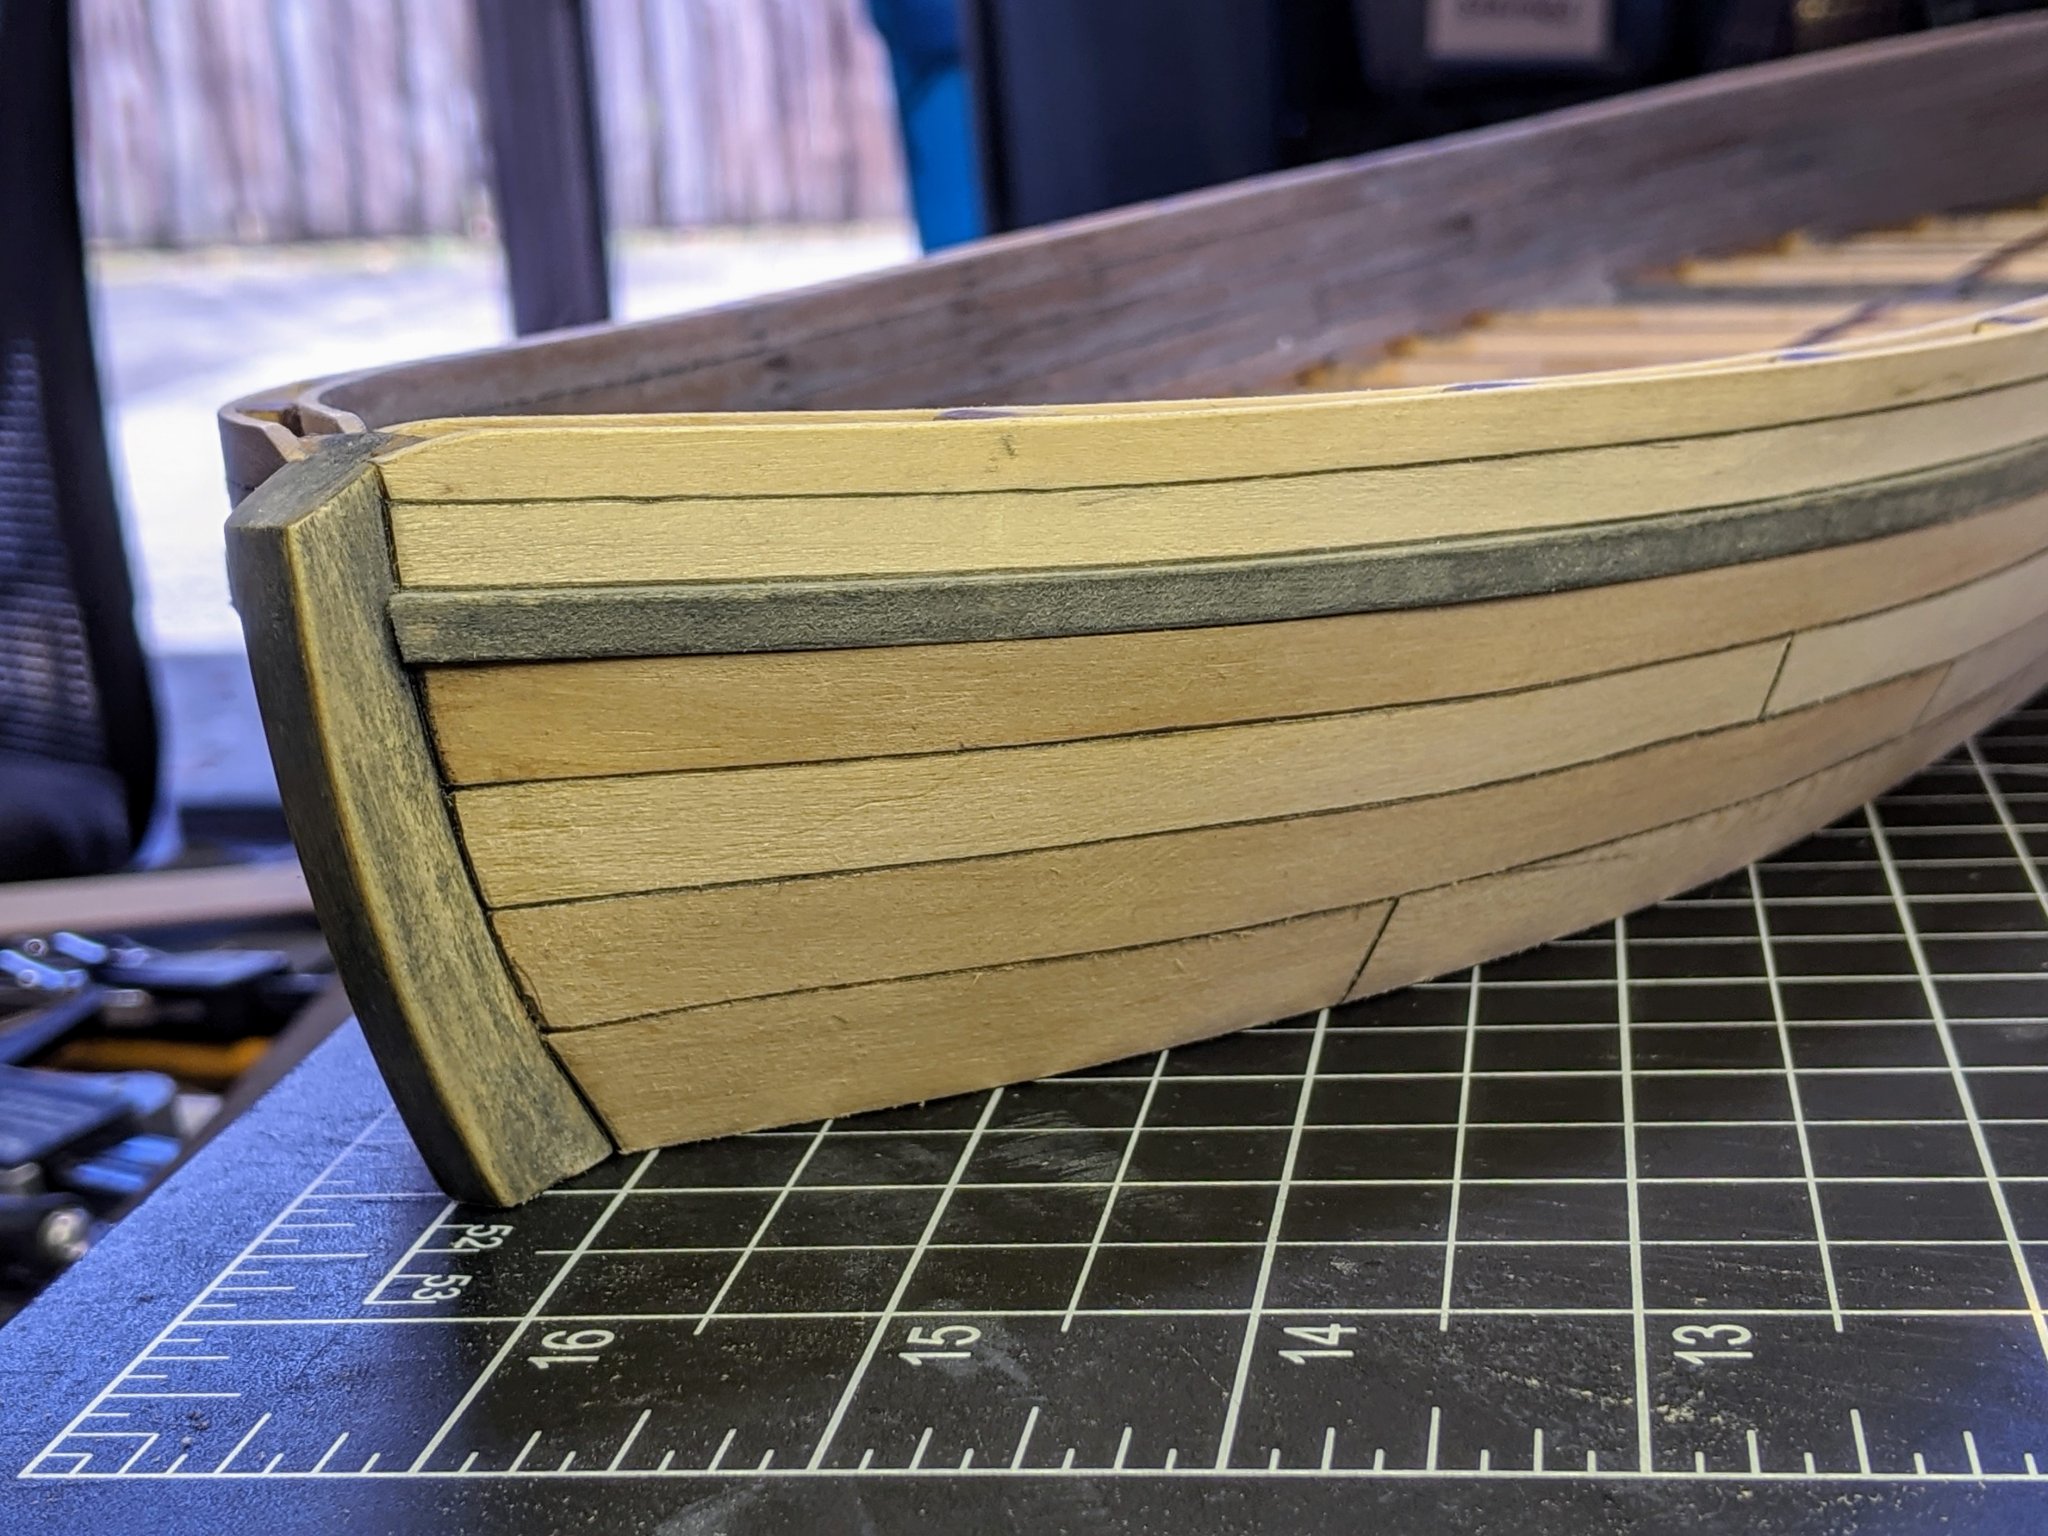
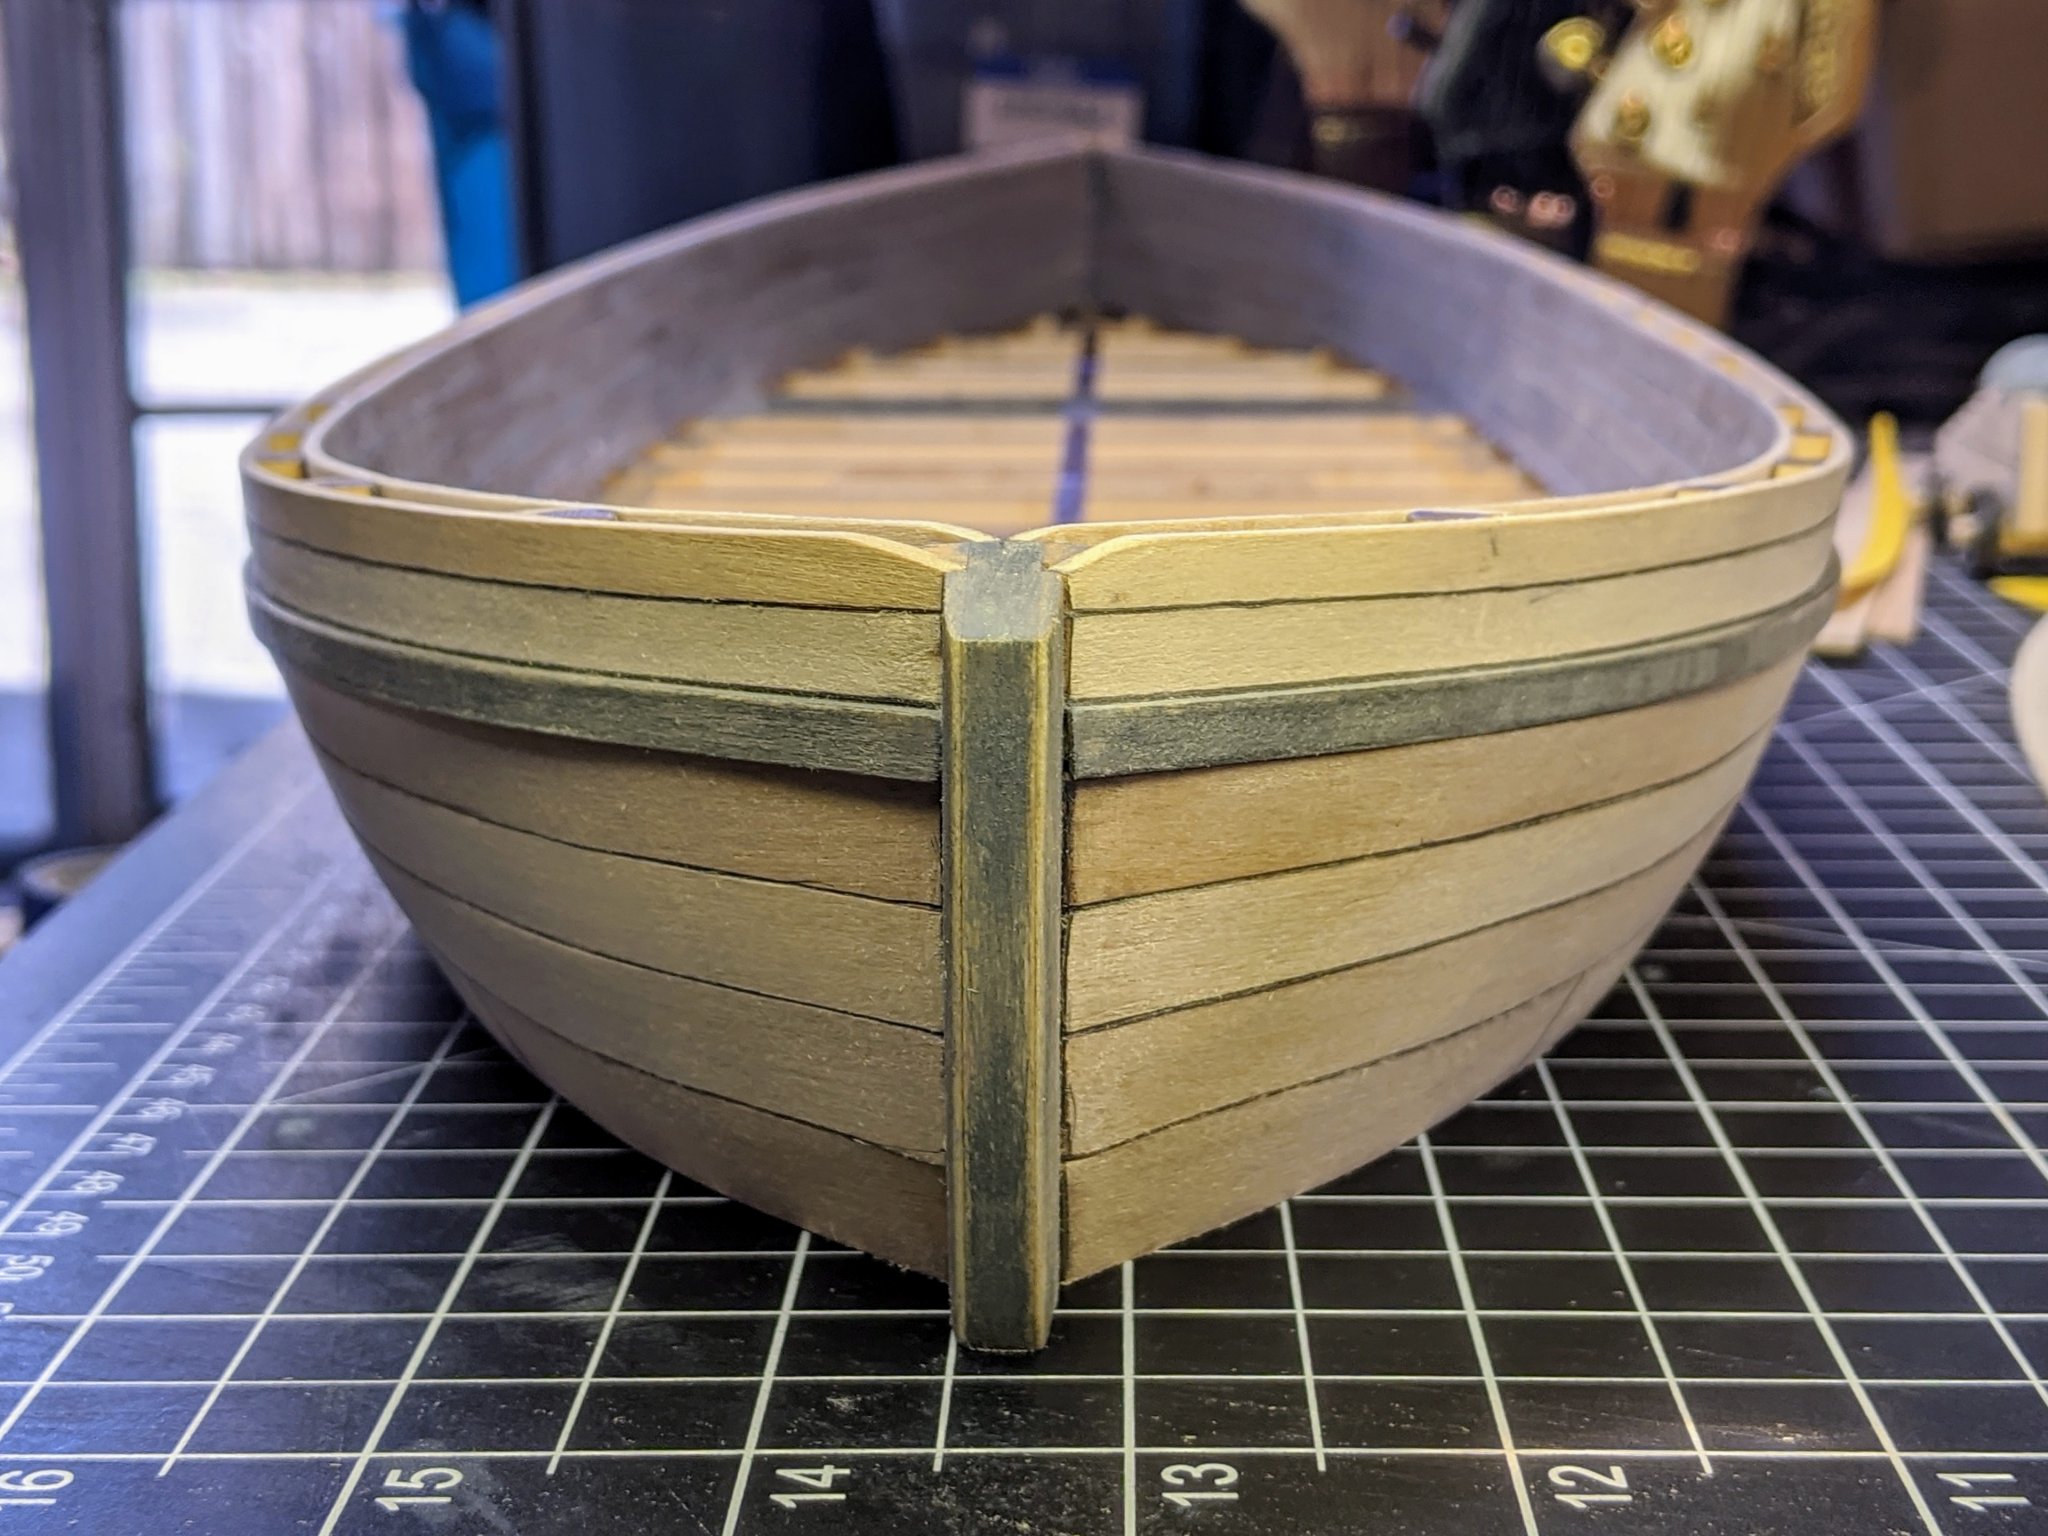
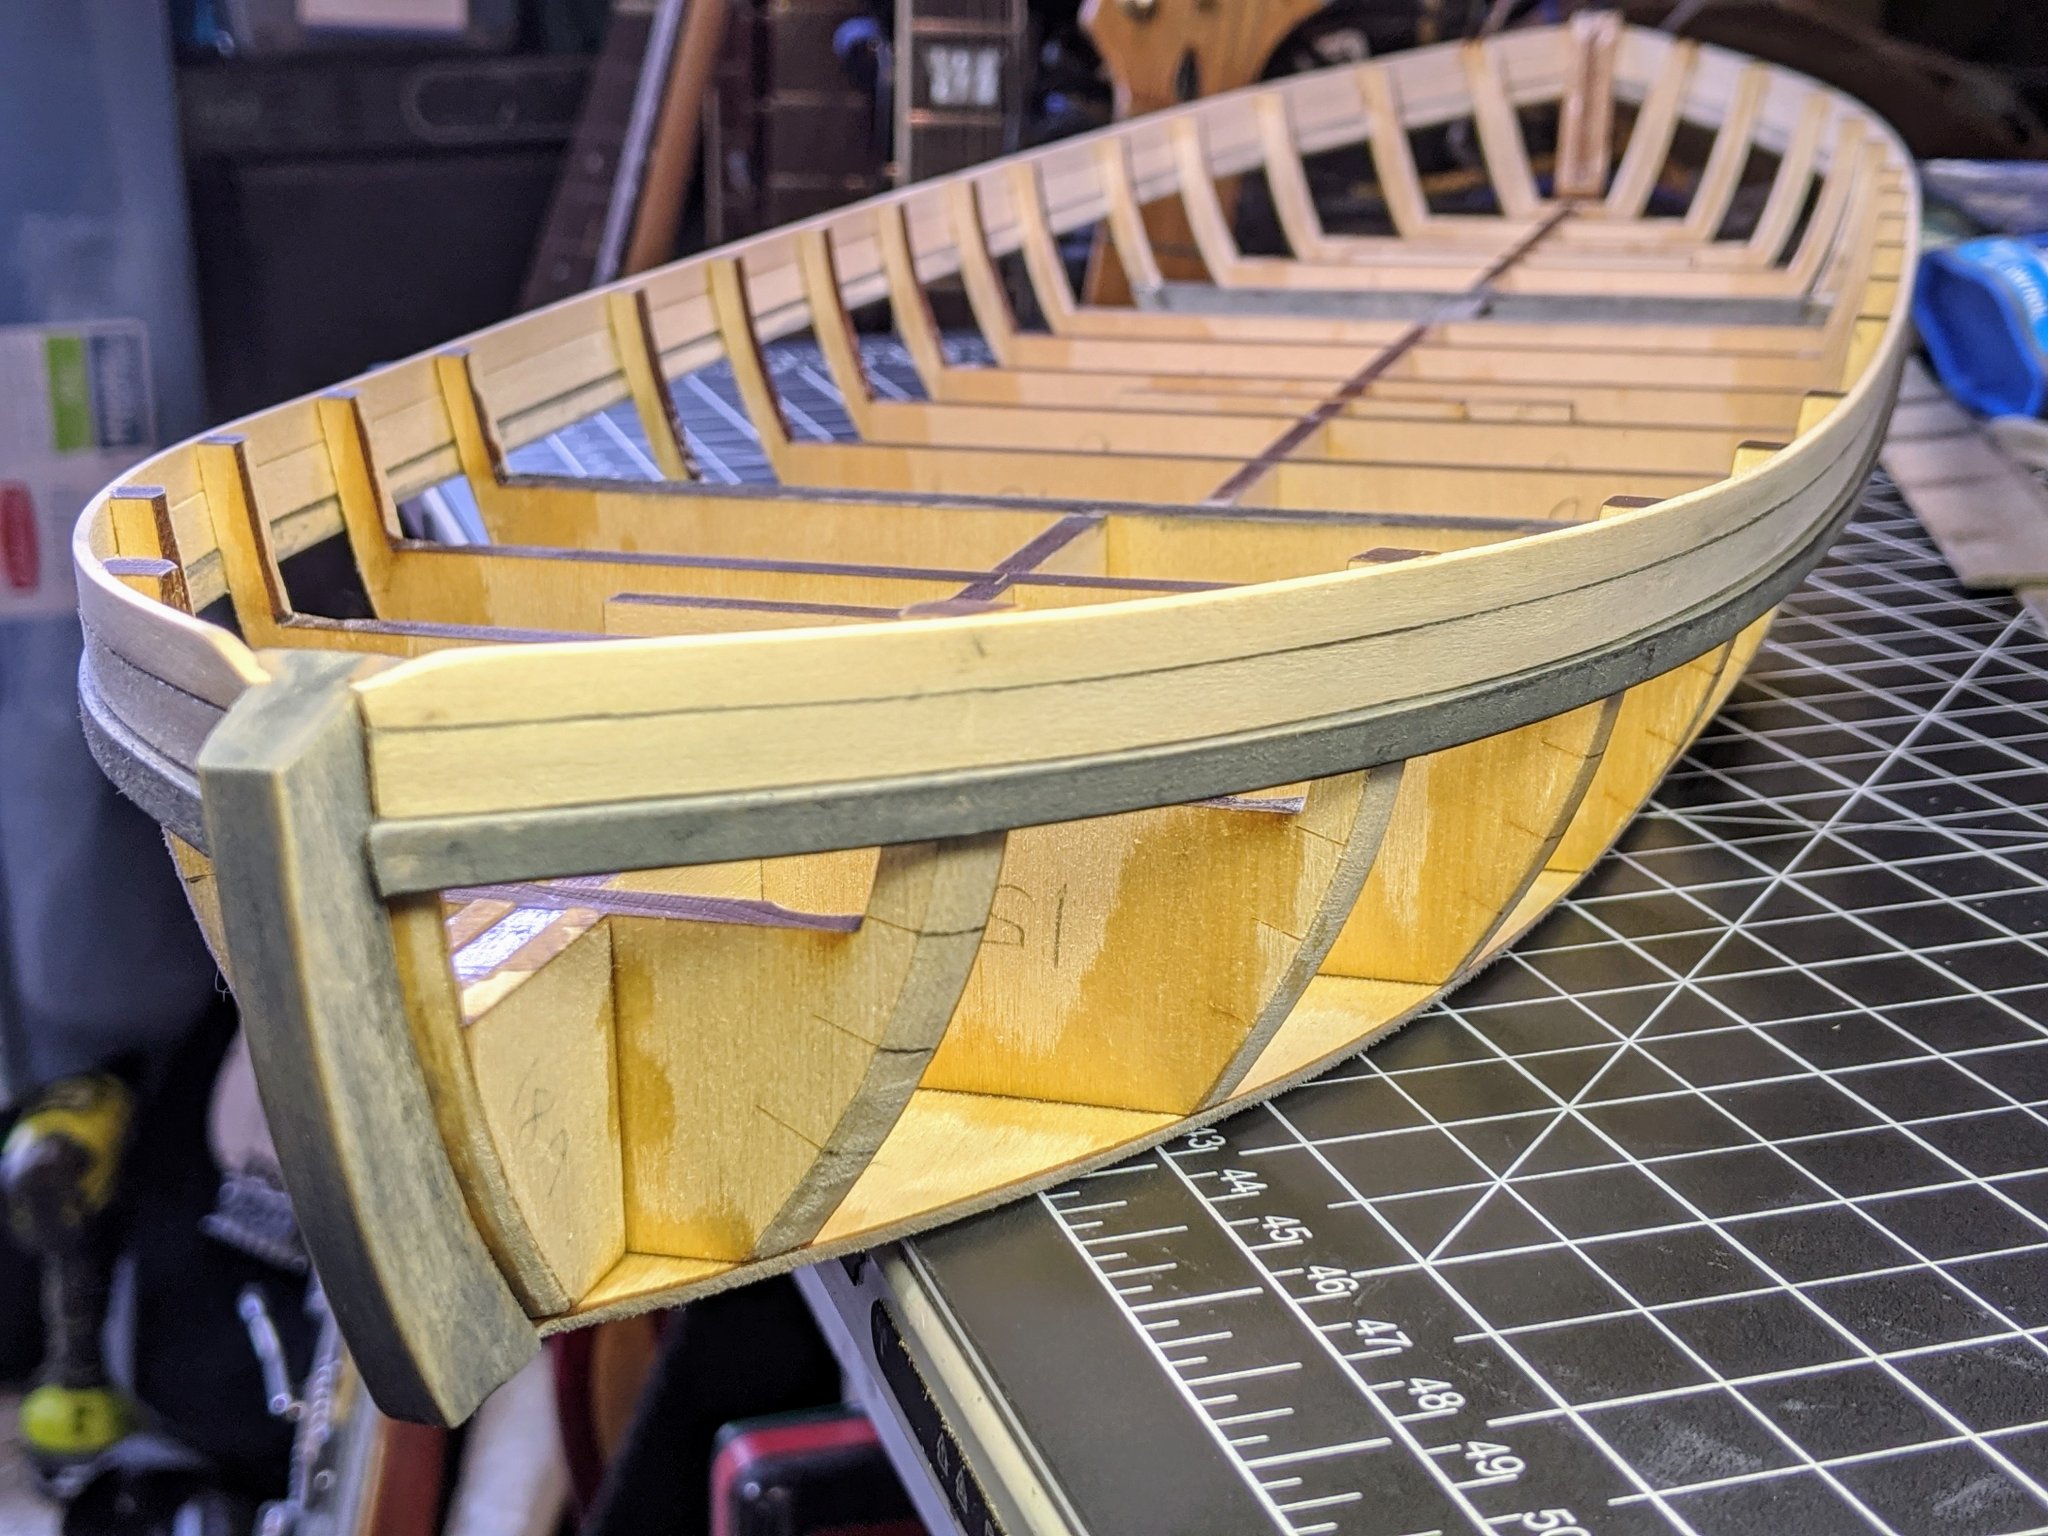
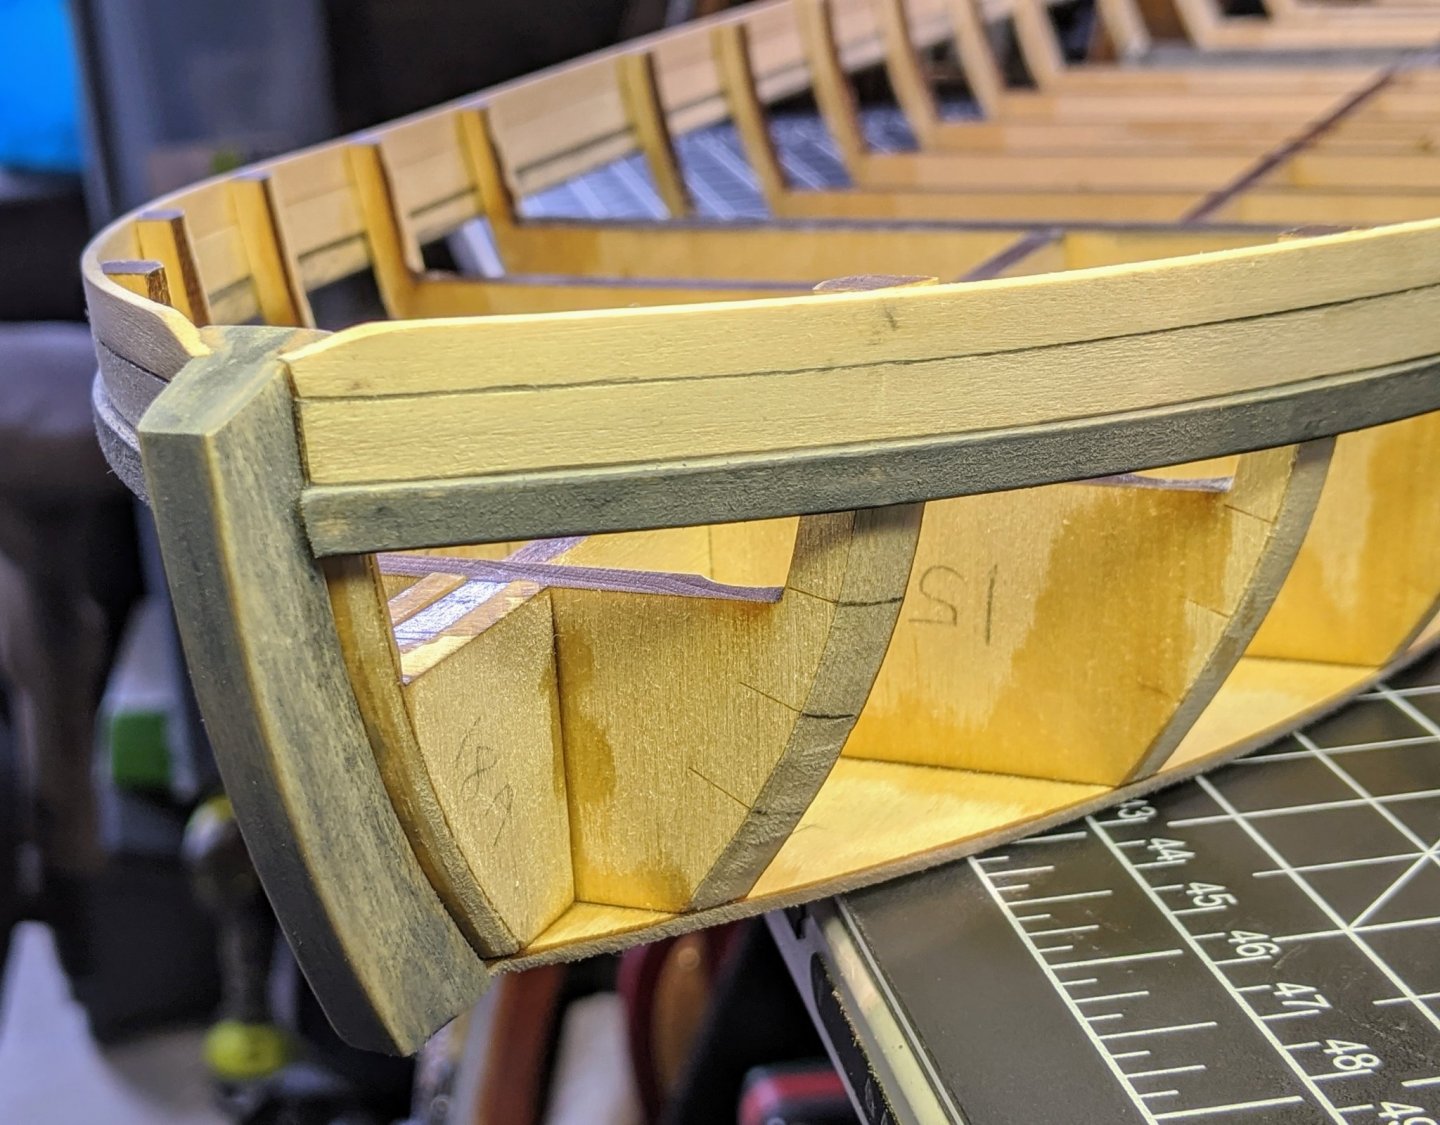
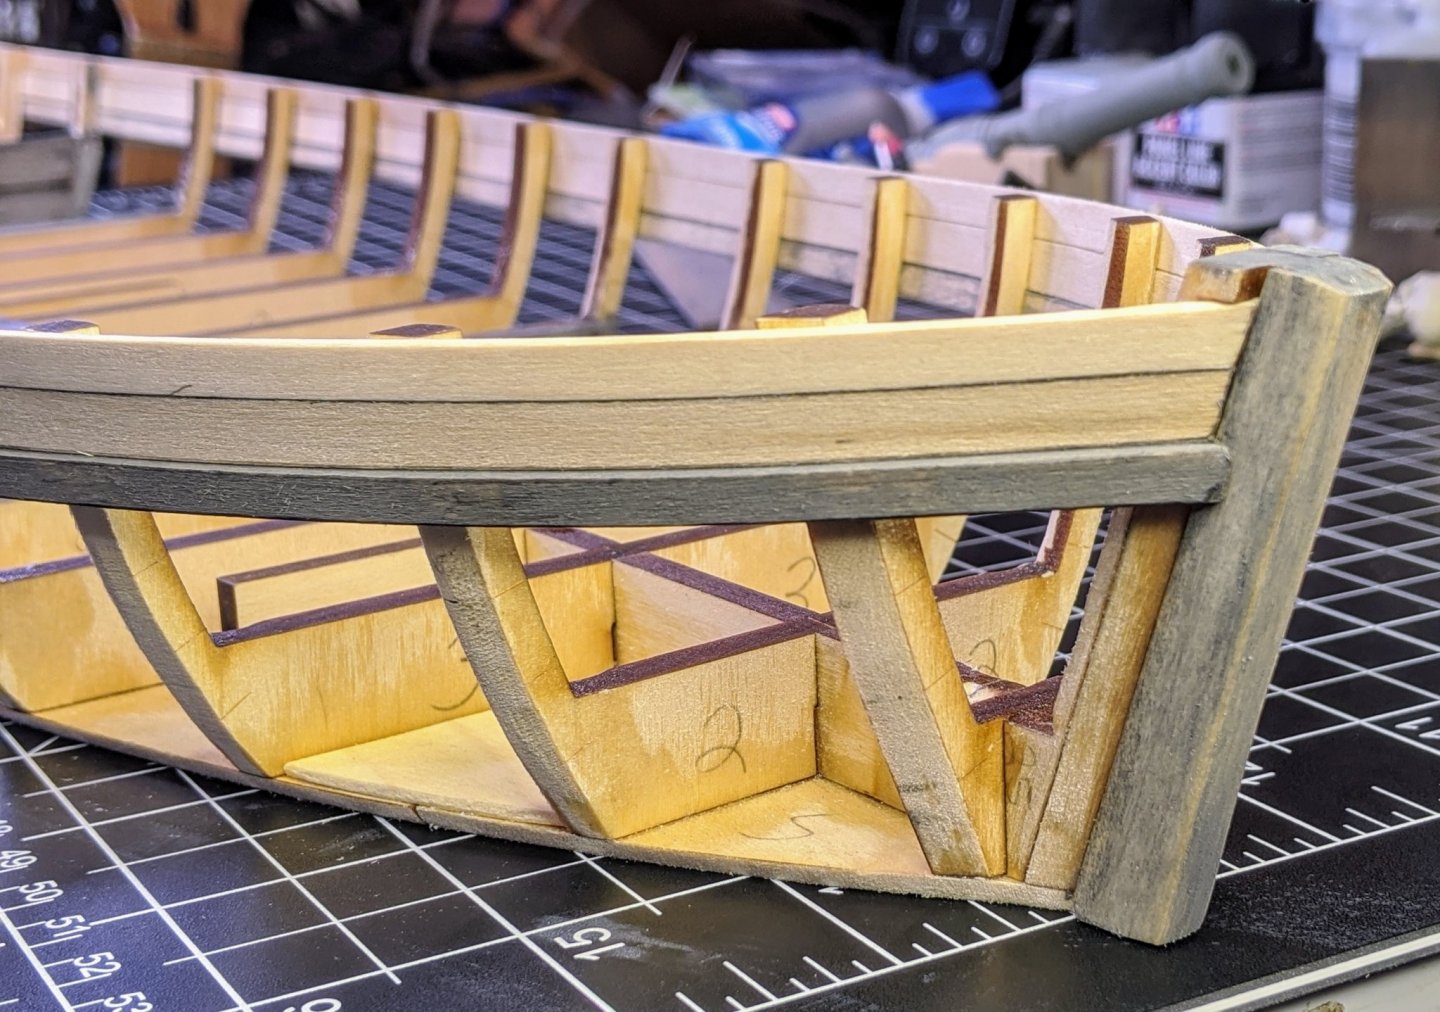
Hi all, I got the top two strakes and wale installed. Forgive me if my nautical terminology is incorrect, I'm learning it as I go... I decided to stain the wale and the bow and stern posts the same as the interior planking in the cockpits. the deck planking and cabinetry will also be the same stain. As far as the exterior hull, I'm leaning towards a dark gunstock tint, I'll experiment on scrap to get the tint I want. I believe that the contrast with the grey will be effective, we'll see... Mucho Kudos to the Philly builds of Brucealanevans, Elijah and others. I learned a lot and got some great ideas from those awesome builds. There is so much good info on this forum! Next phase will be the interior cabinetry. The plans don't show plank lengths so I think I'll use a four course stagger. That will break up the cabinetry nicely and allow me to finish stain and detail each board as I install them. After the interior is completed, I'll finish planking the exterior hull. Here's some progress shots: Bow and stern: Here's Slim, raring to keep building! I found this cool video on the Philadelphia II that is interesting and informative (even if very amateur).


-
Excellent work on both! Your clean build of the schooner really shows the lines to good effect. The pumper is really well done and the work you put in really shows. What's up with the green screen background? some Photoshop action in the future? Cheers, RobertC
-
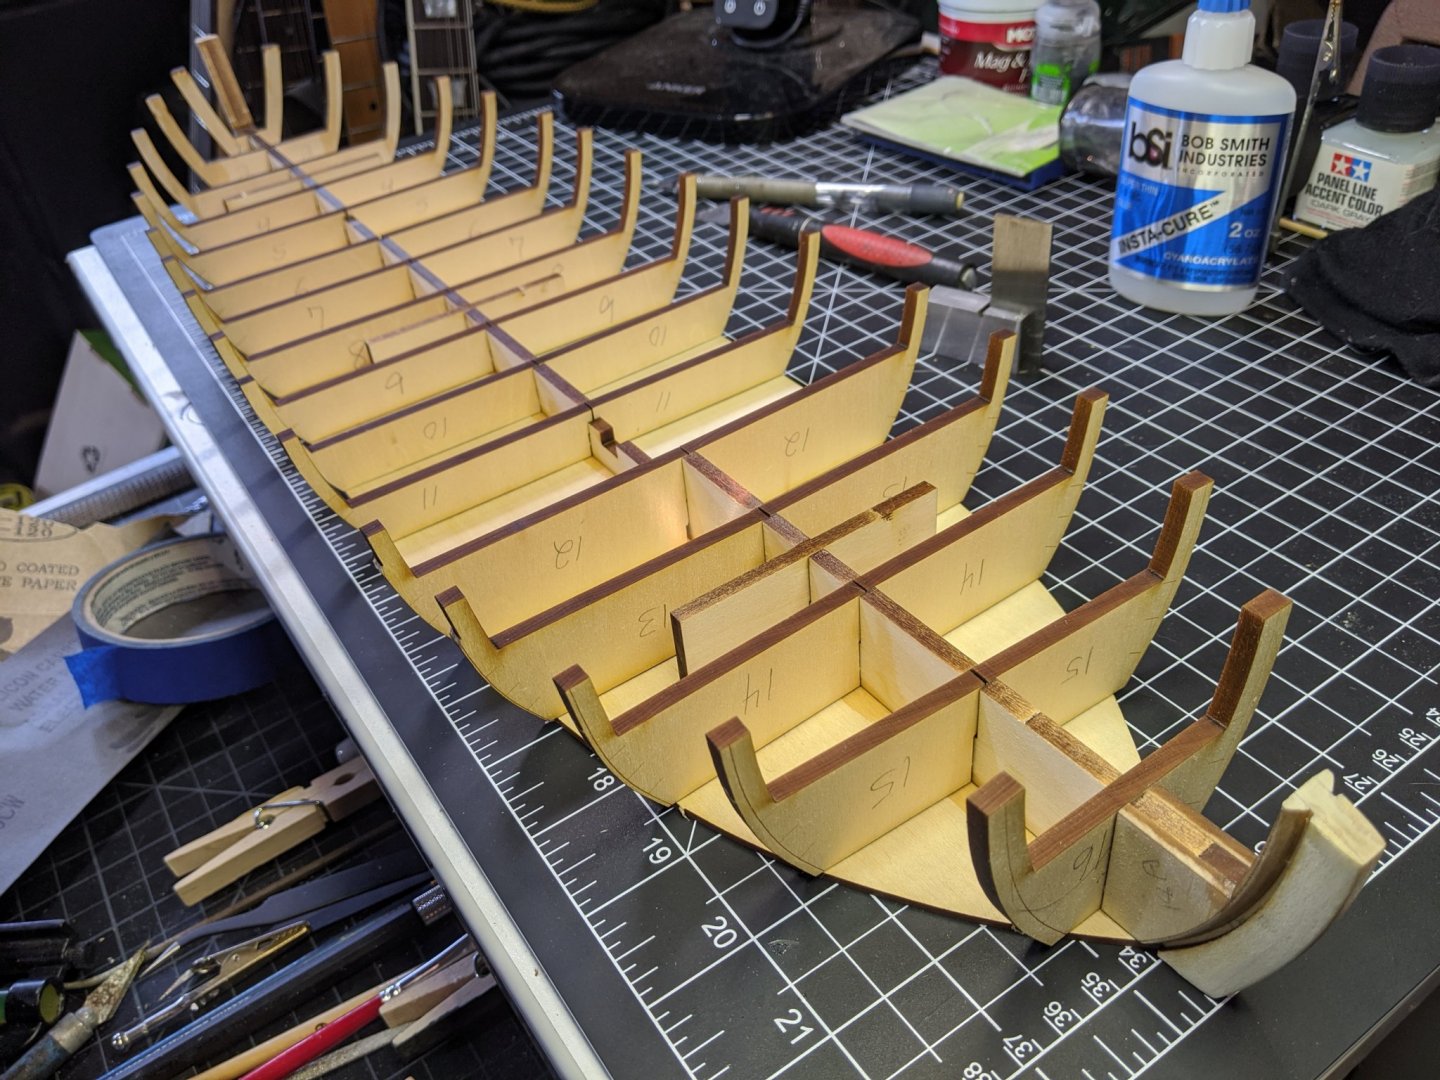
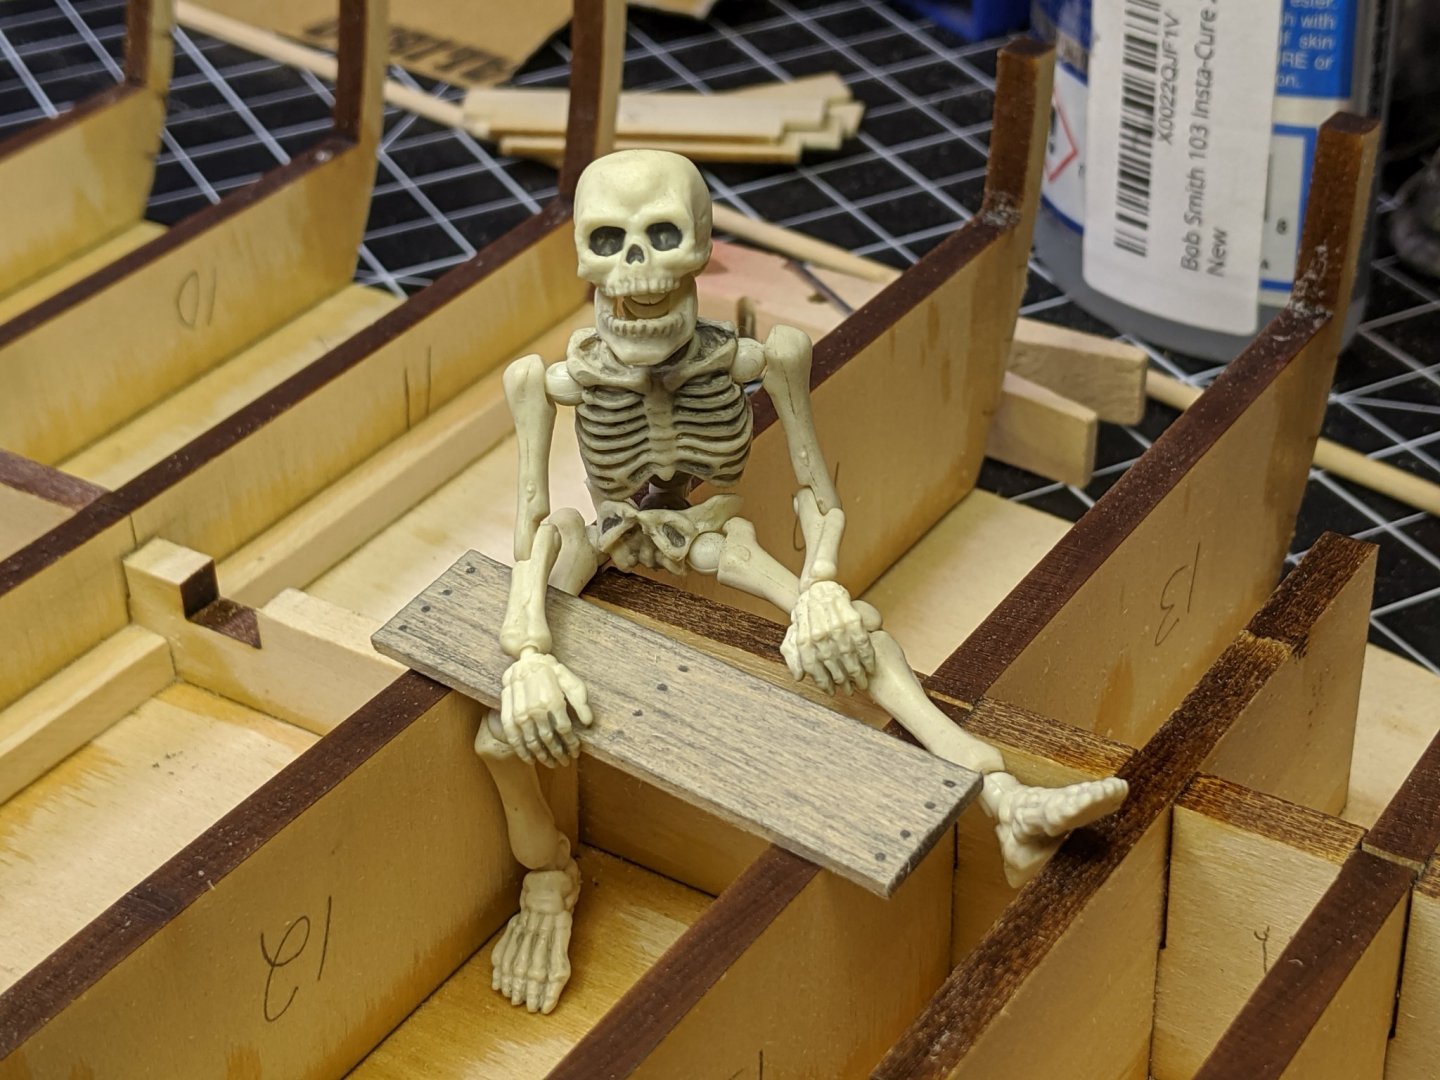
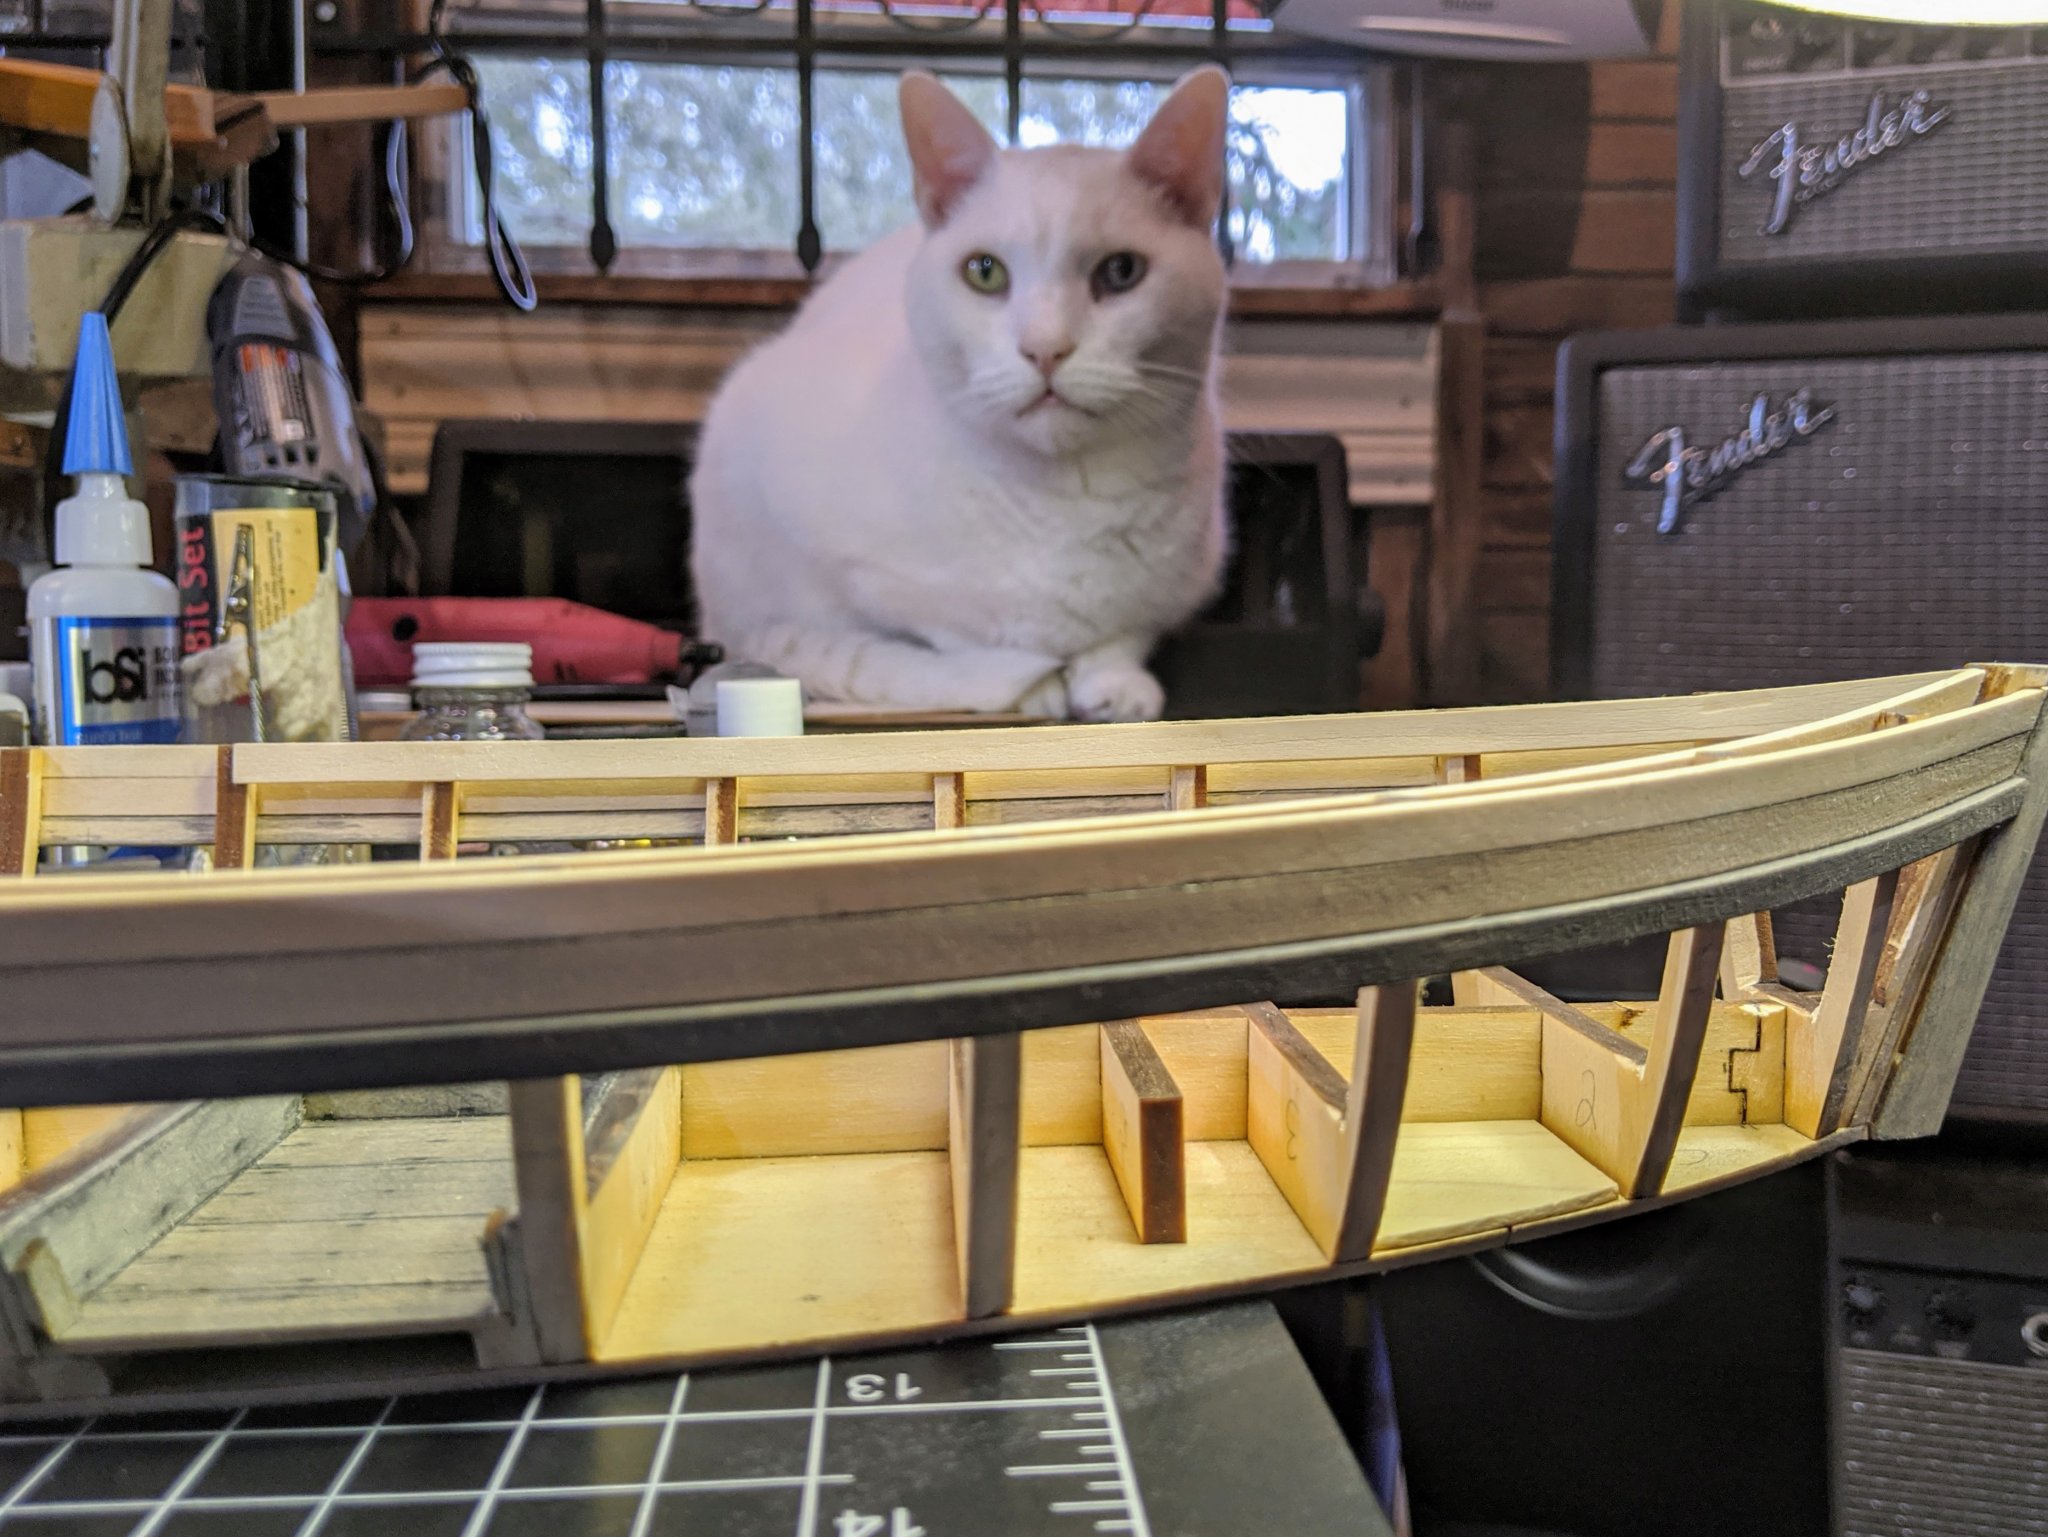
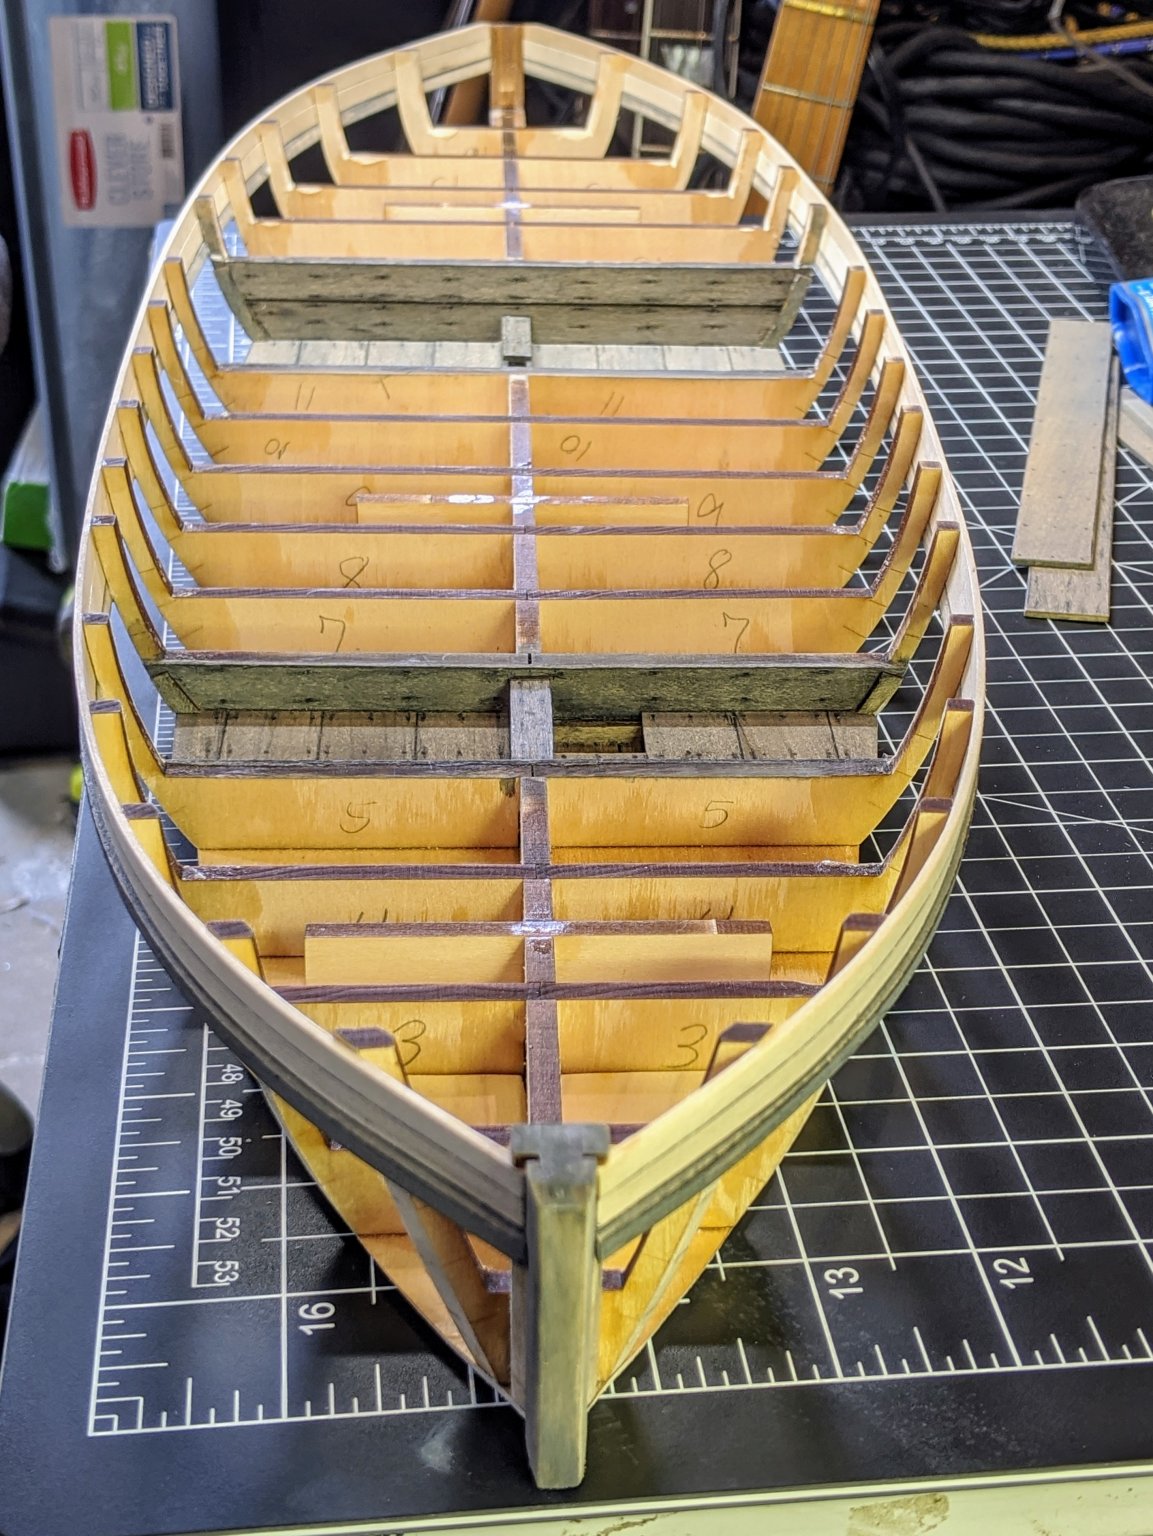
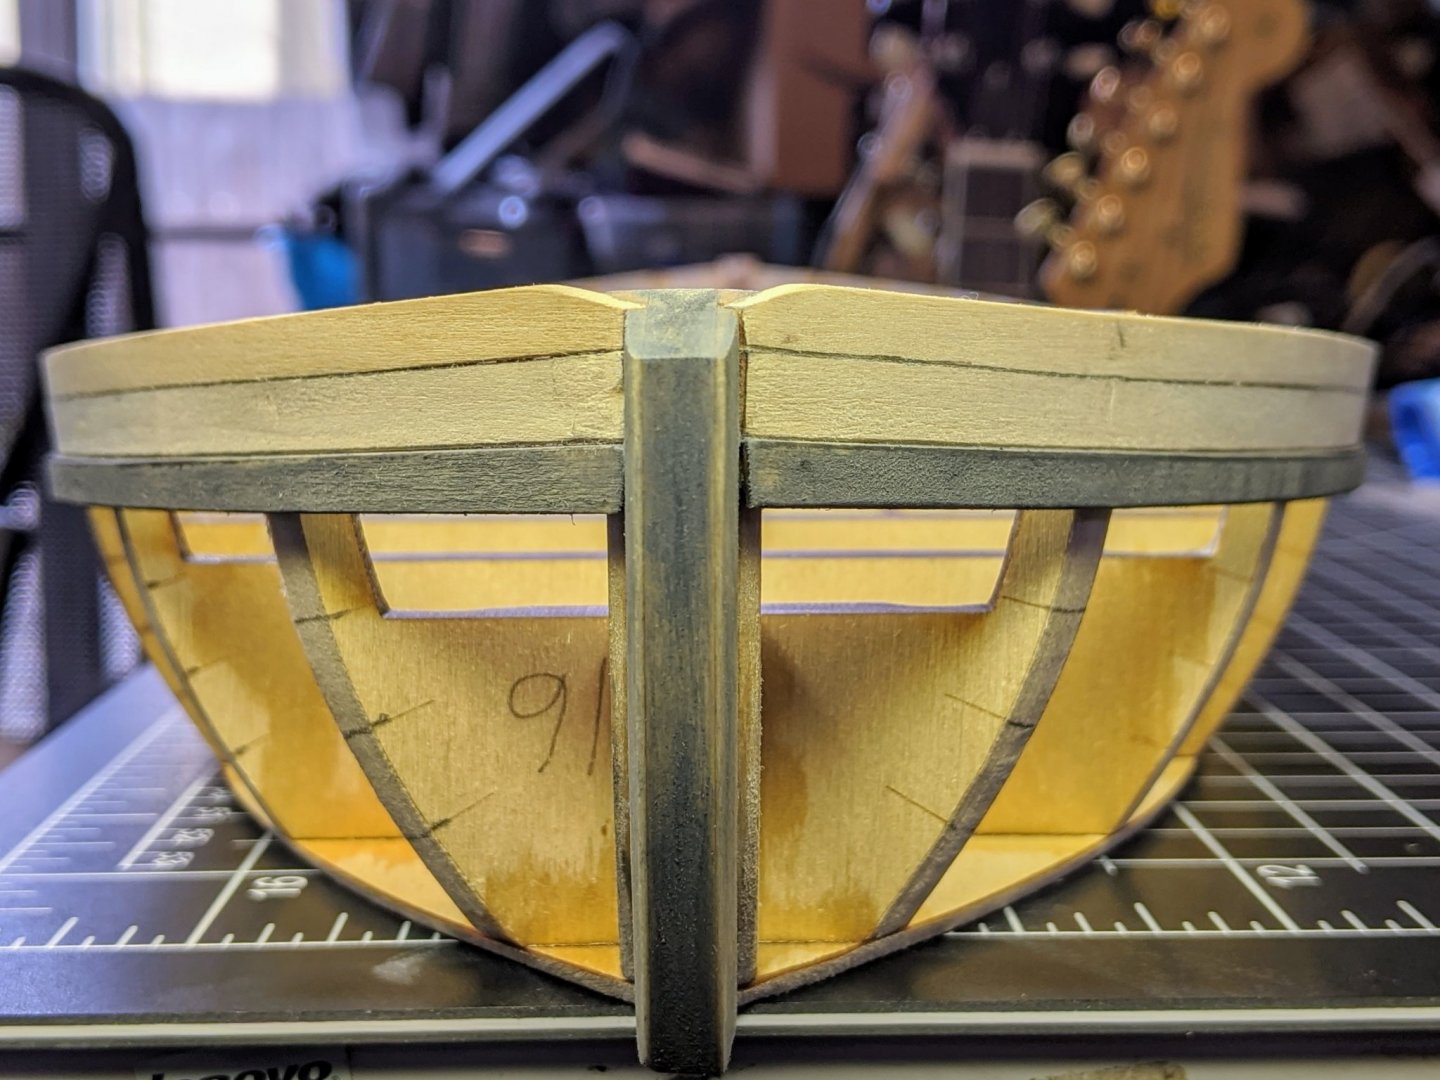
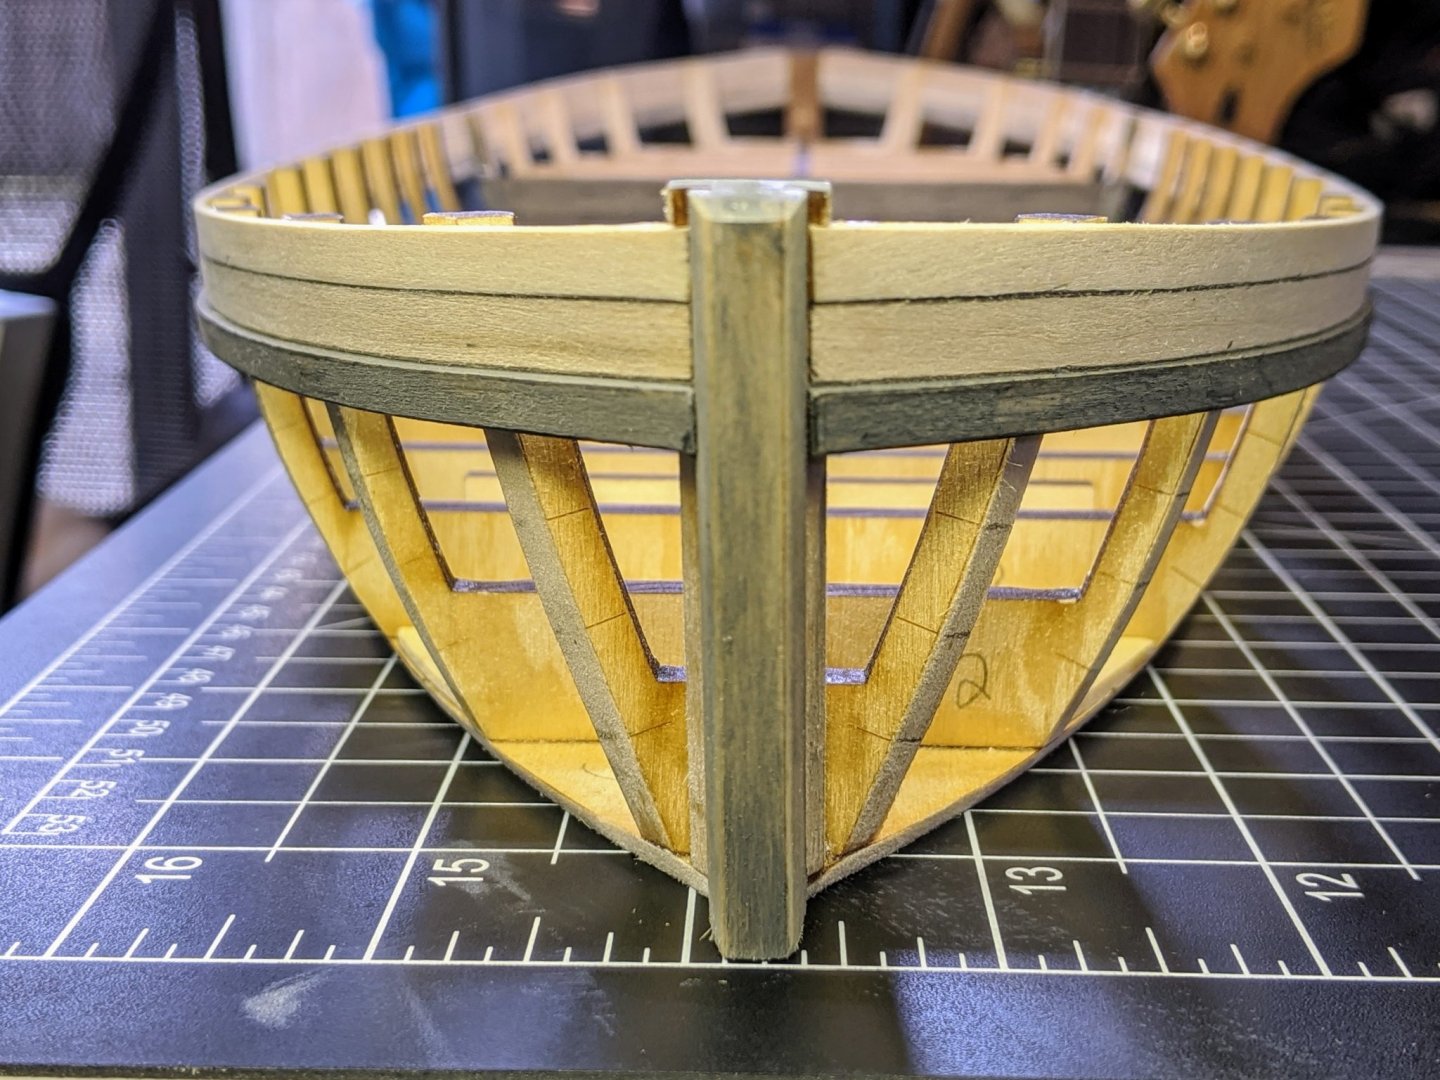
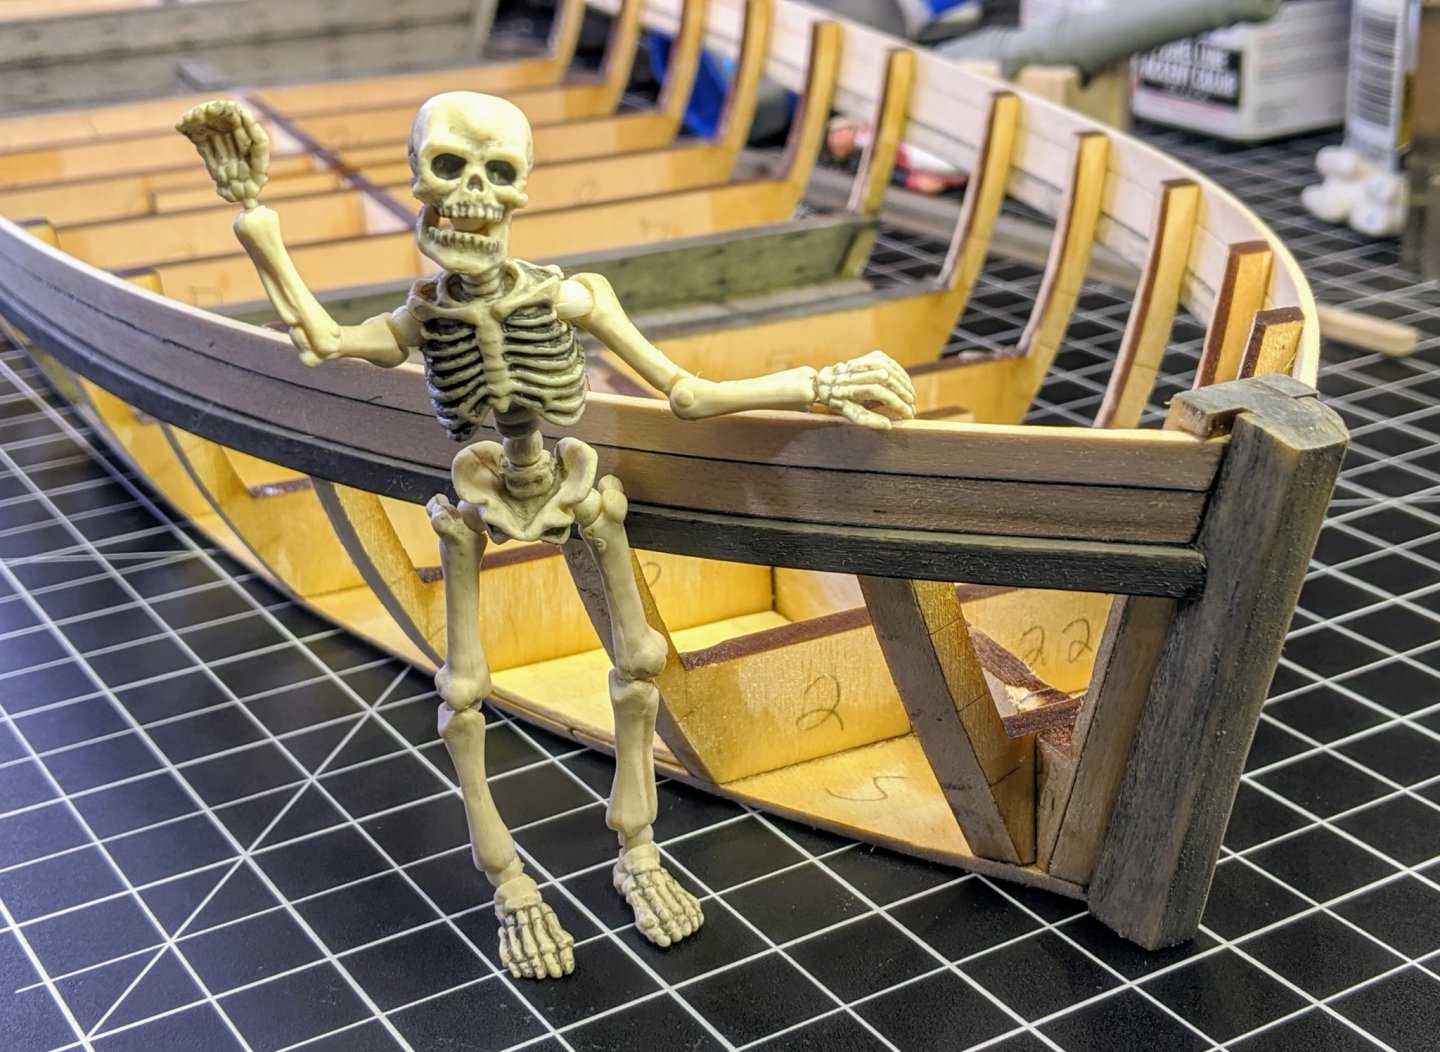
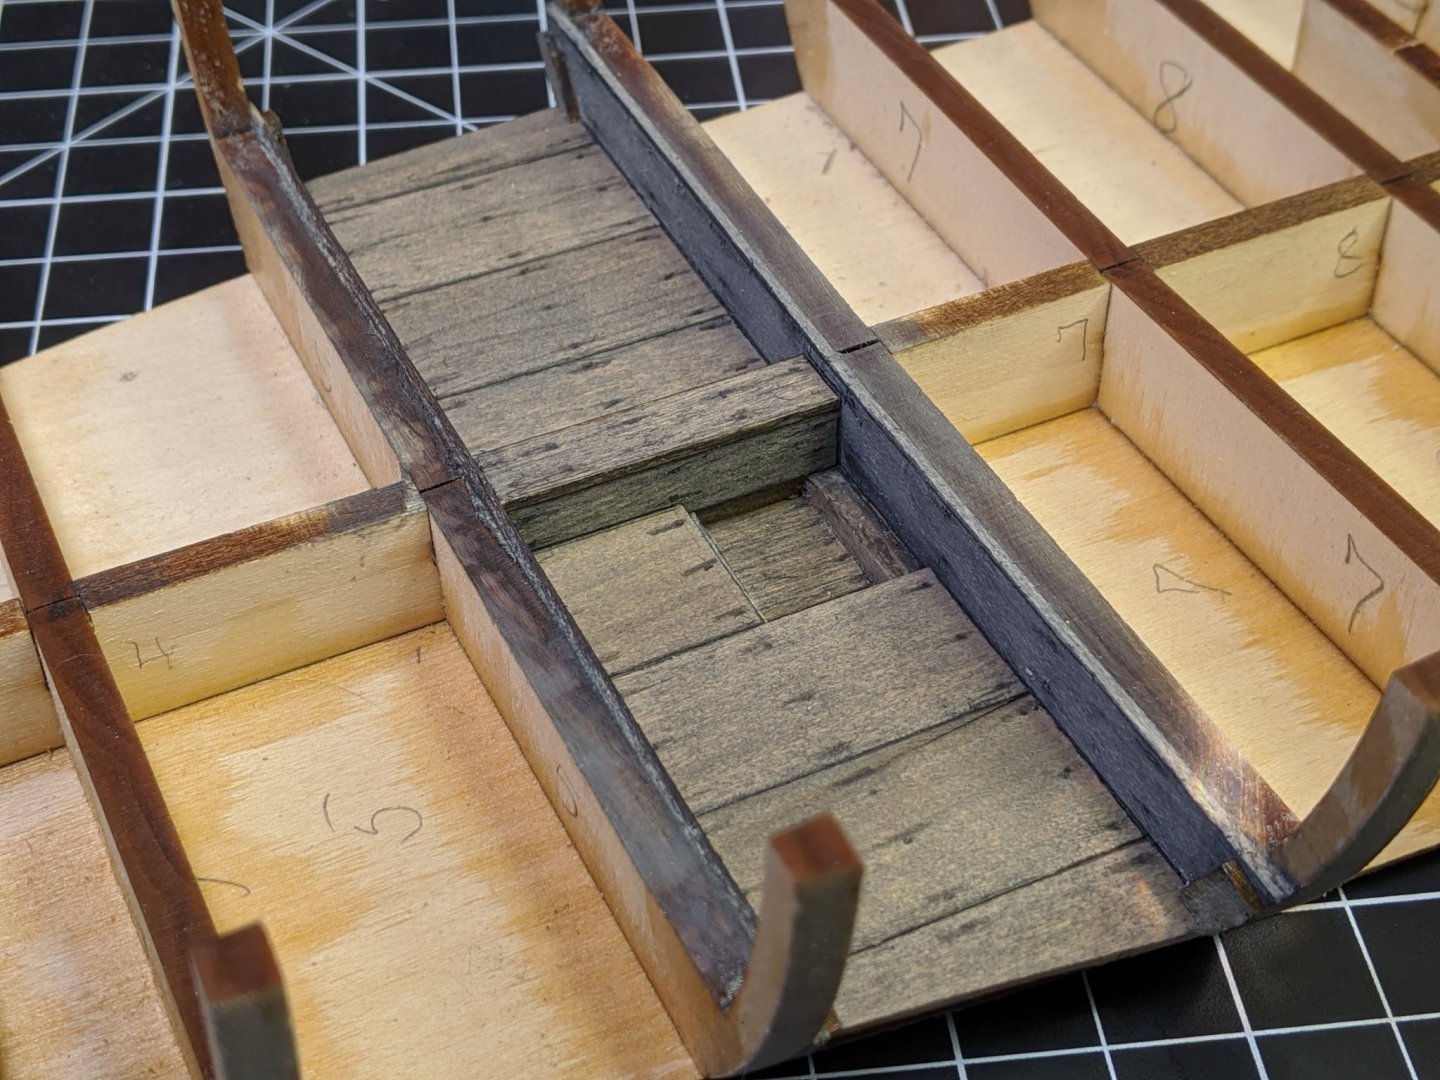
Hi all, I finished the final frame attachment and shaping yesterday. I guess I got "good wood" in the kit, all the pieces were flat and squared up nicely. I attached the bow and stern assemblies last instead of first as the instructions indicated, it seemed easier that way. I'm going to firm up the frames with a few hits of hot melt glue just to be on the safe side, as I used CYA for frame assembly as I'm not convinced of it's long term strength. Today was well planking day. I experimented with a lot of different combinations of sealer, stain and pencils and finally got results I think I can work with. I found the best method was no sealer, a quick wipe with stain and then a light sanding with 1000 grit to take the fuzz off. I did a whole board and then cut the pieces as needed. After all the pieces were cut and dry fitted into place I marked my nail reference lines and then removed the pieces for "nailing". I used a .05 mechanical pencil for the nails, pushing the tip to both indent the wood and leave a black mark for the nail head. I then took a soft graphite pencil and added detail around the nail heads and board edges. I then rubbed each board with my thumb to blend the pencils, then glued them in. After assembly, I used Krylon matte clear to seal the wood and remove the gloss from the pencil work. All things considered, I'm satisfied with the results and think it will work for the rest of the deck and cabinetry. Here's the aft well... And here's the mast well... As far as the construction guy's name... Slim it is. Kenneth suggested it, my wife seconded it and Snowball (the cat) finalized it. I'm going to add a last name... Pickens! Slim Pickens, in tribute to Kubrick and one of the best movies ever. Slim is now enjoying an adult beverage and preparing to watch the Superbowl.
-
Hi all, This will be a build log for my second wooden ship kit. I have a lot of experience in styrene and railroad modelling, and this log will be a running commentary of my trials and tribulations during the construction process. I've read through the other Philly build logs here on the forum, and I'm really impressed with the skills and techniques the builders used to complete their amazing results. I've been interested in building the Philadelphia kit for a while, liking the large scale, interesting construction and unique history of this ill-fated gunboat. Over the holidays I finally pulled the trigger and got the kit. After unboxing and examining the components, I'm mostly impressed with the quality and precision of the plans and materials. The only complaint I have (and it's a big one) is the quality of the 12 and 9 pound cannons (more on that later). So, here's the start and first few construction pics and comments. Here's the hull frame partially assembled just so I can get an idea of what I'm getting into... This thing is huge! Only problem I found was frames 12 and 13 on the port side were laser cut a little wonky. Luckily, fixable. I used Superglue at this stage, but will use wood glue for most of the rest of assembly. Here's the assembled and shaped bow and stern posts. Here is the framing completed and shaped, along with "the construction guy", who hasn't been named yet.... any suggestions? Here's my first attempt at a weathered deck piece. I sealed the wood with Minwax pre-stain wood conditioner, added nails and tar edges with a hard pencil and then stained with Minwax classic grey. I'm not sure what to use as a final finish coat, on this piece I used Krylon matte clear. Any suggestions and comments are greatly appreciated!