-
Posts
142 -
Joined
-
Last visited
Content Type
Profiles
Forums
Gallery
Events
Everything posted by BobCardone
-
I messaged Jim, he graciously responded: "I used these products https://woodlandscenics.woodlandscenics.com/show/category/Water Their website has many how to and hints. I used Murky Water and got all the grasses and cat-o-nine tails from railroad model shop". Very glad to have this info, It'll help a lot.
-
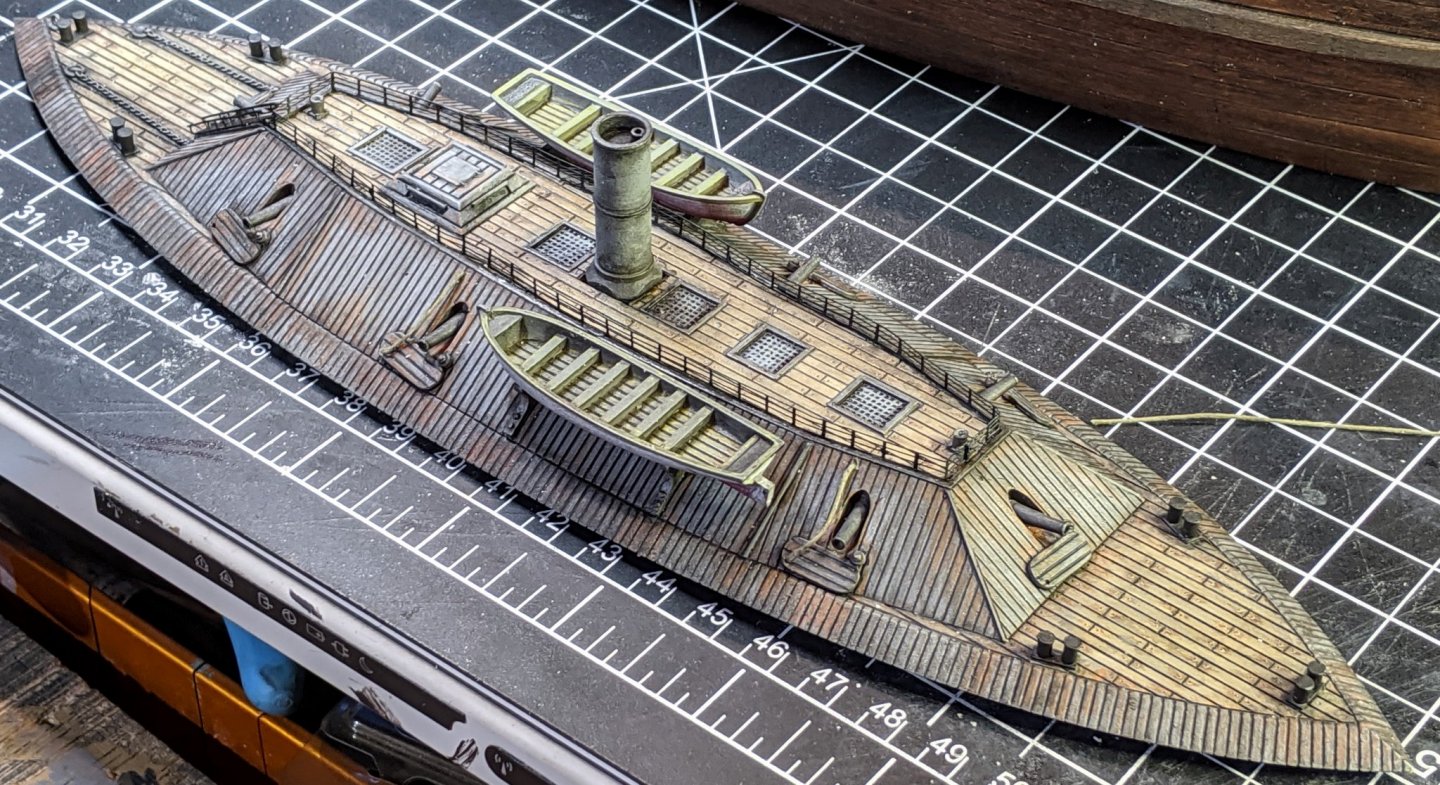
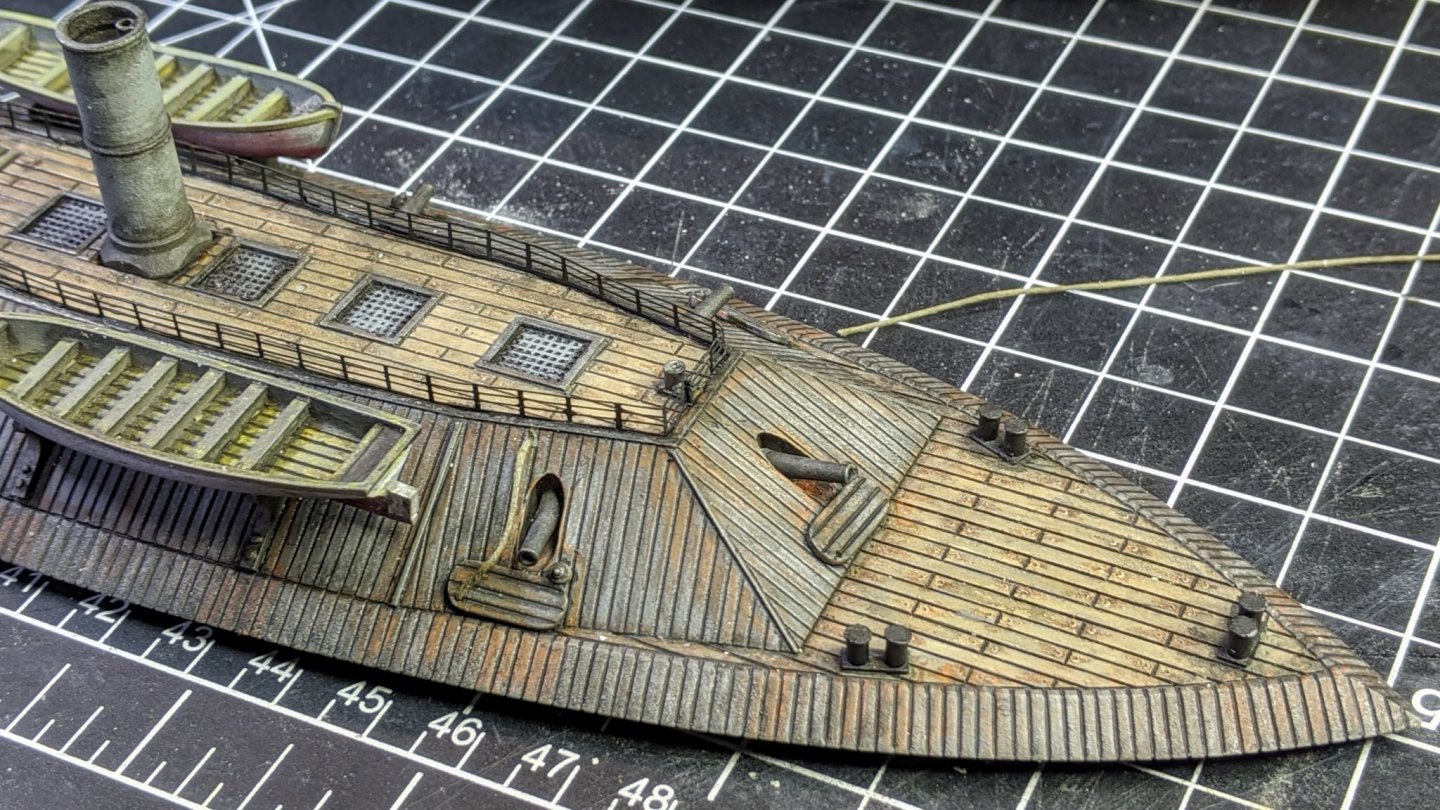
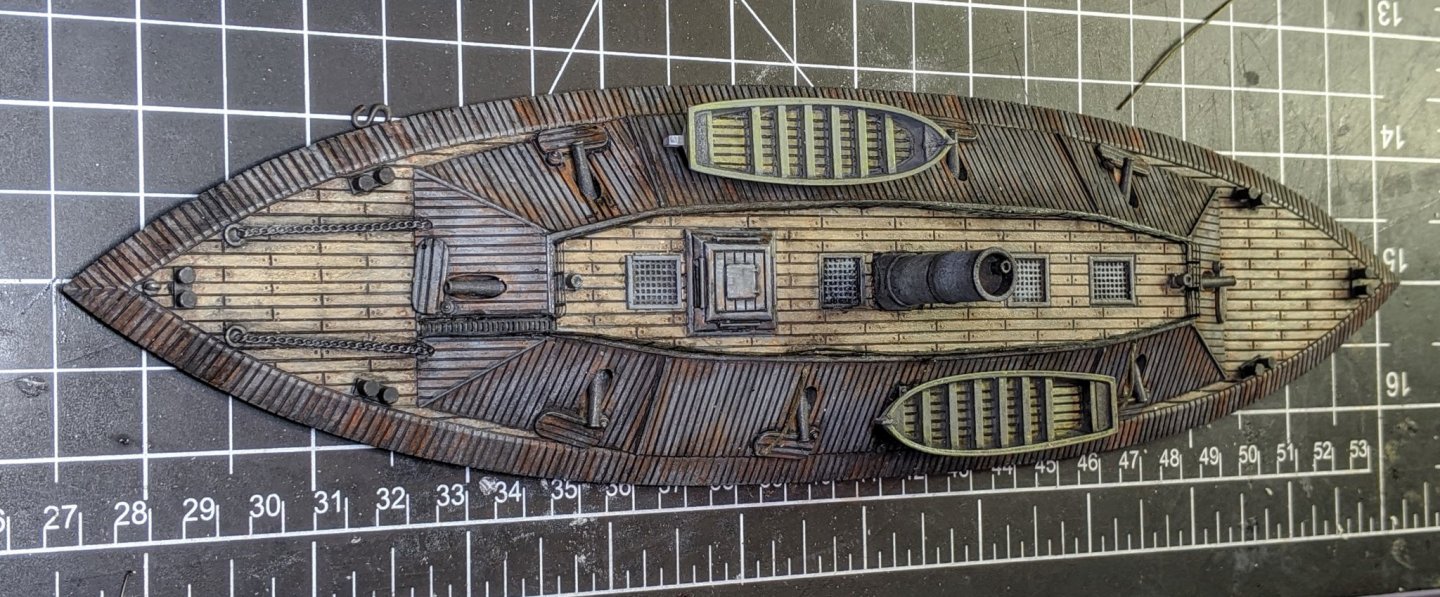
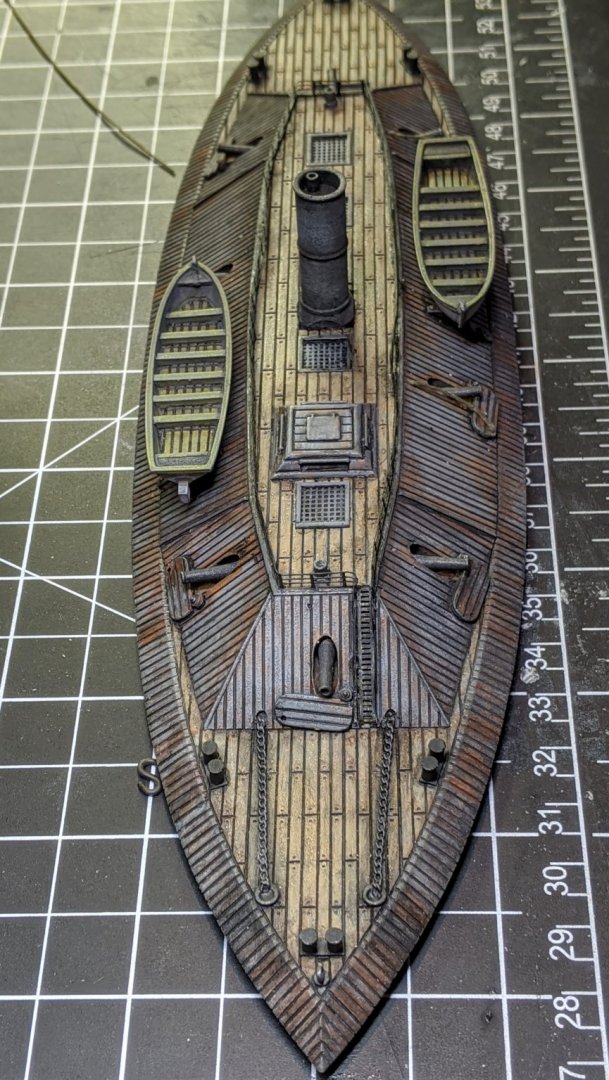
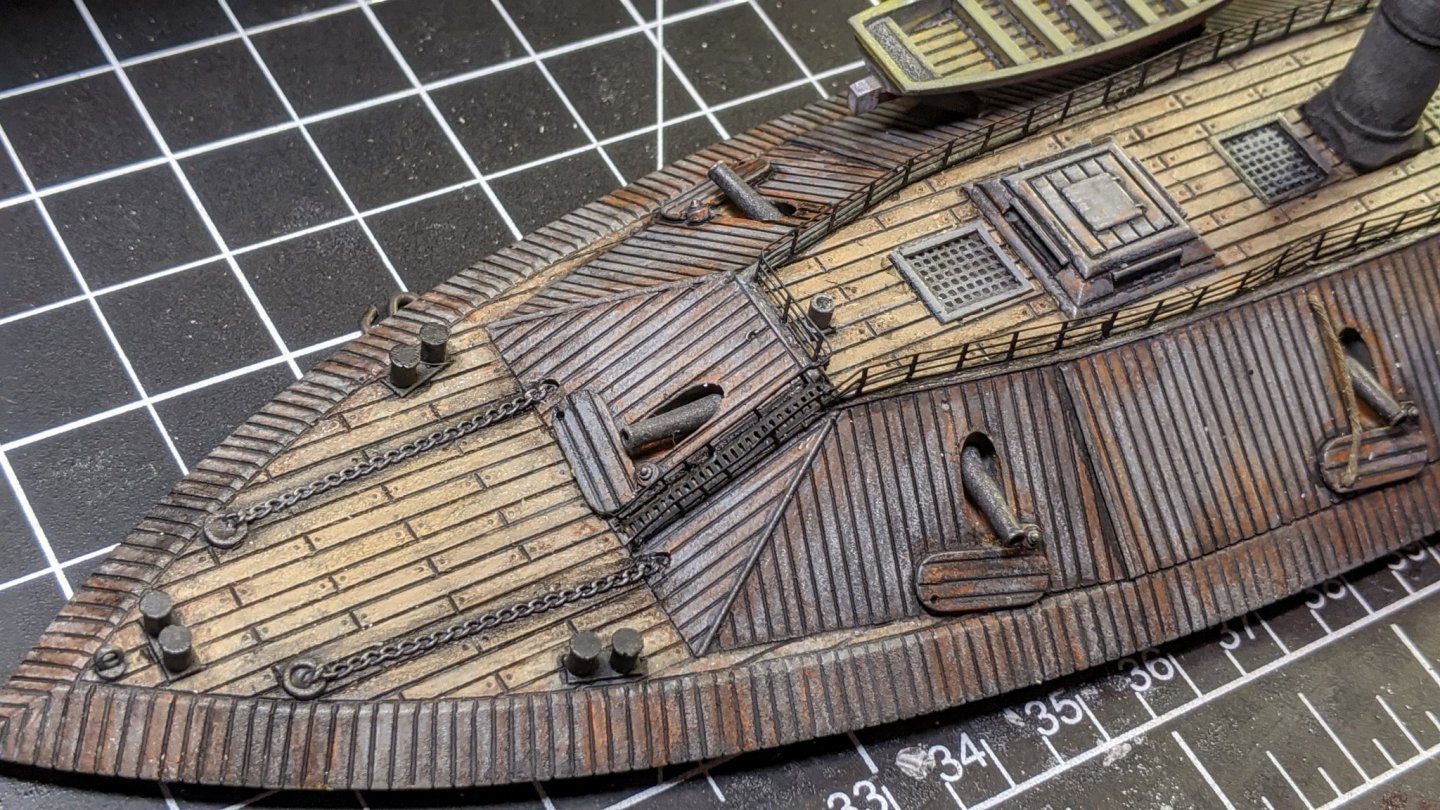
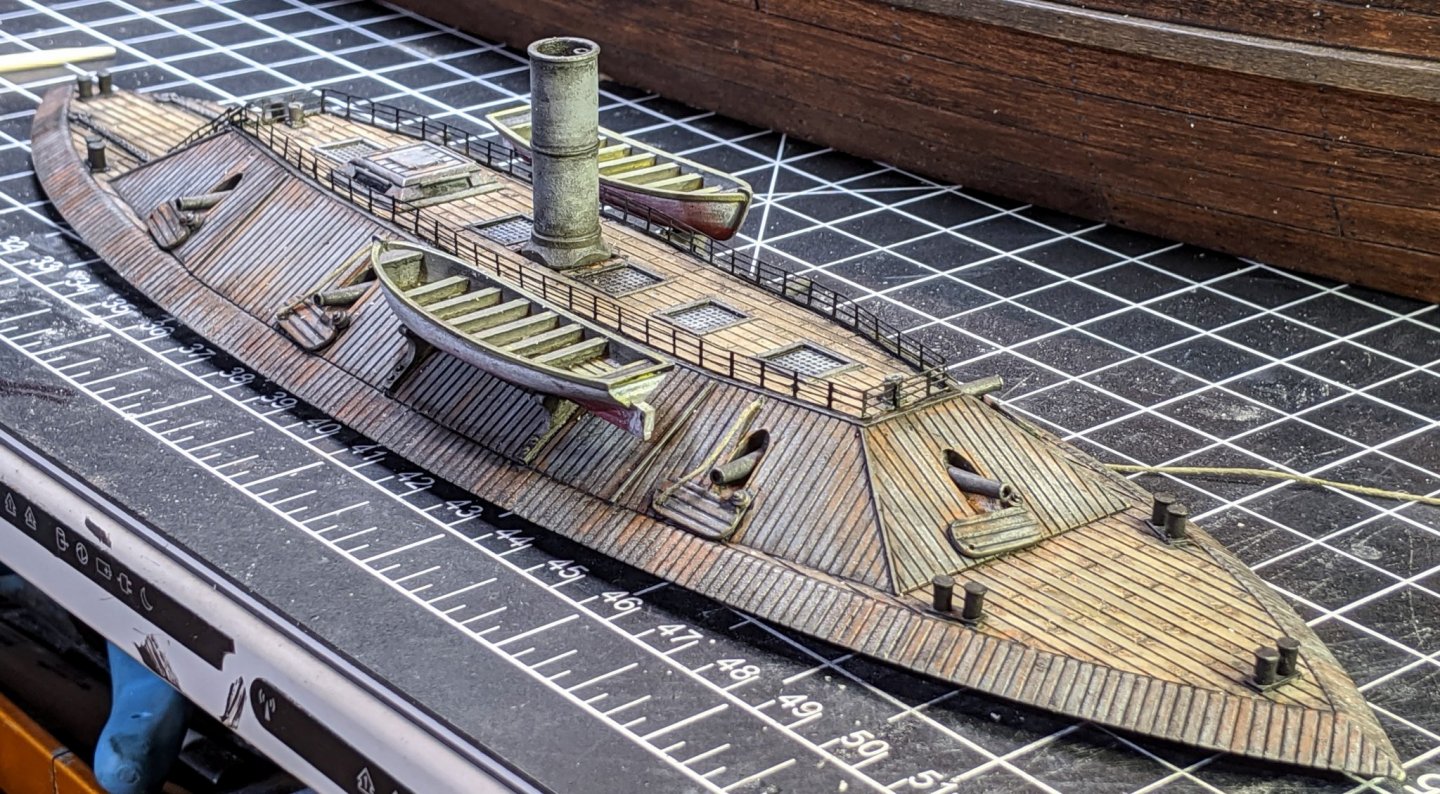
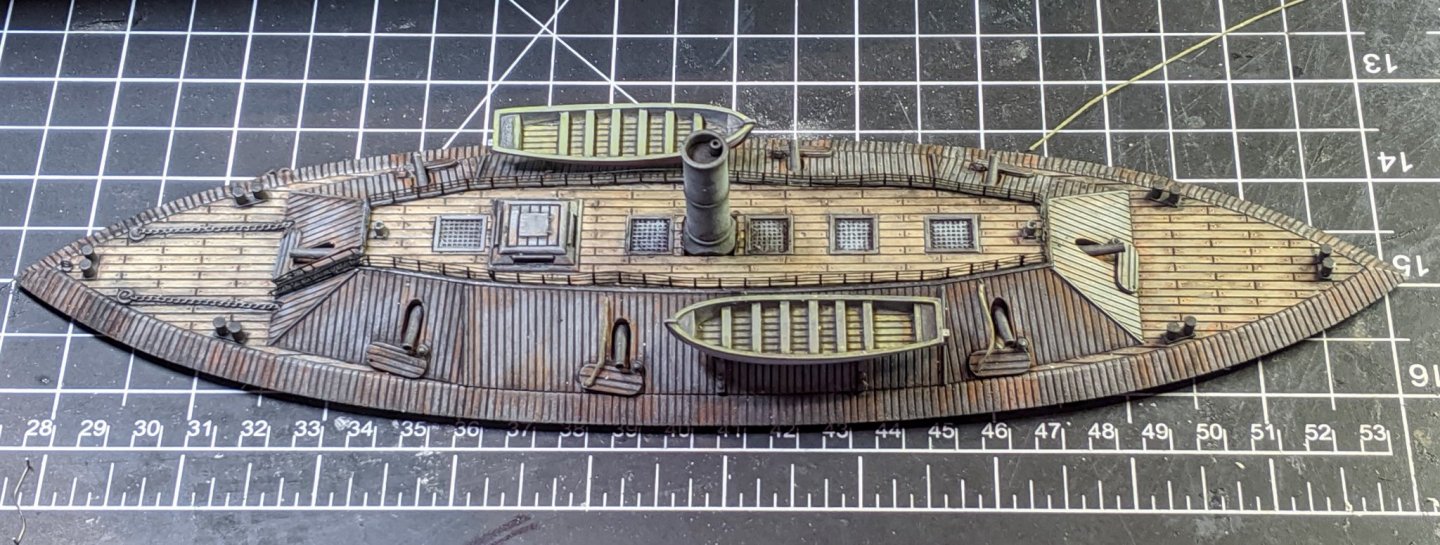
Hi all, I started this kit about two years ago, and in the general workbench confusion that reigns in my shop I thought I lost ALL the rest of the parts to finish it up, so I put it in the "finish later" pile. Lo and behold, when digging for other stuff I unearthed most of the missing parts... the cutters especially. The Verlinden 1:200 ironclad series (about 5 kits, I think) are absolutely flawless resin castings with no flash, blobs or bubbles. The dimensions are about 12" long (with spar torpedo), 2.75" wide and 2.5" tall (with masts). I think they're out of production, but they're out there for less than $100 if you hunt around. They are simple waterline kits, with a one piece hull and only about 10 other resin parts. Since I've already completed most of the time consuming work, I've decided to finish this while I continue on my Philly. CSS Palmetto State was one of about 22 ironclads built or commissioned by the South in the Civil War, and were generally outclassed and outnumbered by their Union counterparts. The South just didn't have the materials or industrial capacity to have parity with the Union, but they sure came up with some creative and interesting designs using what they had on hand. Here's a brief history of the CSS Palmetto State. Things I will need to do to finish it are: Straighten up the PE railings (aftermarket, from a 1:350 Bismarck PE add-on kit) Finish adding the rope for the gunport covers Add the anchors and anchor davits with appropriate rigging Add battened masts, oars and sails inside the cutters and tie them down to the molded mounts Add four guy wires to the funnel Add a ventilator, whistle and cook stove chimney on the upper deck Add a short bow and stern pennant mast with pennants Add two masts to the ends of the upper deck with associated rigging (very simple... three lines each) Build the bow spar torpedo, mount and rig it in stowed position I'm going to mount it in a clear plastic case meant for 1:18 auto diecasts. The case I selected has a clear bottom, and the inside measurements are about 13" x 5". I'm planning on painting the underside of the clear base with a murky water pattern and then use clear gloss Mod Podge medium to simulate ripples on the top of the base around the ship. I may include a dock section, it depends on how much room I have and if it will not detract from the model. Here's where it stands now, I'm sorry I don't have any previous in process pictures, but I'll continue this as a build log and post progress as it happens.
- 3 replies
-
- verlinden
- Palmetto State
-
(and 1 more)
Tagged with:
-
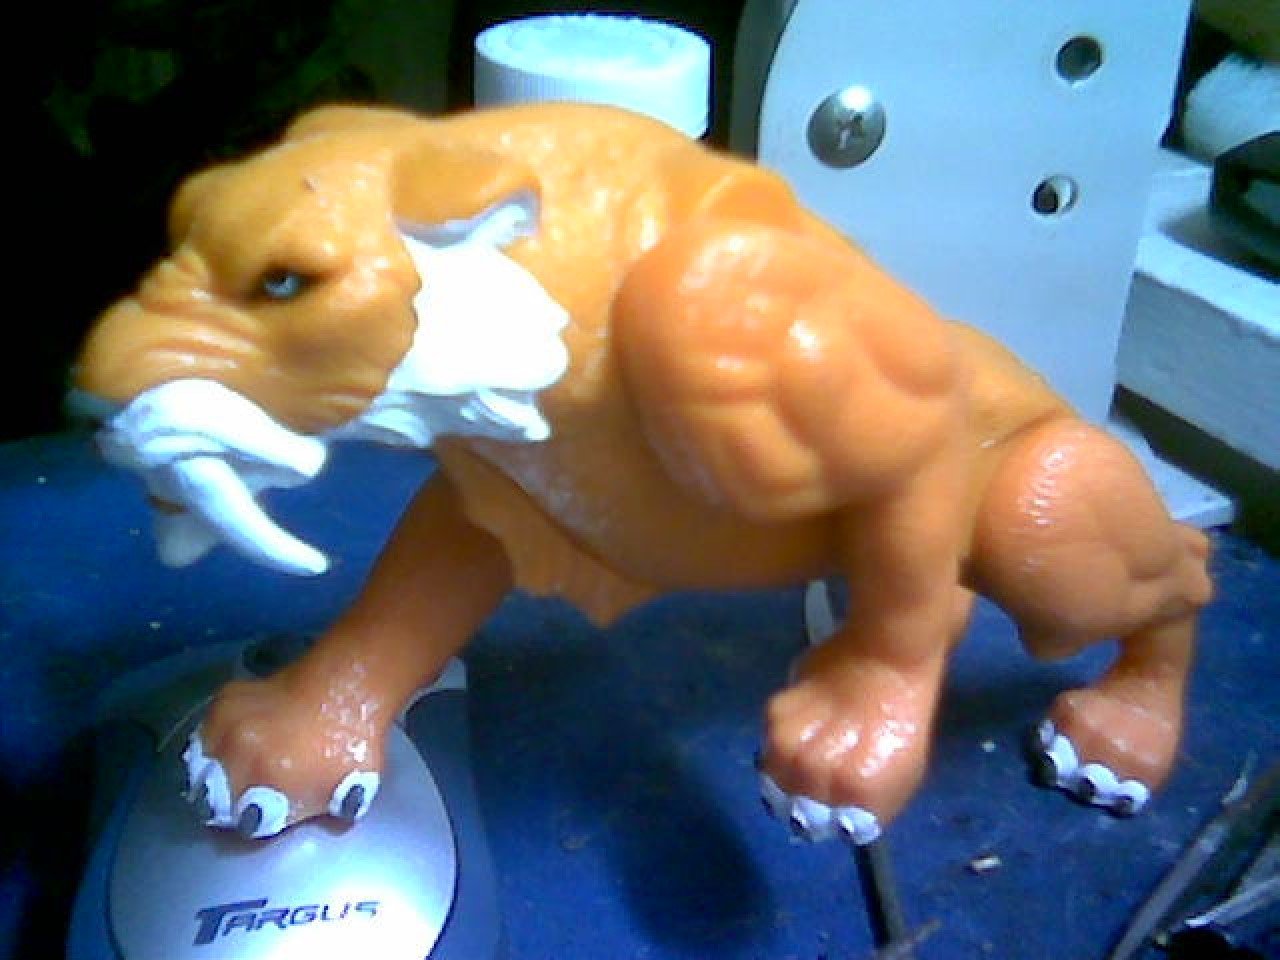
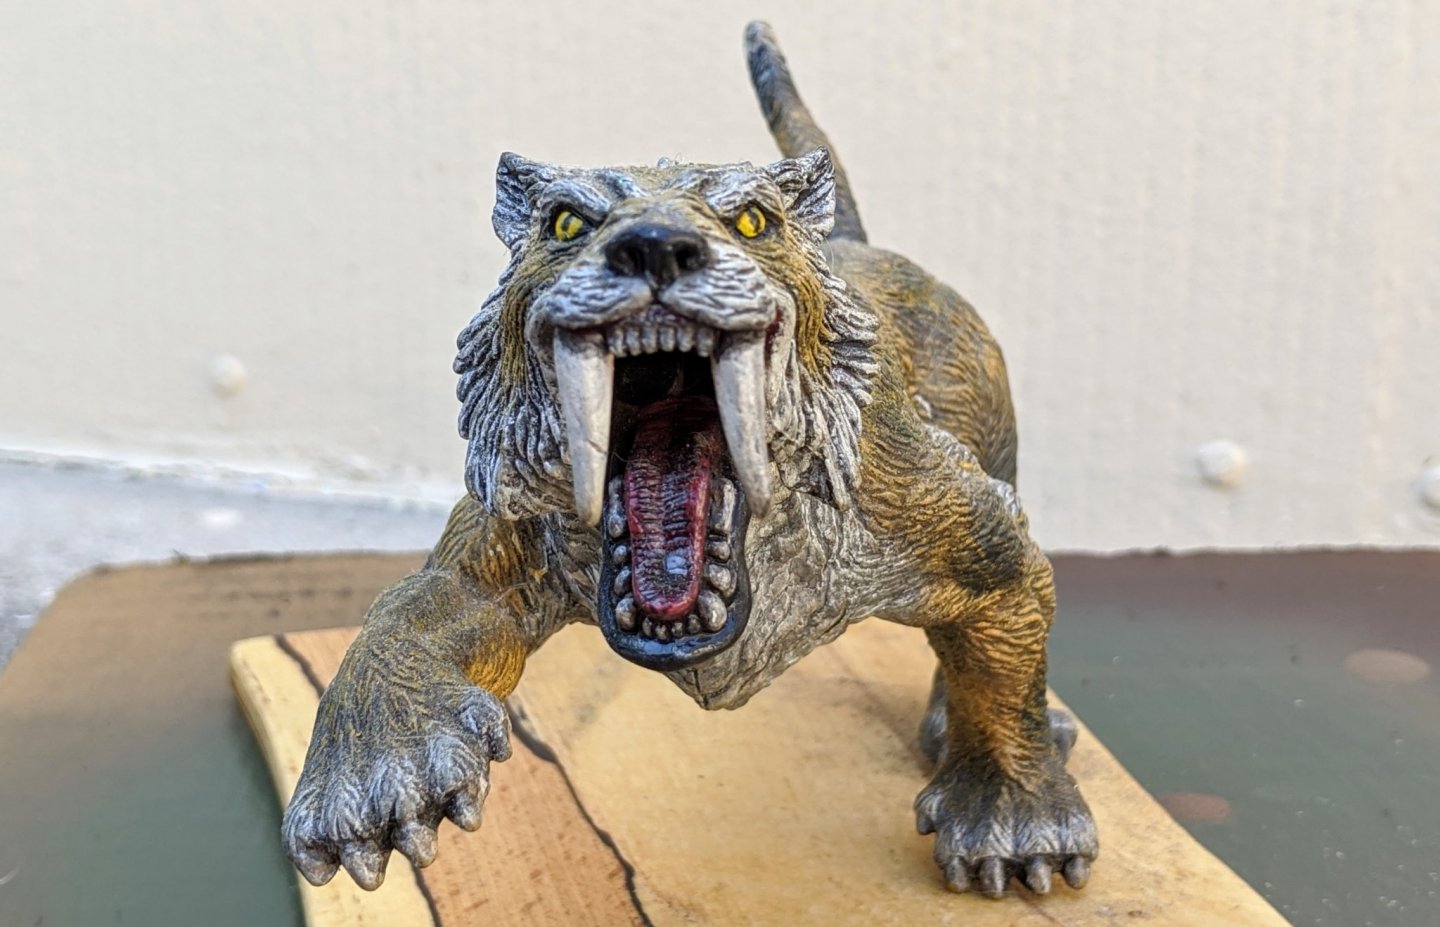
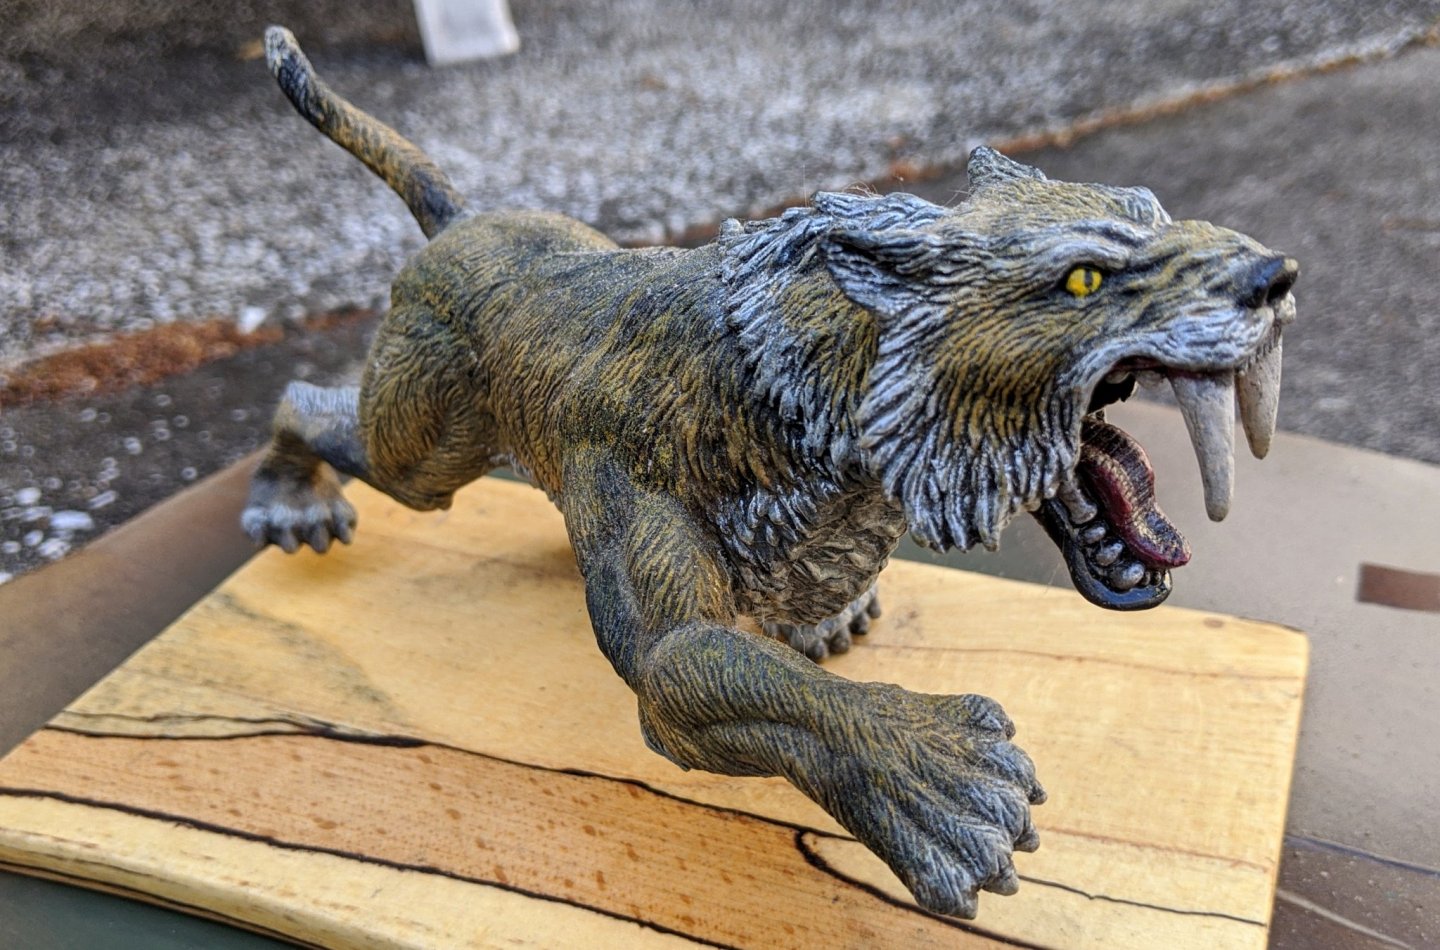
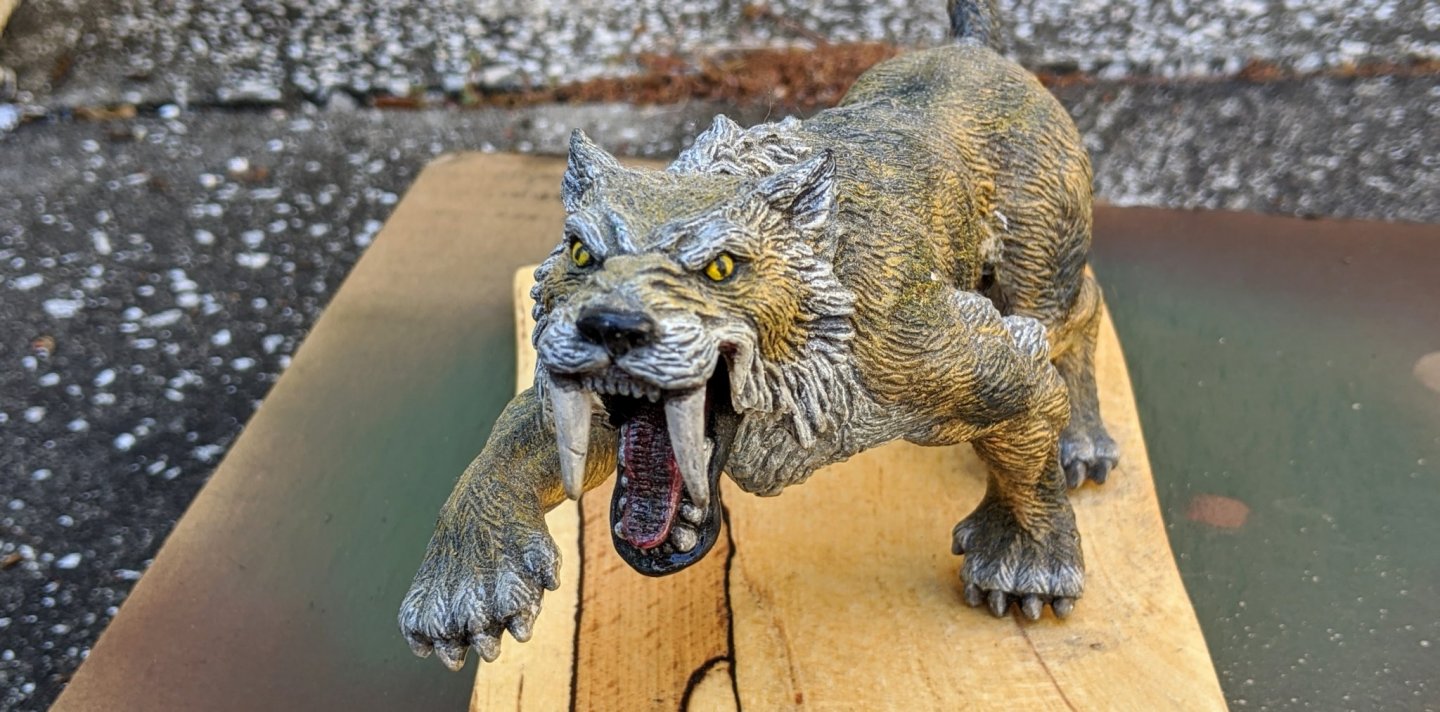
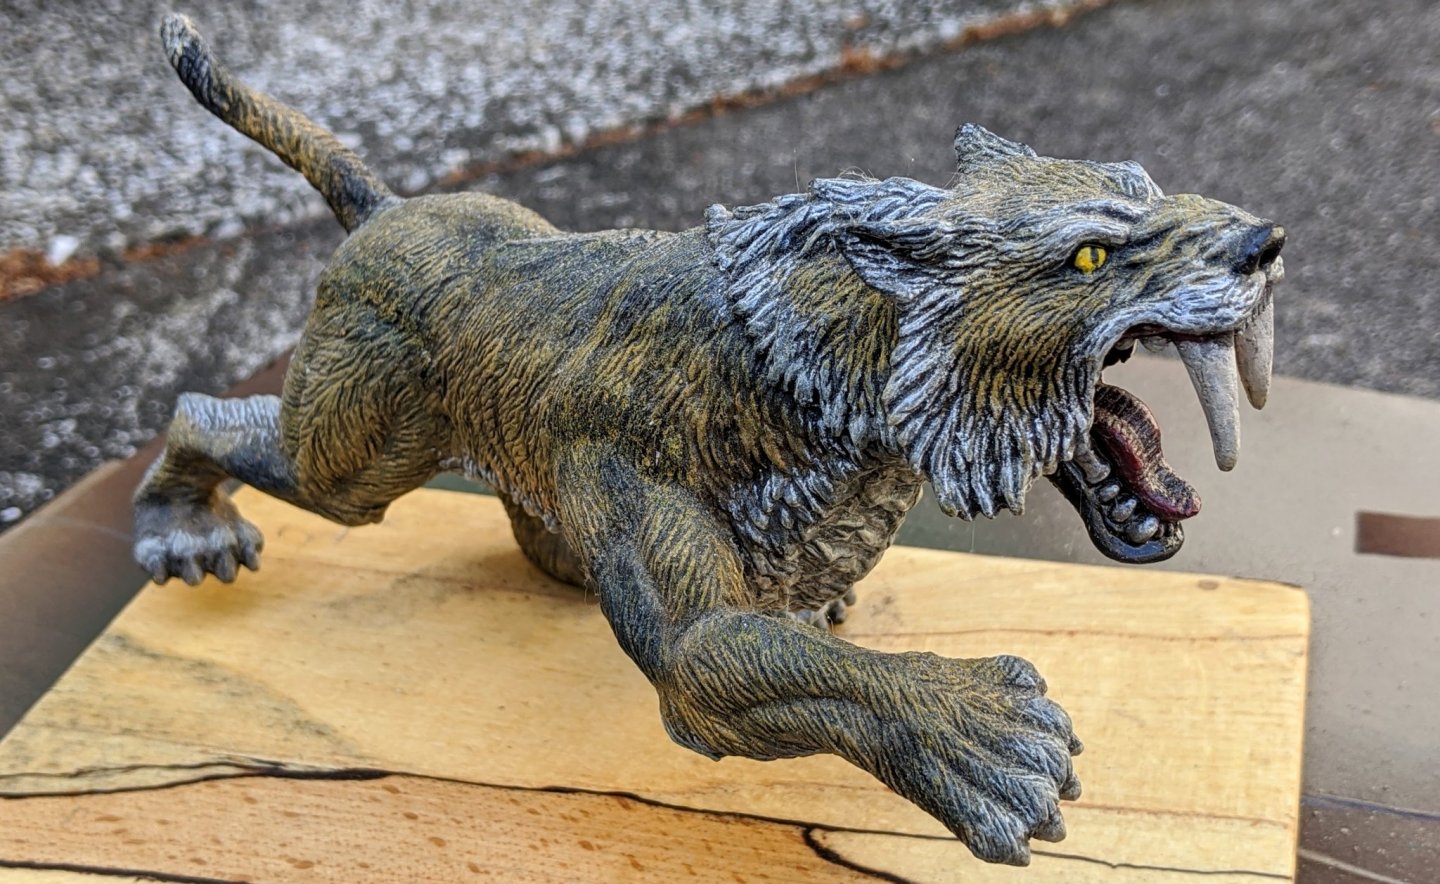
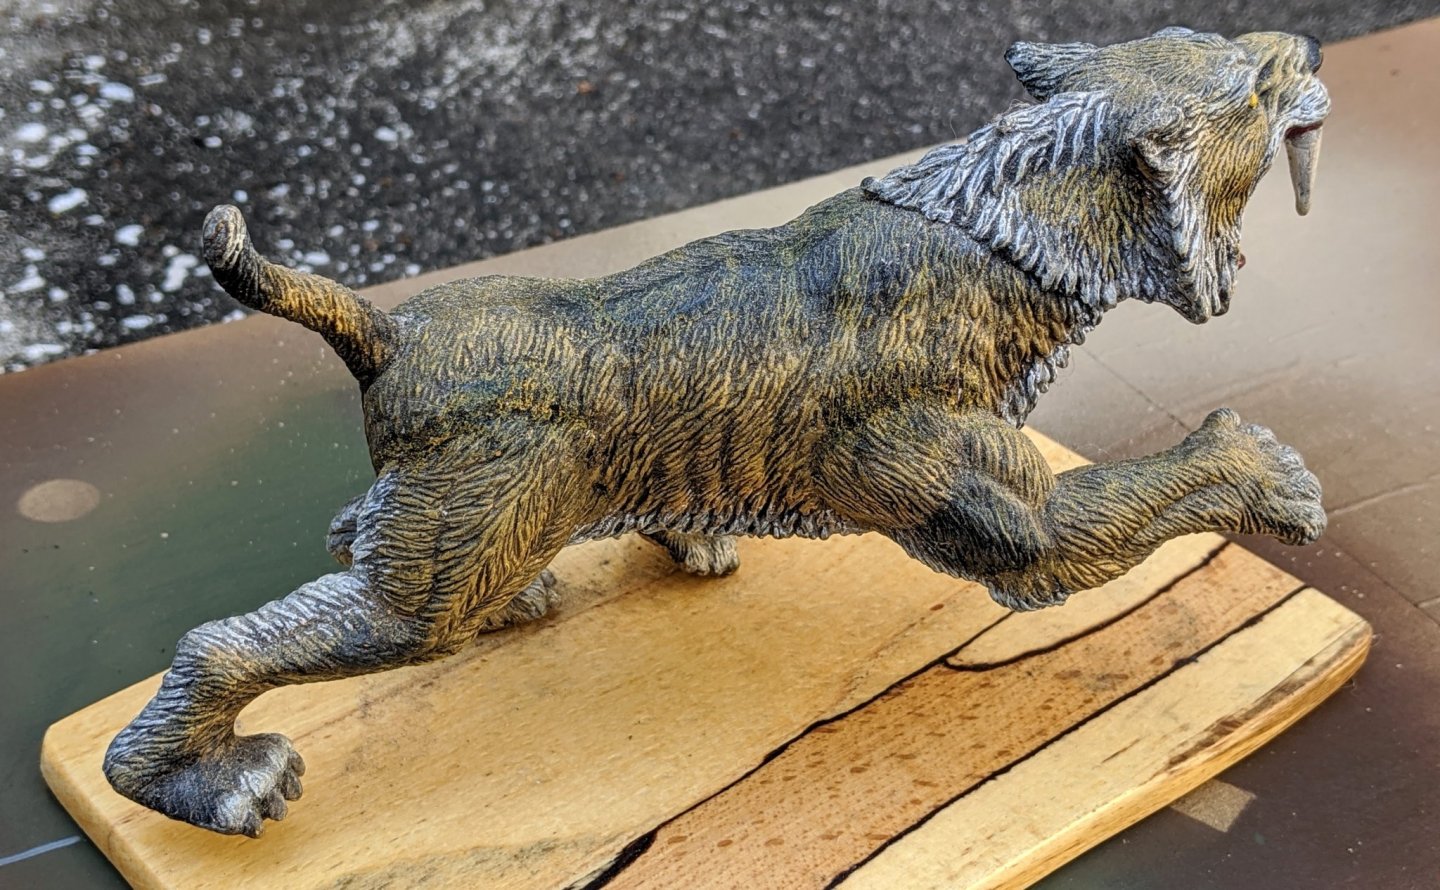
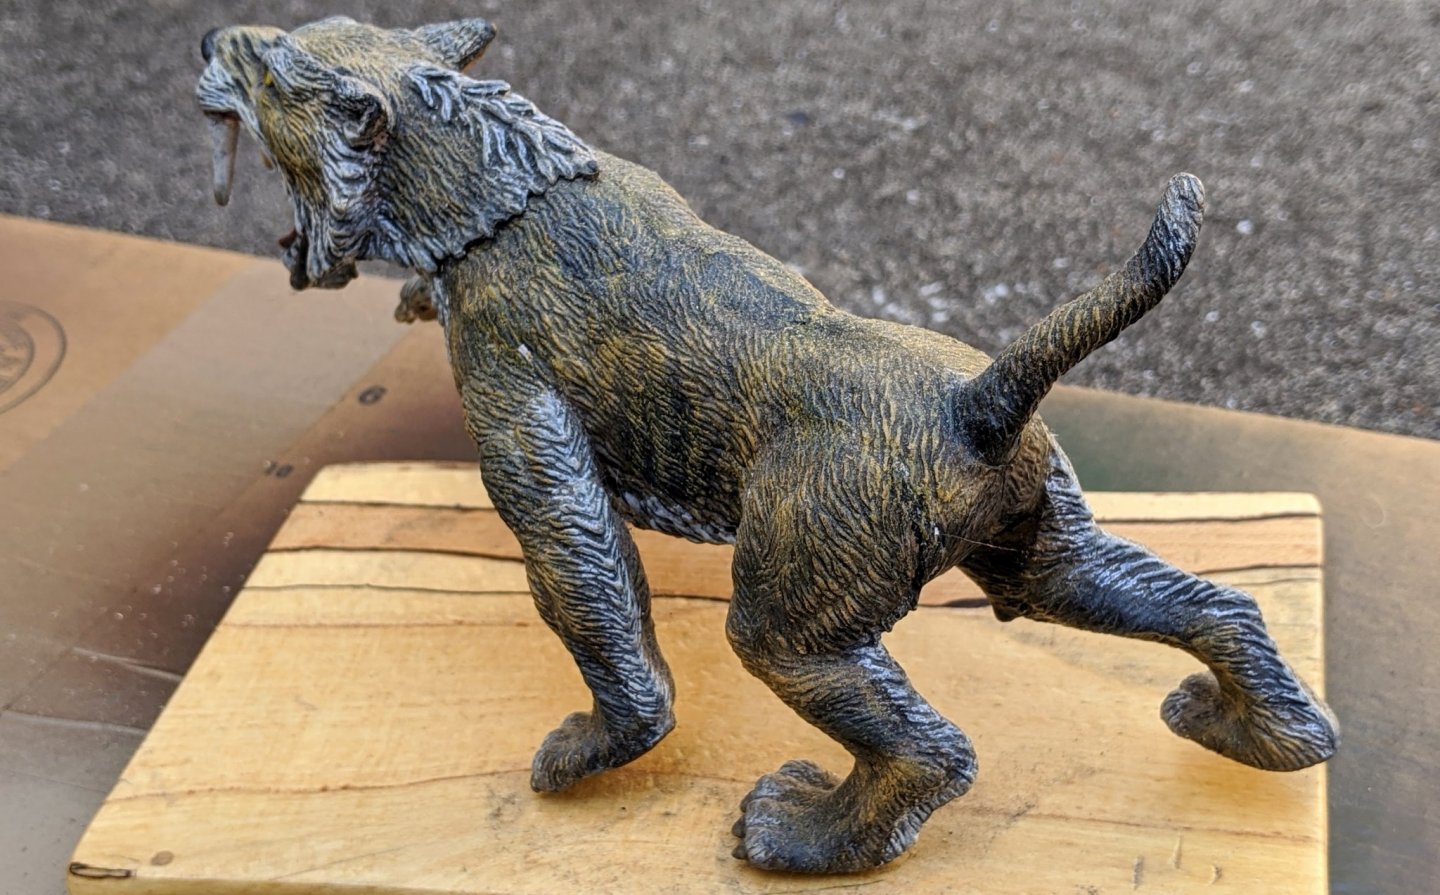
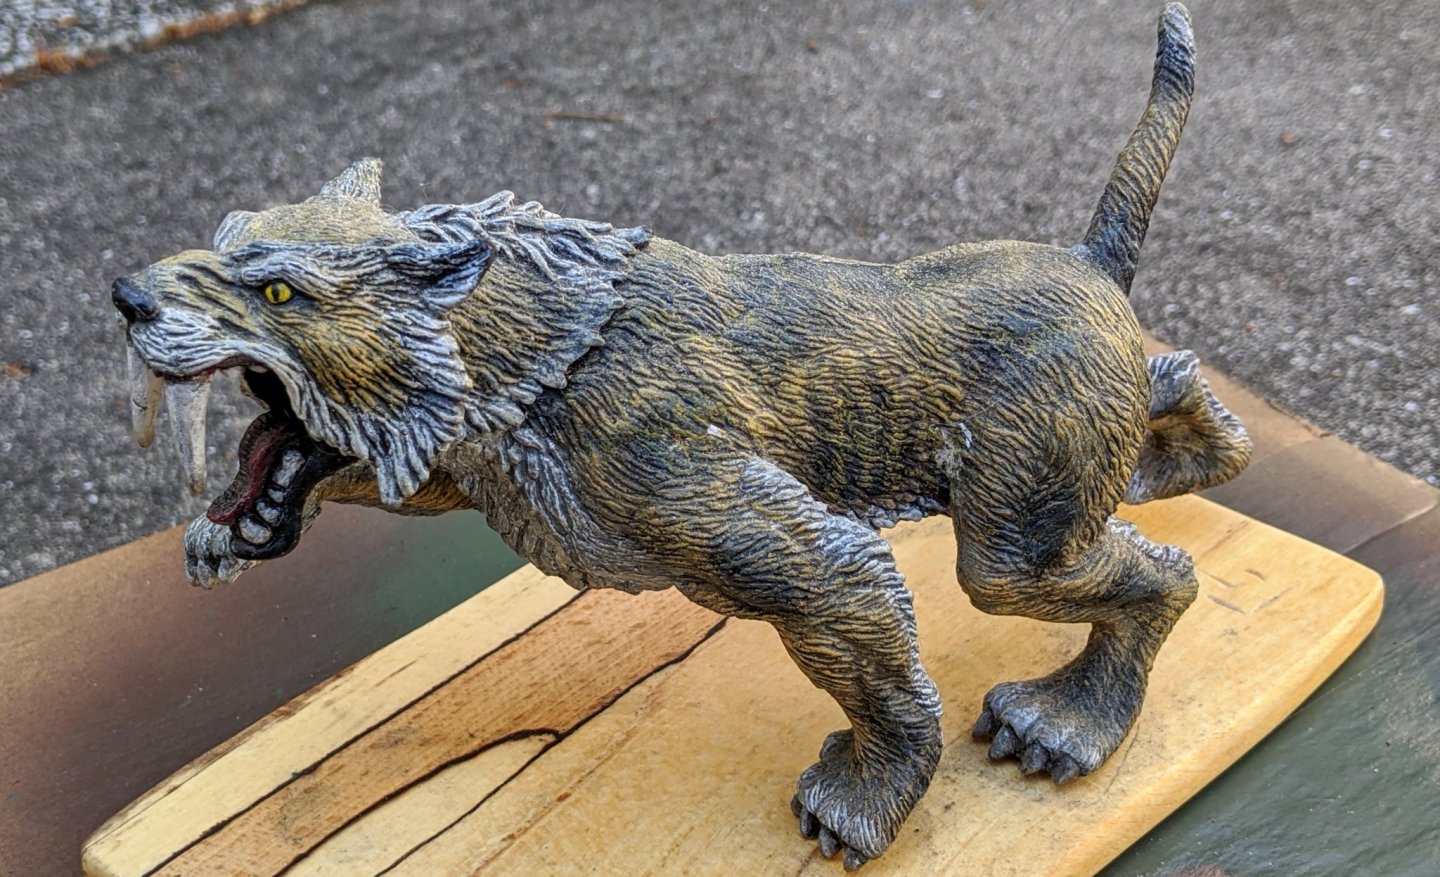
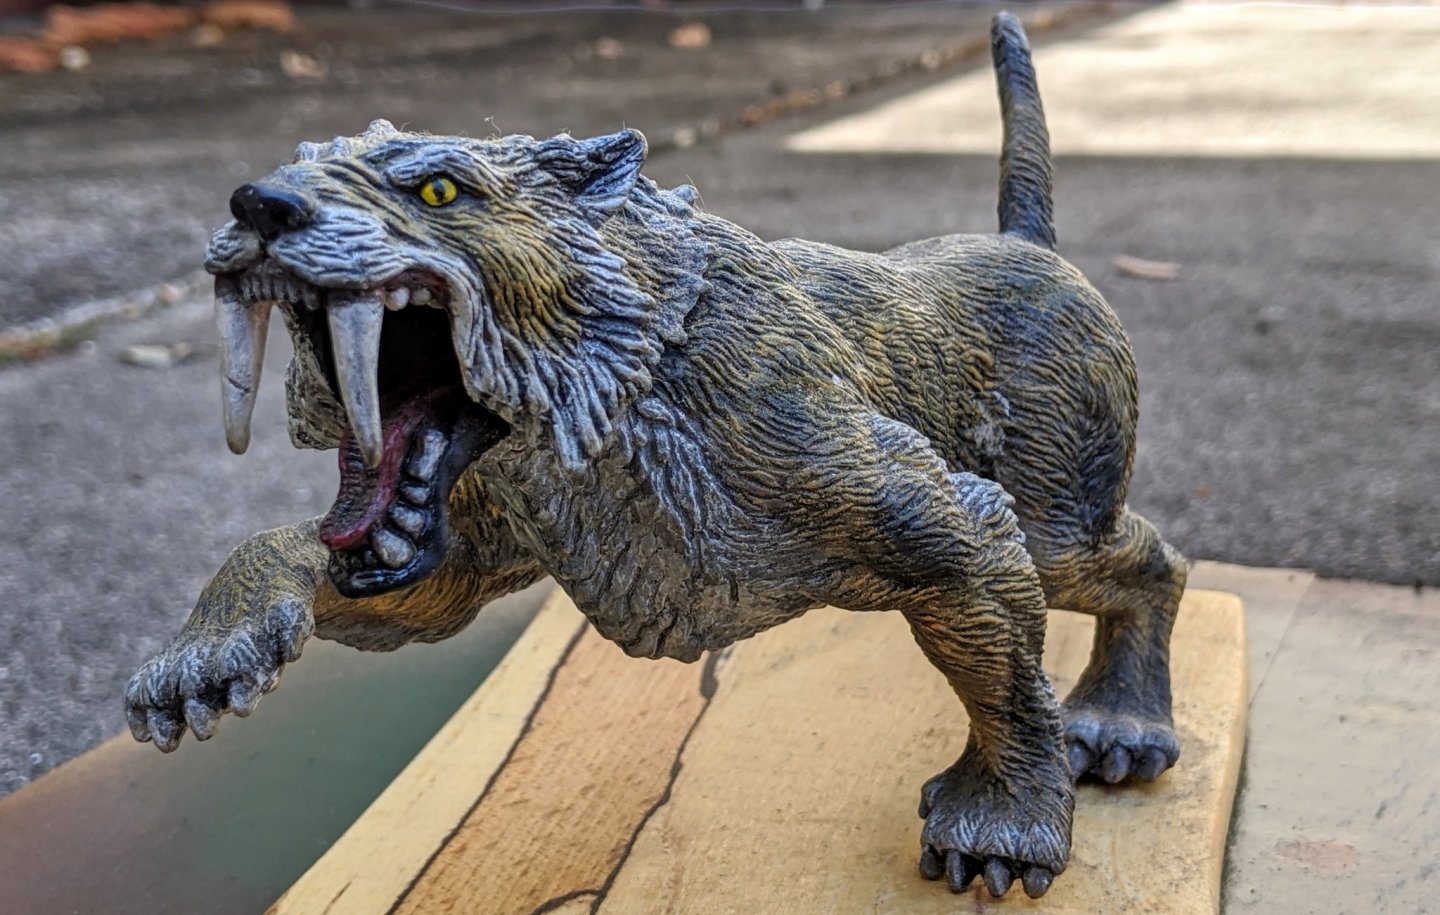
Hi all, I've decided to post another non-ship completed build, this subject is one of my favorites! Here's what I started with. It was originally part of some Arctic Commando play set I picked up at Big Lots about ten years ago. Very crude, but the casting was superb and begged to be detailed. It's about 7 inches long, so I'd guess it's about 1:9 scale and made of vinyl with movable legs and jaw. I glued up the legs in the best positions I could to match the body cast lines, then used putty to hide the seams. I then went over the whole casting with a thin layer of putty and carved in more hair detail. Next was primer and then color coats. Nobody knows what colors the real animals were, so I took some artistic licence with the "camo". Some detail paint, washes and gloss for the eyes and mouth and she's done. I'm planning on building a diorama to "plant" the figure in a complementary setting. I've always loved Sabertooth Tigers since I was a kid, and was really pleased to find this fine casting to work with. Here's a 1:1 casting of a real Smilodon Fatalis skull I keep next to my computer. It was made by a friend who interned at the La Brea tar pits, and he made a mold of a skull which then he used to make some castings. It's awesome...(really creeps out some of my guests, tho).
-
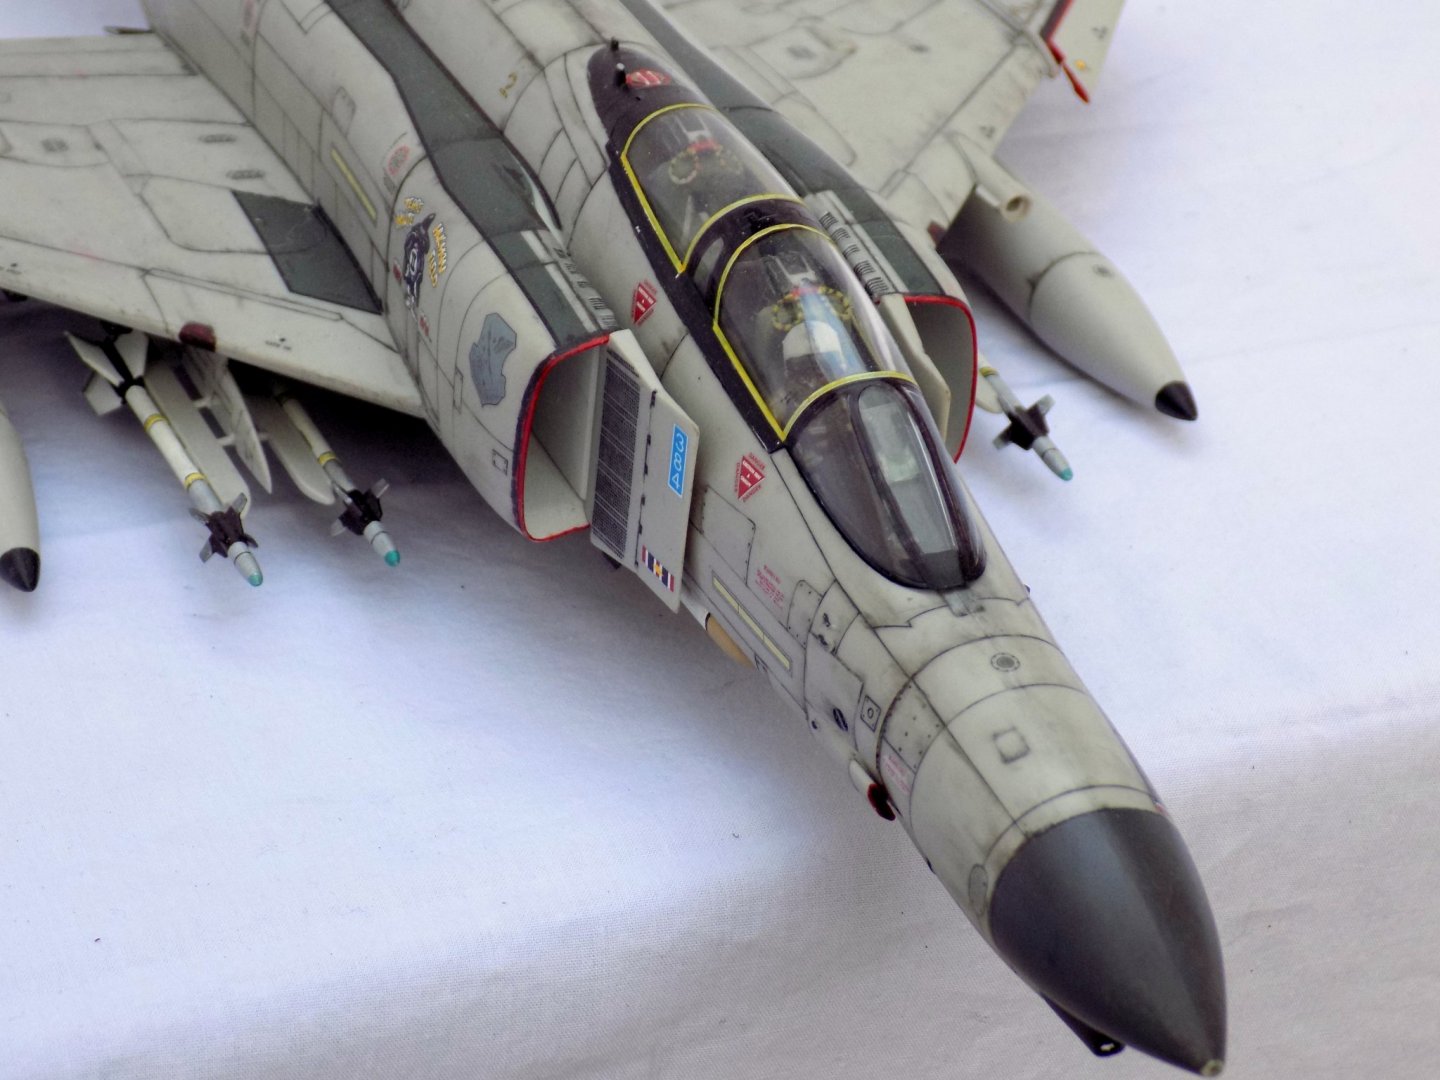
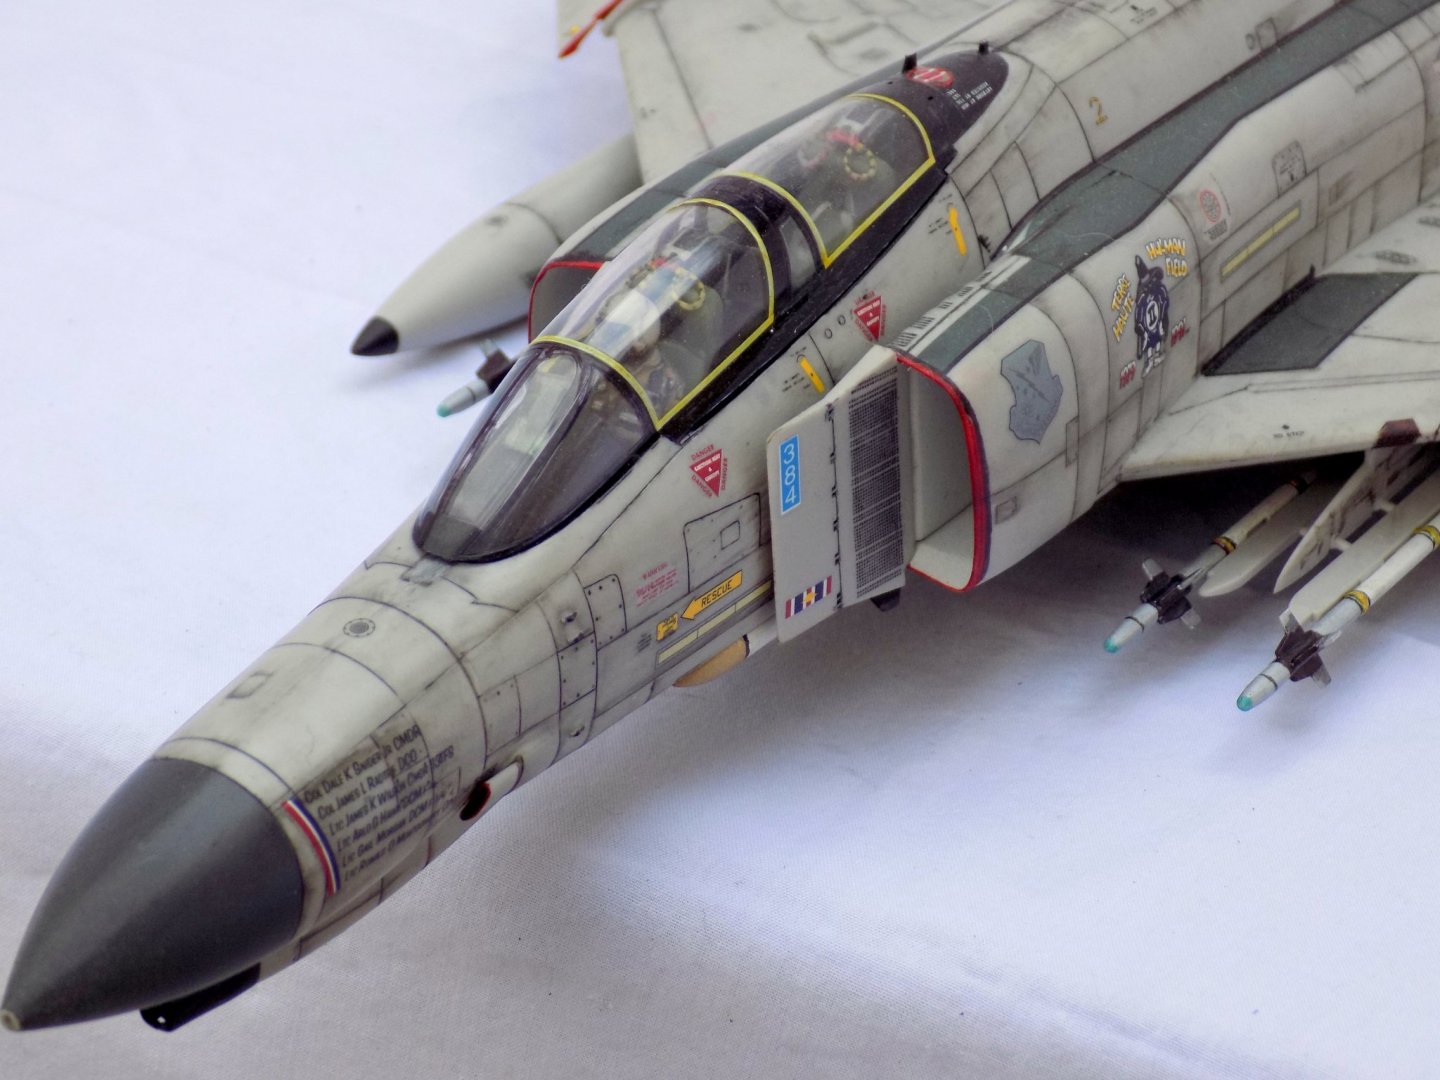
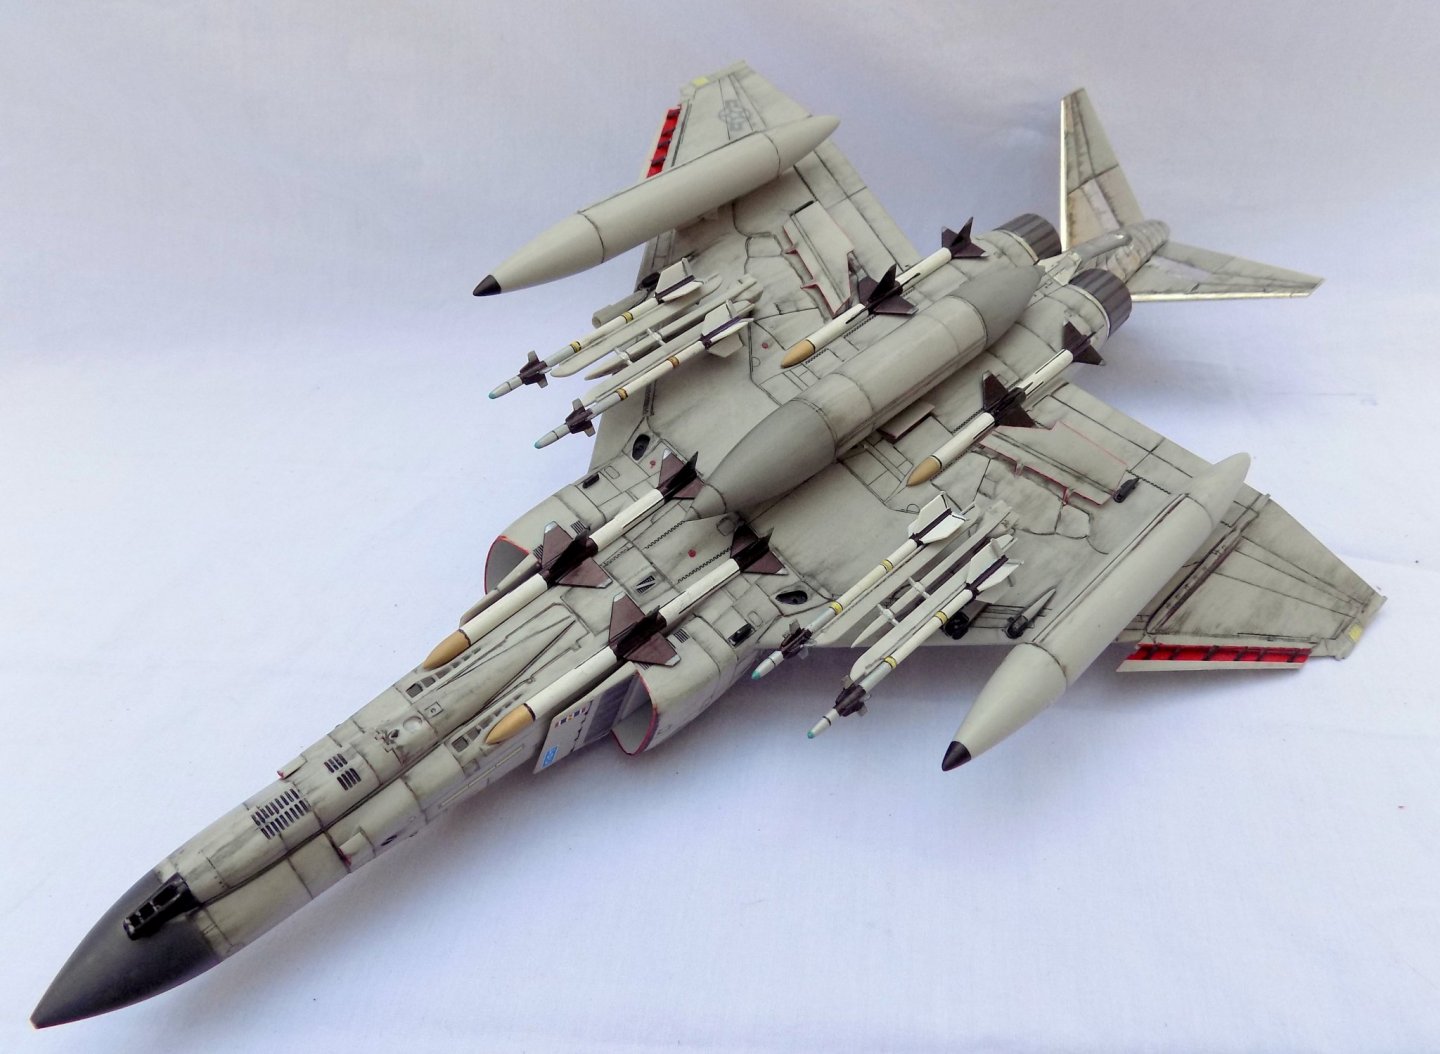
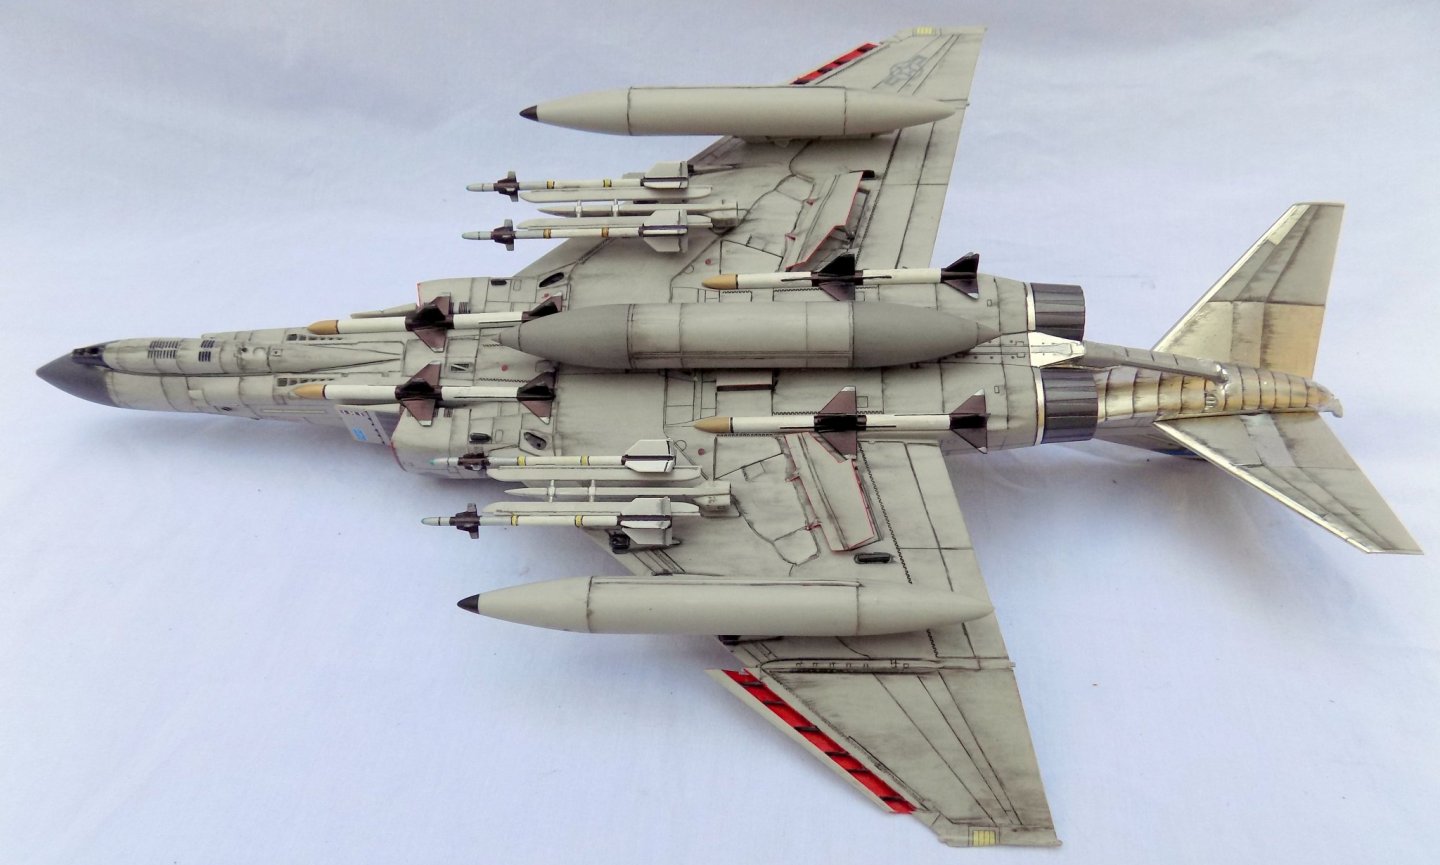
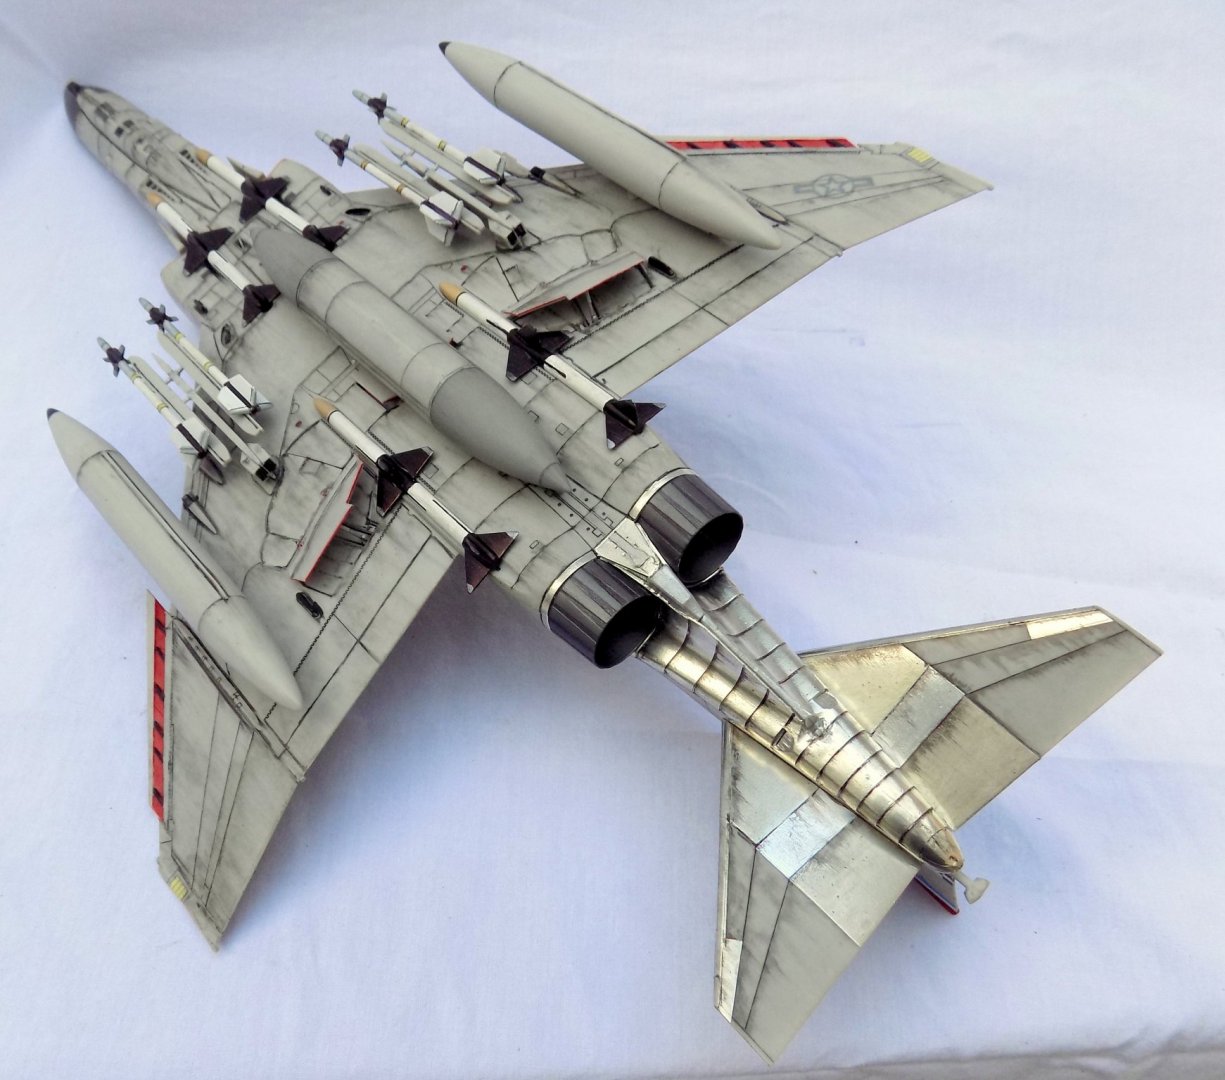
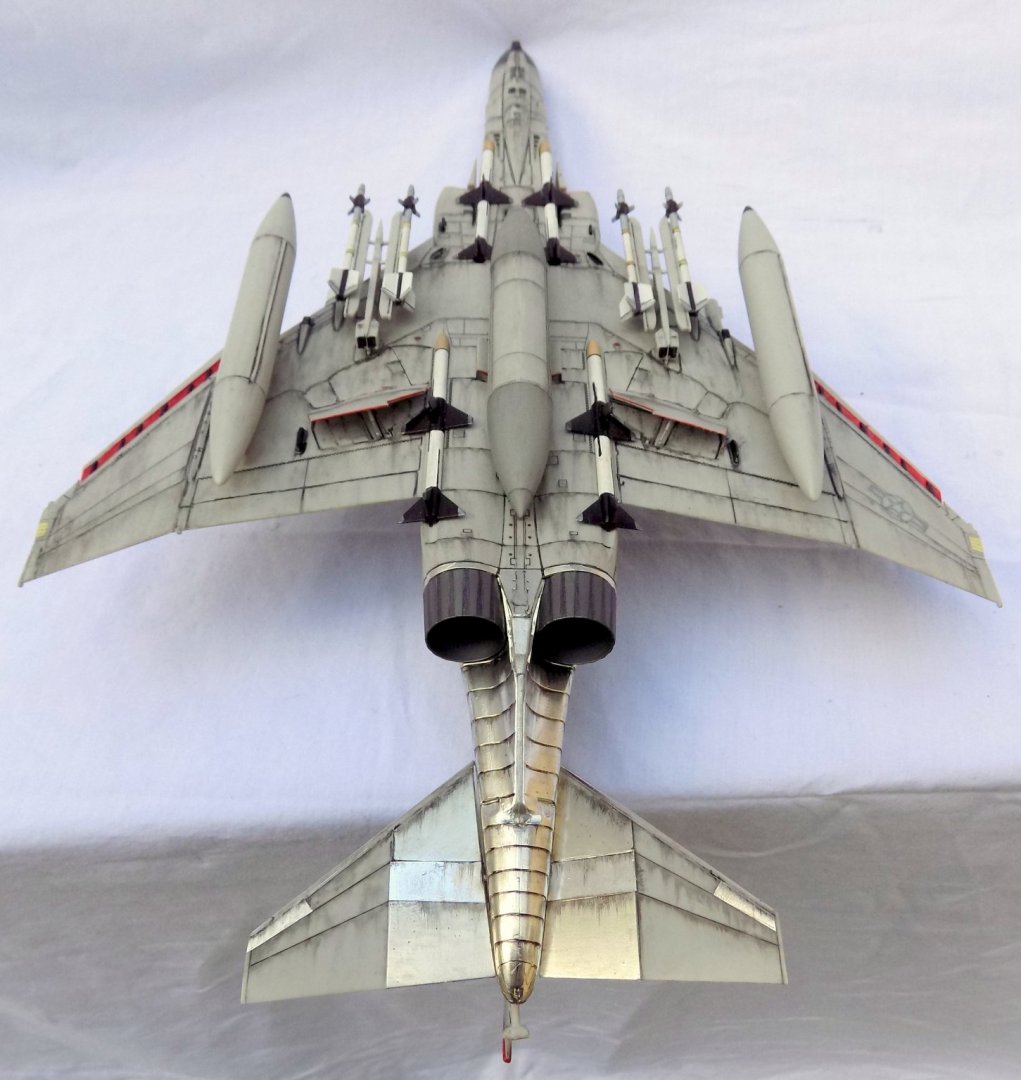
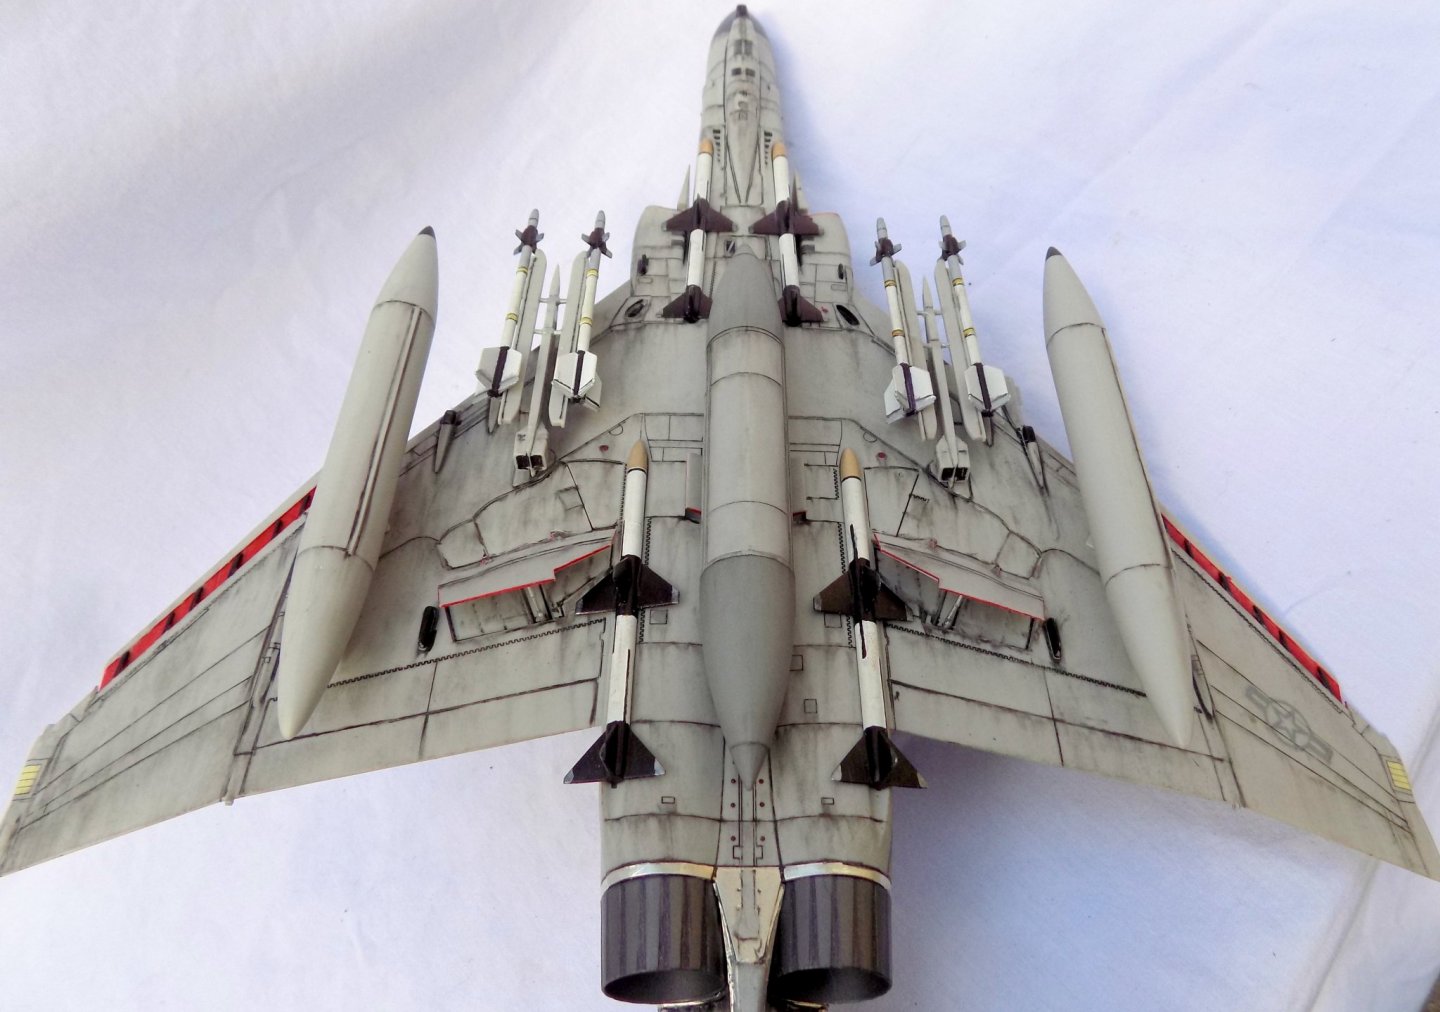
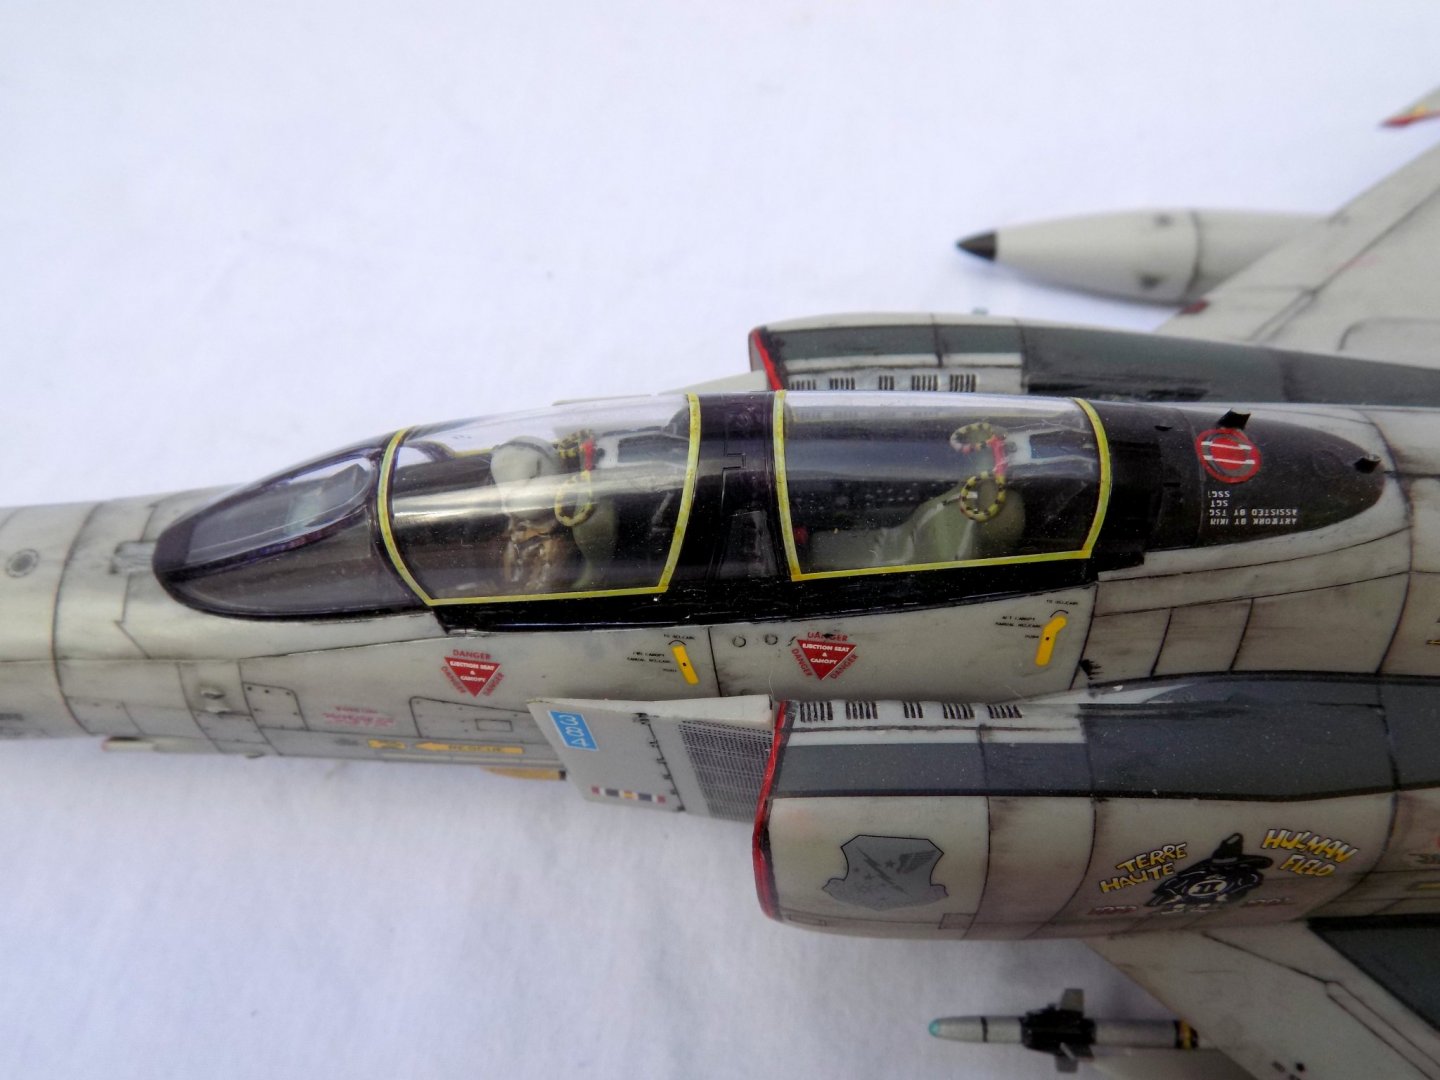
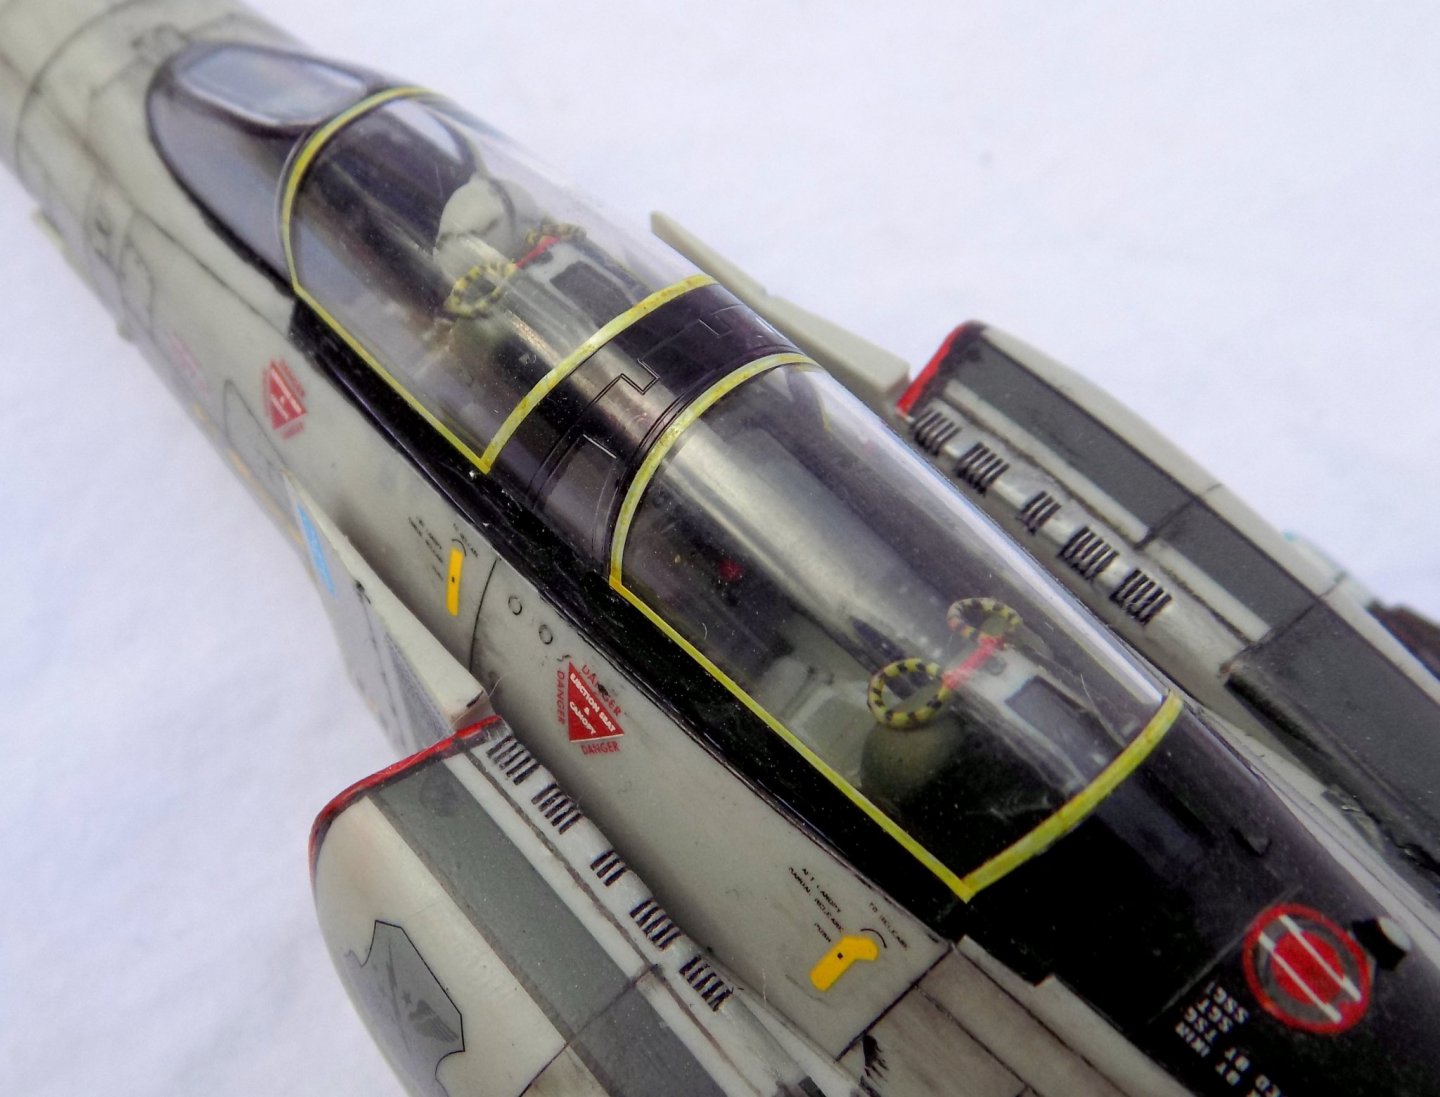
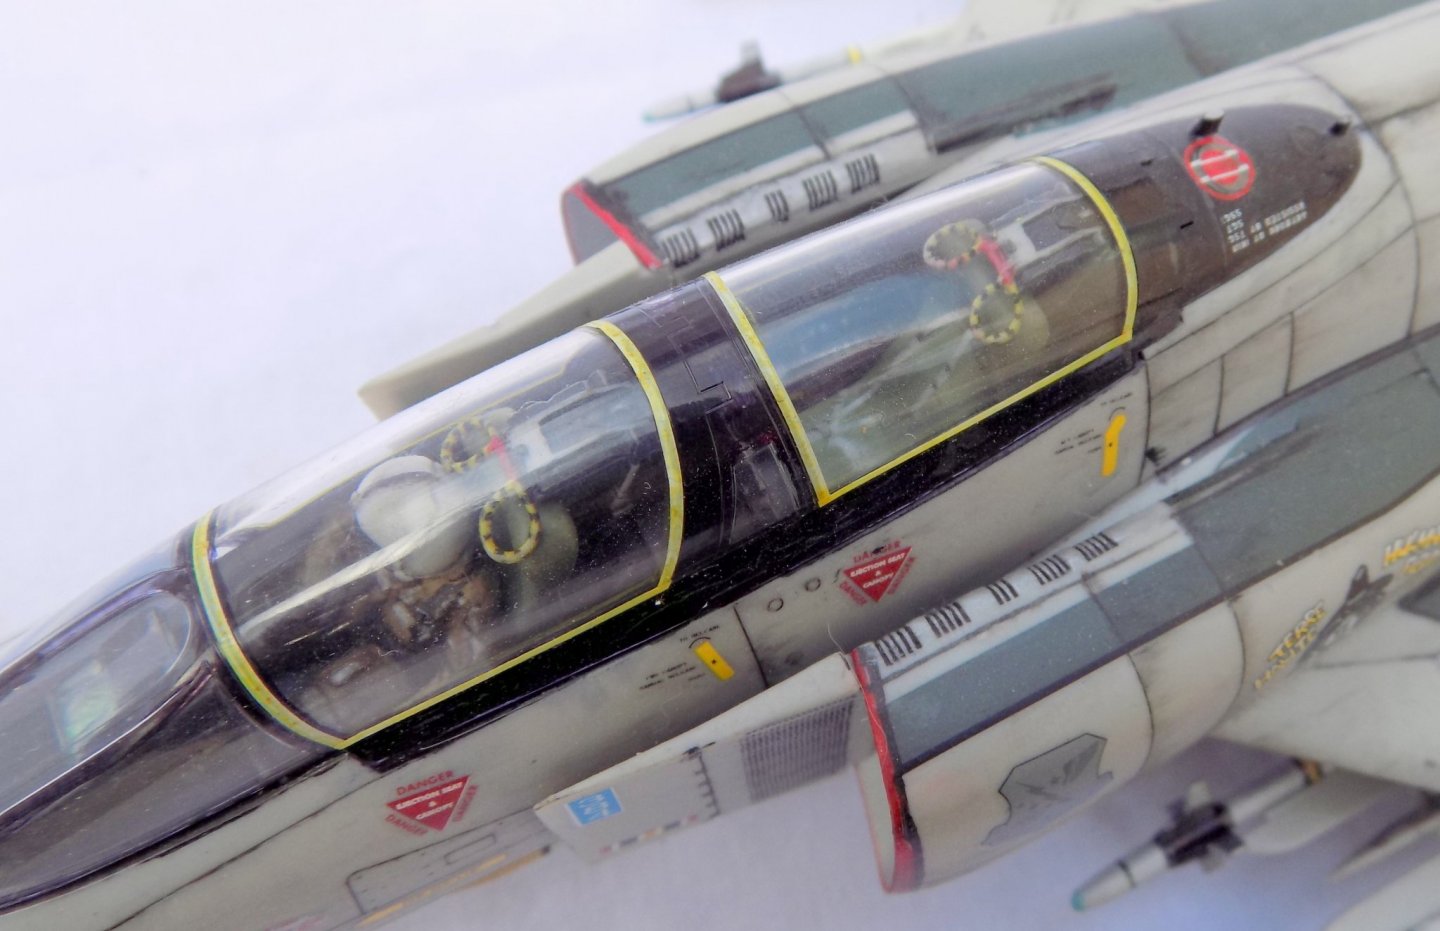
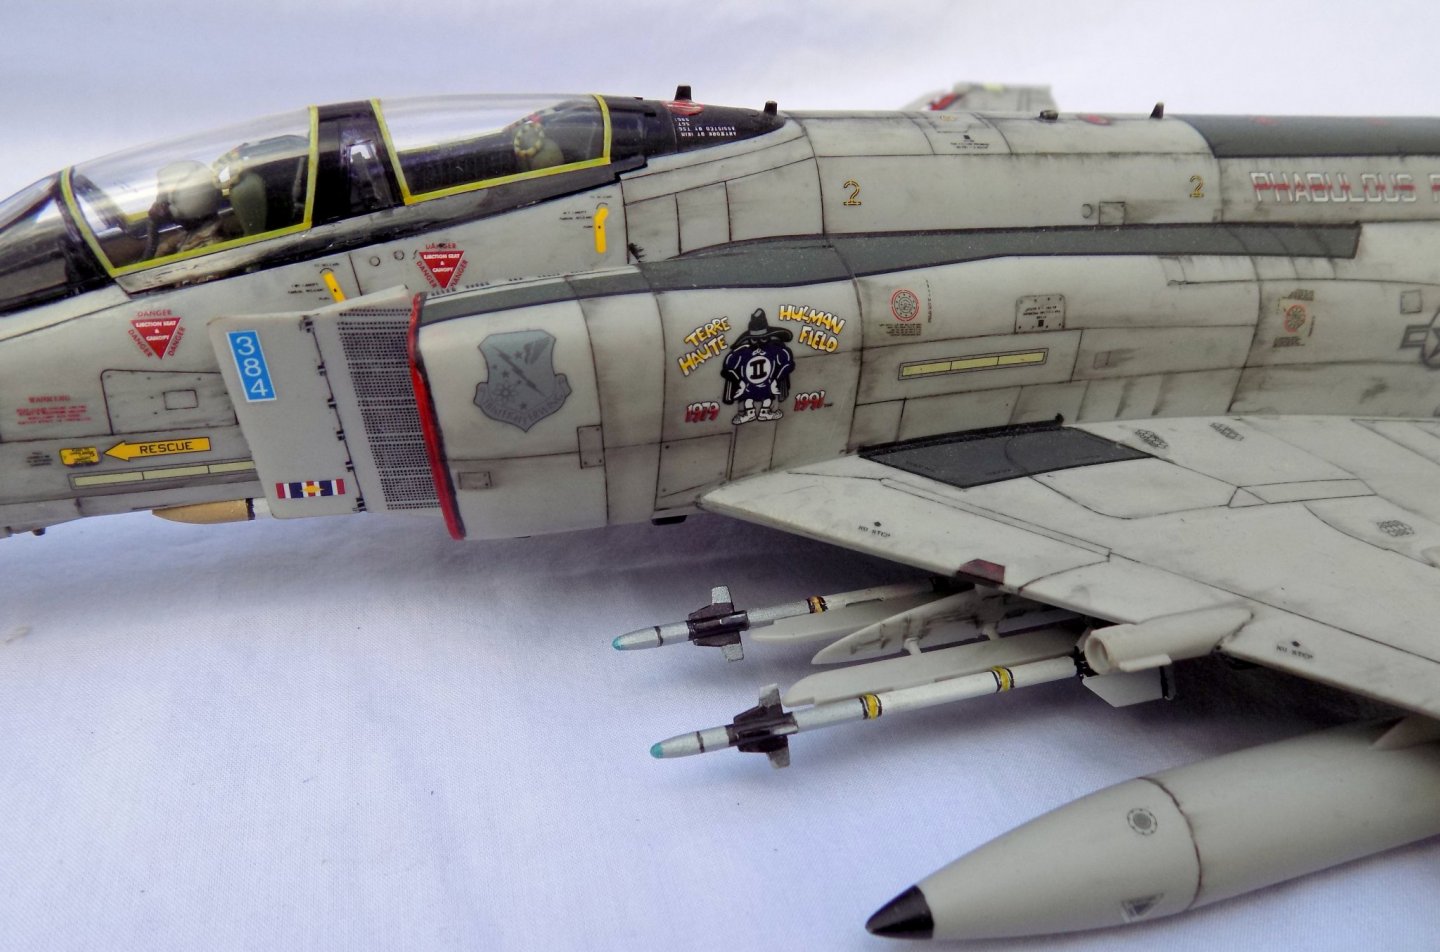
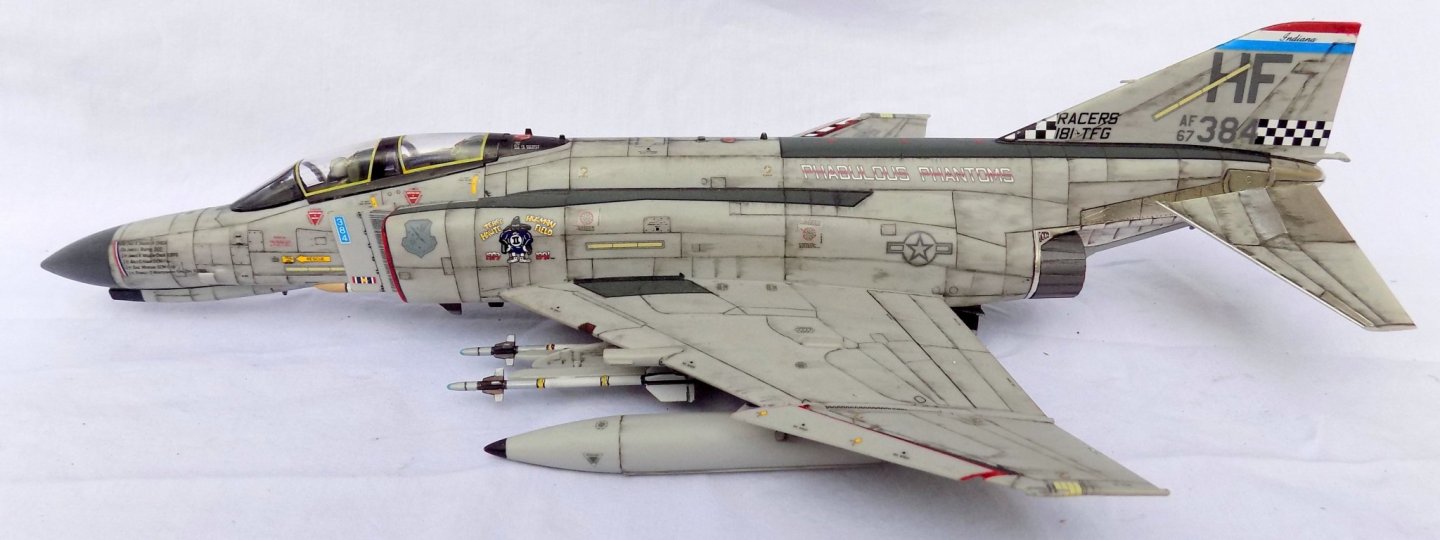
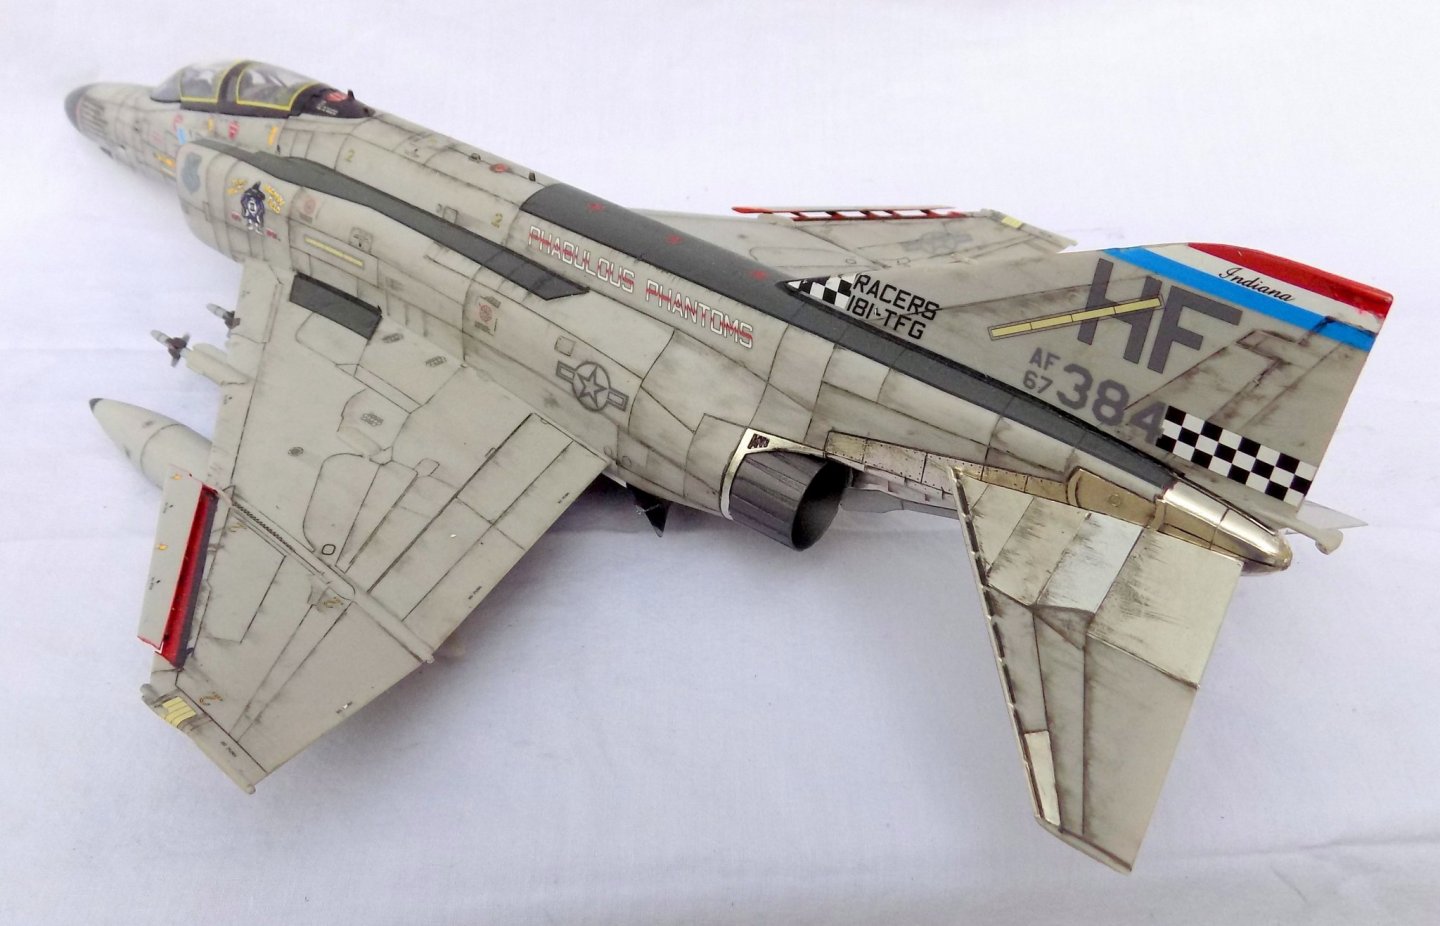
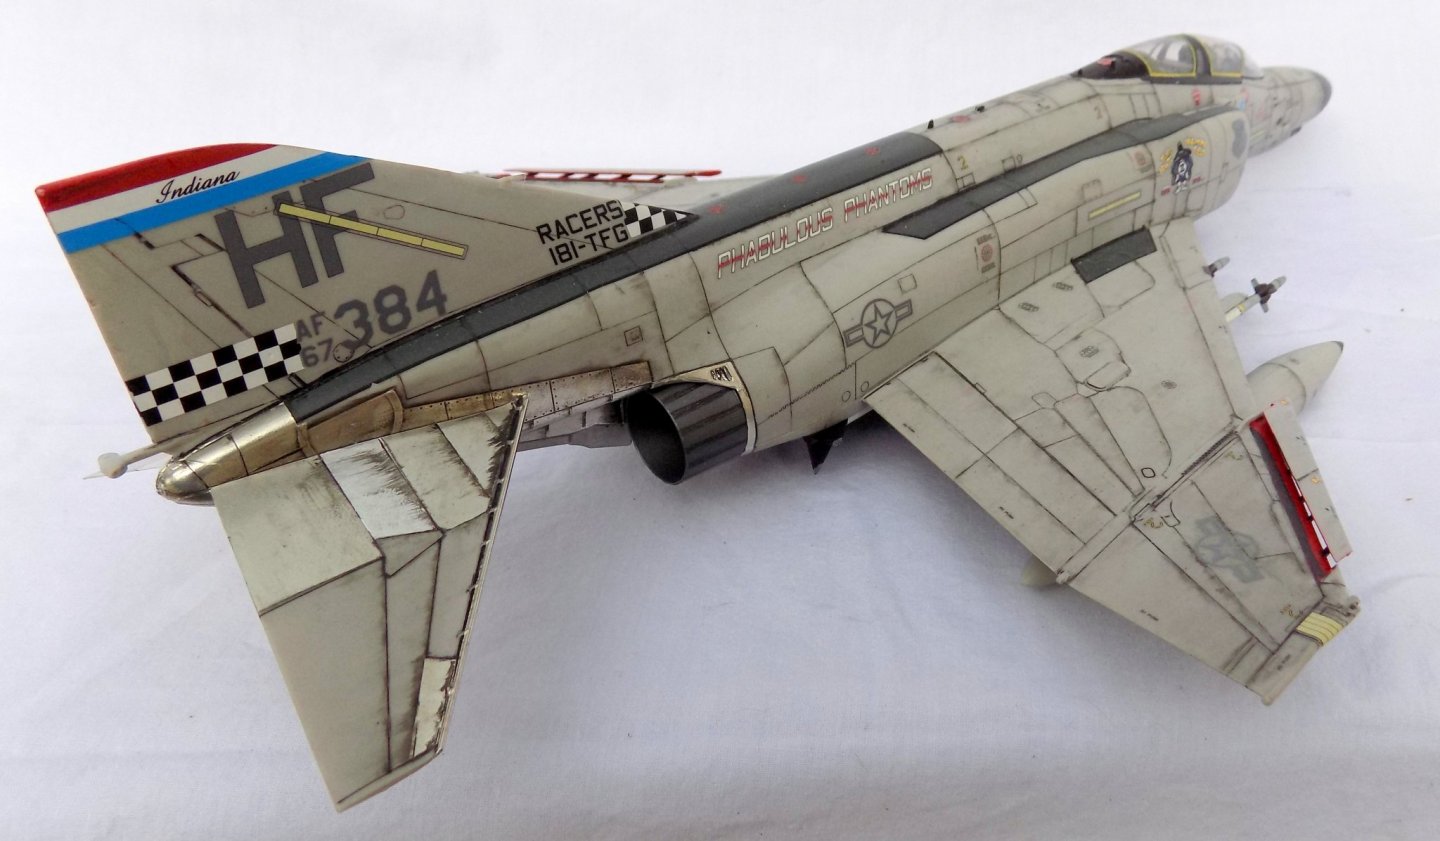
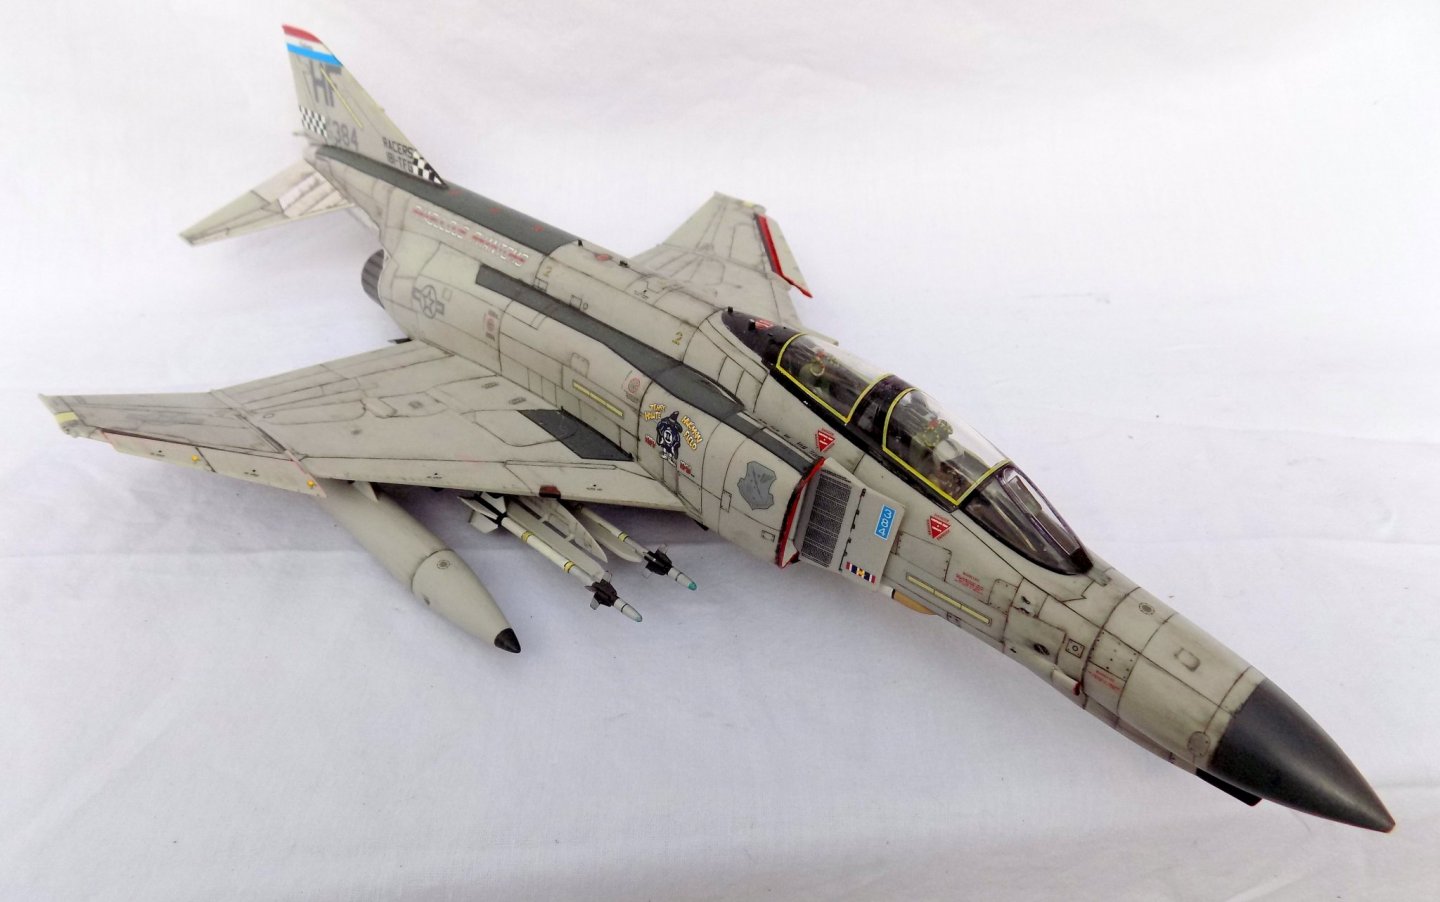
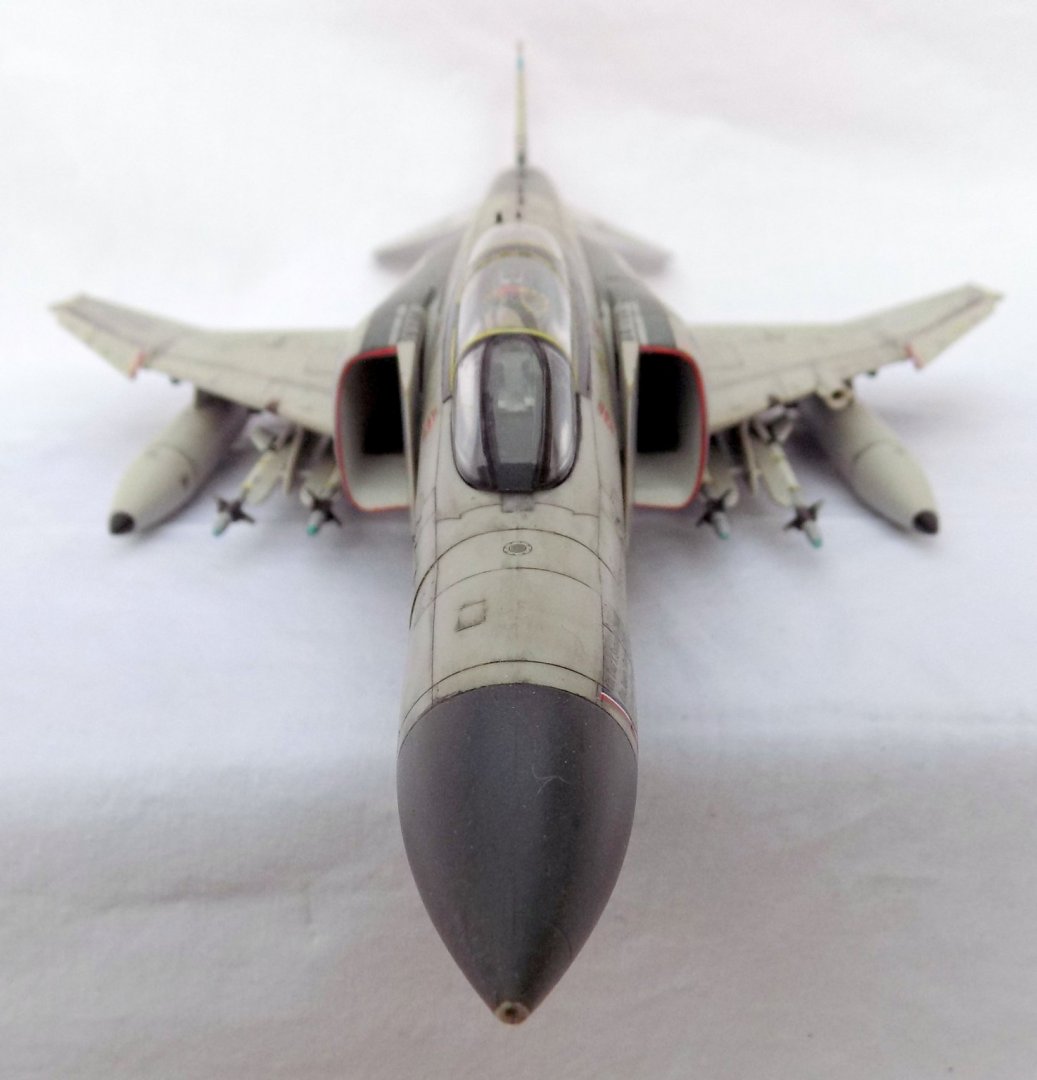
Hi all, I guess this is the section of the forum for completed non-ship model builds. If it's in the wrong section, LMK. I decided to model the last F-4 used bu the US military (Indiana ANG). The Hasegawa kit is an absolute gem, and with some added detail PE and resin builds up into a fine model. Here's my rendition:
-
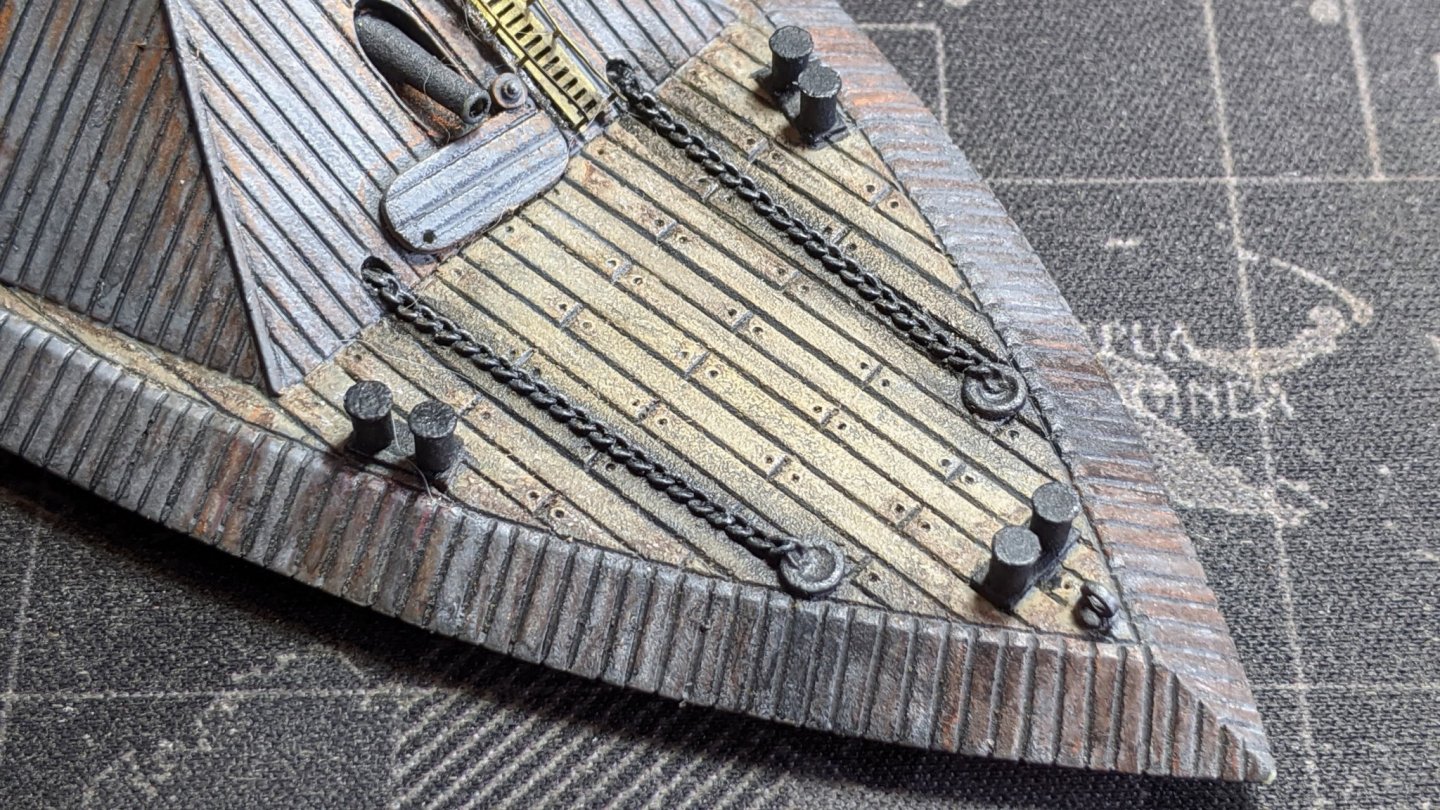
Hey Mike, Here's an example of the front deck of the CSS Palmetto State (Verlinden 1:200 resin kit) I'm just about finished with that's very similar to your deck. I just painted and weathered the existing molding. The casting on your part looks good enough to do the same.
-
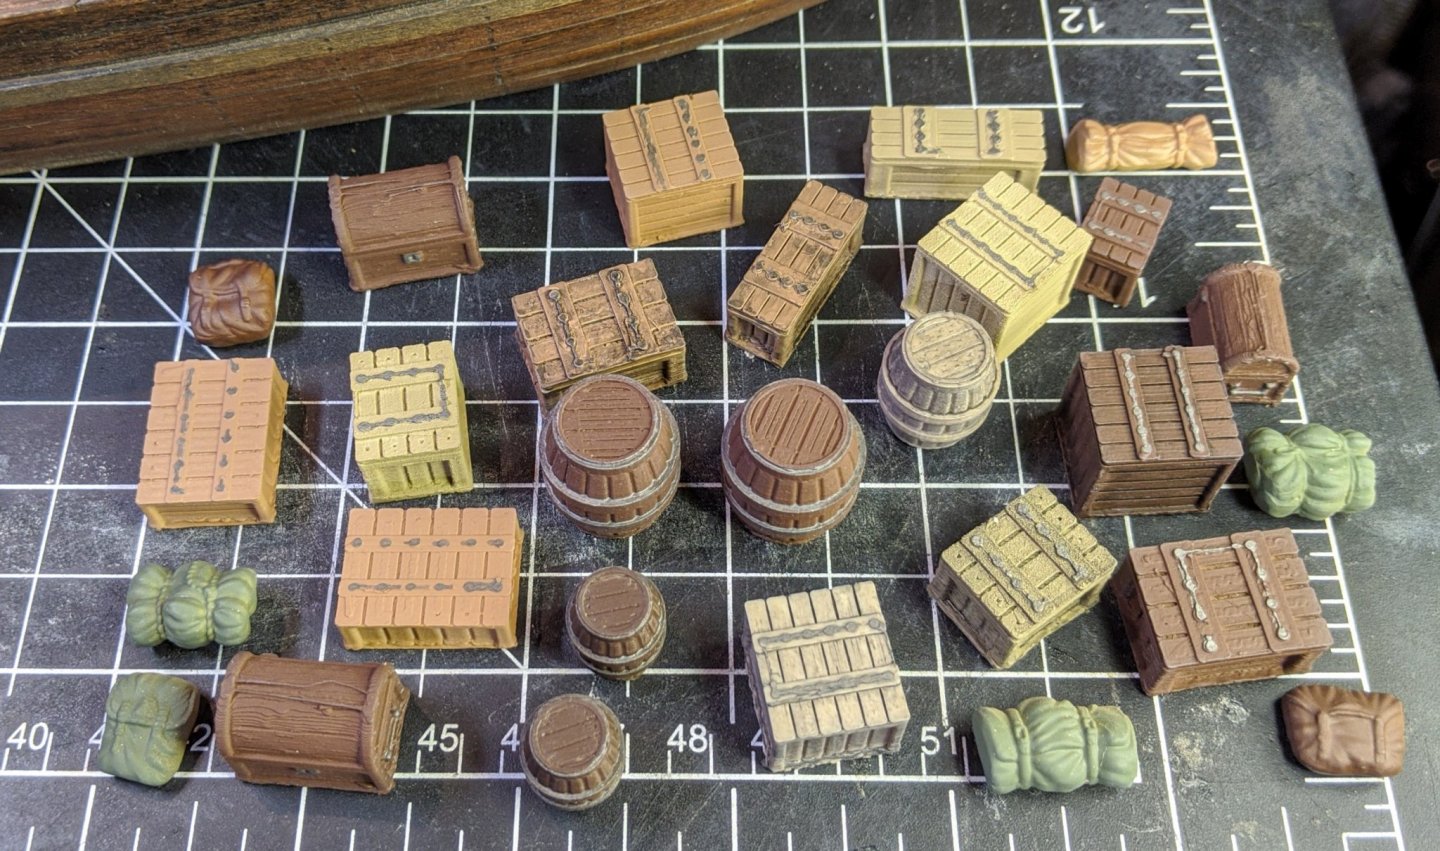
Thank you, Ken! I've been hoping someone would continue making these fine accessories. I'm getting a big order ready from them, my USN Picket boat (next on the bench) will need a lot of their stuff. Washing plastic and metal parts is the first thing I do on a new kit. You never know what mold releases or lubricants the manufacturers use, so washing is good insurance. I also wash whole assemblies after I've built them prior to painting to remove skin oils and other build spooge. Cast metal parts I prime, and brass parts I blacken for prep. Sometimes I get in a rush and skip some prep steps, these crates are a prime example to NOT SKIP THE BASICS! I was able to save some of the pieces I already attempted painting, and ordered another set and some 3D primer so hopefully I won't have the same problem with the next batch. The company that made the crates, barrels and chests I got from a local hobby shop is called Extruded Gaming Ltd., based in Australia. They mostly make 28mm wargaming accessories, which scale well with the large scales I'm building. I've since found out that Amazon carries a lot of their products with prime... Here's the assortment I just ordered, they will be here Monday and were cheaper than the hobby shop I got the first batch from. They'll replace some of the fubared pieces from the first batch, and the extras added to the USN Picket Boat next in the build queue. Thanks for all the help gentlemen, again the forum comes to the rescue! Speaking of help, does anyone know what type of canister the Philly may have carried? I've seen a bunch of different configurations... Metal cans, lumpy cloth bags, smooth cloth bags, etc. Some have a wood plug on the bottom, some don't. I think I've got the wadding and powder bags figured out, but any suggestions would be most welcome. Here's a shot of some of the "survivors" of the great paint fiasco...
-
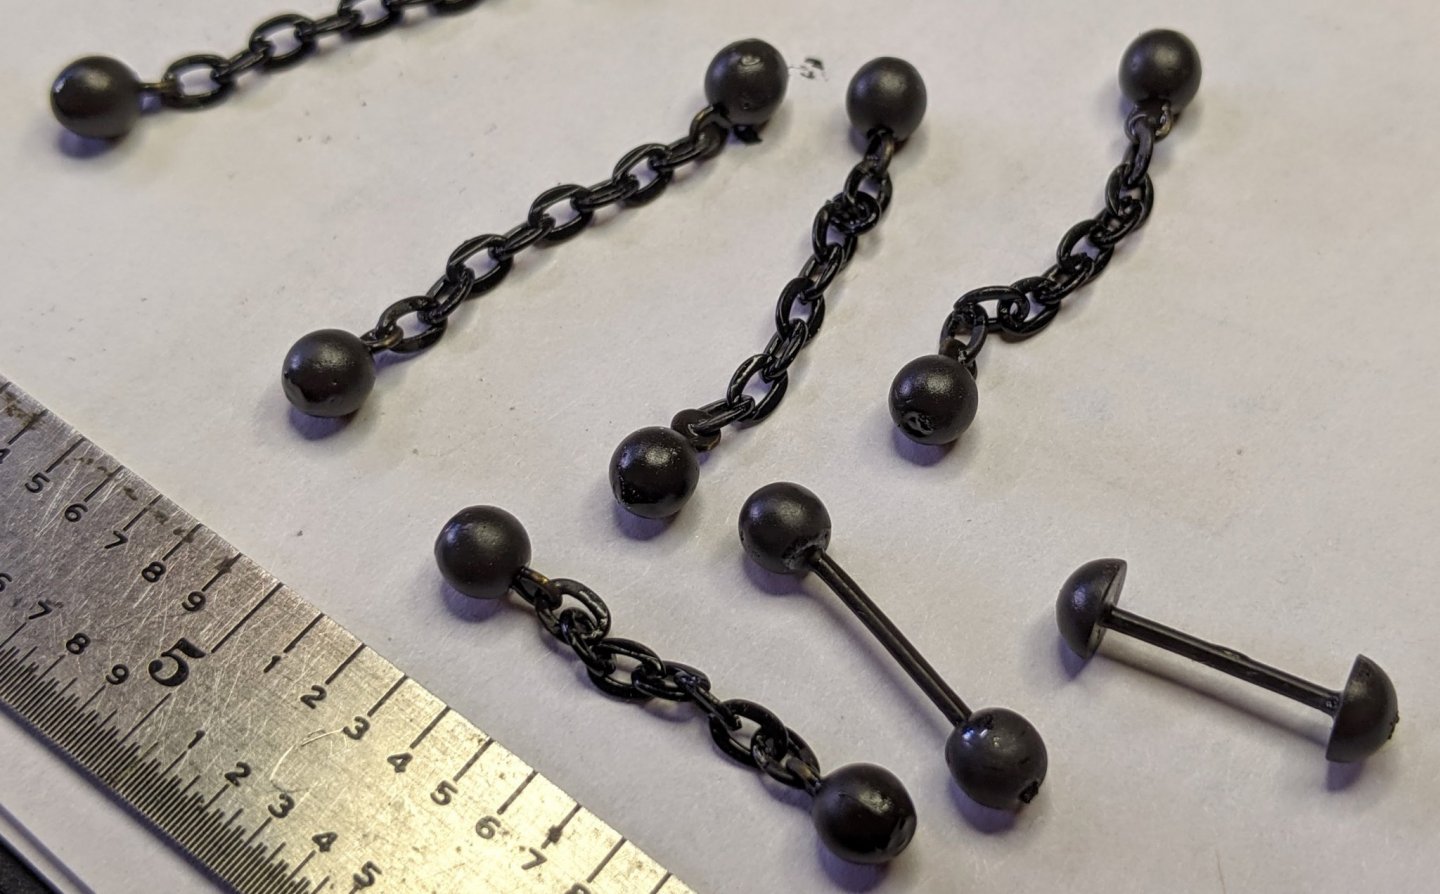
Worked on some ammunition today. For the 9 and 12 pounders I'll be displaying solid shot, bar shot, chain shot and canister. I've got the first three figured out, I made 8 of each type with two types of bar shot: I still have to make canister, wadding and powder bags. I'm not sure how I want to do those yet, more research is needed. If anyone knows some cool way of making them, please let me know. I started in on some deck stuff, first color coat and detailing and weathering in progress. I had some base coat issues with some of the 3-D printed pieces, hopefully fixable. Note to self: Check paint compatibility before blasting away...😬 Got this in the mail today... Must resist.... Do not open the box.... Finish what's on the bench first.... Yeah... like I'm going to follow that advice... It's getting opened tonight (only for a parts inventory, of course😁) Hopefully, my Philly will be done (except for the display case) in about a month and I can get started on this bad boy.
-
Mold quality of that part is really nice! I'd suggest paint and detail washes, that will really pop it. I've tried removing molded chains before... didn't work out well... Excellent start! With the added PE parts she will be a real beauty.
-
I just finished this book, absolutely amazing the second Pacific fleet even made it. Things didn't go well for them after they arrived, tho...🚽 This build encourages me to get one... I've always had a soft spot for pre-dreadnaughts.
-
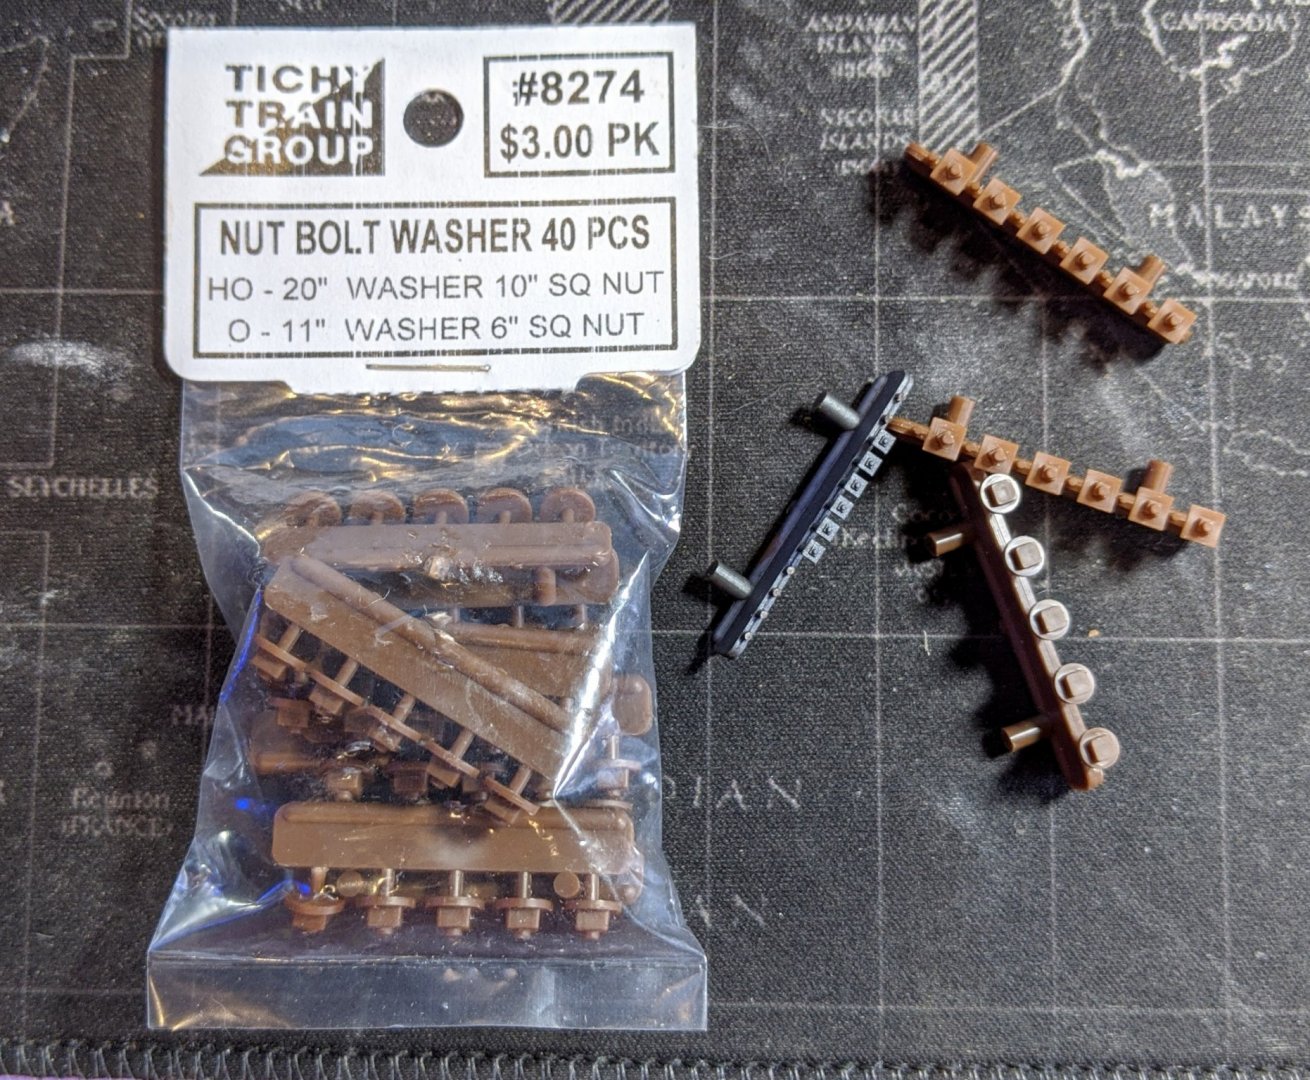
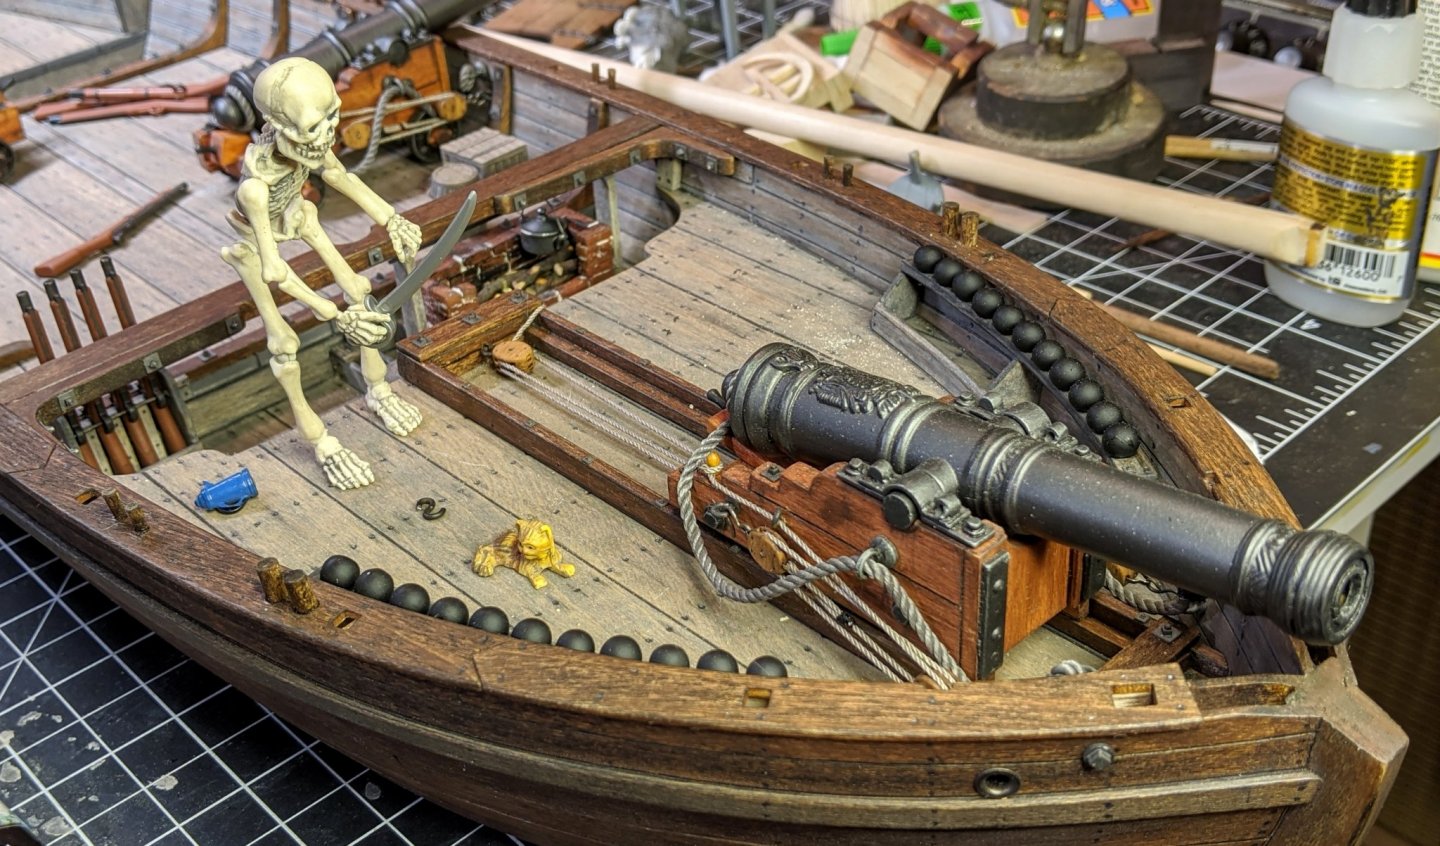
A company called Tichy-Train Group makes dozens of different sizes of nuts and bolts- square and hex head with either square or round washers. They also have a lot of other cool hardware that can be used on our builds. I got them off ebay, but there's probably other vendors on the Interwebs. Also, Grandt Line used to make a lot of nice hardware, but they are getting hard to find (Company gone under?). Slim better be careful... we have five cats, and with Slim packing only single shot muskets and a cutlass he'd better not start any trouble... The cats are swift and vicious and would take Slim down like a pair of cheap gym shorts if he gets out of line.
-
If anyone is interested and is planning to do a Philly build, here's an All Philly build pictures-Raw and Uncut! photo album on Google Photos in chronological order This is all the shots- the good, the bad and the ugly. There are a whole bunch of them that show a lot more of the construction phase. Some cat pics, too. Any questions on what I did are welcome. I'll keep it updated.
-
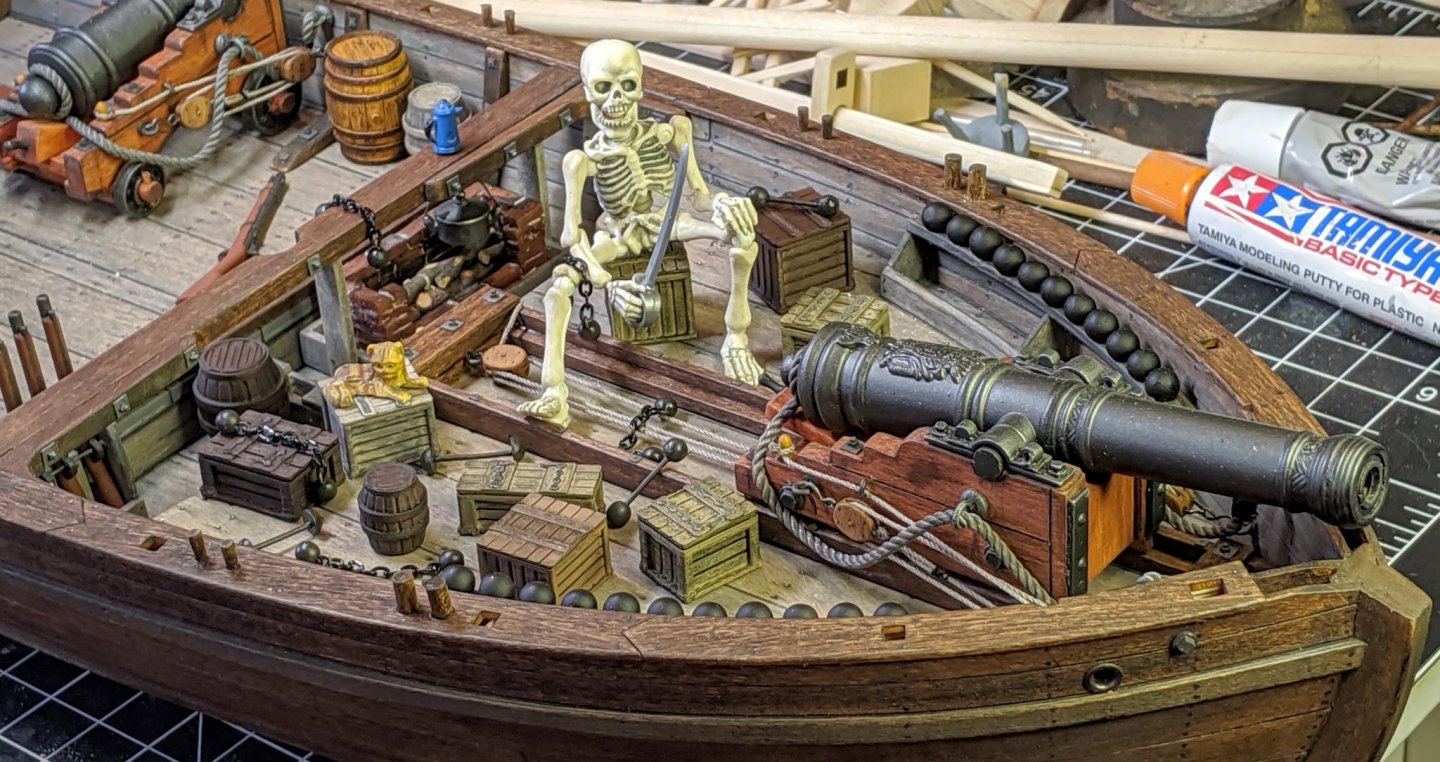
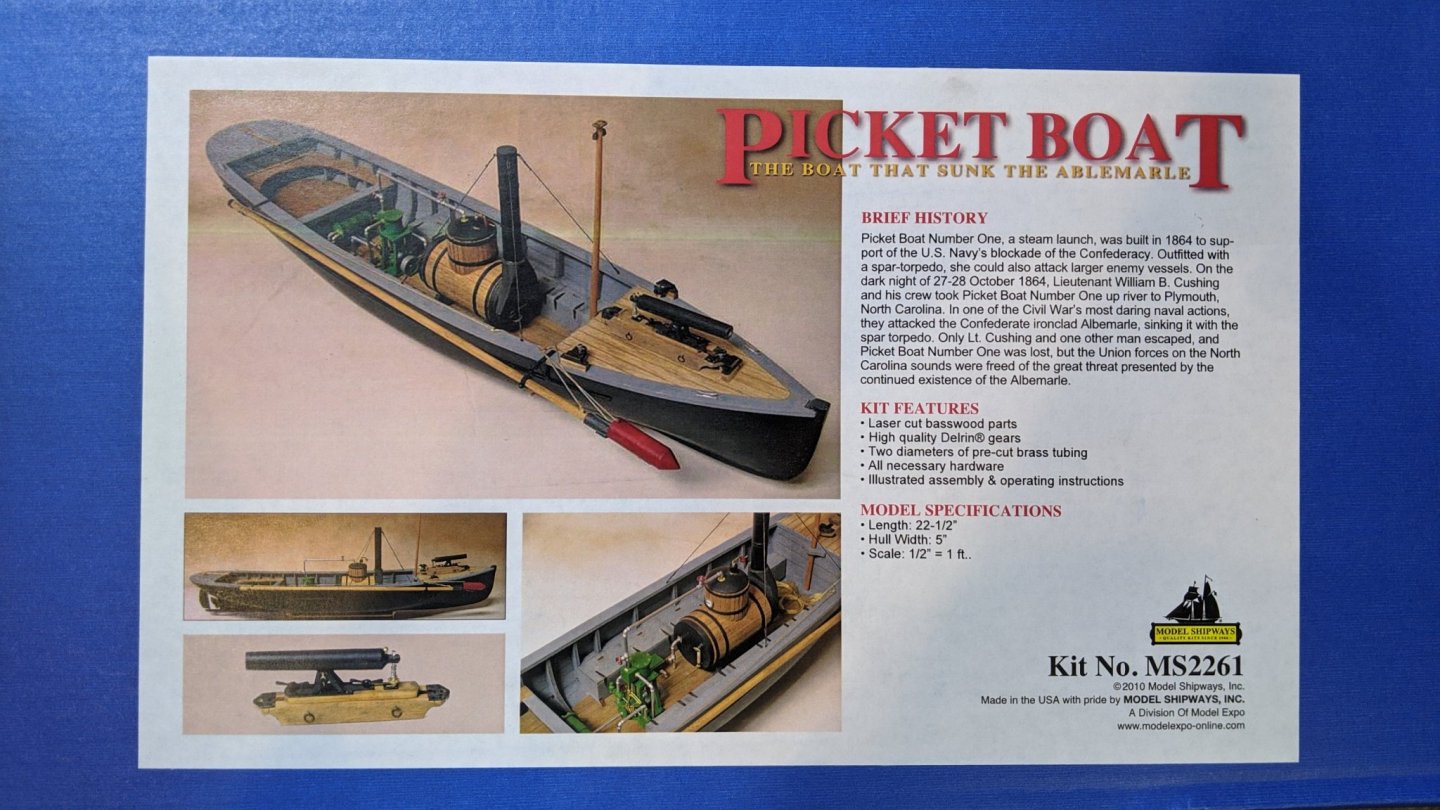
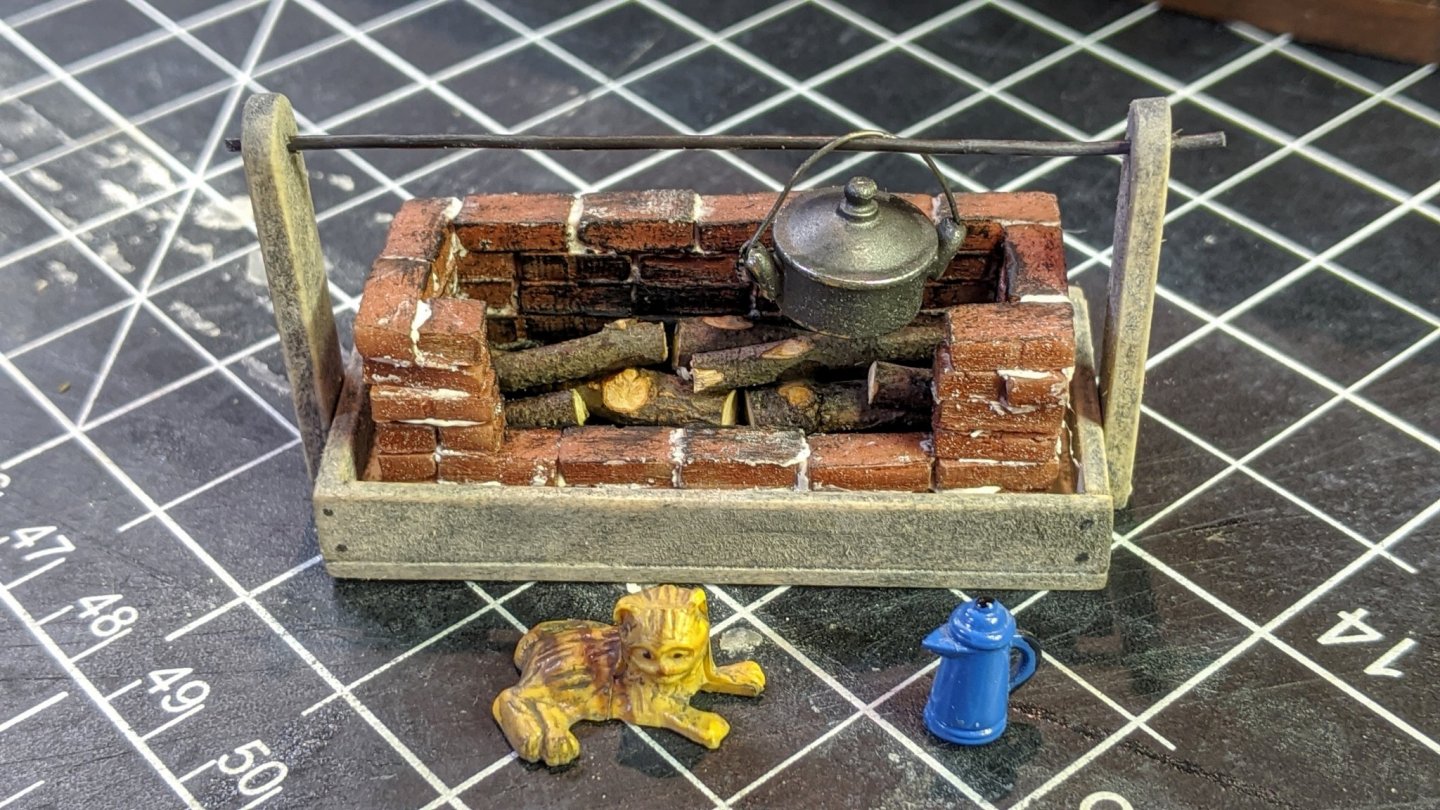
Wow, I really appreciate the kind comments! This is a whole new set of challenges to have to add to my skill set. I've only had to work with wood on my model railroad projects, and that's all flat panels and straight boards and stuff. NOTHING like the spiling, bending, fitting, etc. required to build ships... let alone the new terminology, long history and that DREADED RIGGING. There are so many examples of world class woodwork and top shelf builds on the forum that I truly consider myself a novice. Once I get a few more ships under my belt I'll feel a lot more comfortable. Speaking of which, I've officially got "the ship bug" I haven't had this much fun in years of building, and doing this log makes me very careful of what and how I do stuff. In fact, I just ordered a Model Shipways USN Picket Boat, which will be next build up on the workbench. (Yay! no rigging and lotsa metal stuff to spiff up!) Again, I'm not trying to sandbag anyone, this is all stuff I've never had to do before. I would never have gotten this far without all the great build logs on the forum. As I have said before, If anyone has questions on any of my techniques, please ask. I'll be honored to share and explain, in the tradition of all the other members who graciously do the same. Just finished some touchup on the cook stove, found the coffee pot and cook pot, and some stray cat wandered in... Yikes! Slim found a sword!
-
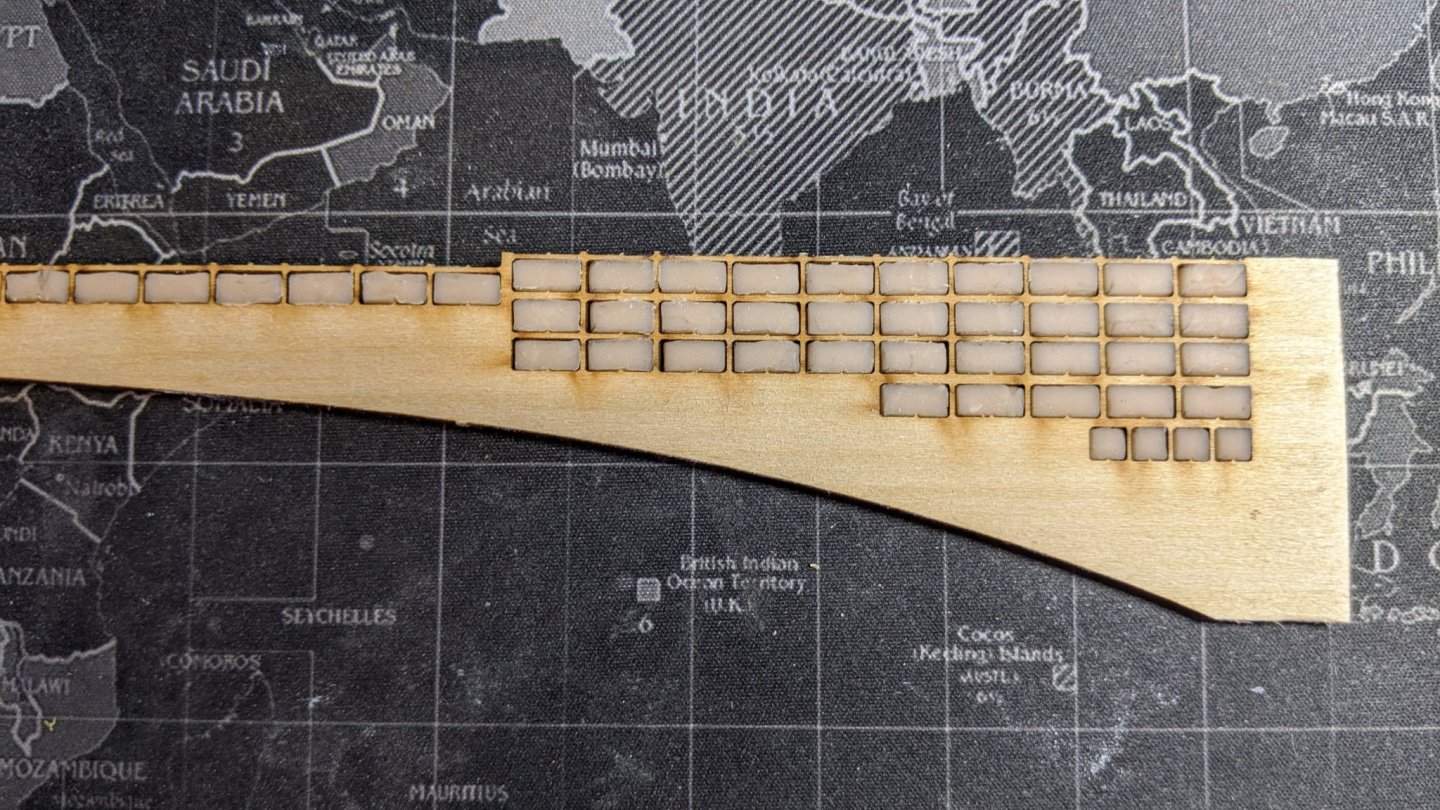
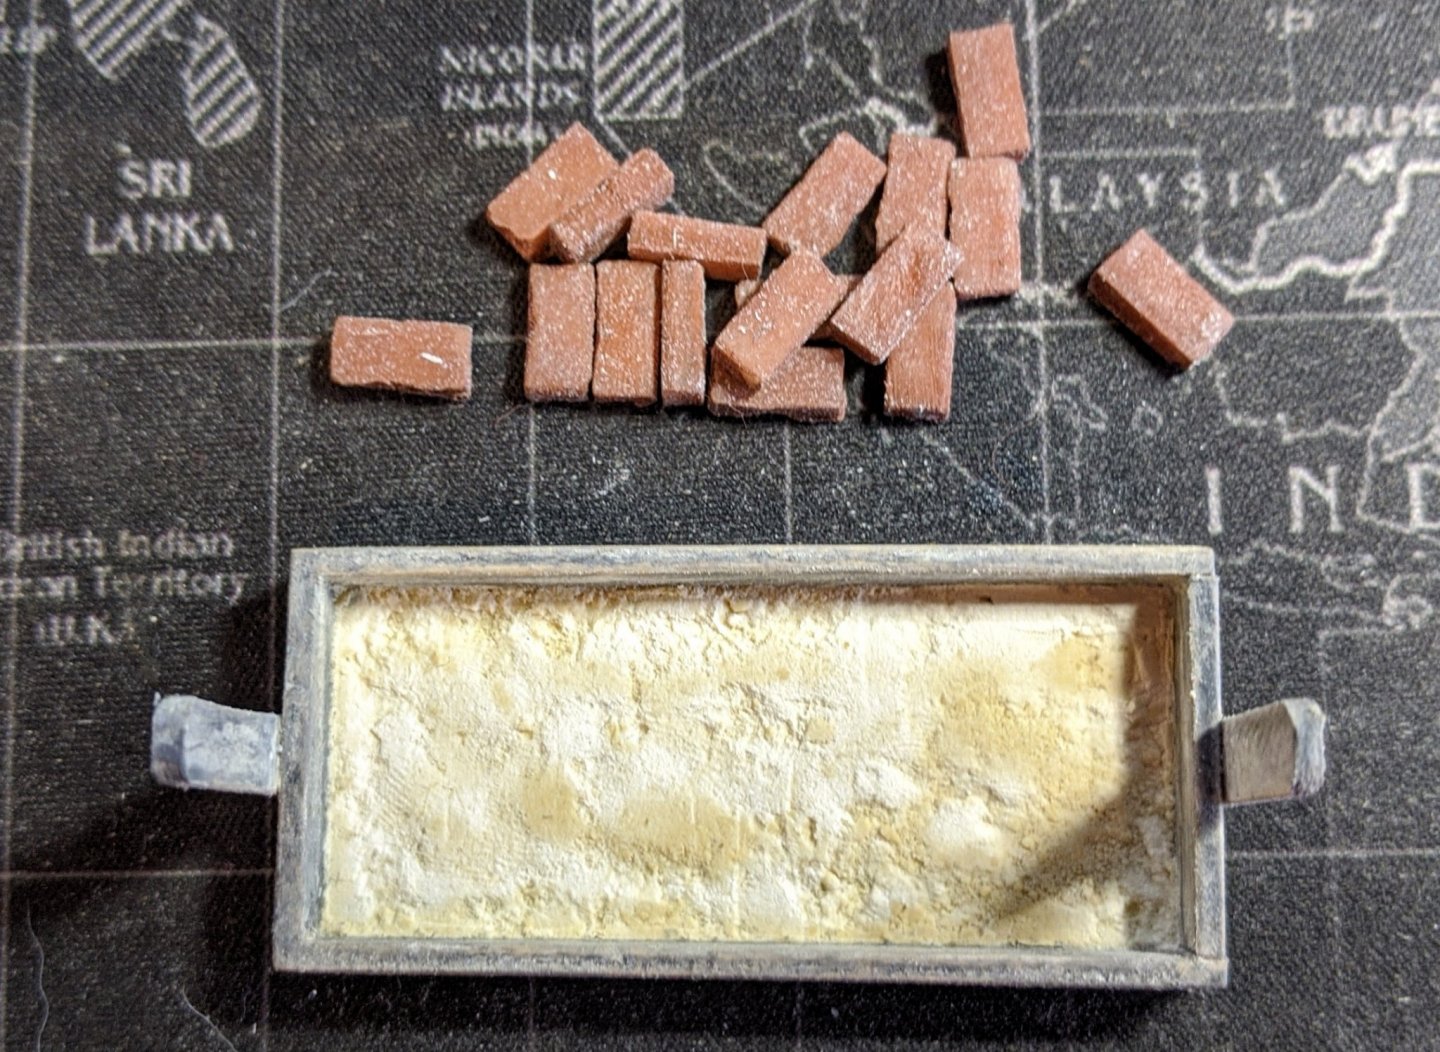
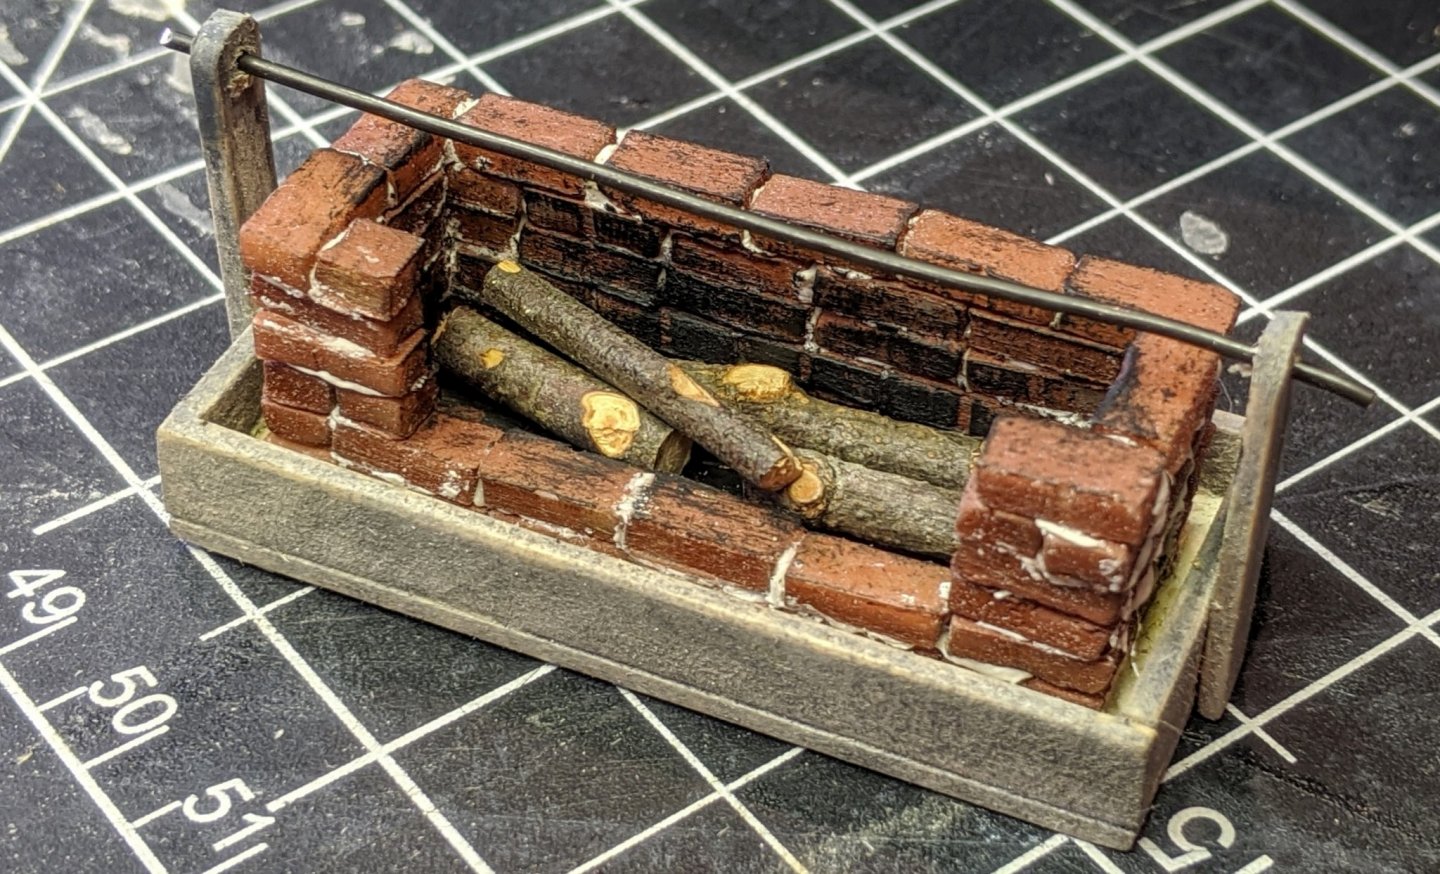
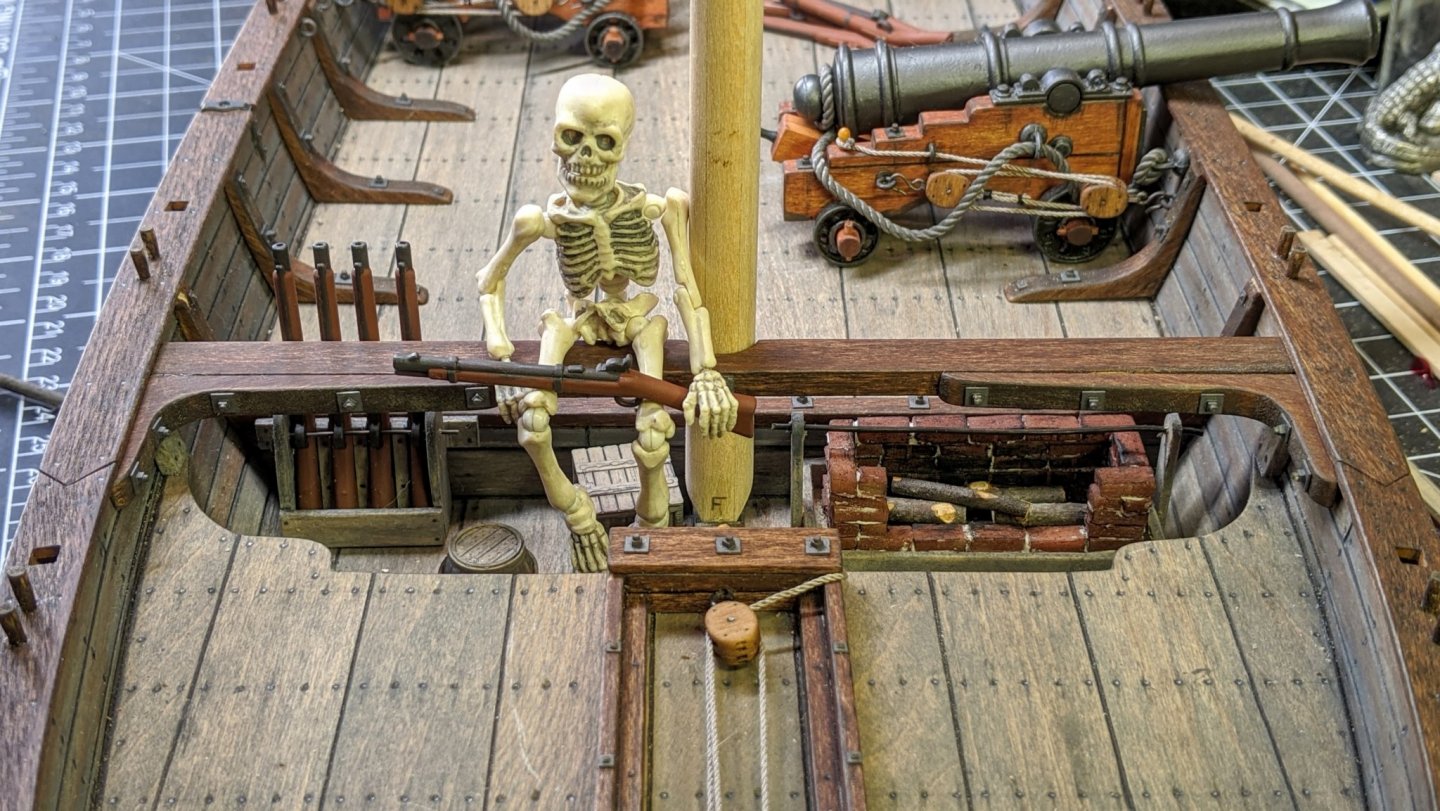
Correct, and they didn't have a lot of time to fix anything... plus they had only one mortar left anyway. Not worth the trouble. The artistic modeler in me says to use it... the rational modeler in me says dumb idea. I'm not sure who's going to win yet... luckily, I have a lot more work to do before I have to make that decision. Made some fun progress today. Permanently installed the mast partner and finished the cook stove. It was a real fun time getting the mast partner set correctly. For one thing, it barely squeezes by the rail caps and it pretty much needs to be exactly oriented in three dimensions when glued in. I ended up making cheater blocks for the roll axis where it attaches to the inside hull, and then using the mast to set the pitch axis and yaw axis. I carefully marked out the correct position and then removed it.... dabbed some glue and dropped it in...success! Everything lined up! Finished the cook stove. As others have done, I used the kit supplied brick section as a mold to make more realistic bricks. First, I popped out all the ones in the frame, then pressed some beige Super Sculpey into the frame mold. 15 min. in the oven at 275' F and voila! Then I popped all the bricks out and painted them Tamiya rust (sloppy on purpose, to let some base color show through). I built up the frame and stained it weathered gray, then mixed up some Durham's Water Putty (really great stuff for anything!) and put a 1/8" layer in the bottom of the frame to simulate the sand base. While the Durham's was still damp, I sprinkled some more on top to add texture. Next, I built up the brickwork using Testors white contour putty as mortar. A quick pass of Tamiya flat black drybrushed to simulate soot, some trimmed twigs from the yard and it's almost done. I'll add a cook pot and a coffee pot (gotta have coffee in the Navy) and add some more detail as other deck work continues. Here's a shot of the mast well with the mast partner, cookstove and Slim (I'm getting worried... he's having way too much fun with the muskets. I think he took a potshot at my cat...) Cheers, BobC
-
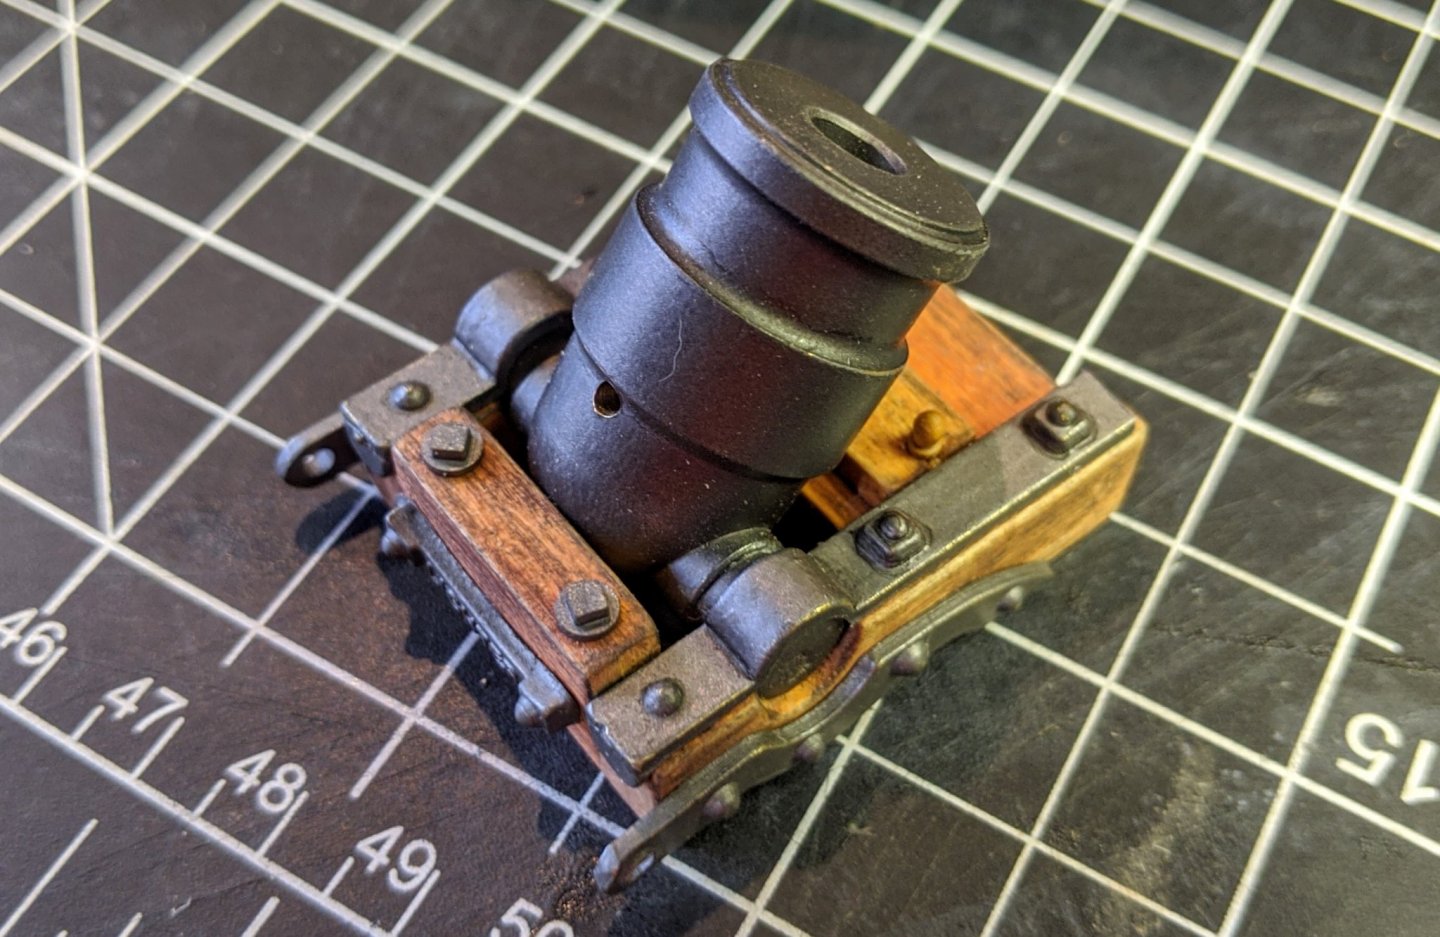
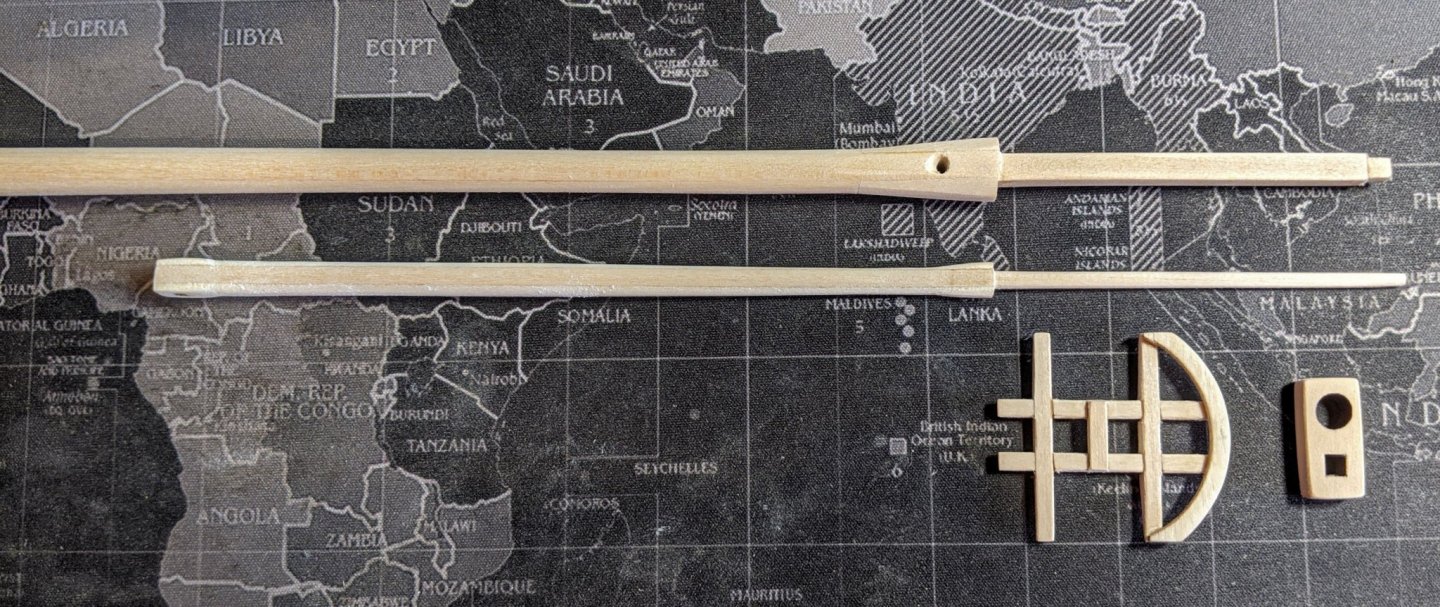
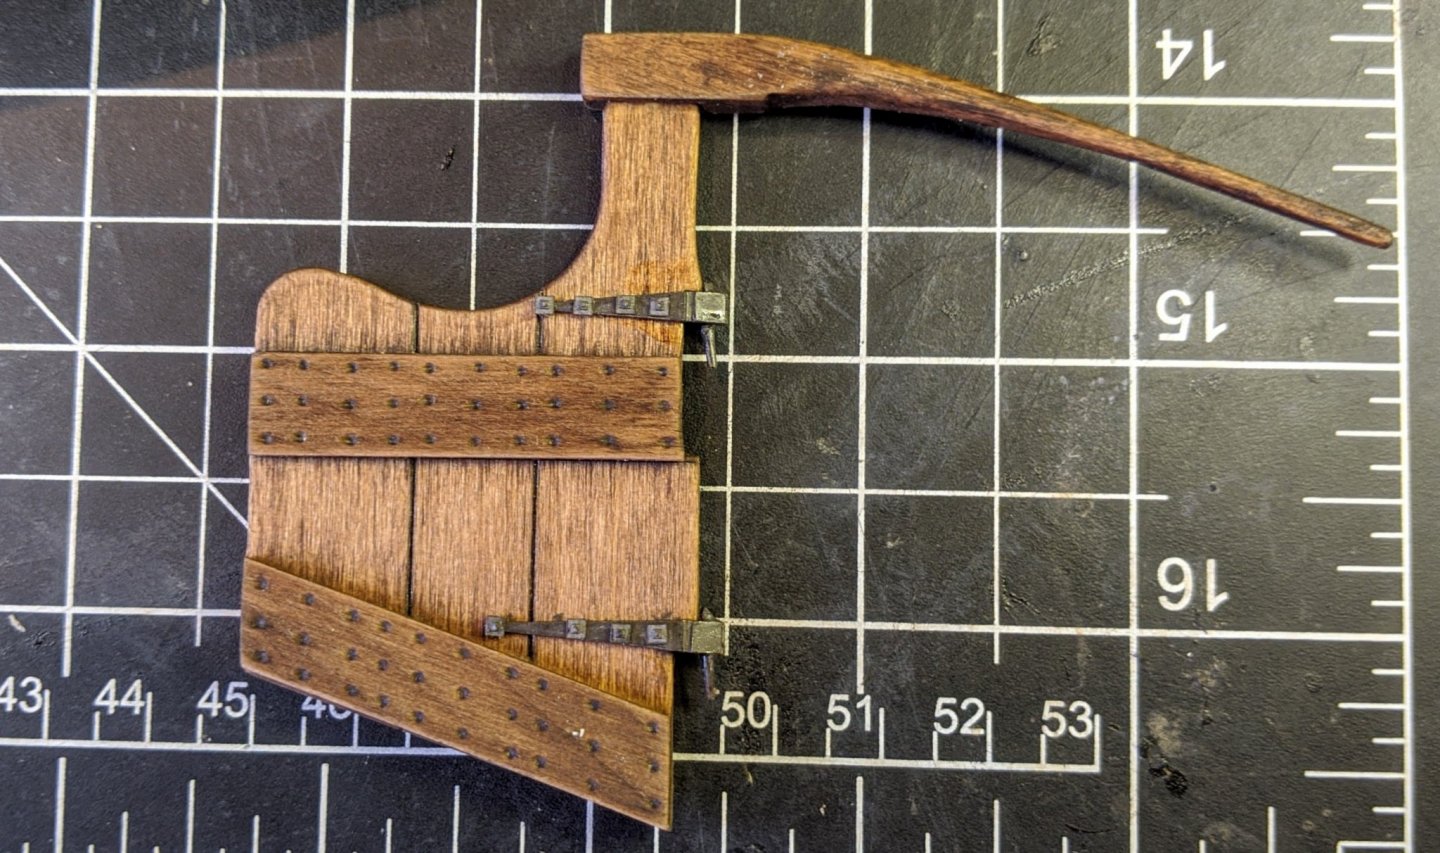
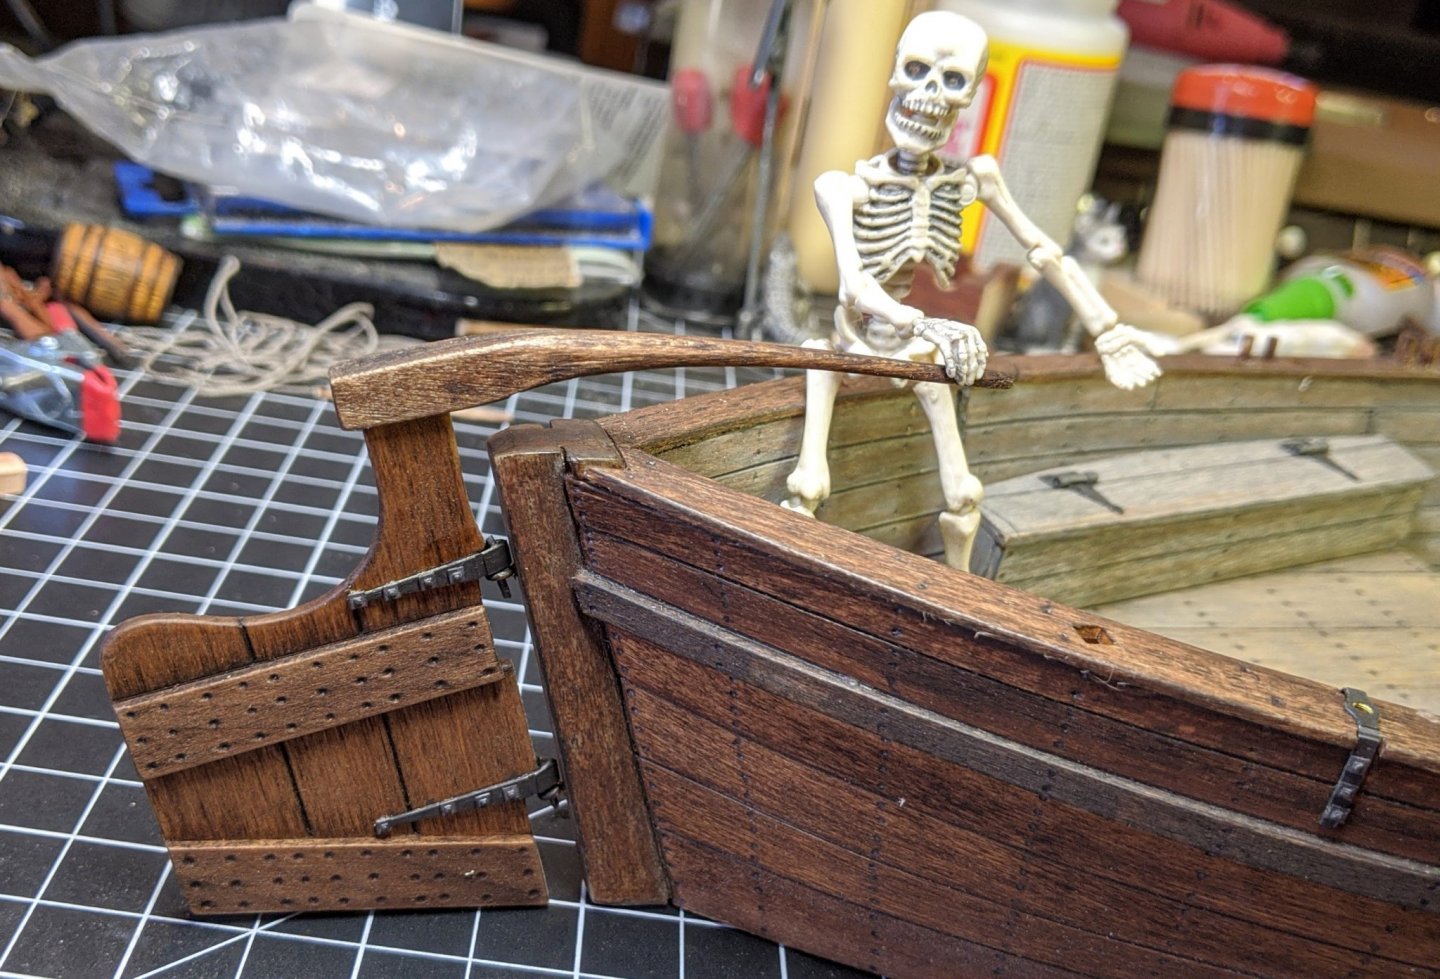
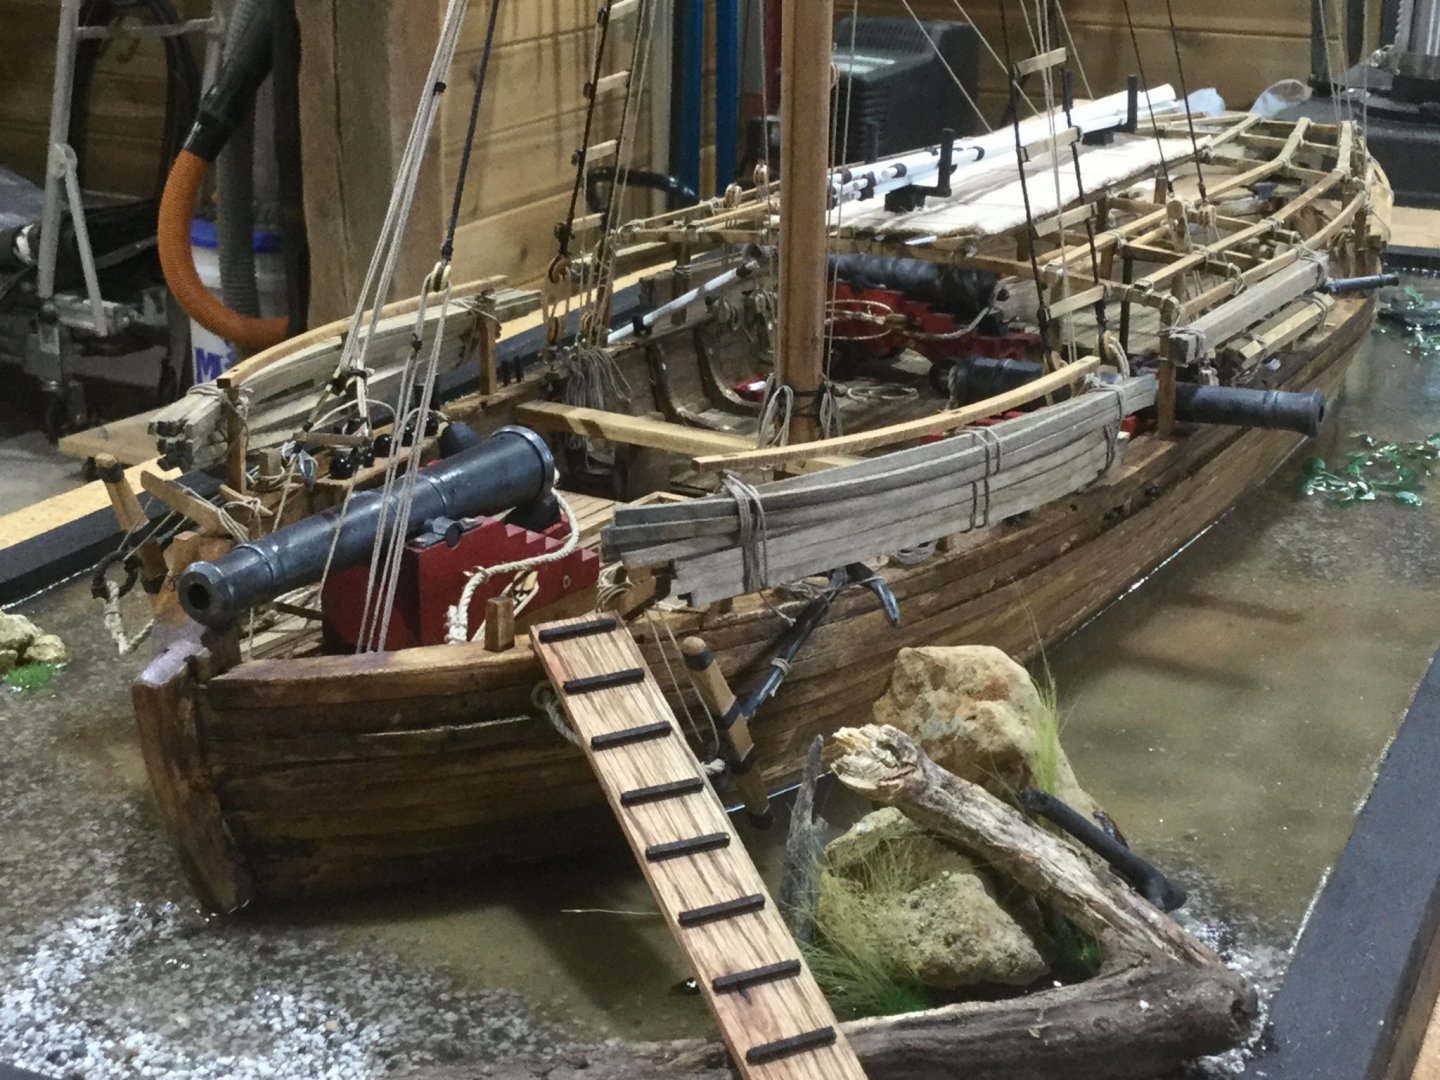
Hi all, Good points, Chuck. I'm going to assume that they fixed whatever issues that prevented mounting and firing the mortar. The main reasons I want to use it are: 1) I believe the stern section needs more stuff to fill out what is a pretty big empty space, and 2) I have one with a scratch built carriage I'm pleased with. Here's an interesting aside about the mortar... It really fires! It was a gift from some co-workers, and it's been kicking around the parts bin for years. I've never actually fired it, but I've watched YouTube videos of people actually firing it. Quite impressive! I got some more stuff done today... Got the mast finished and ready for stain. I'm in a quandary about what color to go with, any suggestions would be GREATLY appreciated! I understand that the original mast was pine, with the branches chopped off leaving ring marks where they attached to the tree. As others have stated, if I try and do the rings, the mast will look "unreal" so that probably won't happen. I also completed the rudder. I'm rapidly approaching the point where I have to finalize the display base and case. I want to complete them before I begin setting the mast and starting the rigging. For the display base, I ran across this pic on google photos that really appeals to me, I believe I'll do something similar (if anyone has more info on this picture, LMK). The original boat extended about 1.5 feet below the waterline, so in scale that's about 3/4 of an inch. I'd like to build a lake bottom and shoreline and then do multiple resin pours to "imbed" the boat about 3/4" in the resin "floating" about 1 inch over the lake bed. The bow will be beached as in the picture. I'll put some rocks and trees on the shore, and include the gangplank and some securing lines to shore. Let me know what you all think, and any suggestions or tips on how to do this. Again, thanks for all the support and kind comments, please feel free to critique and suggest improvements on this build. Cheers, BobC
-
Awesome. You're blending together a whole spectrum of techniques here with great continuity. I bet if you had the resources, you could probably build a real one when you're done with this.
-
Ahhh... rattle cans... Rattle cans are like a box of chocolate. You never know what you're going to get (apologies to Ms. Gump). Rattle cans depend on pigment fineness, carrier volatility, internal pressure and nozzle geometry to work as intended. Manufacturers constantly change these parameters, so the same paint from the same manufacturer can vary quite widely batch to batch. I try to spray on dry days (hard here in Florida) outside when there's not much wind. I first set the can upside down for about an hour, then shake it A LOT. Next, I immerse the bottom of the can in hot water until it's good and warm (not too hot, you really don't want the can to burst) then shake the snot out of it some more. Definitely shoot a test piece before spraying what you want to coat, making sure you have a good even spray pattern. Make sure the nozzle tip doesn't get buildup and start spraying off the piece and end off the piece. I've also had good luck in swapping nozzles and keep good spray pattern nozzles from empty cans. That way if I get a "spitty" can I can swap some other nozzles to see if it improves.
-
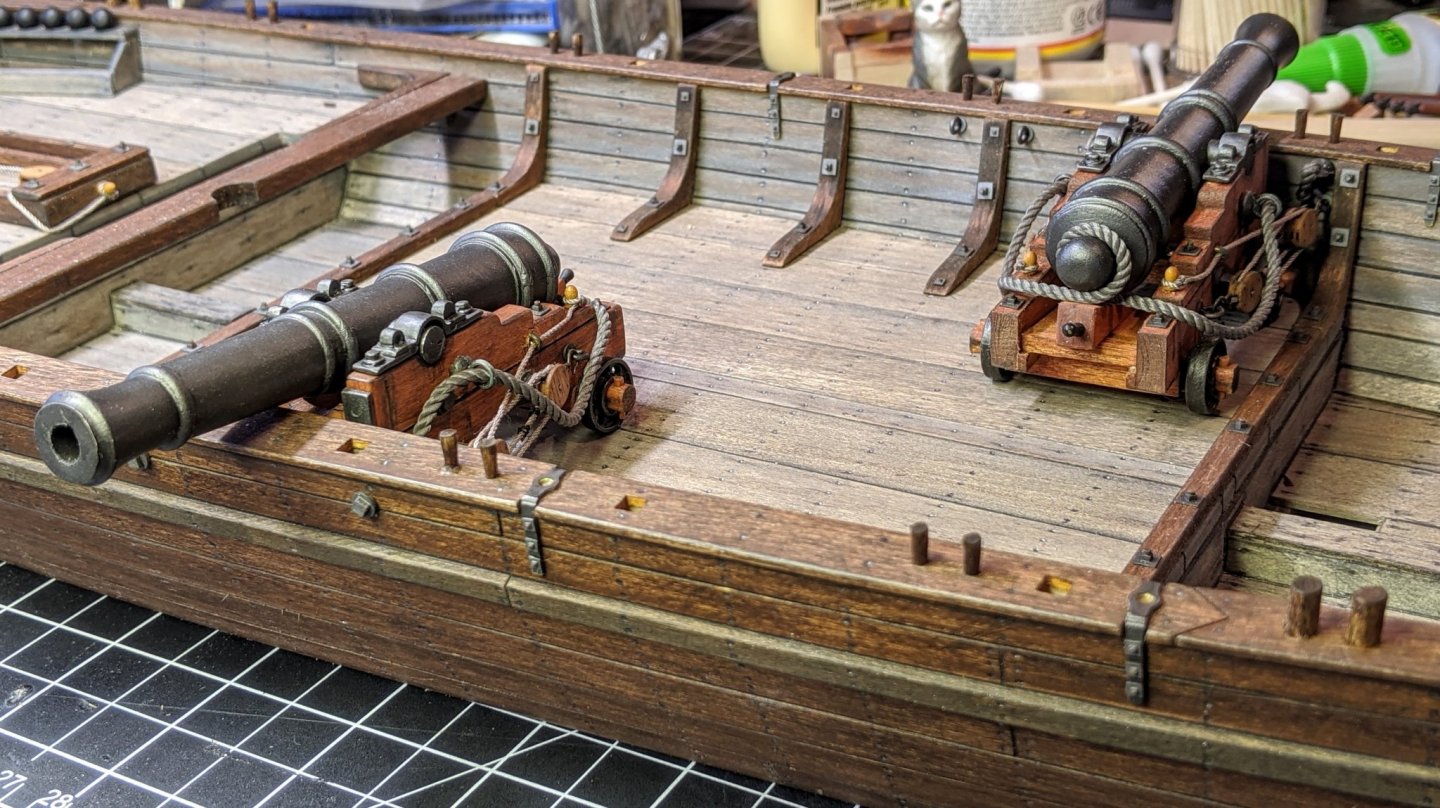
Some progress on the rail cap details today... I installed the swivel gun brackets and used bolts instead of nails... not prototype but it adds a bit of detail. I also added some big bolts on the outside of the hull aligned with the breeching rings for the carriage cannons... recoil insurance I guess. I also stained and installed the thole pins and bitts, but I'm going to hold off on the cleats and catheads for a while. I fear they may get in the way as I continue interior work.
-
Krylon Matte Finish #1311 from a rattle can. I used to exclusively use Testors Dullcote but since Rustoleum bought out Testors the formula seems to have changed for the worse. I've experimented with Tamiya flat but find it's really "hot" and can affect underlying finishes in a bad way. The new Testors Dullcote is pretty hot, too (they're both lacquer based). Krylon is also lacquer based, but it's not near as hot and stinky as the other two. Plus, it's a LOT cheaper and easier to get.
-
Hey all, Thanks for all the kind comments! The more I peruse the forum the more I'm amazed and impressed with the quality and workmanship of the wonderful builds here. Chuck, I really enjoyed your 1:48 scratch build log... very well done and really informative. You're right that the boat didn't have the time to weather at all before her final fate. As far as her appearance when built, she probably resembled a garbage scow instead of a warship. I re-watched the video I posted on the first page of this log (a real hoot... very amateur but there's a lot of good video and the docent Eric really knows his stuff). Philly II (supposedly built similar to the original) had some serious leakage problems from the start. After the hull was completed, the builders filled it with water for two weeks to swell and seal the wood. Even after that, when finally launched she took on over 200 gallons of water an hour for quite a while, finally stabilizing to currently 75 gallons an hour. Knowing this, and the fact the original boat was built quickly (and probably crudely) from live oak leads me to believe that the original boat was probably totally slathered with tar to try and seal her up. Between the white oak, crude construction and lots of black tar I'll bet she was a real ugly duckling. I figured that wouldn't translate to an attractive model, so I decided to do mine as an "alternate reality" Philly. In this alternate world, Philly survived the battle of Valcour island and went on to soldier another year and was maintained well enough to at least be homely instead of butt-ugly. This also allowed time to install the mortar and generally trim up the boat. As I've previously mentioned, my Philly is just loosely based on the original, a re-imagining of what she could have evolved into if not so quickly and sadly lost. Plus, I just love weathering stuff...😁
-
Excellent woodworking and attention to detail, Keith! A very striking color scheme, and your choice of an ebony finish on the hull looks great. Did you seal the hull before staining, and what finish did you use on the deck? I'll be looking forward to your progress as you continue building this very interesting ship. Cheers, BobC
- 206 replies
About us
Modelshipworld - Advancing Ship Modeling through Research
SSL Secured
Your security is important for us so this Website is SSL-Secured
NRG Mailing Address
Nautical Research Guild
237 South Lincoln Street
Westmont IL, 60559-1917
Model Ship World ® and the MSW logo are Registered Trademarks, and belong to the Nautical Research Guild (United States Patent and Trademark Office: No. 6,929,264 & No. 6,929,274, registered Dec. 20, 2022)
Helpful Links
About the NRG
If you enjoy building ship models that are historically accurate as well as beautiful, then The Nautical Research Guild (NRG) is just right for you.
The Guild is a non-profit educational organization whose mission is to “Advance Ship Modeling Through Research”. We provide support to our members in their efforts to raise the quality of their model ships.
The Nautical Research Guild has published our world-renowned quarterly magazine, The Nautical Research Journal, since 1955. The pages of the Journal are full of articles by accomplished ship modelers who show you how they create those exquisite details on their models, and by maritime historians who show you the correct details to build. The Journal is available in both print and digital editions. Go to the NRG web site (www.thenrg.org) to download a complimentary digital copy of the Journal. The NRG also publishes plan sets, books and compilations of back issues of the Journal and the former Ships in Scale and Model Ship Builder magazines.


.thumb.jpg.2abae9c0194e4e915bb097b8a6d5c174.jpg)

