John Ruy
-
Posts
1,423 -
Joined
-
Last visited
Content Type
Profiles
Forums
Gallery
Events
Everything posted by John Ruy
-
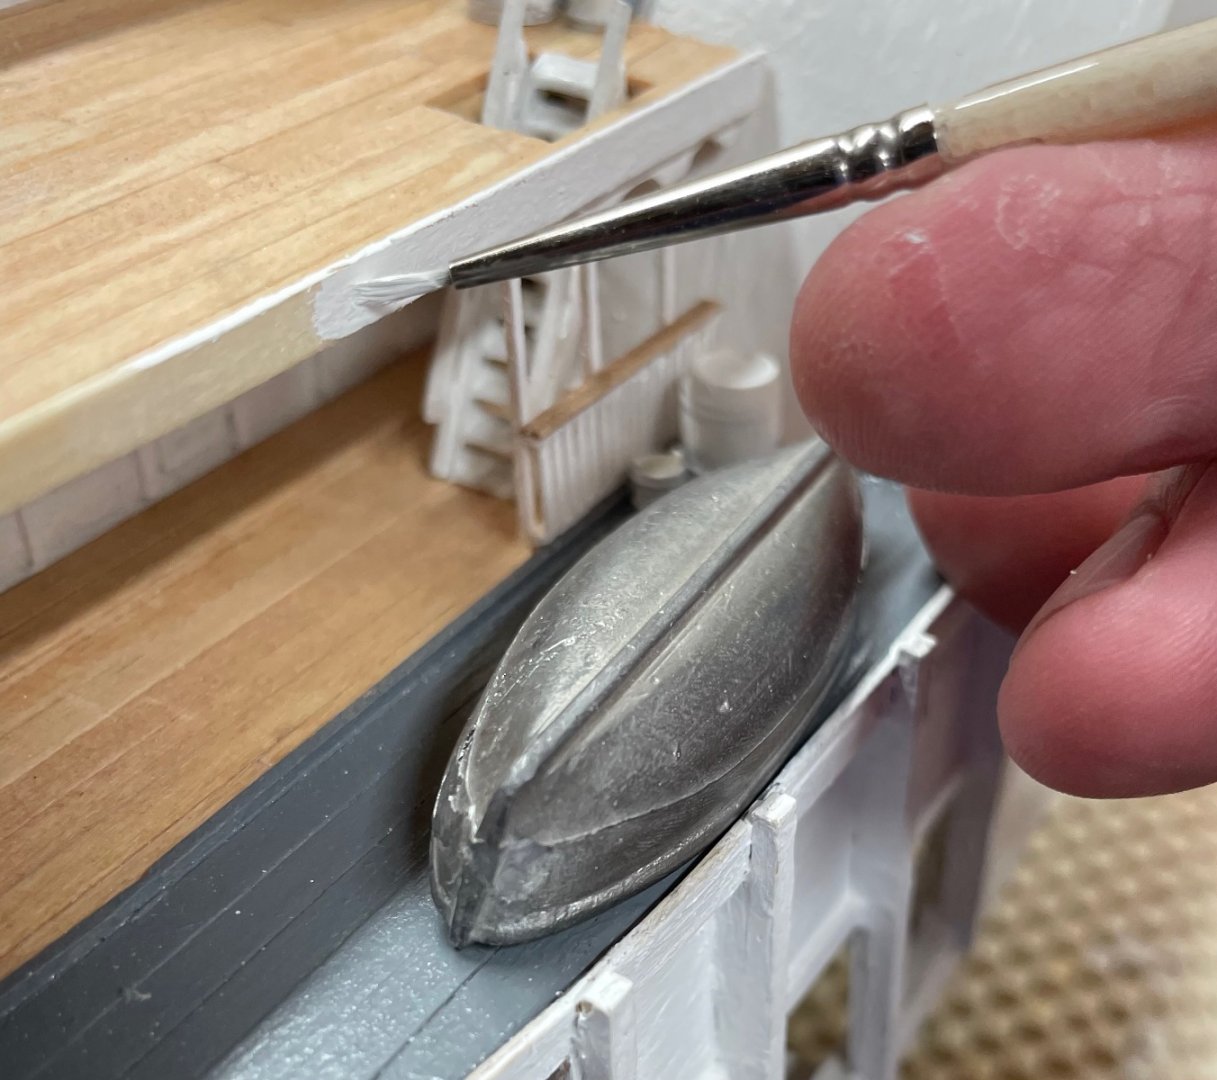
 I agree, lots of tiny detail… and I had kit supplied metal parts. 😆 Nice job!
- 200 replies
-
- 3
-

-

-
- Whaling Bark
- Charles W Morgan
- (and 1 more)
-
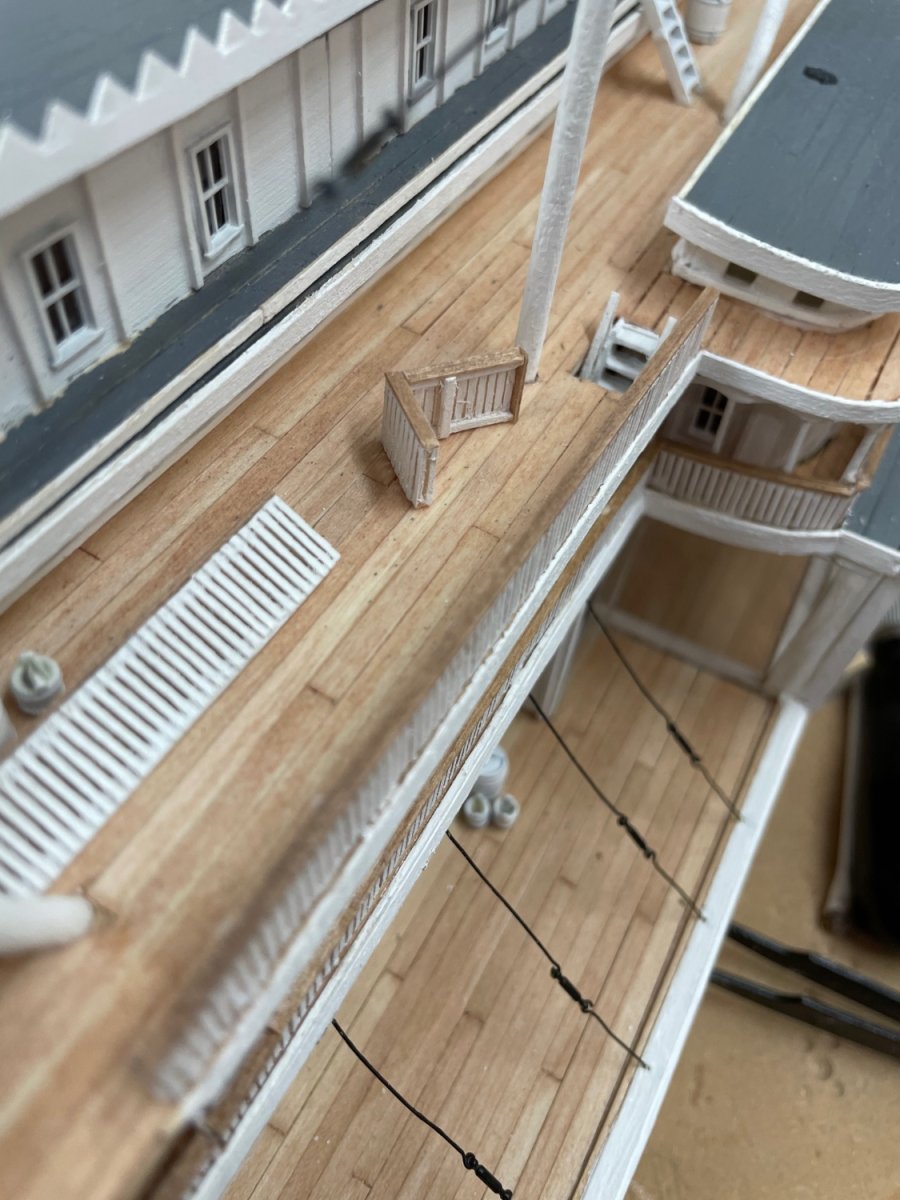
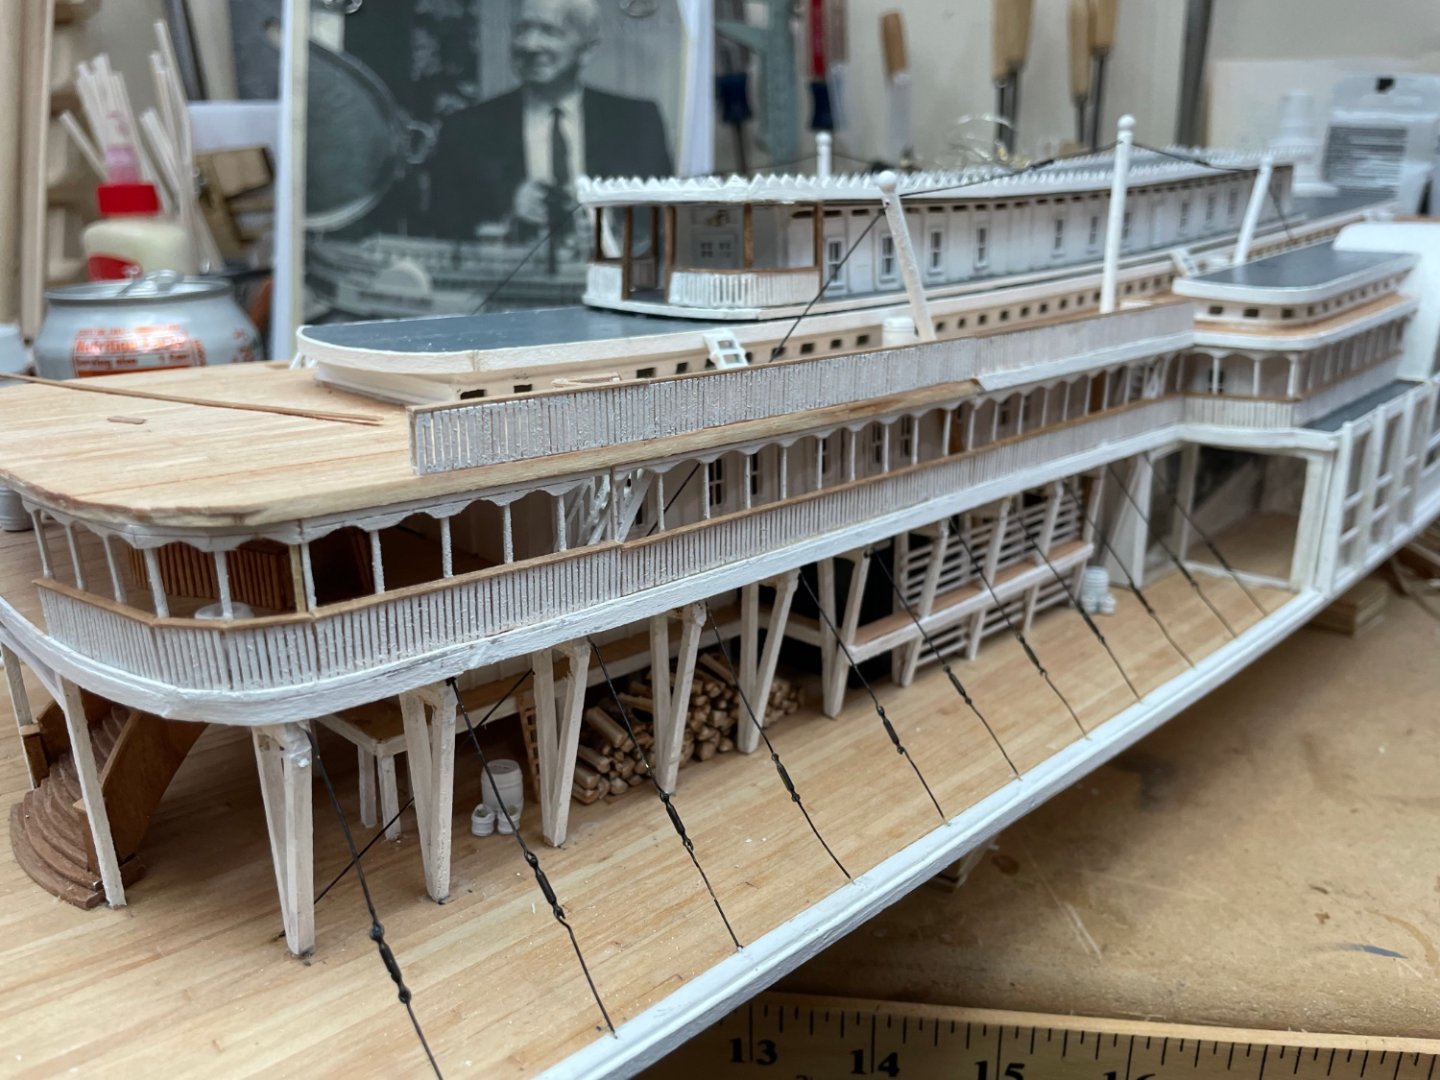
Railing materials arrived today. Yeah! Micro Carpentry may continue without interruption. 🤪 Cheers 🍻
- 238 replies
-
- 6
-
-
- Robert E Lee
- steamboat
- (and 3 more)
-
More progress… Railing construction now taking just 2 hours per 100 mm of railing. 👍
- 238 replies
-
- 4
-
-
- Robert E Lee
- steamboat
- (and 3 more)
-
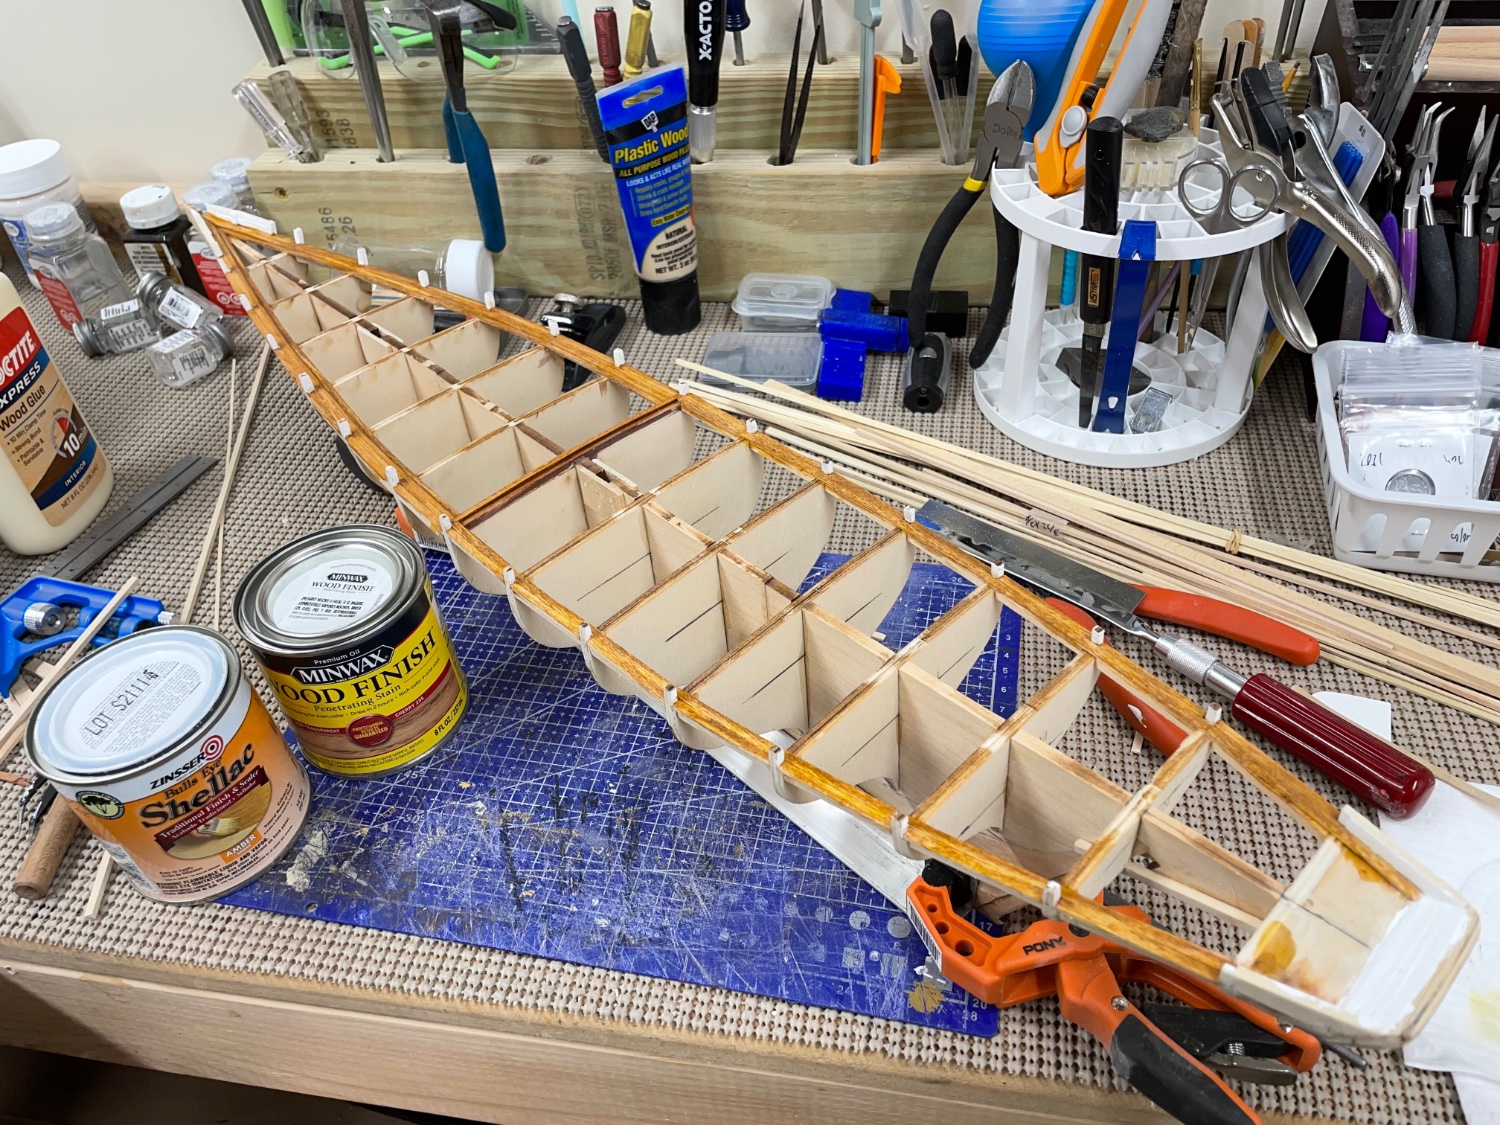
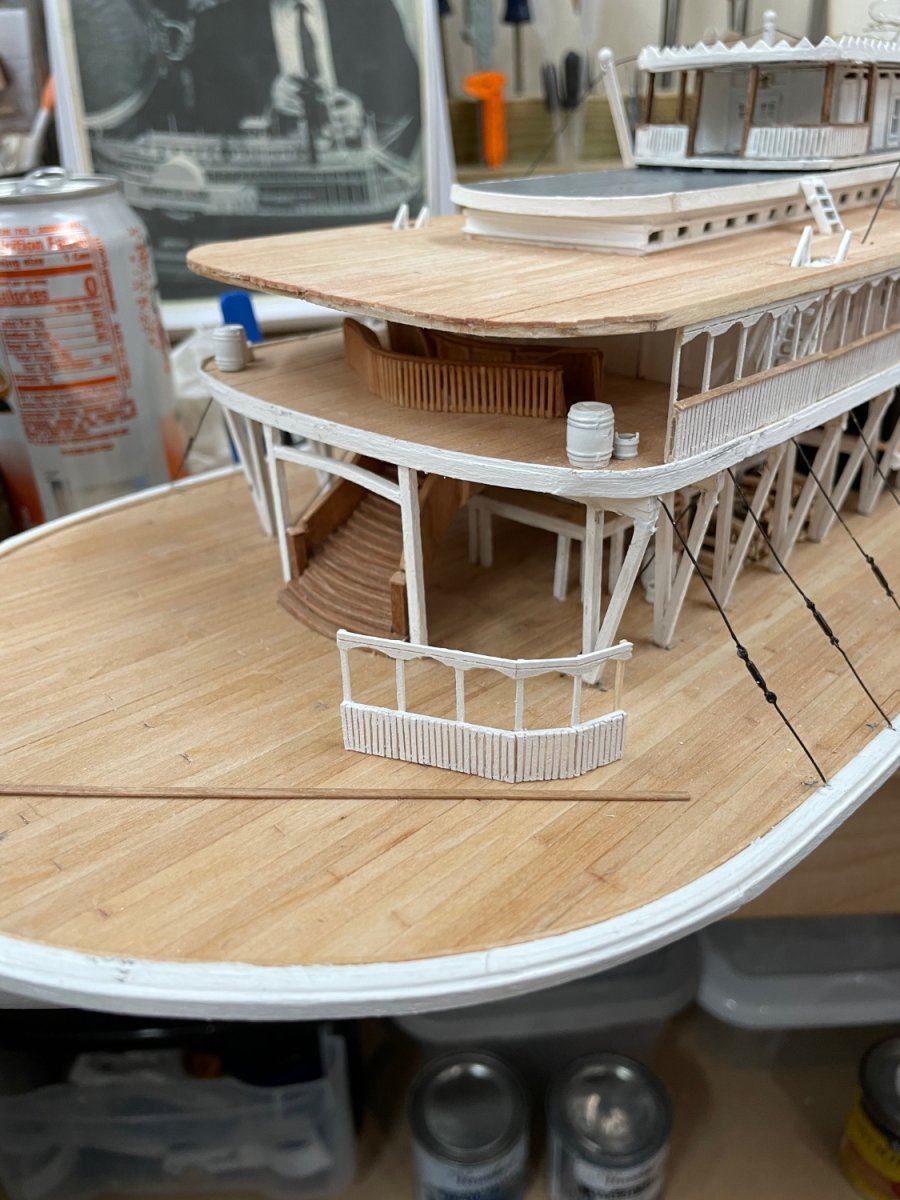
Waterways completed… I have chosen to use Amber Shellac over top a Cherry Stain for the decking. I think it gives that natural oil finish the plans call for. Cheers 🍻
- 282 replies
-
- 4
-
-
- Bluenose
- Model Shipways
- (and 1 more)
-
Brian, Thanks for the lumber source. They have what I needed and more. Great resource. 👍
- 238 replies
-
- 1
-
-
- Robert E Lee
- steamboat
- (and 3 more)
-
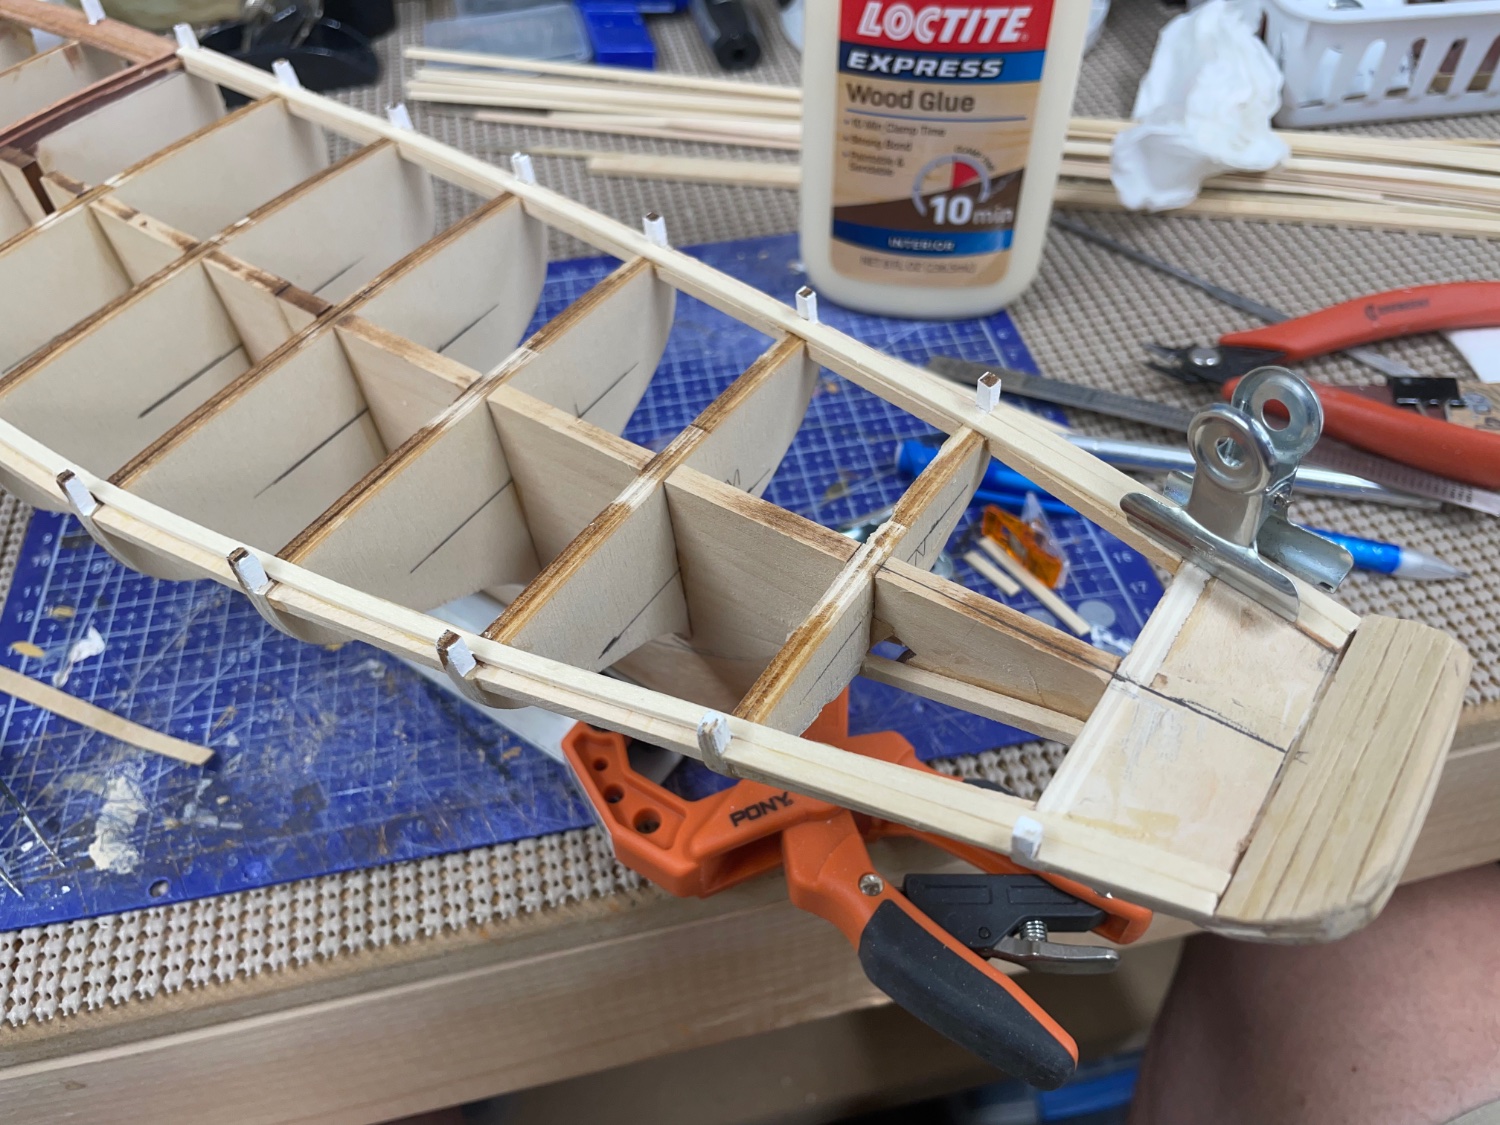
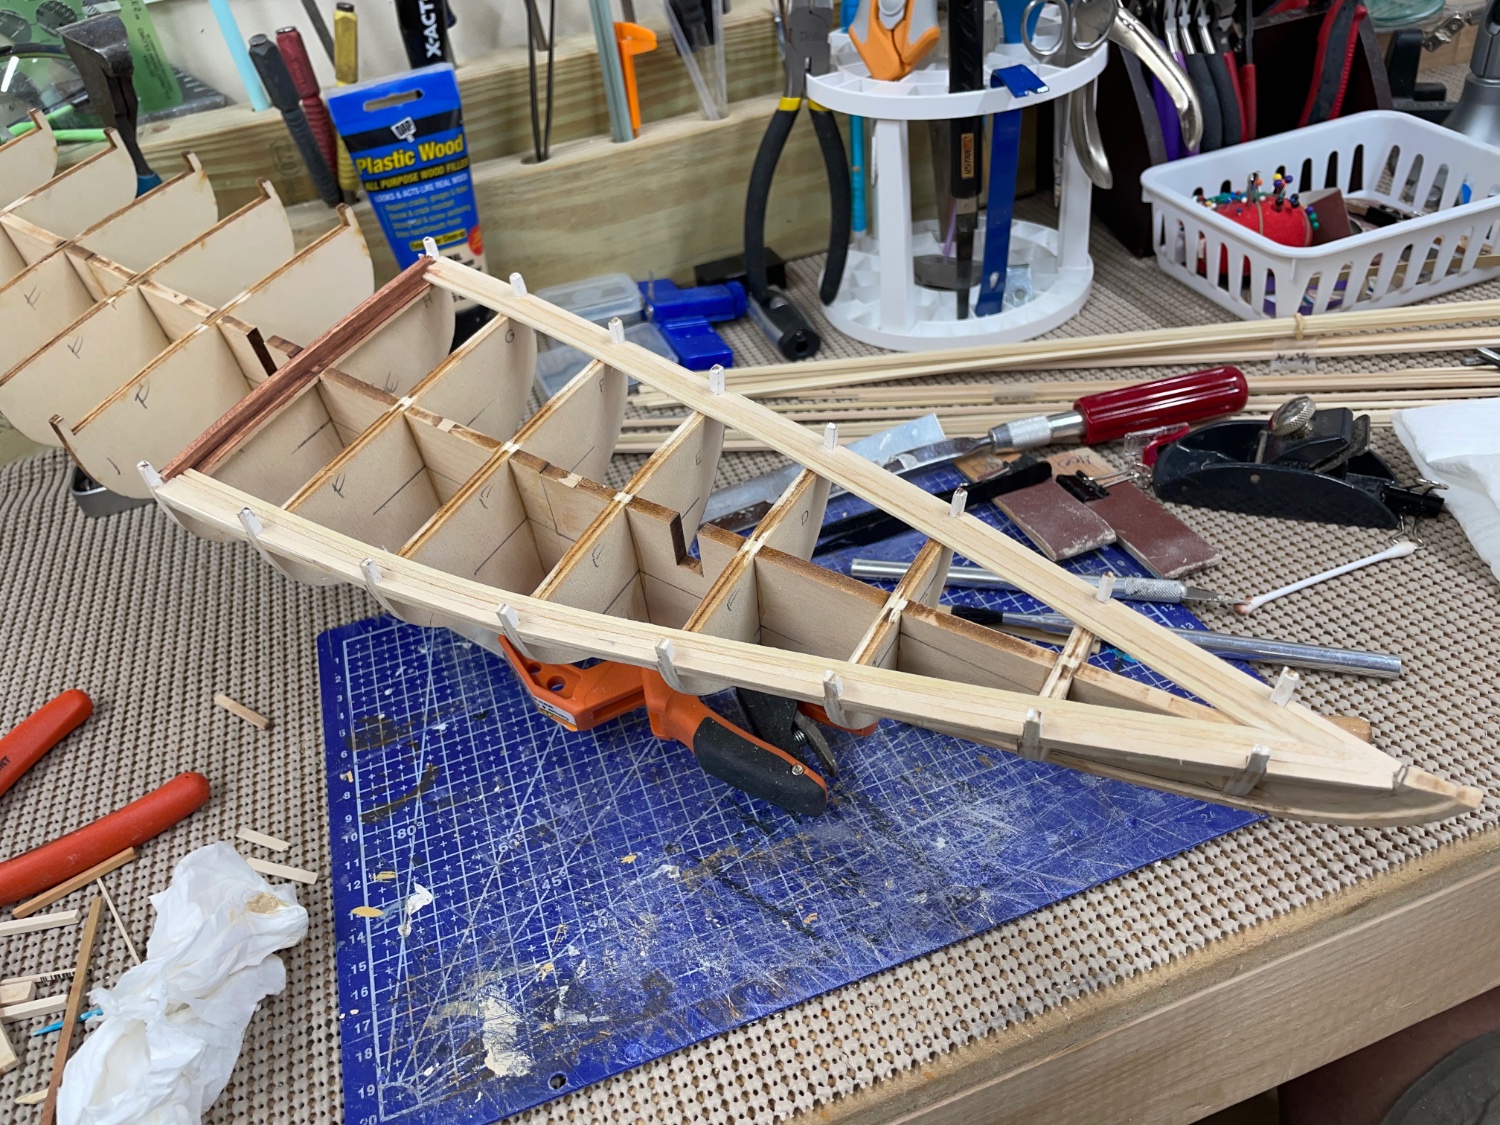
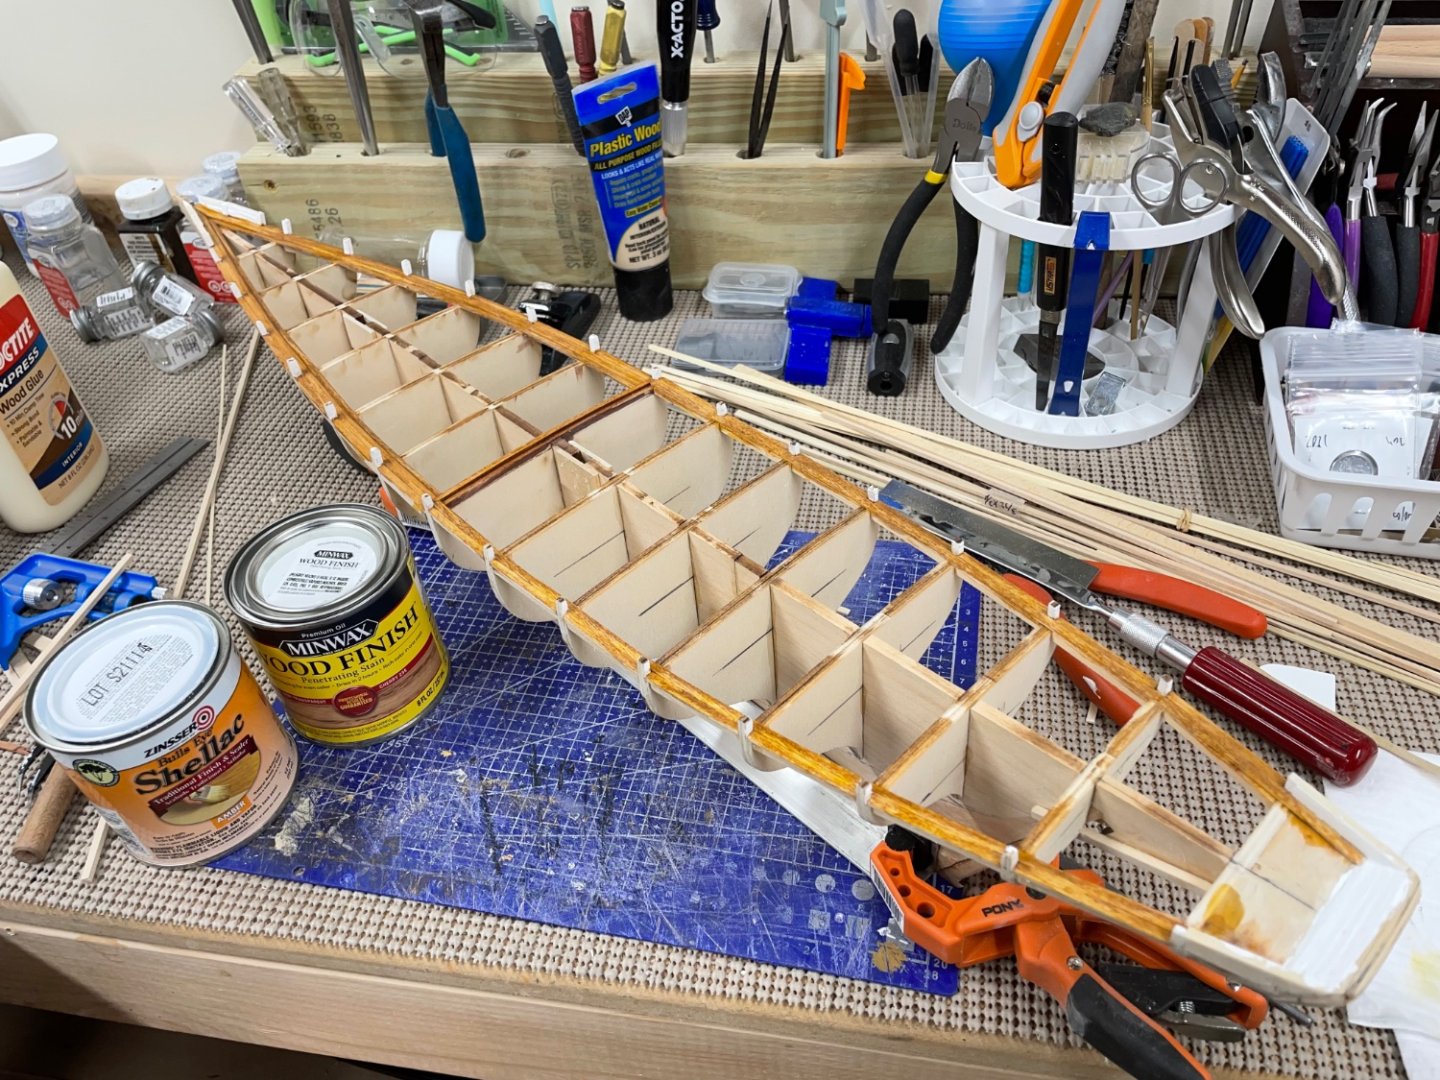
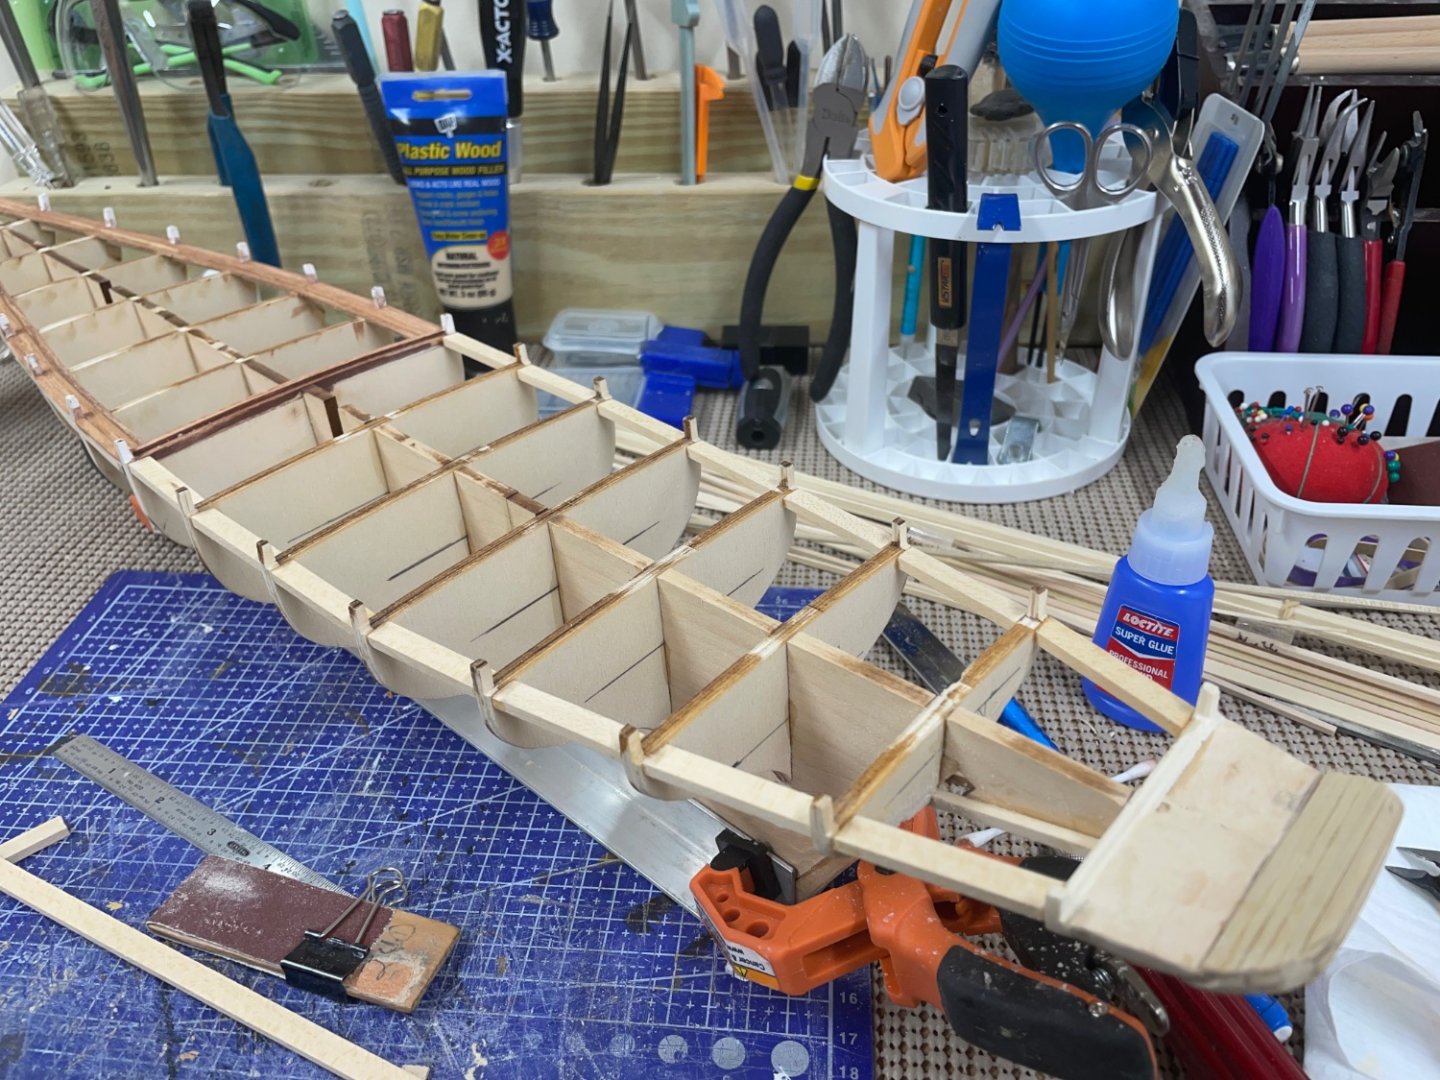
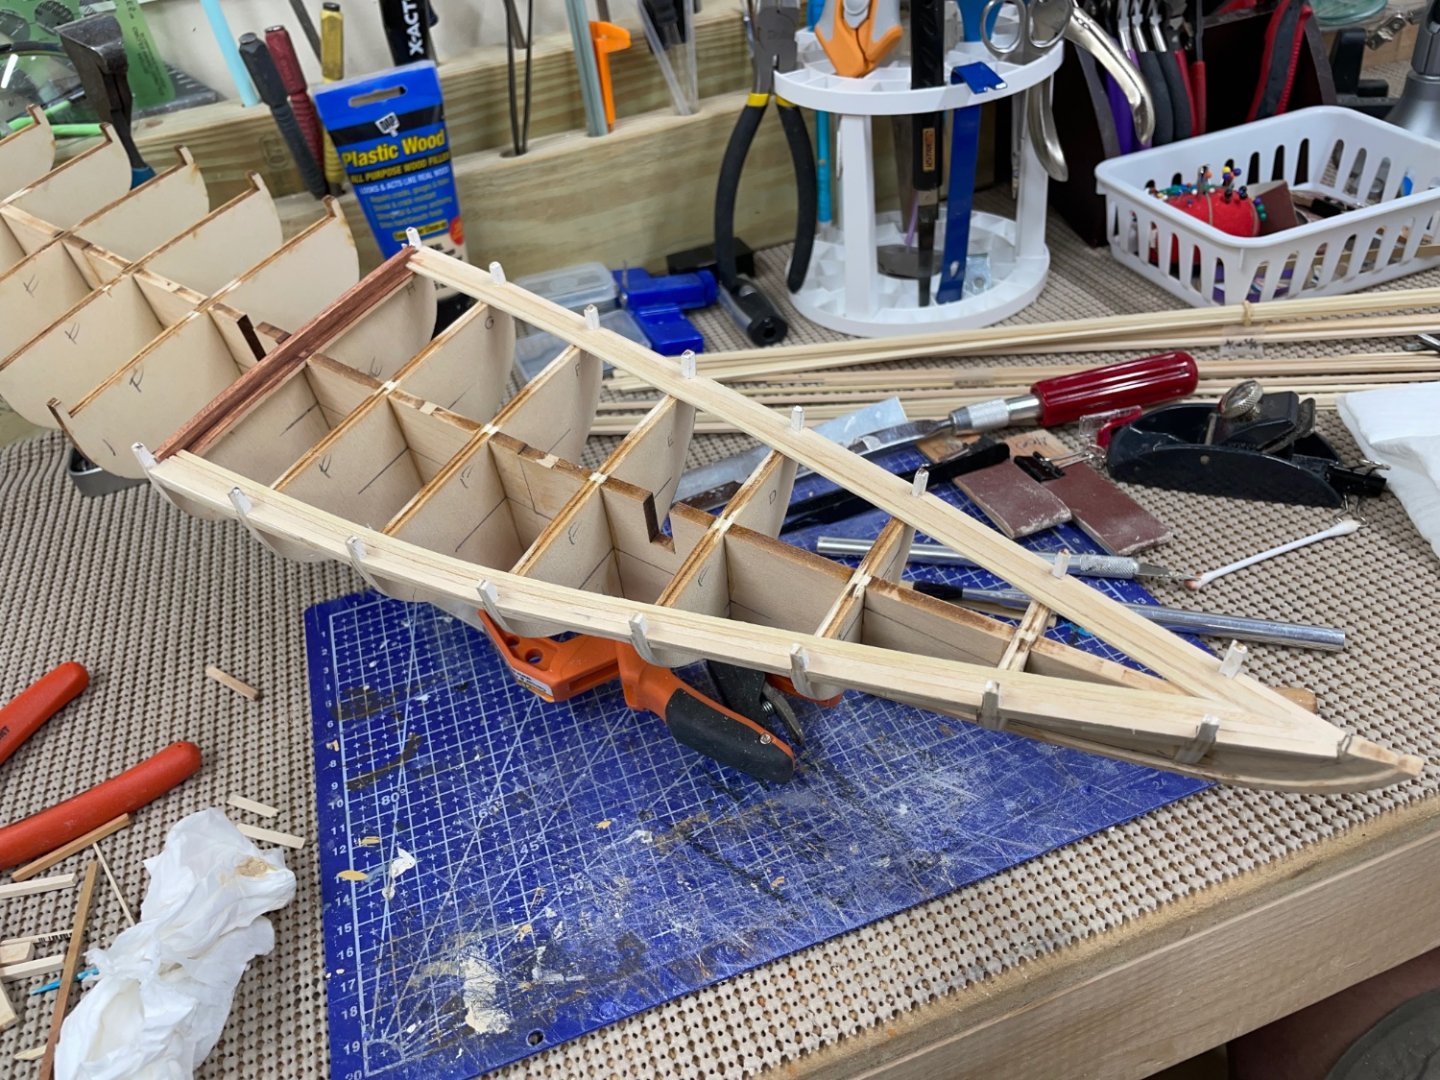
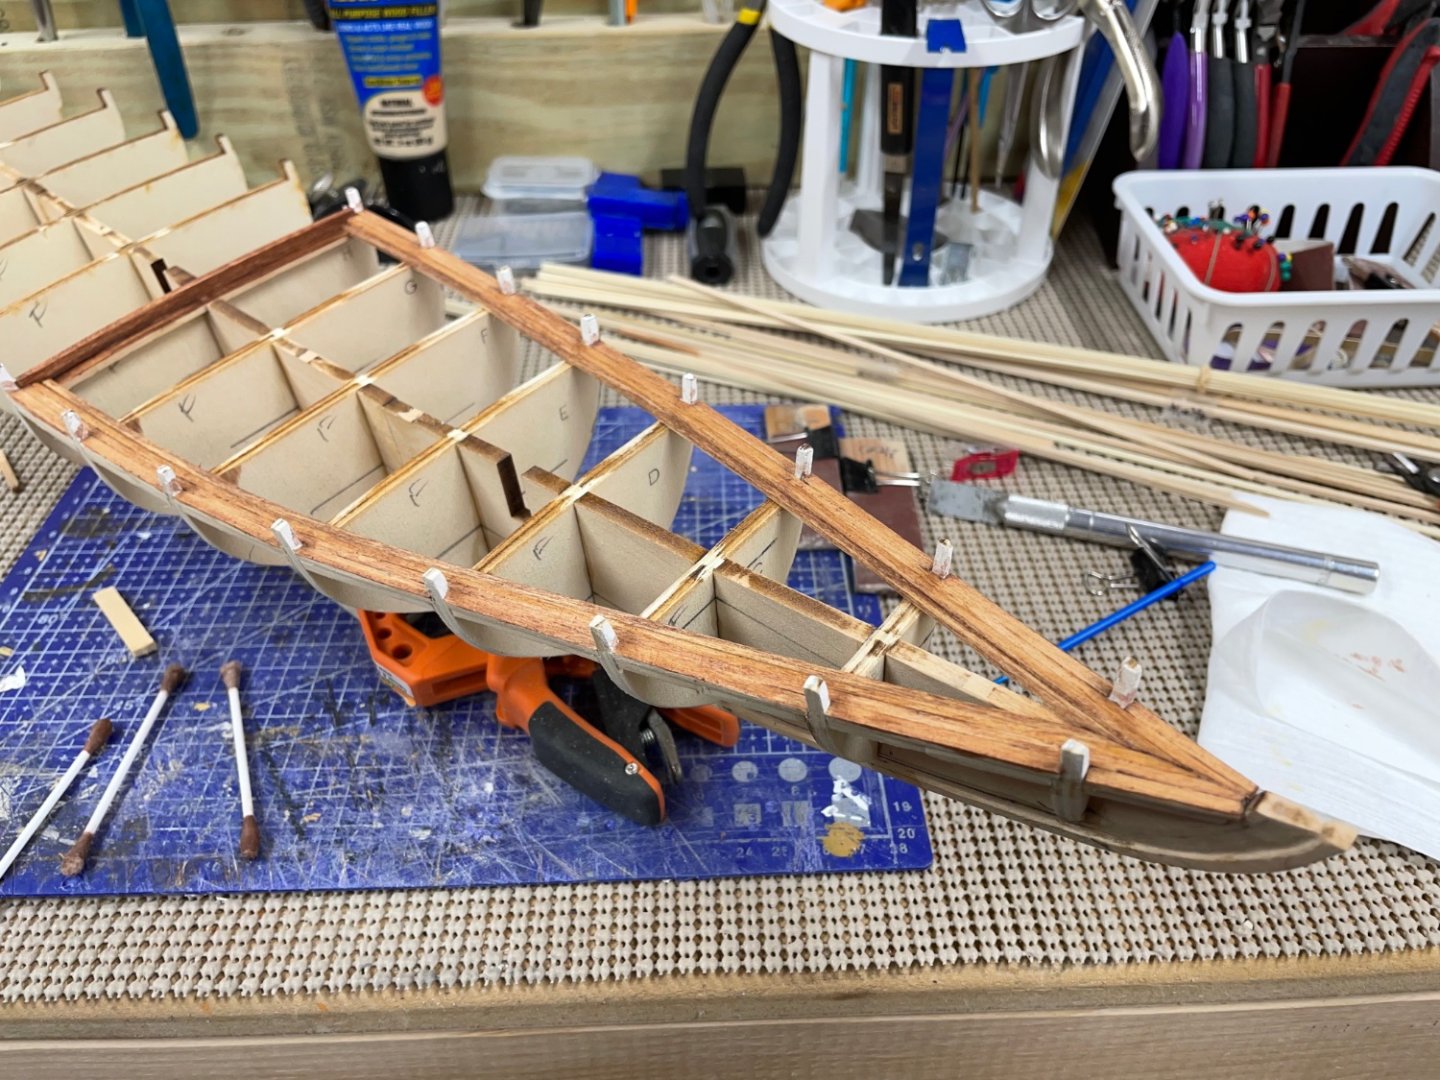
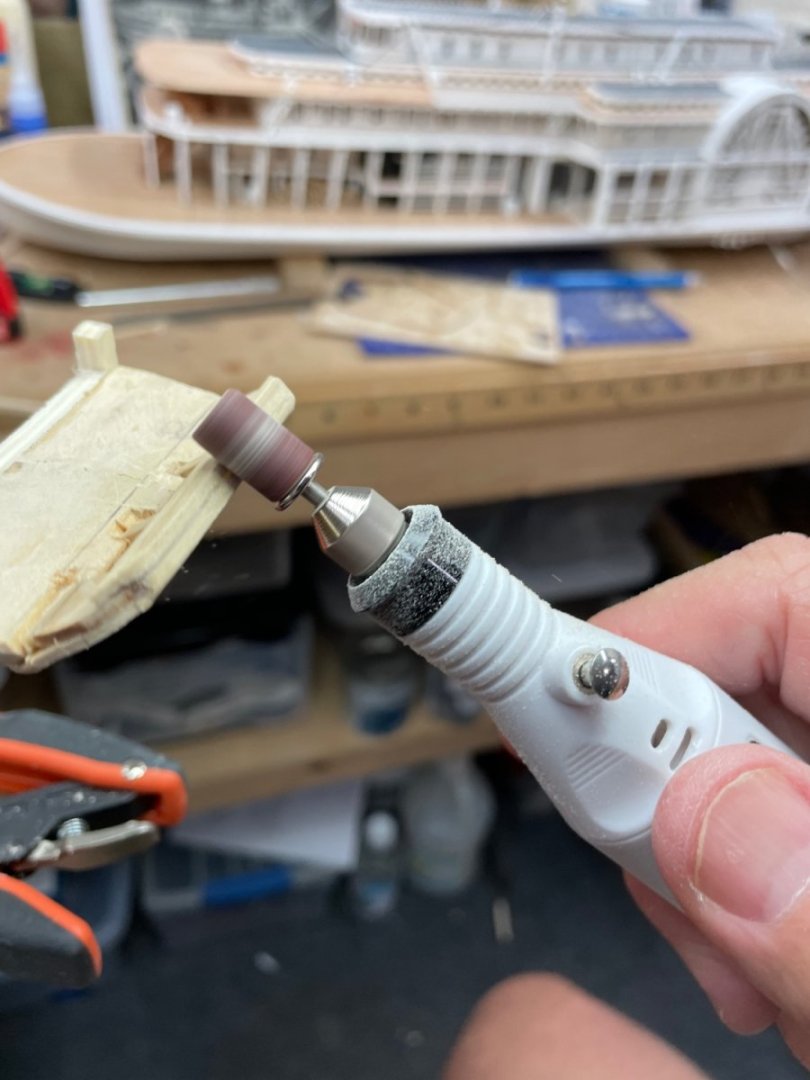
Quarter Deck Waterways etc… Installed bracing below deck… Installing waterways… Finished out Transom Framing… Hawse Timbers placed… Cheers 🍻


- 282 replies
-
- 5
-
-
- Bluenose
- Model Shipways
- (and 1 more)
-
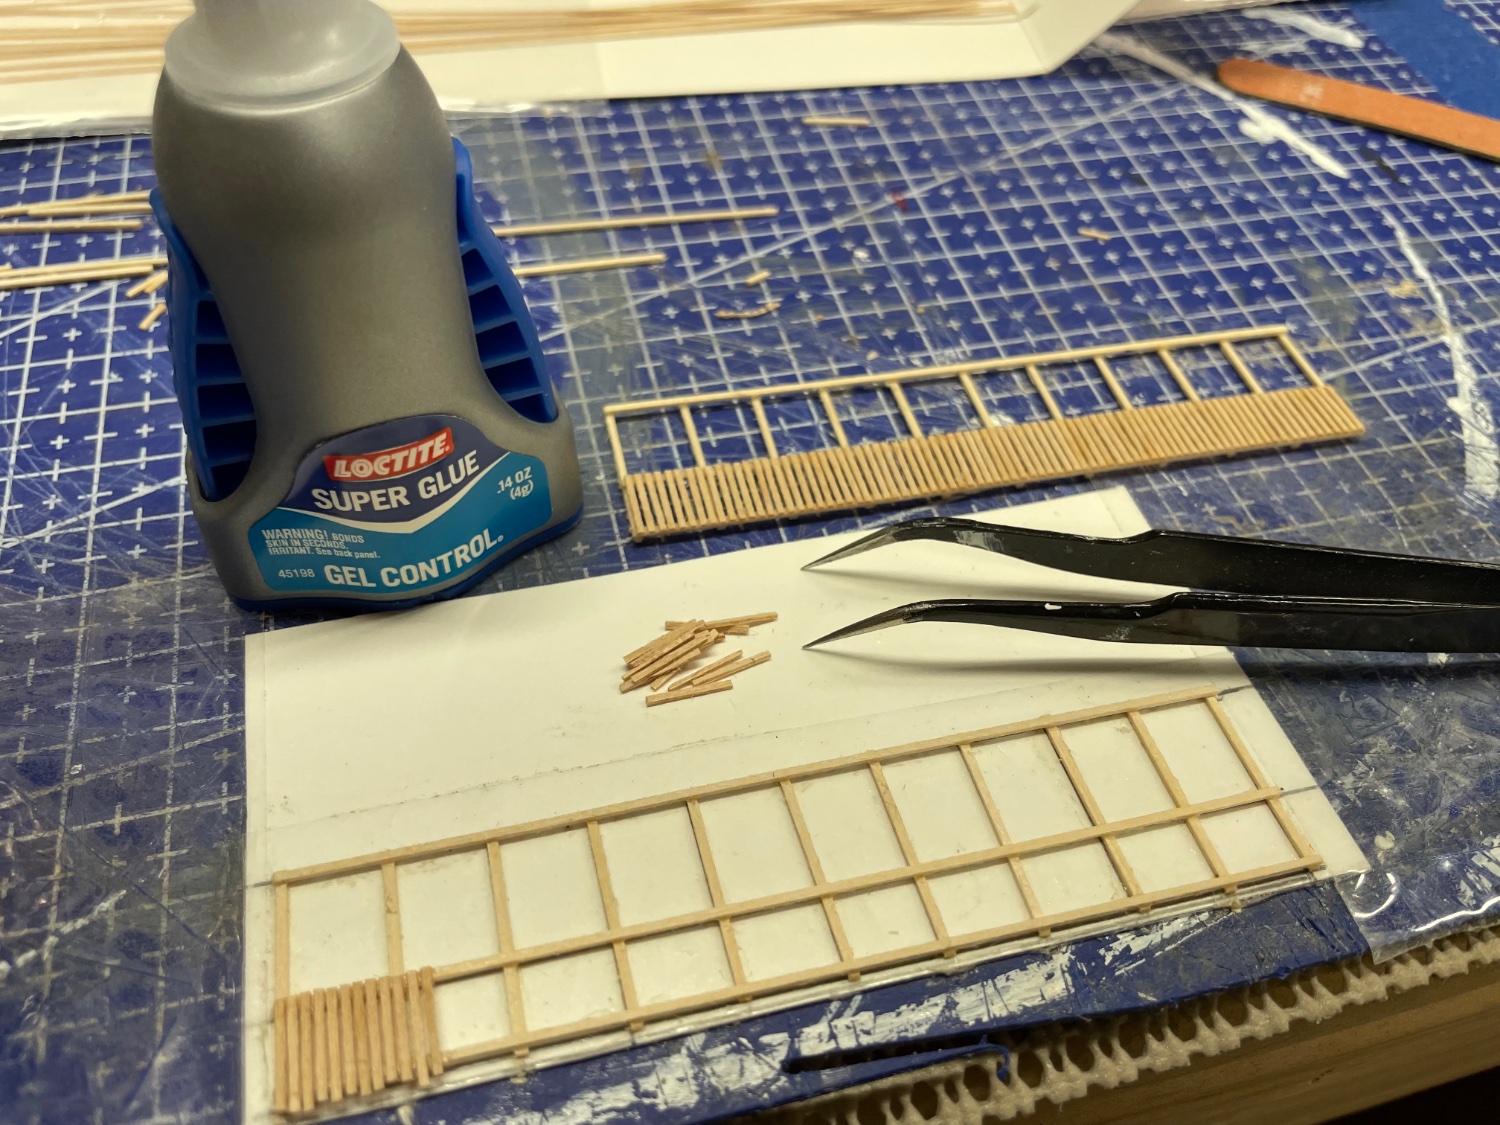
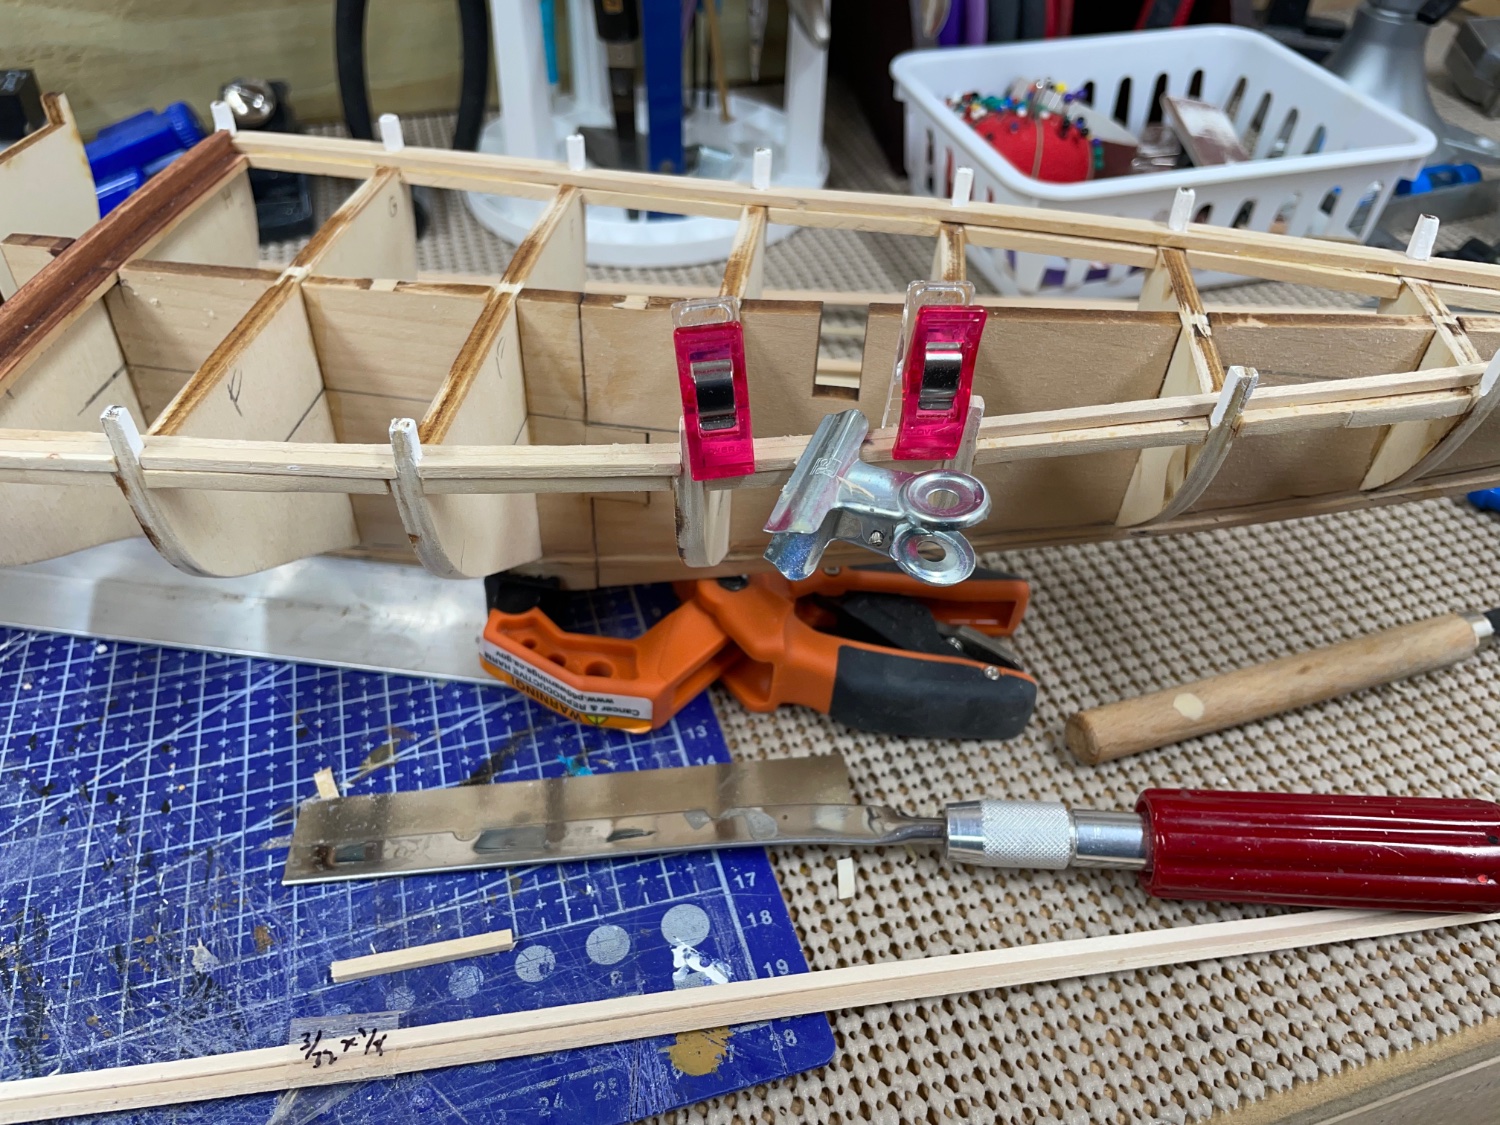
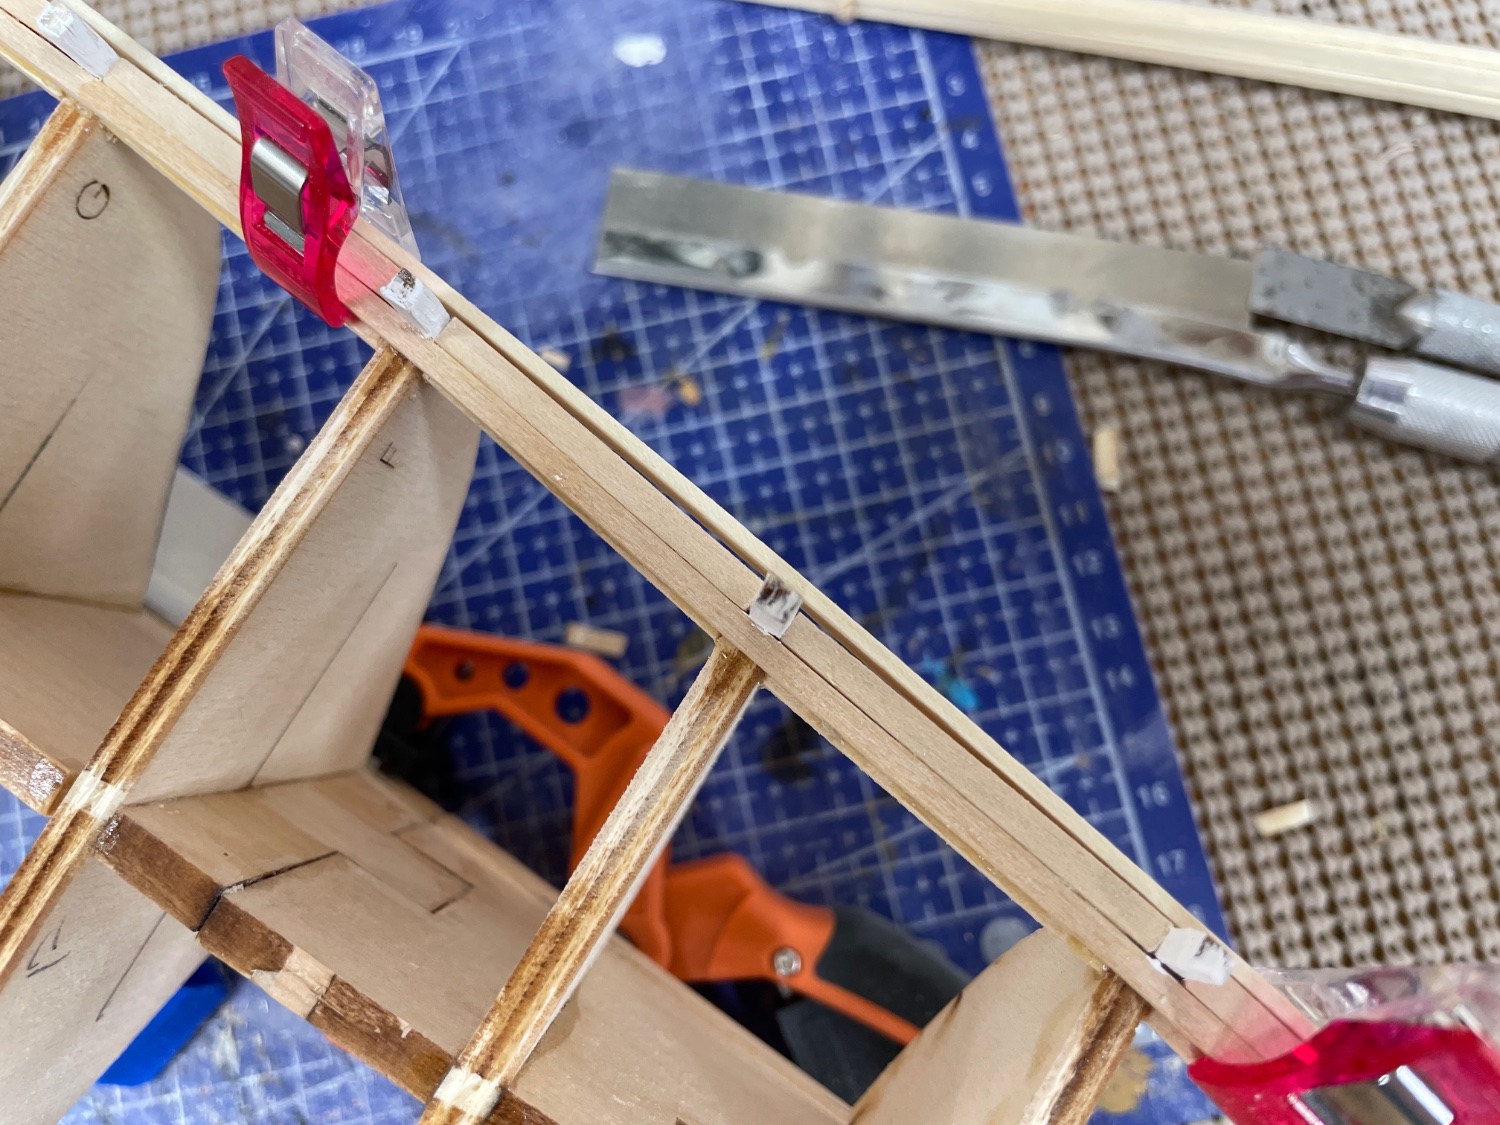
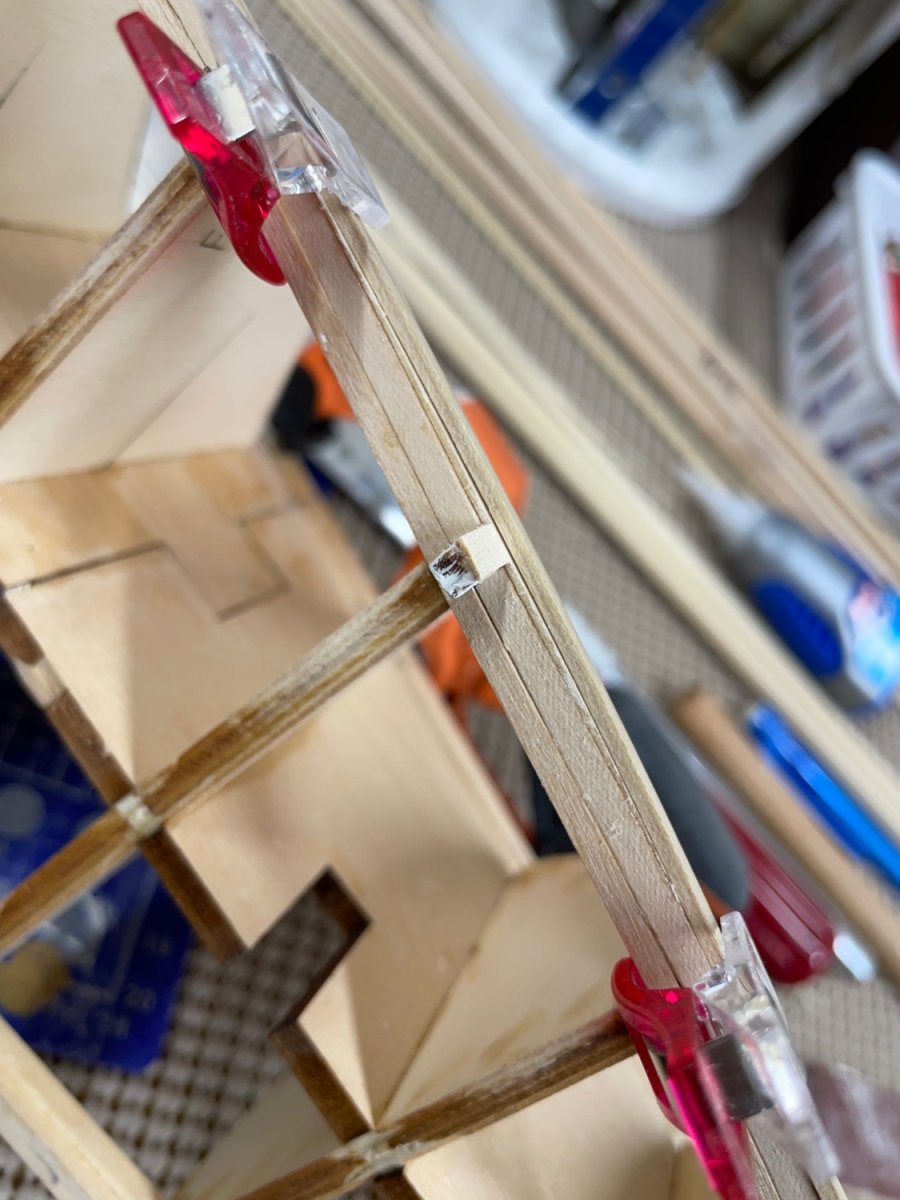
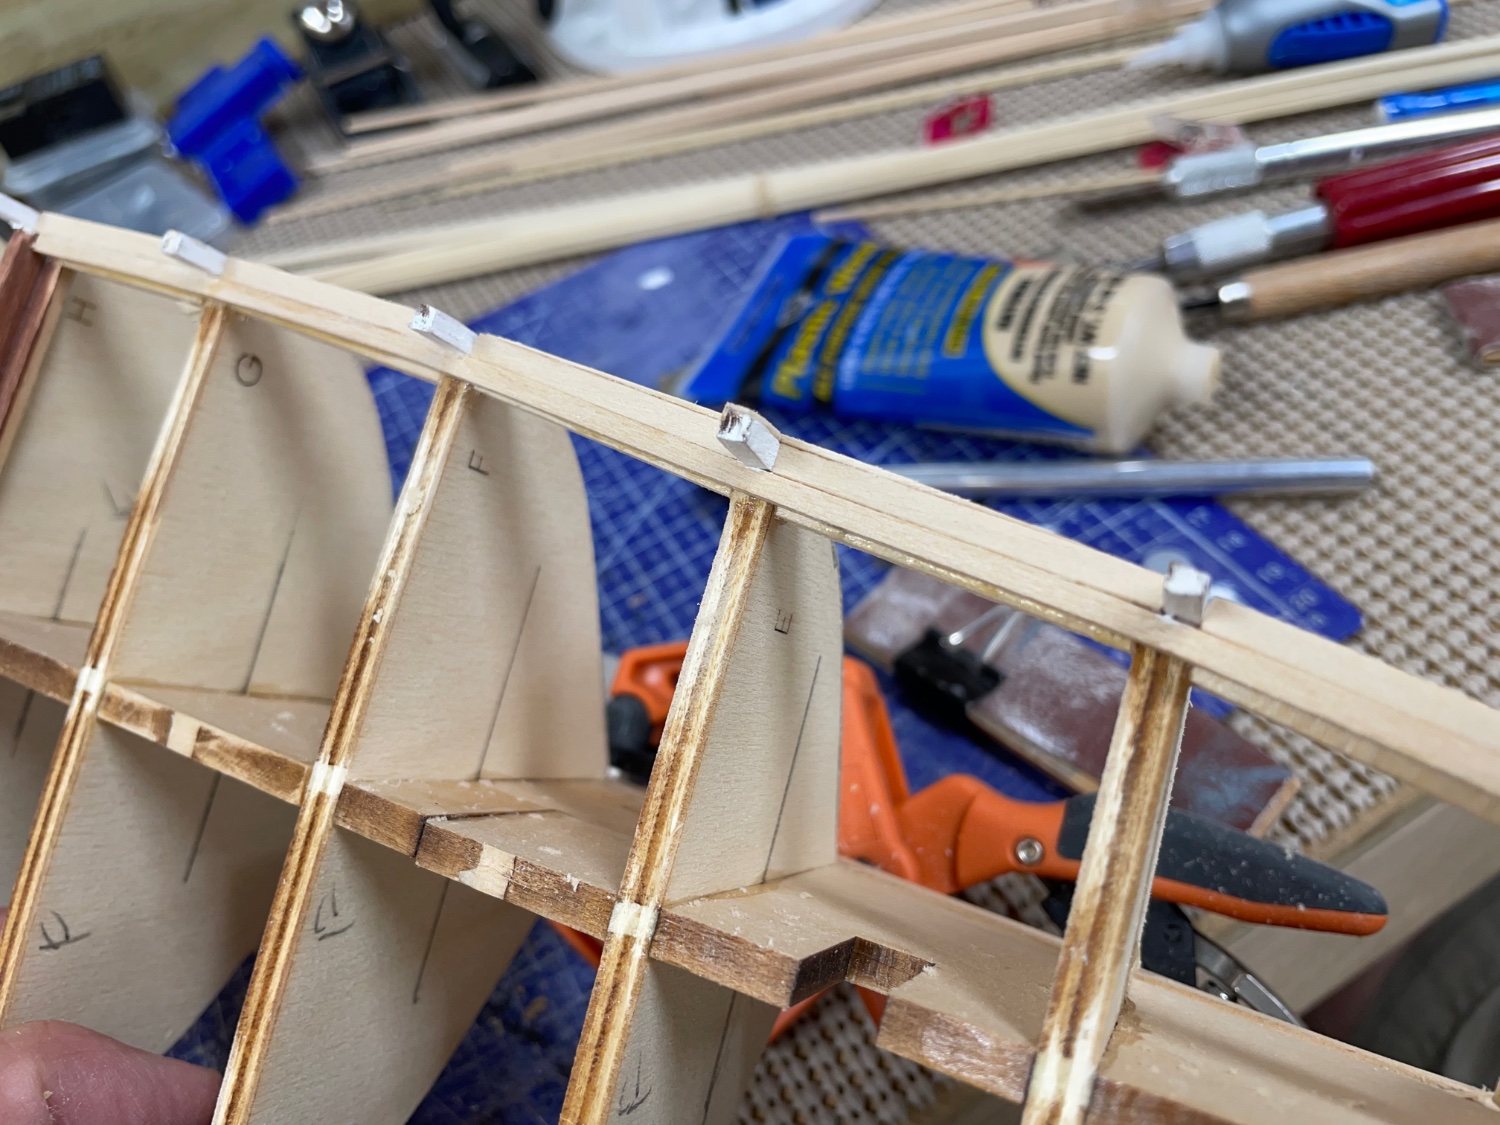
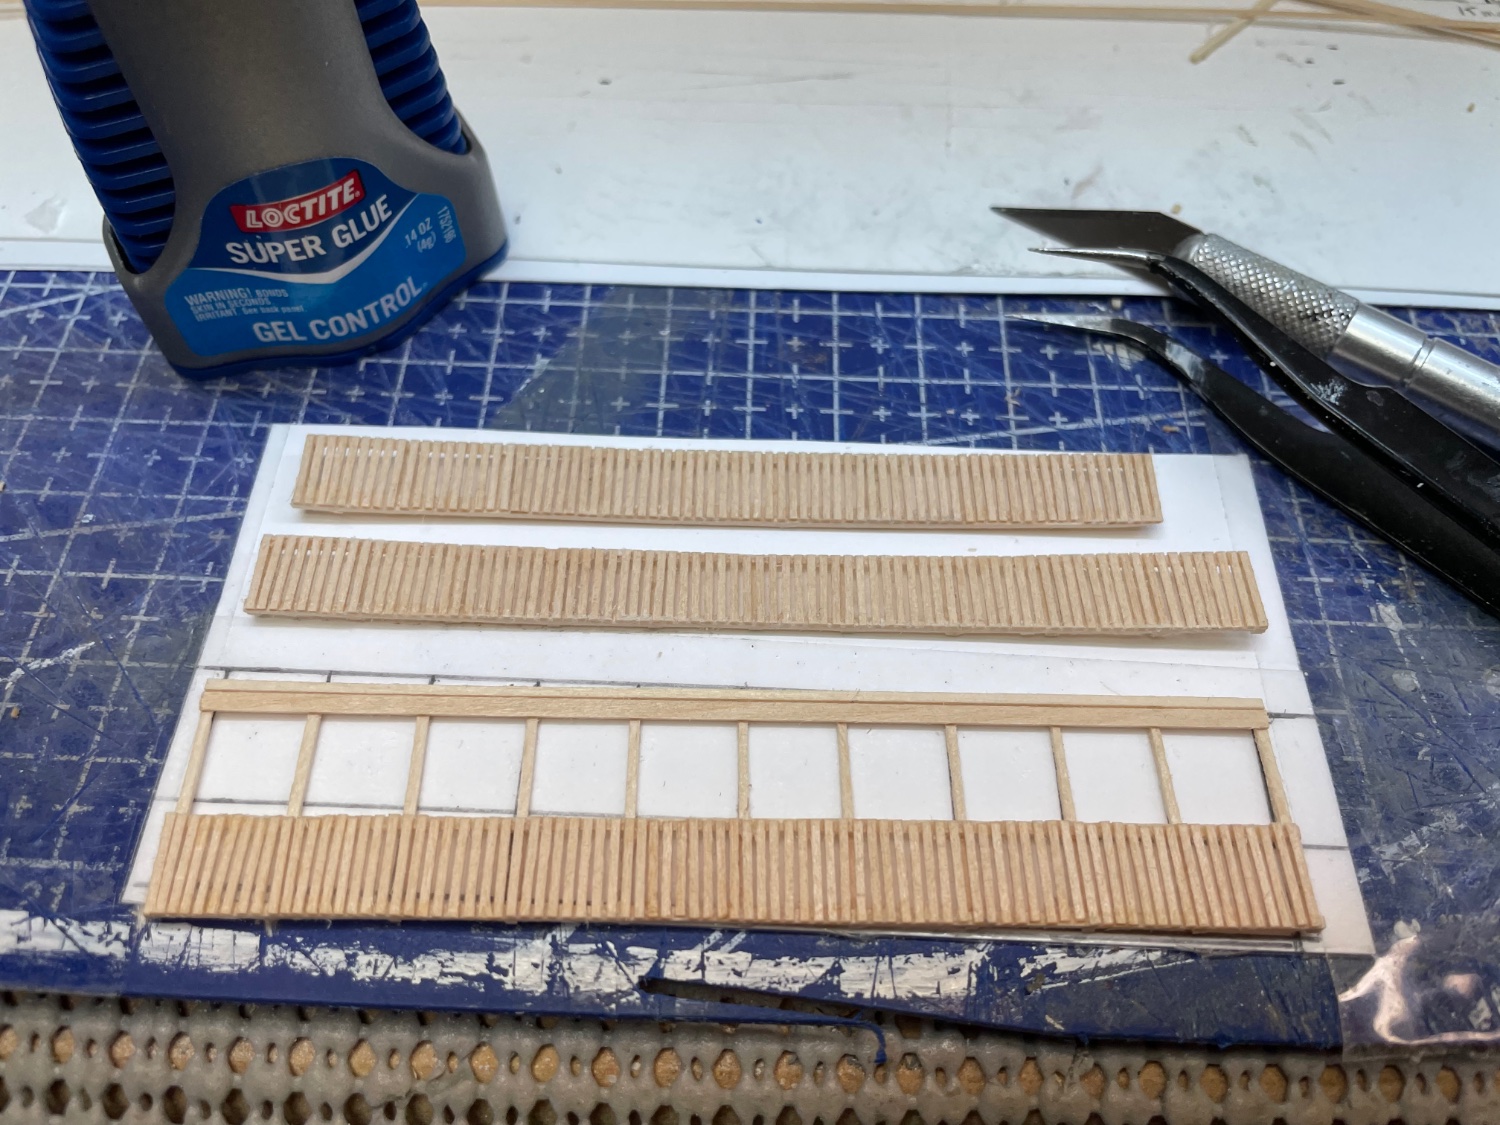
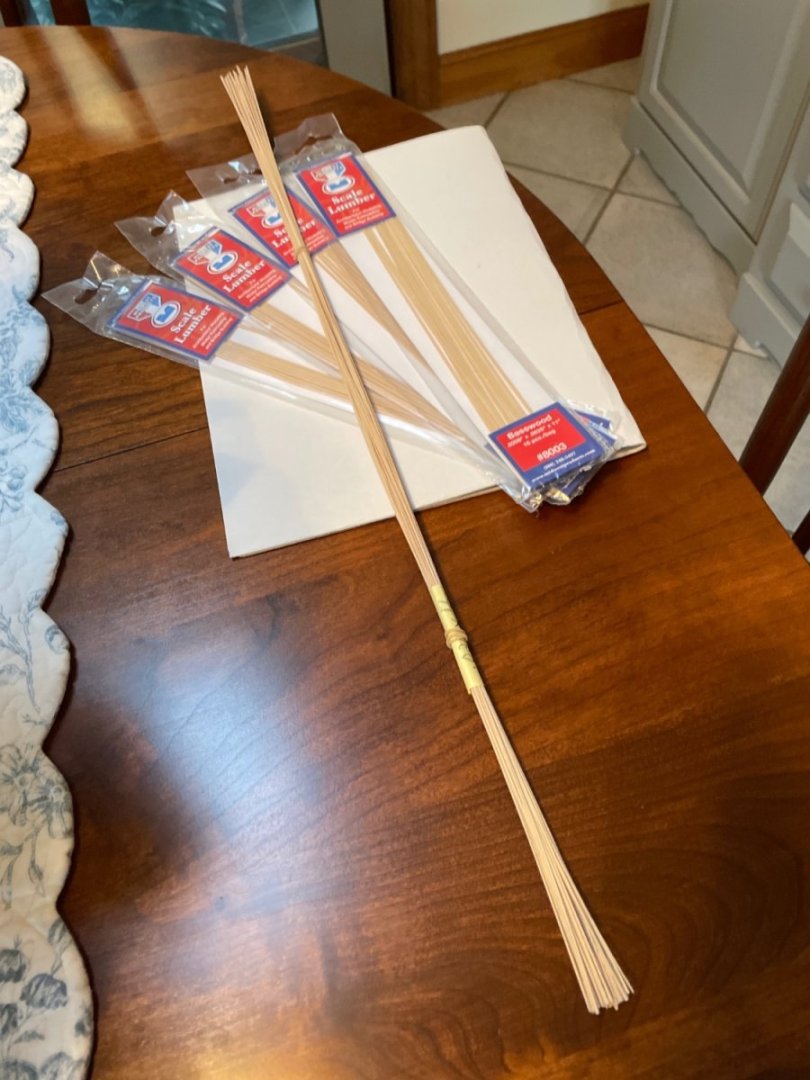
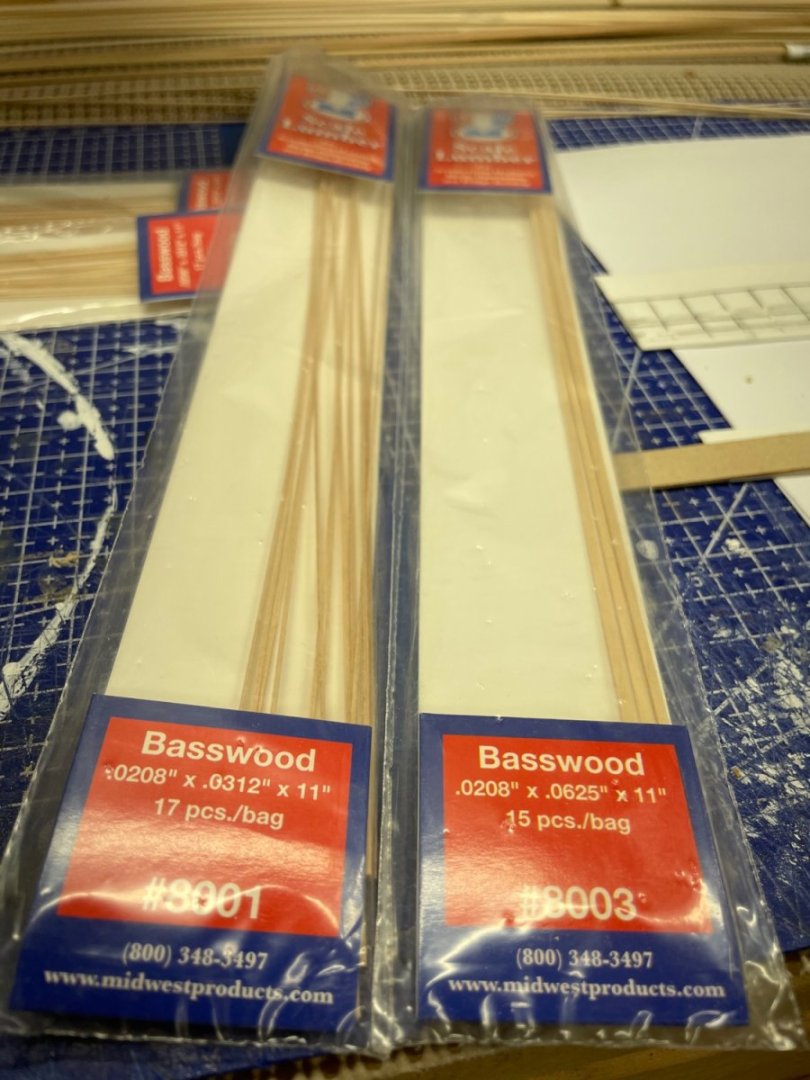
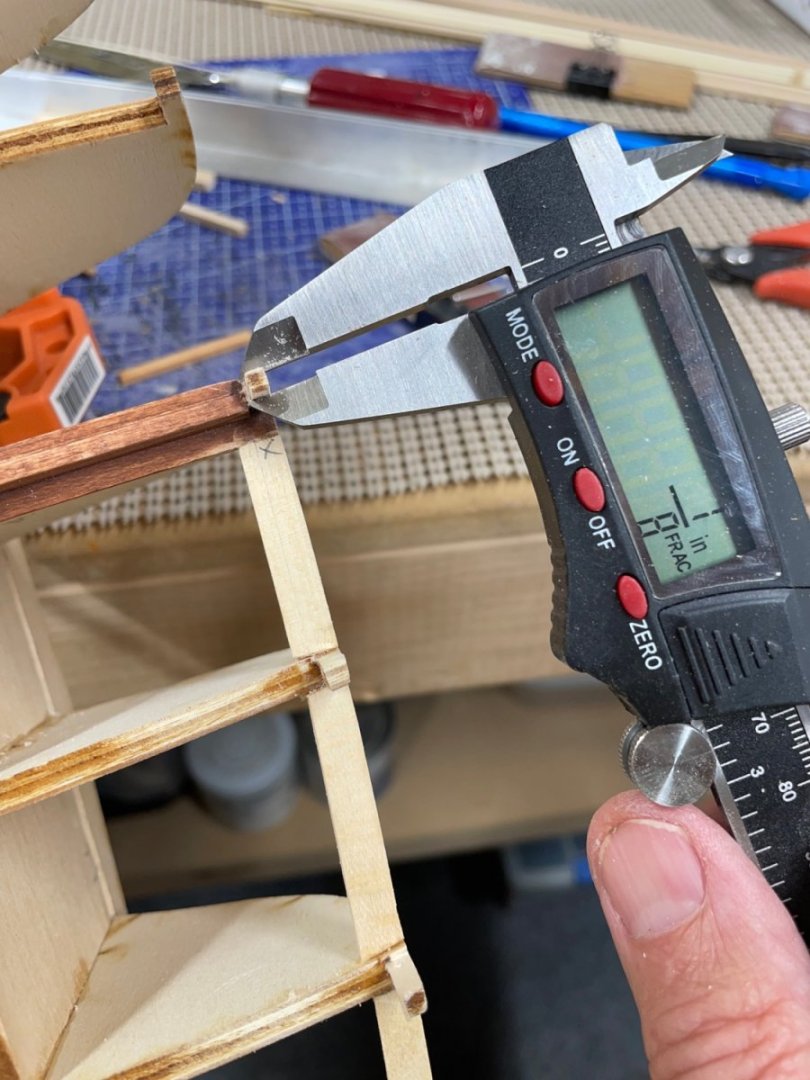
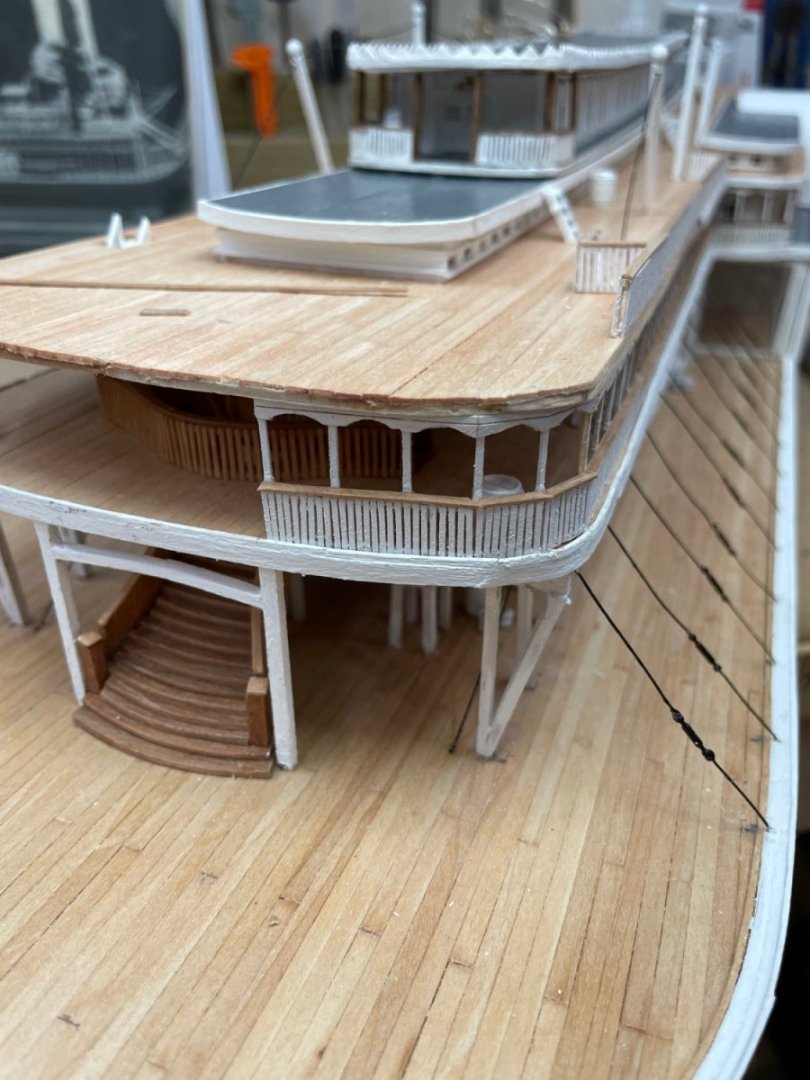
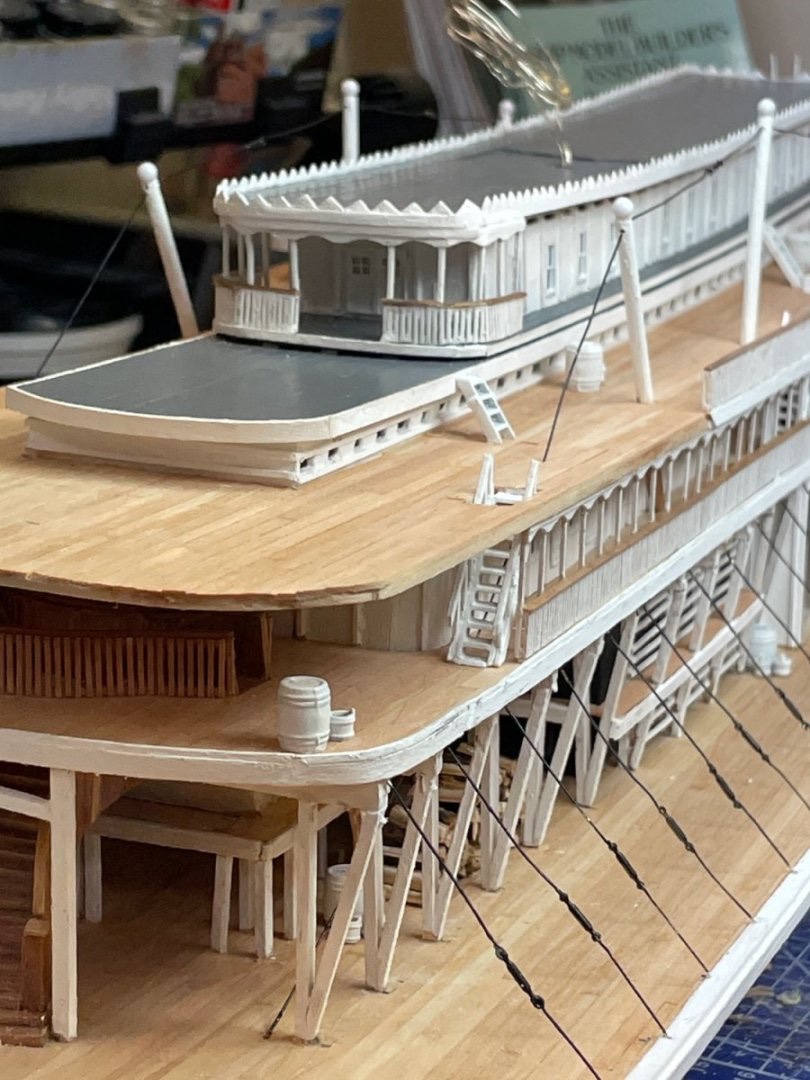
Hurricane Deck edging… As I progress with the railings, I am starting to get a better picture of the material needs. Mid west Products is out of stock on these items. 🤨 I have been able source some from University Bookstores. I need more packets of the .0208 x .0312. My order for these is back ordered until September. I am hoping Midwest can step up production. A 100 mm length of railing is now taking me about 4 hours to complete construction. That’s an improvement over when I started. 🤪 Progress, albeit minimal… Cheers 🍻

- 238 replies
-
- 7
-
-
- Robert E Lee
- steamboat
- (and 3 more)
-
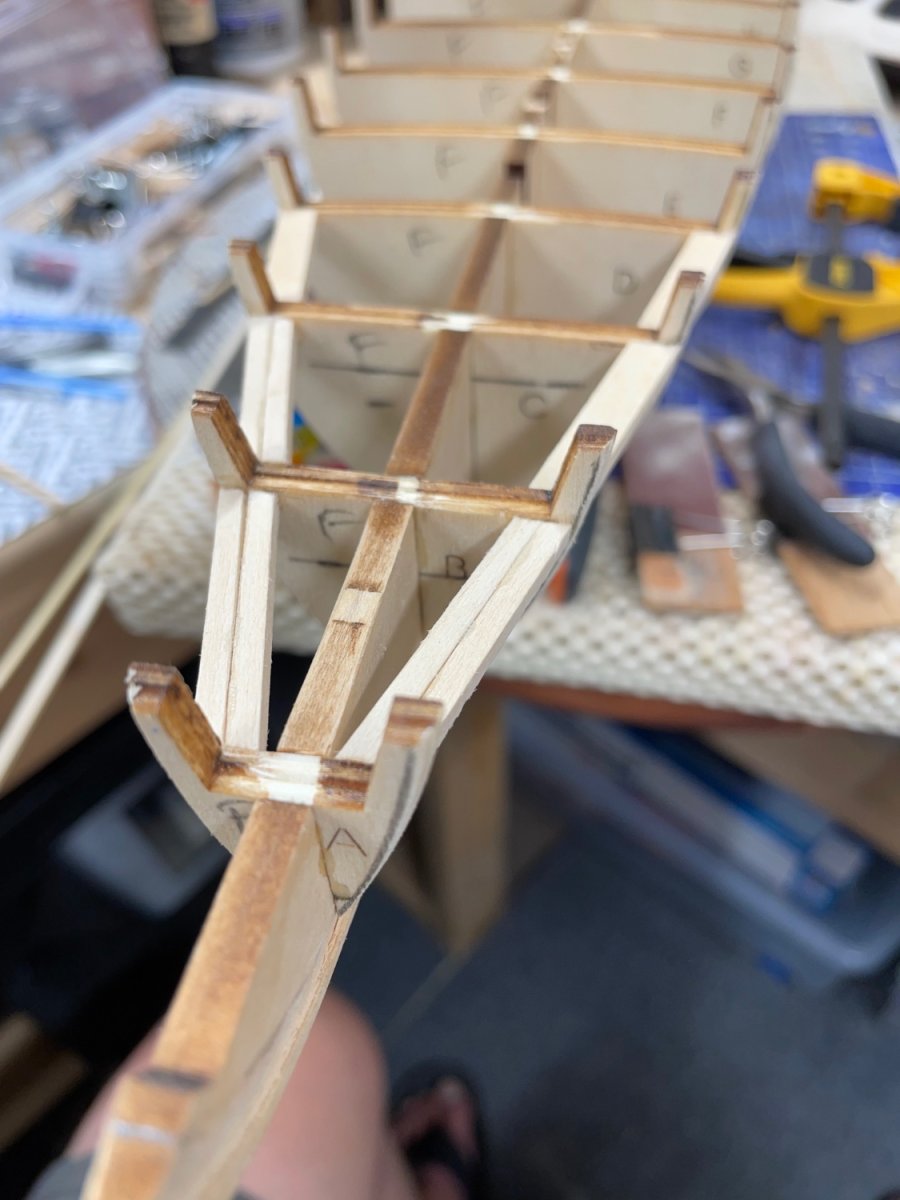
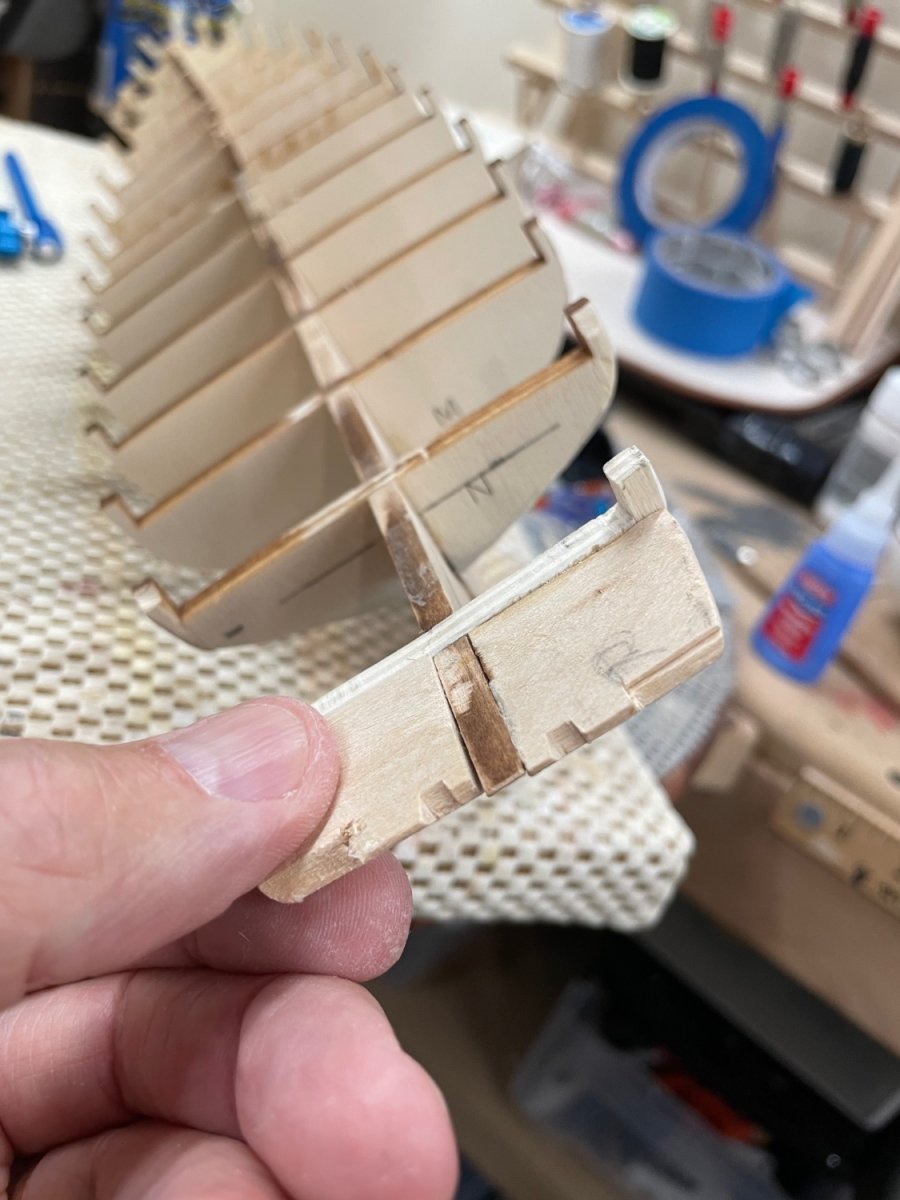
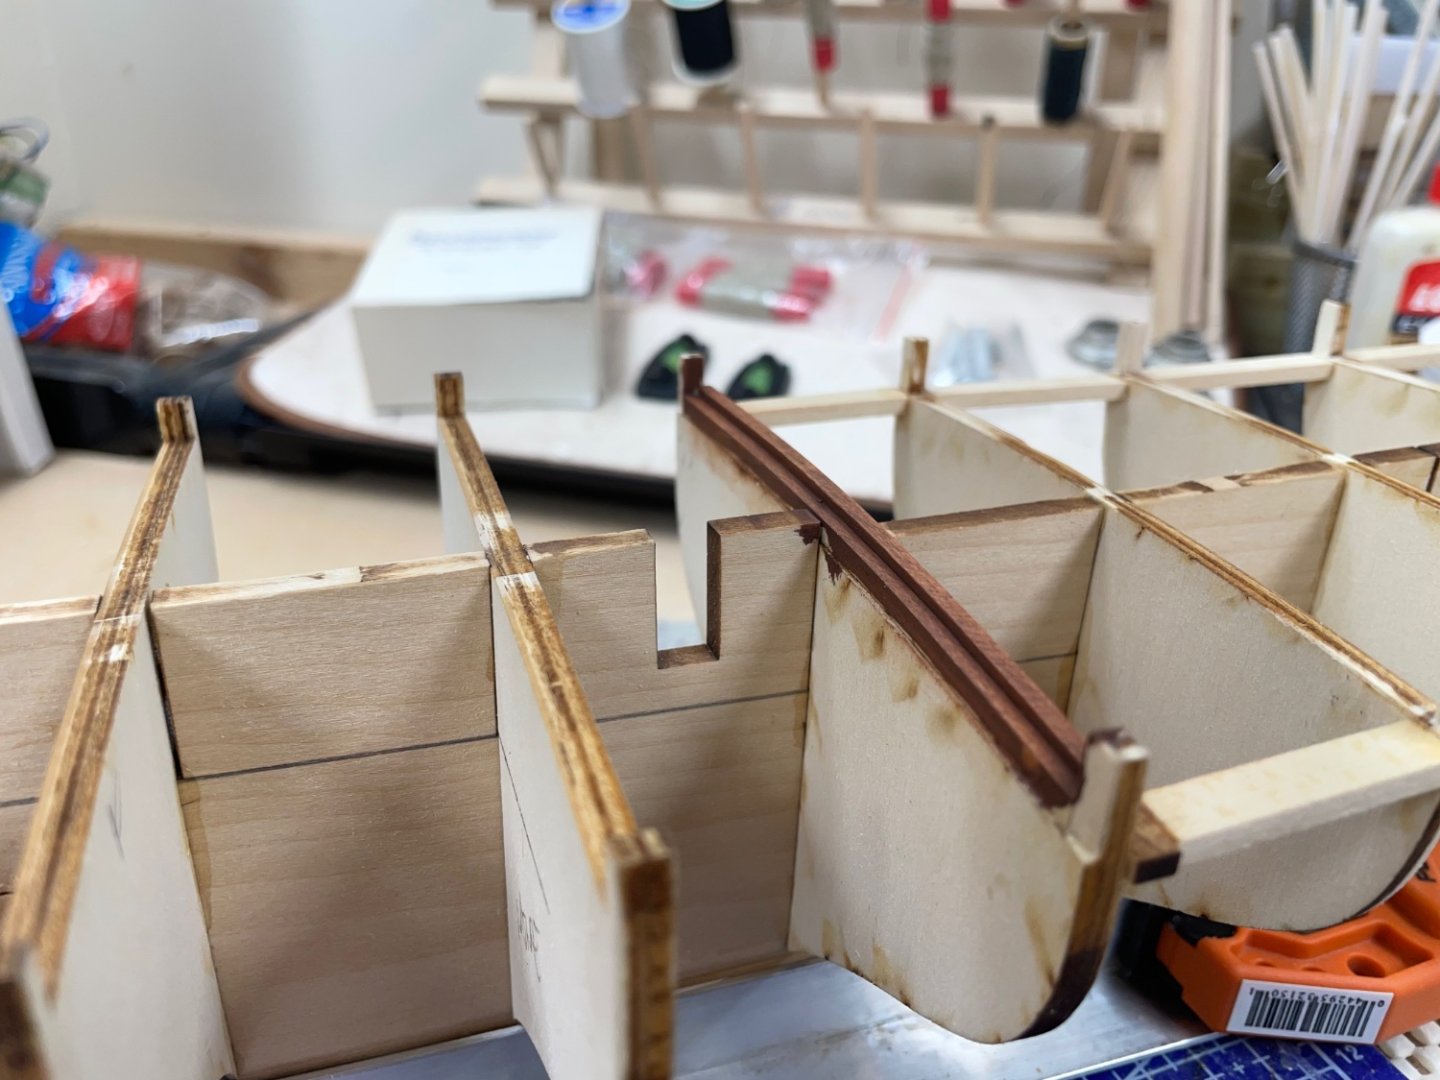
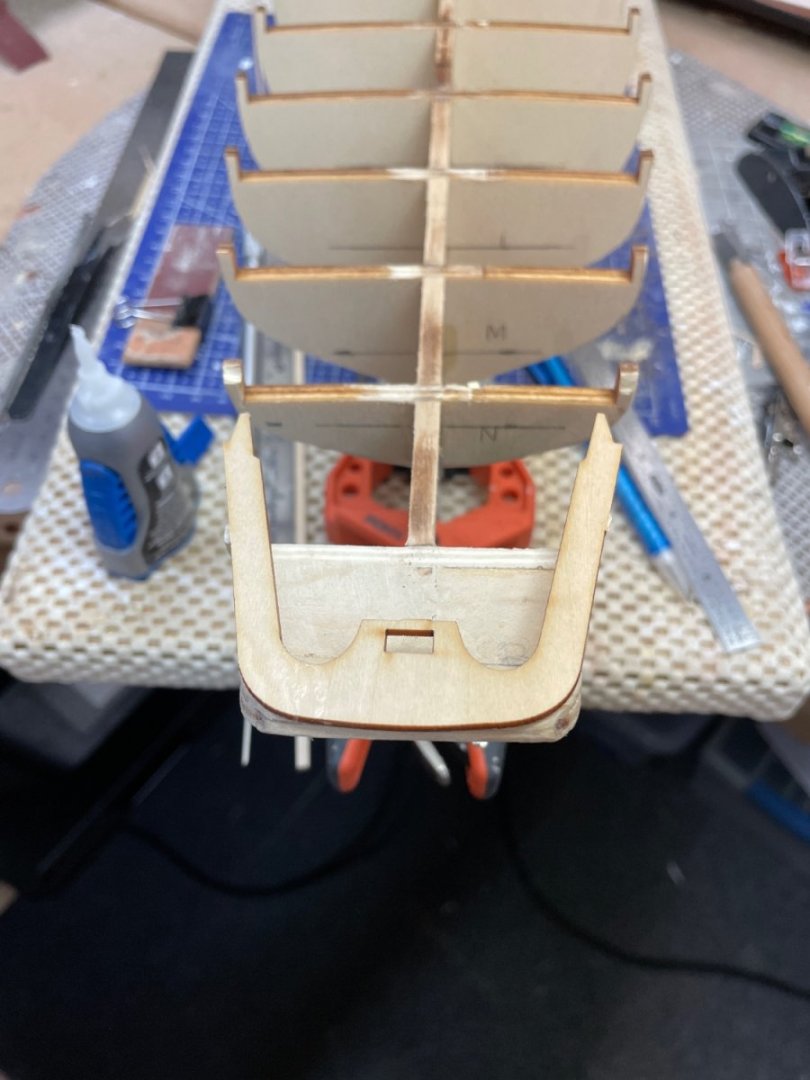
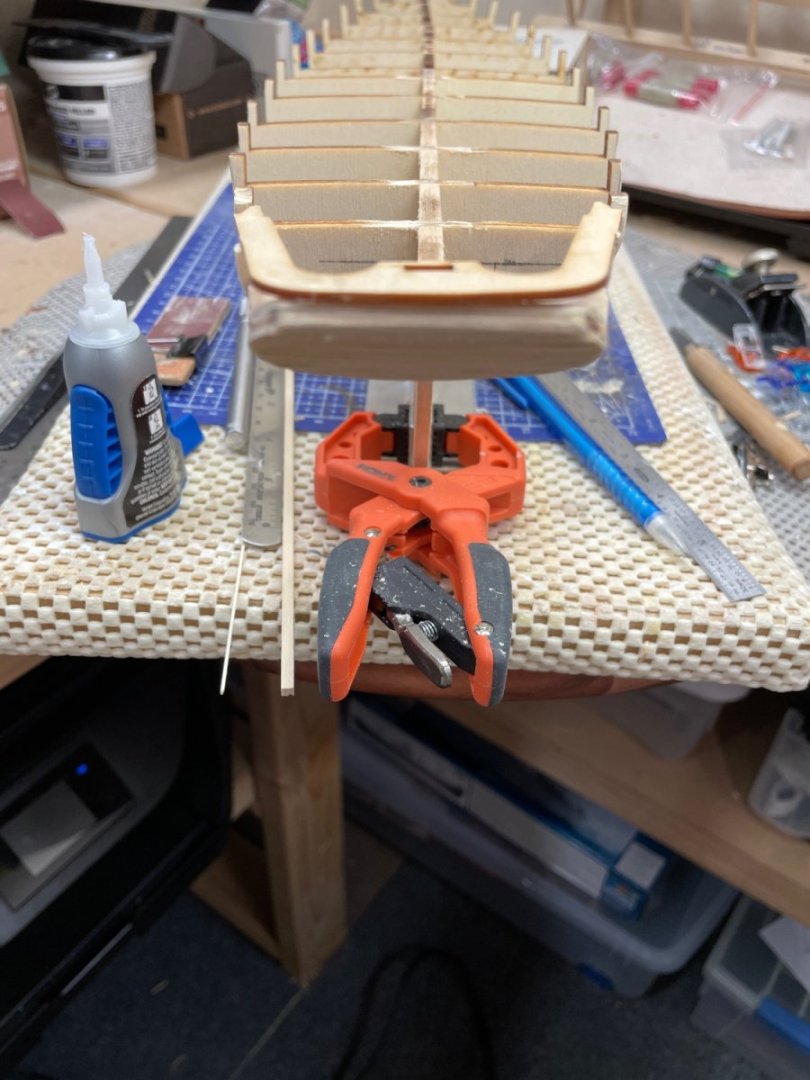
Great Beam… Three laser cut pieces fit together like a puzzle. 😆 GreatBeam completed, now working on shaping the bulkheads extensions into stanchions. stanchions completed, on to fairing out the bulkheads. Installing my first waterways. Need some filling to fair out the planking. Finishing waterways… Finished waterways and added mobbing planks. Fore Deck waterways completed. Now it’s on to the Quarter Deck. Cheers 🍻


- 282 replies
-
- 6
-
-
- Bluenose
- Model Shipways
- (and 1 more)
-
If you take a look at my first page of this build log, you will find photos of the two drawings that came with the one page of instructions. The kit is estimated to be from 1972. Vintage kits like these never have much in the way of instruction beyond the blueprints. As for the blueprints, I like to keep them for display. Paying for copies of the blueprints and shipping to you may be an option, but I wouldn’t guarantee to quality due to the age of these prints. You might just copy the photos from my build, for your purposes. Unless you are planning to scratch build, I wouldn’t suggest buying the plans. Most of my additional detail, particularly the engine room, came from researching the Robert E Lee. As was suggested to me by @Cathead, I would suggest getting a copy of The Western Rivers Engineroom Cyclopœdium by Alan Bates. It's rare but you can find it used in places, or you could always put in an interlibrary loan request. Its out of print but I found it being copied at the Howard Steamboat Museum in Jeffersonville, IN. His companion volume The Western Rivers Steamboat Cyclopoedium would also be an excellent resource, and has some basic information on engine design and layout. Take care John
- 238 replies
-
- 2
-
-
- Robert E Lee
- steamboat
- (and 3 more)
-
thanks… I started with a Plastic model of the Cutty Sark. The first time I opened a wood model, it scared the heck out of me. I resold it on eBay. 😂 Start with a small schooner, you might like it. Warning ⛔️ Wood Ship Modeling is addictive. LOL 😆
- 238 replies
-
- 4
-
-
- Robert E Lee
- steamboat
- (and 3 more)
-
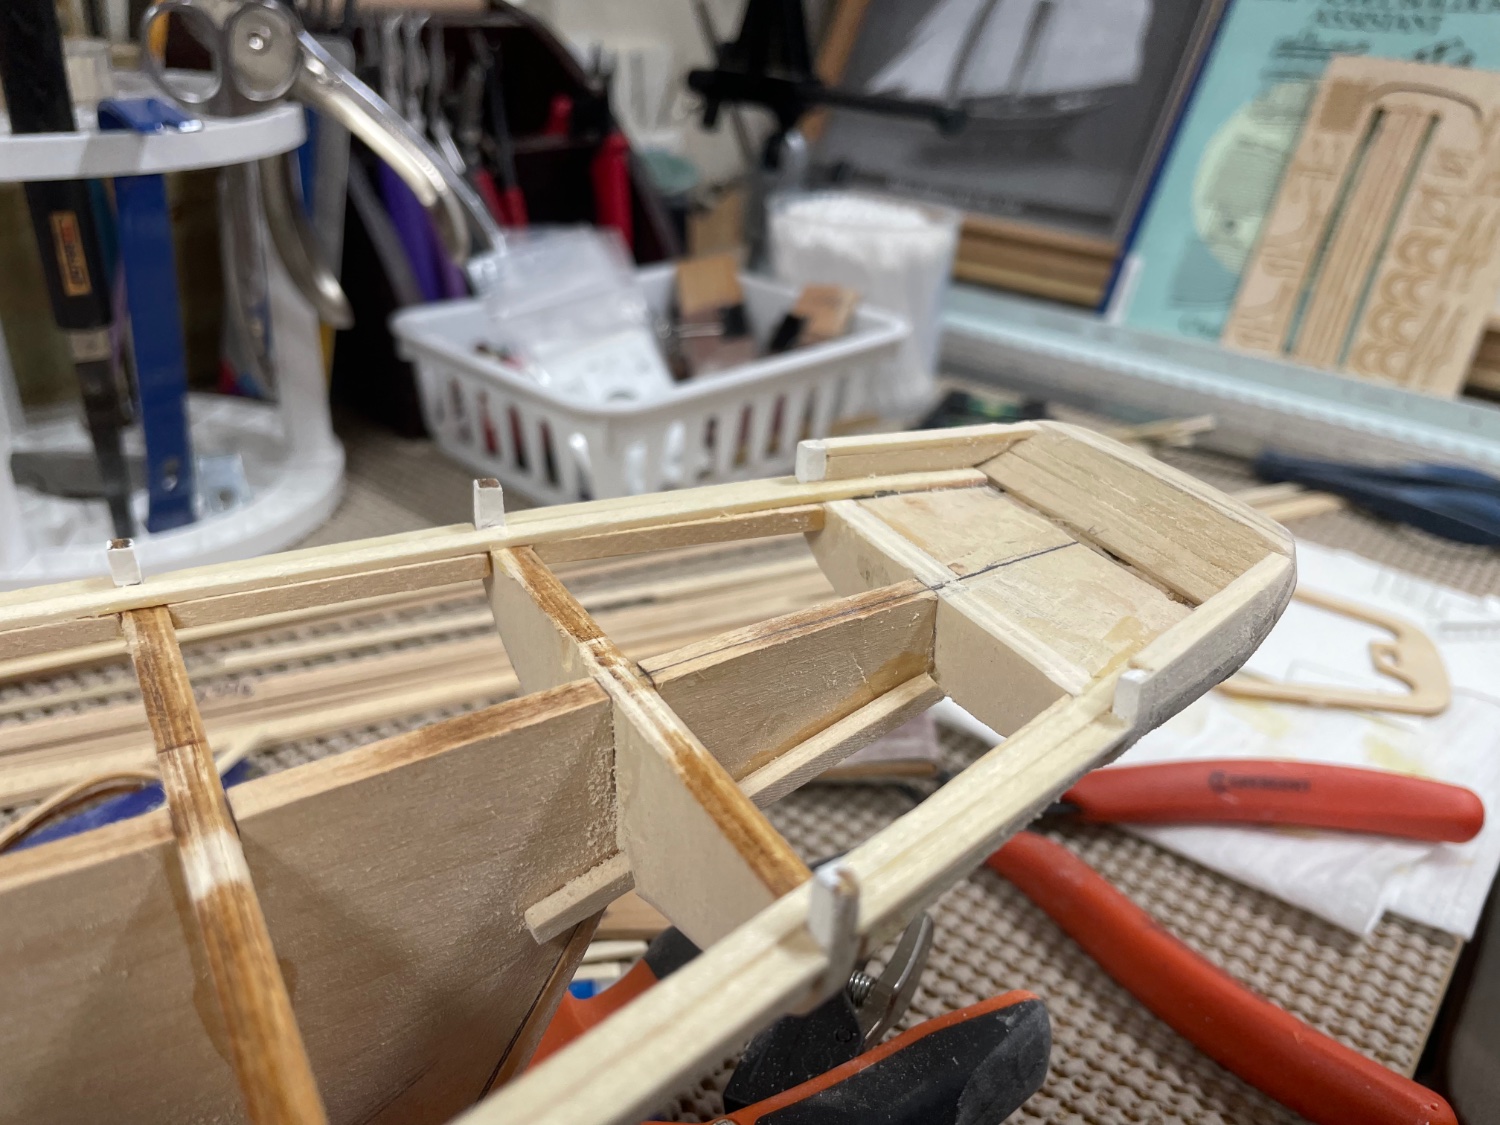
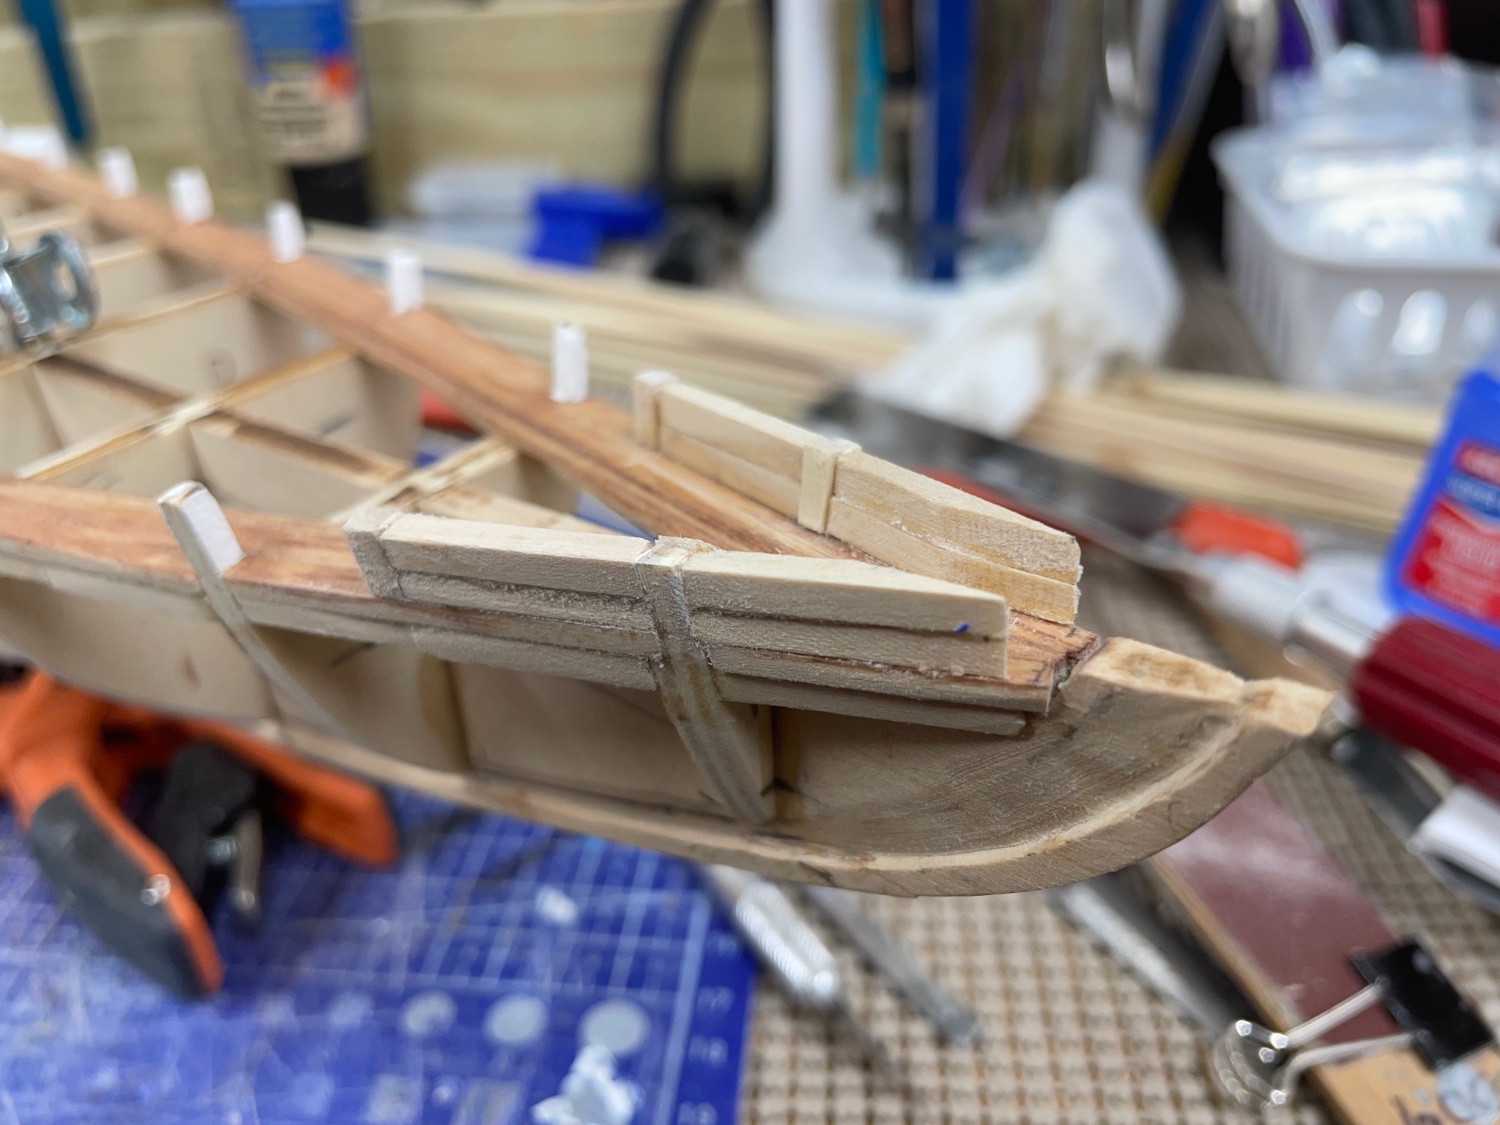
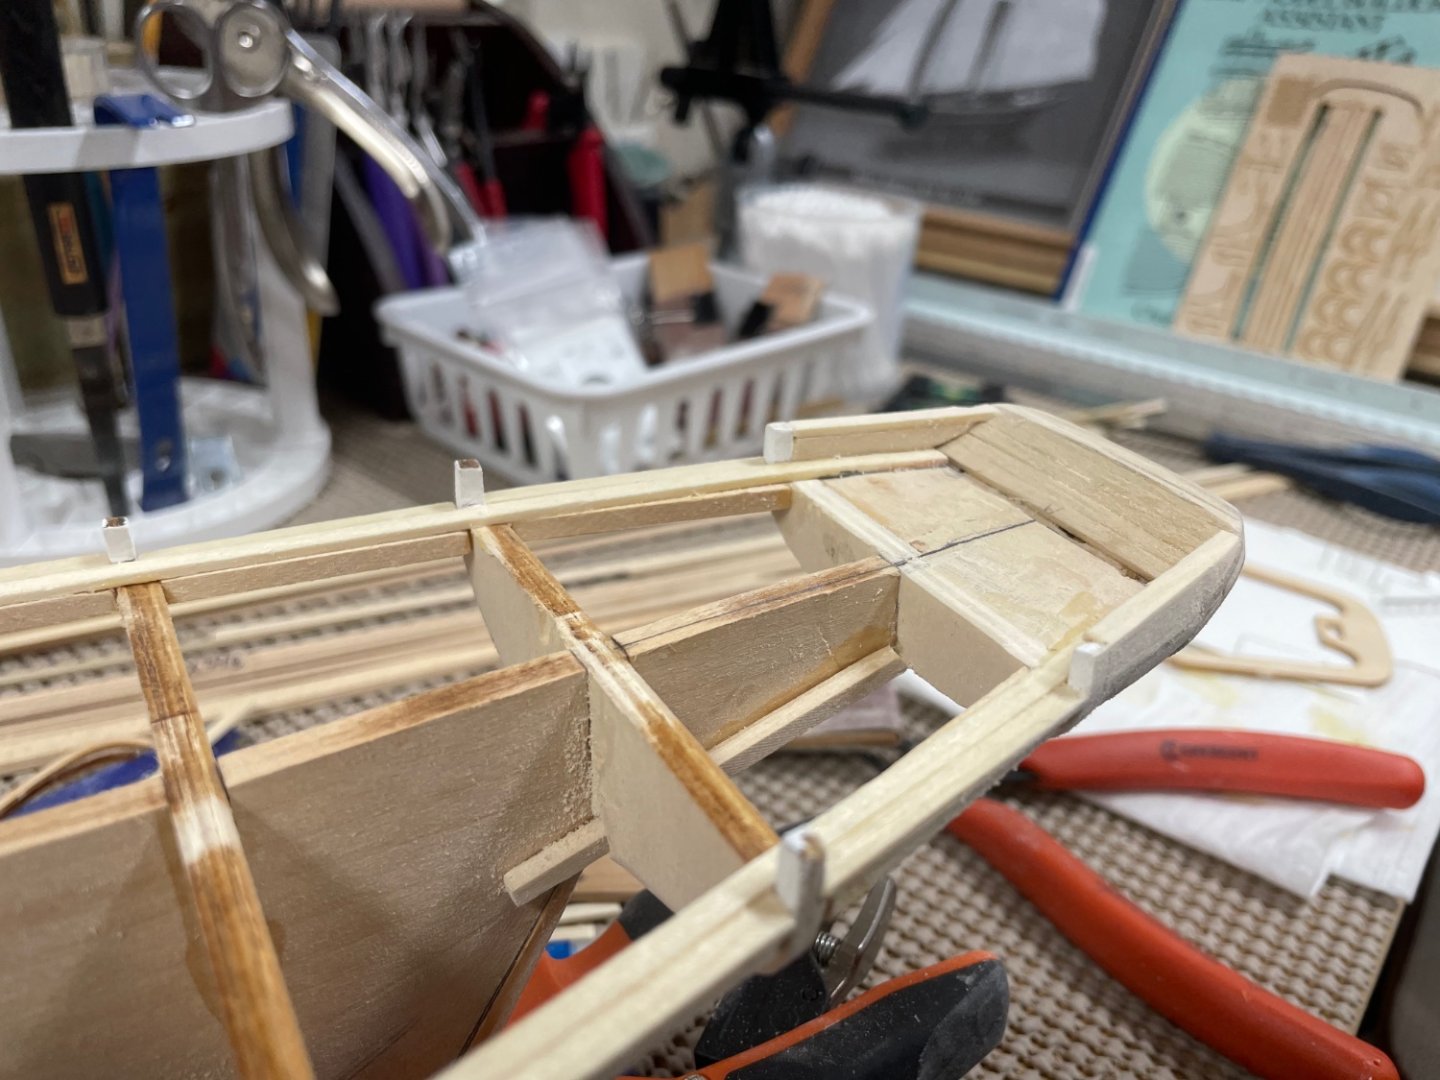
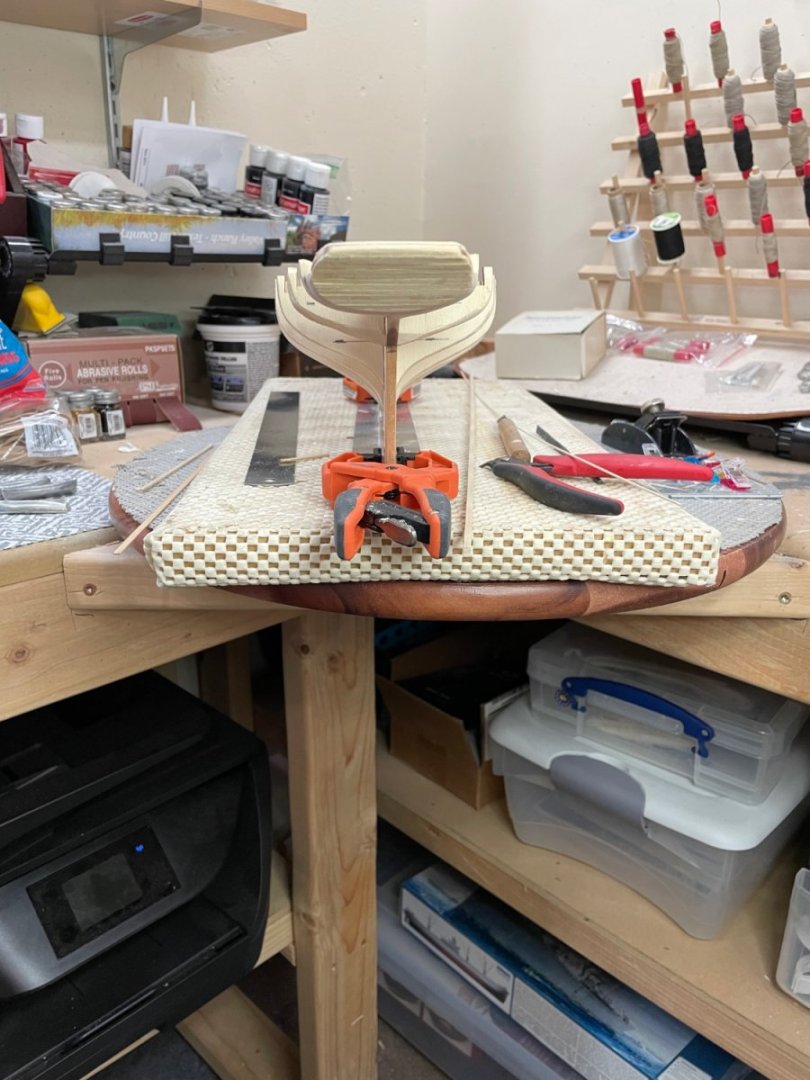
Stern Block and transom shaping… Horn Timbers installed… Installing additional struts between bulkheads… Cheers 🍻


- 282 replies
-
- 4
-
-
- Bluenose
- Model Shipways
- (and 1 more)
-
Tom, Nicely done… Your lettering is excellent. What is your technique to get the White stripping so clean? It looks like it was rolled on. 😎
- 200 replies
-
- 2
-
-
- Whaling Bark
- Charles W Morgan
- (and 1 more)
-
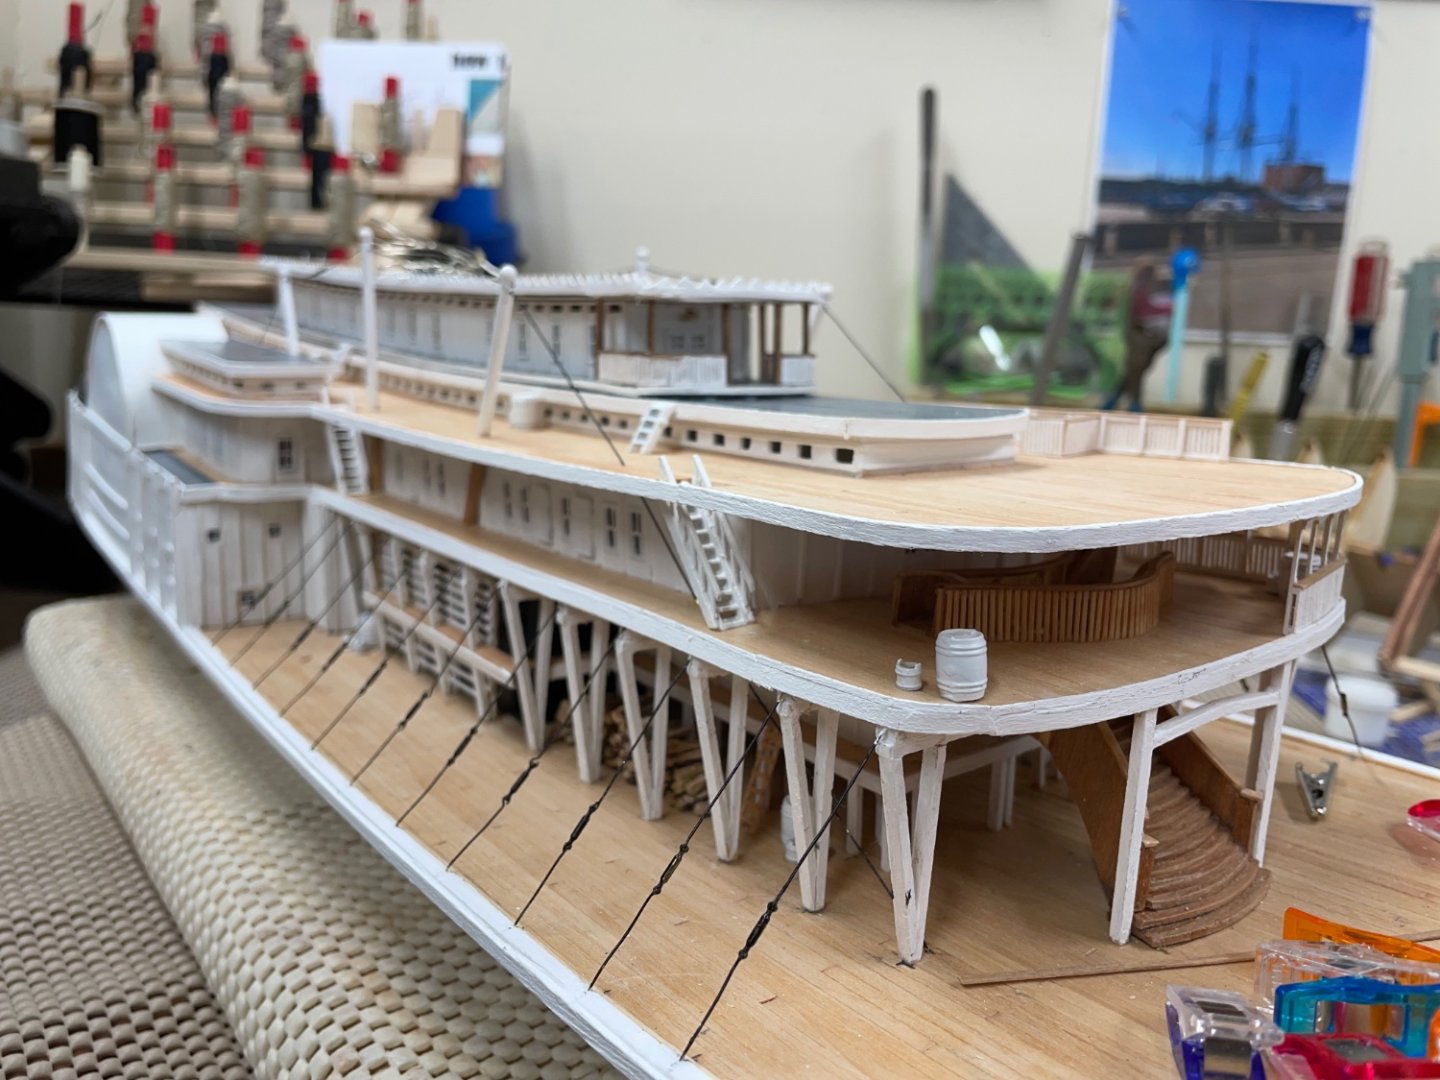
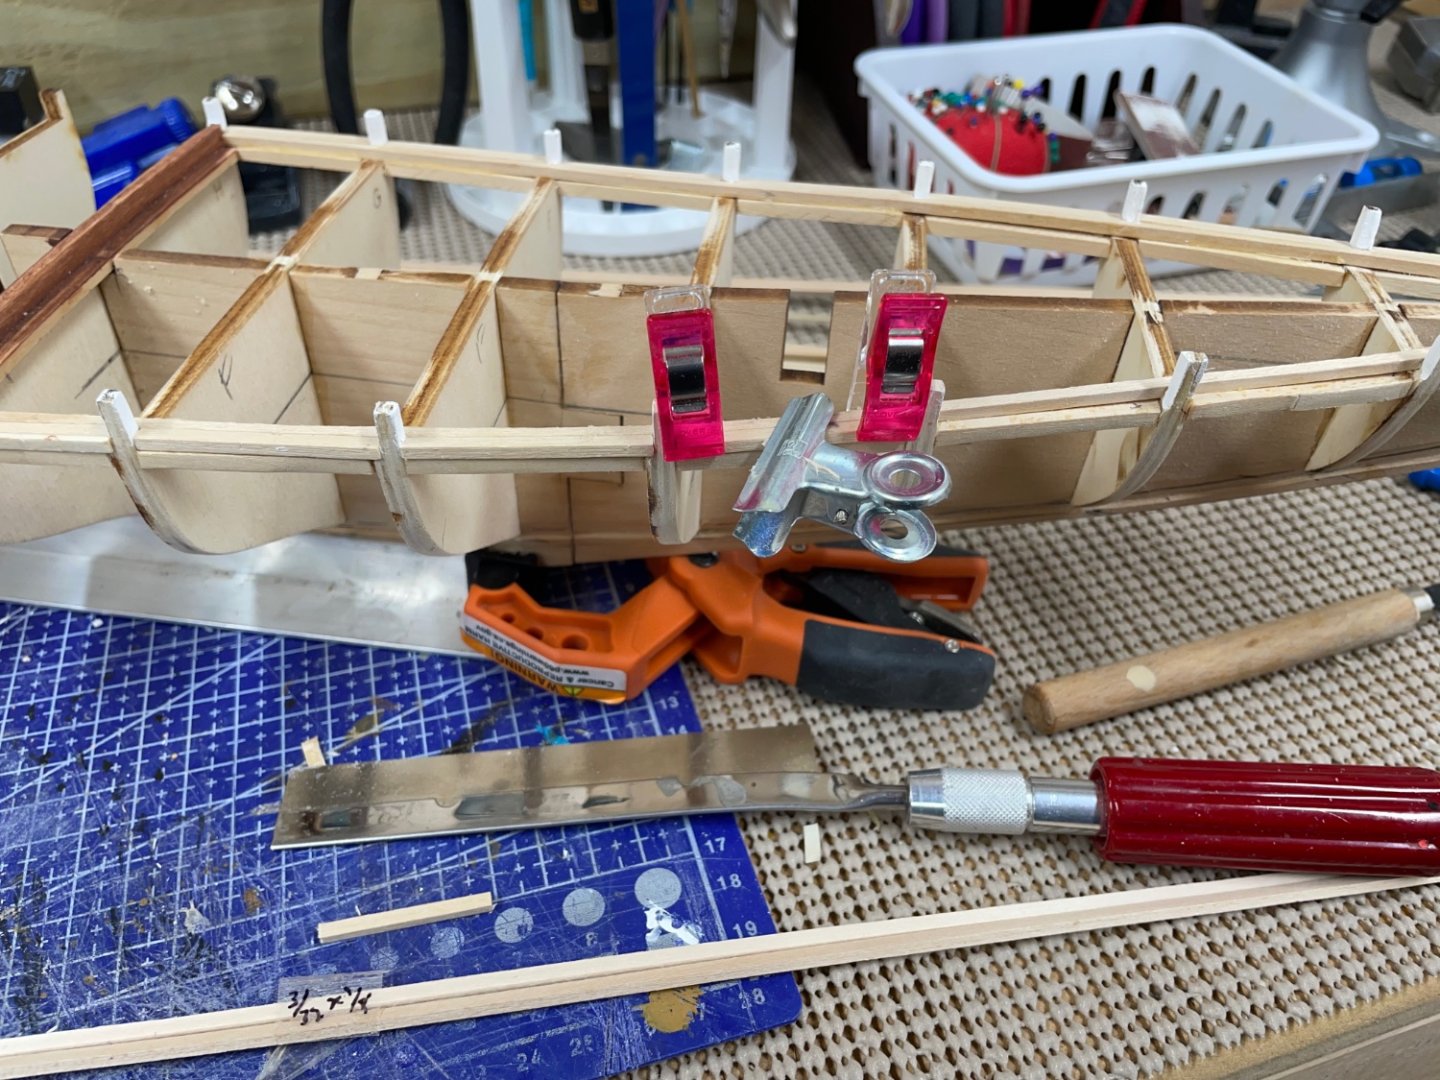
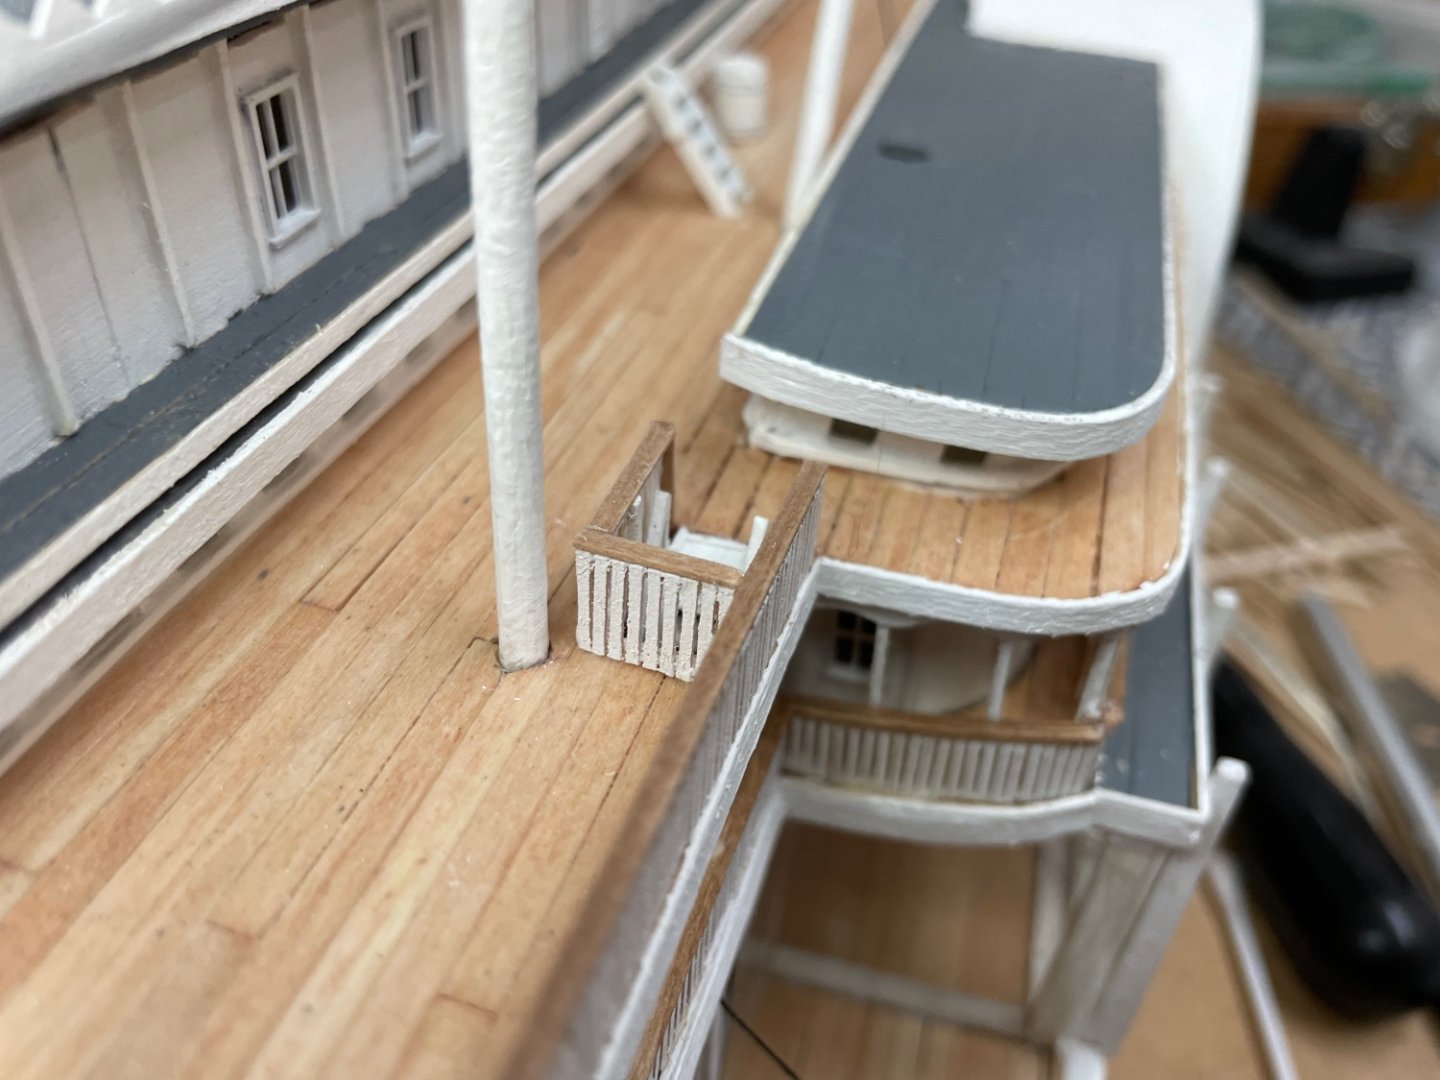
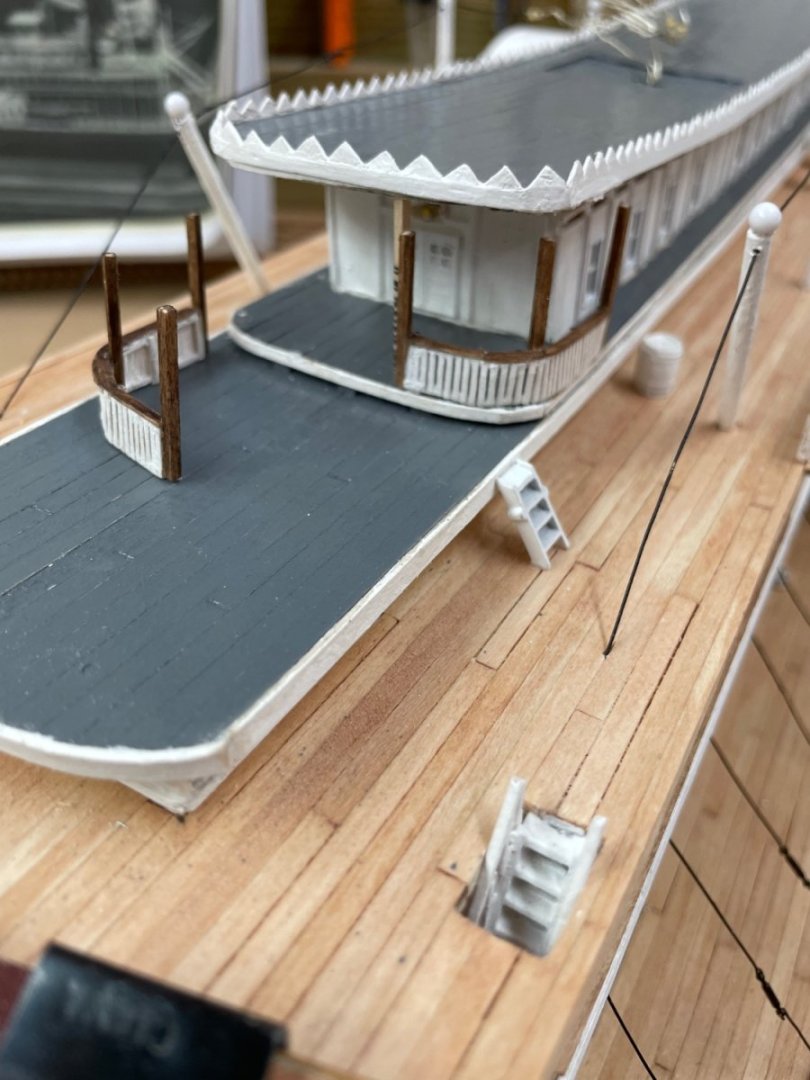
Railing progress… Someone asked earlier about curved railing sections? Progress! First section of curved railing installed. First Stair Guards on the Hurricane Deck. 😎 A good day aboard the Robert E Lee. Cheers 🍻


- 238 replies
-
- 10
-

-
-
- Robert E Lee
- steamboat
- (and 3 more)
-
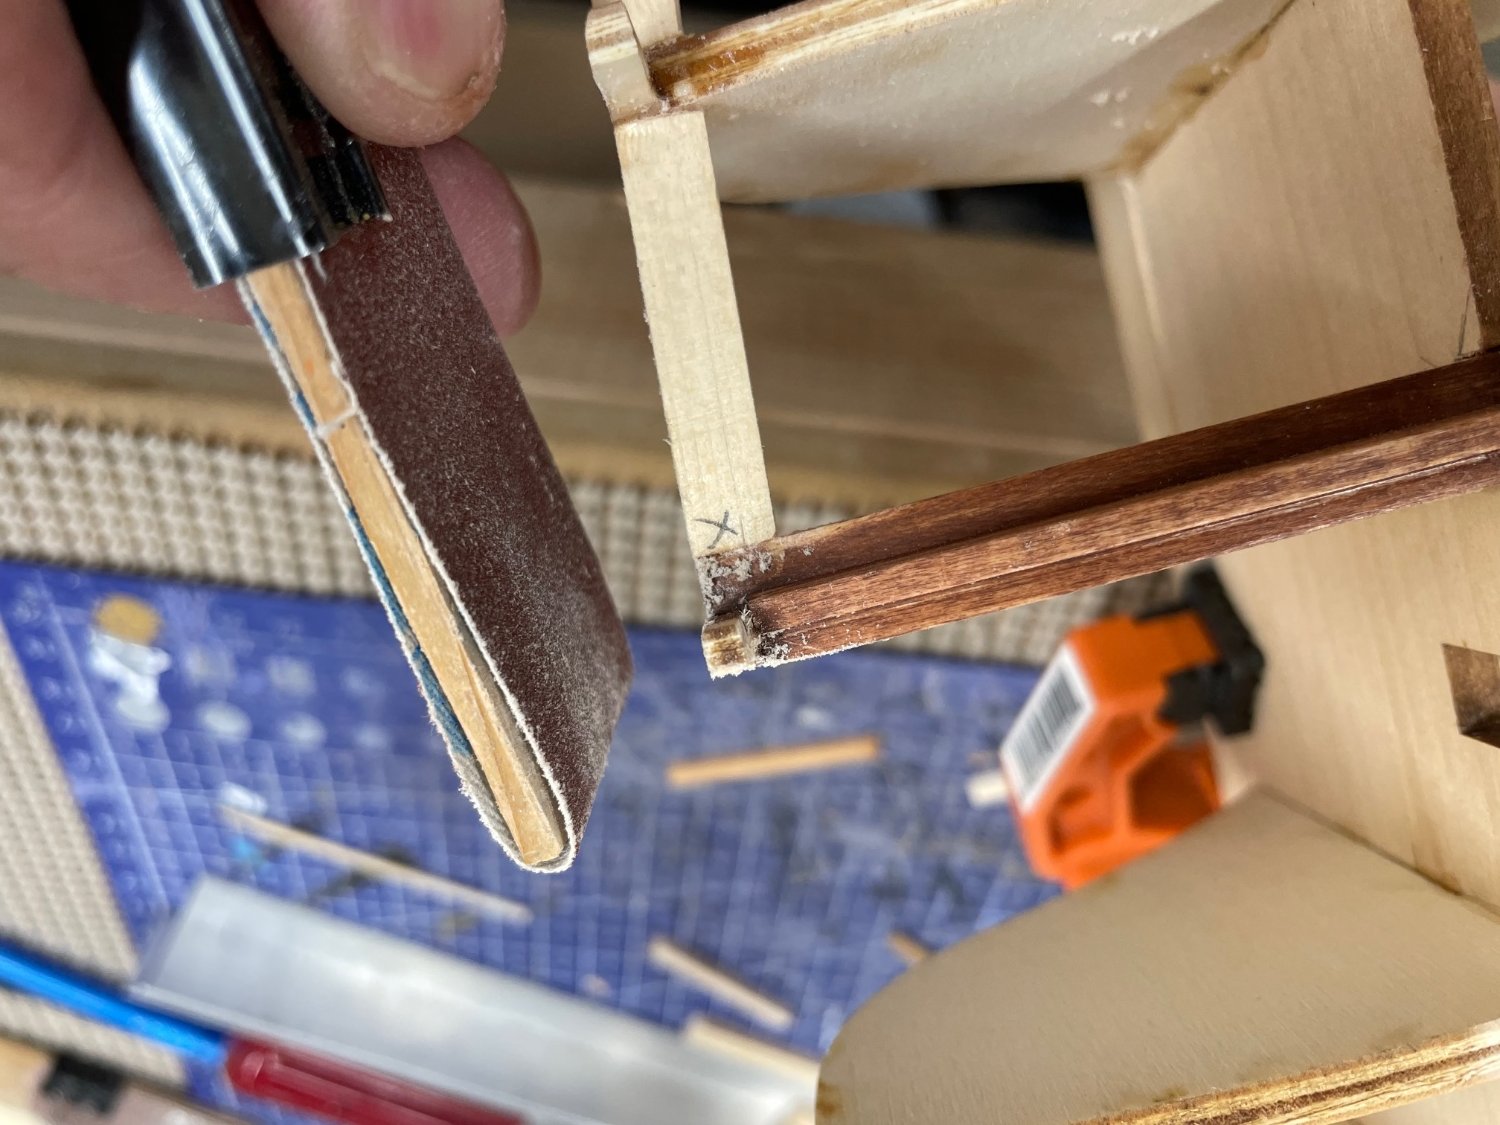
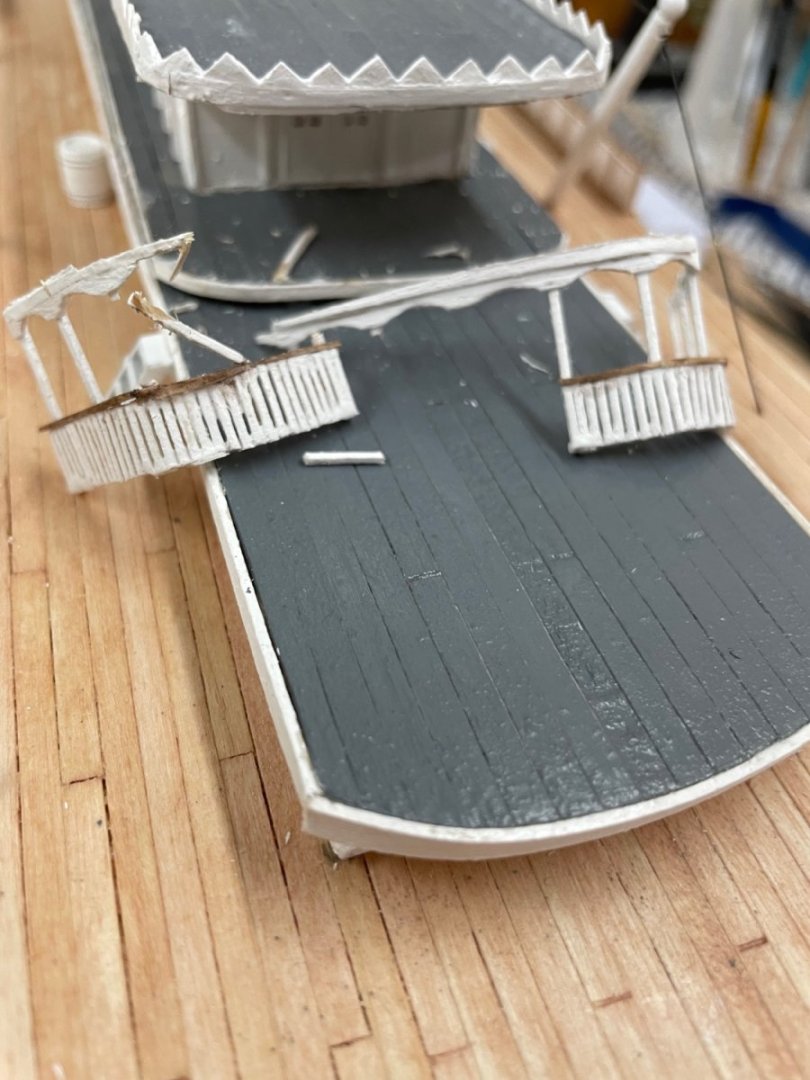
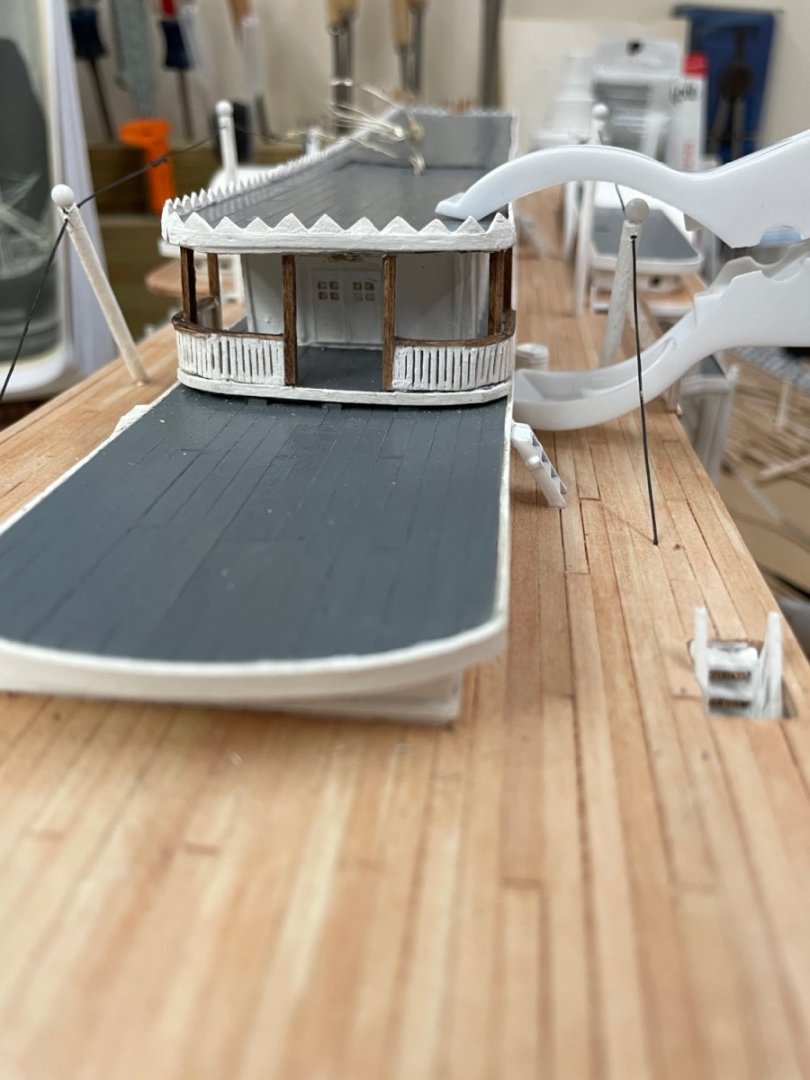
Front Porch Railing 2.0… I’m not happy with the Texas Porch. Railings on the left are collapsing. It needs heavier posts. DEMO Time… Save the railings. 🤪 Added posts… Much better… Yeah! OCD makes for perfection. 😆
- 238 replies
-
- 6
-
-
- Robert E Lee
- steamboat
- (and 3 more)
-
Thanks David, I appreciate your input. I followed your Bluenose build and am referencing it as I proceed. I was aware of this issue as I assembled the Stern and will keep this in mind going forward. I am currently using the rail piece as a guide to shape the stern and hopefully avoid the issue. It does look like I will need to widen the rail, reshape the stern narrower or both. Thanks again for the heads up, I will keep an eye 🧐 on the planking in this area. Cheers 🍻

- 282 replies
-
- 6
-
-
- Bluenose
- Model Shipways
- (and 1 more)
-
Inboard Transom planking… Transom completed… Cheers 🍻

- 282 replies
-
- 4
-
-
- Bluenose
- Model Shipways
- (and 1 more)
-
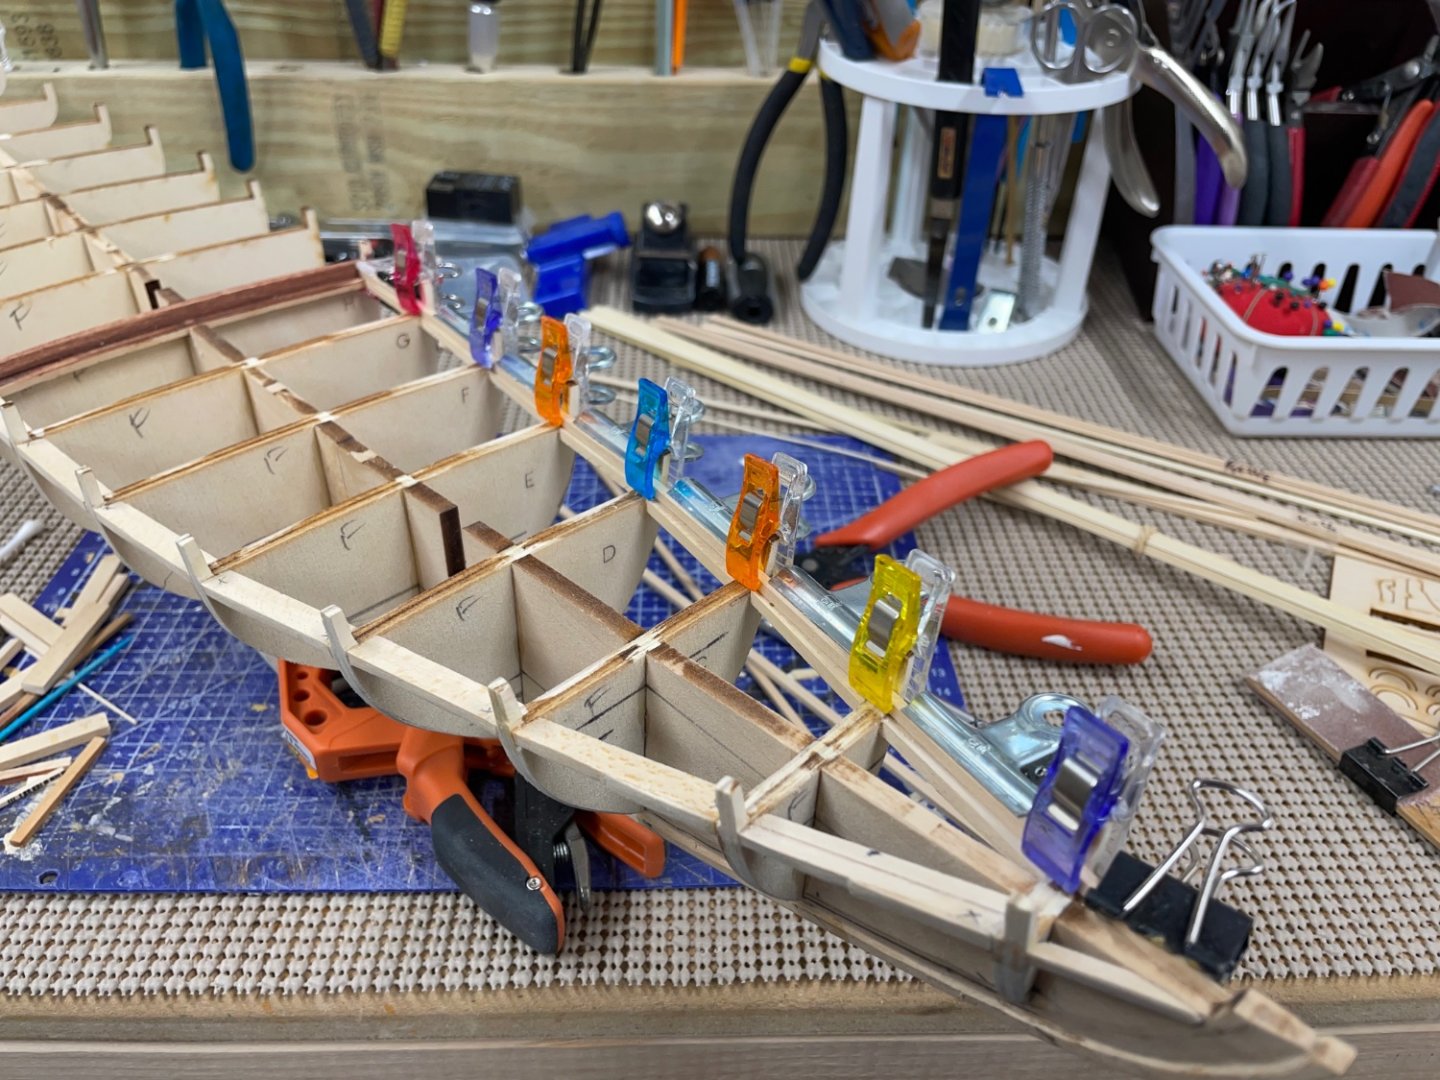
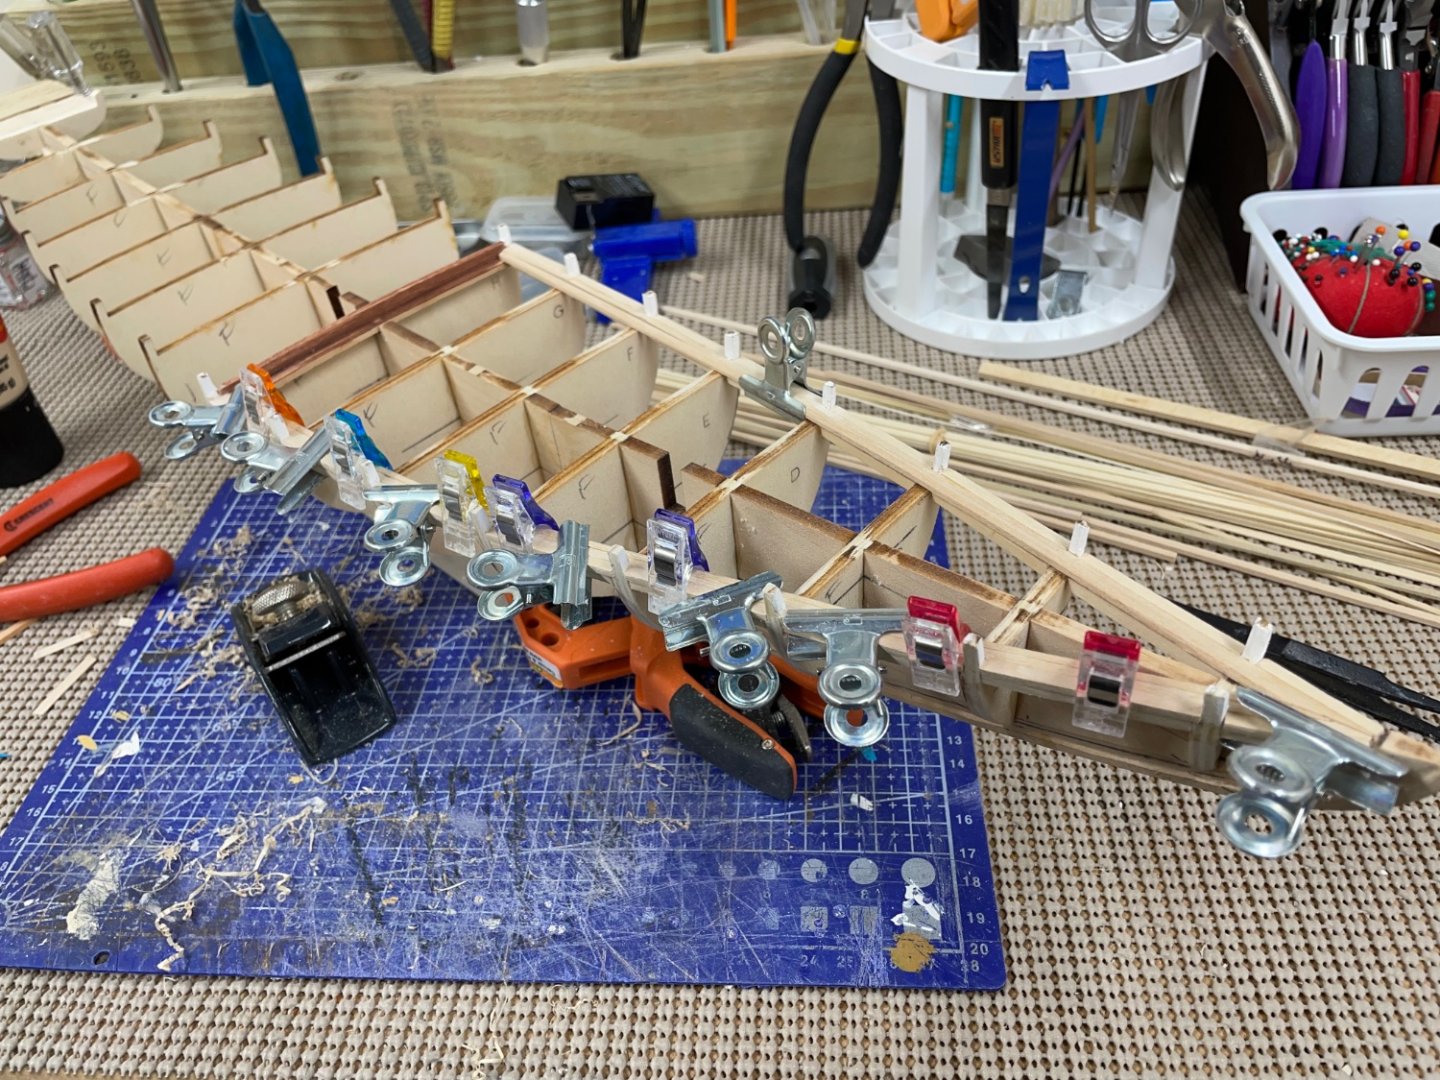
Railing progress… Three more sections ready for paint. Cheers 🍻

- 238 replies
-
- 7
-
-
- Robert E Lee
- steamboat
- (and 3 more)
-
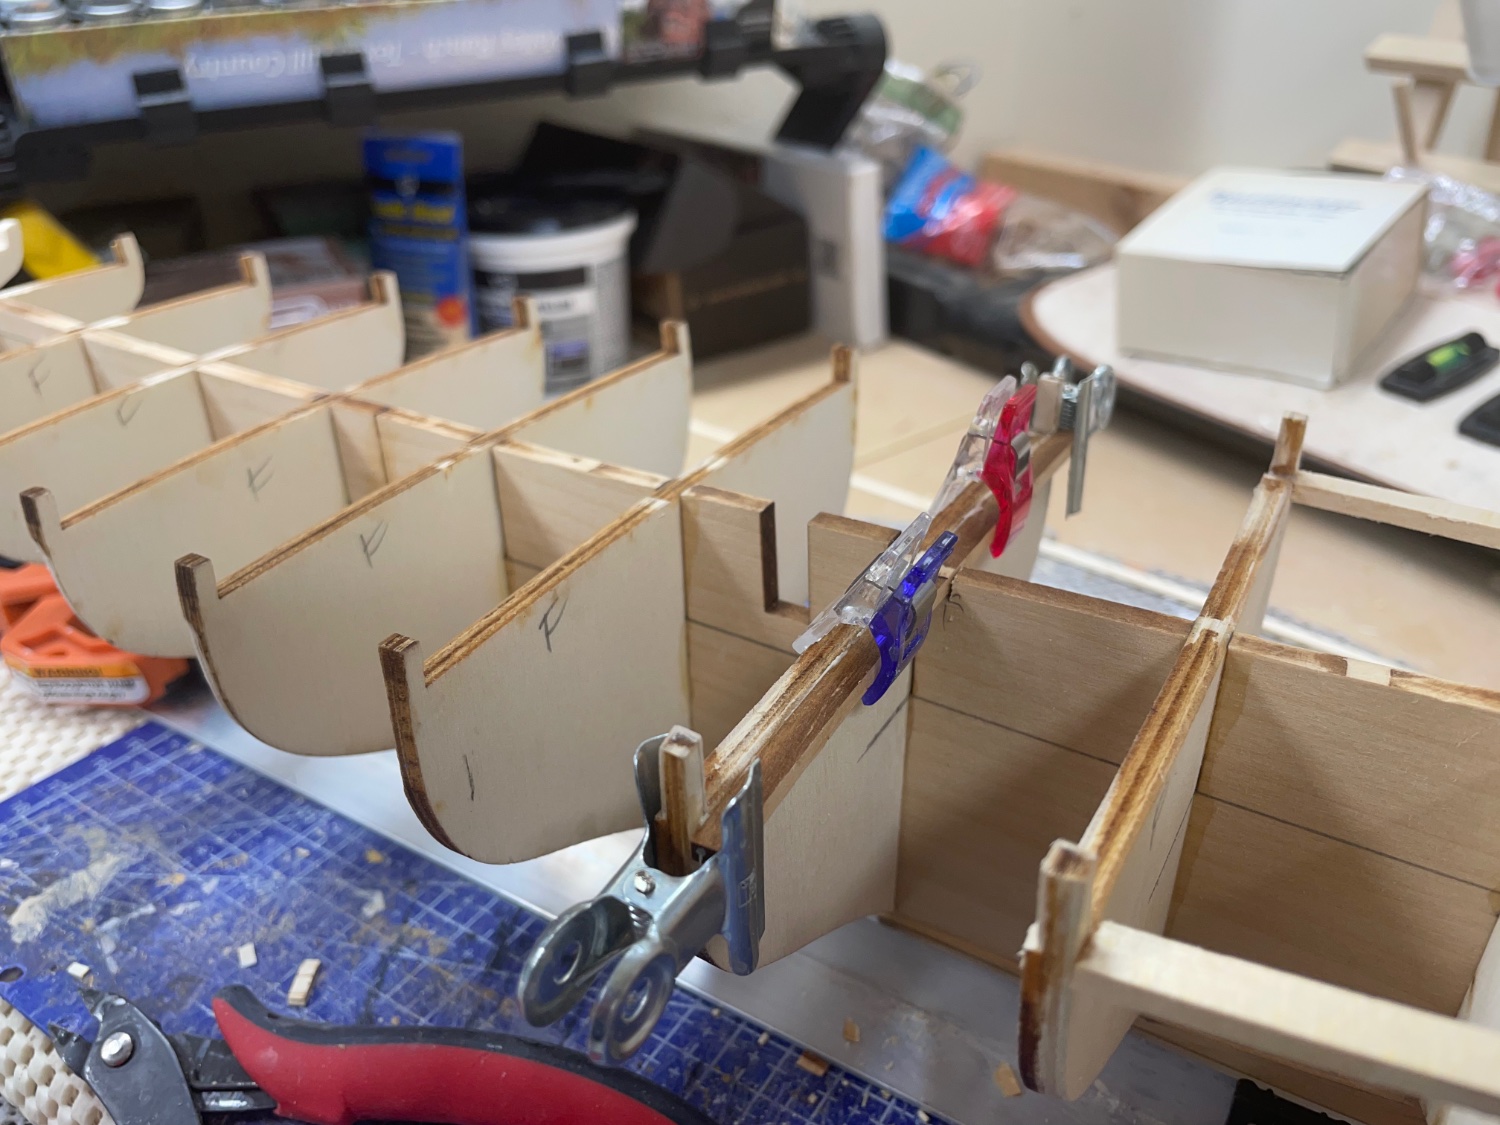
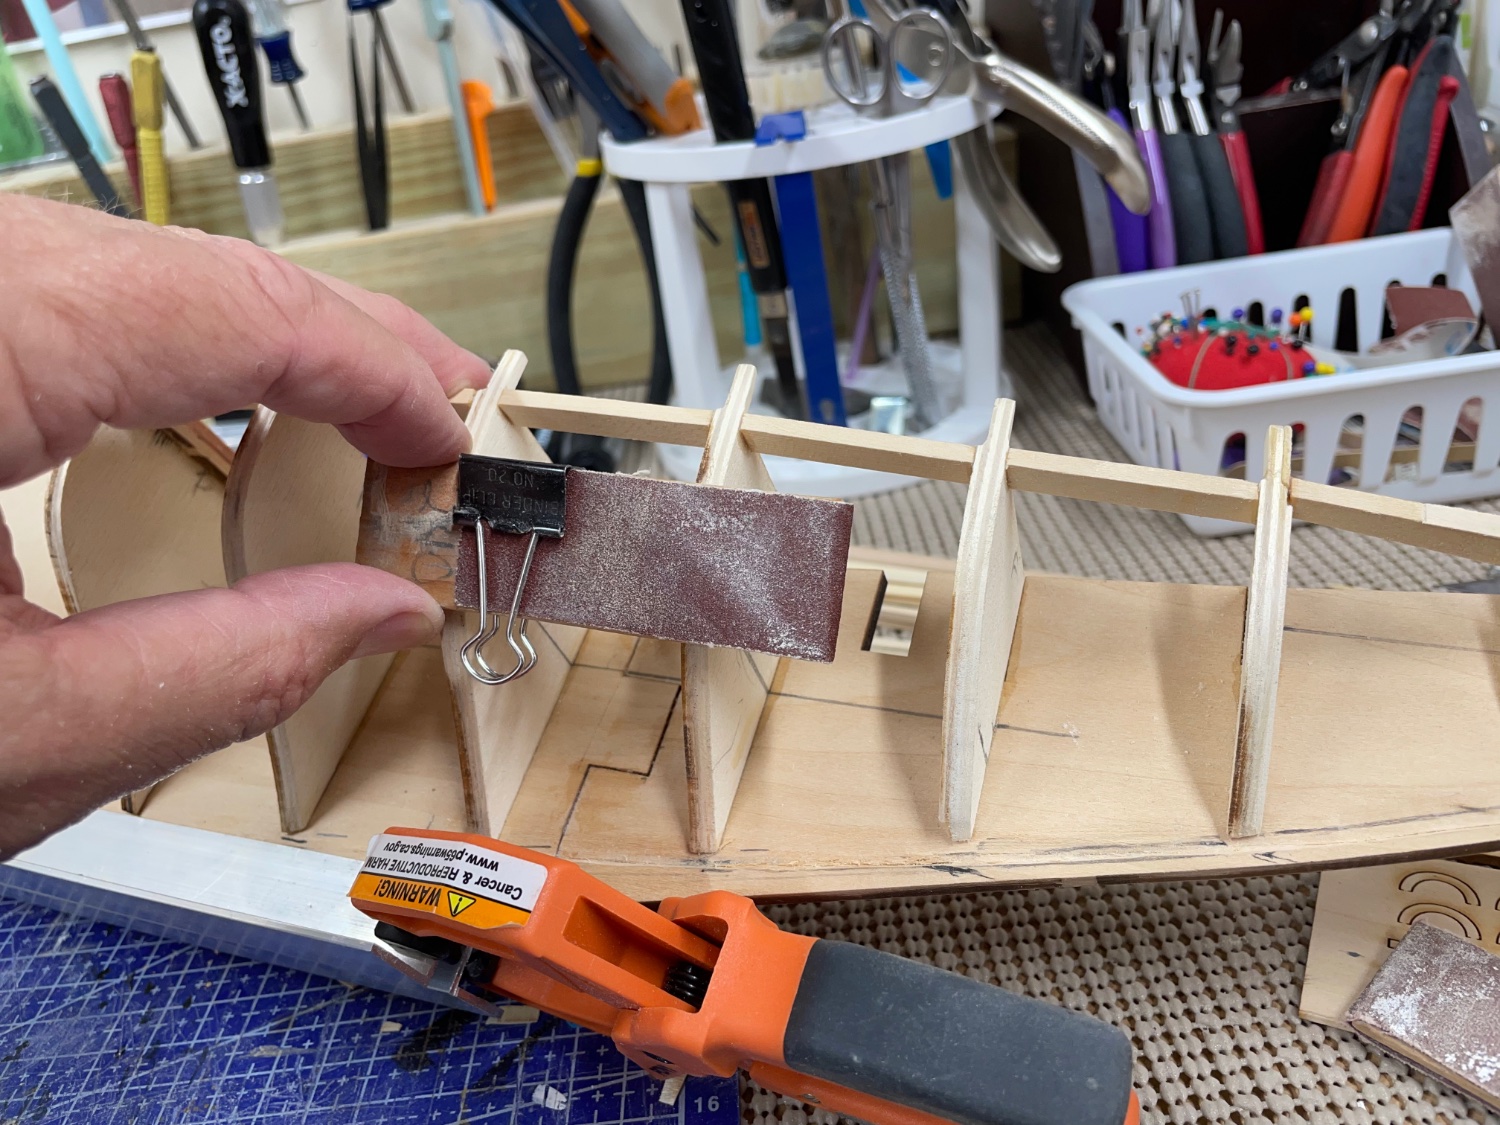
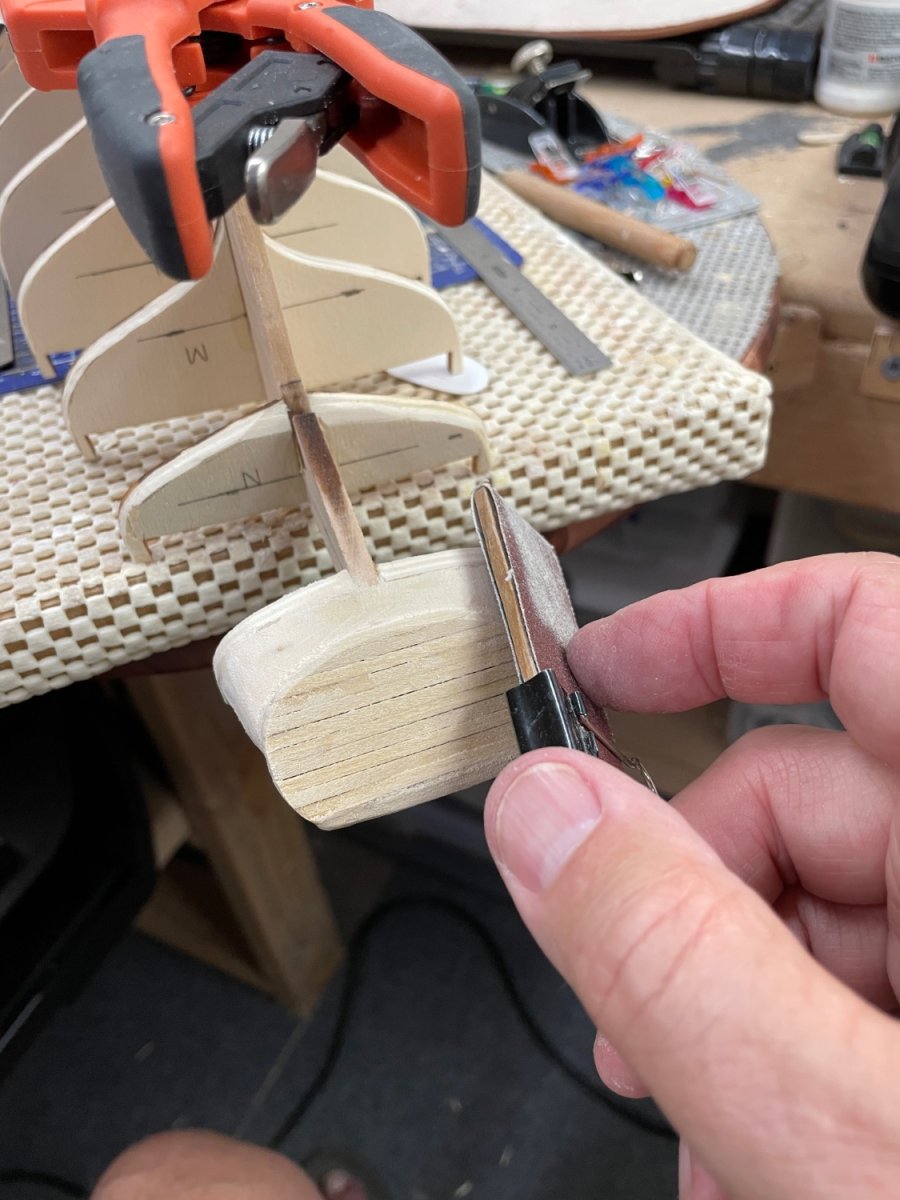
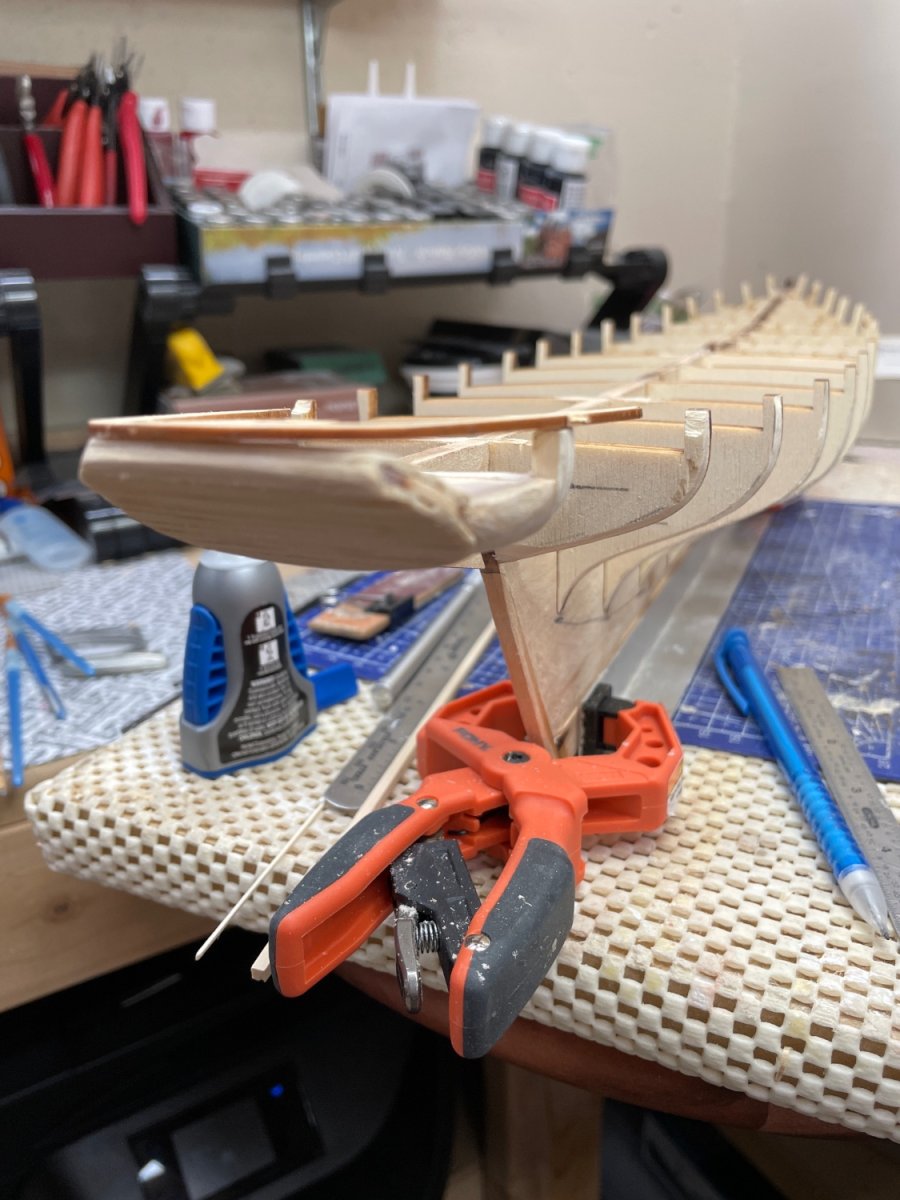
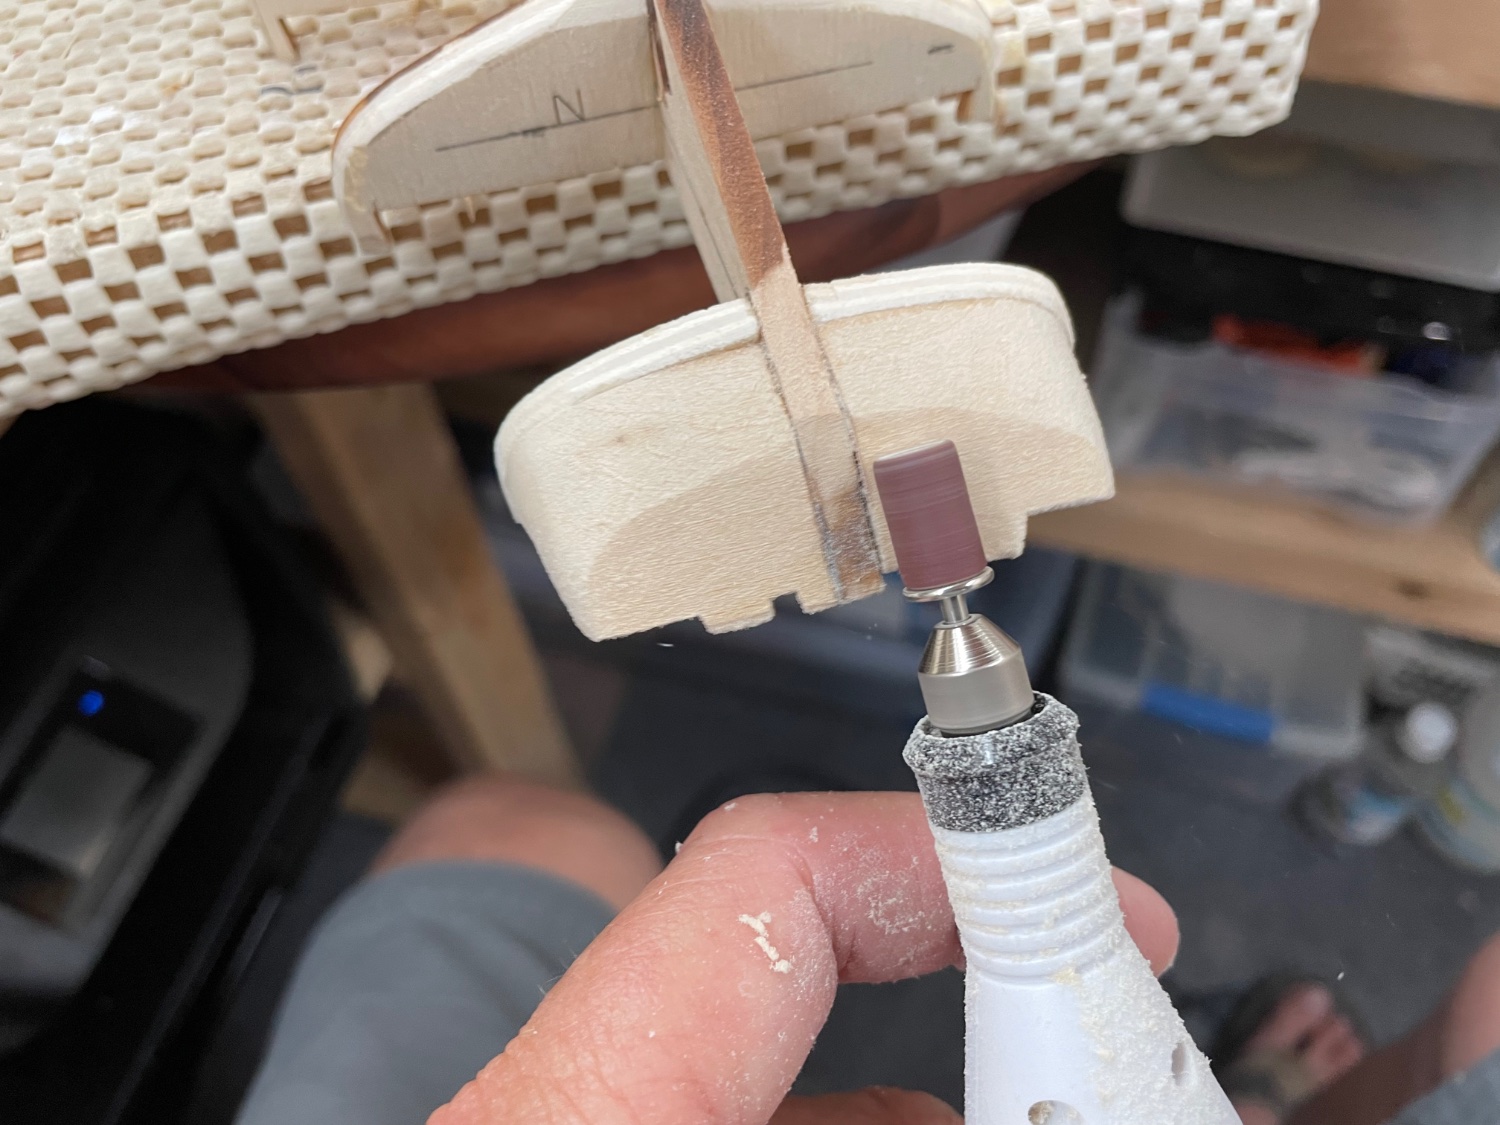
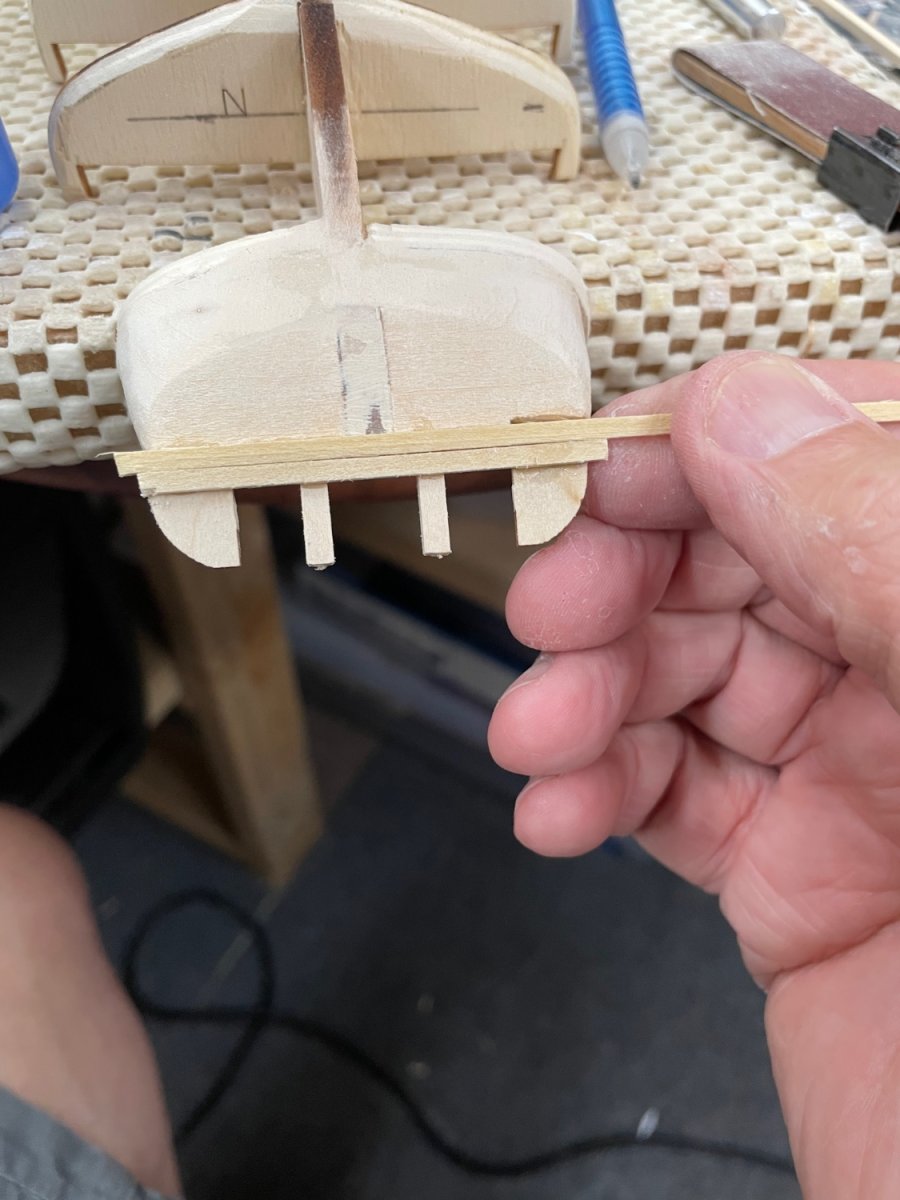
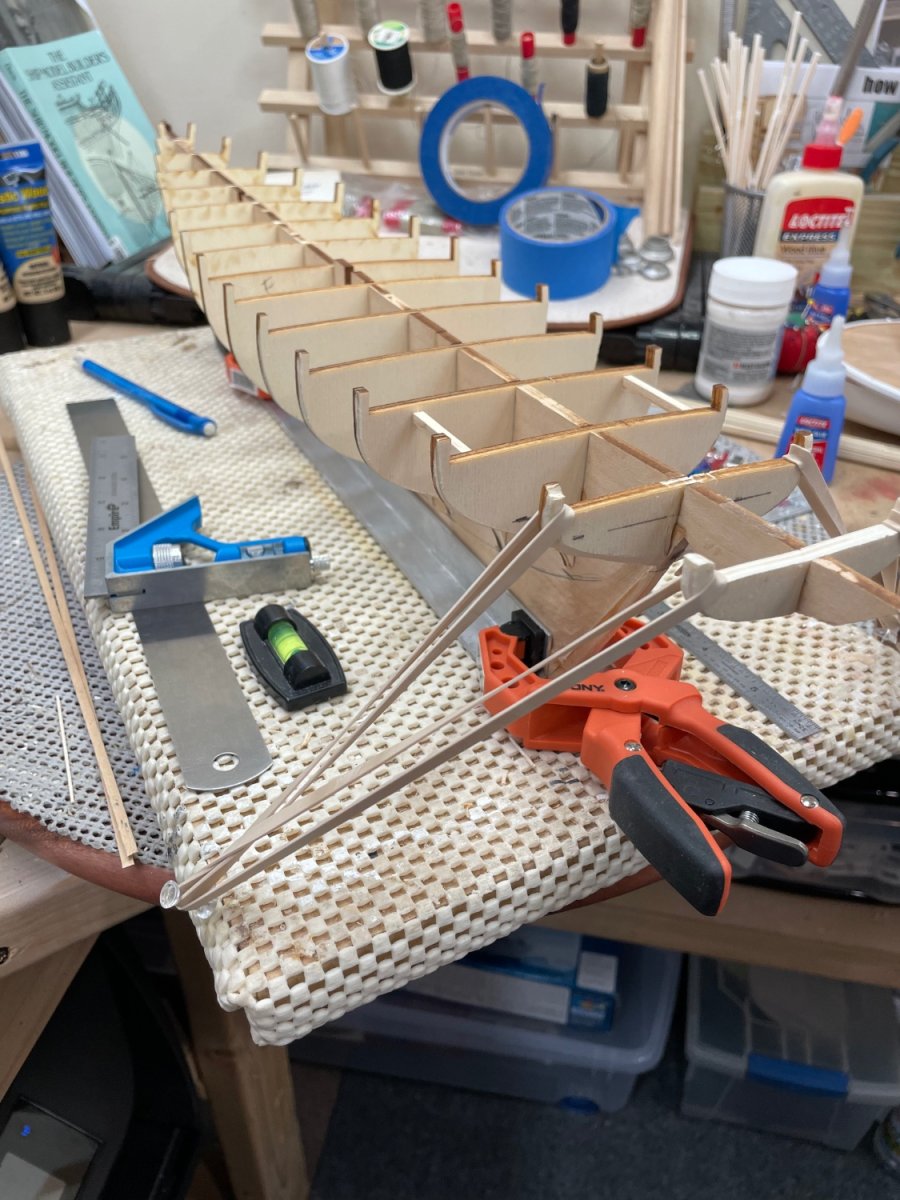
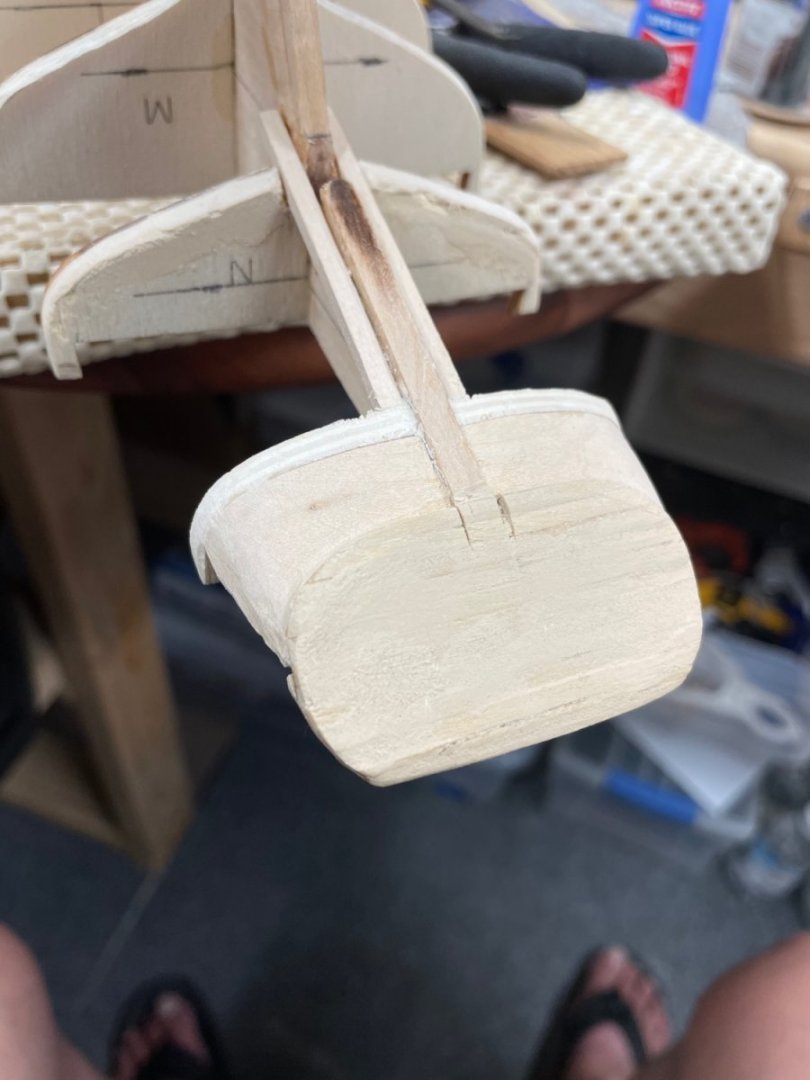
The Stern… After aligning and gluing all of the bulkheads in place, I began the work on the stern section. The blocks had been shaped nicely by the previous owner. Shaping of the stern blocks… Added the stern framing pieces and started planking the stern. Stern planking completed. More sanding required to get this right. This is my third schooner and it still feels difficult. But then if it were easy, it wouldn’t be a challenge. 🍻 Lots more detail to come before planking. Onwards 🍻


- 282 replies
-
- 7
-
-
- Bluenose
- Model Shipways
- (and 1 more)
-
Good eye… I need you guys taking a close look at my work. Keeps me alert, never saw that one. Maybe this box is worth something with its obvious miss print. 😆 Welcome aboard!
- 282 replies
-
- 2
-
-
- Bluenose
- Model Shipways
- (and 1 more)
-
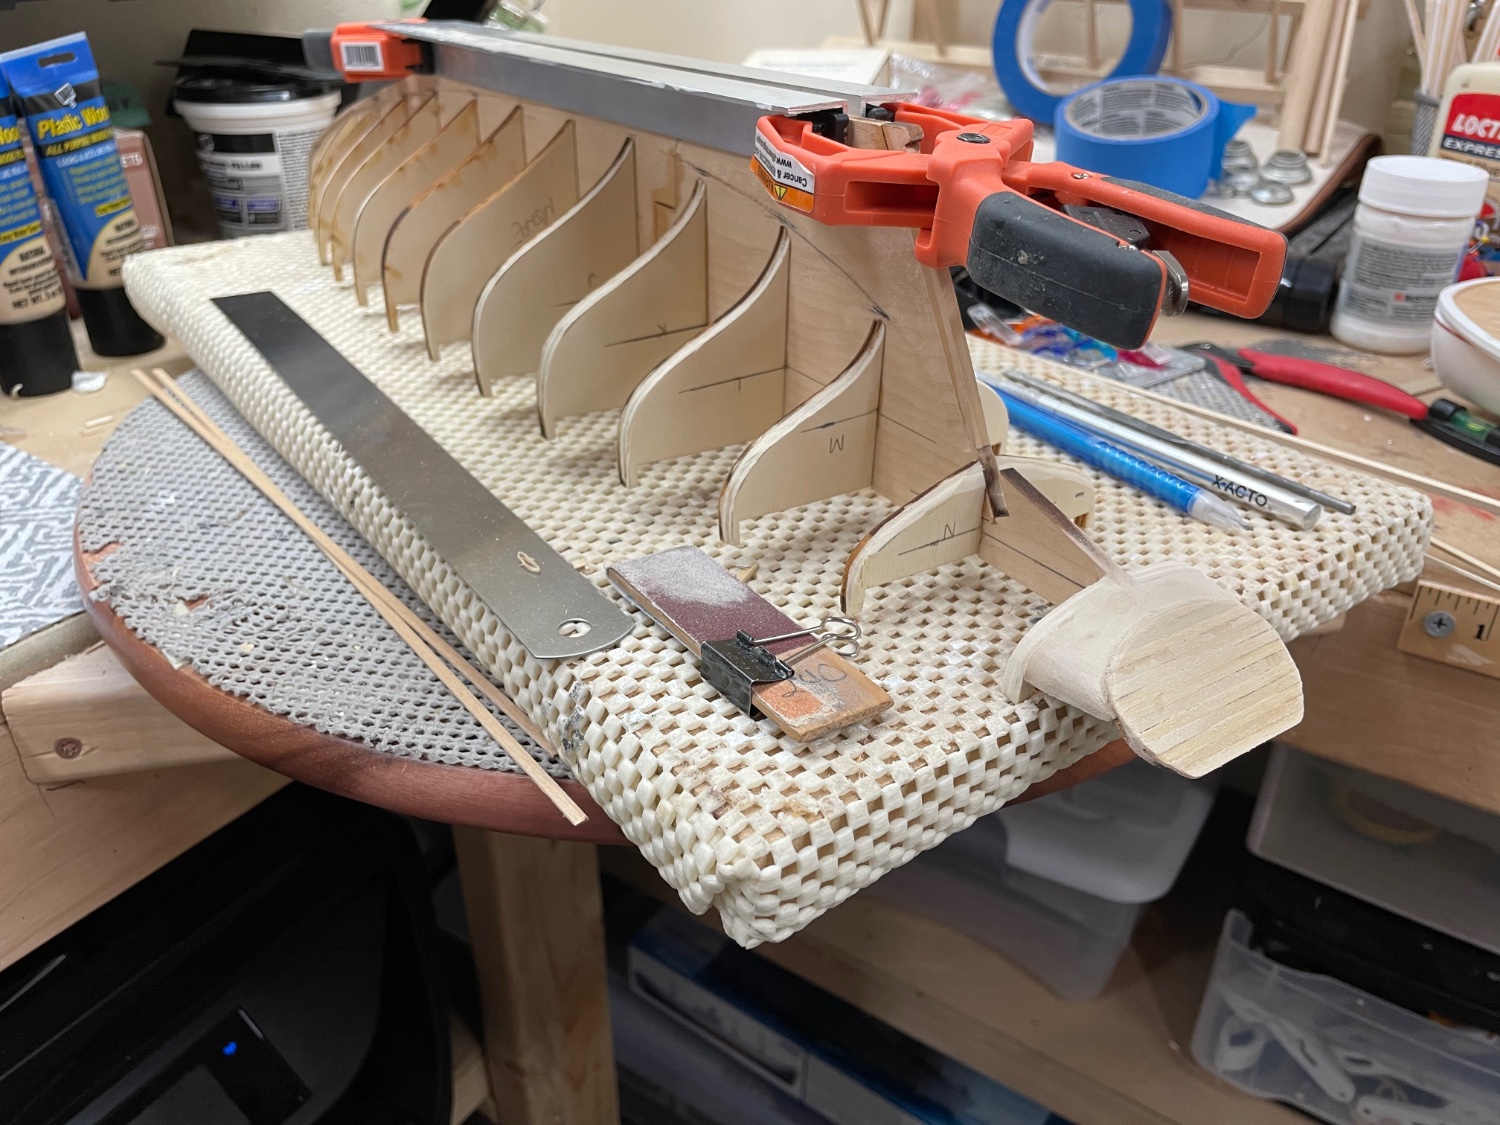
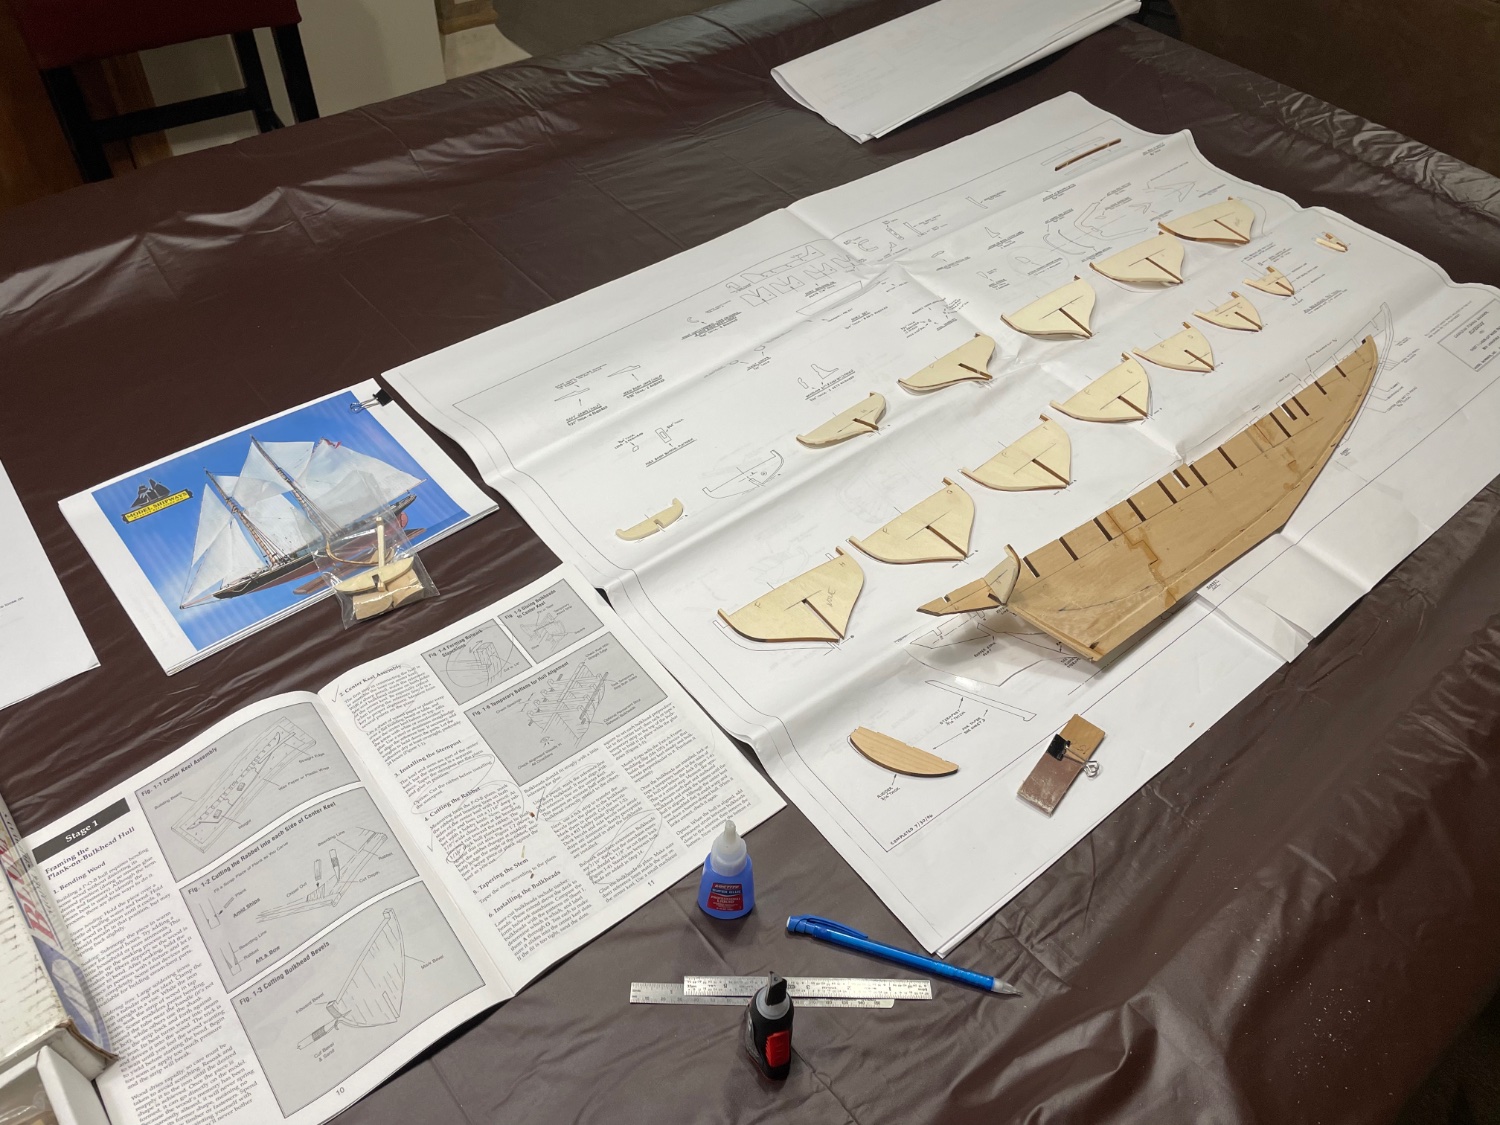
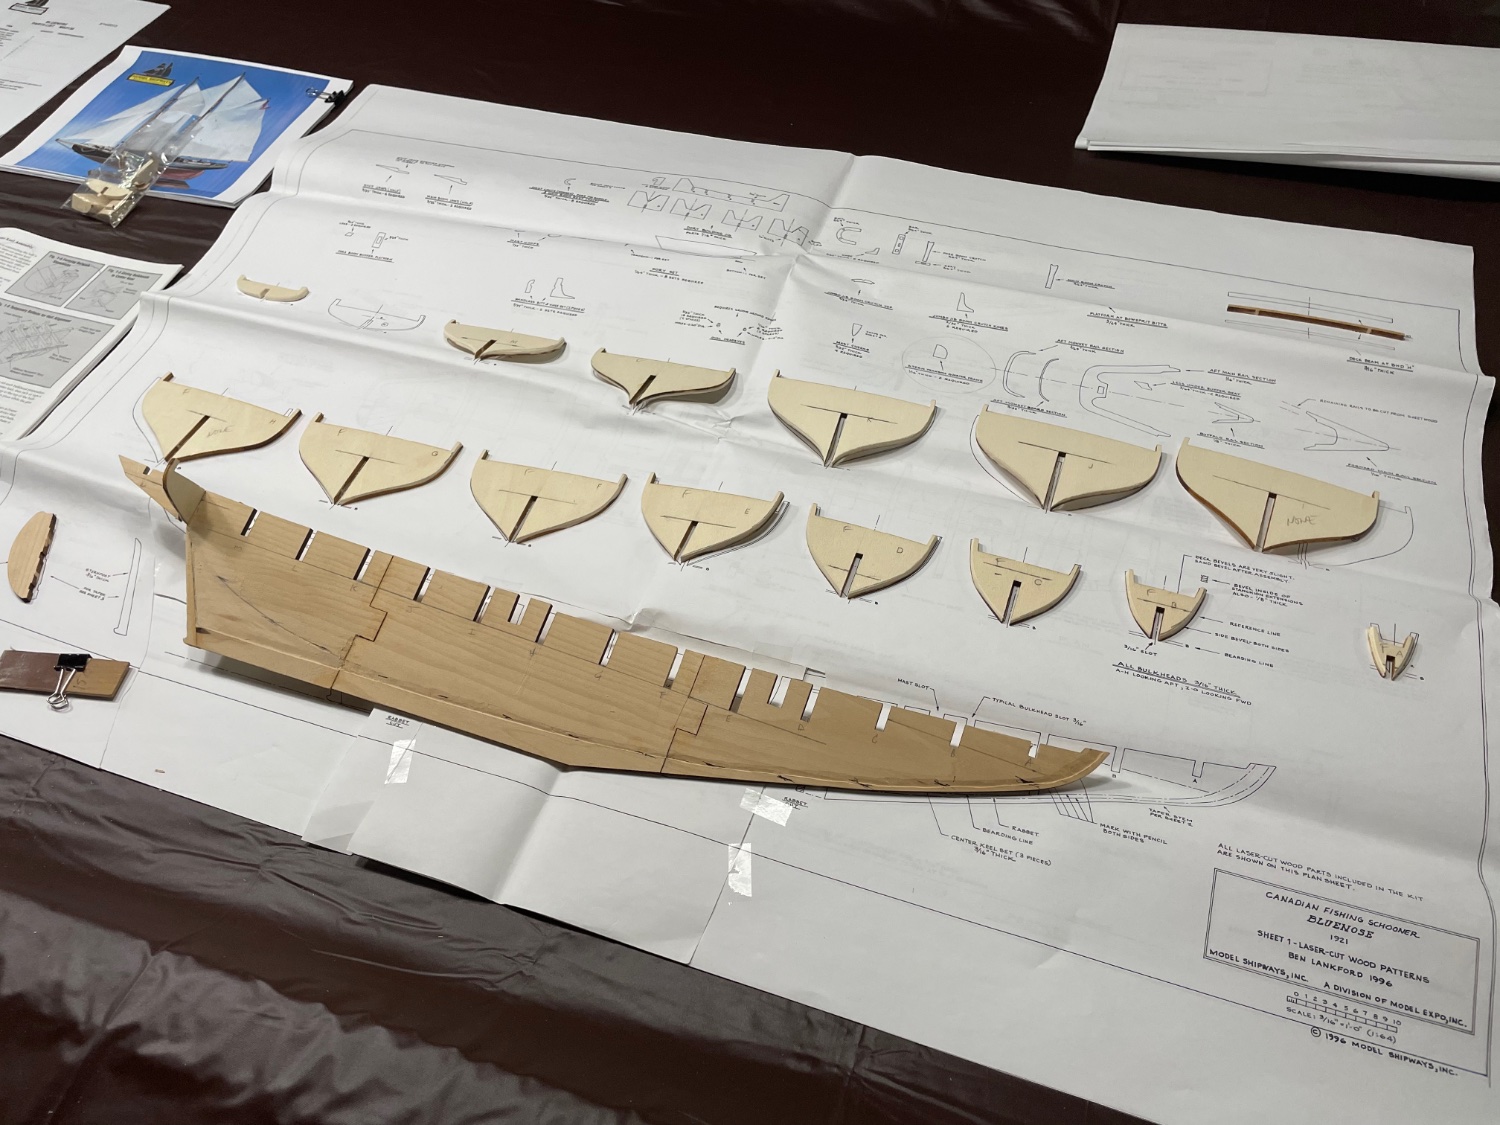
Gluing Bulkheads in place… Good first day… Cheers 🍻

- 282 replies
-
- 5
-
-
- Bluenose
- Model Shipways
- (and 1 more)
-
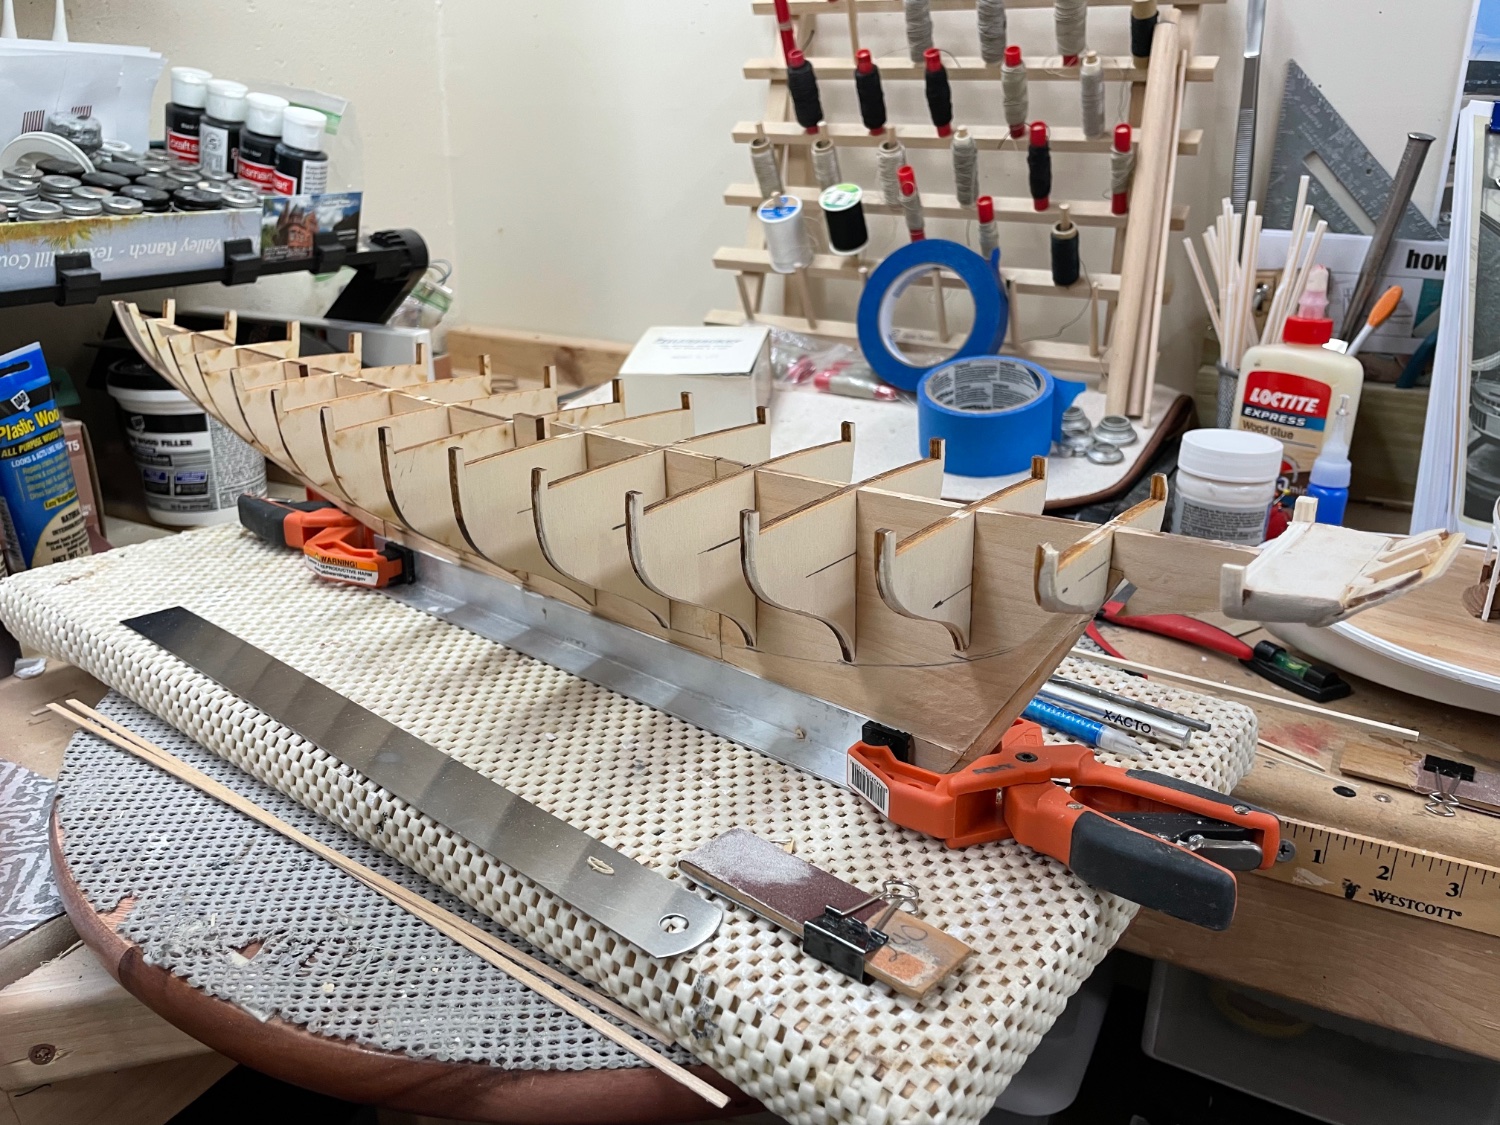
Day 1 - Blukheads fitted… Next step gluing the bulk heads in place. I will need to jig up a frame to insure the bulkheads are square and aligned prior to gluing and then I’ll fair up the framing before planking. Cheers 🍻
- 282 replies
-
- 2
-
-
- Bluenose
- Model Shipways
- (and 1 more)
-
Ok… I need some respite from railings 😆 I will continue steady progress on this build and have started a new day job The Bluenose, here is a link to my other build log if you would like to check it out. https://modelshipworld.com/topic/32549-bluenose-canadian-fishing-schooner-by-john-ruy-164-scale-model-shipways-kit-no-ms2130/
- 238 replies
-
- 4
-
-
- Robert E Lee
- steamboat
- (and 3 more)
-
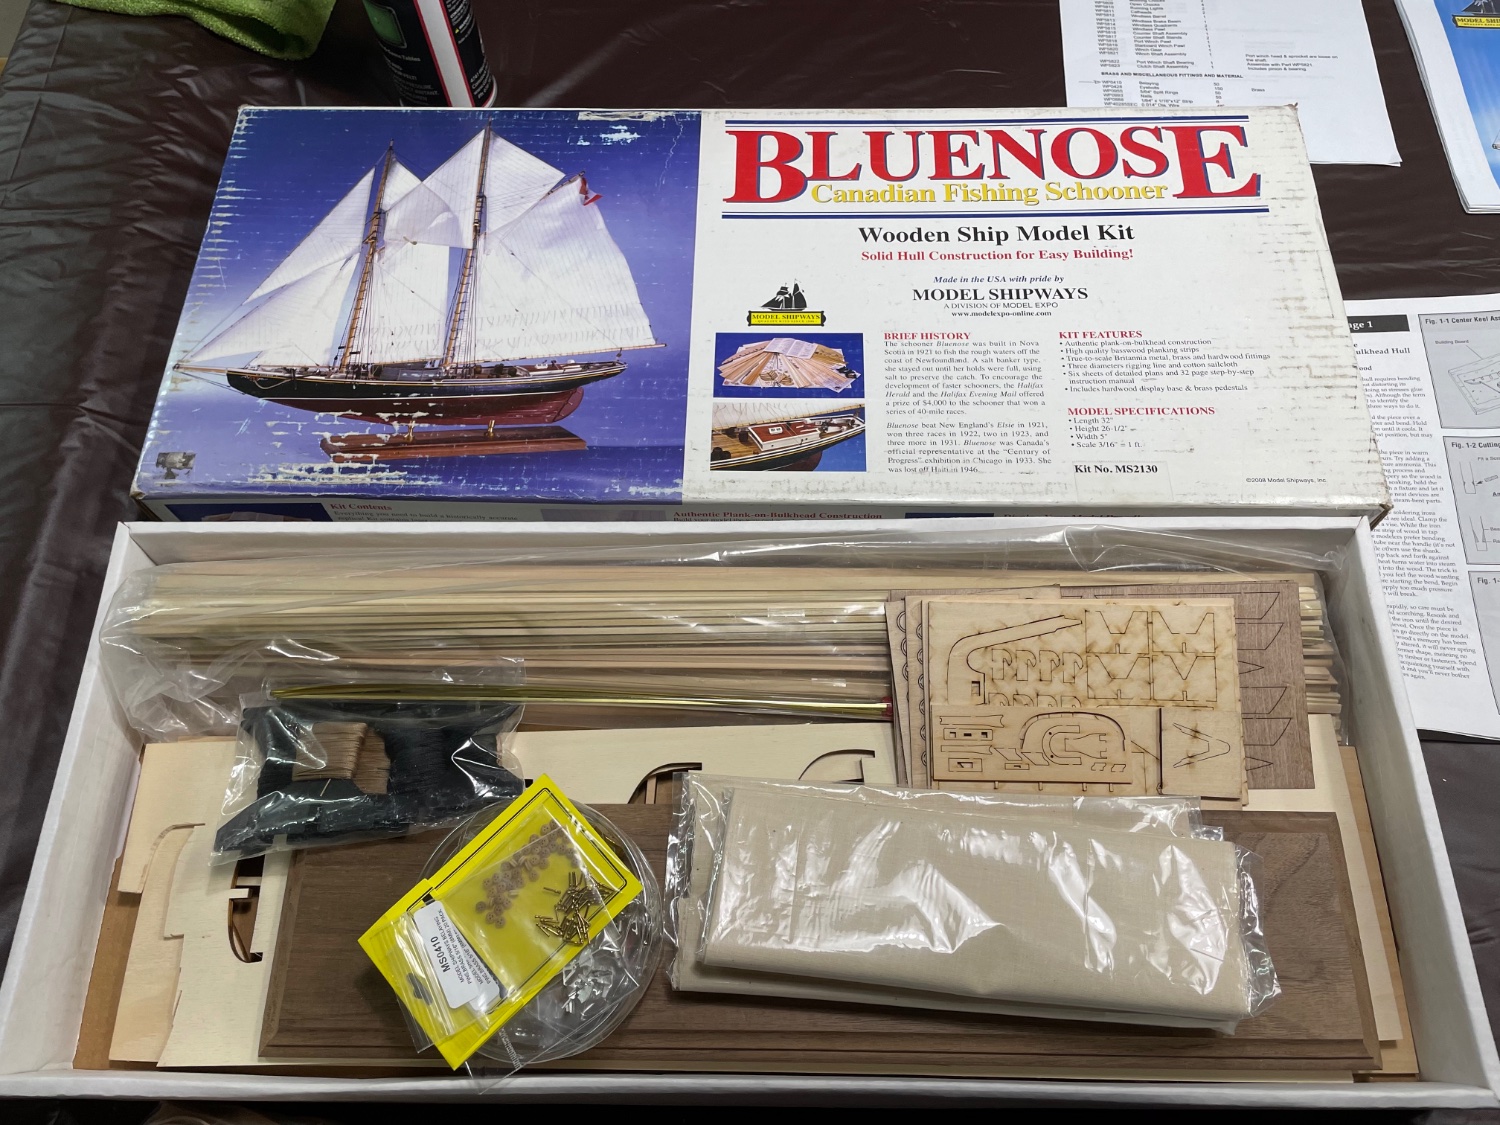
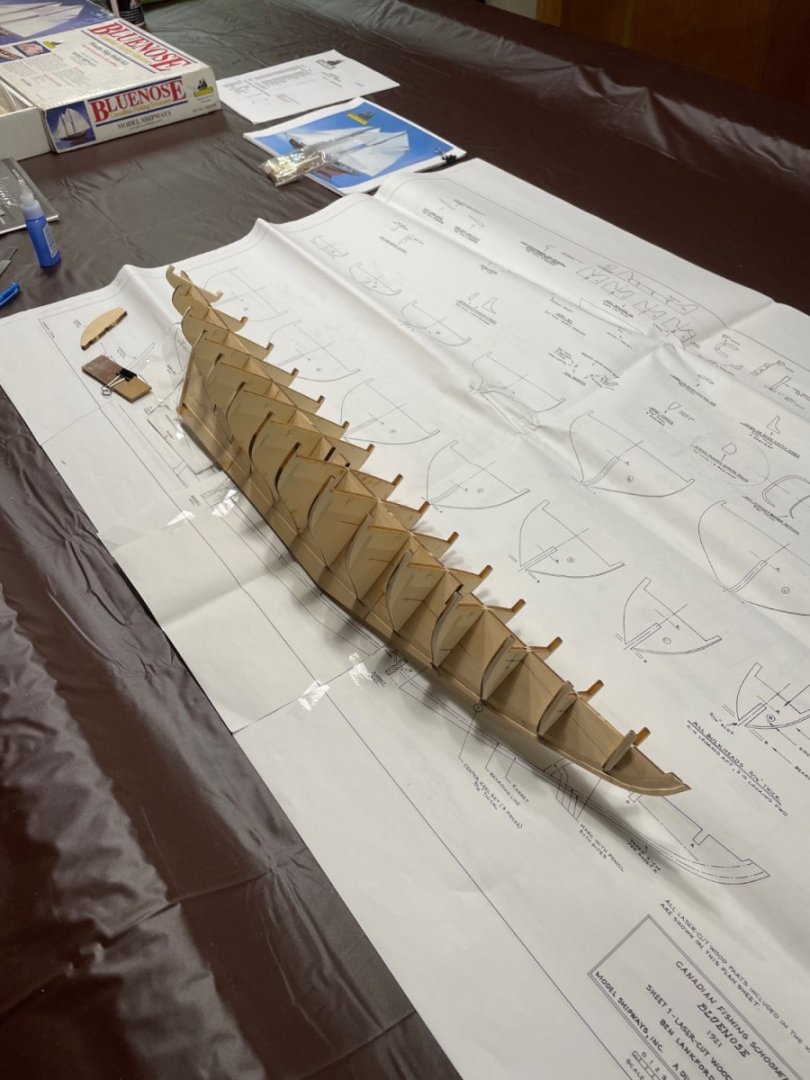
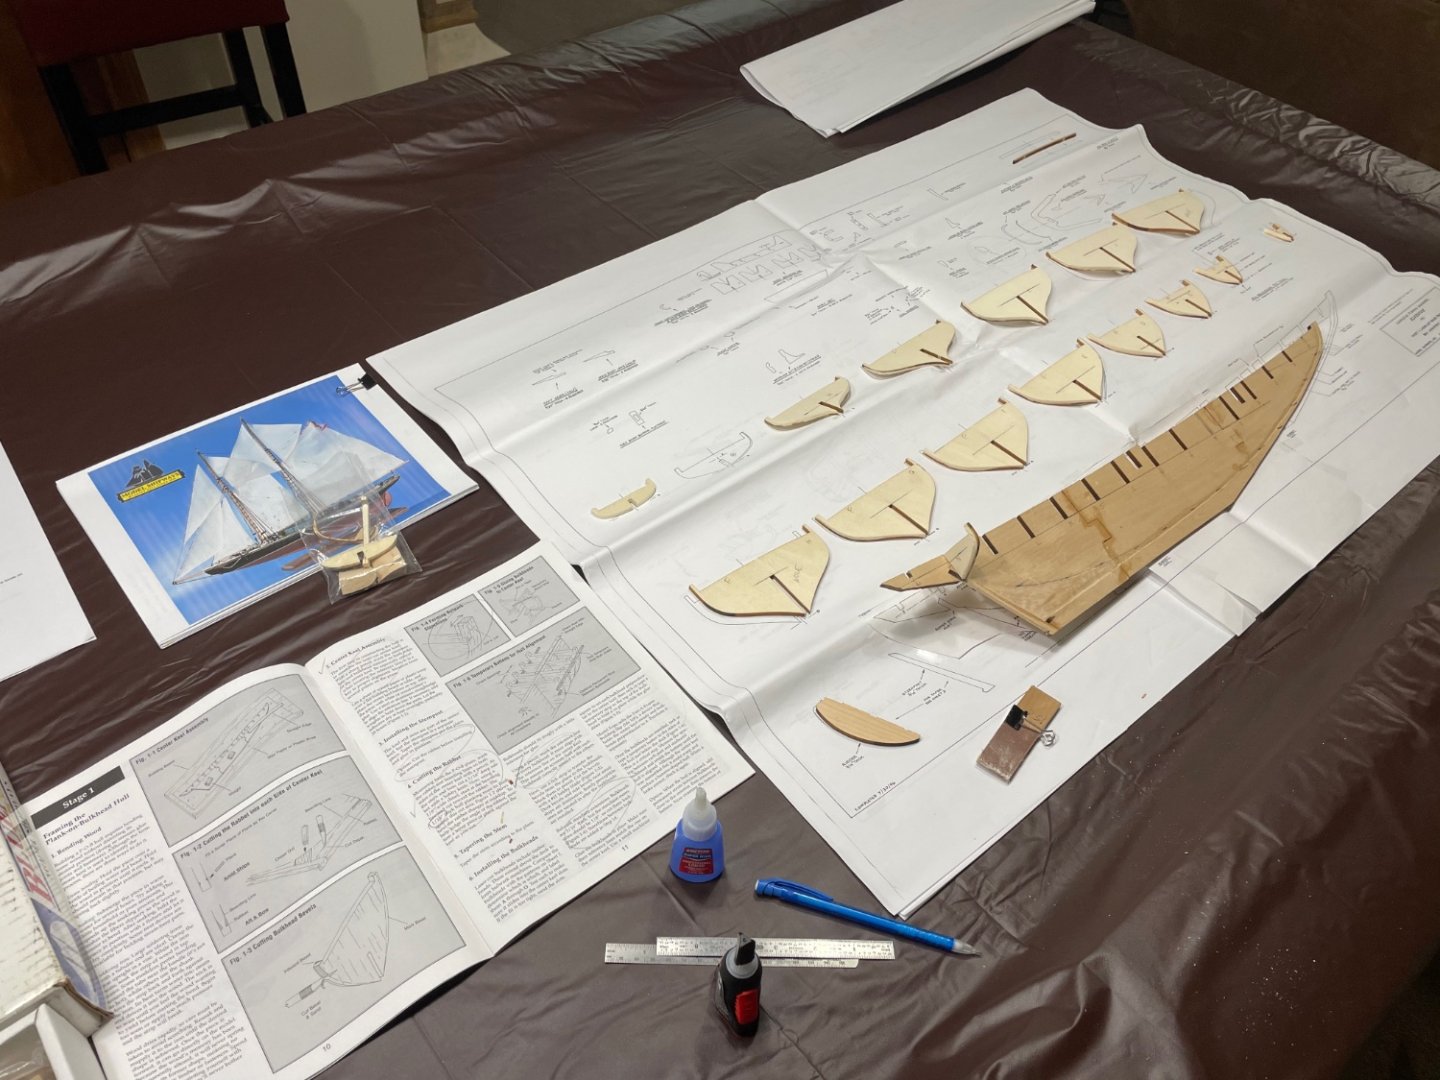
One of my eBay finds out of my stash. I have decided to break up the marathon task of building railings on the Robert E Lee. I will continue building those railings in the evening as I wind down the day. Here is a link to my Robert E Lee Build My new day job will be the Bluenose Canadian Fishing Schooner by Model Shipways. This kit was purchased for just 78.00 including shipping on eBay. The previous owner had started this kit. The kit was only missing some of the deadeyes and belaying pins. Those were easily sourced from Model Expo and are on order. Today I have laid her out to determine what has been started, the work is salvageable. Previous owner had only progressed to step 5. I have also assembled the 3 piece Keel and started the work of smoothing out the bulk head tapers and Rabbit Joints cut by my predecessor. I have been wanting to build the beautiful schooner since I first saw a model of her in the Bluenose Hotel in Bar Harbor, Maine. Plan to visit Nova Scotia next summer and see The Bluenose II among other things Canadian. Wish me luck, I am hoping my skills are now up to the task of doing her justice. Cheers 🍻


- 282 replies
-
- 6
-
-
- Bluenose
- Model Shipways
- (and 1 more)
-
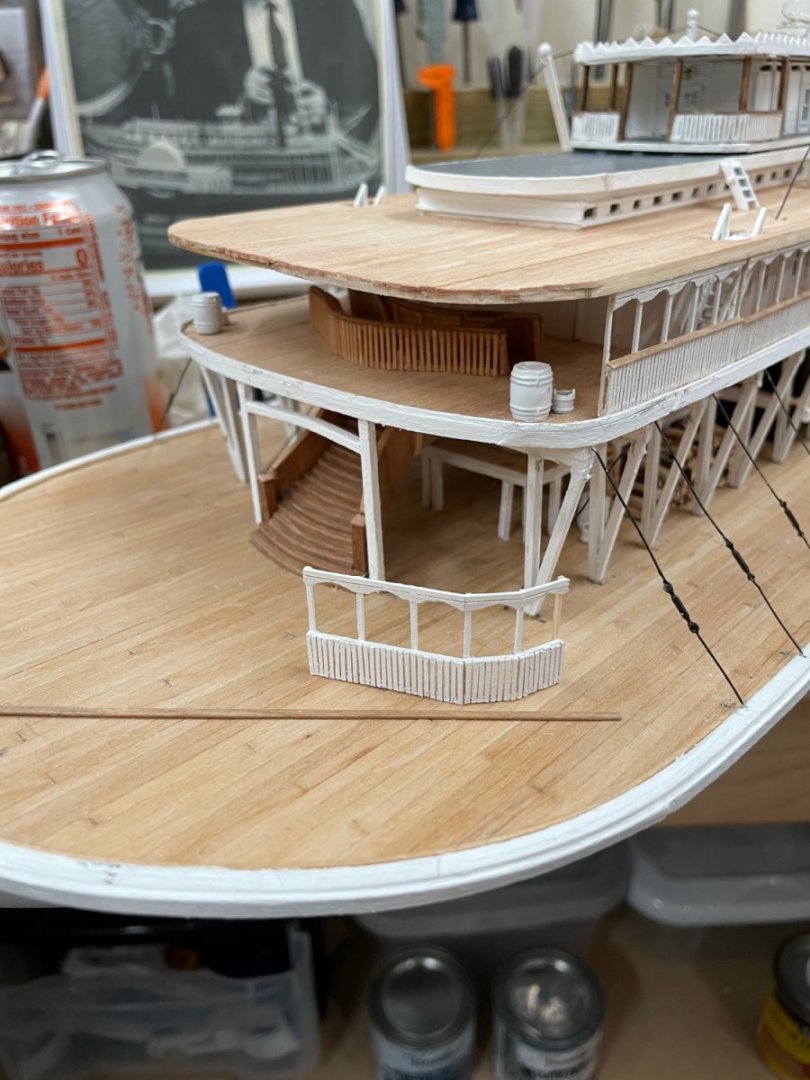
Yes… the drawings indicate they are to be painted White. I would have thought red, but white seems to be the color for everything.