HOLIDAY DONATION DRIVE - SUPPORT MSW - DO YOUR PART TO KEEP THIS GREAT FORUM GOING! (Only 13 donations so far - C'mon guys!)
×


John Ruy
-
Posts
1,566 -
Joined
-
Last visited
Content Type
Profiles
Forums
Gallery
Events
Everything posted by John Ruy
-
IonVac, Lightweight Handheld Cordless Vacuum Cleaner, USB Charging, Multi-Surface https://www.walmart.com/ip/127872186 I use one… Works great on the bench for your micro carpentry. Cheers 🍻
- 1 reply
-
- 2
-

-

-
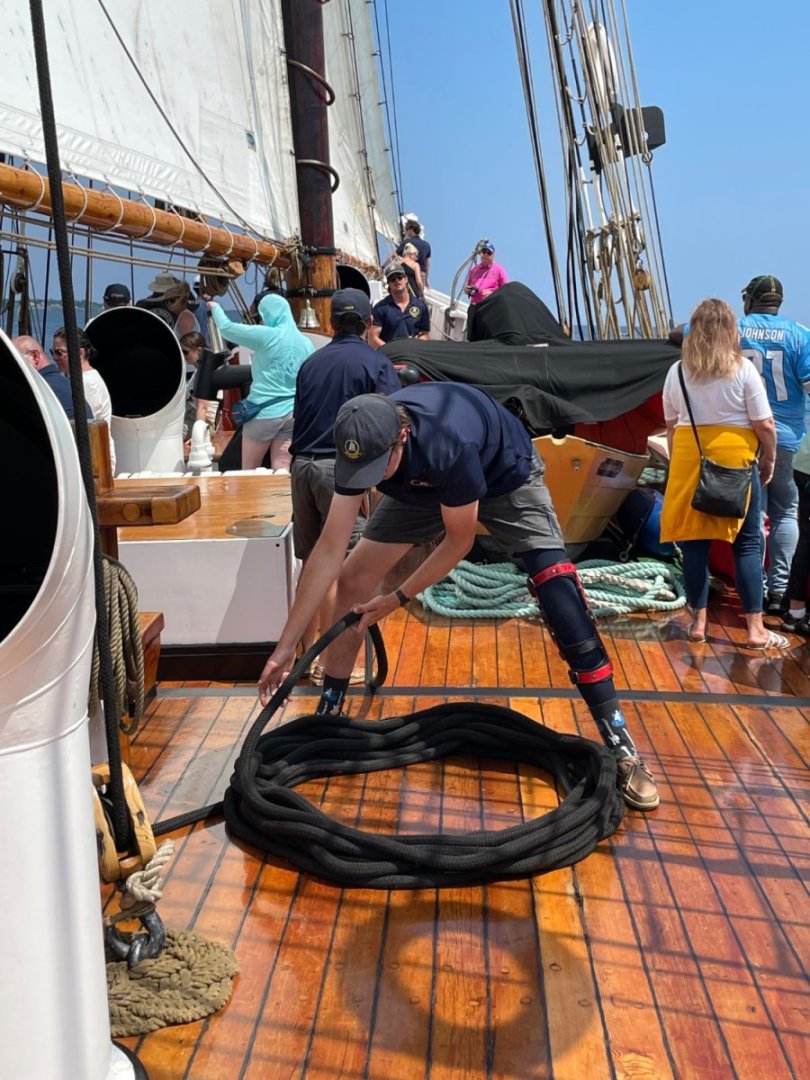
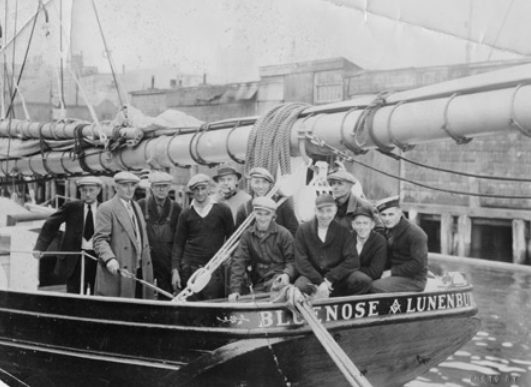
 Hoisting on the Bluenose II, my how times have changed… Cheers 🍻
- 282 replies
-
- 2
-
-
- Bluenose
- Model Shipways
- (and 1 more)
-
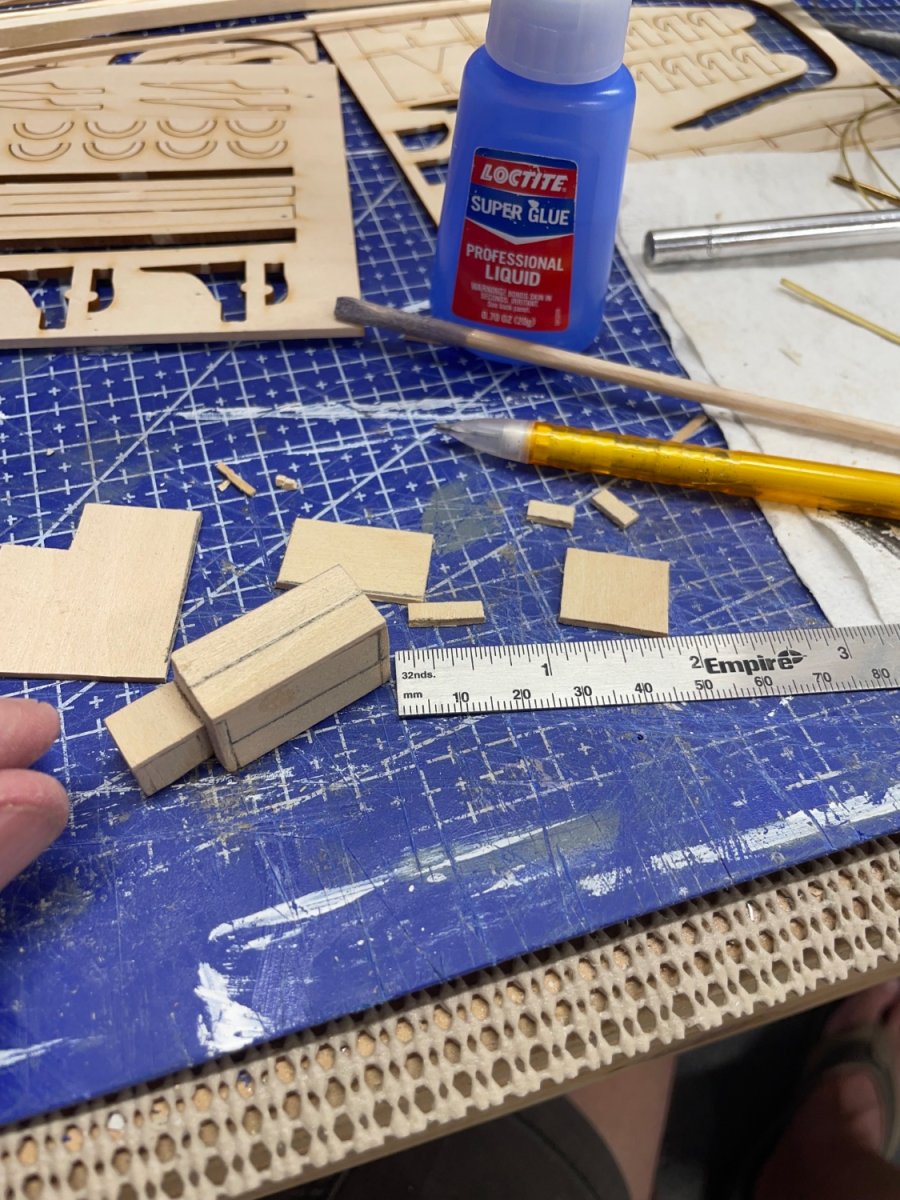
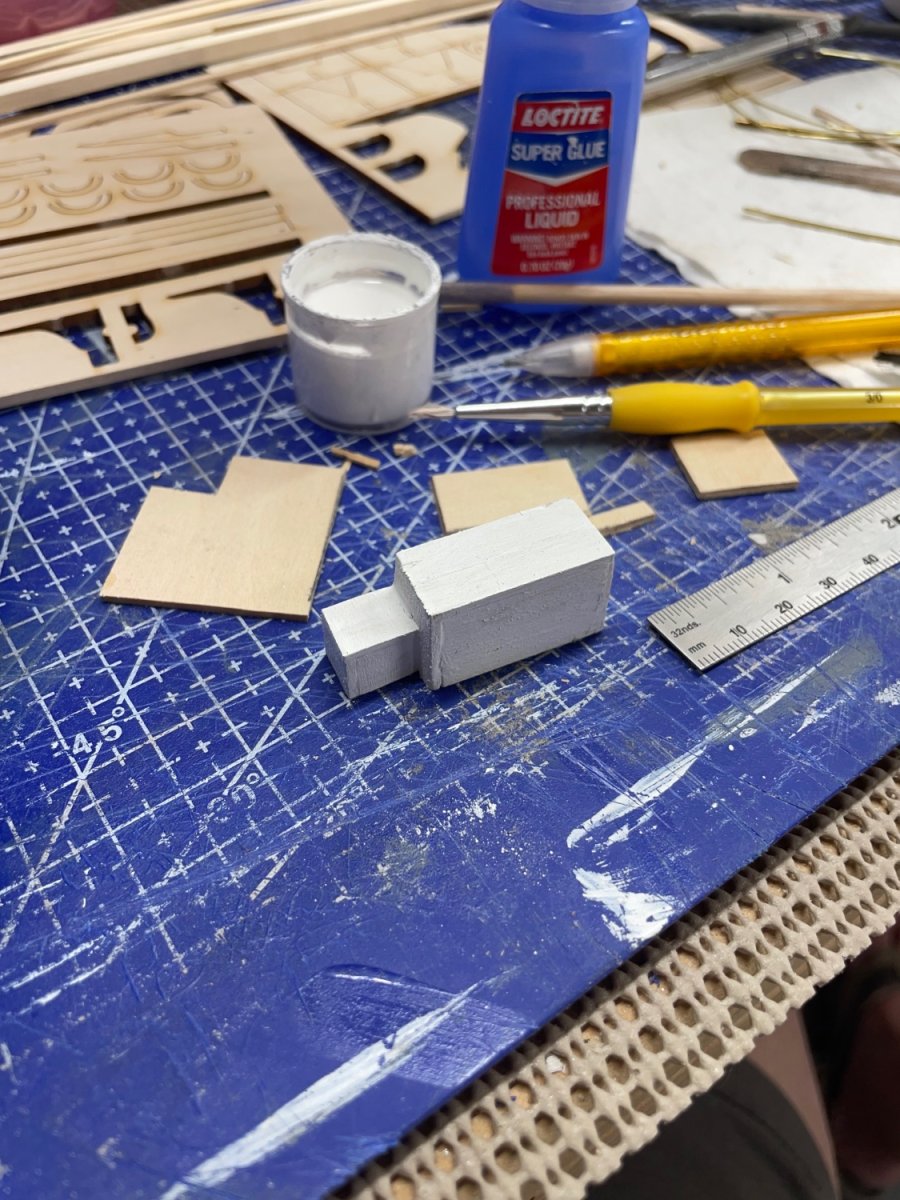
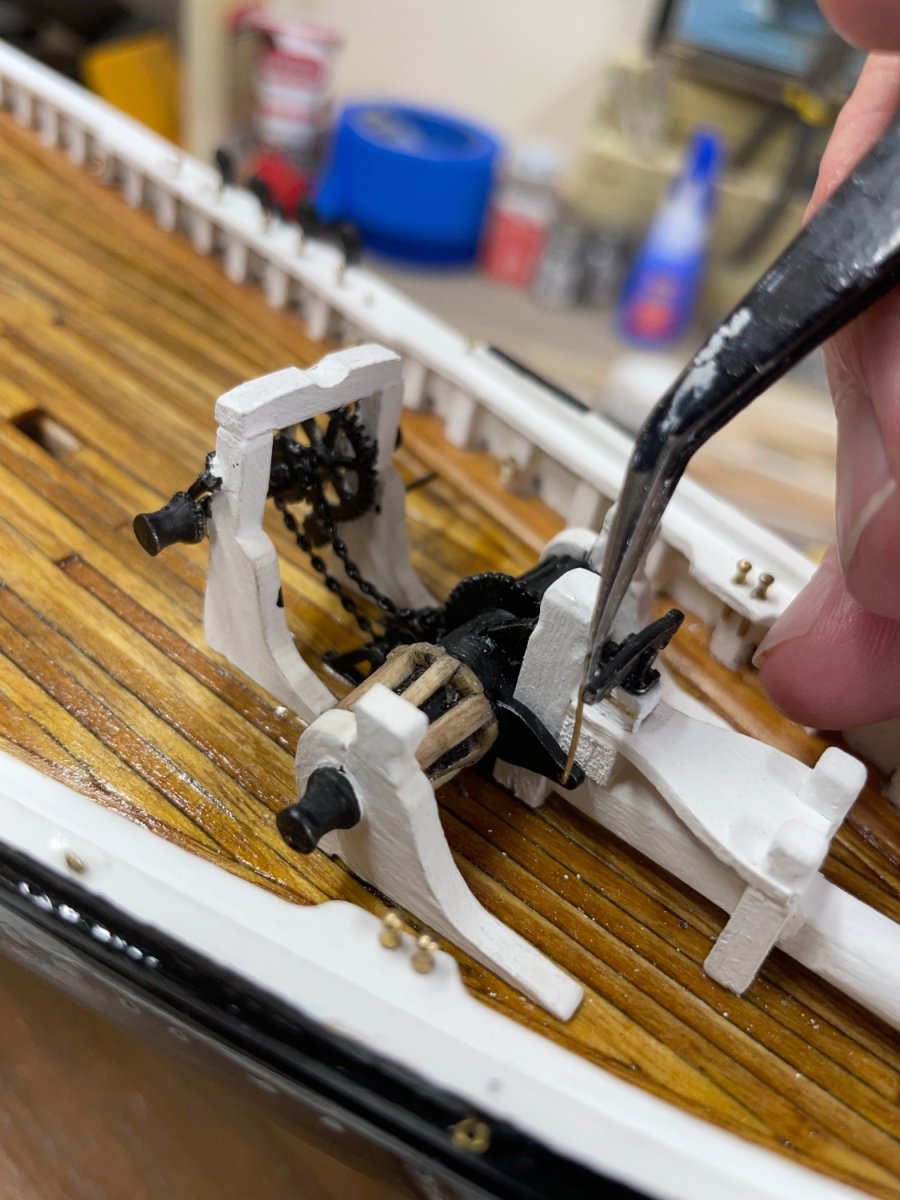
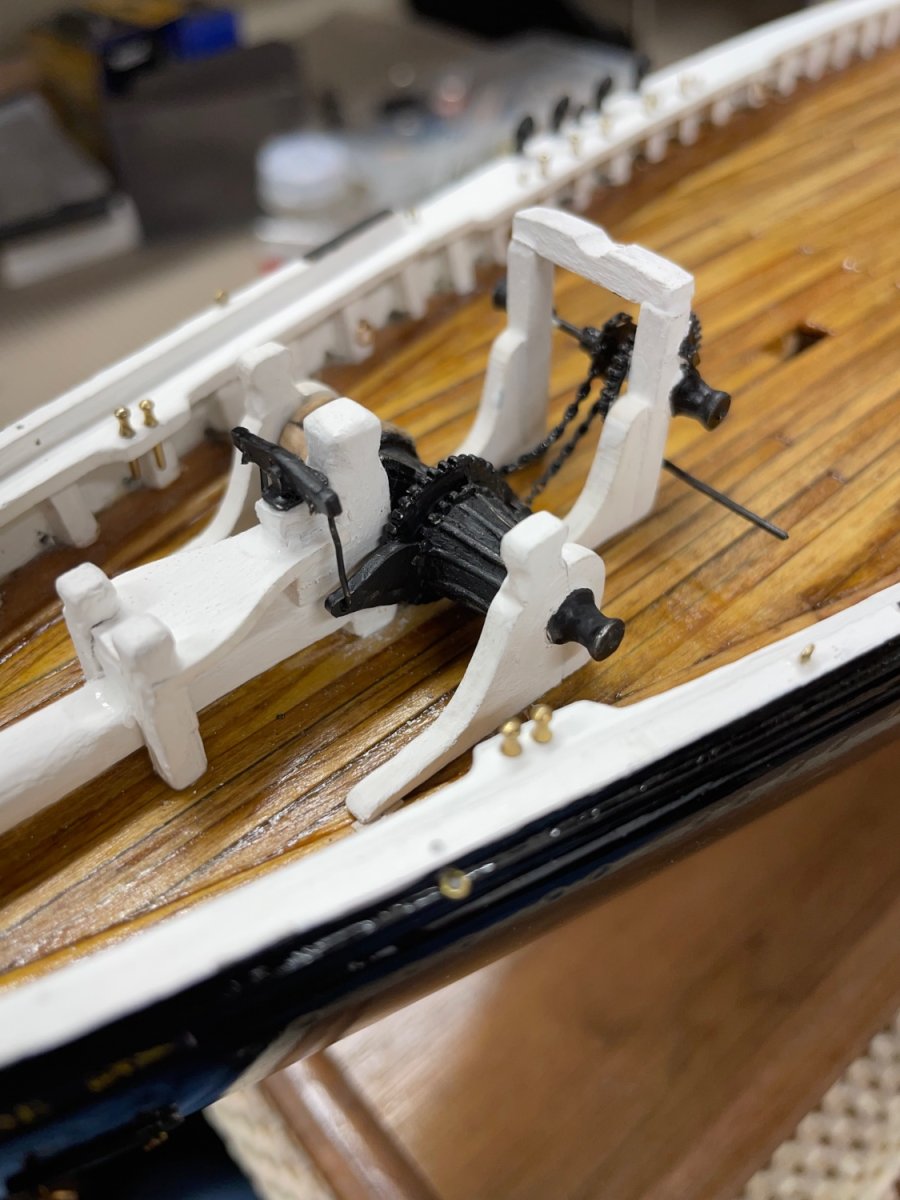
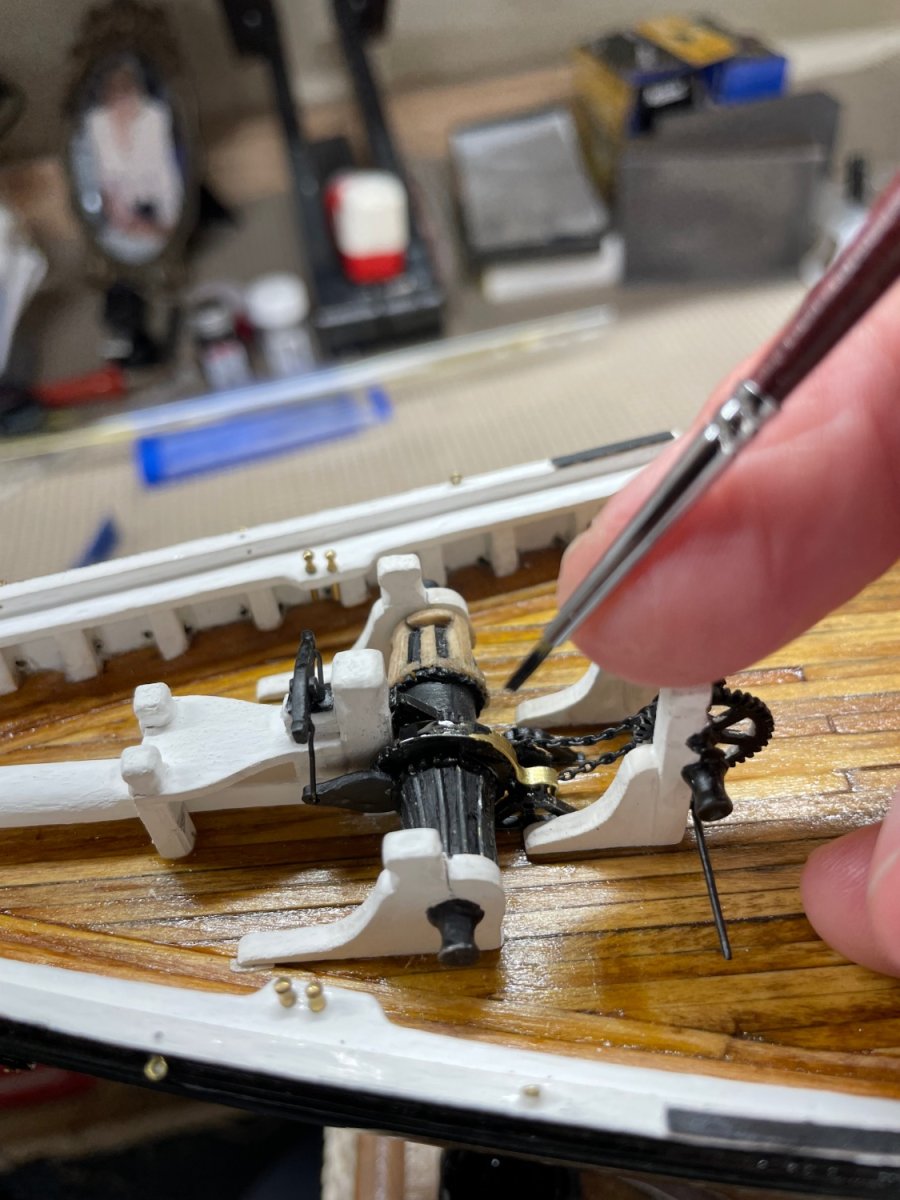
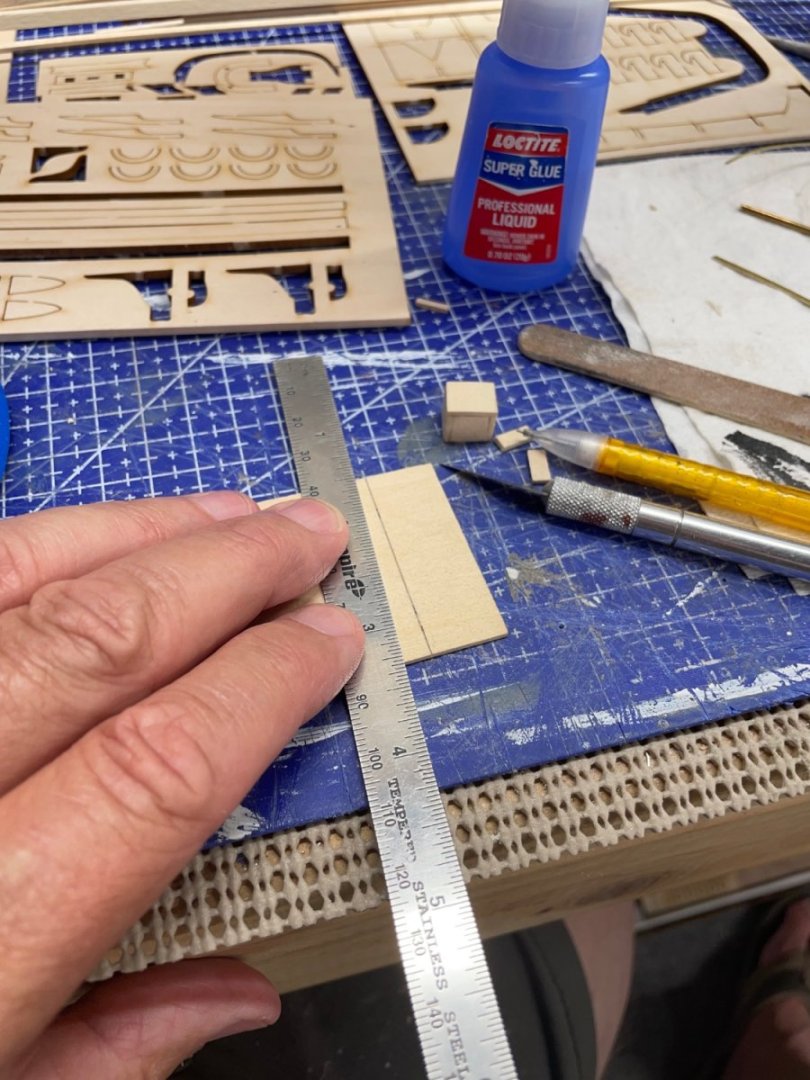
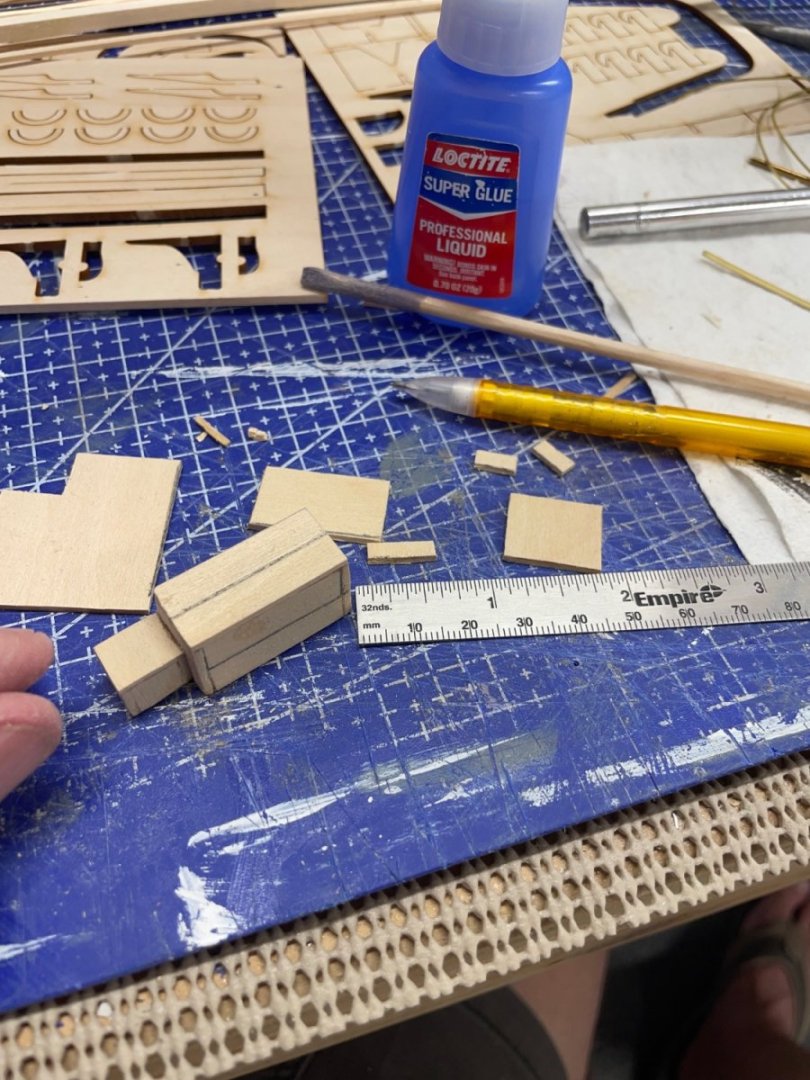
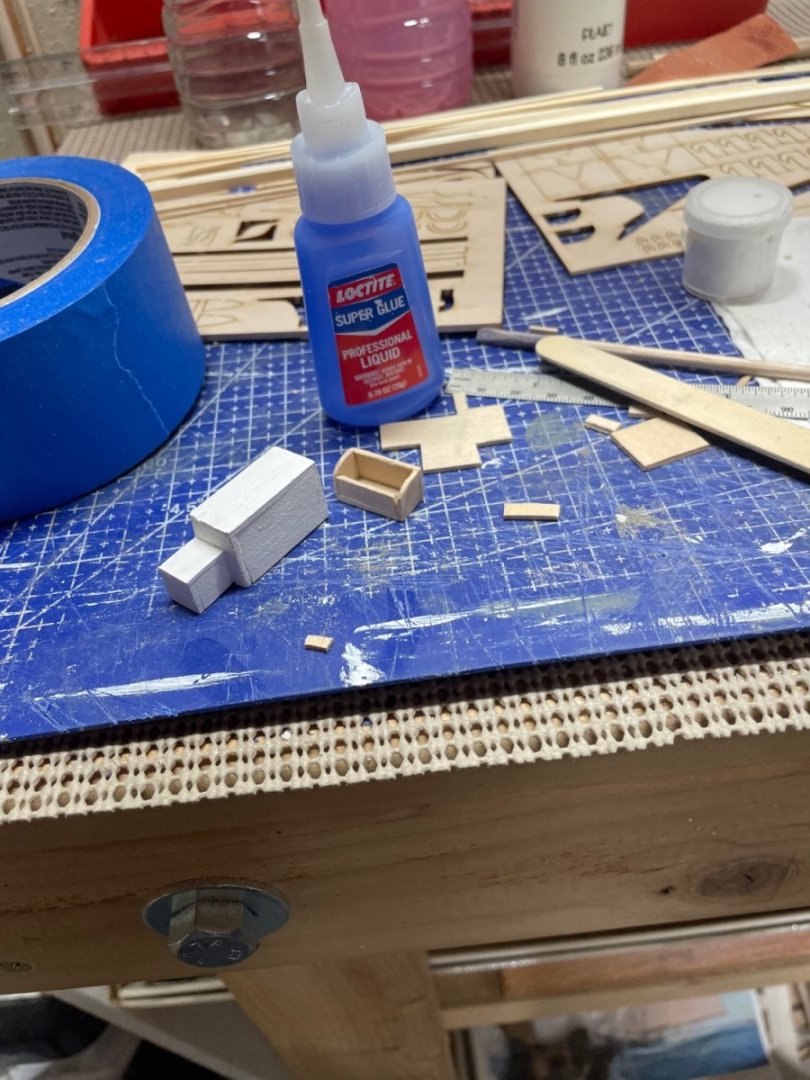
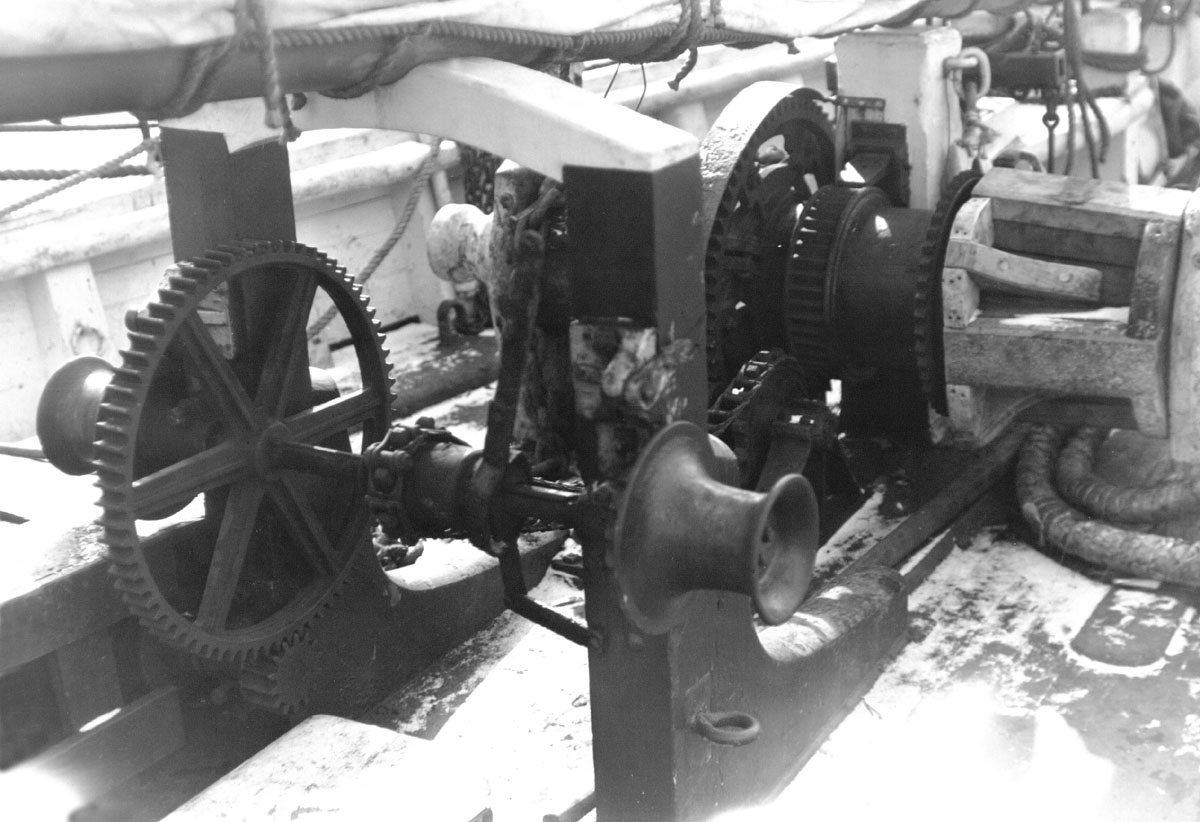
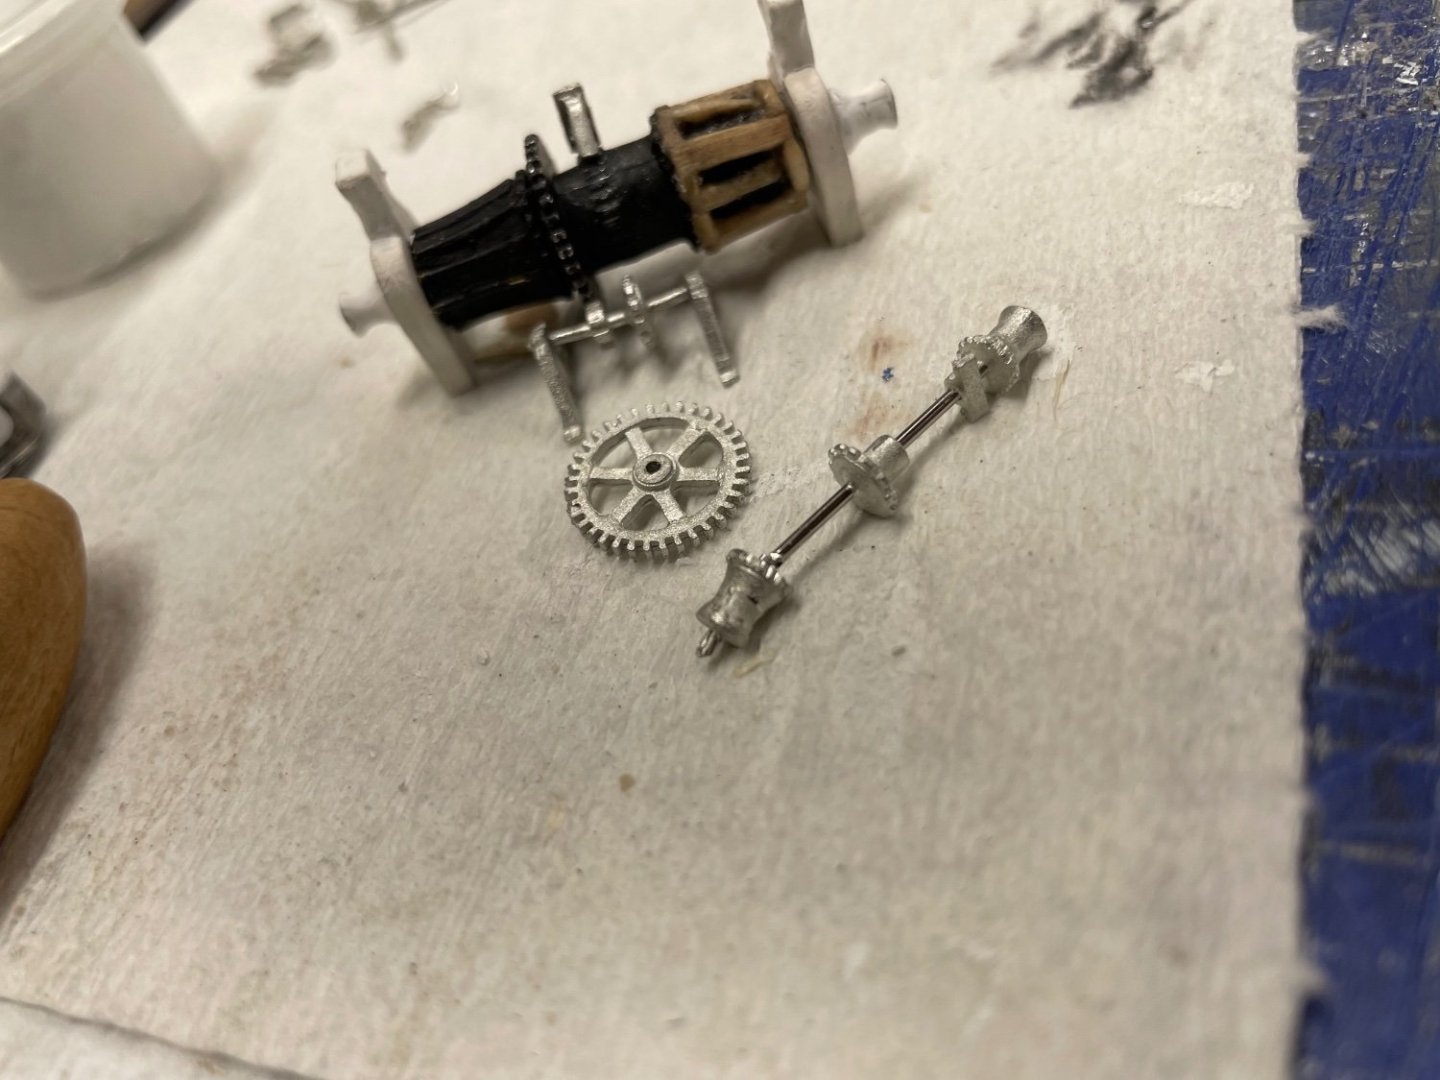
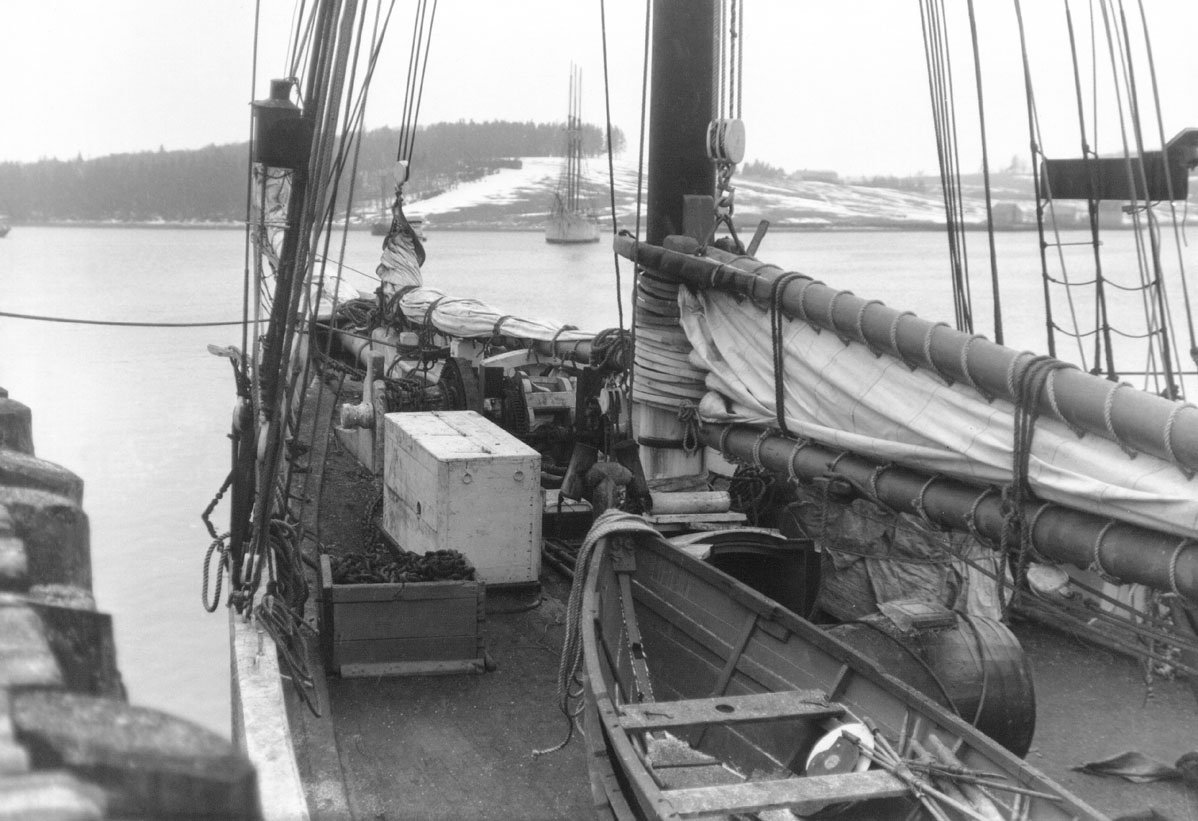
Hoisting Engine Box and Anchor Chain Box… Cheers 🍻


- 282 replies
-
- 3
-
-
- Bluenose
- Model Shipways
- (and 1 more)
-
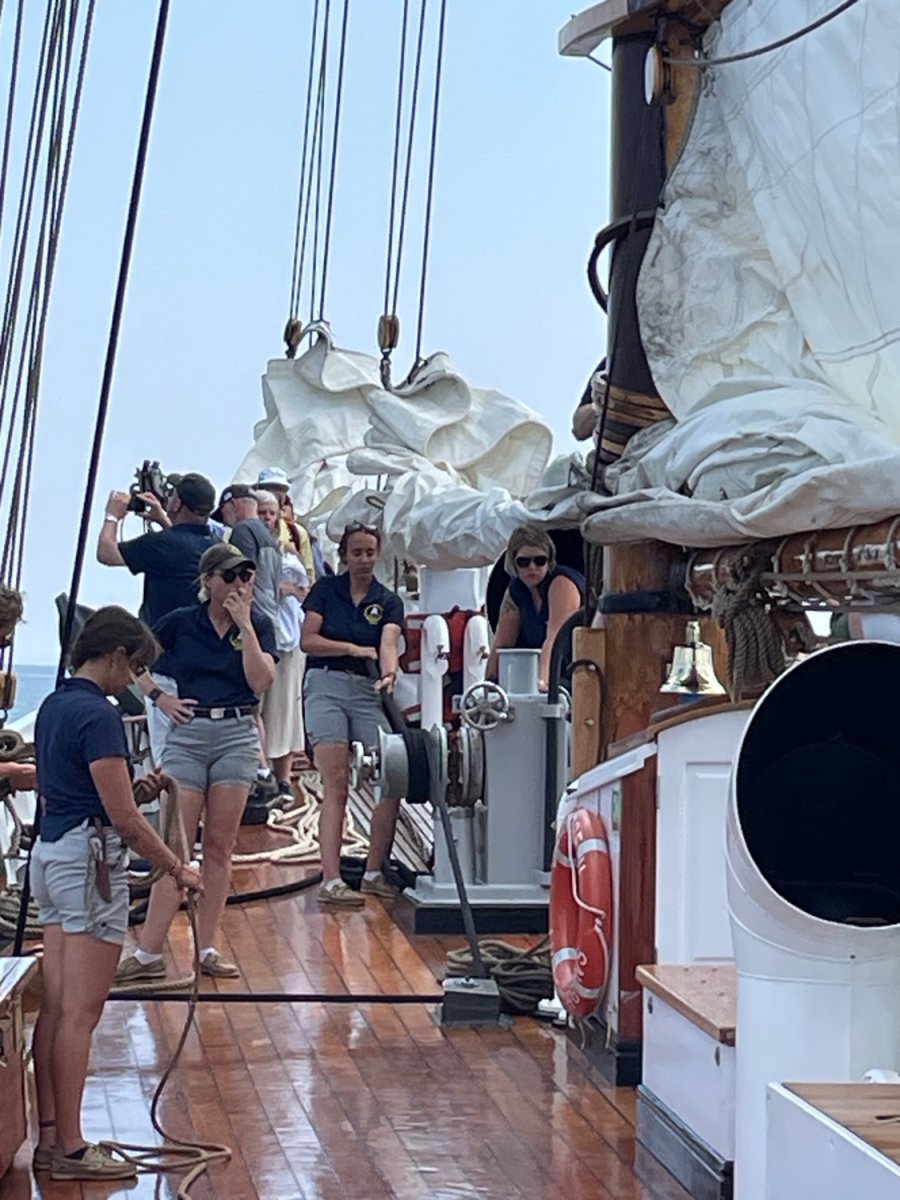
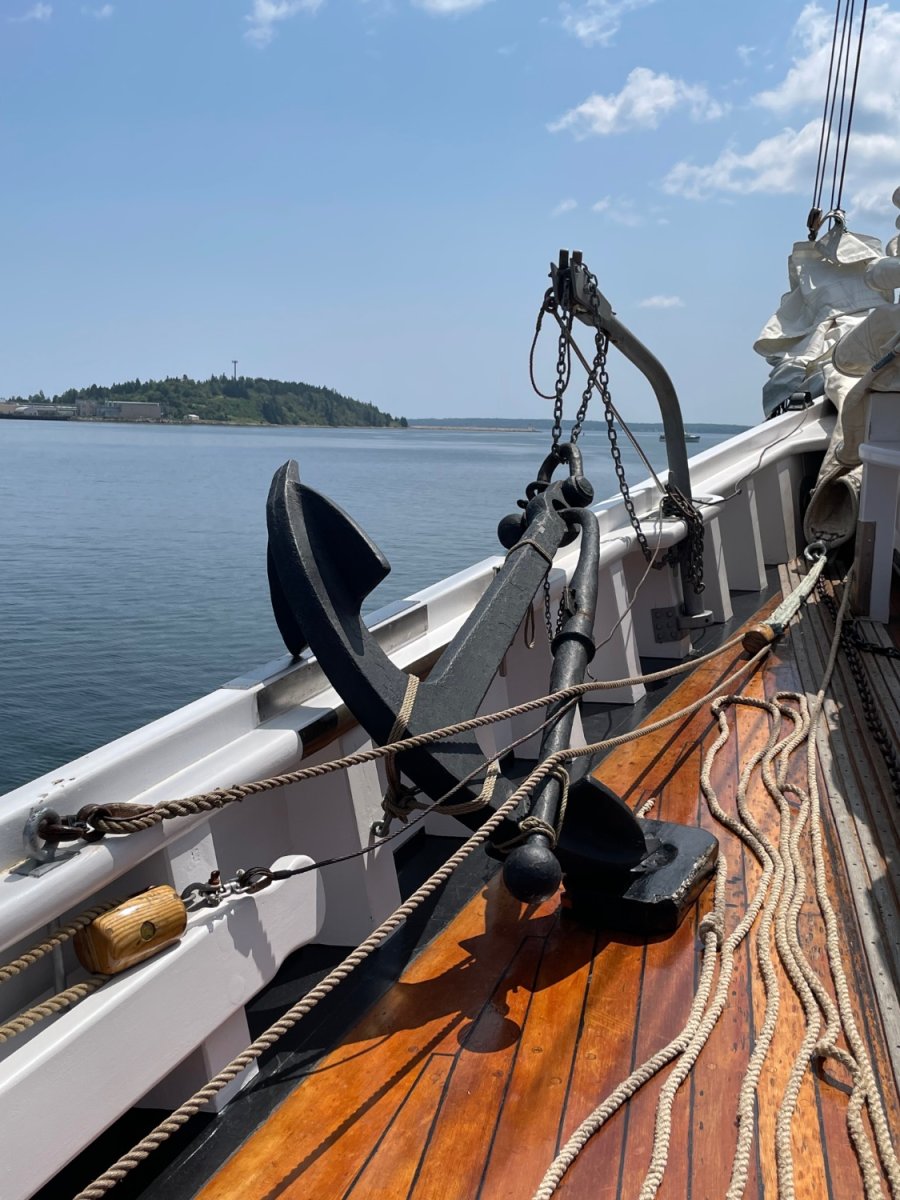
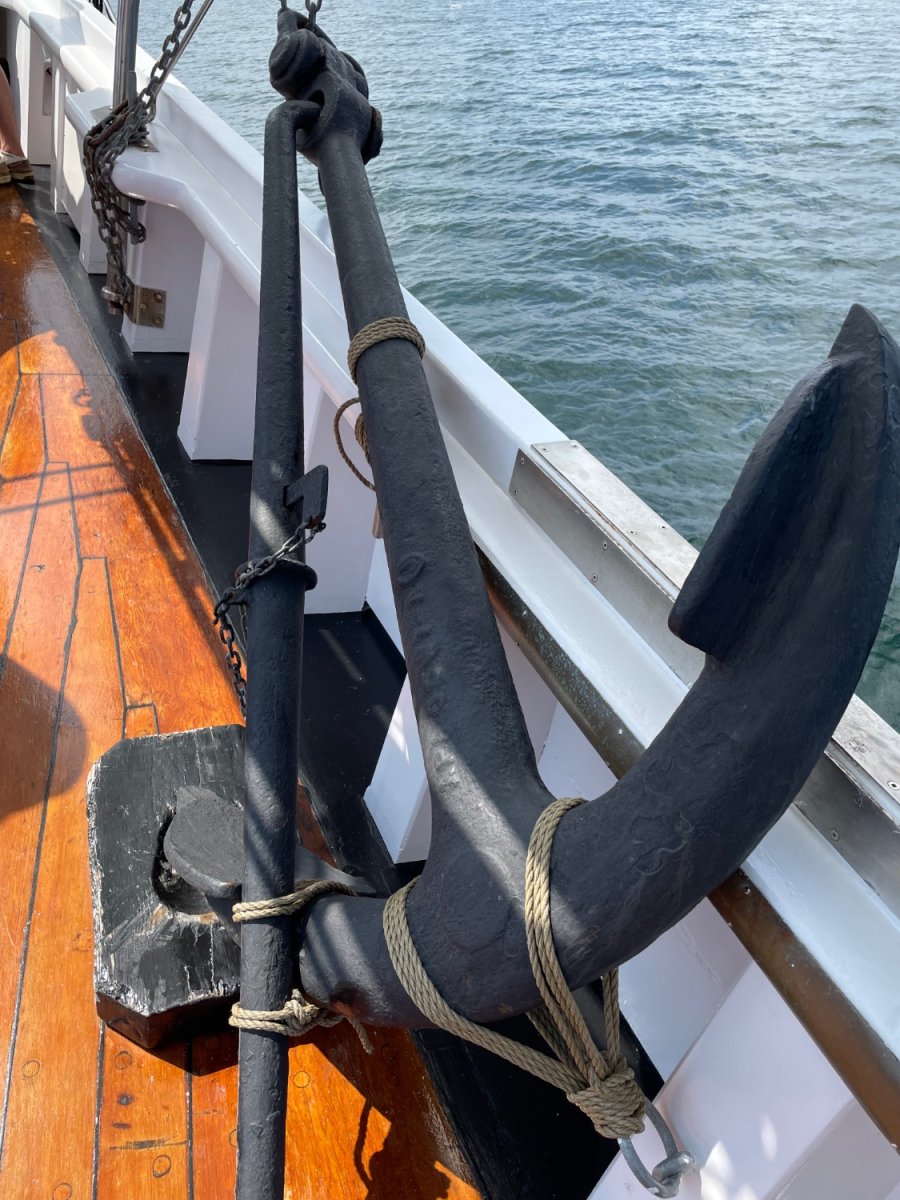
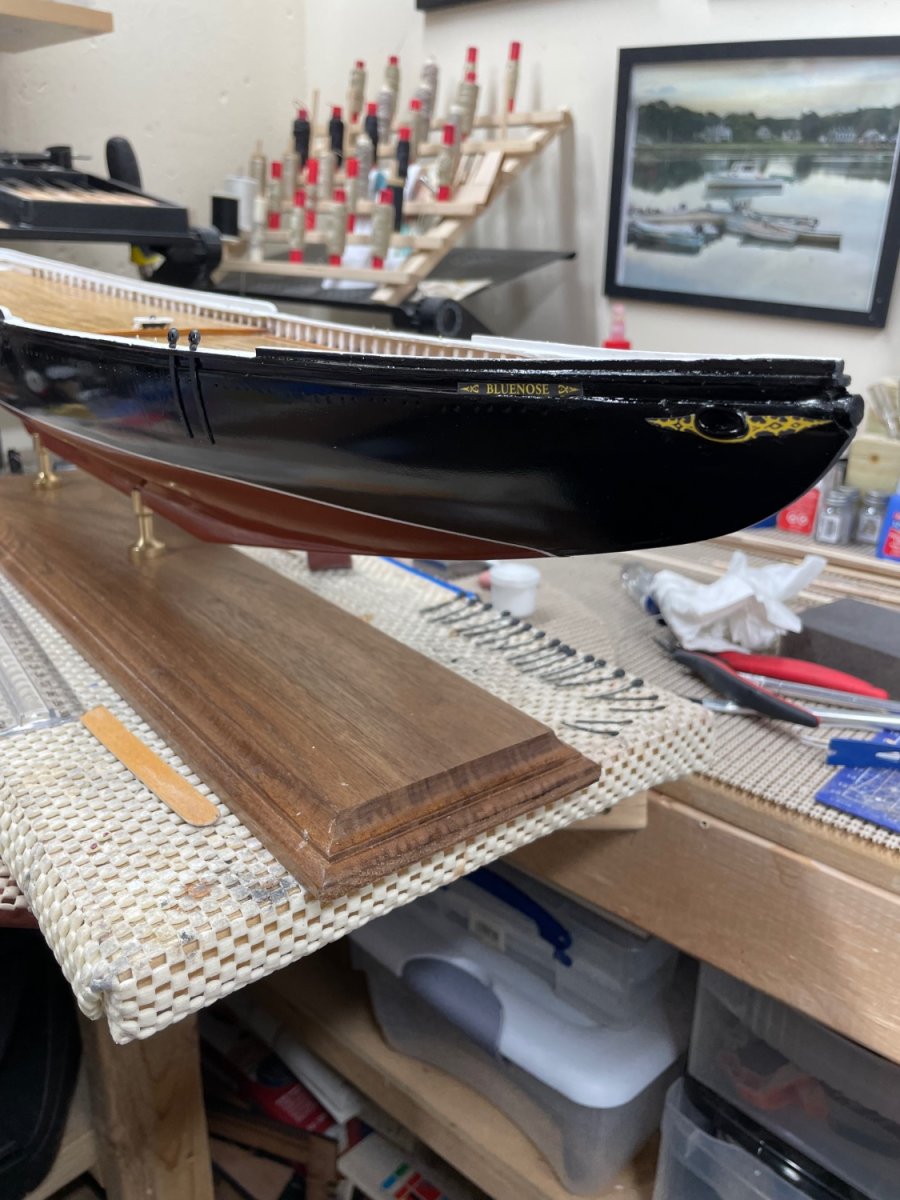
Just got back from Nova Scotia, what a great trip. Beautiful coast line, much like Maine. Spent time at the Canadian Maritime Museum of the Atlantic in Halifax. Fascinating History. Also, went for a short cruise on the Bluenose II. Got lots of good photos and first hand knowledge of rigging, etc… There is nothing like close up reality, almost a step back in time. Port Anchor mounted… Cheers 🍻


- 282 replies
-
- 6
-
-
- Bluenose
- Model Shipways
- (and 1 more)
-
Hi Phil, Nice work on that belfry. However, I’m just returning from Nova Scotia where I just took a cruise on the Bluenose II. One of my photos did capture their placement of the ships bell on the Fore Mast. Nova Scotia takes great pride in the Bluenose II being a detailed replica of the original 1921 Bluenose. As for my own placement of a ships bell, I would probably keep it simple on the Main Mast as I did on my build of the Arctic Explorer Bowdoin. Your Albatros build is setting a high bar for My on build of this Revenue Cutter. Nice work. 👍

-
I agree with Allen, Mystic Seaport Museum would be your best source of information. They do have drawings of The Charles W Morgan for purchase. You can find several build logs on the CWM right here on MSW. John 🍻
-
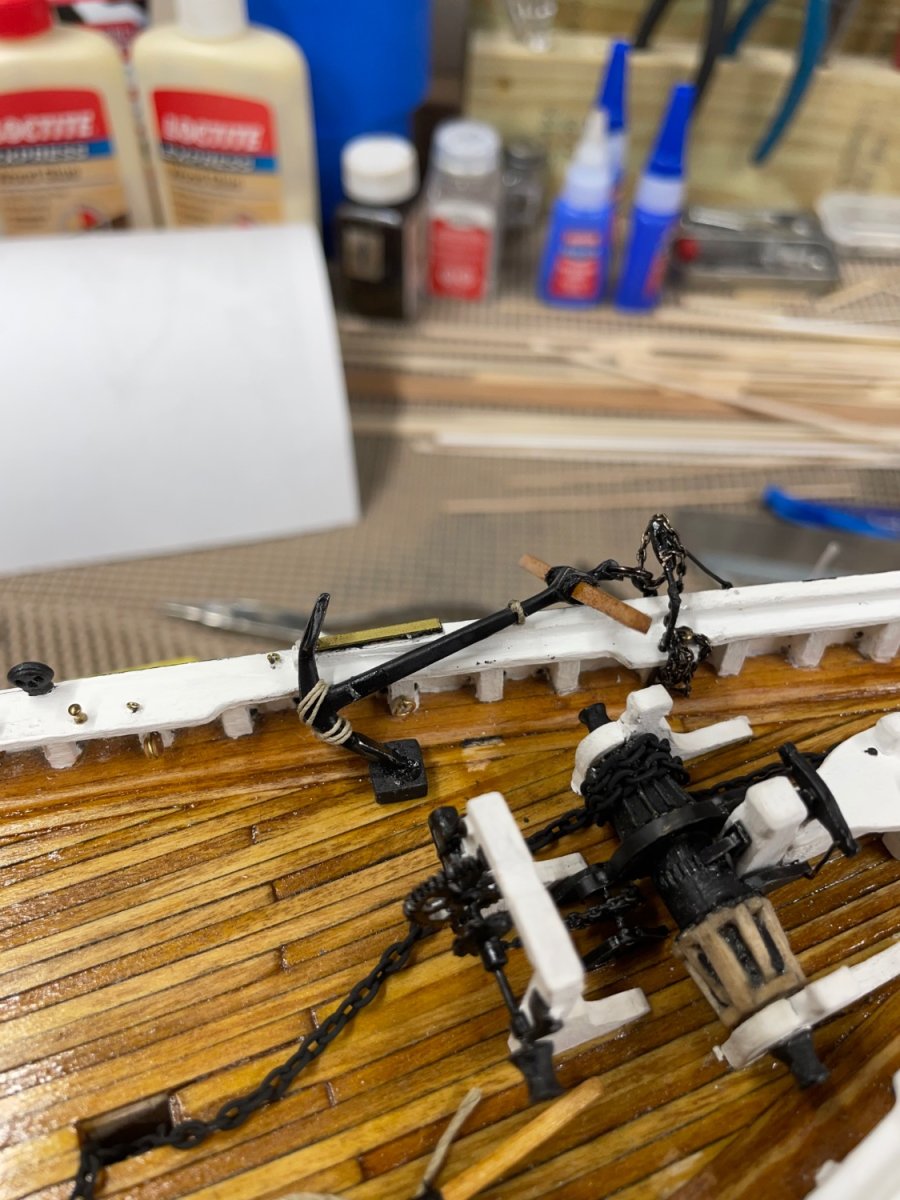
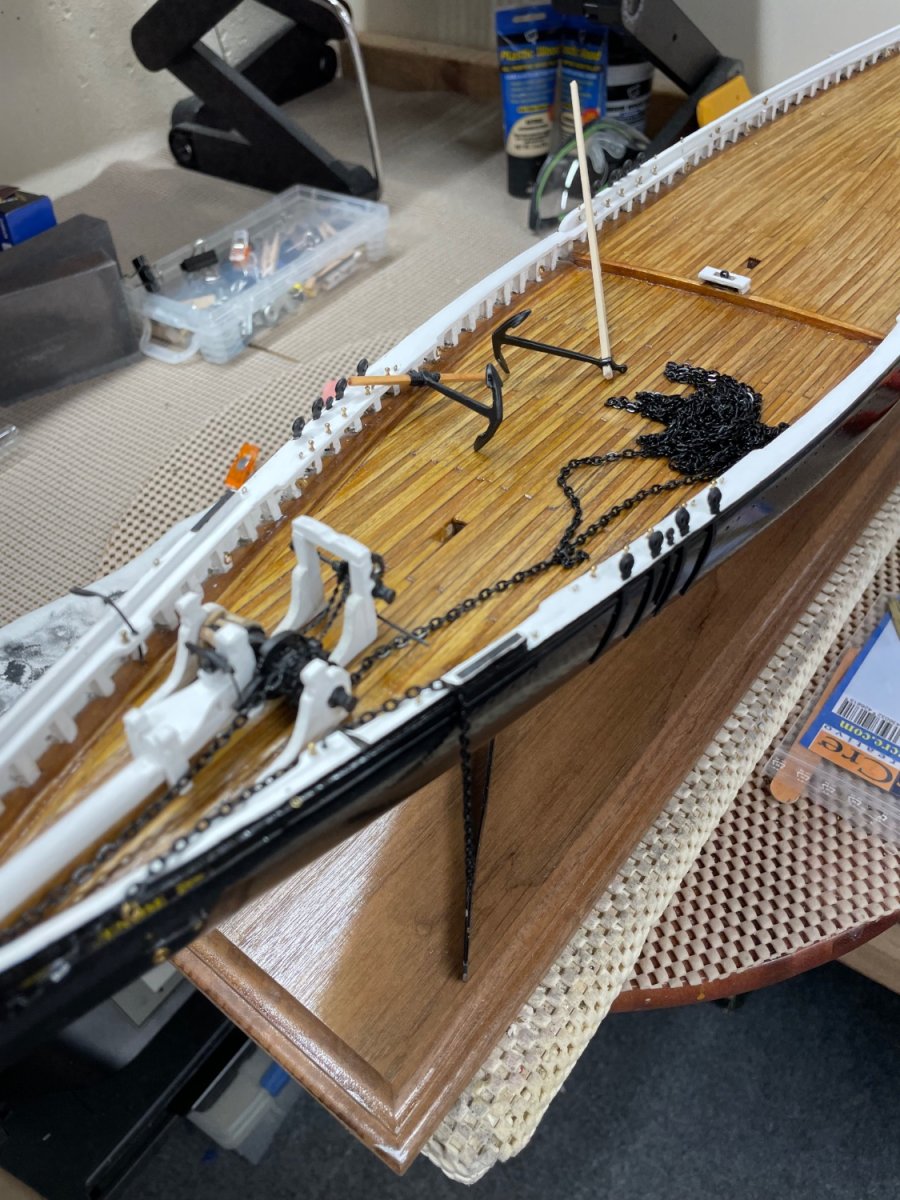
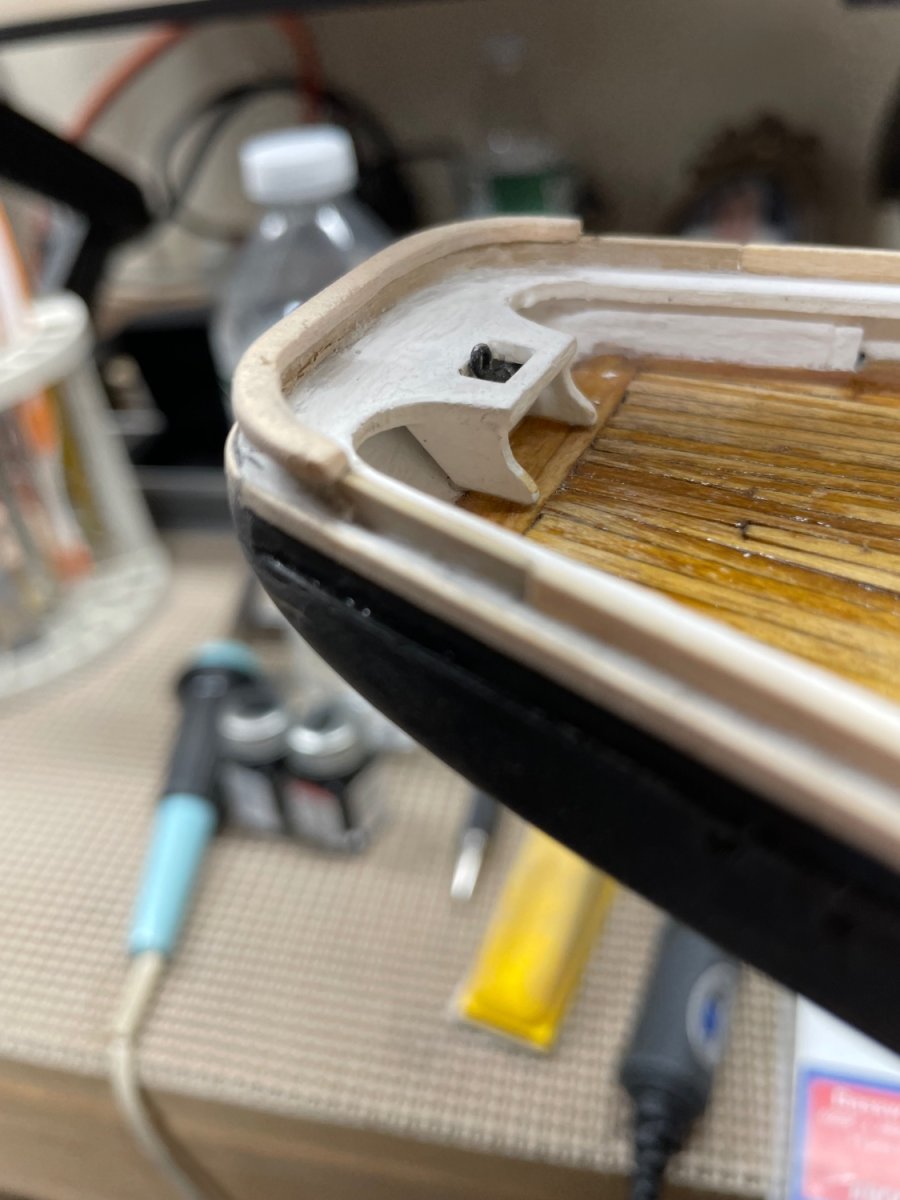
Thanks David… yep, I found the chain box on the plans. Lots of detail on sheet 4. Requires lots of study. 🧐 I too am impressed with the plans from Model Shipways. John
- 282 replies
-
- 2
-
-
- Bluenose
- Model Shipways
- (and 1 more)
-
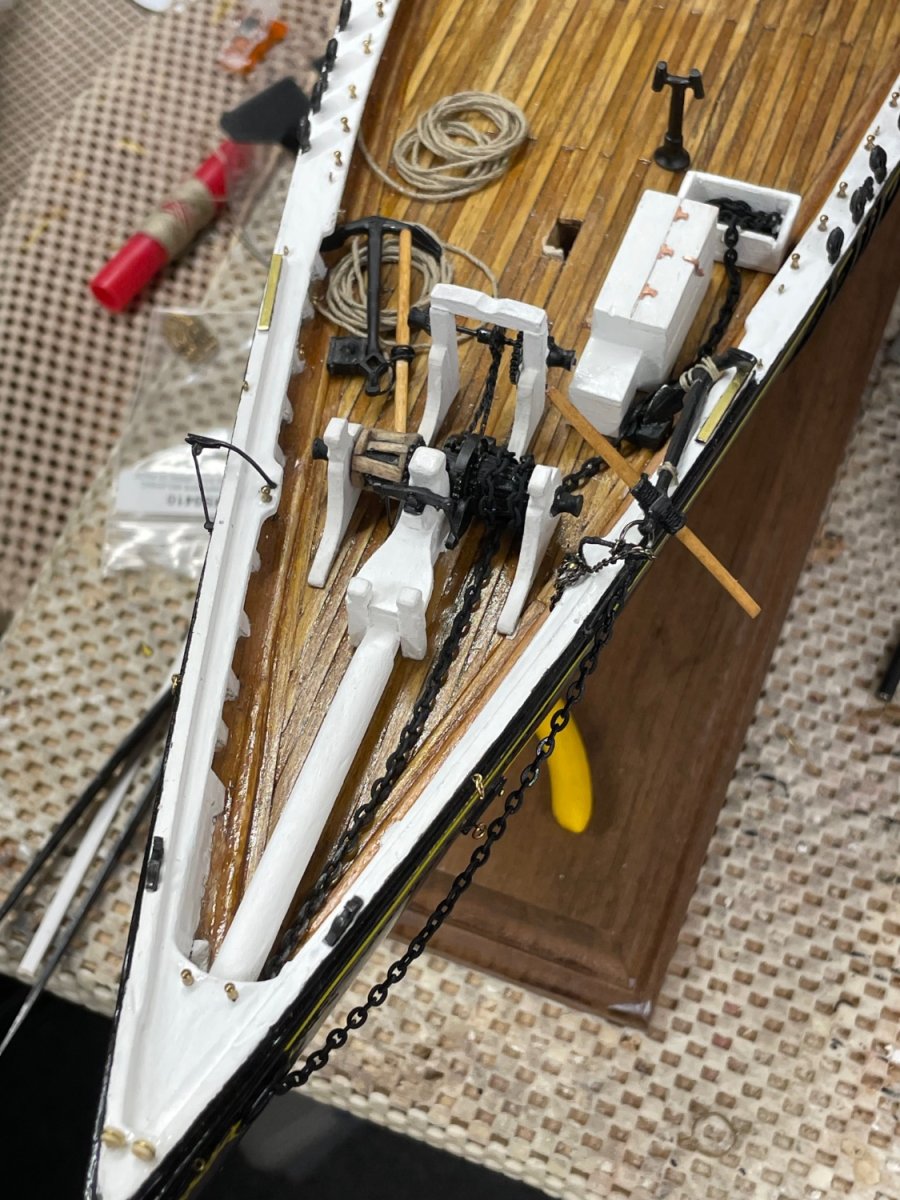
Anchors and anchor chain… Update: found the chain box on the detail sheet. 🧐 Cheers 🍻

- 282 replies
-
- 7
-
-
- Bluenose
- Model Shipways
- (and 1 more)
-
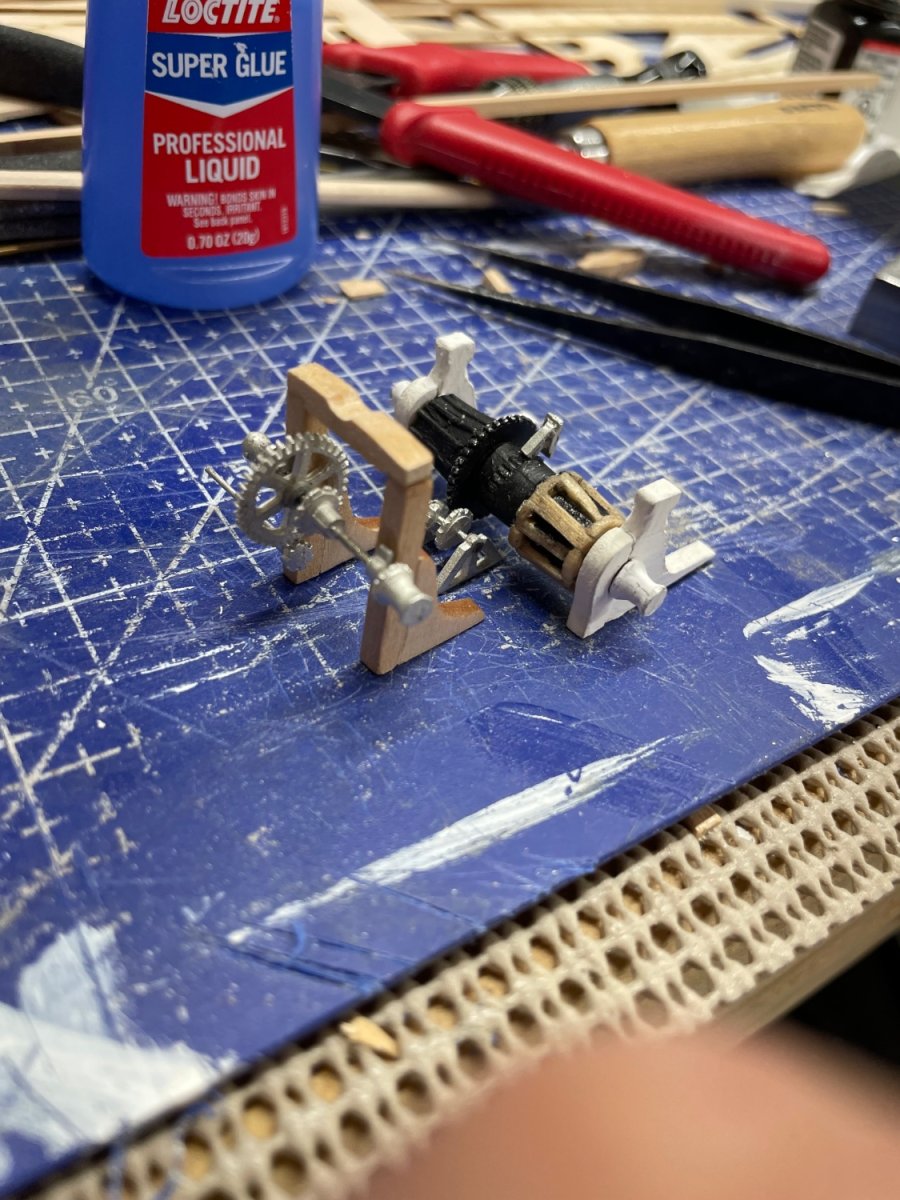
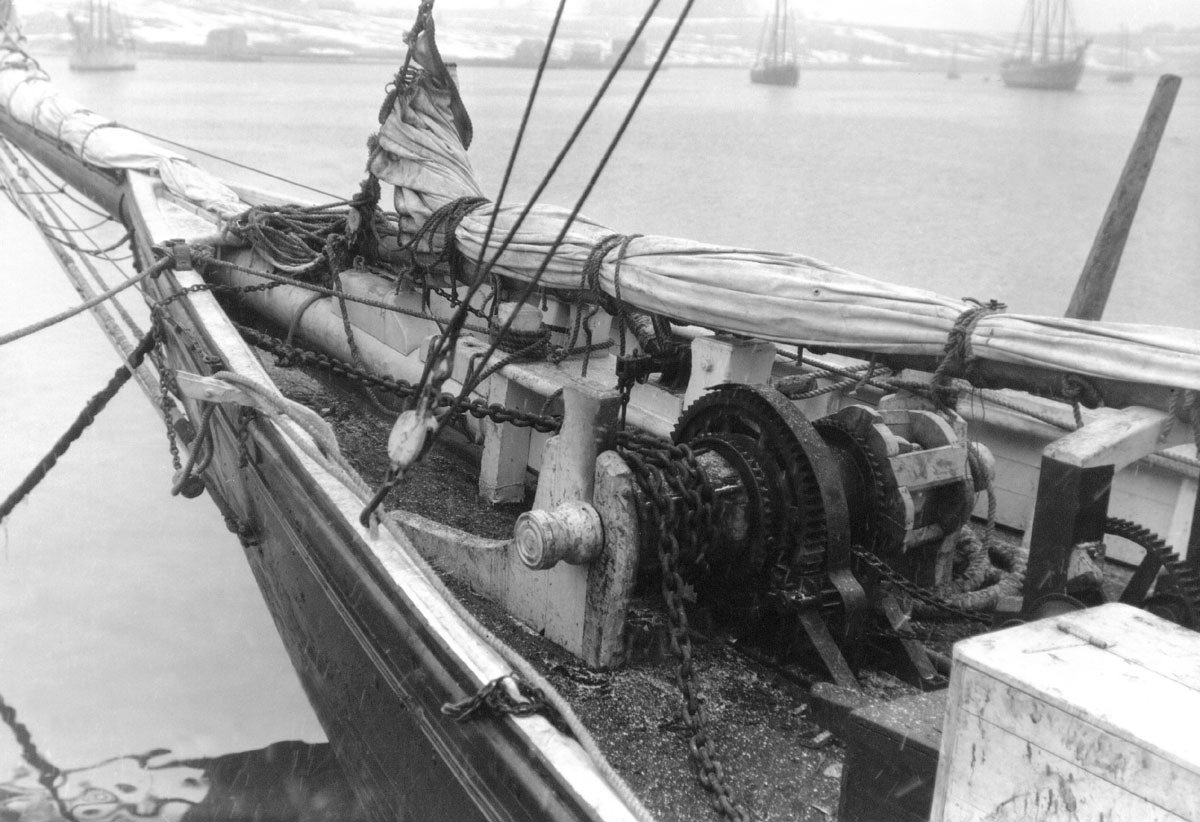
Windlass… Photos of the original Bluenose from Nova Scotia Archives. Very helpful resource. Many more details coming… These archives photos are great. Notice the chain box just aft of the engine box. Not on the MS plan… Cheers 🍻


- 282 replies
-
- 7
-
-

-
- Bluenose
- Model Shipways
- (and 1 more)
-
Tom, You know all the time is worth it. Your whaleboats are absolutely mind blowing. Beautiful work. 👍
- 200 replies
-
- 3
-
-
-
- Whaling Bark
- Charles W Morgan
- (and 1 more)
-
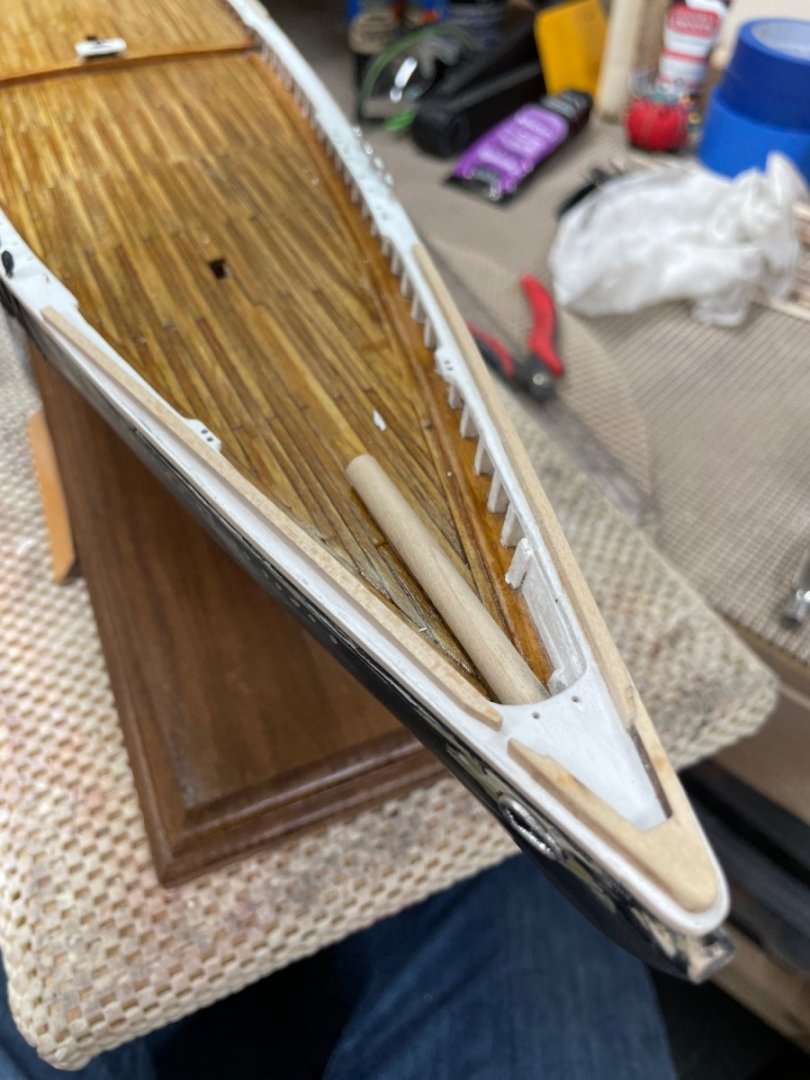
Bowsprit, Samson Post, Bowsprit Bitts, & Platform… Cheers 🍻


- 282 replies
-
- 7
-
-
- Bluenose
- Model Shipways
- (and 1 more)
-
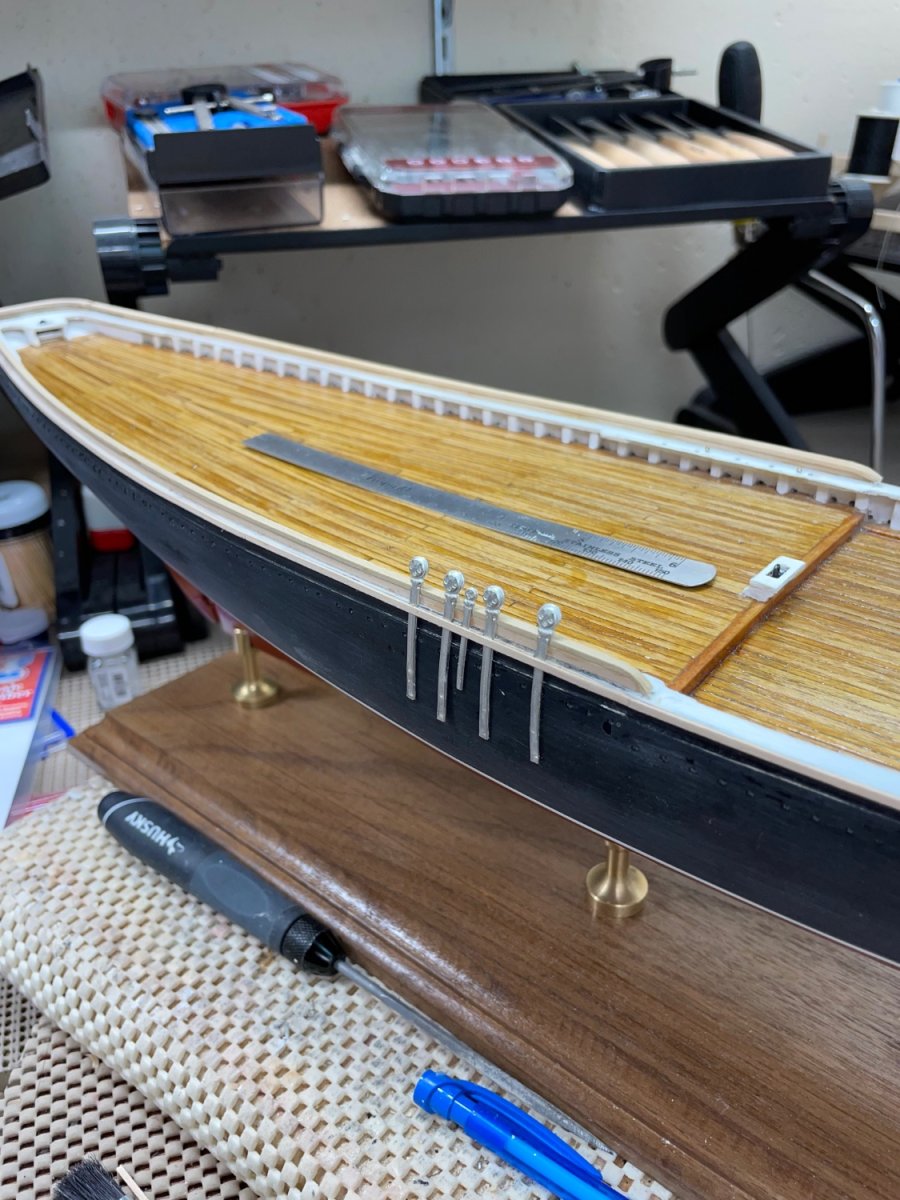
Guys and Bobstay fasteners… She is ready for deck furnishings. Cheers 🍻

- 282 replies
-
- 3
-
-
- Bluenose
- Model Shipways
- (and 1 more)
-
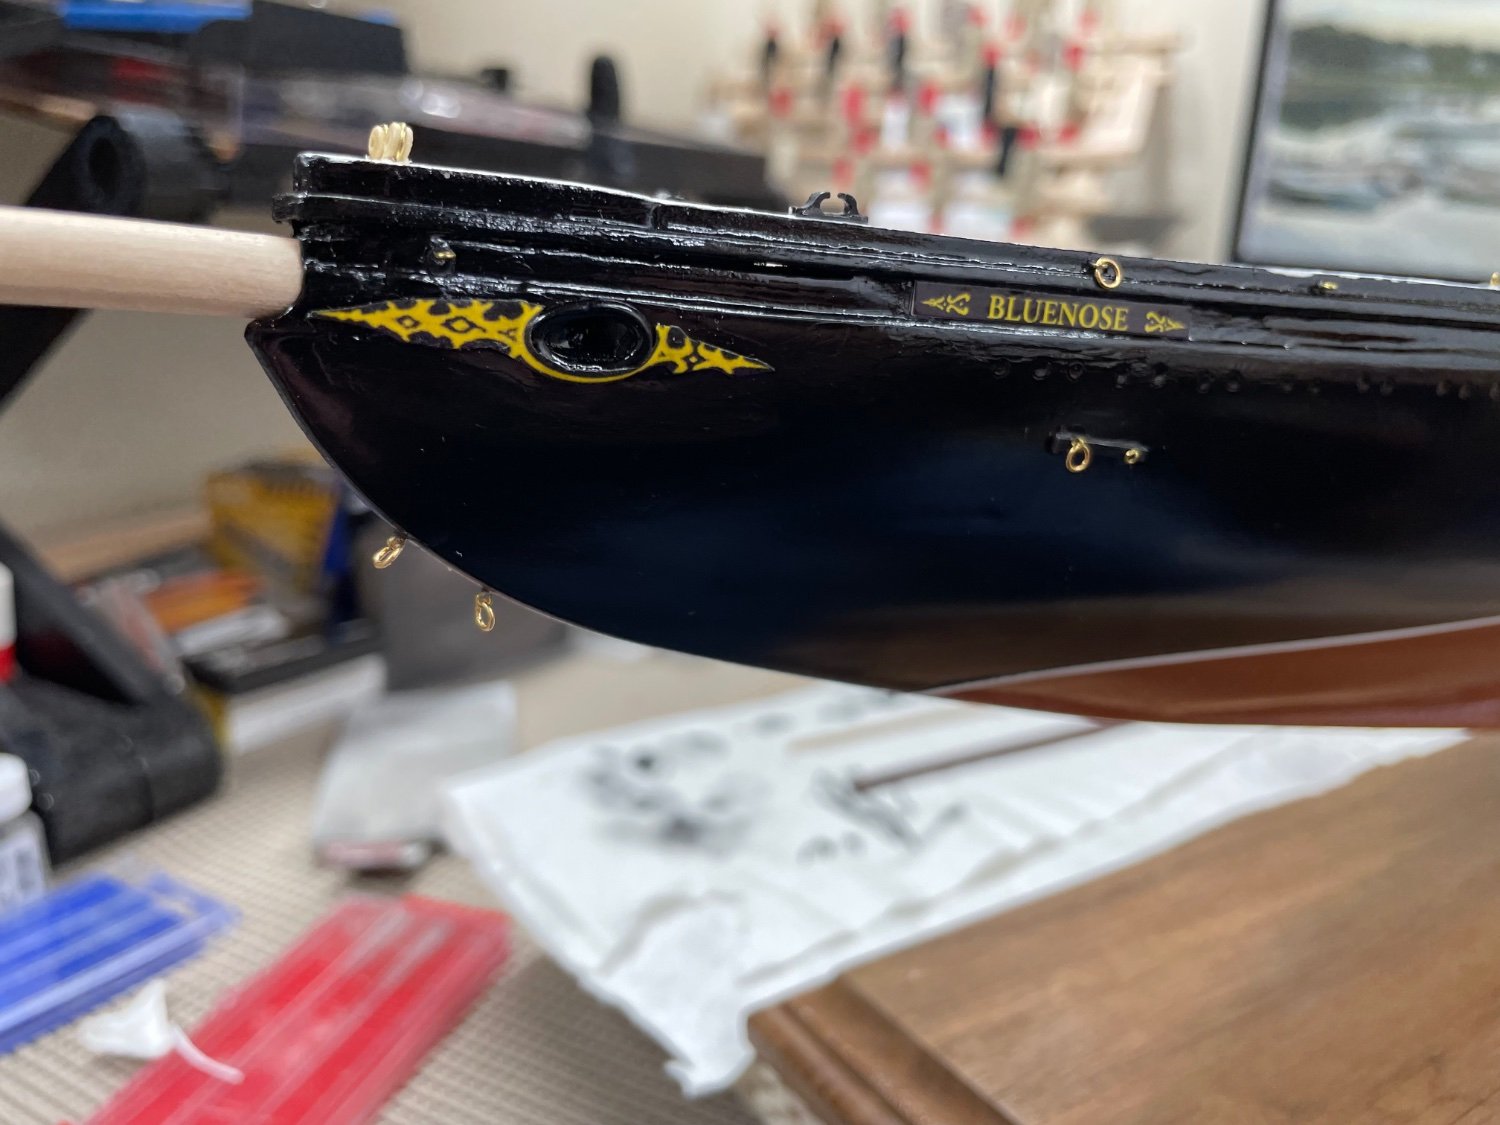
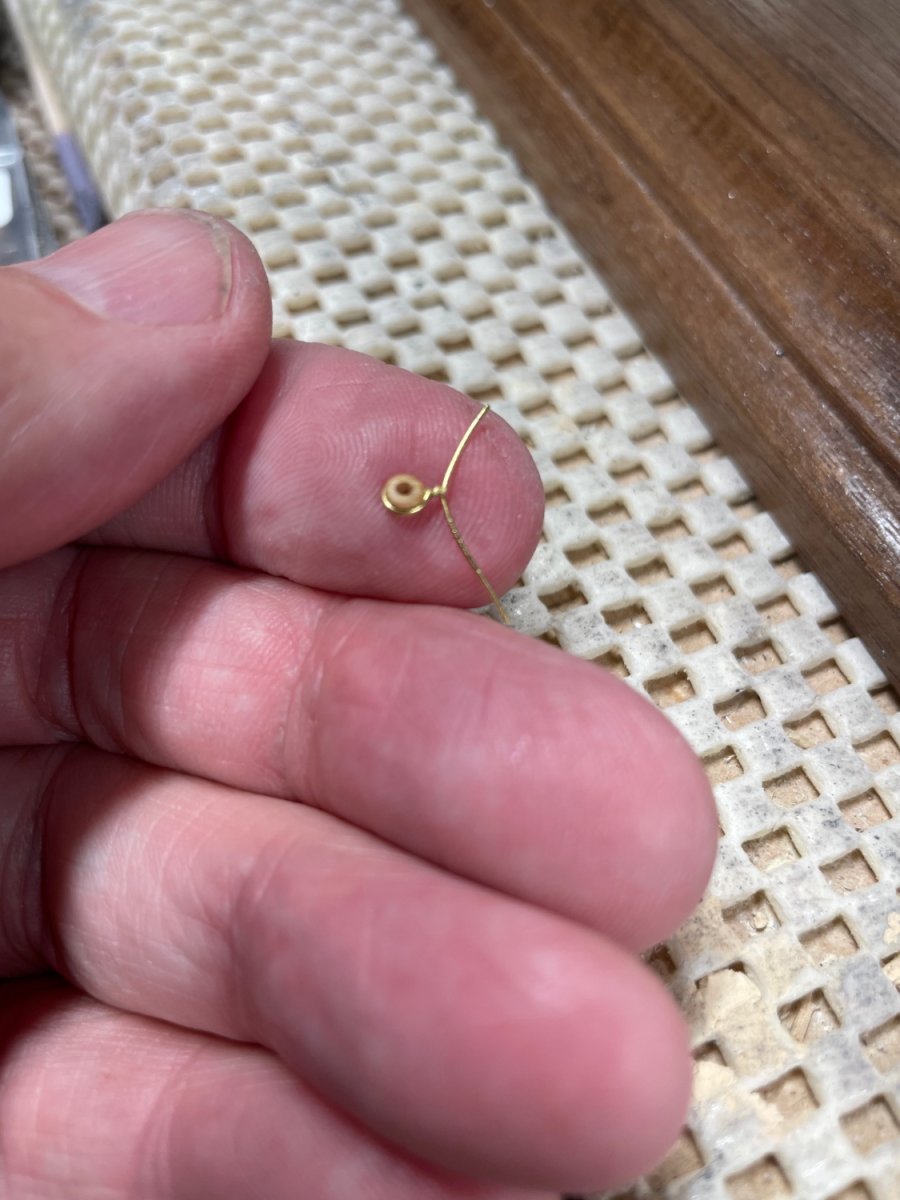
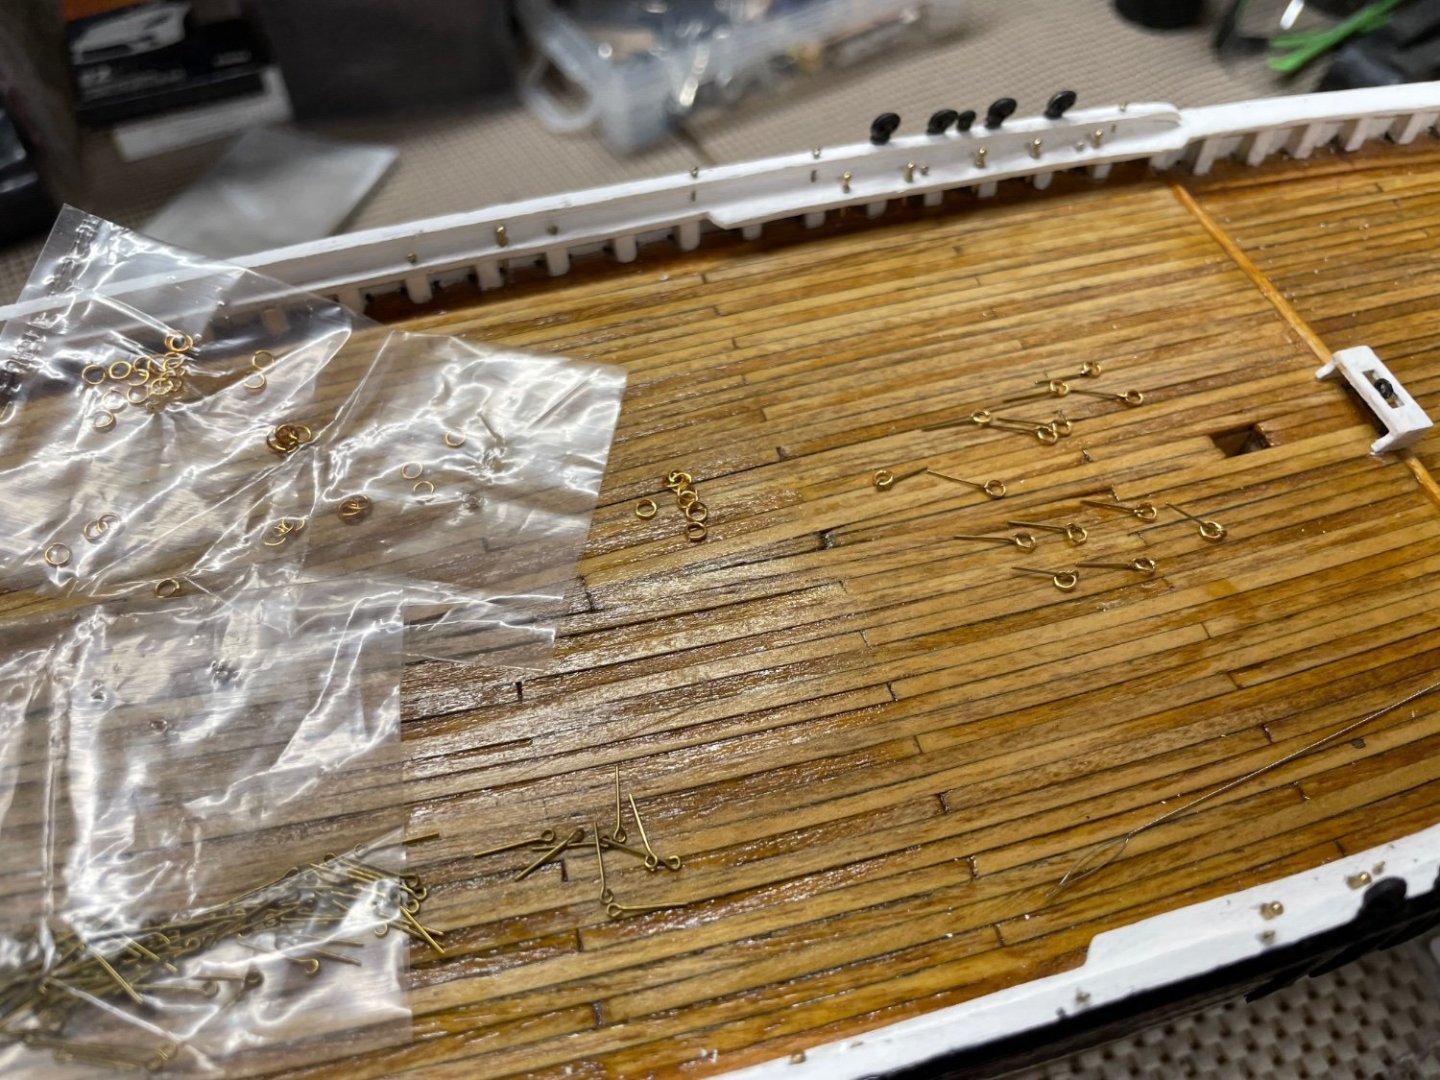
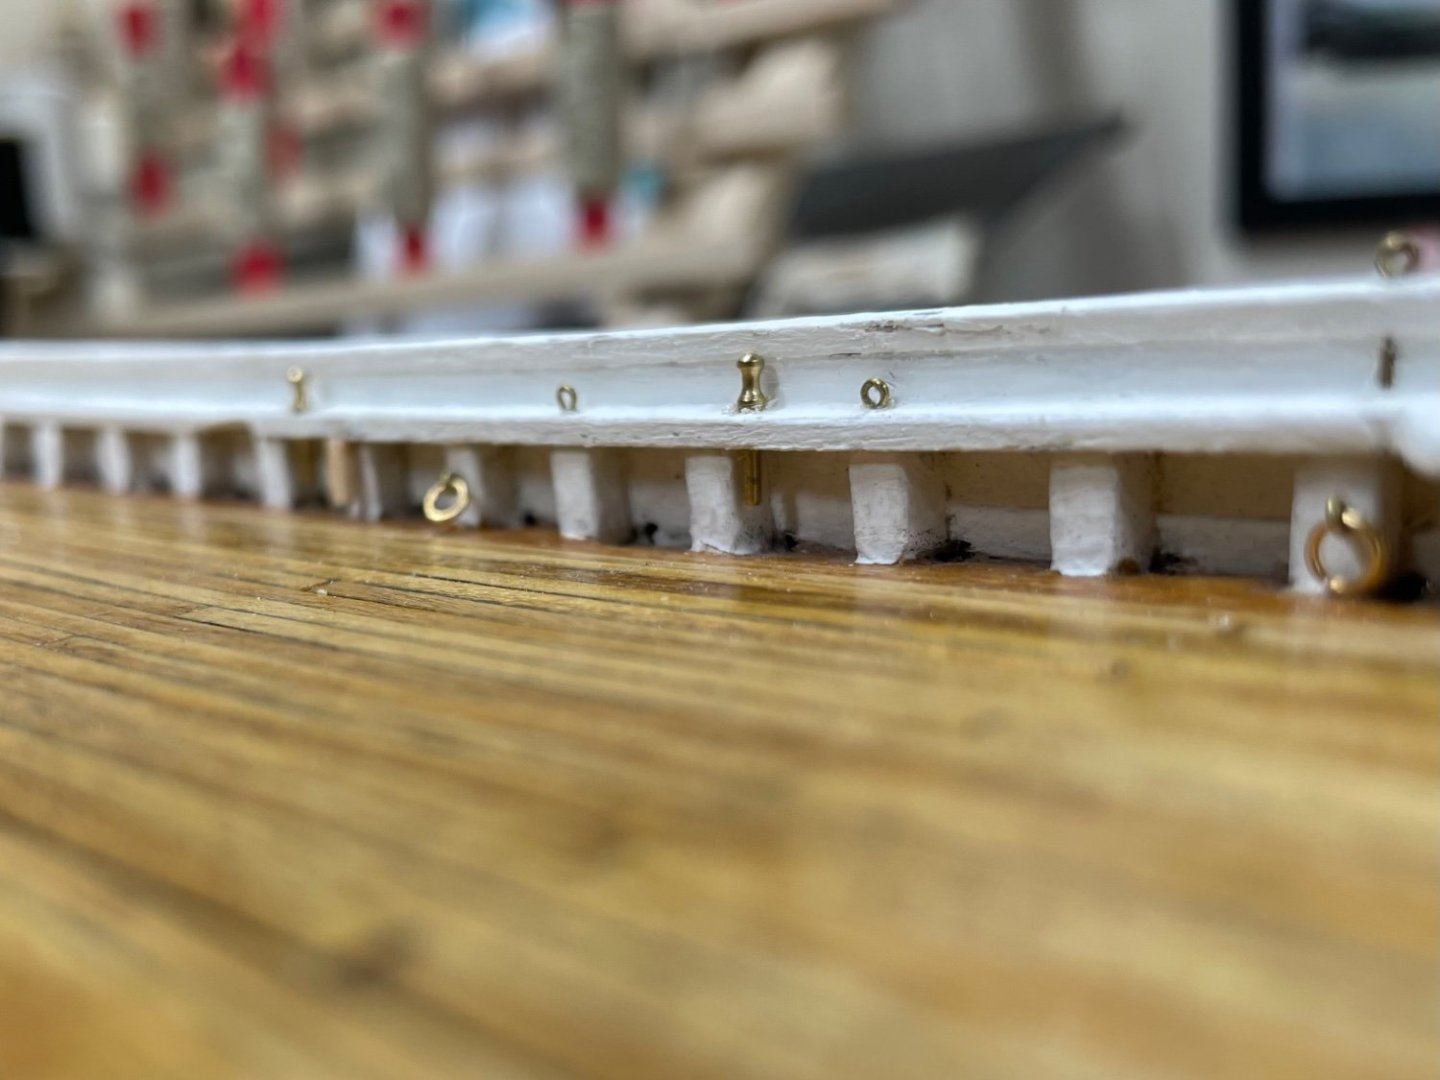
Details continued… Anchor Lashing Ring and Random Ringbolts for tie downs, etc… Cheers… 🍻
- 282 replies
-
- 5
-
-
- Bluenose
- Model Shipways
- (and 1 more)
-
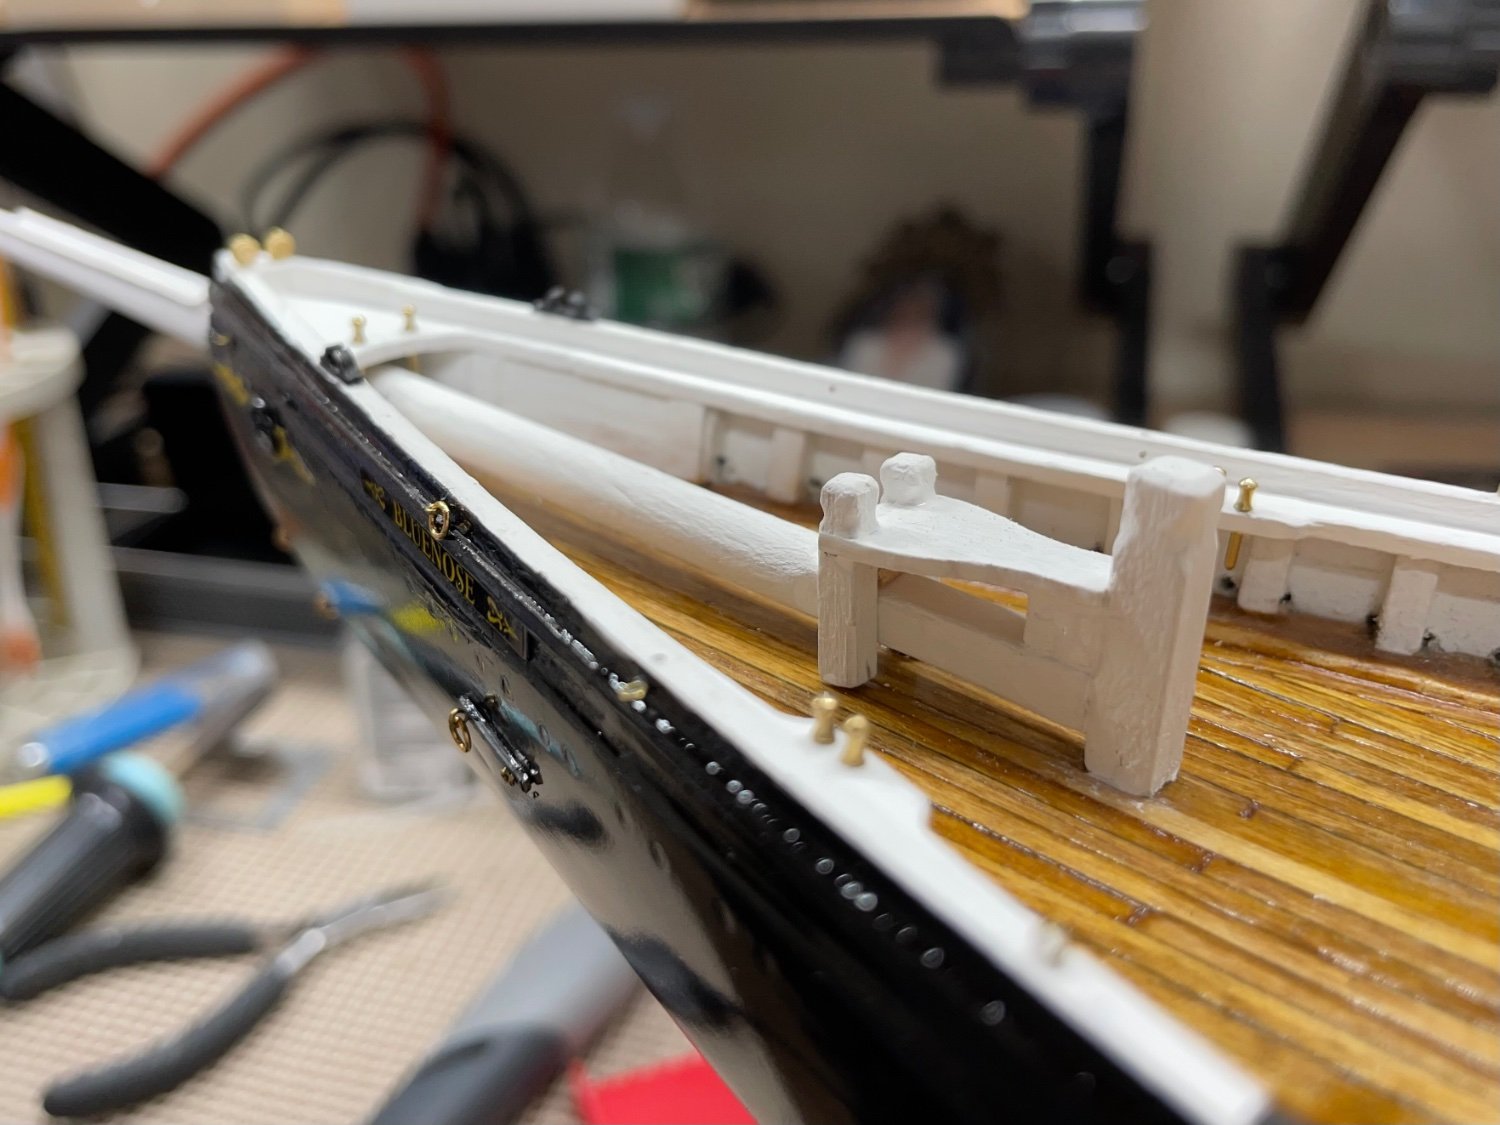
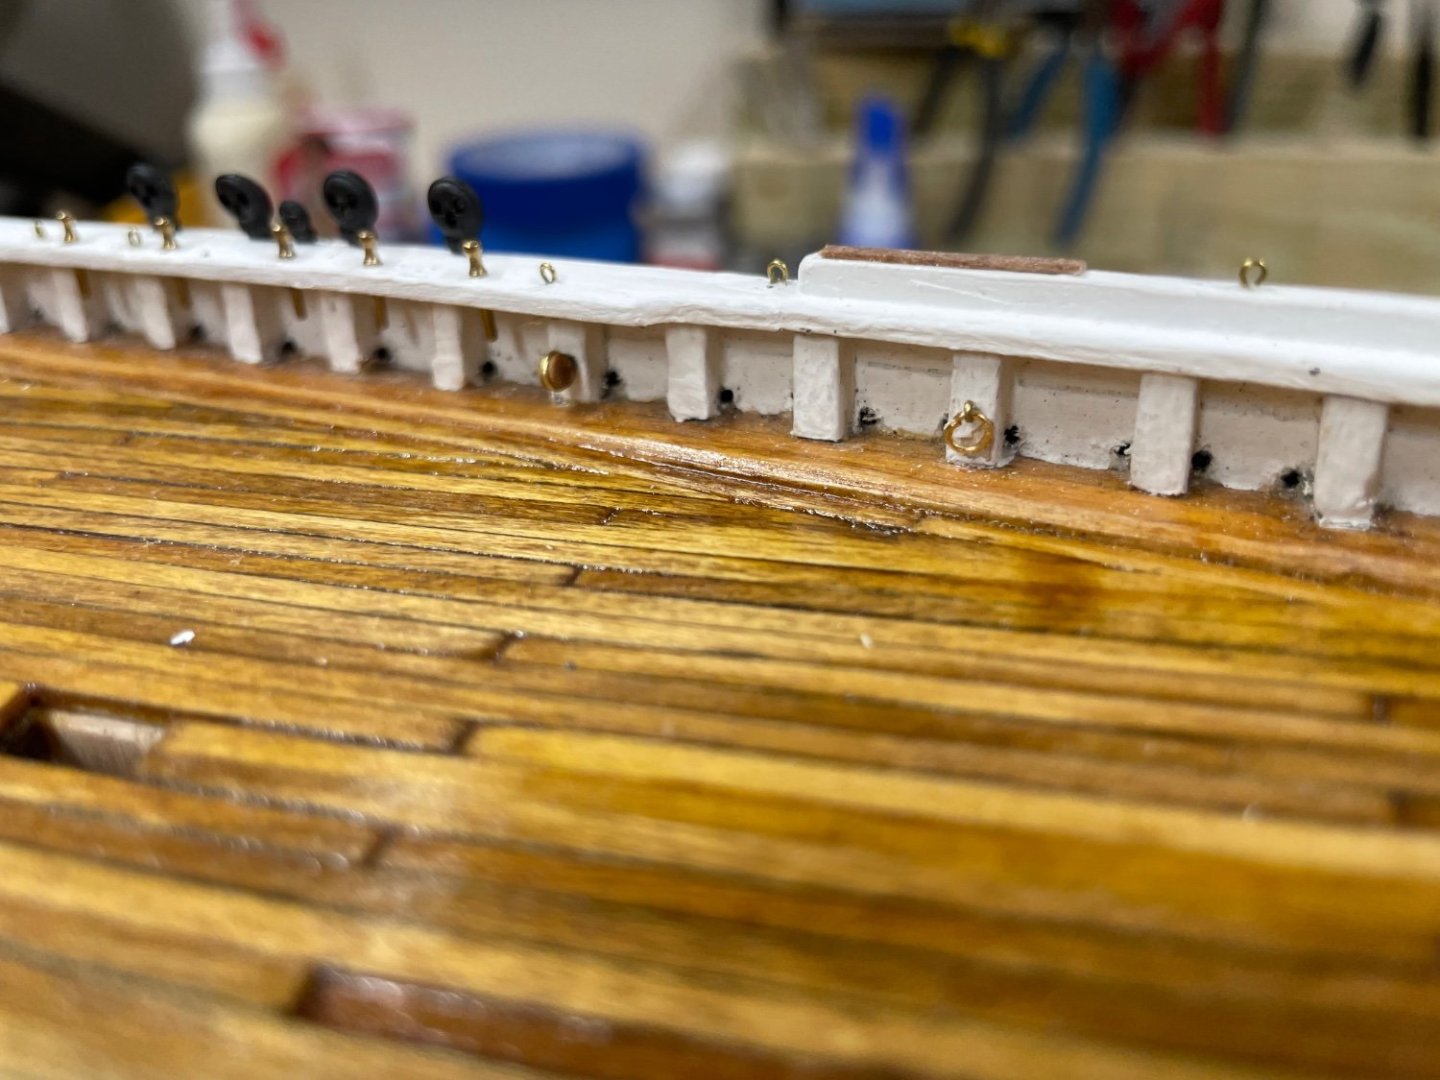
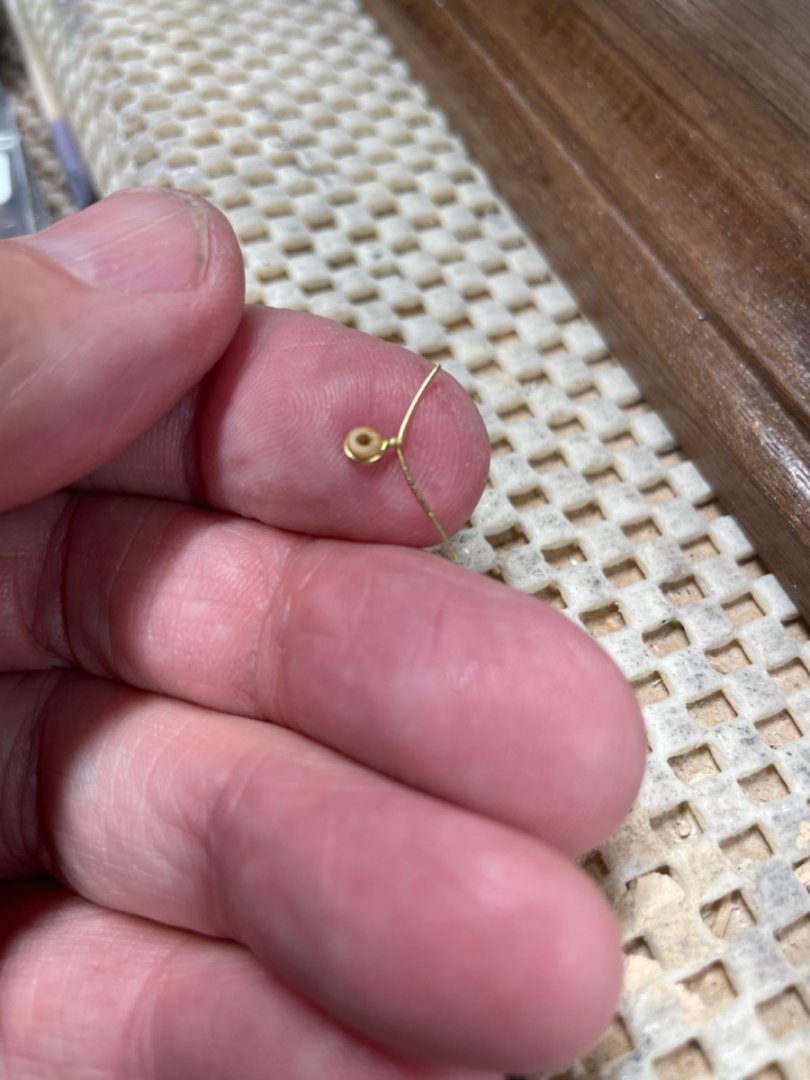
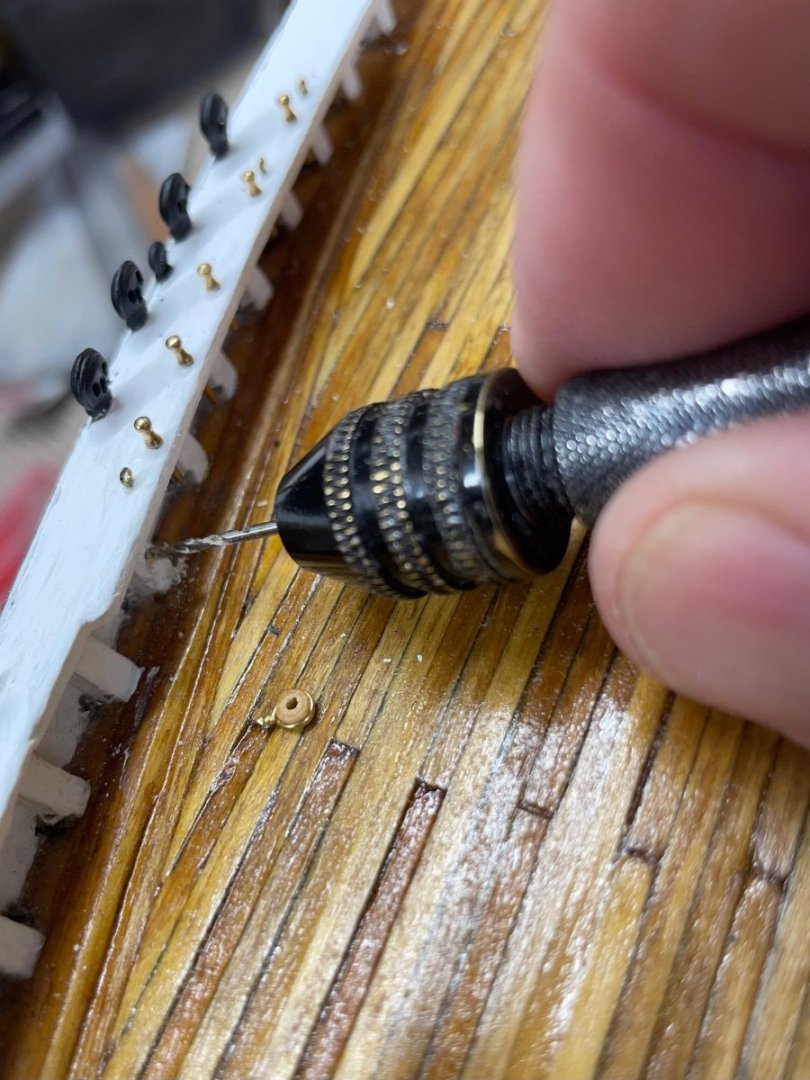
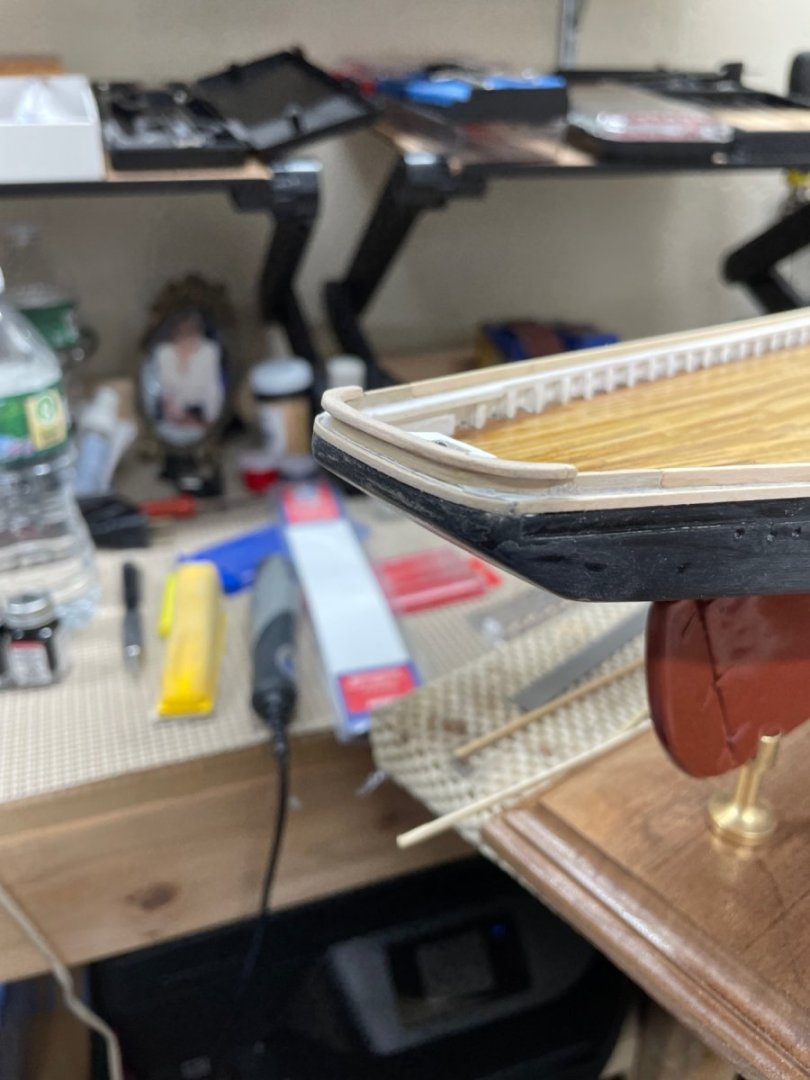
Details Bulwarks inboard… Fair Leads for Balloon Jib and Jib Downhauls. Fair leads P/S for Jib Sheet. Snatch Blocks P/S for Balloon Jib Sheet Cheers 🍻


- 282 replies
-
- 6
-
-
- Bluenose
- Model Shipways
- (and 1 more)
-
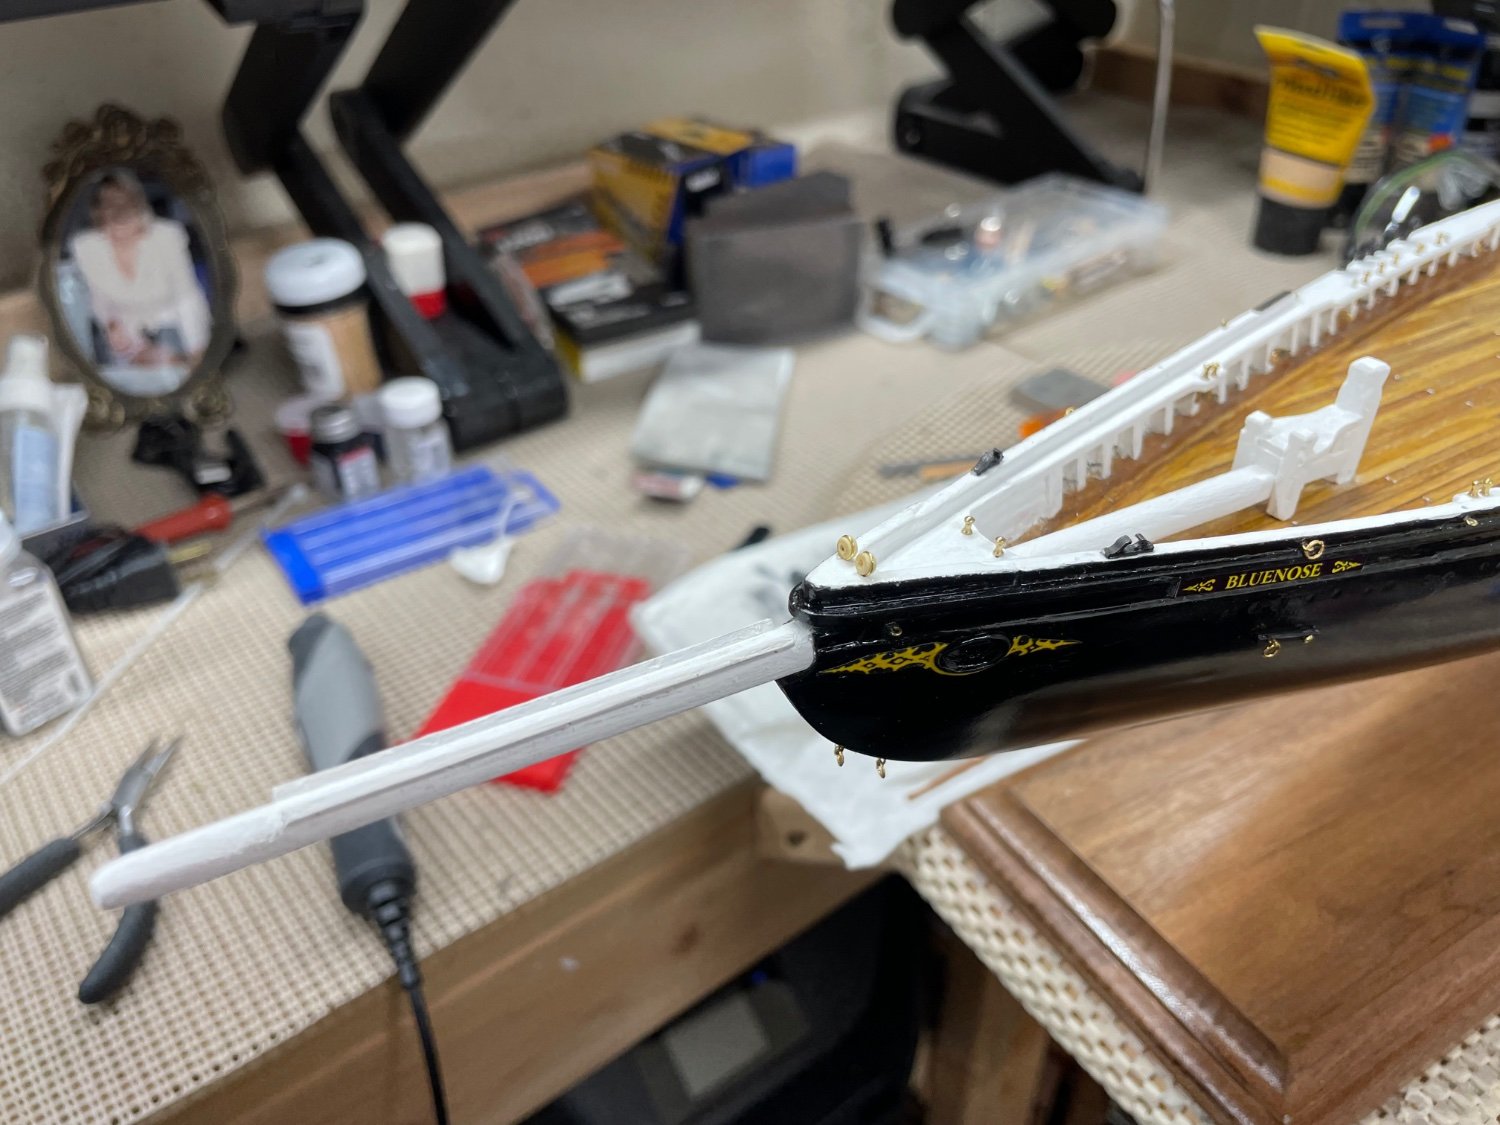
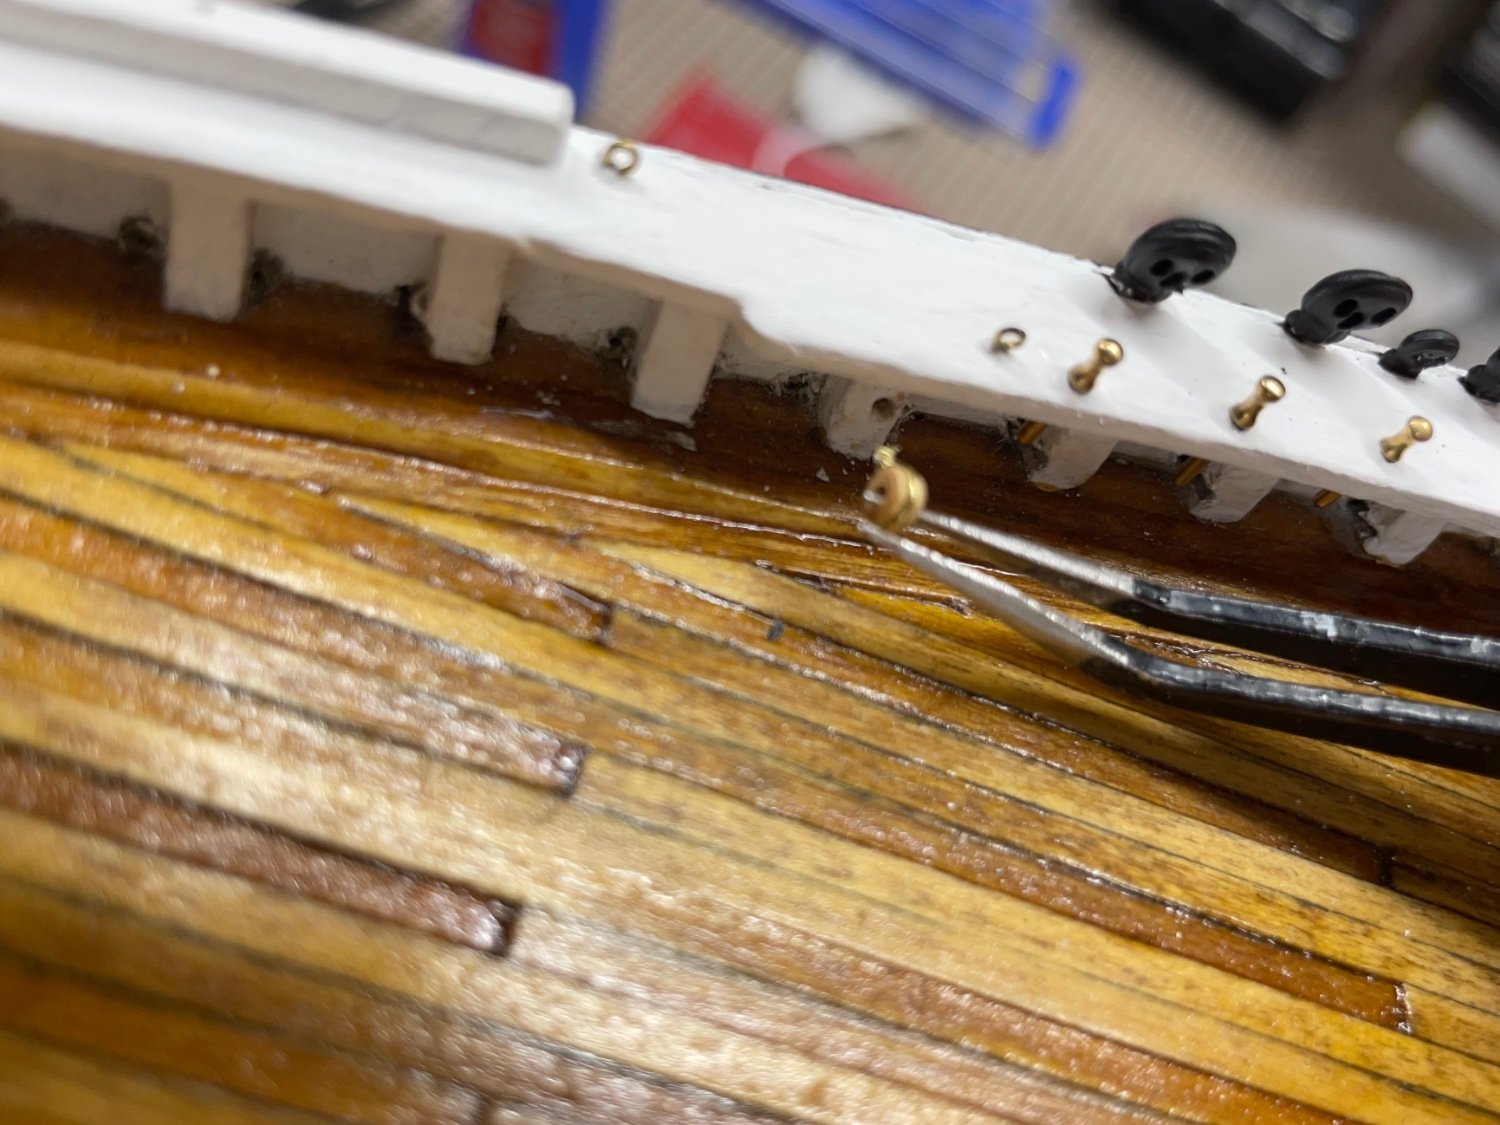
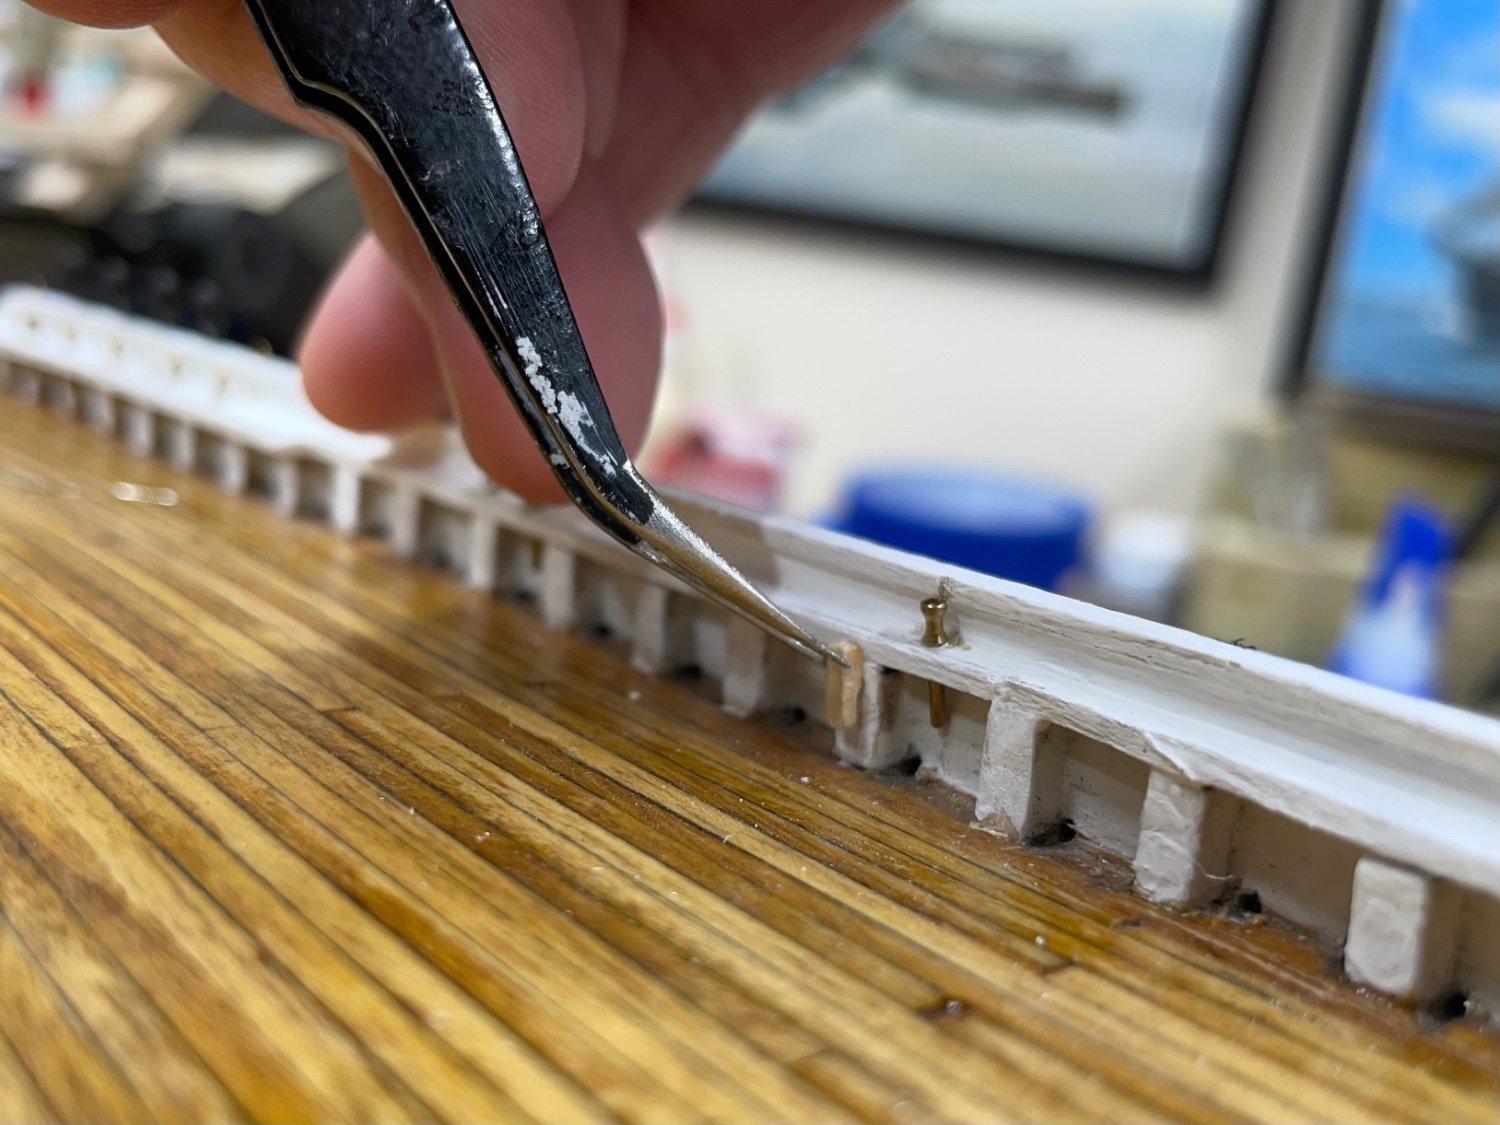
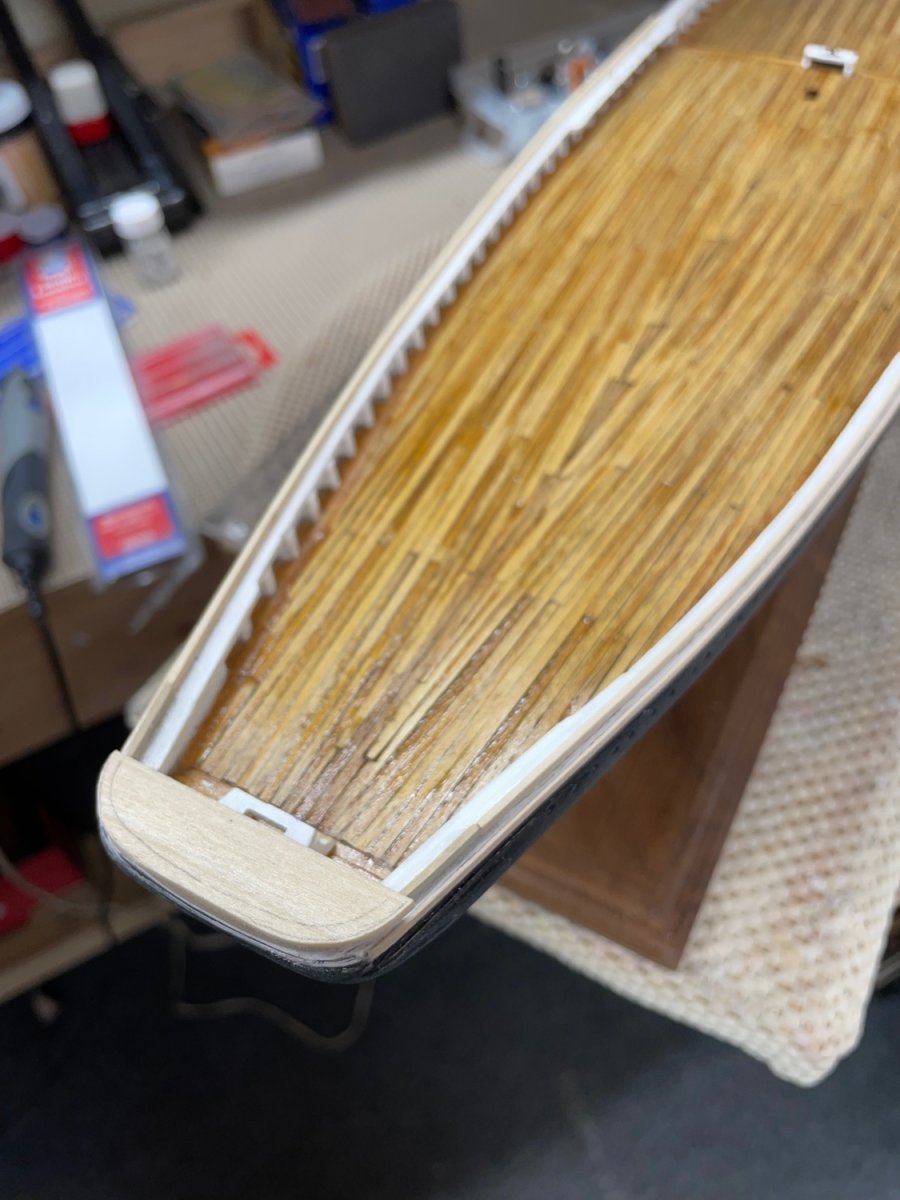
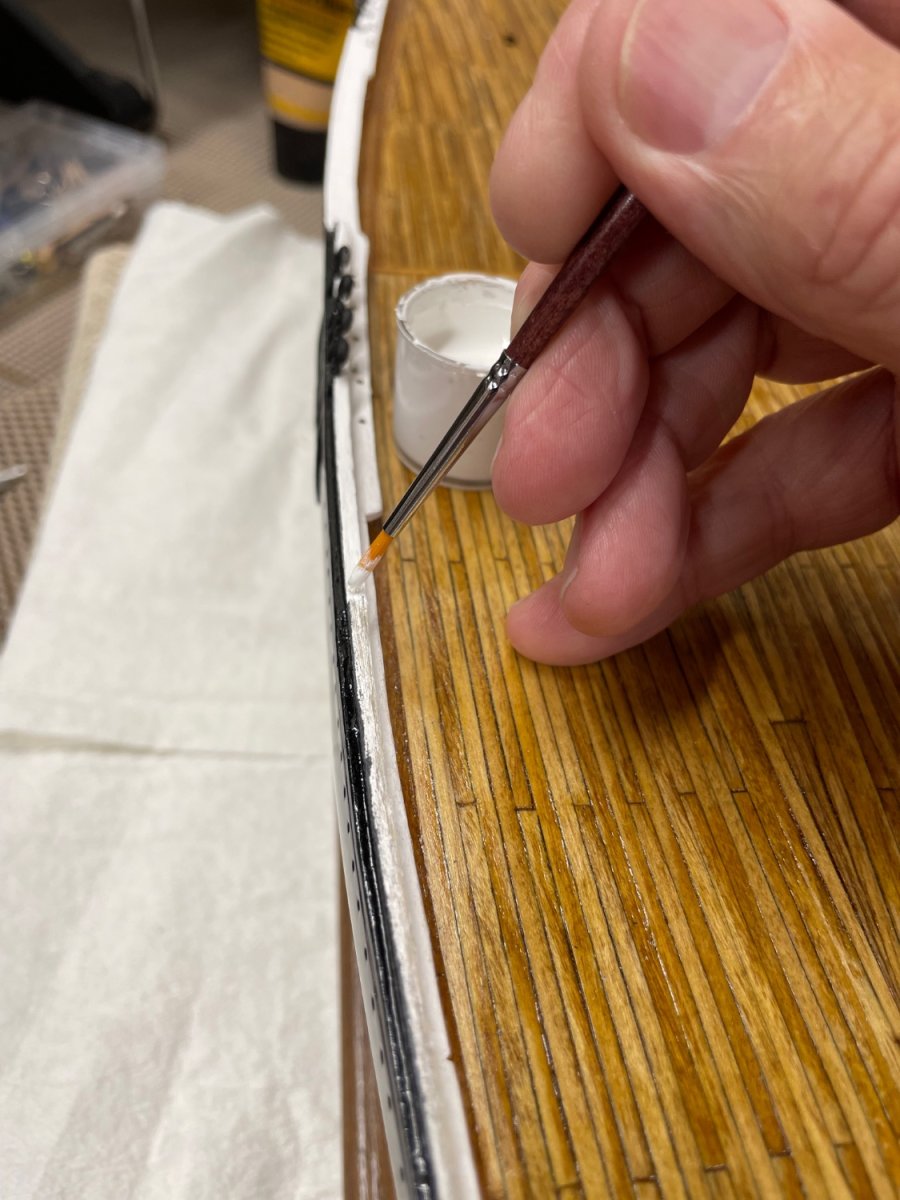
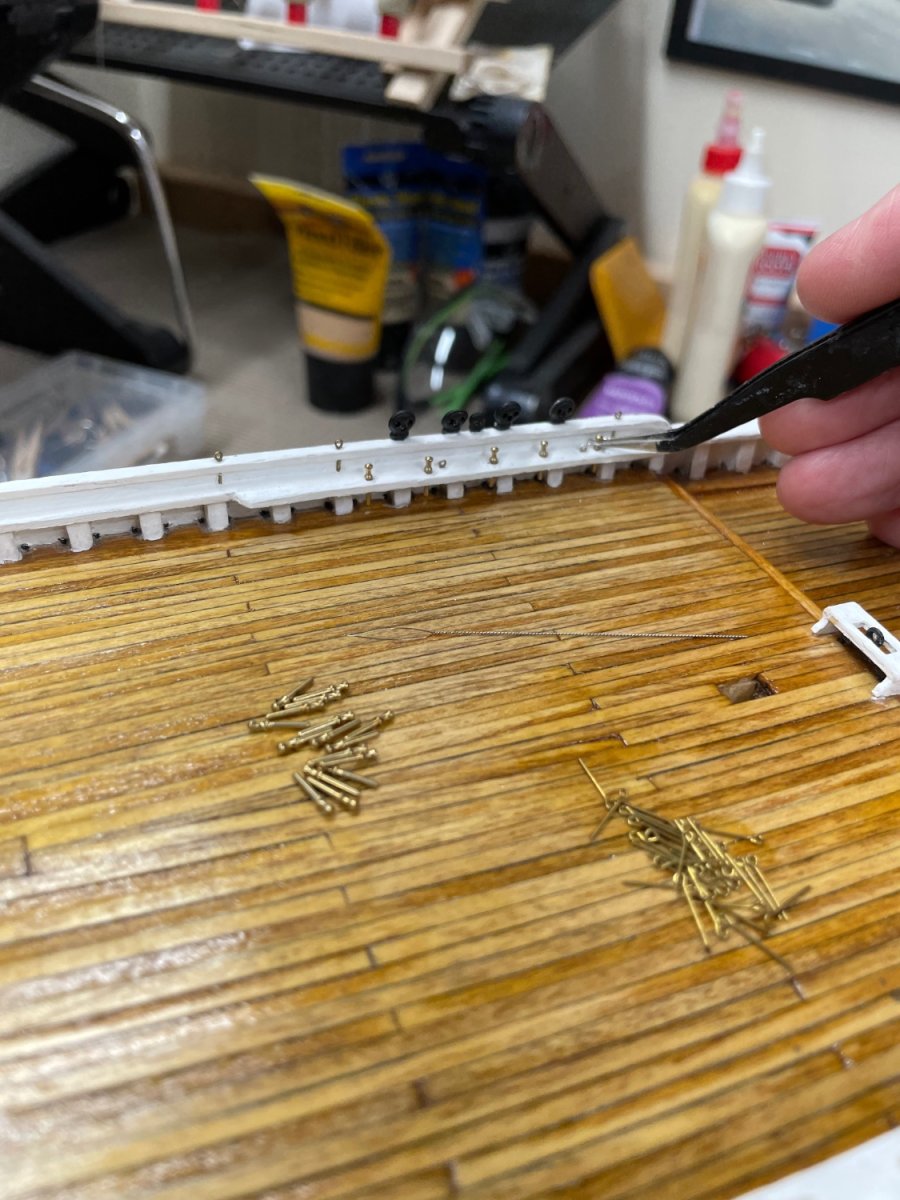
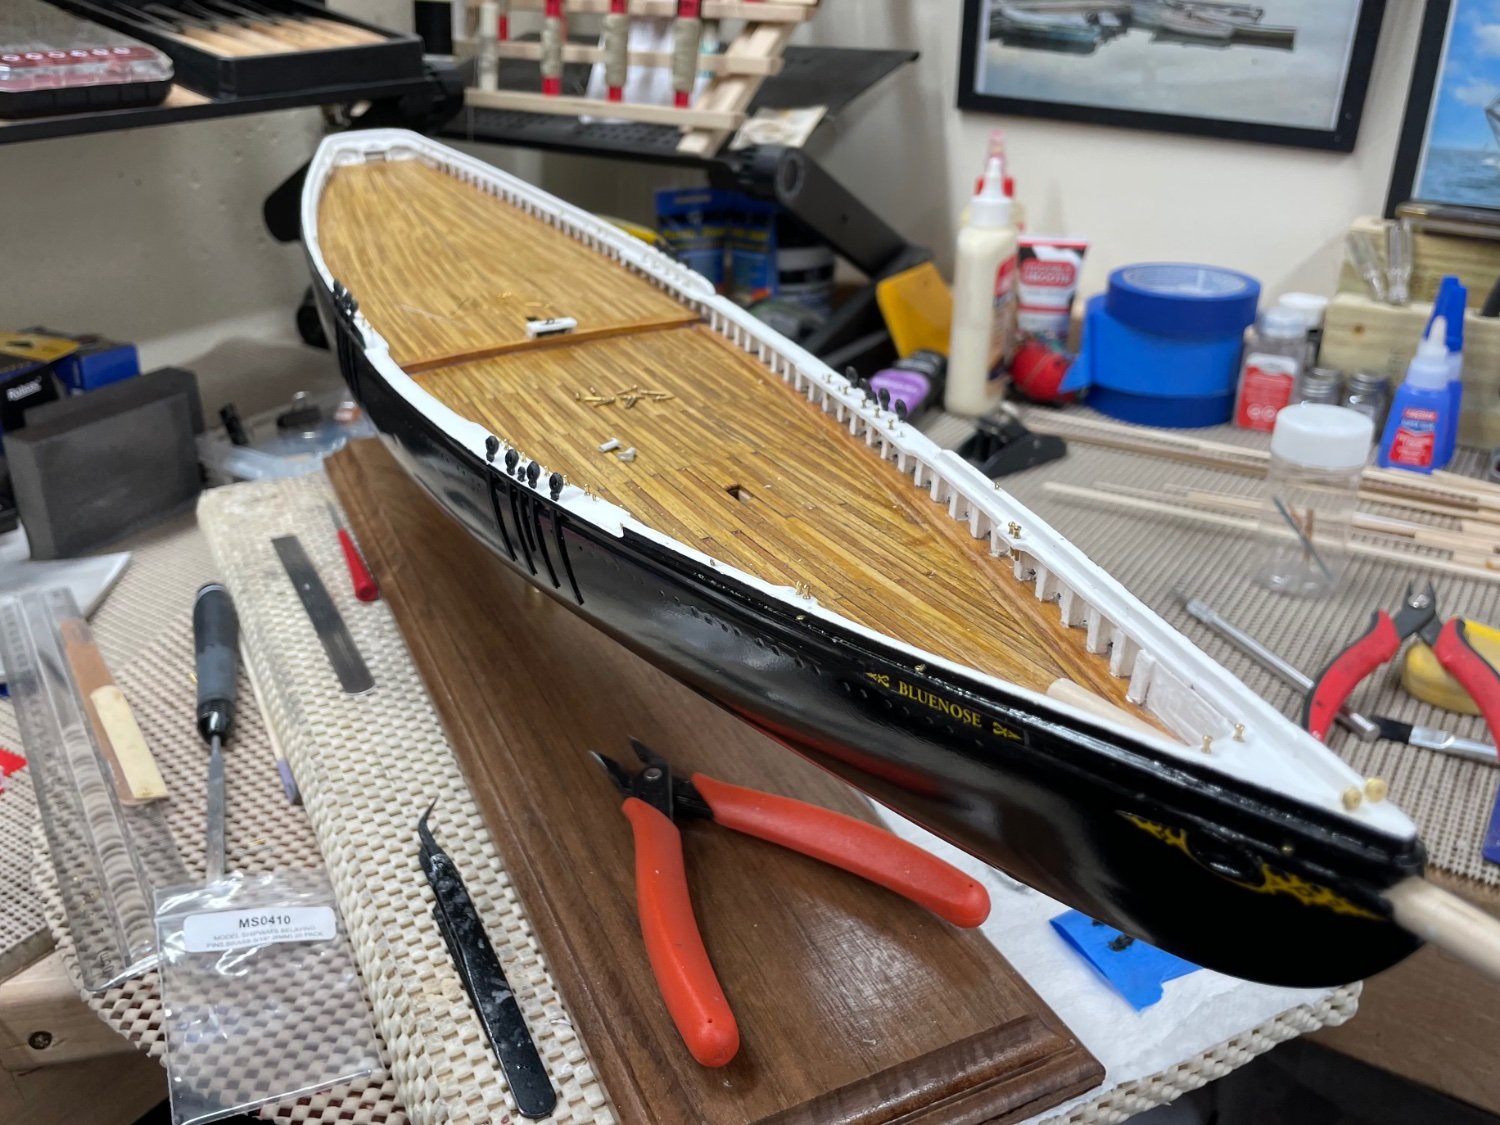
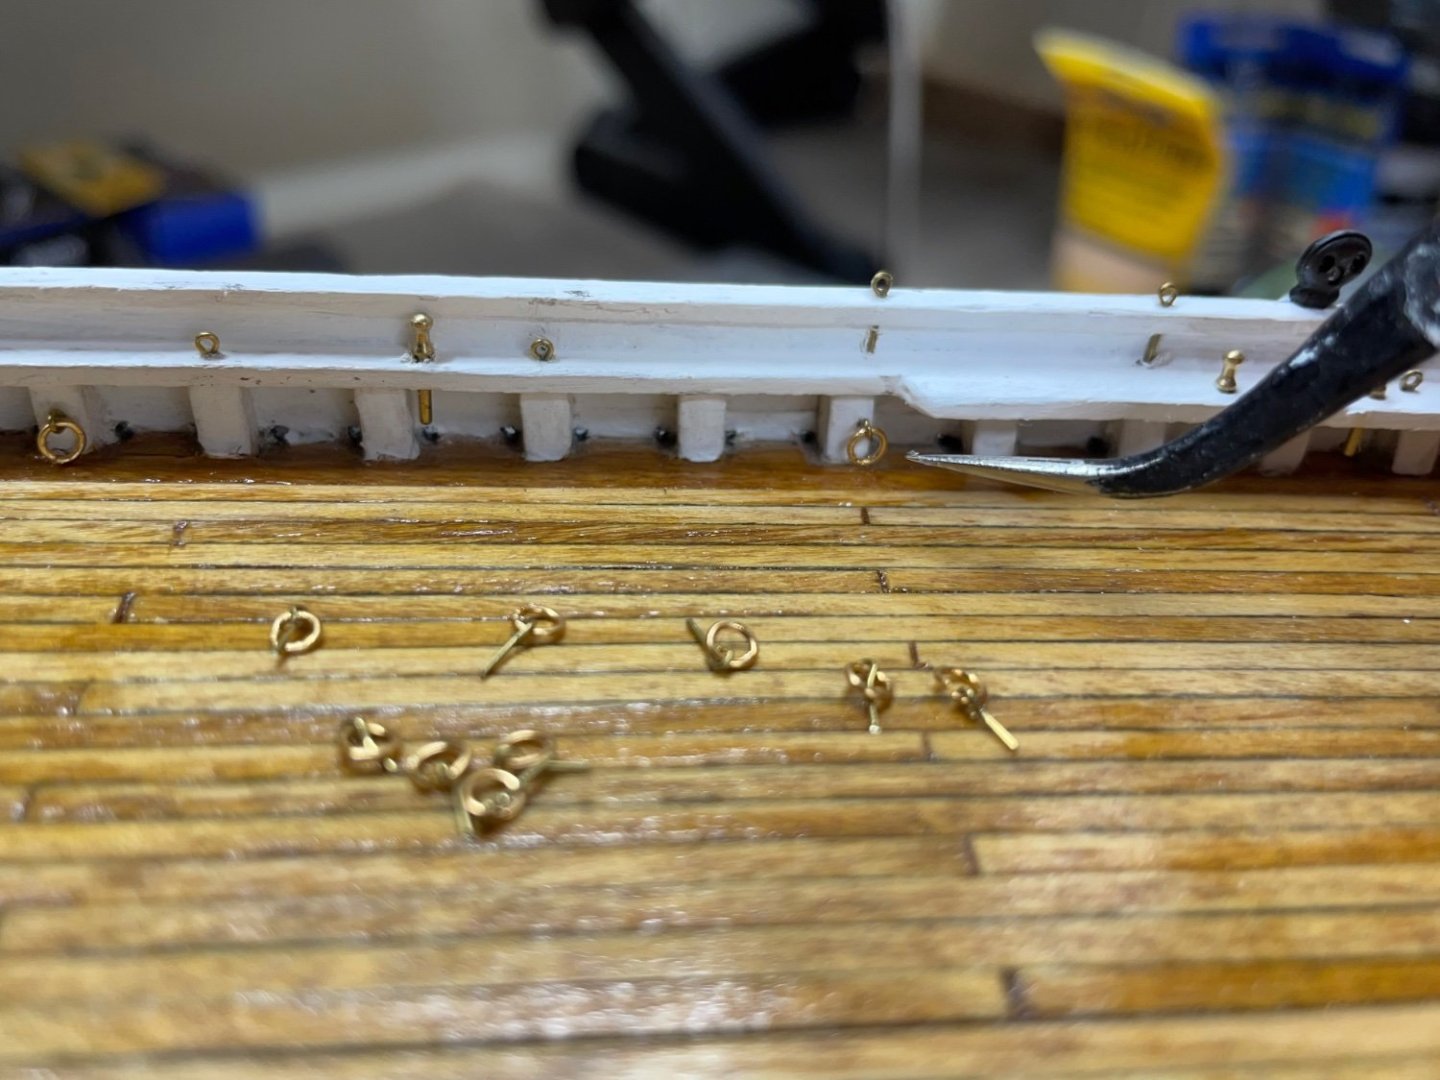
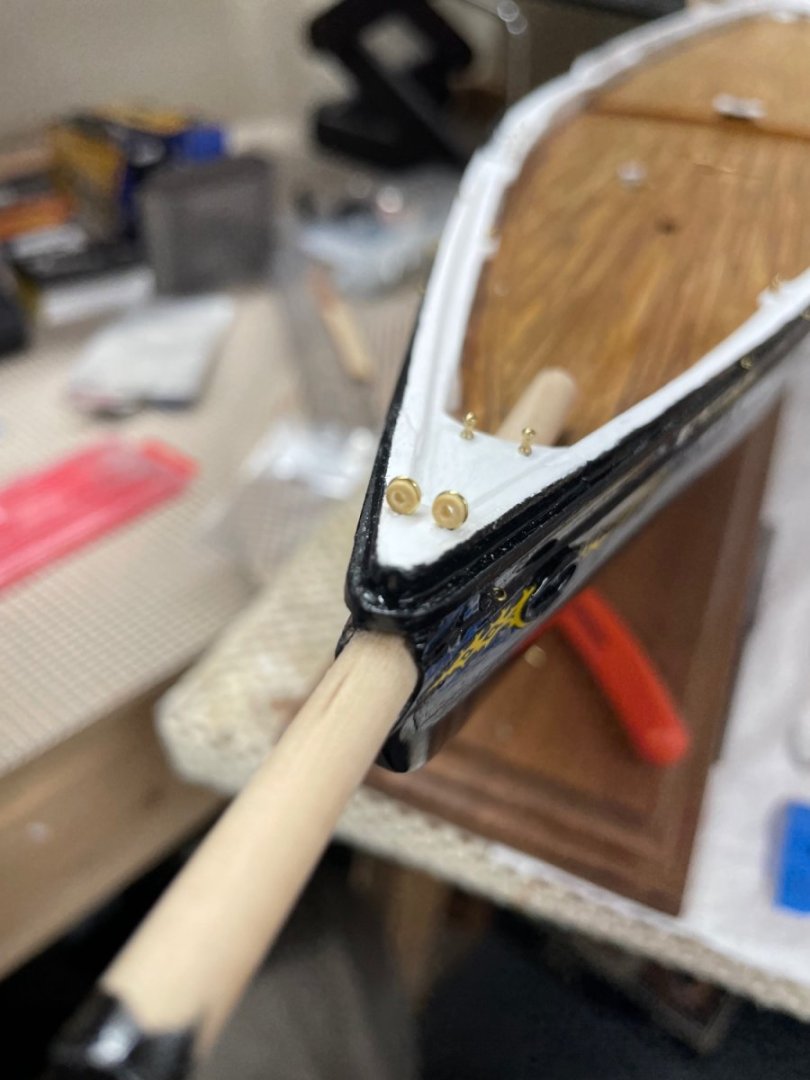
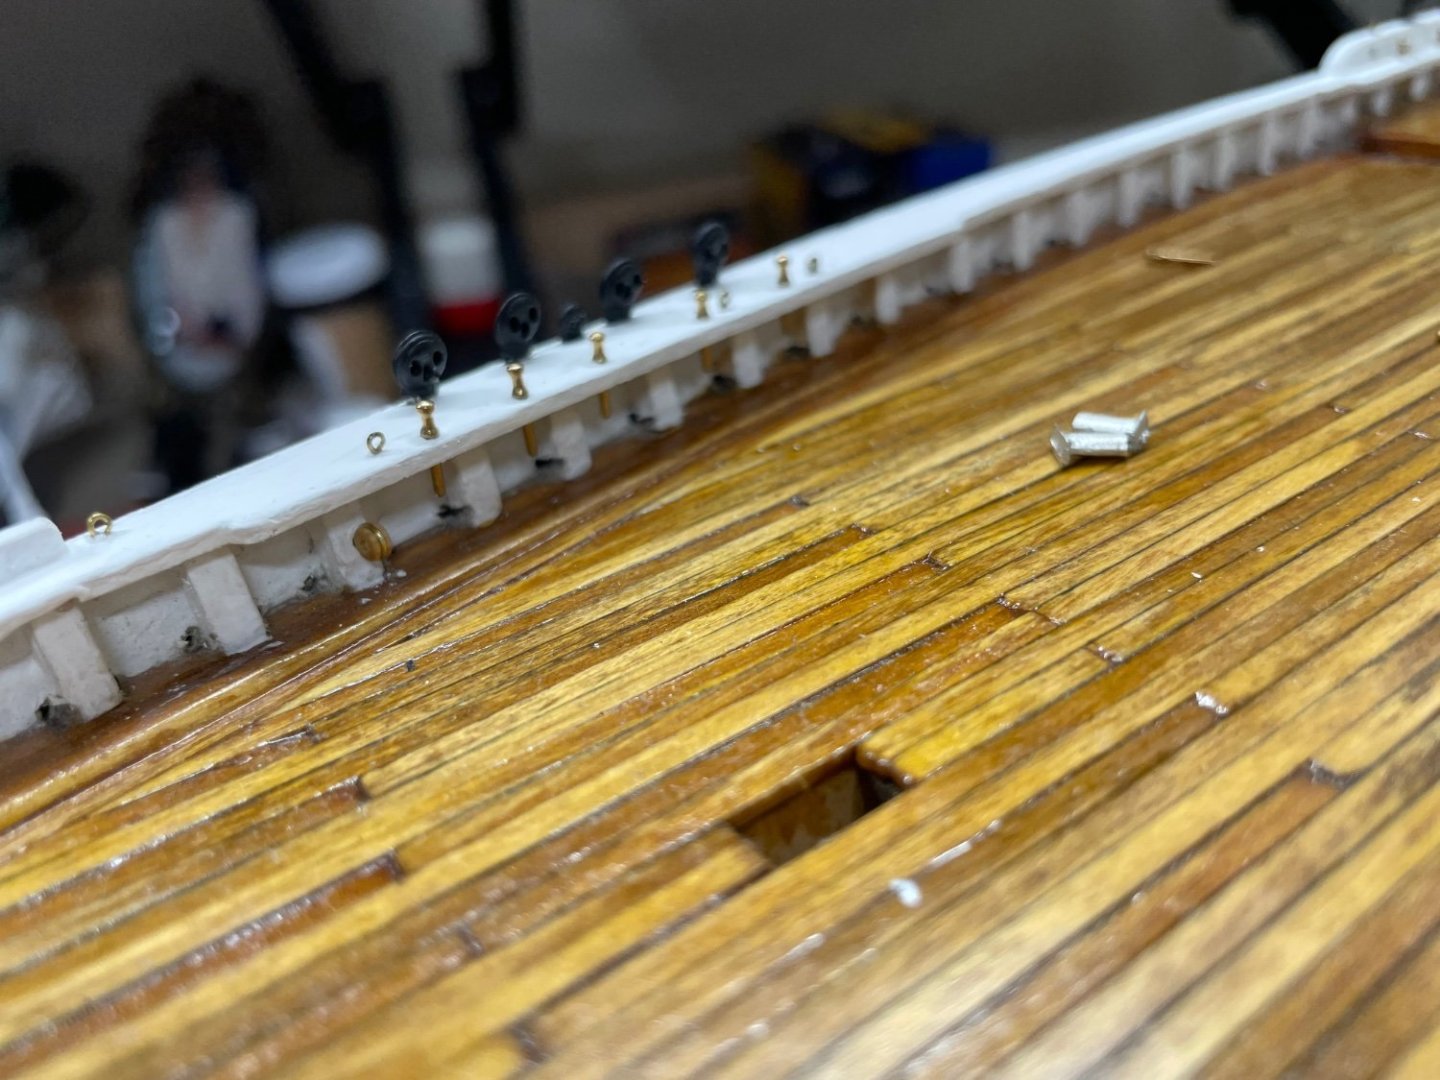
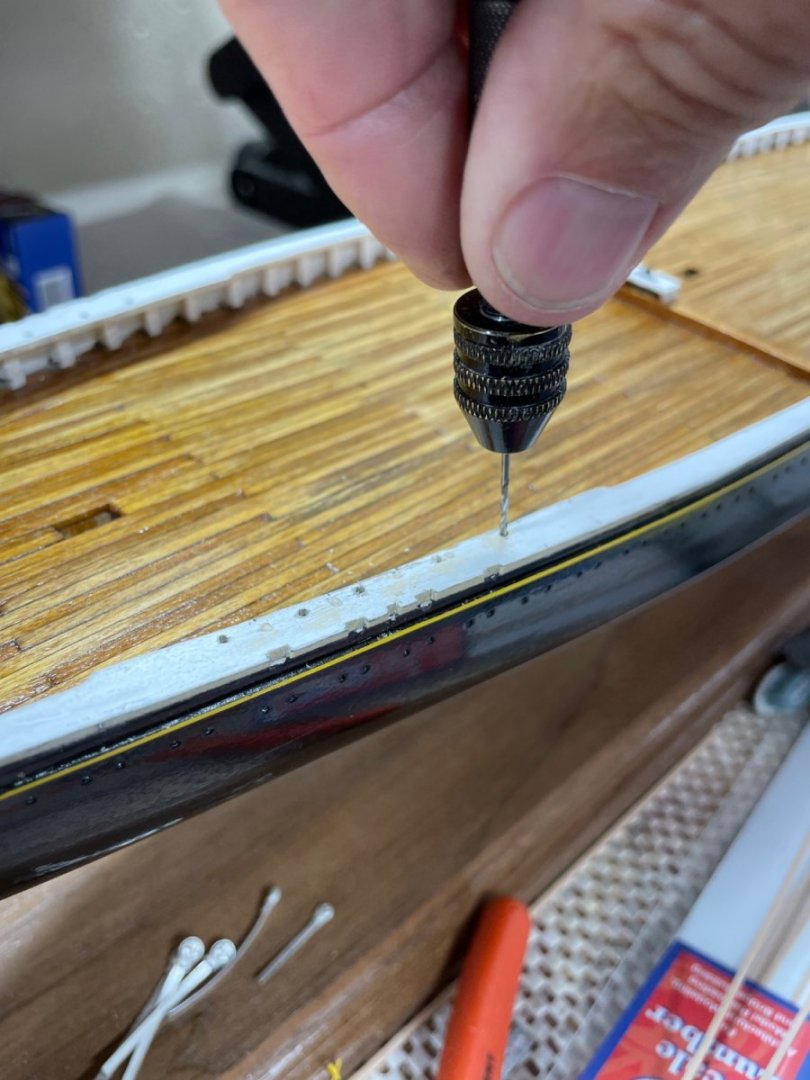
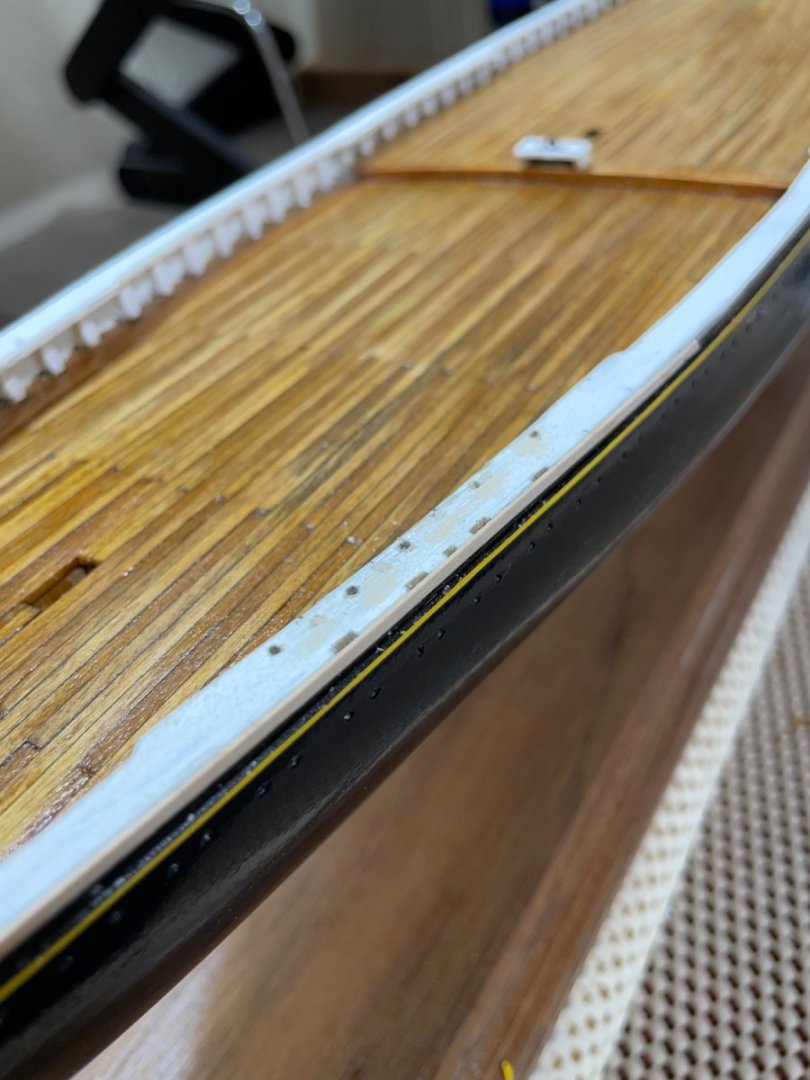
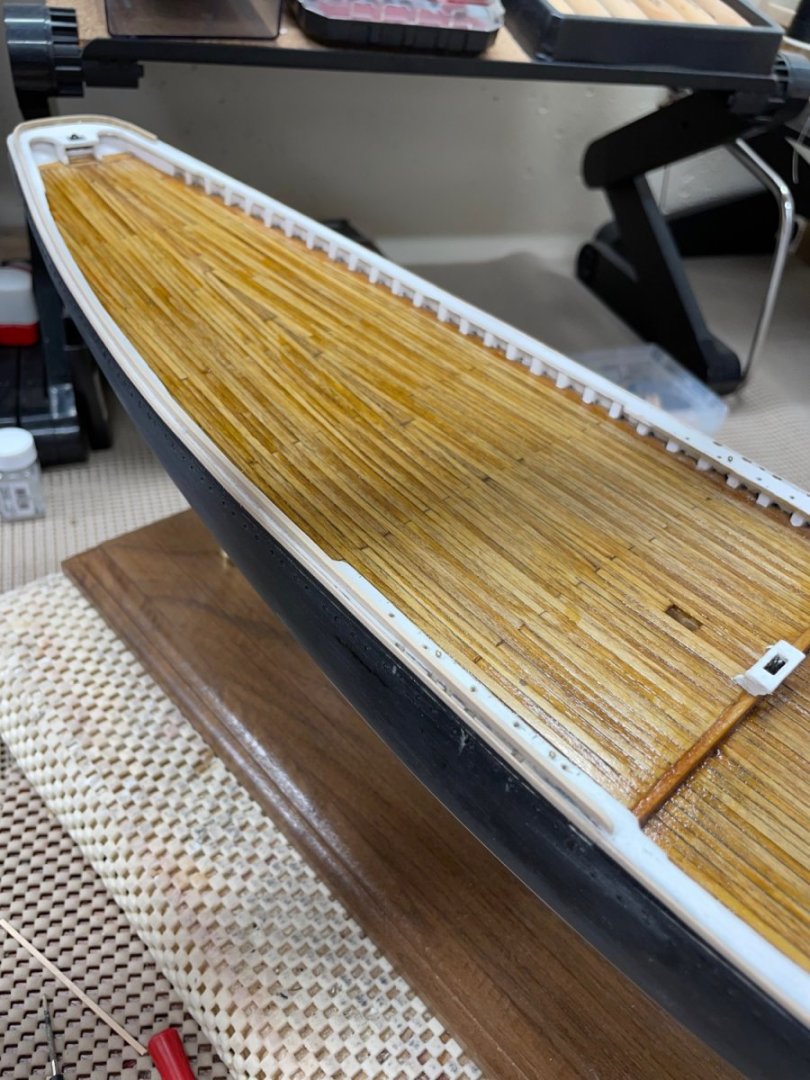
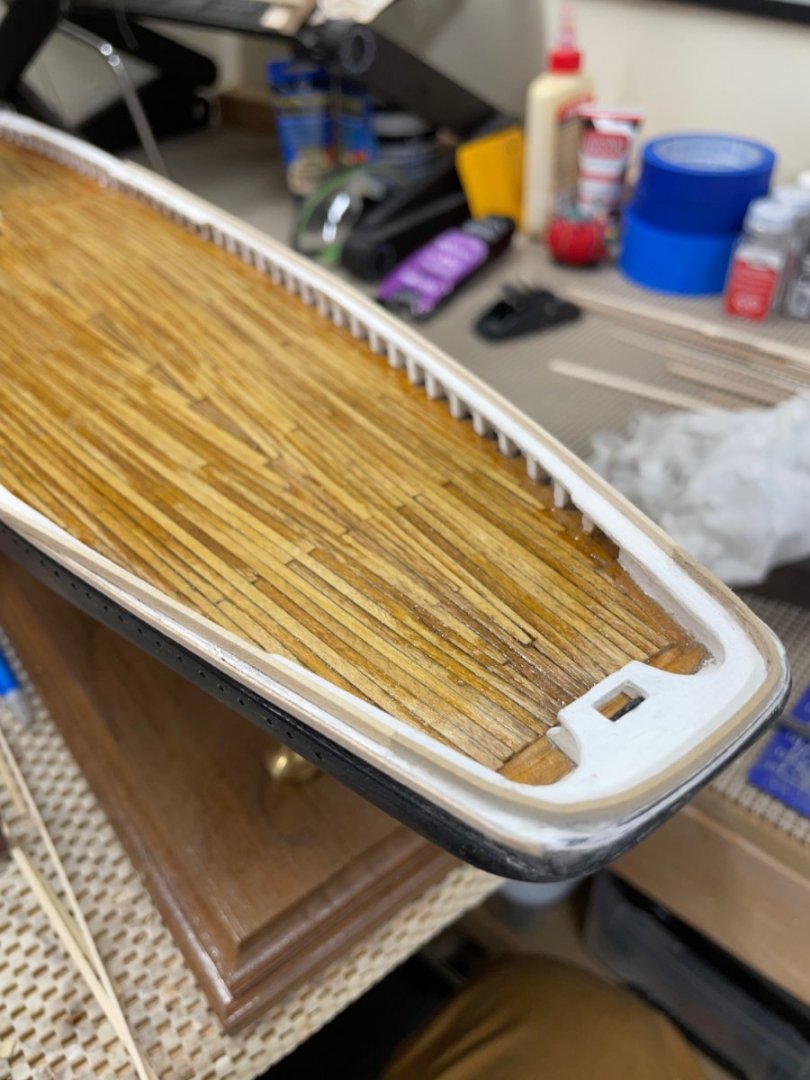
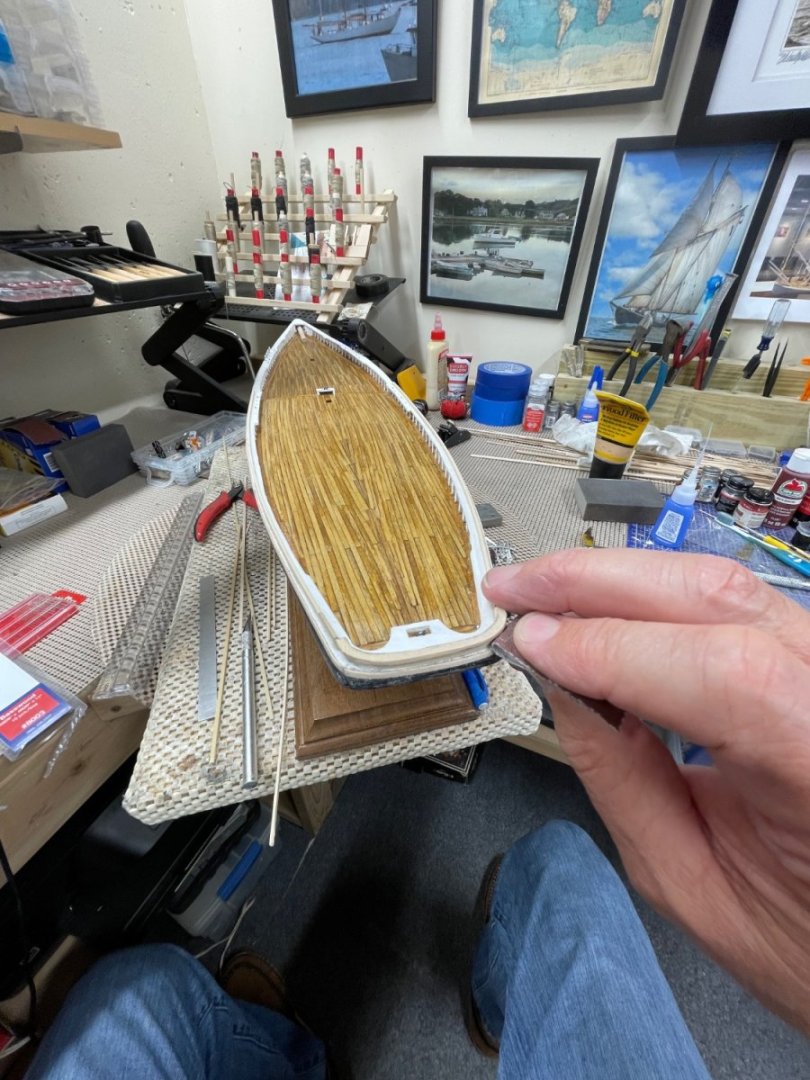
Main Rail… Monkey Rail… Buffalo Rail… Deadeyes… Shoutout to @David Lester for your research and build logs. Stern… Bow… Finishing up deadeyes… Painting out to top Rails… Placing eyelets and belaying pins She is getting there… All this fiddley stuff is tedious. Time to take a break and scan over the drawings. I don’t want to miss any of the hardware on the inside of the bulwark, before I start on the deck furnishings. I know I still have some eyelets, rings and things to do. Cheers 🍻


- 282 replies
-
- 6
-
-
- Bluenose
- Model Shipways
- (and 1 more)
-
She is a beautiful model, you will love the detail at this scale. Can’t wait to follow your build. Cheers 🍻
-
I agree that’s what hooked me into the “challenge”. “It was worth it.” 😆
-
True that Keith… it was only temporarily in that location for the photo shoot. 🍻
-
This is an excellent challenging kit to build. Well worth the shipping cost.

-
Looks very nice. 👍
-
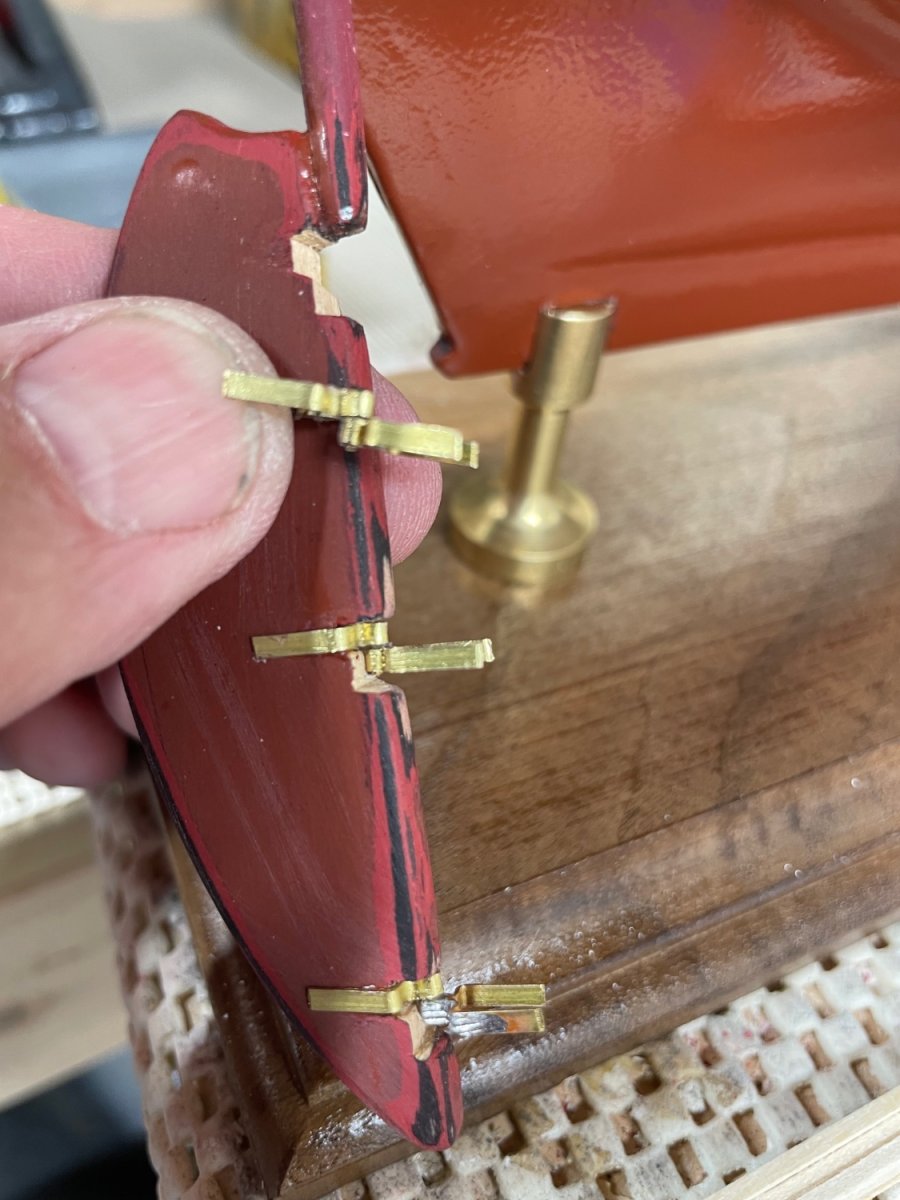
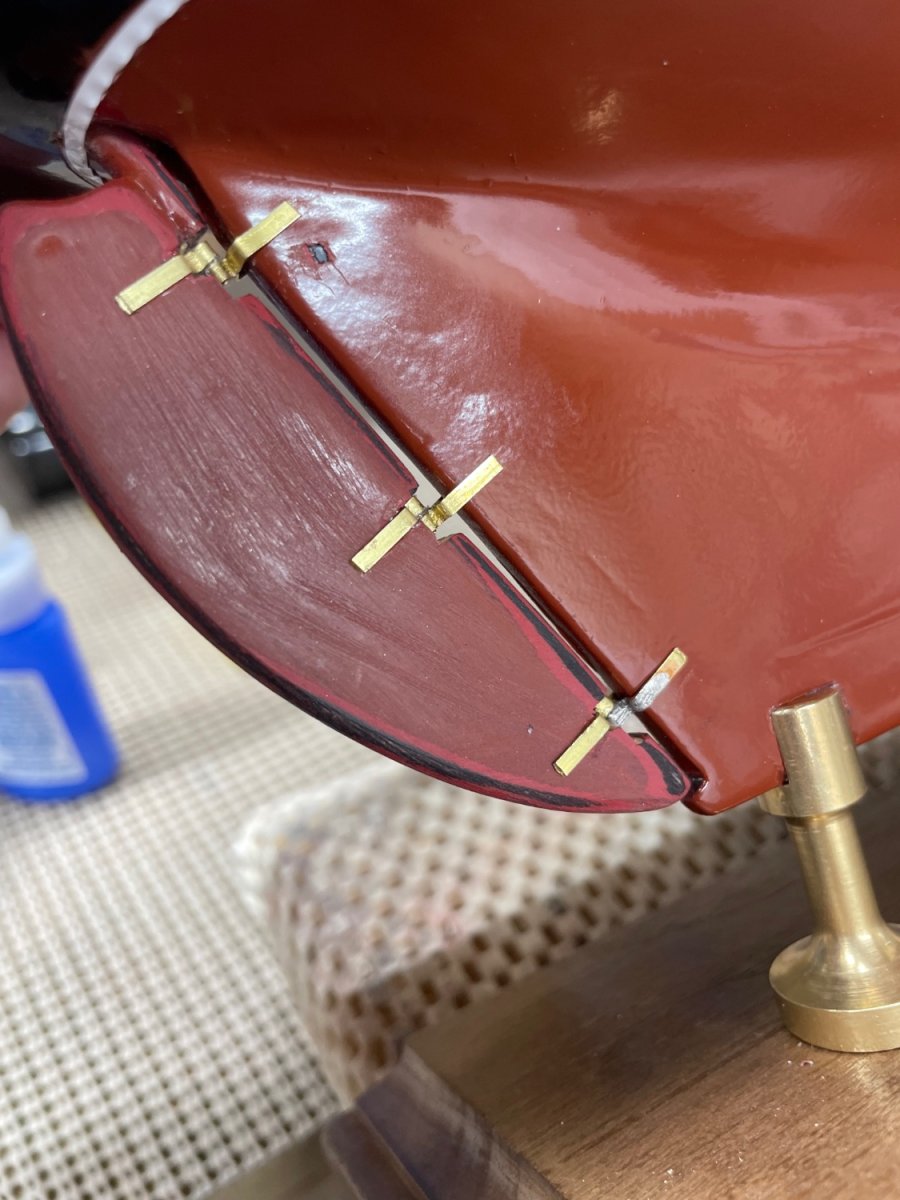
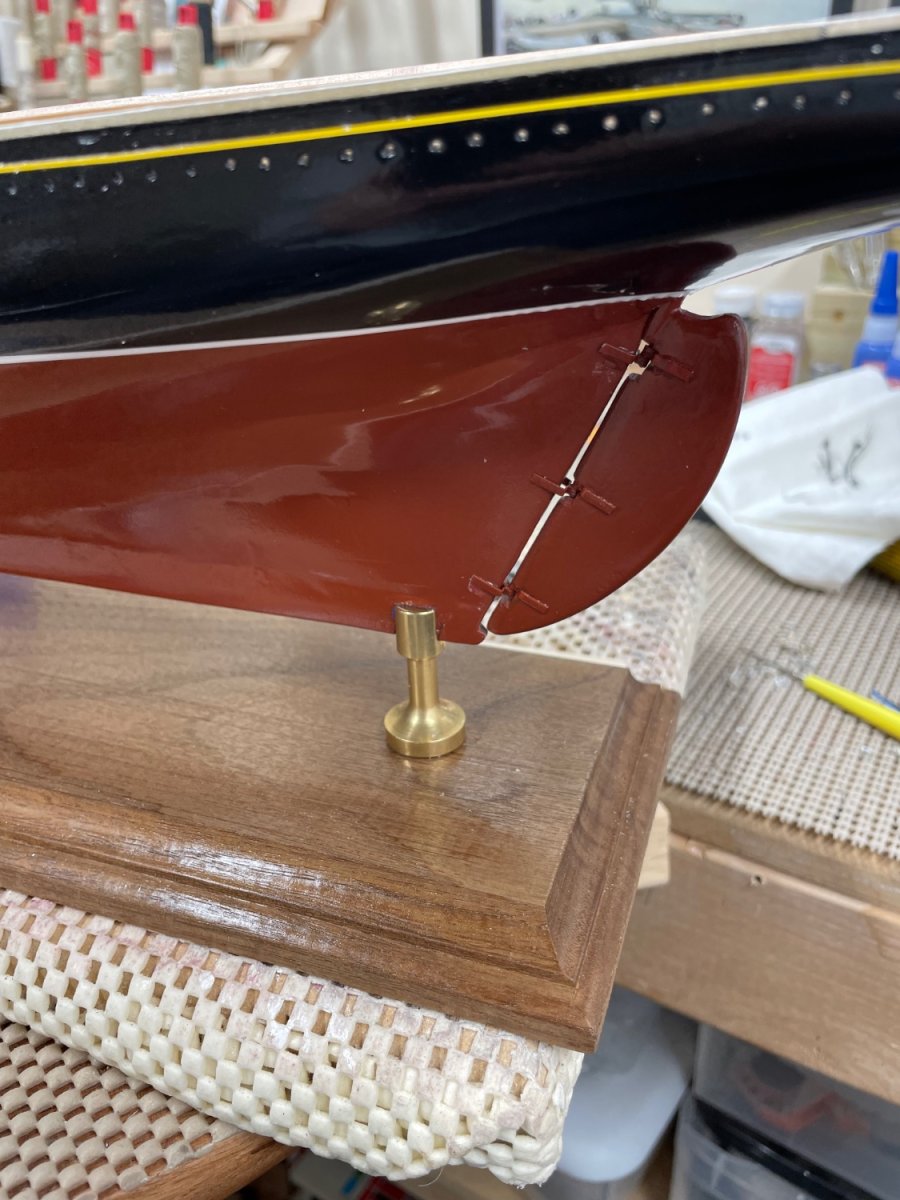
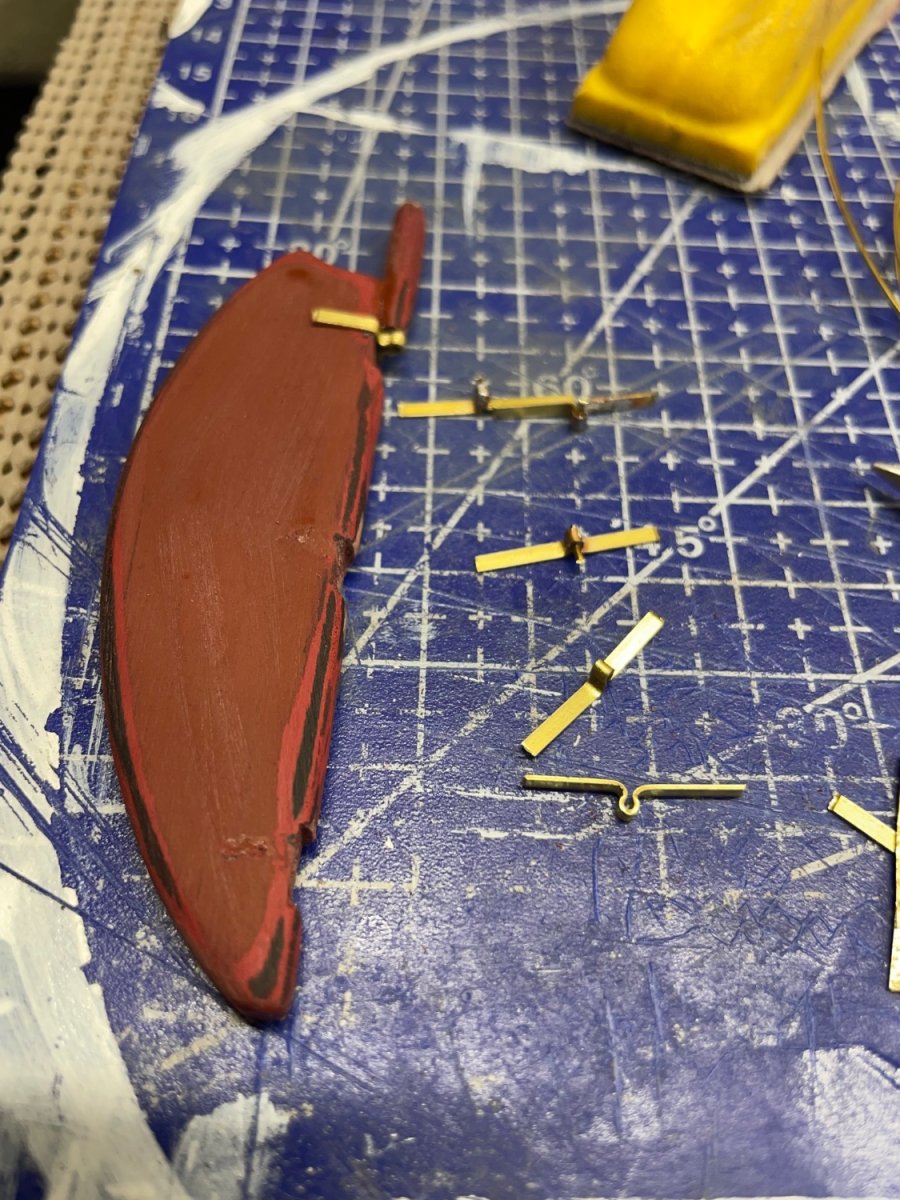
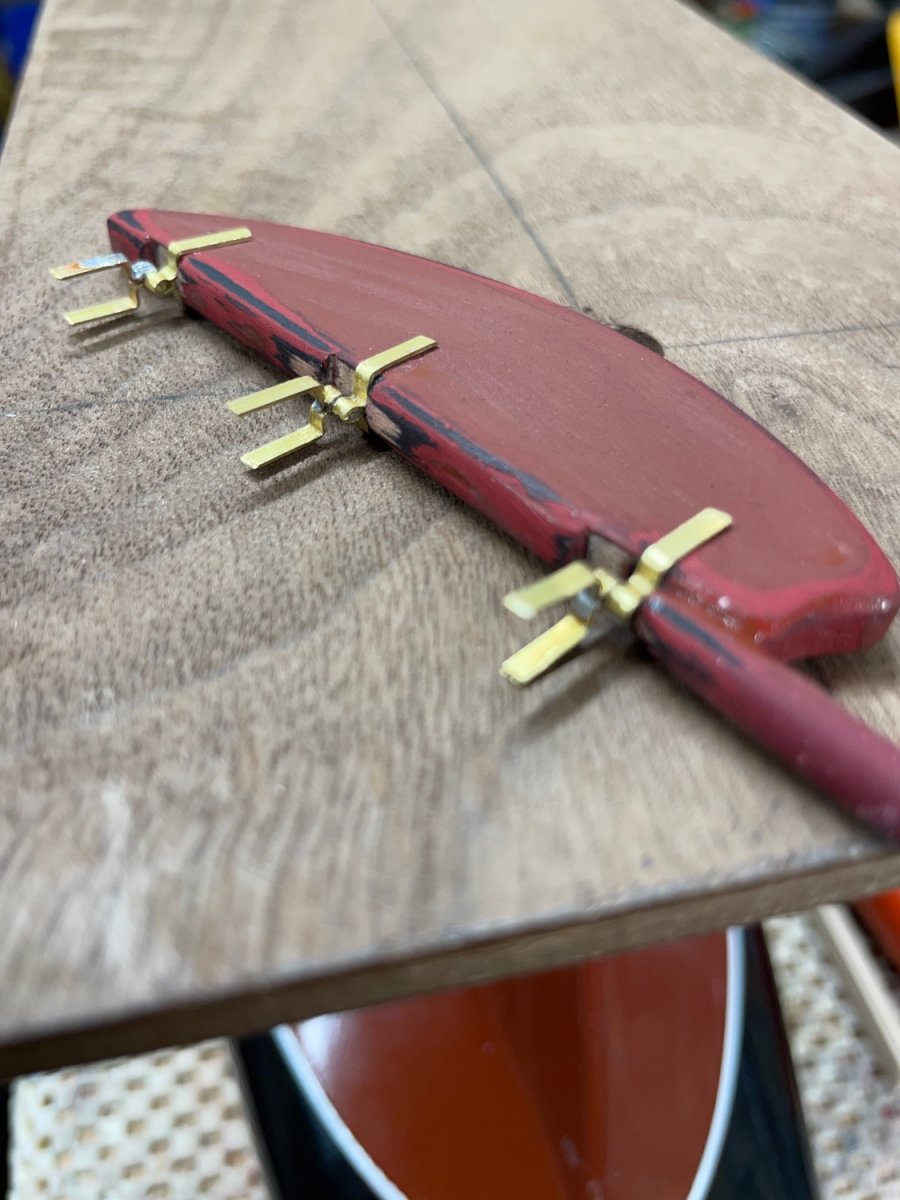
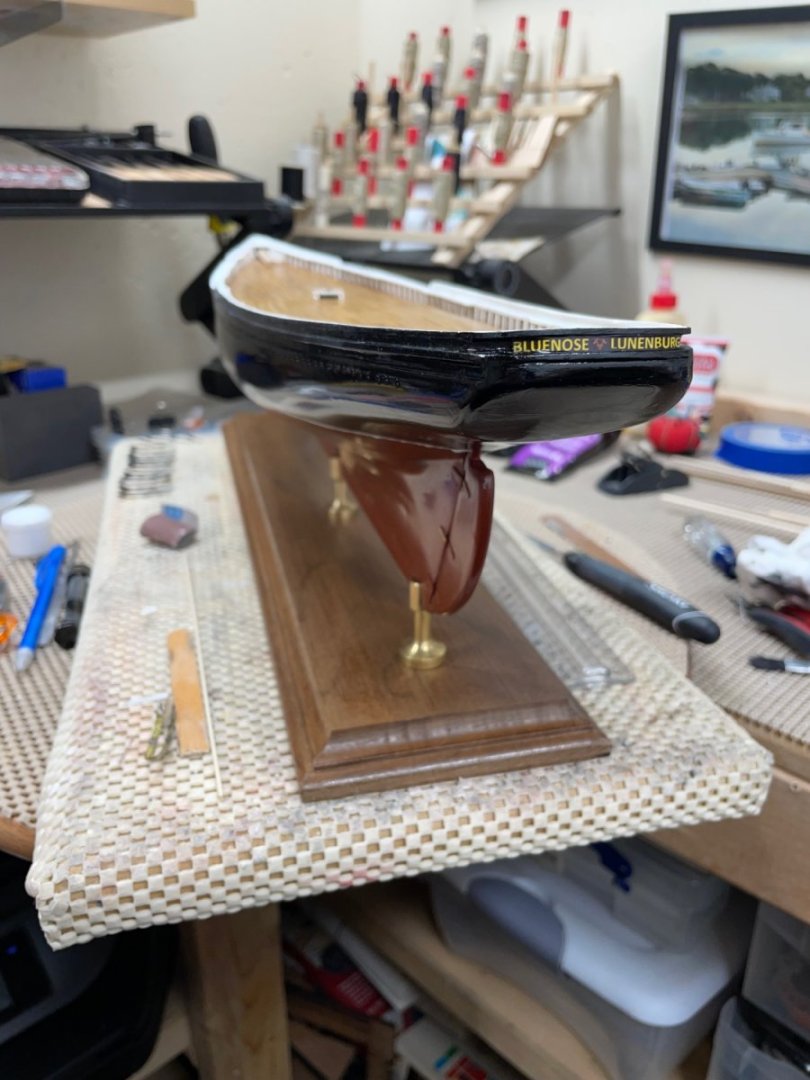
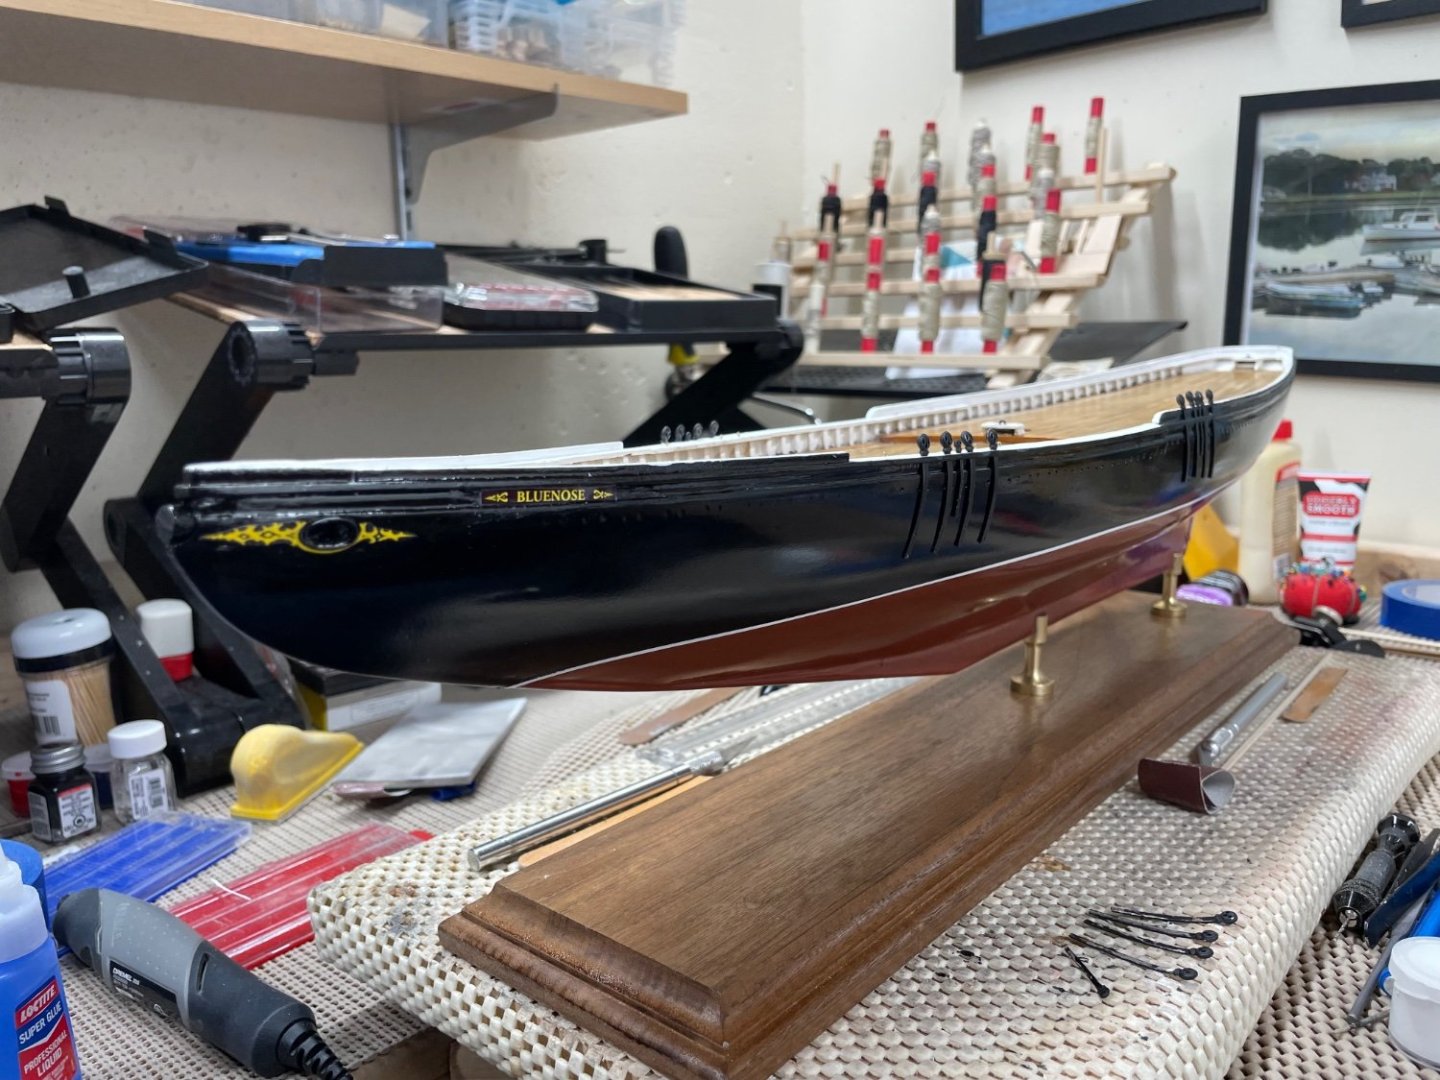
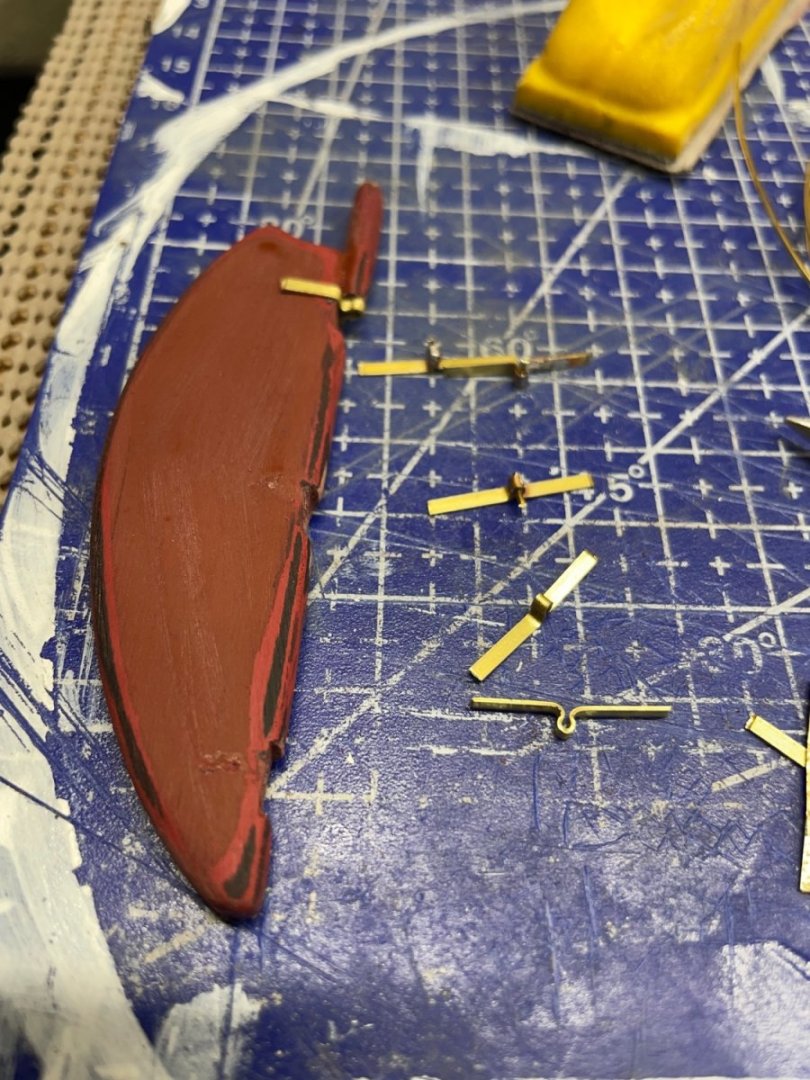
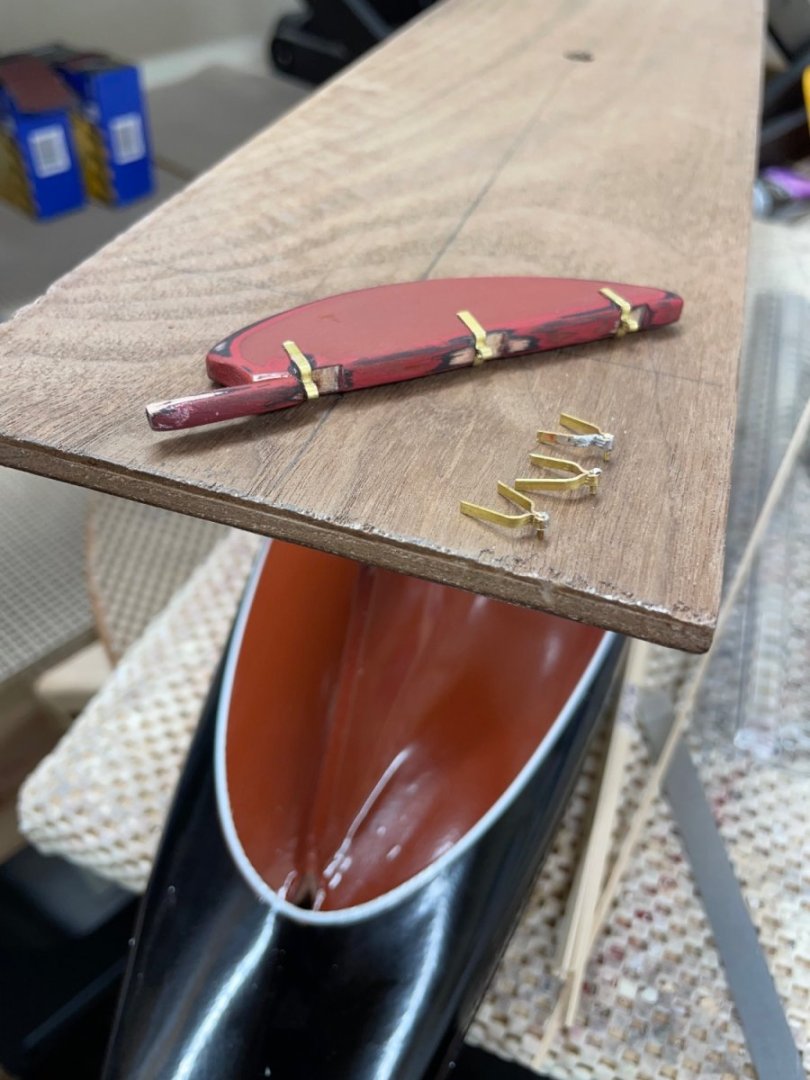
Rudder… Rudder Hinges are built from kit supplied brass strip. Very tedious! 😬 Cheers 🍻

- 282 replies
-
- 8
-
-
-
- Bluenose
- Model Shipways
- (and 1 more)
-
Very nice detail Ron! 👍