HOLIDAY DONATION DRIVE - SUPPORT MSW - DO YOUR PART TO KEEP THIS GREAT FORUM GOING! (Only 13 donations so far - C'mon guys!)
×


John Ruy
-
Posts
1,566 -
Joined
-
Last visited
Content Type
Profiles
Forums
Gallery
Events
Everything posted by John Ruy
-
 BTW… the base is not heavy. It would need to be screwed down if you want to tug on it.
 -
I’m not either, but I’m getting better at it. Takes practice this model will definitely give you the opportunity to practice. Took me several attempts and hours to get what you see here. You need the right tools. 👍
-
I like it too, I’ve had it a very long time. I don’t remember where I got it, but I found one at your favorite delivery service. PANAVISE Model 201 "Junior" Miniature Vise,Silver / Black https://a.co/d/f4guiqj
-
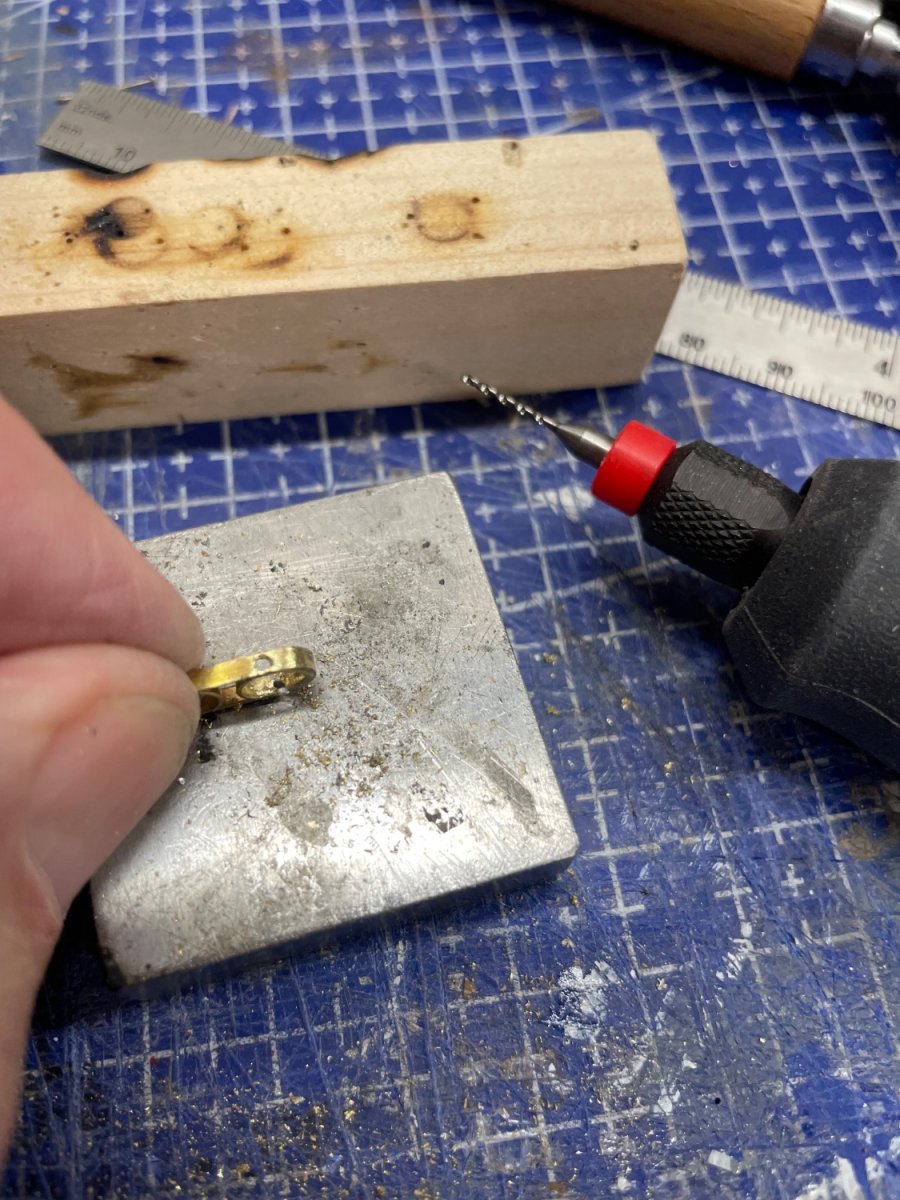
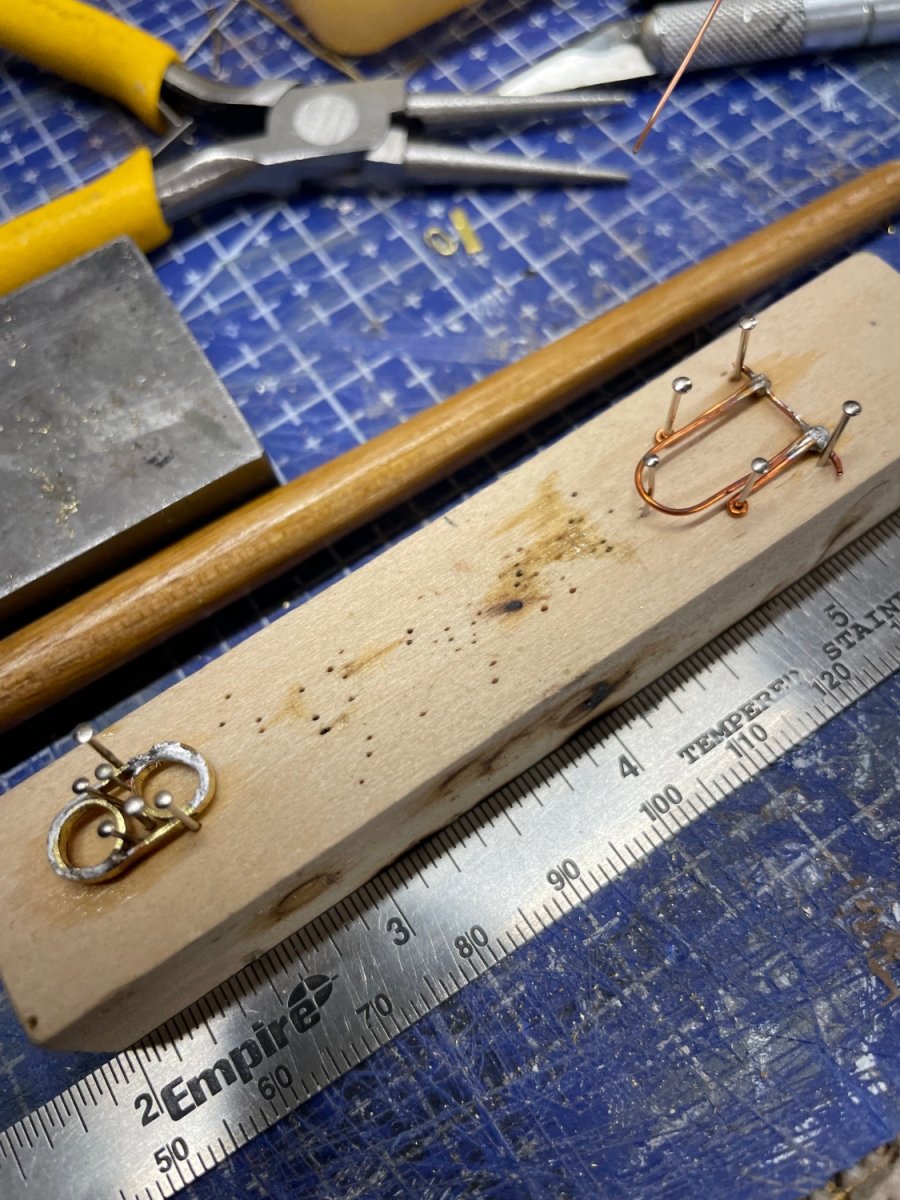
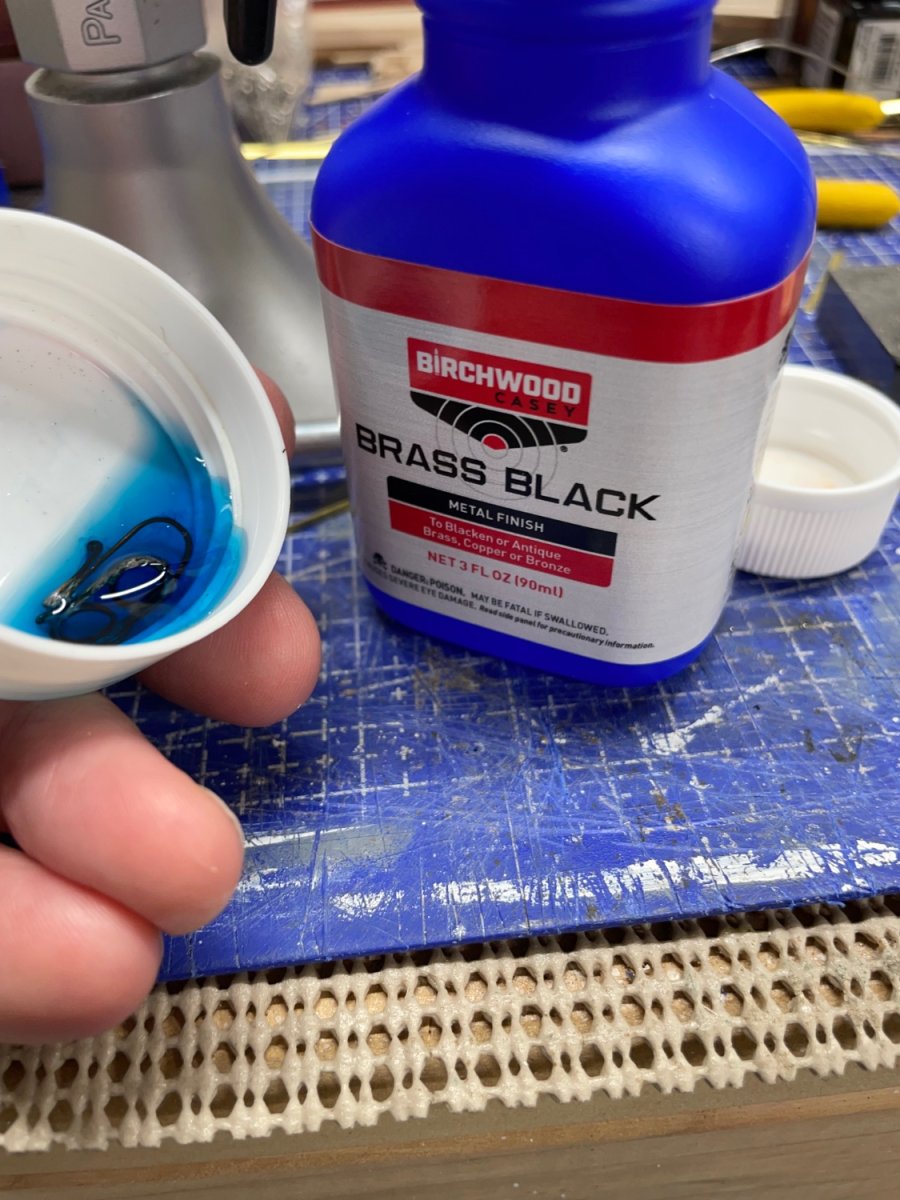
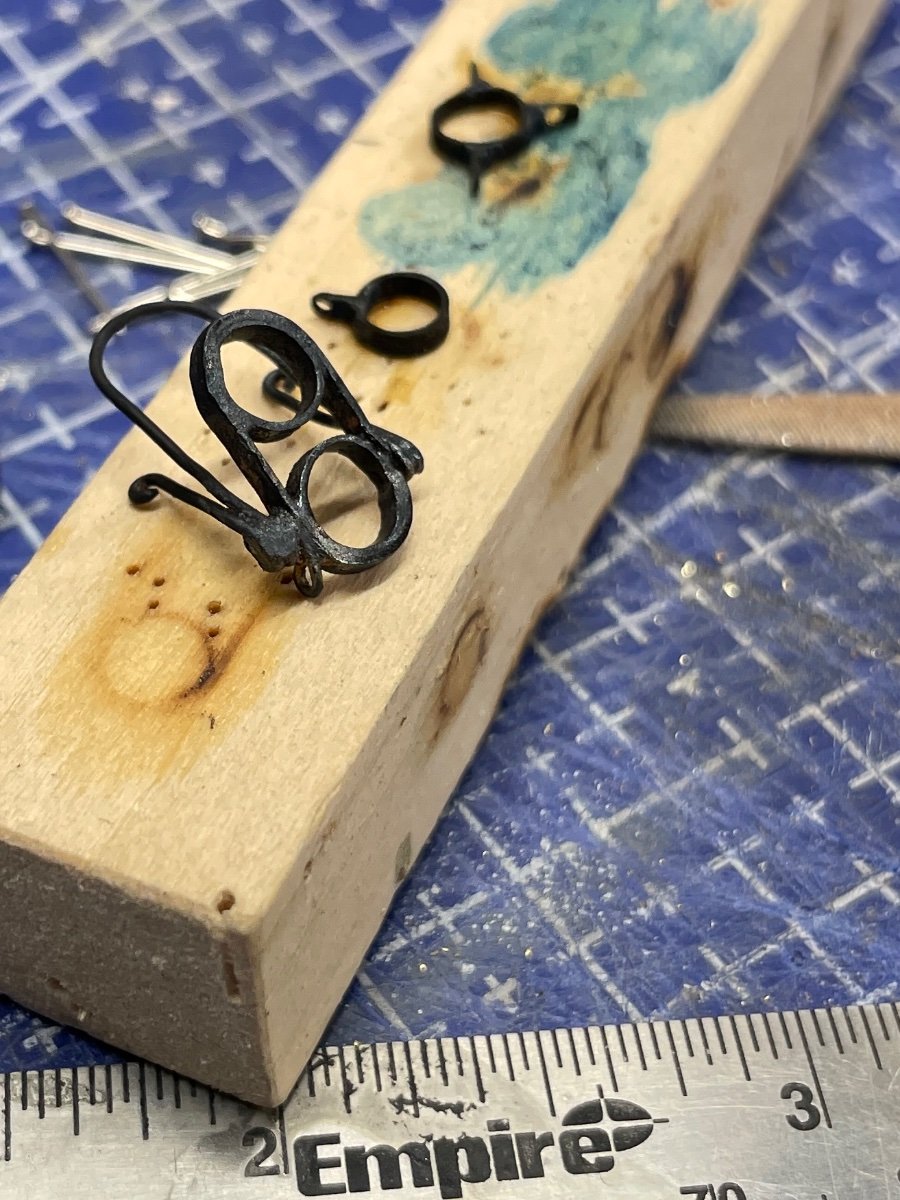
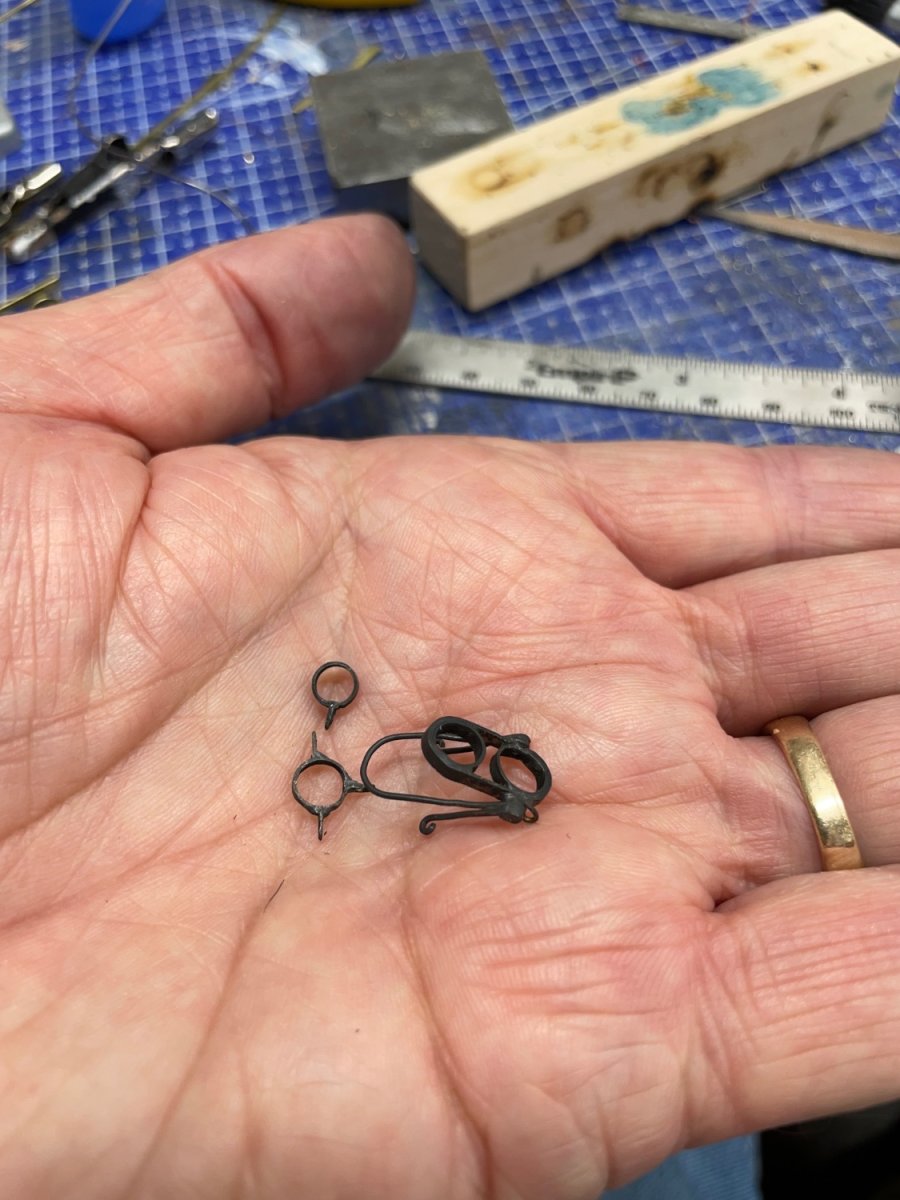
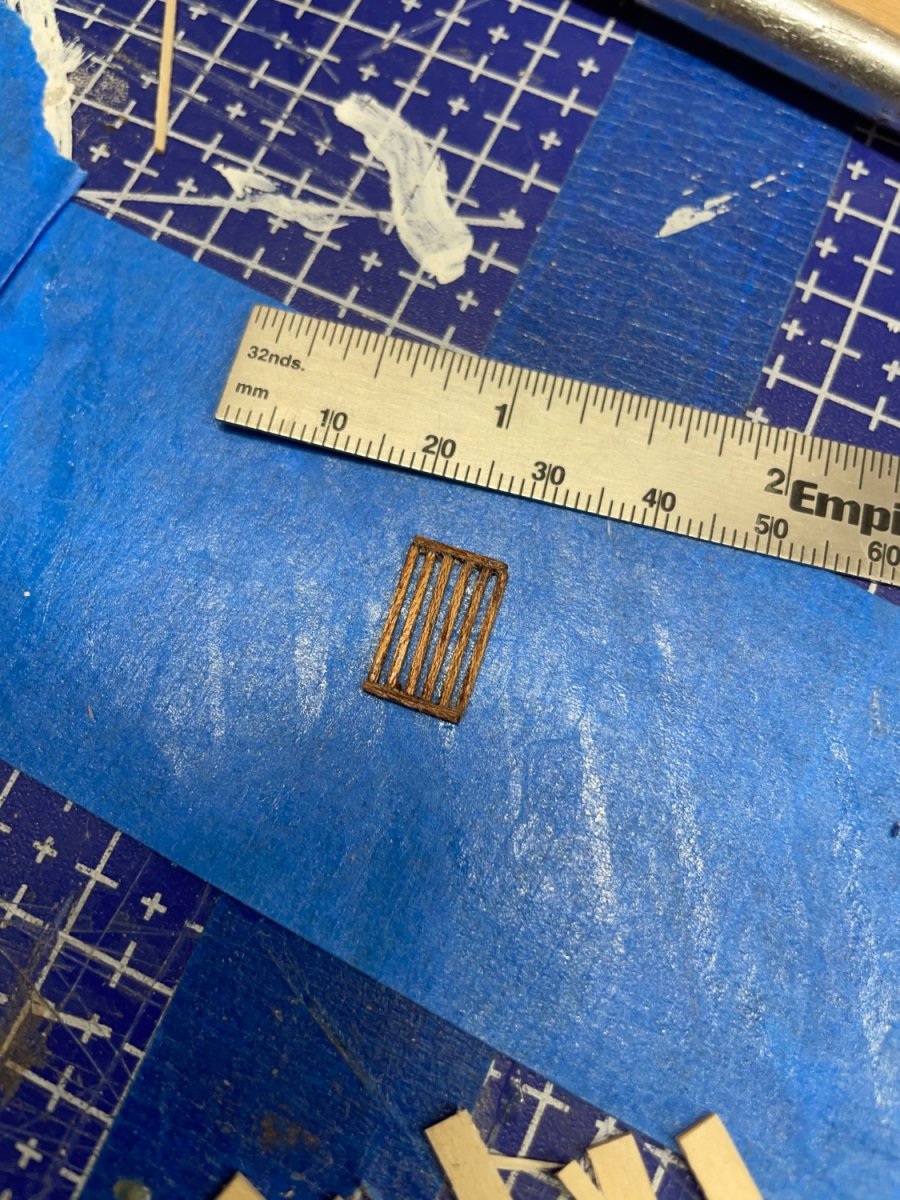
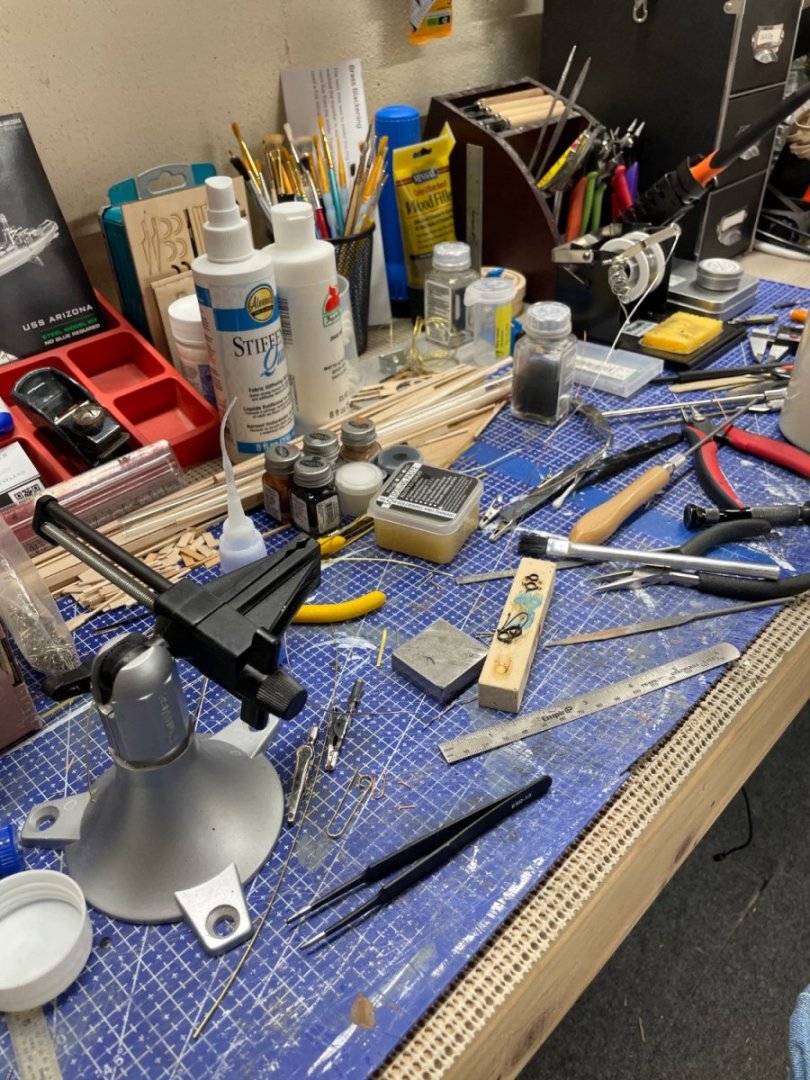
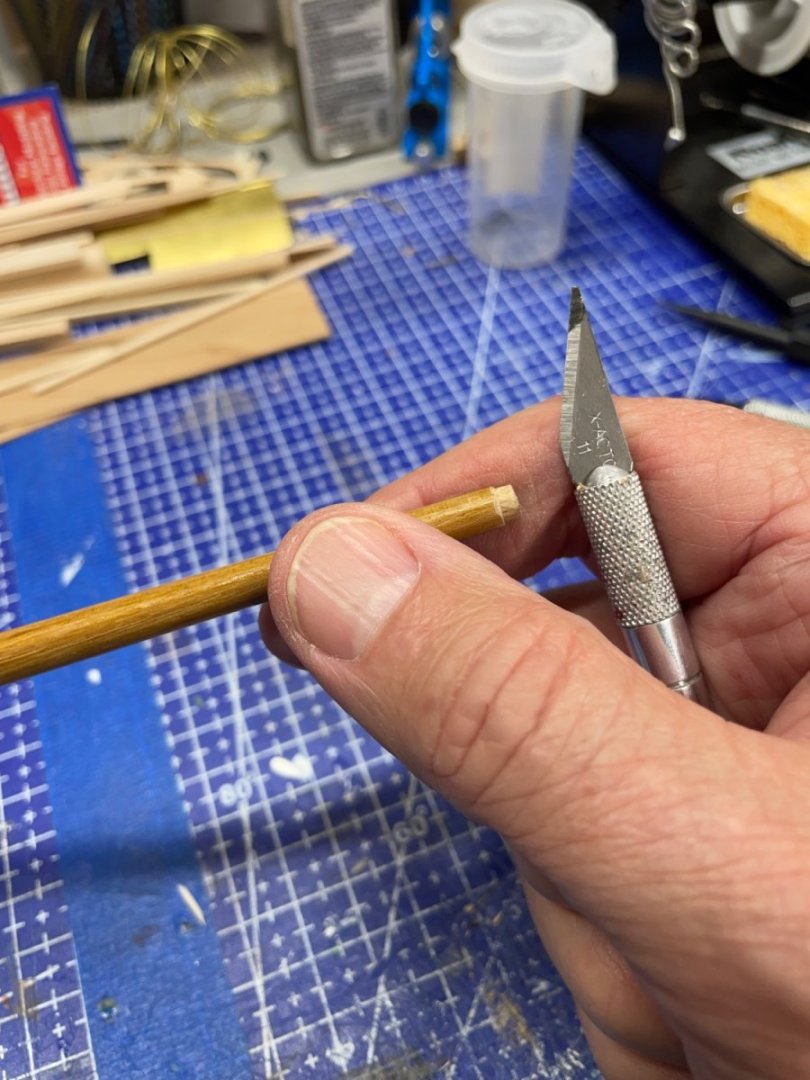
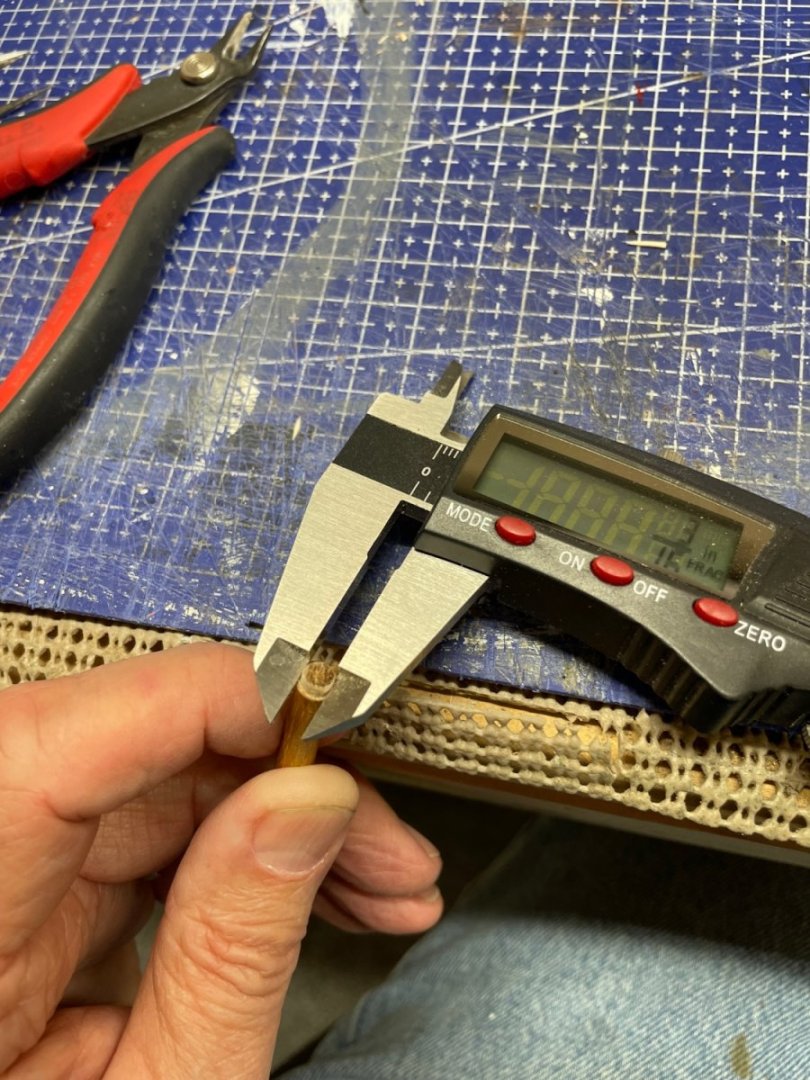
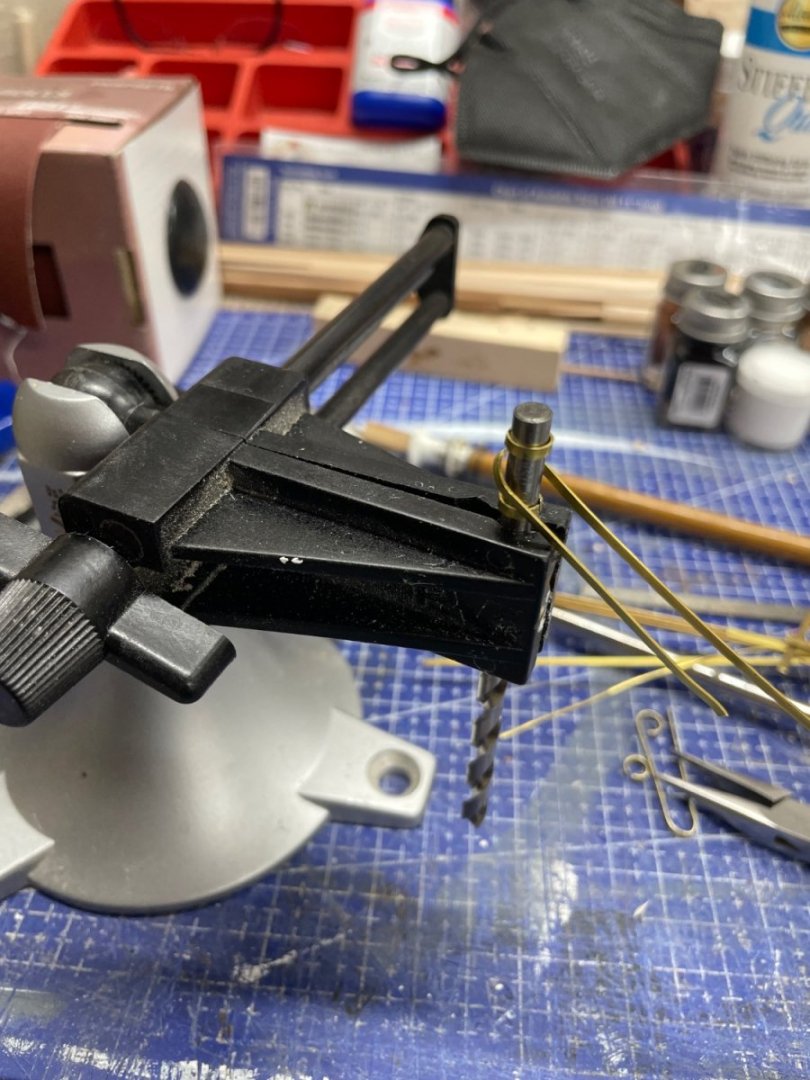
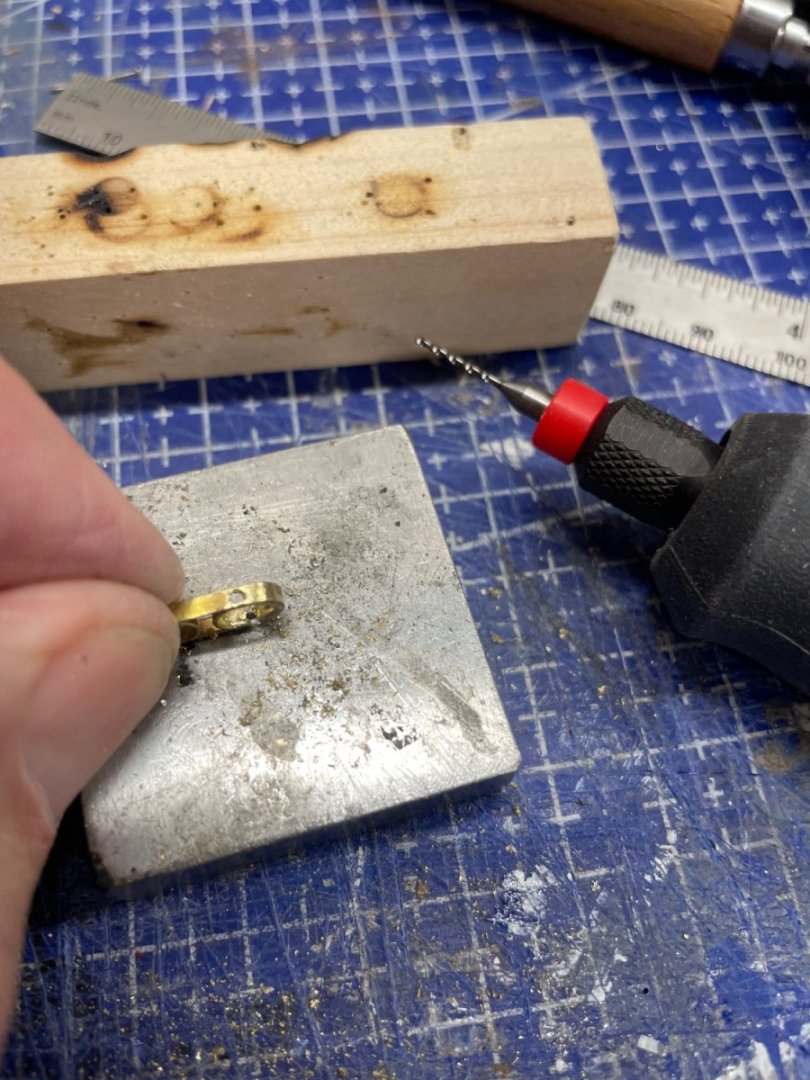
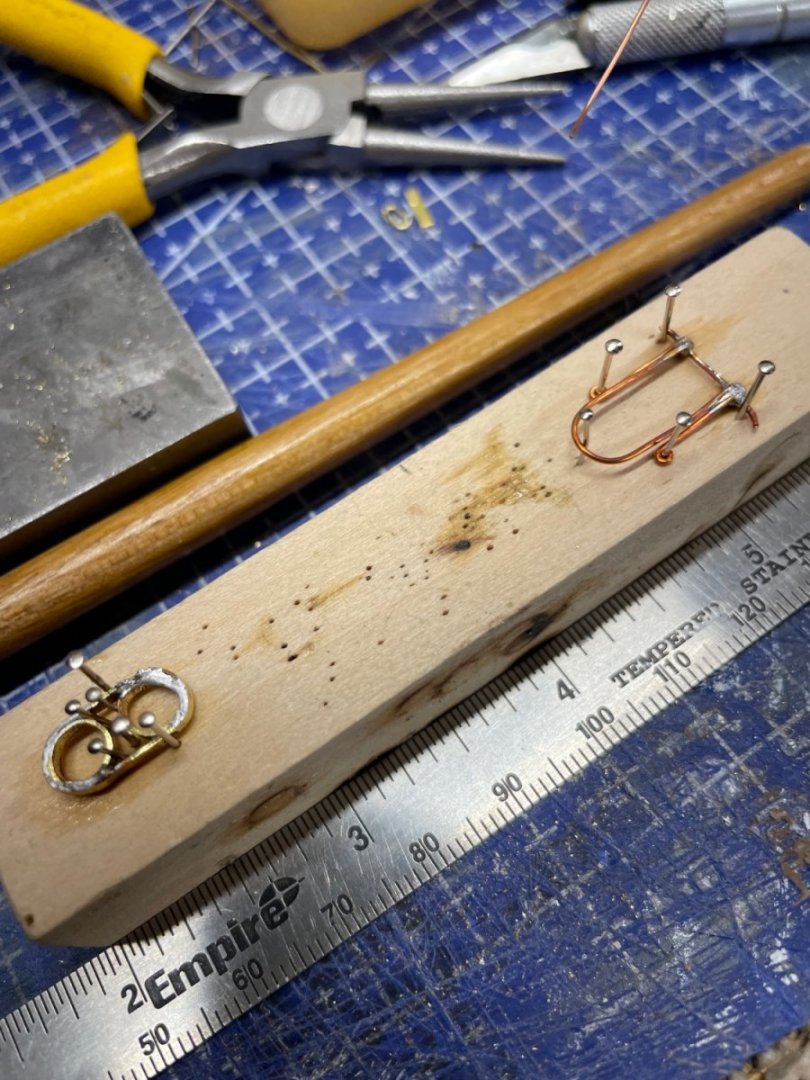
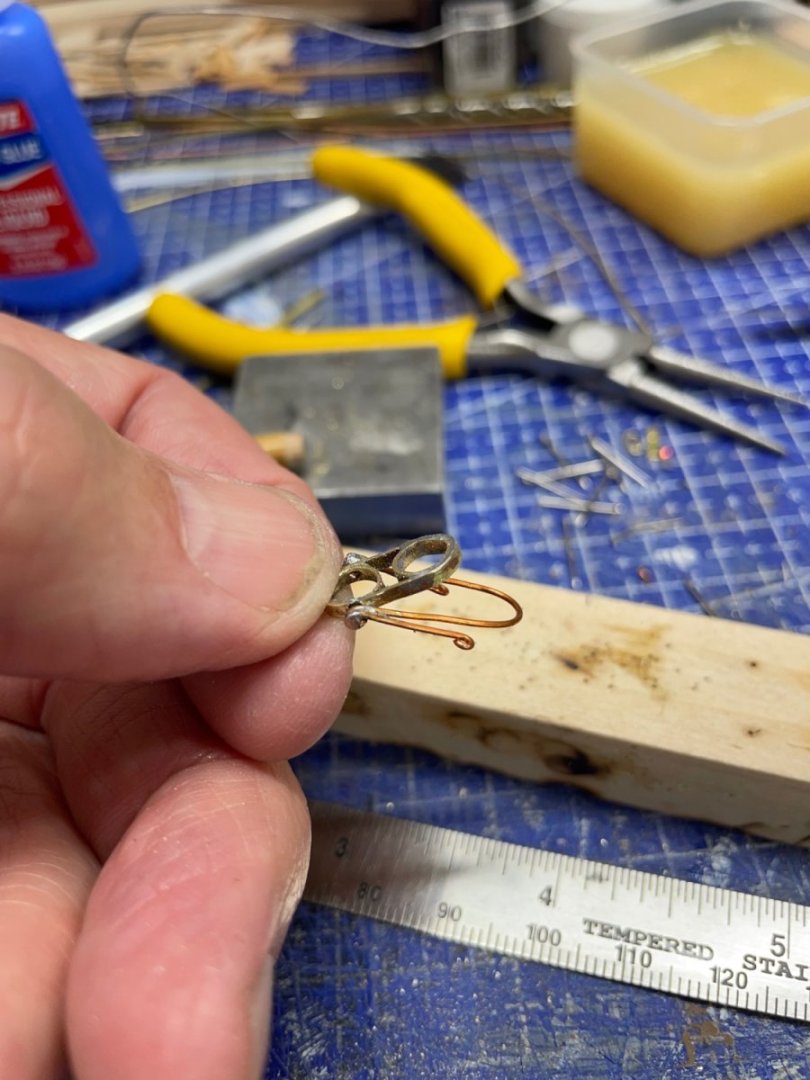
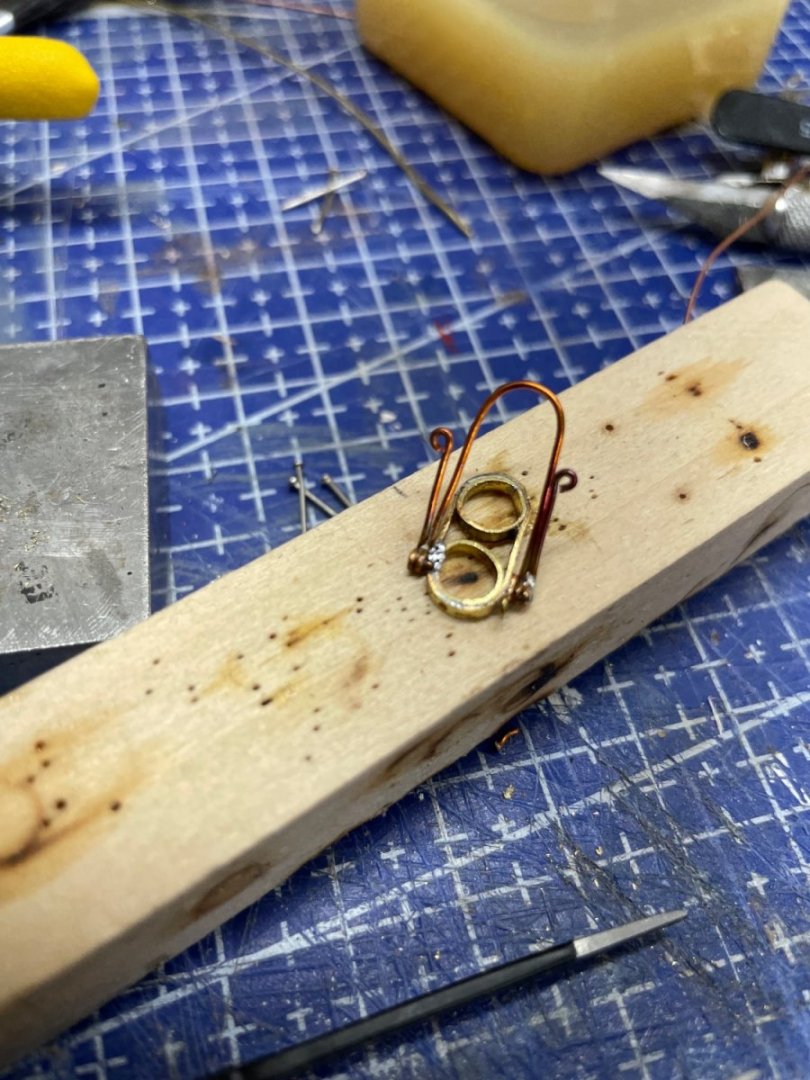
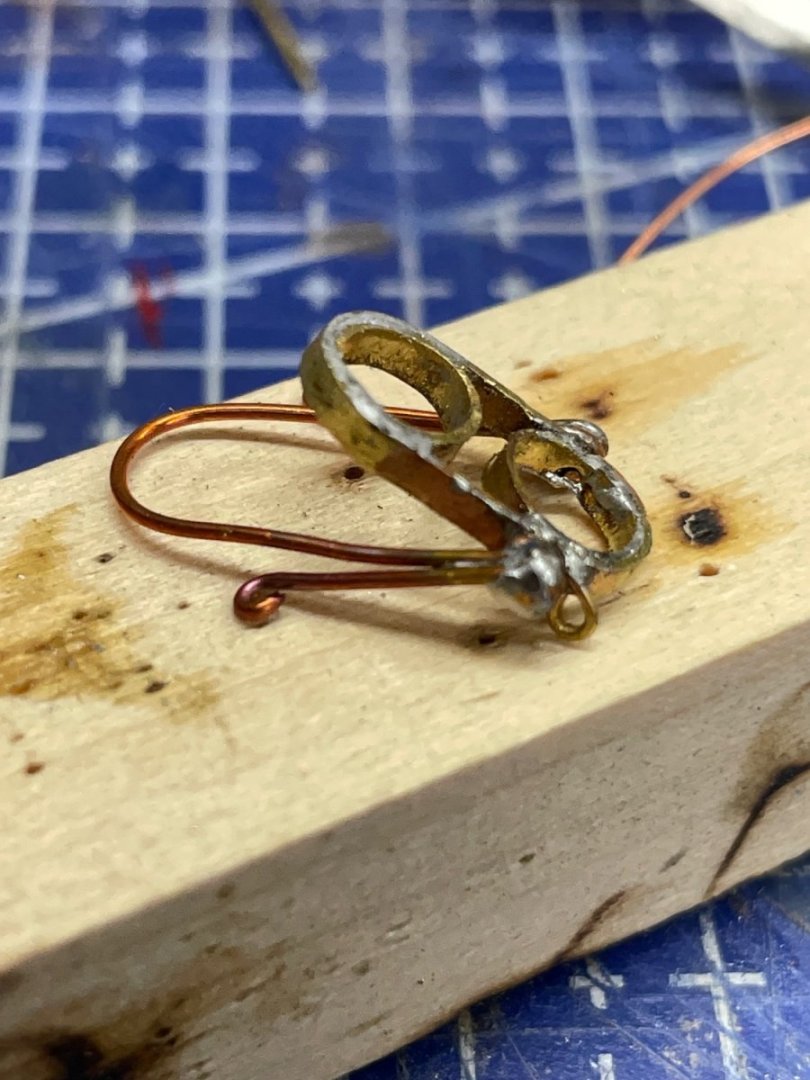
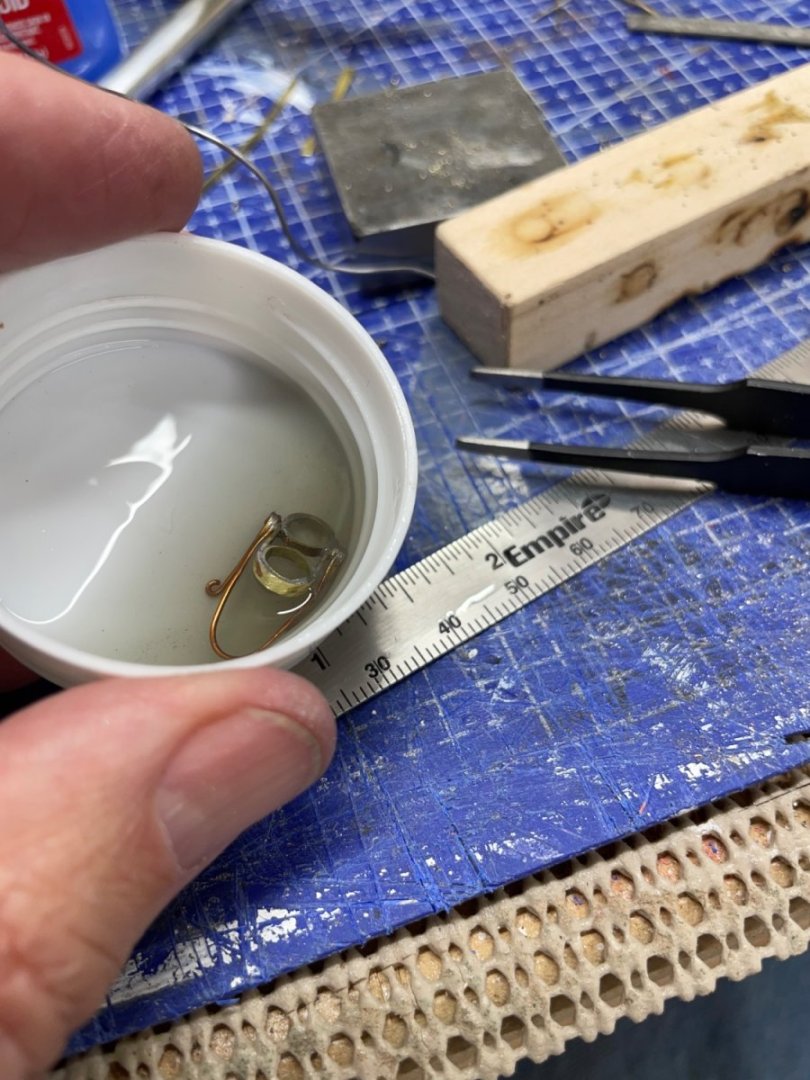
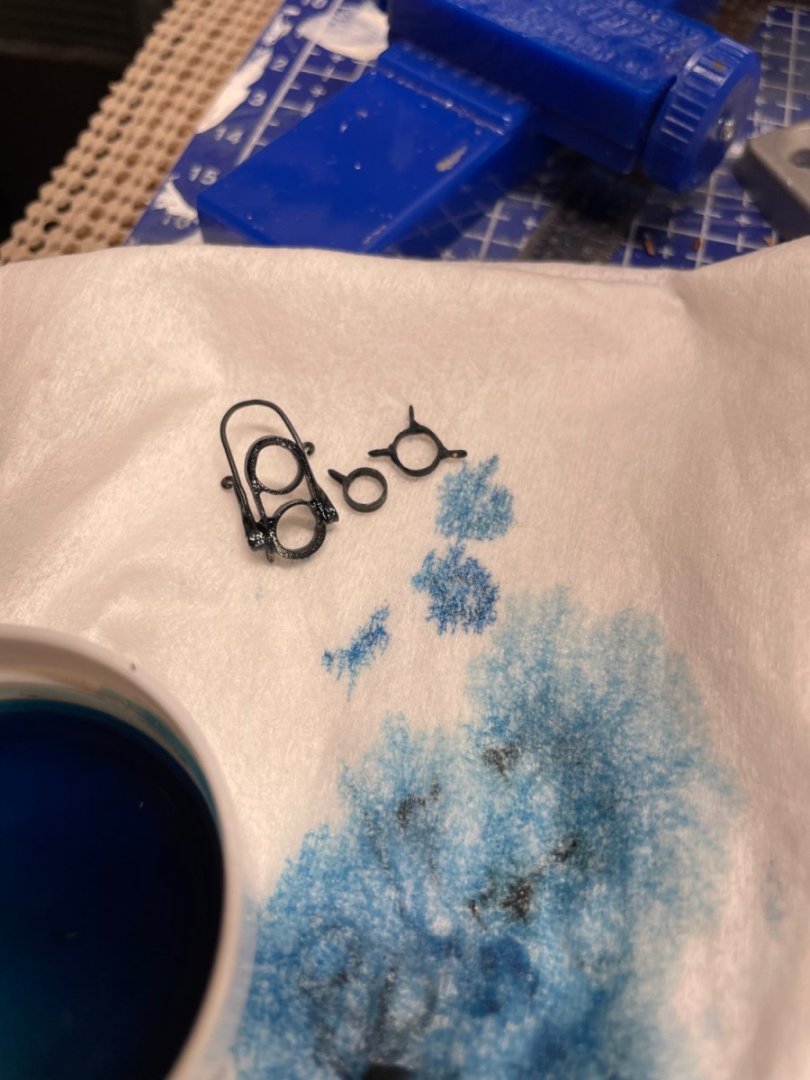
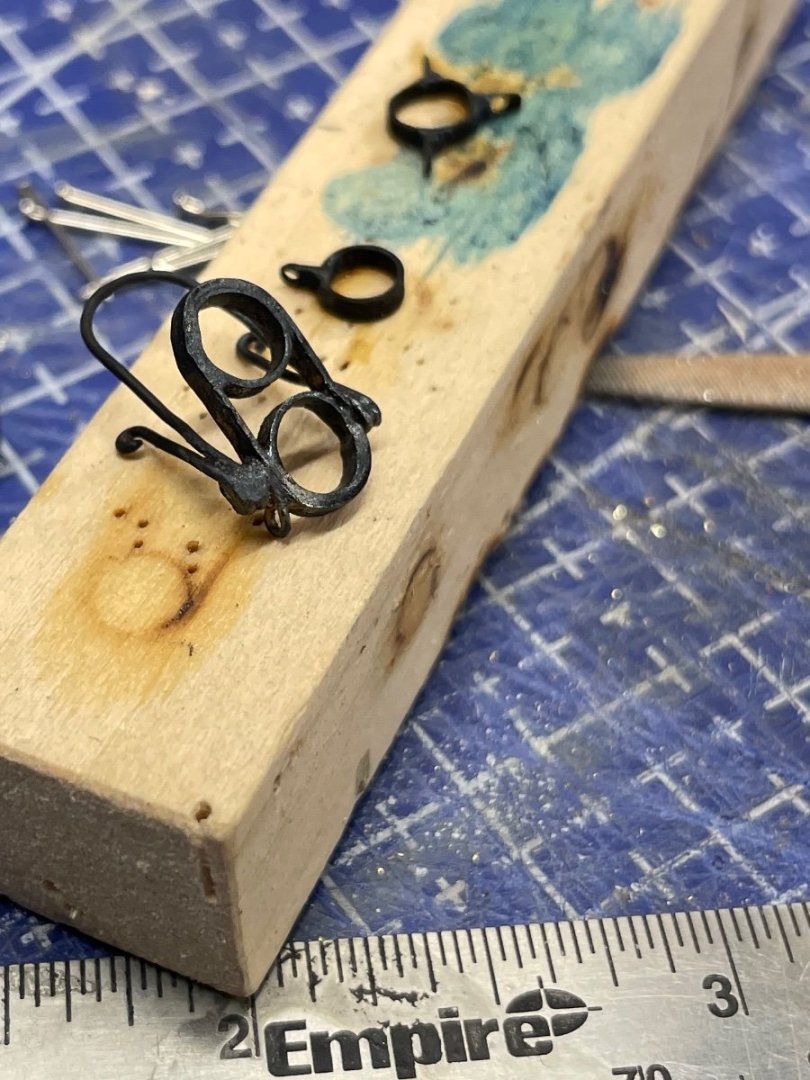
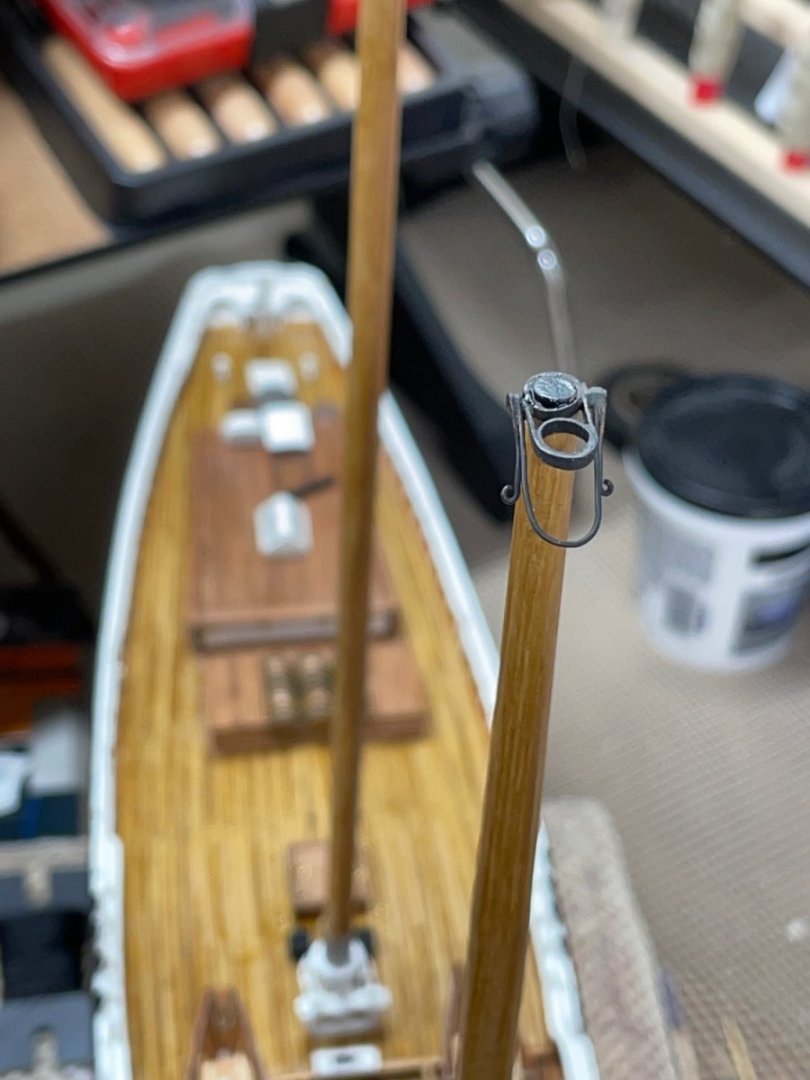
Opening up my Micro Foundry… Fore Mast Cap… 3/16” Drill bit… Soldering .9 mm drill bit complete assembly additional soldering Still working on my soldering skill set. Lots of micro filing needed to clean this up. Cleaning with Acetone Blackening Brush off excess crud to polish it up. 3 of 99 parts to go. Steady as she goes. Cheers 🍻


- 282 replies
-
- 10
-

-

-
- Bluenose
- Model Shipways
- (and 1 more)
-
Beautiful work! Looks like you are making great progress. You did it again, thought I was done with the deck but forgot the Jumbo Job Sheet Traveler Horse. I thought I triple check those drawings. 😜 Lots of details to capture. I’m going to fix that right now. Thanks
- 184 replies
-
- 1
-
-
- Bluenose
- Model Shipways
- (and 1 more)
-
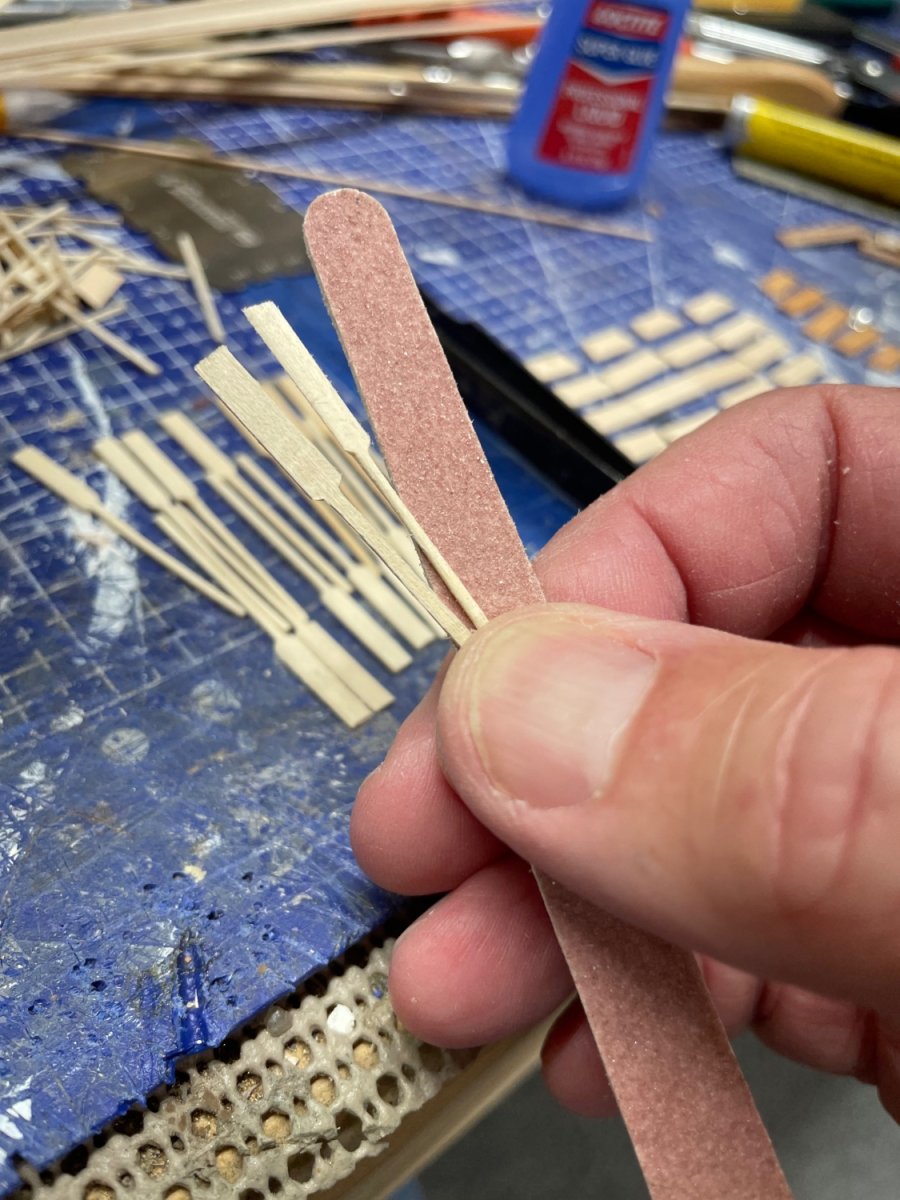
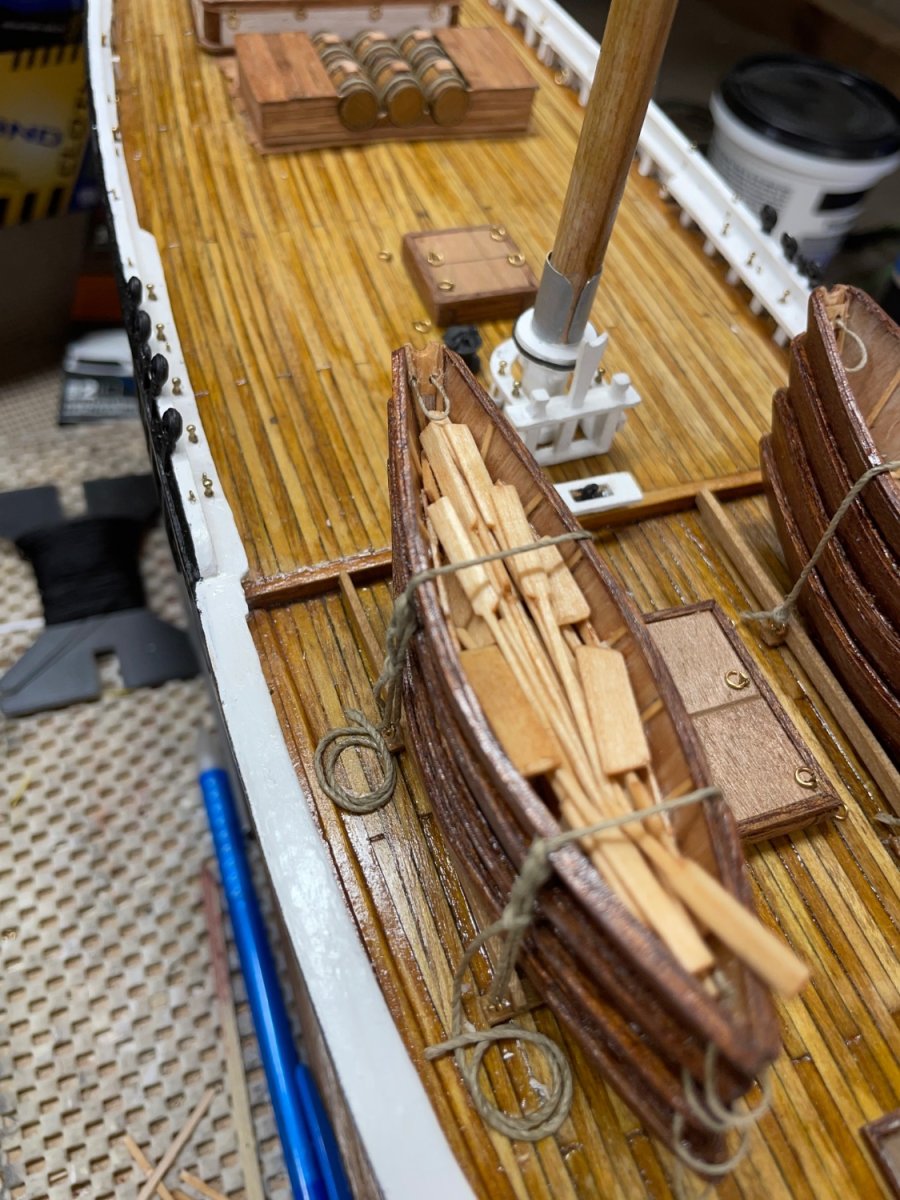
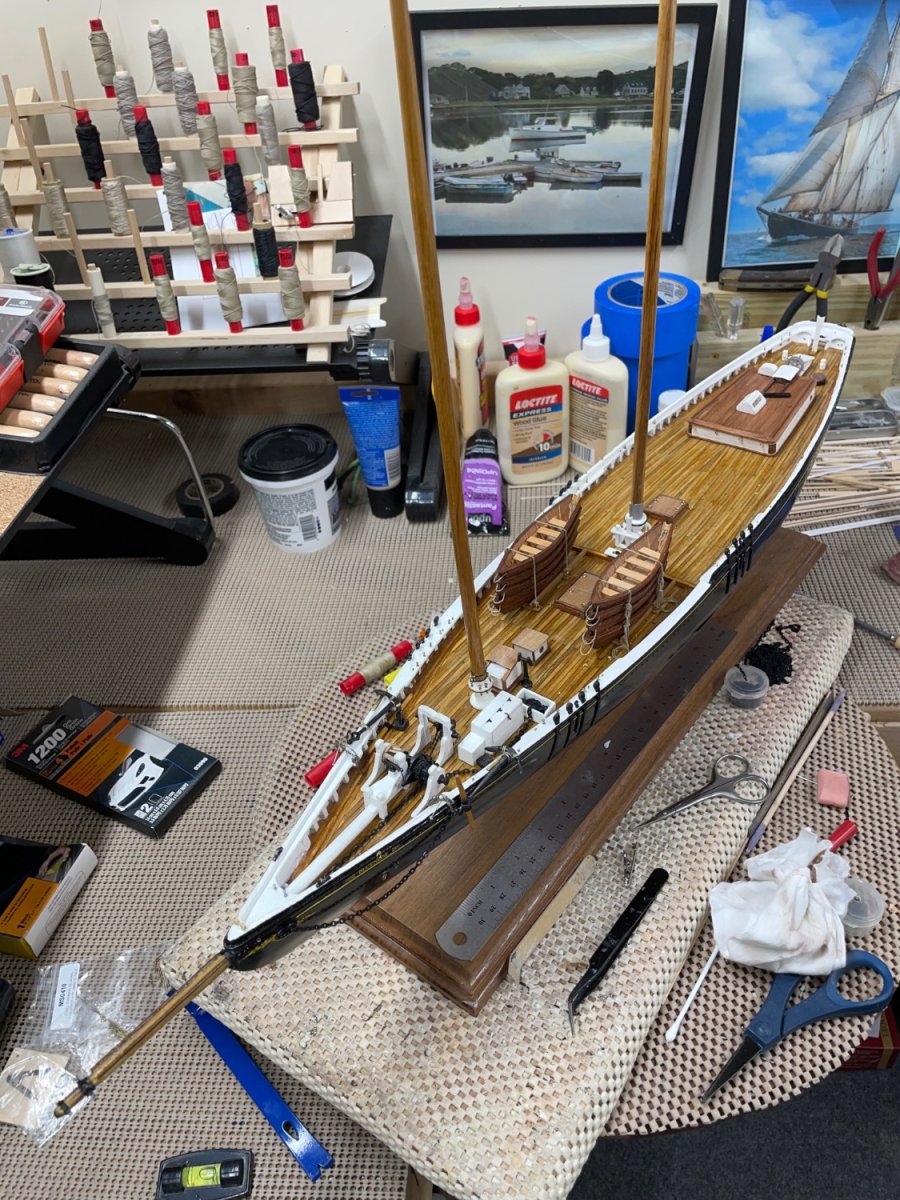
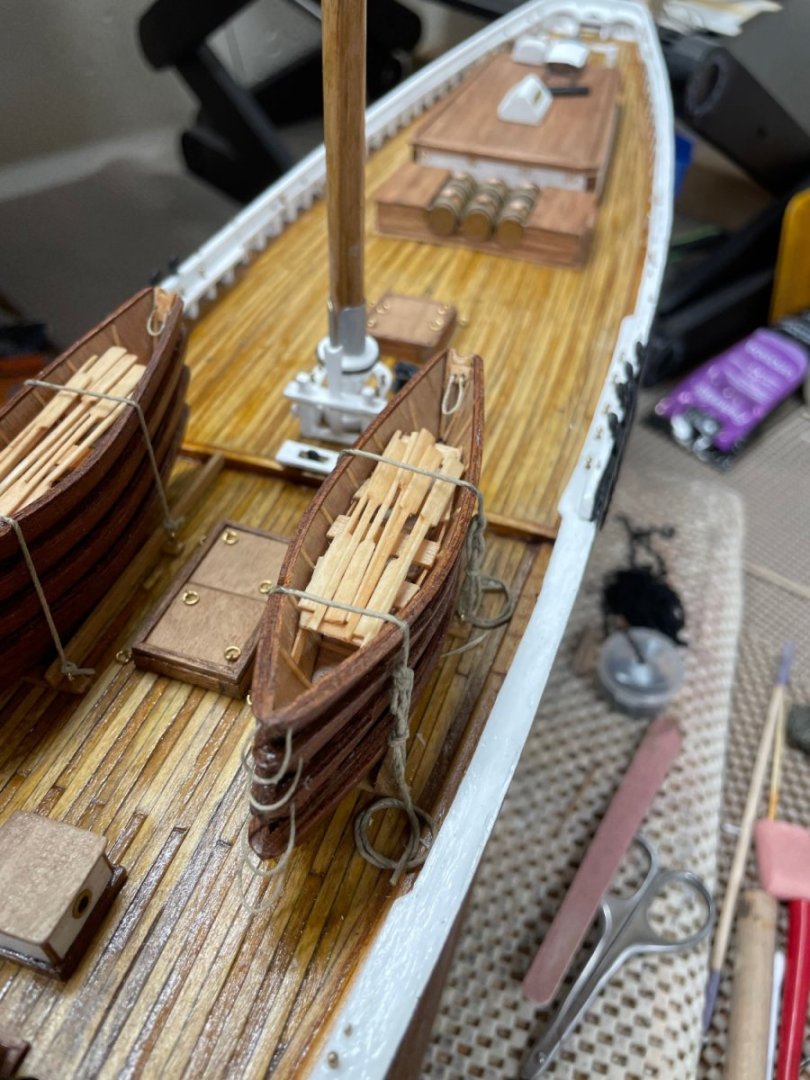
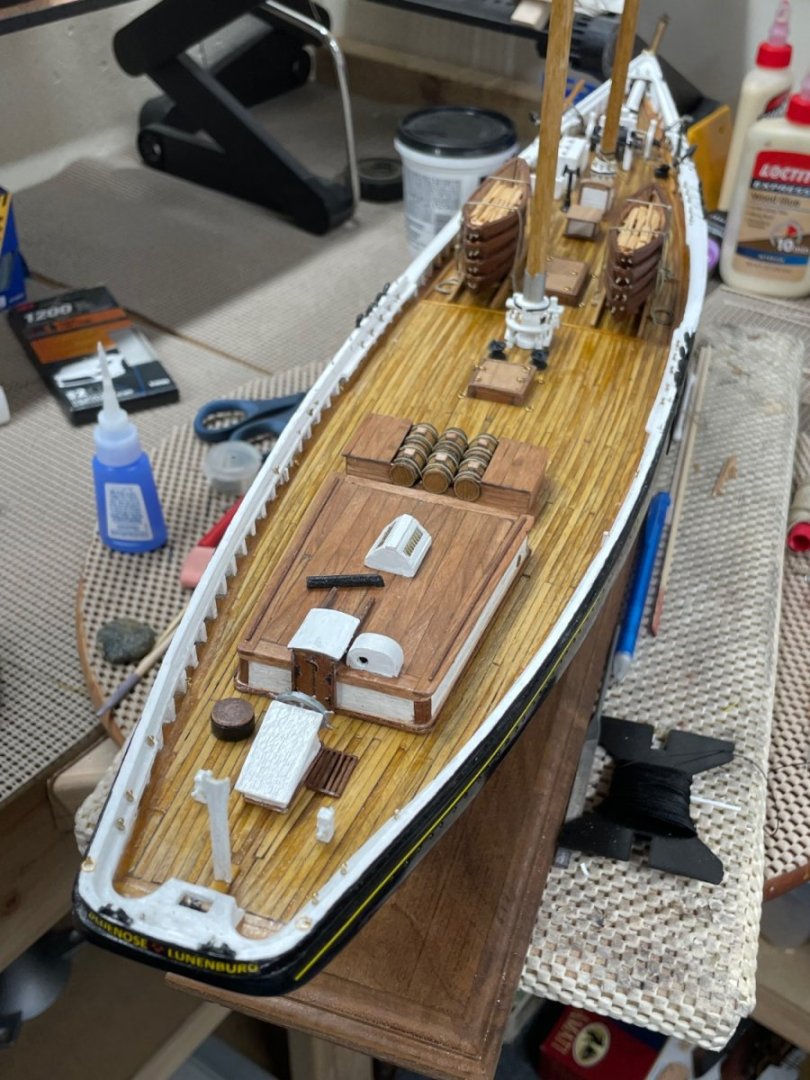
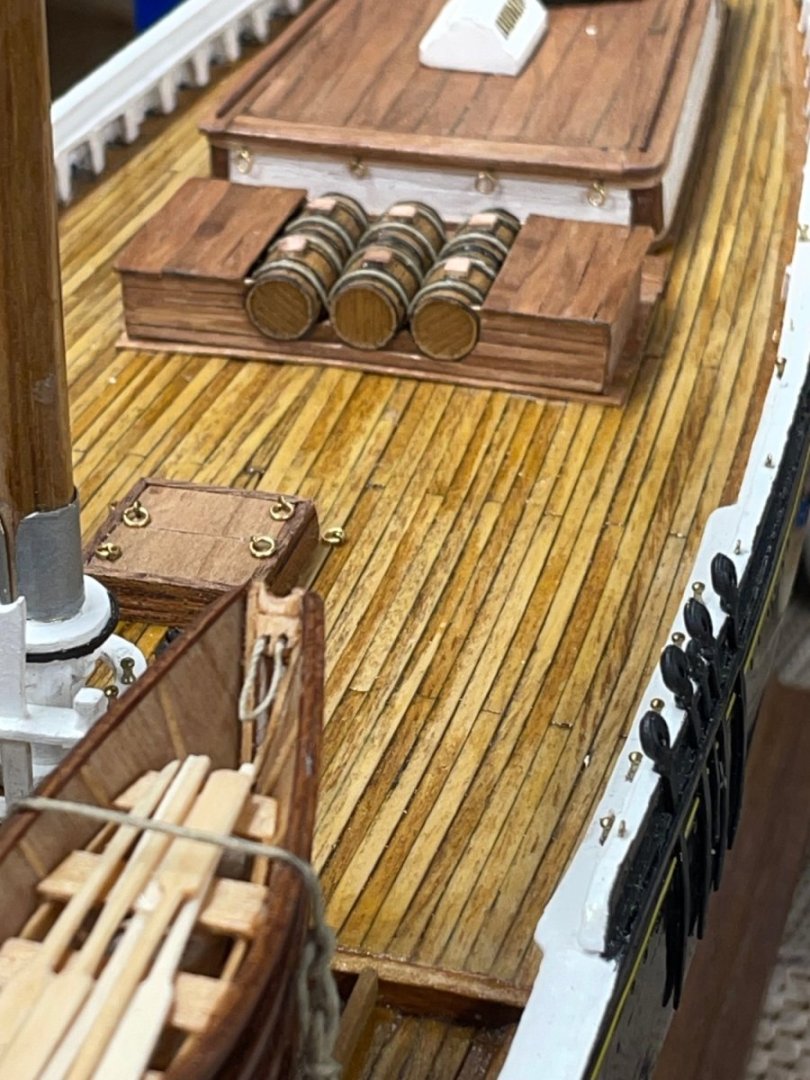
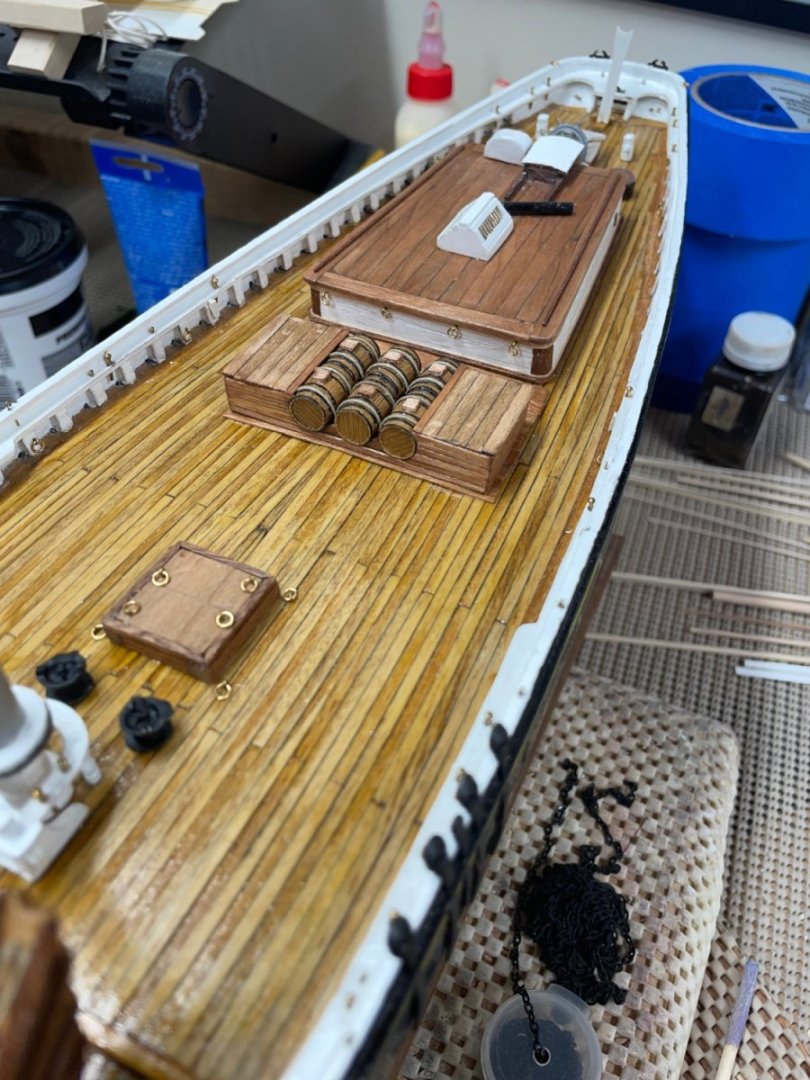
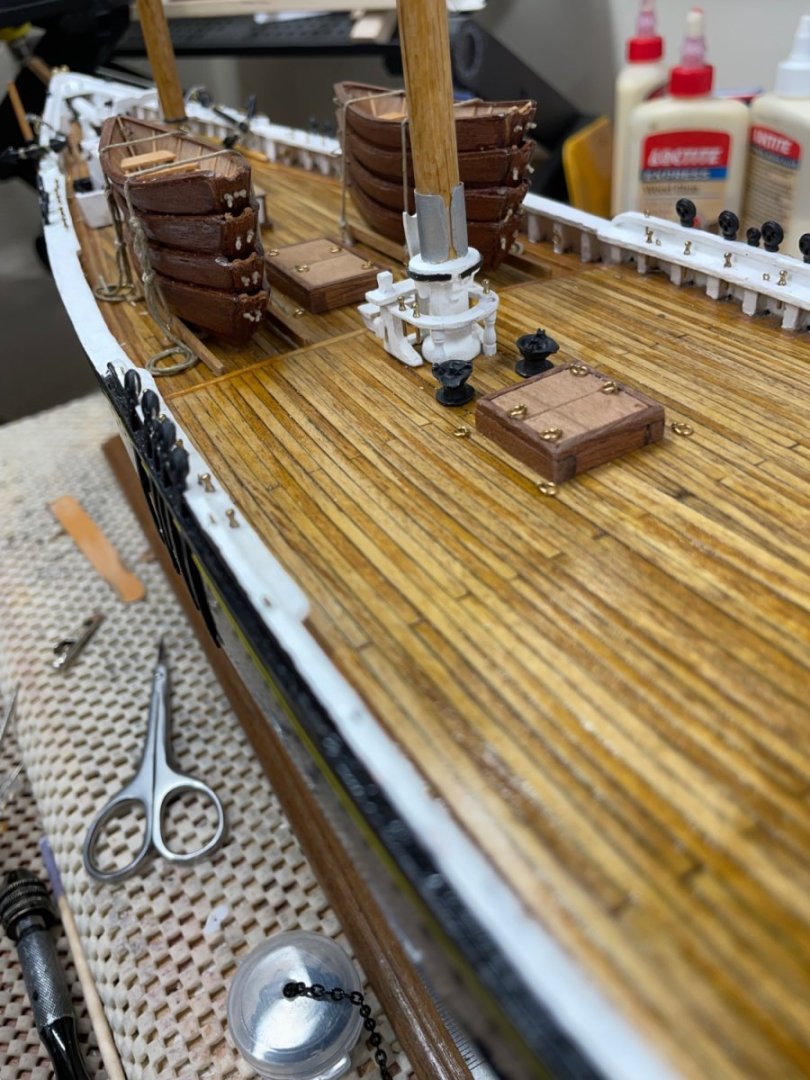
Deck Furnishings complete… Although my goal was realism in the storage of 16 oars and 20 Thwarts in the top Dory, which I believe I achieved, I don’t like the look. So, I have opted to place 8 oars neatly laid out in the top Dory on each side. I think it’s a much better presentation. The Deck is complete, just over a year since I started this project. It was July 18 2022 when I opened the box. I estimate 600 hours a year based on my first build where I actually tracked my hours. 😆 We are ready to go aloft! Thank you all for your comments, likes and encouragement a long the way. Cheers 🍻


- 282 replies
-
- 12
-
-
-
- Bluenose
- Model Shipways
- (and 1 more)
-
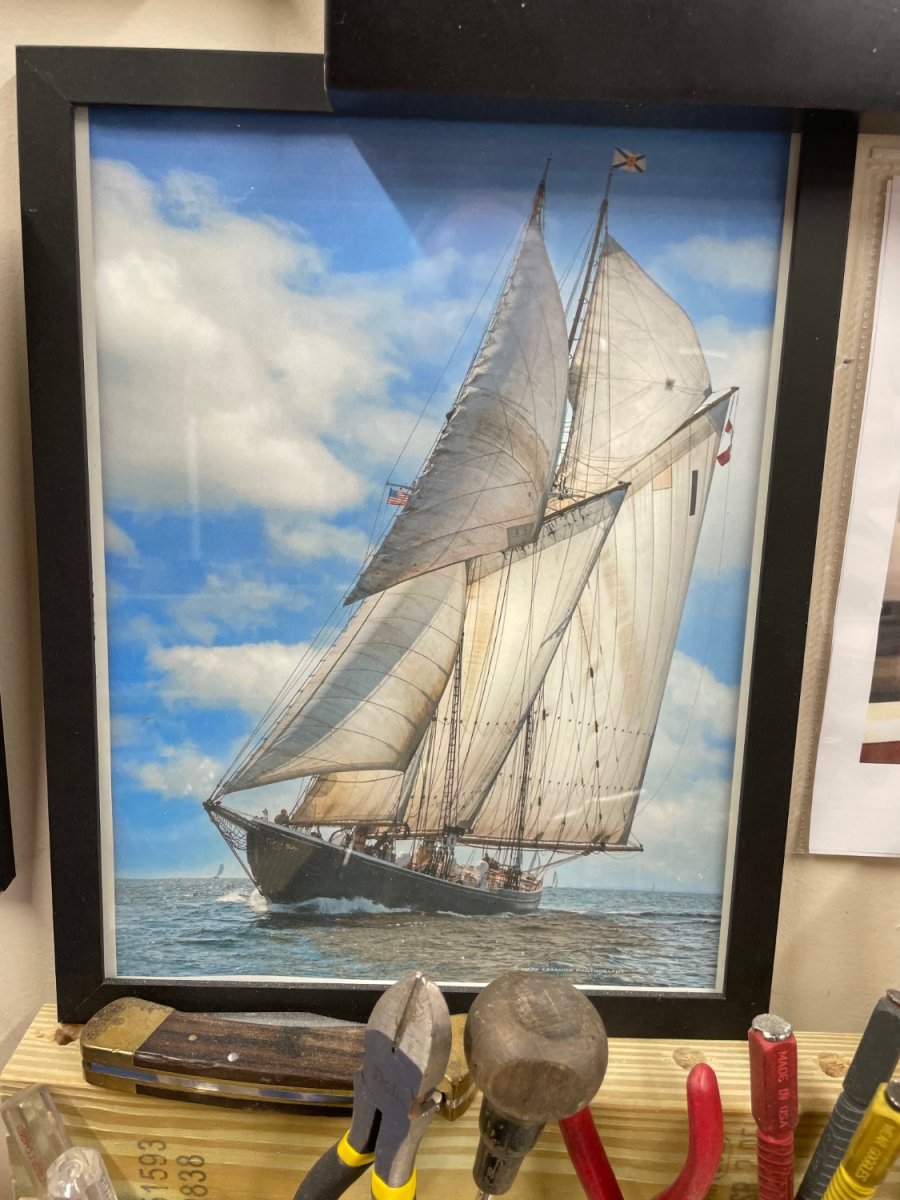
On second thought… I will probably go for all the glory of my inspiration photo. I have looking at this photo on my bench for three years now. Steady as she goes… 🍻

- 184 replies
-
- 3
-
-
-
- Bluenose
- Model Shipways
- (and 1 more)
-
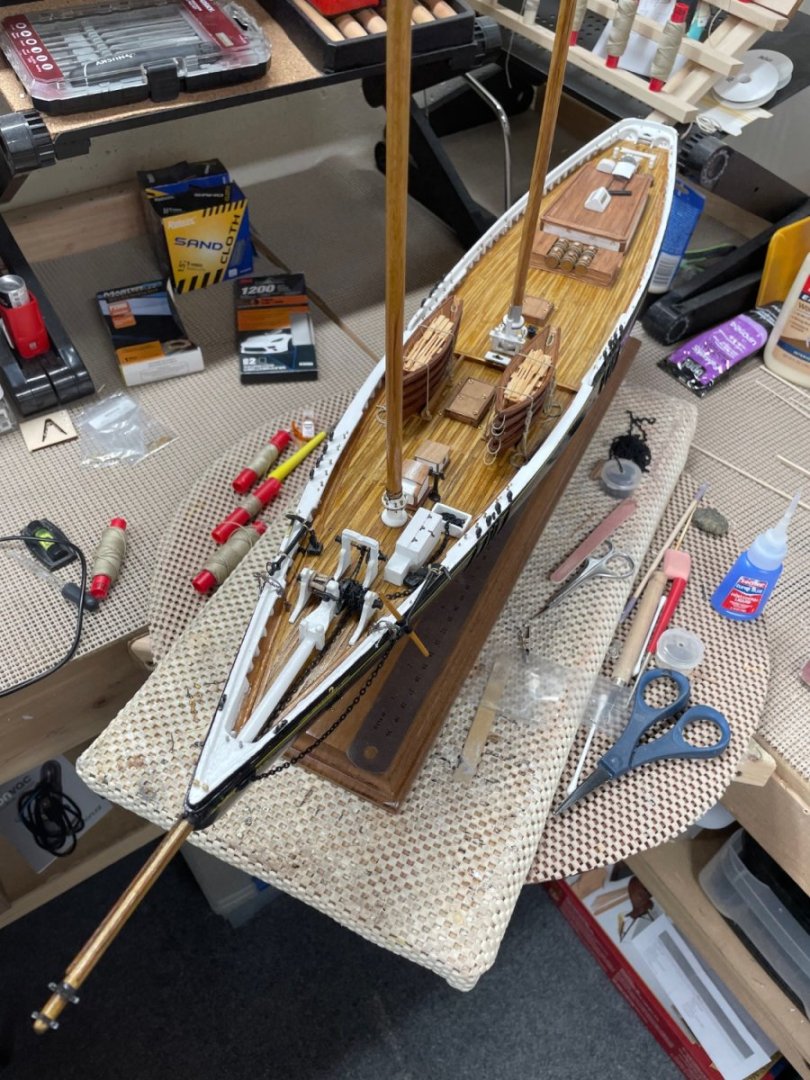
We got a ways to go before we can set those sails. Cheers 🍻
-
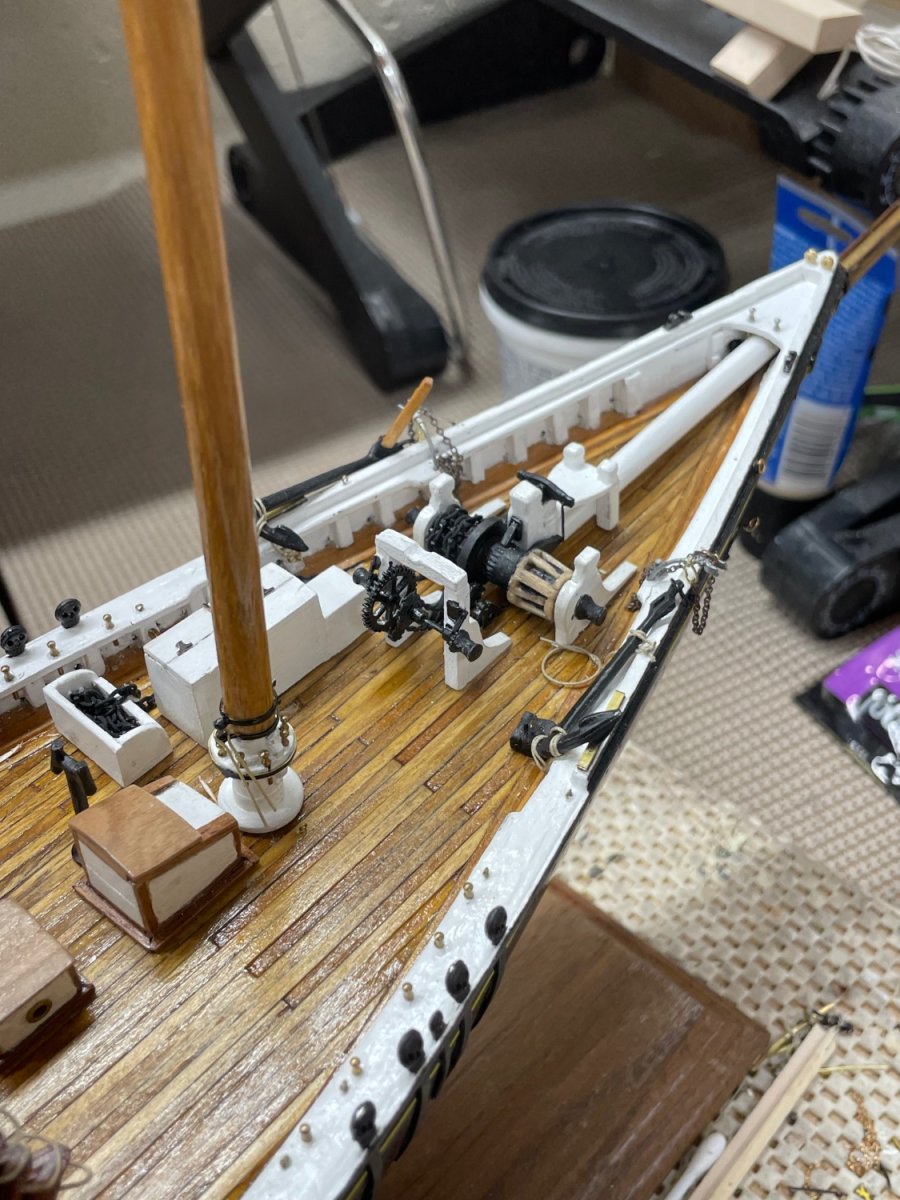
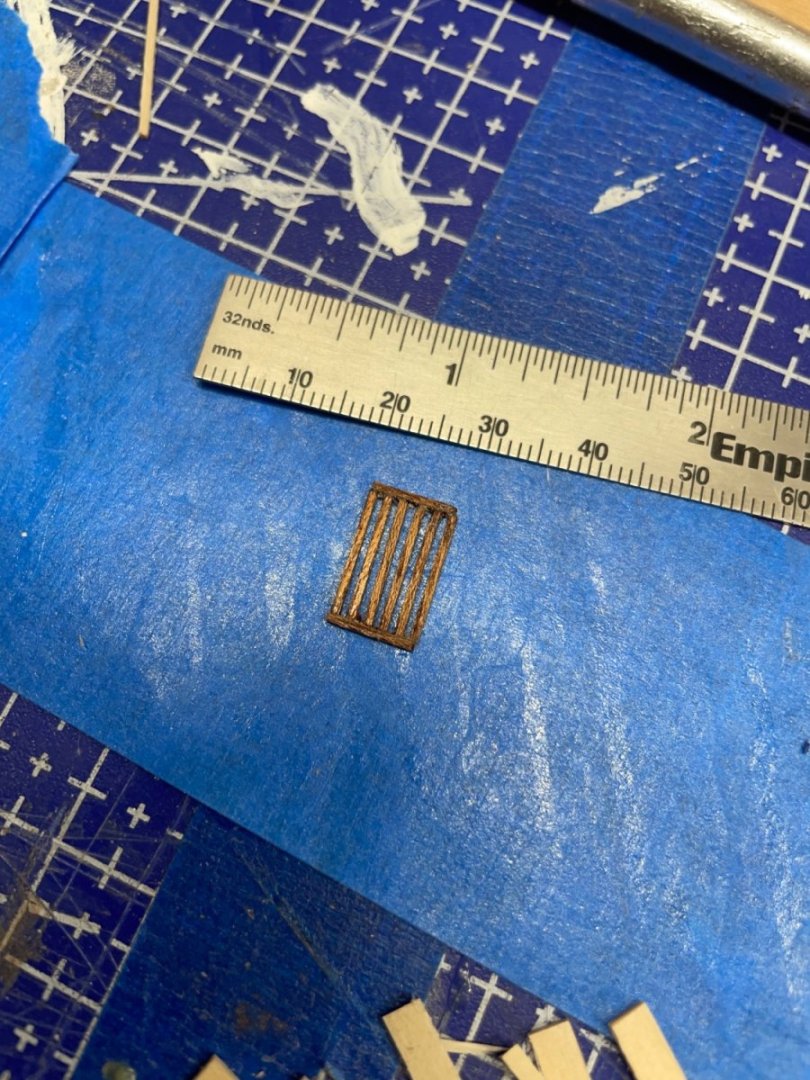
Batten Platform… @GGibson Thanks for the reminder, I nearly forgot to place this small but important detail. I used 1/32” Mahogany, only because I didn’t have the 1/64” material in a hardwood. I think we can overlook the over scale on this one, just this once. 😆

- 282 replies
-
- 4
-
-
- Bluenose
- Model Shipways
- (and 1 more)
-
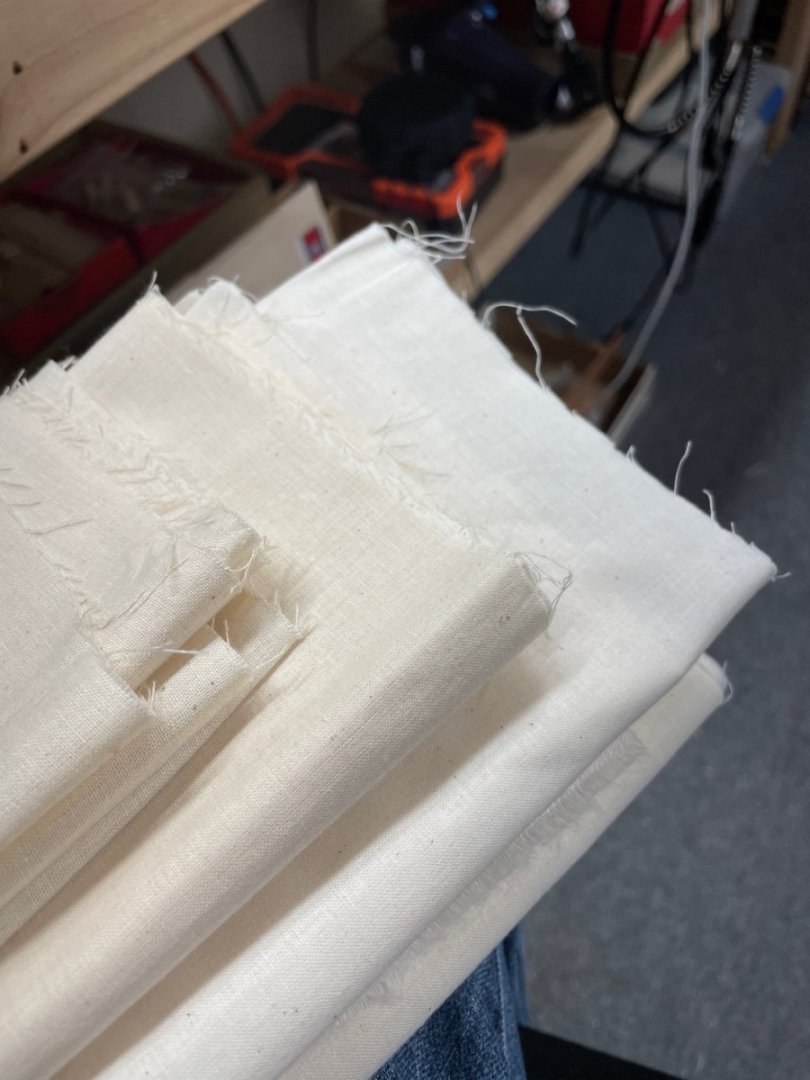
Yes, I have considered silk span. Definitely an option for a smaller scale. I like to use muslin materials, however the material in kits is usually too heavy. This photo shows two kit supplied “sail cloth” and a third locally sourced (JoAnn Fabrics) muslin fabric. Muslin fabrics are not all created equal. The bottom one is the locally purchased muslin. My goal is to create the full sail and fold it down as in the photos below, with all of the stitched and rope detail. 😎 If the sails won’t cooperate, then I’ll set sails up full with fair winds. I believe I can do this at this scale. Wish me luck. 🍻


-
You are correct, schooners needed to be slid down the ways before they weighed too much. If you look closely at the launching photos in the archives, nothing was done regarding rigging until launch. As for folding the sails down on the booms the sail material has to be very thin to represent the furled or folded sails properly. Most kit sail materials are not fine enough. I have some thinner material that I’ll have to experiment with, once I get the sails sewn up, to decided if I leave them up or bring them down on the booms and fore deck. Decisions and Research 🧐 to be done for sure.
- 184 replies
-
- 1
-
-
- Bluenose
- Model Shipways
- (and 1 more)
-
I know it’s a little detail, but for me it’s all about the detail. 🧐 BTW… A launching way sounds like a nice display. I haven’t done one of those yet. I’m considering sails hauled down and stowed, myself. Steady as she goes. Cheers 🍻
- 184 replies
-
- 1
-
-
- Bluenose
- Model Shipways
- (and 1 more)
-
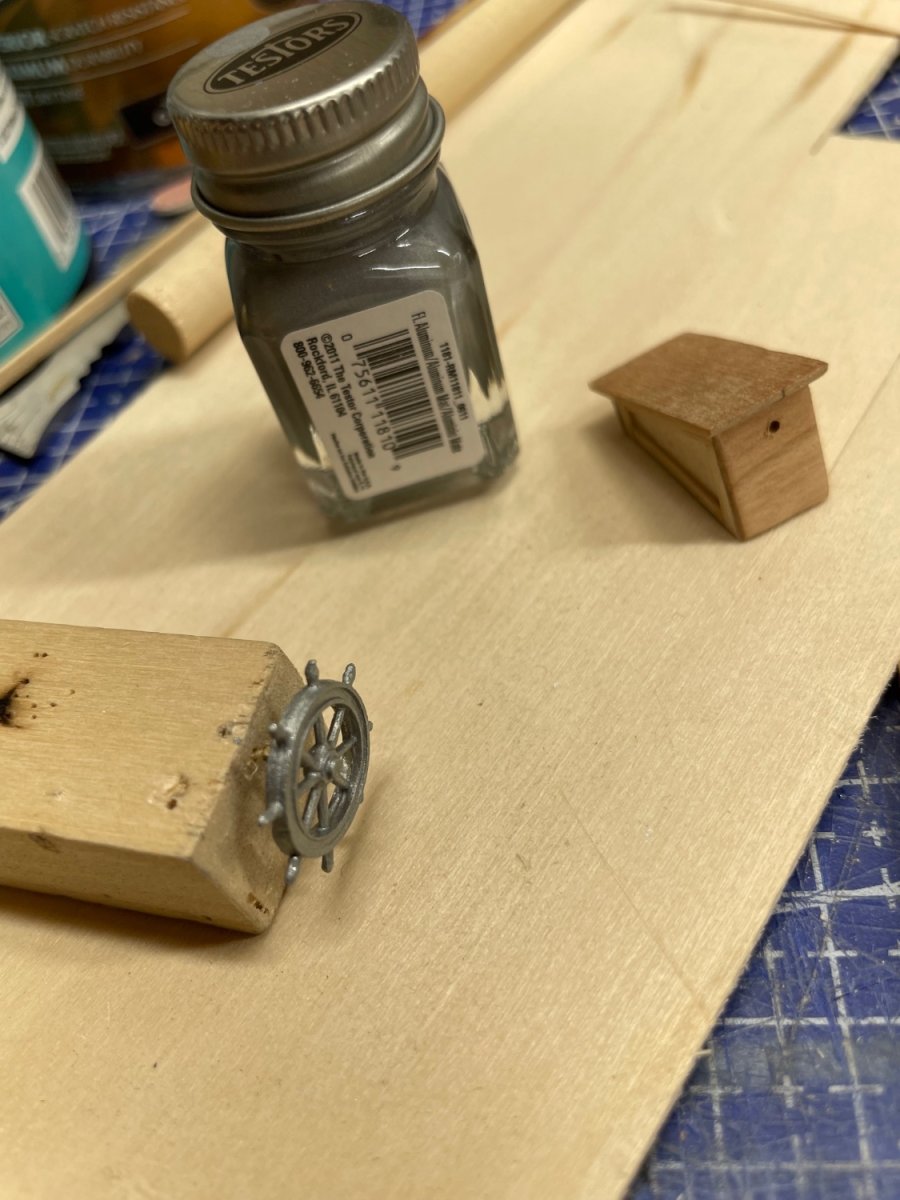
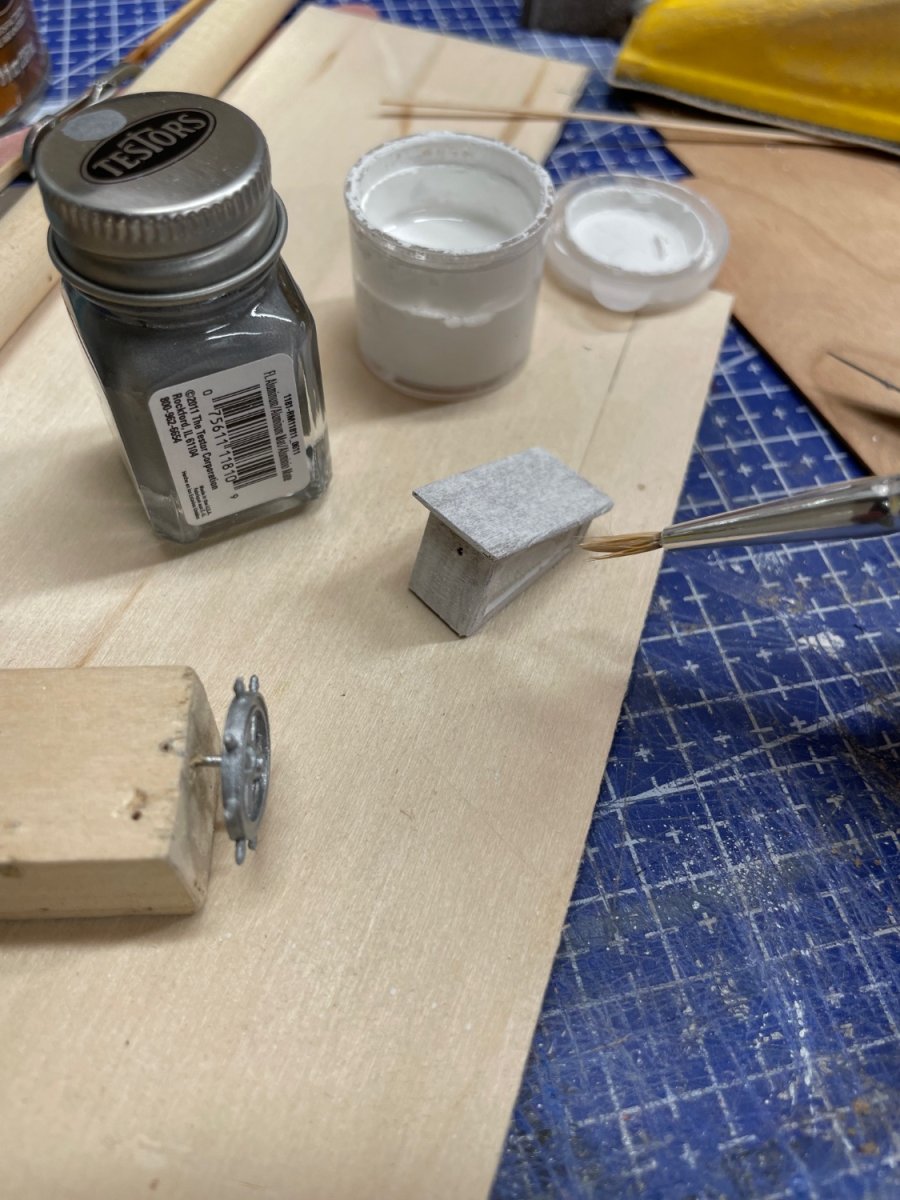
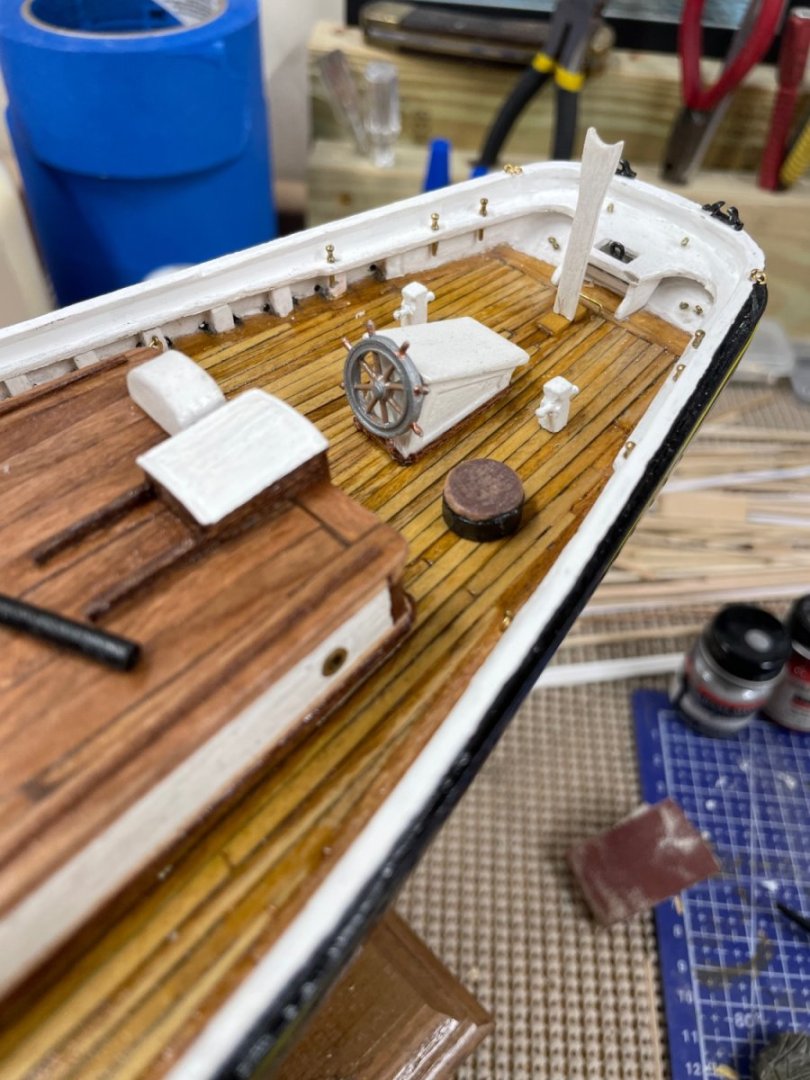
Looking good 👍 Glad I’m checking in, you just reminded me of the battens beside the wheel box. I’ll have to get back to that after I finish the Oars. John
- 184 replies
-
- 1
-

-
- Bluenose
- Model Shipways
- (and 1 more)
-
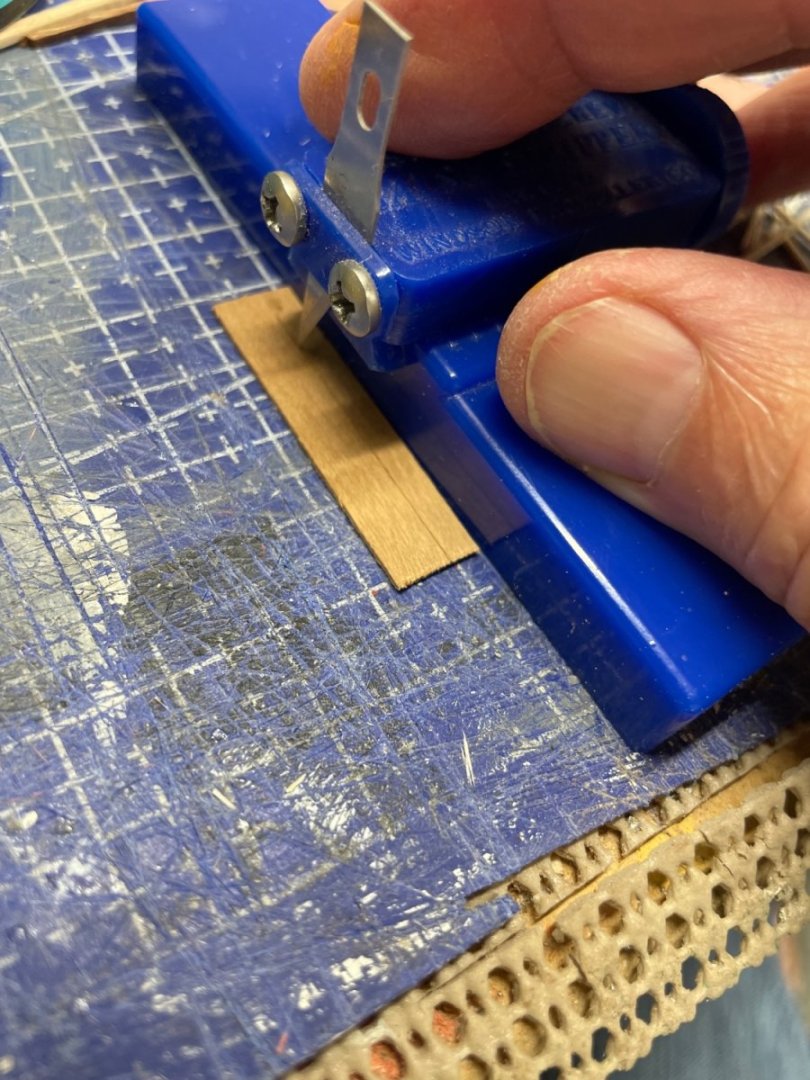
Yes, I got it from Micromark.com. Works well on thin stock.
-
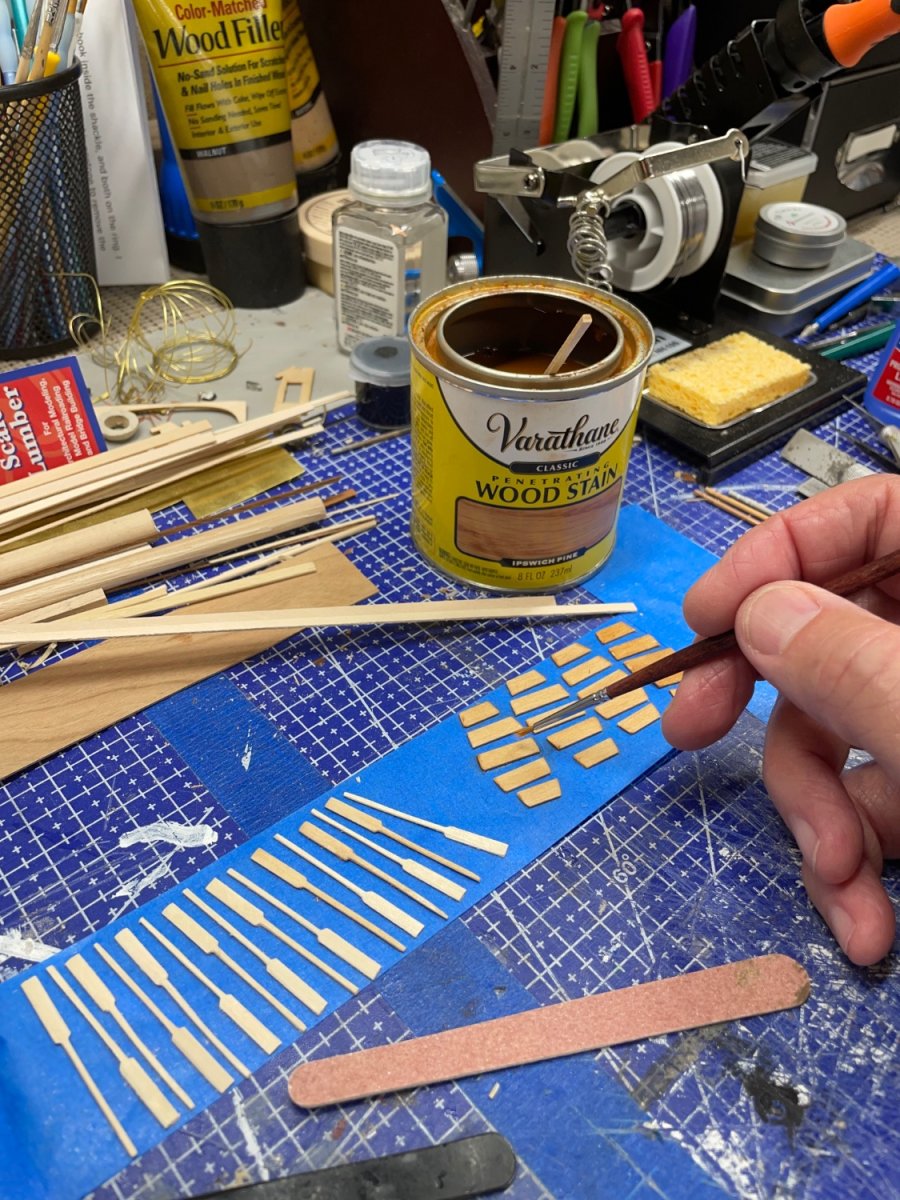
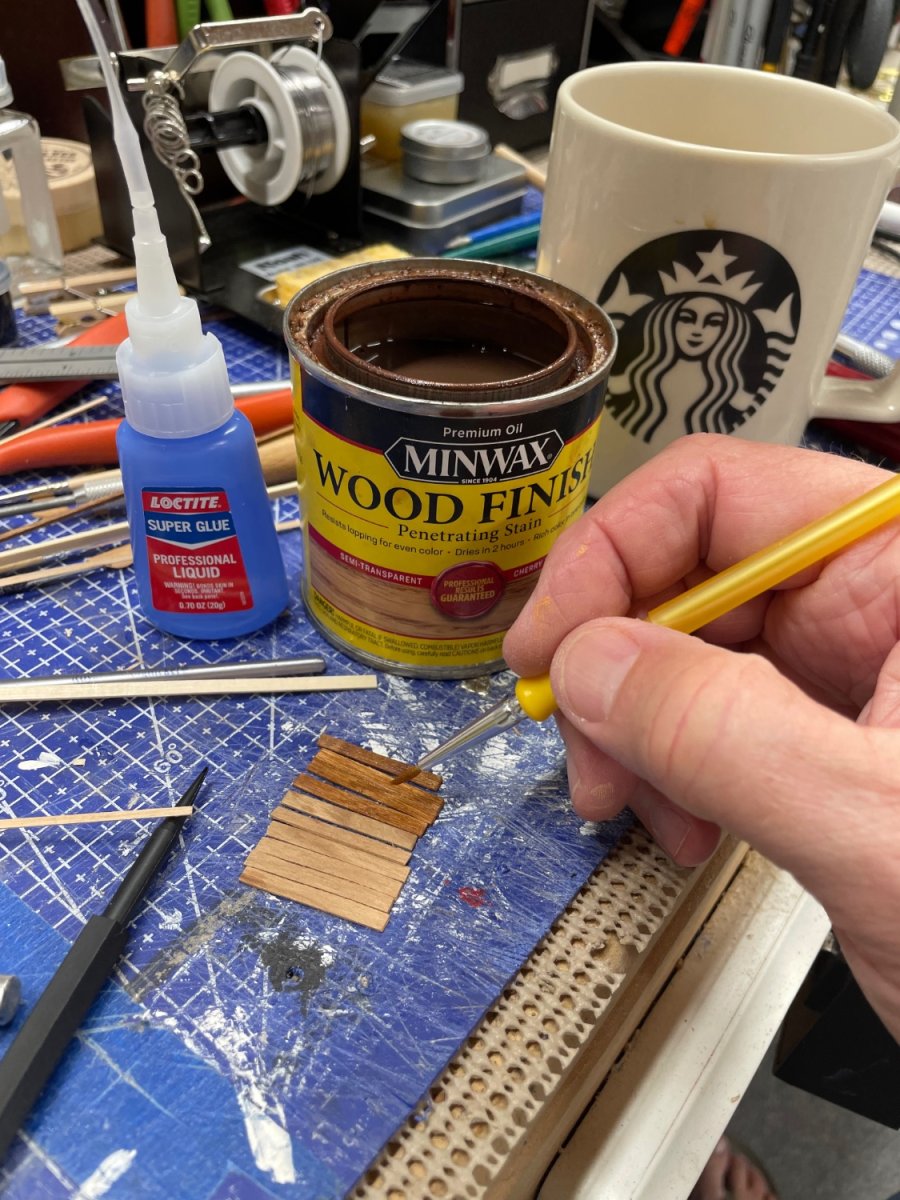
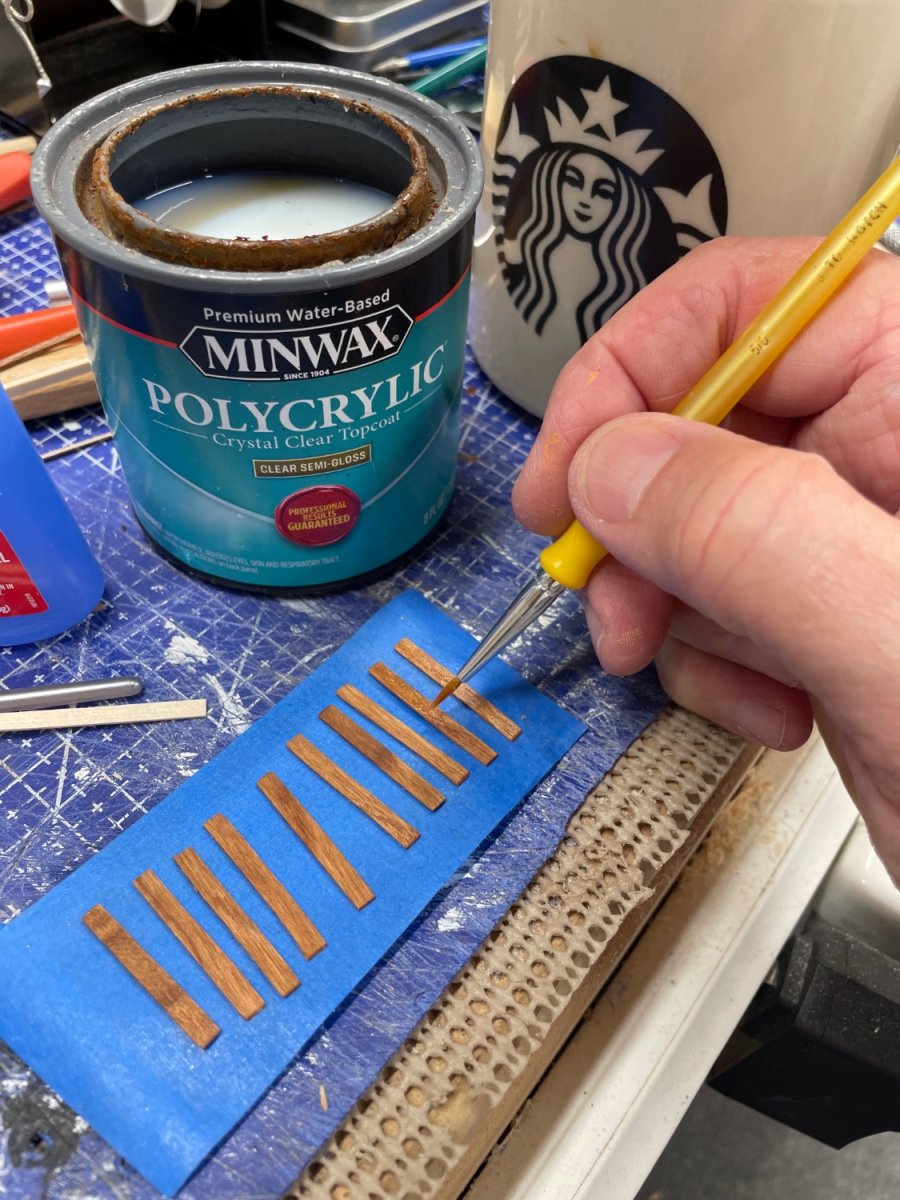
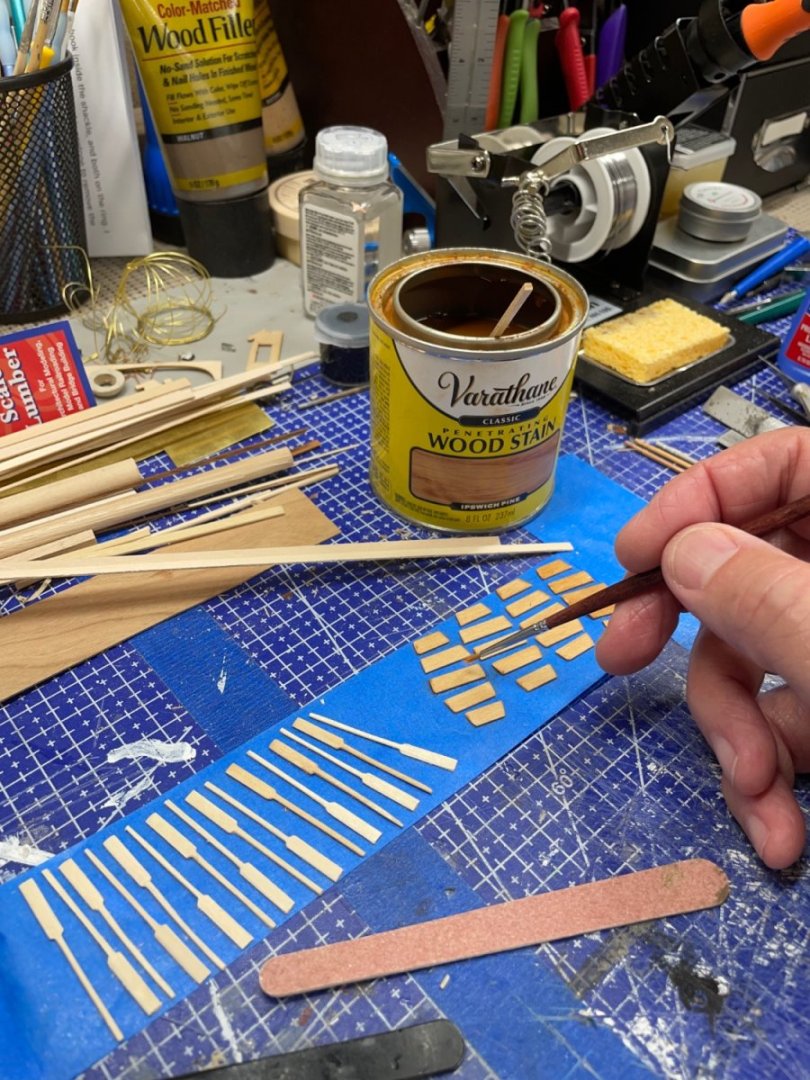
Thanks I’m noticing the hardwood sheets (Cherrywood) make for more consistent staining, than basswood. You are welcome to incorporate any ideas, they may or may not have been my ideas to begin with. 😆
- 282 replies
-
- 1
-
-
- Bluenose
- Model Shipways
- (and 1 more)
-
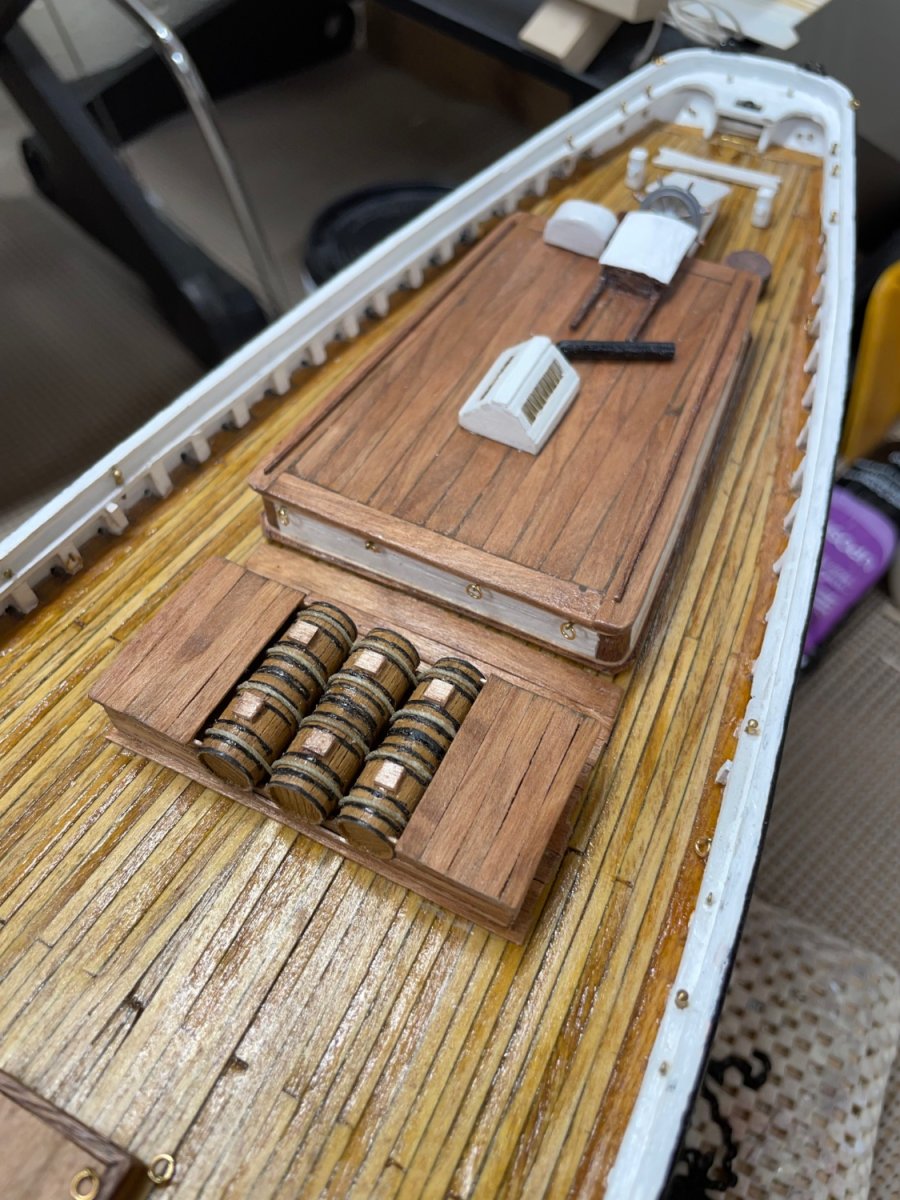
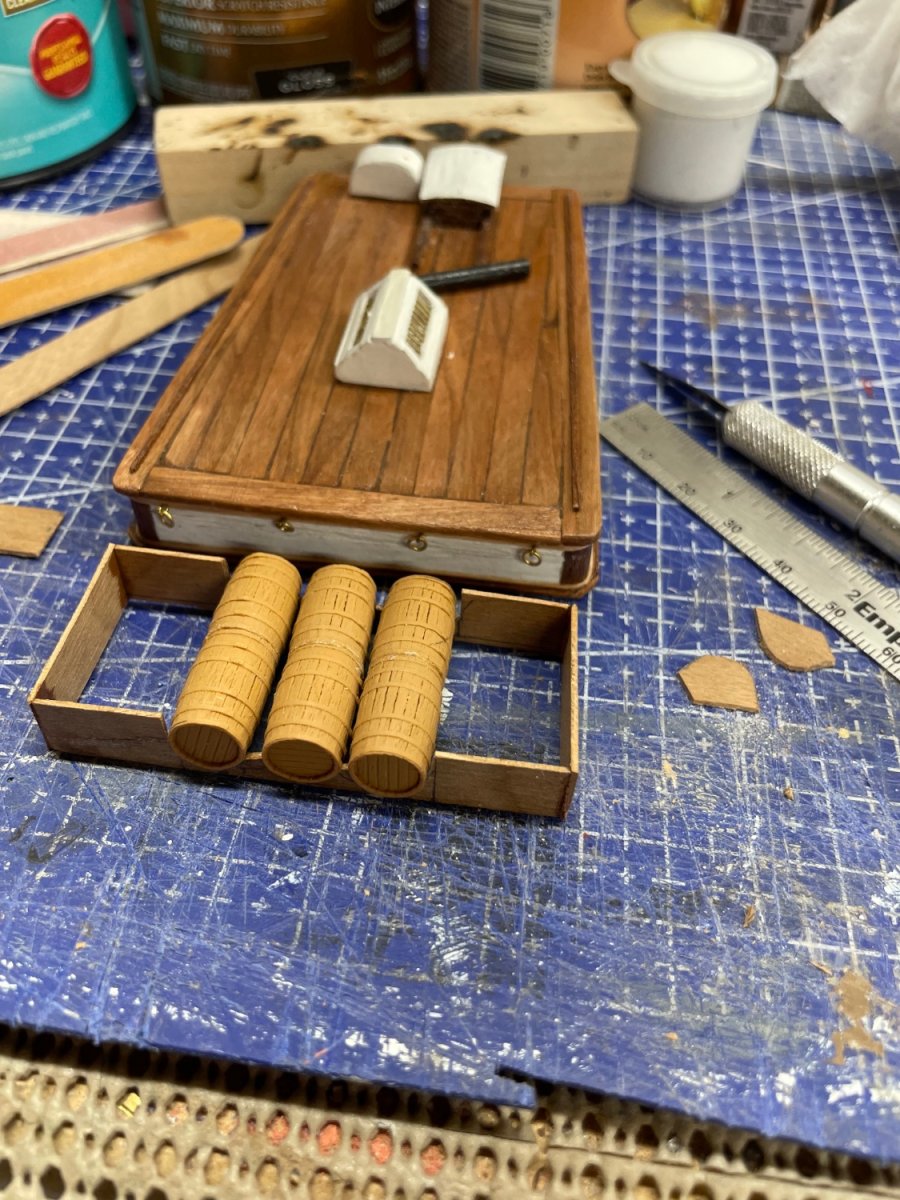
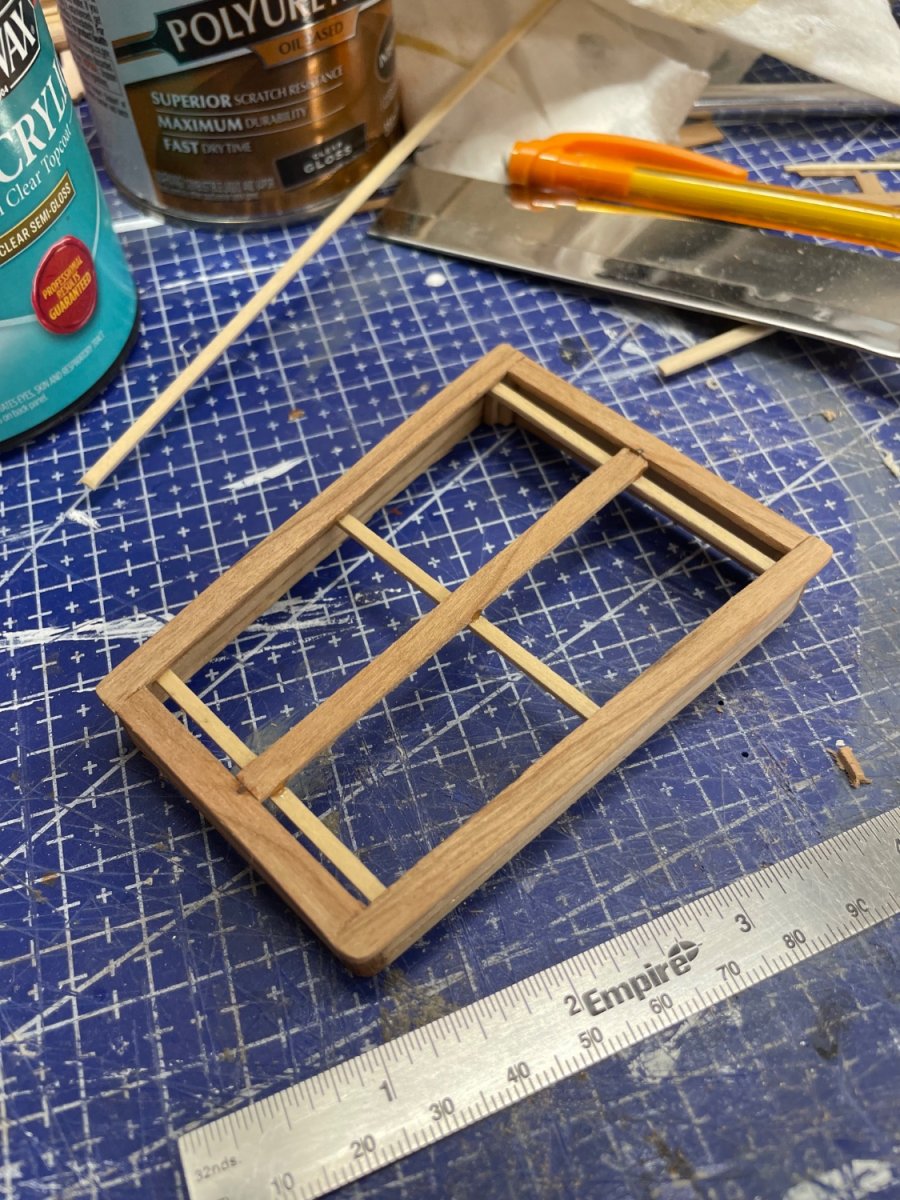
Storage Bins… Much Better! Back to carving out those pesky oars and thwarts. 😎 Cheers🍻


- 282 replies
-
- 6
-
-
-
- Bluenose
- Model Shipways
- (and 1 more)
-
Thanks… Love the crewman with his hands in his pockets. LOL 😆
- 282 replies
-
- 1
-
-
- Bluenose
- Model Shipways
- (and 1 more)
-
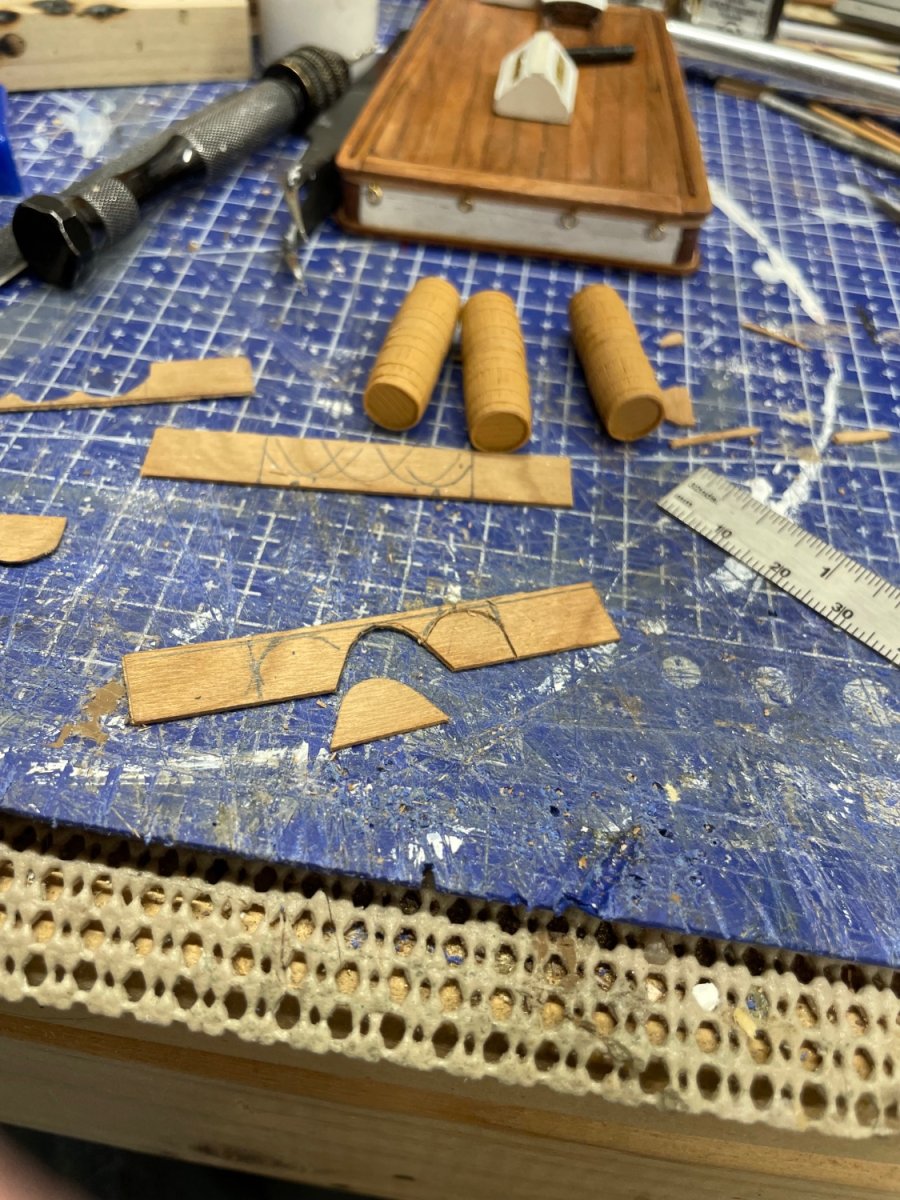
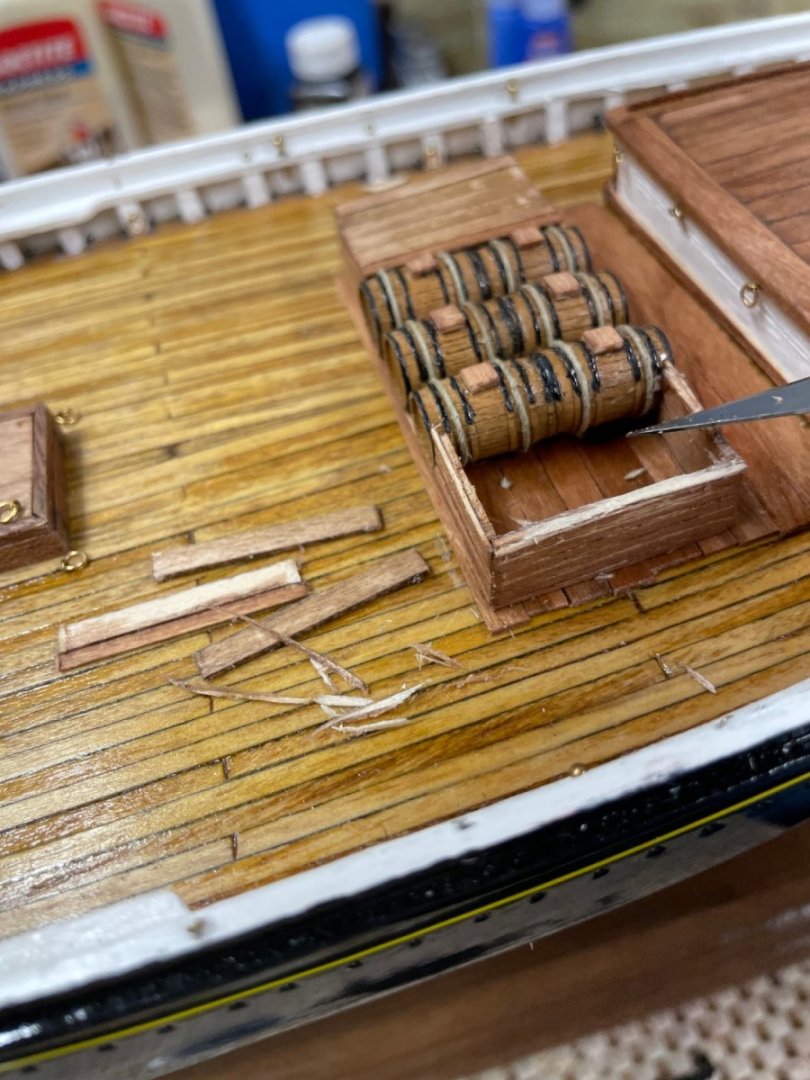
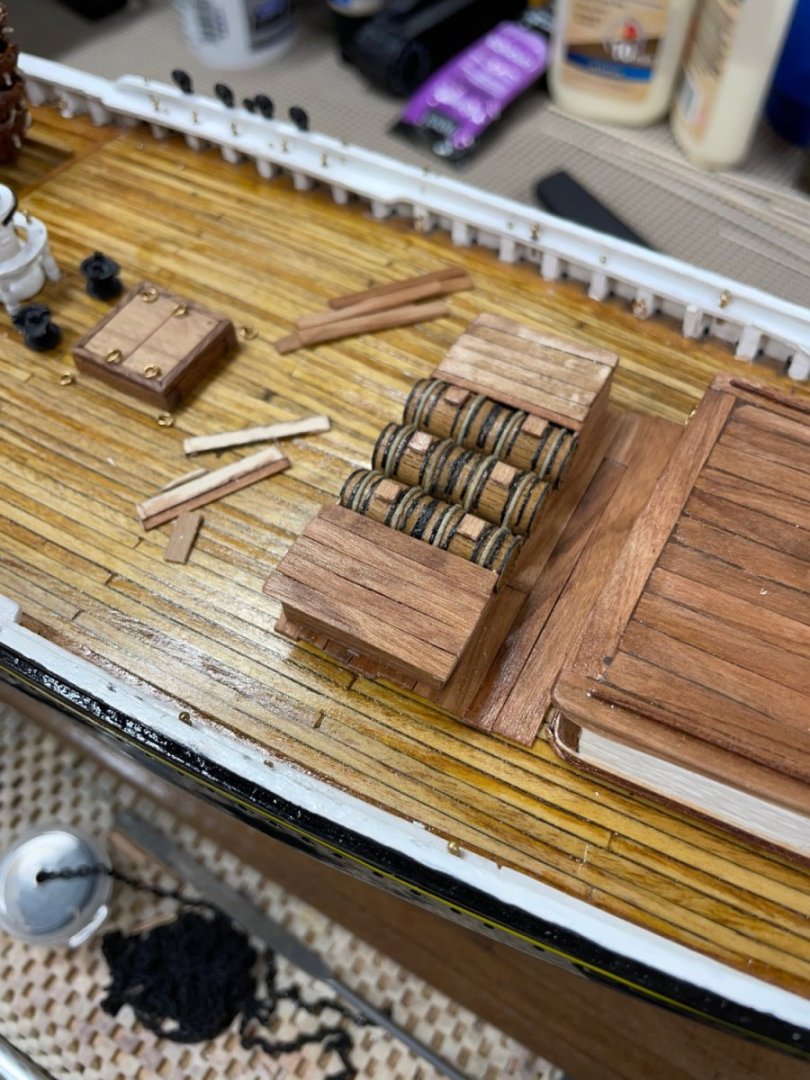
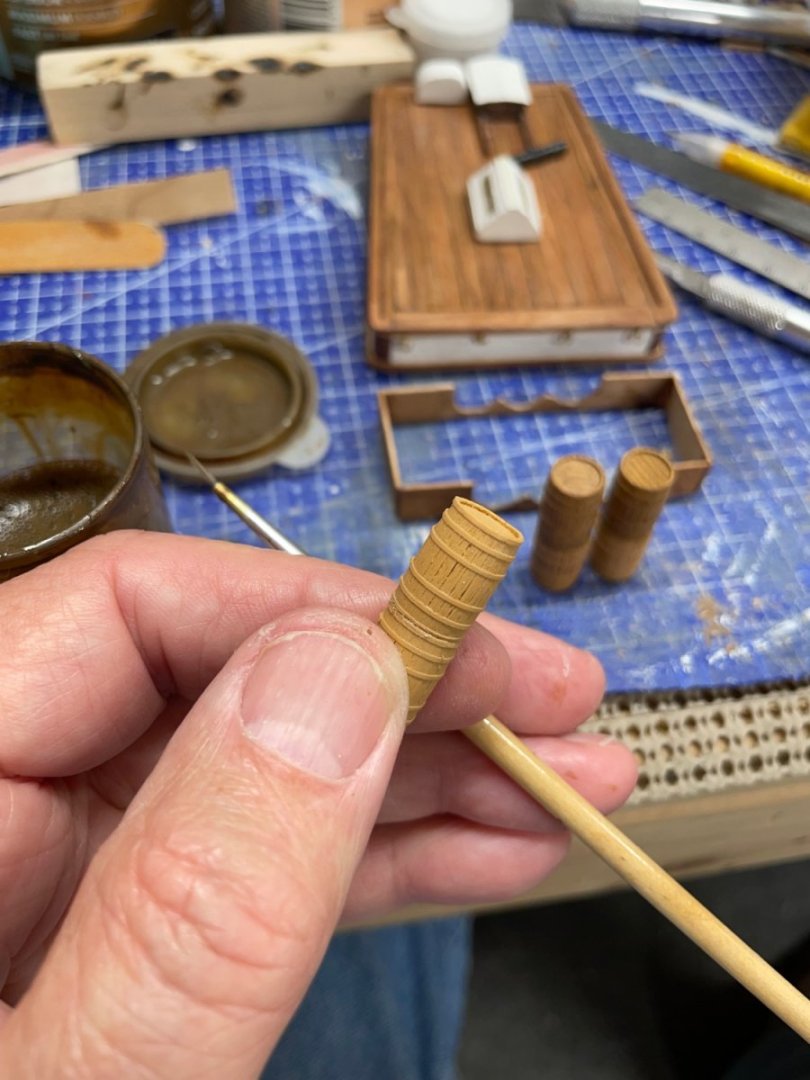
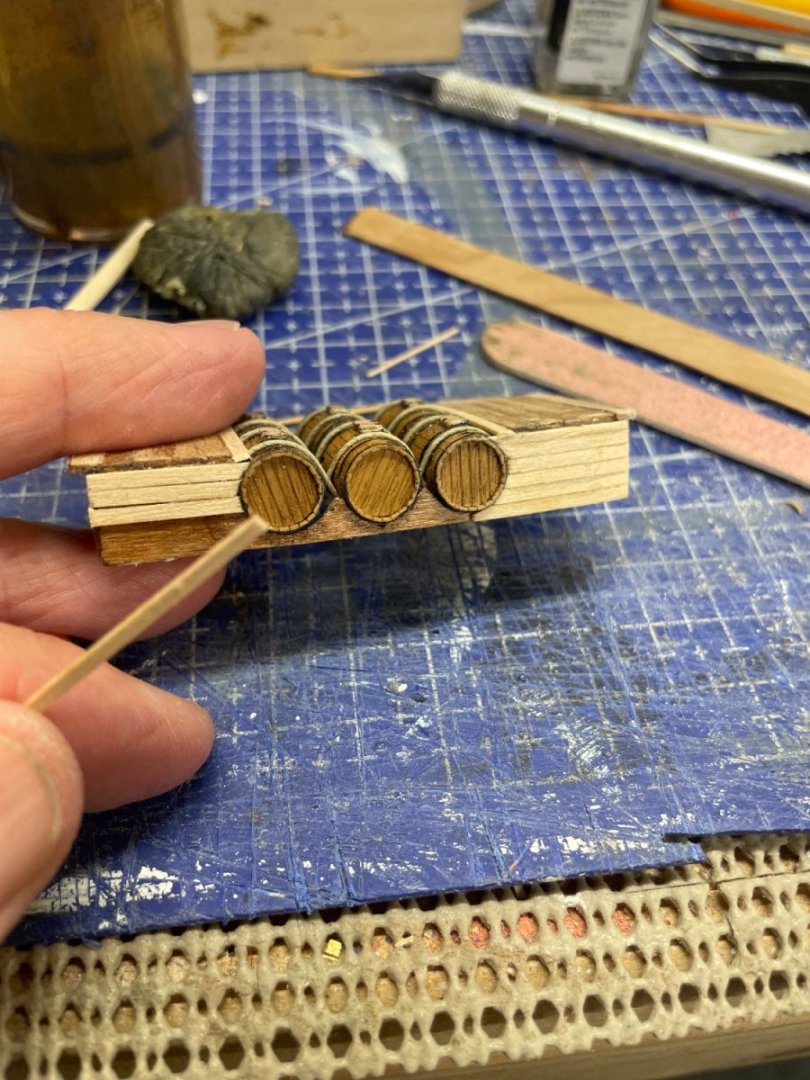
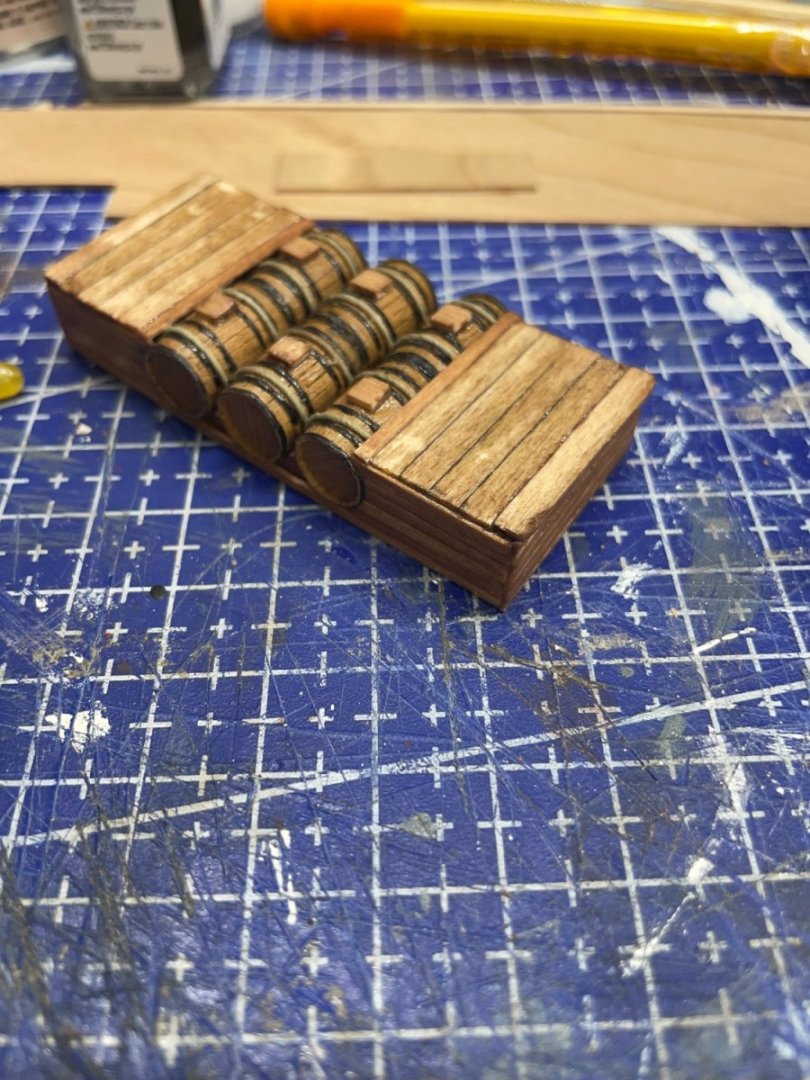
Thanks… The 1/64 scale Barrels came from a modeling web site Frenchman River Model Works. https://frenchmanriver.com/Wooden-Barrels-_p_96.html Good stuff 😎
- 282 replies
-
- 1
-
-
- Bluenose
- Model Shipways
- (and 1 more)
-
I debated building a working deck with the barrels and bait stations all the way thru the construction of them. 😬 I’m still not quite happy with the finish on the storage bins, I may redo the tops. Darn OCD. I’m considering a few bait line buckets, But I don’t want to turn it into a diorama. LOL 😆 Thanks to all, for your comments and 👍… John
- 282 replies
-
- 1
-
-
- Bluenose
- Model Shipways
- (and 1 more)
-
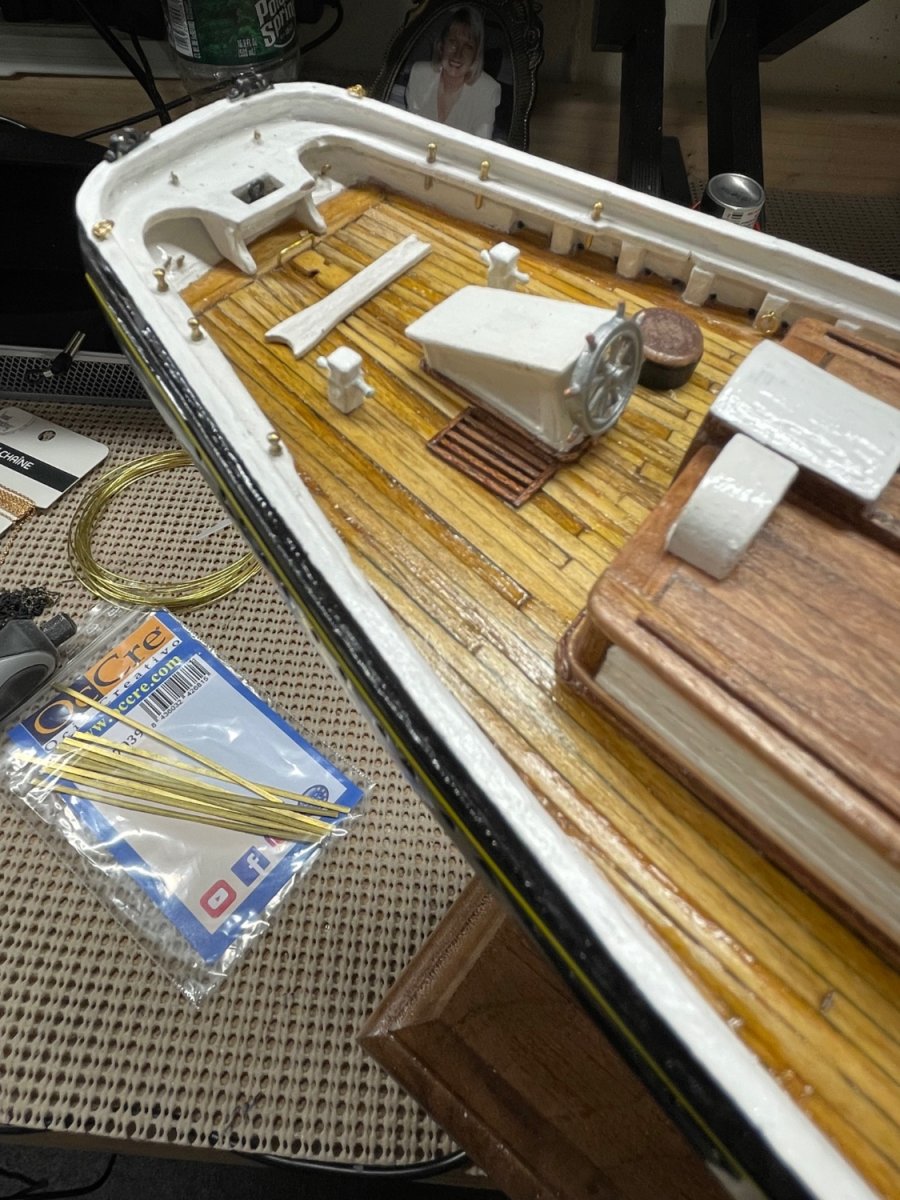
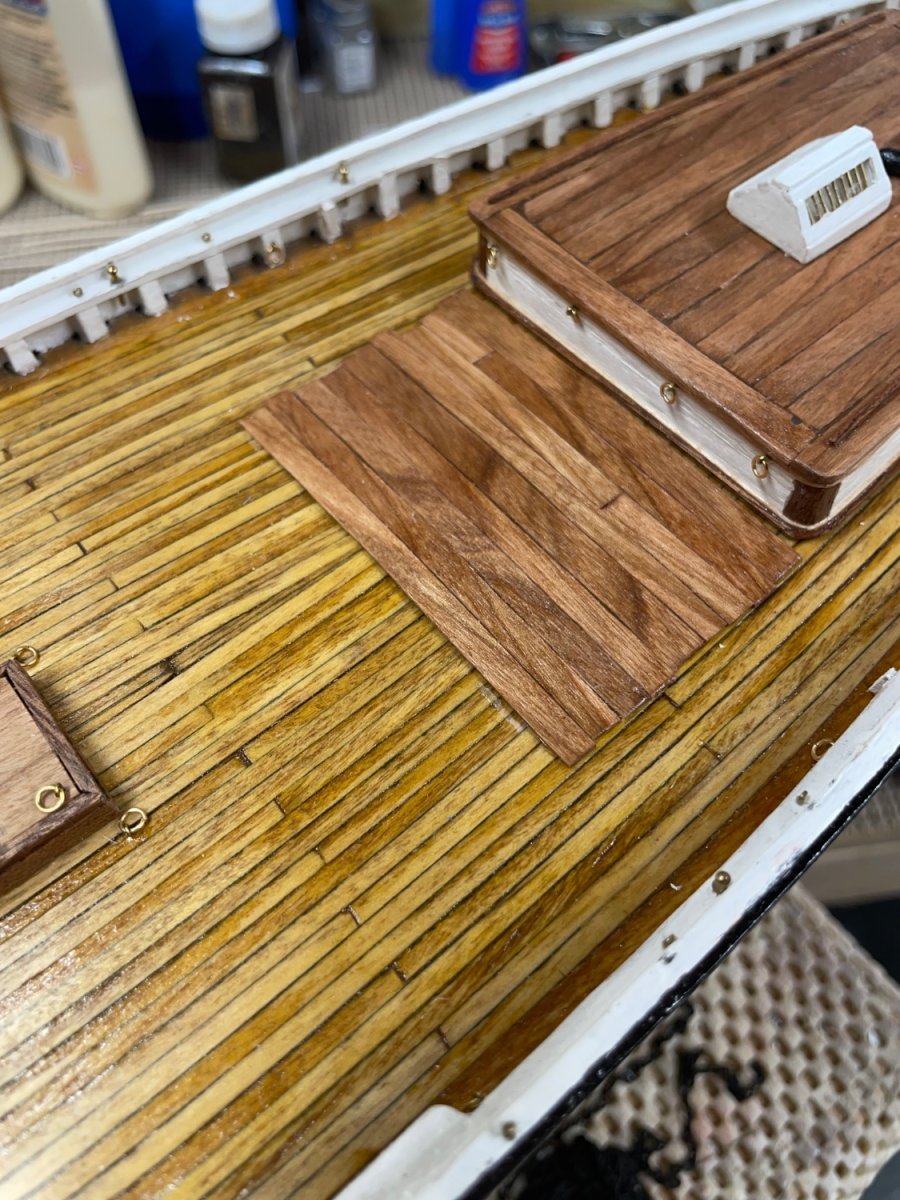
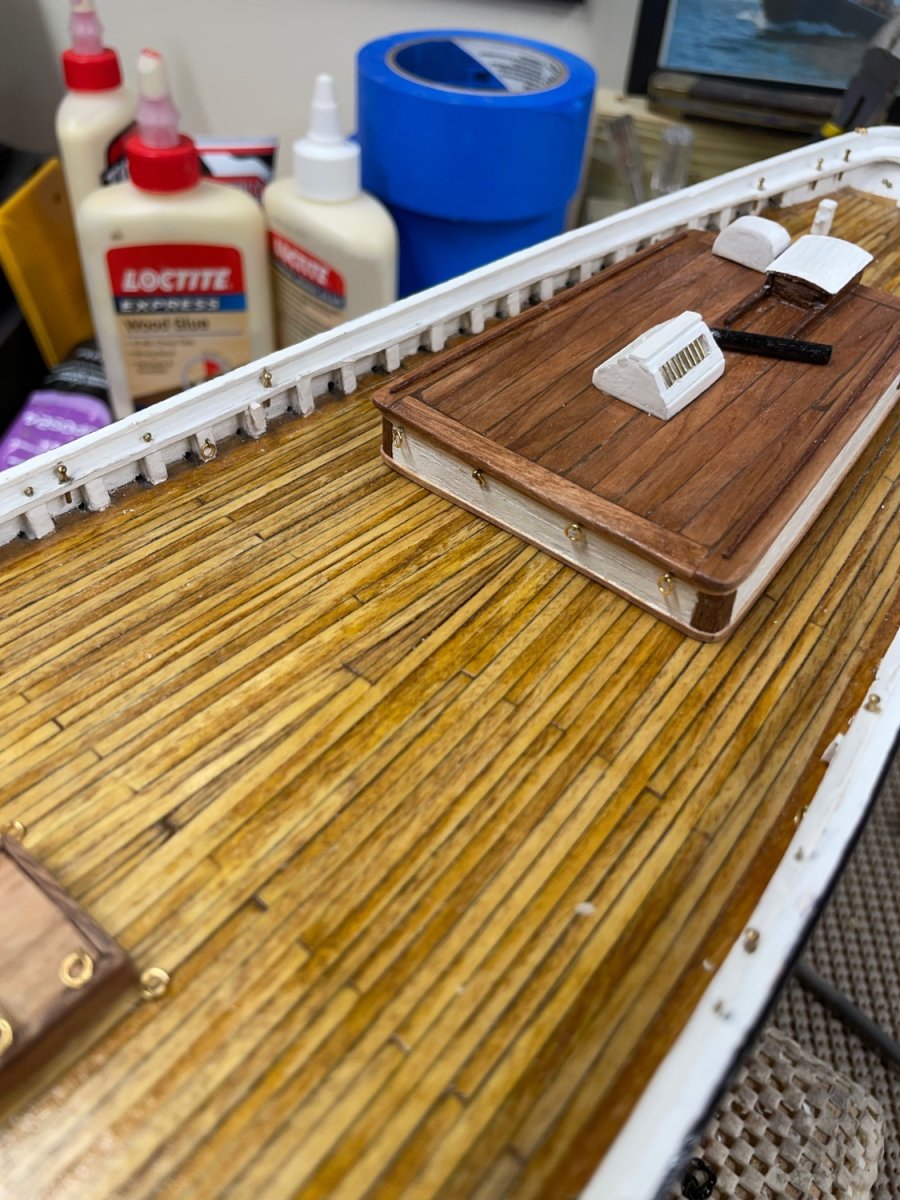
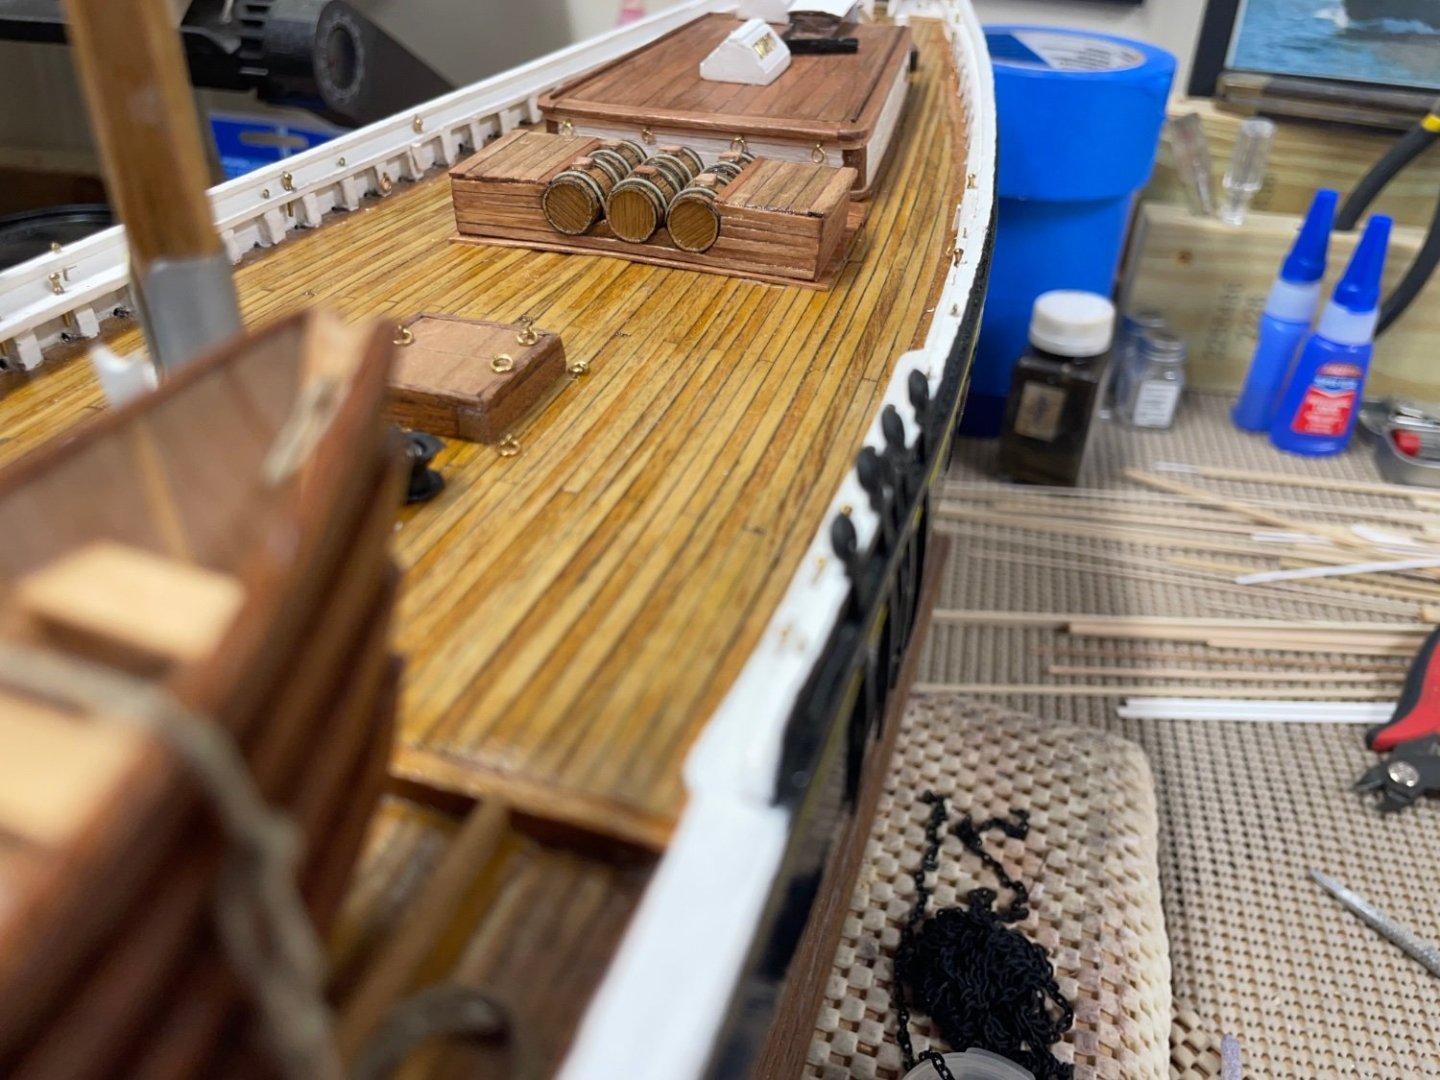
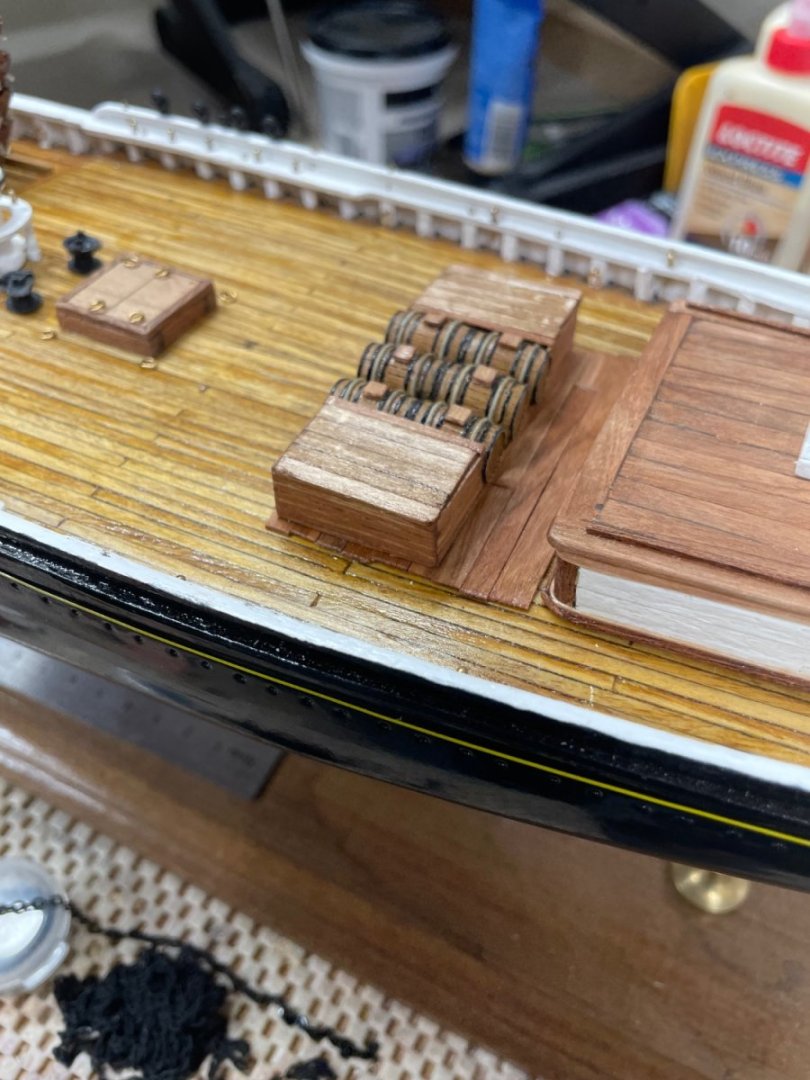
Additional Deck Furnishings… Deck Furnishings are now complete and ready for fishing. Next up oars and thwarts stowed in the top Dories as seen in the fore ground of this photo. Cheers 🍻


- 282 replies
-
- 7
-
-
-
- Bluenose
- Model Shipways
- (and 1 more)
-
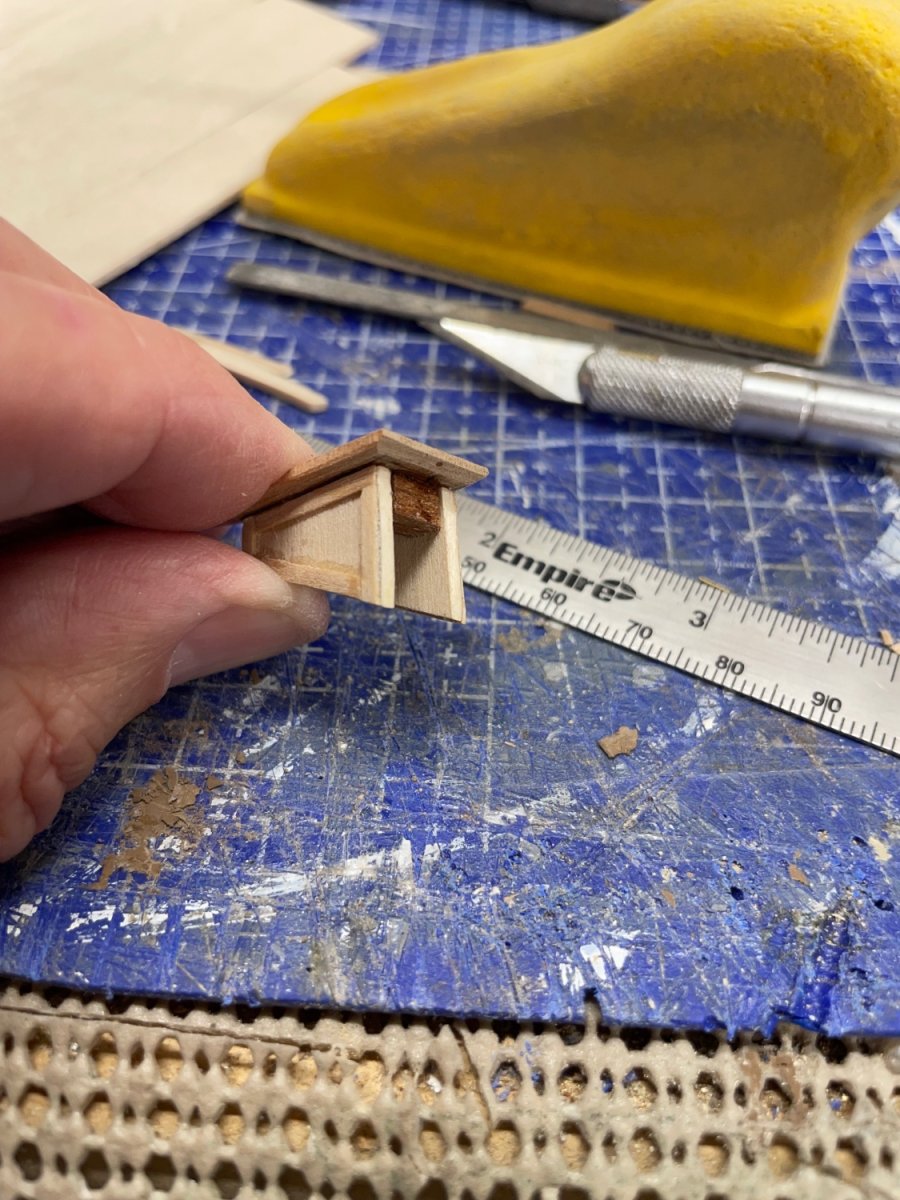
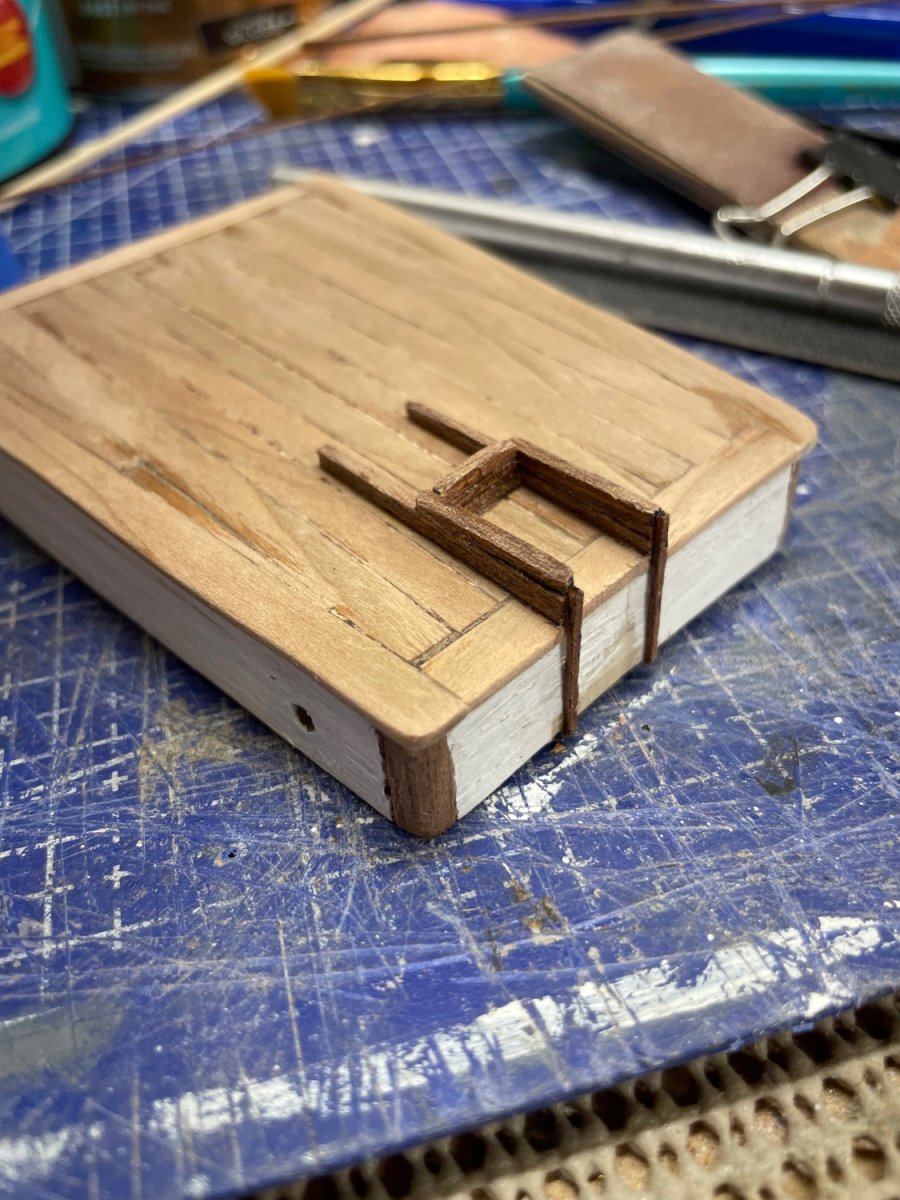
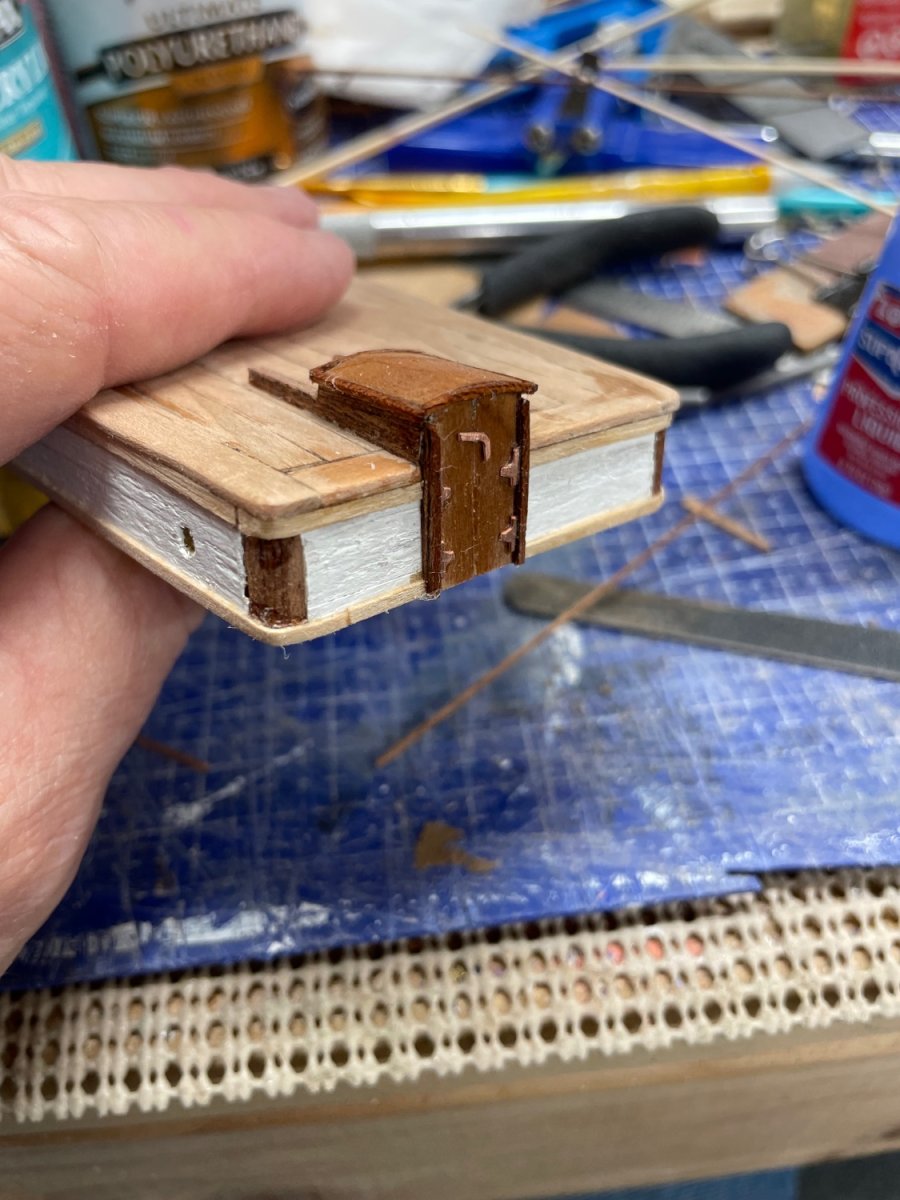
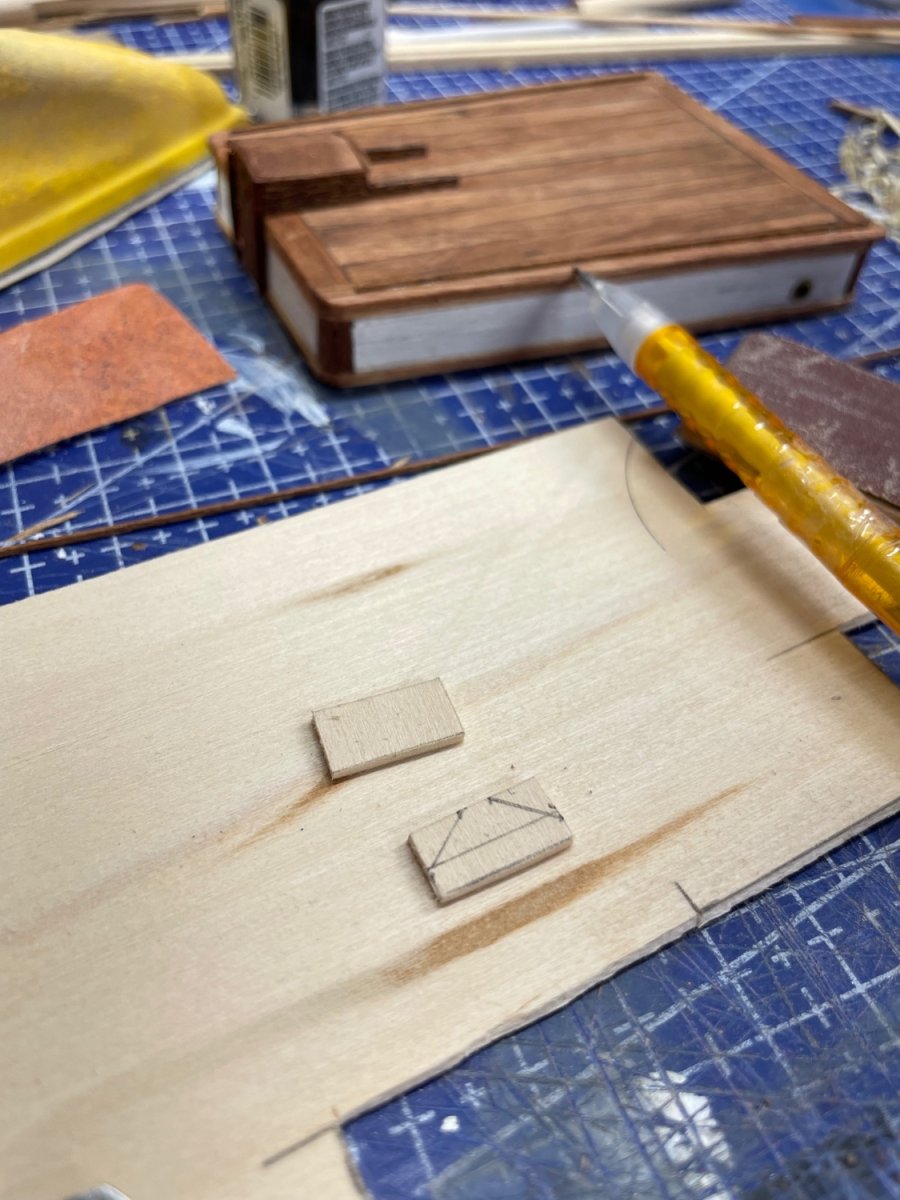
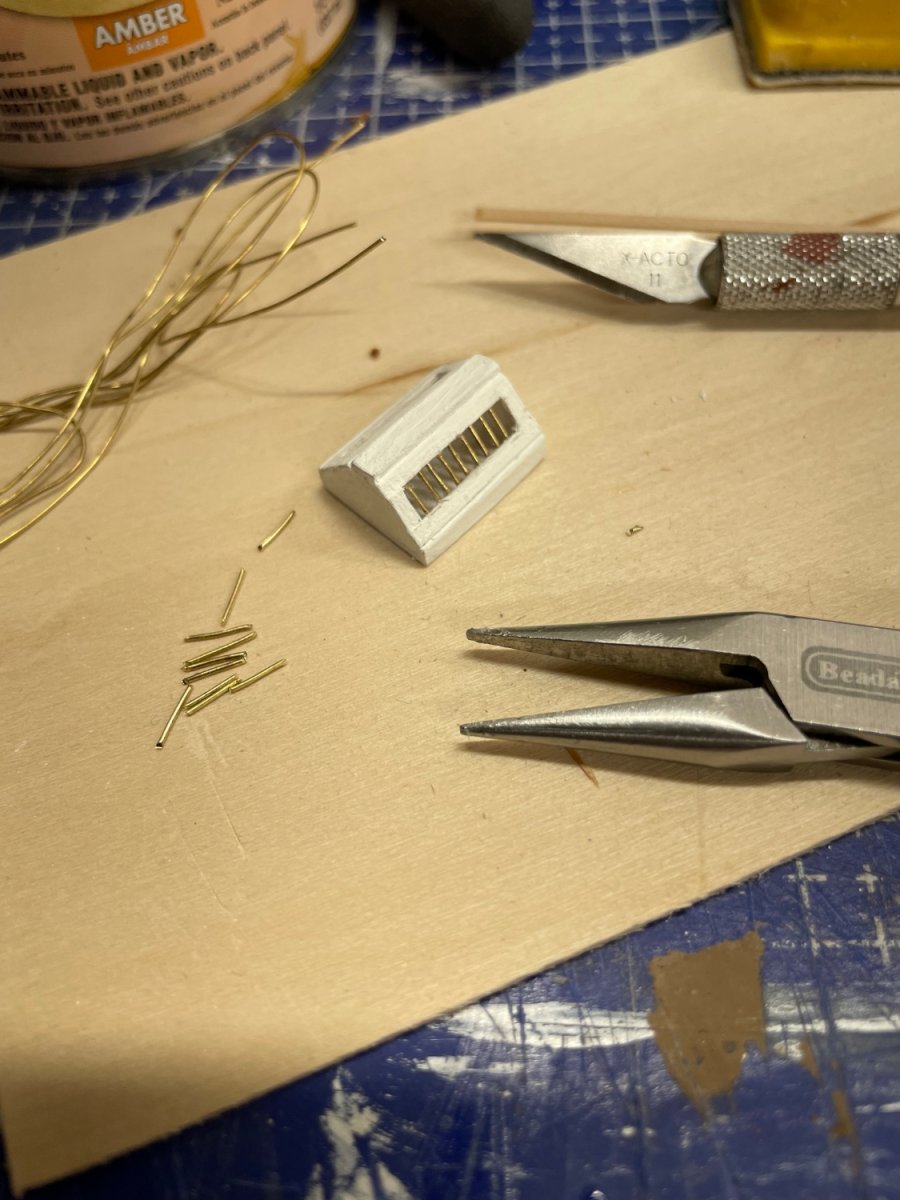
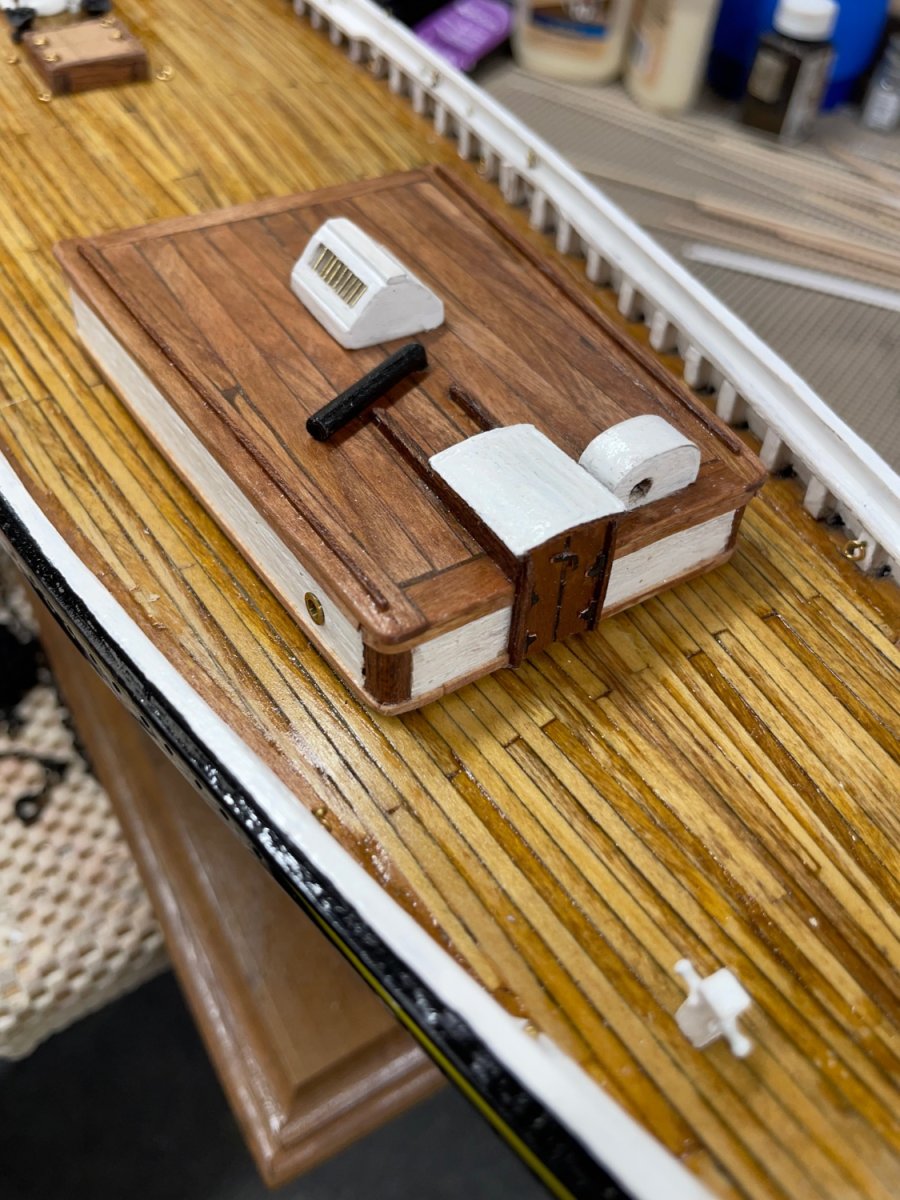
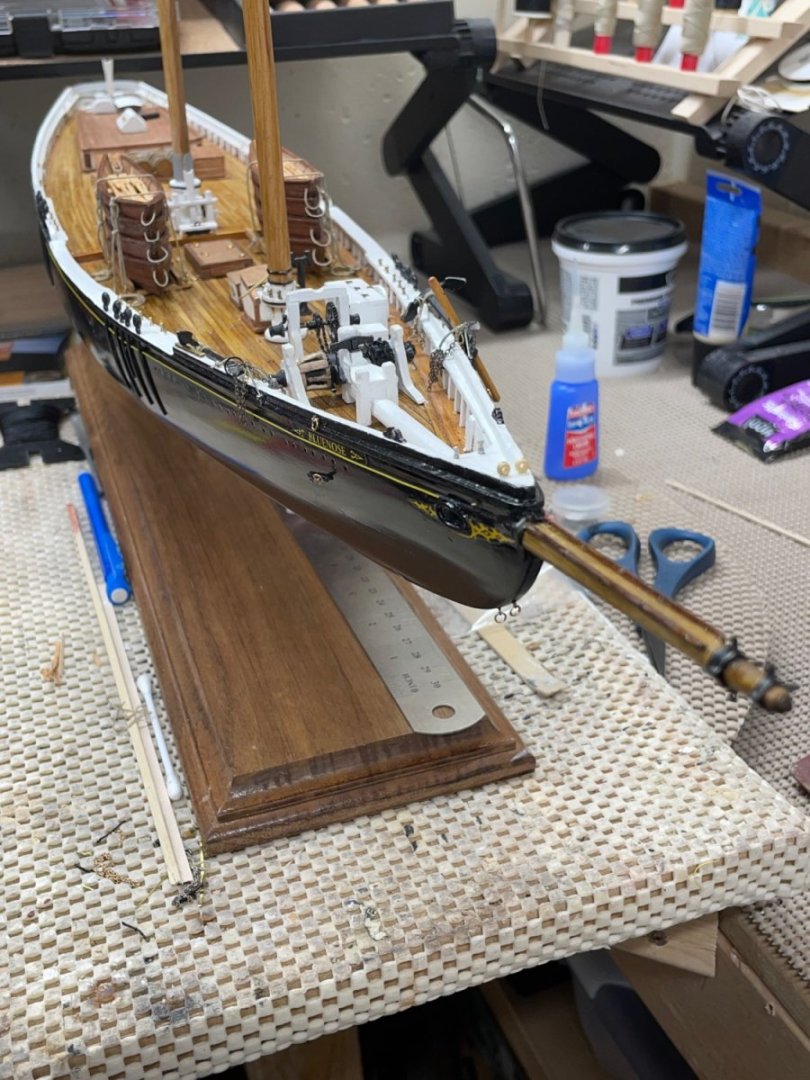
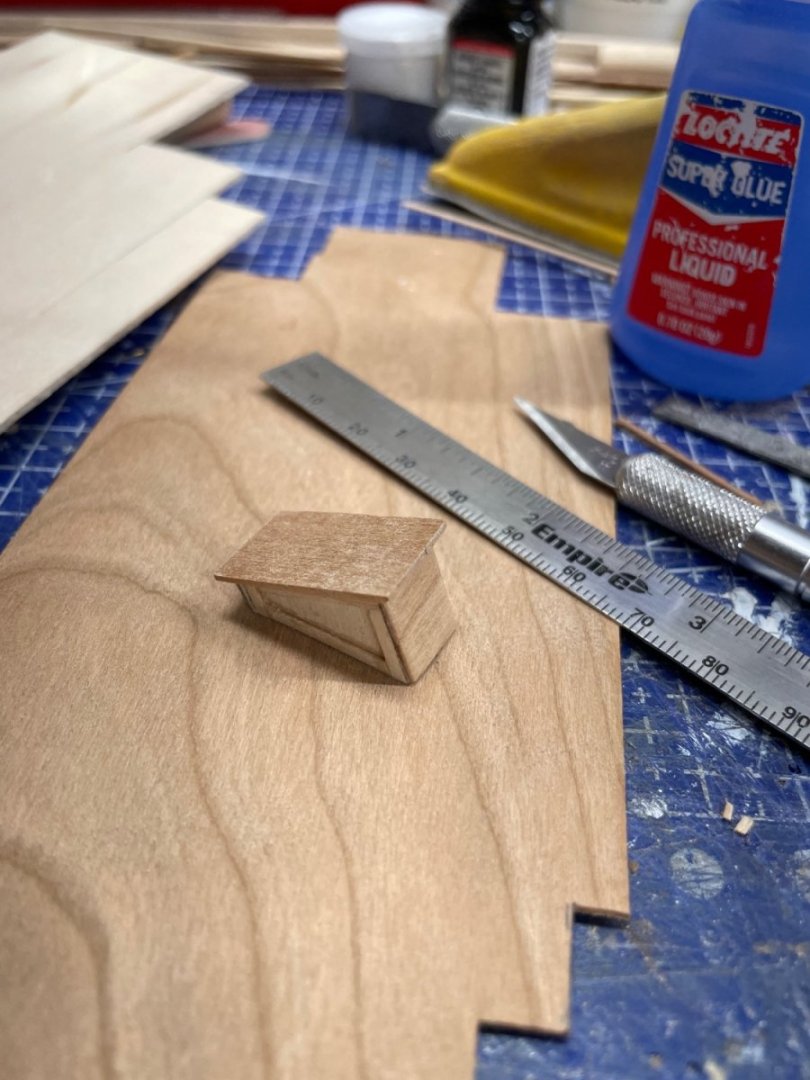
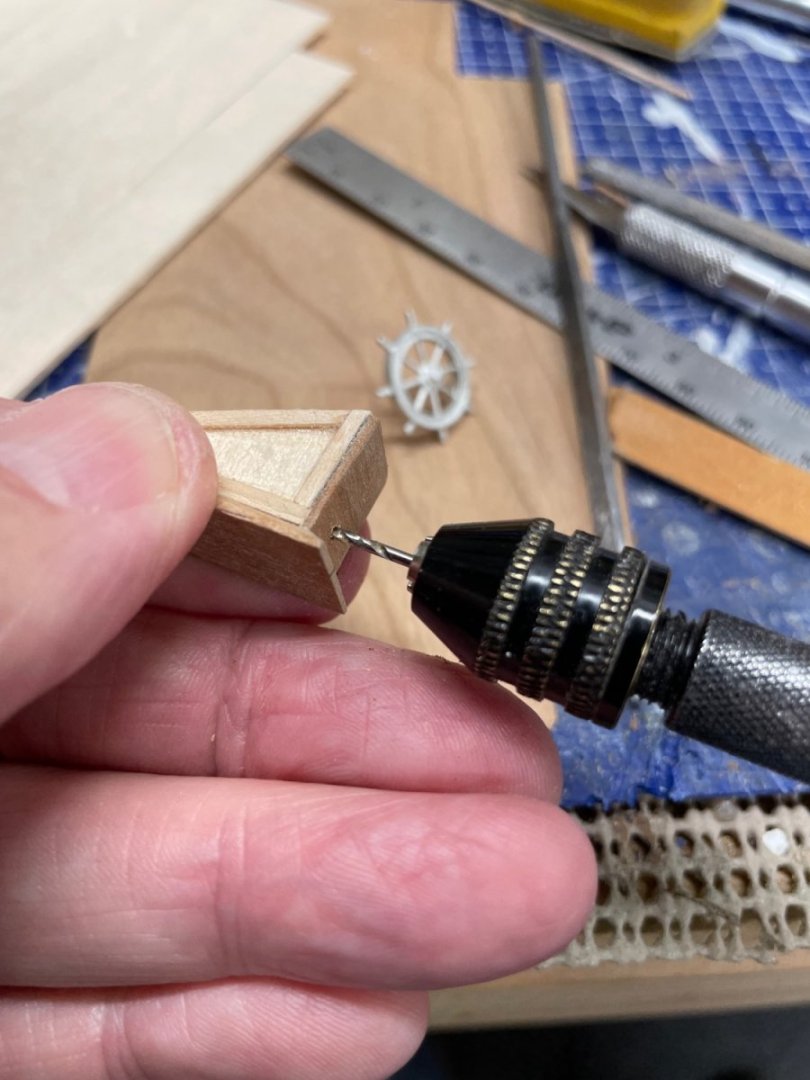
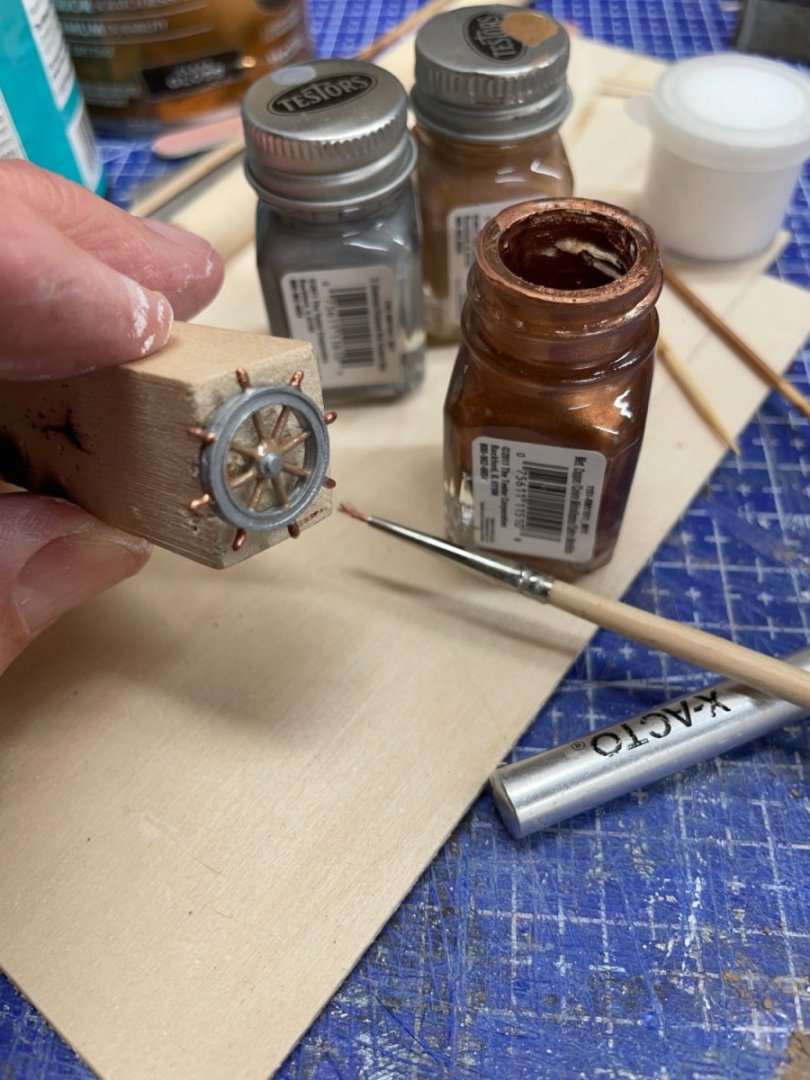
Wheel box etc… Deck furnishings complete. Woo Hoo! Next up… I have decided to add a little something to the deck. I am going to add fishing gear. I asked the question, Are we going to fish or cut bait? The answer is of course, YES! More research 🧐


- 282 replies
-
- 6
-
-
-
-
- Bluenose
- Model Shipways
- (and 1 more)
-
Nice build so far… Looks like we are at about the same stage on our Bluenose builds. I’ll pull up a chair, we can keep tabs on each other. I’ll PM you some photos, that should help… John
- 184 replies
-
- 1
-
-
- Bluenose
- Model Shipways
- (and 1 more)
-
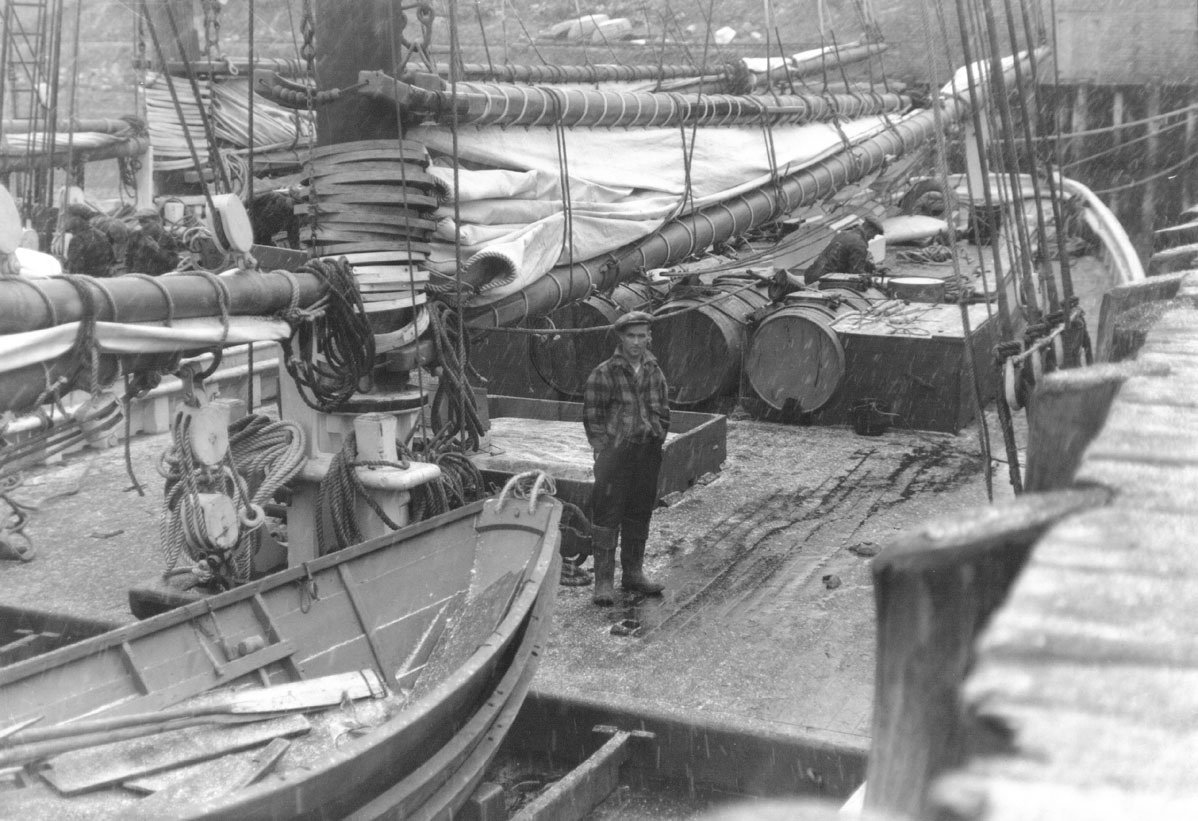
Thanks for your comments, are you building the Bluenose II or the original? Here is a vintage photo of the original Bluenose just before it was sold. I’m trying to strike a balance, using the Bluenose II photos as a guide to my finishes but build her as the original. Do you have a build log posted? Cheers 🍻
- 282 replies
-
- 2
-
-
- Bluenose
- Model Shipways
- (and 1 more)
-
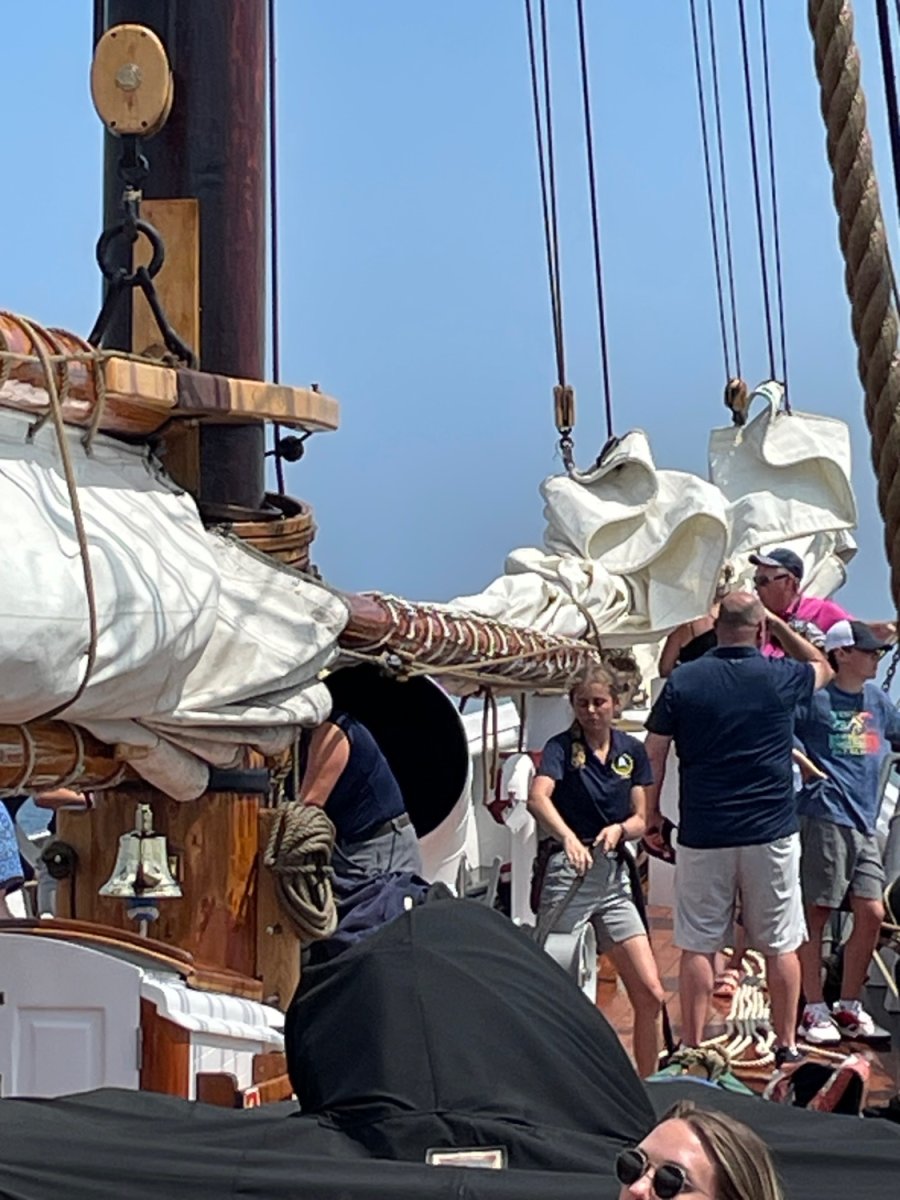
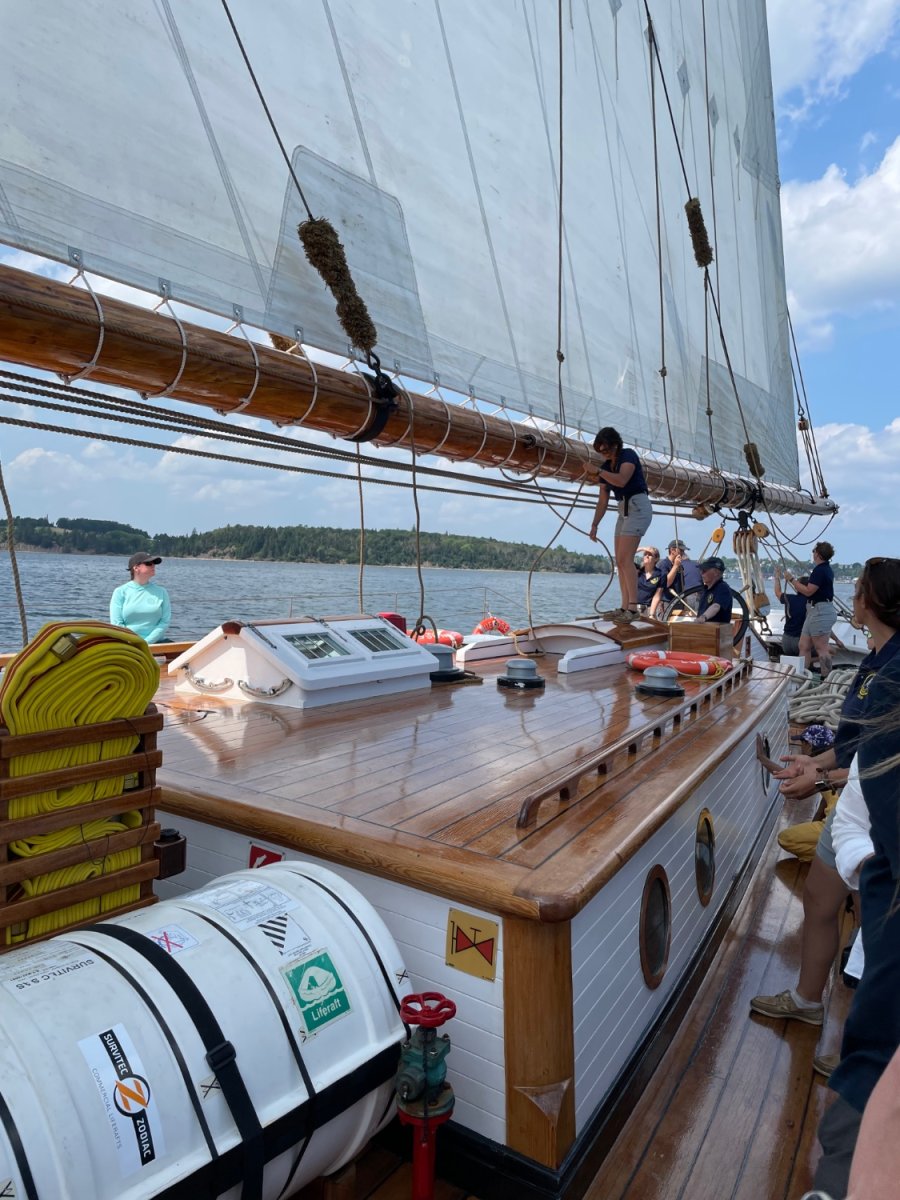
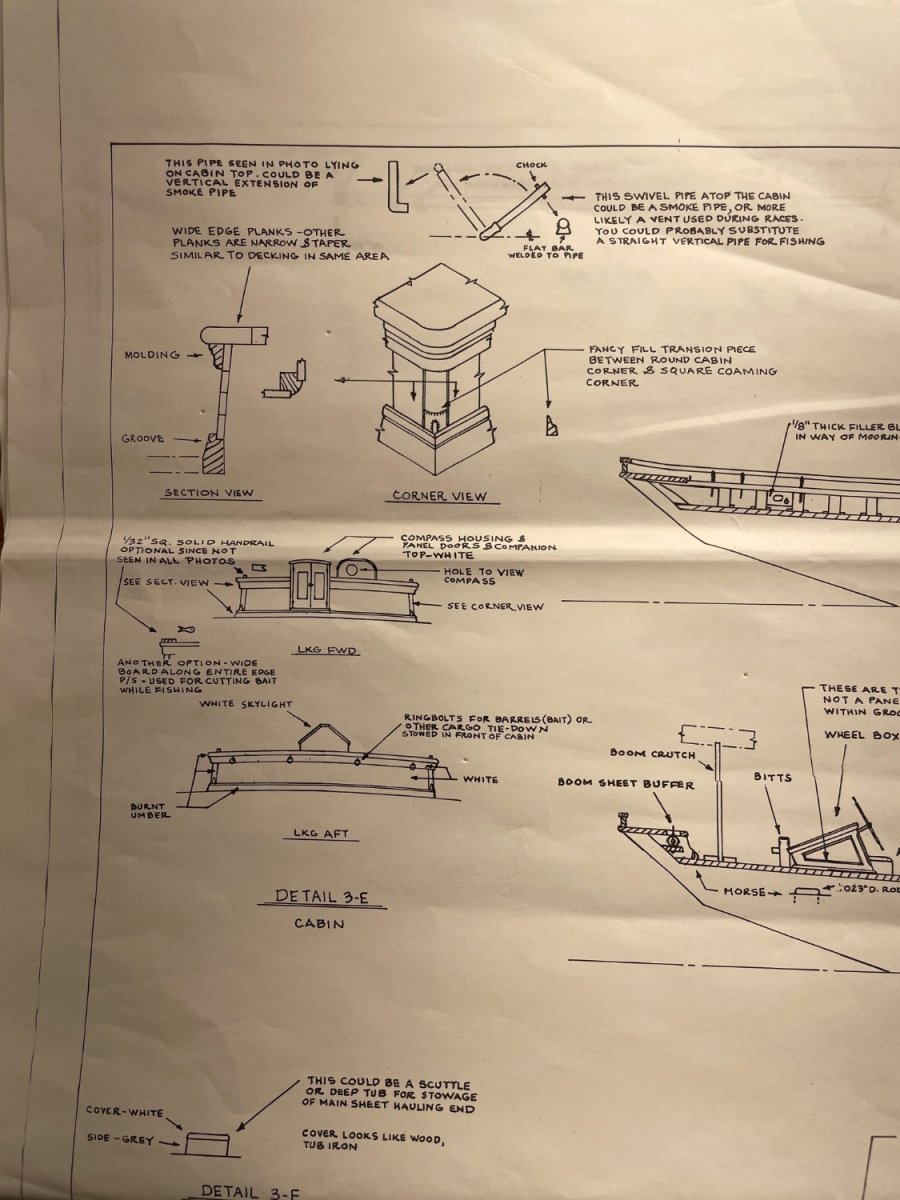
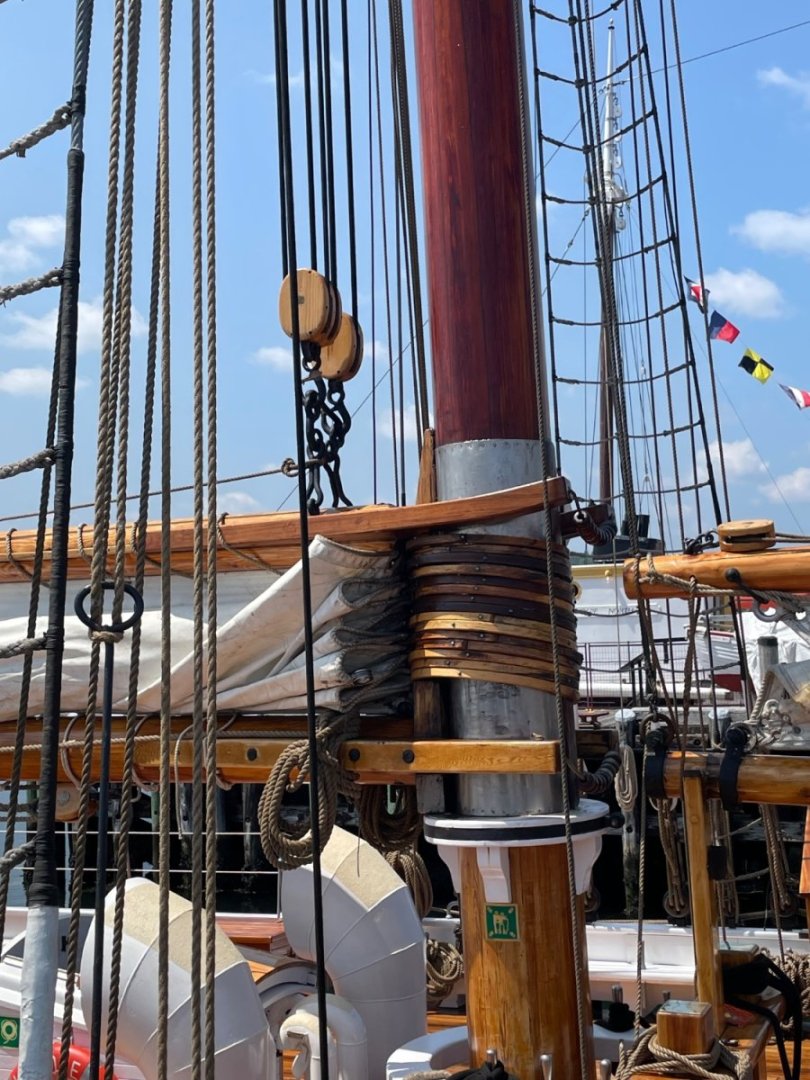
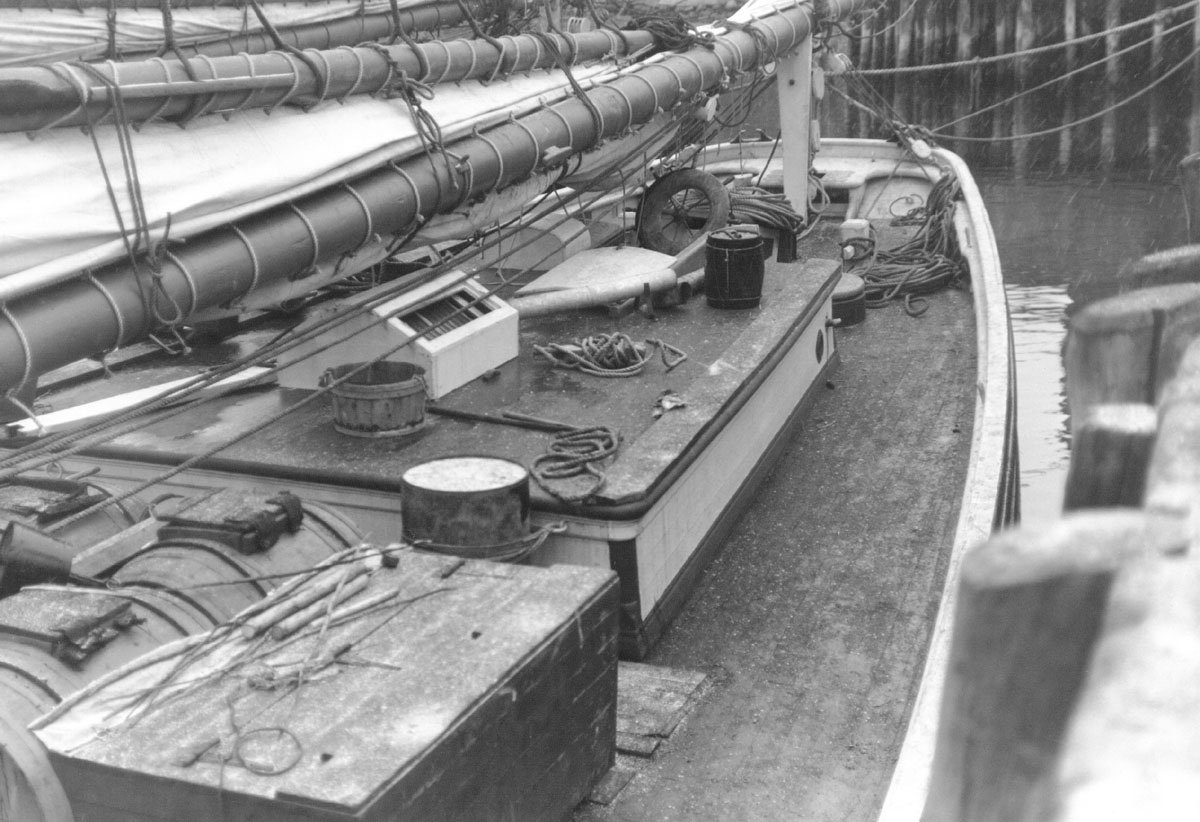
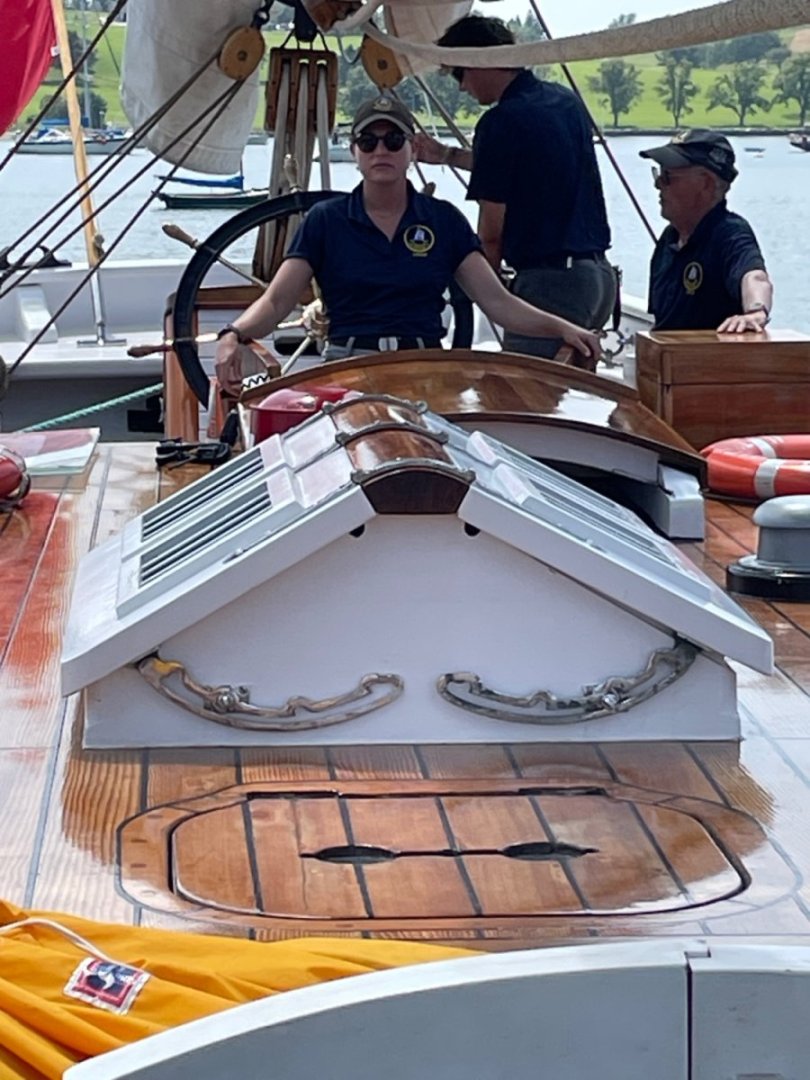
Pumps and another Hatch… Up next, The Cabin… Details… Here are a couple of photos I took on board the Bluenose II. Cheers 🍻


- 282 replies
-
- 8
-
-
- Bluenose
- Model Shipways
- (and 1 more)