John Ruy
-
Posts
1,588 -
Joined
-
Last visited
Content Type
Profiles
Forums
Gallery
Events
Everything posted by John Ruy
-
 Some History… Note: She was built right here in Maine. Red Jacket was a clipper ship, one of the largest and fastest ever built.[2] She was also the first ship of the White Star Line company. She was named after Sagoyewatha, a famous Seneca Indian chief, called "Red Jacket" by settlers. She was designed by Samuel Hartt Pook, built by George Thomas in Rockland, Maine, and launched in 1853, the last ship to be launched from this yard.[3] Name Red Jacket Owner Seccomb & Taylor, Boston Builder George Thomas, Rockland, ME Launched 2 Nov 1853[1] United Kingdom Owner Pilkington & Wilson Operator White Star Line Acquired 1854 Notes In the immigrant trade; became an Australian and Indian coastal freighter, 1861. Owner Wilson & Chambers, Liverpool, 1868 Portugal Owner Blandy Brothers, Madeira Islands Acquired 1883 Fate Driven ashore in a gale, 1885. Notes Hulked, became a coal barge in the Cape Verde Islands. General characteristics Class and type Clipper, designed by Samuel Hartt Pook Tons burthen 2305 tons Length 251 ft. 2 in., or 260 ft. 109m Beam 44 ft.. Draft 31 ft History Red Jacket left Rockland under tow, and was rigged in New York. Her captain was a veteran packet ship commander, Asa Eldridge of Yarmouth, Massachusetts,[4] and she had a crew of 65. On the passage to Liverpool, she averaged 14.5 knots (26.9 km/h) for the latter part of the voyage, with sustained bursts of 17 knots (31.5 km/h). A Collins Line steamer arriving in Liverpool (which had left New York two days before Red Jacket) reported that Red Jacket was just astern. As she entered the harbor, tugs tried to get lines aboard the clipper but she was traveling too fast. Thousands, alerted by the Collins Liner, watched as Eldridge shortened sail and backed the vessel into its berth. On this voyage, Red Jacket set the speed record for sailing ships crossing the Atlantic by traveling from New York to Liverpool in 13 days, 1 hour, 25 minutes, dock to dock. A few days after the Red Jacket’s arrival in Liverpool, the accuracy of the ship’s log—and thus the integrity of her captain—was questioned in a letter to The Times of London, arguably the world’s most important newspaper at the time. The letter came from a highly authoritative source, Lloyd’s of London, but was signed only with the author’s initials. It prompted a fierce rebuttal the following day from a second correspondent who also did not disclose his name, but was clearly American. Three days later, the final word in this correspondence went to Asa Eldridge himself; The Times printed a letter from him (sent in his own name) in which he patiently explained why the original correspondent was wrong in his interpretation of the ship’s log.[5] At Liverpool, the Red Jacket had her bottom coppered and cabins fitted out for the Australianimmigrant trade. She was purchased by Pilkington & Wilcox and other Liverpool investors with registry changing on April 24, 1854. (Most secondary sources say that the vessel was bought by the British a year later, copying a mistake made by earlier historians.) She was then chartered by the White Star Line for a run to Melbourne, Victoria. Under Captain Samuel Reid (who owned 1/16 of her), she reached in Melbourne in 69 days. Only one clipper, James Baines, ever made the run faster.[citation needed] On 13 June 1859,[6] whilst on a voyage from Liverpool to Melbourne, she collided with the British merchant ship Elizabeth Walker, which sank. Red Jacket rescued the crew of Elizabeth Walker, which was on a voyage from Buenos Aires, Argentina to London.[7][8] Red Jacket served in the immigrant trade until 1867, when she became an Australian and Indiancoastal freighter.[citation needed]. In May 1871, she ran aground at Cantick Head, Orkney Islandswhilst on a voyage from Calcutta to Dundee, Forfarshire. She was refloated and completed her voyage.[9] Fate In 1872 Red Jacket became a lumber carrier from Quebec to London, joining the clippers Marco Poloand Donald McKay, which "ended their days" in the transatlantic Quebec timber trade,[10] She collided with the Eliza Walker in 1878[dubious – discuss], which sank; Eliza Walker′s crew were rescued.[1] On 29 January 1878, she put in to Plymouth, Devon in a leaky condition, her crew refusing to proceed. She was recorded as a collier on a voyage from Newcastle upon Tyne, Northumberland to Genoa, Italy.[11][12] In 1883, Red Jacket was sold to Blandy Brothers, a Portuguese shipping company in the Madeira Islands as a coaling hulk. She dragged her anchors in a heavy gale and was driven ashore on 16 December 1885; the sale of her wreckage fetched just £113. from Wikipedia
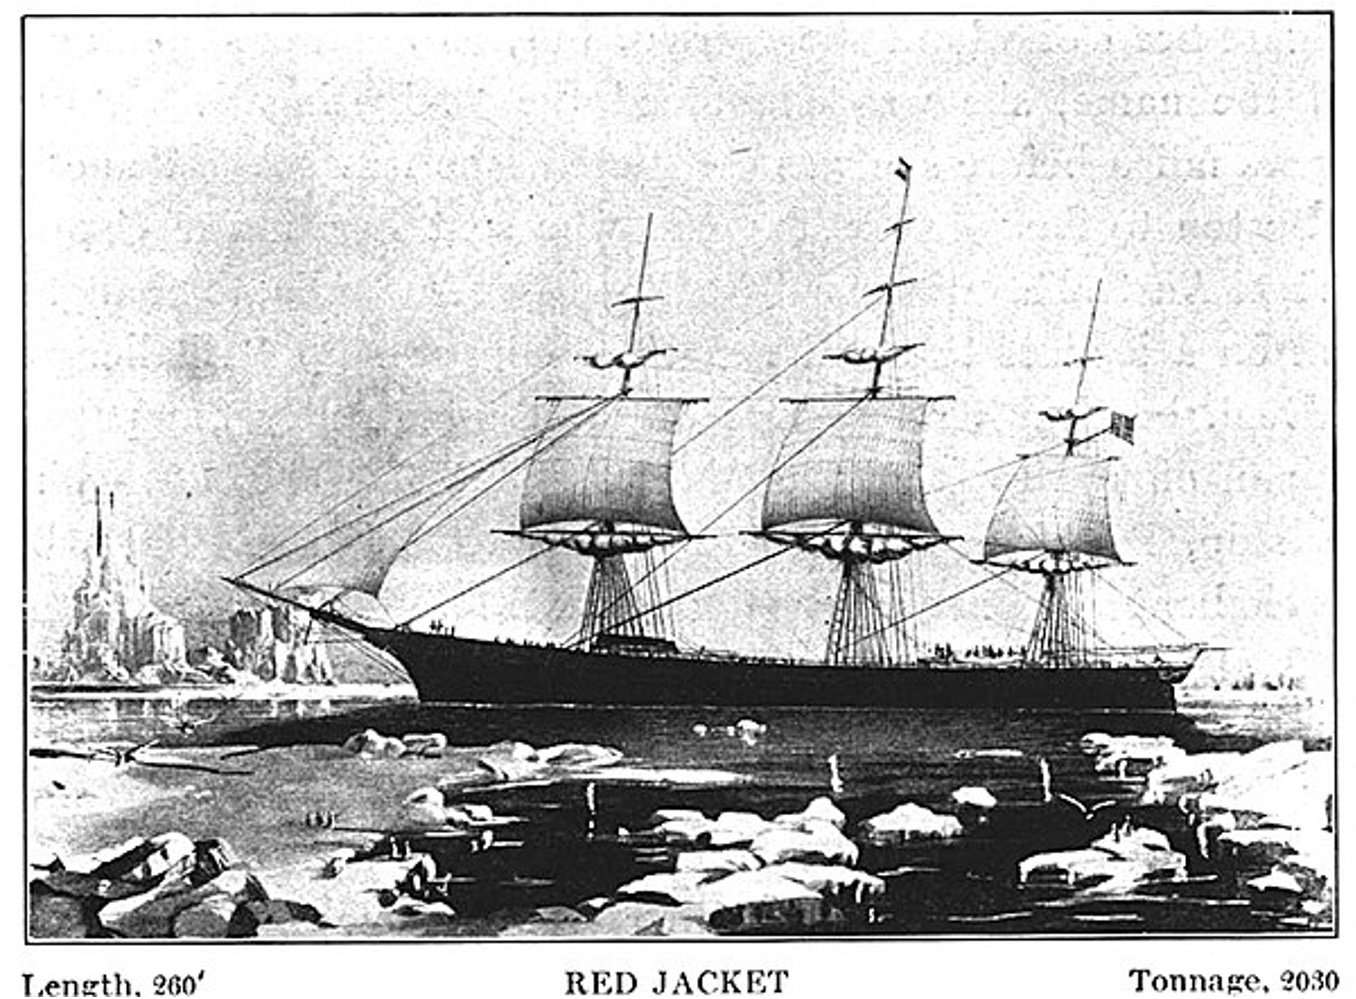
- 165 replies
-
- 5
-

-
- Red Jacket
- Marine Model Company
- (and 2 more)
-
Thanks Phil… I just ordered it, sounds like it will be very useful. You know how these Vintage blueprints can be lacking in detail. I am all about the detail. 🧐 Cheers 🍻
-
Welcome aboard Bob. This one should be real fun. But then, they all are… Cheers 🍻
- 165 replies
-
- 3
-
-
- Red Jacket
- Marine Model Company
- (and 2 more)
-
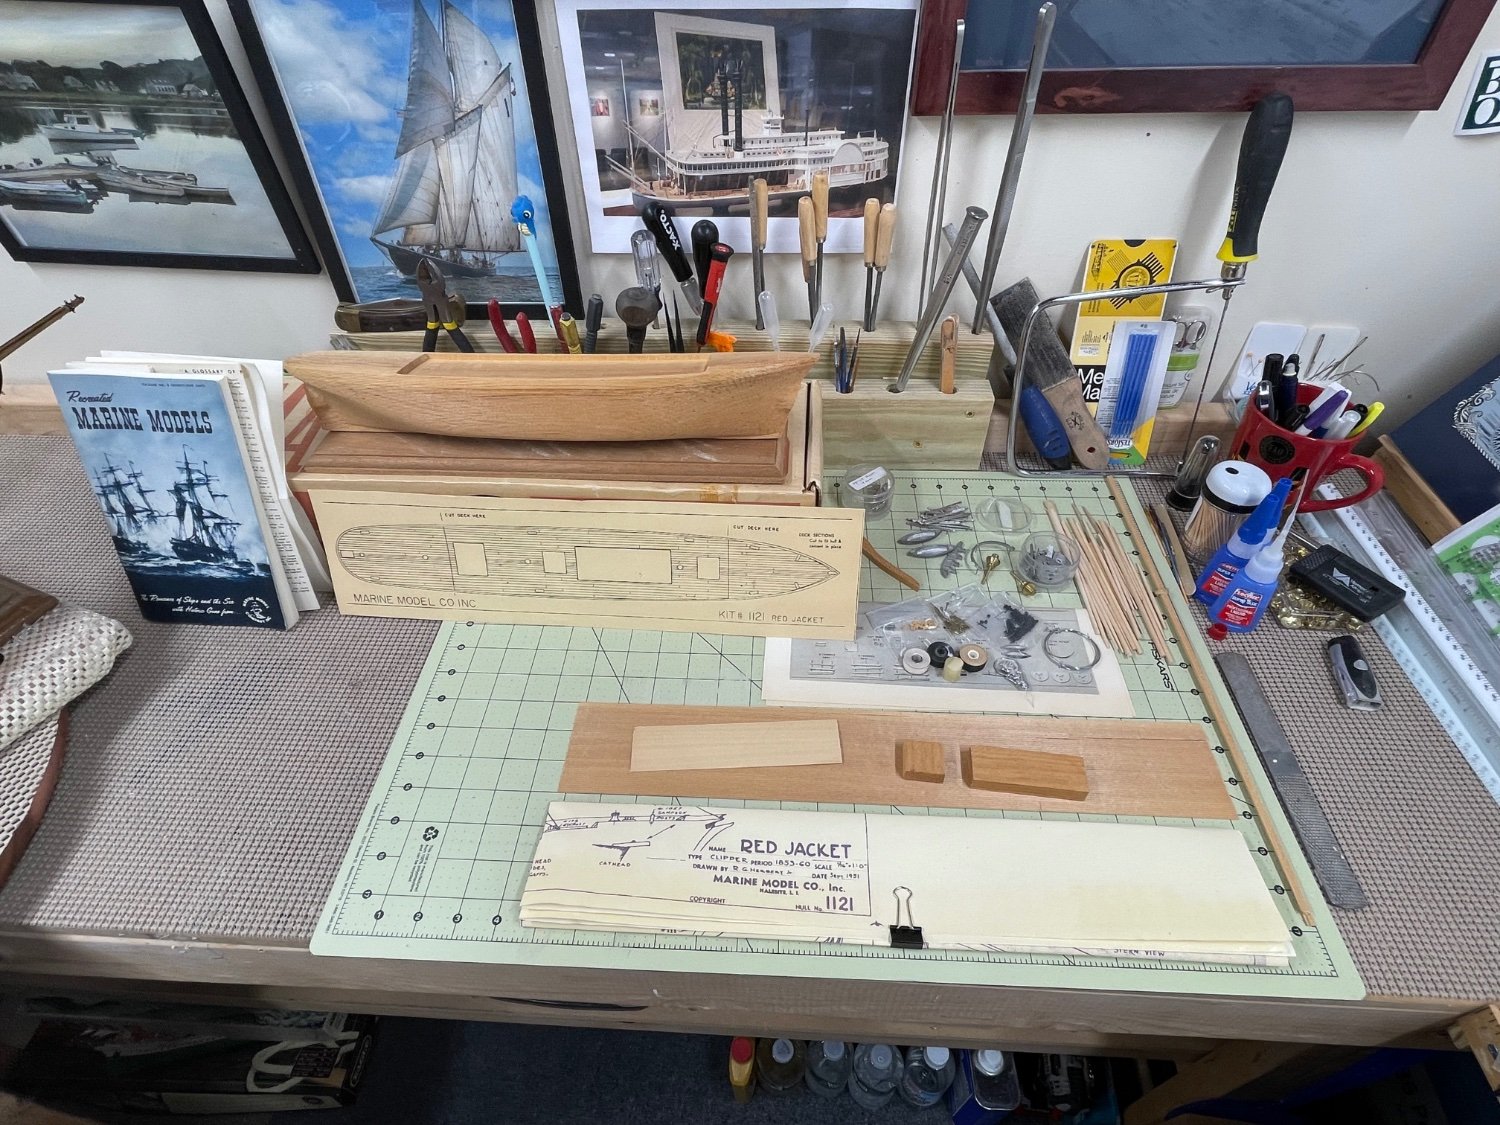
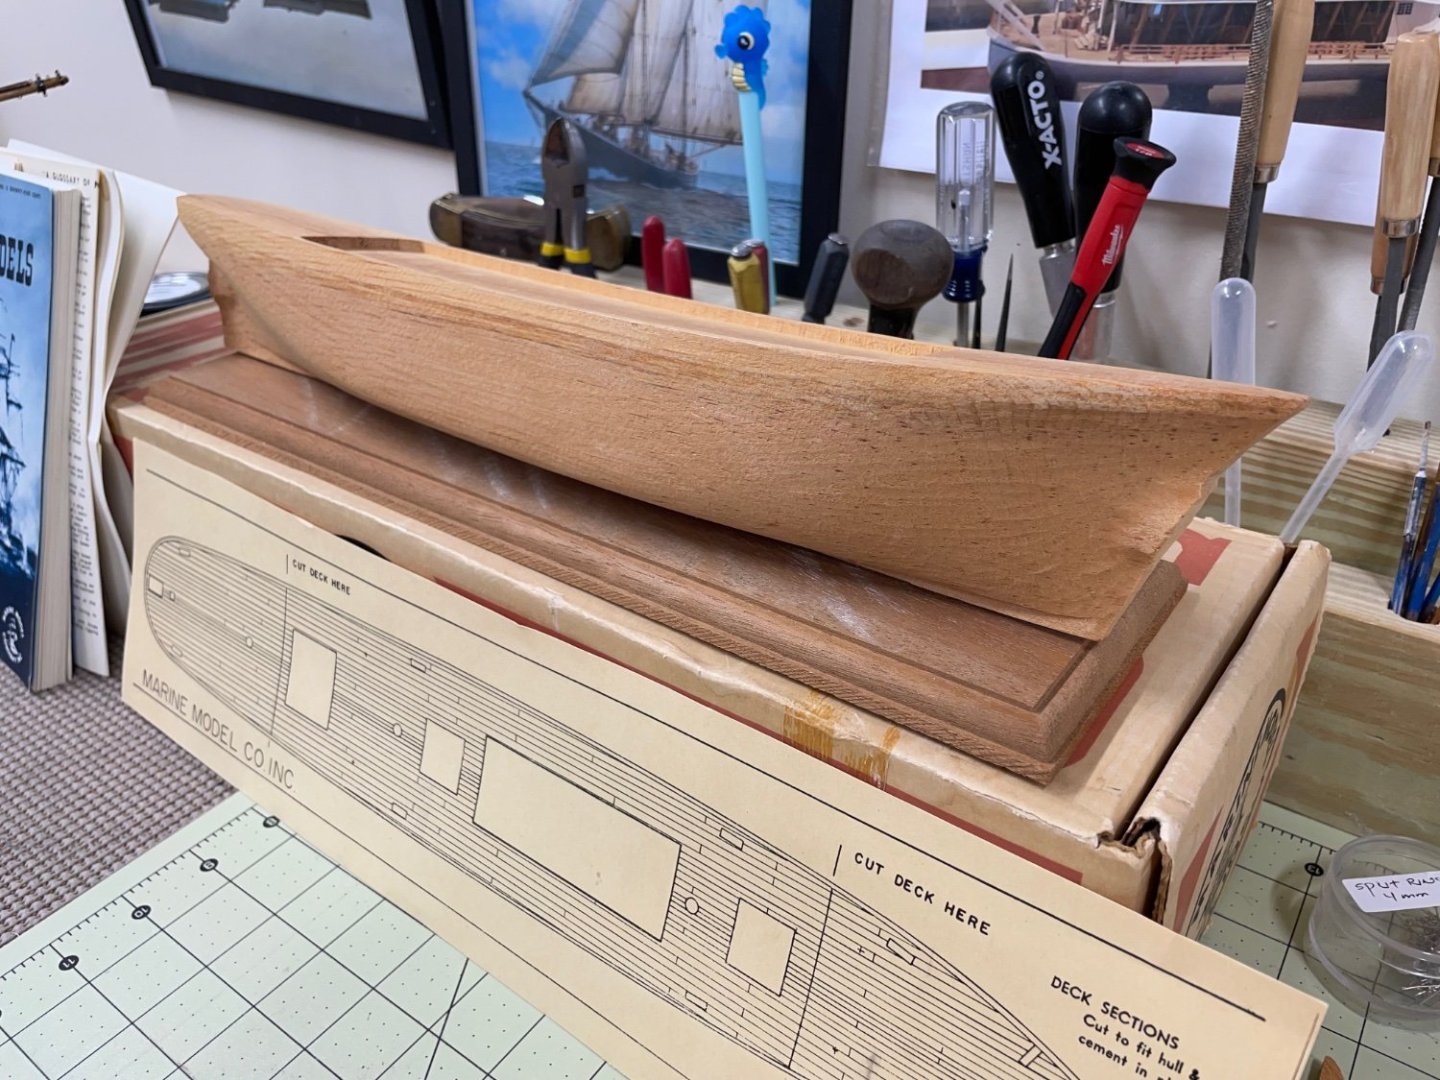
Picked up this vintage kit from @Cornhusker1956 back in August. Here is the build log, I promised. I do have a soft spot for these old kits. My first wood ship build was the Charles W Morgan by Marine Model Company. I built that kit in 2020. The date on the blueprint is 1951. This kit seems to have survived well and deserves to be rescued. This is a solid hull kit so my first order of business will be to get this “pre carved” hull into proper shape from stem to stern. Many thanks to @Cornhusker1956 for entrusting this little beauty to me. Cheers 🍻


- 165 replies
-
- 11
-
-
- Red Jacket
- Marine Model Company
- (and 2 more)
-
Thanks Greg, add patience and attention to detail. 😆 I’m still learning new technique every day. You can do it. 👍
- 282 replies
-
- 2
-
-
- Bluenose
- Model Shipways
- (and 1 more)
-
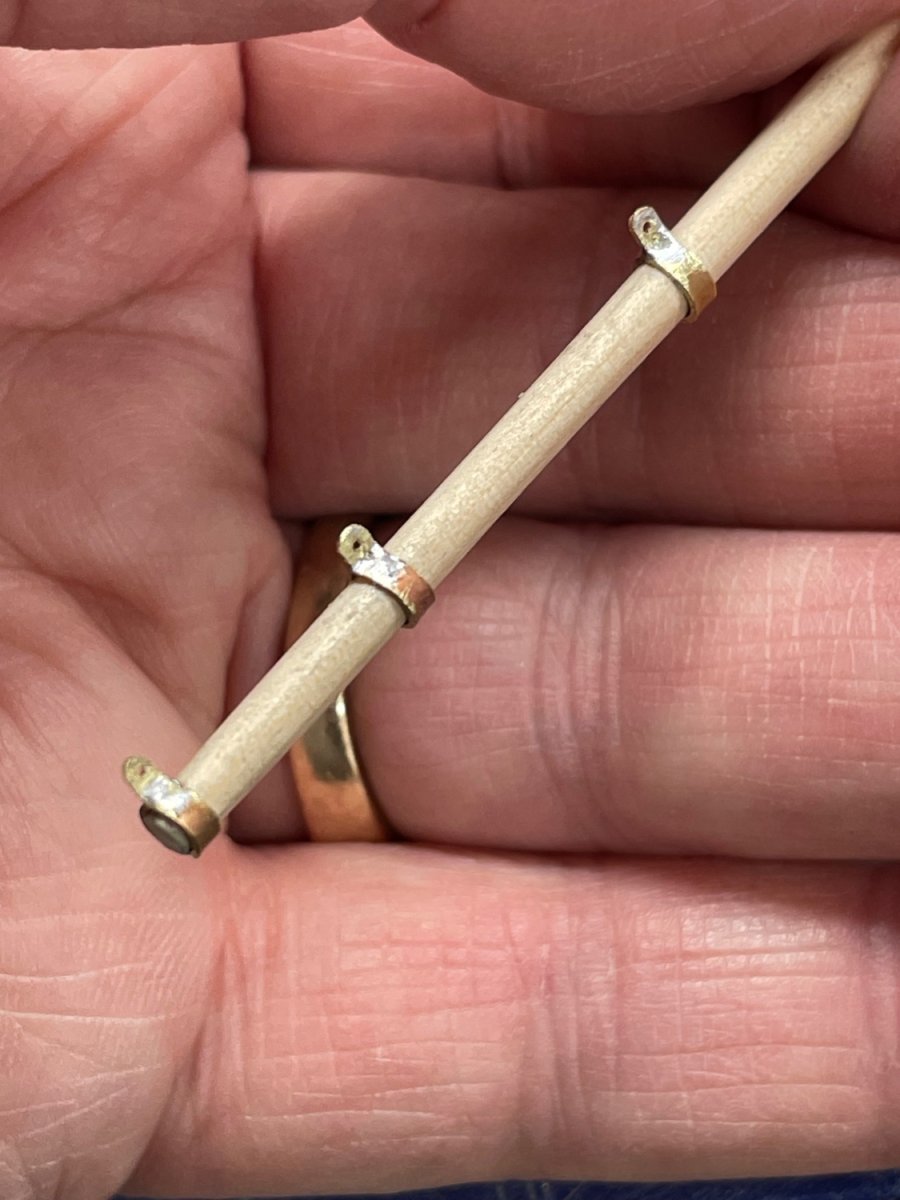
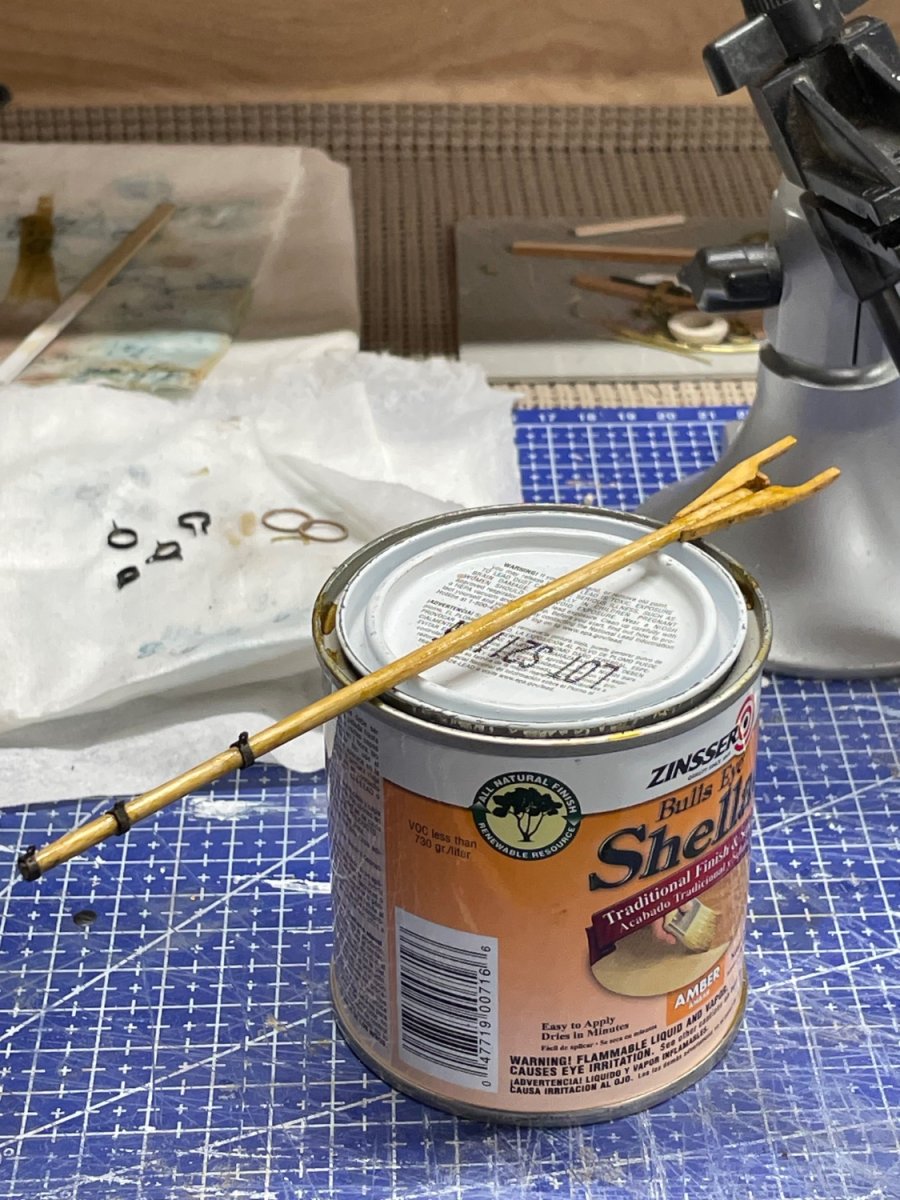
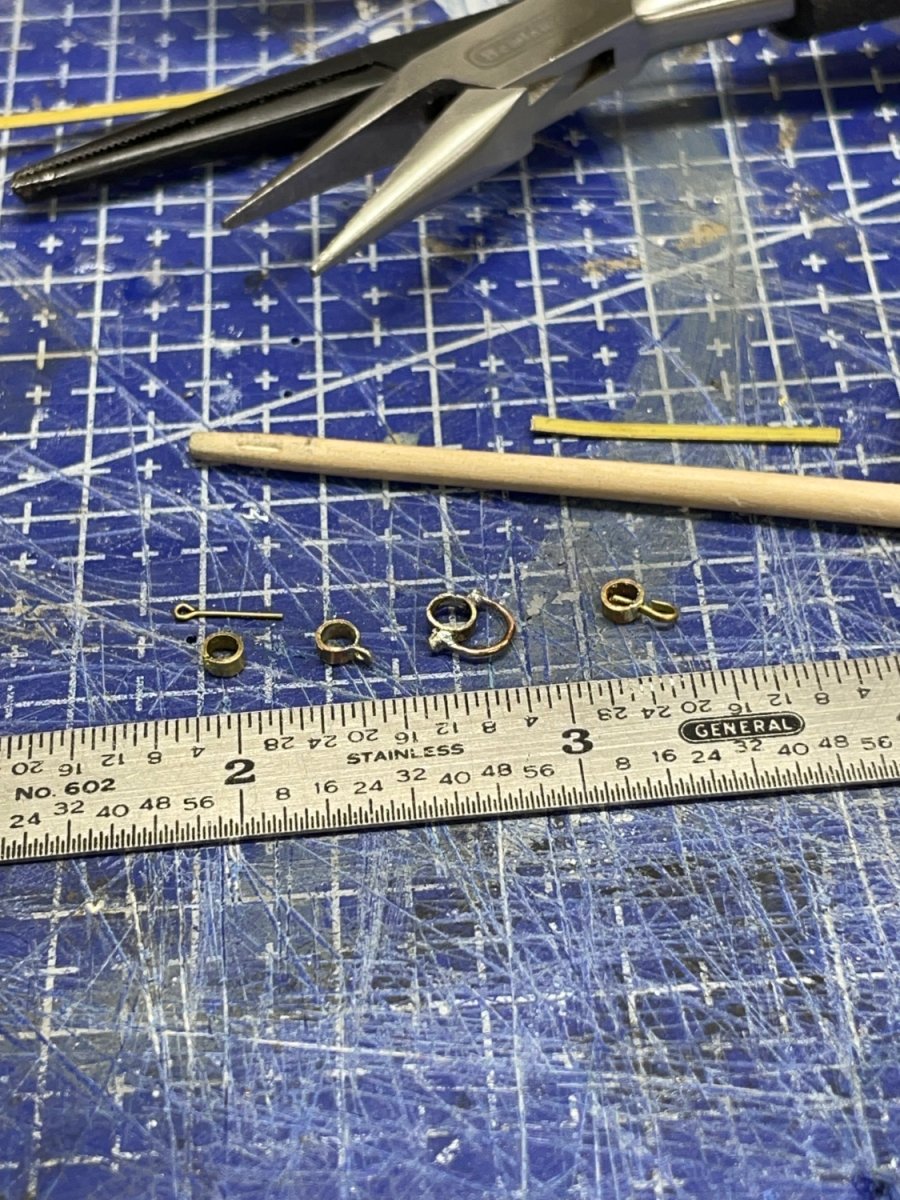
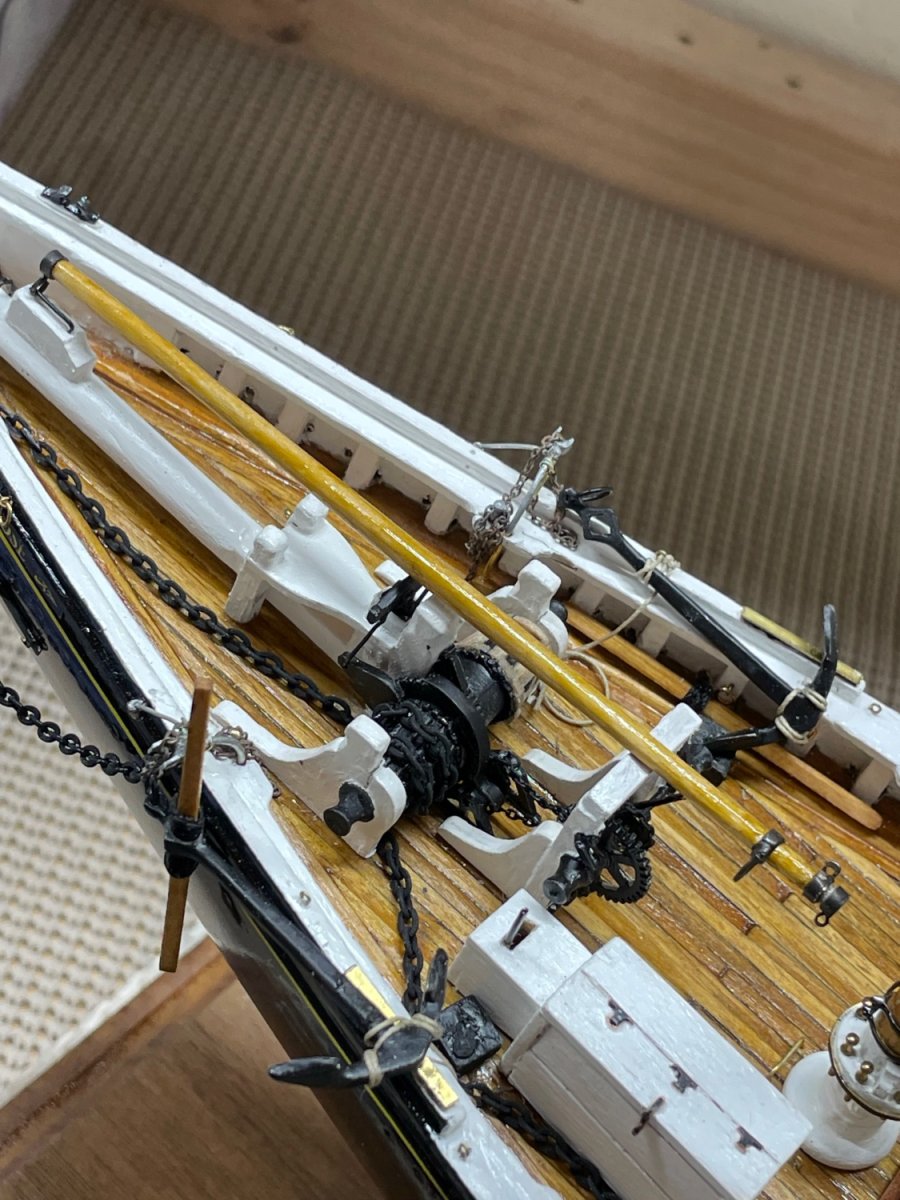
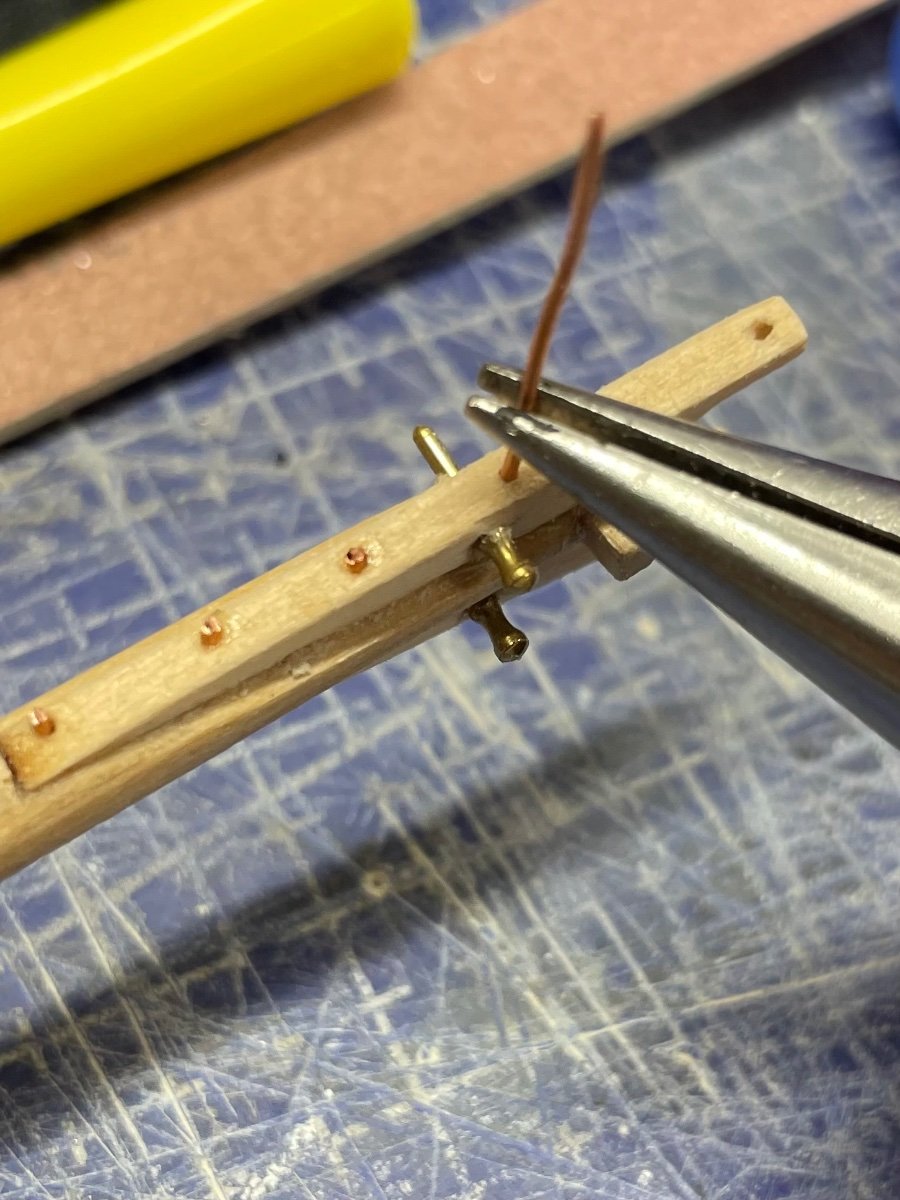
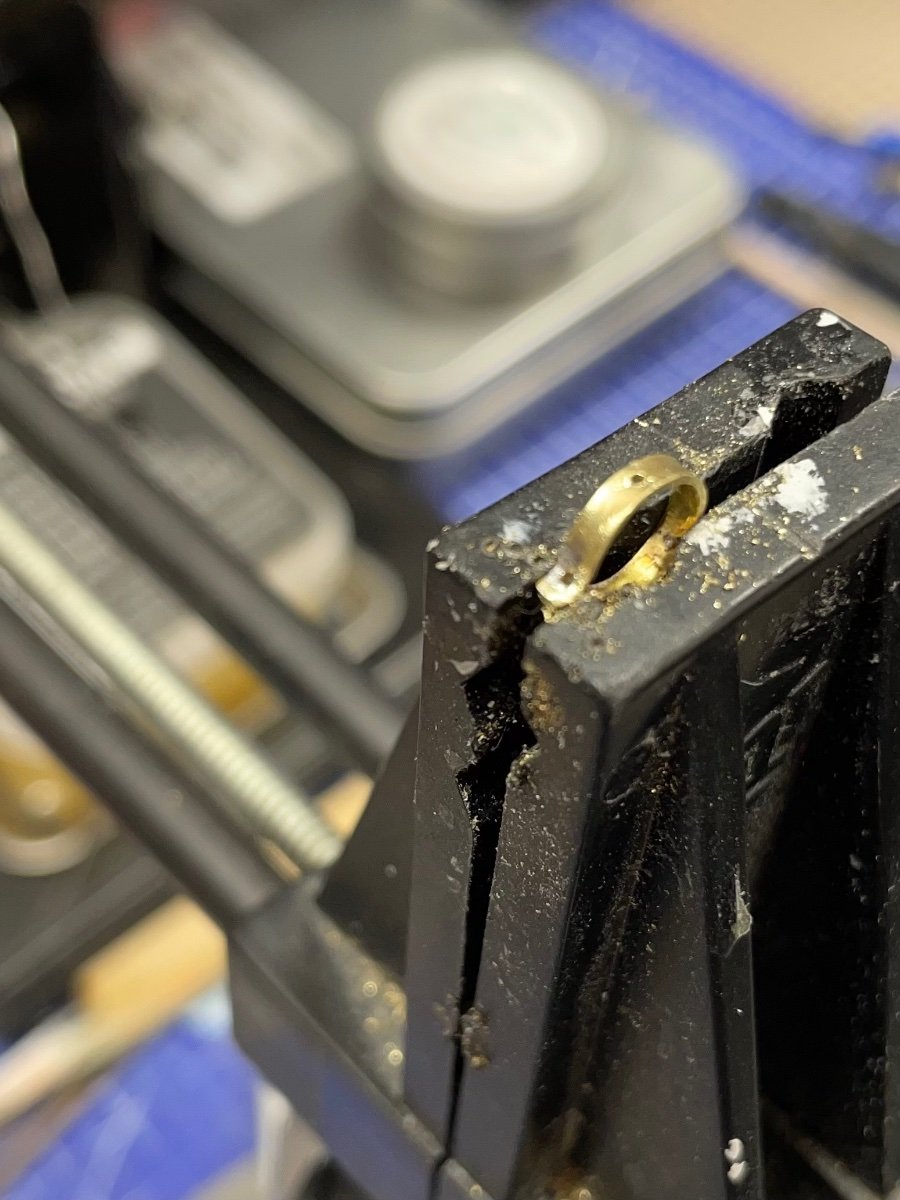
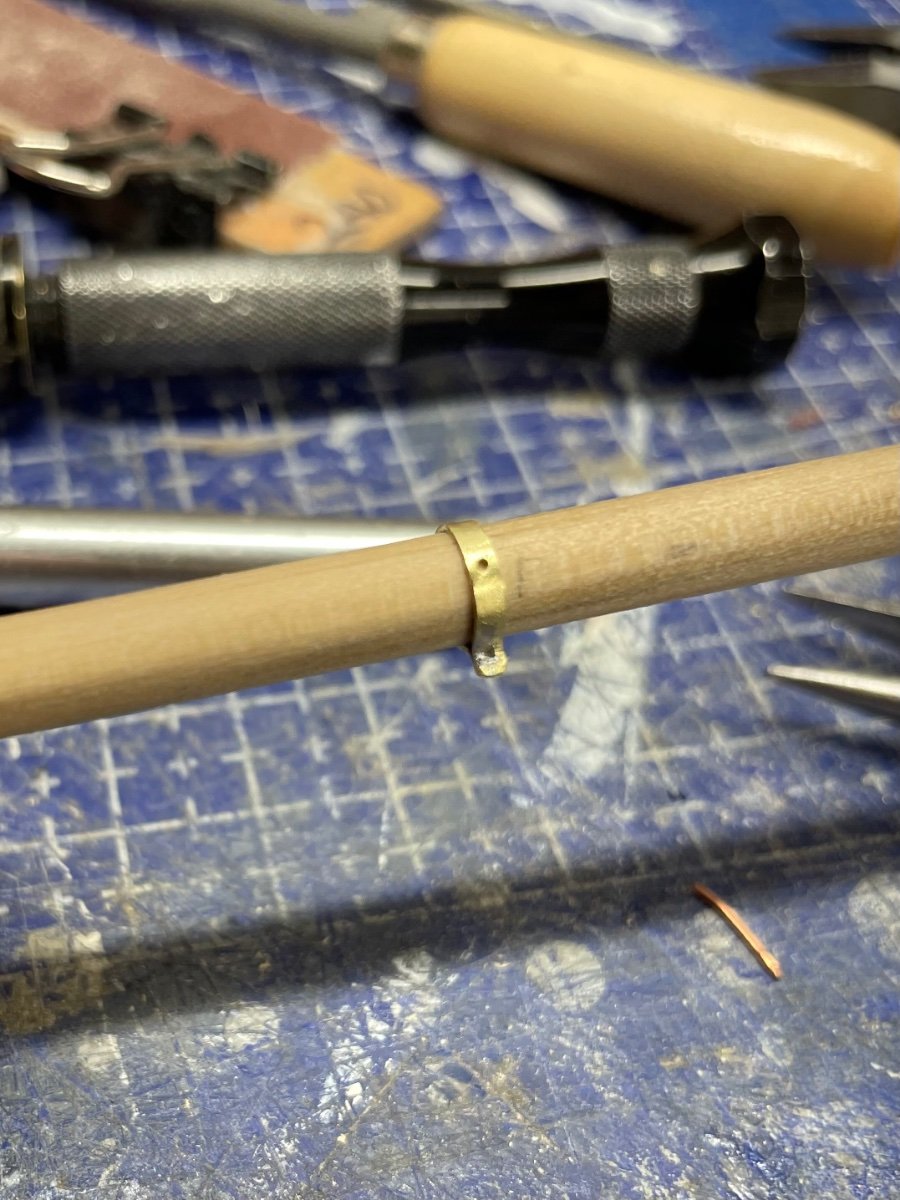
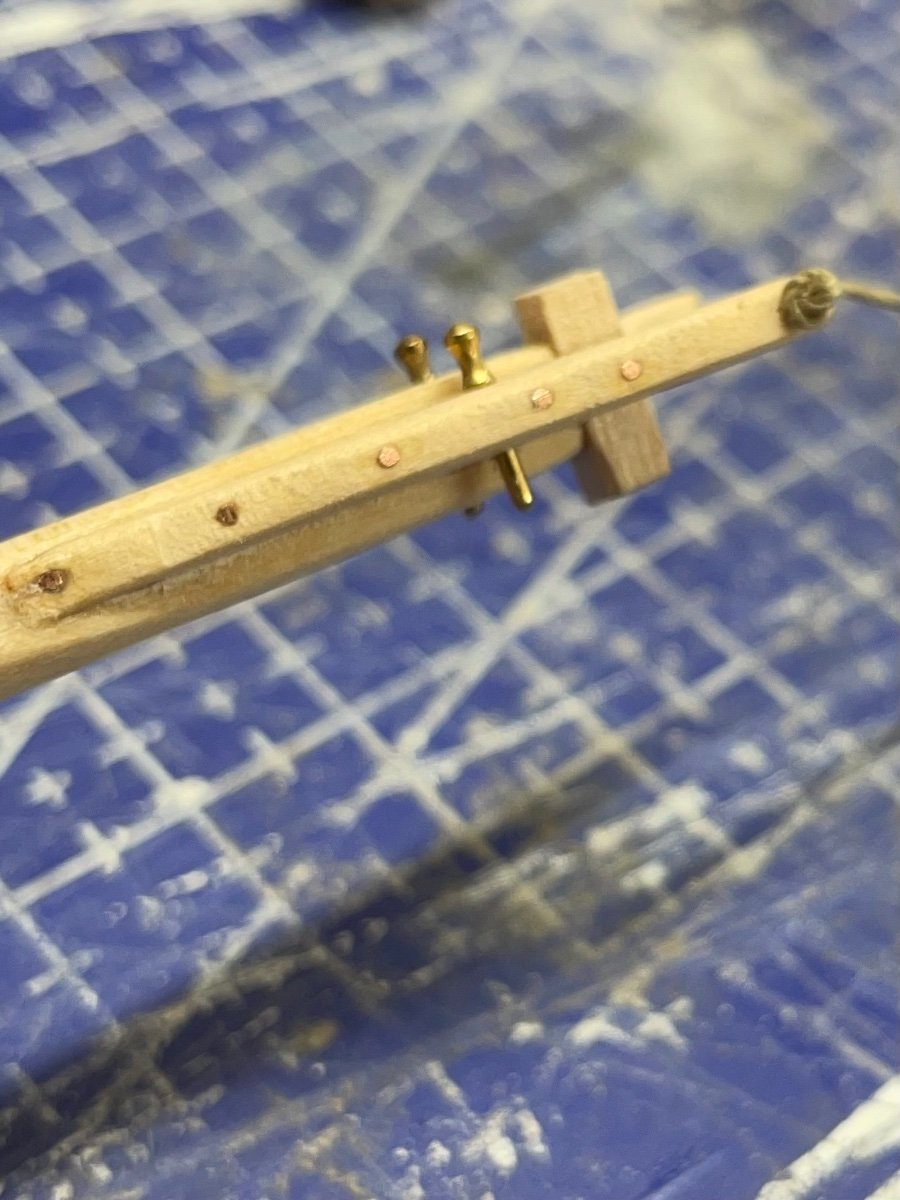
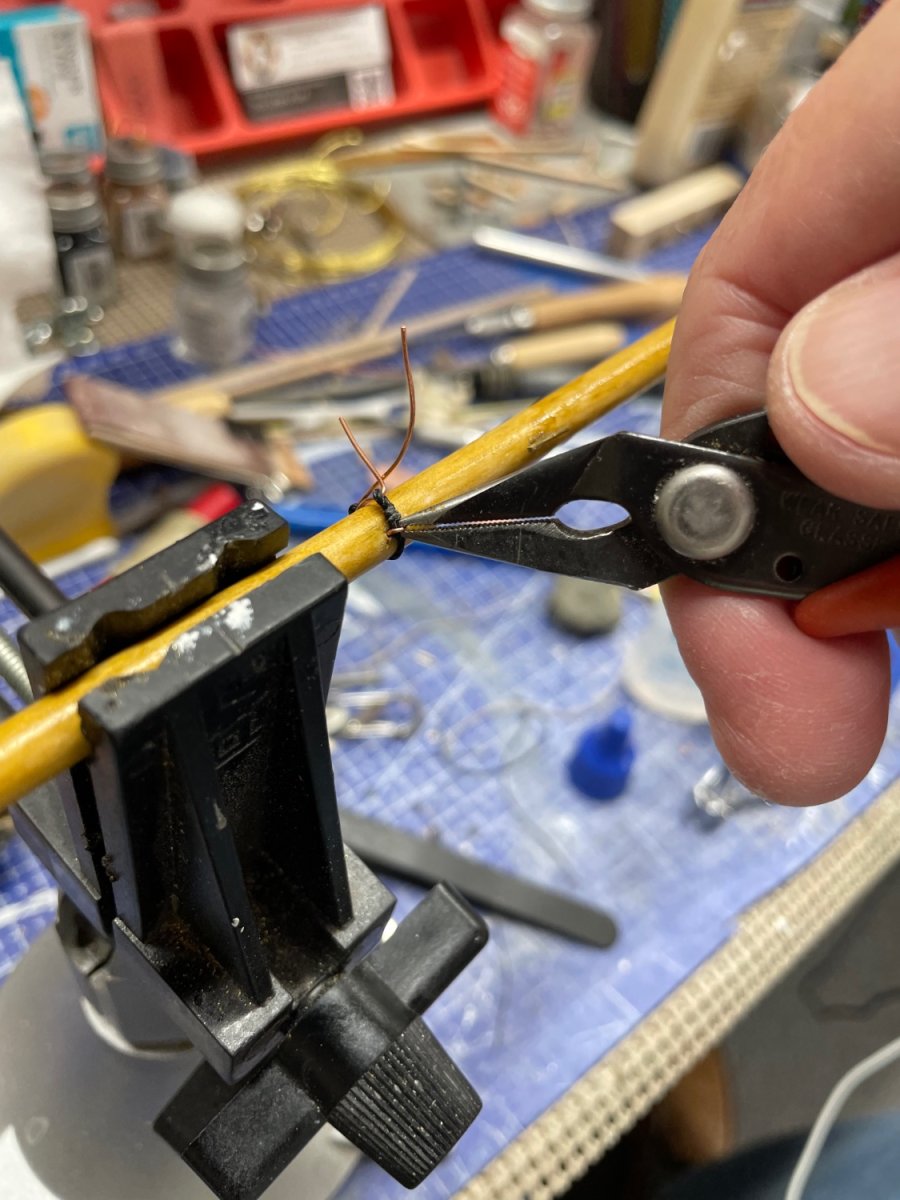
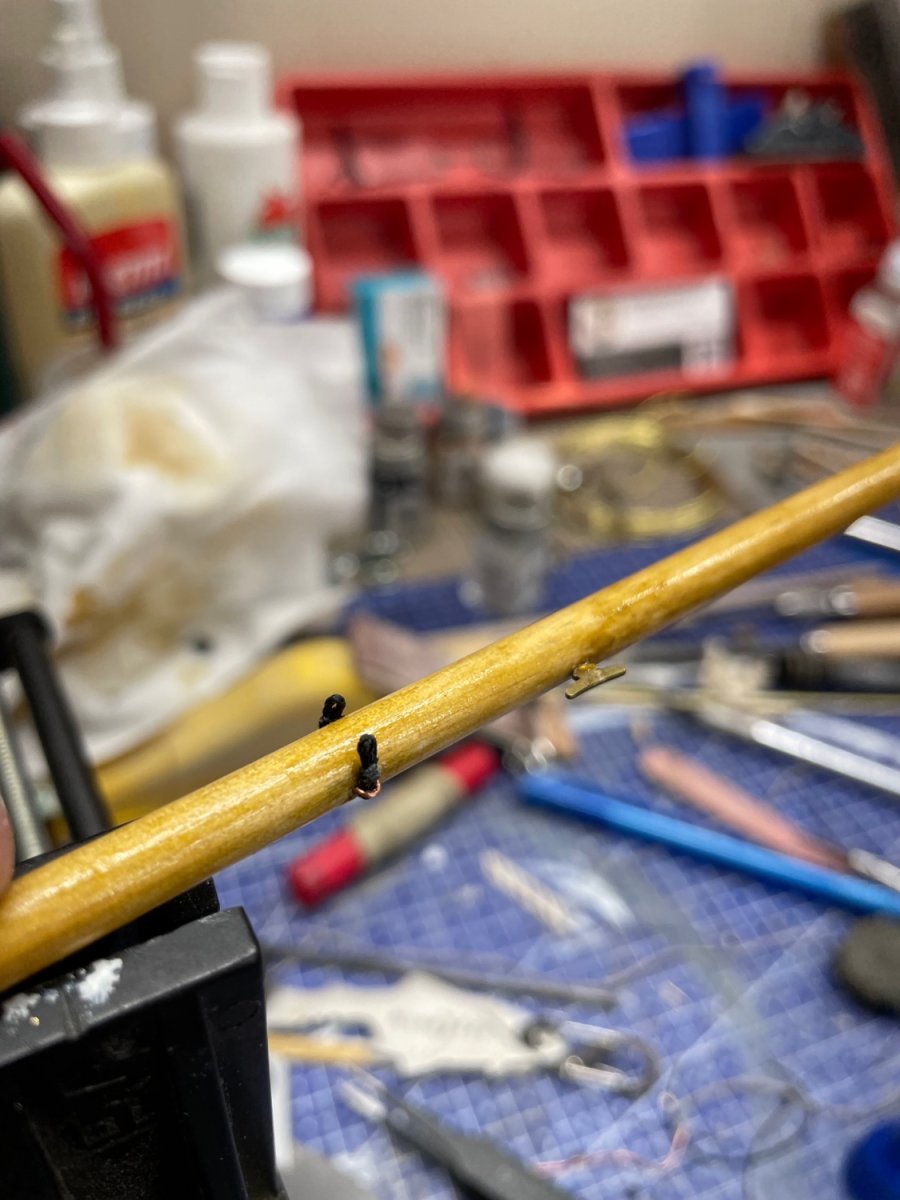
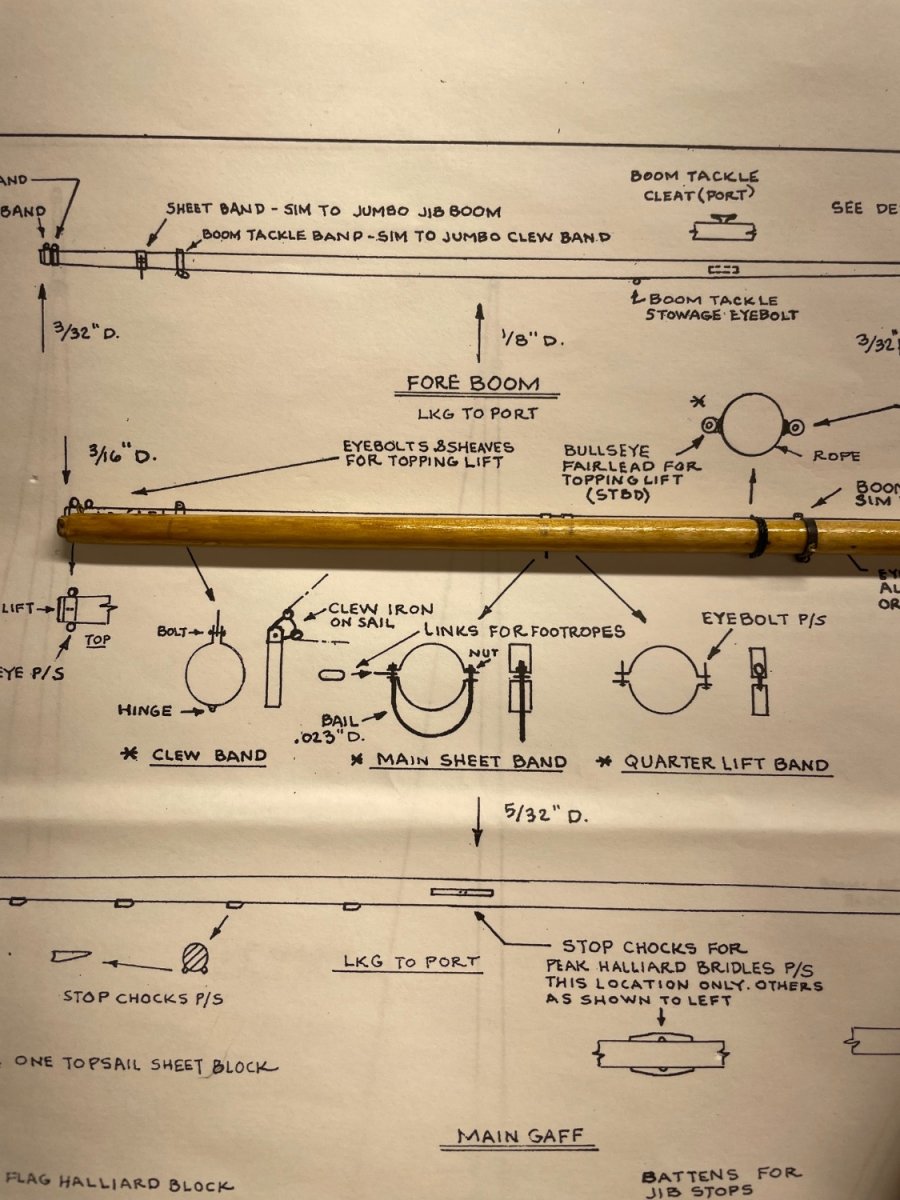
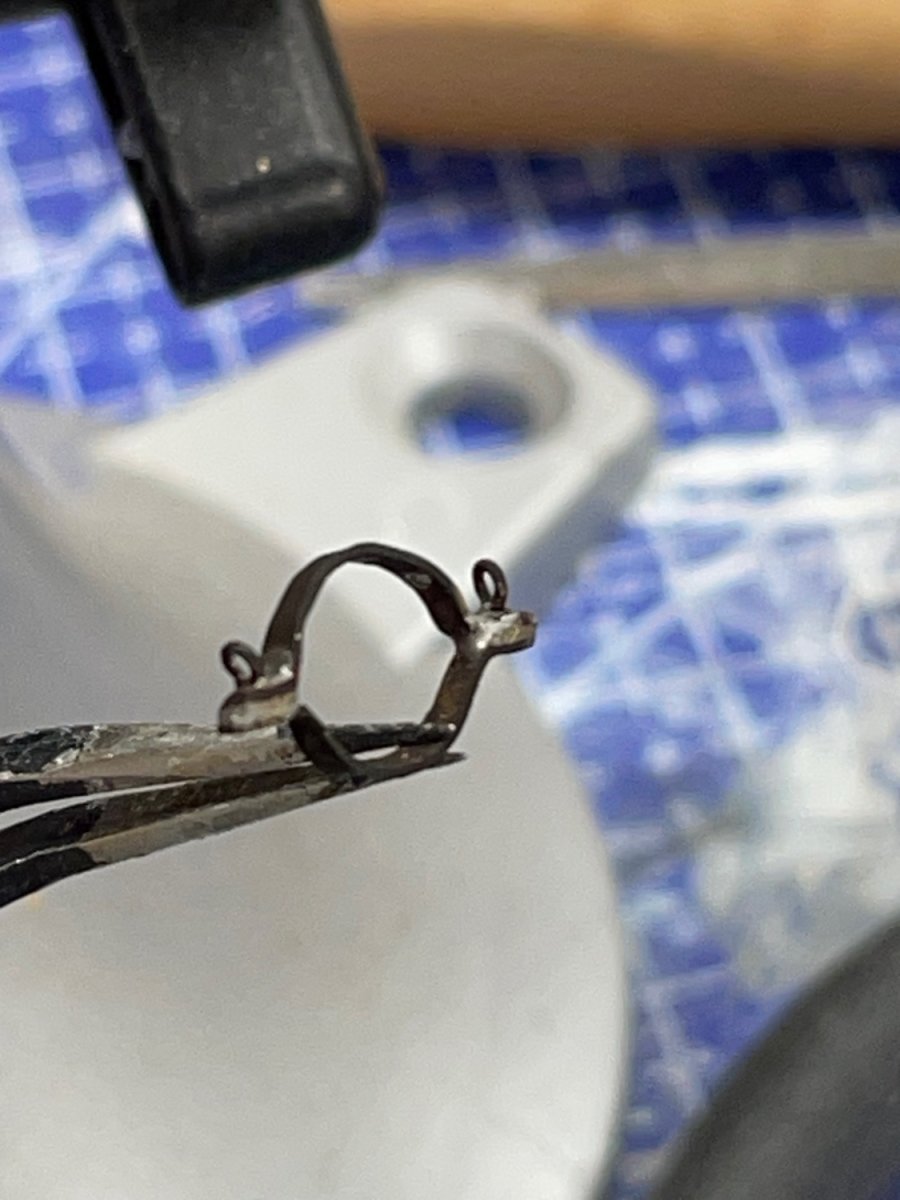
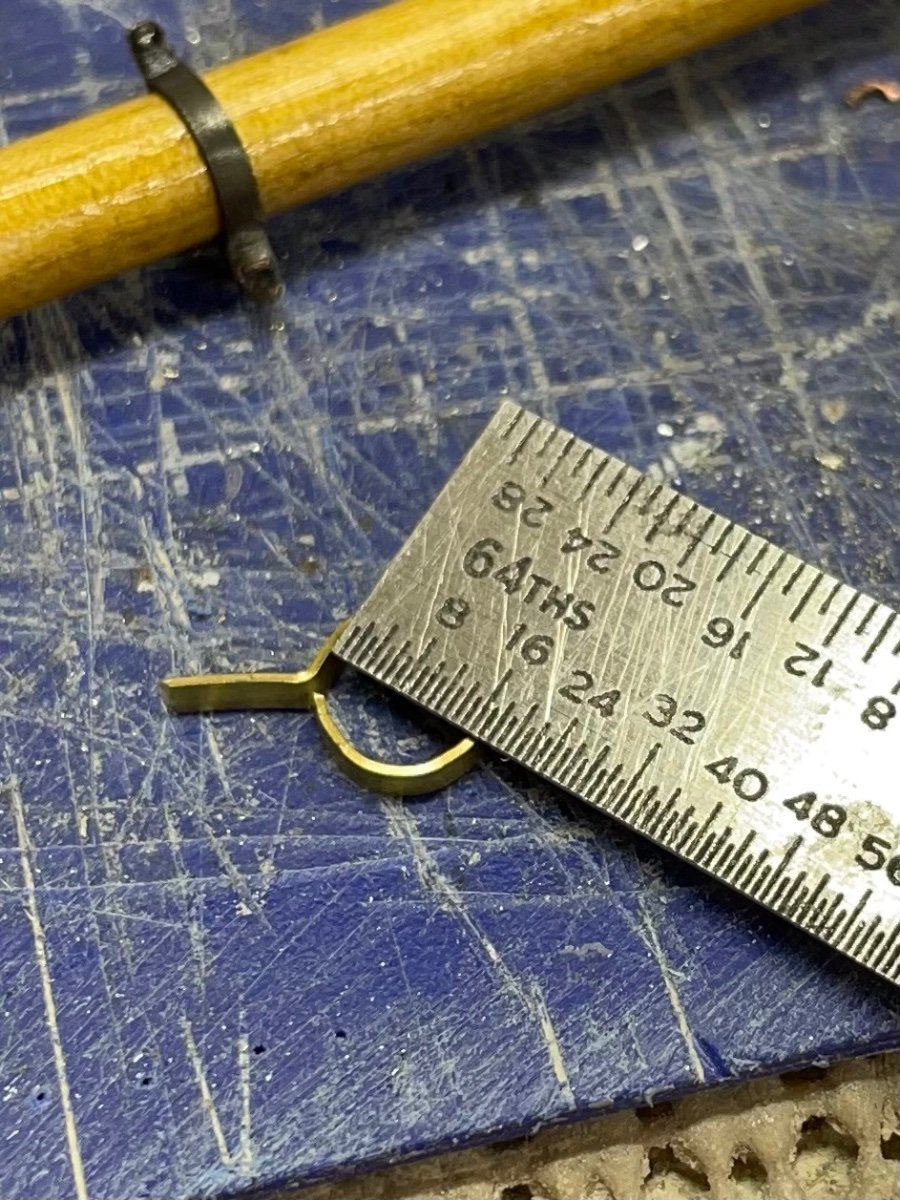
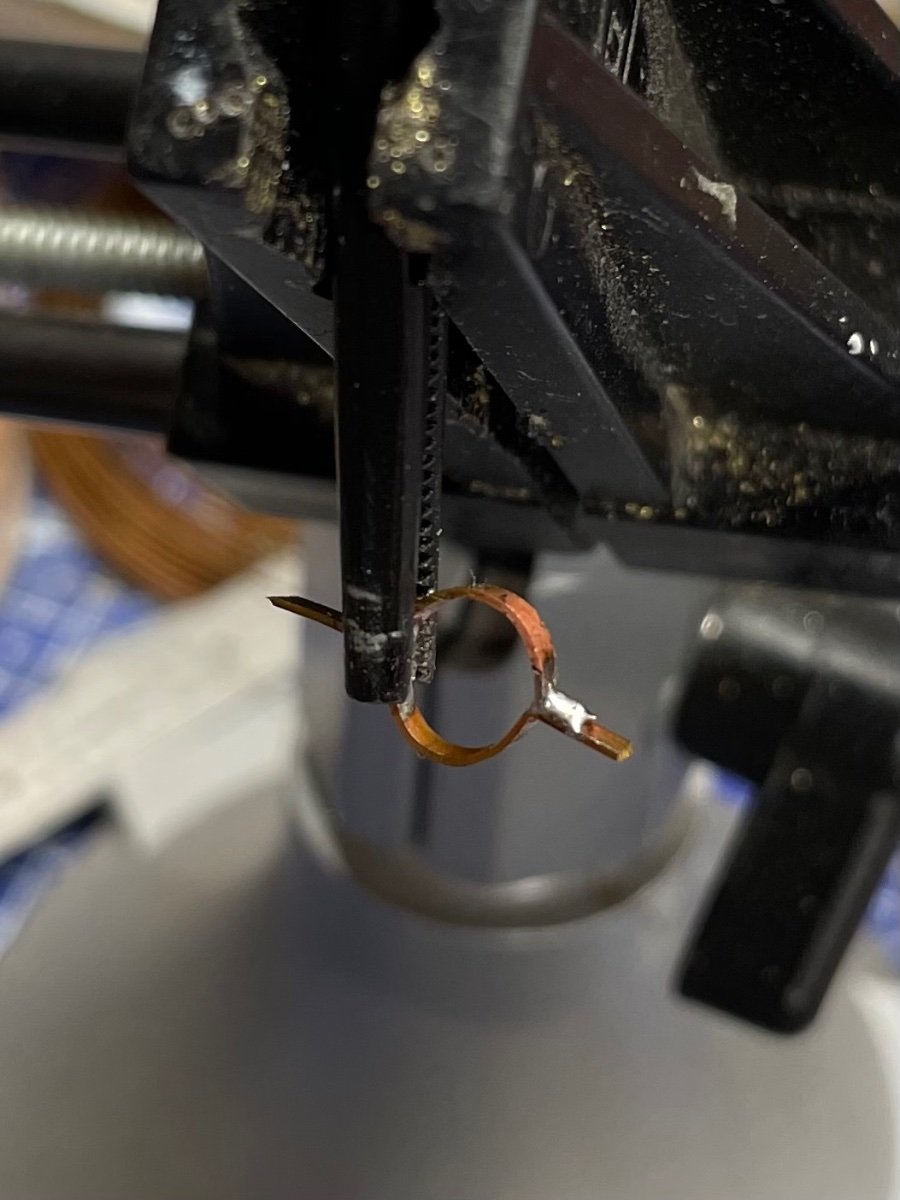
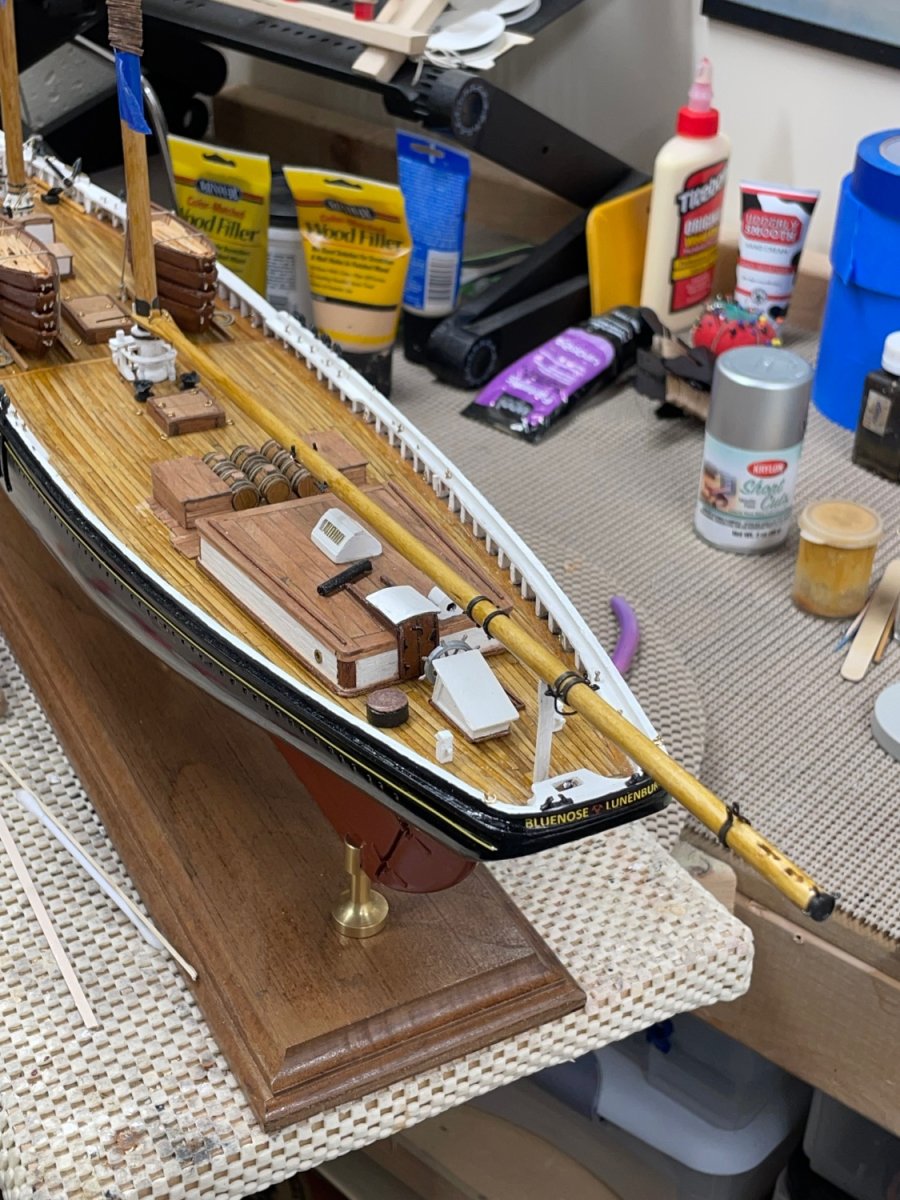
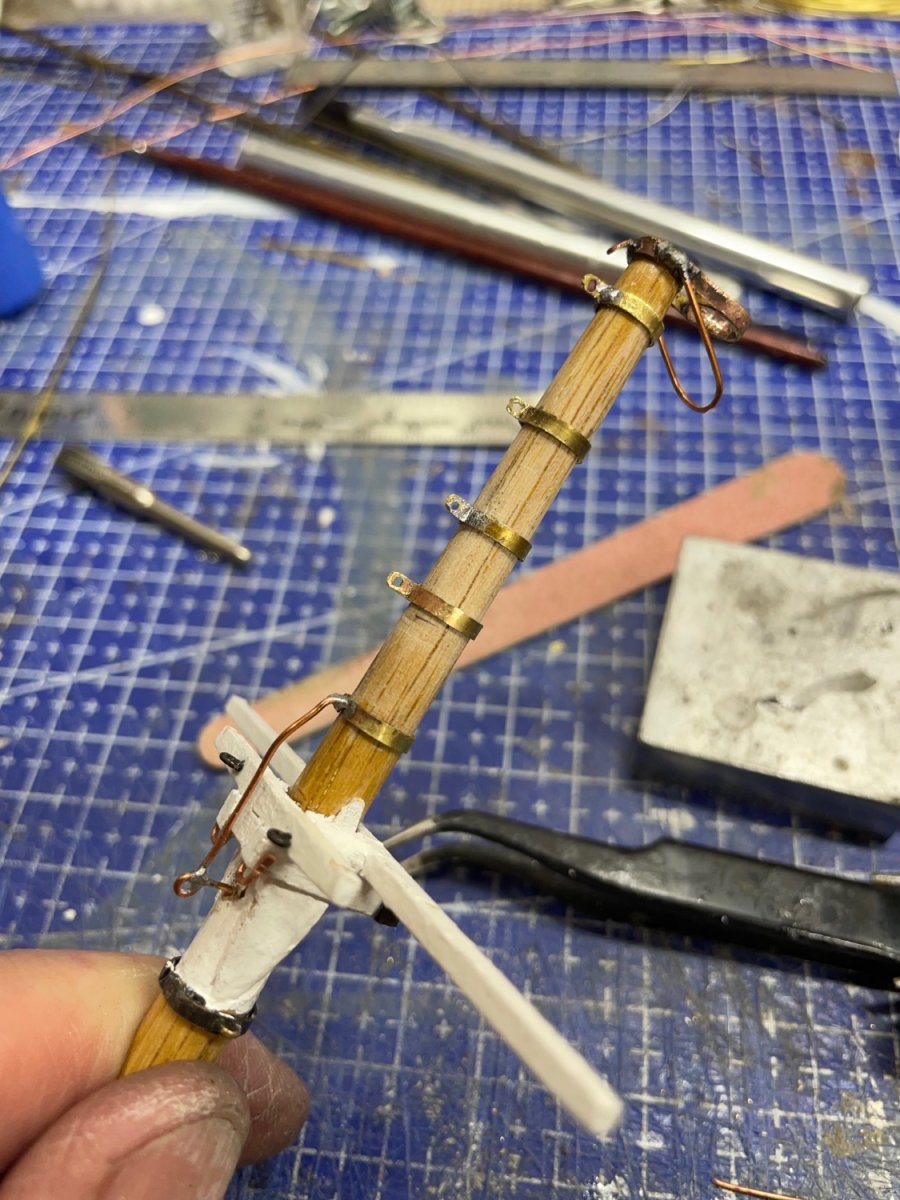
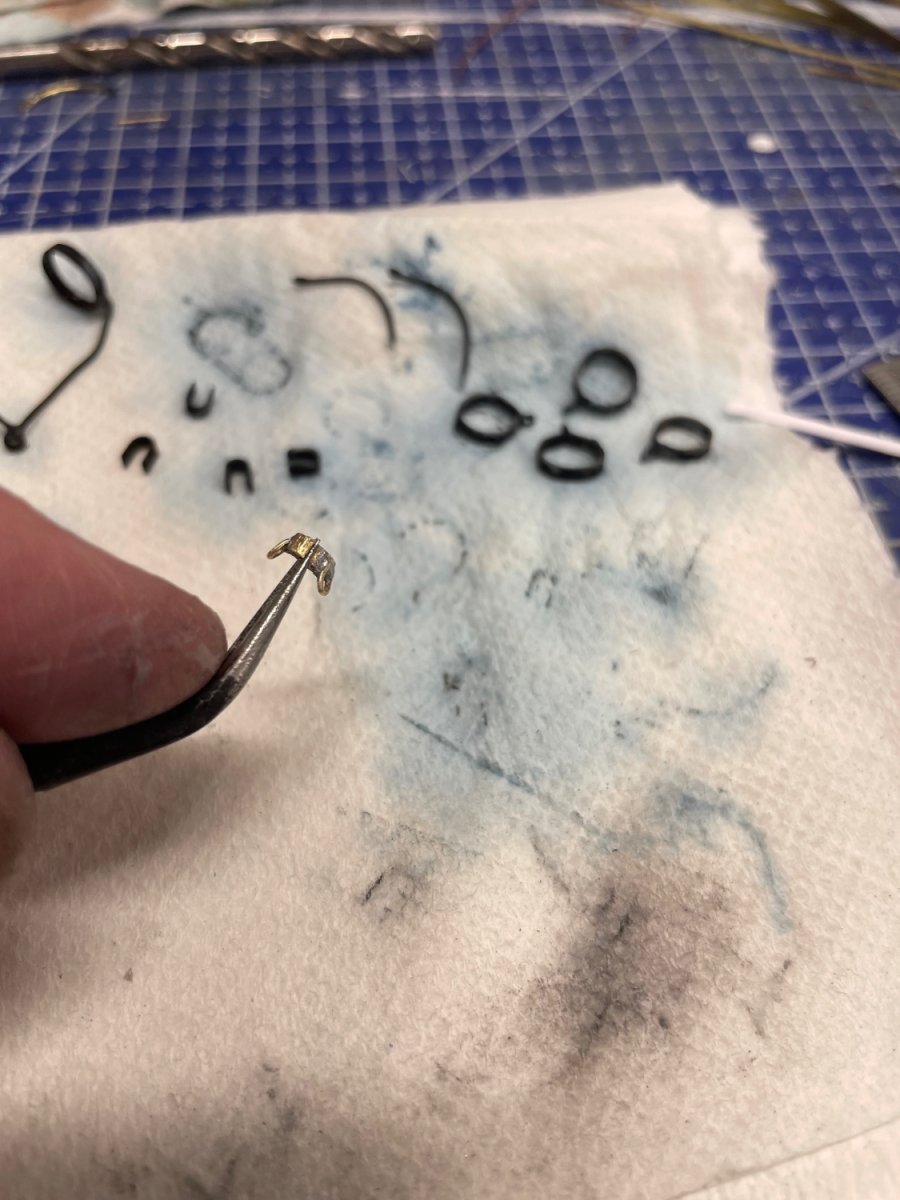
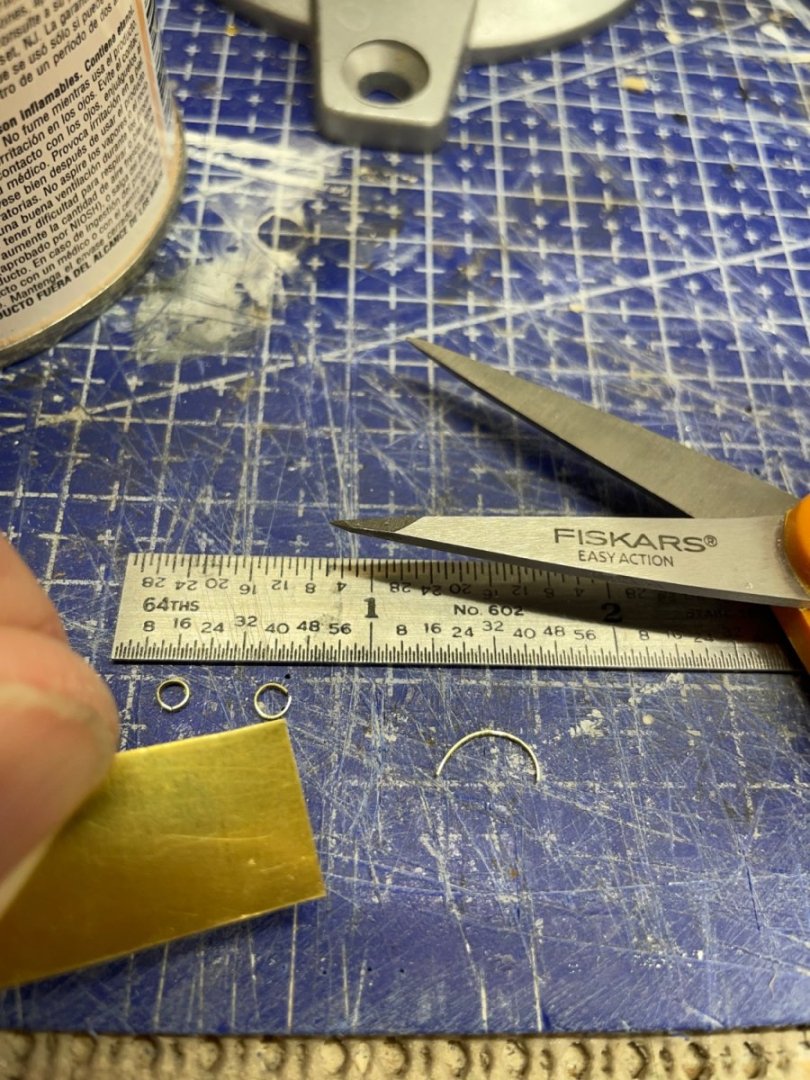
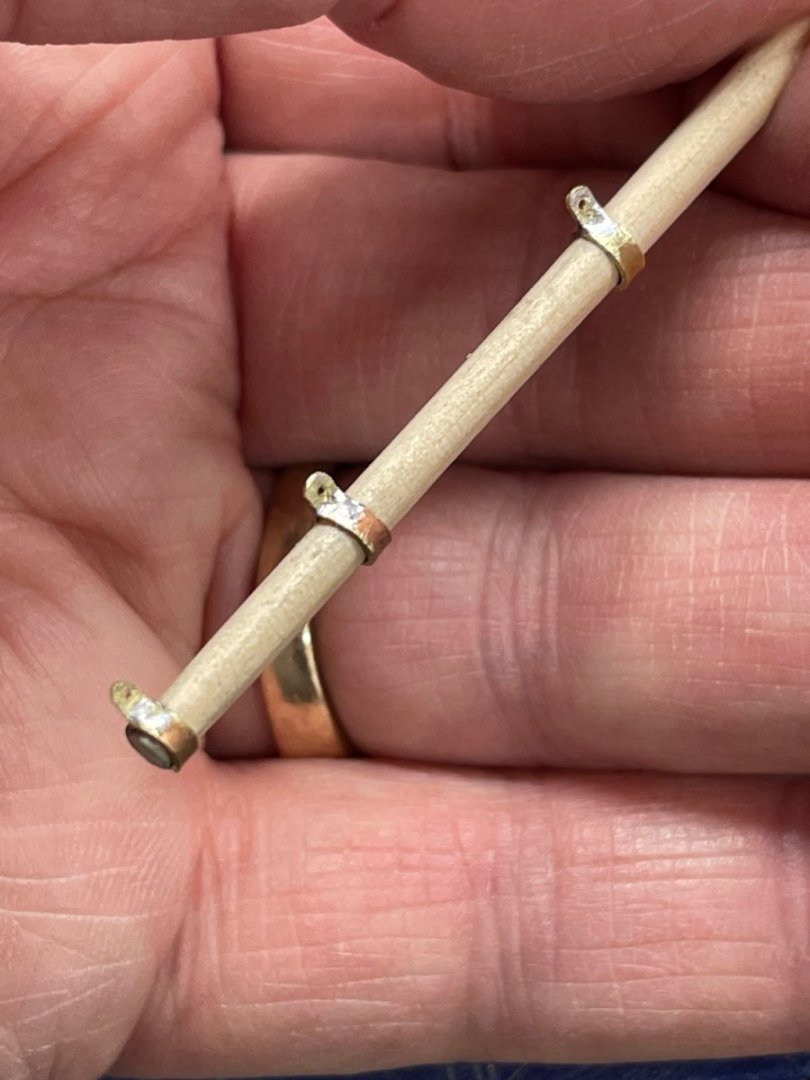
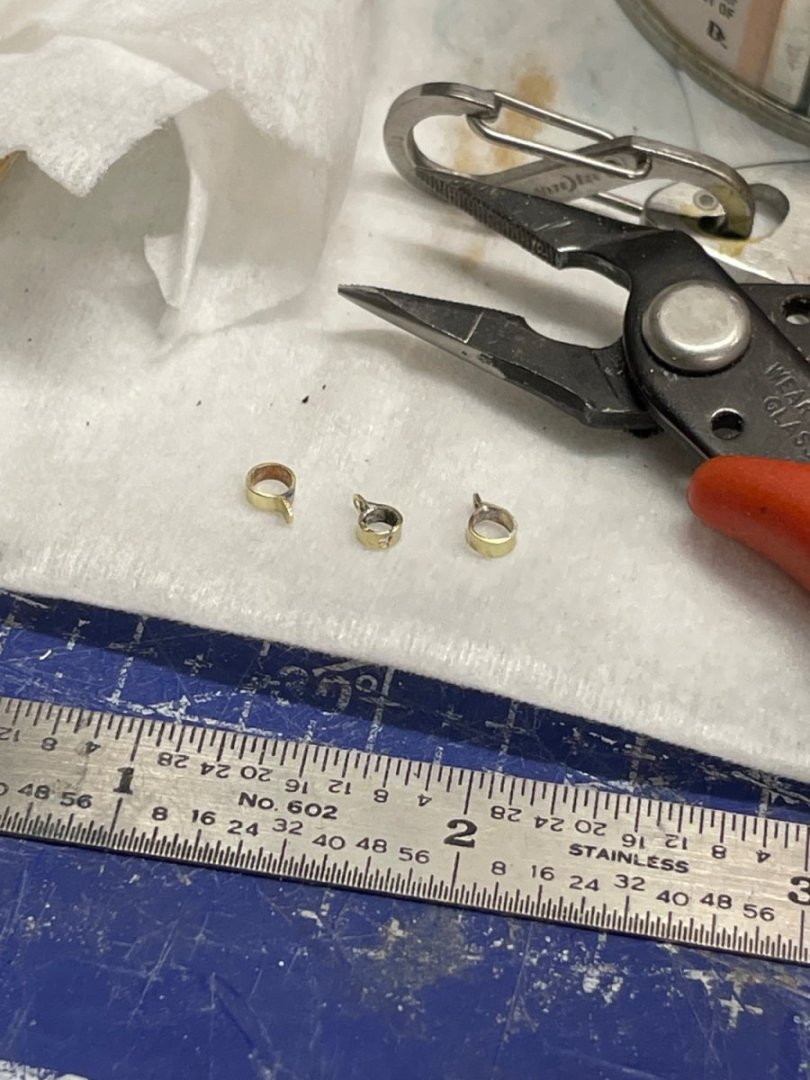
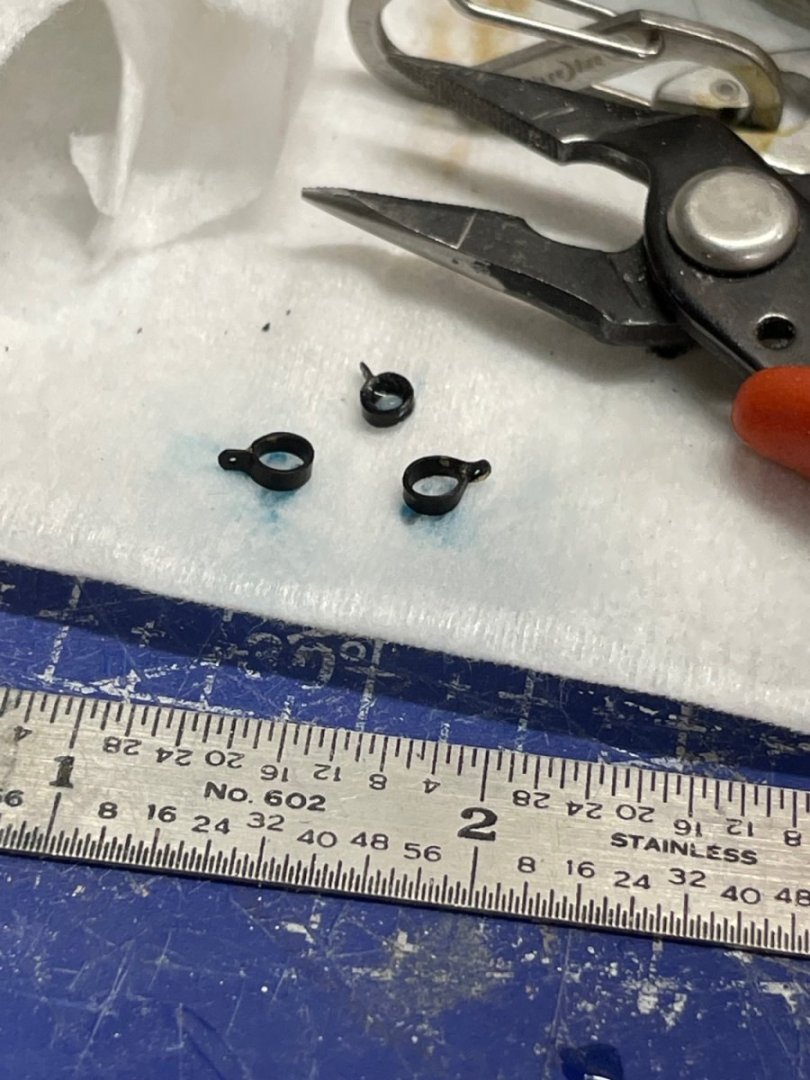
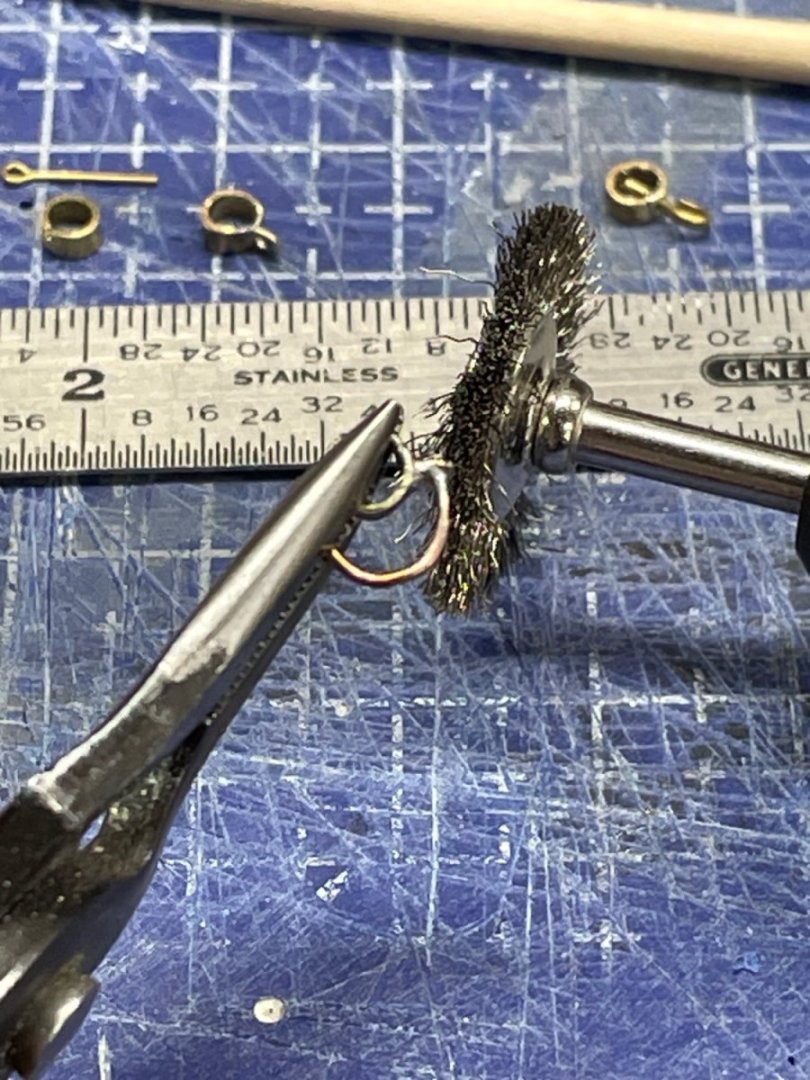
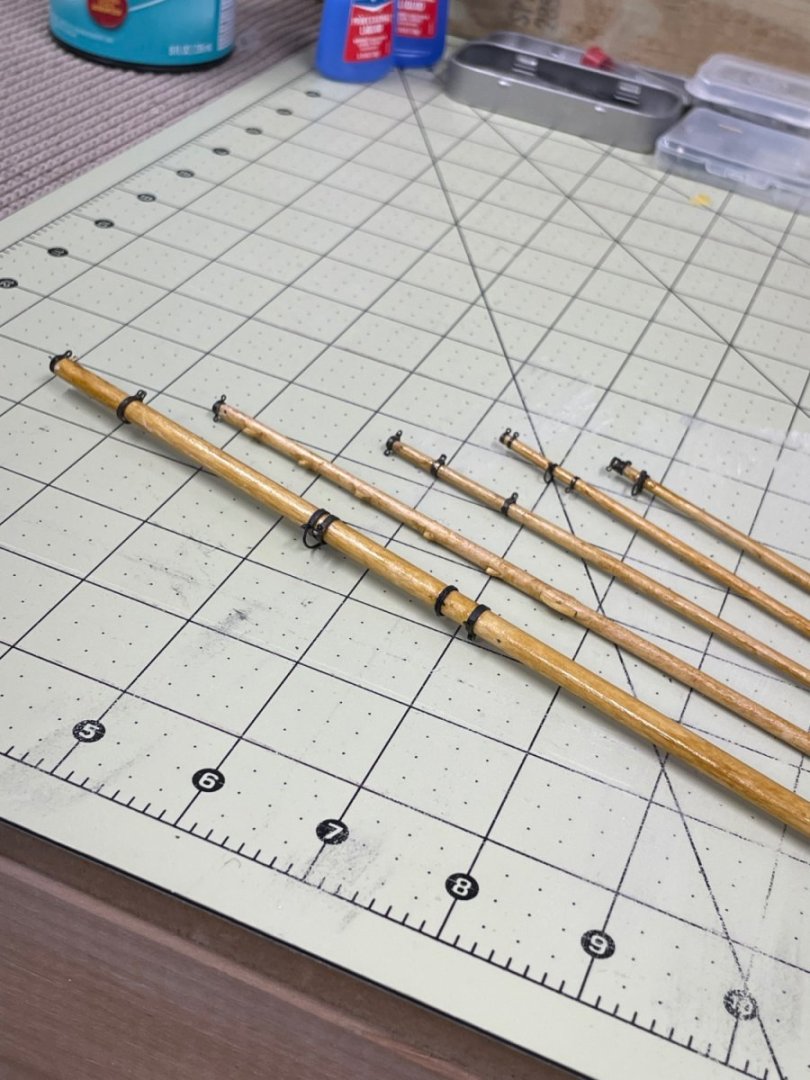
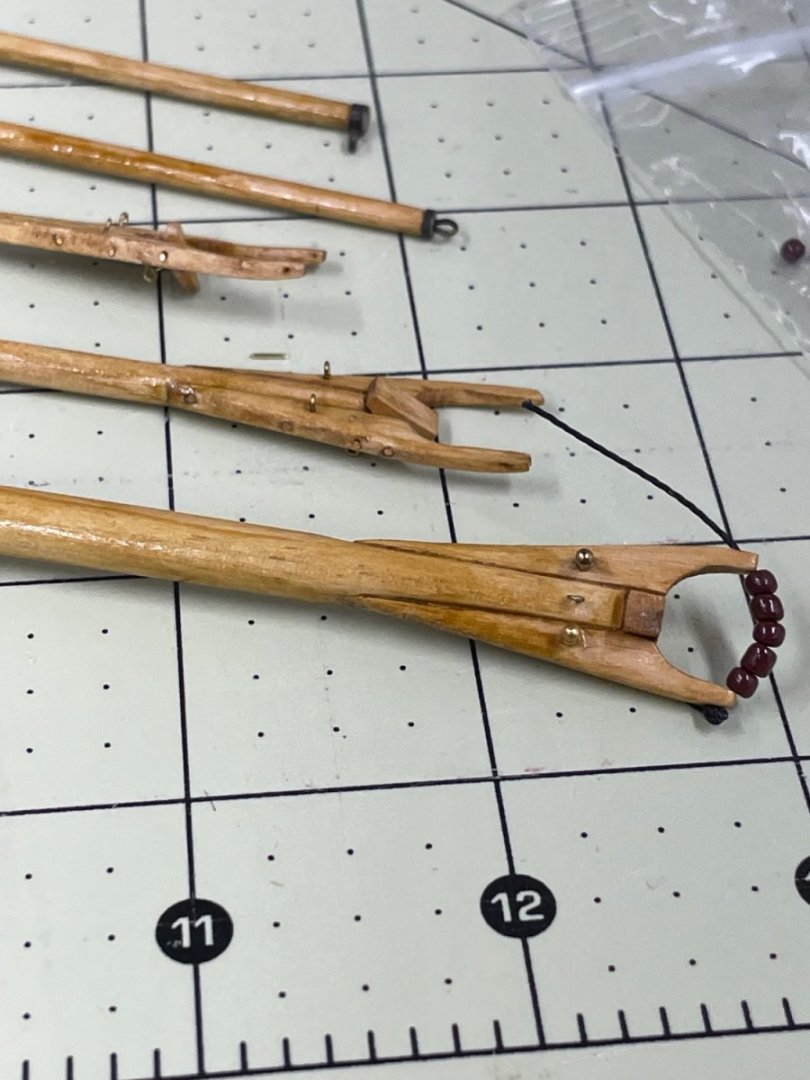
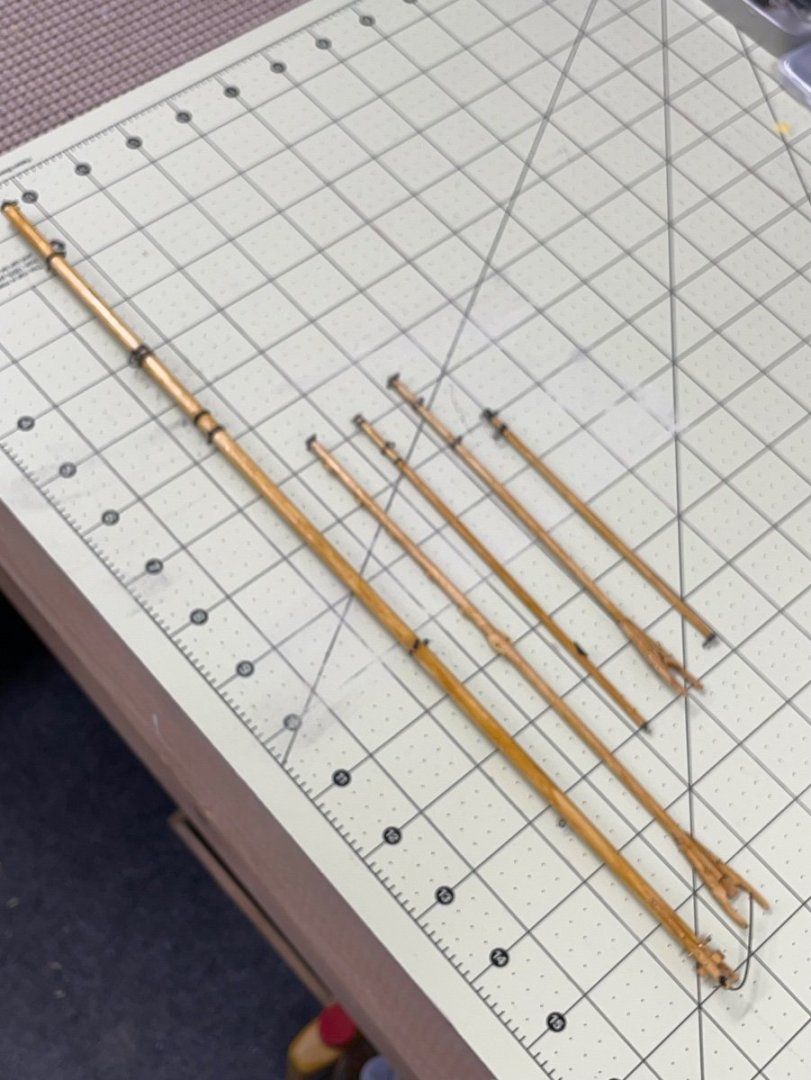
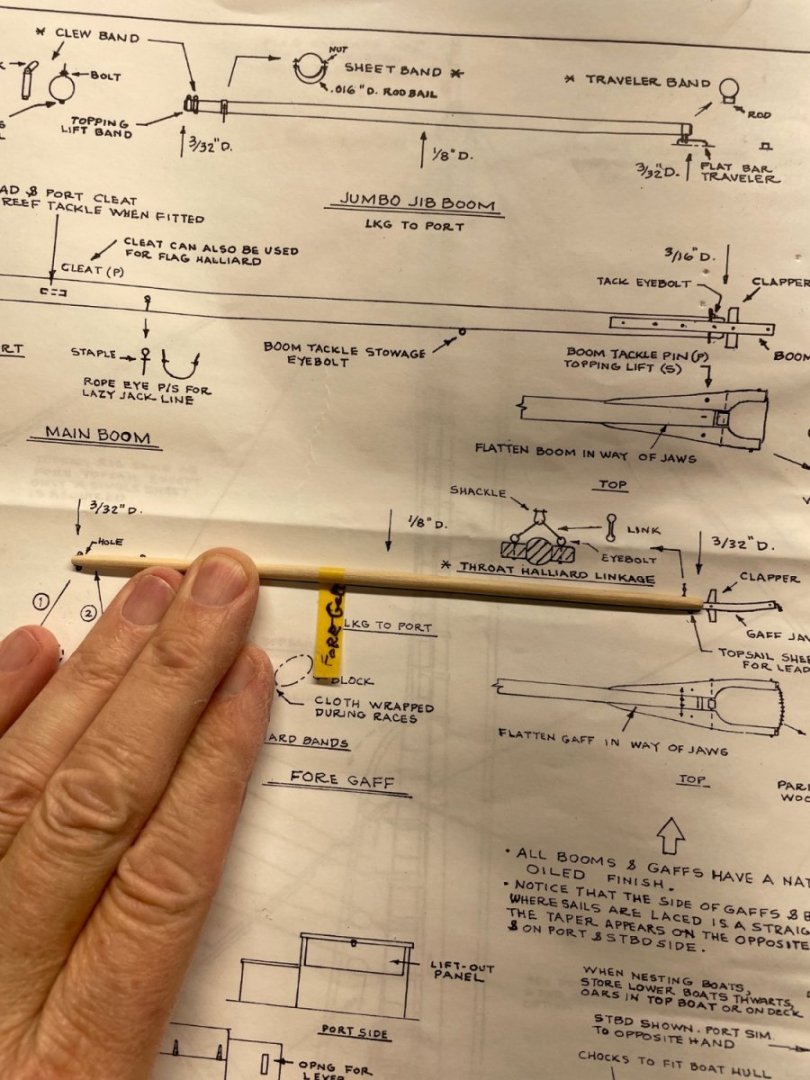
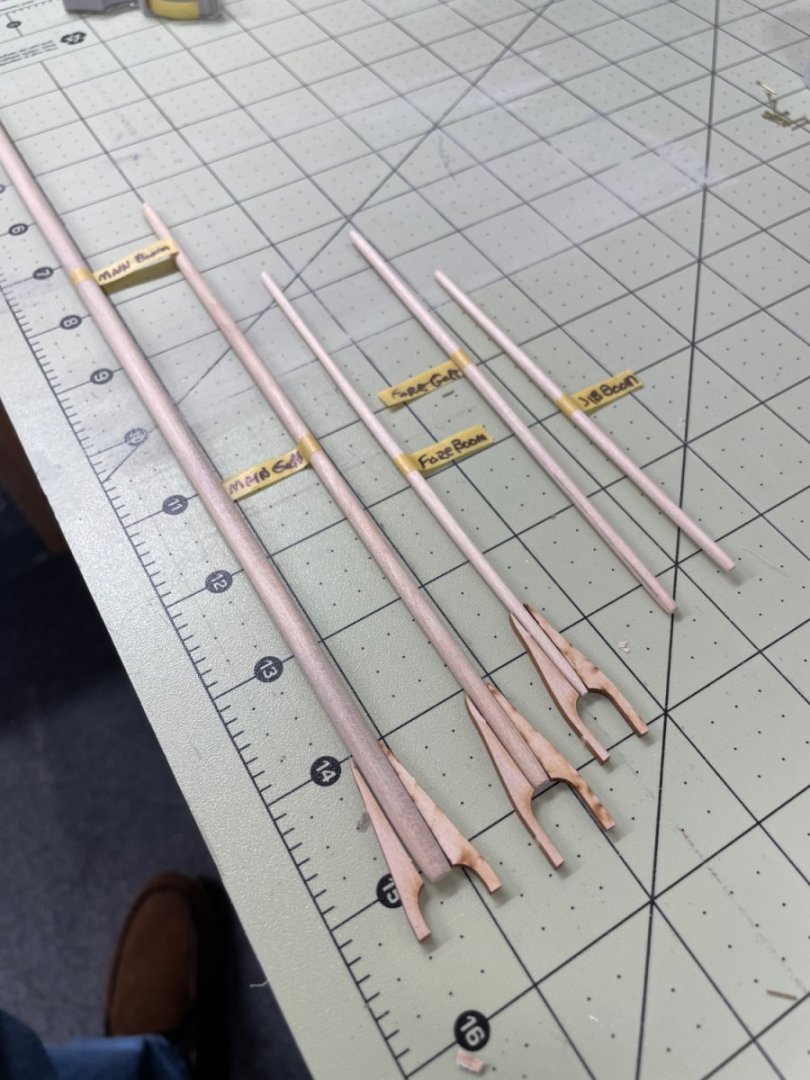
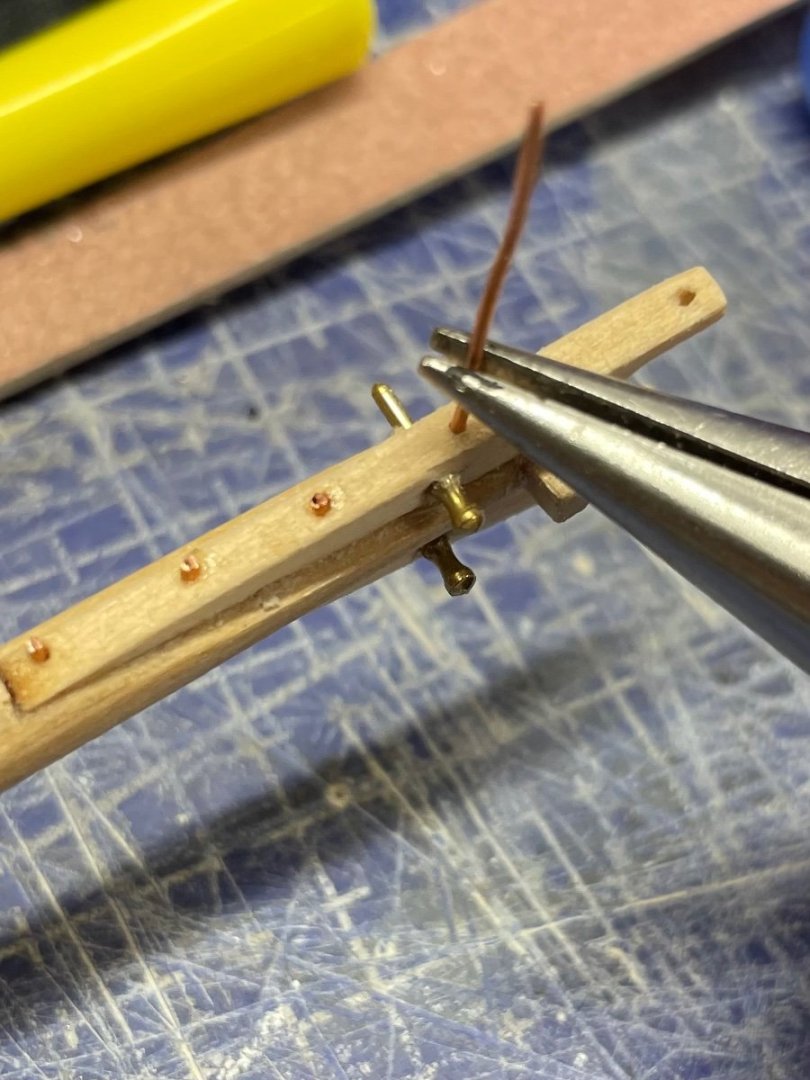
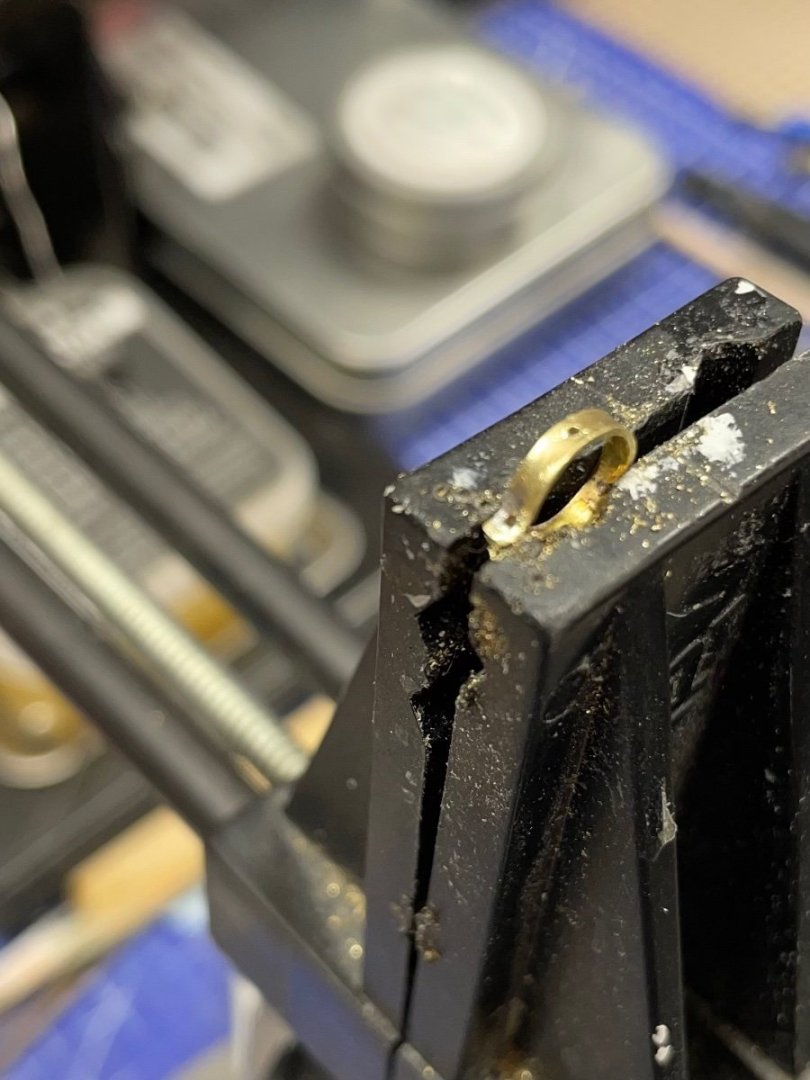
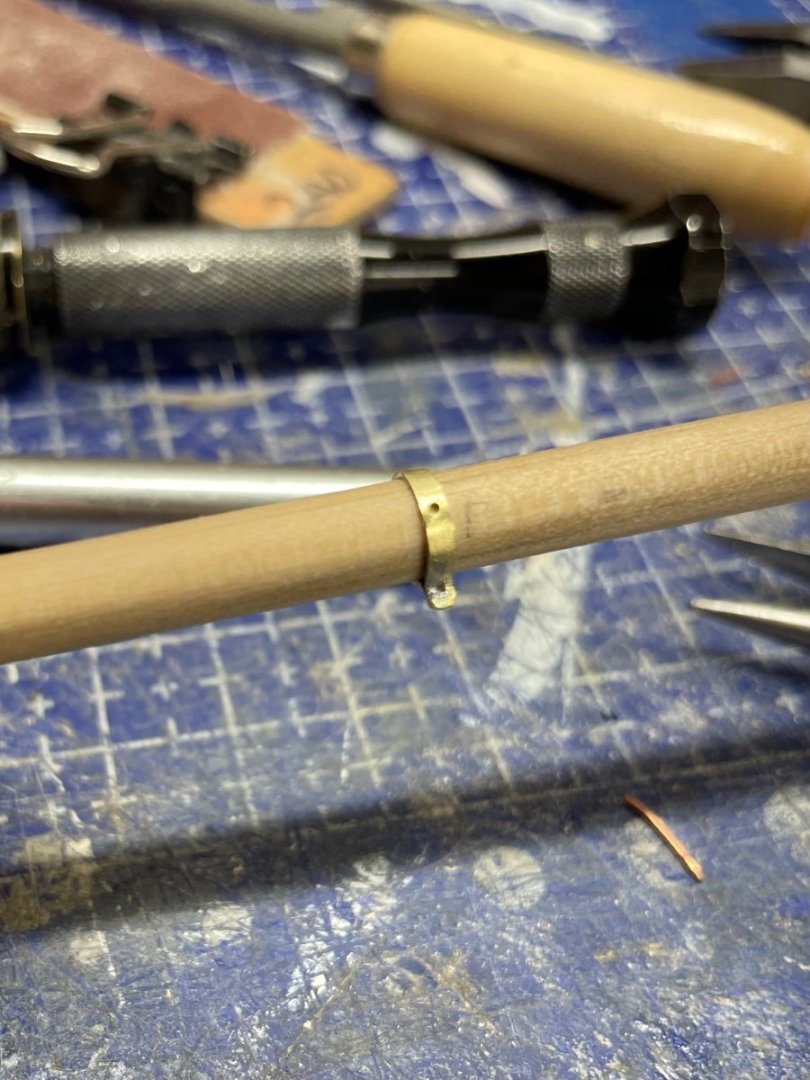
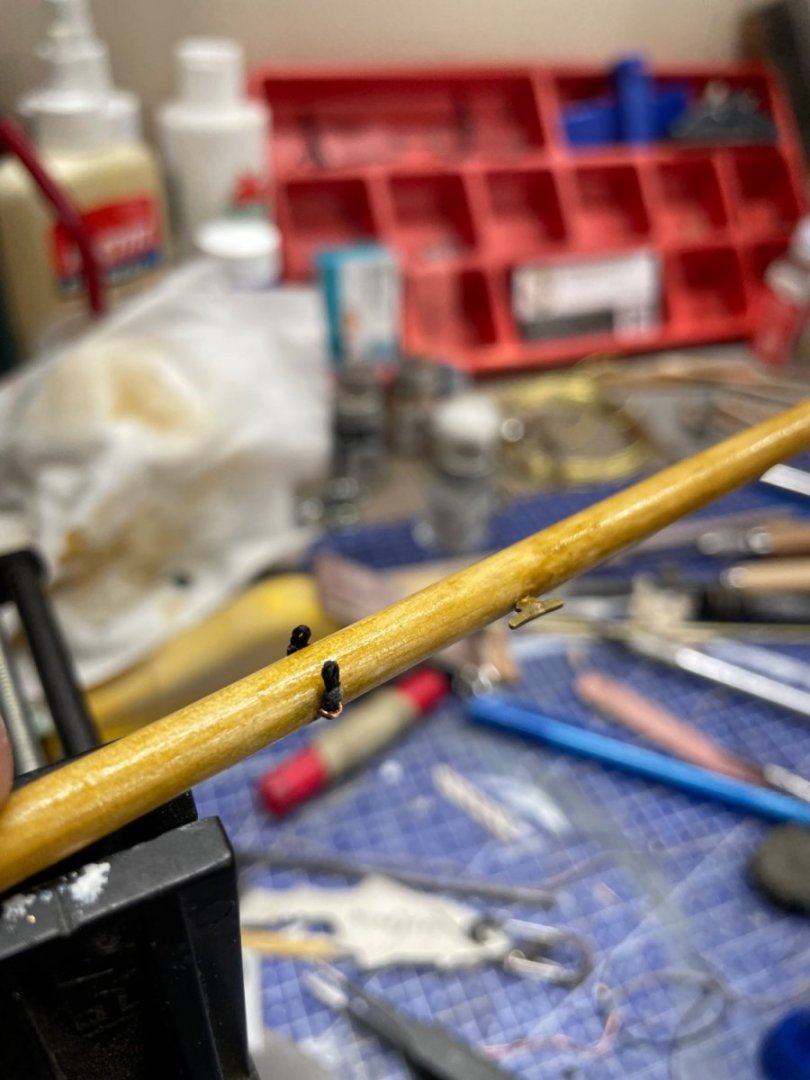
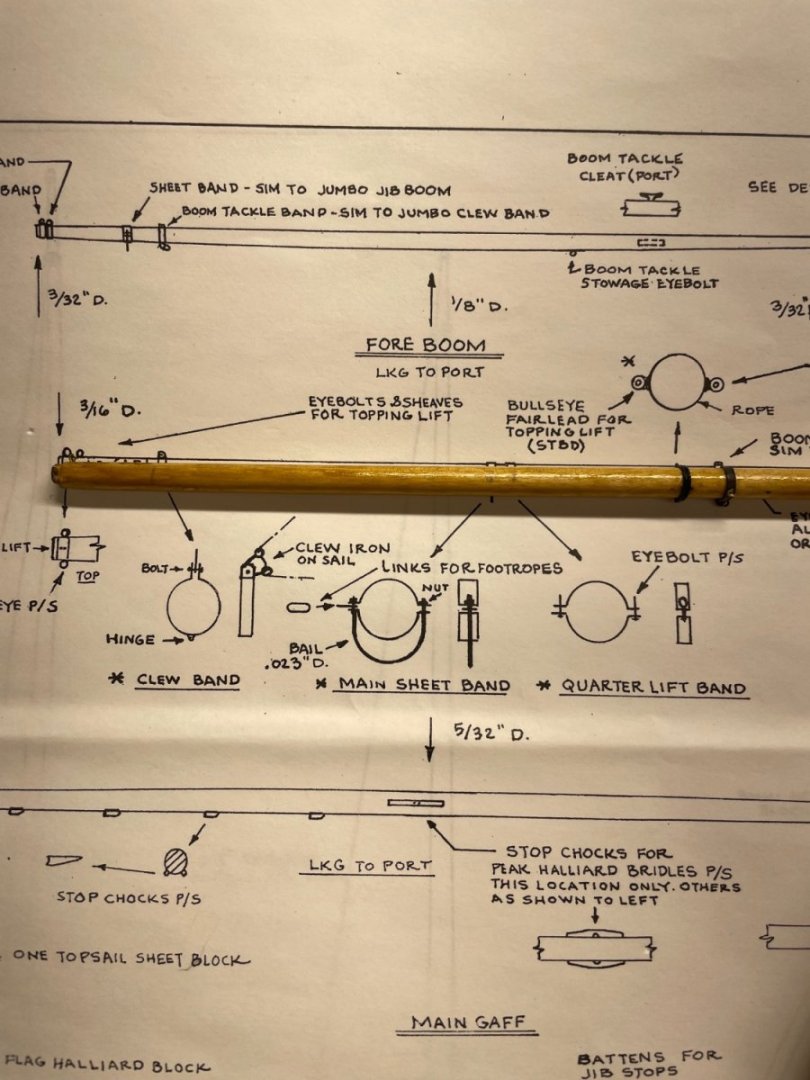
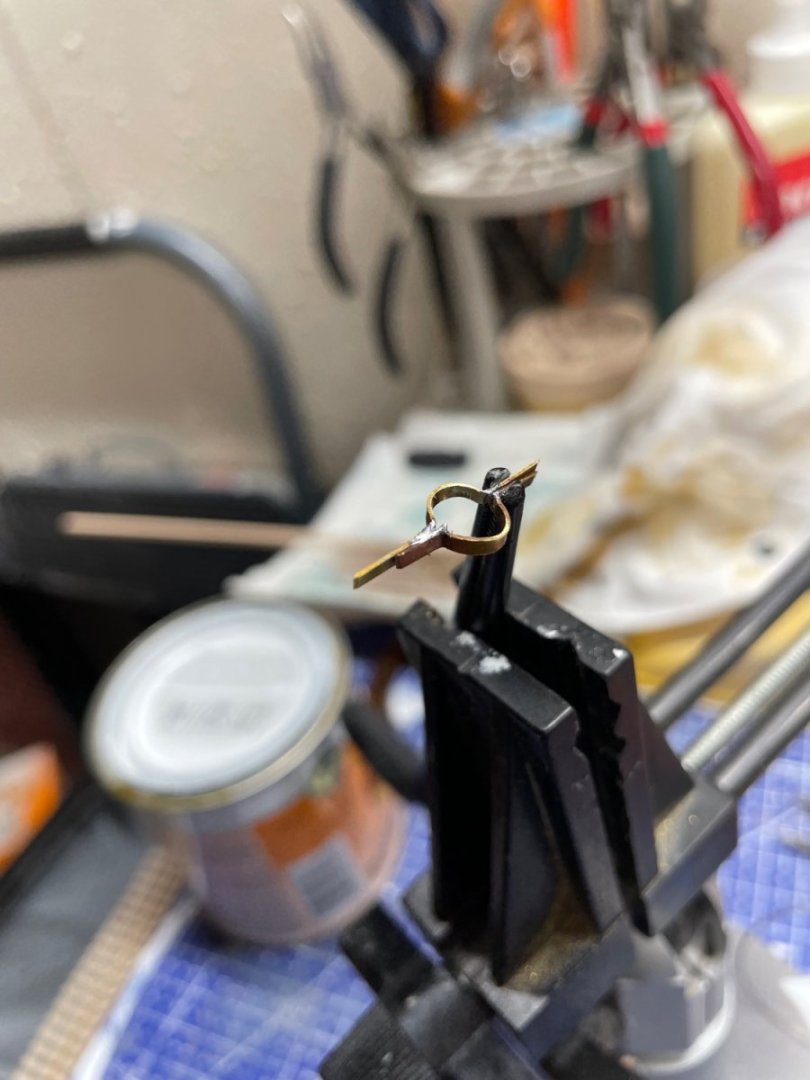
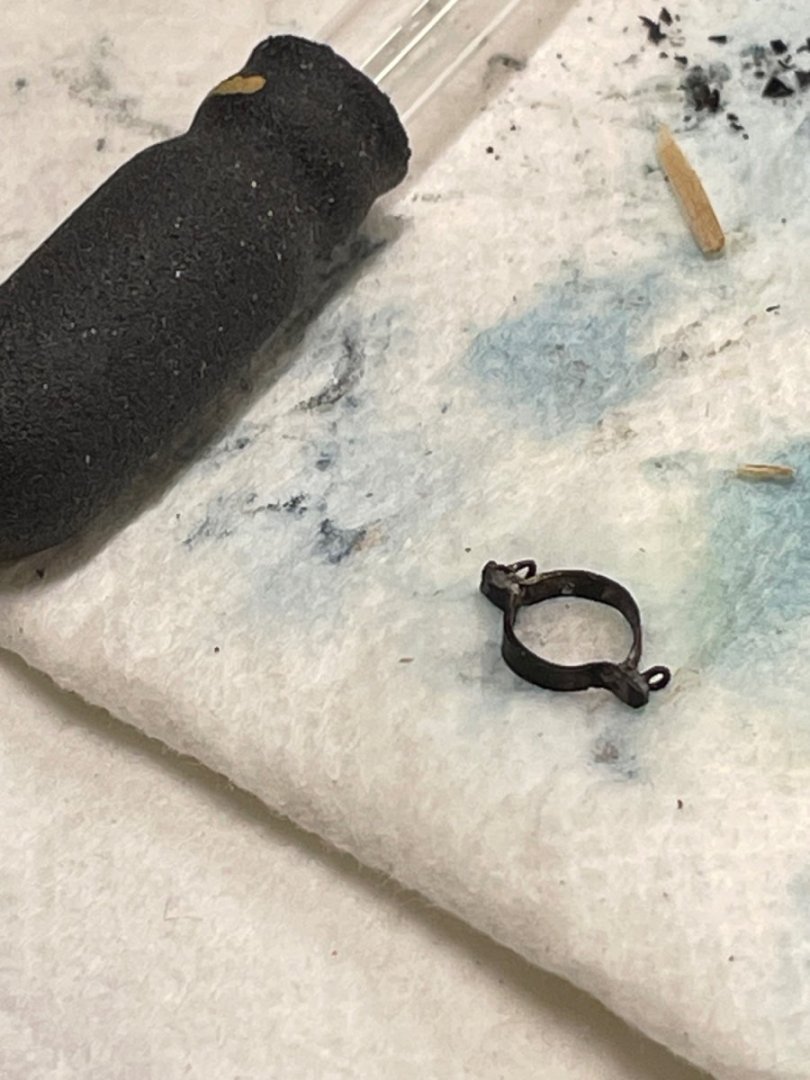
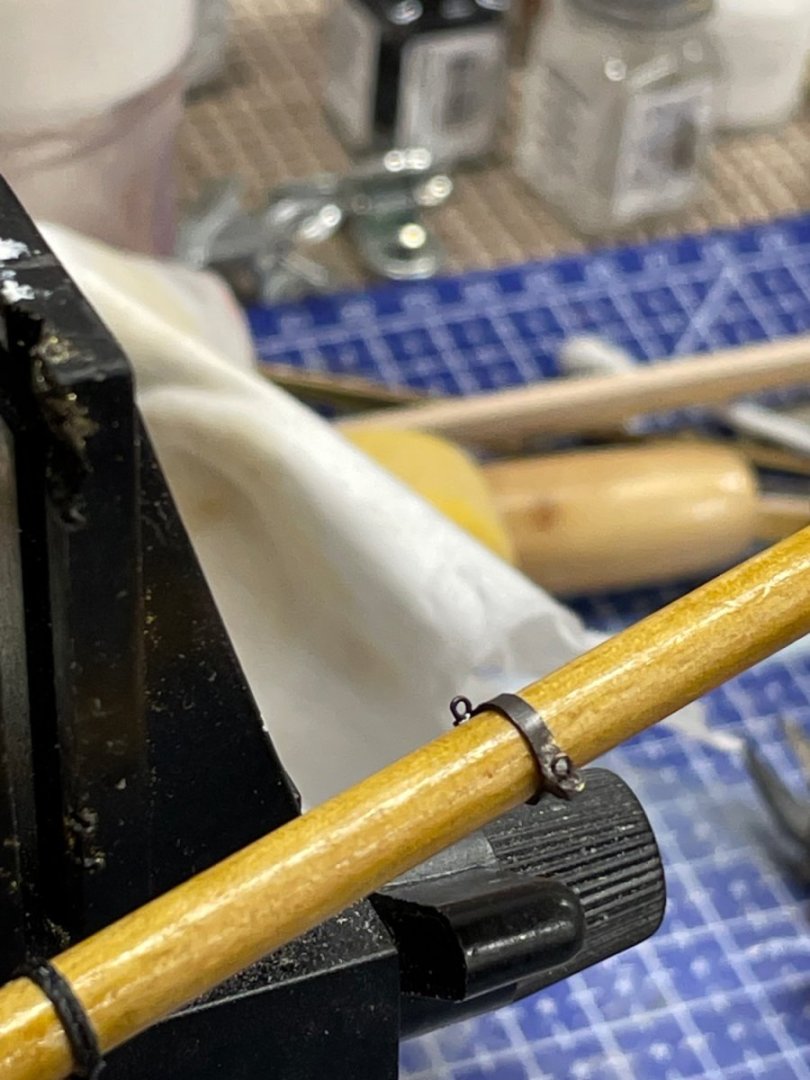
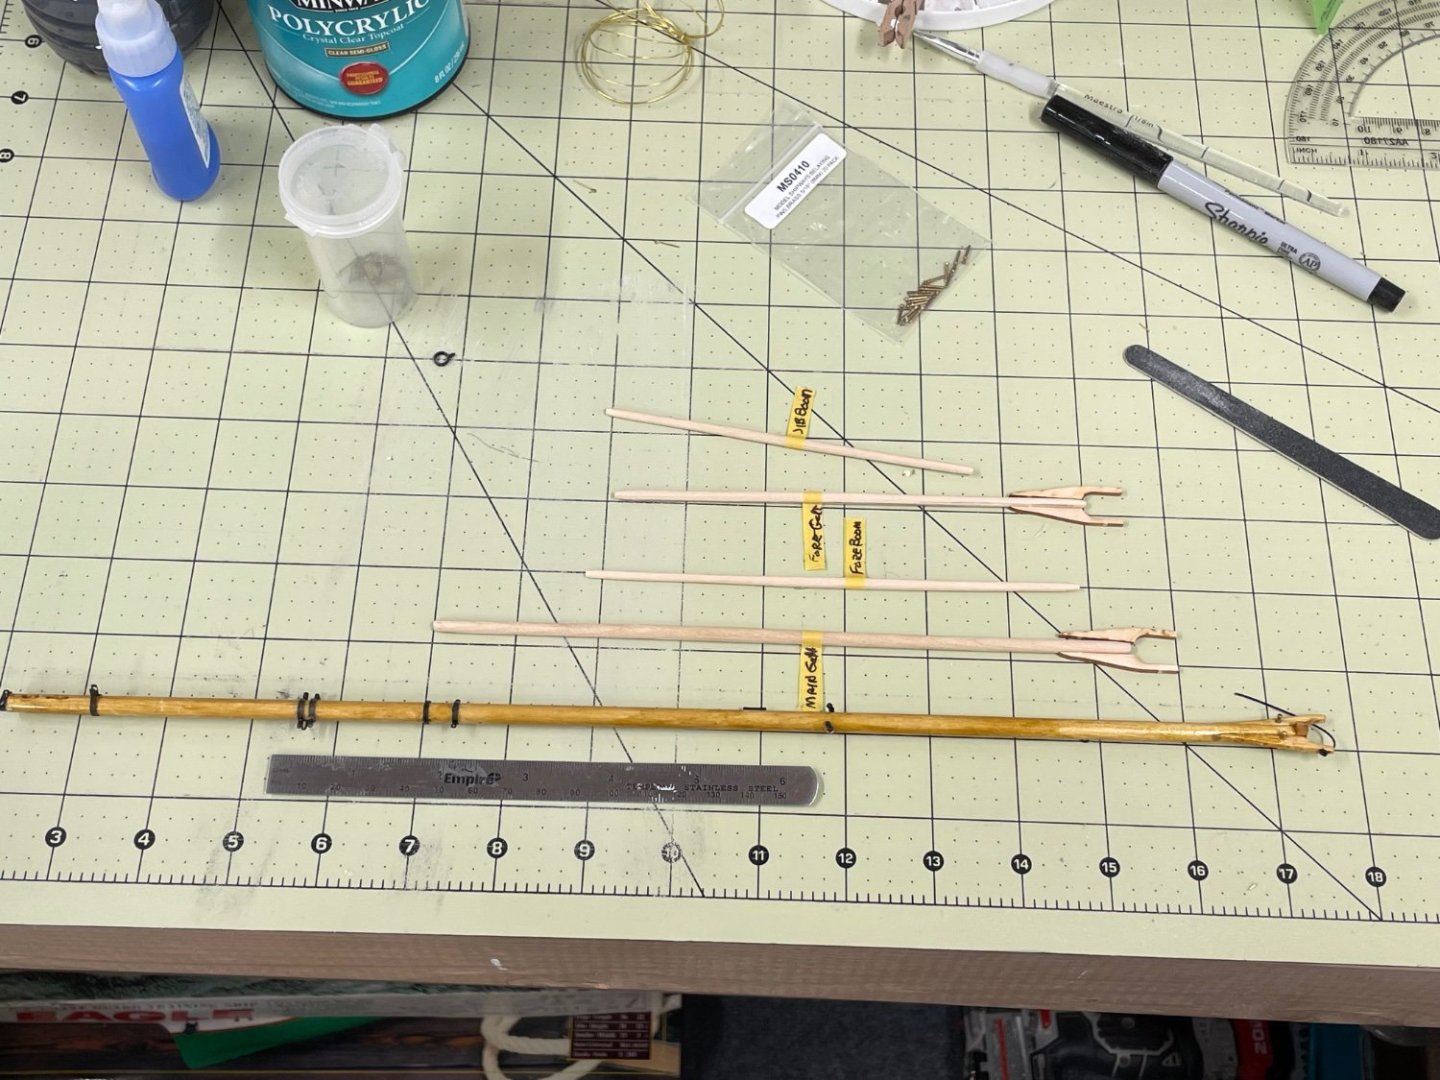
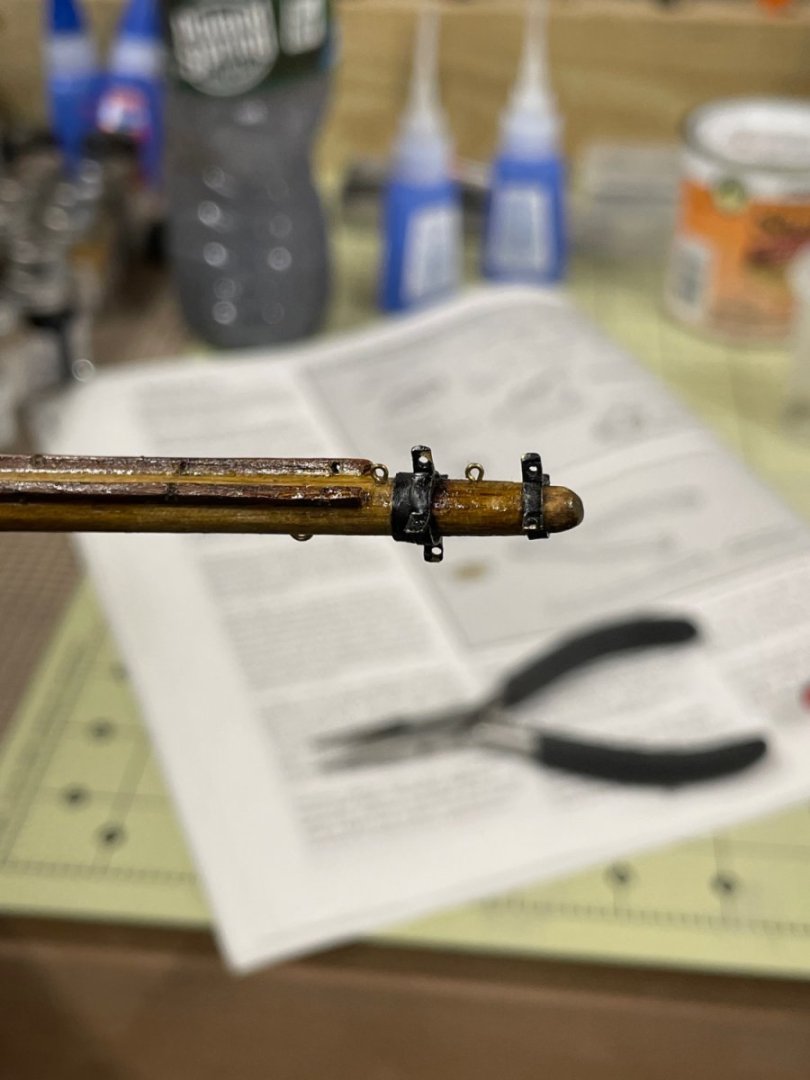
Main Gaff… Main Gaff completed… Fore Boom… I cut thin strips of brass, these Eye Bands are the smallest thus far. Fore Boom completed. Fore Gaff… Fore Gaff Jaws Peak Halliards Bands soldered Bands blackened Fore Gaff completed Jib Boom… Jib Clew Band Jib Sheet Band Cleaning up solder All bands blackened Hardware complete on Jib Boom Jib Boom completed All 5 Booms and Gaffs completed I think we are ready to start rigging and sails. Woo Hoo! 🍻


- 282 replies
-
- 13
-
-
- Bluenose
- Model Shipways
- (and 1 more)
-
I’m with you Phil, seems like parts keeping getting smaller and then slip right from my fingers and disappear to be found months later. Again, impressive work. The details matter. 👍 John
-
Thanks Tom, I had a suspicion that’s what they were. The detail is great. I also like your sails, I am certainly going to try silk span when I get to some smaller scale. I’ll check out your process in your Leopard build log. John
- 200 replies
-
- 3
-
-
- Whaling Bark
- Charles W Morgan
- (and 1 more)
-
Nice detail, Tom. I haven’t seen or read of “gaskets” hung from the Jack Stays. Nice work! 👍 John
- 200 replies
-
- 2
-
-
- Whaling Bark
- Charles W Morgan
- (and 1 more)
-
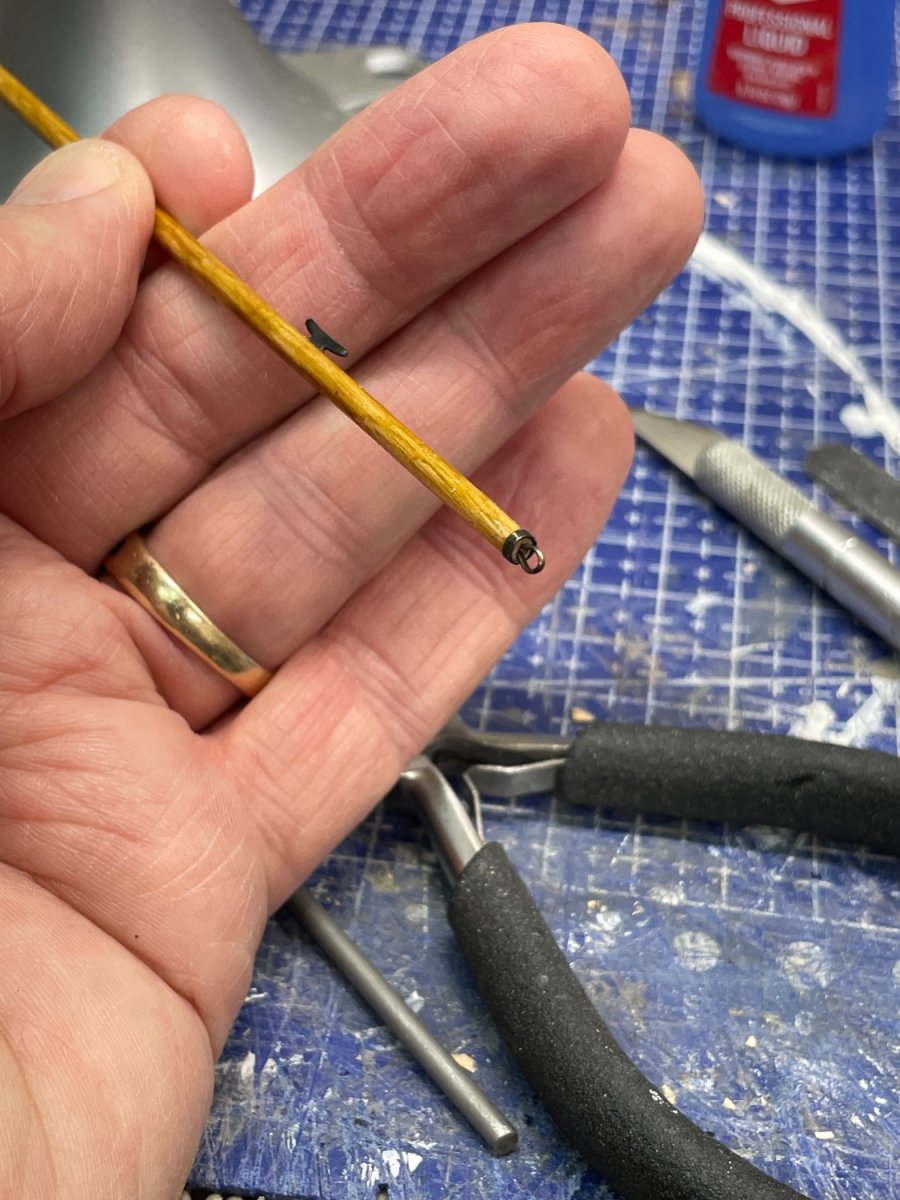
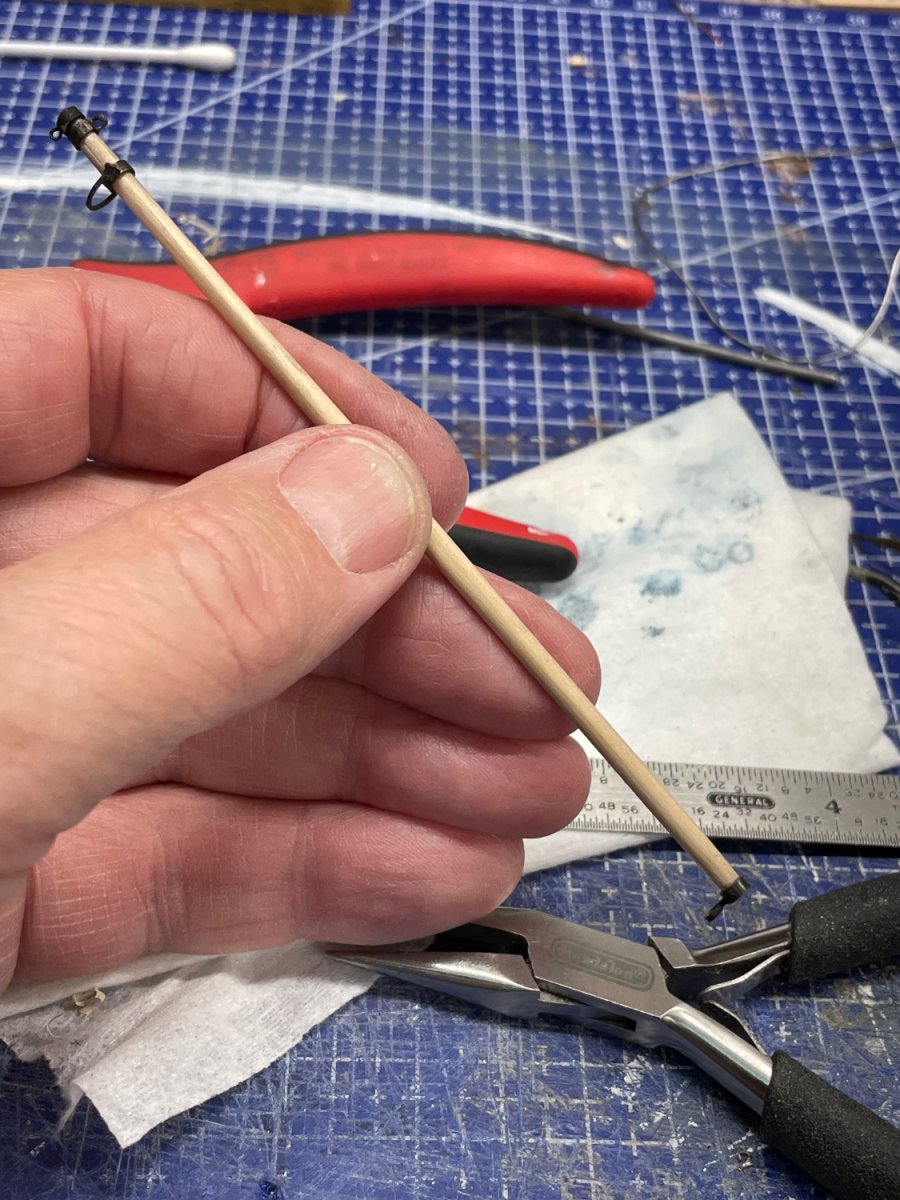
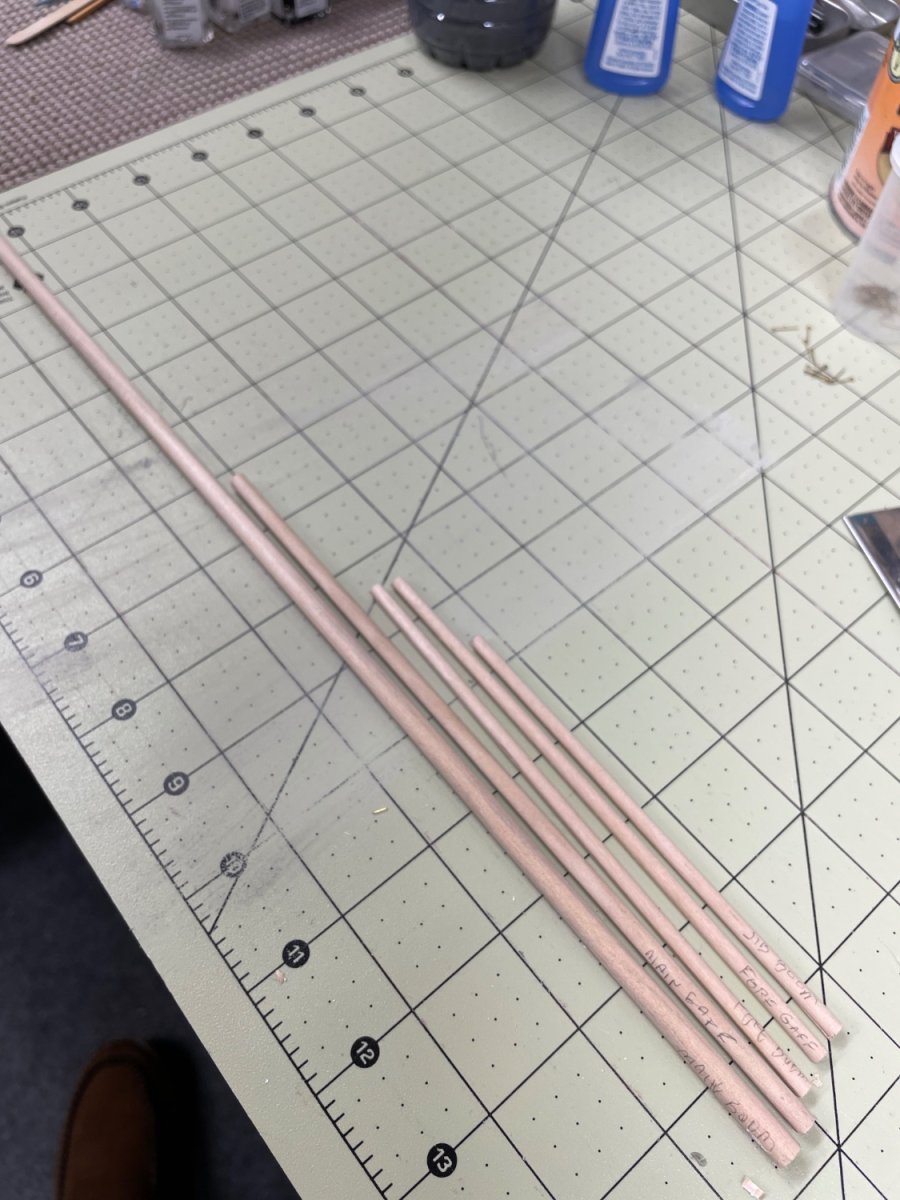
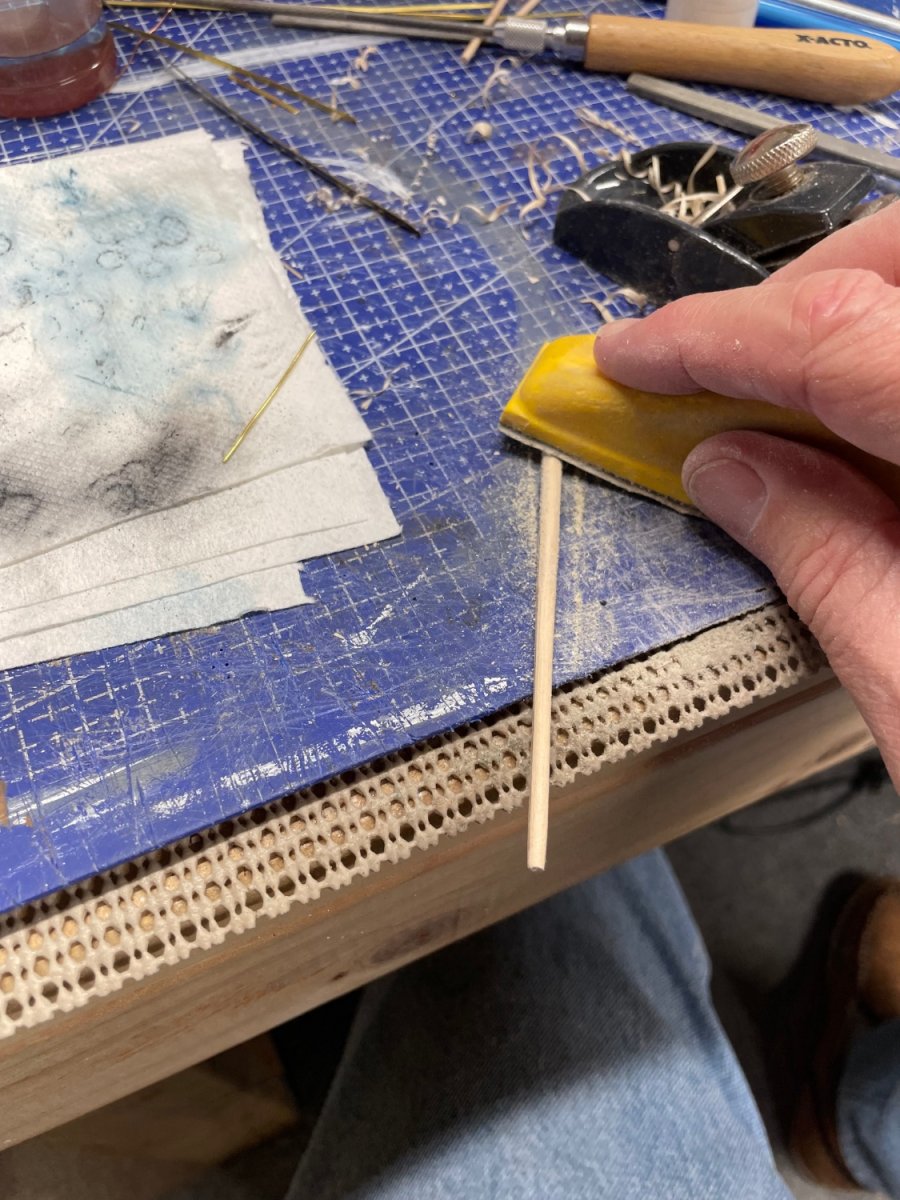
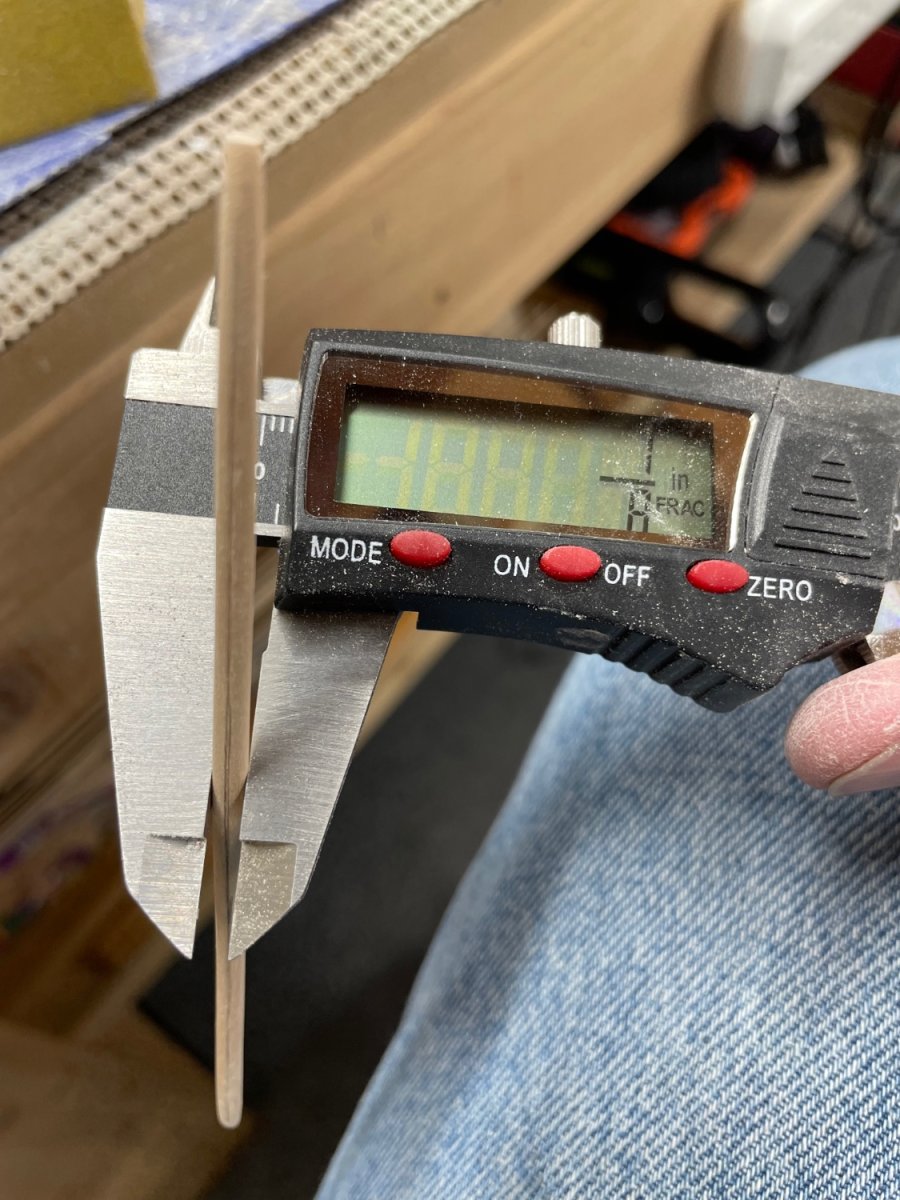
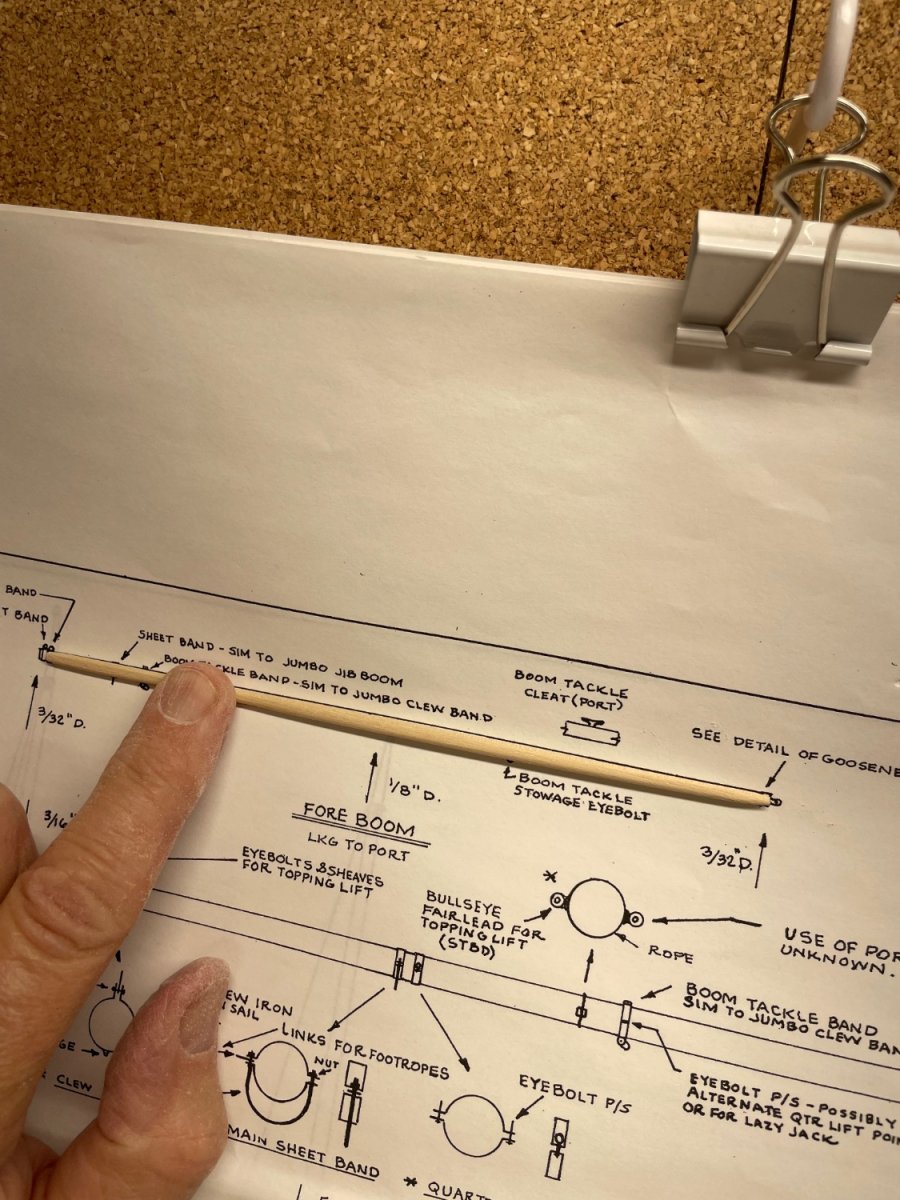
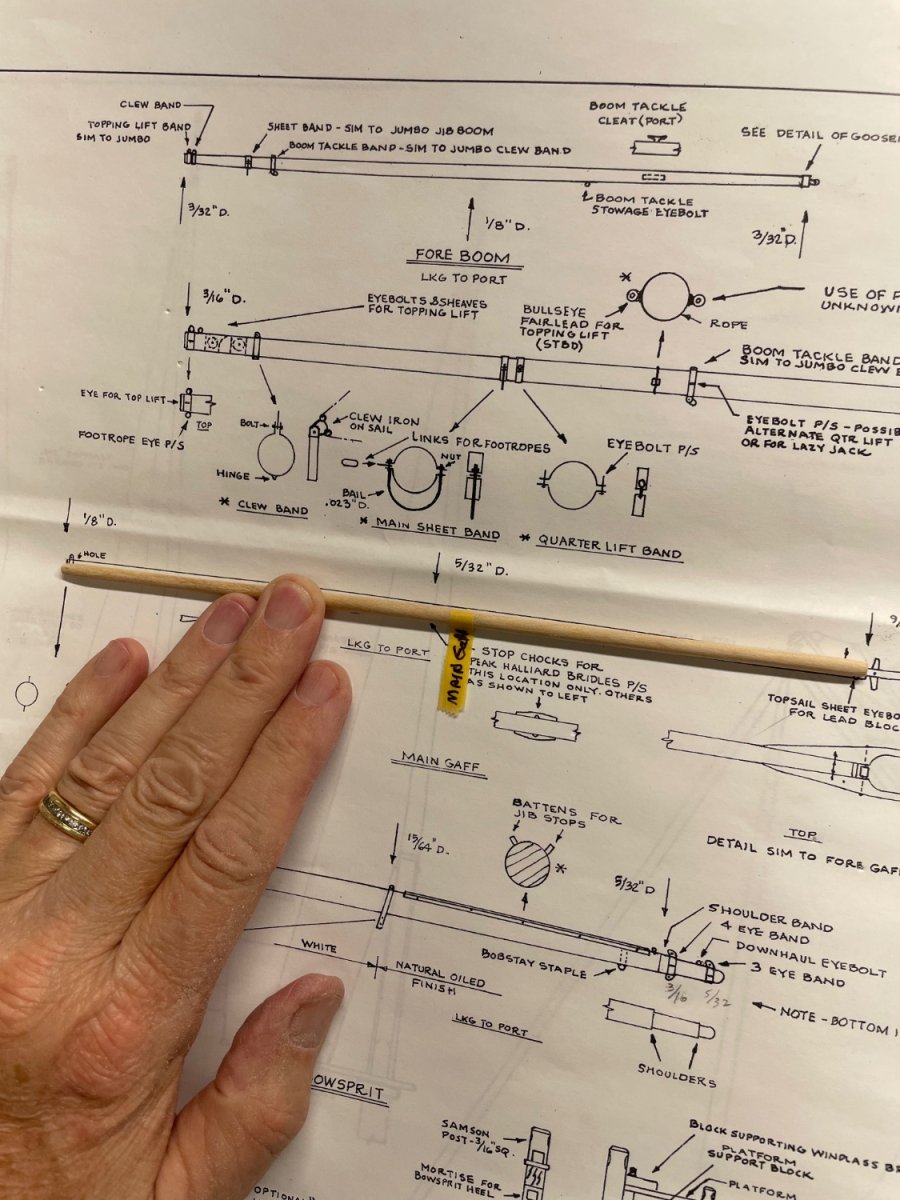
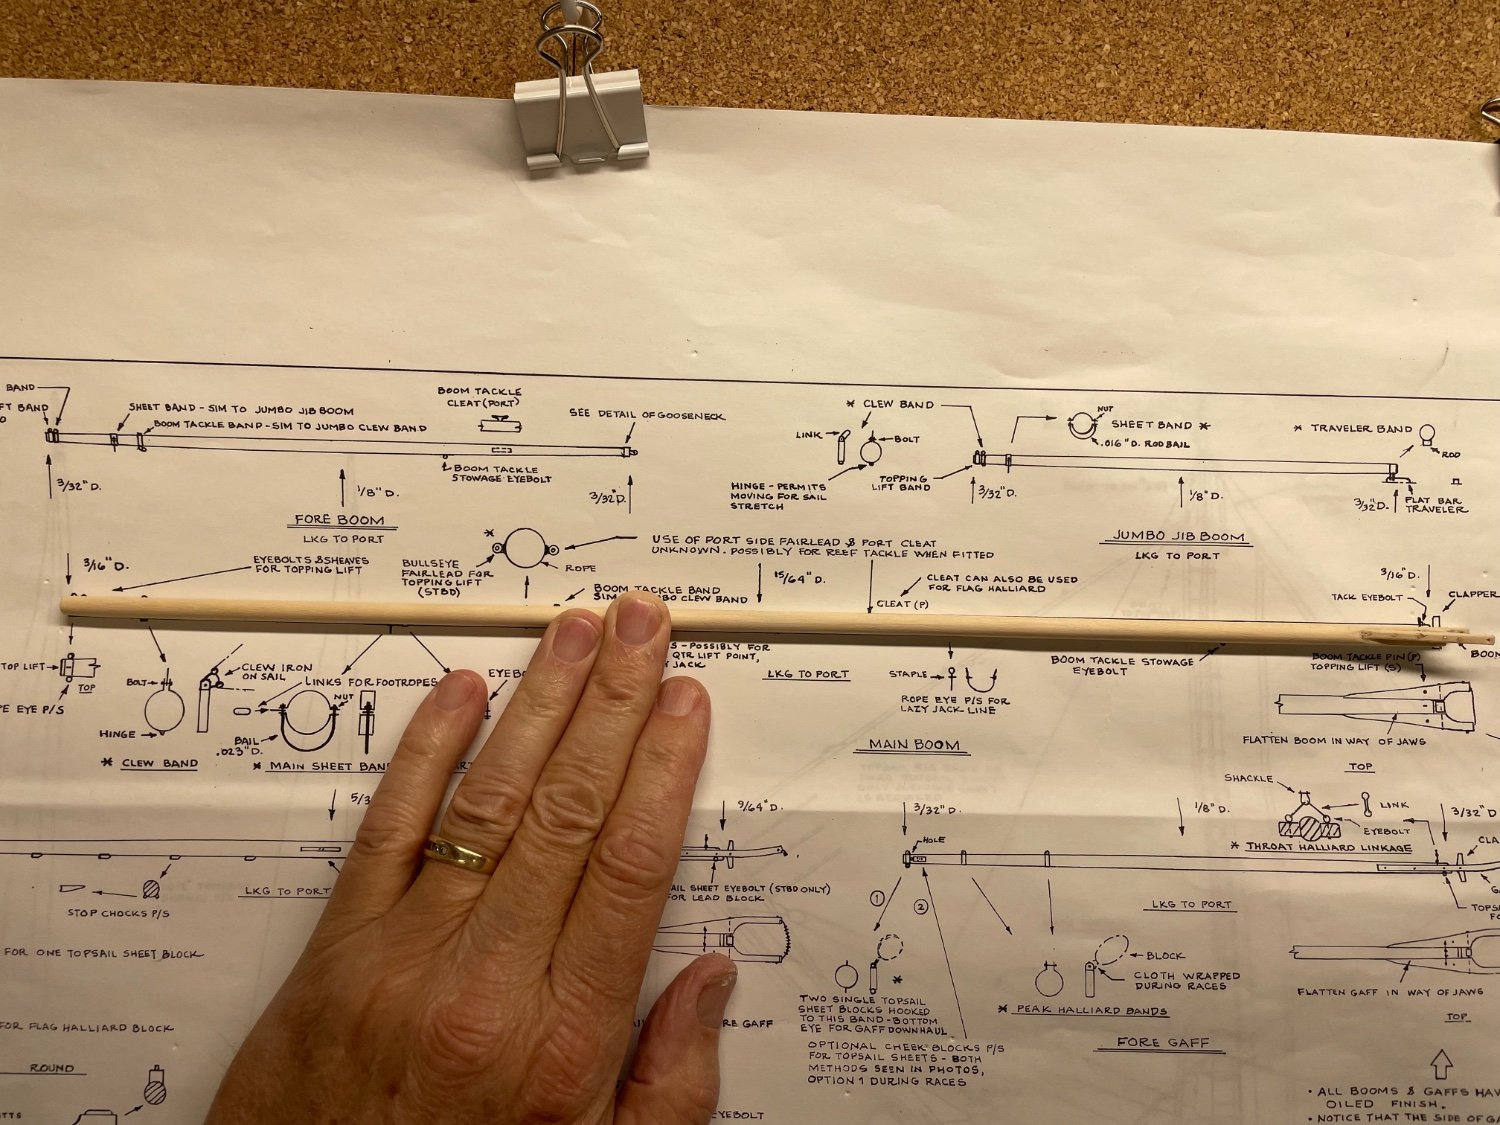
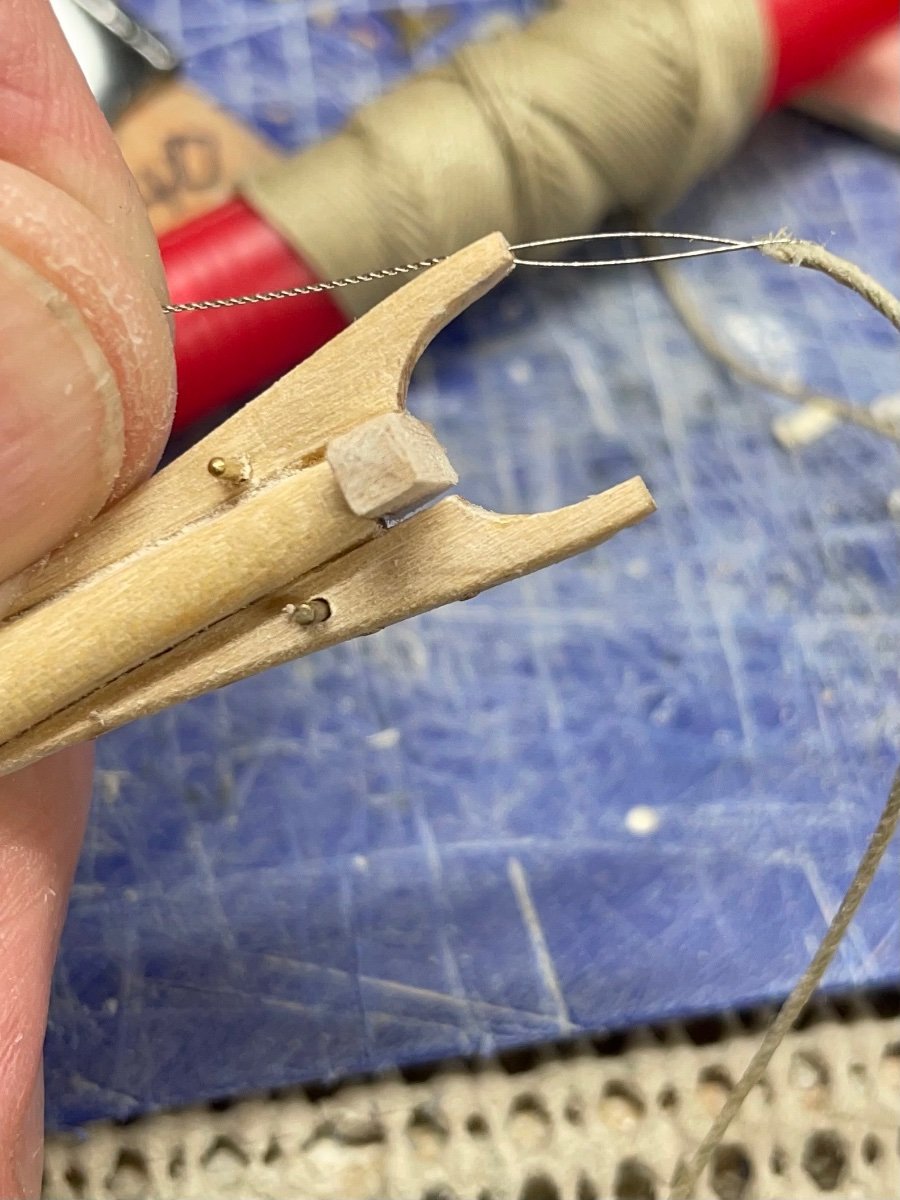
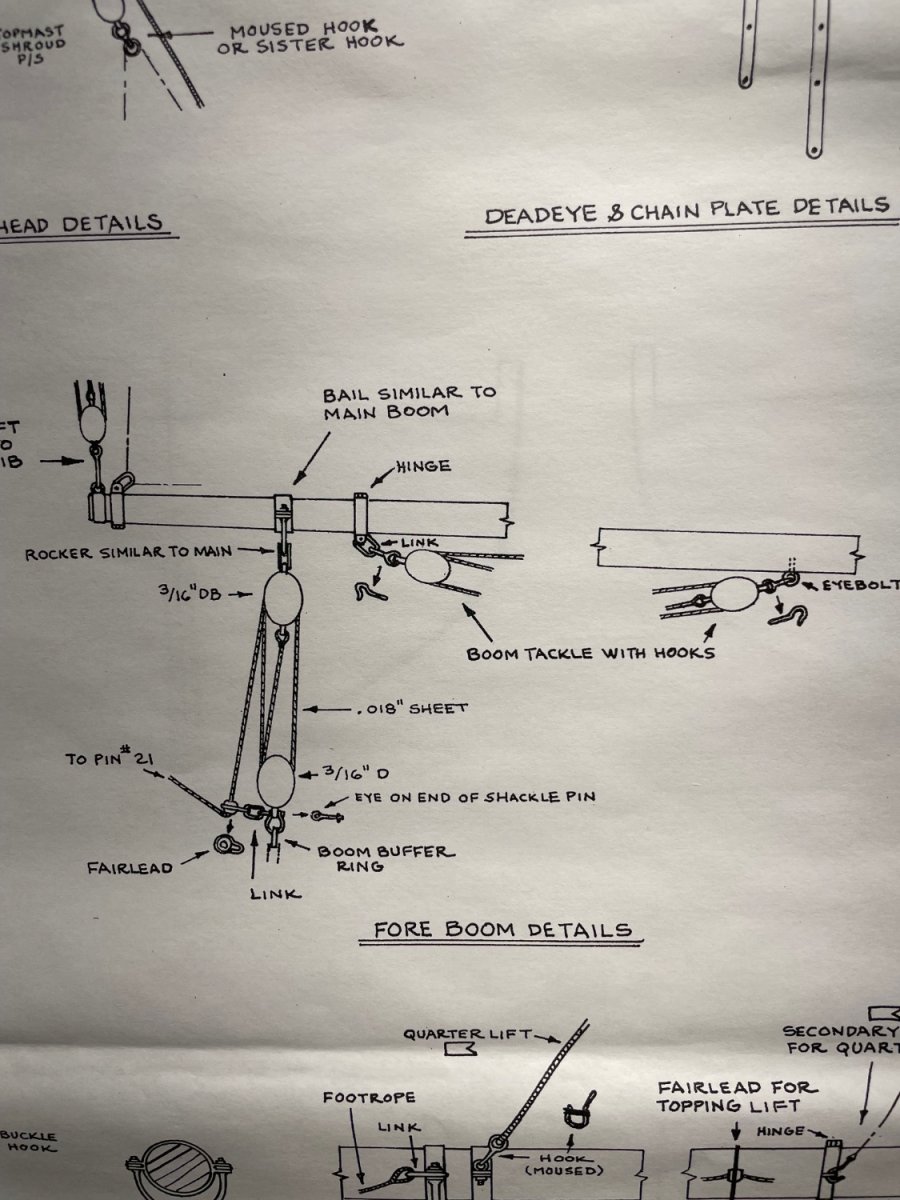
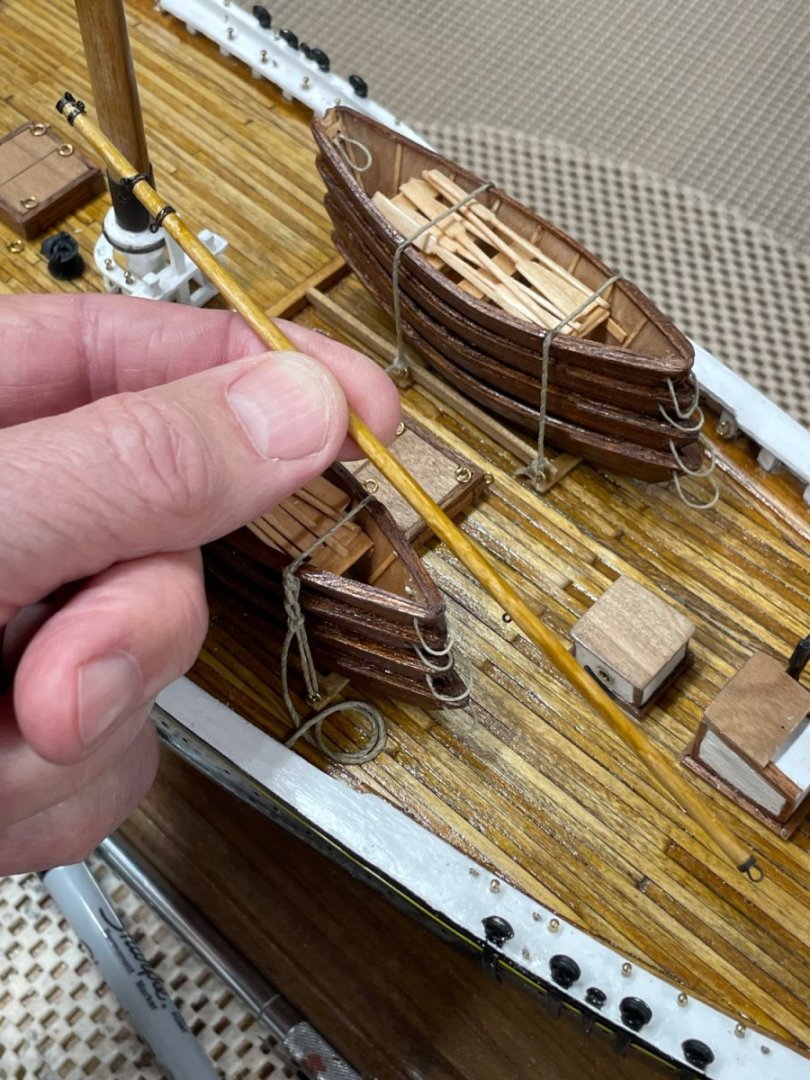
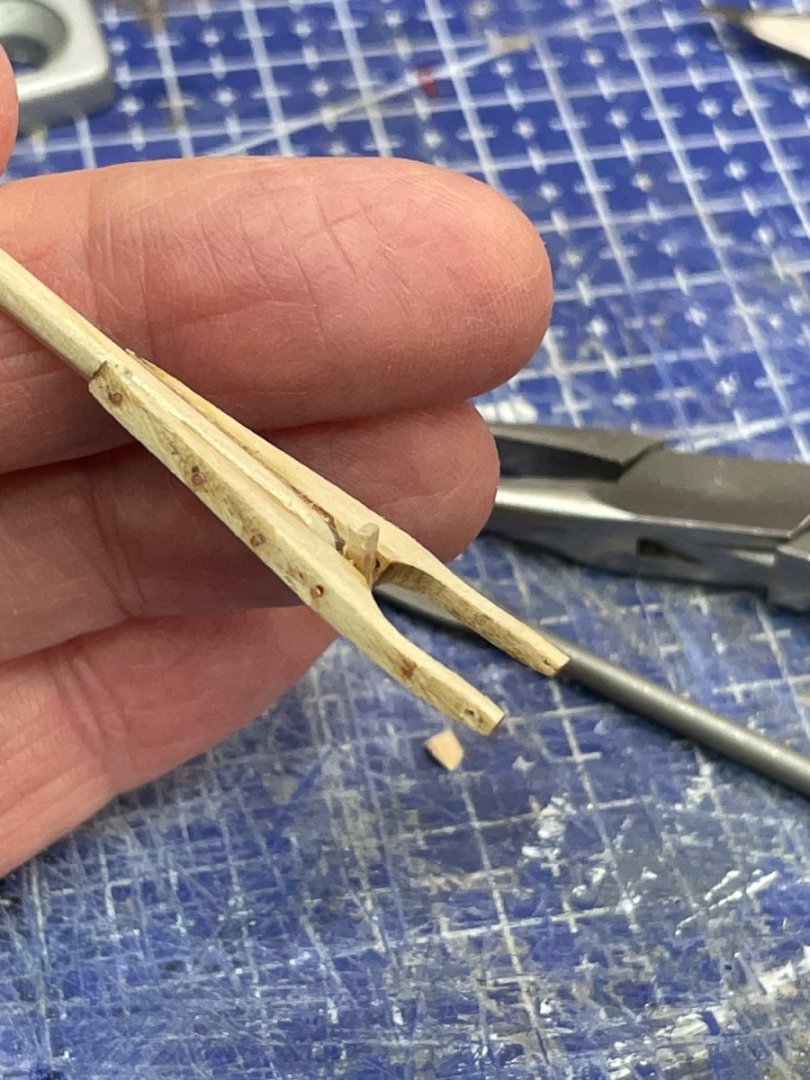
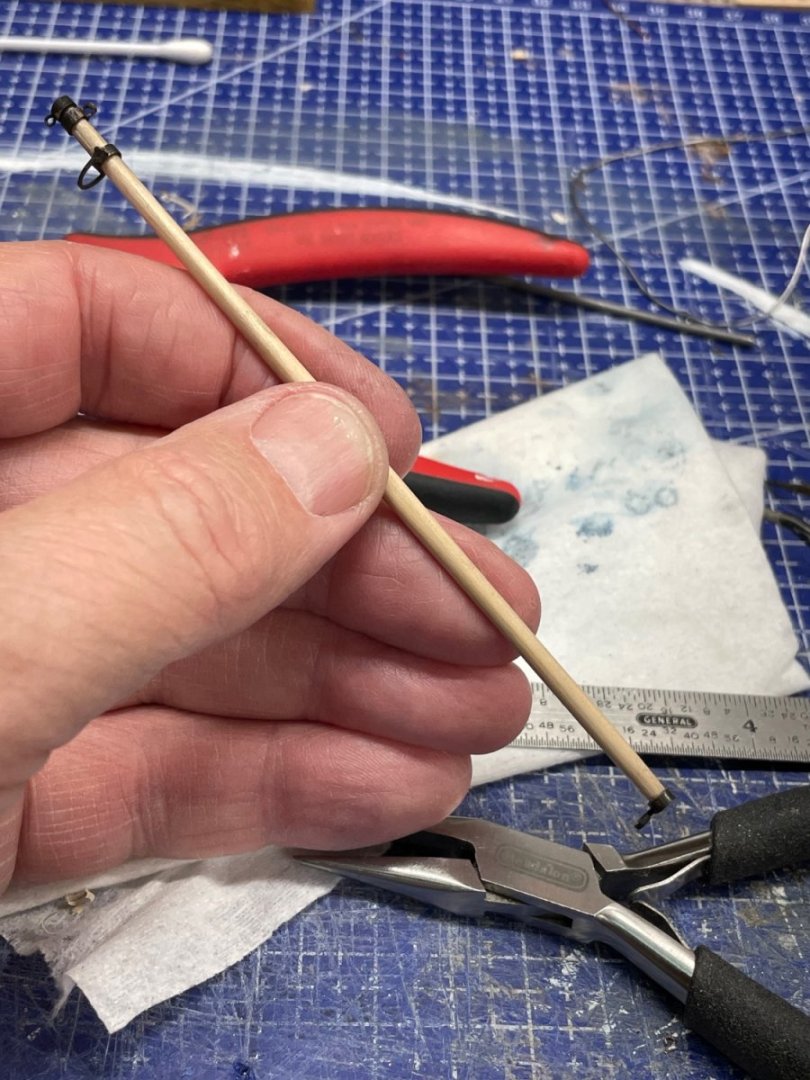
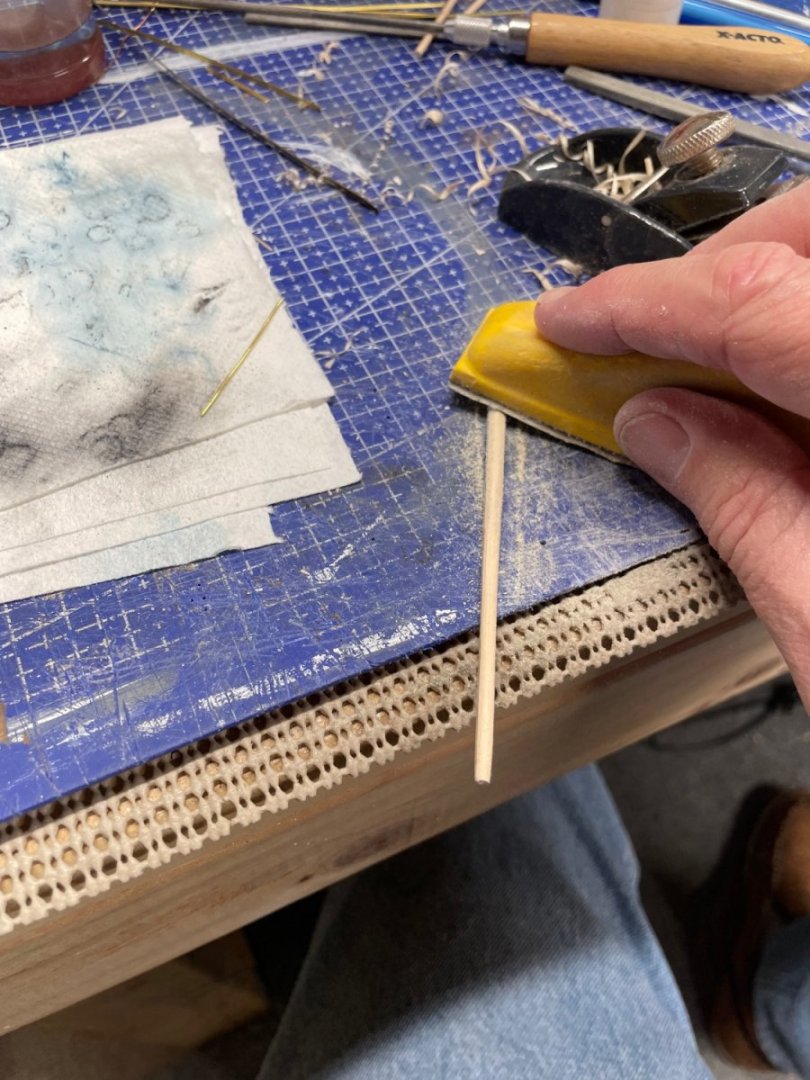
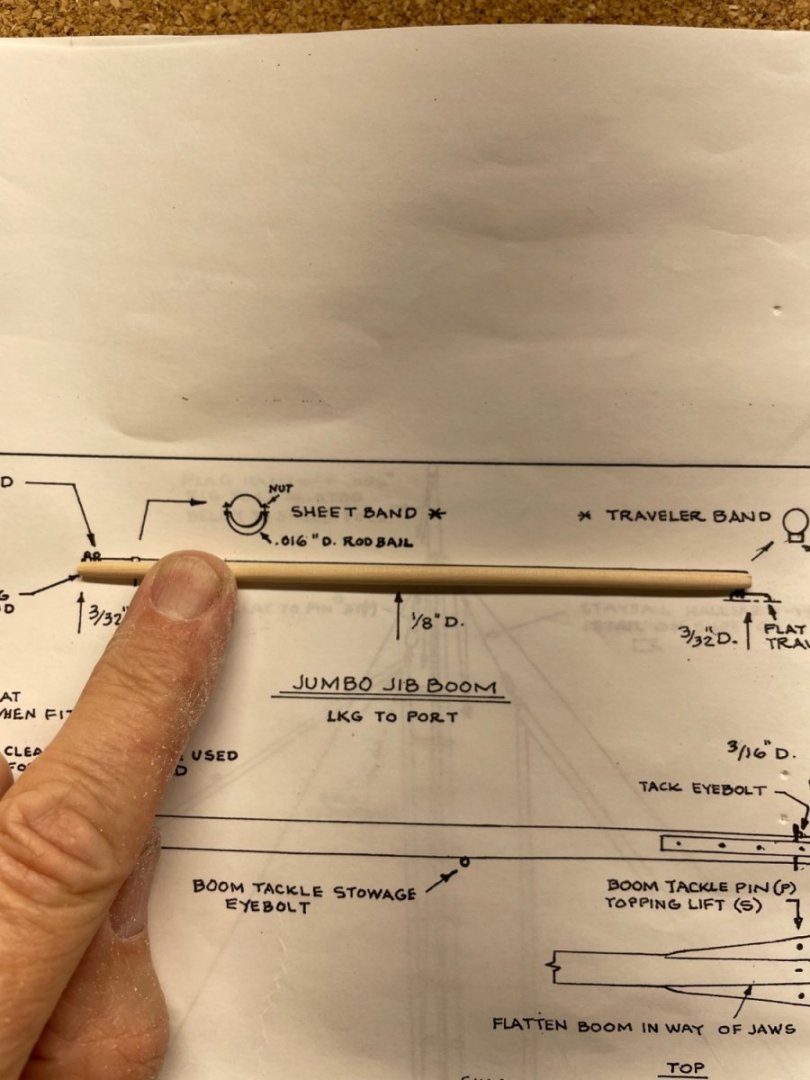
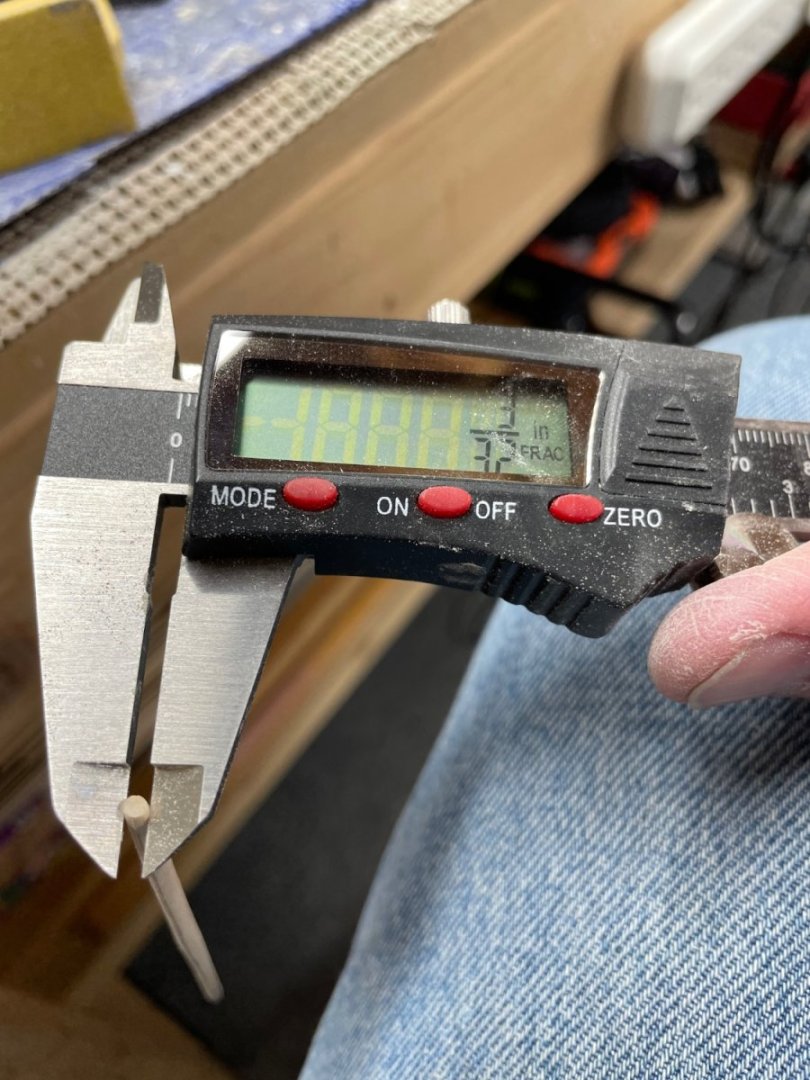
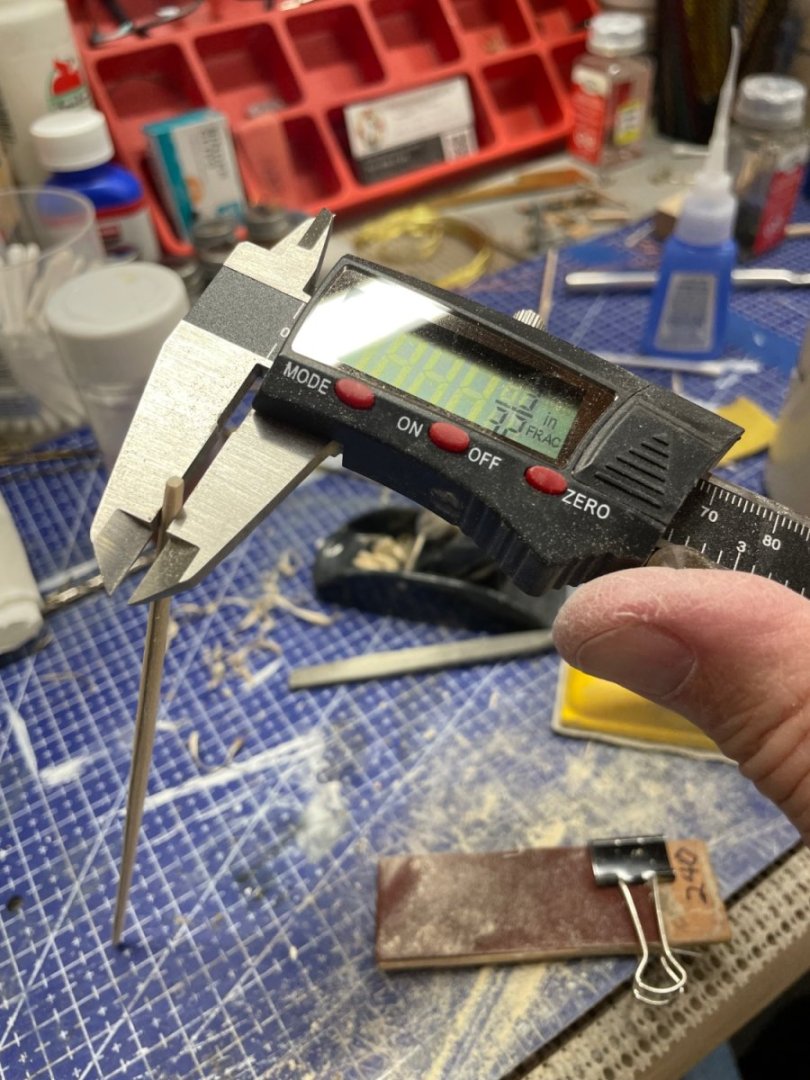
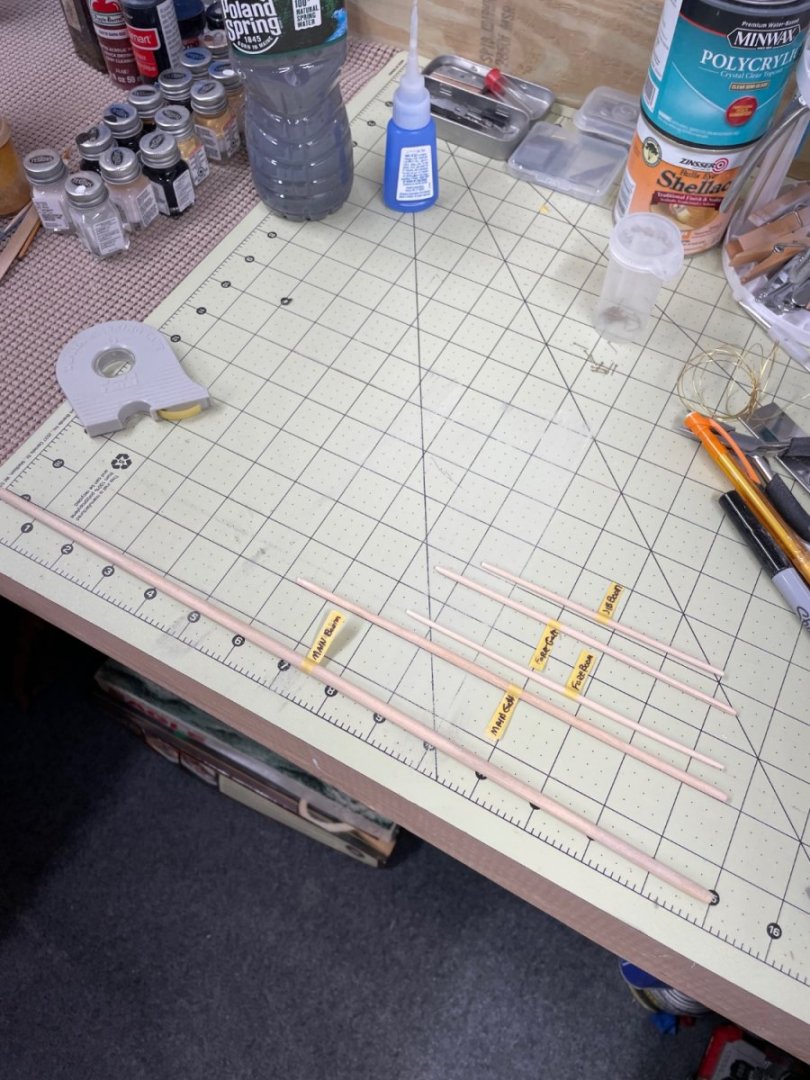
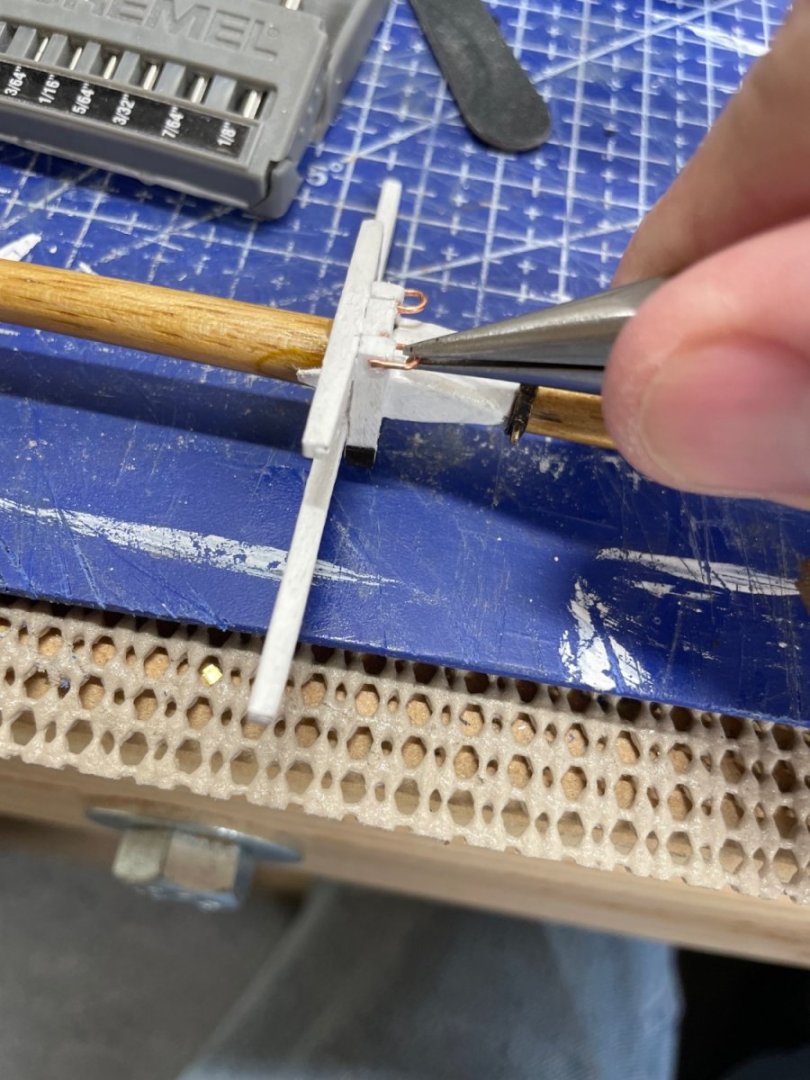
Booms and Gaffs… Dowels cut to length… Lots of sanding needed to shape the dowels. Note from instructions: Spar tapers: Fishing schooners are a little different from other ships. Notice on the plans that the forward side of masts, lower side of gaffs and bowsprit, and top side of booms is a straight line. This is done to better match the sail or position mast hoops. All other faces are tapered. To avoid confusion, identify the straight side on each spar with a pencil mark at both ends. Taper the dowel with a file. Or, lightly slice it with a hobby blade or small plane, then sand to its final shape. Using a lathe or electric drill to taper these dowels doesn’t work due to the straight edge. Close enough… Rinse and repeat for the remaining Booms and Gaffs. Booms and Gaffs all shaped to specification and ready for Details. Main Boom Details… Main Boom Jaws Boom Tackle Band Rope Eye for Lazy Jack Line Quarter Lift Band Main Sheet Band Sheaves for Topping Lift Topping Lift Band Clew Band Main Boom Complete 1 of 5 Booms and Gaffs done… Cheers 🍻


- 282 replies
-
- 11
-
-

-
- Bluenose
- Model Shipways
- (and 1 more)
-
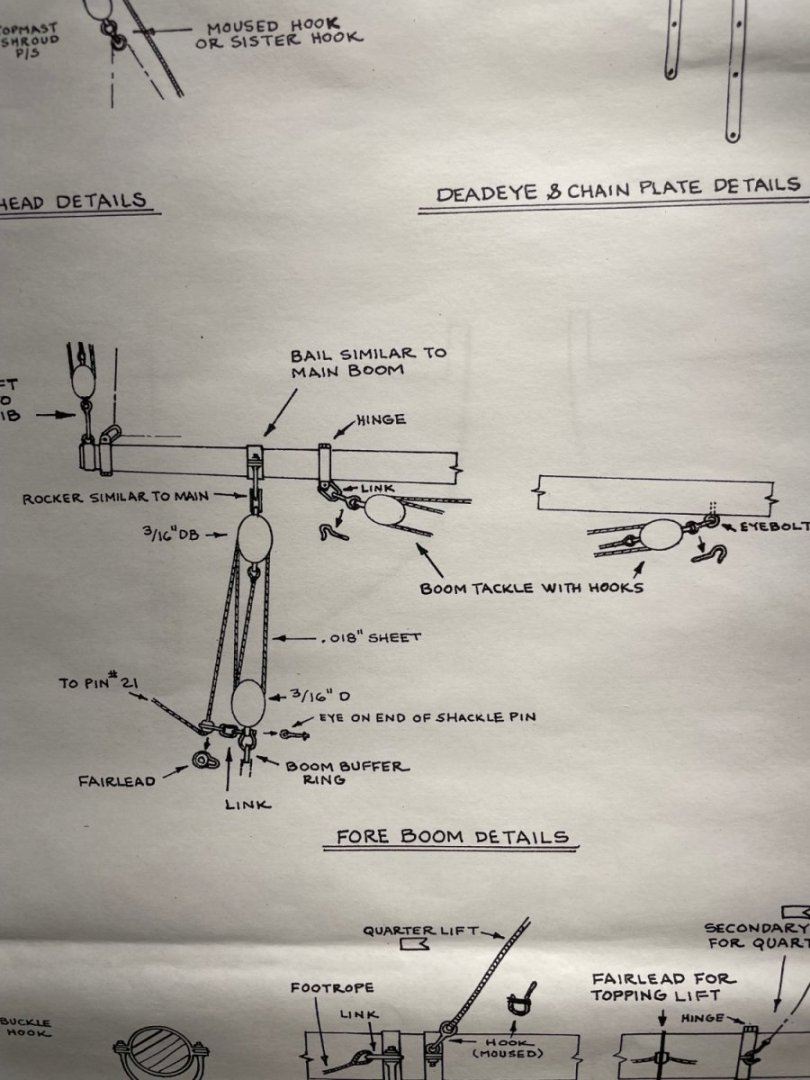
Greg, It really depends on how you plan to display the sails. By that I mean the placement of the booms. As you can see in the Fore Boom details below, the only attachment between the Dory Stacks is the Sheet Tackle to the Boom Buffer Ring. This is just aft of the Dory Stacks. The other Ring Bolts on the deck are unused save for the Dory Tie Downs. the Rigging and Blocks on the Fore Boom itself, including the lacing of the Sail will be done on the Fore Boom before placing it between the Dories. That said you may have the better idea, waiting to tie down the Dories. However, you will want to mount the Dory Stacks before any Shrouds are placed or running rigging is belayed on the Pins along the Rails. You can always build the Dories on the Dory Kids and permanently attach them later after you have the Fore Boom placed. It’s up to you. As for me, my lot has been drawn, I will be working the Fore Boom around the Dory Stacks. 😆 I will let you know how that goes. LOL As for the Main Boom Crutch, I will most likely present both Sails leaning into the Sheet lines and not sitting stowed on the Crutches. I hope this discussion was helpful. 🍻 John
- 184 replies
-
- 2
-

-
-
- Bluenose
- Model Shipways
- (and 1 more)
-
Awesome work, nice progress. I agree, anchors can be a bit tricky to display. Looks great. 👍 John
- 184 replies
-
- 1
-
-
- Bluenose
- Model Shipways
- (and 1 more)
-
Wow! Incredible detail, Phil… Well done. 👍
-
Nice 👍 work on the Chain Plates and deadeyes. Your barrels and bait cutting stations look great.
- 184 replies
-
- 1
-
-
- Bluenose
- Model Shipways
- (and 1 more)
-
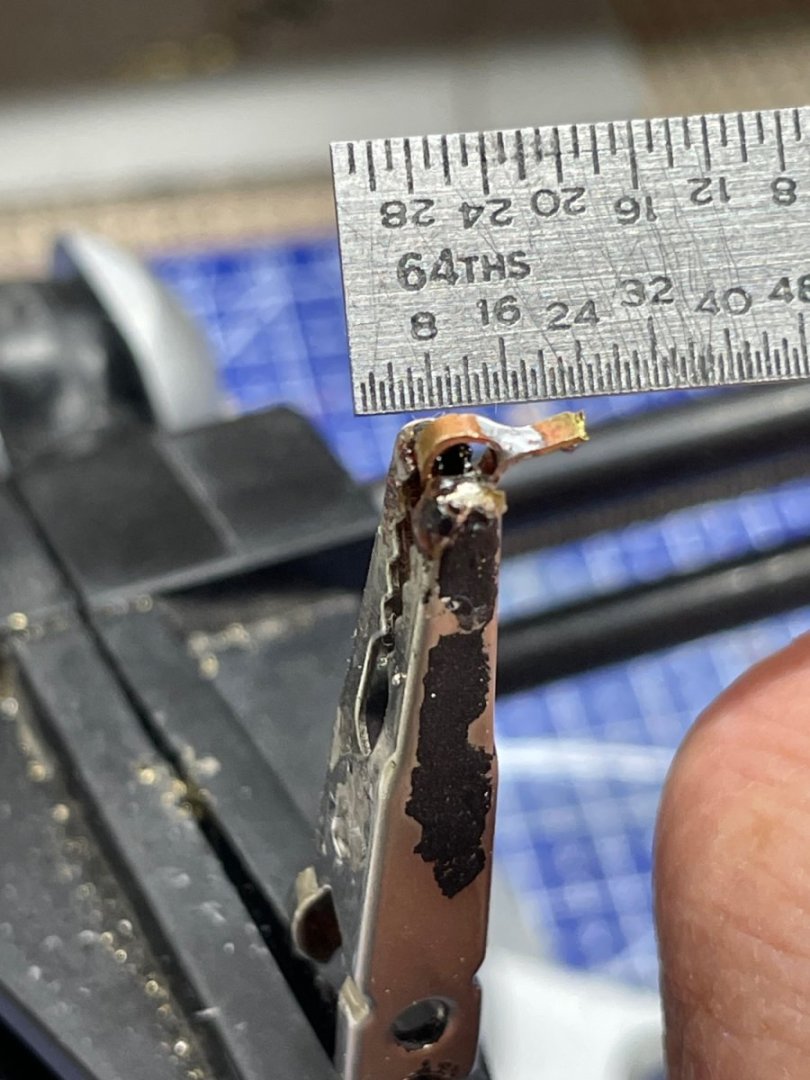
Thanks Phil, I have found your suggestion of wire brushing with the dremel tool and a rinse in acetone has improved my blackening process. I did discover that an over stay in the blackening solution actually scales the black off the brass and copper. 10-15 seconds after a good bath in Acetone has produced good results for me. John
- 282 replies
-
- 1
-
-
- Bluenose
- Model Shipways
- (and 1 more)
-
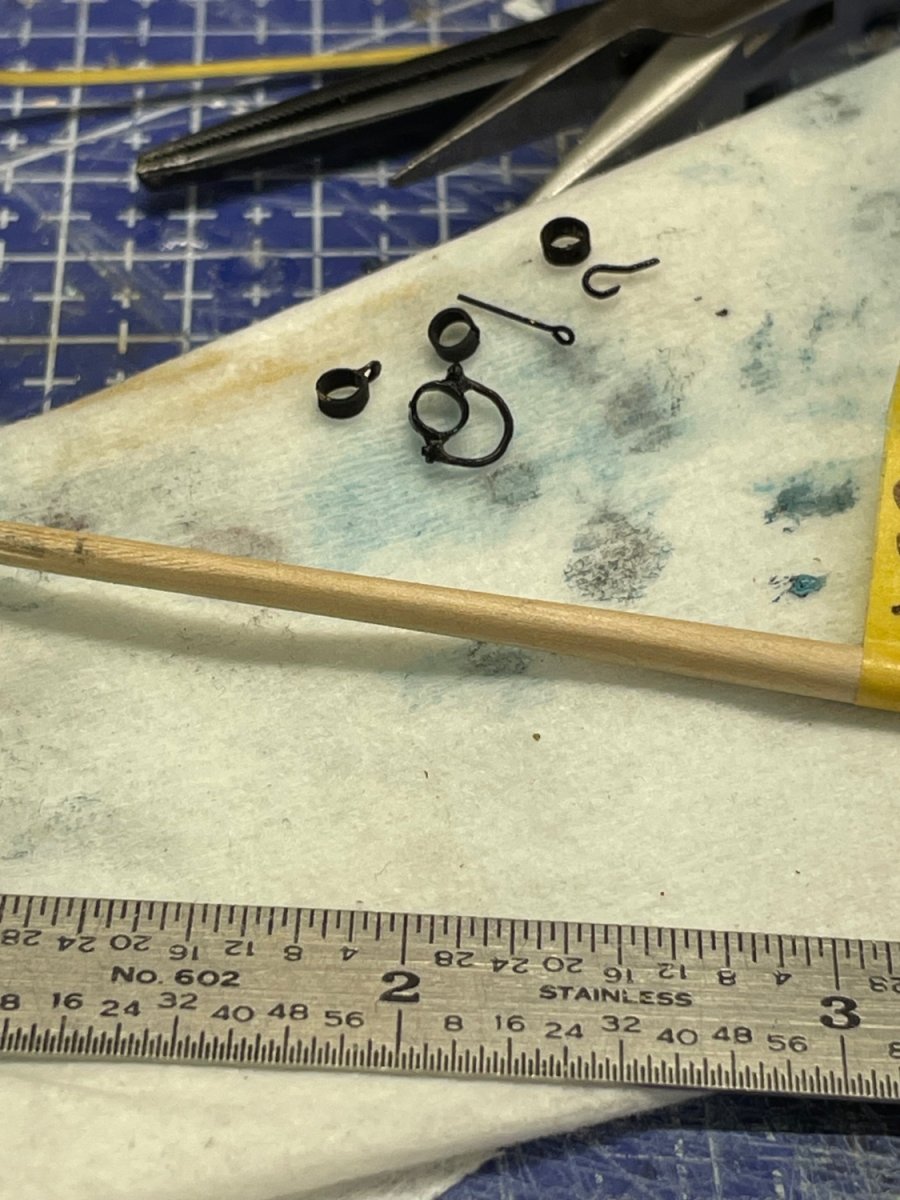
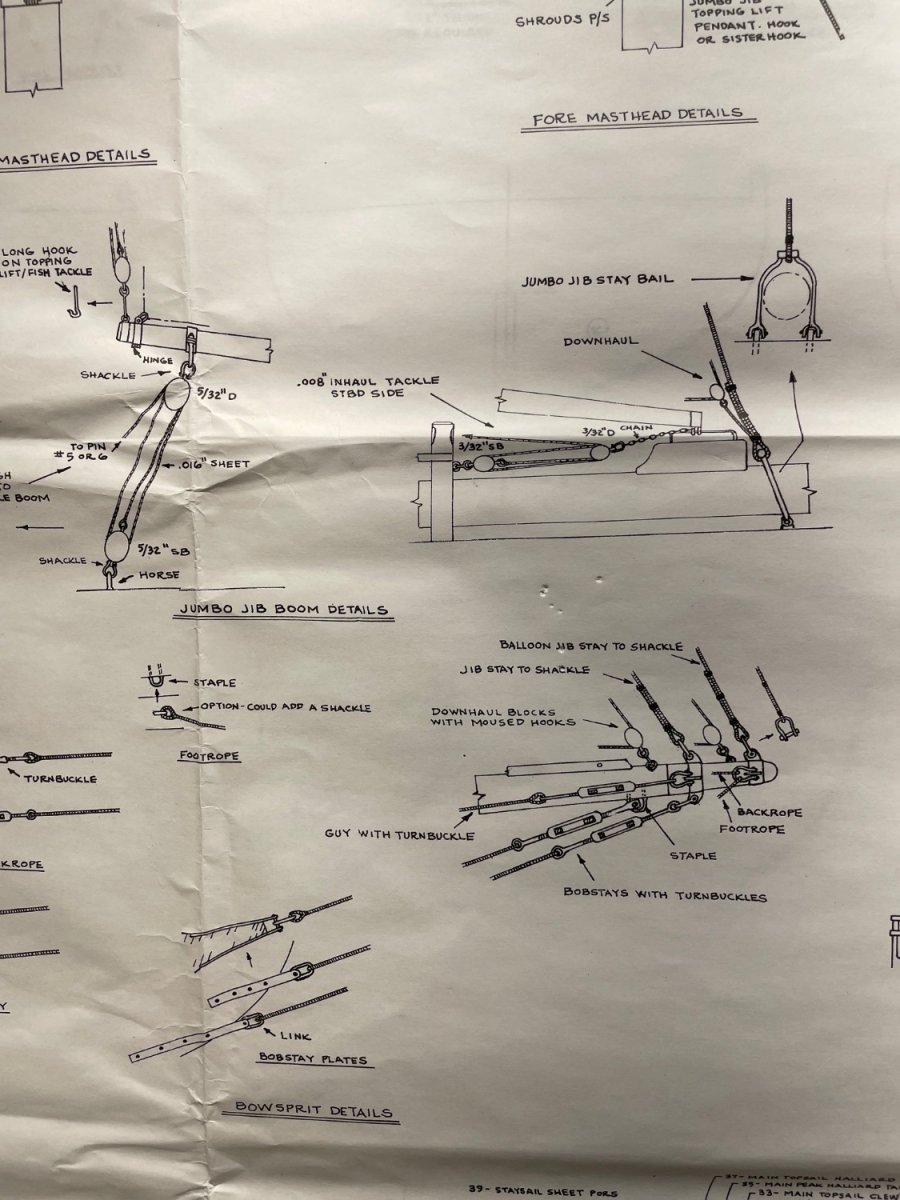
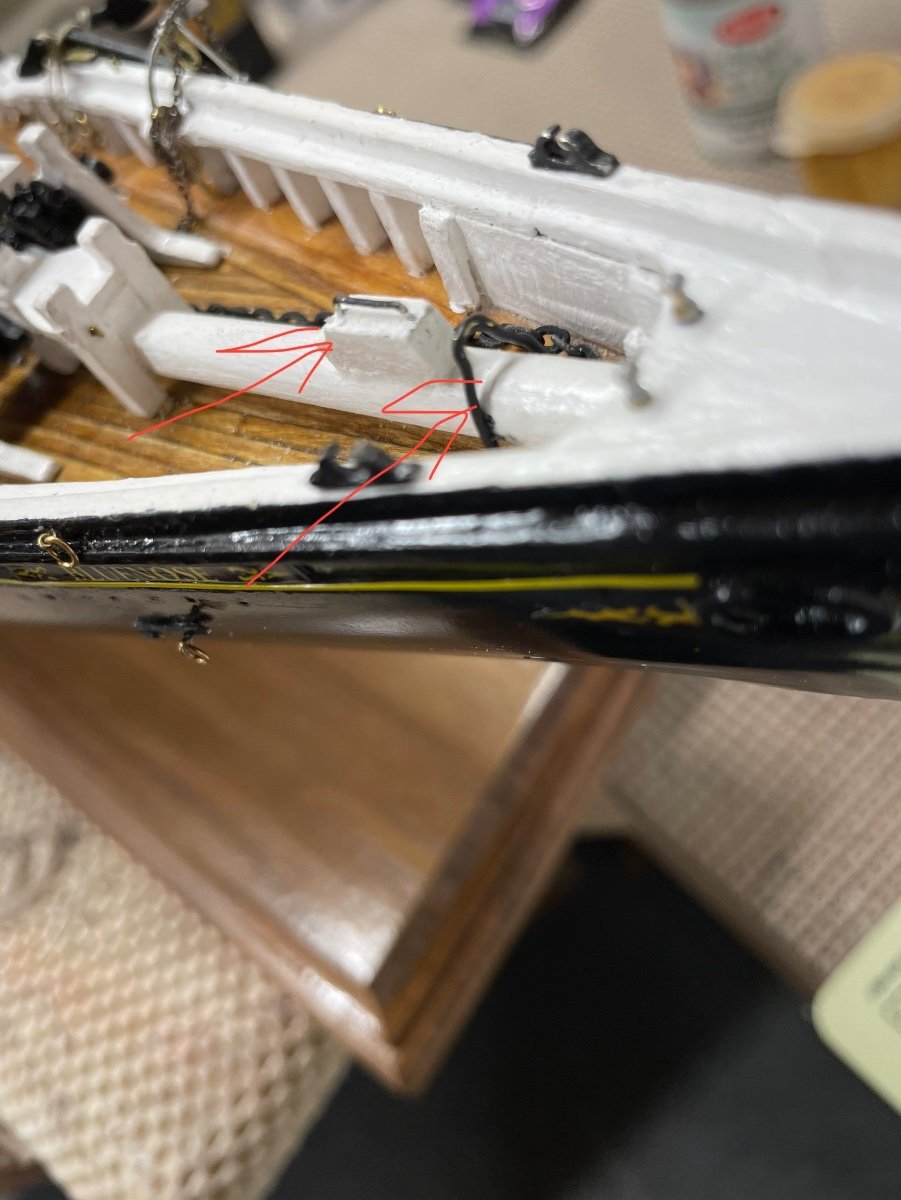
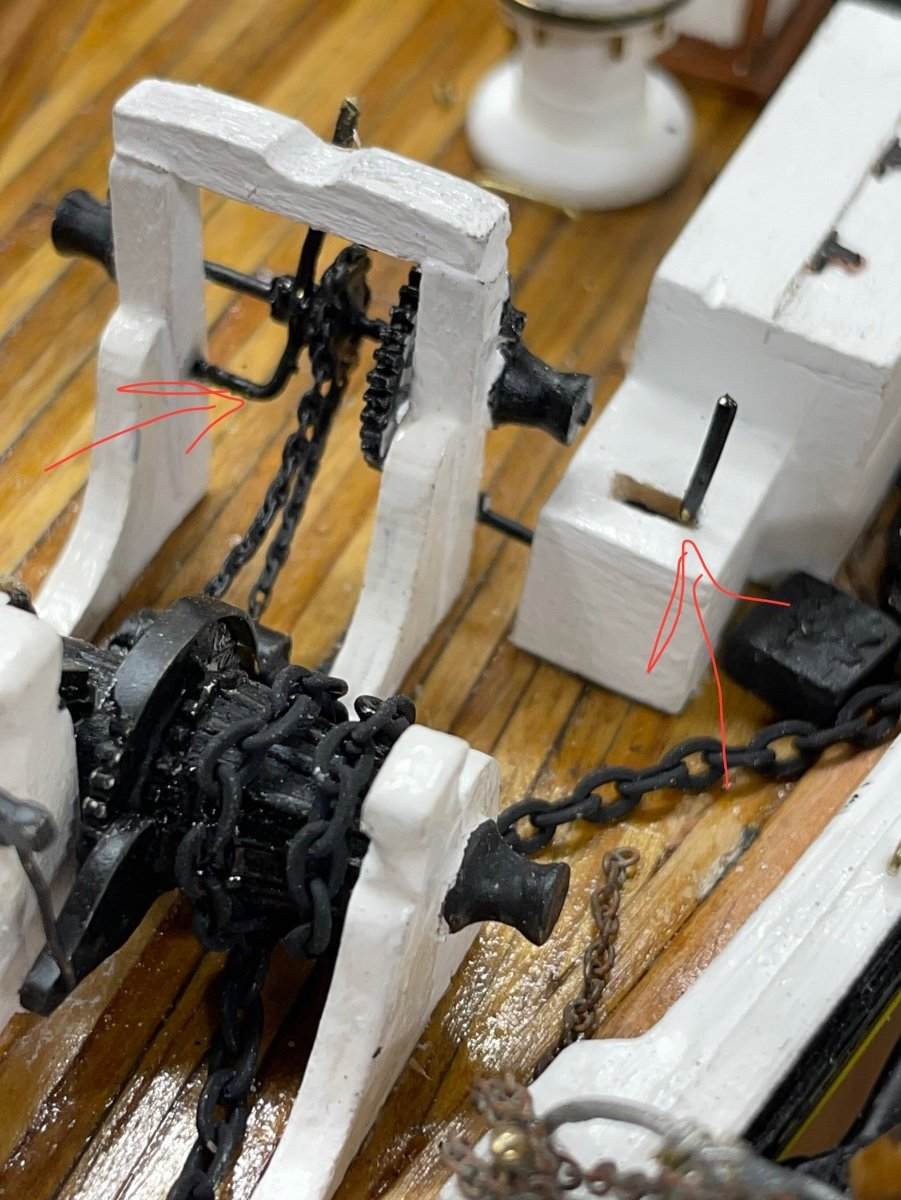
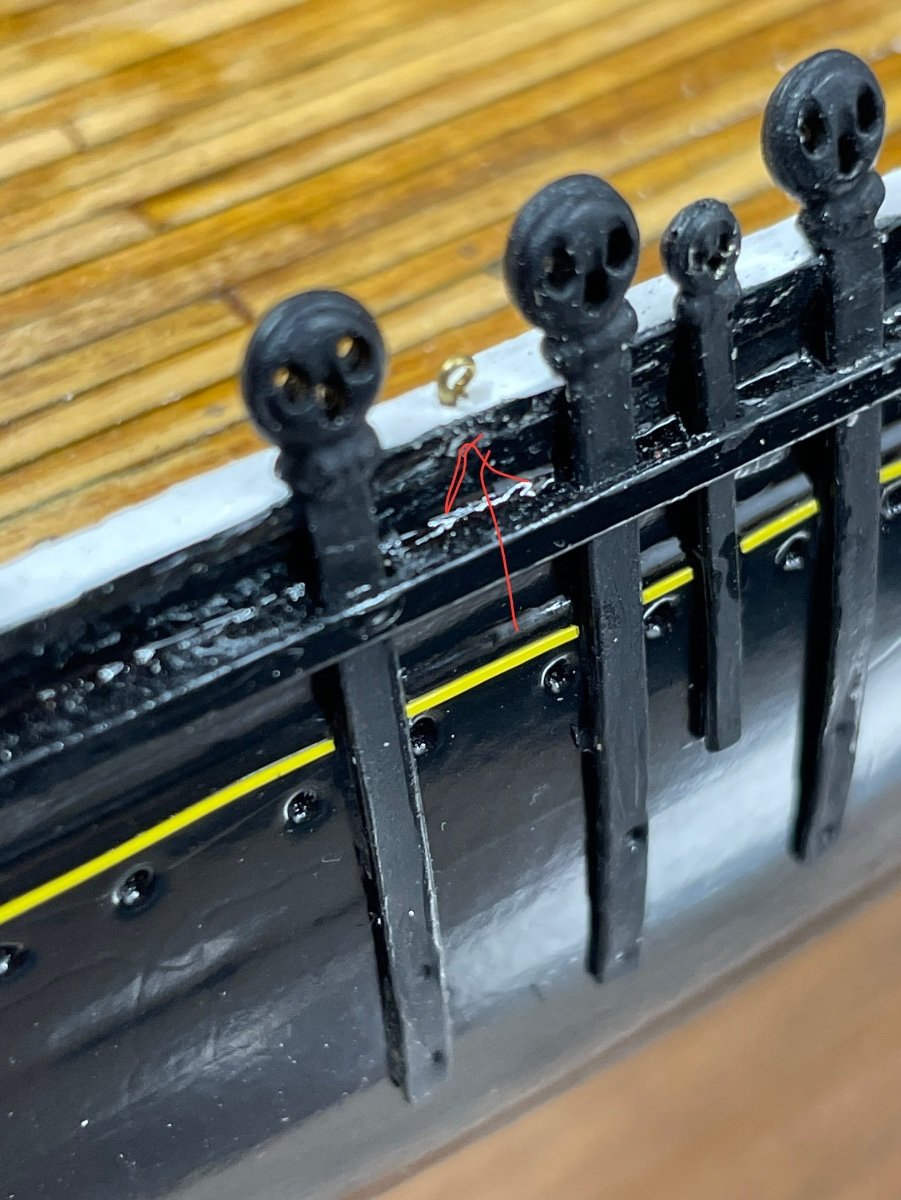
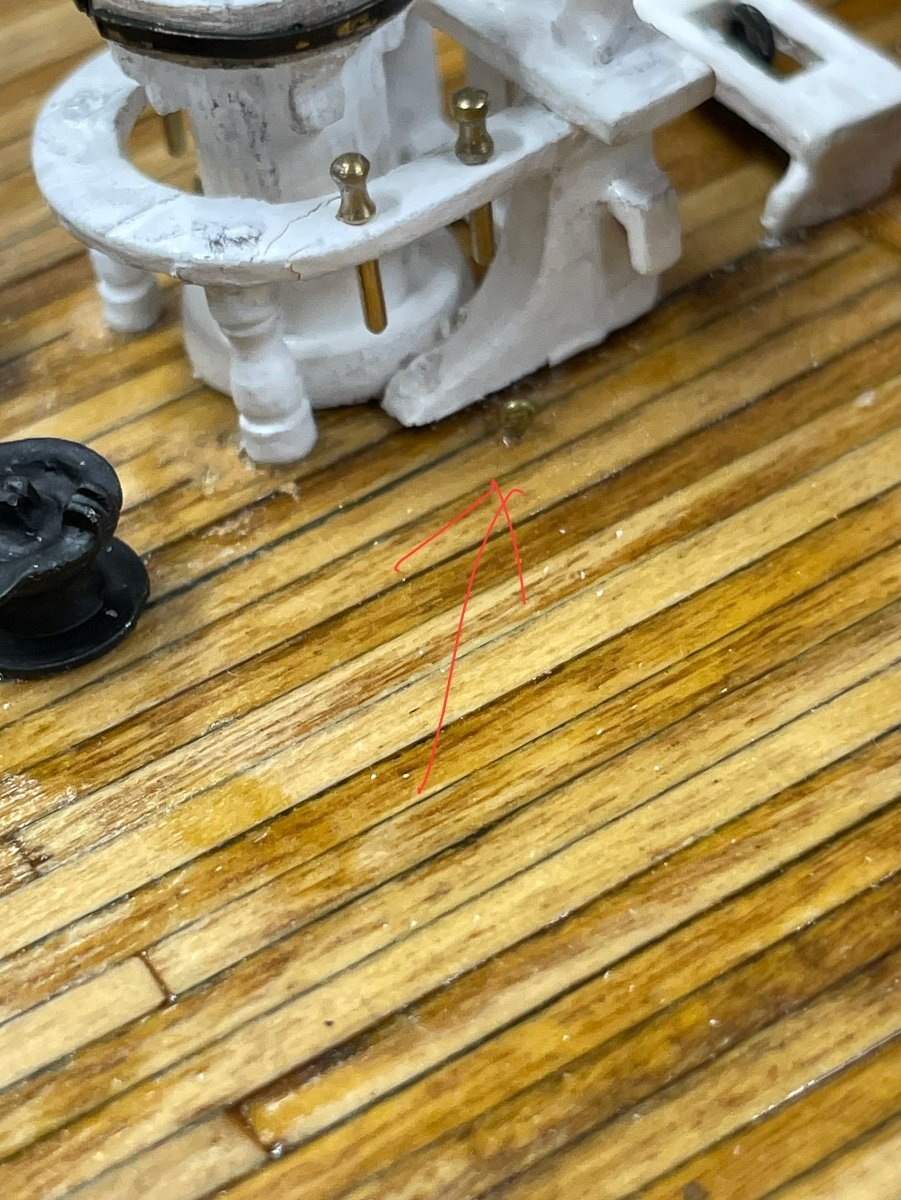
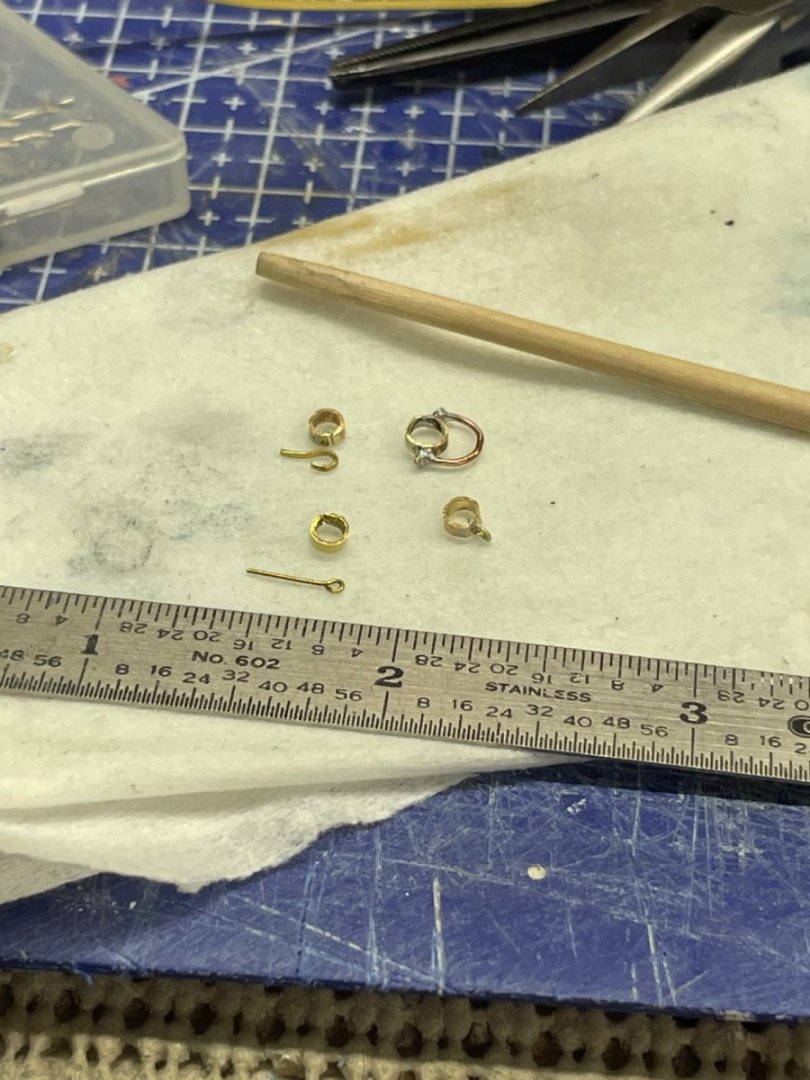
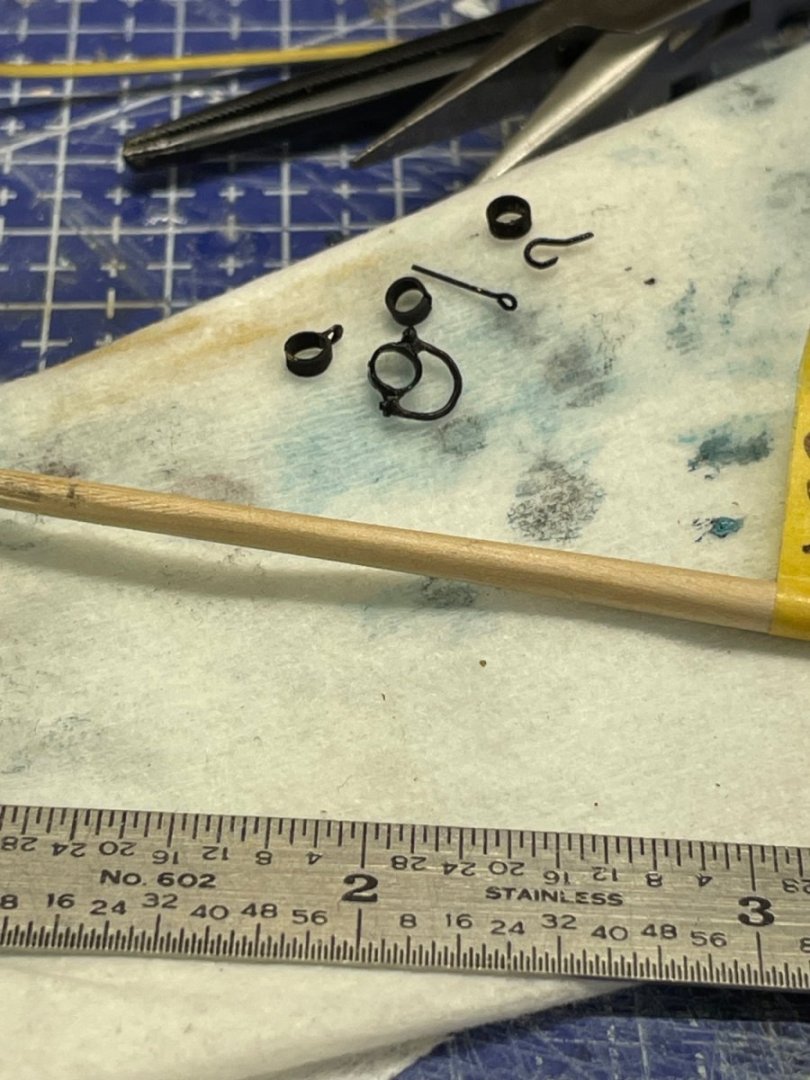
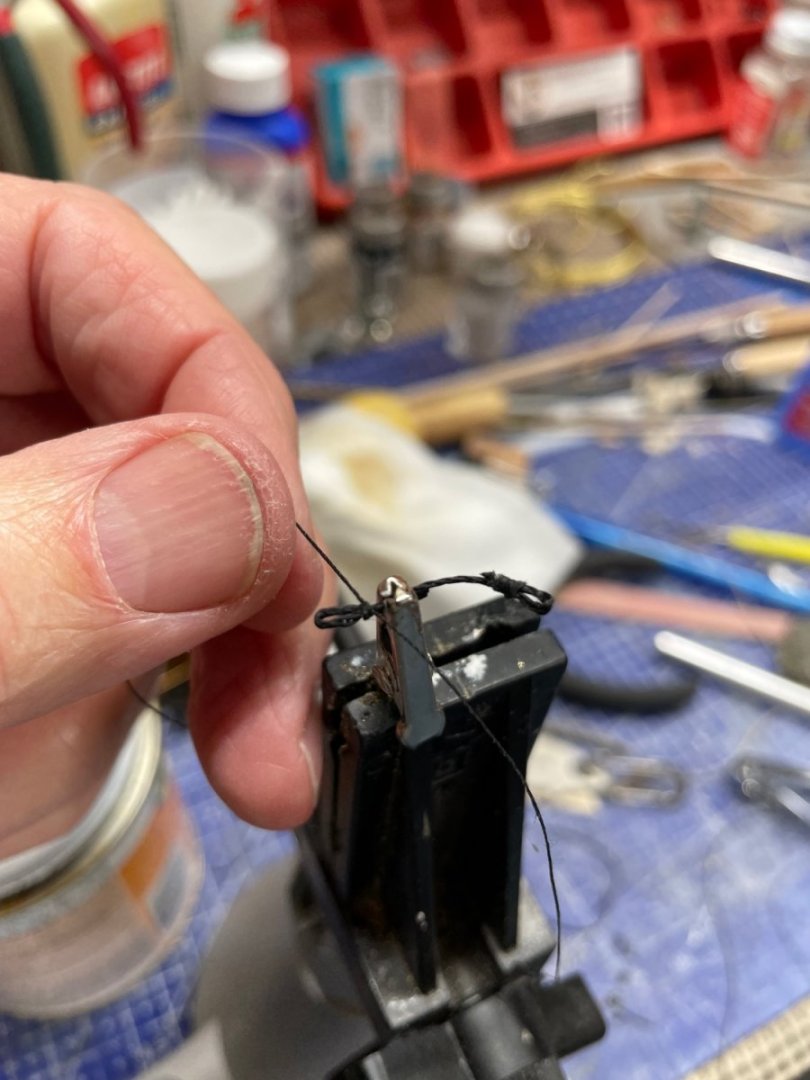
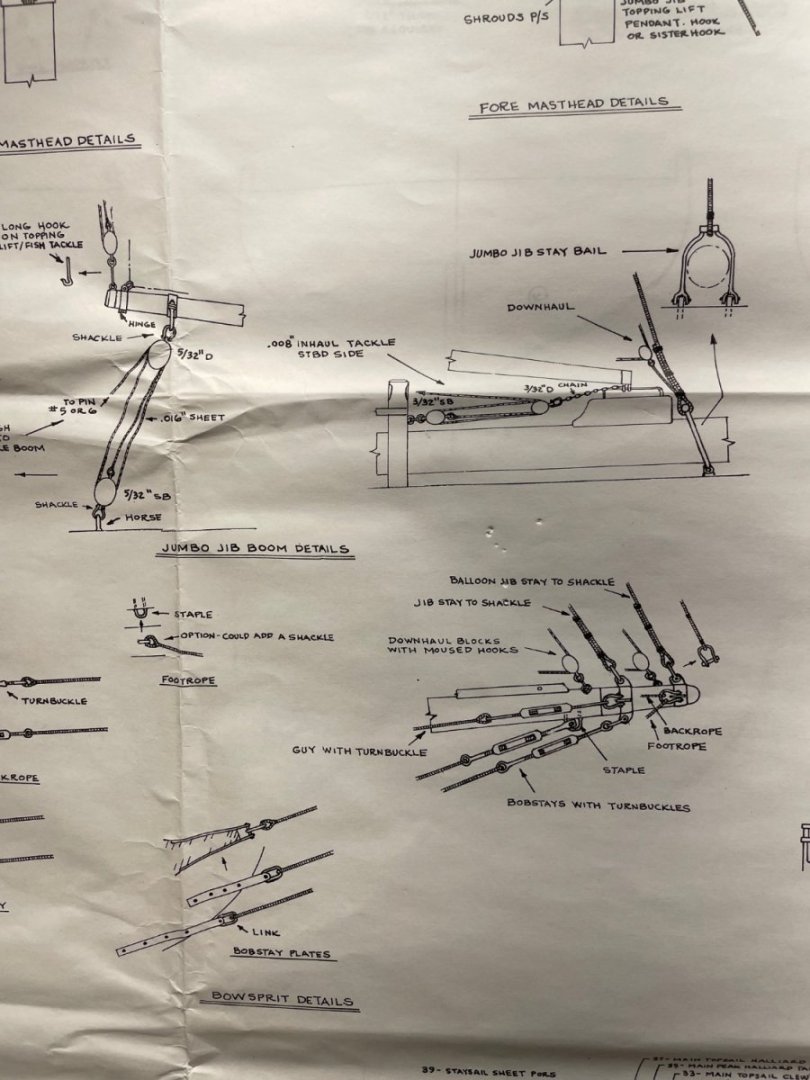
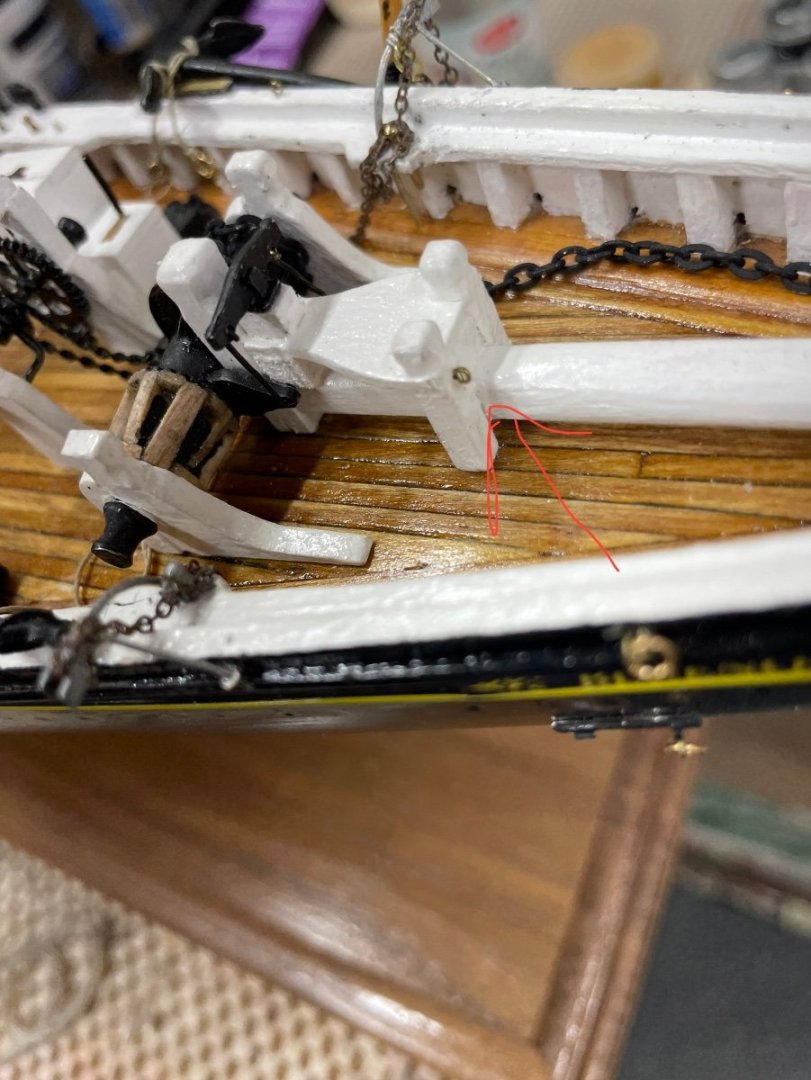
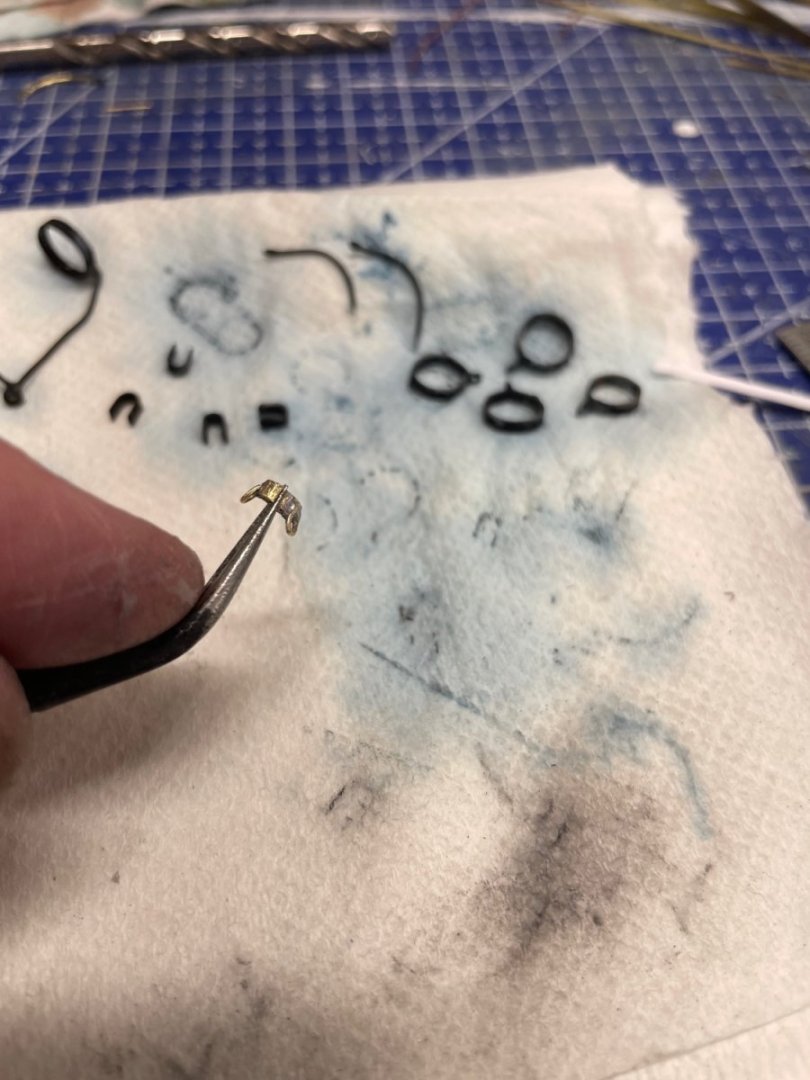
Missed Details… Before moving on to Booms And Gaffs, I thought I would review some rigging detail on Sheet 6. I wanted to double check that I had placed “all” of the eyelets, etc… needed to tie off the rigging. My review paid off… The Jumbo Jib Boom Traveler Block and the Jumbo Jib Stay Bail had not been placed. An eyelet for the Inhaul Tackle needed to be placed. I had forgotten that I intended to include the clutch levers for the Hoisting Engine Gear Assembly. Needed to place 4 eyelets on the rail between the 3rd and 4th Lower Shrouds. Also needed Eyelets for the Main Throat and Peak Halliards. And the Halliards on the Fore Mast as well as the Jumbo Jib Sheet Traveler Horse. Also 2 eyelets and a staple on the Bowsprit for Halliards and Bob Stays. I hope I found all of the missing attachments. 😜 These would be rather difficult to place after the shrouds and standing rigging are completed. So many details… Now, I think I can move on to Booms and Gaffs… Cheers 🍻


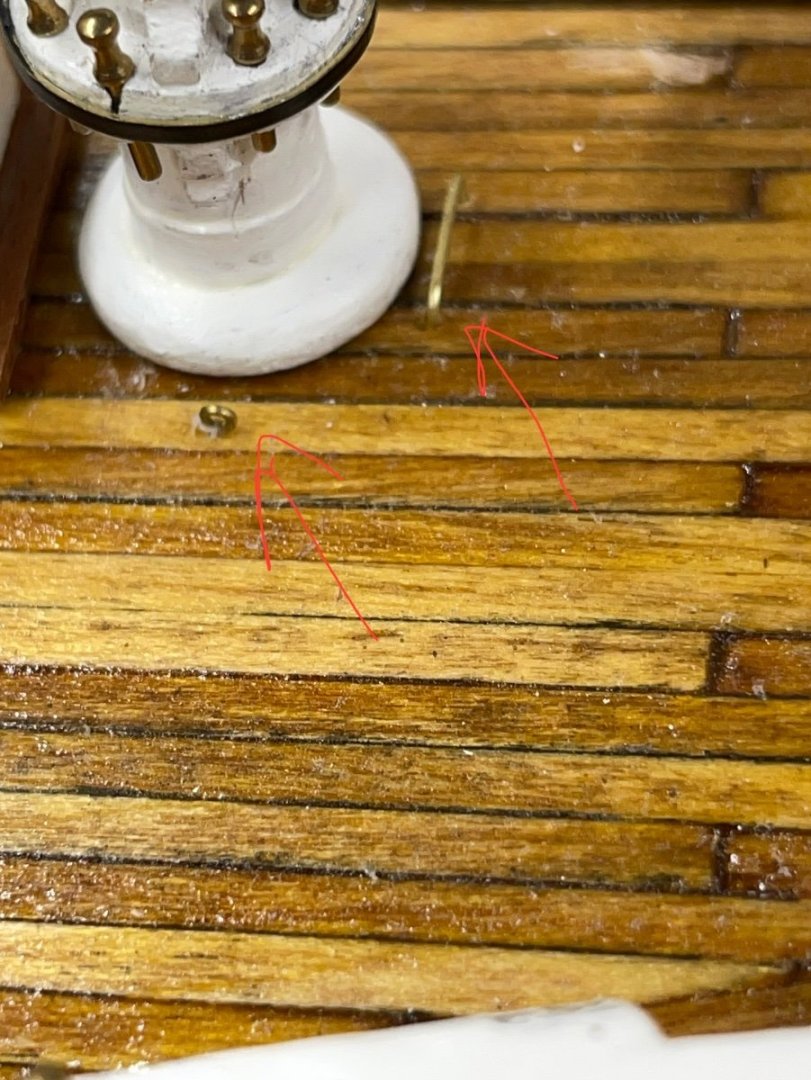
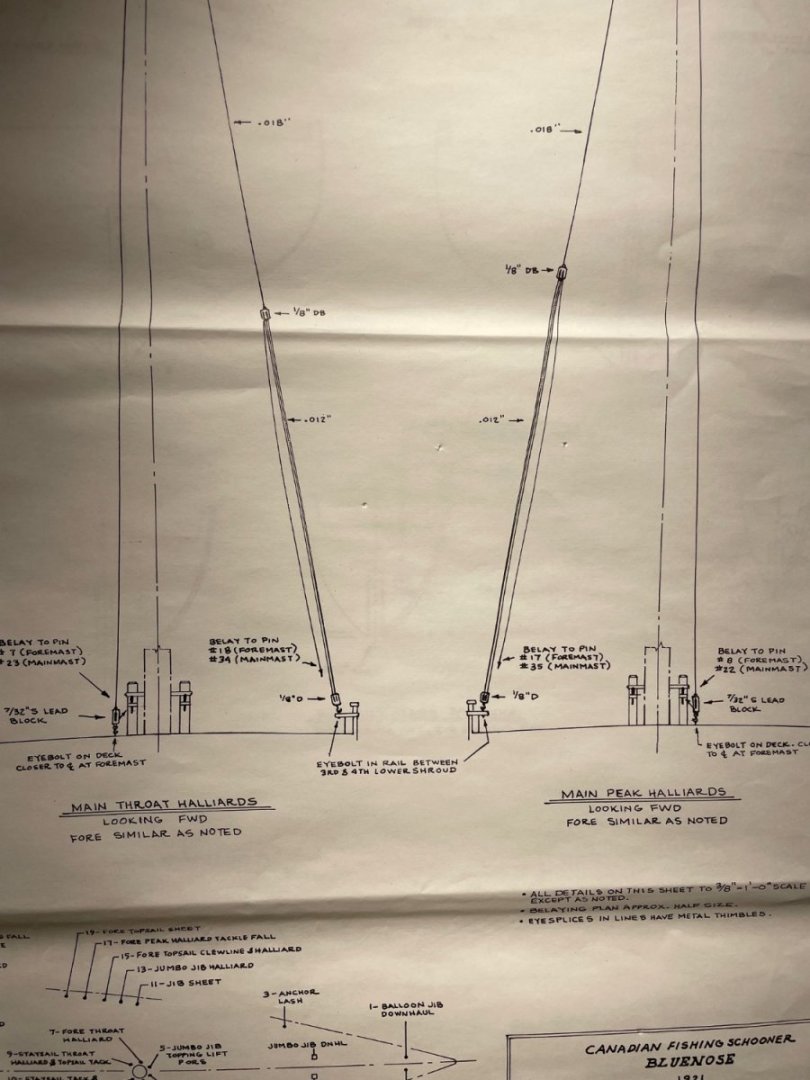
- 282 replies
-
- 4
-
-
- Bluenose
- Model Shipways
- (and 1 more)
-
Been there, space was always the problem and $$$. 😆 Ship modeling is much more reasonable, when you work out the cost over a per annual basis. Beautiful model railroading work, Yves. 👍 John
- 102 replies
-
- 10
-
-
Thanks Greg… I have been using Testors Flat Black Enamel and Brass Black on other pieces. The Main Mast Eye Bands were all Brass Black. I’ve gotten the process down pretty well now, I’ll probably use the Brass Black going forward. Got to build the Booms and Gaffs before I start rigging, but yep getting closer. Thanks again for you comments… John
- 282 replies
-
- 1
-
-
- Bluenose
- Model Shipways
- (and 1 more)
-
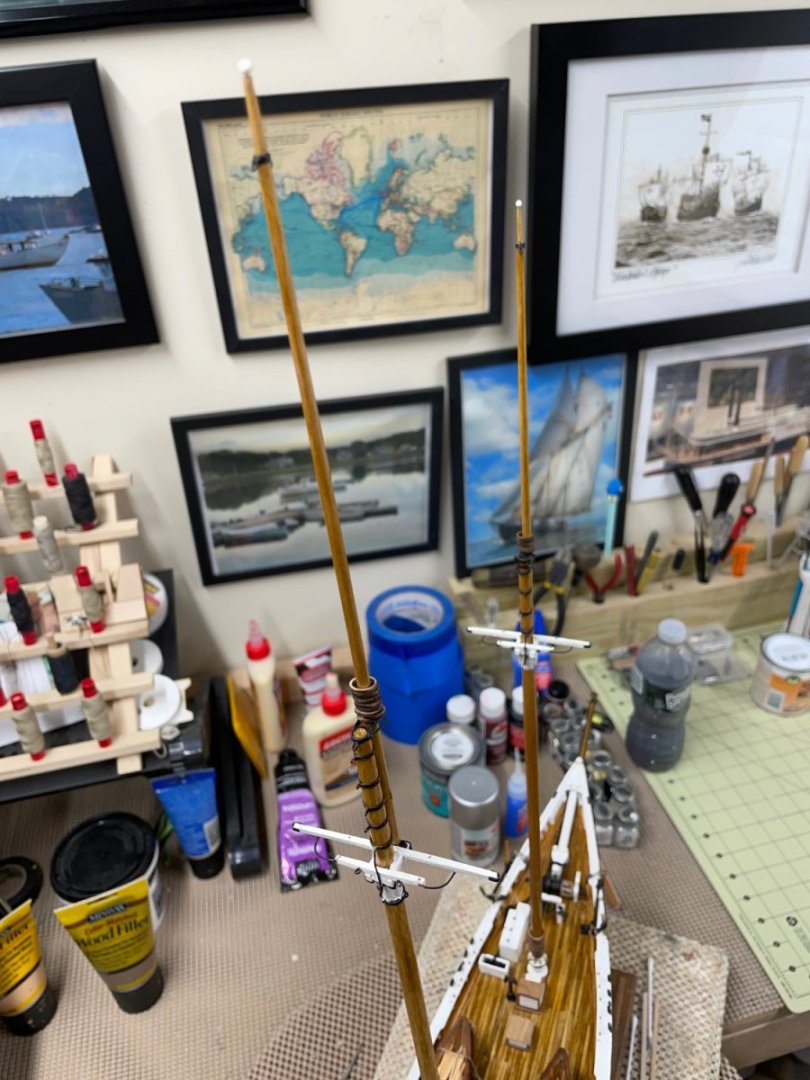
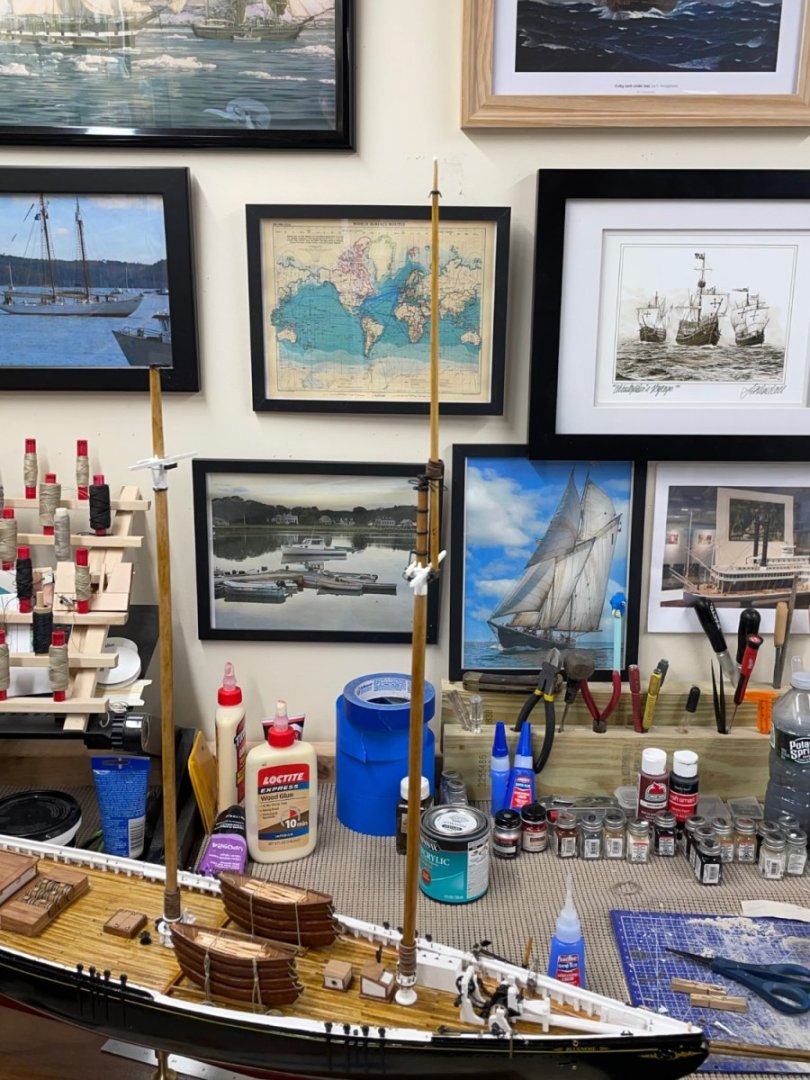
Main Top Mast… Main and Fore Top Masts are completed. Cheers 🍻


- 282 replies
-
- 8
-
-
- Bluenose
- Model Shipways
- (and 1 more)
-
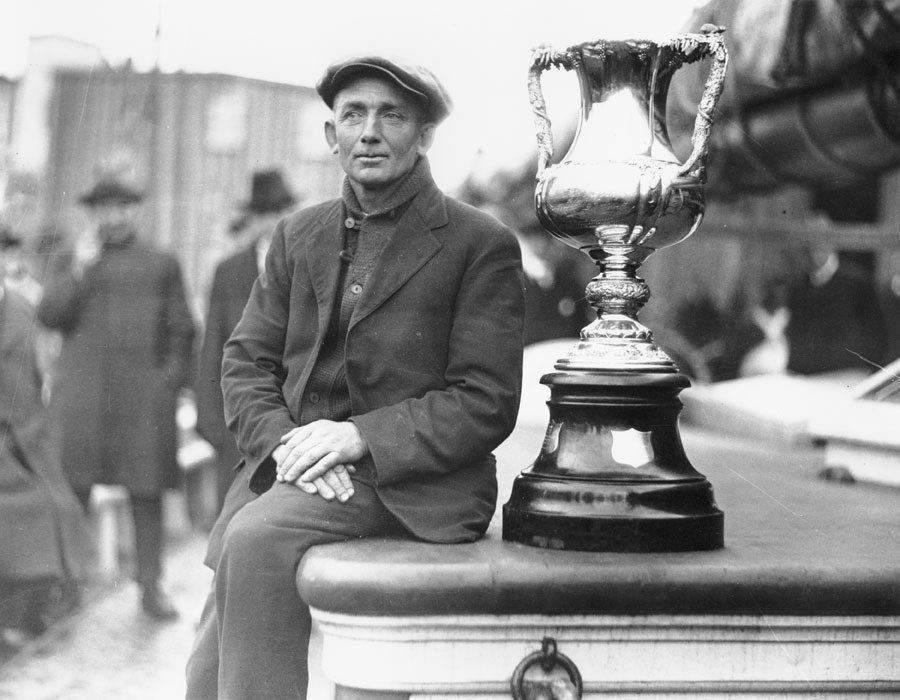
Research 🧐 into the ownership of the original Bluenose. https://en.m.wikipedia.org/wiki/Angus_Walters Captain and part owner of the Bluenose, Angus James Walters. Interesting a Committee of Halifax Businessmen came together to build the Bluenose as Fishing Schooner that could win races internationally. Good stuff… It really was built as a racing schooner. Bluenose was constructed by Smith and Rhuland in Lunenburg, Nova Scotia. The schooner's keel was laid in 1920. The Governor General the Duke of Devonshire drove a golden spike into the timber during the keel-laying ceremony.[8] She was launched on 26 March 1921, and christened by Audrey Smith, daughter of the shipbuilding Richard Smith.[9][10] She was built to be a racing ship and fishing vessel, in response to the defeat of the Nova Scotian fishing schooner Delawana by the Gloucester, Massachusetts, fishing schooner Esperanto in 1920, in a race sponsored by the Halifax Herald newspaper.[11] https://en.m.wikipedia.org/wiki/Bluenose#:~:text=Bluenose's captain and part,schooner reached the racing port.
- 282 replies
-
- 2
-
-
- Bluenose
- Model Shipways
- (and 1 more)
-
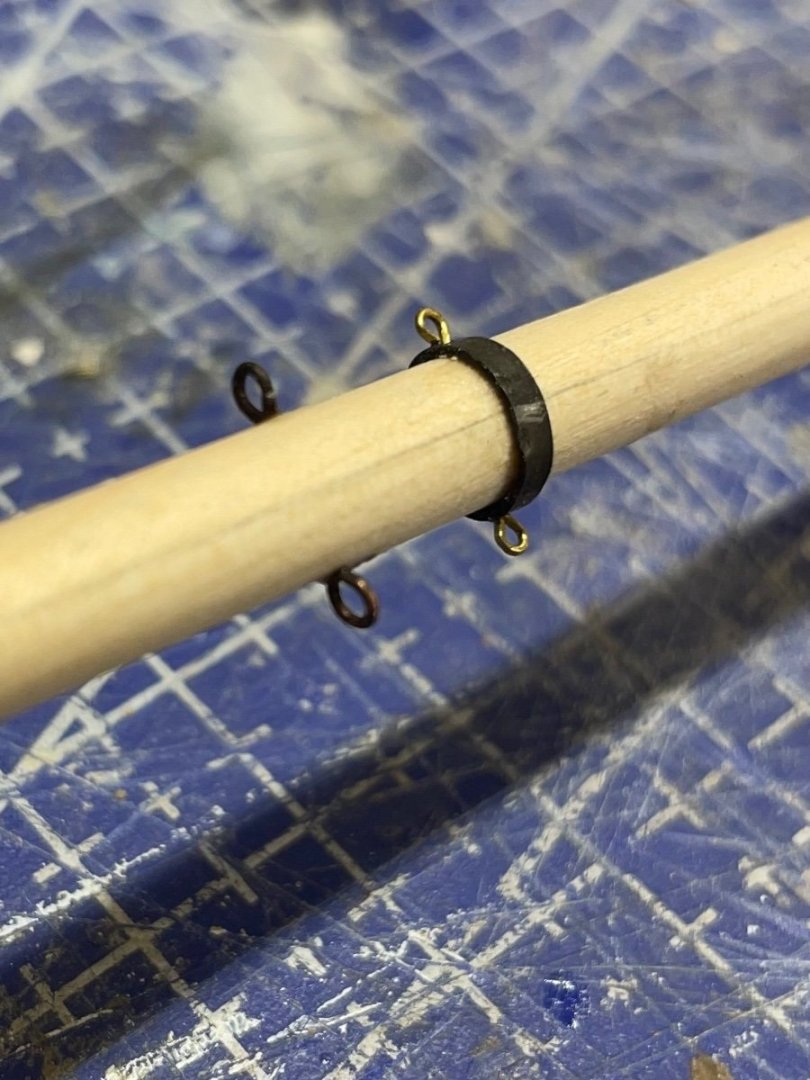
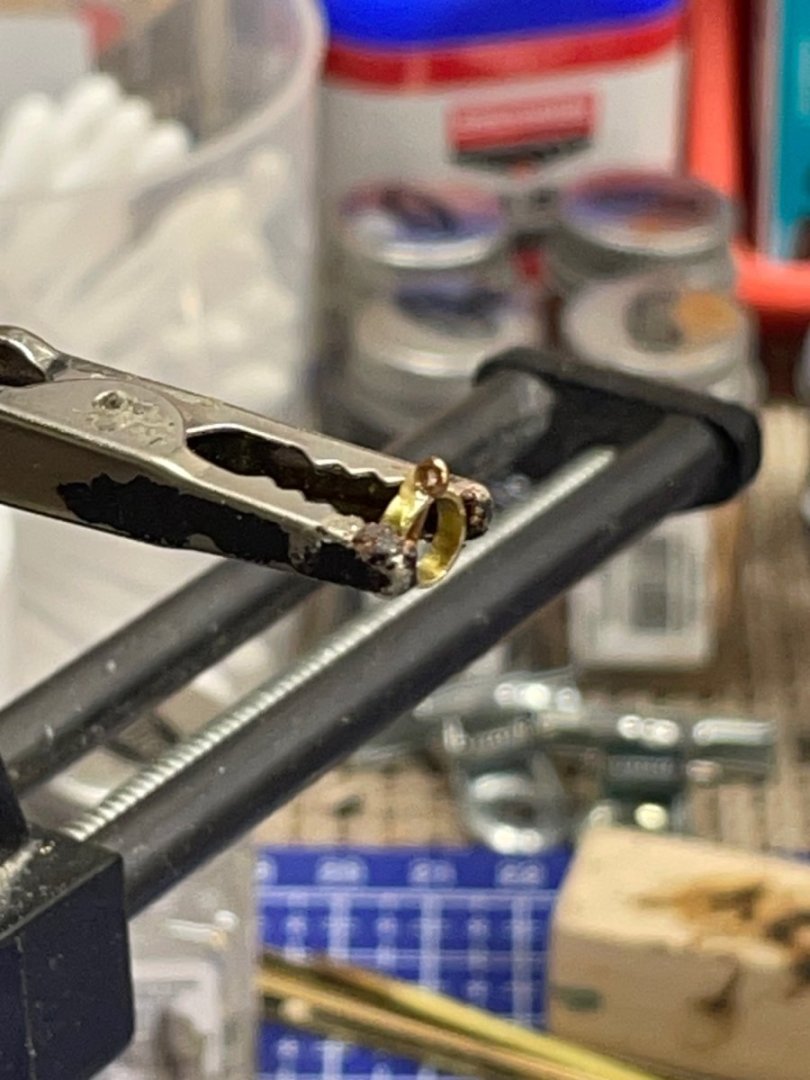
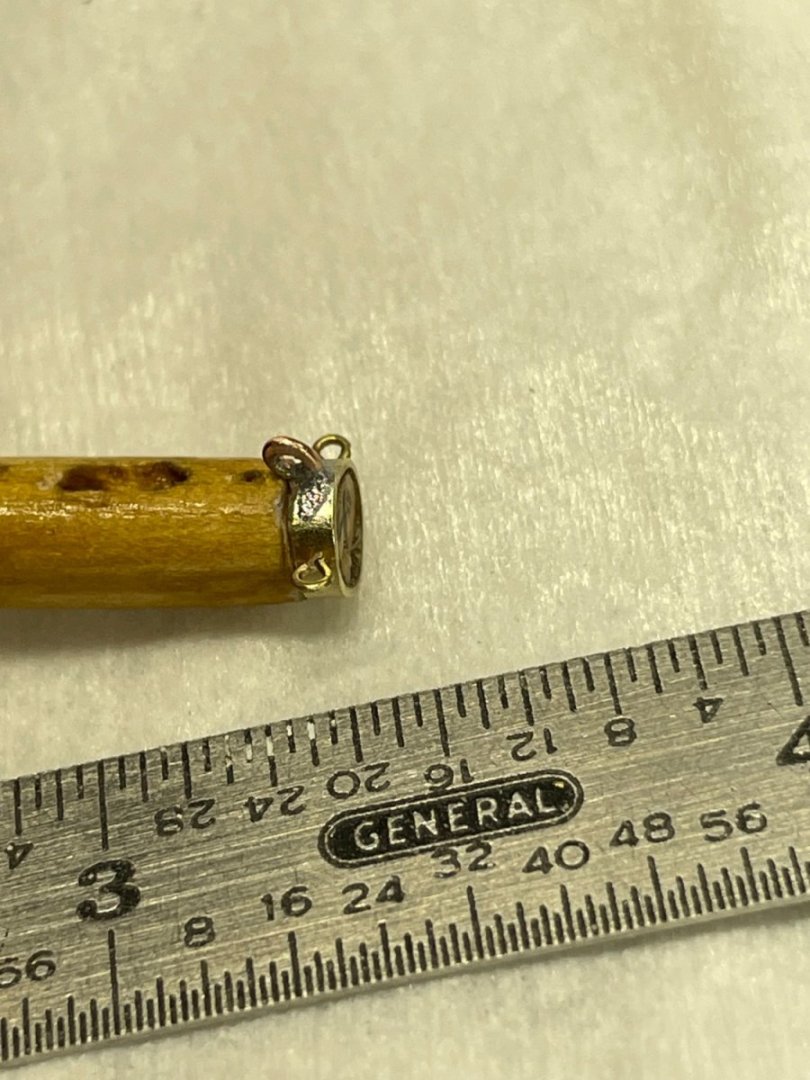
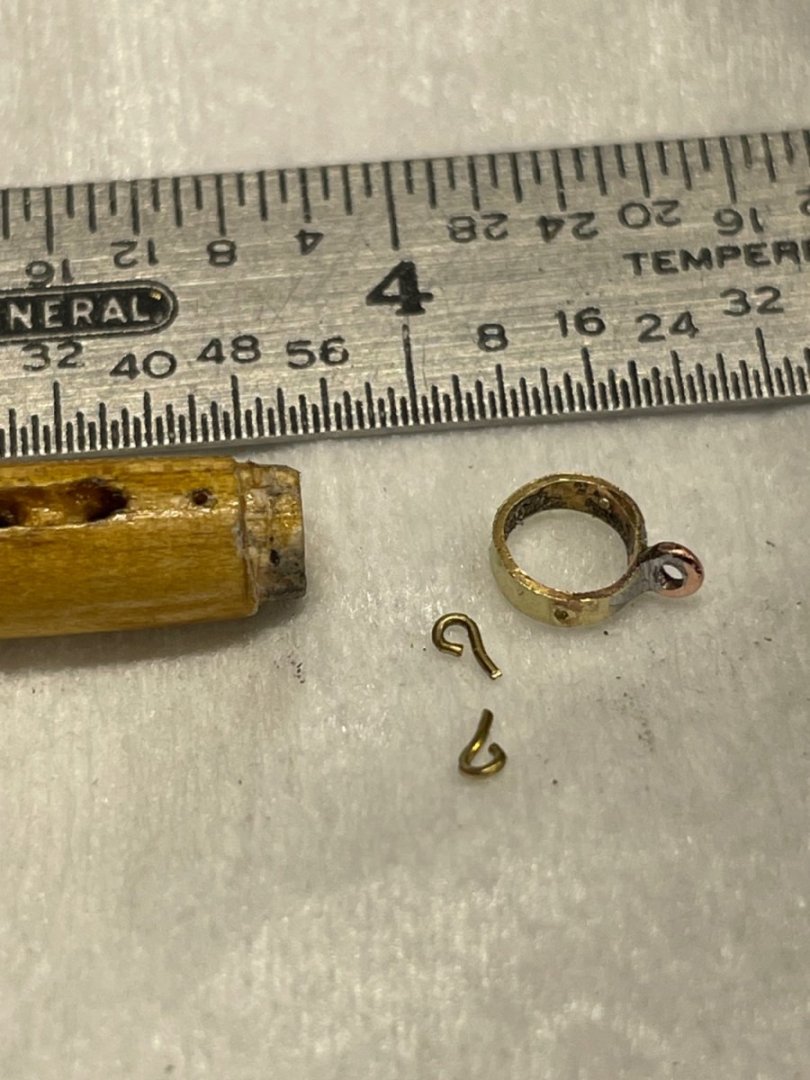
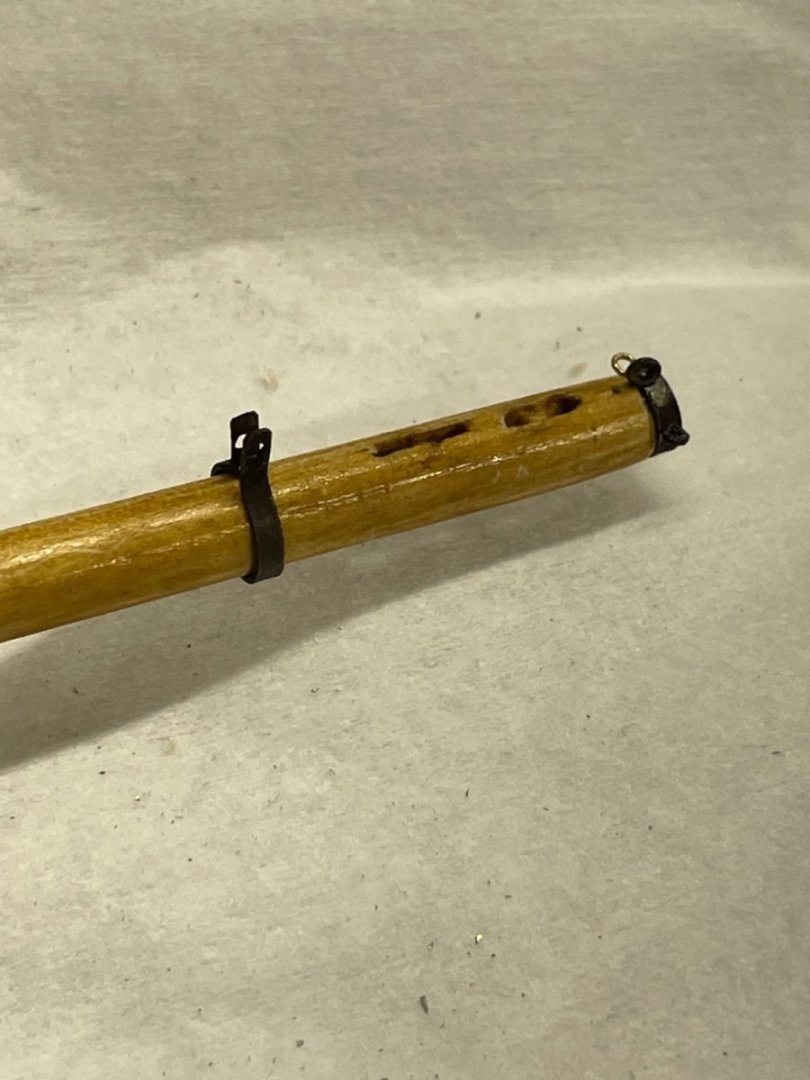
Fore Topmast complete… Replaced the CA glued Hilliard Shackles with the newly soldered one. Touched up the top tapper and placed the Gilt Ball. I cut off a white sewing pin 1/8” from the head a C A glued it in place. Trucks for the Flag Halliard Re so small at this scale, I will represent the truck with black thread. Now maybe I can move on to the Main Topmast. Cheers 🍻
- 282 replies
-
- 7
-
-
- Bluenose
- Model Shipways
- (and 1 more)
-
Just found this 8.5x11 sheet of Bluenose Flags on Ships of Scale. https://shipsofscale.com/sosforums/attachments/bluenose-pdf.200877/ Bluenose.pdf
- 282 replies
-
- 1
-
-
- Bluenose
- Model Shipways
- (and 1 more)
-
Thanks Hamilton… Nope, I have never been a jeweler, LOL. Just working on my new skill sets to keep up with all you watchmakers out there. A steady hand and a good Optomitrist, helps. Oh! And a lot of help from my friends on MSW. 👍
- 282 replies
-
- 3
-
-
- Bluenose
- Model Shipways
- (and 1 more)