Arjan
-
Posts
38 -
Joined
-
Last visited
Content Type
Profiles
Forums
Gallery
Events
Everything posted by Arjan
-
Great build and I love the figures ! Regards, Arjan
-
The BB Oseberg kit does have its issues but it's much easier to build than the 1/35 Dusek Longship models (due to the correctly shaped hull planks). The interior of your CA model really looks awesome ! I can imagine that this has taken you many hours . I haven't finished my CA model yet, I've been too busy with more pressing matters in the "real" world 🙂. I'm looking forward to seeing more pics of your models. Regards, Arjan
- 23 replies
-
- 1
-

-
- oseberg
- billing boats
- (and 2 more)
-
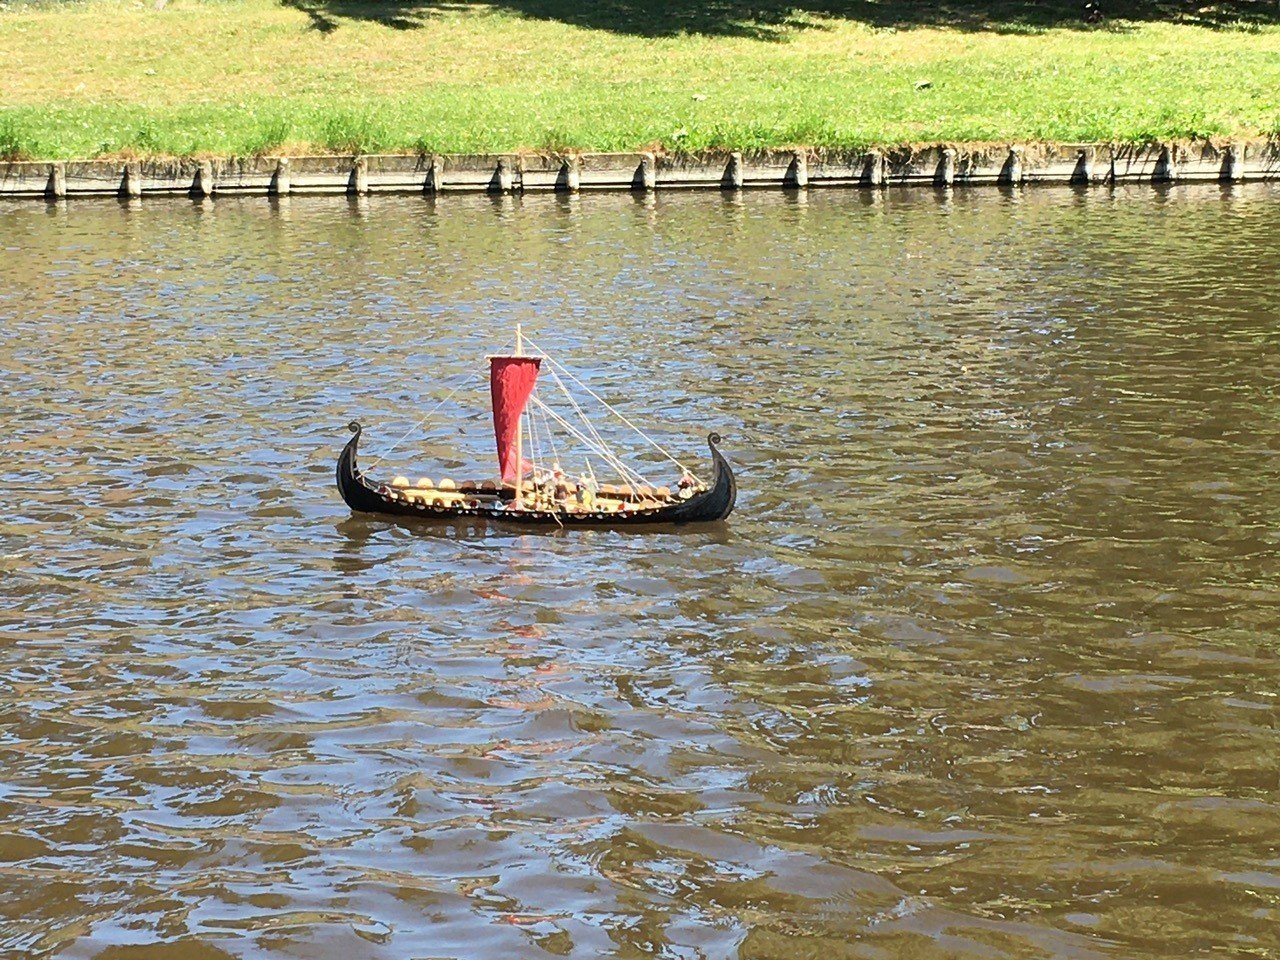
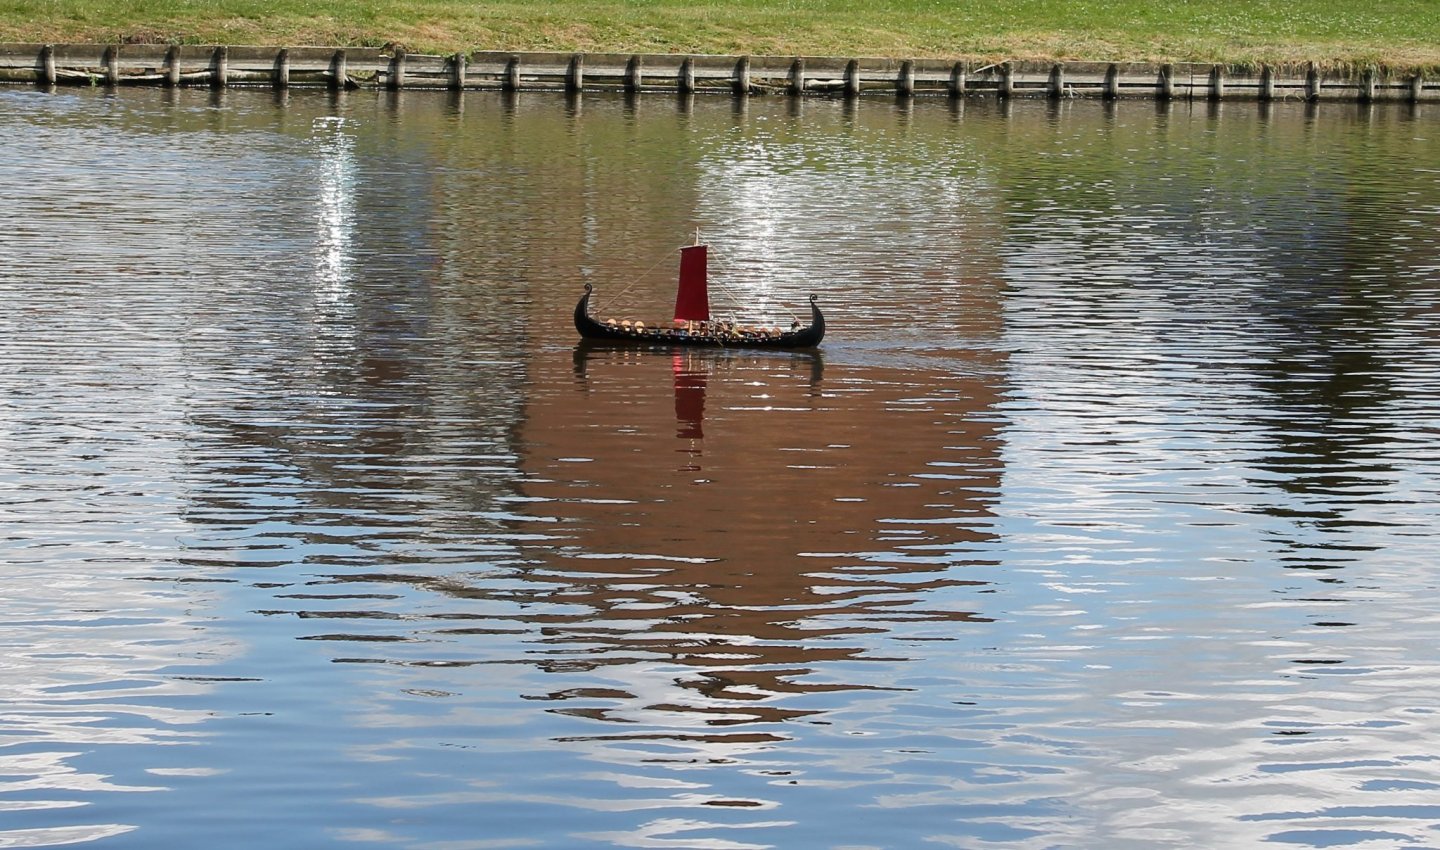
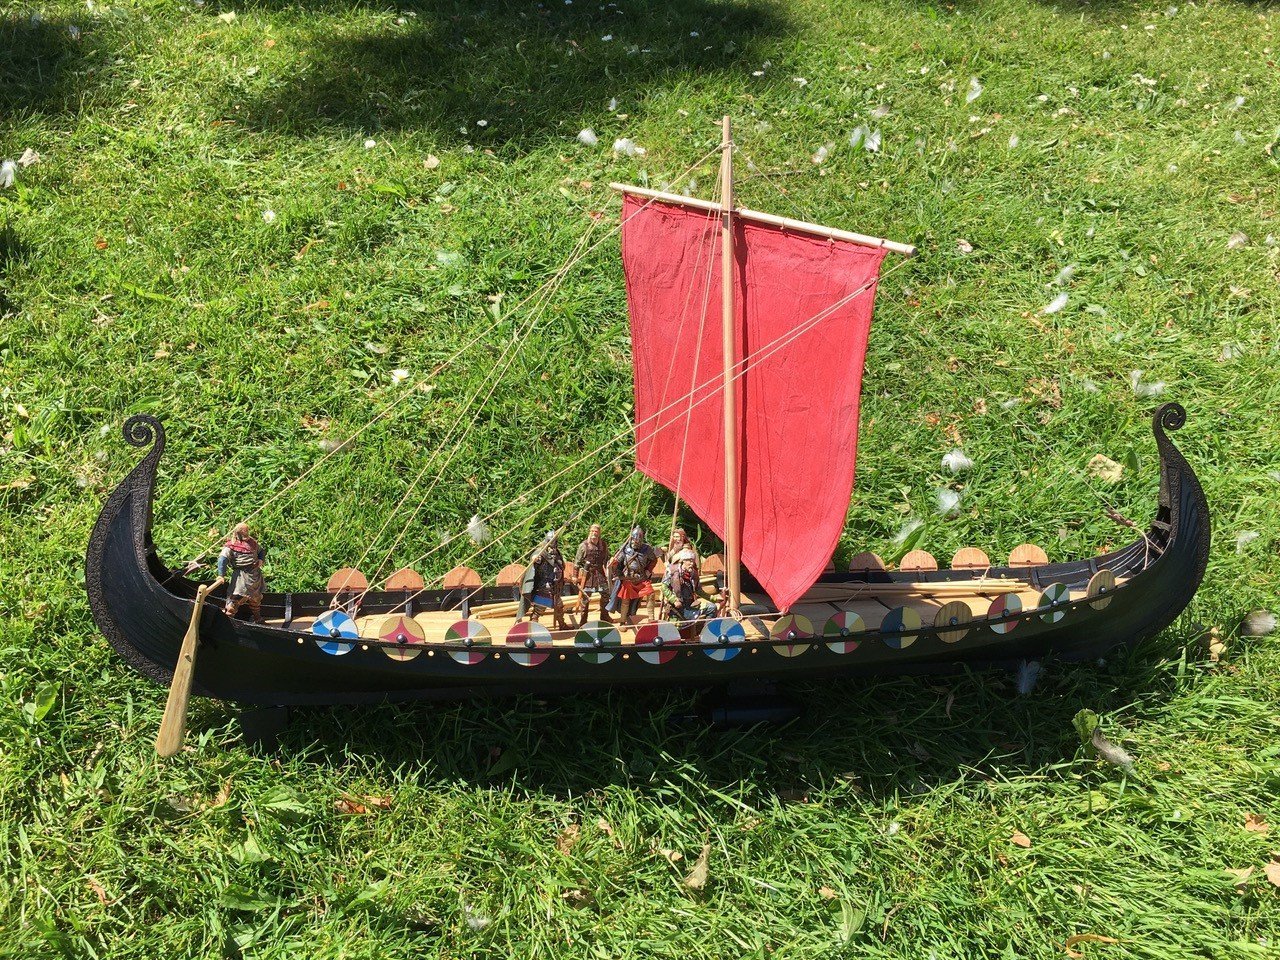
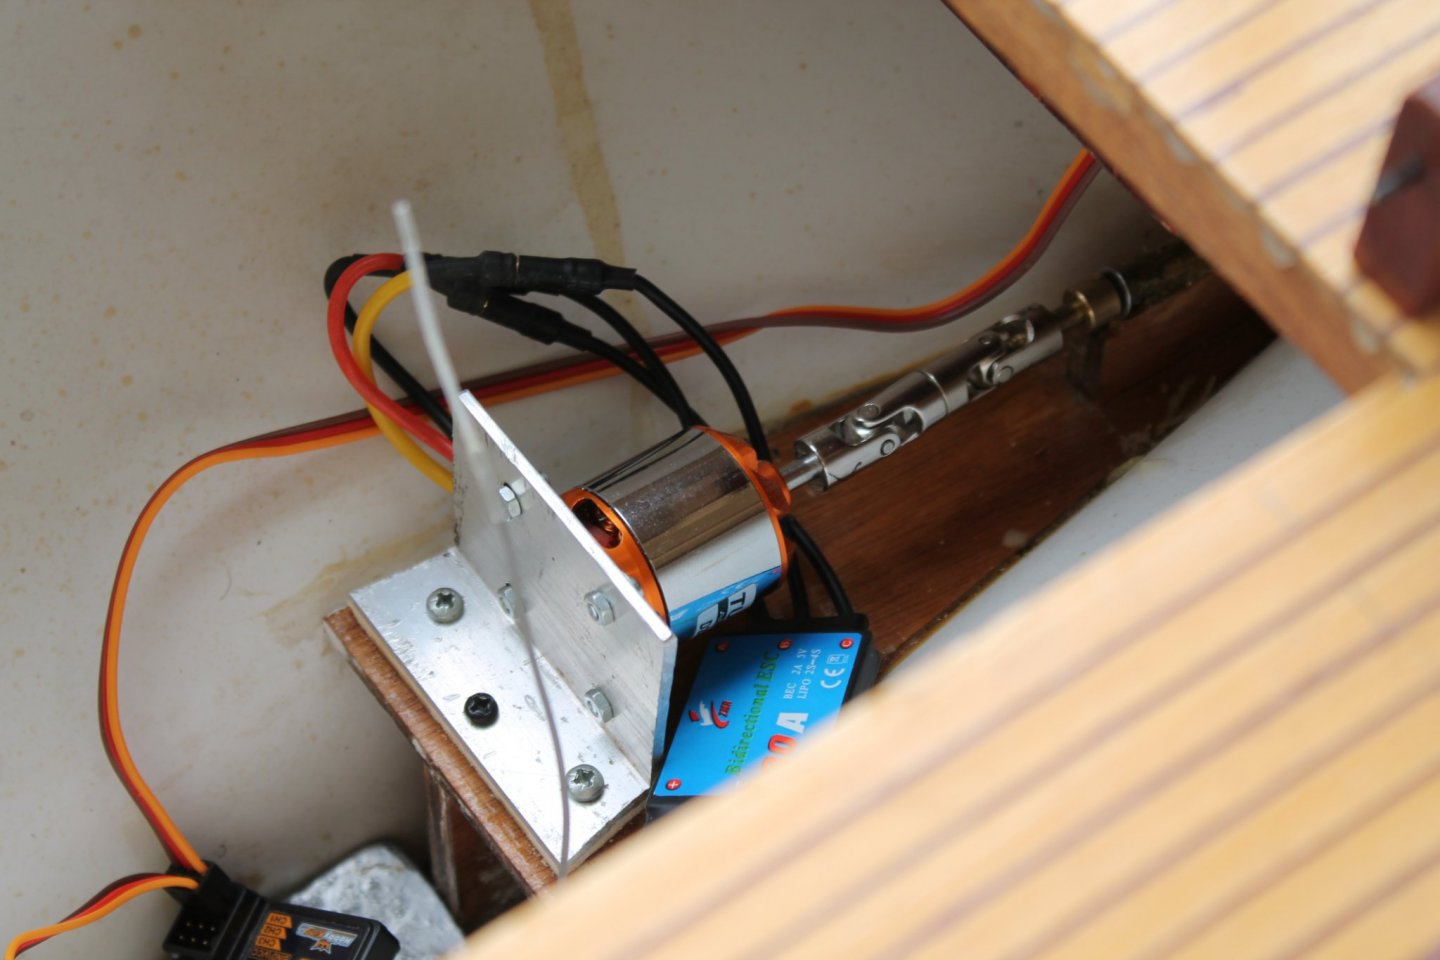
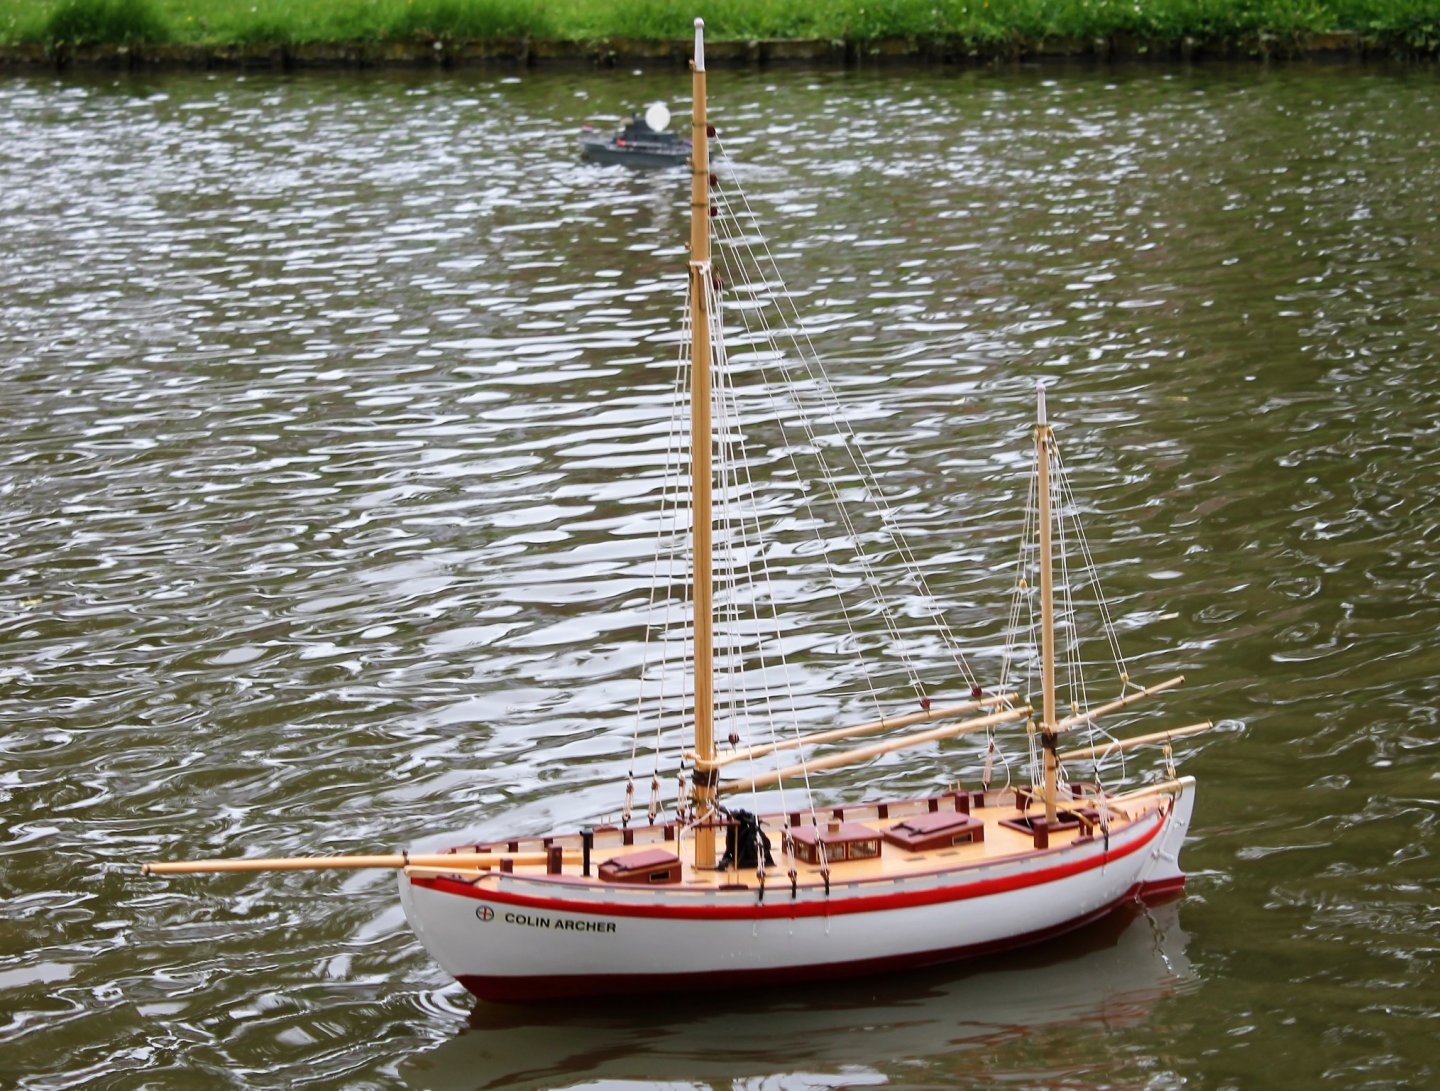
Thanks George, I guess building an Oseberg model is almost mandatory for Norwegian boat modelers 🙂. I regret not having visited the Viking Ship Museum when I was in Oslo many years ago. As for ballast, my model has an underwater motor under the keel (140 grams) and a 2S lipo (also 140 grams) inside the hull . So the total ballast is 280 grams. I must confess, though, that my model should only be used when there's very little wind. The model capsized moments after the attached pics had been taken (in a sudden gust of wind). Fortunately, the boat didn't sink completely and I managed to salvage it. It definitely requires a bulb keel but since it will never make a decent rc model I haven't bothered. Regards, Arjan
- 23 replies
-
- 4
-
-
- oseberg
- billing boats
- (and 2 more)
-
Thanks Steven, I added a sixth crew member. I should still add the chests/seats for the oarsmen. Regards, Arjan


- 23 replies
-
- 5
-
-
- oseberg
- billing boats
- (and 2 more)
-
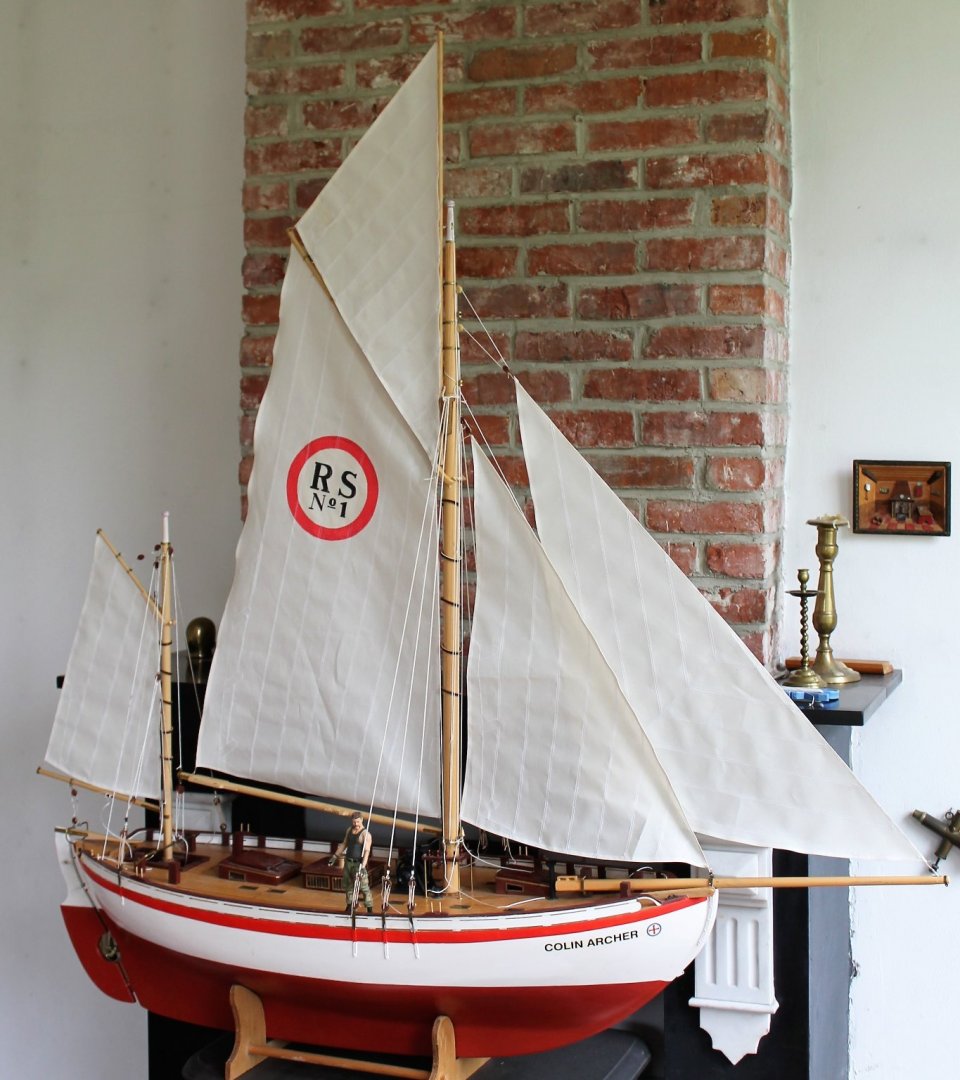
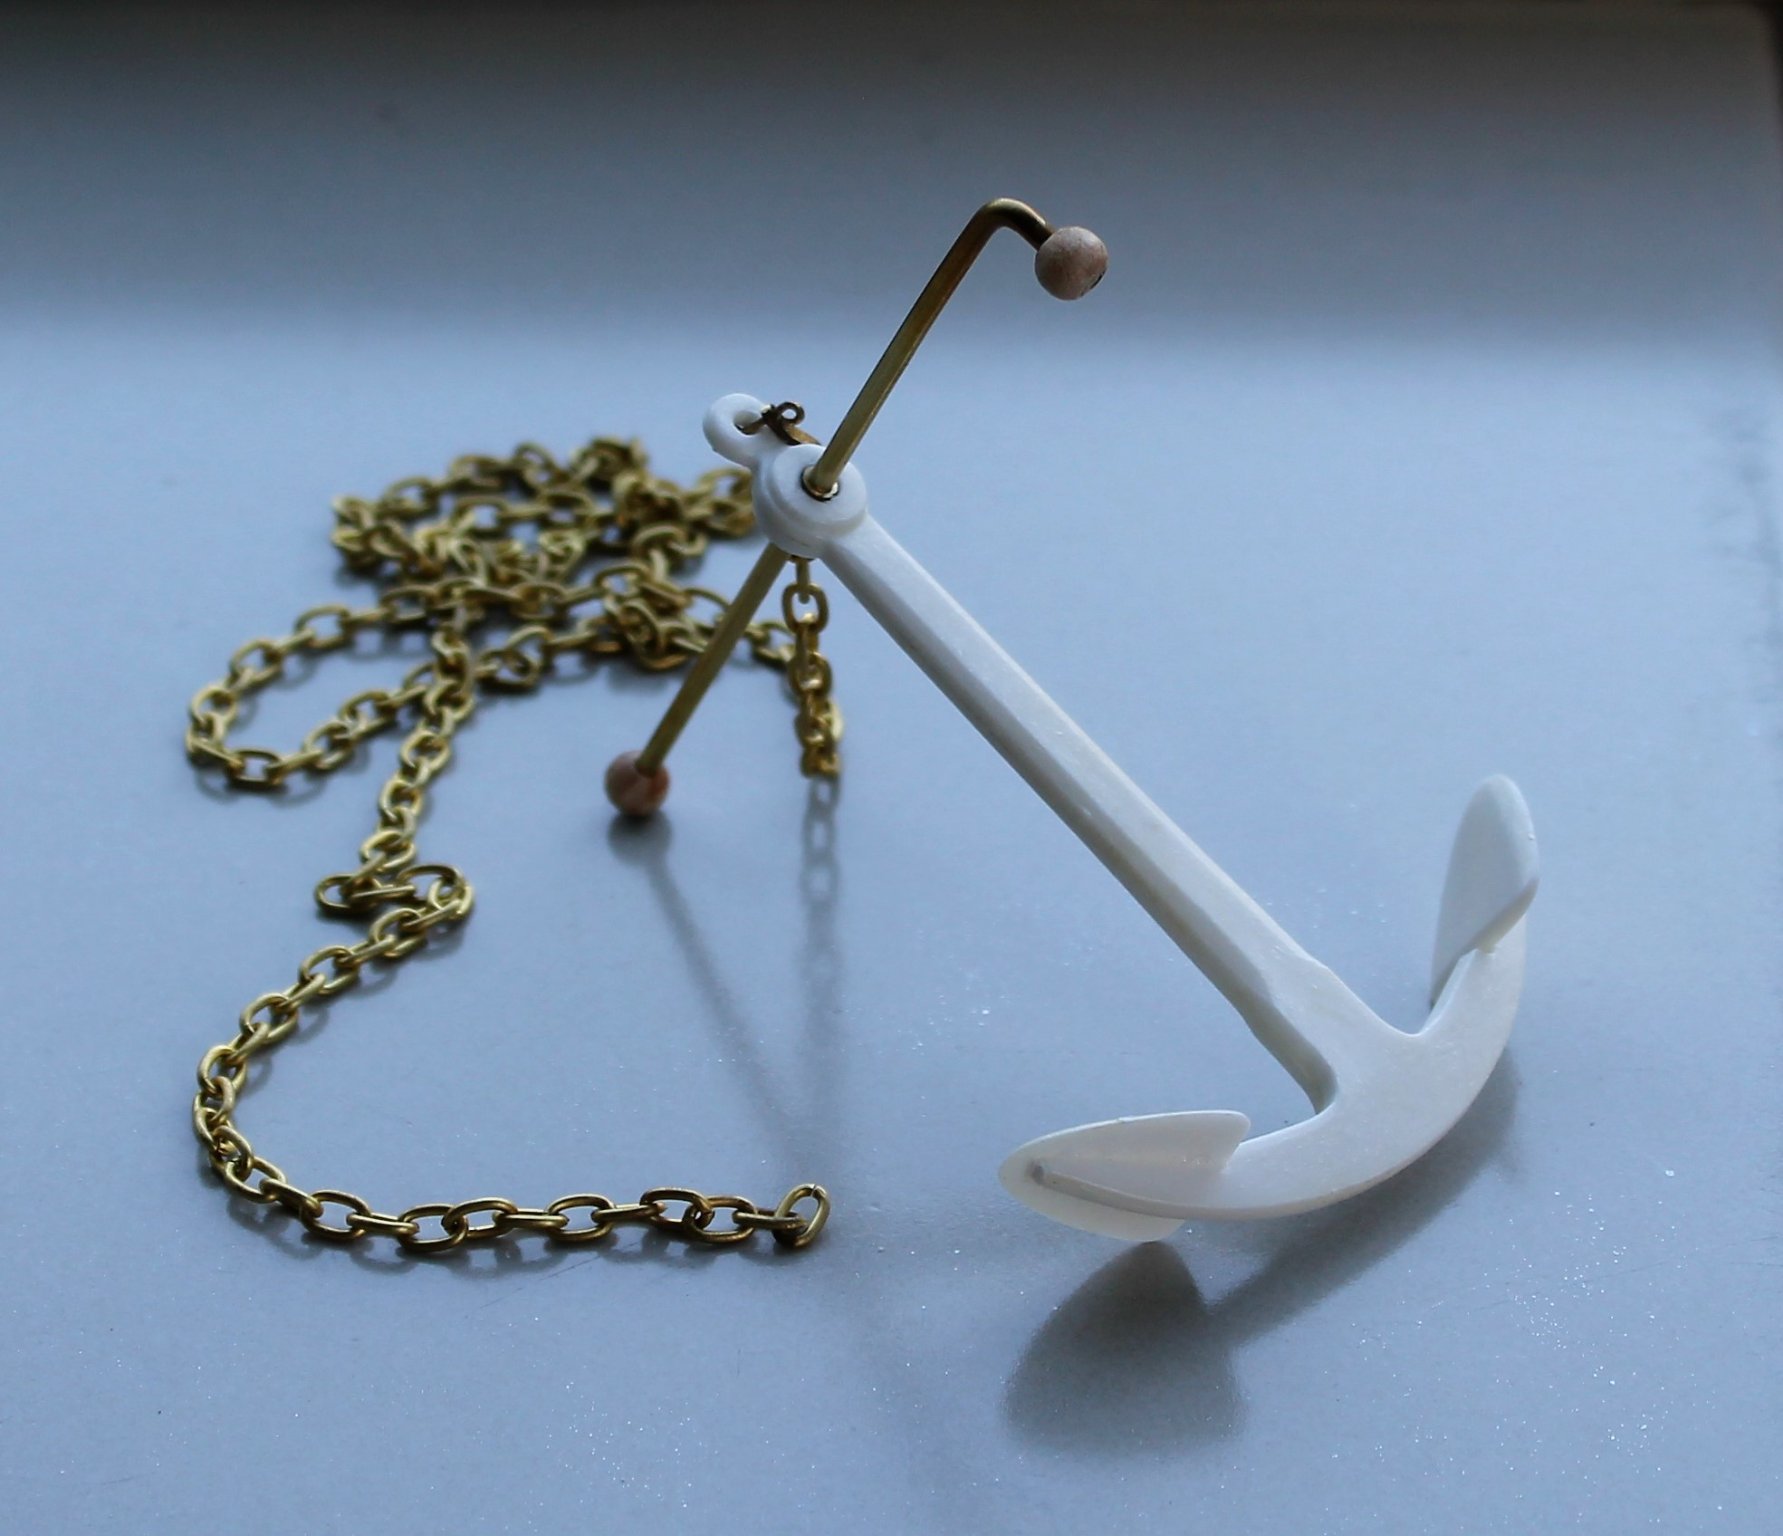
Thanks George. In the mean time I've assembled the anchor and fitted the sails. Regards, Arjan


-
Looking good George. Leaving the deck off for now is probably wise, especially until you have decided what to do with the steering arrangement. Regards, Arjan
-
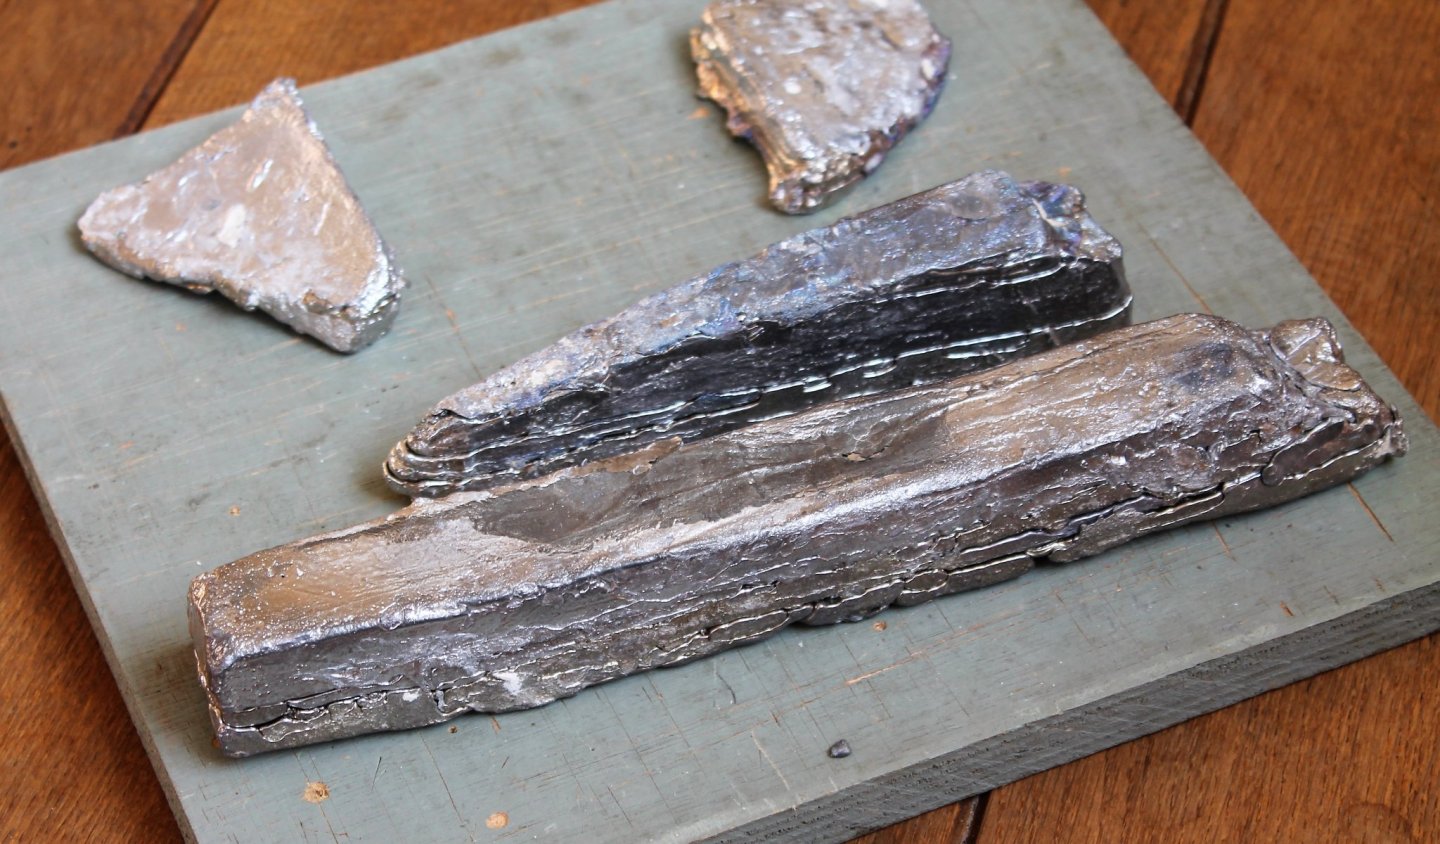
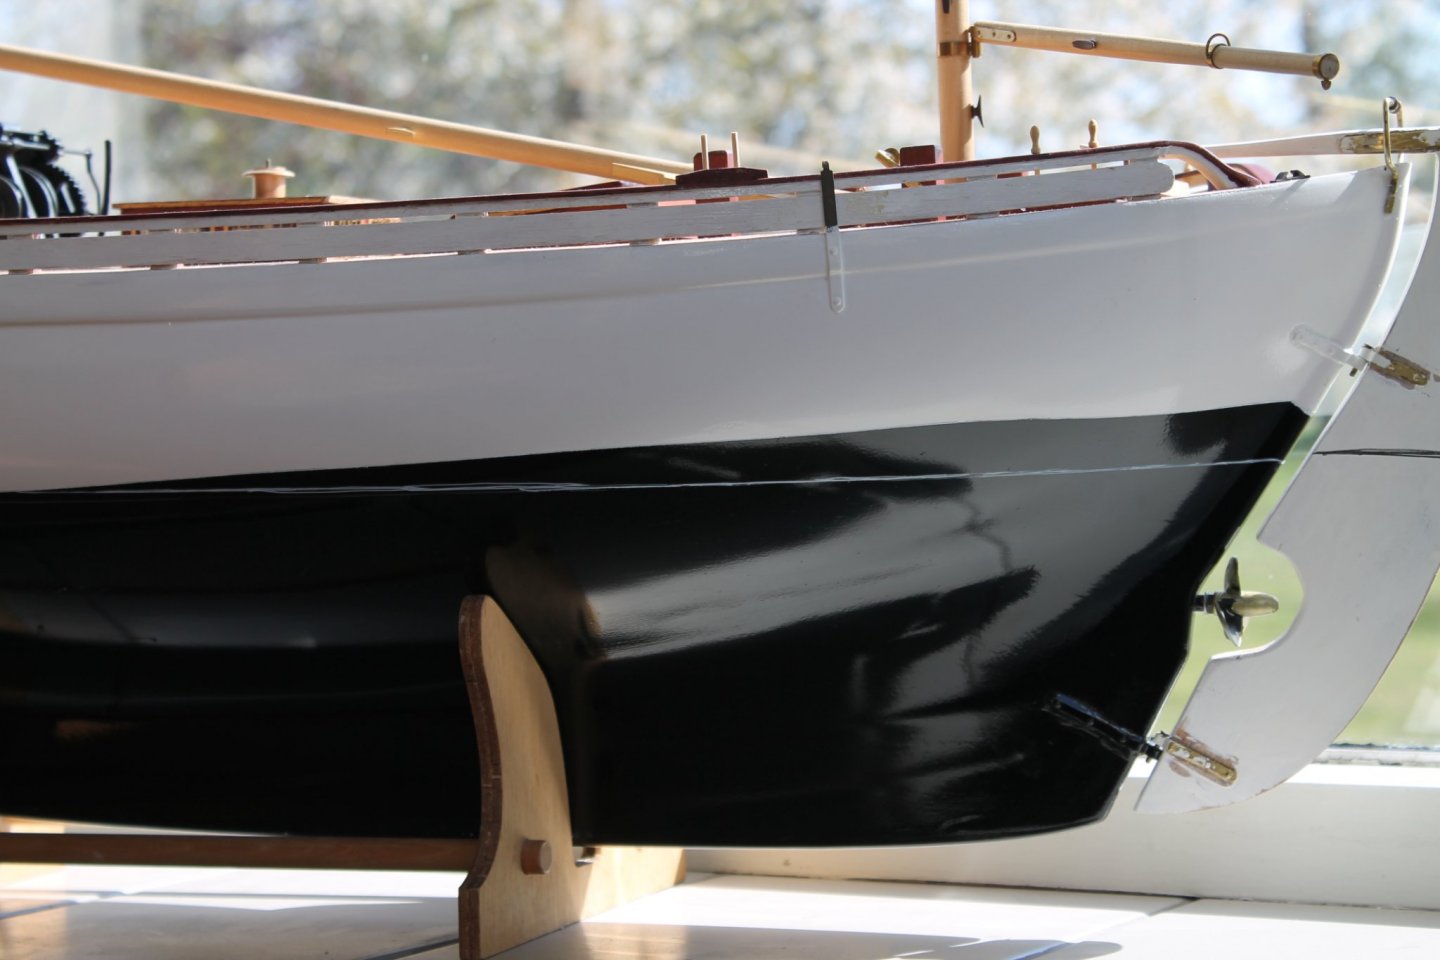
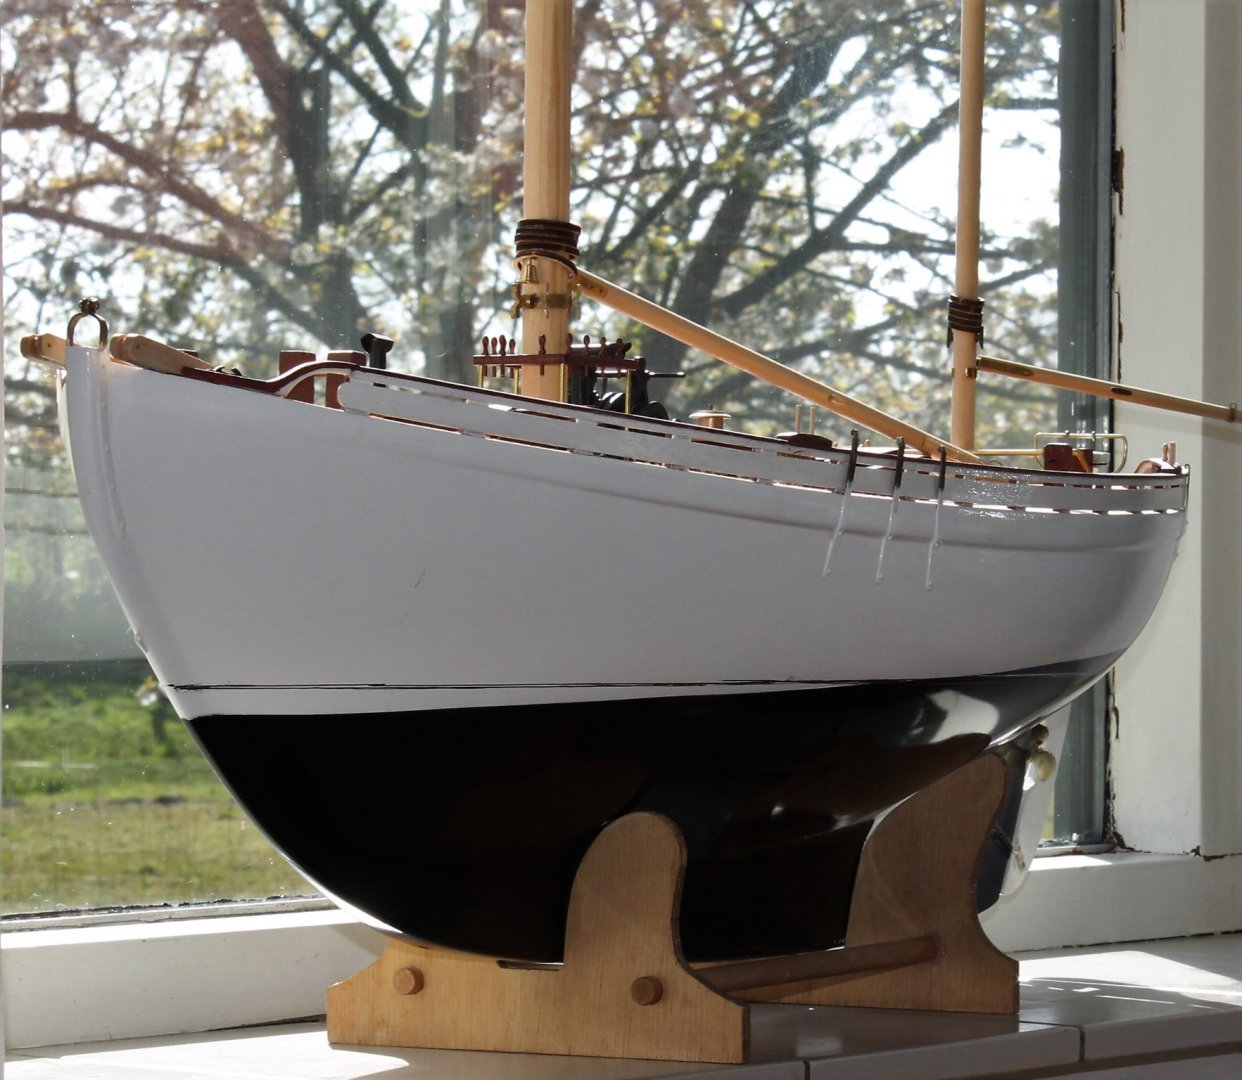
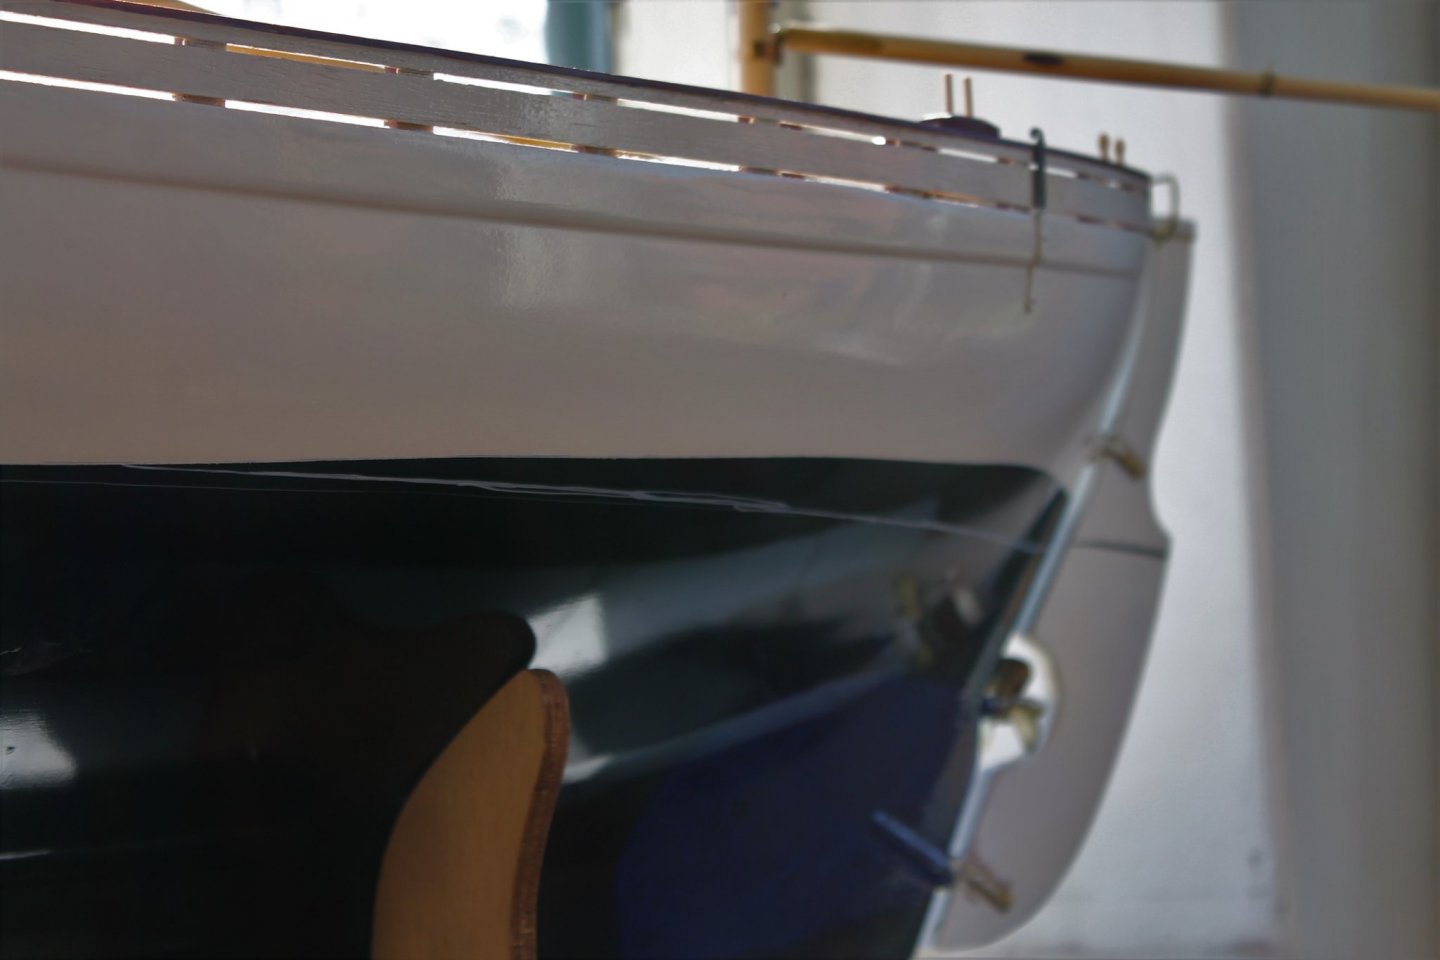
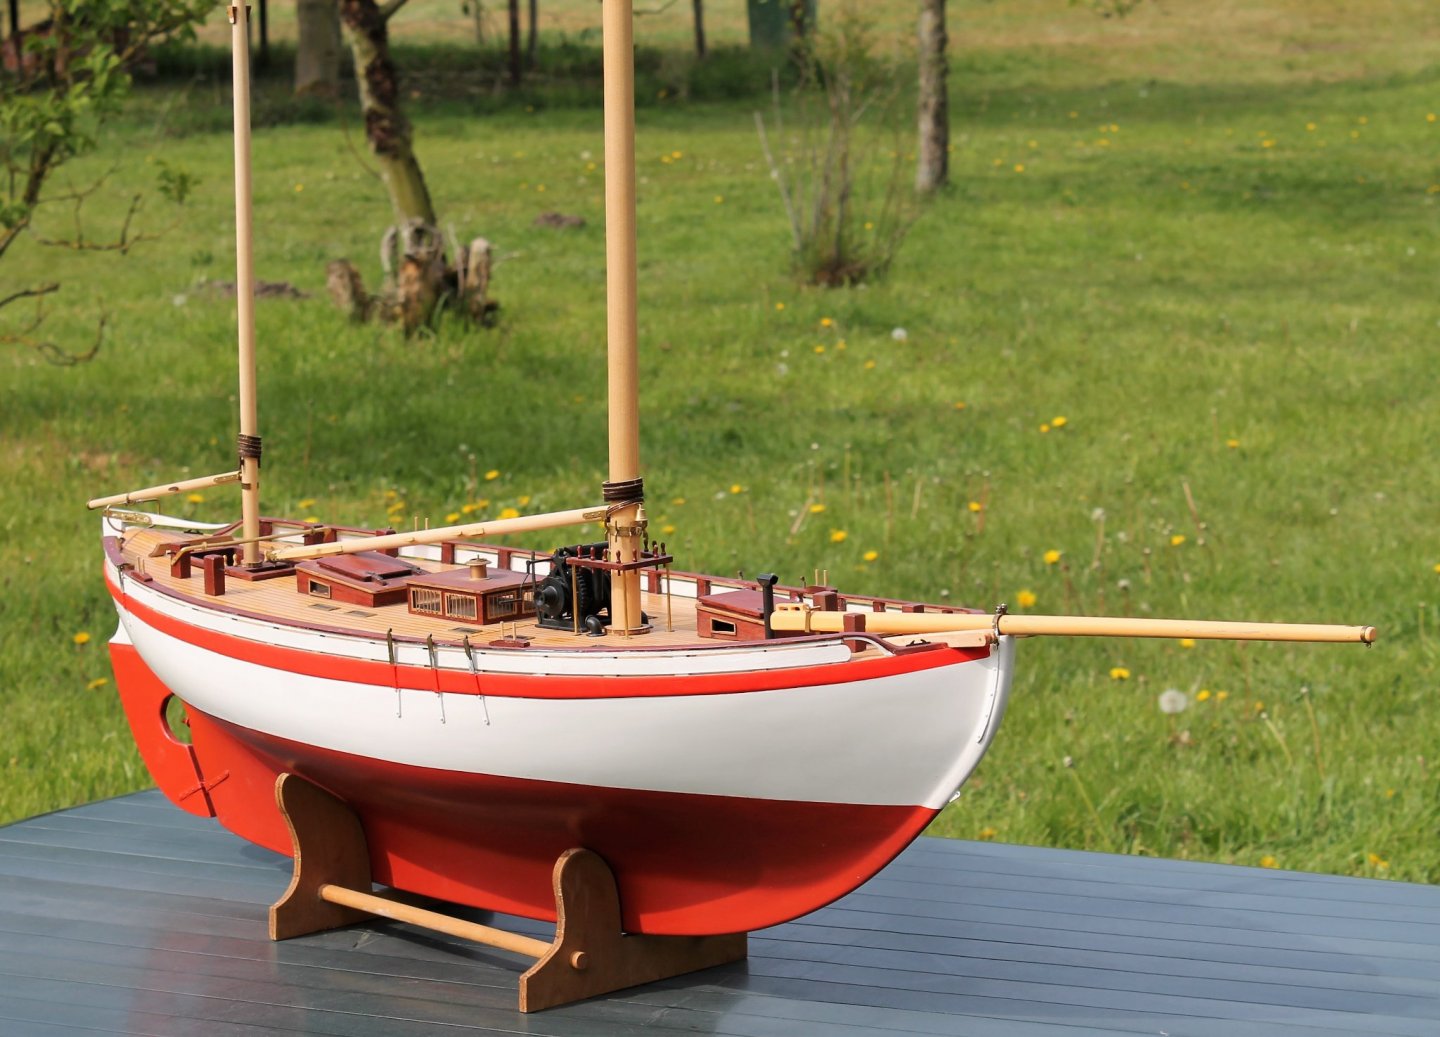
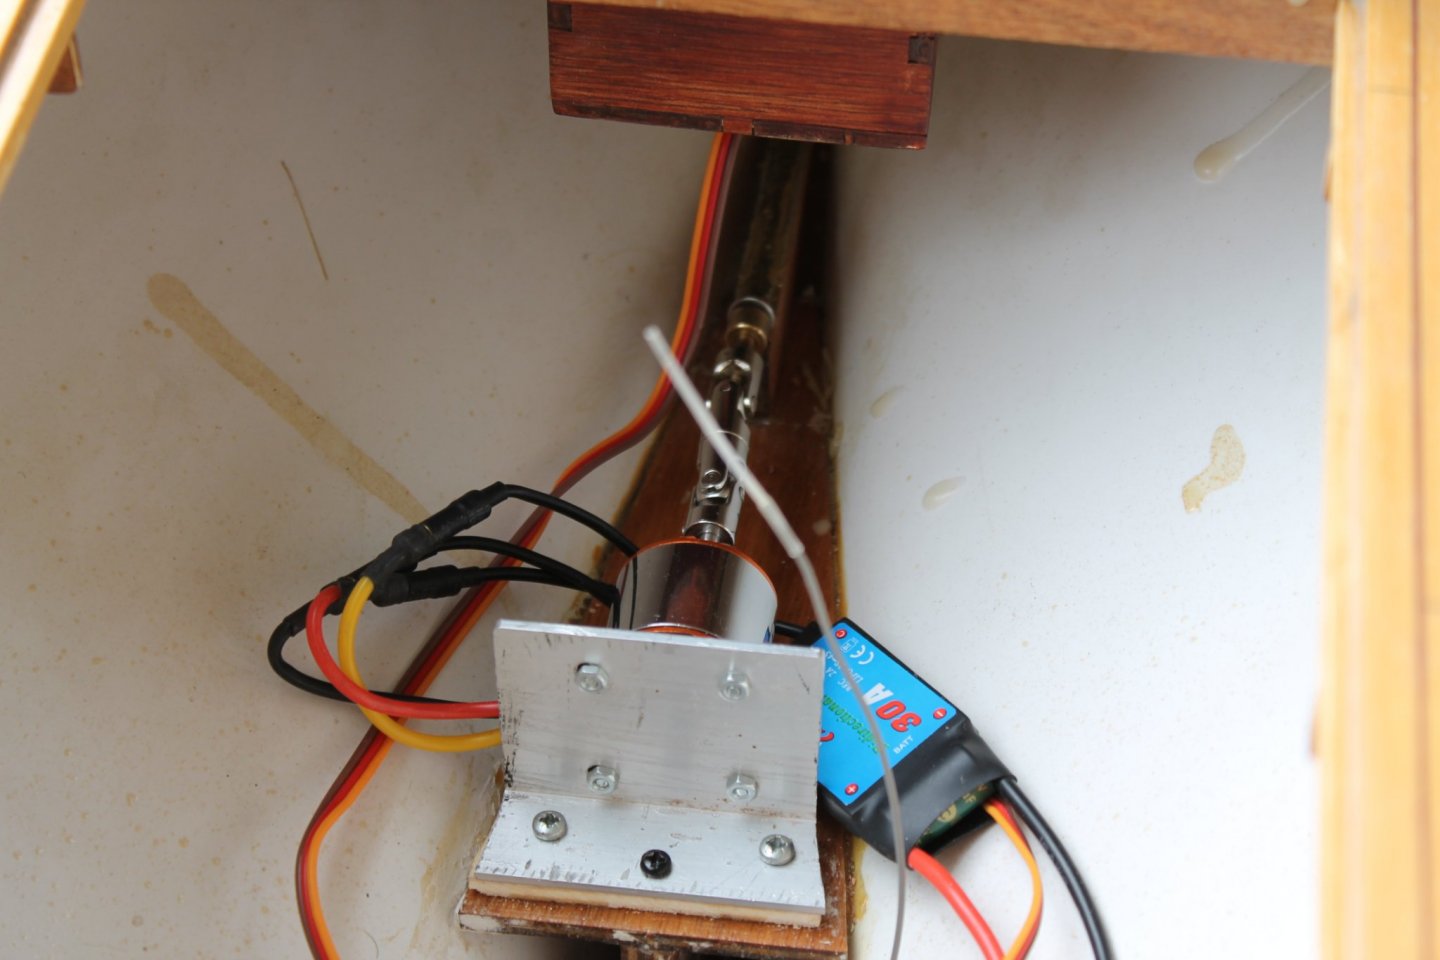
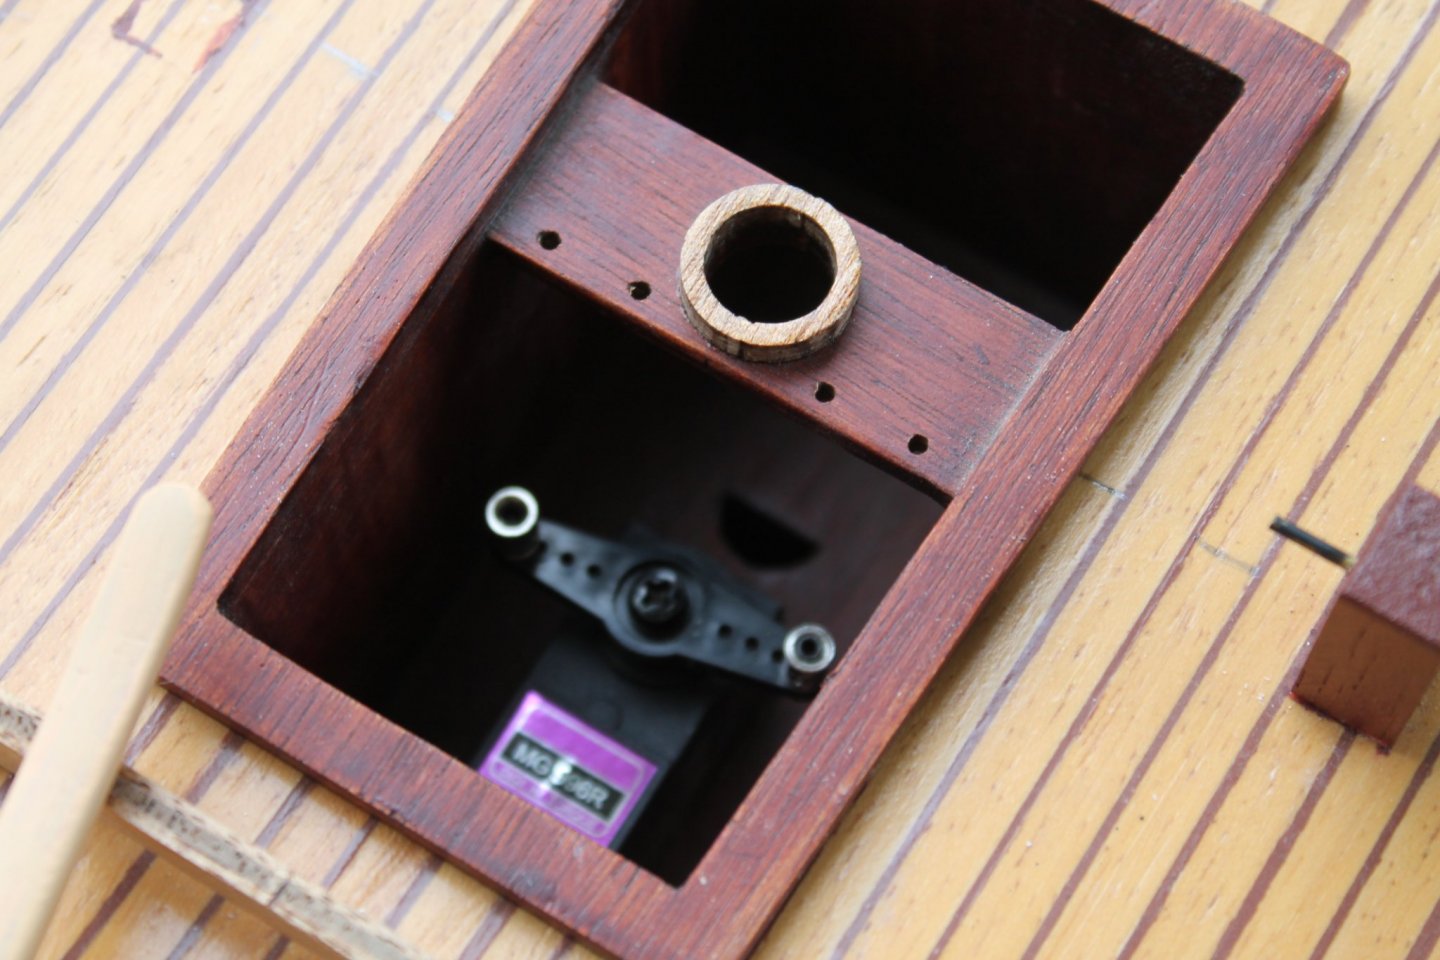
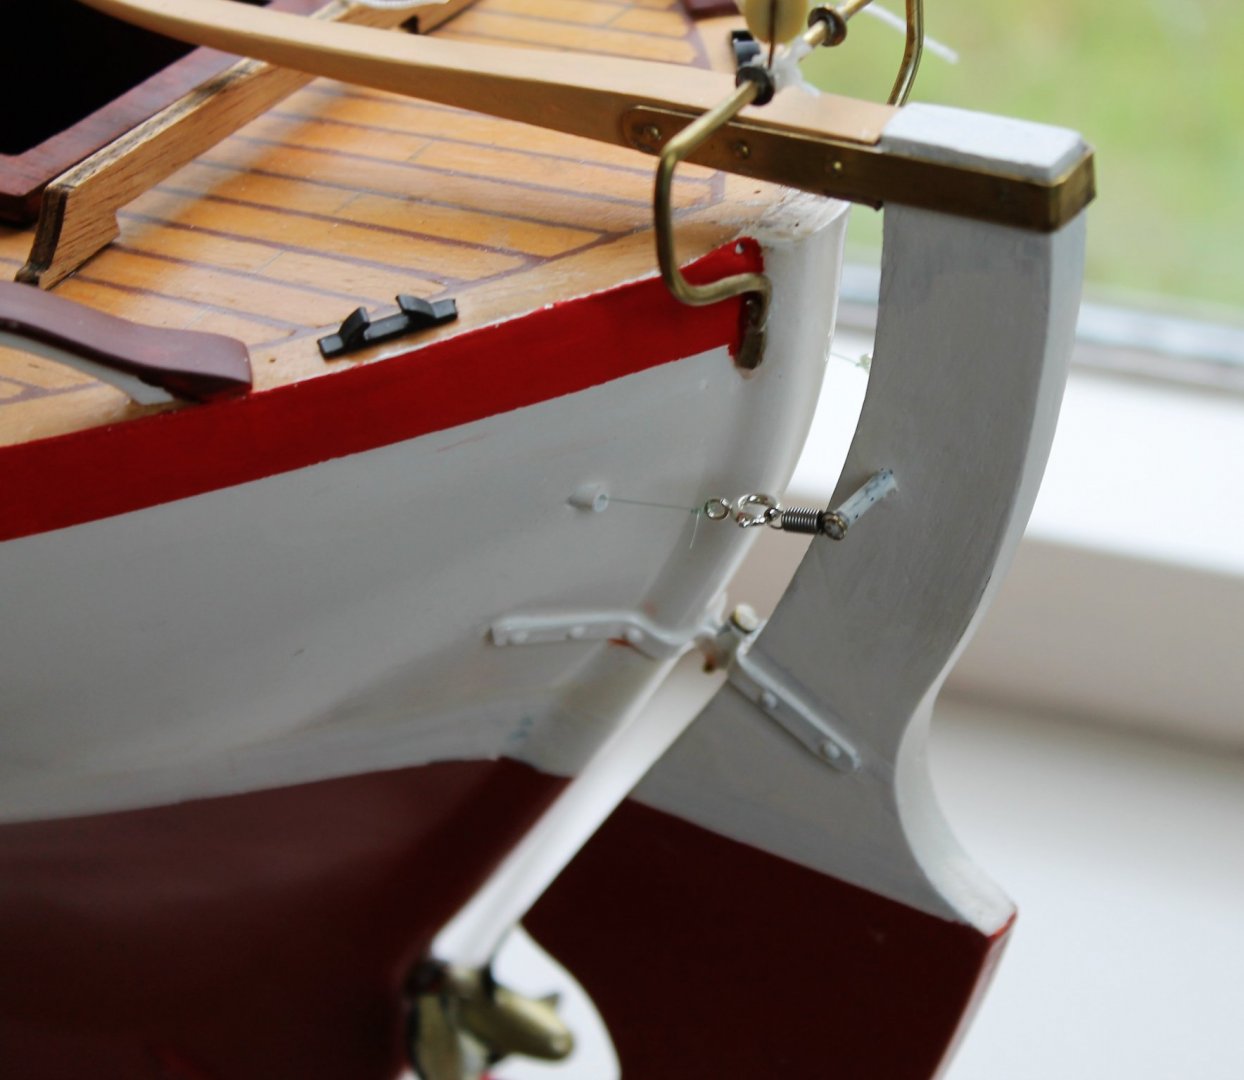
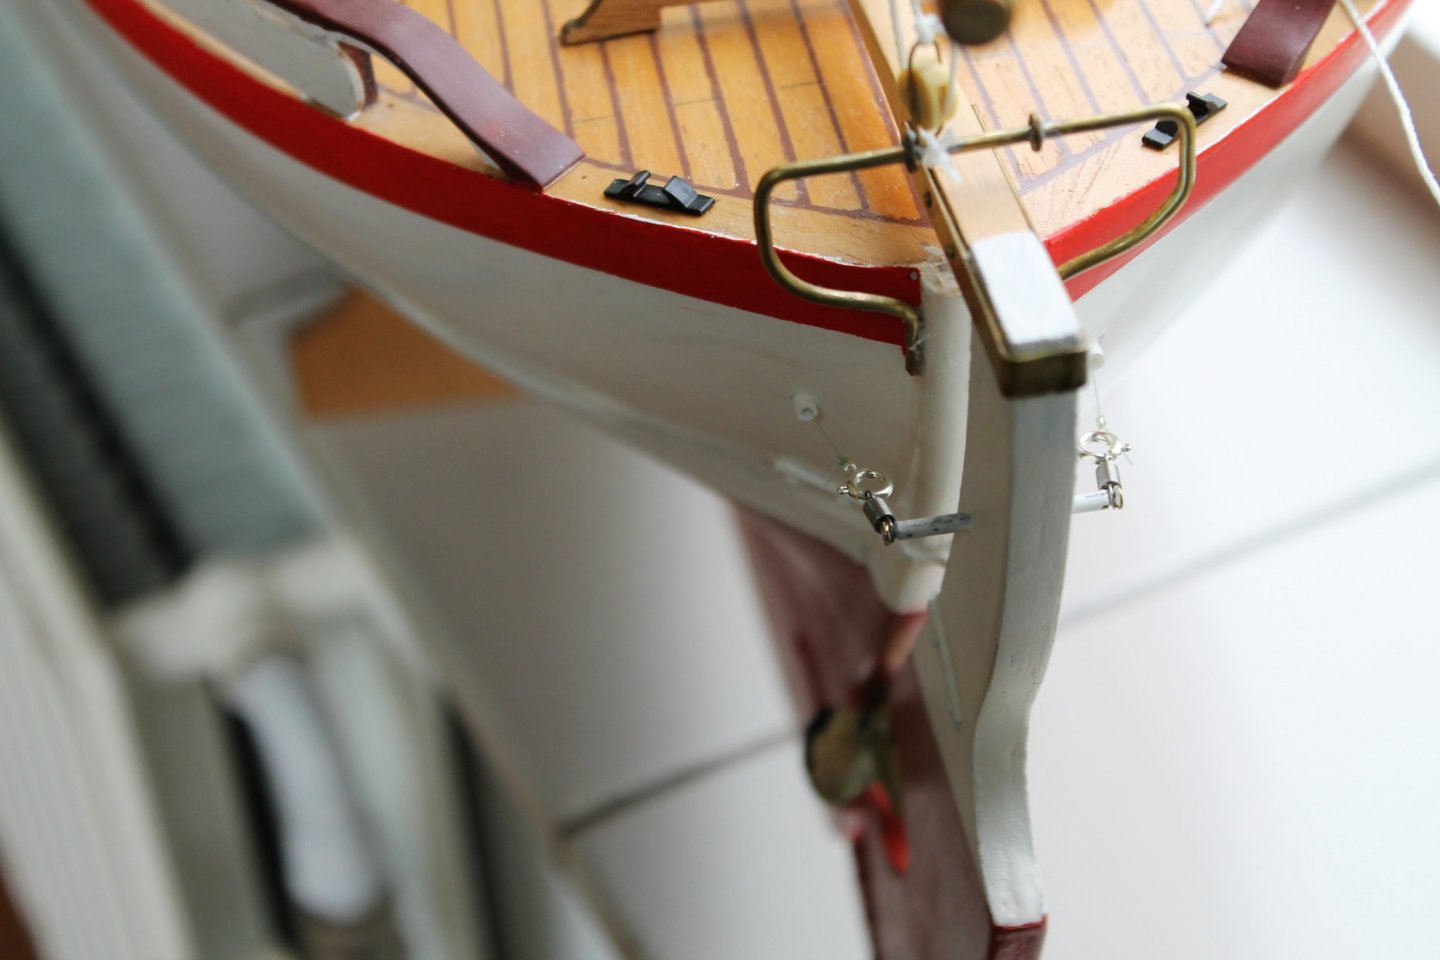
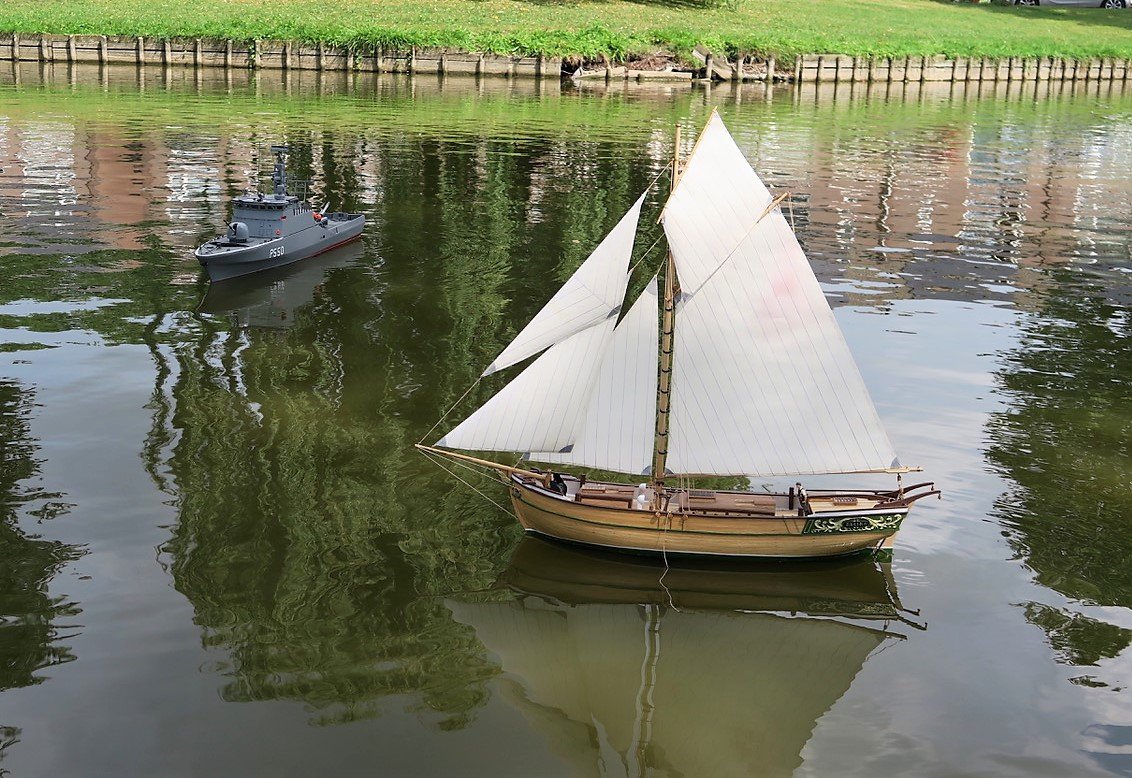
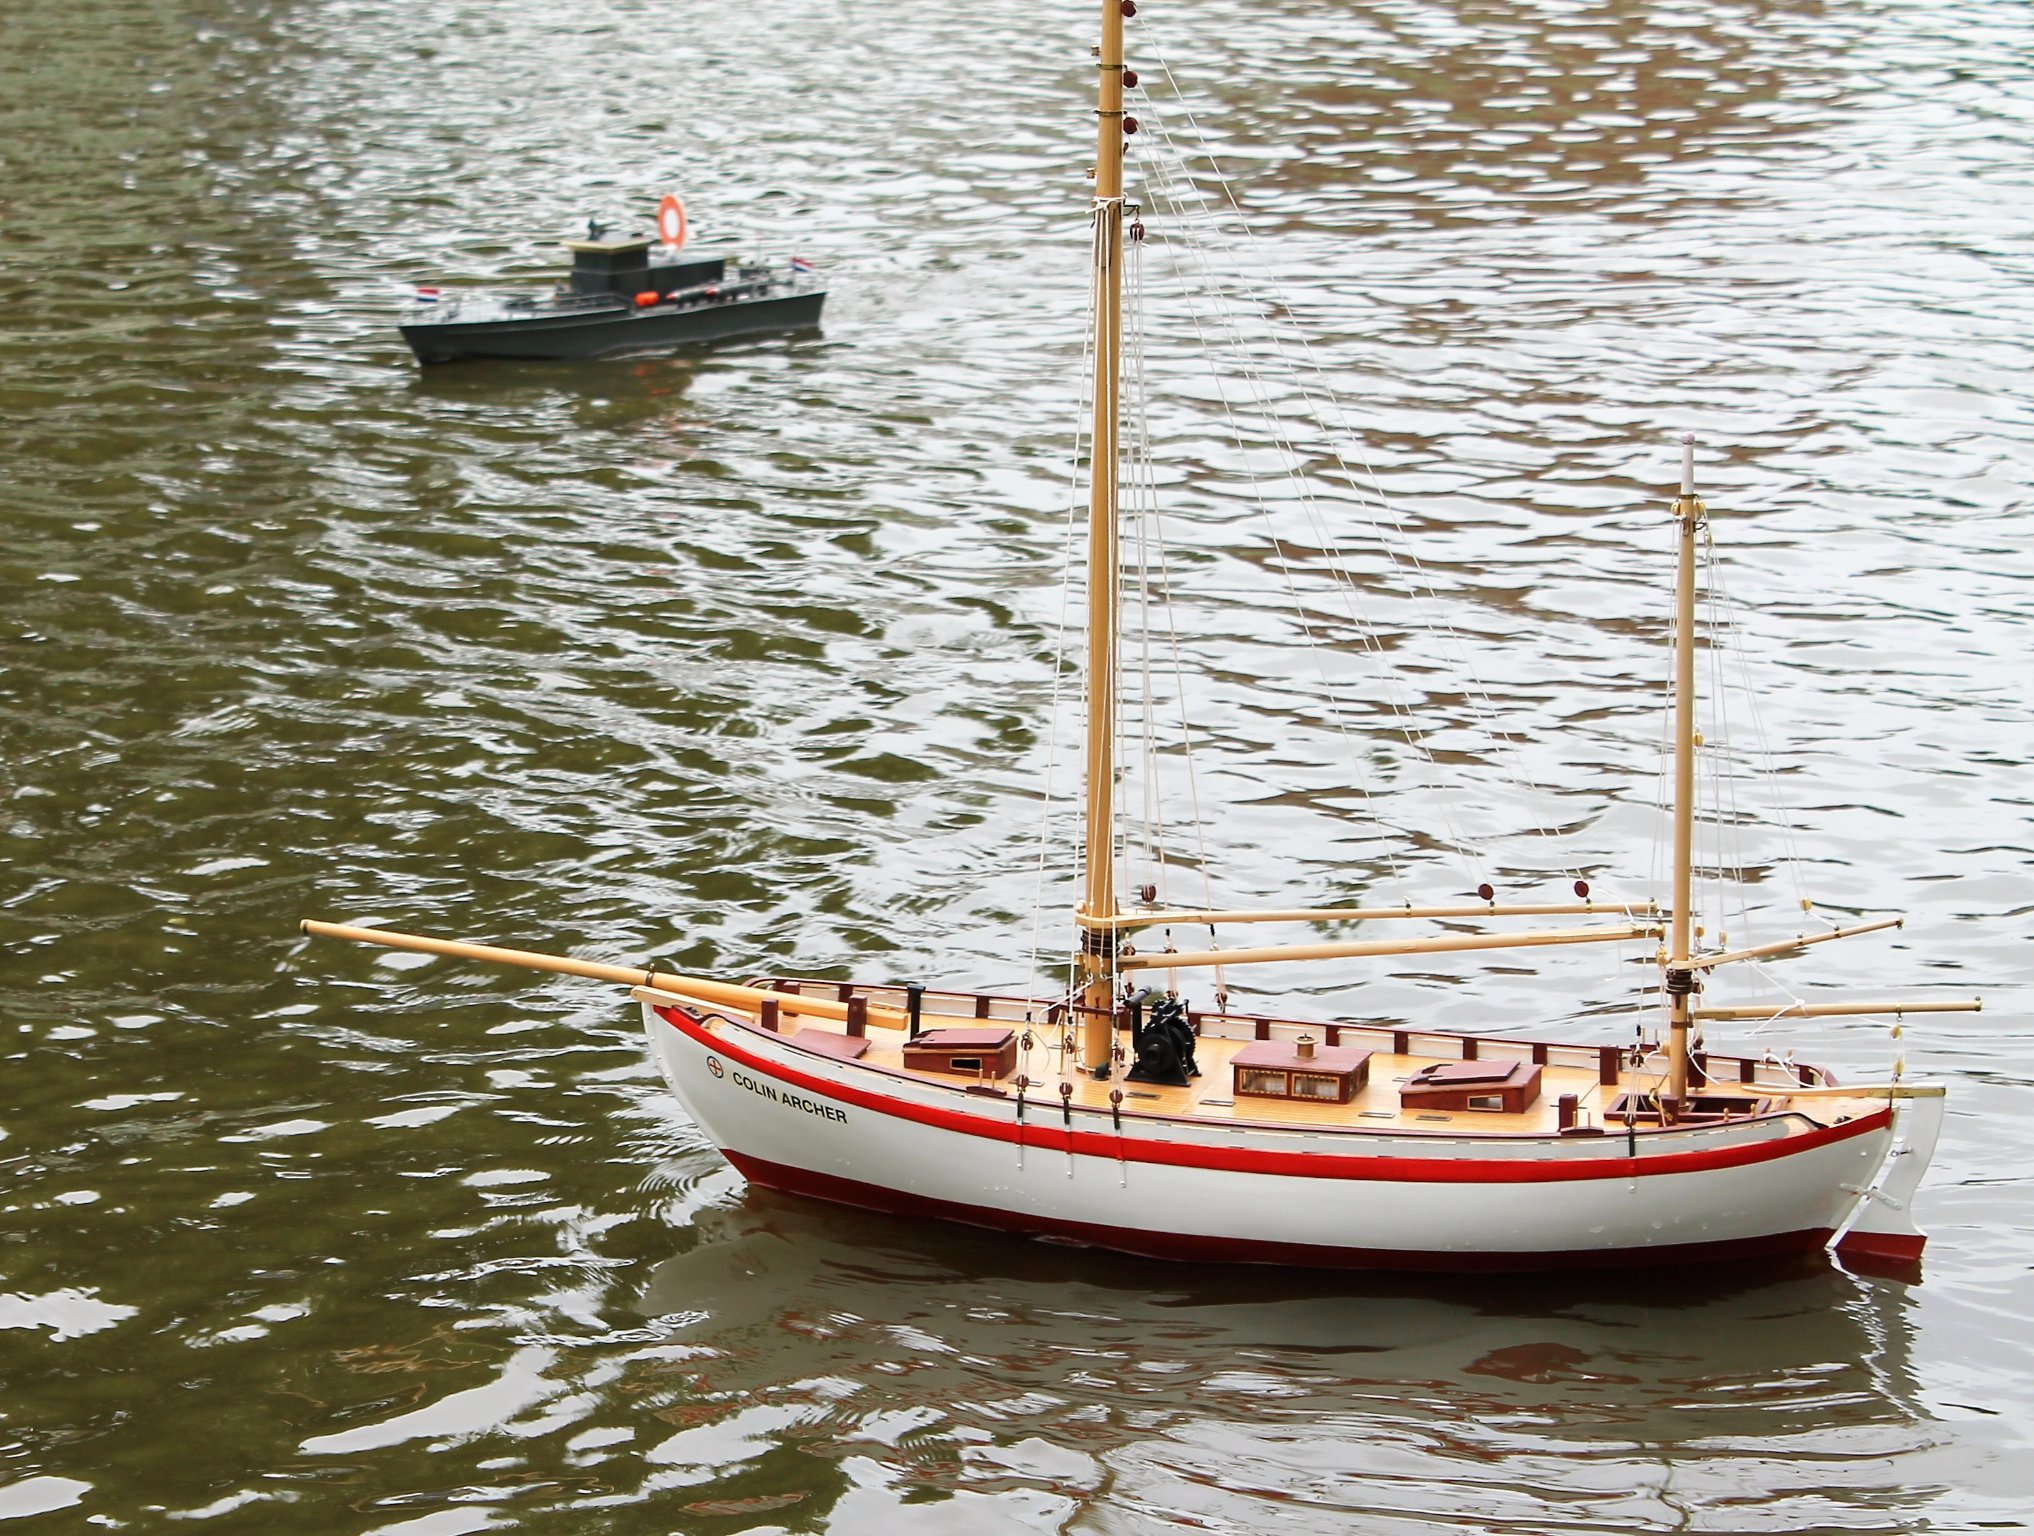
Time for an update. I cast some lead ballast , repainted the underwater ship, added the motor, steering servo and finally I added some rigging. Next job will be the sails. Regards, Arjan


-
Thanks gentlemen for your kind remarks ! George, I think for most people building the CA kit just takes far too much time. The new kit, with the wooden hull, only makes matters worse in this respect . Personally I think BB should have upgraded their instructions instead of discontinuing the ABS hull. Håkan, most of the paint work was done by brush. I must confess that the Regina model is not a viable rc boat (too small and vulnerable). I put my CA build on hold last November but I will continue once my current Schnellboot project has been finished (shouldn't take too long now) : https://www.britmodeller.com/forums/index.php?/topic/235083518-135-schnellboot-typ-s-38-rc-conversion/ I usually find it hard to finish projects because new ones are always more interesting 🙂. Regards, Arjan
-
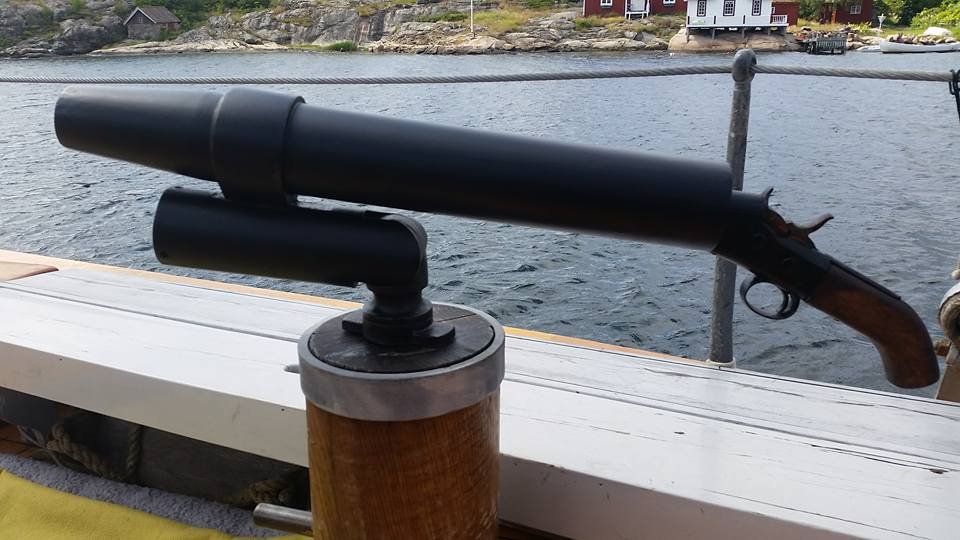
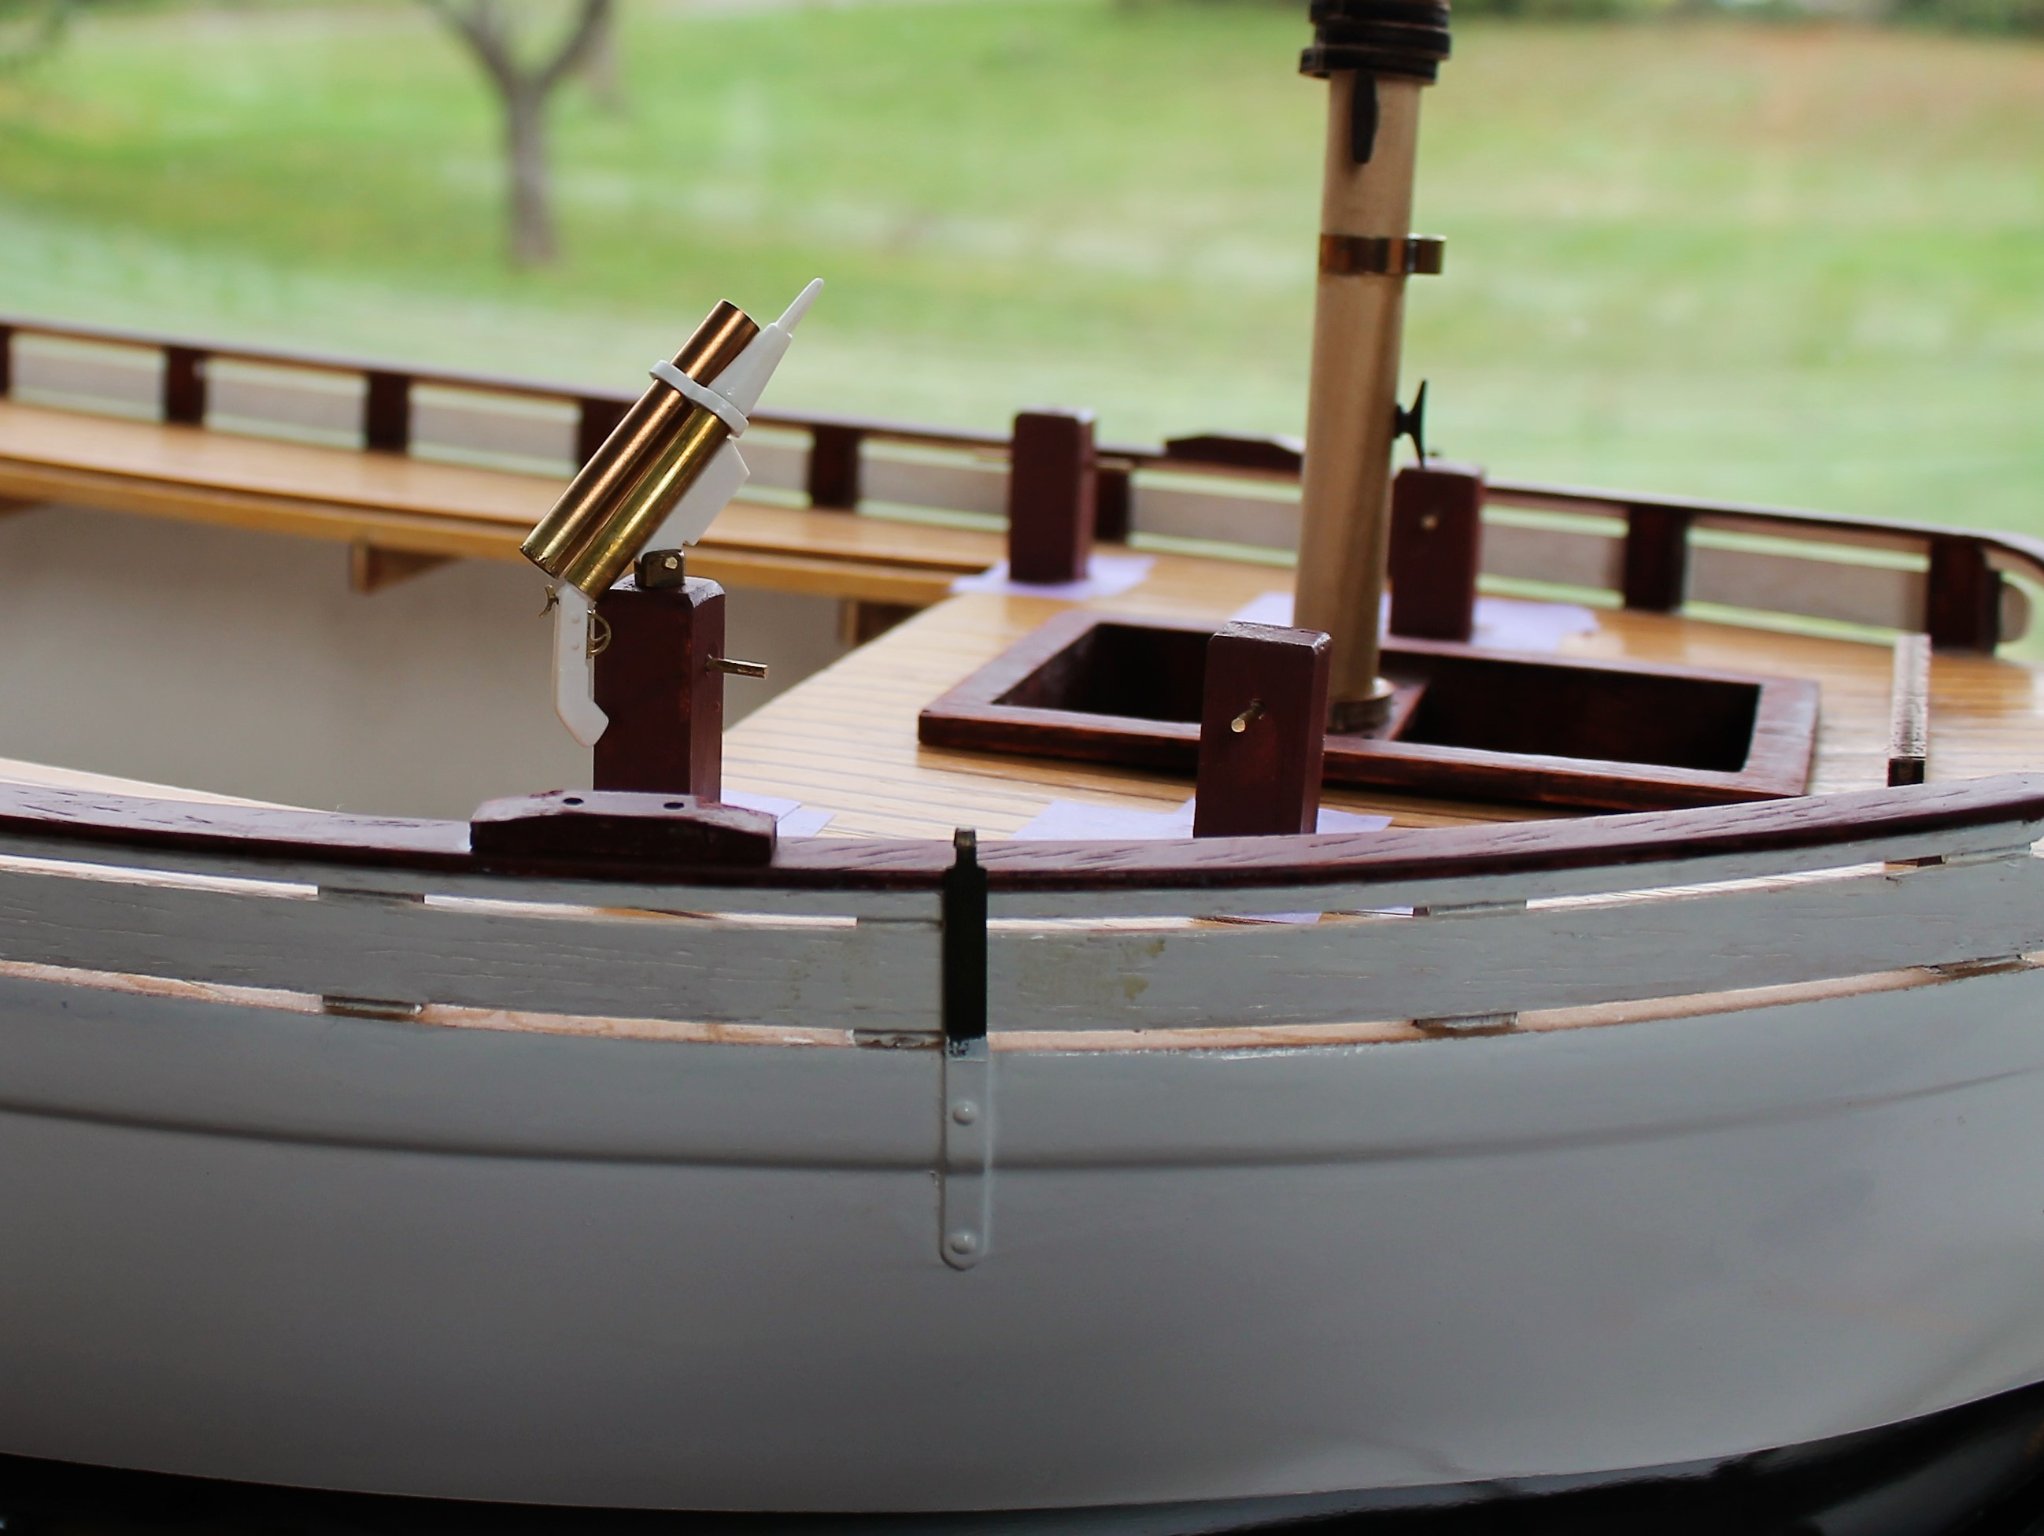
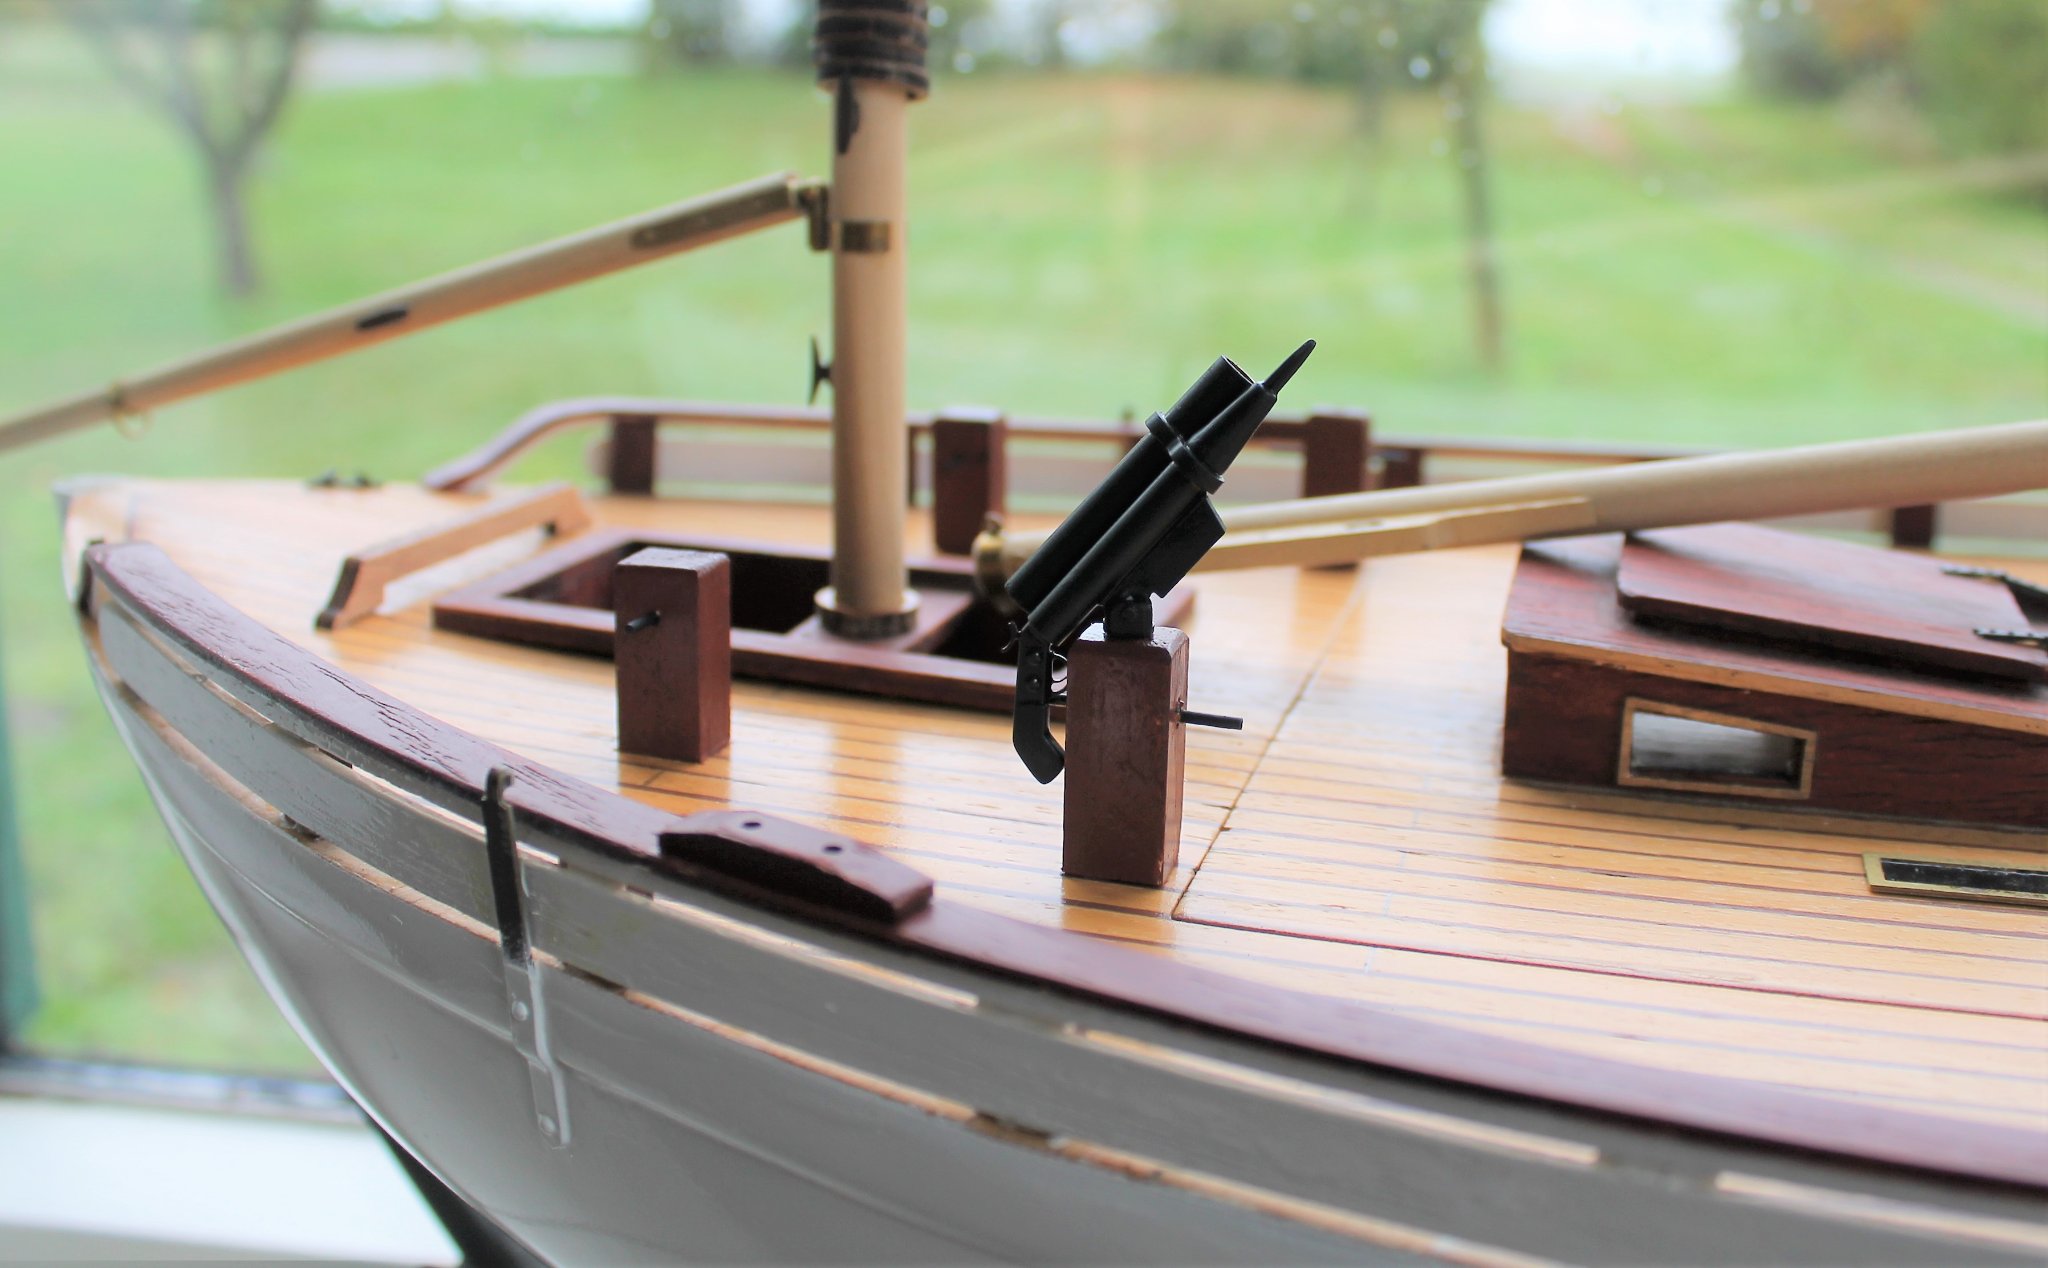
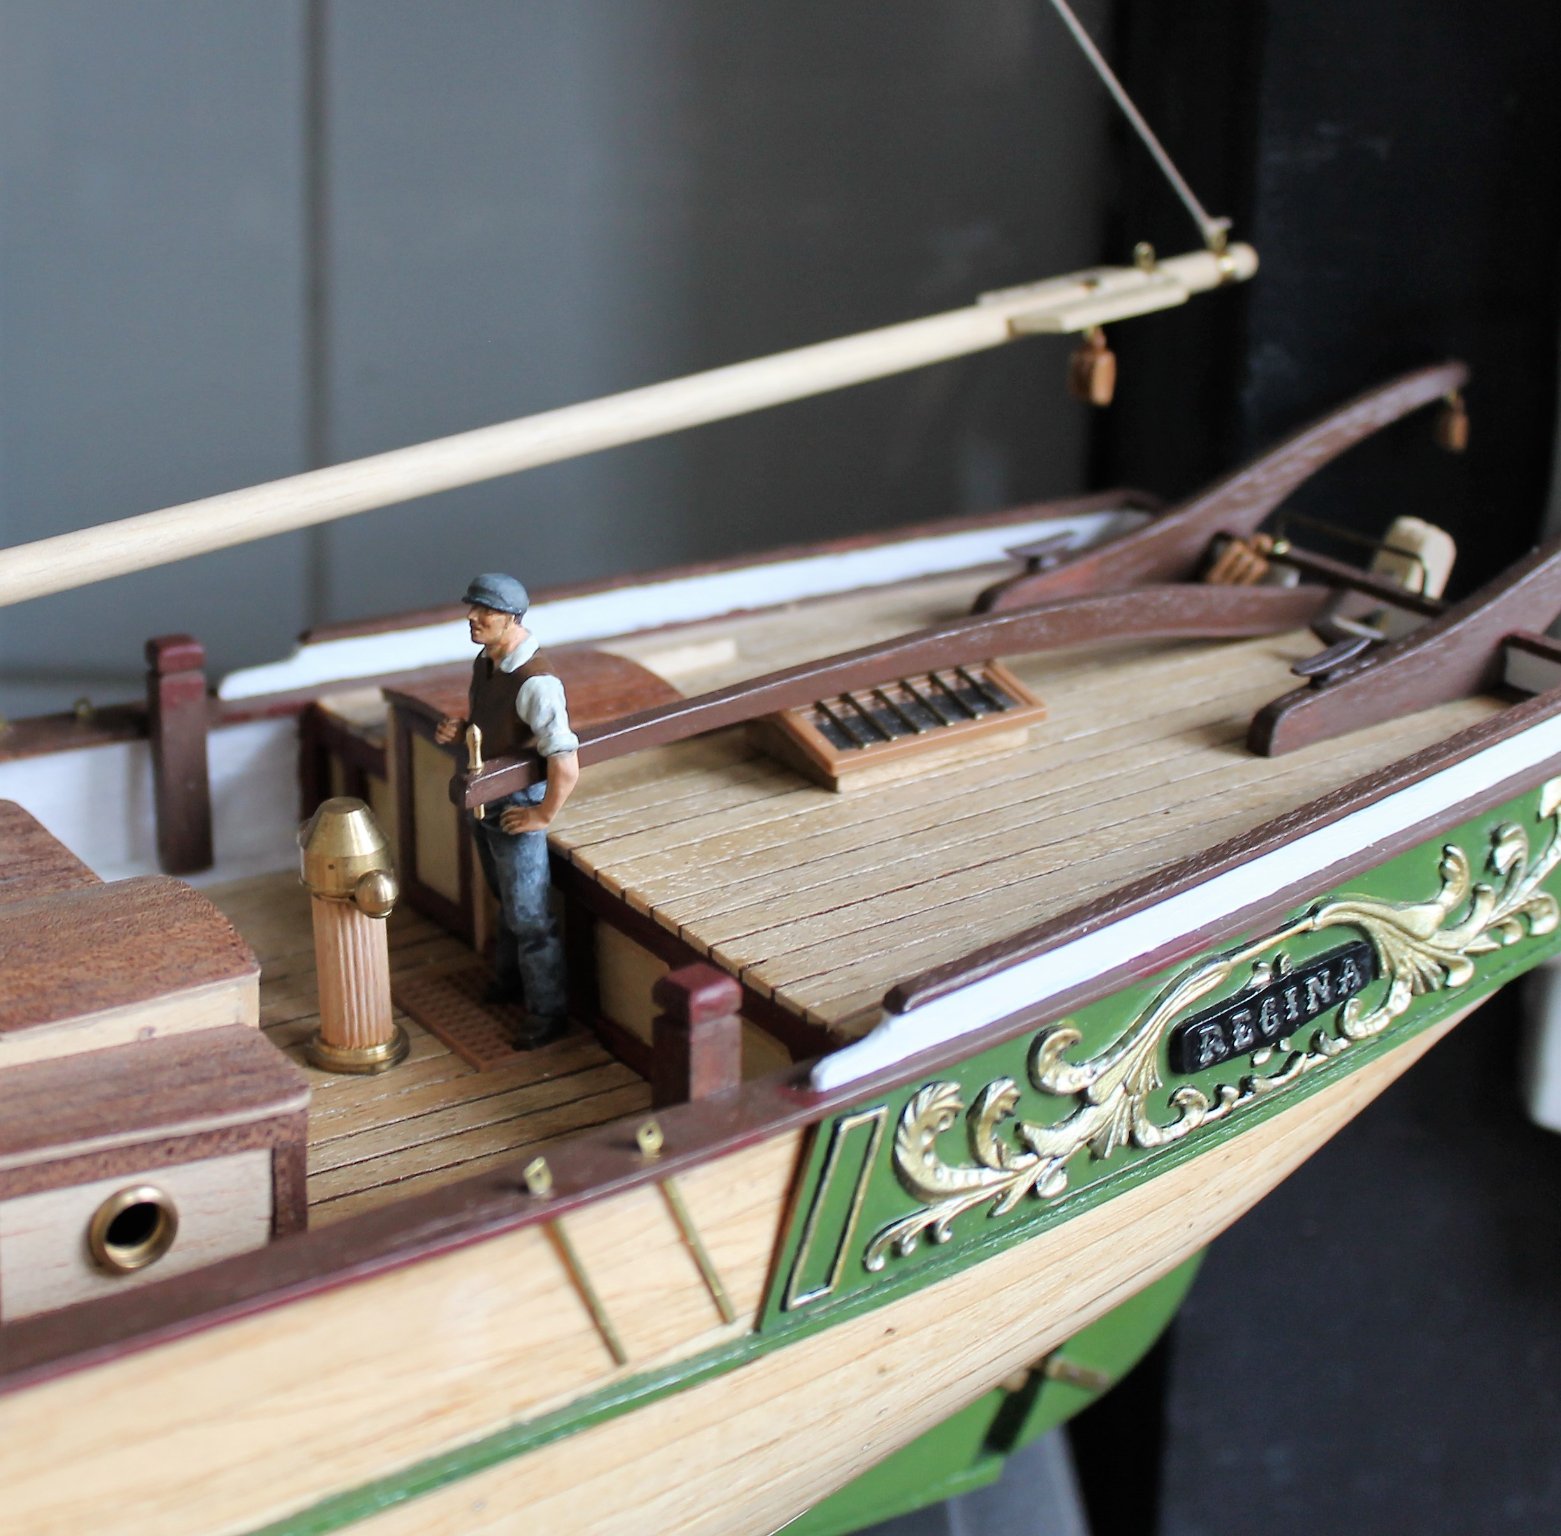
I have fitted the line thrower, bollards on the rear deck and smoke stacks. The line thrower on the current CA RS1 doesn't look like the one included in the kit. Arjan


-
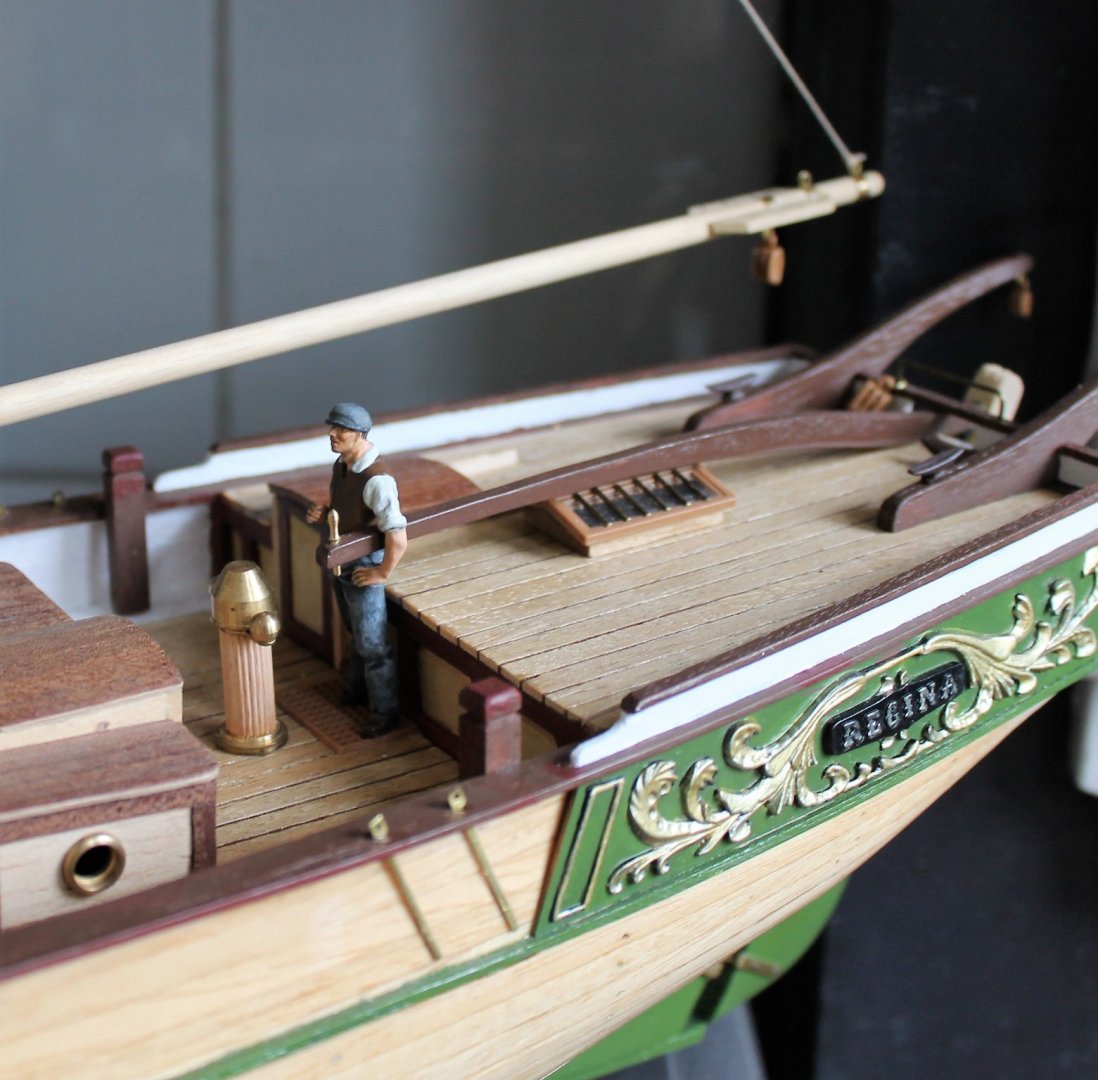
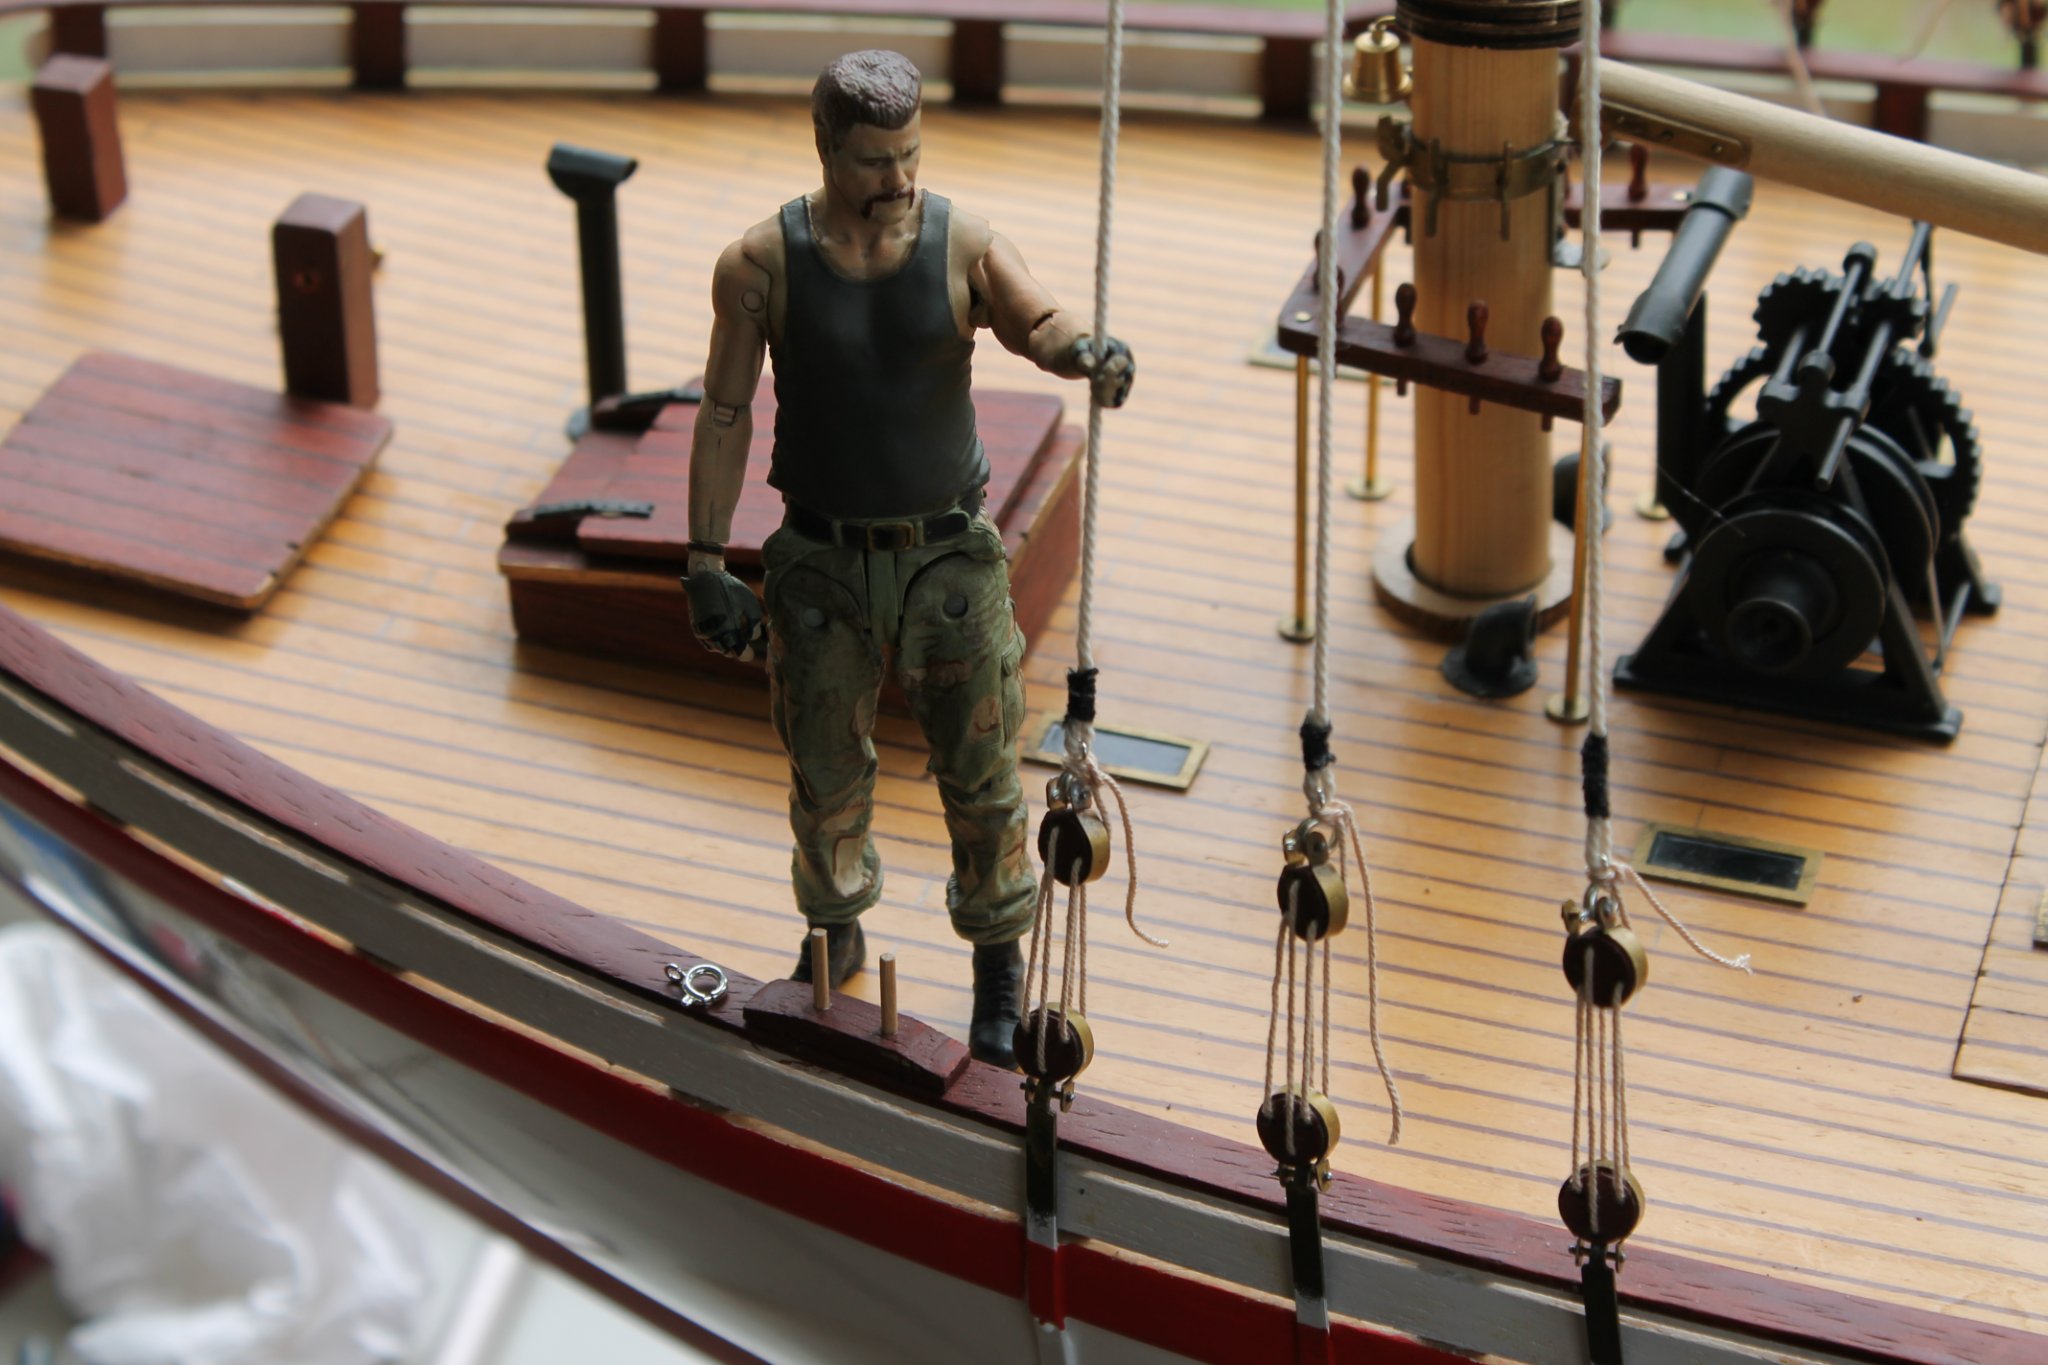
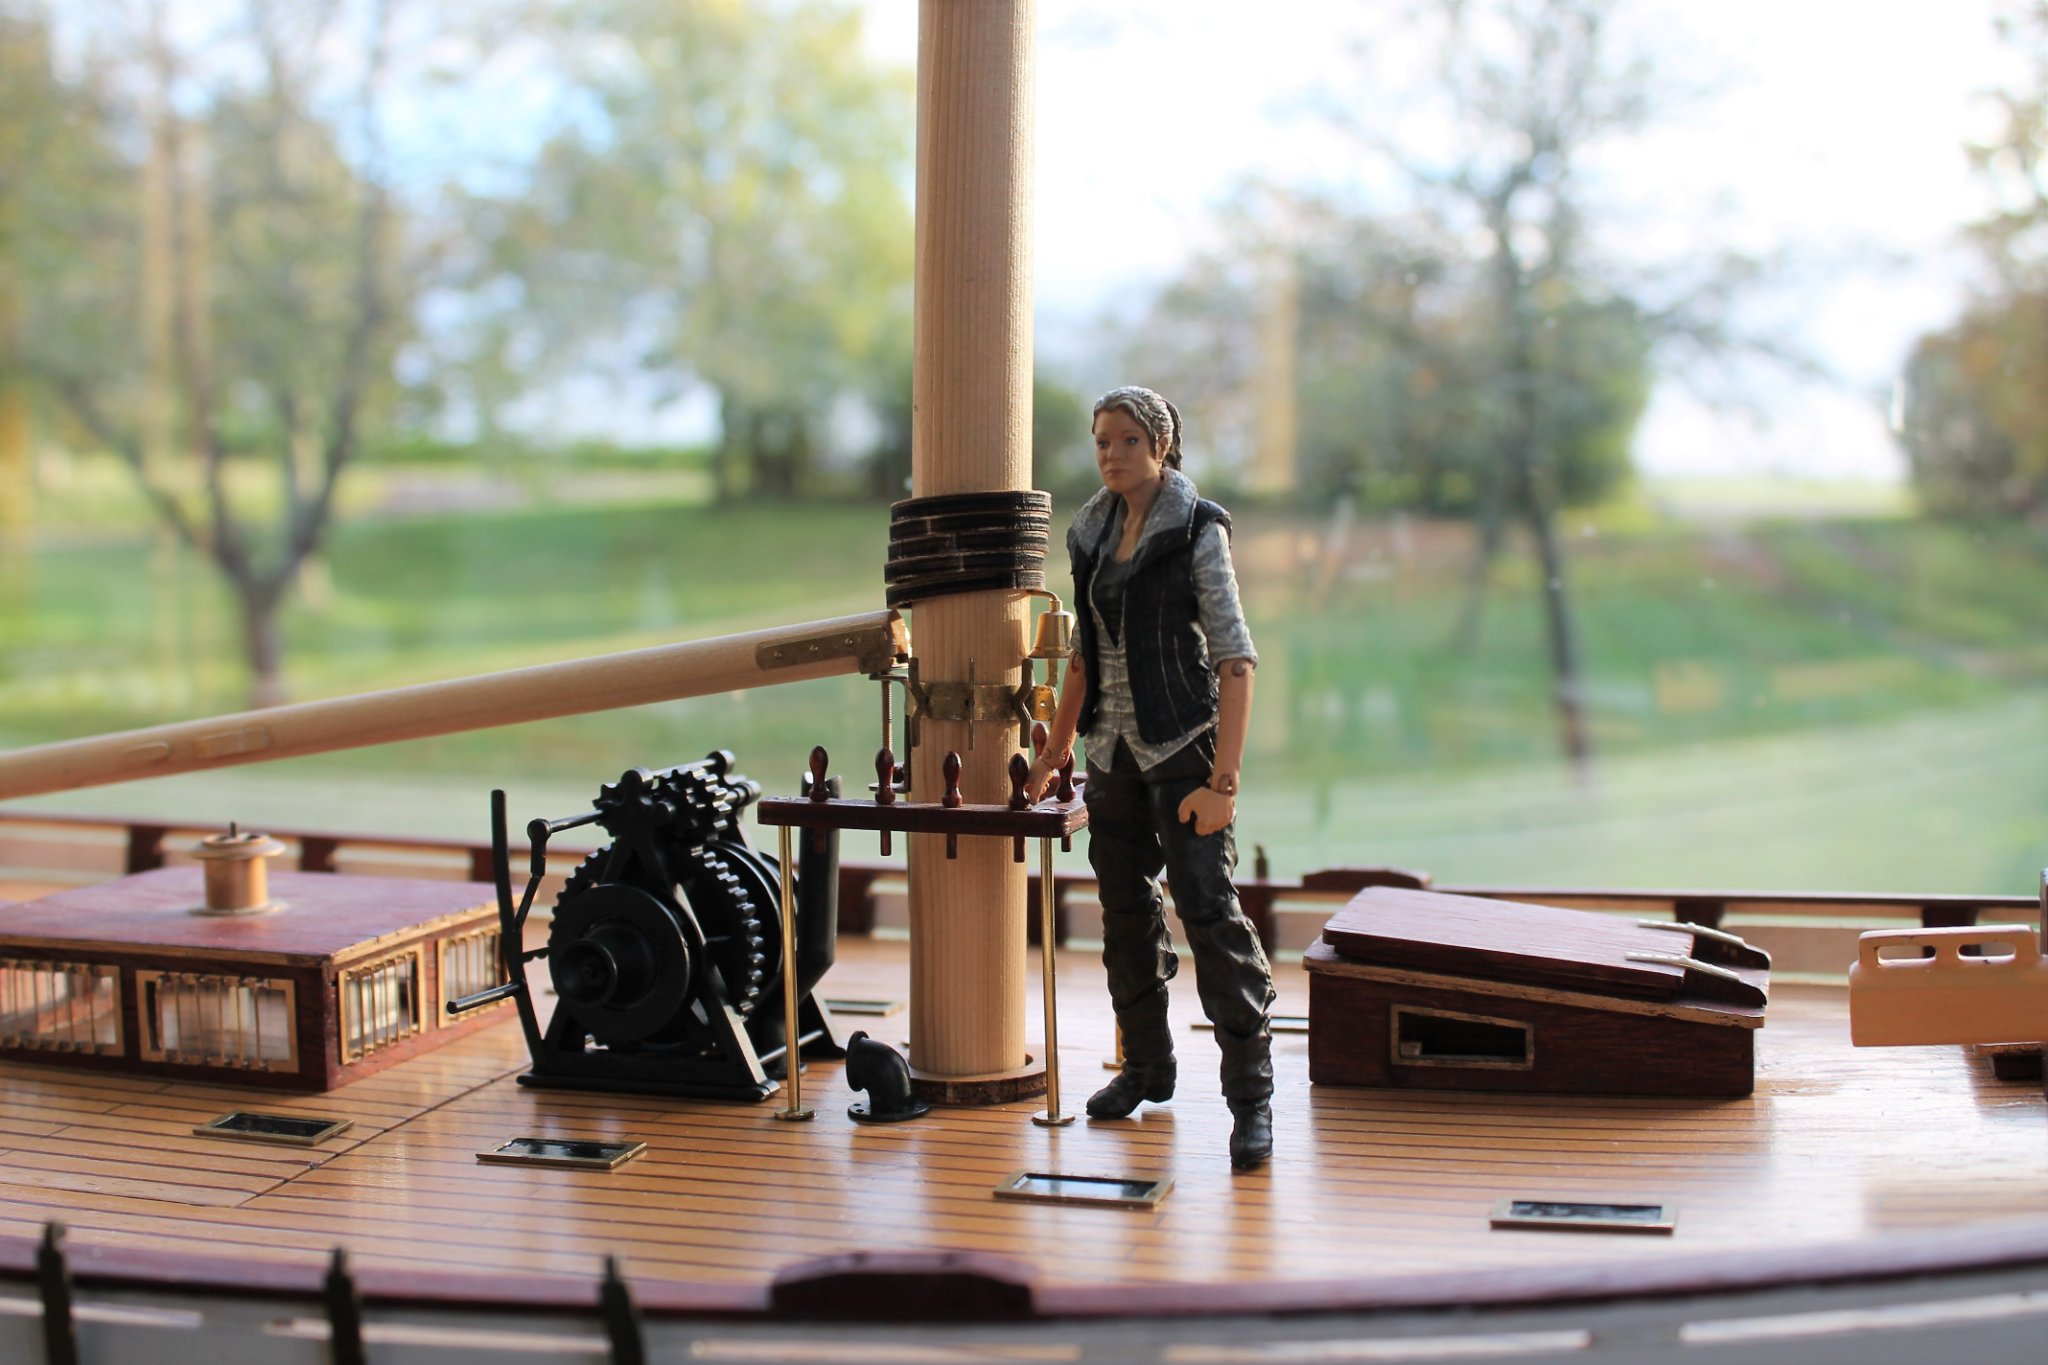
Pin rail with a 1/15 figure : Arjan

-
Thanks gentlemen ! I like buying second hand kits which have been languishing in an attic for many years. I guess well over 50% of all the wooden boat kits people buy never get finished. Also I often seem to prefer vintage kits which are no longer available. Popeye, I've just noticed you are the modeler who built Susan A which I liked very much. I also built (not quite 100% finished) BB's Regina Yacht which is also one of the vintage kits I bought second hand. Regards, Arjan
-
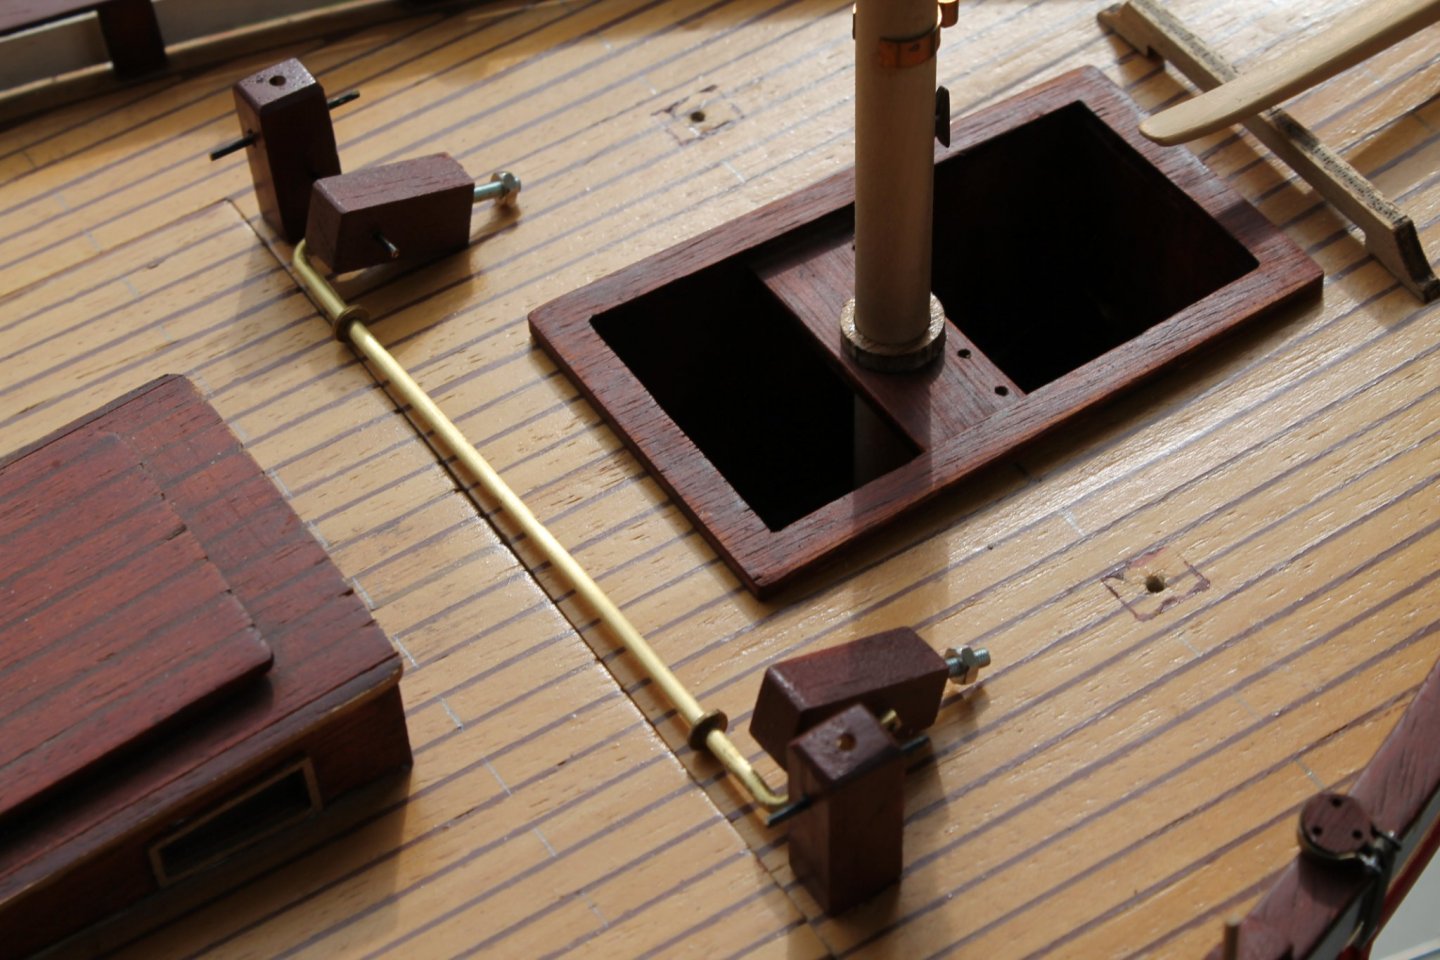
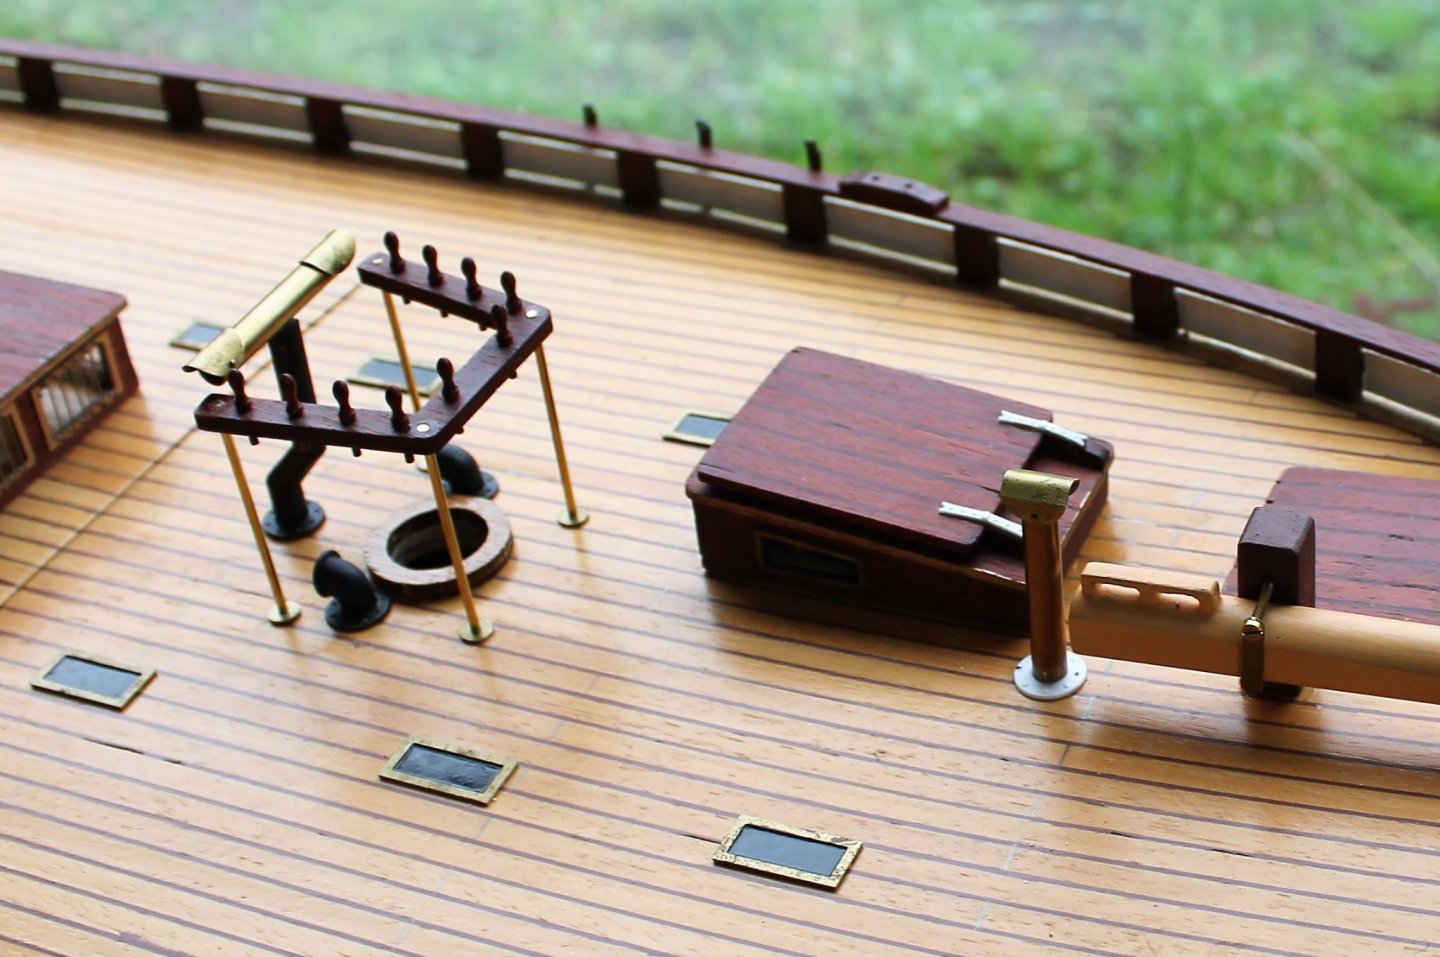
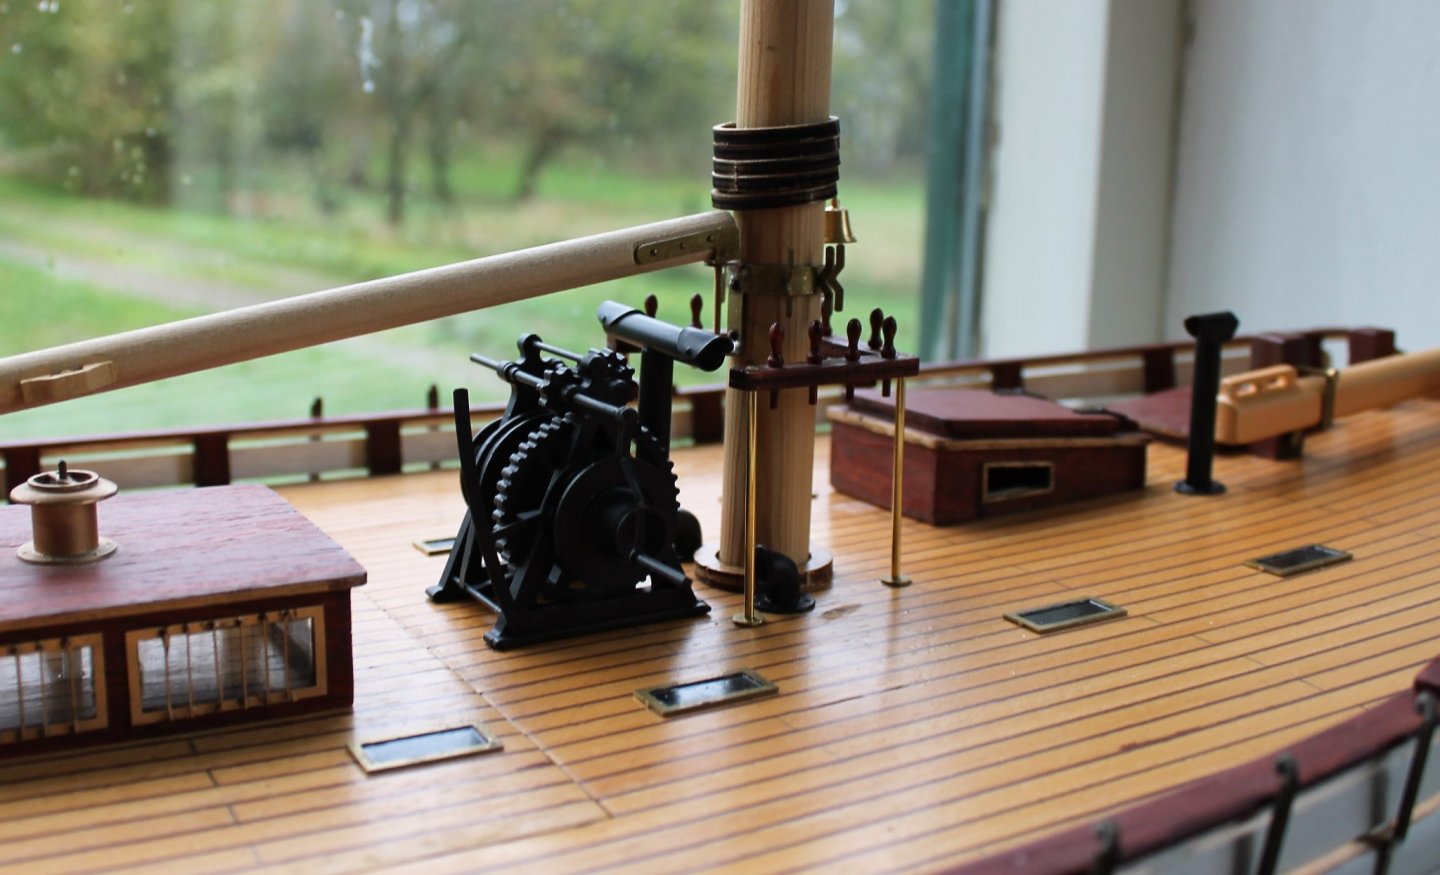
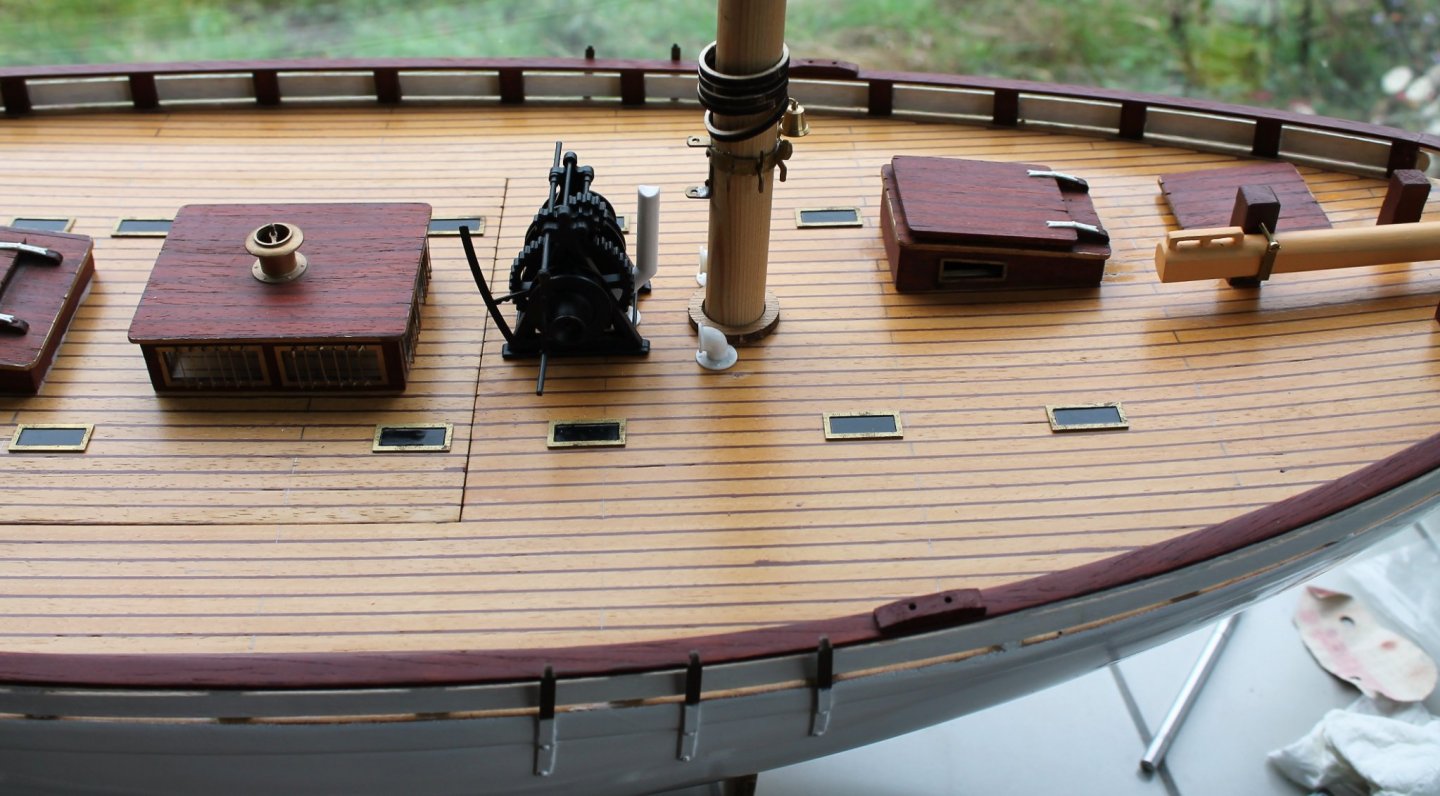
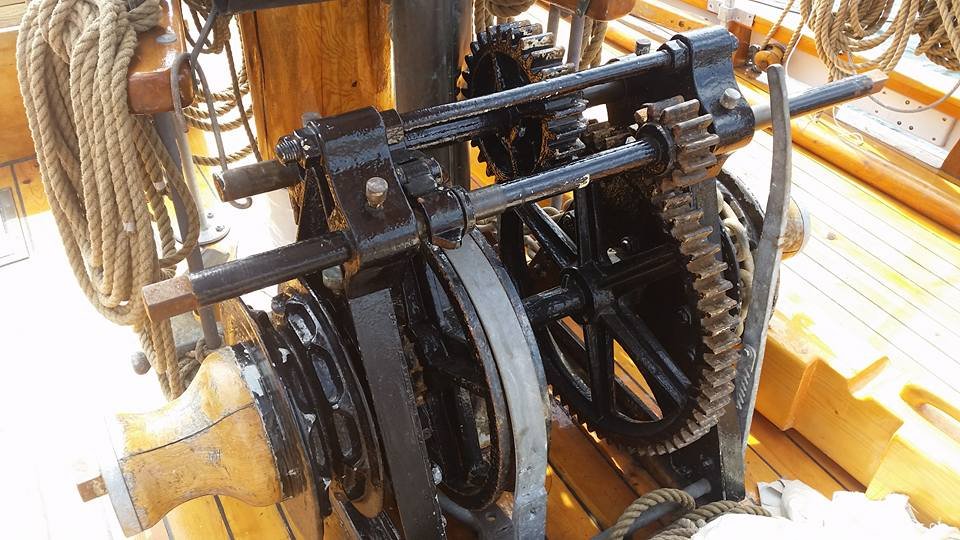
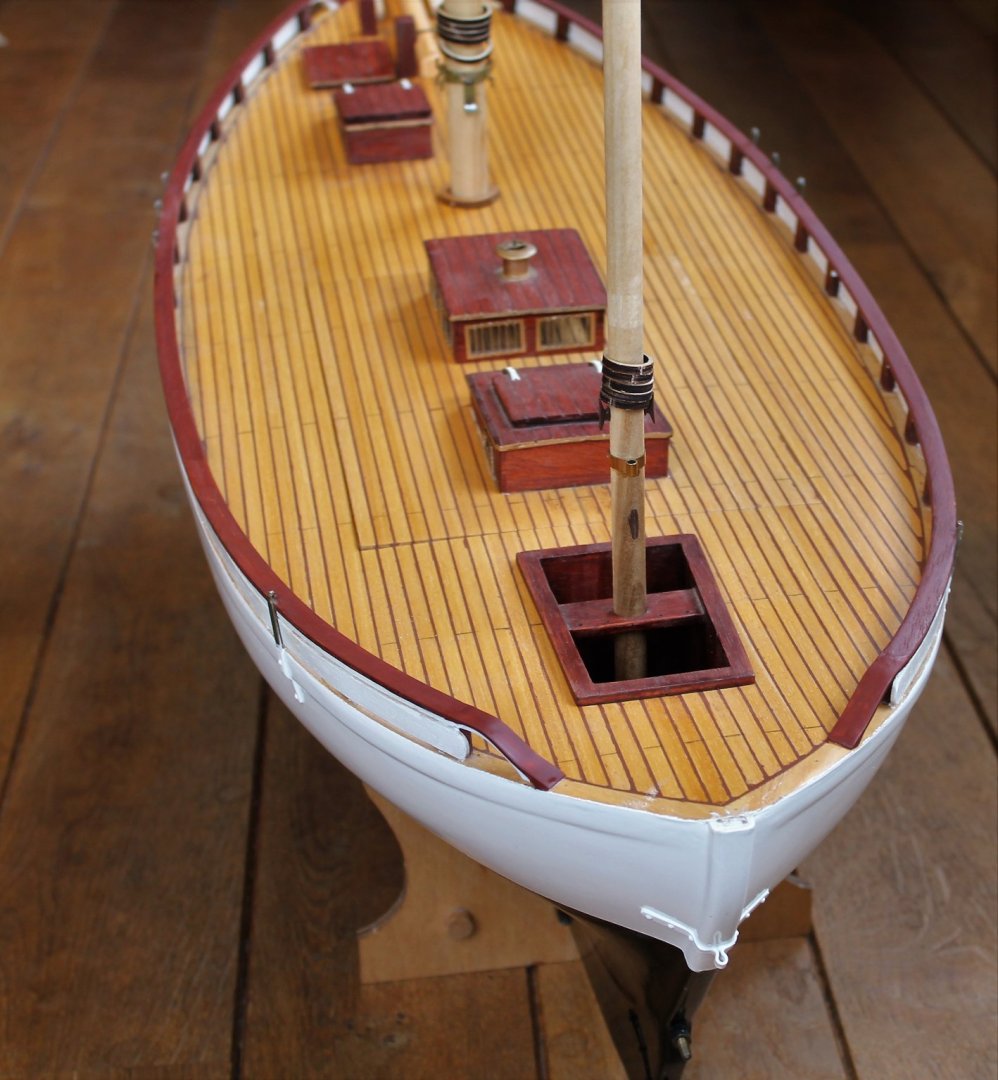
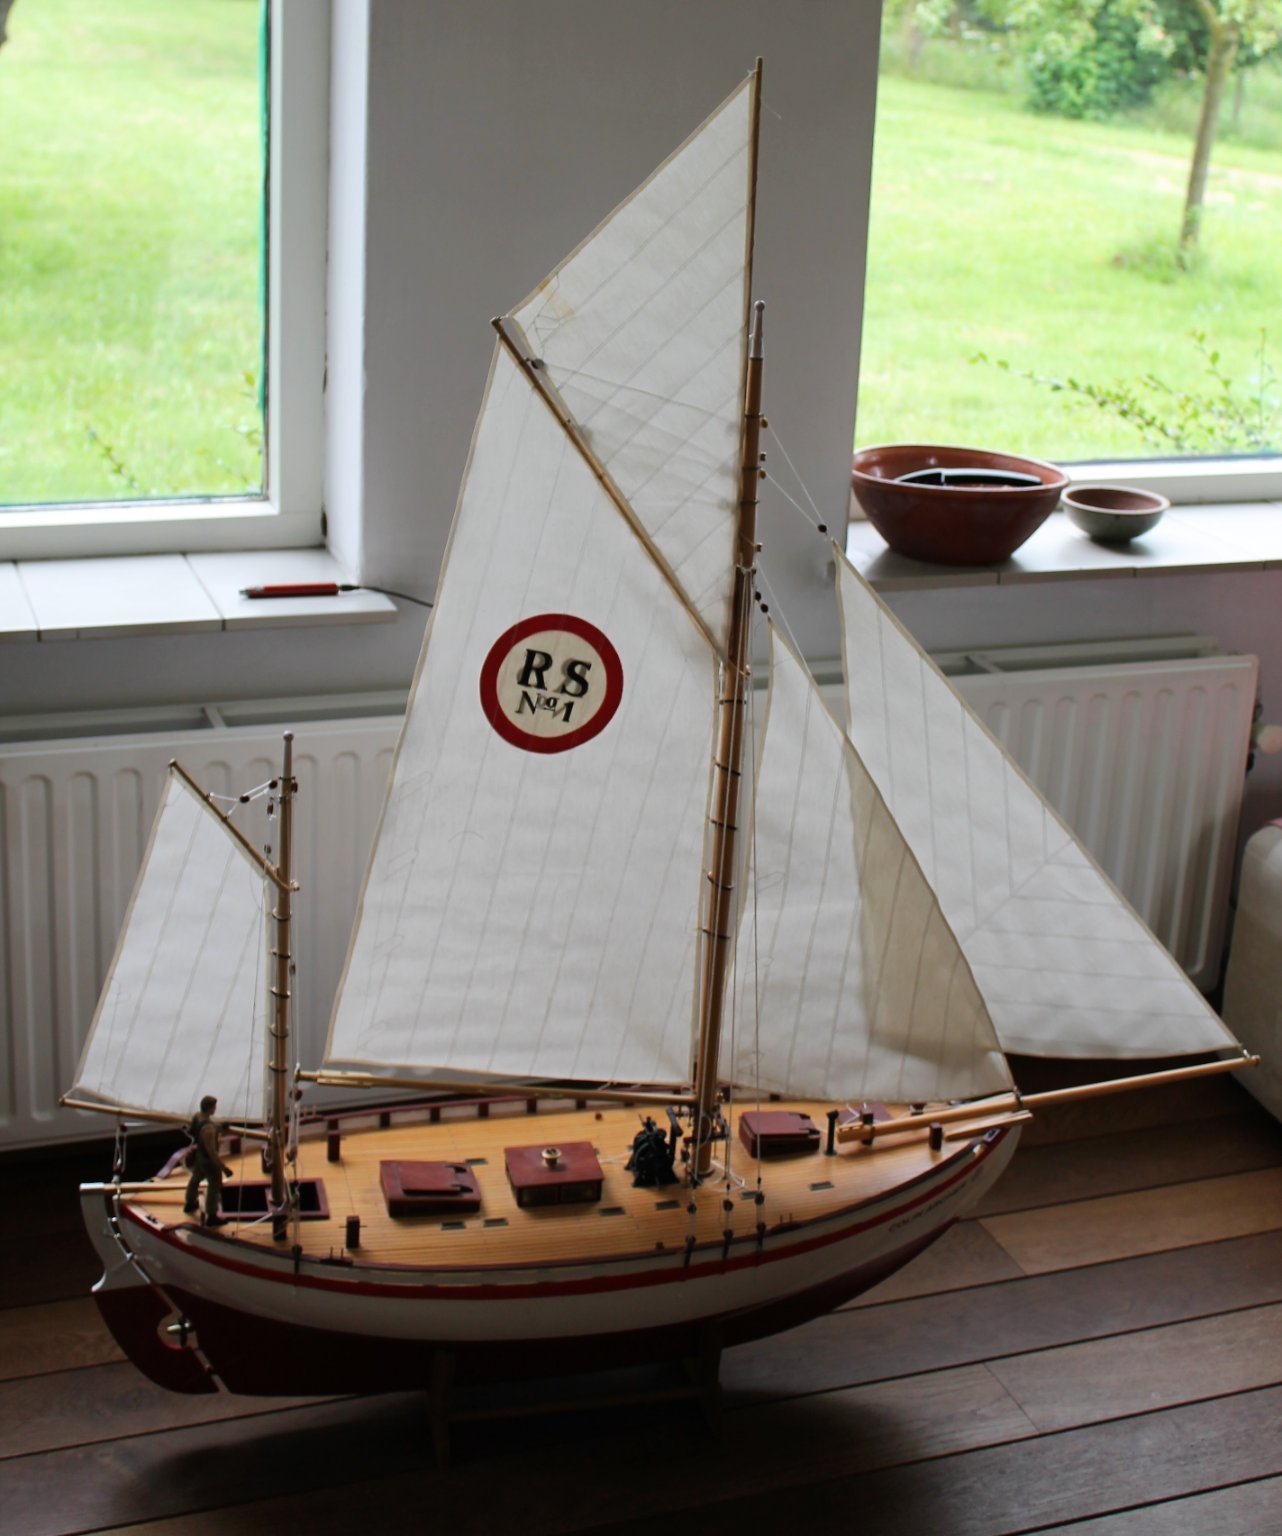
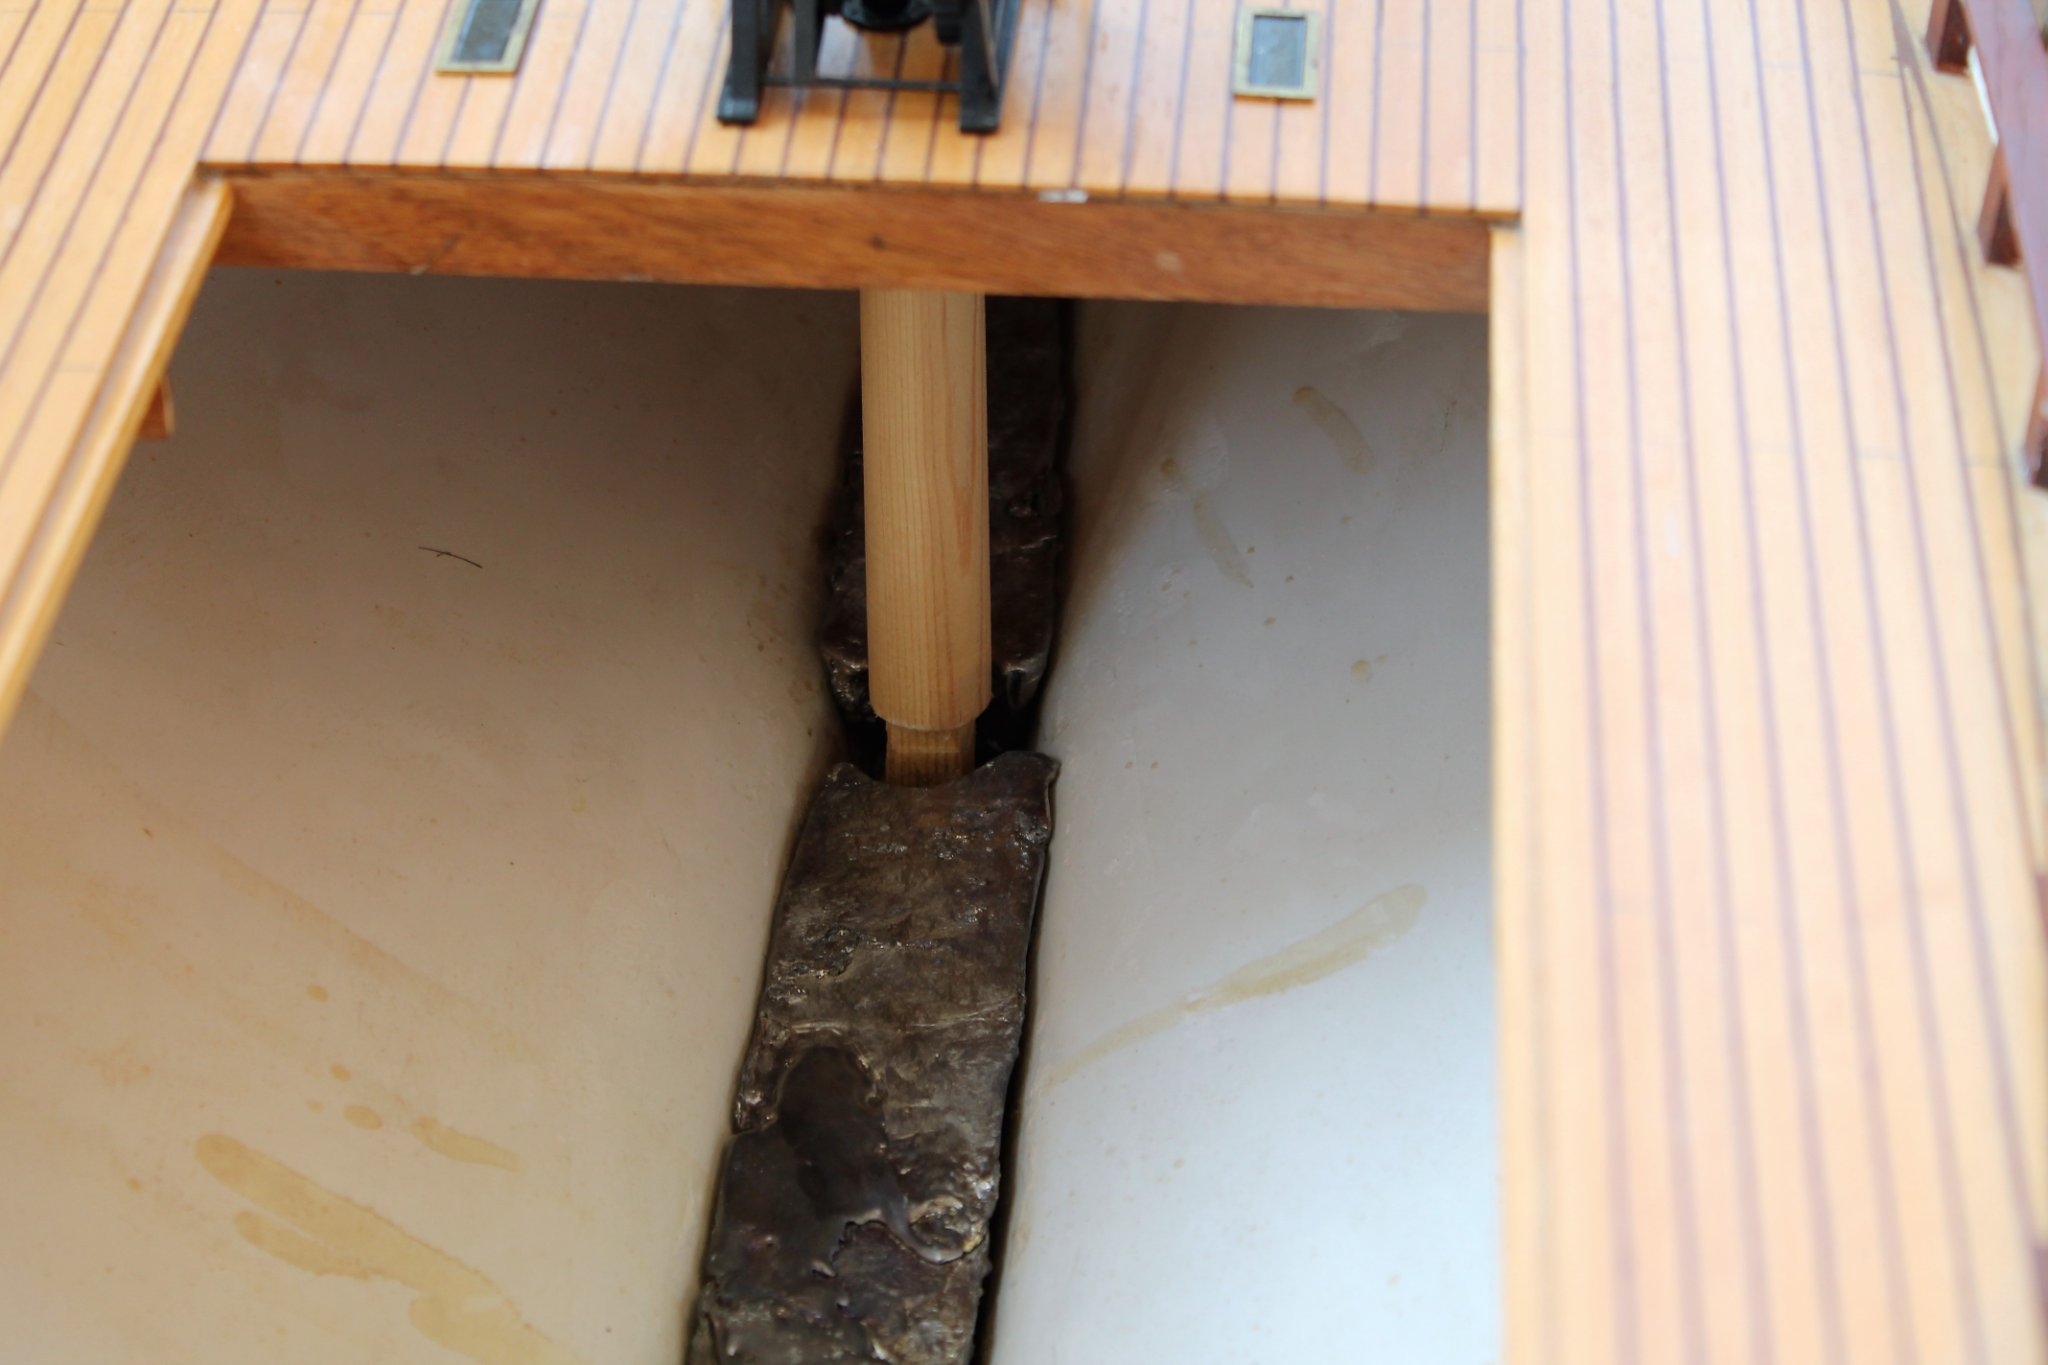
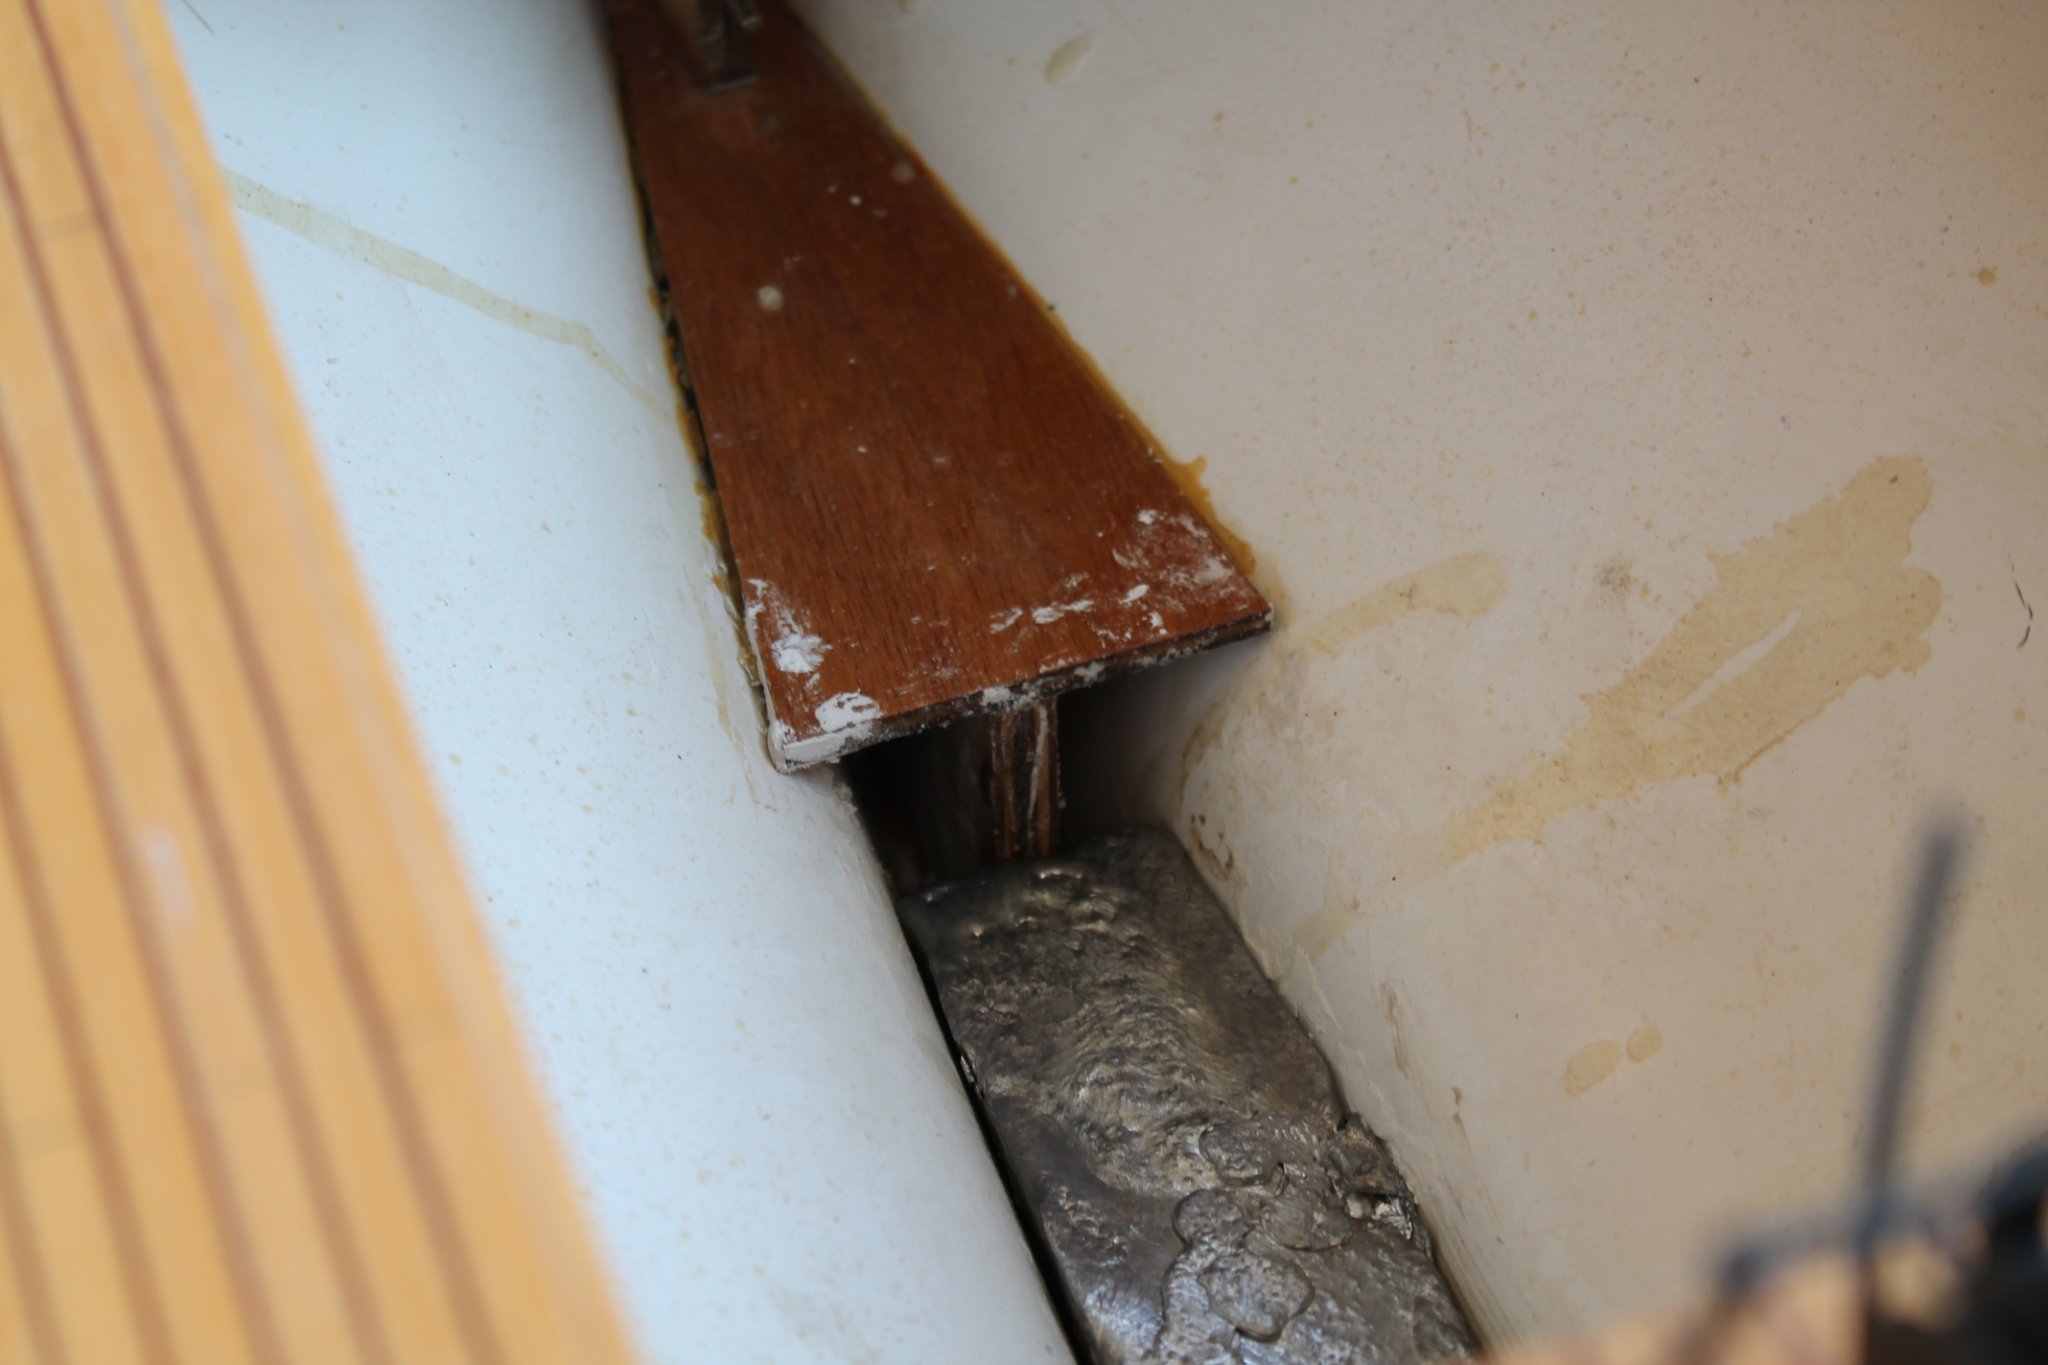
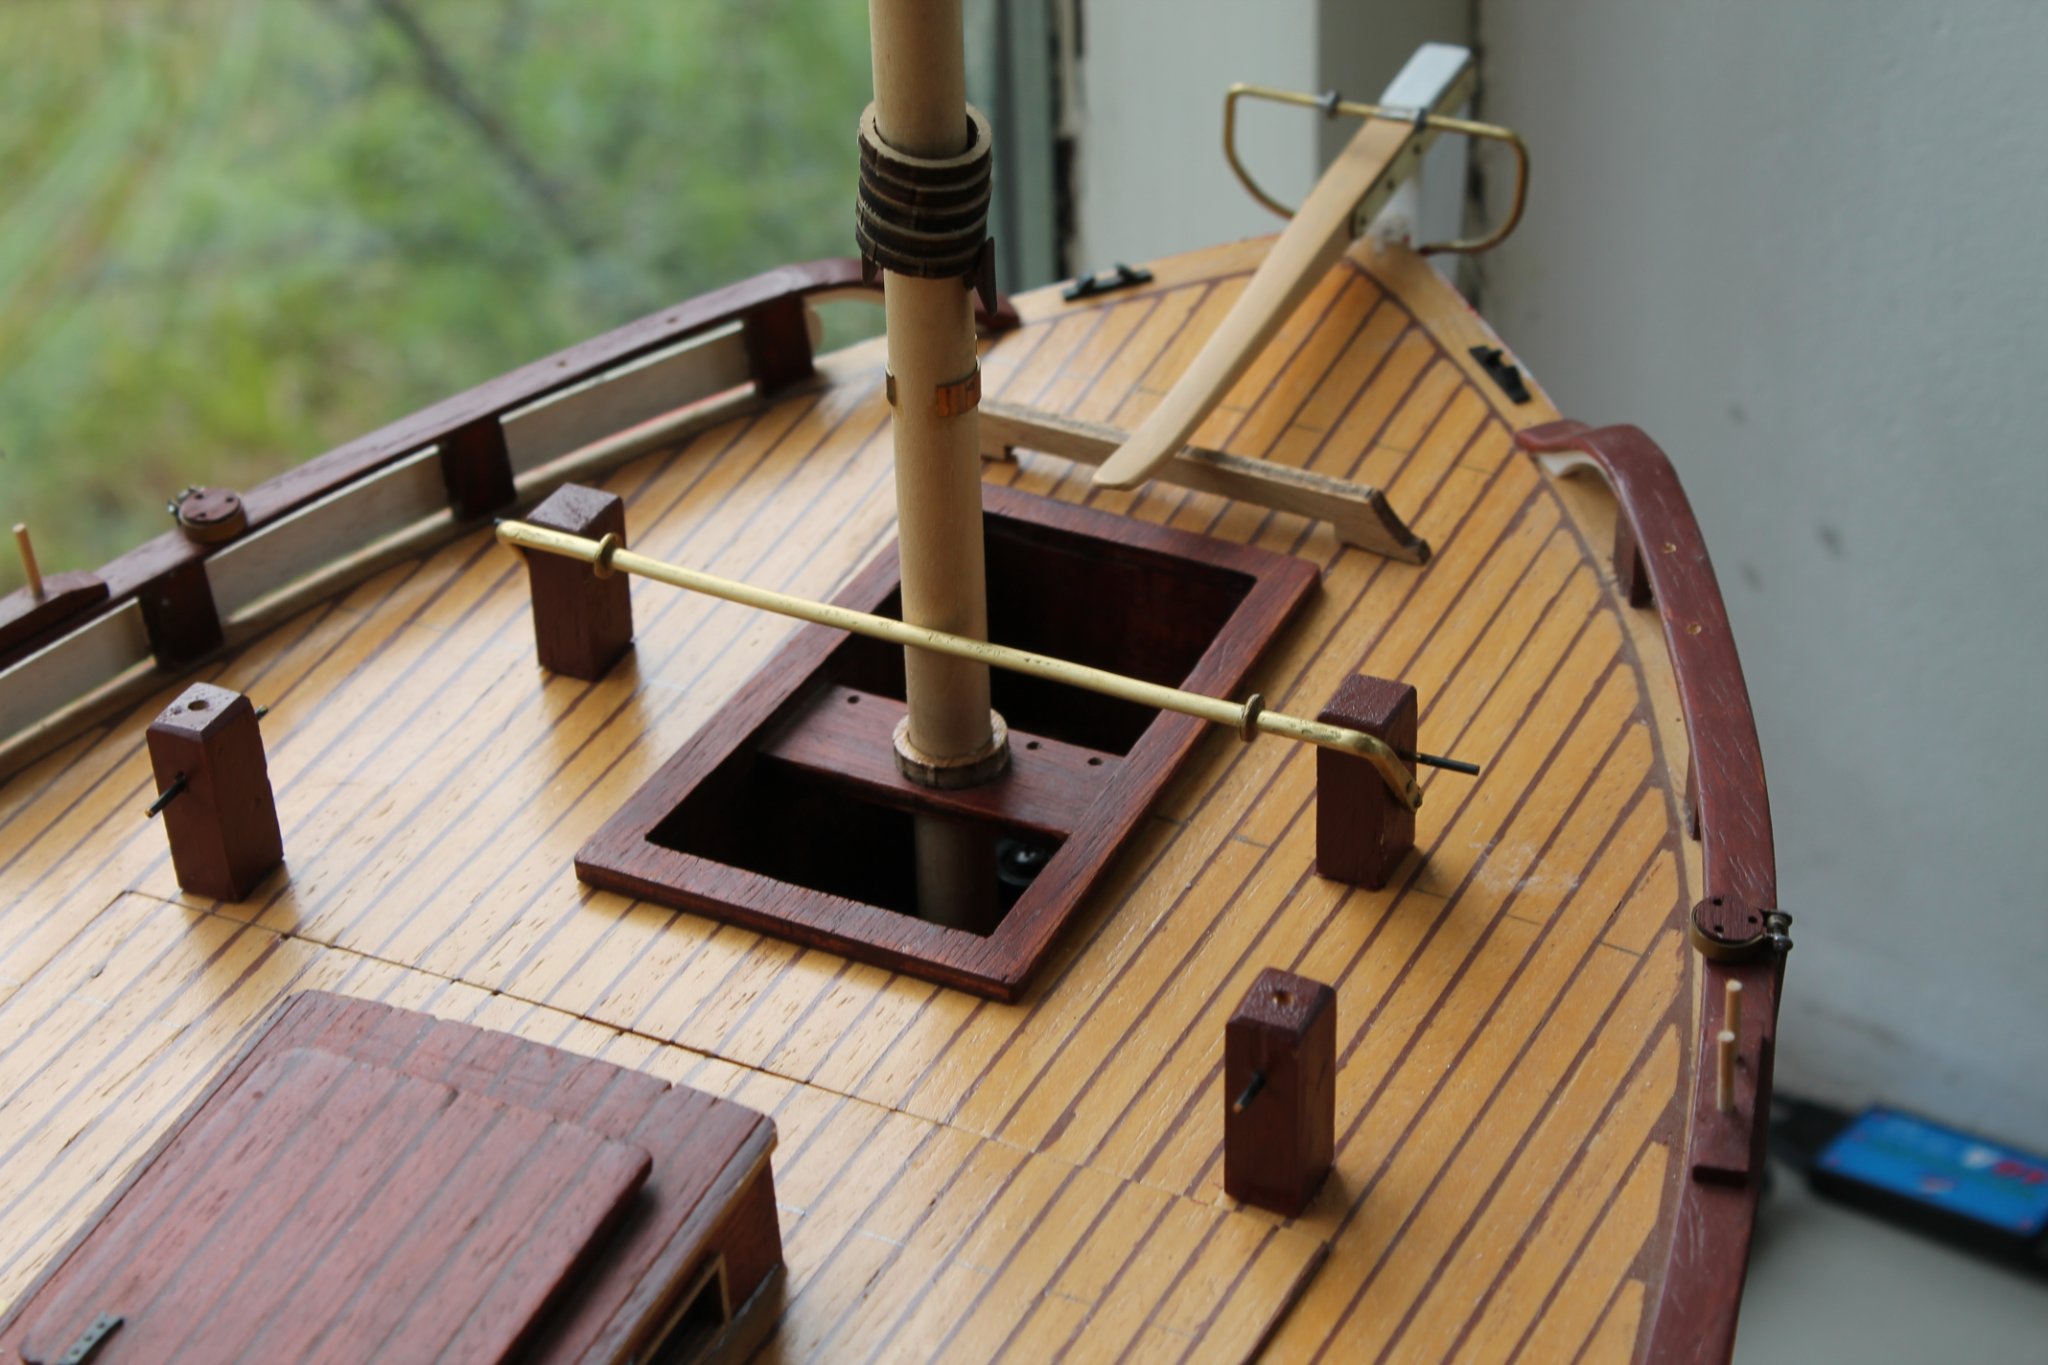
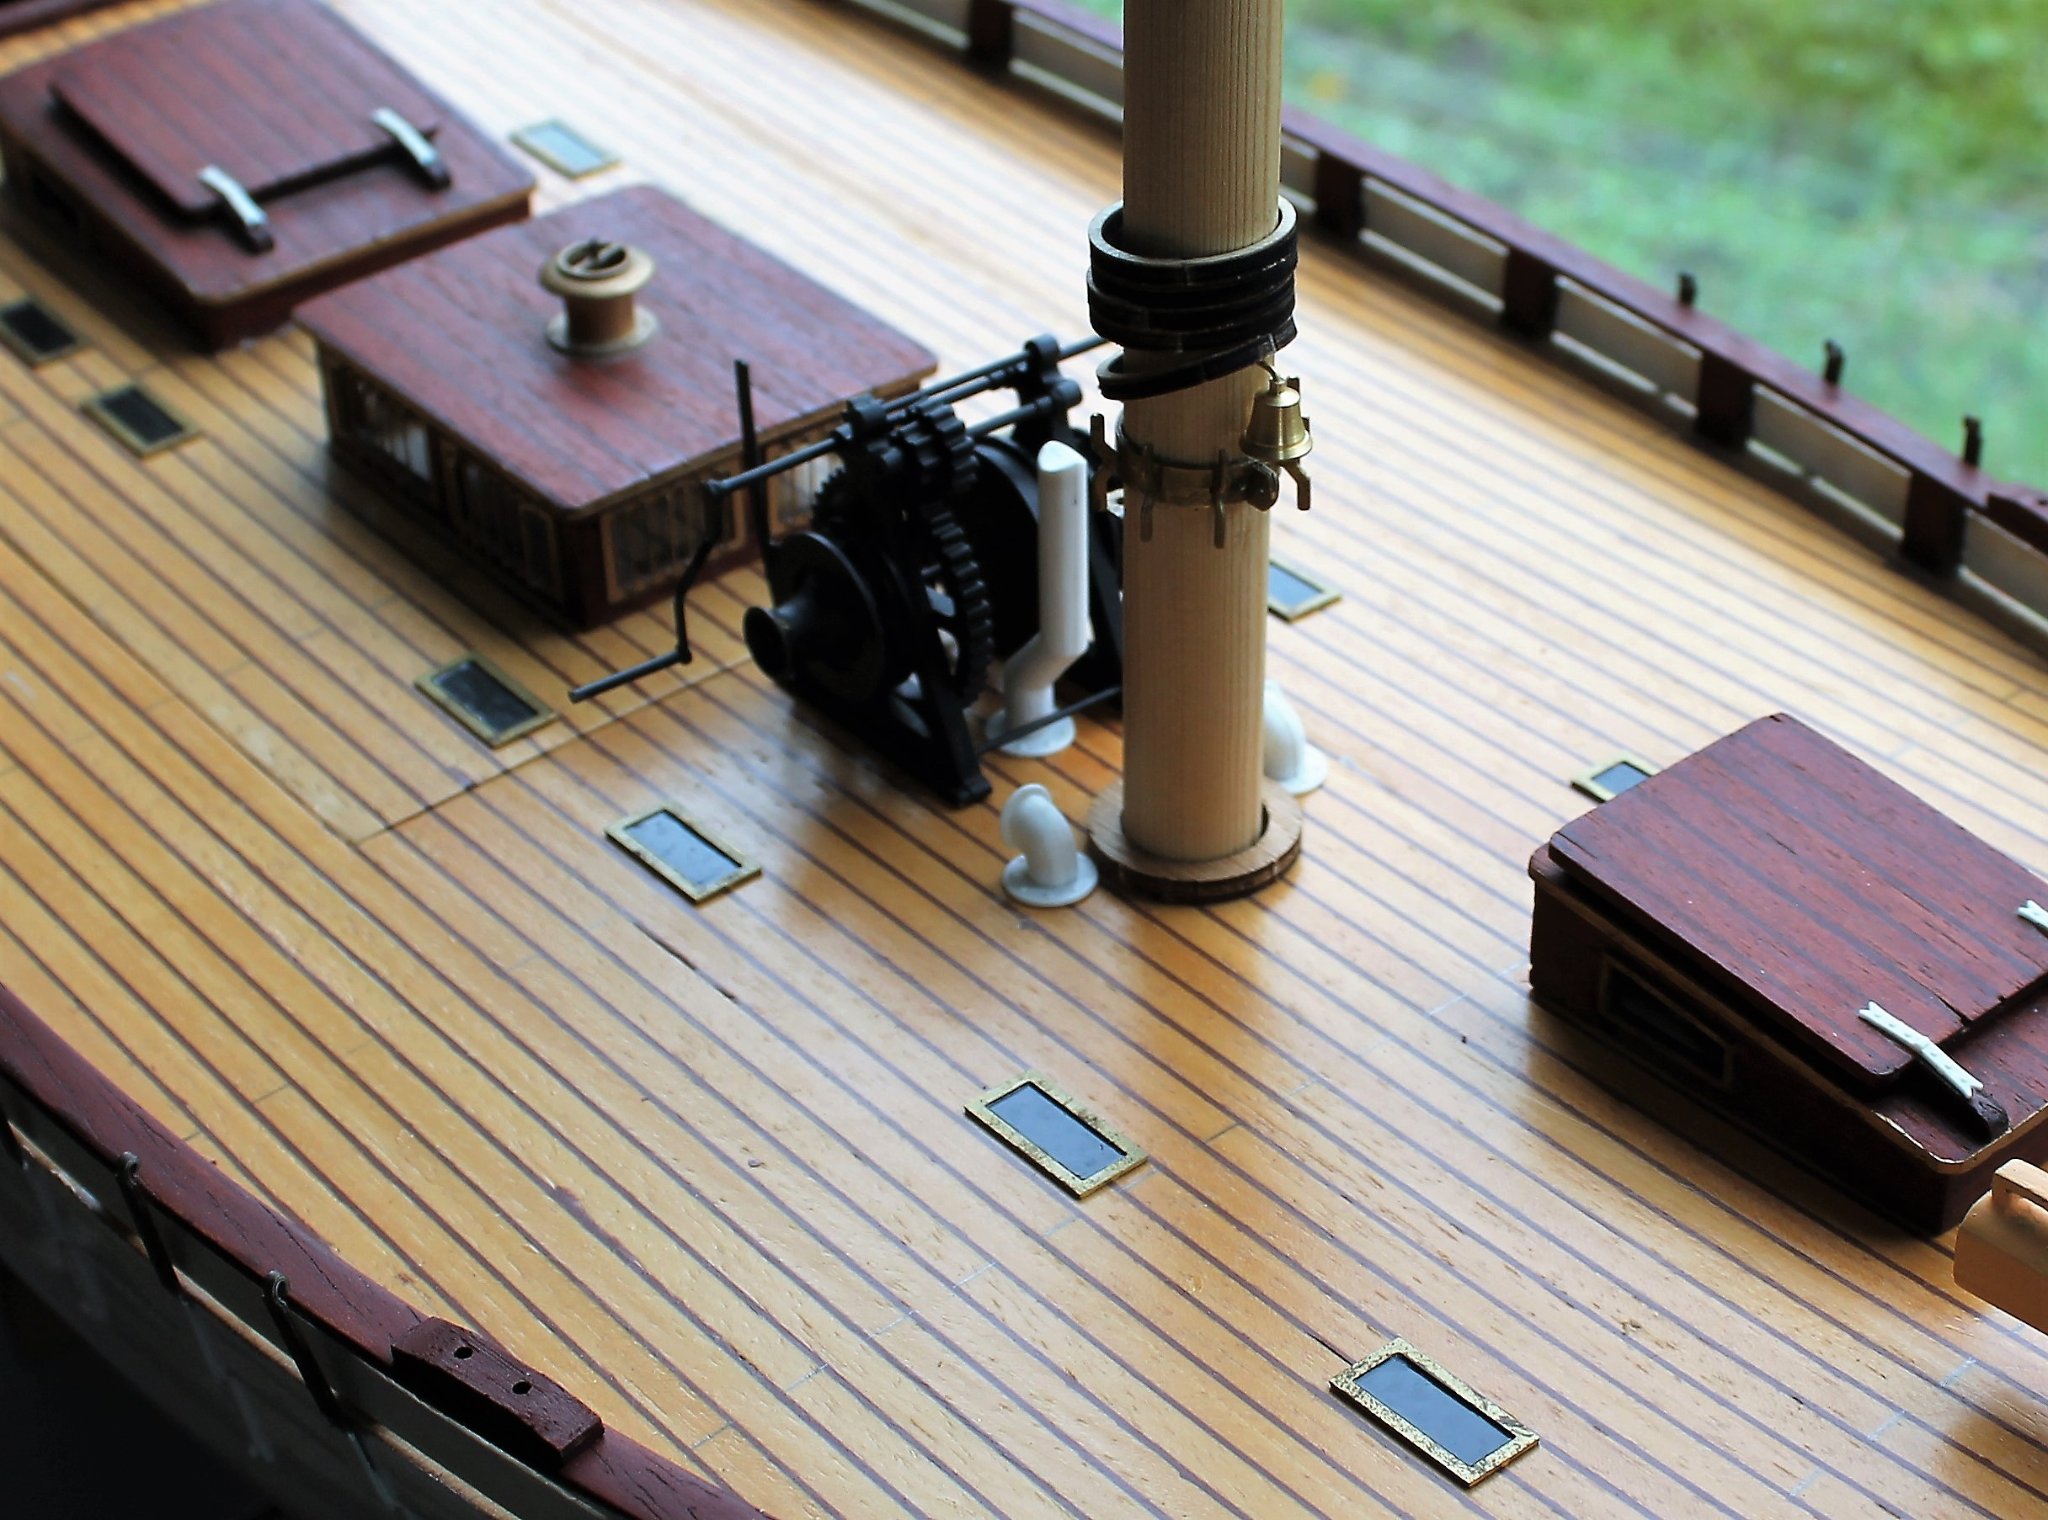
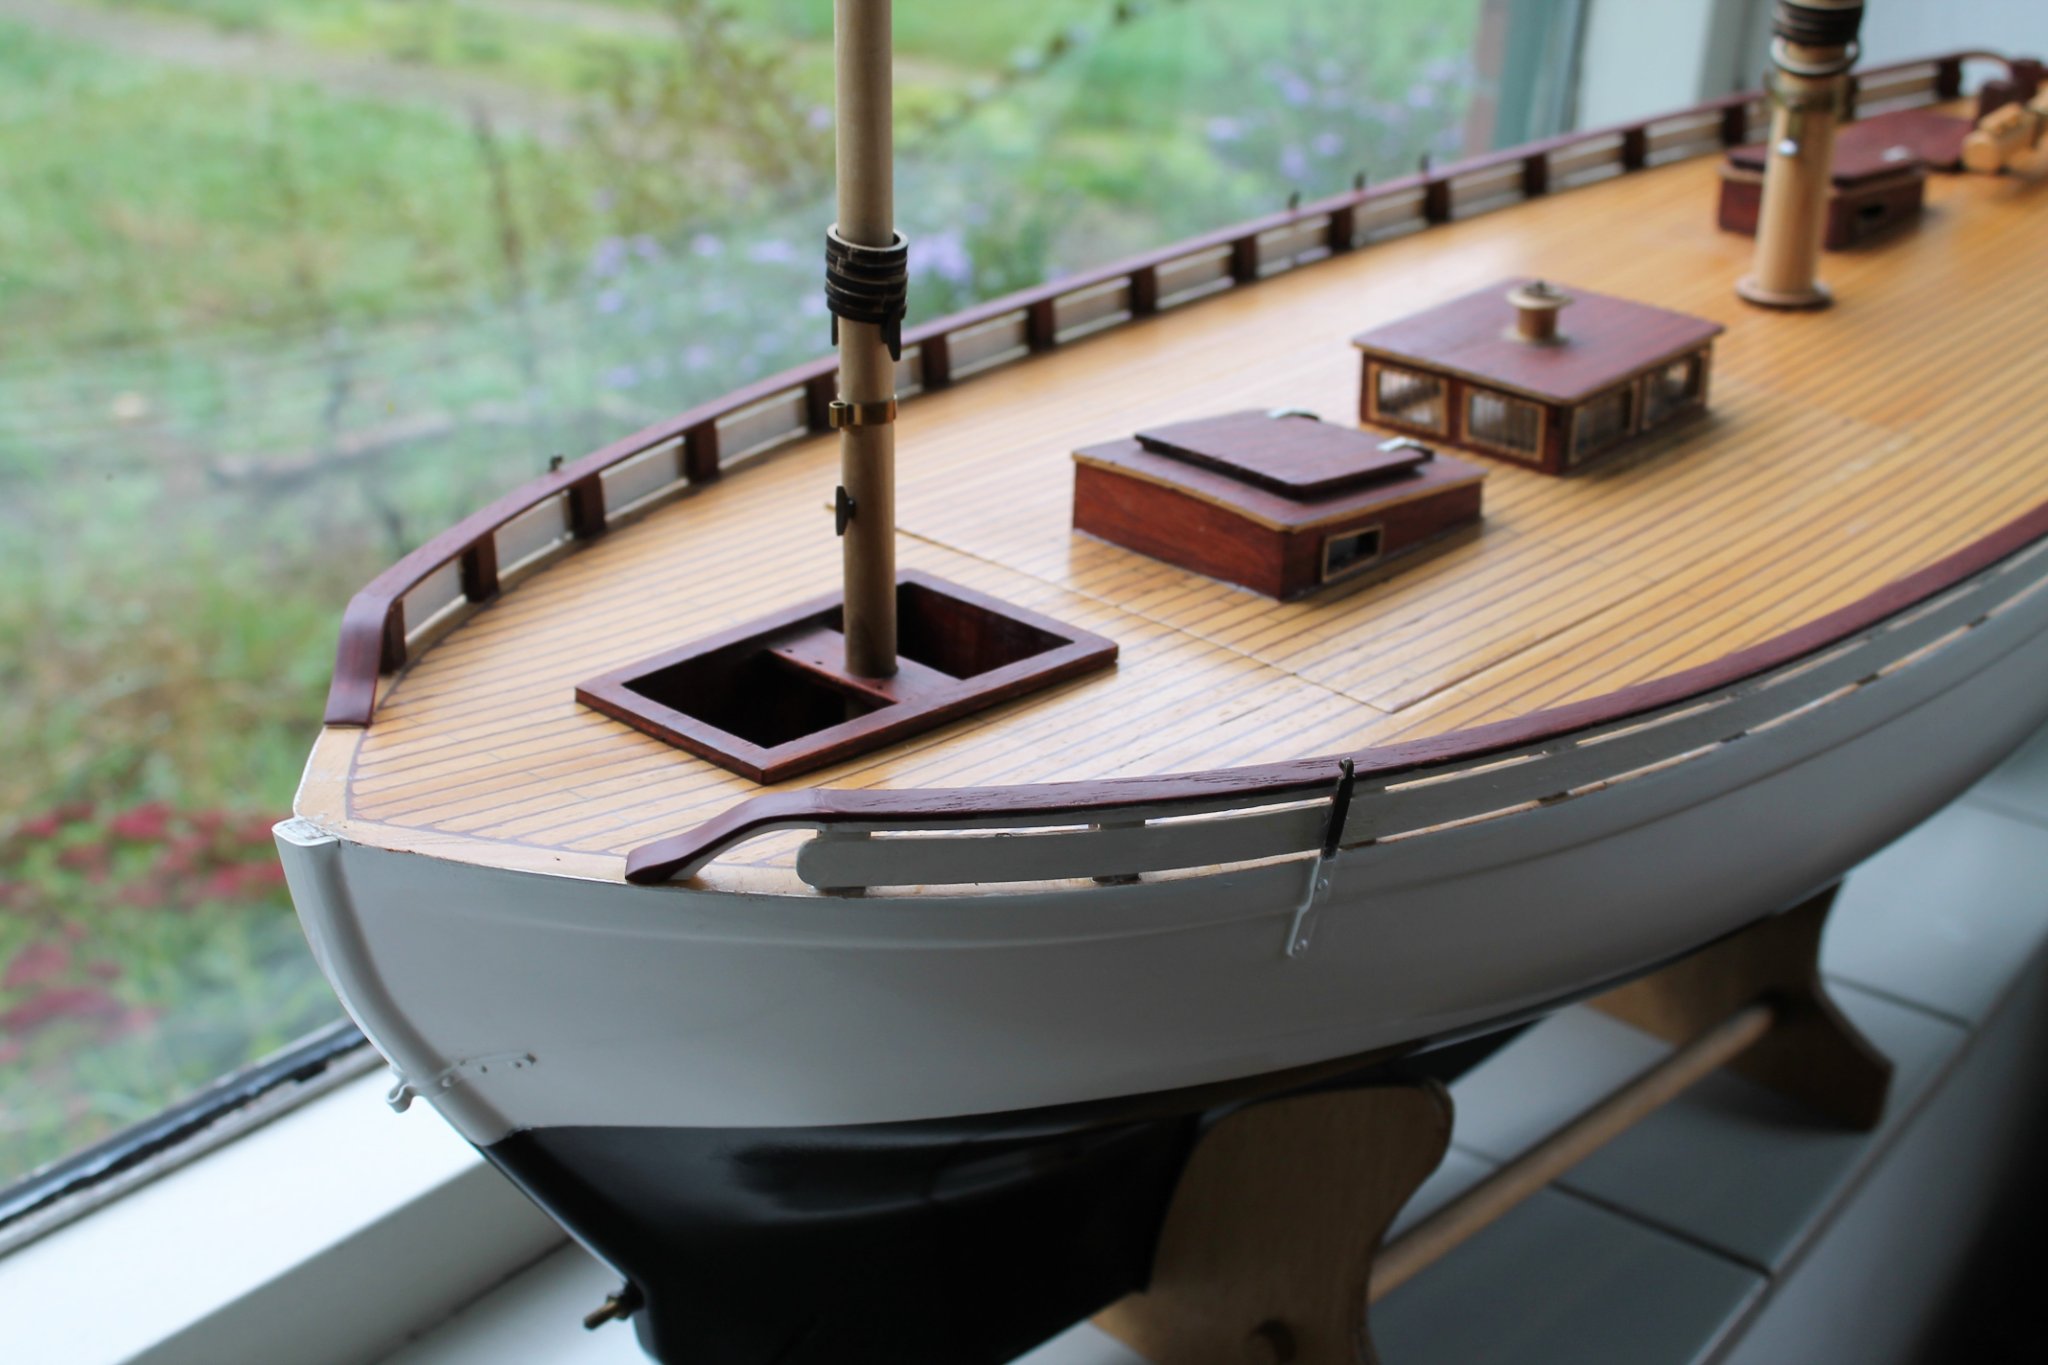
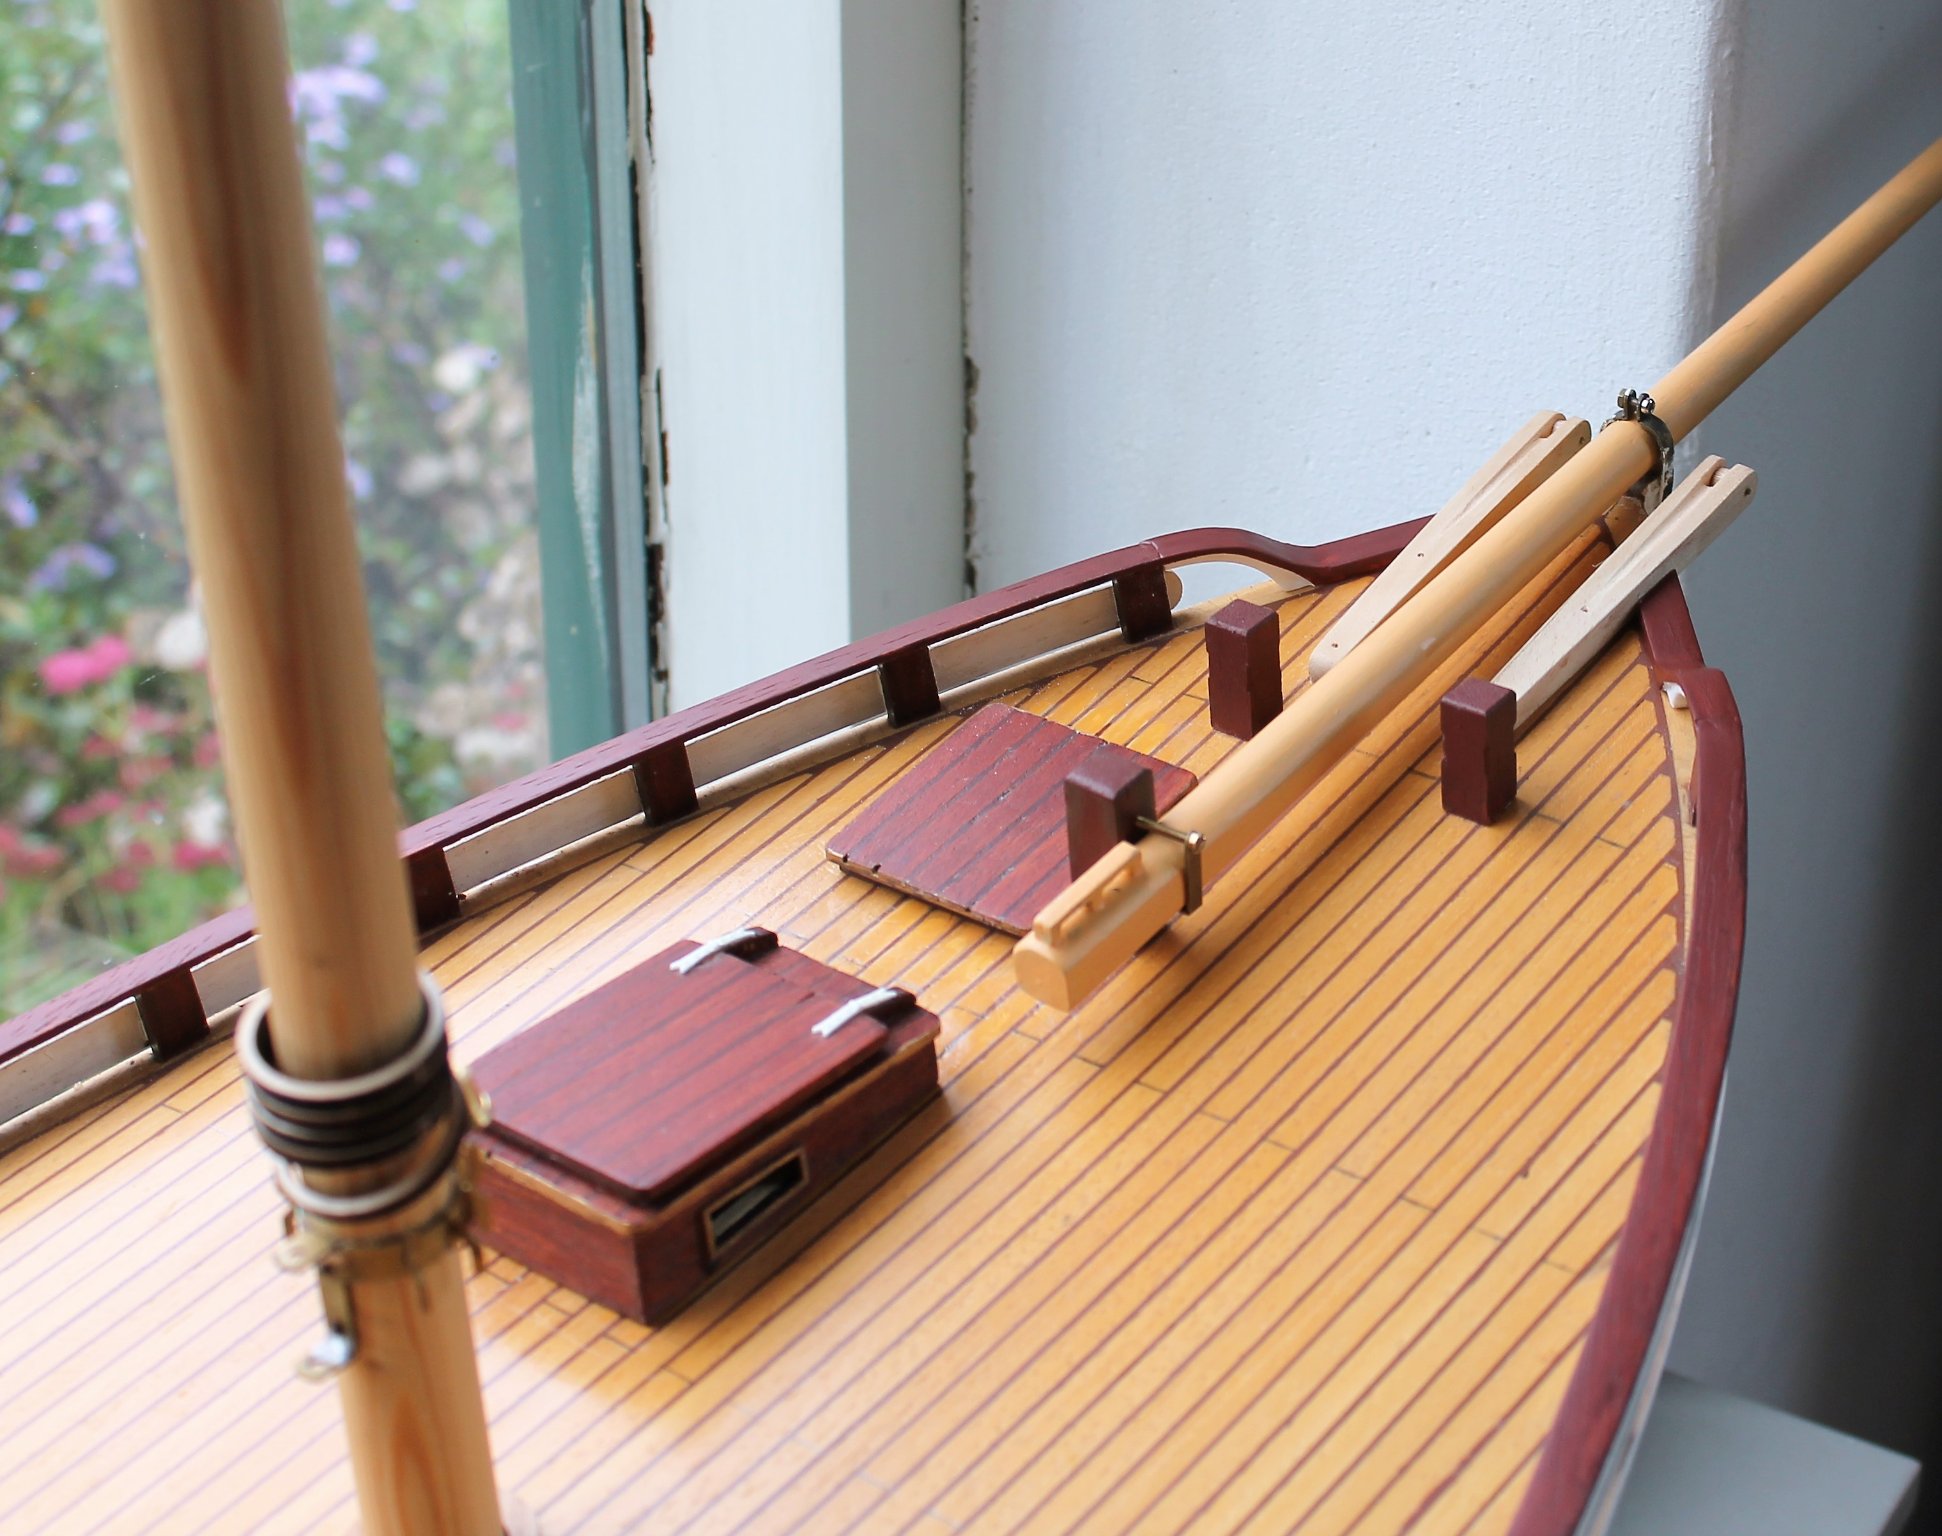
Thanks gentlemen ! I've been working on the curved anchor chain ducts in the deck. According to the BB drawing these ducts should be positioned at some distance from the mast foot . I drilled holes into the deck accordingly but I noticed that the chain would then run onto the winch at an angle. This didn't make sense to me so I looked for some pics of these ducts on real CA boats. These images show that the ducts should be positioned tight against the mast foot which means the anchor chain now runs straight onto the winch. I filled the holes I had drilled and I also positioned the smoke stack further forward than in the drawing. Regards, Arjan
.png.88035cc08cf5d69883260f923f2862fb.png)
.png.6fc4a0d91e9790ee588c5e38482d2ff4.png)
.png.917db4317357bc298d13ce32bec4f9e8.png)
.png.c4b20c84fa831368bd415bab4b1dd0c2.png)

-
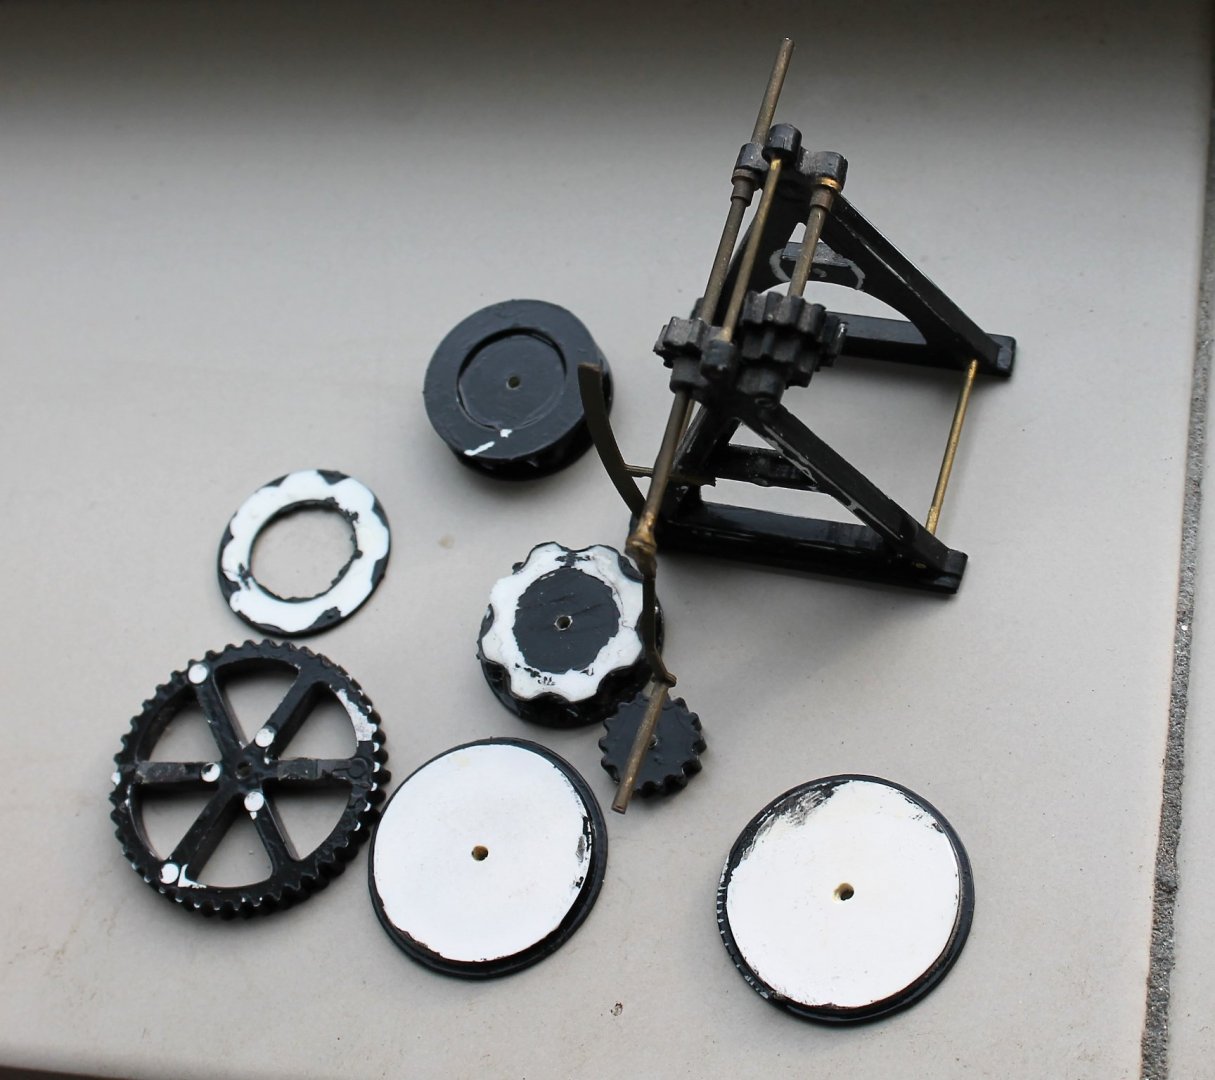
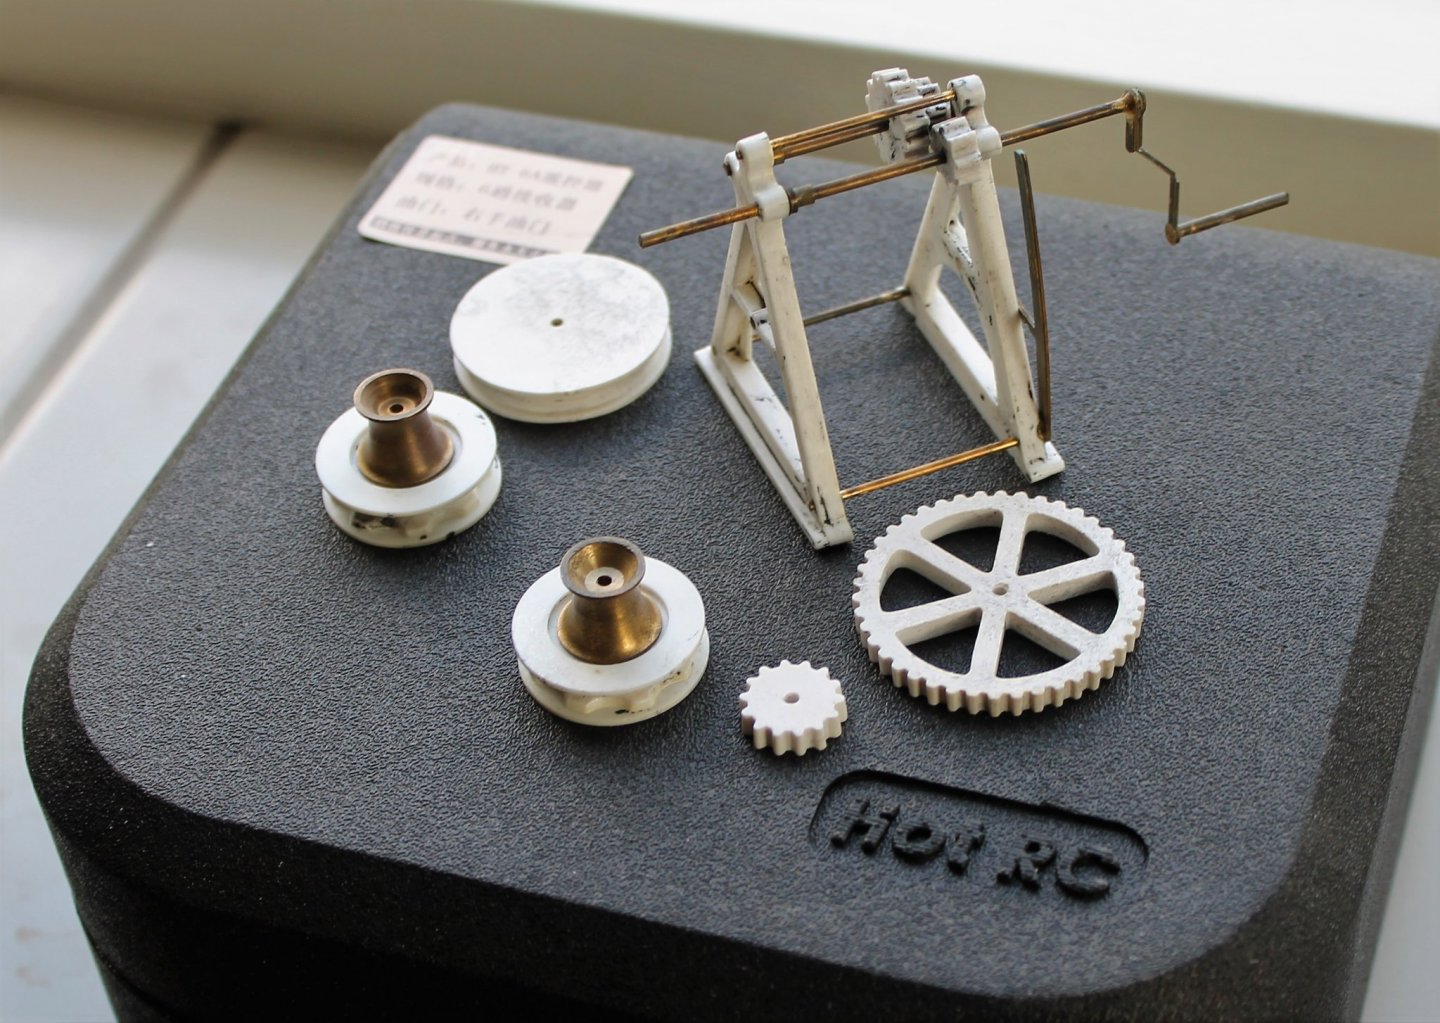
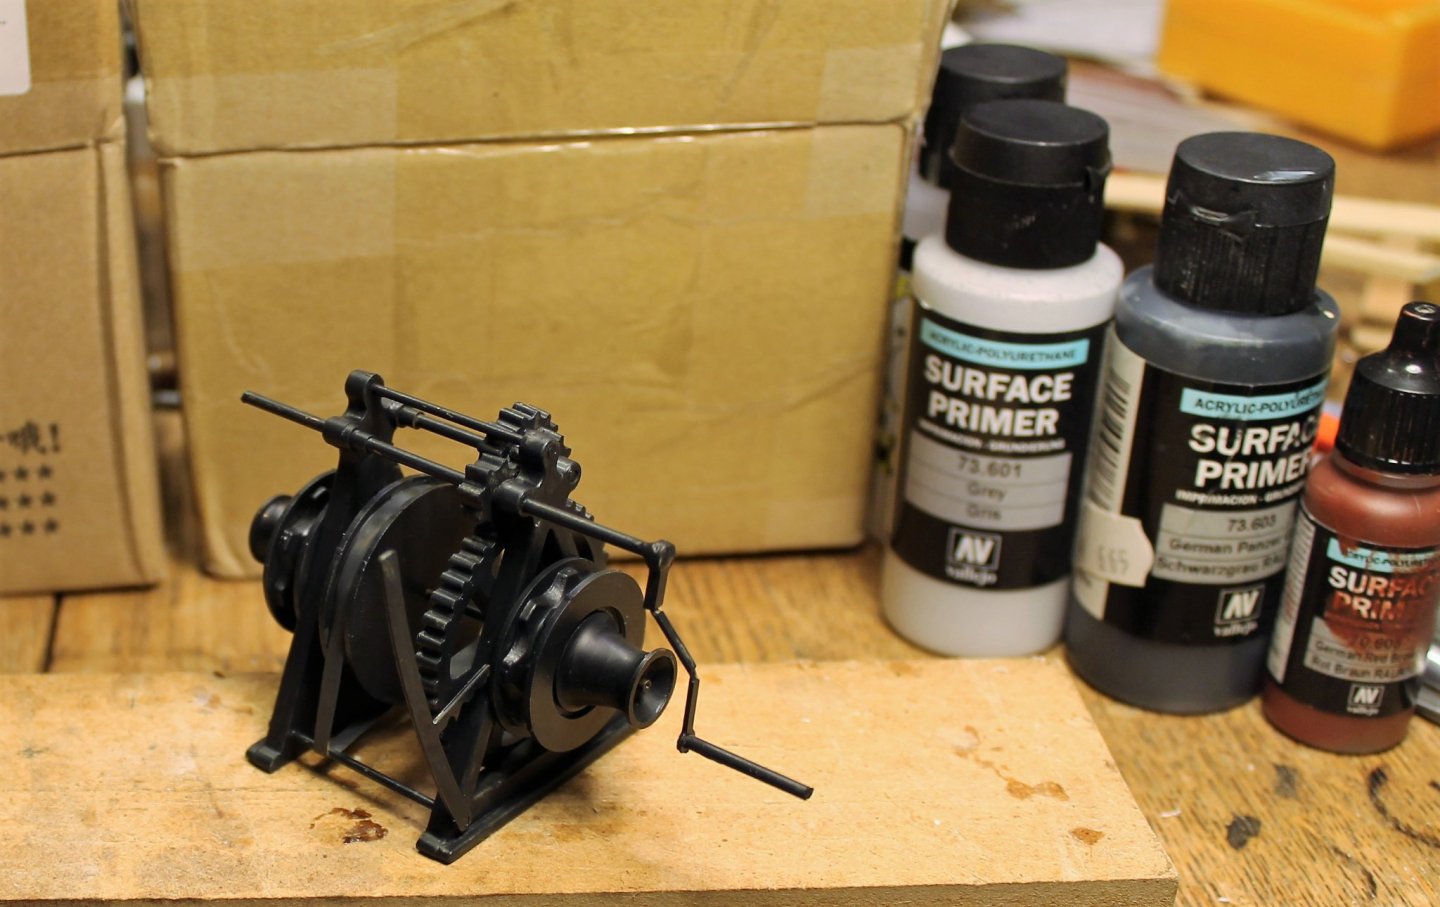
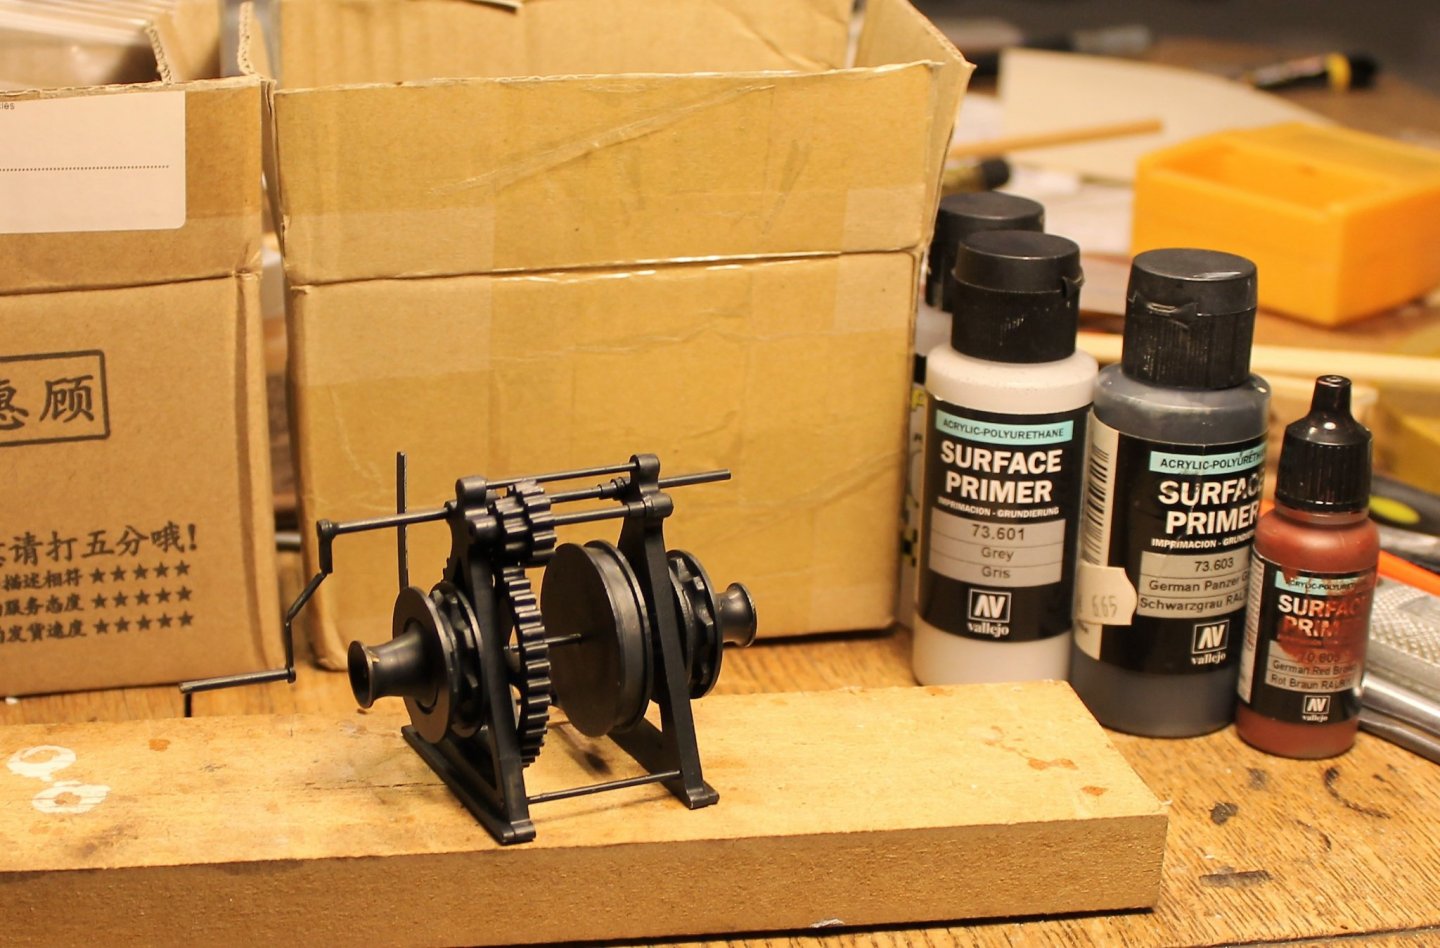
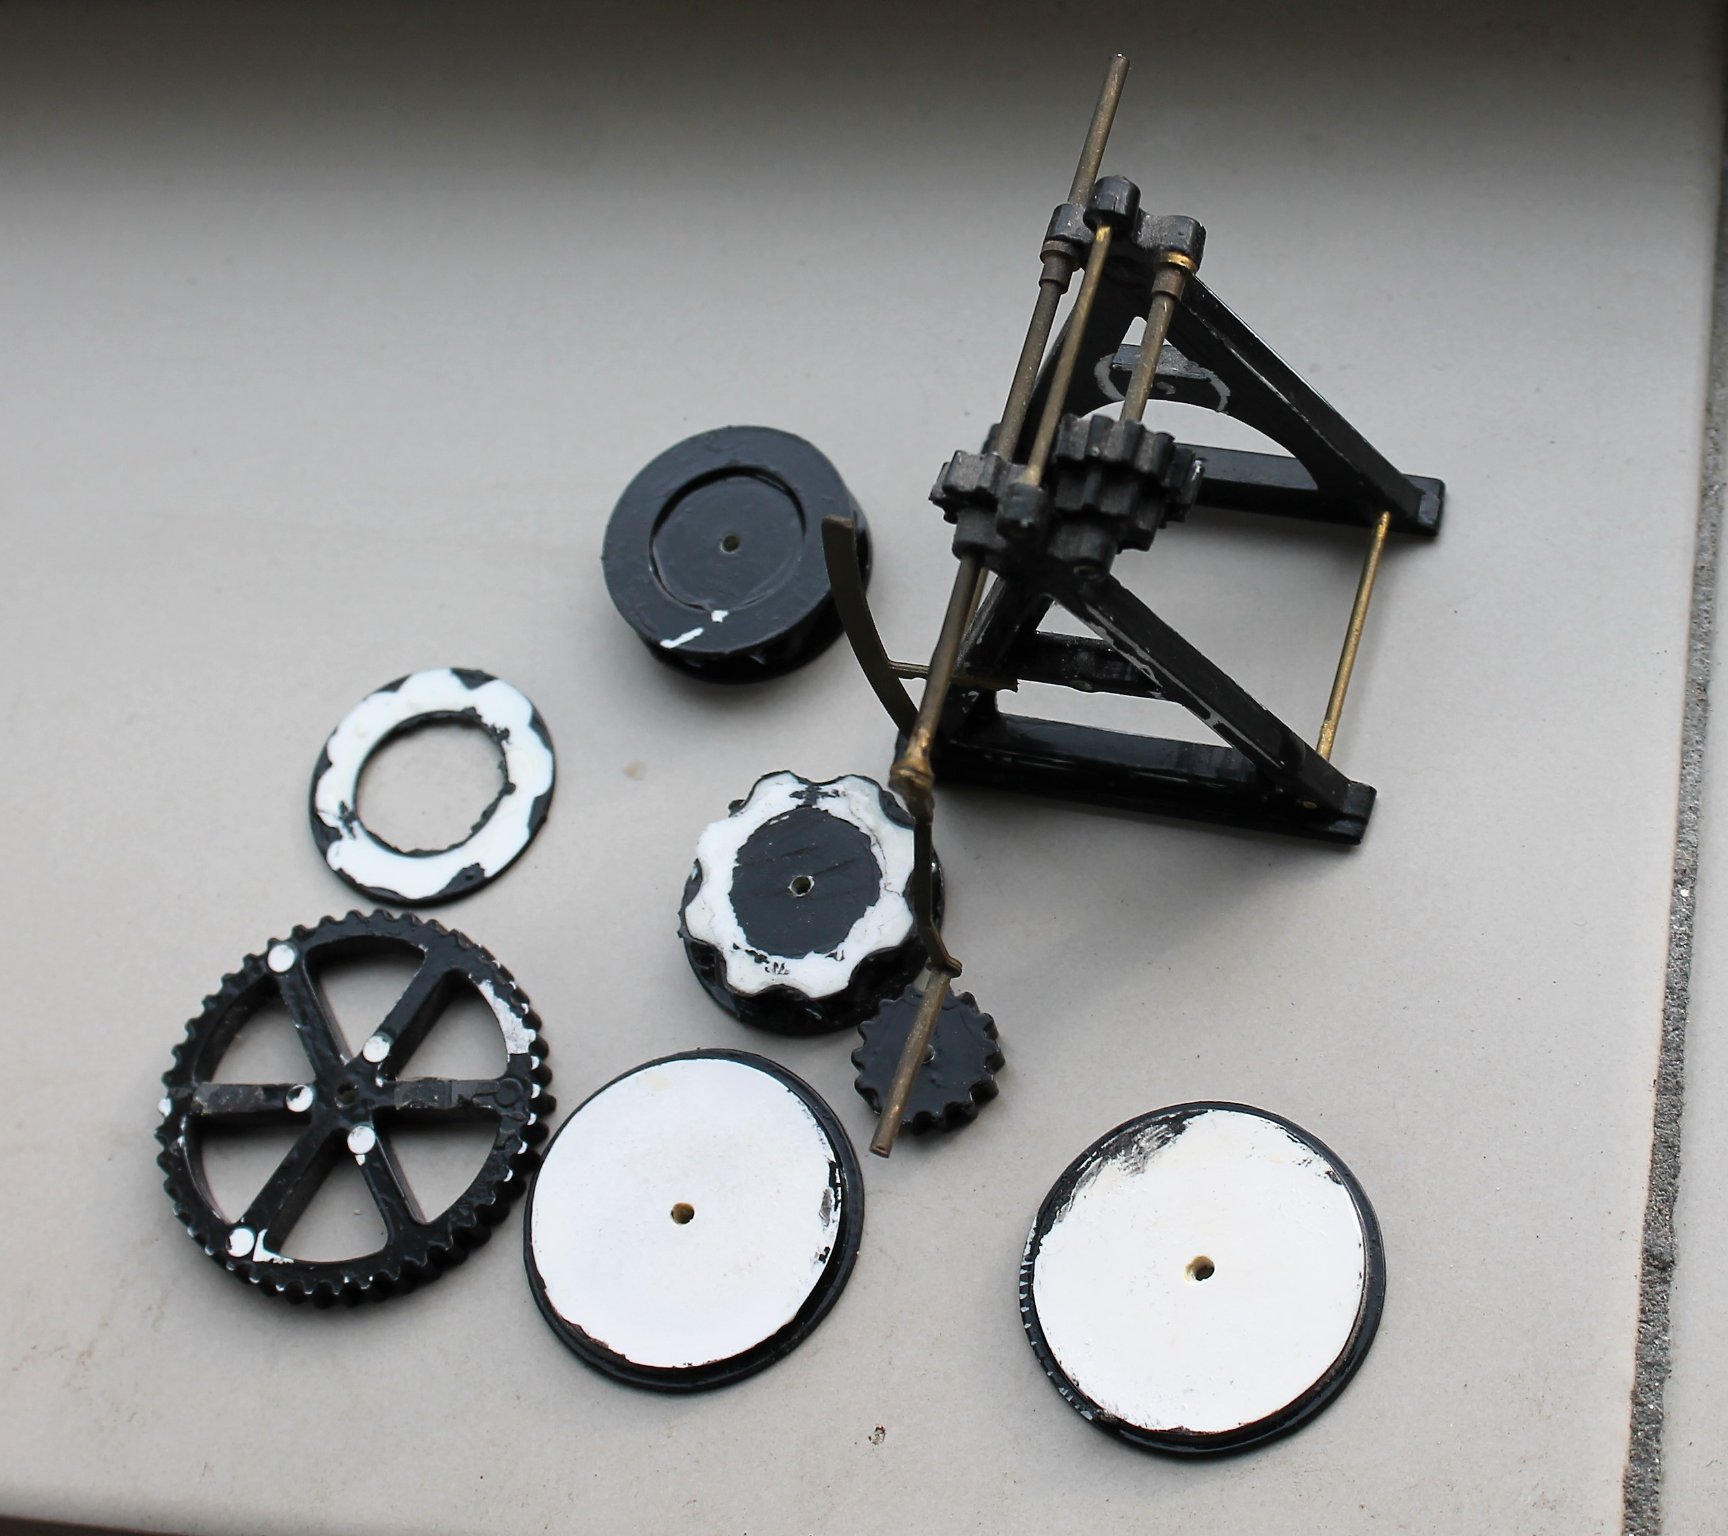
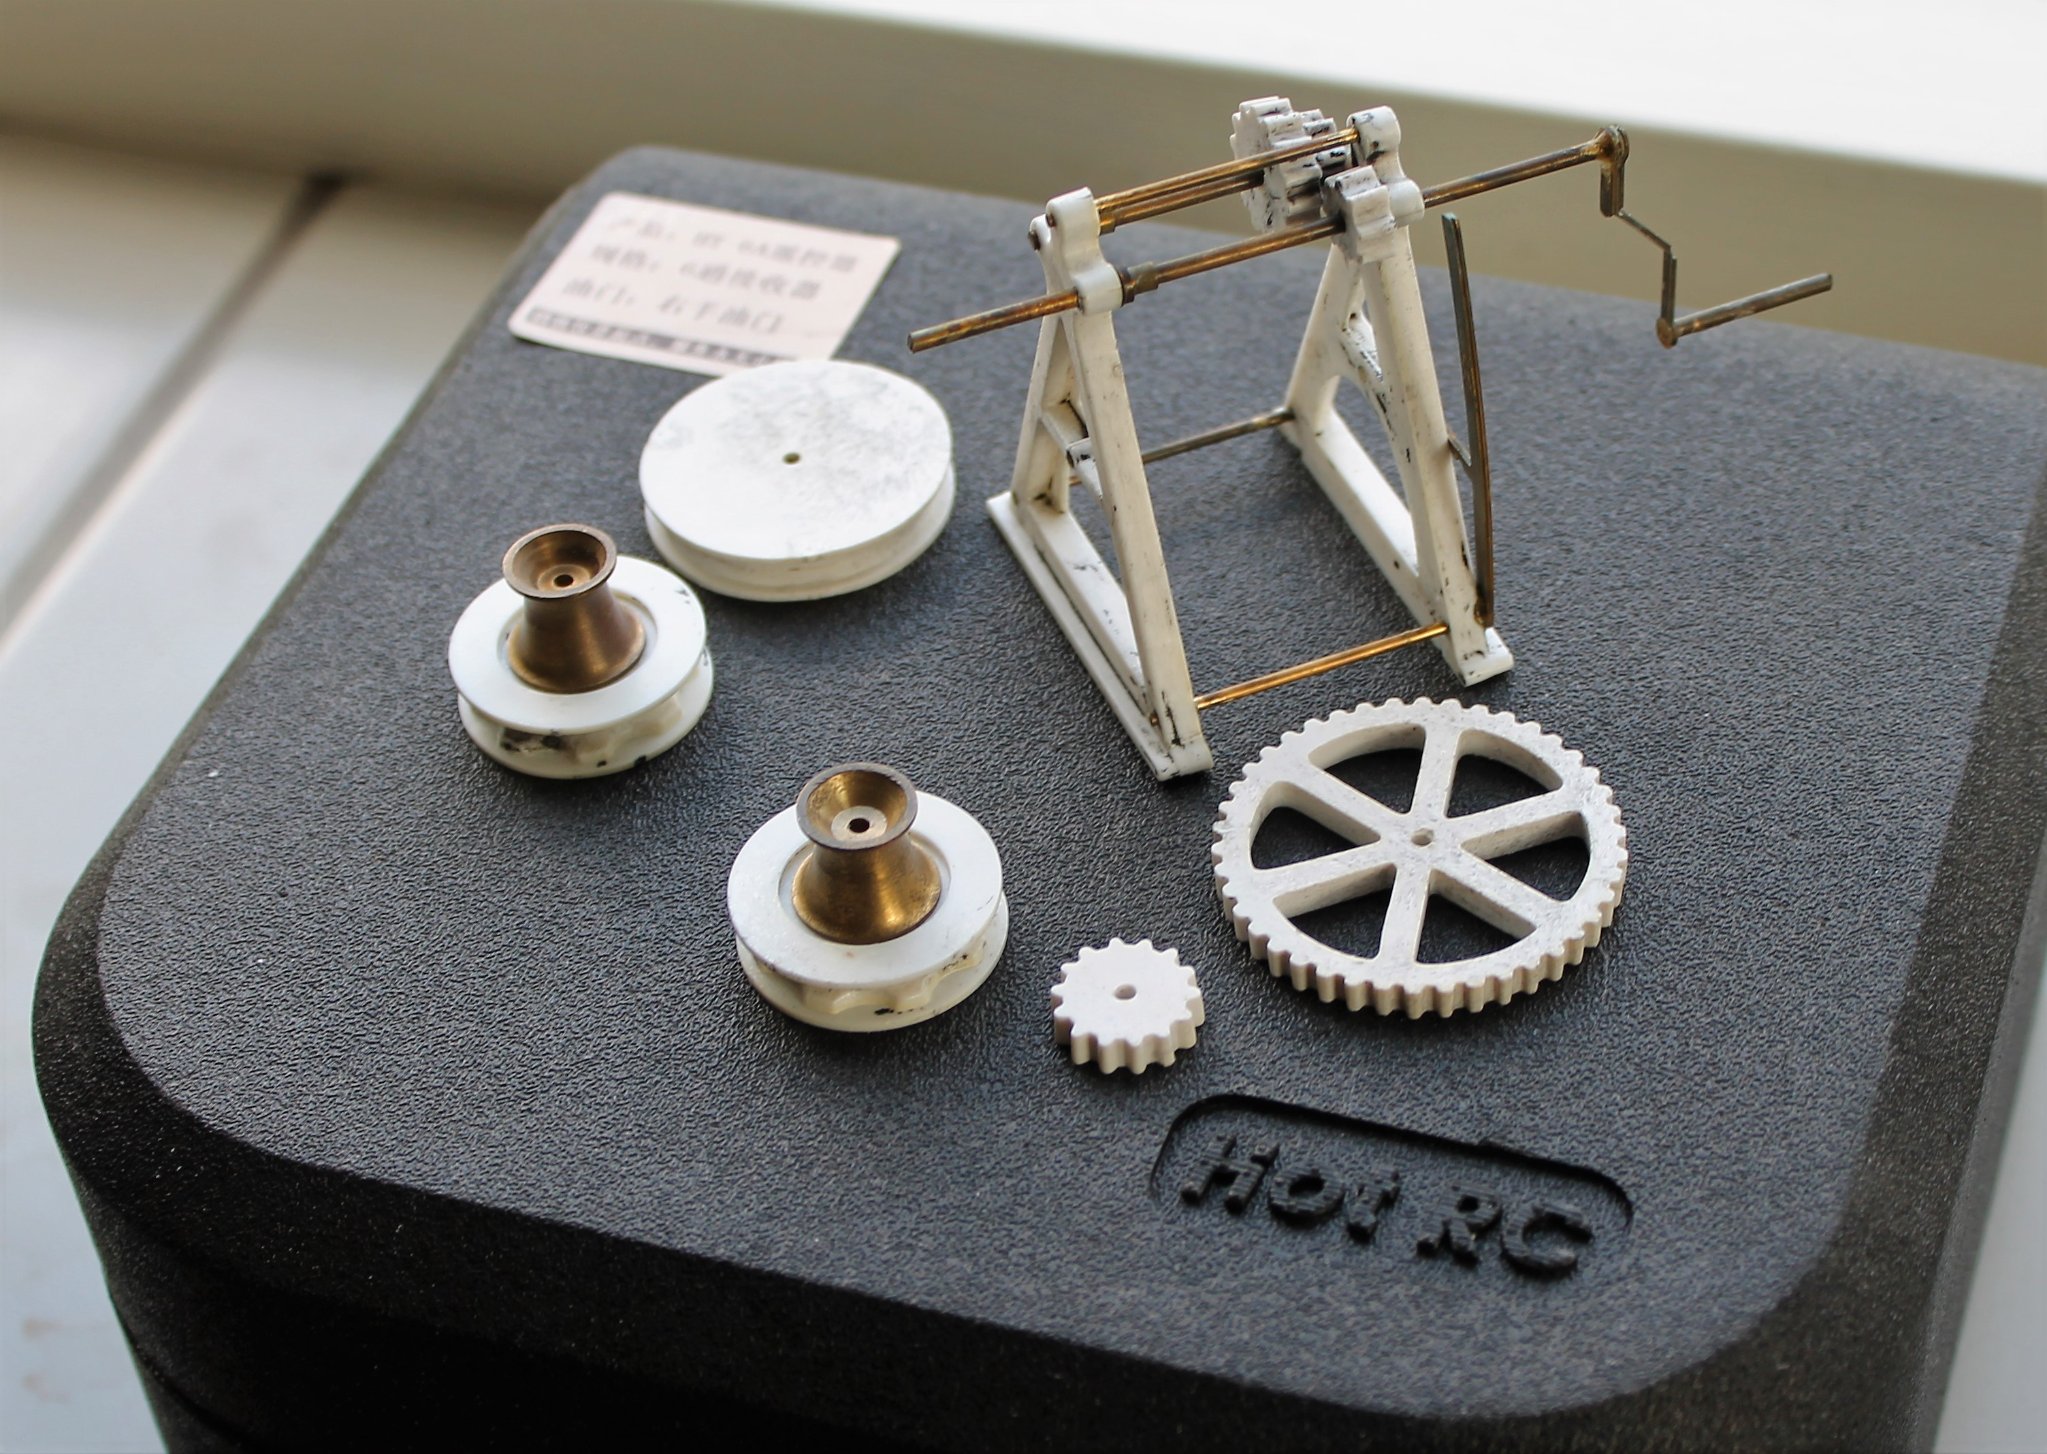
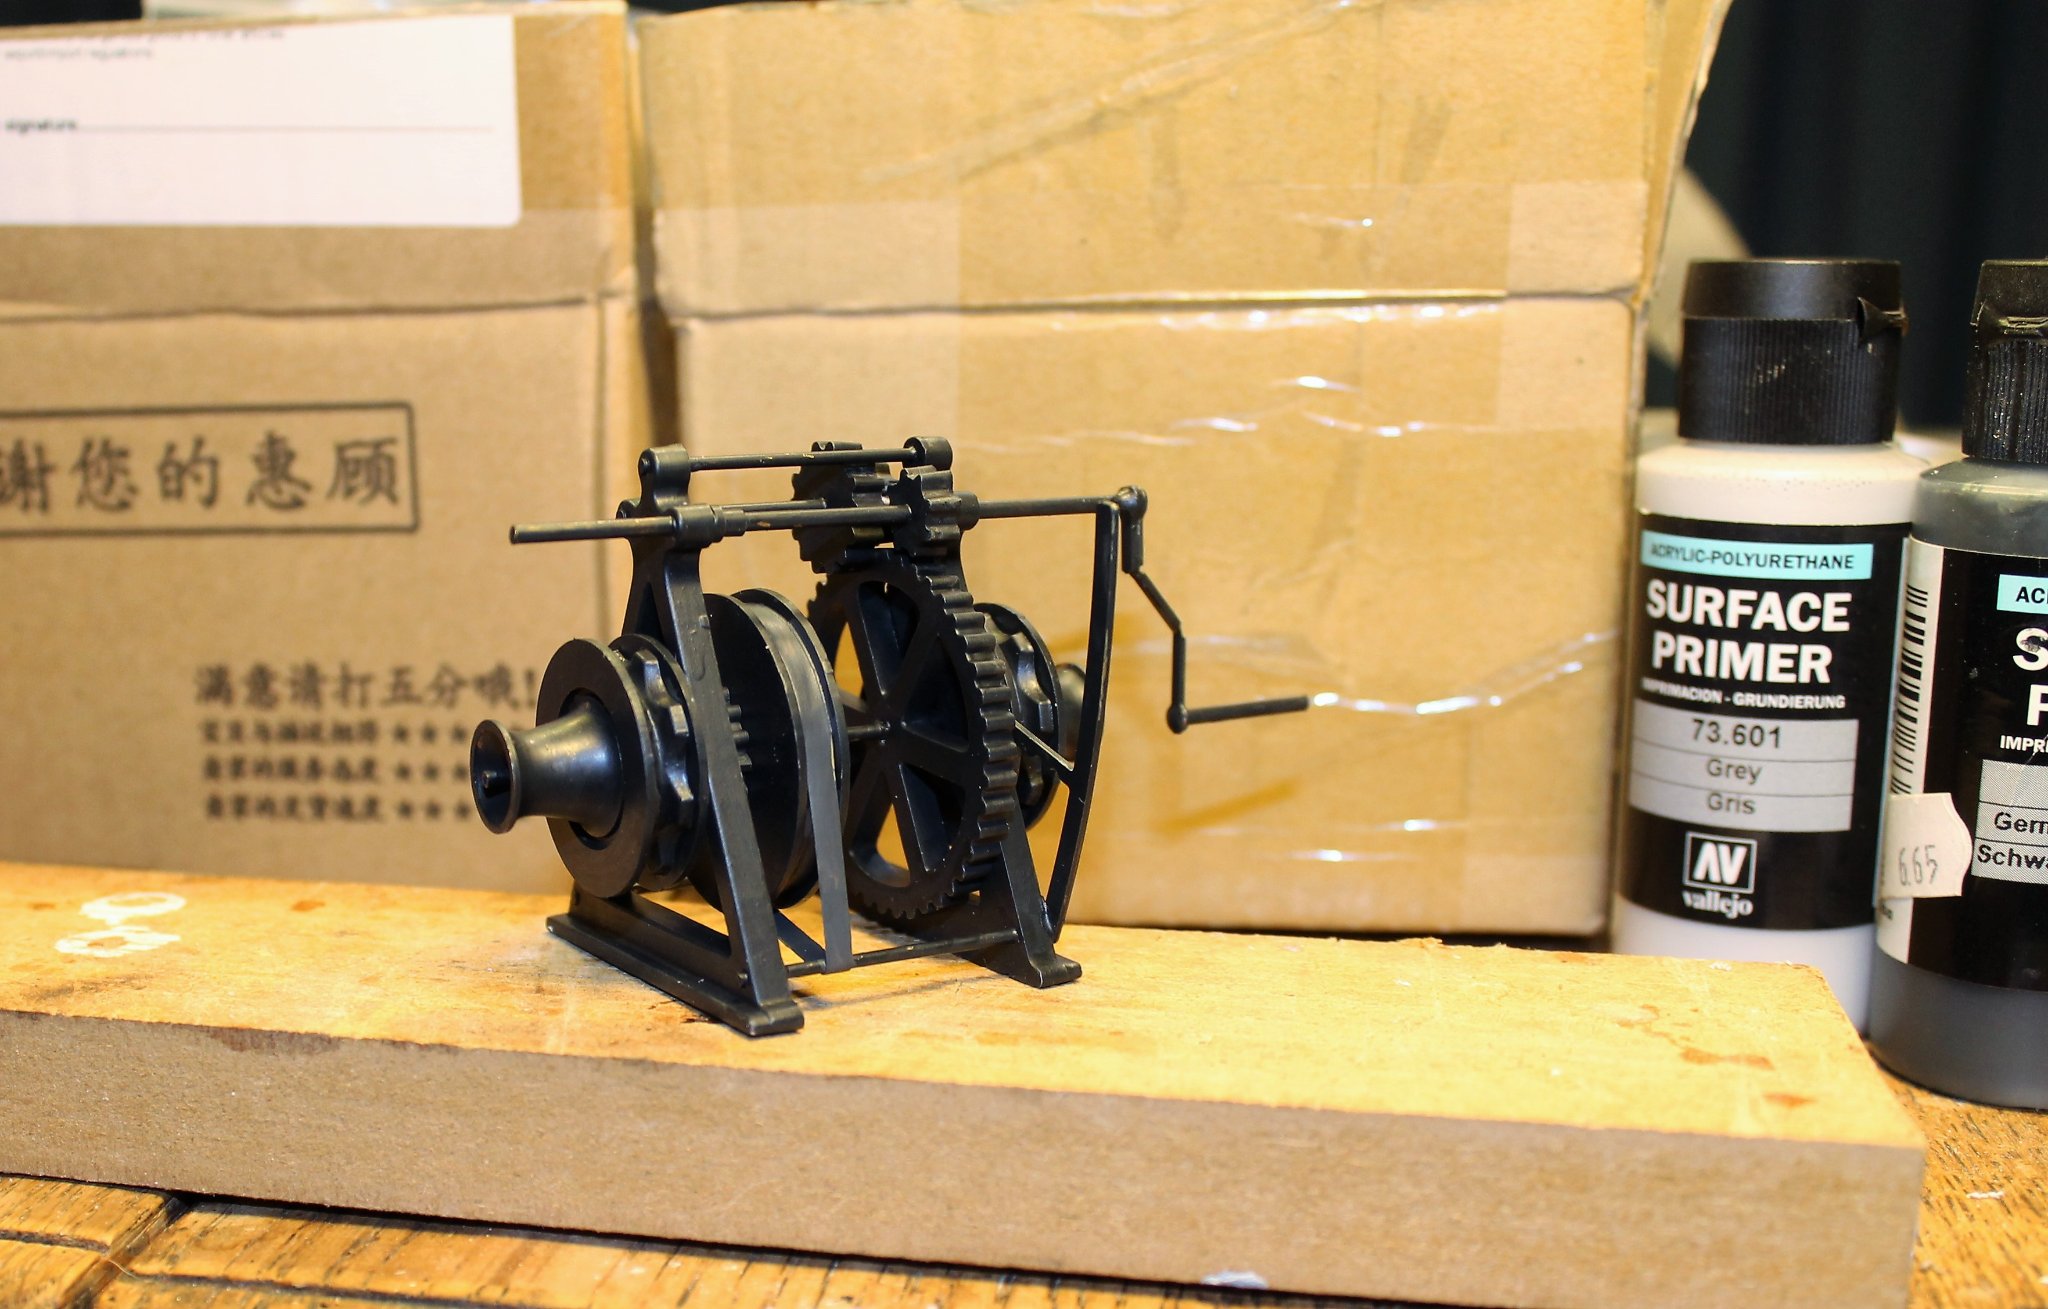
I've been working on the windlass . It was assembled and painted by the previous owner but I wasn't quite happy with it. I disassembled it and removed the paint with oven cleaner. I repainted it with Vallejo Polyurethane paint.

-
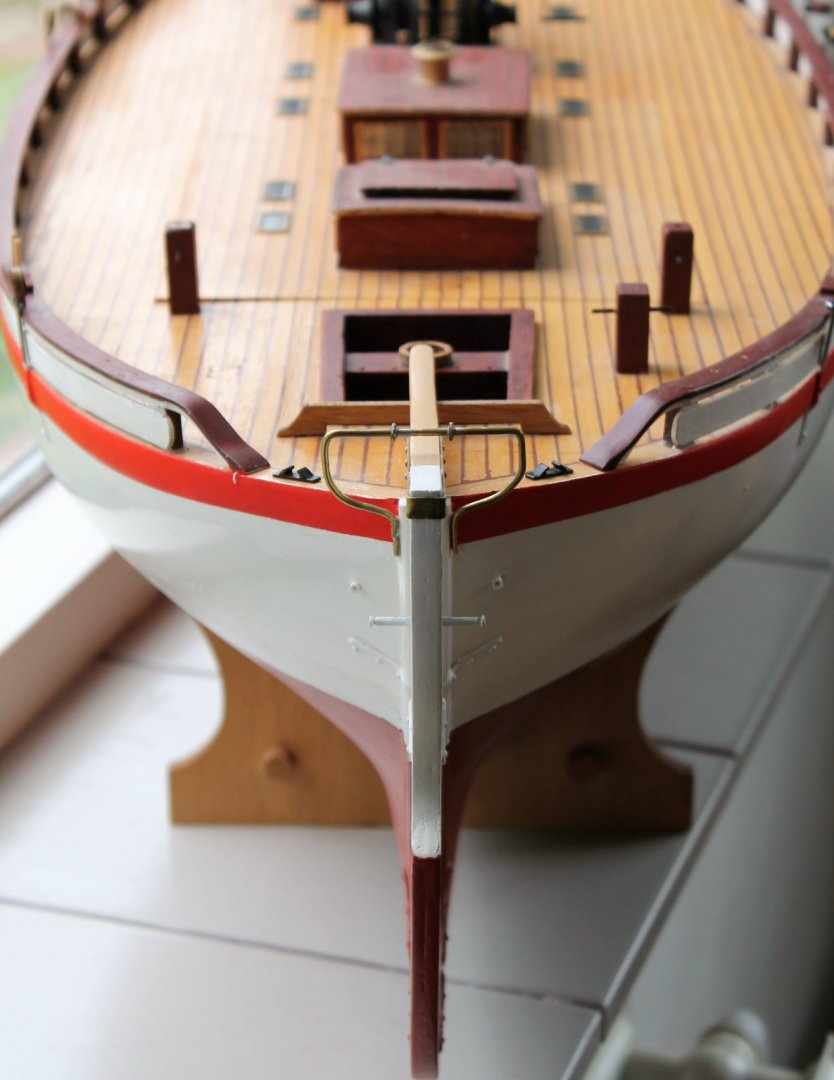
I have fitted the catheads and bollards to the fore deck. I also fitted the plastic bulwark end parts. It's not easy to align these plastic parts with the wooden bulwark parts, especially not the forward ones. These were sitting far too high and I had to modify them extensively. Arjan


-
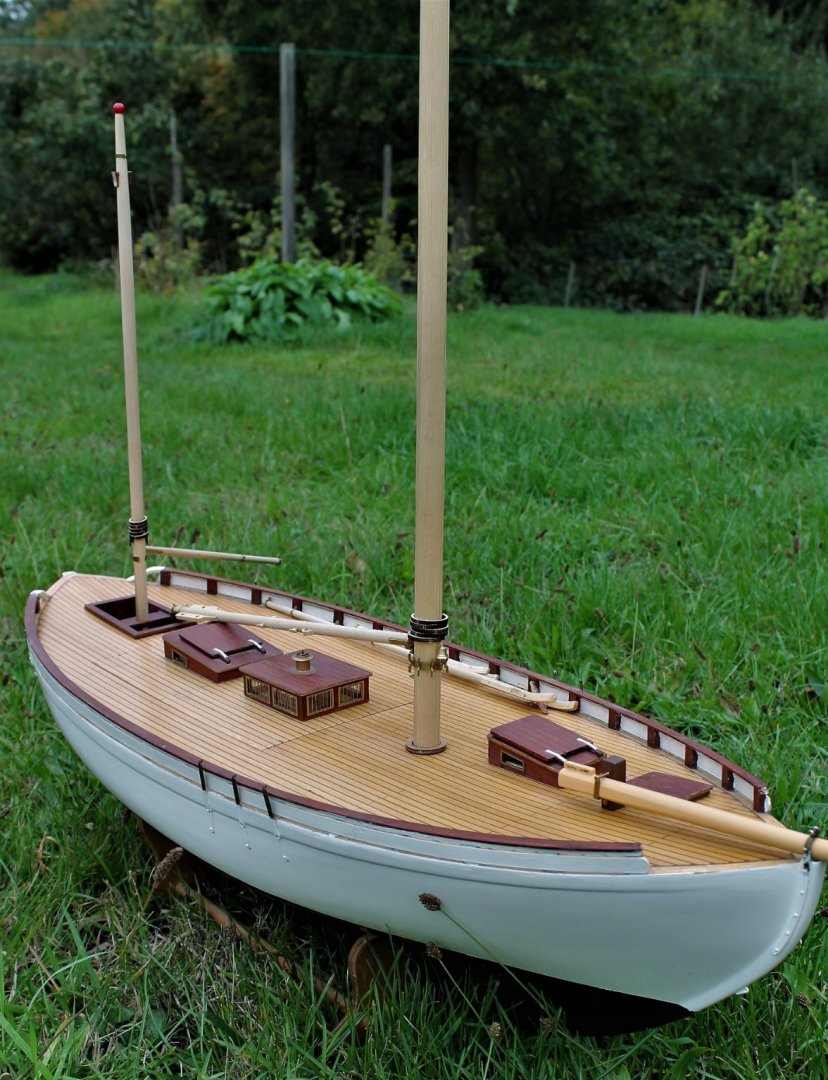
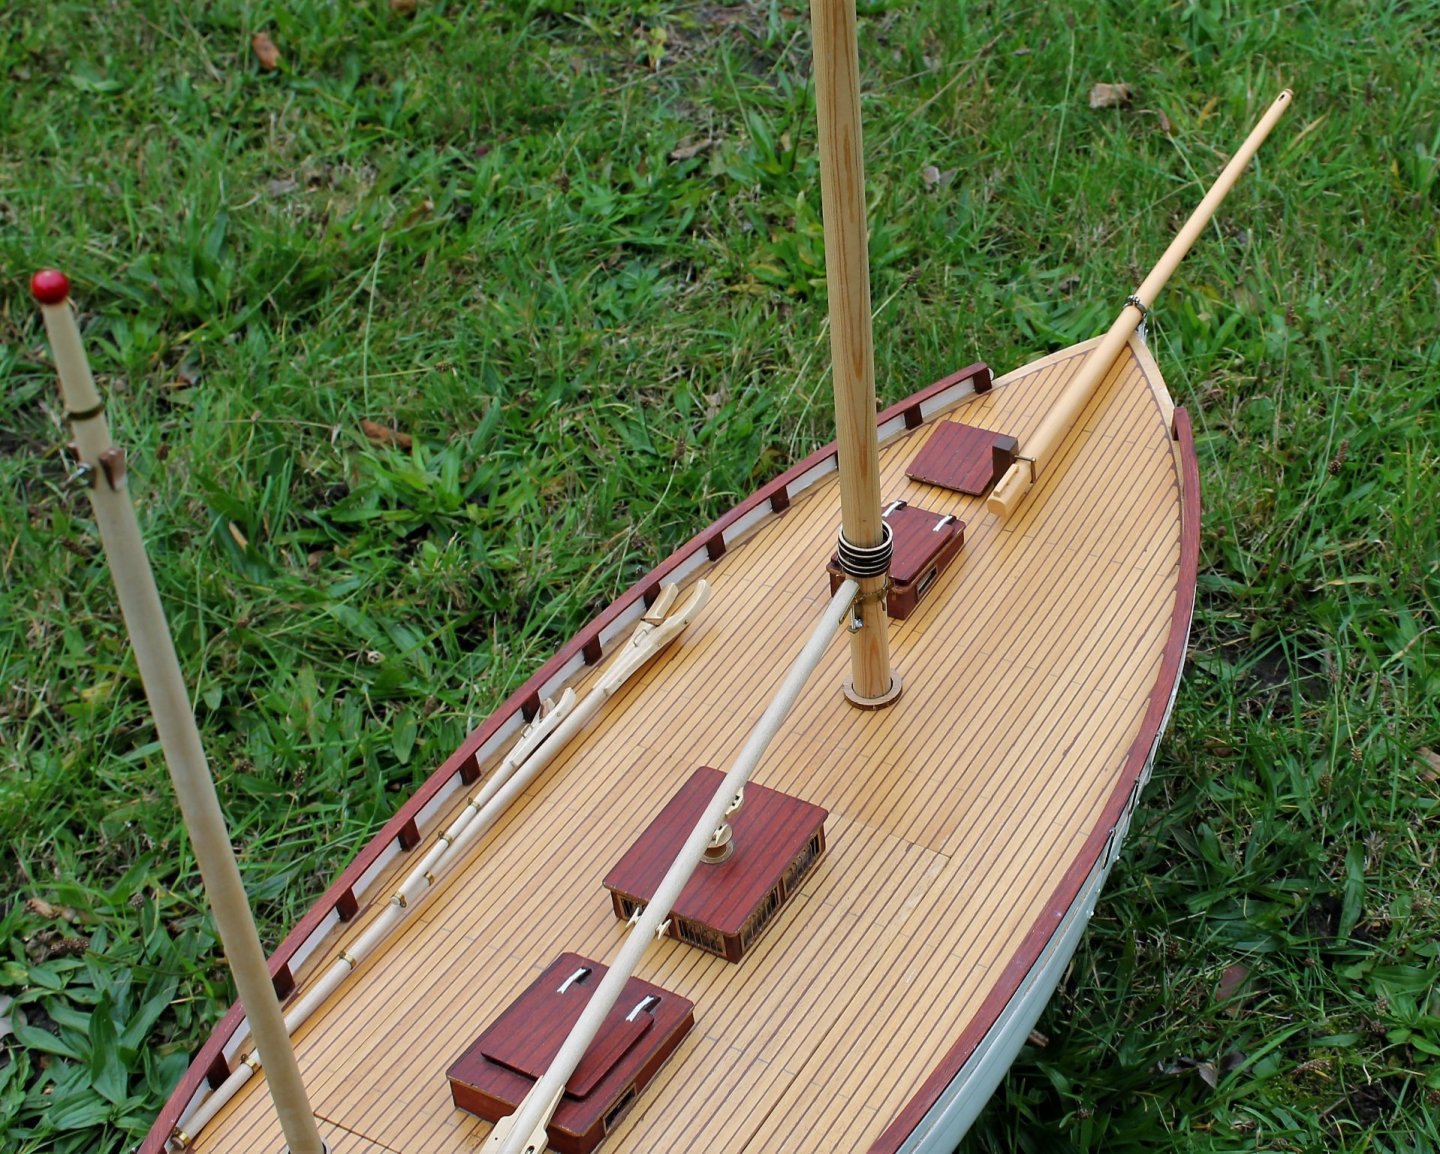
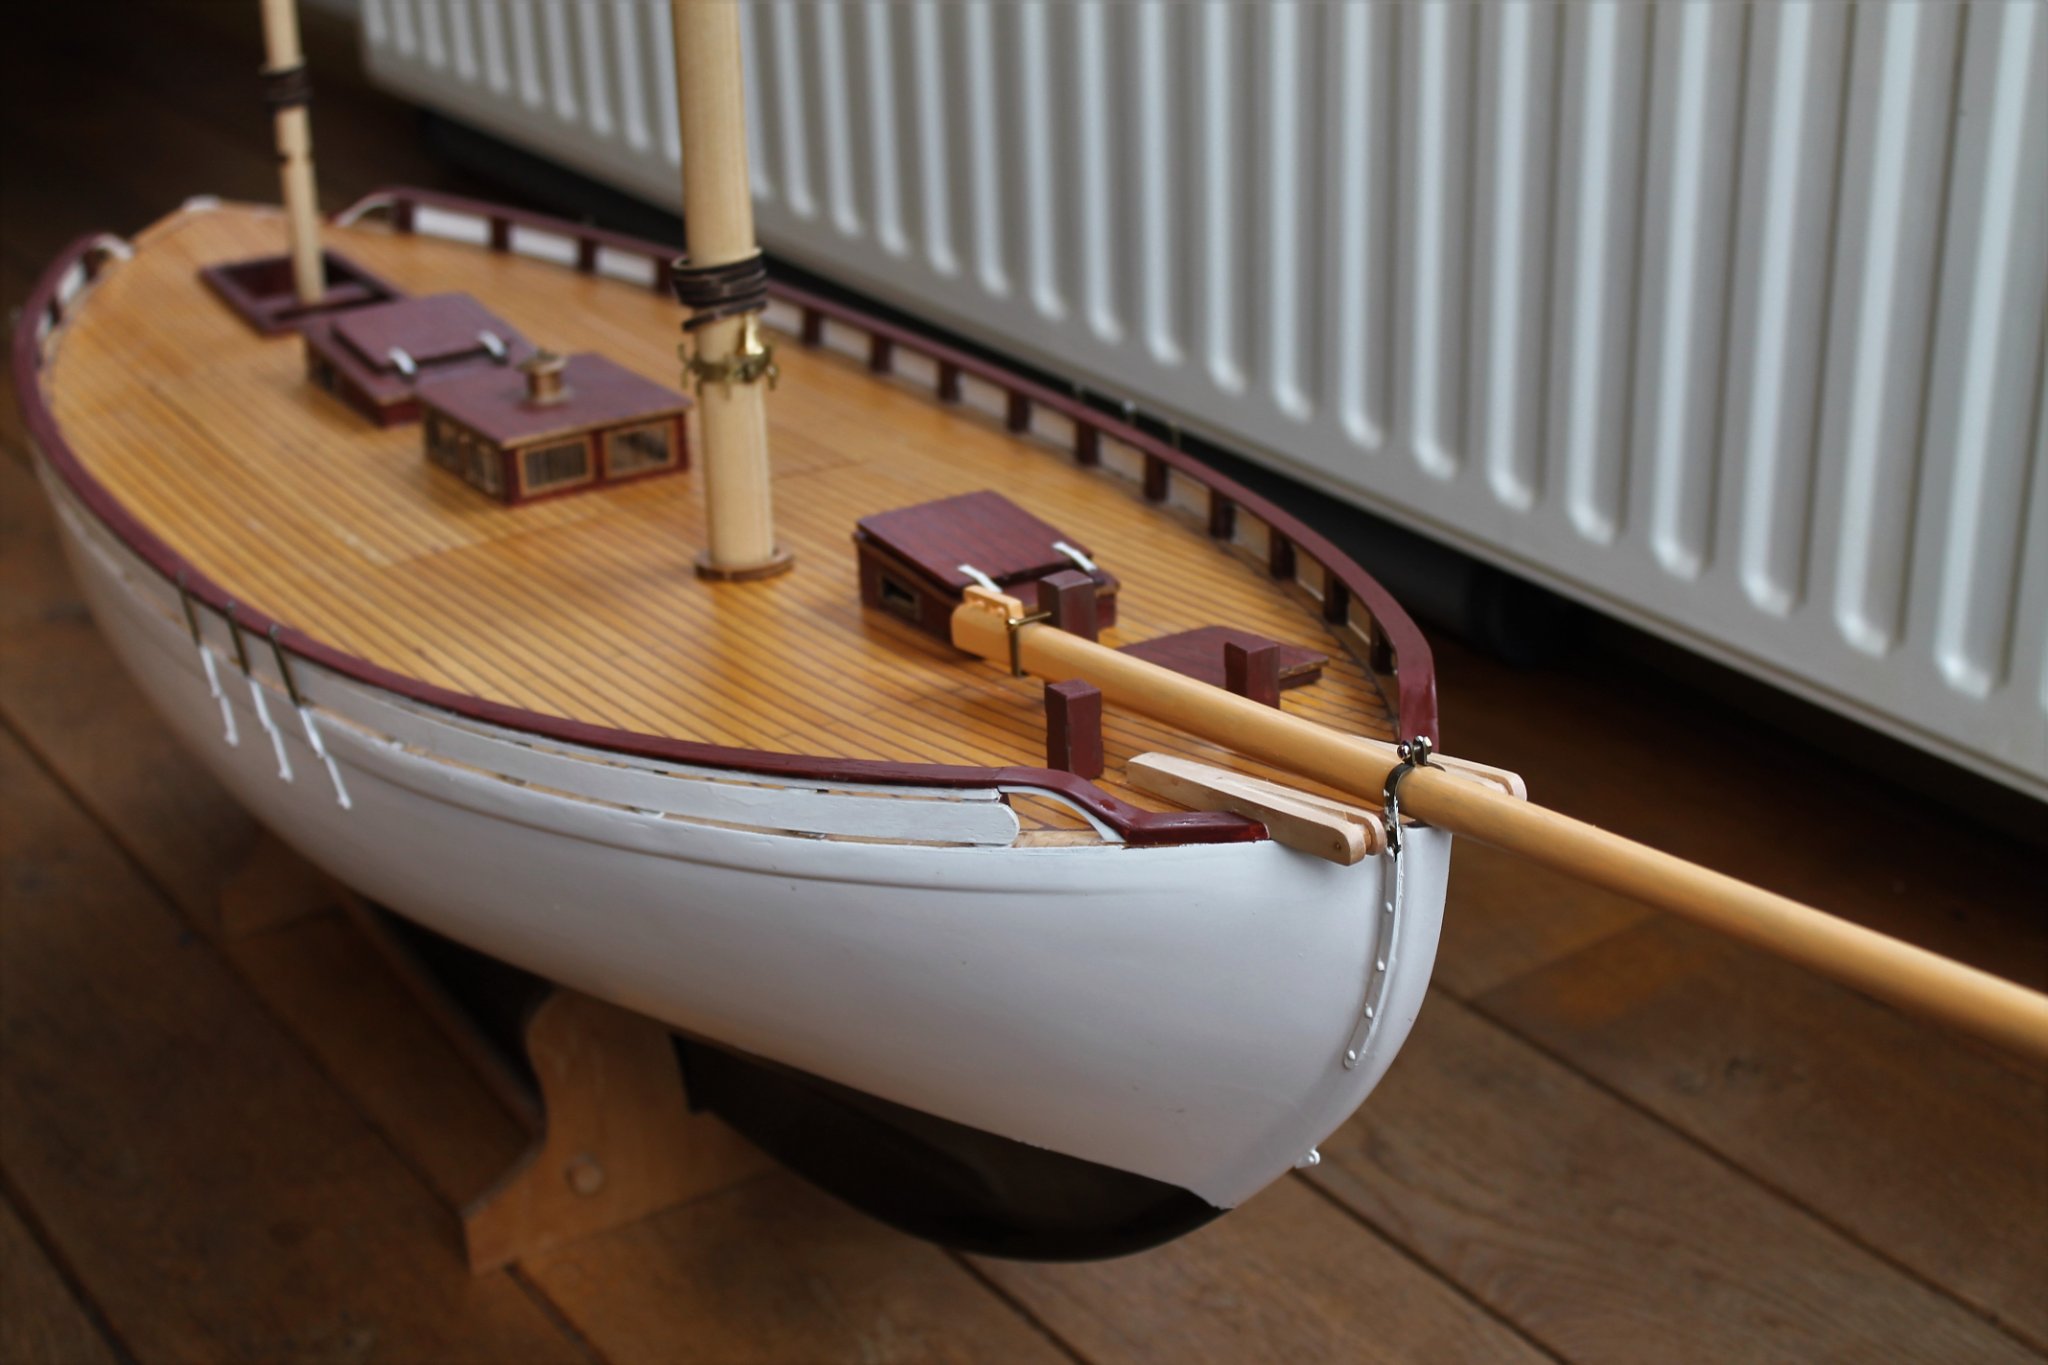
Hi, I moved the companionway and hatch on the fore deck one cm to the rear. This wasn't easy because the previous owner had used two component adhesive. I couldn't remove these parts without causing damage to the deck which meant I had to use some putty afterwards. After sanding down the putty I had to paint it in a colour which more or less matched the surrounding planks. I used a mix of Vallejo Sunny skin and Bronze skin tone which proved to be a reasonable match. Compare the position of these parts in the following pics . I removed the plastic bulwark end parts because only half of the parts were used and only those intended for the rear deck (the parts for the fore deck were still on the sprue). Regards, Arjan
.thumb.jpg.474118e1a6645a1acbe22c05115fa482.jpg)
.thumb.jpg.5200e80cbb6d04e4798cb567f15a88c3.jpg)
-
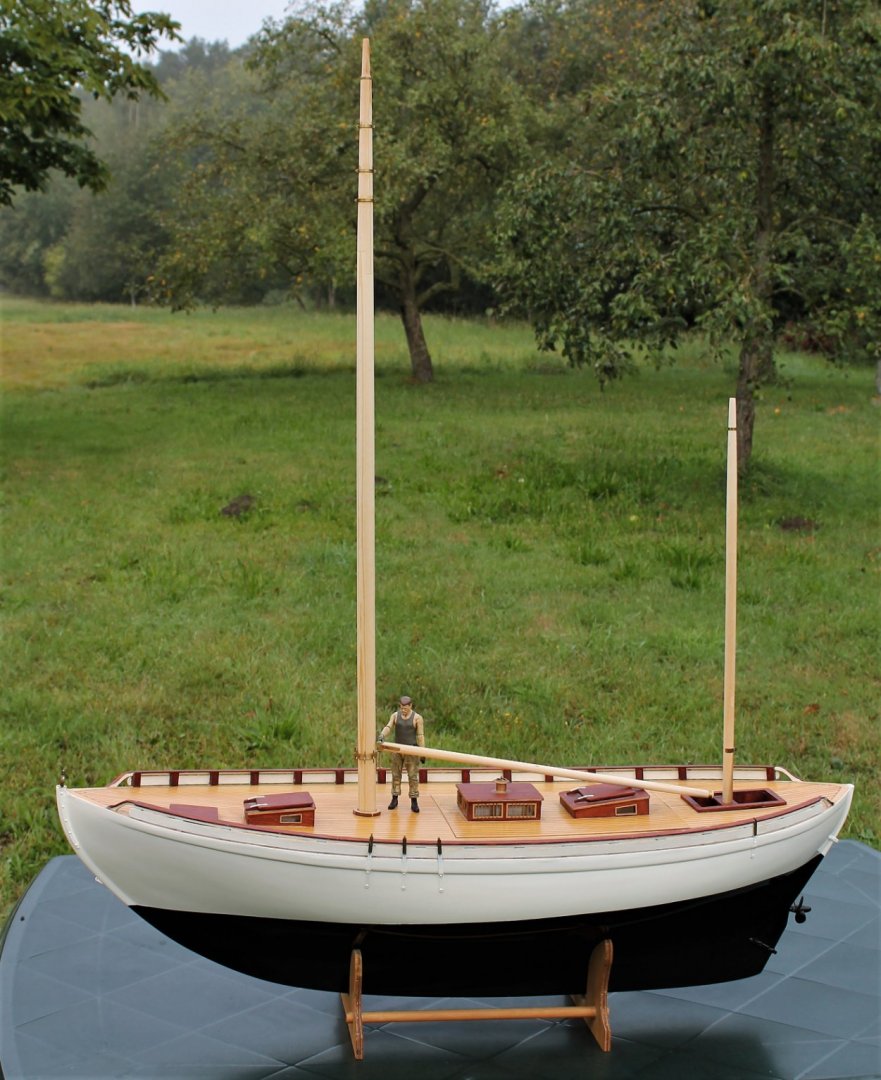
Thanks Bolin ! This is the current state of my build. Finally, I seem to have managed to post some pics .... The previous pics of my build can be found here: https://www.modelbouwforum.nl/threads/bb-colin-archer-1-15.274135/ Regards, Arjan


-
For those interested, the pics that fail to materialize in my previous post (I really tried everything I could think of) can be seen here : https://www.modelbouwforum.nl/threads/bb-colin-archer-1-15.274135/ Arjan
-
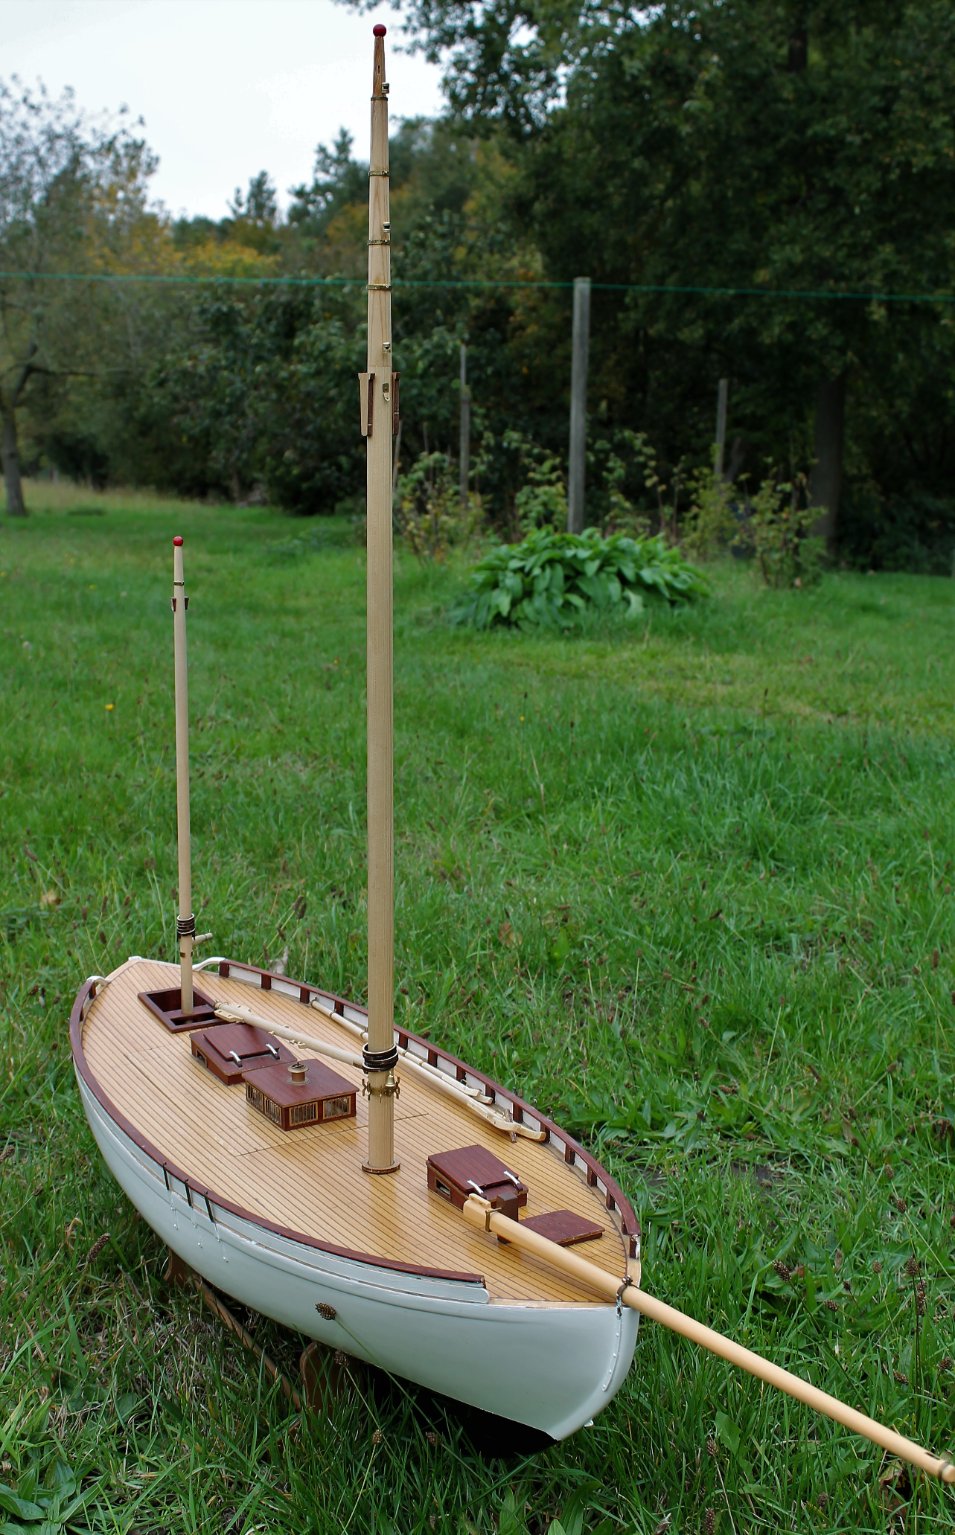
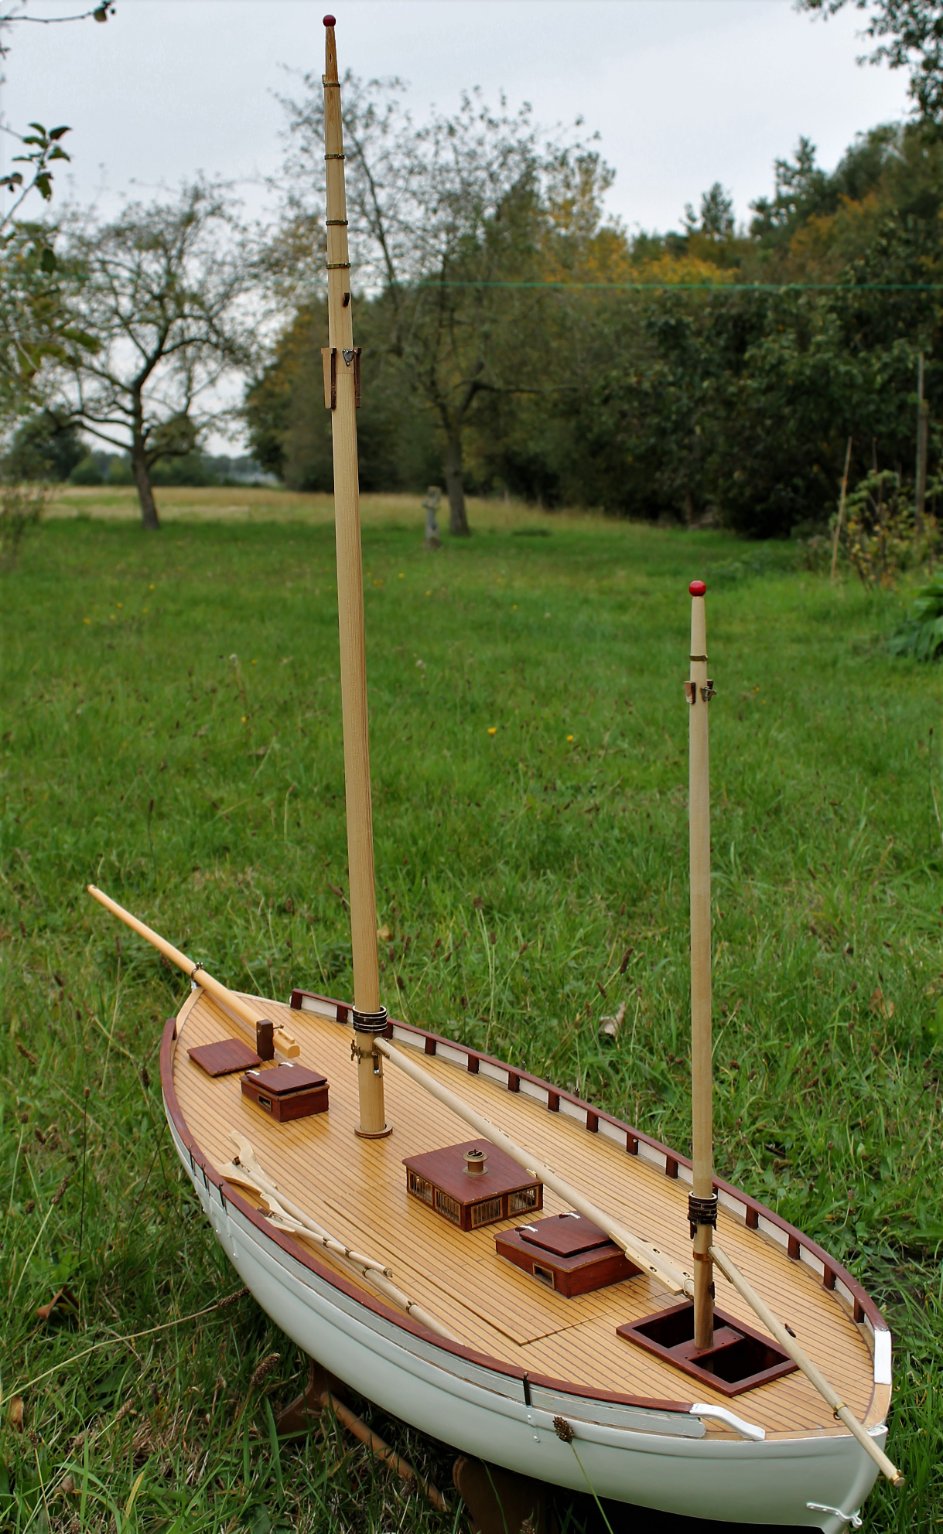
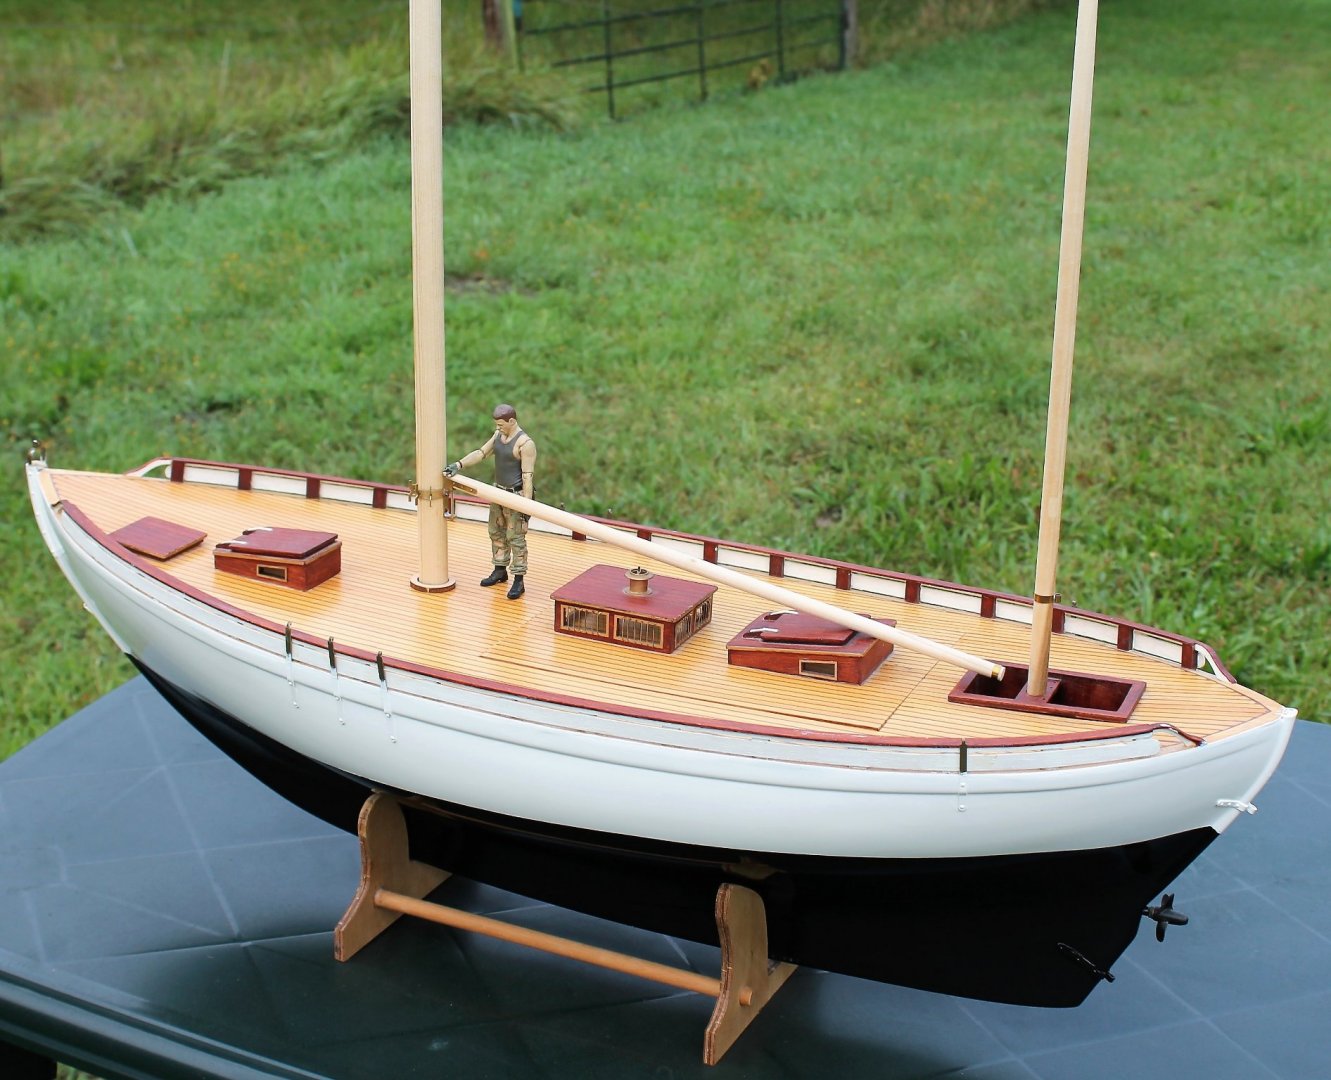
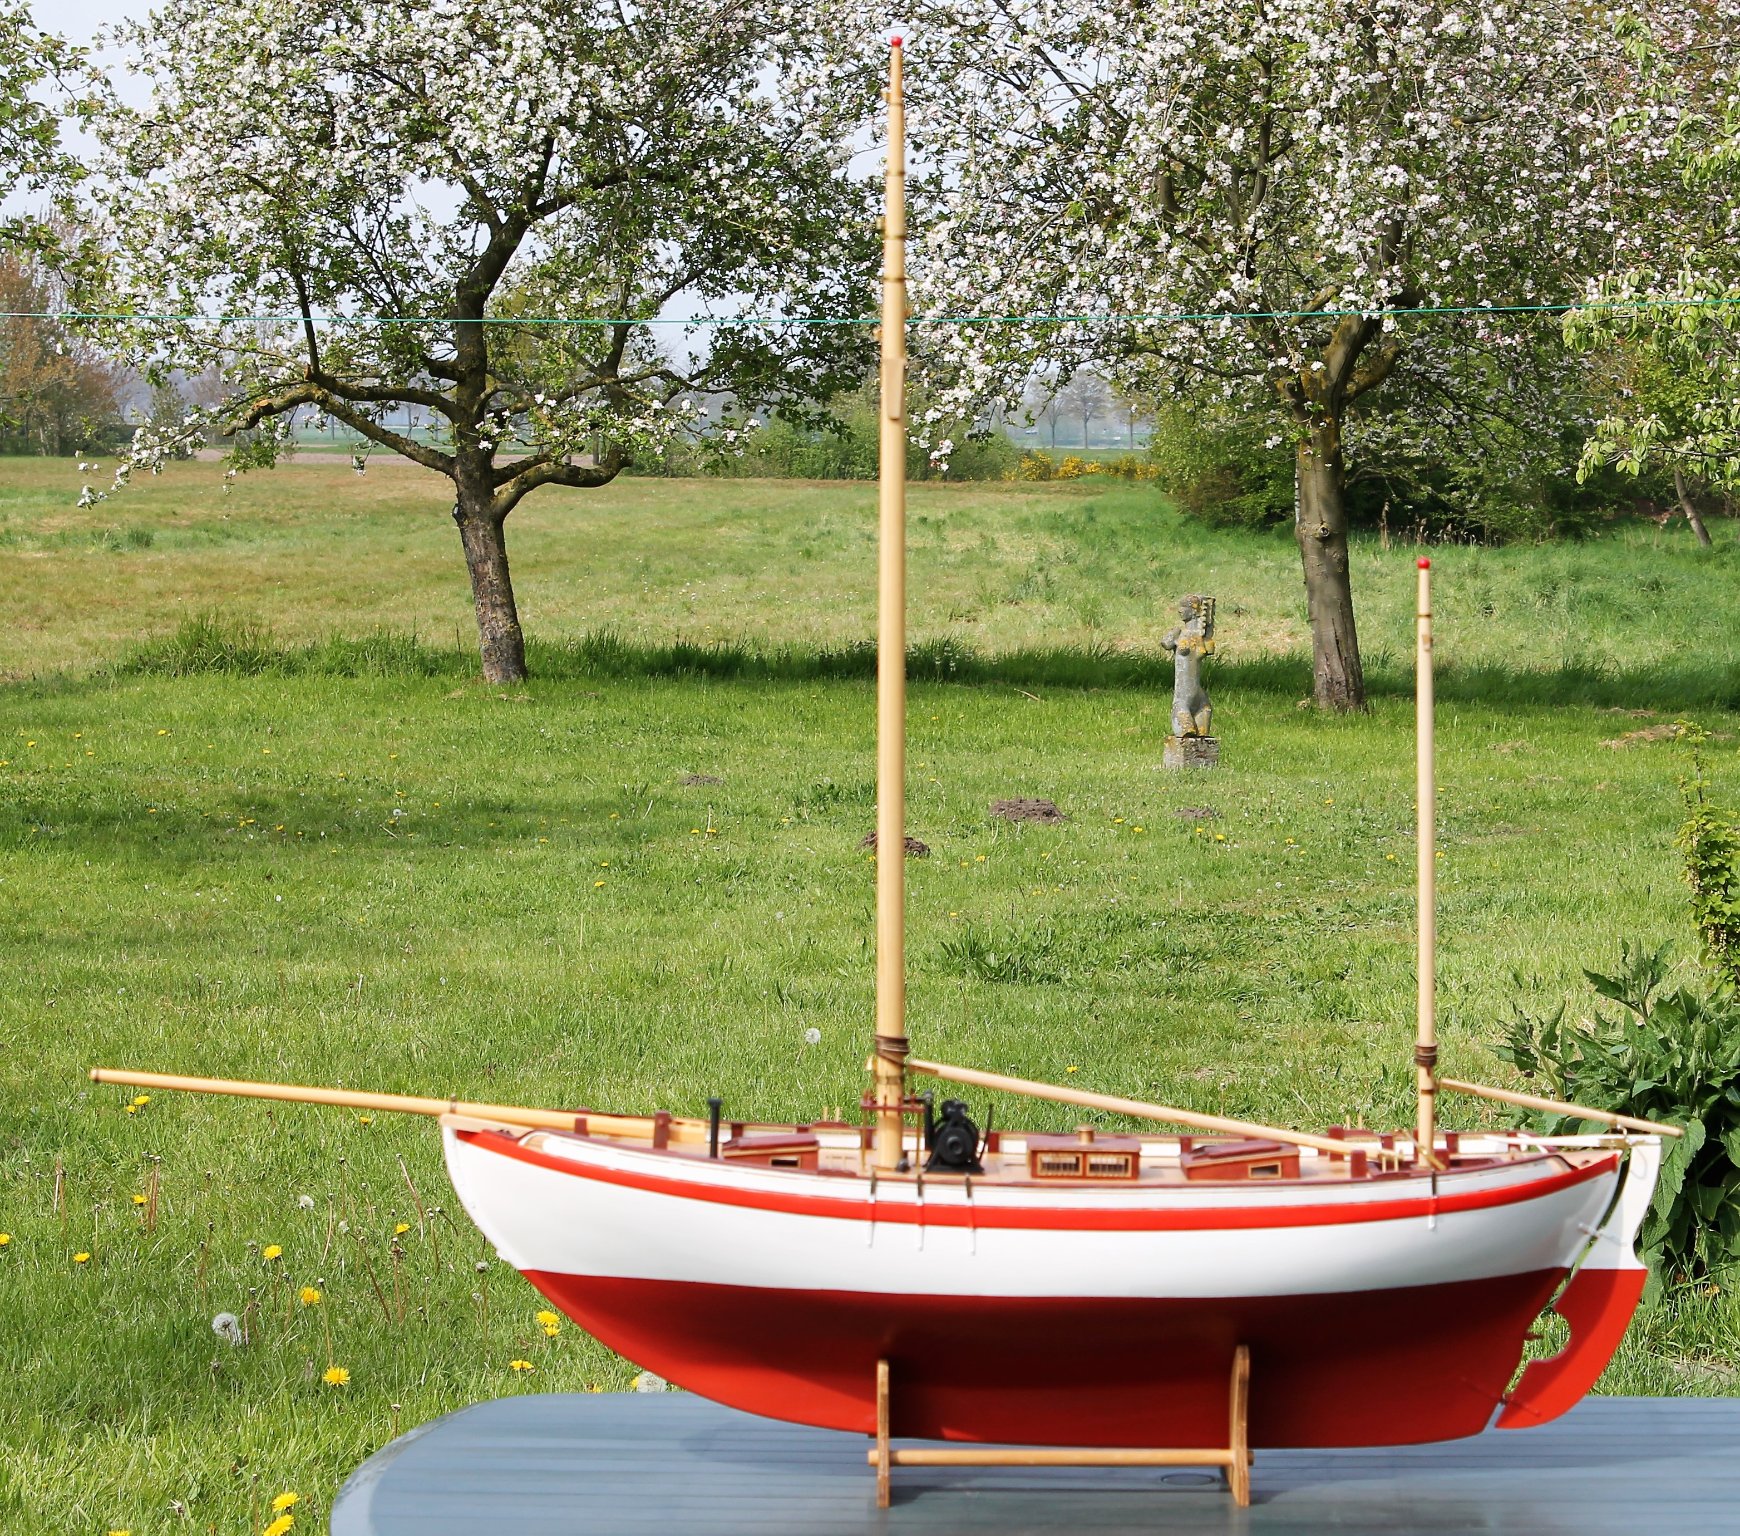
This summer I bought an old second hand kit that had already been started. I think its previous owner bought it in the mid nineties, the certificate that comes with the kit shows number 455. He had already fitted the deck, superstructures, bulwarks, chain plates and bow sprit. Also, the winch was assembled and the hull painted. Buying a kit that has been started by someone else is always a bit of a gamble and usually some mistakes have to be corrected and some parts may also prove to be missing. Fortunately, the only missing parts were a bag of small brass nails which could easily be sourced. Unfortunately, the previous owner of the kit made quite a few mistakes and I will only mention the most annoying ones now. The fore deck companionway and hatch were positioned incorrectly (one full centimetre too far forward). The plastic bulwark end parts were assembled and fitted incorrectly. Winch parts not assembled and painted properly. Needless to say, the colour of the hull bottom will also have to be addressed. Finally, no ballast was added to the hull and since the deck has already been fitted adding the lead ballast will now be more difficult. I started by shaping and assembling the masts and spars. The first pics : [img]https://i.imgur.com/LchH0C3.jpg[/img] [img]https://i.imgur.com/uLYrEYd.jpg[/img] For sanding the main mast into shape I temporarily screwed a metal rod into its base so it would fit into the electric drill head (the diameter of the mast is 2.2 cm, almost the size of a broom handle). Some pics of the boom : [img]https://i.imgur.com/QAz4dSY.jpg[/img] [img]https://i.imgur.com/PKWRqPC.jpg[/img] [img]https://i.imgur.com/R069kAc.jpg[/img] [img]https://i.imgur.com/u1tLn4f.jpg[/img] I applied a uniform colour to the darker pieces of wood : [img]https://i.imgur.com/oOoHPtj.jpg[/img] I have by now also shaped and assembled the boom of the mizzen mast and the gaff of the main mast. I will make and post some pics of these parts later. Regards, Arjan edit: not clear to me why the pics I posted don't show
-
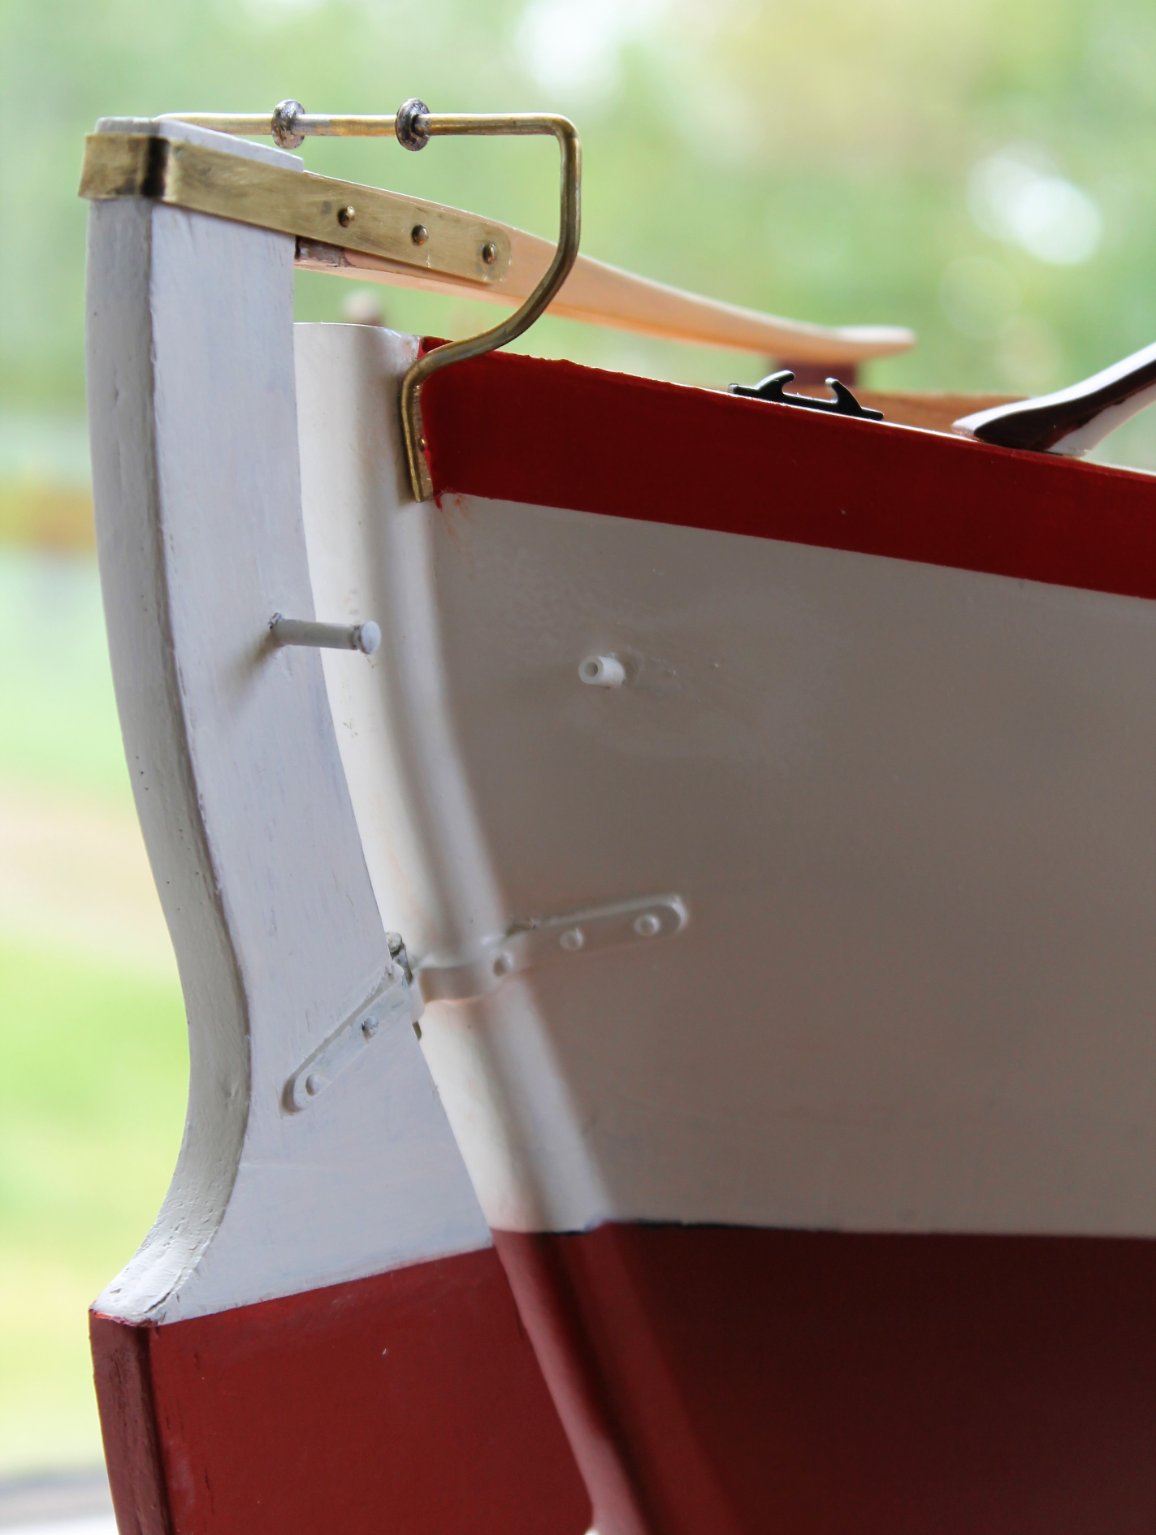
Hi George, the rear end of the BB catheads should be rounded off on the top side only. The straight front end of the BB parts should be rounded off and a roller should be added. The parts from the instructions : This is what they should look like : I hope I've made myself clear. Regards, Arjan
- 90 replies
-
- 4
-
-
- billing boats
- colin archer
- (and 1 more)
-
I've been following this thread with interest because I have recently bought an old, partly built 414 kit . I have found that the BB kit has some issues of which the wrongly shaped catheads, parts 38 (414) or 57 (728 ) is one. Caner: The instructions of the latest 728 kit can be found here : https://www.pelikandaniel.com/dld/3BB7028_Colin_Archer_Instructions.pdf Some time ago an ABS hull was offered for sale on ebay by a German. I would advise you to check ebay regularly. Regards, Arjan
-
Oseberg by crispy - Billing Boats - 1/25
Arjan replied to crispy's topic in - Kit subjects built Up to and including 1500 AD
A solid wood base could be helpful for a carvel built model. This is a clinker built one and lapstrake planking provides quite a bit of rigidity. -
Oseberg by crispy - Billing Boats - 1/25
Arjan replied to crispy's topic in - Kit subjects built Up to and including 1500 AD
In hindsight I think fitting the scroll pieces before attaching the strakes is the best solution. Mainly because the shape of parts 10a and 10b is not 100% identical to that of the scroll pieces. Personally I think the soft wood filling exercise is quite superfluous because the frame is sufficiently sturdy. Regards, Arjan -
I prefer building models of boats that either exist as replicas or are well-documented. There are loads of detail pics of the le Renard replica to be found on the internet. I'm currently building BB's Regina Yacht and to my dismay I haven't been able to find any reference material on this particular ship type , even though BB claim this was a common 19th century Baltic sailing vessel ..... Regards, Arjan
-
I have also recently bought the AL Renard kit so I'm following this thread with interest. Looking good so far ! My intention is to scale up the kit parts to 1/25 (simply a matter of enlarging them by 200 % ) and I may not even build the original 1/50 kit. Regards, Arjan
-
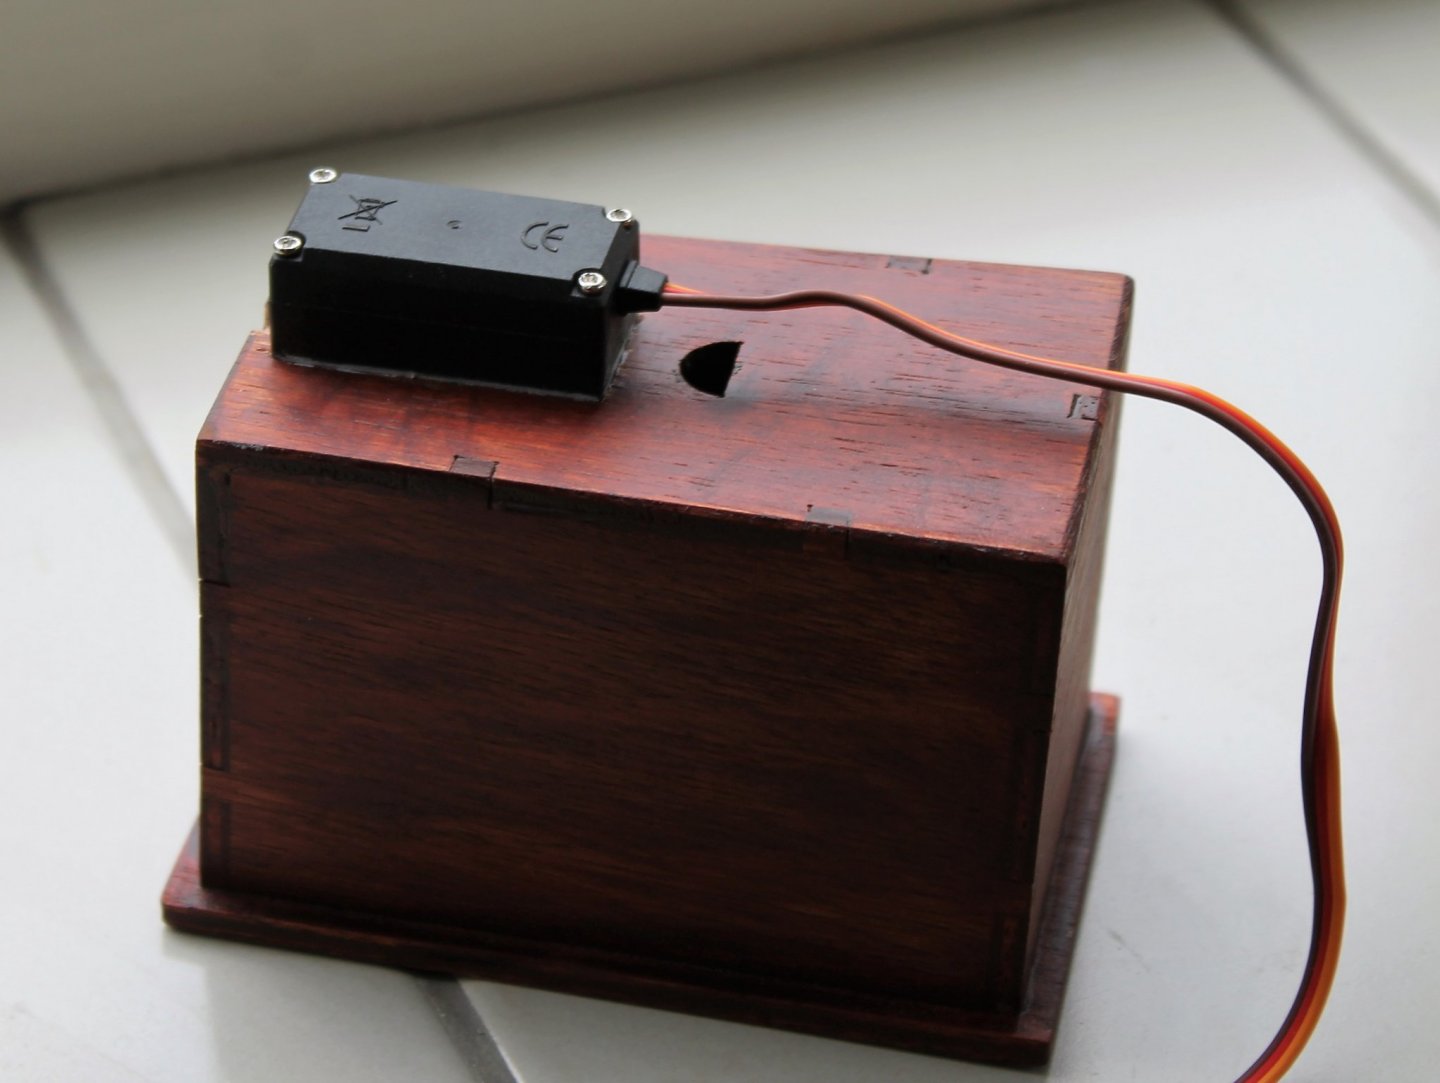
Thanks for your kind words ! Making the model watertight was not very hard. I filled some bigger gaps with filler and small fissures with ca glue. I then used some exterior stain to paint the whole model (both the interior and exterior). I finally used Vallejo polyurethane primer (available in various colors such as dark grey, brown and black) and polyurethane matt varnish . I'm a big fan of Vallejo polyurethane primer and varnish because it's waterproof and extremely hard wearing. The only downside of this type of paint is that it tends to clog up air brushes so I usually apply it with a brush. I haven't used any epoxy based products because I don't fancy endless sanding sessions and there is always the risk of mixing in too little or too much hardener (been there, done that .....). Regards, Arjan


.jpg.07262c081bf3d6fd733907a69859d8a3.jpg)
.jpg.66b329e4ea531cf9696820033d83bd1f.jpg)